
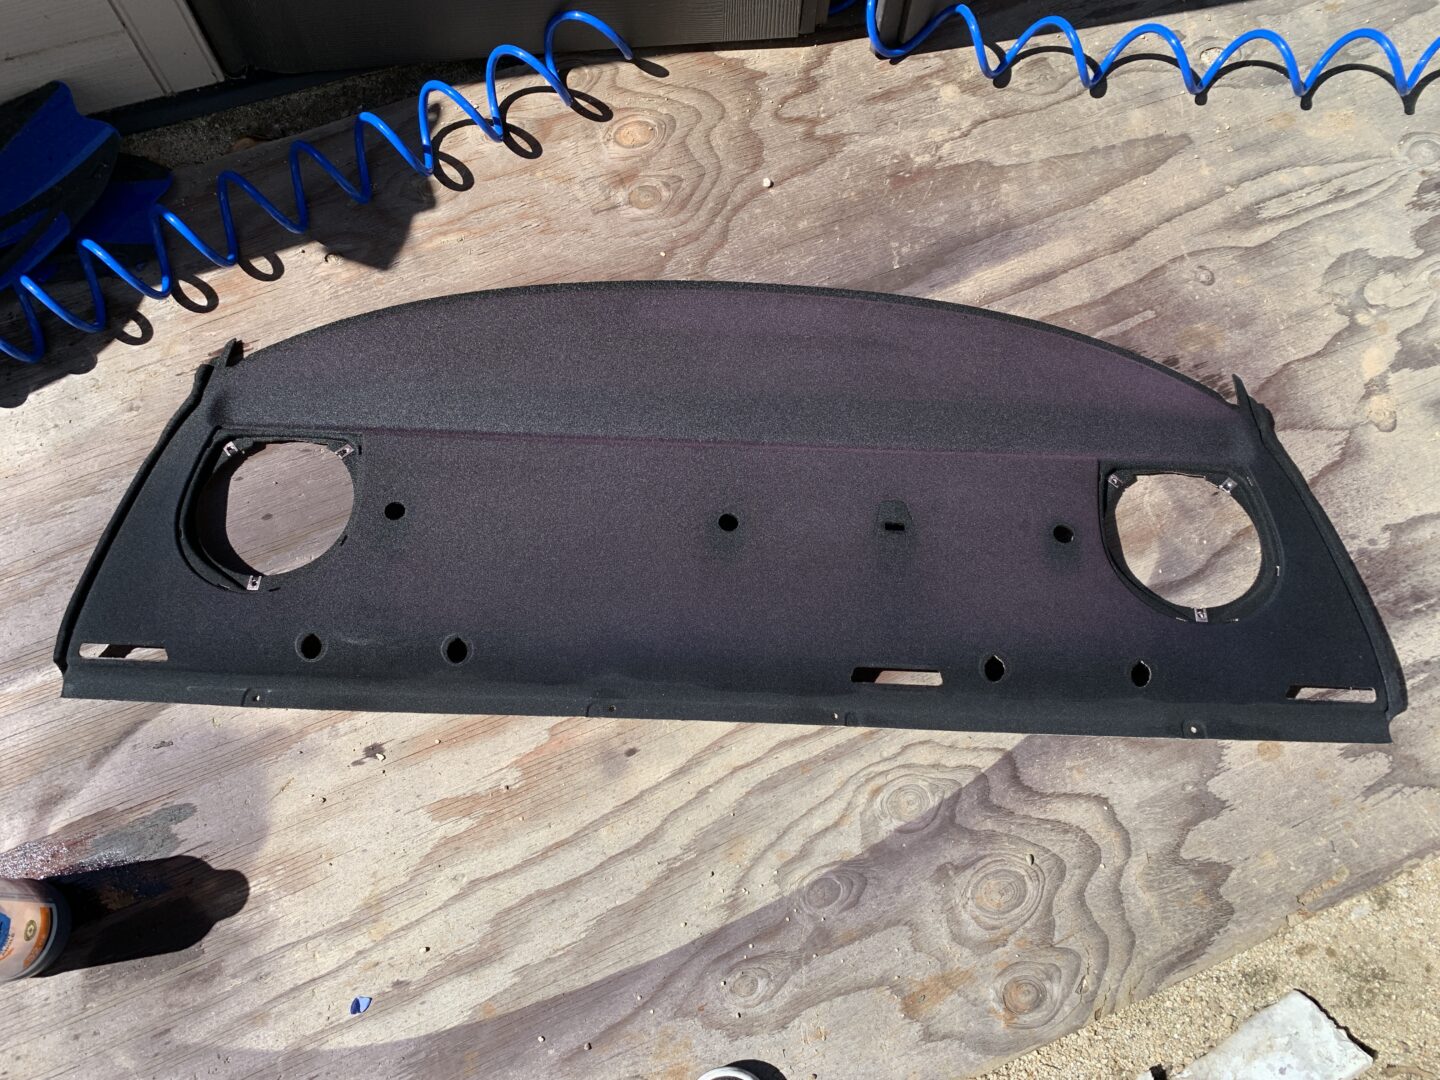
One of the things I noticed when I first bought my BMW E46 was that the area behind the rear seats (the rear shelf) had a purplish color to it, which was very noticeable when I looked through the rear windshield. This is an extremely common issue on the E46 and is essentially caused from the fabric being constantly being exposed to sunlight. Over time, the rear shelf fabric will fade until it changes color from it’s original color of black to a lightened hue of purple.

A popular fix that many E46 owners undertake is to dye the rear shelf fabric black. The thing to be aware of however is that dyeing fabric can return the color of the rear shelf back to black to a certain degree. Depending on how many applications and how you apply the dye, you may have varying results.
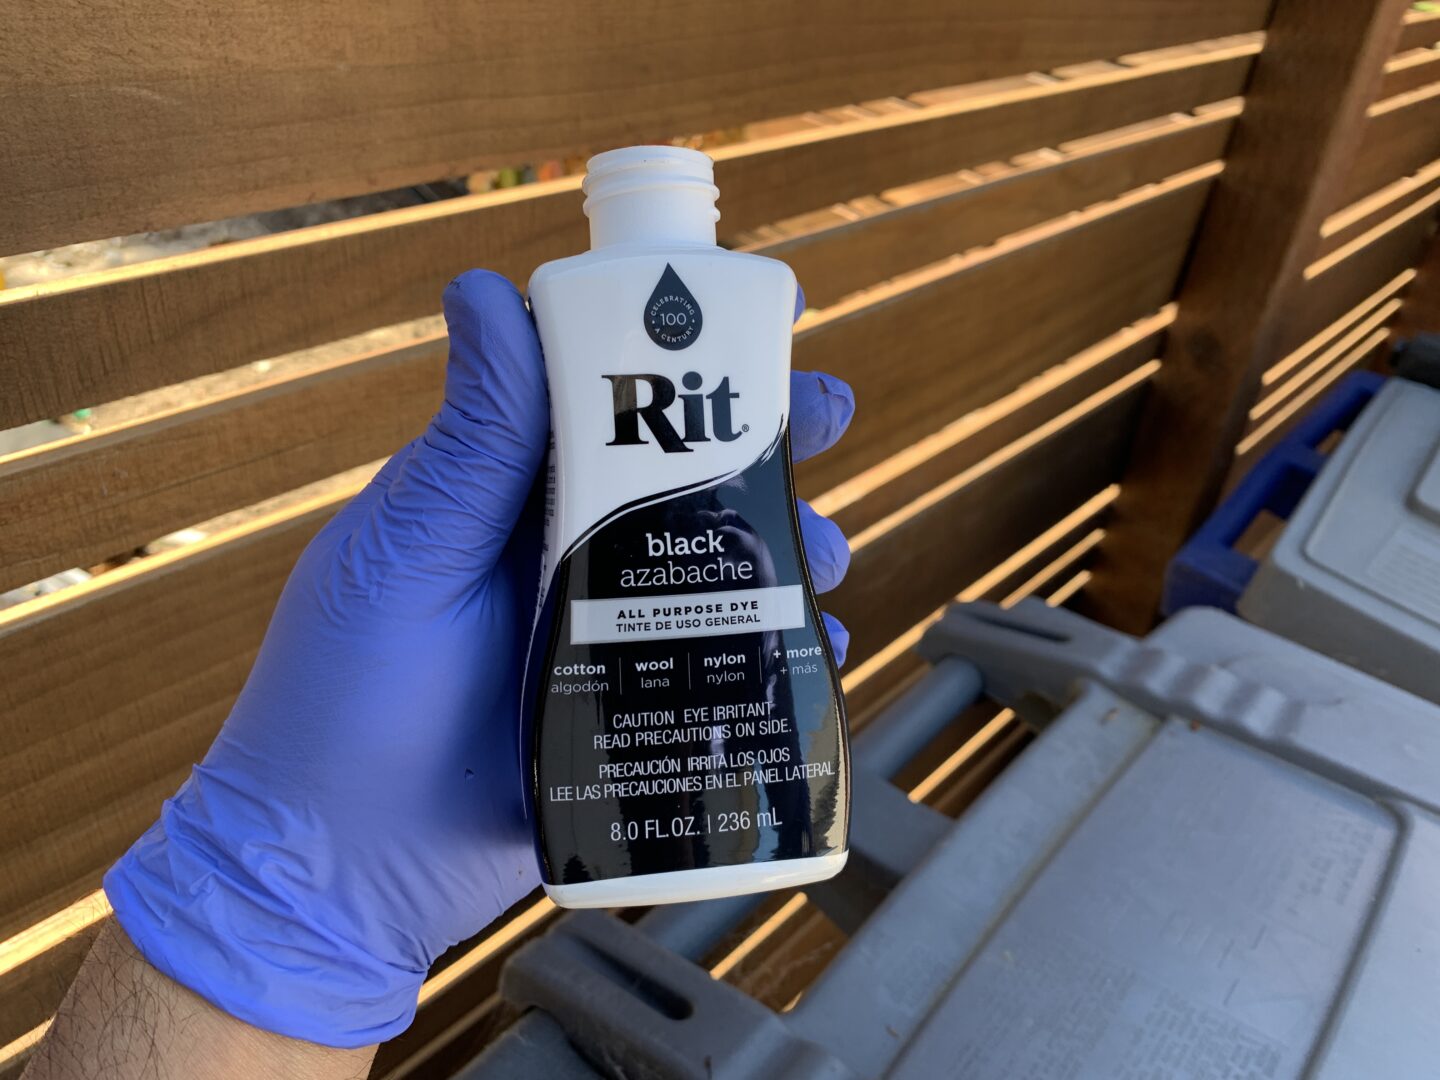
I will be demonstrating how I used Rit Fabric Dye to restore the color on the rear shelf of my BMW E46. Typically the color of the rear shelf turns purple when it’s faded, and restoring it with black dye can bring it back to a darker purple or even some shade of black. In my opinion, using fabric dye is not going to get your rear shelf to look completely black as it is difficult to use the product as designed. More on that later. Aside from re-wrapping the upholstery on your rear shelf, you can still get some pretty decent results with using fabric dye.
Tools & Parts Needed
Rit Fabric Dye
The most common application for Rit Fabric Dye is with clothing. The process for dyeing clothing involves mixing the dye with water and then submerging the clothing into the mixture, letting the dye soak into the fabric.
Unfortunately, you can’t really submerge the rear shelf the same as you would with clothing because it is made up foam and wrapped with fabric. It’s also a pretty large piece that isn’t as easily submerged as a piece of clothing. You can however, mix and apply the dye a different away in order to dye the fabric of the rear shelf, however it probably won’t be as effective as doing it the way the manufacturer suggests.
Rit Dye Liquid – 8 Oz. (Black)
Mechanics Tool Set or Socket Set
You’ll need a variety of tools to remove various interior parts to get the rear shelf out. A nice starter mechanics tool set can be found here: DEWALT Mechanics Tool Set, 84-Piece. If you are shopping for a new mechanics tool set, here is an article that I wrote that might help you with your selection.
Long Nose Pliers
Edward Tools Pro-Grip Needle Nose Pliers 6”
T50 Torx Socket
I recommend using a T50 socket with a ratchet rather than a bit with a screwdriver attachment as you need some more torque to remove and tighten these bolts for the seatbelt.
Individual T50 Torx Socket: TEKTON 3/8 Inch Drive x T50 Torx Socket
Torx Socket Set: TEKTON 3/8 Inch Torx Bit Socket Set, 12-Piece (T10-T60)
Nitrile Gloves
MedPride Nitrile Exam Gloves, Powder-Free Box/100 – Small | Medium | Large
Restoring the Faded Purple Rear Shelf on a BMW E46
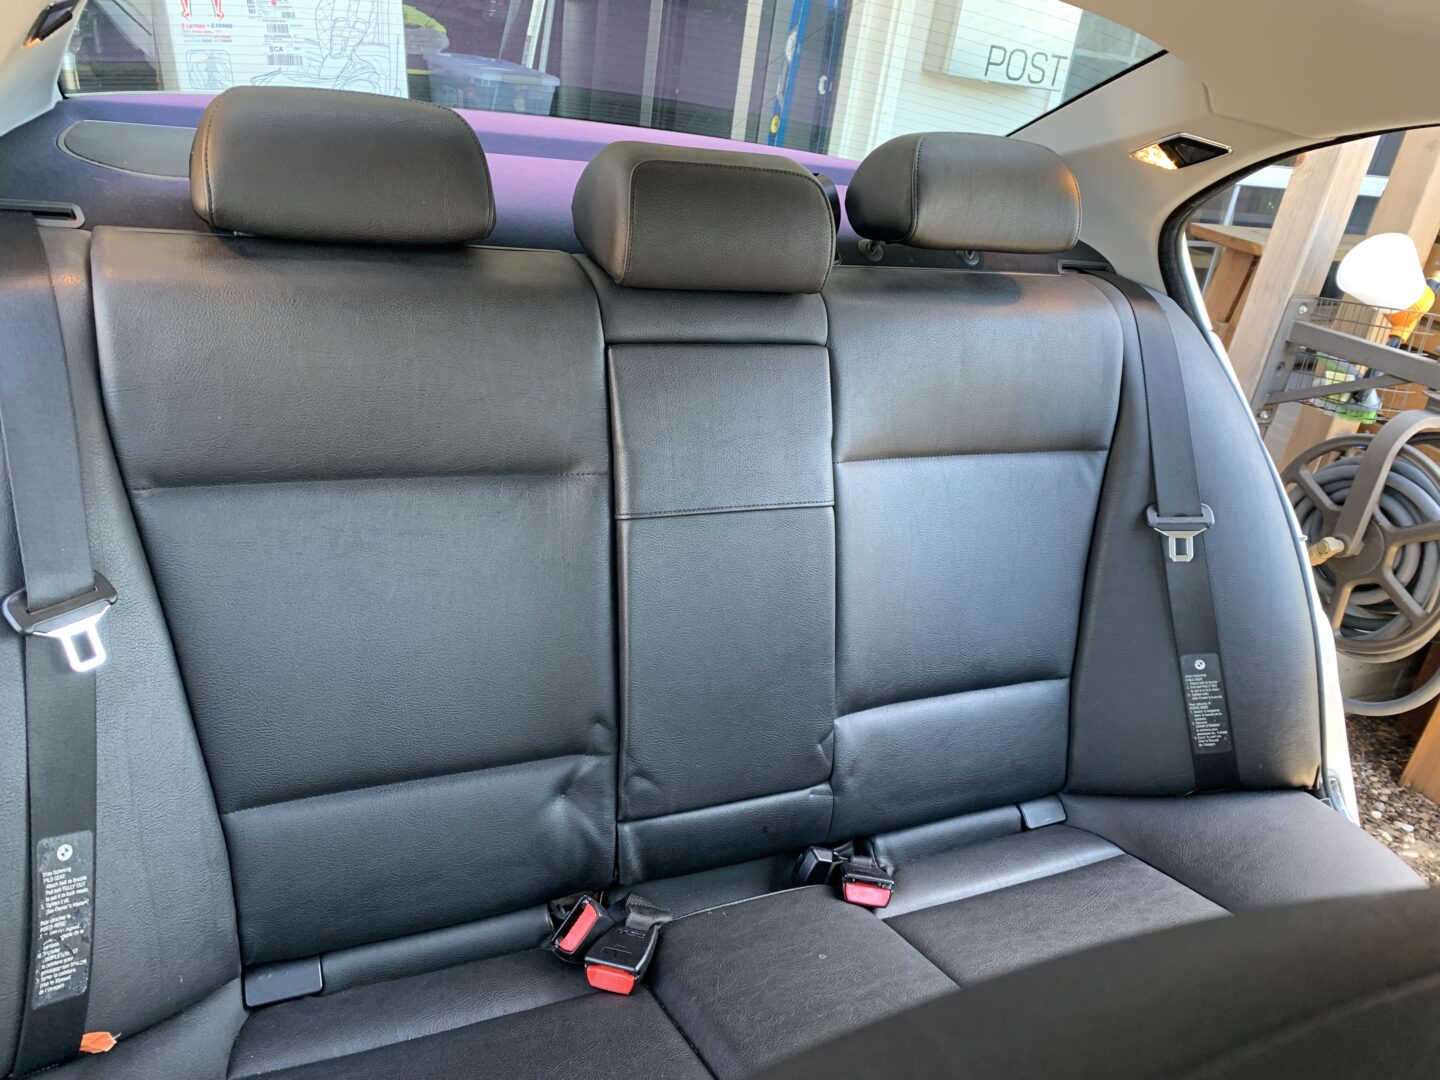
Let me start off by saying, the easy part of restoring the rear shelf of your E46 is dyeing it. The difficult part is removing all of the interior parts so that you can actually remove the rear shelf. Unfortunately, it’s not that simple to remove the rear shelf. In order to remove the rear shelf, you have to remove the rear seats, rear trim pieces, and disconnect some rear seat belt connections and hardware before you can get to the rear shelf.
If you were wondering if you could dye the rear shelf without removing it, I’d say no. When I got started with this project, I asked this same question because I didn’t want to have to remove all of the rear seat components. Unfortunately, you just can’t enough access to the rear shelf to dye it when it’s still in the car. Furthermore, you won’t get a good result and you risk getting dye on other parts of the interior. If you want to most effectively dye the rear shelf, there’s only one way to do it and that is to remove it from the car before dyeing.
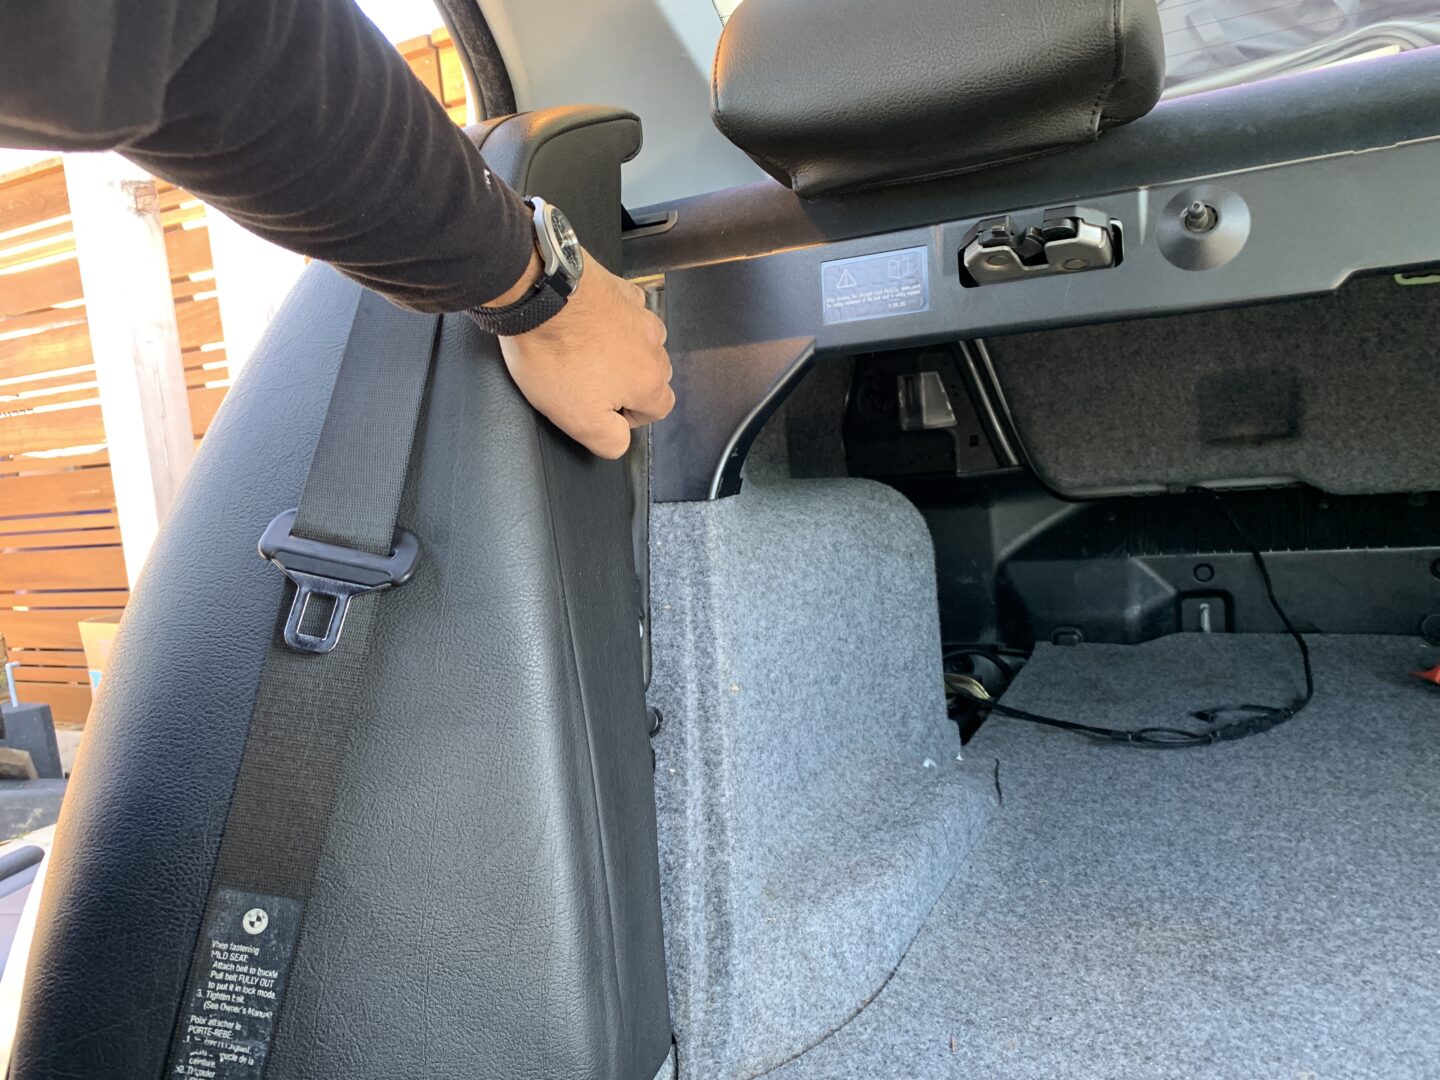
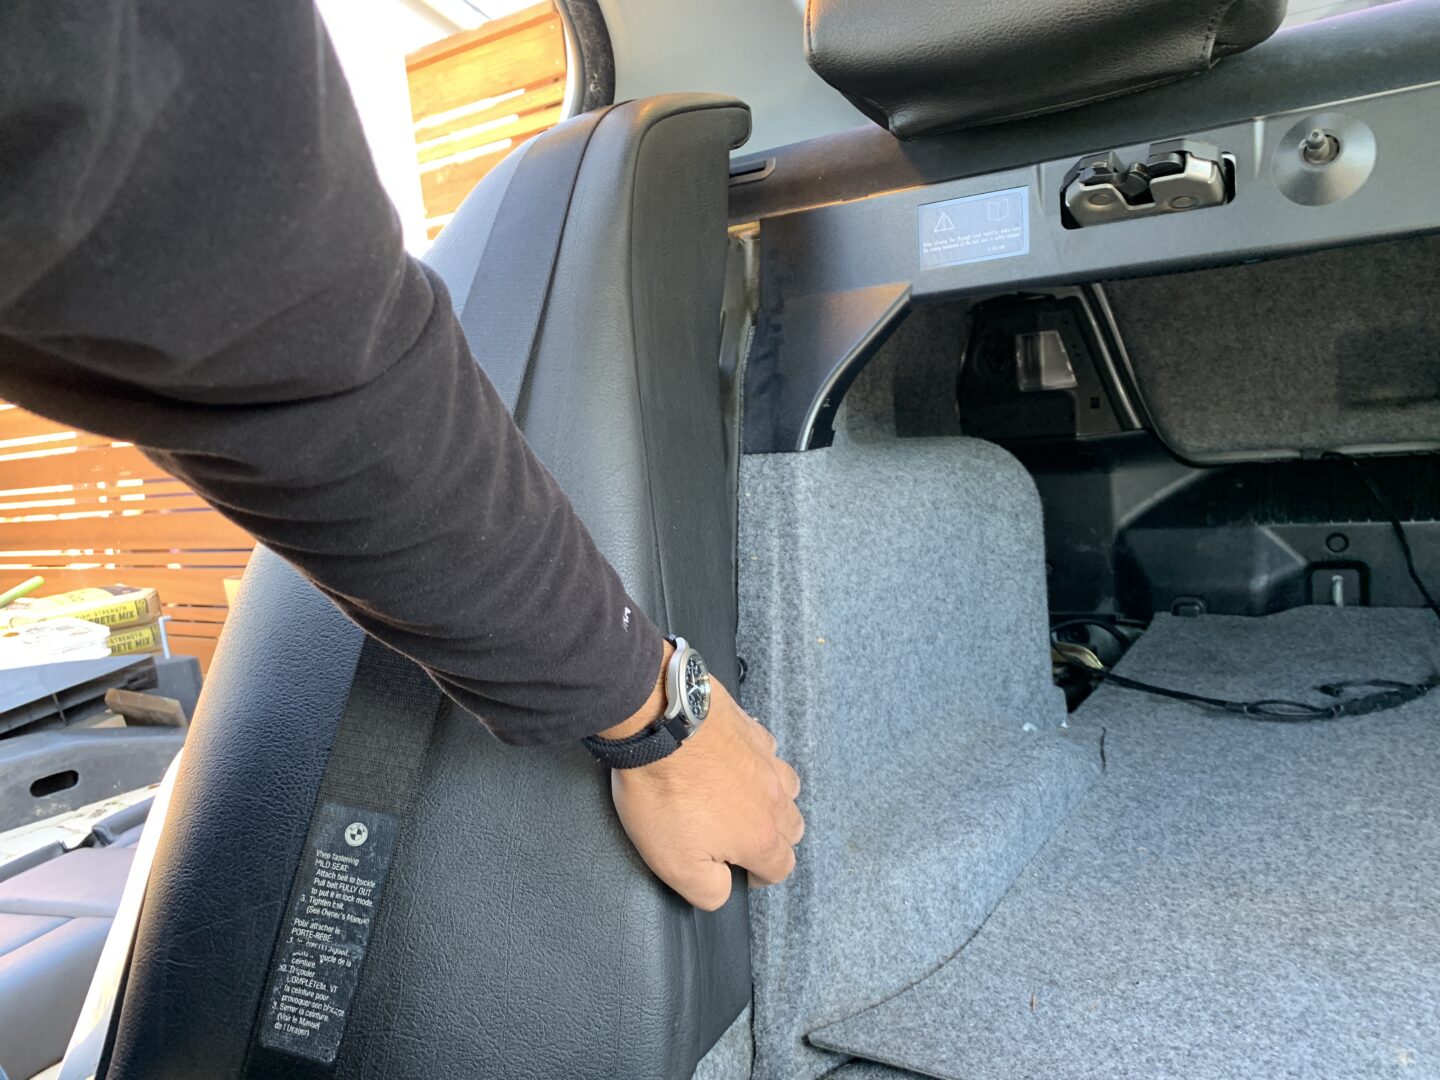
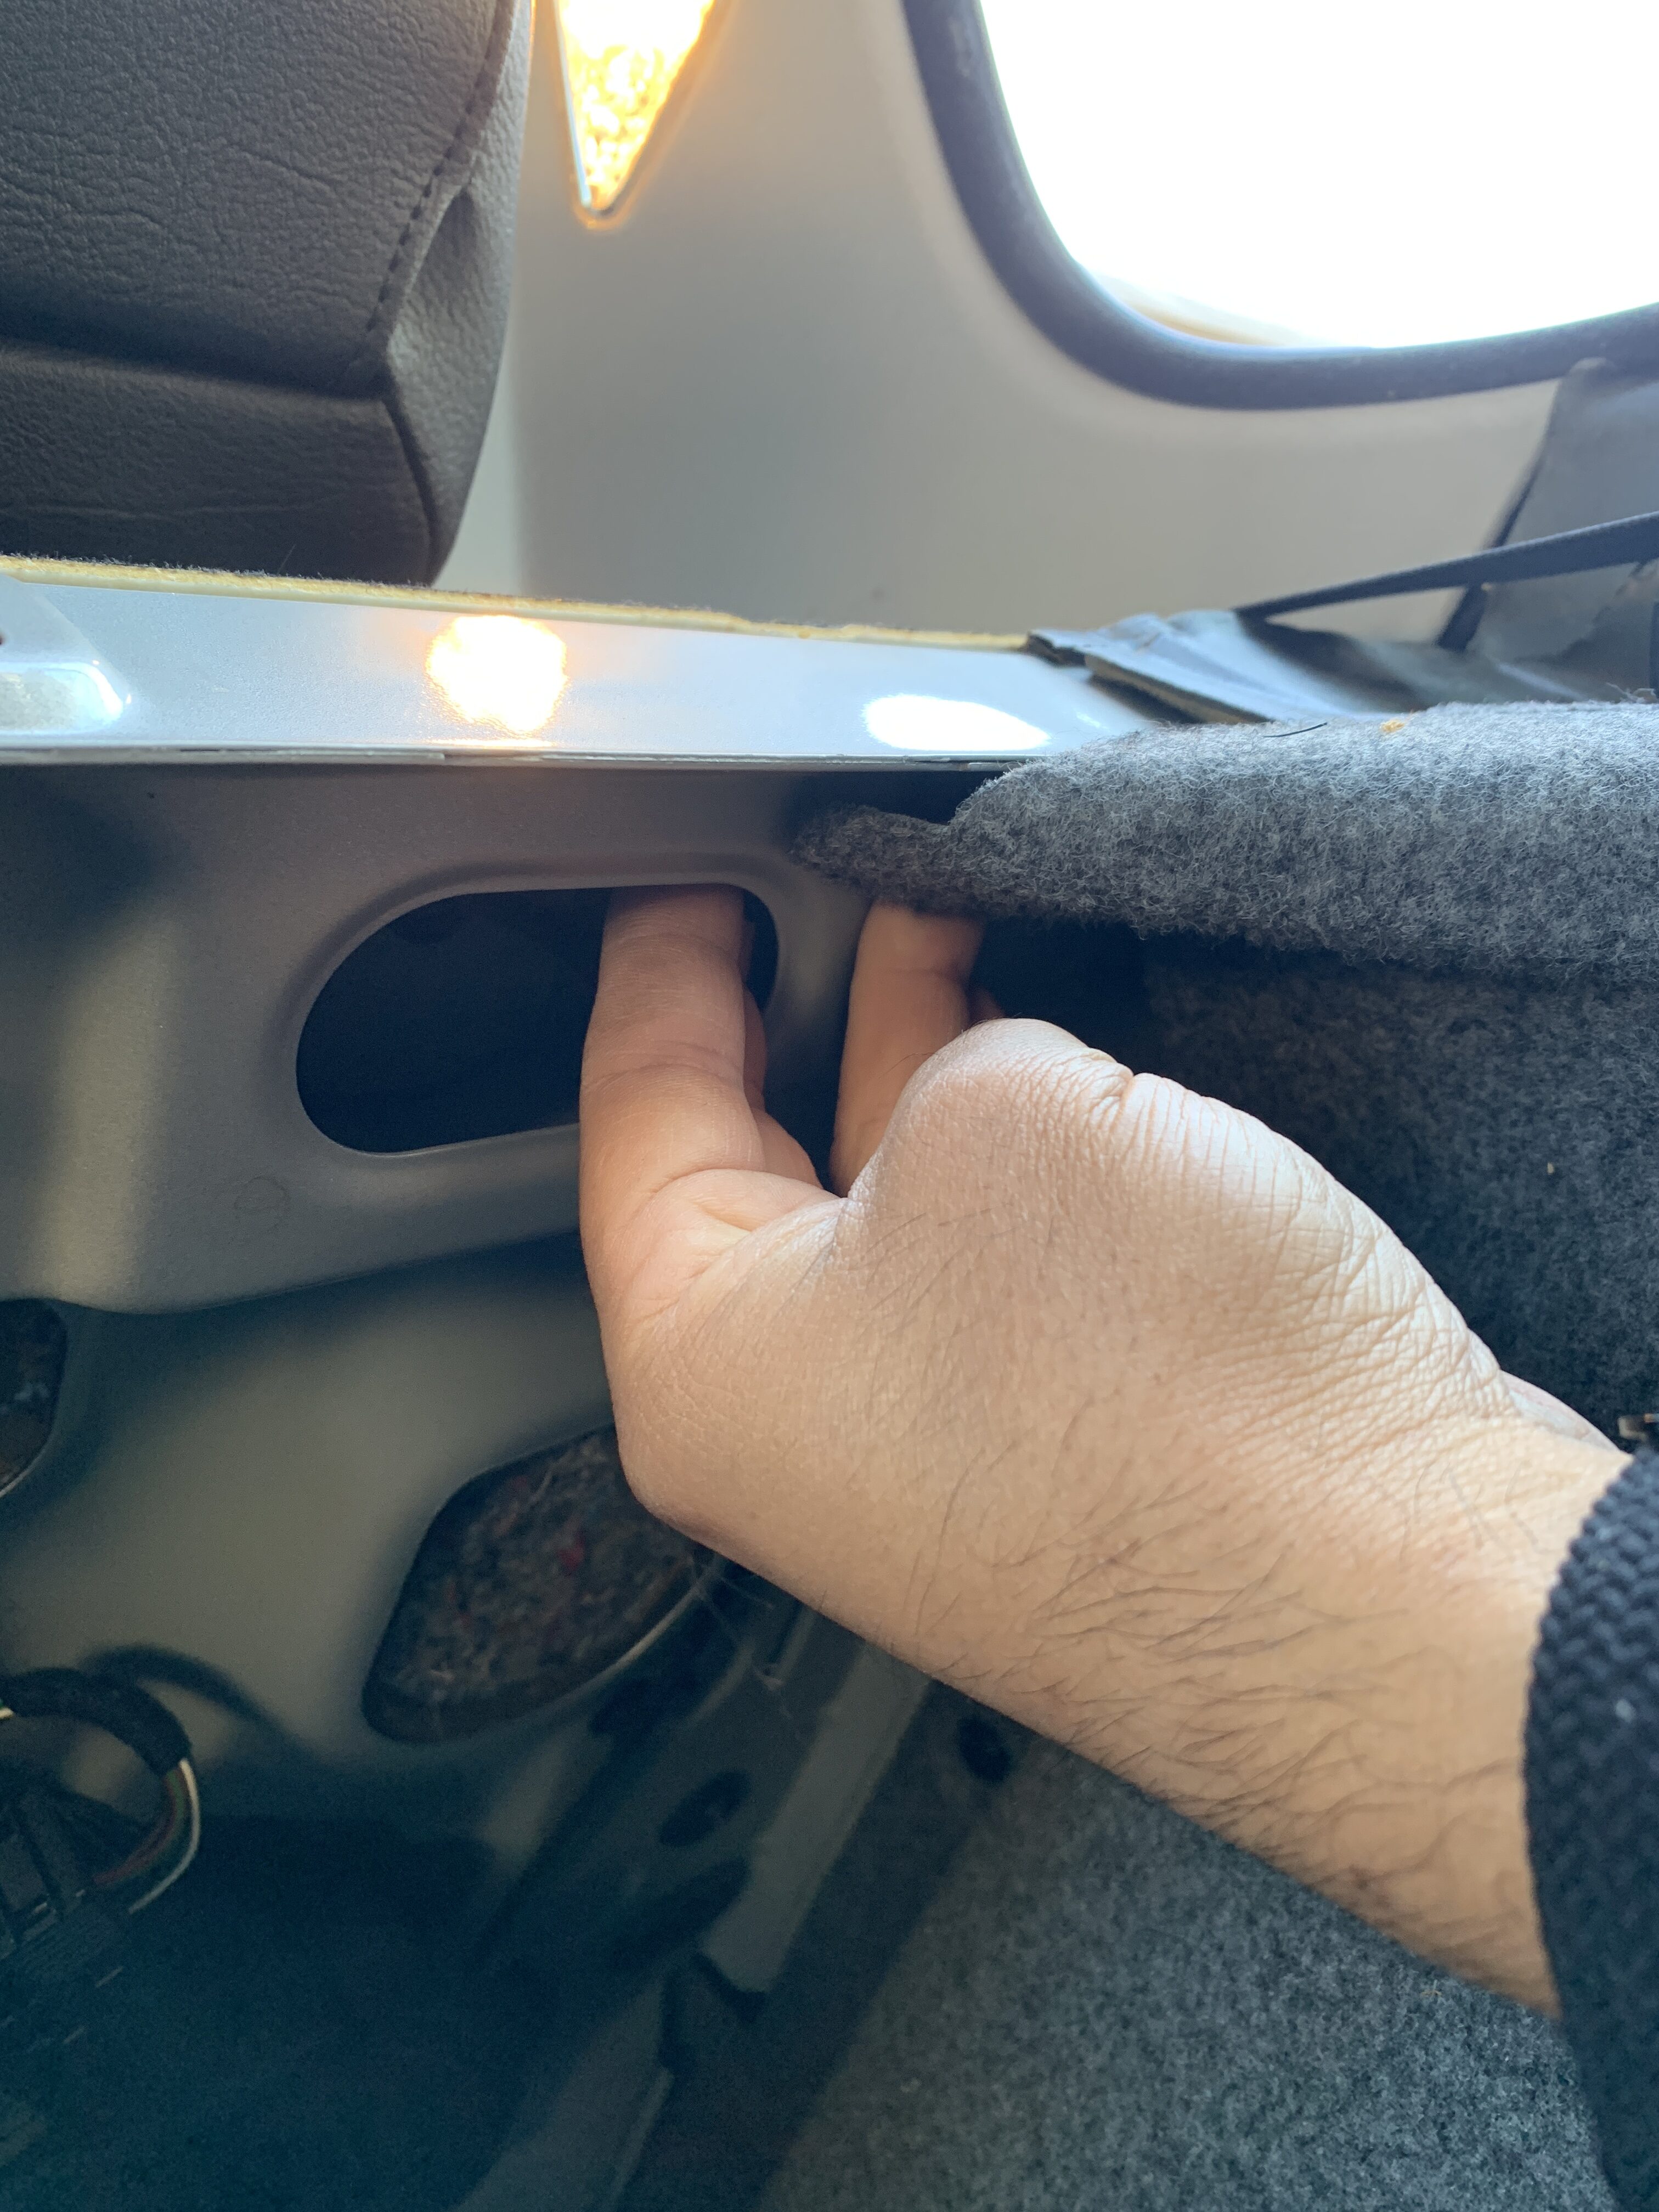
To start, remove the trim piece covering the car seat anchors and use your hands to grab a hold of the bottom of the seat bottom and pull it up and out. The whole seat bottom comes off in one piece.
If the rear seats on your E46 fold down, then you’ll have these levers in the trunk that allow you fold them down. Otherwise if your rear seats do not fold down, you will need to remove the rear seats accordingly. There are also the sides to the rear seat that need to be removed, which can easily be removed by grabbing it from the backside and pulling it straight out.

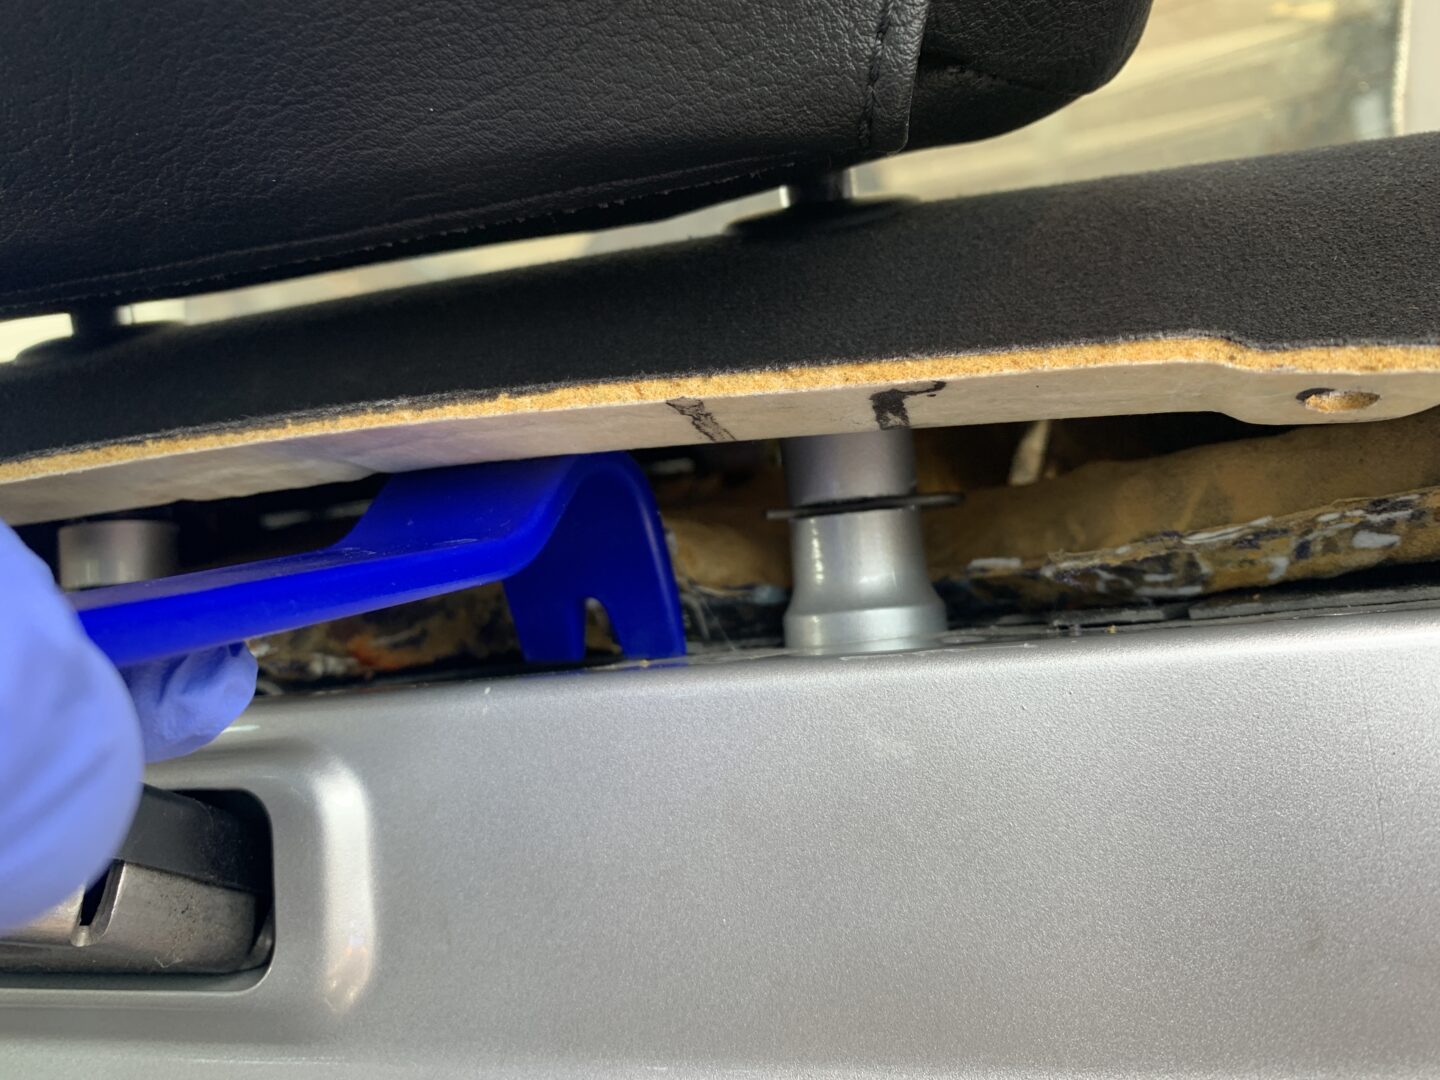
Next, there is a long plastic trim piece that runs along the front of the rear shelf. To remove this, you’ll need a small tool of some sort that is skinny and small in diameter so that you can punch these plastic pins out. These pins are made up of a center plastic pin and a surrounding clip. After you push the pin through (which will just drop down below), you can then use a trim clip remover or a flat head screwdriver to pull the surrounding clip off.
The small tool I used that was both skinny and was thin enough to push these pins out was a small Allen wrench to push the center pin out. There are several of these pin clips that run along this trim piece. If the pin is hard to push out, use your little tool and use a hammer to punch it through.
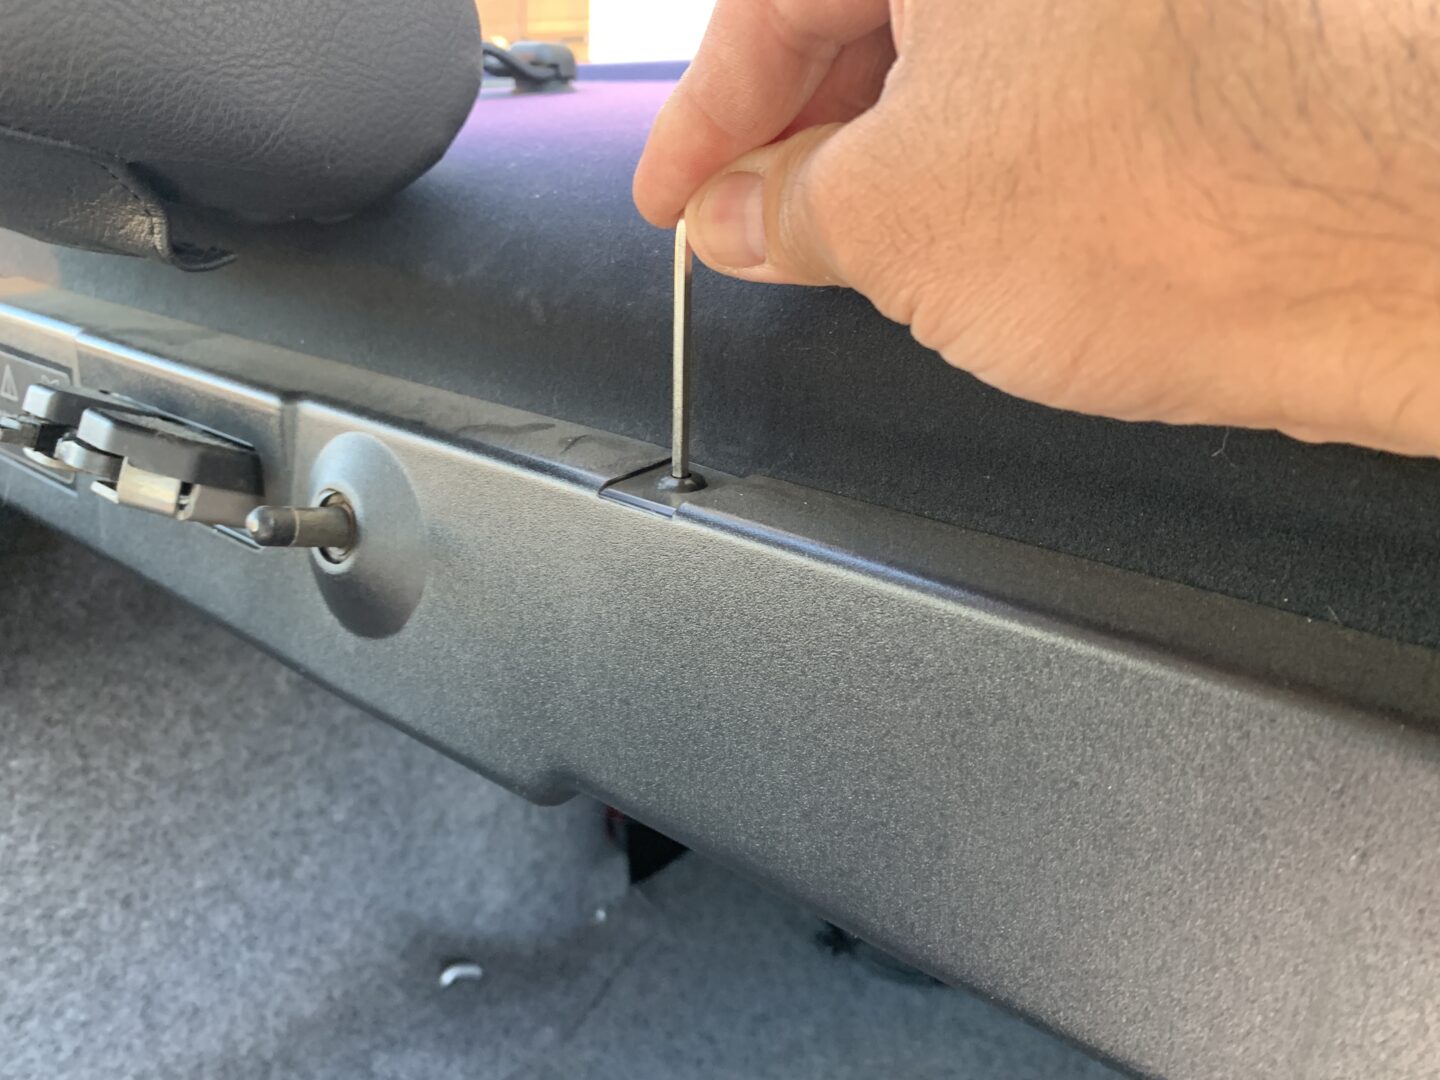
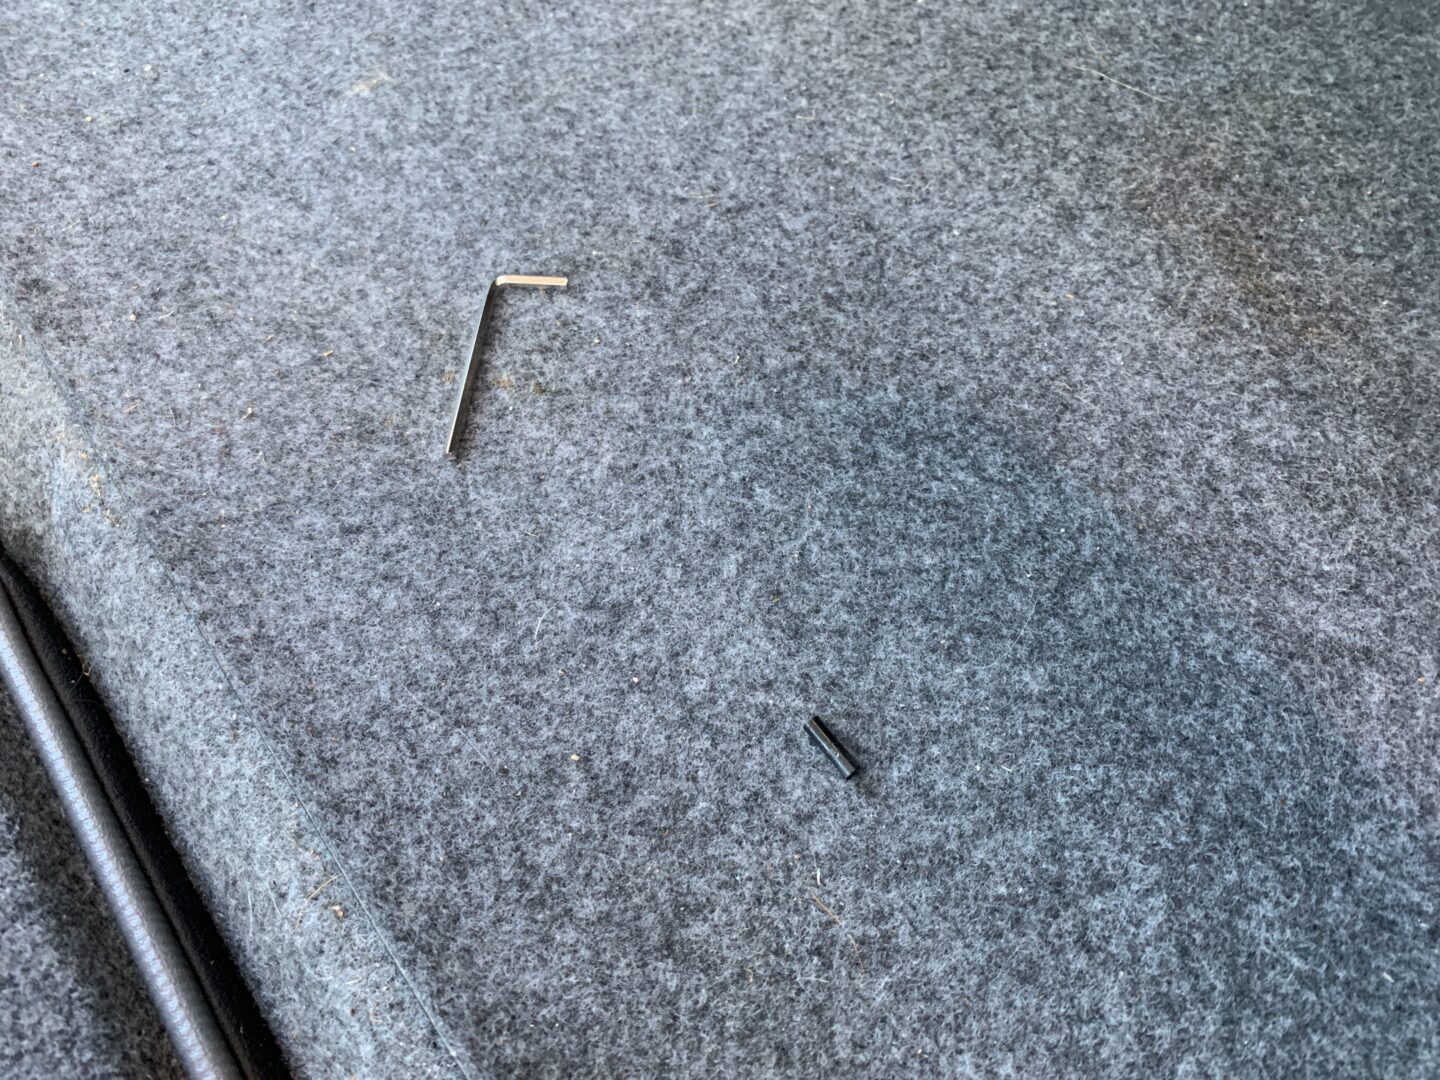
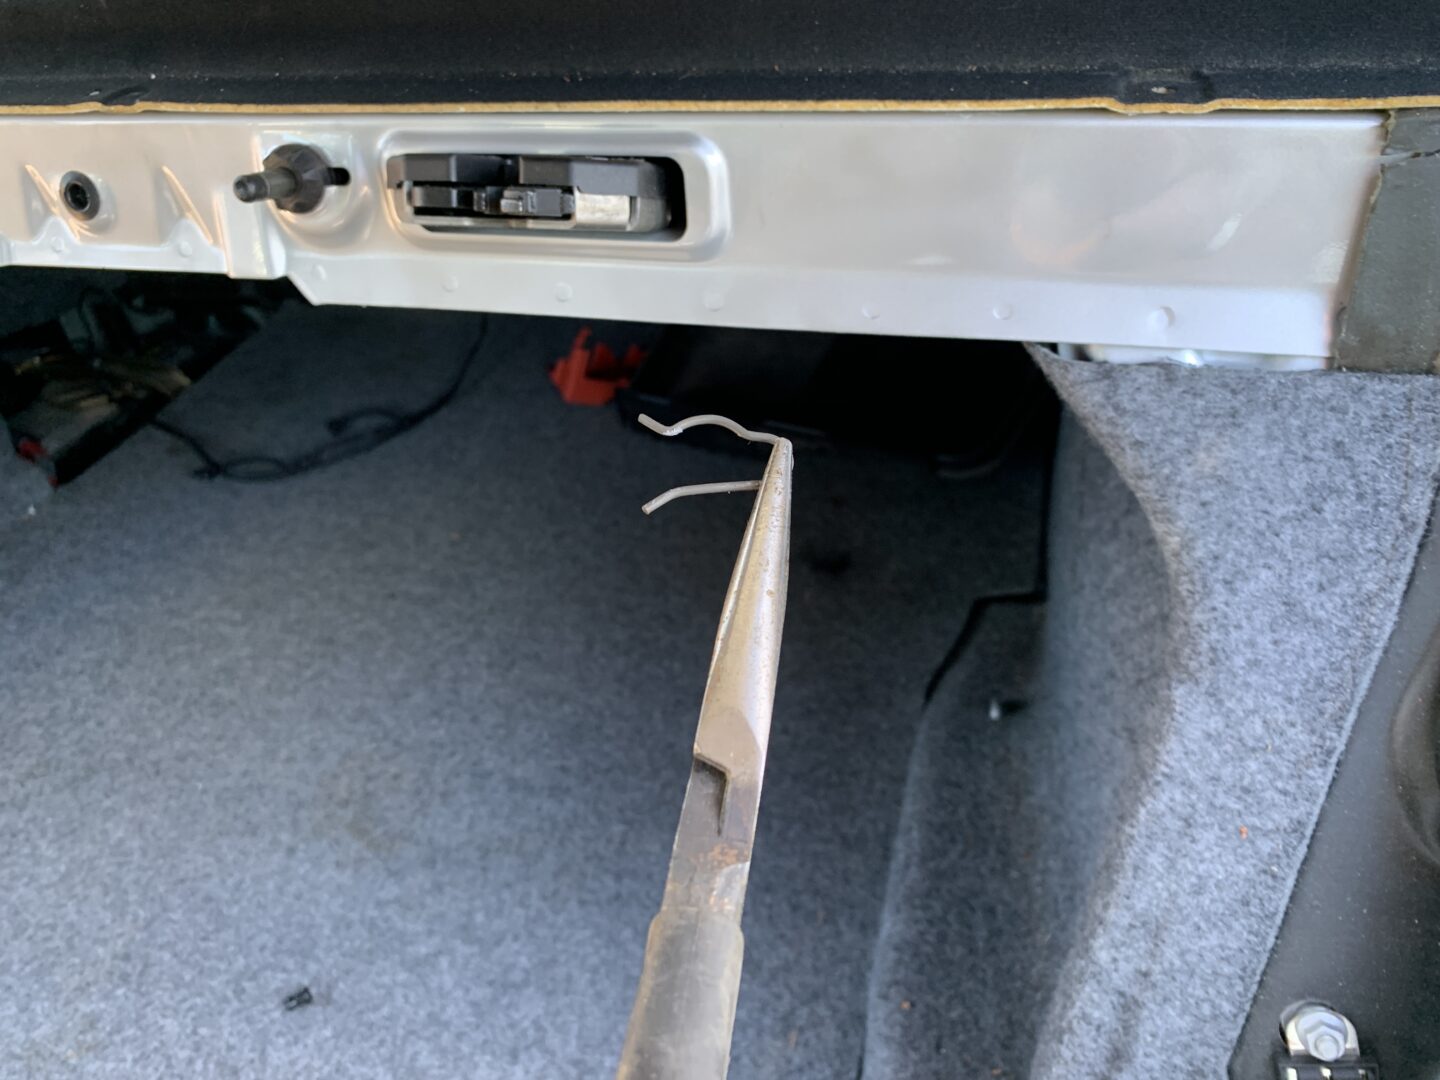
Something to be aware of is that once you push the center pin down and out, it just drops down somewhere behind the panel as shown below. Sometimes you can find it; other times it disappears into an abyss and you’ll never find it again. Expect to lose a couple clips here and there. You can either purchase these clips or find replacement ones at your local auto yard.
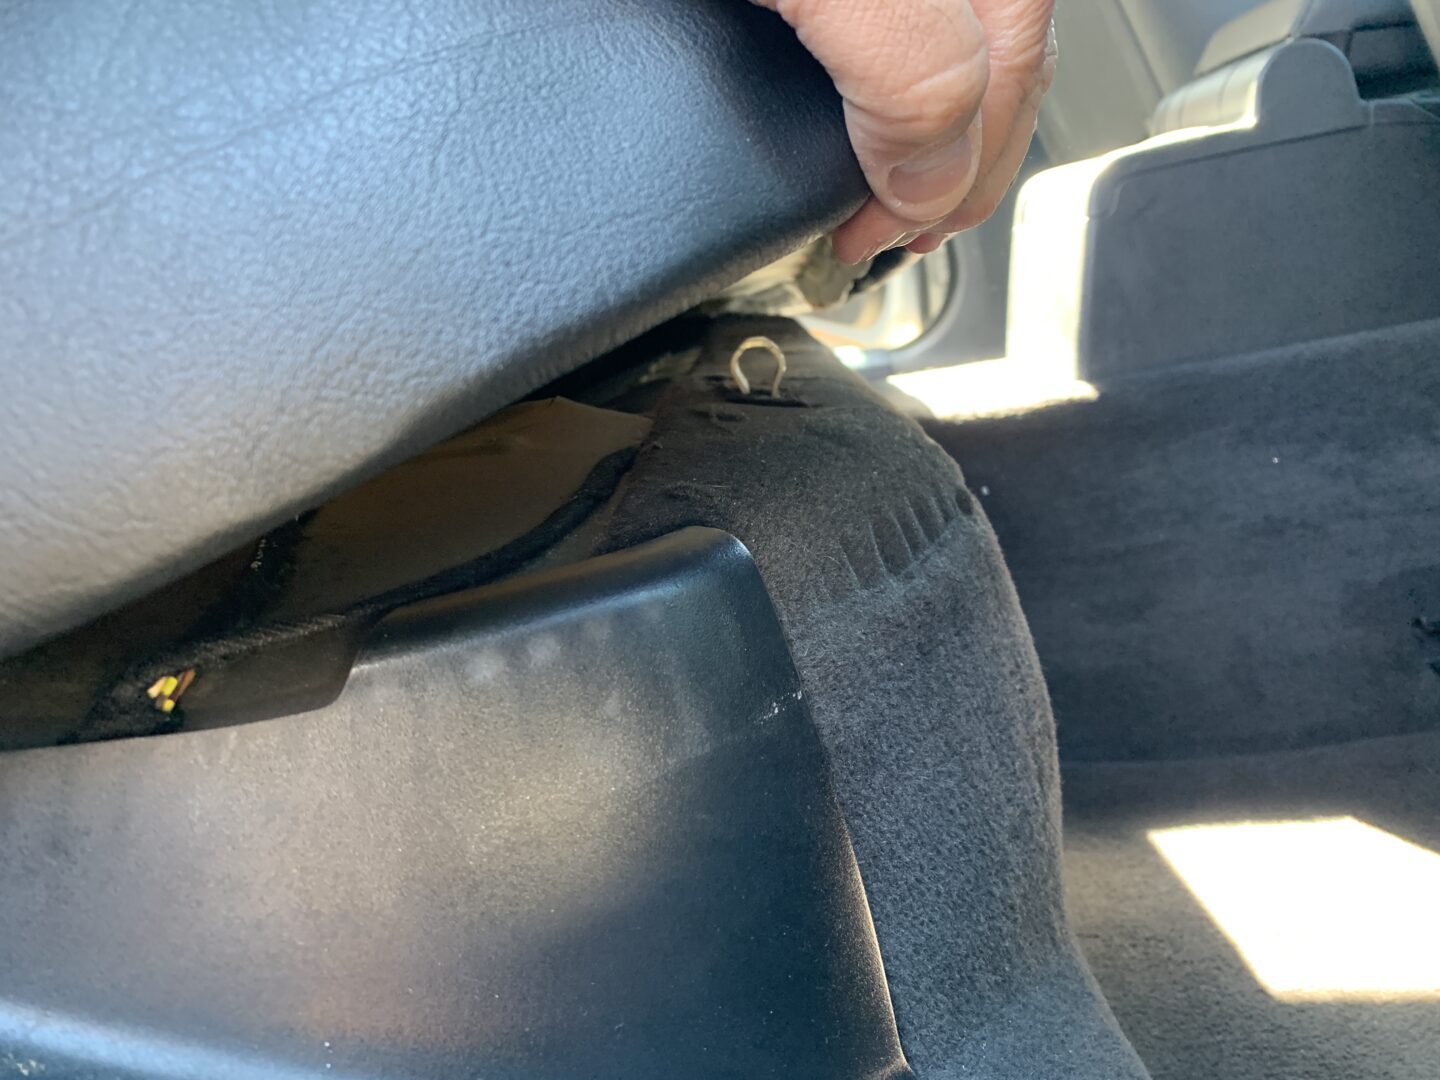
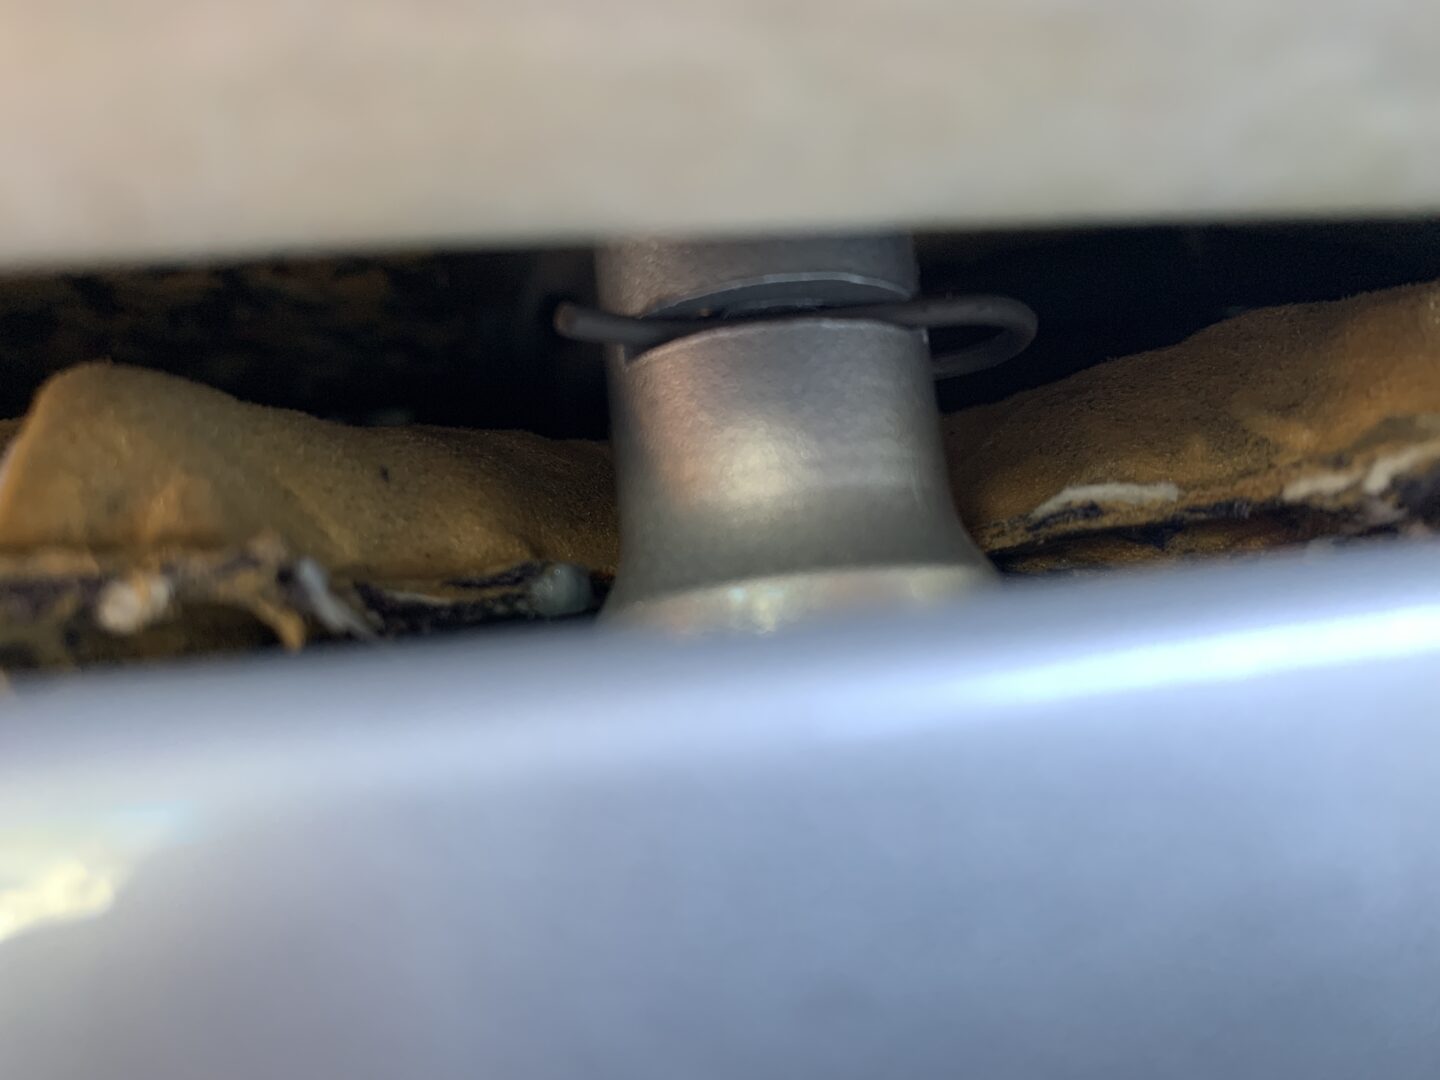
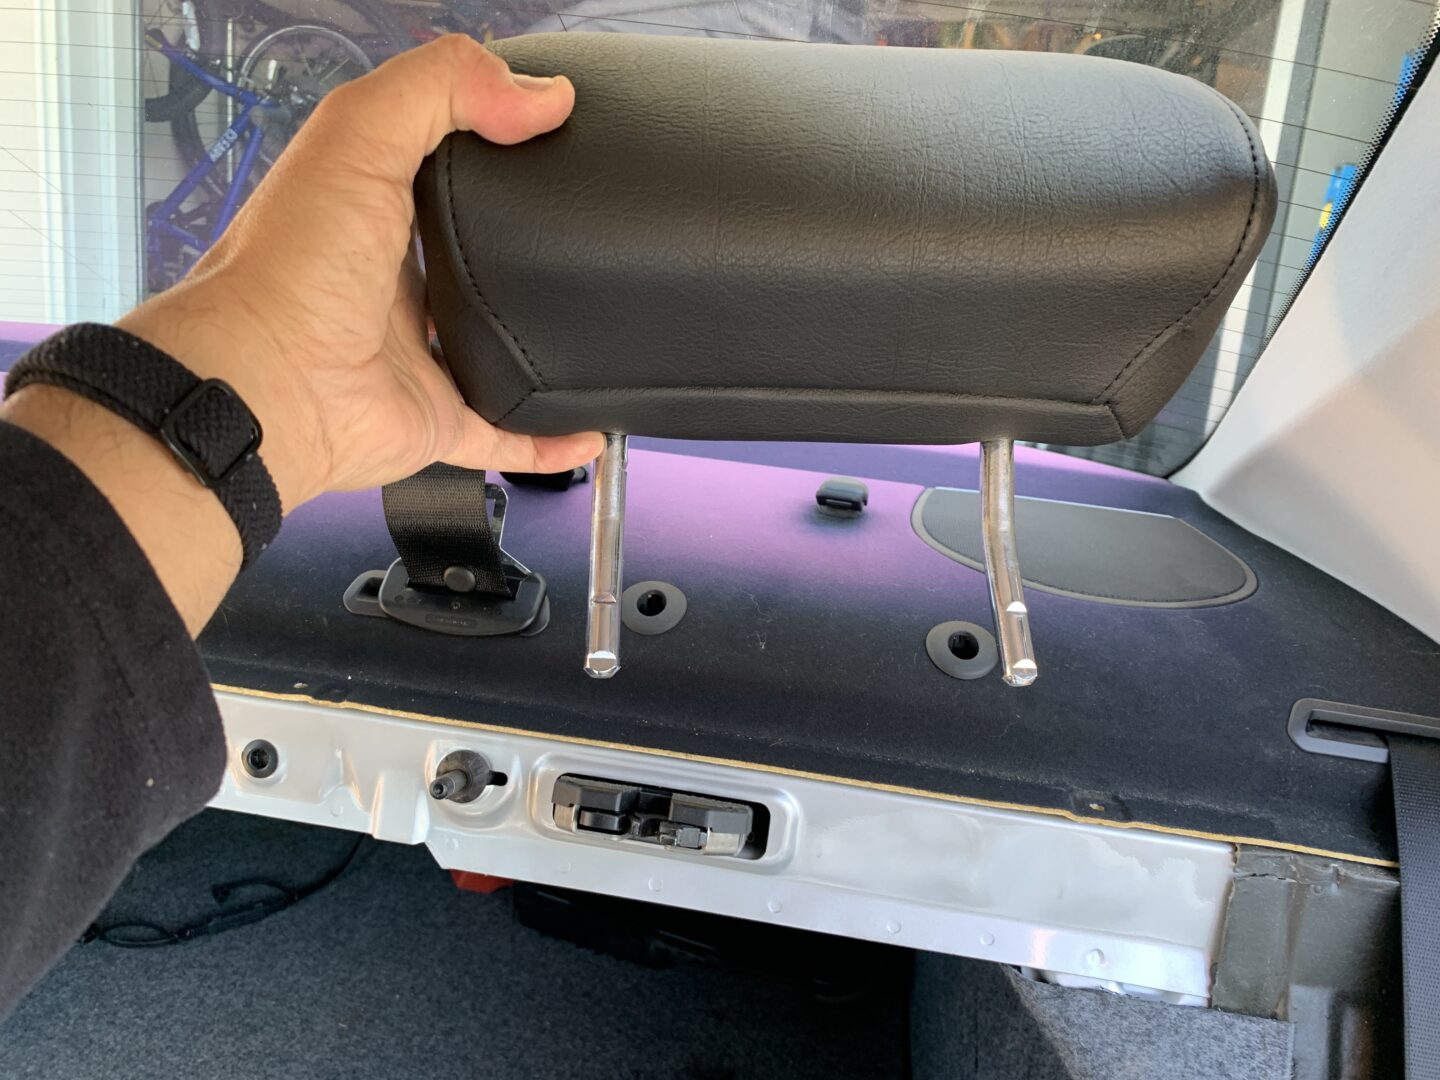
The rear head rests also need to be removed. They are held in place with these cotter pins that hold in both rods of the rear head rest. The cotter pins are difficult to access, so you need to lift up on the rear shelf and then use a set of long nose pliers to pull it off. Proceed to remove the rear head rests.
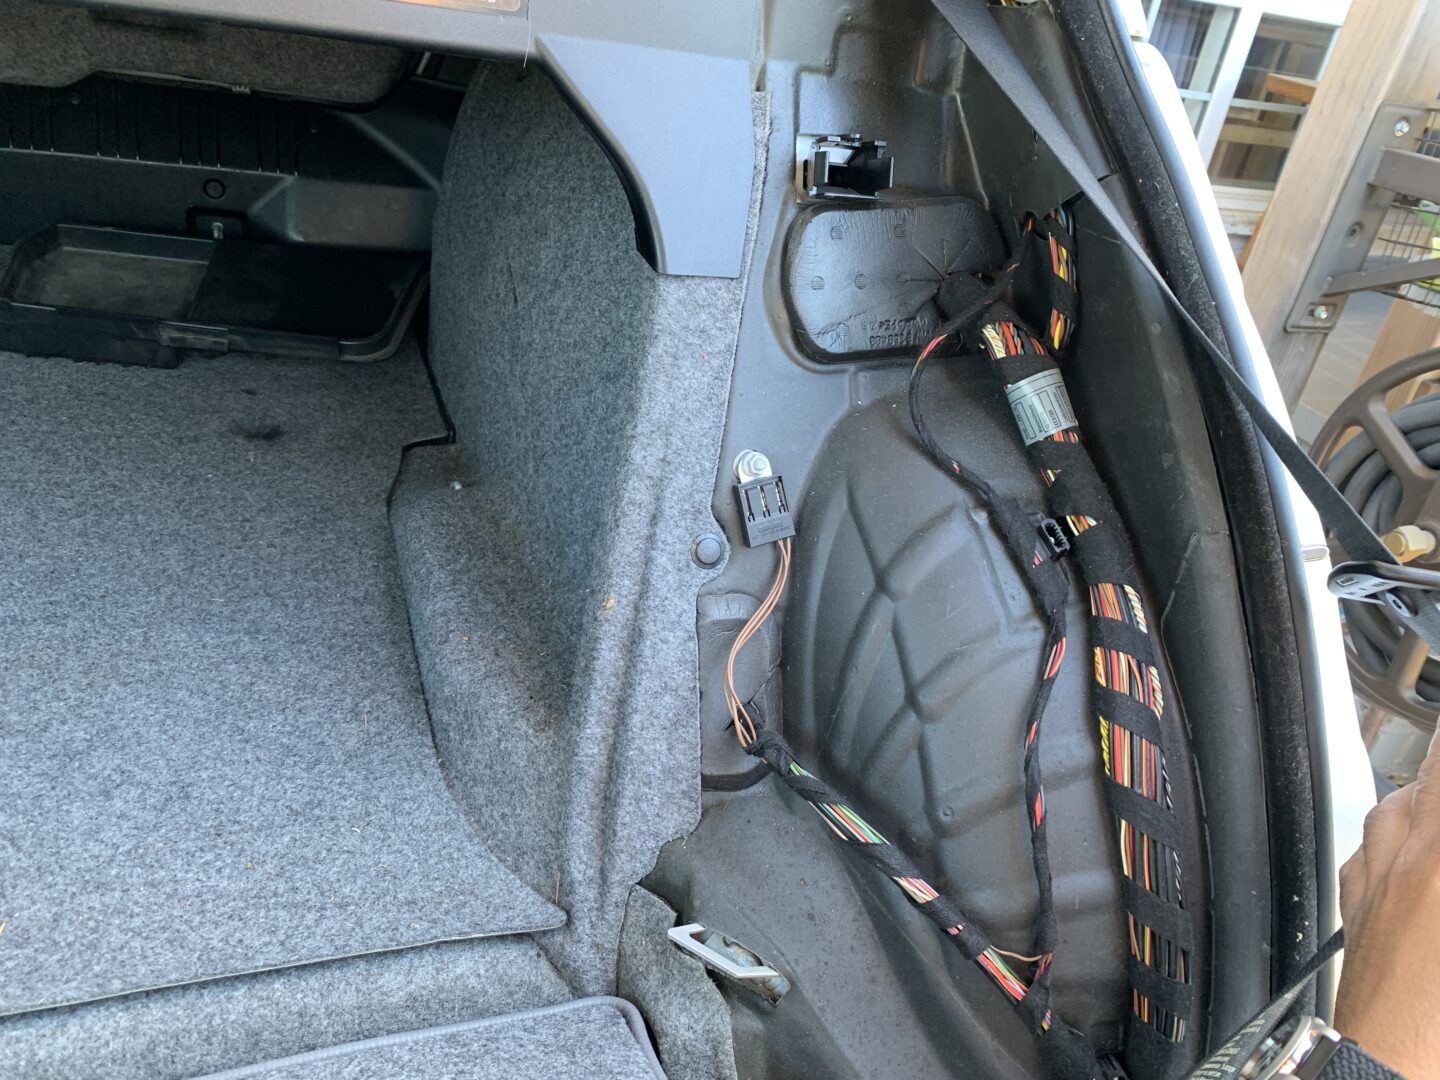
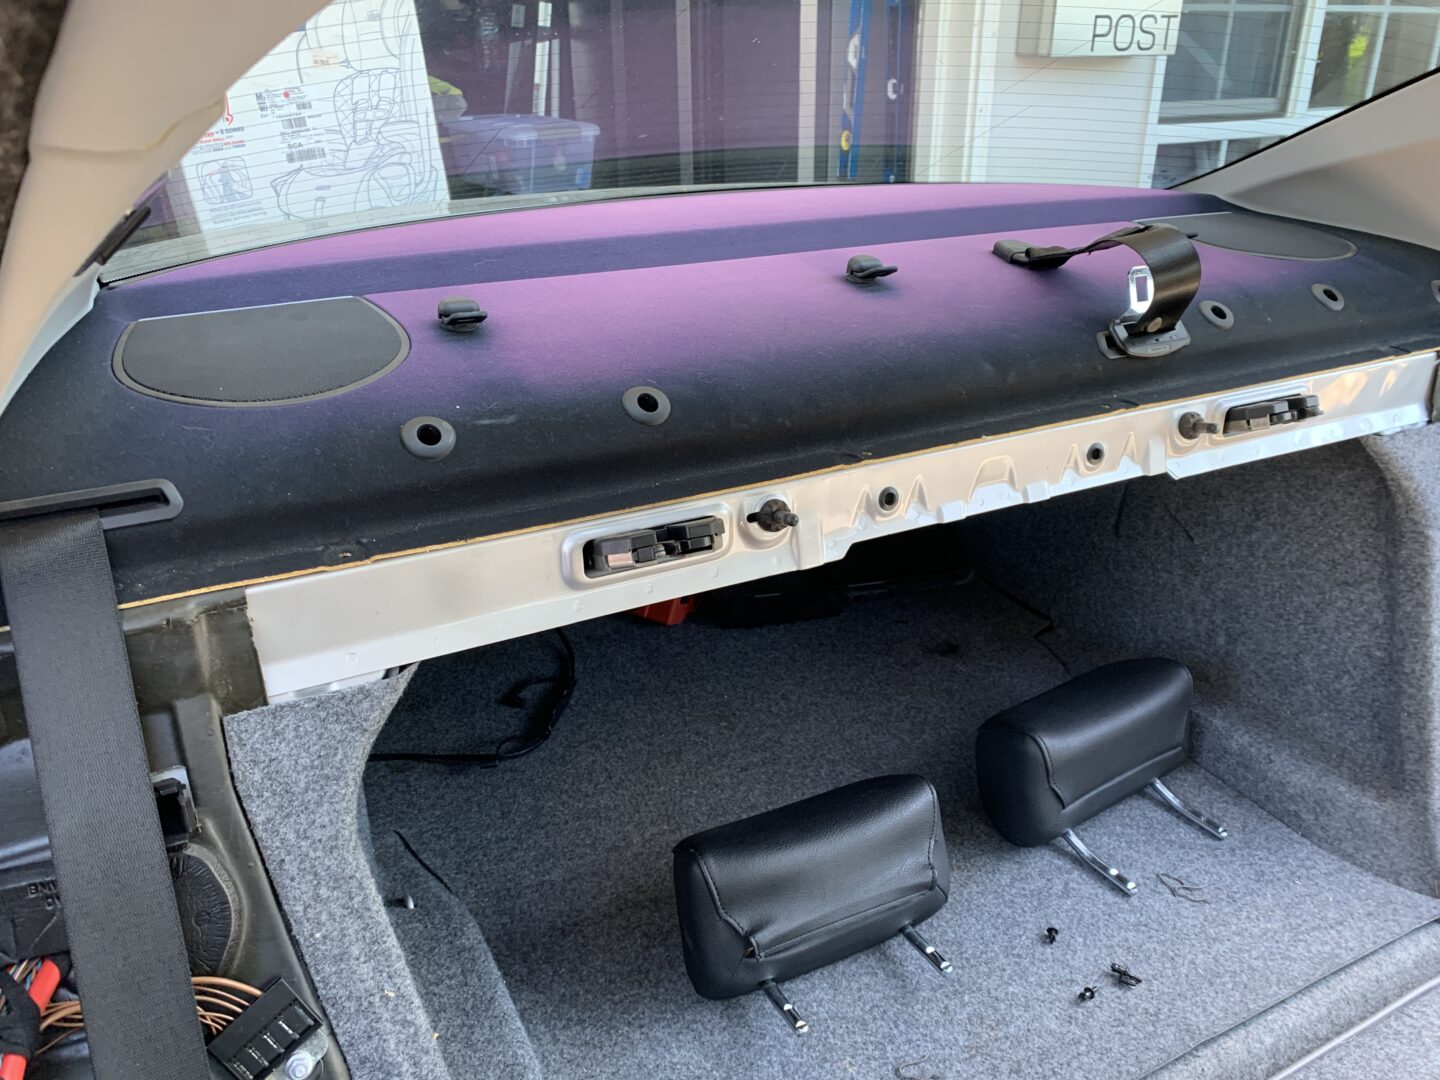
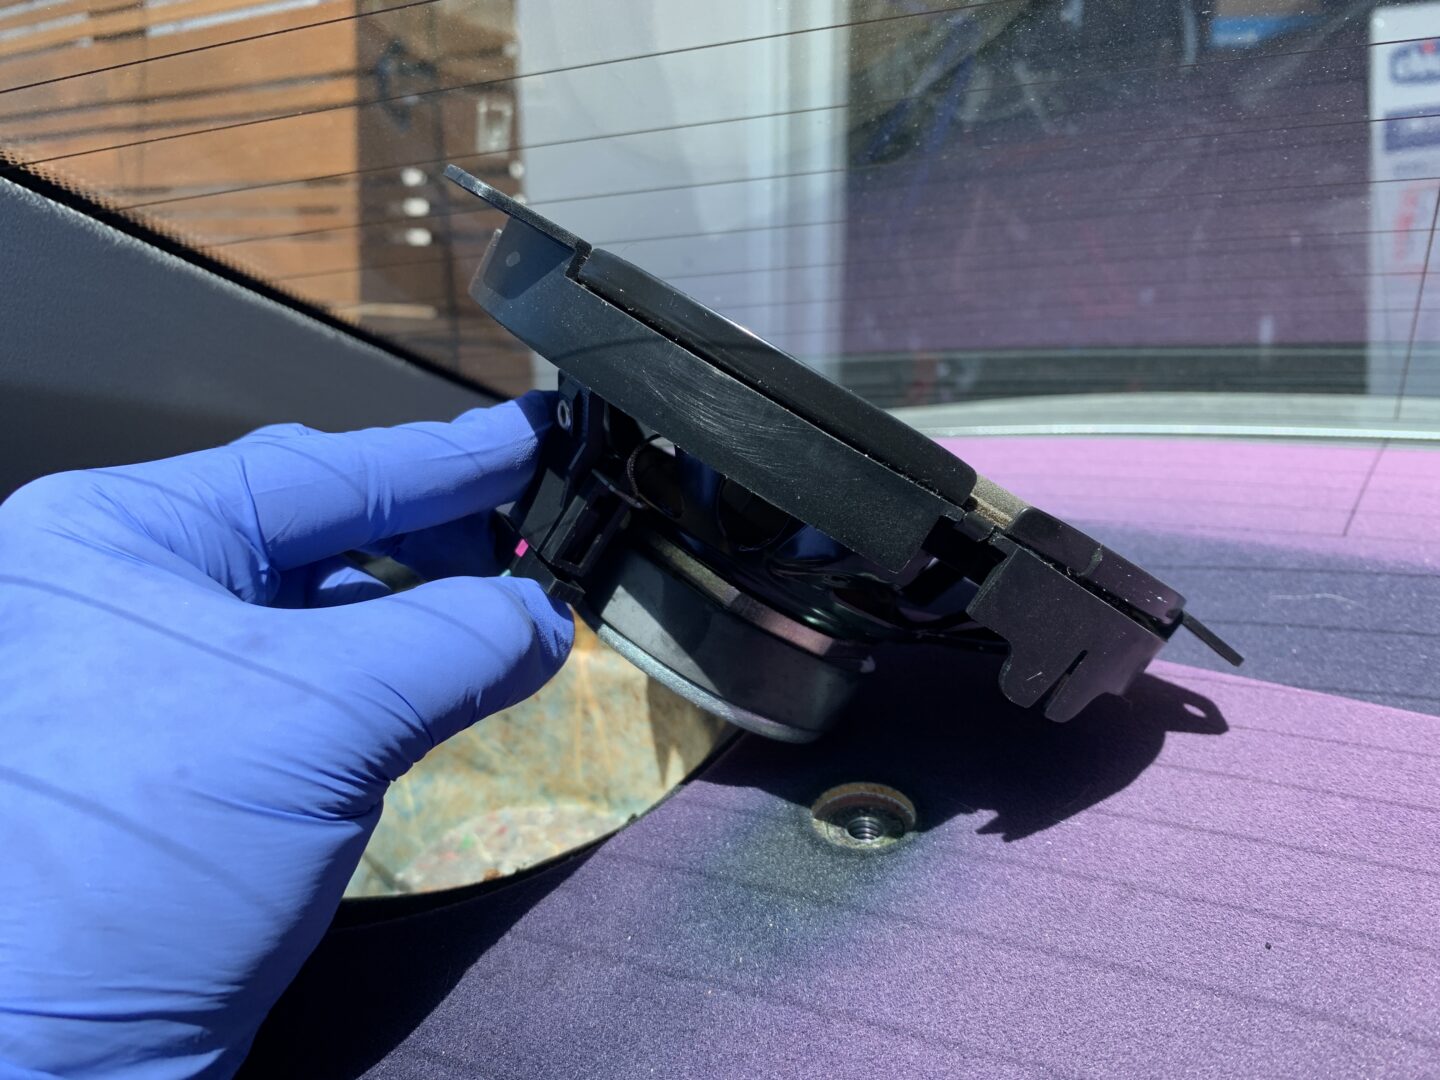
Almost there! You can see that you have the speakers and speaker grilles, as well as some anchors and seat belt mounts that still need to be removed prior to the removal of the rear shelf.
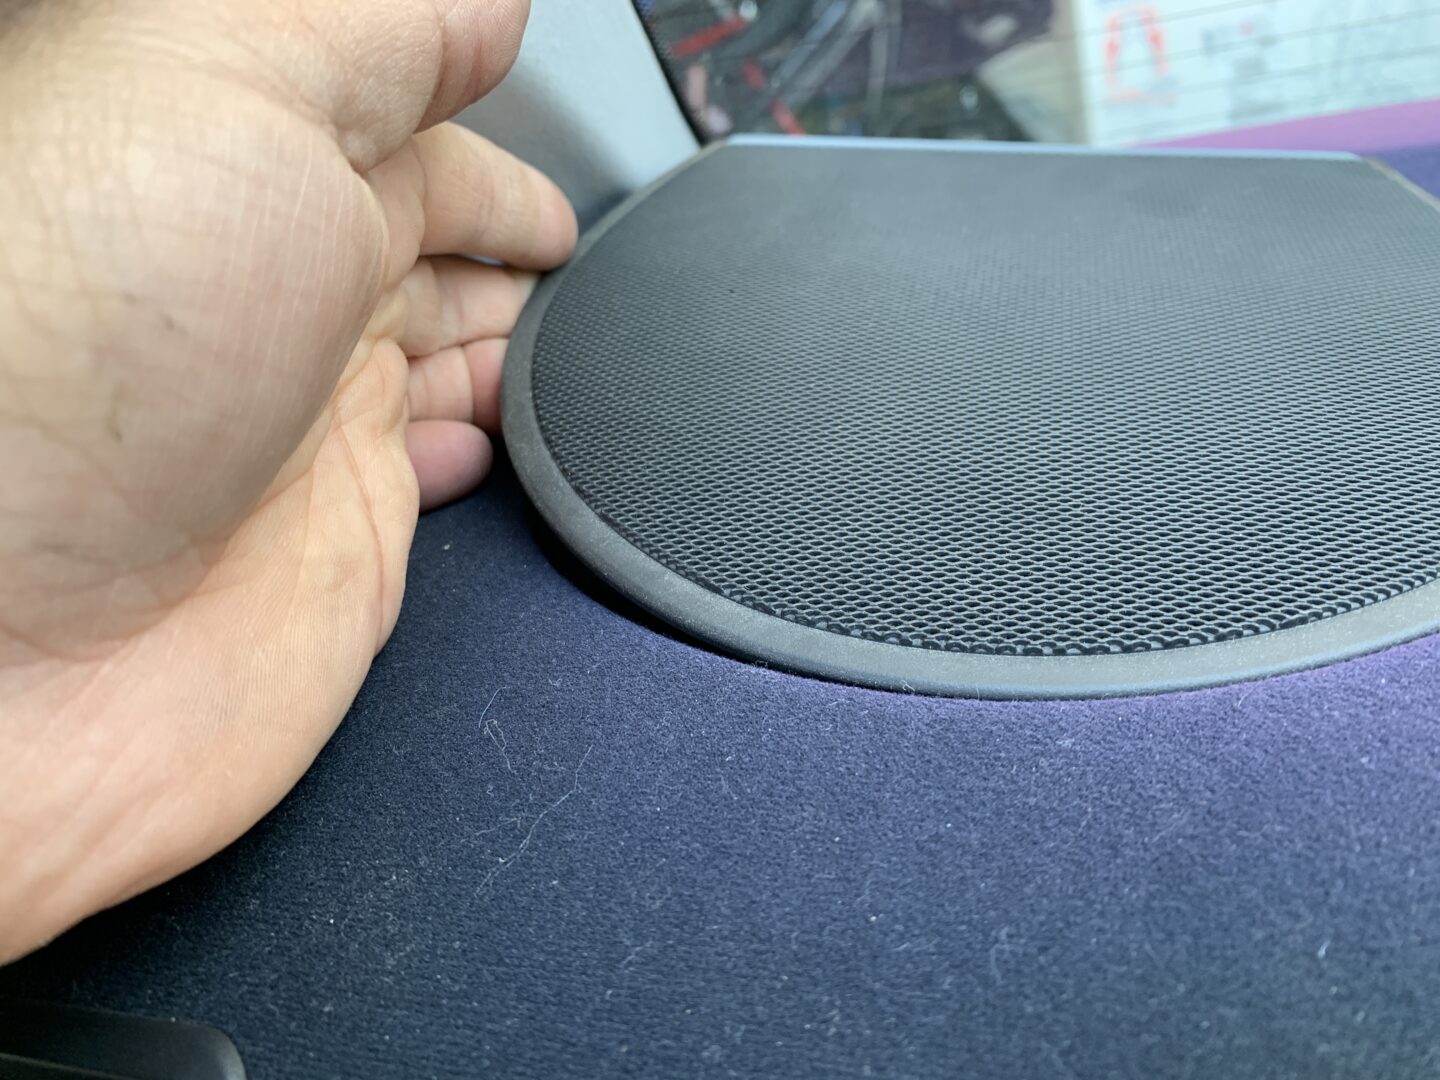
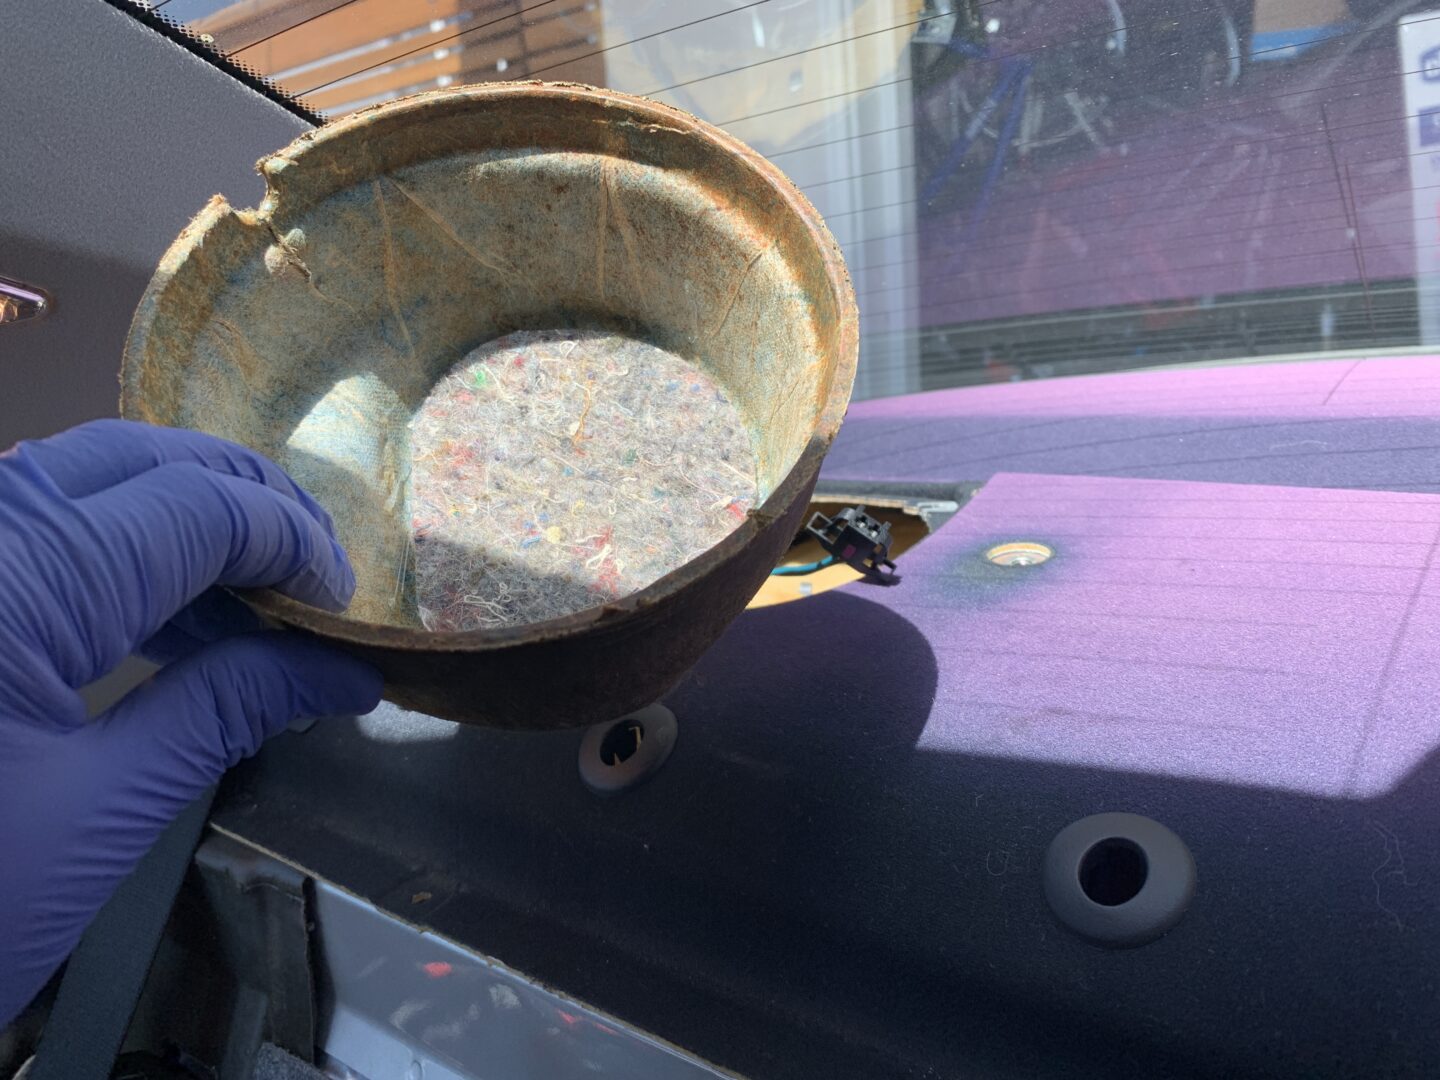
If your E46 has had enough sun exposure to cause fading of your rear shelf, it probably also has caused the plastic of your rear speaker grilles to very brittle. Be extremely careful removing the speaker grilles as it’s common for these to break off during removal. These are held in by clips underneath, so you simply need to pull up on the grilles. Then remove the foam underneath as well as the trim cover over the anchor bolt mounts.
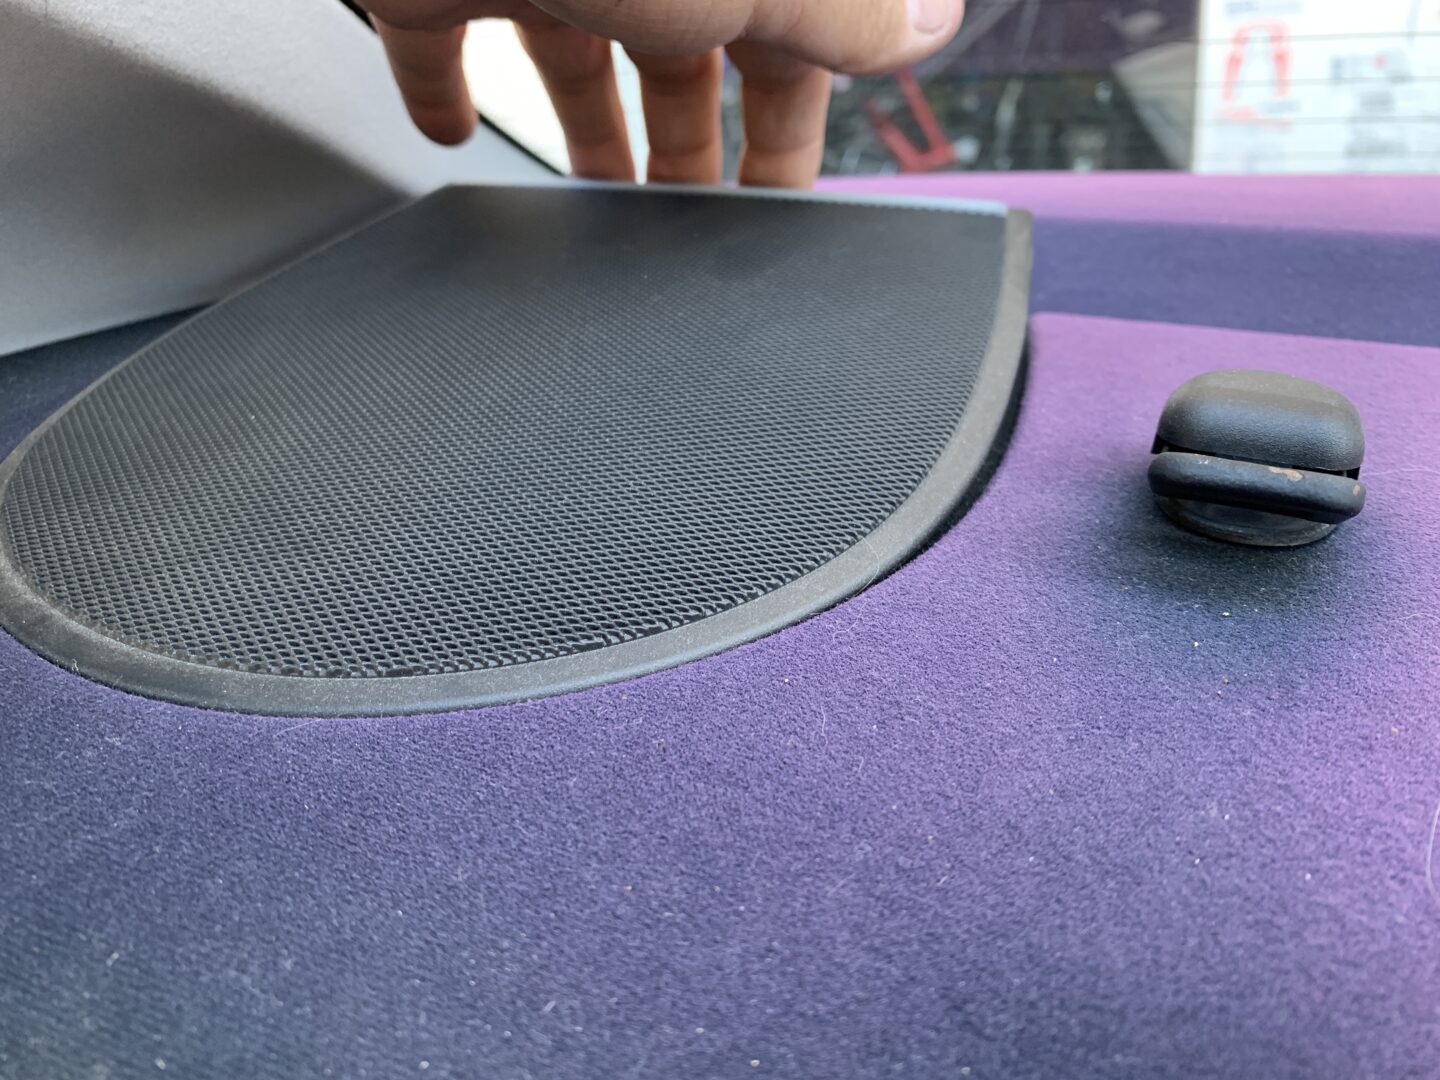
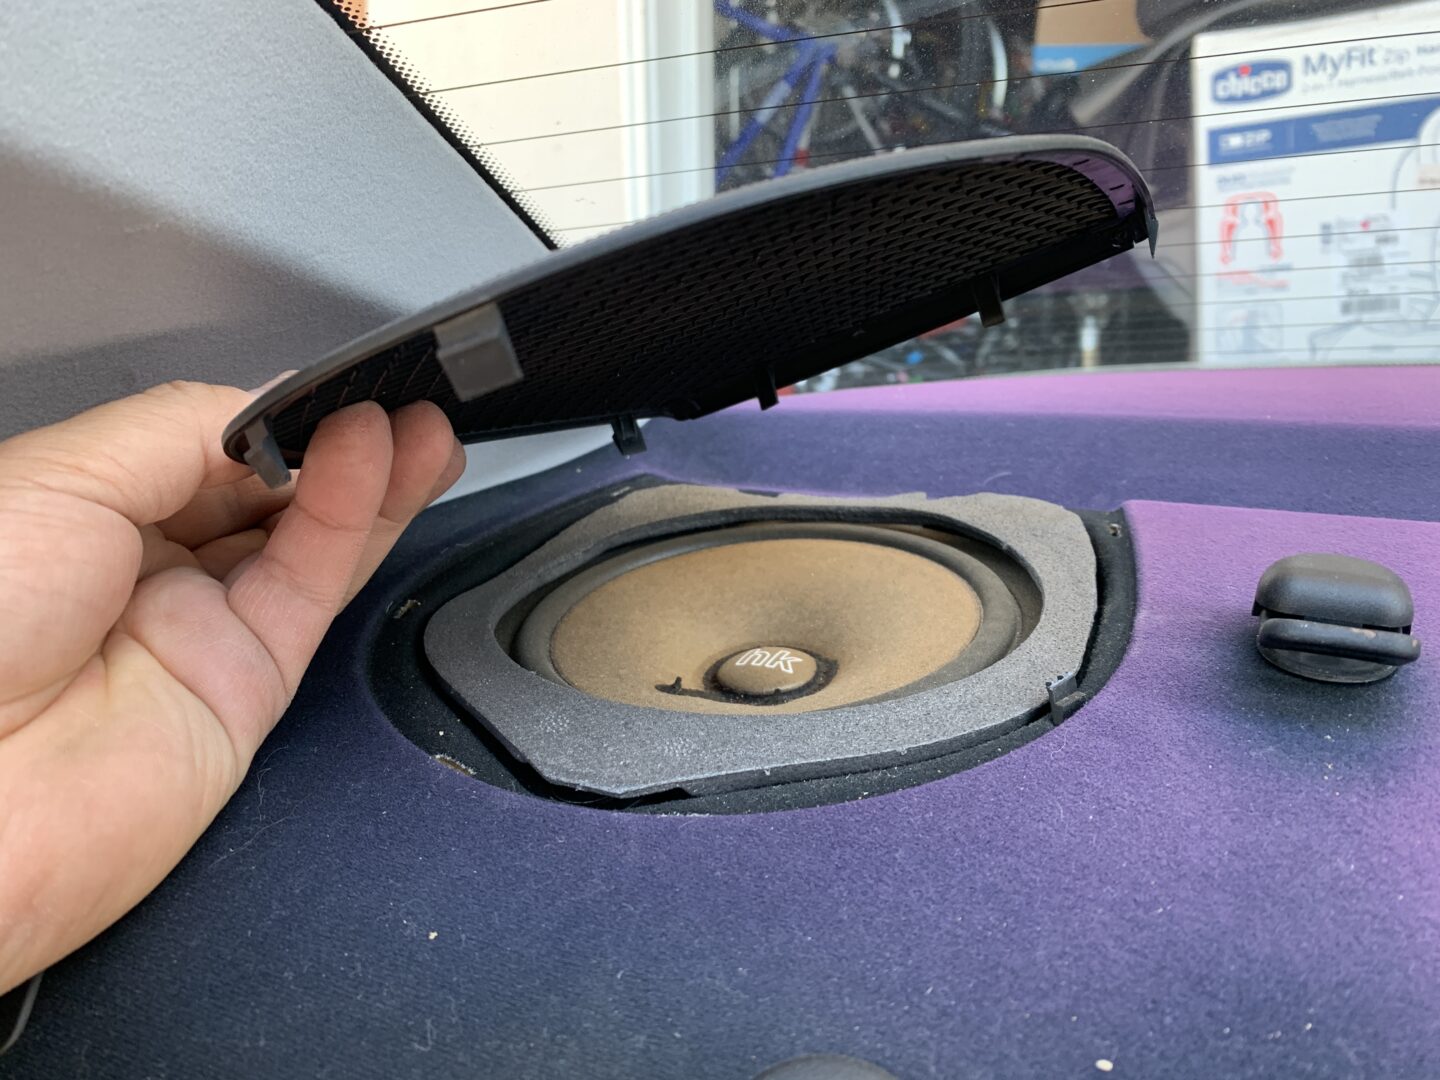
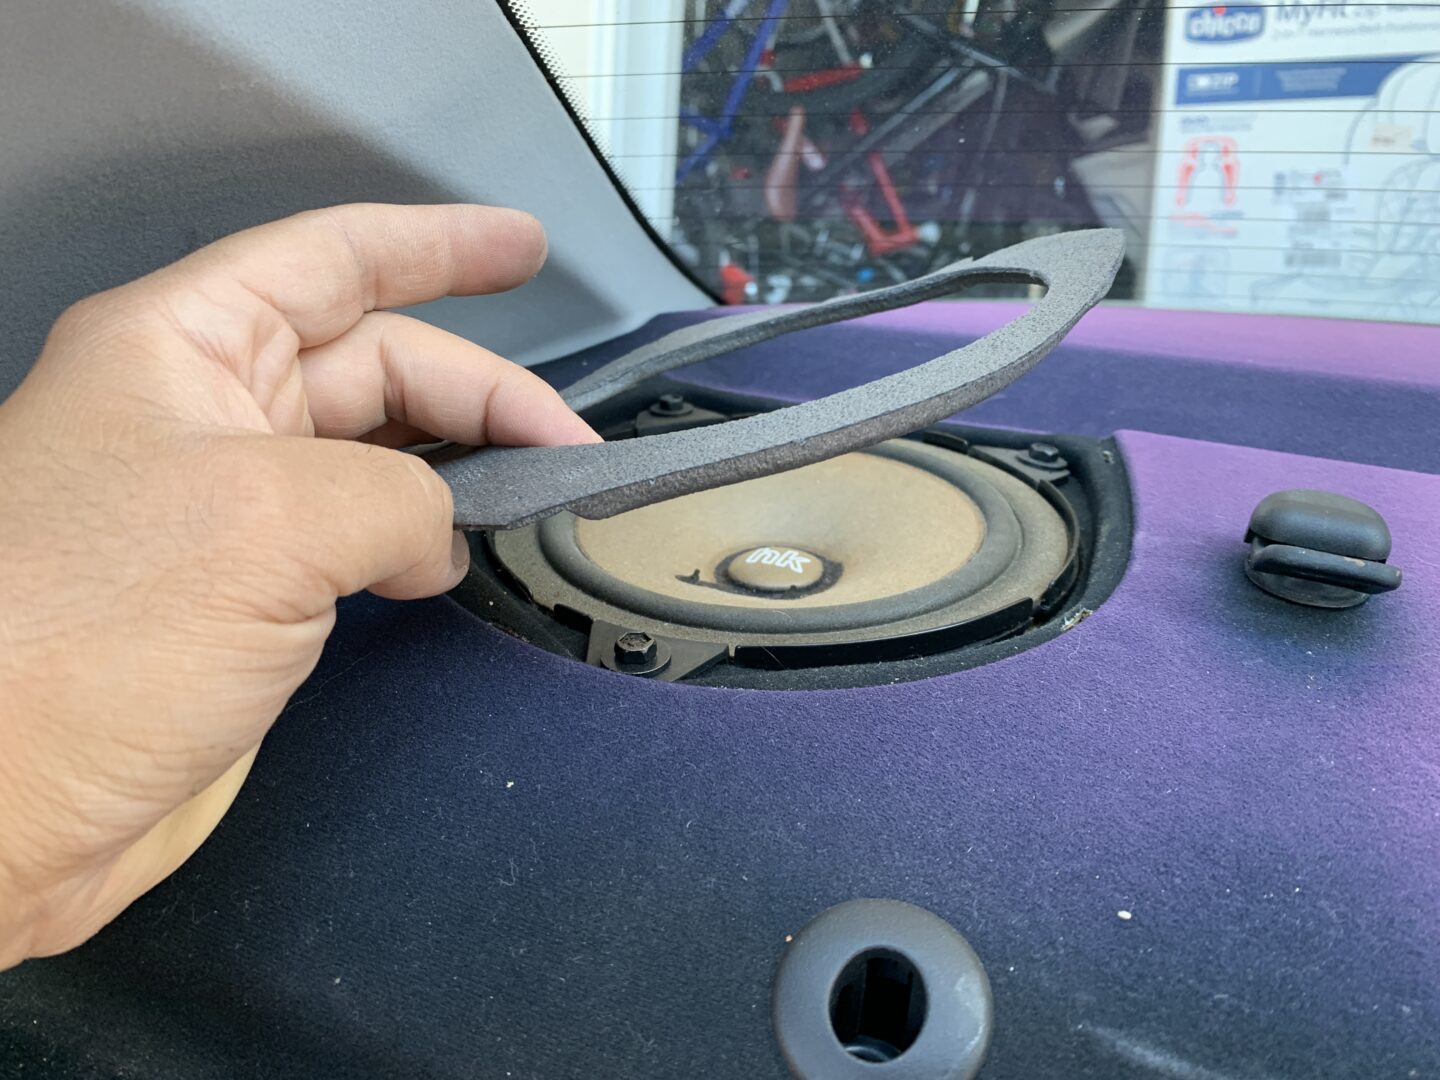
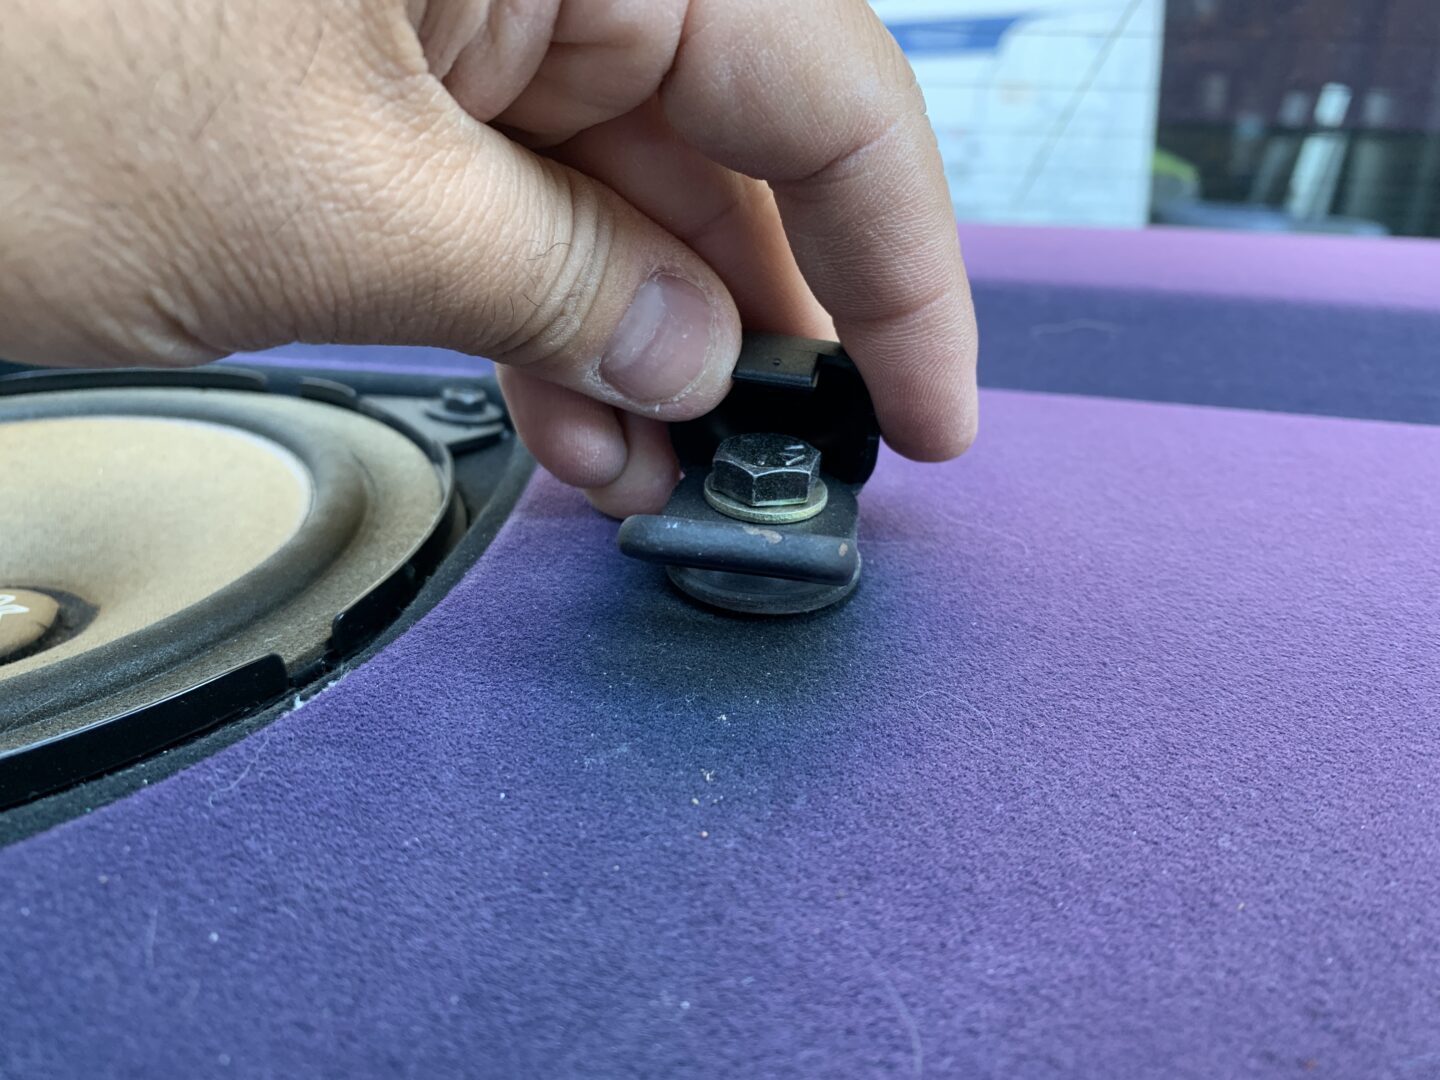
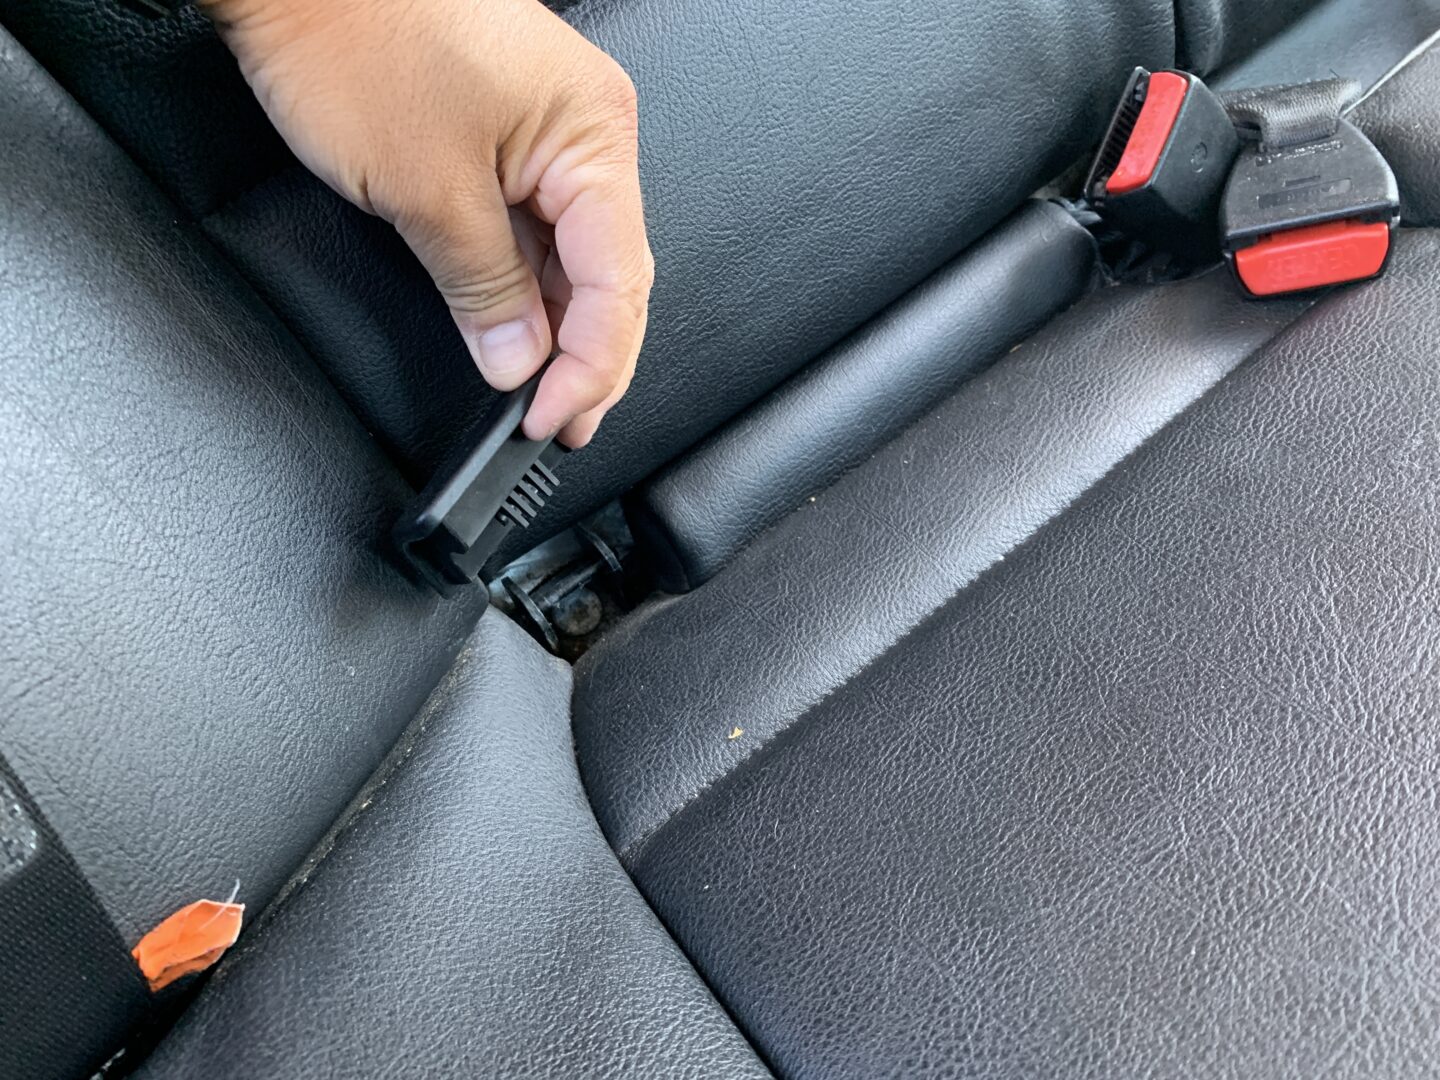
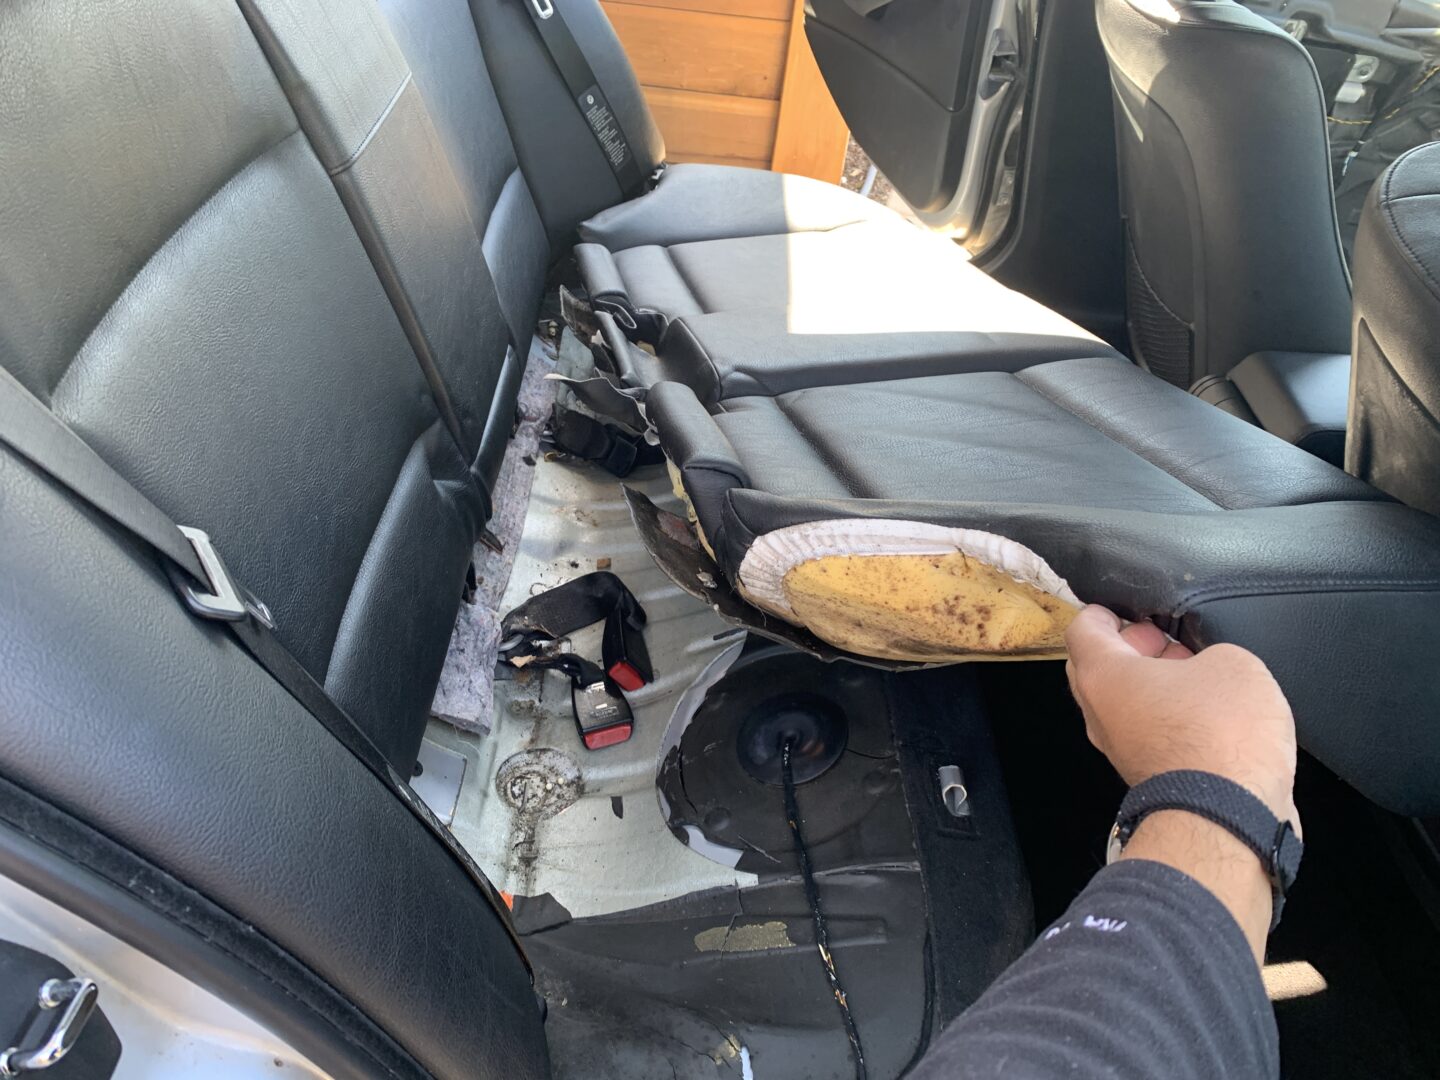
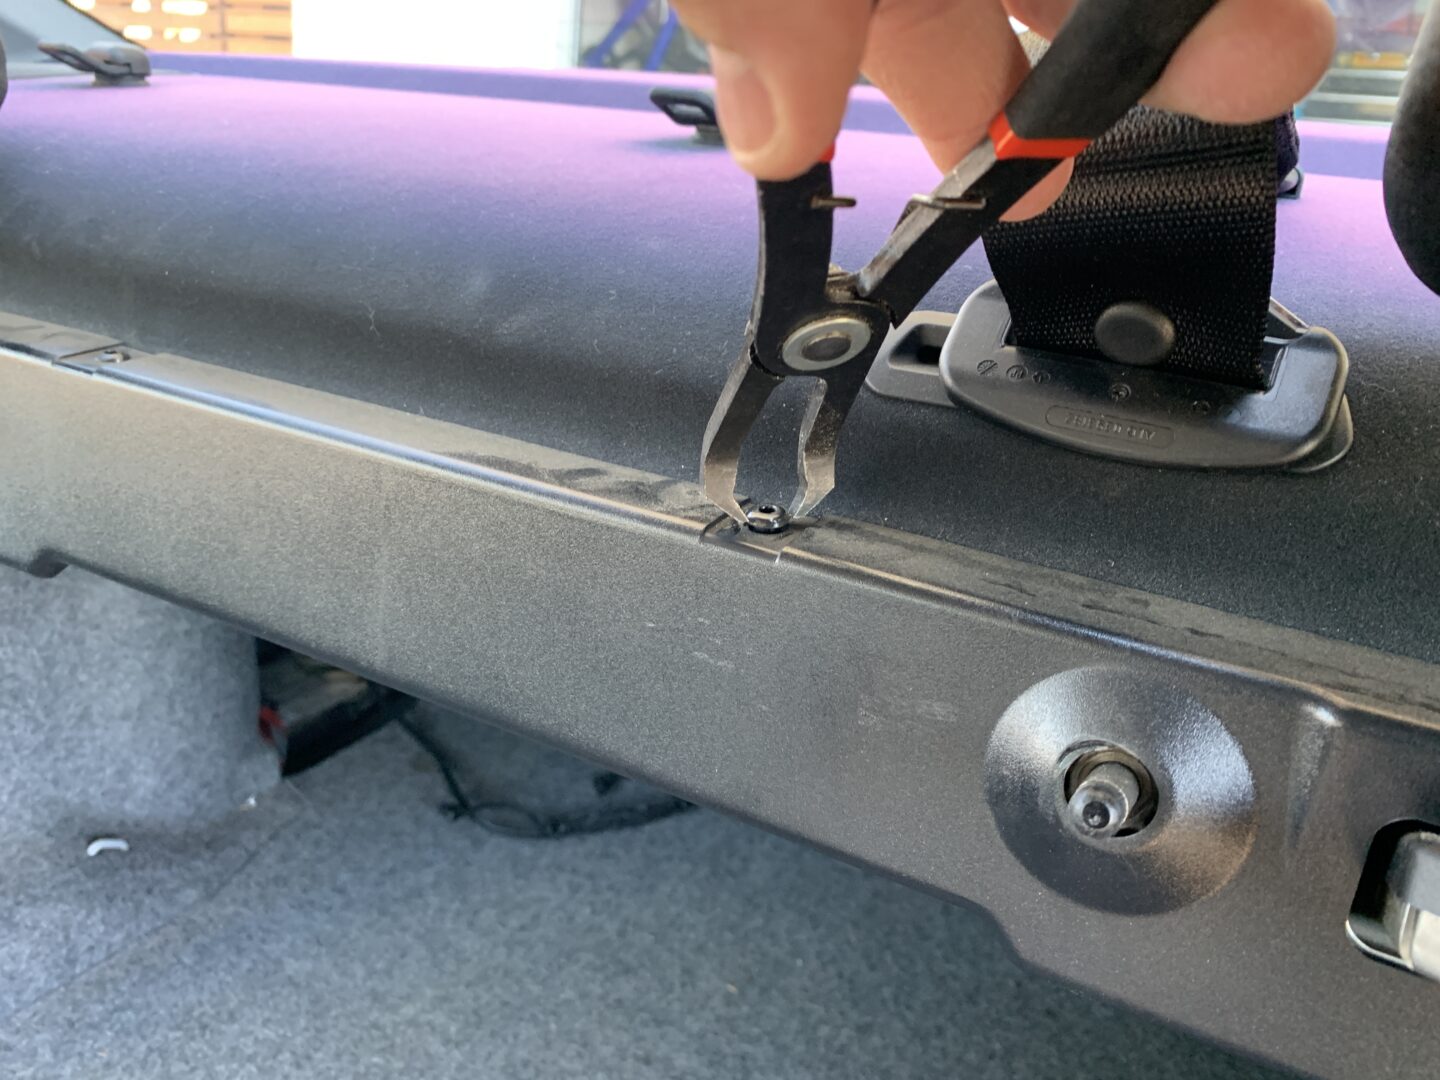
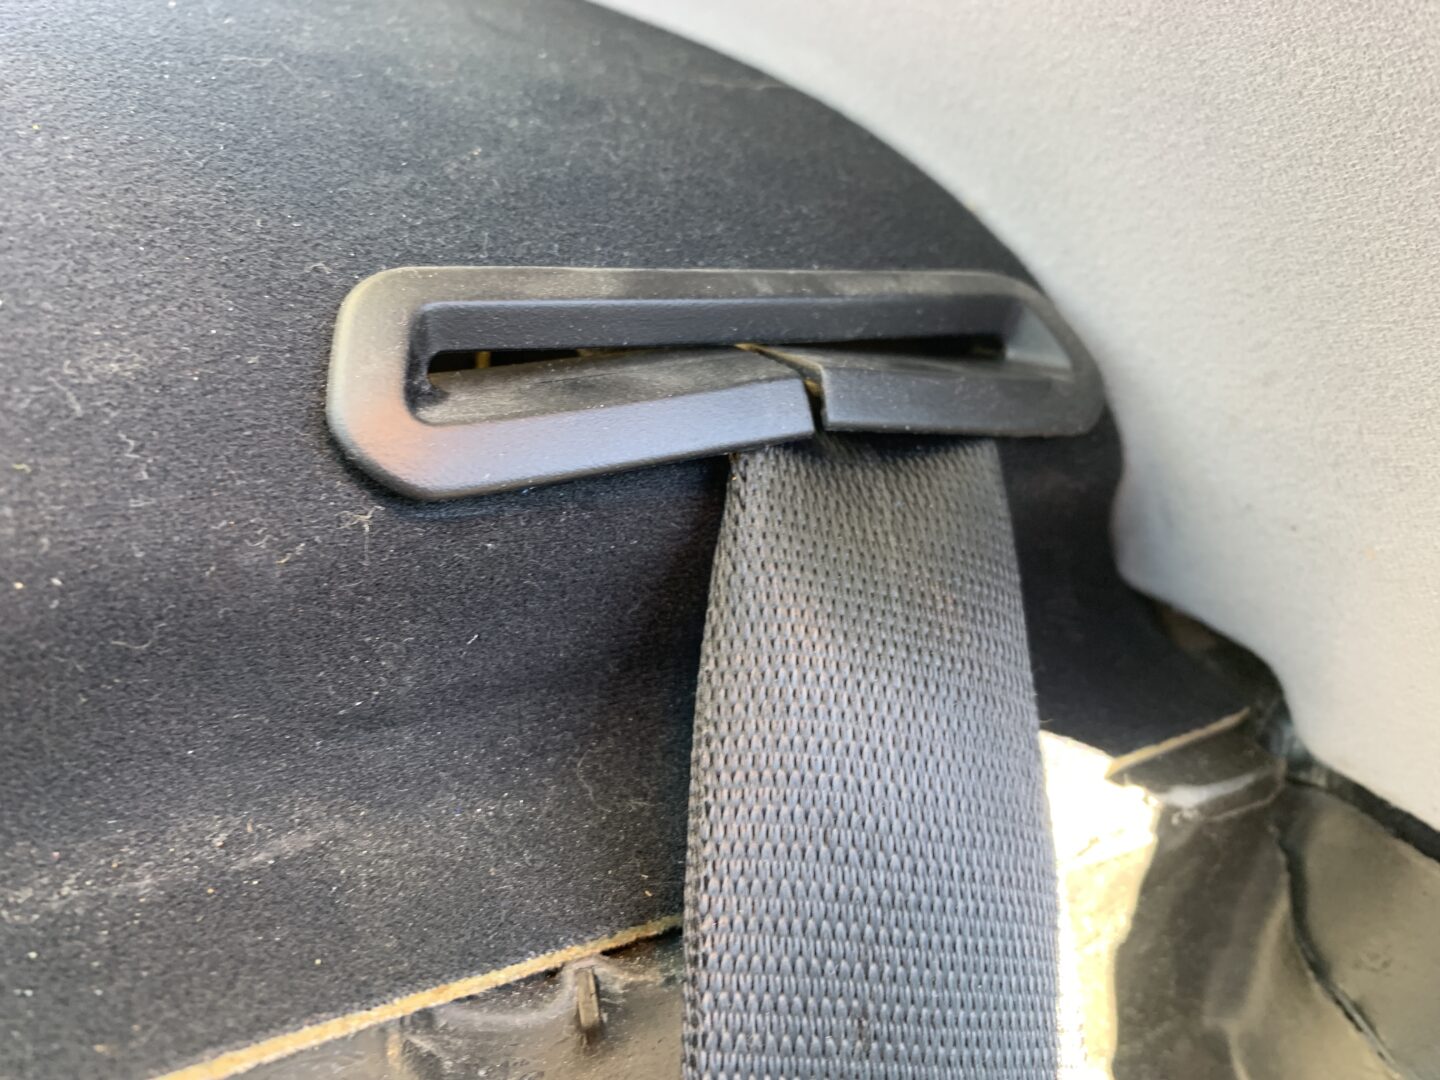
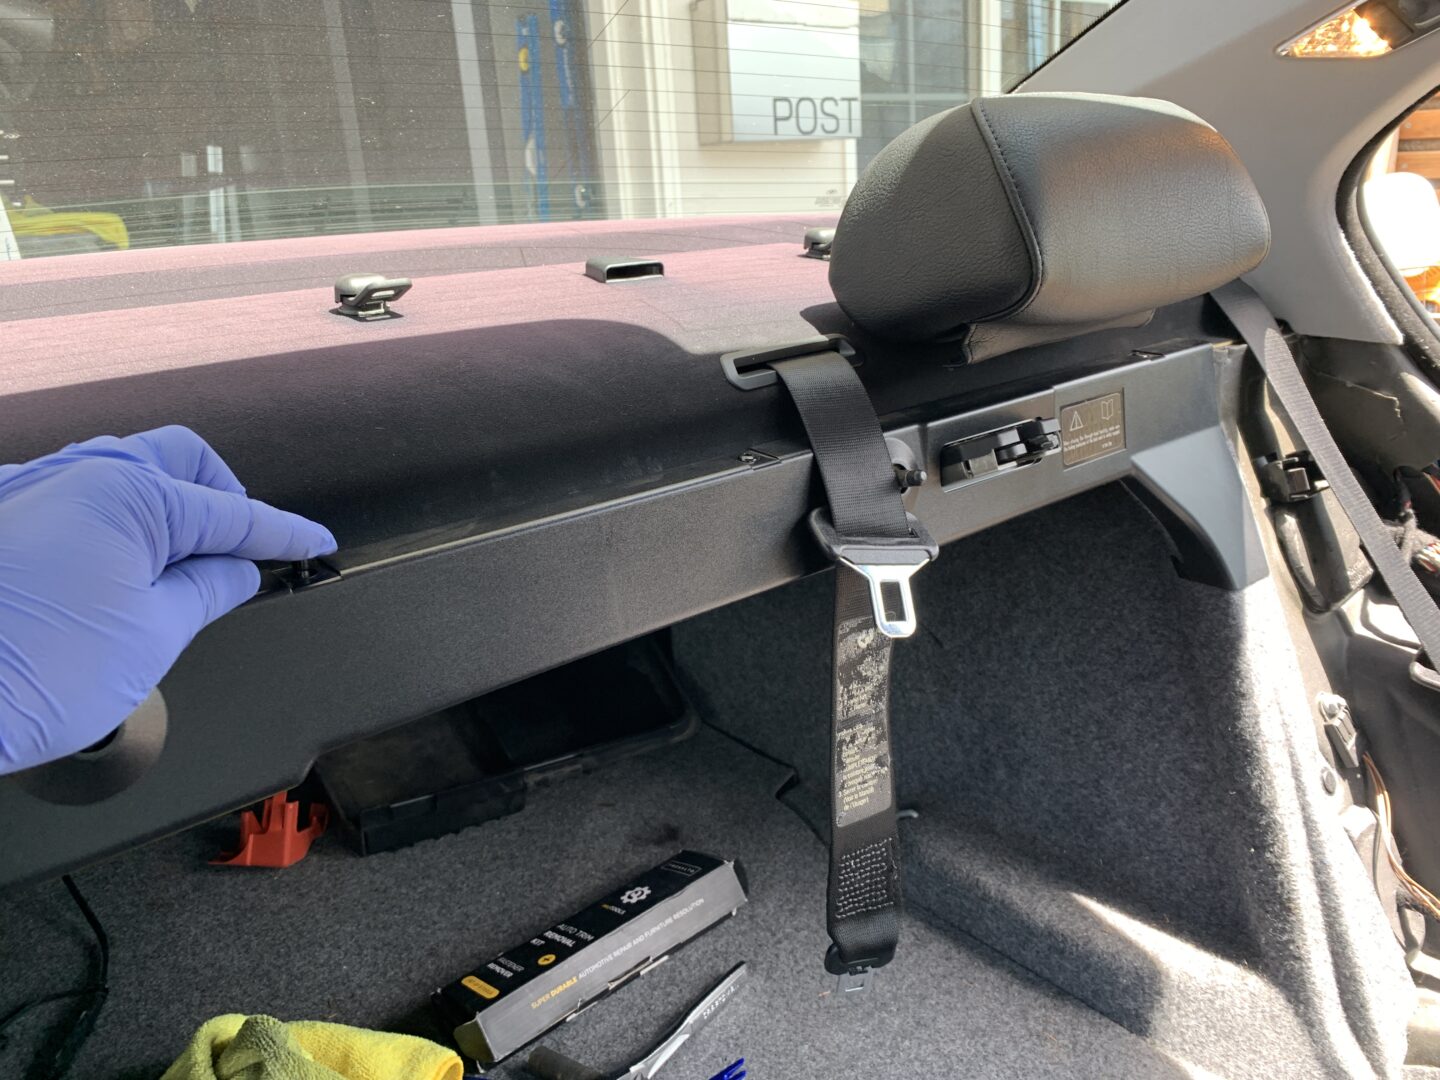
Use a 13mm socket to remove the anchors and an 8mm socket to remove the speakers. Disconnect and remove the speakers and baffles. Then use a T50 Torx bit to remove the bolt that holds the bottom portion of the seat belt.


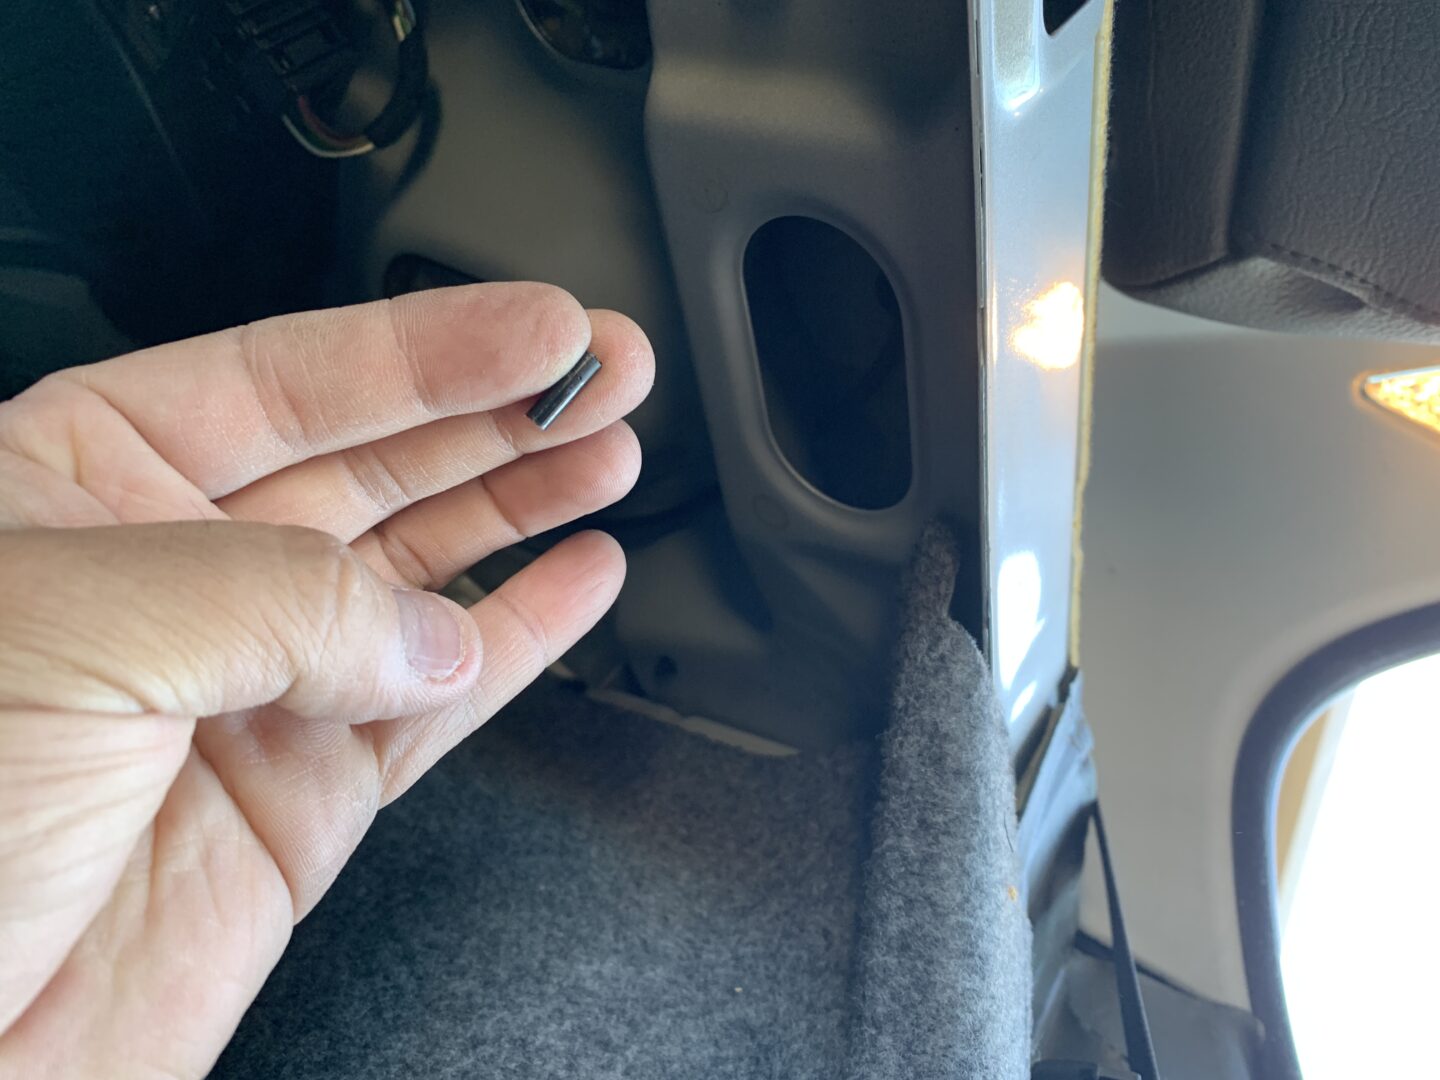
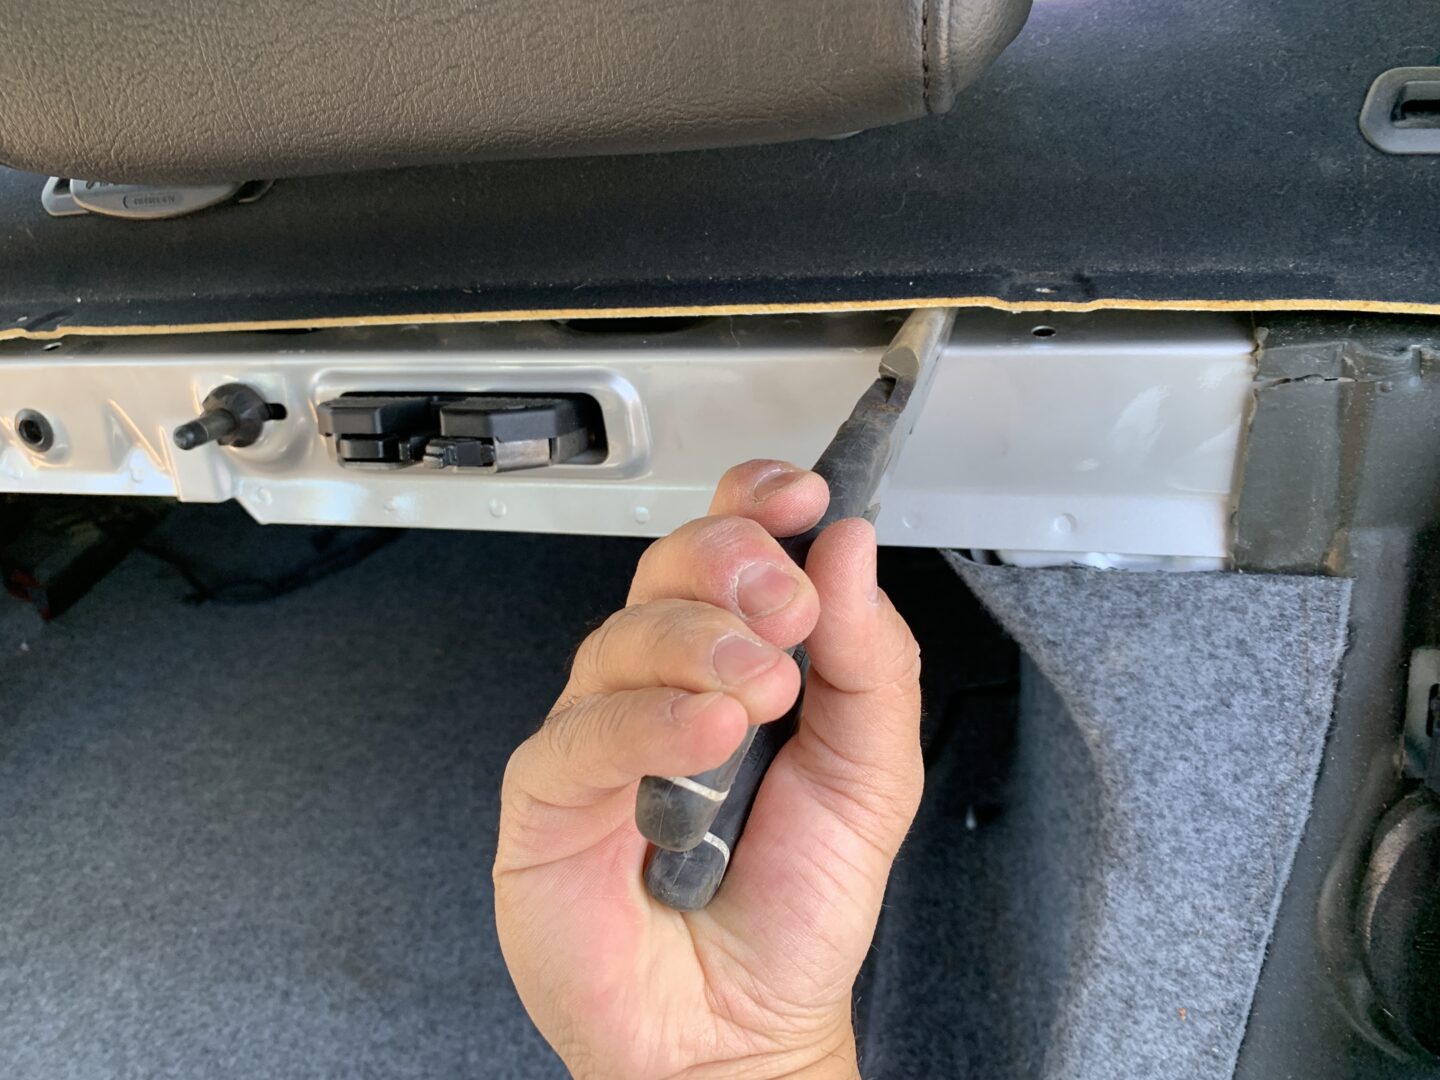
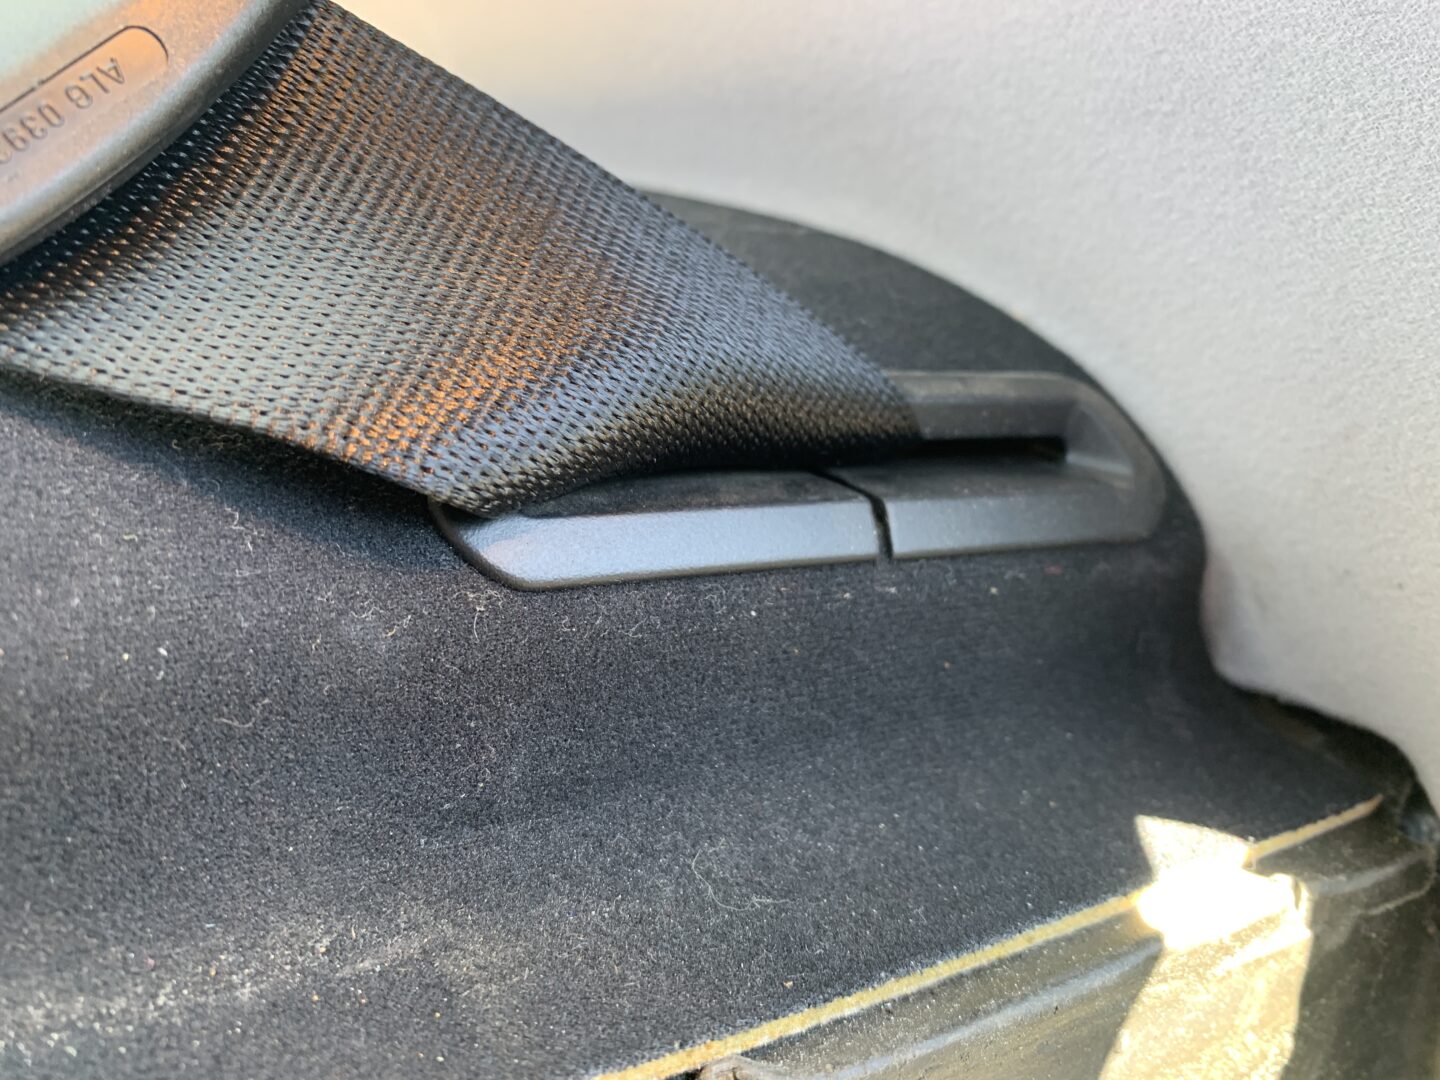
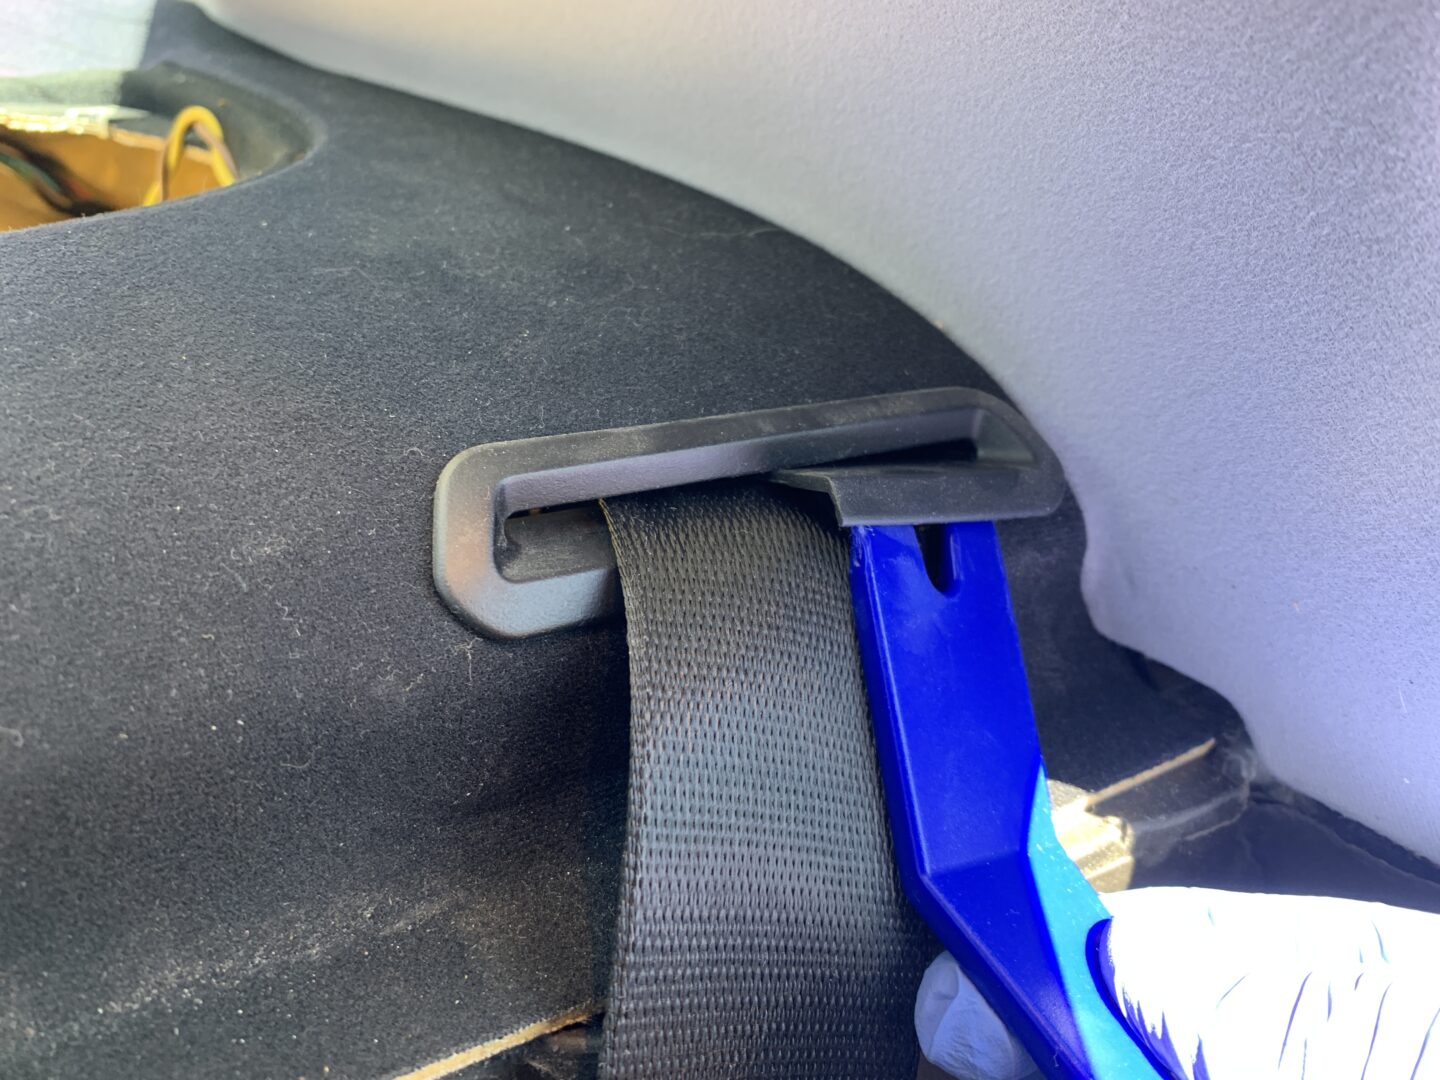
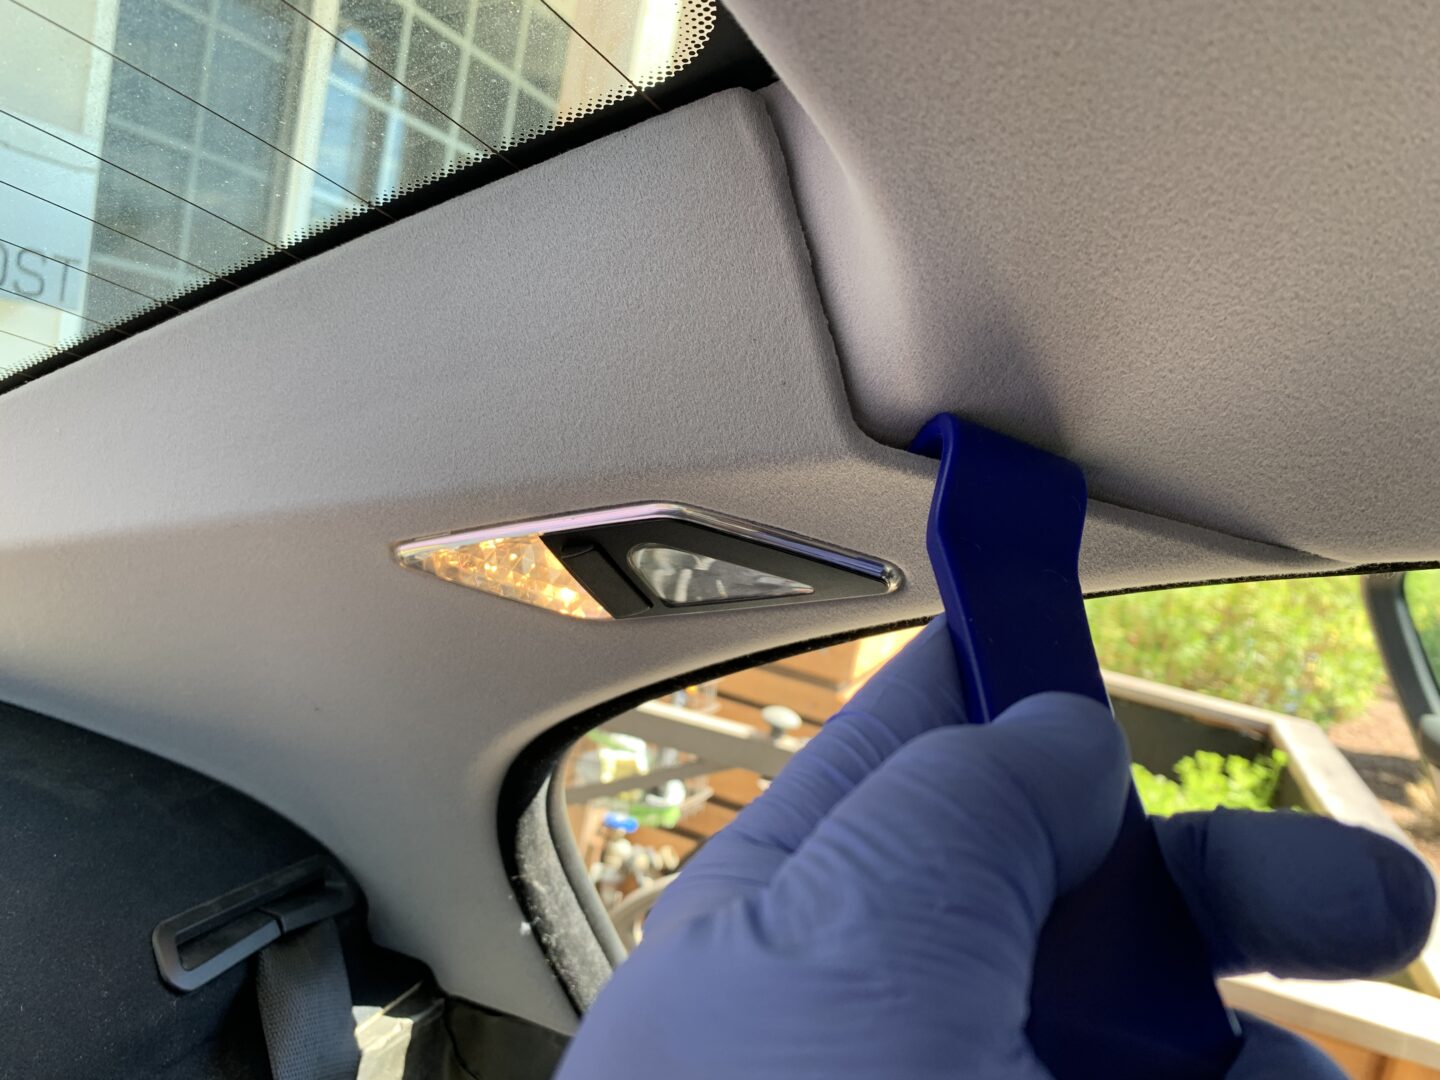
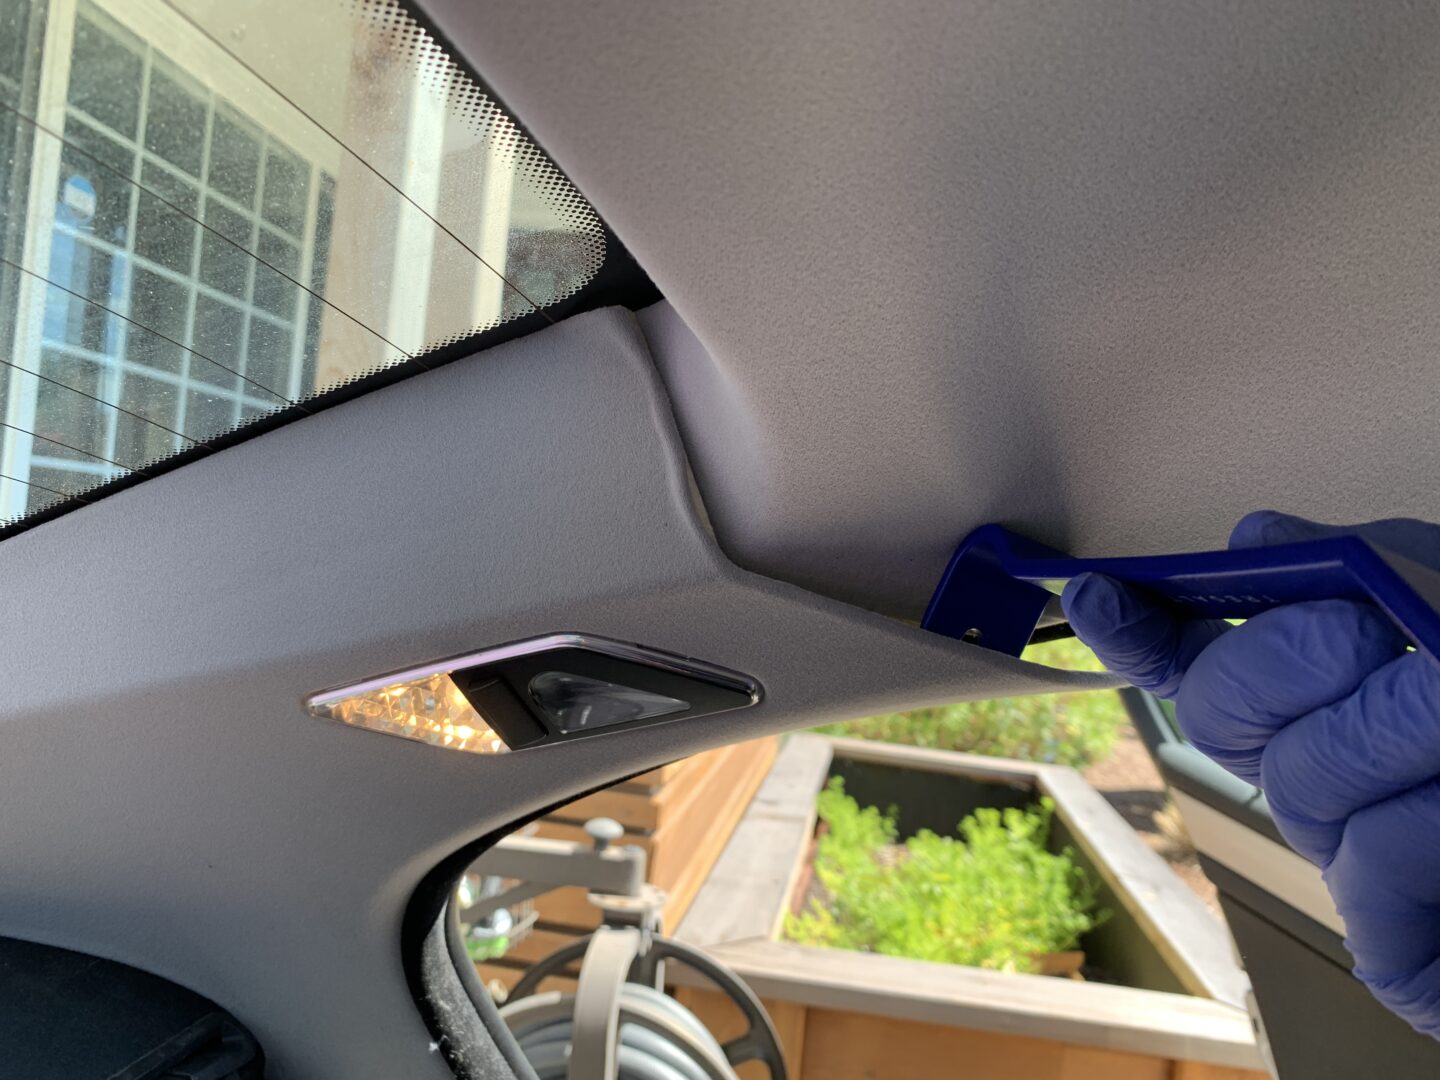
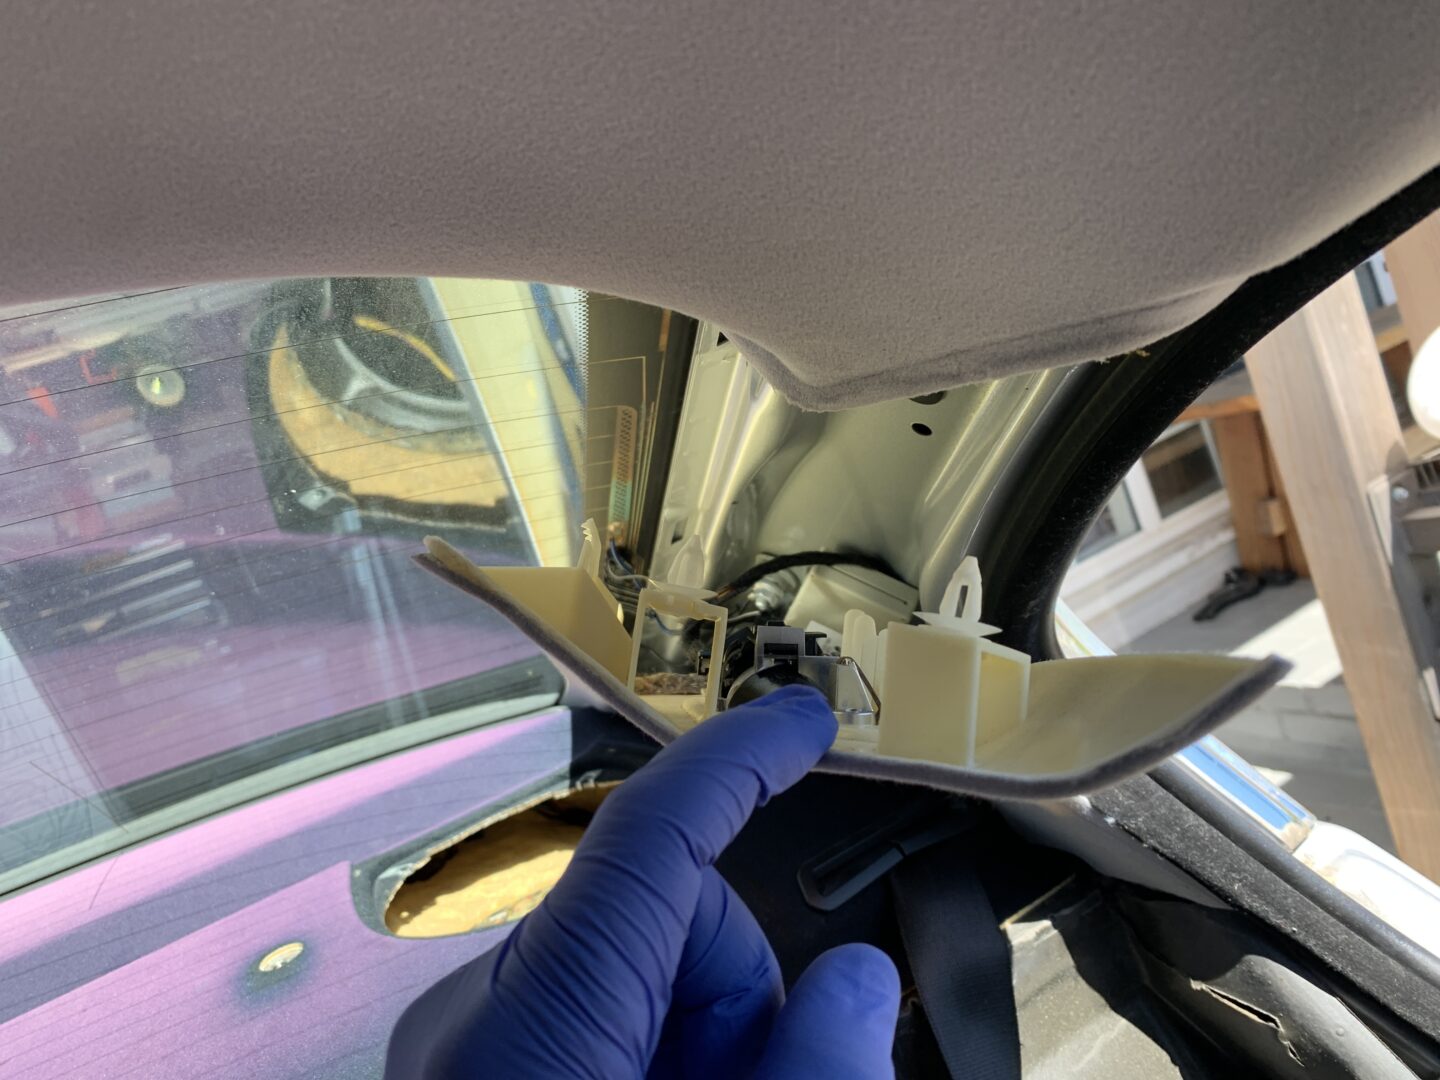
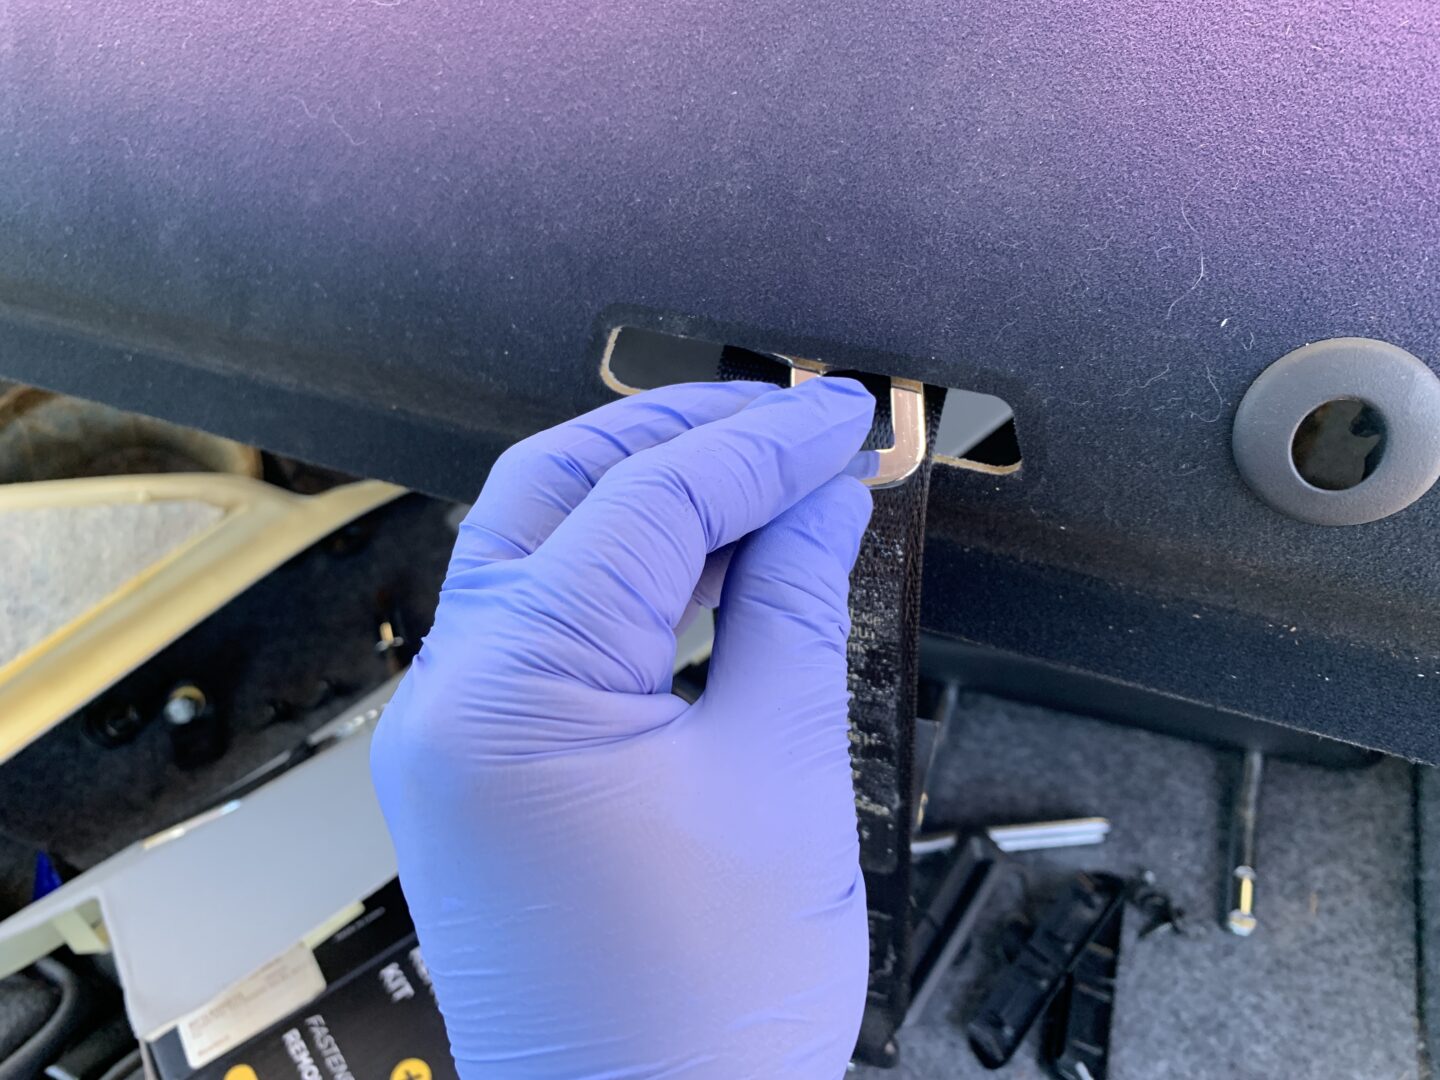
On the top end of the seat belt, you’ll need to slide the seat belt out of the rubber sleeve at the opening of the rear shelf. First, snake the seatbelt out of the rubber sleeve, then remove the sleeve. You will also need to remove the C-pillar interior trim, which can be accomplished by pulling it off as shown below (disconnect the electrical connector to the light located behind the interior piece as well.)
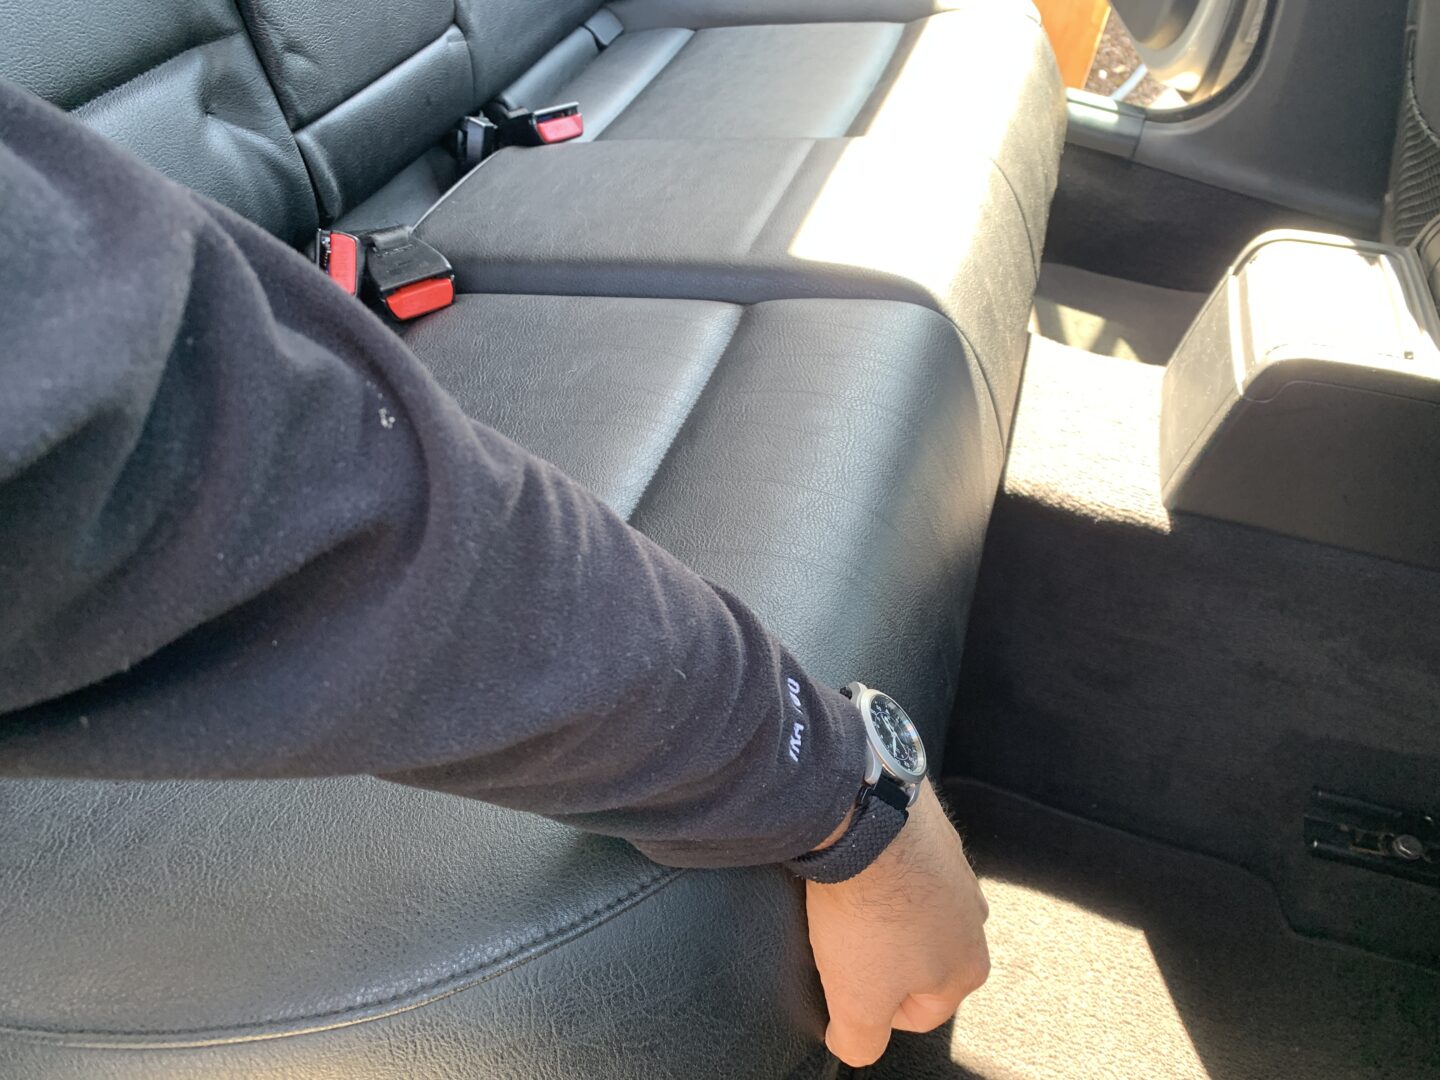
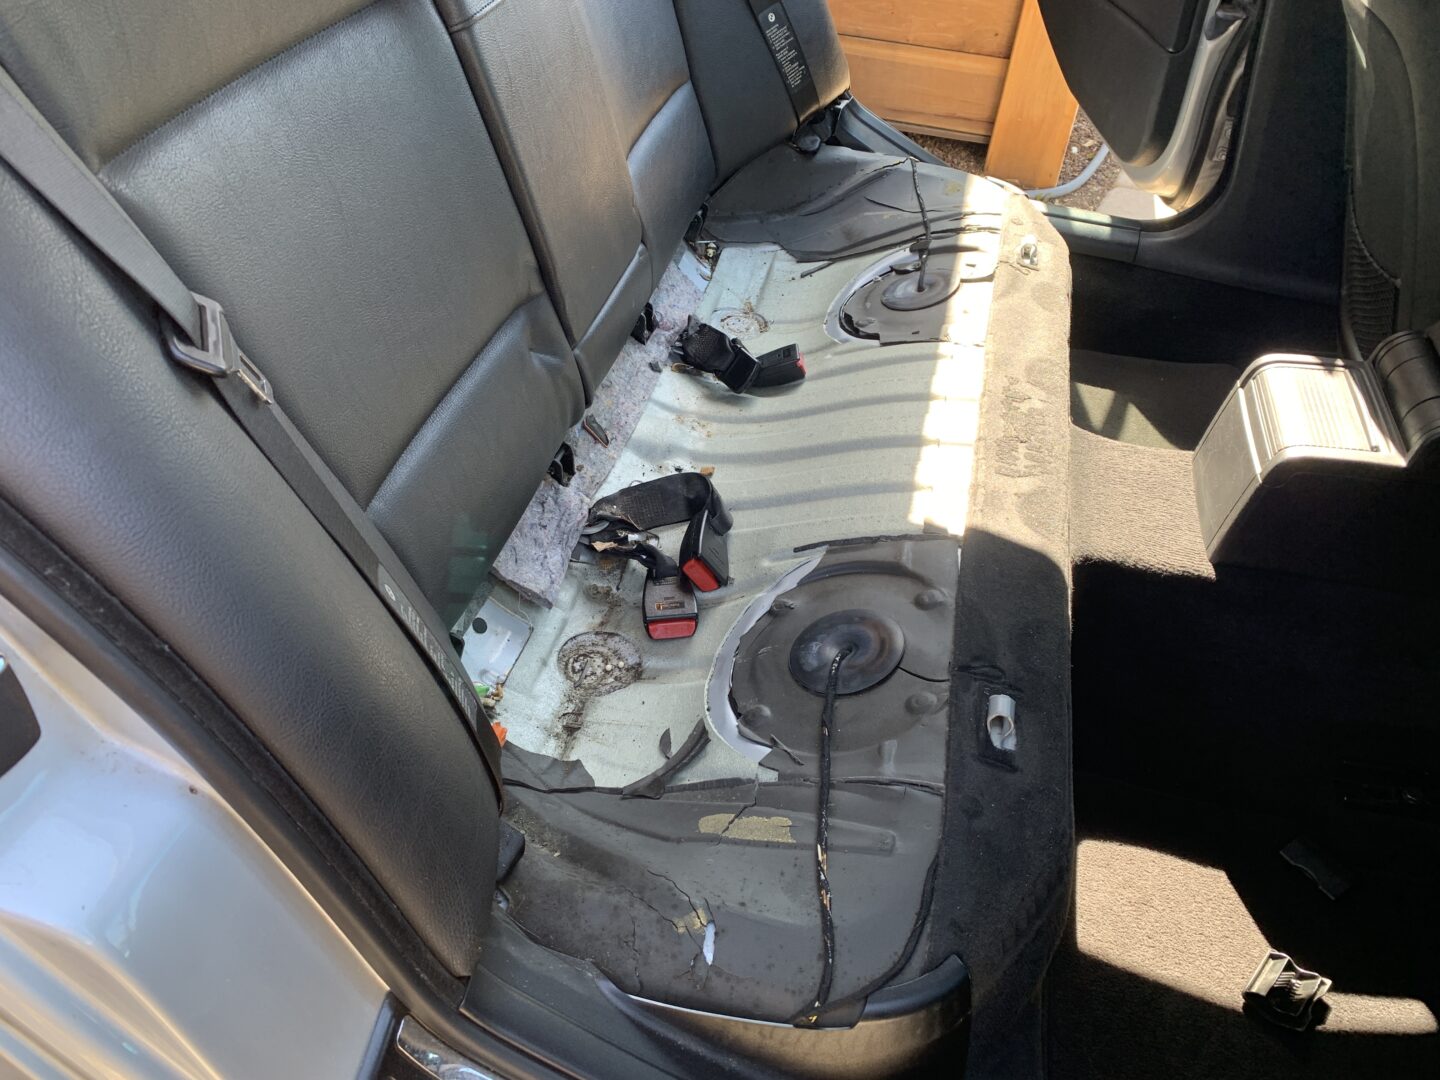
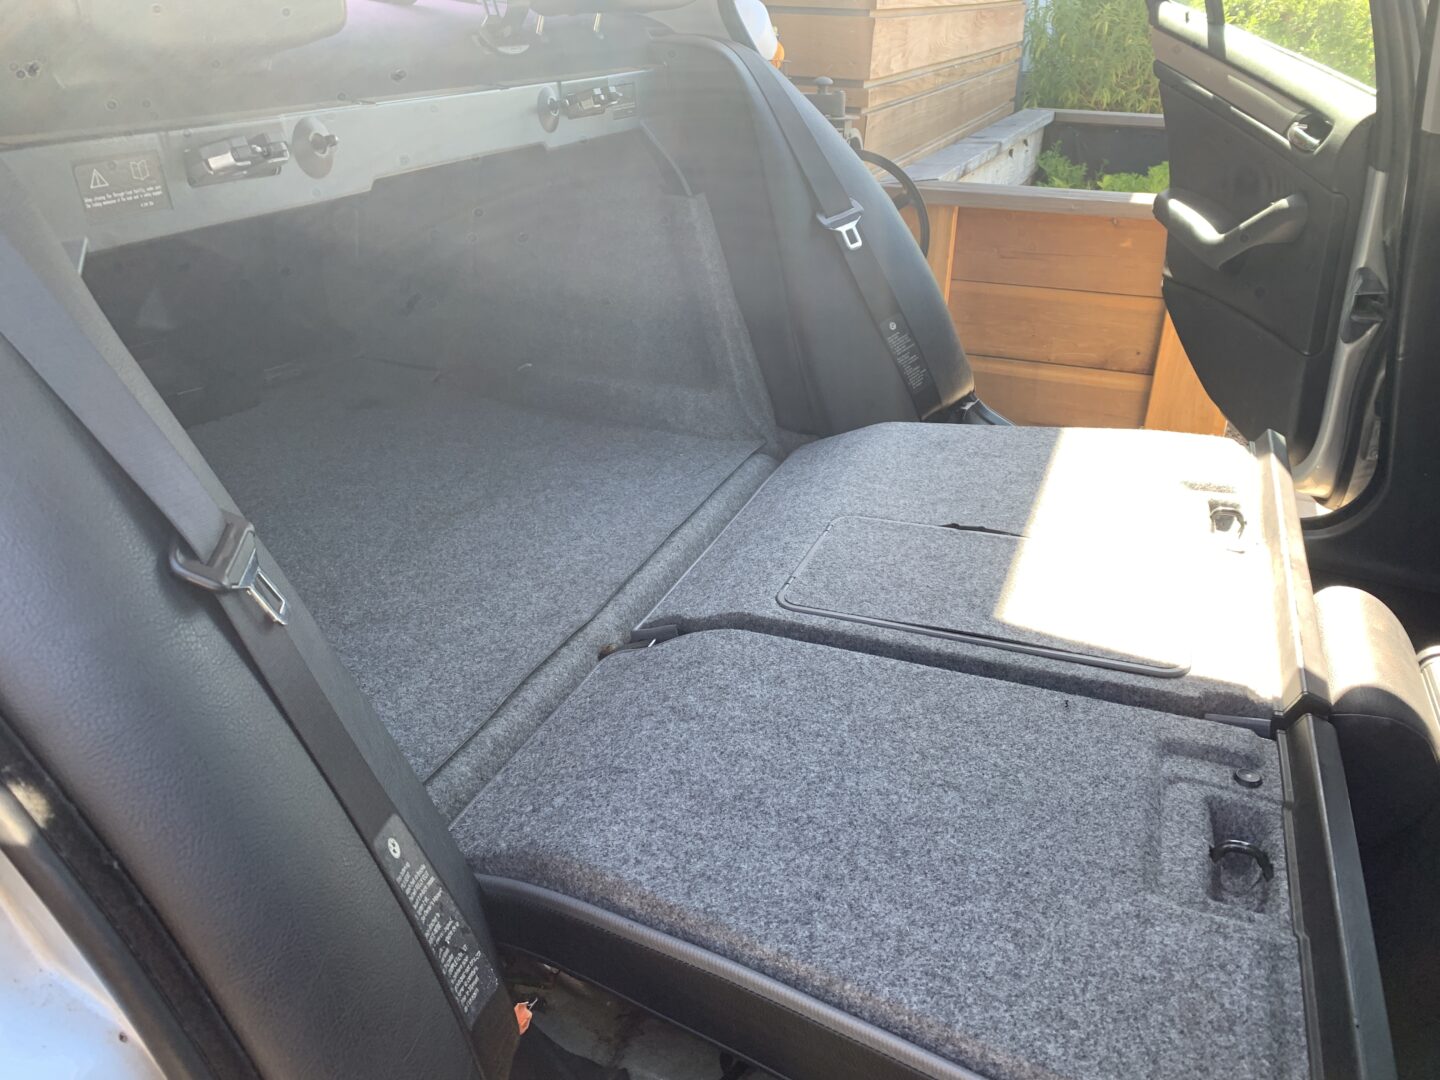
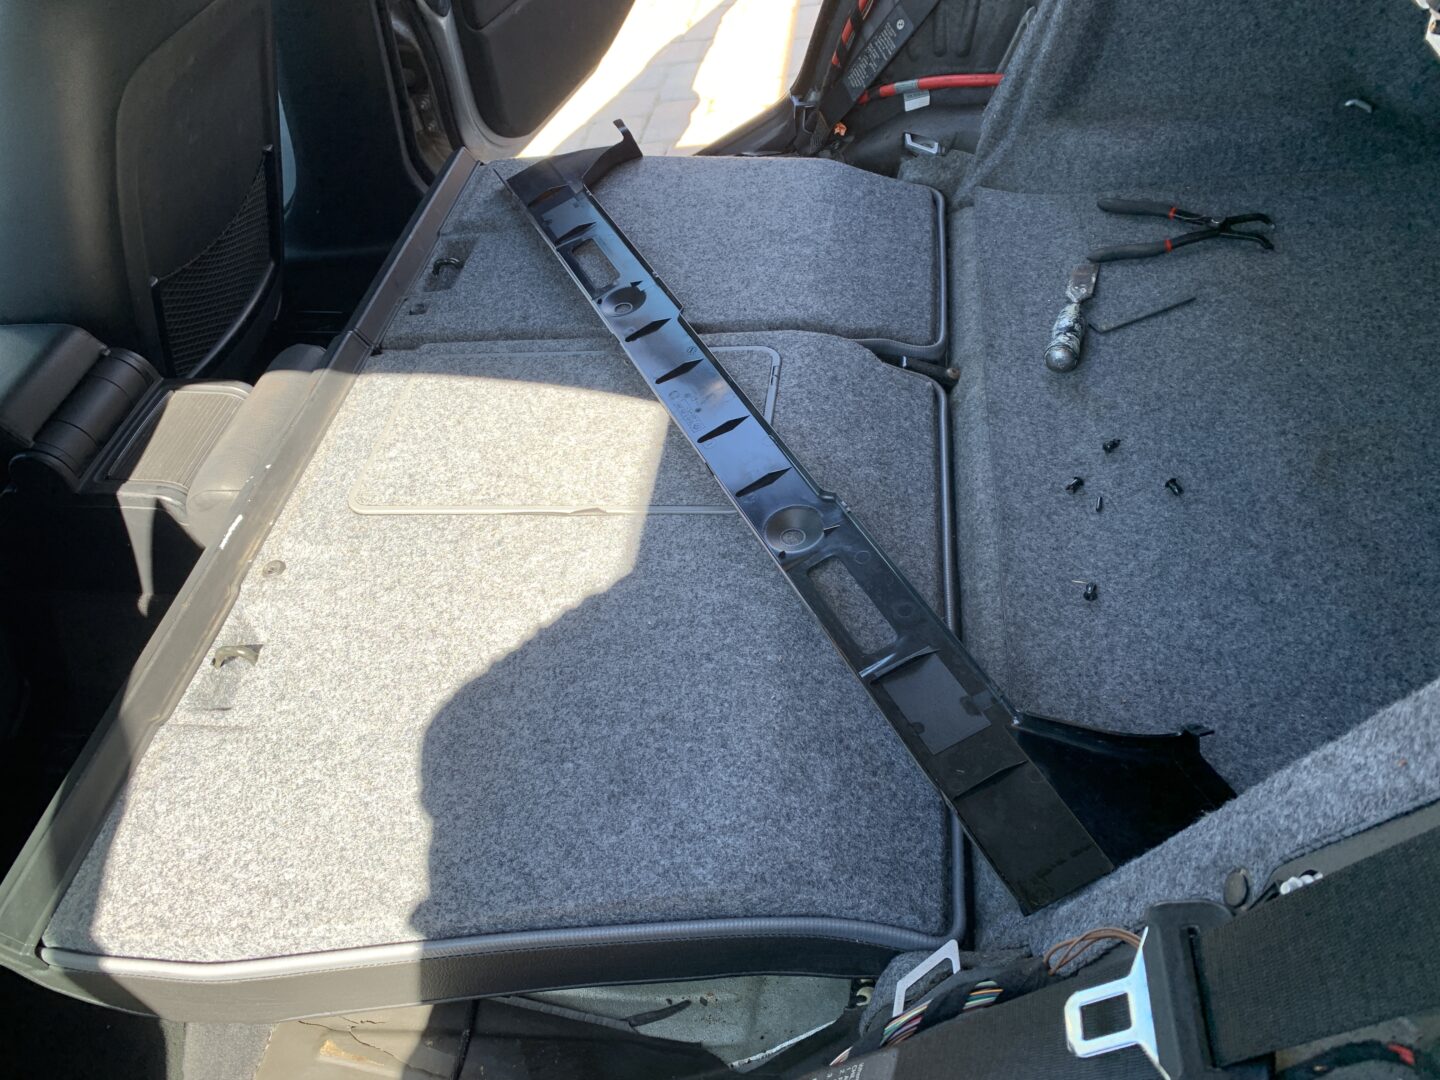
Snake the rest of the rear seat belts through the opening of the rear shelf. Finally! The rear shelf is now able to be separated from the car.

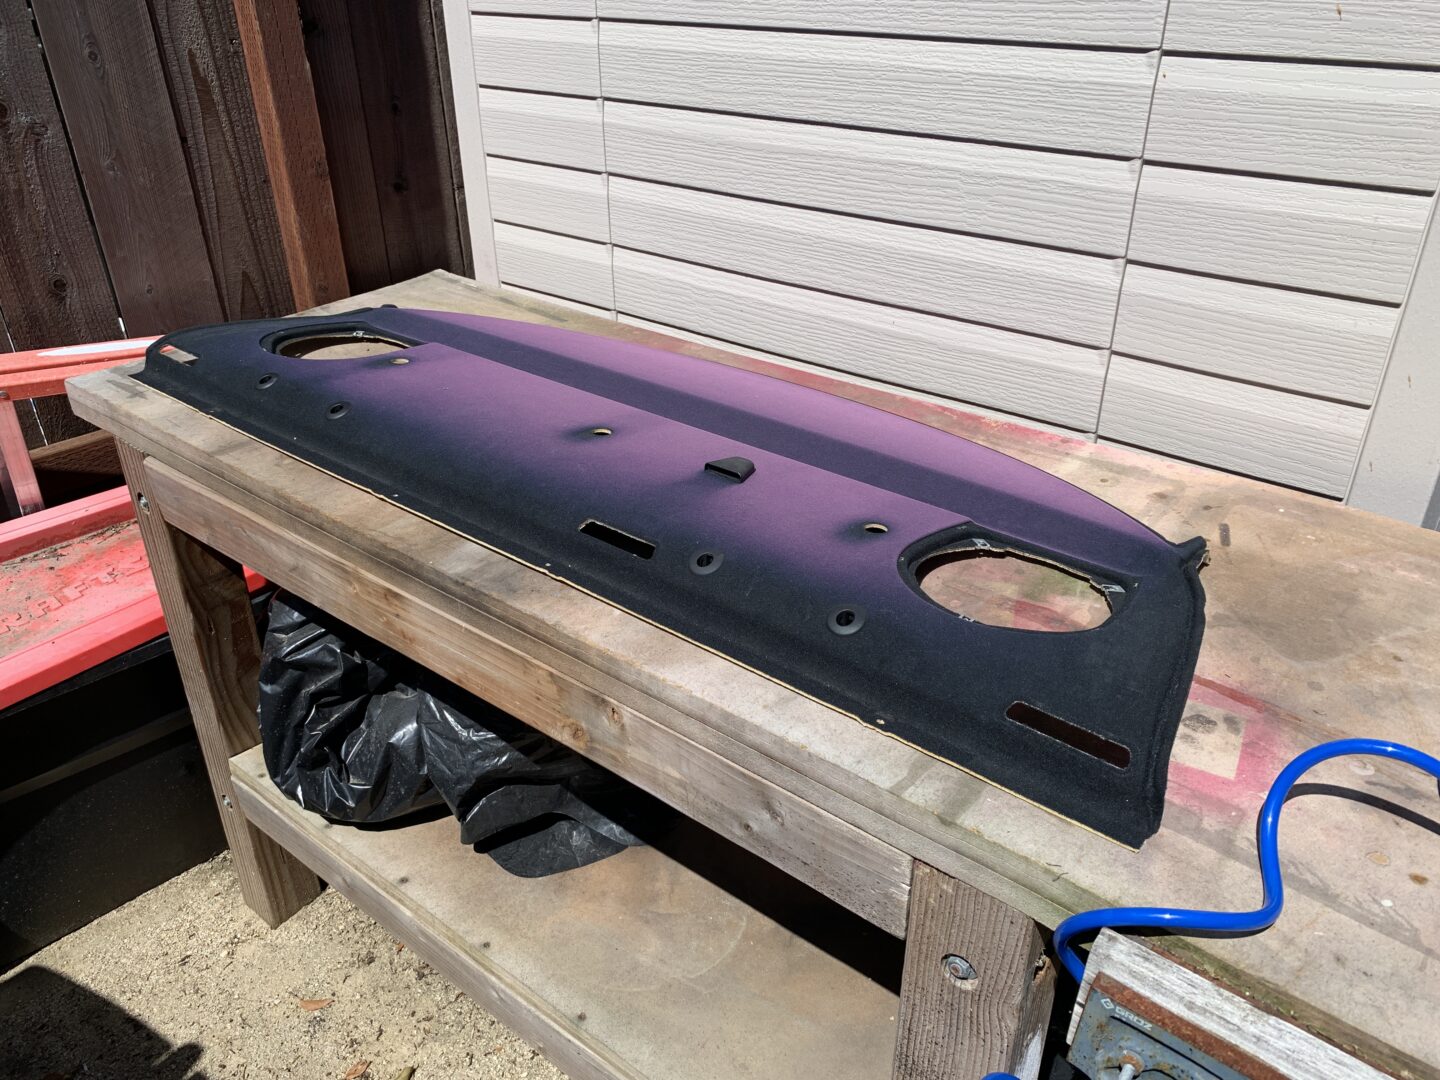
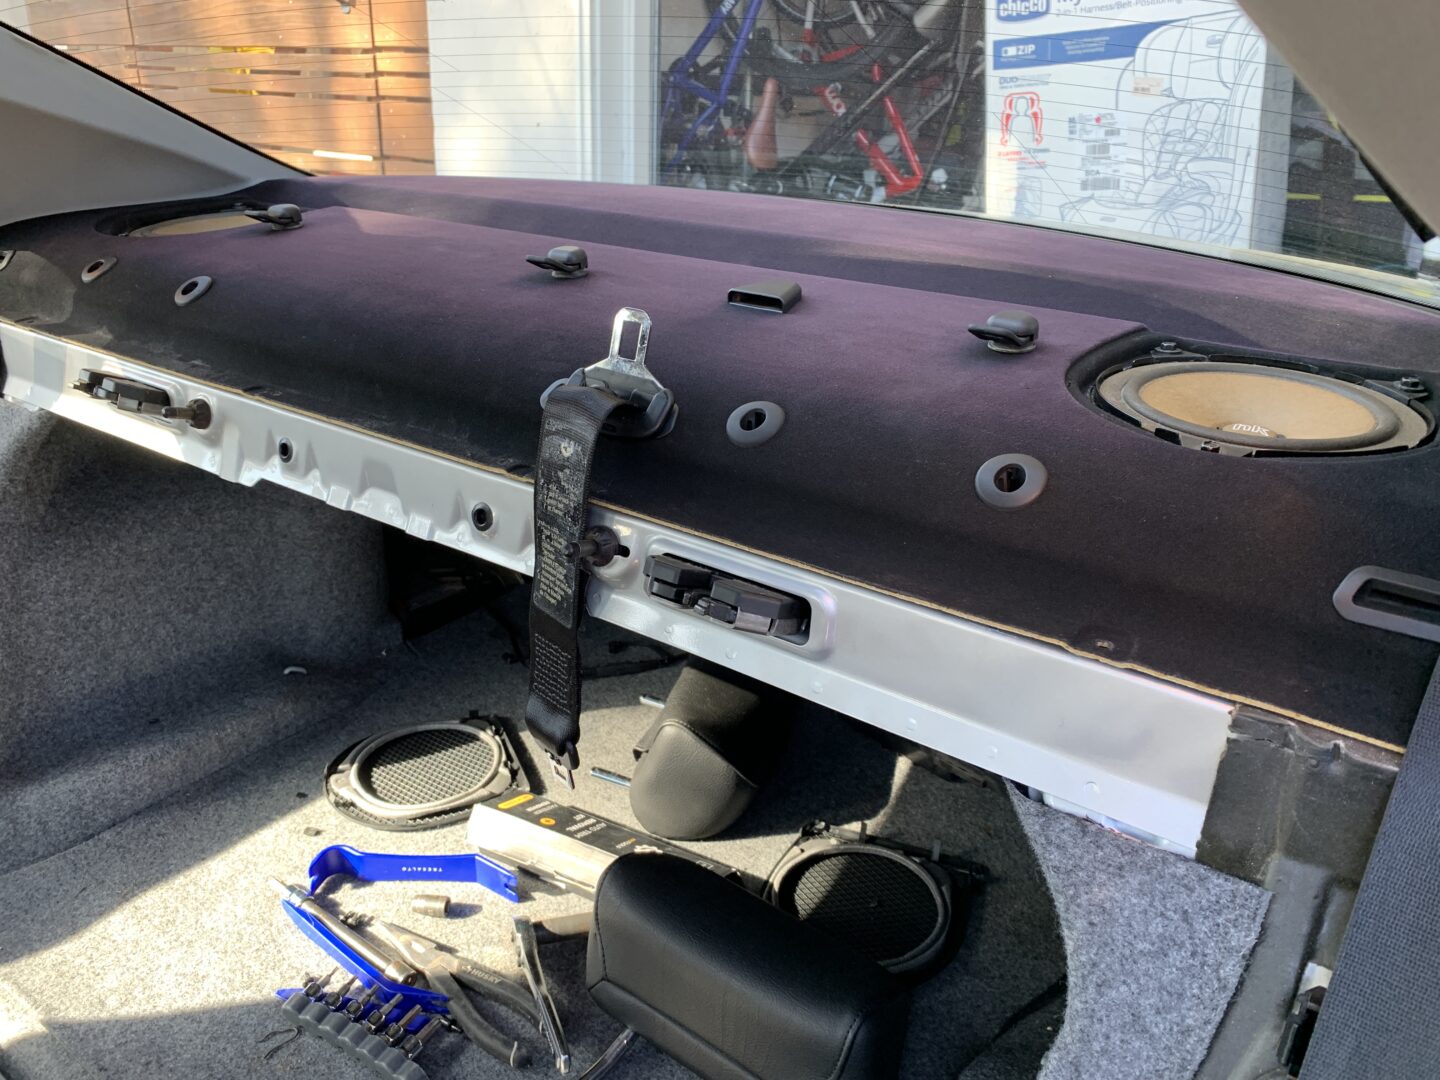
You can now take the rear shelf out of the car and find a good place to dye it. It will get a bit messy, so you want to do this in a place that can get dirty and that you don’t mind getting dye on. I’ve seen people do it on the grass or in their garage with plastic underneath the protect the floor. For me, I did it on an old workbench in my backyard, as well as on top of an old piece of plywood.
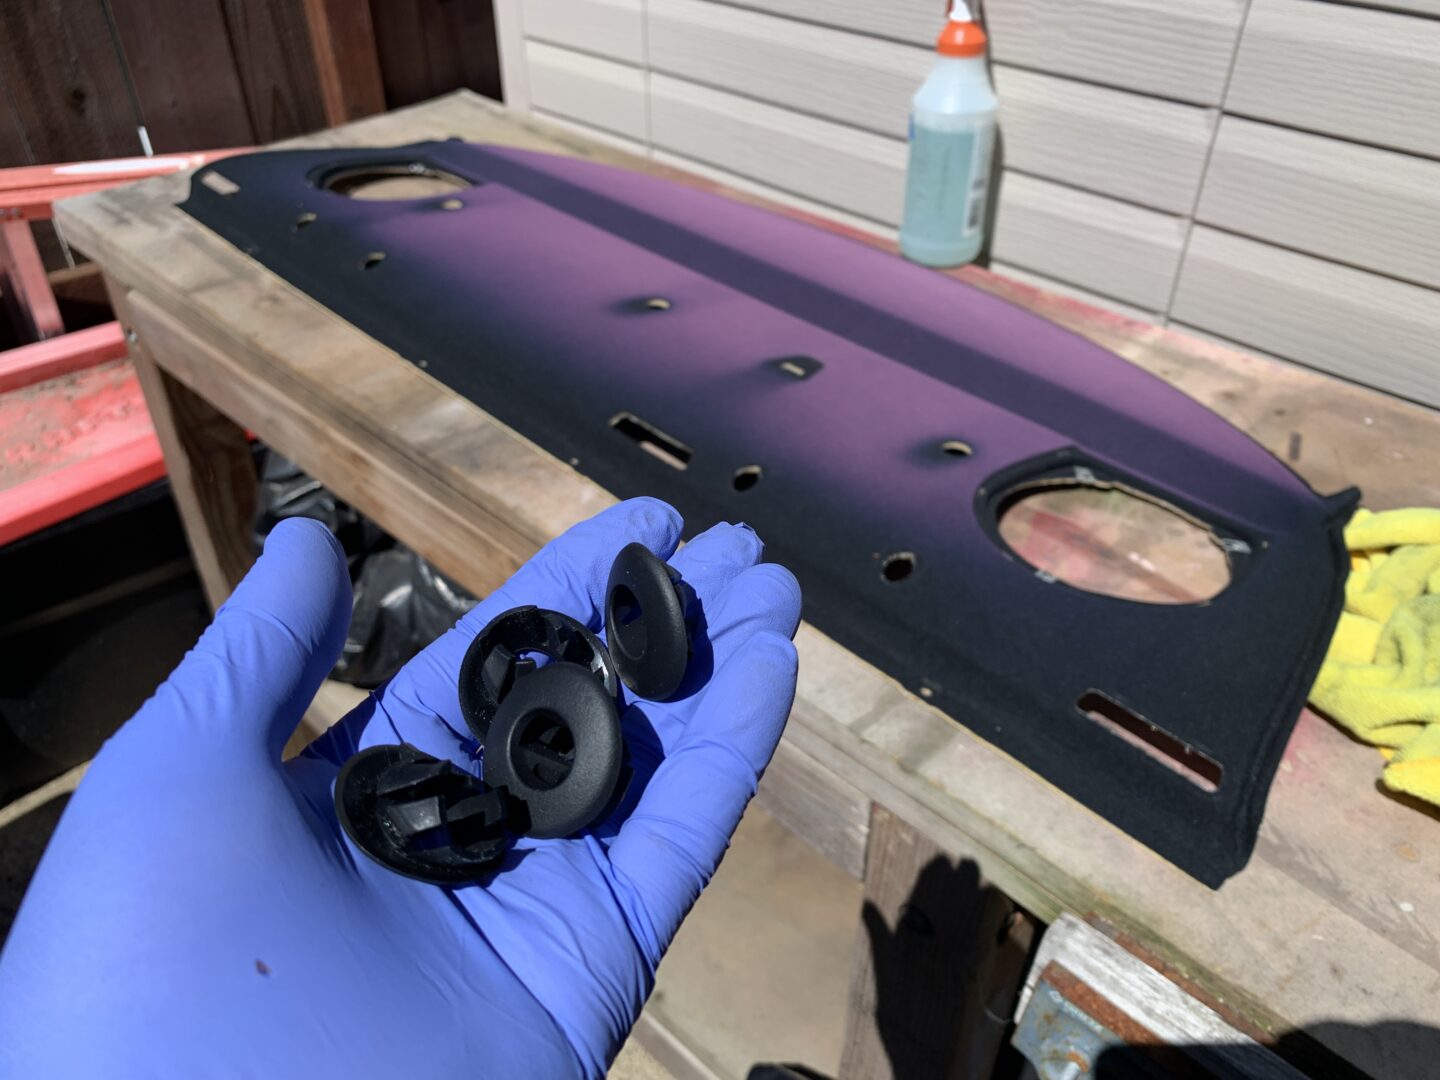
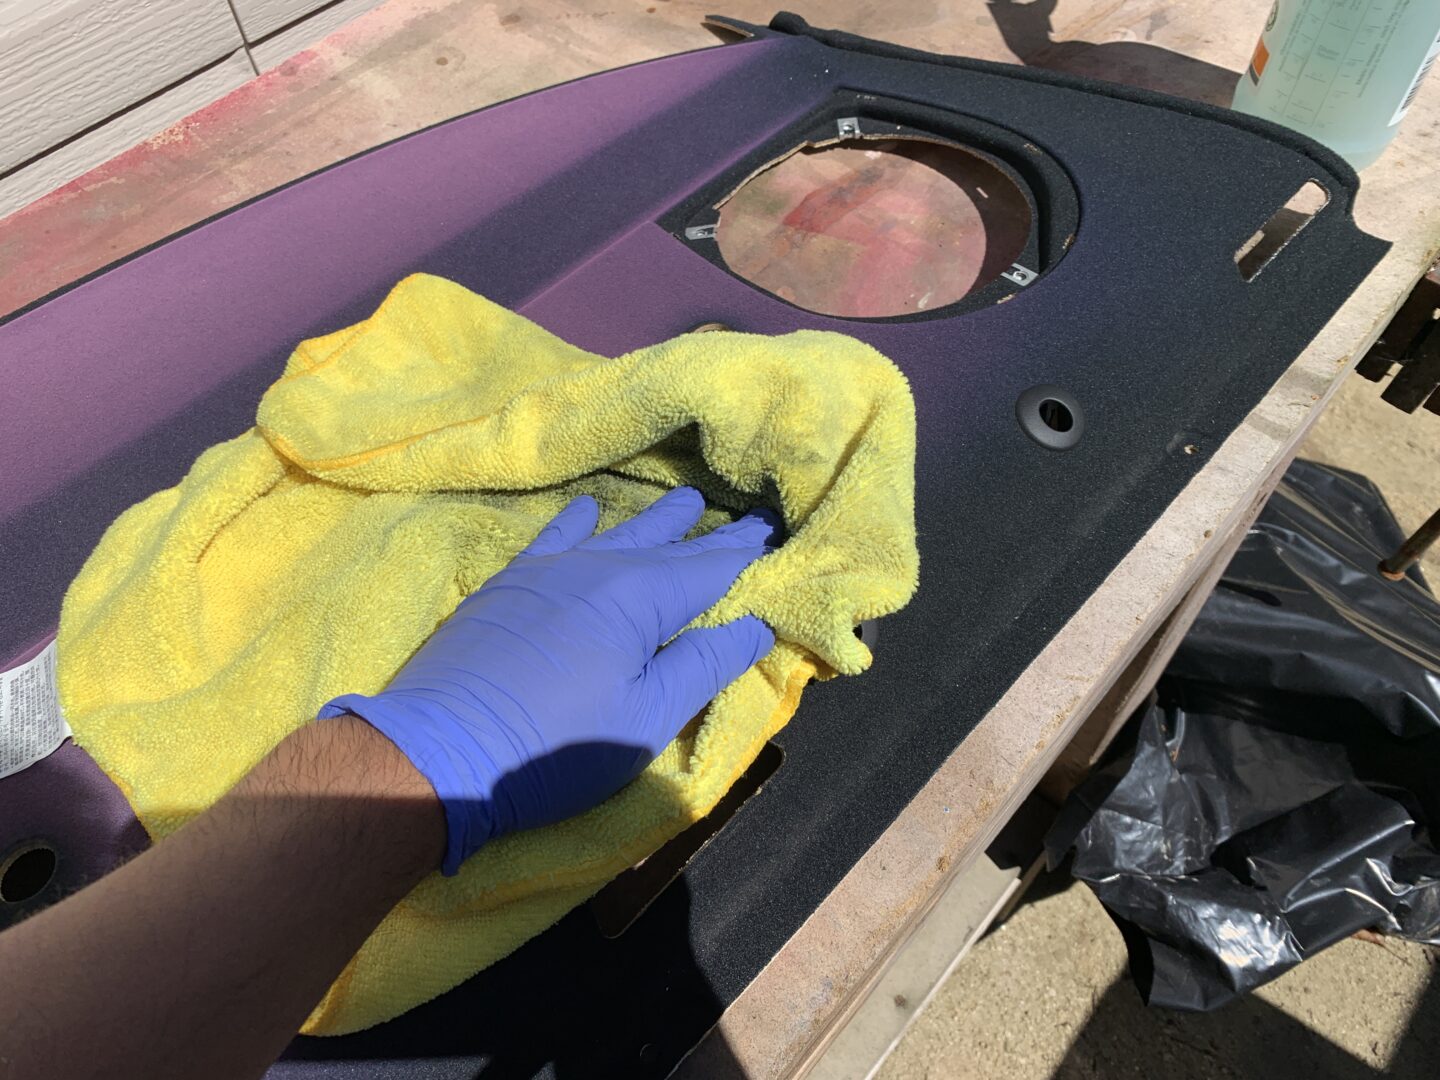
The first thing you should do is remove any remaining trim pieces; these can be popped off from the bottom side of the shelf. I used compressed air to clean it off and then cleaned it off with all-purpose cleaner and a microfiber towel. If the rear shelf is cleaned, you will have a better surface for the dye to absorb into.
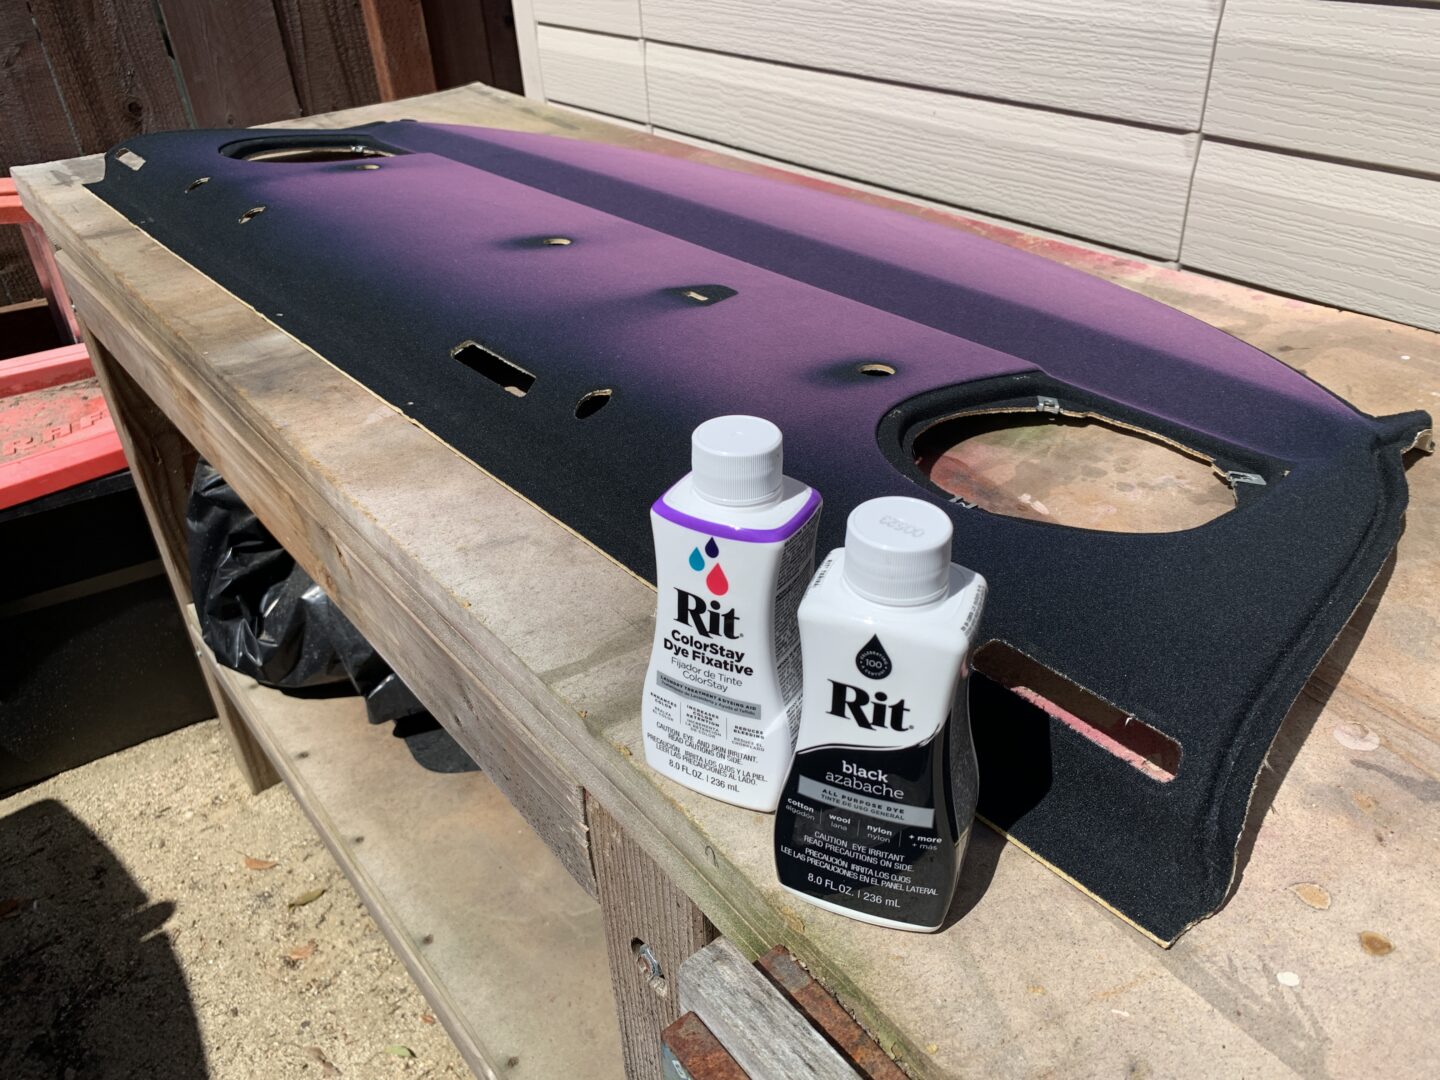
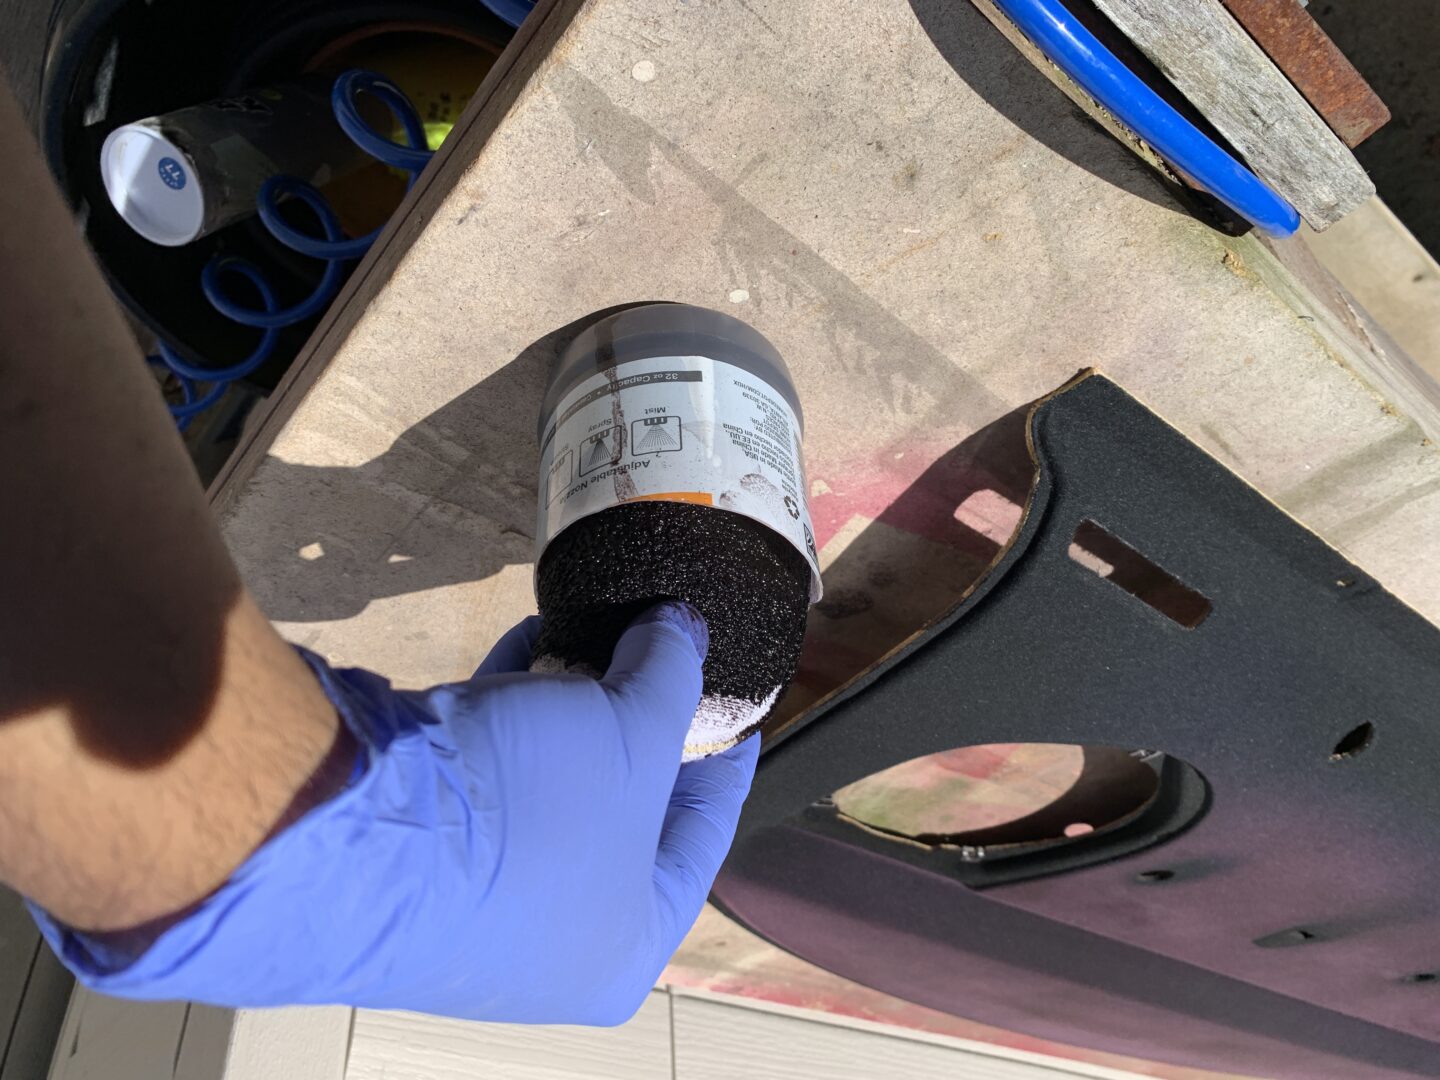
I used Rit Fabric dye in black, followed up with Rit ColorStay Dye Fixative. The dye fixative is intended to prevent bleeding or transfer of the dye. From my experience, I don’t think the ColorStay product is necessary as the dye itself does a good job of staying absorbed into the fabric. Also, the rear shelf doesn’t get touched much once it’s in the car, so I think the dye itself is sufficient for this project. If you want the peace of mind knowing that the dye won’t come off of the rear shelf material, then using it won’t hurt.
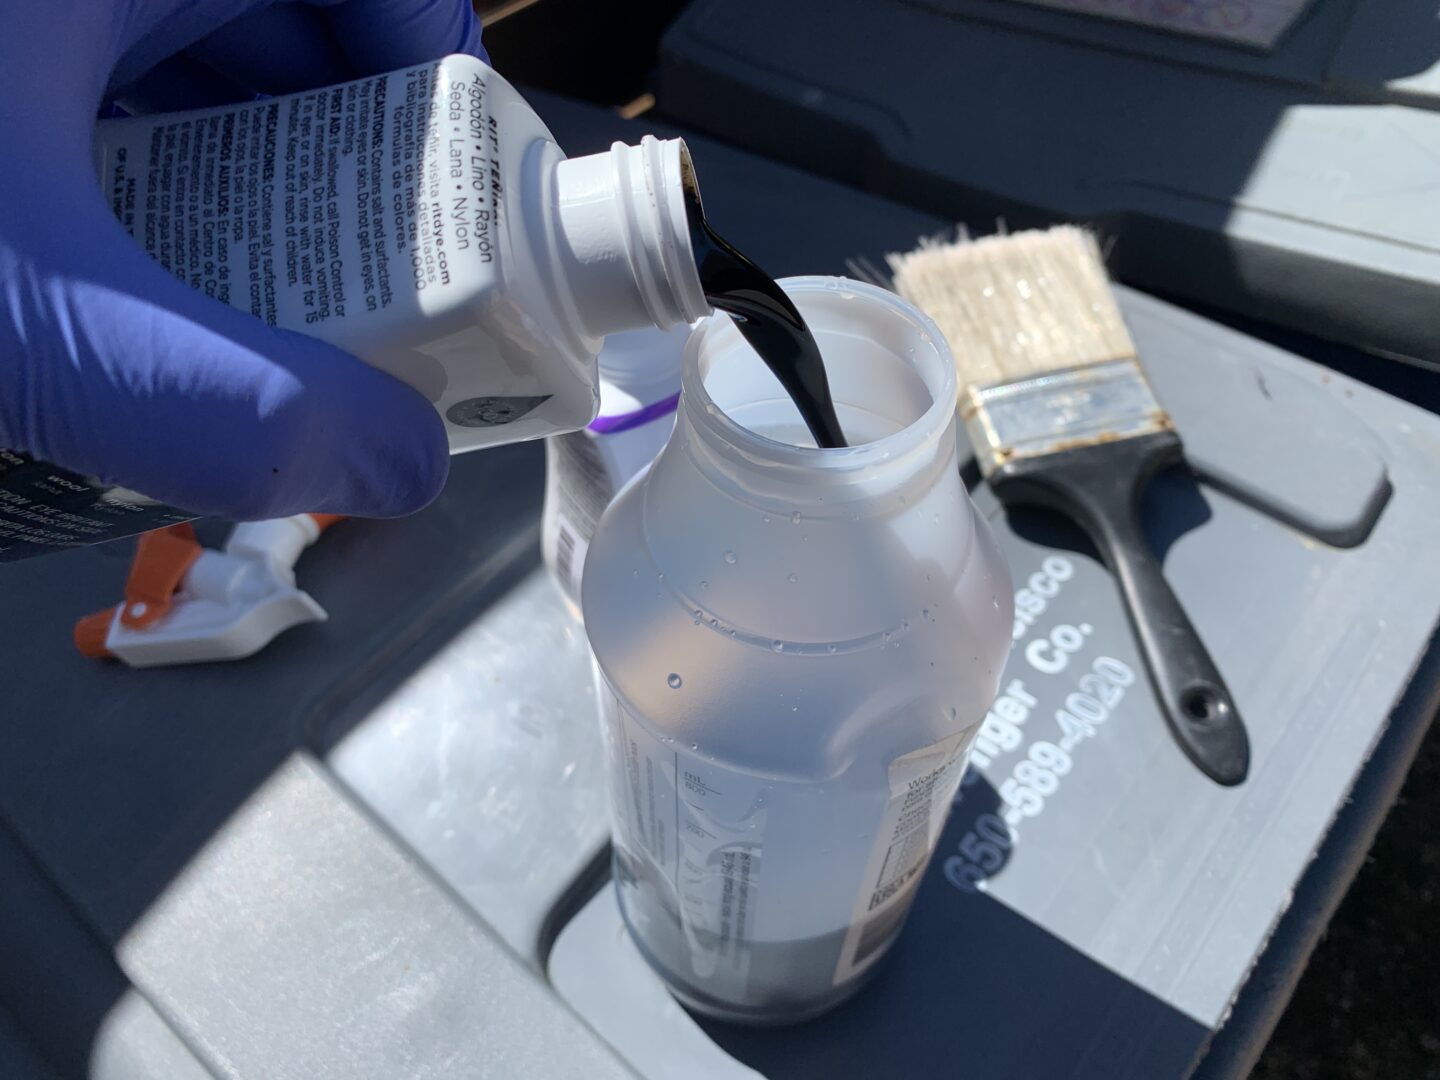
With Rit Fabric Dye, you dilute the dye with water prior to applying. Technically, Rit Dye is used to dye fabric; an example of this would be a piece of clothing like a T-shirt. If you follow the manufacturer’s instructions, you’ll find that they suggest emptying the dye into a bin of water and then subsequently submerge the clothing to allow the dye to soak in. The longer it is soaked, the darker the fabric will be dyed.
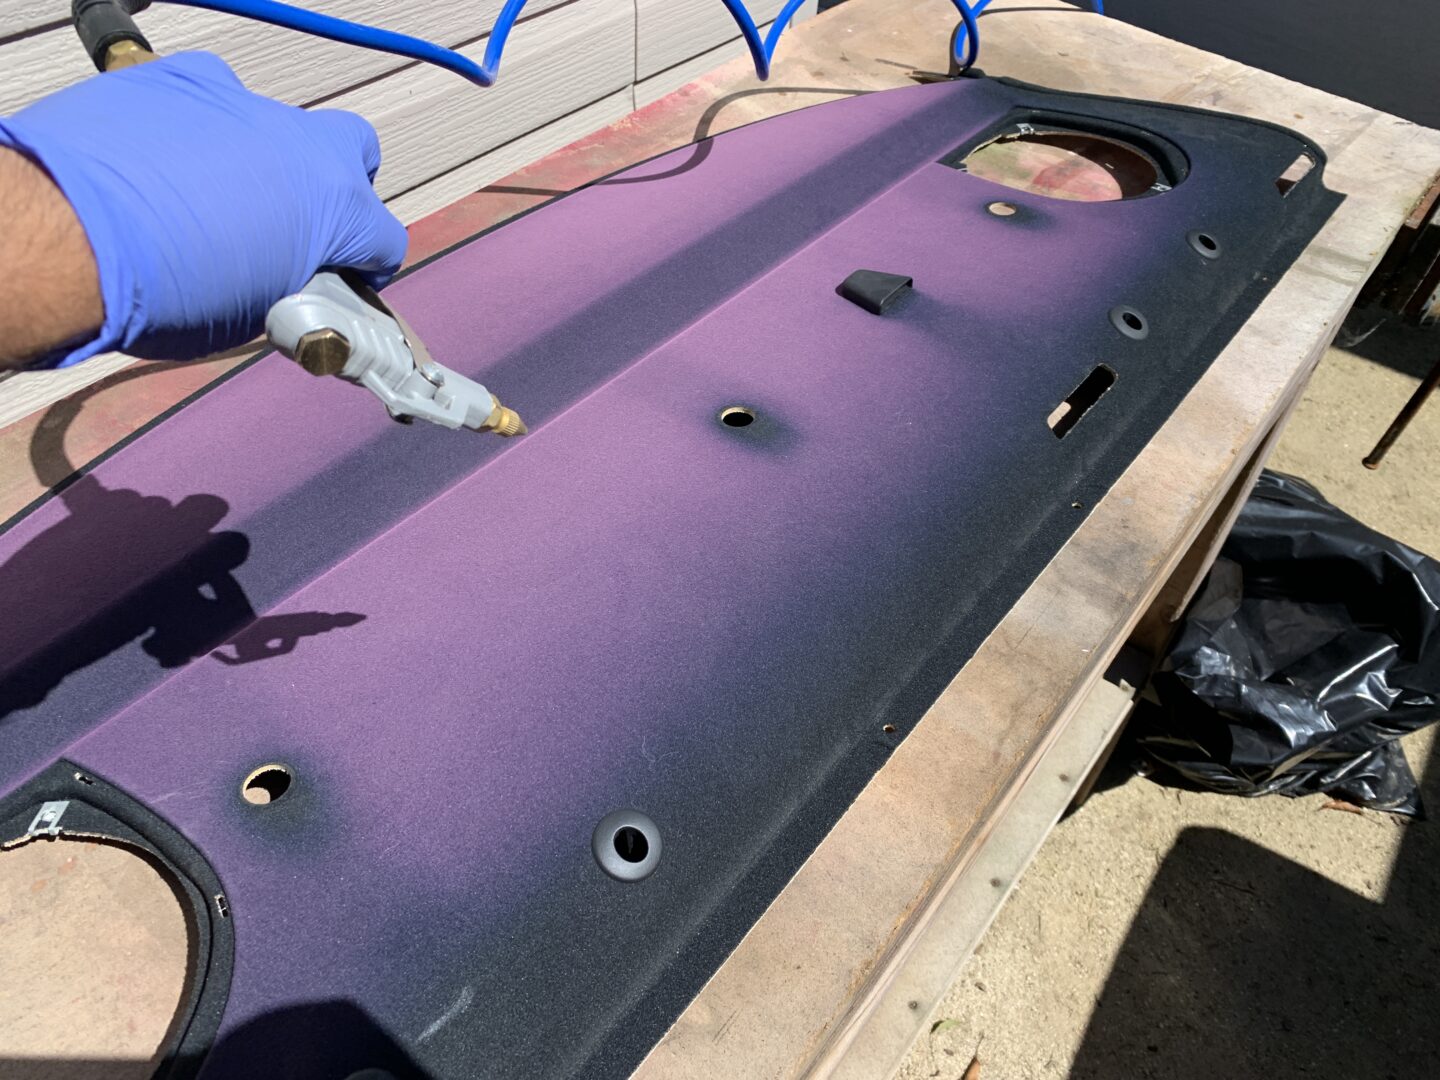
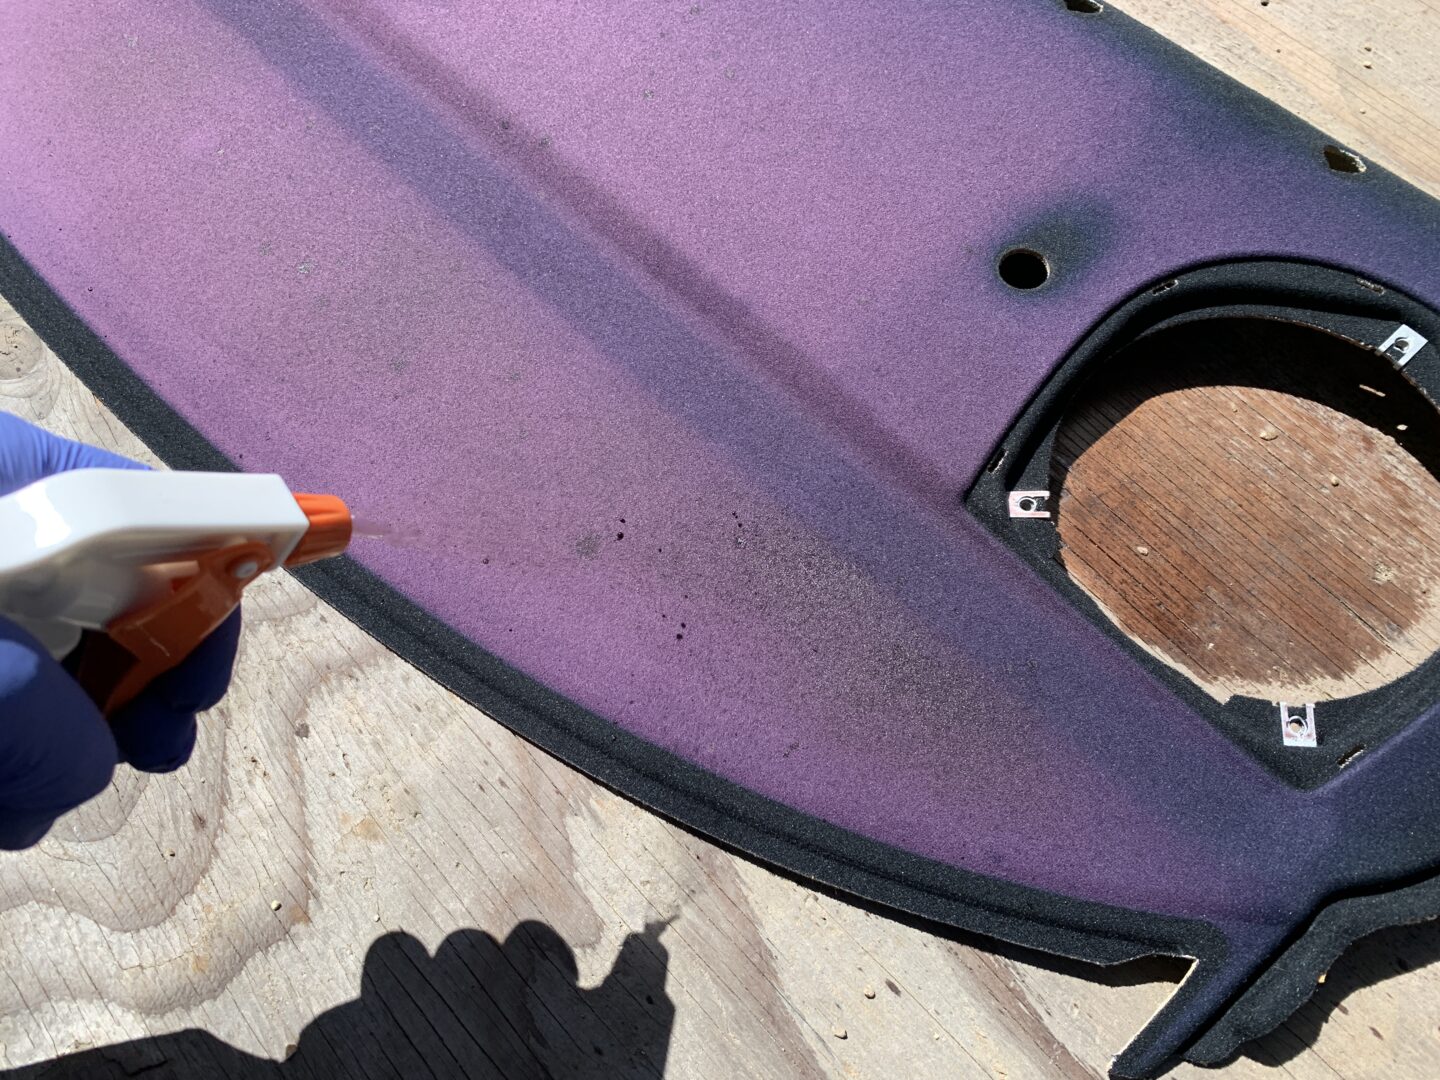
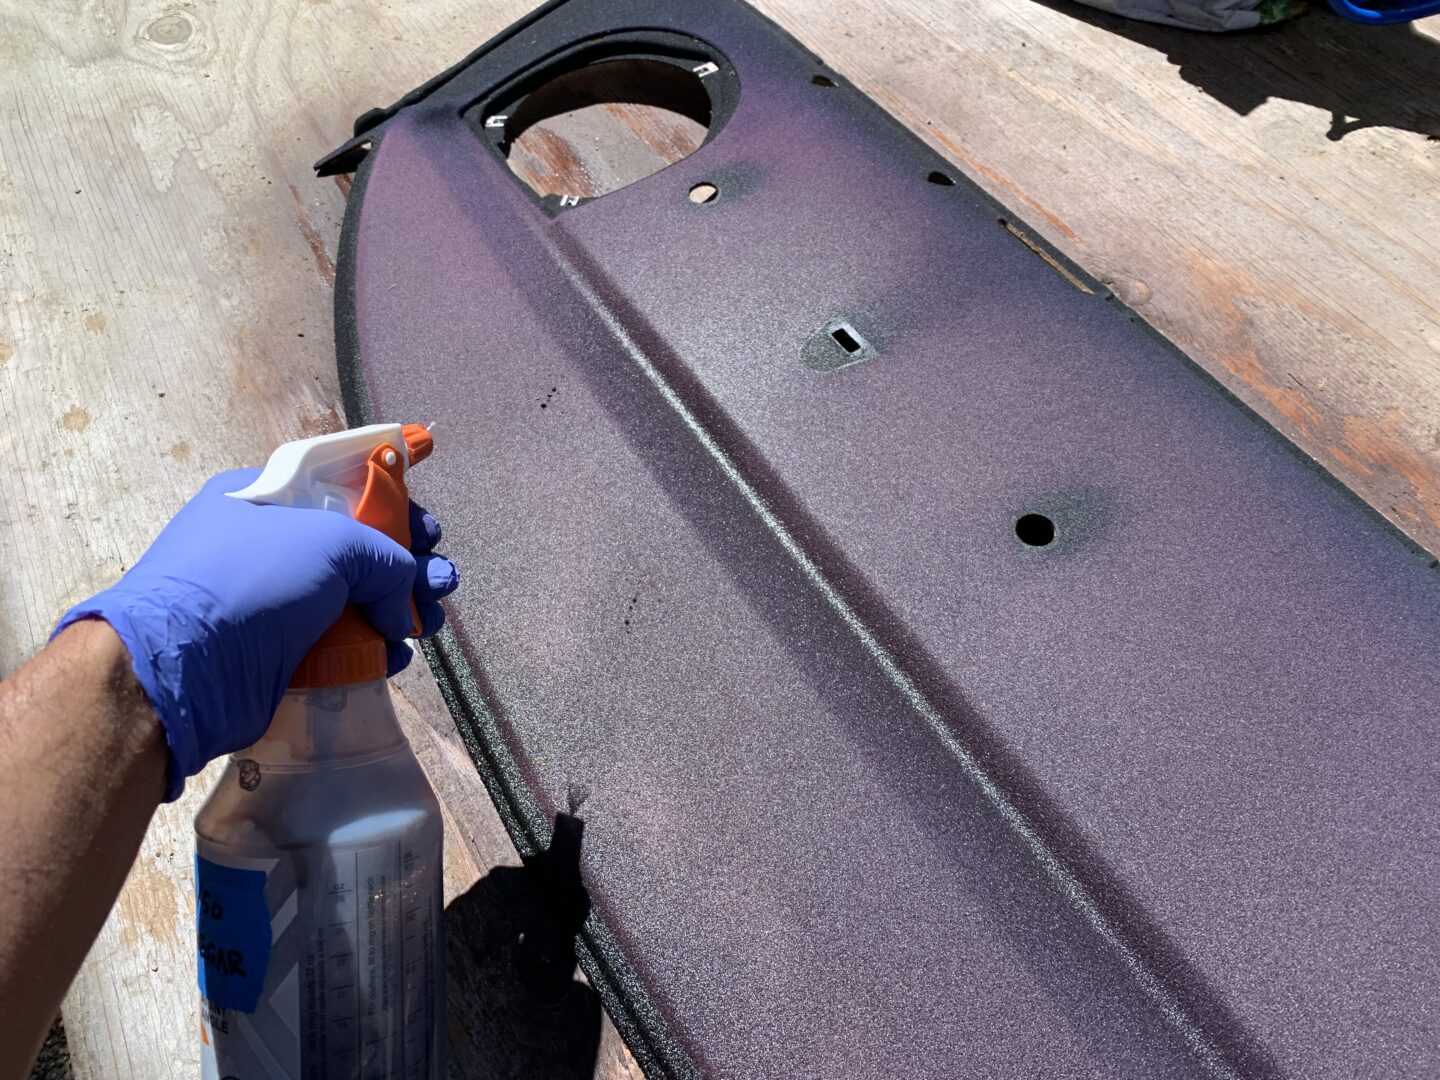
The thing with the rear shelf is that it has fabric on the top side, but if you look underneath, it has a harder material underneath with foam as well. The rear shelf is also quite large. With this said, it’s probably not a good idea to submerge the rear shelf in dye. Instead, I chose to apply the dye with a spray bottle which gives a good uniform dispersion of the dye.
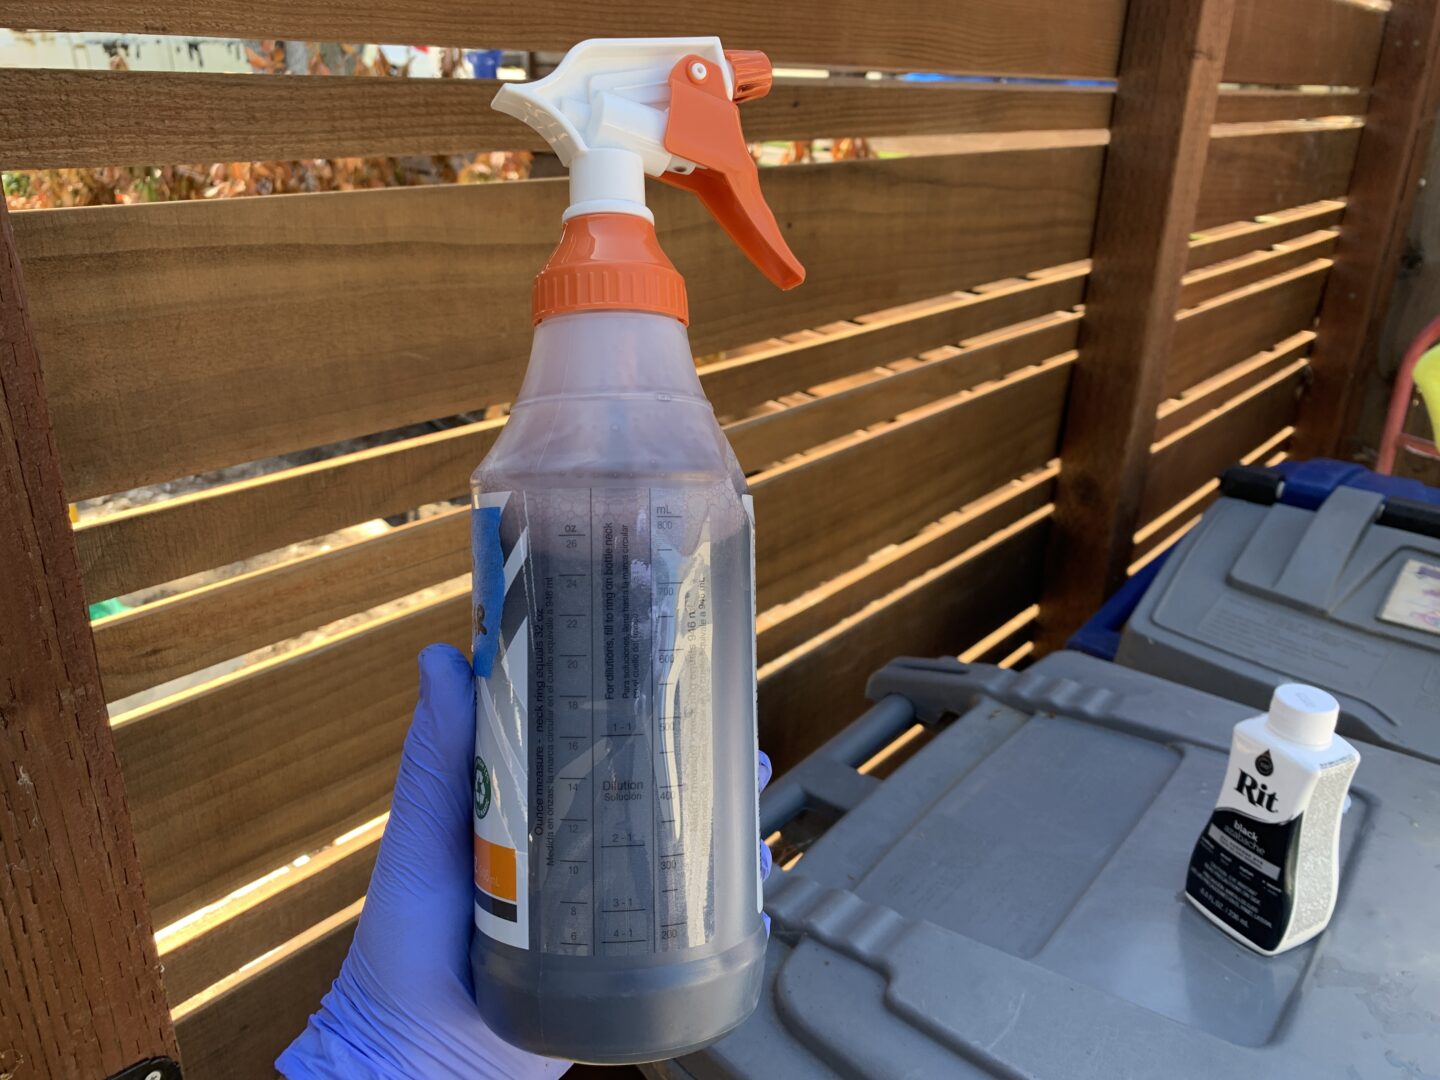
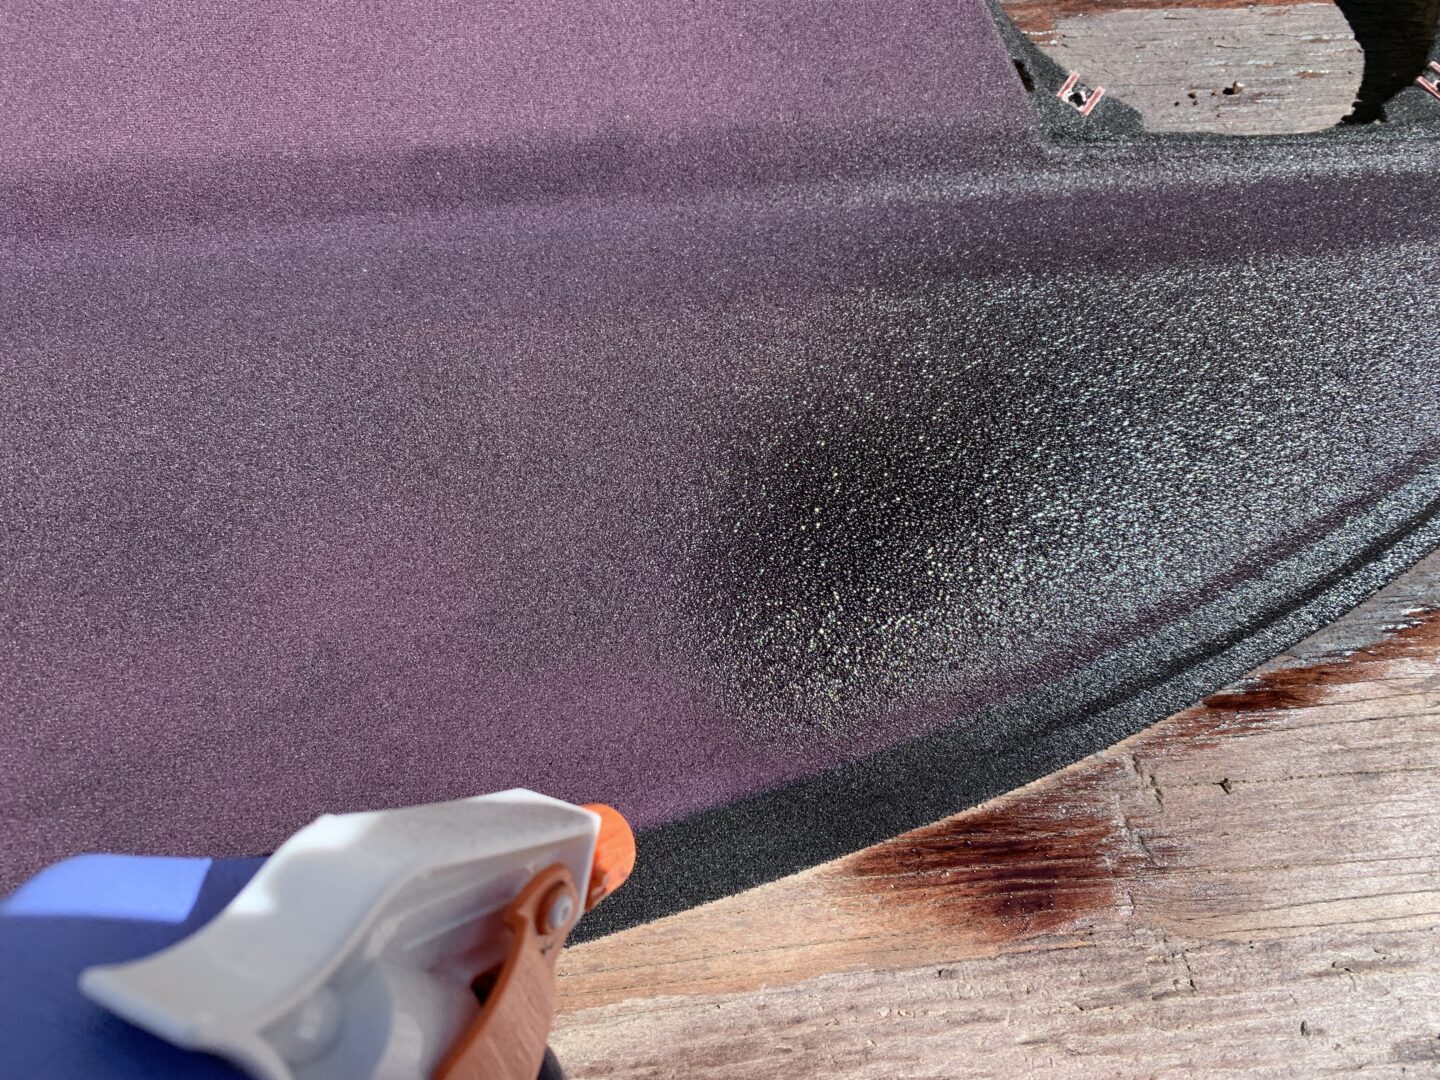
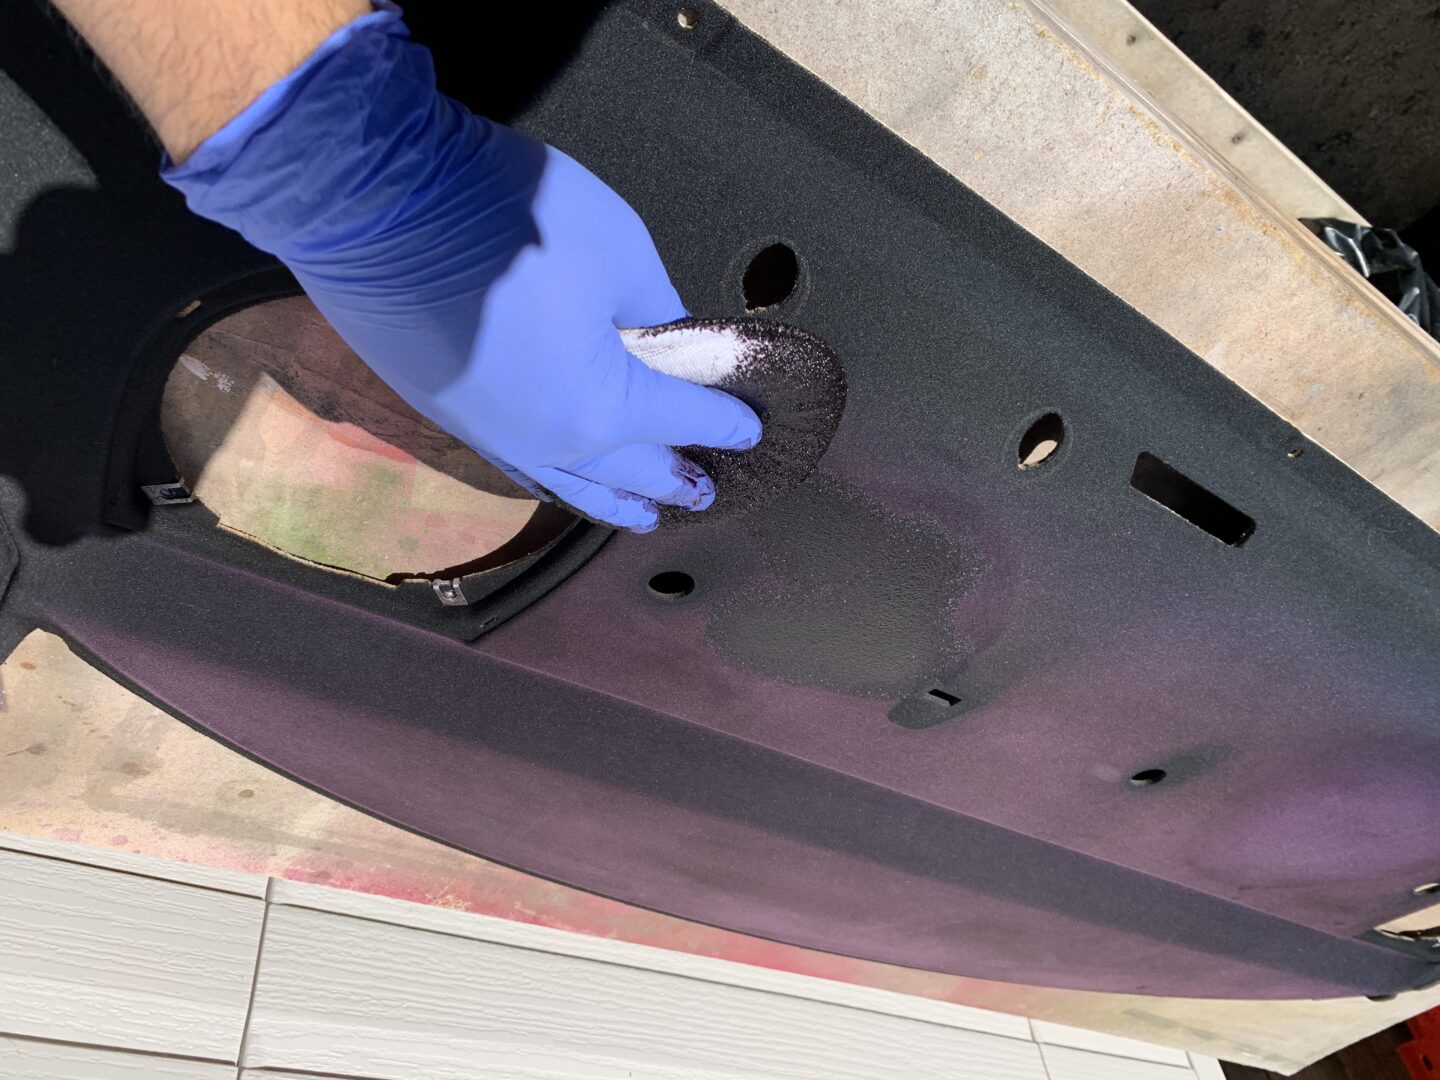
Spray the rear shelf evenly and completely with the dye. You’ll find that the when the dye formula is applied to the rear shelf, the area sprayed gets darker. It may be a good idea to spray from different angles and to even use a brush to work the dye into the fabric material. Then, allow it to fully dry.

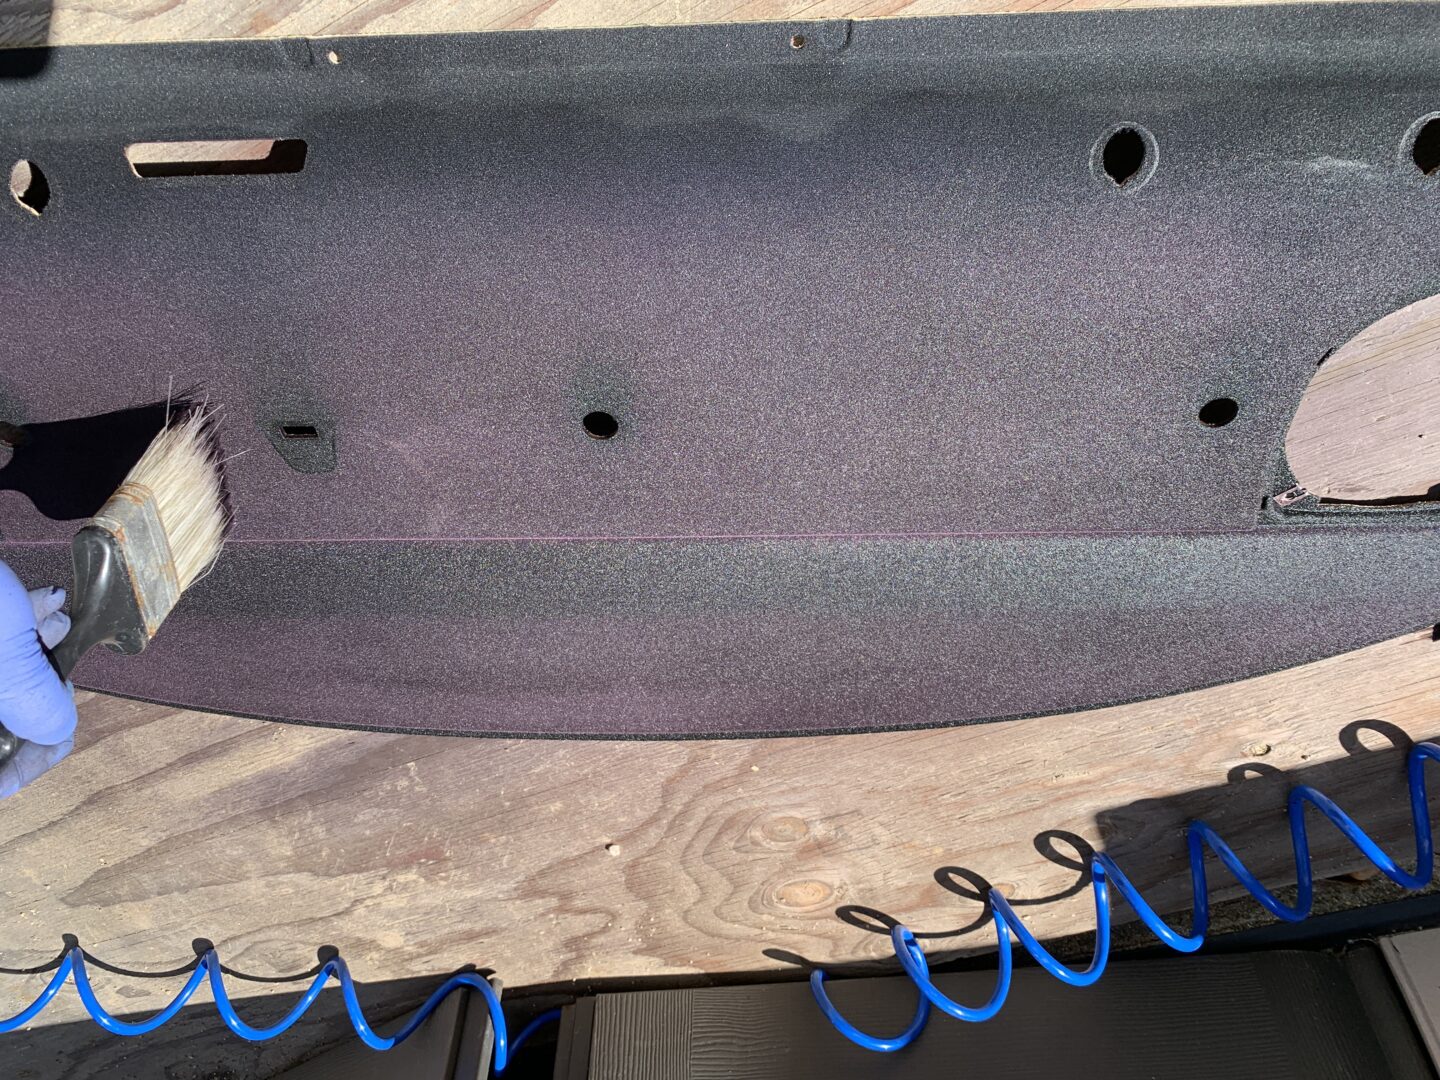
I experimented with other application methods such as using an applicator pad and massaging the dye into the rear shelf. I didn’t feel there was much difference in both application methods.
When applying the dye, I noticed is that when the rear shelf is wet from the dye, it will look much darker. But then when it dries, the purple color returns. So it’s important to let the dye fully dry and then determine if you need further applications of the fabric dye.
After your rear shelf is fully dried and you are content with the outcome of the color restoration, it’s time to re-install. As much as I hate to say it, re-install everything in reverse of removal.
There are a few things that is worth mentioning for the re-install. When you’re installing the rear head rests, it is a bit more difficult to install the cotter pins than when you removed them (due to having to hold the rear shelf up and maneuvering the long-nose pliers with the cotter pin to snap onto the rods of the head rest.) I recommend using something like a trim tool or pry bar to prop up the rear shelf when you’re installing the cotter pin. Also, ensure that both rear head rests are set to the same position during installation, otherwise you’ll have one head rest higher than the other in the back.
I’d also like to mention that when you’re re-installing the clips for the rear plastic trim piece (2nd photo below), you insert the outer plastic clip first, and then press the center pin into the outer plastic clip to secure the long plastic trim piece. You will need something like a hammer or mallet to tap the center pin in.
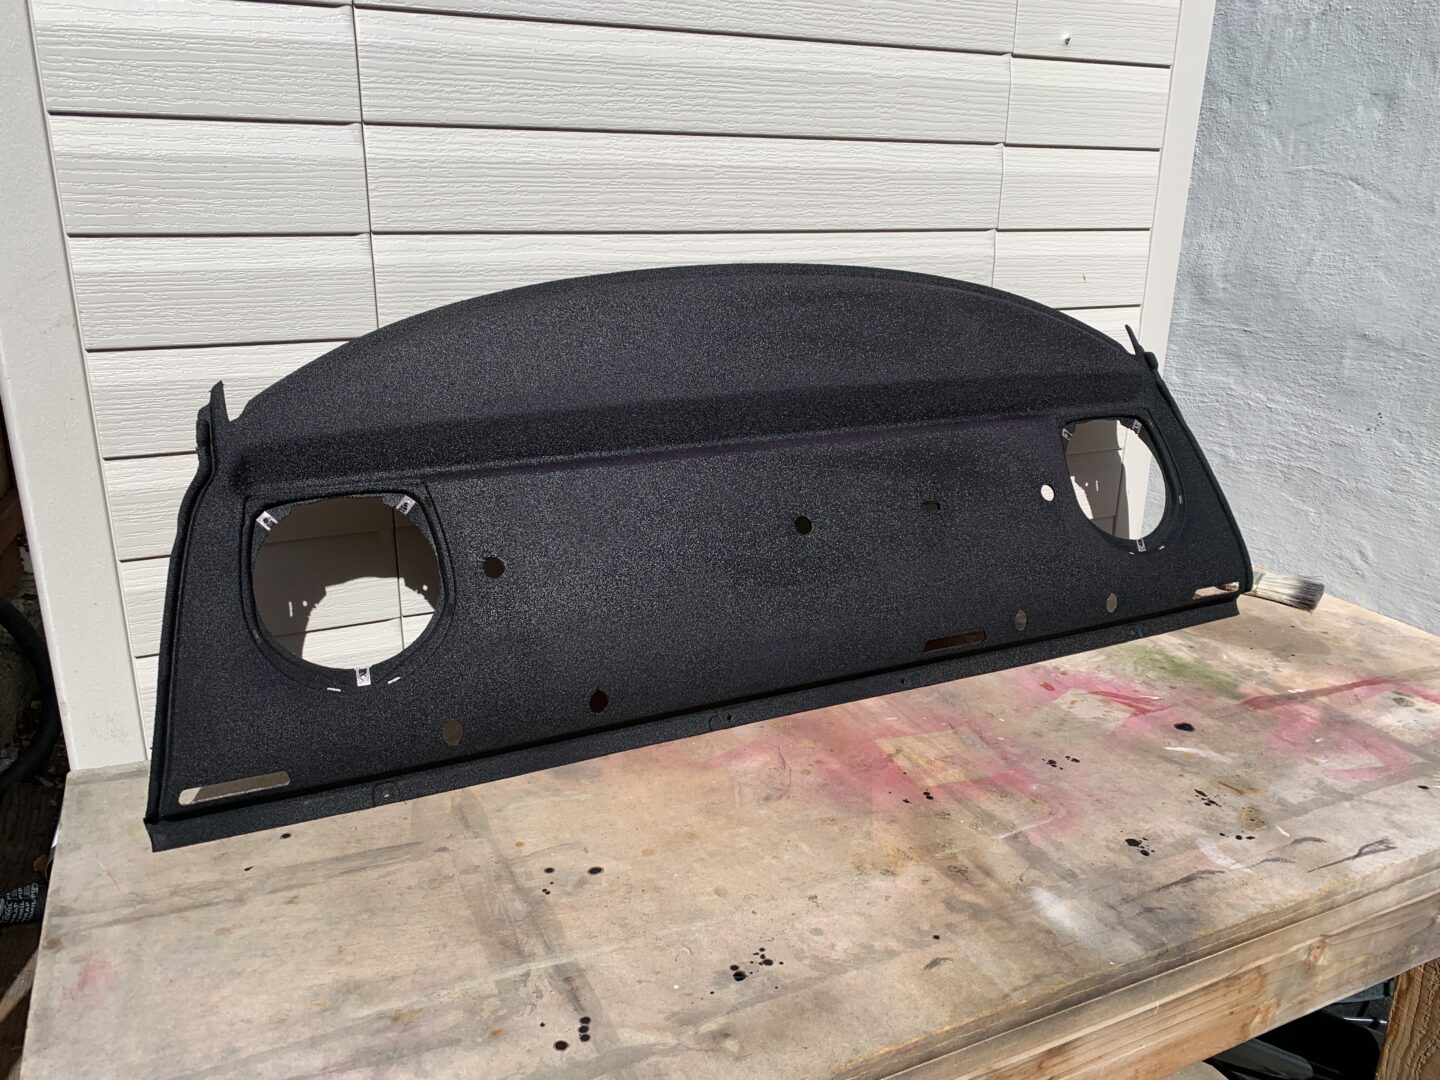
Here is what my rear shelf looks like after I applied black Rit Fabric Dye about 3-4 times. It does still have a purple tint to it, but it is much darker than it was previously. If I applied dye with additional applications, it’s possible it could be slightly darker.
The best way to see the difference in appearance with the application of the dye is to see a before-and-after photo. As you can see, the rear shelf definitely looks darker and no longer has that light faded purple color that immediately catches your eye. Now, it is a darker color that looks much better than before.
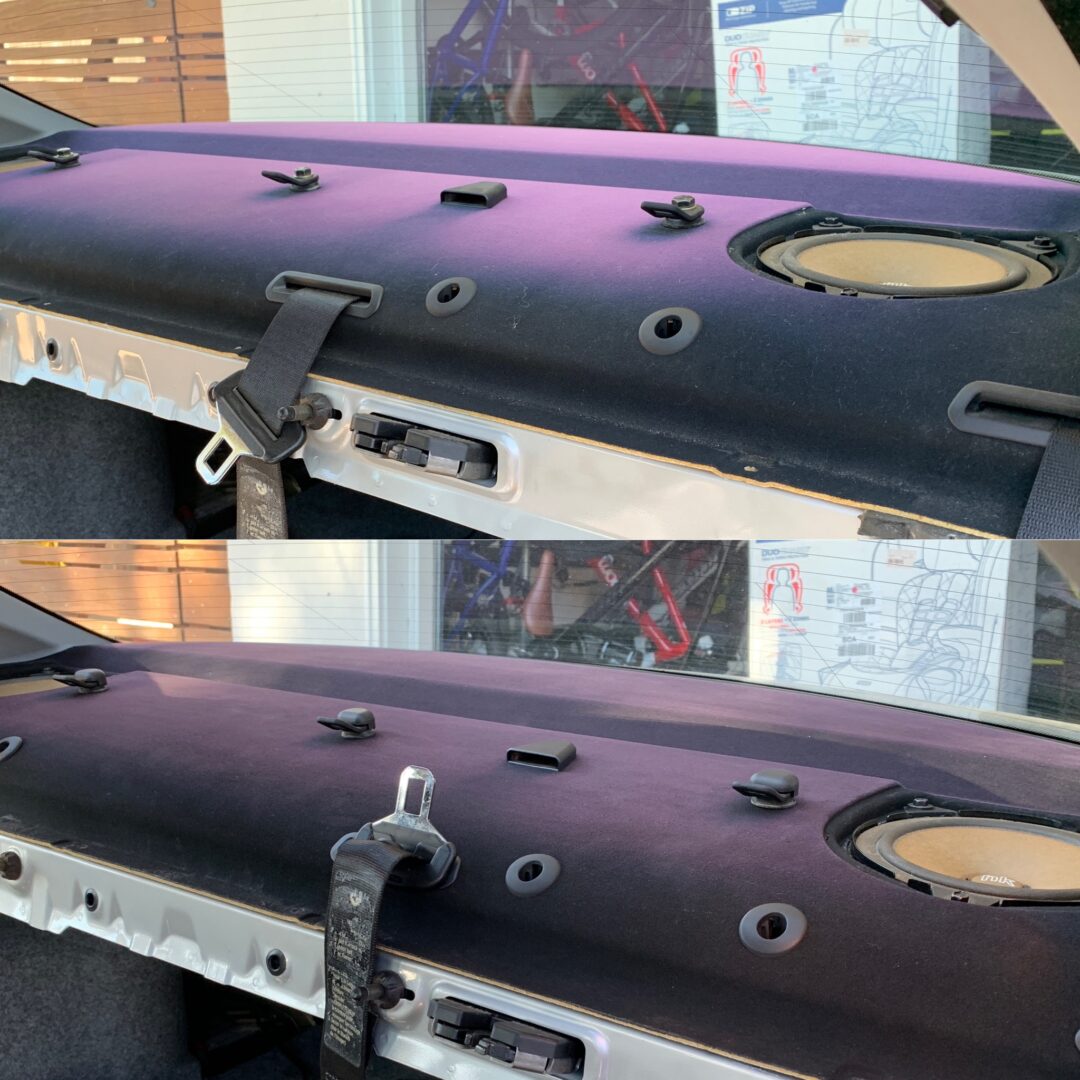
I think this project is worth it if your rear shelf looked as faded as mine. Although after dyeing it still looks a bit purple, it’s a darker hue rather than a light purple that immediately catches your attention. If the rear shelf on your E46 is only a little faded, I probably wouldn’t attempt this because it is a pain removing all the interior bits just to be able to get the rear shelf out to dye.


