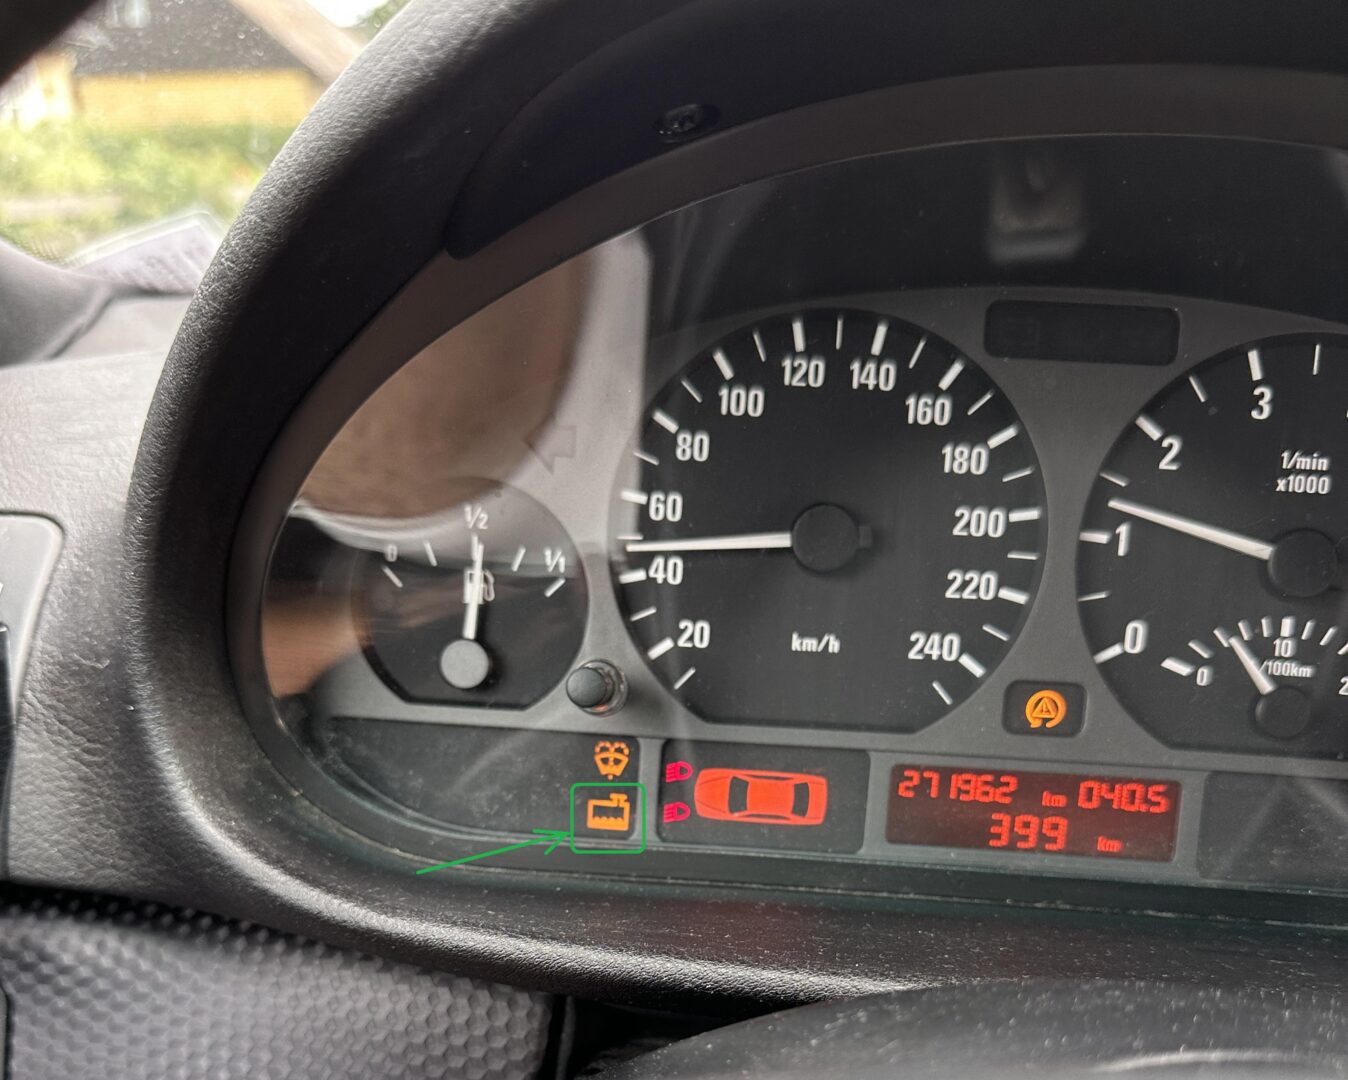
If you know anything about the BMW E46, you’ll likely have heard of certain components in the cooling system are prone to failure. Amongst these problems is the inevitable failure of the expansion tank. Unfortunately with the failure of the expansion tank or any other part of the cooling system, it can be catastrophic to your engine. If you’re lucky, the issue will start with a slight leak in your coolant system, causing a low coolant light on your dash to warn you of the impending failure.
If your vehicle is not able to effectively cool down the engine because of the coolant loss, it will lead to the overheating of your engine. Due to the aluminum block and head of the engine, it is more susceptible to warping from overheating. Many of the components that tend to fail are made of rubber or plastic. As expected, these parts fail as the heat and vibration cycles from regular use of the vehicle over the years will cause the material to degrade or break.
As a preventative measure, E46 owners should attempt to replace certain parts on a regular basis. The typical service interval for a cooling overhaul falls in the 75,000-90,000 mile range. If you have the ability to do the work yourself, you can save yourself money by just buying the parts and doing the work yourself. On this post, I will be addressing the replacement of major components on the cooling system on the BMW E46. This guide should apply to most BMW E46 cars: the 323i, 325i, 328i, and 330i models.
Tools & Parts Needed
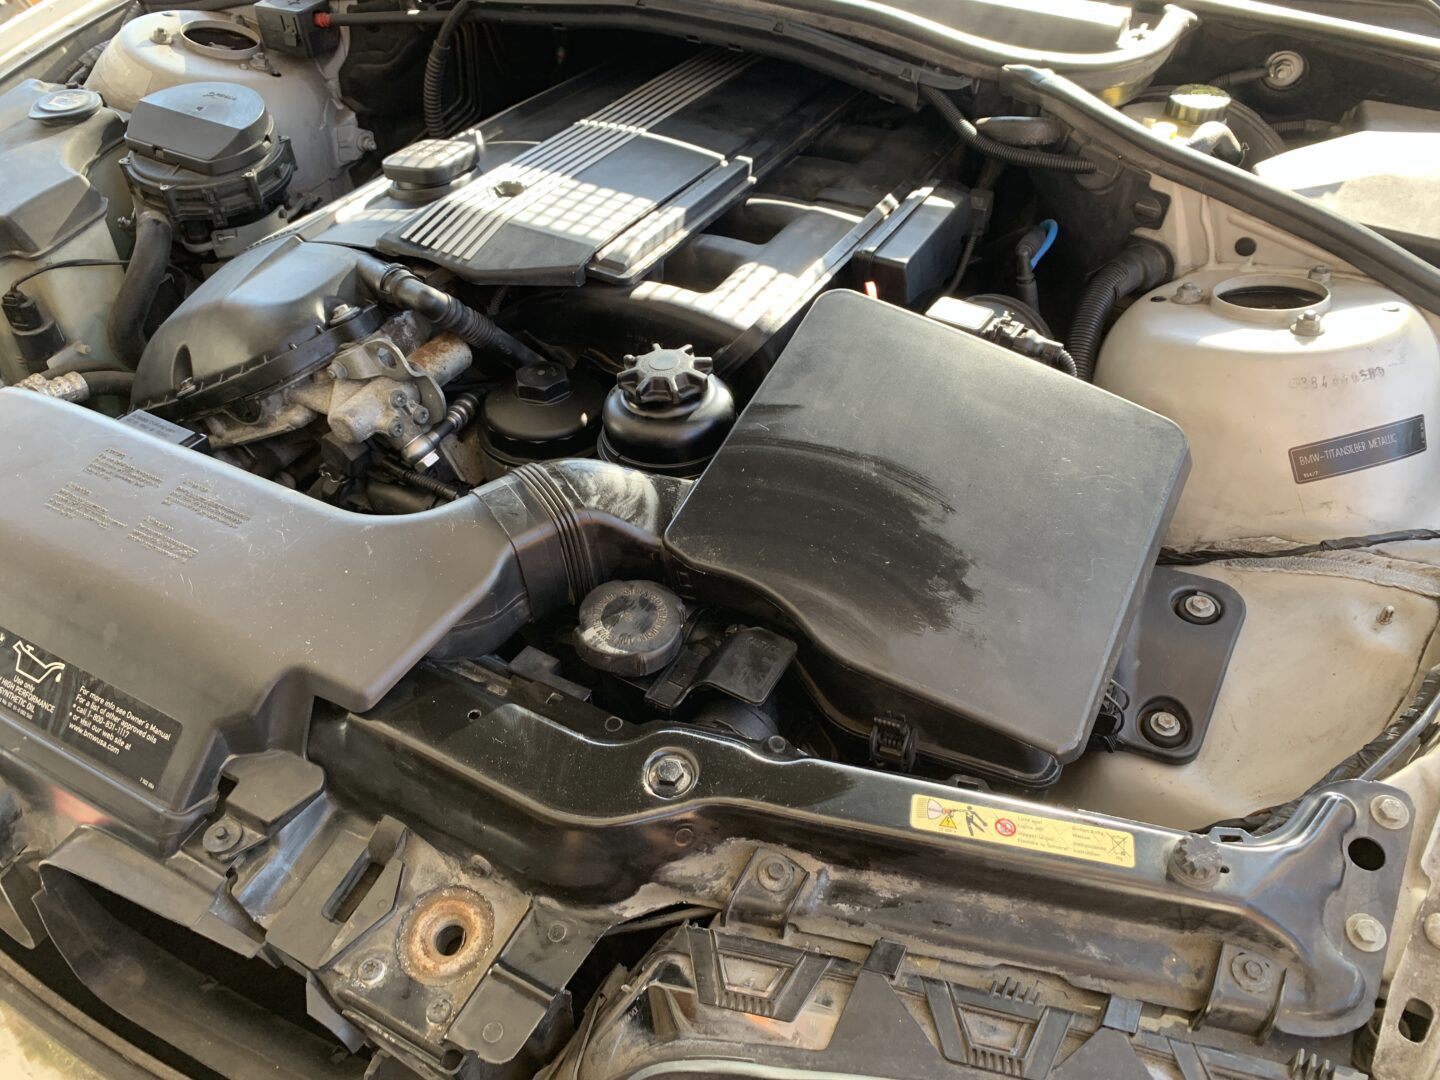
The cooling system is made up of a variety of components, but there are some major ones that are known to fail. I’ve focused on the replacement of the expansion tank, coolant level sensor, upper and lower radiator hoses, water pump, coolant, and engine intake temperature sensor and o-ring. Probably the most common failures amongst these items is the expansion tank and water pump. As with many other jobs on the E46, if you’re already in there and replacing certain components, you might as well replace other ones as preventative maintenance.
Sometimes if you buy a “cooling system overhaul kit”, it might include other parts that I may or may not cover under this tutorial. When you’re purchasing parts, note that BMW has a large number of equivalent part numbers for any given part due to changes over the years, so make sure to input your specific make, model, and trim of vehicle in any parts website (or even Amazon/Ebay) to ensure you get the correct part for your vehicle.
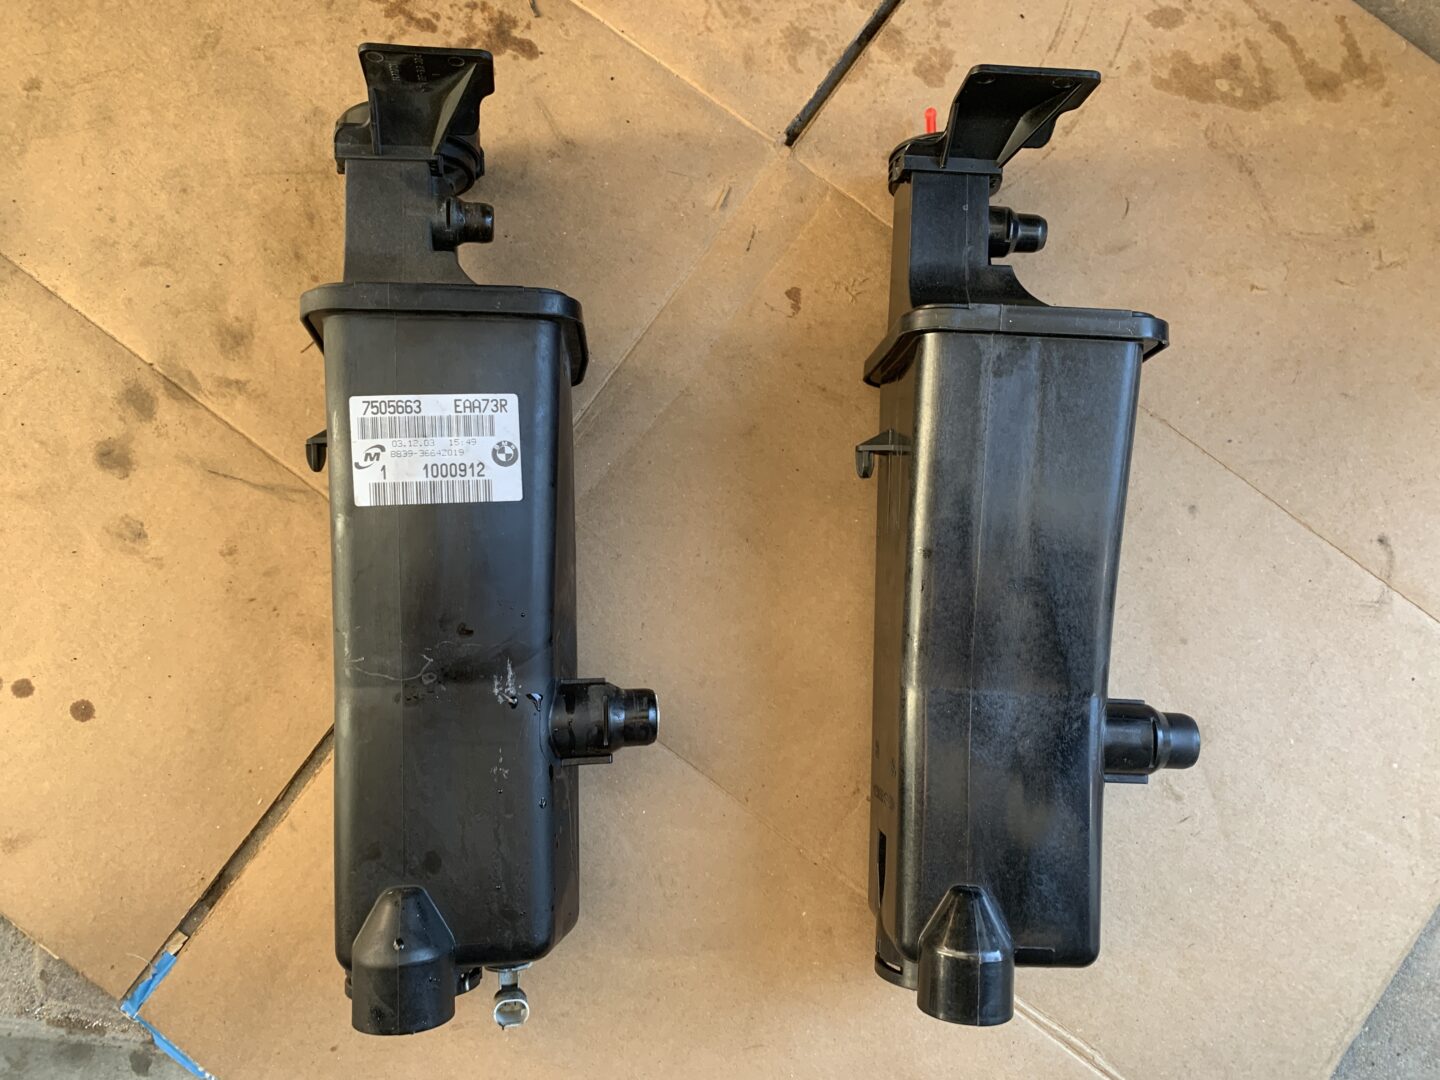
Coolant Reservoir Expansion Tank
BMW OEM Coolant Reservoir Expansion Tank (Part #17117573781)
Coolant Level Sensor
URO Parts 17137524812 Coolant Level Sensor
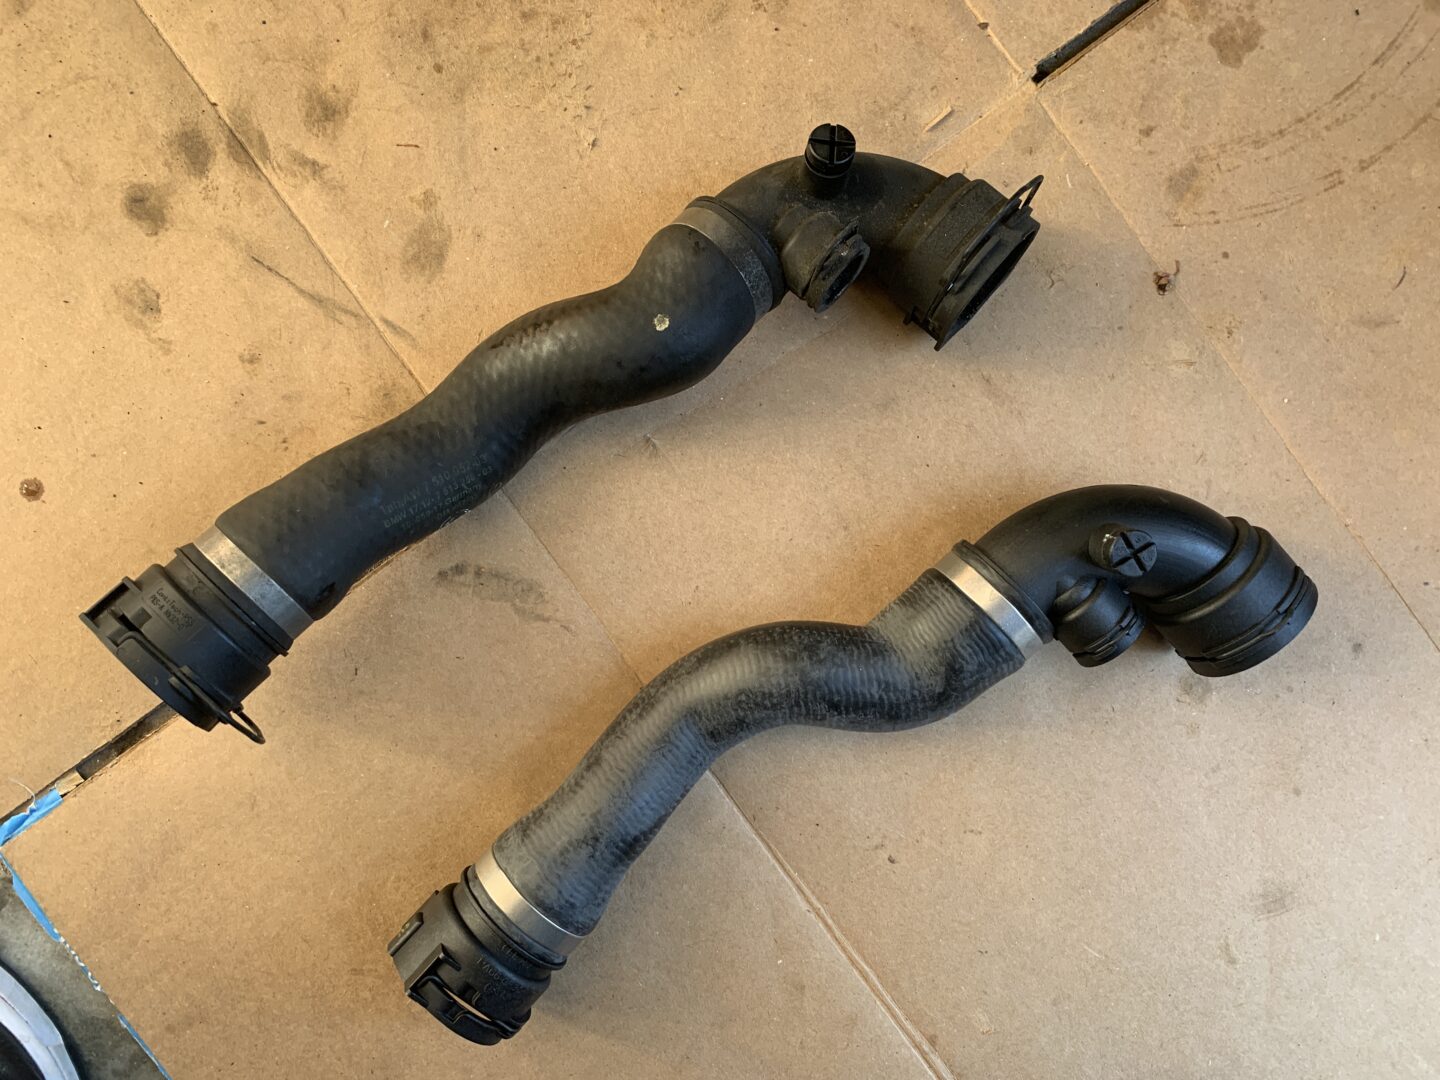
Upper & Lower Radiator Hoses
Rein Upper Radiator Hose (Part #17127510952)
Rein Lower Radiator Hose (Part #11531436408)
Water Pump
BMW OEM Mechanical Water Pump (Part #11517509985)
URO Parts Water Pump, w/Metal Impeller (Part #11517527799)
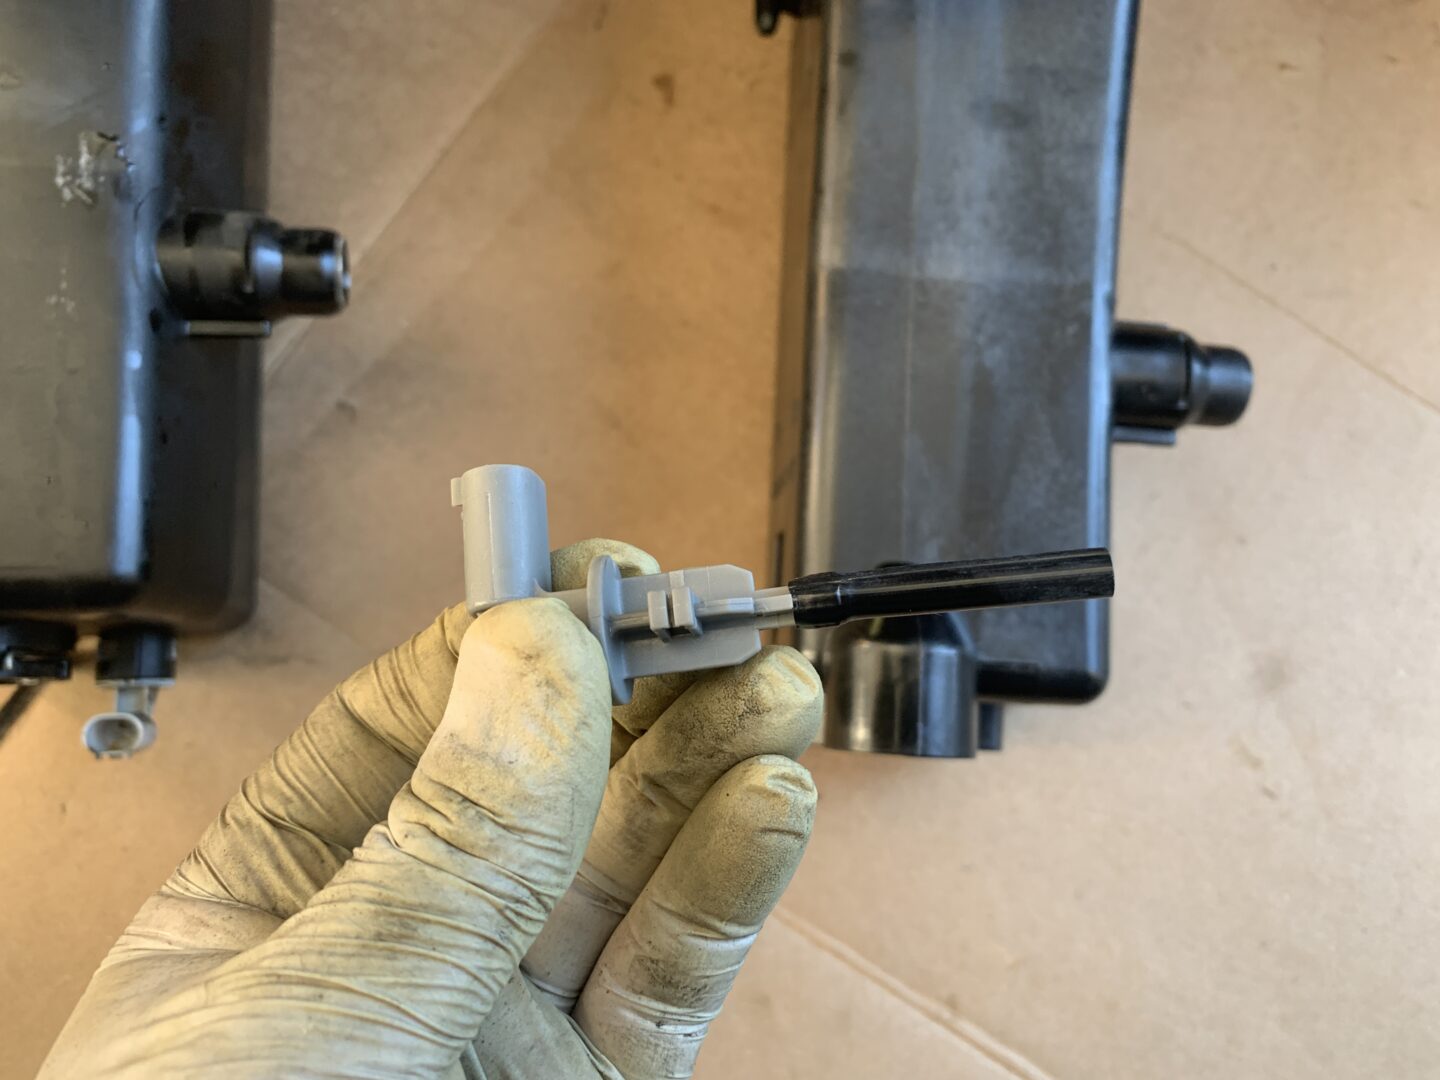
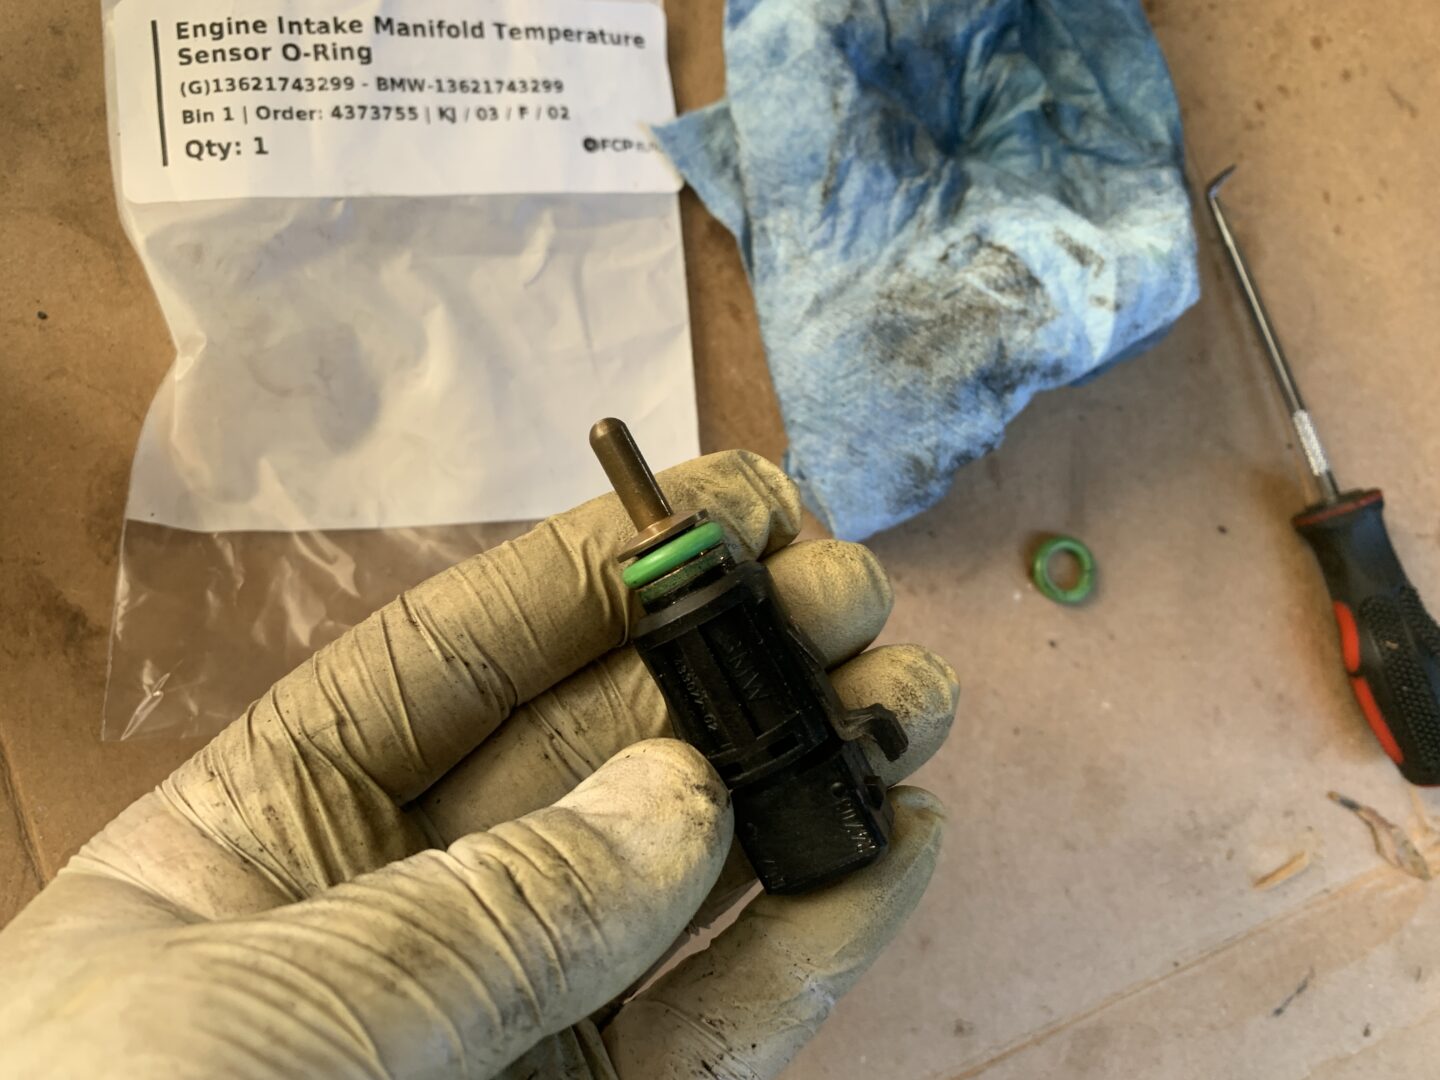
Engine Air Temp Sensor & O-Ring
URO Parts Engine Air Temperature Sensor with O-Ring (Part #13621743299)

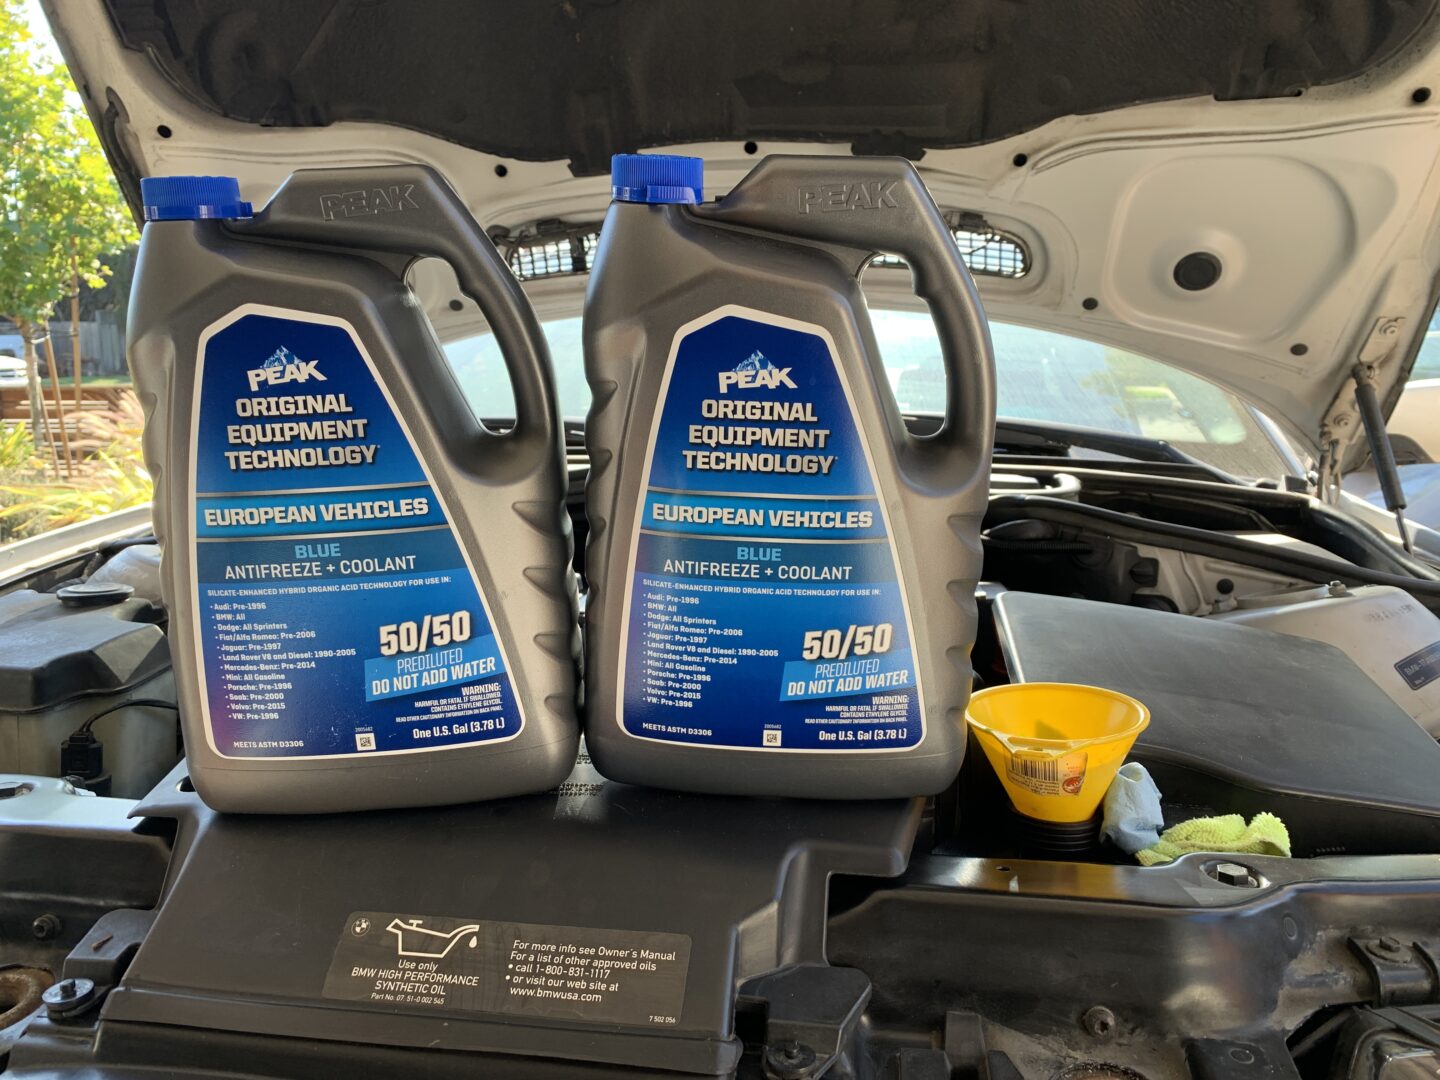
Coolant/Antifreeze
BMW Antifreeze/Coolant (1gal) / PEAK Blue Antifreeze for European Vehicles (1gal)
Tools
Screwdriver Set: CRAFTSMAN Screwdriver Set, 8 Piece Set
Mechanic’s Socket Set: EPAuto 40 Pieces 1/4-Inch & 3/8-Inch Drive Socket Set
Torx Bit Set: LEXIVON Torx Bit Socket Set, 13-Piece Star (T8 – T60 Set)
Torque Wrench: EPAuto 3/8-Inch Drive Click Torque Wrench (10-80 ft.-lb)
Drain Pan: Custom Accessories Drain Pan , Black
Nitrile Gloves: MedPride Nitrile Exam Gloves (100 qty) – Small | Medium | Large
Shop Towels: Scott Shop Towels Original, Blue, 12 Rolls/Case, 660 Towels/Case
Vehicle Ramps: FloTool RhinoRamps (12,000lb GVW Capacity)
Wheel Chocks: MAXXHAUL Heavy Duty Black Wheel Chock (2-Pack)
Jack Stands: BIG RED Torin Heavy Duty Steel Jack Stands: 3 Ton (6,000 lb) – 1 Pair
Cooling System Overhaul on the BMW E46
Doing this job requires you to get access underneath the vehicle at times, so it might be worth while to at least lift the front of the vehicle up. For convenience, I’d suggest driving up onto some vehicle ramps to elevate the front of the vehicle, placing jack stands, and chocking the rear wheels for safety.
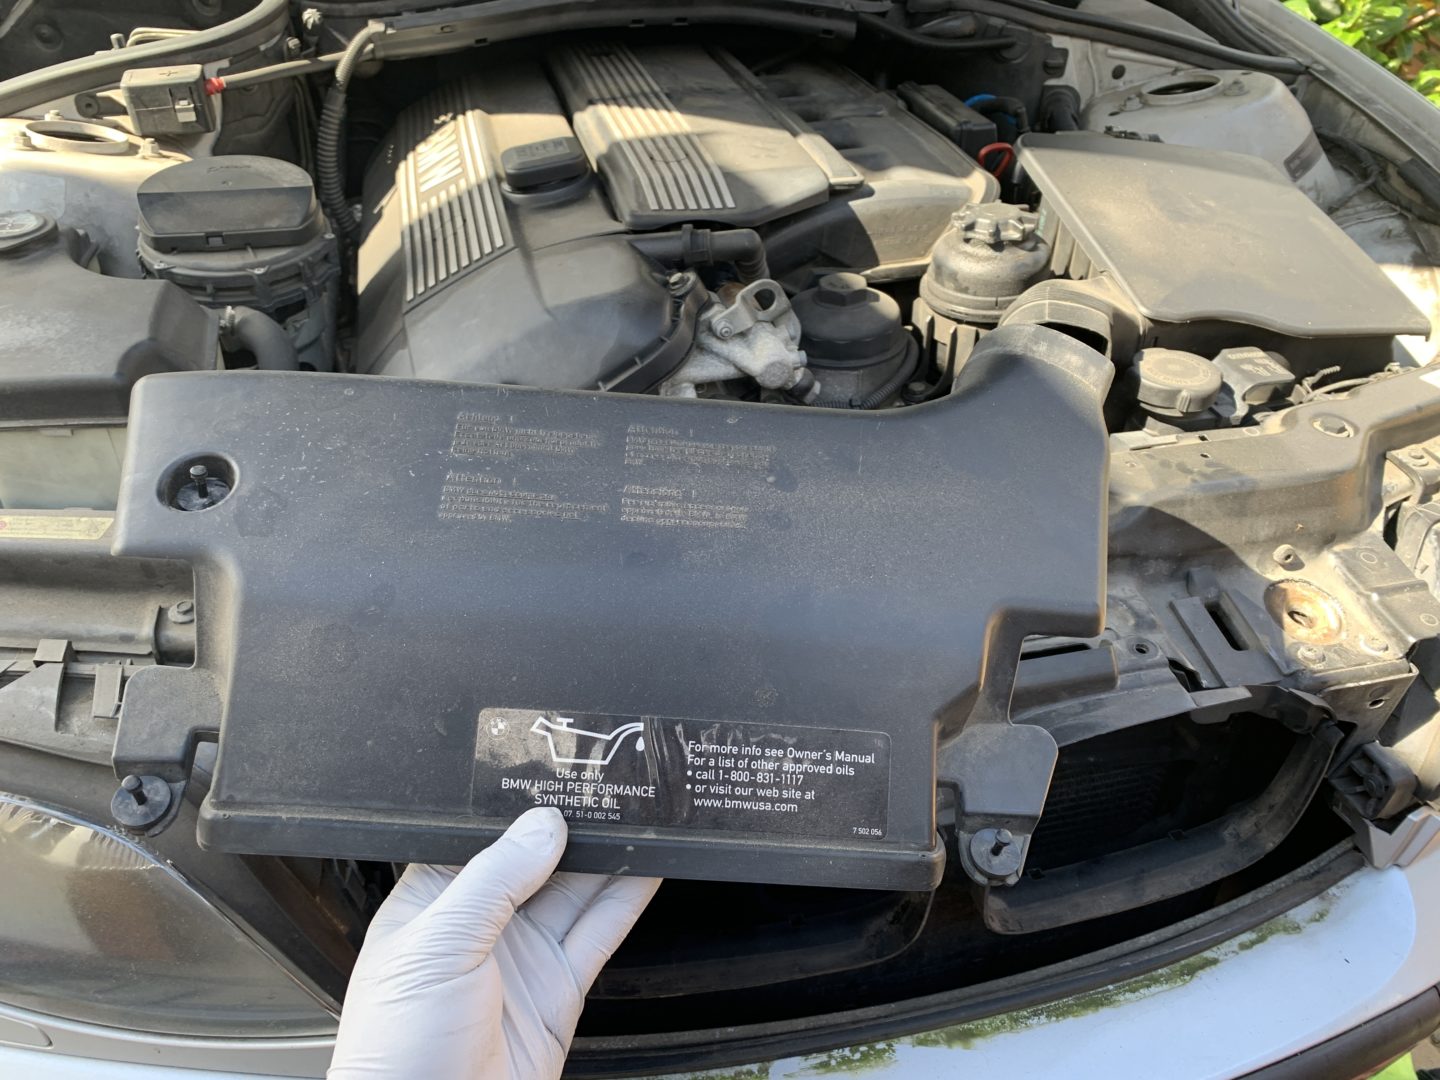
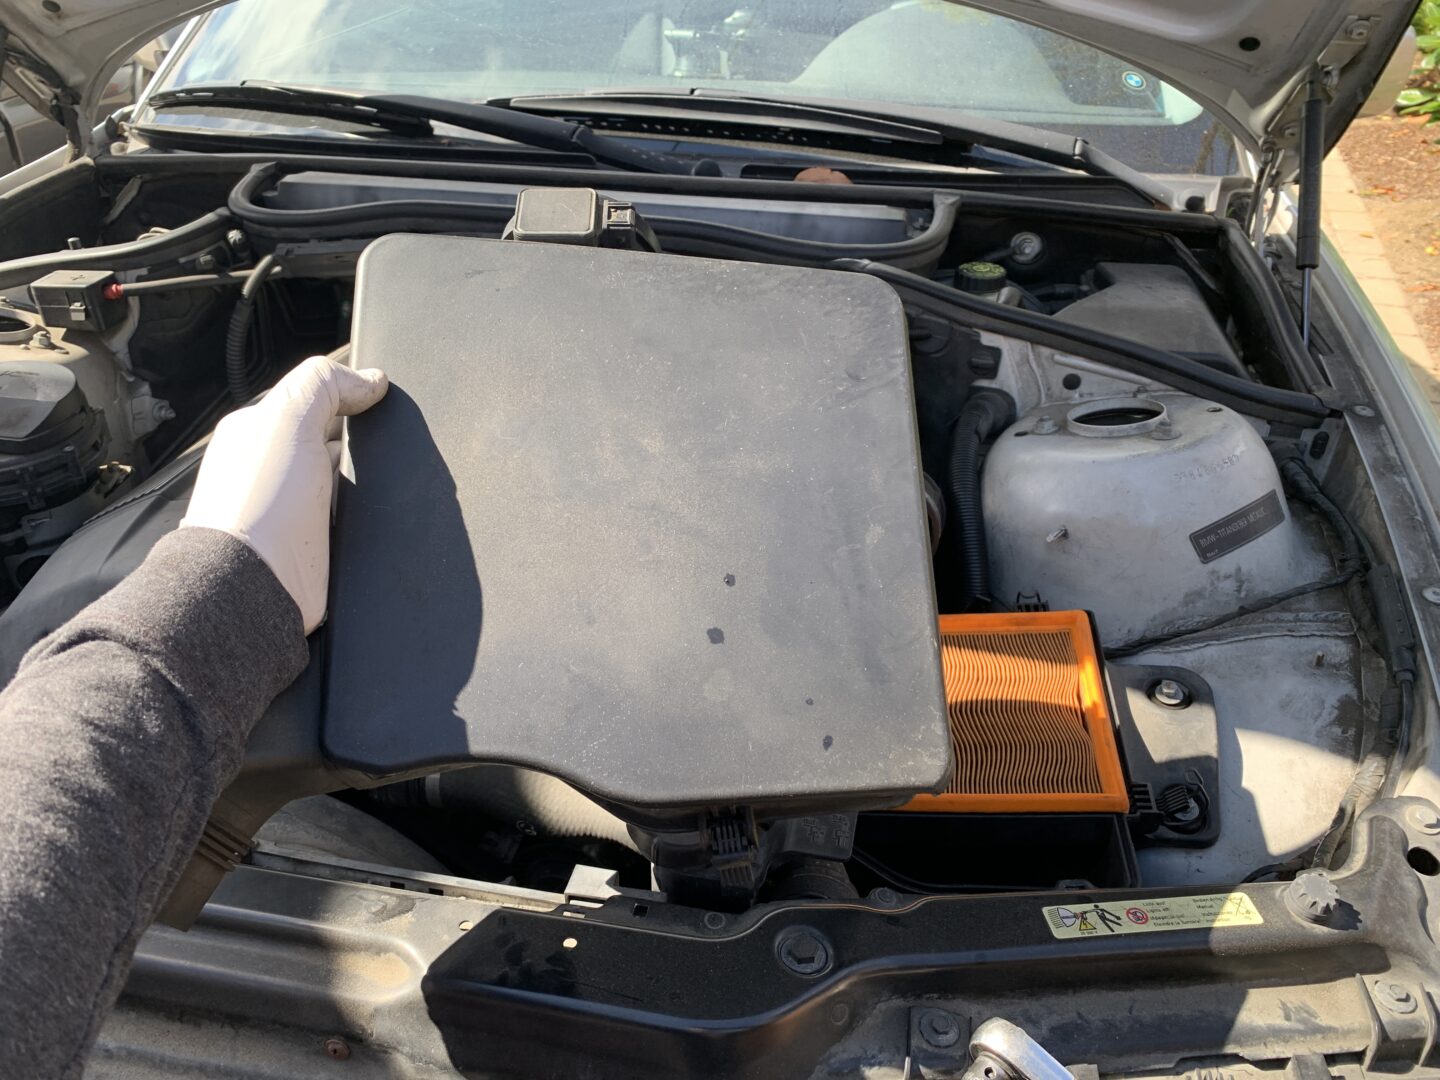
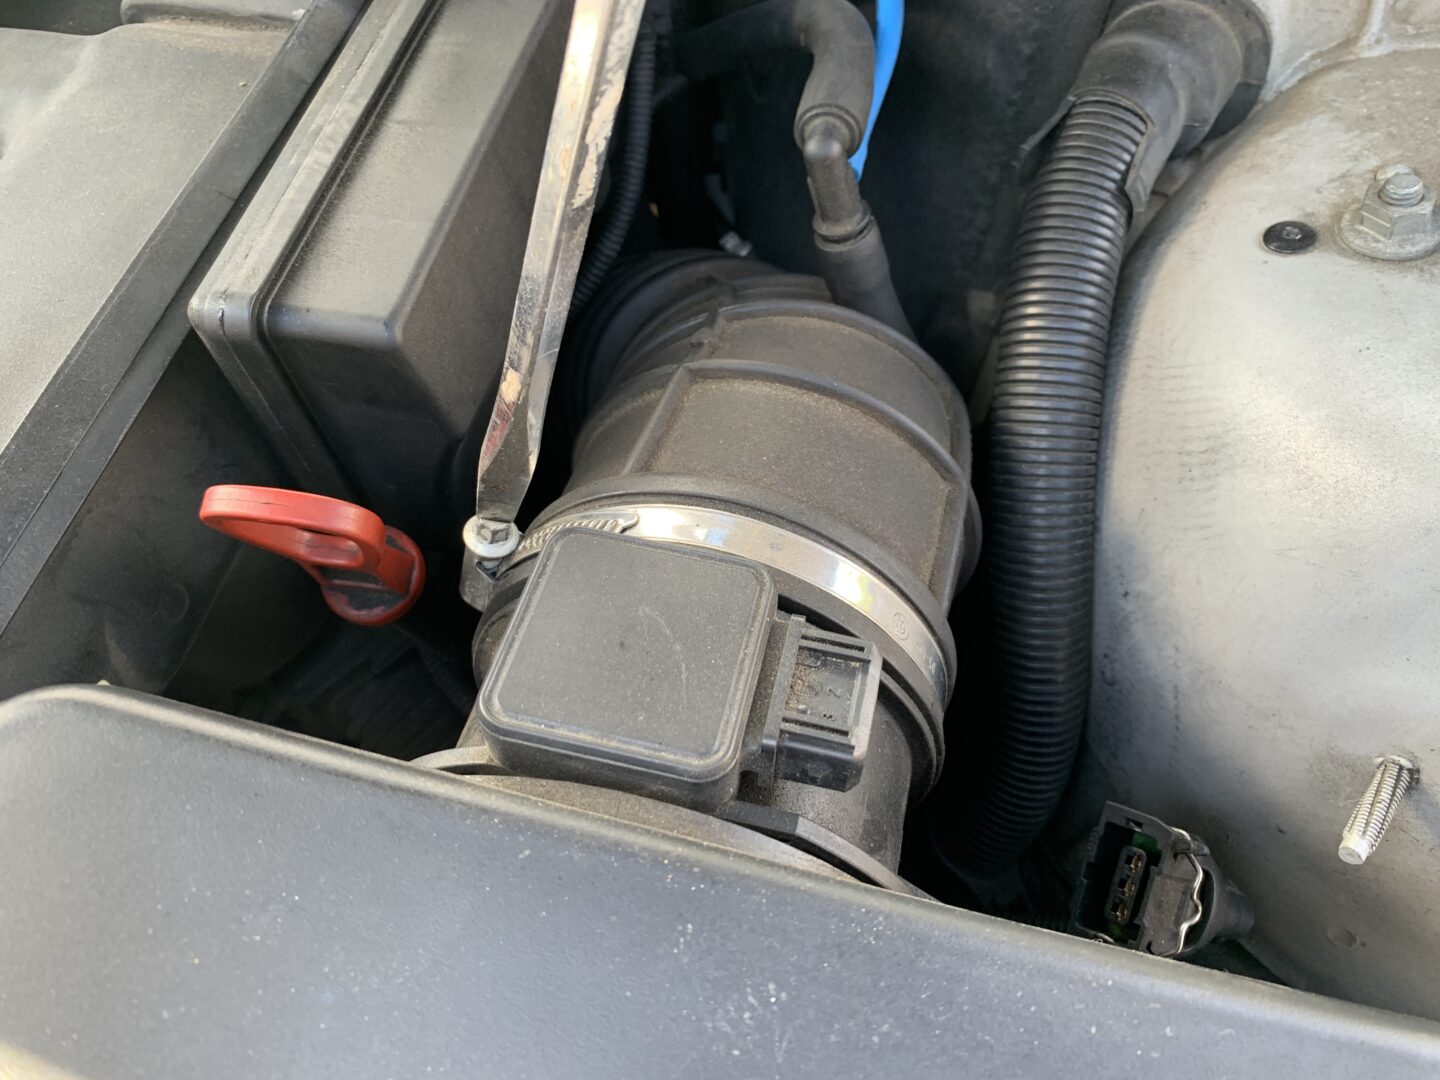
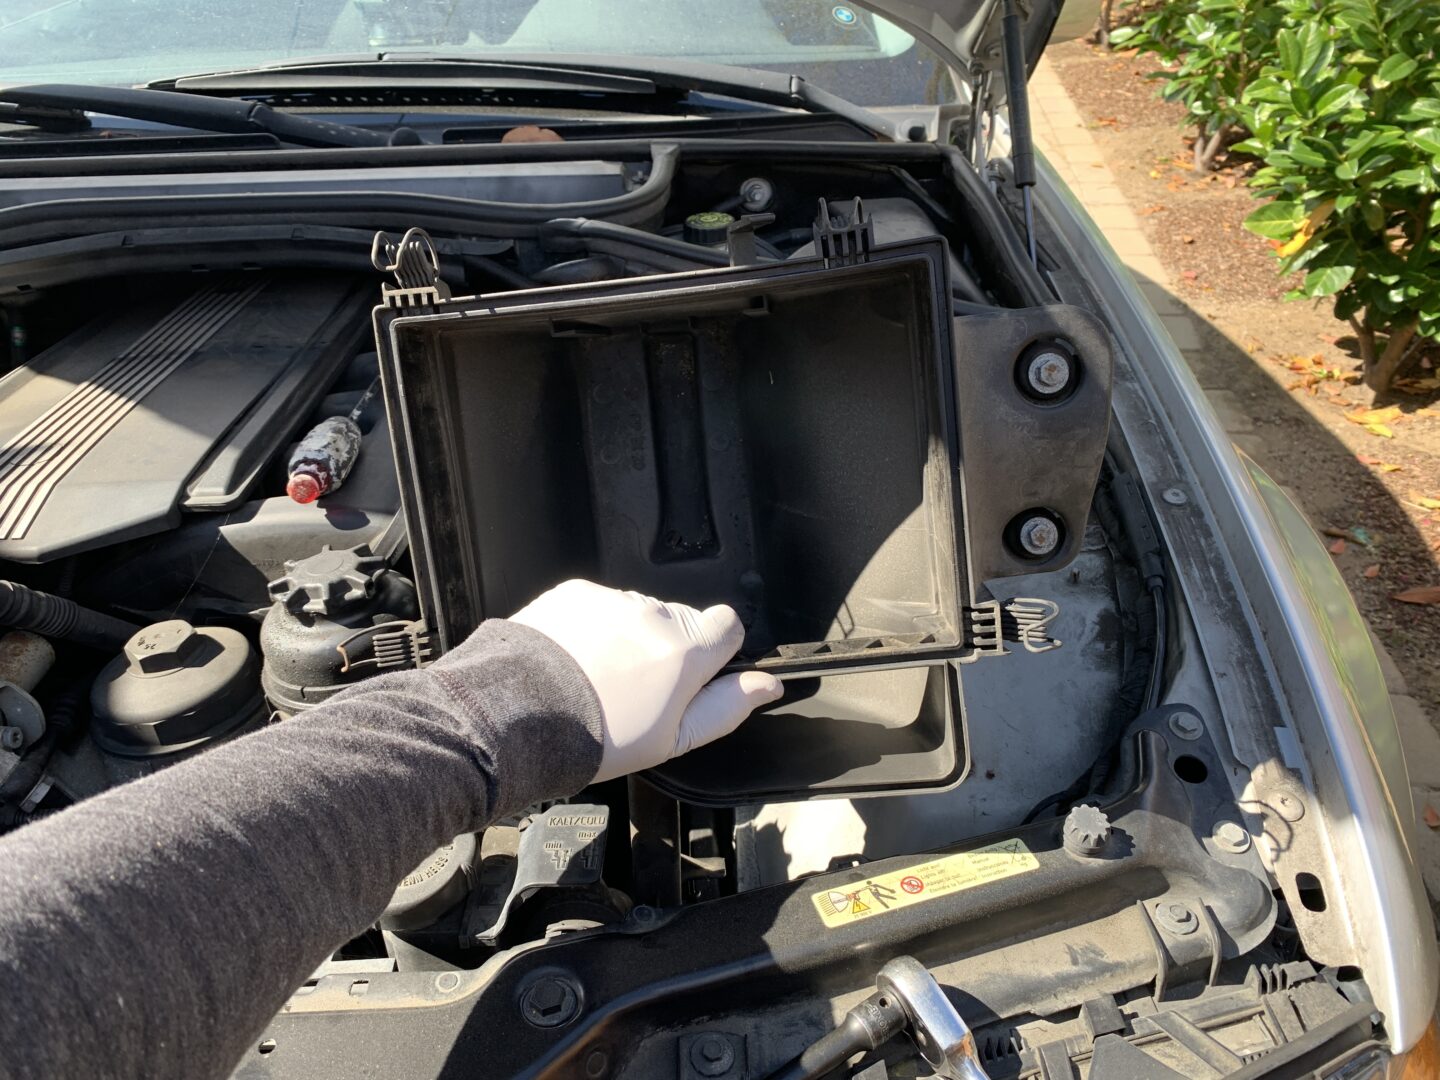
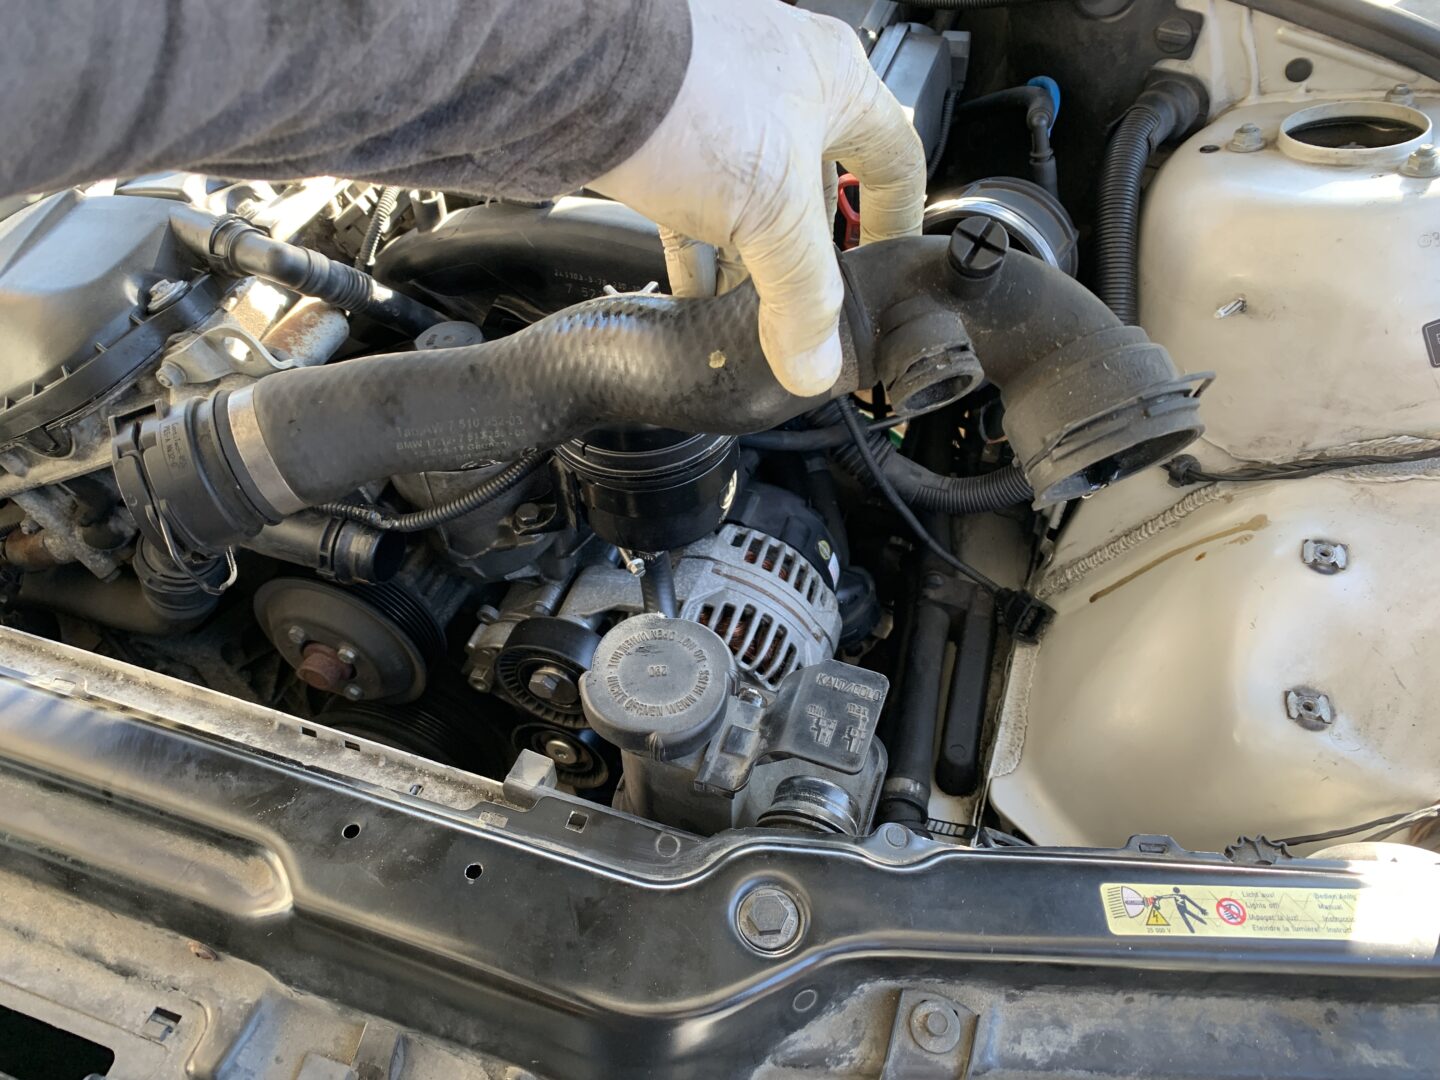
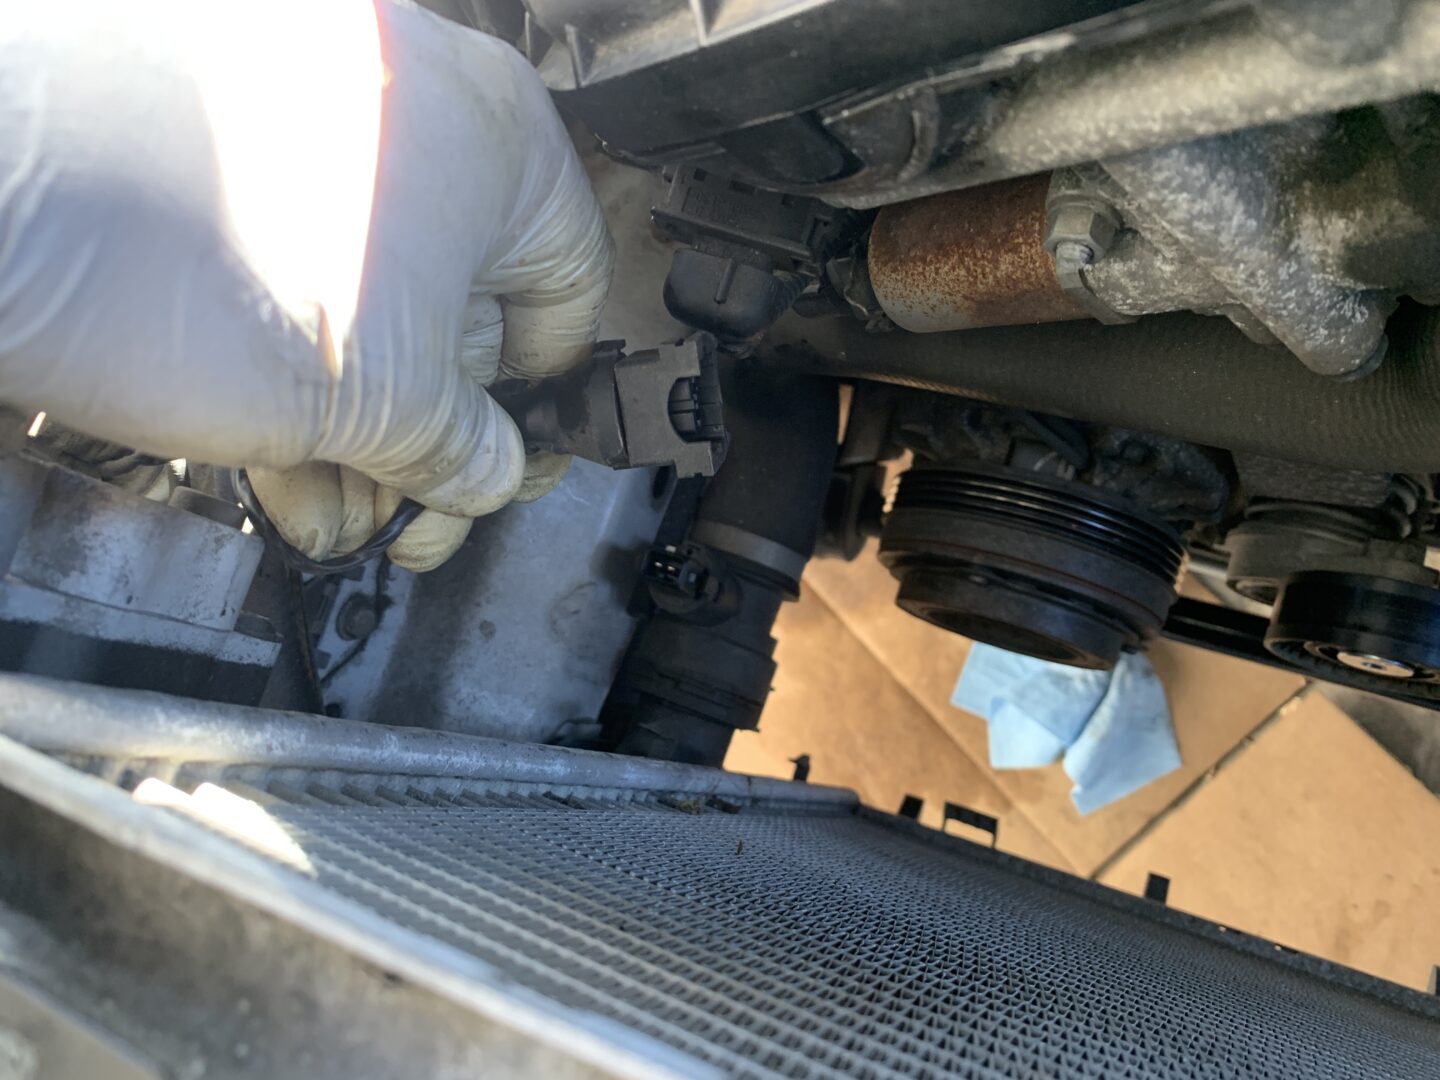
Remove the intake duct and engine air filter housing. There’s a pop rivet for the front intake dam, several clips that hold the top of the air filter housing to the bottom, and (2 qty) 10mm bolts that hold the air filter housing to the frame. There’s also a large clamp that needs to be loosened and the MAF sensor connector that will need to be disconnected.

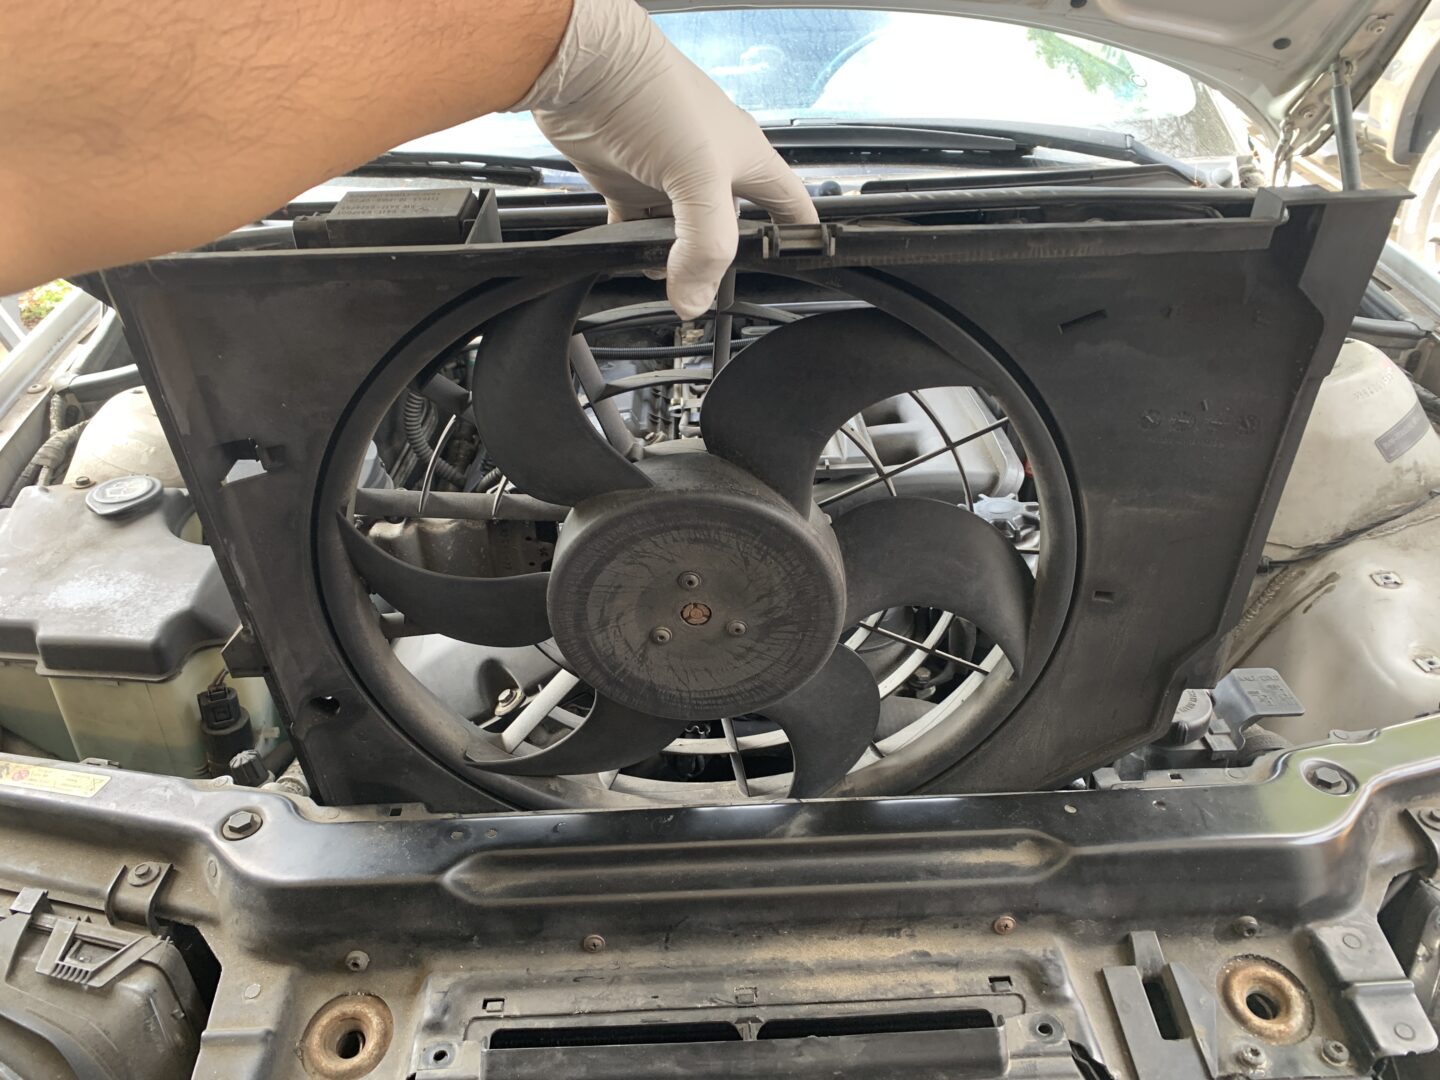
There are two types of E46 fan shrouds: an electric fan shroud such as the one shown below, and a fan clutch shroud that requires the use of special wrenches as described in the tools section at the beginning of this post. The thing to remember when loosening the nut on a fan clutch shroud is that it is reverse-threaded, so you must turn it clockwise to loosen. Check out this video from 50sKid or FCP Euro to learn more about the removal for that specific type of fan.
On the other hand, if you have an electric fan shroud, disconnect the two electrical connectors, plastic clip, and T25 Torx screw. Then pull up the fan shroud and remove.
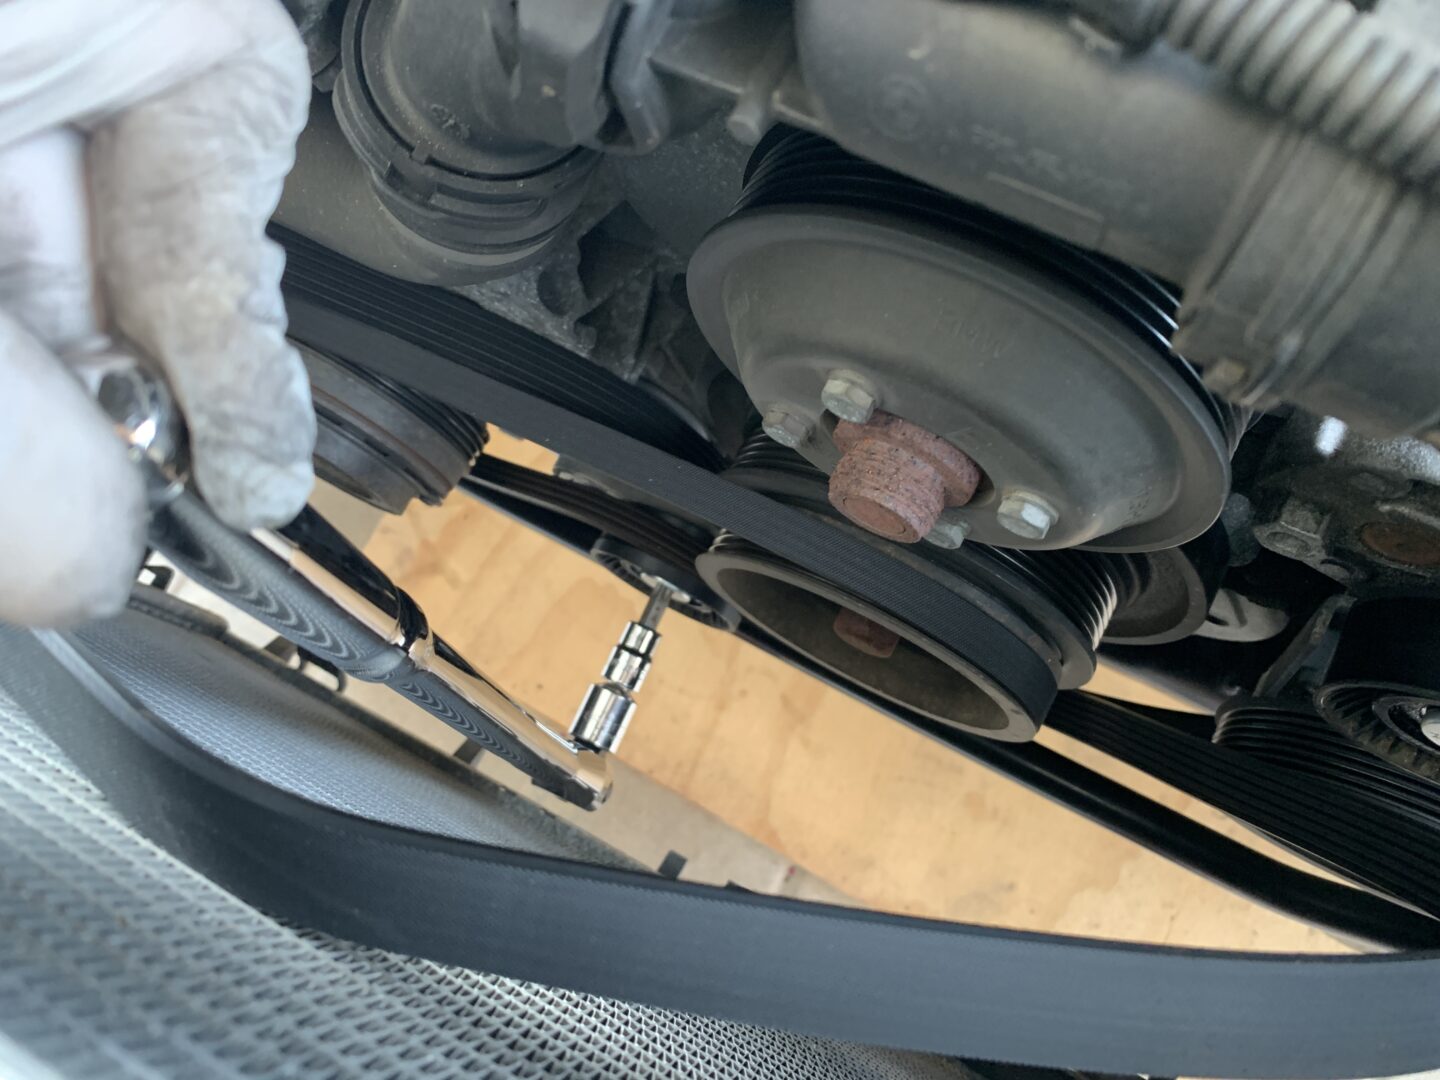
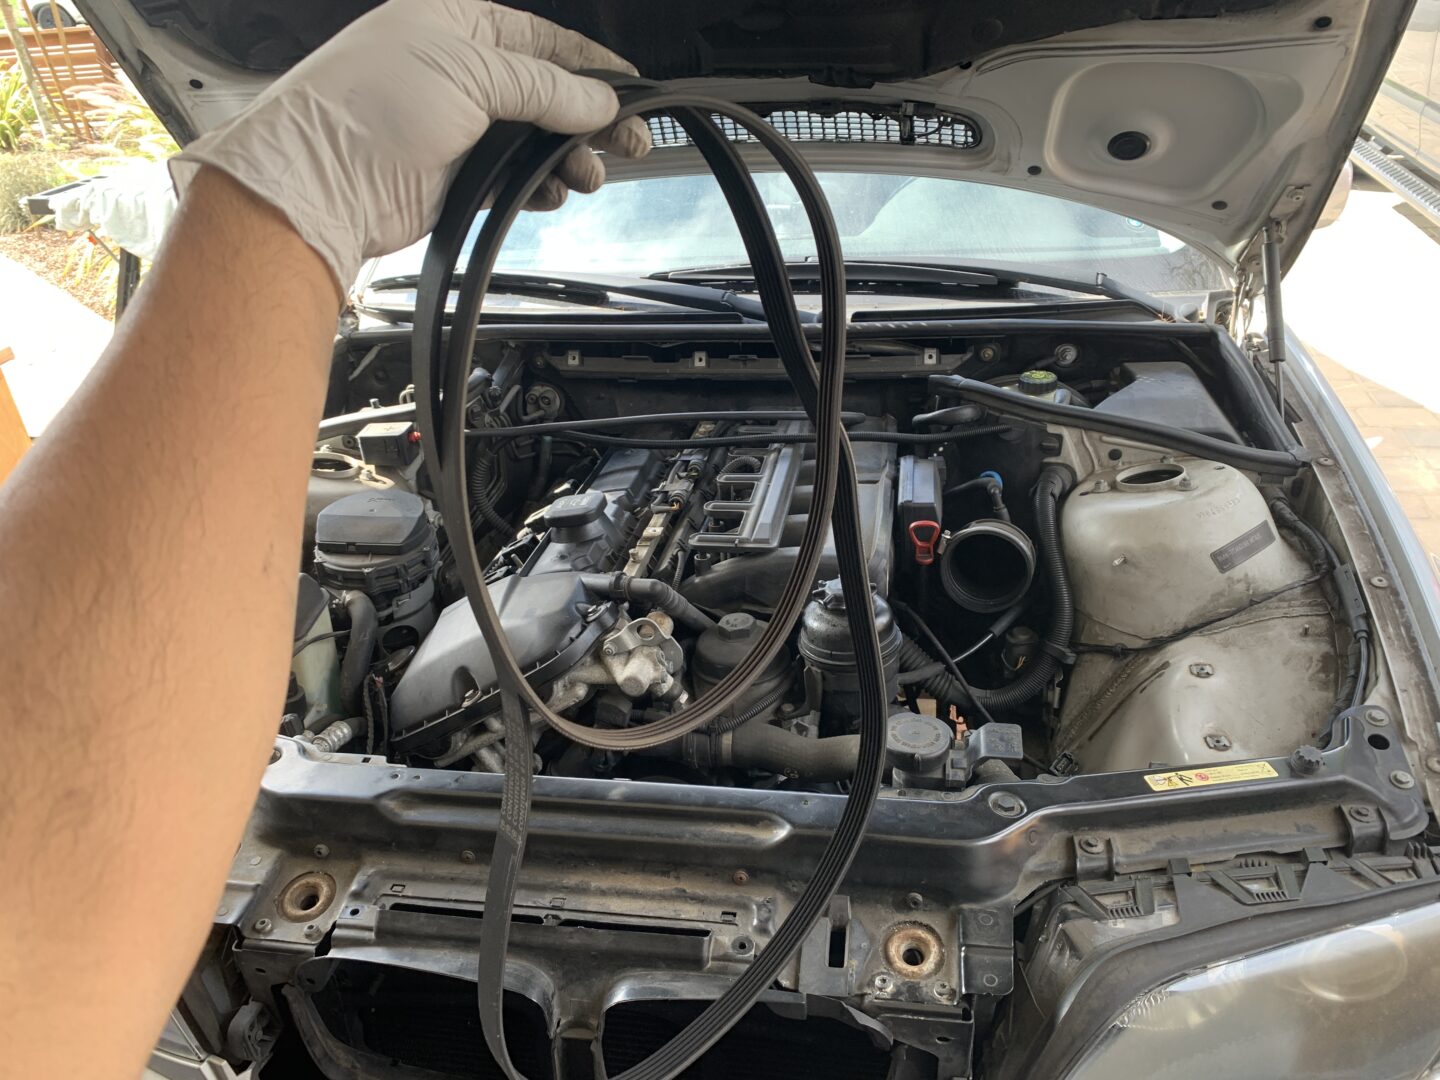
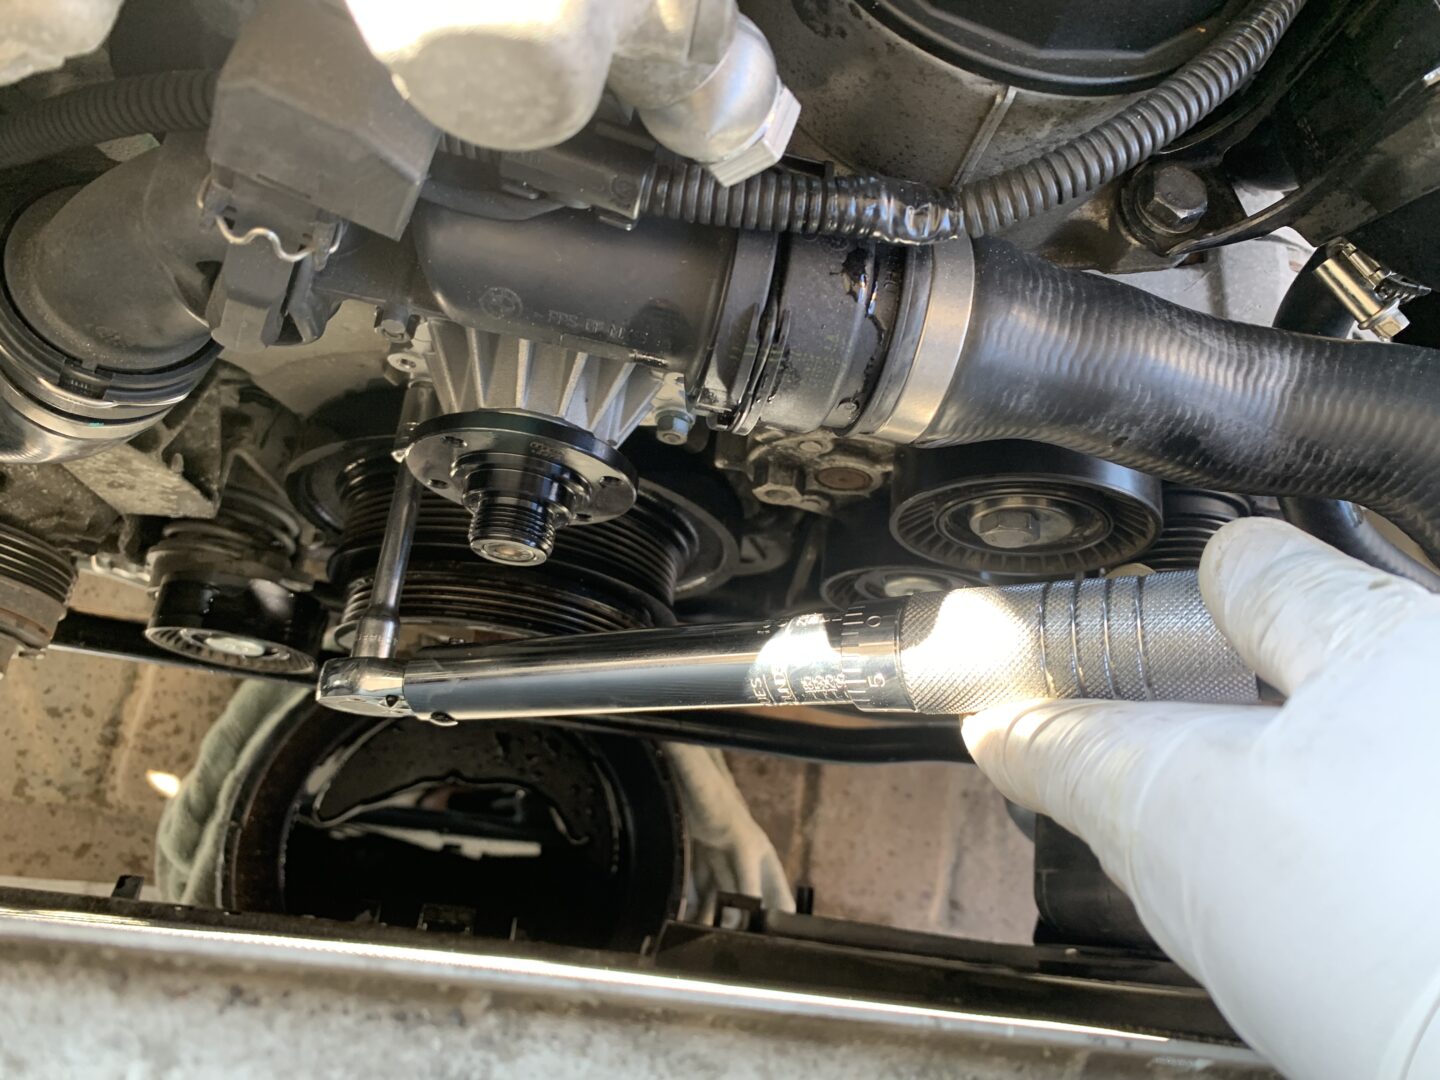
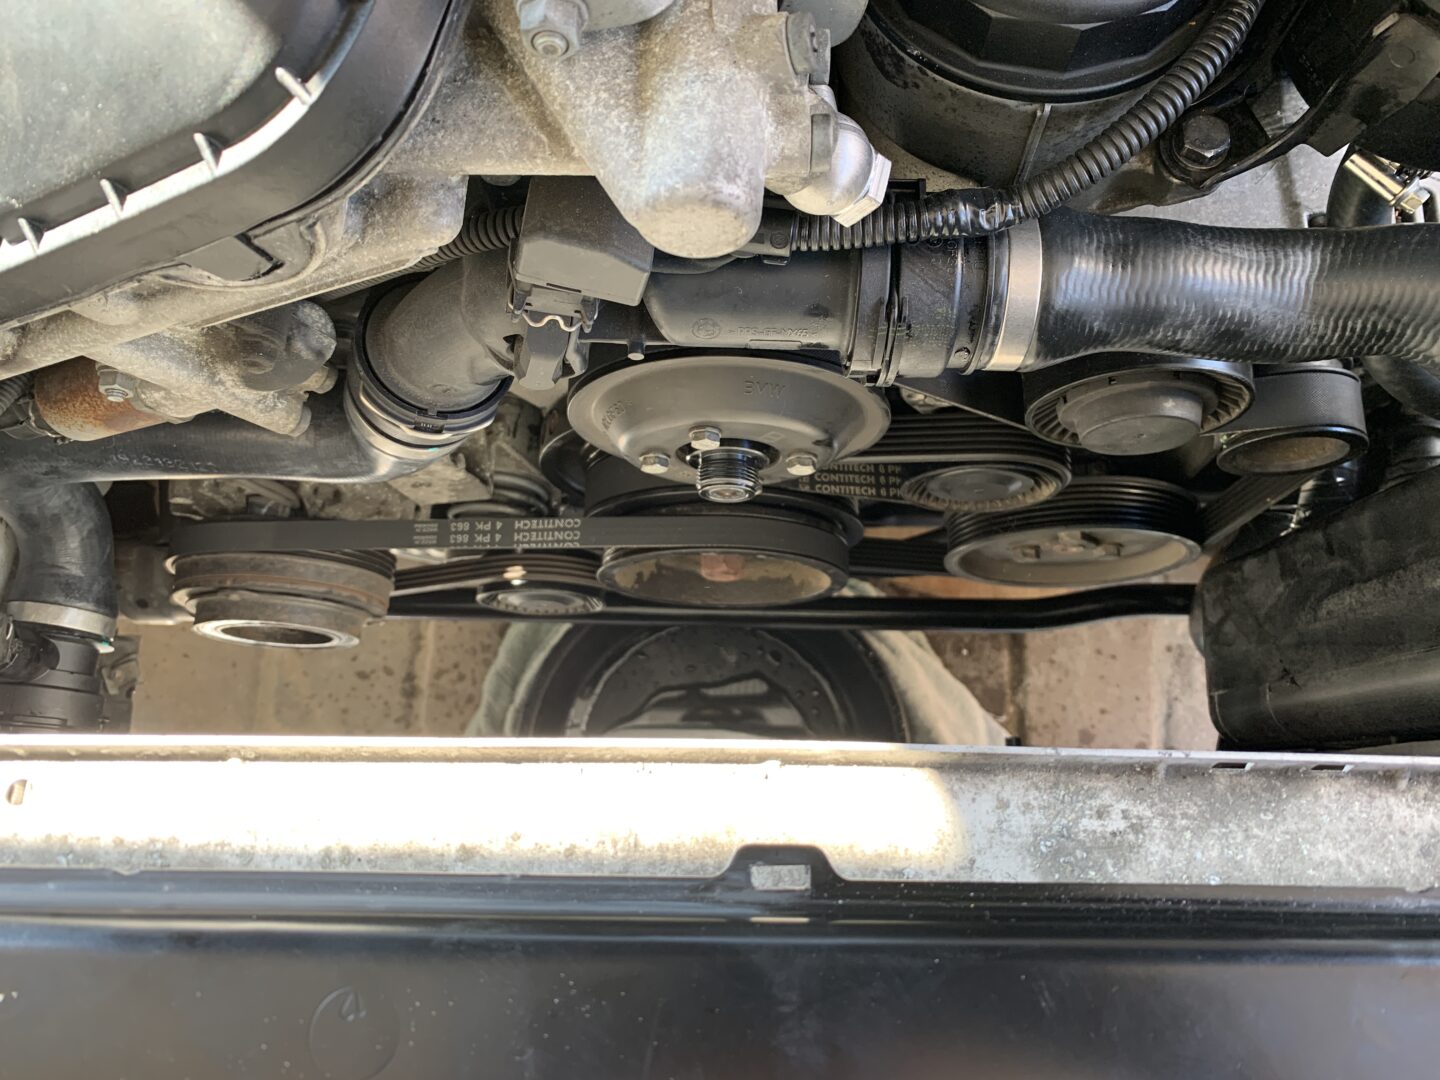
Use a T50 Torx bit and turn clockwise on the pulley in order to loosen the tensioner pulley. Remove the plastic cap off the head of the bolt if required. Then with the tension offloaded, remove the belt. Now with more room, we can proceed with the cooling system.
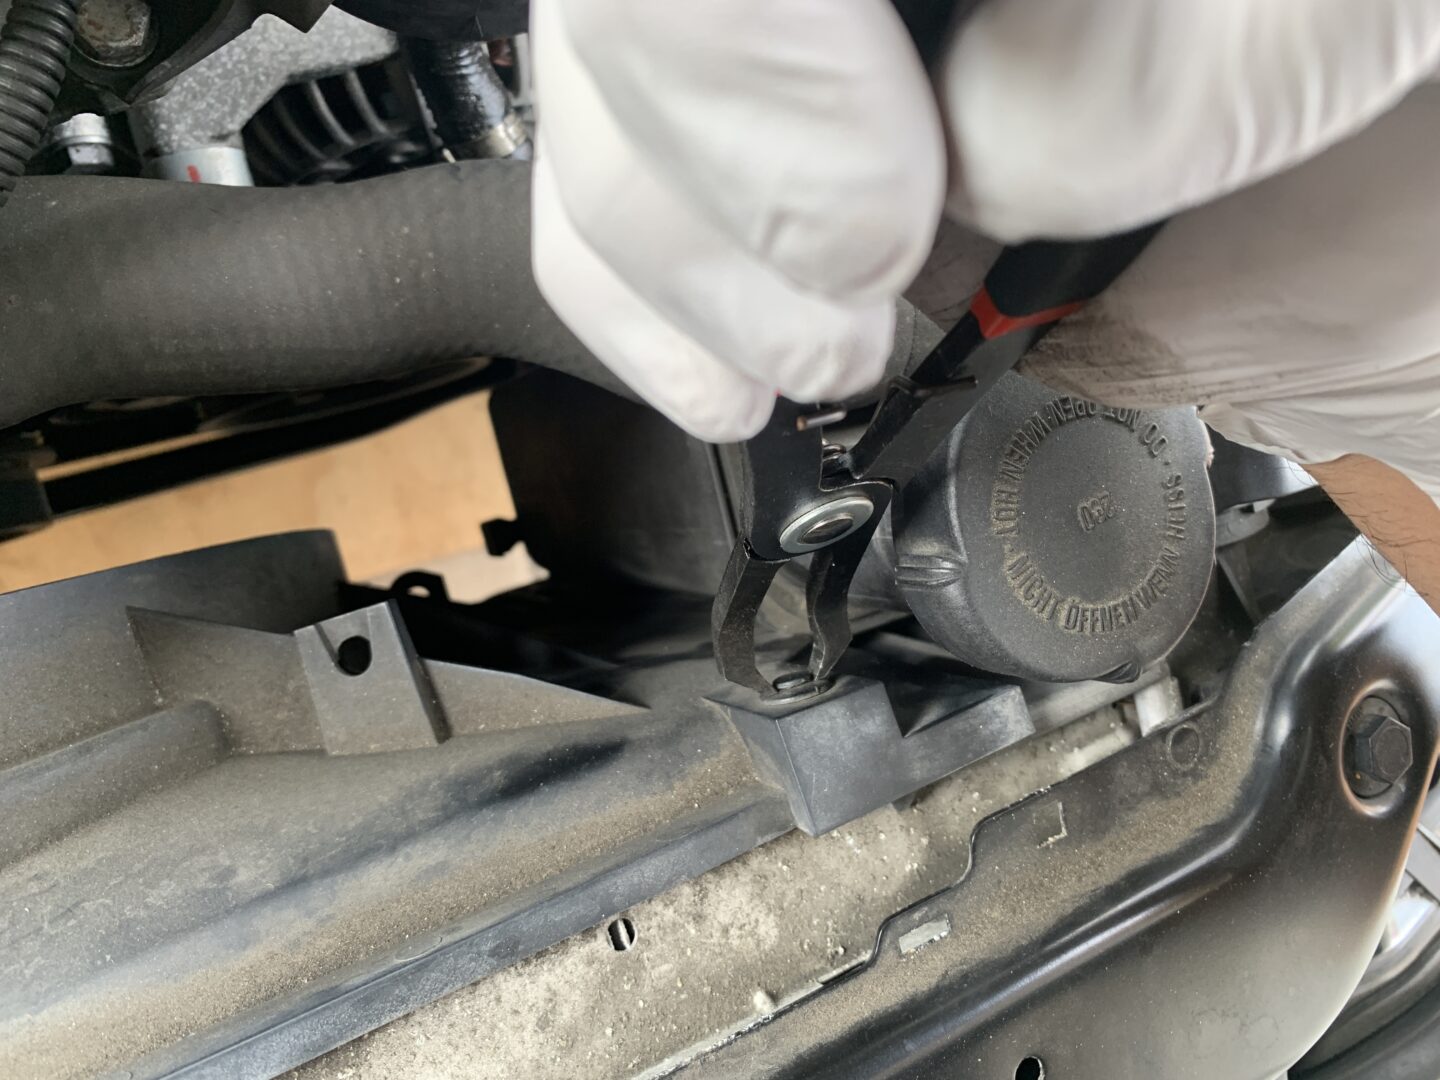
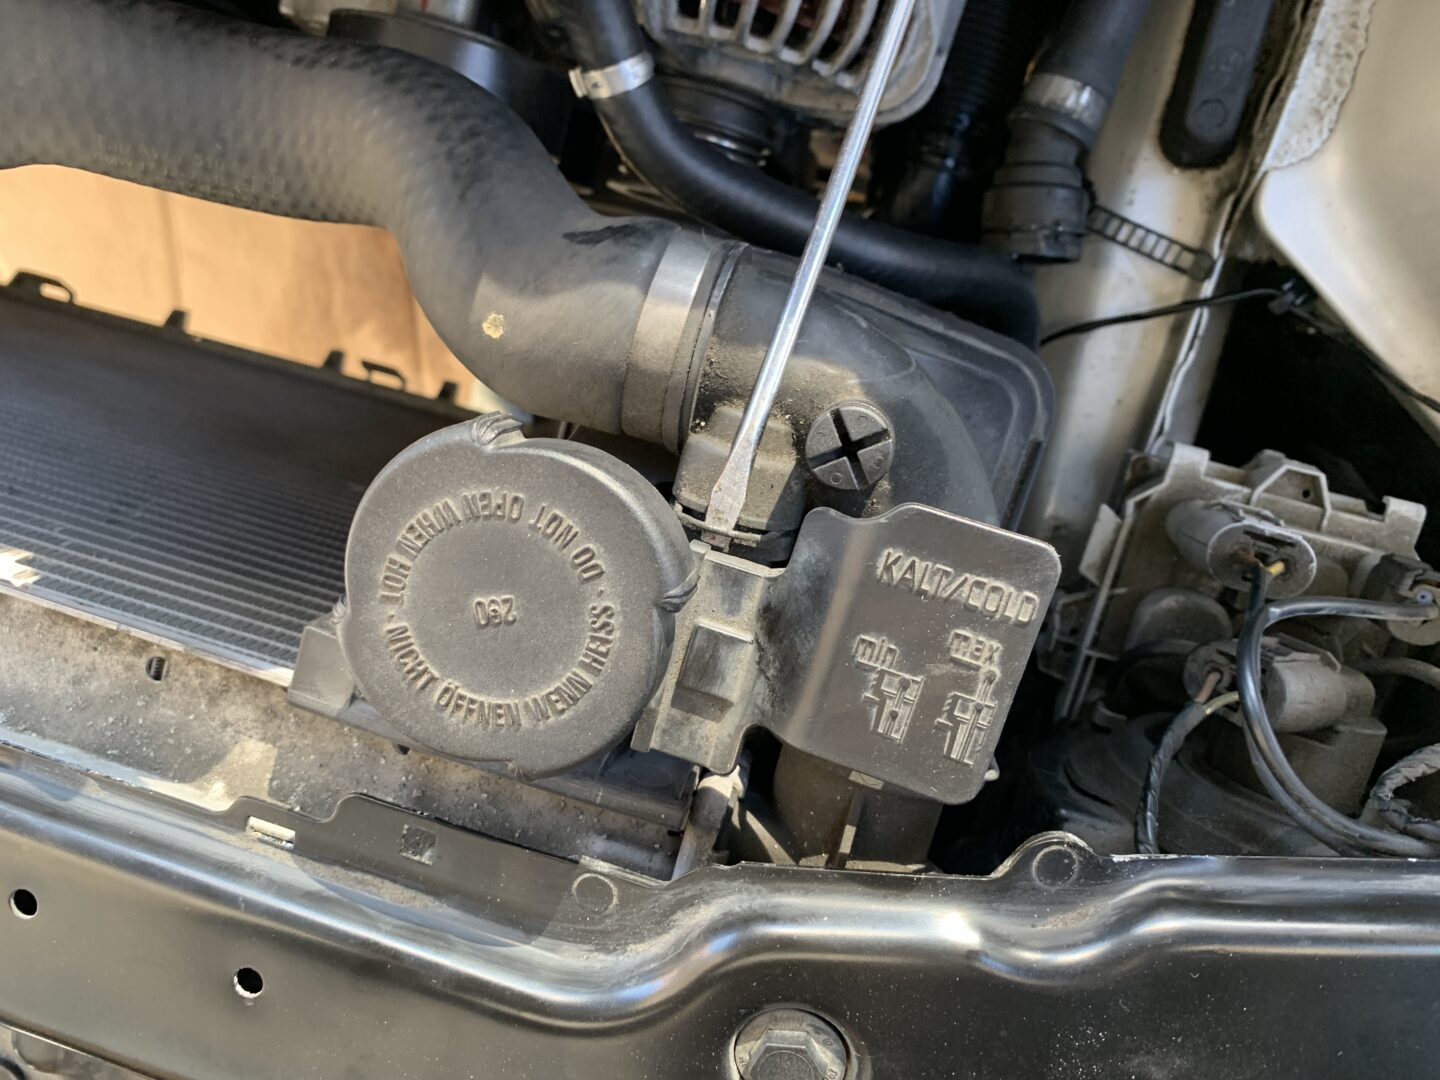
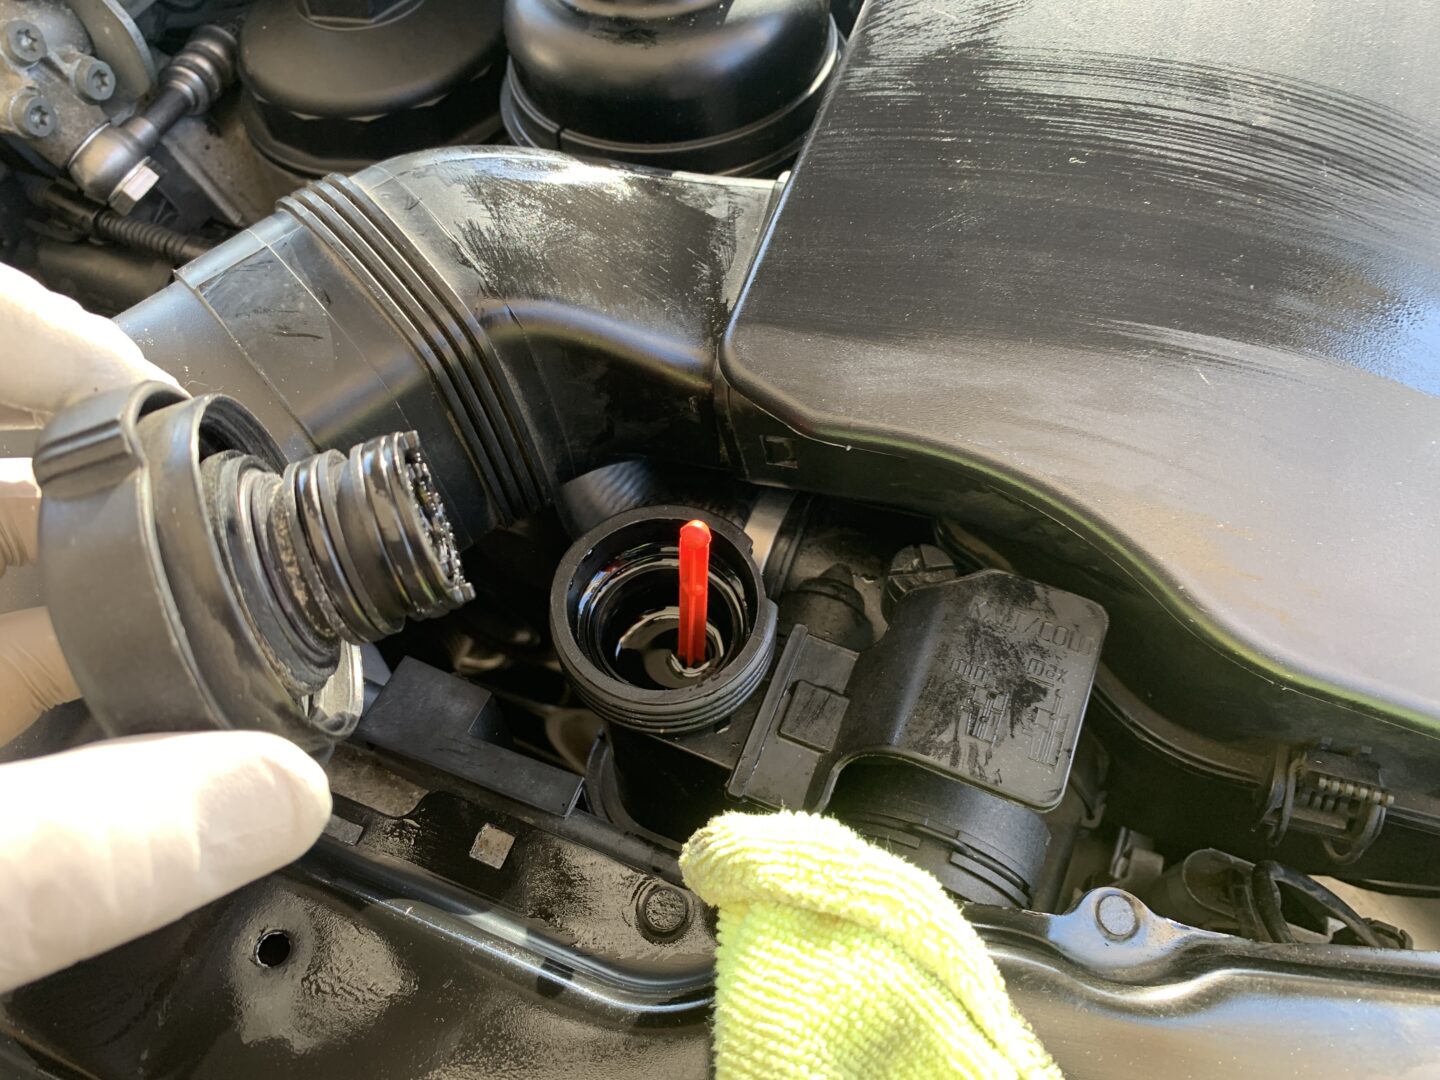
Before removing components from the cooling system, we’ll need to drain as much engine coolant as possible to avoid a bigger mess later. Start by loosening the bleader screw and removing the radiator cap. Never remove the radiator cap when the engine is hot for your safety.
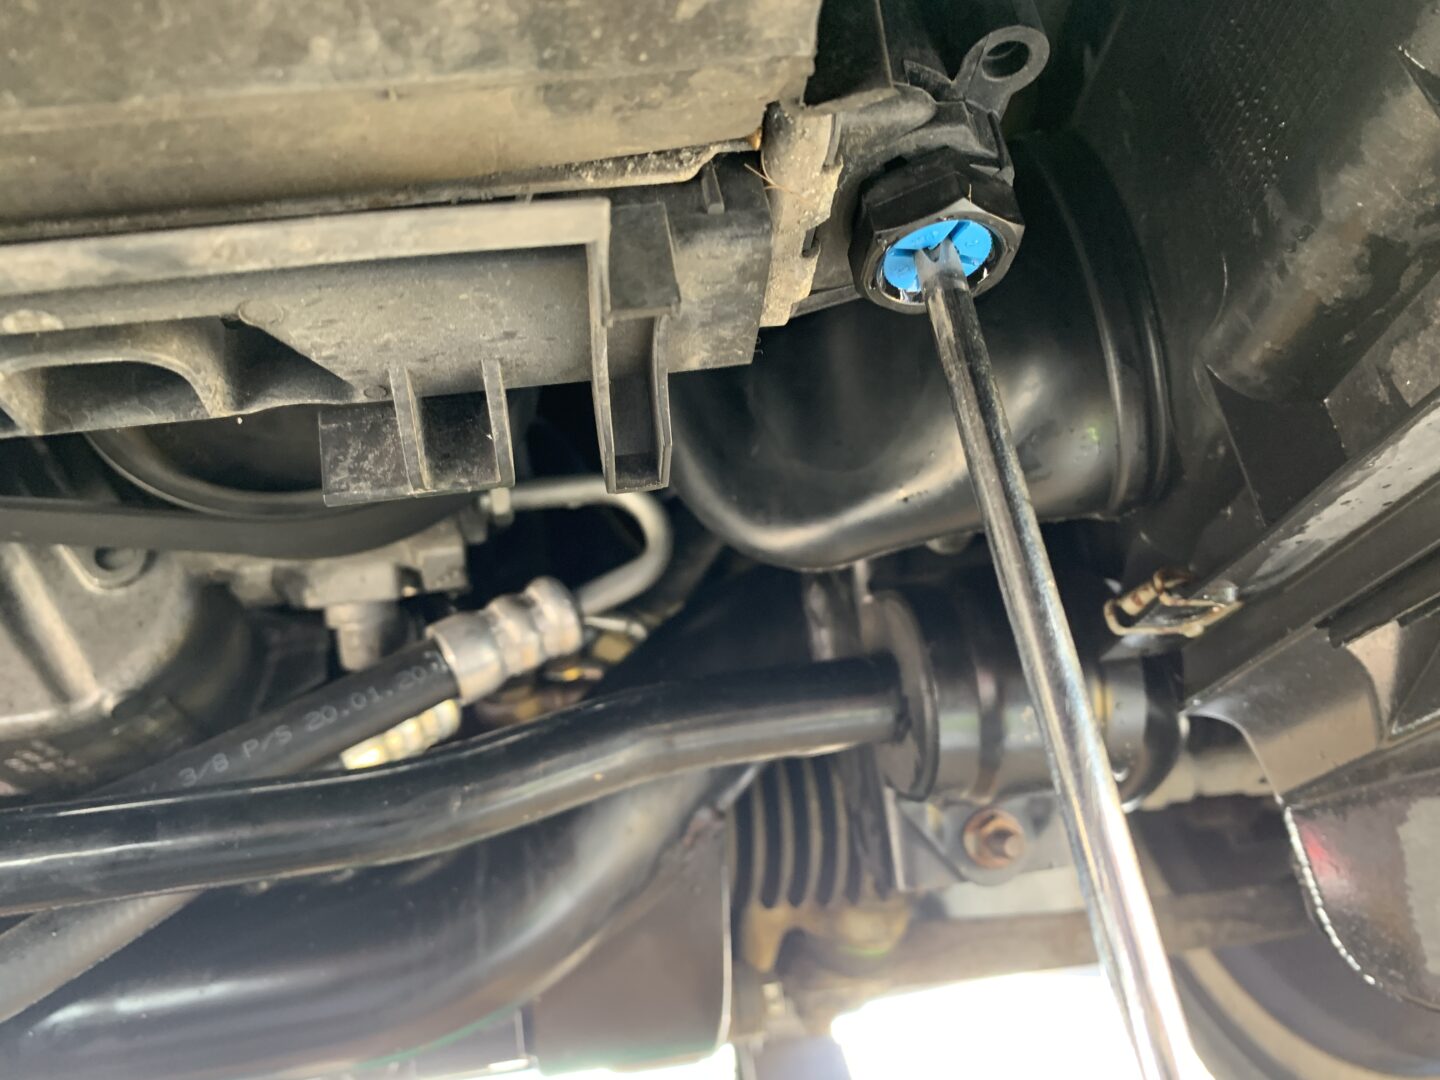
Remove the splash shield underneath the vehicle. Position a drain pan underneath the car below the front driver’s side of the vehicle. There are two blue plastic drain screws. Unscrew and remove the larger one, allowing the coolant to drain into the drain pan below. Then unscrew but do not remove the smaller screw next to it, and let the coolant drain into the pan as well.
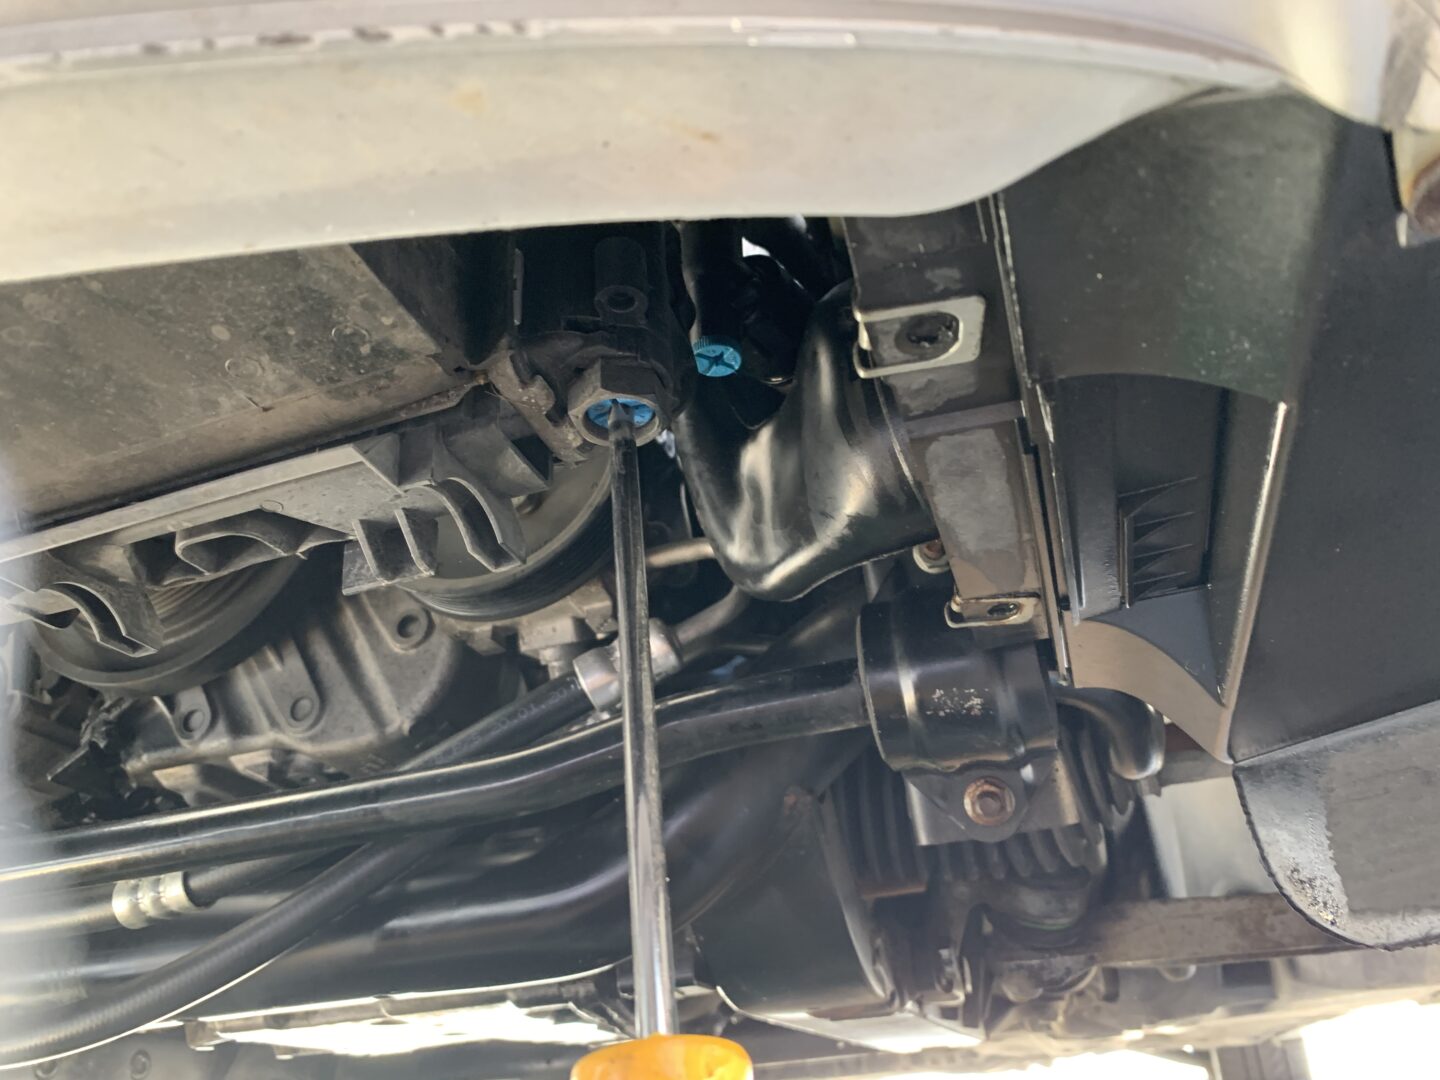
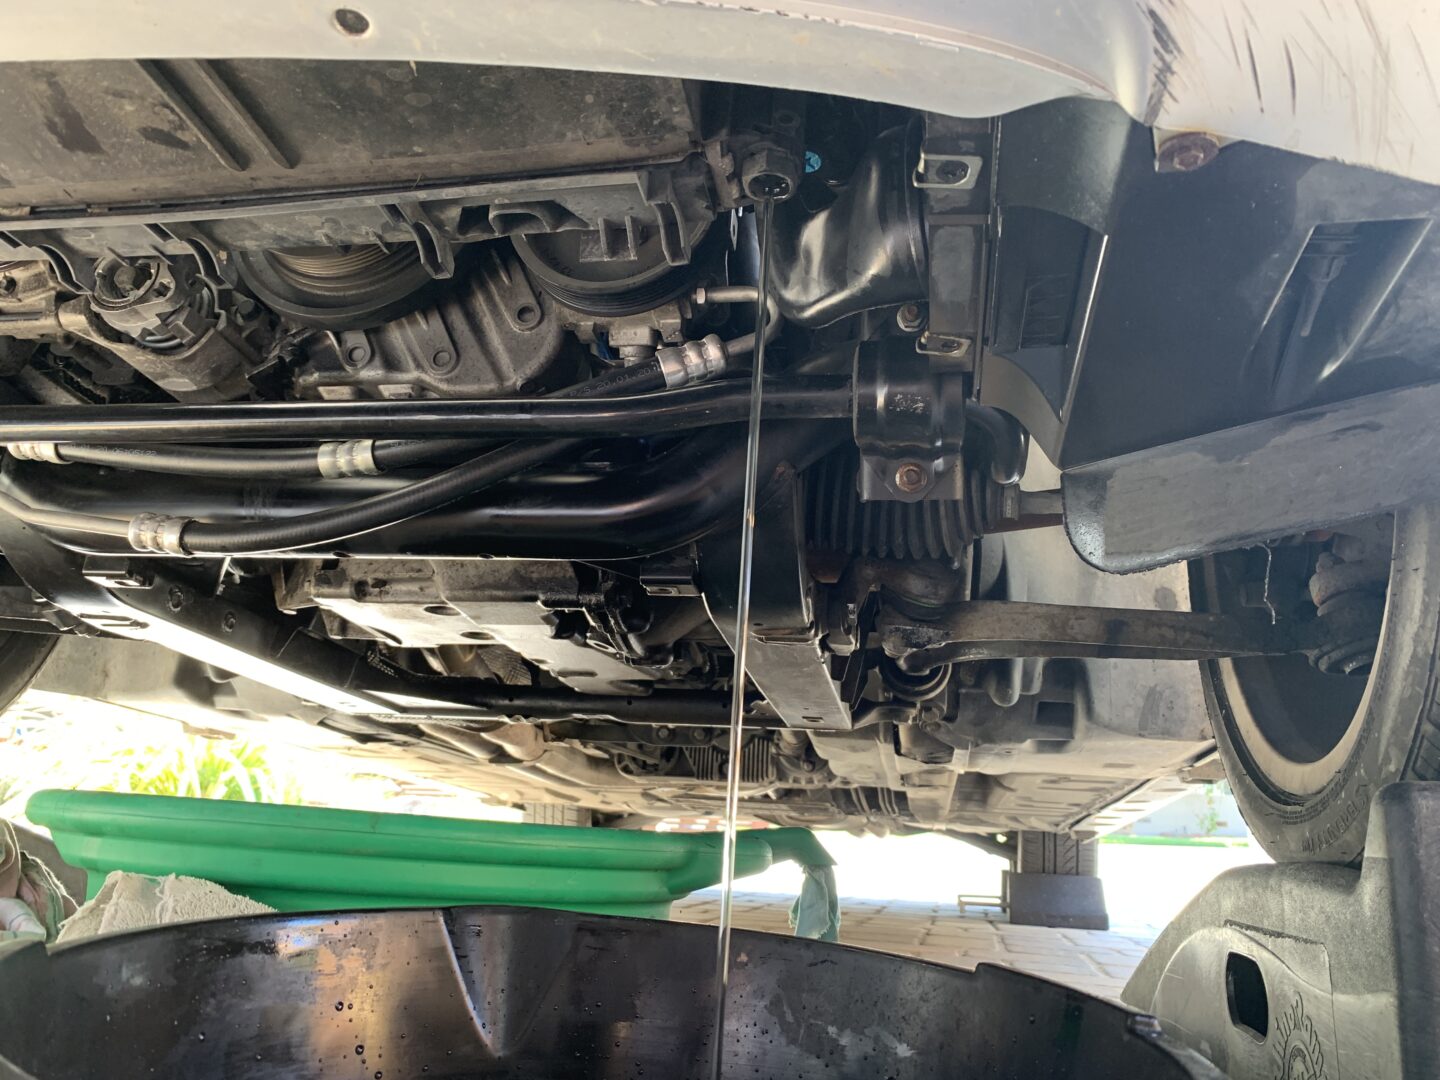


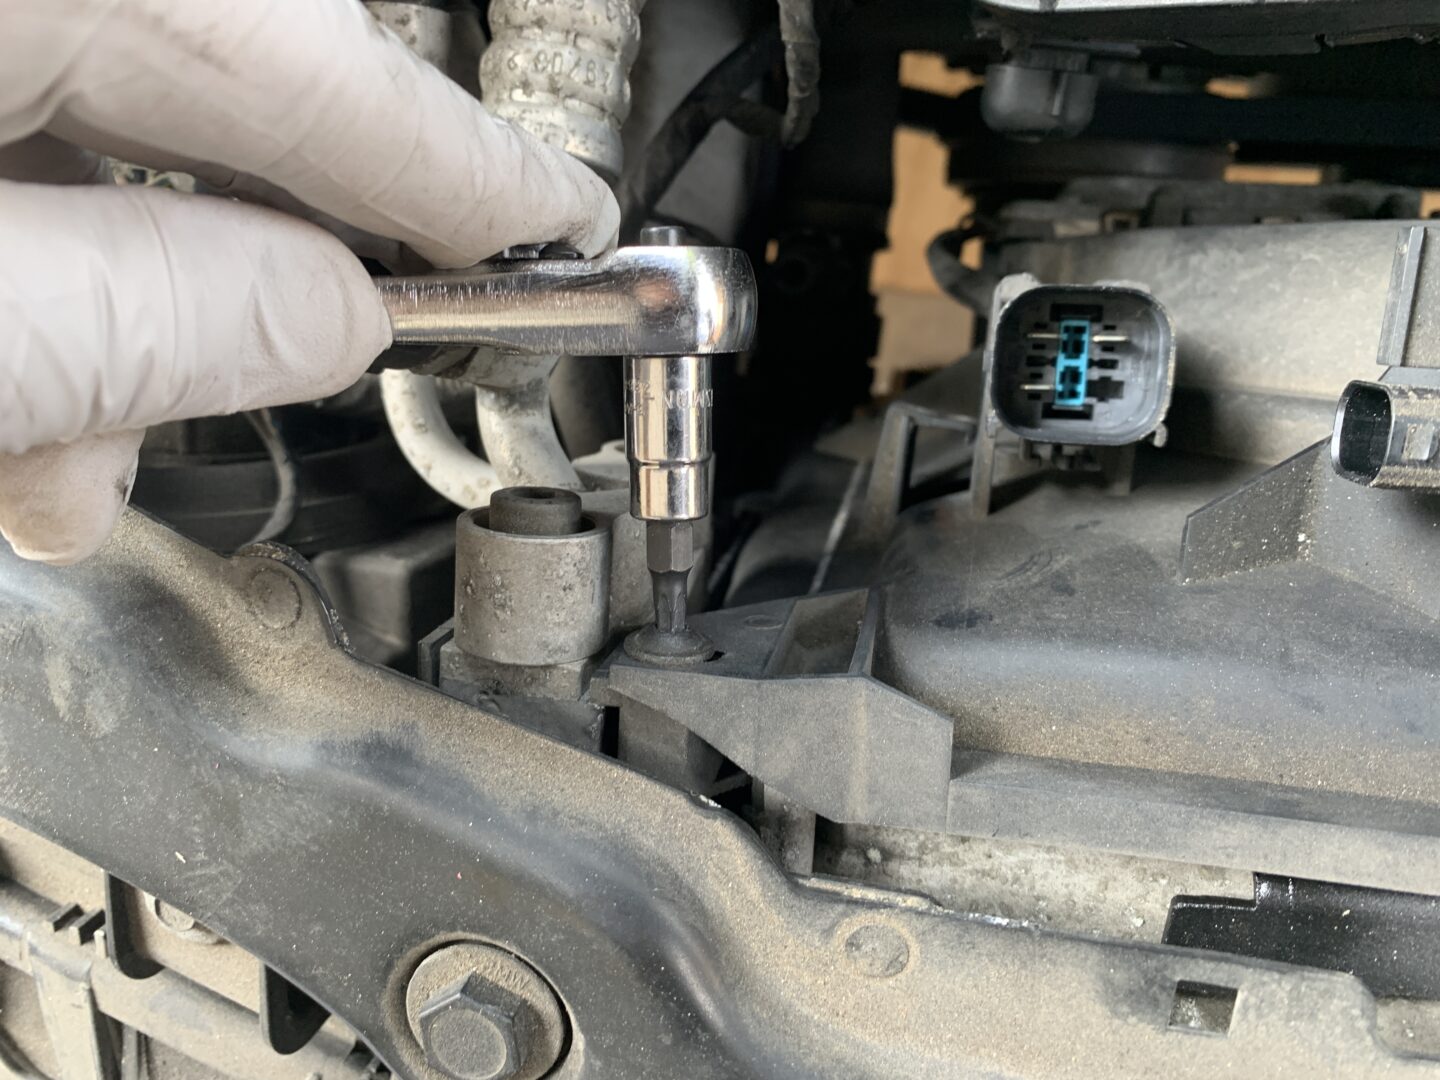
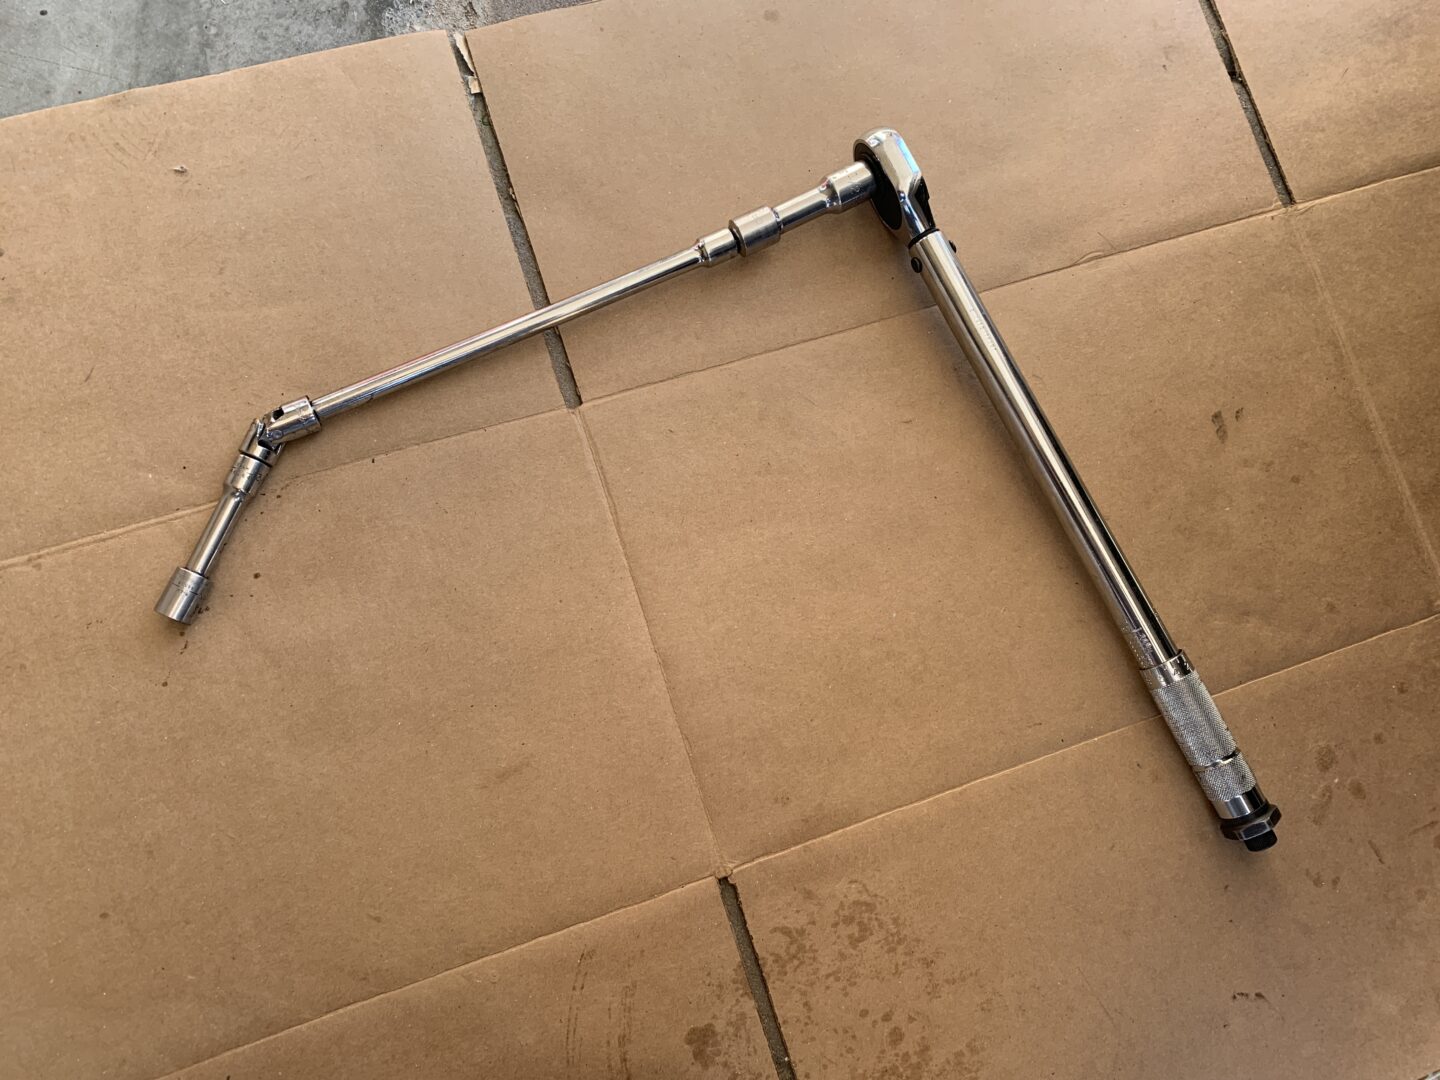
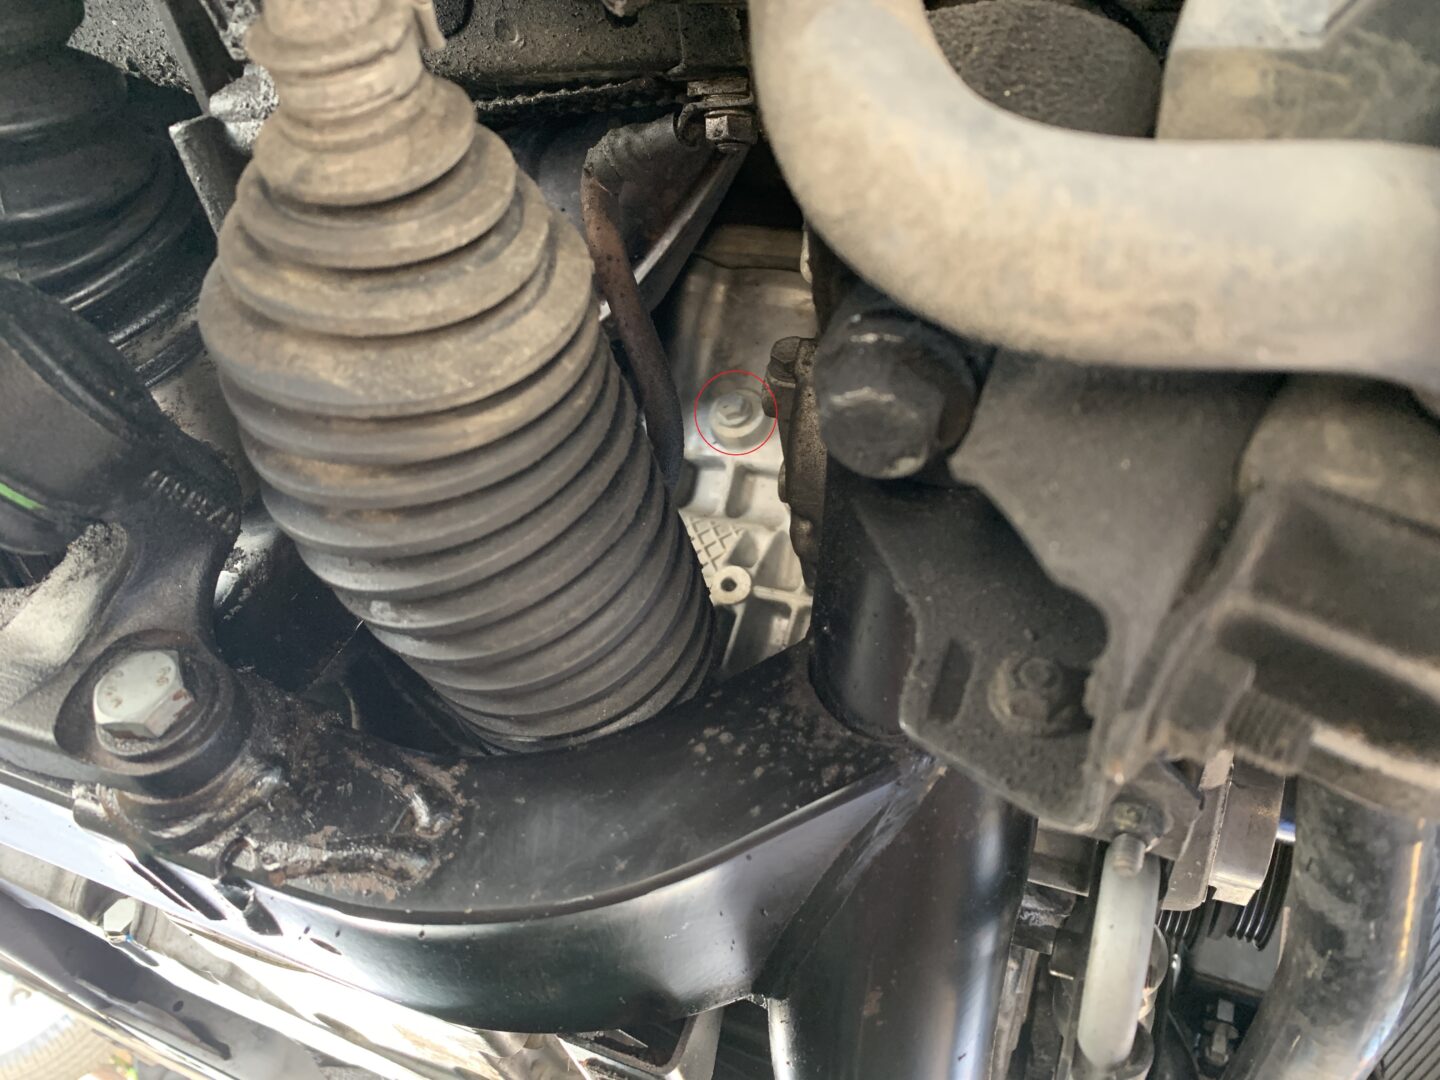
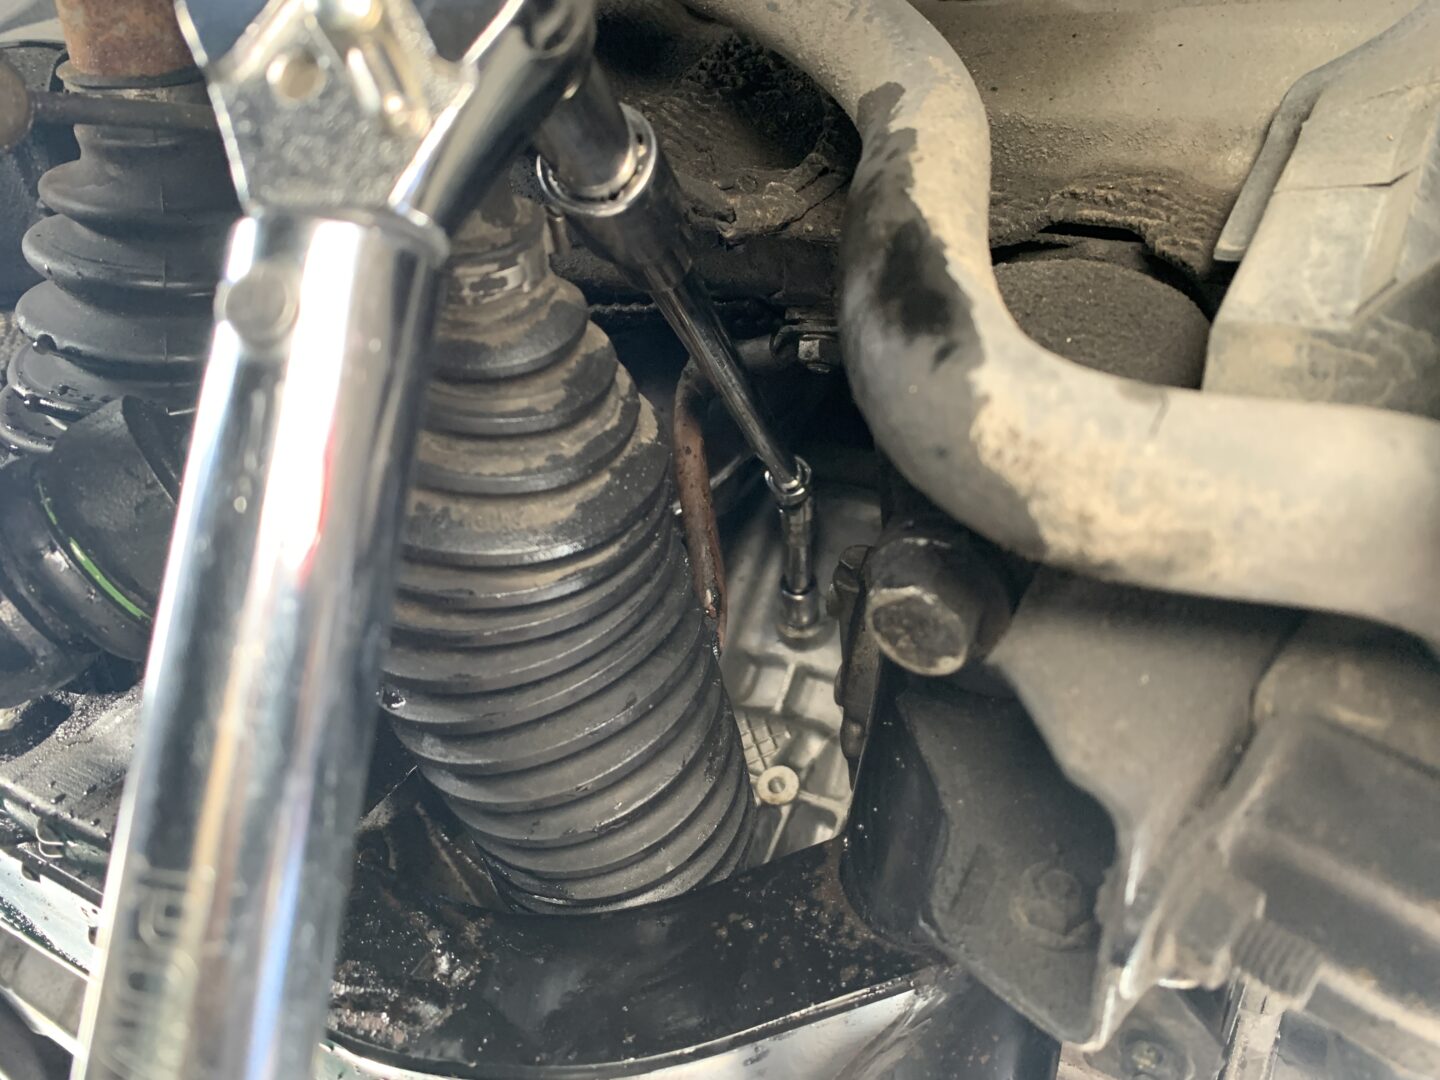
There will still be engine coolant inside of the engine that is not drained from the previous drain plugs. The engine coolant drain plug (13mm) is located on the passenger’s side of the engine block front footwell area, and is extremely difficult to get access to. As you can see below, I used a combination of extensions, adapters, and swivels to get access to the engine coolant drain plug deep in this spot. After the coolant drains, it’s even harder to replace the bolt and tighten back up (torqued to 18 ft-lbs.)
For the reason just mentioned, I suppose it’s possible you could just not drain the engine coolant from the engine and just allow the coolant to drain out when you remove the water pump. This will probably cause a huge mess of coolant, but might be more convenient than dealing with the engine coolant drain plug. However, you wouldn’t be draining as much of the coolant out as if you had drained it out of the engine block.

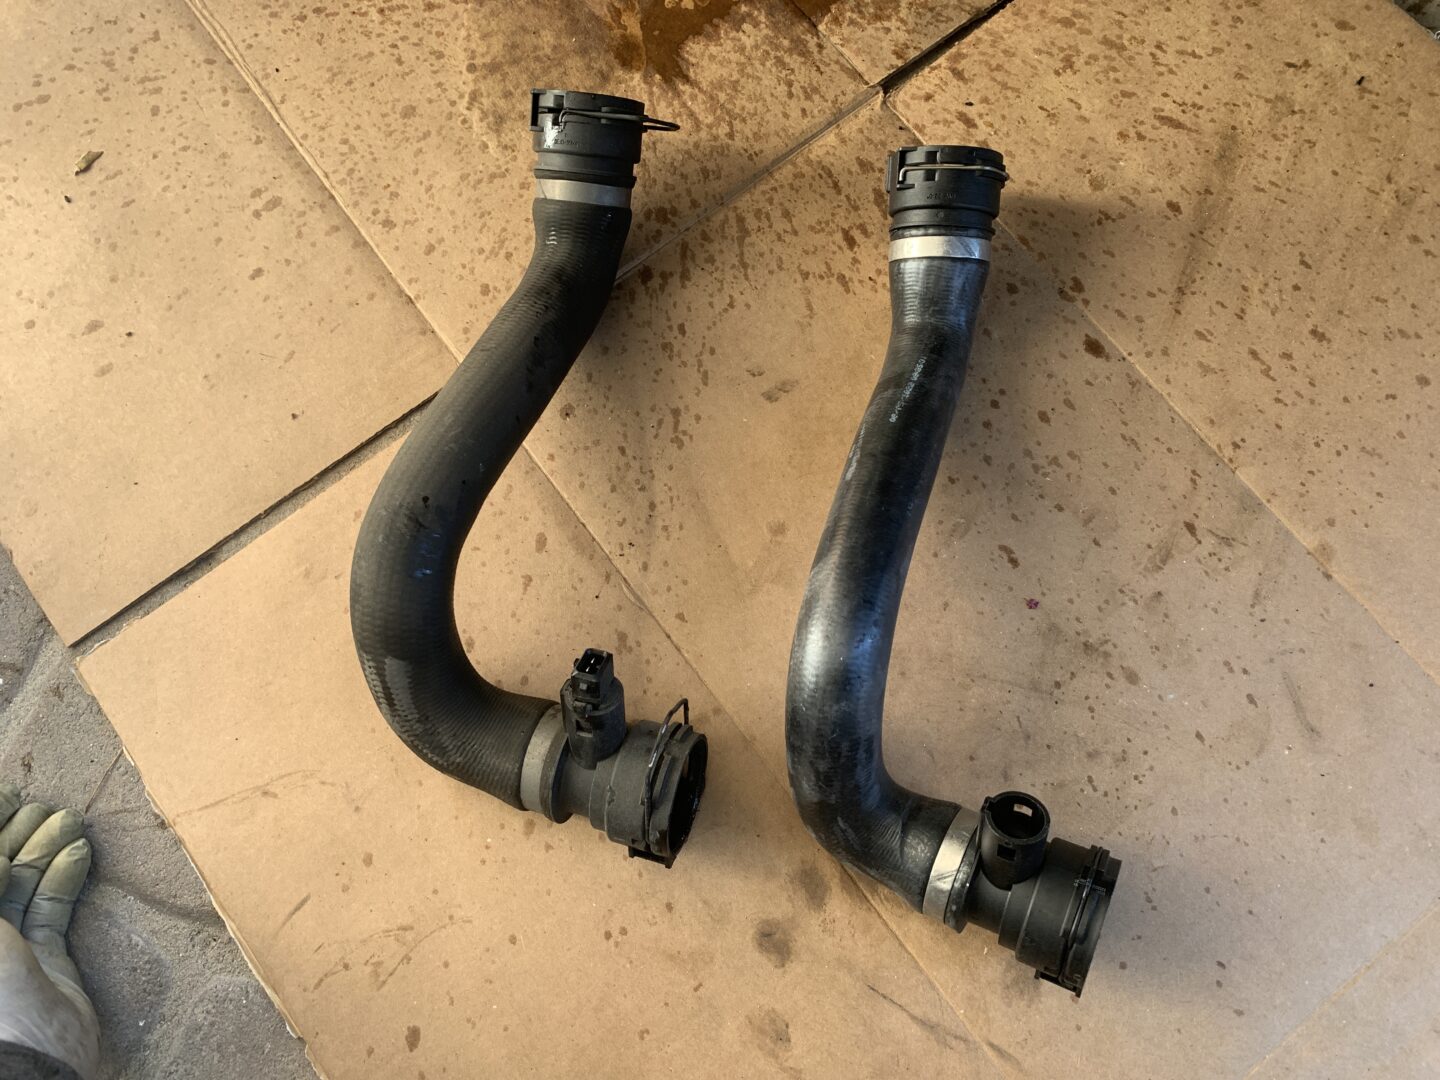
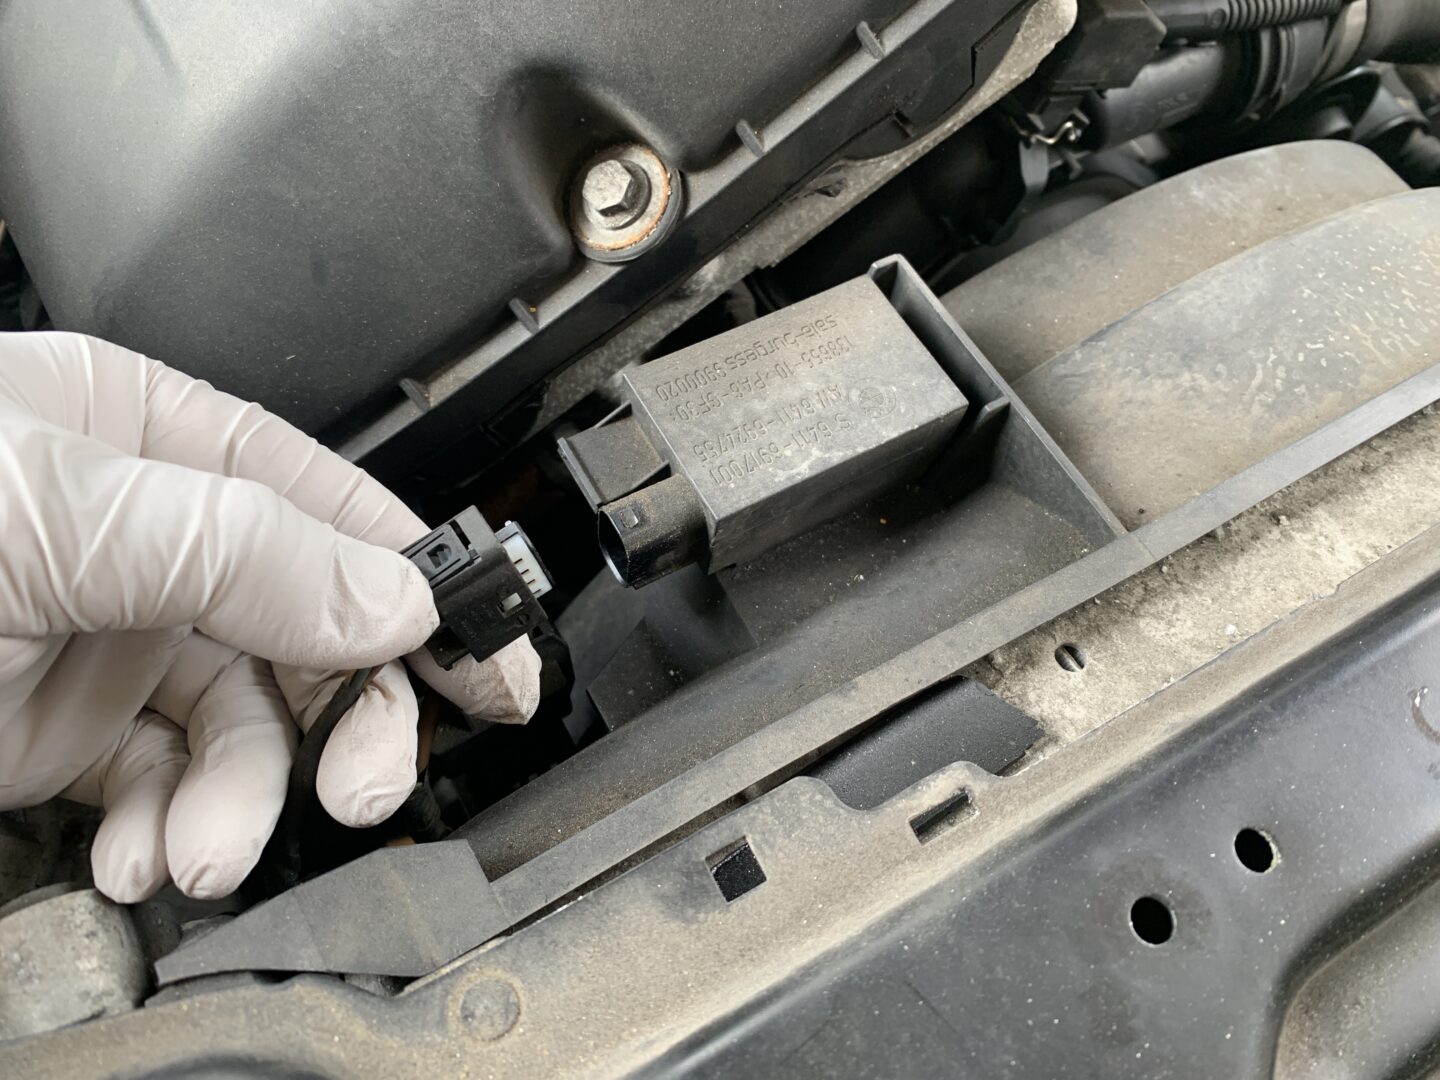
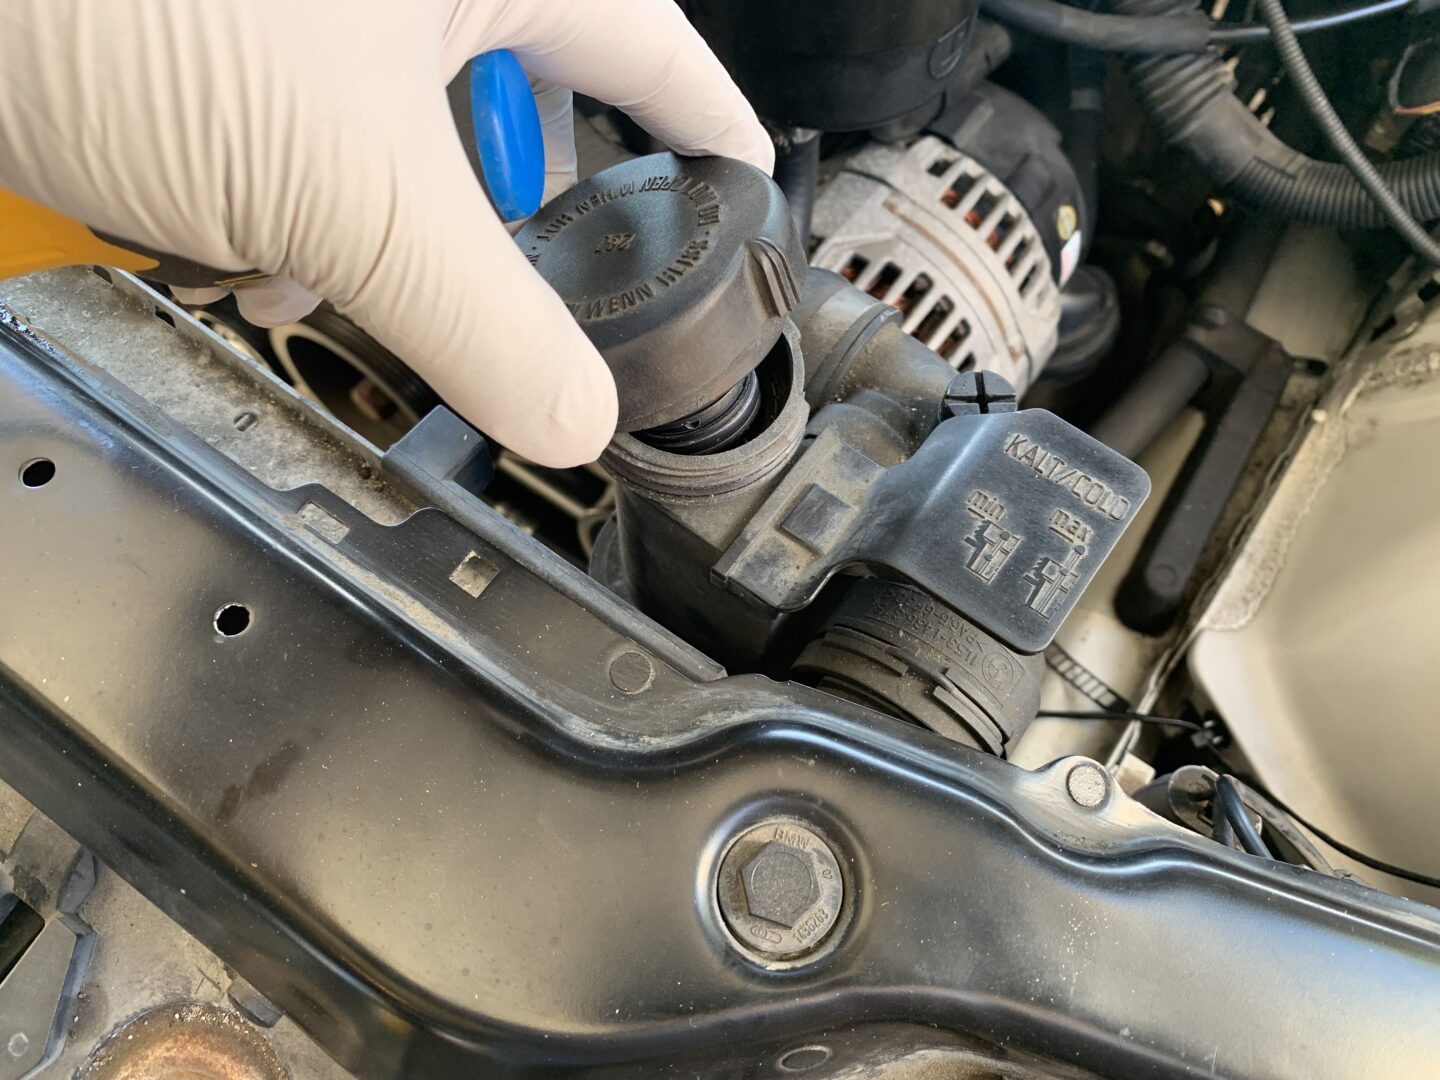
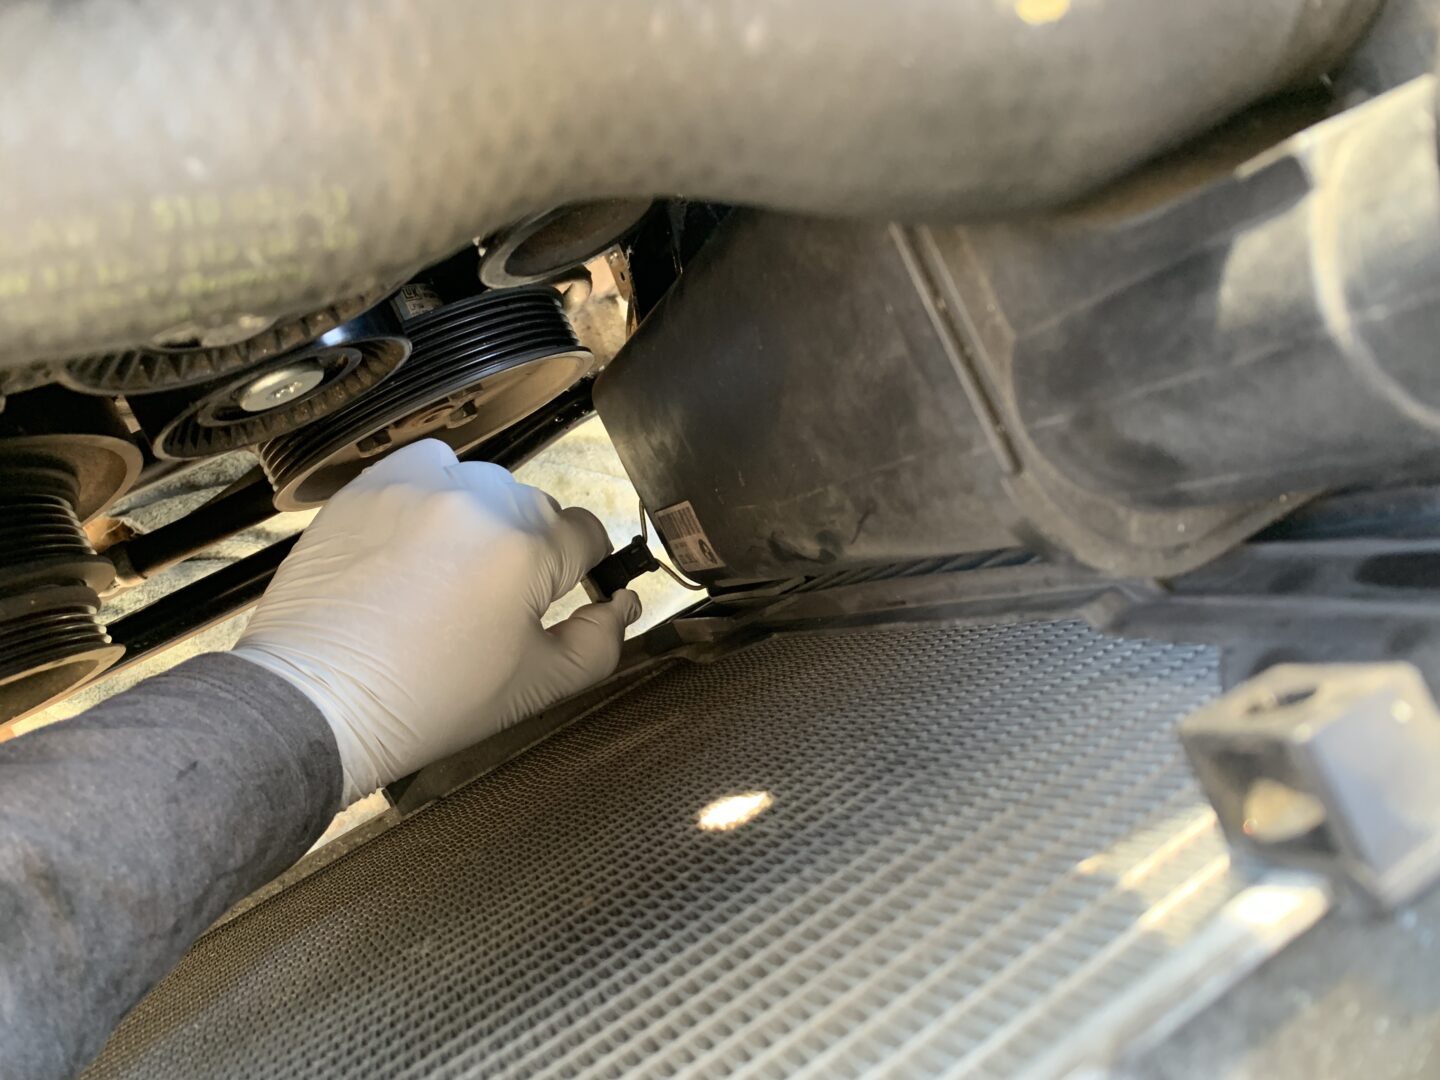
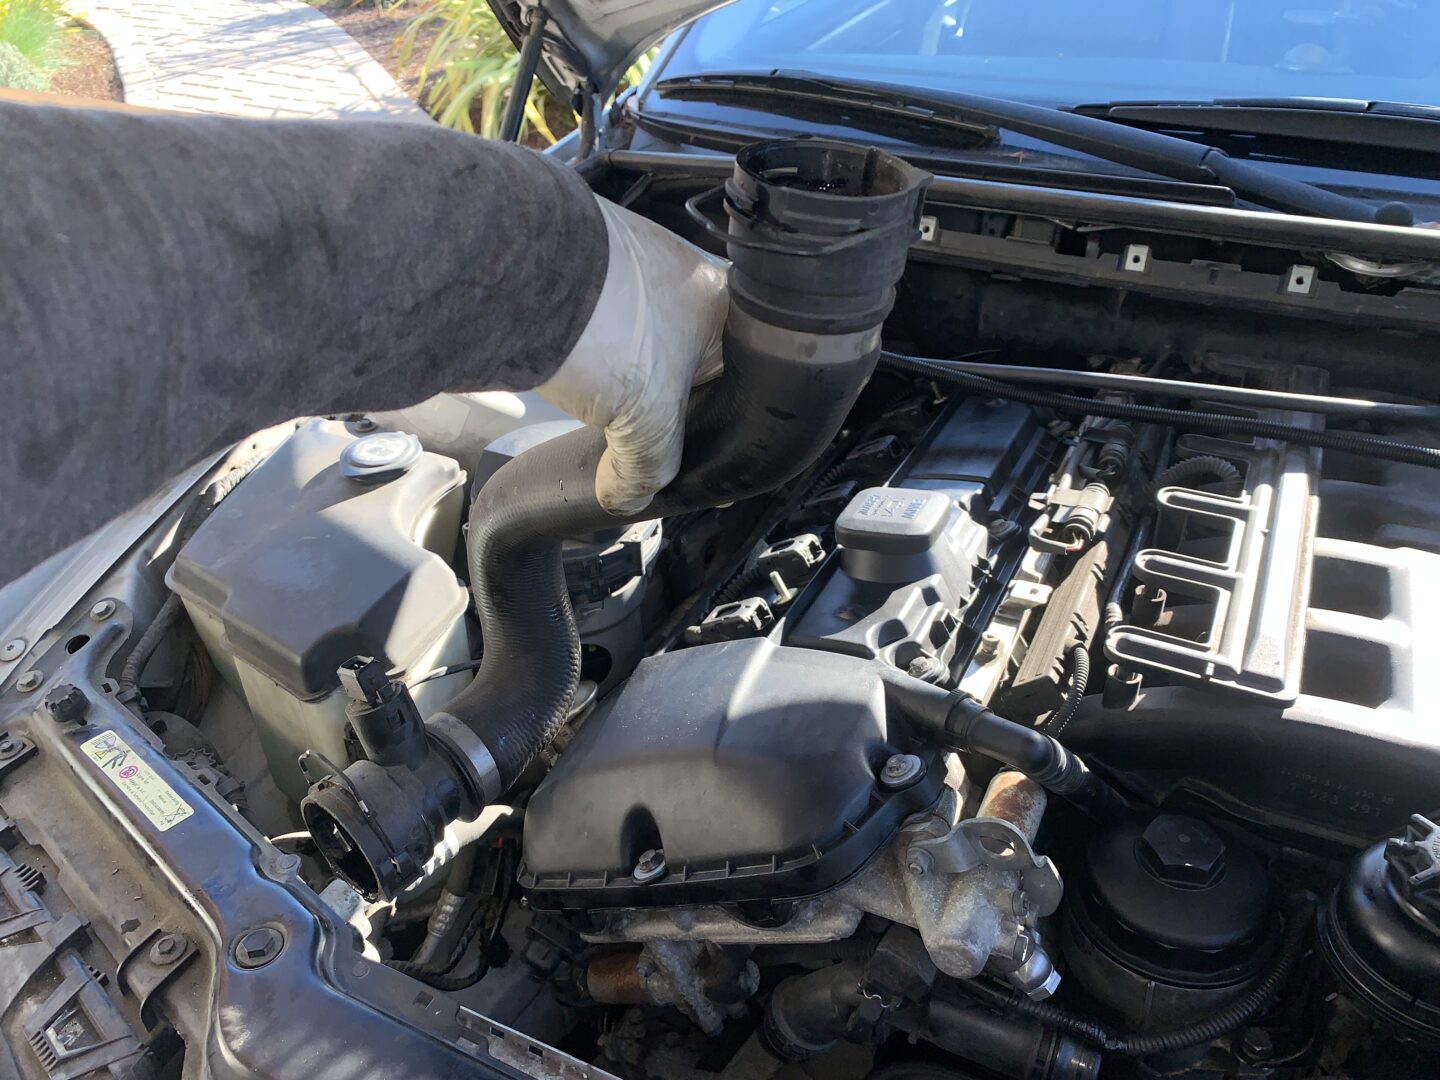
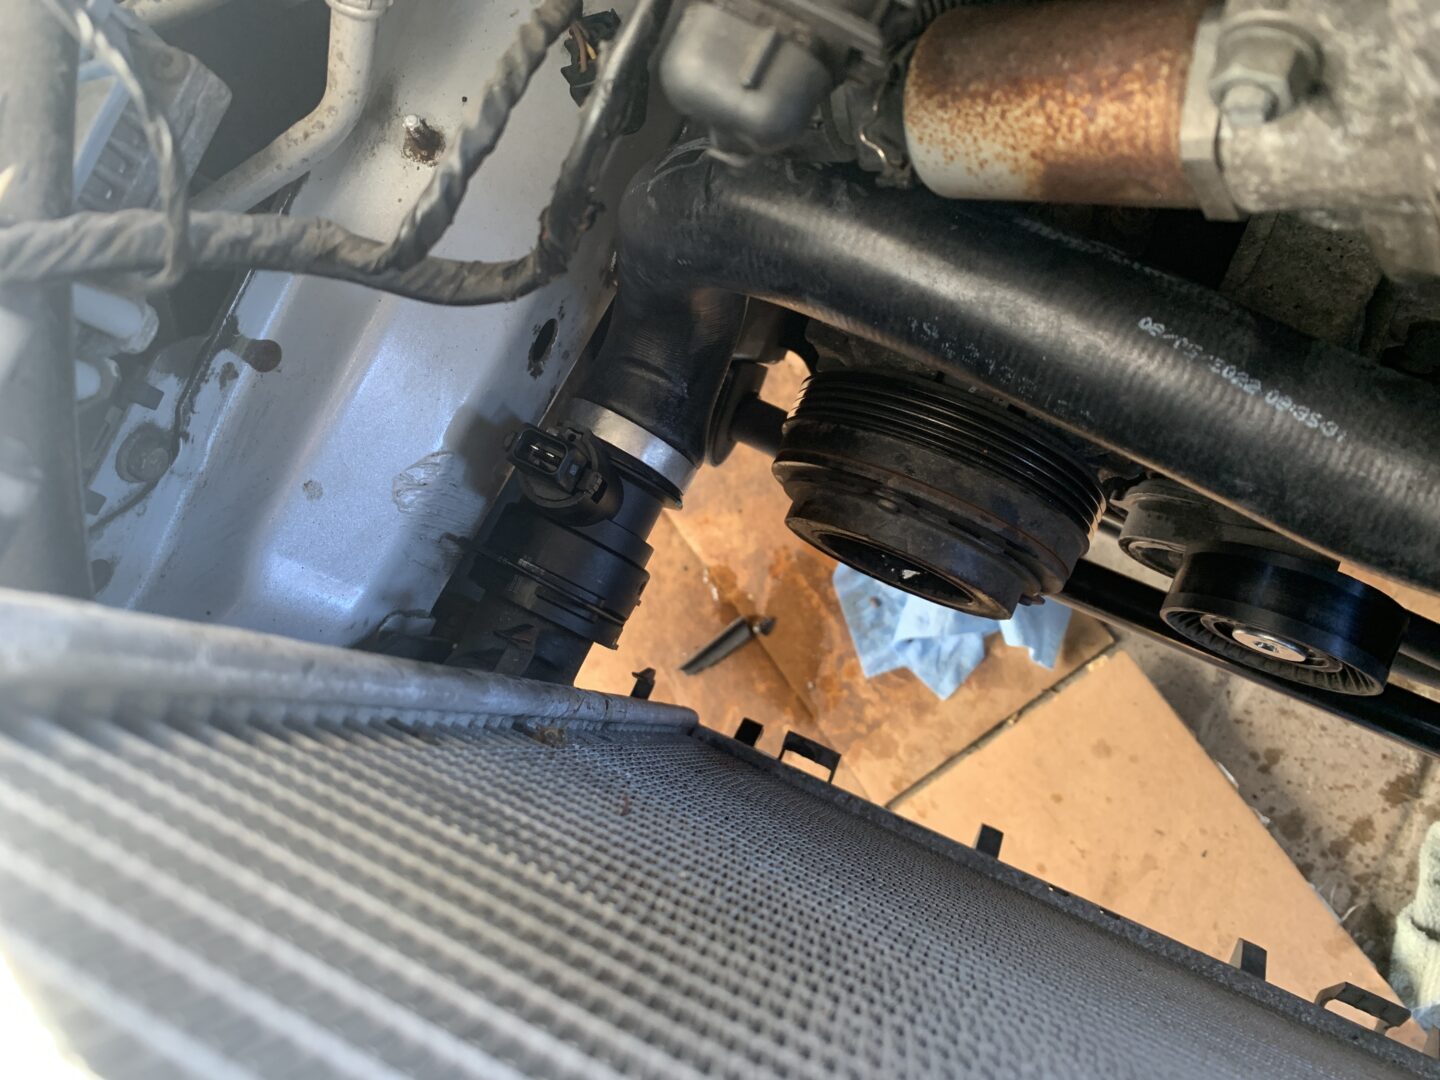
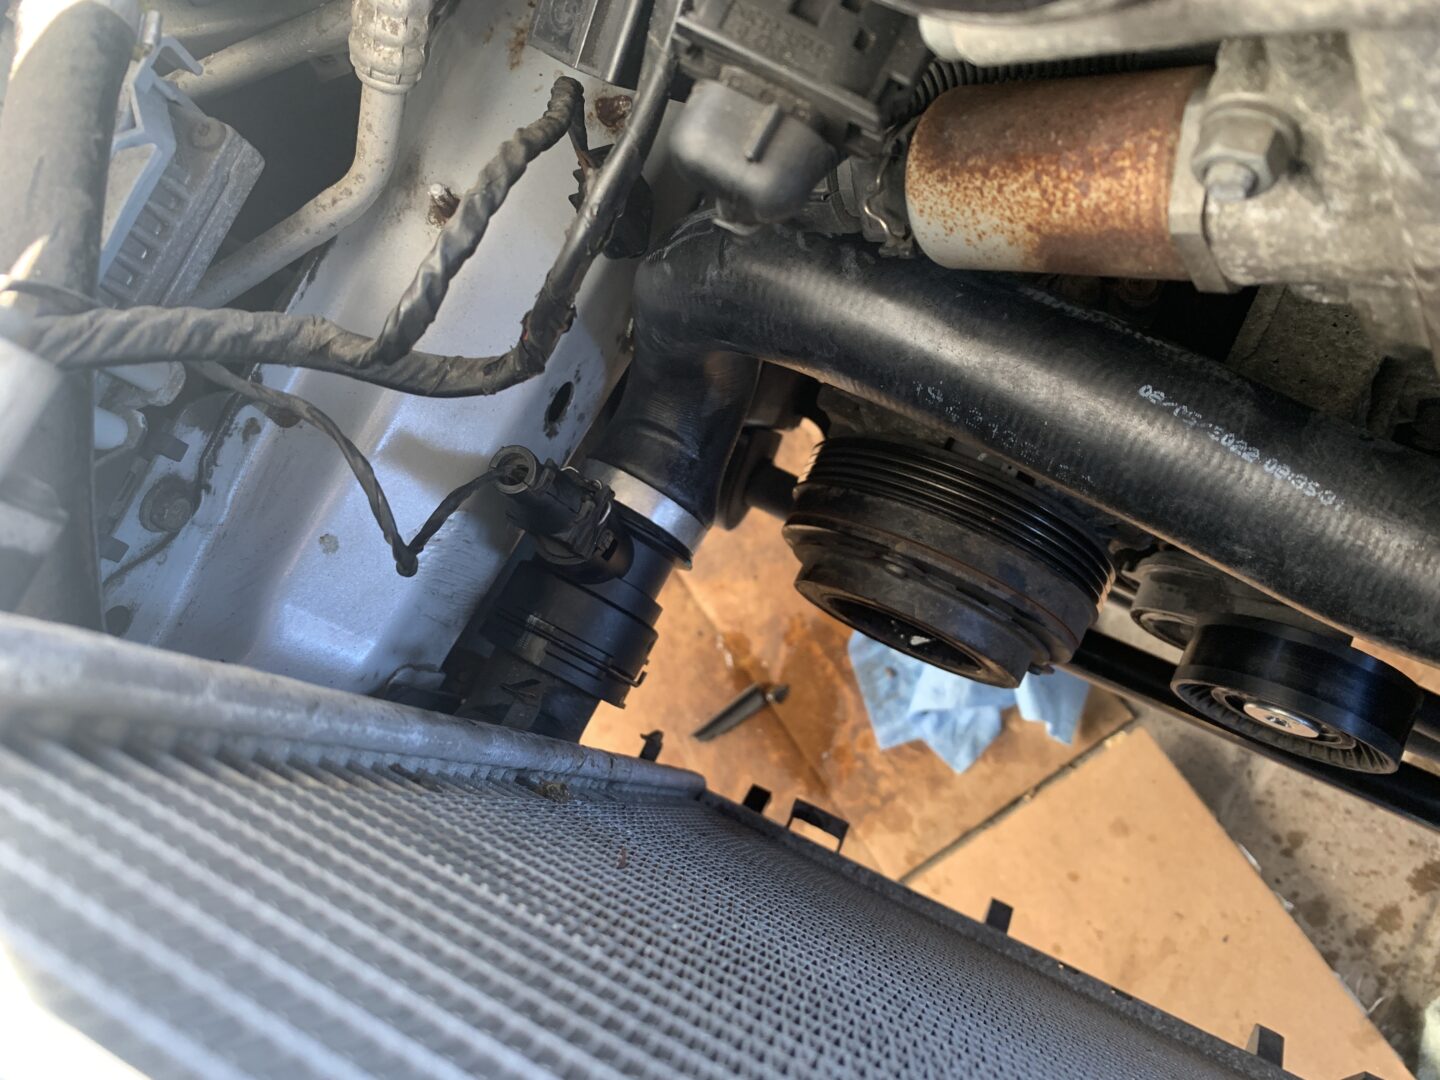
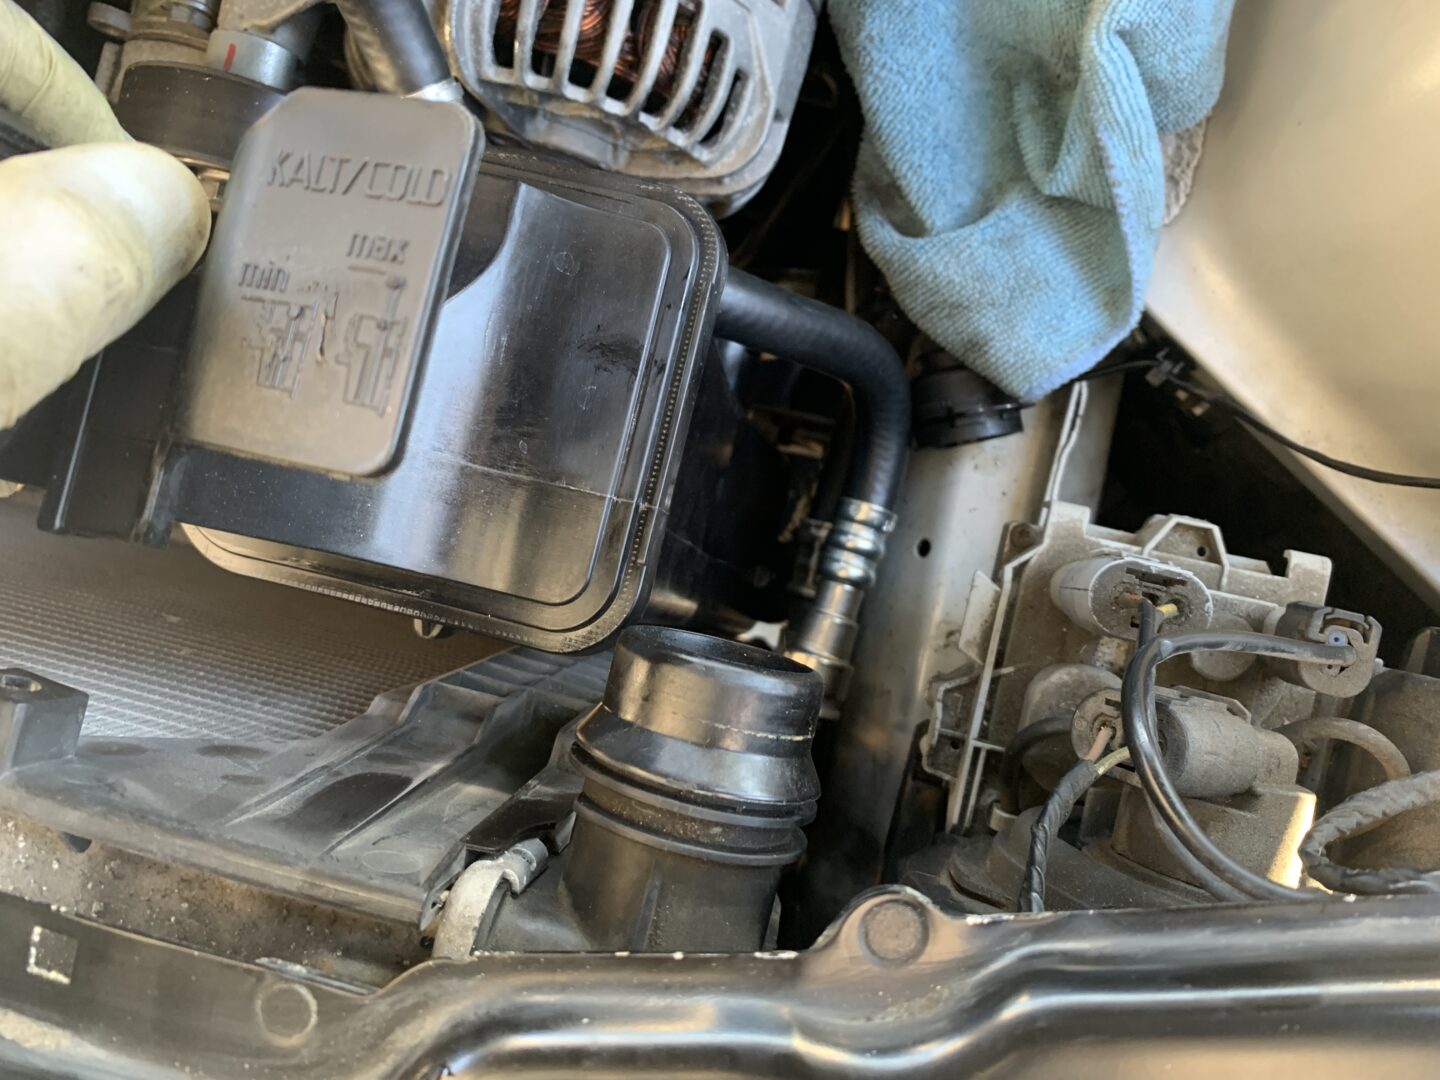
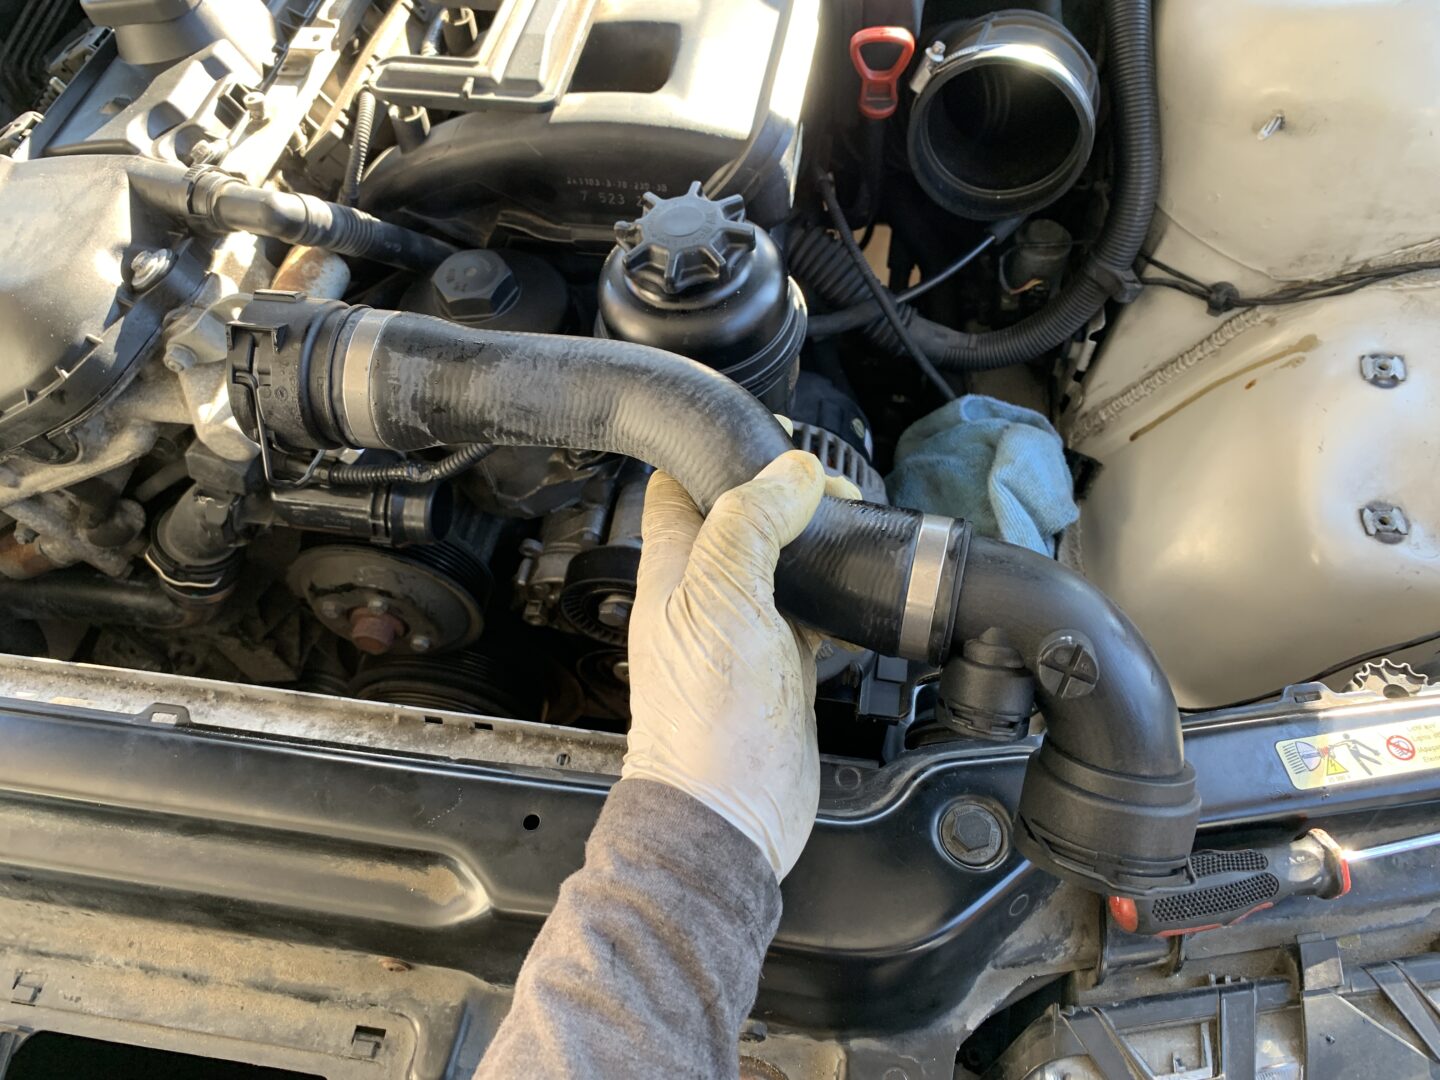
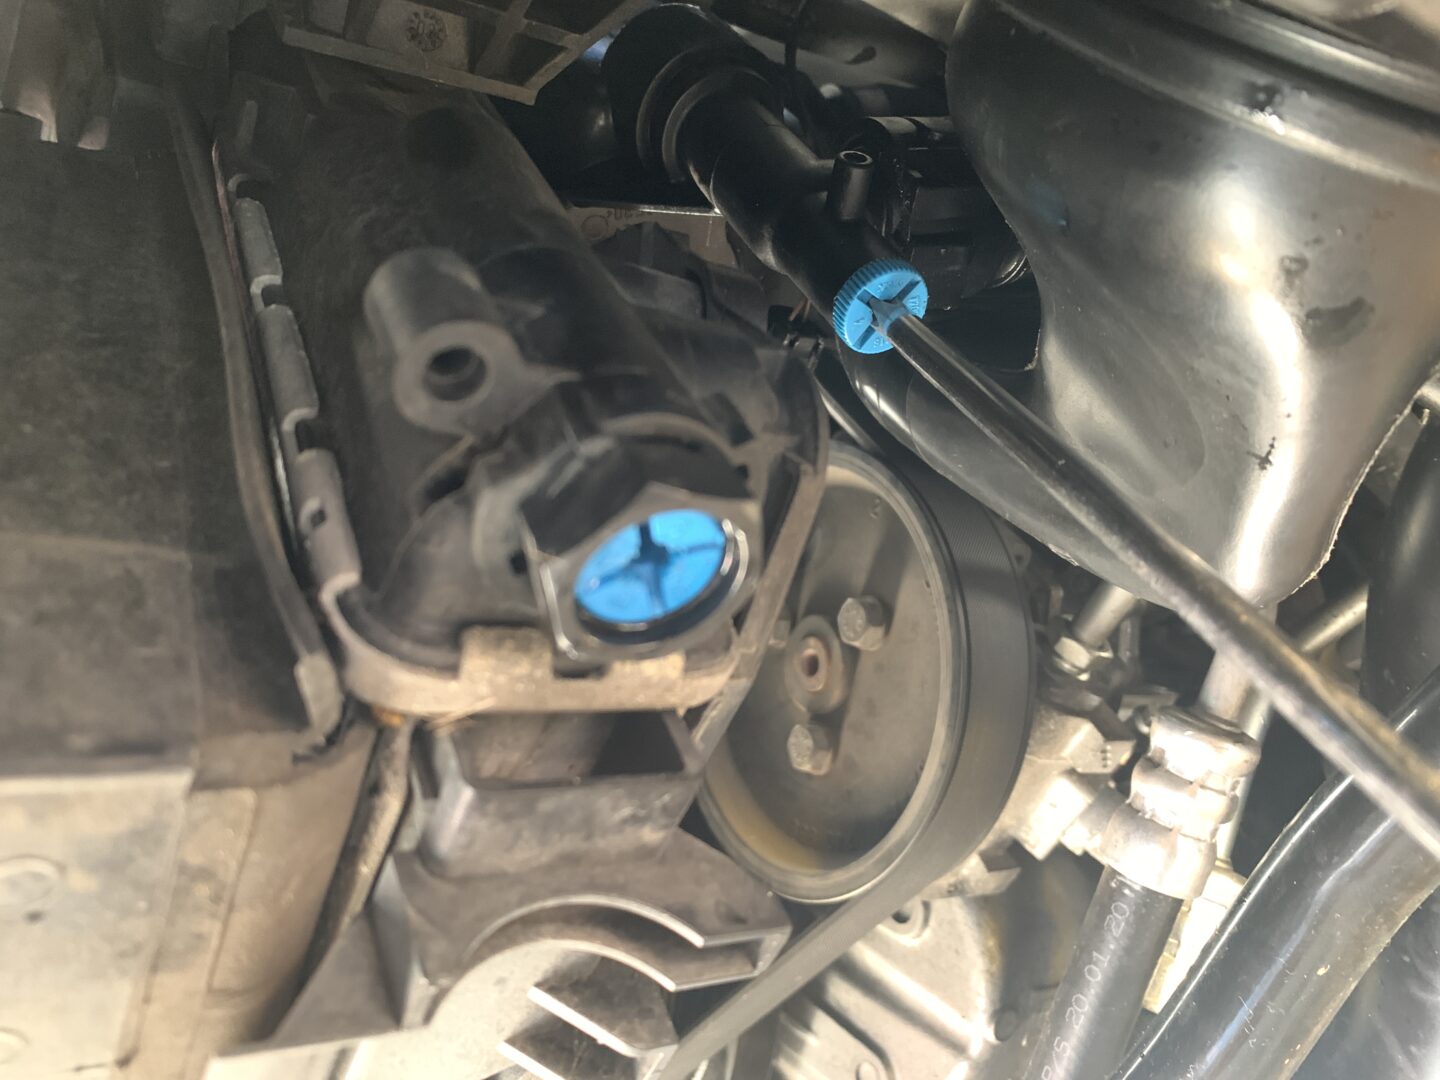
If it is there, cut the tie that is securing the plastic wire loom to the radiator hose. We’ll start with the upper radiator hose. Release the retaining clip and pulling the hose straight off; it helps to wiggle it just slightly to work it loose before pulling it off. This hose connects on the other end to the expansion tank, which is also removed in the same way.
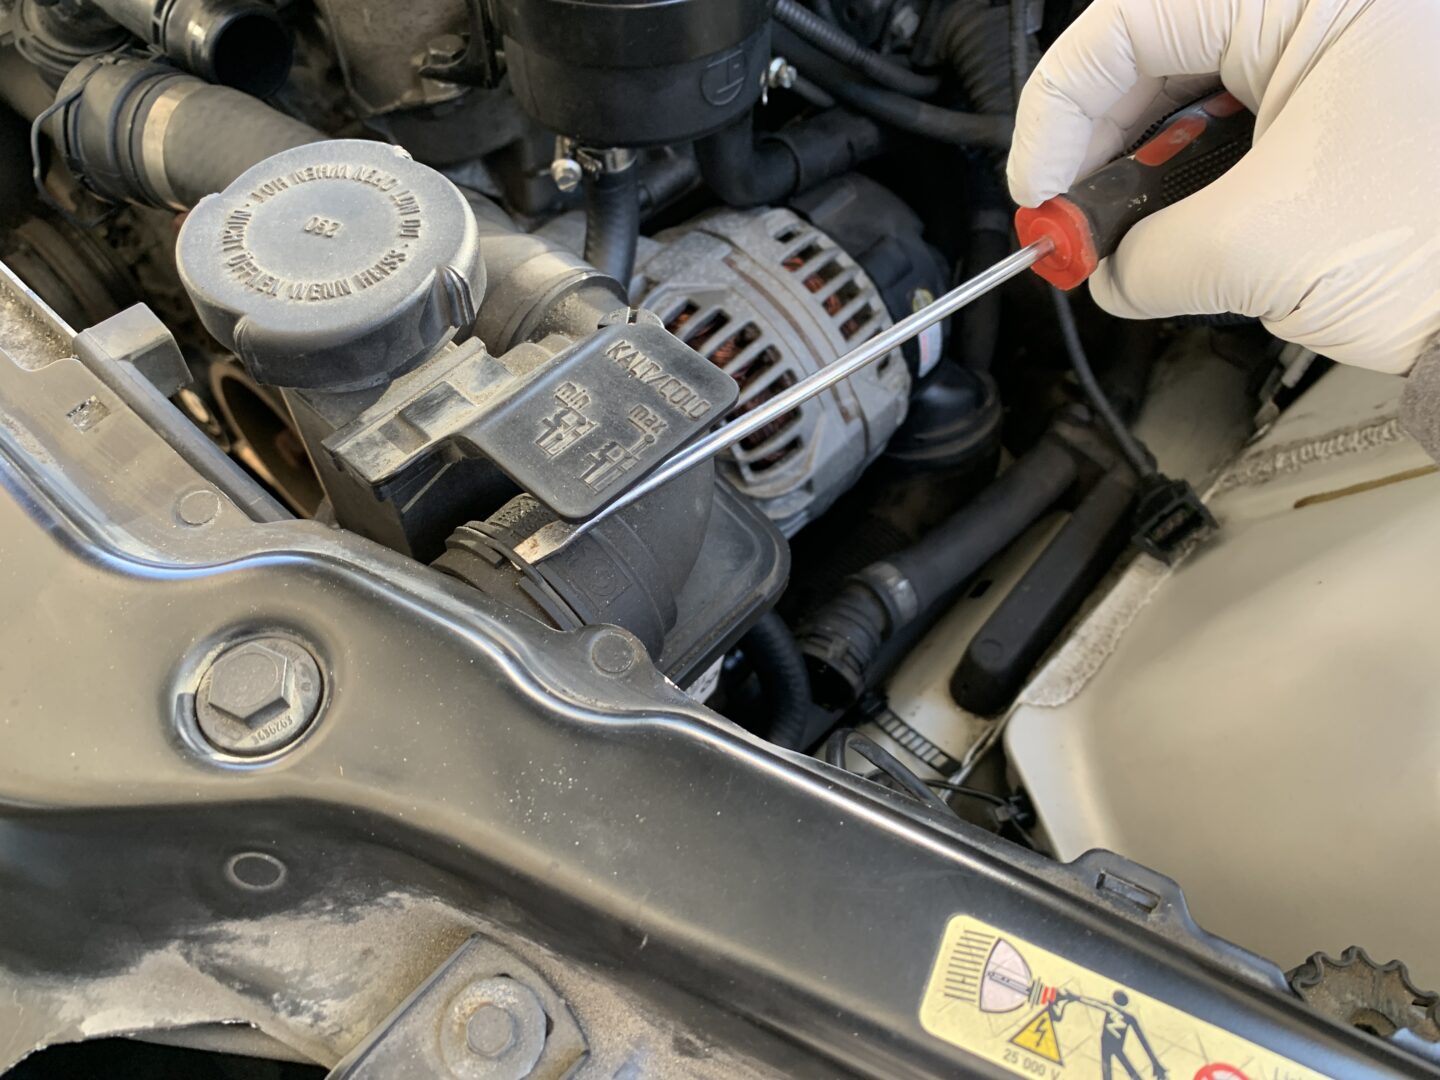
The upper radiator hose also has another connection on the expansion tank right by the radiator cap. Life on the release tab with a flat head screwdriver and pull the hose off. The upper radiator hose should be able to be freed at this point.
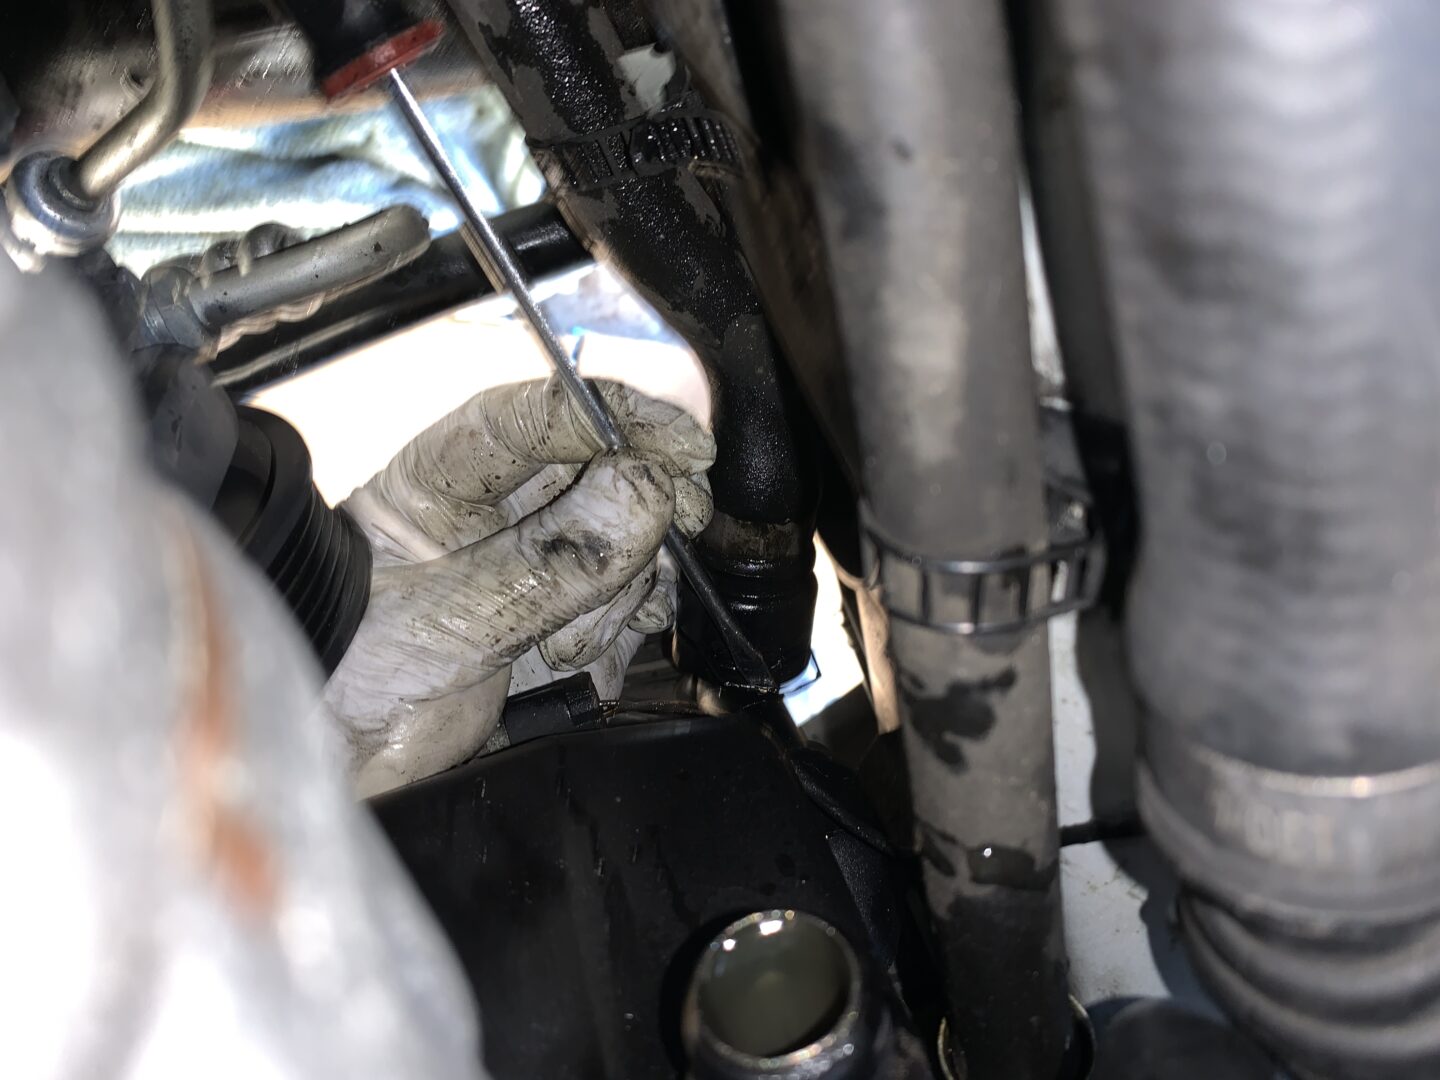
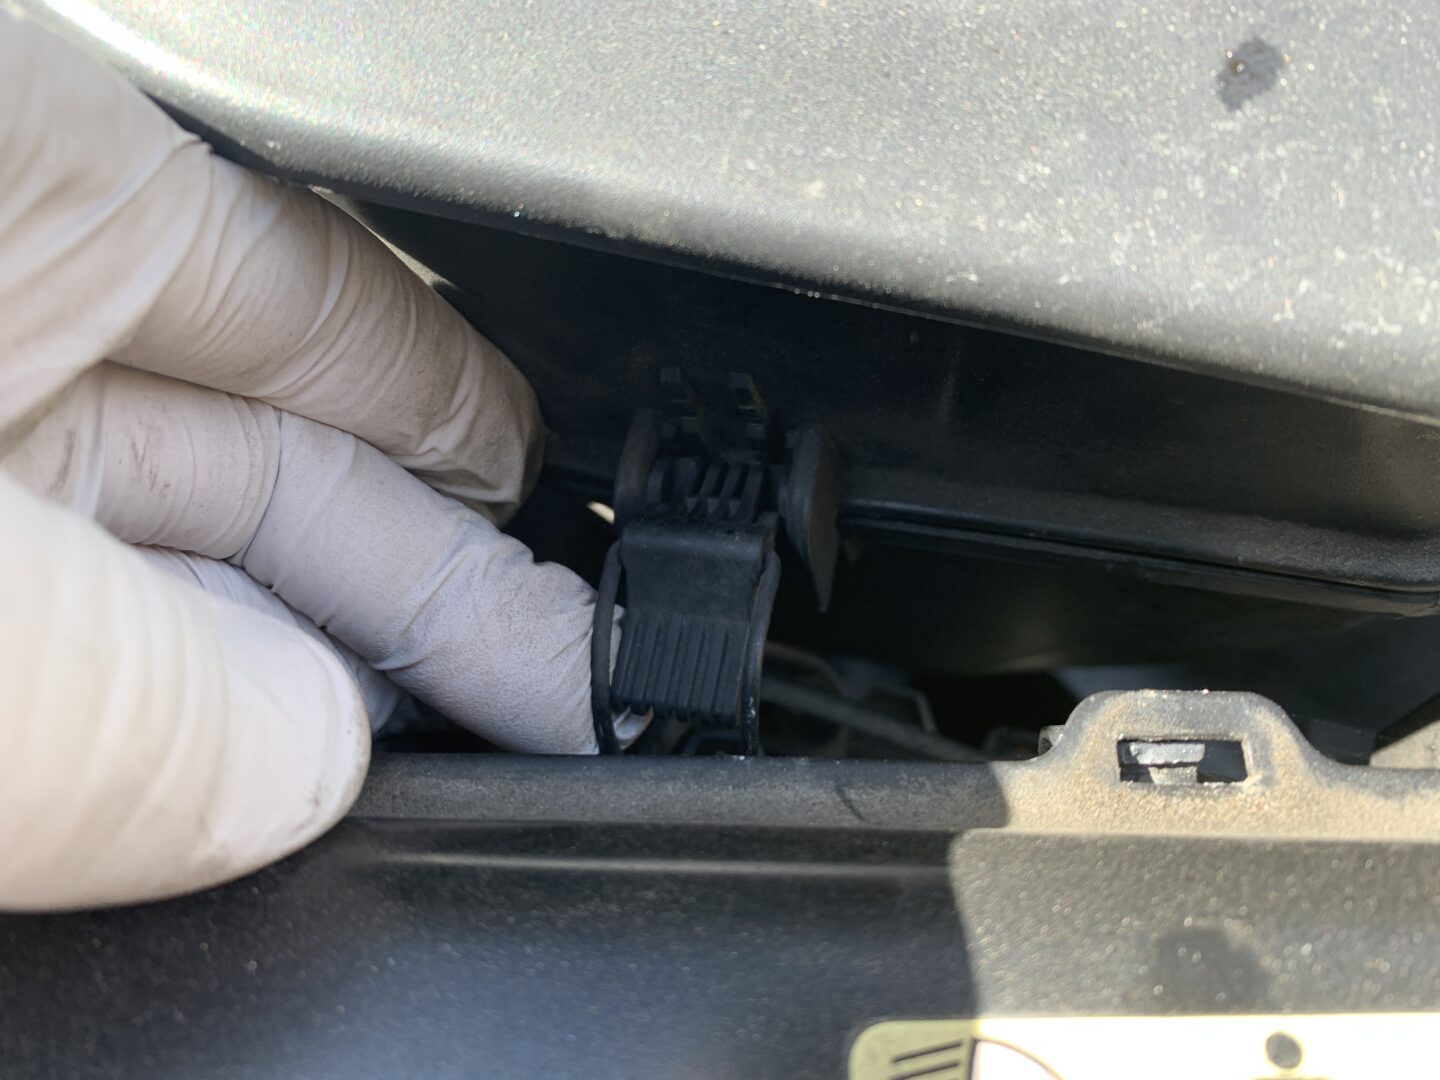
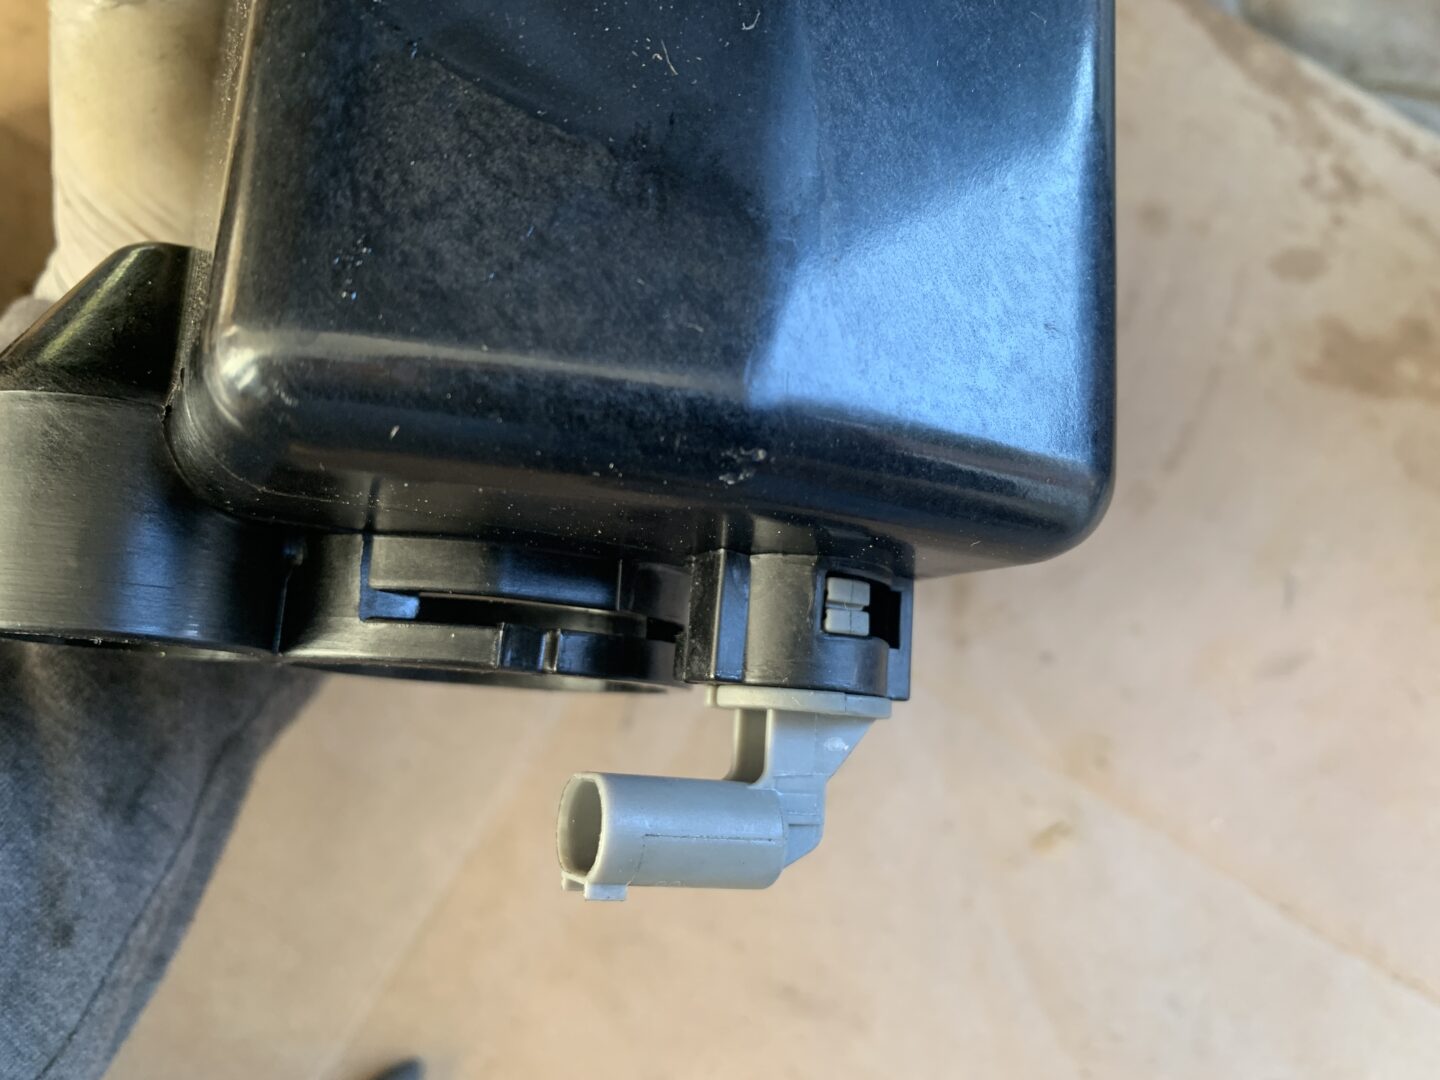
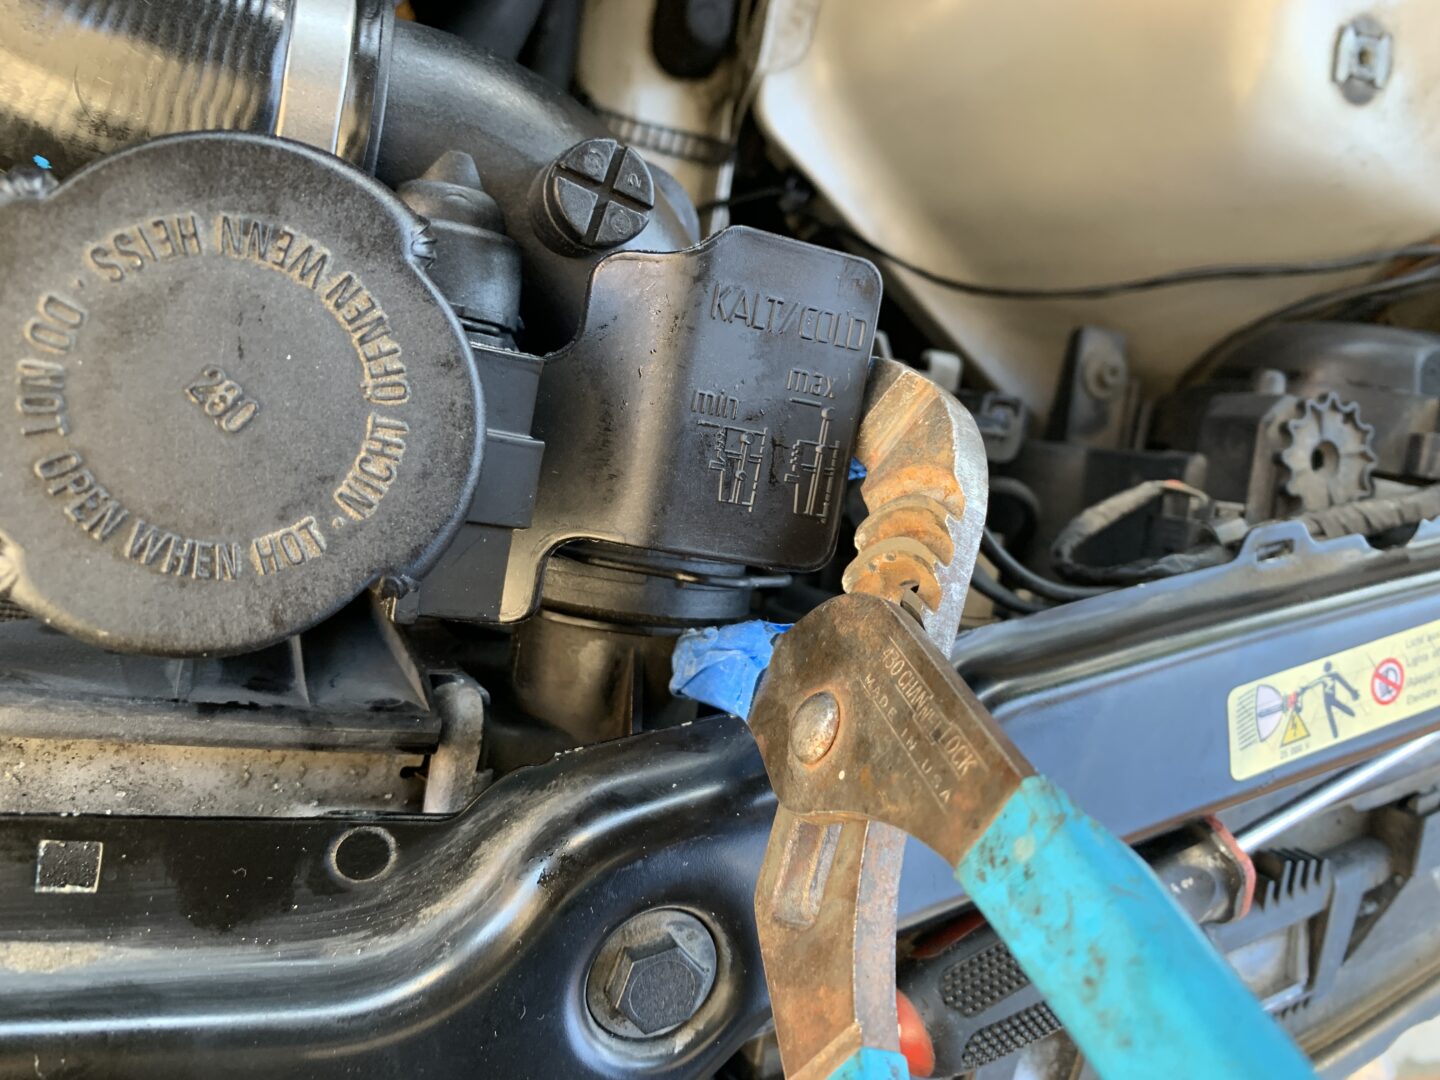
To help with the removal of the hose, you can pry with a flat head screwdriver very carefully as shown. Unclip the electrical connector for the expansion tank sensor. Pull the release tab for the expansion tank at the bottom of the of the expansion tank.

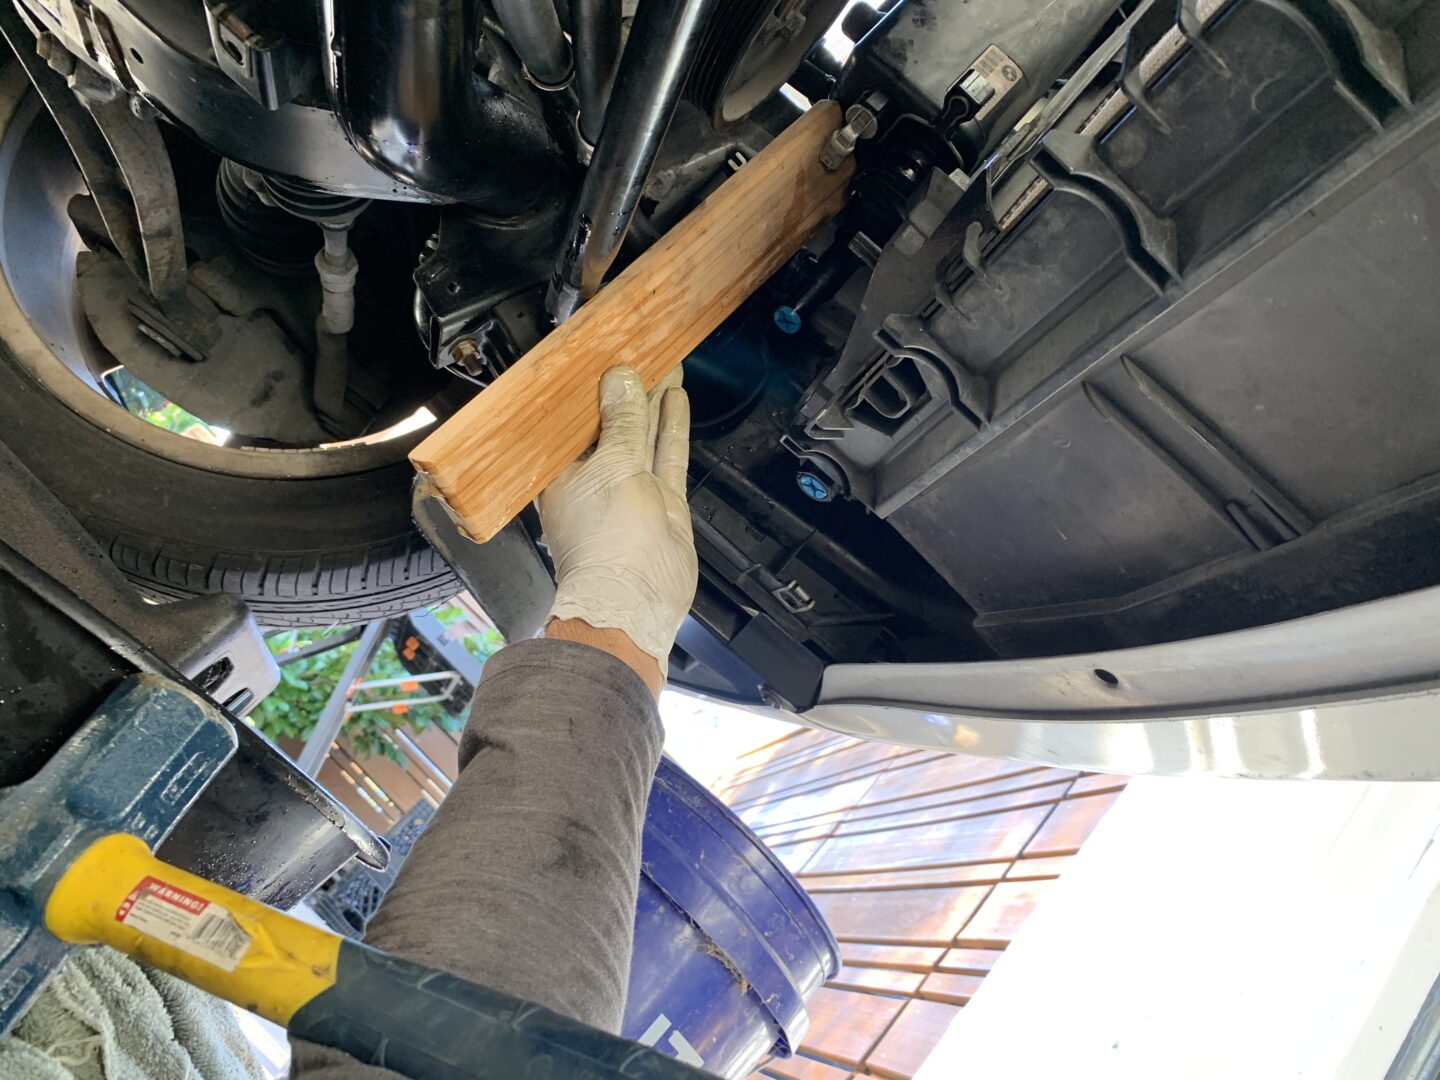
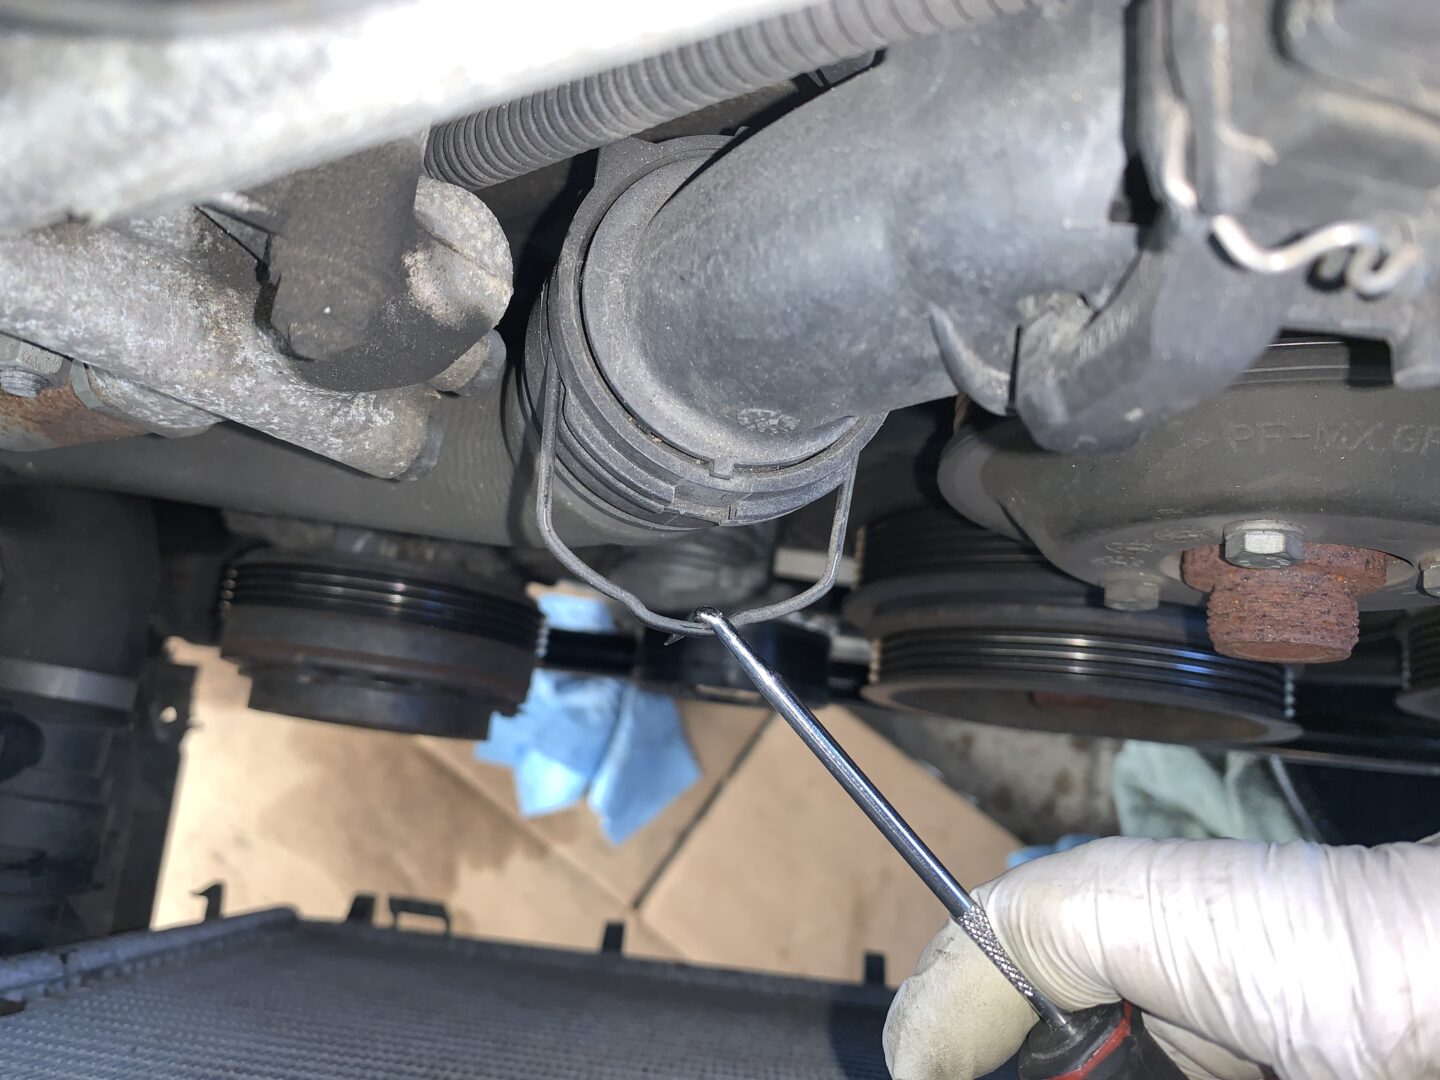
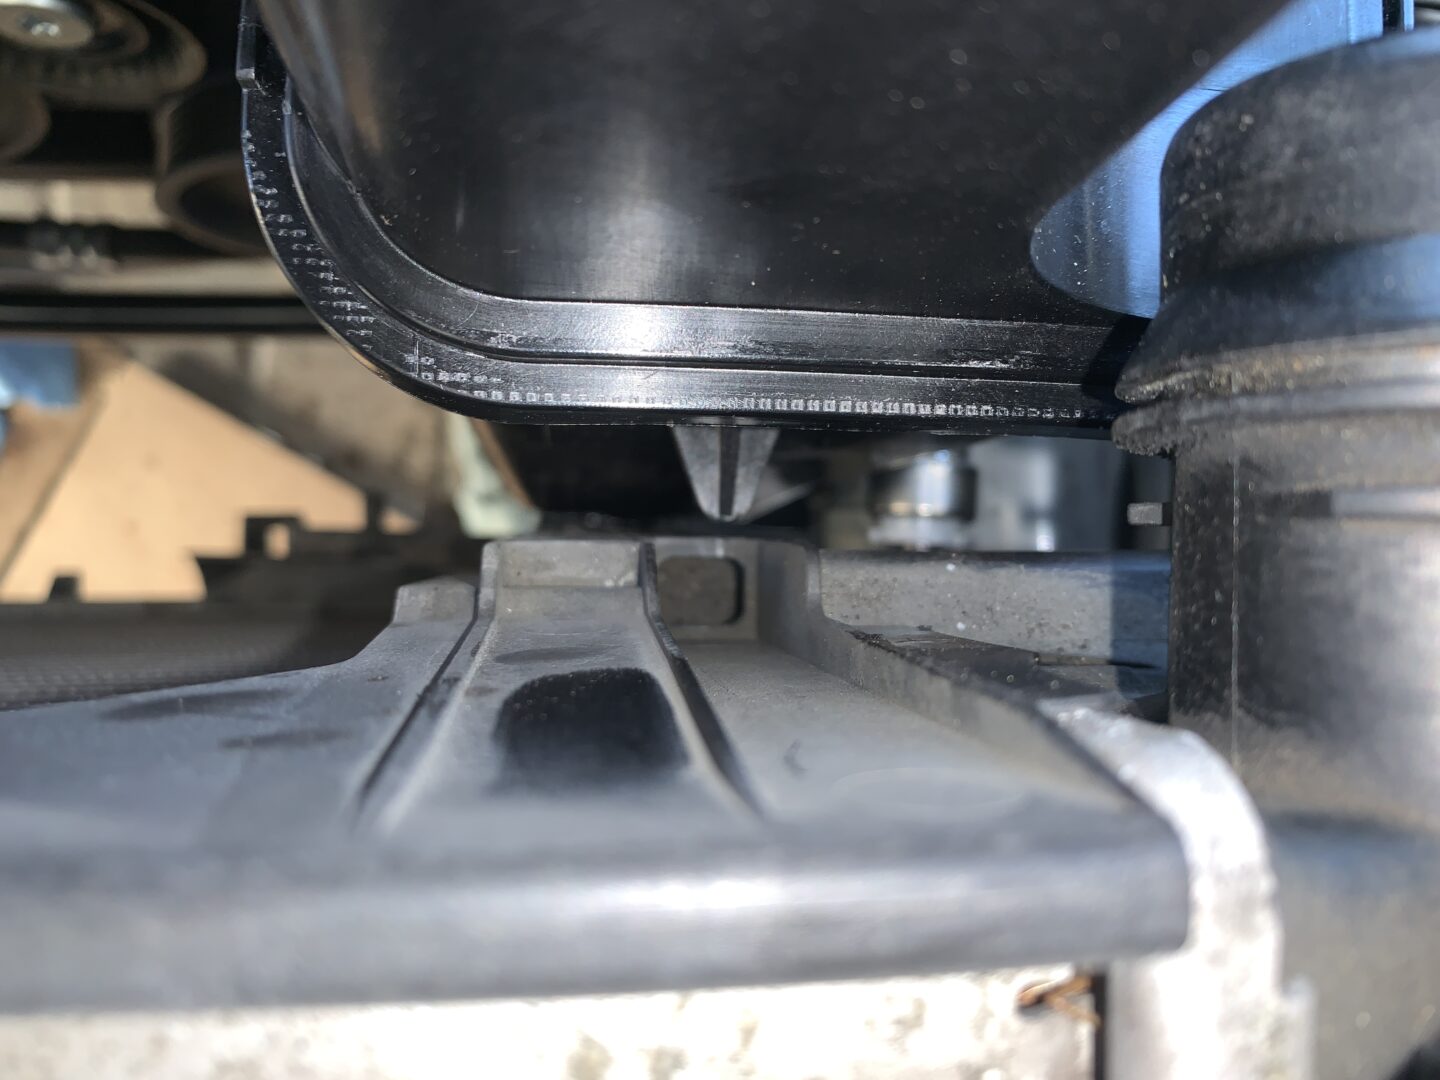
Although the expansion tank should now be free, it is seated into the bottom opening. I used a 2×4 to brace against the bottom of the expansion tank from the bottom of the car. Then hit the 2×4 with a hammer to knock it up free the expansion tank so it can be pulled out.
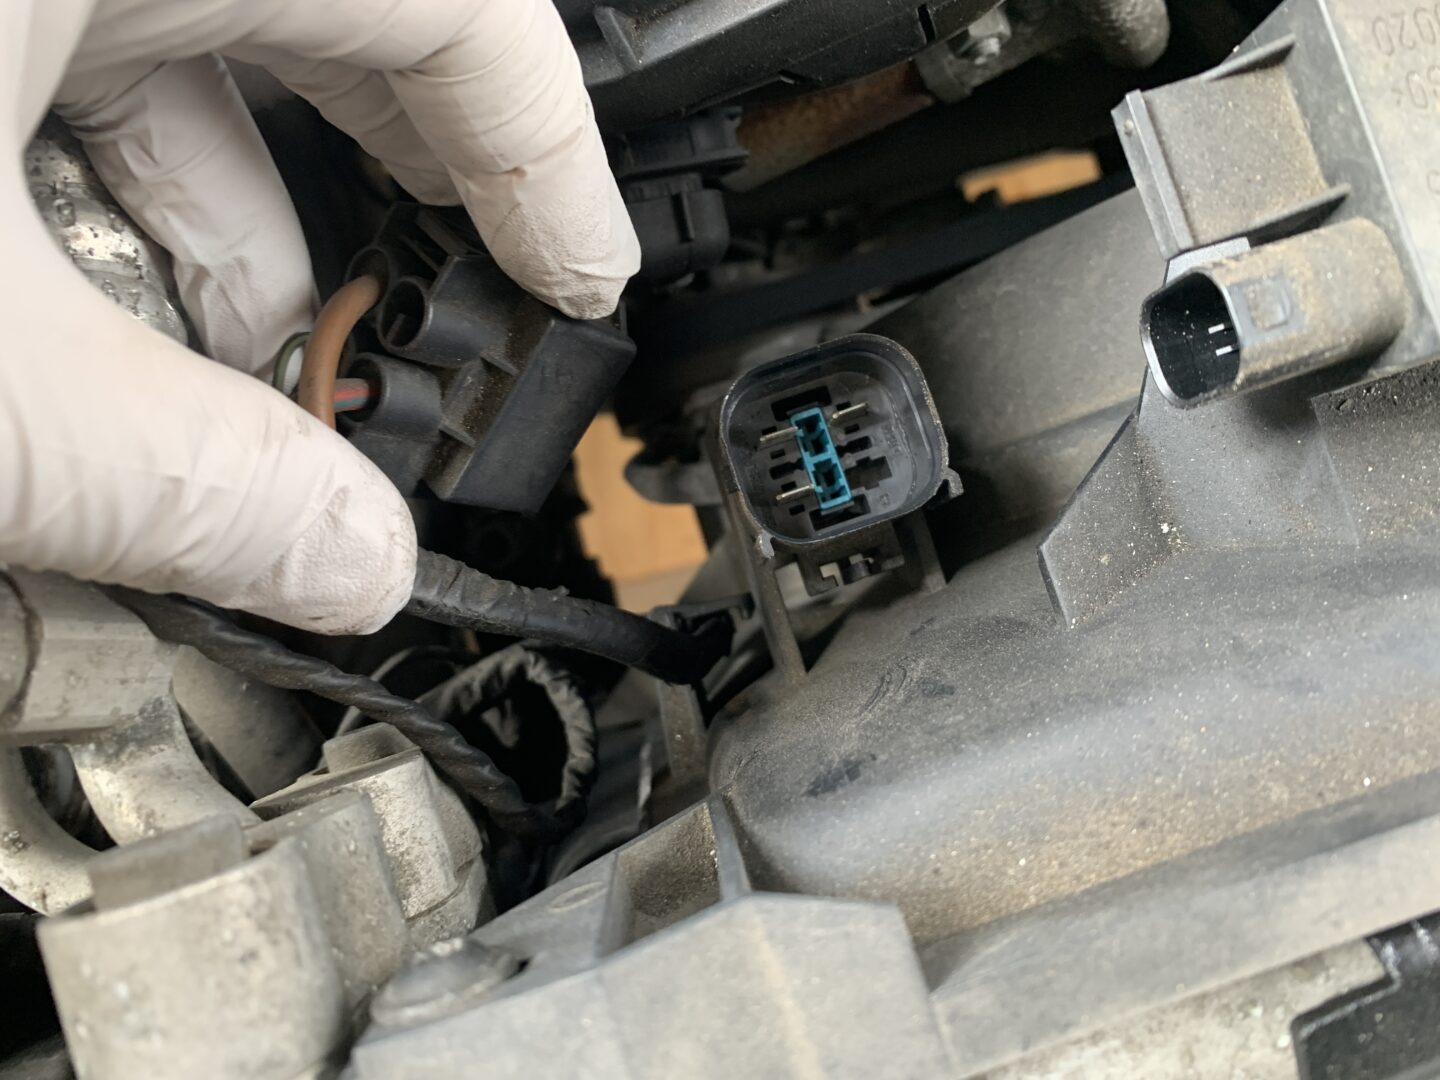
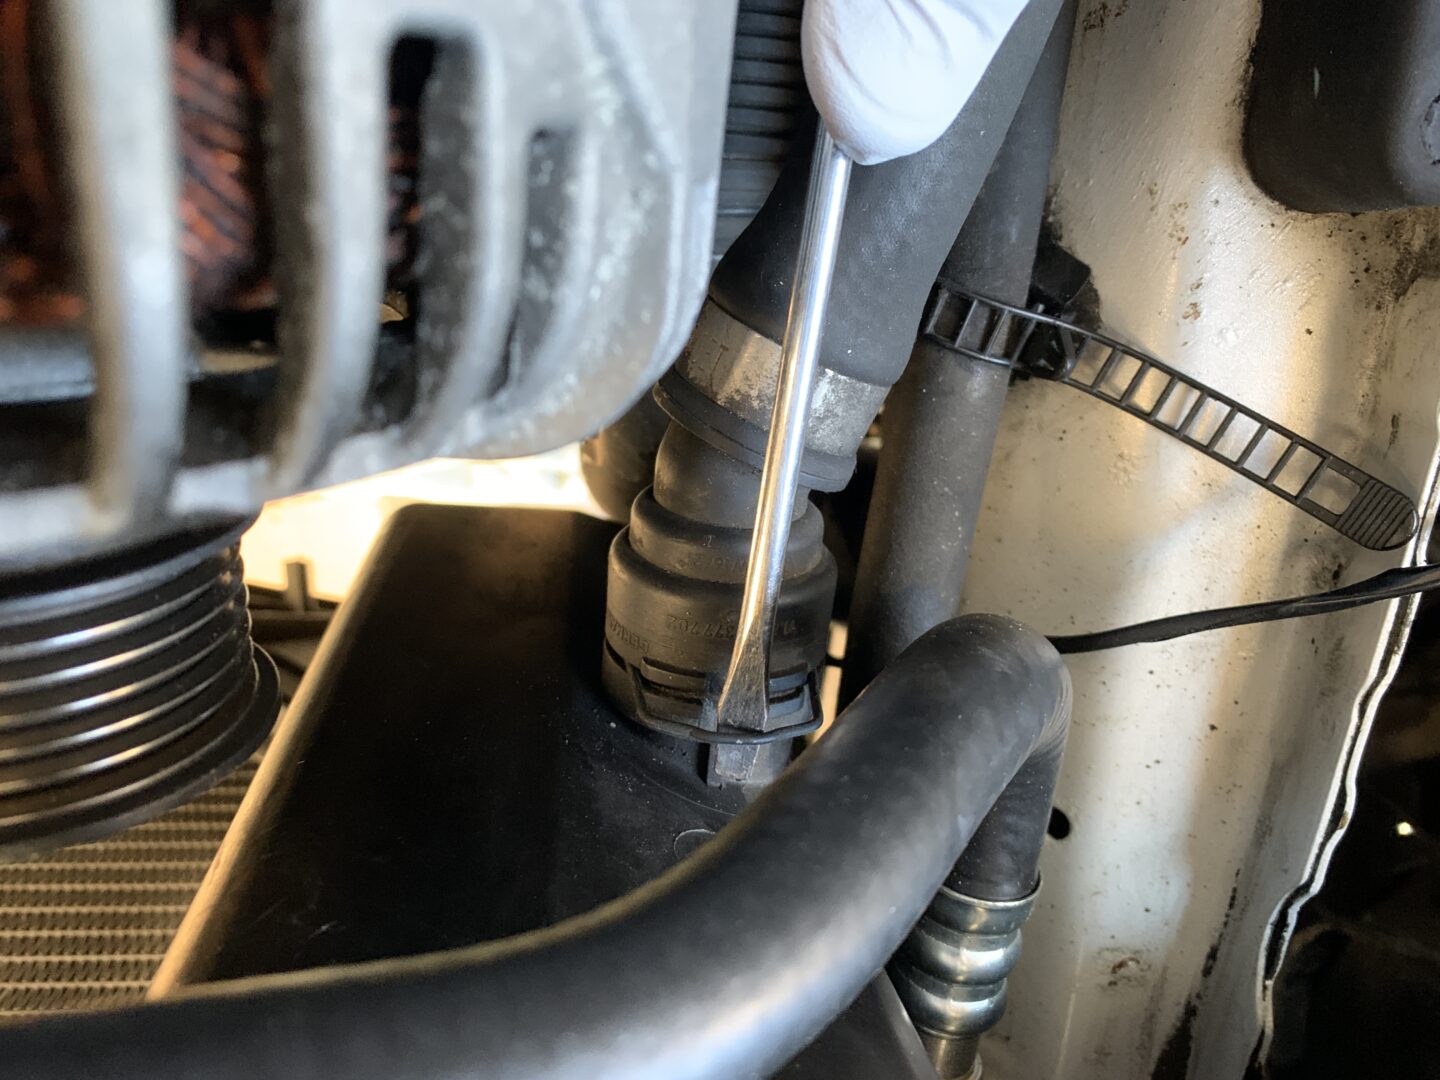
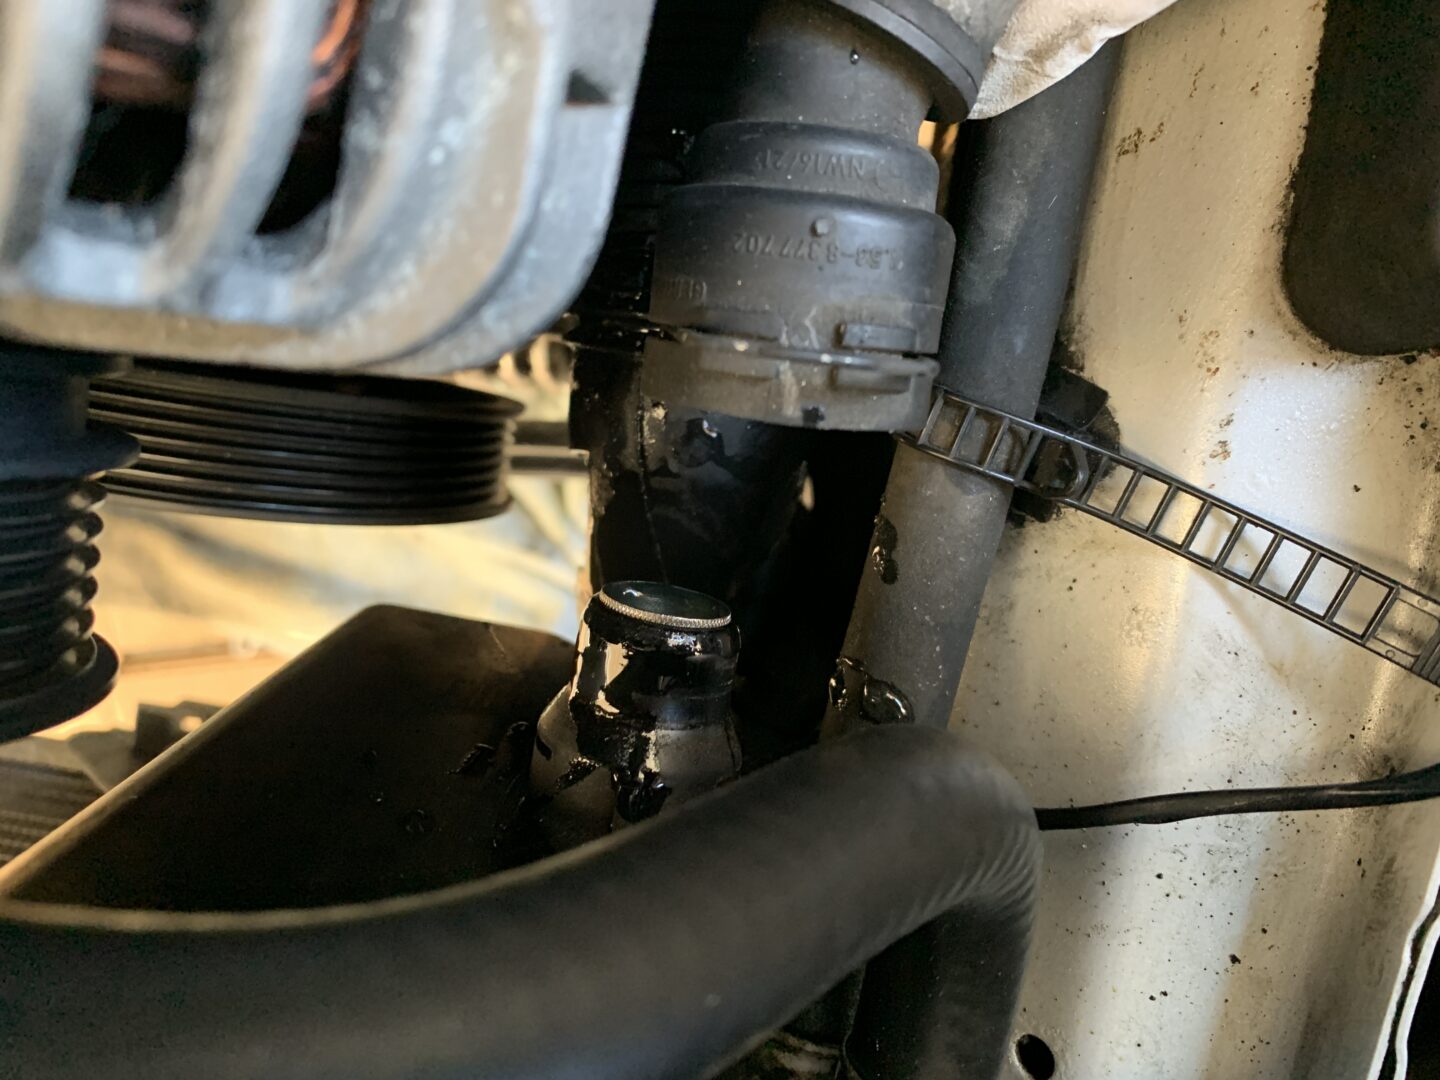
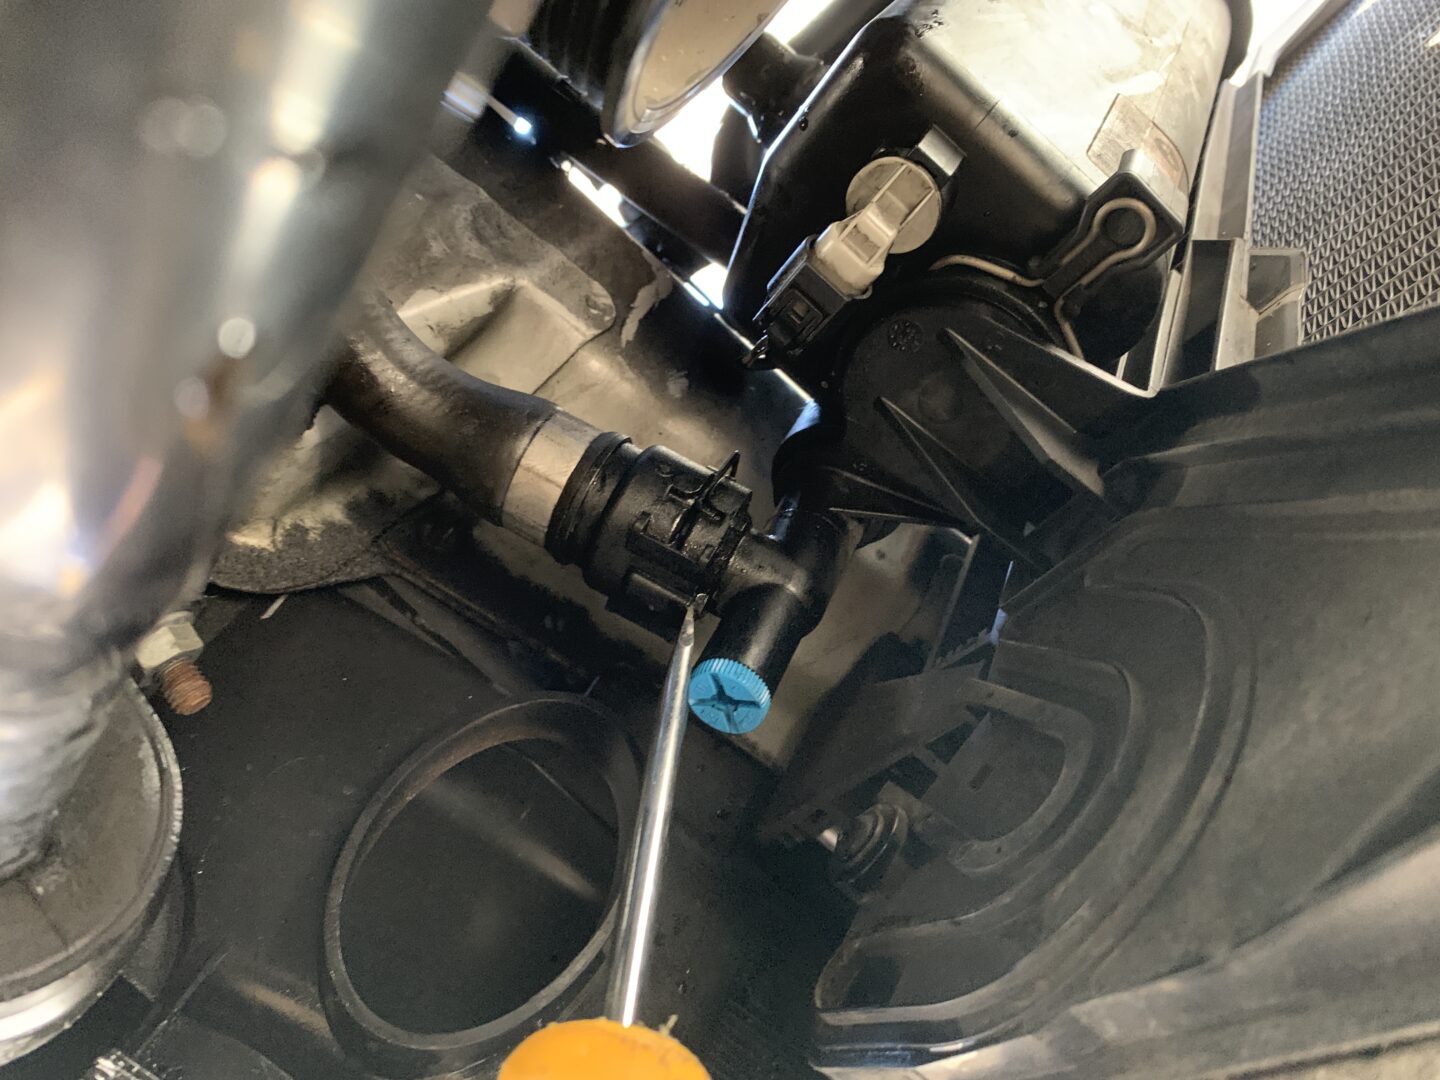
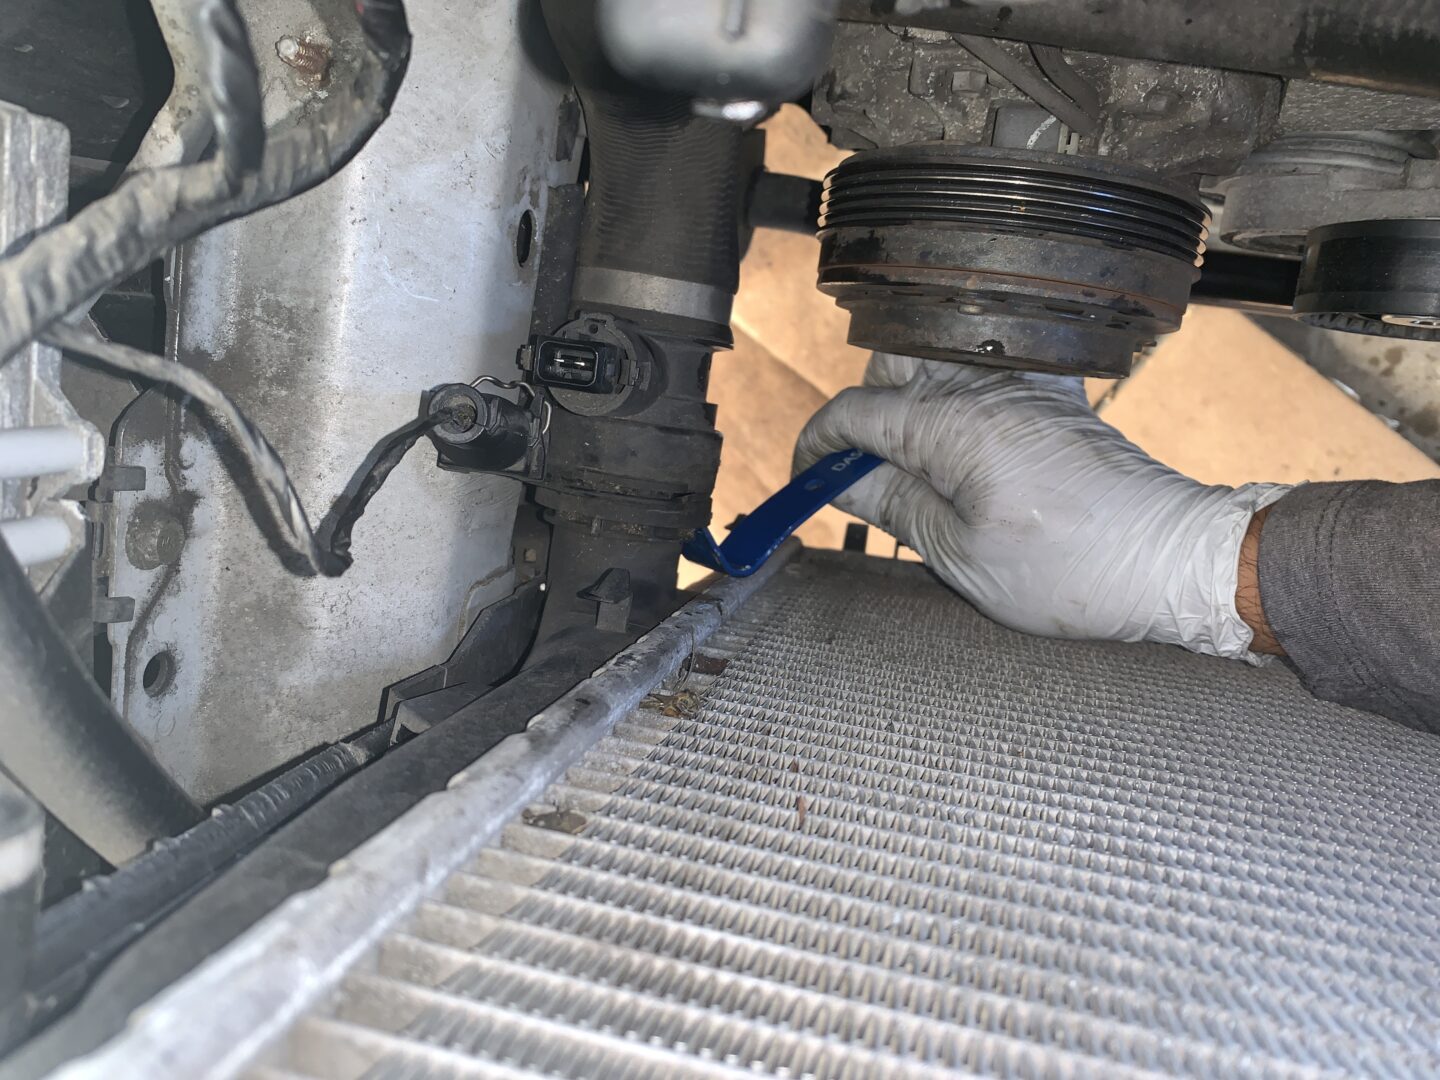
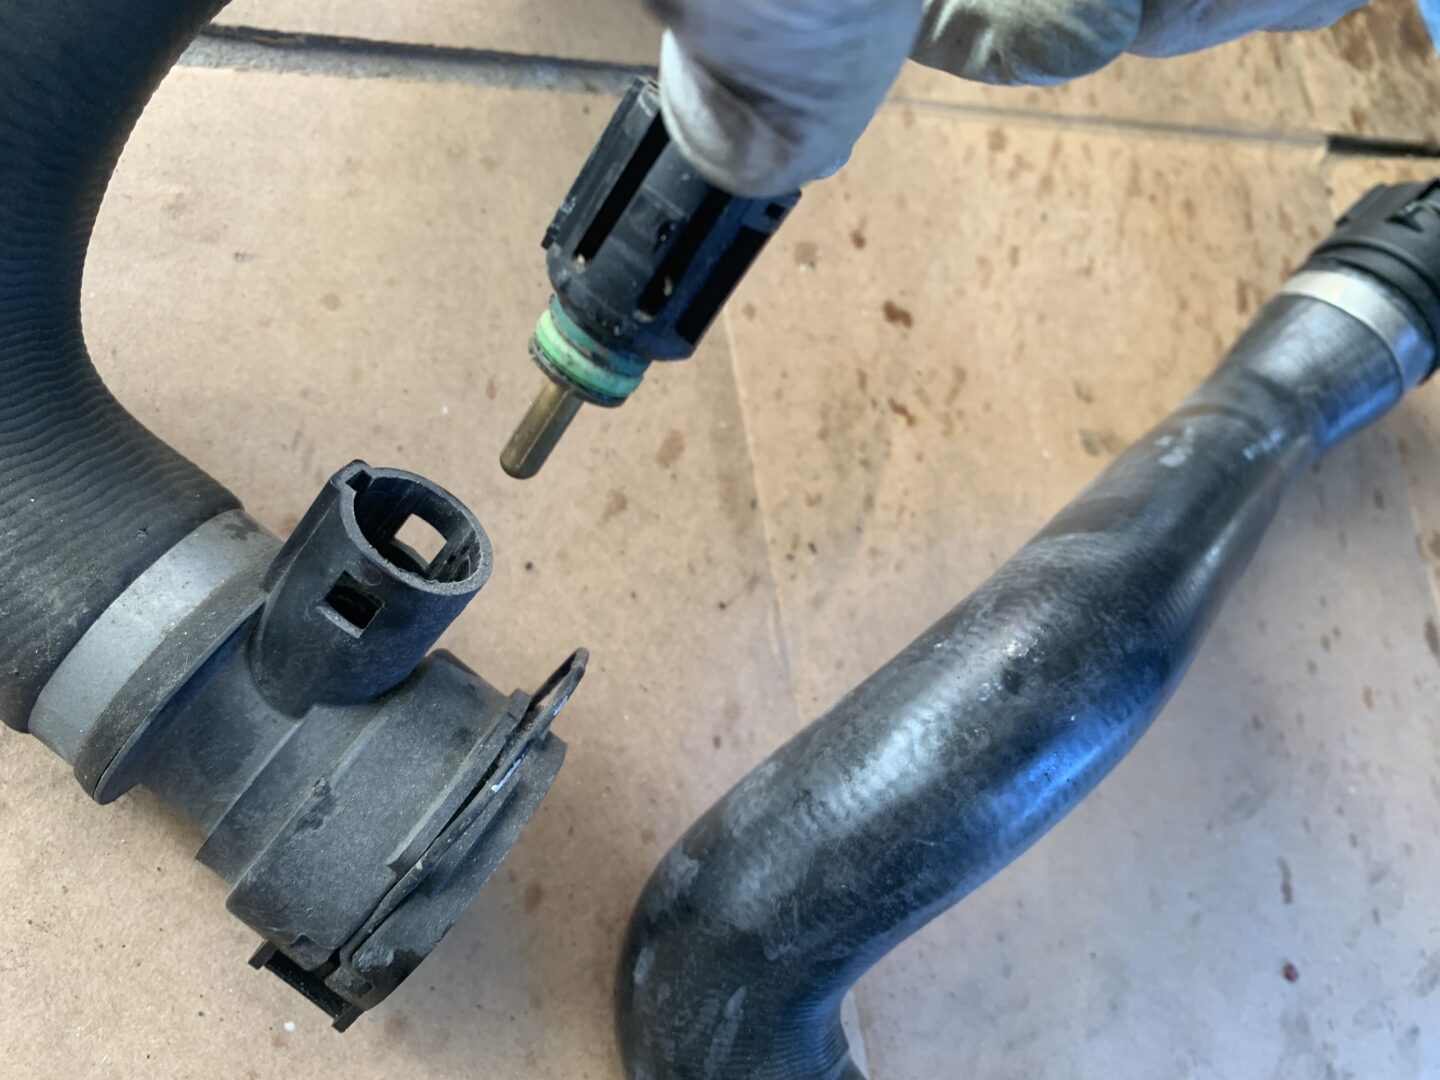
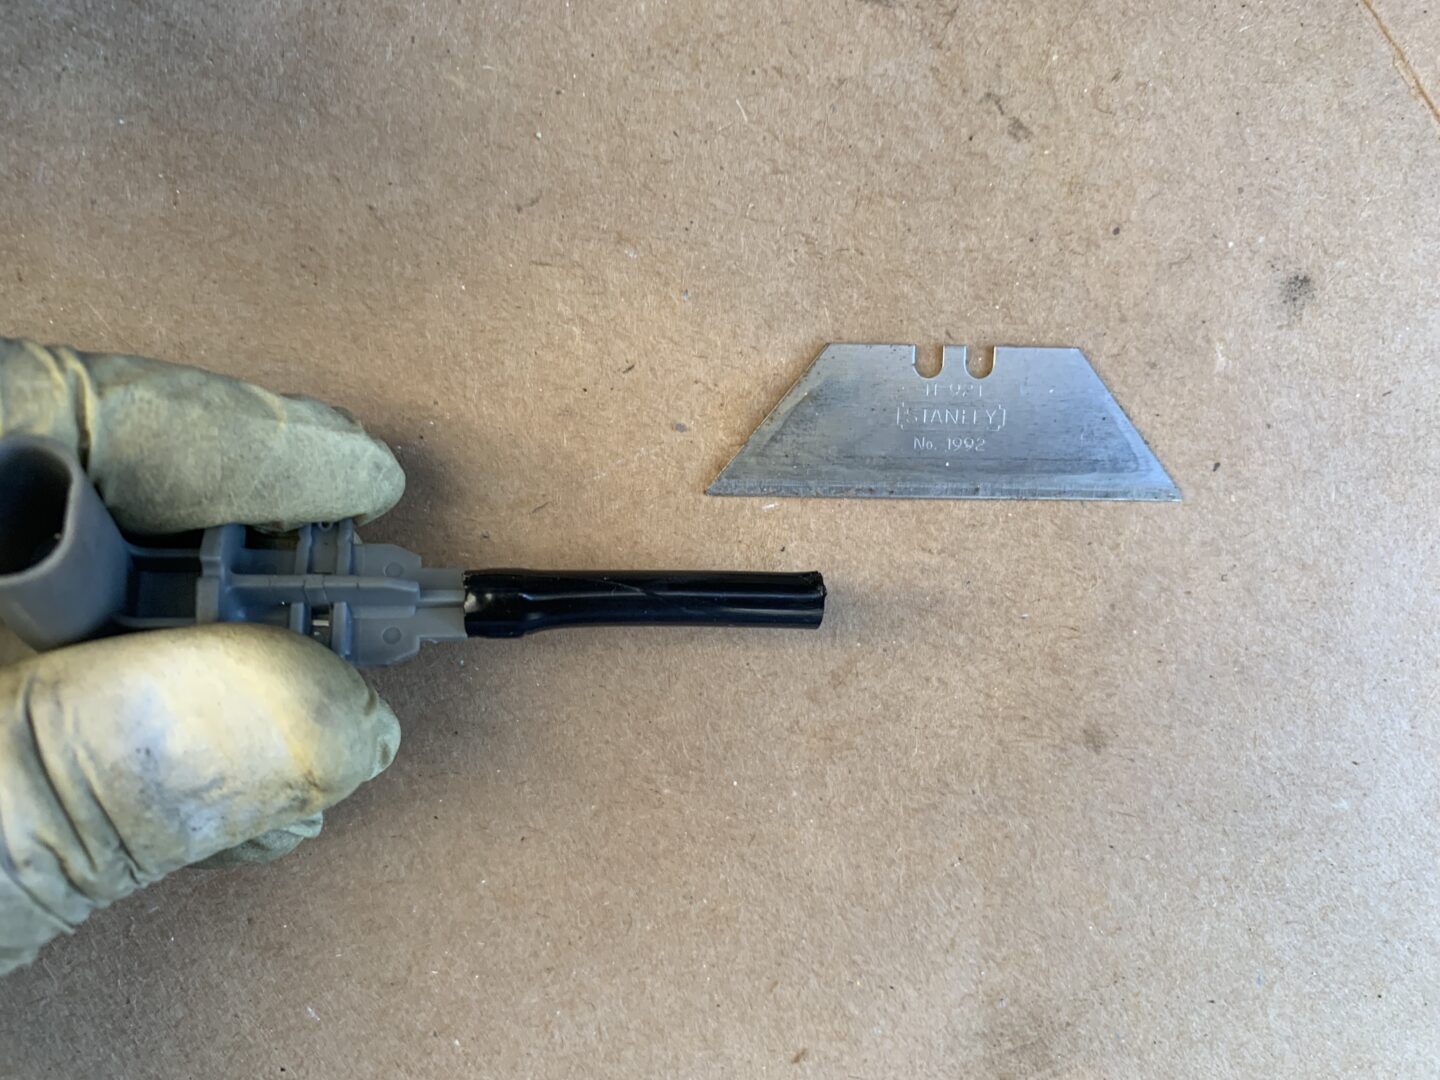
The lower radiator hose can then be removed by releasing the following retaining clips and removing the coolant temperature sensor as shown.
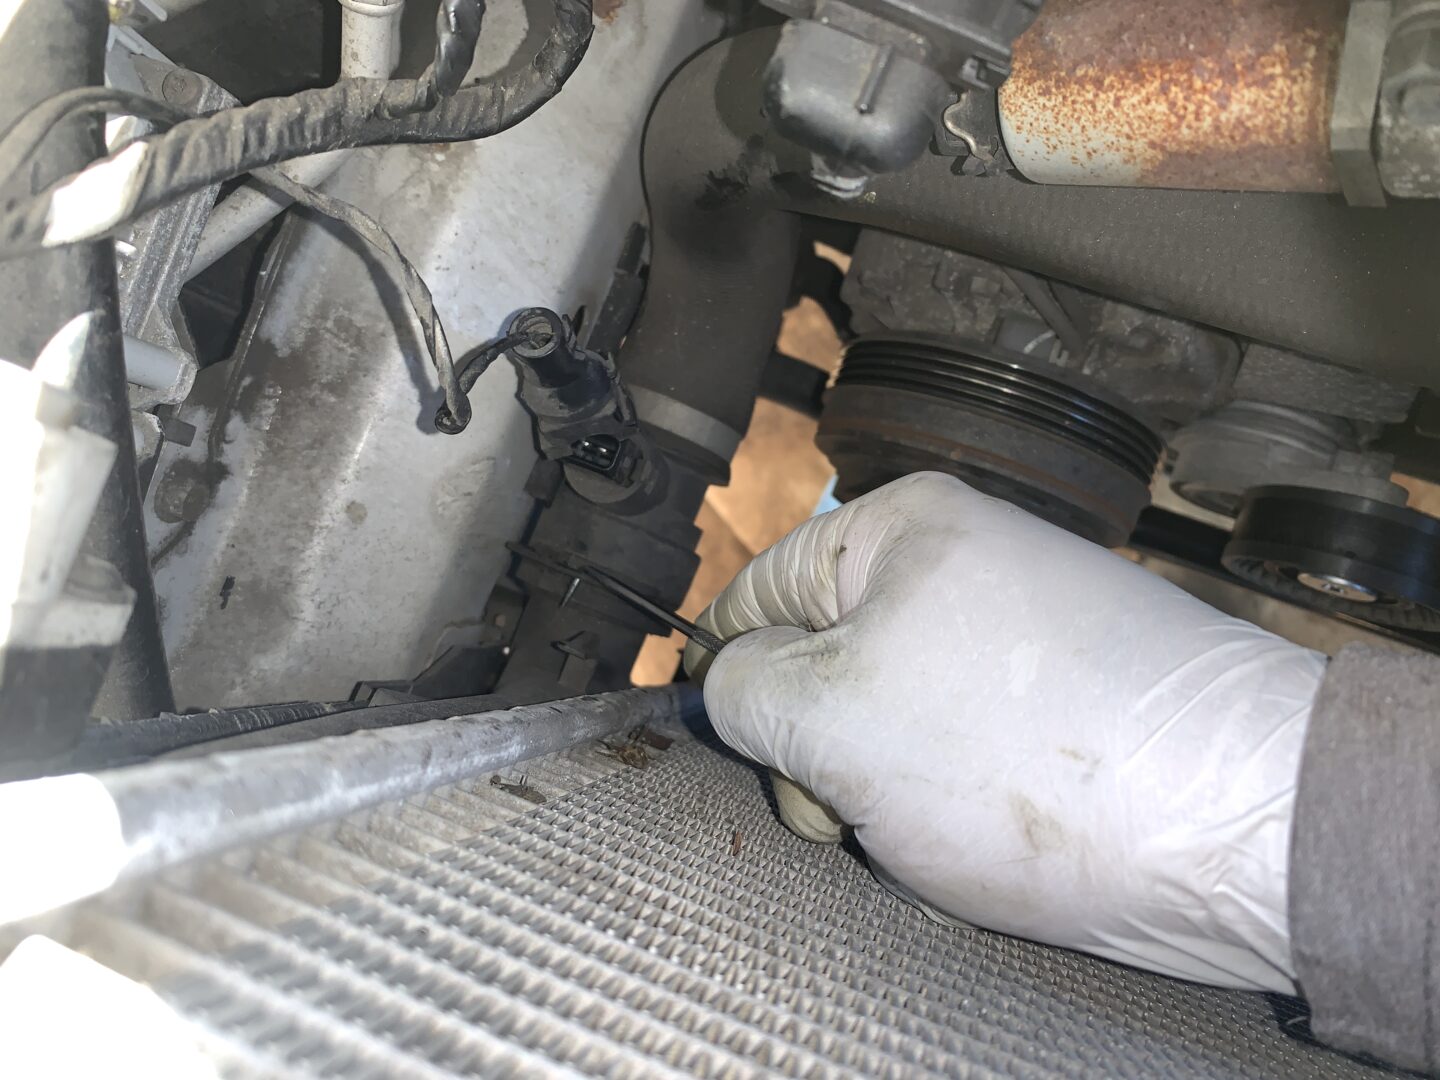
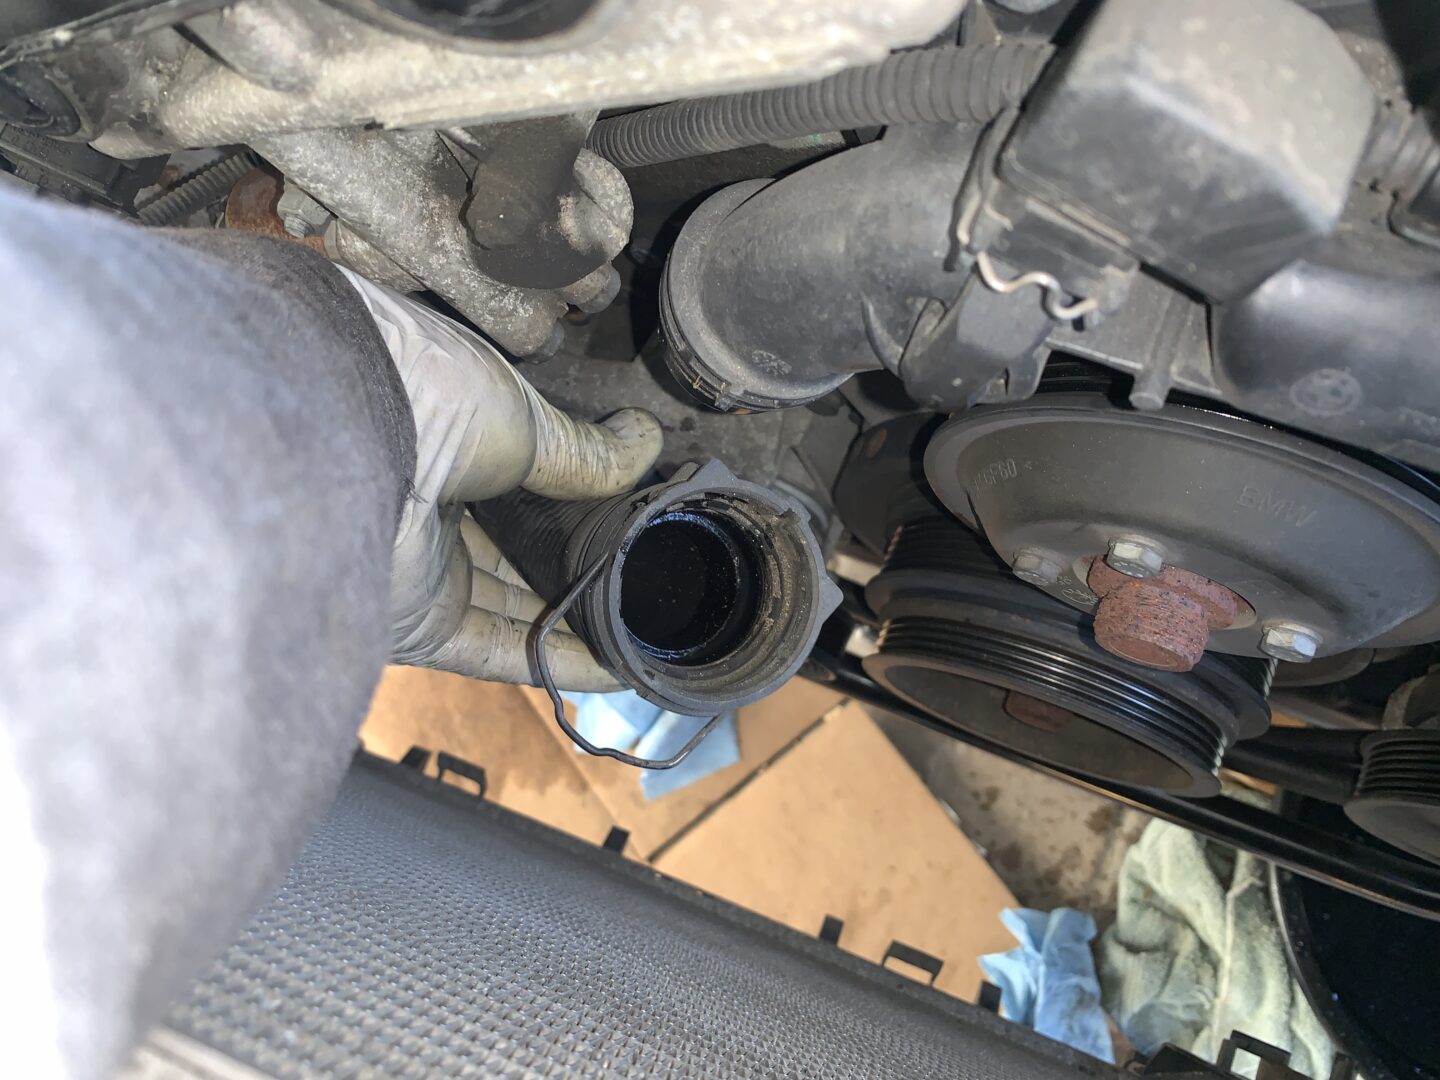
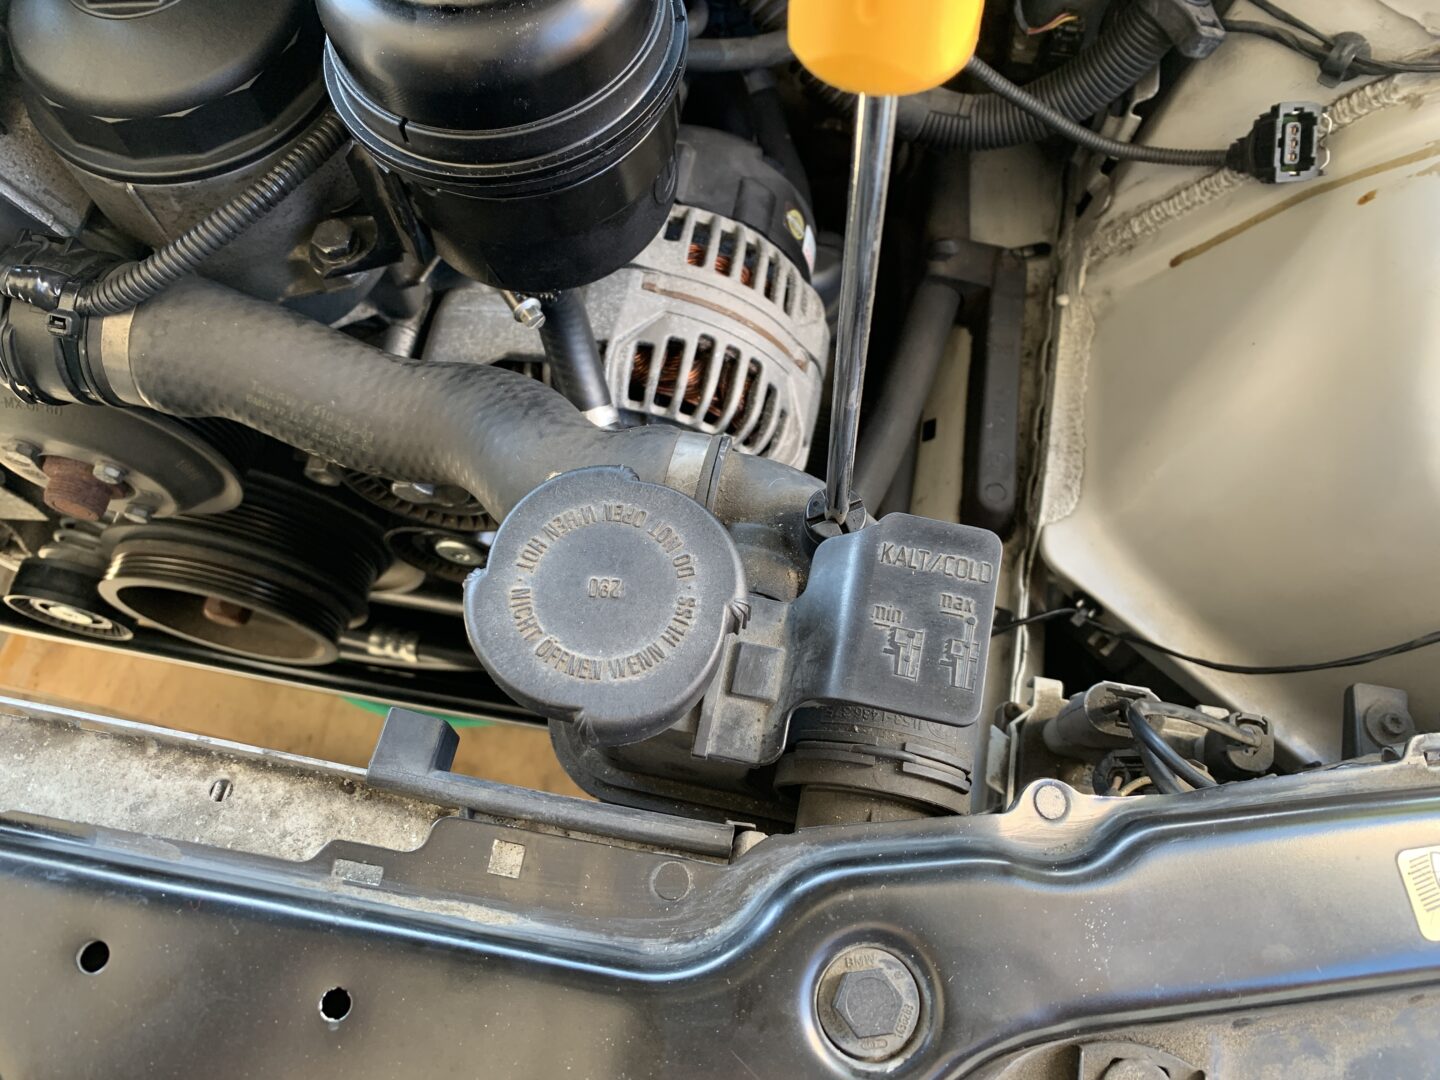
Because we are already removing the engine intake manifold temperature sensor, it may be worth replacing the o-ring at this point. Then reinstall the sensor.
The expansion tank sensor can also be replaced at this point. It simply unscrews off of the bottom of the expansion tank. The new sensor will have a protective rubber sleeve that should be removed prior to installing it.

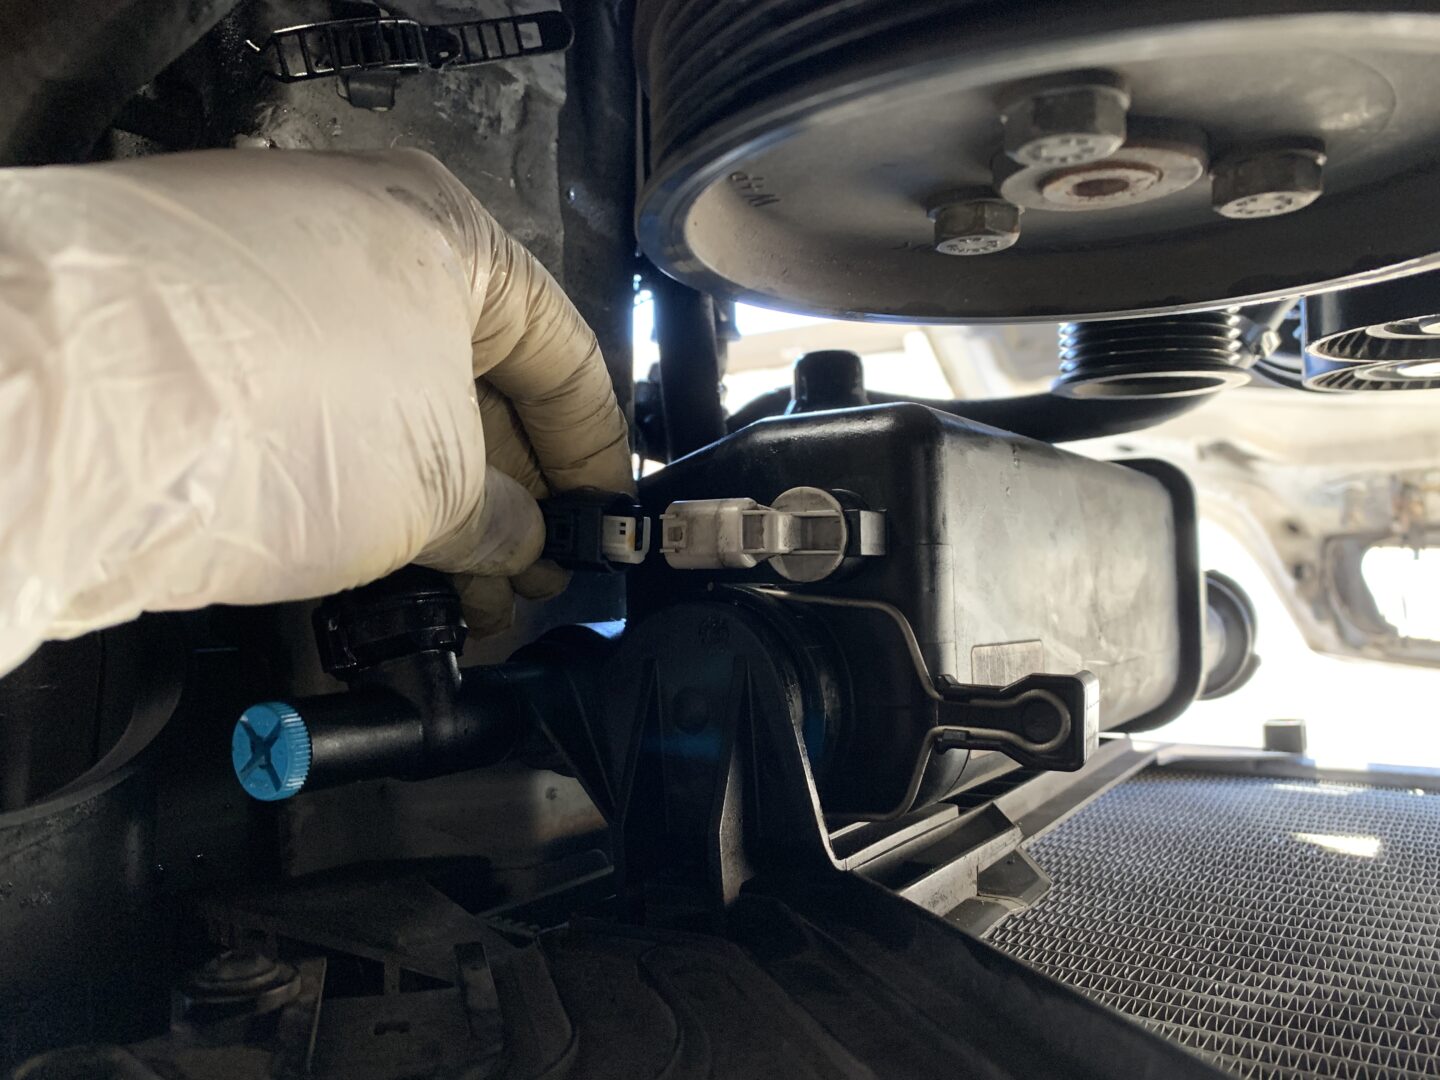
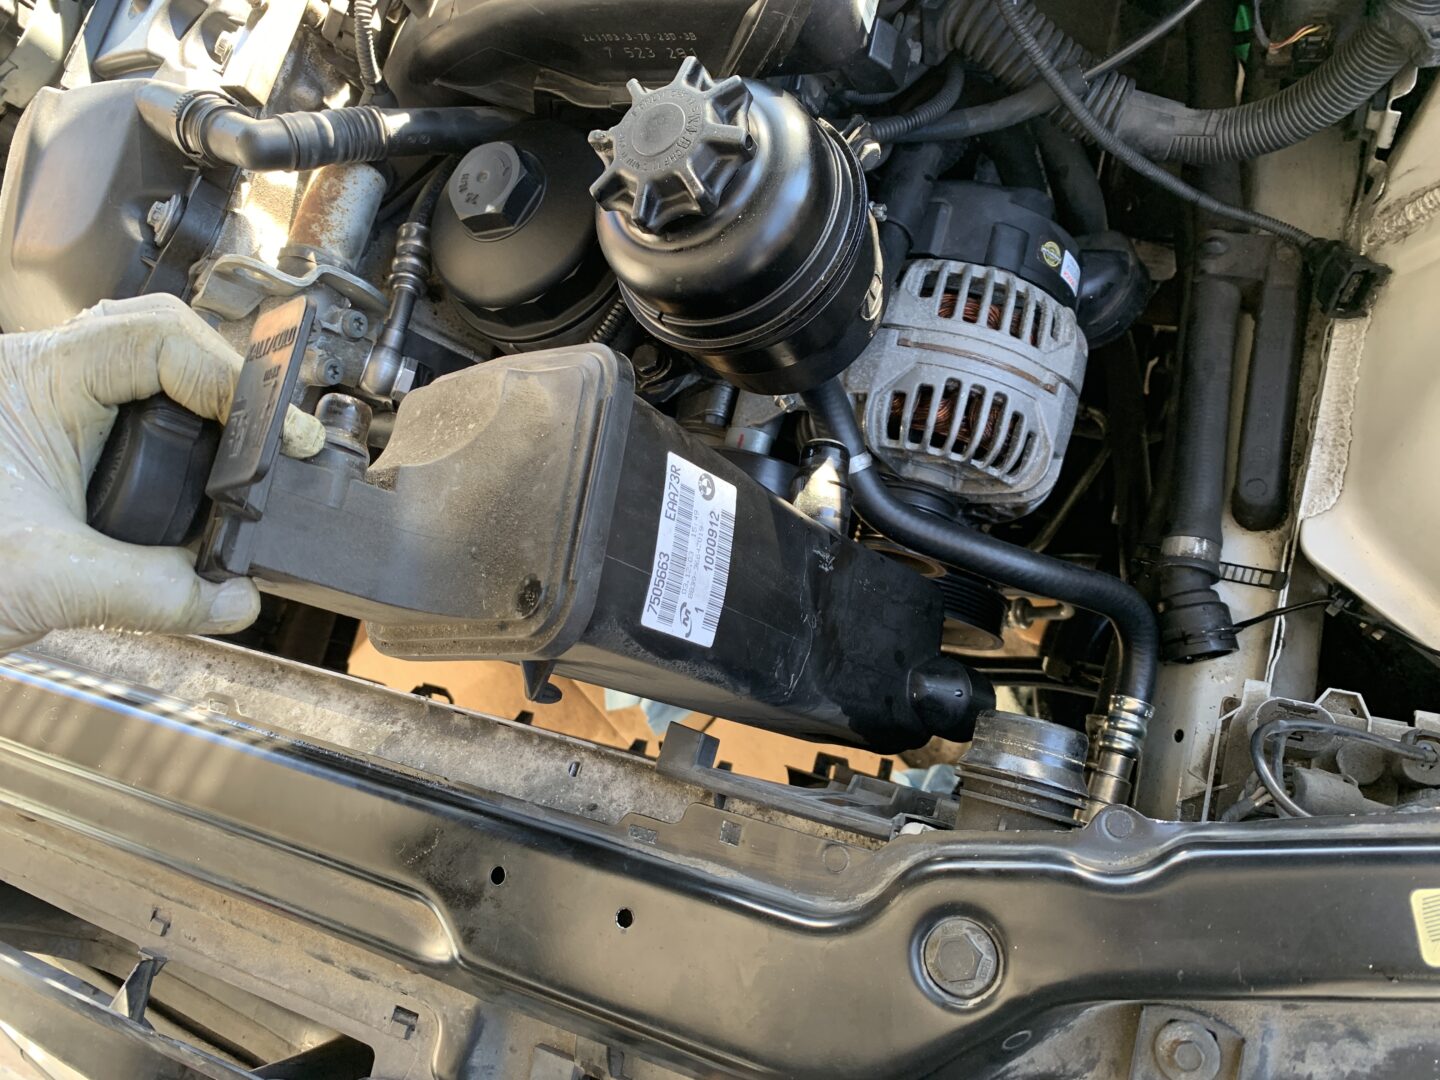
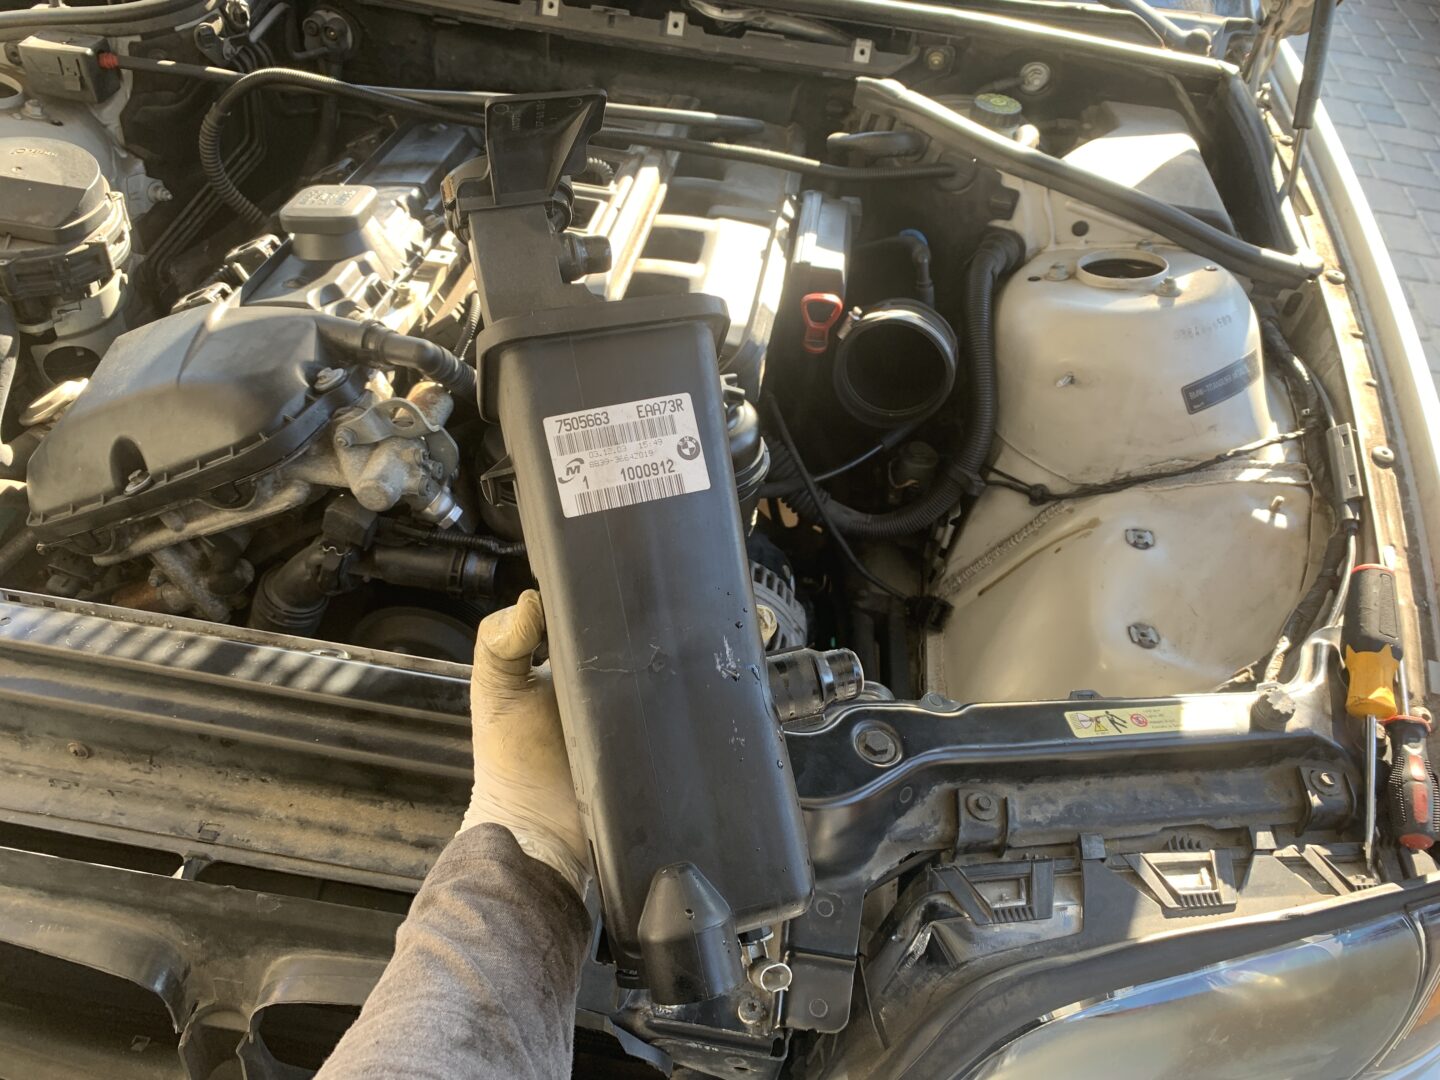
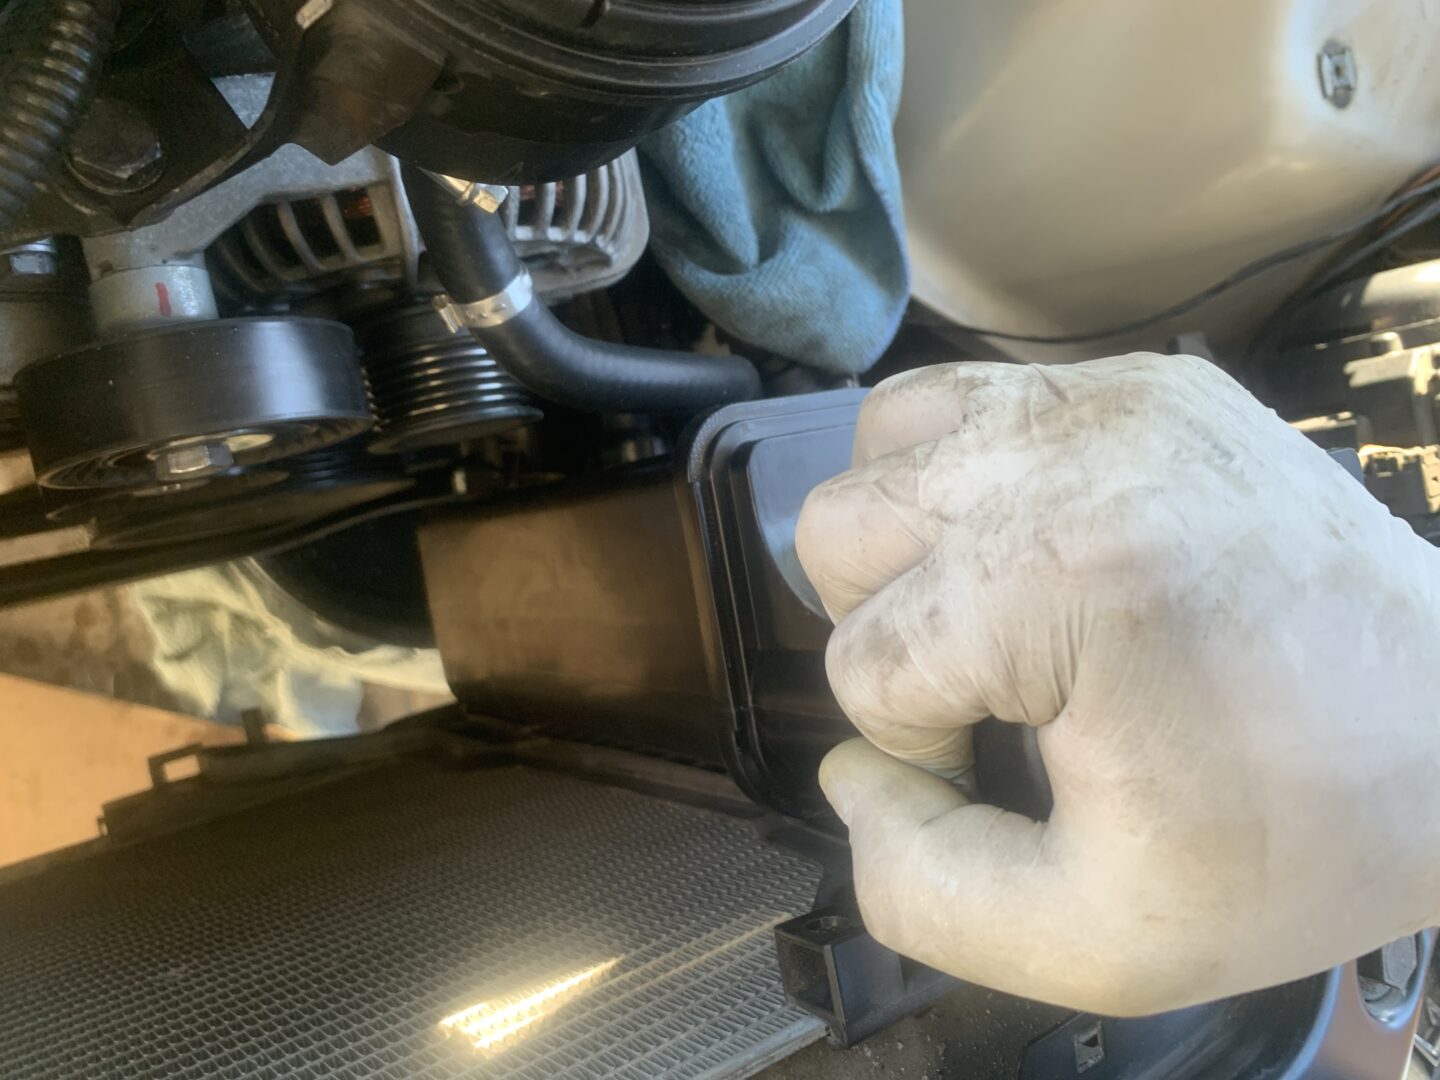
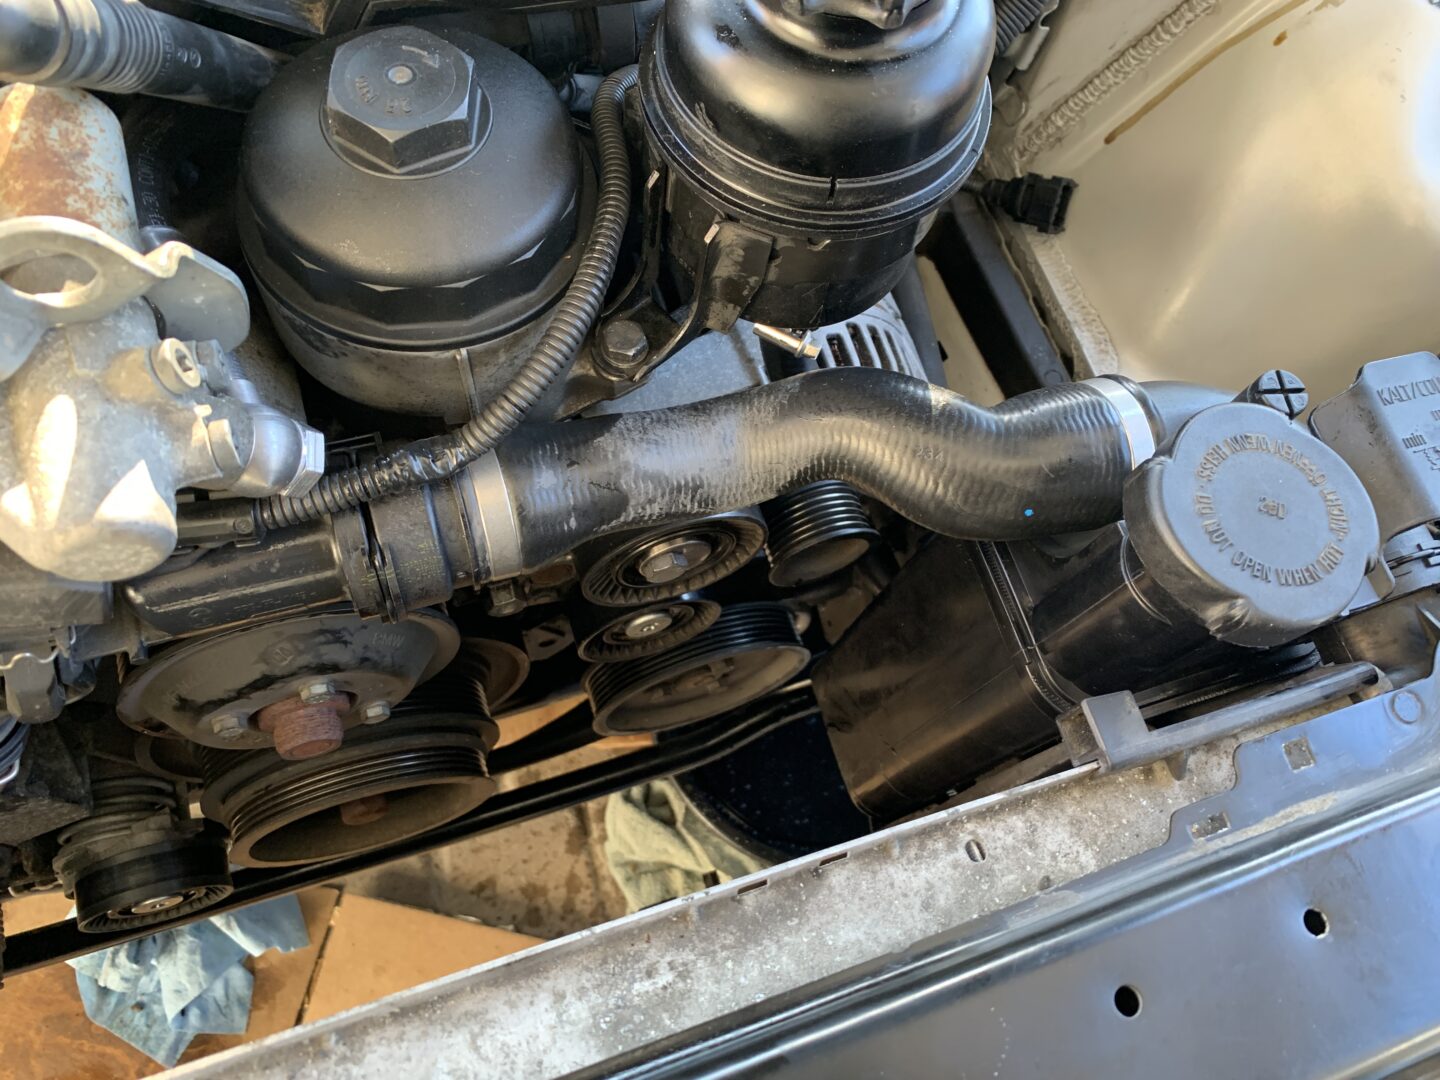
The new expansion tank can now be installed. If you are re-using your old expansion tank cap, replace it now. Then lower the expansion tank into place, ensuring that the orientation is correct and the alignment tab is inserted correctly as shown. Then press down until you feel/hear the expansion tank clip into place.

Now, reinstall the expansion tank hose and then press down on the retaining clips to lock it into place.
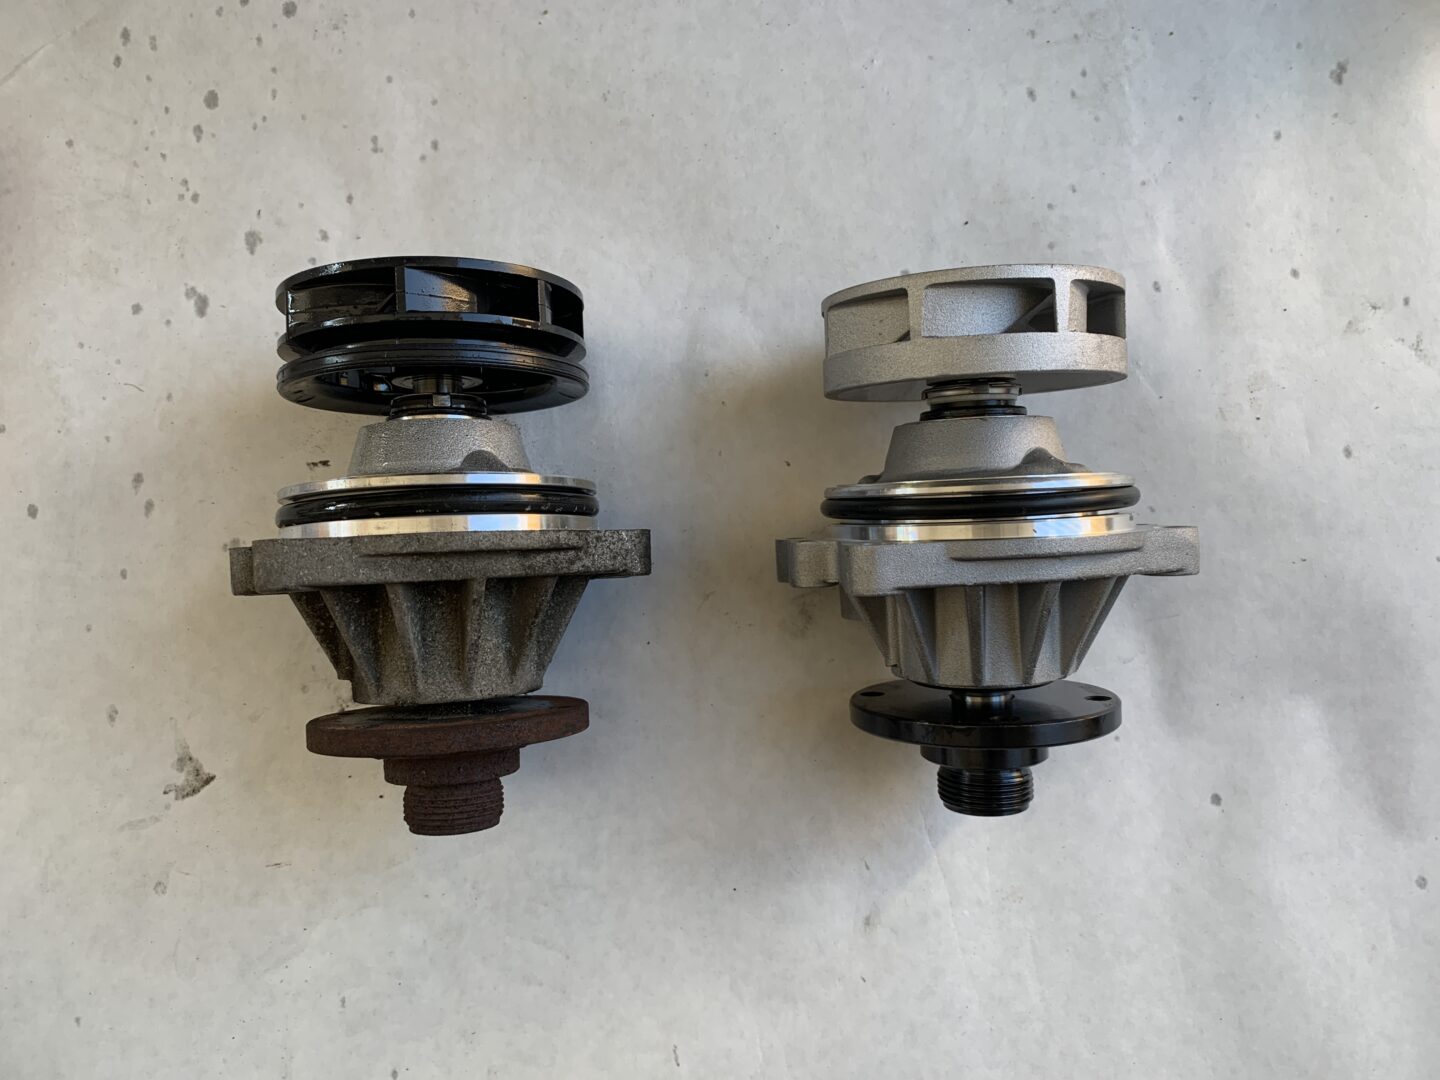
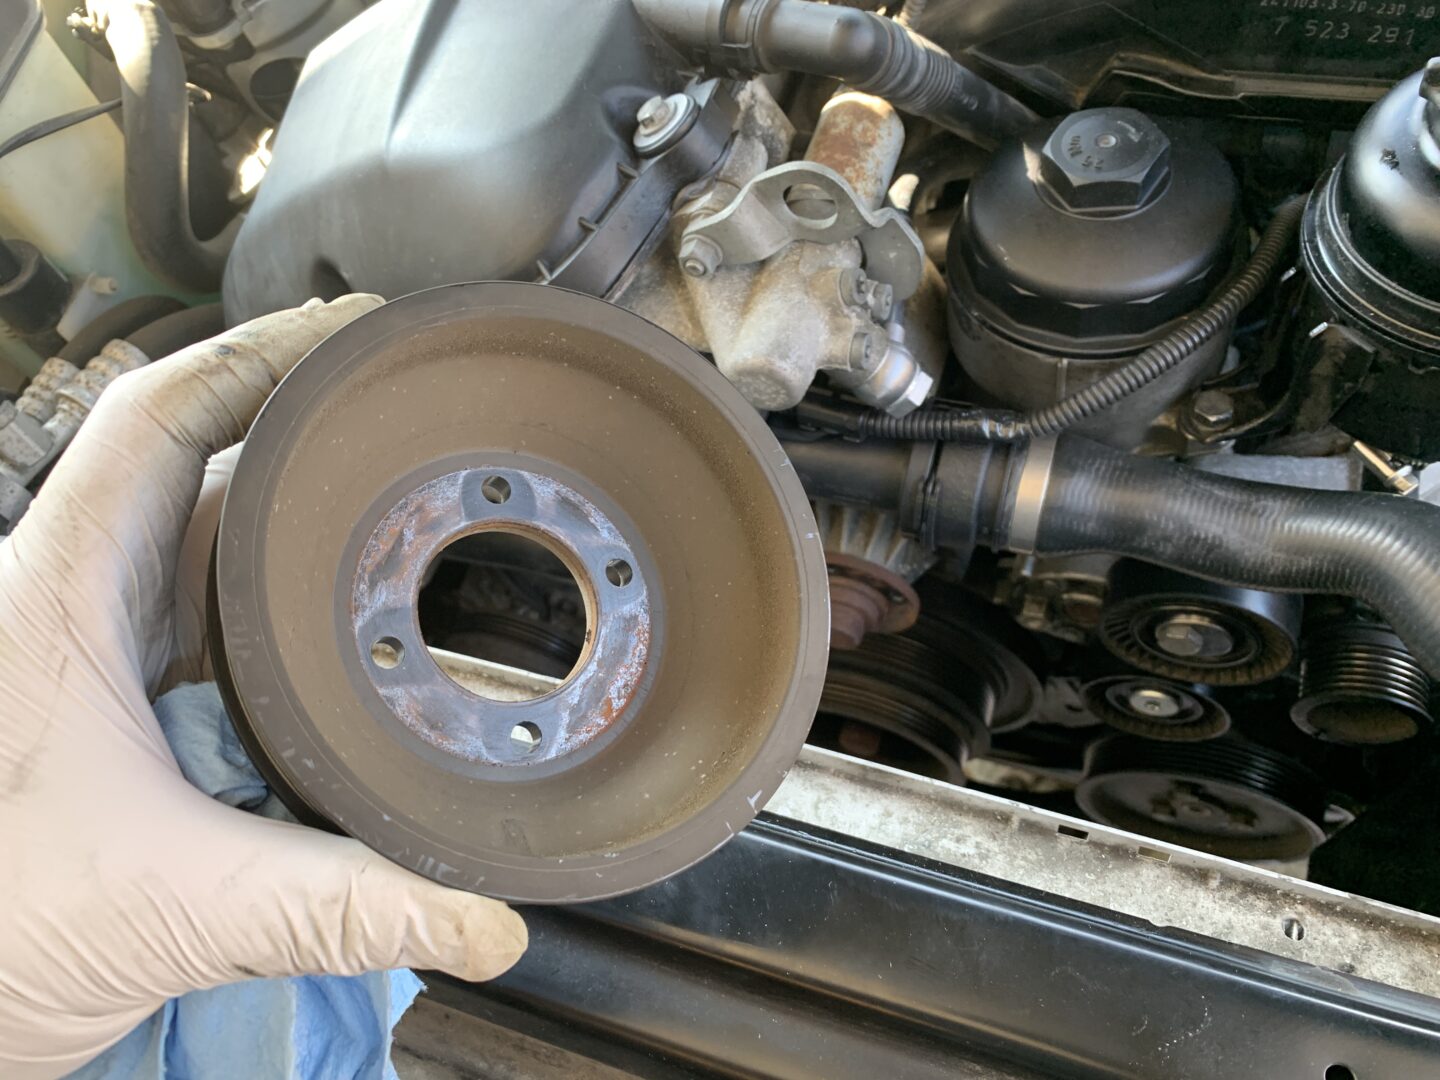
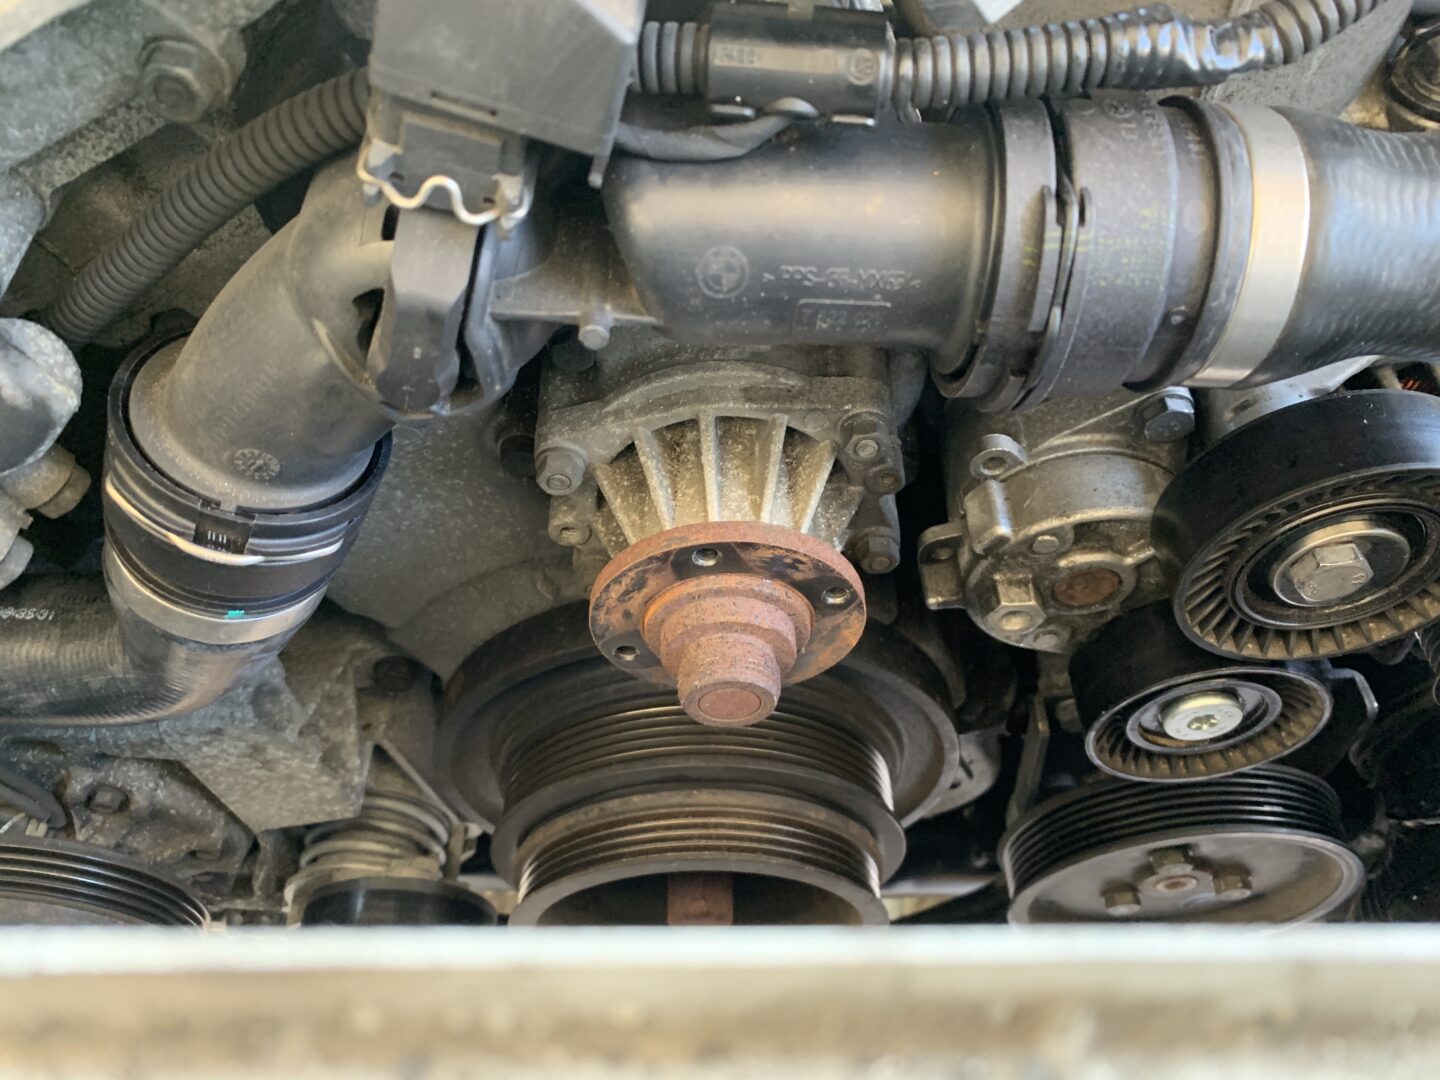
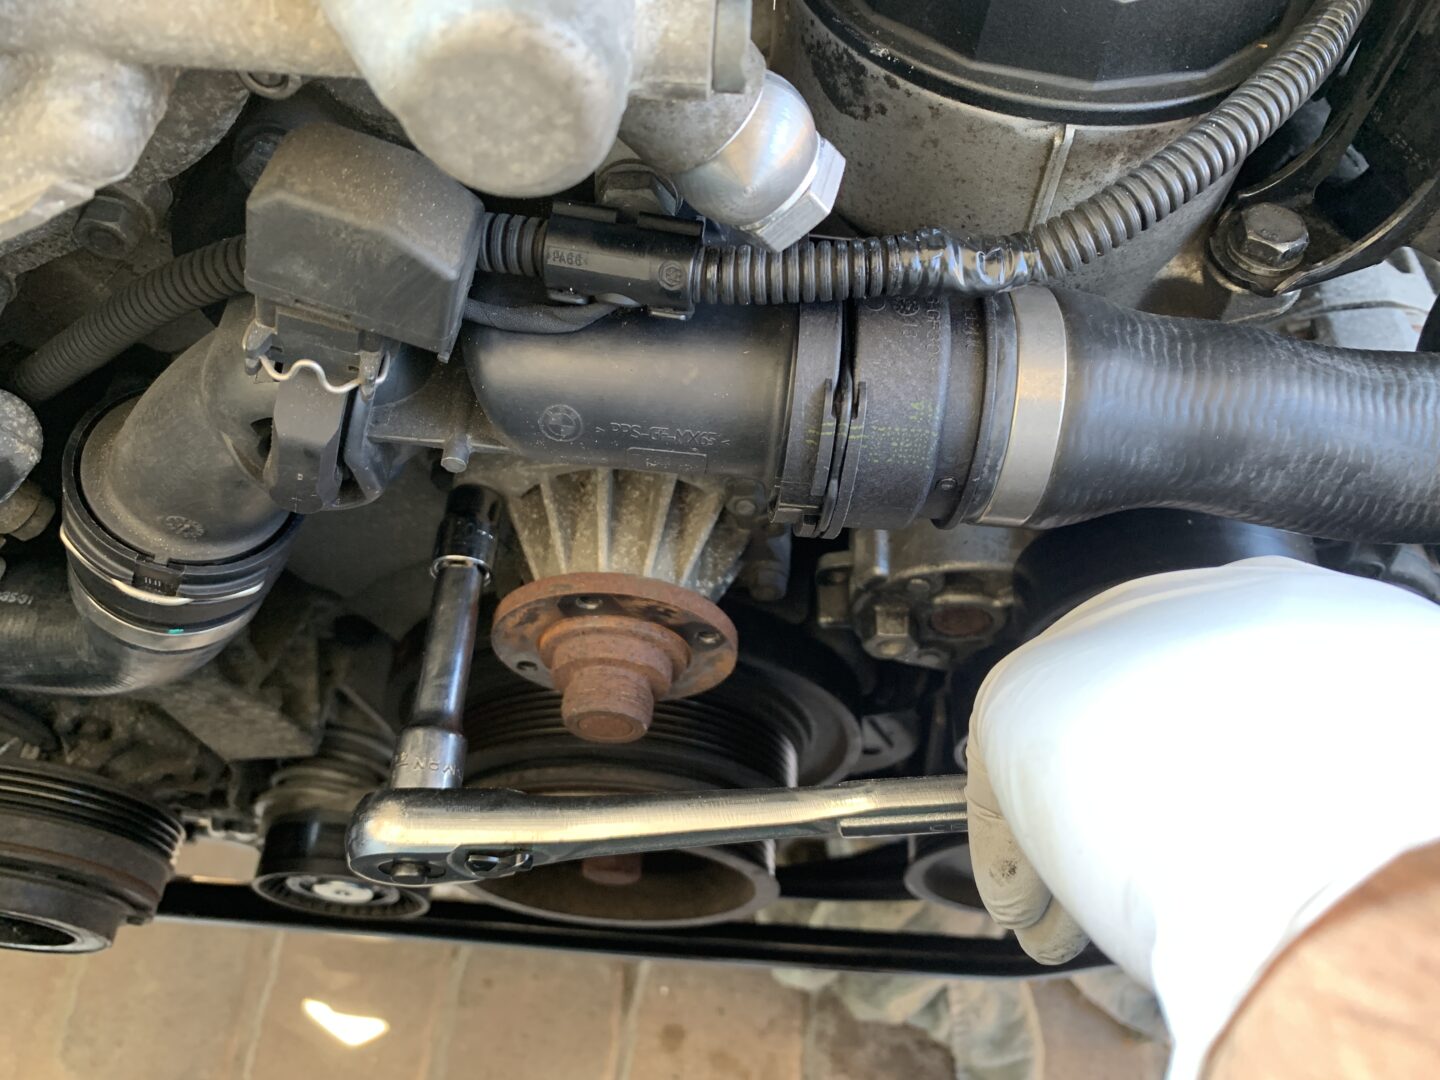
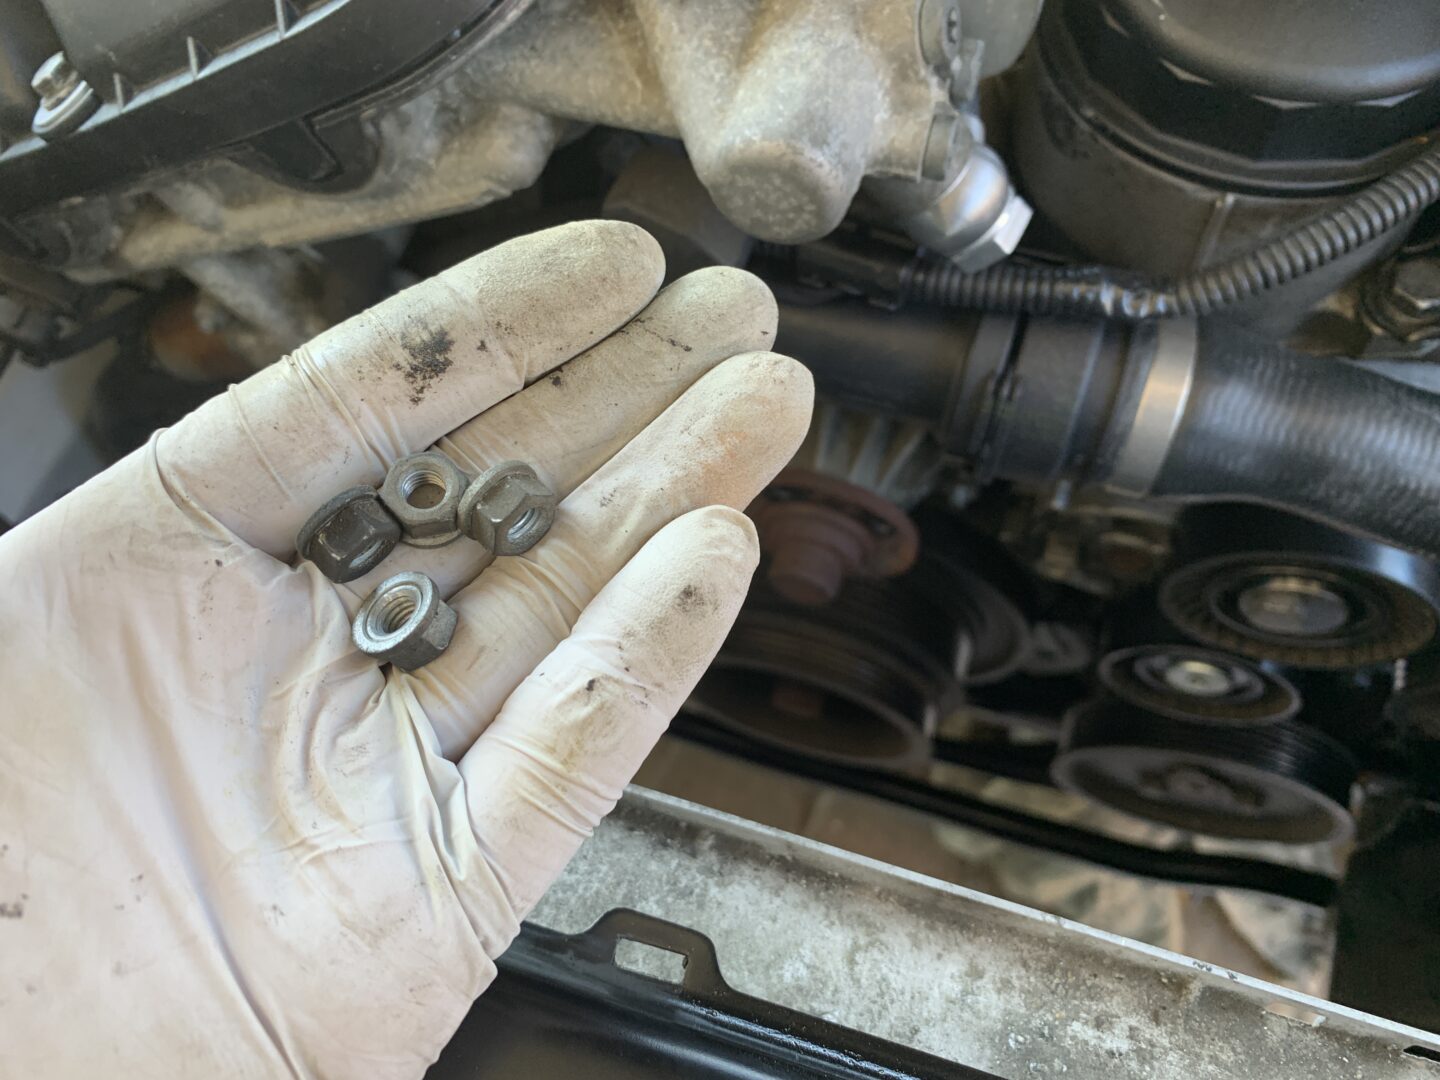
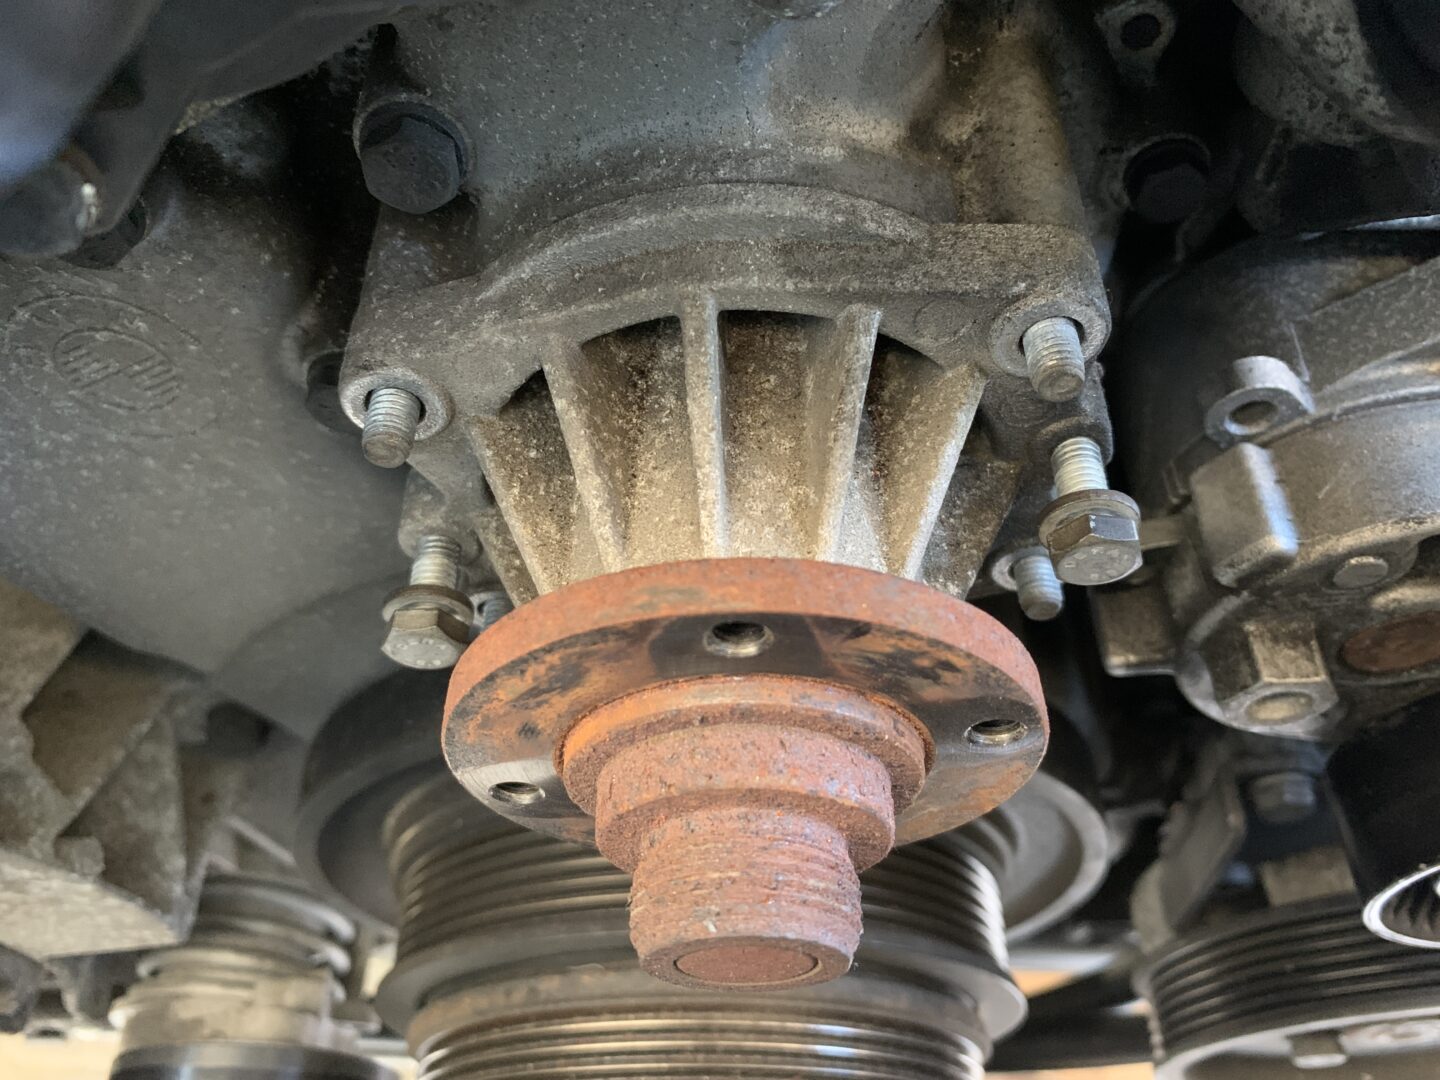
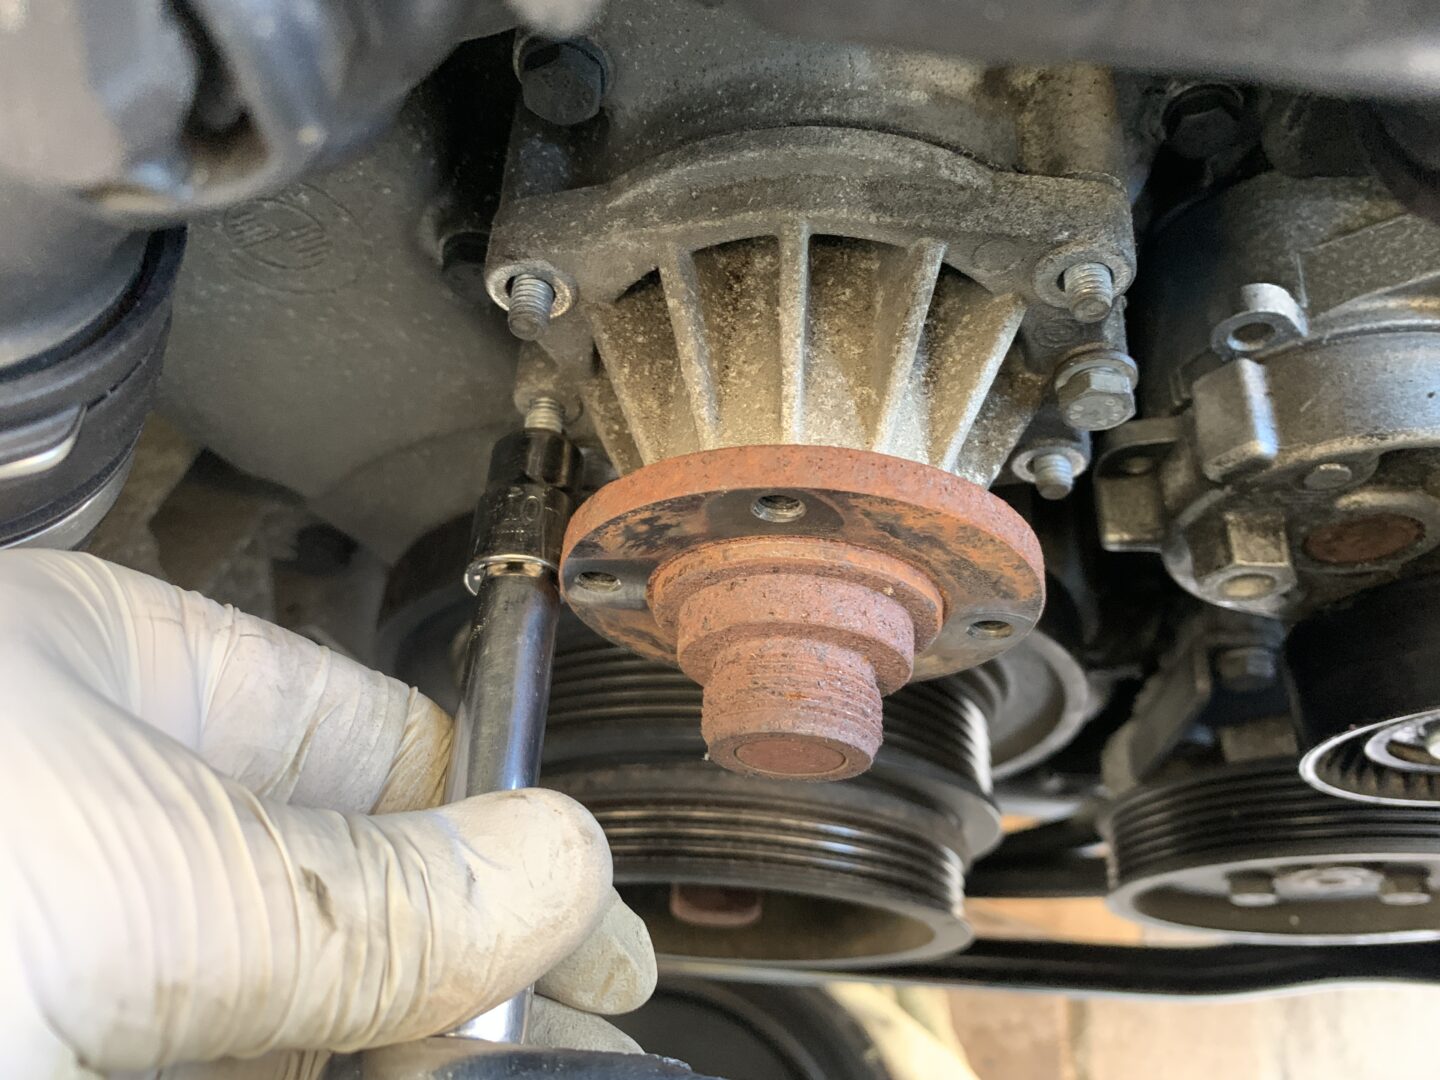
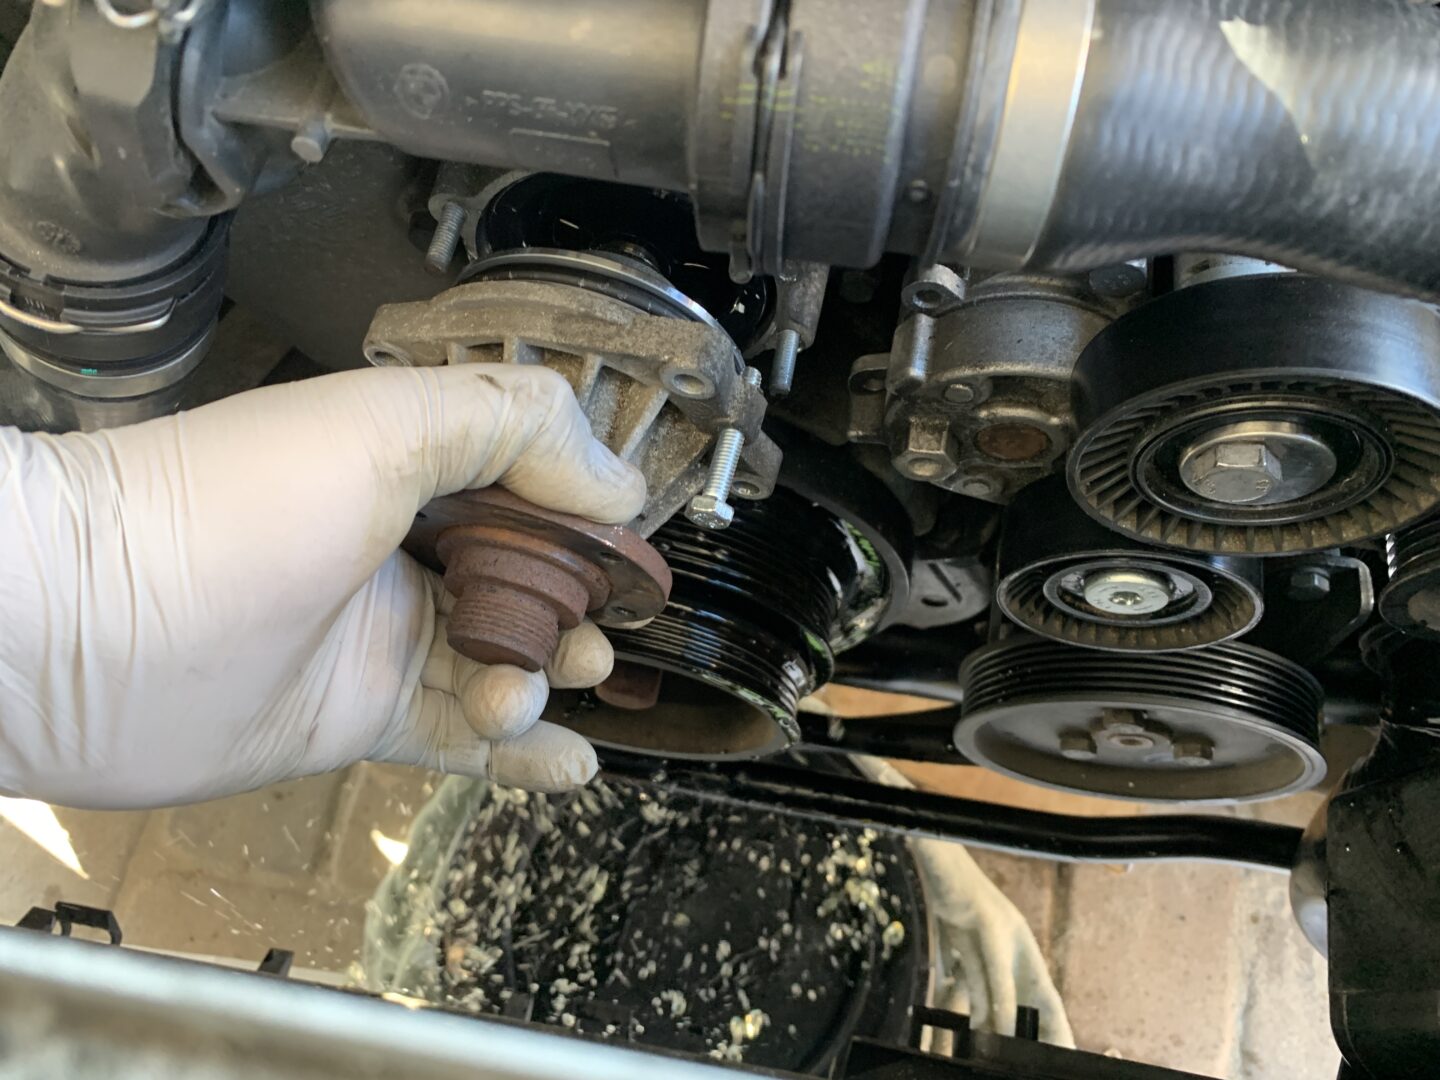
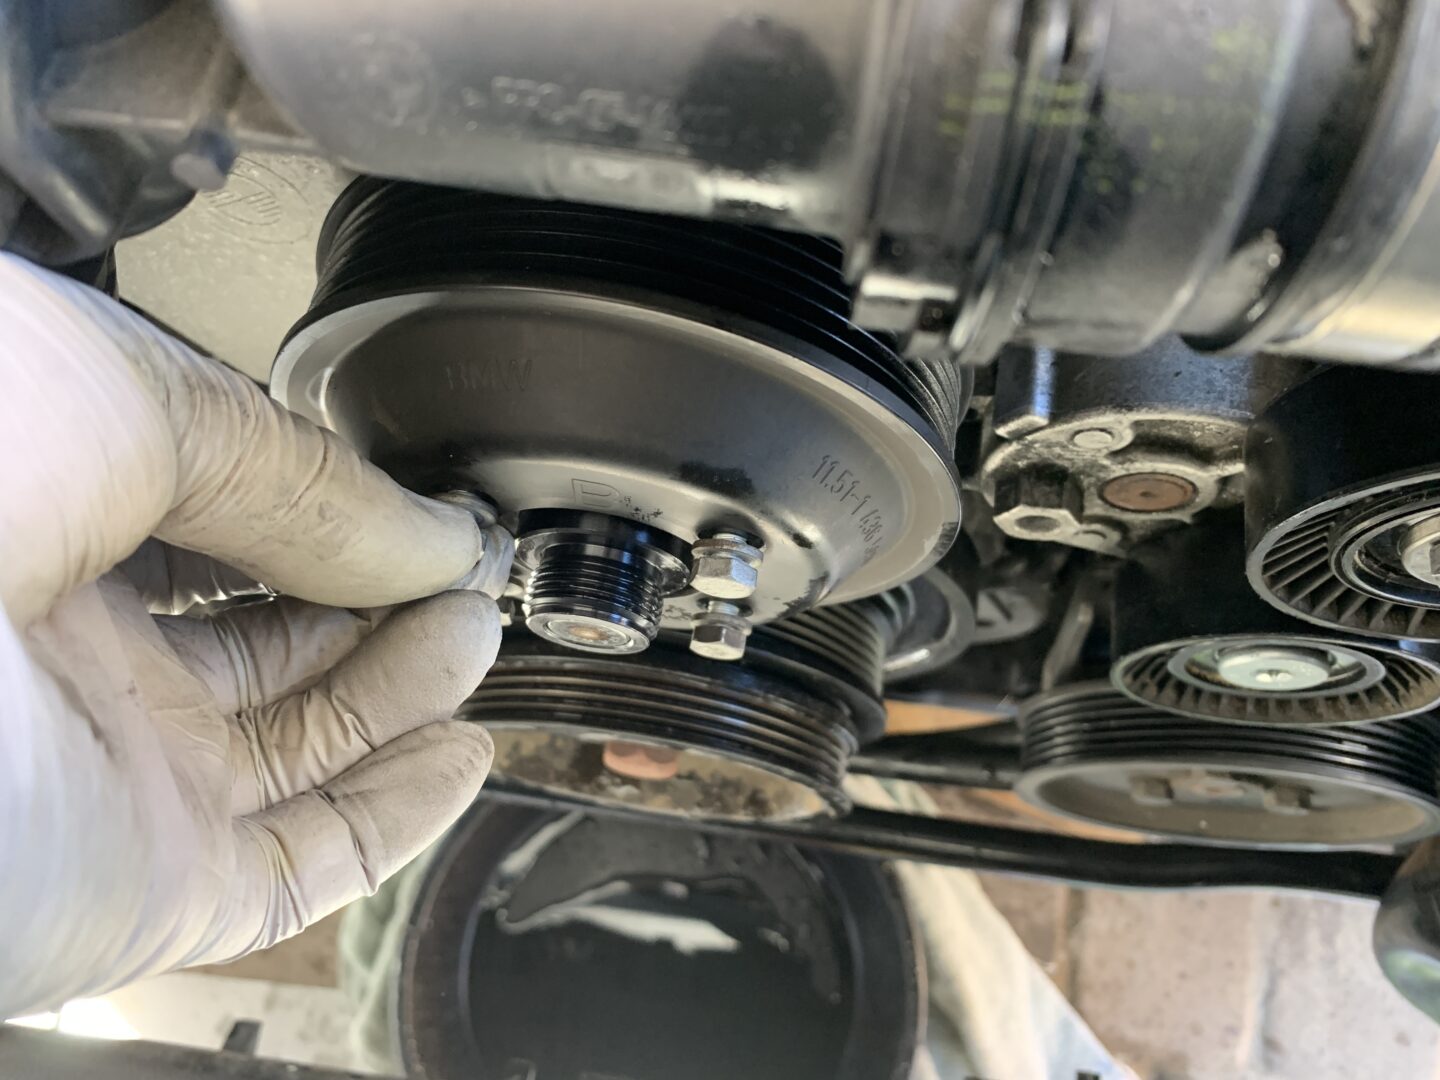
The water pump can be replaced now. Remove the water pump pulley via the (4 qty) 10mm bolts, then pull the pulley off.
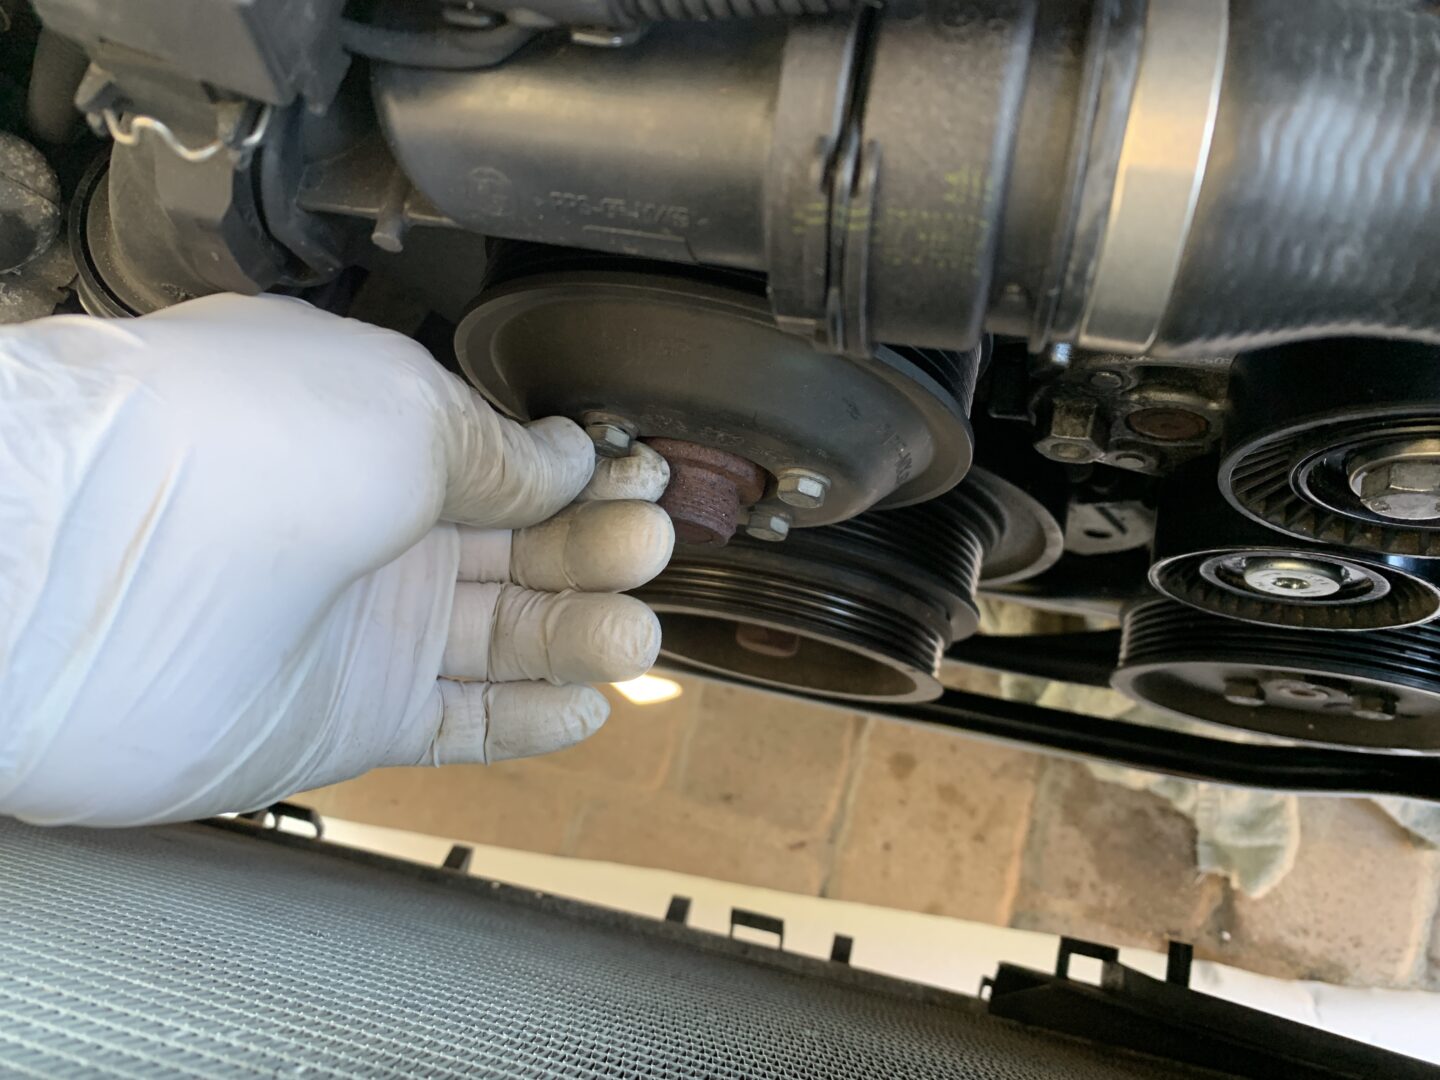
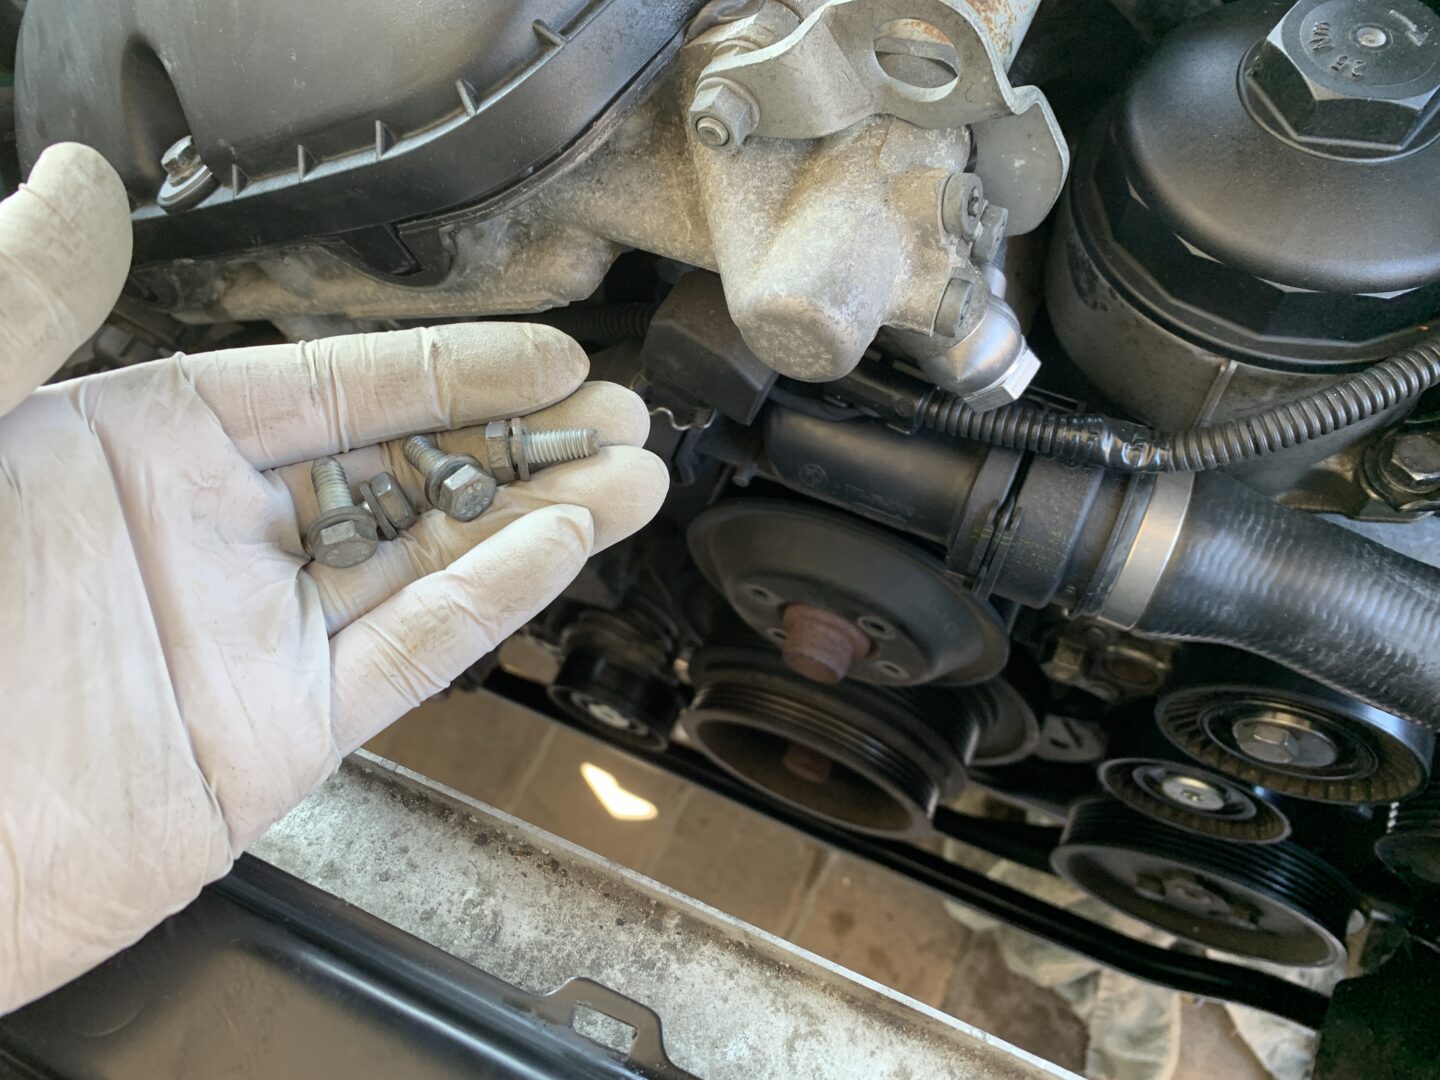
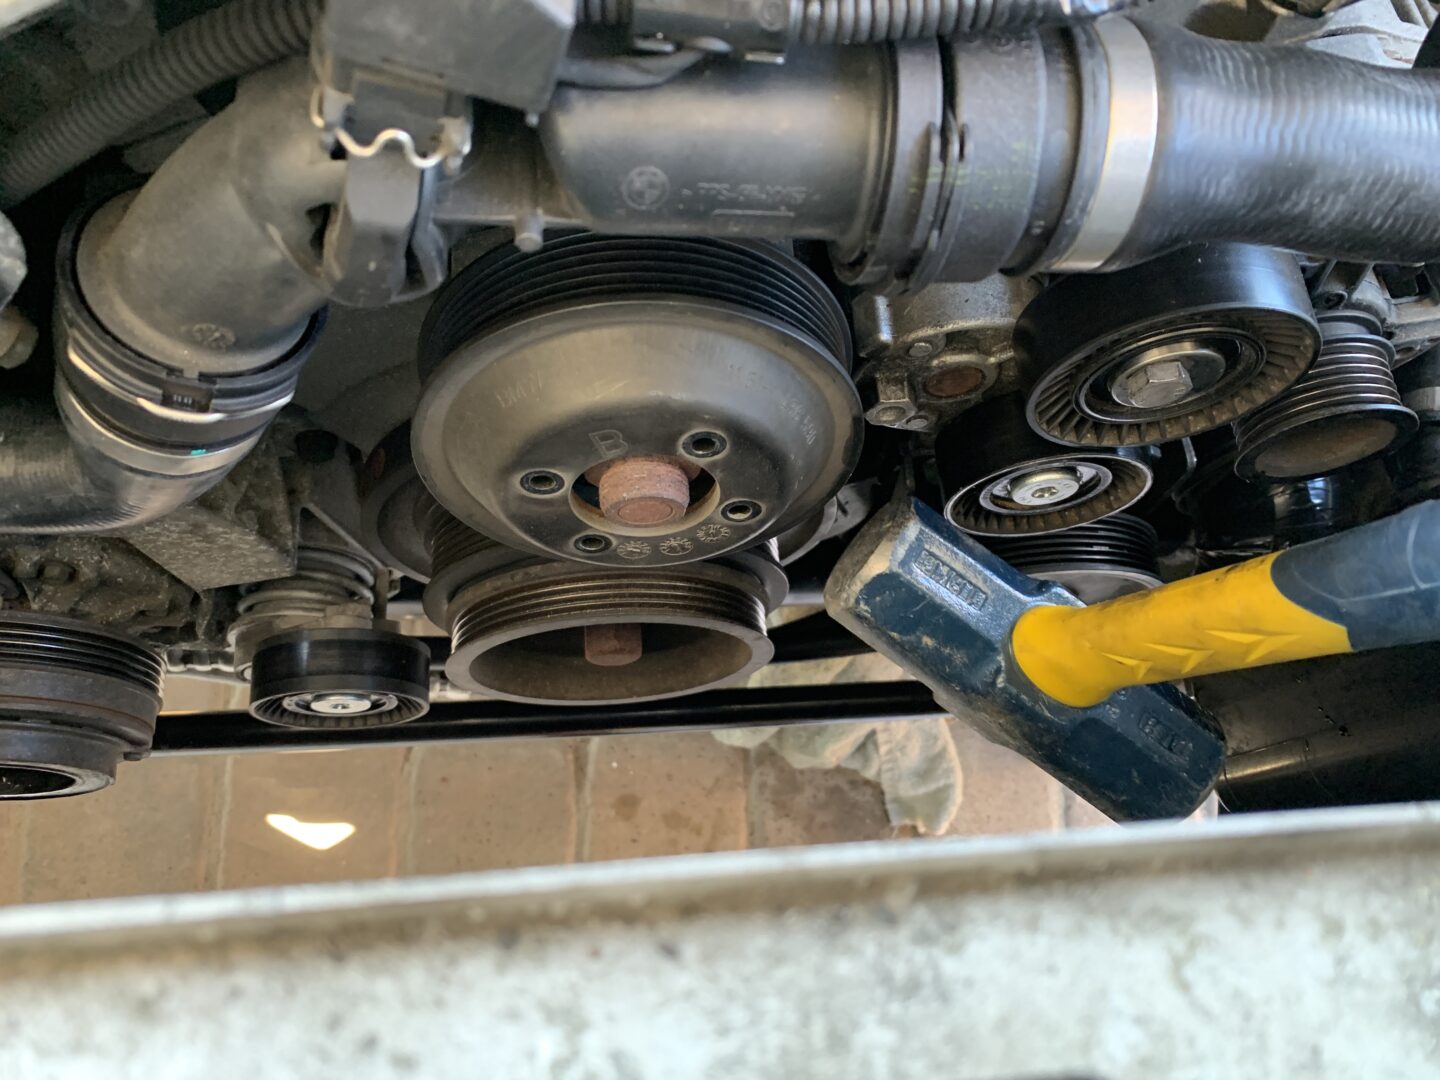
The waterpump itself is removed via the (4 qty) 10mm nuts and (2 qty) 10mm bolts. With these fasteners removed, the water pump can be pulled off. If you didn’t drain the coolant via the engine coolant drain plug earlier, the coolant will come pouring out of the water pump opening now when you remove it. If you did drain the engine earlier, you might still have some coolant coming out at the time of removal.
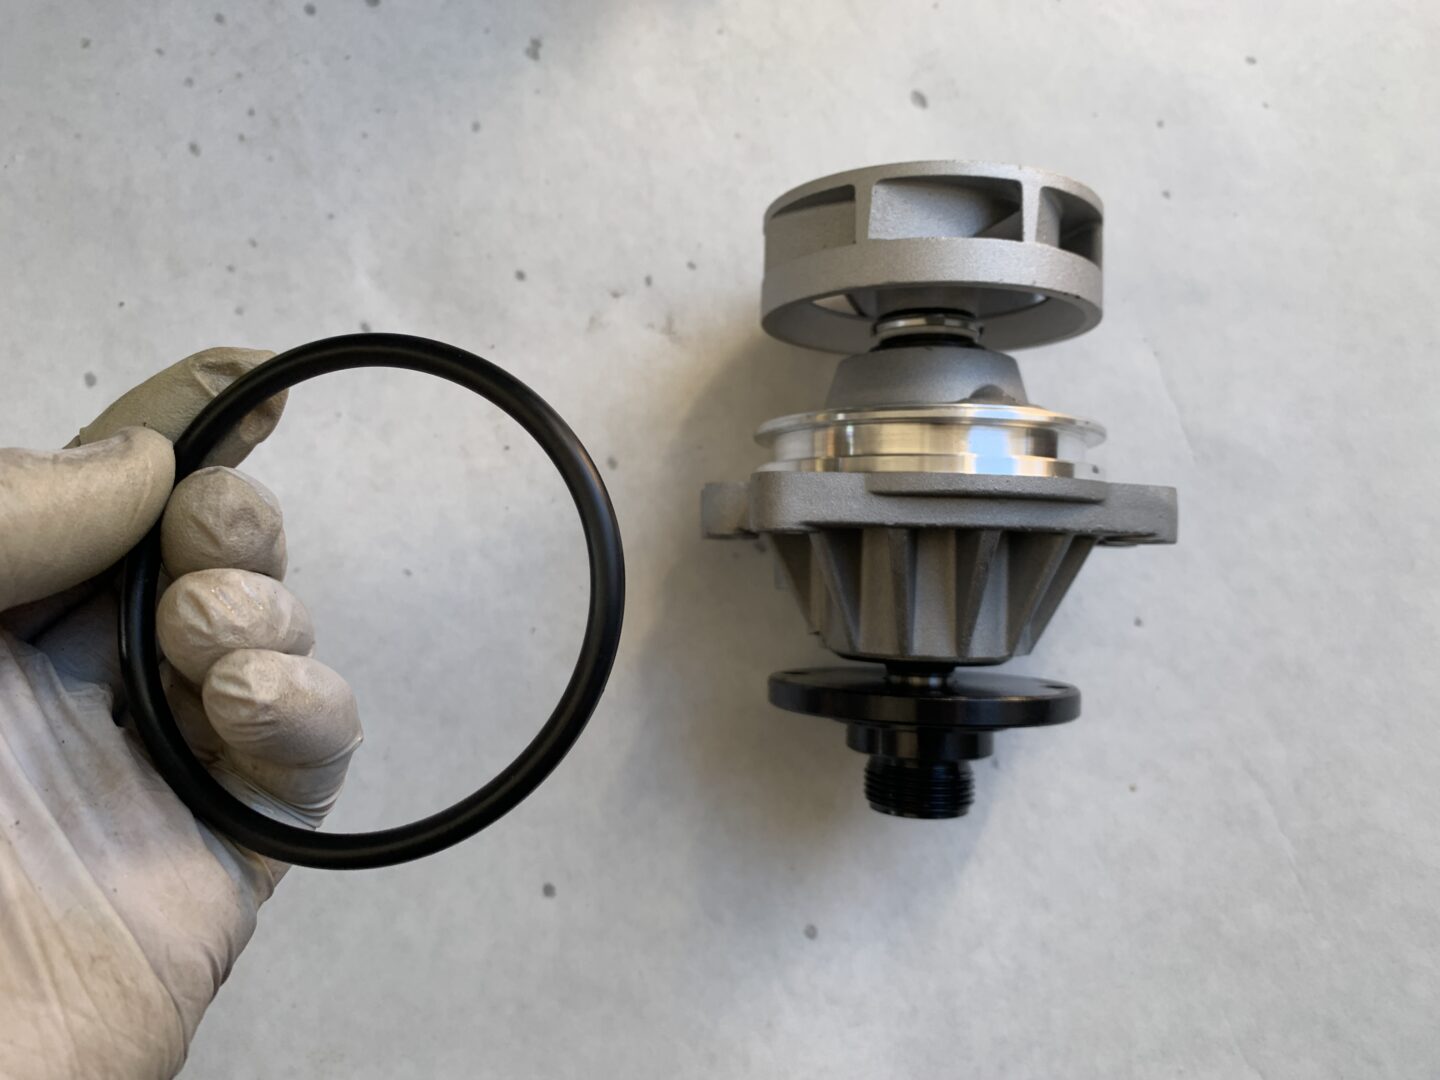
The water pump is a simple swap out with the new one; just make sure that a new o-ring is installed on the new water pump prior to installation. The new impellor for the water pump I installed is made of metal versus the old one which was made of plastic. This design change should prevent future failures due to a broken impellor.
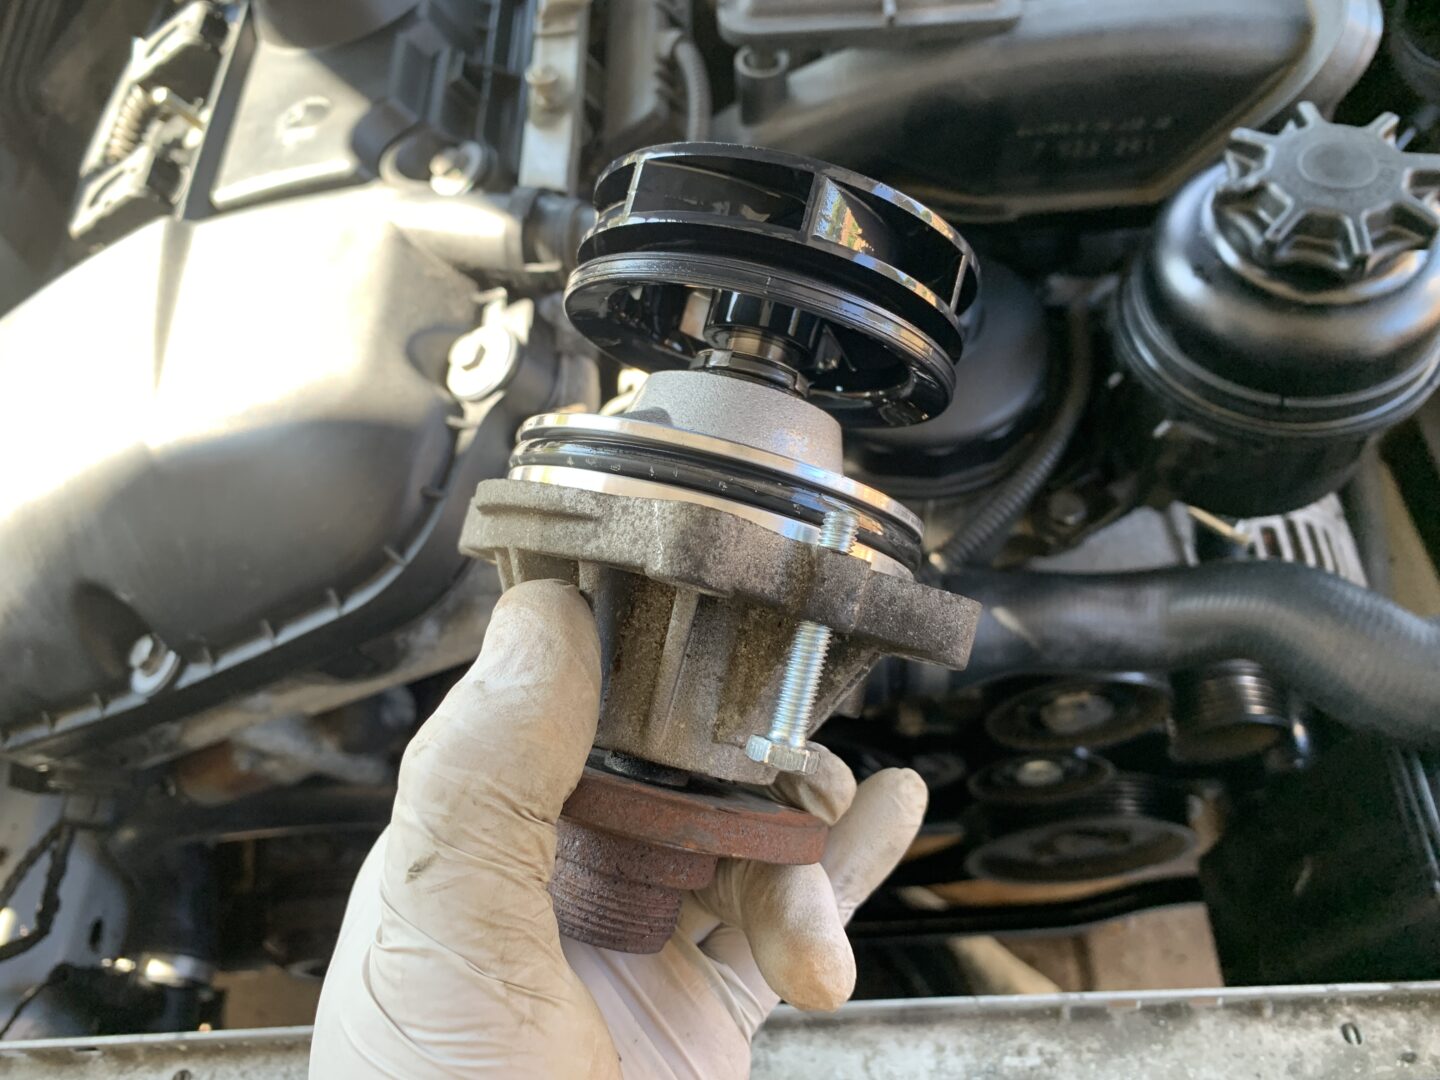
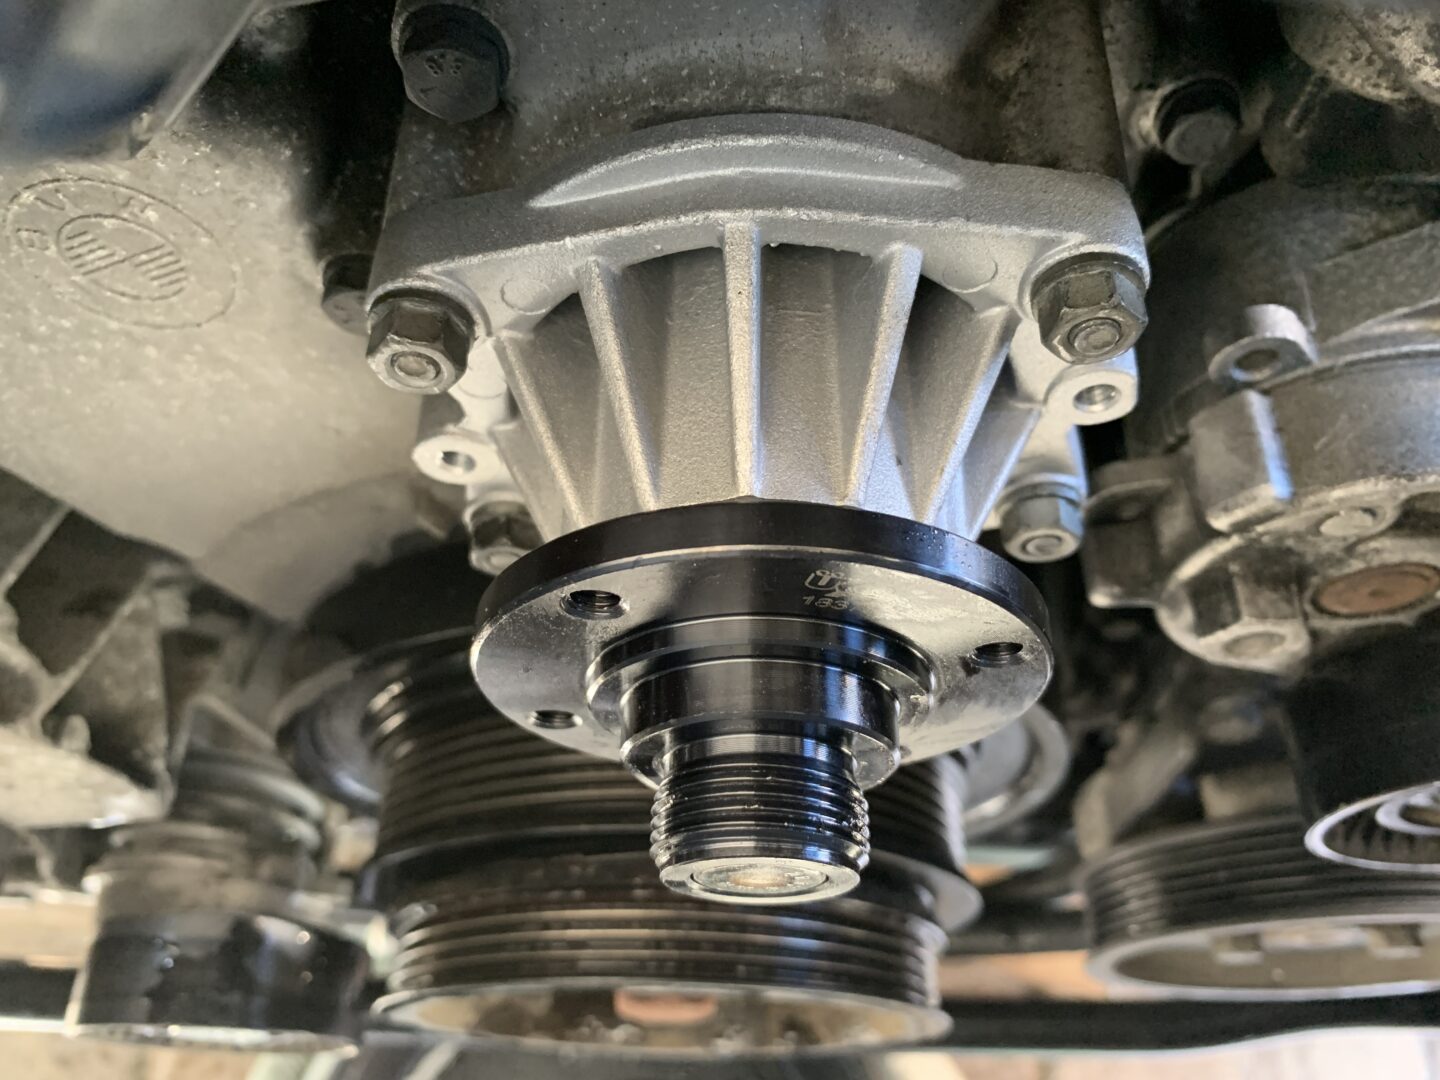
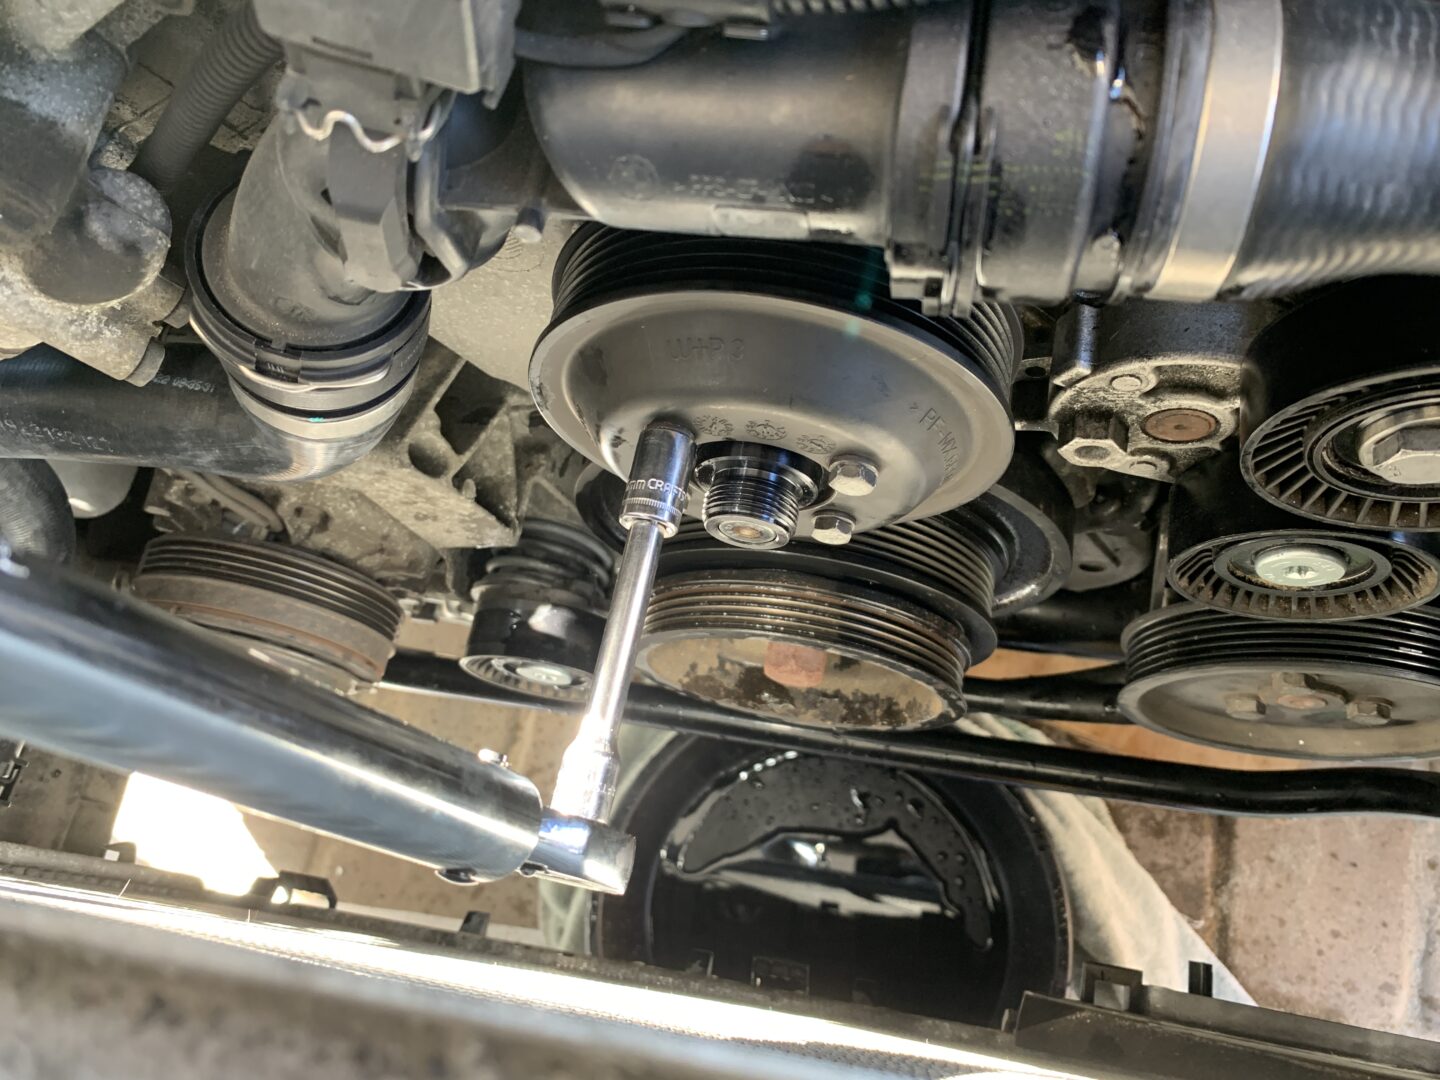
Reinstall the water pump and fasteners, torquing them to 89 in-lbs (~7 ft-lbs) of torque. Then reinstall the water pump pulley and torque the pulley bolts to 89 in-lbs (~7 ft-lbs) of torque.
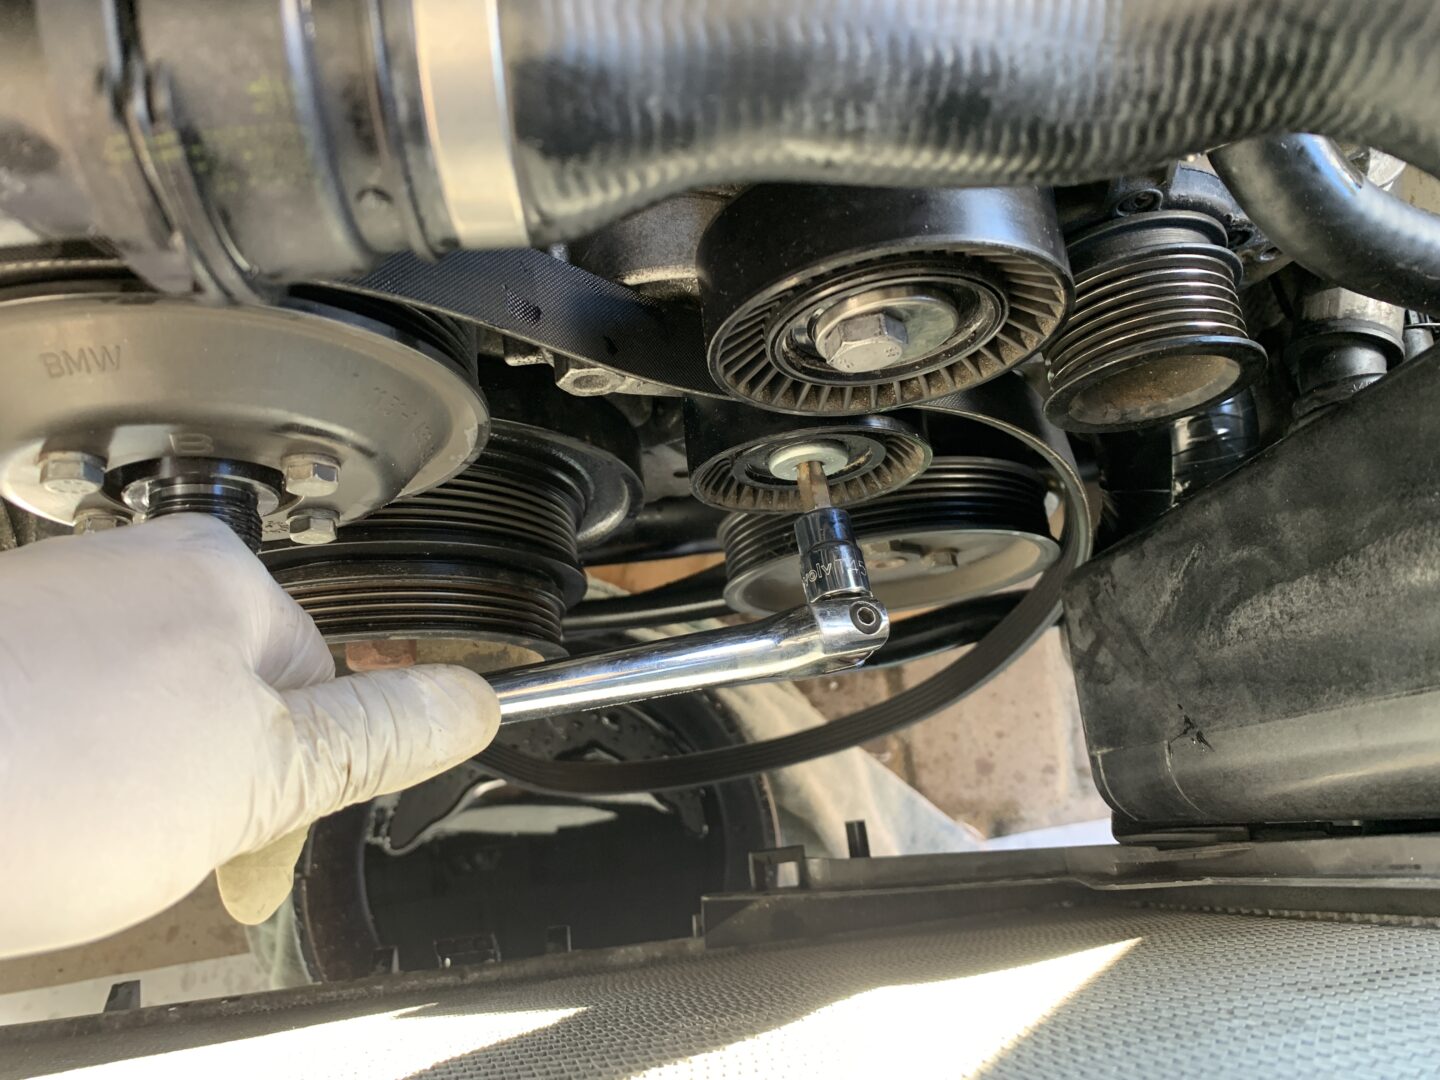
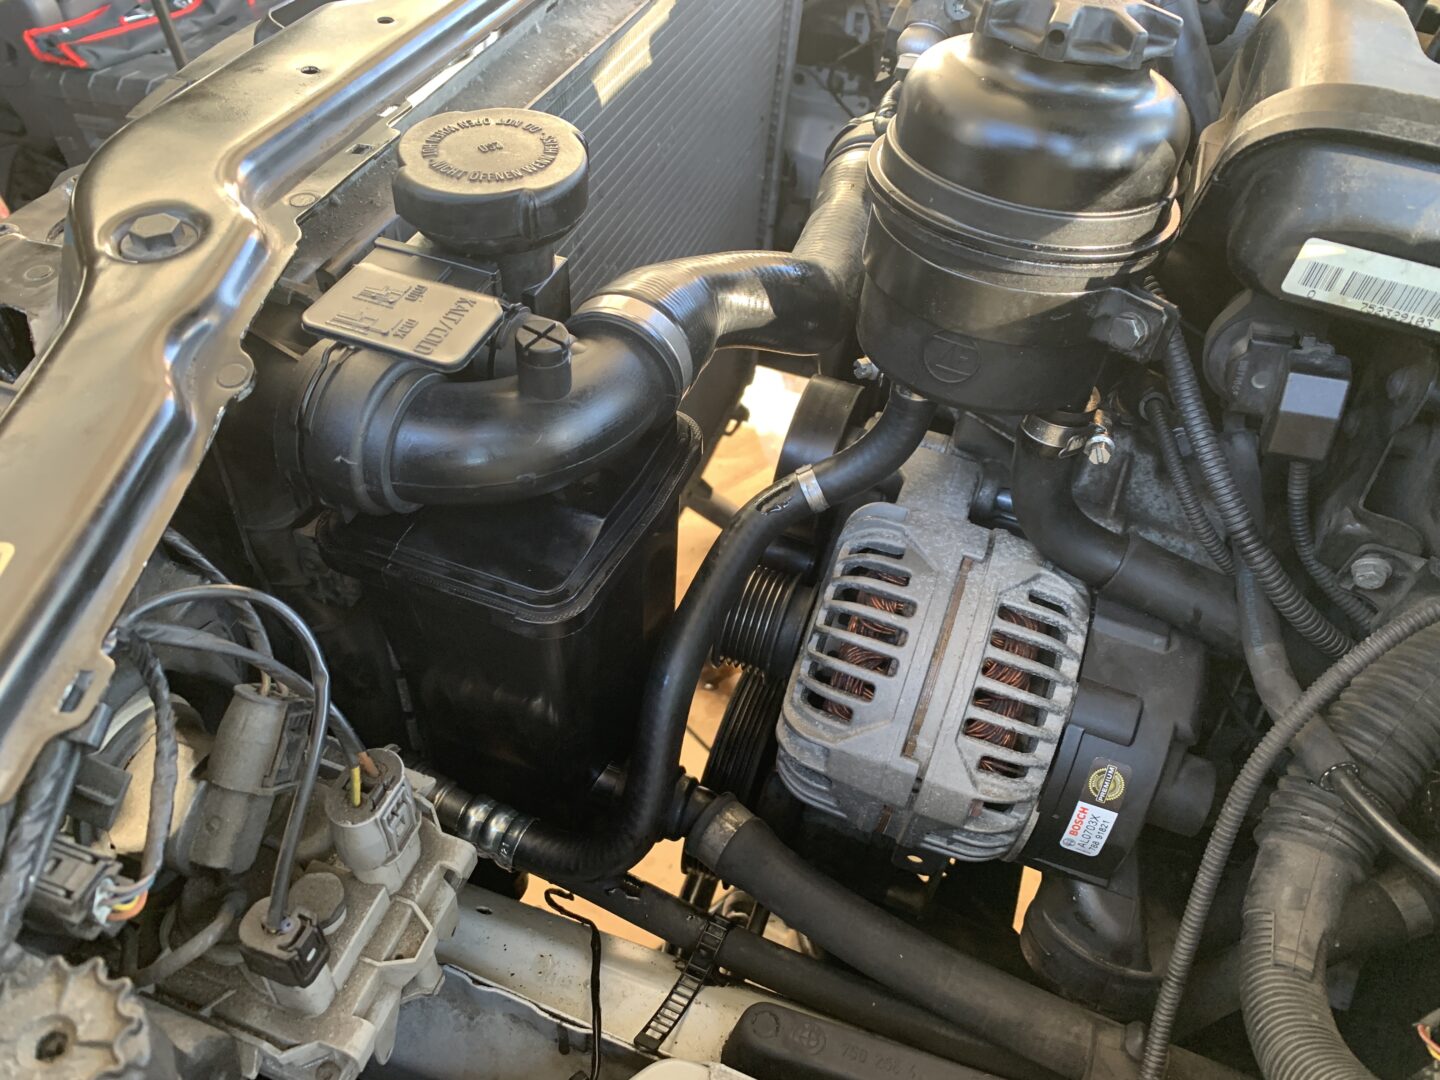
Then, screw the bottom expansion tank and radiator drain screws back on tight. Also, tighten the top of the expansion tank. Replace the upper and lower radiator hoses and press in the clips to secure them, if you haven’t already. Reinstall the other components that you removed in reverse order.
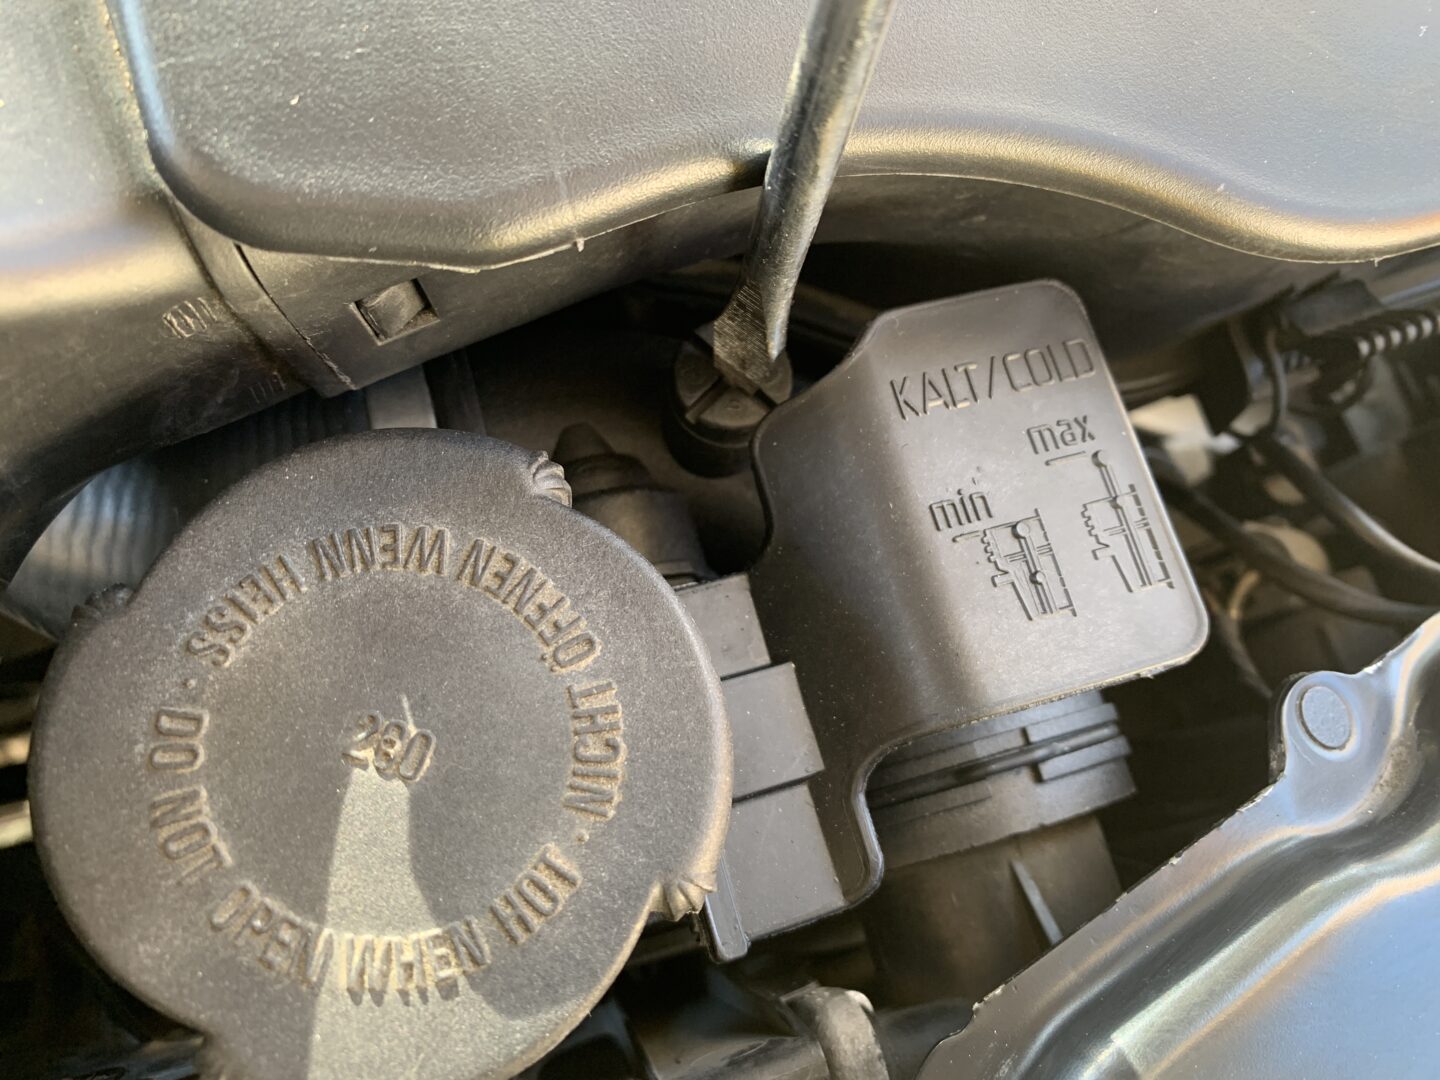
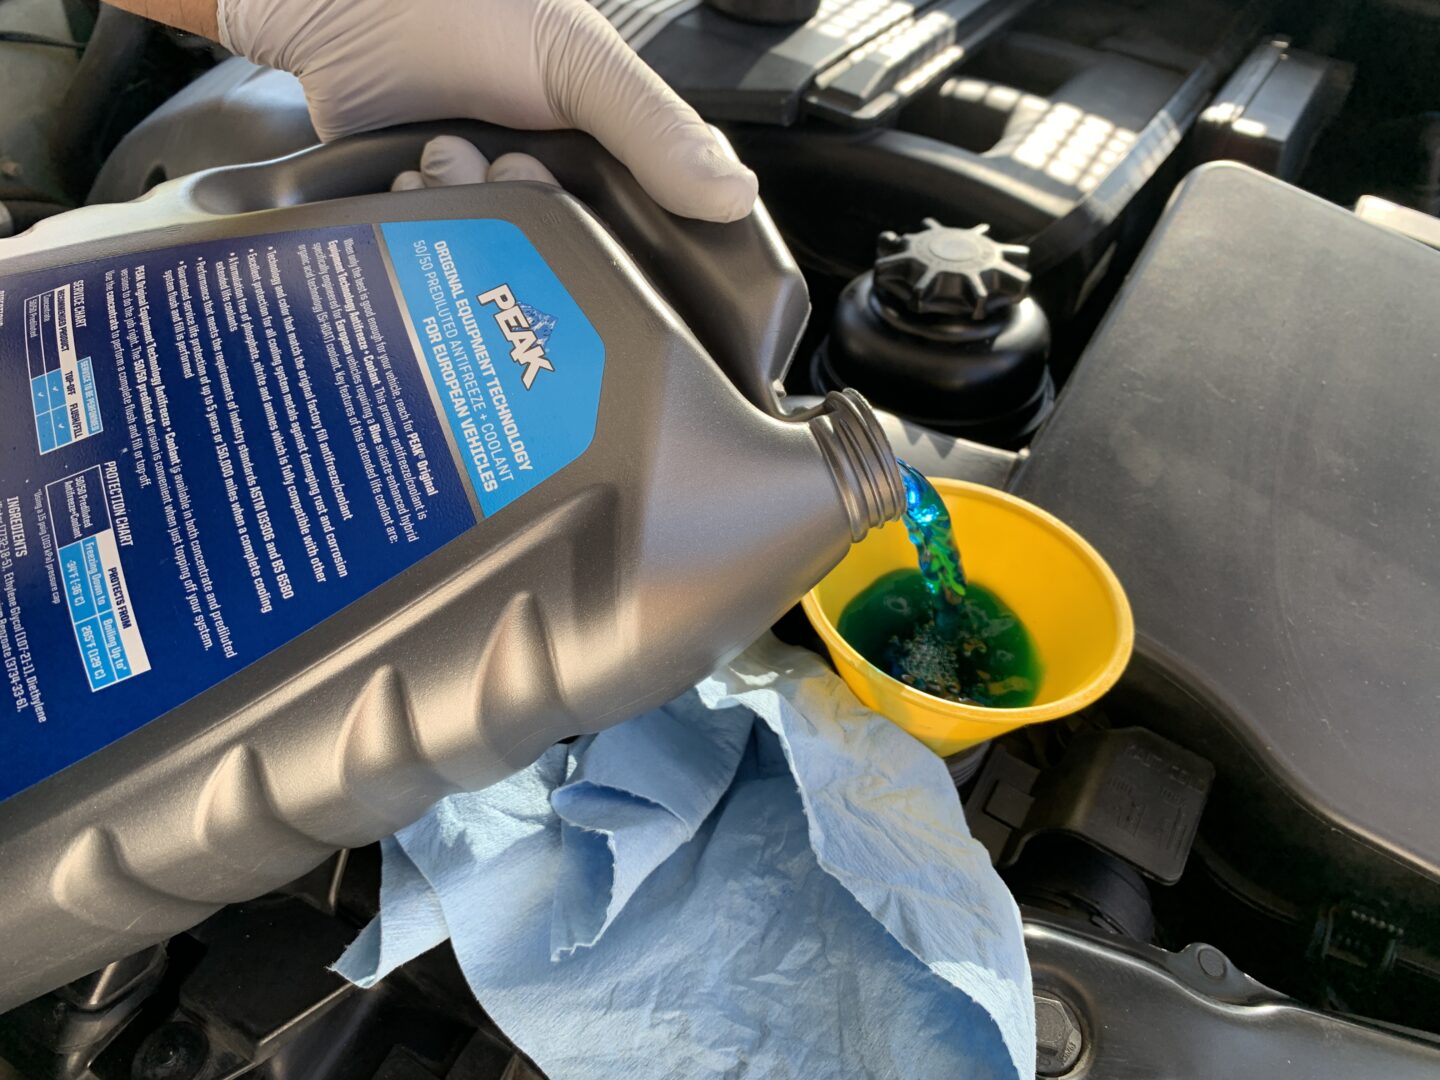
Refill the coolant and ensure that there are no leaks. You should refill the coolant until it begins to flow out of the bleeder vent (the screw right next to the fill port.) Now, loosen the bleeder vent screw, and turn the ignition to the ON position. Continue to fill coolant until it begins coming out of the bleeder vent again and all the air bubbles have worked themselves out.
Now, turn on the engine and allow it to warm up for a few minutes. When it is fully warmed up, shut the vehicle off and allow it to cool. Finally, top off the coolant until the coolant in the reservoir reaches the full mark.
After you’ve completed this process, replace the splash shield underneath the car and anything else that hasn’t been put back on the vehicle. Carefully go for a test drive and ensure everything is running properly. With this cooling system overhaul, you will be covered on the majority of components of your coolant system on your E46 that are most prone to fail.


