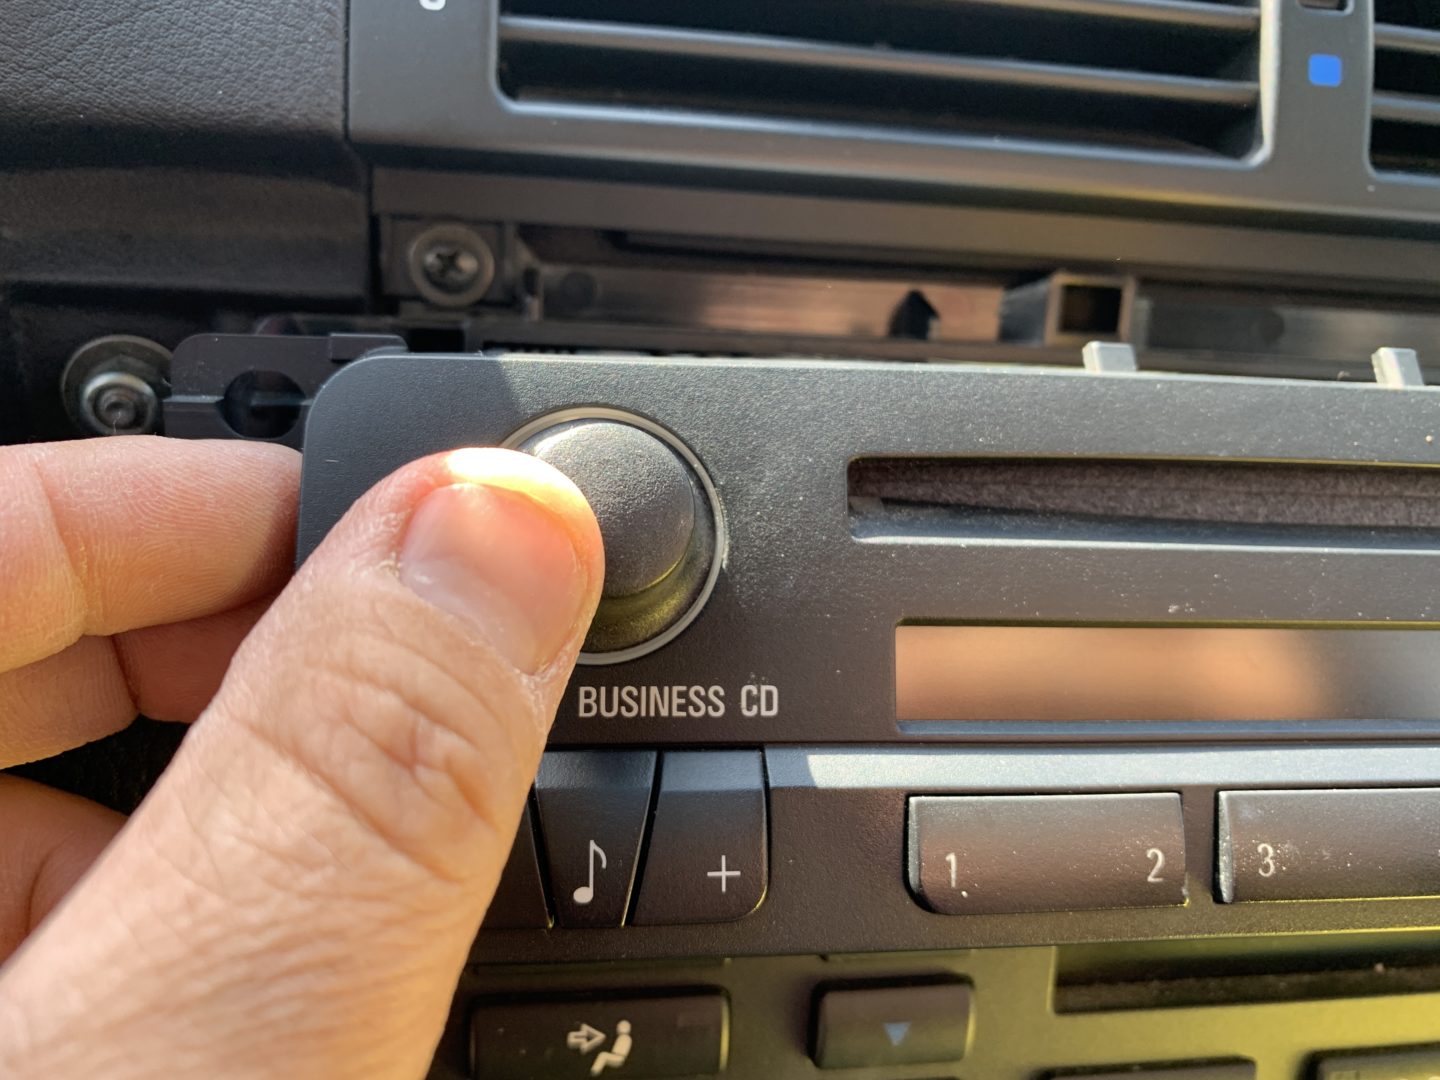
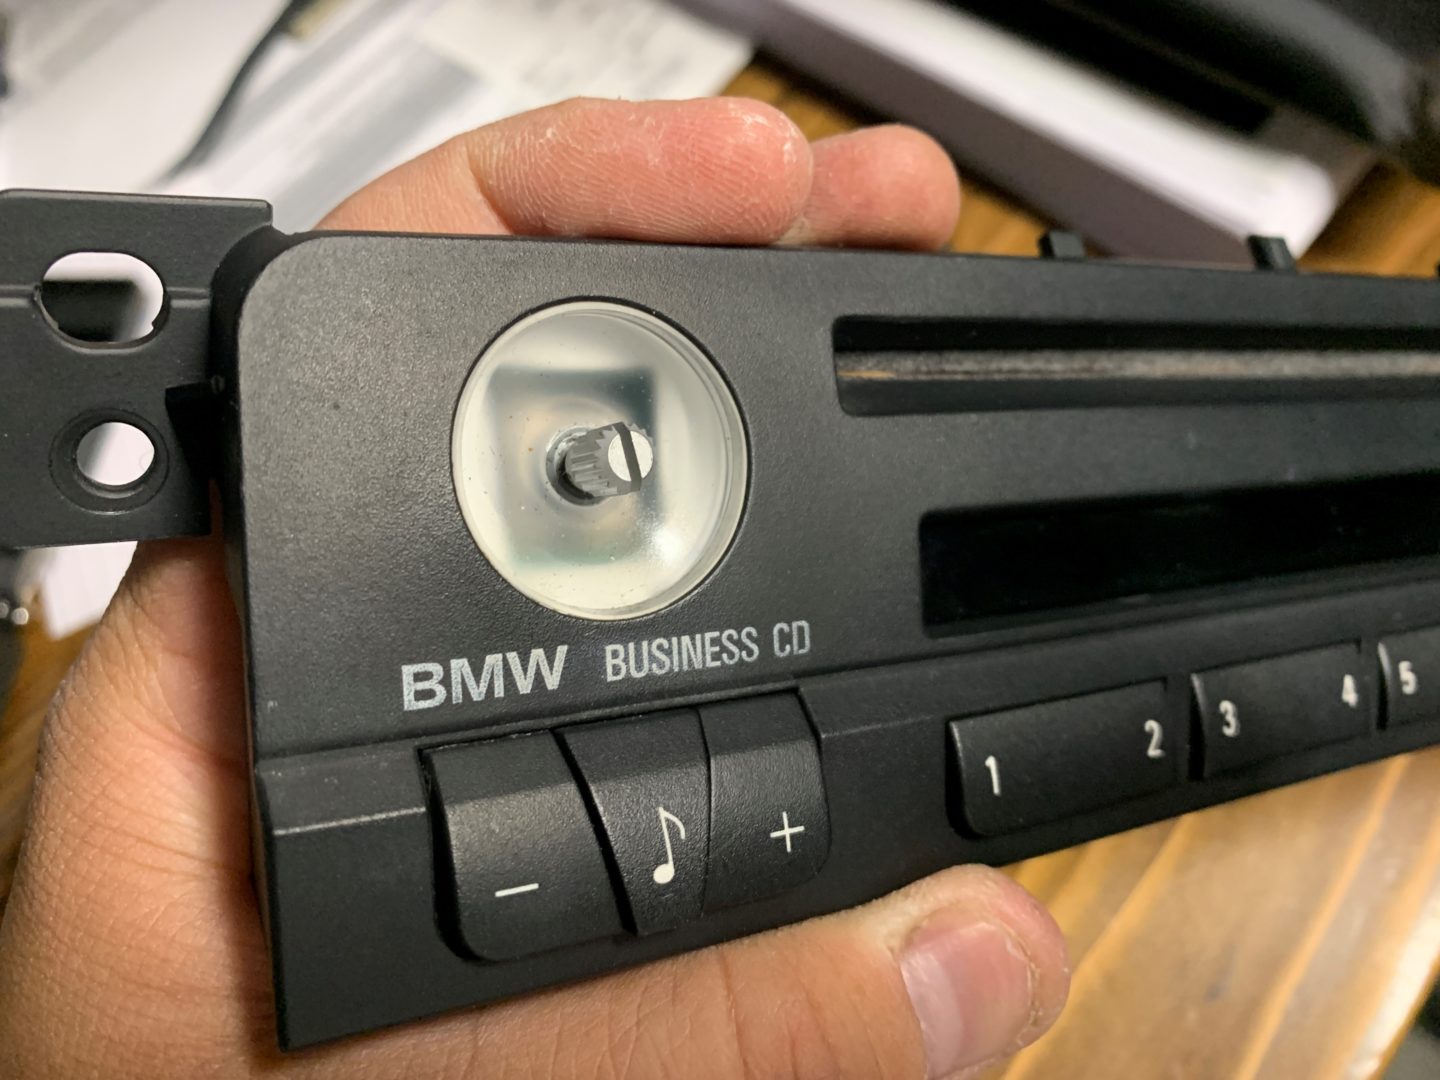
A very common issue on the BMW E46 is that the volume knob on the factory radio ends up breaking, so that you can no longer press the button to turn it on or off. It doesn’t matter which model E46 you have: 323i, 325i, 328i, or 330i (convertible/sedan/coupe), all of these vehicles use a similar BMW Business CD radio unit.
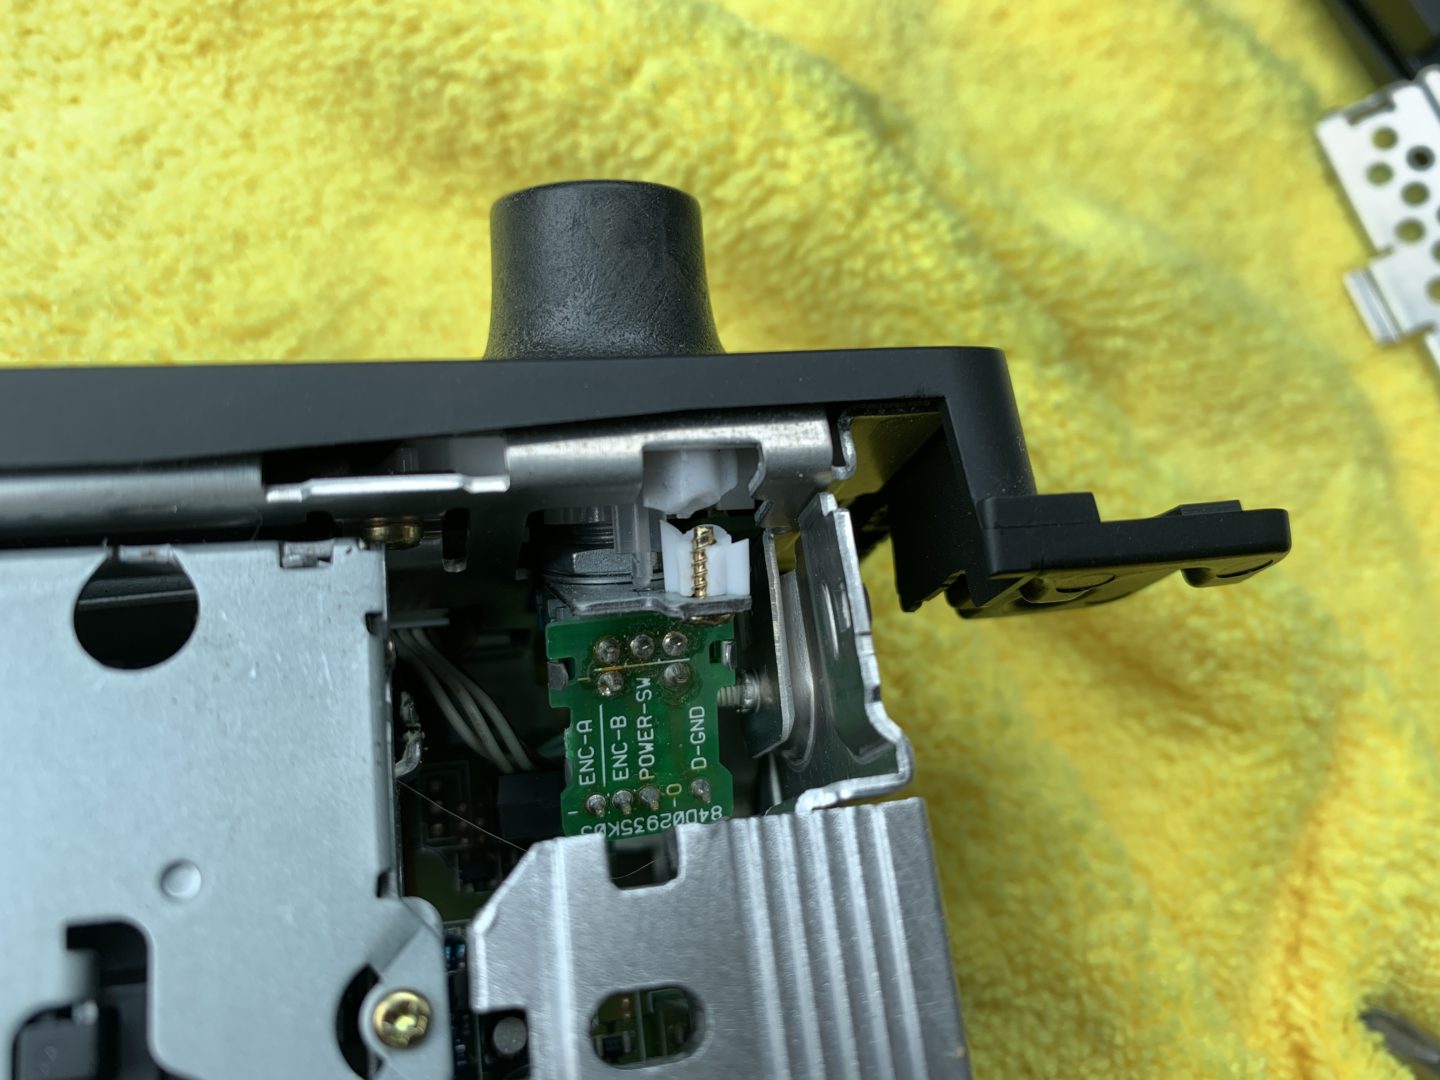
Basically what happens is that there is a plastic mounting base located behind the volume button (requires opening the head unit to gain access to) and there are screws that hold the volume button to the base. This allows the volume button to be pressed against a push button switch.
Because this mounting base is made of plastic, it can easily break. As a result, the small screws that are supposed to hold onto the mounting base are no longer doing so. Now, pressing the volume button no longer presses against the push button switch, hence the reason for the now inoperable power/volume button.
There is actually another style power/volume button on some E46 radios that don’t have this plastic mounting base, and those can be identified by the ability to pull the volume know off of the front of the radio. For the E46 radios that have the fragile plastic mounting base, you cannot pull the front volume button off the front of the radio.
The 3 Ways to Fix the Broken Volume Knob Button
There are a few ways of fixing this broken volume button issue:
- Make a repair to the plastic mounting base behind the button. (Free)
- Replace the plastic mounting base with a new one. (~$15)
- Replace the entire radio head unit. (~$50)
The E46 was in production in the US from 1999-2006, so at the time of this writing these cars are a good 15+ years old. Up until now, it may have been a bit pricey to source a used replacement radio, which has for some time, motivated E46 owners to fix their own radios. However nowadays, you can pick up a replacement radio for $40-$60 depending on where you get it from. The most common ways to get them would be to get it at a local junkyard or from Ebay. Generally, it’s much easier to swap out the factory radio than to do a repair.
With that said, you can always fix your radio for practically no cost, although it may be more of a band-aid fix than a true repair. In addition, you can spend about $15 to purchase a plastic mounting base and replace it yourself. If you want to do a quick fix or want to spend little to no money, then this would be the option for you.
Tools & Materials
Trim Removal Tools
These are critical to removing the interior trim without damaging your interior.
Tresalto Auto Trim Removal Tool Kit, Set of 5 Pcs
Electronics Precision Screwdriver Set
These are useful for the smaller screws you’ll find inside of the radio if you plan on making repairs to your existing factory radio. You’ll also need some regular-sized screwdrivers for removing the screws on the outer casing of the radio unit.
ORIA Precision Screwdriver Kit
Volume Button Plastic Mounting Base
If you want to replace the plastic mounting base behind the volume knob, replacement parts are available on Ebay. It looks like each Ebay seller who sells this product has their own type of design that is either a direct replacement or one that claims to be a more robust design. These range quite a bit in cost and come from different parts of the world. Just remember, it’s a piece of plastic… so compare the cost of this with the cost of a full radio replacement to see if it’s even worth going this route.
Volume Button Mount Base: engelwurzmotors / bavtek / electromanjohn
Factory Radio for the BMW E46
If you plan on replacing your radio, it is very easy to swap it out with another one. Here are some things you need to be aware of if you plan on replacing your factory radio:
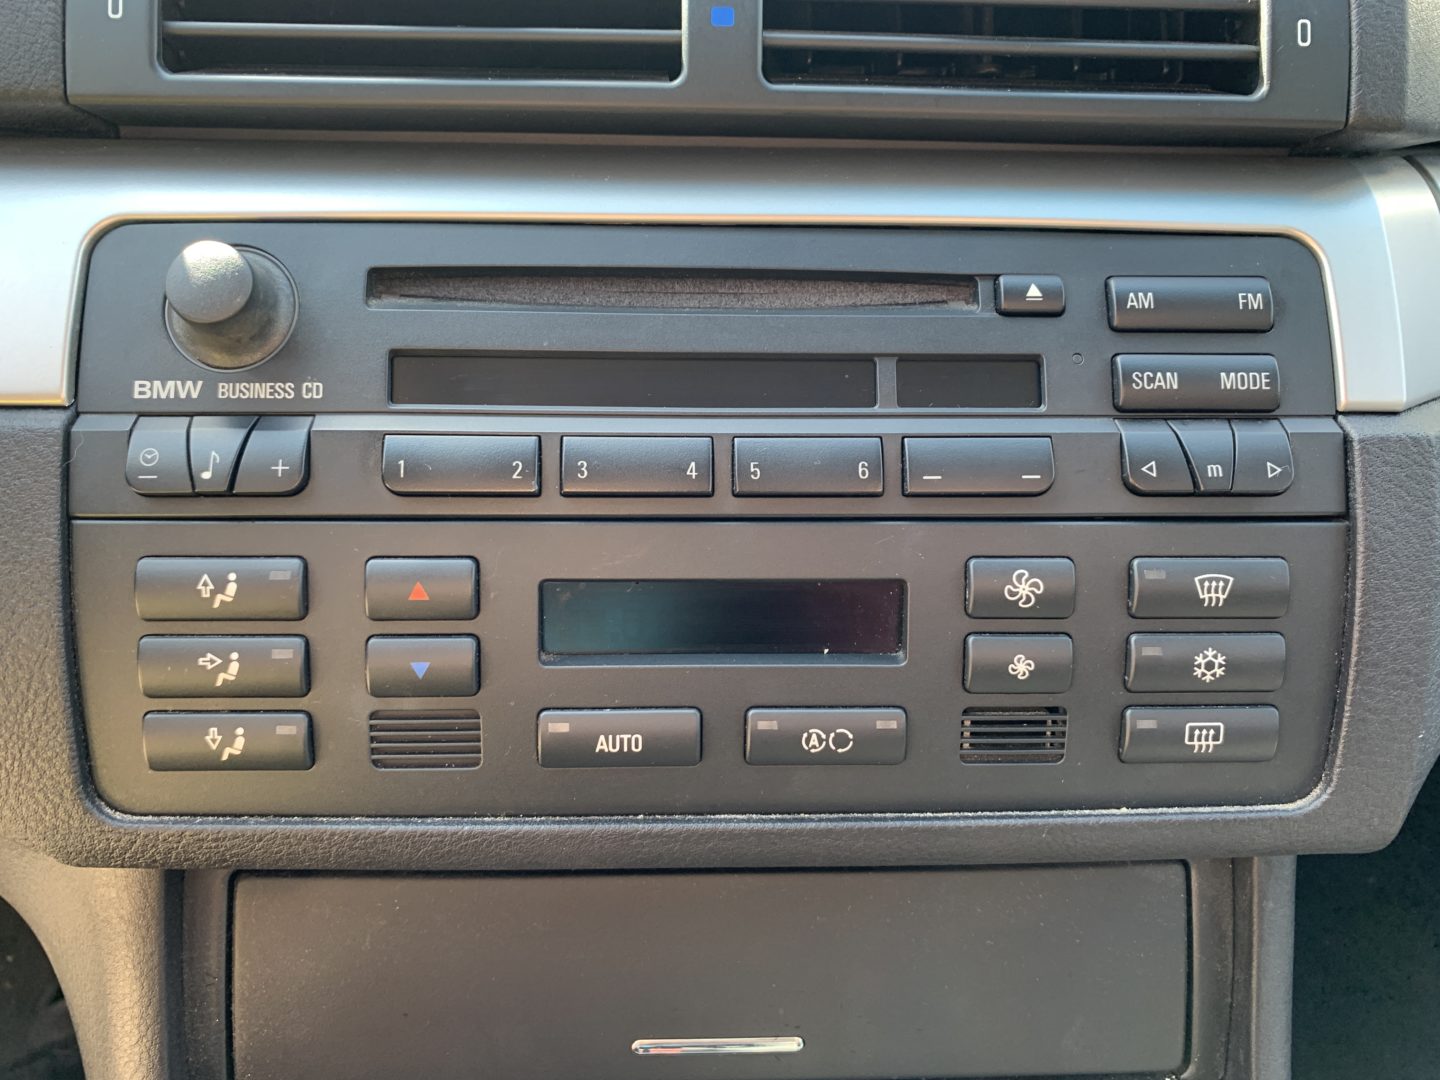
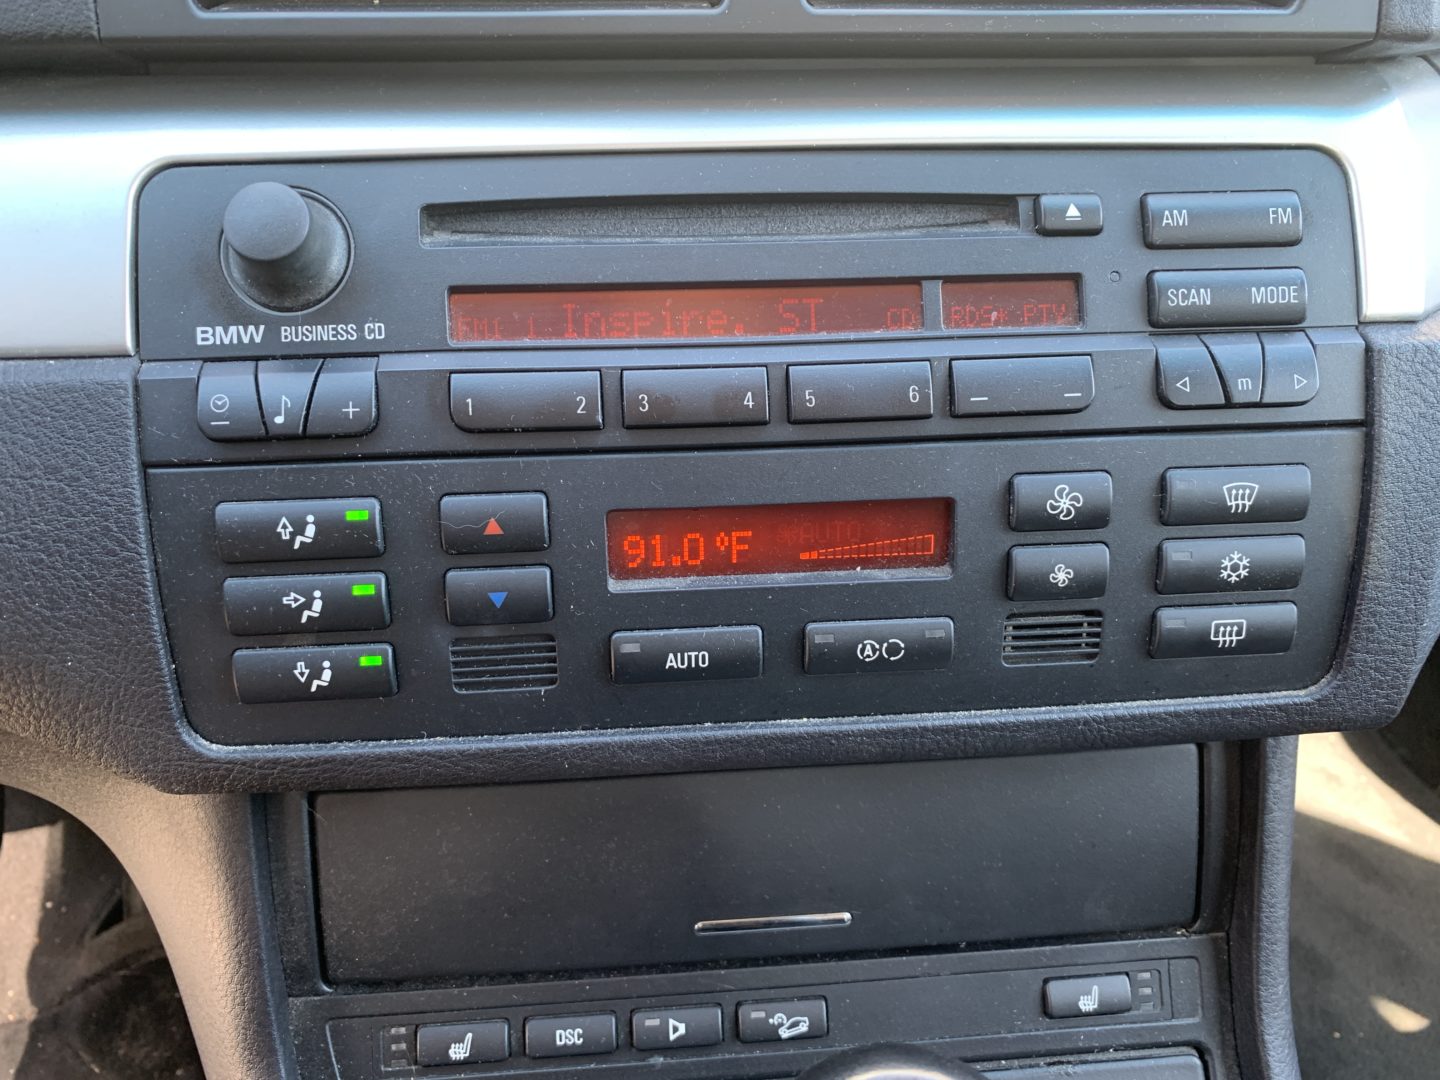
The first thing is there are two brands of factory radios out there for the E46: the Blaupunkt radios found in 1999-2001 model years, and the Alpine radios found in 2001-2006 model years. They look identical with the exception of CD/MODE button on the right-hand side of the unit (Blaupunkt says CD, Alpine says MODE). I believe the connections to the back of the two radios are different, therefore you can’t just do a direct swap between these two radio types.
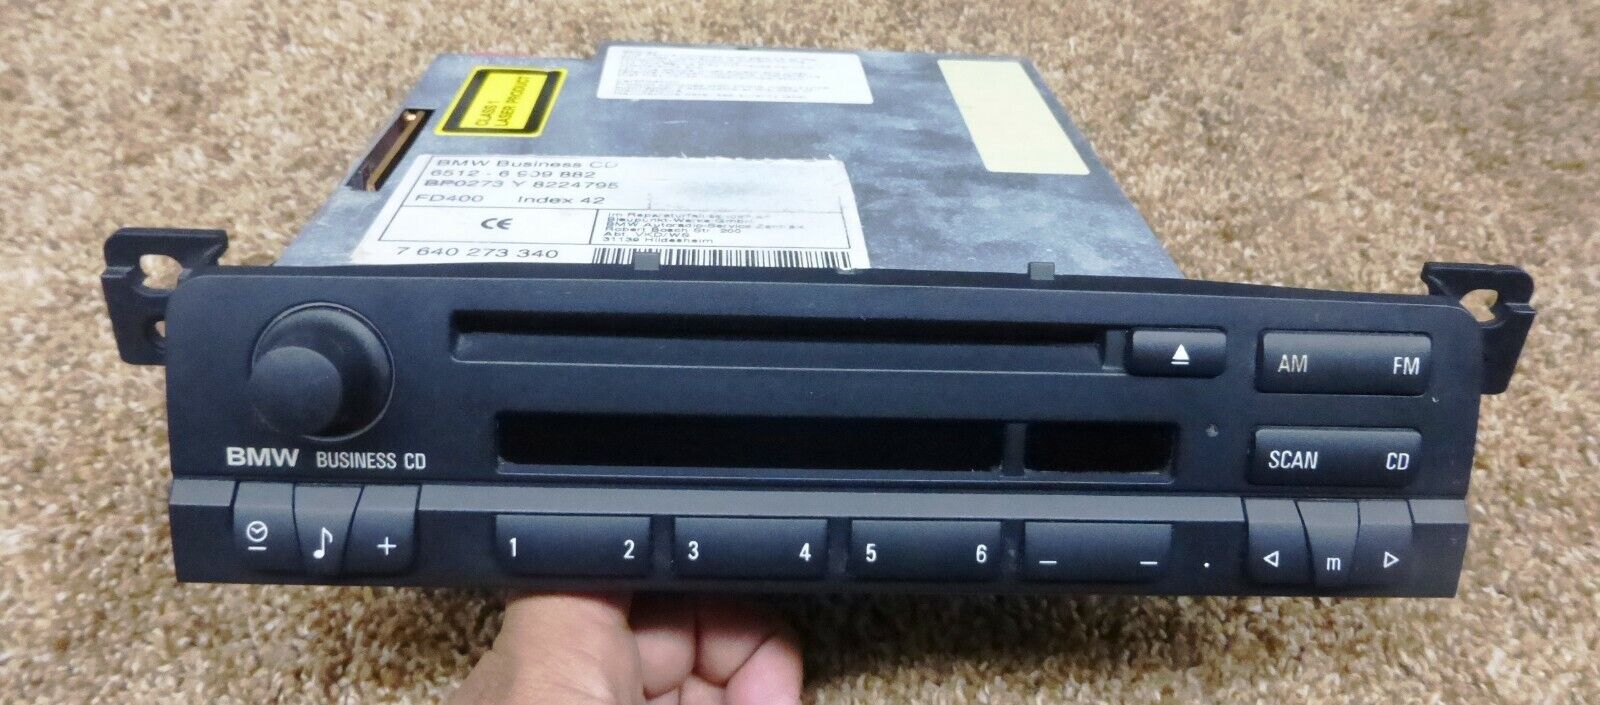
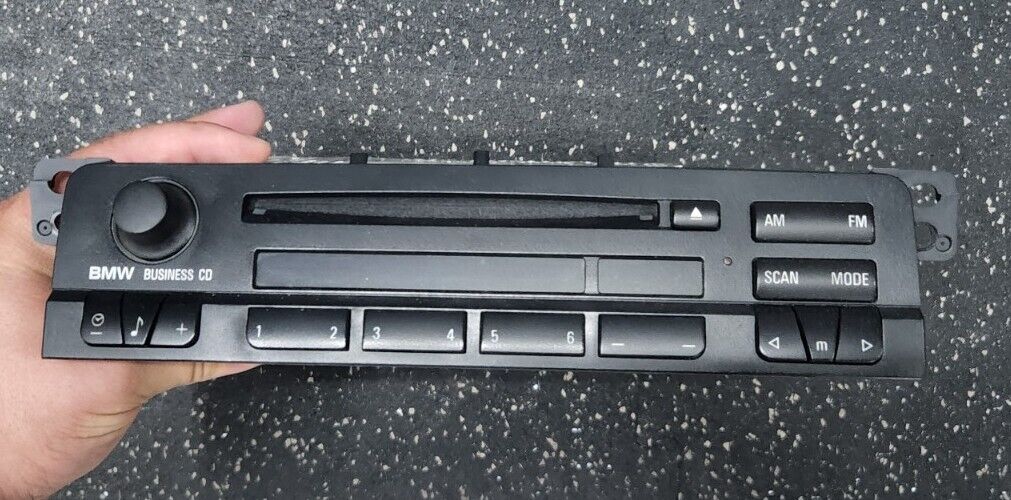
The second thing to know about these factory radios is that there are two different styles of volume buttons. There is one where the volume button can be pulled off of the knob, and there is another where the volume button is integrated into the head unit and therefore cannot be pulled off. For the repair portion of this guide, I will be focused on the volume button that does not pull off, which is the radio that has the plastic mounting base that commonly breaks.
Another thing that you should be aware of is that the used factory radio that you’re using as a replacement may already have issues of its own. This can be the same broken volume knob issue, or it can even have issues with damaged pixels on the LCD screen. These are problems that you risk running into by installing a used factory radio. If you’re buying on Ebay, you may want to ask the seller if there are any of these issues present with the unit they’re selling; you can also ask about their return policy in the case that you install it and you run into any of these issues. If you get a radio through the junk yard, check their return policy. For example, I know the local Pick-N-Pull junkyards where I live in Northern California allow you to return your part for credit.
Finally, the last thing you should know is that there are number of different E46 factory radios with different BMW part numbers, which correspond to different production timeframes. These different units also have various capabilities, such as being able to play music from an iPod, connect to Sirius XM Radio, and the ability to read MP3 CD’s.
Below is a table with information I’ve compiled from various BMW forums from member delmarco, who has provided a wealth of information related to these factory radios. If you plan to replace your radio, check the part number on the replacement unit to see what capabilities you might want to have on your E46. Having these part numbers also can help you find a deal online for a used radio because you’re able to search by the exact part number.
| Manufacturer | BMW Part Number | Production Date | Capabilities |
|---|---|---|---|
| Blaupunkt | 6512-6 909 883 | — | iPod Data1 |
| Blaupunkt | 6512-6 909 882 | — | iPod Data1 |
| Blaupunkt | 6512-6 902 661 | — | iPod Data1 |
| Alpine | 65. 12-6 916 241 | Jul 2001 | iPod Data1 |
| Alpine | 65. 12-6 915 711 | Sep 2001 | iPod Data1 |
| Alpine | 65. 12-6 919 072 | Dec 2001 – Jun 2002 | iPod Data1, Sirius XM |
| Alpine | 65. 12-6 921 963 | Jul 2002 – Jan 2003 | iPod Data1, Sirius XM |
| Alpine | 65. 12-6 927 902 | Feb 2003 – Aug 2003 | iPod Data1, Sirius XM, AUX |
| Alpine | 65. 10-6 927 903 | RMFD2 thru Dec 2006 | iPod Data1, Sirius XM, AUX |
| Alpine | 65. 12-6 941 505 | Jan 2004 – Sep 2004 | iPod Data1, Sirius XM, AUX |
| Alpine | 65. 12-6 941 506 | RMFD2 thru Dec 2007 | iPod Data1, Sirius XM, AUX |
| Alpine | 65. 12-6 943 429* | Oct 2004 – Sep 2005 | iPod Data1, Sirius XM, AUX, MP3 CD |
| Alpine | 65. 12-6 943 430 | RMFD2 thru 2008 | iPod Data1, Sirius XM, AUX, MP3 CD |
| Alpine | 65. 12-6 961 215 | Dec 2005 – May 2006 | iPod Data1, Sirius XM, AUX, MP3 CD |
Note 2: RMFD = Remanufactured/Refurbished. This is a unit that would have been a replacement of a factory-recalled unit under warranty. These units would be refurbished and then the part number would have had one number added to the end of the part number for a new refurbished part number. For example, Part No. 65. 12-6 927 902 had issues and was repaired under warranty; it now has a new Part No. 65. 12-6 927 903.
* Part Number 65.12-6 943 429 was an especially problematic radio unit with even a factory recall tied to this part number. Try to avoid getting this unit if at all possible.
How to Fix a Broken Volume Knob on a BMW E46
I’ll go through the process of removing the factory radio, repairing the volume button, and replacing the entire factory radio so you’re covered no matter what you decide to do.
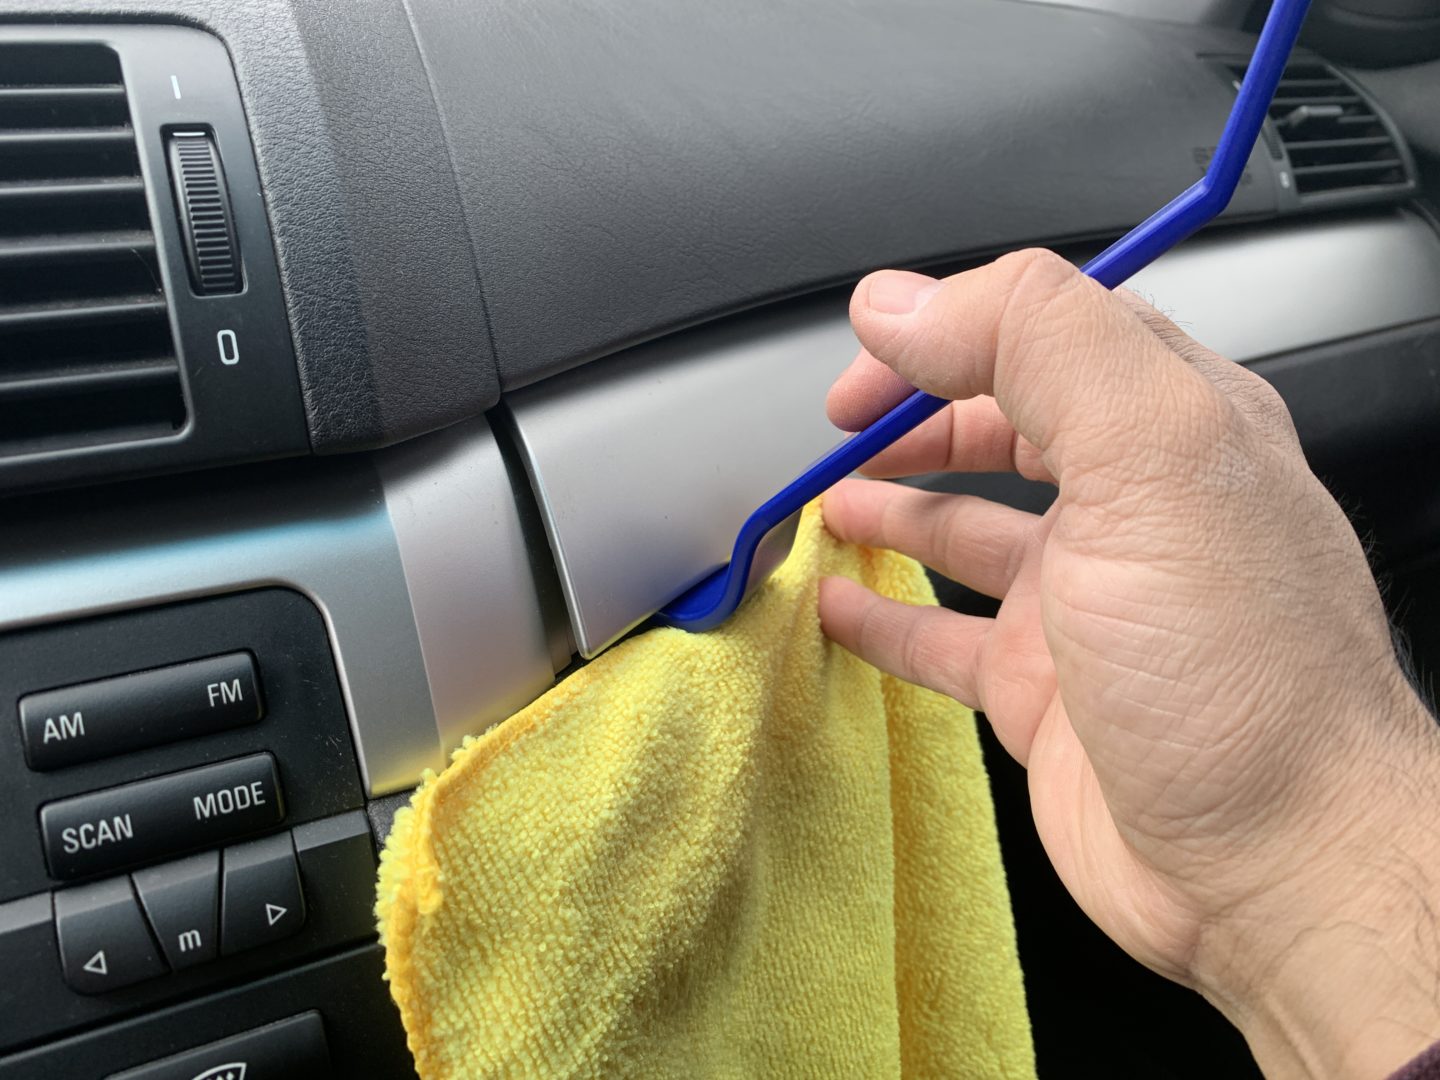
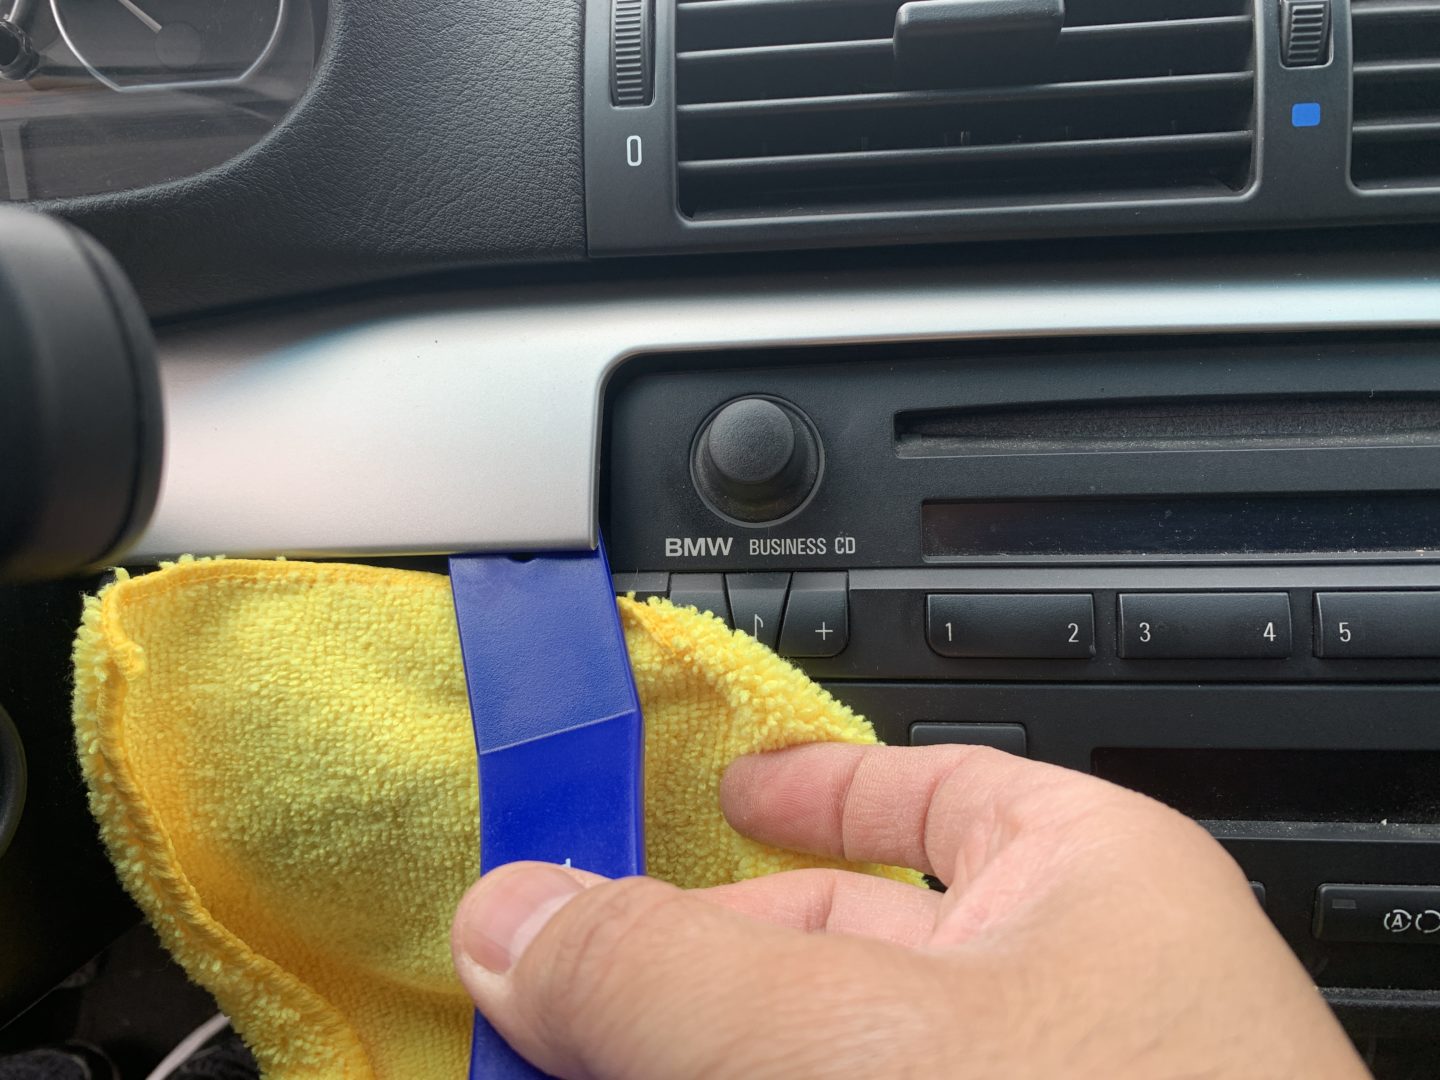
When using a plastic trim tool, pry against a microfiber towel to ensure you don’t damage the interior. This is good practice especially on older vehicles as even plastic tools can leave dents and imprints into your dashboard.
Pry up the left-hand side of the passenger side dashboard trim. Then pry out and remove the center trim piece. The center trim piece sits behind the passenger side trim, therefore you need to remove the left side of the passenger trim first.
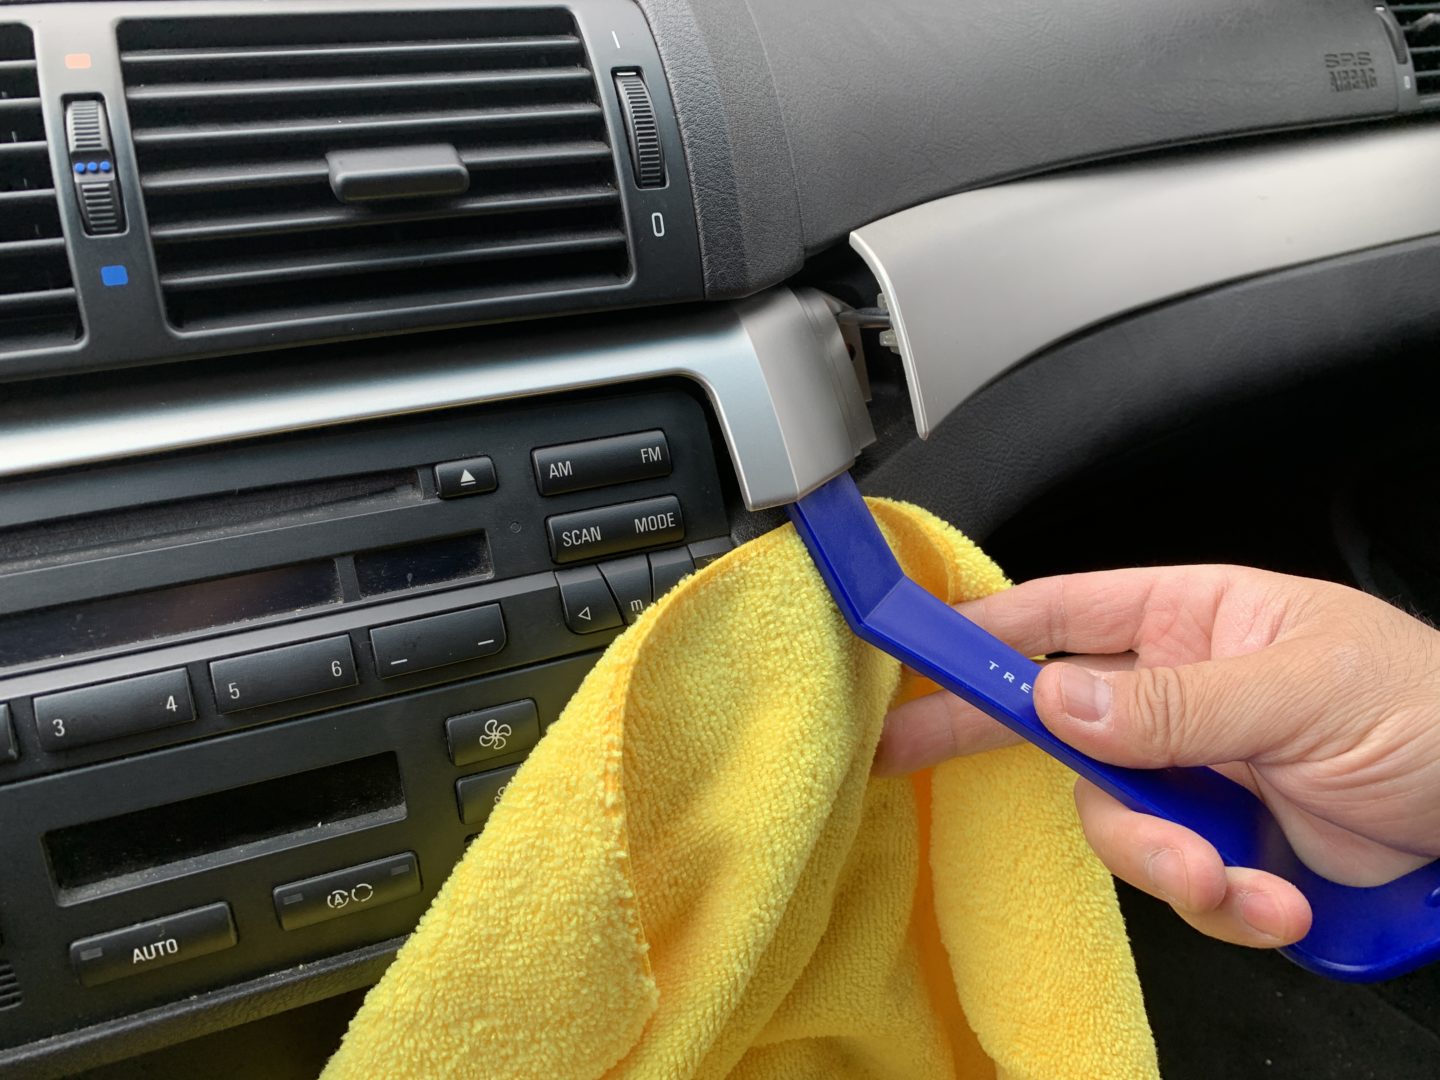
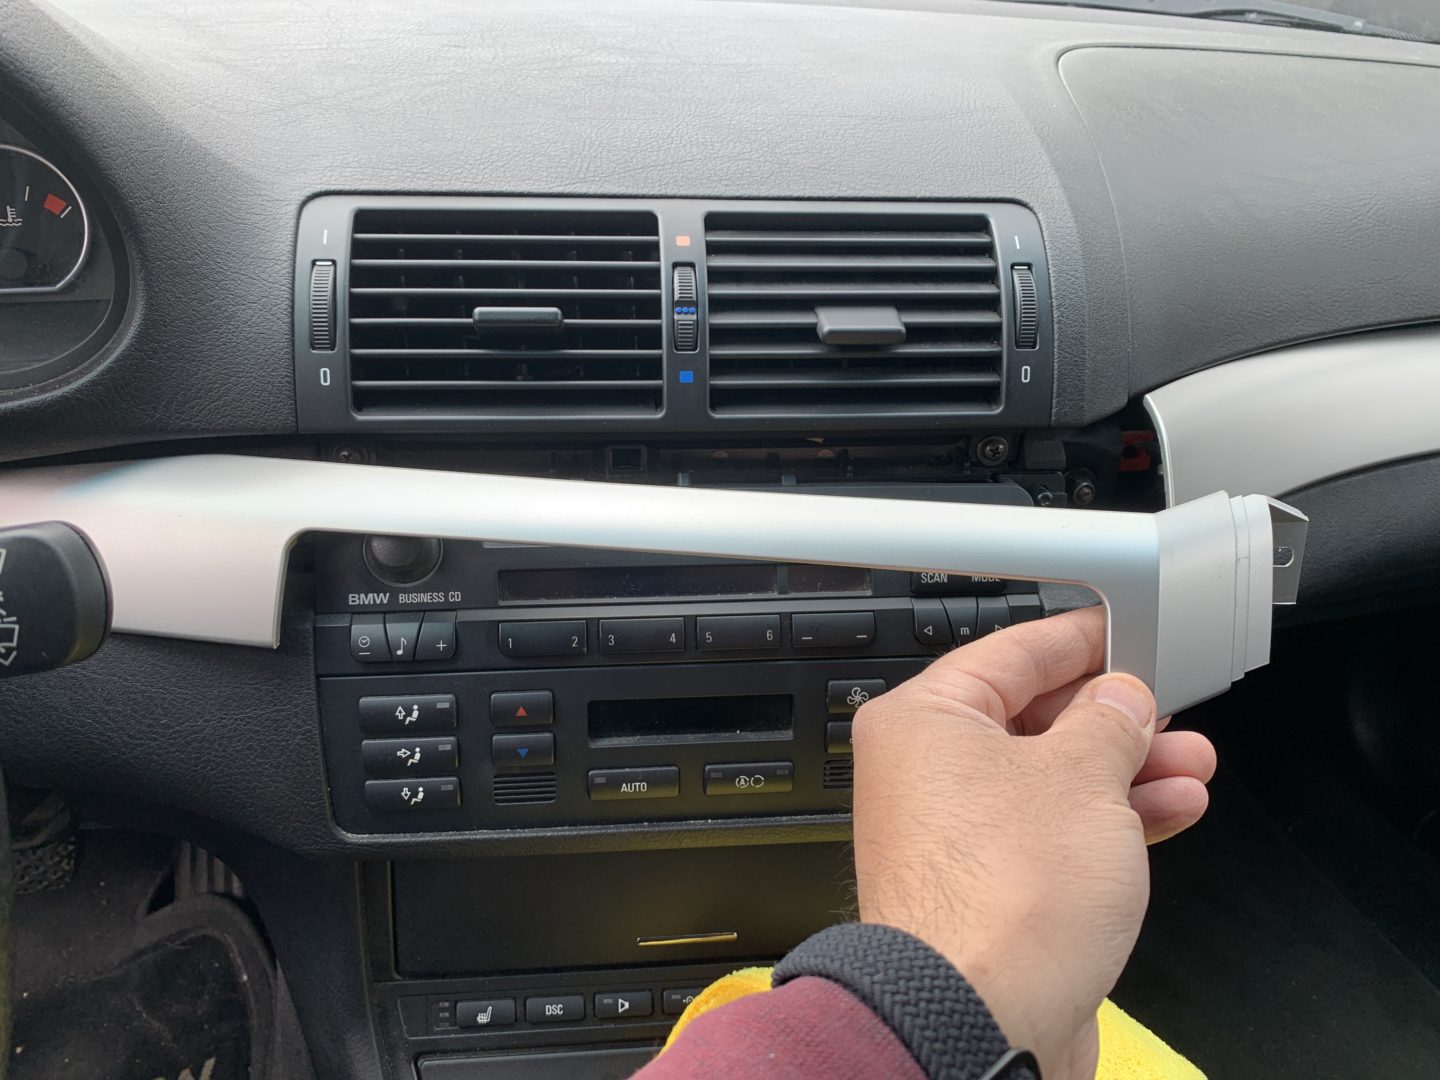
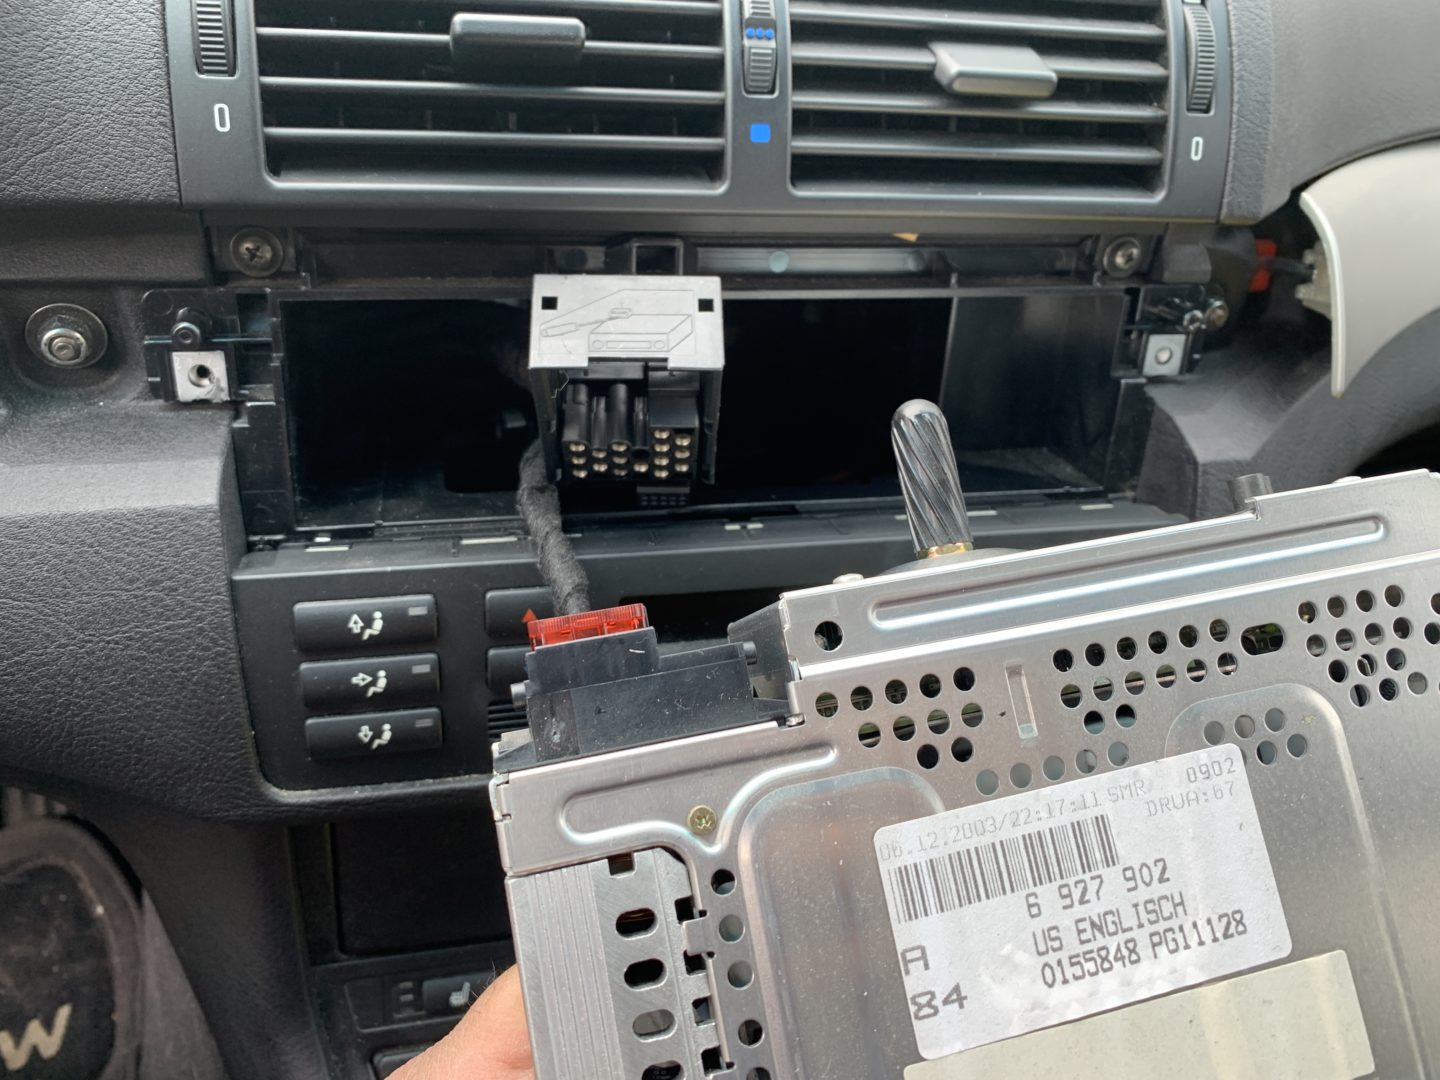
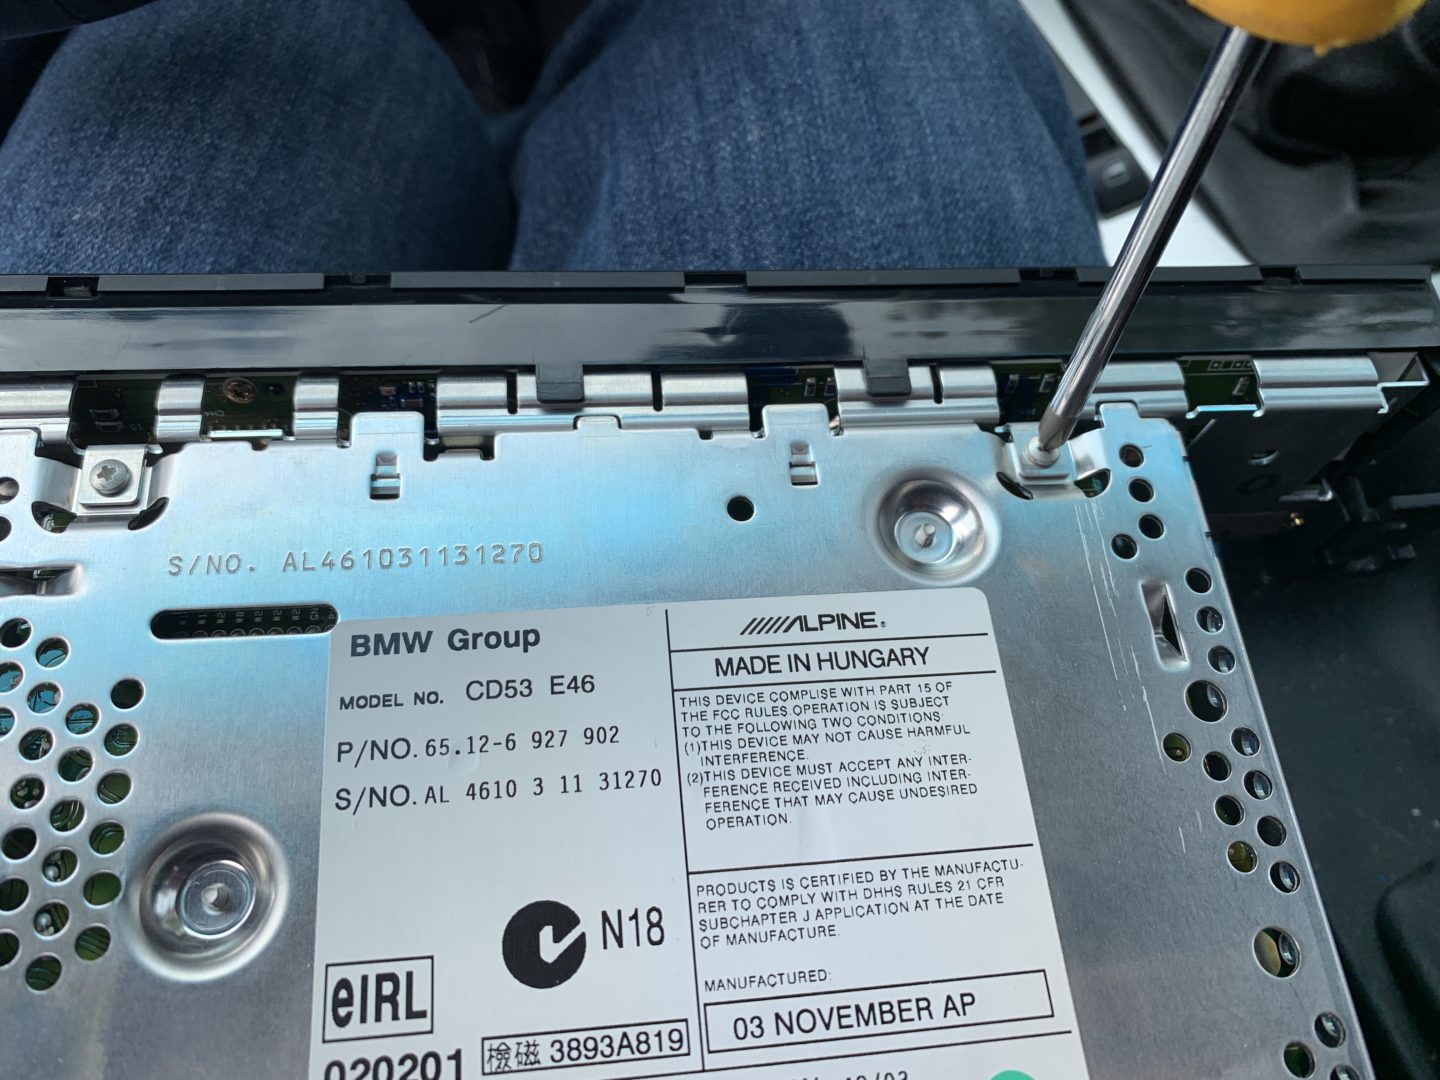
You now have access to the (2 qty) Phillips head screws that hold the radio unit in place. Remove those and you can pull the radio out.


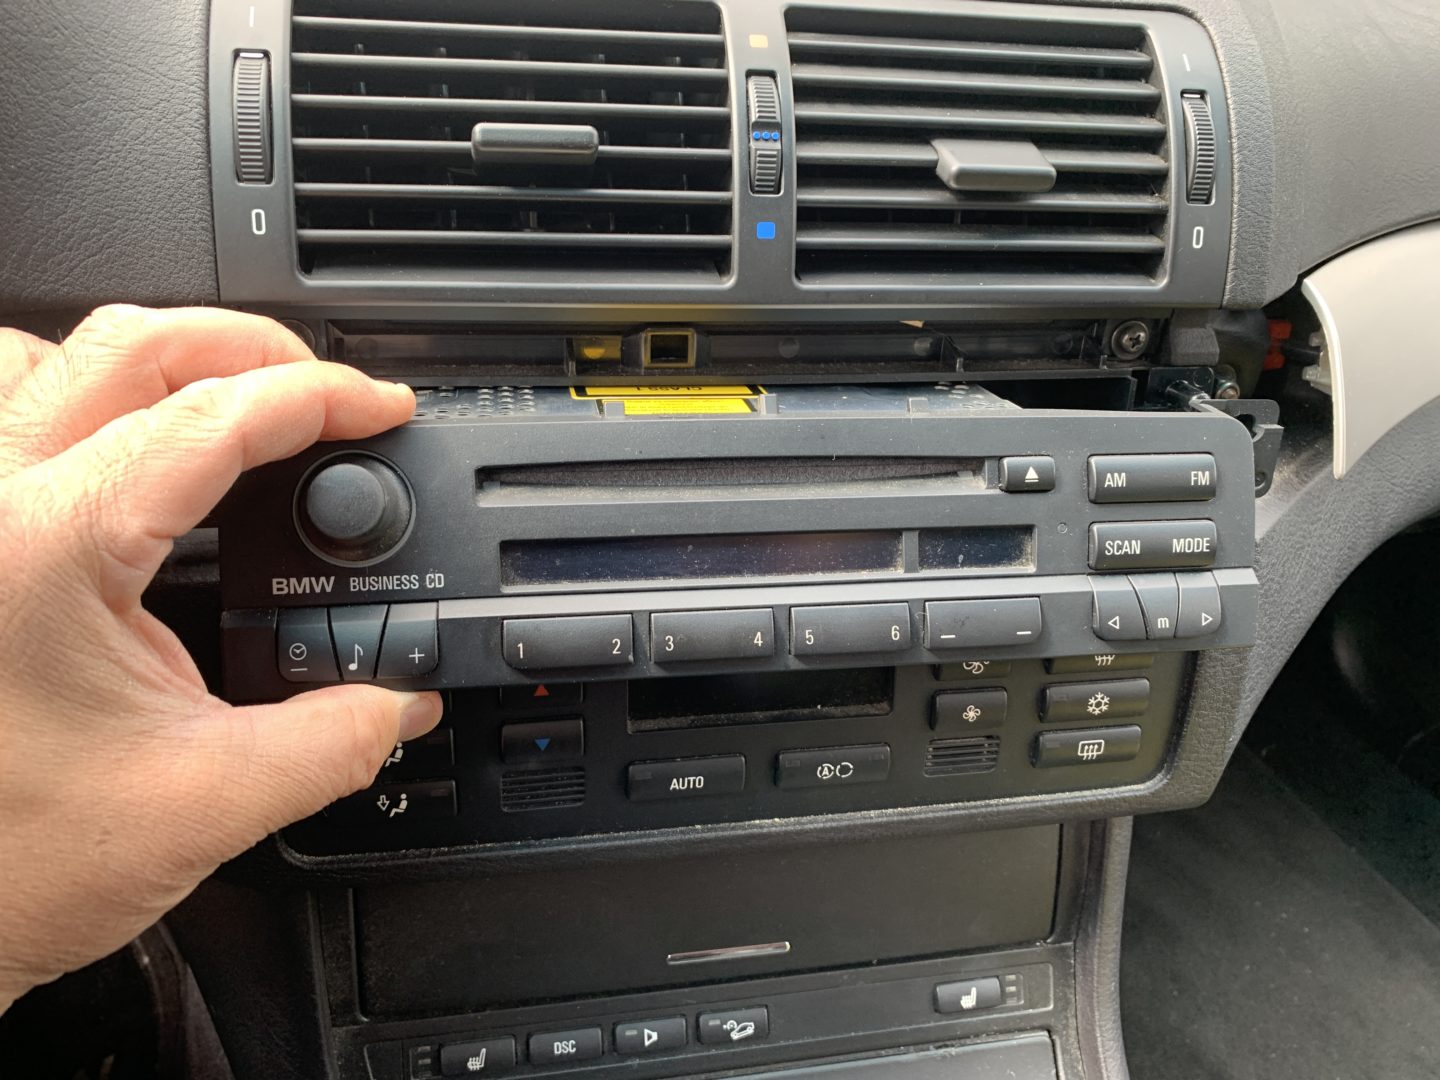
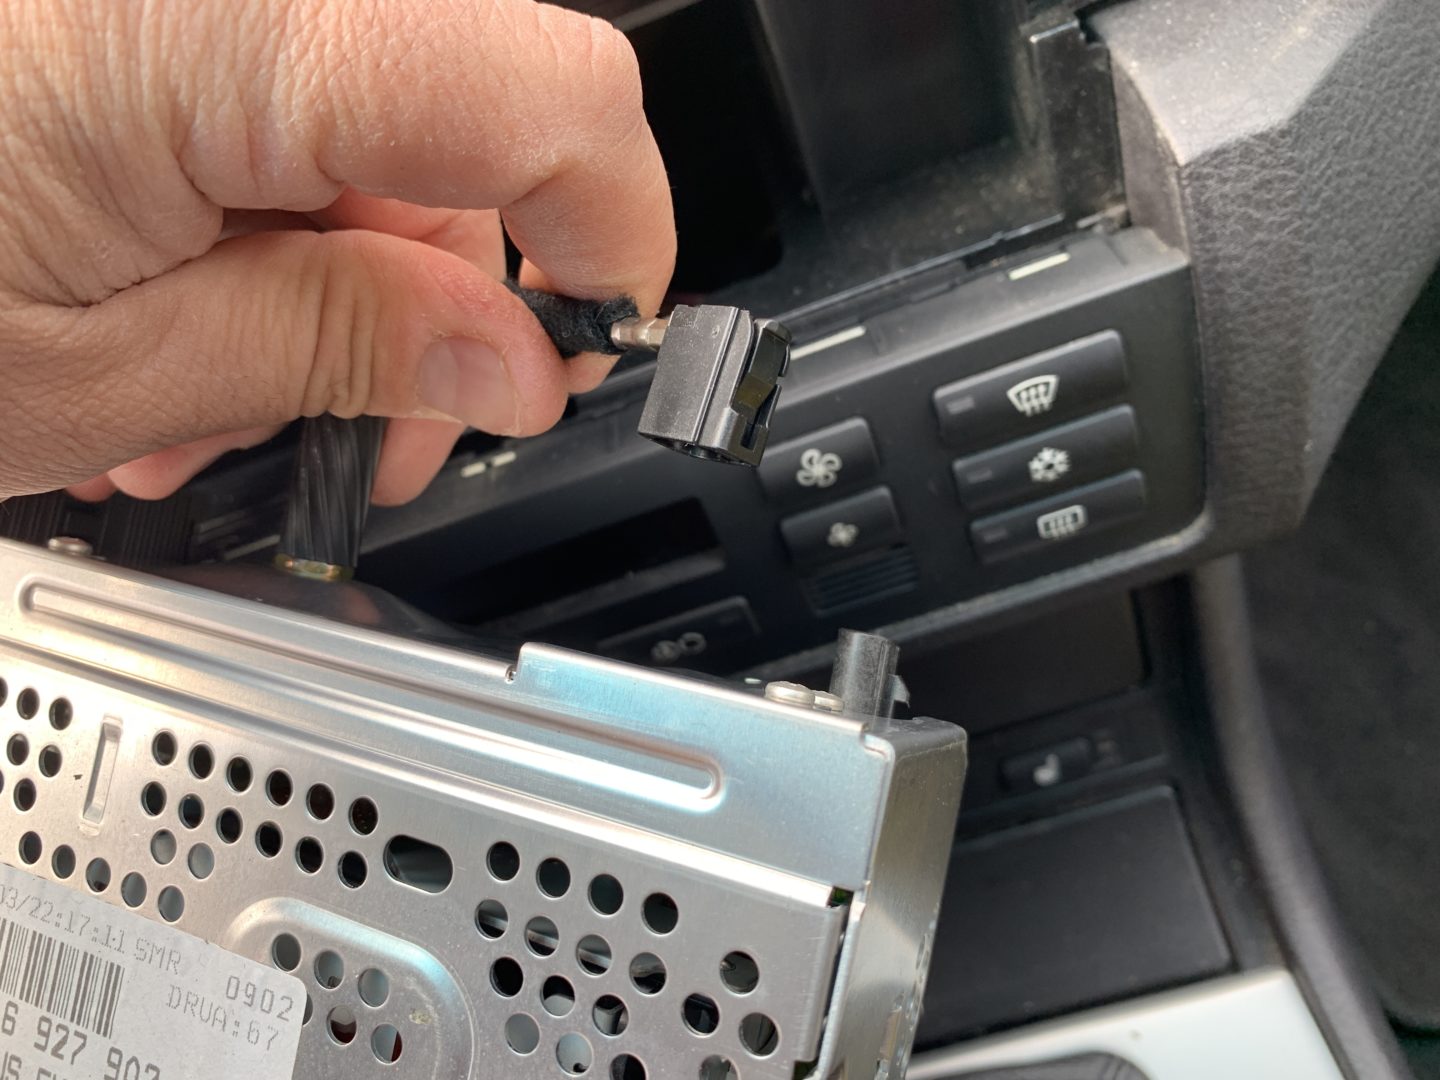
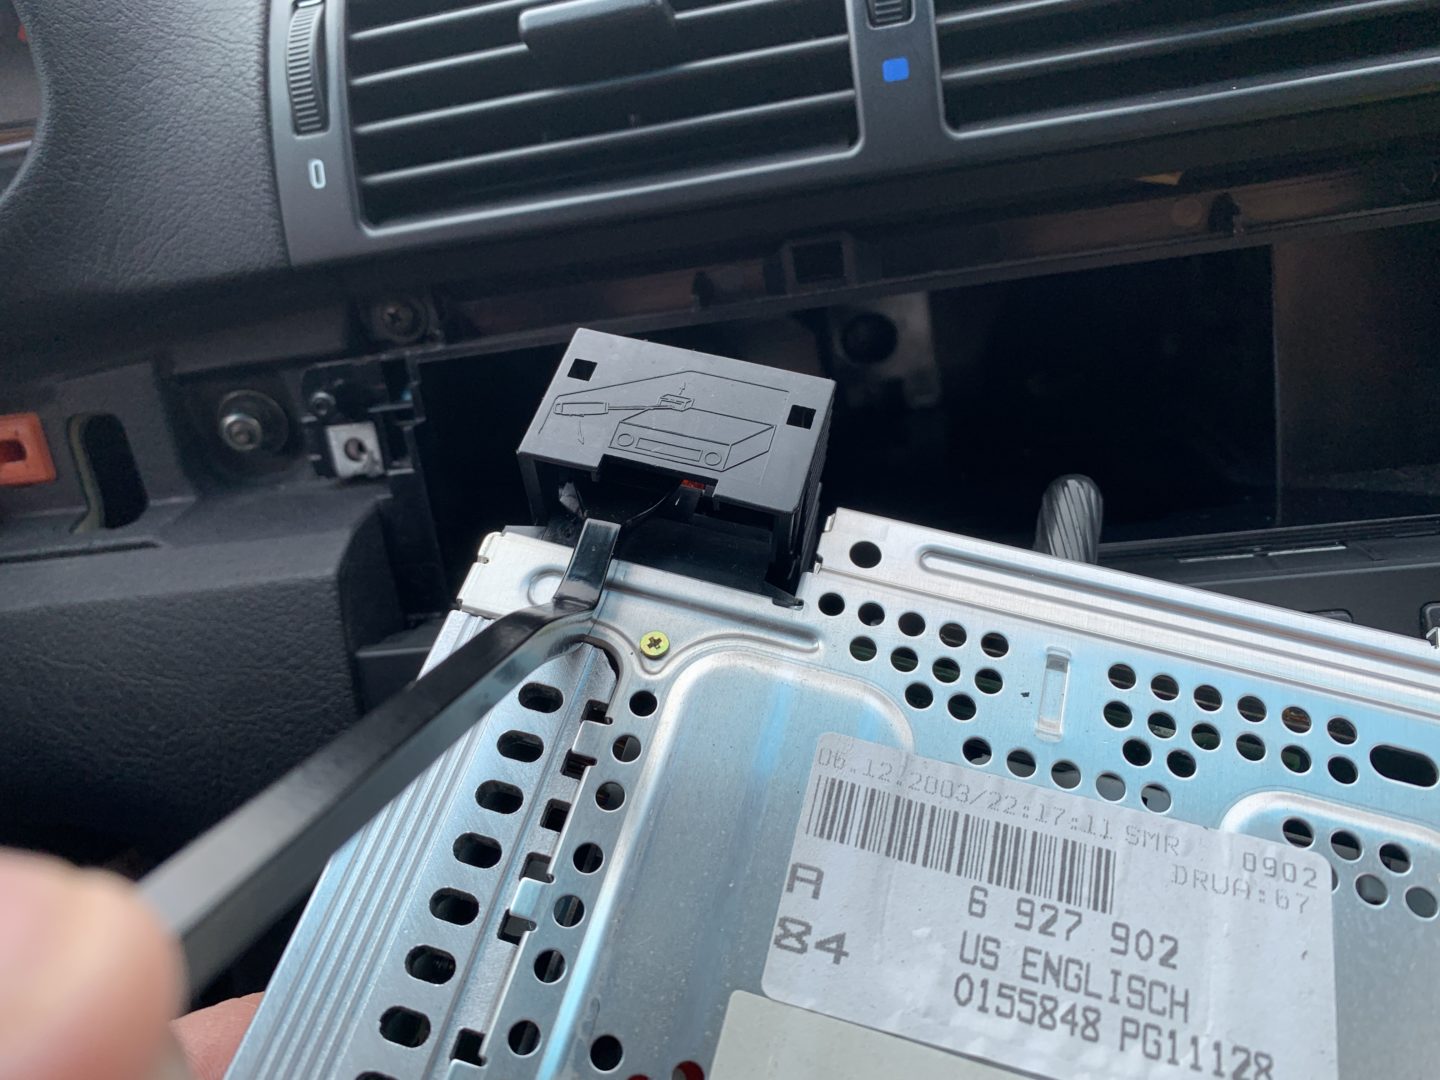
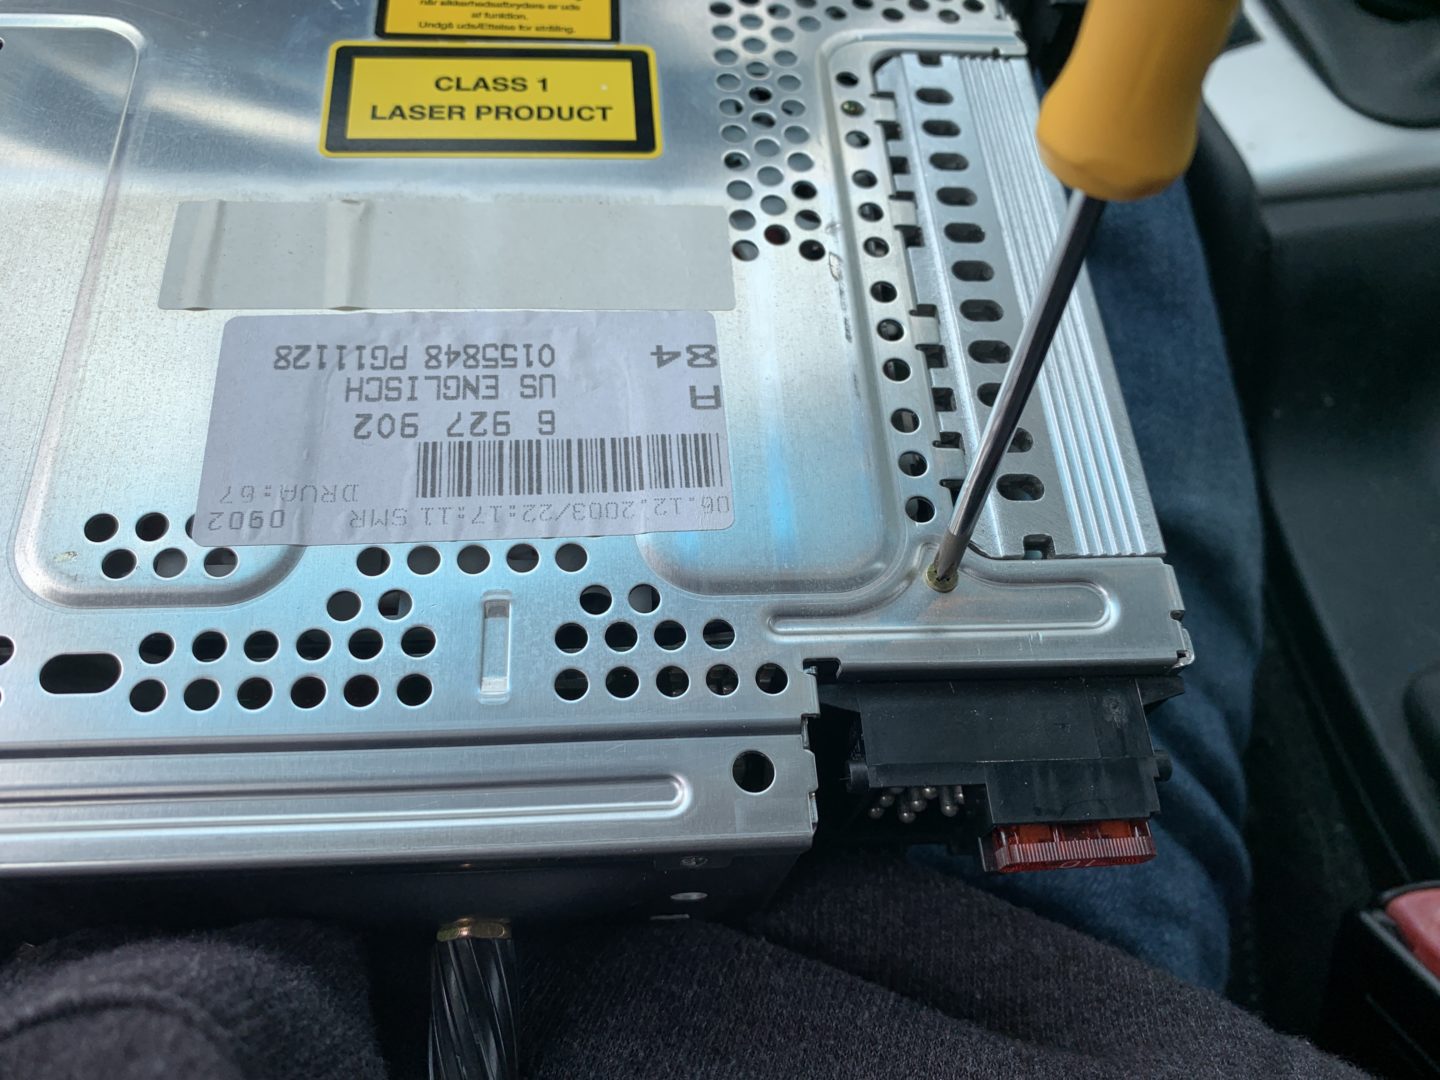
Once you get the radio unit out, you can disconnect the antenna plug and wiring harnesses in the back. The main wiring harness has a unique connector, which requires you to pry up on this release tab before it detaches from the radio. There is a small diagram on the black release tab that shows you how to do this as well.
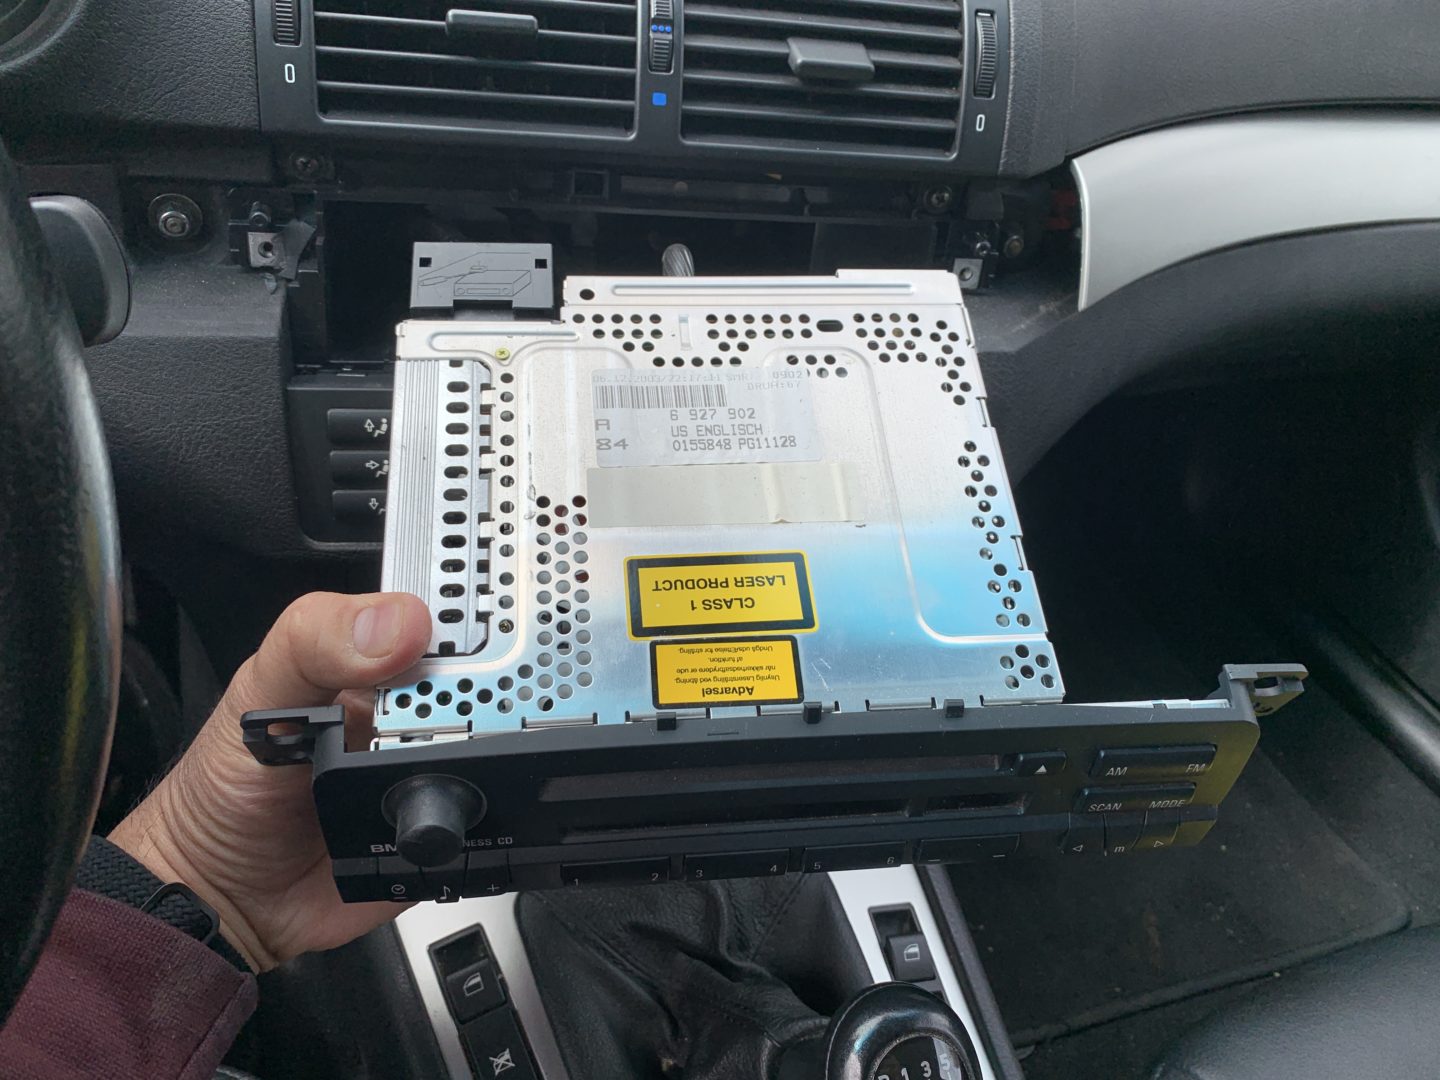
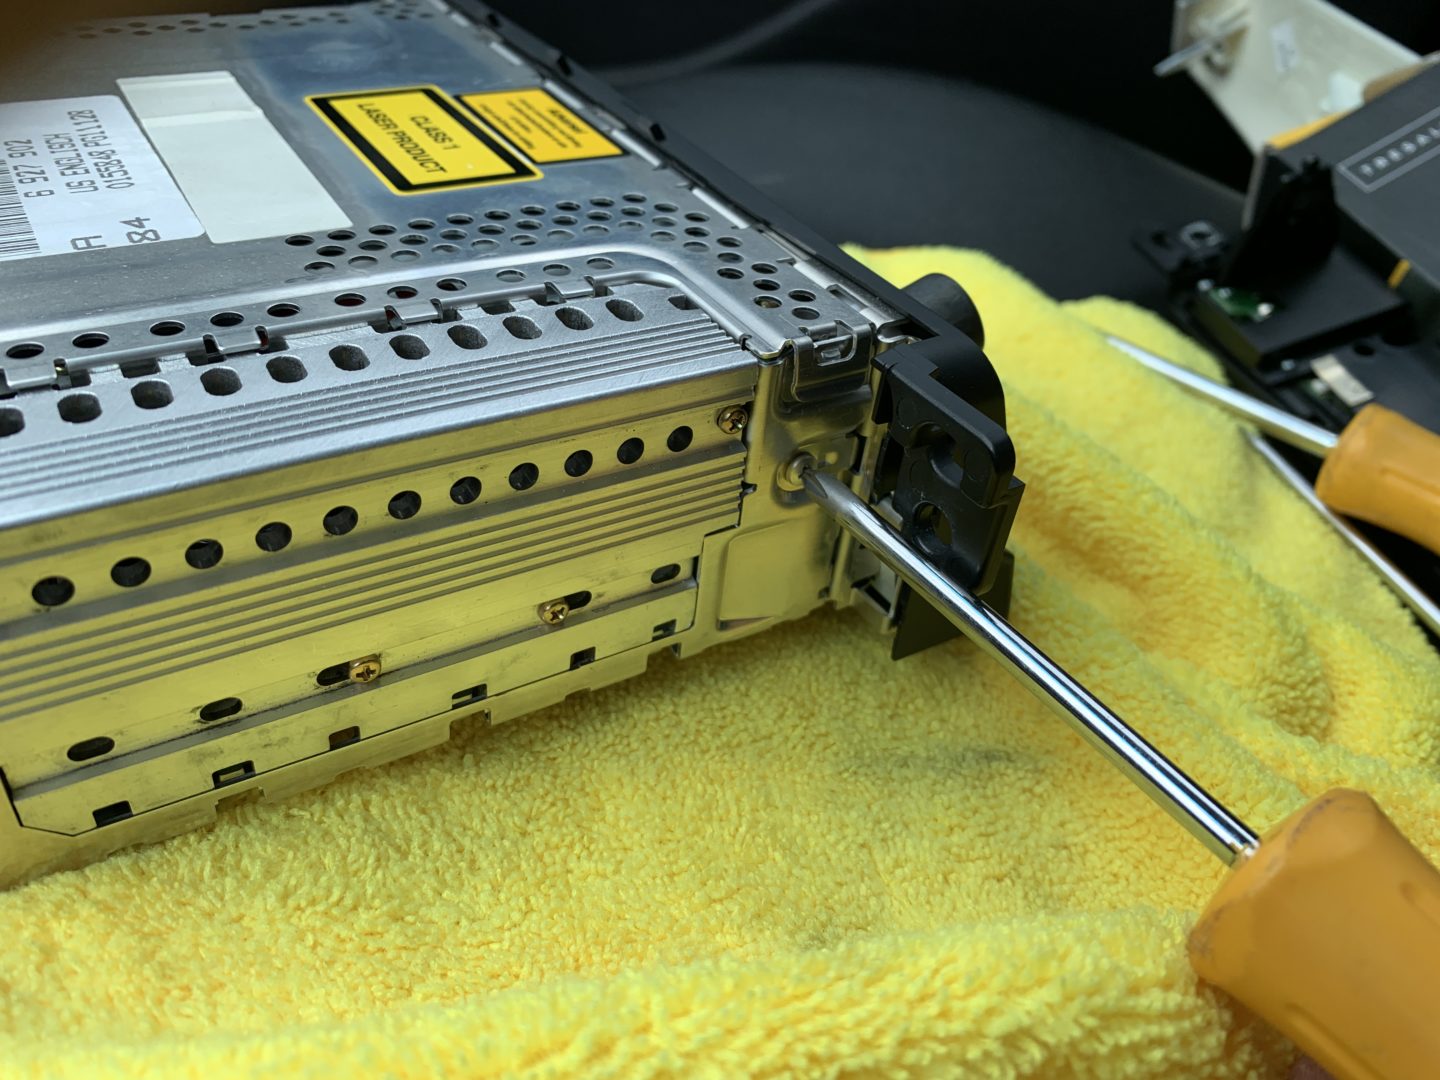
If you’re simply replacing the factory radio, you can now plug in the new radio and reinstall everything again. Alternatively if you’re making a repair, you’ll need to open up the factory radio in order to do this.
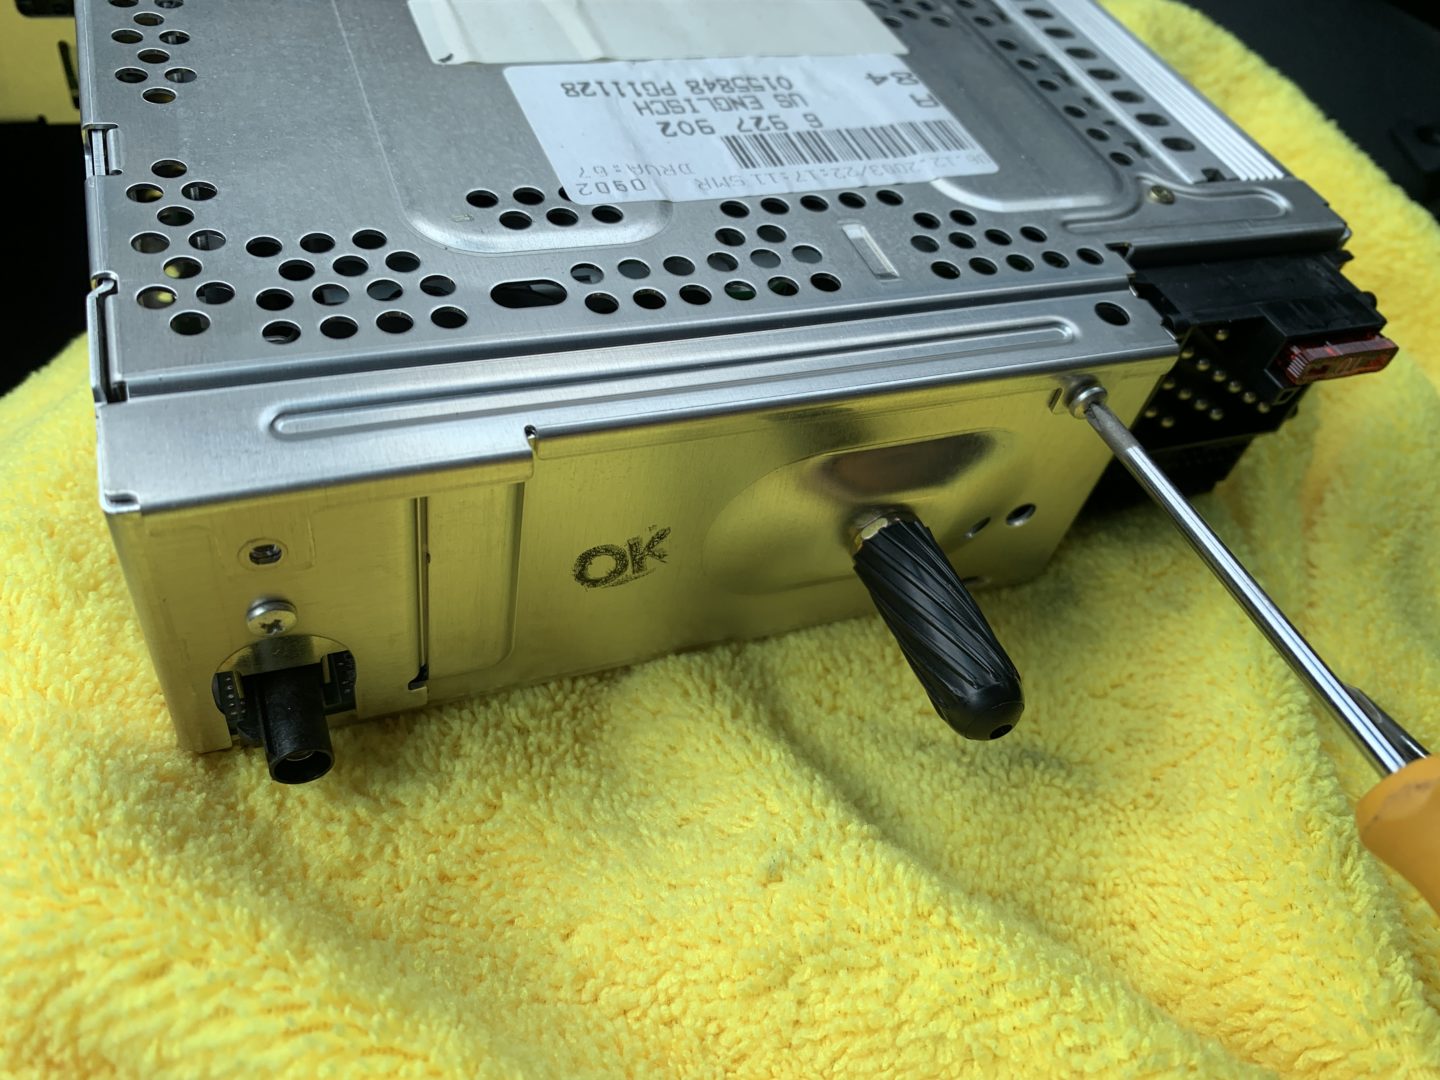
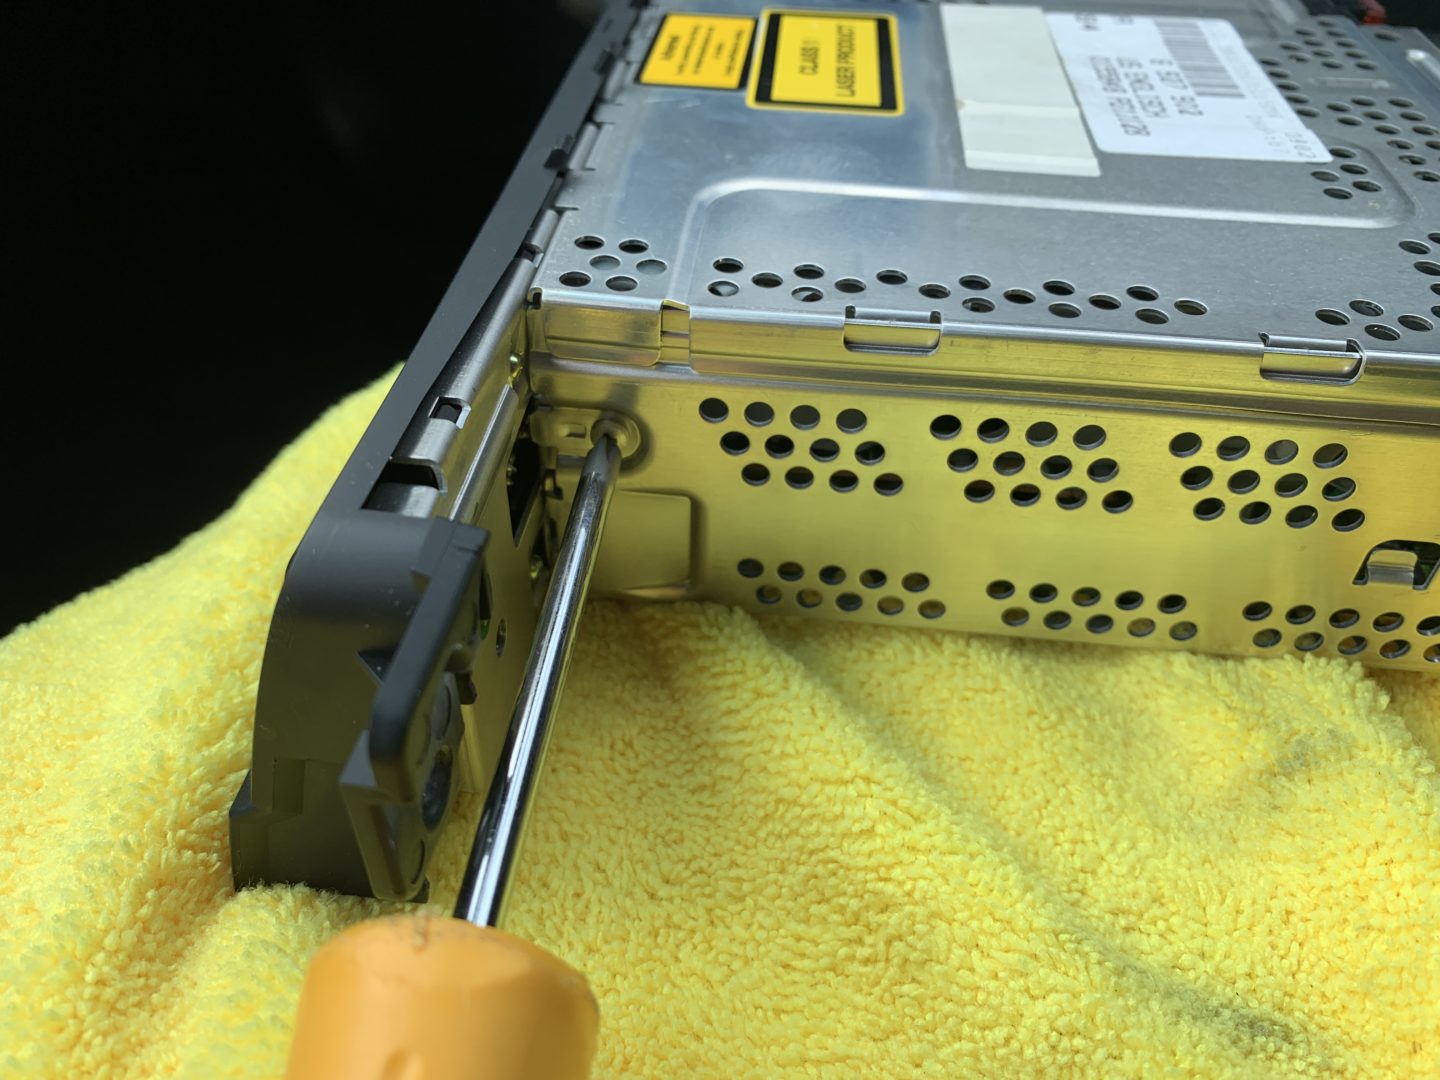
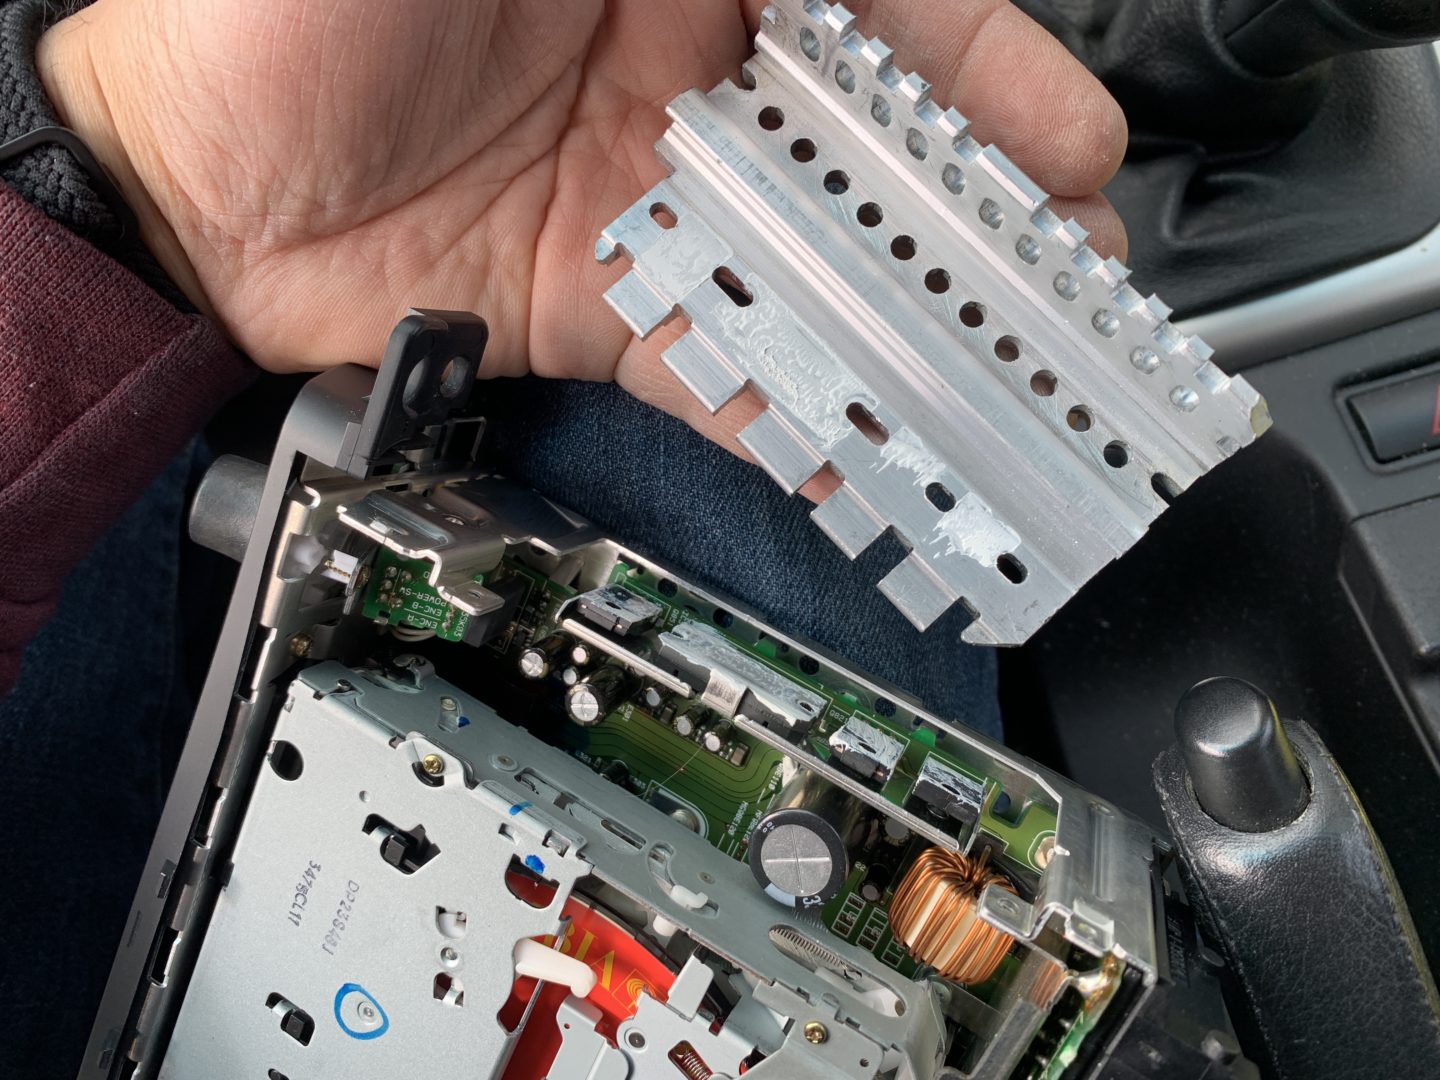
There are a number of smaller Phillips head screws that hold this top cover onto the unit; you will also need to pry up on this metal release tab to separate the top cover.
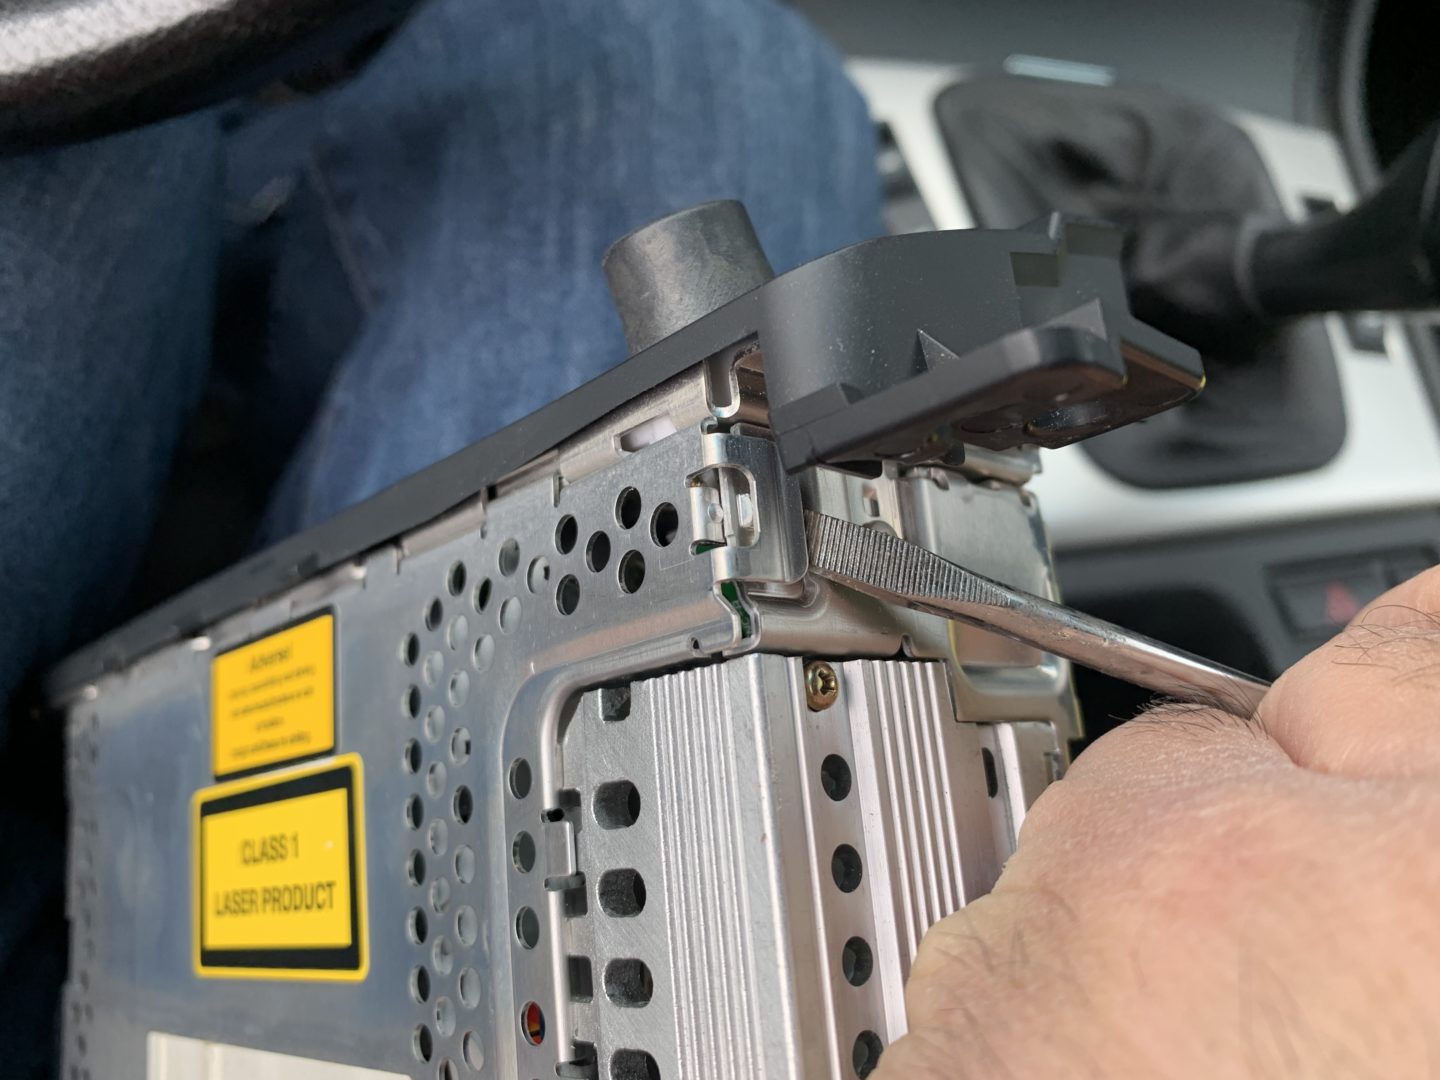
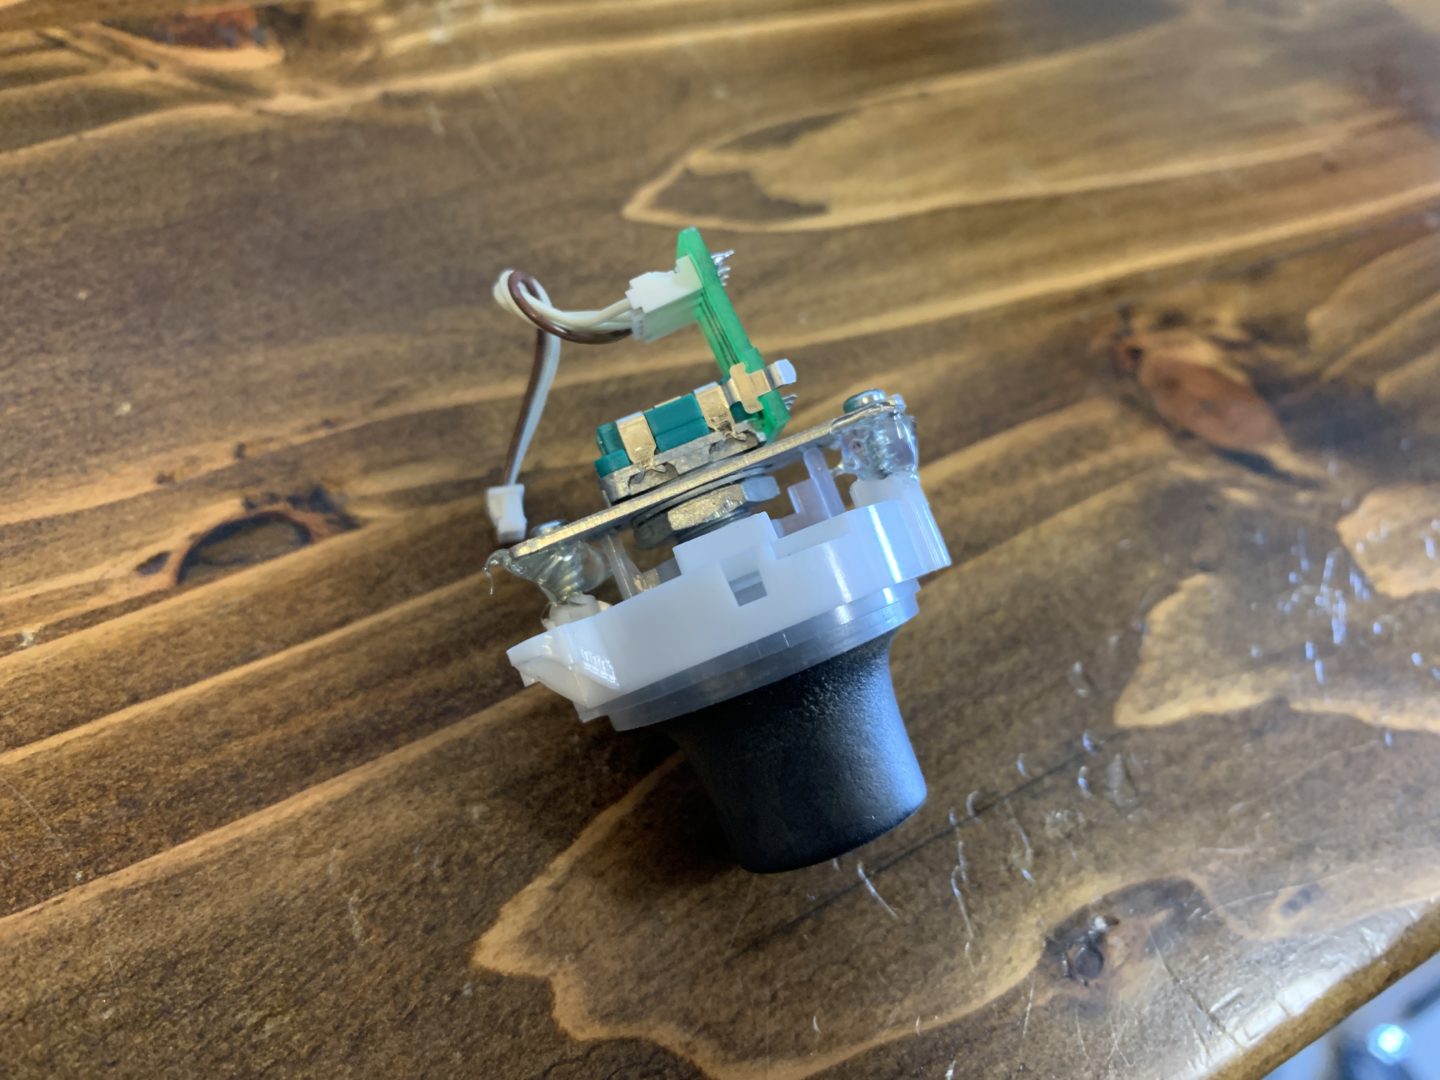
With the top cover of the unit removed, you can now get a closer look behind the volume button to see why it may be broken. In the photo below, you can see the issue. The plastic mounting base is broken, therefore when you press the volume/power button, it has nothing to press against. Keep in mind that you only see one mounting screw here; there is actually another one on the opposite side that may be broken as well.
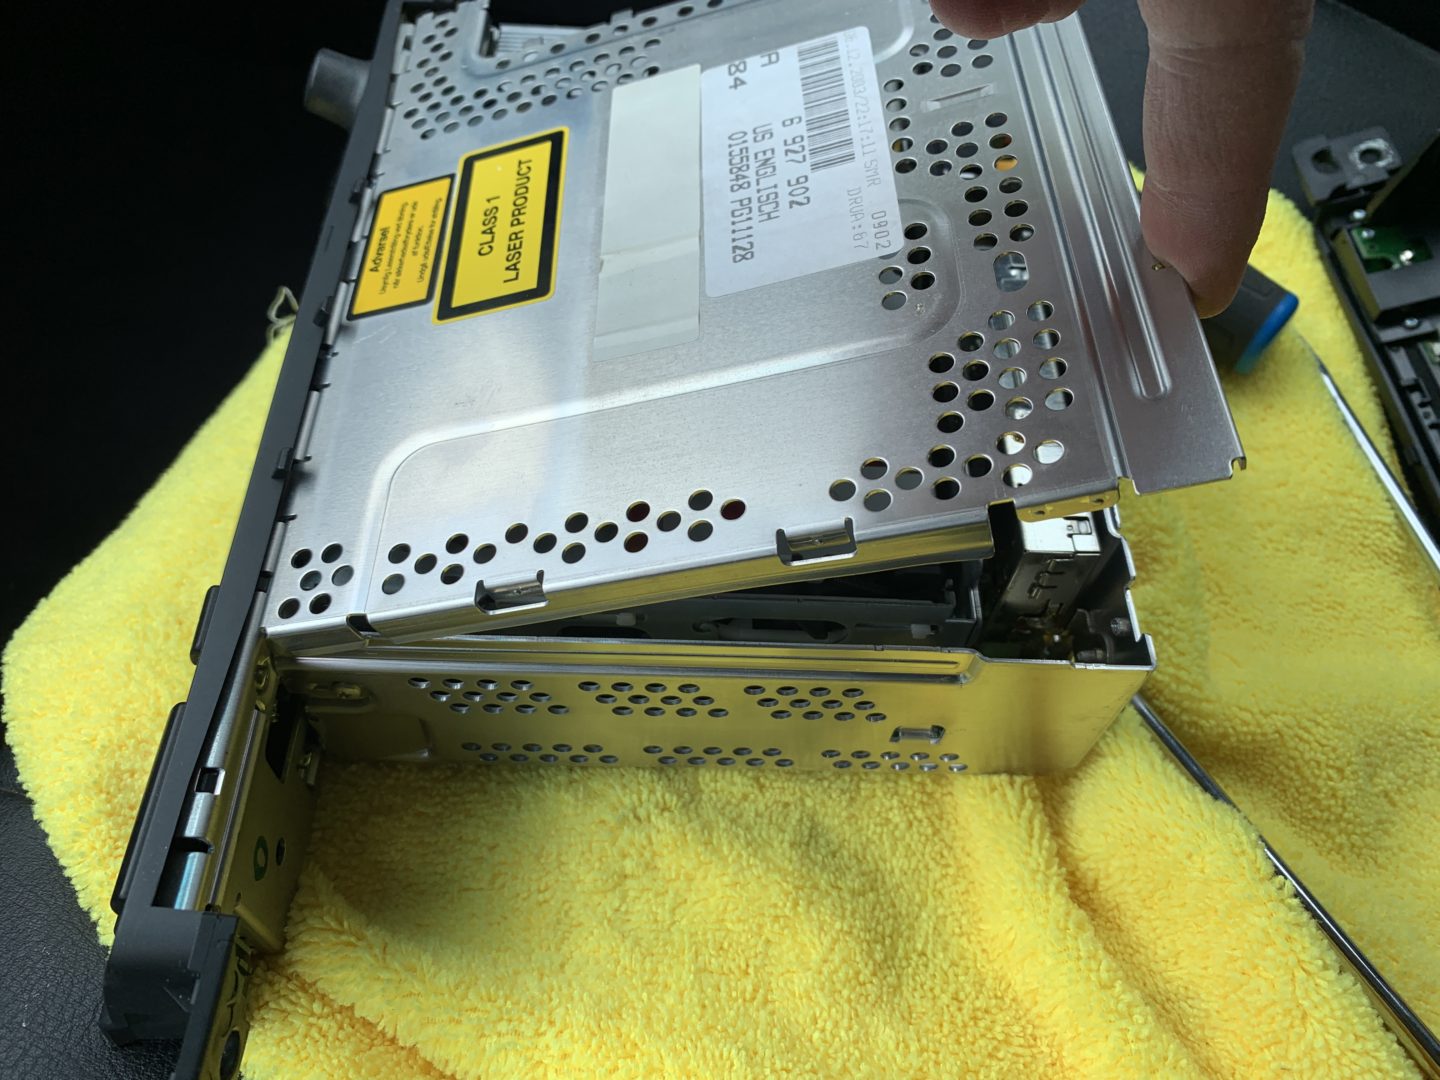
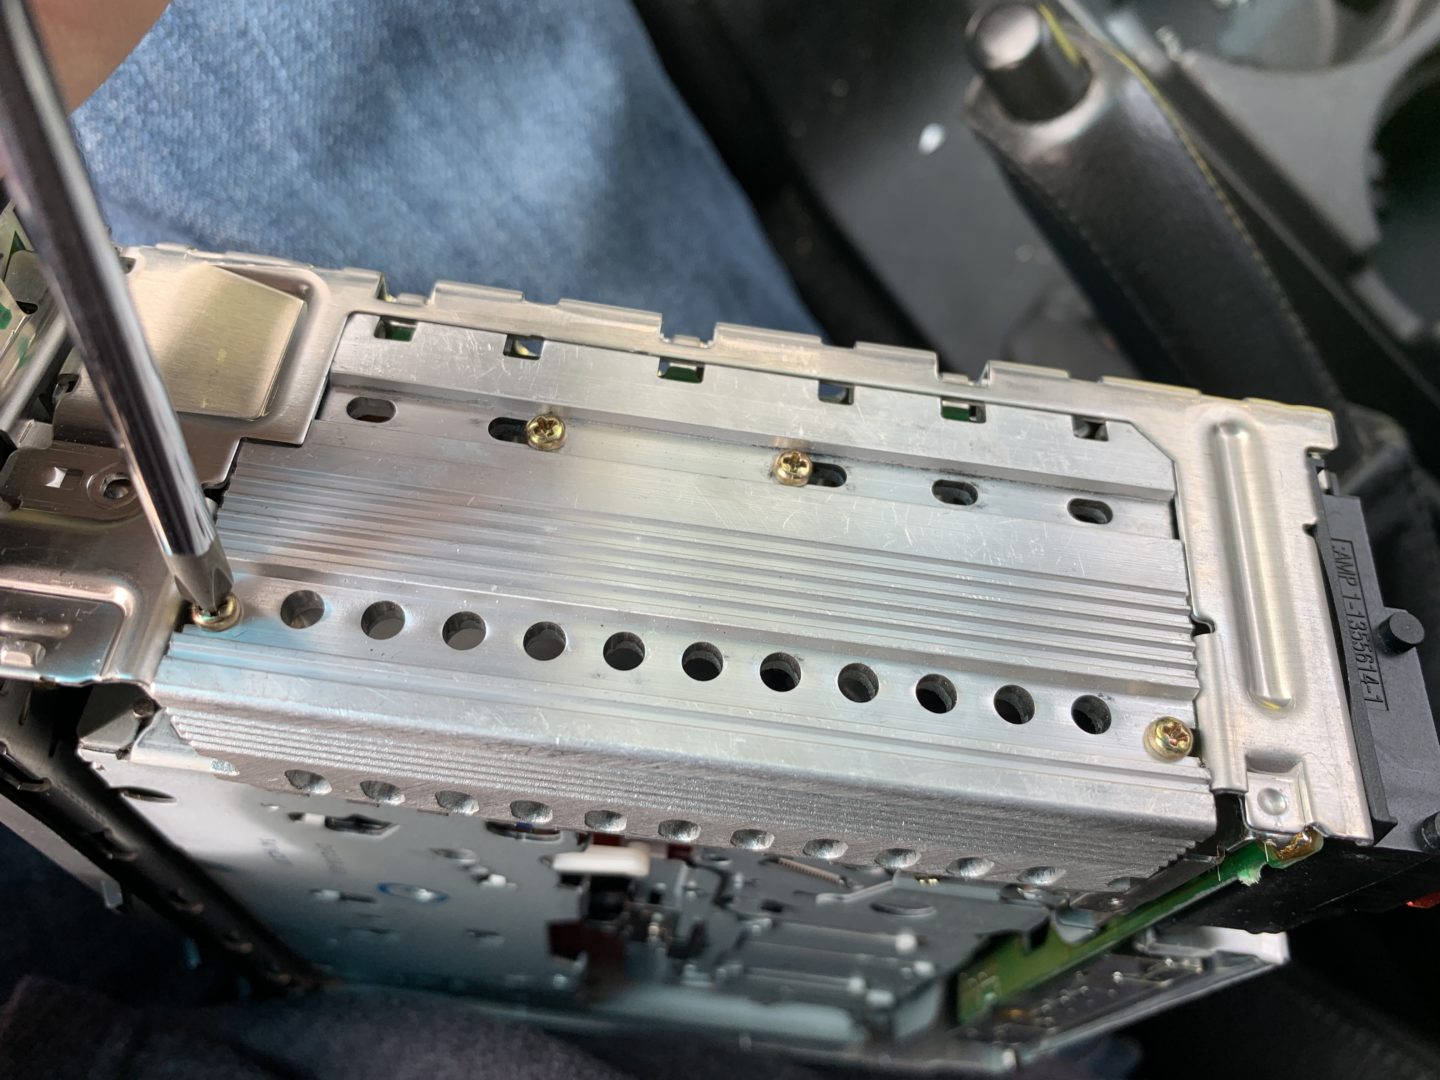
To gain access to the plastic mounting base, remove some more of these Phillips head screws and put them aside. Keep track of where these various screws go by making notes or taking photos along the way.
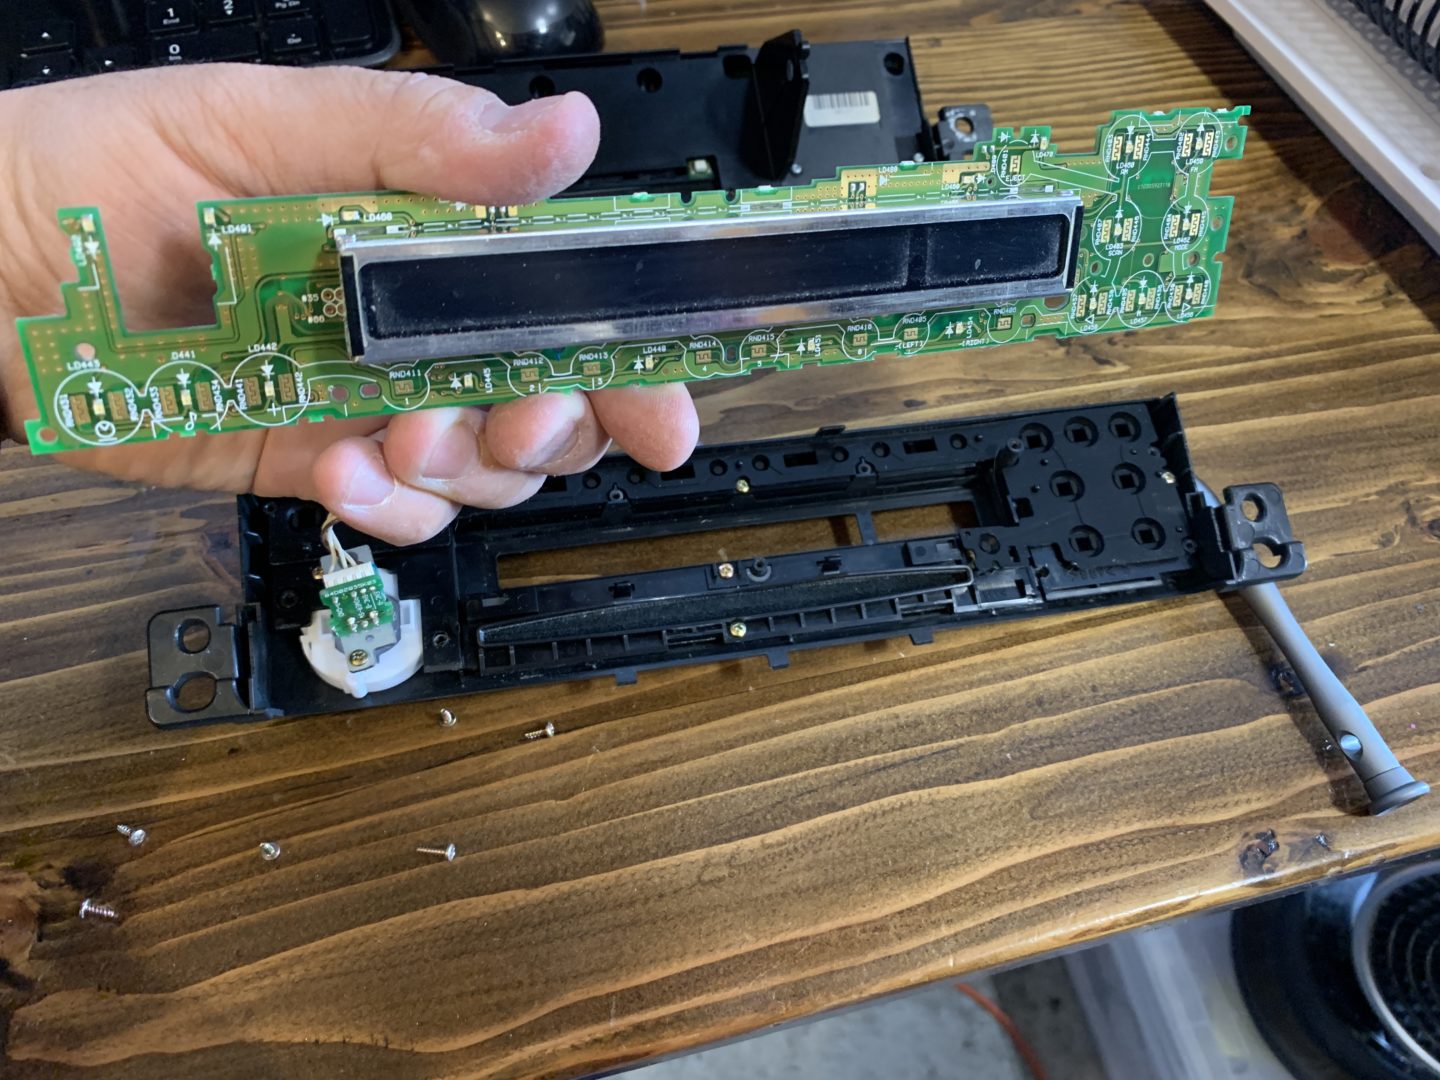
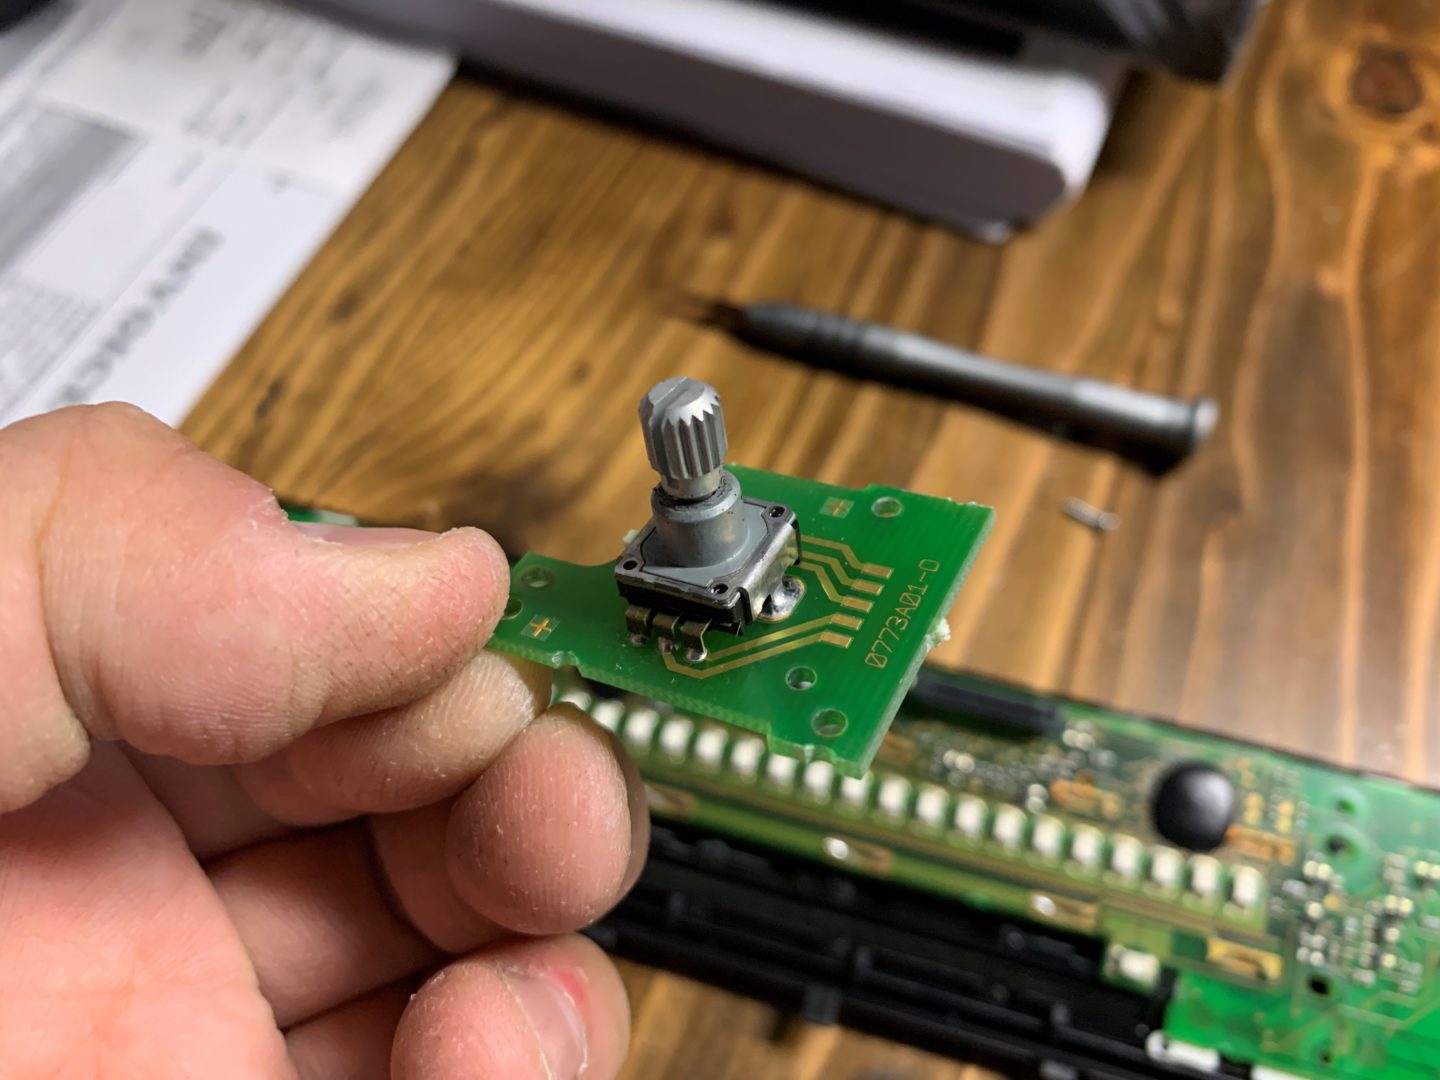
We’ll remove the faceplate from the rest of the unit to make it easier to work with. The face can be separated by removing the ribbon connector and small white connector as shown below. These are released by simply pulling off of the circuit board.

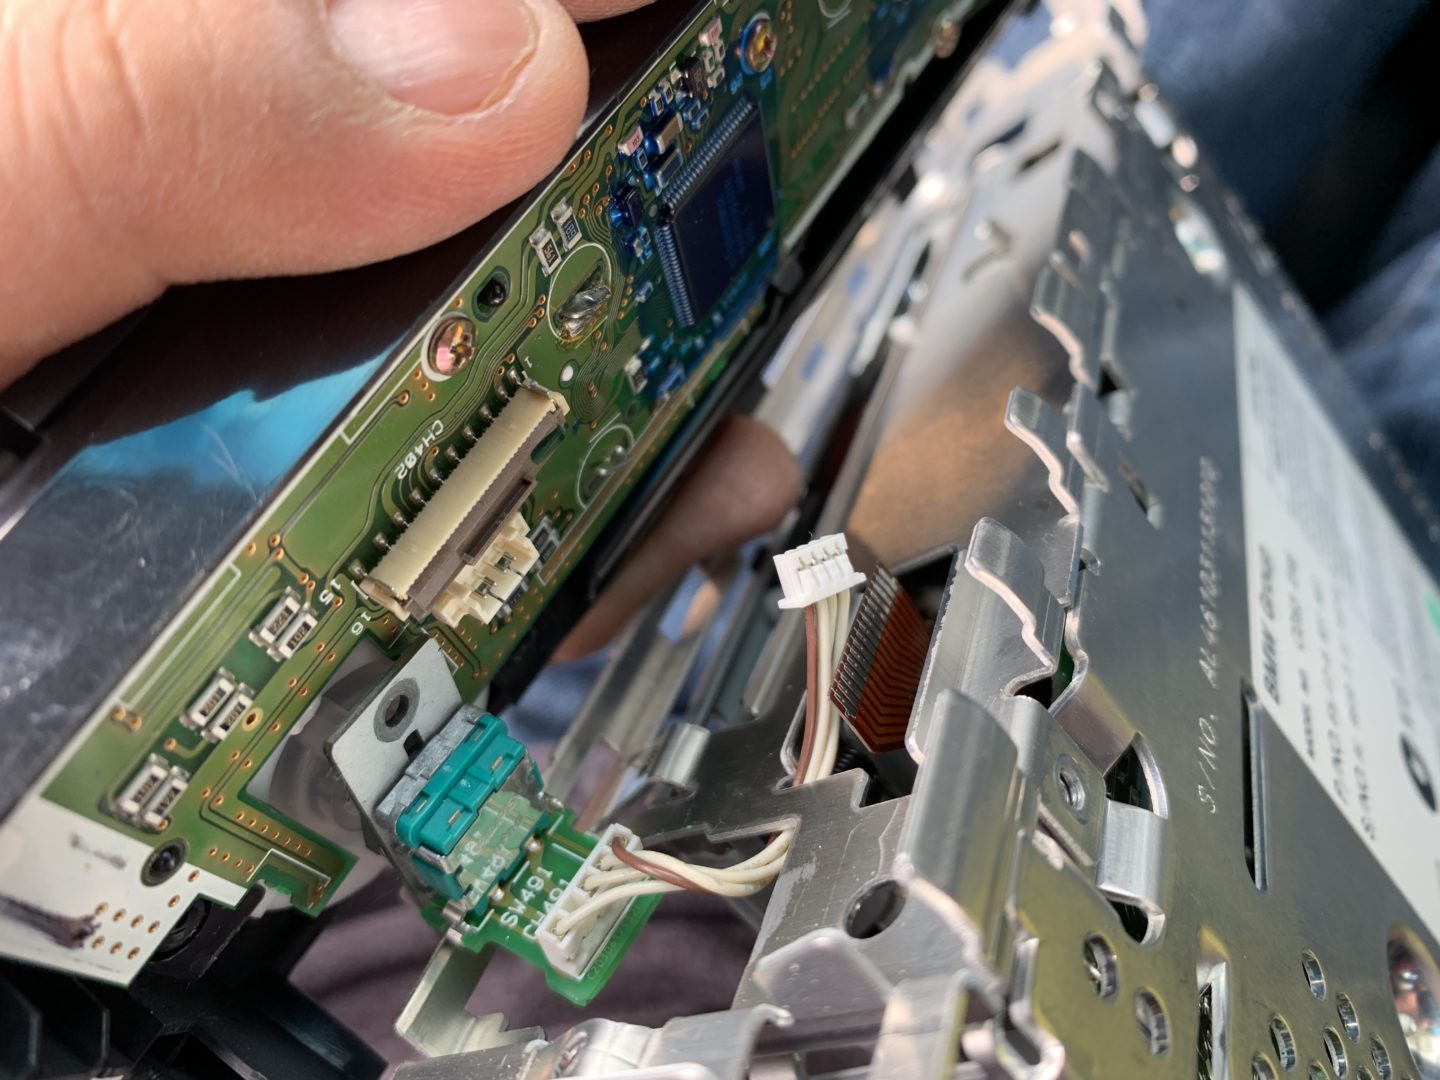
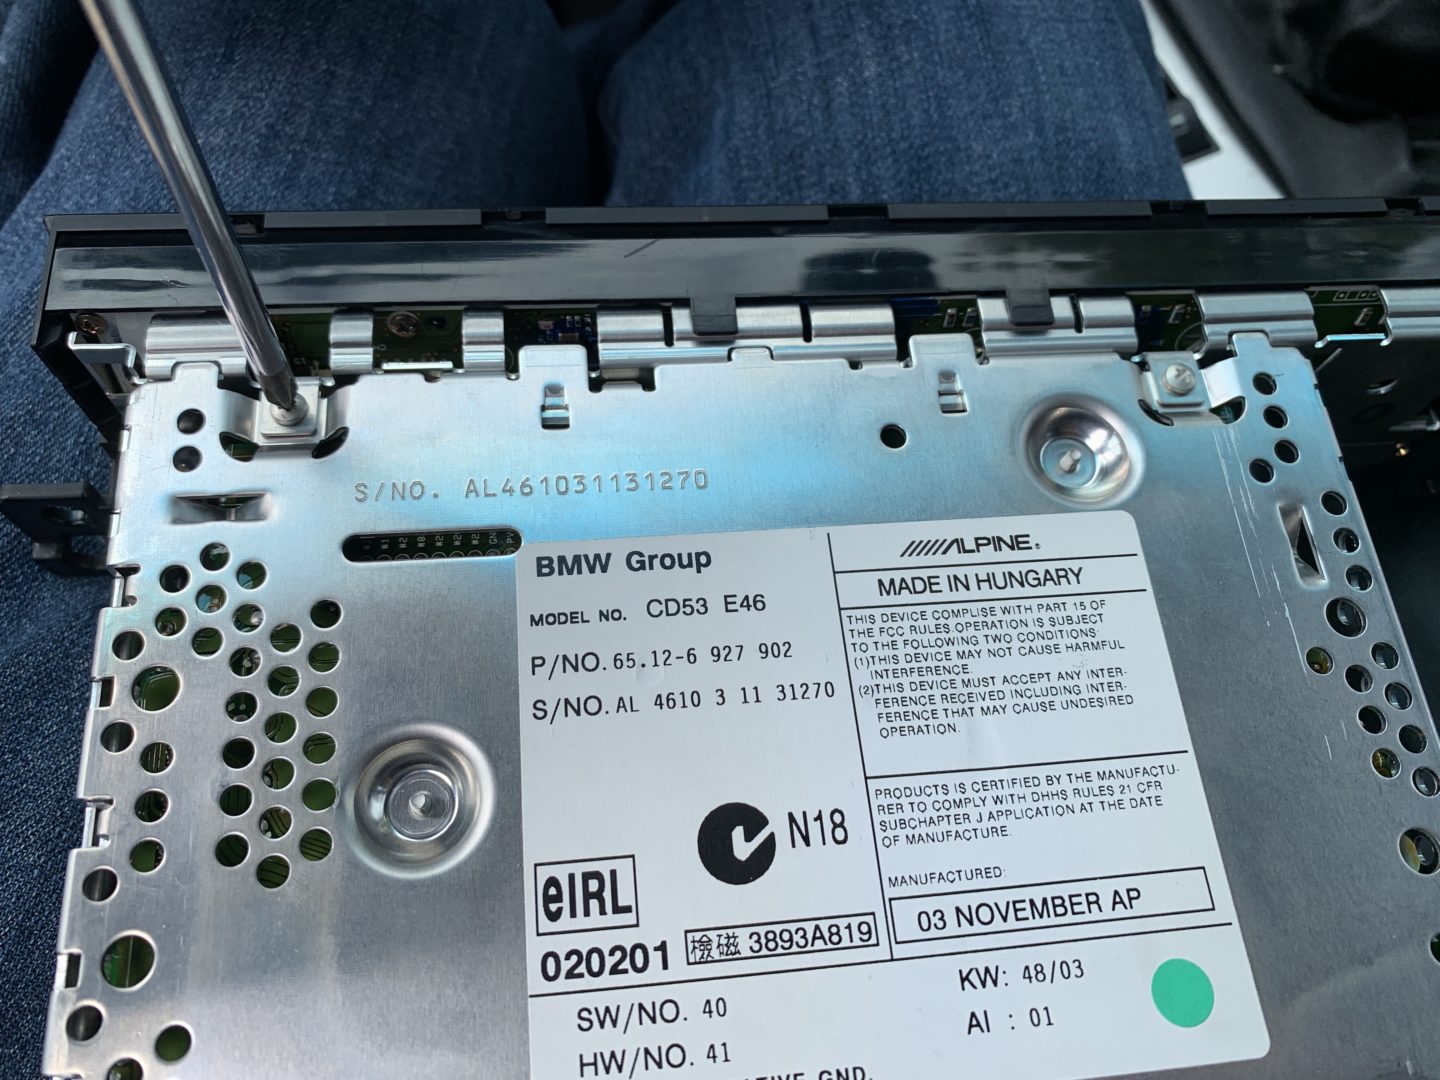
The plastic mounting base that we need to make repairs to is actually located between the faceplate and this circuit board. Remove the small Phillips mounting screws to detach the circuit board.
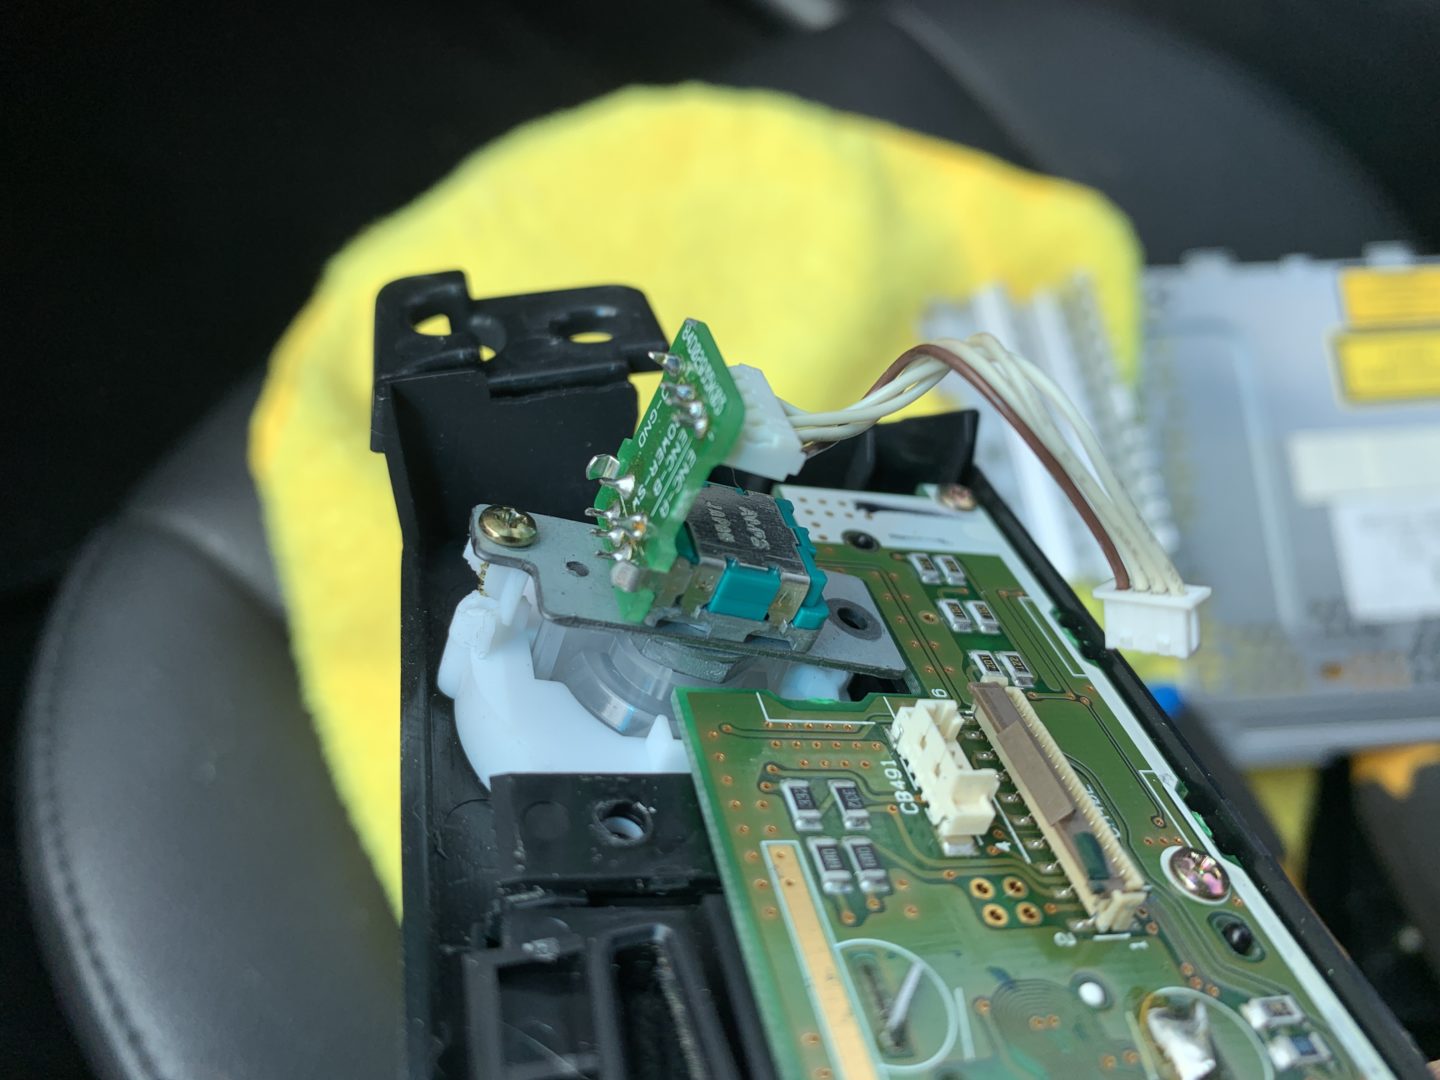
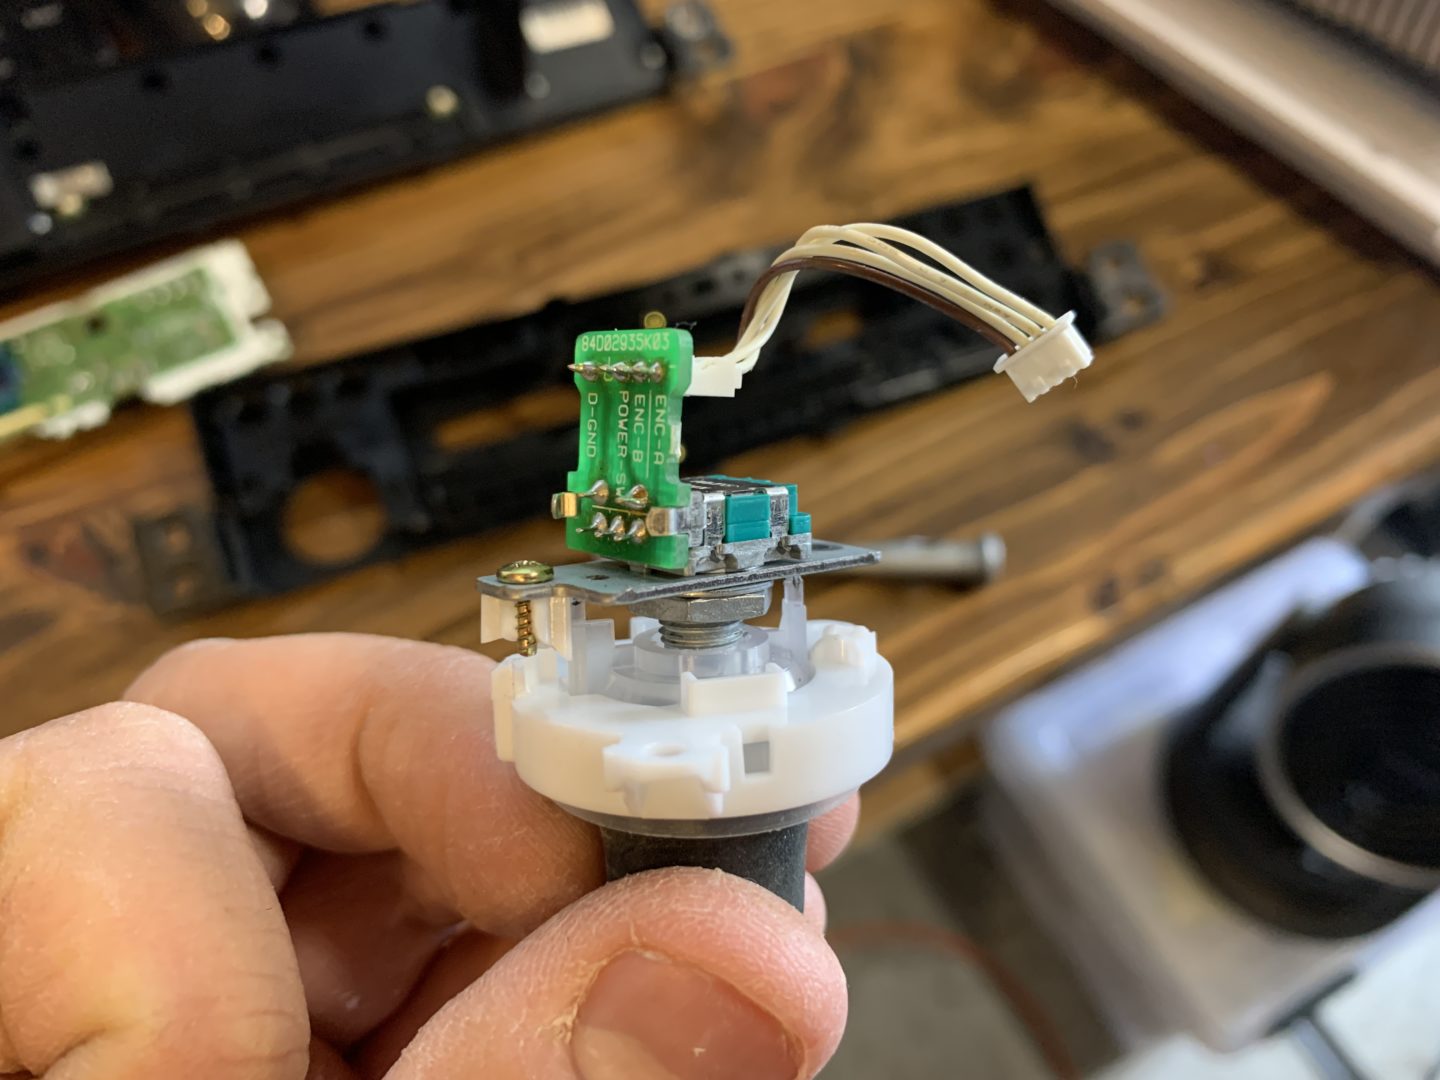
Now, we can pull the volume button off and get a close look at the problem. Earlier we saw only one side which was broken, but now we can see that both sides are broken. For the volume/power button to operate, it needs to have two screws on both sides engage with the plastic mounting base in order for it to be pressed.
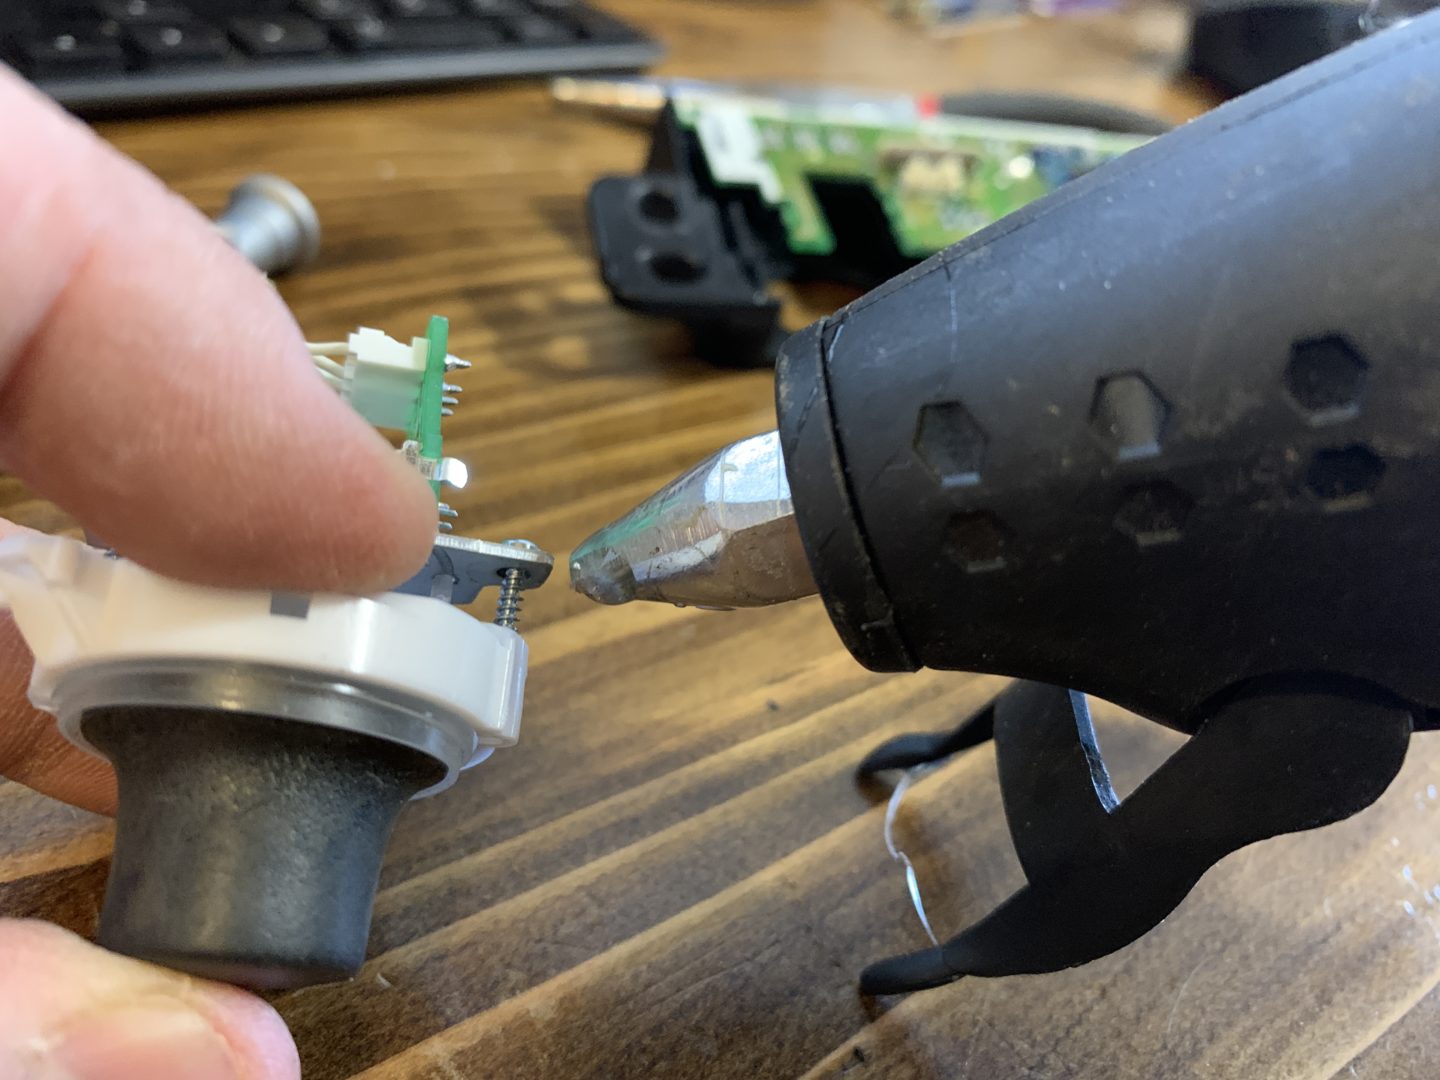
At this point, you could replace the plastic mounting base if this is what you’re planning to do. You’d remove the center nut and swap the base out. If you’d rather make a repair, you could try using something like a hot glue gun like I did below to create a bond behind the plastic mounting base and the mounting screw.
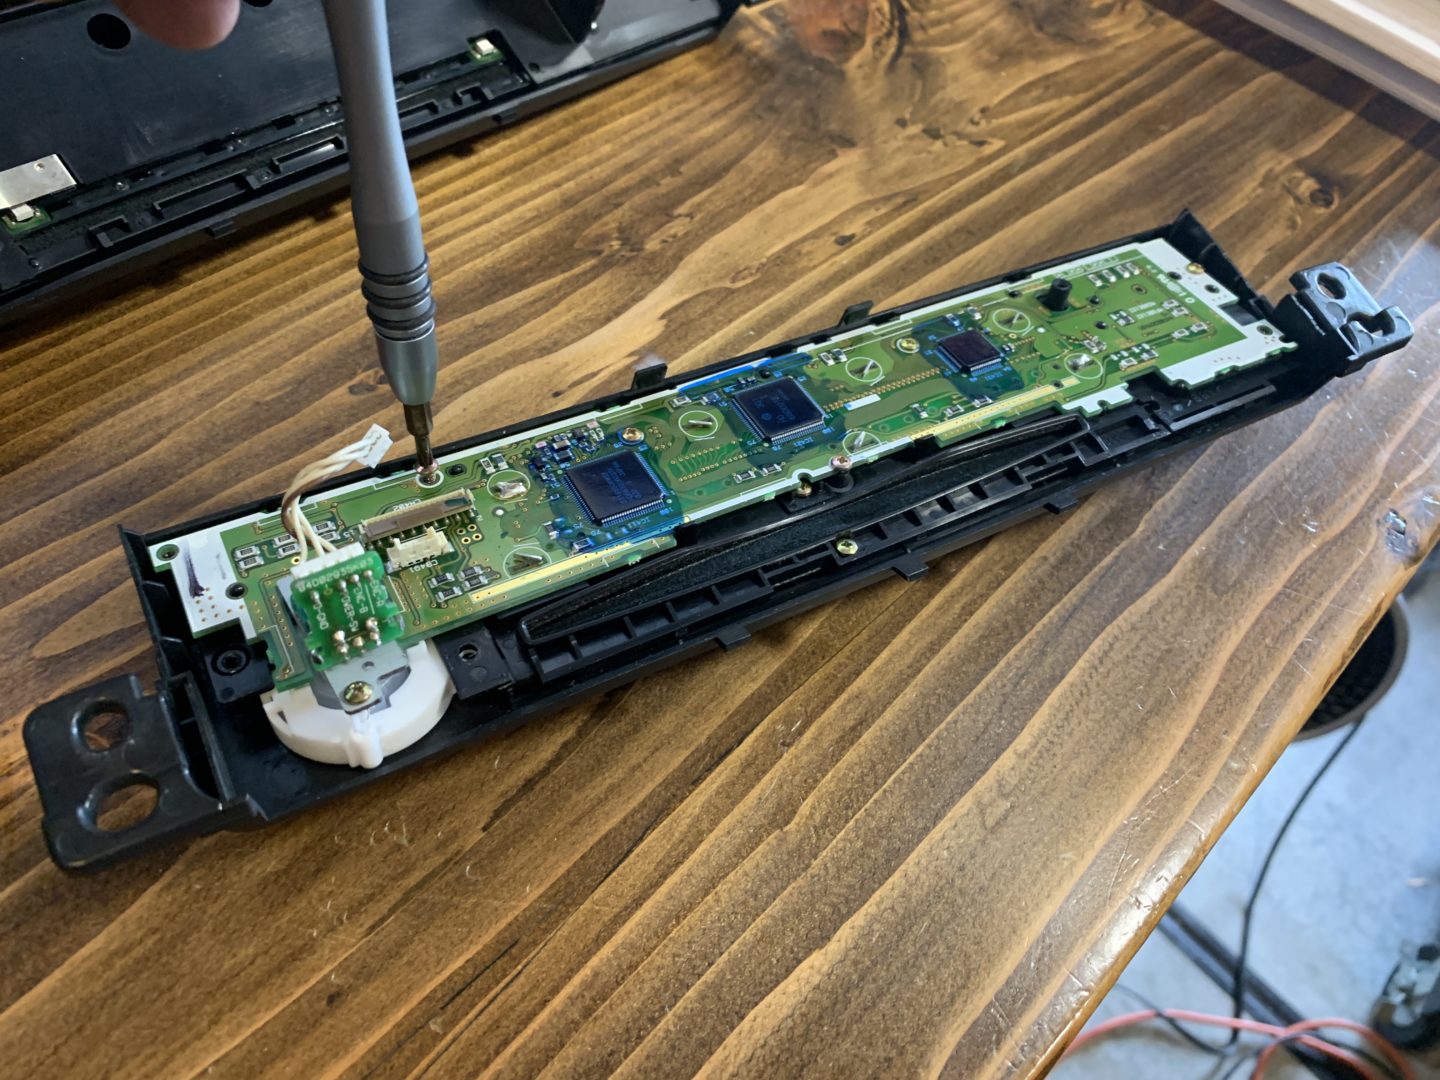
I also replaced these two small screws with slightly longer ones. Once I screwed in the two screws, I put hot glue to secure it in place. The reason I do this is because even though the screws are slightly longer and can screw into whatever is left of the broken plastic mounting base, it will likely break off again because there is not much thread engaged into the plastic base.
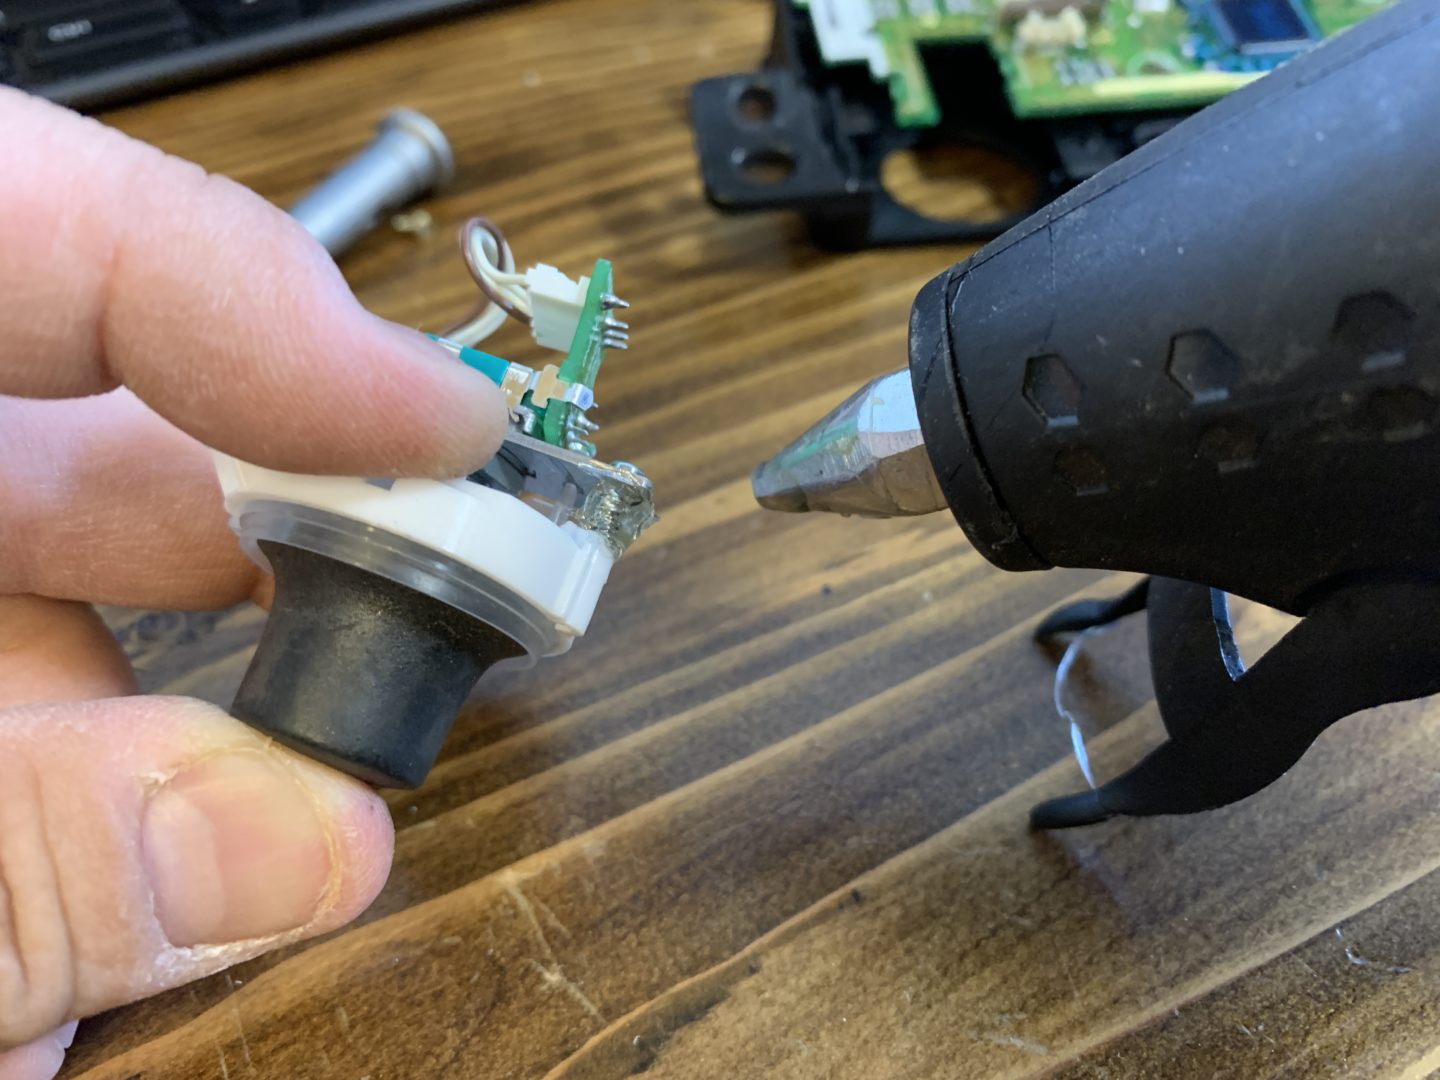
This hot glue gun fix actually works as I’ve tested it out personally. The volume button actually presses again after putting everything back together. Below, you can see that repair with hot glue. I don’t know how long this repair will actually last, but it did work for me.
Keep in mind that on my factory radio, this is the style of the volume button mechanism. Meanwhile you might have a radio in your E46 where the volume button pops off the faceplate and the actual volume button itself looks like what is shown in the second image below. For this type of radio, you can also swap out this specific piece from another E46 radio or simply change out the radio completely.
The next steps would be to put everything back together in the reverse of removal. The main wiring harness goes back in by pressing the connector into the back of the radio, while at the same time pressing down on the black release tab.
After you reinstall, test out the volume button and you should feel that nice button press that you didn’t have before. Power on the radio after everything is reconnected and ensure everything is working as it should.