When you make purchases through links on this site, The Track Ahead may earn an affiliate commission. Also, these posts are based off my own experiences. I am not responsible for any action you take as a result of reading this. Learn More
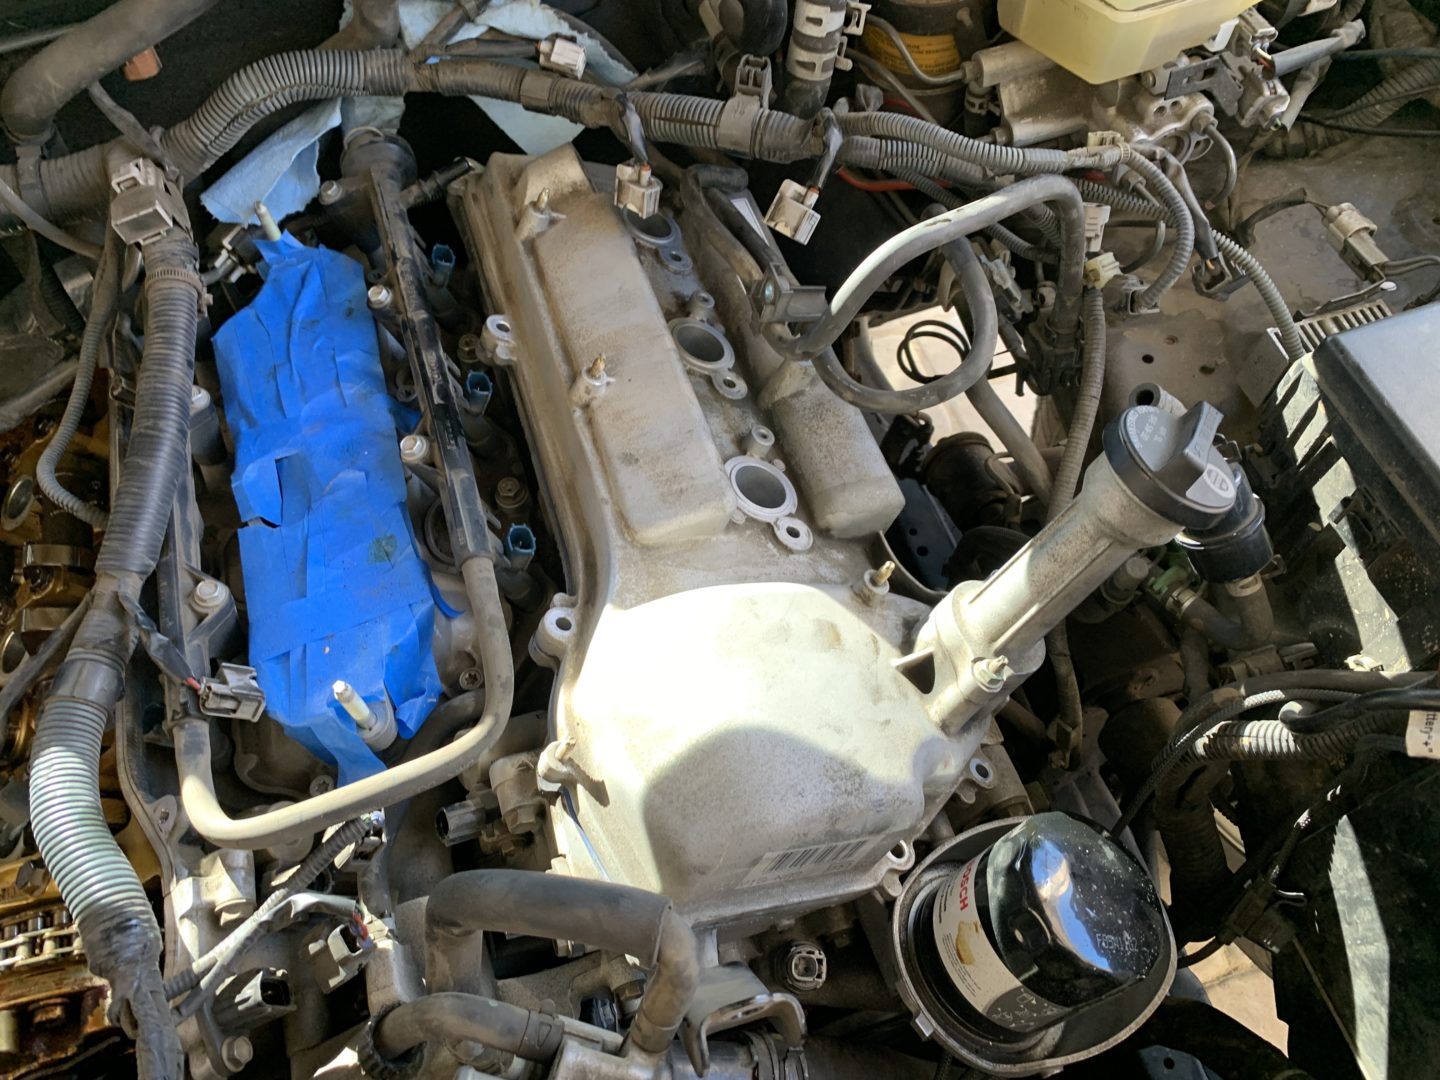
One very common issue on the 4th generation Toyota 4Runner is an oil leak that occurs at the front corner of the passenger side valve cover. From what I can tell, it seems to leak near the oil dipstick where the timing chain and cylinder head meet. Because there is a seam in the cylinder head at this location, a gasket sealant is applied here at installation (there are two of these locations per head.) Over time, the sealant hardens and is no longer effective at providing a seal and therefore causes an oil leak.
If you plan to change the valve cover gasket on the passenger side, then the job is not too difficult. However, I decided to change out both passenger and driver side valve cover gaskets. I also replaced the upper intake manifold gasket and throttle body gasket since I was already removing these parts. When you look at the job of replacing both valve cover gaskets and the other work involved, you’re looking a much bigger job.
Changing out the valve cover gaskets on both passenger and driver sides can be a bigger job, but mainly because it can be a bit overwhelming with the amount of parts you need to disconnect or remove. Therefore, it’s very important to be organized when removing parts and to document everything you take apart. Photos along the way help tremendously in guiding you to put everything back in the right order. I hope this guide helps you if you need to replace the valve cover gaskets on your 4.0L V6 (1GRE-FE) 4th Generation Toyota 4Runner.
Tools & Materials Required
Valve Cover Gaskets
There are a number of different valve cover gaskets out there, but I opted for a popular aftermarket one made by FEL-PRO.
FEL-PRO VS 50634 R Valve Cover Gasket Set
Upper Intake Manifold Gasket
If you are replacing the driver side valve cover gasket, you’ll need to remove the upper intake manifold. It would be wise to replace this gasket since you already are removing the upper intake manifold. This gasket set includes both upper intake manifold gasket and the lower intake manifold gasket. I only had access to and replaced the upper intake manifold gasket.
Fel-Pro-MS96671 Intake Manifold Gasket Set
Throttle Body Gasket
Another gasket to replace while you have the throttle body removed is the throttle body gasket.
Fel-Pro 61392 Throttle Body Mounting Gasket
Mechanic’s Tool Set
You’ll be fine with any mechanics set with a socket wrench and various-sized sockets. You’ll specifically need a 6mm hex for the upper intake manifold if you plan on changing out the driver side valve cover gasket. If you’re looking for a mechanics tool set or are planning to upgrade, check out this guide to choosing the best mechanic’s tool set.
Here’s an all-around mechanics tool set that will have most everything you’ll need including the hex sockets if you don’t have one already.
DEWALT Mechanics Tool Set, 1/4″ & 3/8″ & 1/2″ Drive, SAE/Metric, 205-piece
Torque Wrench
You definitely need a smaller 1/4″-drive torque wrench for torqueing down the low-torque hardware of the valve covers and the throttle body bolts. The upper intake manifold nuts/bolts will probably require a larger torque wrench like a 3/8″ drive. Personally I keep a 1/2″ (with a 1/2″ drive to 3/8″ adapter) and a 1/4″ to cover most of the torque I will ever need.
TEKTON 1/4 Inch Drive Click Torque Wrench (20-200 in.-lb.)
TEKTON 3/8 Inch Drive Click Torque Wrench (10-80 ft.-lb.)
TEKTON 1/2 Inch Drive Click Torque Wrench (10-150 ft.-lb.)
Gasket Sealant
A gasket sealant isn’t used in place of a gasket. It’s only supposed to supplement the valve cover gaskets at four locations between the engine cylinder head and the timing chain location (more details later in this post.) Without gasket sealant applied at these locations, oil will most certainly leak. Toyota recommends the use of their own gasket sealer called Pack Seal, however you may use a similar product like an RTV sealant.
Toyota Genuine Seal Packing (FIPG) Liquid Oil Pan Gasket
Permatex Ultra Black Maximum Oil Resistance RTV Silicone Gasket Maker
Pliers & Screwdrivers
WORKPRO Pliers Set, 7-piece
CRAFTSMAN Screwdriver Set, 12-Piece
Nitrile Gloves
MedPride Nitrile Exam Gloves, Powder-Free Box/100 – Small | Medium | Large
Shop Towels
Scott Shop Towels Original, Blue, 12 Rolls/Case, 660 Towels/Case
MAF Sensor Cleaner or Throttle Body Cleaner
This is required if you plan on cleaning the MAF sensor or throttle body. If you are planning to clean both, I would recommend only buying the MAF sensor cleaner to clean both. This is because you can use a MAF sensor cleaner to clean either MAF sensor or throttle body, but you cannot use a throttle body cleaner to clean the MAF sensor. This is due to the sensitive parts on a MAF sensor.
CRC Mass Air Flow Sensor Cleaner
CRC Throttle Body and Air-Intake Cleaner
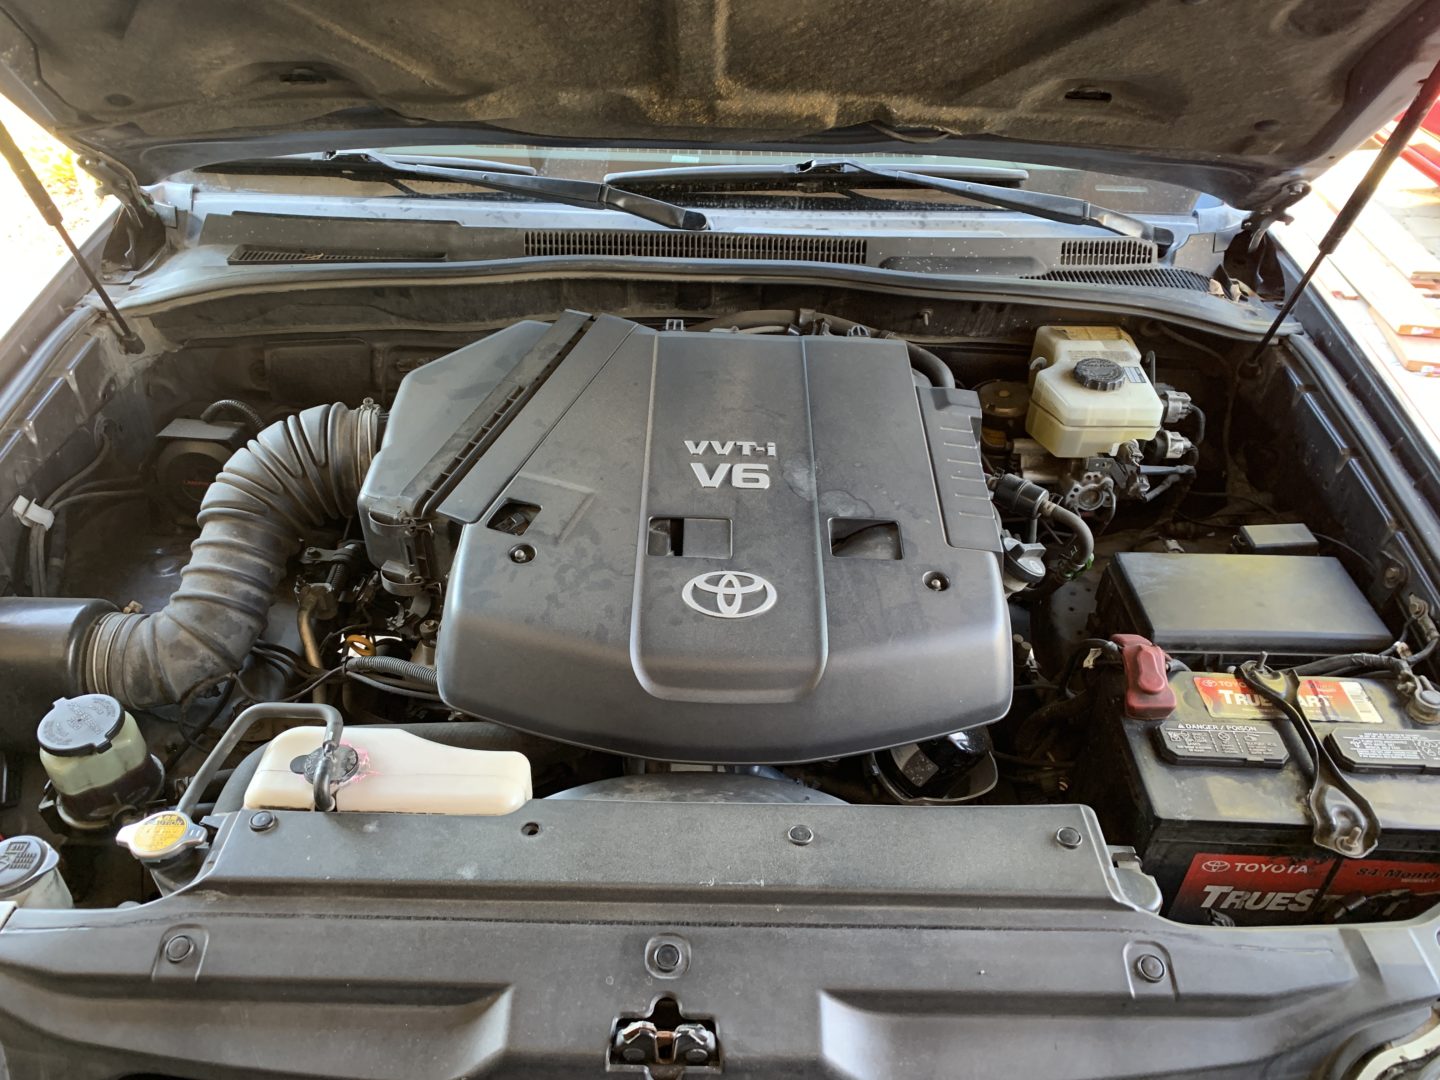
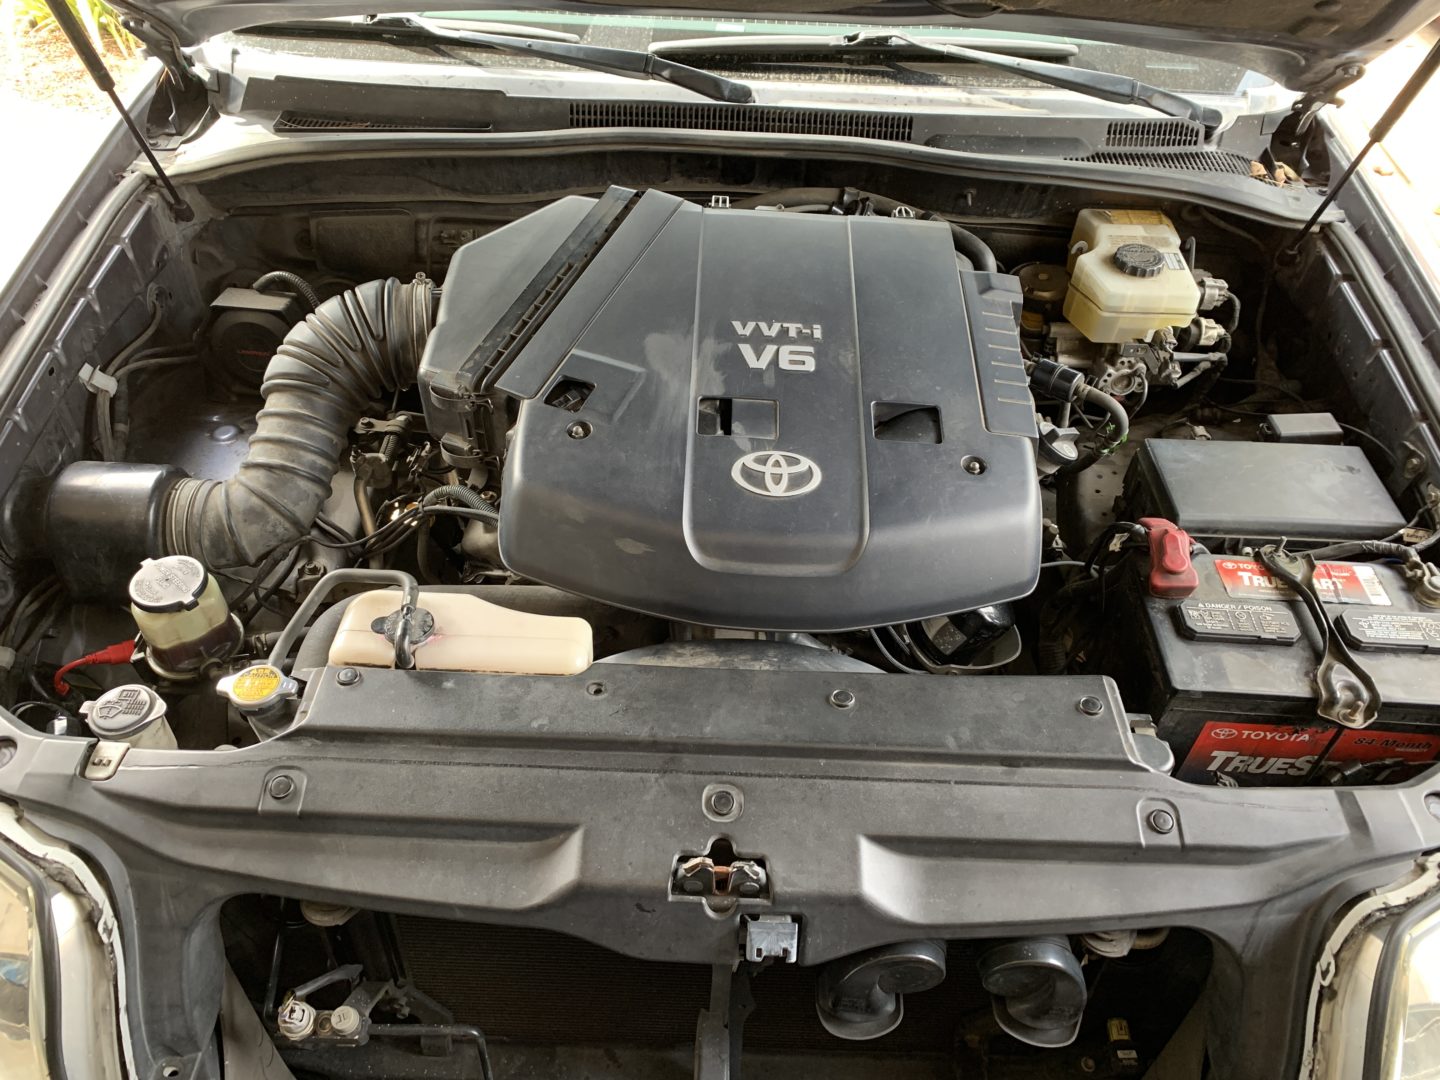
How to Replace Valve Cover Gaskets on a 4.0L V6 4th Gen Toyota 4Runner (1GRE-FE)
Disconnect the negative terminal of the battery. Remove the engine cover with the (2 qty) 10mm nuts.

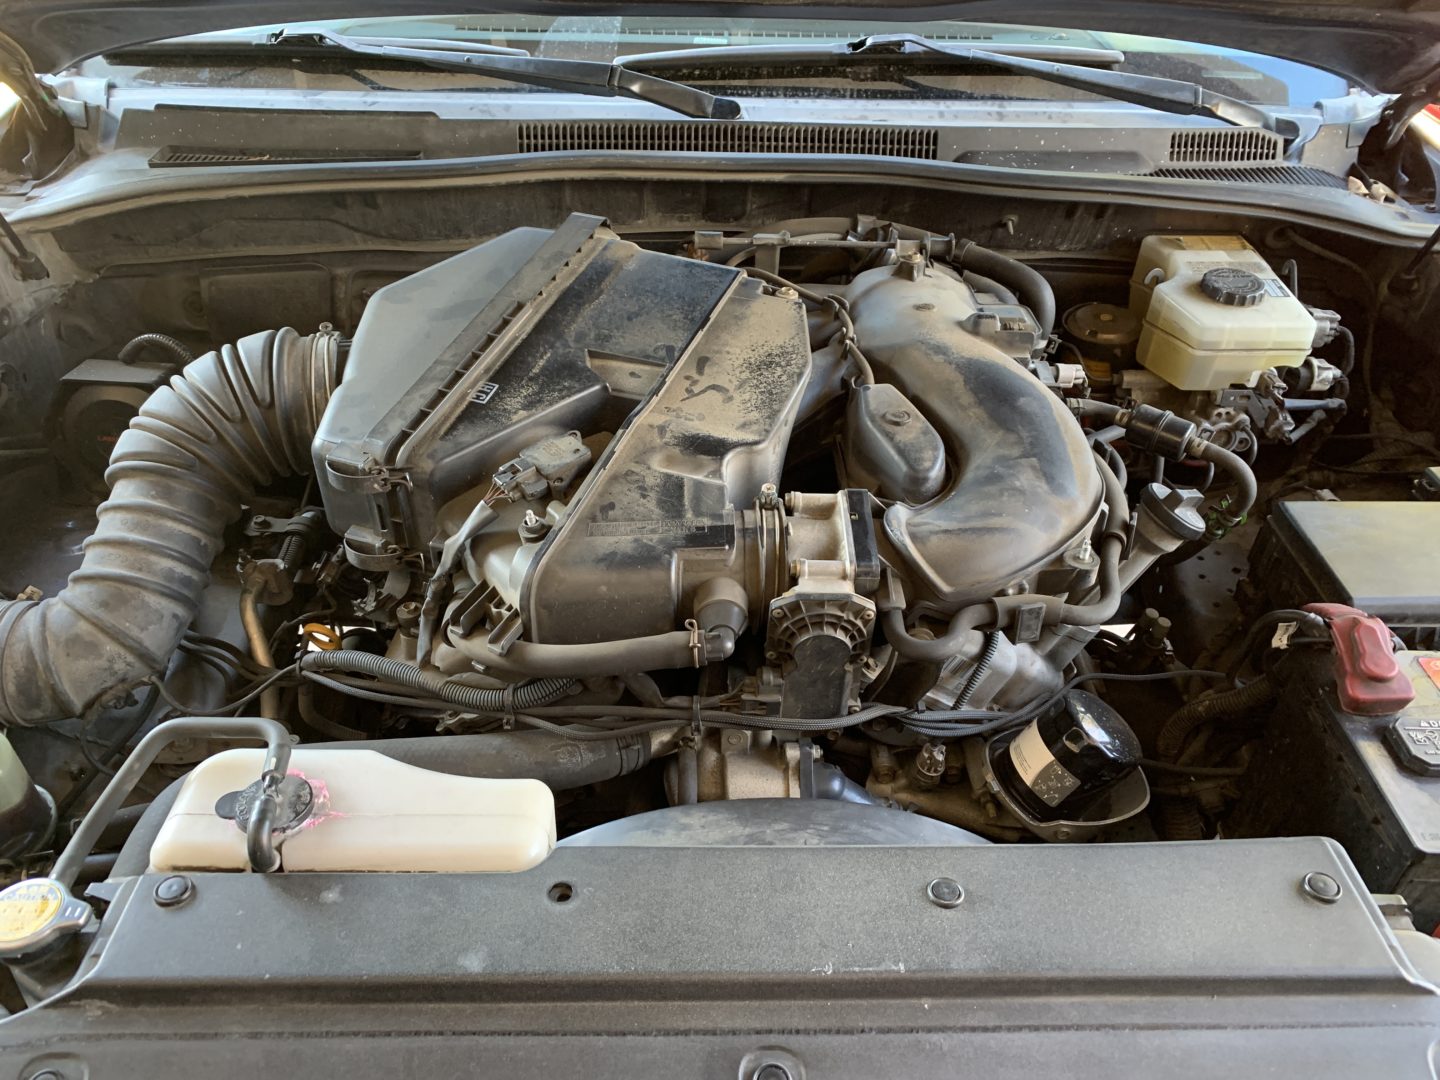
Remove the entire air intake and air filter cover (with air filter). This is done by unclipping the two clips to the air filter housing, removing the (2 qty) 12mm bolts that hold the air intake to the frame, and detaching the wire that is held to the air intake hose. Remove the entire air intake assembly.


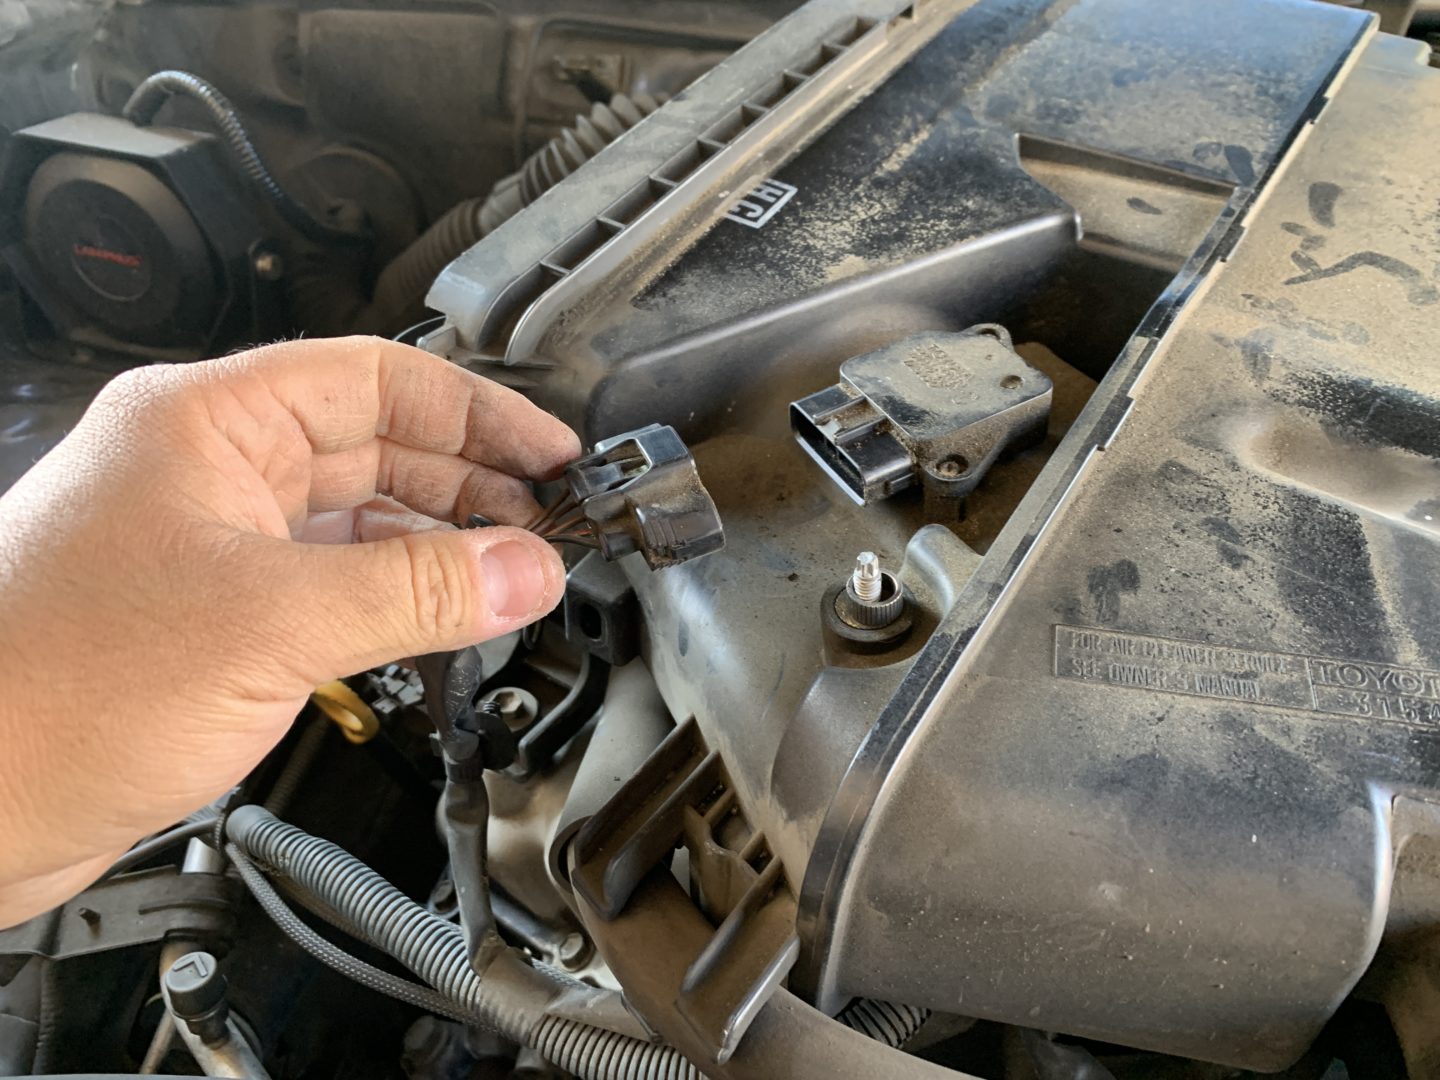
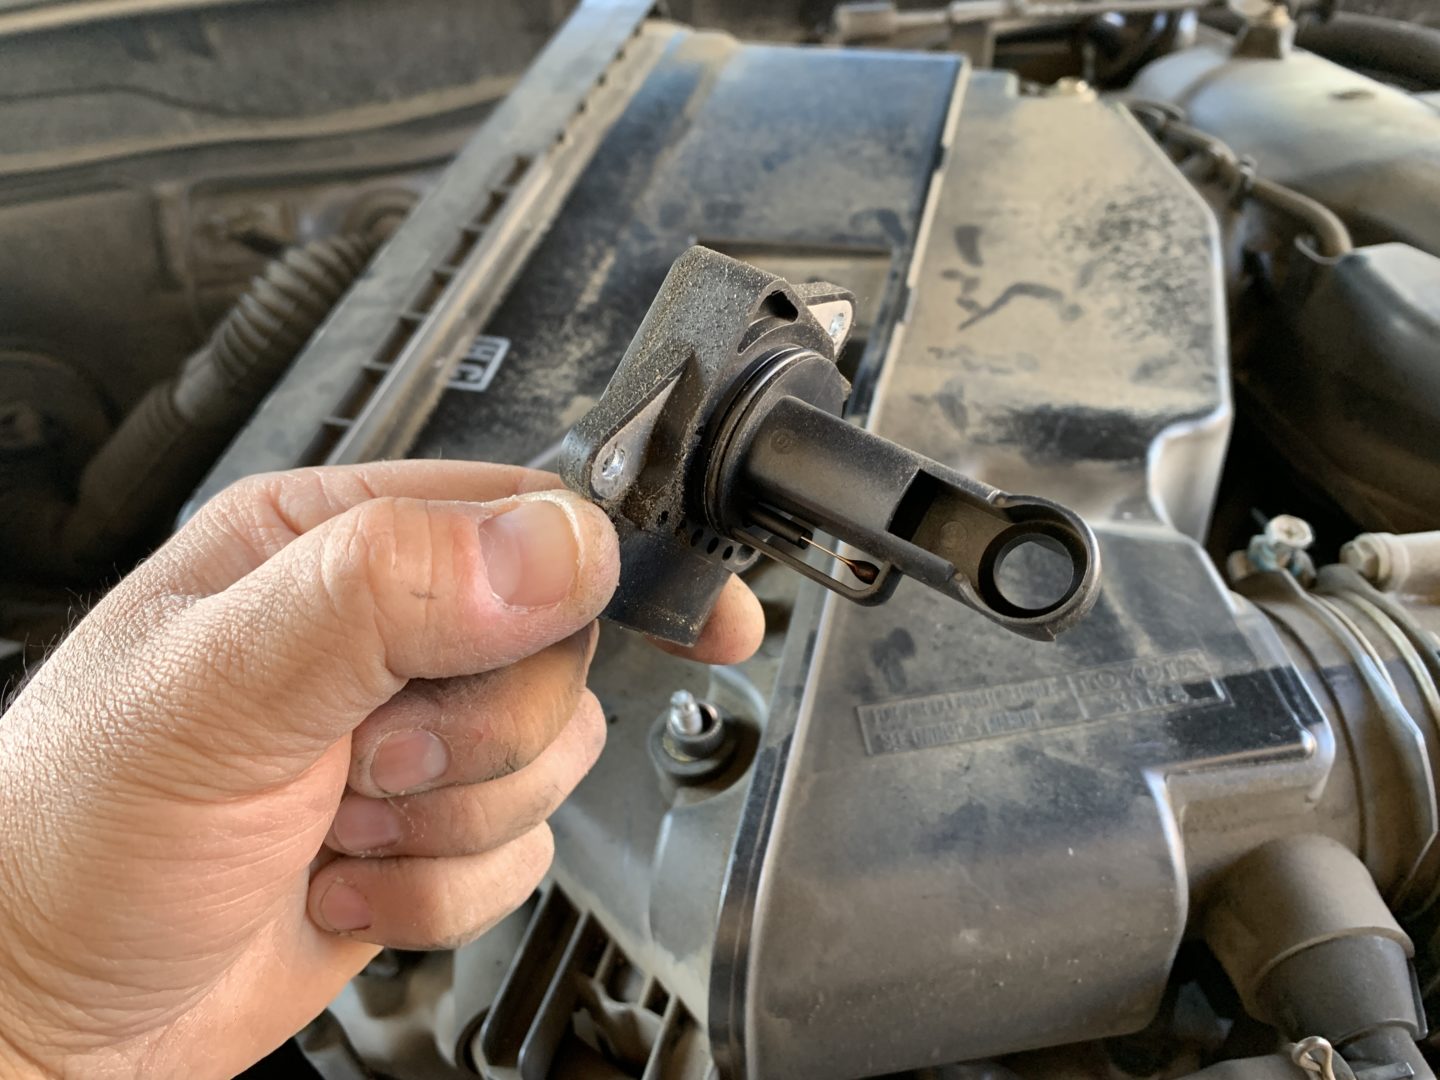
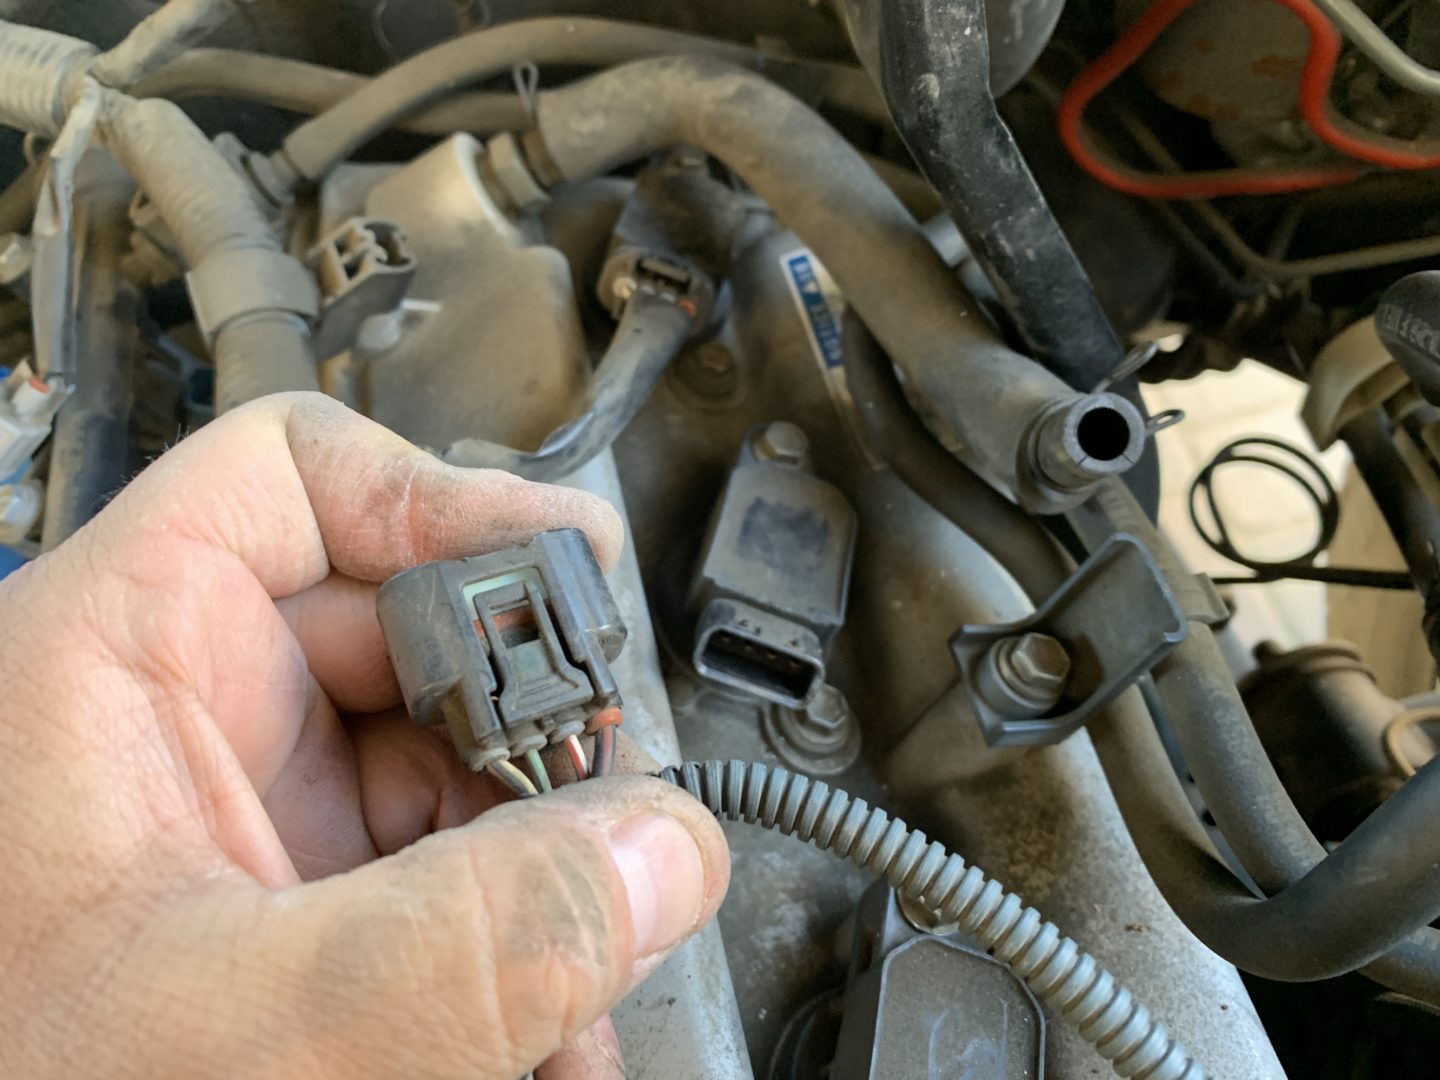
Disconnect the electrical connector to the MAF sensor. Remove the MAF sensor via the (2 qty) small Phillips head screws and set it aside.

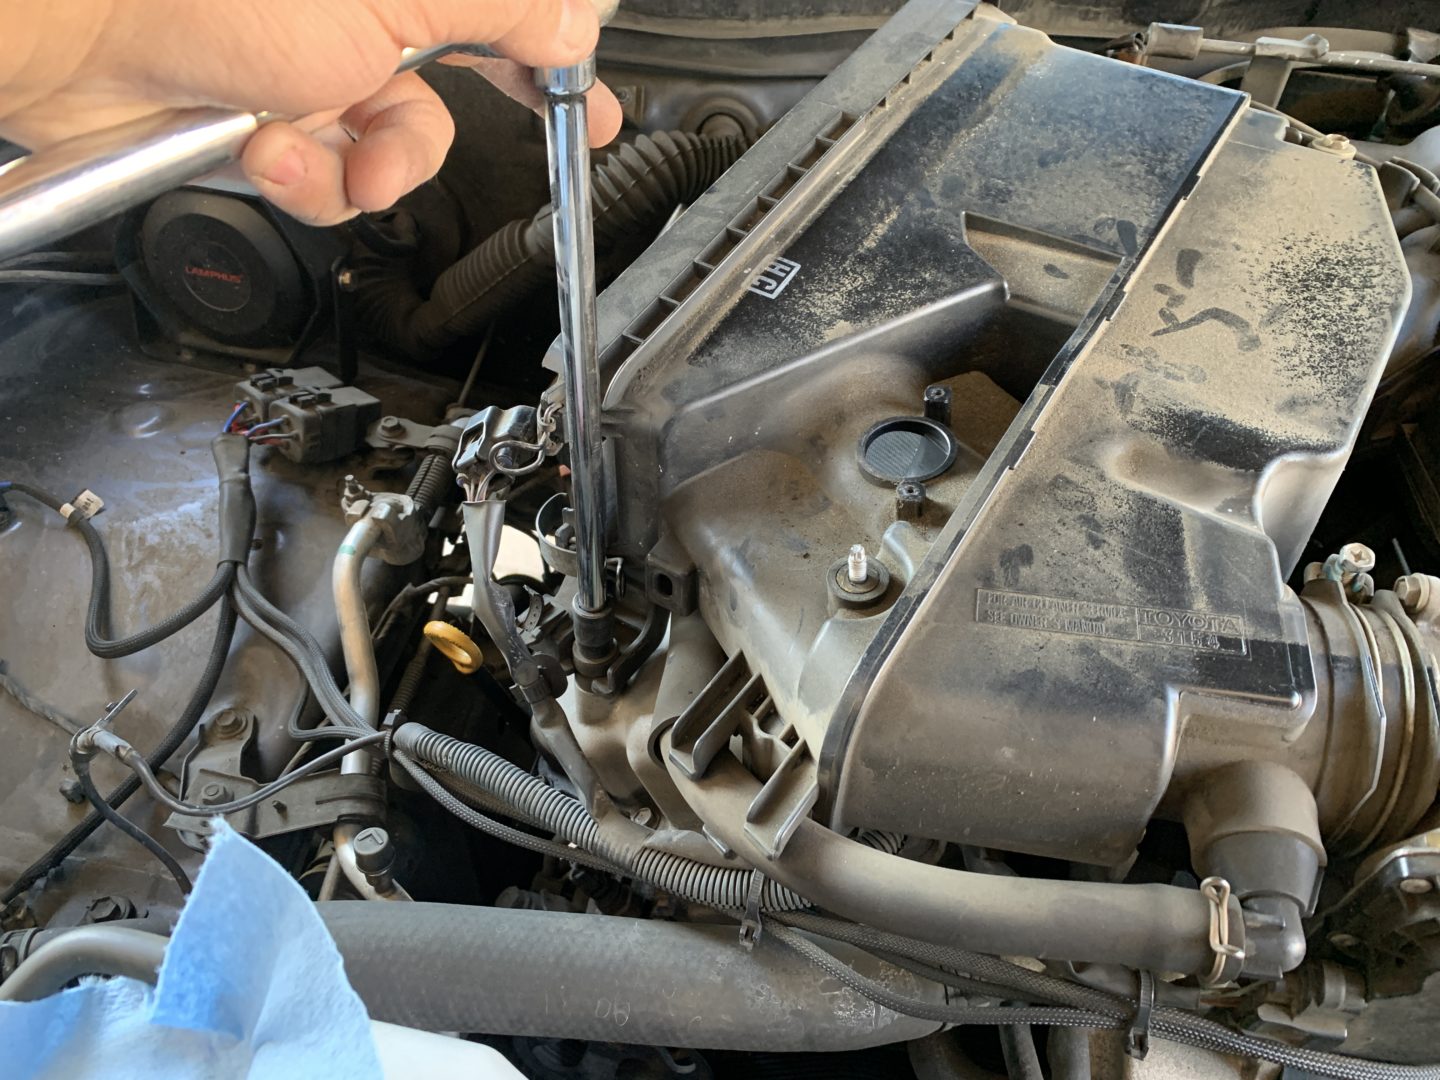
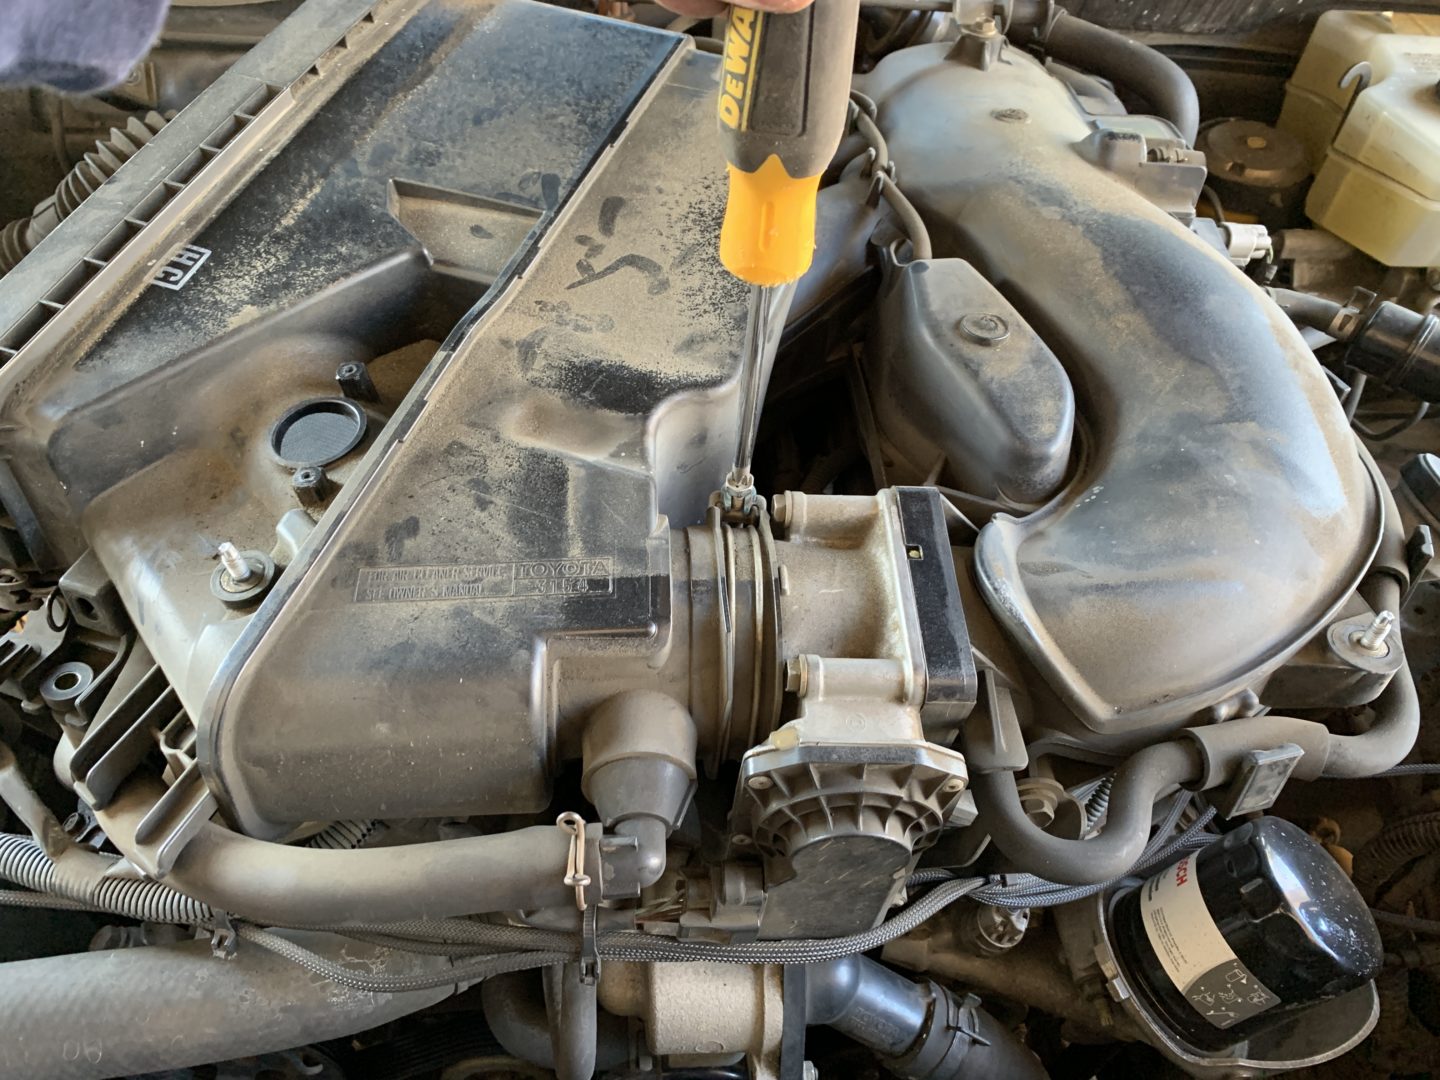
Use a 10mm socket to remove (2 qty) bolts holding the air intake housing in place, then use a Phillips head screwdriver to unscrew the clamp on the throttle body. Then remove the hose in front beside the throttle body by removing the hose clamp and pulling the hose off of the nipple.

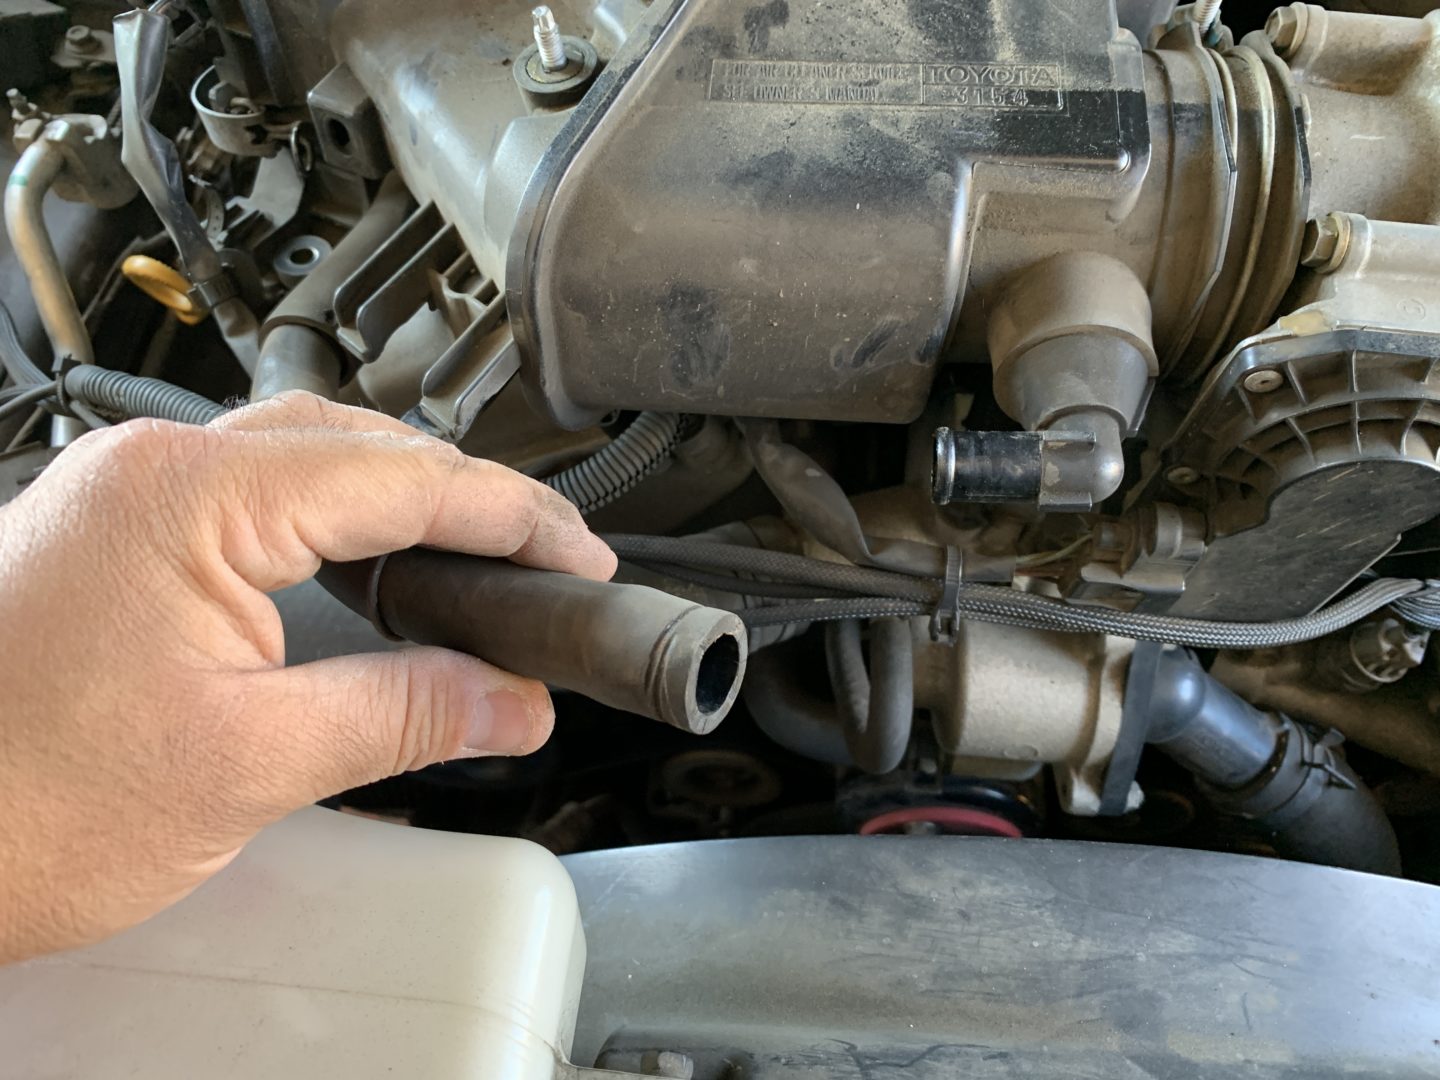
Work the air intake housing off of the throttle body and then carefully turn it over as if you were turning a page of a book. On the underside, there is a small vacuum hose that will need to be removed.
If you have trouble working this small hose off by hand, use a flat head screwdriver to carefully wedge between the hose and box and twist. This will help break loose the hose-to-nipple connection. I like using this method rather than trying to work the hose off by-hand for a smaller hose such as this one because it is easy to break off the small plastic nipple inside of the vacuum hose.


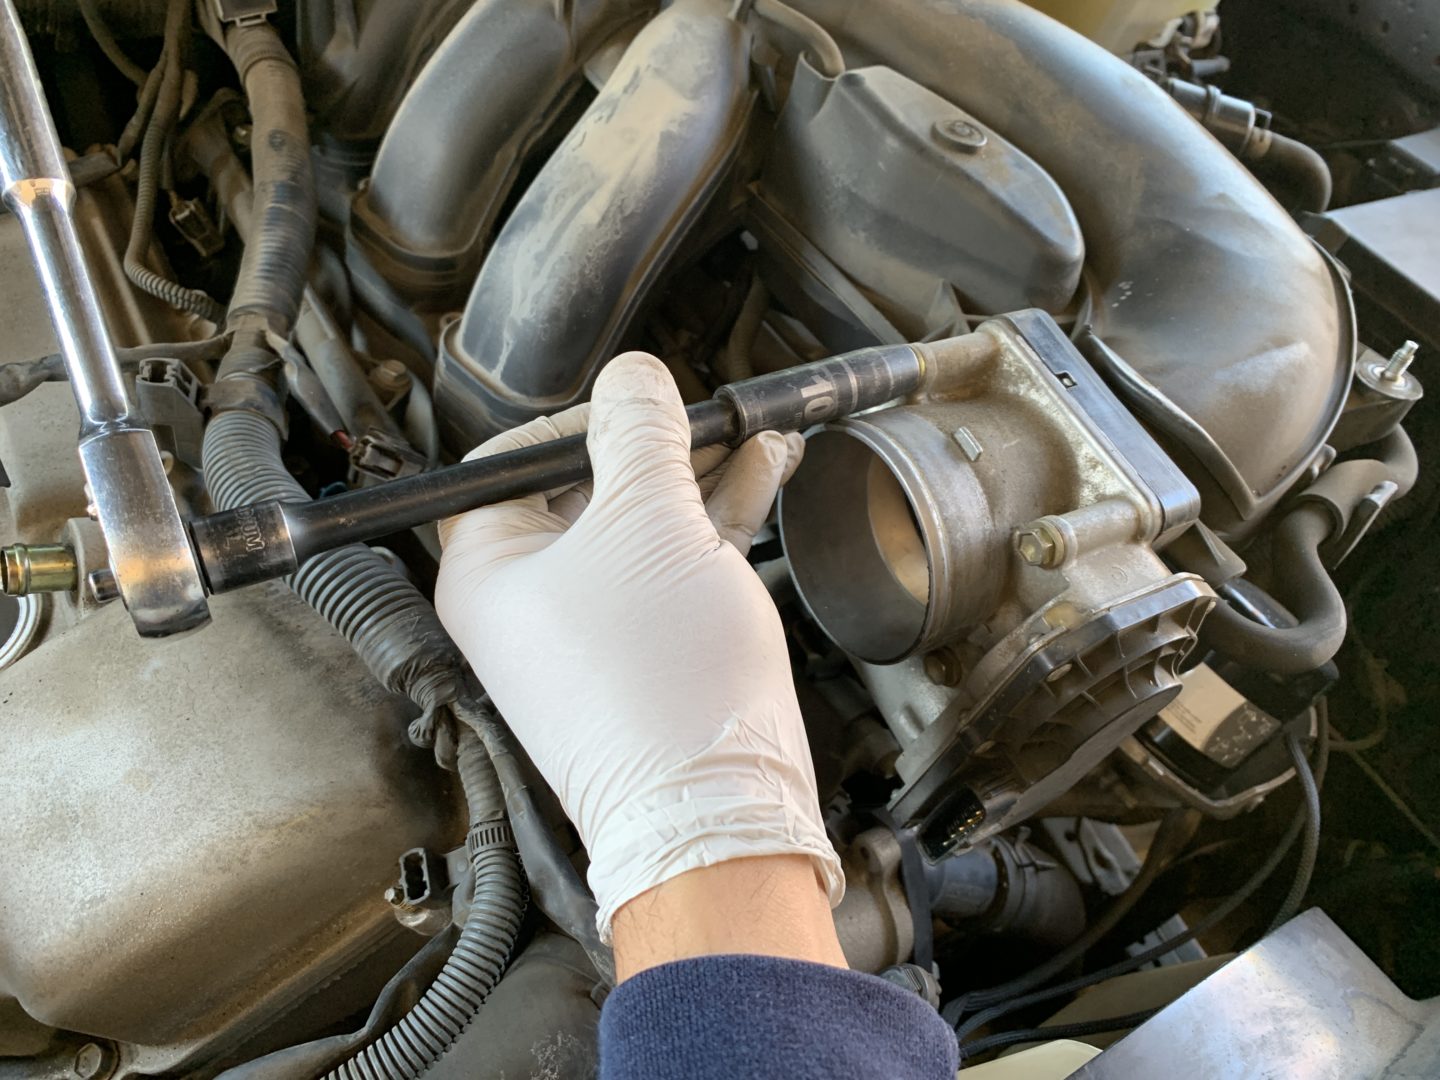
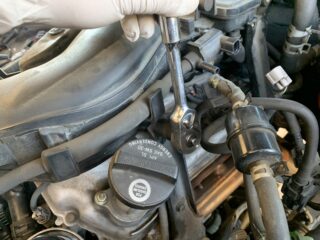
Using a 10mm socket, remove the (4 qty) throttle body bolts.
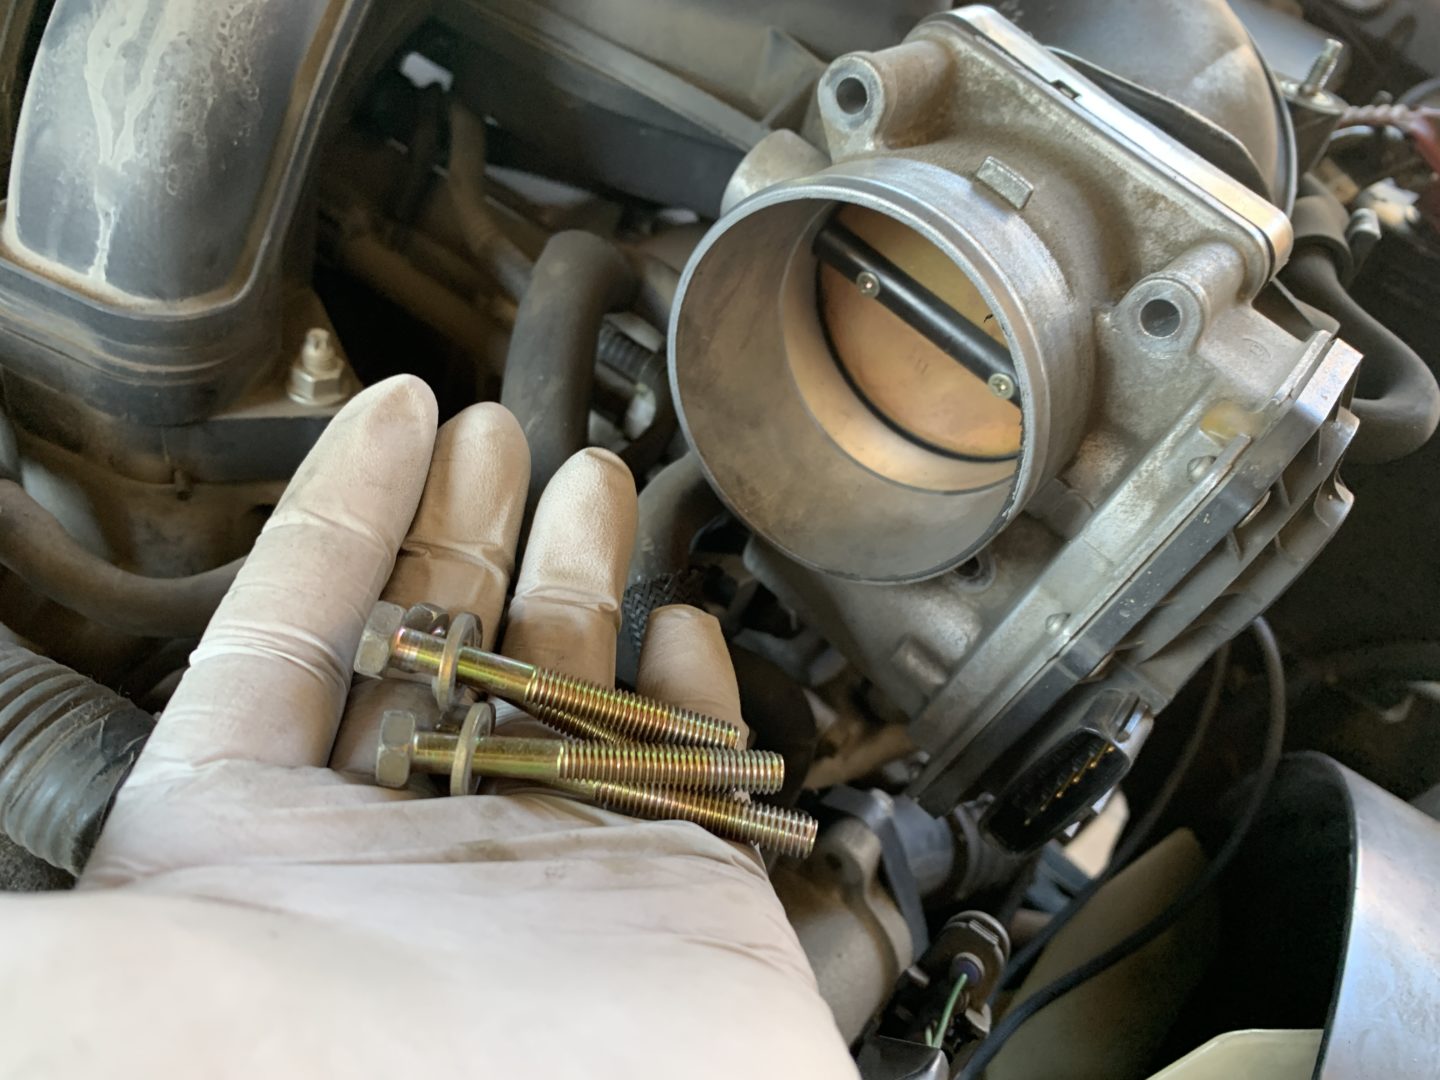
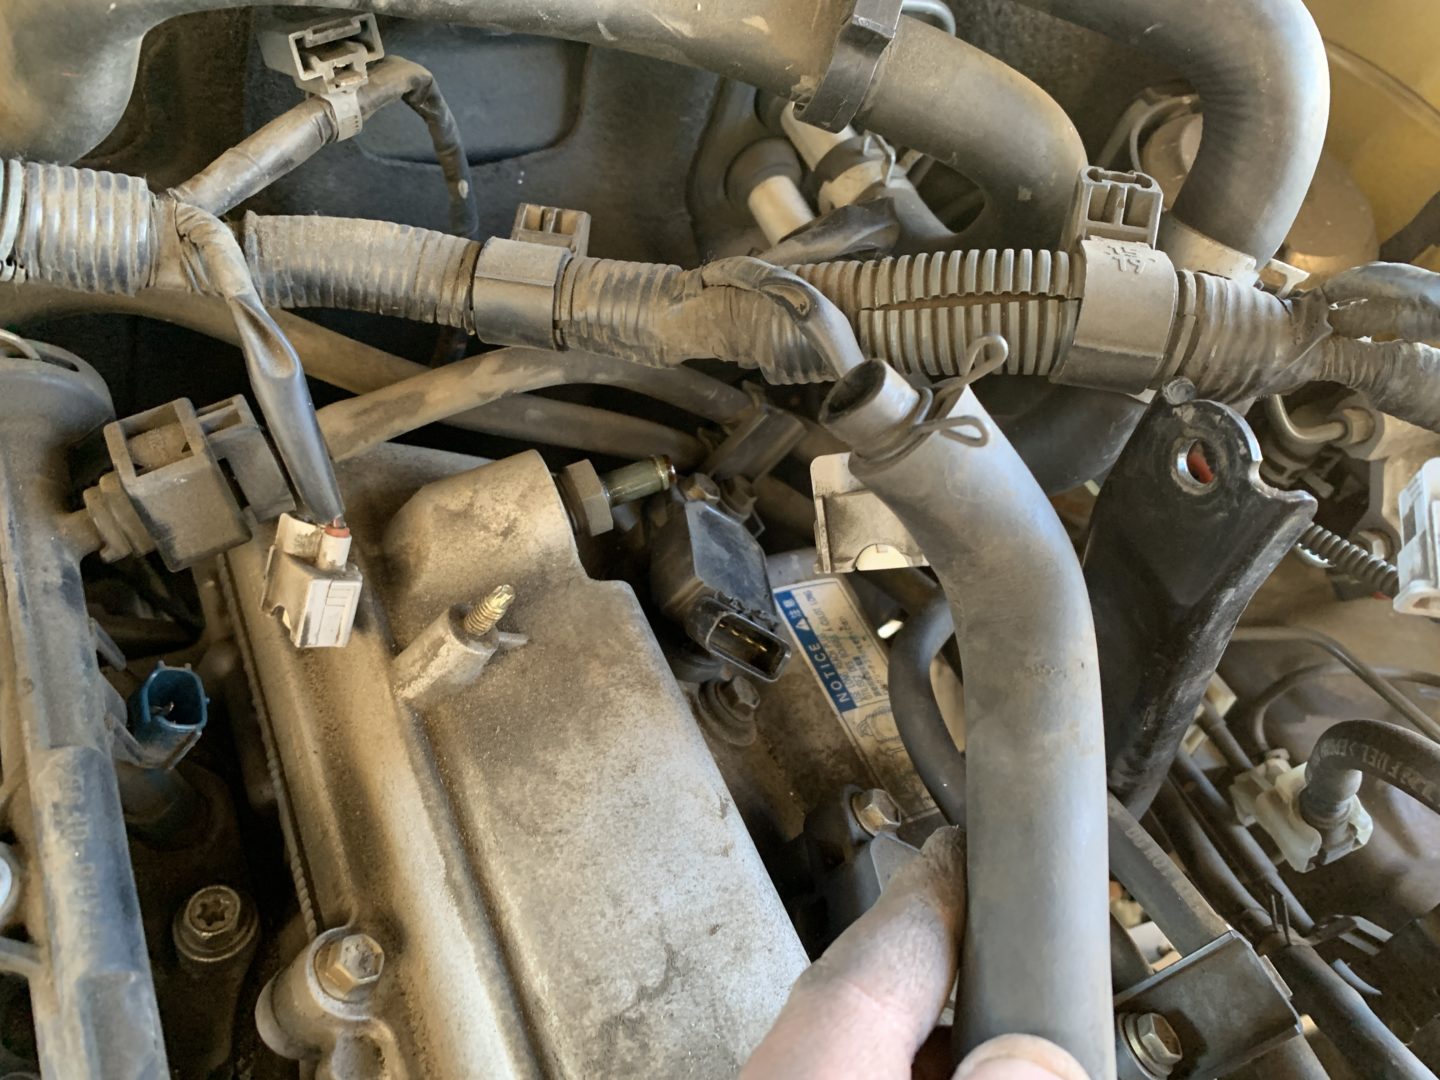
Remove the hose that is attached to the valve cover by removing the hose clamp and pulling it off. This is the same hose that you removed the other end to earlier.
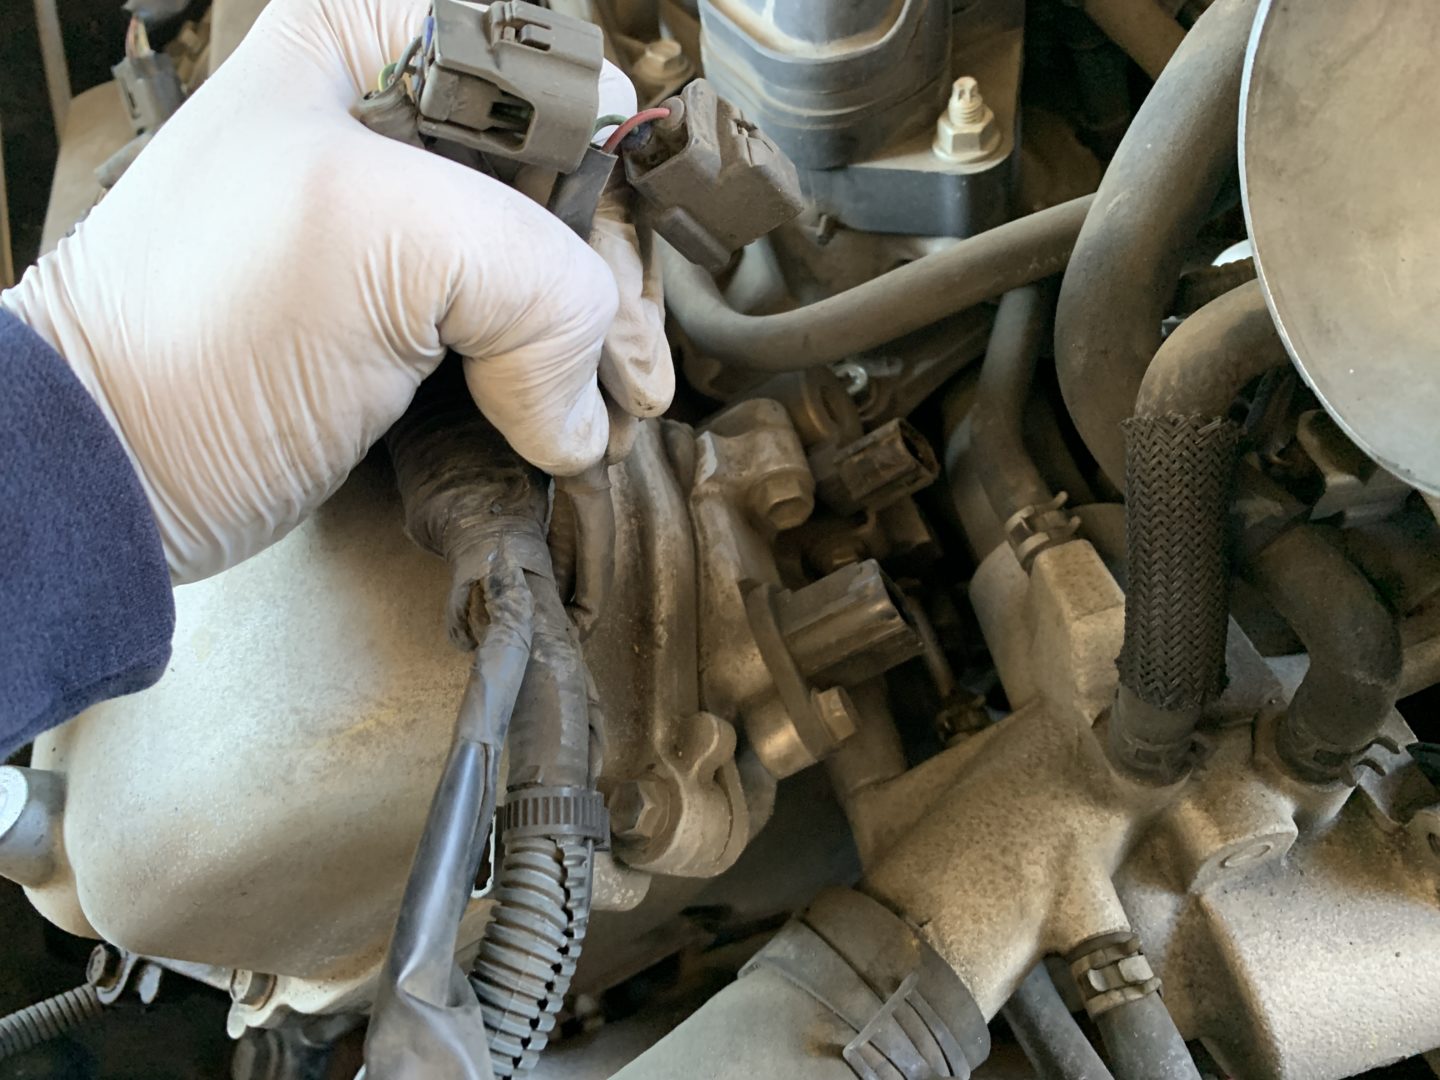
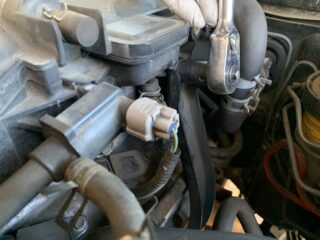
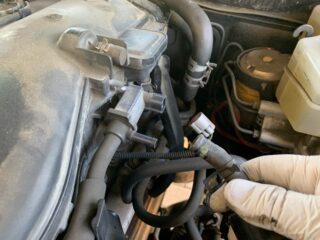
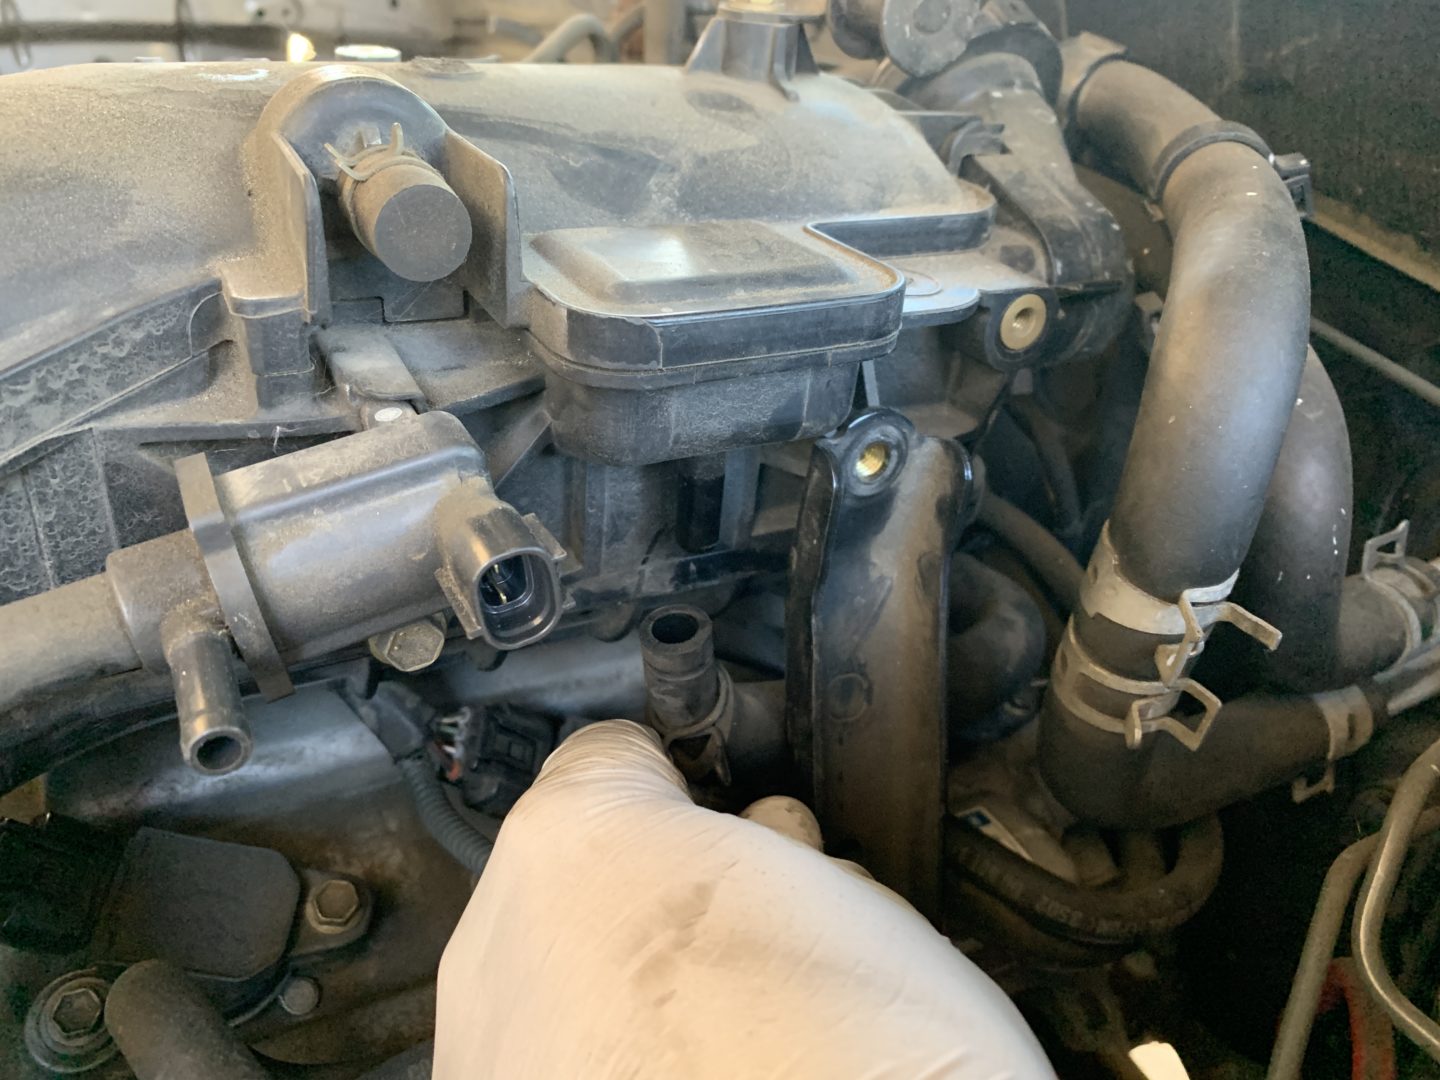
Disconnect the three connectors to the ignition coils on the passenger side bank. Remove the (3 qty) 10mm bolts and then pull out the ignition coils.


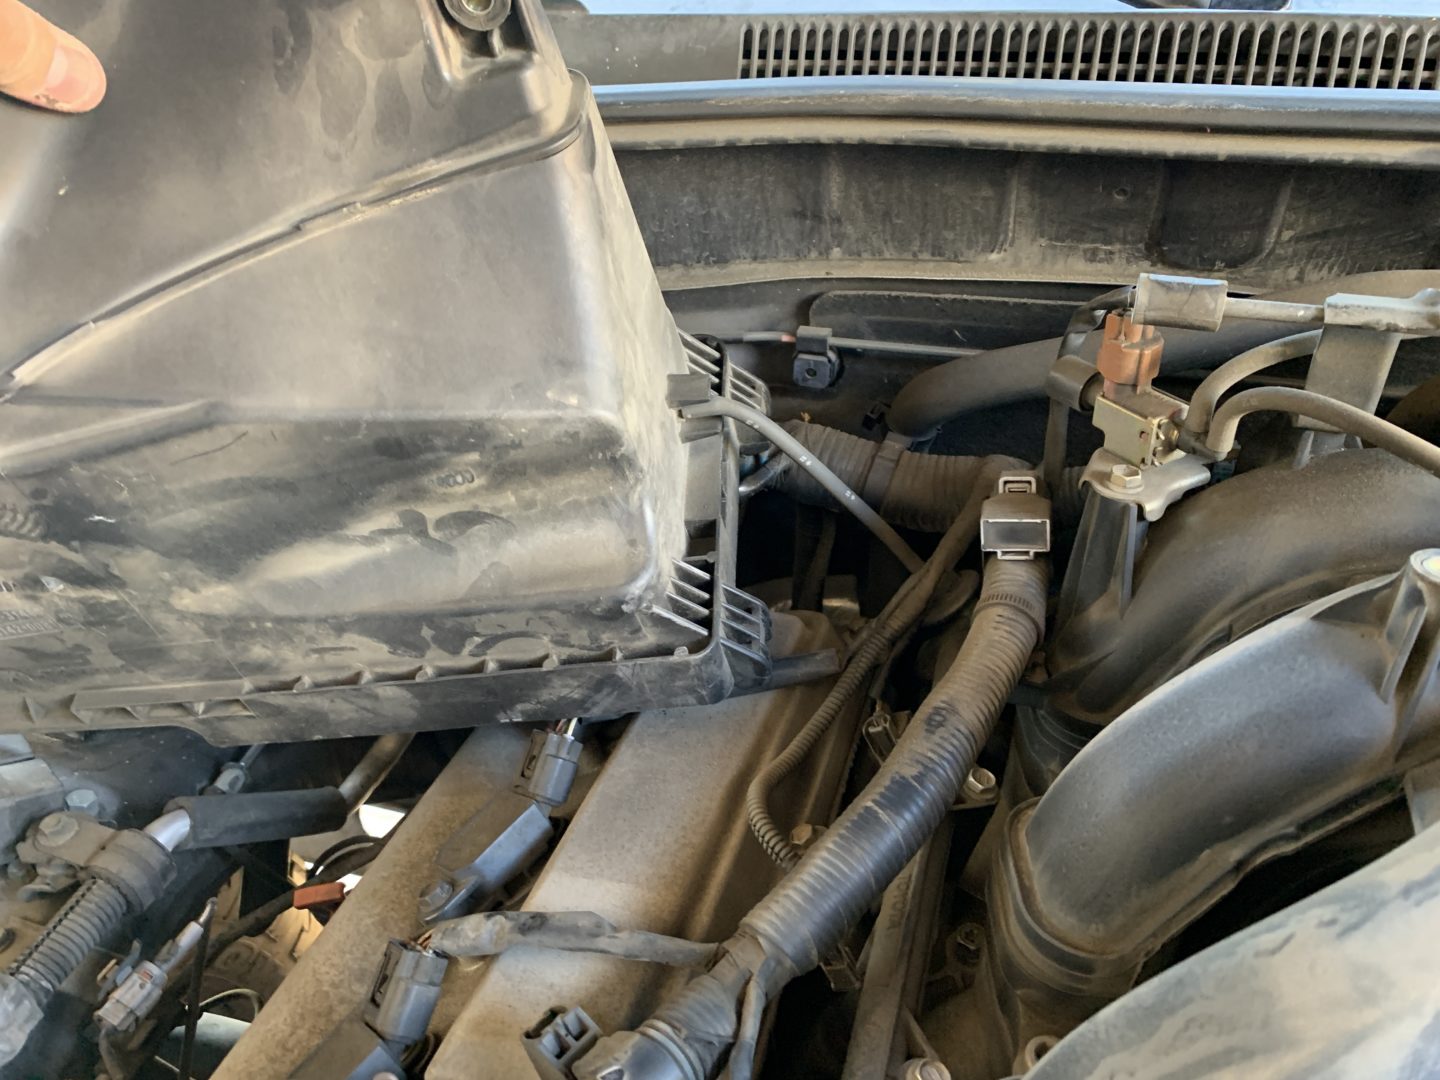
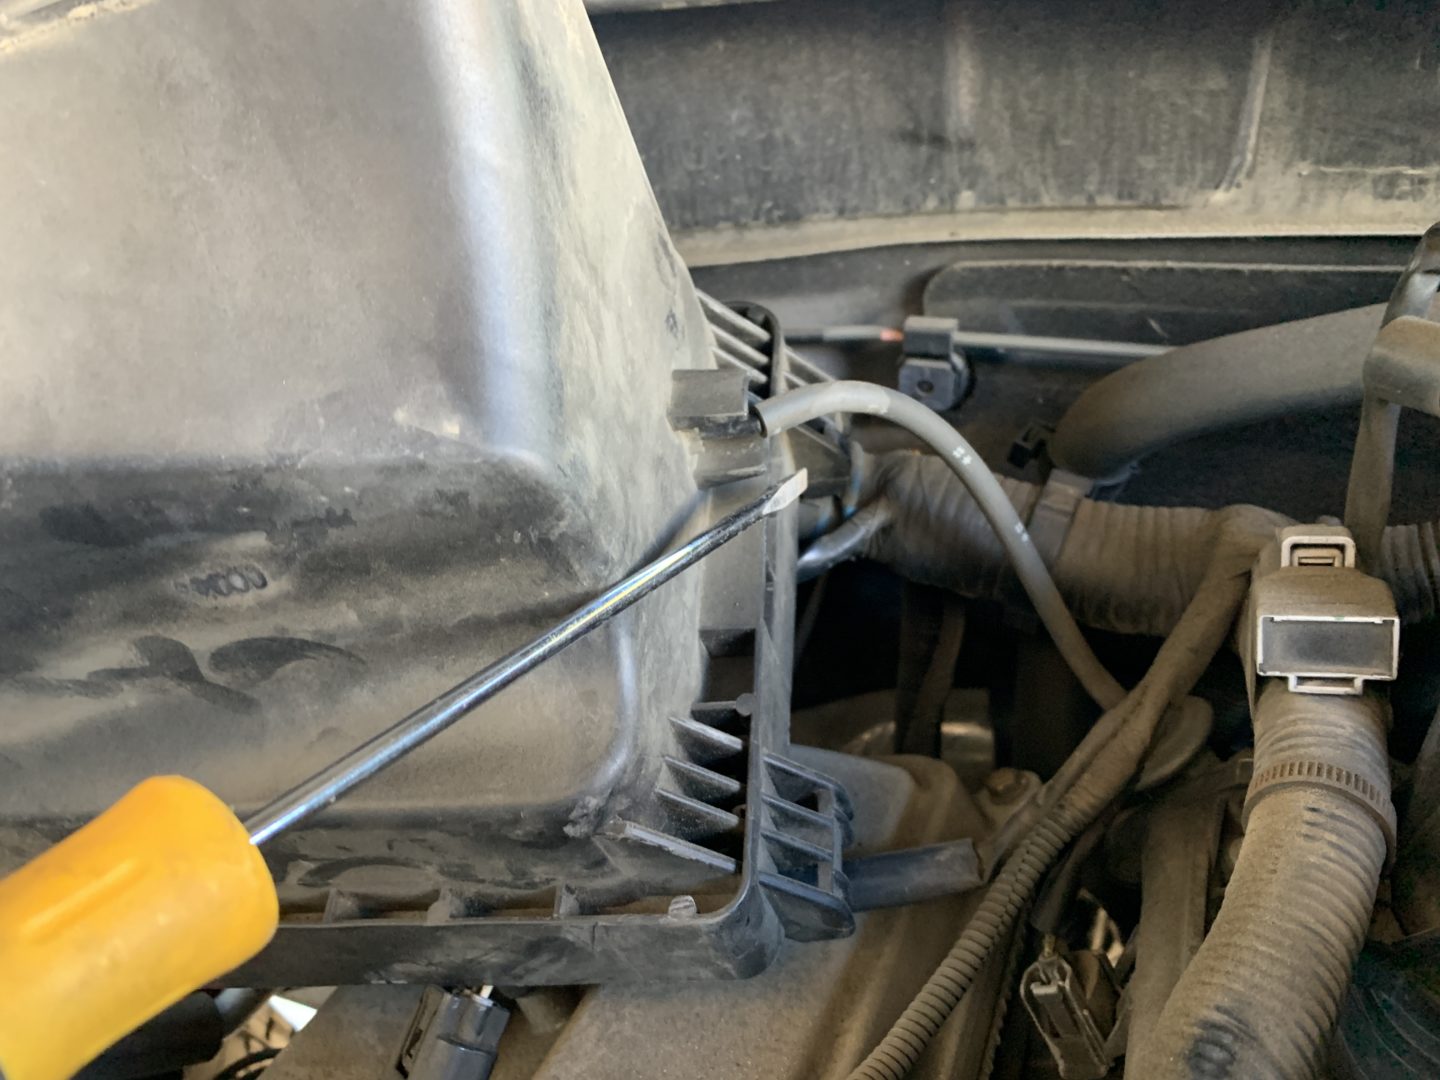
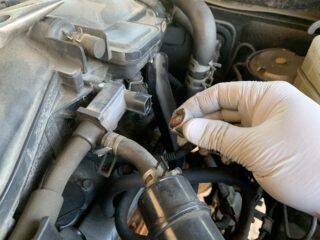
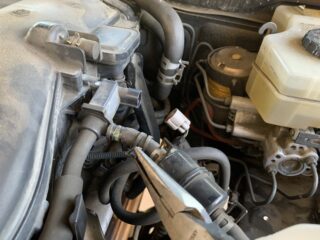
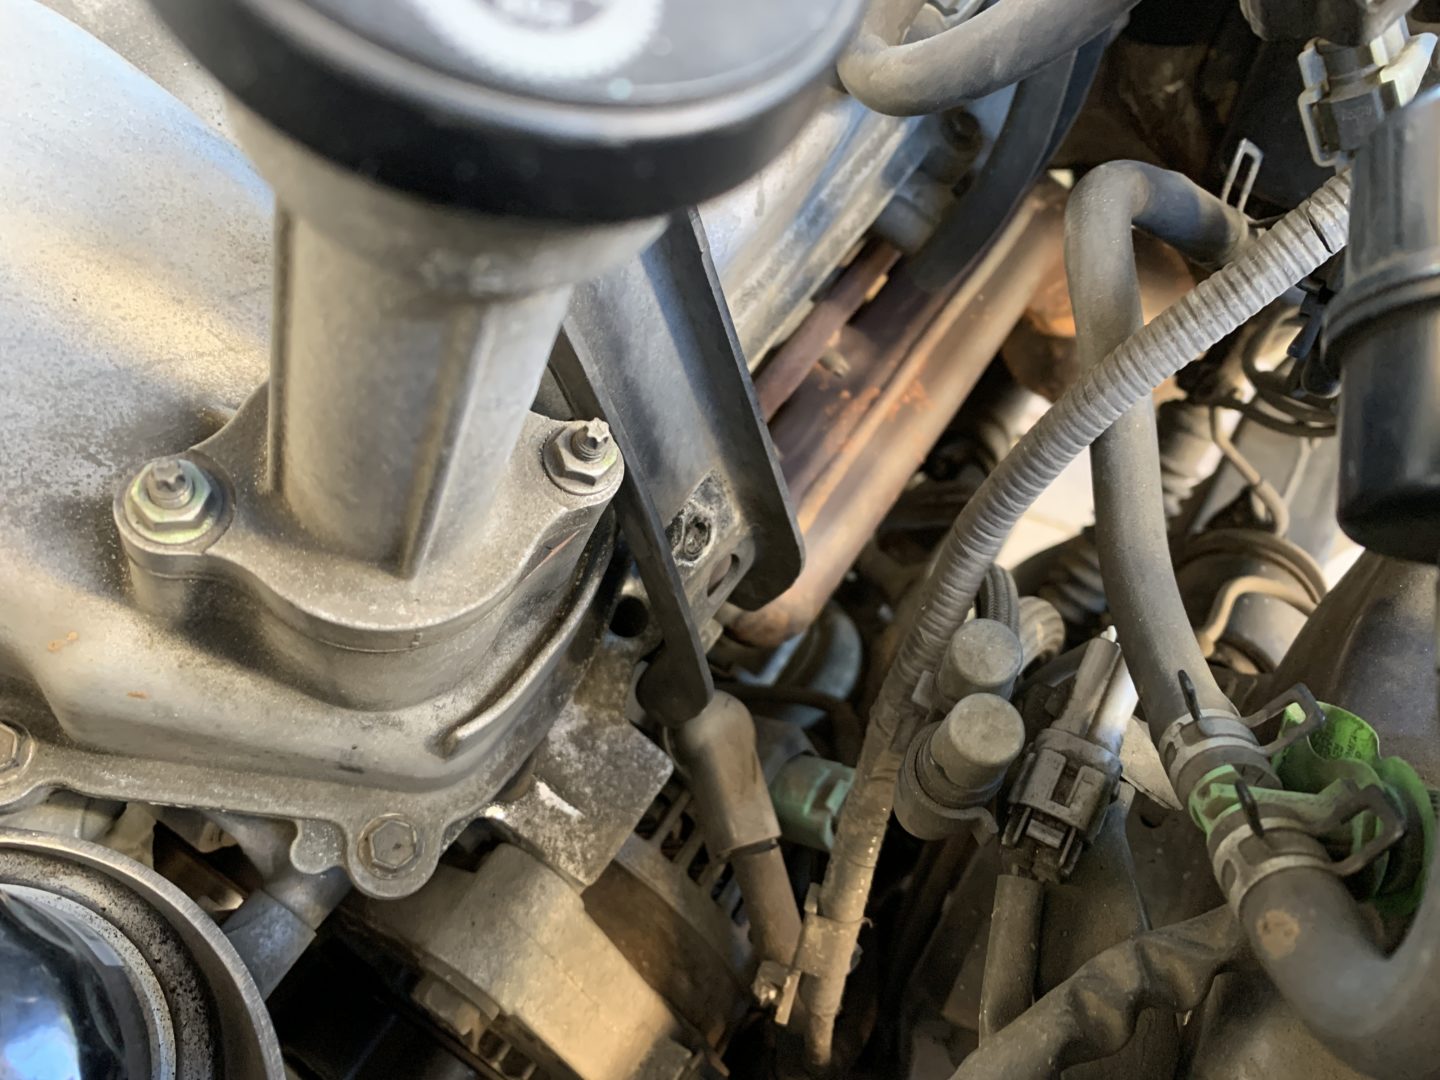
There are a number of wiring harnesses, connectors, and brackets that you’ll need to remove and get out of the way. These things either keep you from or make it harder to remove the passenger side valve cover.
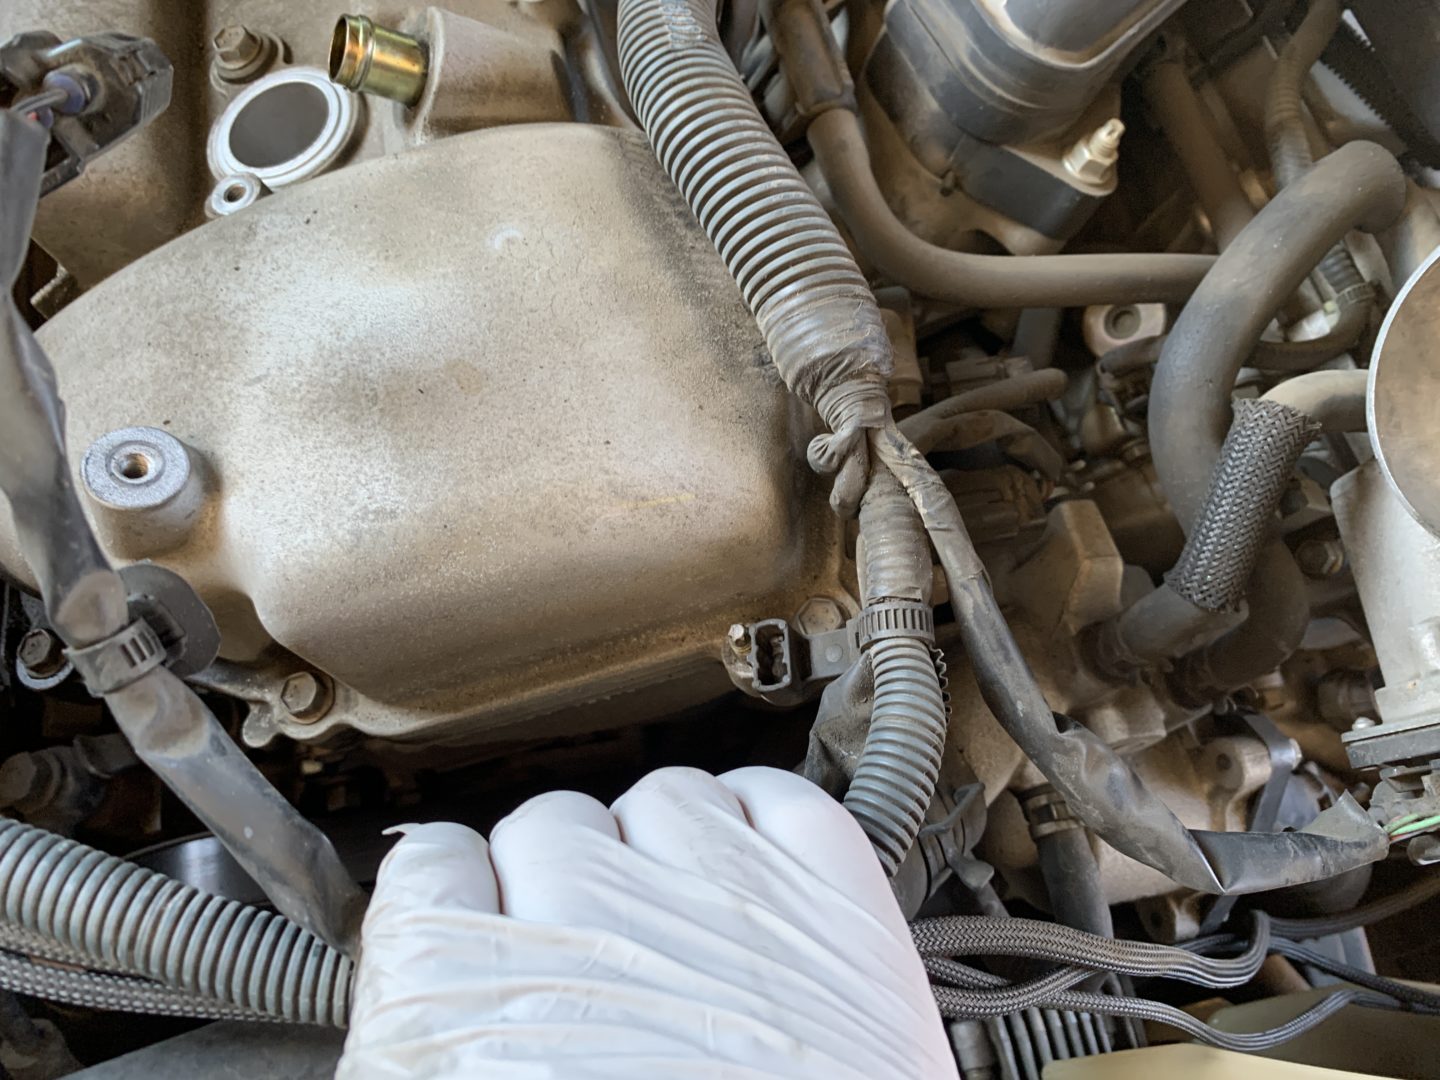
At this point, you should be able to remove the passenger side valve cover to change out the gasket. However, if you plan on changing out both valve cover gaskets, then continue on with the removal process.
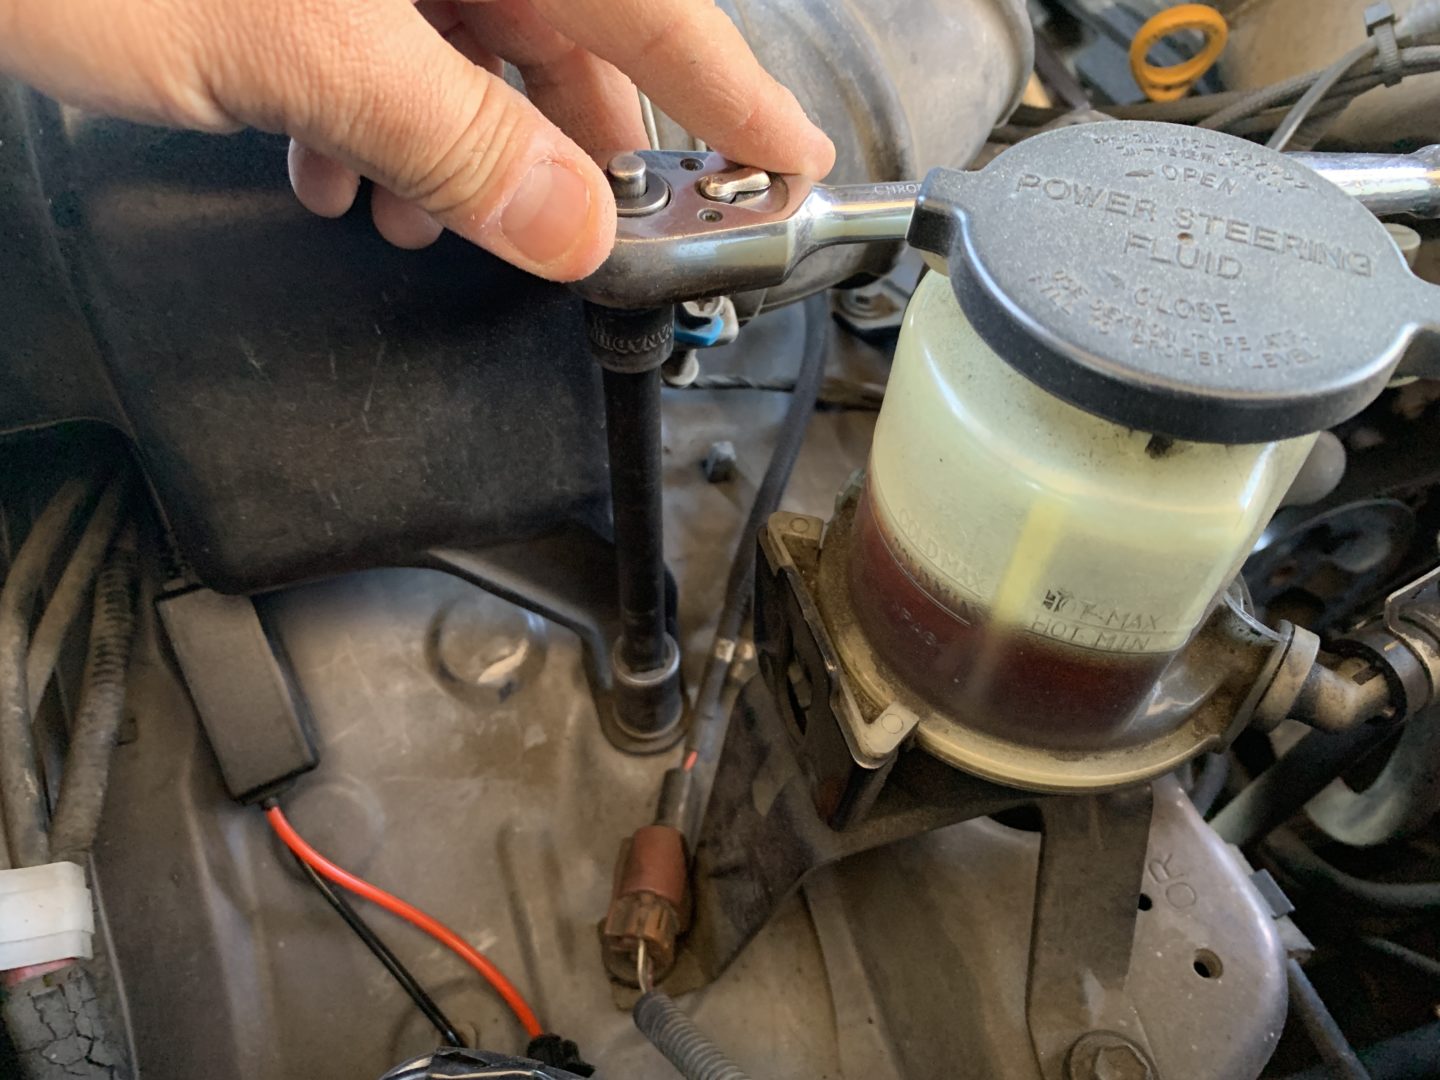
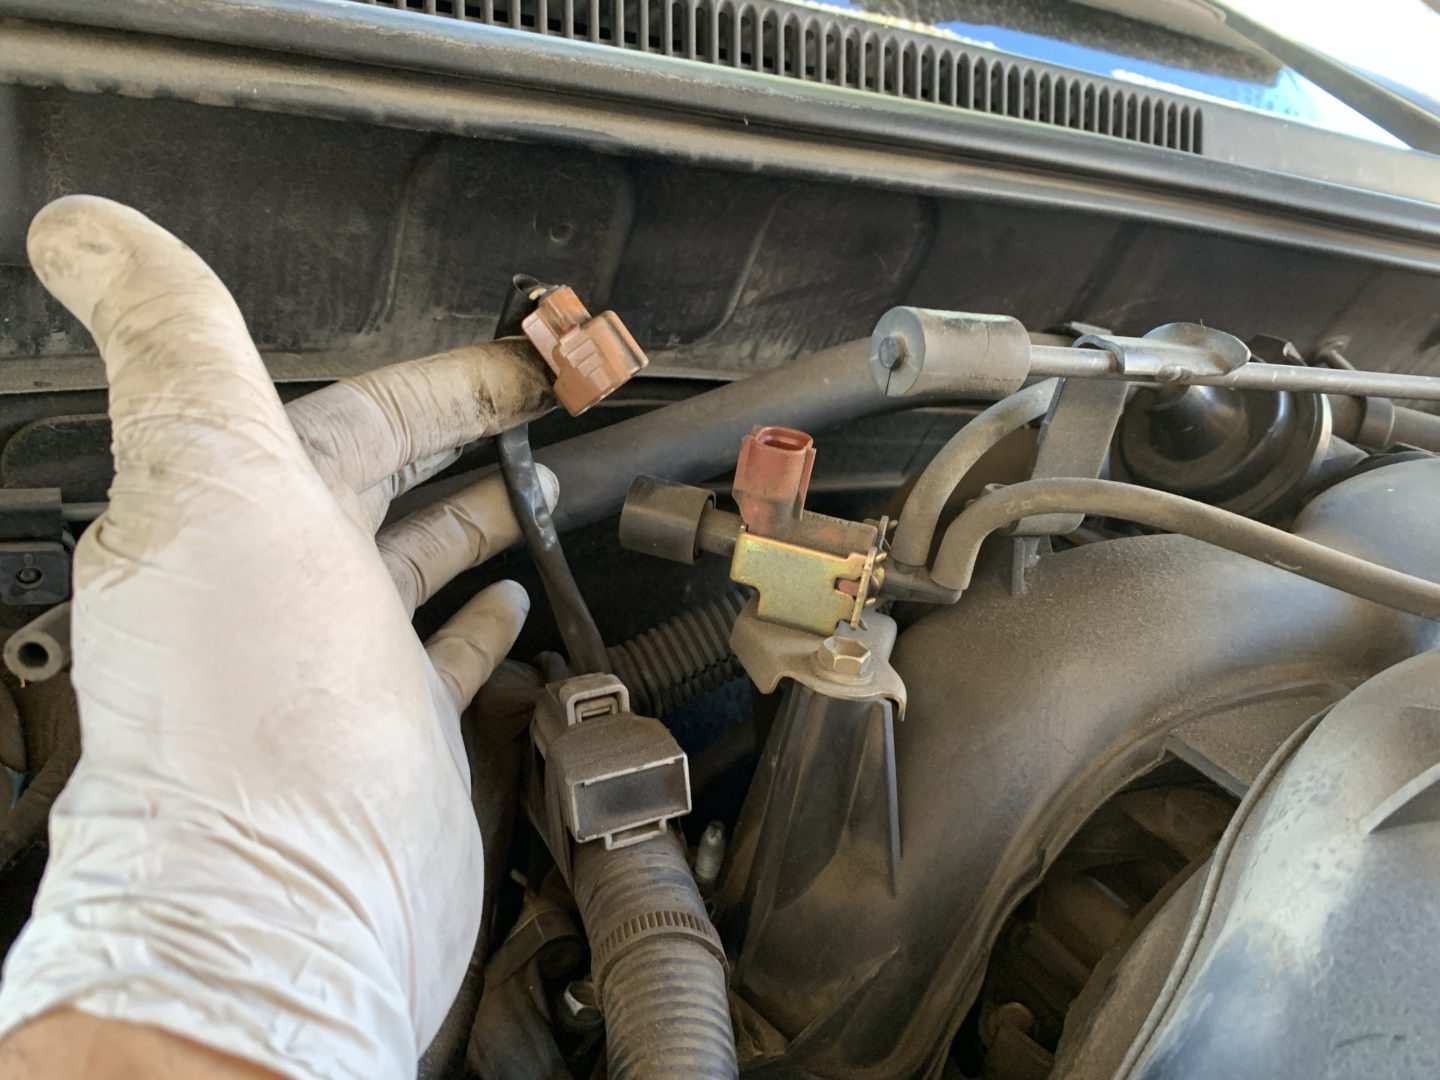
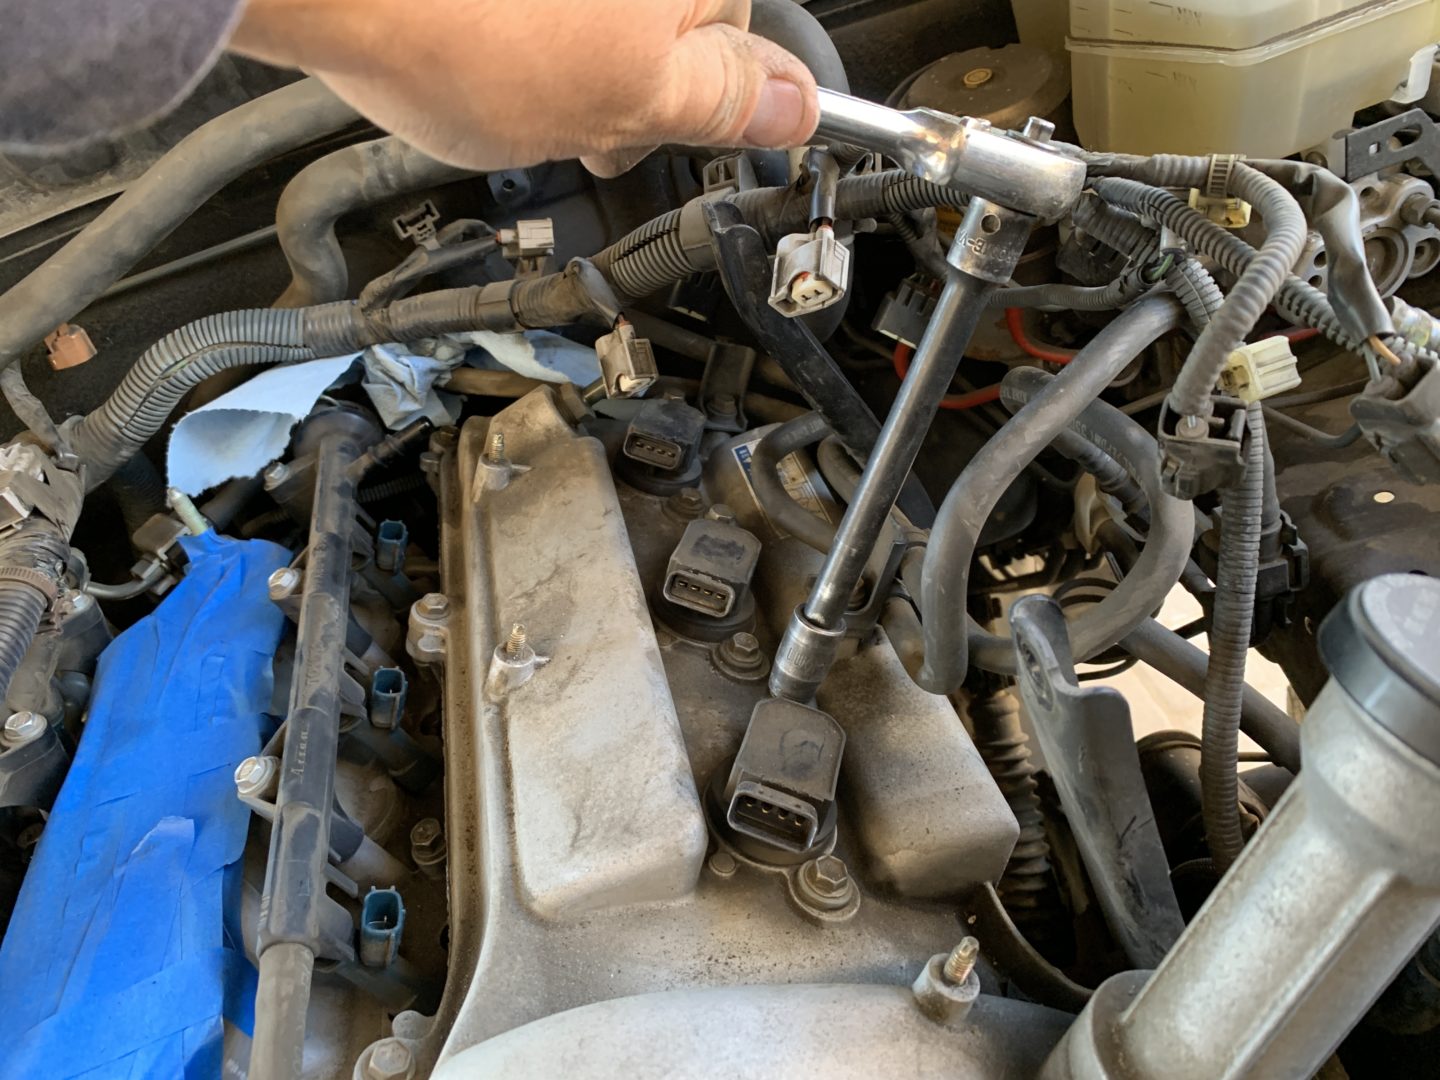
Since the intake manifold needs to be removed in order to get access to the driver side valve cover, we’ll need to remove more components so that the intake manifold can be taken out. There are (3 qty) 12mm bolts that hold various brackets to the intake manifold: one on front, and two on the sides of the manifold. Then remove the connector and hose as shown below.
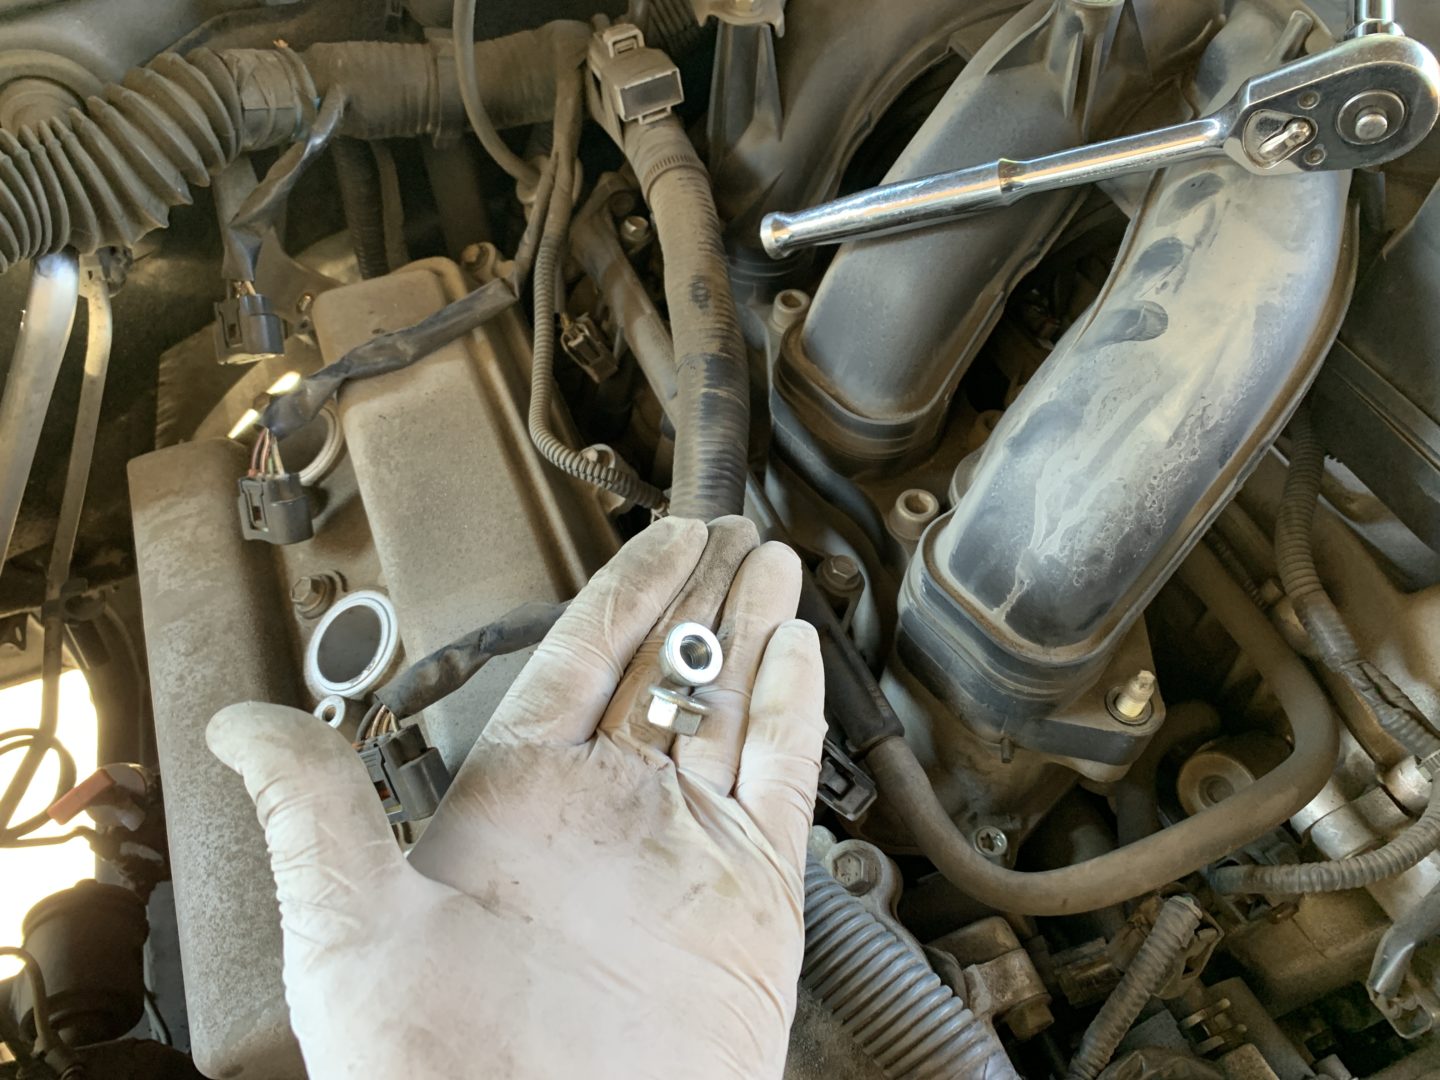
There are (2 qty) 12mm nuts on each end of the upper intake manifold and (4 qty) 6mm hex bolts between each of the intake manifold chambers.
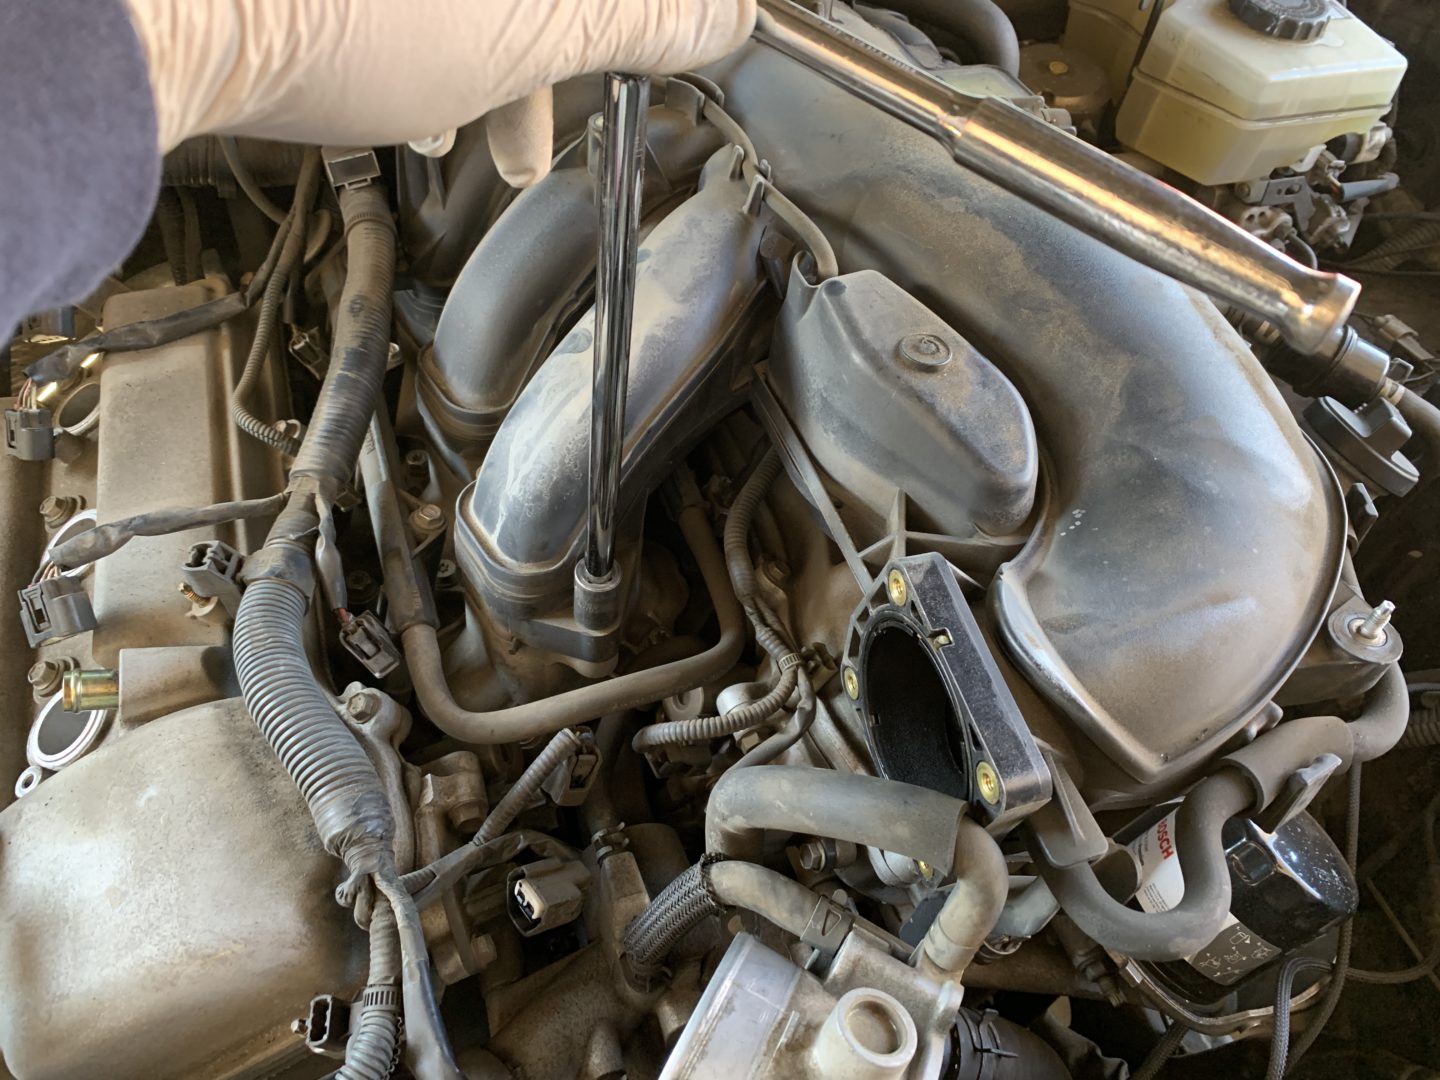

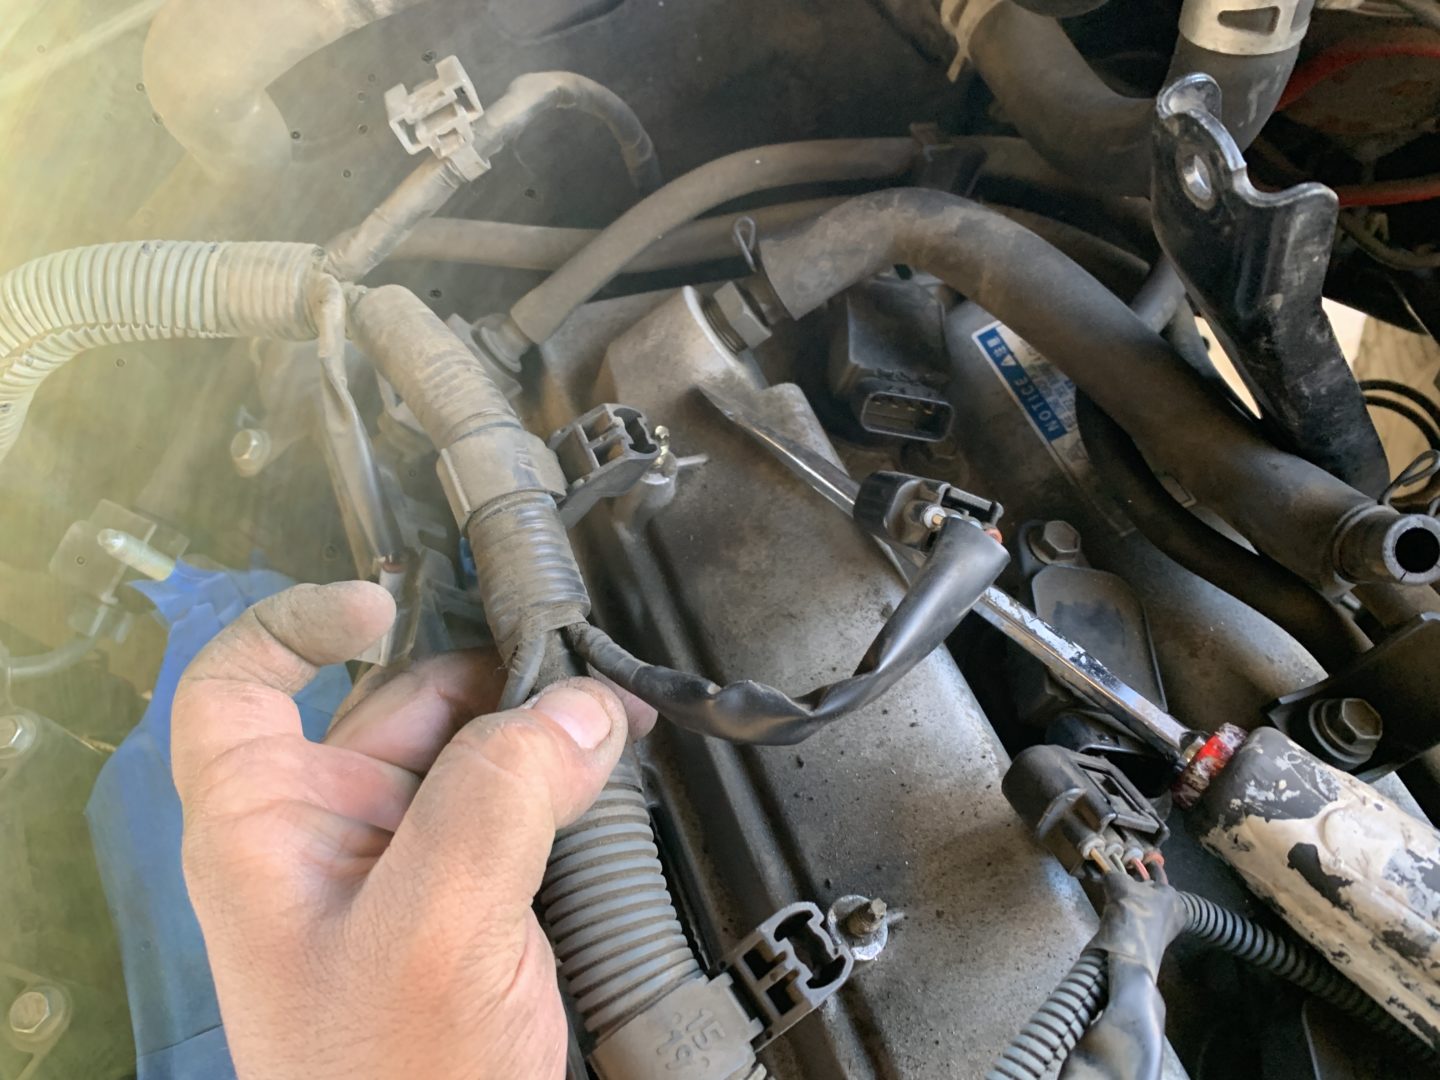
There are a few more things to remove to free the upper intake manifold: some connectors, hoses, and freeing up of the wiring harness in the back. The toughest time I had was with the wiring loom being held by various brackets and trying to release them while working with limited space behind the engine.


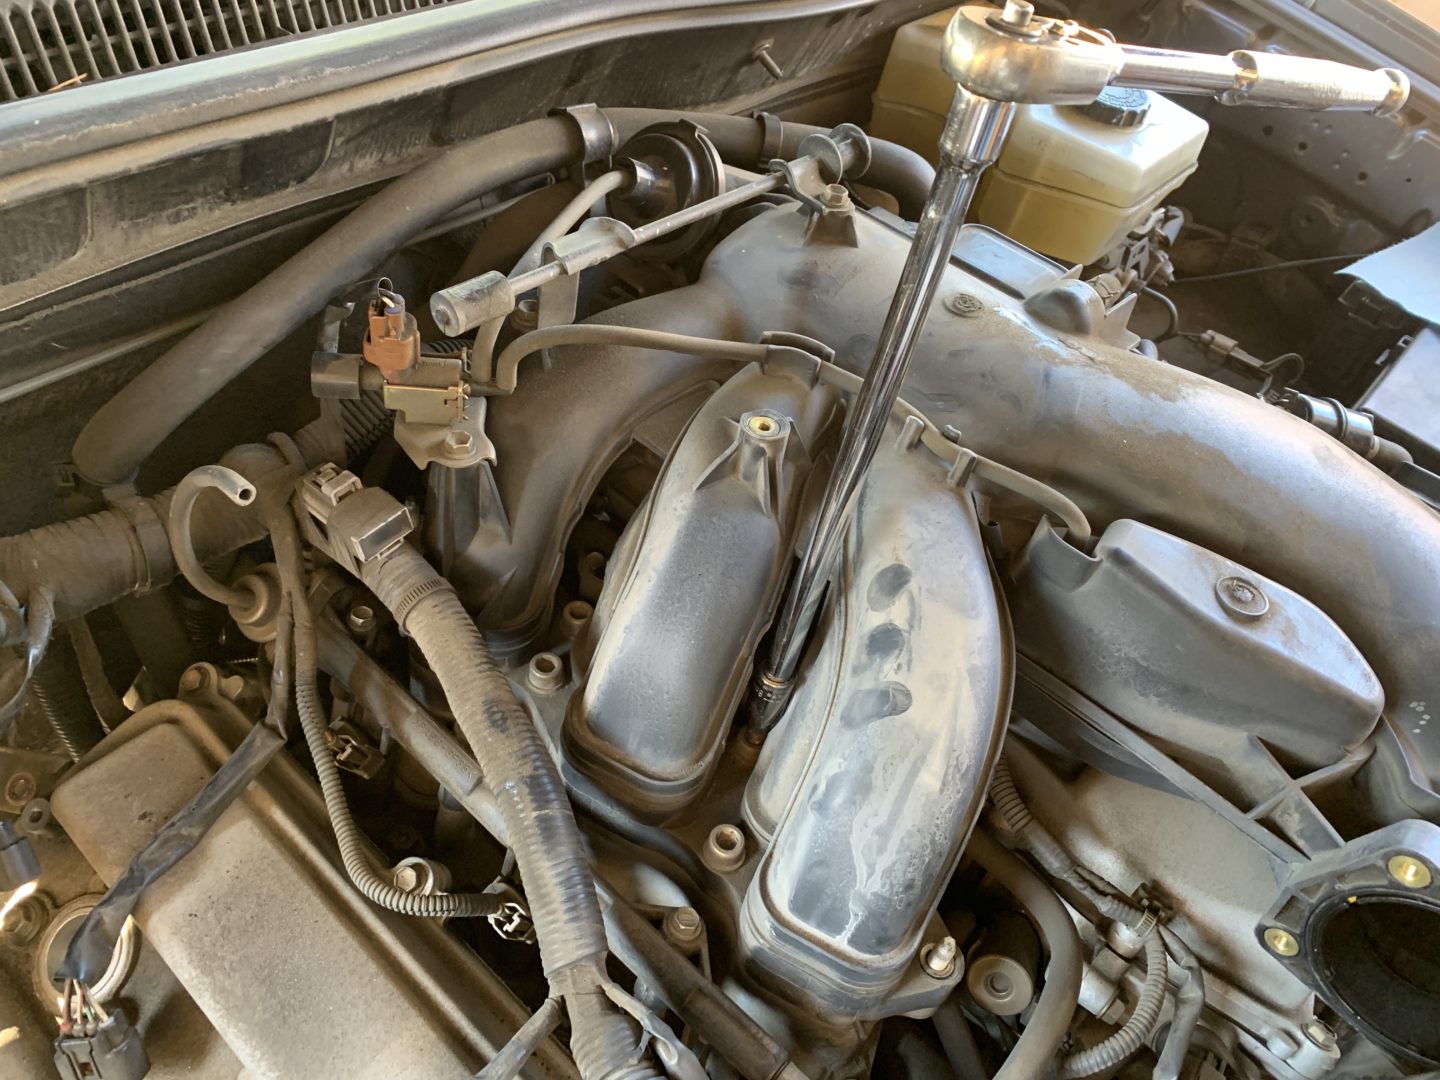
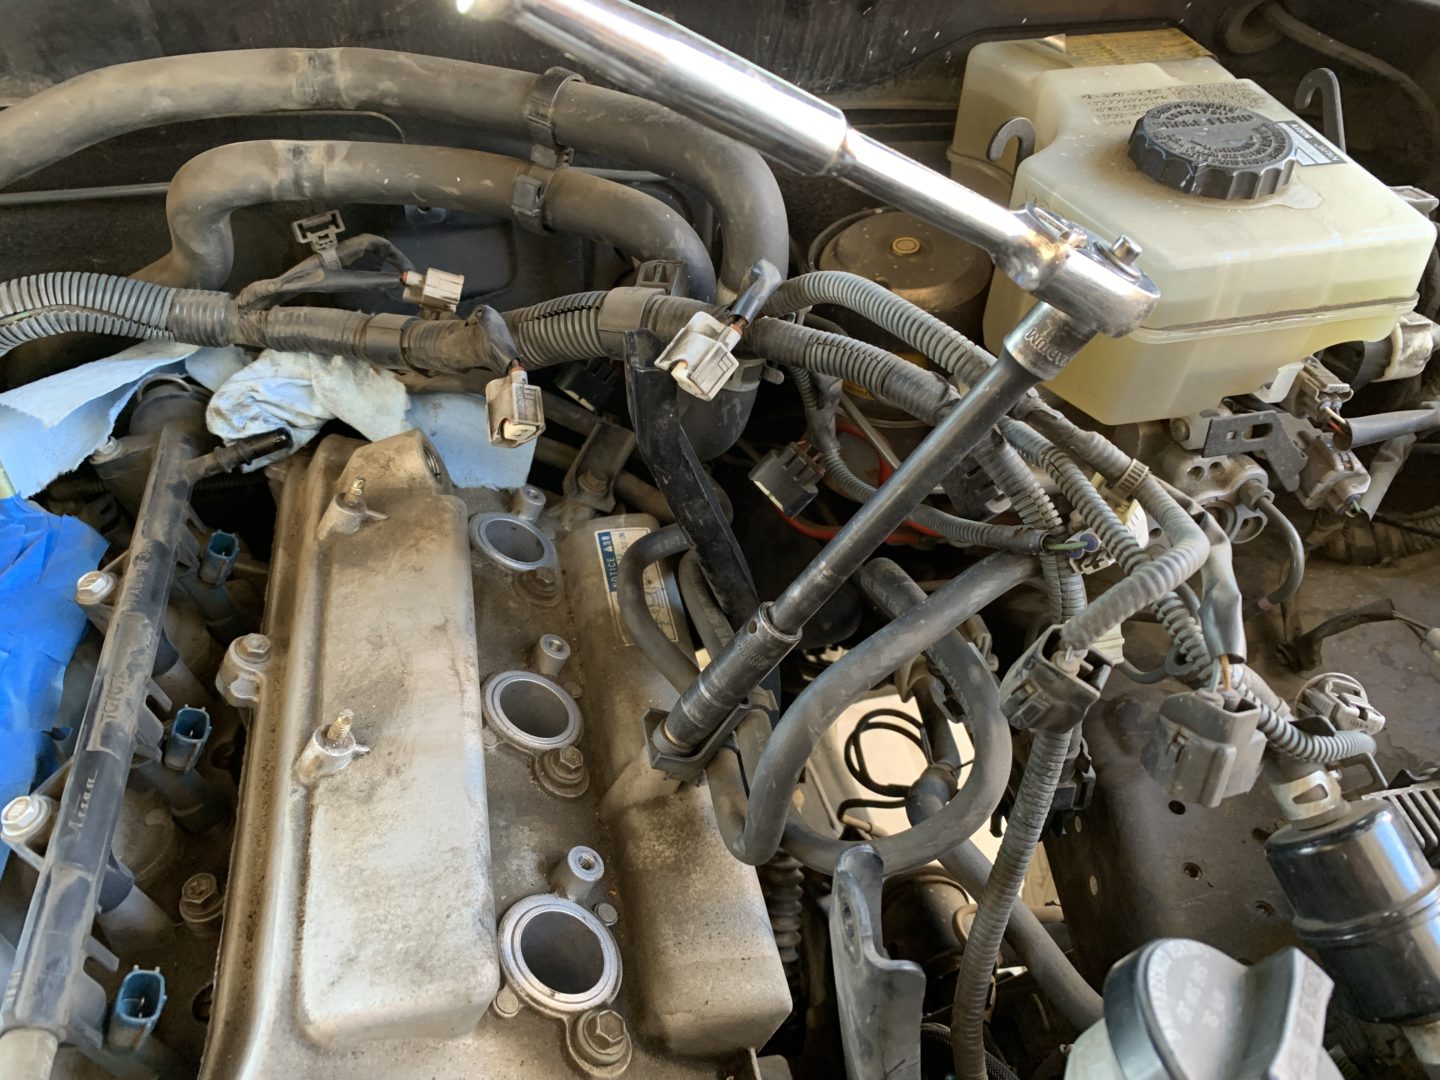
Finally, you should be able to remove the upper intake manifold. Make sure to lift straight up as you have to lift the manifold up out of the threads on each end of the intake manifold (where you removed the two 10mm nuts from.) Then set it aside.
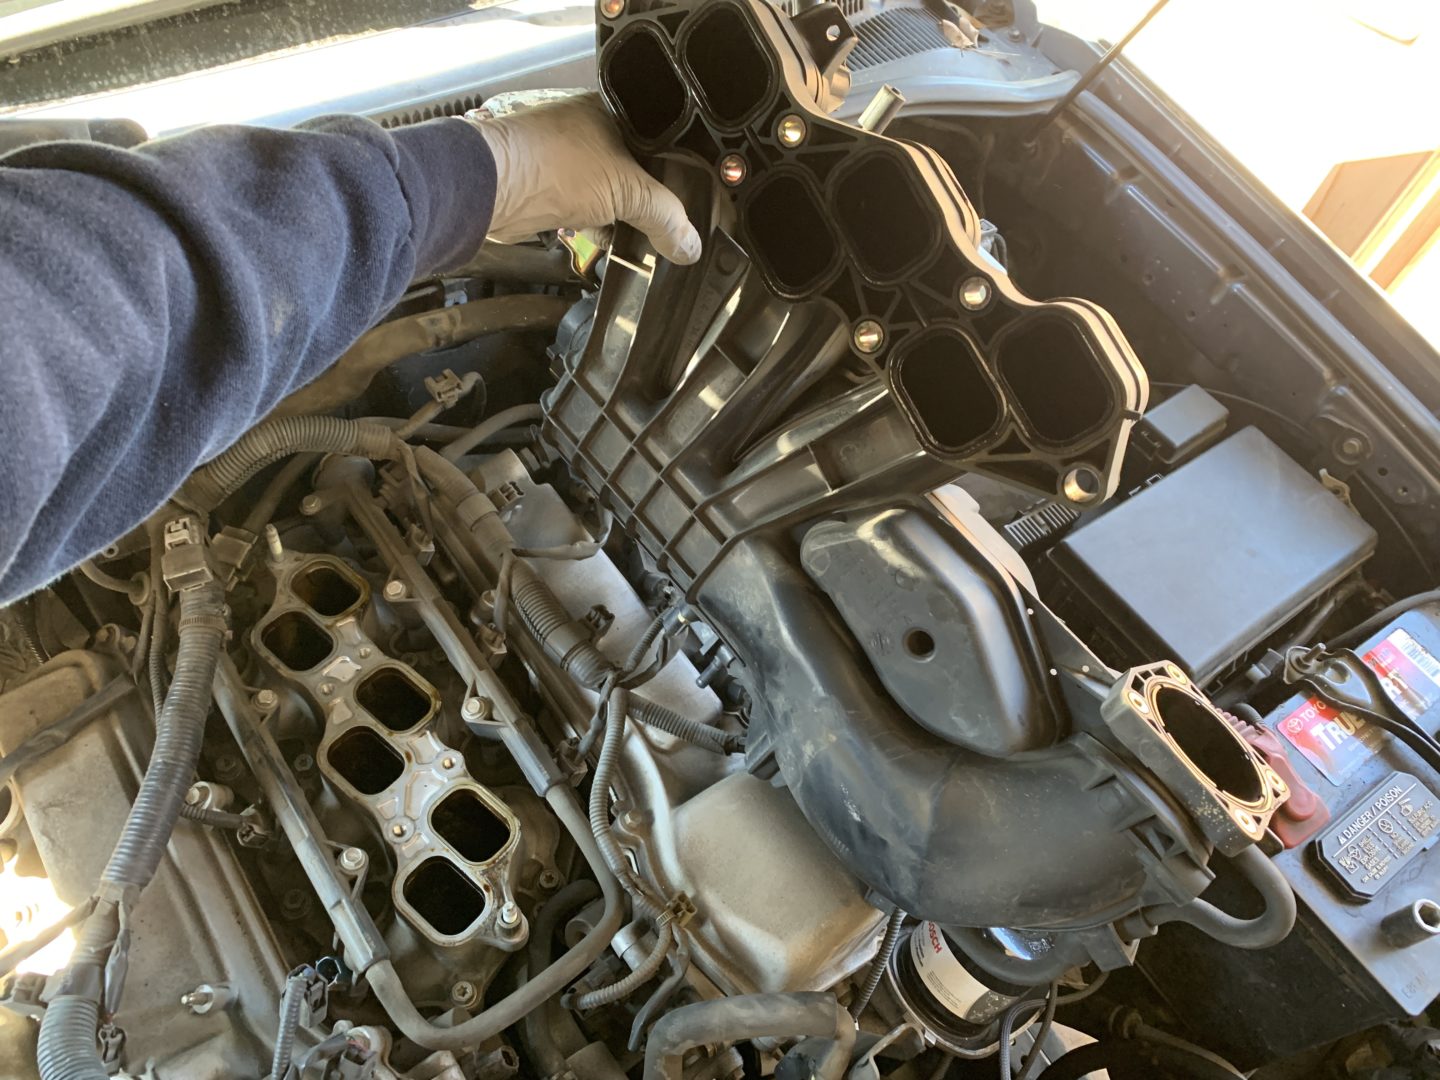


I highly recommend using something like masking tape to cover up the intake chambers that you have exposed now. You can also use blue shop towels shoved into each one as another option. You don’t want something dropping down the chamber where the valves are located.
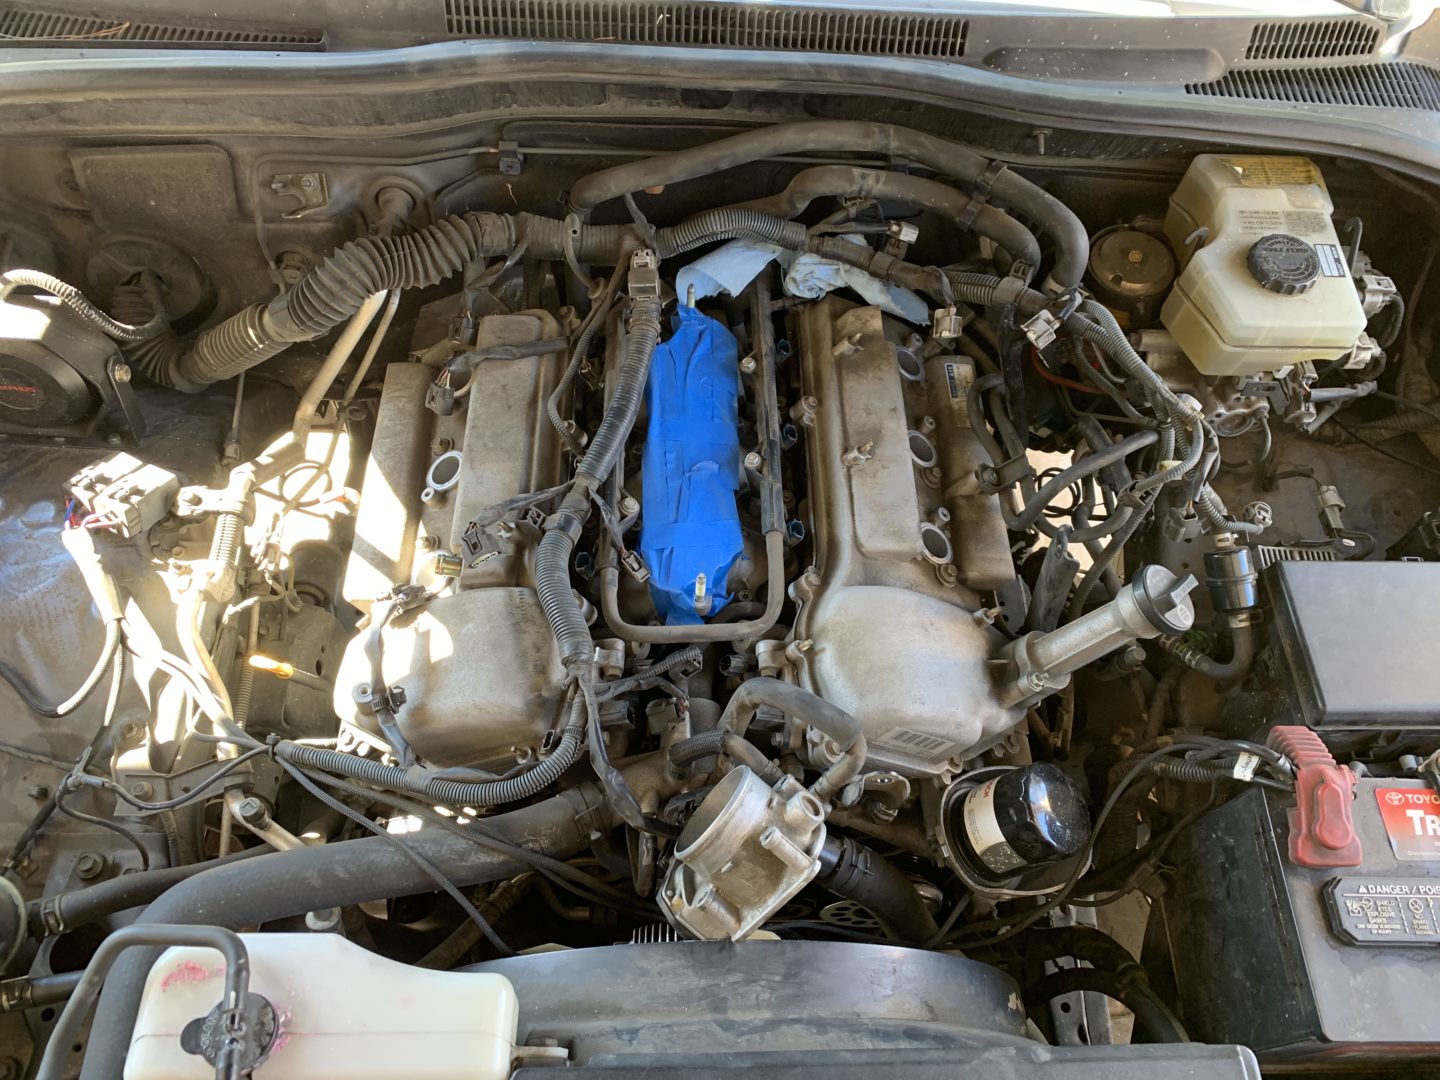
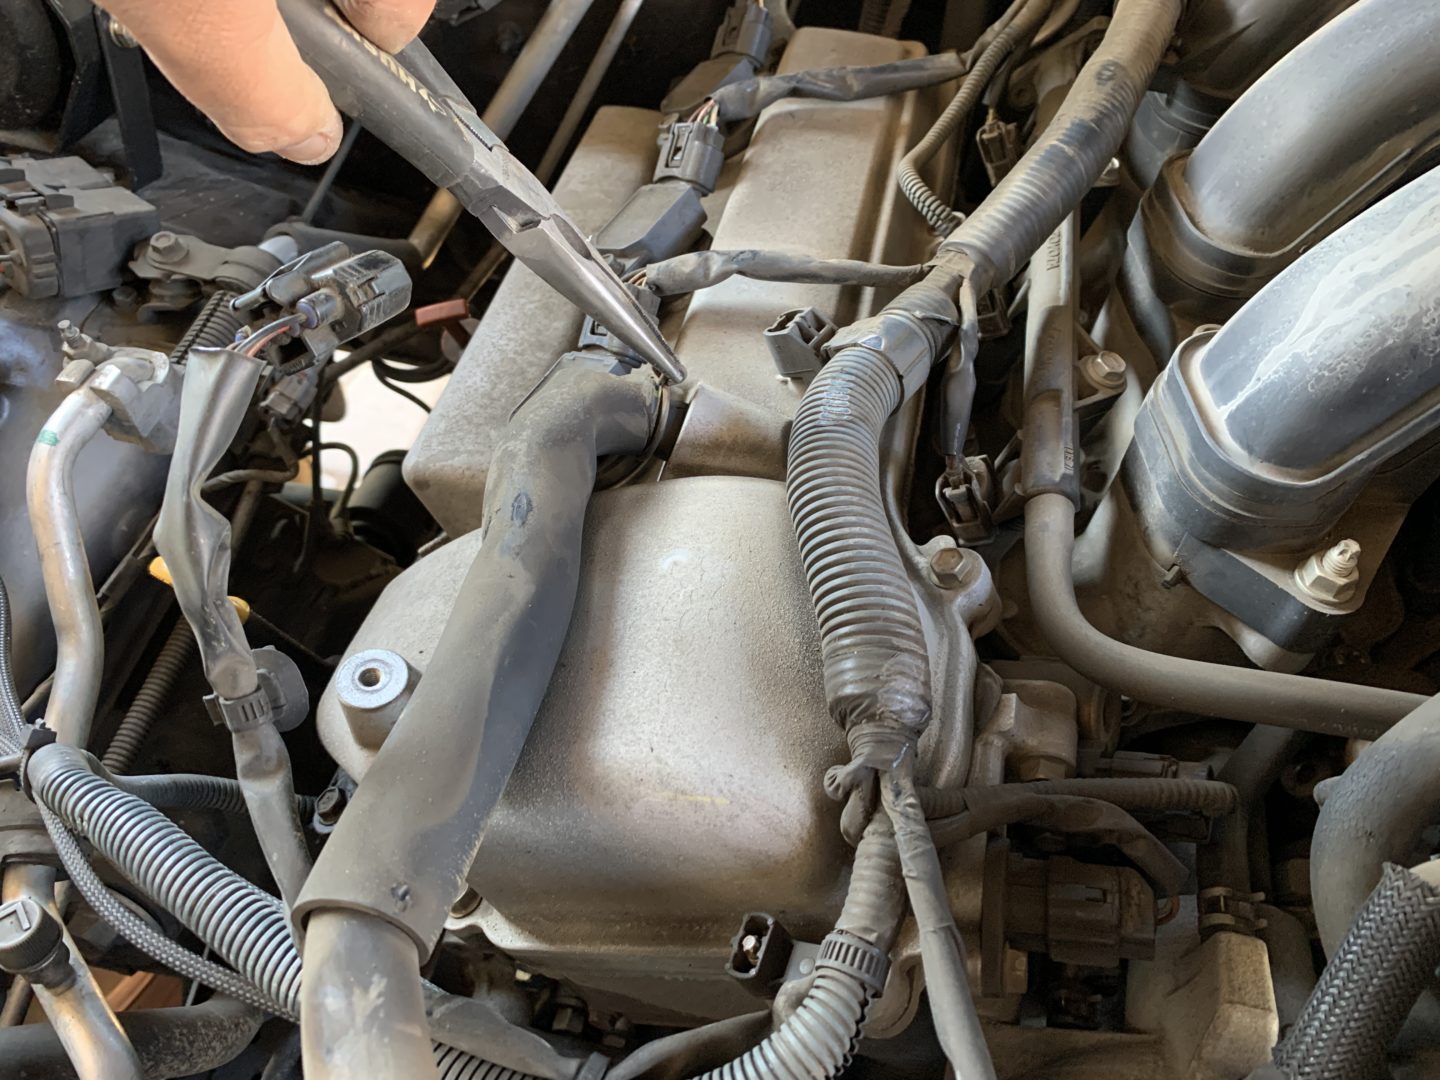
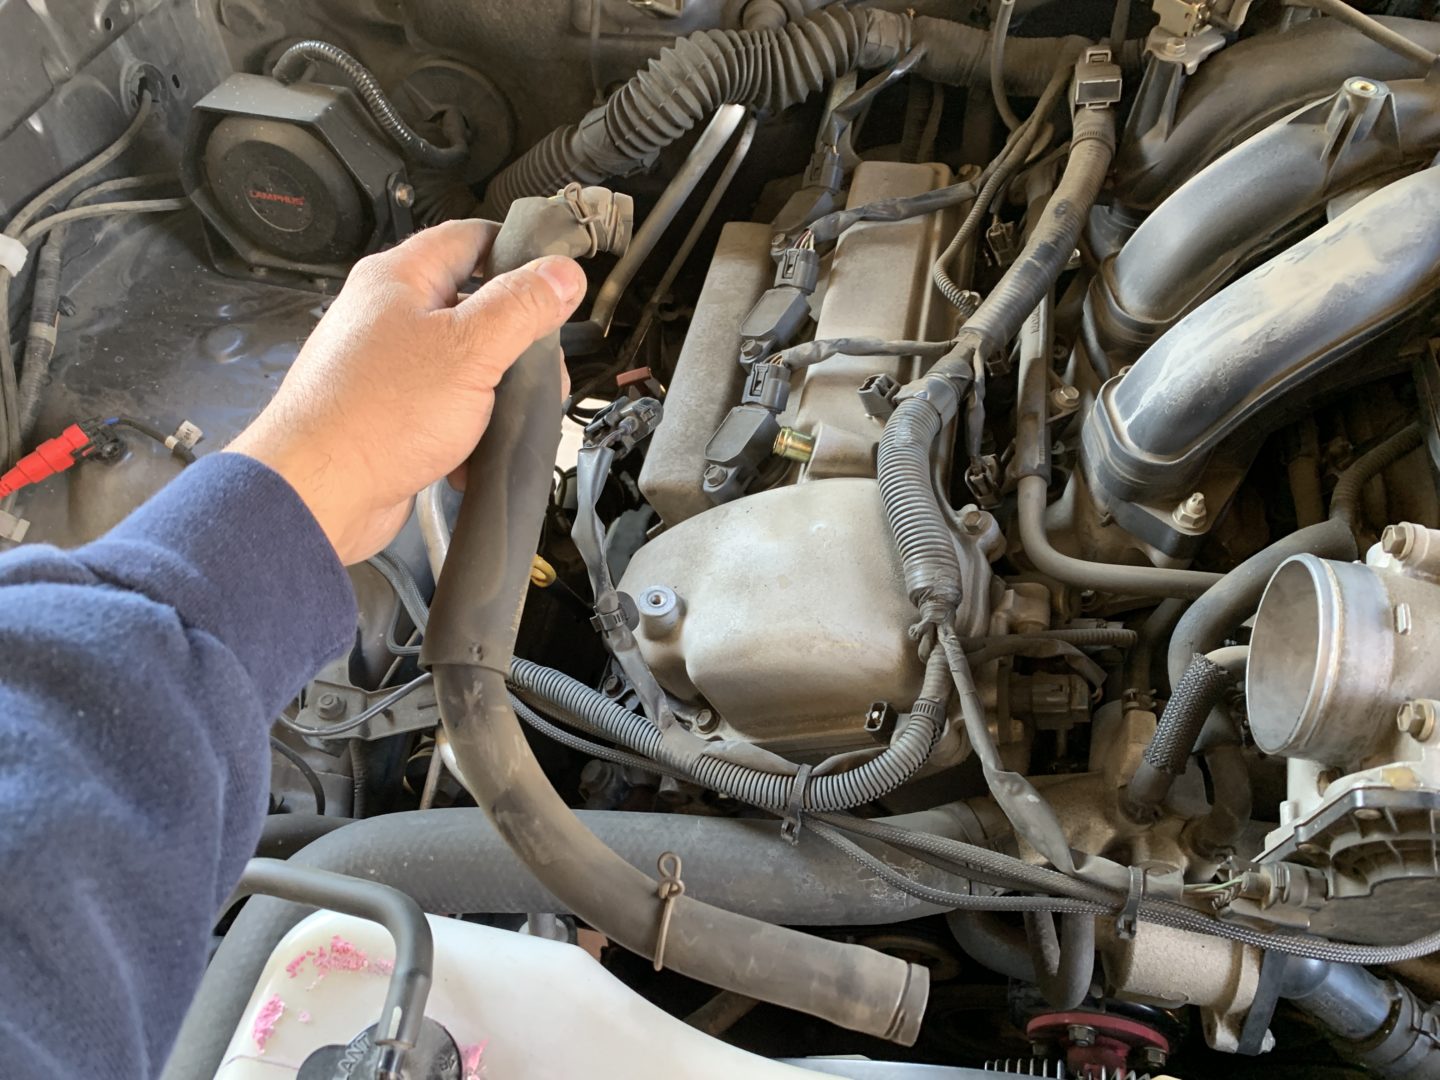
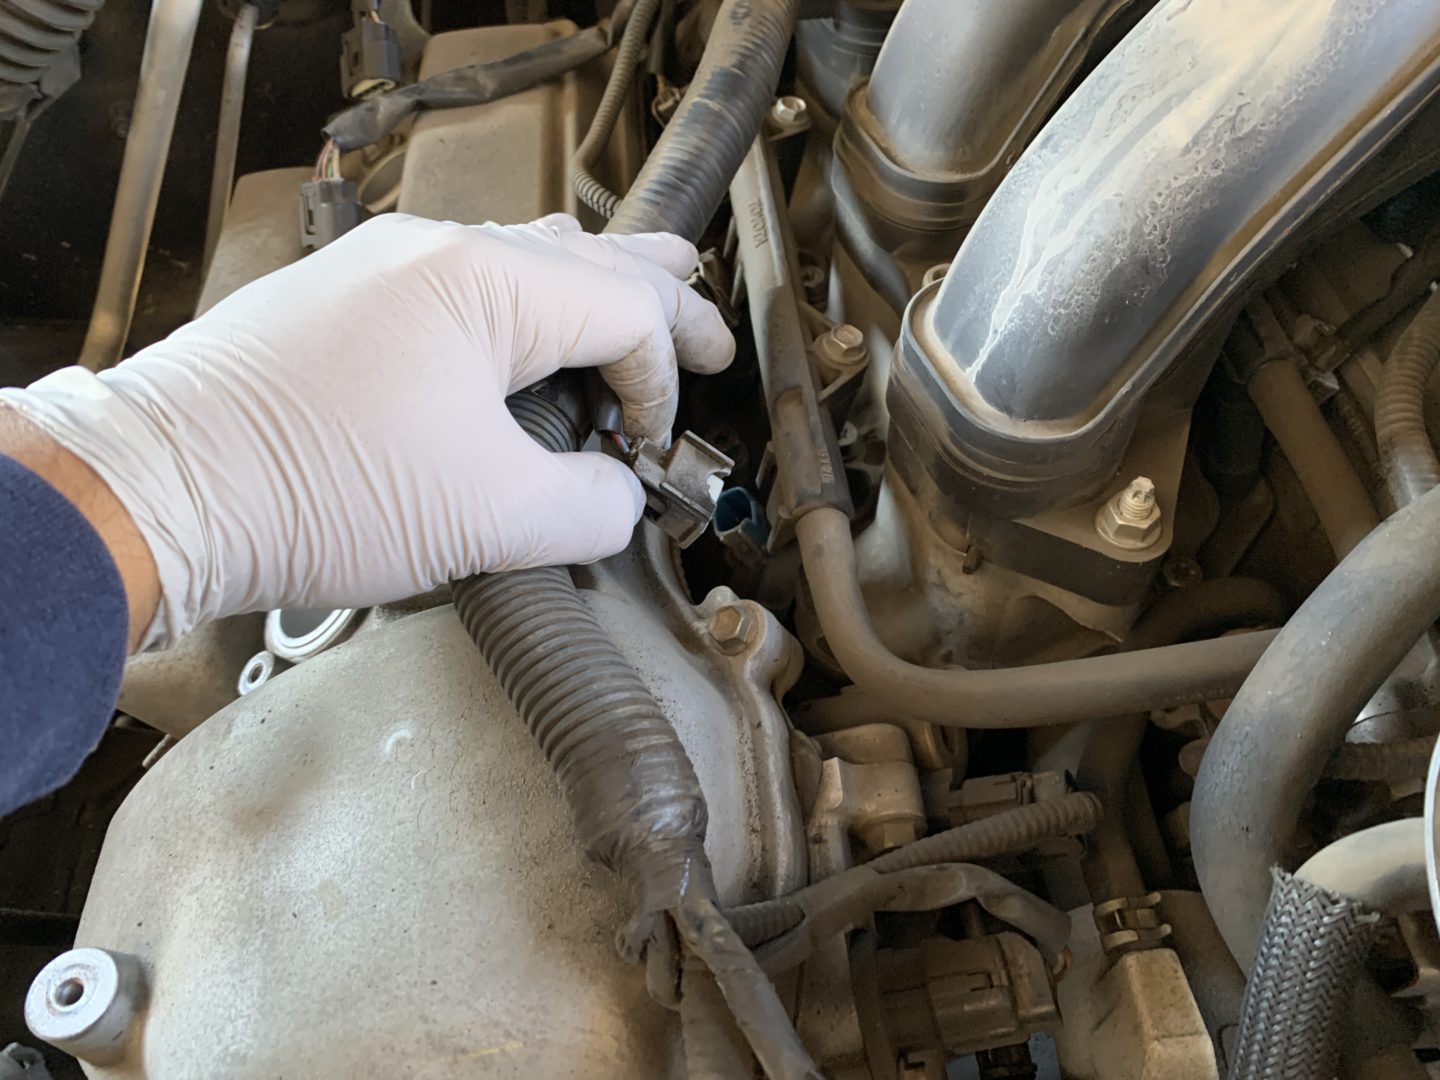
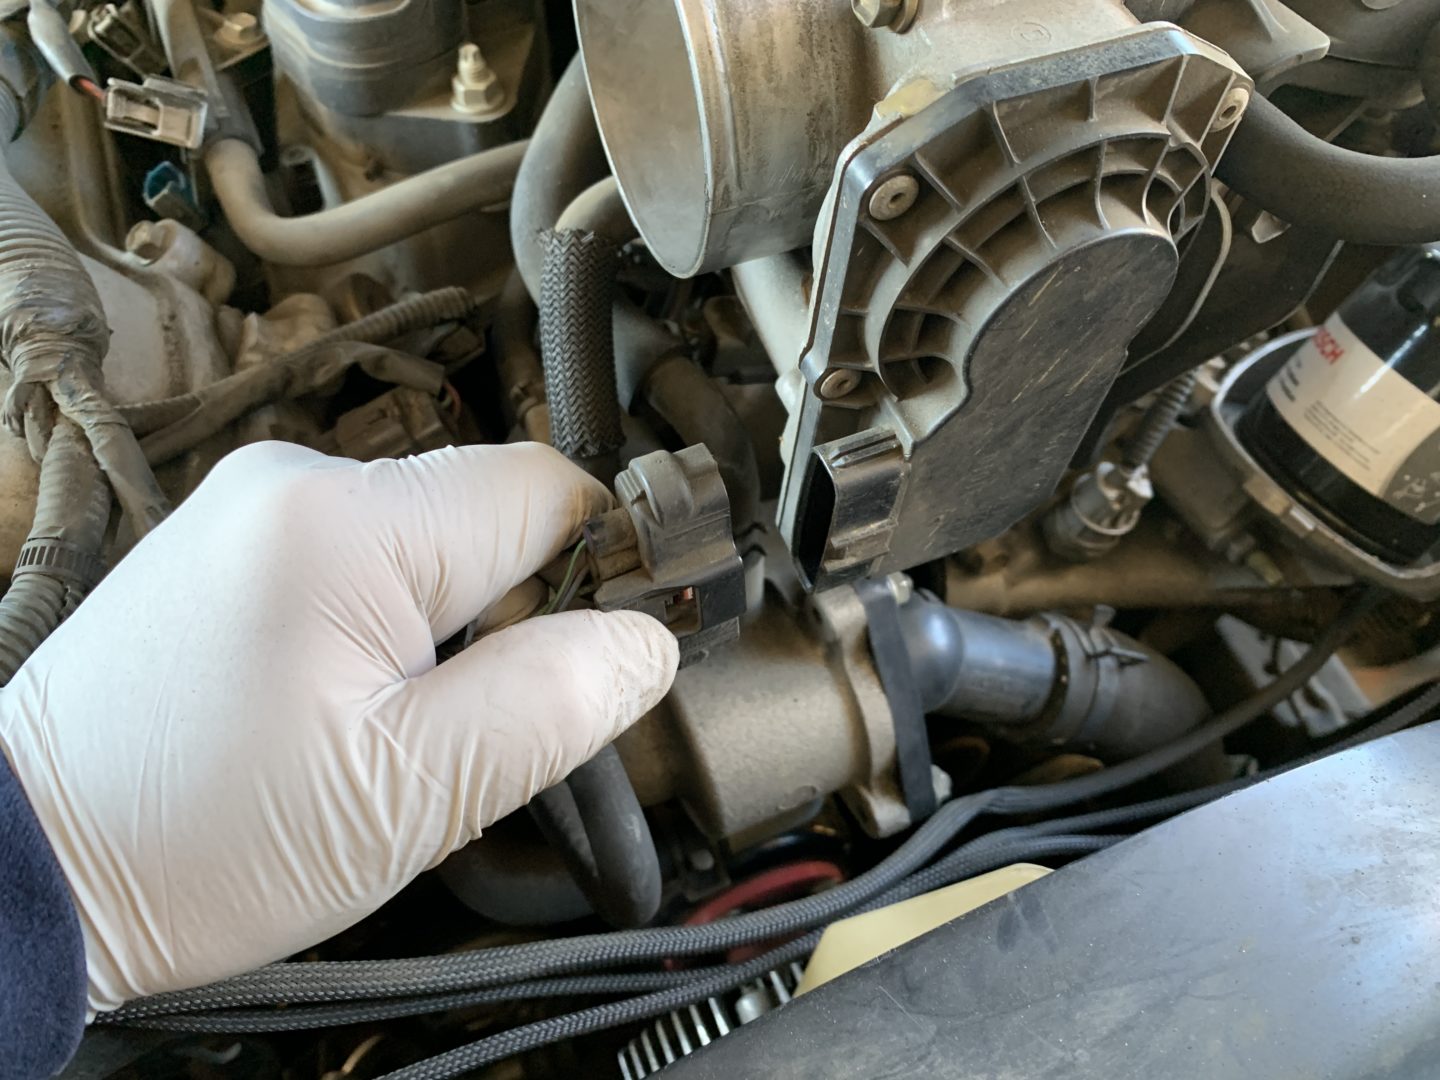
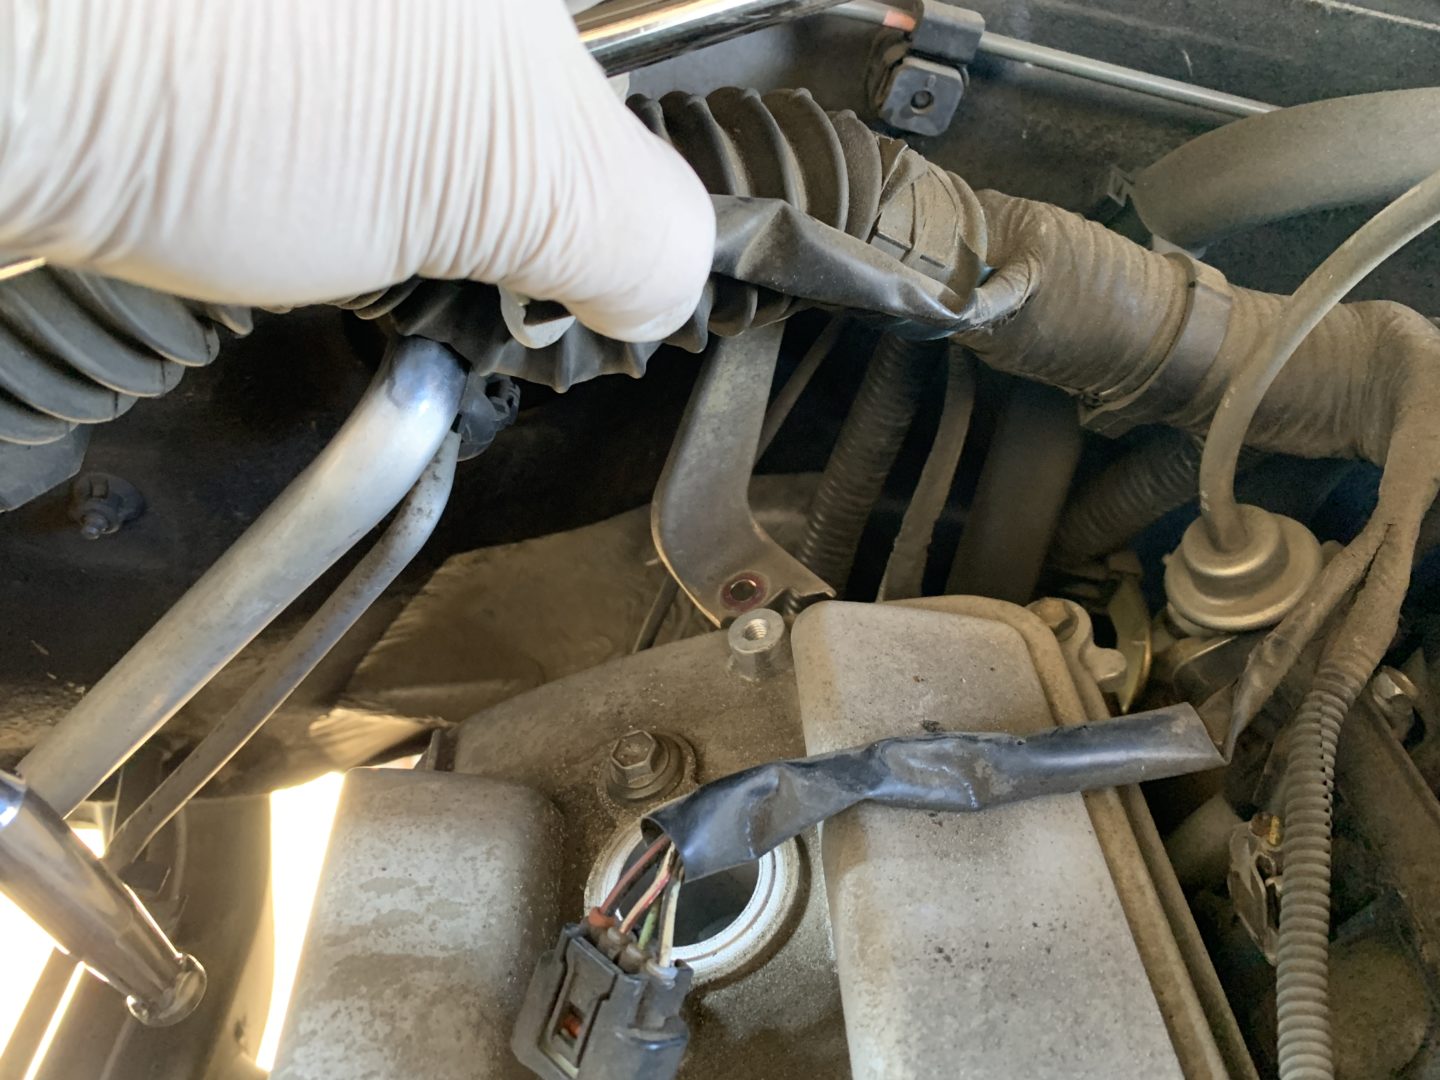
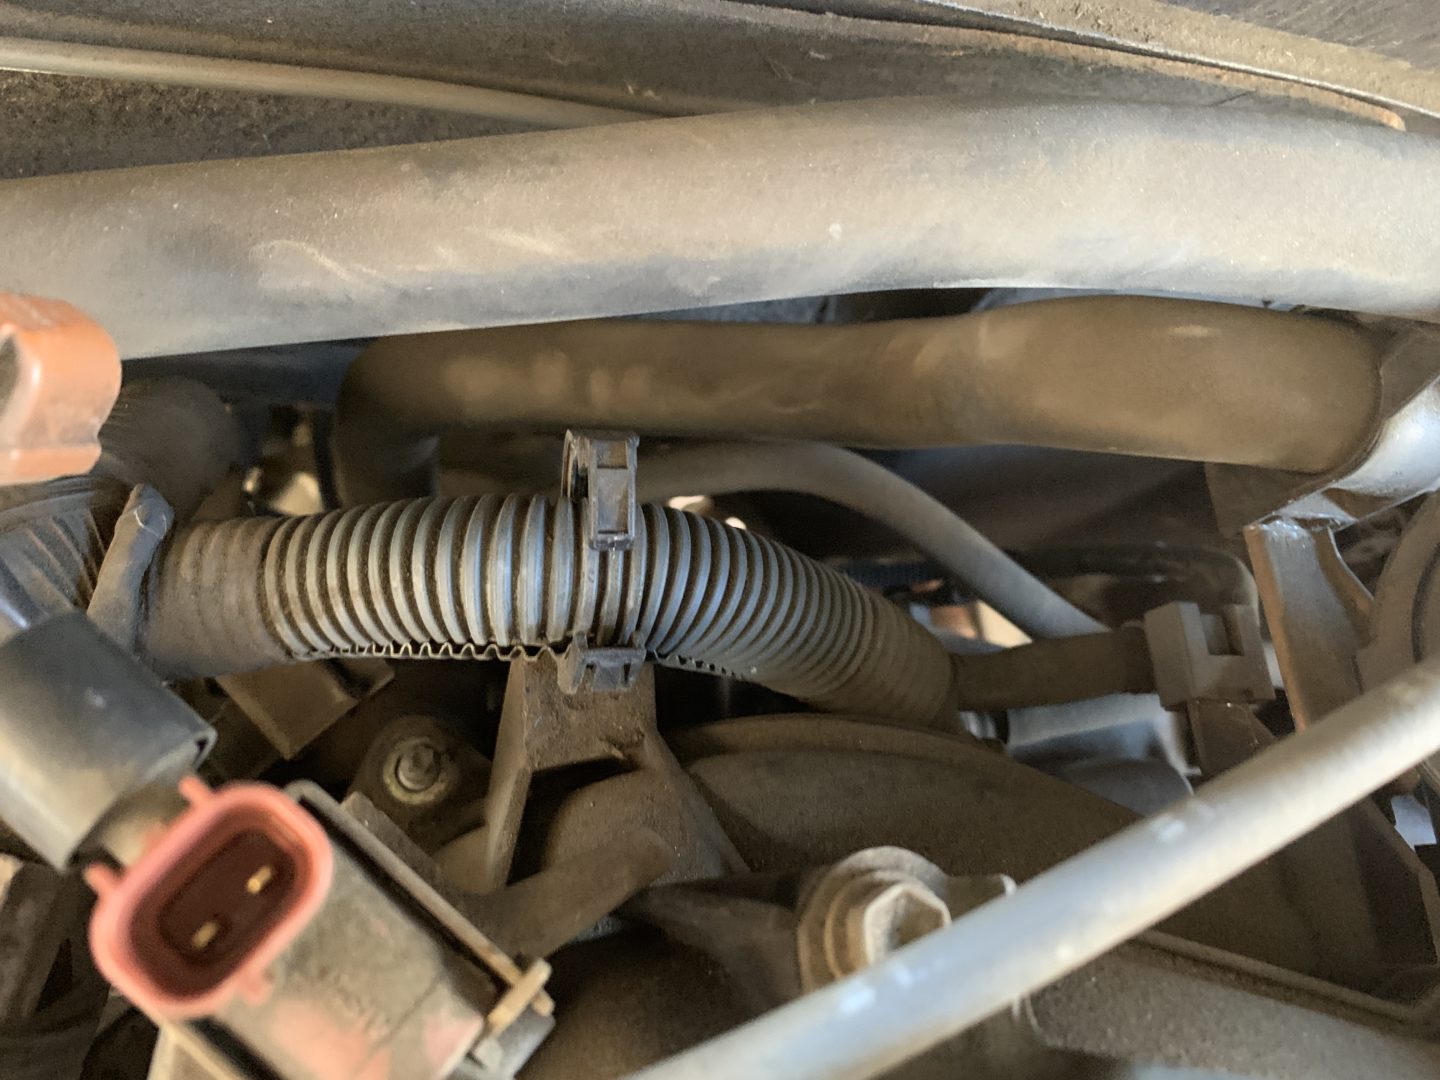
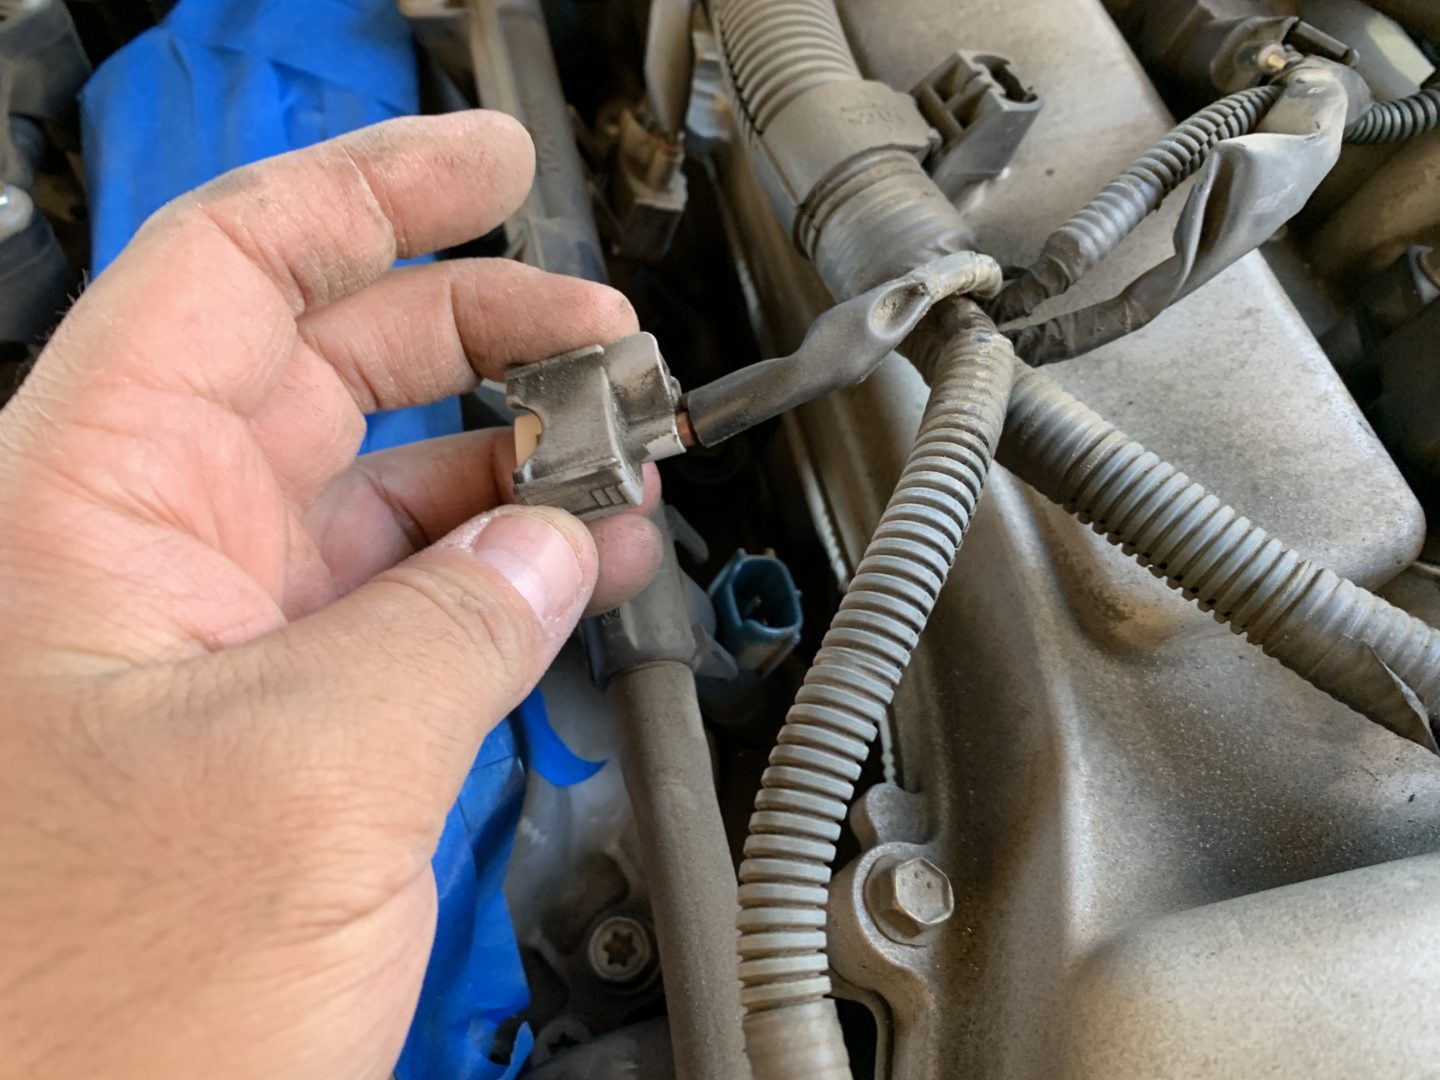
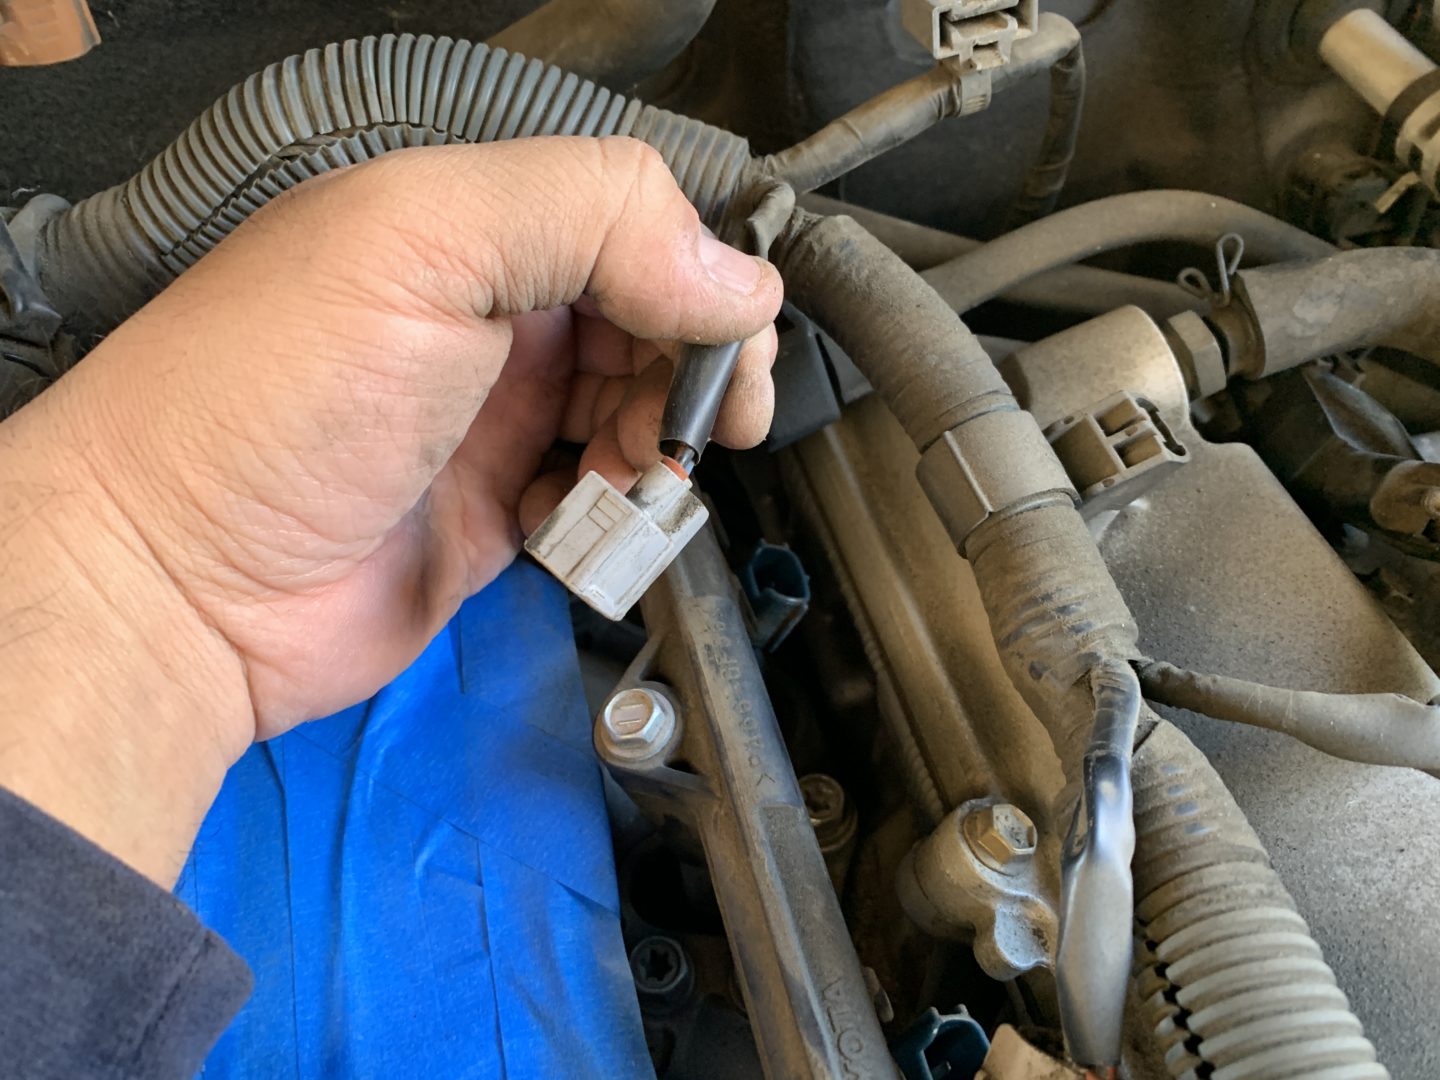
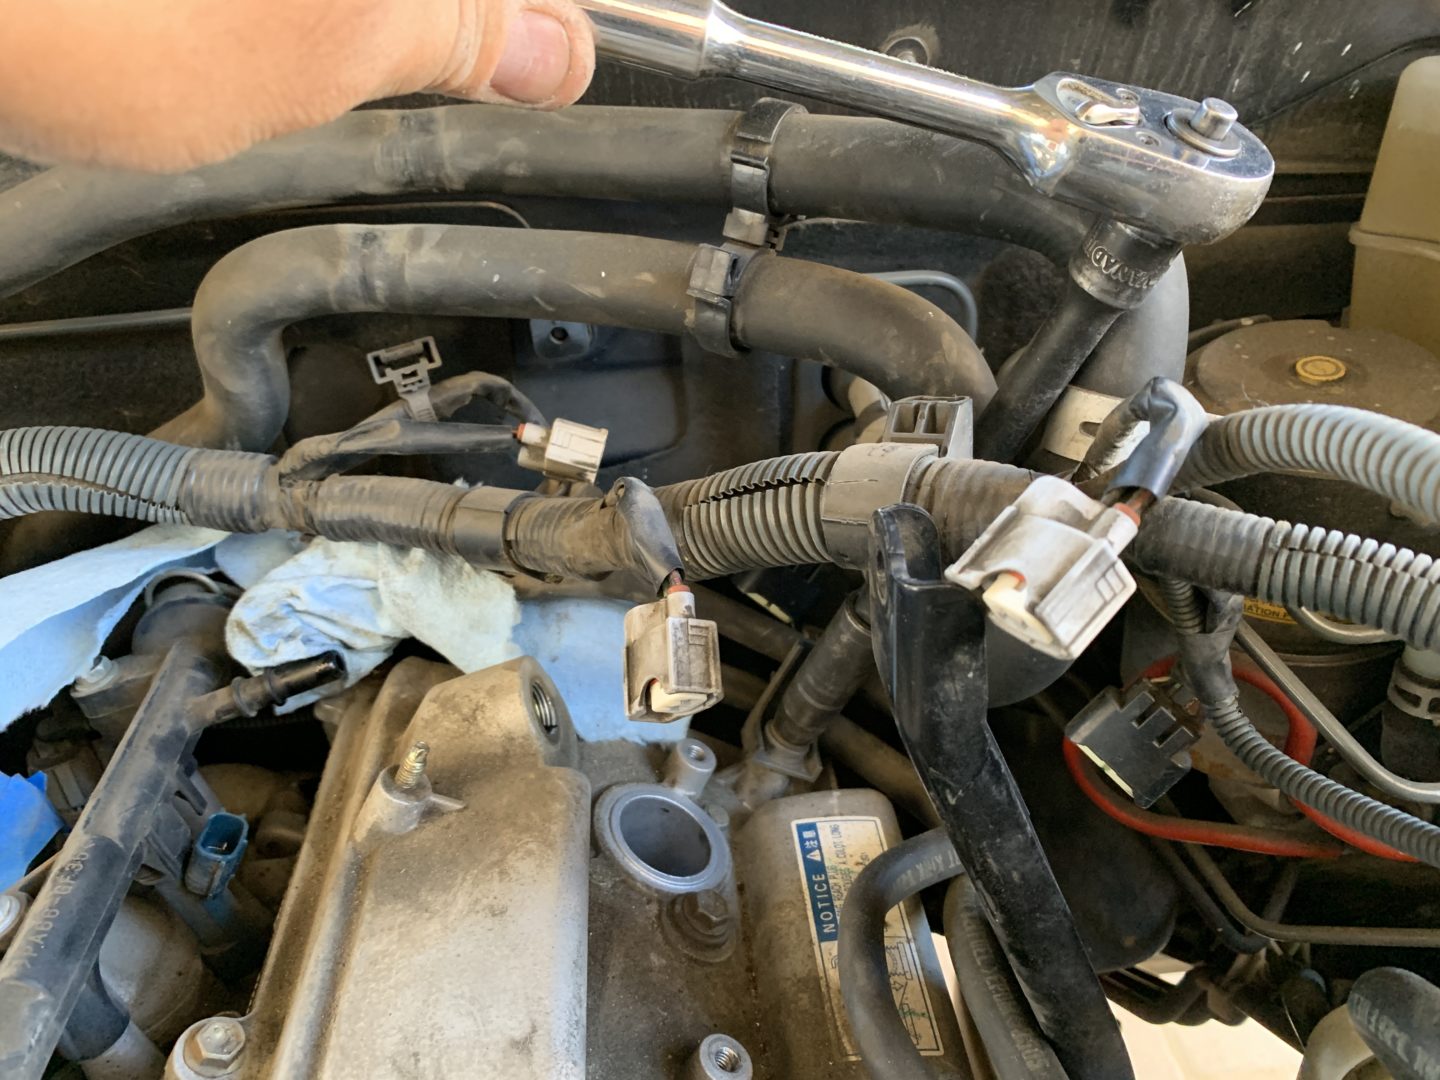
Now with the upper intake manifold removed, you still have more components on the driver side bank to remove in order to change out the valve cover gasket on this side. You will need to remove various connectors, clips, wire harness holders, and the hose that connects to the PCV valve.
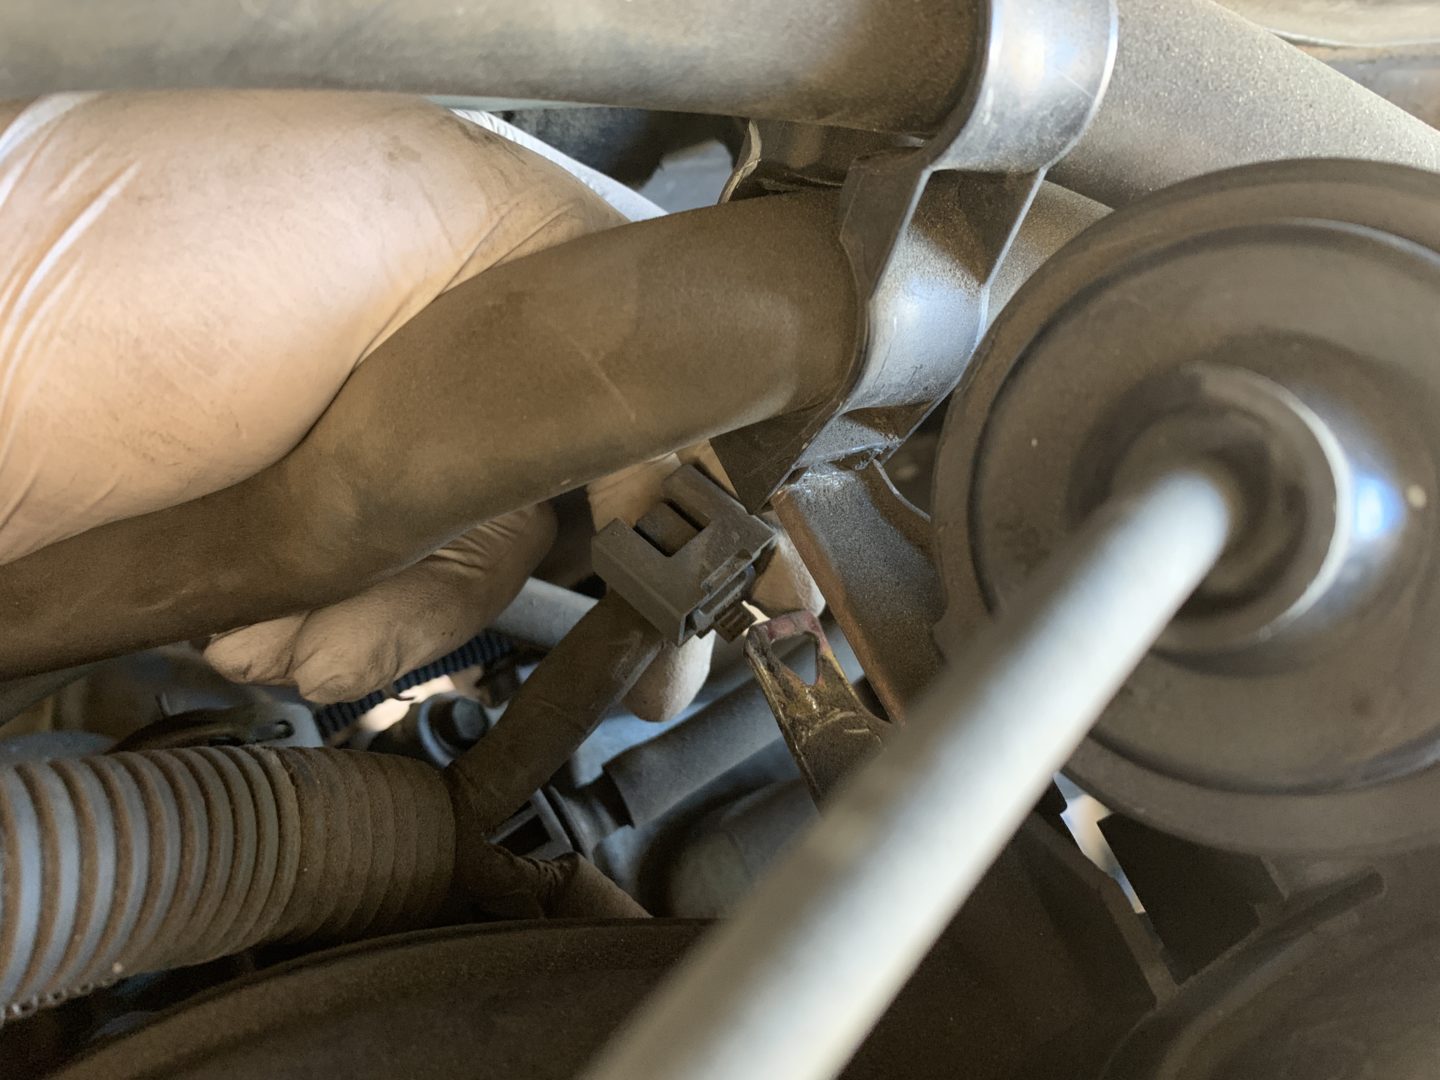
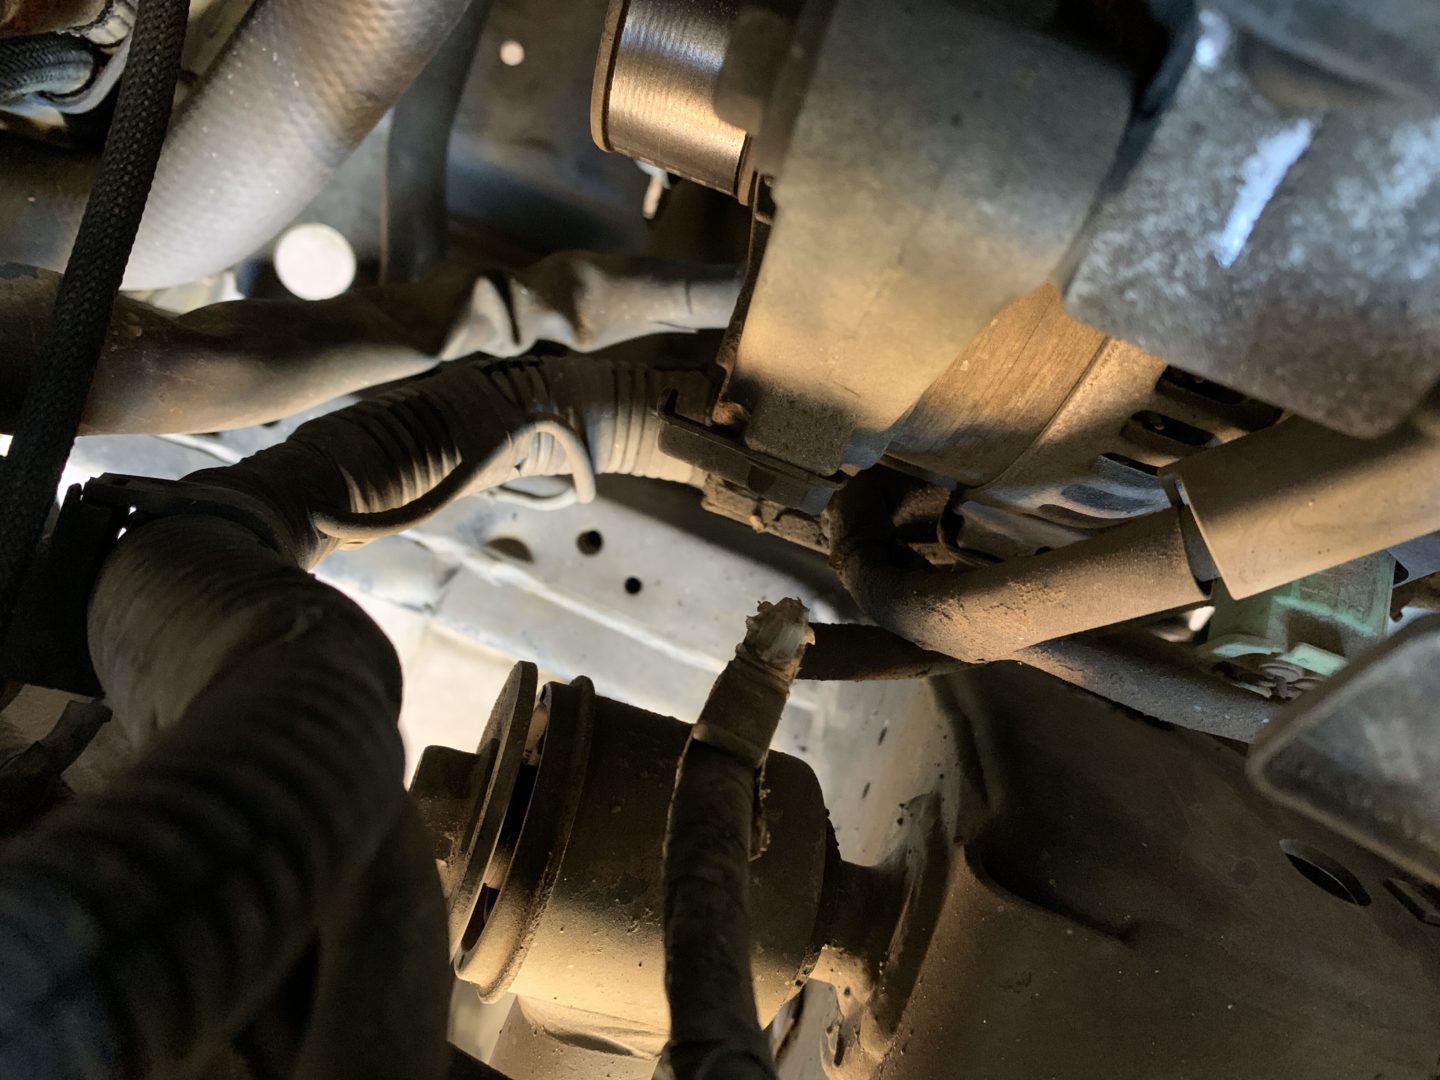
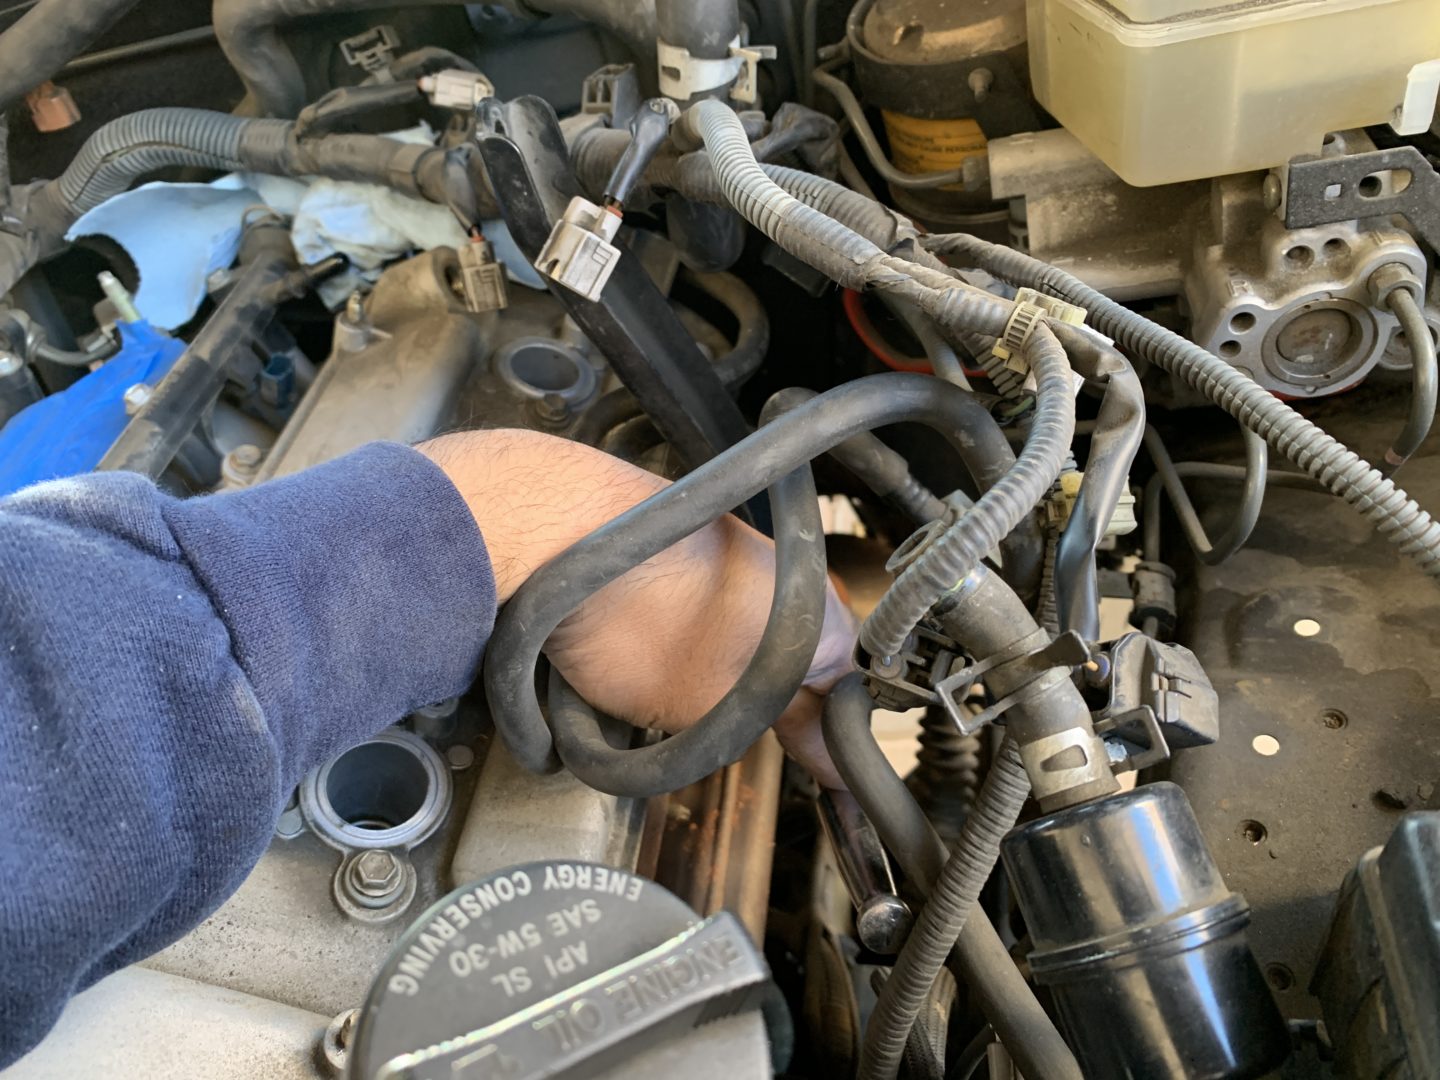
Apologies for the photo dump, but here are most if not all of the items you’ll need to remove. These are basically all of the various parts that need to be removed or moved out of the way to allow for the driver side valve cover to be removed. For the fuel lines that you disconnect, don’t worry about a bit of fuel spilling out, just catch the fuel with some shop towels. Keep in mind that the fuel lines are held in place by a clip which you will need to pull off before you can pop the fuel line off.


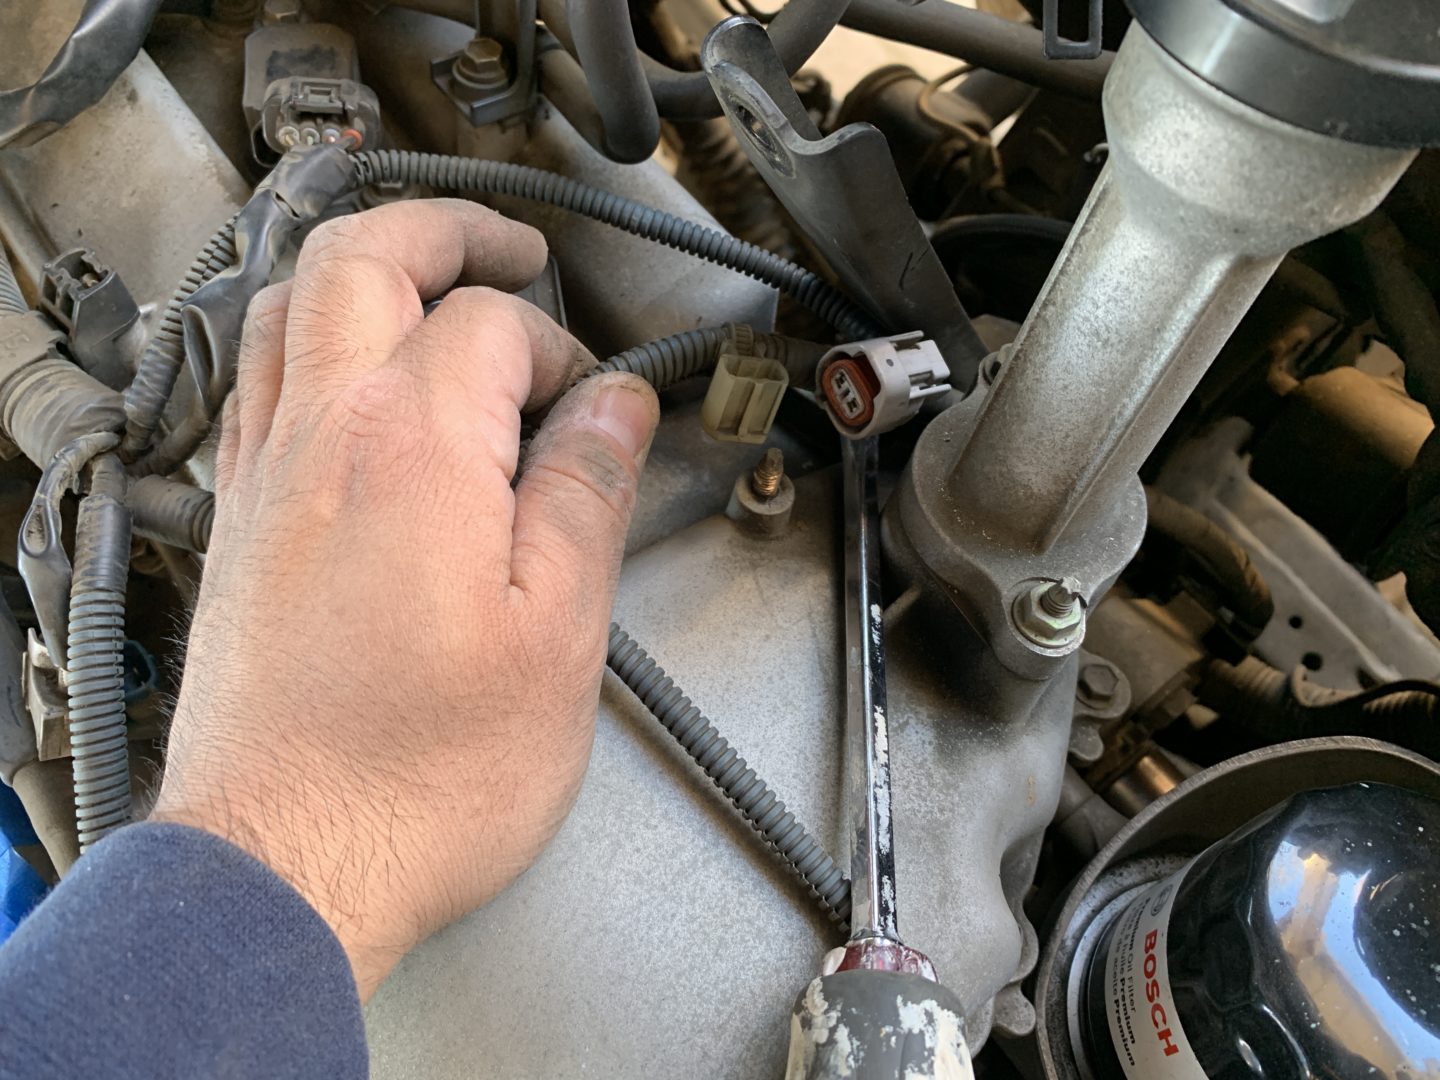


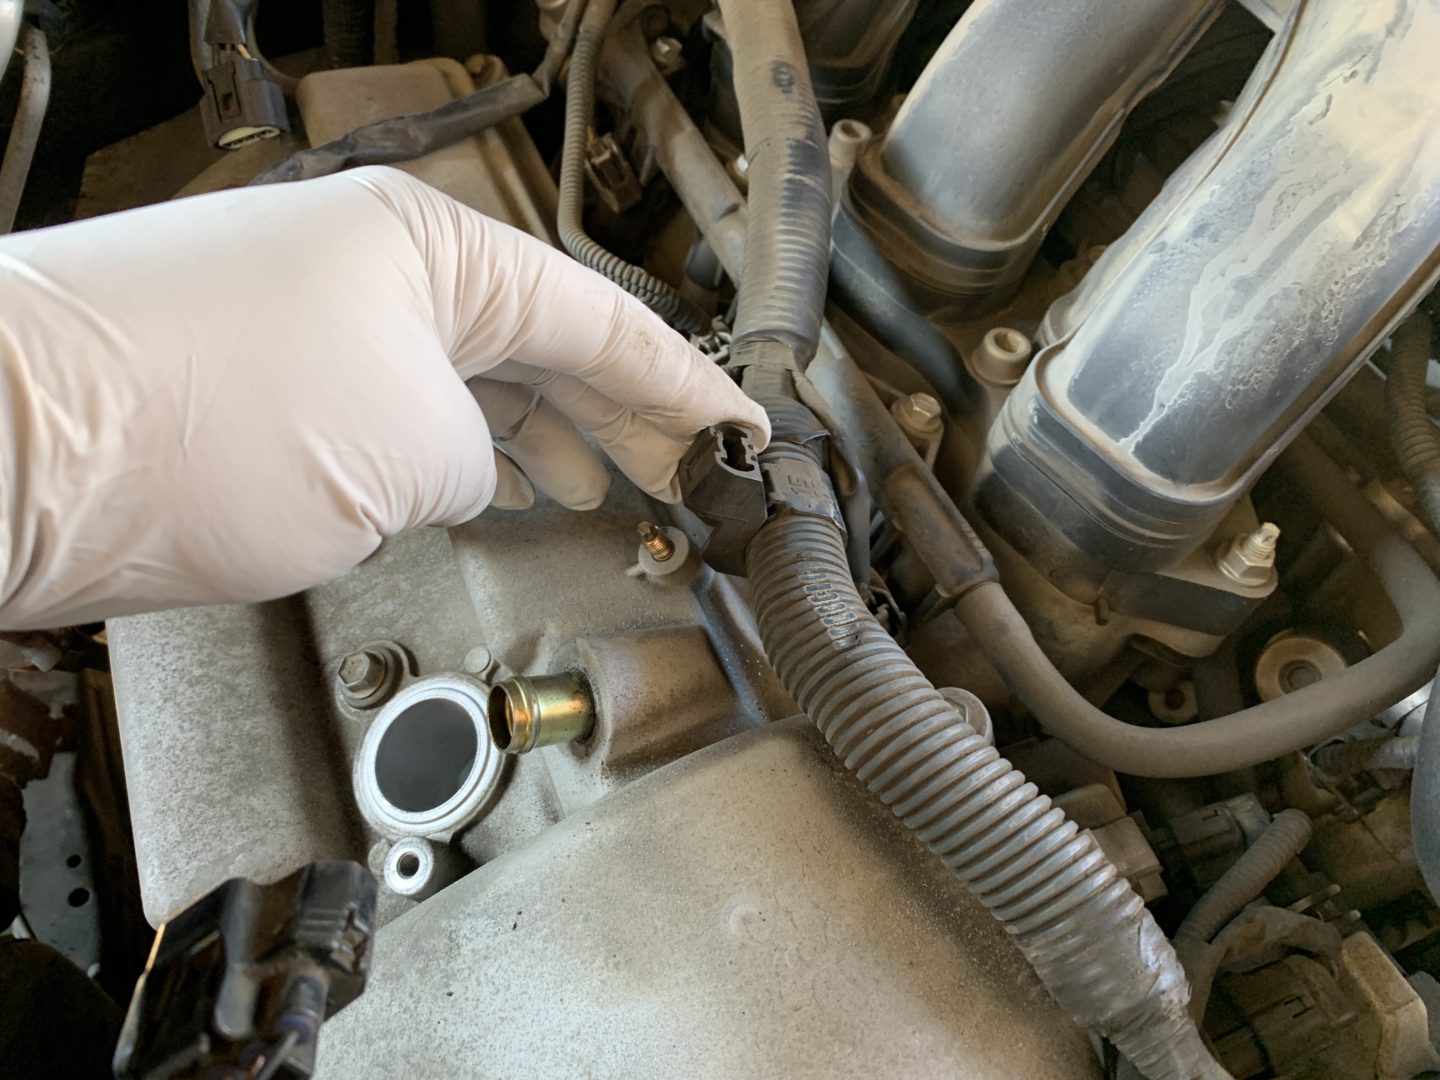
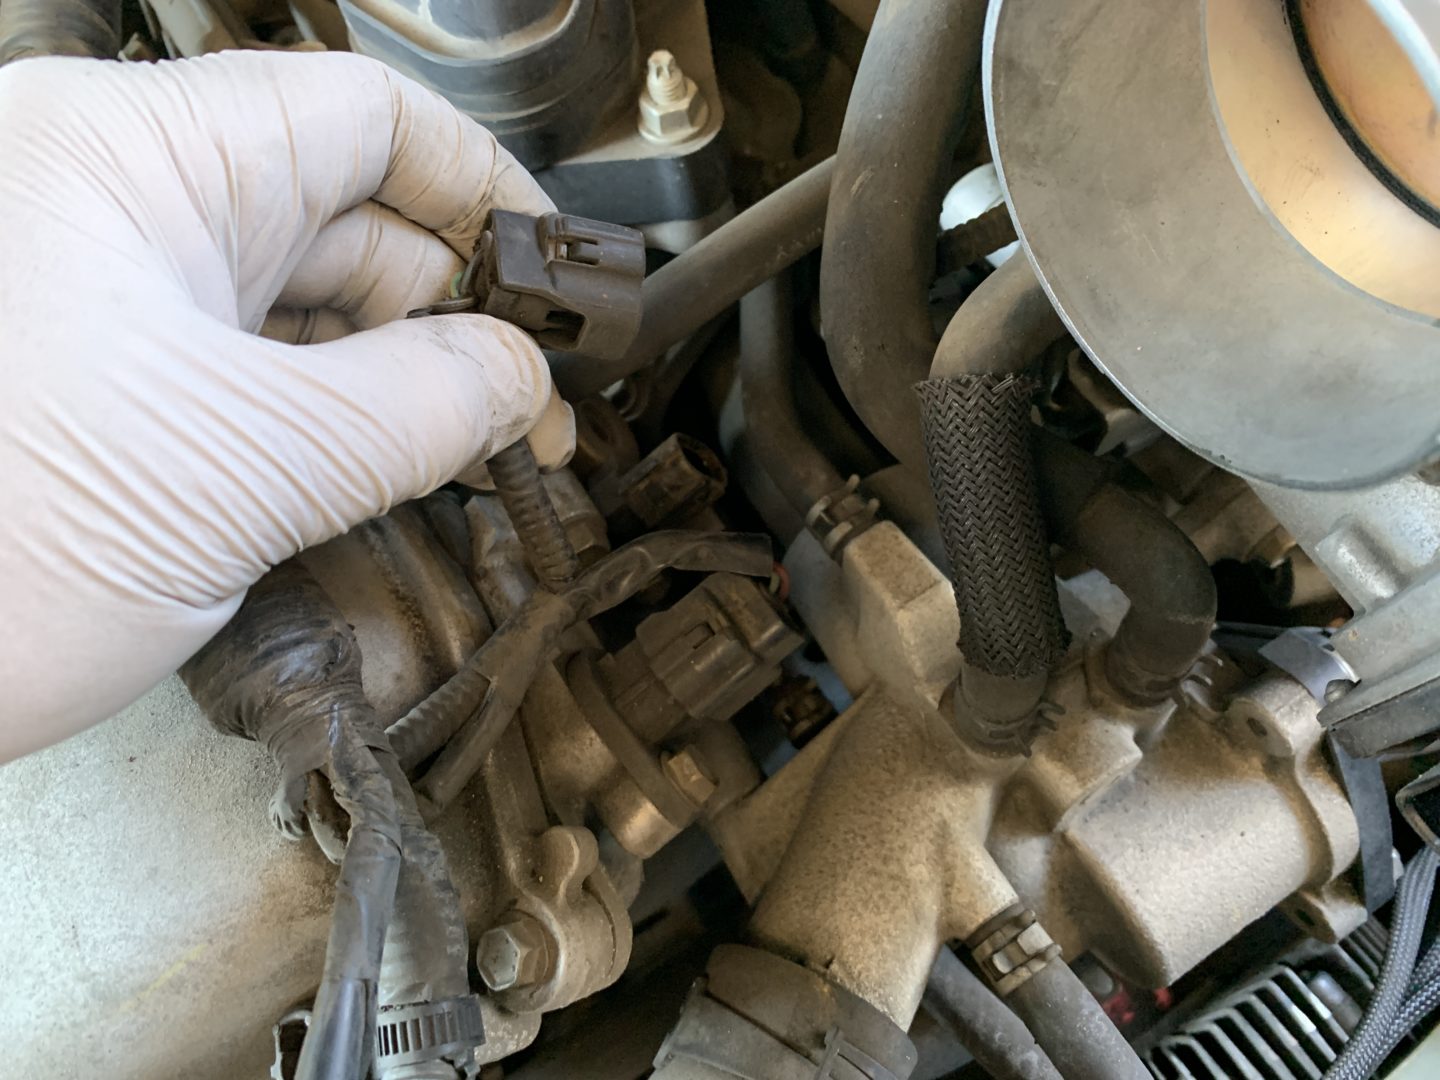
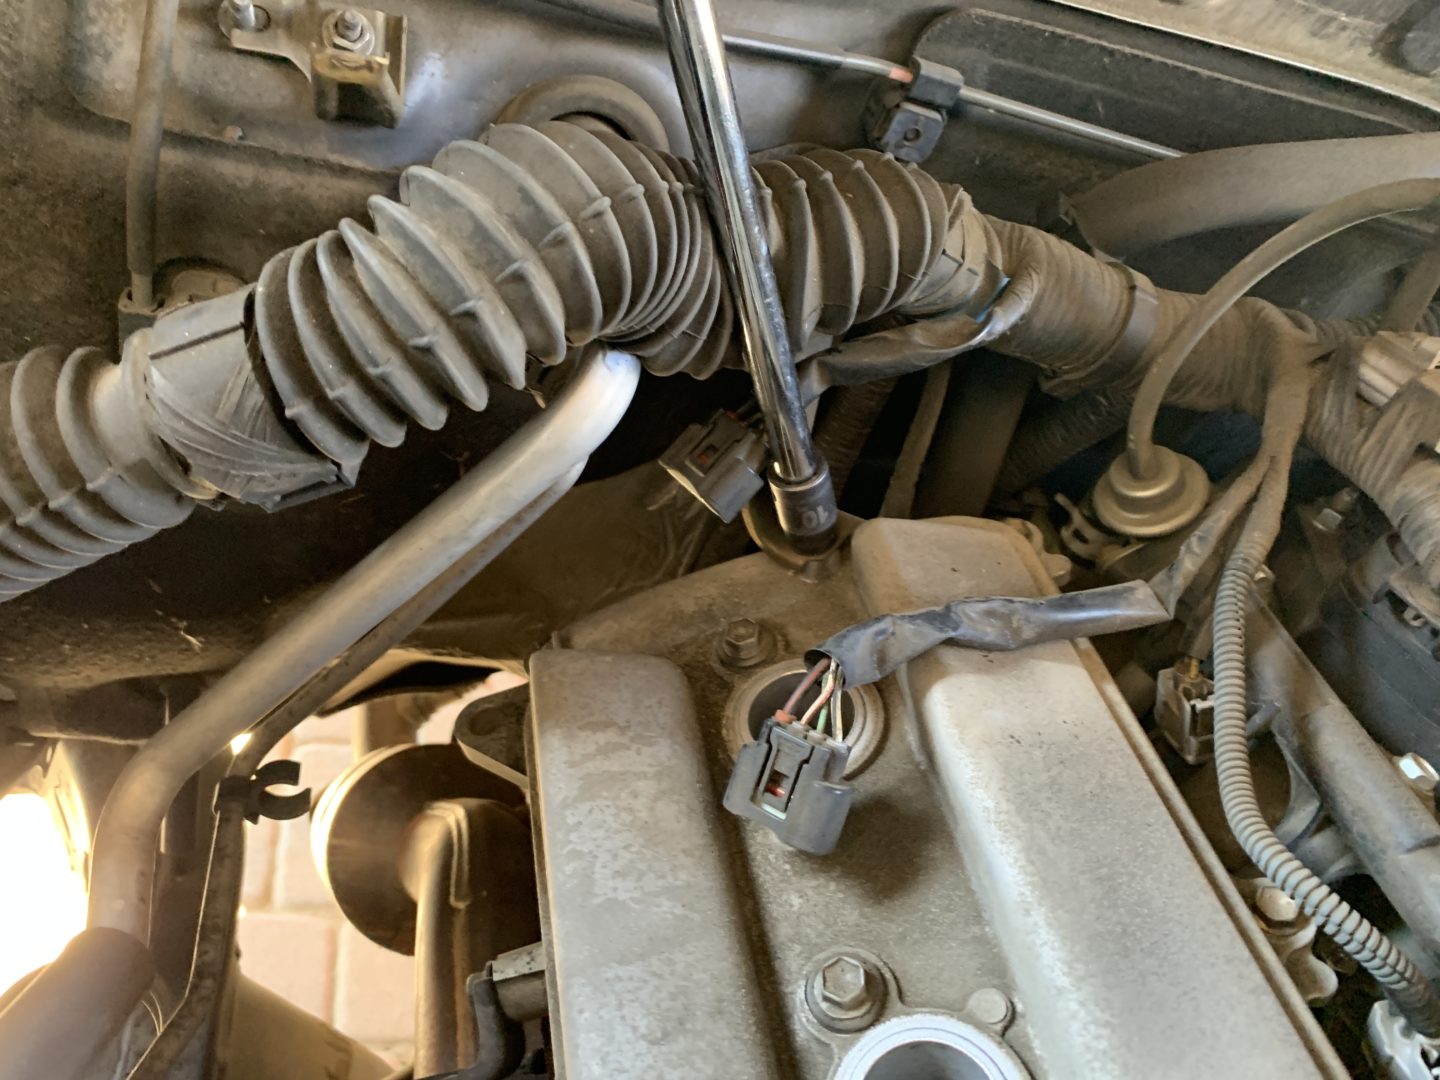
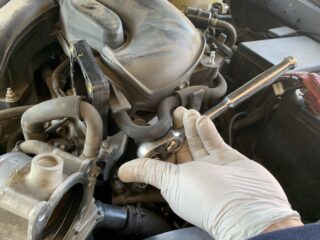
To remove the ignition coils on the driver side bank, remove the (3 qty) 10mm bolts holding them in place and then remove the ignition coils. Then use a 19mm deep socket to remove the PCV valve.


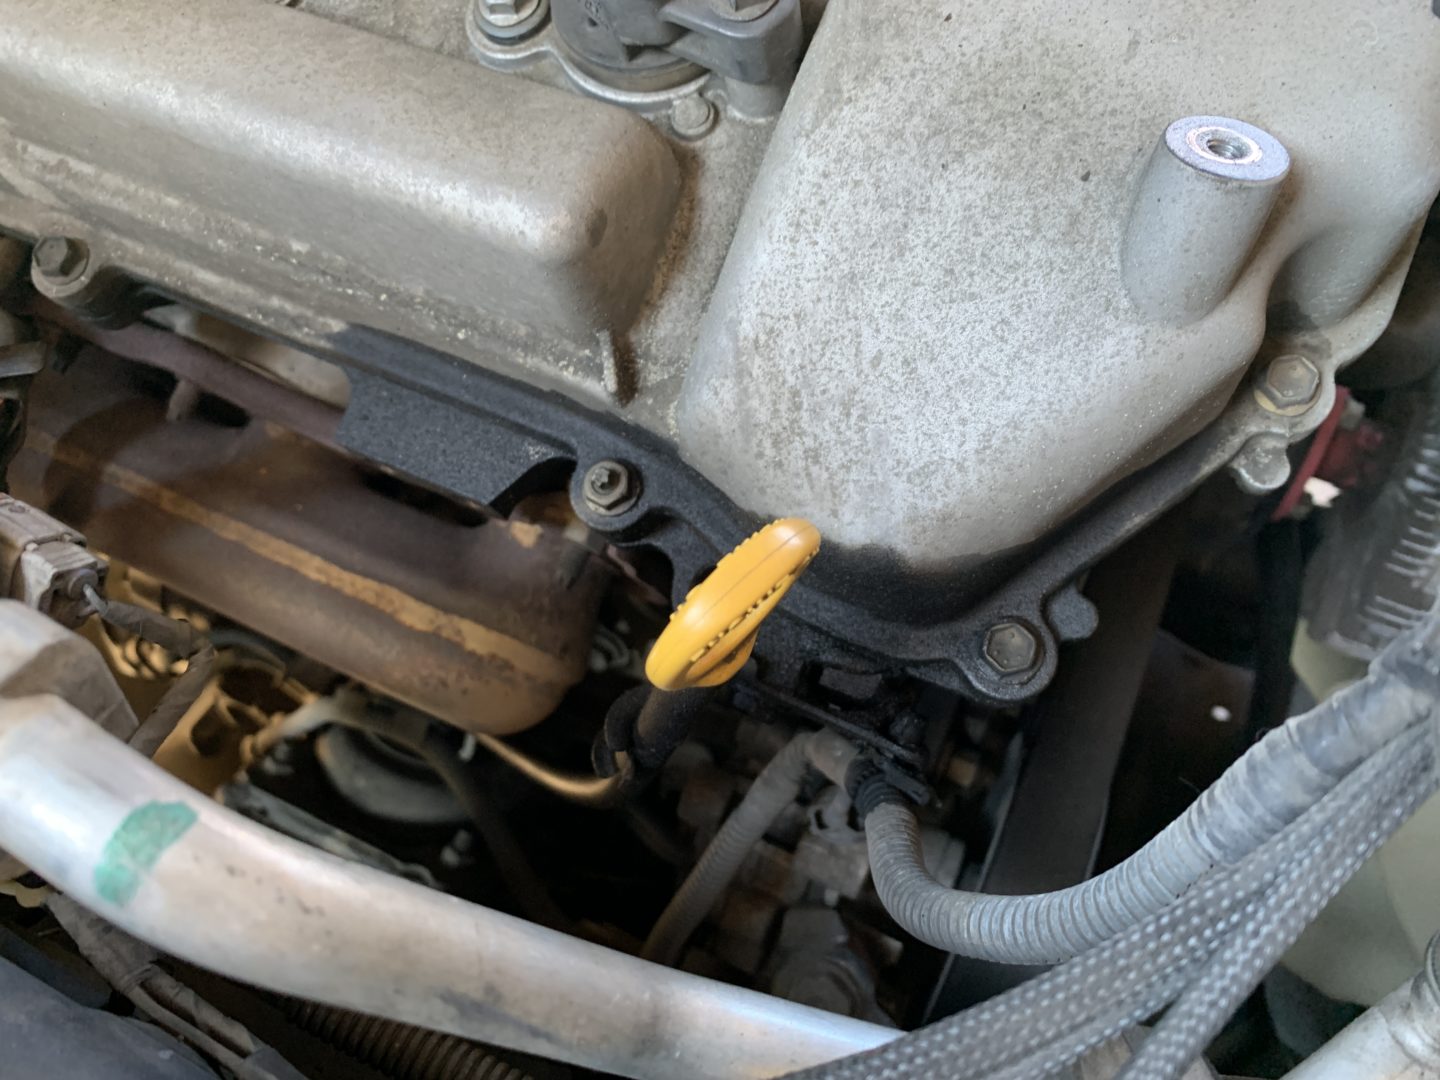
Also remove these two brackets as shown below with a 10mm socket.
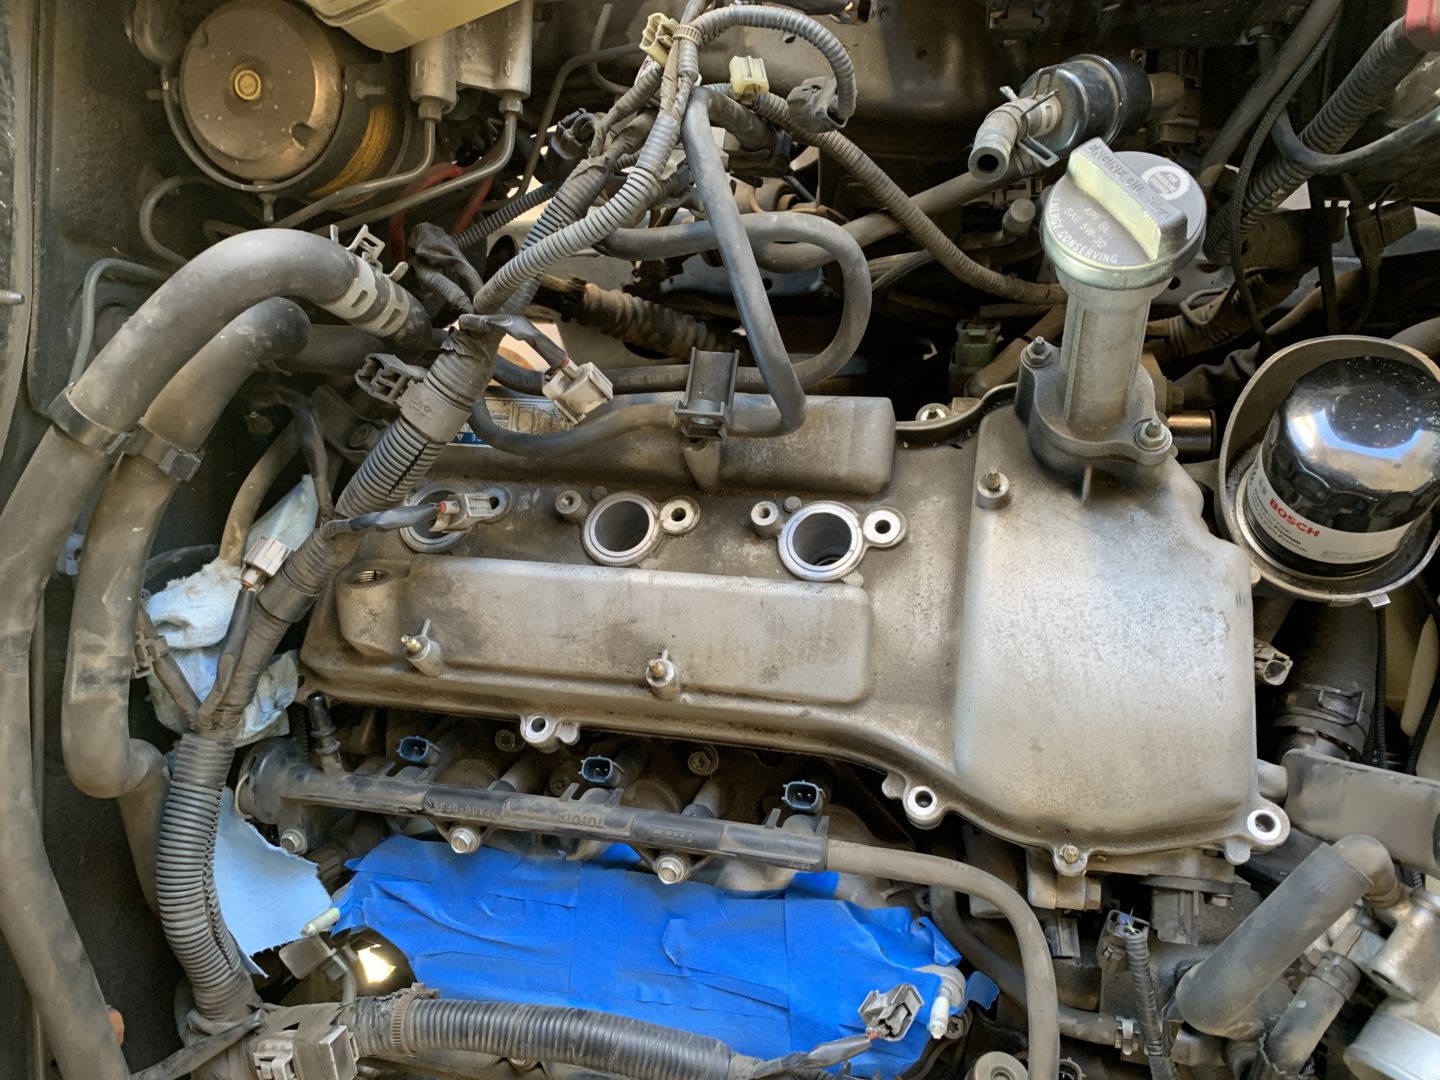
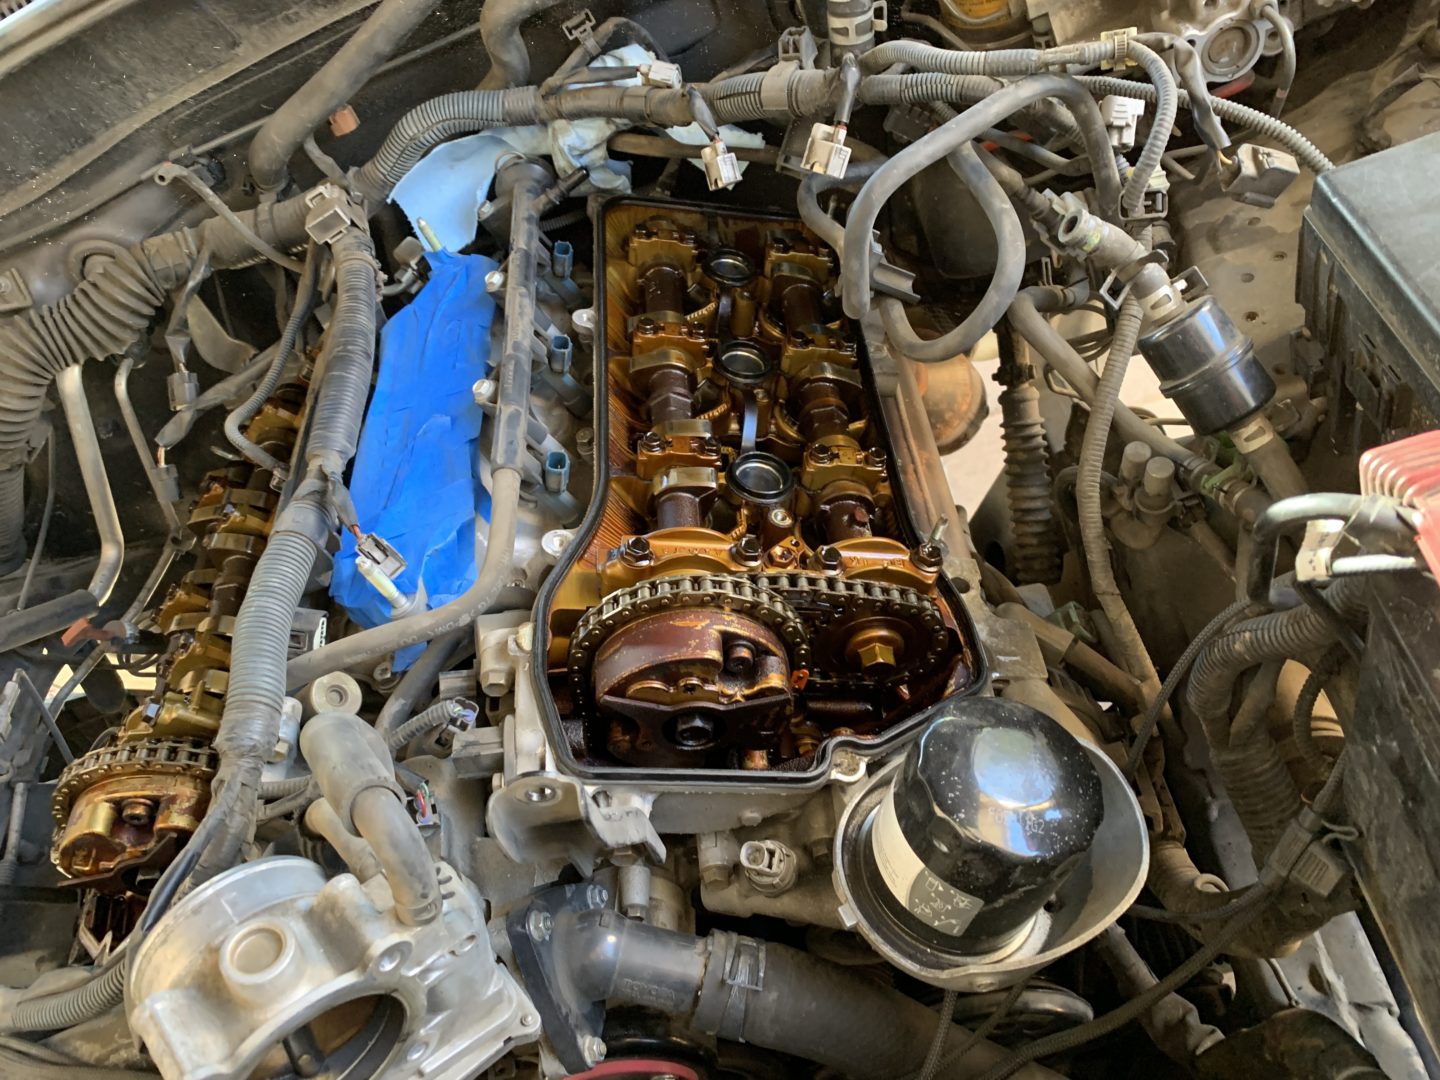
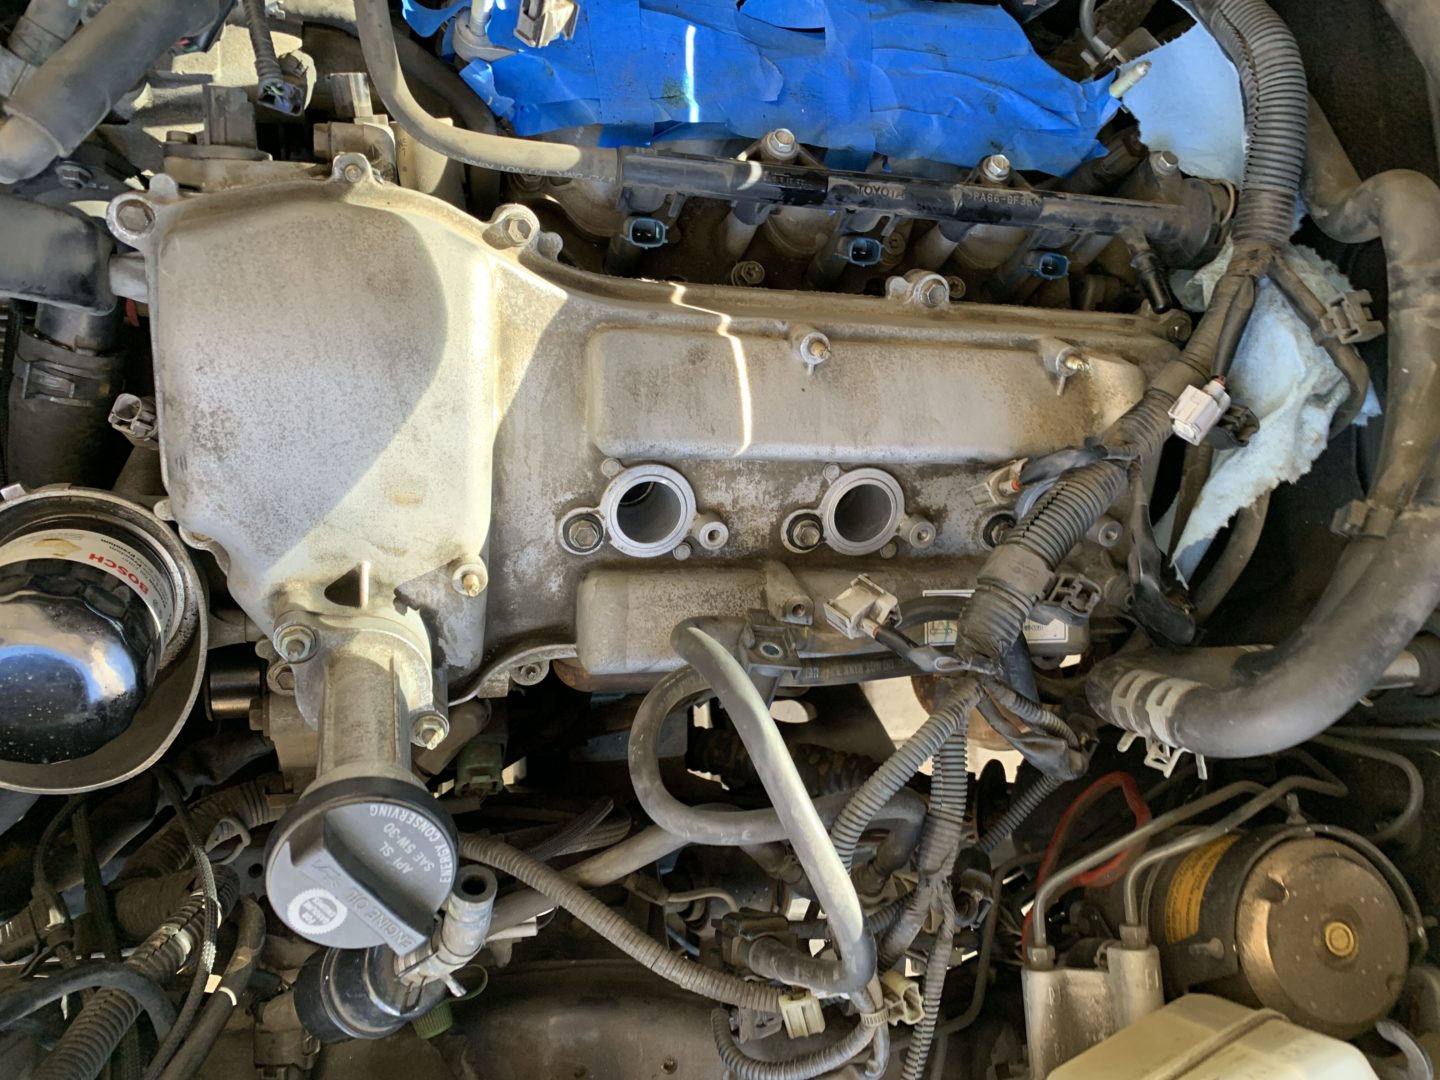
On the perimeter of the passenger side valve cover, there are (7 qty) bolts and (2 qty) nuts, as well as (3 qty) bolts in the center.
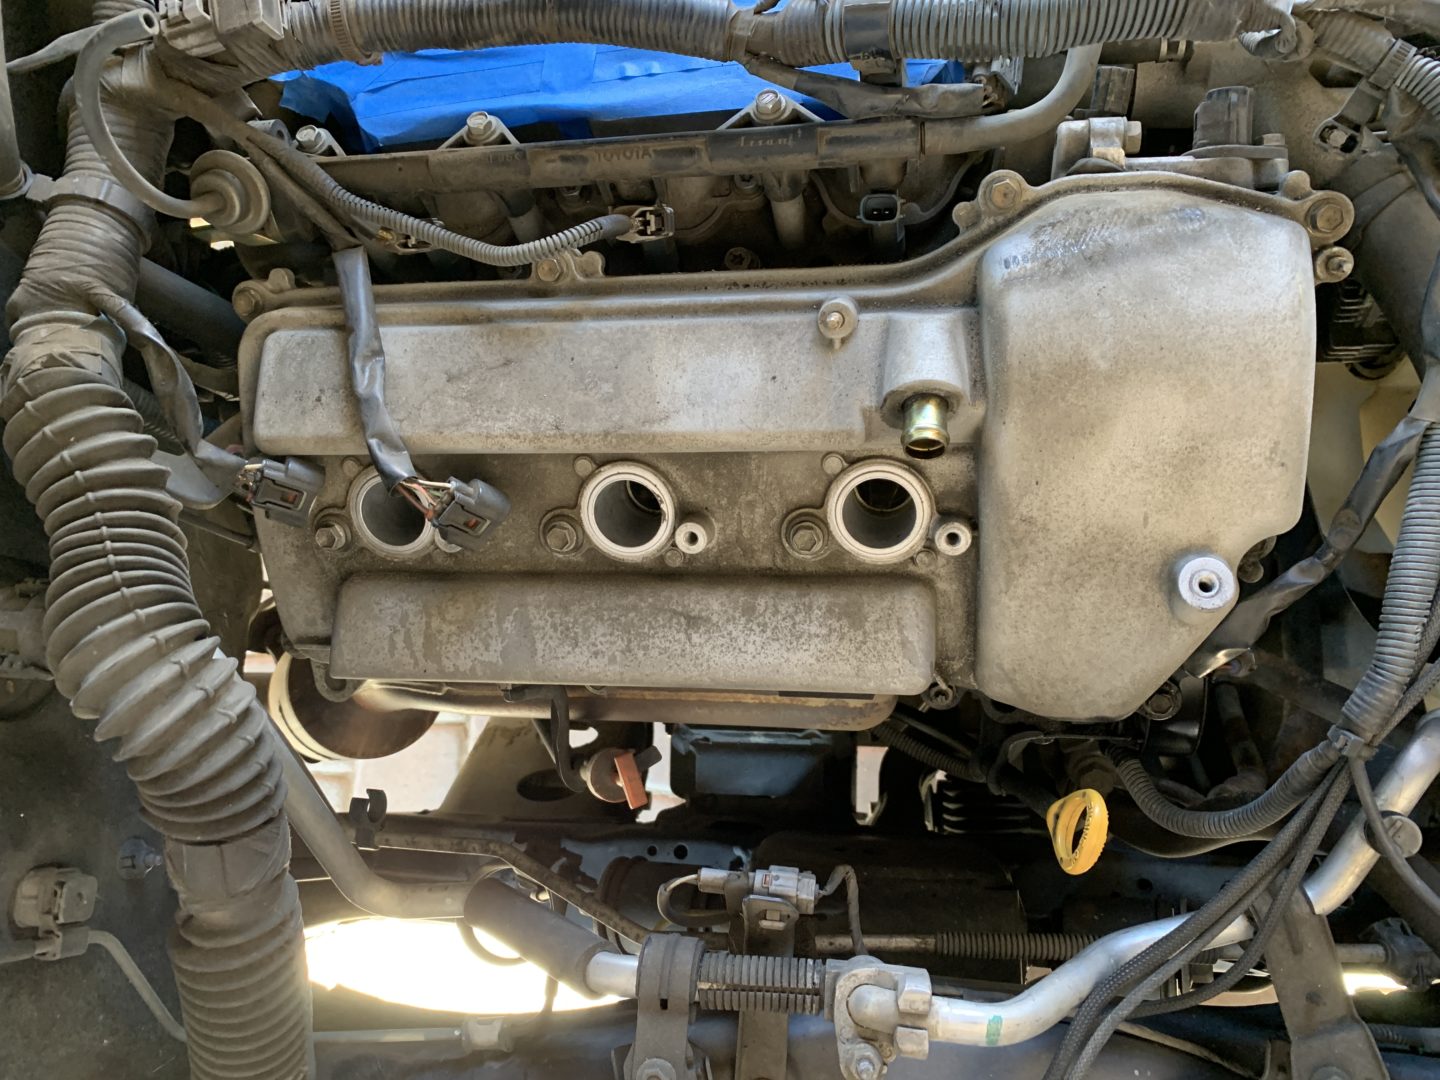

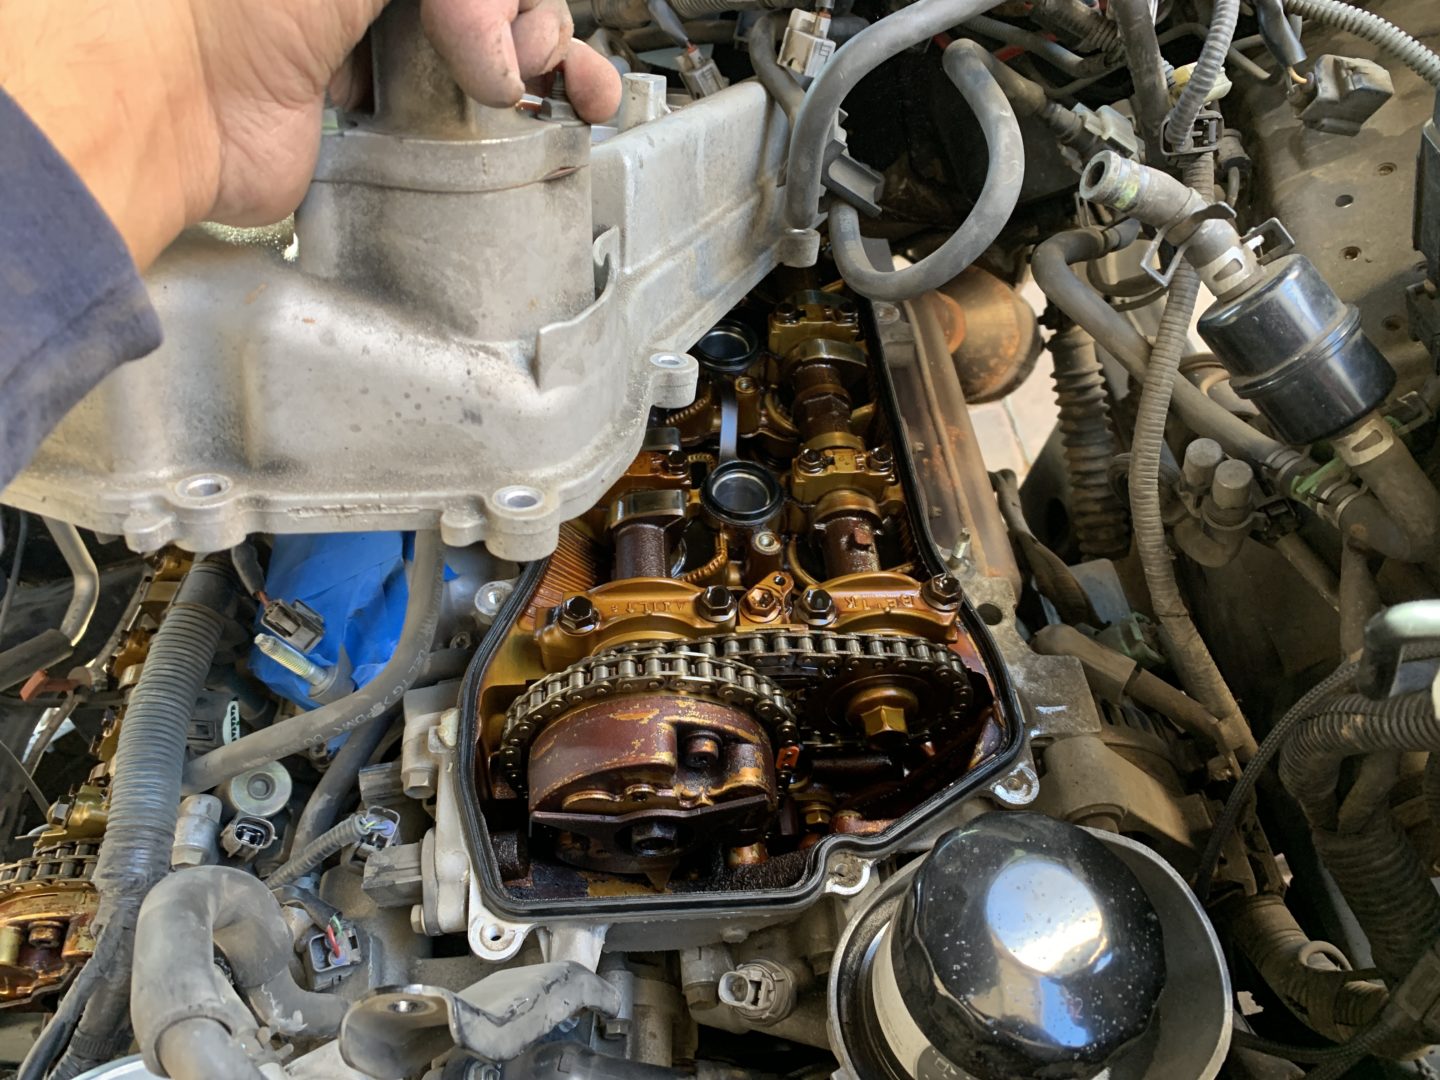
Now, let’s remove the passenger side valve cover. It may be difficult to remove the valve cover by hand, but if you use a large flat head screwdriver and wedge it the way I have below, then it is very easy to pry the valve cover off. Once it separates, the rest of the valve cover will come off very easily.


Sometimes the gasket comes off with the valve cover, but if it does not then remove it from the cylinder head once you’ve pulled off the valve cover.


Removing the driver side valve cover will require the removal of yet a few more components.

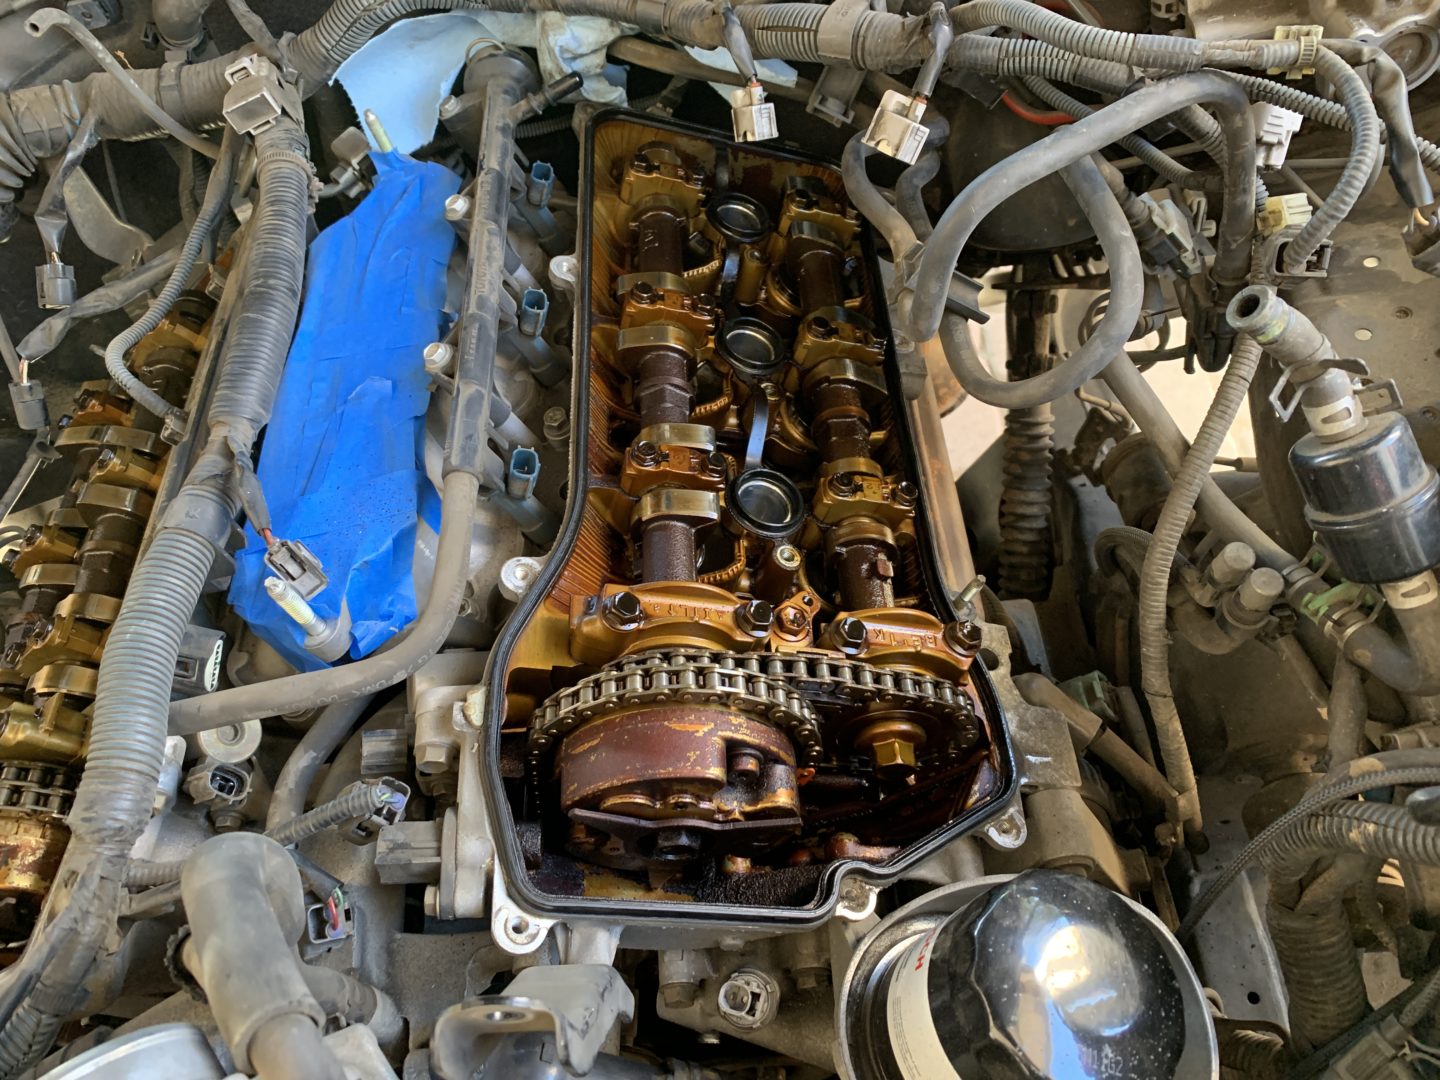
With those parts removed, you should finally be able to remove the driver side valve cover without anything in the way. On the perimeter of the valve cover, there are (7 qty) bolts and (2 qty) nuts, and (3 qty) bolts near the spark plug chambers— similar to the passenger side valve cover.

Using a flat head screwdriver, pry at the location below and separate the driver side valve cover from the cylinder head.

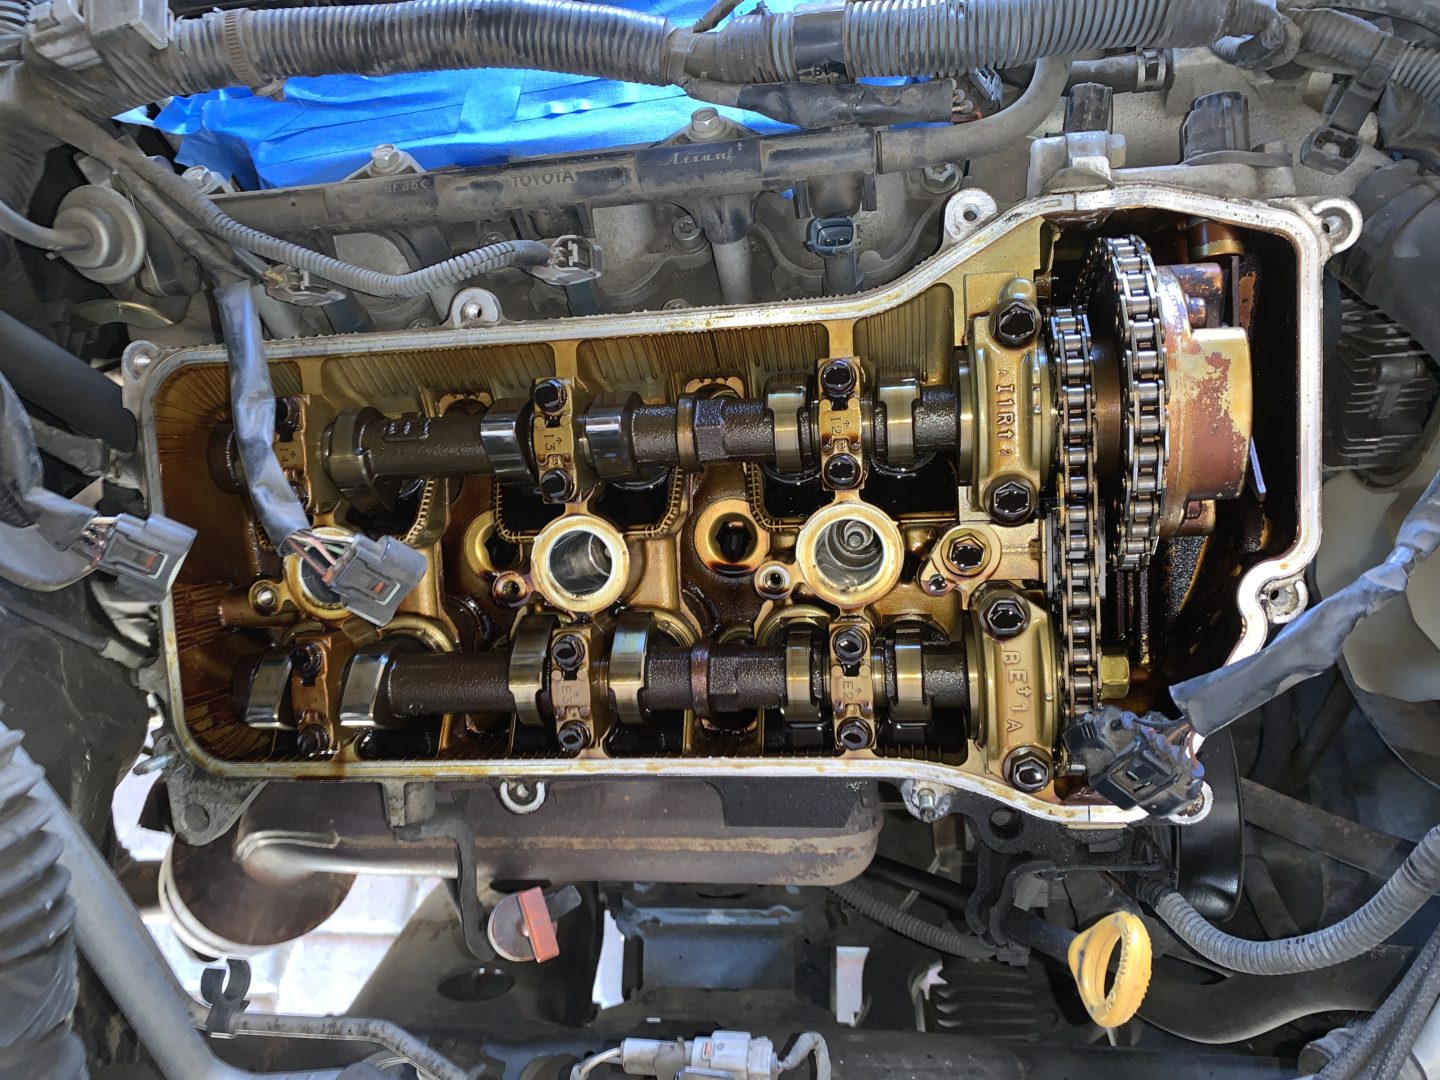
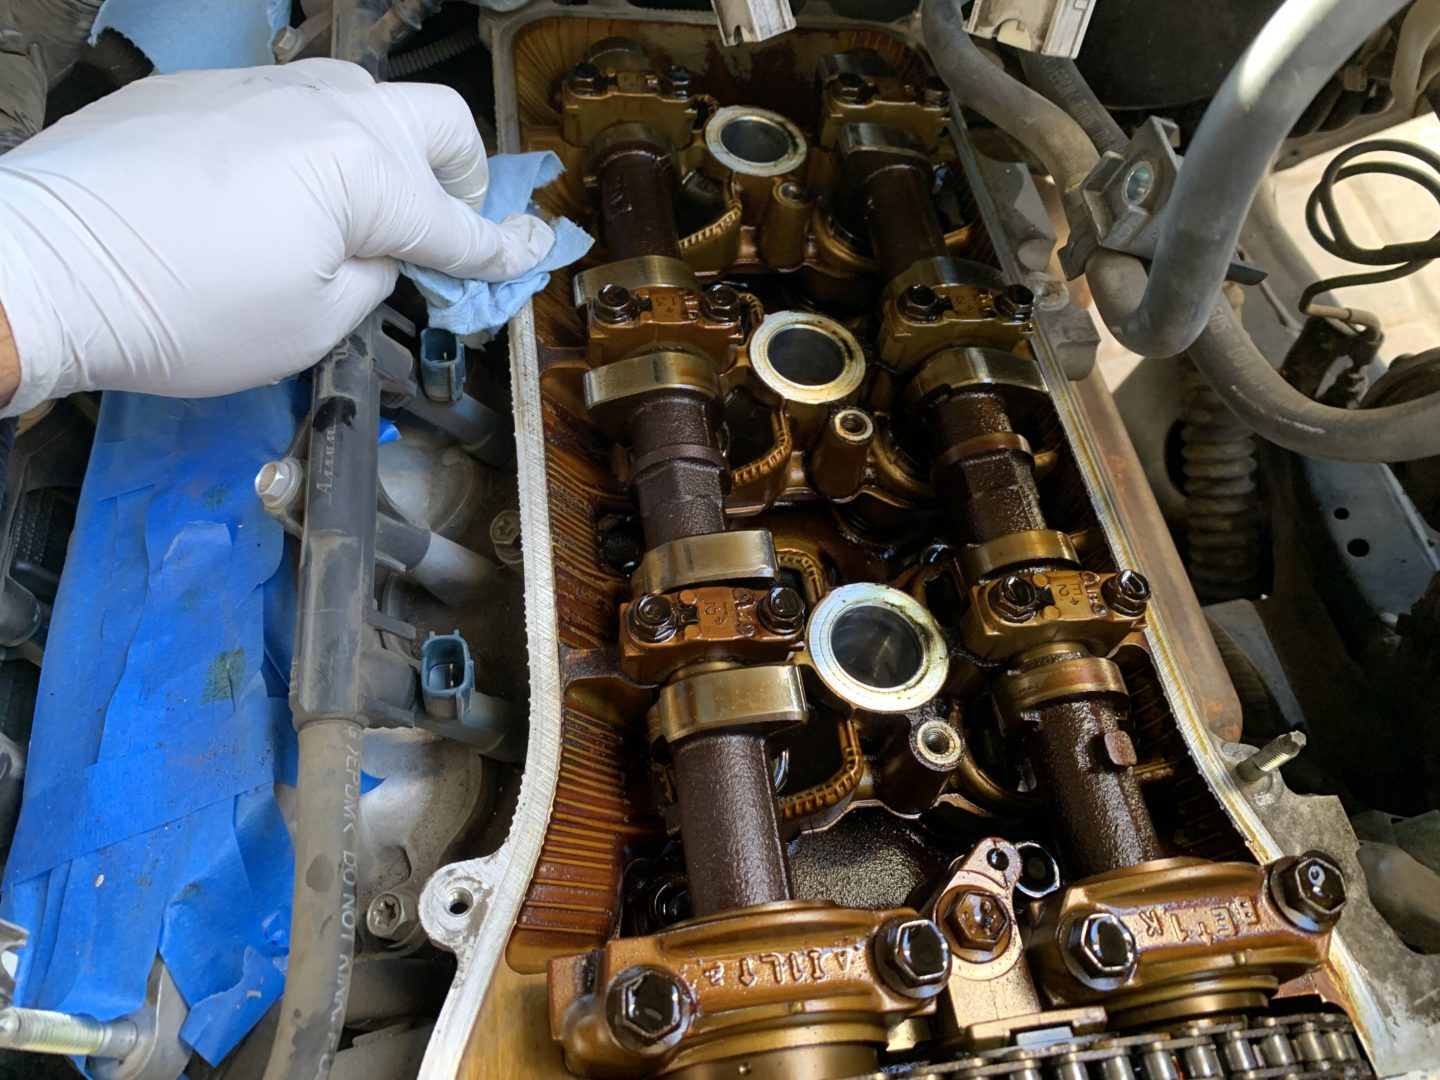
Pull the valve cover gasket off taking care not to let anything call into the cylinder head. The valve cover gasket did not come off with the valve cover on the driver side as shown here; remove the gasket if it is still stuck to the cylinder head.

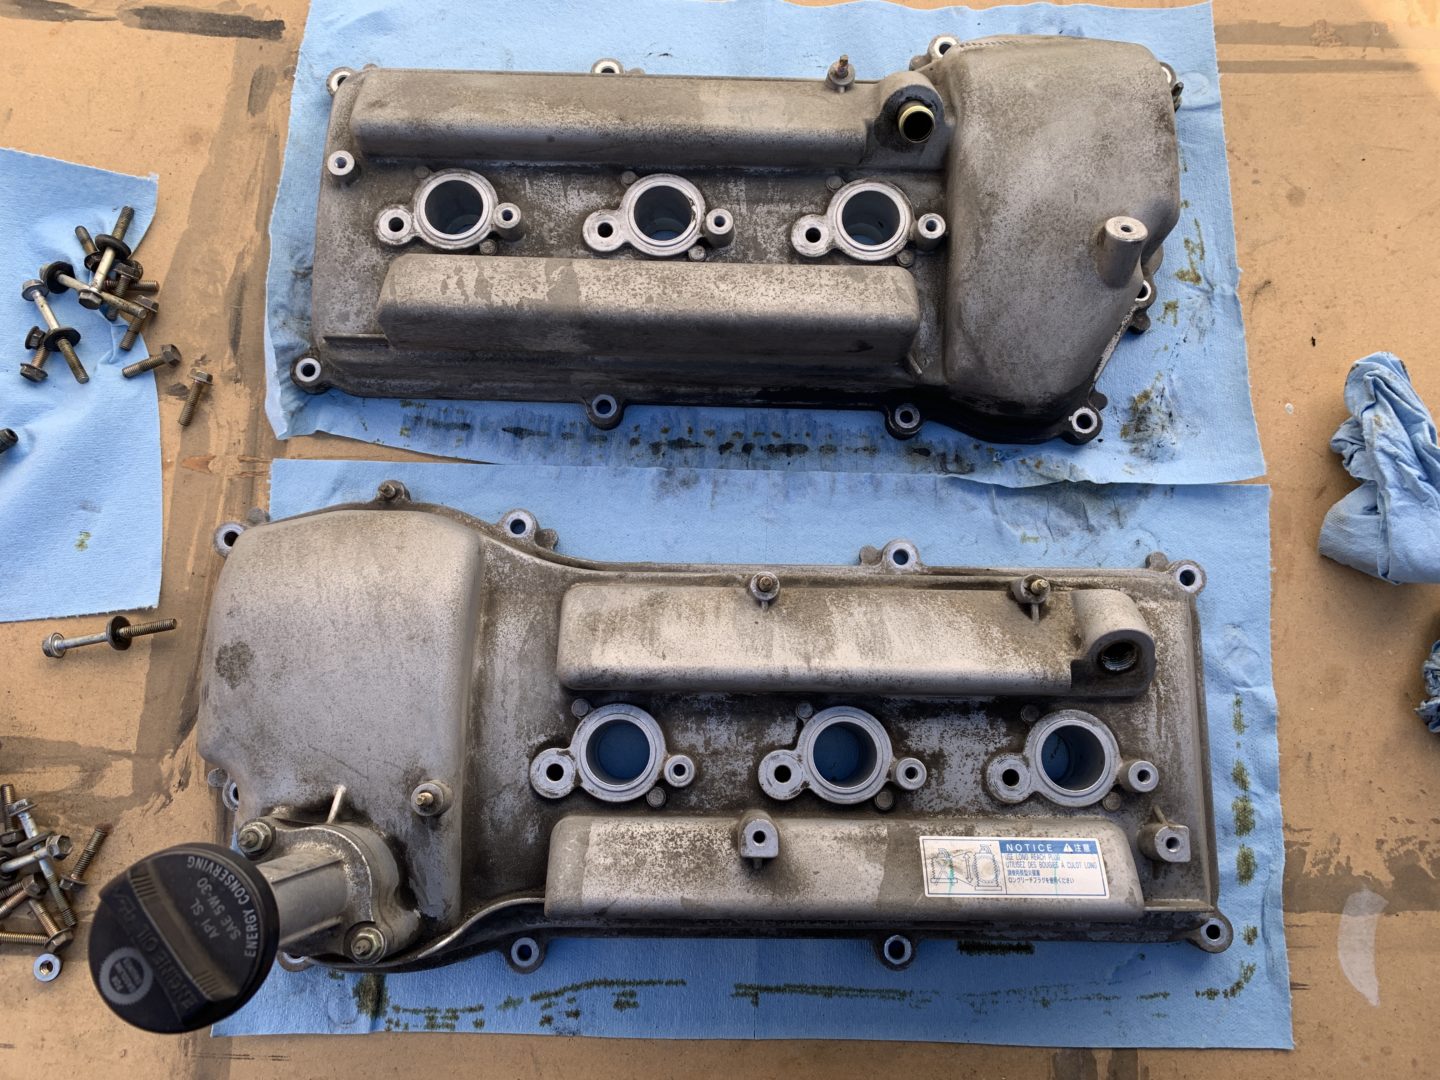
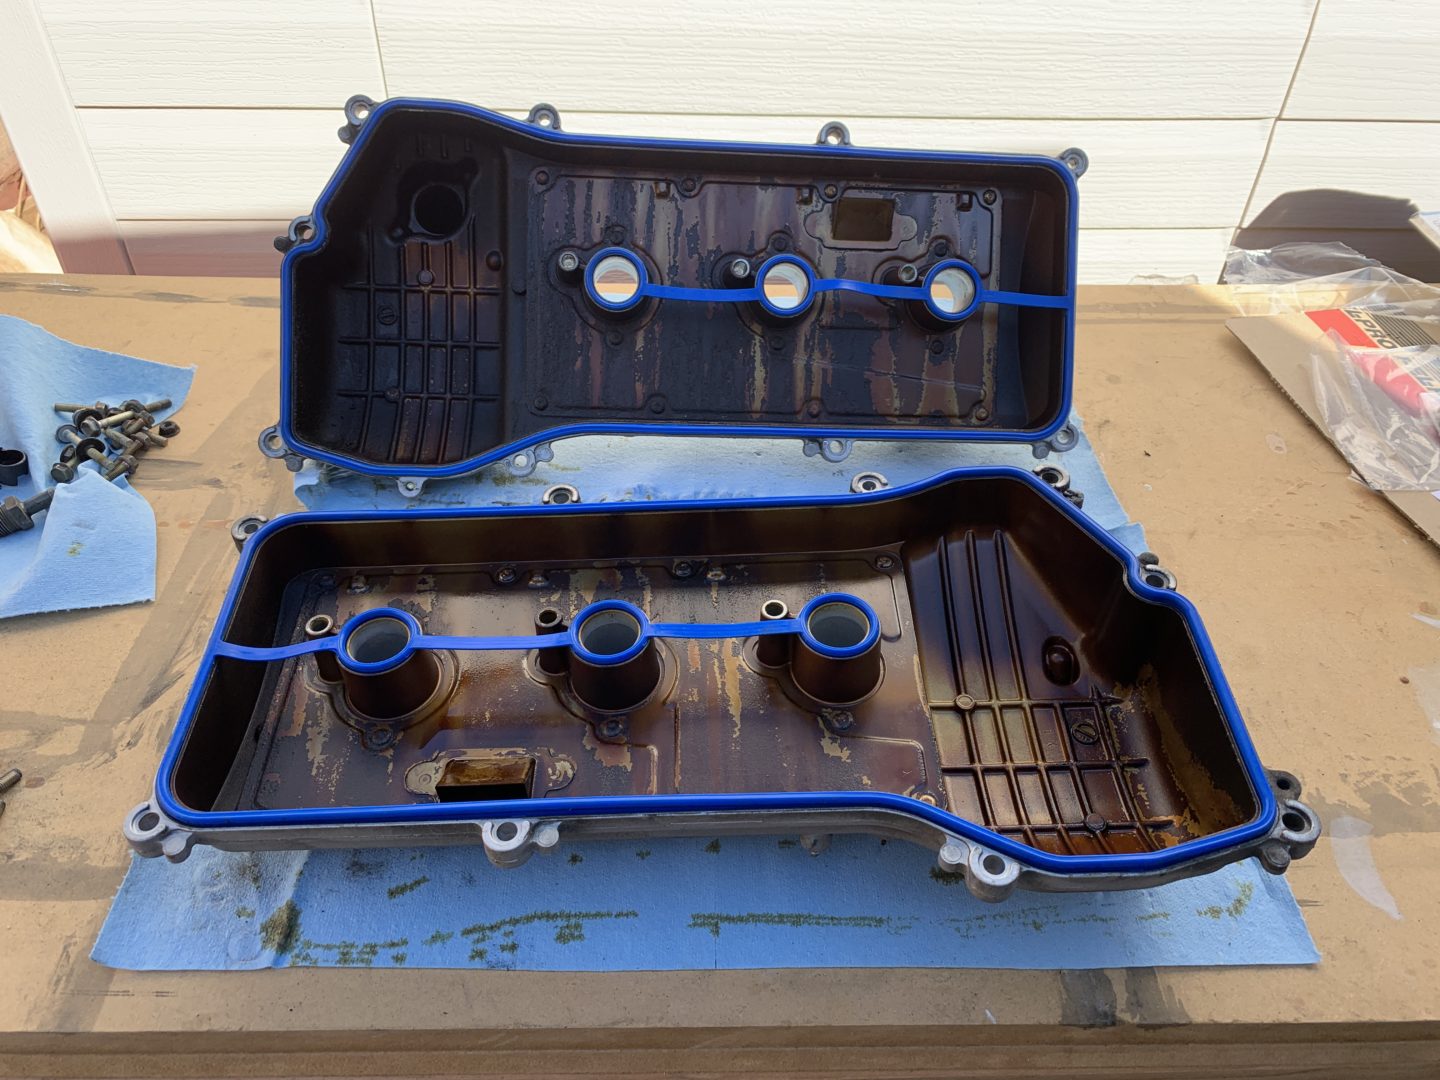
It’s time to prep the new valve cover gaskets. Clean the exterior of the valve covers as it’s easier to clean them now rather than when they are installed. I just did a quick wipe-down with some all-purpose cleaner, although if you really want it clean a degreaser may be a good option. Make sure to also clean along the grooves of the valve cover (where the new gaskets will go) including the center holes to ensure there is no loose debris that may affect the seal when you go to install the gaskets.
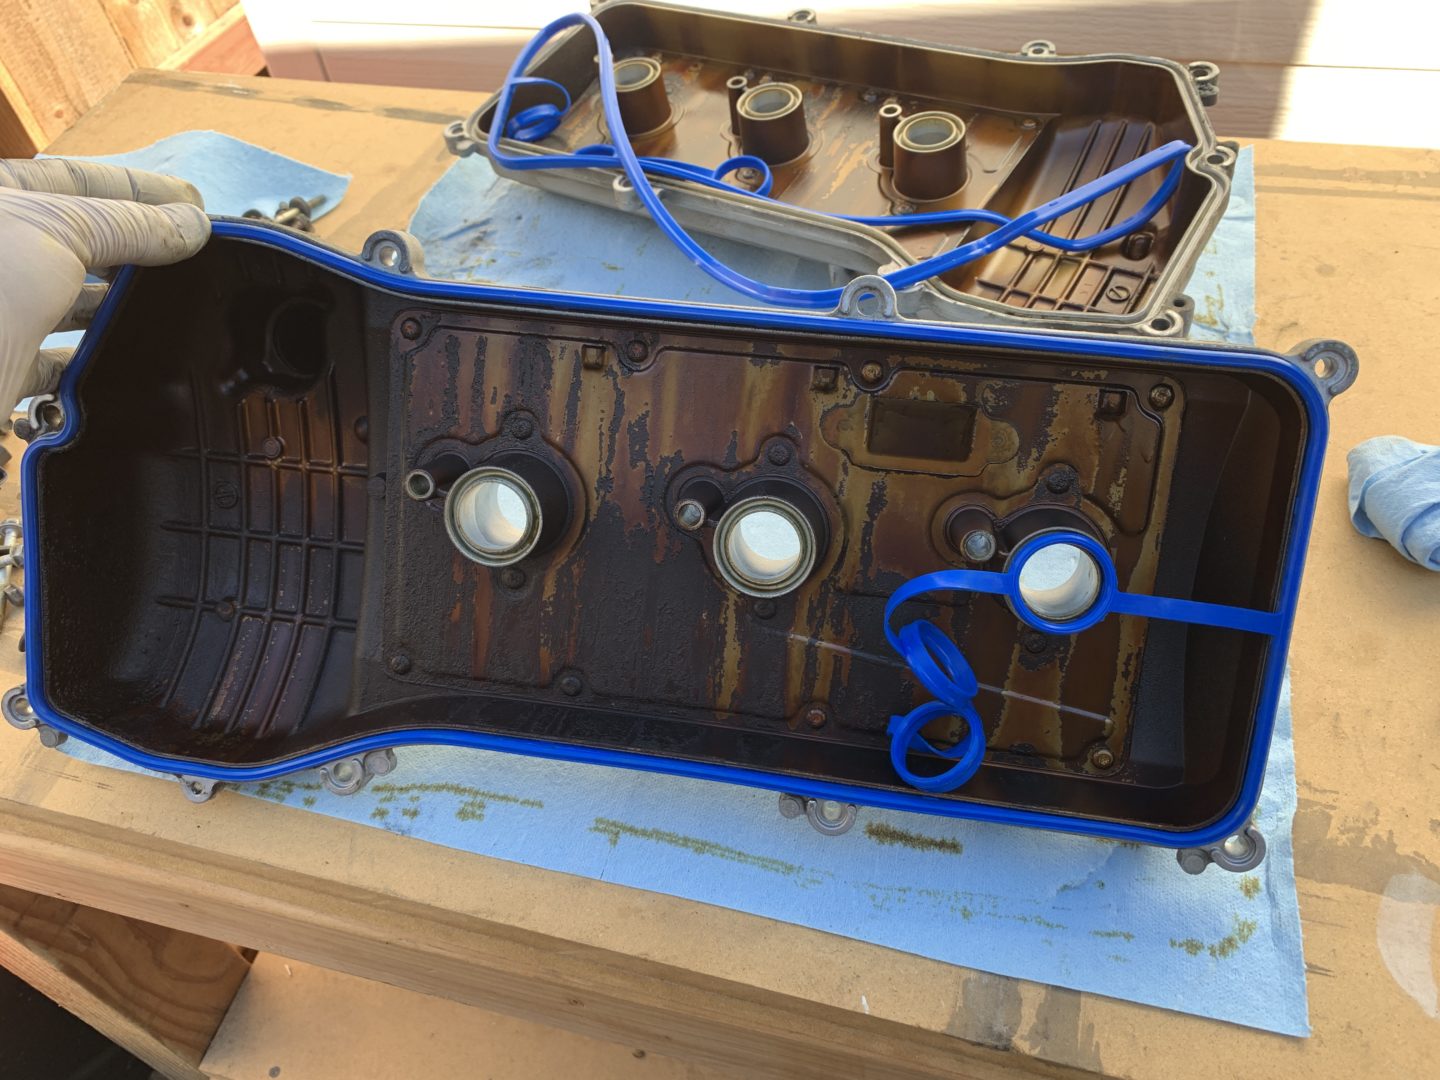
Take the new valve cover gaskets and install them onto the valve covers. Make sure the gaskets fit within the grooves of the valve cover and the hole openings.

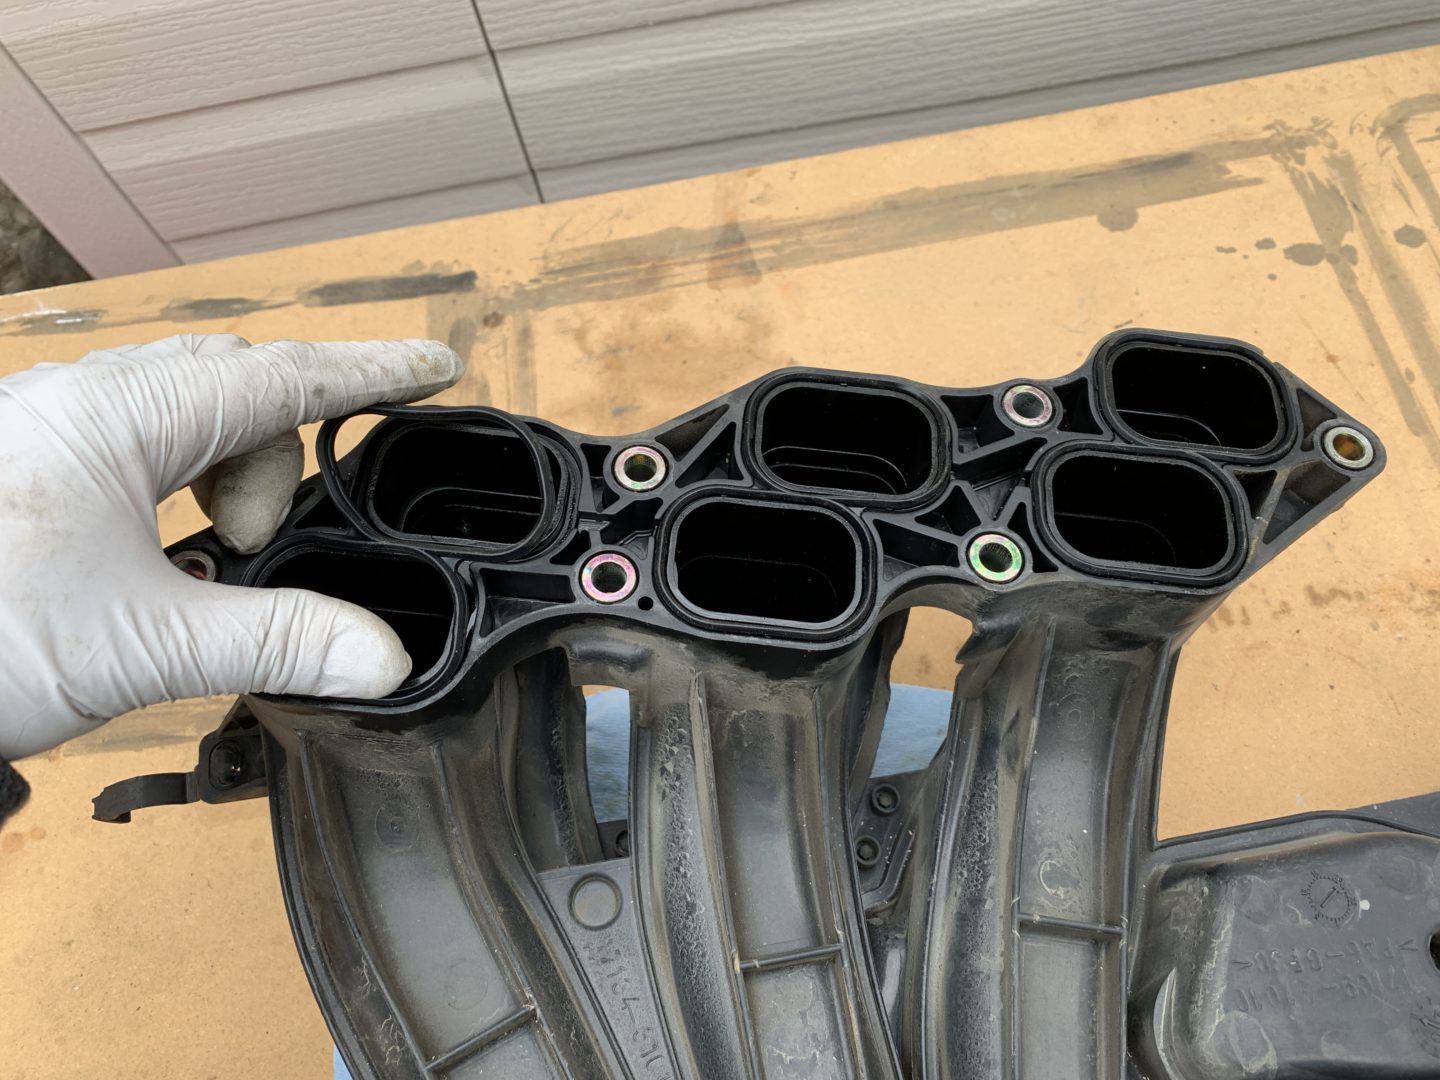
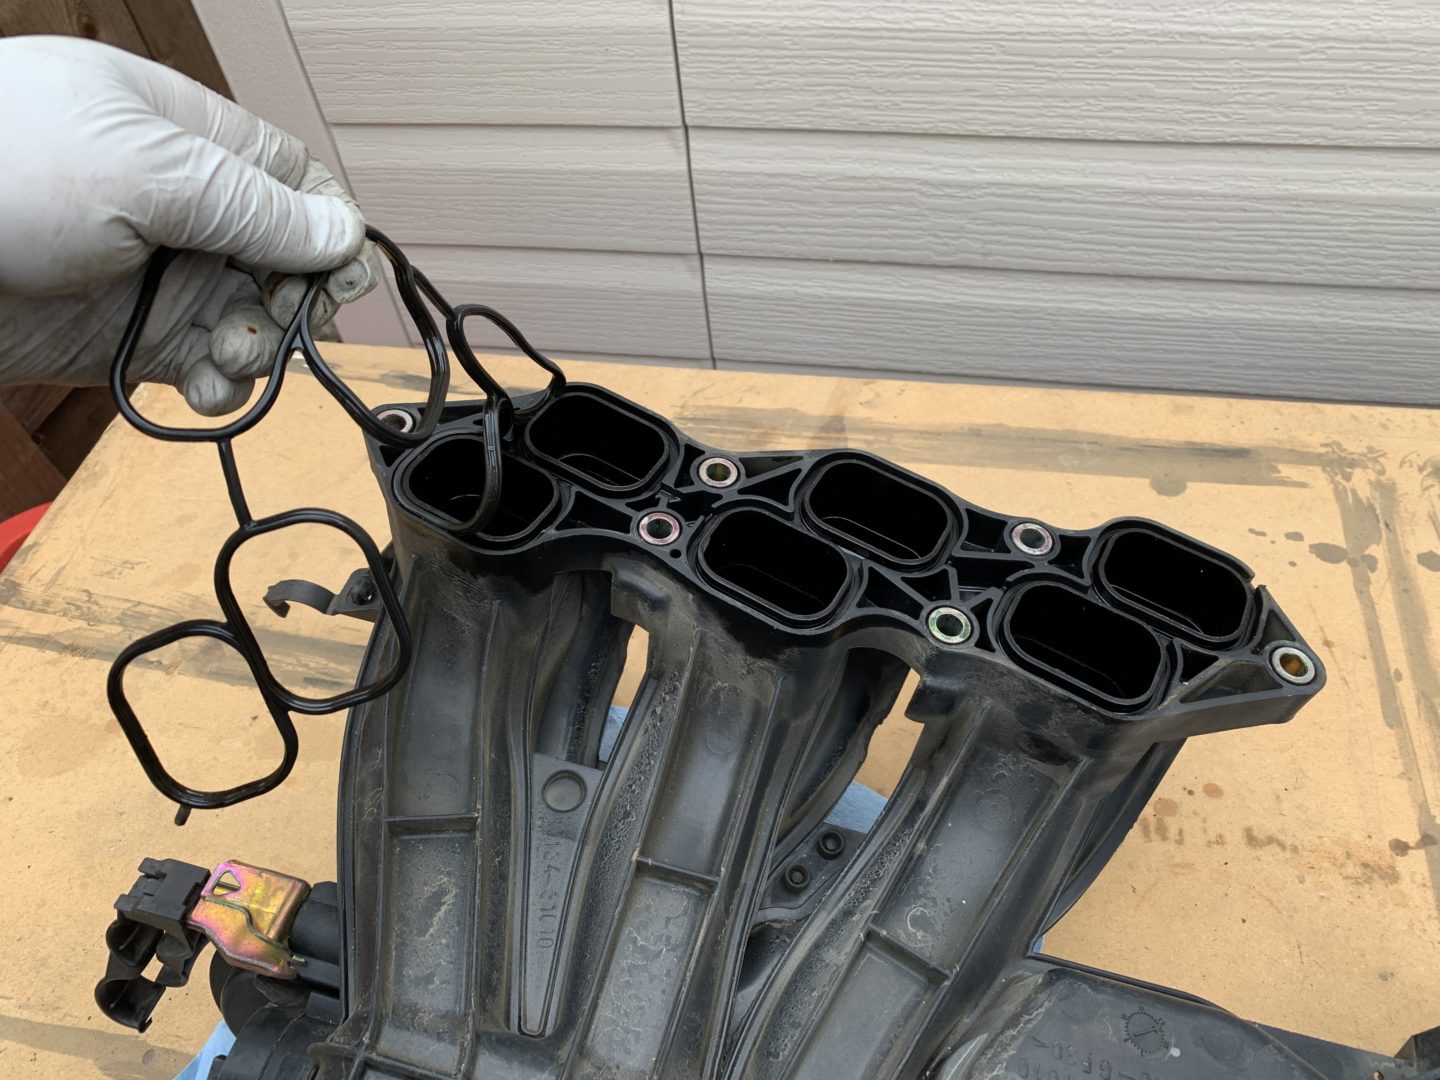
You can also change out the upper intake manifold gasket now if you plan on replacing them. Simply remove the old gasket, ensure the surface is clean, and then install the new gasket.

Before installing the valve covers back on with the new gaskets, we should prep the cylinder head side first.
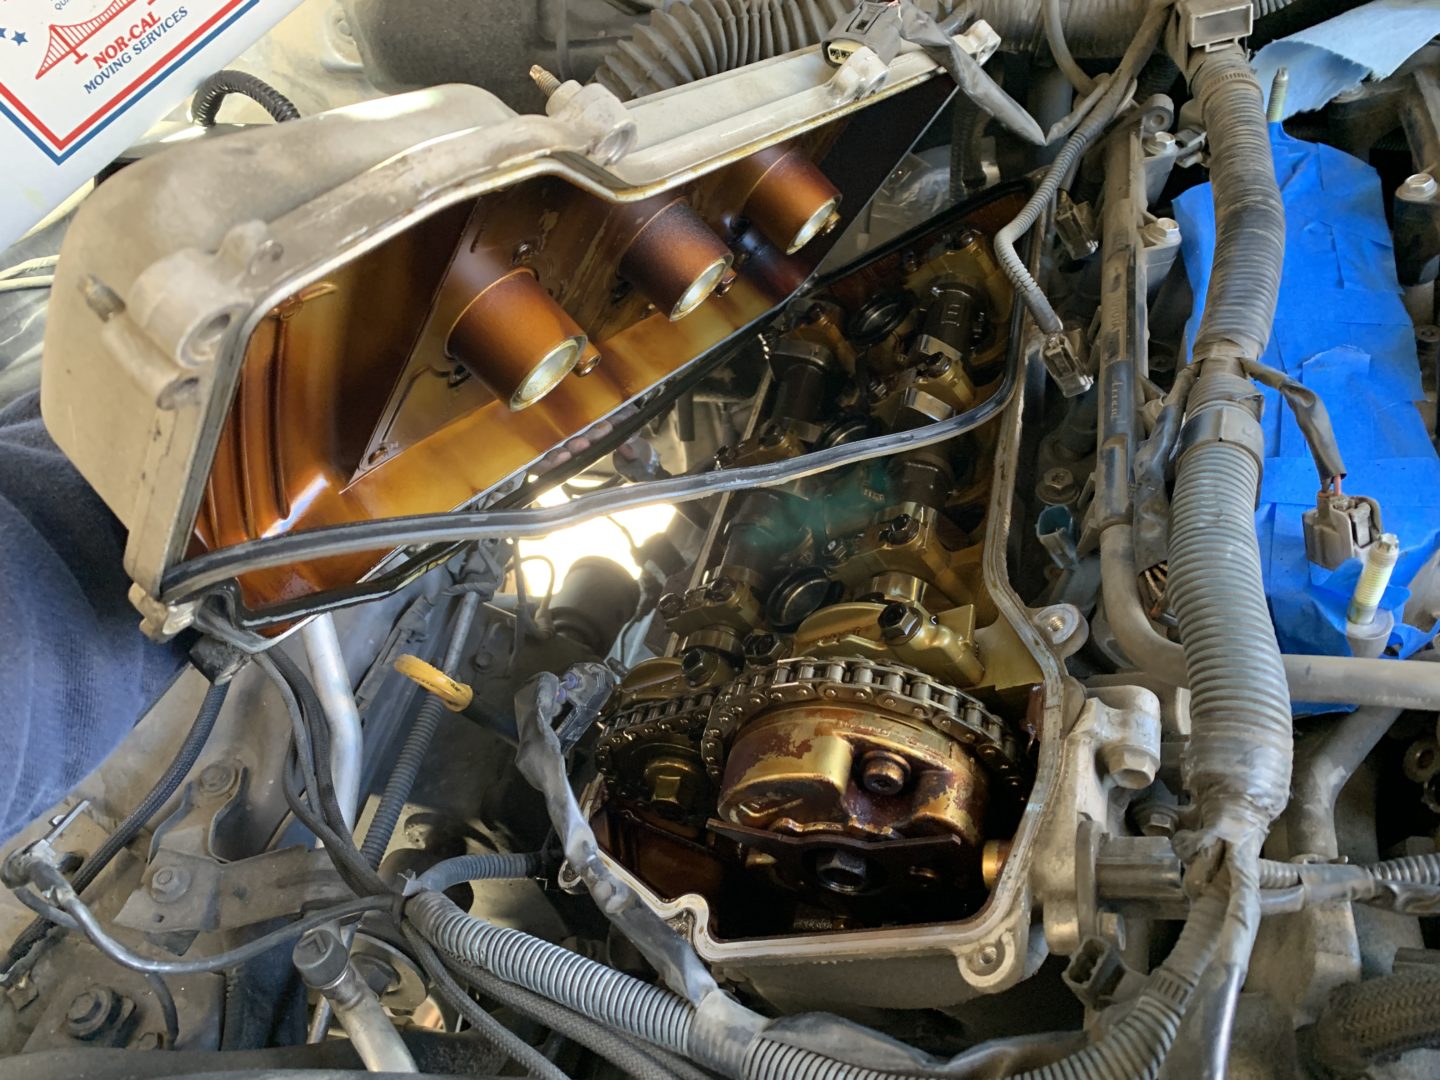
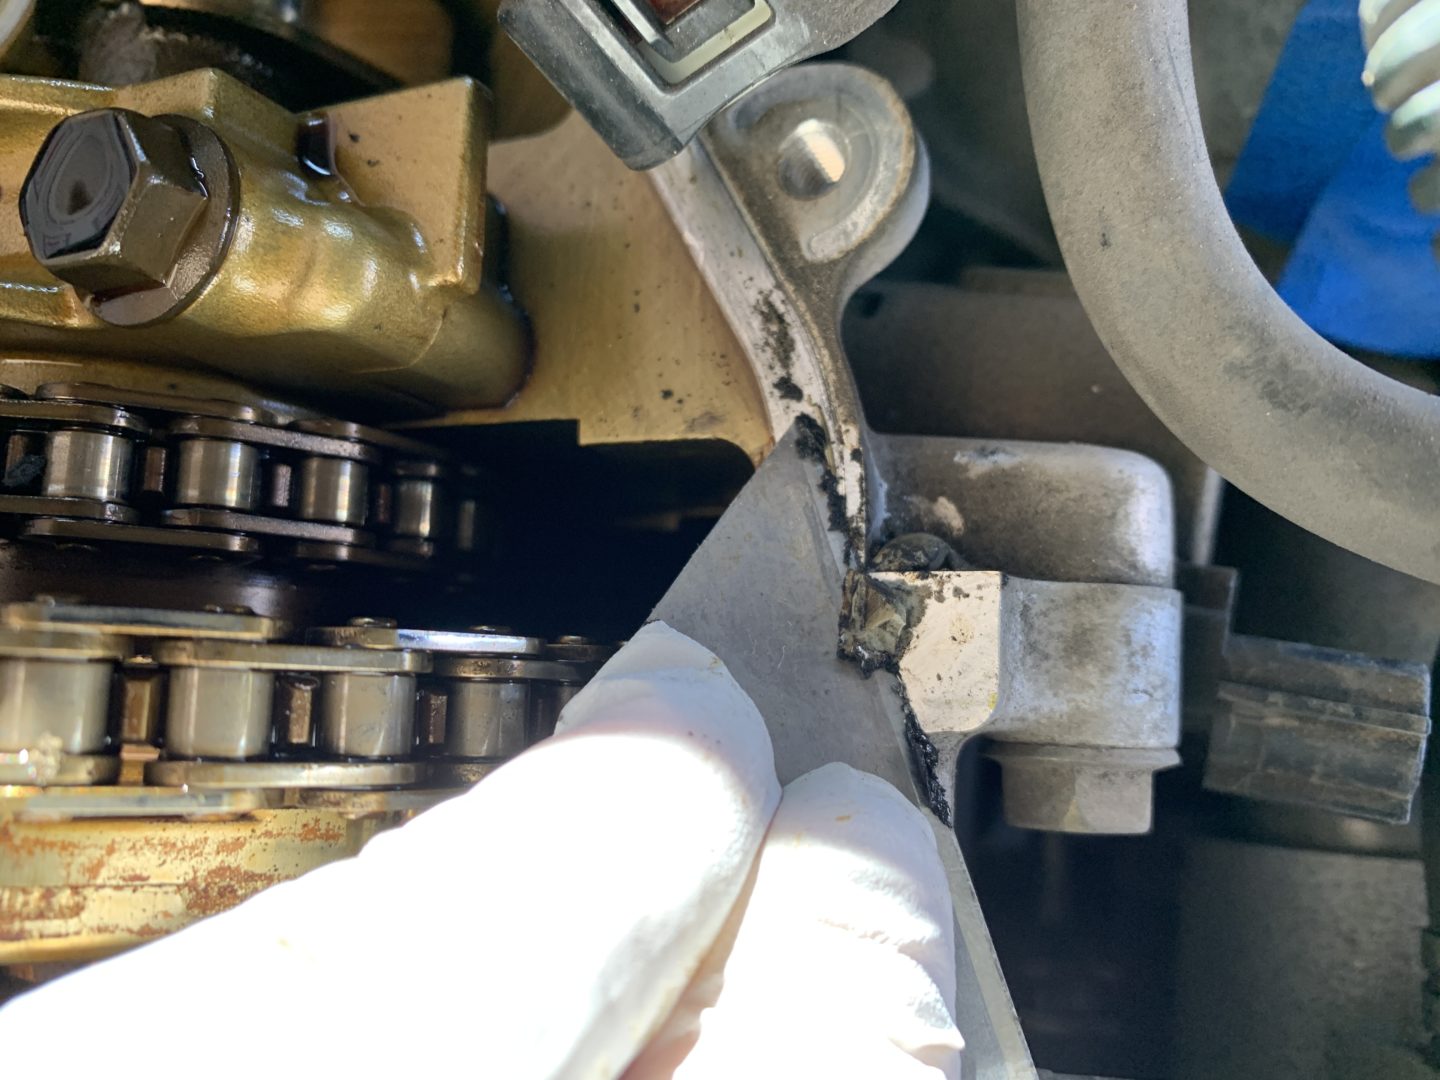
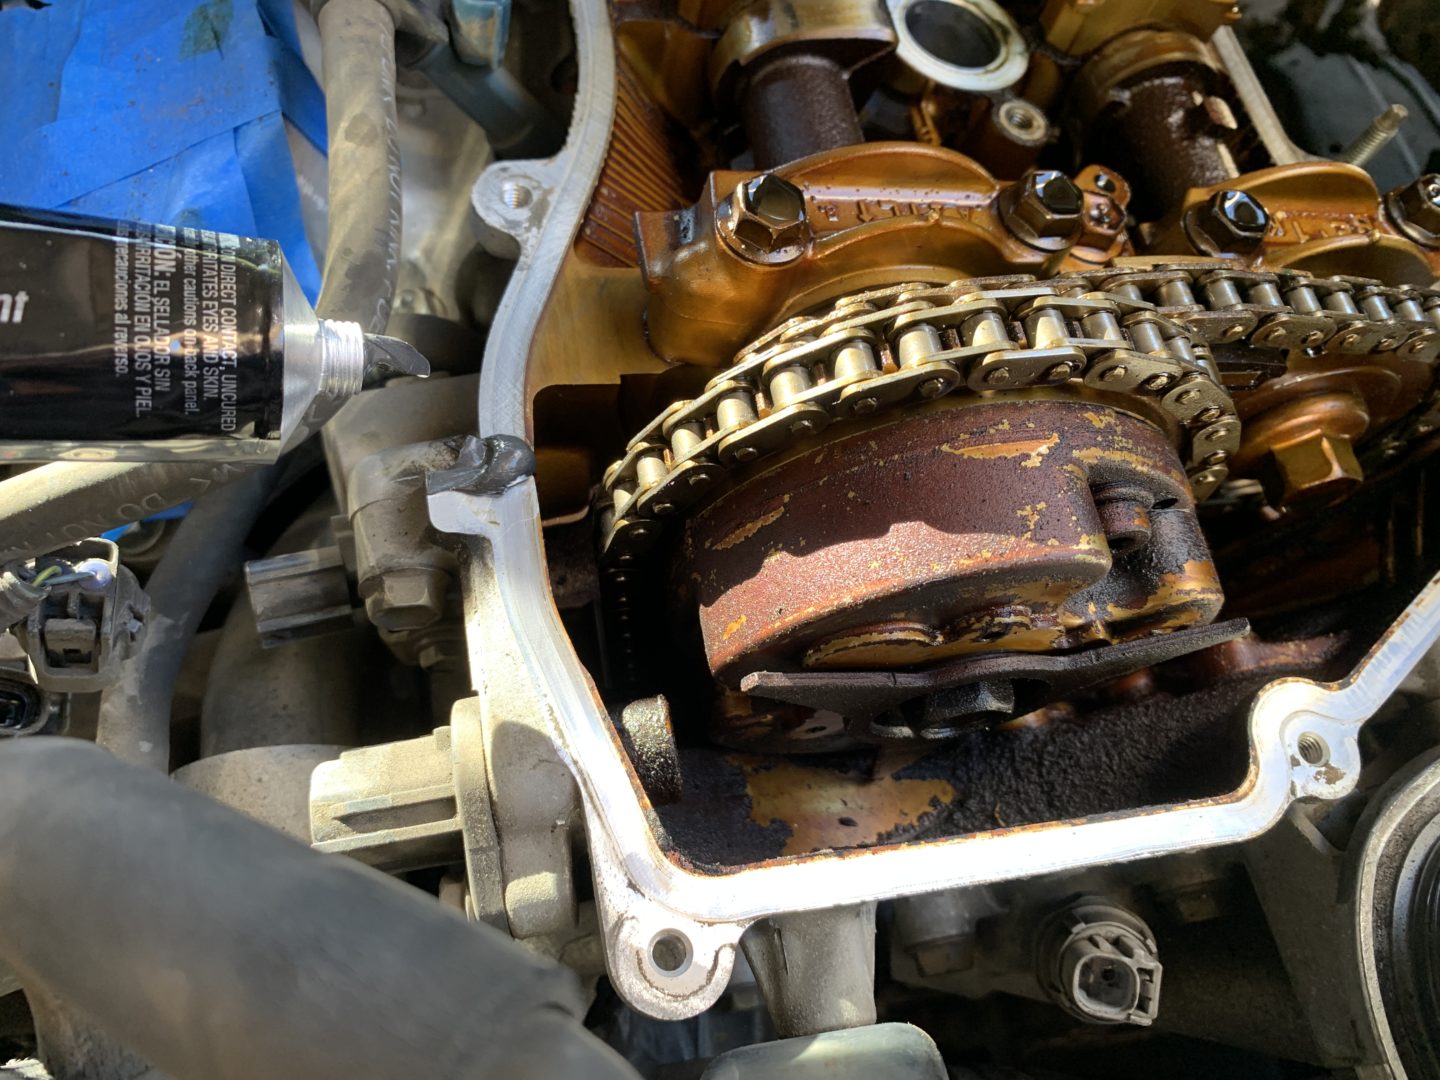
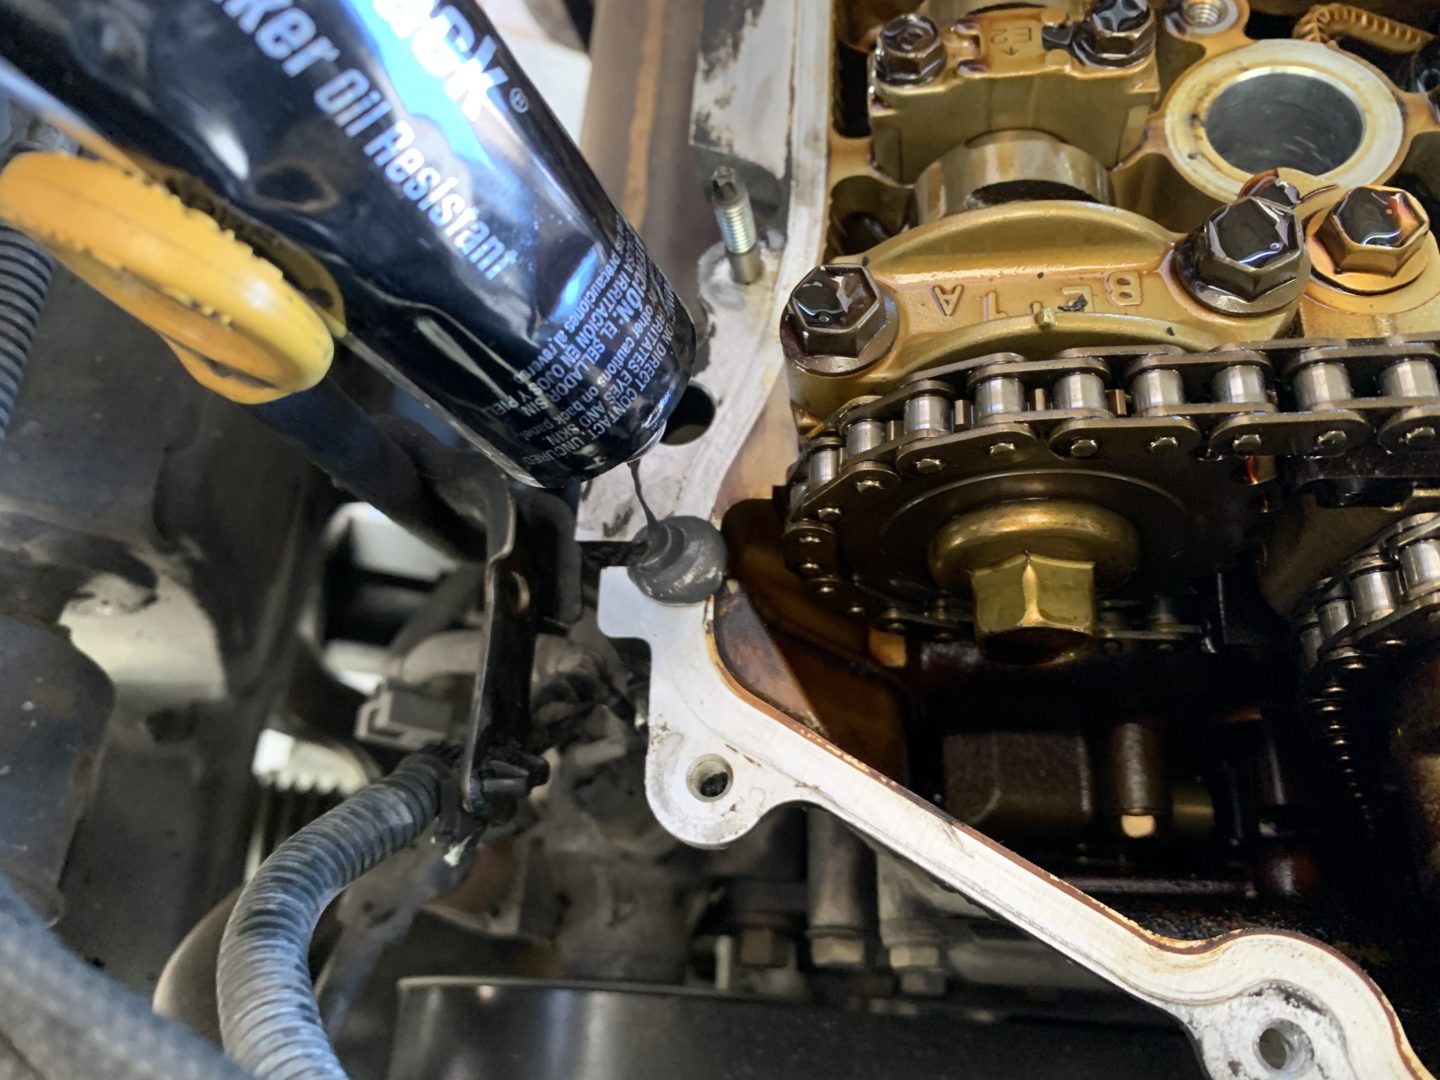
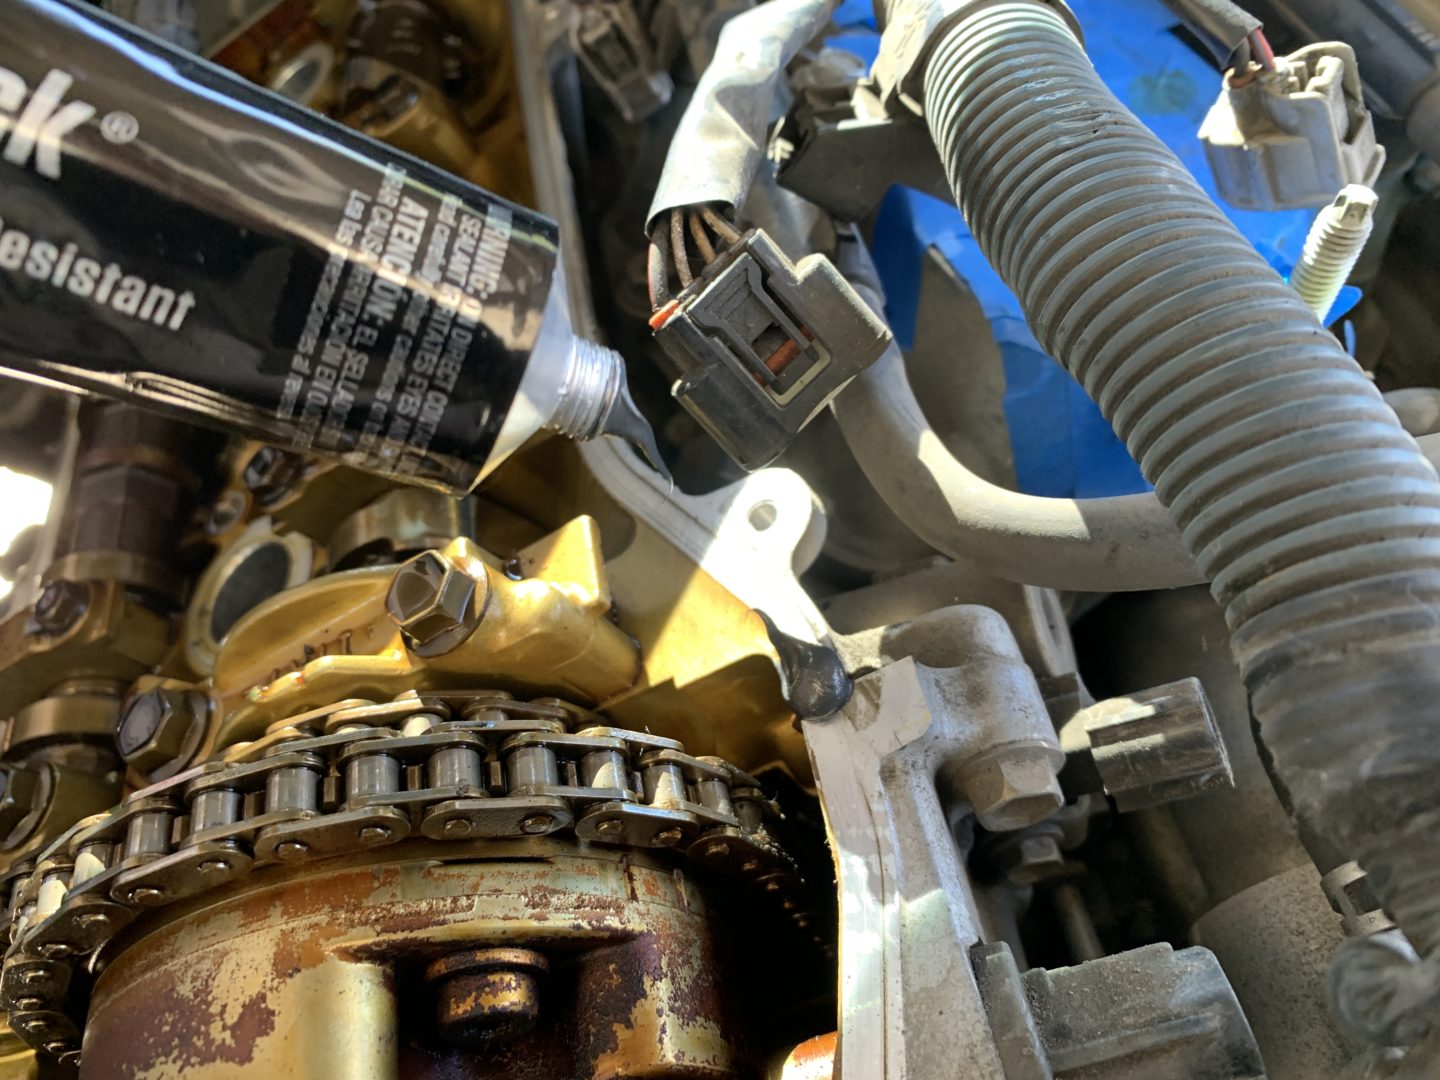
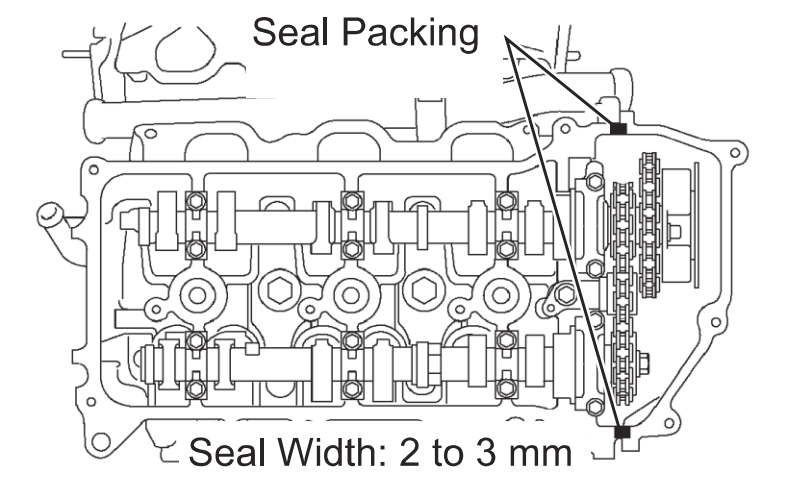
On the cylinder head, there is a seam between the timing chain and the engine block. These are common locations for oil leaks; this is why a dab of sealant is applied here when a valve cover is installed.
At this time, you may want to use some degreaser to clean off the areas where oil has leaked in the past. Not only should you clean it because you have slightly more access to cleaning it now, but also because you want the surface clean so that you can tell in the future if it leaks again.
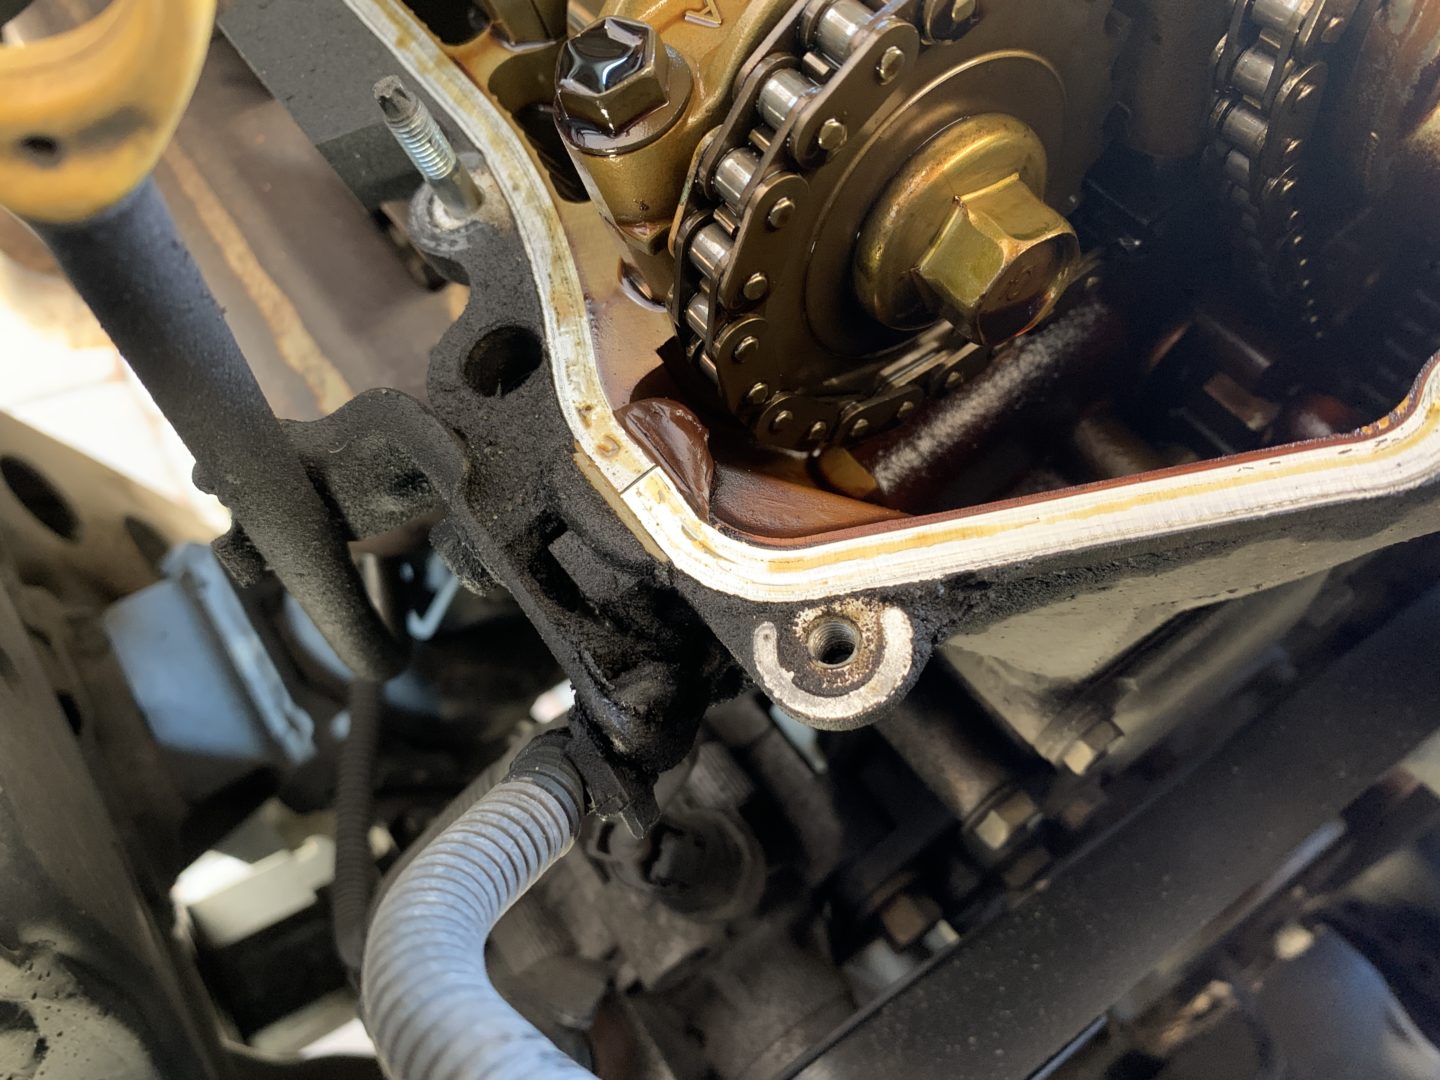
It is common to find a leak at this location even though there was sealant applied previously. If you feel the old sealant, you’ll find that with the heat and oil exposure over time, the sealant has turned hard. After so many years and miles on the engine, it’s likely that the sealant that hardened is no longer able to provide a good seal at this location.
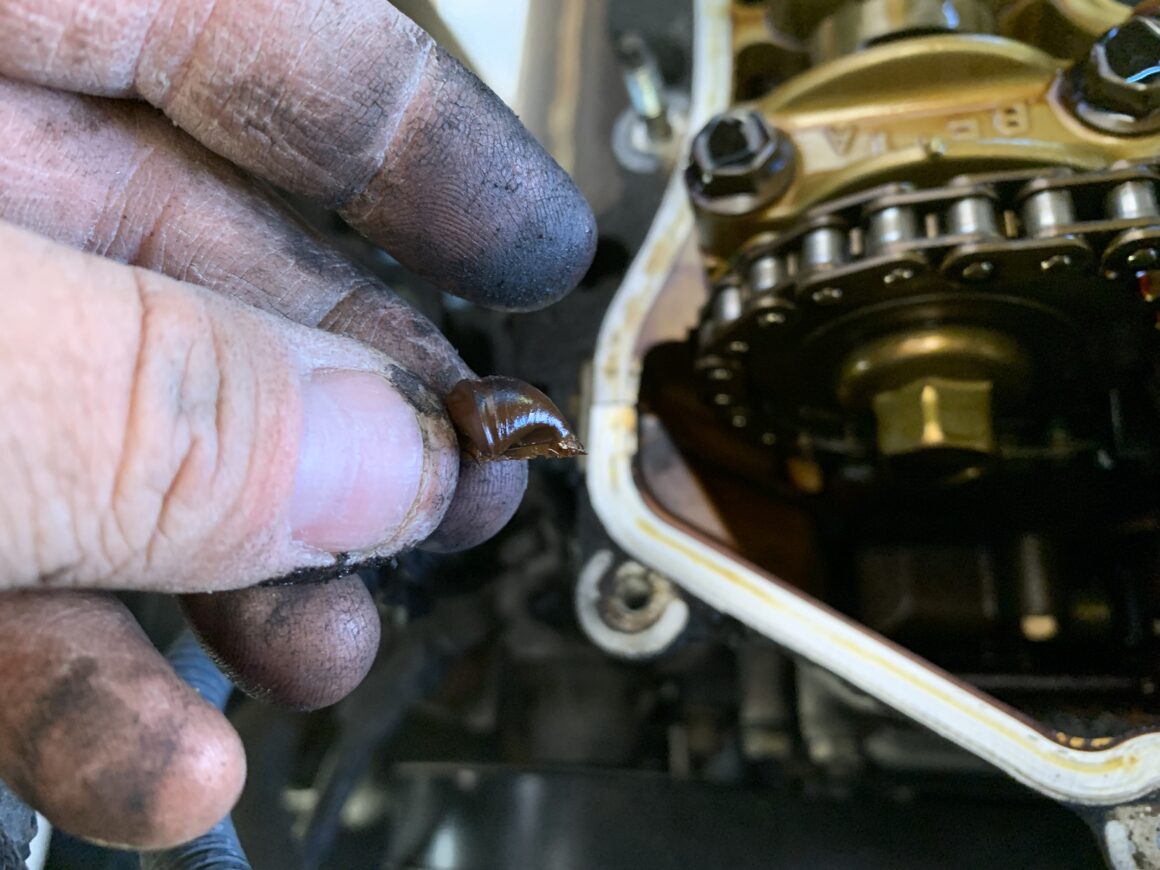
You’ll need to remove the old sealant that was applied previously at the seams between the cylinder head and the timing chain location. You’ll find a total of four locations where you’ll need to remove this dab of sealant (two on the passenger side, two on the driver side.)
In addition to removing the dabs of sealant, you should also use a razor blade to clean the surfaces where the valve cover gasket will be in contact with. Also use some all-purpose cleaner on a shop towel or rag to clean the surface afterwards.


Reinstalling in reverse of removal, we’ll start with the driver side. Apply a bead of sealant to each side of the locations where the cylinder head and timing chain meet. Keep in mind that if you are using the Toyota packing seal, you are to install the valve cover within 3 minutes and the hardware tightened within 15 minutes. I’m not sure about the working time with RTV sealant, but I would try to follow the same guidelines.


Then bring the valve cover with the new valve cover gasket installed back to the cylinder head. For me, I think the best way is to guide the back of the valve cover in and get the hole (where you’ll install a nut onto later) through the threaded stud, and then placing the rest of the valve cover on. Make sure there the valve cover gasket is seated properly between the valve cover and the cylinder head.

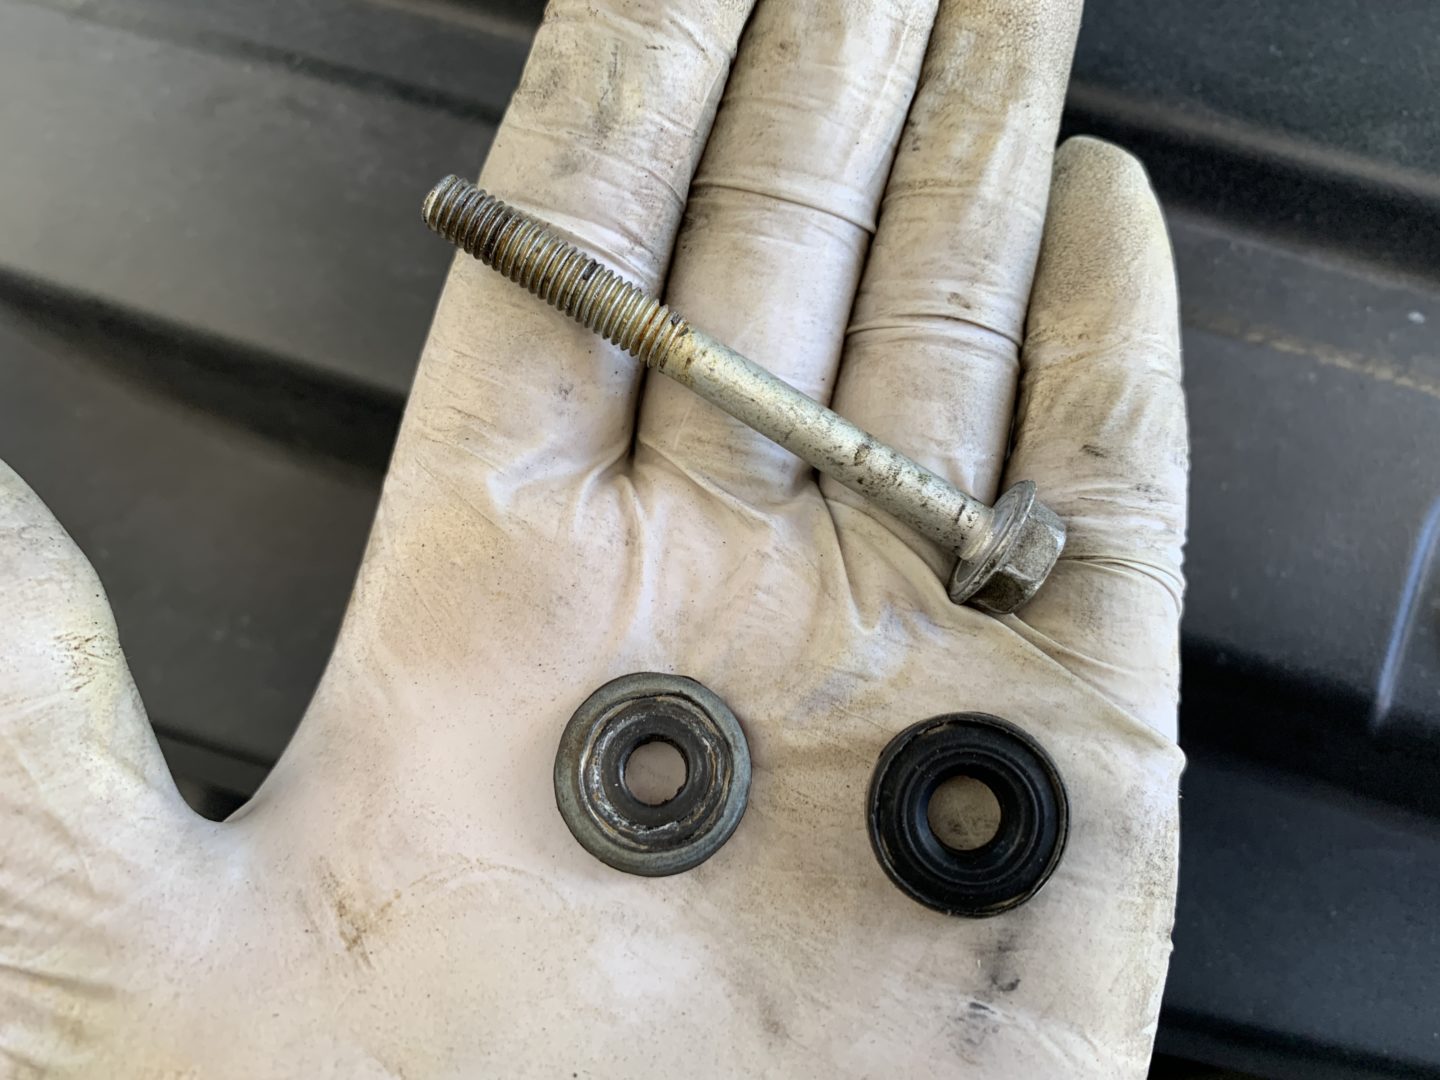
Your valve cover gasket should have come with new rubber washers for the center bolts, so swap out the old ones with the new.

Thread in each of the valve cover bolts and nuts by hand, then go around with a 1/4″-drive torque wrench and torque everything down uniformly to the torque specifications below for the driver side valve cover.

Moving back over to the passenger side, do the same process of applying a dab of sealant to each of the two locations where the cylinder head and timing chain meet. Same note as above: if you’re using Toyota packing seal, you are to install the valve cover within 3 minutes and the hardware tightened within 15 minutes. I used black RTV sealant and followed the same guidelines.
Carefully guide the passenger side valve cover with the installed gasket into place, using the rear threaded stud to guide the valve cover back on. Then set the valve cover in place ensuring the gasket is seated correctly.

Thread in each of the valve cover bolts and nuts by hand, then go around with a 1/4″-drive torque wrench and torque everything down uniformly to the torque specifications below for the passenger side valve cover.


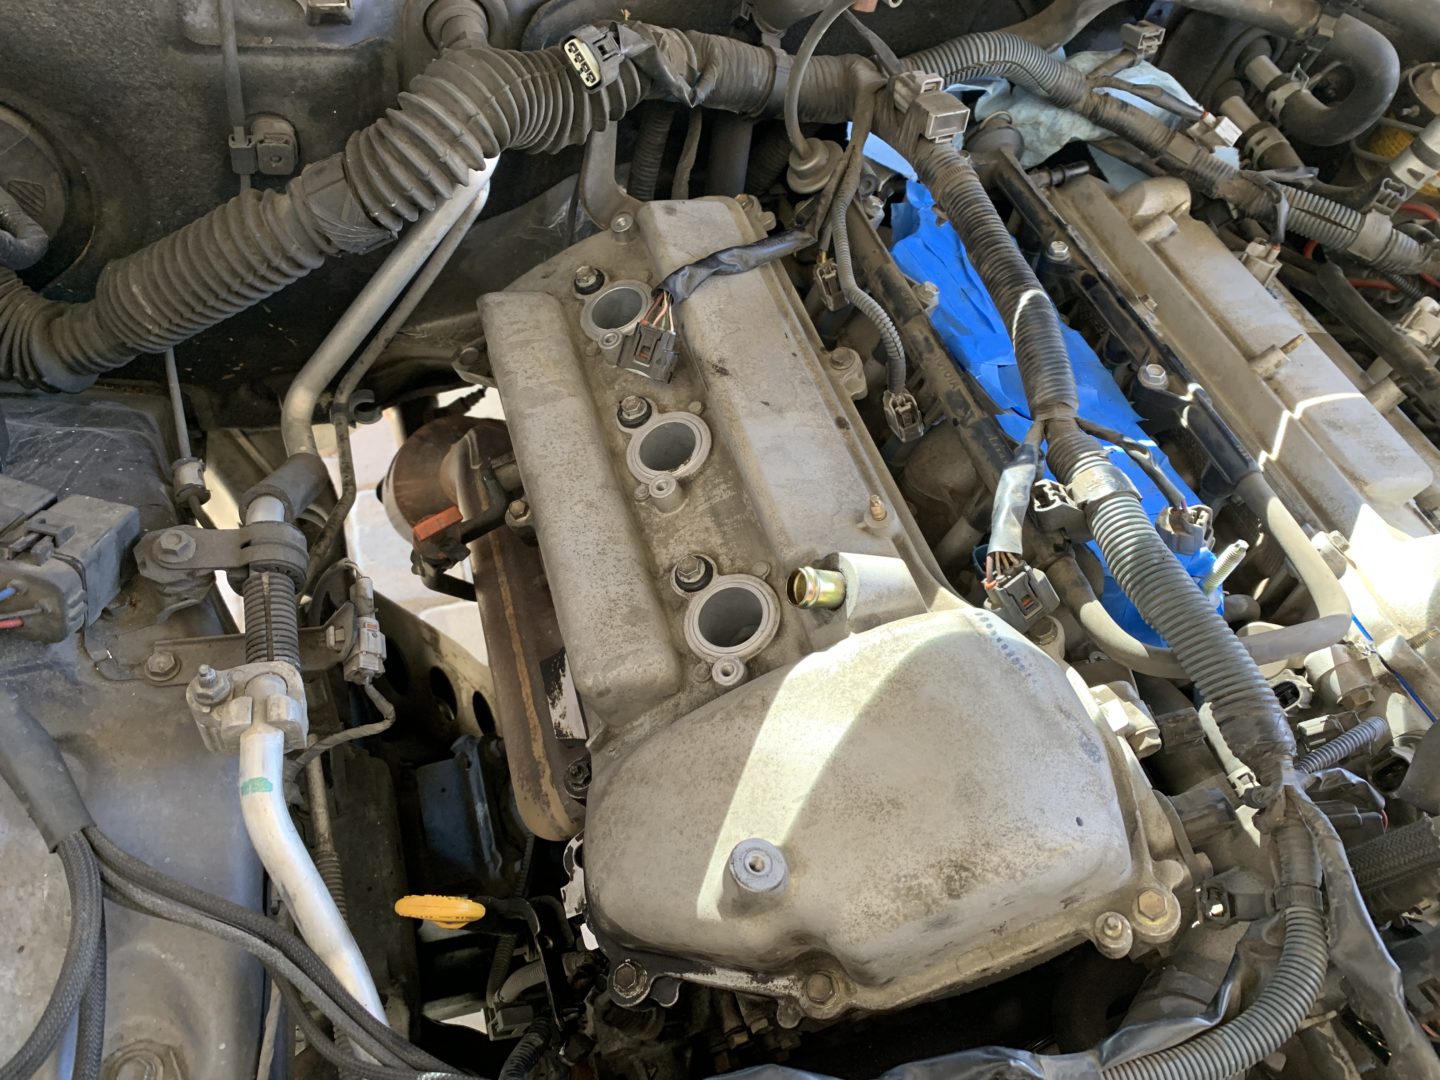
That completes the valve cover gasket replacement! There are a few more components that you may want to consider cleaning while you have access to them all: the PCV valve, throttle body, and MAF sensor. You should also replace the upper intake manifold gasket (if you haven’t already) since it is accessible.
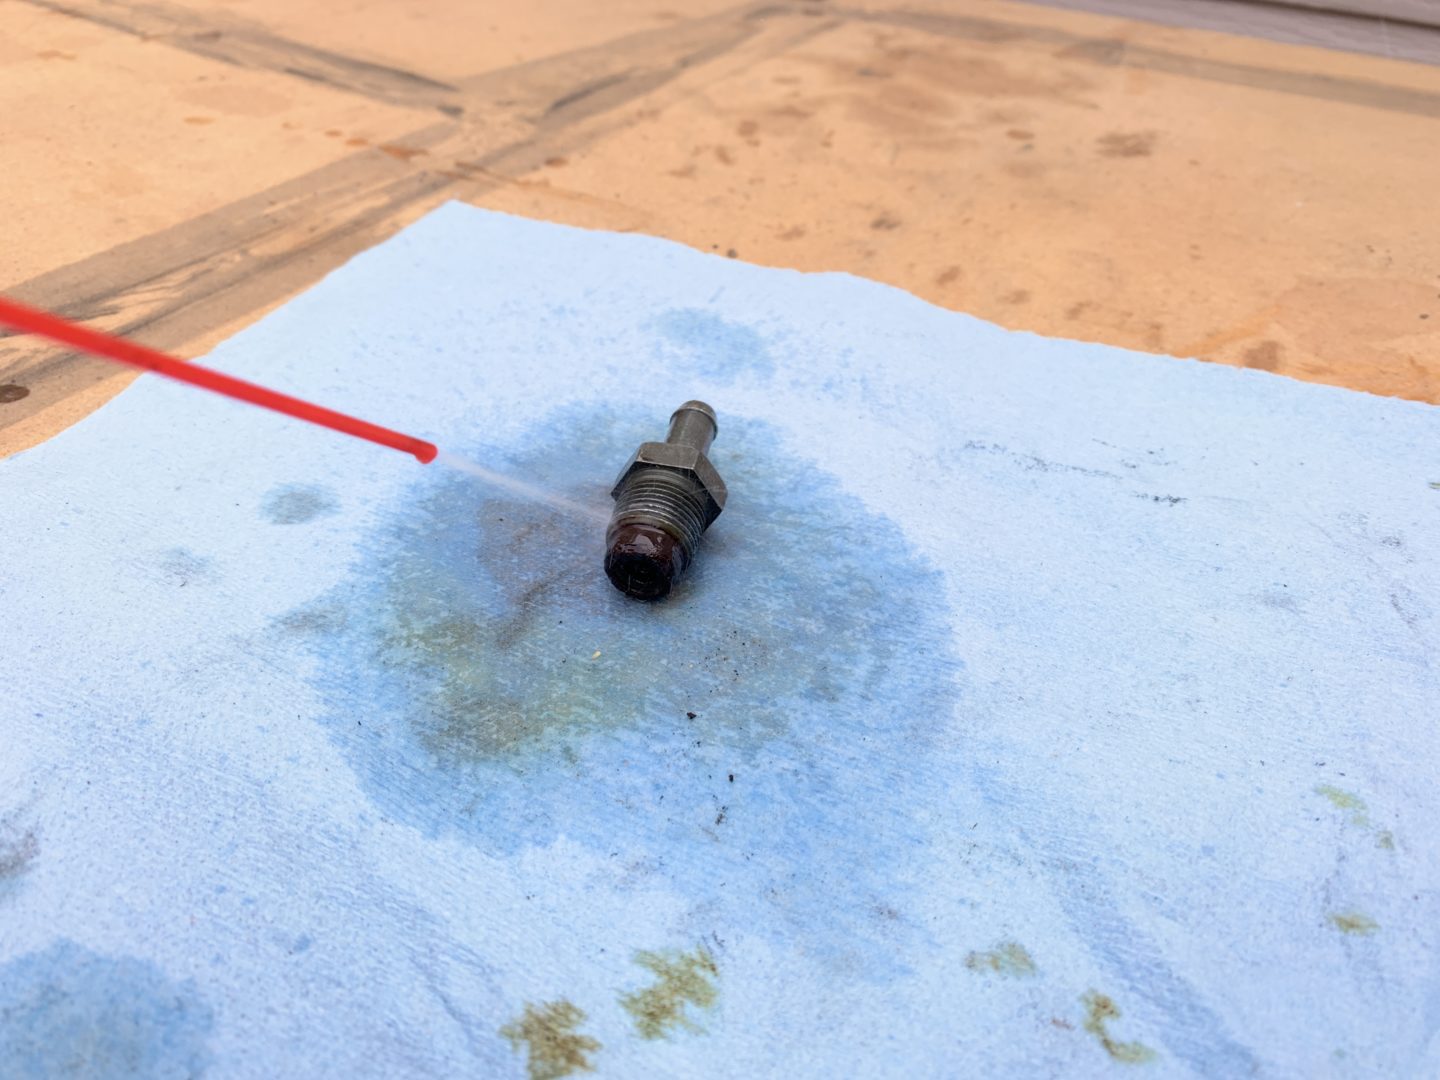
Now would be a good time to either replace or clean the PCV valve before you install it. I did not have any issues with mine and chose to simply clean it with the MAF sensor cleaner I had on-hand. Replacements are inexpensive so you may want to replace it now for peace-of-mind. The OEM part number for the PCV valve is 12204-31030.

Now, reinstall everything in the reverse order of removal. There are a few important things I want to point out:
- When installing the nuts/bolts to the upper intake manifold, torque these down to 21 ft-lbs.
- You should also replace the throttle body gasket; again, it is already accessible and can be easily replaced during reinstallation of the throttle body.
- The throttle body bolts should be torqued down to 108 in-lbs.
- Ensure your fuel lines are reinstalled properly and everything else is installed in reverse order of removal.
- Consider cleaning the throttle body before reinstalling; here is a detailed guide to cleaning the throttle body.
- Another thing to consider cleaning is the MAF sensor; here is another tutorial for cleaning the MAF sensor.
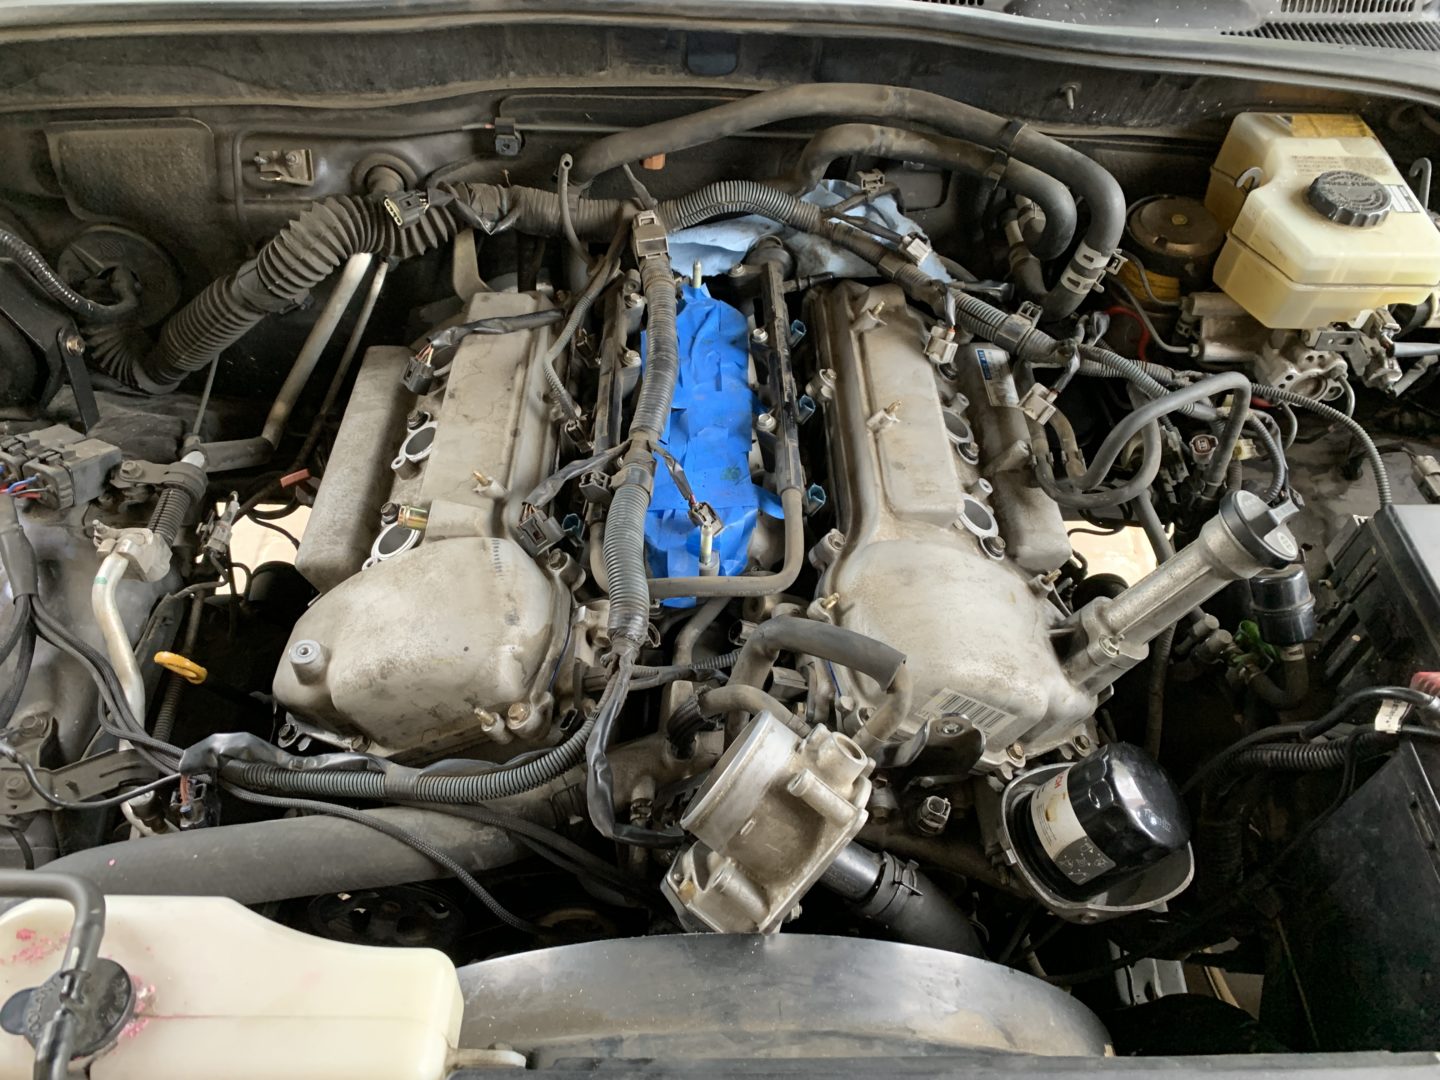
That completes the entire valve cover gasket replacement job (along with other supplemental maintenance too). Start up the vehicle when you’re finished to check for proper operation. You might have a bit of trouble getting the vehicle to start the first time because you had removed your fuel lines. You may need to crank the vehicle a few times before the fuel has time to reach to the engine.

: 4th Gen Toyota 4Runner")
: 4th Gen Toyota 4Runner")

: 4th Gen Toyota 4Runner")
: 4th Gen Toyota 4Runner")


4 Comments
Scott, this is a terrific tutorial, especially with so many helpful photos. Thank you for the effort.
You are very welcome!
Really great write up. Thank you for the detailed layout,, nice work and flow to it. I have been wrenching my whole life basically, but not professionally. This helps with my planned gasket replacement.
Thanks again,
Appreciate the comment, good luck!