When you make purchases through links on this site, The Track Ahead may earn an affiliate commission. Also, these posts are based off my own experiences. I am not responsible for any action you take as a result of reading this. Learn More
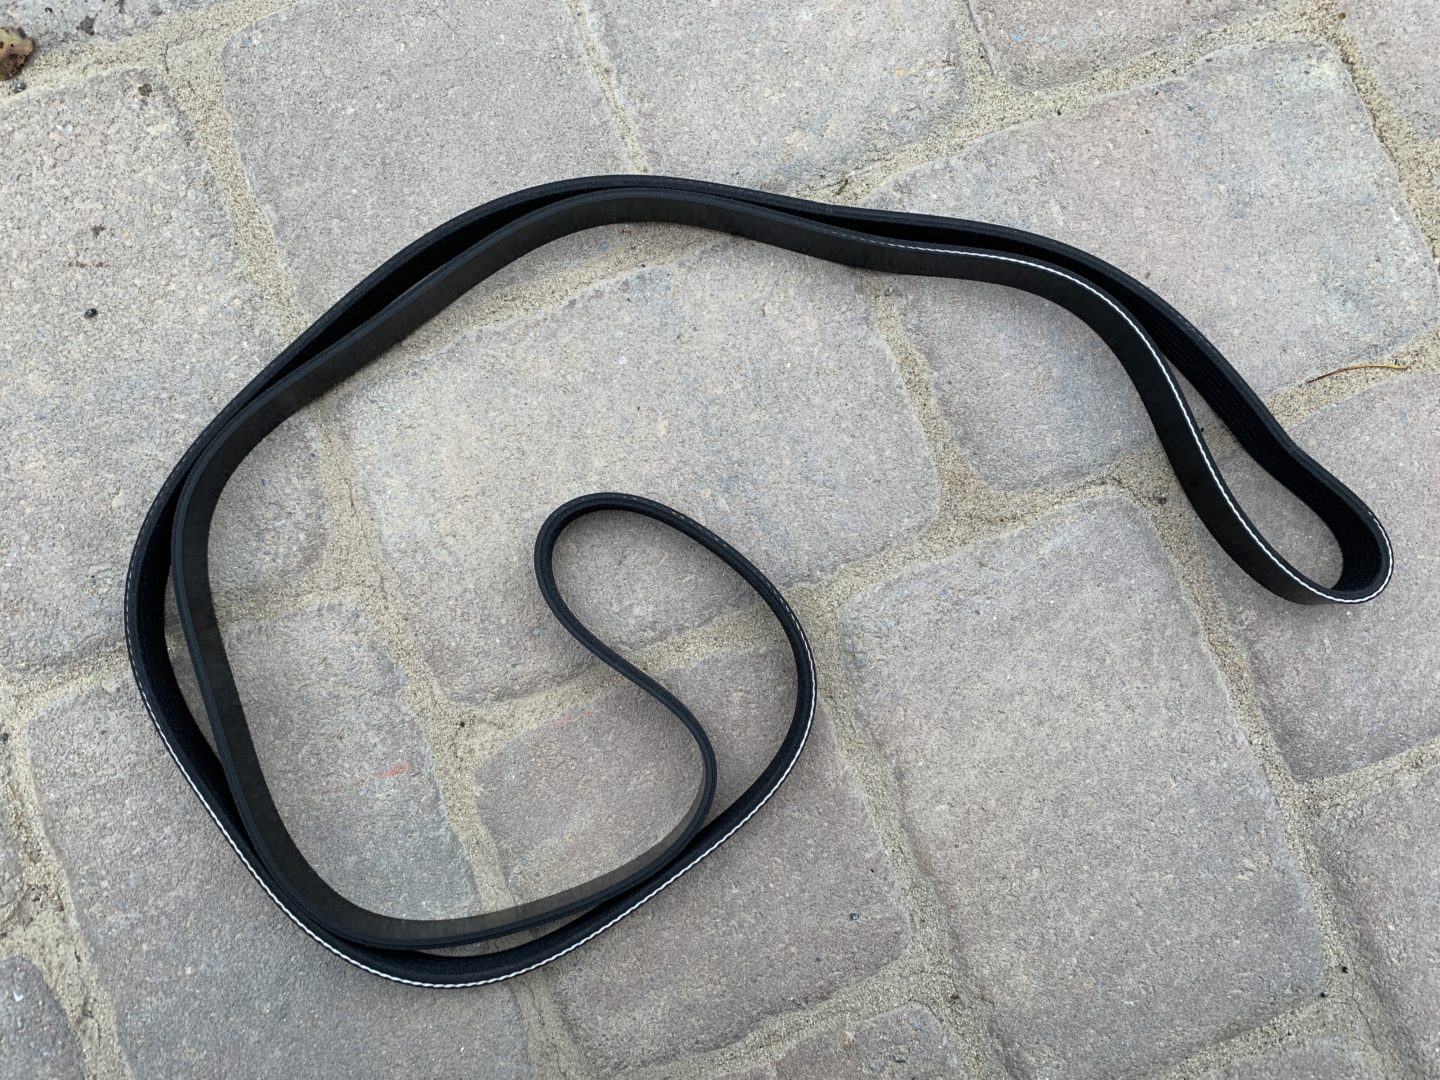
The serpentine belt (also known as the drive belt) is a reinforced rubber belt that delivers power from the crankshaft to multiple accessories of a vehicle such as the air conditioning, alternator, water pump, etc. Since it drives critical components of a vehicle, it is important to perform regular inspections of the serpentine belt and to replace it when it is required to do so.
Toyota recommends inspecting the serpentine belt at 60,000 miles and every 15,000 miles thereafter. Interestingly, there is no replacement interval given for the serpentine belt. Therefore, it is important to inspect for cracks, excessive wear, and oiliness. The belt tension should be checked as well for any excessive play. You may also opt to just replace the serpentine belt every 60,000 miles for peace-of-mind.
The replacement of the serpentine belt can be a quick and easy job if you are aware of a couple things that could possibly throw you off-course. First, the belt can be removed without removing any other components; it may appear that the fan and the water inlet coolant hose may need to be removed, when in fact they do not (more on that in the details of this write-up). And second, once you identify the tensioner and can relieve tension via this tensioner, you can remove and install the serpentine belt with ease. Knowing these things and following the serpentine belt diagram further down on this page, you should be able to easily replace the belt without any issues.
Tools/Materials
Serpentine Belt for the 4.0L V6 (1GRE-FE)
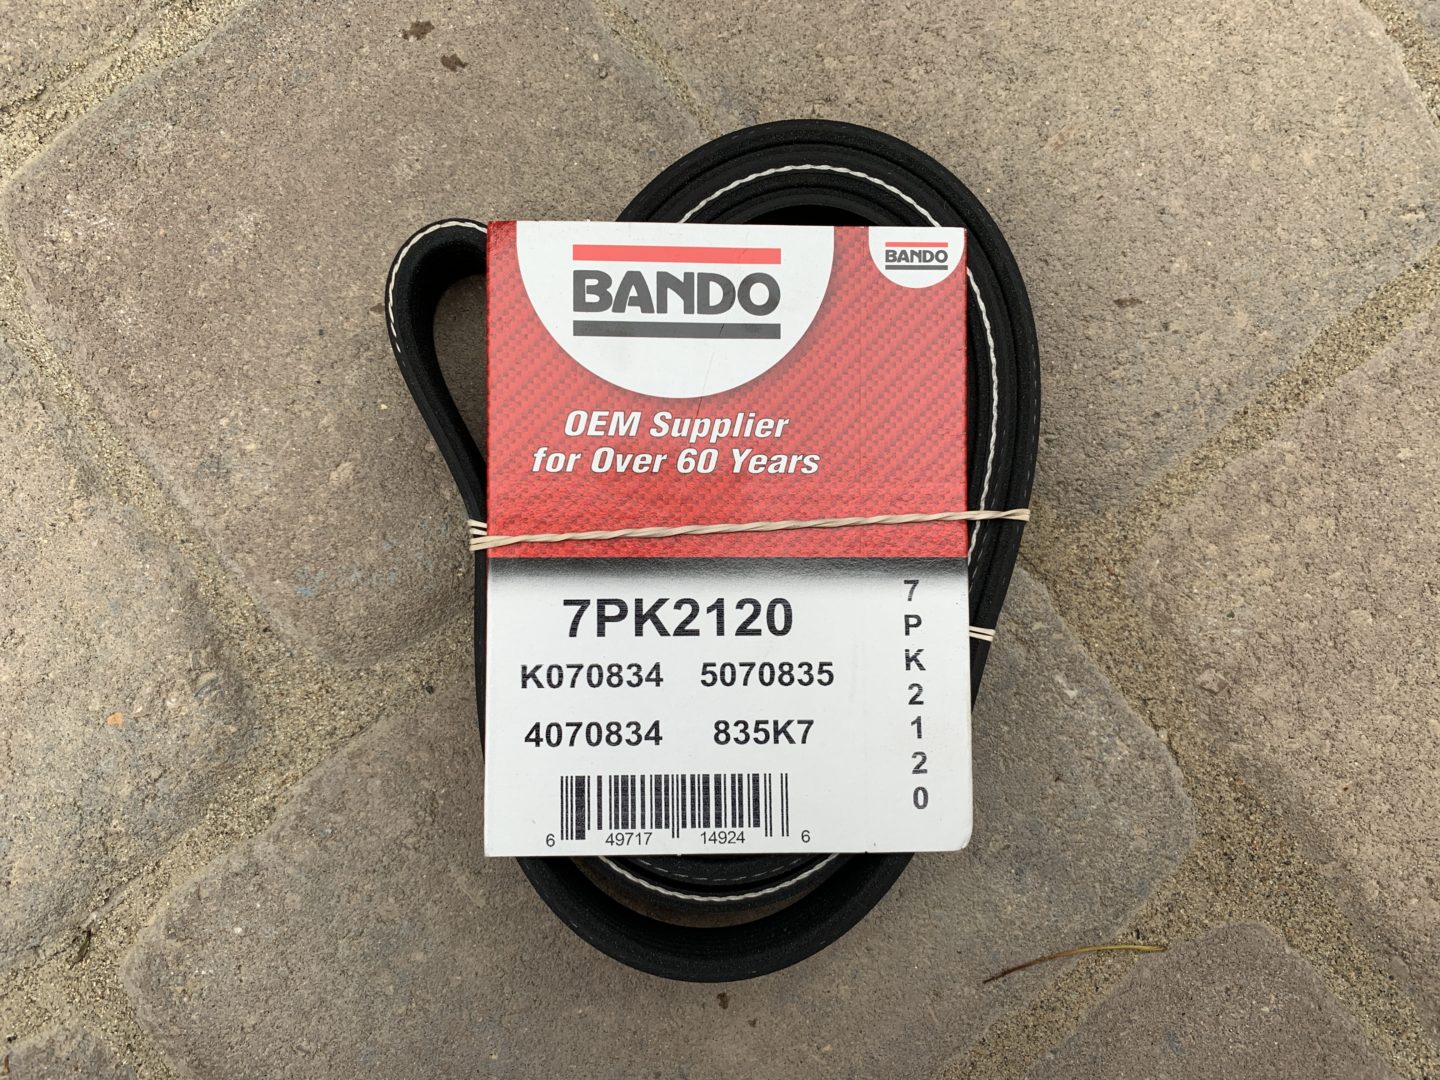
There are quite a few choices when you are looking for a replacement belt for your 4th gen Toyota 4Runner (03-09). However, there are usually a few go-to companies that are well-known for their belts: Dayco, Bando, Continental, and Gates. You can also go OEM, but the price can be almost double the price of a quality aftermarket one. On my 4Runner, I went with a Bando serpentine belt, but I would be perfectly content going with any of the other reputable brands.
Dayco 5070835 Serpentine Belt
Bando 7PK2120 OEM Quality Serpentine Belt
Continental 4070834 7-Rib Multi-V Belt
Gates K070835 Micro-V Serpentine Drive Belt
Socket Set
If you don’t already have a socket set, you should have one available so that you can remove the 10mm nuts for the engine cover and move the tensioner pulley via the 14mm socket. A simple socket set or mechanics tool set should have what you’d need for this job.
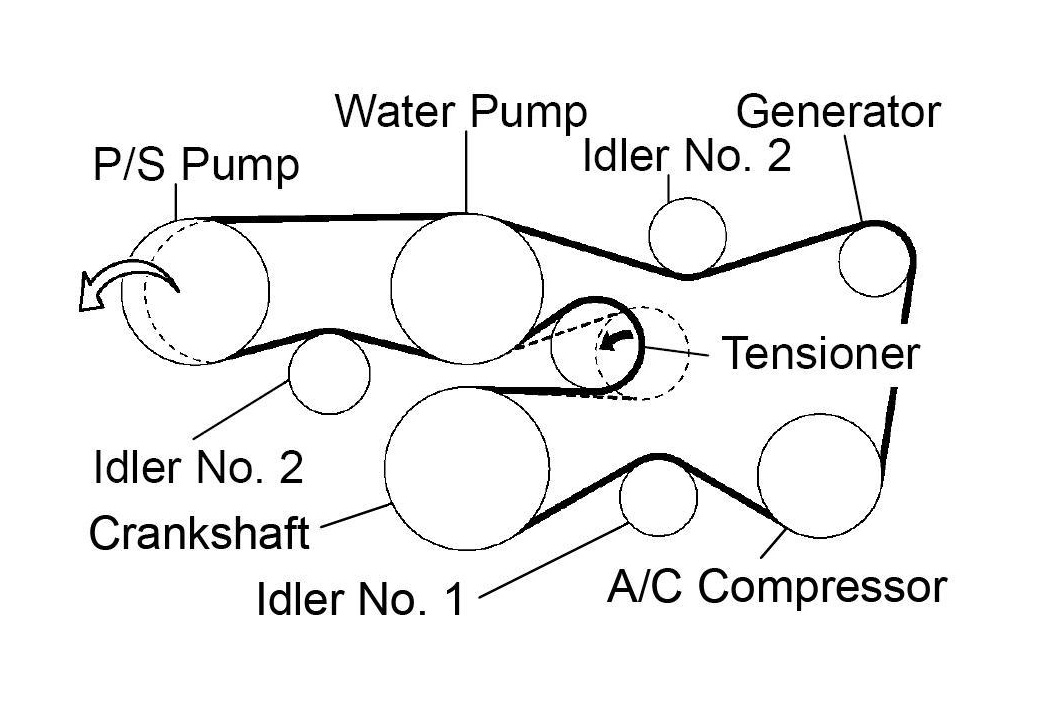
Serpentine Belt Diagram: 4th Gen Toyota 4Runner 4.0L V6 (1GRE-FE)
Below is the serpentine belt diagram for the 4th gen Toyota 4Runner 4.0L V6 1GRE-FE engine (2003-2009). When you loosen tension on the belt by moving the tensioner, you will be able to pull the belt off starting at the P/S Pump. When you are reinstalling the serpentine belt onto all of the pulleys and have moved the tensioner, you should have enough slack to get the belt over the final pulley. If you can’t seem to get enough slack on the belt to get it over the final pulley, you should re-check the belt route and make sure that it matches the diagram below.
Serpentine Belt Replacement (1GRE-FE 4.0L V6): 4th Gen Toyota 4Runner
Remove the engine cover via the (2 qty) 10mm nuts, then remove the cover and set aside.
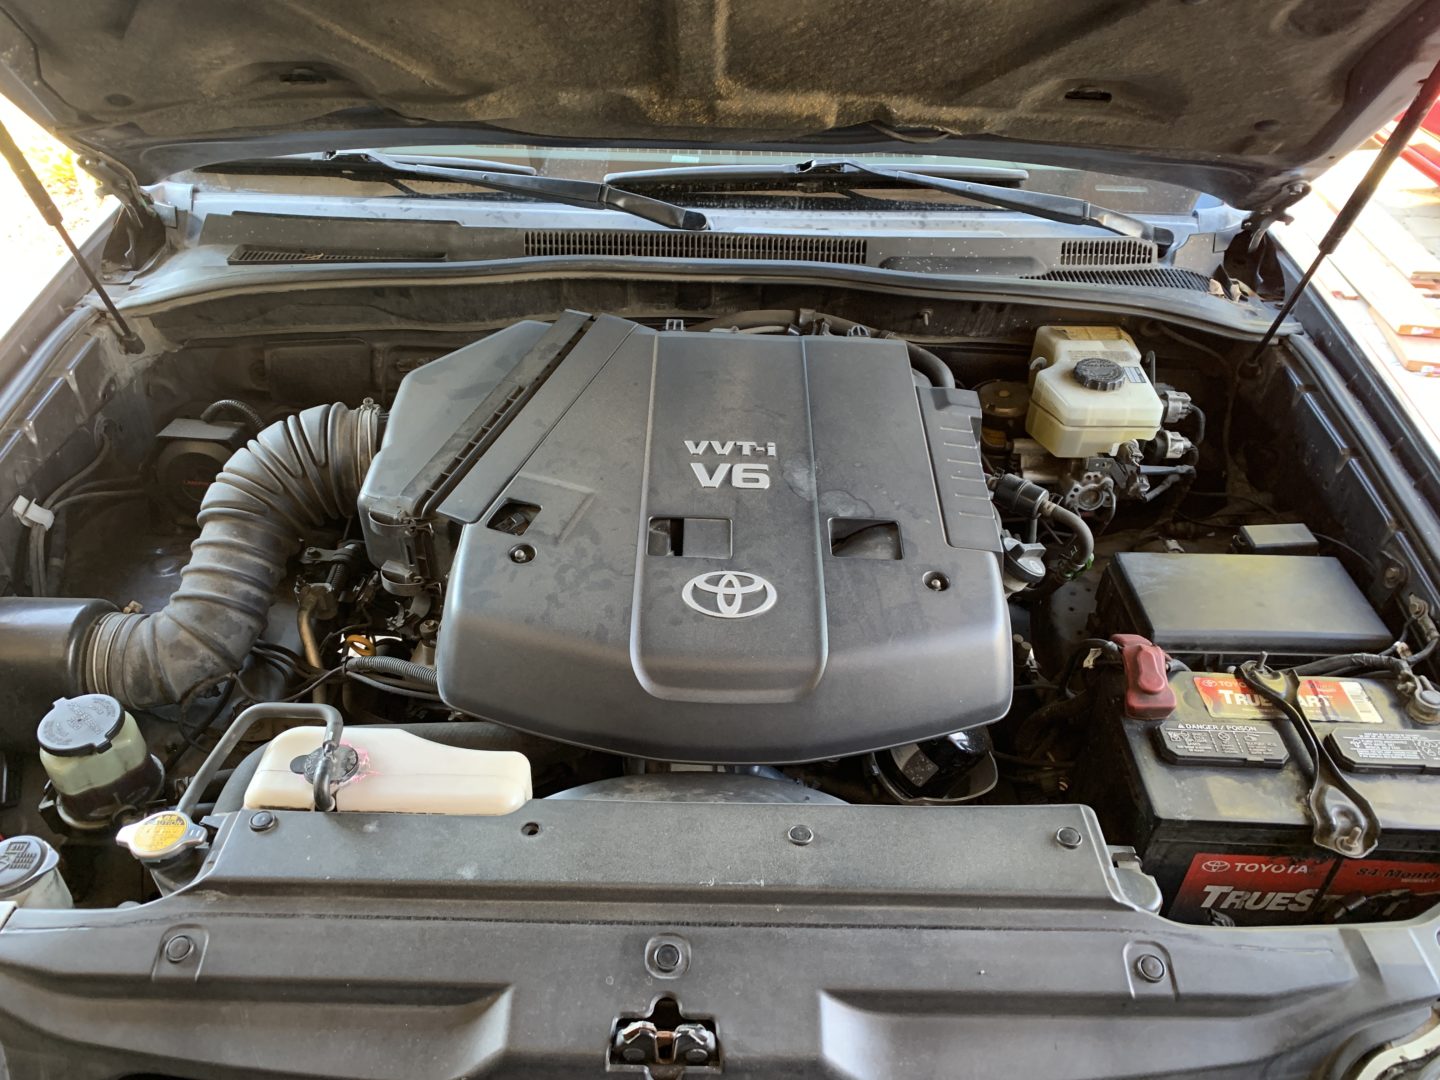

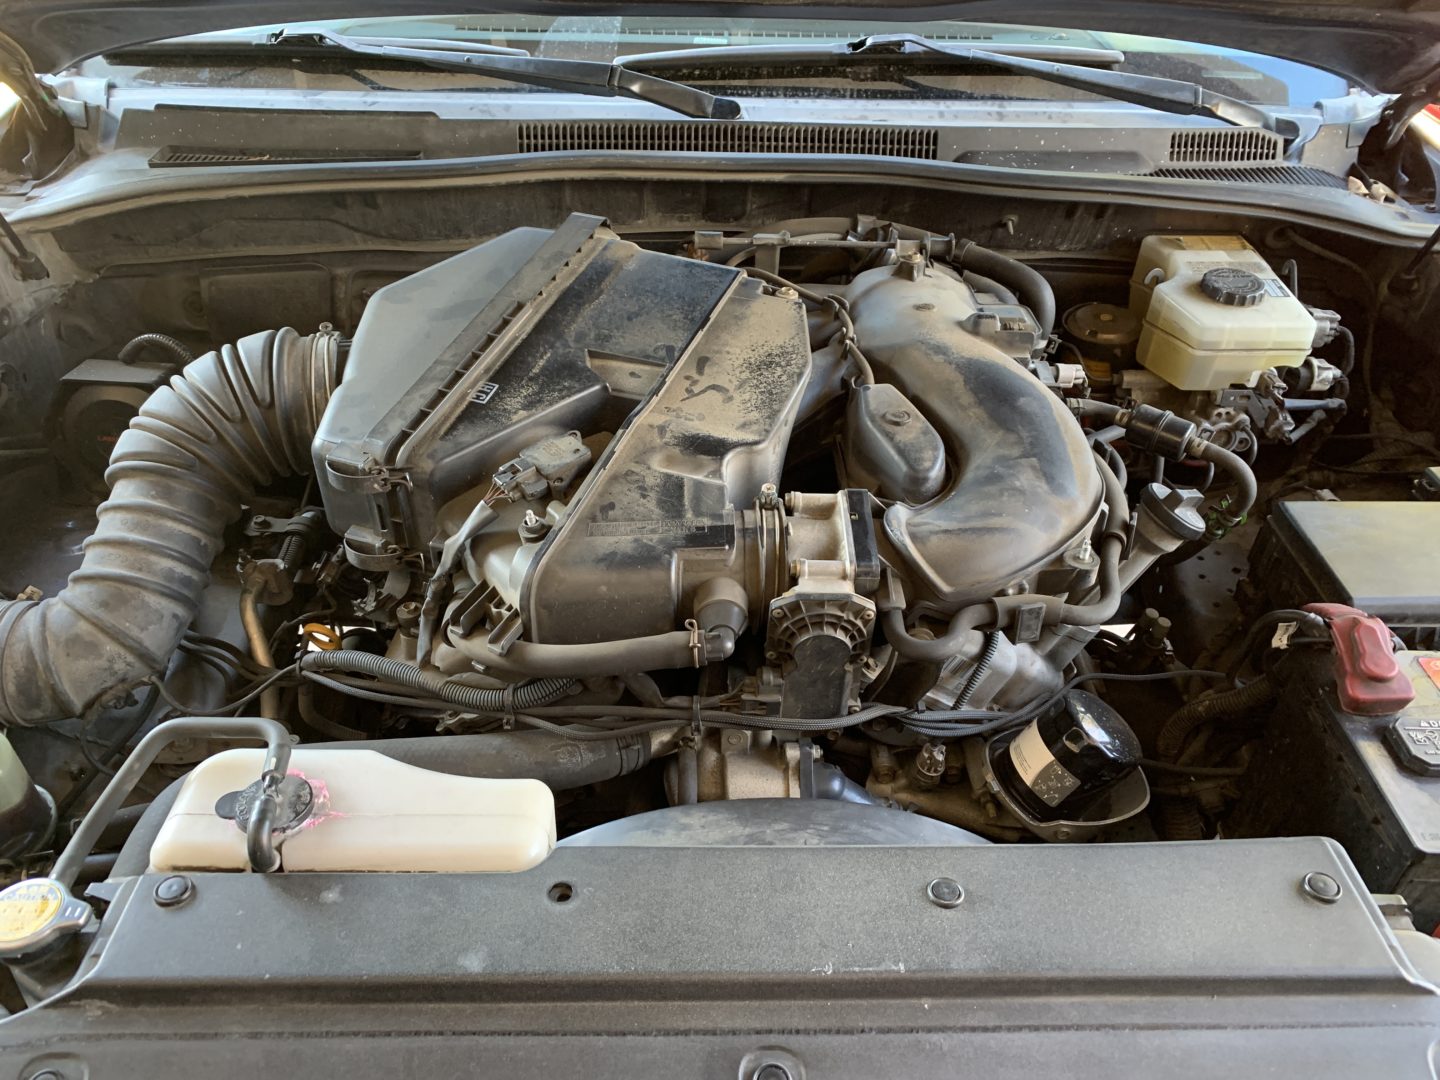
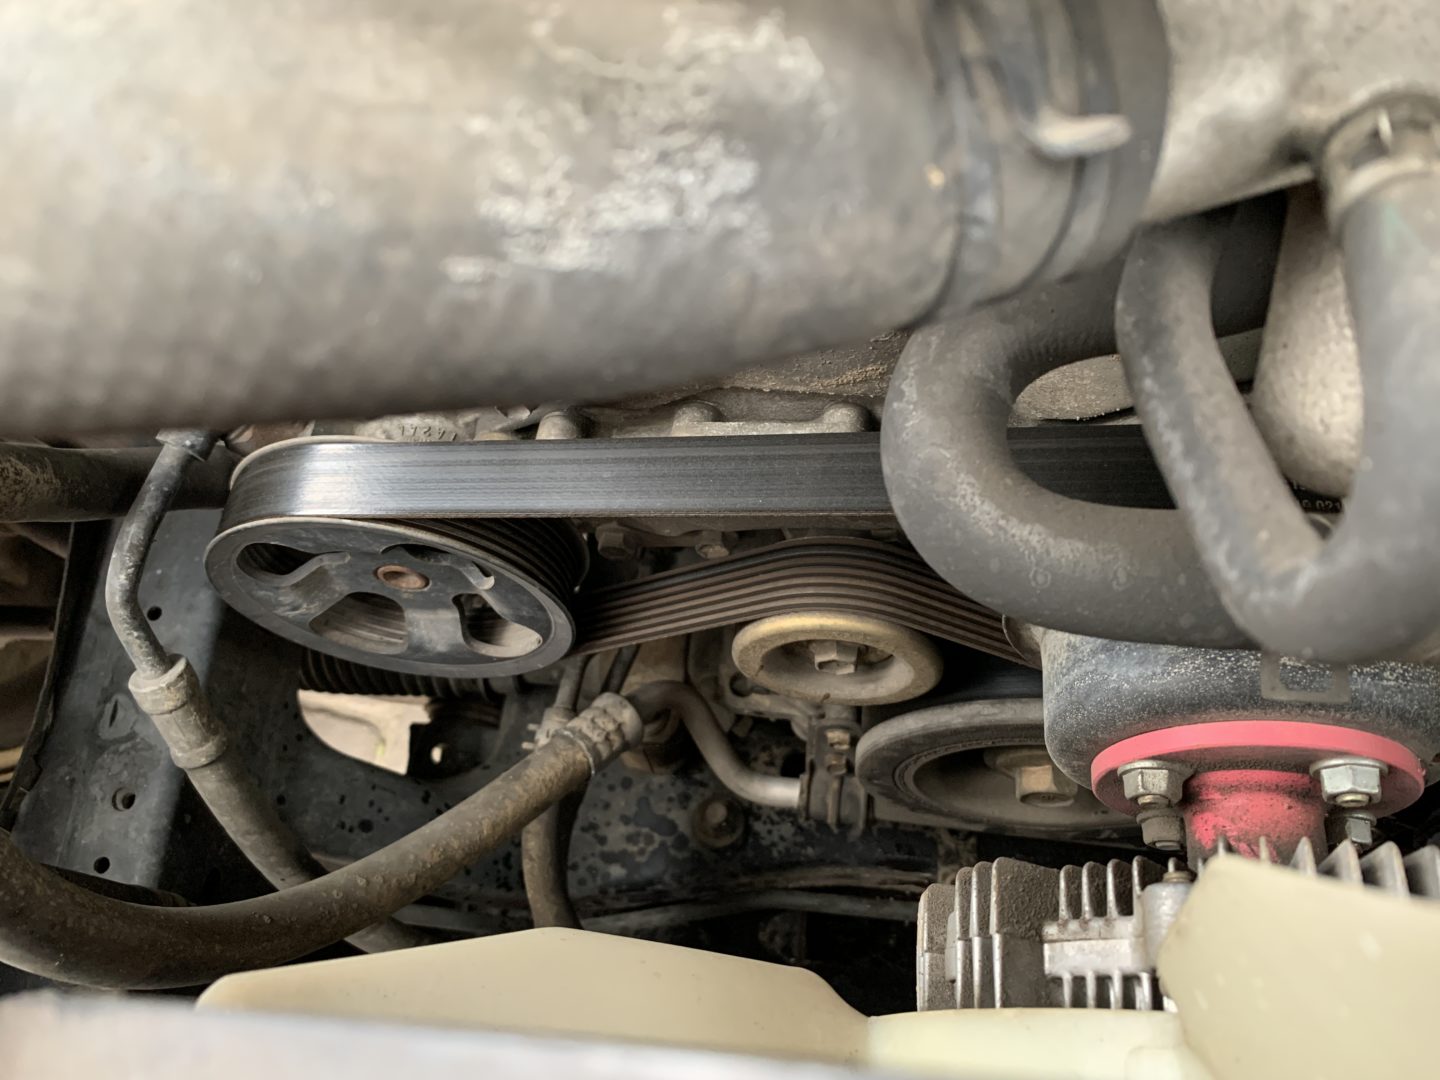
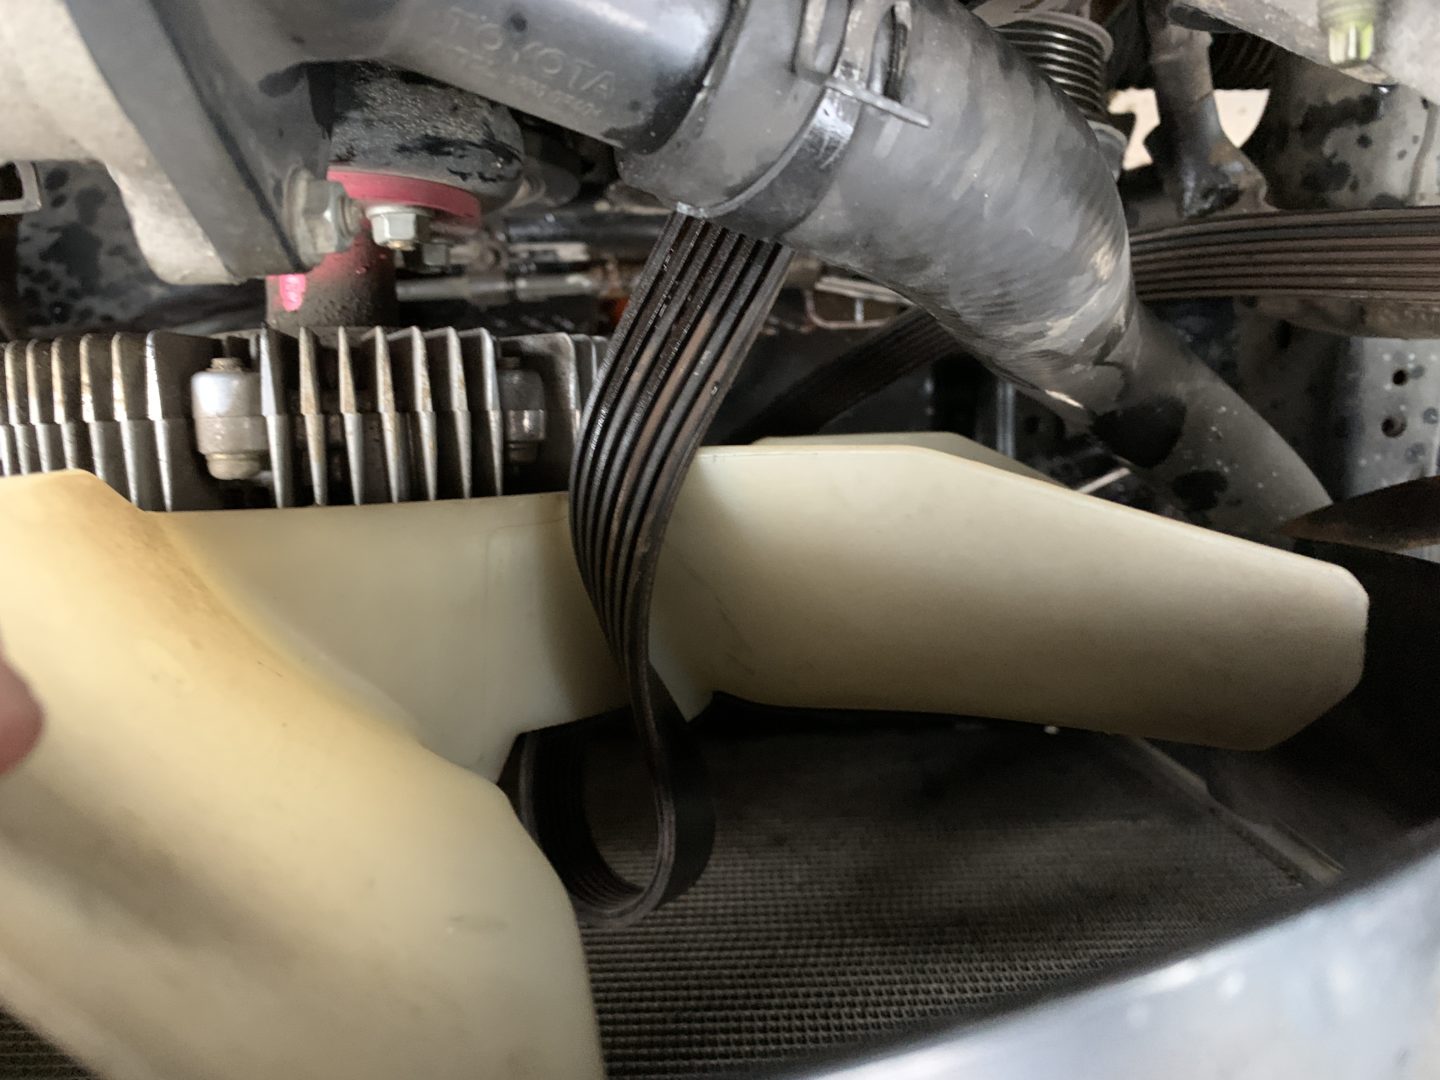
With the engine cover removed, you should now have a bit more room to work with. As I mentioned earlier, you can remove and install the serpentine belt without removing any other components. At first glance however, it may seem the water inlet coolant hose and the fan may be obstacles in preventing the belt from being completely removed, but you can remove the belt without removing those parts.
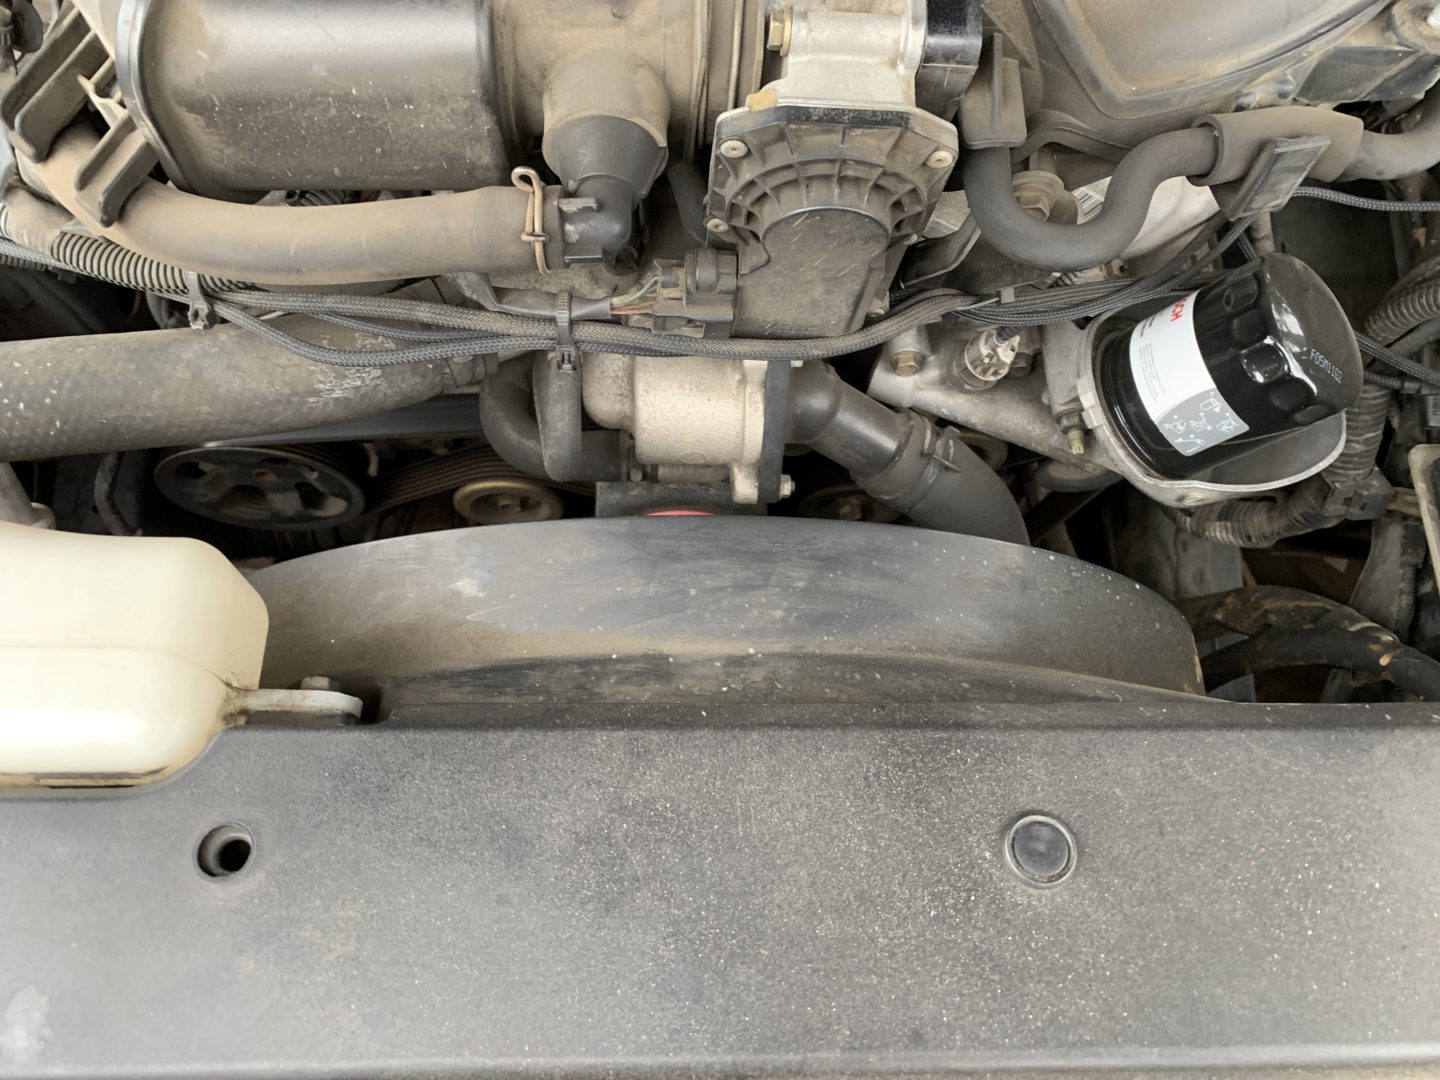
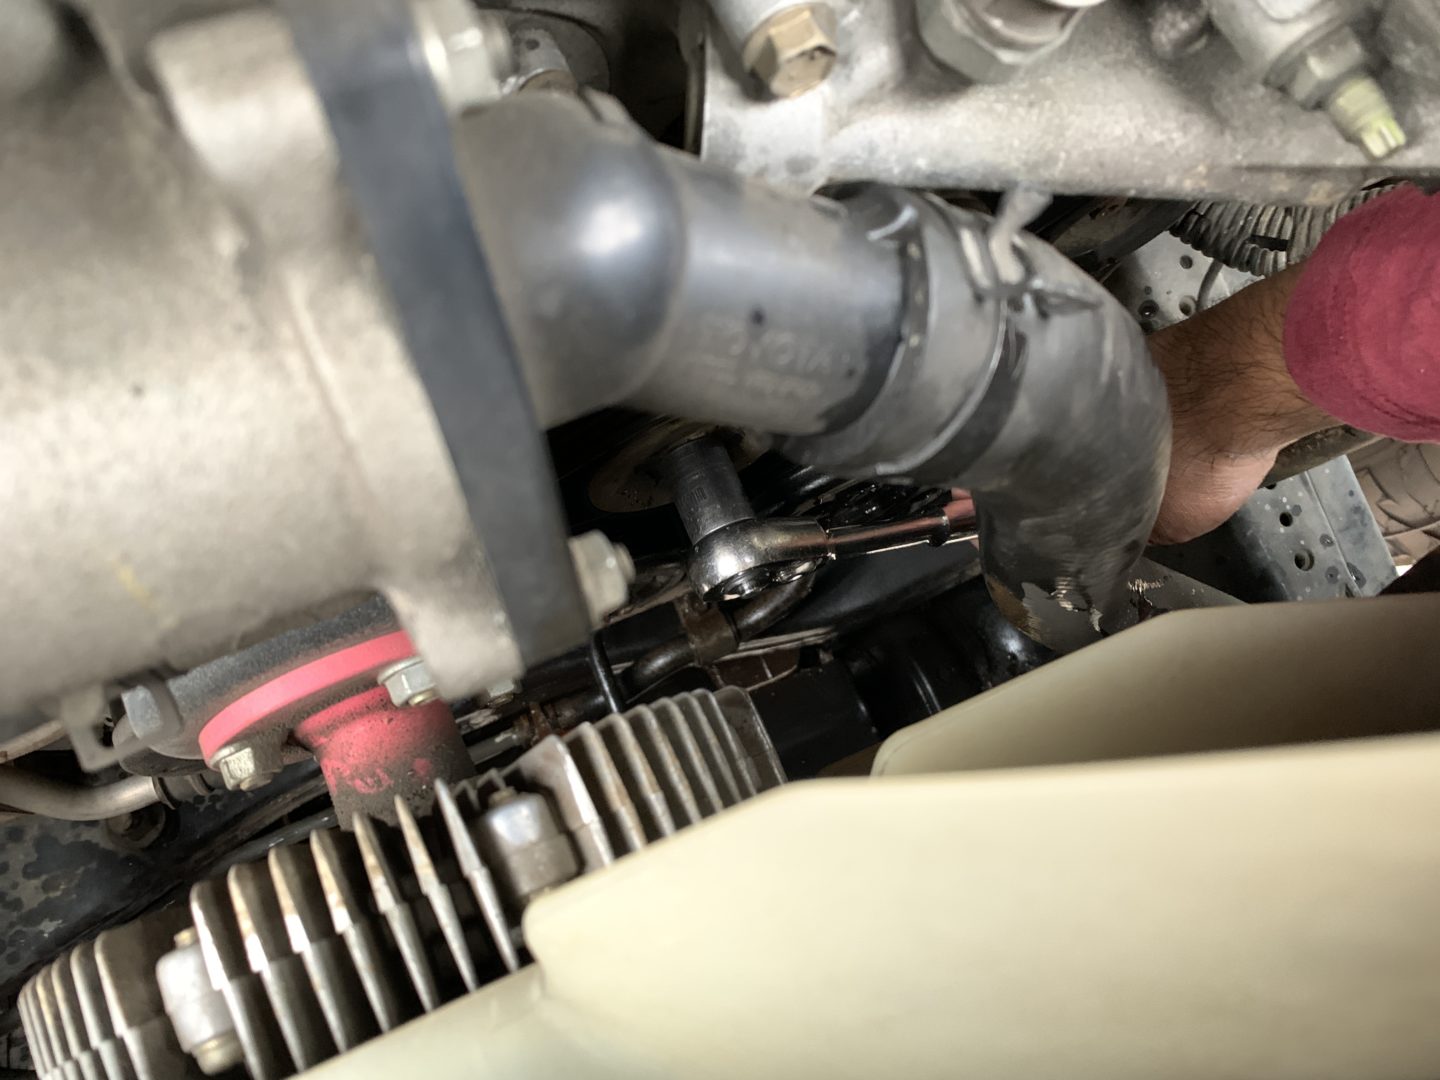
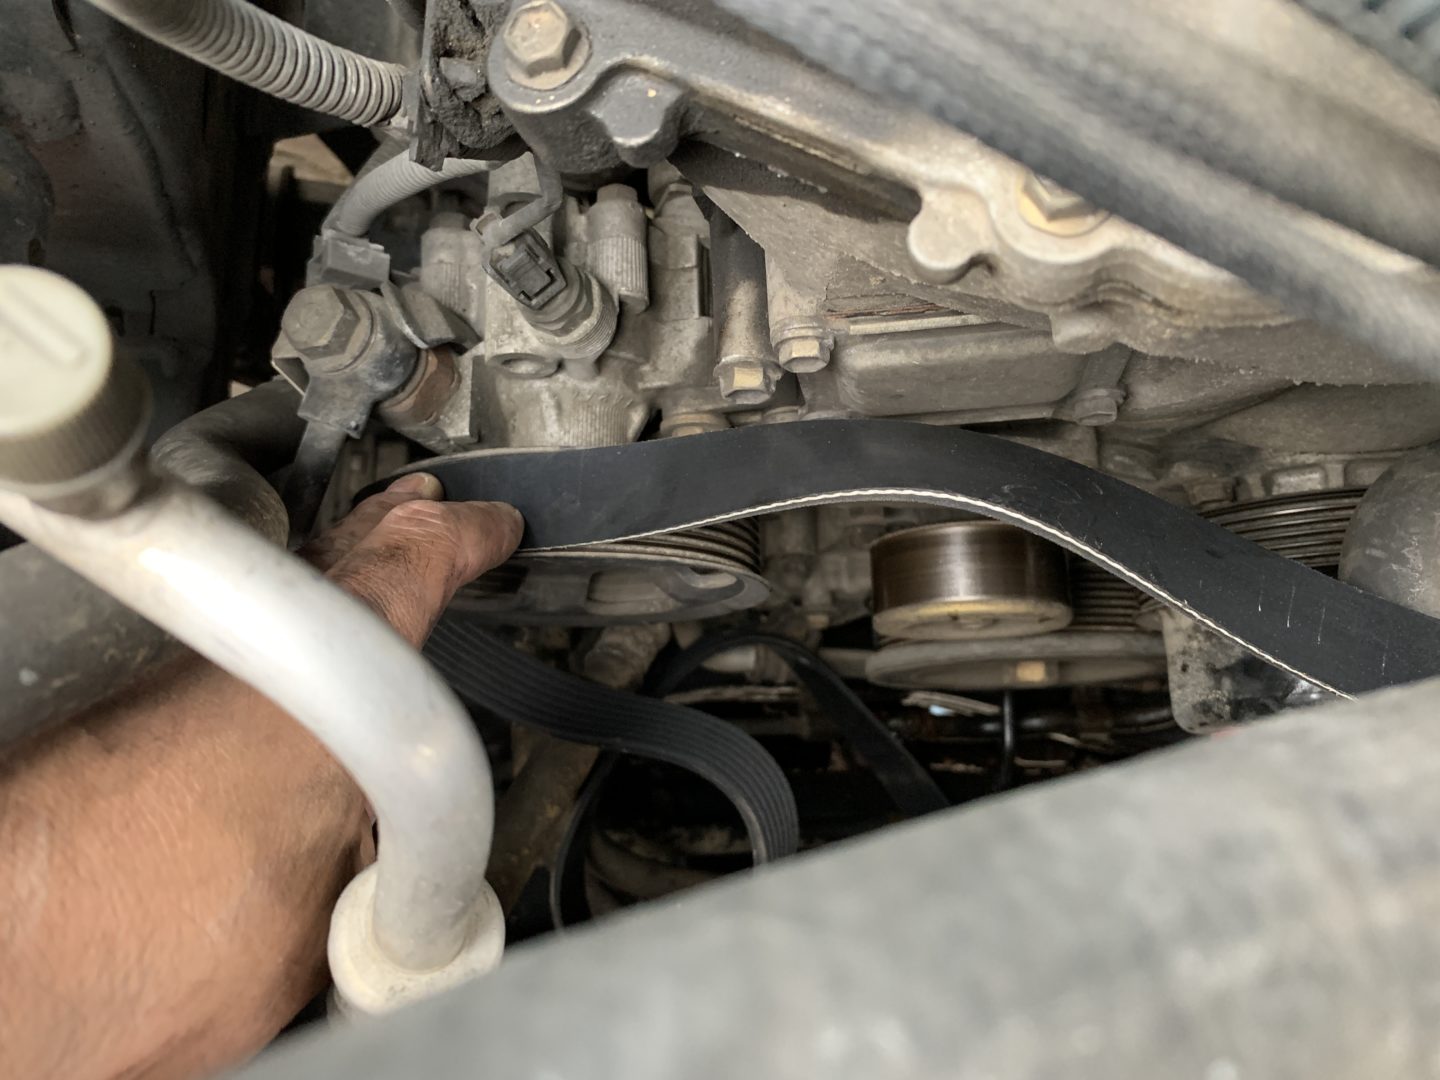
In order to relieve tension on the serpentine belt so that it can be removed, you’ll need to use a 14mm socket with a socket wrench to loosen the tensioner pulley. When you use your socket on the 14mm tensioner pulley, you need to turn it counter-clockwise, which will actually slide the tensioner pulley to the left. This will relieve tension off of the serpentine belt.
You must also have the socket wrench positioned as I have shown below. You can also have it positioned from underneath the vehicle if you have enough room below. Just know that it is difficult to do it from above due to other things getting in the way.
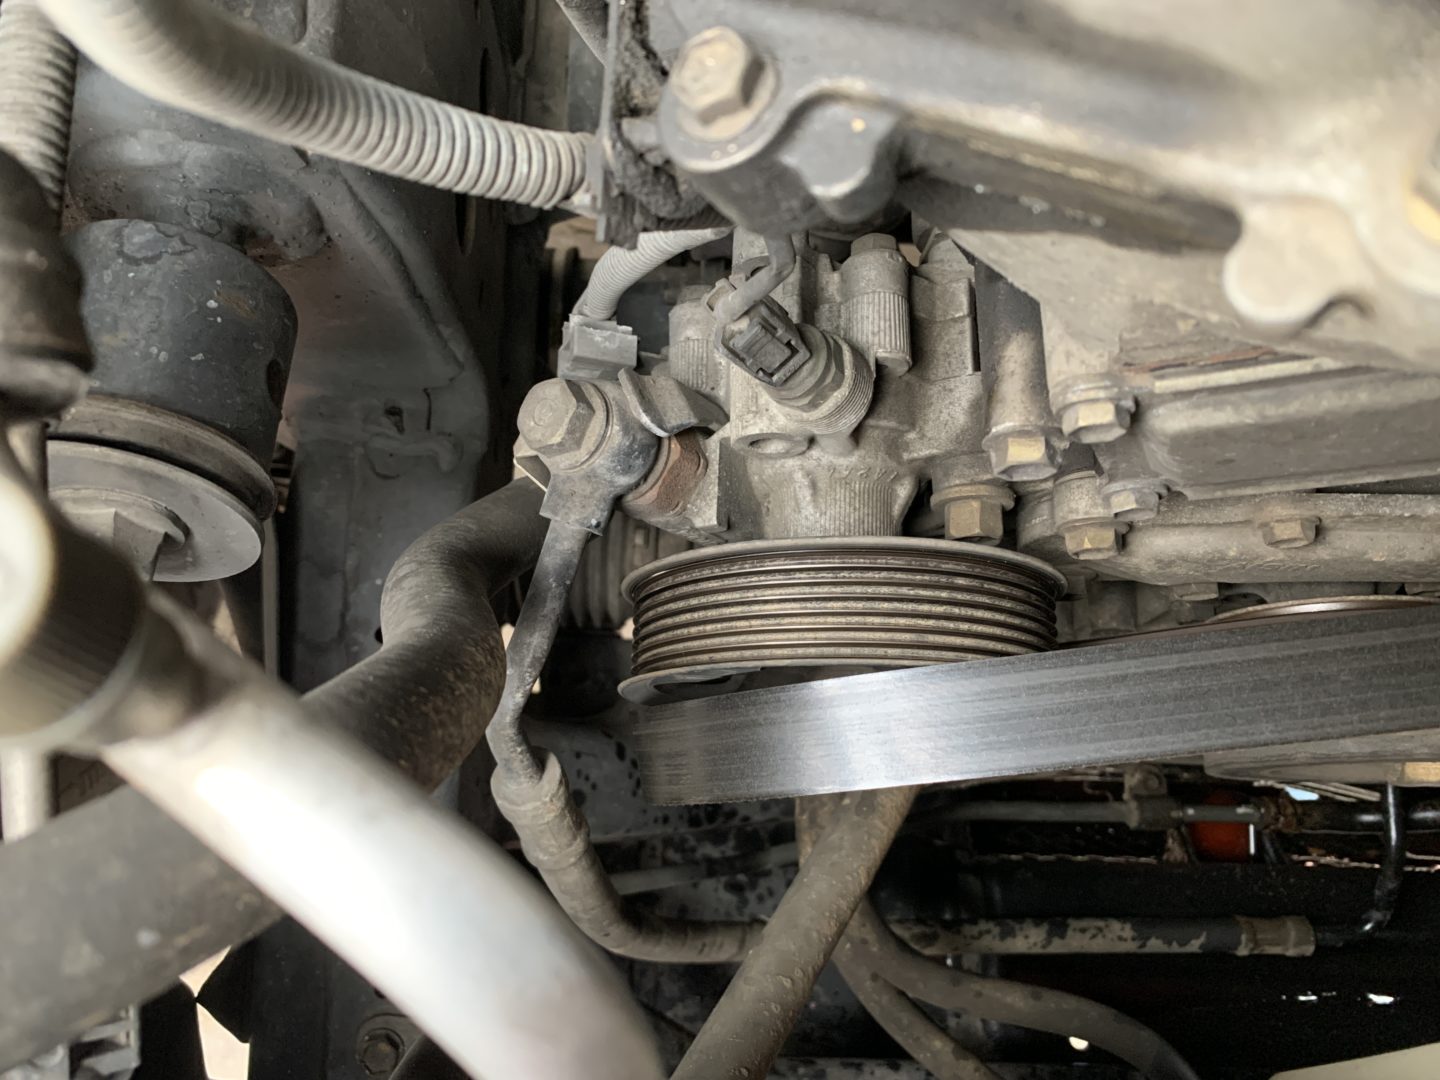
Pull the tensioner pulley over to the side (turning the wrench counter-clockwise) to relieve tension. At the same time, pull the serpentine belt off of the power steering pump.
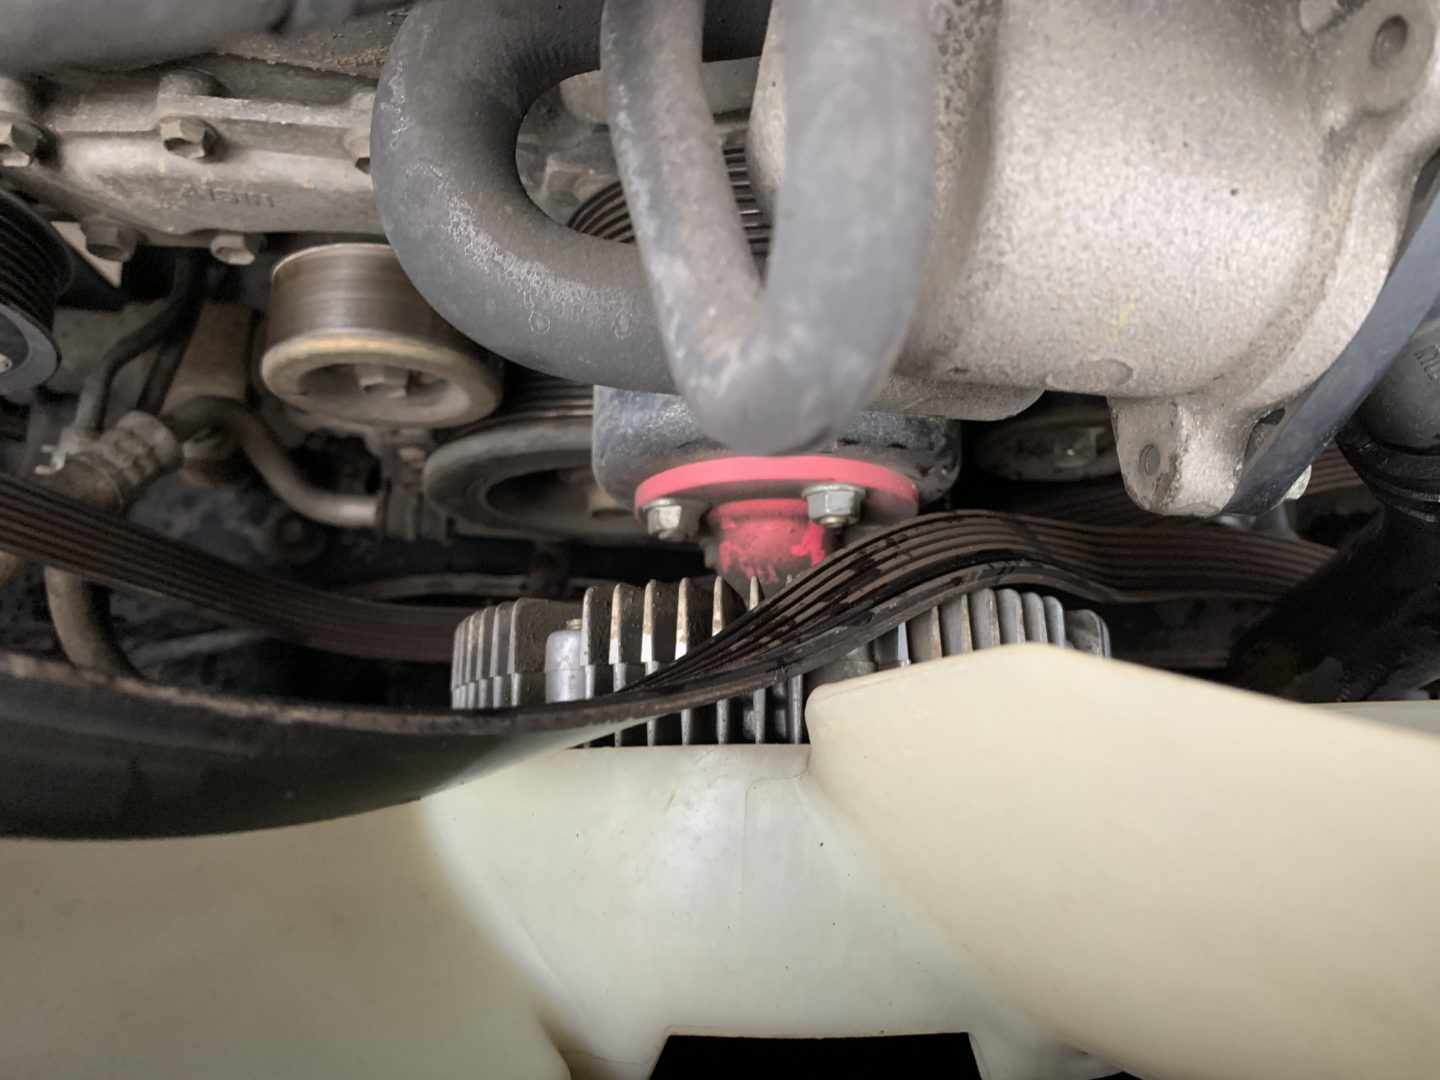
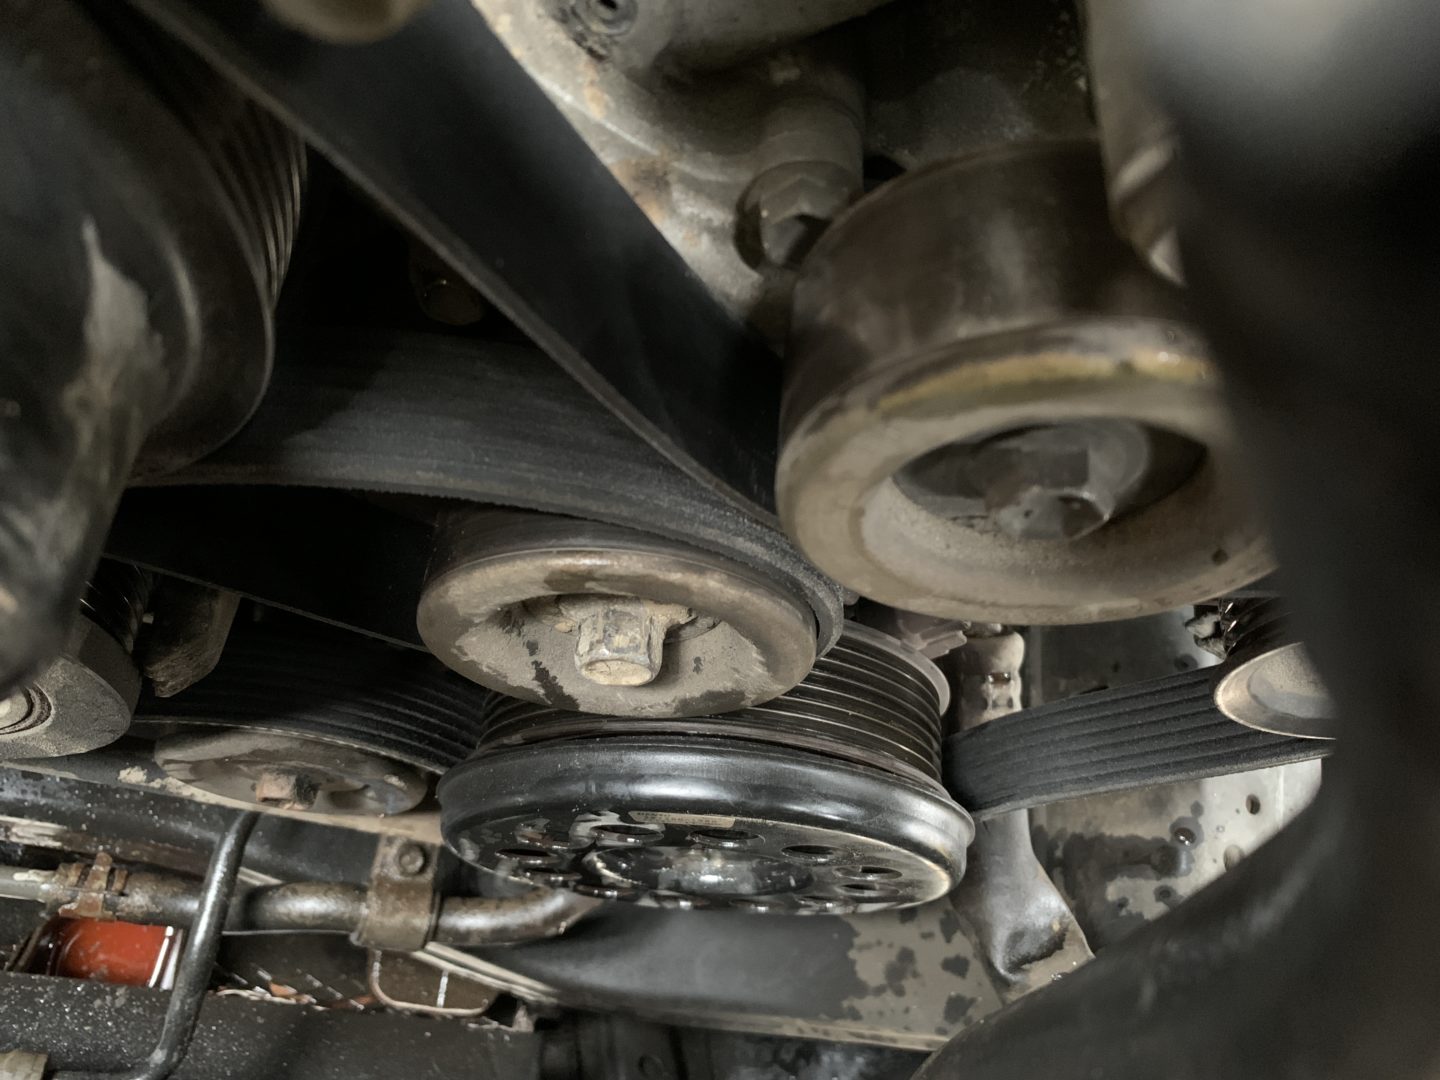
You can then slowly release the tensioner pulley and proceed to route the serpentine belt off of all of the pulleys. You can then weave the belt around the front of the fan and finally remove the belt out from the engine bay without removing any parts.
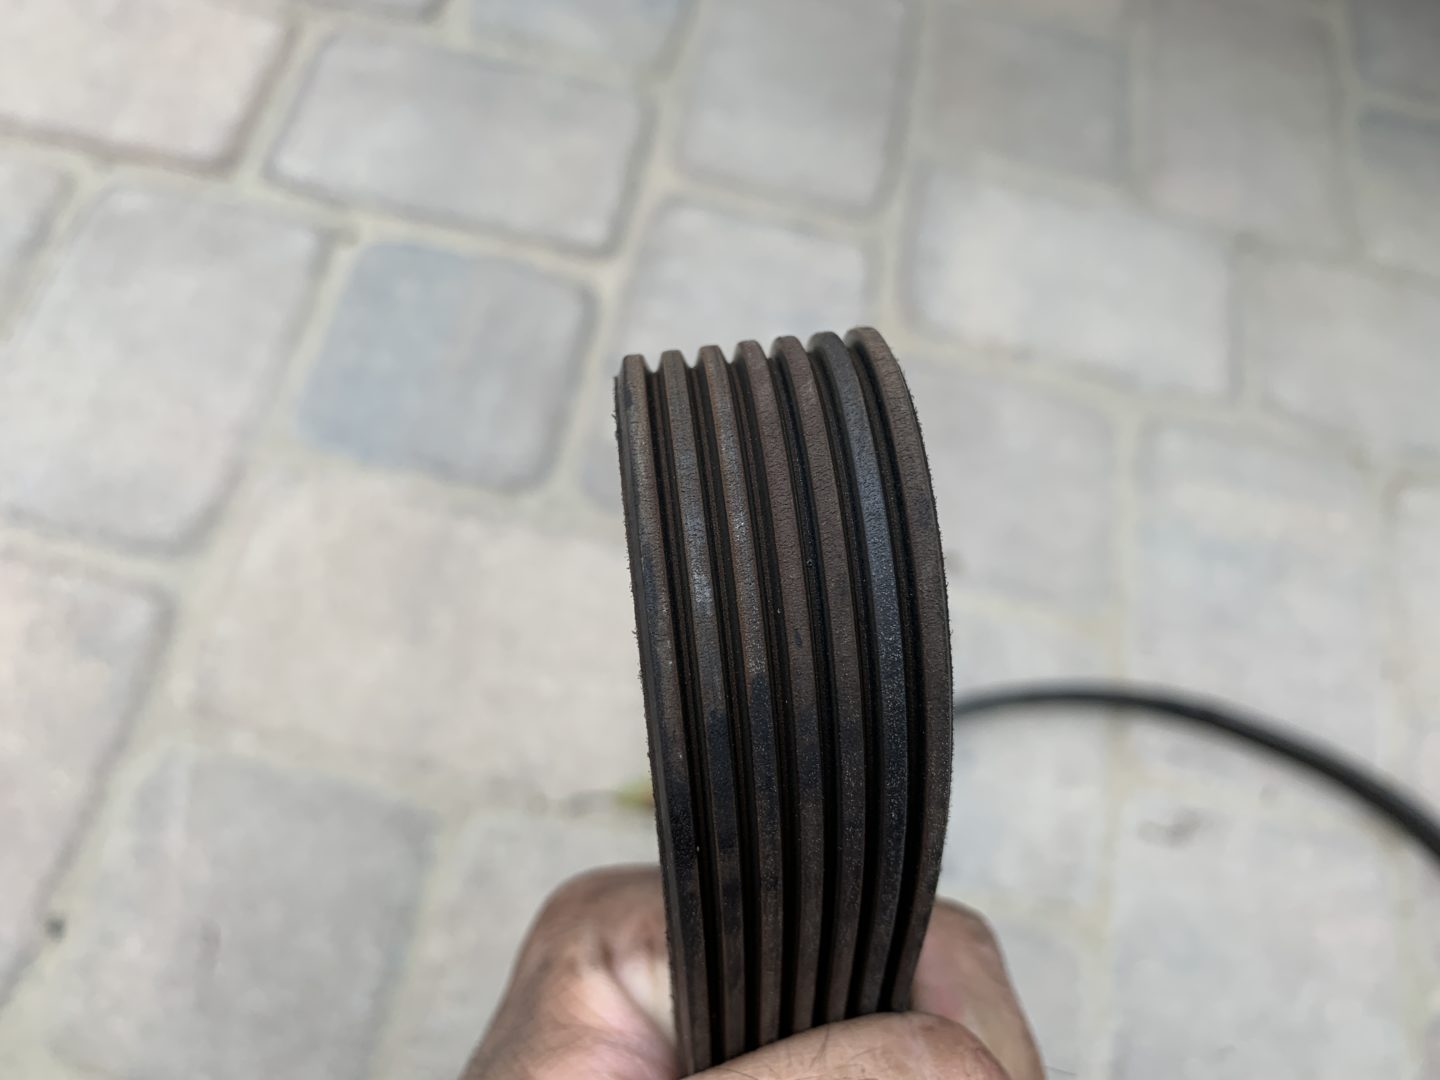
The existing serpentine belt was still in pretty decent shape, but it’s relatively economical and easy to change out the belt every 60,000 miles with a new one. I like the peace-of-mind doing it this way rather than trying to remove for inspection.
Just like the way you removed the belt, weave the new belt back through between the fan and the fan shroud, route the belt through all of the pulleys (according to the diagram), and get the belt onto all of the pulleys. Ensure that the belt route matches the diagram and that all of the grooves of belt are seated properly on all of the teeth of the different pulleys.
The last pulley that you should be the serpentine belt onto is the power steering pulley. You will then need to pull the tensioner pulley over counter-clockwise again with the 14mm socket and wrench with one hand, then slip the serpentine belt over the power steering pump with the other hand. Ensure the teeth of the pulley matches up exactly with the grooves of the belt, and then carefully release the tensioner pulley.
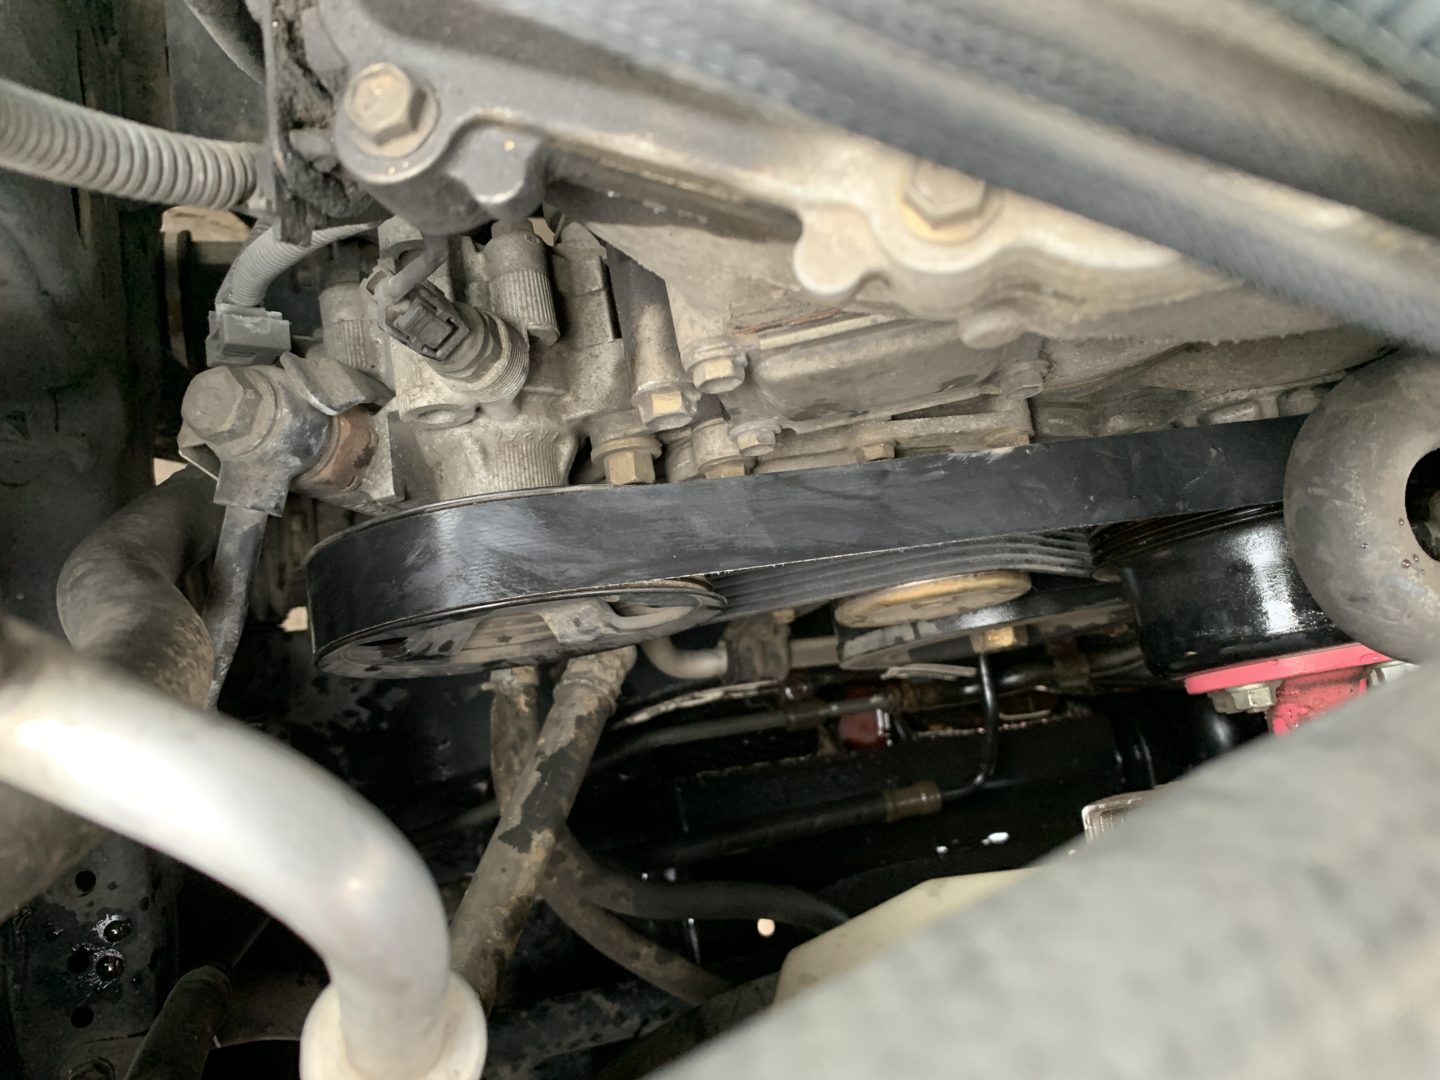
That will complete the serpentine belt replacement on the 4th generation Toyota 4Runner (03-09) with the 4.0L V6 1GRE-FE engine. You may then start the vehicle and ensure the belt is running properly. Once you confirm all is well, replace the engine cover via the 10mm nuts.
: 4th Gen Toyota 4Runner")

: 4th Gen Toyota 4Runner")
: 4th Gen Toyota 4Runner")

: 4th Gen Toyota 4Runner")


