When you make purchases through links on this site, The Track Ahead may earn an affiliate commission. Also, these posts are based off my own experiences. I am not responsible for any action you take as a result of reading this. Learn More
The throttle body is a valve located between the intake hose and manifold that opens and closes to adjust the amount air coming into the engine. In an electronic fuel injected vehicle, the throttle body works in conjunction with the mass air flow (MAF) sensor and the throttle position sensor (TPS) to adjust fuel in order to effectively provide the proper air-to-fuel ratio to the engine.
With time, there can be a buildup of carbon deposits on the butterfly valve at the throttle body, which can affect the amount of air flow going through the valve. Unburned fuel and gasses can rise up to the throttle body, which can cause this buildup when it gets heated up from the engine. Symptoms of a dirty throttle body are fluctuating idle, stalling, sluggish acceleration, and poor fuel economy.
Cleaning the throttle body on a 4th generation Toyota 4Runner (1GRE-FE 4.0L V6 engine) is not a difficult job. It requires removal of the air intake and air filter housing to gain access to the throttle body. You should also consider replacing the throttle body gasket since you will already have access to it.
Tools & Materials Required
Throttle Body Cleaner
Throttle body cleaner is used to clean the throttle body, but if you have MAF sensor cleaner, you can use that as well. Just remember that you cannot use throttle body cleaner on the MAF sensor. If you are planning to clean both the MAF sensor and the throttle body, you can save money by buying MAF sensor cleaner to clean both.
CRC Throttle Body and Air-Intake Cleaner (12 oz.)
Mechanic’s Tool Set or Socket Set
An assortment of sockets and a socket wrench is needed for removal of various nuts/bolts. A typical mechanics tool set will have what you need. If you are looking for a mechanic’s tool set, here’s a nice set that will have what you’ll need. I also have a guide to choosing the right mechanic’s tool set if you’re shopping for one.
DEWALT Mechanics Tool Set, 84-Piece (DWMT81531)
Torque Wrench
The throttle body is held in place with 4 long bolts that need to be torqued down to 15 ft–lbs of torque. Since the torque level is quite low, you may want to use a 1/4″ drive torque wrench to torque down these bolts. A slightly larger 3/8″ drive torque wrench may not be accurate at this low of a torque level.
EPAuto 1/4-Inch Drive Click Torque Wrench
Throttle Body Gasket
You can always go with an OEM throttle body gasket, but I feel the aftermarket ones work adequately and are much easier to obtain. Some of the most common ones for the 1GRE-FE 4.0L V6 engine are the Beck Arnley and Fel-Pro throttle body gaskets. In this write-up, I used a Fel-Pro gasket.
Beck Arnley 0395082 Throttle Body Gasket
Fel-Pro 61392 Throttle Body Mounting Gasket
Shop Towels
Optional, but I always have these around anyway. They can be used to catch all the runoff when you’re spraying down the throttle body; they can also be used to clean the throttle body valve and inlet.
Scott Shop Towels Original, Blue, 12 Rolls/Case, 660 Towels/Case
Nitrile Gloves
MedPride Nitrile Exam Gloves, Powder-Free Box/100 – Small | Medium | Large
How to Clean the Throttle Body on a 4.0L V6 (1GRE-FE) 4th Gen Toyota 4Runner
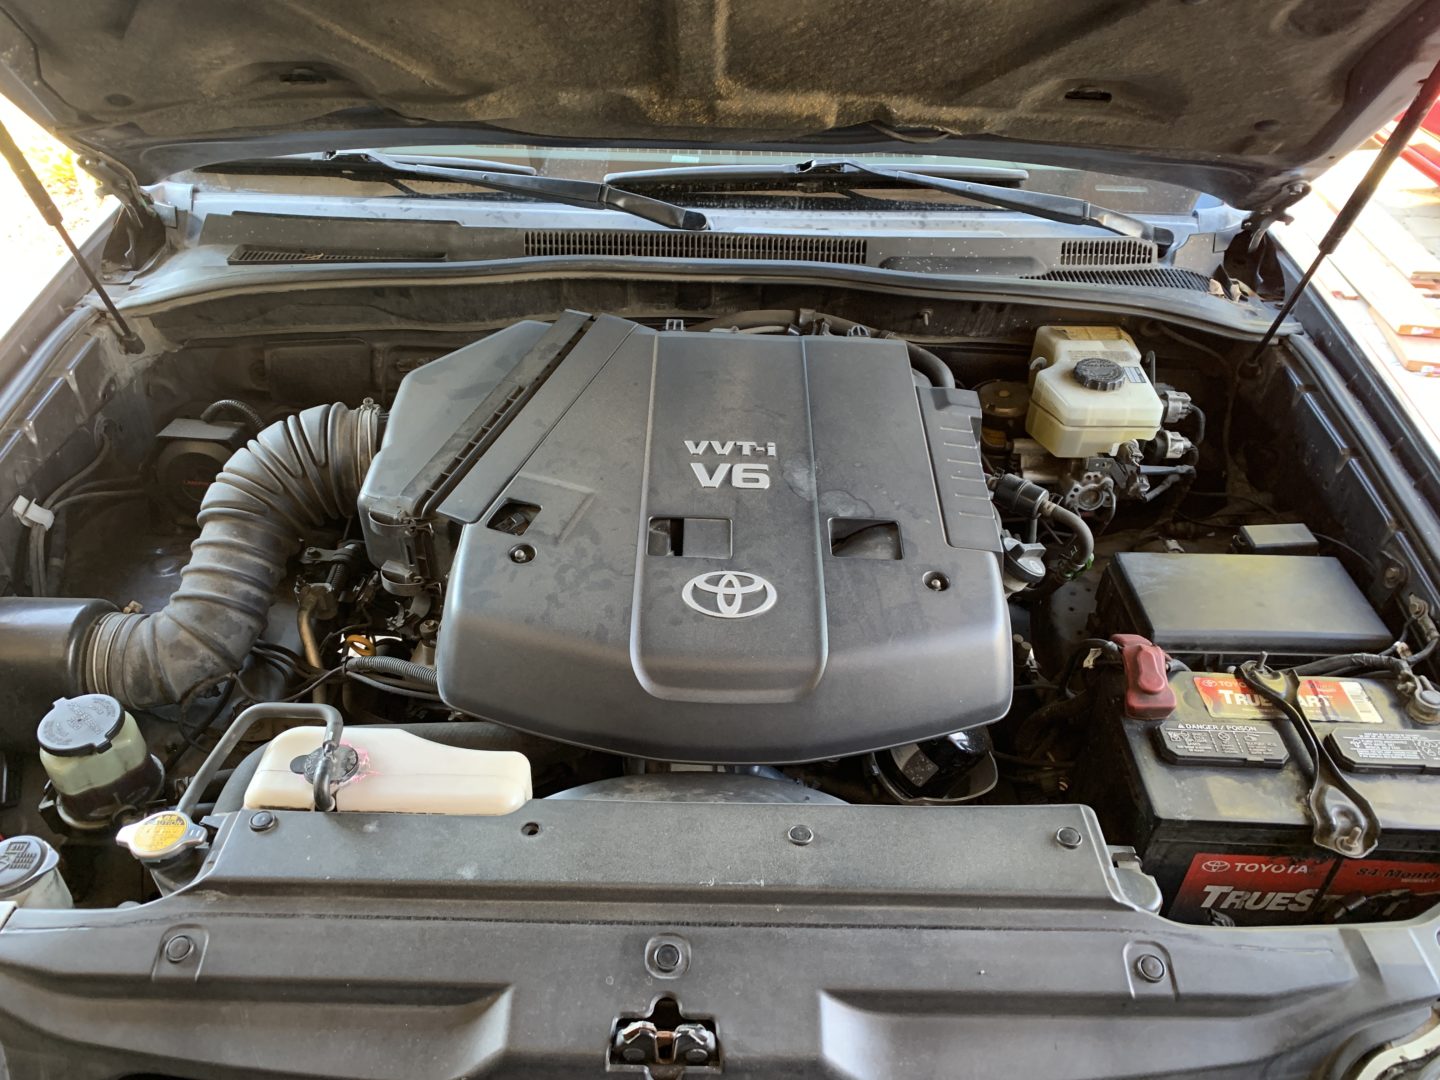
You may disconnect the negative terminal of the battery prior to doing this work, but it is not necessary. Remove the engine cover with the (2 qty) 10mm nuts.

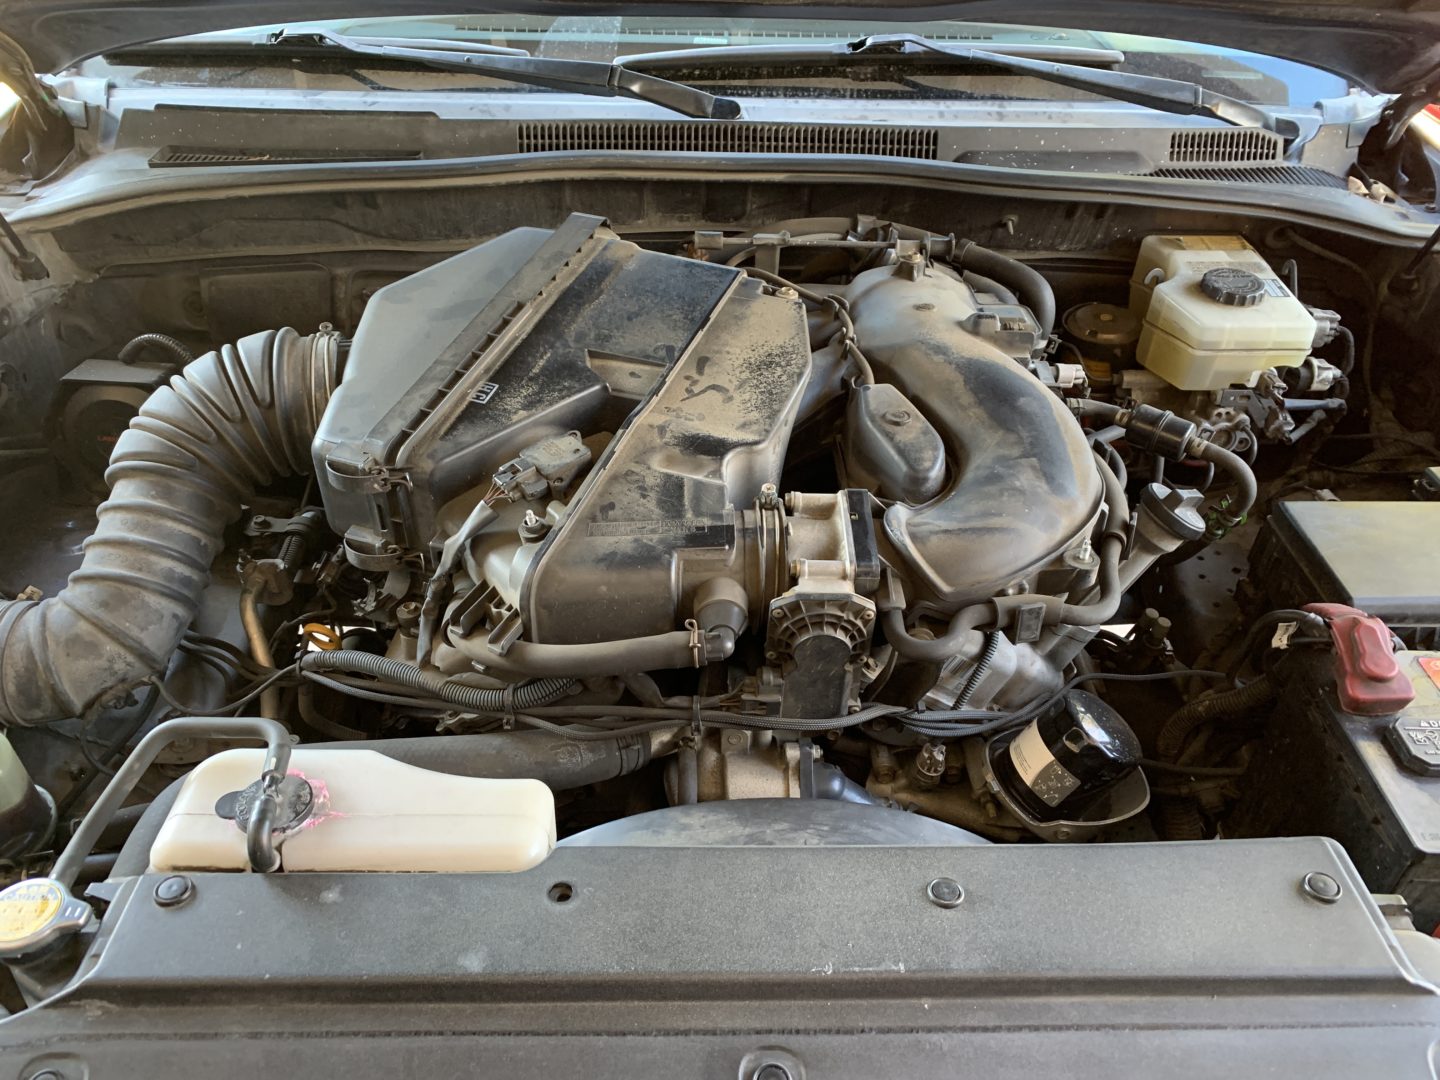
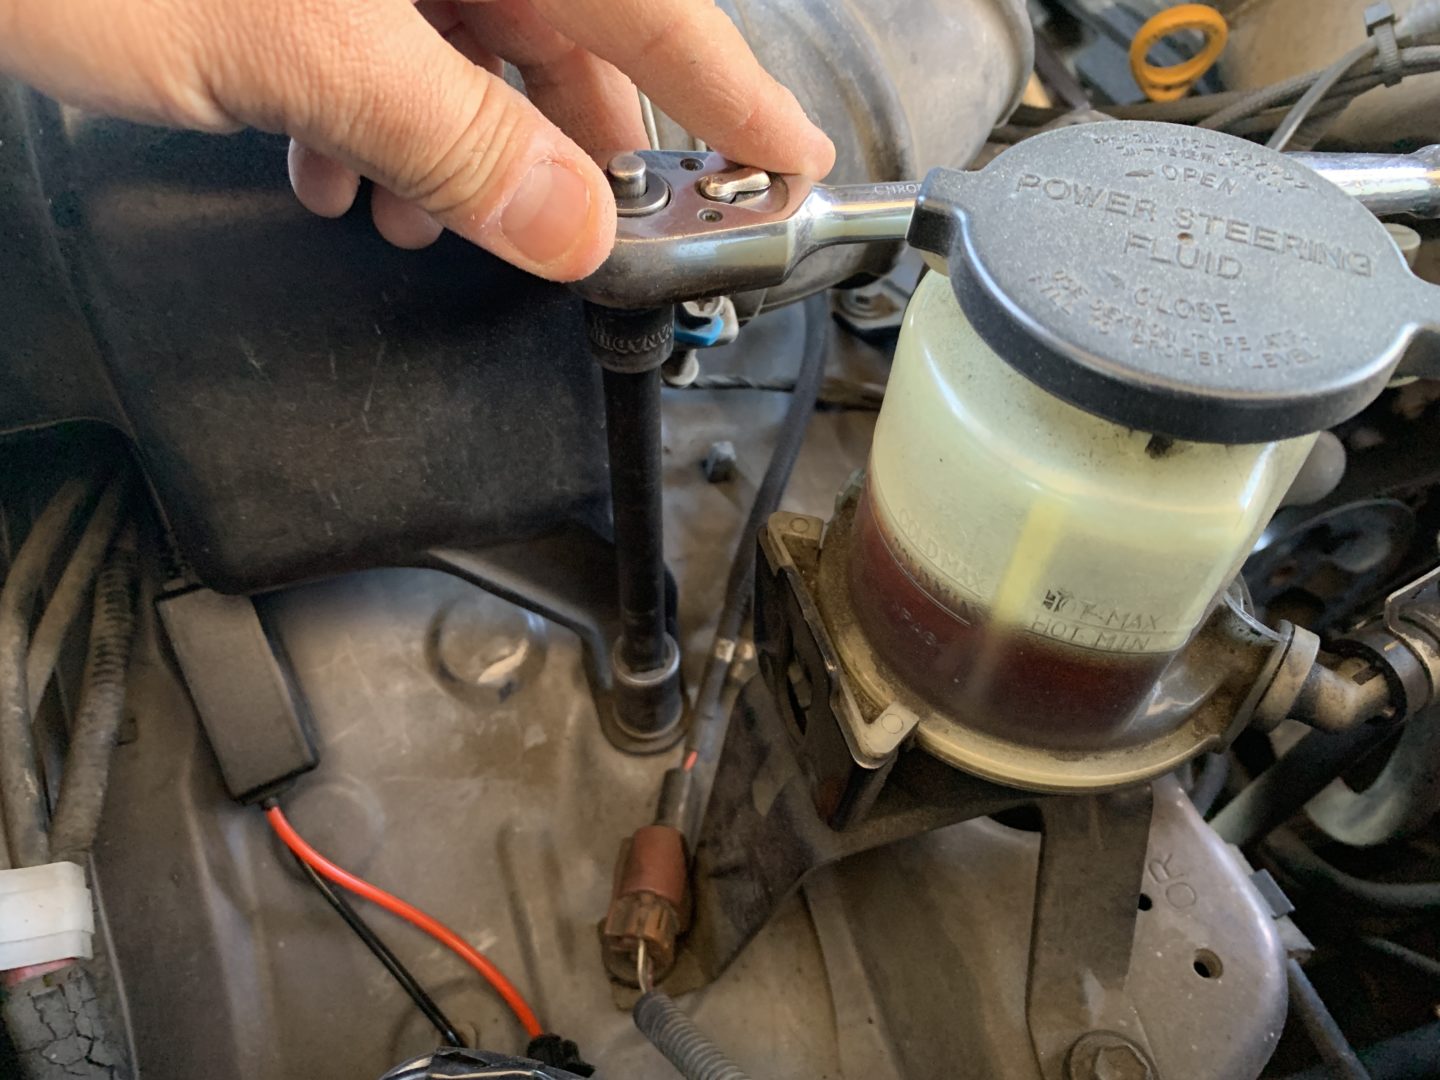
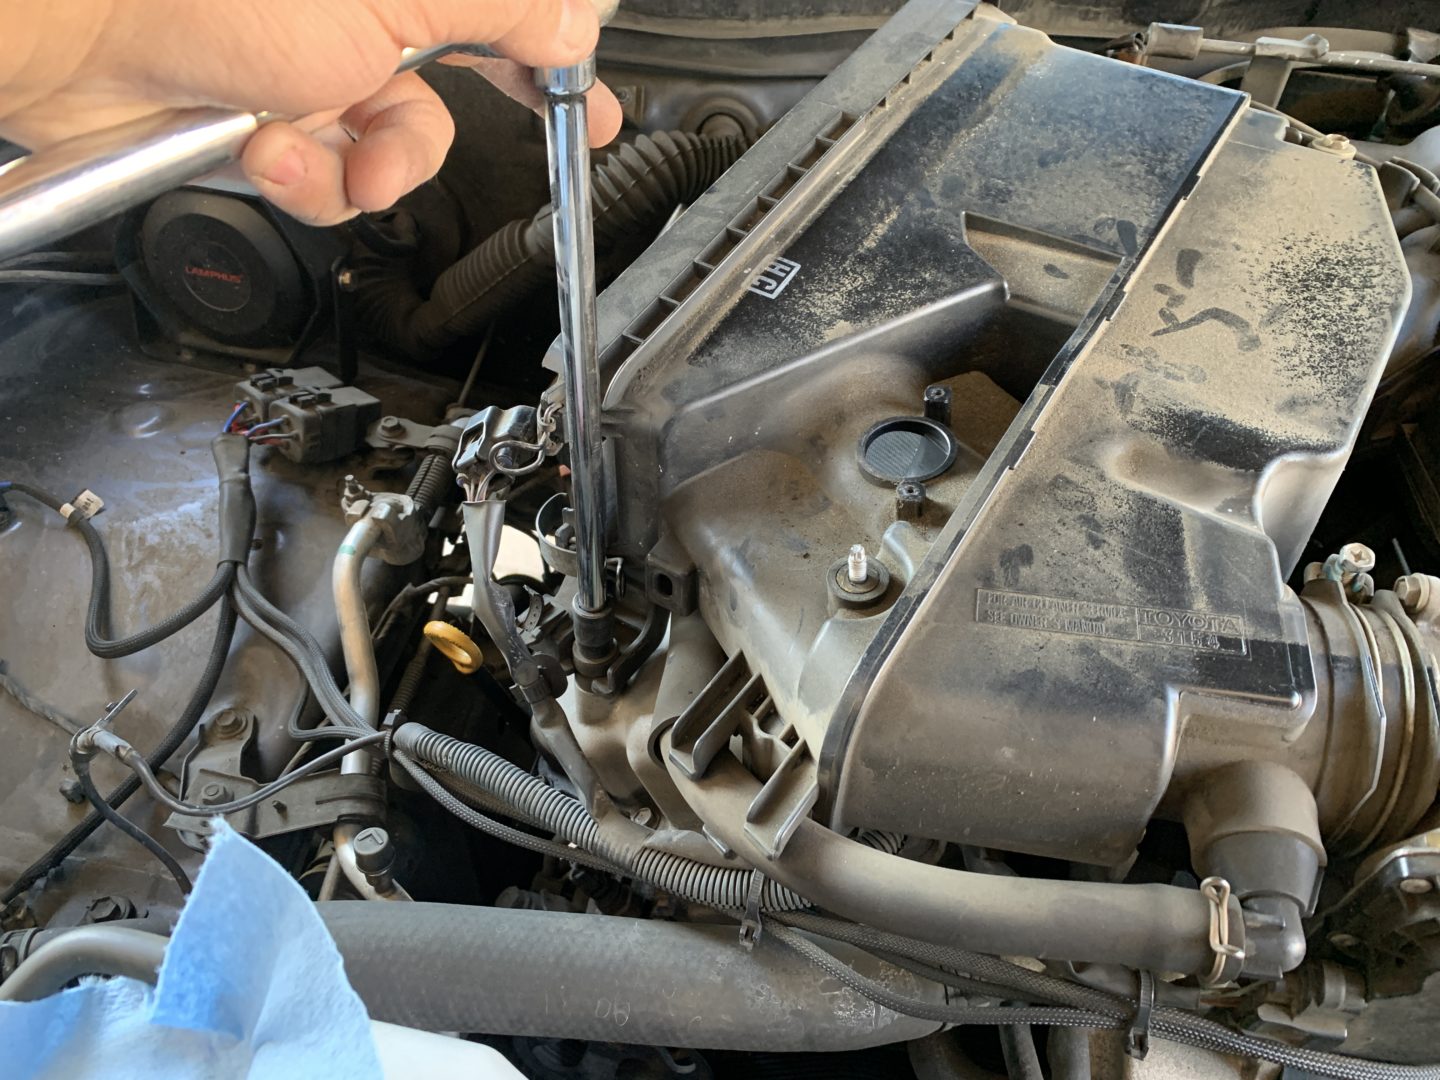
Remove the entire air intake and air filter cover (with air filter). This is done by unclipping the two clips to the air filter housing, removing the (2 qty) 12mm bolts that hold the air intake to the frame, and detaching the wire that is held to the air intake hose. Remove the entire air intake assembly.


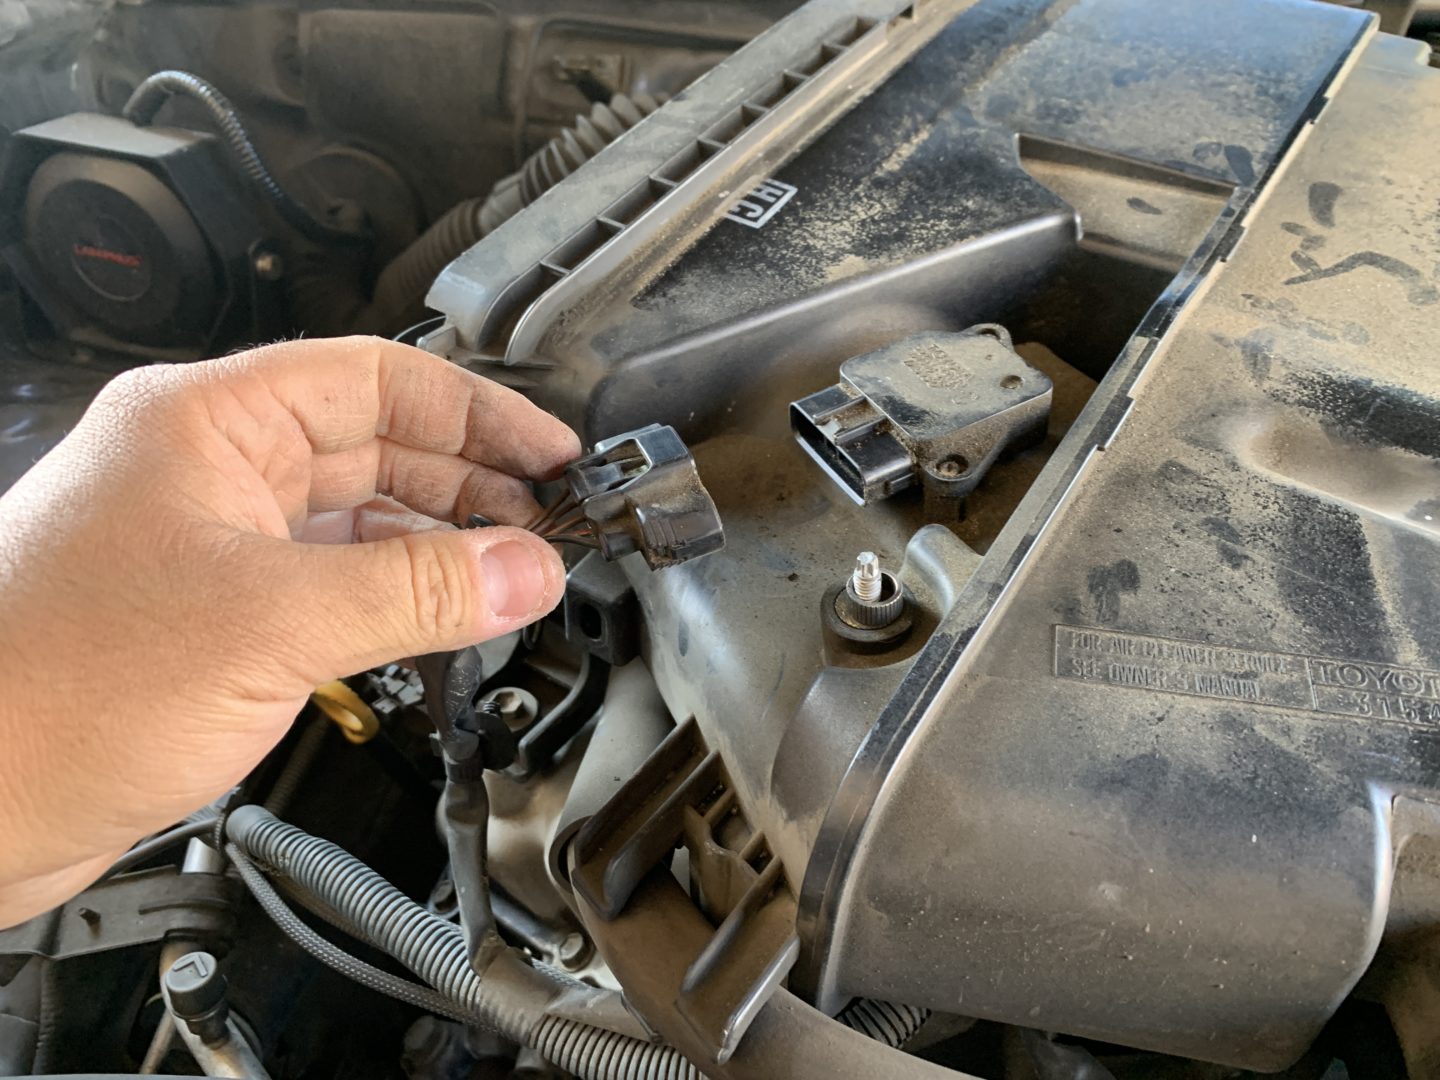
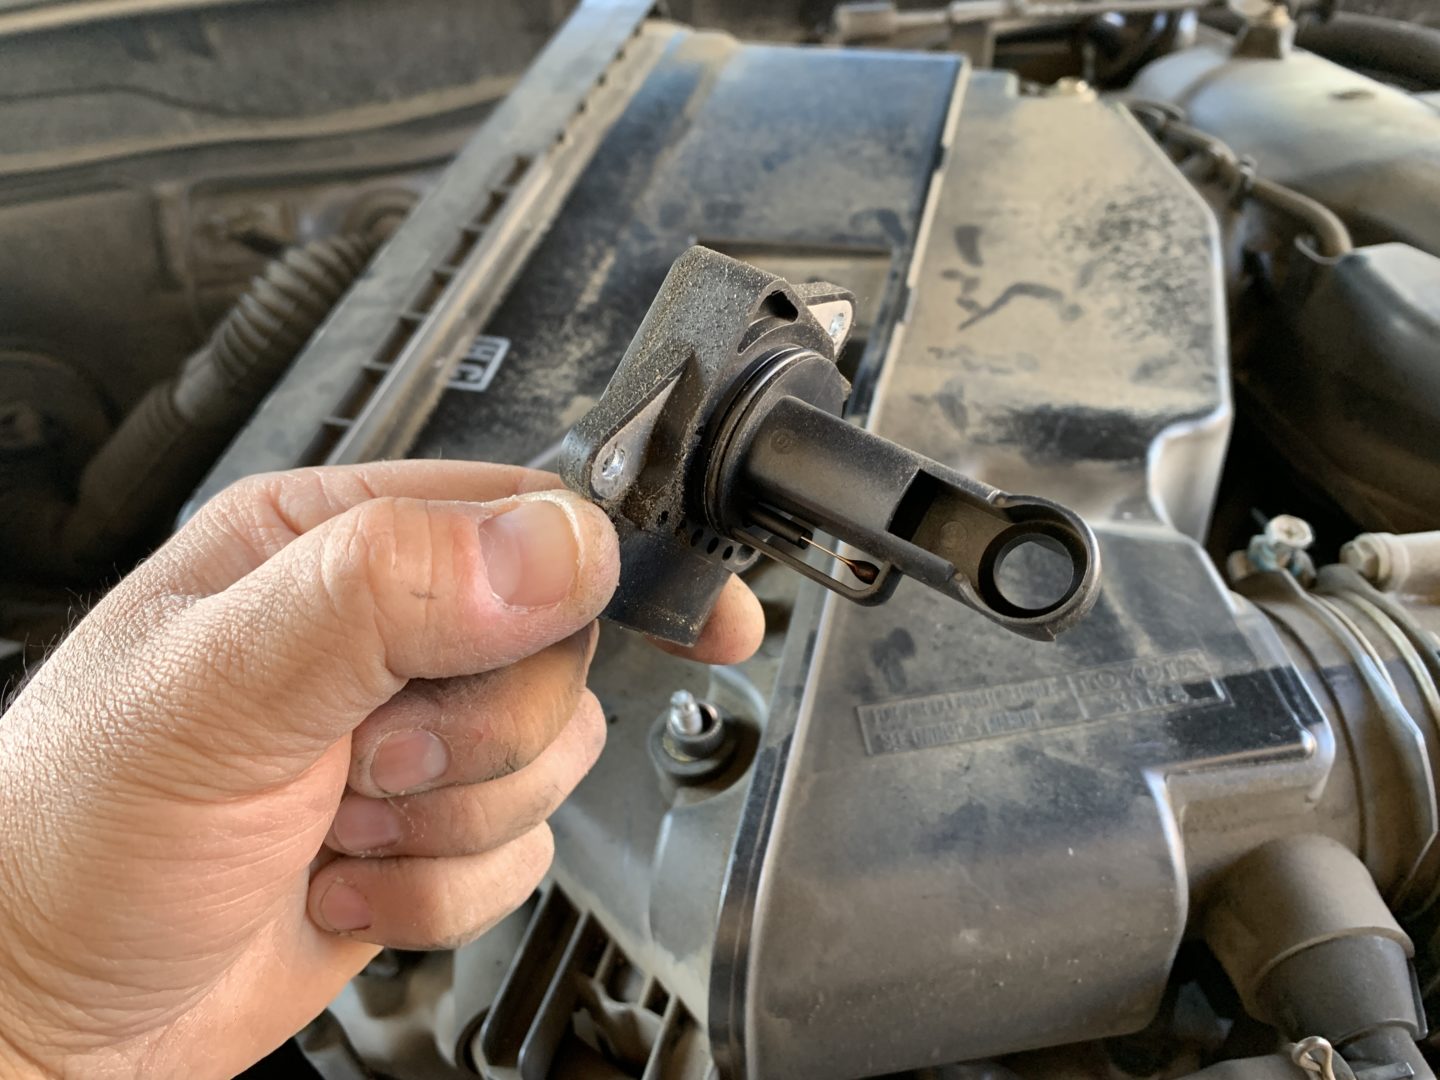
Disconnect the electrical connector to the MAF sensor. If you wish to clean the MAF sensor as well, you can remove it via the (2 qty) small Phillips head screws and follow this guide.

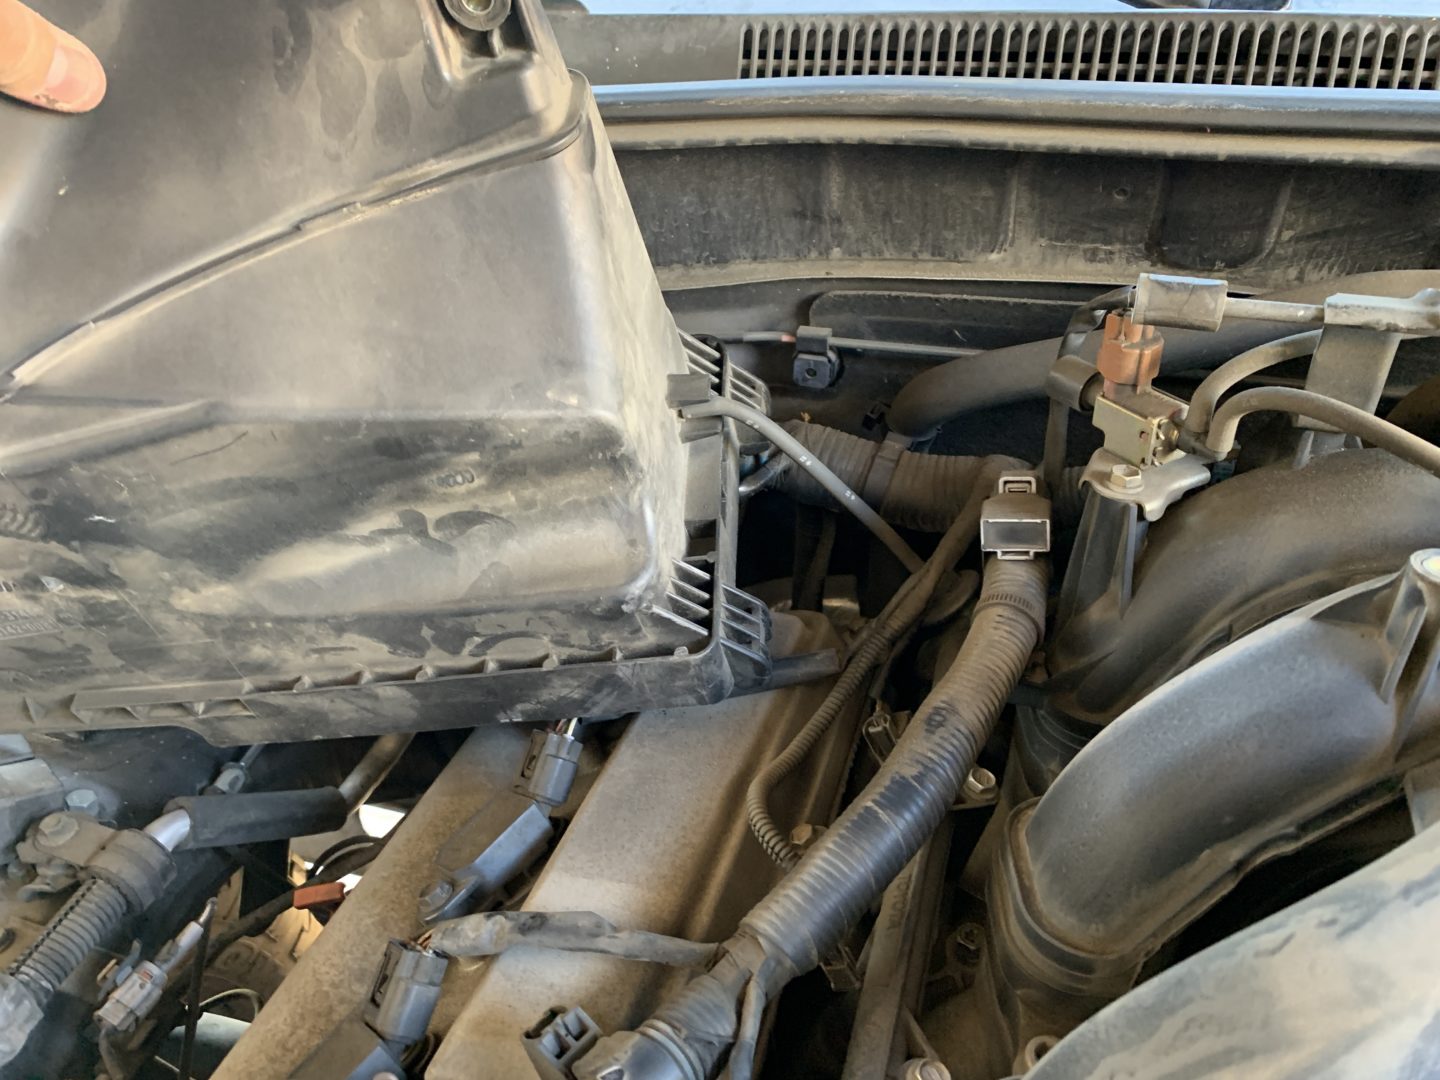
Use a 10mm socket to remove (2 qty) bolts holding the air intake housing in place, then use a Phillips head screwdriver to unscrew the clamp on the throttle body. Then remove the hose in front beside the throttle body by removing the hose clamp and pulling the hose off of the nipple.

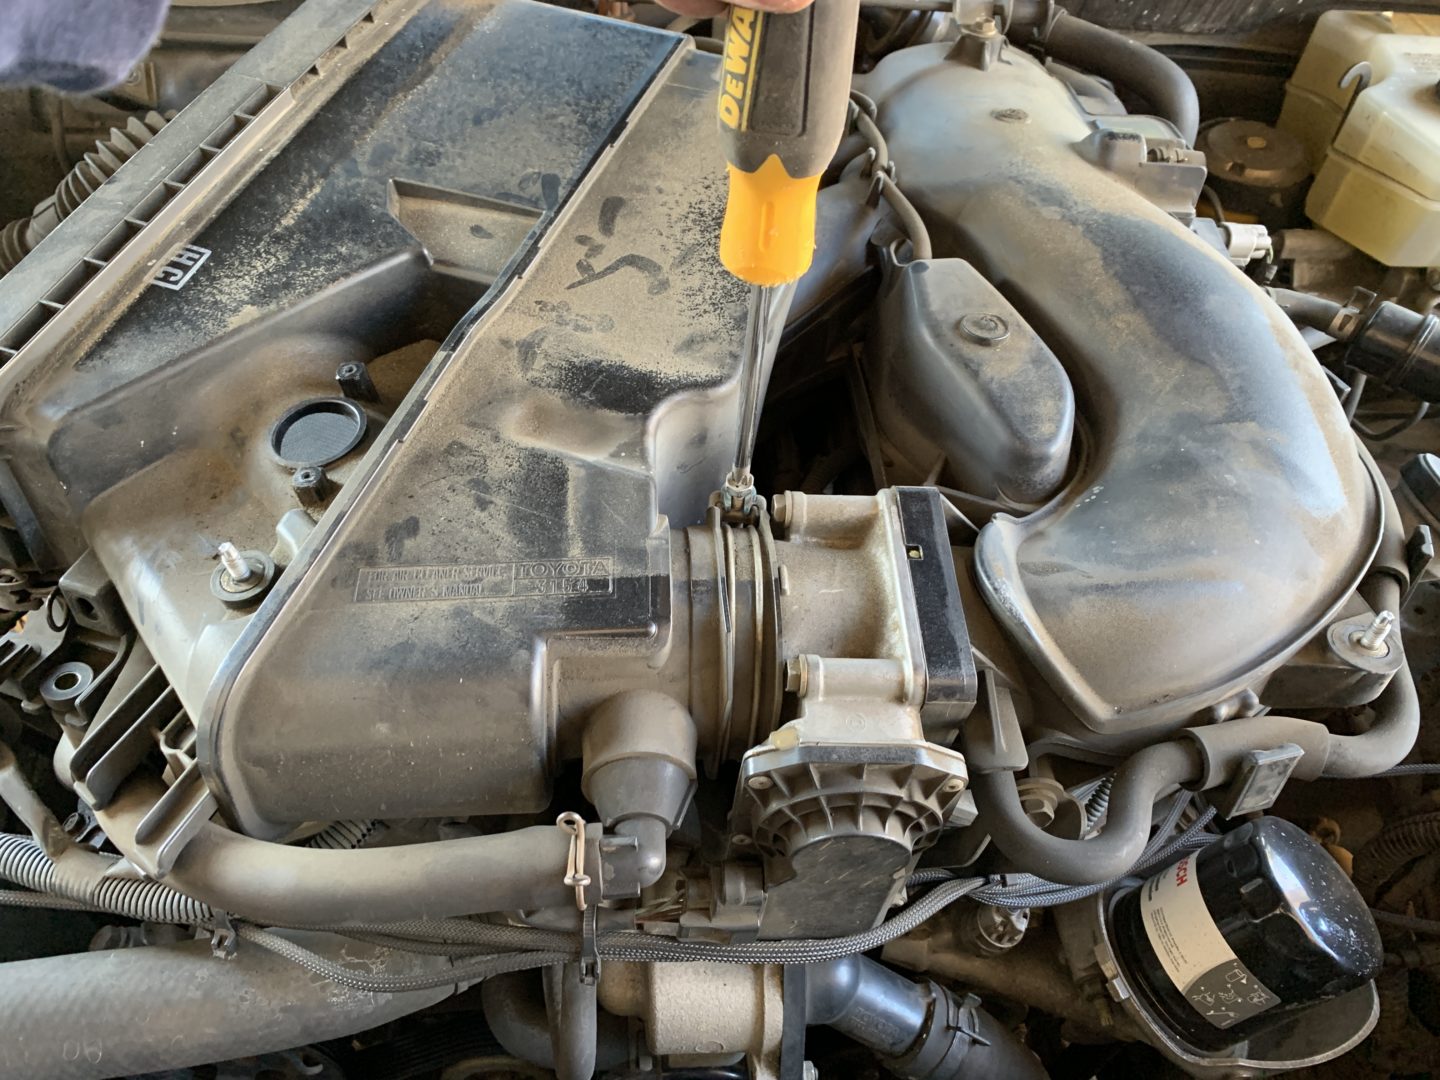
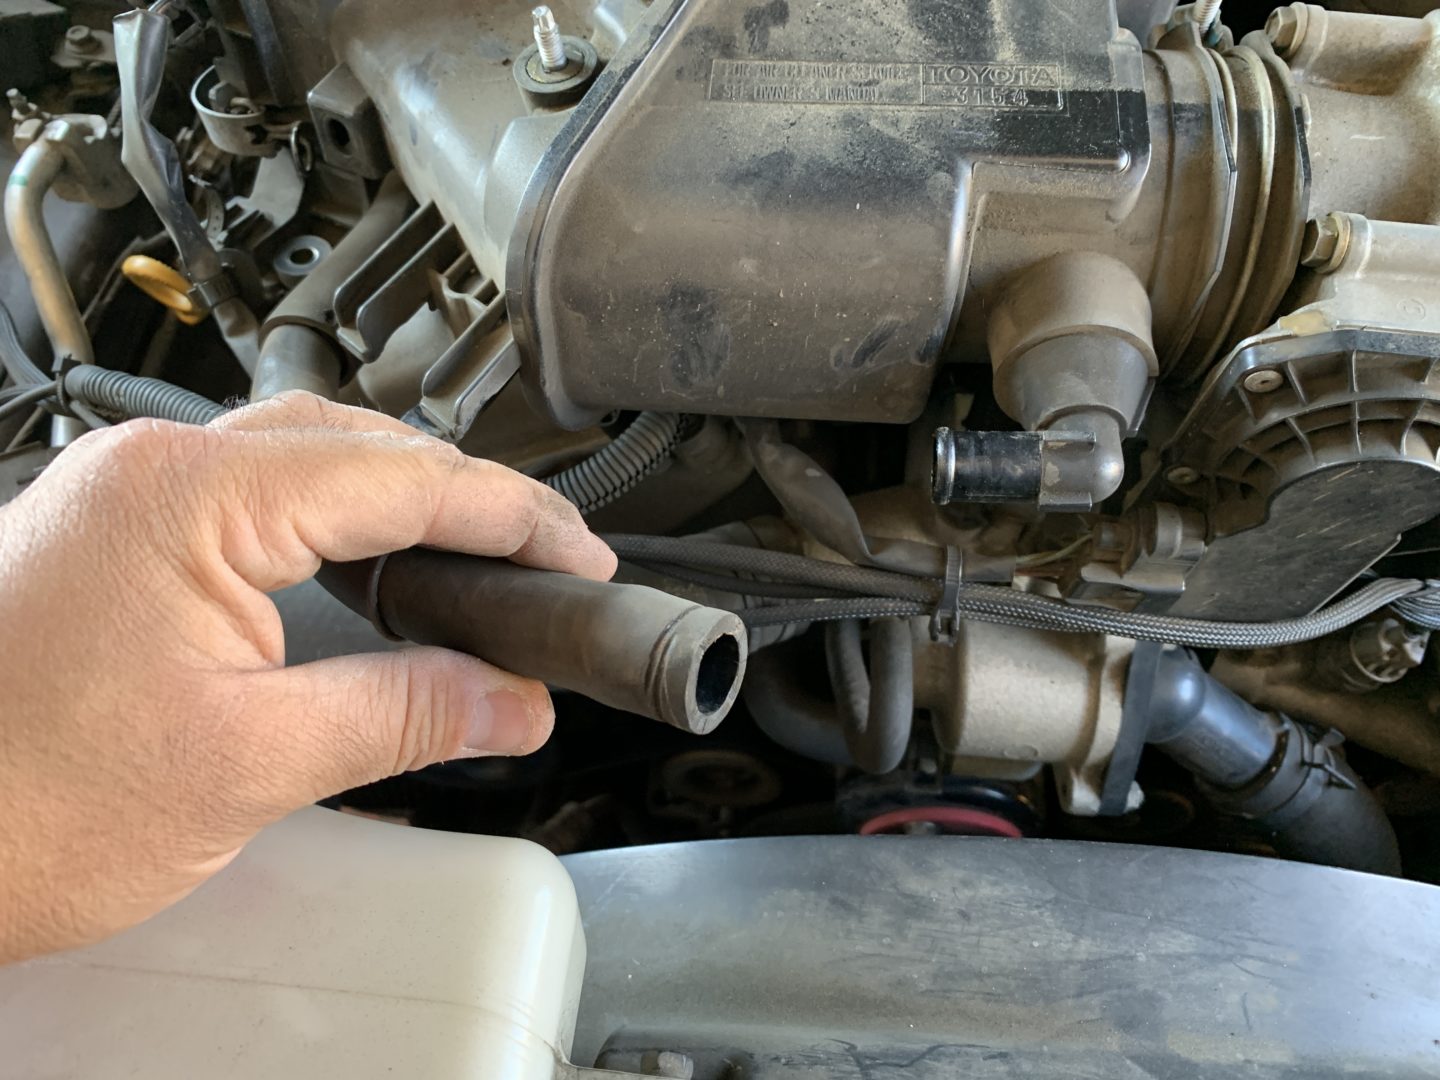
Work the air intake housing off of the throttle body and then carefully turn it over as if you were turning a page of a book. On the underside, there is a small vacuum hose that will need to be removed.
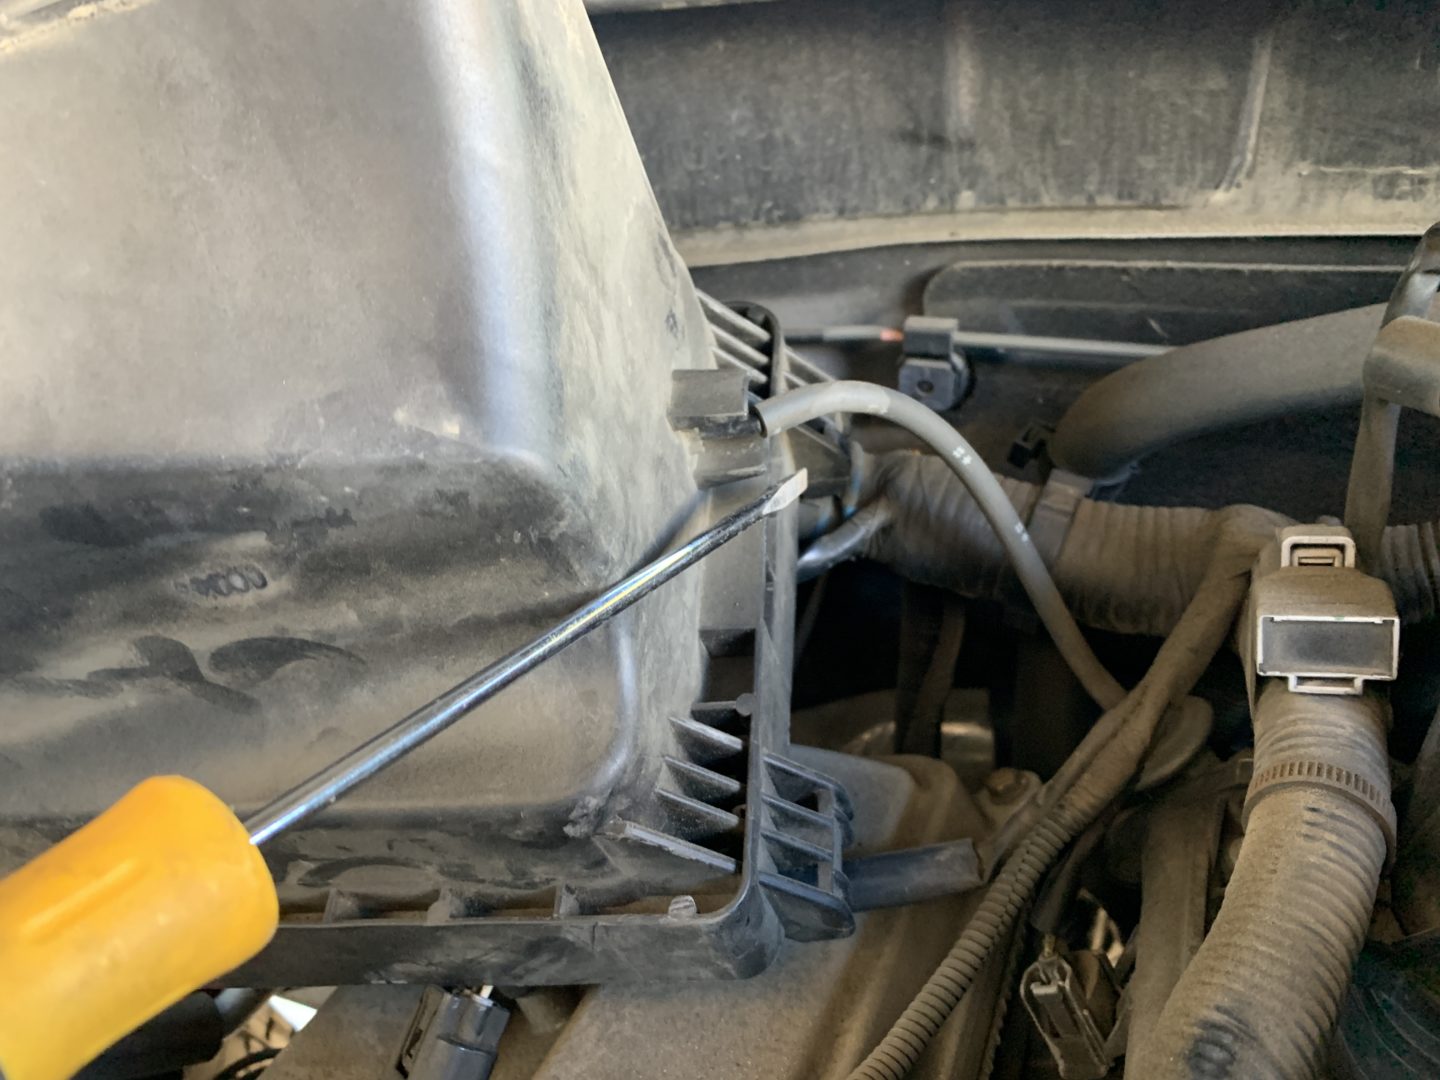
If you have trouble working this off by hand, use a flat head screwdriver to wedge between the hose and box and twist. This will help break loose the hose-to-nipple connection. I like using this method rather than trying to work the hose off by-hand for a smaller vacuum hose such as this one because it is easy to break off the small plastic nipple inside of the vacuum hose.


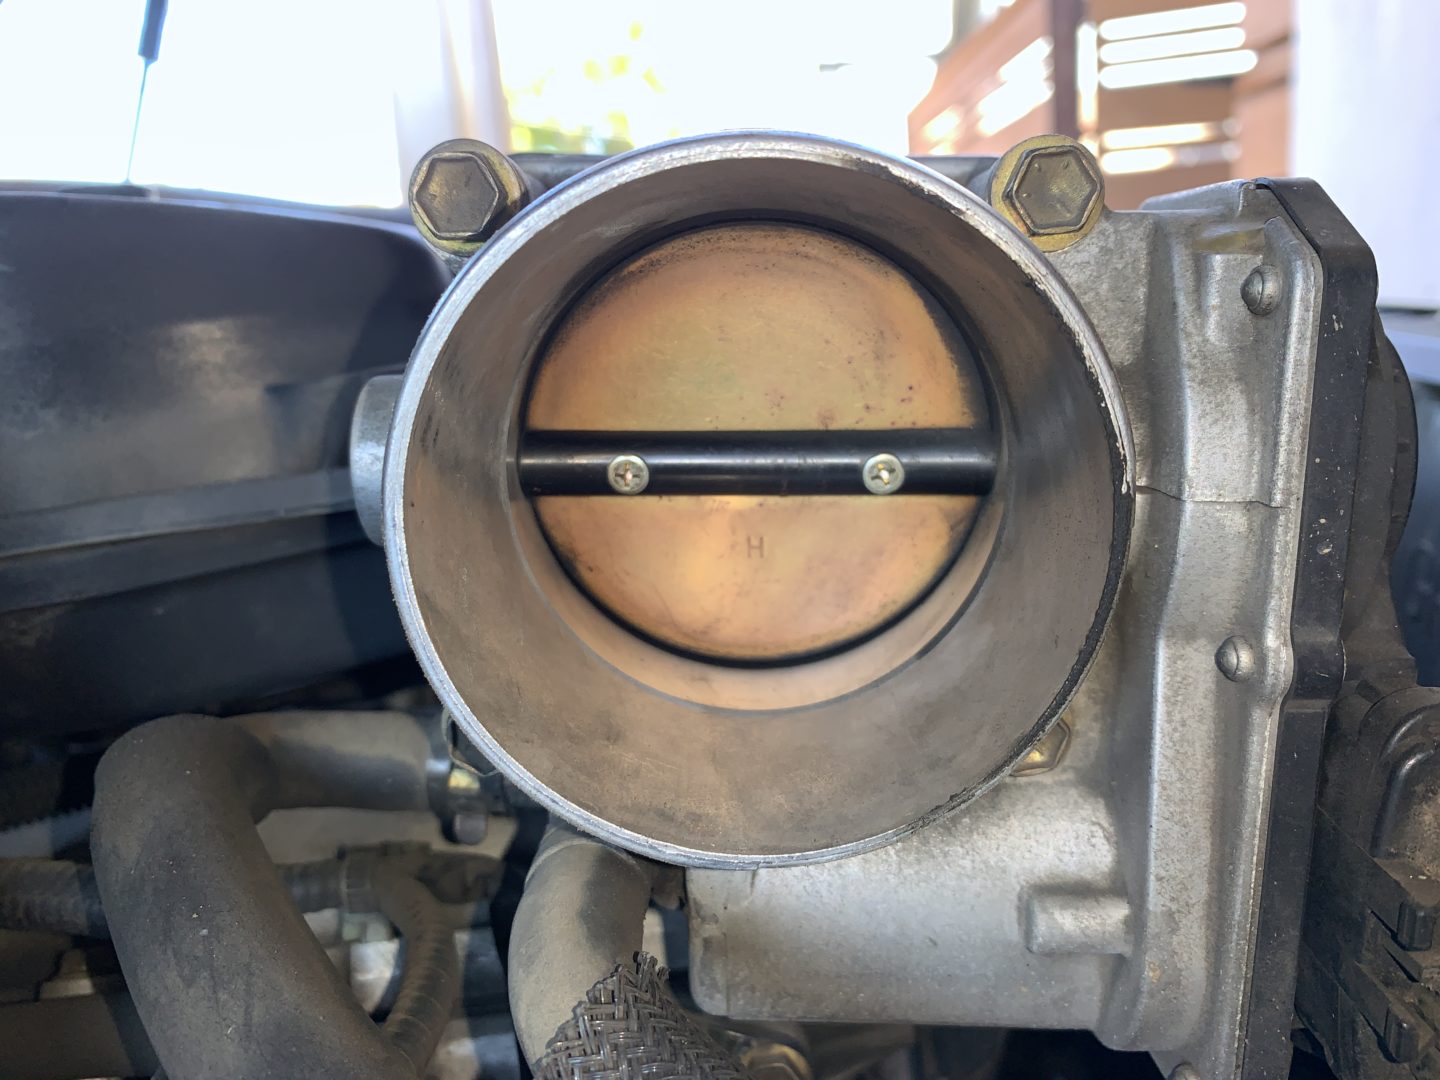
You can now see one side of the throttle body. Mine doesn’t look too bad here, but the important parts of the valve to pay attention to are on the edges of the valve. The valve in its “closed” position should still be slightly open to allow for idle, therefore if carbon deposits builds up at edge of the throttle body, then it can affect idle and performance. So we’ll remove the throttle body and take a good look all around.
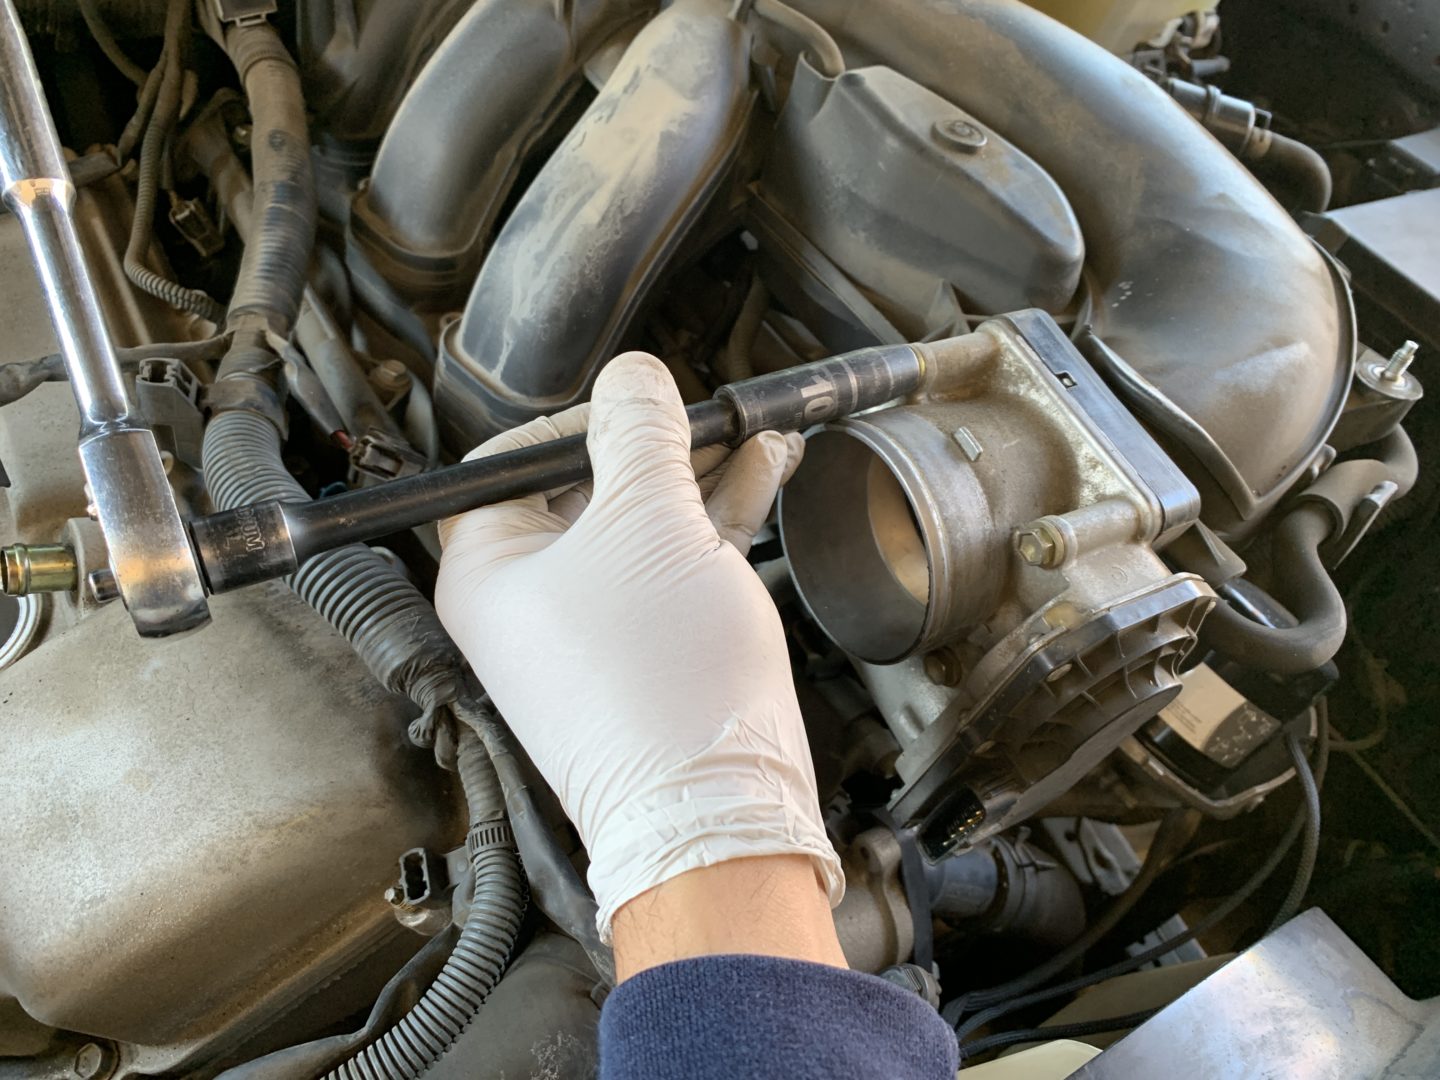
Using a 10mm socket, remove the (4 qty) throttle body bolts. The throttle body can then be removed. There is also an electrical connector that is connected to the throttle body that should be disconnected (pictured on the right side of the right image below already disconnected.)
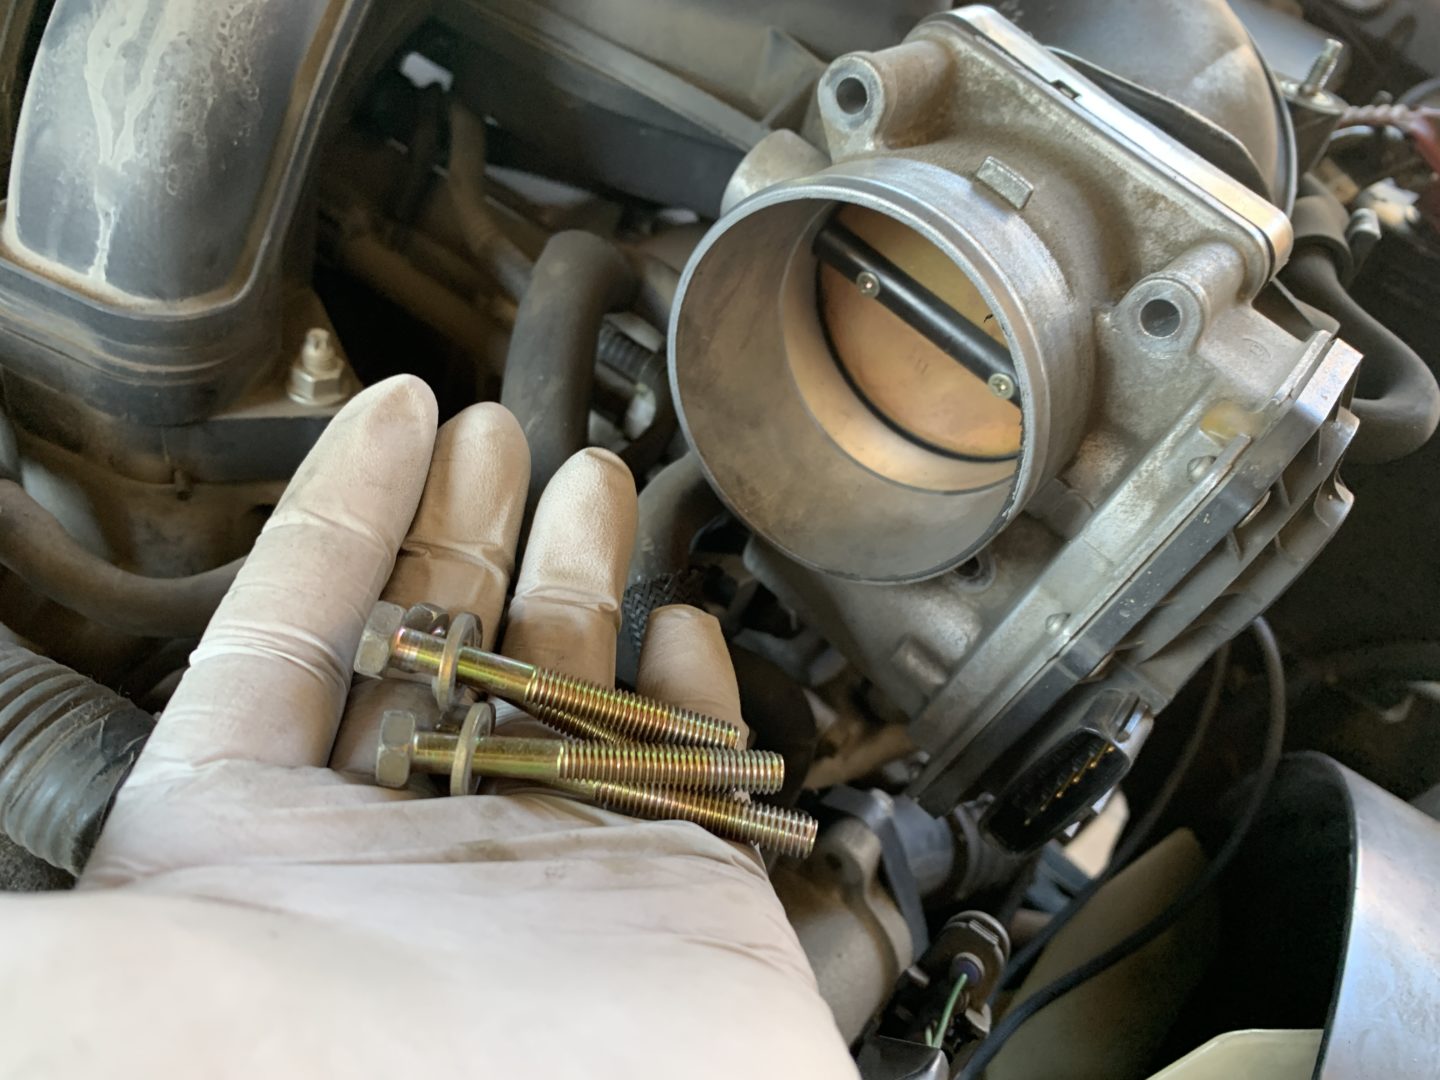
I chose to keep the the throttle body still connected to the two coolant lines. It’s a bear to remove these hose clamps and coolants lines, plus it is not necessary to remove them if you can clean the throttle body with them still attached.
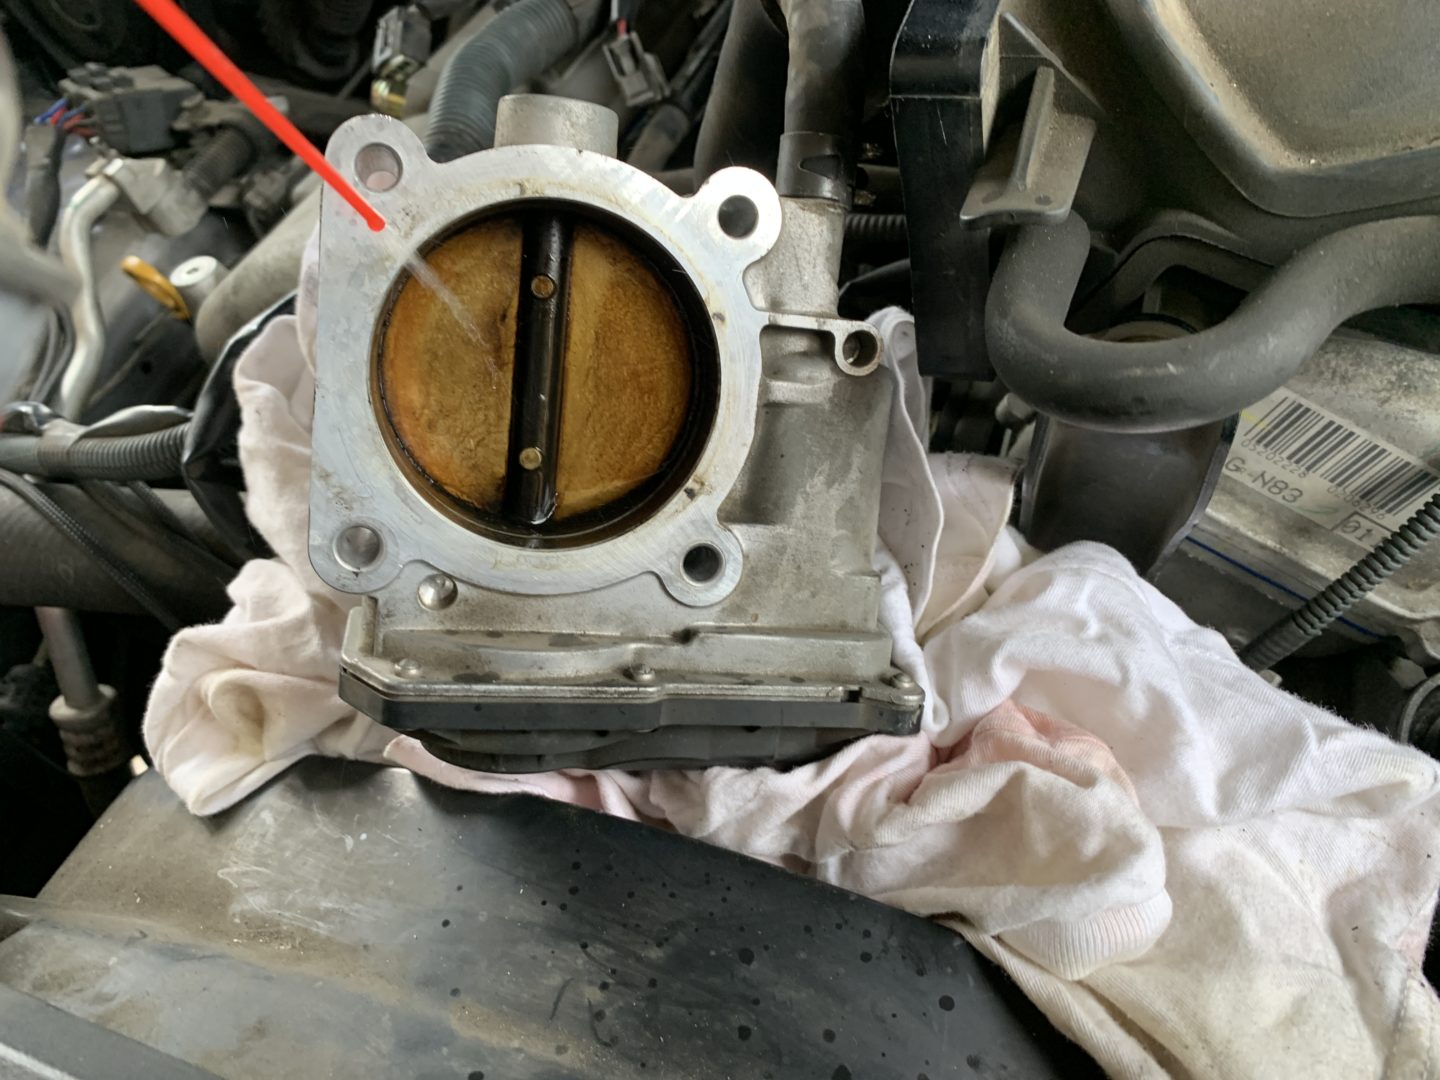
I placed a rag underneath the throttle body and used the throttle body cleaner to clean the valve on both sides. I also used blue shop towels to clean the surfaces of the butterfly valve. Open the valve by hand and continue to use cleaner and a towel to clean along the edges. Clean until you’re satisfied with the removal of the carbon deposits and let dry.


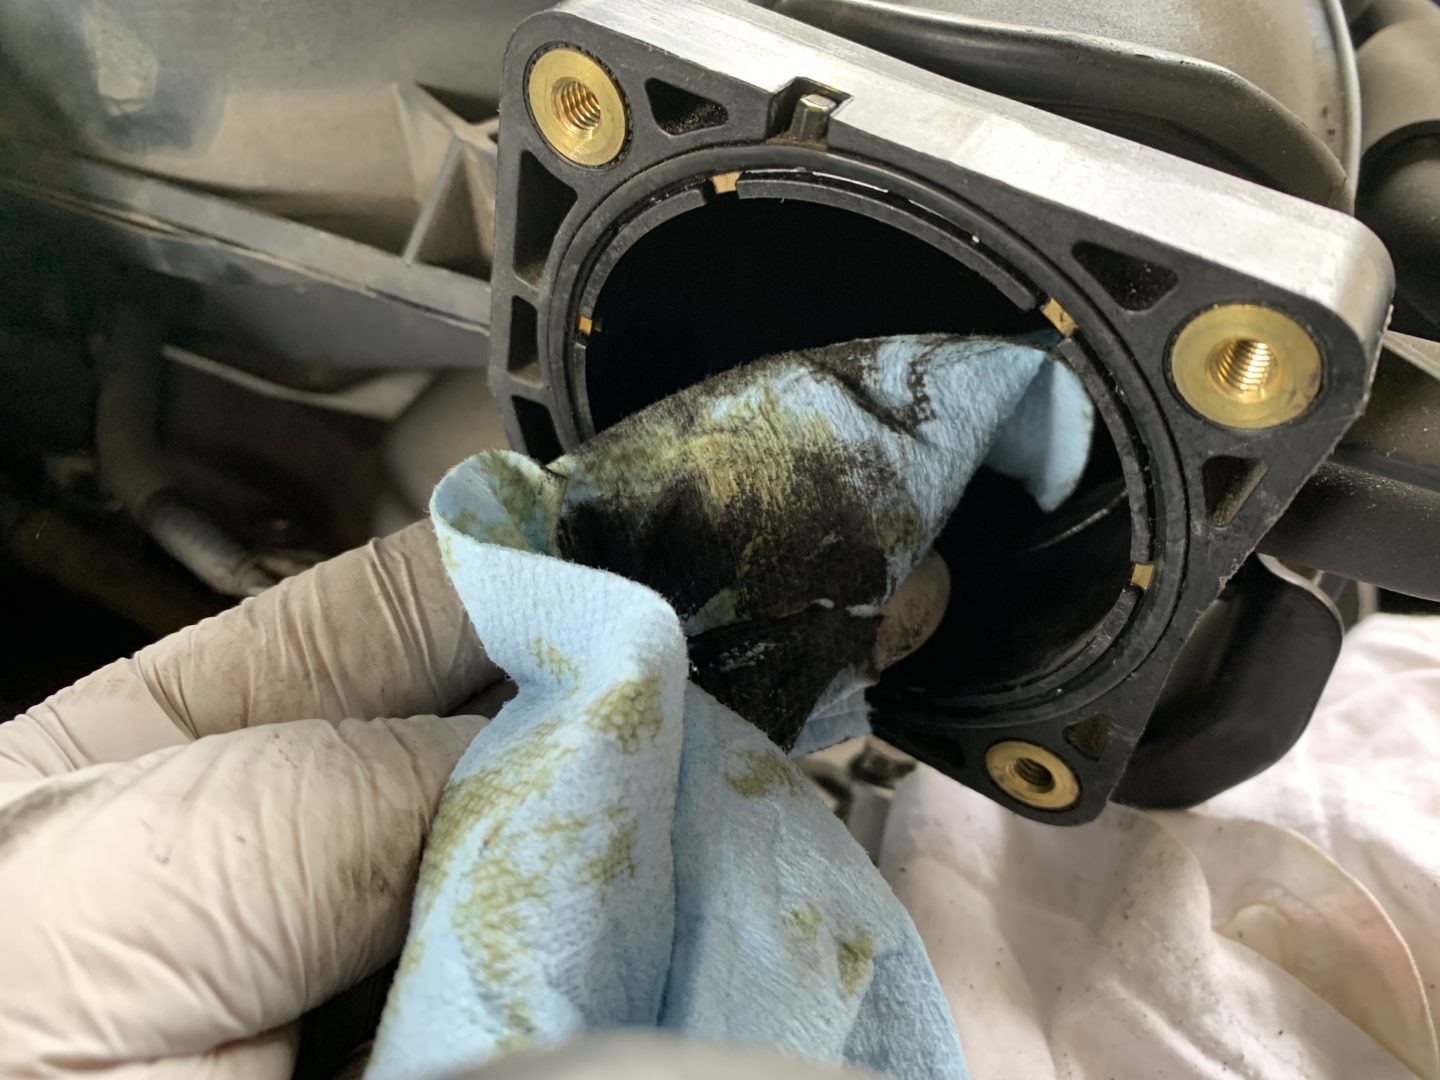
On the intake manifold side, you’ll find the throttle body gasket. If your throttle body gasket is older like mine, you’ll find that it is no longer a pliable piece of rubber, but more like a hardened piece of plastic. Replace the gasket with a new one taking care to line up the marker piece in the groove. I also used a shop towel to clean up the inside as shown below.


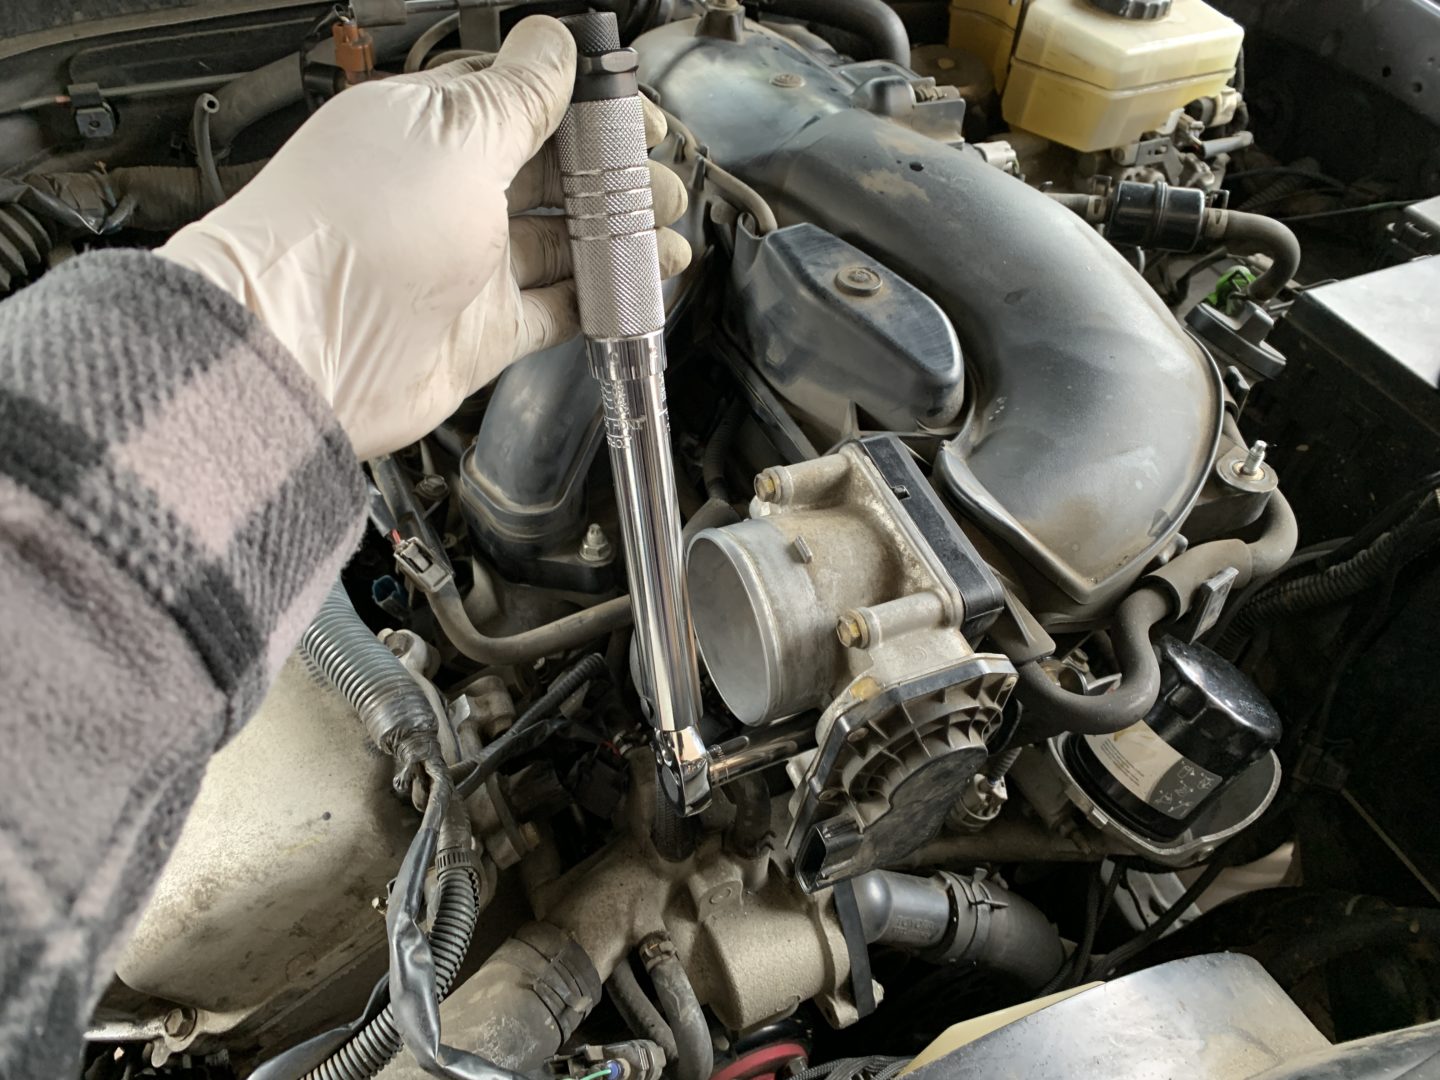
With the throttle body cleaned, replace it in reverse of how you removed it and install the (4 qty) throttle body bolts by hand. Then use a 1/4″ drive torque wrench to torque down each bolt to 15 ft-lbs of torque.

Now, you can reinstall all of the parts that you removed in reverse order of removal. Many folks will also clean the MAF sensor when they clean the throttle body. Here’s a guide for cleaning the MAF sensor if you plan on doing that too. When you’re all finished putting everything back together, double-check you’ve reconnected everything and start up the vehicle. It may take some time idling and driving to get the computer to recalibrate and get things running smoothly again.
: 4th Gen Toyota 4Runner")

: 4th Gen Toyota 4Runner")

: 4th Gen Toyota 4Runner")
: 4th Gen Toyota 4Runner")


