When you make purchases through links on this site, The Track Ahead may earn an affiliate commission. Also, these posts are based off my own experiences. I am not responsible for any action you take as a result of reading this. Learn More
Finding the Right Head Unit
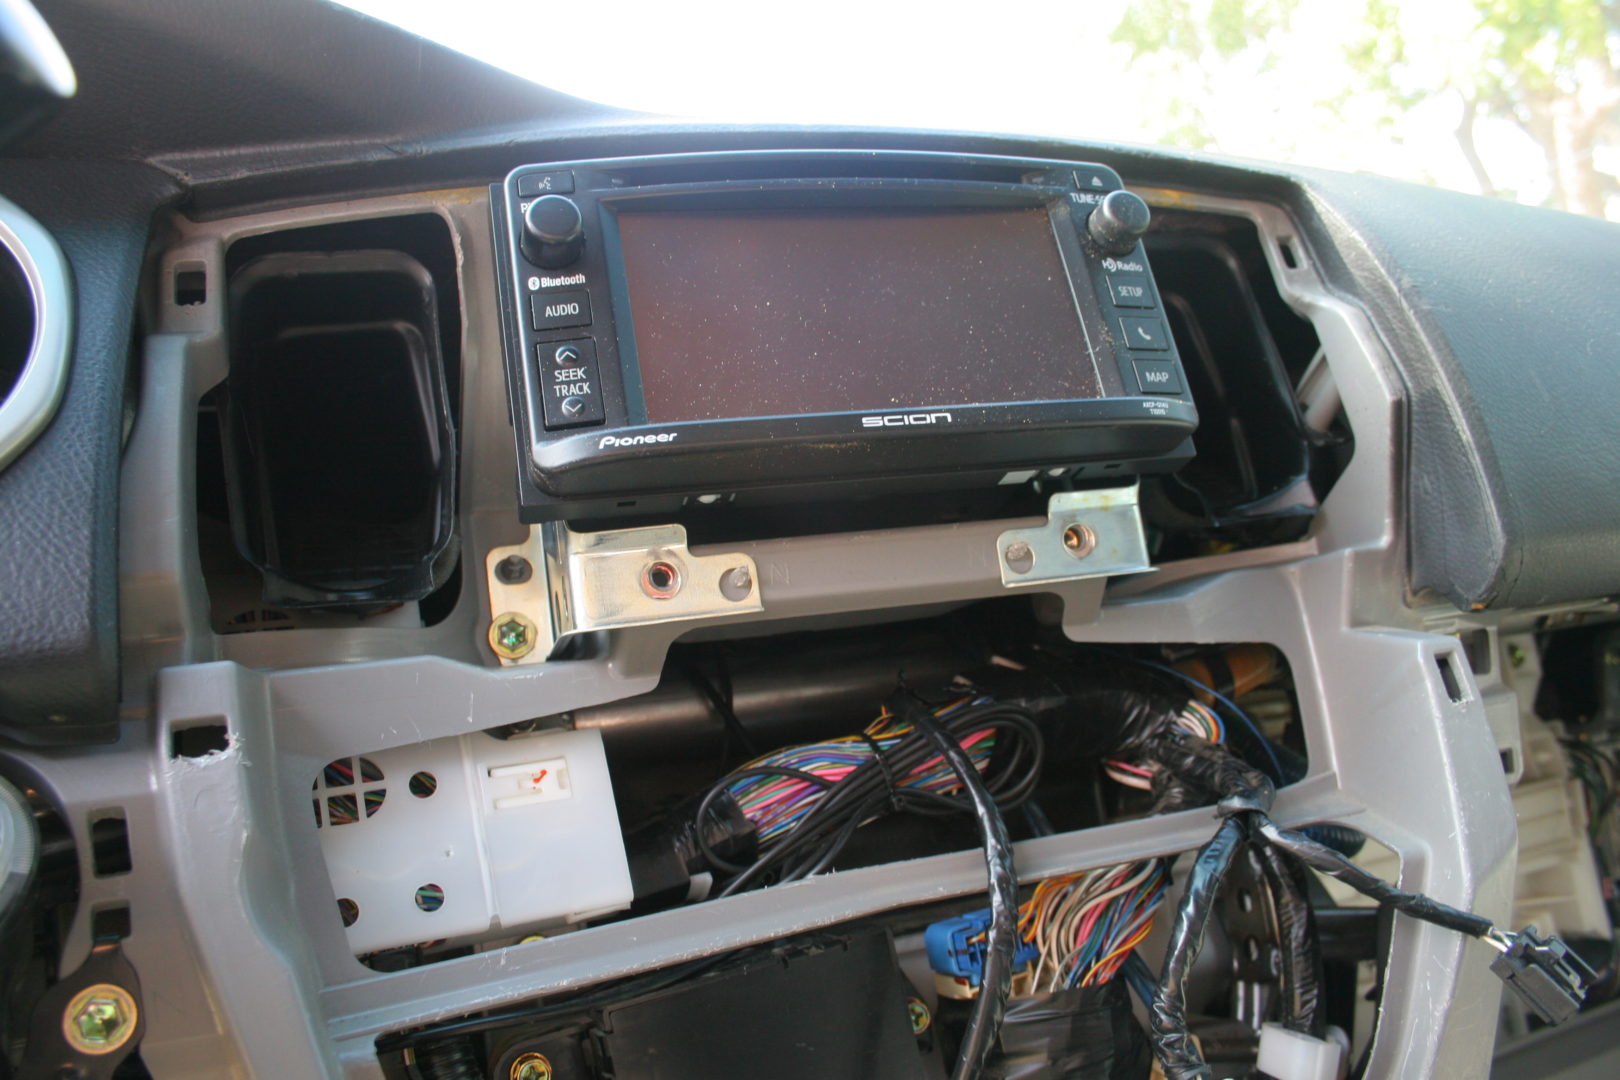
I previously wrote about my experience with trying out various Scion head units in my 2003 Toyota 4Runner. I eventually chose to go with a Scion T10015 touch screen head unit not just because of its sleek but stock look, but also because of its extra capabilities. One of them being the ability to display a backup camera on the touch screen. I also later tried using a Scion T10017 head unit that is also compatible with this backup cam.
Backup Camera Choices
Cheap Ebay Backup Cameras aren’t that bad honestly, and I’ve tried both wireless and wired kits. These kits would display the backup view onto an add-on rear-view mirror. This solution worked, however I had some reservations using these kits.
One, they didn’t always correctly display the view on the add-on mirror. The wired kit was more reliable, but the wireless ones had a lot of electrical interference causing static to be displayed. Either way, you couldn’t guarantee the backup camera would turn on every single time you shifted into reverse.
Another issue I experienced was that all of these Ebay backup cameras were not actually wide view cameras. You can always tell that they’re not wide view the moment you see the backup camera in action. No matter how you angle the camera, you won’t be able to get a proper view of both rear corners of the vehicle. These Ebay listings all claim to have various degrees of point of views, but in the end, they all seem to have the same camera view.
Finally, I didn’t like look of the Ebay backup cameras. The backup camera itself just looked cheap and the mounting of the camera didn’t look all that elegant either. The rear view mirror that comes with the kit snaps onto your OEM mirror, and overall everything just looks a bit clunky.
I decided to take a step up to a better backup camera that exhibits a true wide view and aesthetically looks pretty darn good. I then wired it up to my Scion T10015 touch screen head unit to make it look as OEM as possible. The wiring got a bit daunting at times, but I took my time and was able to get it all working in the end. Here’s my installation process of installing a Rydeen MINy (CM-MINy) backup camera to have it display on my Scion T10015 head unit.
Parts & Materials
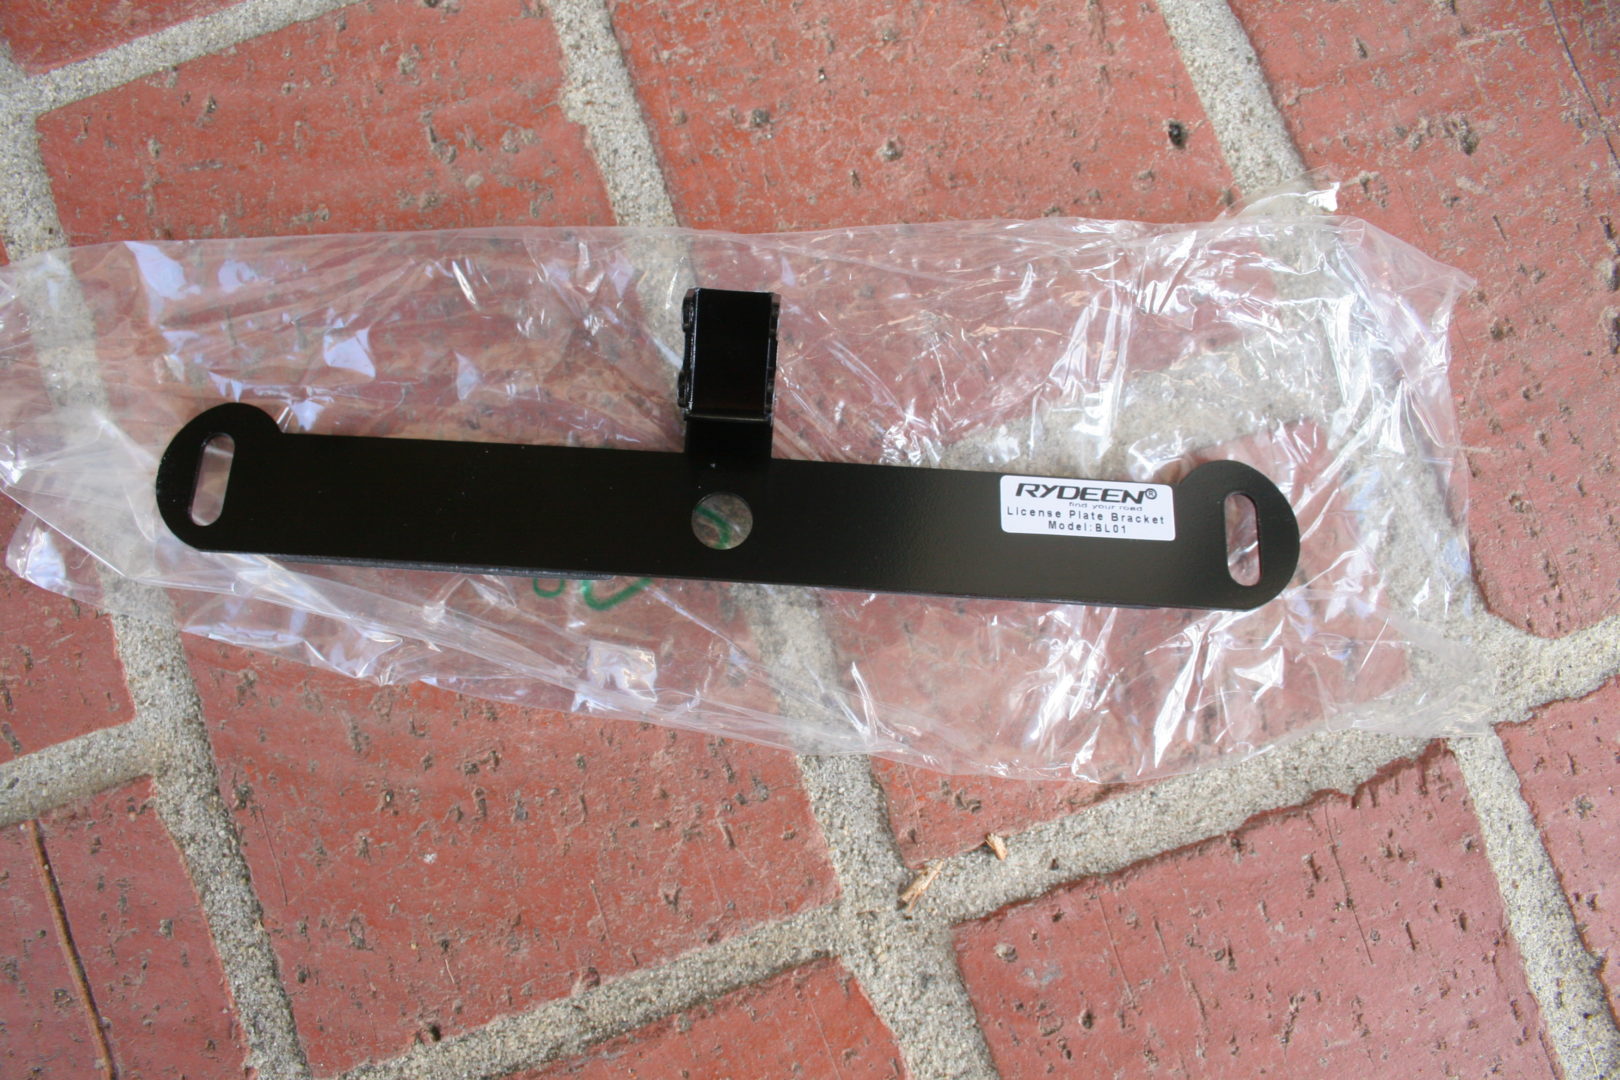
Obviously, you will need both the Scion head unit and the Rydeen MINy backup camera for this installation. You’ll also need a rear view camera adapter (CAM-TY11), which is essentially a pre-wired connector that plugs into the back of the head unit with various connectors for power, ground, and a yellow RCA connector.
It’s very possible to make this work with a different head unit and/or backup camera, but with this specific setup, there are very peculiar details that need to be in place in order for the backup camera to work. The head unit sends power in a very particular way to check for proper connection to a backup camera. Also, the backup camera has specific wiring that allows this connection between head unit and camera to be made.
T10015 Scion Head Unit
Find on Ebay: T10015 Scion Head Unit
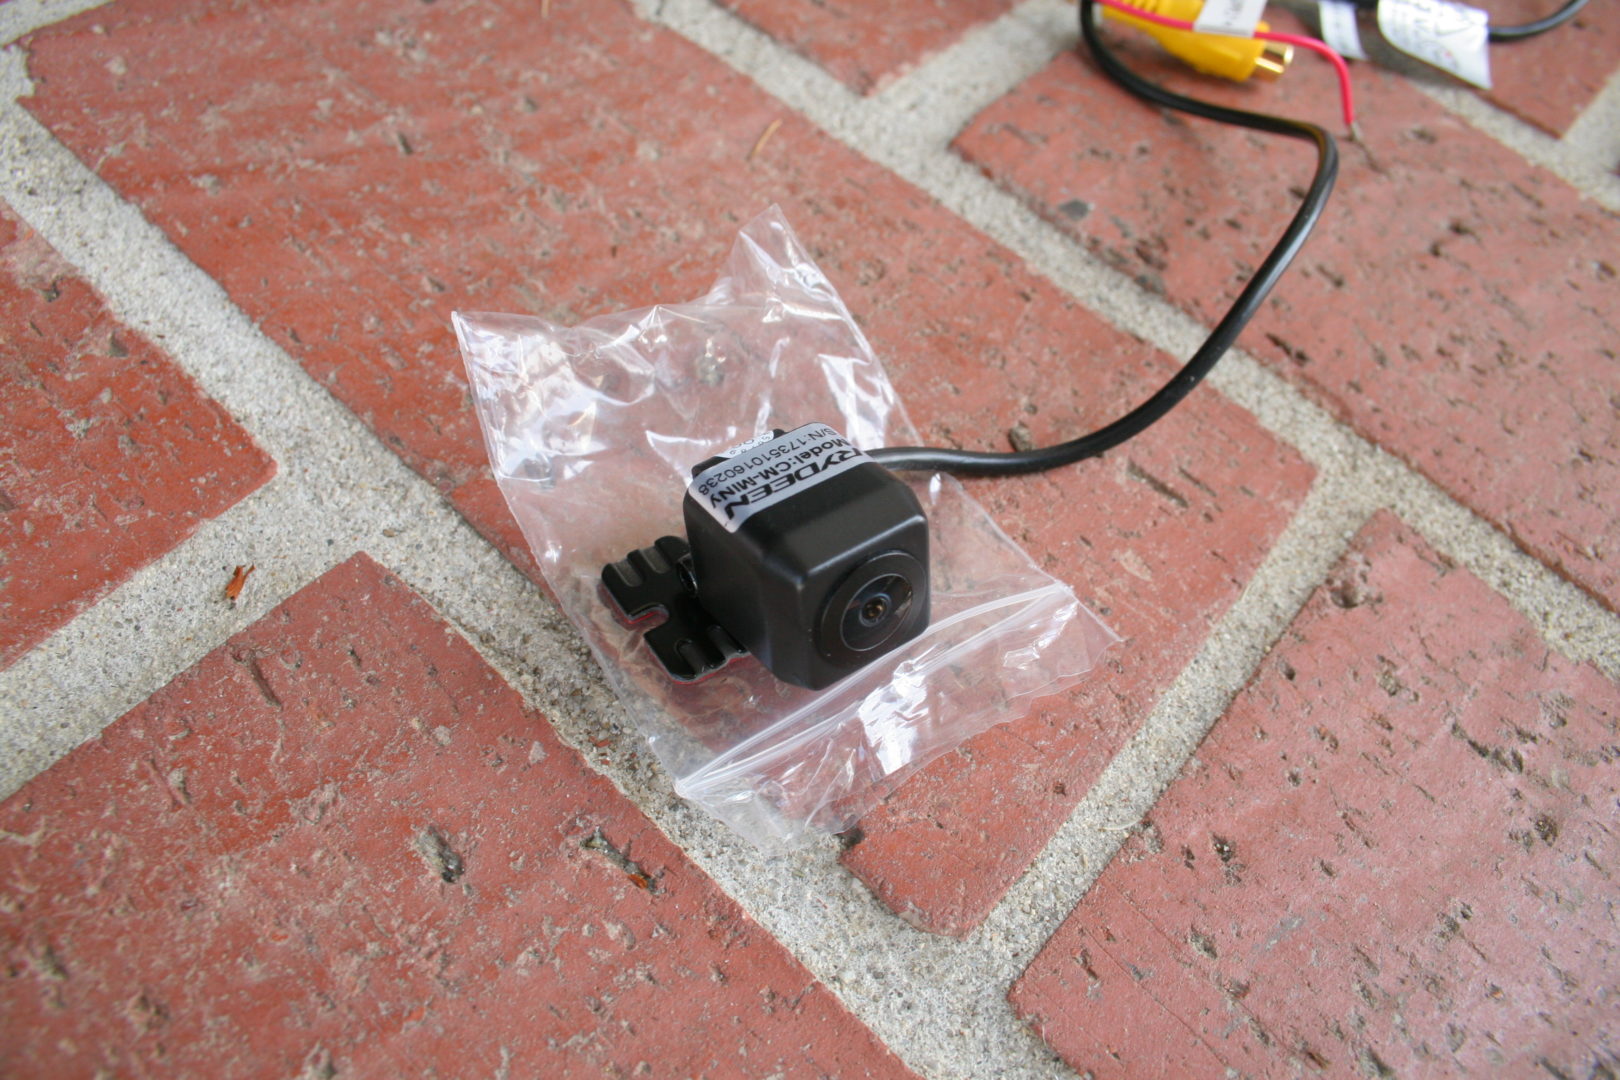
Rydeen MINy Backup Camera
This is the specific backup camera I used, however my understanding is that there are several other Rydeen (e.g. Rydeen Duo) backup cameras that may work.
Find on Amazon.com
Find on Ebay.com
Rear View Camera Adapter: CAM-TY11
Buy on Amazon.com
RCA Connection Cord (male-to-female)
Buy on Amazon.com
Other Materials
These other items are things that you will probably need for the installation, however you may have similar materials or ways of getting around. I’ve included some notes below so you can determine the need.
- Flex Tape: This will be used to wrap some wiring during the install to make a waterproof seal. There is a part of this install that may require cutting open a waterproof seal, and this tape will help re-seal so there will be no water intrusion.
Find on Amazon.com - Electrical Tape: You’re going to need quite a bit of this to wrap up all of the connections to be made.
Find on Amazon.com - Terminal Connector Plugs: may be needed for running a new wire between the reverse connector on the head unit to the reverse wire in the footwell.
Buy on Amazon.com
How the Rydeen MINy Backup Camera Works
Below is a wiring diagram that I sketched showing how the components hook up to one another. Keep in mind that the lines below may not represent actual electrical connections, but the way the wires from the various connectors and plugs connect to one another. Use this diagram as more of a schematic along with the install procedure below.
It helps to understand how the whole system works. I say this because when I was troubleshooting issues during the install, it was difficult to know why something wasn’t working even though everything seemed to be connected properly. Here’s a quick summary of how the system works:
- When the key is turned to ignition, +12V accessory power runs to the head unit which powers it on.
- When the Scion T10015 head unit powers on, it sends +6V power through the CAM-TY11 connector. As you can see below, the power to ground connection powers on the Rydeen camera.
- Within the first five seconds of the head unit being turned on, it checks for a video signal. If it sees the camera, it will enable the backup camera feature. If it does not get a video signal, it will disable the backup camera feature.
- Moving forward, whenever the car is shifted into reverse, the +6V power is sent through the CAM-TY11 connector to power on the backup camera (if the backup camera feature is enabled). If the backup camera was getting its power from the reverse lights (like you would with some universal backup camera kits), then the head unit would not get the proper signal at start up in order for it the enable the backup camera feature.
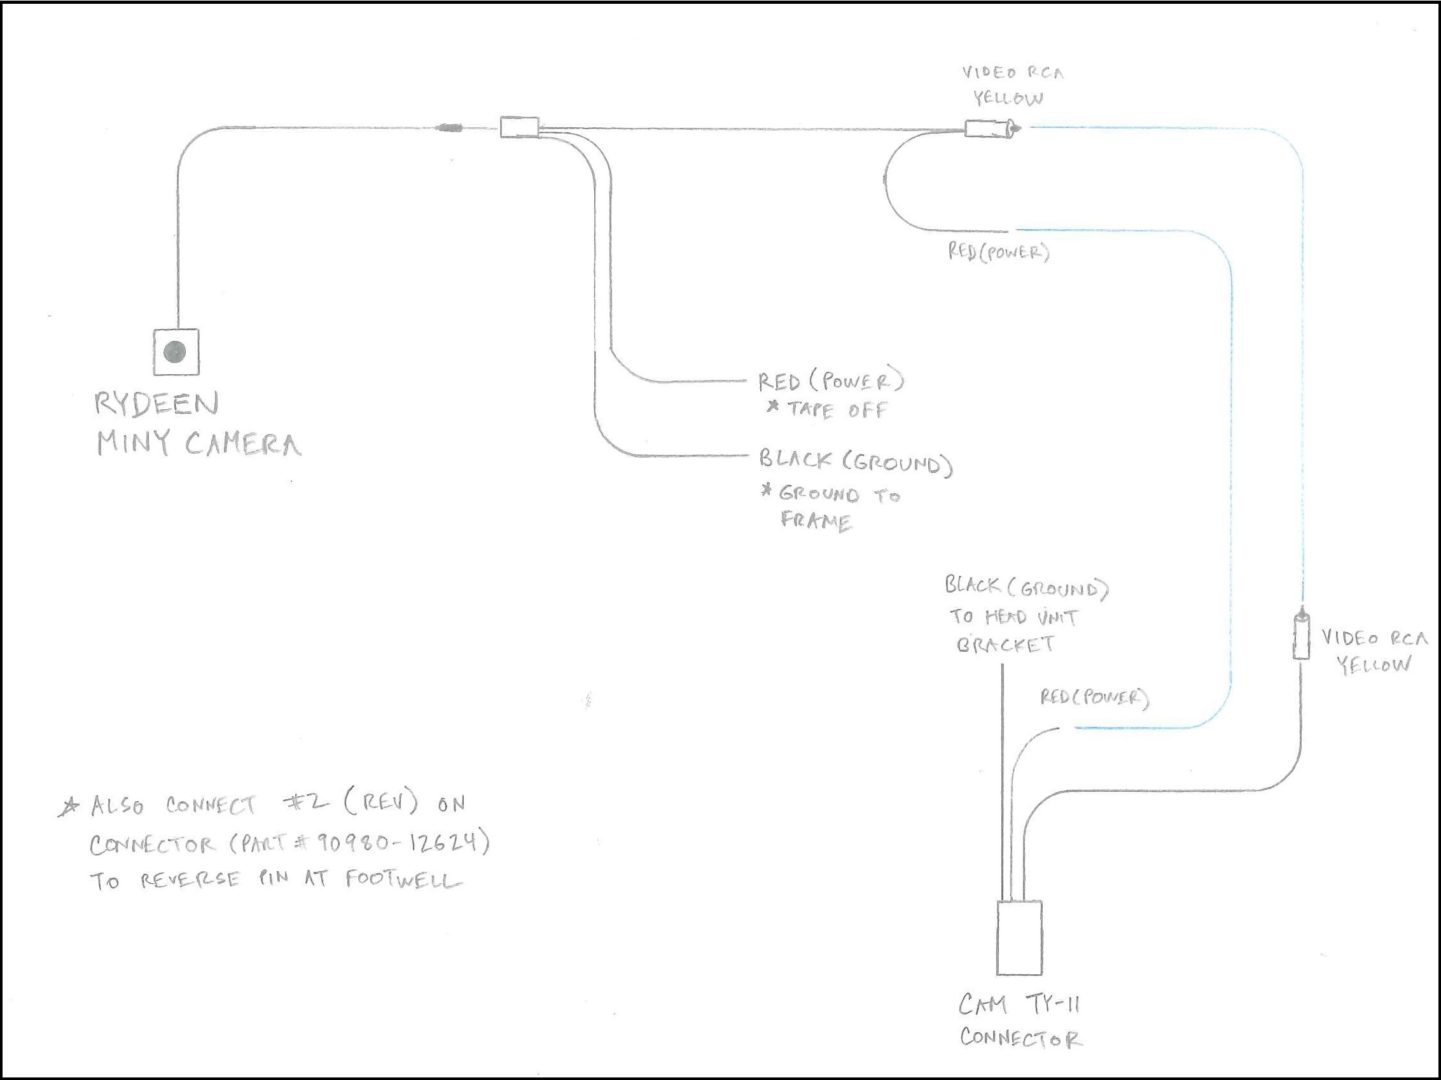
* note that an extra wire needs to be connected between the #2 (REV) connector on part #90980-12624 and the reverse pin at the footwell. More on this later.
I’d like to add here that one reader said that he wasn’t able to get the backup camera working even though he had it wired up the way the diagram shows above. He ended up disconnecting the red (power) pigtail off of the yellow RCA plug and taped it off. He then ran a power wire connecting from the red (power) pigtail running off of the Rydeen backup camera, directly to the red (power) wire coming off of the CAM TY-11 connector. So if you are running into an issue with your backup camera not working, this may resolve your issue.
Rydeen MINy Backup Camera Install
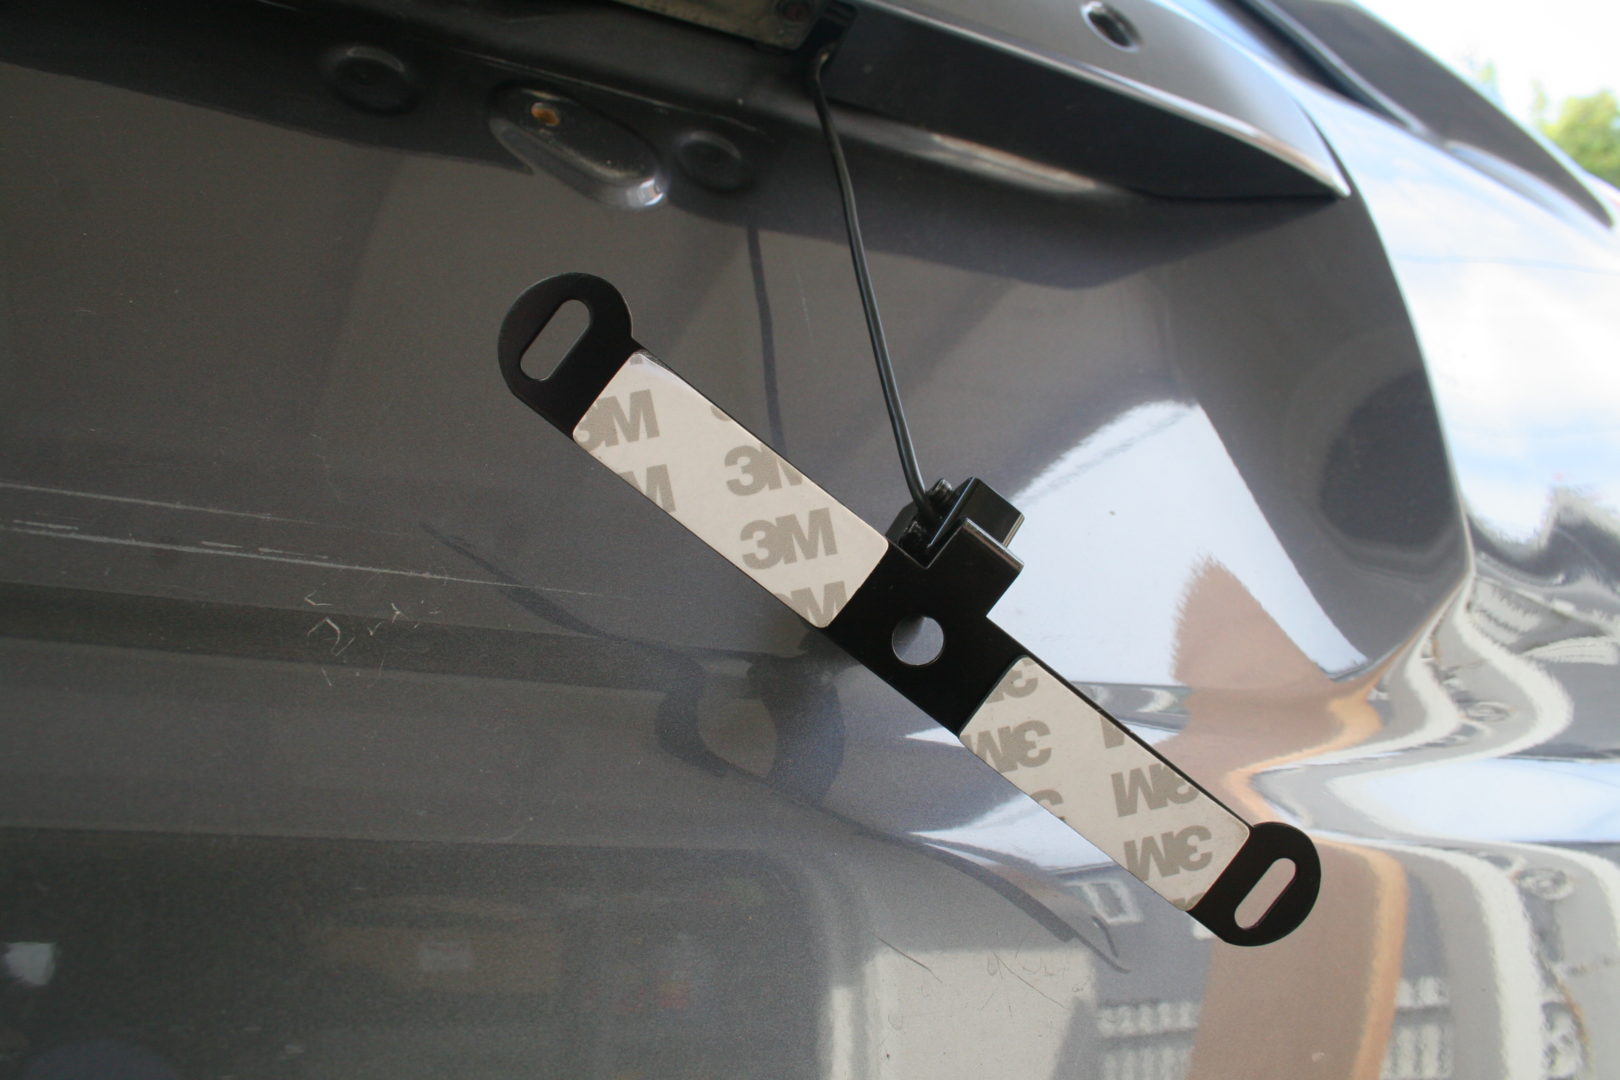
I chose the Rydeen MINy backup camera because I didn’t want to drill any holes. This camera can be installed with a license plate mount. Contrary to other license plate mounted backup cameras which tend to look bulky or cheesy, this one looks sleek and low-profile.

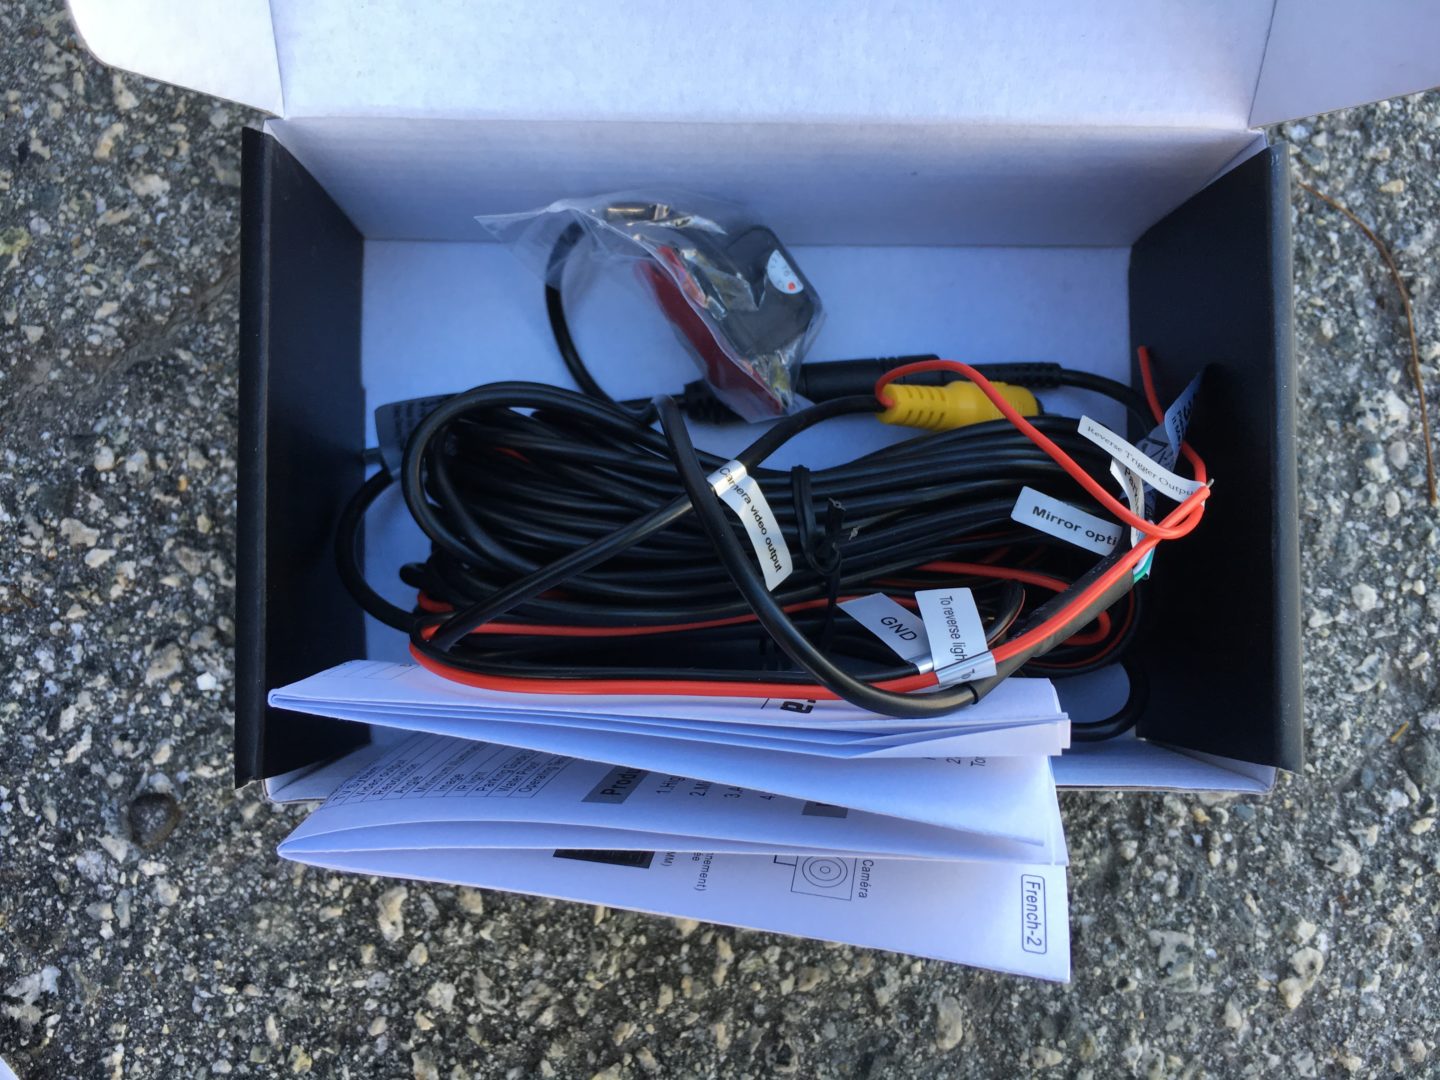
When you remove the wiring from the box, it can look like quite the mess. That’s why I found it helpful to sketch out the wiring and connections to keep my mind straight during the install.
The MINy camera and mount:
Disconnect the negative terminal of your battery to ensure you don’t damage any electrical wiring/components during the install. I would recommend opening the tailgate first before disconnecting the battery since the latch is electronically controlled.
The first part of the install is to mount the camera and run all of the wiring. I decided to start off with installing the backup camera and getting the wiring through the tailgate and into the cabin.
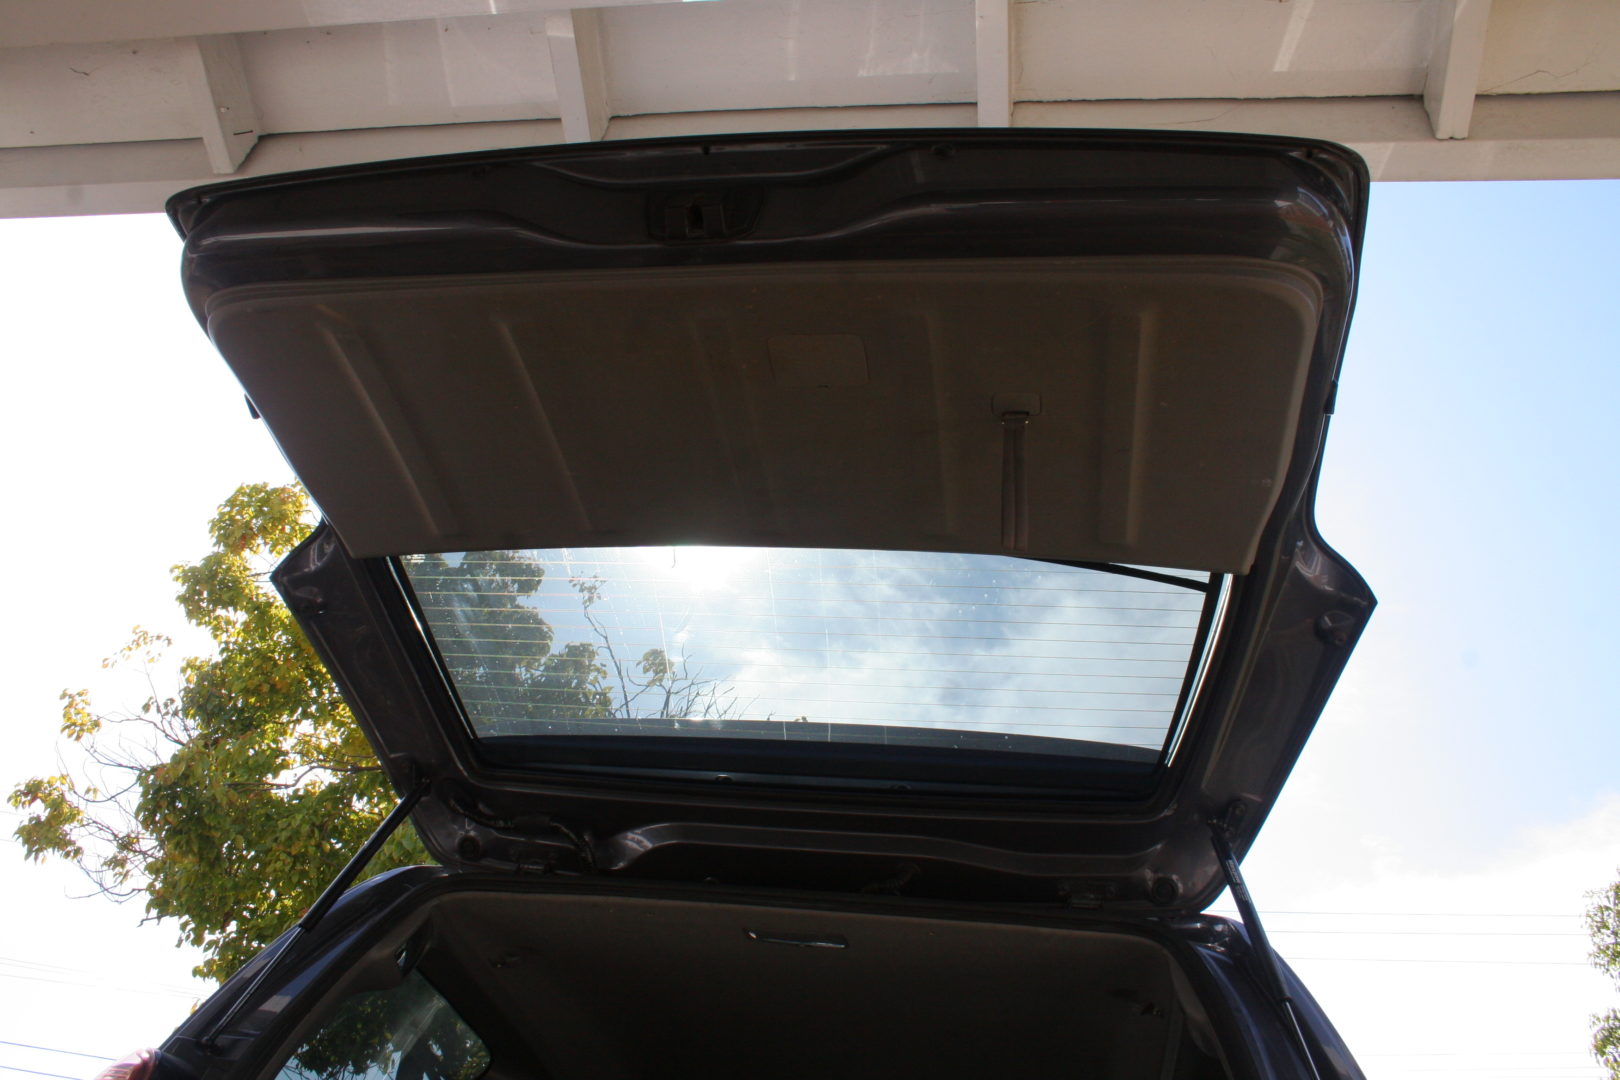
After opening the tailgate, you should be able to undo the bolt that is hiding behind the trim piece where the pull handle is. After removal of this bolt, the whole interior tailgate trim can be pulled off by hand. Work your way around the edges of the trim and pry the little trim clips off. After you’ve worked your way around the trim, you can slide the tailgate trim towards the hood struts and the entire piece will come off.
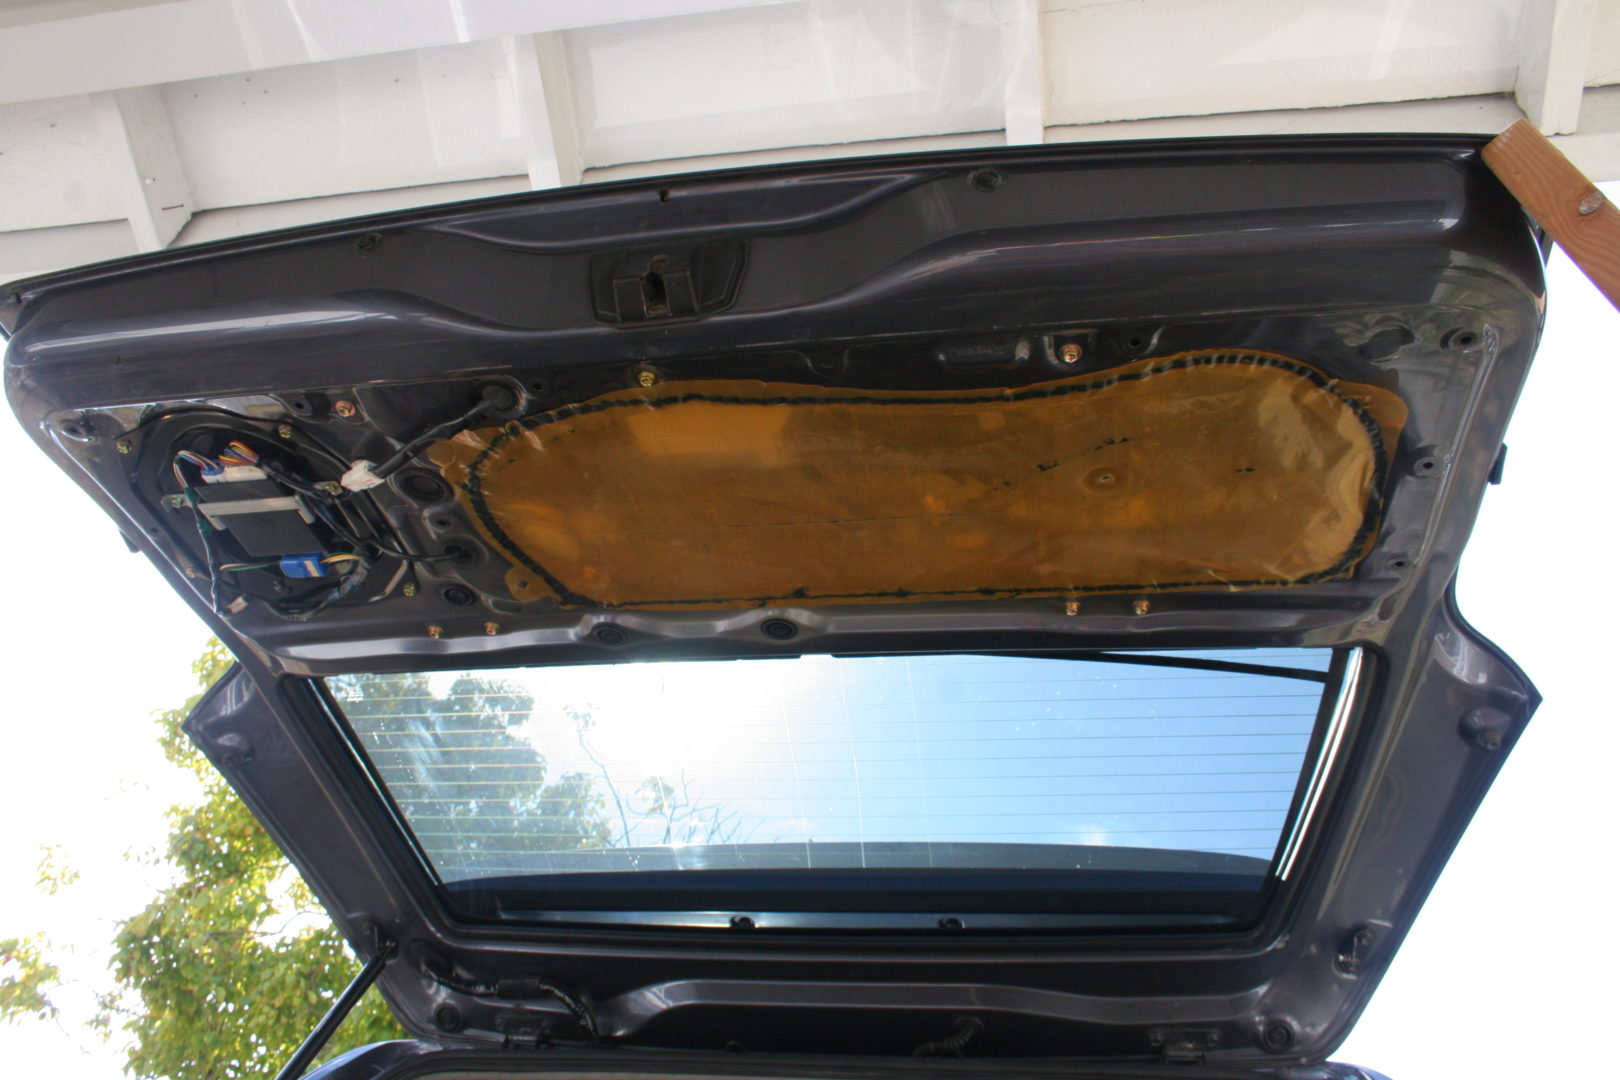
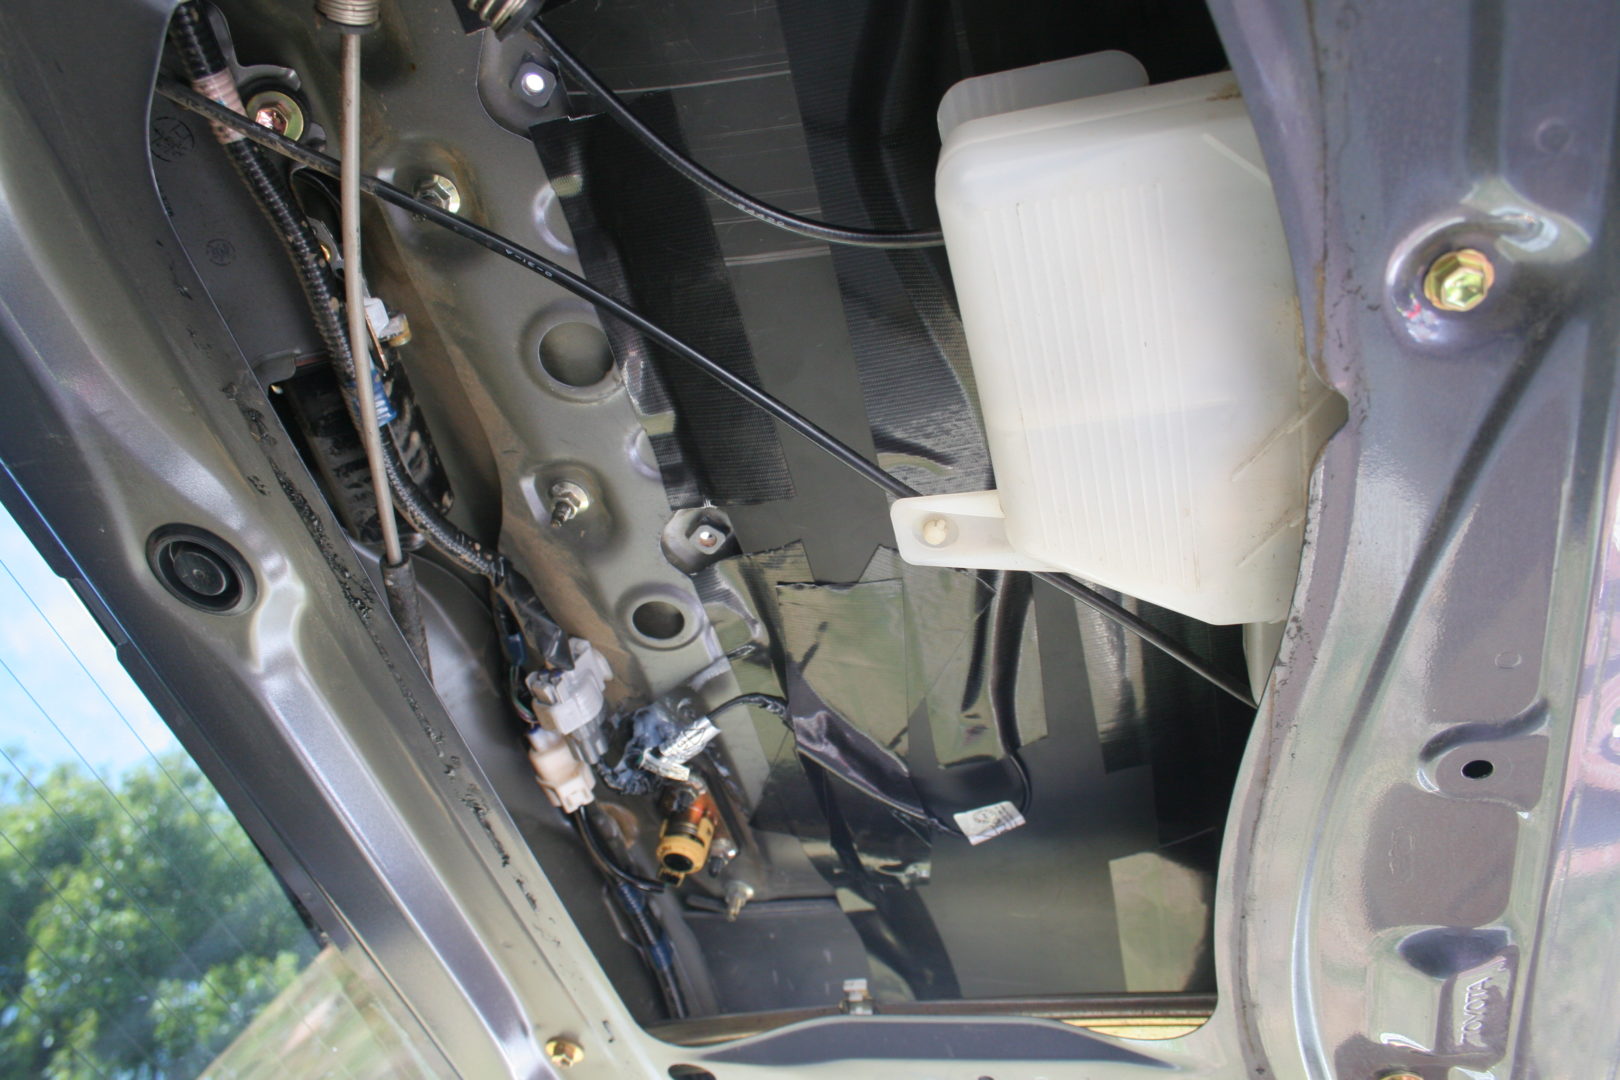
You’ll see this butyl rain-proofing that holds the orange plastic sheet in place. The weather proofing gunk can get messy so be careful. I normally use a razor blade or Xacto knife to slit the butyl ribbon between the plastic sheet and tailgate frame. This plastic sheet with butyl along the perimeter can easily be pressed back into place during reinstall.

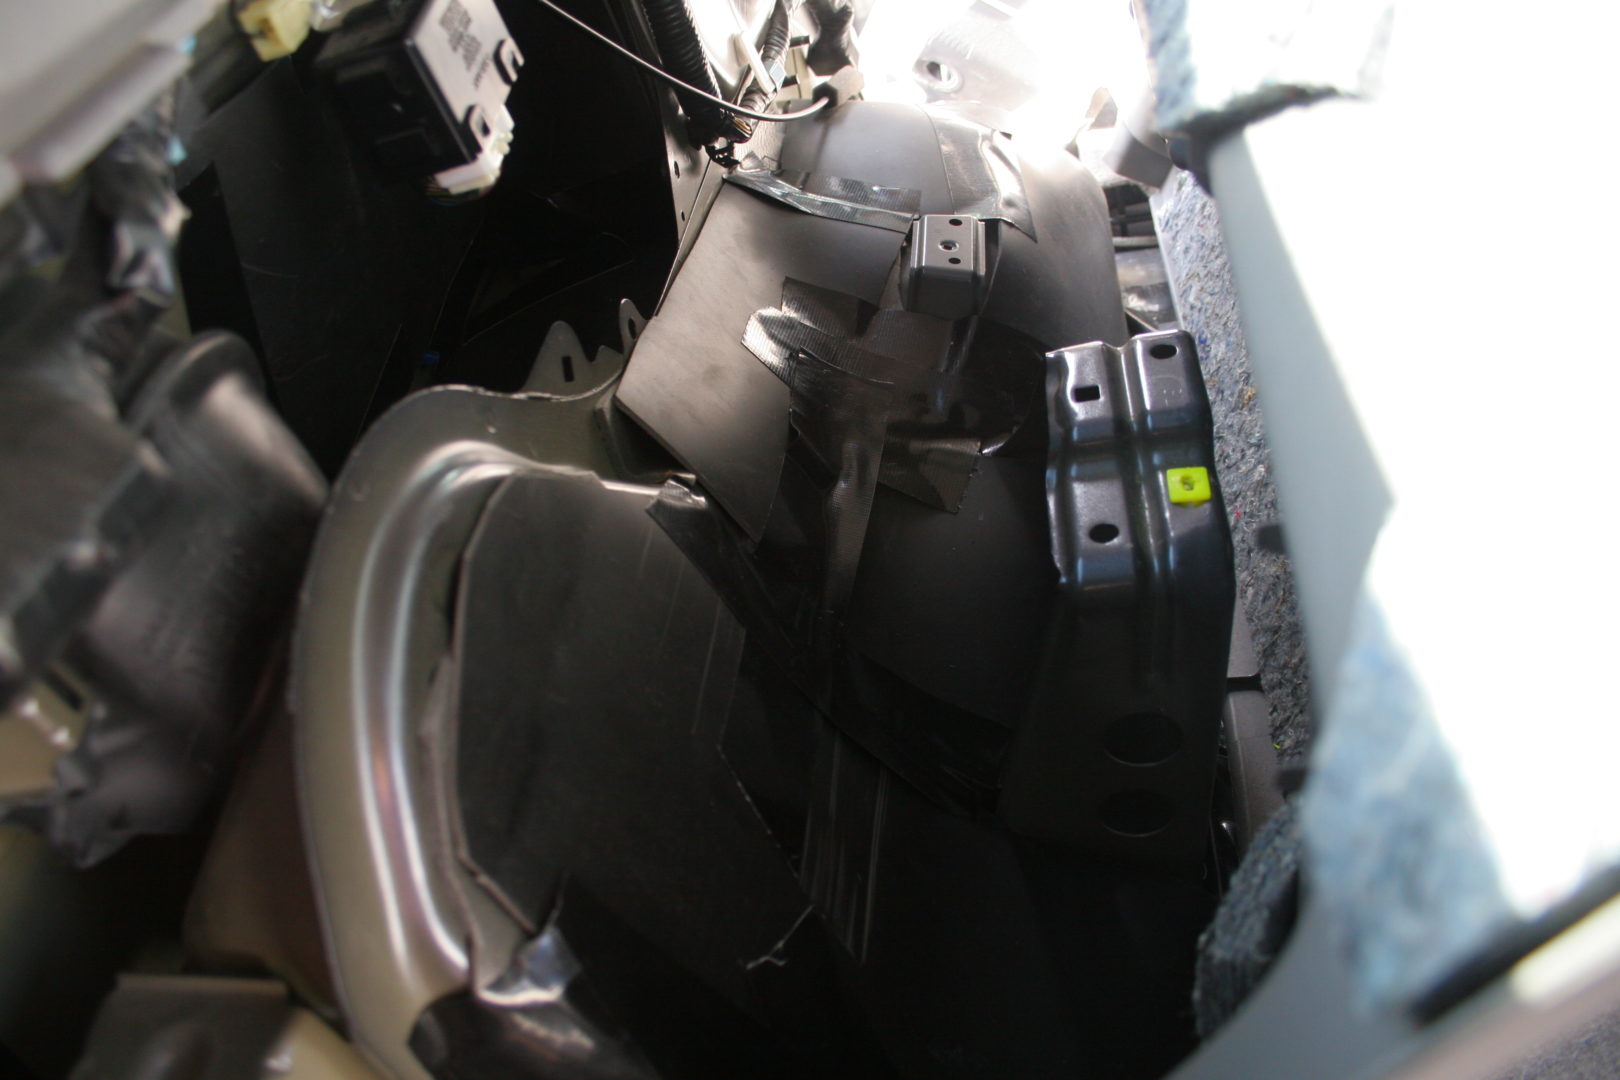
Now you’ll see something like this. Remove the window motor (via the mounting bolts) and any other things that might get in your way when you run the wiring.
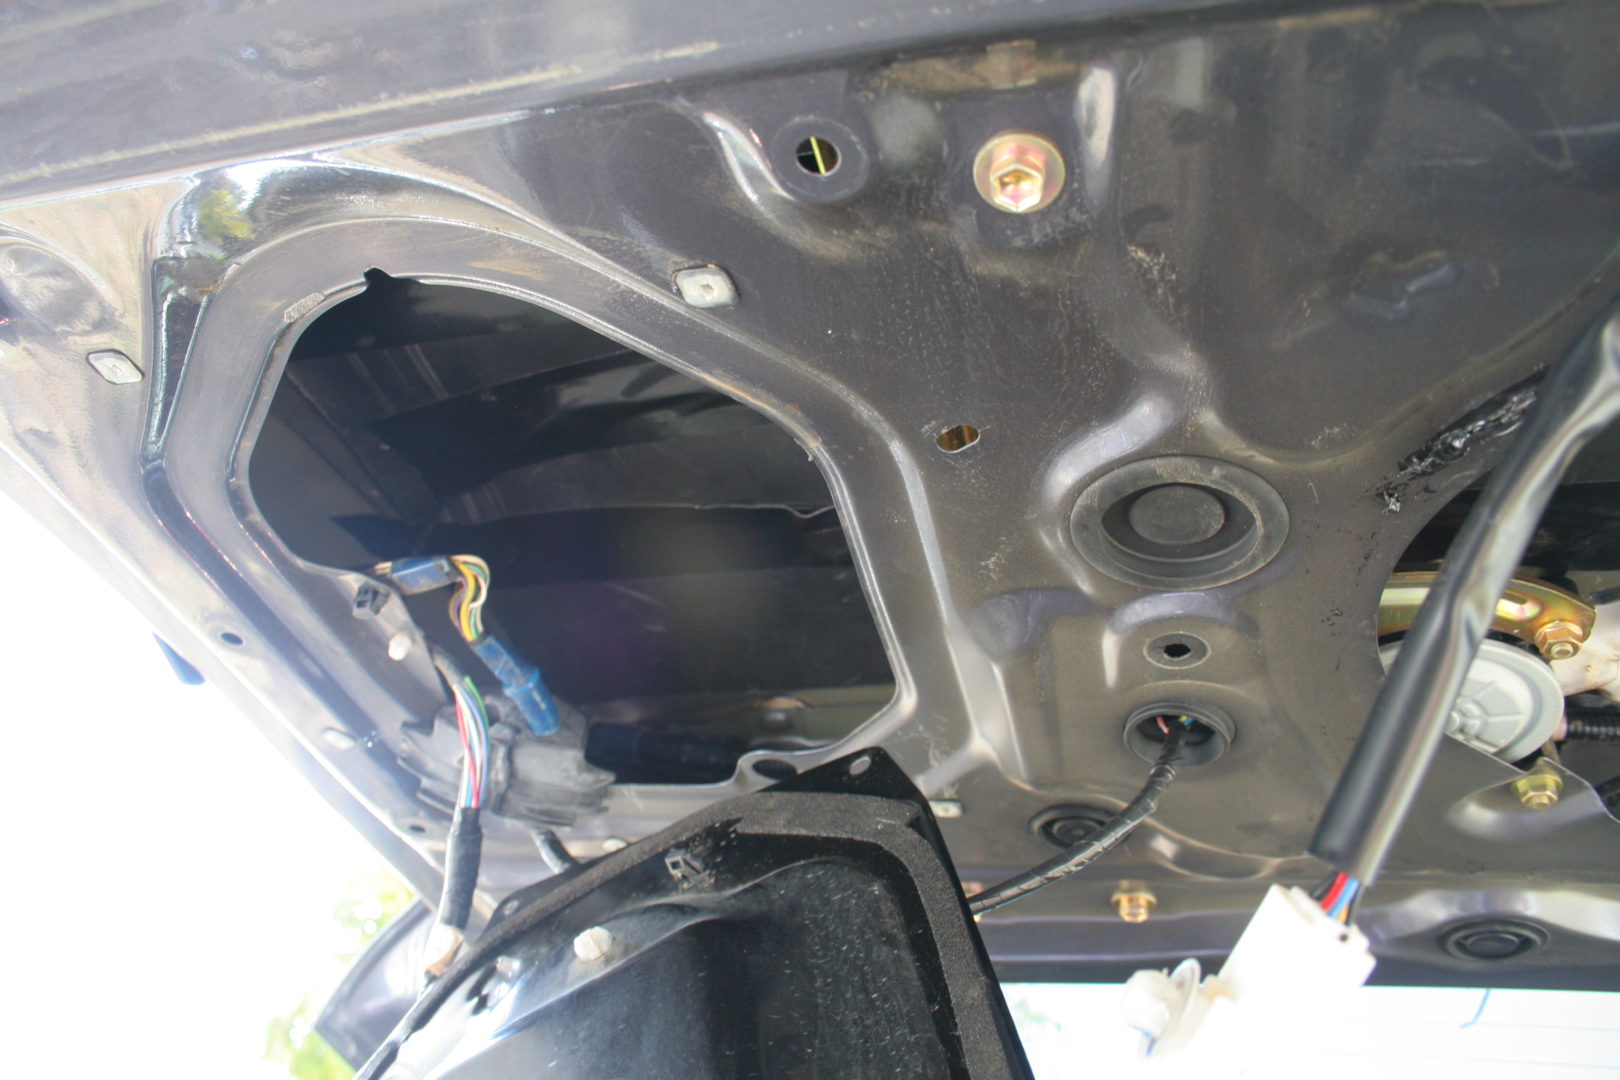
There are several nuts that need to be removed from the inside of the tailgate that hold the trim piece (shown partially removed in below photo), and two nuts that hold the key lock cylinder in place. After these nuts are removed, the rear trim piece that includes the Toyota emblem can be pulled off by hand.
The camera itself is attached to the license plate mount via the two small bolts provided.

It takes a bit of finagling to get the holes lined up, but it will eventually. You can get the bolts screwed all the way through. This should be how it looks in it’s final place minus the license plate.

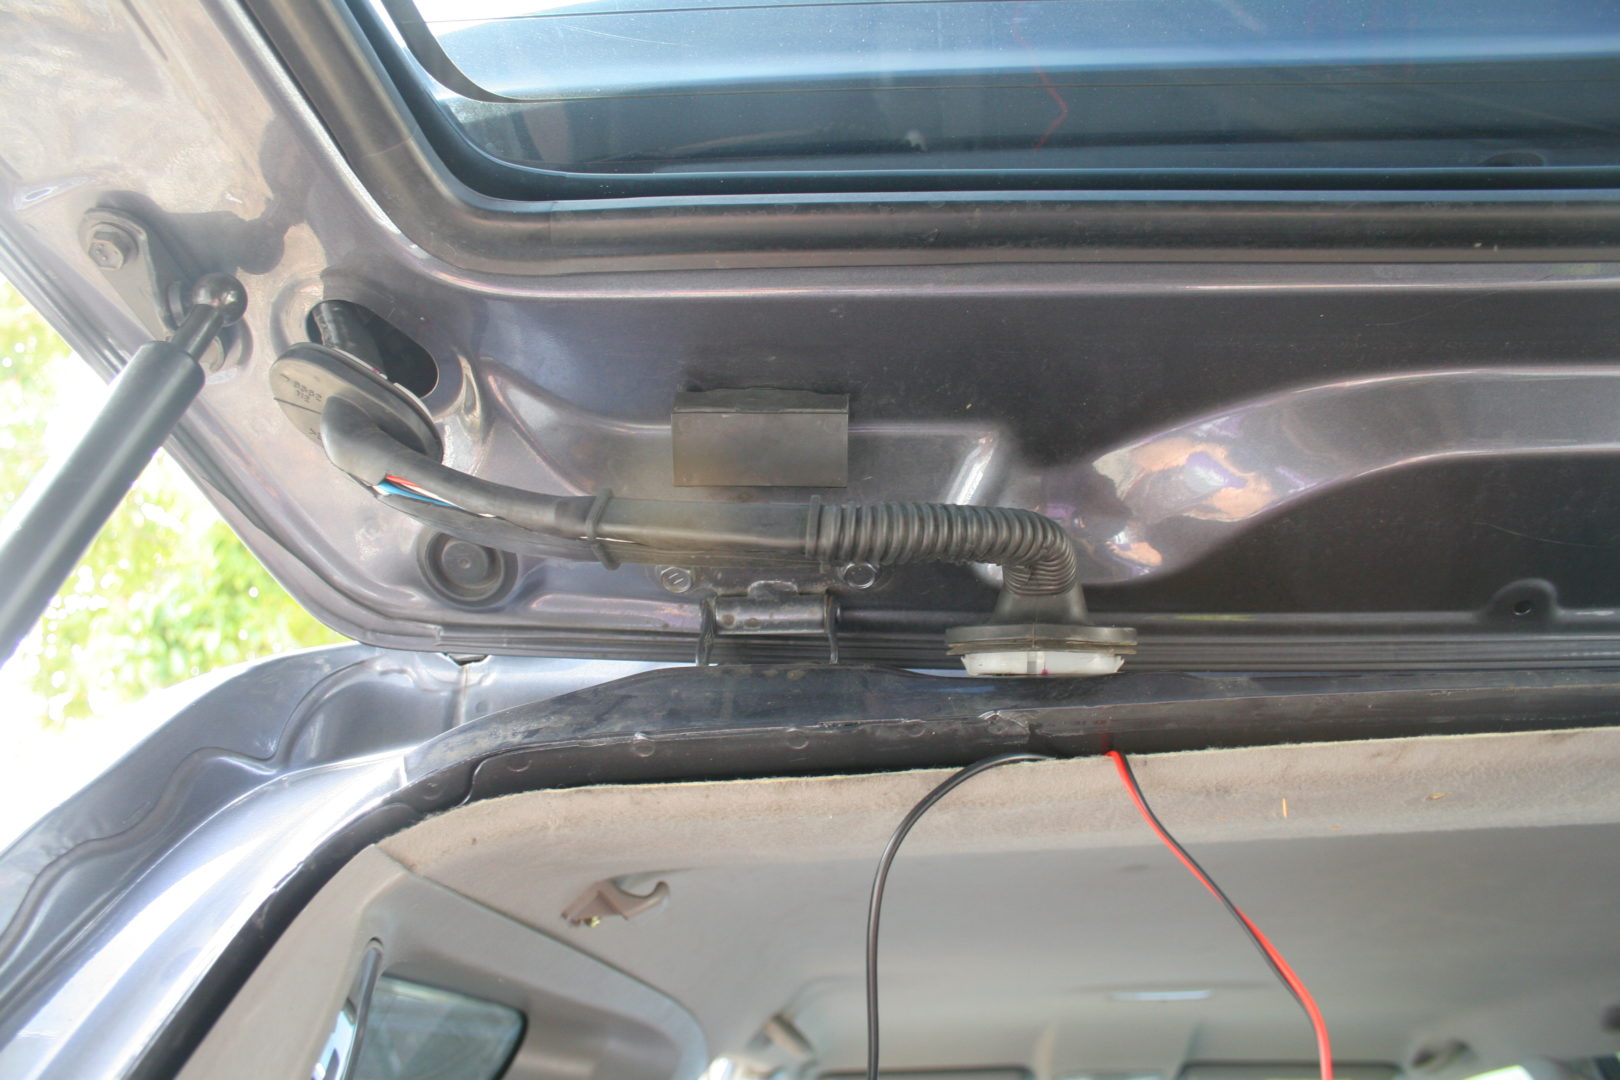
The wire from the camera needs to be run through the rubber gasket where all of the other electrical wiring runs through. These wires include the ones for the license plate lights and for the rear window motor.
There was very little room to stick another wire (with connector) through the hole along with the other wires. So, I poked a new hole through the rubber grommet and ran the wiring through there. In order to ensure it was protected from any water intrusion, I made sure the wiring was in its final position and then filled the gap around the new wire and hole with silicone caulking.

It’s not the prettiest thing to look at, but the important thing is that it’s waterproof. After the silicone caulking set, I then ran the wiring with the skinny black connector through the inner part of the tailgate on the vehicle’s left side. The wire needs to be pushed through this corridor in the tailgate up towards the tailgate hinge.
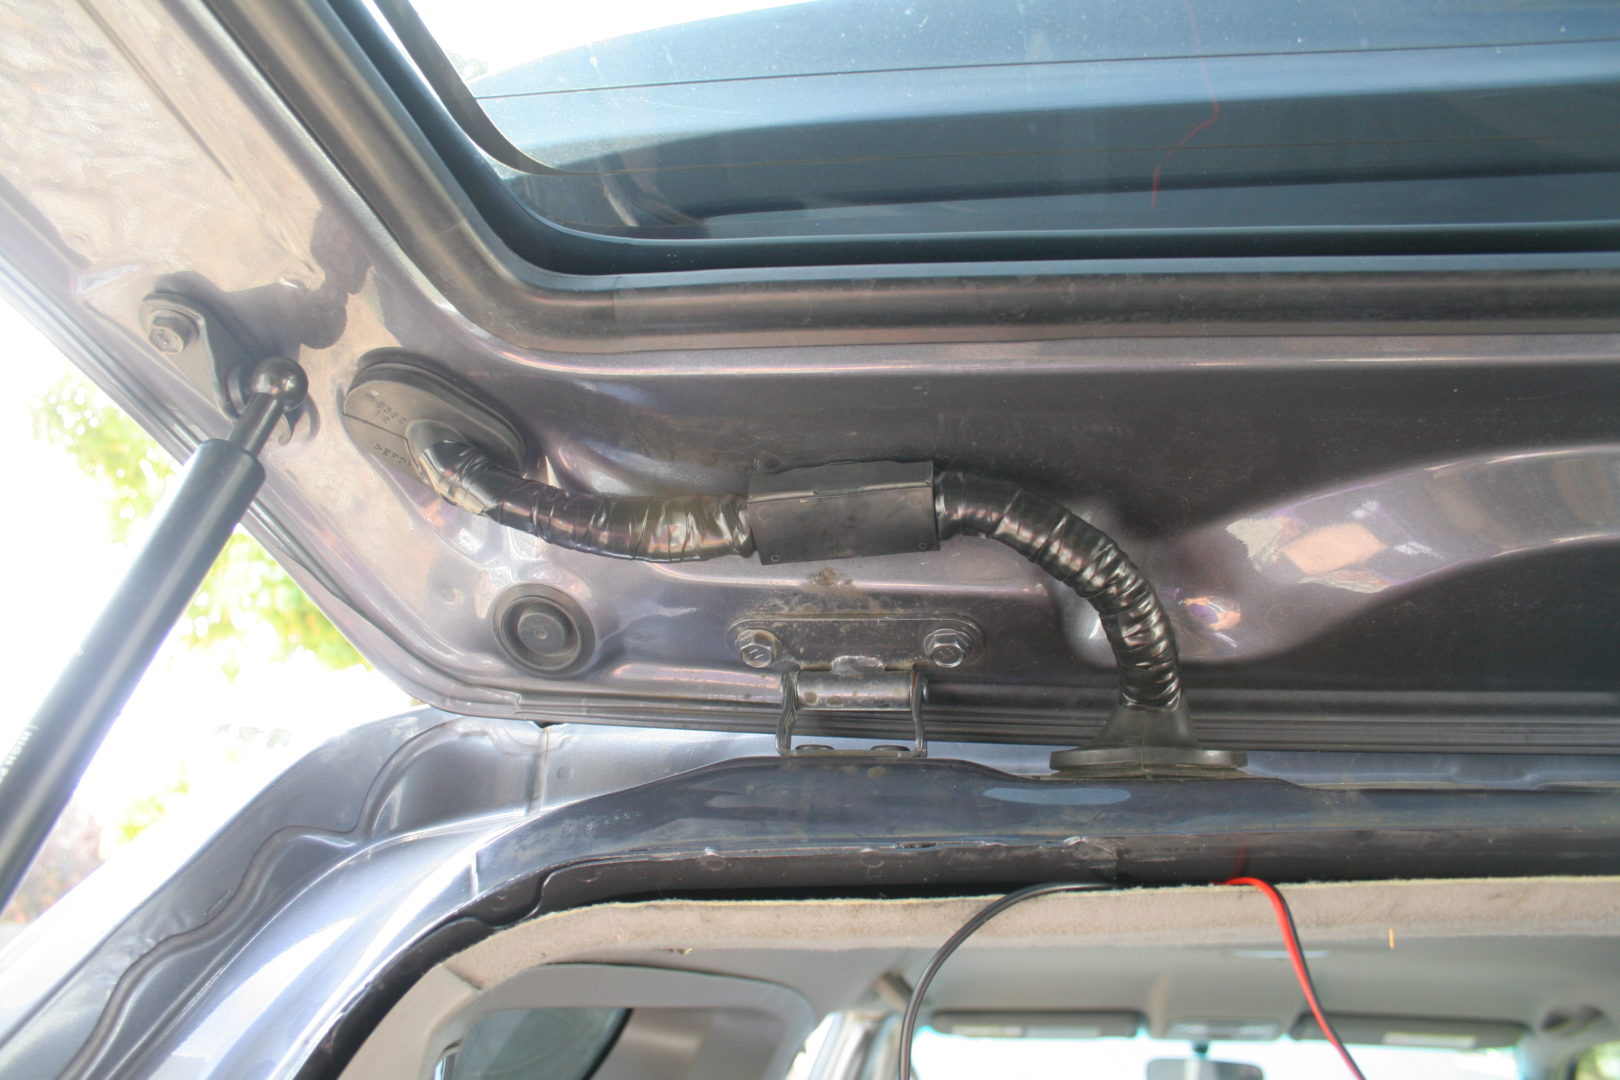
To facilitate the movement of the wiring through this part of the tailgate, it helps to use a fish tape or a wire hanger to tape the wiring to, in order to guide it through. If you are disassembling a wire hanger to use as a fish tape, make sure that the tip is filed smooth so that you’re not poking and causing damage to other electrical wiring during the fishing process.

This ribbed rubber conduit between the tailgate and the body of the car is very difficult to get through if you want to keep the rubber intact. I agonized trying to get the wiring through and eventually decided I was going to cut it open so that I could get the wire and connector through. Although the connector is fairly narrow and cylindrical, there was no way I was going to get it through this passage without cutting this ribbed rubber section open.
Going with an Xacto knife, I cut a slit through the rubber piece so that I could get the wire through. I figured I could wrap it all back again when I was done fishing the camera’s wire through.

With the wire run through this section, I covered the wires with the rubber conduit again. Since there is an opening now, I used a waterproof wrap such as Aqua Seal or Flex Tape to reseal this set of wires. I used this waterproof seal tape to wrap around the open slit kind of like wrapping a new grip on a tennis racket. On top of that, I generously wrapped over the waterproof seal with electrical tape so that I could everything sealed up nice and tight.
The entire wrapped wire set can be put back into the plastic clip and secured. The plastic/rubber grommets can be popped back into place (one on the tailgate, and one on the body of the car).

Phew! Now have a beer (or your choice of non-alcoholic beverage). In my opinion, that part was the most frustrating part of doing the backup camera wiring.
Moving on, the black connector coming from the Rydeen camera should be connected to the mating connector and then taped together in order to keep it from pulling apart in the future.

Before moving forward, secure the wires that you’ve run directly to the metal sheeting. I used Gorilla Tape to tape the wires to the tailgate, but you can use anything that you can be confident will hold the wires to the sheet metal for a very long time. The last thing you want is for you to be rolling down the tailgate window and have it catch, consequently pulling out the wiring that you just put in.
Now, the window motor can be put back, plastic protective sheet with butyl ribbon can be pressed back on, and tailgate trim can be put back on and secured.
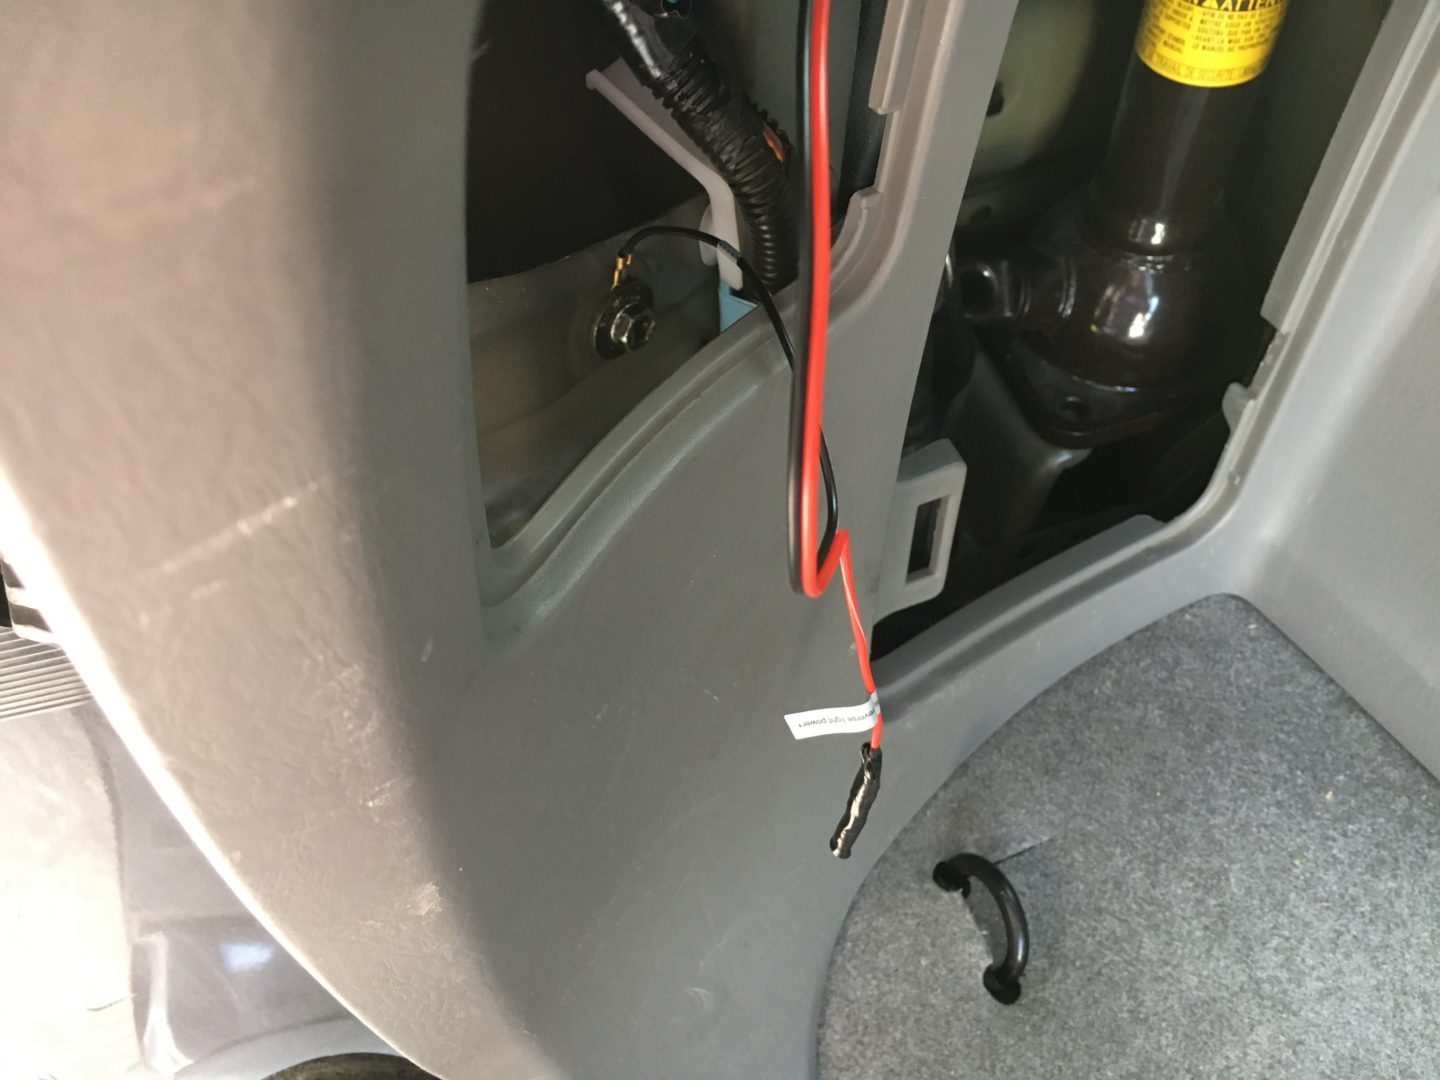
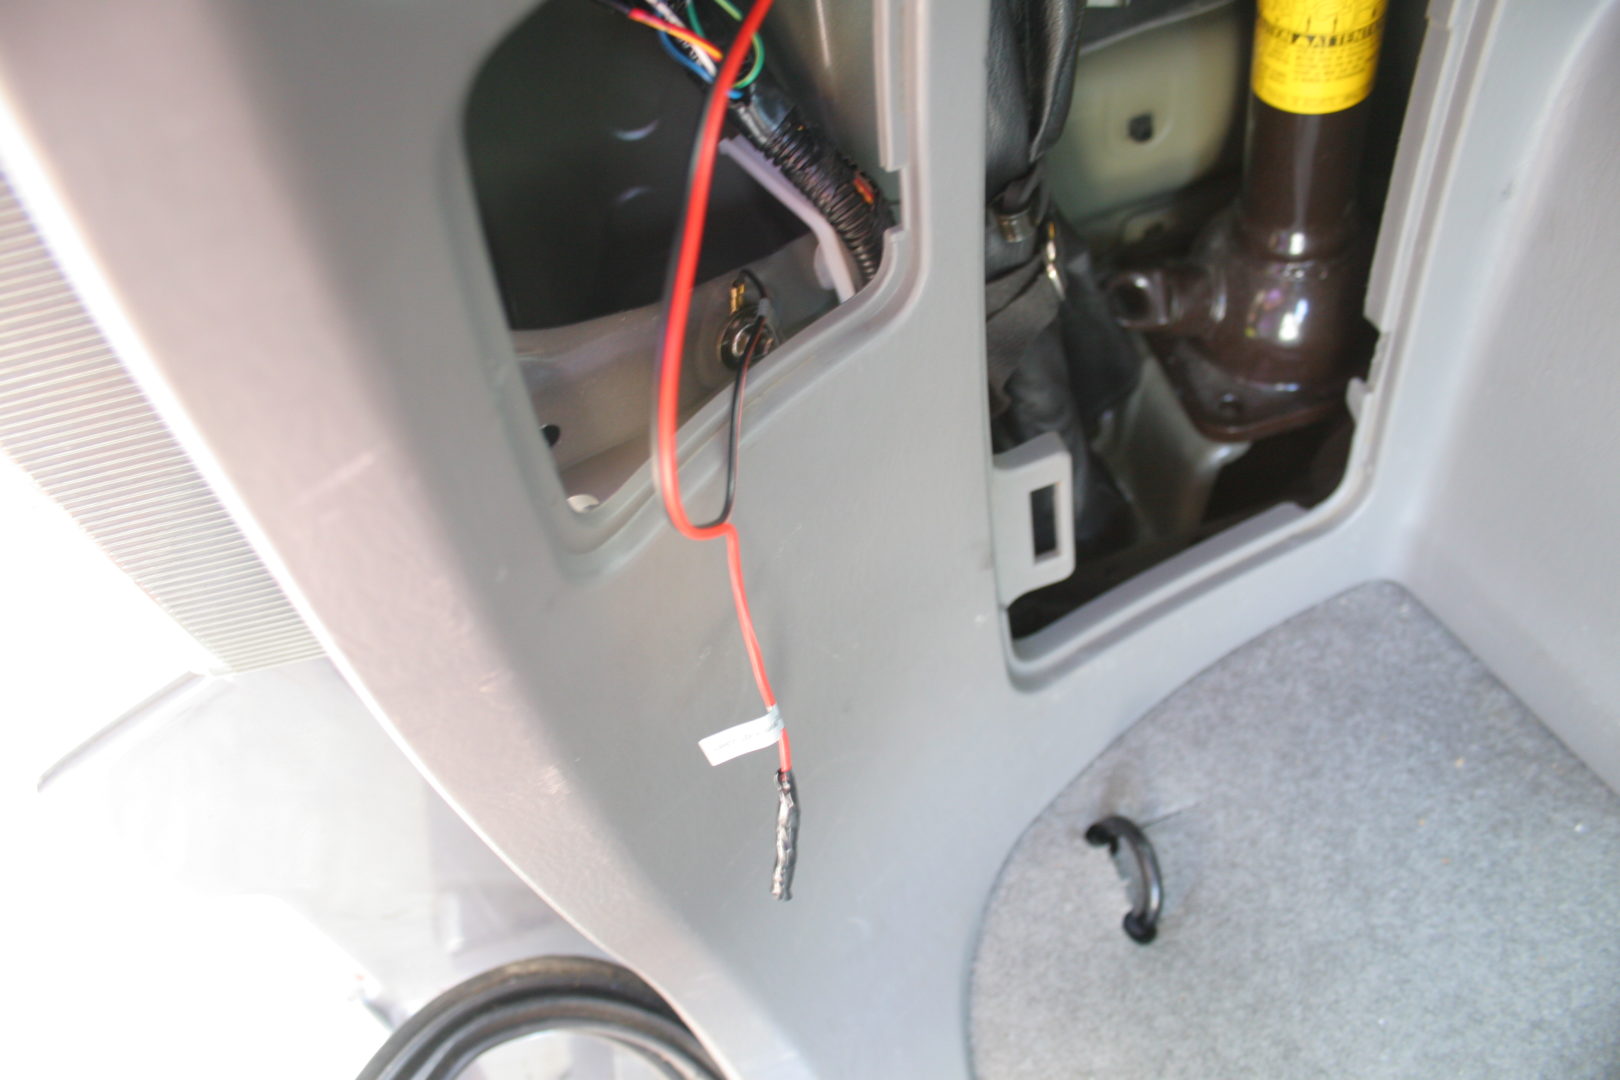
There are three wires that comes out of the cylindrical black connector (see wire diagram at top of post).
One is a red power wire that should be taped off. I wrapped the end with electrical tape and set it aside.
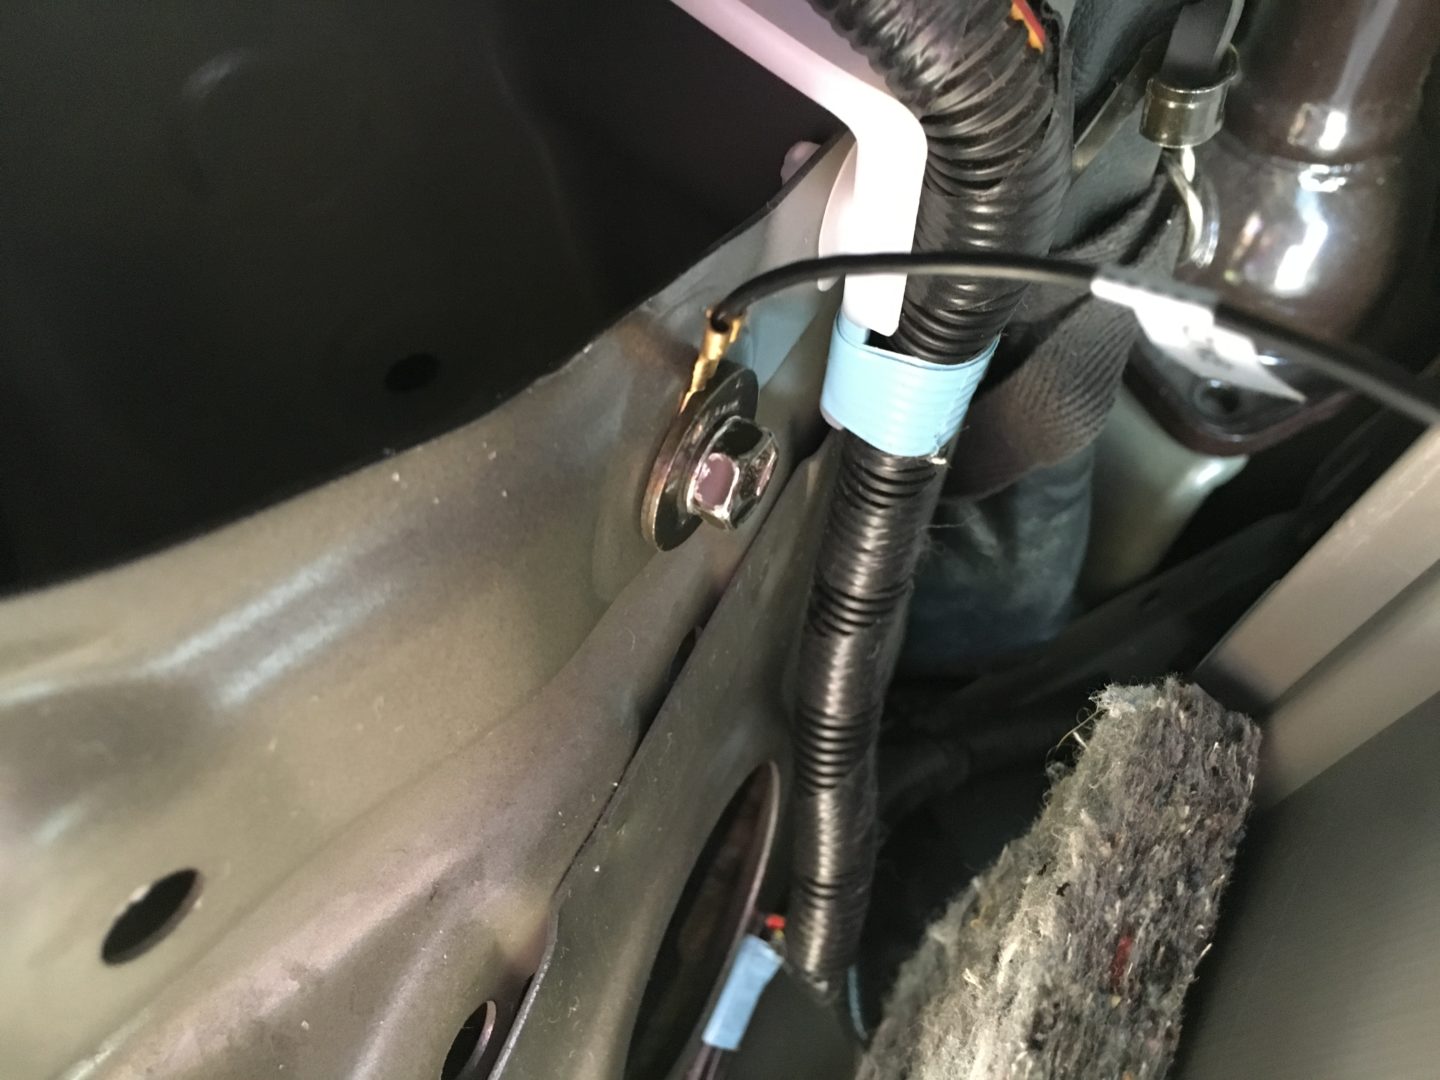
The other is a black wire with a fork connector that needs to be connected to the frame of the car. I found an empty bolt hole and a matching bolt that I was able to make use of to connect the fork connector to the frame. Before bolting the connector the frame, I scratched up the surface of the metal so that there was good contact for ground.
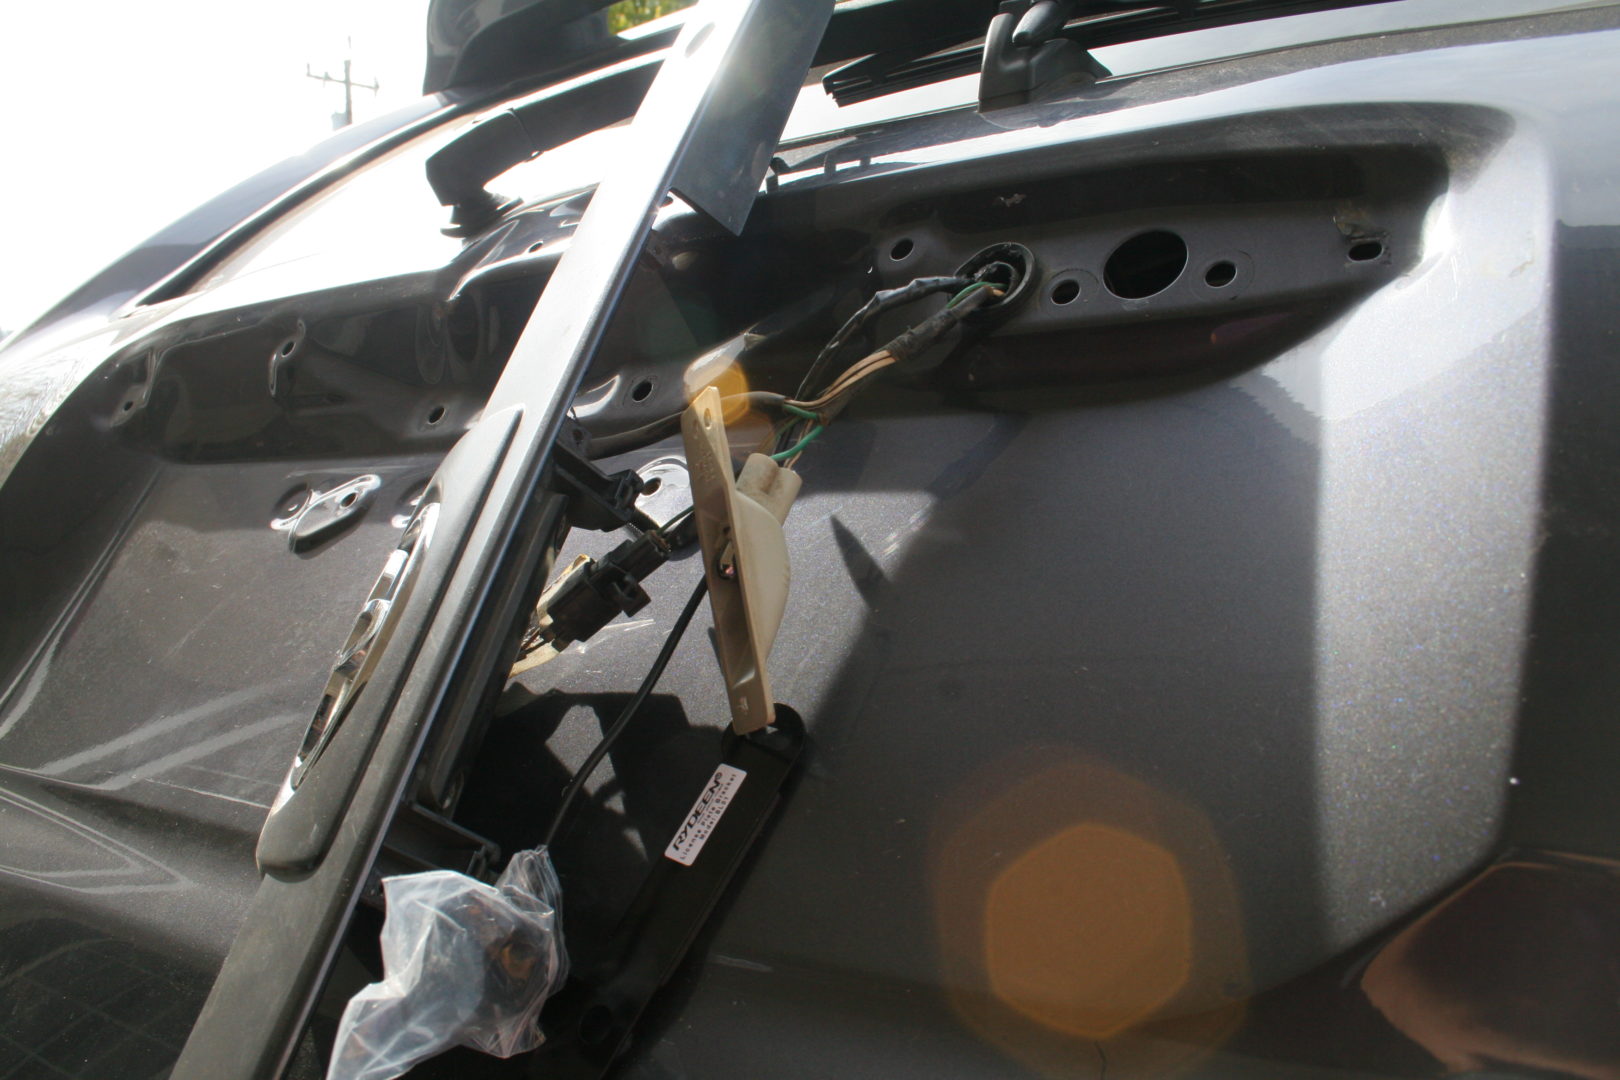
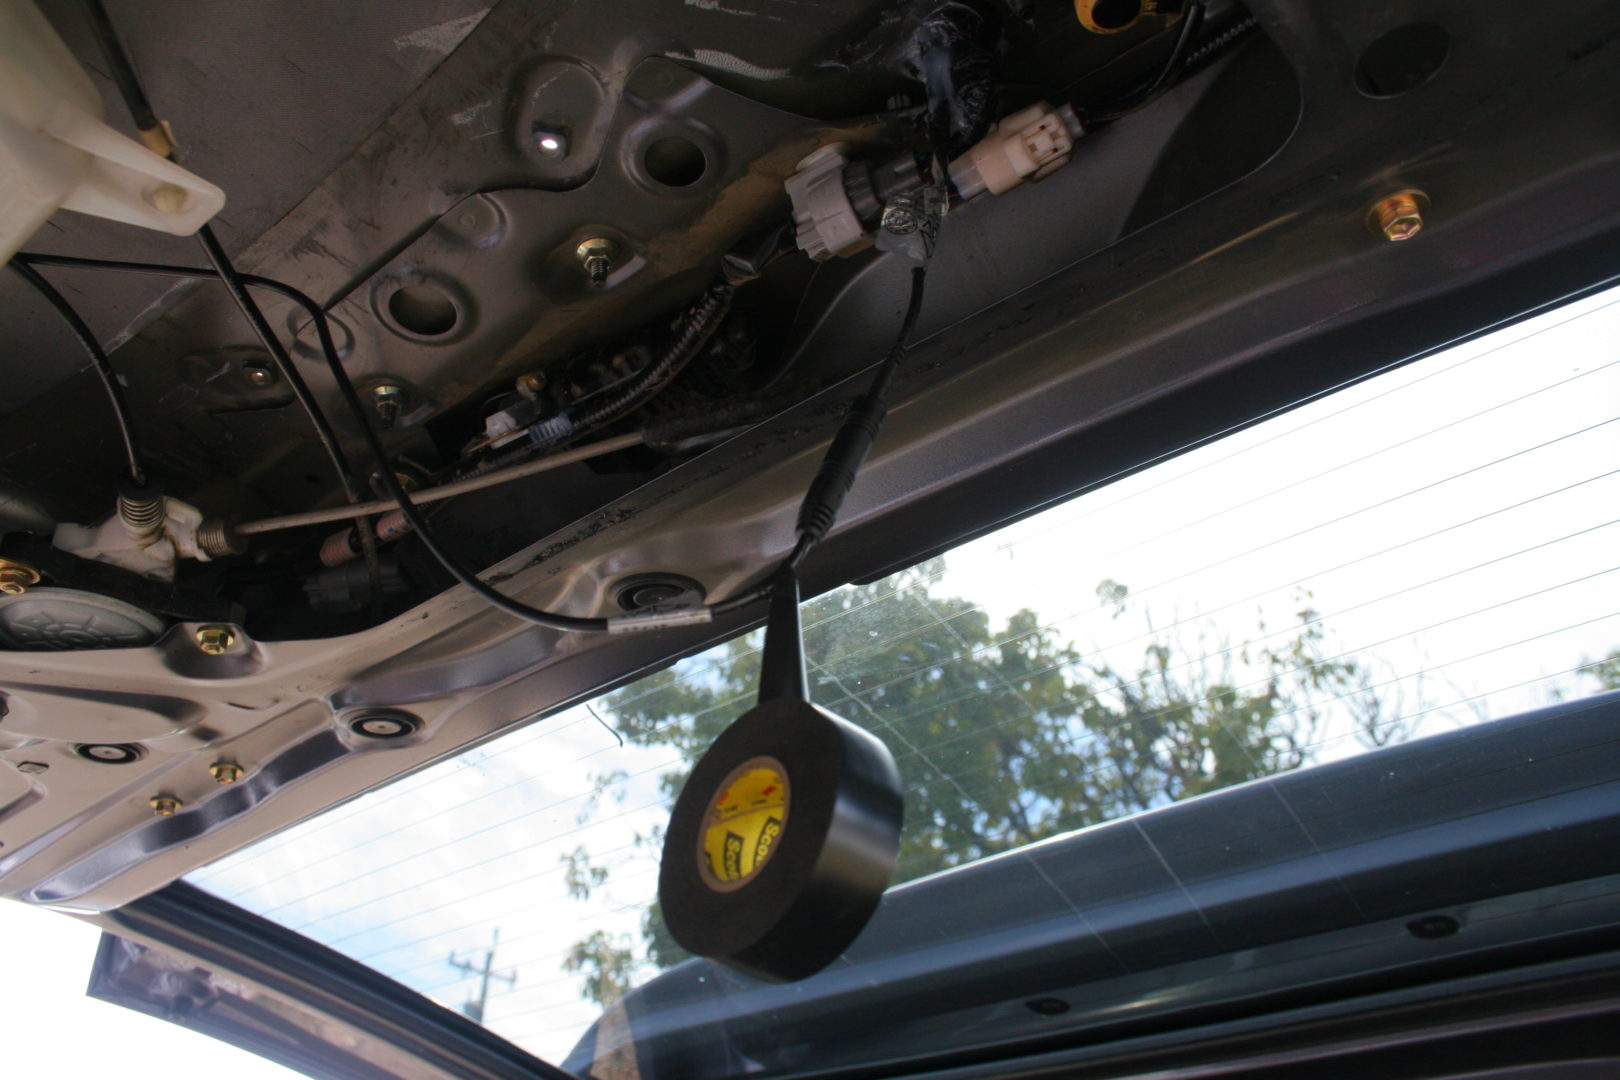
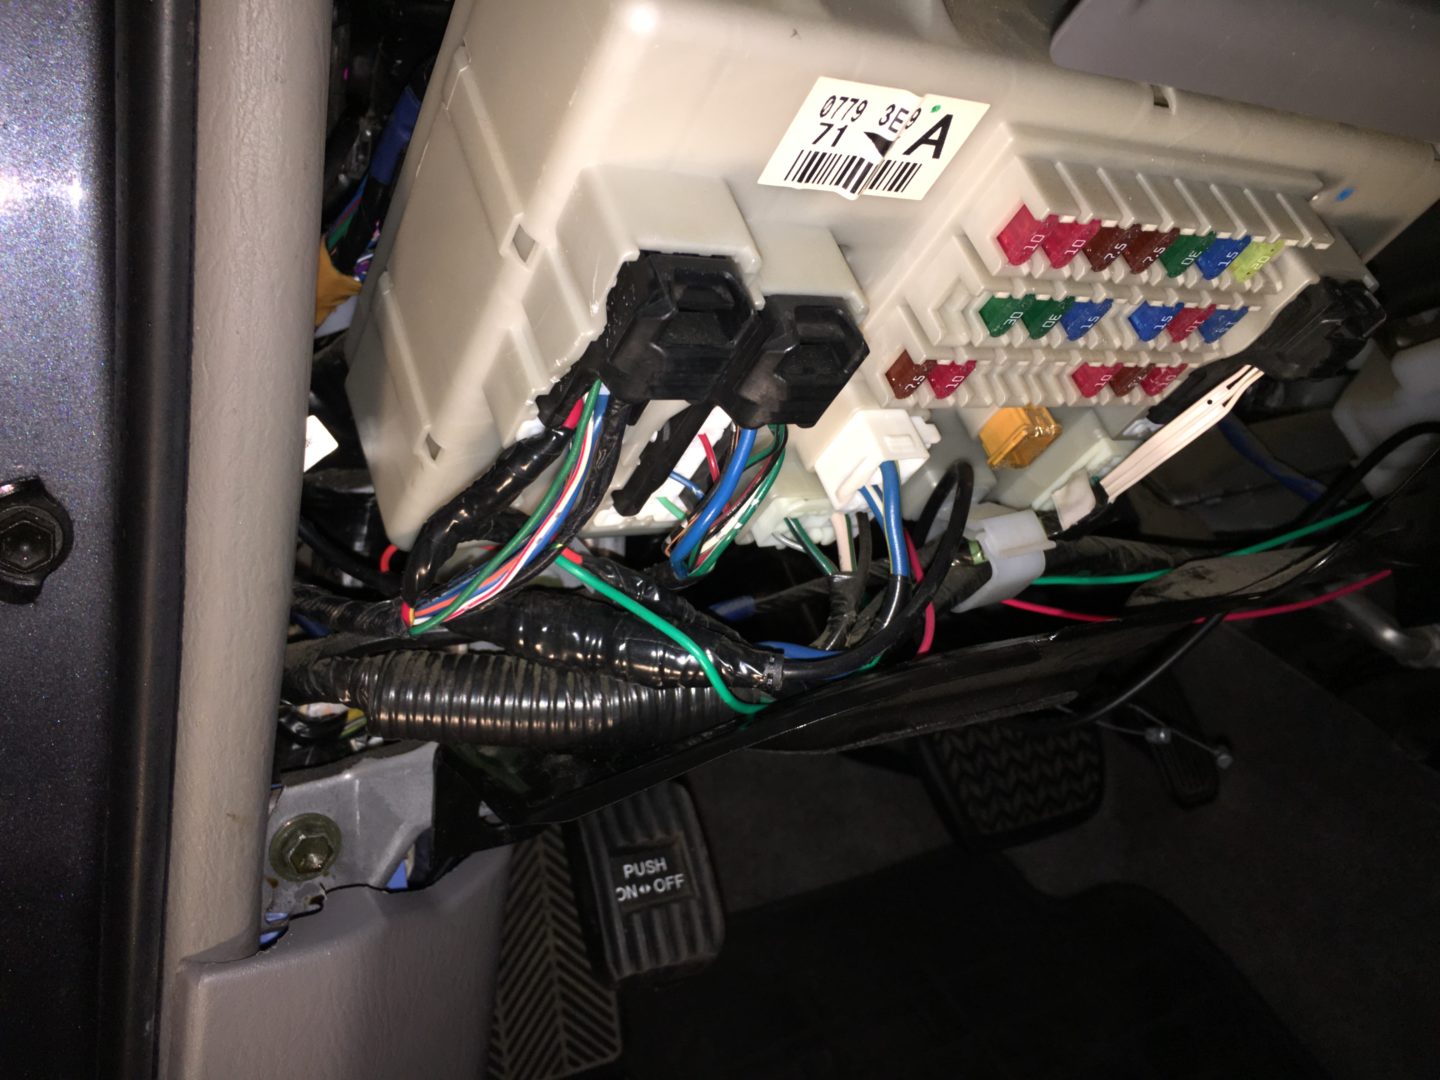
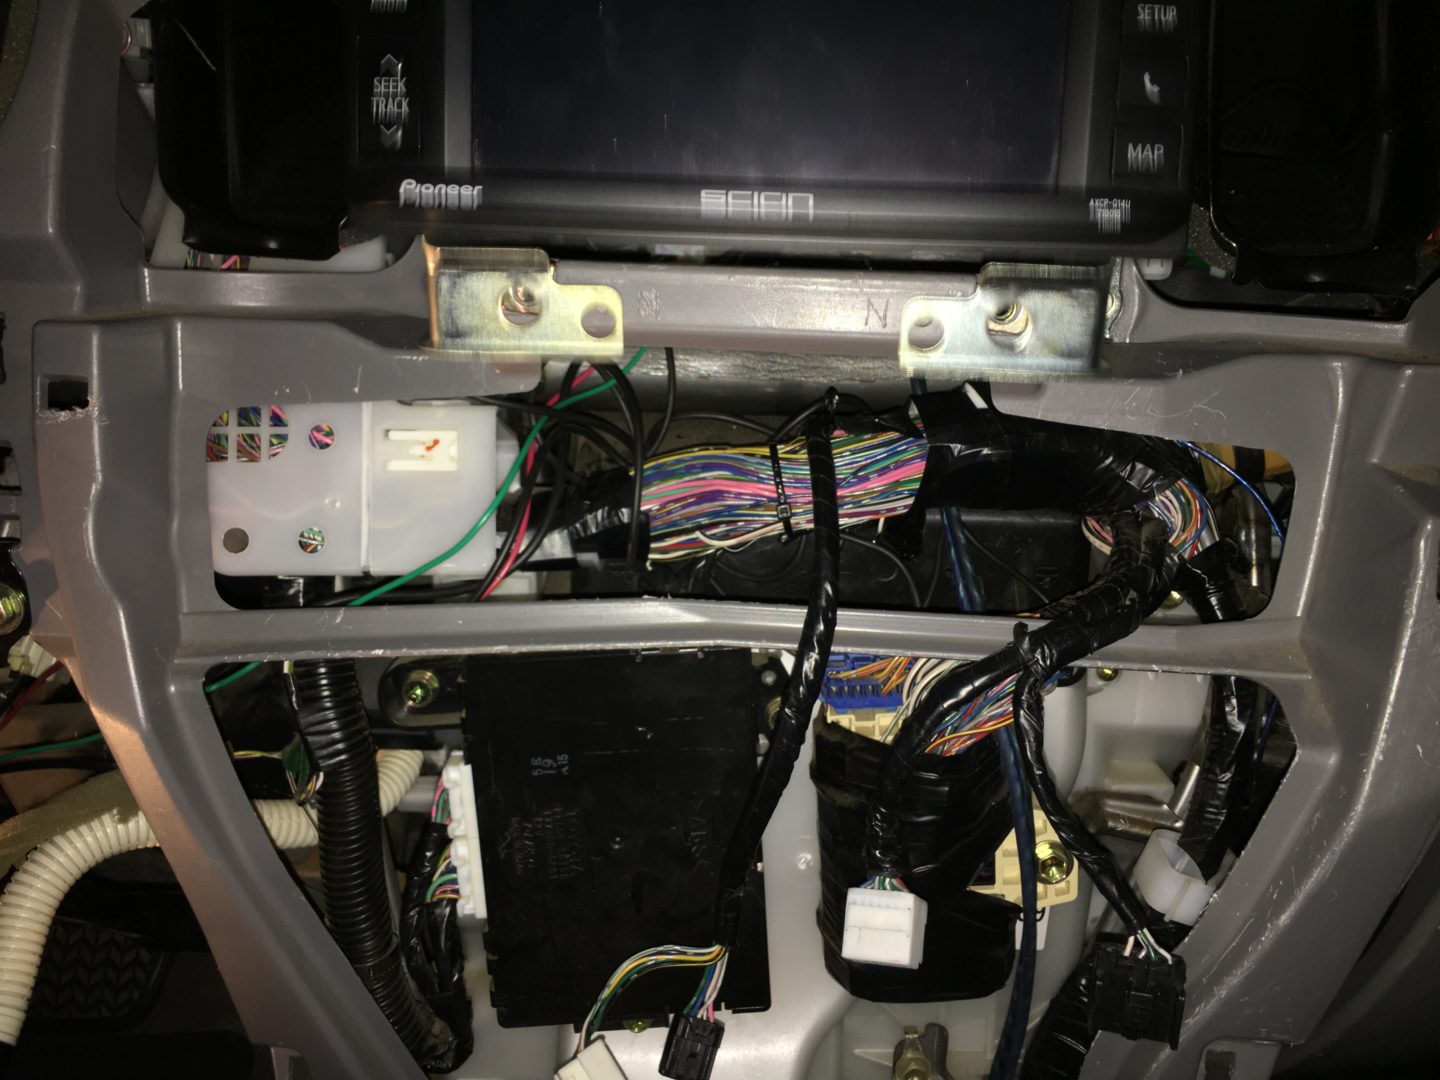
You’ll now need to run the wiring from the rear of the vehicle to the front, all the way to the head unit location. This involves laying out the wires behind the interior trim, over the rear wheel well, running along the floor trim of the vehicle from rear to front, and then up and around the steering column, finally ending up at the head unit.

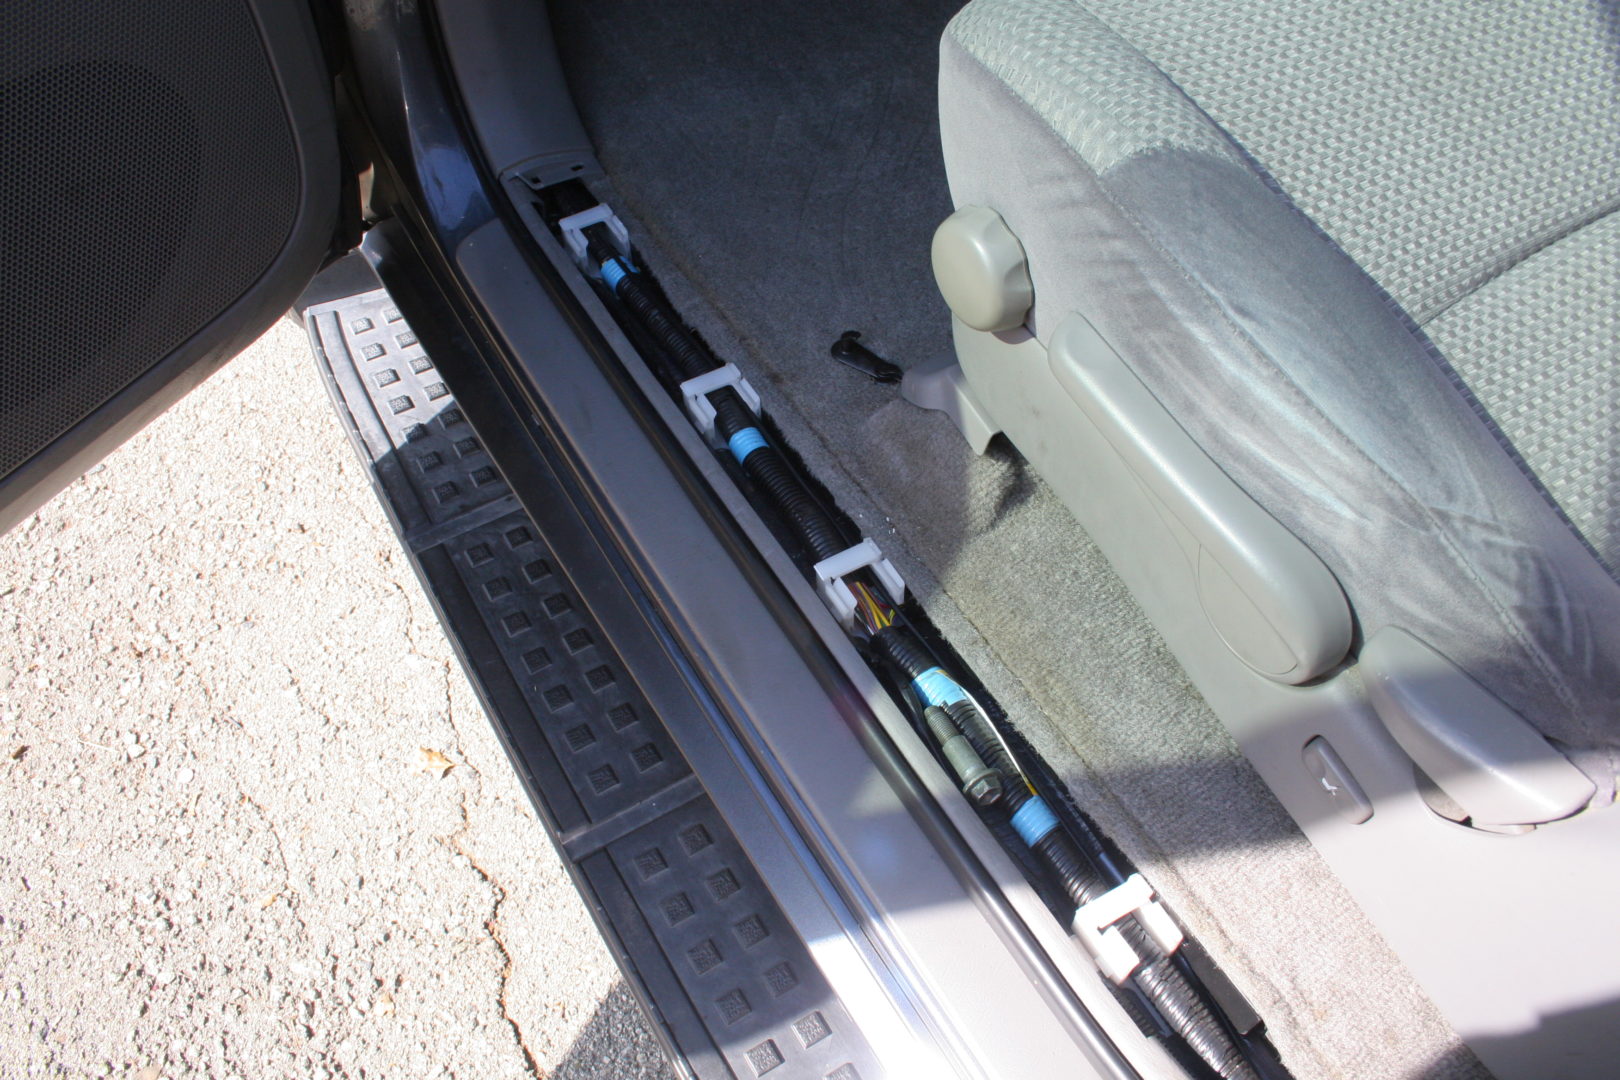
I kept the wiring inside of the white wire clips (seen above) just in case the wire would get snagged when reinstalling the floor trim. As you follow this route, you’ll run out of wire and eventually find the need to connect the yellow rca male end to the rca female end from the CAM-TY11 connector. However, the wire is not long enough.
You will need to use the RCA extension plug to bridge the gap between the two RCA connectors. You’ll also need to run some wire between the two red power wires. The power wire provided by Rydeen appears to be 20 or 22 gauge wire, but just size up the wire and ensure the wire gauge you’re using is the same size or larger. I believe I used 20 gauge to be safe. And of course with these connections made, I wrapped them securely with electrical tape.
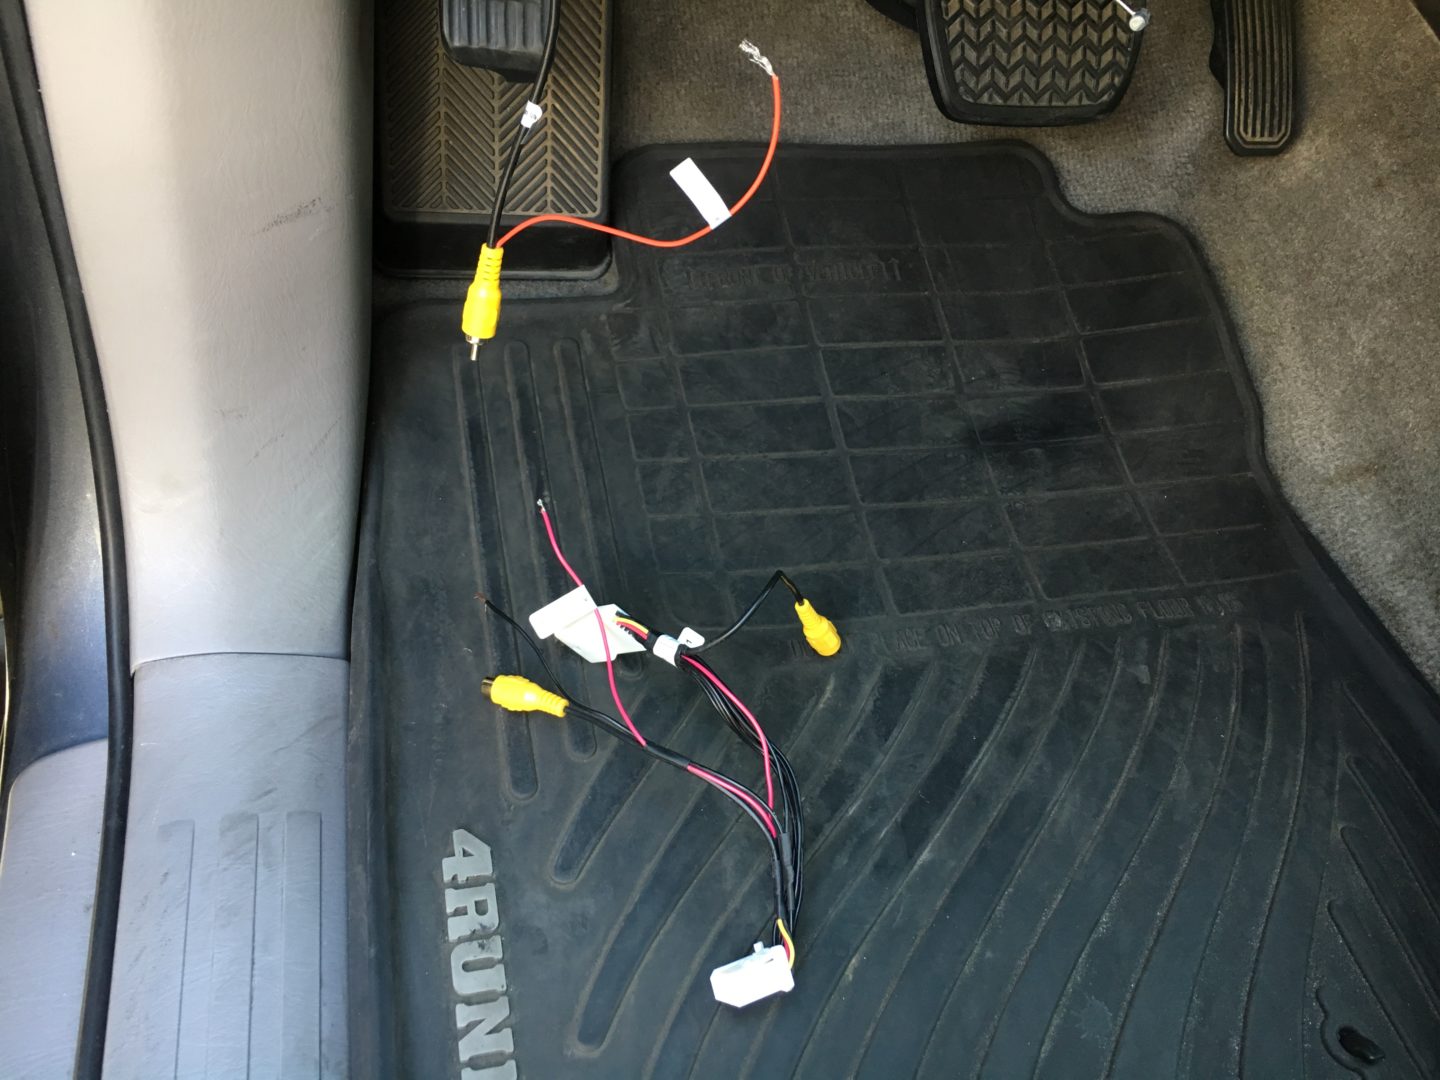
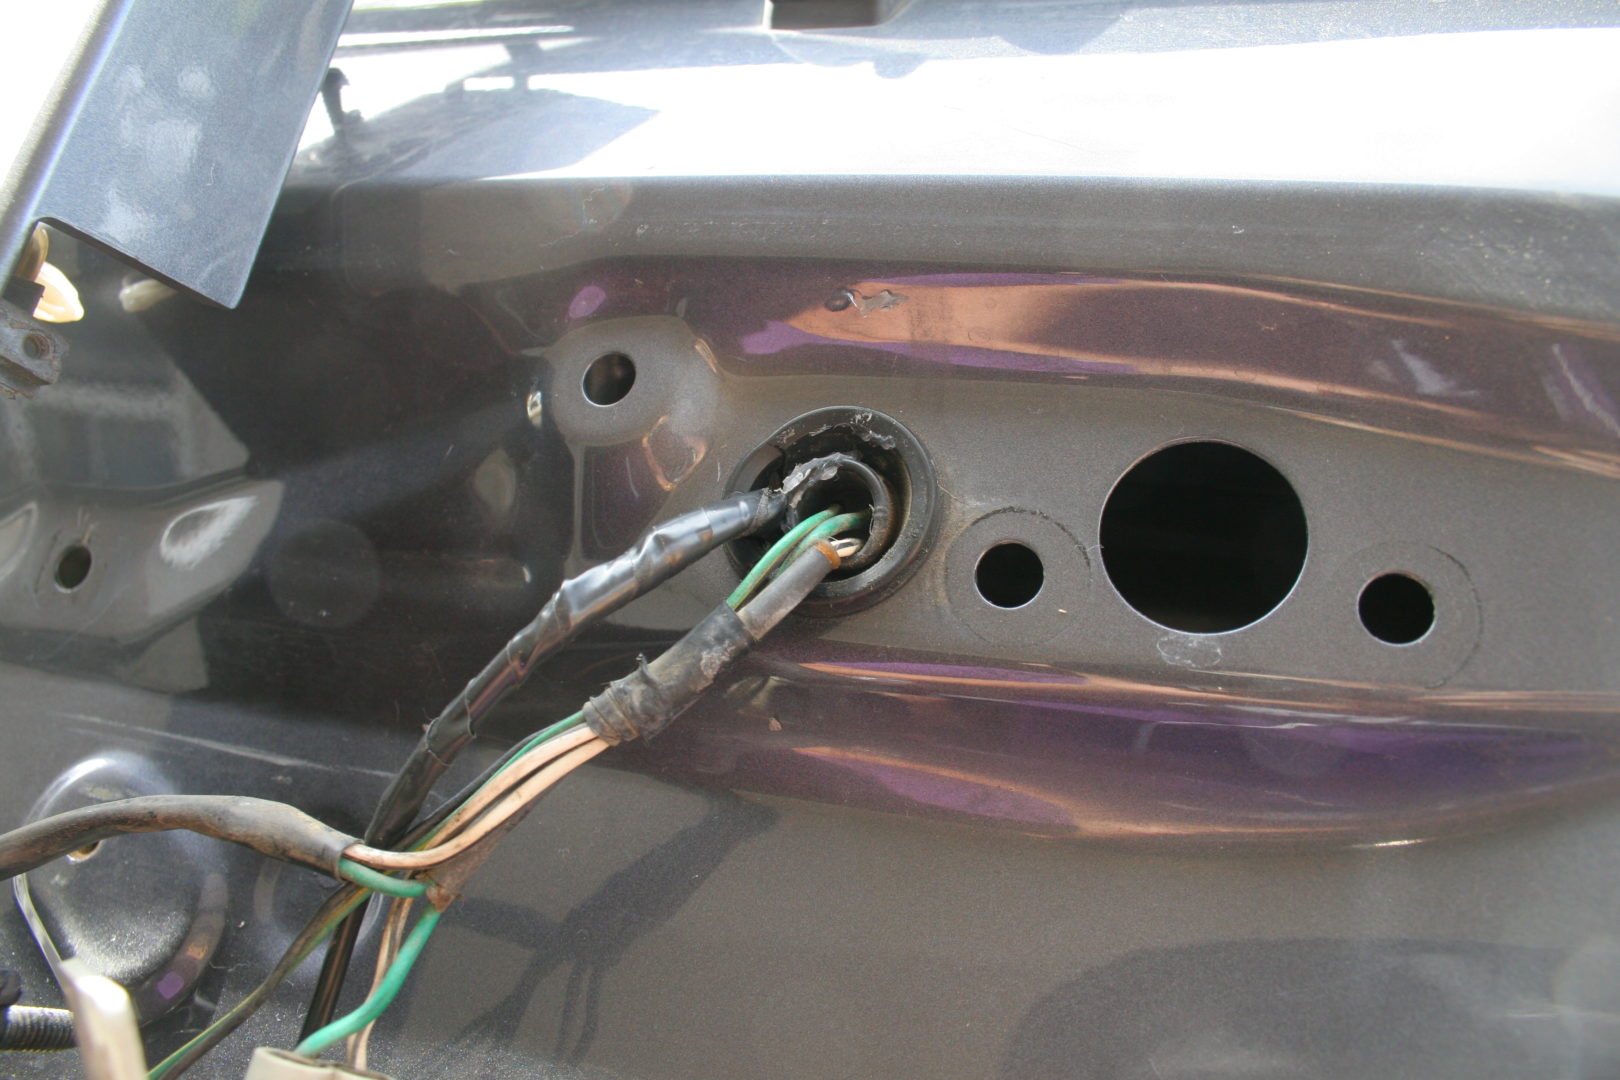
Both the extension for the RCA video signal and the red power wire should now be brought up past the fuse box and snaked between the steering column and lower trim panel (located above the foot well). The two wires should be brought out to be connected to the CAM-TY11 connector, which ultimately plugs into the Scion T10015 head unit.
Take your time to find the best route that best hides the wires and ensures that they are well protected.
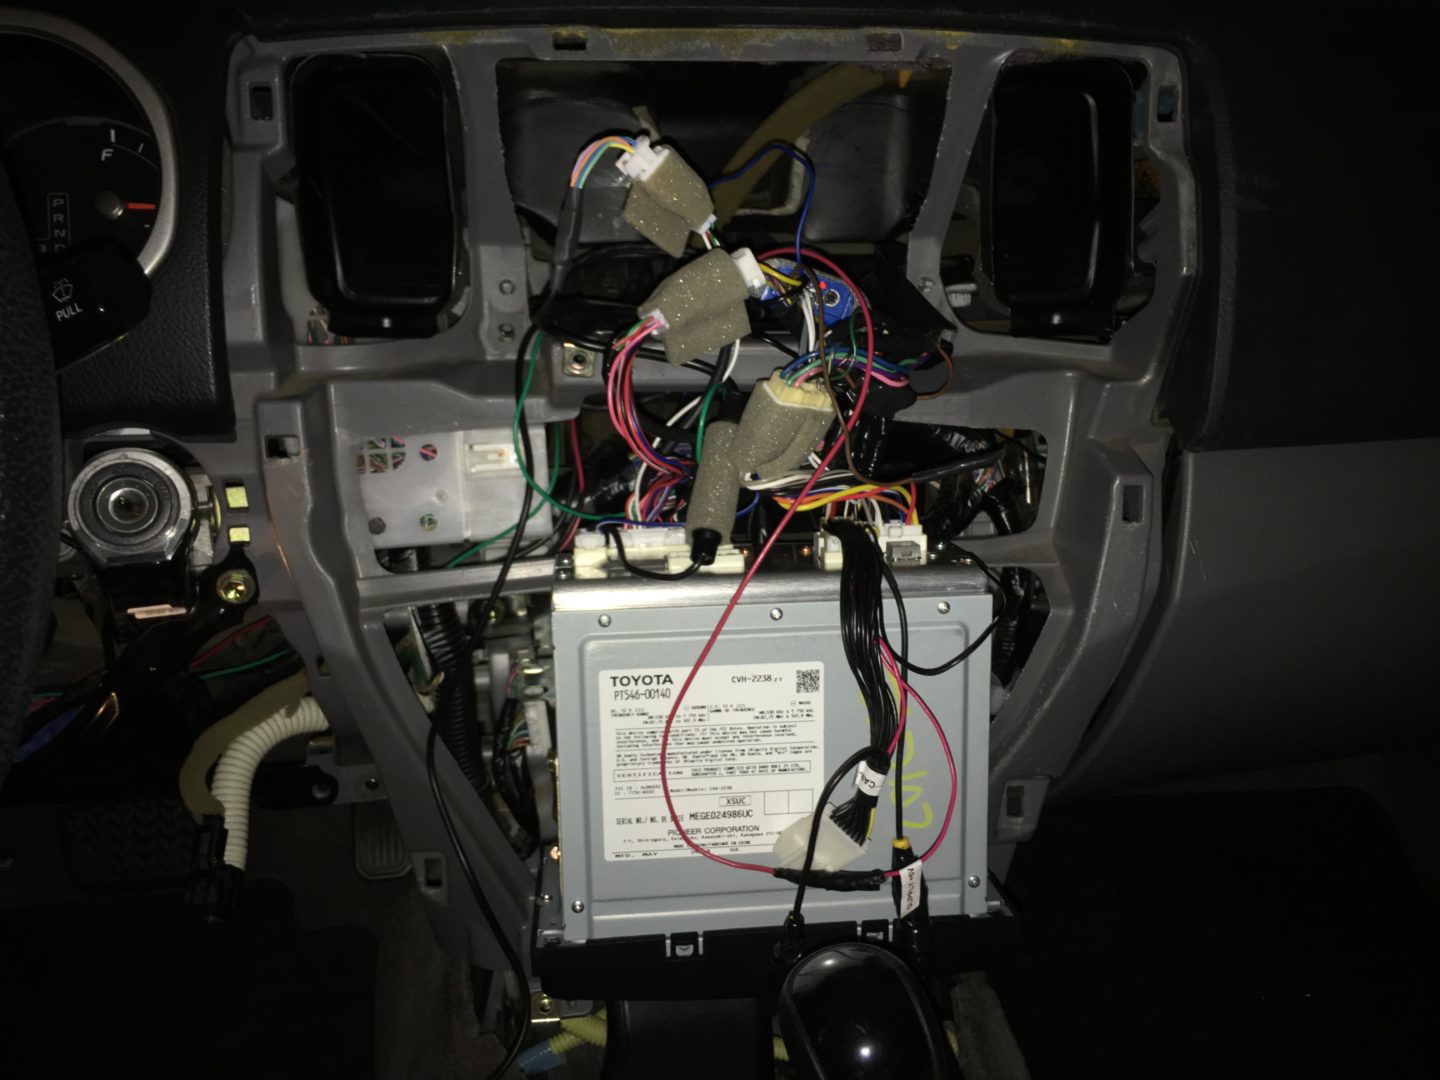
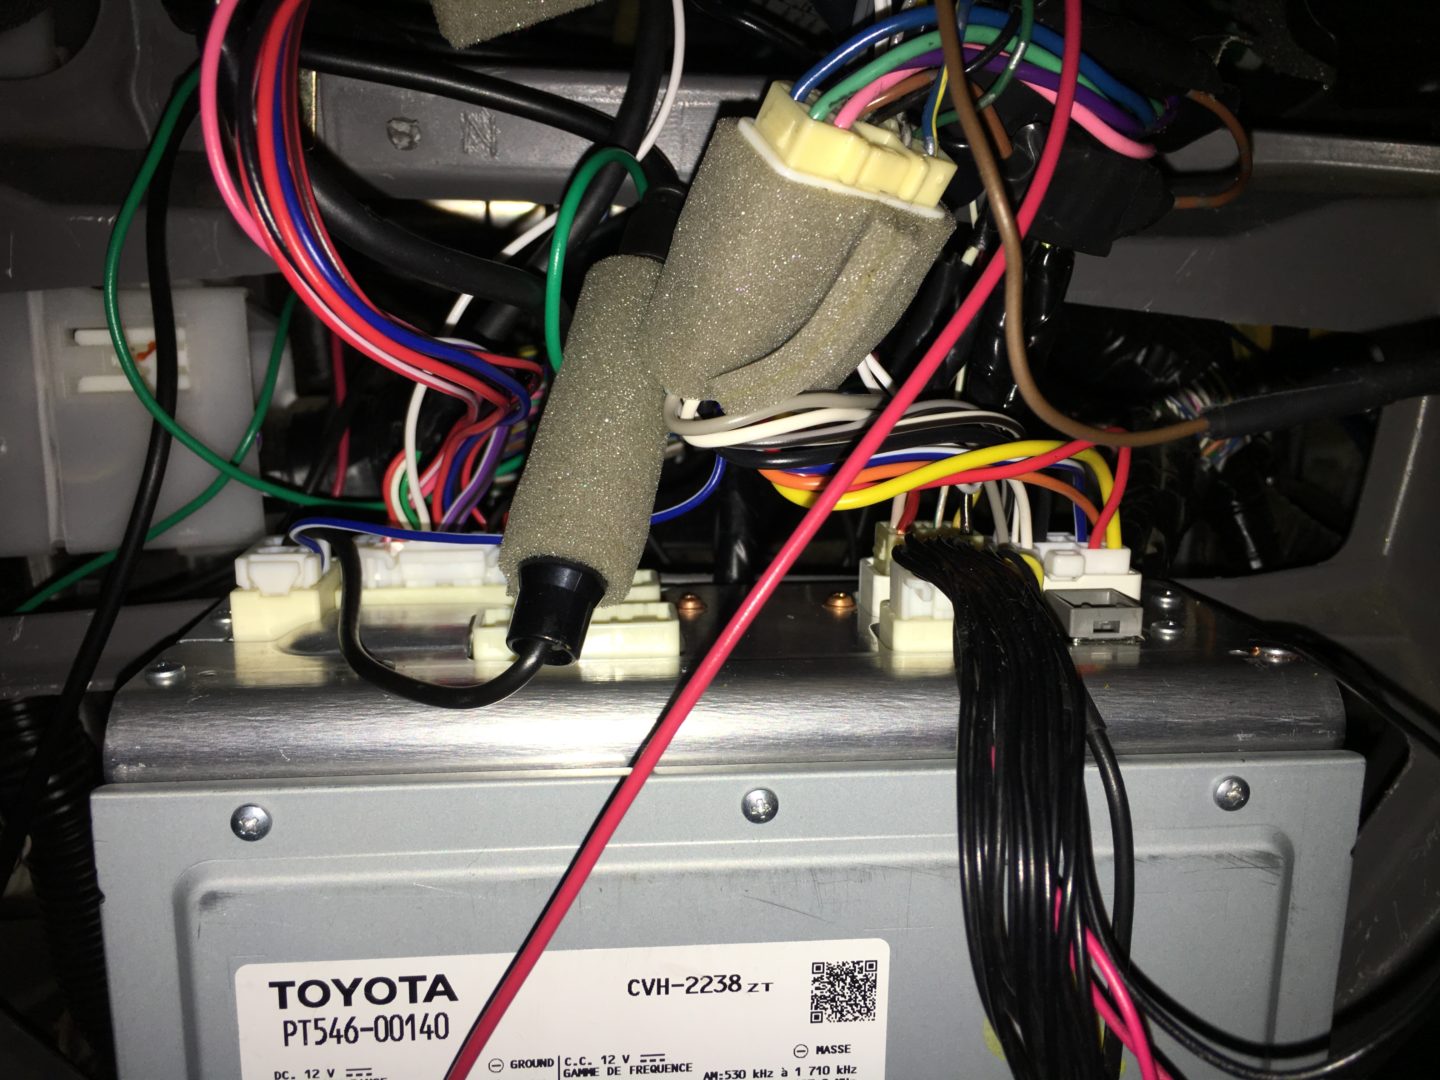
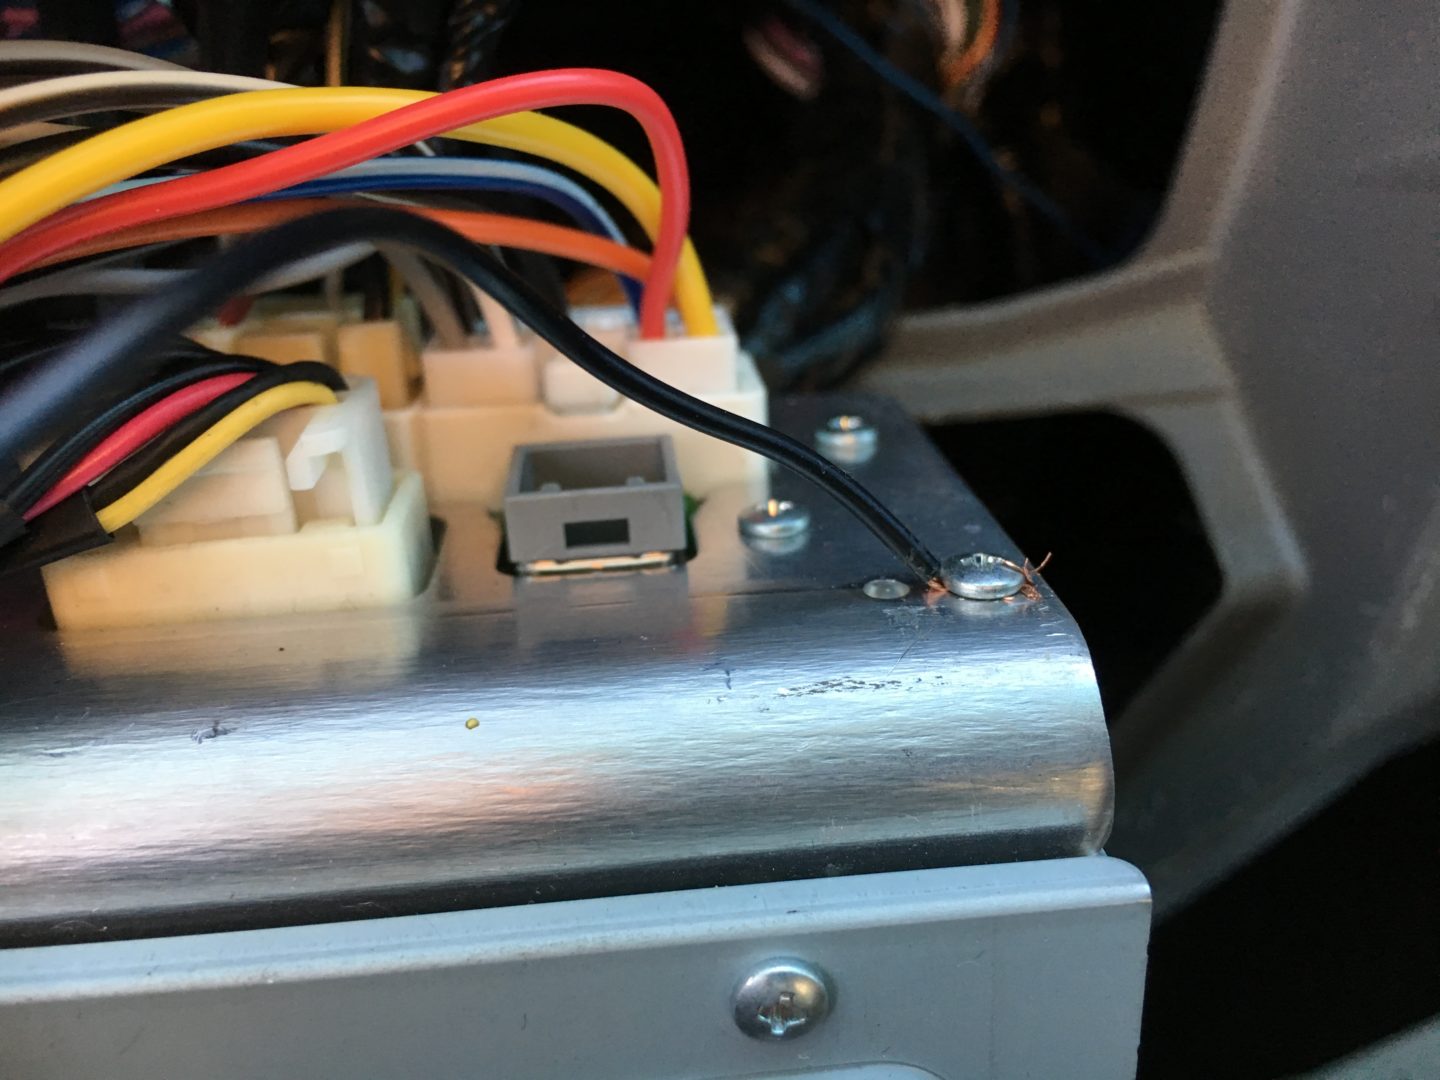
There is also a black wire that comes from the CAM-TY11 connector that needs to be grounded. I chose to ground it to the rear body of the head unit using one of the existing case screws on the back side of the head unit.
There is one more connection that needs to be made and that is the connection between the reverse wire of your vehicle and the reverse pin of the head unit. This will allow the head unit to pickup the signal that the car has been shifted into reverse.
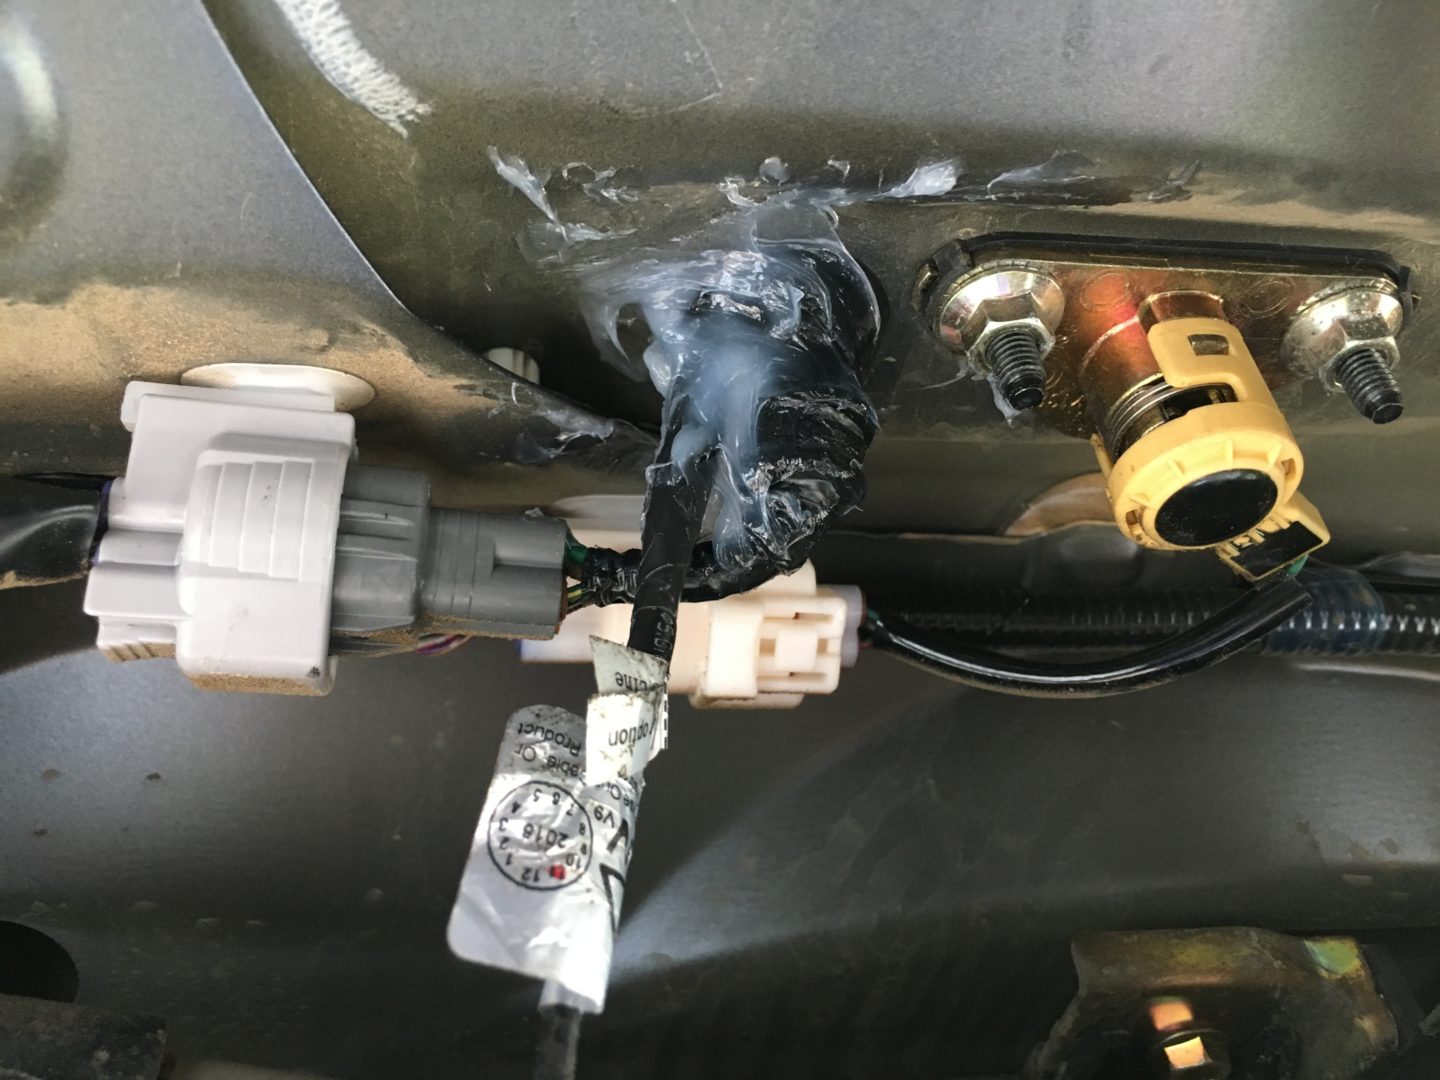
I used a green-colored wire (again, match up the gauge wire which I believe is a 20 or 22 gauge wire). On one side, I tapped off of the red with yellow stripe reverse wire in the 16-pin connector that is removed in the below photo.

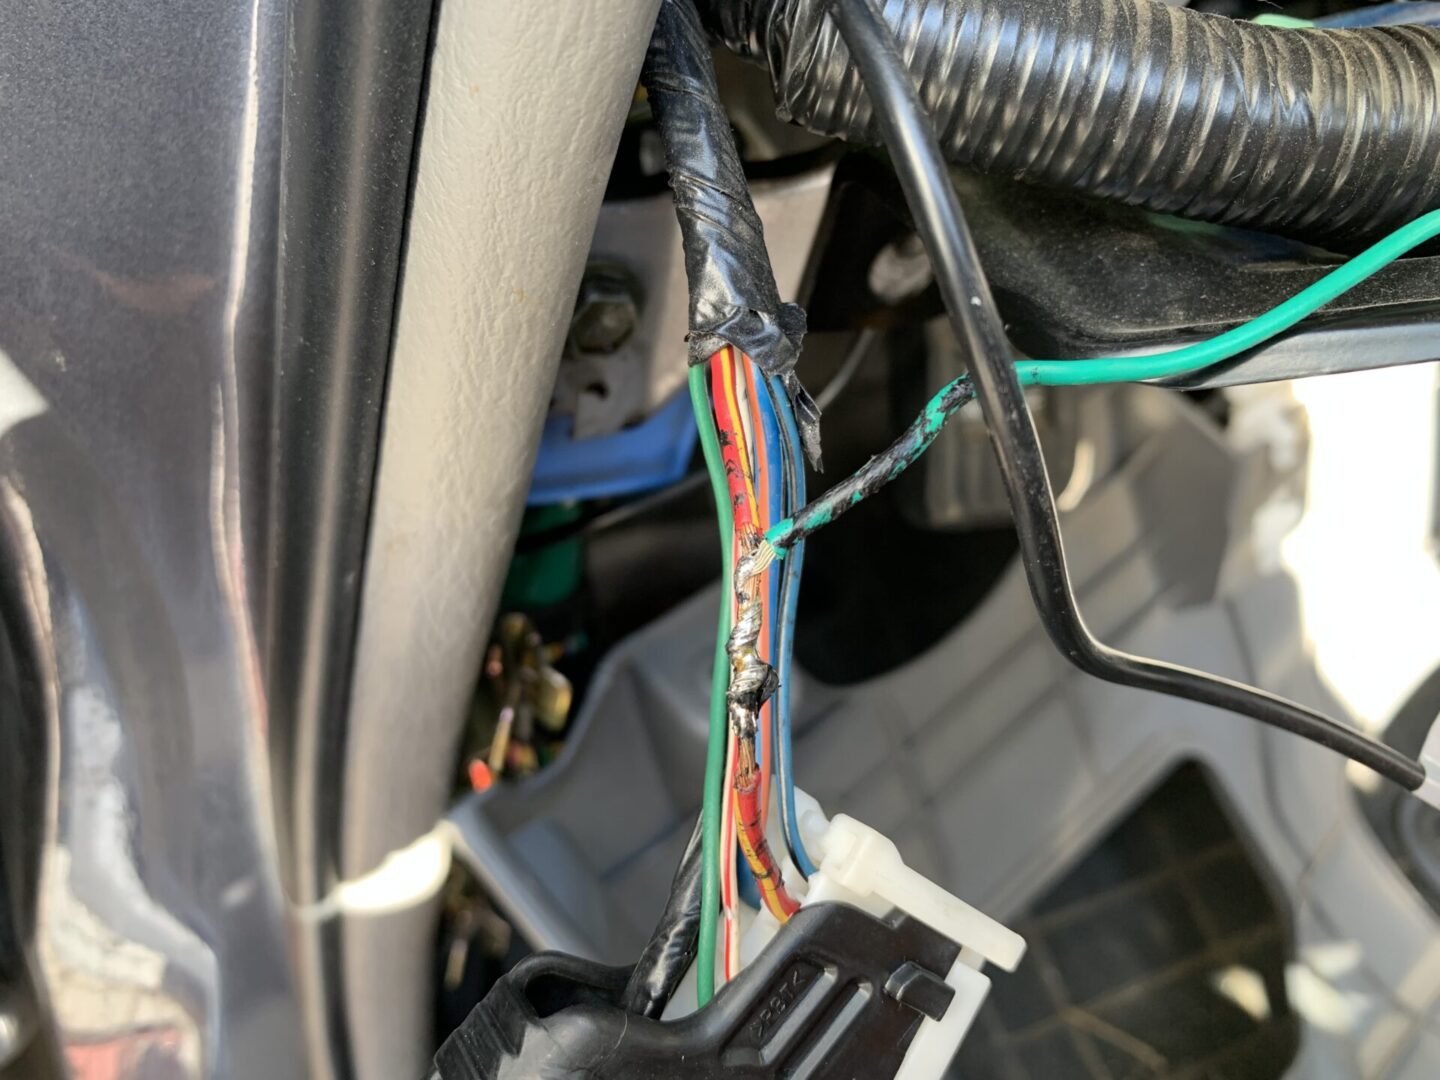
I cut the electrical tape back on this harness so I would have enough room to make a tap off of the wire. I wrapped the stripped end of the new wire around the stripped back section of the red with yellow stripe wire (reverse wire), then soldered in place.
After tapping off this wire to a new green 20/22 gauge wire (which will go to the head unit), I securely taped the wires back, and plugged the connector back in.
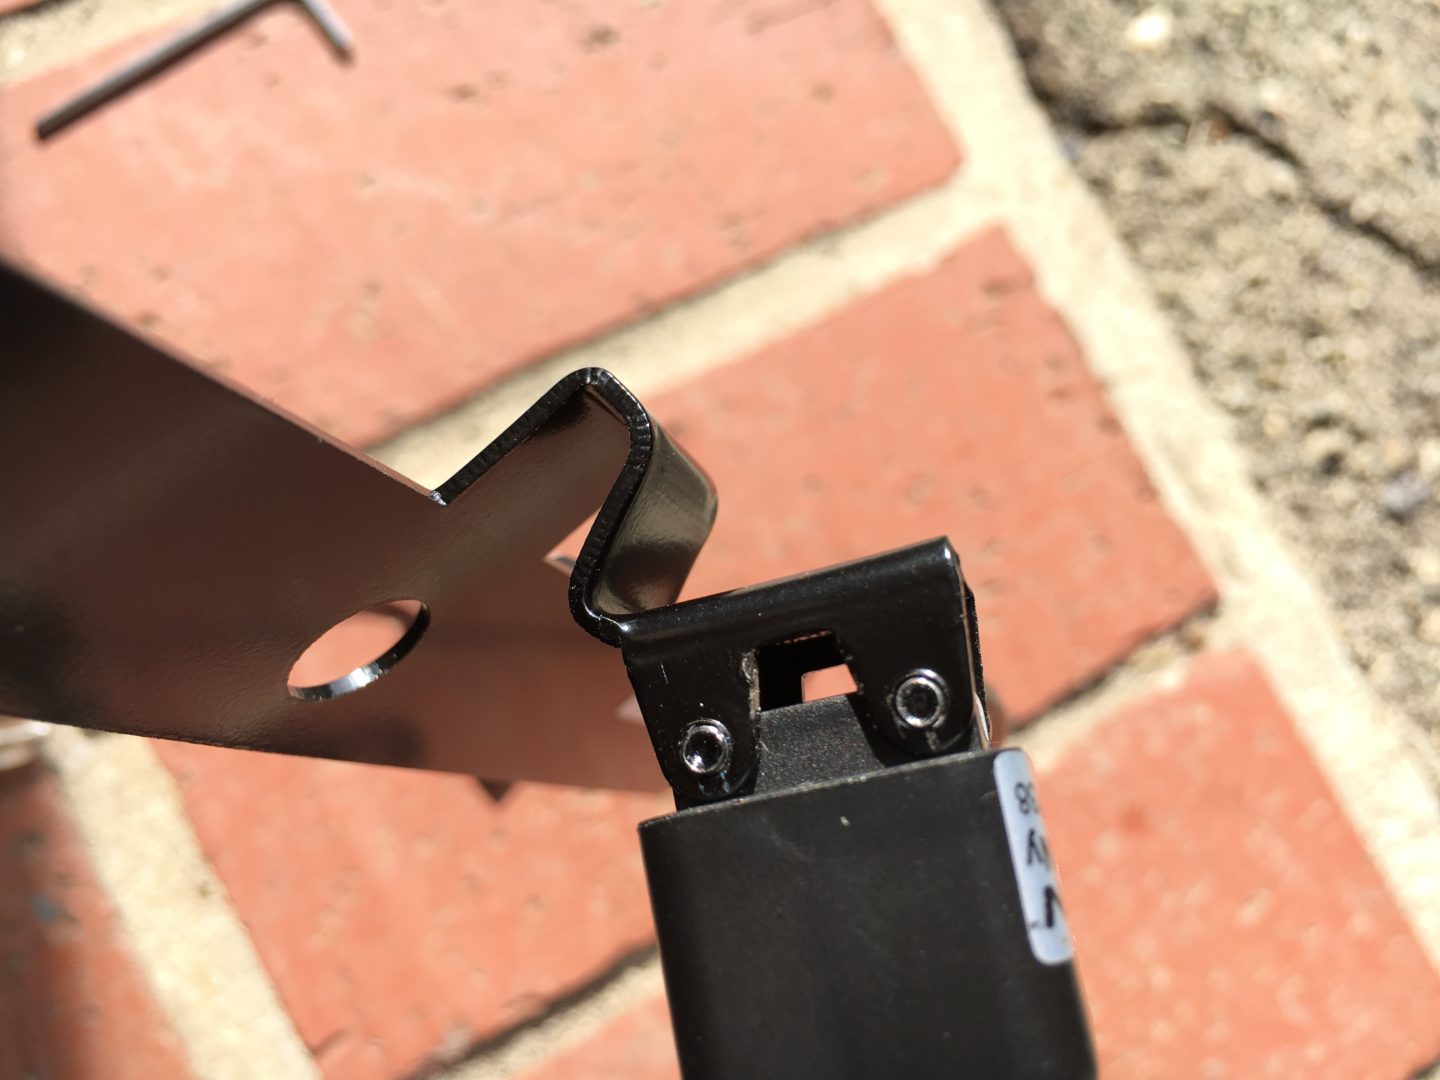
Route the green wire along with the other red/black wire that was snaked between the steering column and the lower trim panel. The end of this green wire needs to have a terminal end crimped on in order to plug into empty position #2 in the following connector (plugged into the back of the Scion T10015 head unit).
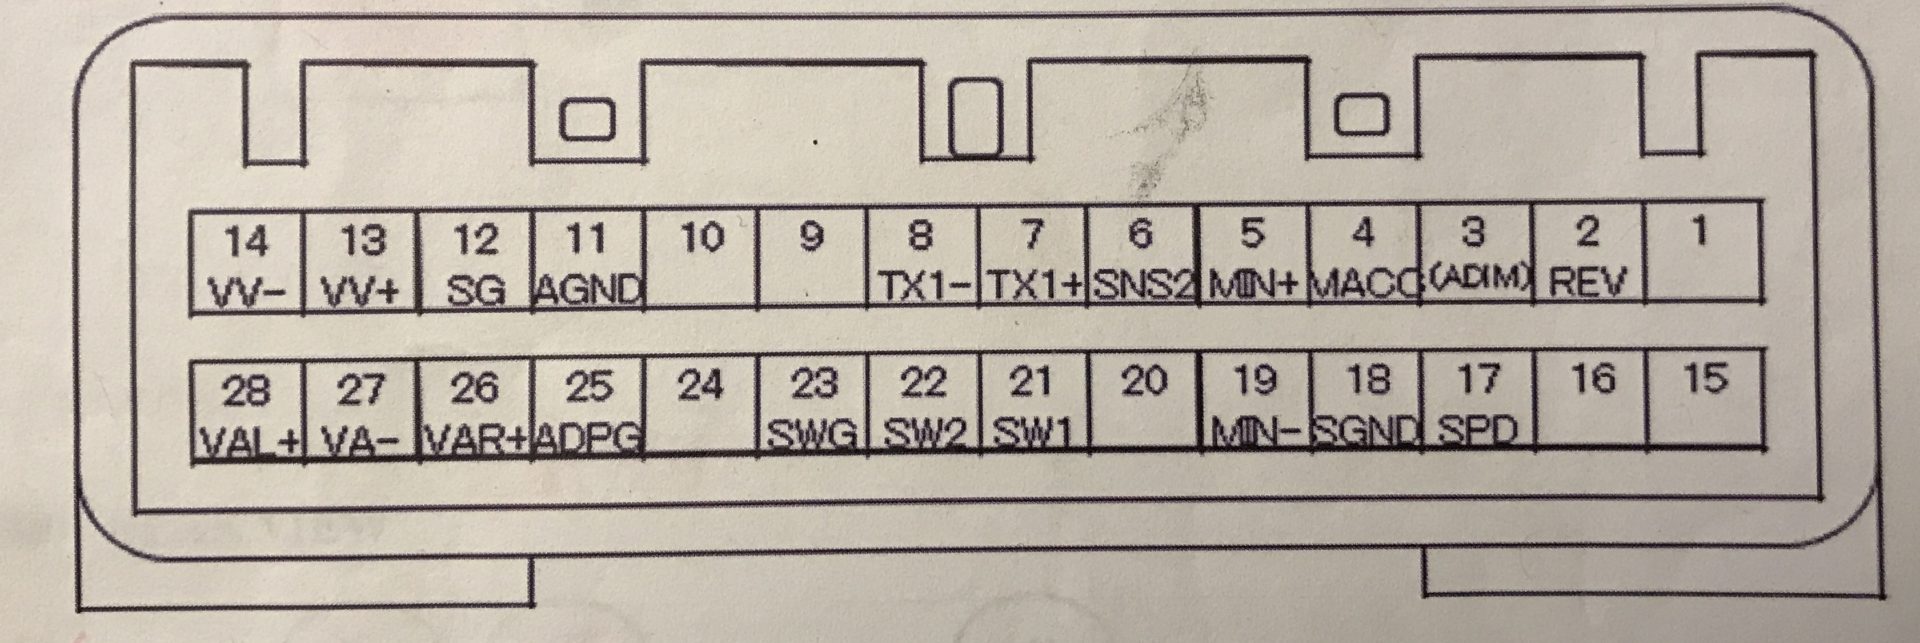
As an alternative to buying the necessary terminal end, I found another connector plug I had that wasn’t being used and pulled out a wire with the terminal end attached). I then took this wire with its already crimped terminal end and plugged it into the REV#2 position of the connector. Next, I took the green wire I brought from the footwell, and spliced it to this wire going into the REV#2 position of the connector.

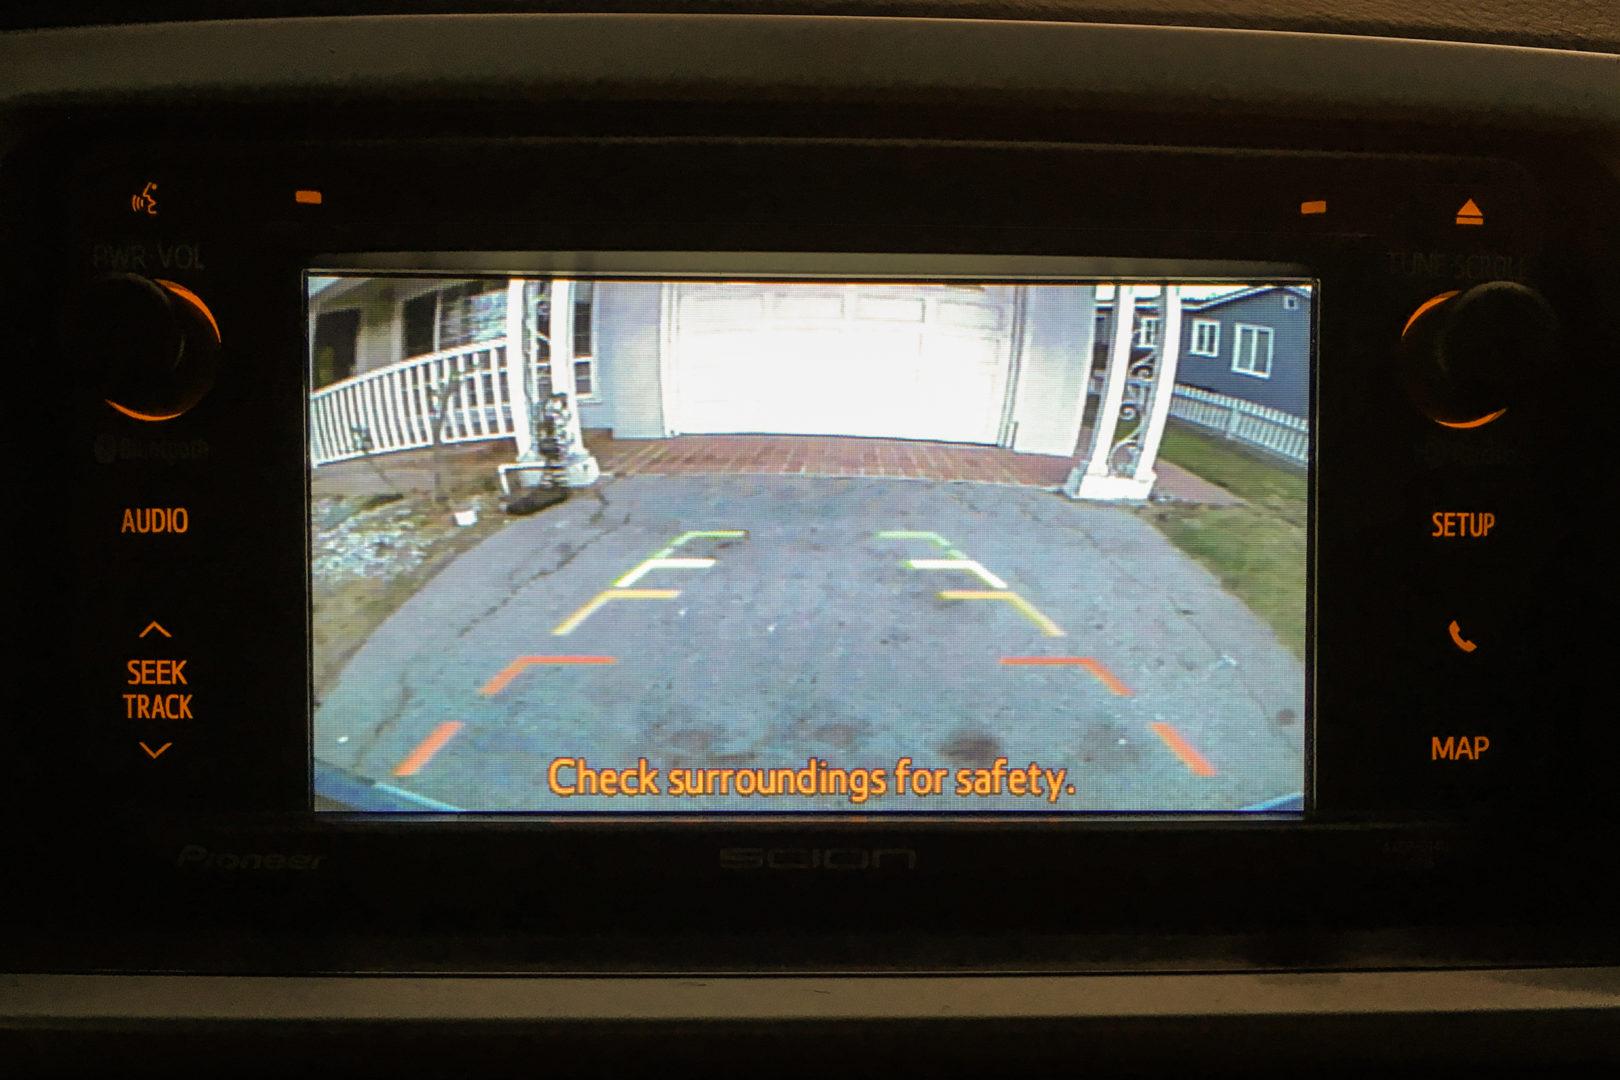
I wrapped this splice up and proceeded to test out everything out. I wanted to check that my reverse view would display on the head unit when I shifted into reverse before I start putting things back, just in case something didn’t work. I reconnected the negative terminal of the battery, bolted back the head unit, and reinstalled all of the interior trim.
I turned on my car, shifted into reverse, and voila! A clear view of my rear end— the car’s rear end— the car’s rear view!
Now that I know everything works, I can now more permanently attach the backup camera mount. The Rydeen camera mount comes with some very strong 3M double-sided tape pre-mounted. This goes behind the license plate for a clean look. The license plate is then mounted on top of it.
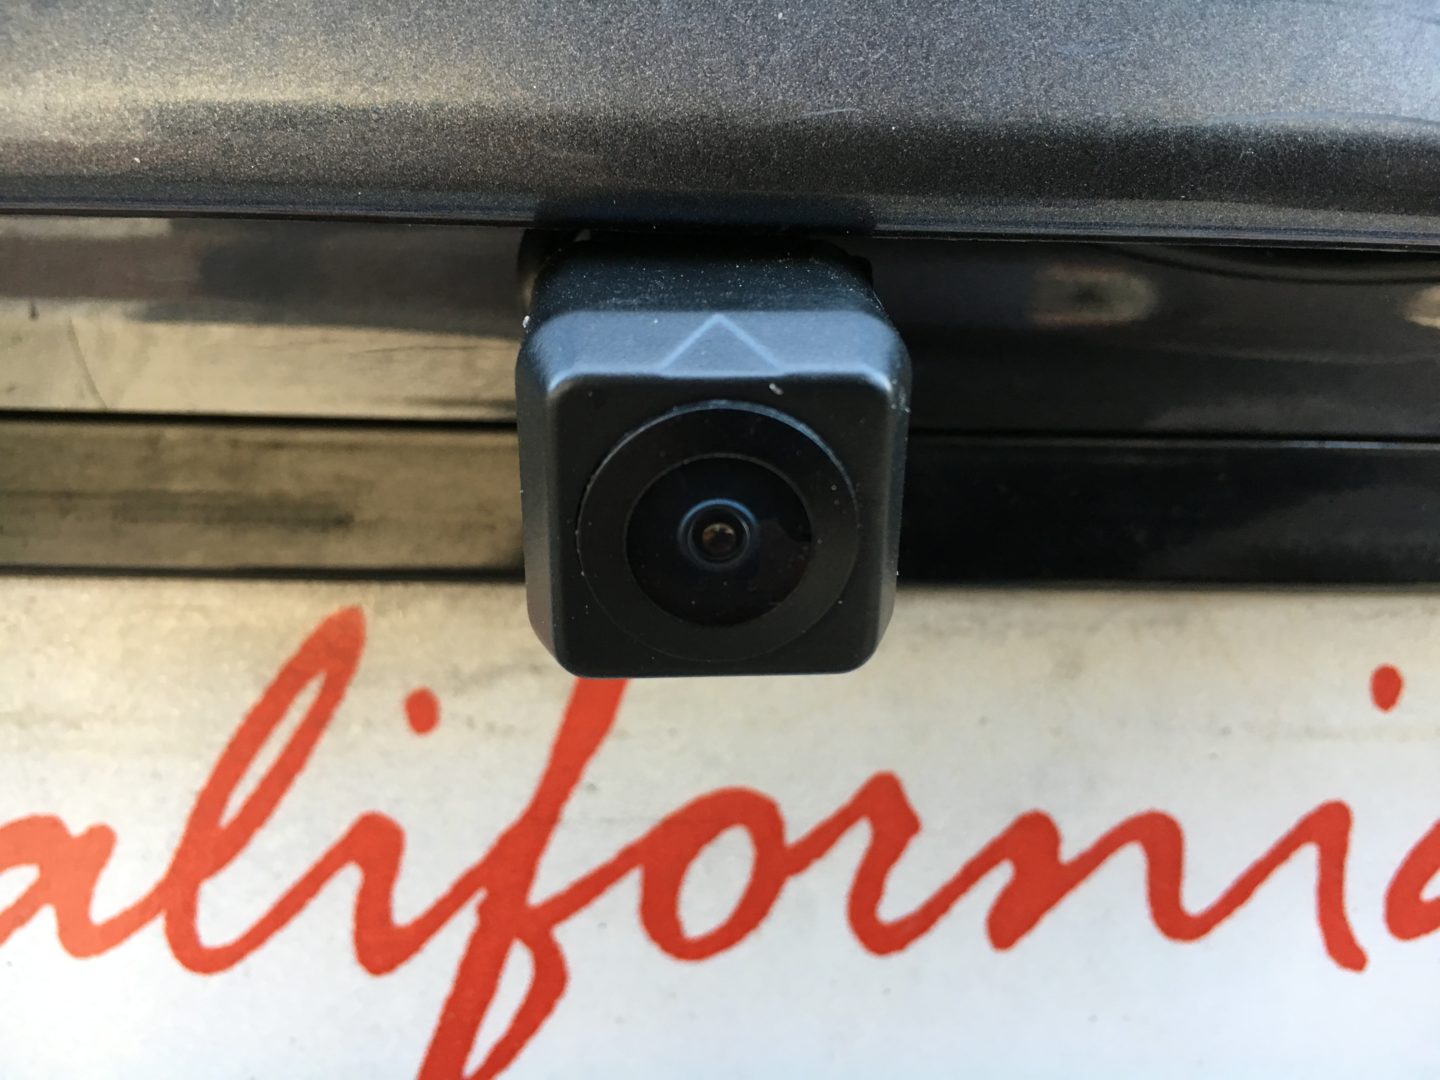
Here’s the final backup camera setup on my 4Runner. Perhaps I could do something better to hide that wire that is showing, but I’m very happy with out how it turned out.

I really love how this Rydeen backup camera and Scion T10015 head unit pairs up. The install was a bit complicated at times, but the seamless operation of the backup camera function makes it all worth it. I’m still using it to this day (a year later) and it is still working flawlessly.
I recommend this upgrade for anyone who doesn’t have a backup camera. Anyone who owns a 4Runner can probably agree with me that although rear view visibility isn’t all that bad, nothing substitutes a rear view camera for rear visibility.
: 4th Gen Toyota 4Runner")

: 4th Gen Toyota 4Runner")
: 4th Gen Toyota 4Runner")

: 4th Gen Toyota 4Runner")
: 4th Gen Toyota 4Runner")


43 Comments
Can you please tell me if this radio will work with a JBL Synthesis and if so, what is the wire harness combo?? METRA part numbers?? Thanks!
Hi Walter,
I have the non-JBL unit so I don’t know the specifics of running the T10015 with JBL. On the T4R forums, some people talk about needing an adapter (Metra TYTO-01 that will convert the signal from the head unit to the JBL amp. However, everyone has the same complaint about volume fluctuations and various sound issues. If I were in your shoes, I’d probably go the aftermarket route to see if this whole issue with the JBL system could be avoided. Good luck.
Hi, for the reverse wire in fuse box, you said solid light green wire is the reverse wire – but I see from 4runner forum reverse wire is red wire with yellow stripe. Do you happen to remember if it was the green wire or red with yellow stripe wire? I found Bluesky07 post https://www.toyota-4runner.org/engines-suspension-wheels-tires-audio-accessories/215387-4th-gen-stereo-install-info-including-pics-reverse-parking-brake-wires.html
not sure if this is the post you saw. Please let me know. Thanks.
I think I need to take a look at my car. I wrote this post almost two years ago and did the install even longer before that so I’ll have to refresh my memory. When I do get to taking it apart to verify, I will let you know.
So I went to my car and located the wire that you’re talking about and you’re absolutely right to point this out. I made a big mistake and put down the wrong wire for this reverse wire. I took photos, and corrected the post to point out the correct wire. Thank you so much for bringing this up and helping me fix my post.
Thanks for checking! I am following your post – bought the same radio too 🙂 it’s been very helpful. I appreciate it!
Sounds good! I think you’ll enjoy it! Thank you again.
How did you find a stereo like that with orange lights?
It’s a Scion T10015 (product link is in the beginning of the post). You can find more about this on my other post: https://thetrackahead.com/projects/the-ultimate-scion-head-unit-2003-toyota-4runner/
Very nice. I guess the ones I find seem to be red in colour?
If you’re talking about the Scion head units, there are some that have a more red color and others that have a more amber color. This T10015 matches the amber color of the OEM interior lighting.
Great, thanks! Fantastic write and work on everything. Can’t wait to do this to my 4Runner.
I followed all the steps here. But what confused me was when connecting your green wire to position REV#2. Did you take out the cable that was already there and not use it?
The REV#2 on the 28-pin connector on the back of the head unit should be empty. I found another wire from some old connector I had laying around, and pulled the terminal end out (with the associated wire). I then plugged this terminal end into the REV#2 position of the 28-pin connector, and then just spliced a new 20/22 gauge wire onto this wire. If you actually have the terminal end itself, you can just install it directly on the 20/22 gauge wire.
If you already see a wire in the REV#2 position, you might want to double-check the pin diagram and make sure the orientation is correct as I don’t believe there should be a wire in that spot already. Let me know if you have any more questions.
So in that picture with the REV#2 position (28 pin)⁷. Why is there a spliced wire on the right side of the picture but REV#2 is on the left side of the picture? (I hope you understand what mean)
I do understand what you mean and I’m getting confused myself honestly. If you can be patient with me, I’ll have to find some time within the next week or two to pull out the head unit and trace out the wires and connectors to make sure I clear this up. Sorry for the confusion and I will make sure to respond when I find out what the issue is.
Oh yeah no worries. I was confused looking at that picture and I accidently spliced into it at first not realizing it was the wrong one.
Hi again, sorry it took me so long to do this but I only got the chance to do it recently and wanted to close the loop. When I looked at it again, it refreshed my memory. I’m pretty sure I spliced into the wrong wire at first, and then taped it up. I then wired in the green wire in to the REV#2 location as shown in the diagram in the post. Thanks for pointing out this error, I have updated my post accordingly.
Do you know if any CAM-TY11adapter would do the work? I found this one cheaper, but don’t want to take risks https://www.amazon.com/gp/product/B07ZPPXZC6/ref=ox_sc_saved_image_2?smid=A236UT9Z5WDWZA&psc=1
I can’t say for sure if that would work or not. It all comes down the connections and wiring. In my experience, it’s usually pretty easy to return if you purchase on Amazon, so you could always buy and take a closer look when you get it if you want to go the aftermarket route. Good luck!
Did you tried the NATIKA camera? I like the OEM look.
I haven’t. Mine has worked flawlessly so I never had to look at other options. I took a gander at the Natika cameras and yes I agree they look pretty slick.
Very helpful, thanks so much for taking the time to do this writeup.
You’re welcome! Glad it was helpful to you.
Hey man, I hope you’ are still there !!
First, I want to thank you for your very helpful information regarding the backup camera installtion. I’m doing the same thing and got confused when connecting the green wire to the reverse wire of the vehicle. The RCA
Hi Scott,
After reading you again, I come to a question why do you have to connect the reverse signal with the CAM – TY11 ?
I can see that you use that green wire to bring the reverse signal to the rev#2 to the CAM – TY11, so I was wondering why do you have to do such connection because in other youtube videos they said the red wire from the CAM – TY11 is the trigger wire that will signal the headunit to turn in reverse mode. If you see what I mean !!!!!!
I would like to explain to me if you can because your method has worked so I would like to understand your method
Thanks
Hi there, I believe it depends on the head unit you are using. From what I remember, the head unit that I used did not provide get a reverse signal from the vehicle through the existing wiring harness and therefore had to be wired directly with that extra wire. If your head unit already receives a reverse signal through the existing wiring, then I don’t think you’d need to run that extra wire. I hope that explains why I did it, but please let me know if you have any more questions.
Hi Scott,
I’m using the same head unit with yours( the Scion T10015). the trigger wire is the red wire that comes with CAM-TY11 and not the the head unit. If I understood your method, you took the reverse signal from the red yellow wire with the green wire and you brought that signal to the CAM-TY11 in the REV2 ?
I’ll try to do that and tell you the result.
Thanks
The REV2 connection is not at the CAM-TY11 connector, but the other 28-pin connector plugged into the back of the Scion head unit.
Scott,
First off, thank you for taking the time to create this post.
Completed the install last night. Upon shifting into reverse (dramatic pause)…nothing.
I’m starting the troubleshooting process and wanted to get your take if you have a moment. Am I correct to assume that if the head unit doesn’t shift into camera mode the error is likely that it’s not being triggered by the reverse wire? So the error is likely in the wire between the reverse wire (red w/ yellow) and head unit?
You’re welcome. I also ran into a lot of issues when I installed it way back when, but eventually after some troubleshooting got it to work. I’ll try my best to help, although it has been a while since I’ve done the install/troubleshooting and no longer have the car.
The difficult thing is that if it doesn’t show the backup view when you shift into reverse, you can’t exactly tell what the issue is. There are a few things I’d suggest looking at. First, definitely read through that link I have in the references as this helped me understand more of how the backup camera works and what signals it needed in order to operate correctly. Second, ensure that all of your wiring is connected exactly as my diagram showed. Finally, double-check that you tapped into the actual reverse wire (red with yellow stripe) at the driver side footwell, and that this is tied into the REV #2 wire in the head unit harness. I mention these three things because these were the major issues I had when mine didn’t work. The red with yellow stripe wire was easy to confuse with the others in that bundle of wires at the driver side footwell. Also, the REV #2 connection is easy to mix up as that position in the connector looks the same whether you have it turned right side up or upside down.
Just some things to look at first off…
Hi Scott,
I see that the one red power wire is supposed to be taped off in the rear. This is the one that comes off the black cylindrical connector and is labeled ACC on the Rydeen wiring. The RCA that connects in front of that connection also has a red wire labeled PT2. Your instructions don’t mention it. Am I correct that there is no power wire running all the way front to back? Or should there be a separate power wire running all the way front to back along with the RCA cable?
Thanks, James
I believe the power comes from the red wire (tail) that comes off the yellow RCA plug. So if you look at the diagram I drew on this post, the CAM TY-11 connector receives power from the head unit, power goes through the red (power) wire to the red (power) tail off the yellow RCA plug, and continues back to the backup camera. I hope that answers your question.
I hooked everything up per your instructions and per the diagram, which is what you reiterated in the reply. However, when I tested it, it didn’t work.
I then disconnected the power wire from the power wire connected near the rear RCA and connected the power wire to the power wire coming from the camera. It then worked perfectly. Maybe this will help someone if they have a similar problem in the future.
Man, sorry I didn’t see this comment until now. Thanks for bringing this up; I’m happy to hear you were able to work it out. I’m going to add your suggestion to my post in case others run into the same issue as you. Thanks again!
Did you use the power source from the stereo harness? The output voltage is 6V from the stereo but the camera requires 12V. Wondering if anyone ran into this problem.
I used the power source from the head unit, which comes from the CAM TY-11 harness.
Hey Scott,
Thanks for the write up. Currently shopping for the backup camera through Rydeen. They offer about 5 different backup cameras at different price points with different resolutions and night vision and yada yada. It looks like this is the camera you got: https://rydeenmobile.com/product/cm-miny3/#details? I dont mind spending a little more money for something with better resolution or night vision, but im wondering if you have felt like yours could be better. I figured the backup lights illuminate enough at night. Here are their other offerings: https://rydeenmobile.com/vehicle-cameras/backup-cameras/
Thank you!,
Danny
No problem. Personally, I wasn’t super picky about the camera quality especially with it being displayed on my Scion head unit screen. I wouldn’t say it’s excellent quality resolution, but then again, you might be limited by the resolution of your head unit, so getting a better resolution camera might not net you a higher quality image at the head unit.
Hey Scott, do you know what size molex pin is used to connect the reverse signal wire into REV#2 on the 28 pin connector? I’ve tried googling and it’s not certain what size the molex pin is. I believe it might be 1.25mm. Strangely, I called Tustin Toyota and they said since that pin is not a 3rd party accessory item they are not able to look up the part number. 🤦♂️
Sorry, I meant since that pin is not a Toyota part and is a 3r party supplied part they can’t look up a part number for it.
Hi, thank you for taking the time to explain with details all this camera installation.
l am confused to where you connect the other end of the PAC CAM-TY11 Reverse Camera Harness, l understand one end connect to the unit, l am not sure where the other one connect to.
Also if you can help with the RCA extension cord part number because its not longer available in the link you have posted .
Thanks.
Hi Edgar, you’re welcome. The CAM-TY11 harness comes with a connector on one end, and the other side are wires that connect to other components. Check out the diagram I drew, which should show where all the different connections go to (black ground to head unit bracket, red power to the red power wire of the rear view camera wiring, and yellow video RCA to the yellow RCA cable of the rear view camera wiring.
https://thetrackahead.com/wp-content/uploads/2019/01/scion-t10015-rydeen-backup-camera-wiring-diagram-tta-1160×869.jpg
For the RCA extension cord, I added a new link so it should work now. You basically need 2 coaxial cables, 10ft long, and with a male connector on one end, and a female connector on the other end.