When you make purchases through links on this site, The Track Ahead may earn an affiliate commission. Also, these posts are based off my own experiences. I am not responsible for any action you take as a result of reading this. Learn More
The fastest and easiest way to get a work surface in your garage is just putting out a fold out table kind of like the one you see below. It’s probably the most affordable option and does the job as a work surface wherever you need it. However, if you’re looking for a better-looking and more permanent work surface, you might think about getting a wood or steel workbench. I was considering these options since I wanted to have a more permanent work surface, but installed as a wall-mounted fold out workbench.

Because I personally needed to affix the surface to fold out wall-mounted brackets, I opted for a wood table top over a steel one. Some other reasons I chose a wood table top is that it I think it looks better and feels nicer overall. I may be biased because I’m a big fan of woodworking, but nothing beats a beautiful slab of wood as a work surface. Before using your new wooden slab as a work surface, you’ll need to protect it so that it stands up to wear-and-tear you’ll be exposing it to. I’ll demonstrate the process of preparing and protecting the wooden workbench top.
Materials Used On This Project
Bme Hevea Butcher Block Countertop: 4-ft / 5-ft / 6-ft / 8-ft / 10-ft
Watco Wipe-On Poly: Satin / Gloss
Oil-Based Polyeurethane (alternative to Wipe-On Poly for more protection): Satin / Semi-Gloss / Gloss
3M Pro Grade 220 Grit Sandpaper
Warner Tool Sanding Block
S&F Tack Rags
Applicator: T-Shirt Rags / Bristle Brush / Foam Brushes
Milescraft Triangle Bench Supports
XPOWER Air Mover
0000 Steel Wool & Paste Wax
Types of Wood for a Workbench
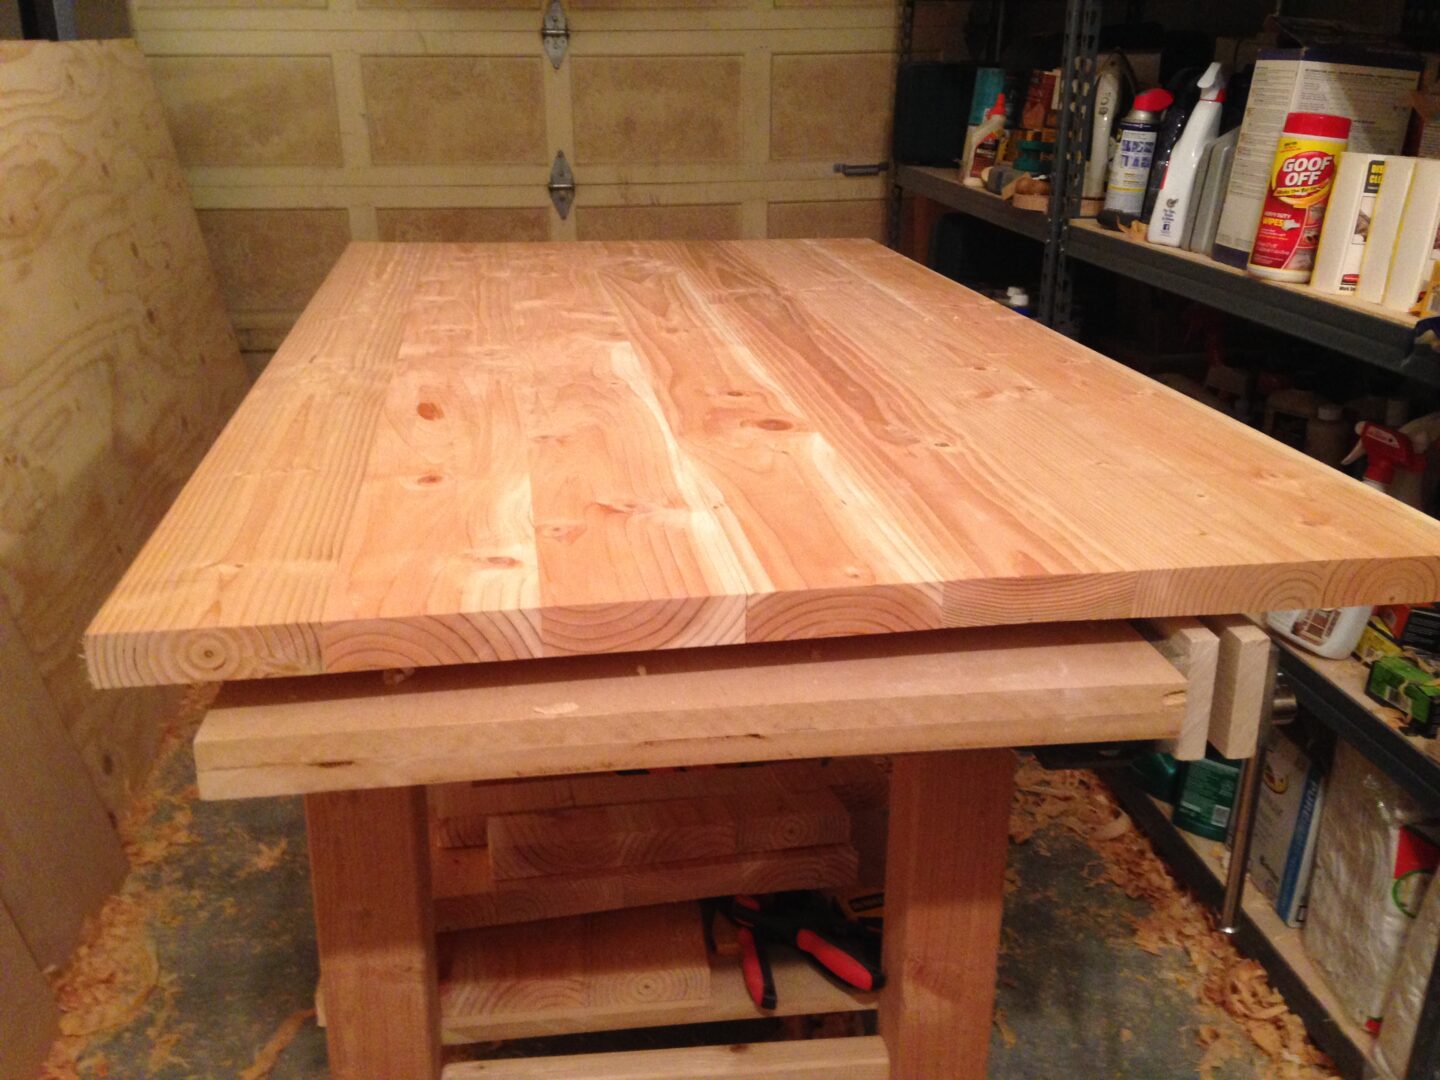
Prices can vary depending on what type of wood you go with for your work surface. Of course with the many options out there, you can end up with a different hardness (durability), color, and overall look. I wouldn’t recommend making one yourself because it is a lot of work to do and is difficult to make into a perfectly flat surface. Because there are already pre-made wooden table tops that can be purchased for a pretty good price, it’s a lot easier to purchase one instead.
In my opinion, if you want to go with a wooden table top for your workbench, go with one advertised as a “butcher block”. It’s funny that it’s marketed as that because it’s not really a butcher block. Generally generally butcher blocks are constructed by joining wood so that the top surface is exposed end grain, and not edge grain like these are. These “butcher blocks” are generally sold using certain hardwoods like birch, maple, poplar, and acacia. I see these 4 to 8-foot long table tops normally selling for about $200-$300. The depths are generally 2-feet in depth, and the thickness at 1.5″ thick.
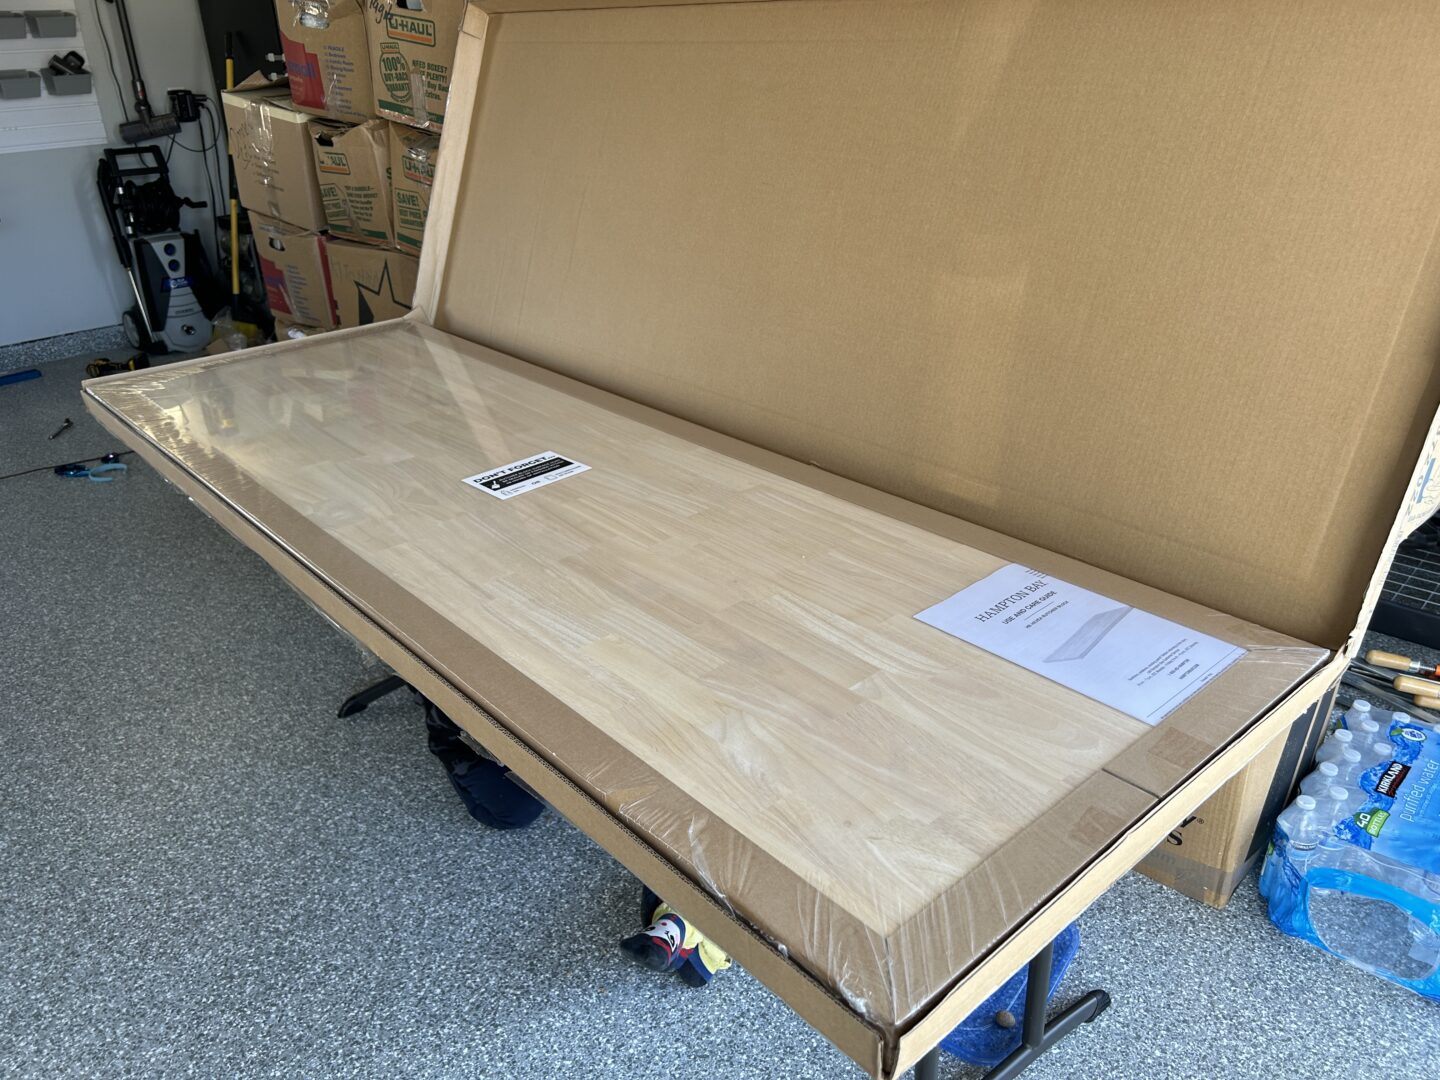
Out of the hardwood choices, I chose an economical countertop made out of Hevea wood. This specific one is a 6-foot Hevea countertop made by Hampton Bay, which I picked up at Home Depot for less than $150. It seems that the price has gone up since then, so you’ll likely find an equivalent one for $200. Beware when you’re looking at these “butcher blocks” as some are just veneered hardwood with particle board inside. A solid piece of wood will guarantee you the longevity and durability that you need.
Another desired feature is a full-thickness slab of wood for the table top. Sometimes, some of these table tops are sold with two smaller thicknesses of wood glued together to make one thicker piece. There are also smaller 1-inch thick tops available that are not as durable as the thicker 1.5-inch tops. Just know that these countertops (especially as you go with the longer 6-ft+ long pieces) can be massive and quite heavy. So, make sure that however you plan on installing them, you design accordingly.
Hevea wood is commonly known as rubberwood, but it’s really a subset of maple. It’s about as hard as a “softer” maple on the Janka Hardness Scale, so it’s actually not that bad as a hardwood. The great thing about this is that it is really quite cheap and in my opinion is the perfect option for a workbench that will see a lot of use.
If you’ve ever tried gluing wood boards together, planing it down flat, and take the other necessary steps to construct a table top from scratch, you’ll know how grueling and time consuming such a job is. That’s why I think these pre-constructed “butcher blocks” are such an amazing deal.
Without venturing too far into the weeds, here’s some of the issues with making one from scratch: it’s a pain to join the boards together with glue, it’s extremely tiring to plane or shave down the wood until it is totally flat on both sides, and you have to deal with constantly moving wood which easily warps the table top. I think the better choice is to shell out the $200-$300 to have a perfectly smooth, flat, and even wooden table top ready for you to seal.

Sealing the Wooden Workbench Top
When you buy one of these pre-made “butcher blocks”, you need to seal it right away. I was pleasantly surprised to see this large warning sticker (pictured below) on the wooden table top, which warns you to seal the wood within 48 hours of installation. Although, in reality, it should be done within 48 hours of removing the plastic wrap, not within 48 hours of installation.
It is critical to seal the table top as soon as you unwrap the plastic seal. If you don’t seal it right away, you risk the wood absorbing ambient moisture in the air and warping. This actually happens and can occur within a couple days time, depending on your environment. Since we’re not using this as a butcher block where it will be in contact with food, we’re not going to use mineral oil. Instead, I’ll be using my go-to wood sealer, oil-based polyeurethane. More specifically, I’ll using a less viscous polyeurethane called, Wipe On Poly. It’s essentially a thinner poly that is more easily wiped onto a surface and leaves less room for error.
Plenty of wood finishes exist–some of the most common ones are polyeurethane, shellac, varnish, lacquer, and the list goes on. Each has their own pros and cons, but I’ve mainly worked with polyeurethane and have had very good results with it. So, I will demonstrating its use in this article.

Oil-based polyeurethane is a bit harder to work with than water-based polyeurethane, although you can get a thicker coat and therefore more durability from less coats. Because the wood is technically not super-hard like other types of hard woods, I do want to protect it as much as possible. At the end of the day, it’s still wood, and if you dumped a huge metal car part on it, it’s going to dent the wood. My goal is to protect it with some poly to ensure the wood doesn’t warp, bring out a nice color from the wood, and give some added protection.
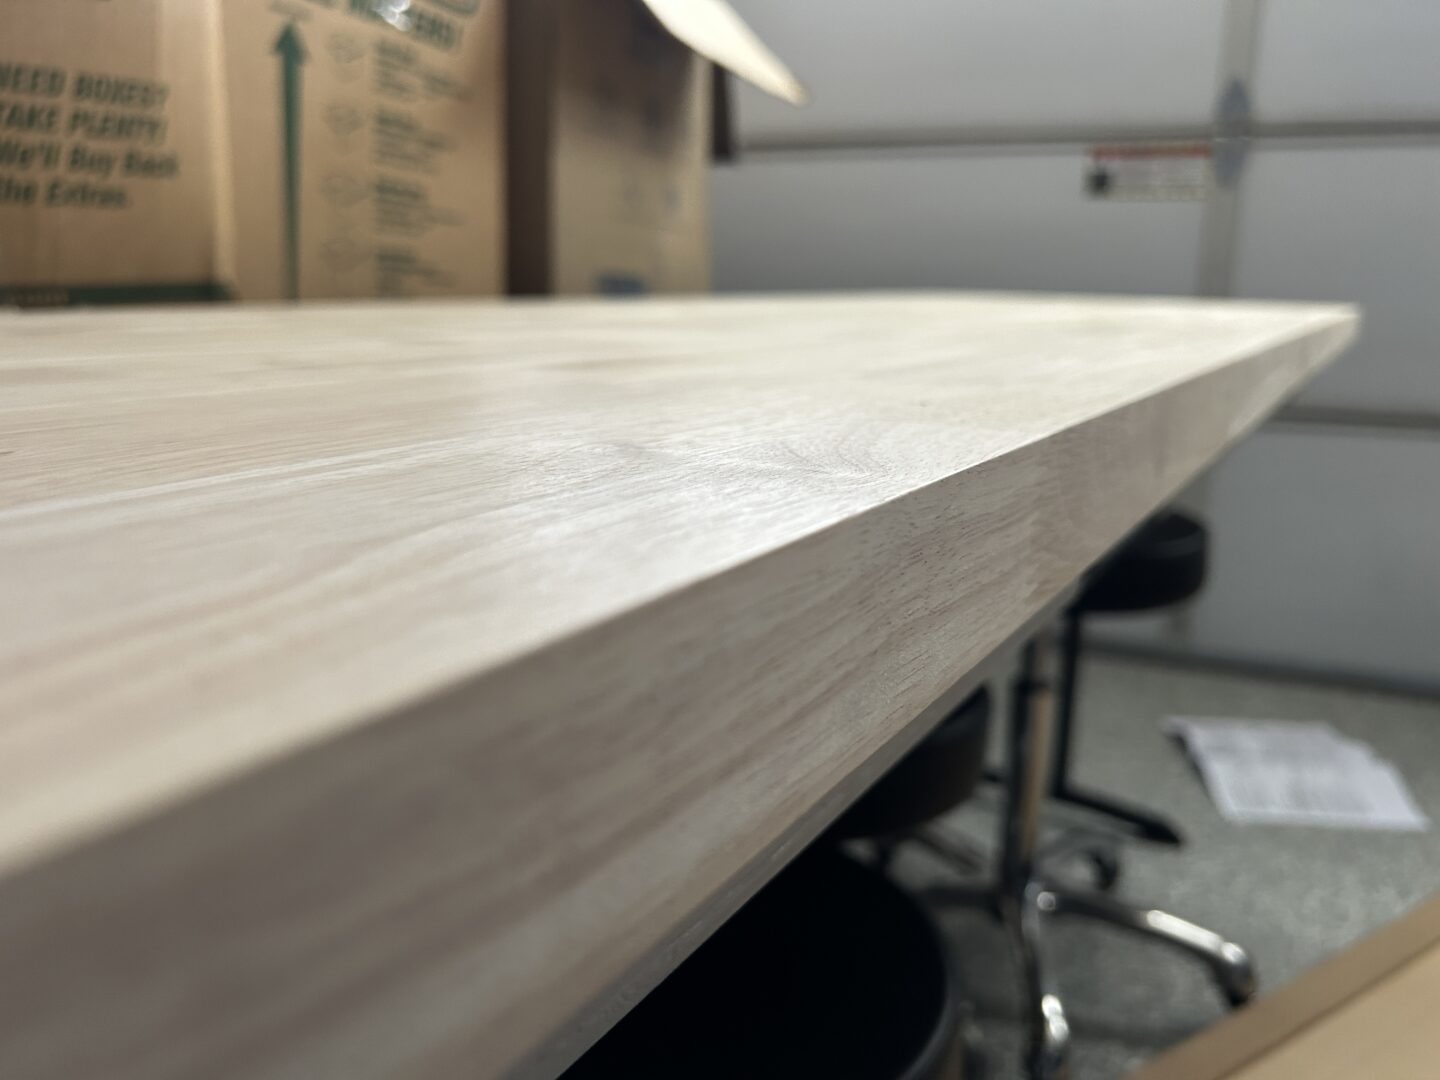
When you unwrap your new table top, check the edges and see if it is acceptable to you. I’ve done some tops in the past where the edge was smoothened out already, but sometimes they come to you with the edges unfinished and uncomfortably sharp. The one I got from Home Depot had this issue and I could tell if I sat at the table, these edges would dig into my forearms.
Preparing a “Butcher Block” as a Workbench Top
A 220-grit sandpaper will smooth out the corner with a bit of sanding, and without the need to follow-up with a higher grit sandpaper. If you go with a 120-grit, it will sand down the wood faster, but it will probably need to be followed up with 220-grit at a minimum prior to staining/sealing. otherwise you may not have as nice as a finish. On this table, I sanded the edges at a 45-degree angle first, then rounded out the edges so that it would result in a curved edge. A sanding block is necessary to get clean edges, although I will follow up with sandpaper in my hand at the very last step to smooth everything over just a tad.


Once you’re done sanding, clean up all the wood dust with a vacuum and wipe everything down with a wet rag. Then, wipe the wood surface down with a clean rag with a mist of water. Ensure that you’ve removed as much wood dust from the wood surface as well as from the area you’re working in.
Now, the sealing stage. If you want to stain the wood with your choice of stain color, by all means go for it. I personally like the natural color of this hevea wood, so I’ll just protect it without any stain. If you do have plans to stain the wood, consider using some pre-conditioner on the bare wood prior to staining so that the stain absorbs more evenly.
Applying Polyeurethane to the Wooden Workbench Top
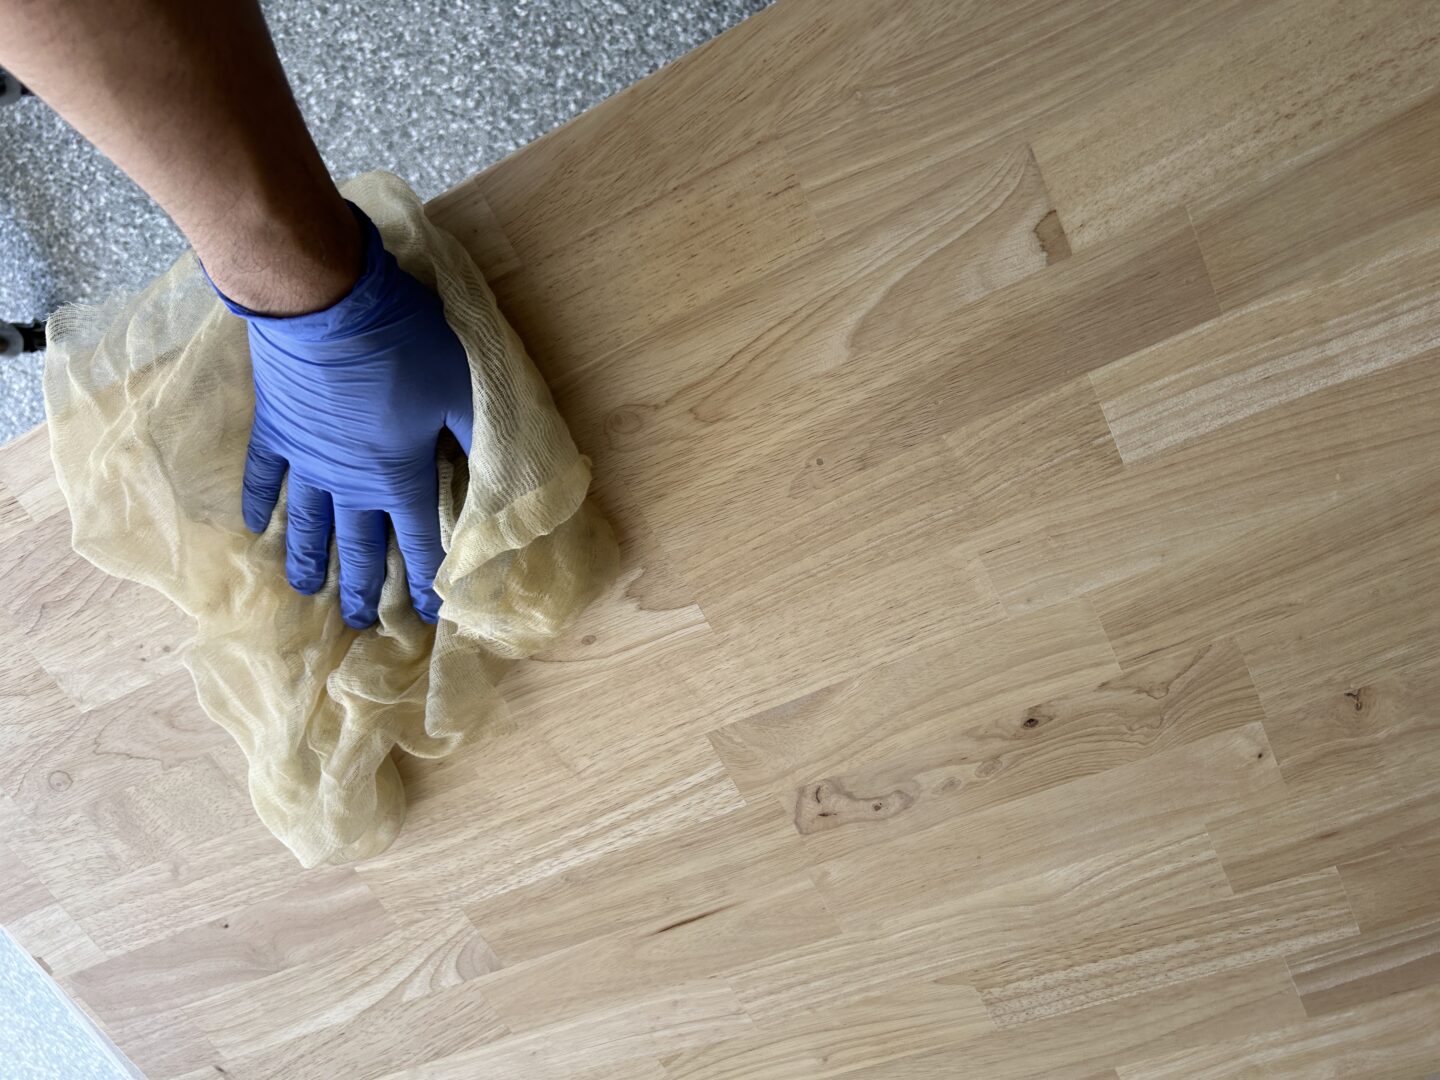
Before applying some oil-based poly, I wipe down the table top completely with a tack rag to remove any remaining dust.Then, I apply the Wipe On Poly with a spare applicator pad I have. I usually apply this product with old t-shirt rags, but this will have to do since I’m all out right now. Another great option for applying polyeurethane are foam brushes.
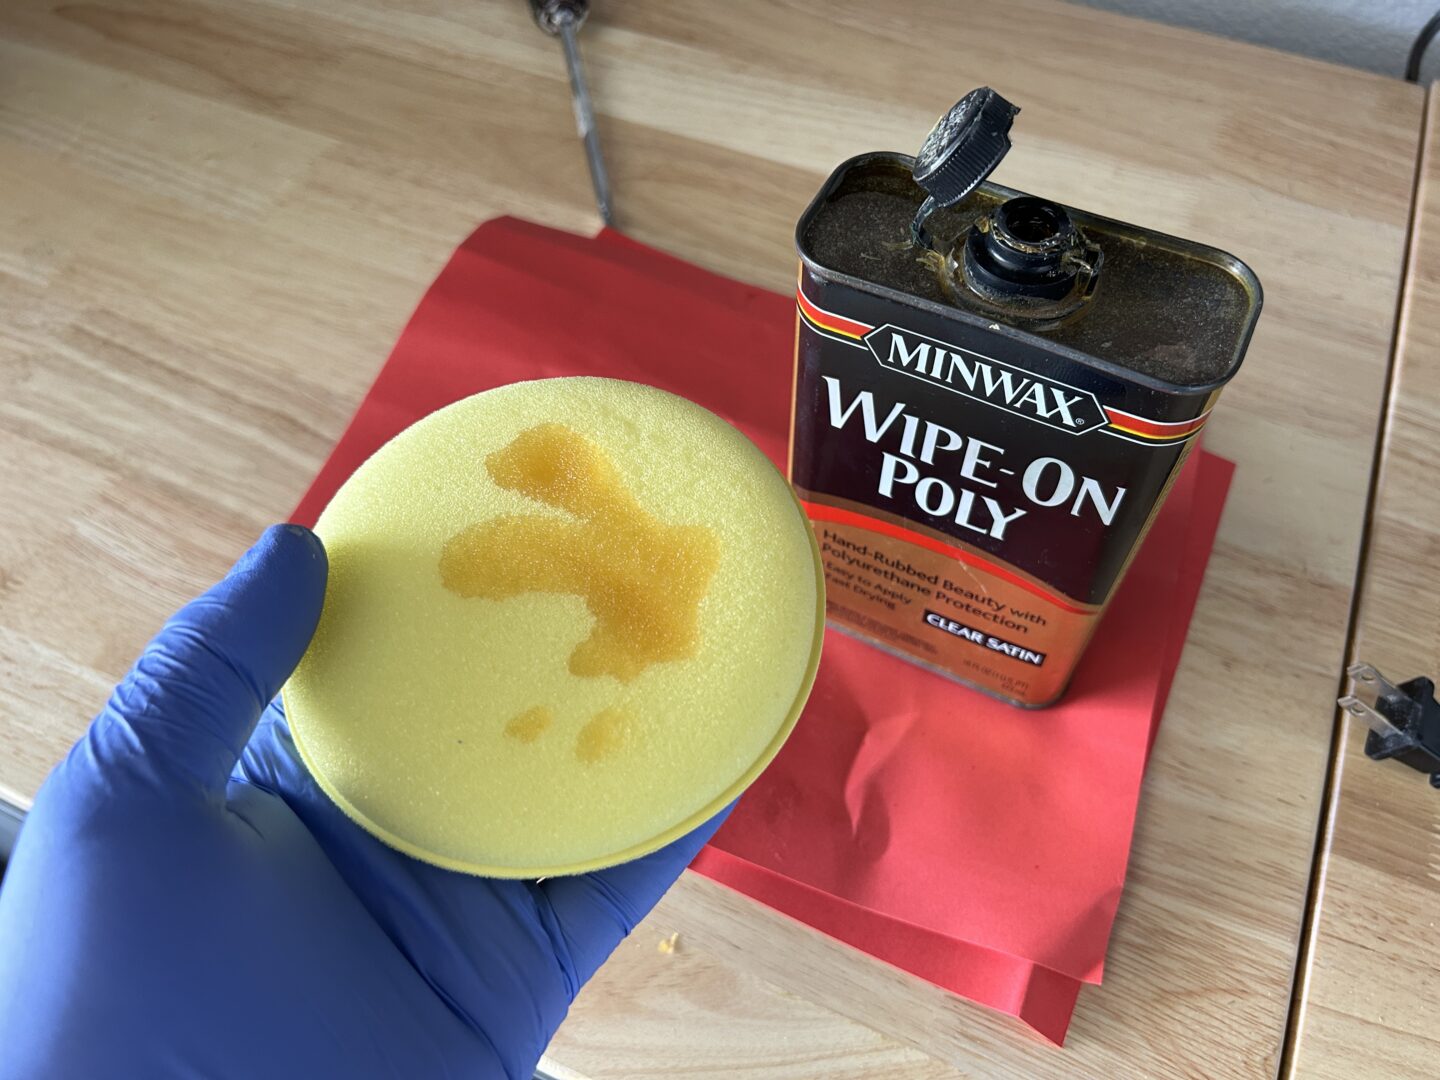


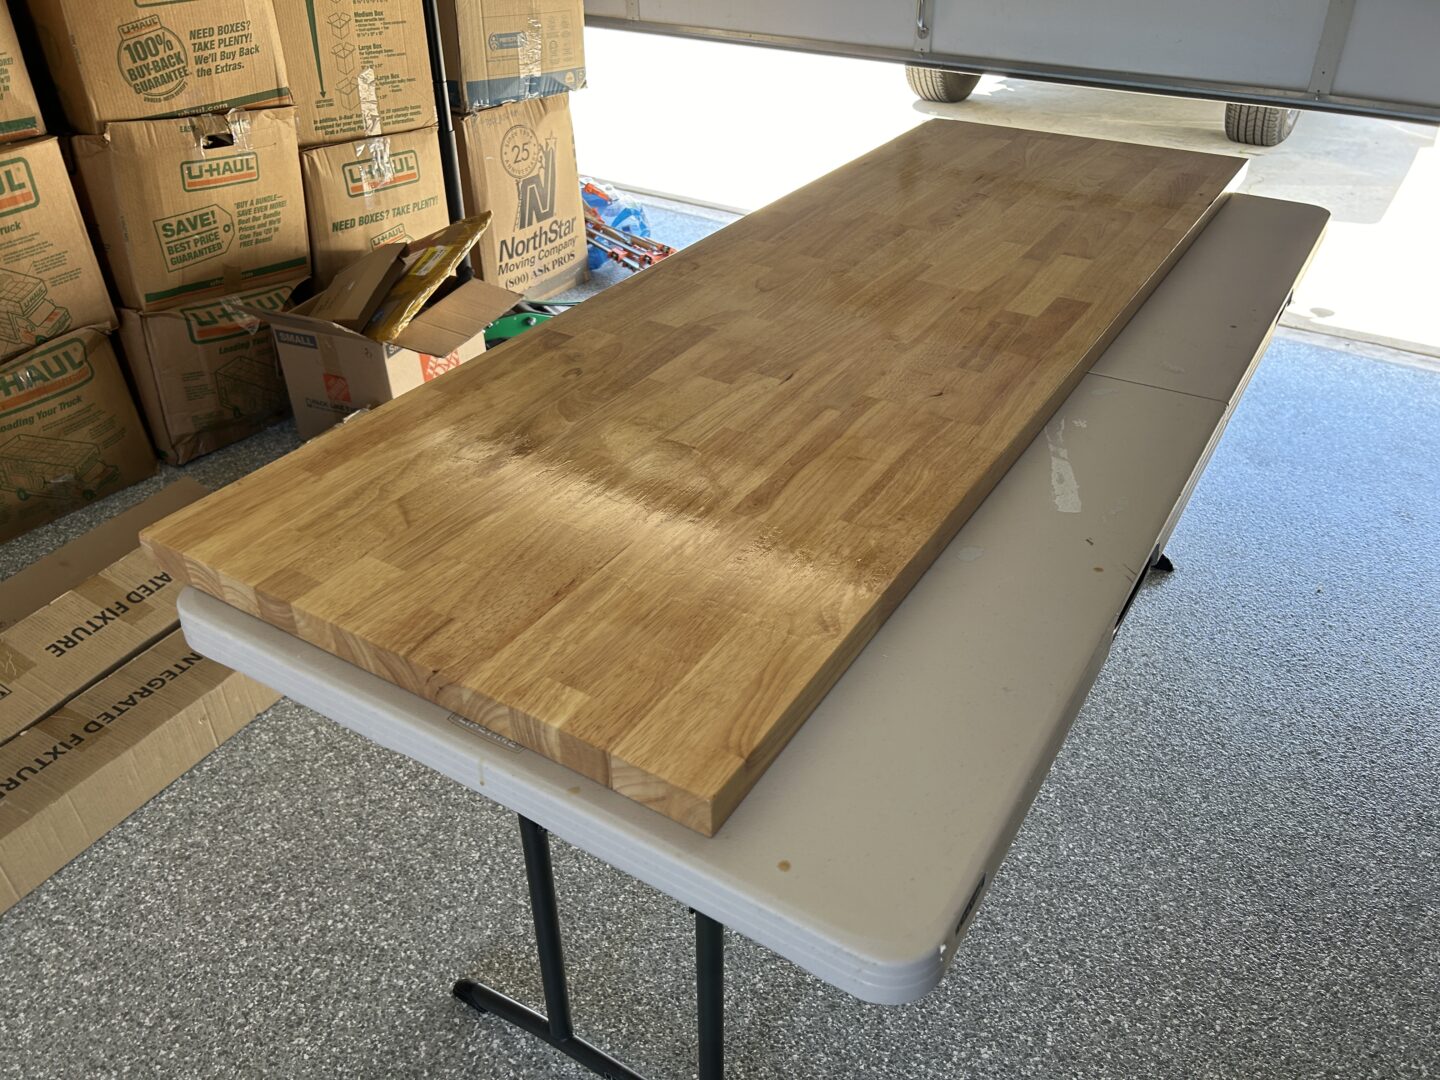
When applying any polyeurethane, you want to apply a full, even coat across the entire surface. I want to coat the entire table top, both top and bottom, so I first apply on the bottom side of the table and let it dry for at least a few hours. Then, after it has sufficiently dried-to-the-touch, I’ll flip it around and then apply the polyeurethane to the top surface of the table top. Keep in mind that I’m talking about wipe-on poly, so it’s a thin coat that will dry a lot faster than if you were to apply a standard polyeurethane with a brush.
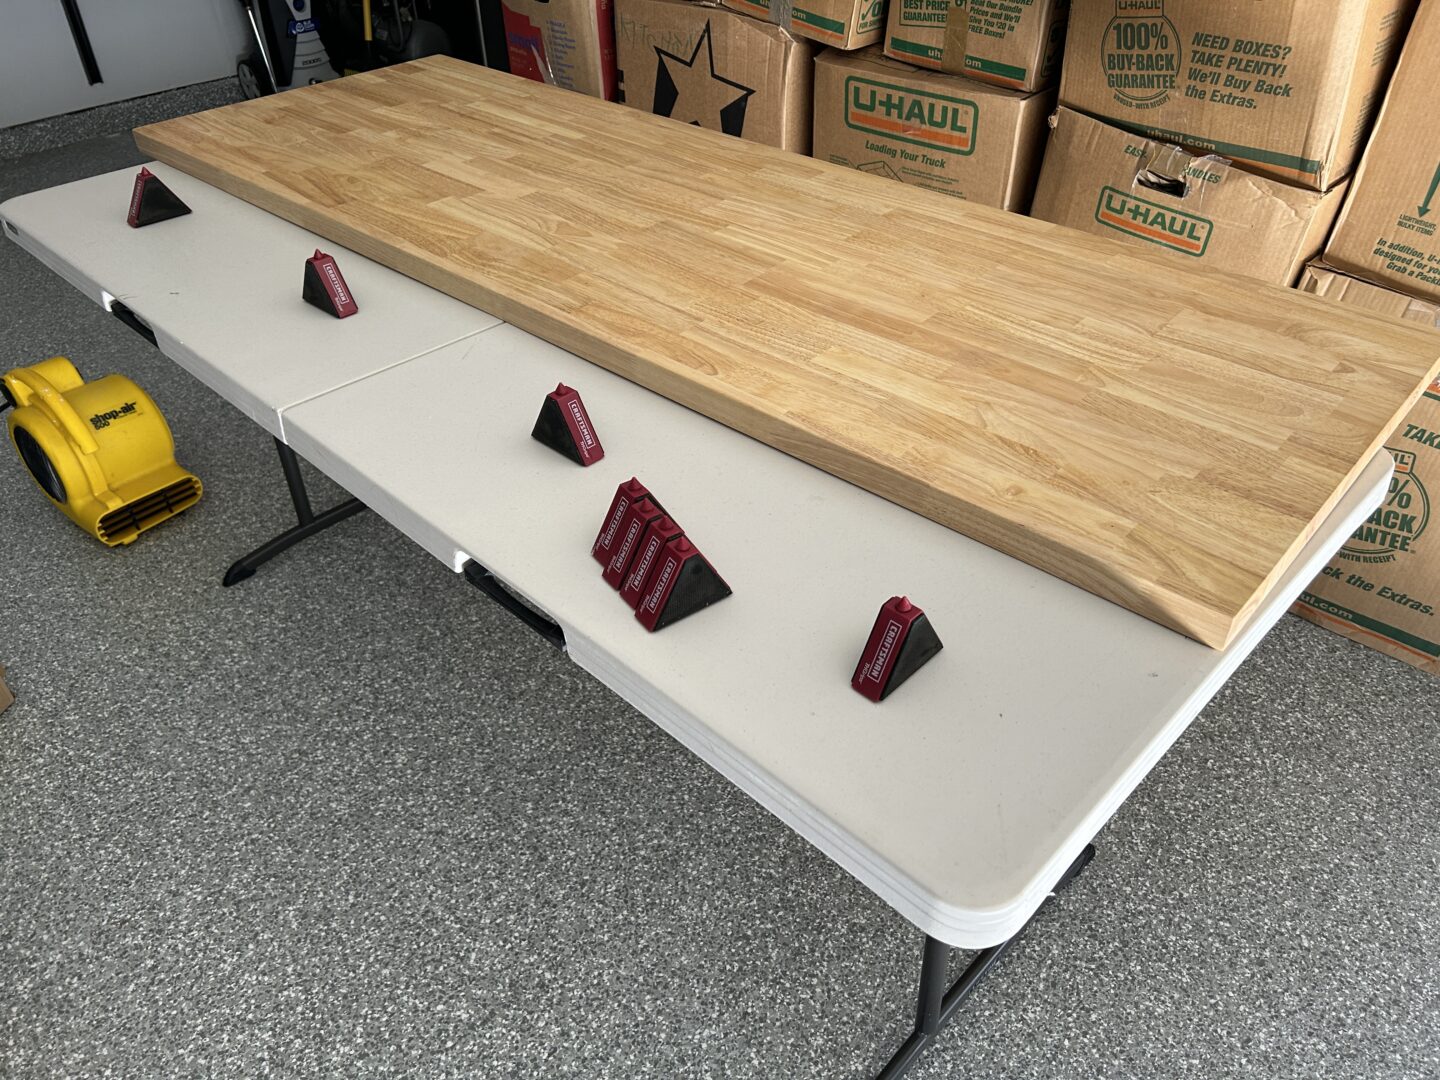
To keep the wood suspended, I use these little triangle bench supports. The reason why I apply polyeurethane to the bottom side of the wood first is because when I flip it over so that it is supported on the supports, it is inevitable that the weight of the table top will cause indentations from the pointed supports underneath. The indents will be small points, so not very noticeable, but you do want it on the bottom side on the table as opposed to the top.
Therefore, if you should always start with the bottom side first so that when you flip it over to support it on these stands, all of those little indentations in the wood will always end up on the bottom side of the table.

Always beware of drip marks; they can really mess up your final results. When I apply poly especially around the edges of the table top, I will run the applicator/t-shirt cloth across the side edges of the workbench, and then finally run a dry part of the applicator pad or cloth/t-shirt across the bottom edge of the workpiece. It is all too common to find polyeurethane dripped down the edge and ending up as a run on the bottom side of the work piece, when it is already too late. Following this process reduces the chance of run marks.


Whenever you finish applying polyeurethane, you need to let the coat fully dry. You must allow for plenty of air flow for this to happen. If you’re doing this outside, you’ll have plenty of fresh air. If it’s going to dry inside your garage, I’d recommend keeping the door slightly open to allow for some air to move through. If the coat you’ve applied does not adequately dry prior to adding more coats, it may end up with a sticky or tacky finish at the end that will never go away.
I did this table top in my garage, so after I applied one coat of poly, I opened the garage partially and ran a blower (not blowing directly on the workpiece, but to circulate the air.) If you apply poly outside or leave the garage door open too much (especially if it’s windy), it’s more likely for dust and other particles to end up in your polyeurethane finish. Dust and other small particles will inevitably end up in your finish, which you’ll have to deal with later.
Fixing Imperfections in the Polyeurethane Finish
Sometimes if you’re applying polyeurethane, you may end up with an uneven surface after everything has dried. This can usually be fixed by sanding the top layer of polyeurethane down smooth, and then applying a smooth coat of polyeurethane.
If you find yourself with this situation, use a random orbital sander and sand down the surface with 220-grit sandpaper. After sanding, you can see if there are any high or low spots on your work piece. You don’t want to sand so much that it burns through the layers of poly that you’ve applied. You do however, want to sand enough so that you have a smooth surface so that you end up with a flatter/smoother surface with your next coat of polyeurethane.
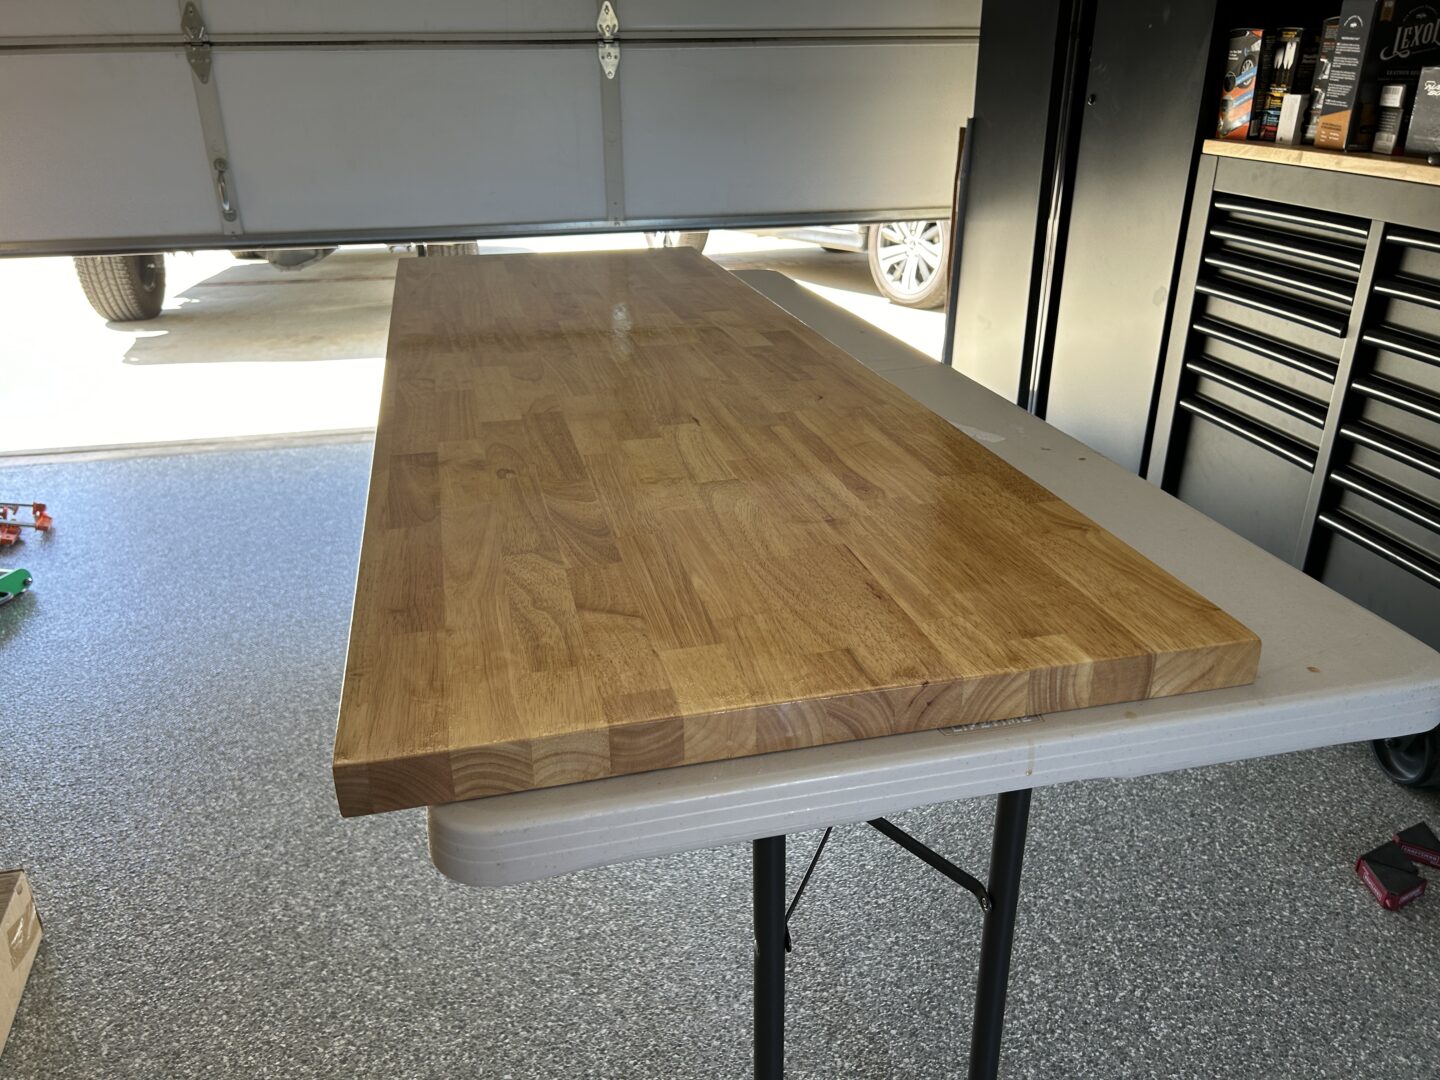
After sanding, completely clean the wood surface with a slightly damp cloth, then tack rag your piece again, prior to applying another coat of poly. Remember that your last coat of poly needs to be as close as a flawless coat as you can make it because you can’t really sand down your final coat. Depending on how much protection you want on your workbench, repeat these steps until you’ve built up however many coats of poly you intend on applying.


After you’ve applied the last coat of poly, it’s not uncommon to have specks of dust and other particles that end up in the final finish. If it’s very minor, you can use a brown paper bag to rub against the finish to remove those little nibs. If it’s a lot worse, you could potentially use 0000 steel wool with a paste wax to remove more of the nibs. As an added effect, 0000 steel wool will also dull your surface a bit so that it exhibits less of a sheen than what you’ve originally applied.

Installing the Workbench in the Garage
On another post, I detail how I affixed this wooden table top to heavy-duty folding wall-mounted shelf brackets for a workbench that can be folded out of the way when needed. My garage is not very deep, so if I need to bring a car in to work on, I can simply fold the table up against the wall to give me the the extra space to drive all the way in.

With your newly protected wooden workbench top, you can affix it to the top of a set of cabinets, a tool cabinet, or even some legs if you wish. The nice thing about working with a nice thick slab like this is that you can secure it to various materials with screws easily. Just make sure to pre-drill to the proper depth and use the correct length wood screws to ensure they don’t poke through to the top of your beautifully finished wood surface.


