Here’s another one of those common oil leak points on the BMW E46. Up there with the valve cover gasket as one of the most common sources of oil leaks on the E46, the oil filter housing gasket is yet another weak point. What’s crazy is that, the oil filter housing gasket itself costs less than $5, but the overall job usually costs much more due to the labor it takes to remove all of the other components needed to get to the gasket.
It may be difficult to determine if the oil leak that you have is coming from the oil filter housing gasket– there could be oil on the driver’s side of the engine or at the oil pan. However, since the oil filter housing gasket is located higher up on the engine, oil will leak down the engine to the oil pan. This makes it more difficult to determine the exact source of the oil leak.
As is the case when you’re replacing other parts on the BMW E46 platform, if you’re already in there replacing certain parts, it’s recommended to go and replace other parts at the same time. For this specific job, I advise purchasing an oil filter housing gasket kit which includes the gasket itself, the VANOS oil feed line (another source of oil leaks), coolant temperature sensor, oil pressure switch, and other hardware.
Also since we’re going to be draining the oil anyway, we might as well do an oil change at the same time. Some oil filter housing gasket kits include oil and an oil filter as well.
This guide will walk you through the replacement of the oil filter housing gasket along with the installation of the rest of the new parts in an oil filter housing gasket kit. This will apply to the BMW E46: 323i, 325i, 328i, 330i as well as all ci and xi variants of these models. Keep in mind that there might be some small variations depending on your specific vehicle (e.g. the power steering pump might be configured slightly different from vehicle-to-vehicle.)
Tools & Parts Needed
Oil Filter Housing Gasket Kit
Oil Filter Housing Gasket Kit: FCP Euro
Standalone Oil Filter Housing Gasket: MAHLE B32350 from Amazon
Fan Clutch Tool (if your car has a fan clutch instead of an electric fan)
DPTOOL 32mm Fan Clutch Wrench for BMW
Set of Larger Wrenches
You will need a variety of wrenches, but specifically the 22mm and 24mm wrenches come in handy for the oil pressure sender and oil temperature sensor.
SUNEX TOOLS 5-Piece Raised Panel Metric Combination Wrench Set (20mm-24mm)
Sunex Metric 14-Piece Raised Panel Combination Wrench Set (6mm-19mm)
Torx Bits
LEXIVON Torx Bit Socket Set, 13-Piece T8 – T60 Set
Nitrile Gloves
MedPride Nitrile Exam Gloves, Powder-Free Box/100 – Small | Medium | Large
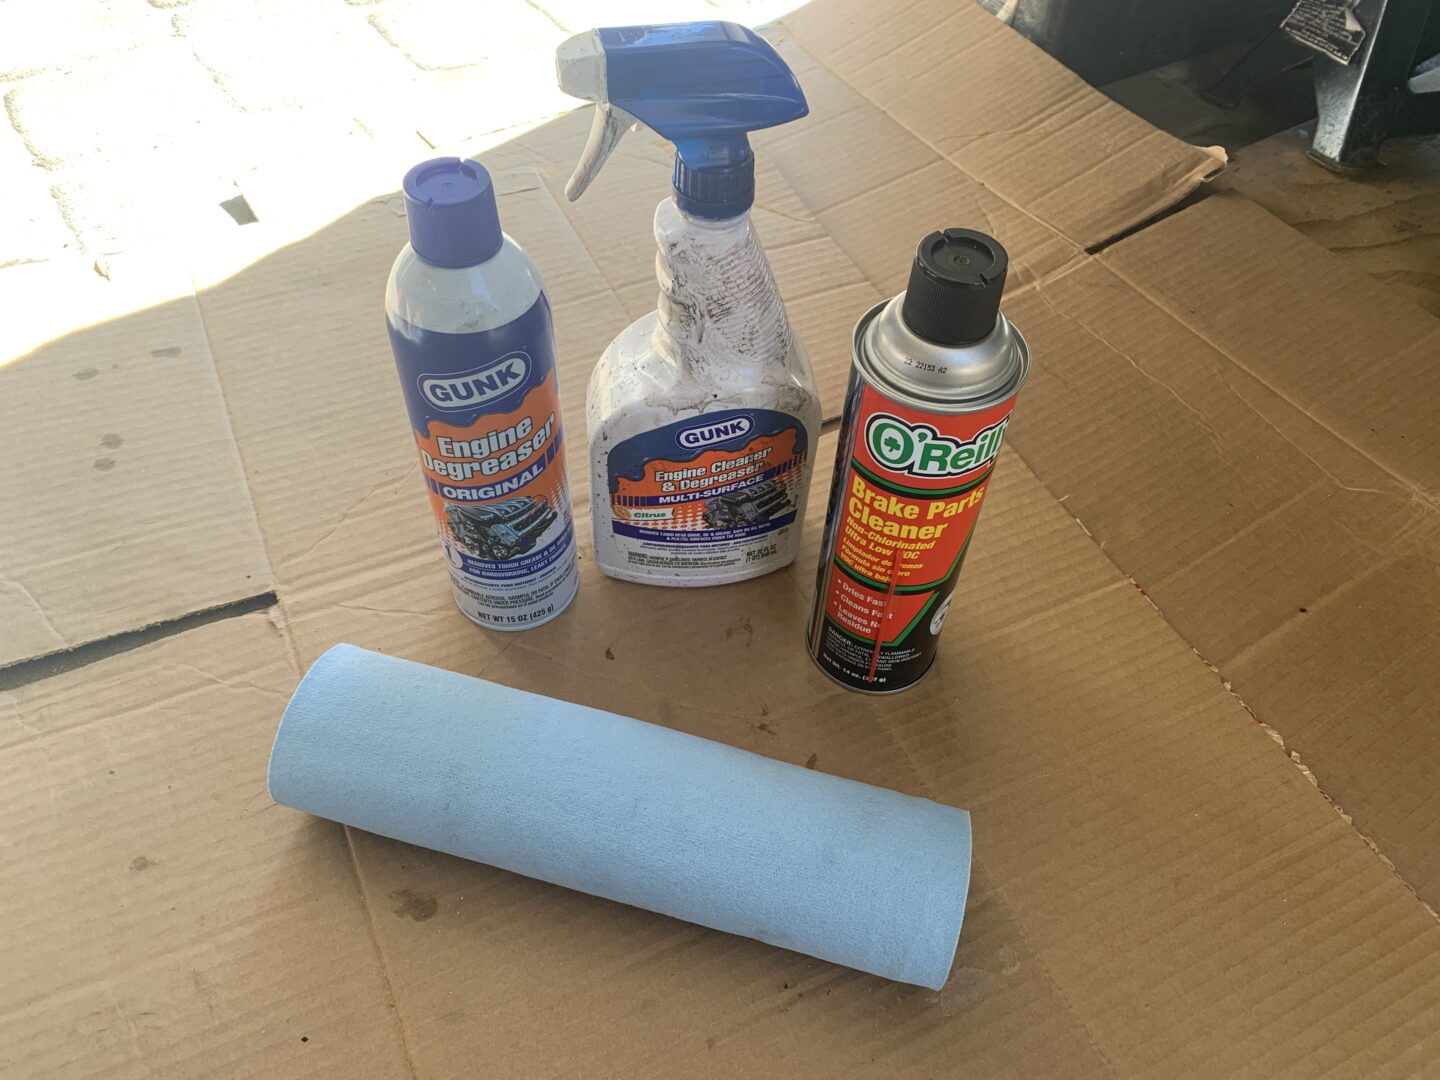
Shop Towels
Scott Shop Towels Original, Blue, 12 Rolls/Case, 660 Towels/Case
Tools/Materials for Oil Change
Motor Oil
LiquiMoly Full Synthetic Leichtlauf High Tech: 5W-40 (5L) & (1L)
Valvoline Full Synthetic European Formula: 5W-30 (5qt) & (1qt) / 5W-40 (5qt) & (1qt)
Castrol Edge Euro Car Synthetic: 5W-30 (5qt) & (1qt)
Castrol Edge Synthetic: 5W-30 (5qt)
Mobil1 Advanced Full Synthetic: 5W-30 (5qt)
Oil Filter
Mann Engine Air Filter (HU925/4X): Amazon
Mahle Oil Filter (OX154/1D): Amazon
BMW Genuine OEM Engine Oil Filter (11-42-7-512-300): Amazon
Other Aftermarket Options: Mobil 1 M1C-252A / Fram Extra Guard CH8081
Oil Drain Plug Gasket
BMW OEM Oil Drain Plug Gasket Ring (Part # 07-11-9-963-151
M12 Copper Oil Drain Plug Crush Washer Gasket Fits for BMW, M12 x 17 x 1.5, 10 Pack
Mechanics Tool Set or Socket Set
DEWALT Mechanics Tool Set, 84-Piece
Channelock Pliers for Oil Filter
Oil Drain Pan
NEIKO Oil Drain Pan | Black Plastic Anti Splash | 2 Gallon (8L)
Torque Wrench
TEKTON 3/8 Inch Drive Micrometer Torque Wrench (10-80 ft.-lb.)
How to Change the Oil Filter Housing Gasket (and VANOS Line) on a BMW E46
We’ll start by draining out the oil. Although I normally drive the front of the vehicle up onto ramps for an oil change, I recommend for this job to jack up the front, place jack stands, and to chock the wheels when you drain the oil. That way, you can lower the vehicle back down and work more comfortably as the vehicle will be back down at the ground level. If the vehicle were up on vehicle ramps, it would be difficult to work in the engine bay at a higher elevation.
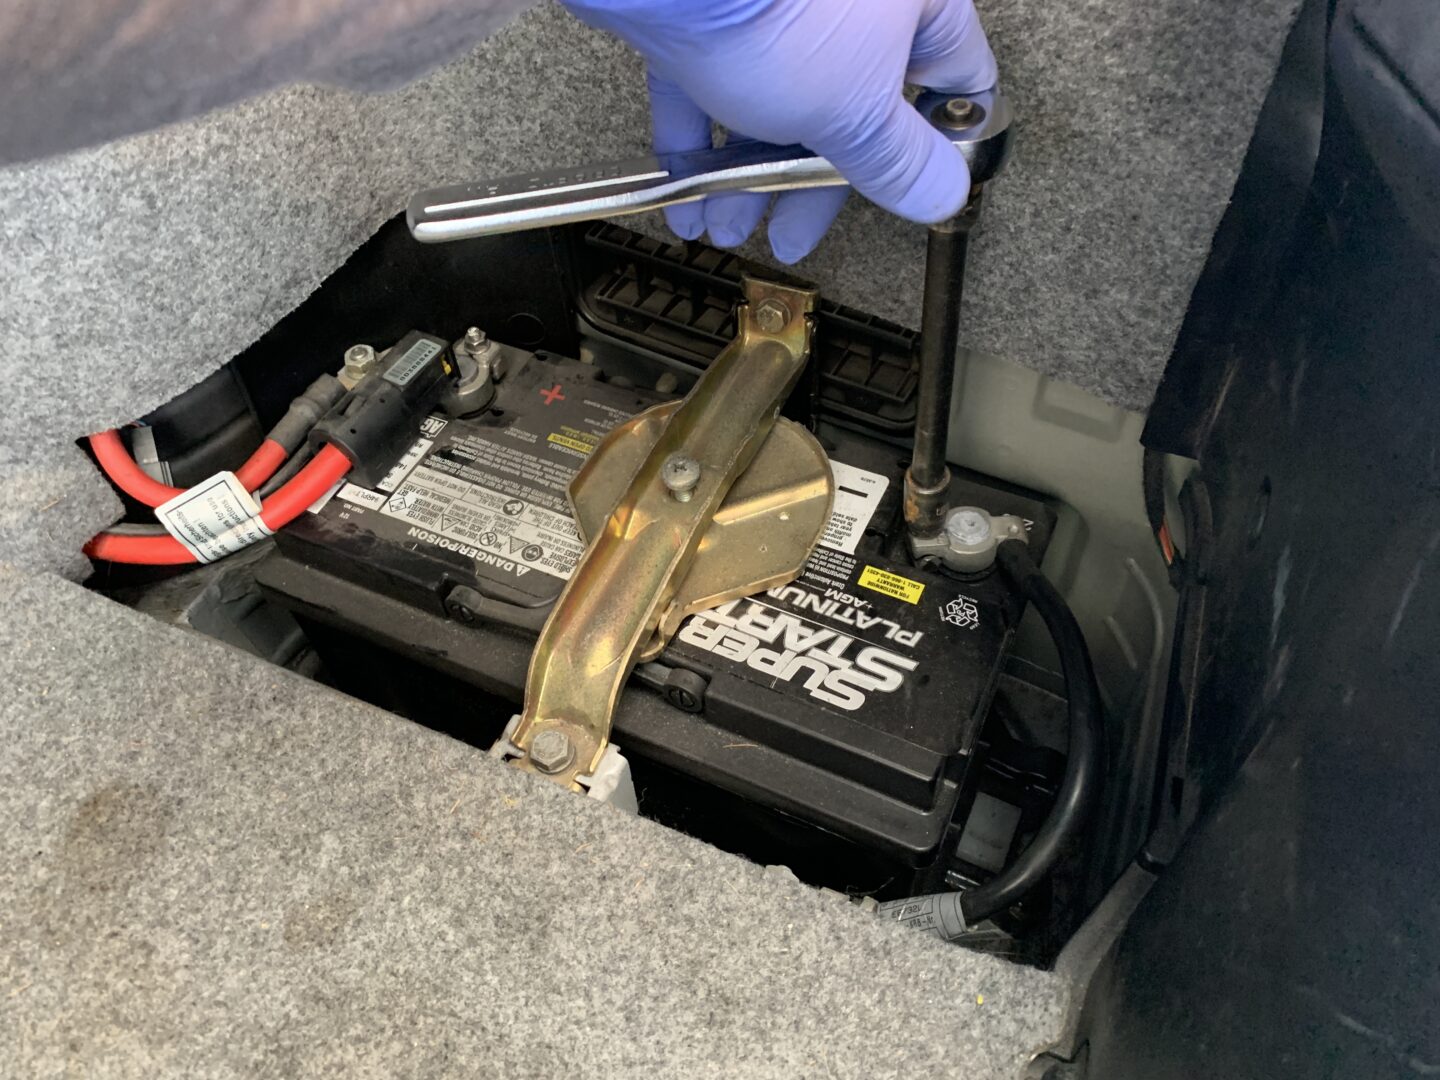
Some folks have done this job without disconnecting the battery, but you end up having to work around a hot wire at the alternator. Since you have to remove the positive cable from the alternator, it’s best to just disconnect the negative cable at the battery terminal so you don’t have to worry when you’re working on the alternator.
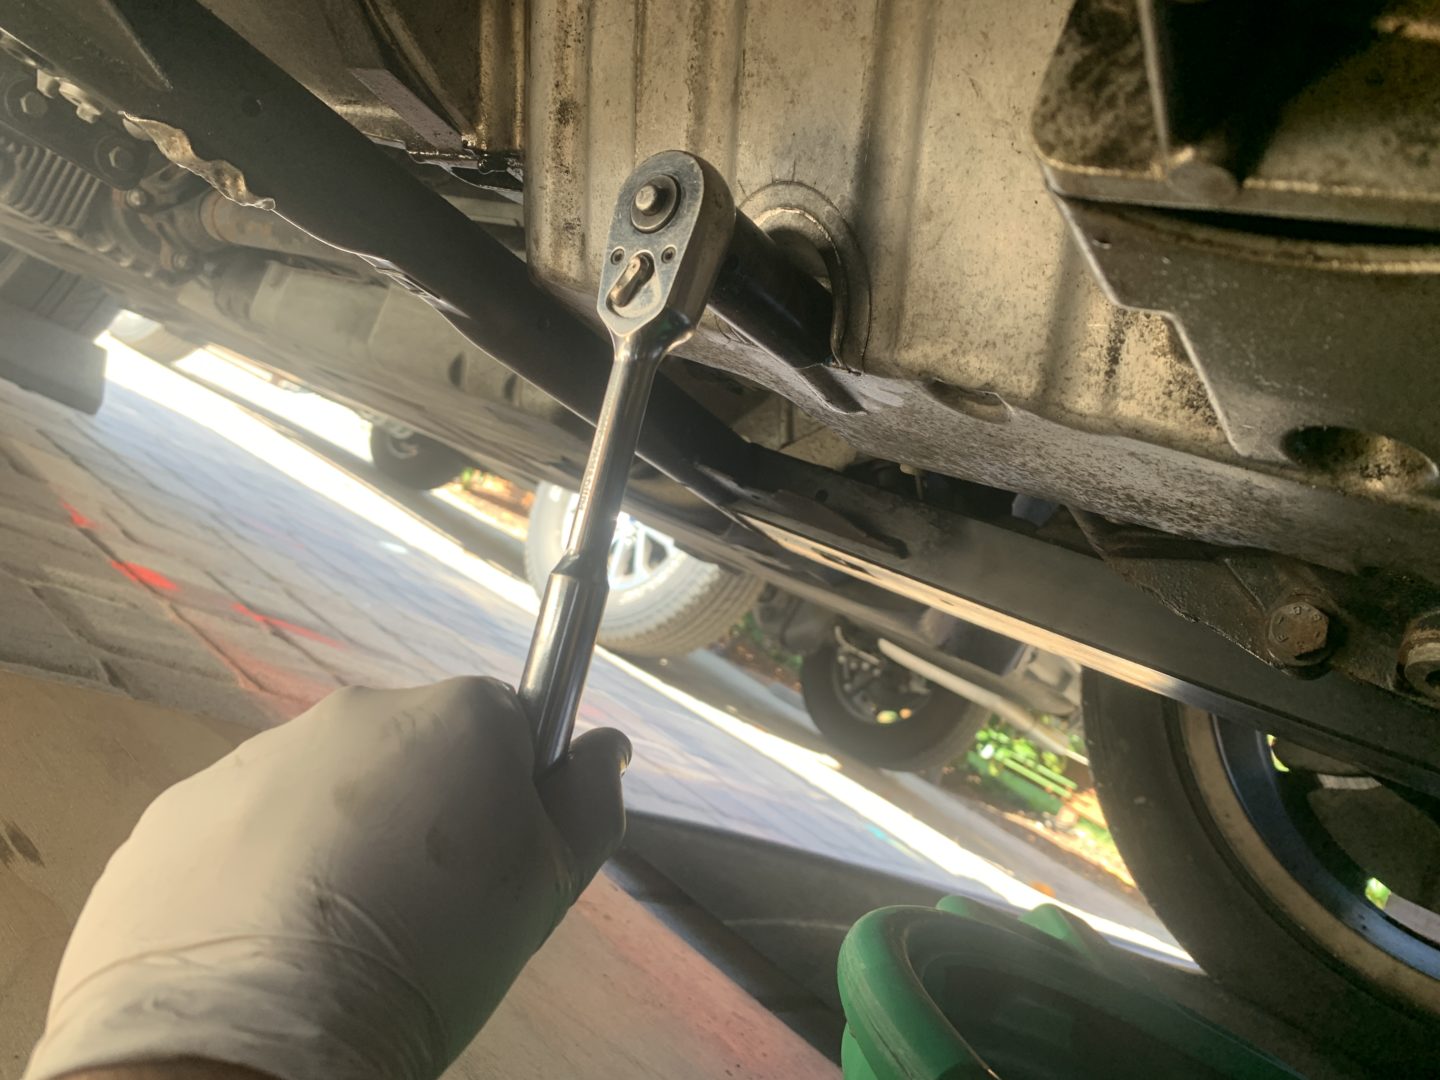
So with the front of the vehicle lifted, jack stands in place, and wheels chocked, drain all the oil out of the car. The oil drain plug takes a 17mm socket. Drain the oil into a drain pan.

Reinstall the drain plug with new drain plug crush washer and reinstall the oil drain plug. Make sure that the old crush washer is not stuck to the drain opening when installing the new one. The torque for the oil drain plug is 25 Nm (18 ft-lbs), or you may also tighten the drain plug snug.
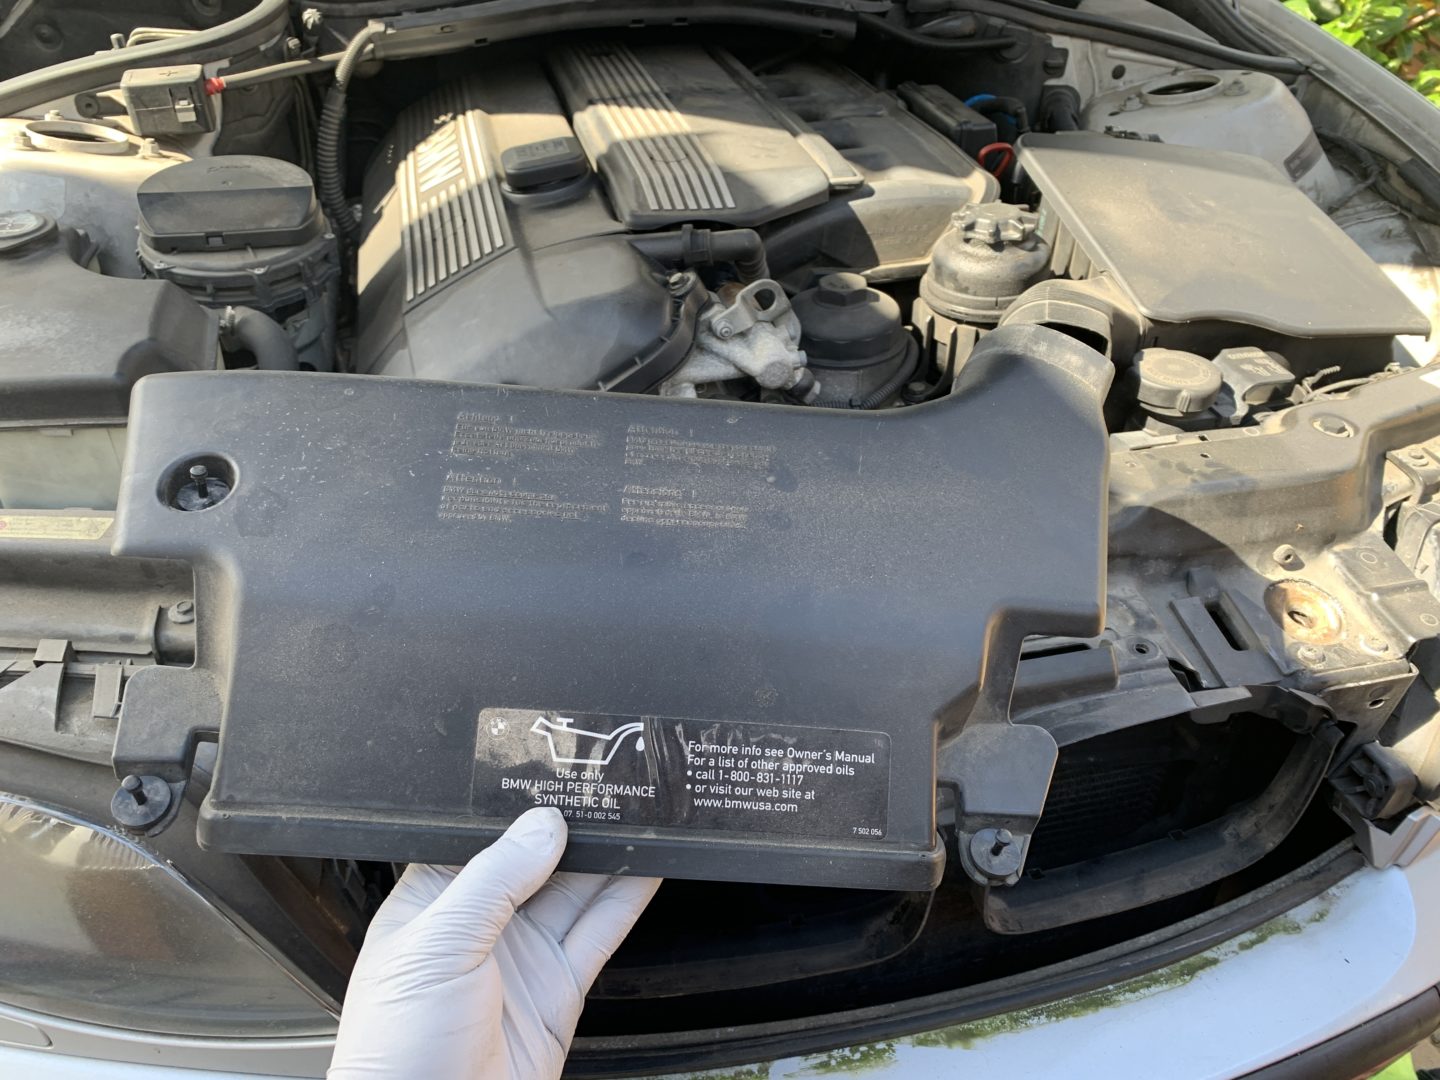
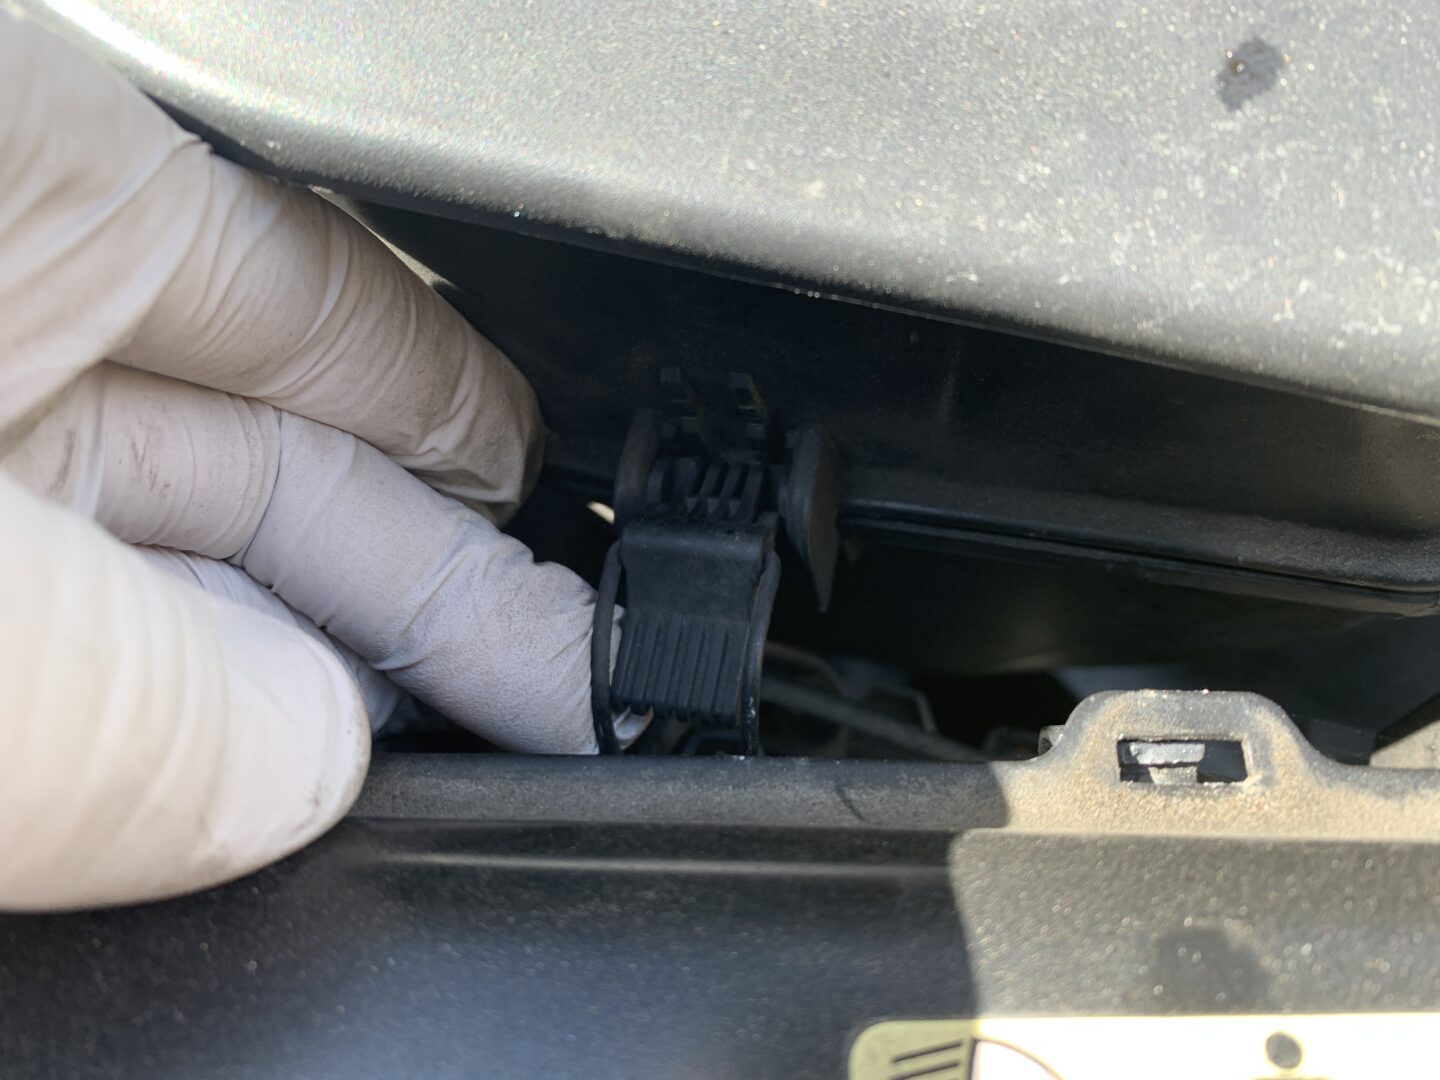
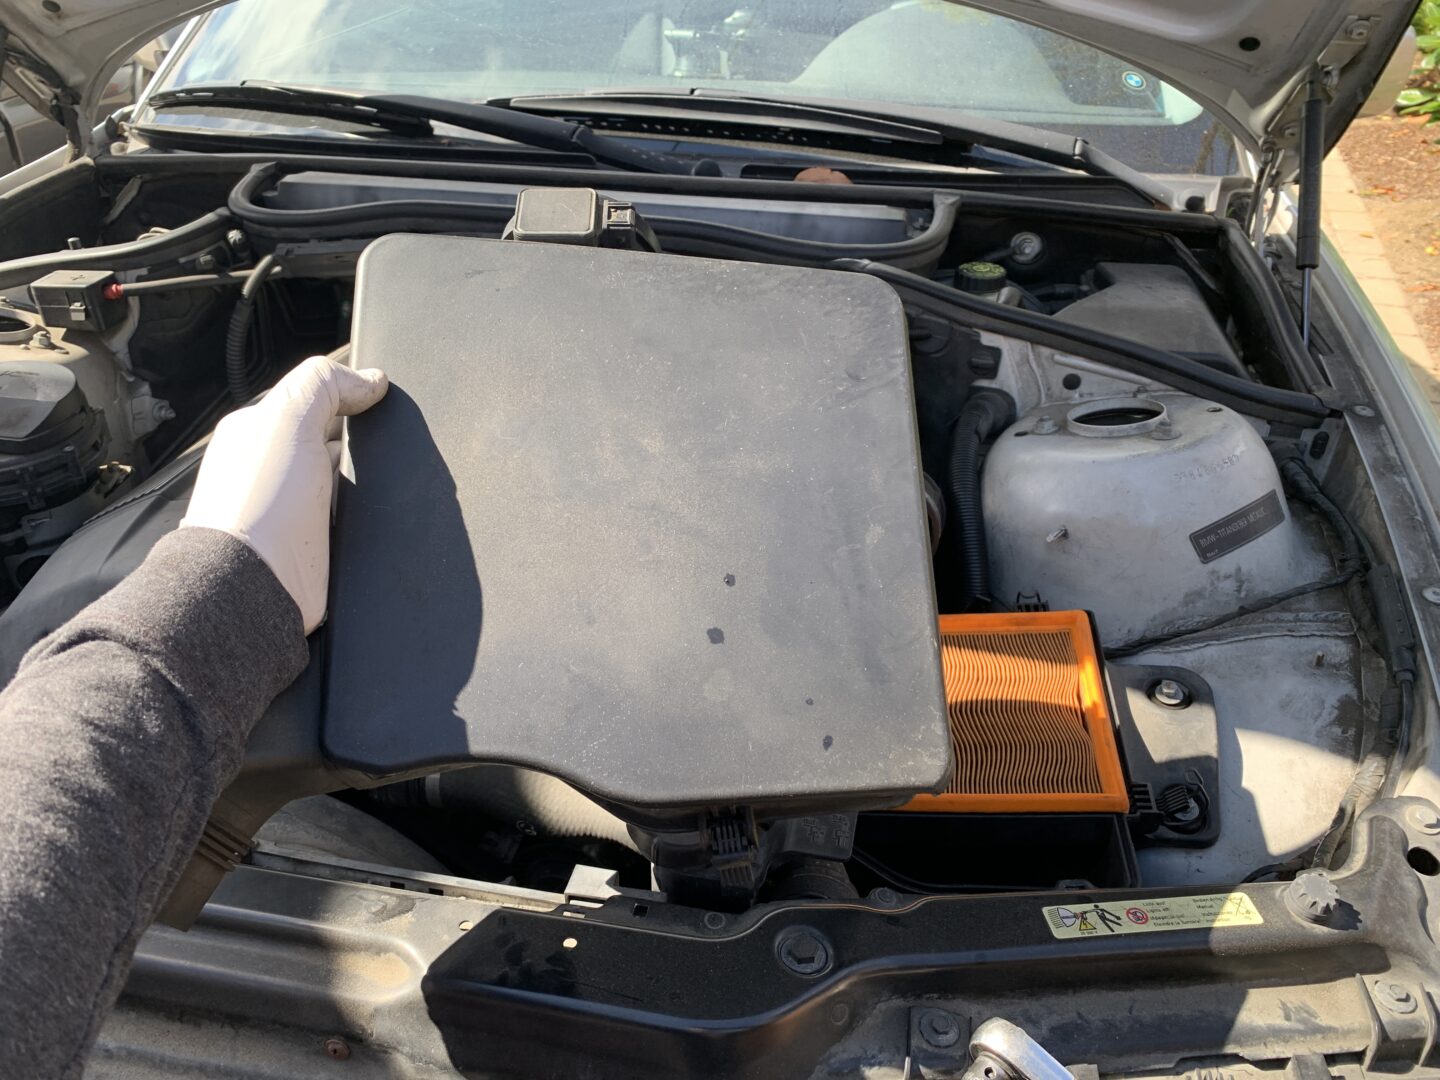
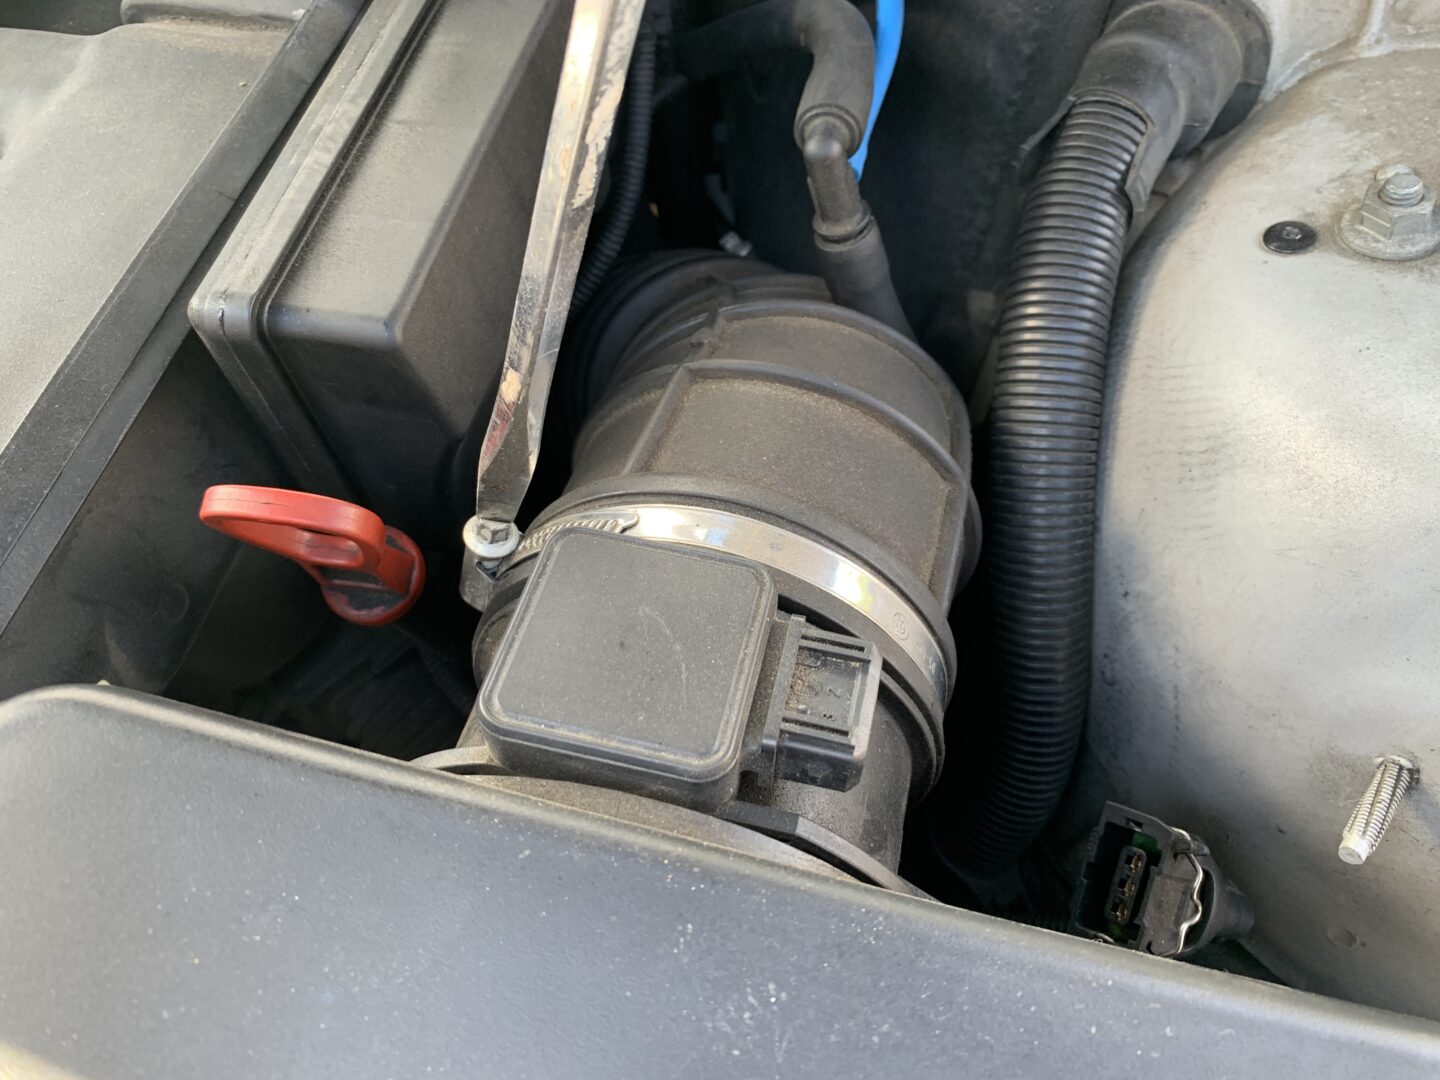
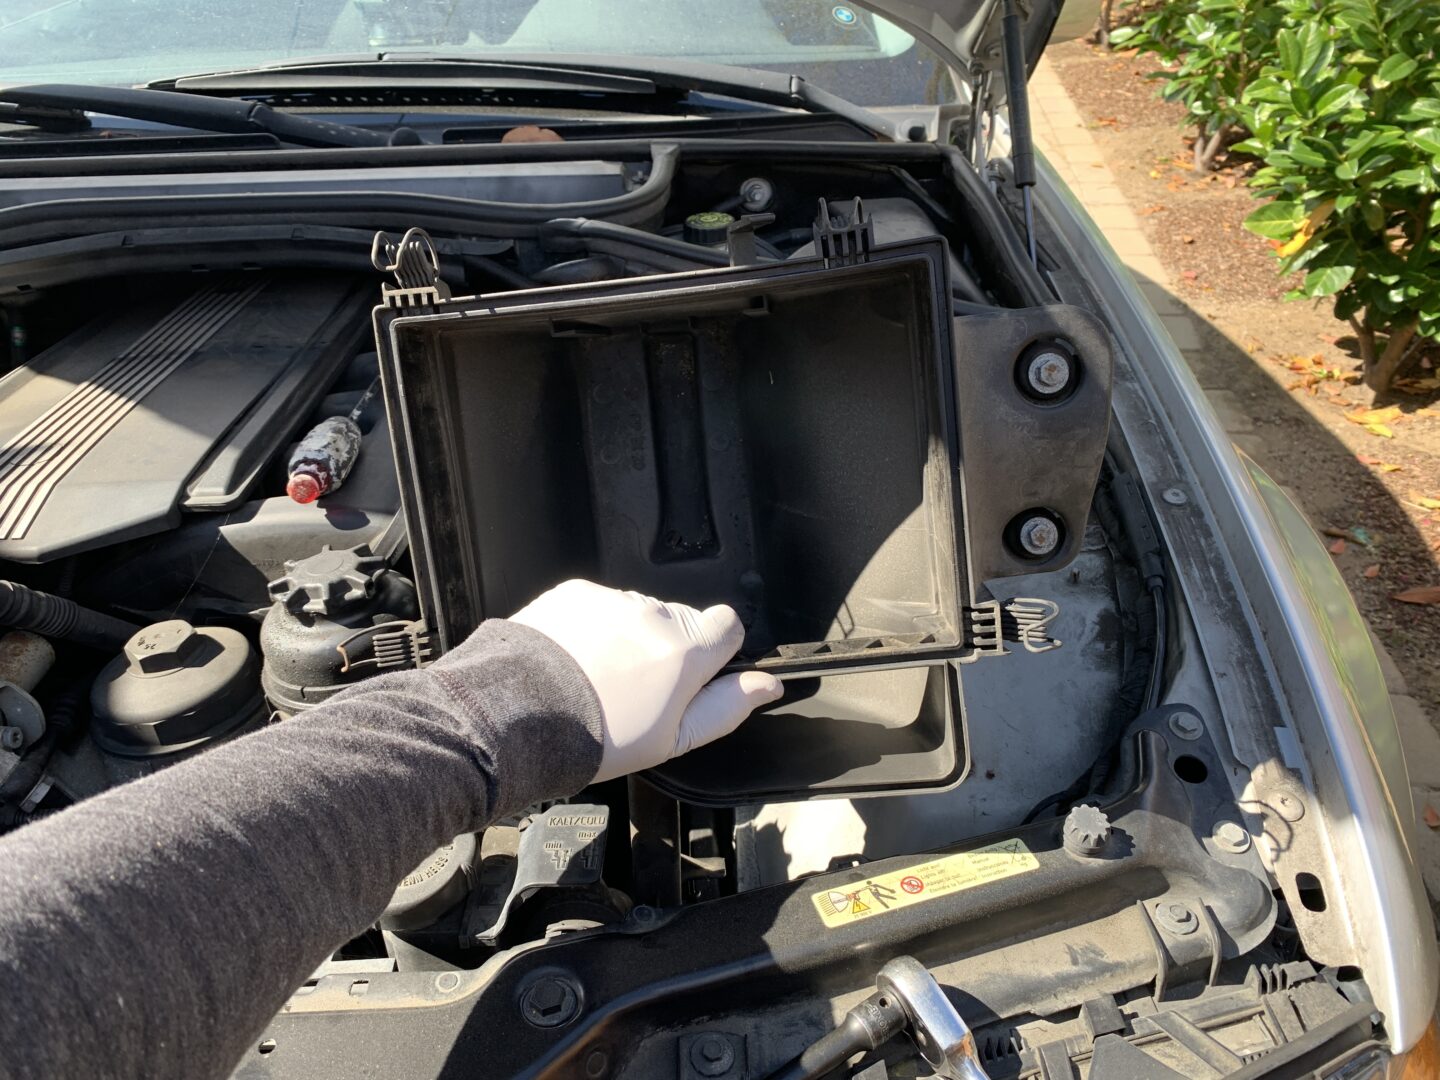
Safely lower the vehicle back down onto the ground. Remove the intake duct and engine air filter housing. There’s a pop rivet for the front intake dam, several clips that hold the top of the air filter housing to the bottom, and (2 qty) 10mm bolts that hold the air filter housing to the frame. There’s also a large clamp that needs to be loosened and the MAF sensor connector that will need to be disconnected.

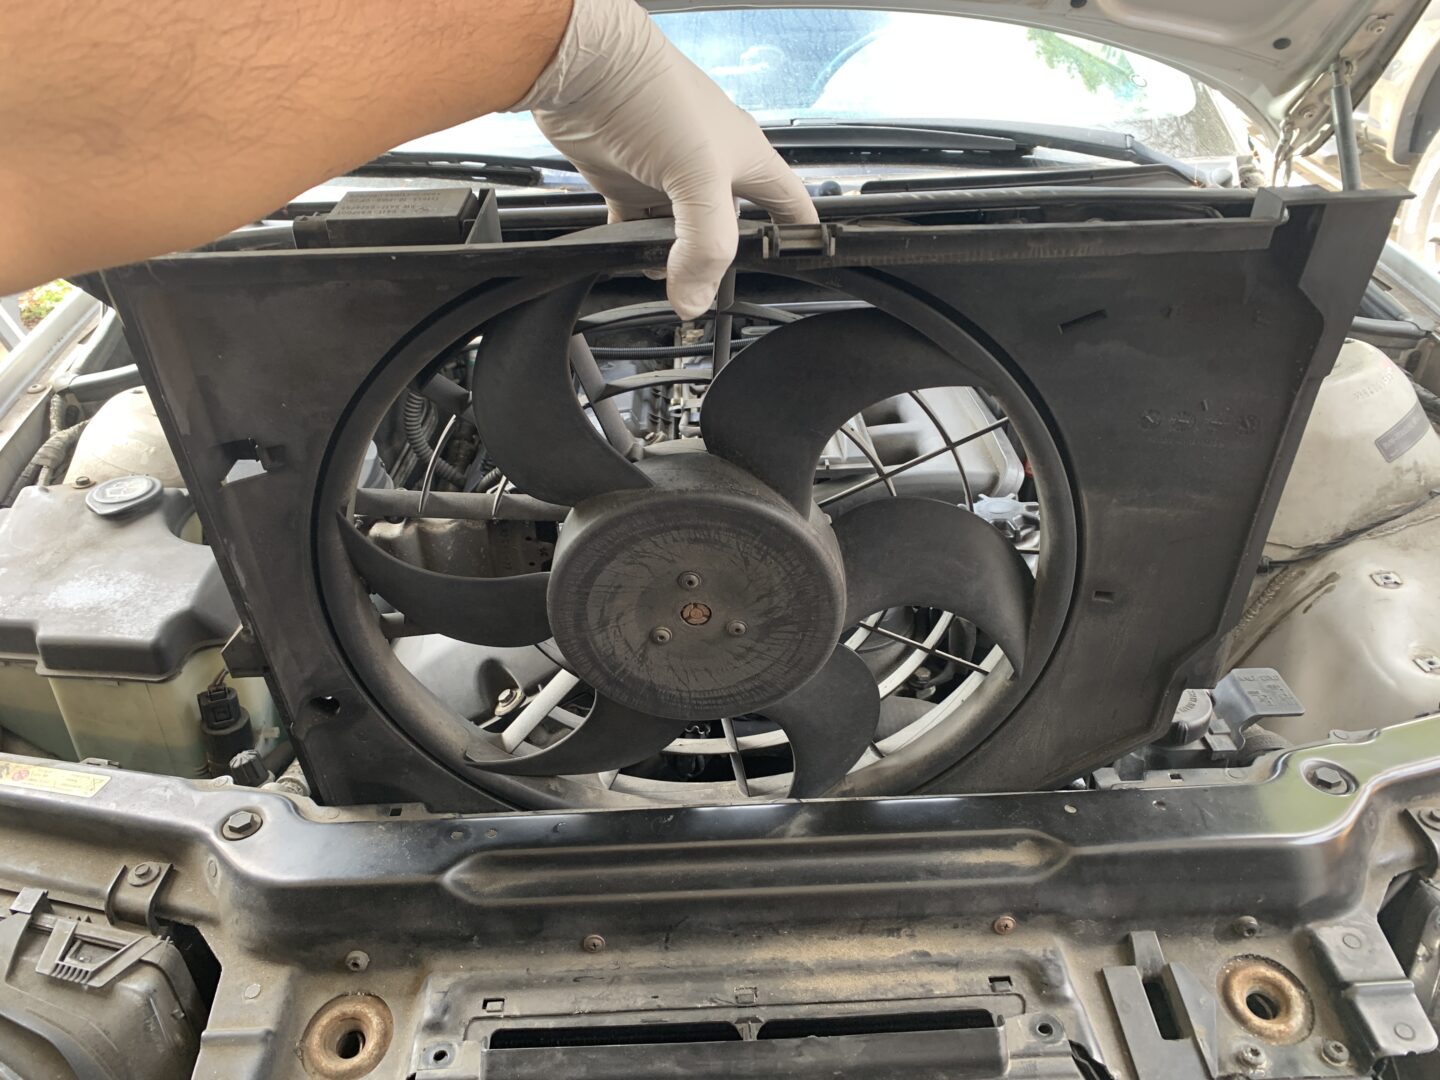
There are two types of E46 fan shrouds: an electric fan shroud such as the one shown below, and a fan clutch shroud that requires the use of special wrenches as described in the tools section at the beginning of this post. The thing to remember when loosening the nut on a fan clutch shroud is that it is reverse-threaded, so you must turn it clockwise to loosen. Check out this video from 50sKid or FCP Euro to learn more about the removal for that specific type of fan.
On the other hand, if you have an electric fan shroud, disconnect the two electrical connectors, plastic clip, and T25 Torx screw. Then pull up on the fan shroud and remove.
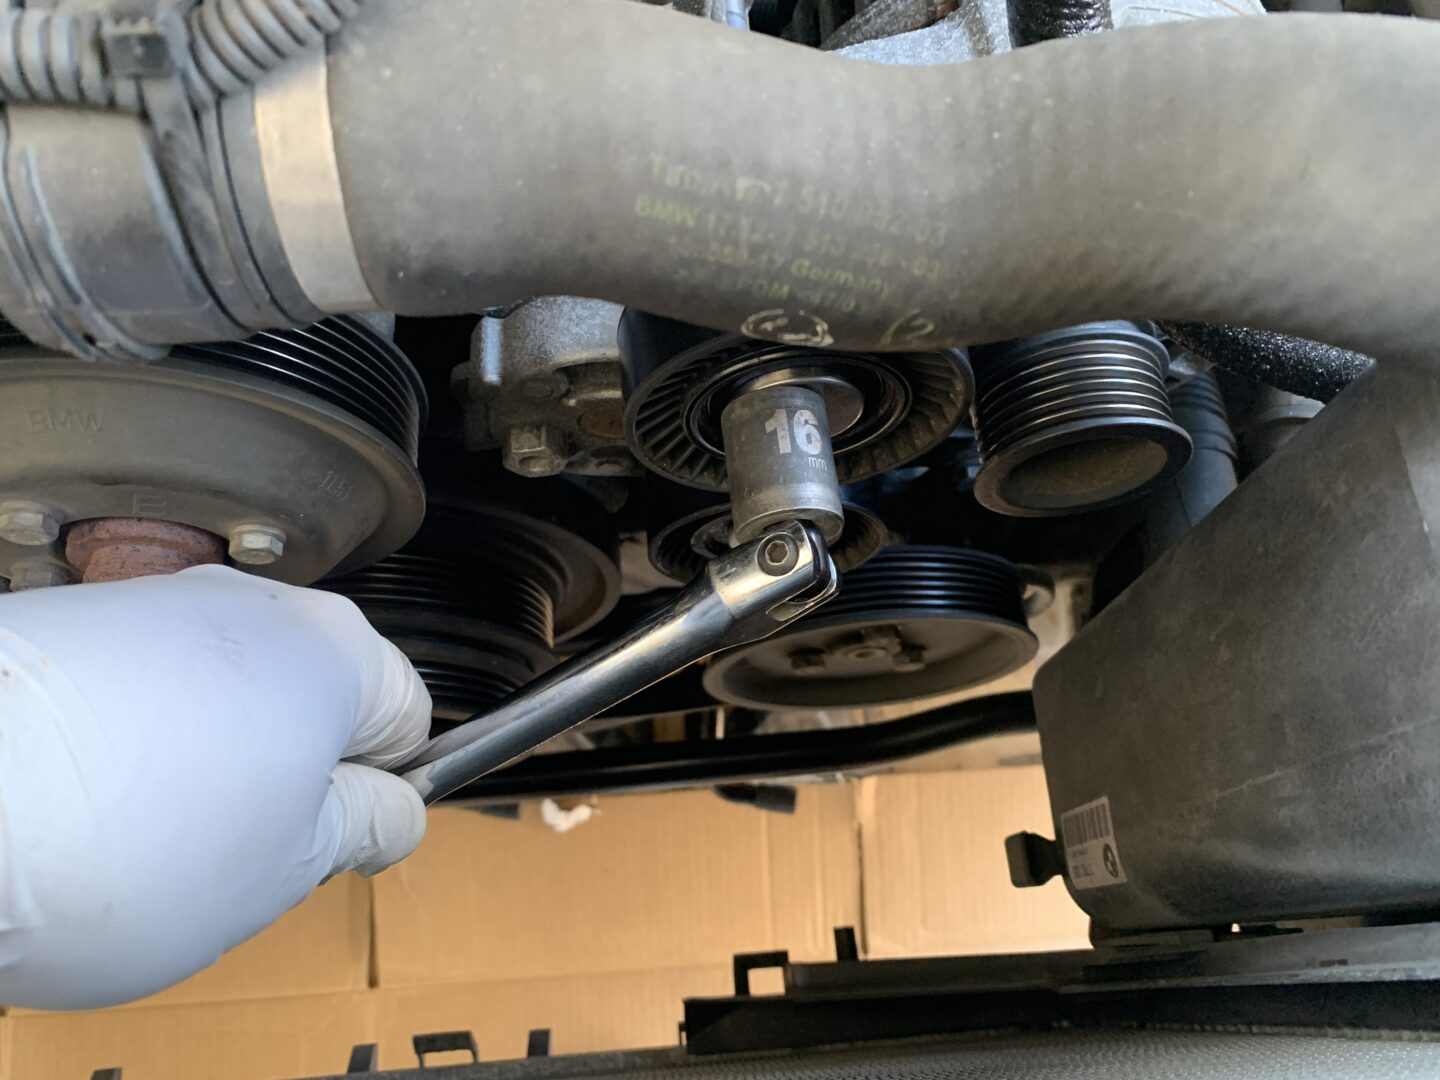
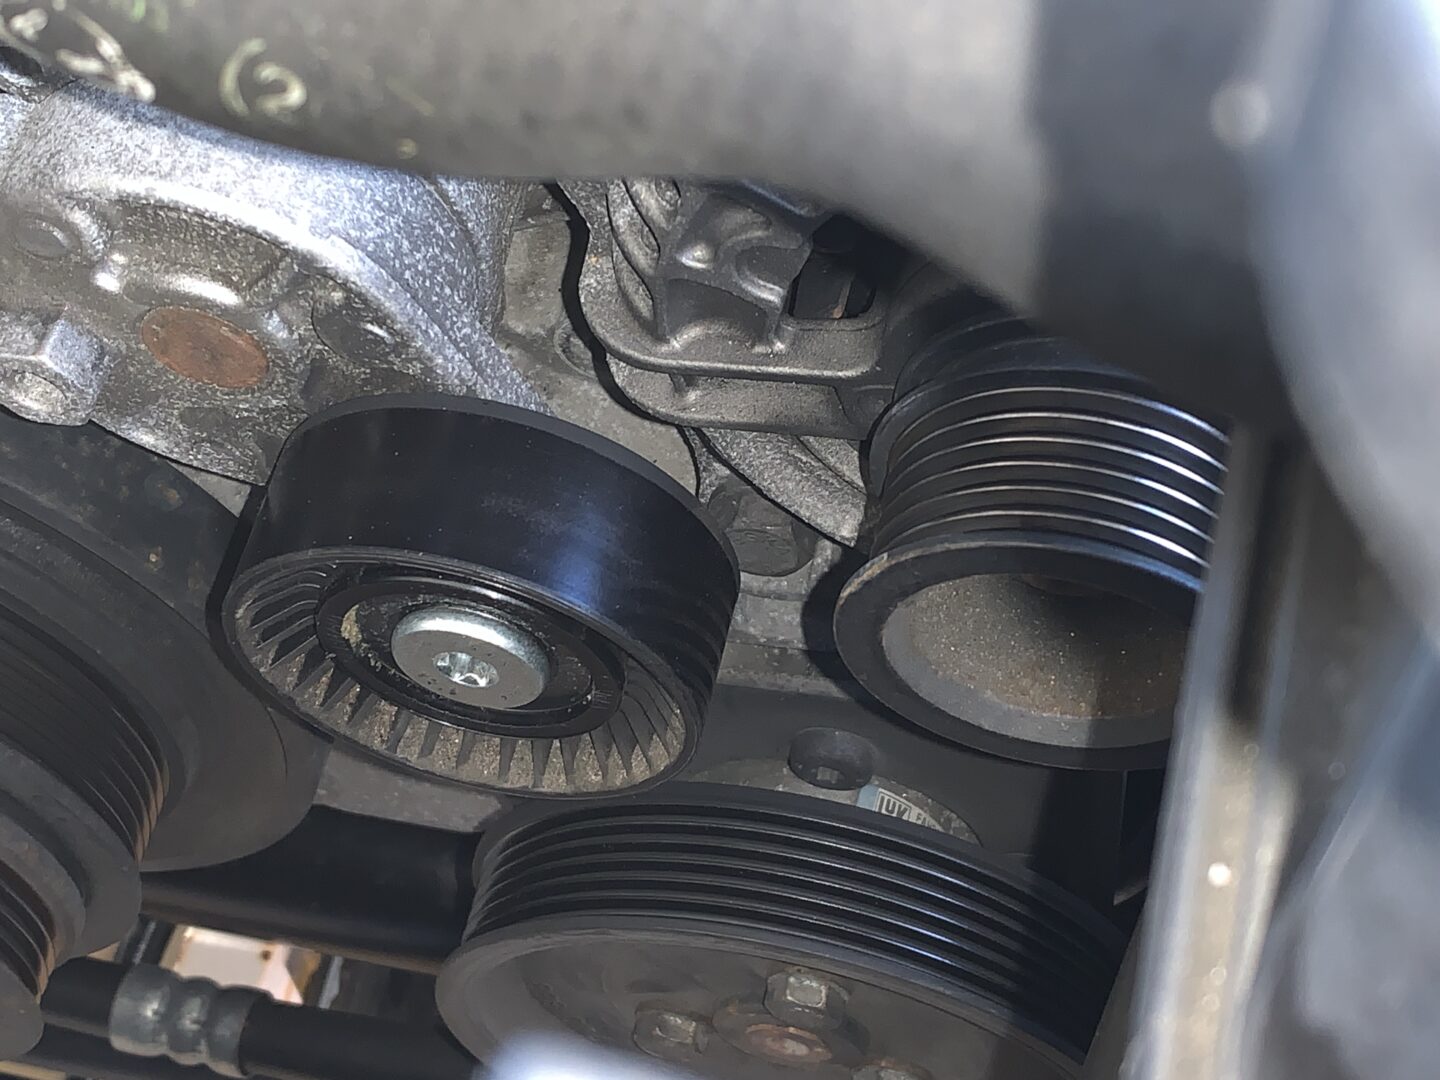
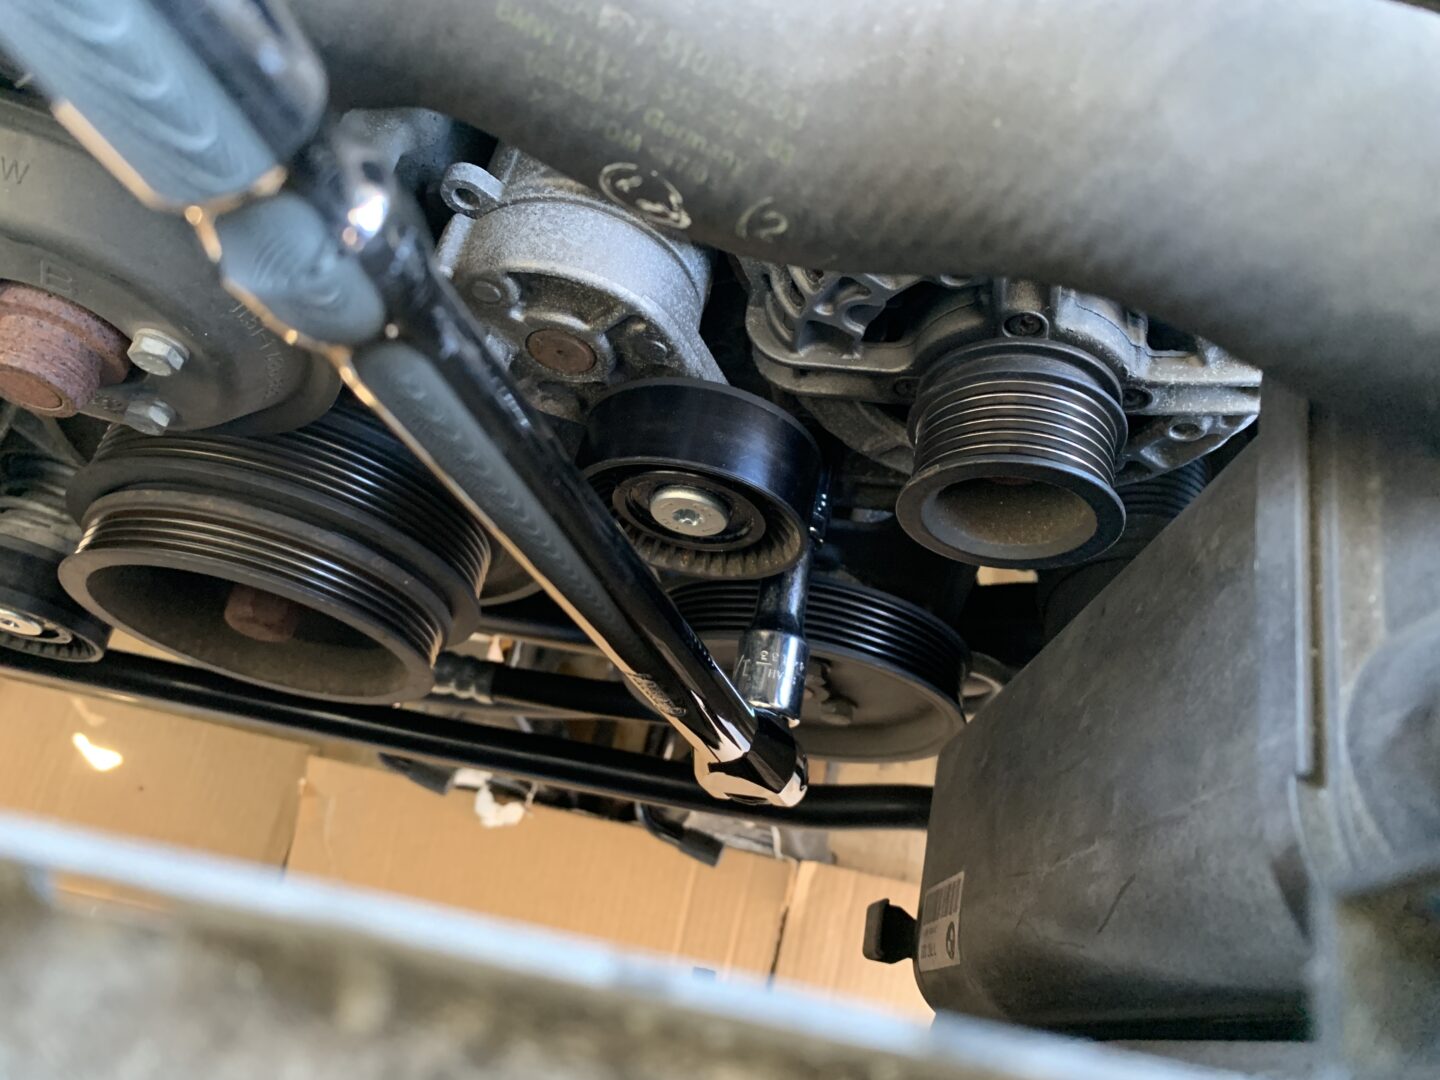
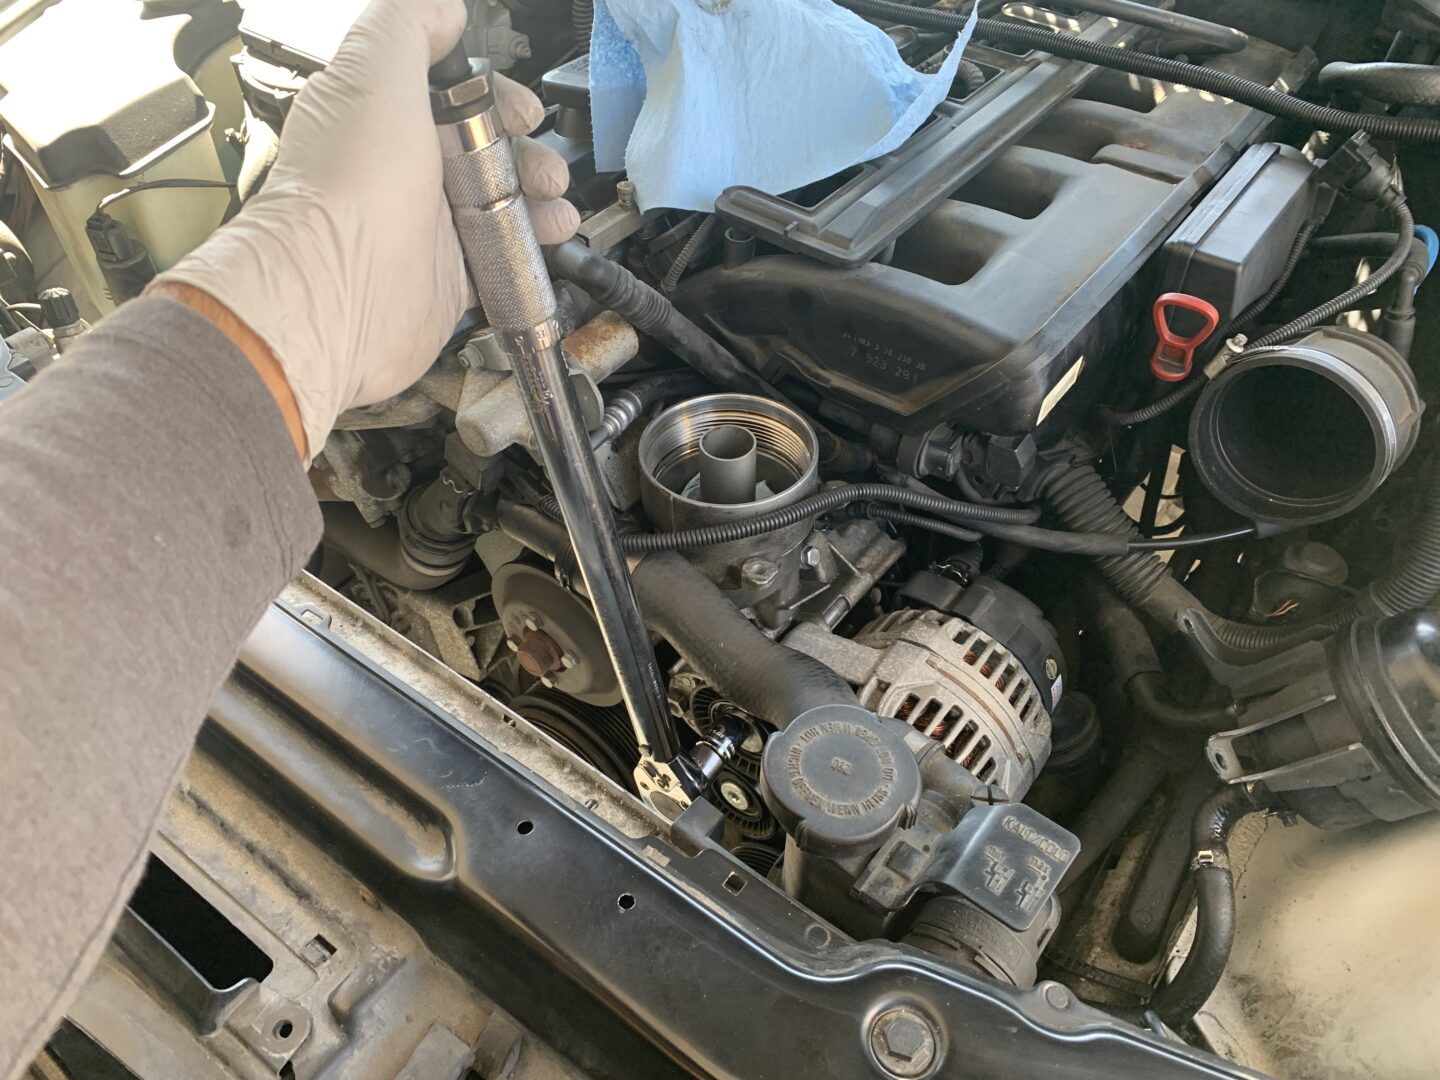
We’ll need the drive belt off the idler pulley. To do so, we’ll need to use a T50 Torx bit and turn clockwise on the pulley in order to loosen the tensioner pulley. Remove the plastic cap off the head of the bolt prior.
The belt can then be pulled off. The belt can actually be pulled off of the idler pulley and left hanging there, but I chose to remove it completely to get it out of the way.
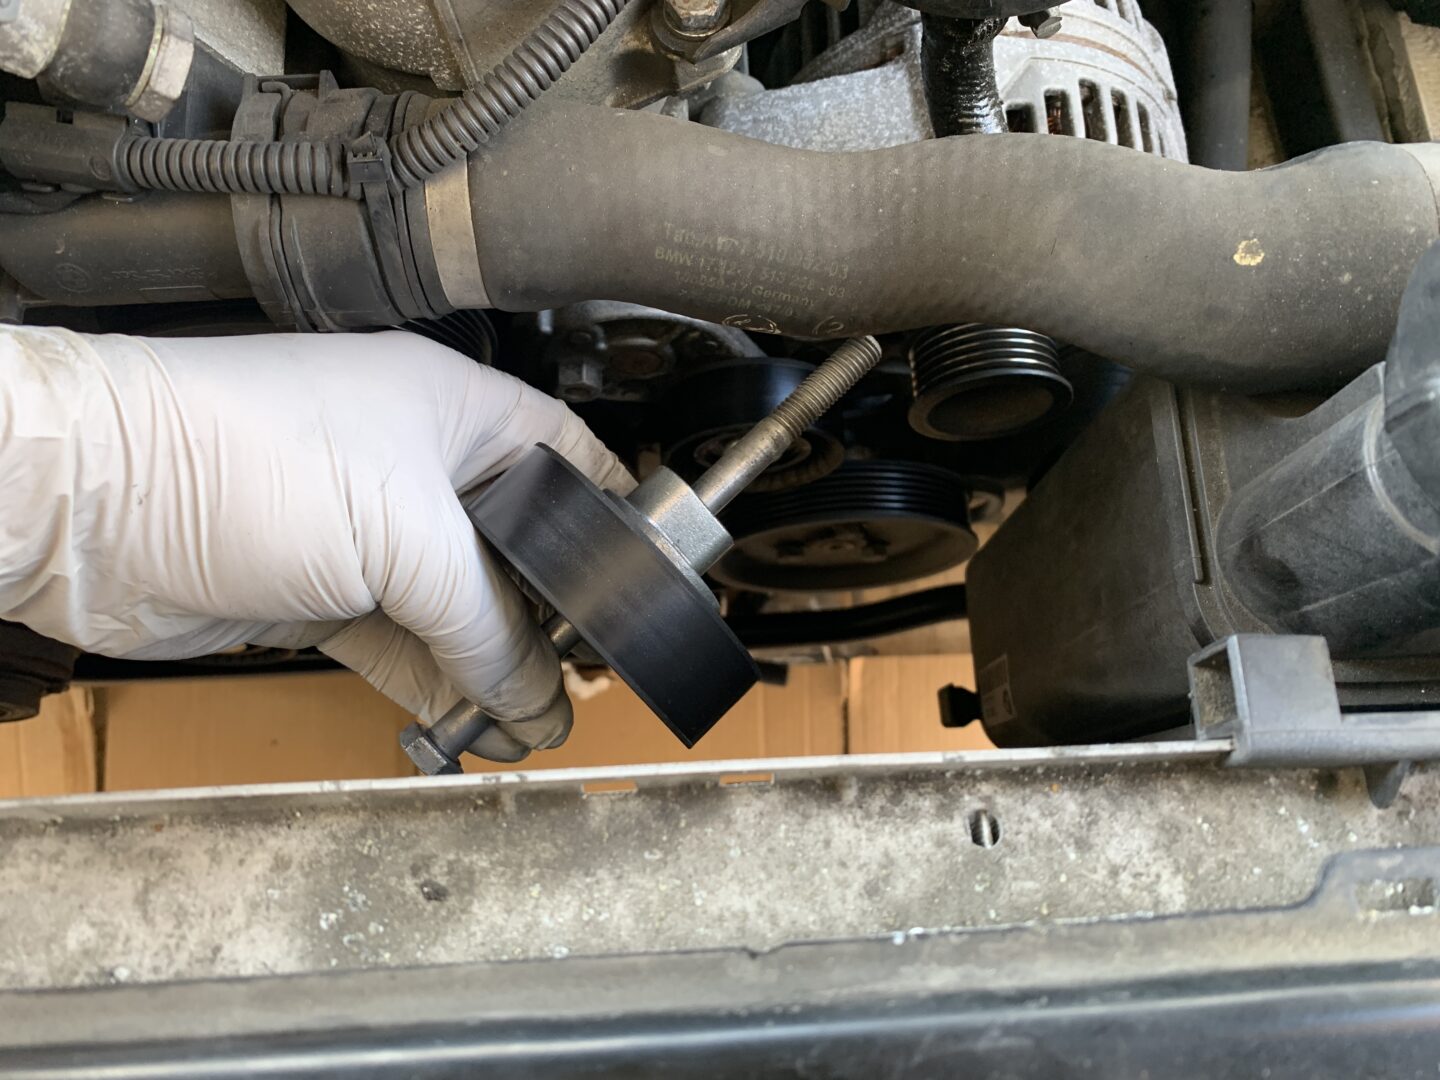
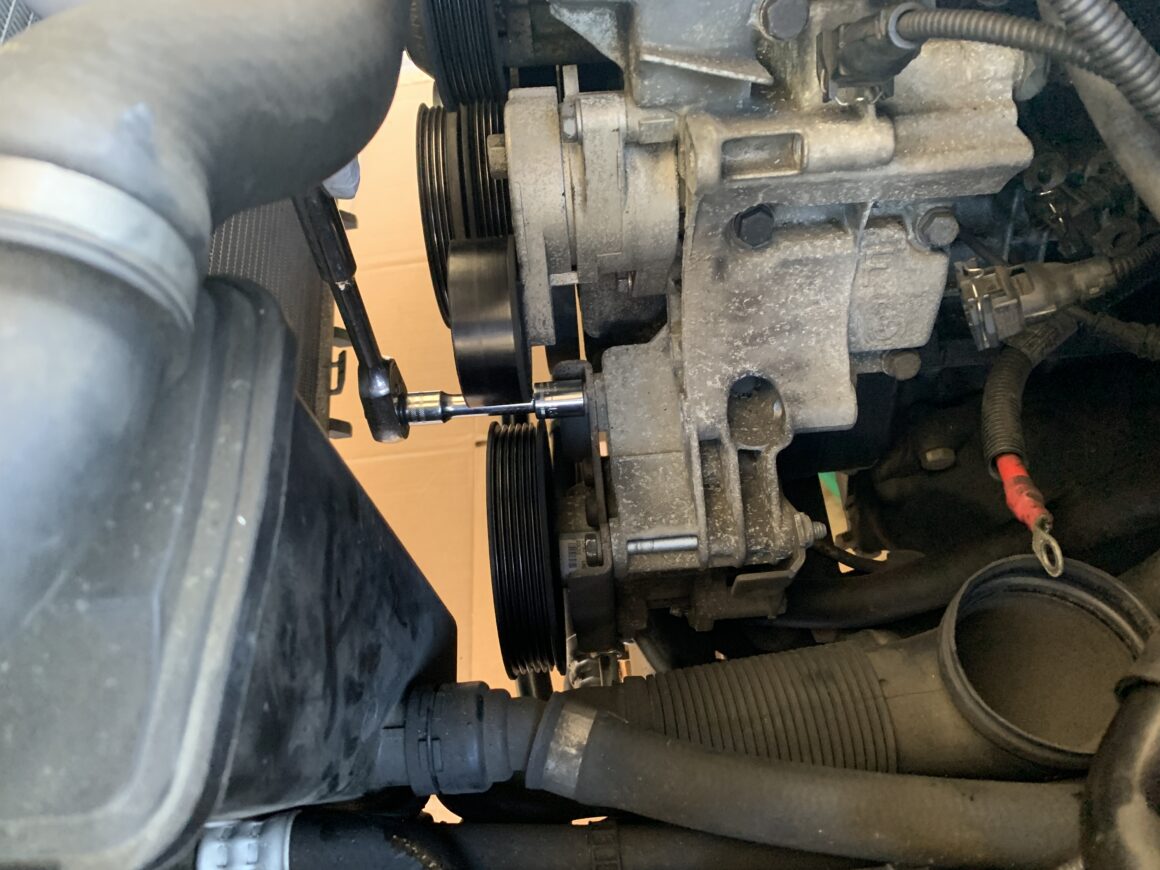
With the belt off, remove the idler pulley bolt by unscrewing the 16mm bolt holding the idler pulley to the engine block. Again, there may be a plastic cap covering the head of the bolt that you will first need to remove. With the 16mm bolt removed, the idler pulley and bolt can now be pulled out.
Next, remove the power steering reservoir by removing the (2 qty) 13mm bolts. Put the power steering reservoir off to the side as the return and suction hoses are still attached.
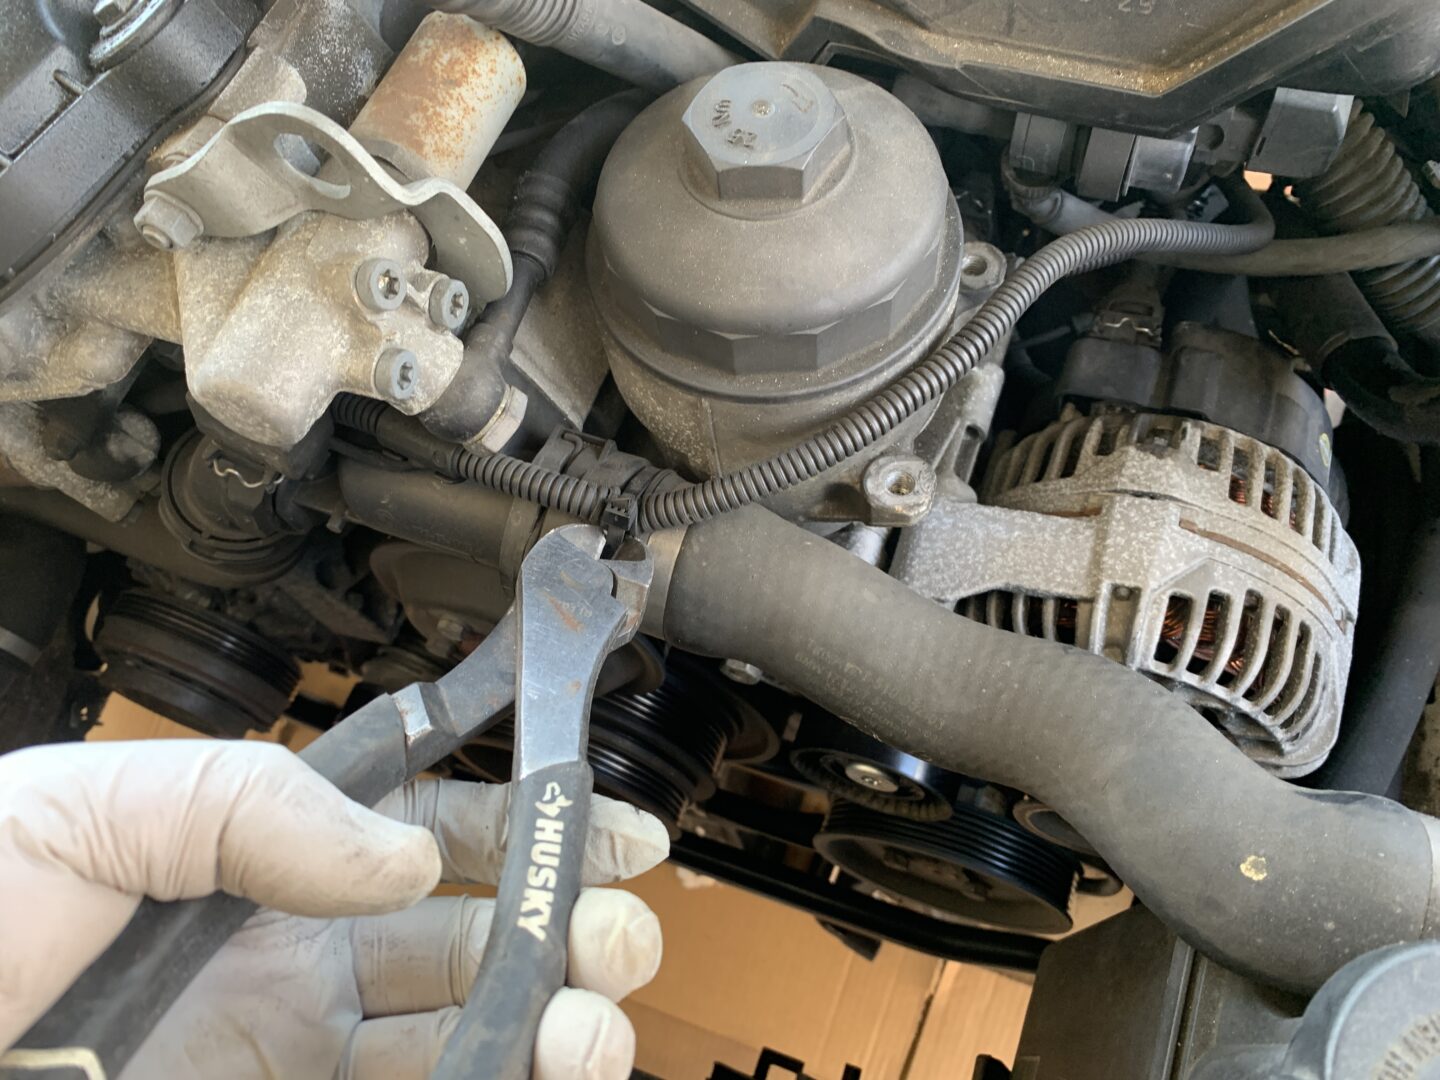
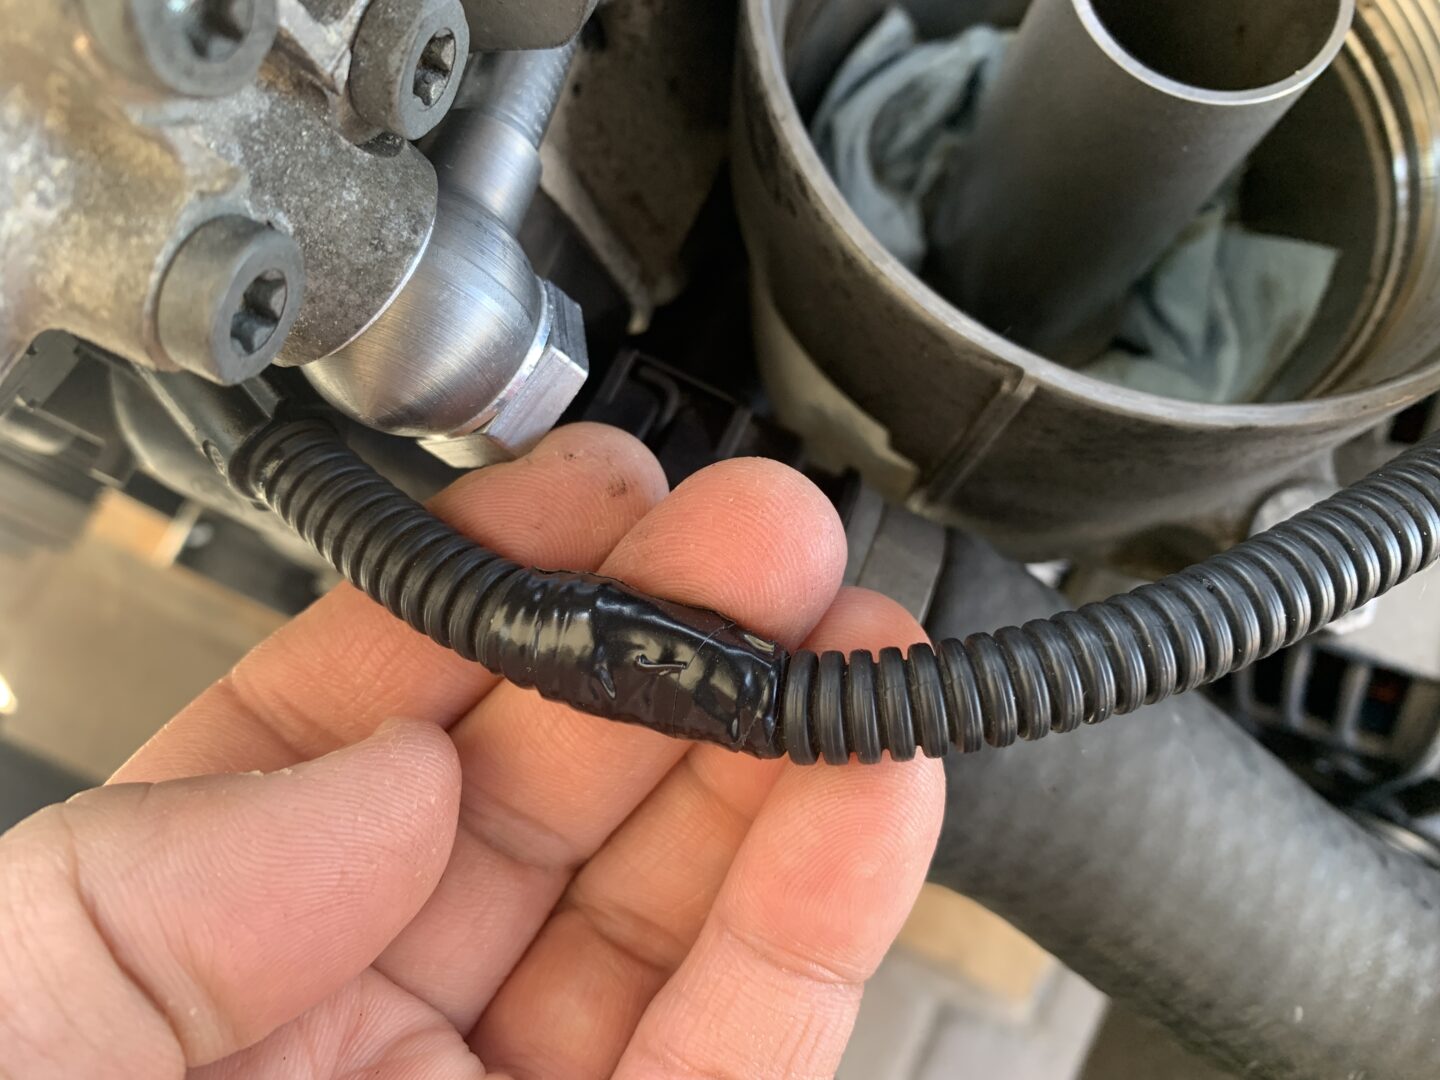
Cut the zip tie that secures the wire loom of the VANOS wiring to the coolant hose and maneuver it out of the way. Also, disconnect and remove the electric connectors as well.

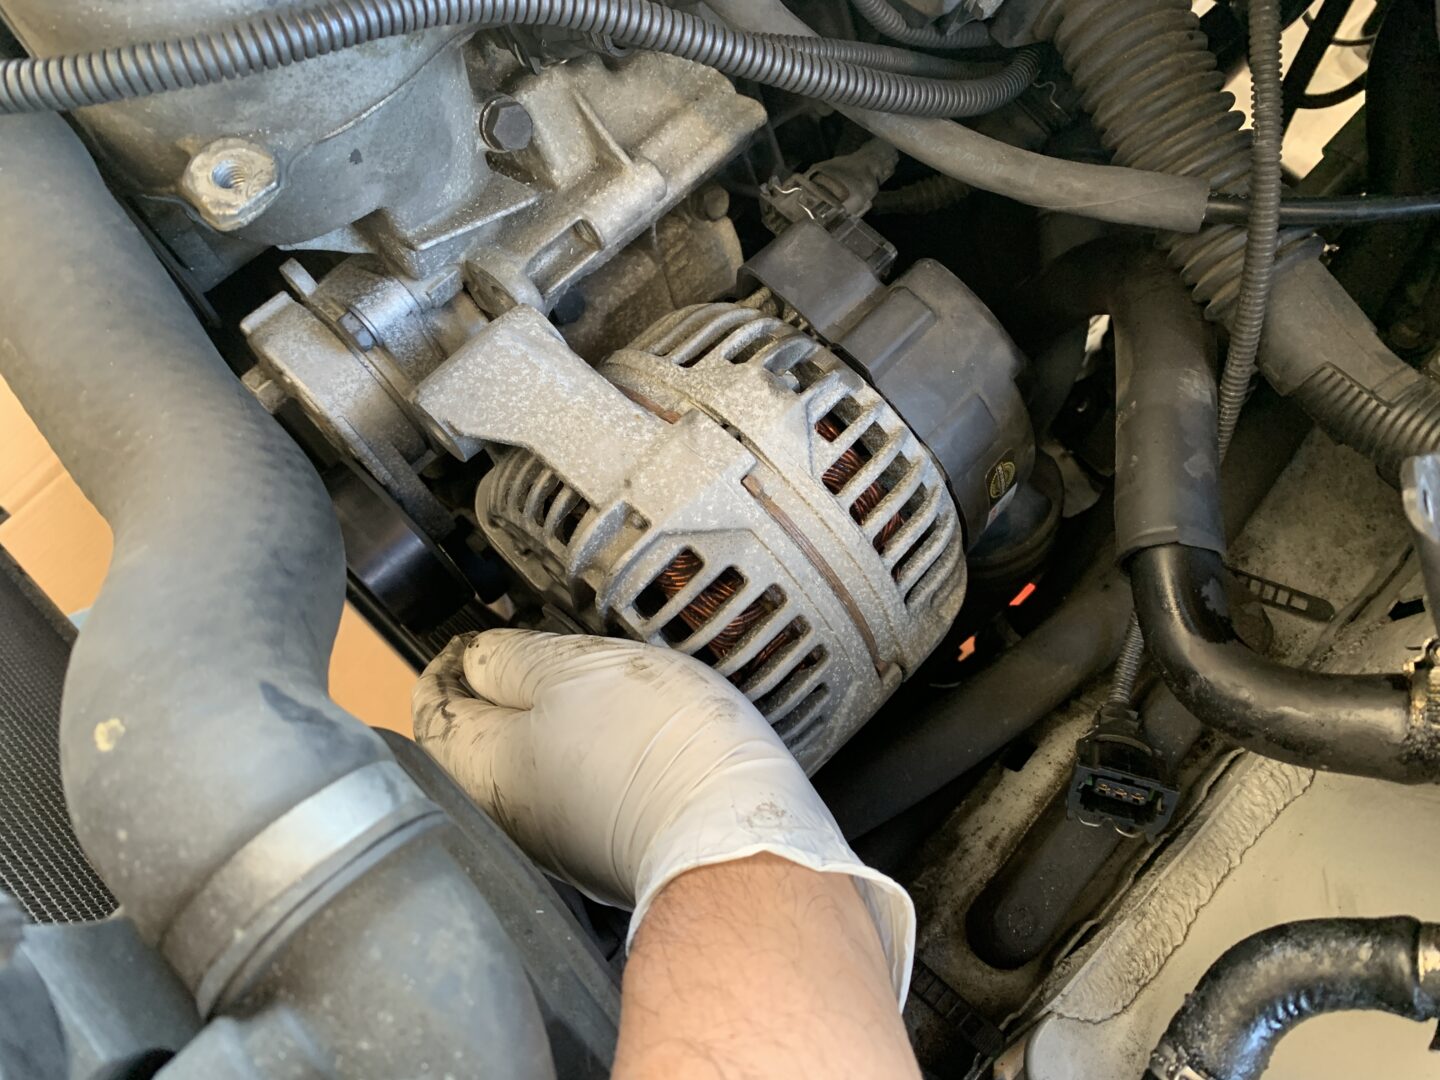
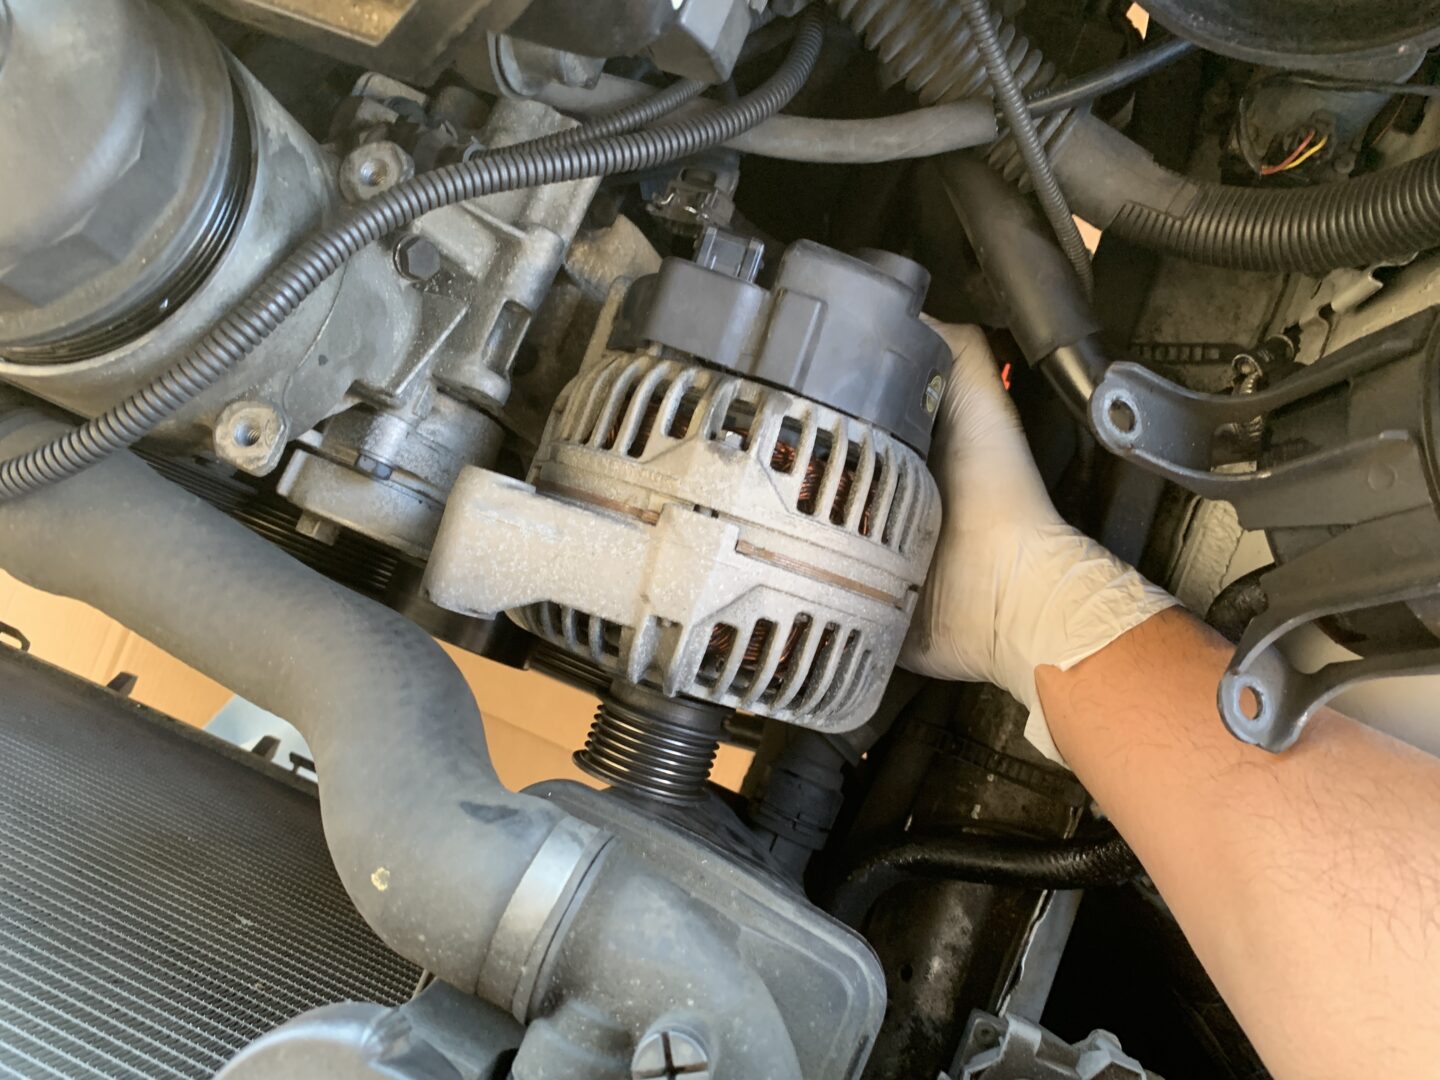
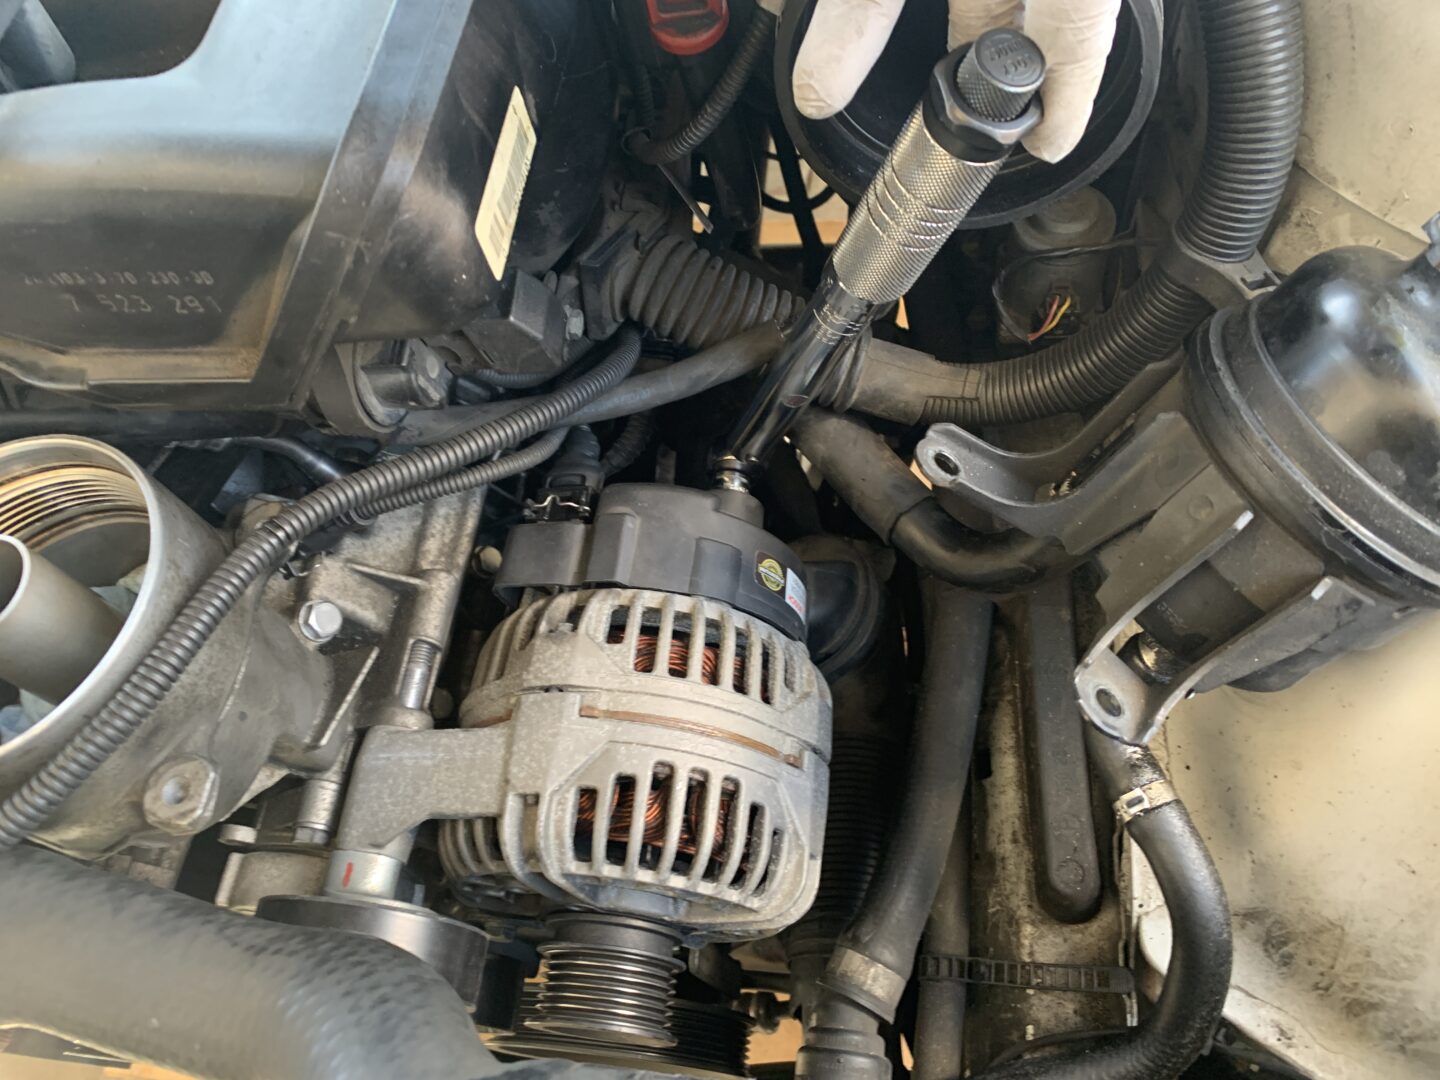
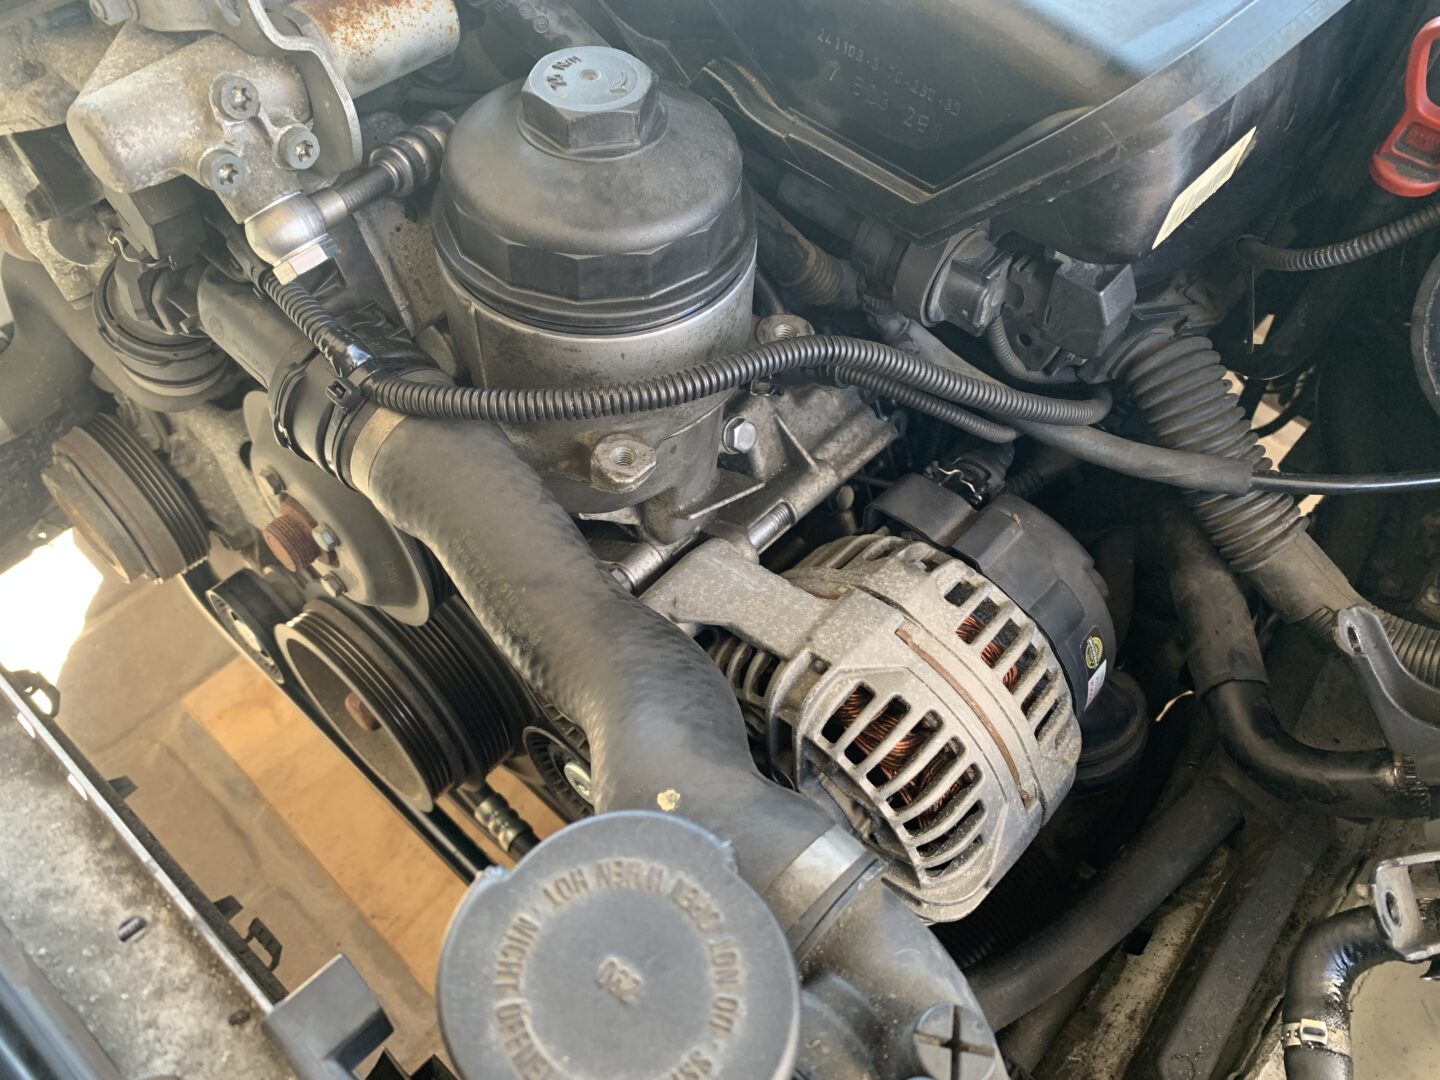
Disconnect the electrical connector to the alternator.
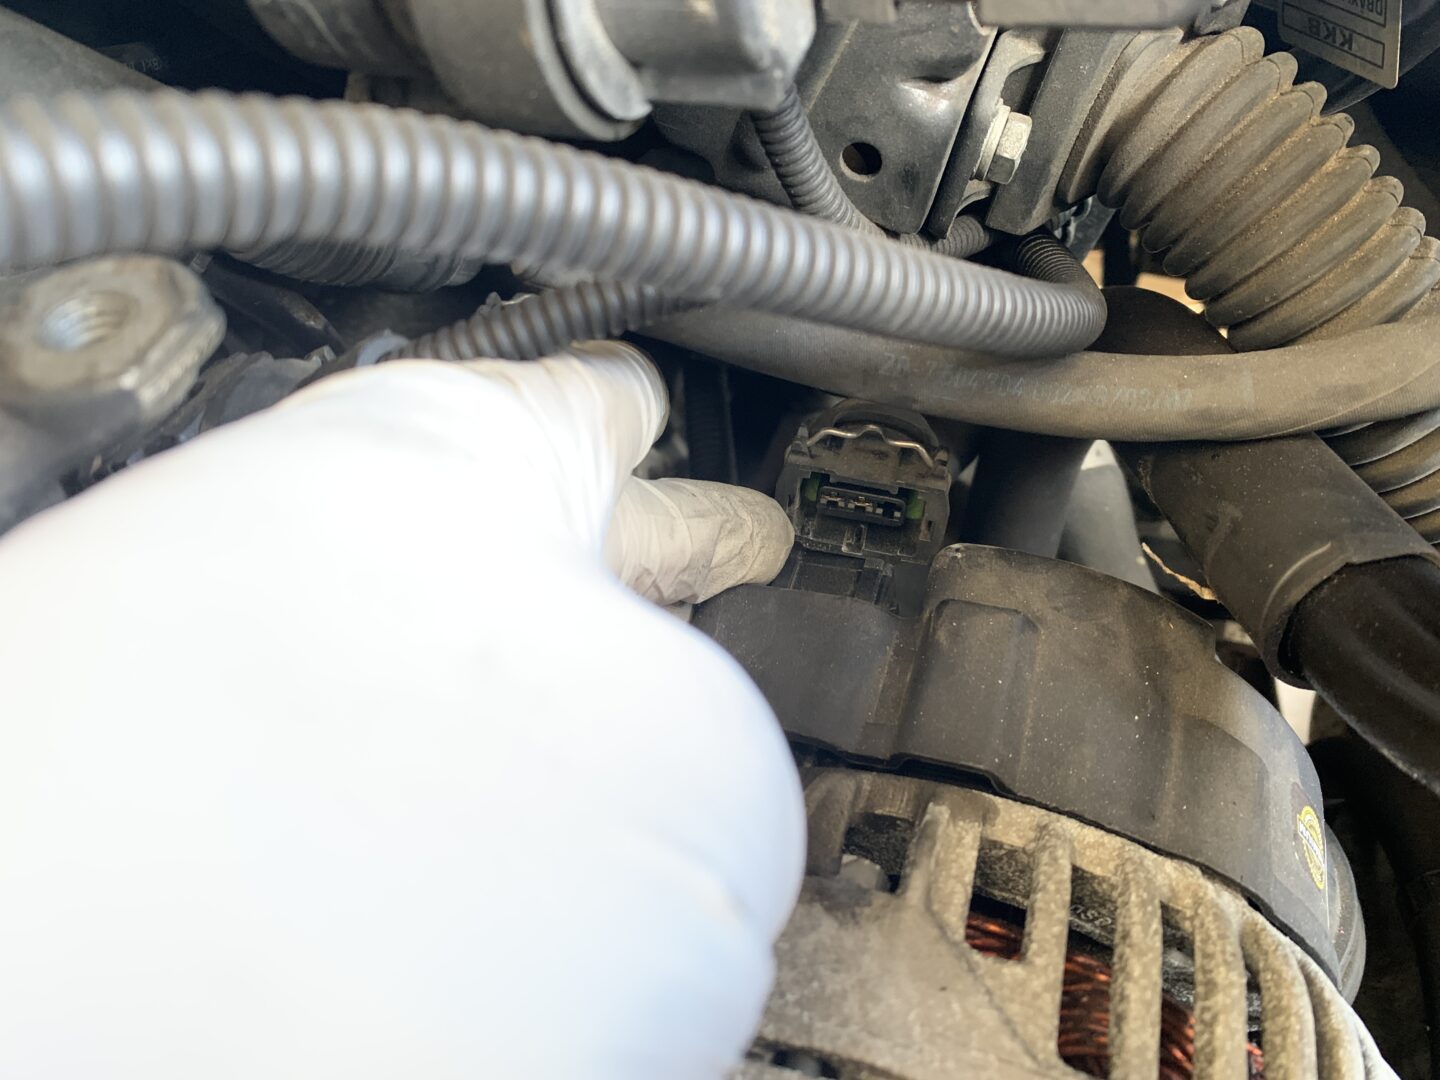
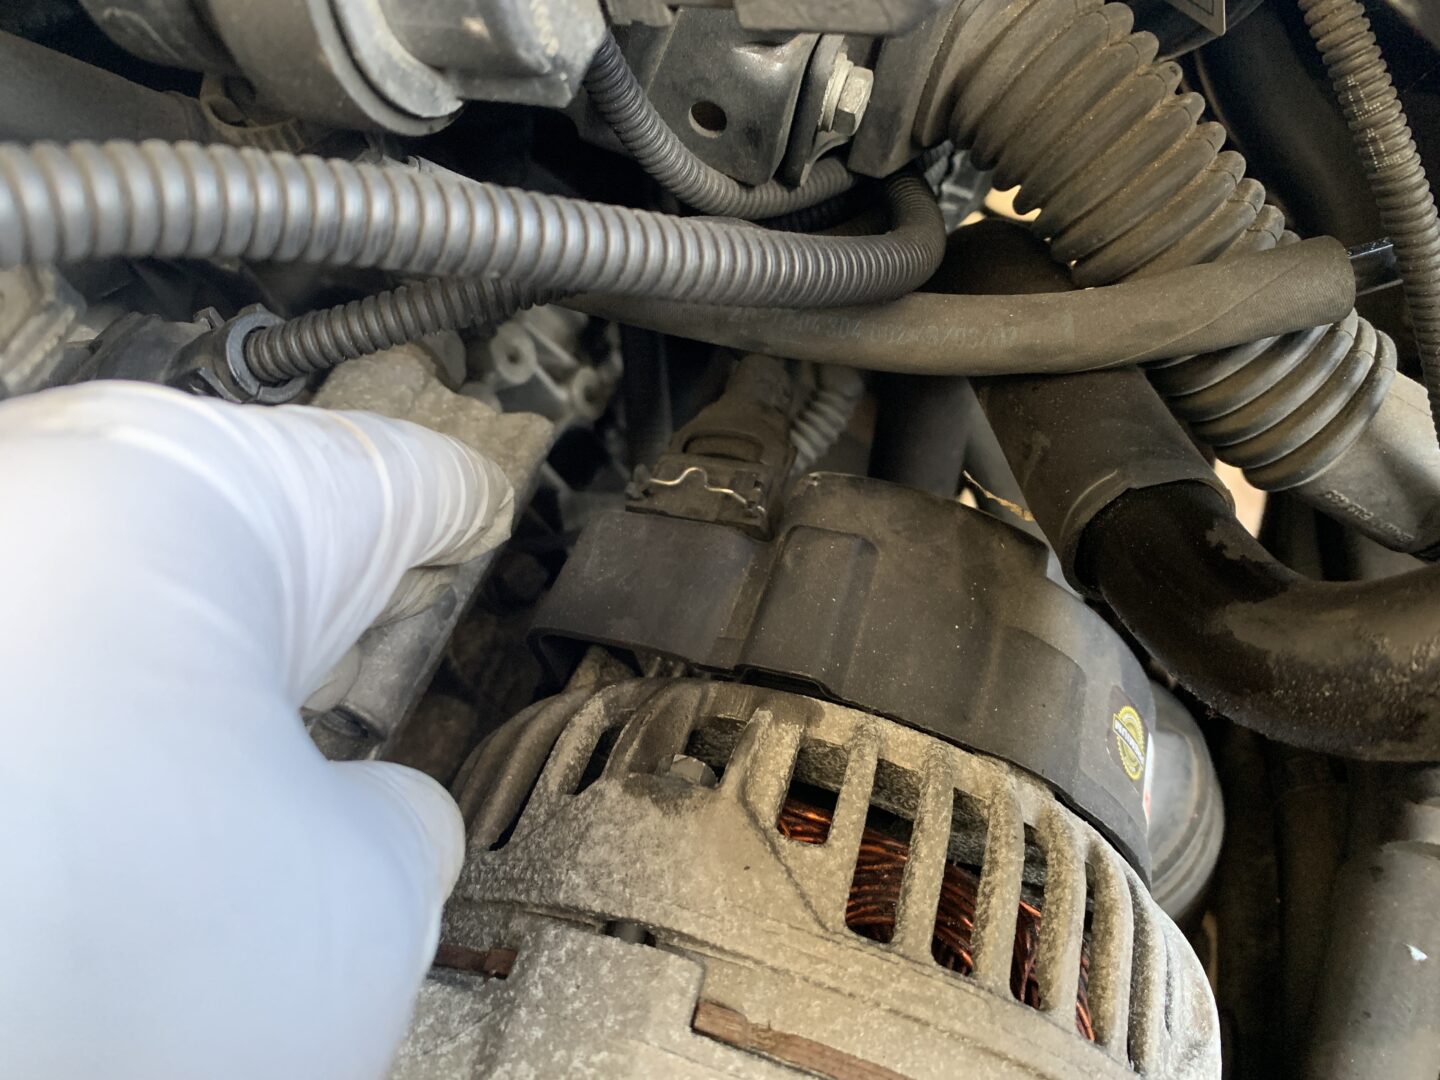
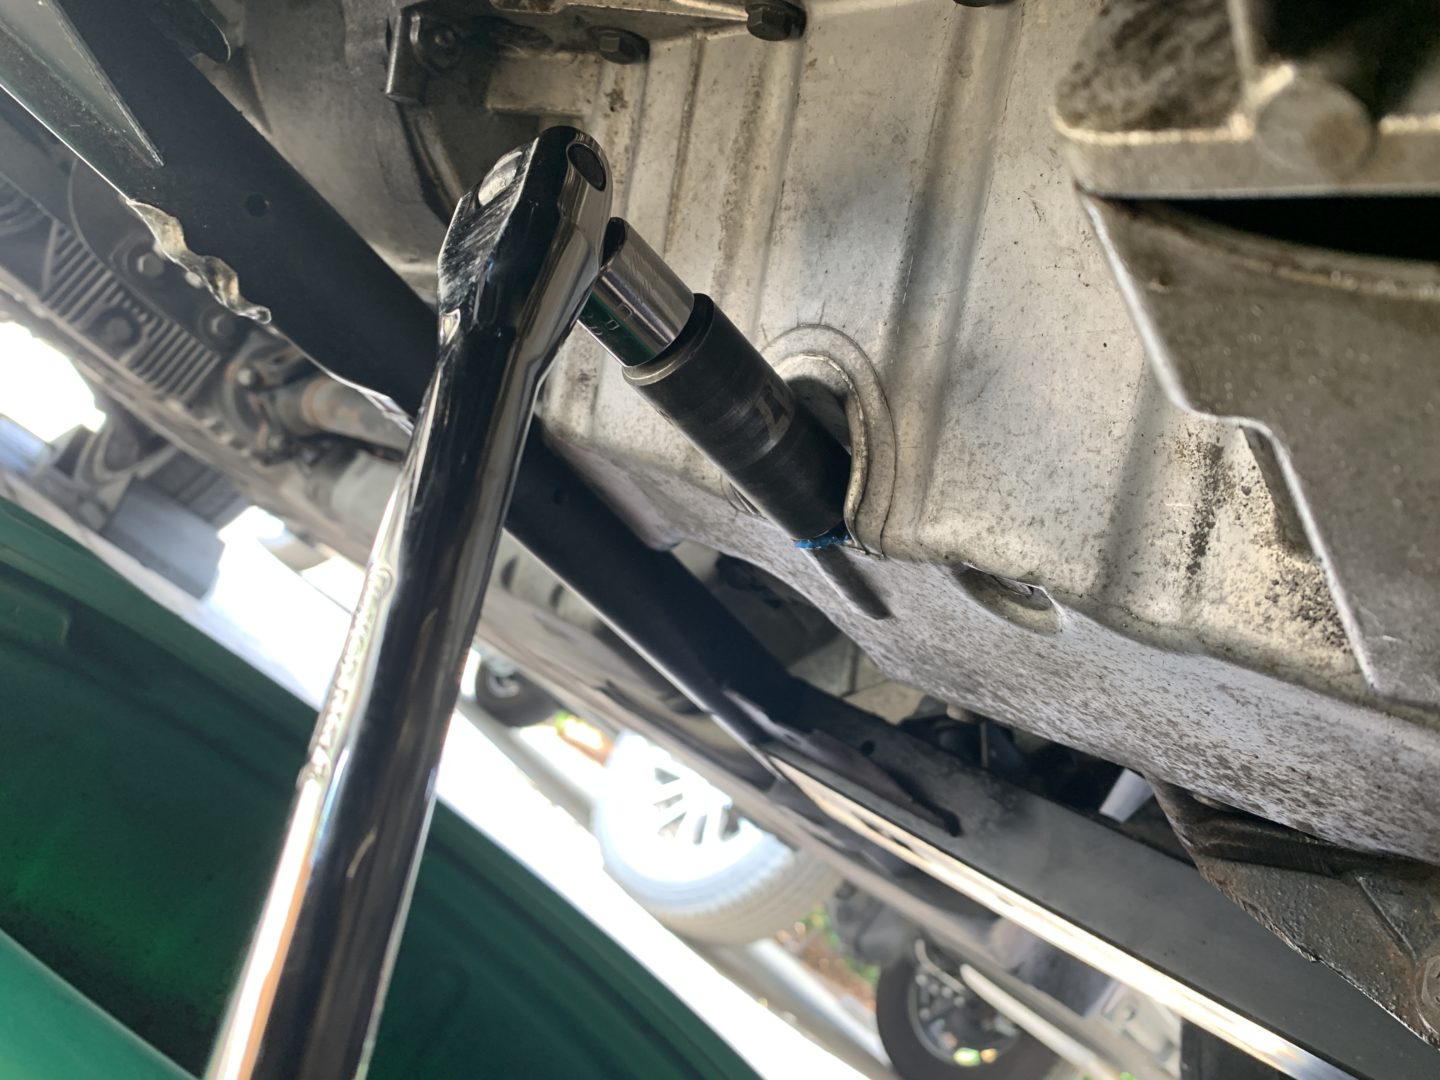
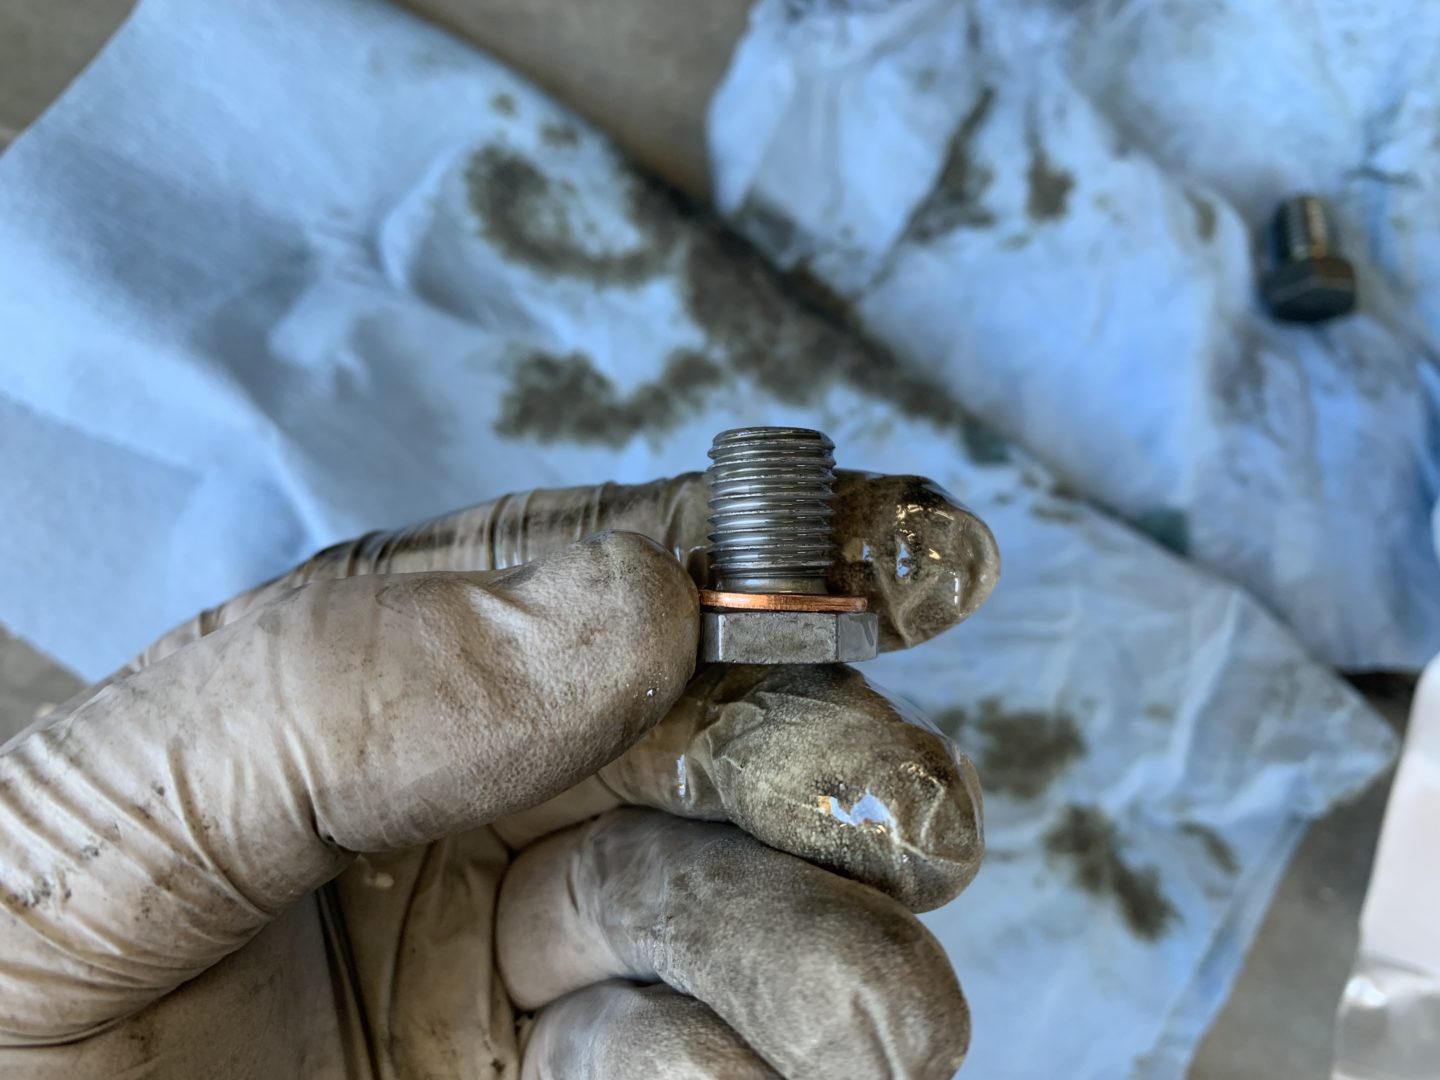
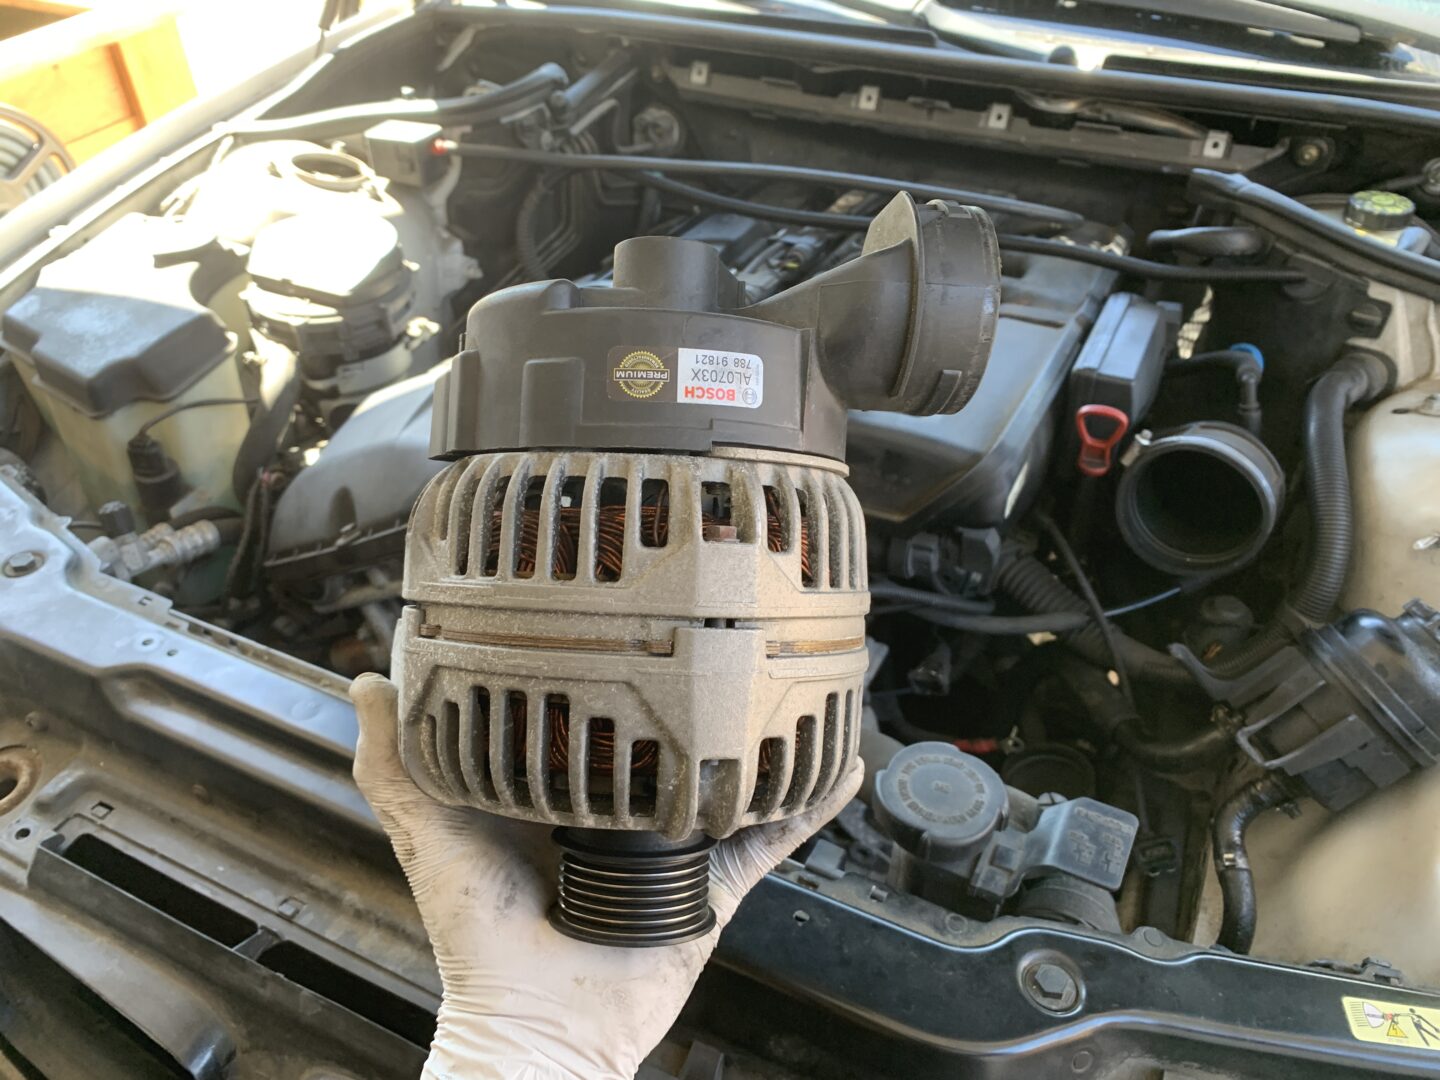
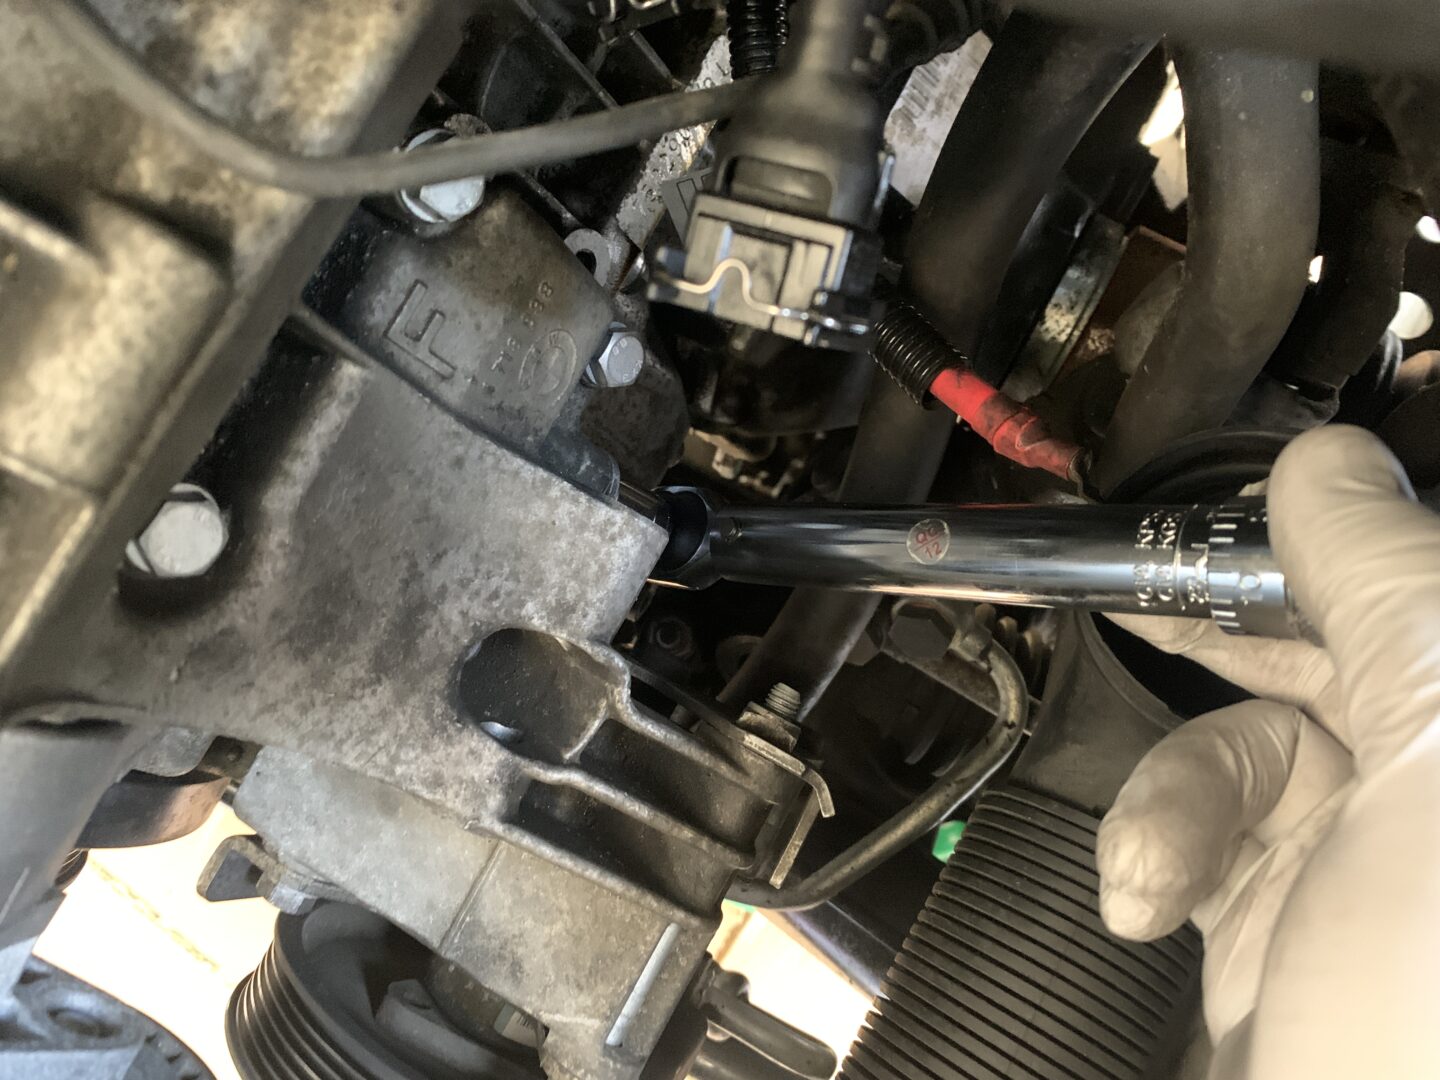
Disconnect the alternator’s power cable by removing the 17mm nut that secures the positive cable to the alternator. The first photo in the set below shows the backside of the alternator that is not visible from the front of the car. After you loosen the nut, remove it by hand so it doesn’t drop down into the bay.
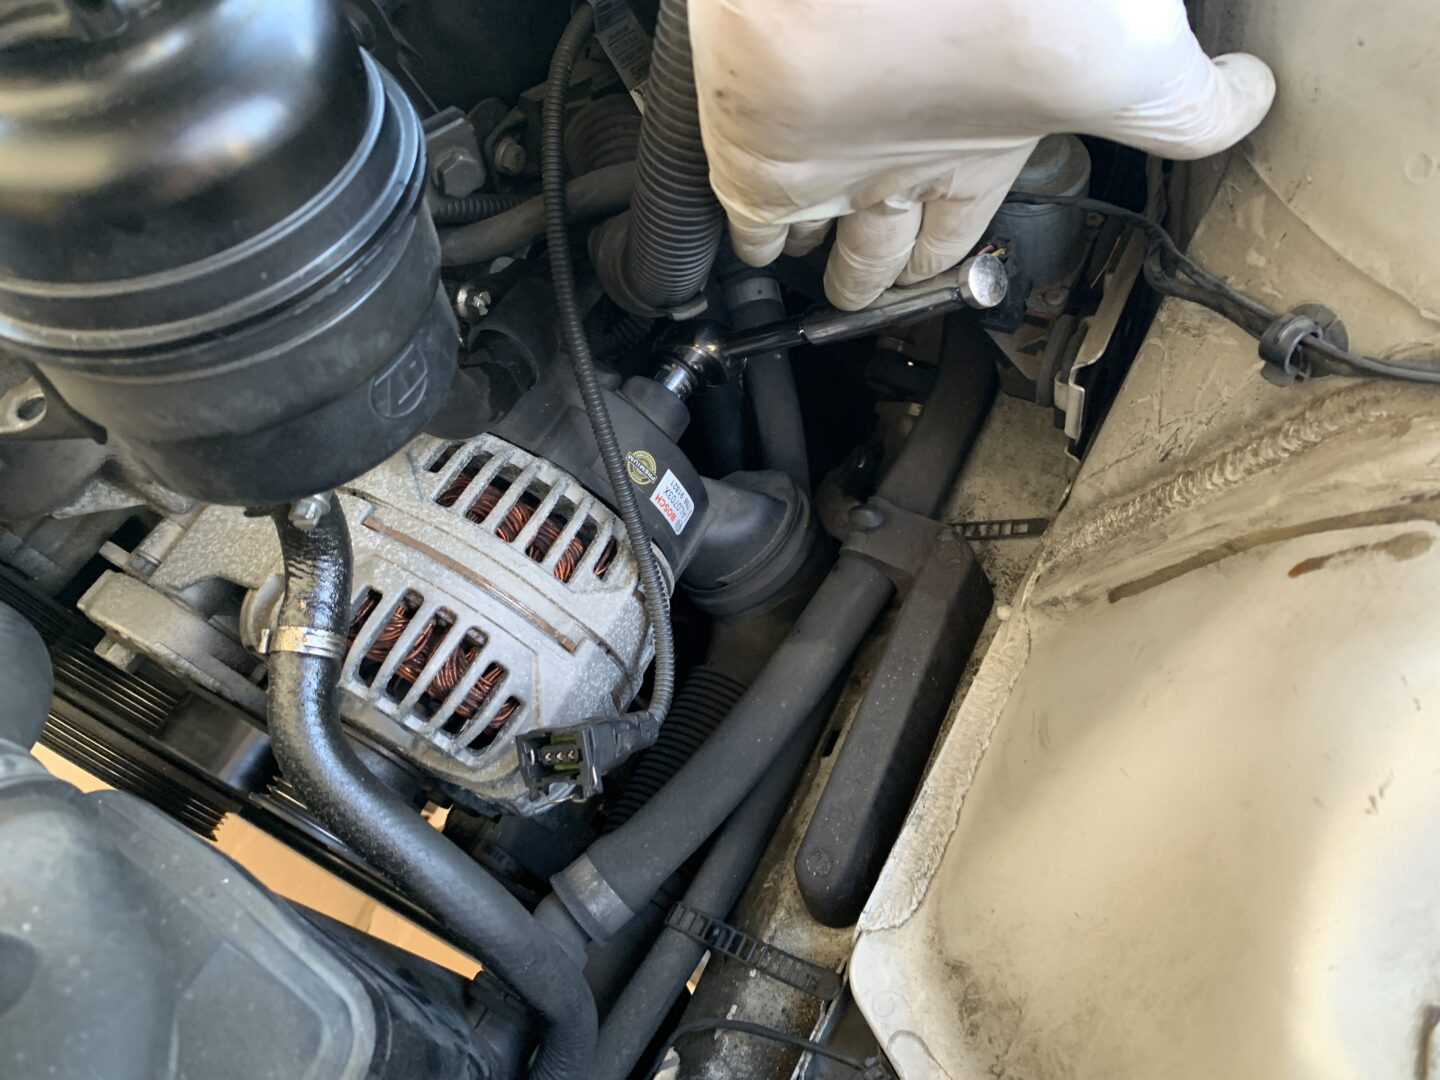
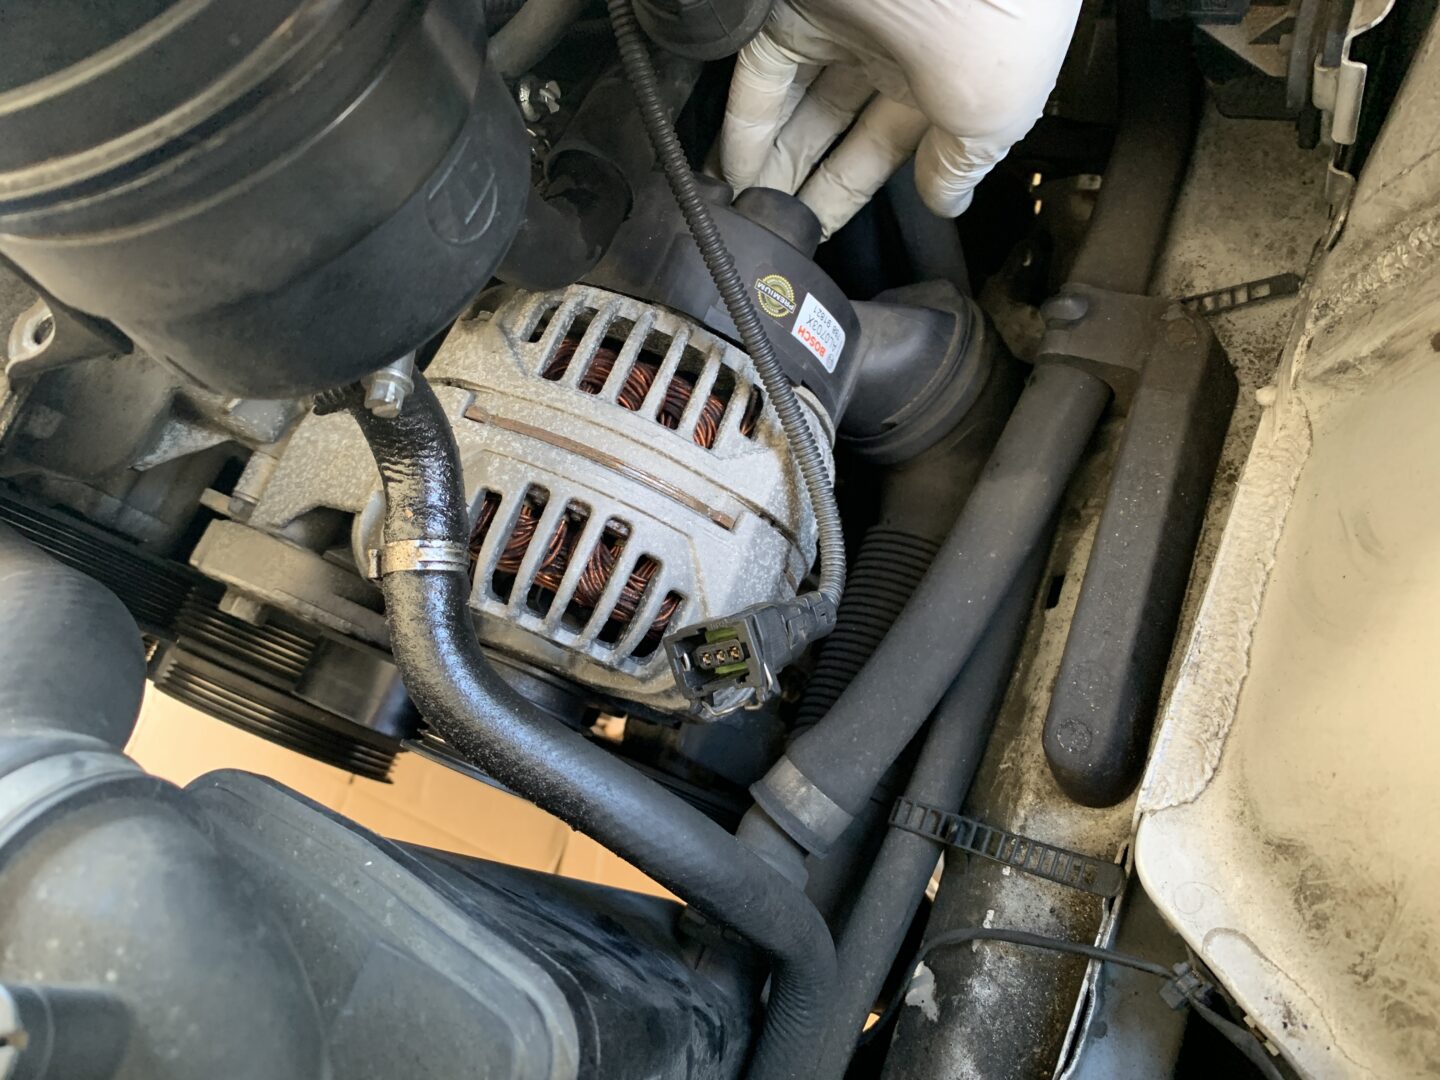
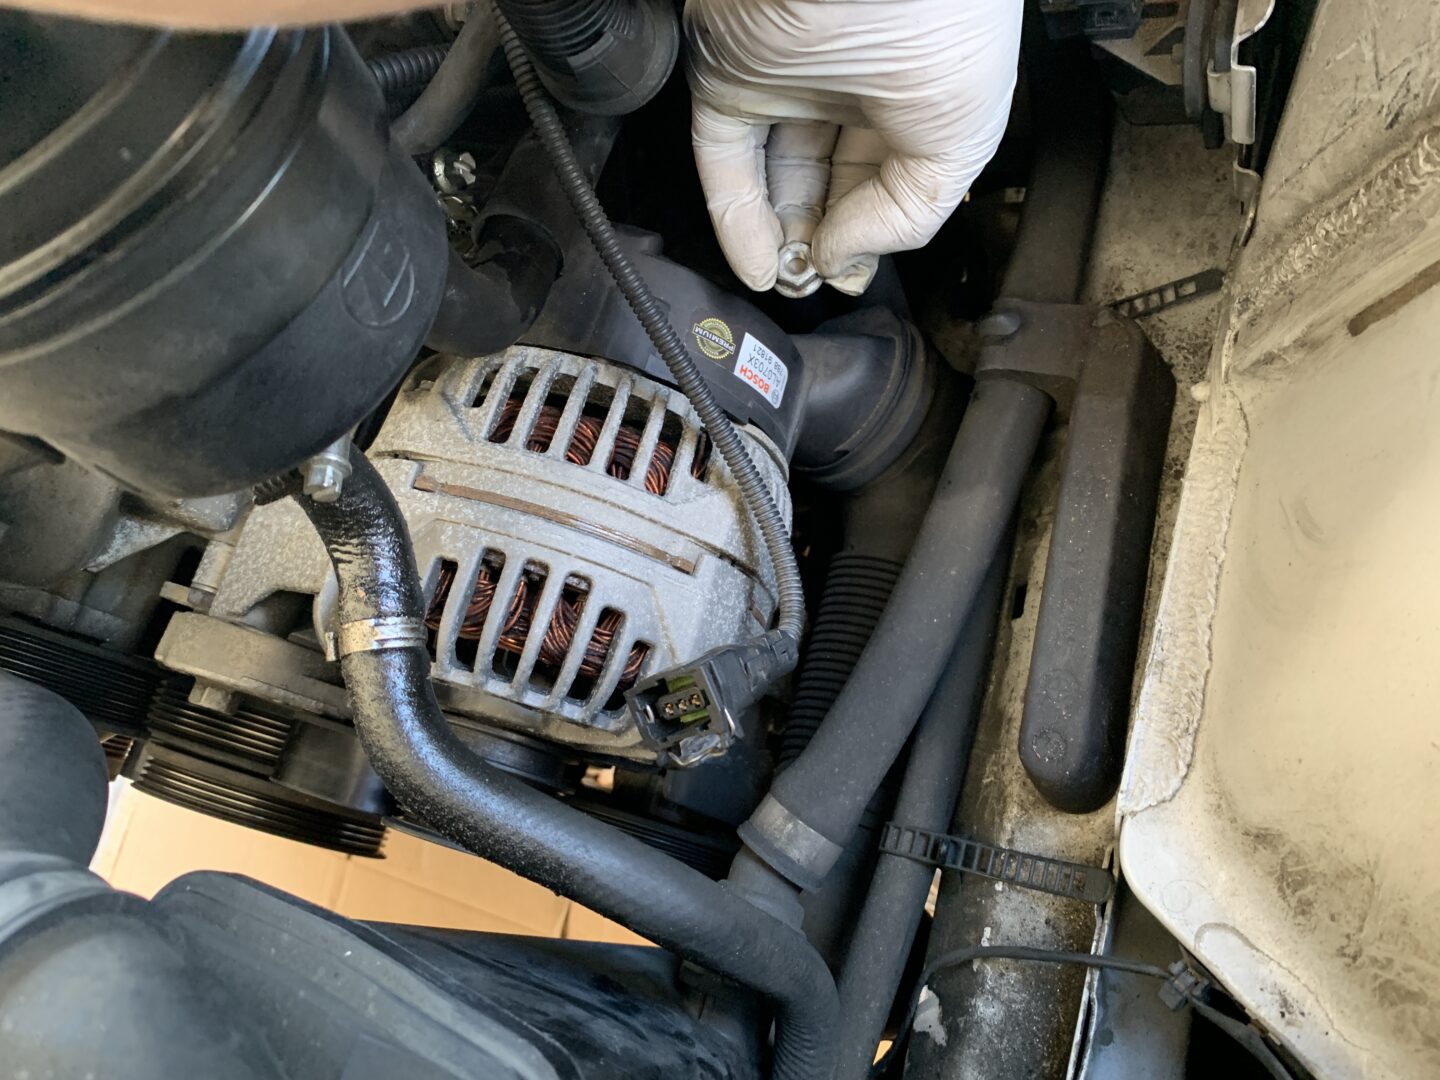
There is one more 16mm alternator bolt that holds it to the engine block that needs to be removed.
Now, the alternator may be freed from the engine bay. It may take a bit of effort with both hands to get it to loosen. Pull it out carefully and set it aside.
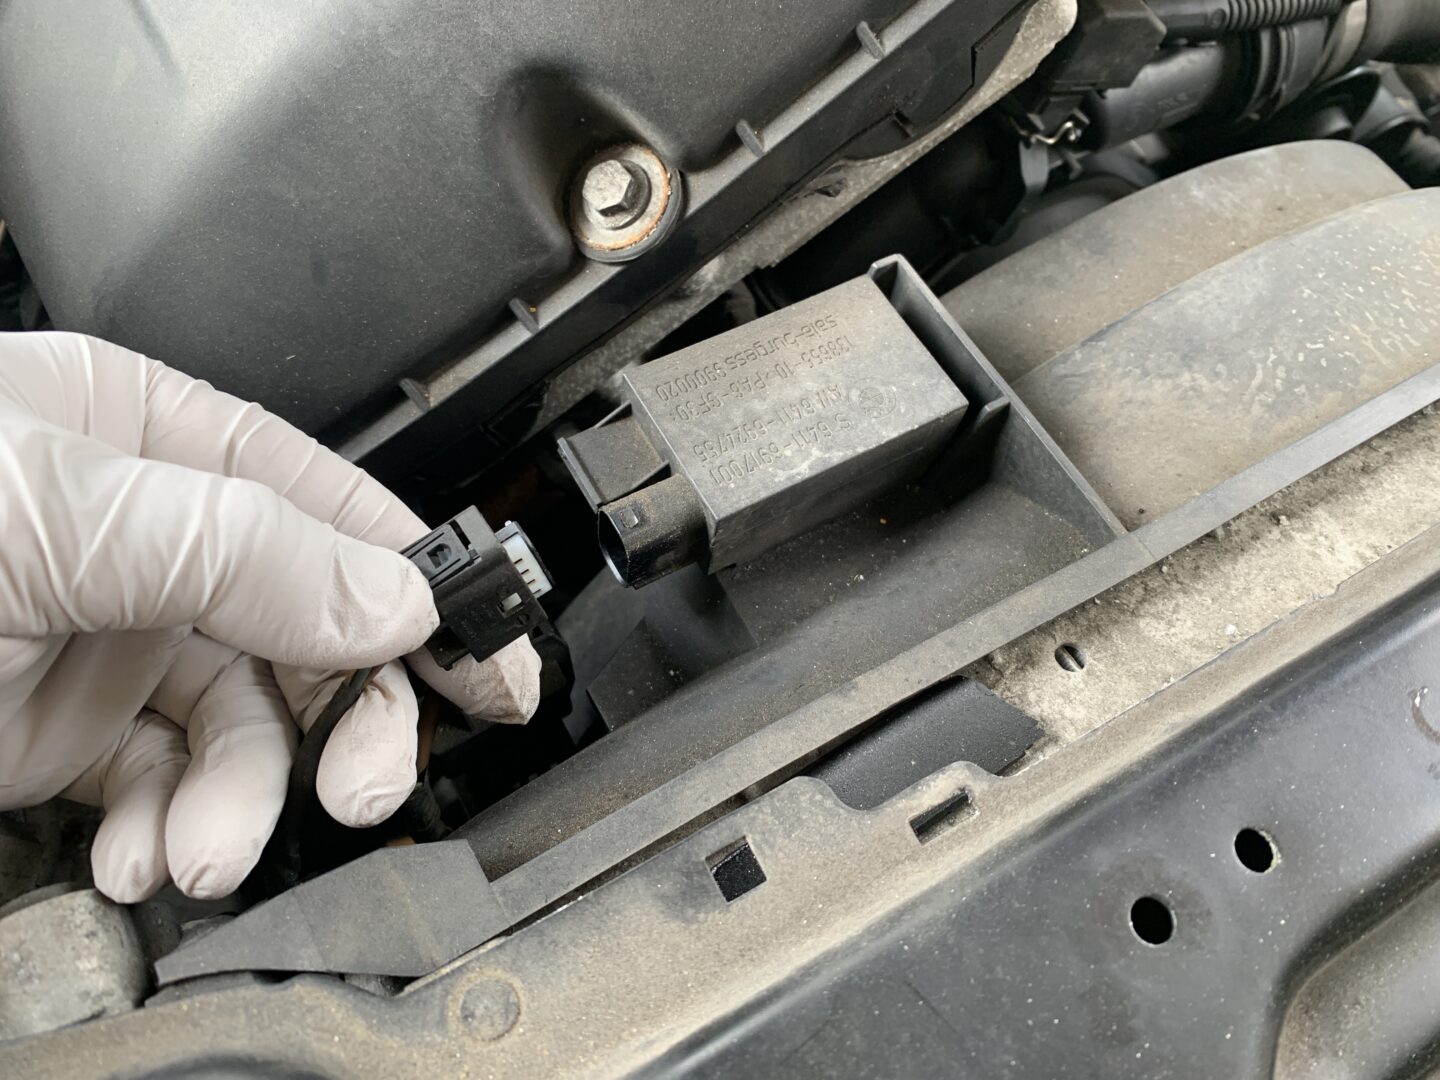
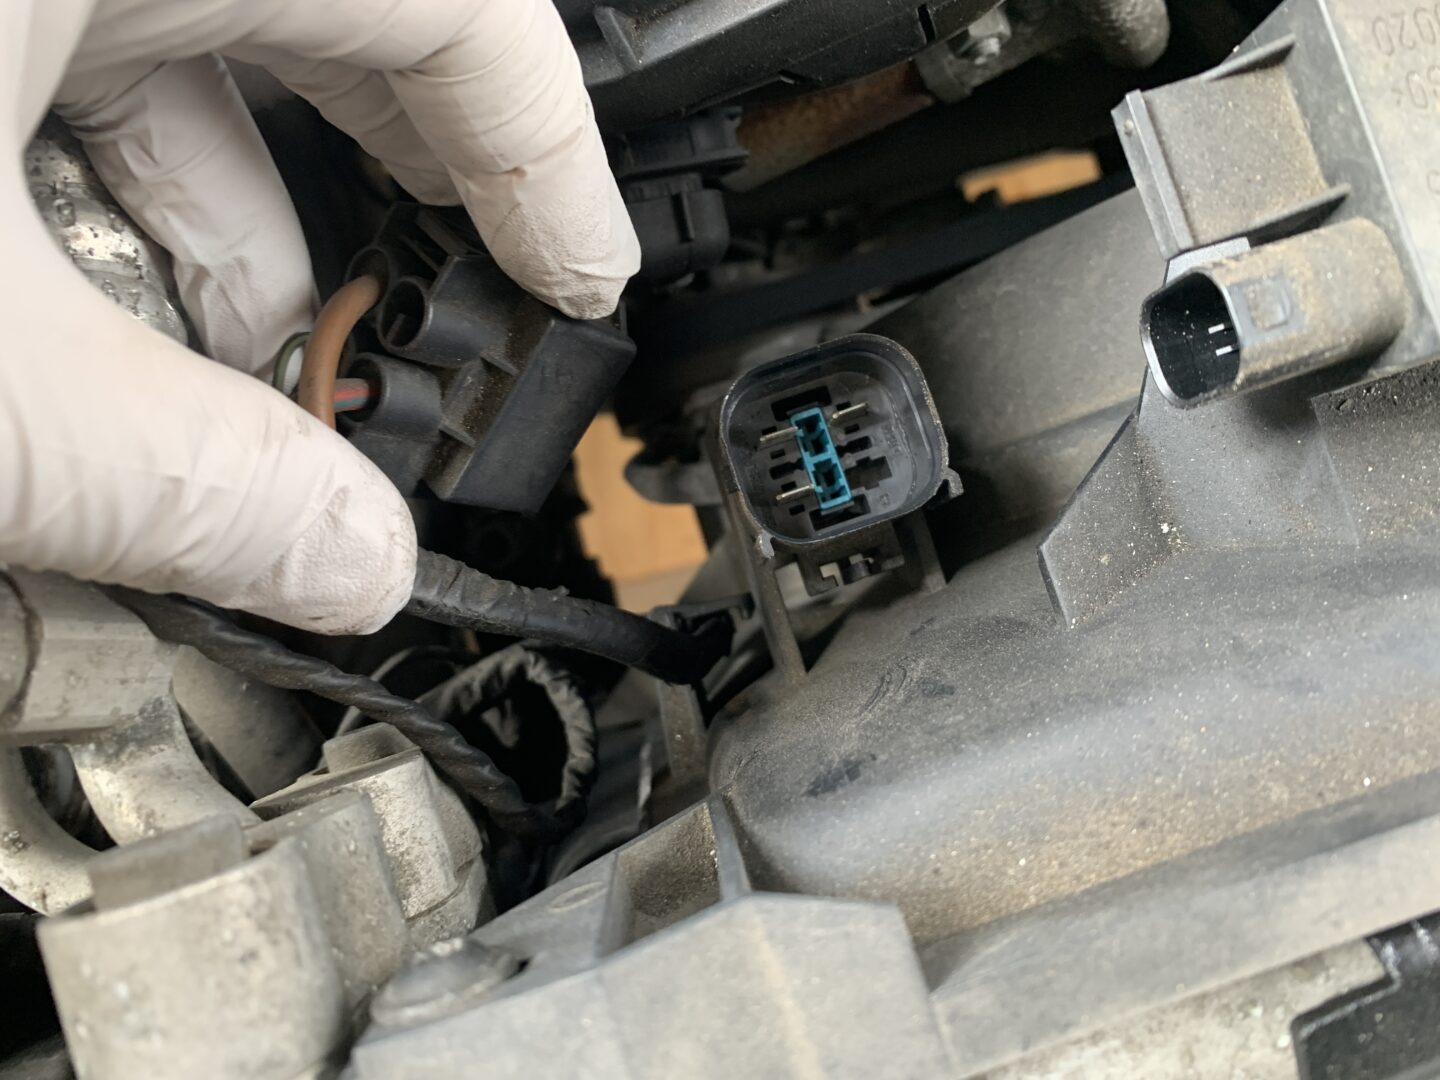
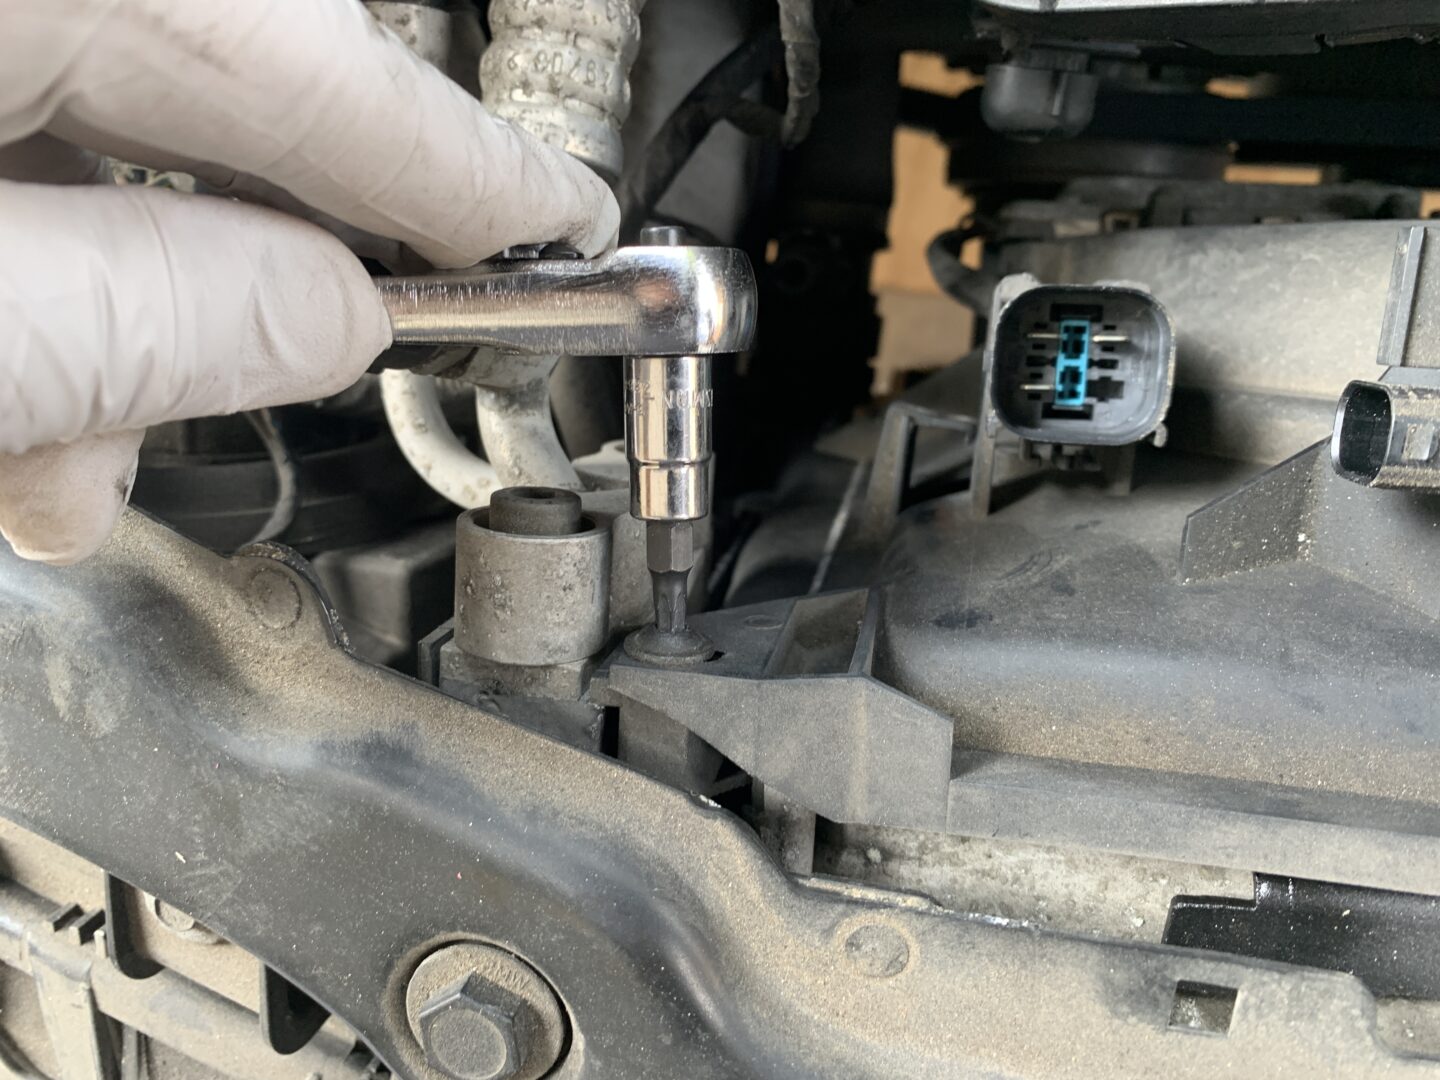
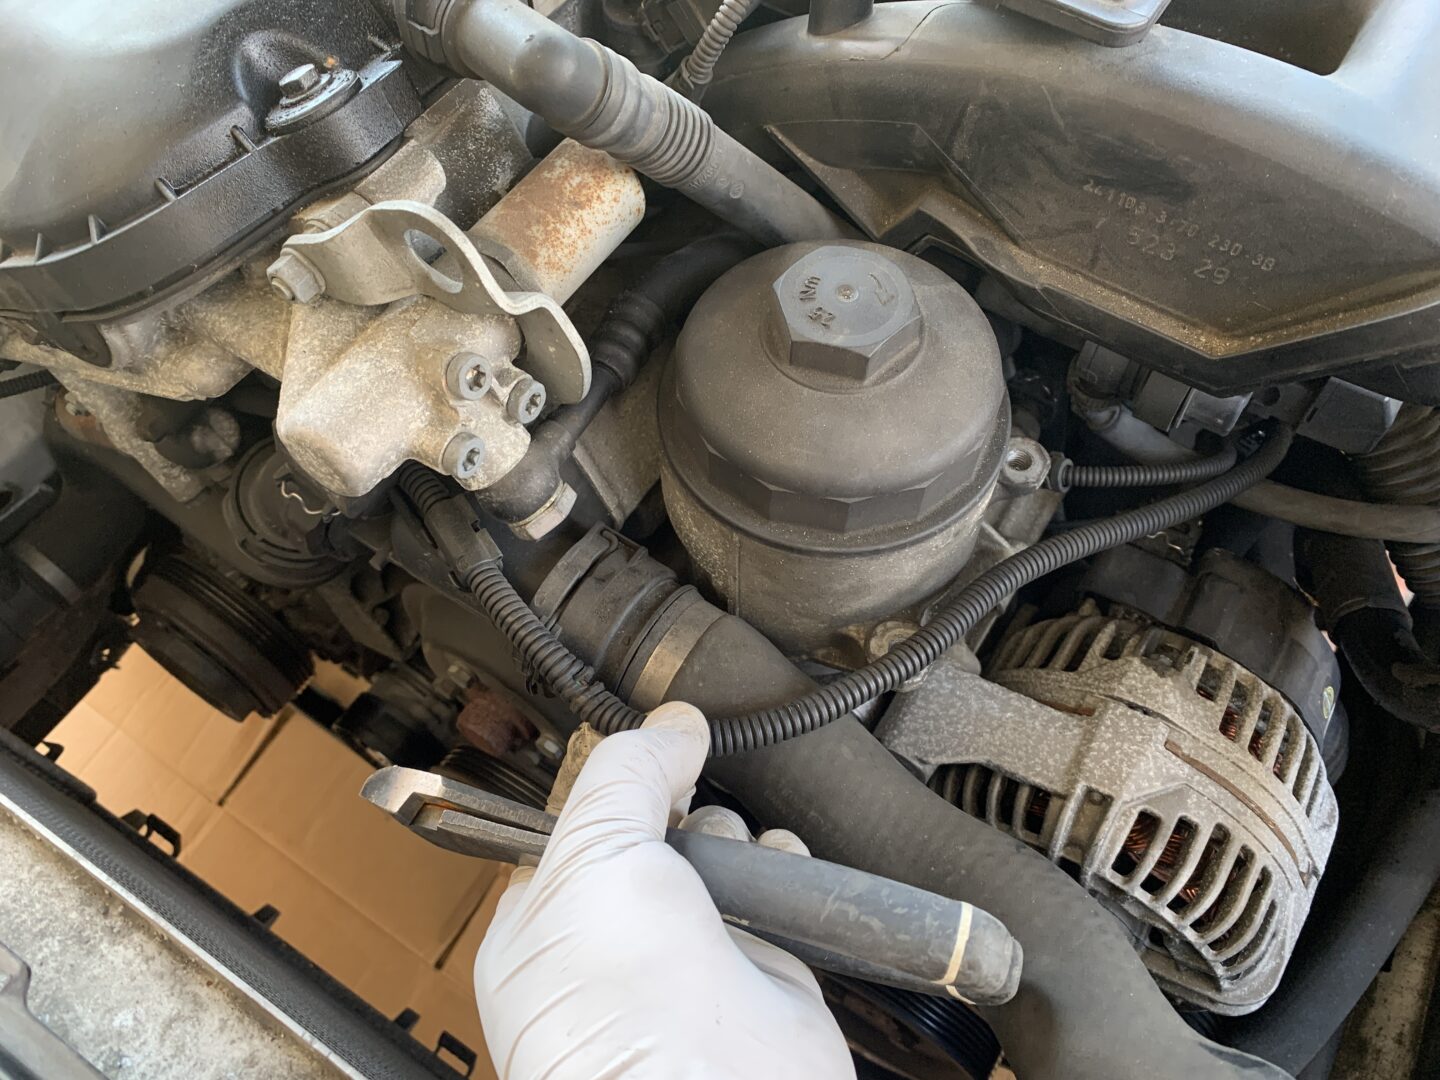
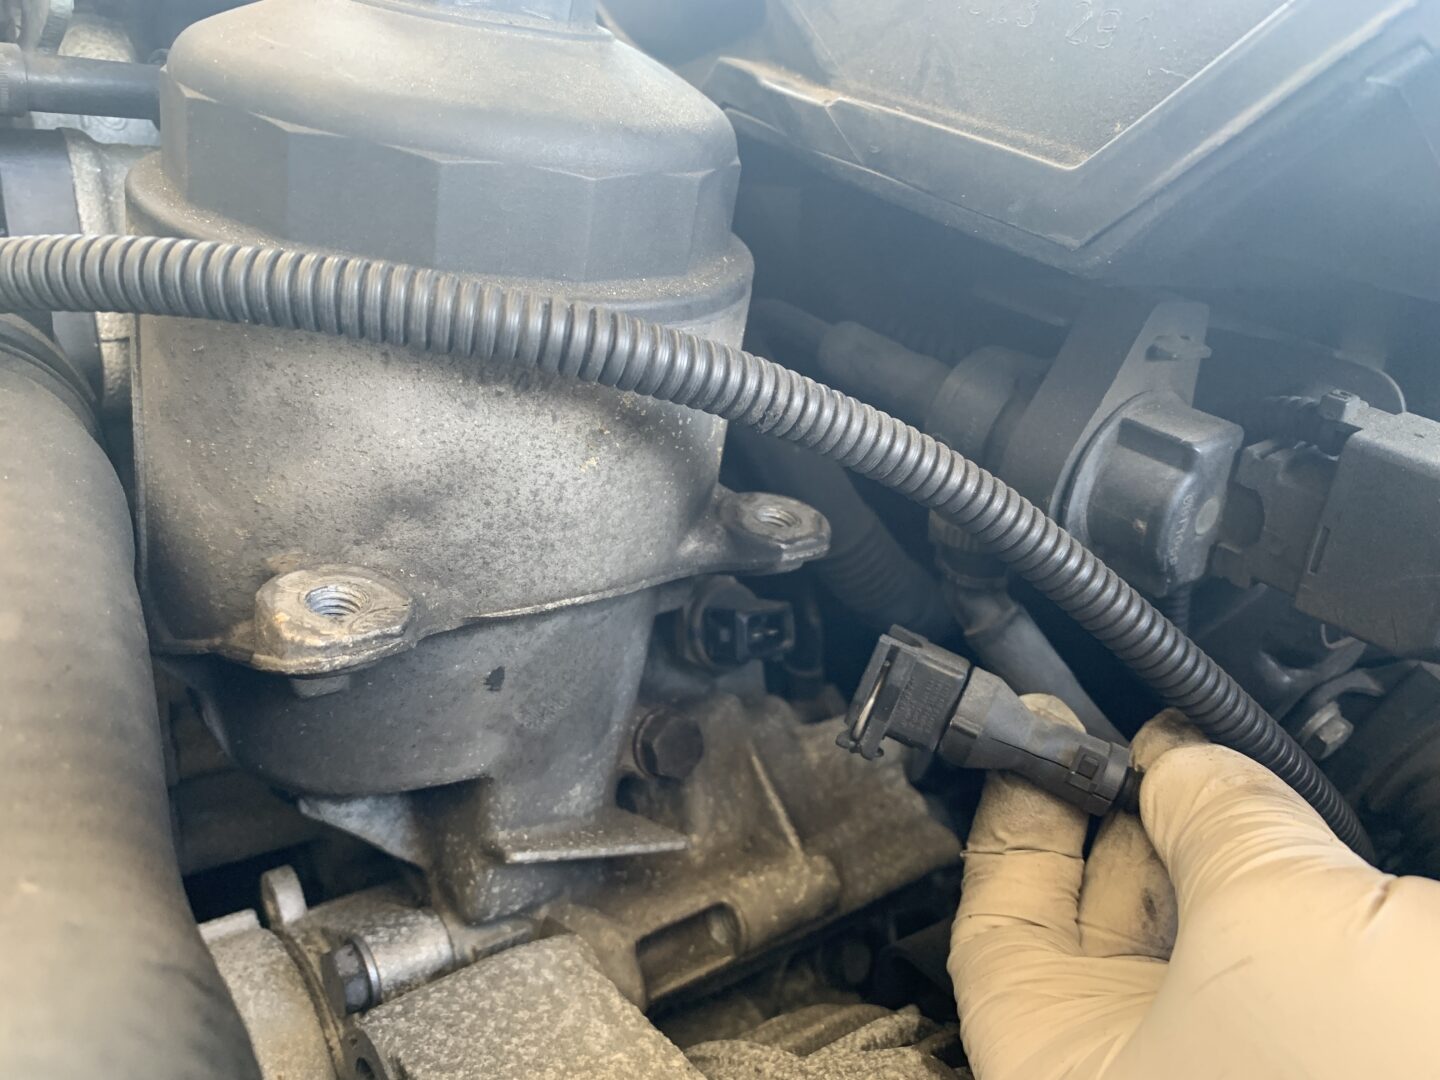
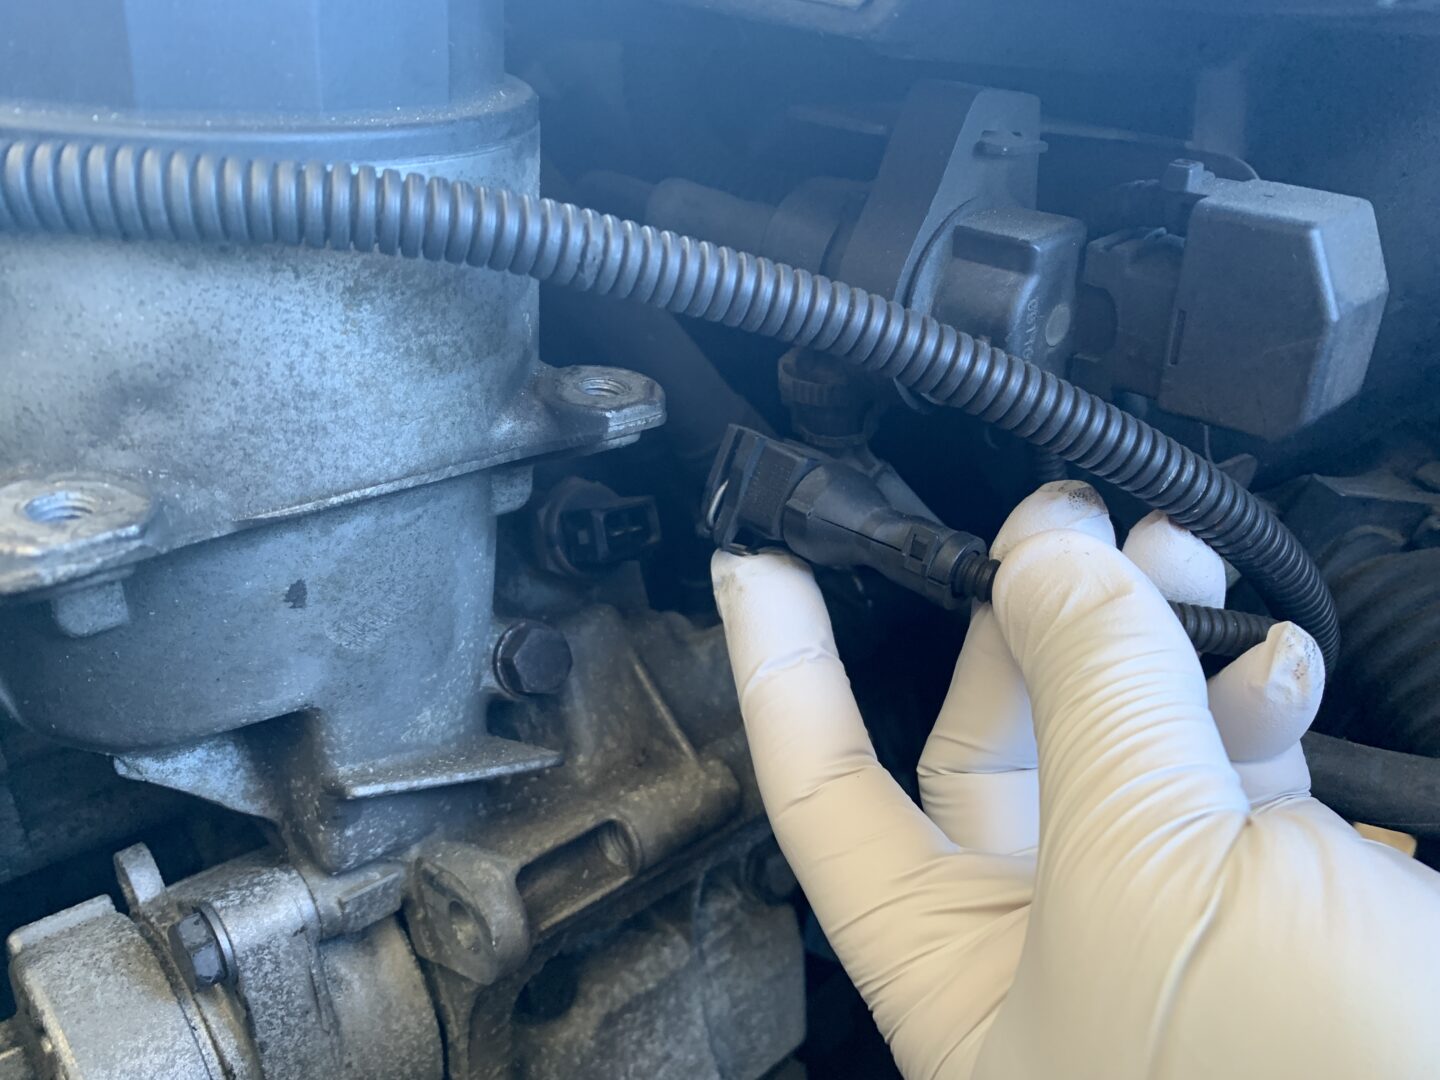
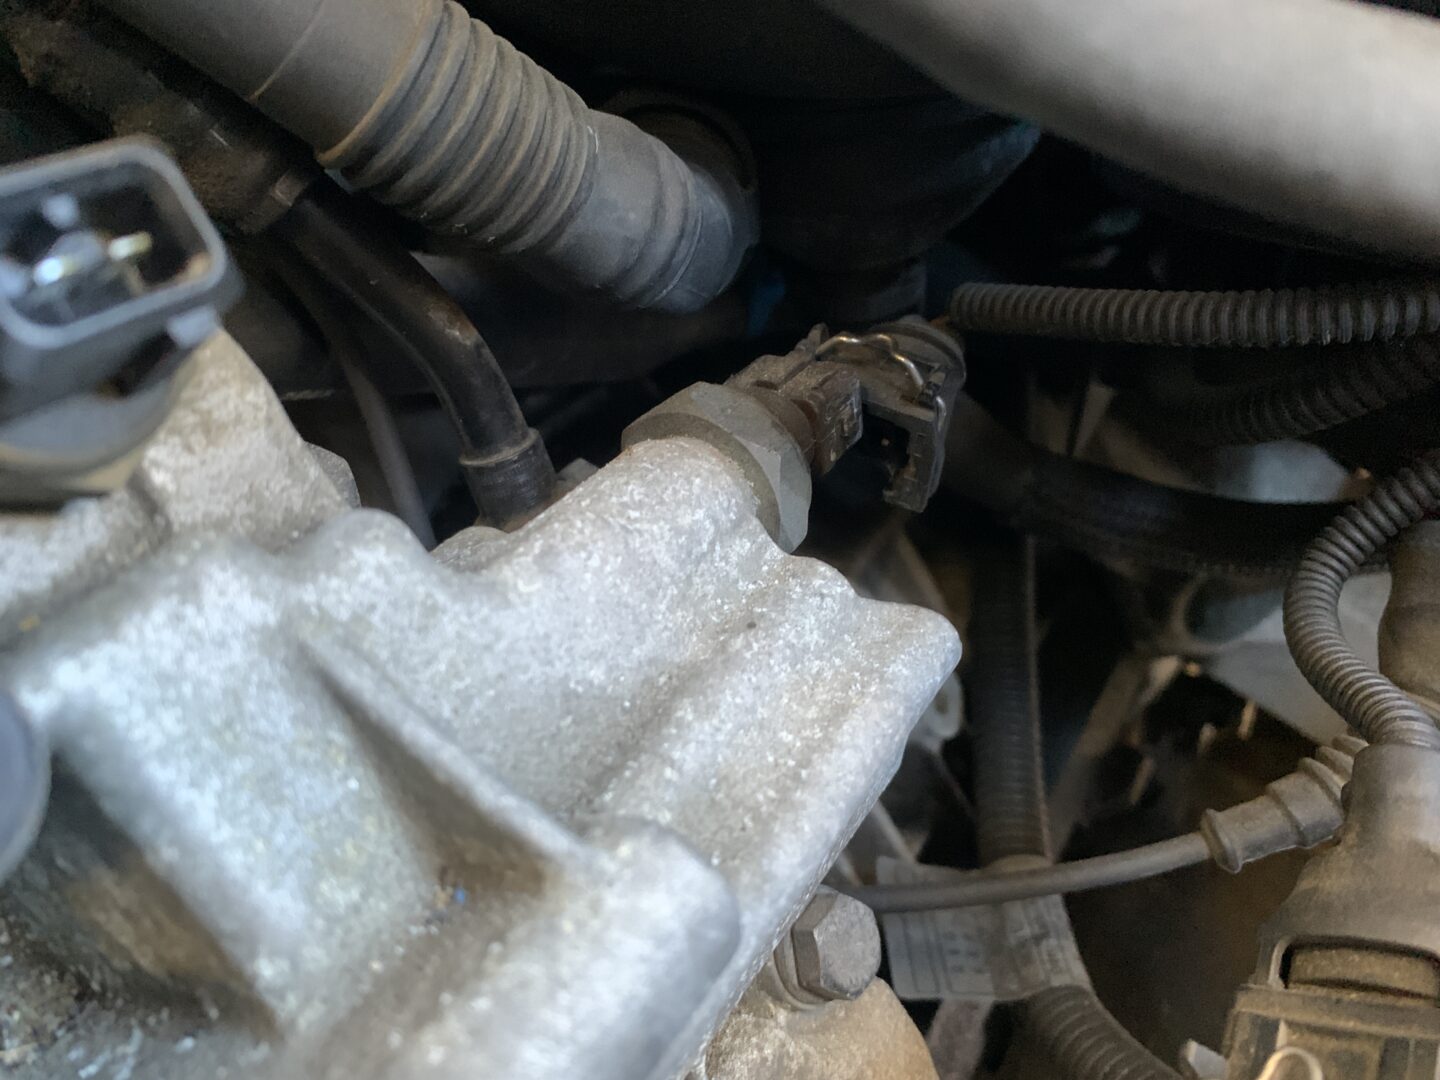
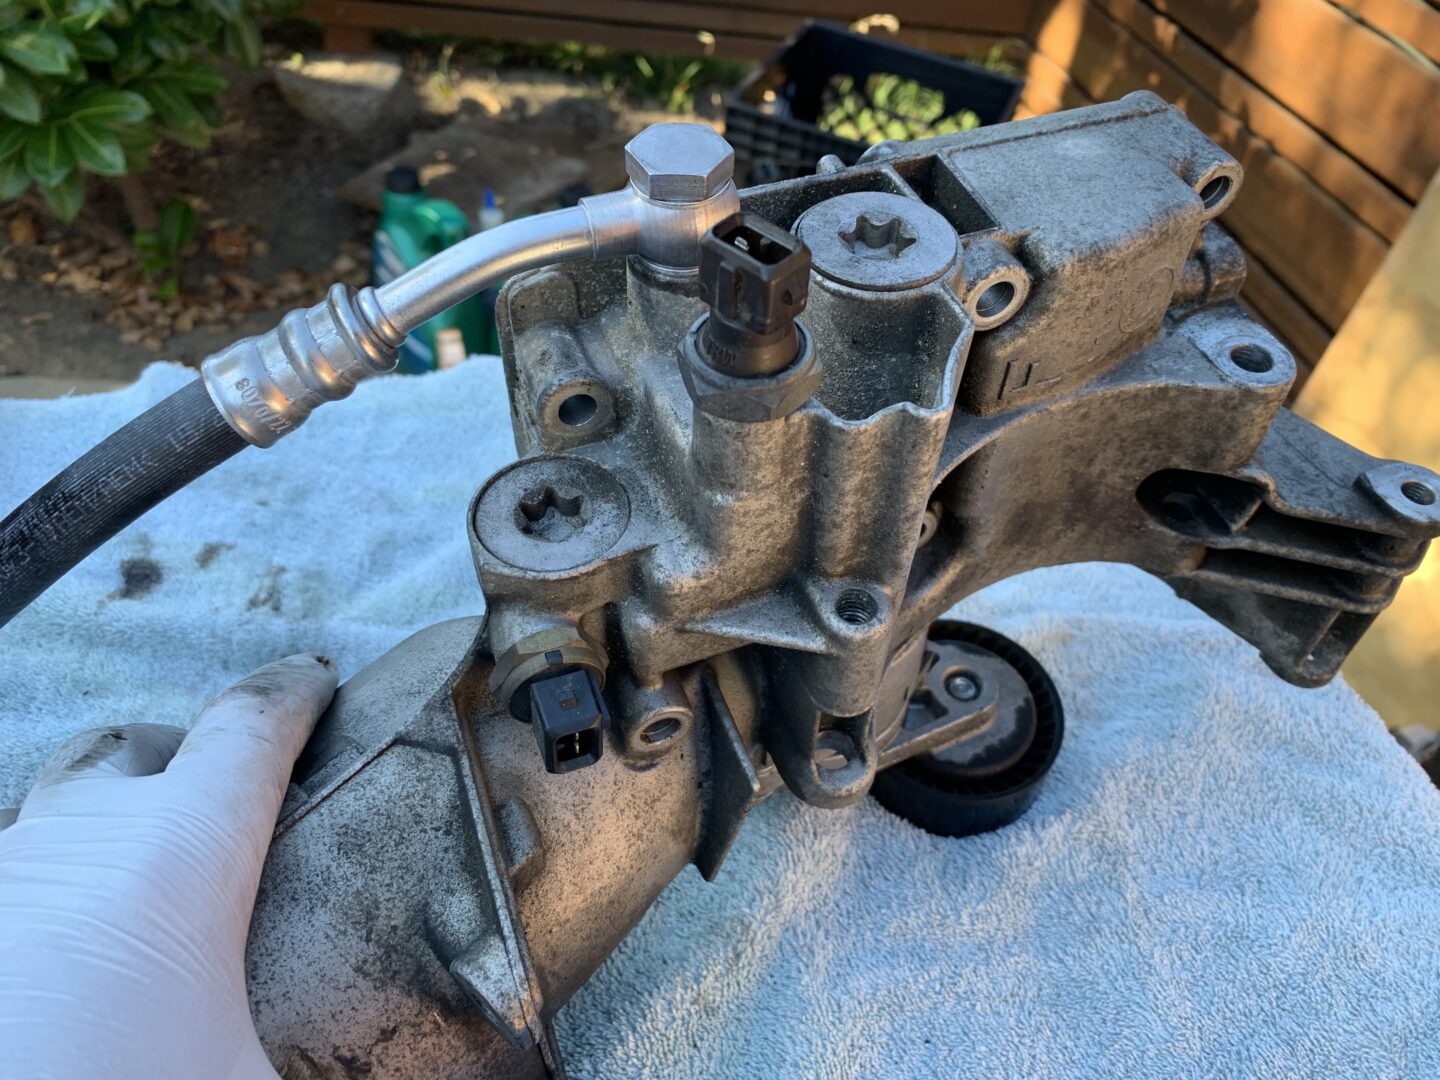
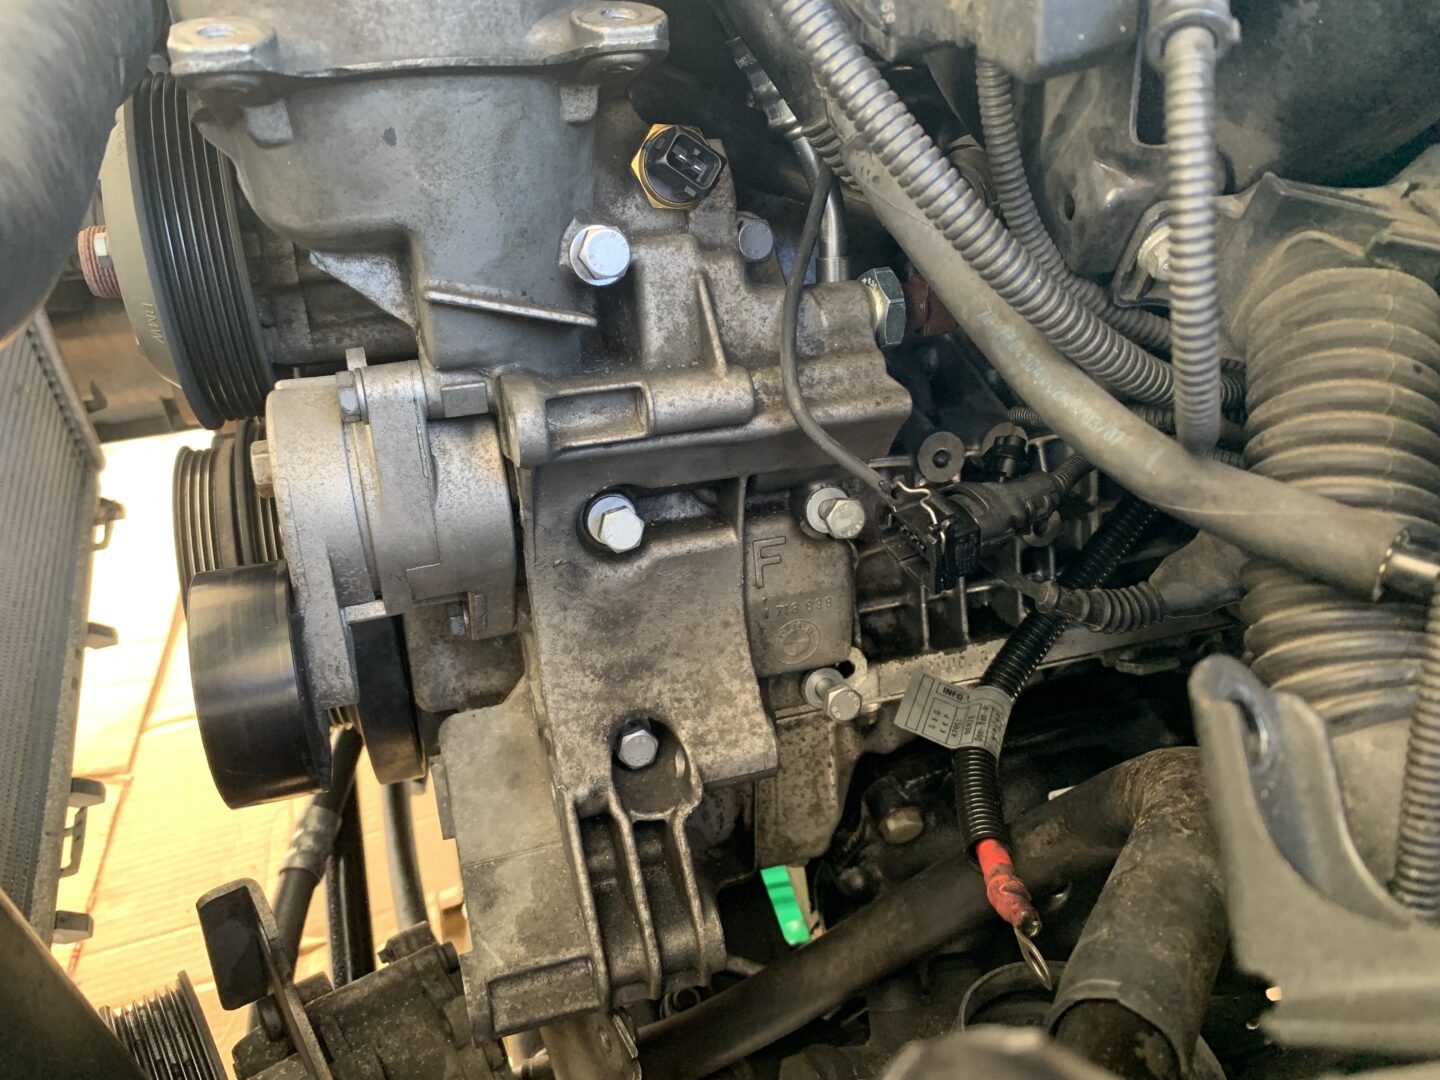
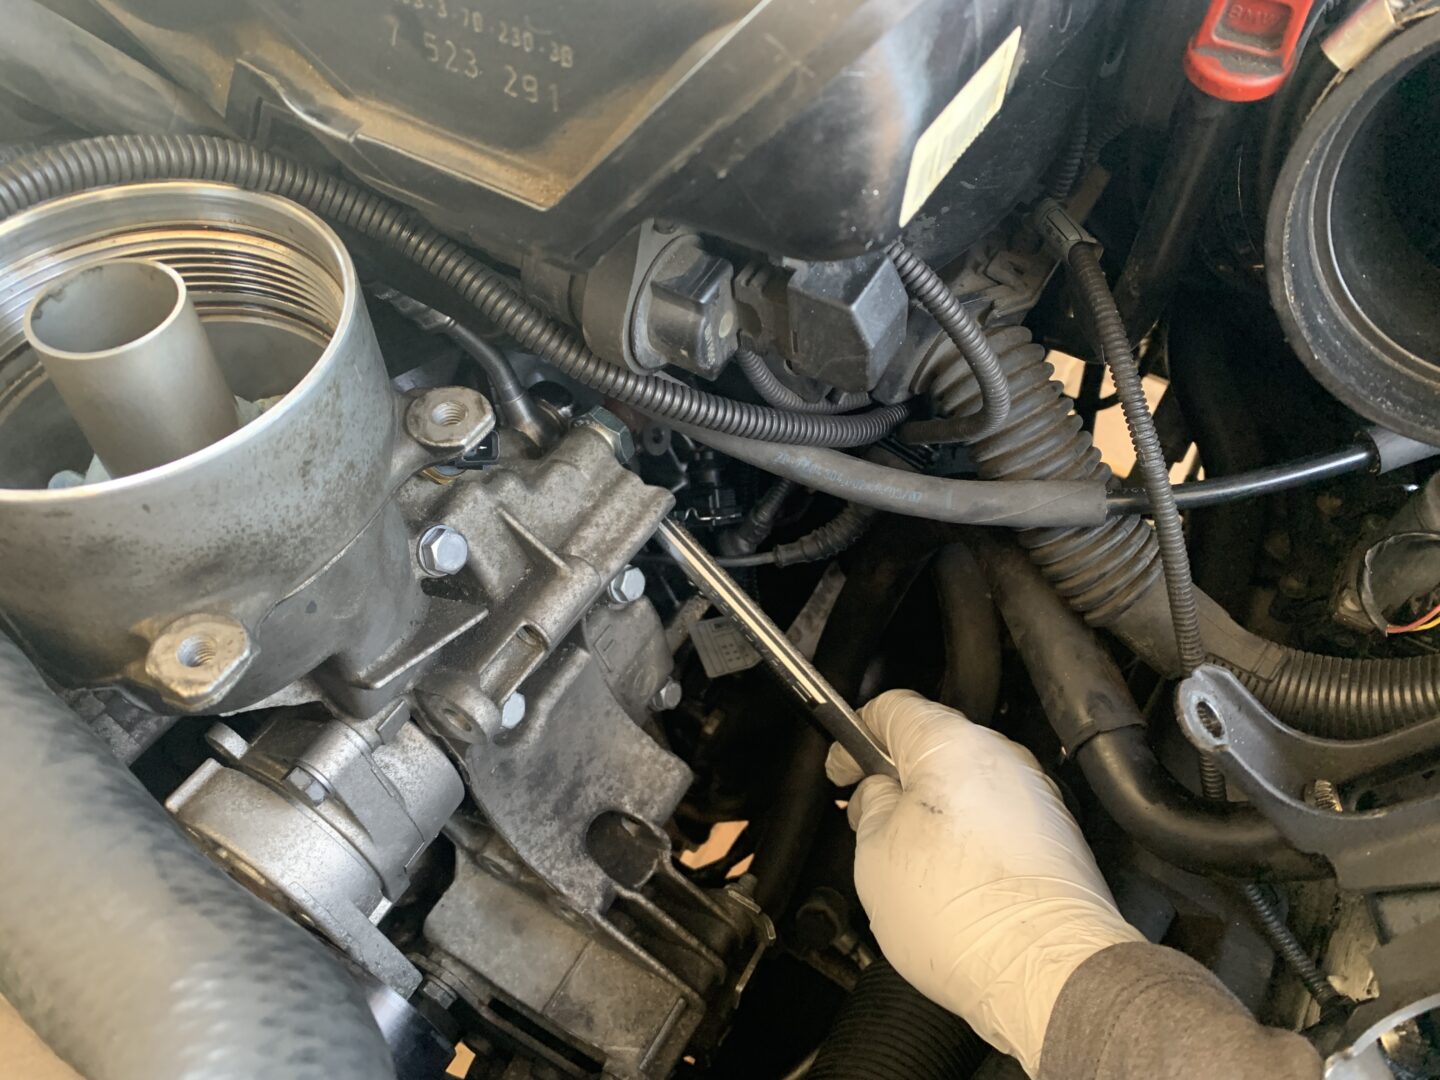
Disconnect the oil pressure sensor and the oil temperature sensor as shown below. No need to worry about which is which when removing them as the oil pressure sensor is a 1-pin connector and the oil temperature sensor is a 2-pin connector.
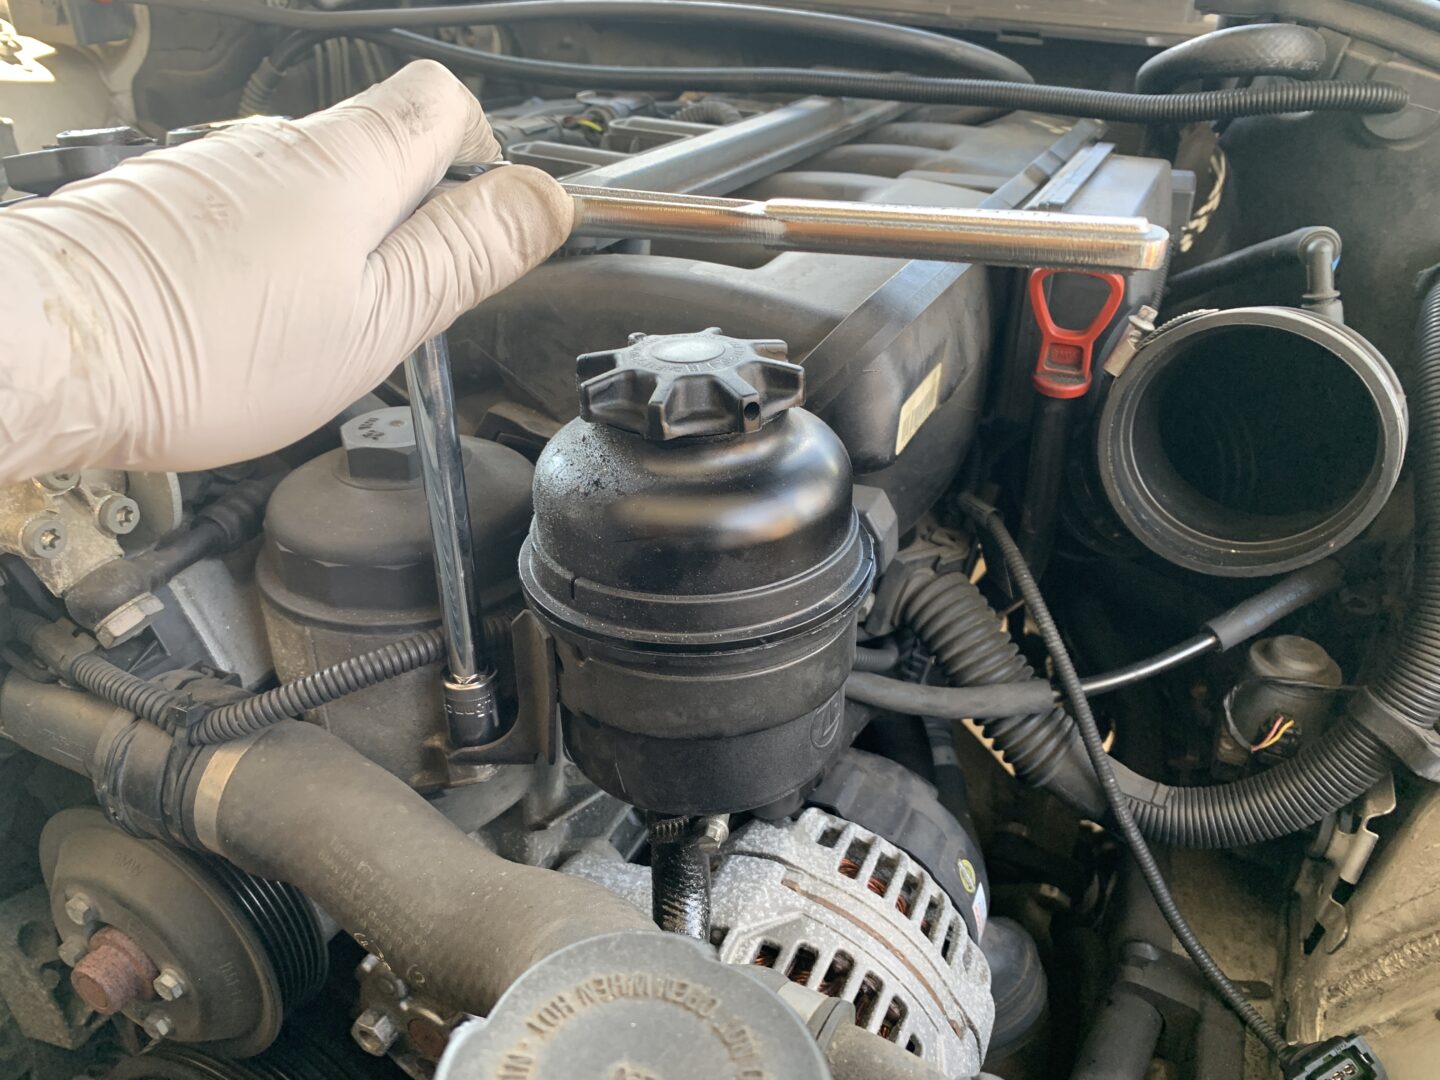
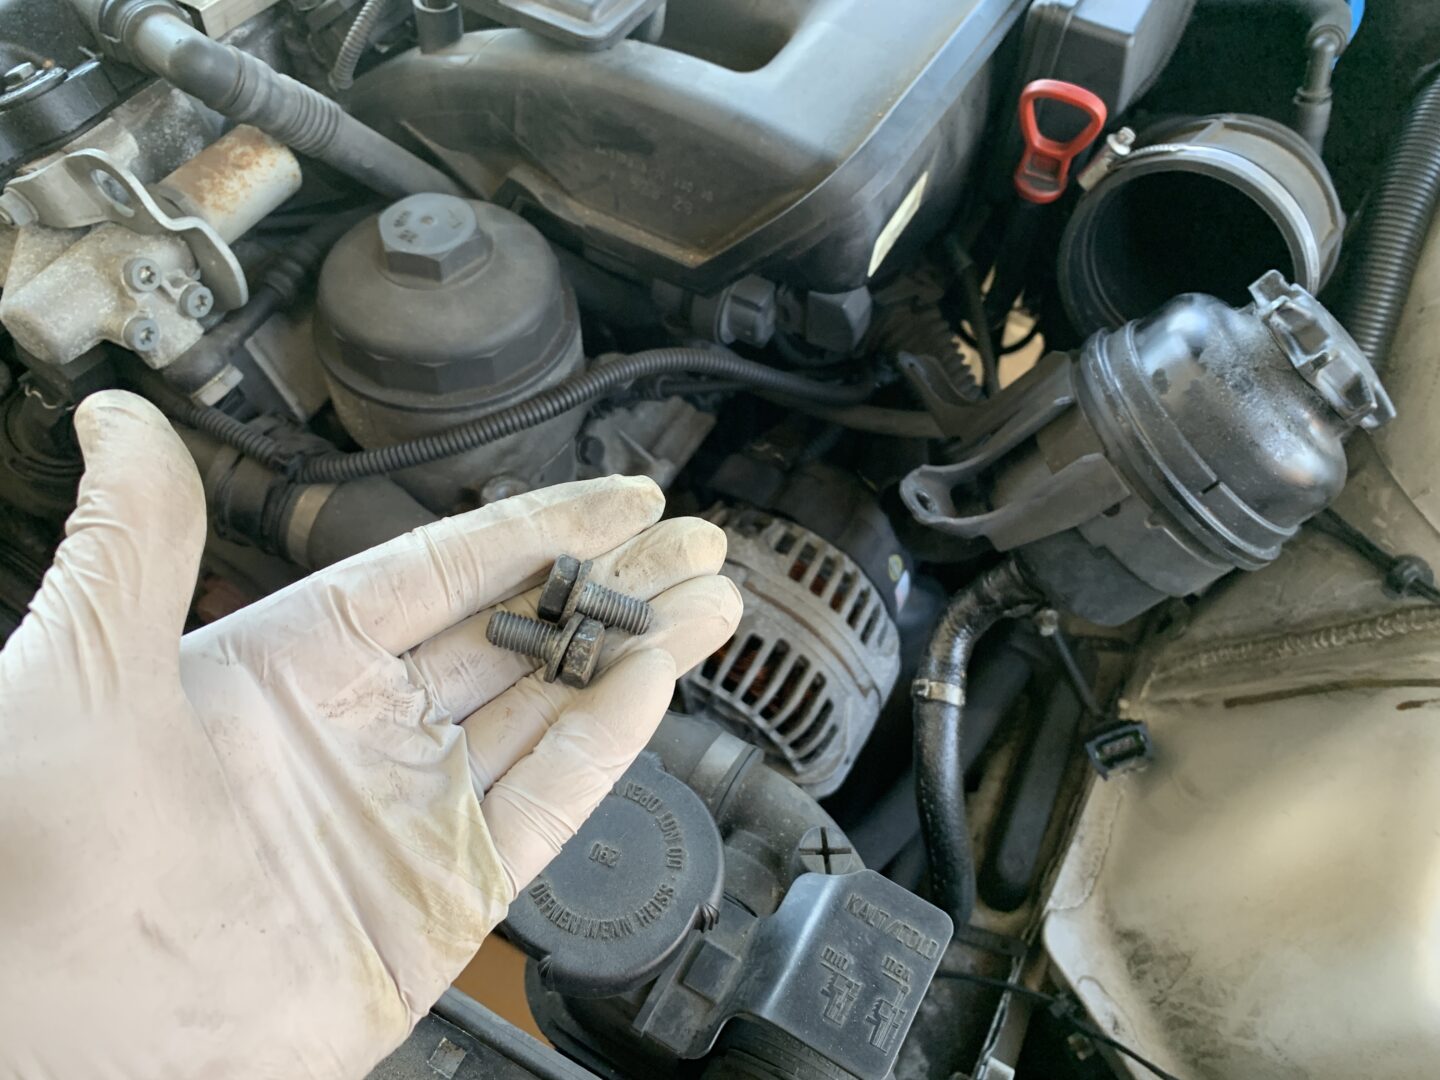
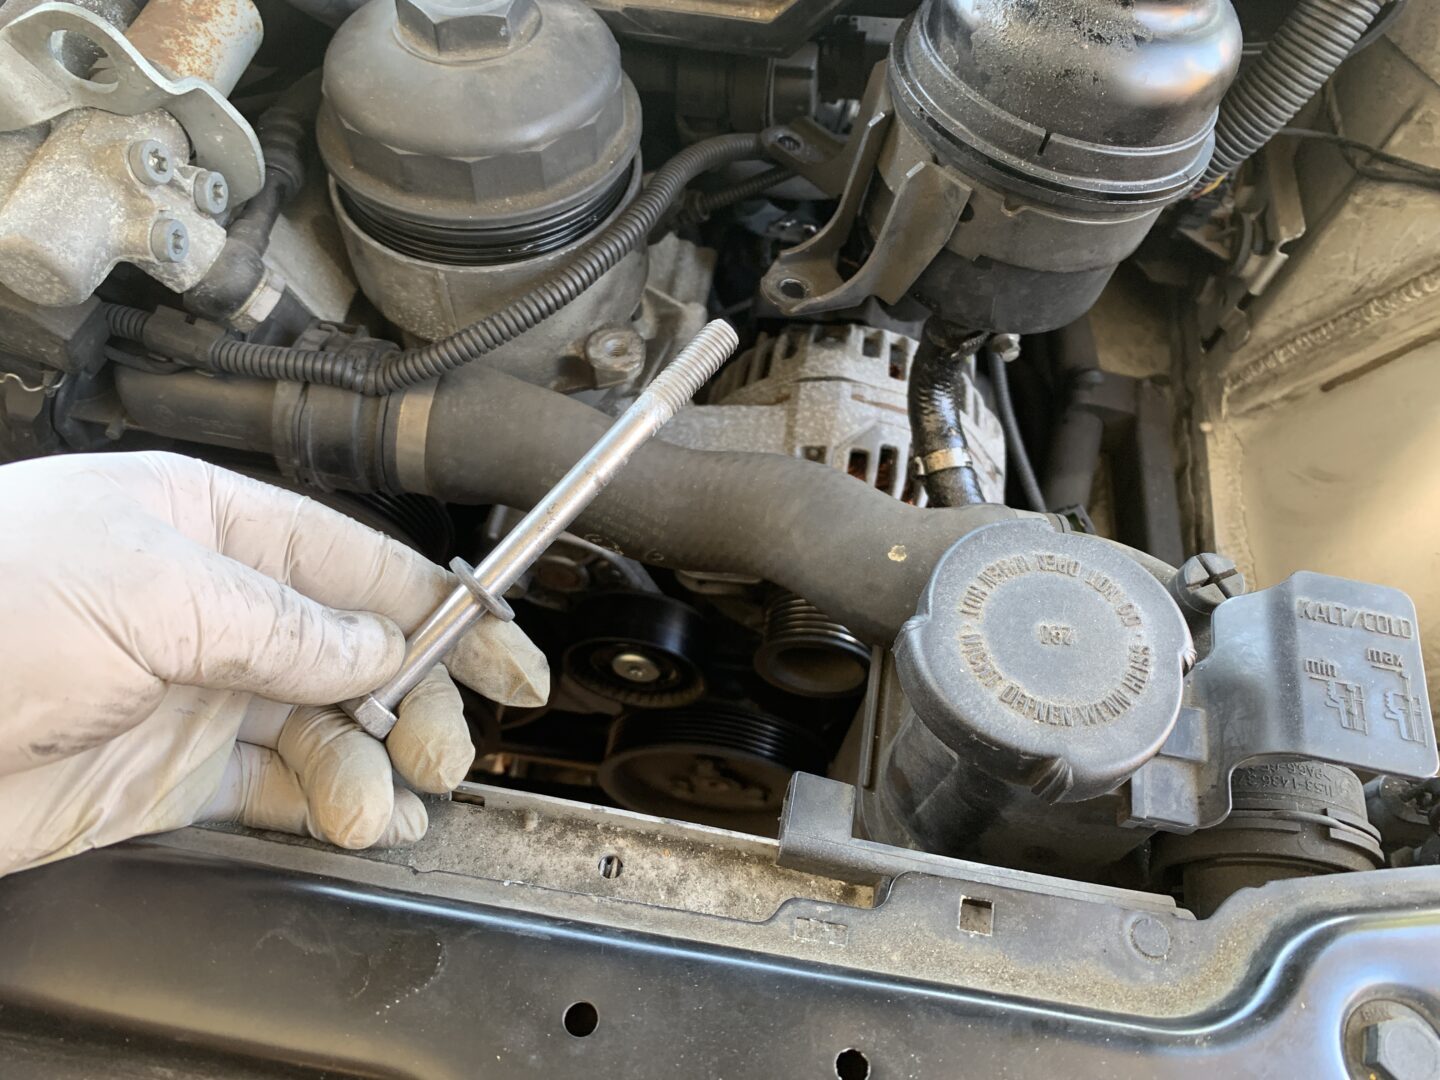
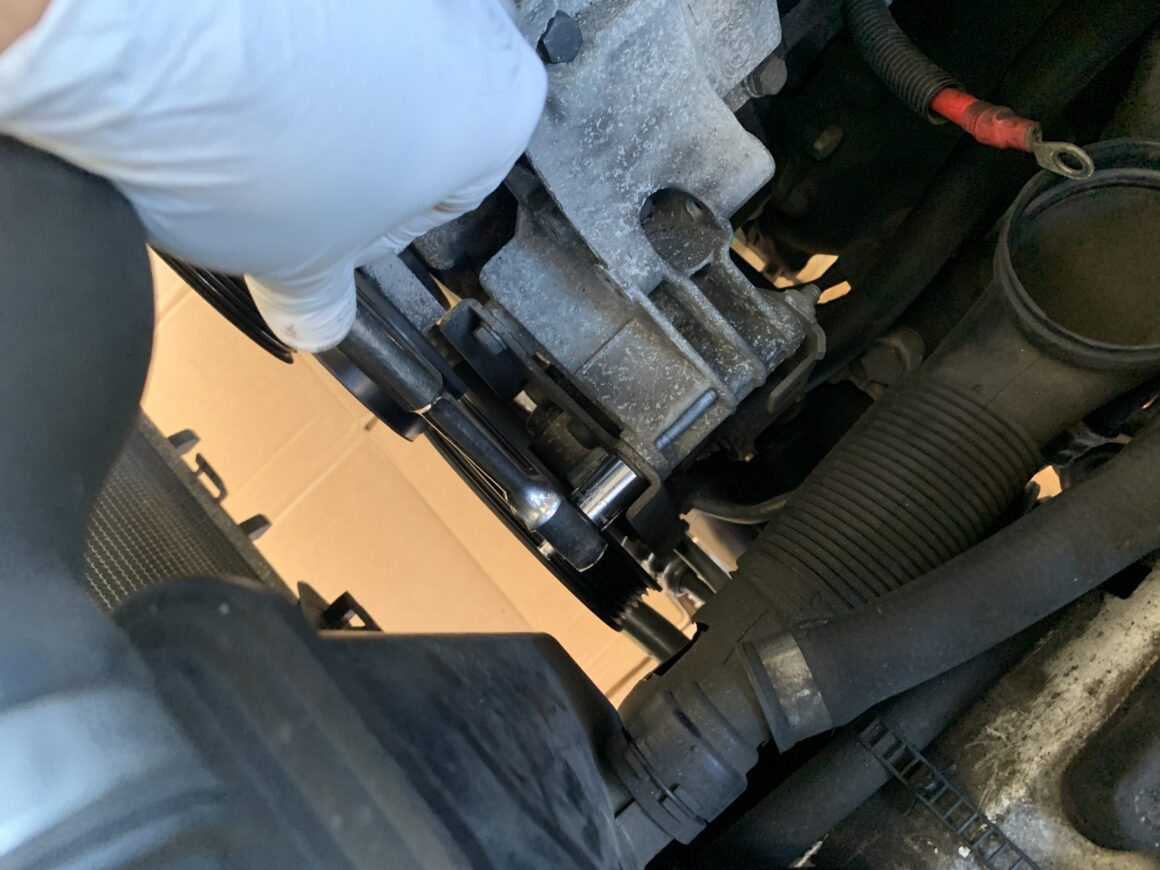
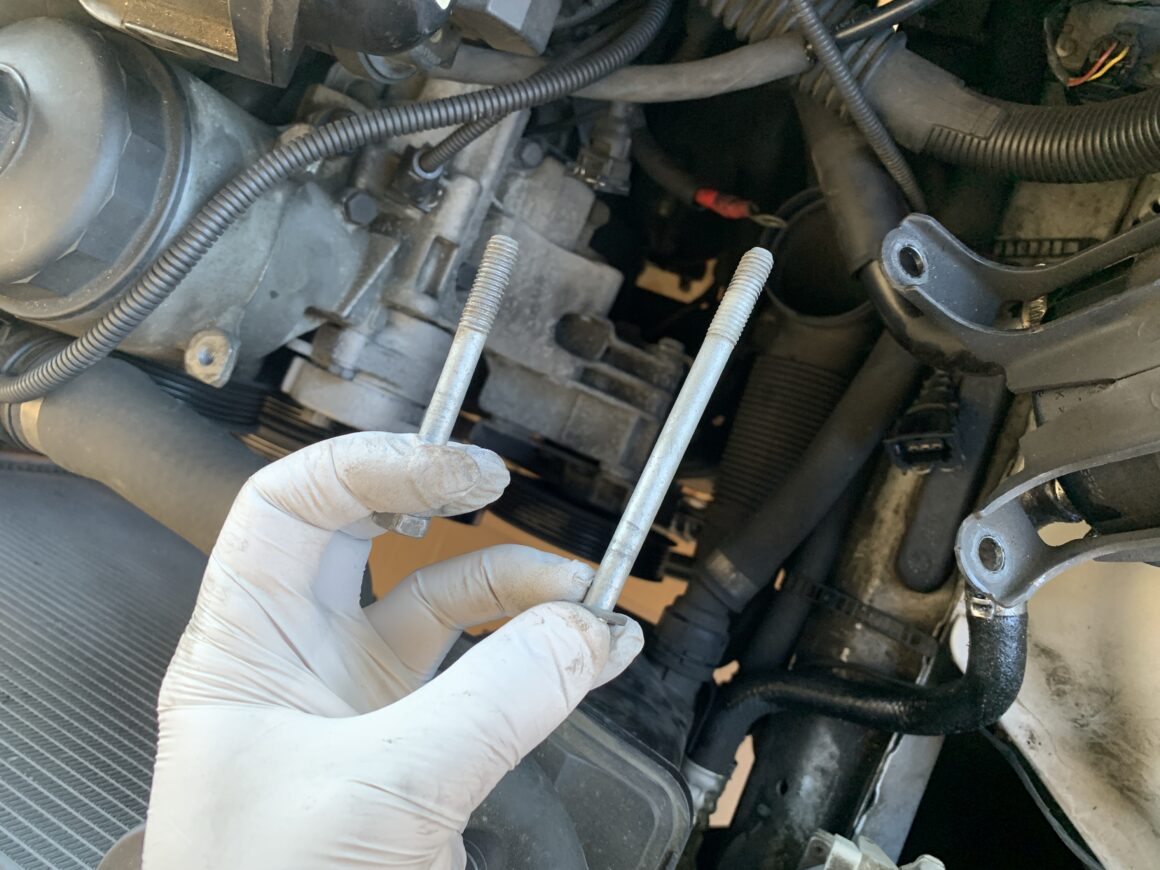
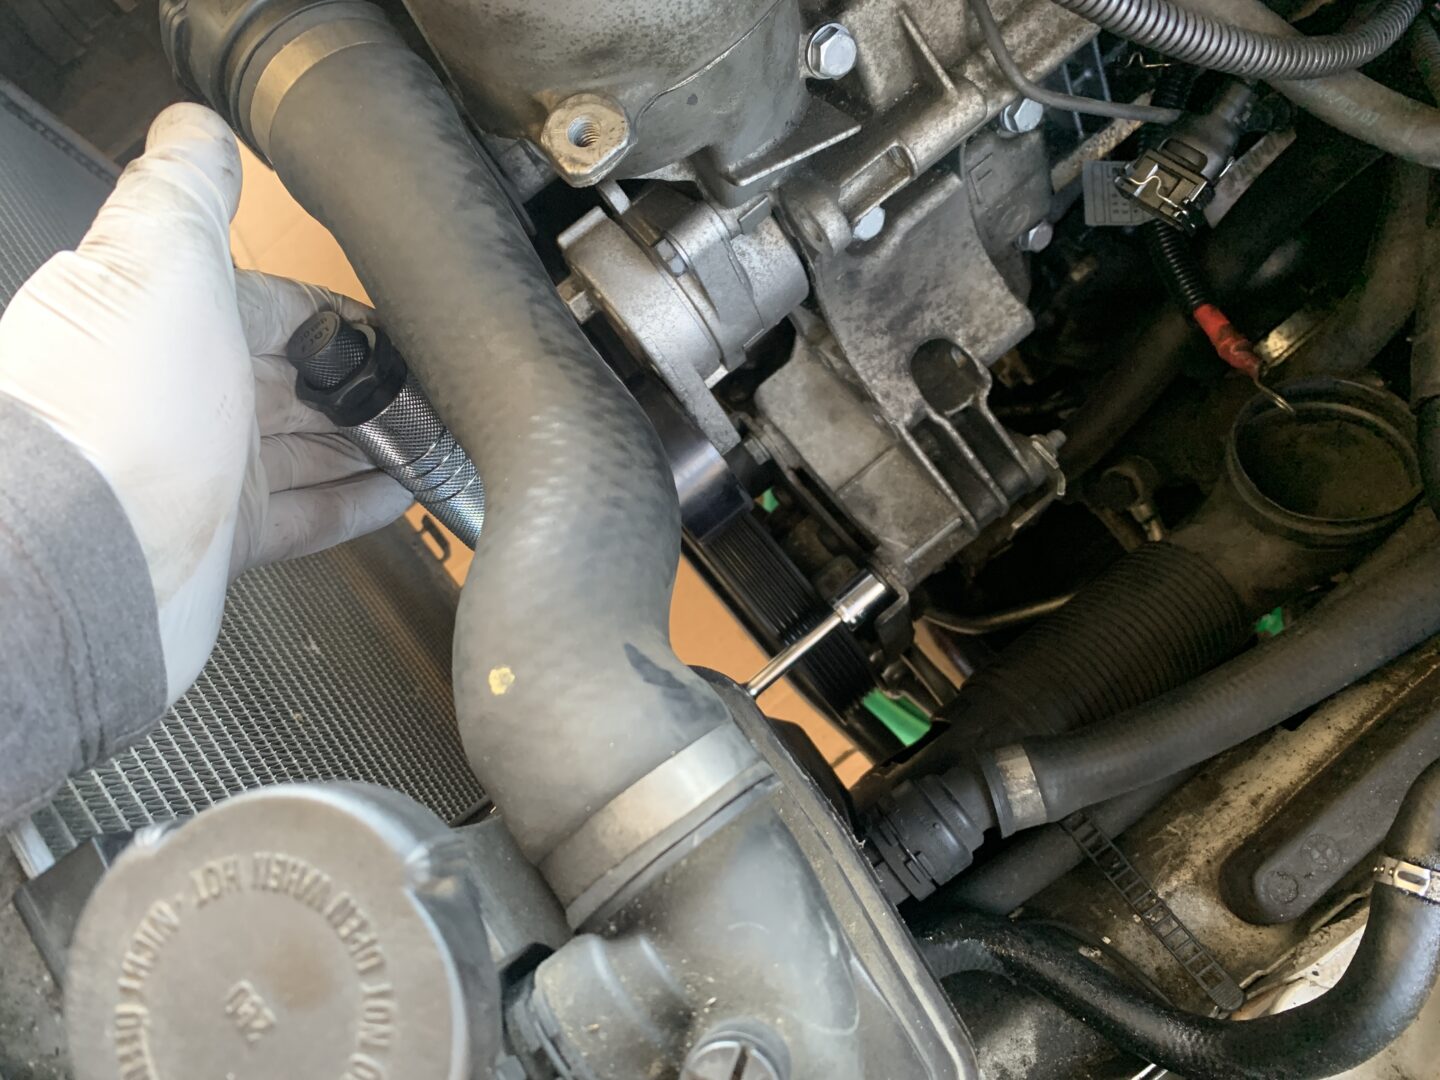
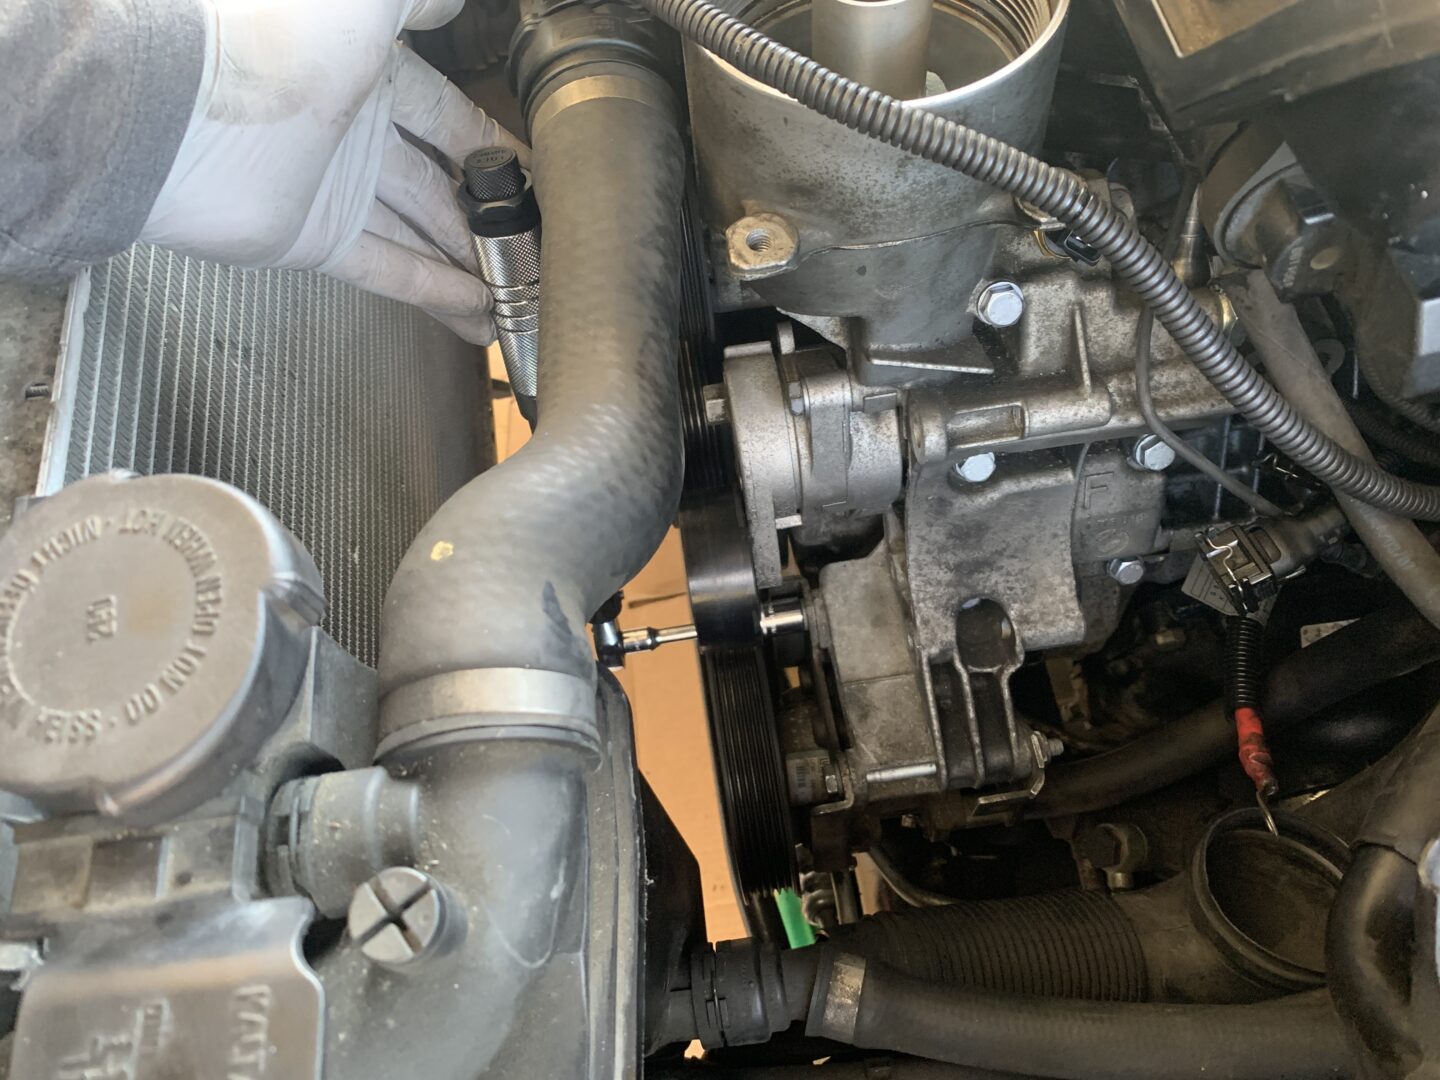
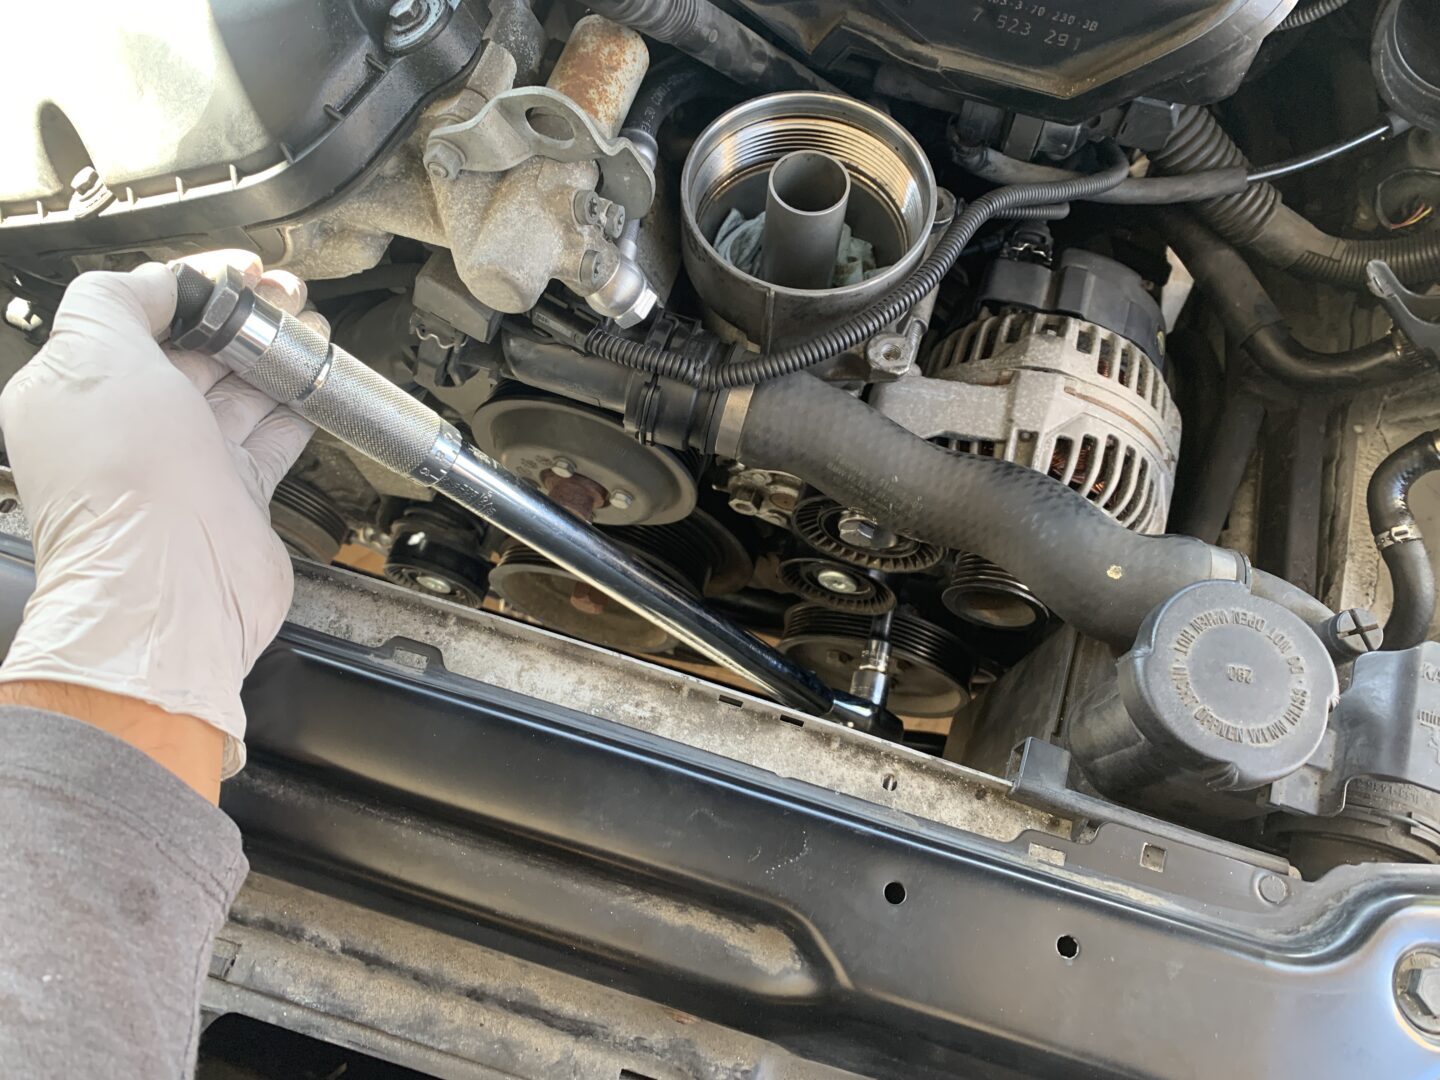
You will need to remove the power steering pump bolts; on the E46, the power steering pump configuration may differ from vehicle-to-vehicle. On mine, it required me removing these two long bolts in order to separate it from the oil filter housing, as well as a hidden 13mm bolt from underneath (not pictured here).
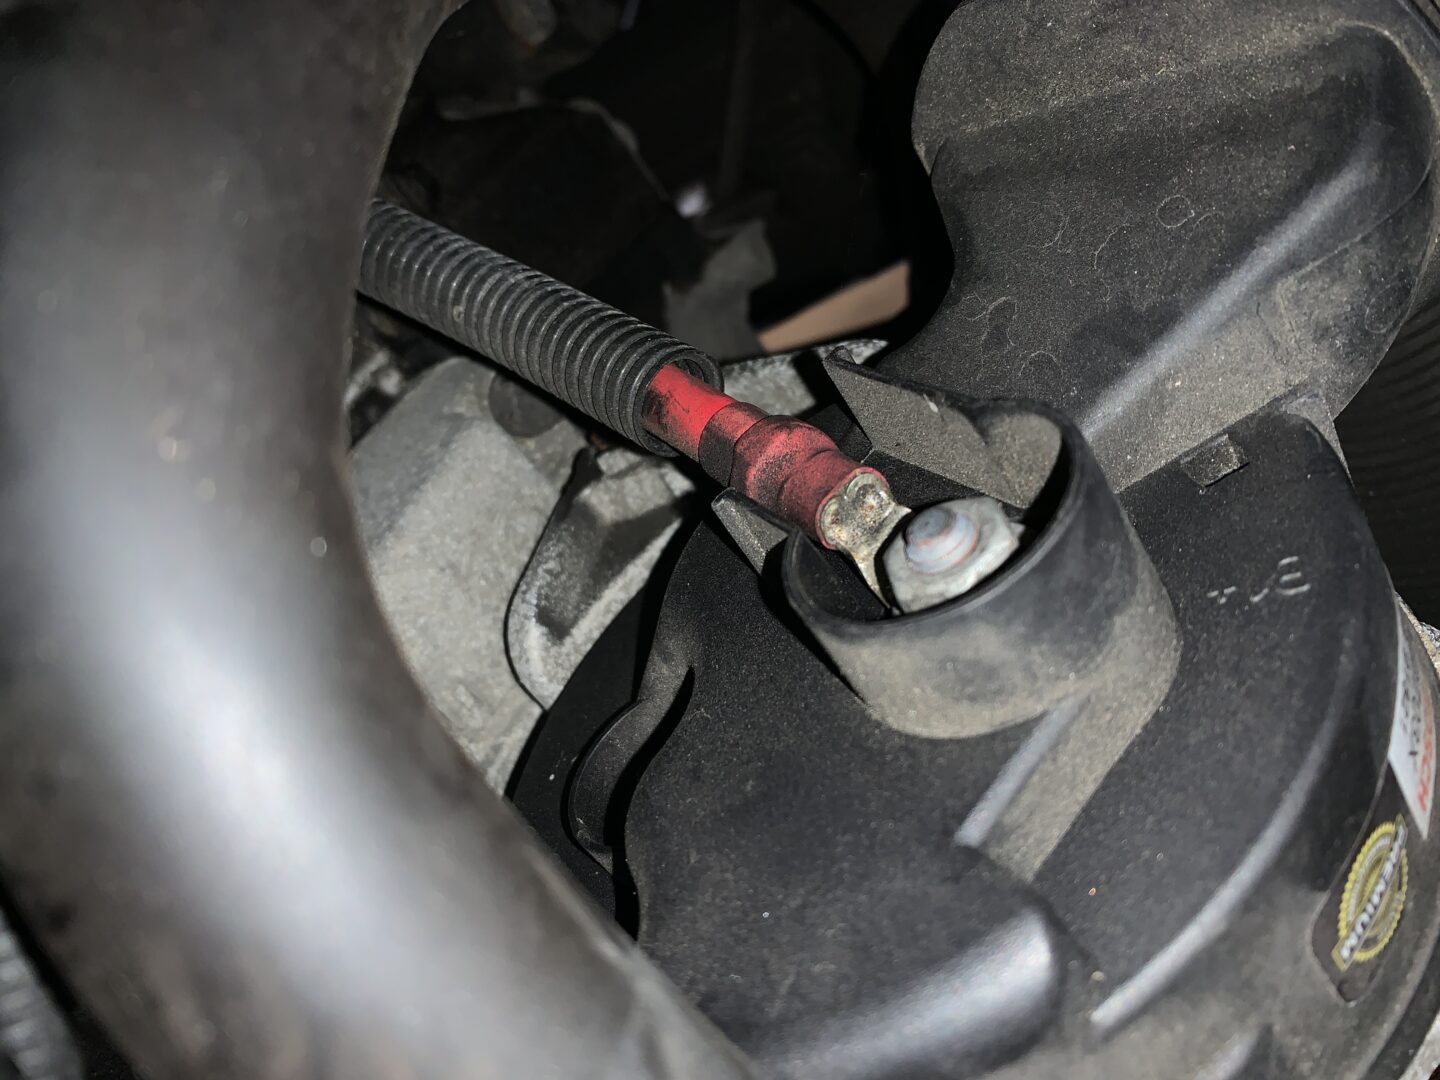
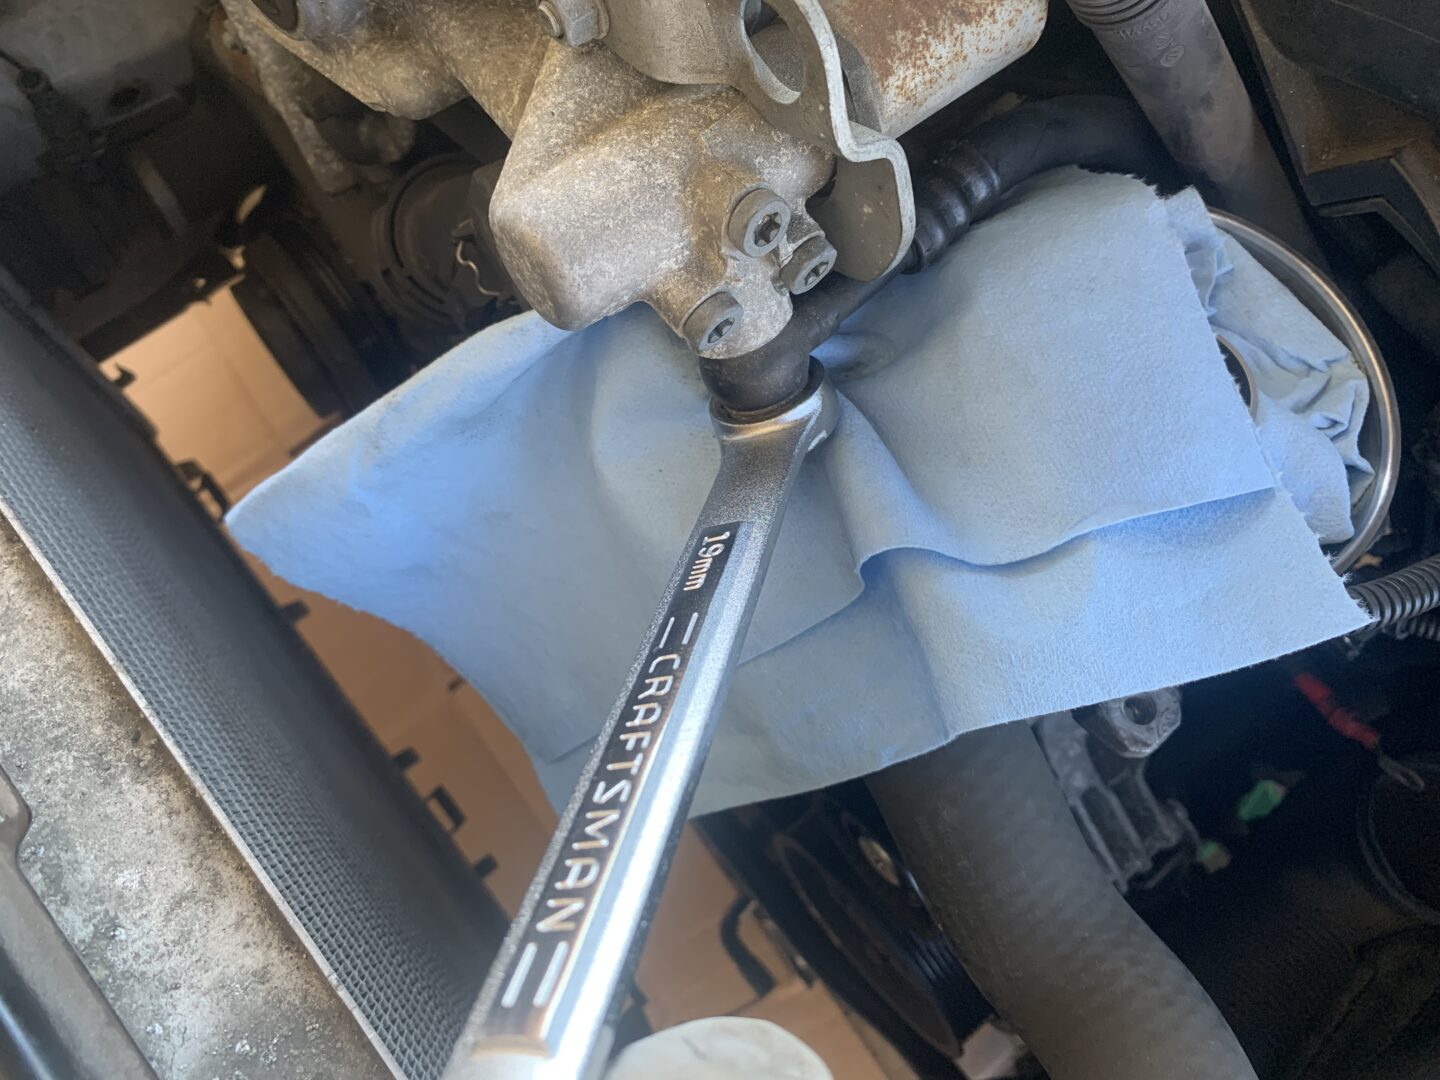
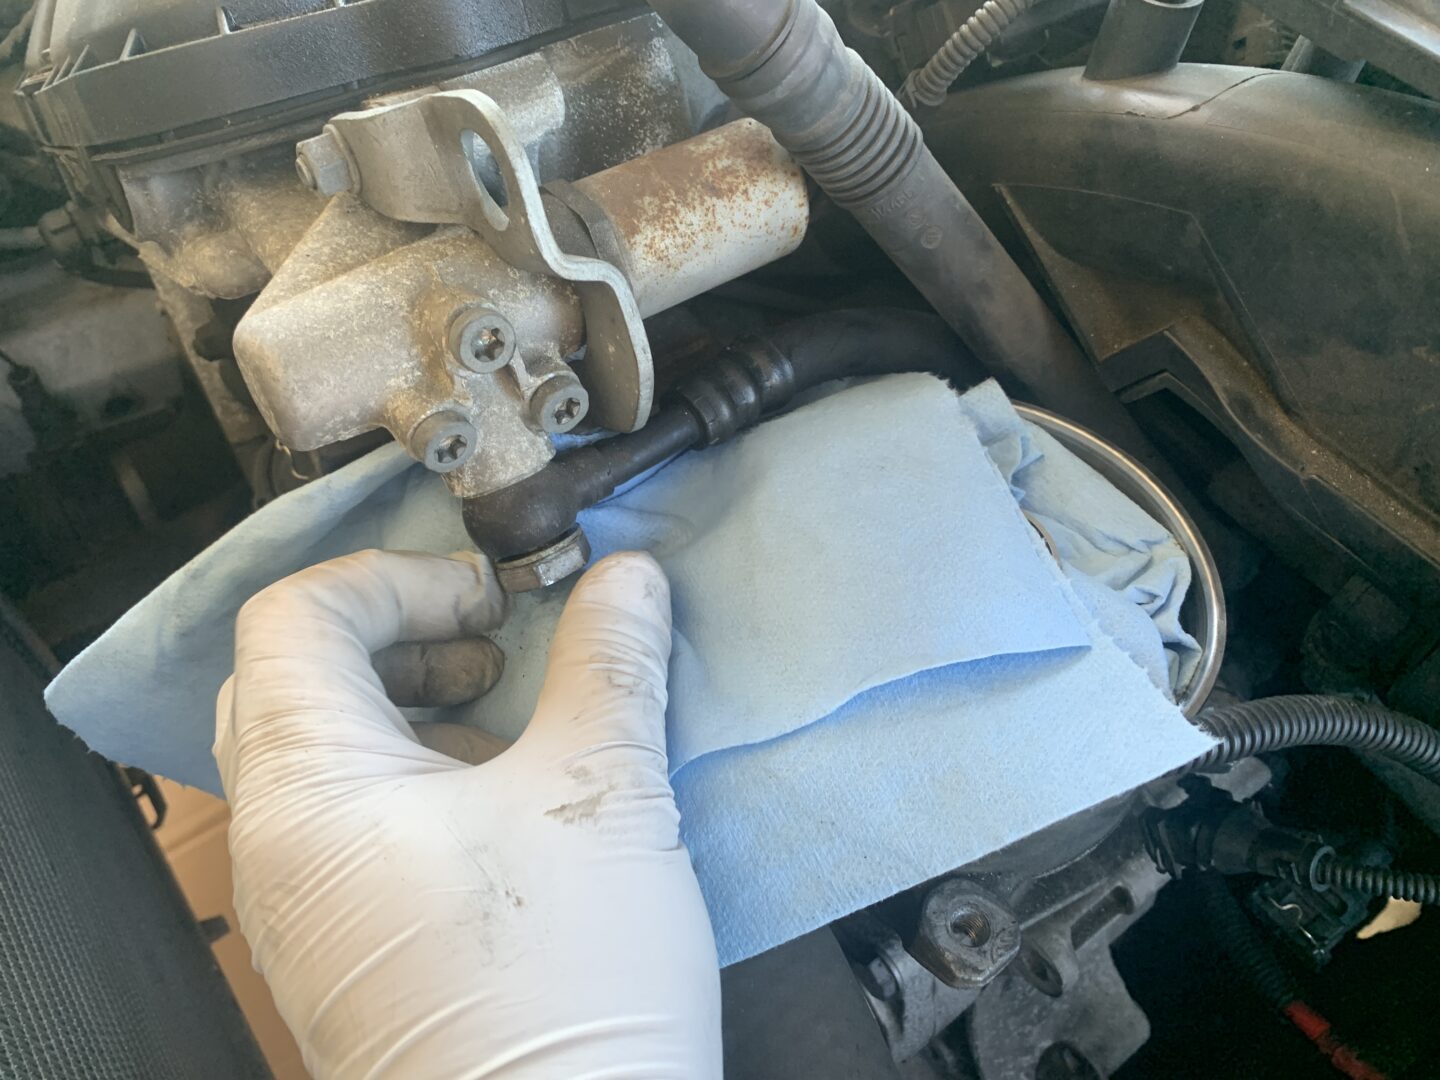
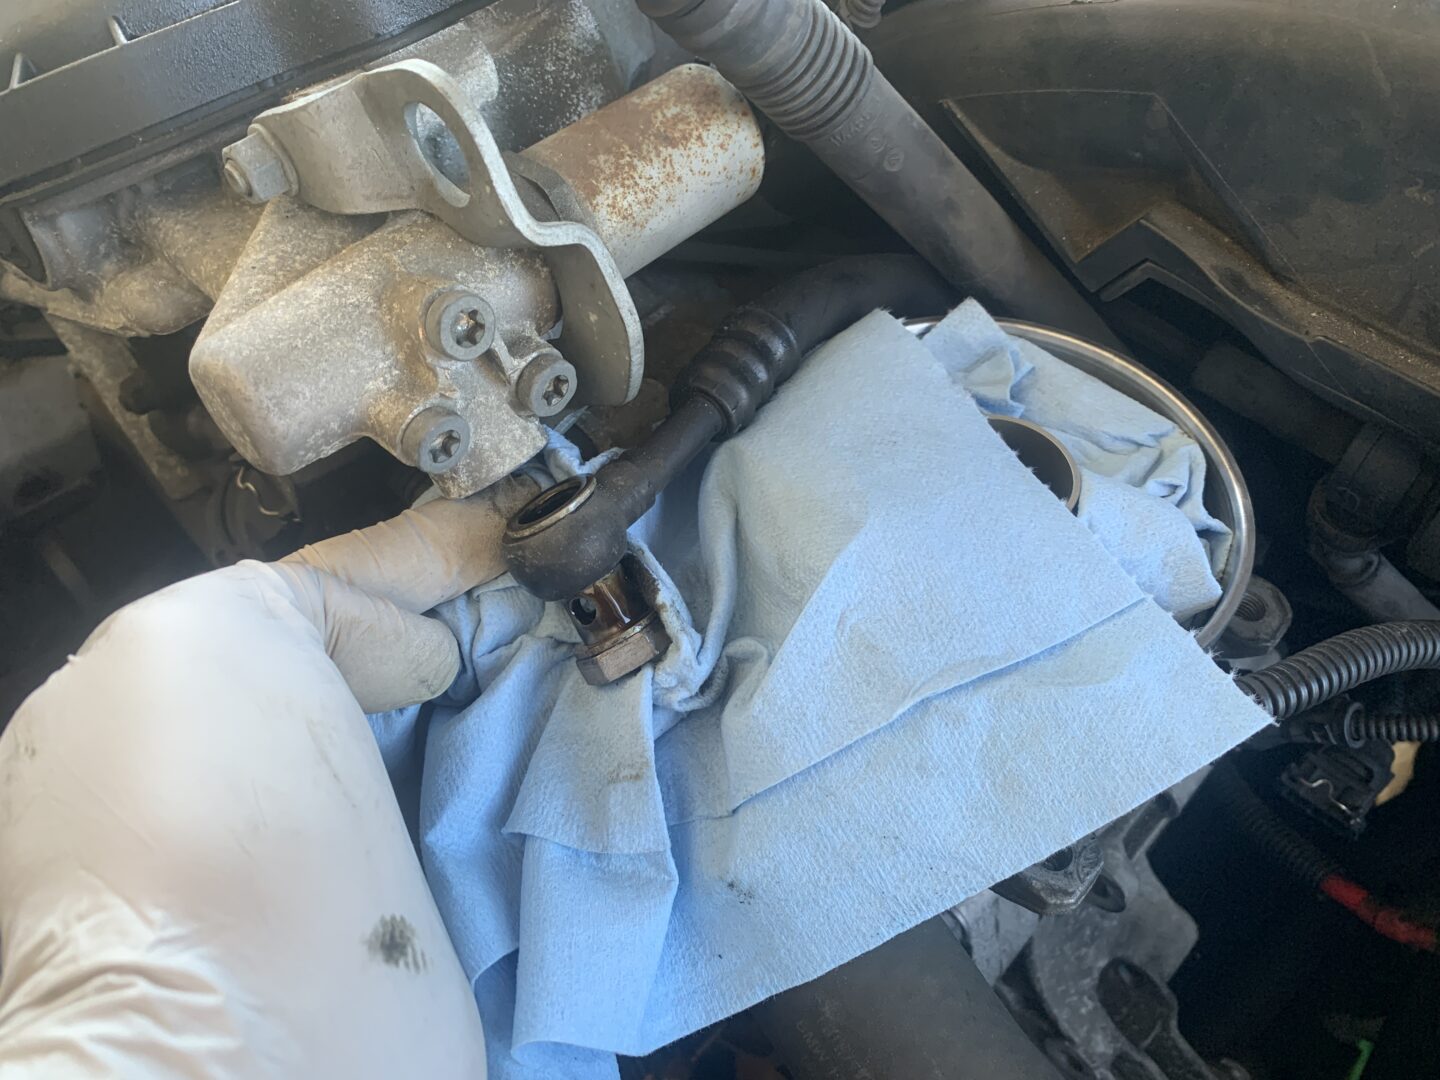
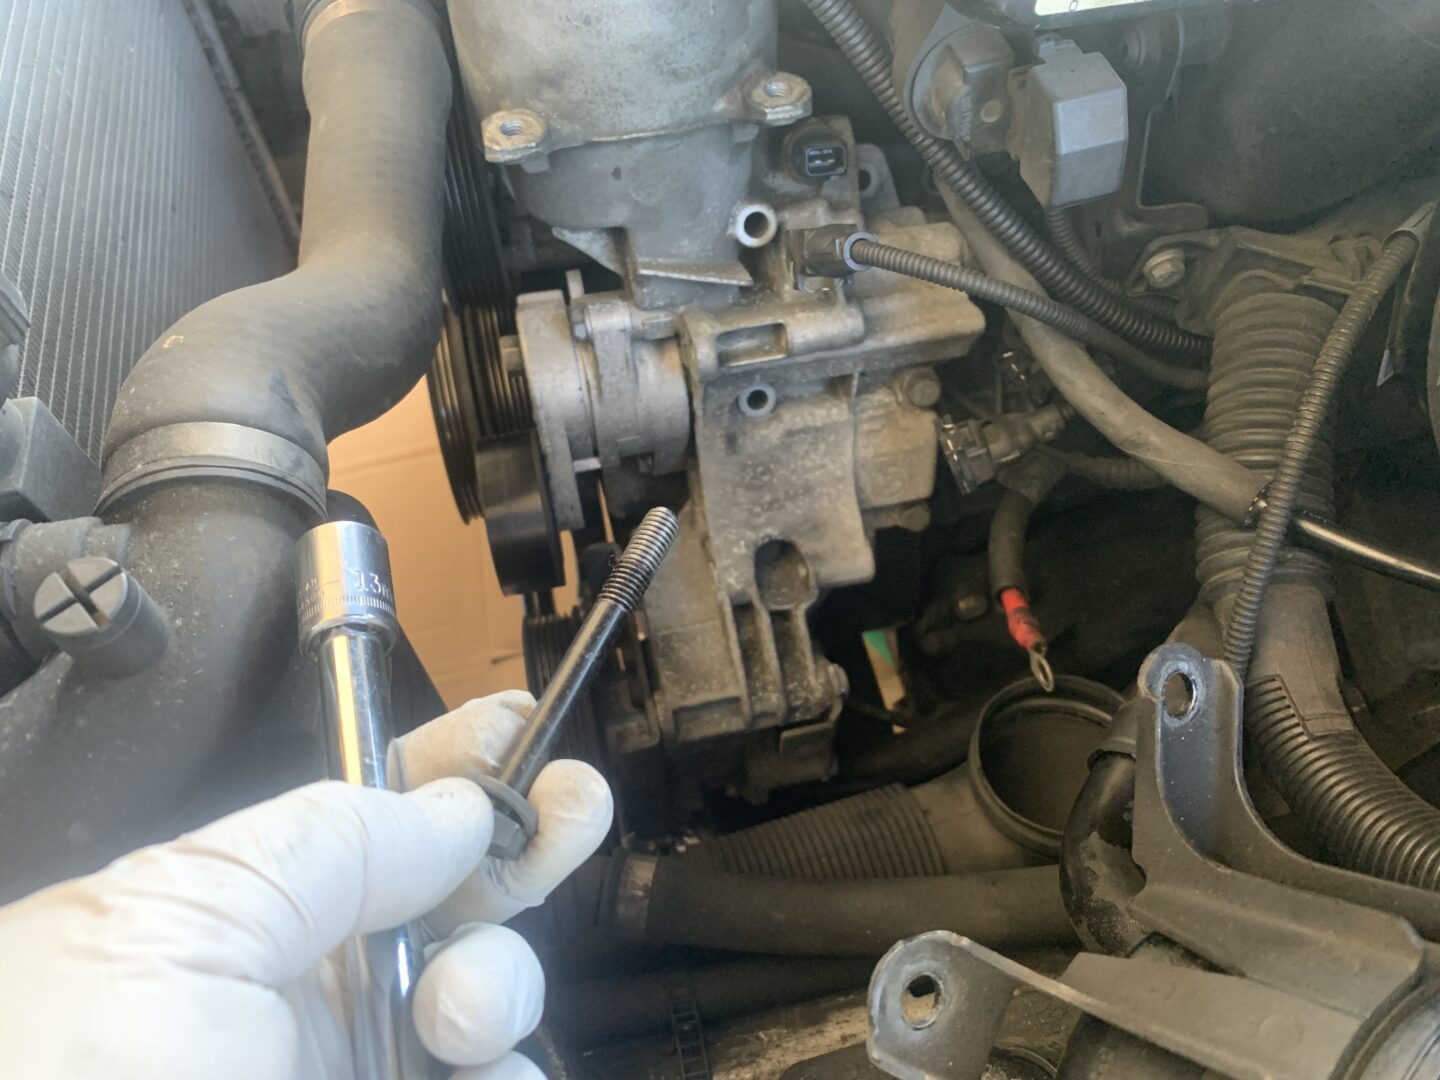
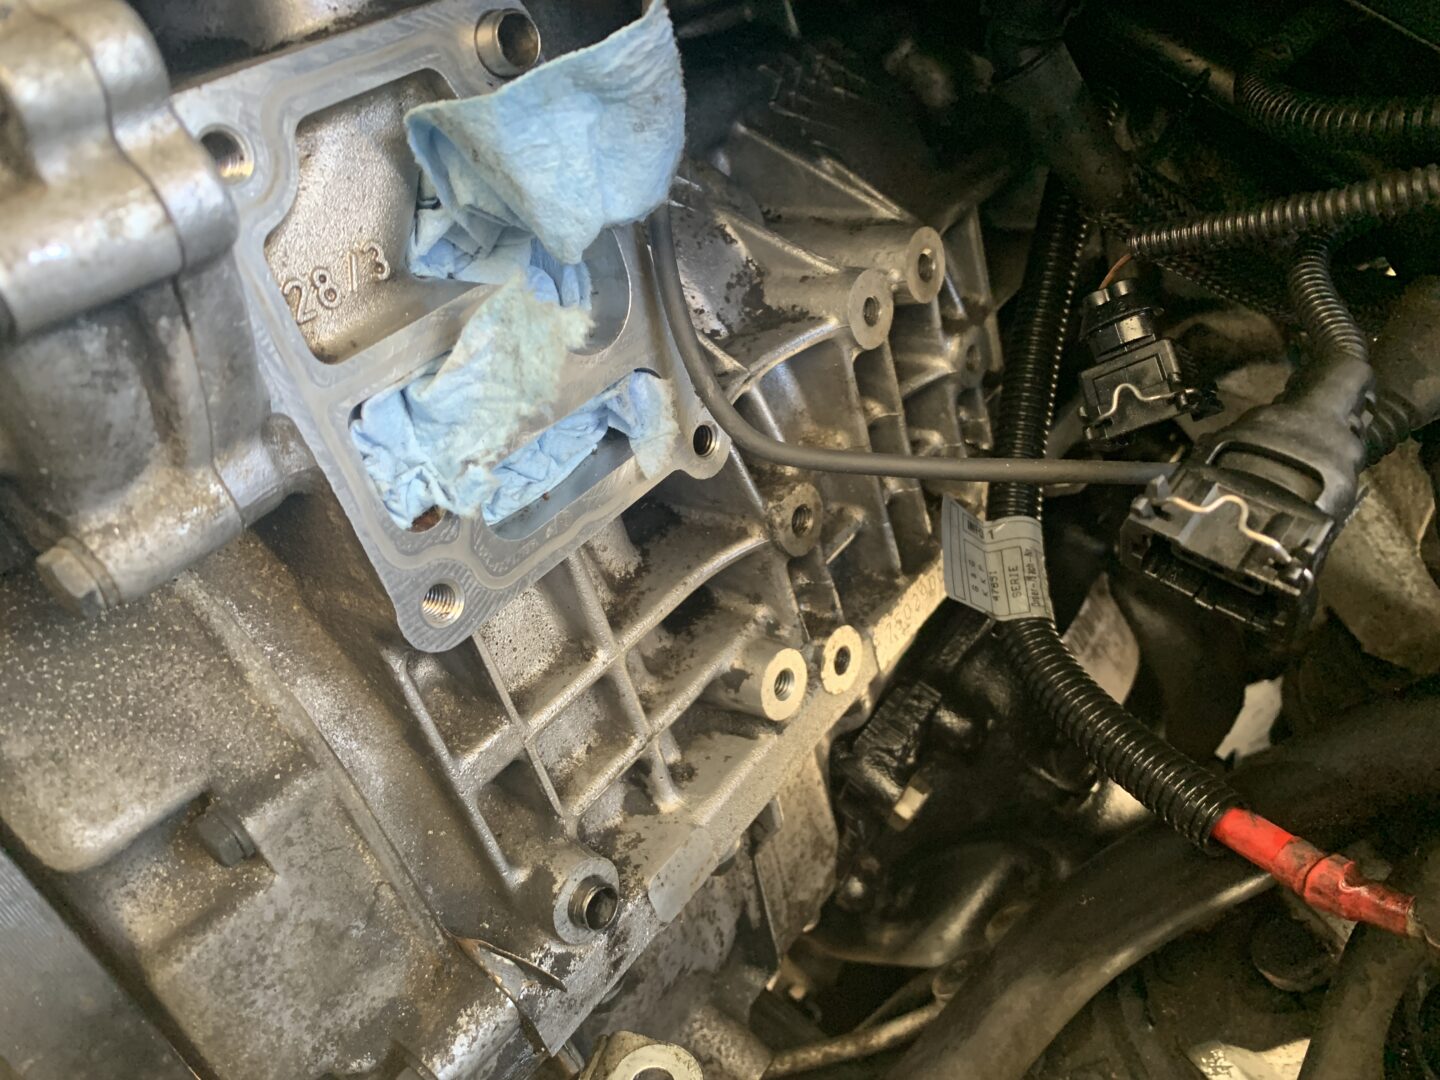
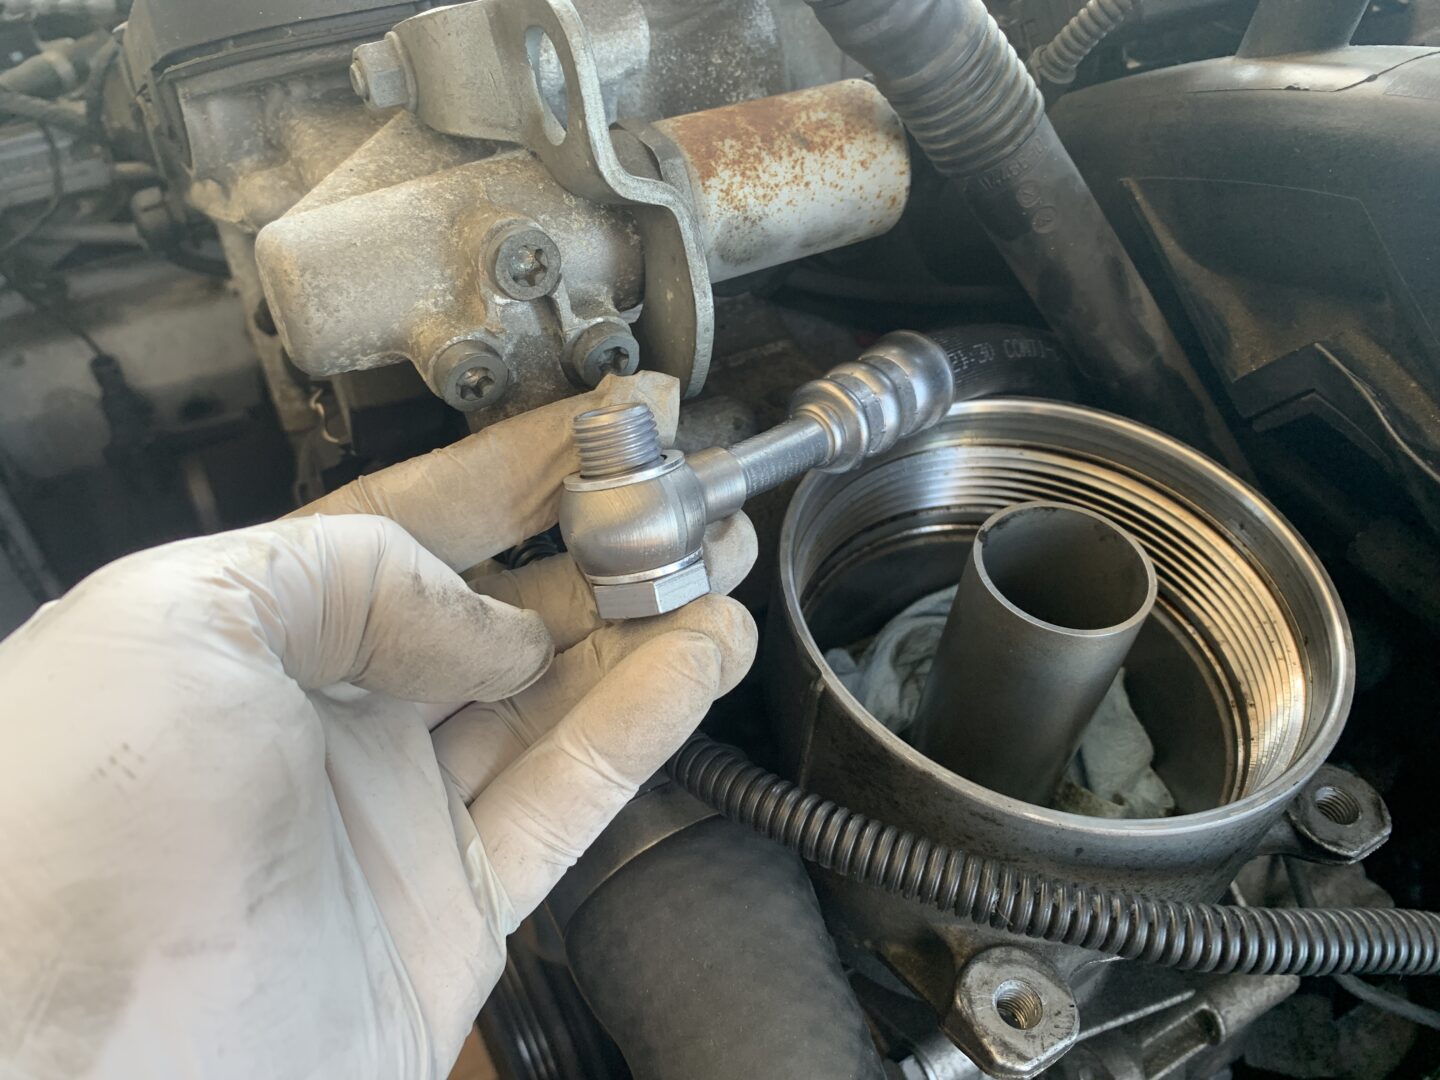
Next, put a shop towel or rag down underneath the 19mm banjo bolt from the VANOS line in case it leaks any oil during the removal. This end of the VANOS line connects to the engine block, while the other end connects to the oil filter housing (which we will remove next).

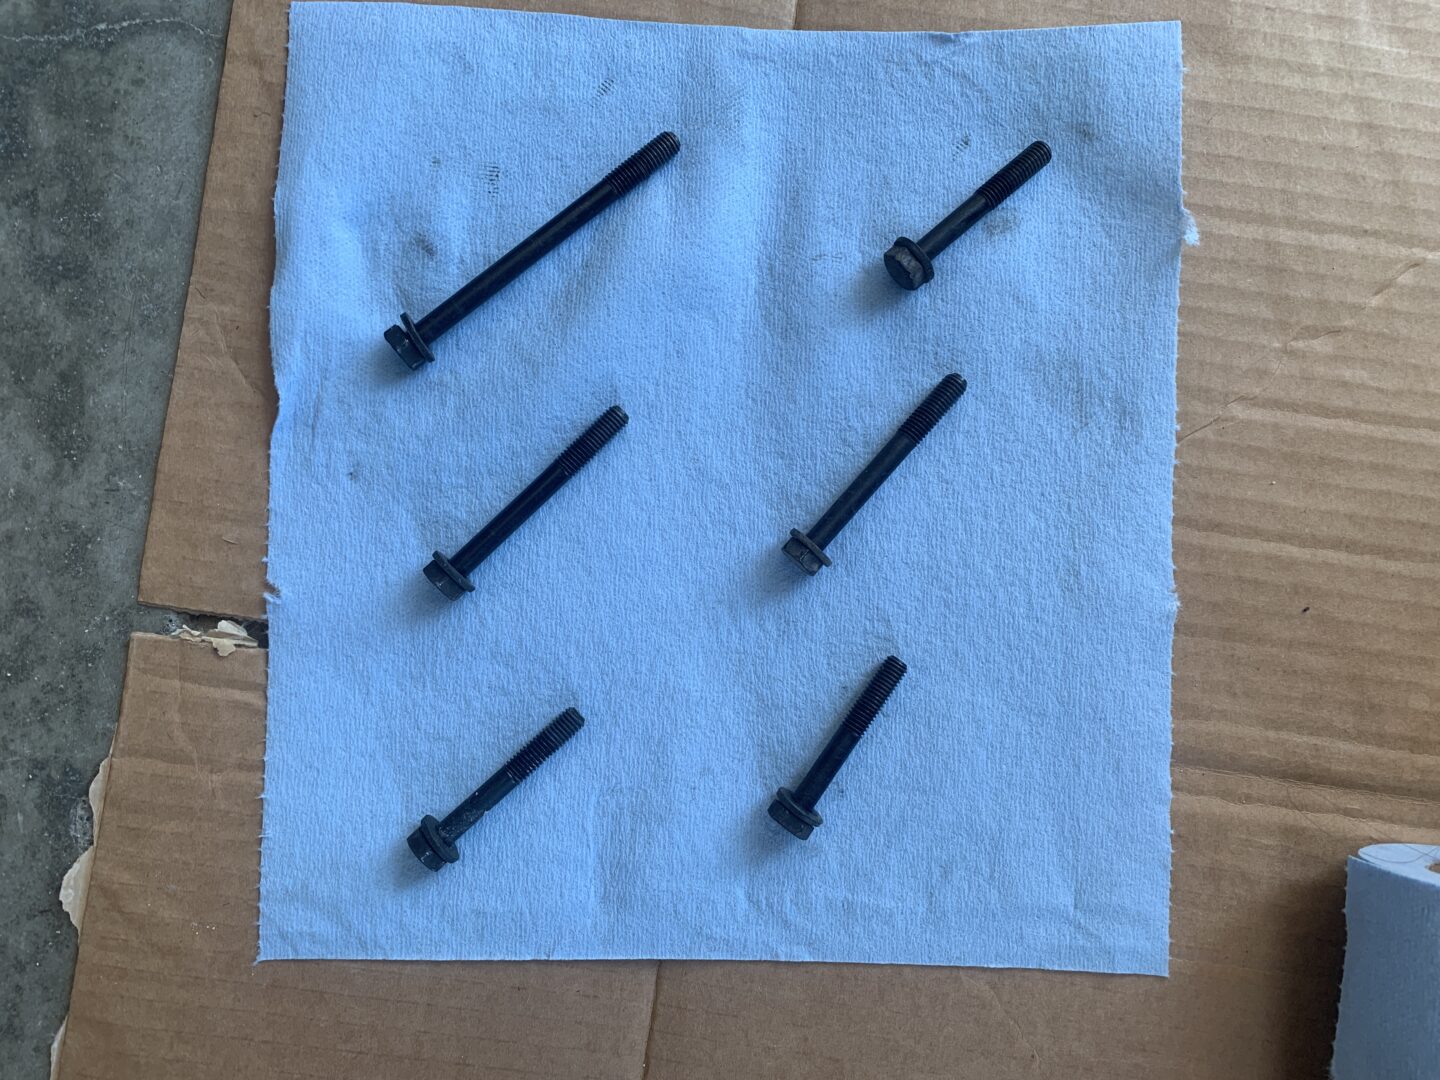
These are the (6 qty) 13mm oil filter housing bolts of various lengths that will be removed. The photo I created below shows which length bolts correspond to which location. There is one long, two medium, and three short bolts. This is a handy digram to have when reinstalling them later.
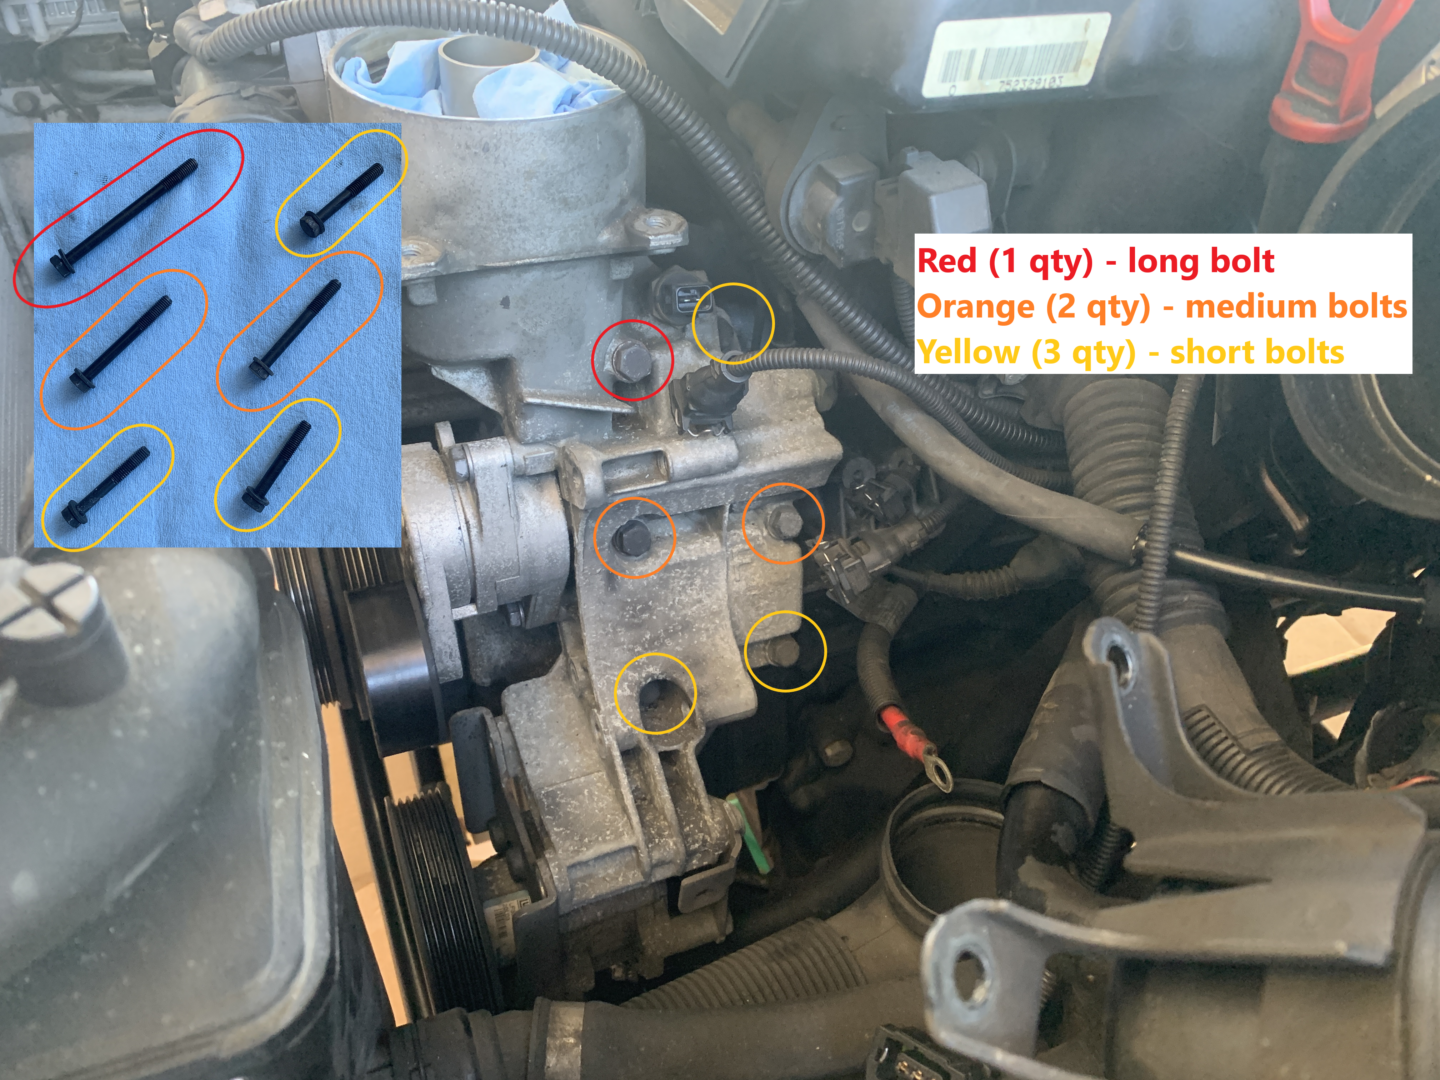
Remove the six bolts and label them so that you know how they are reinstalled later, or you can use the photo above for reference.
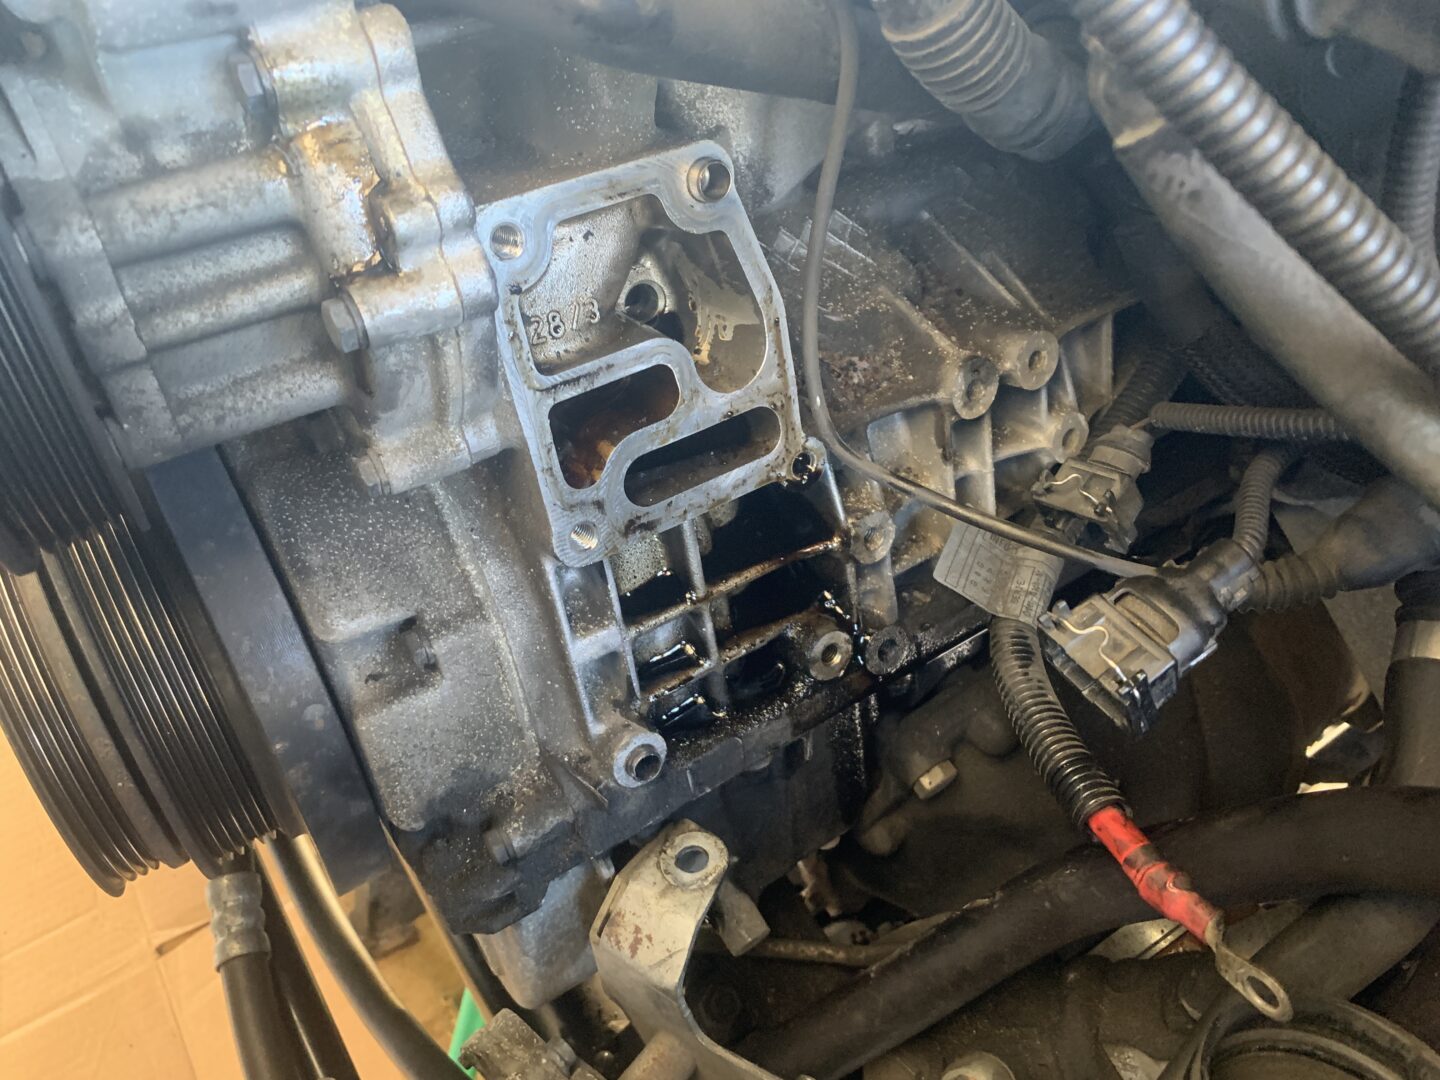
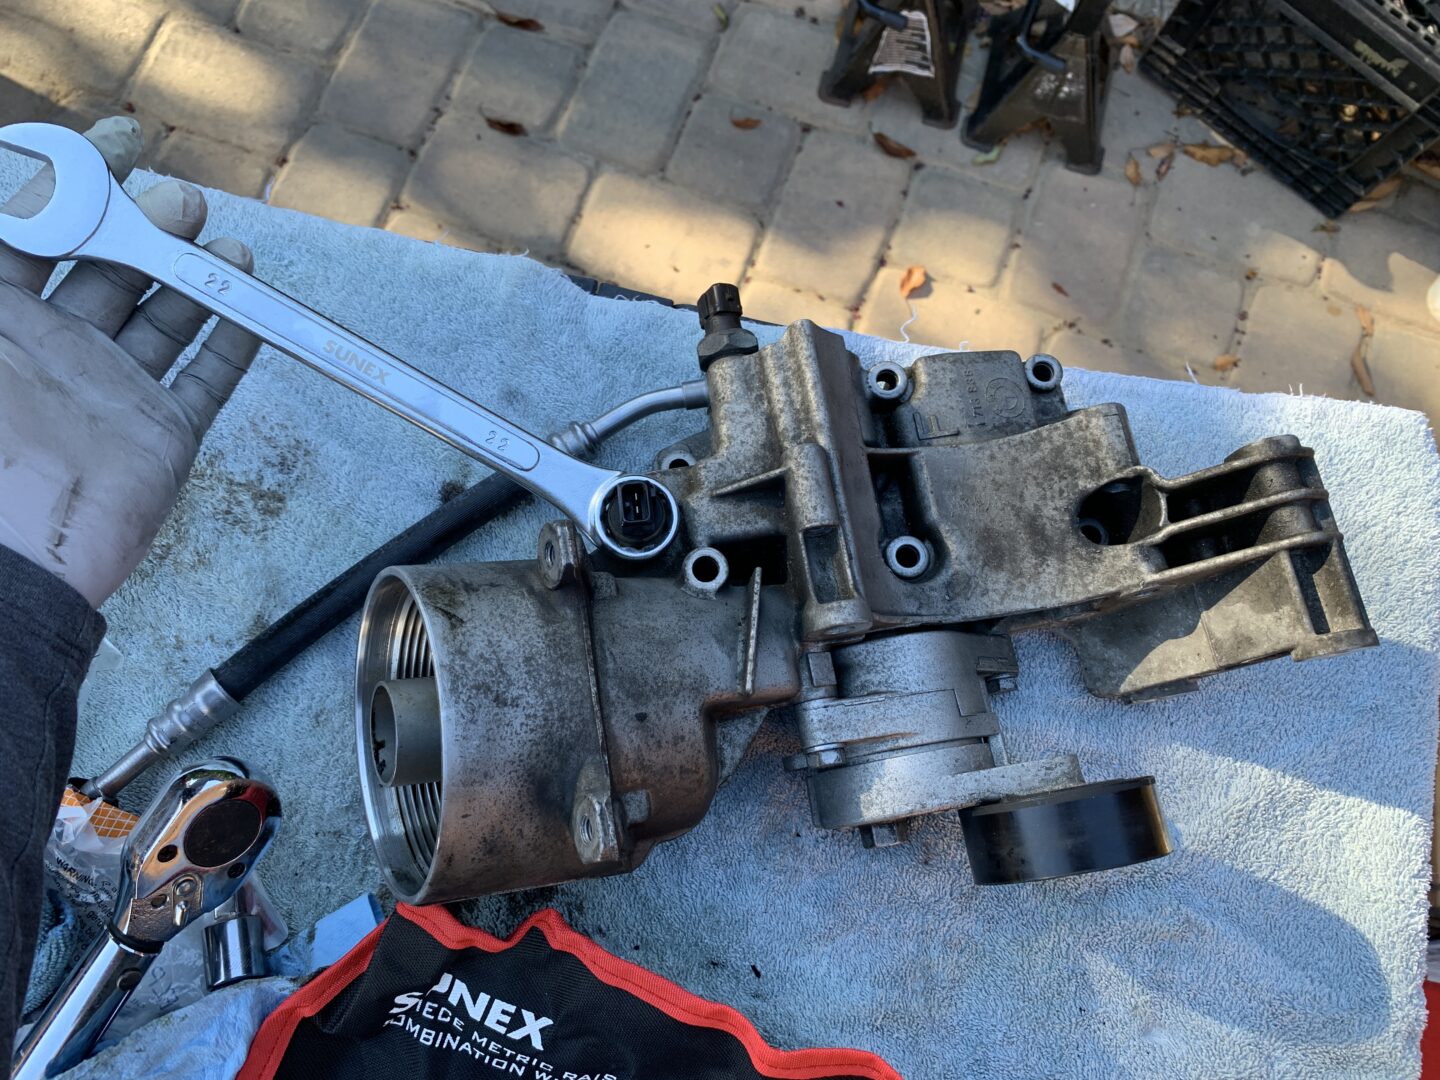
With the (6 qty) 13mm bolts removed, you can separate the oil filter housing from the engine block. You might need to tap it with a rubber mallet to break it loose.
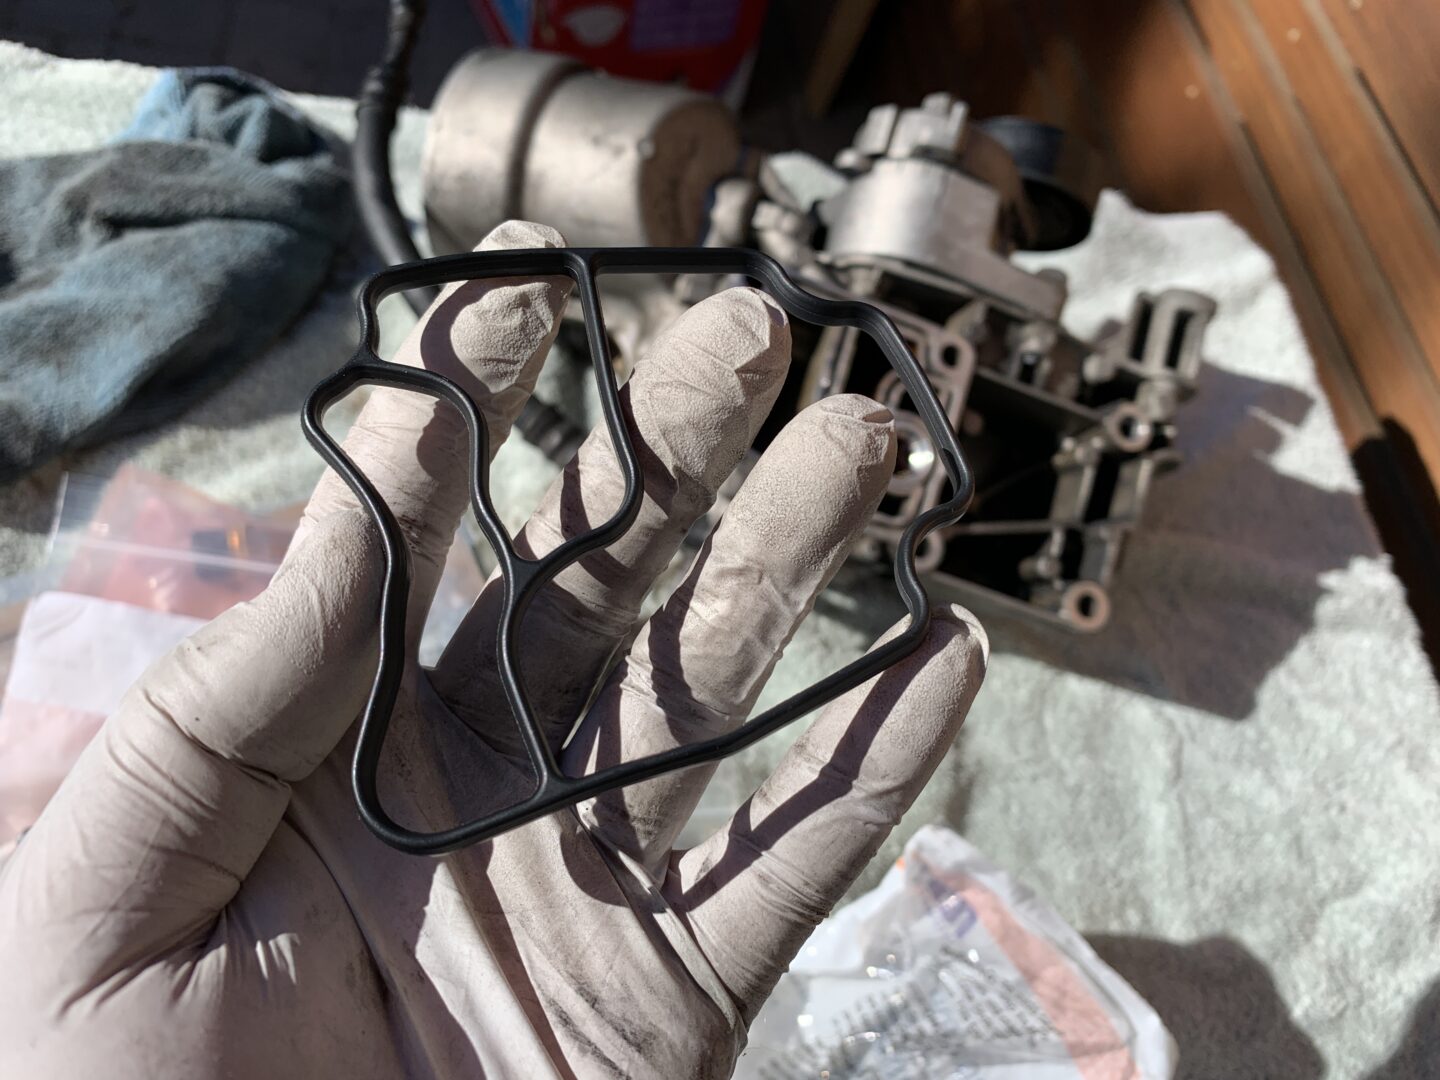
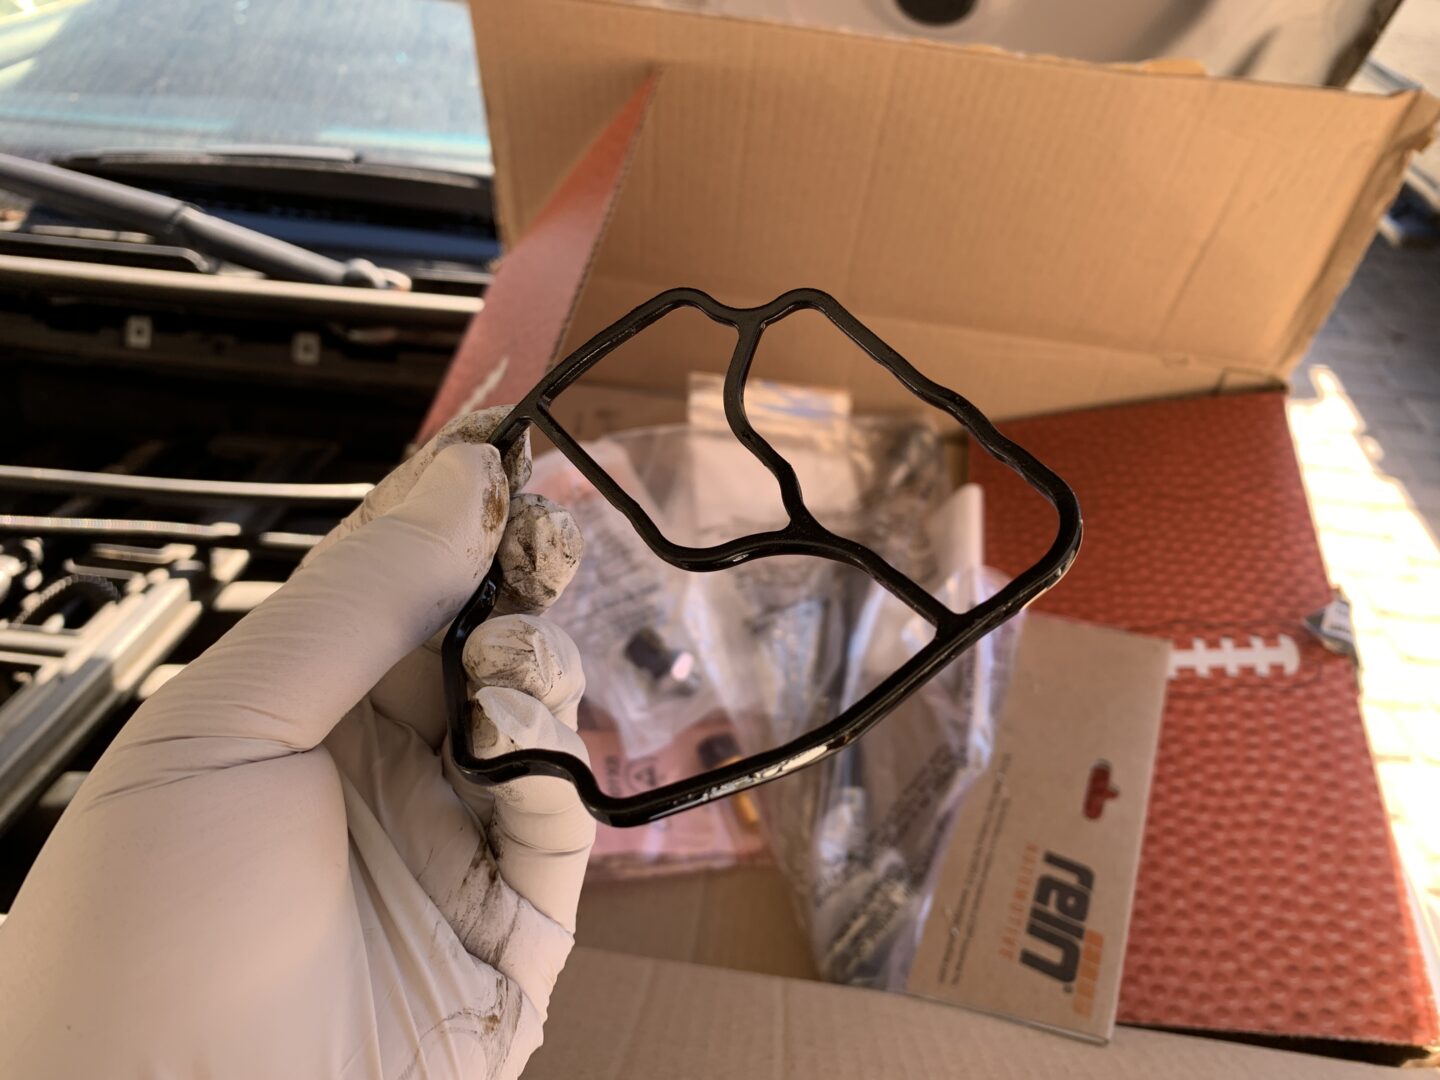
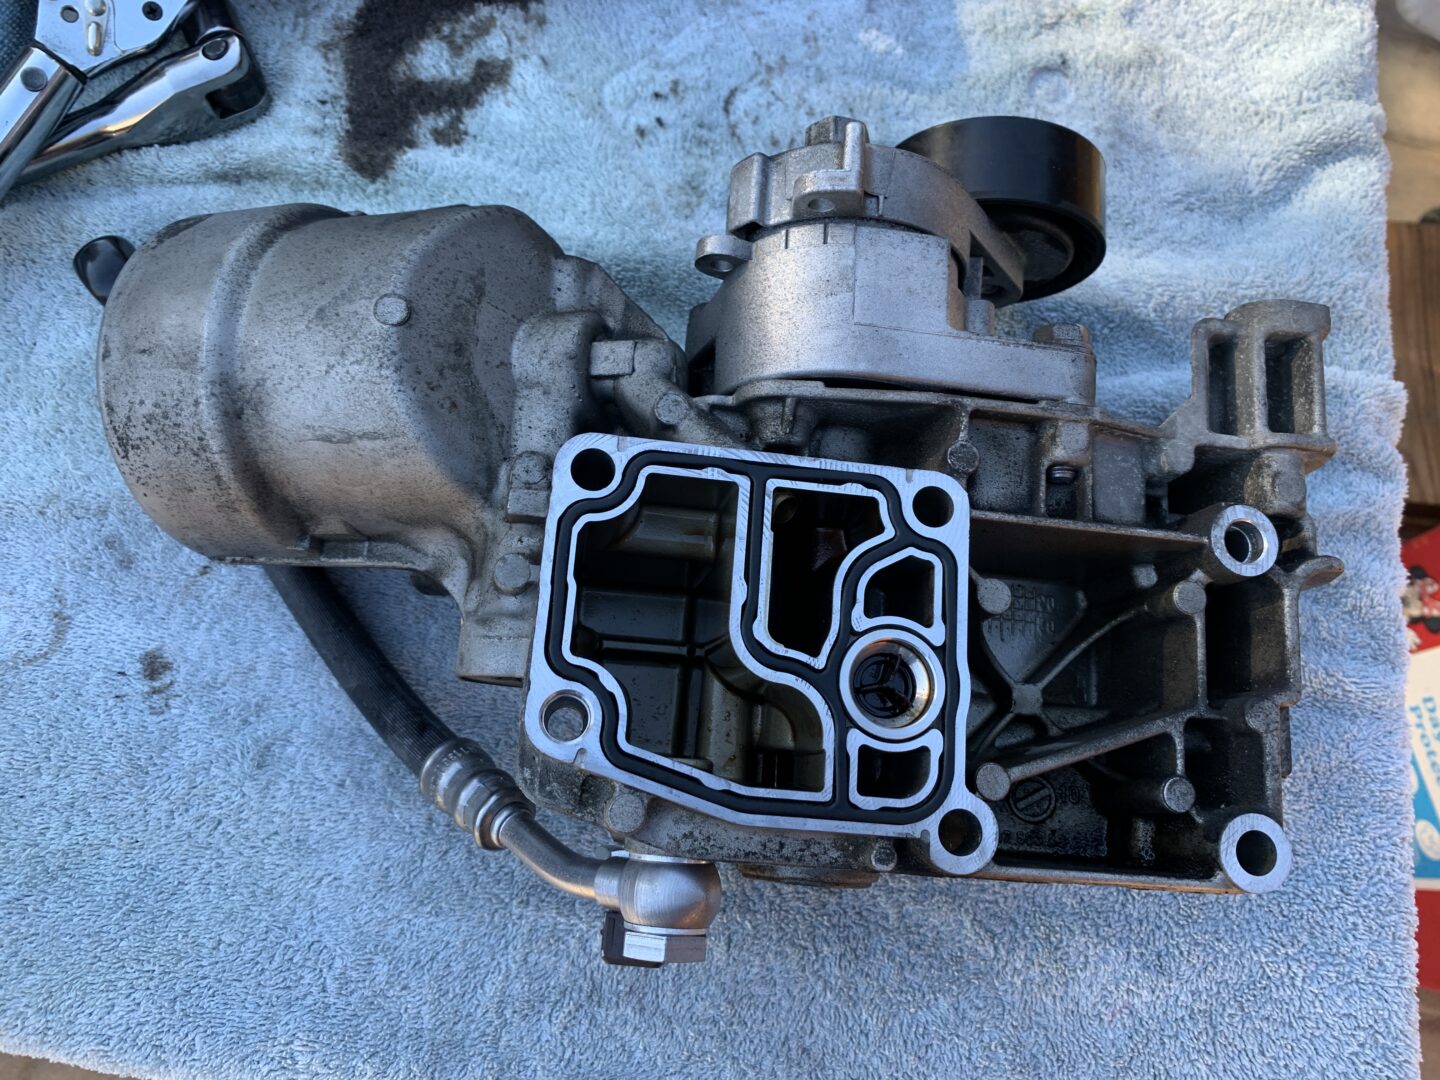
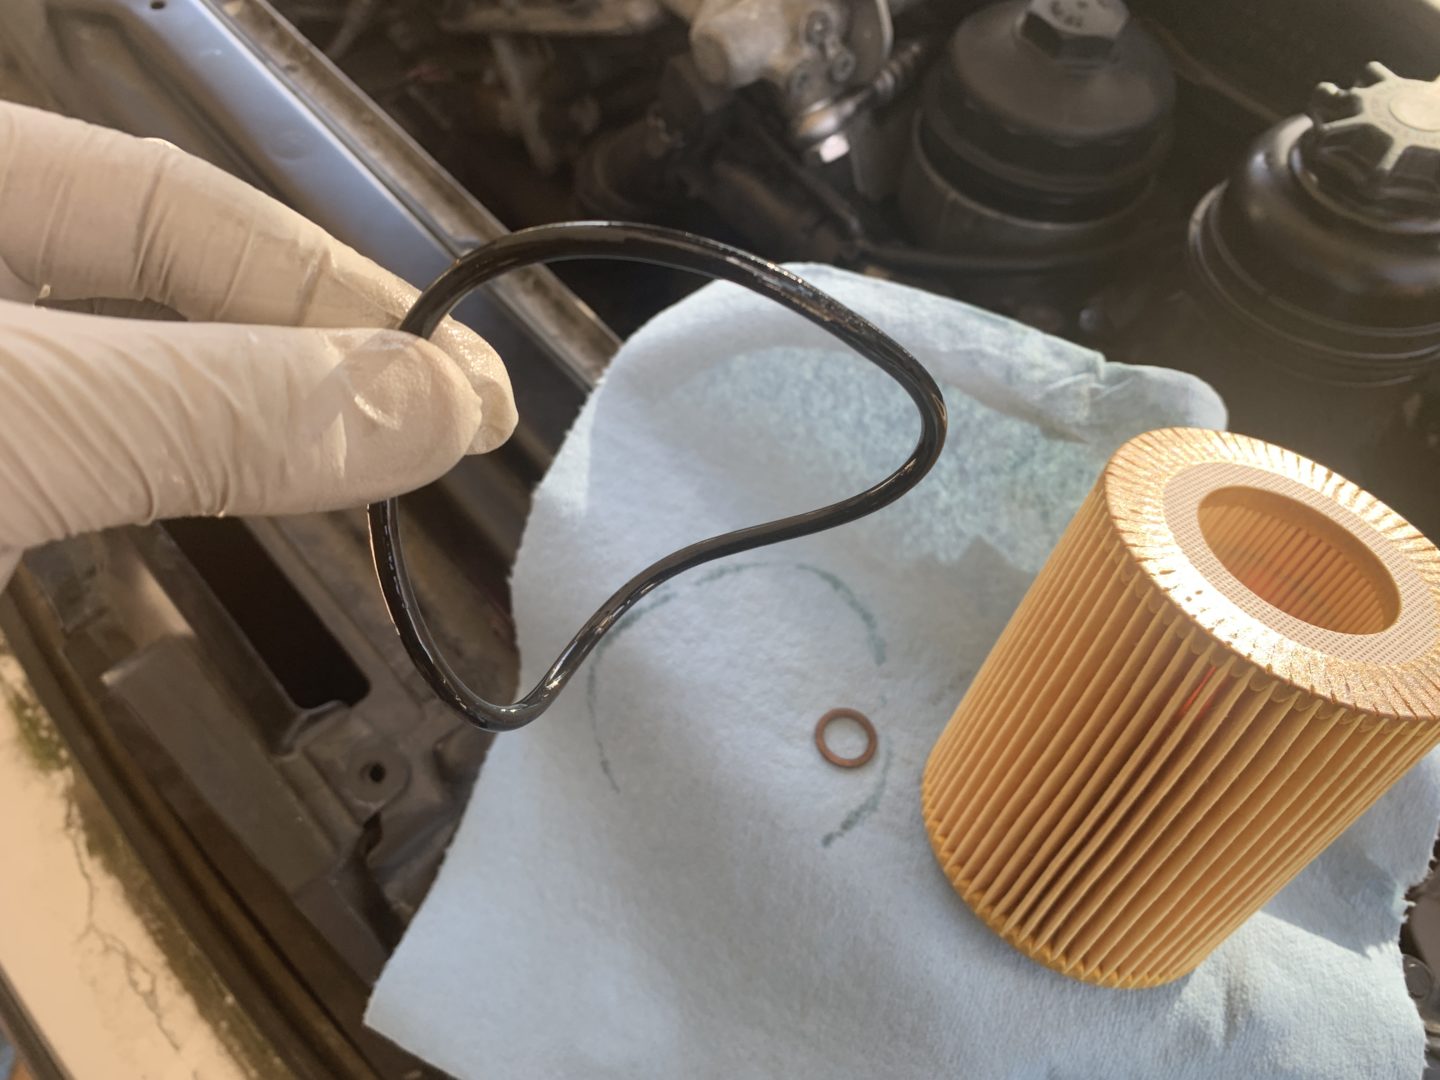
Once you pull the housing off, you can see the oil filter housing gasket and evaluate its condition. You can check out the area underneath the oil filter housing where all of the oil that may have been leaking from your gasket would have ended up.
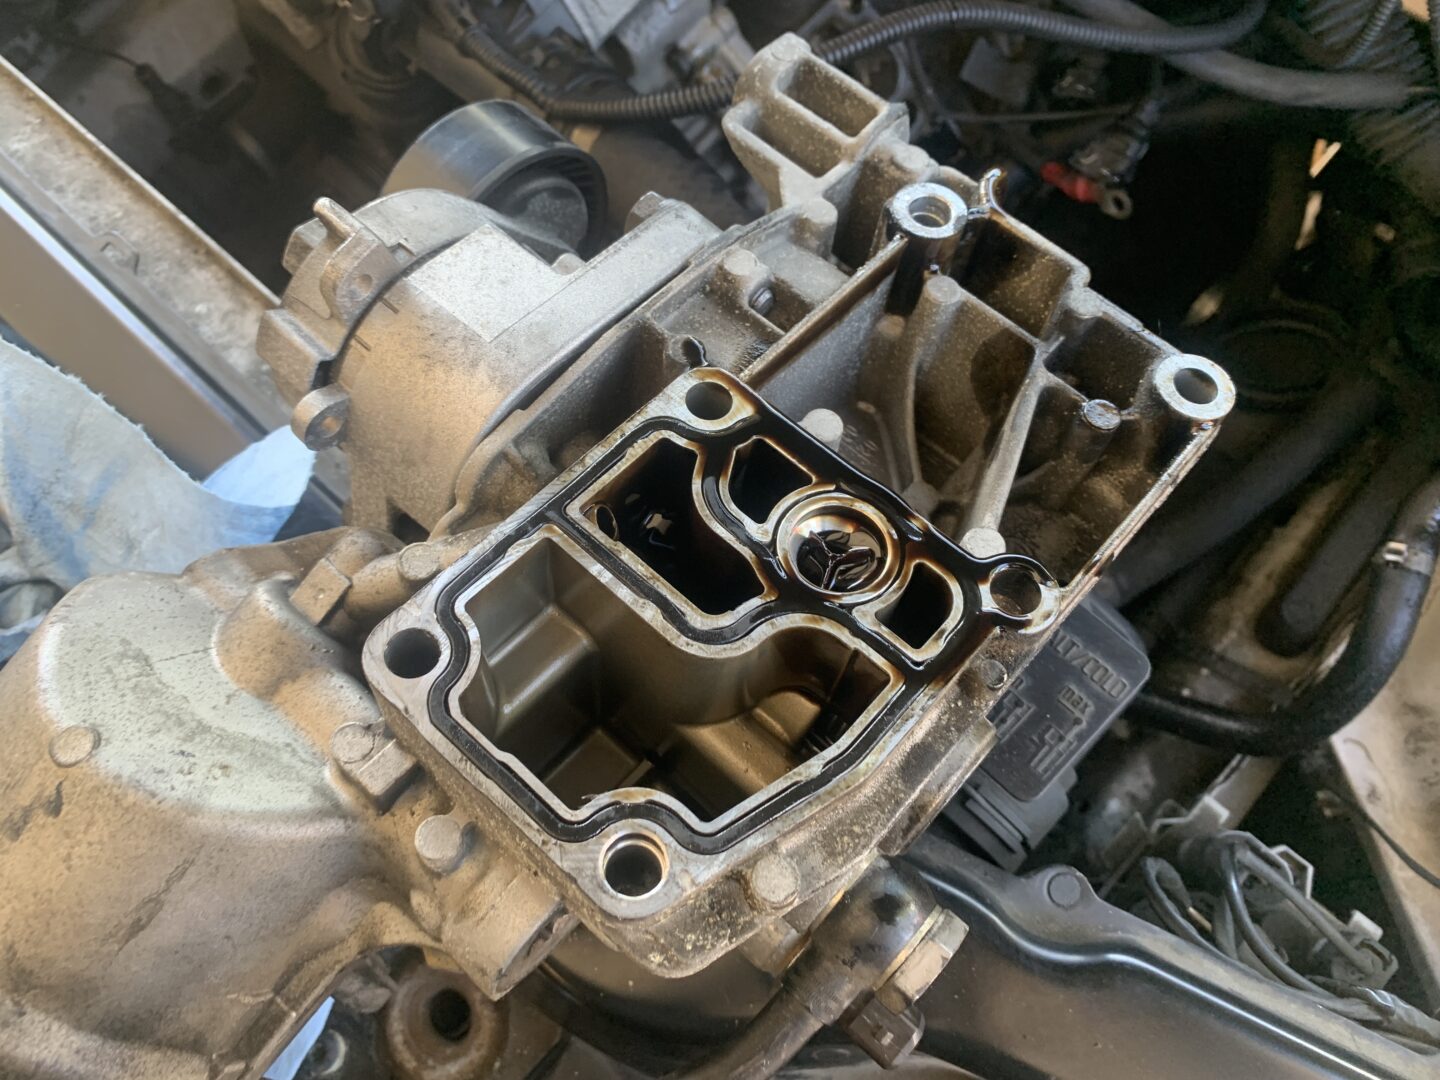
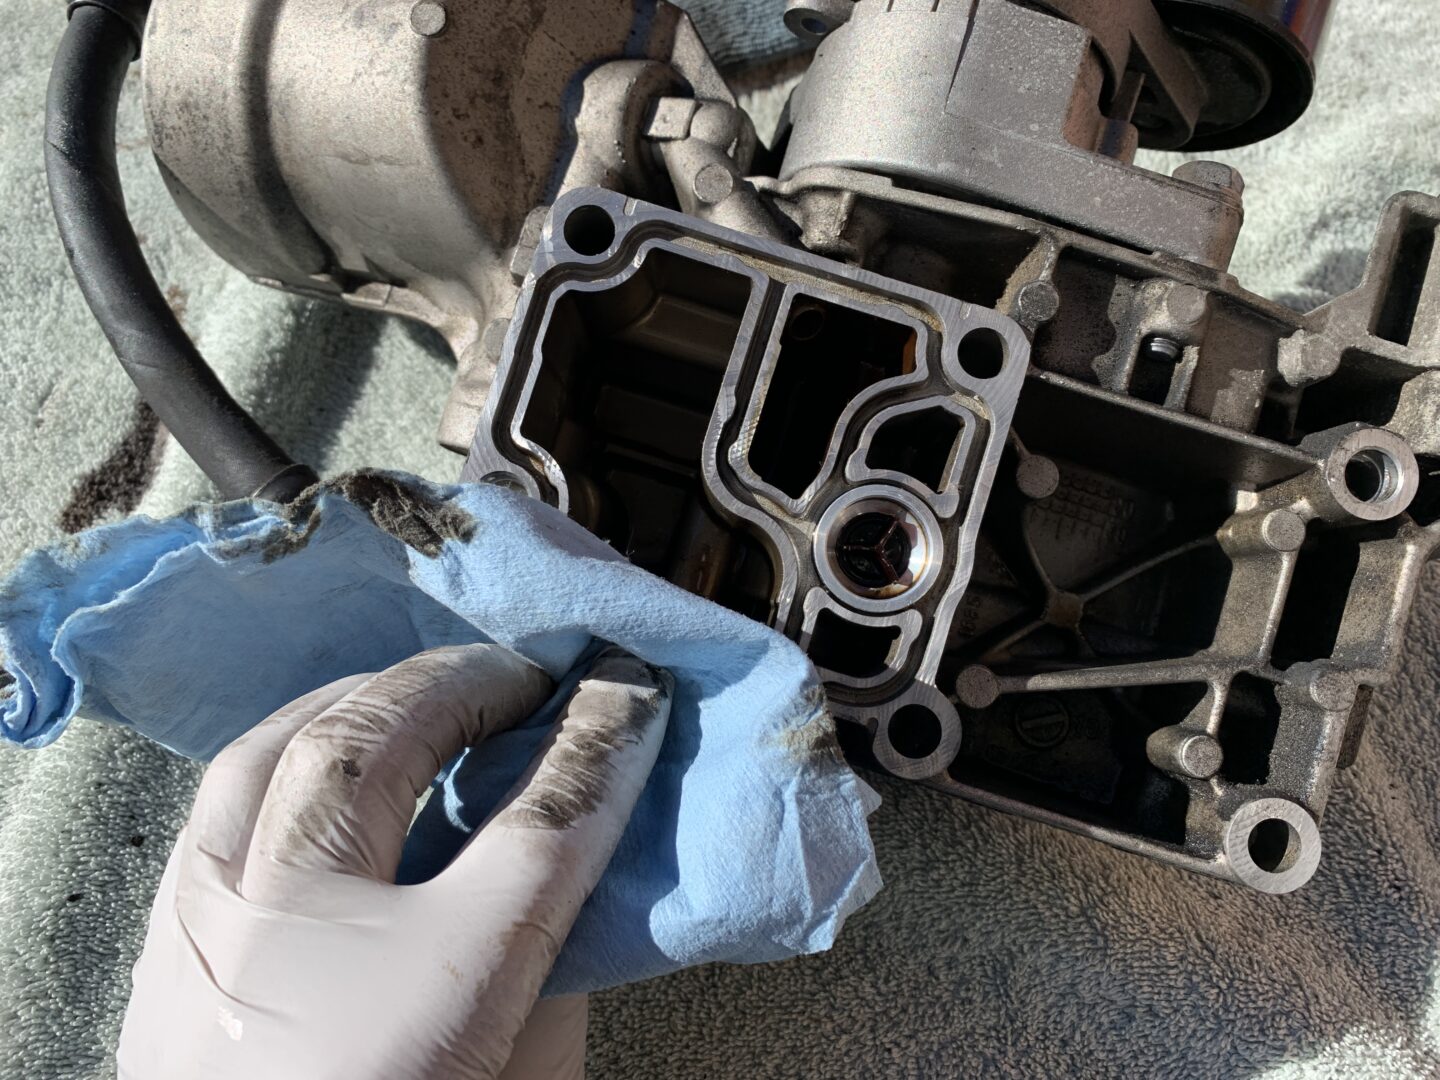
At this point, I like to use some degreaser and brake cleaner to clean up the area of oil. Shop towels work great for blocking the oil filter housing openings, but they are great for cleaning up the mess as well.

Back at the oil filter housing, remove the old gasket and clean the groove that the gasket sits inside of. Also, clean the surface where the oil filter housing meets the engine block. Take your new oil filter housing gasket and place it inside the groove.
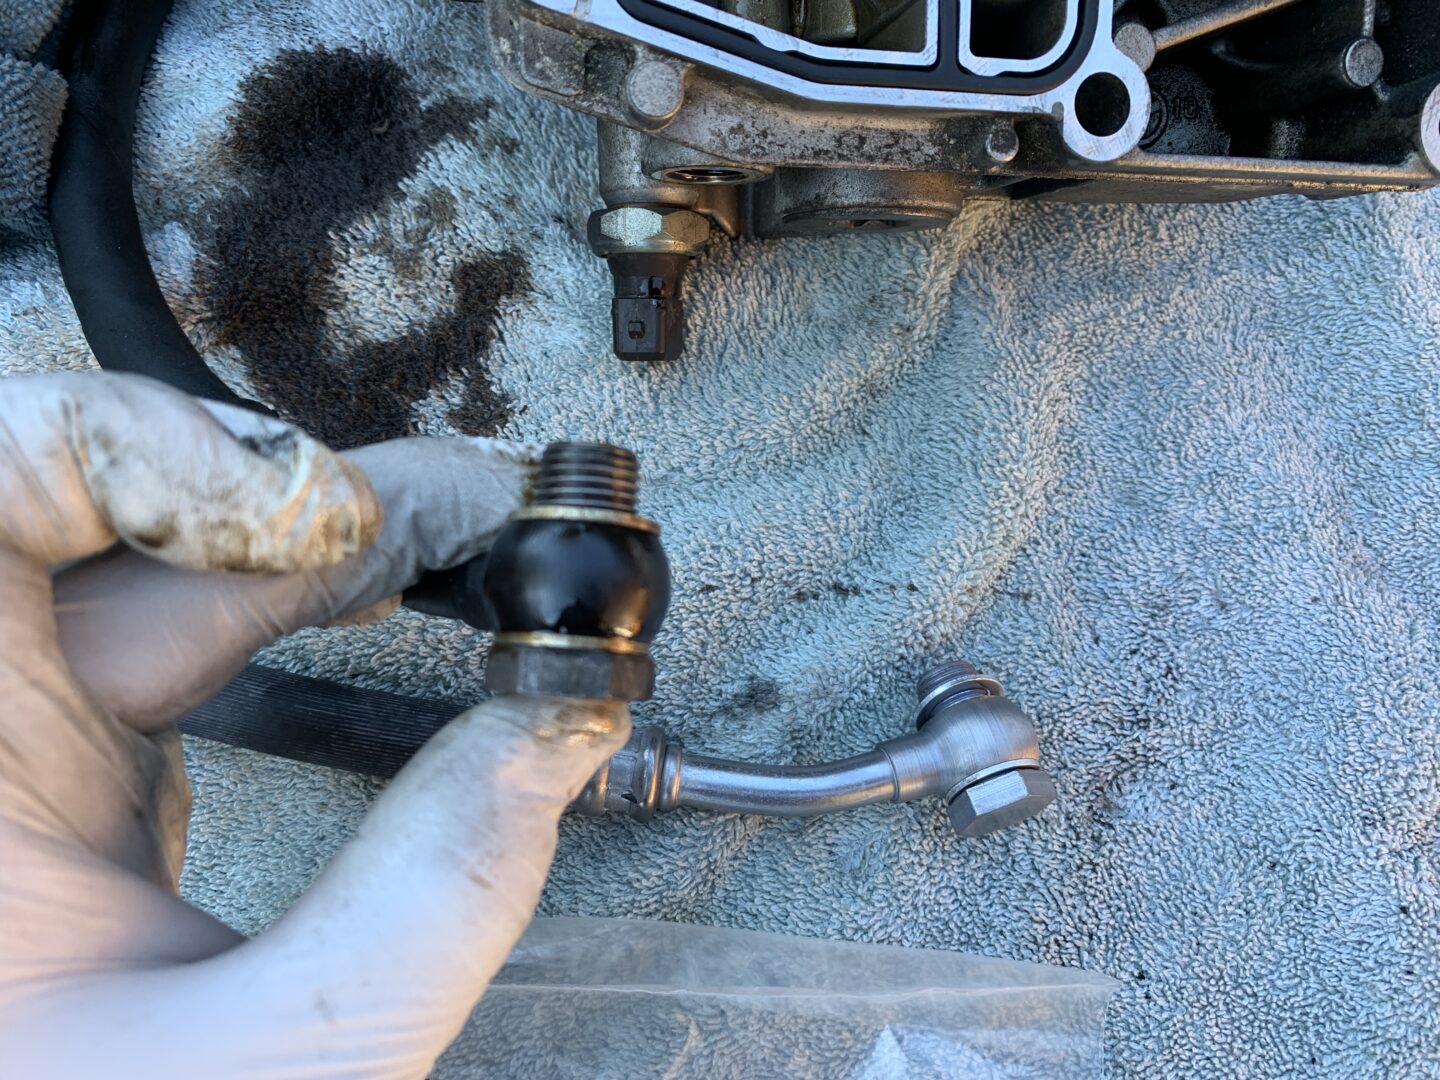
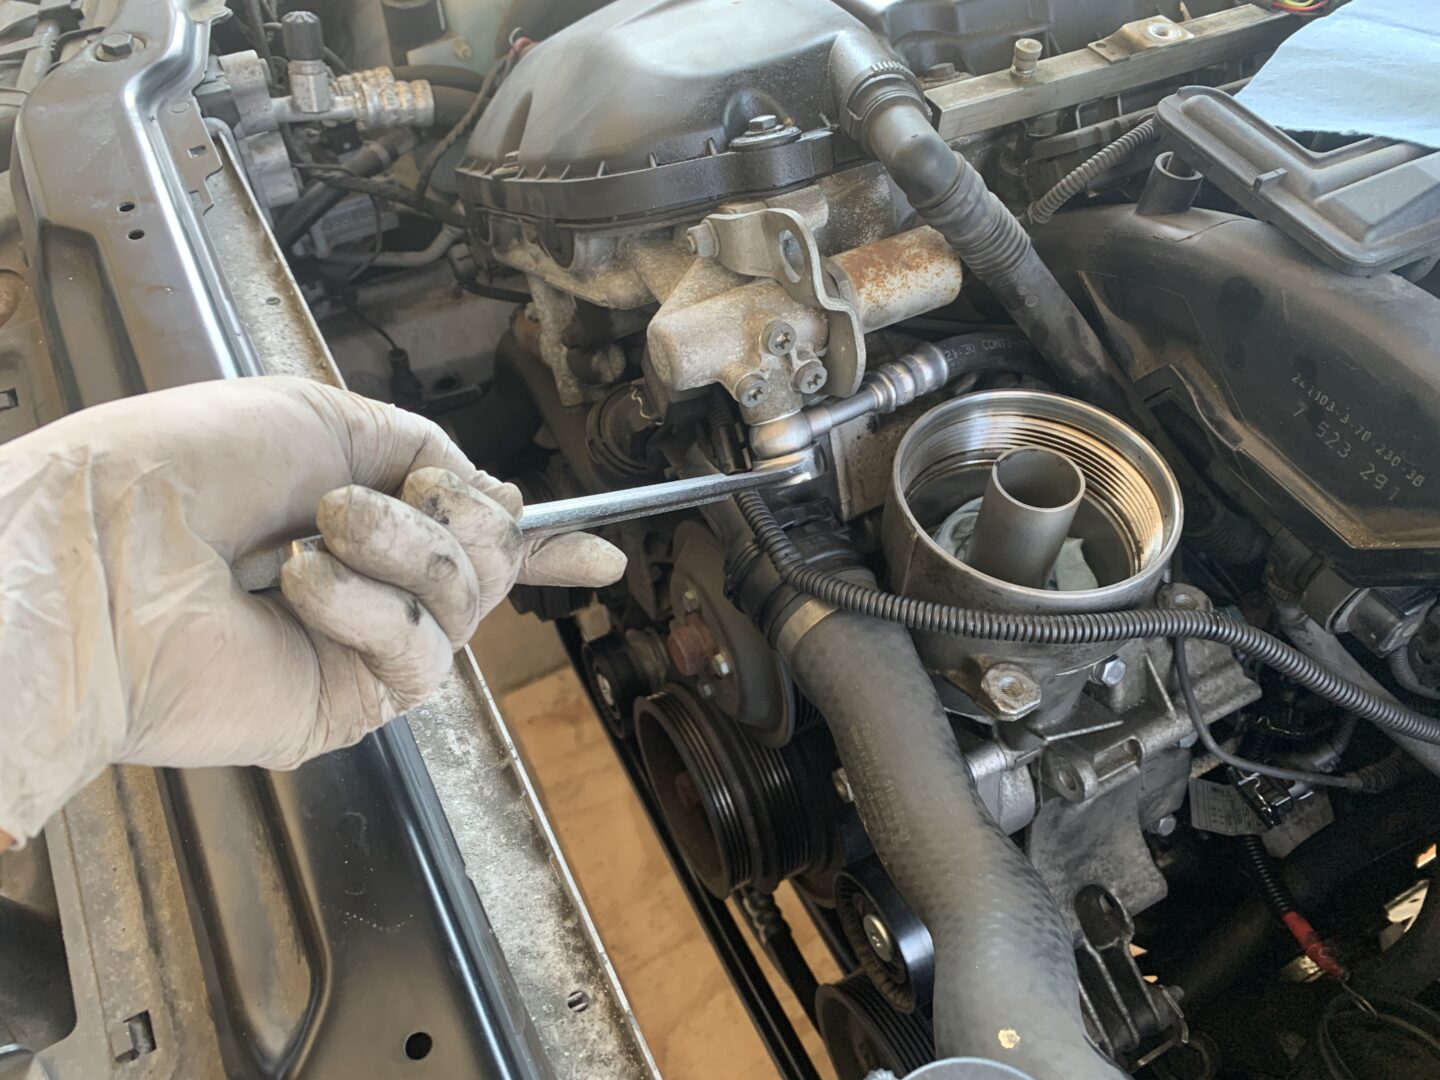
With the oil filter housing assembly on the workbench, use a 19mm wrench to remove the other side of the VANOS line that connects to the oil filter housing assembly. Keep note of how the banjo bolt and washers connect to the VANOS line and oilf filter housing. Connect the new VANOS line assembly in the same orientation as the old one. The housing-side of the VANOS line has more of a bend than the other end.
At this time, we will just hand-tighten, but we won’t torque down the bolt as we need the ability to rotate the VANOS line when we’re reinstalling the oil filter housing back in the car.
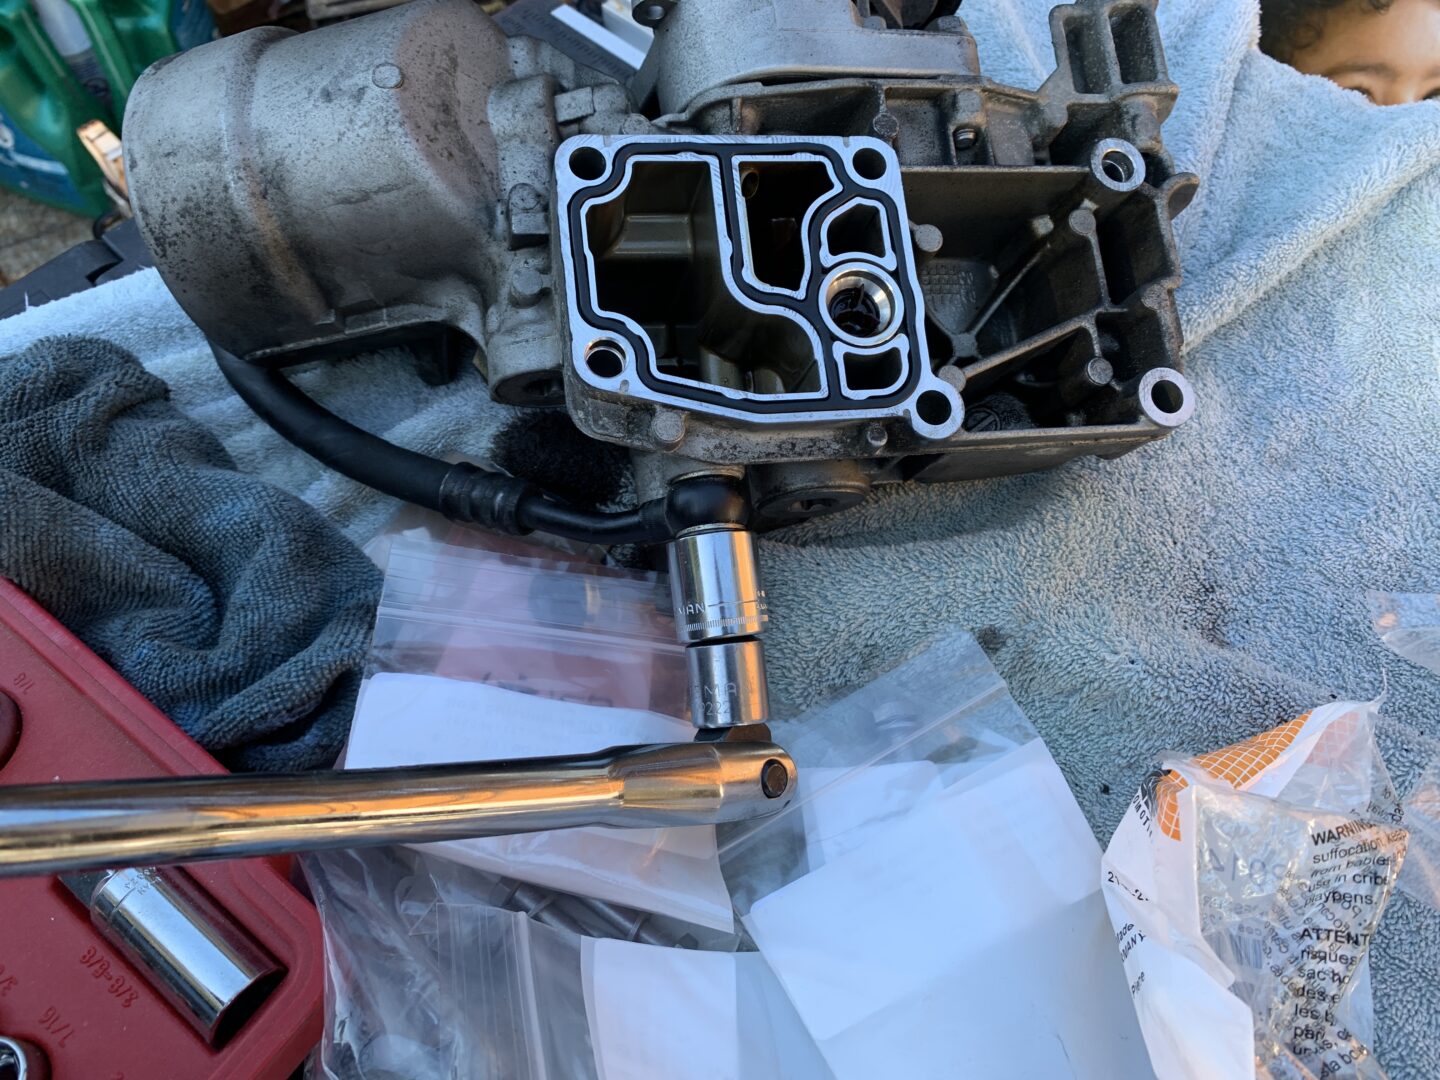
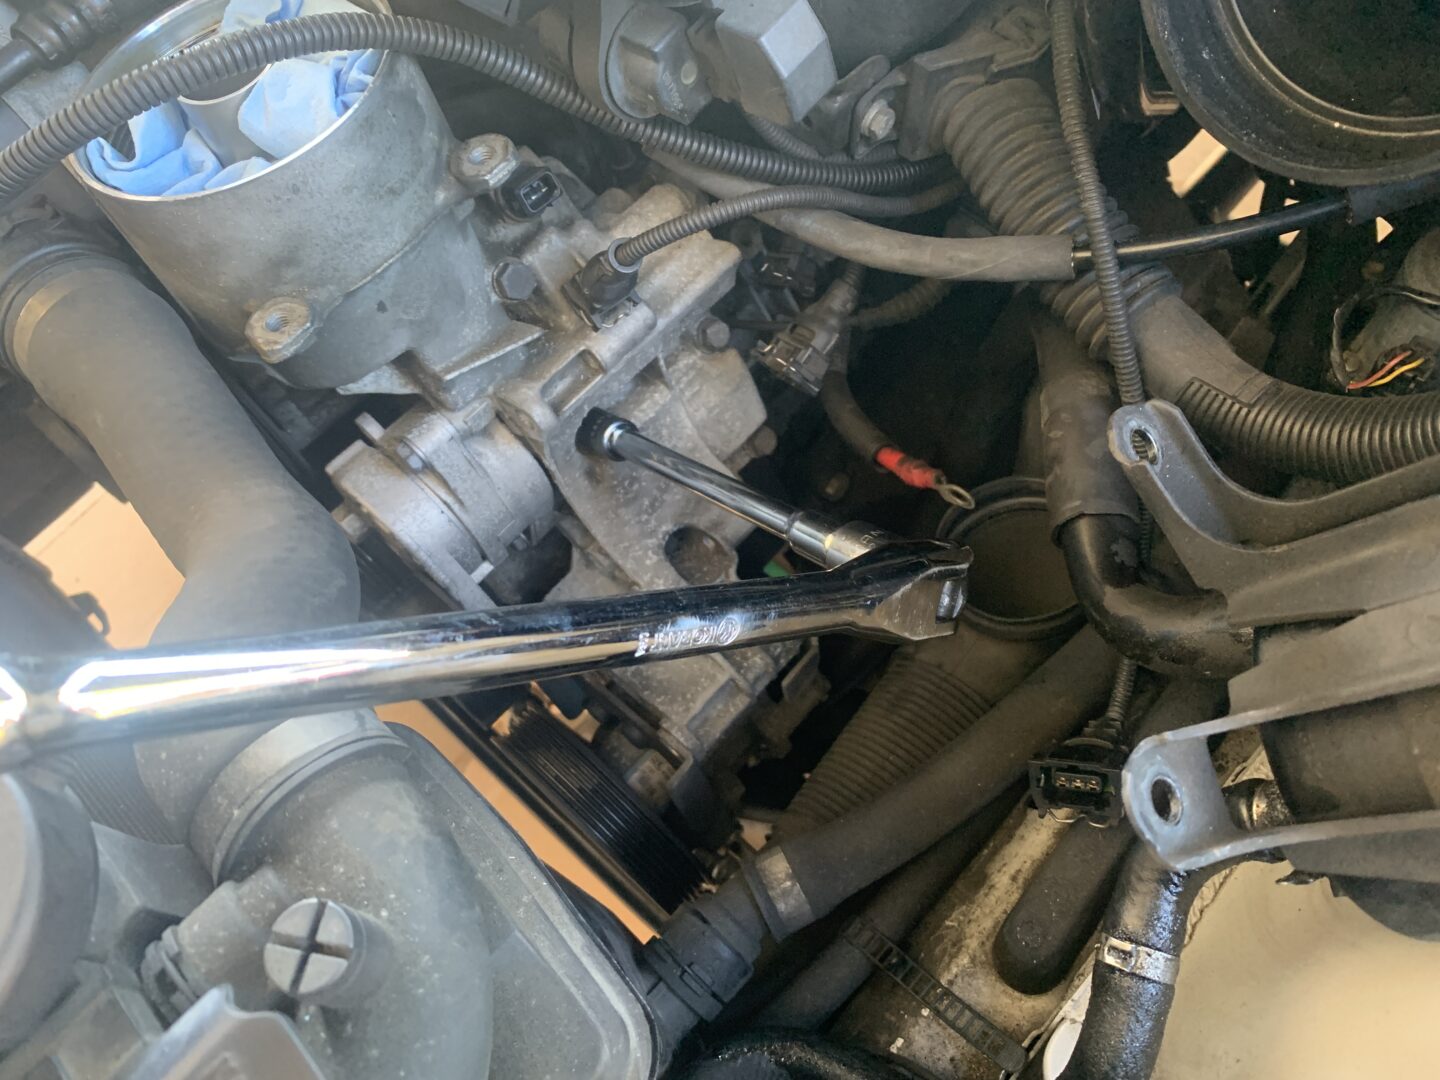
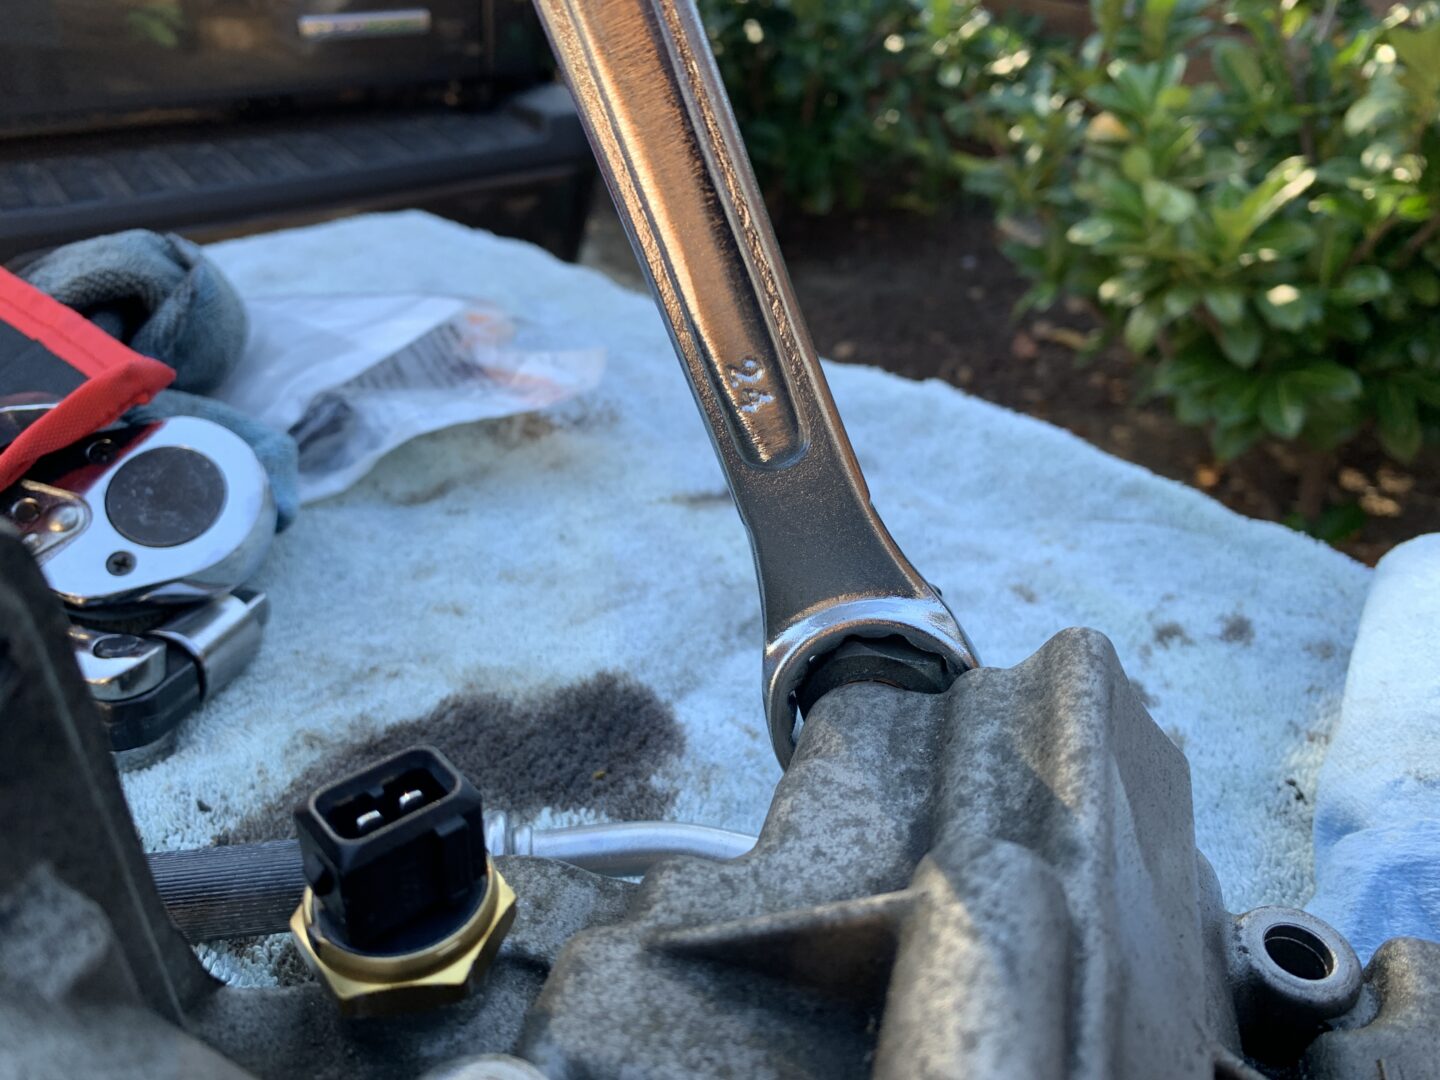
Proceed to change out the coolant temperature sensor with a 22mm wrench and the oil pressure switch with a 24mm wrench. The new sensor and switch should be installed snug.

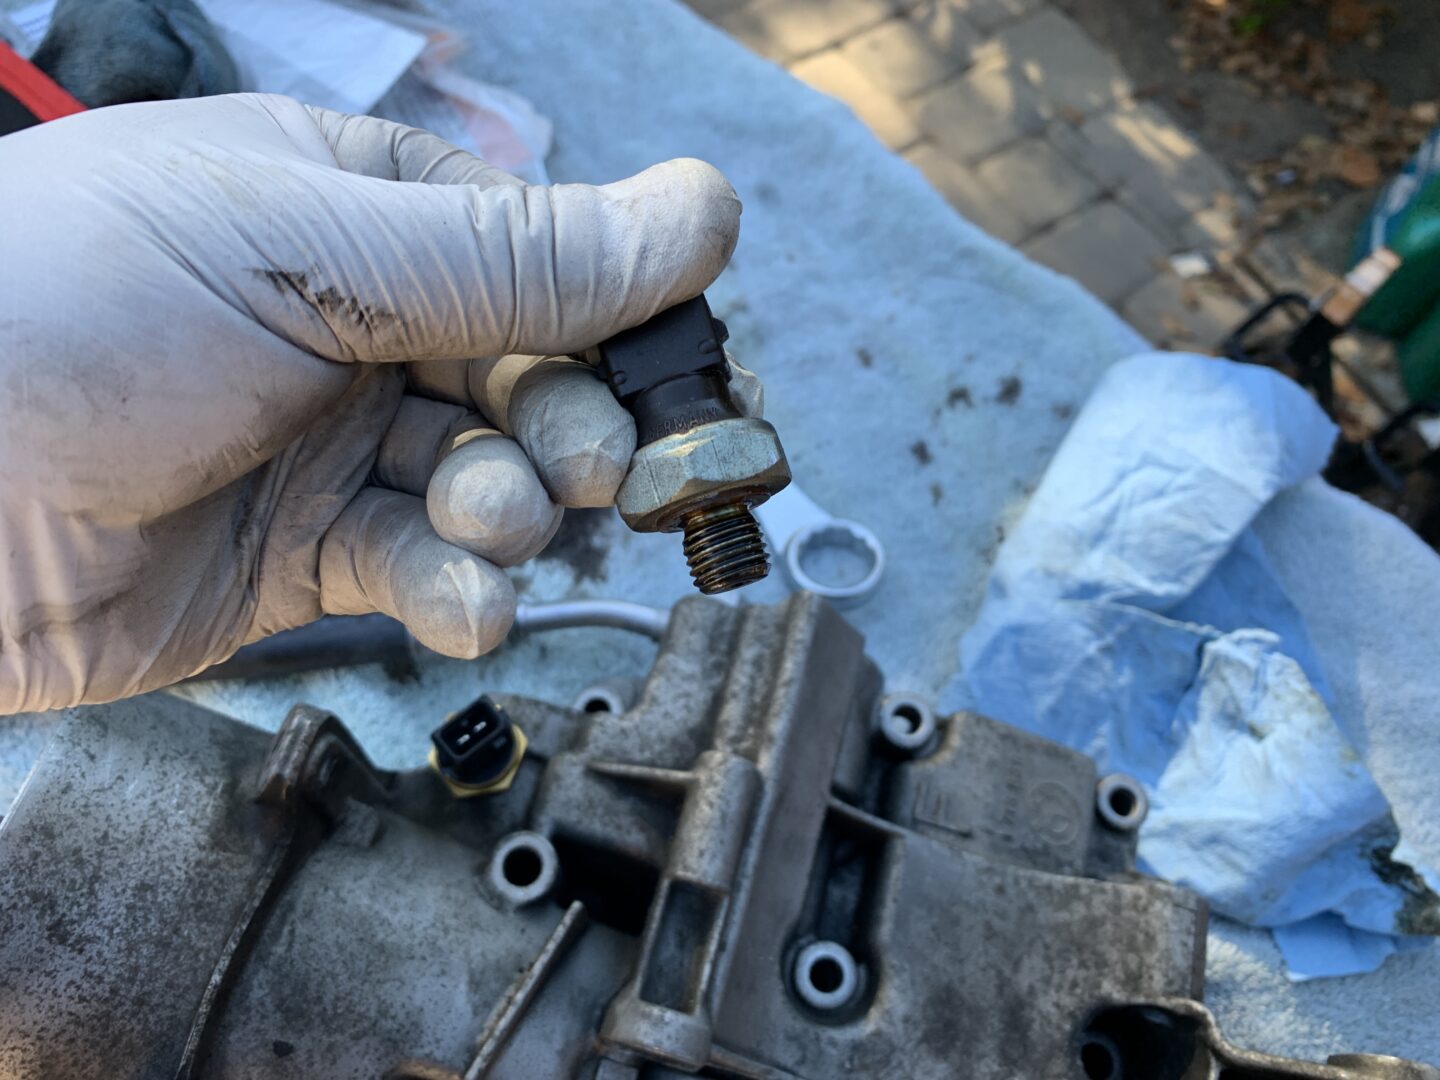
The oil filter housing should now have the new VANOS line installed (not tightened/torqued yet), new oil filter housing gasket installed, and new oil pressure switch and oil temperature sensor. Ensure that the old sealing washers are not still on, and also be sure that the new sealing washers are installed with the new coolant temperature sensor and new oil pressure switch.
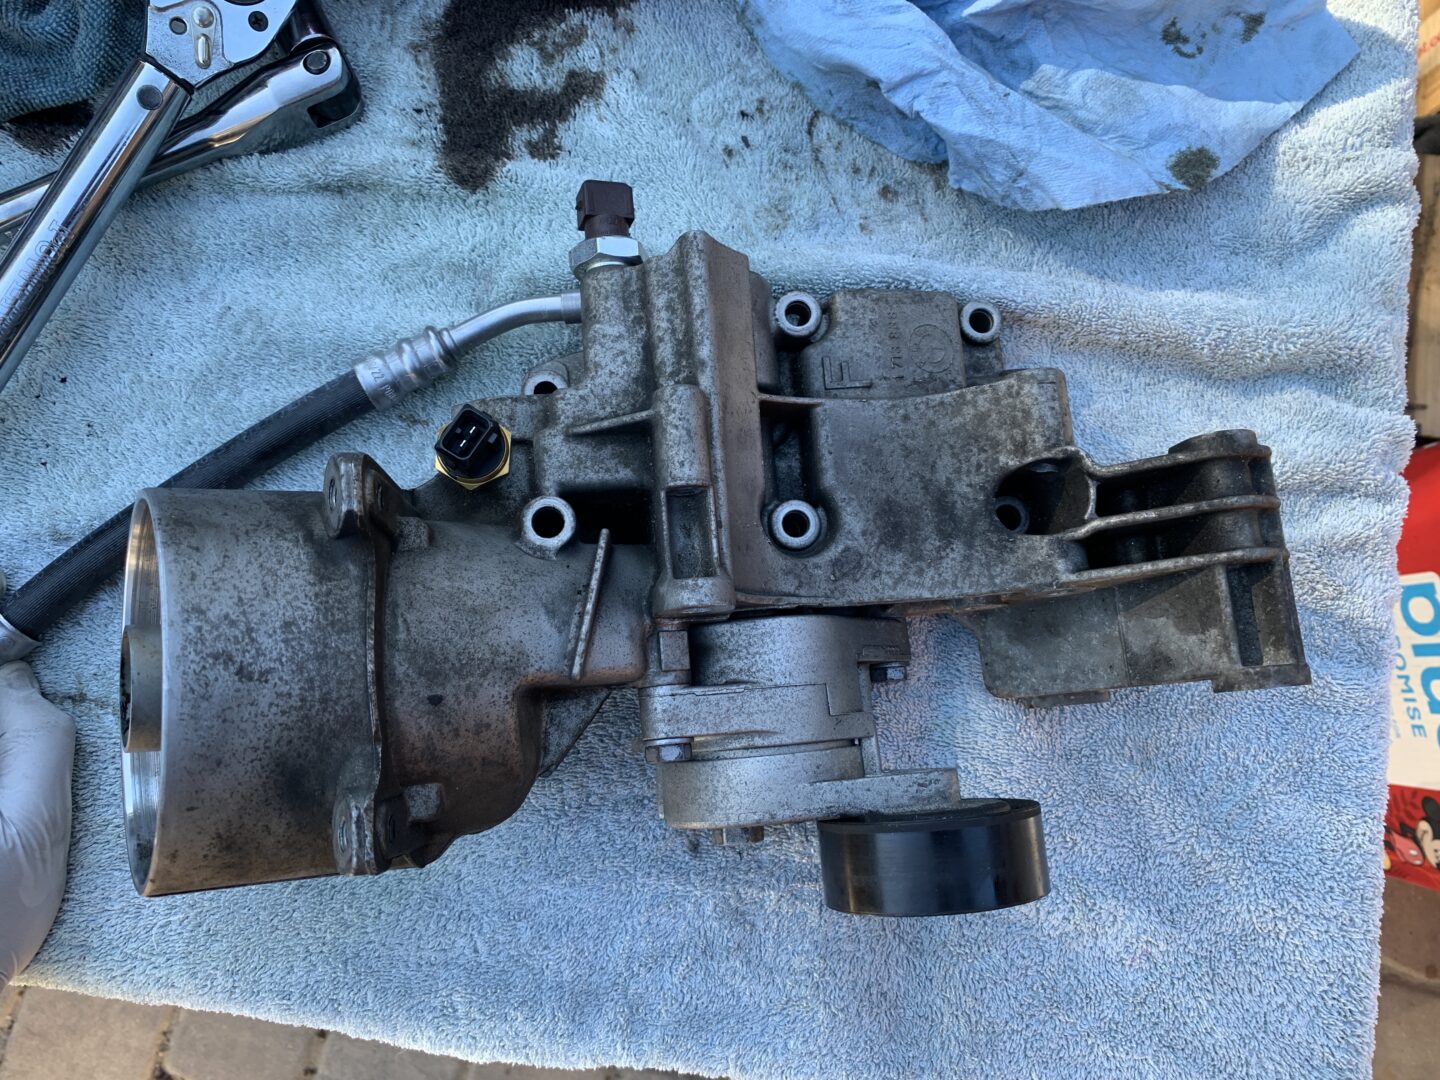
Carefully place the oil filter housing assembly back on and reinstall the bolts where they belong. I placed the diagram below again for your reference.
Interestingly, there doesn’t seem to be a torque specification for these oil filter housing bolts, so tighten them snug so that there is a good seal on the oil filter housing gasket. I recommend tightening them down slowly and in a star pattern to evenly apply a seal to the gasket. I’ve heard of some E46 owners throwing some numbers out there of somewhere between 22-25 ft-lbs of torque.
Assemble the other end of the VANOS line with crush washers on each end of the fitting and a banjo bolt through it all. Then tighten snug with a 19mm wrench. Then reach around and tighten the other end of the VANOS line (that you left un-tightened earlier) snug as well.
Put the power steering pump back into place. Reinstall the 13mm bolts and snug them tight.
Reinstall the alternator (ensuring the plastic cooling duct is intact during the installation) and torque down the bolts. Connect the connector for the alternator and reinstall the power cable and 17mm nut onto the alternator.
Reinstall the power steering reservoir back to it’s original location with their respective bolts. Reinstall the idler pulley and tighten snug. Plug in the oil pressure switch connector and coolant temperate sensor connector back in if you haven’t already. And finally, reinstall the fan in reverse of removal.
Also reinstall the other components in the engine bay such as the air box, intake duct, fan shroud, and any other items that were removed at the beginning of this job. I’ll also reattach the wireloom at the front to the coolant hose with some wrapped electrical tape around the area where it will be zip-tied.
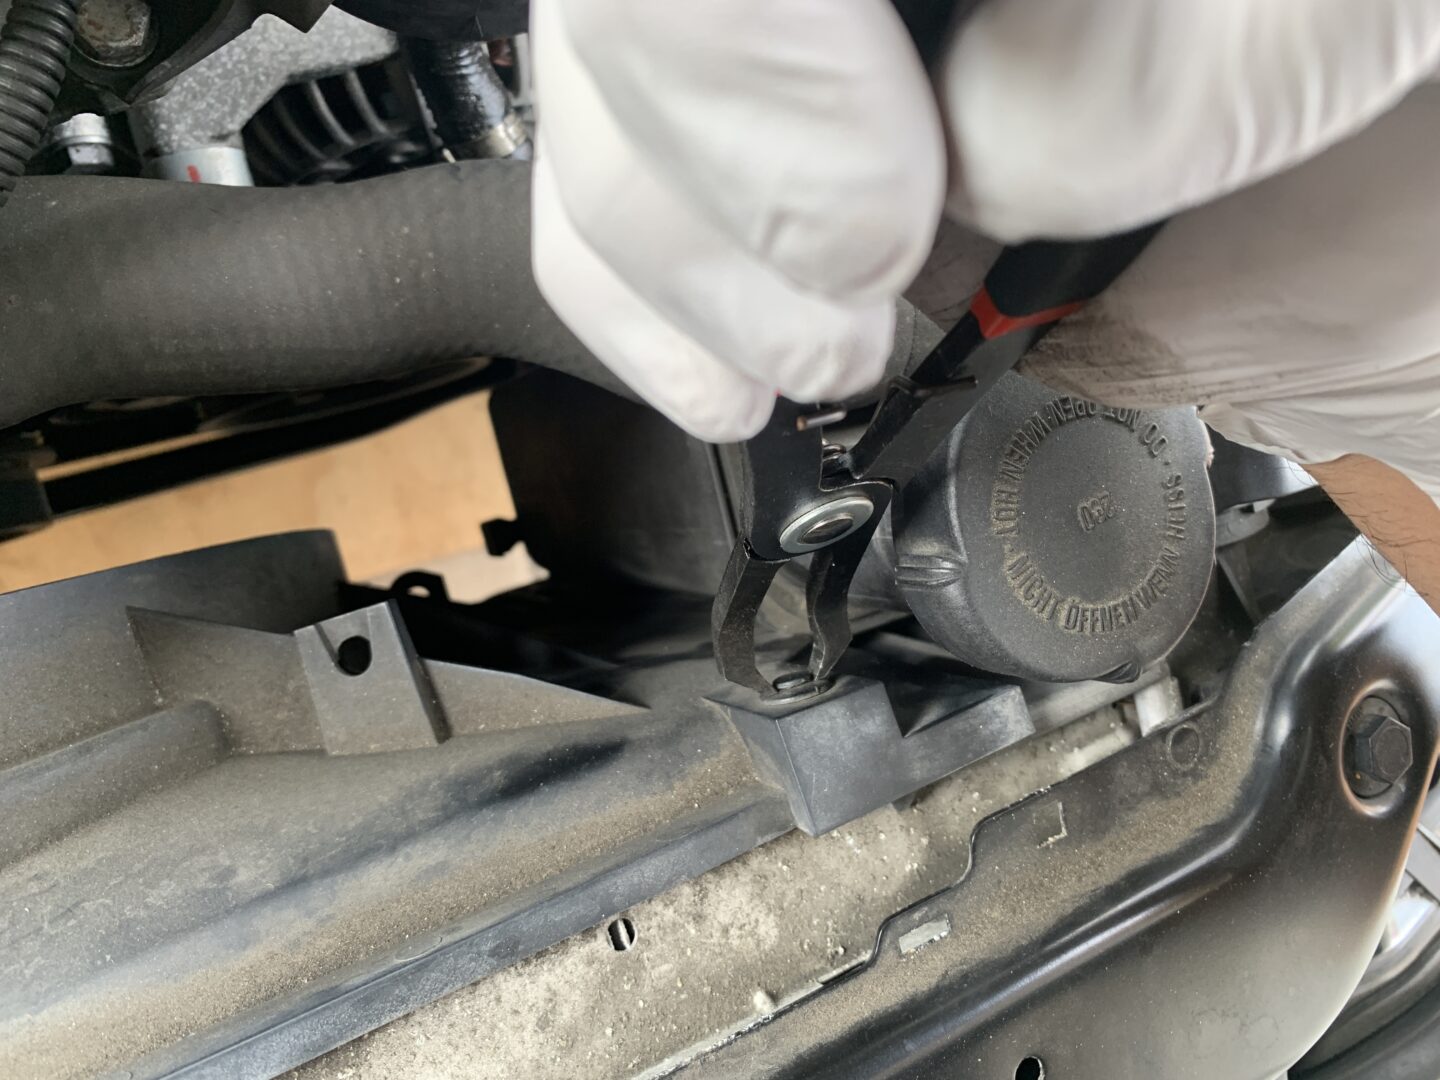
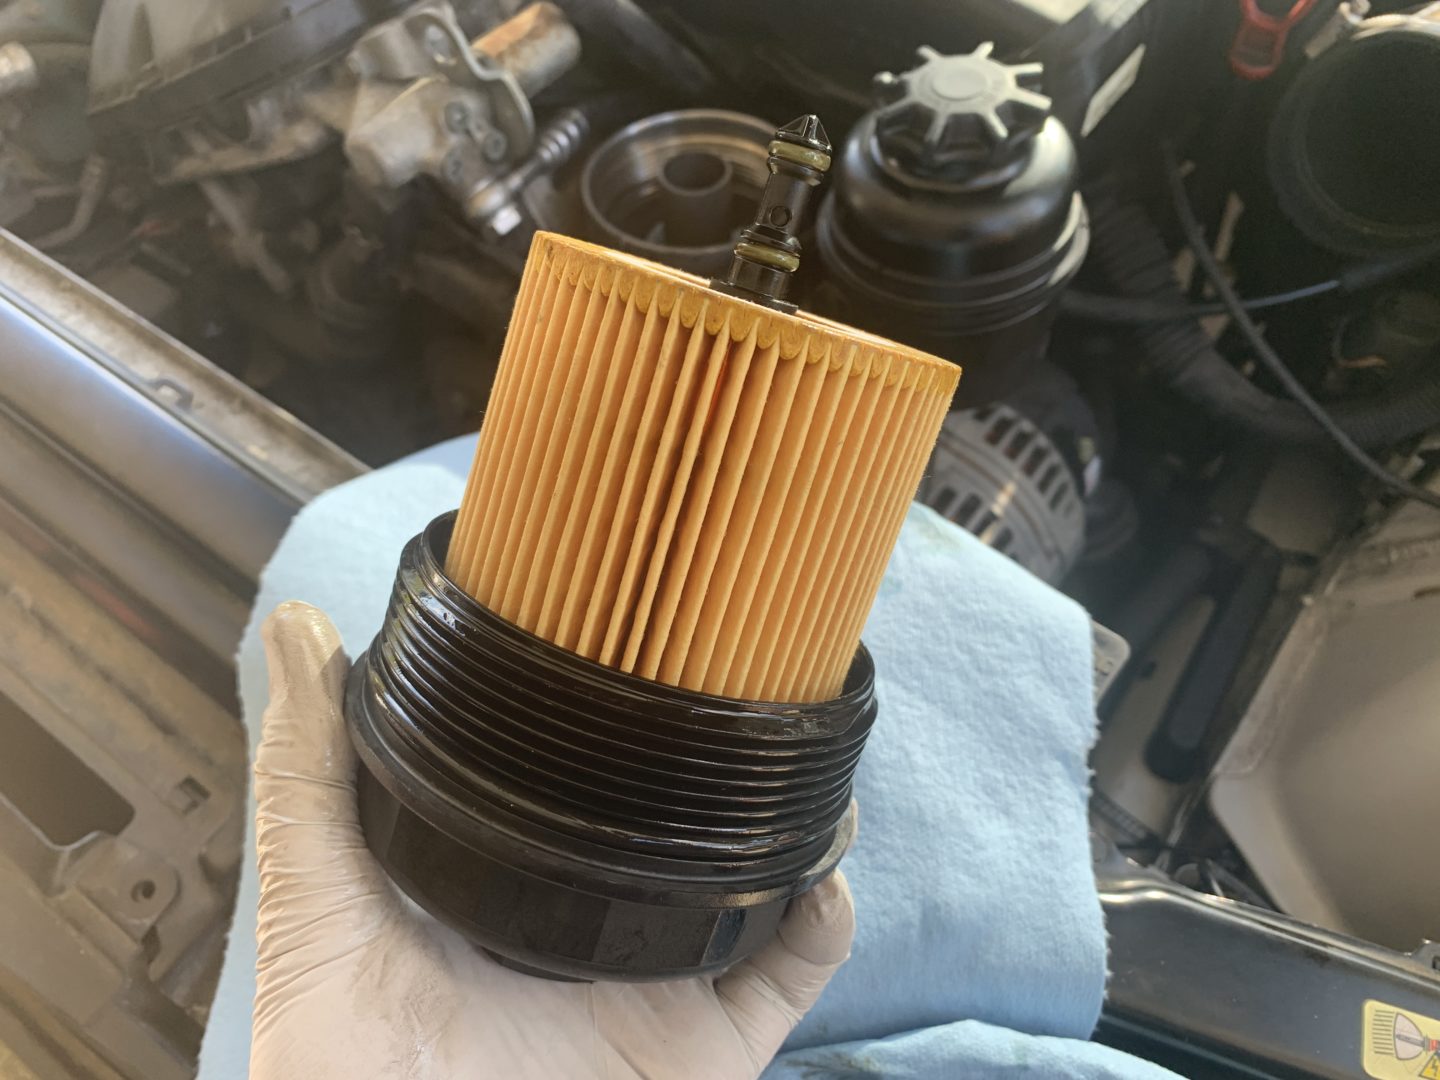
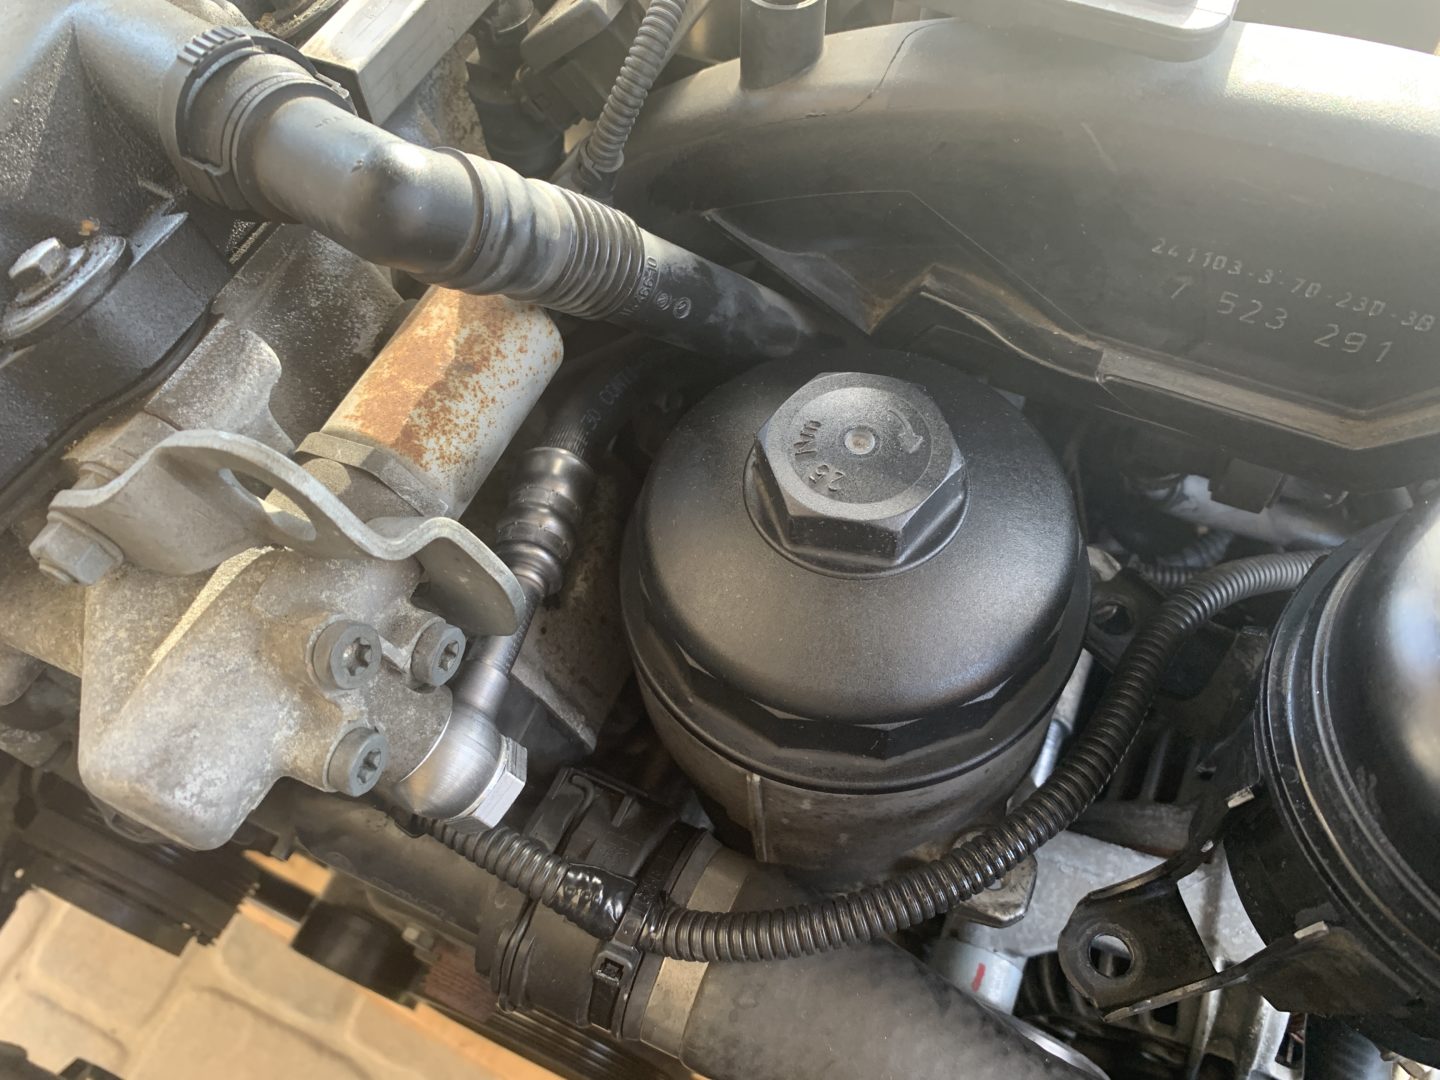
Finally if you haven’t aleady, replace the (2 qty) oil filter O-rings on the oil filter cap; there should be a larger one and a smaller one. Install the new oil filter onto the cap, then reinstall and tighten the oil filter cap to 25 Nm (18 ft-lbs), or tighten slightly snug.
At last, refill the engine oil to the proper oil level.
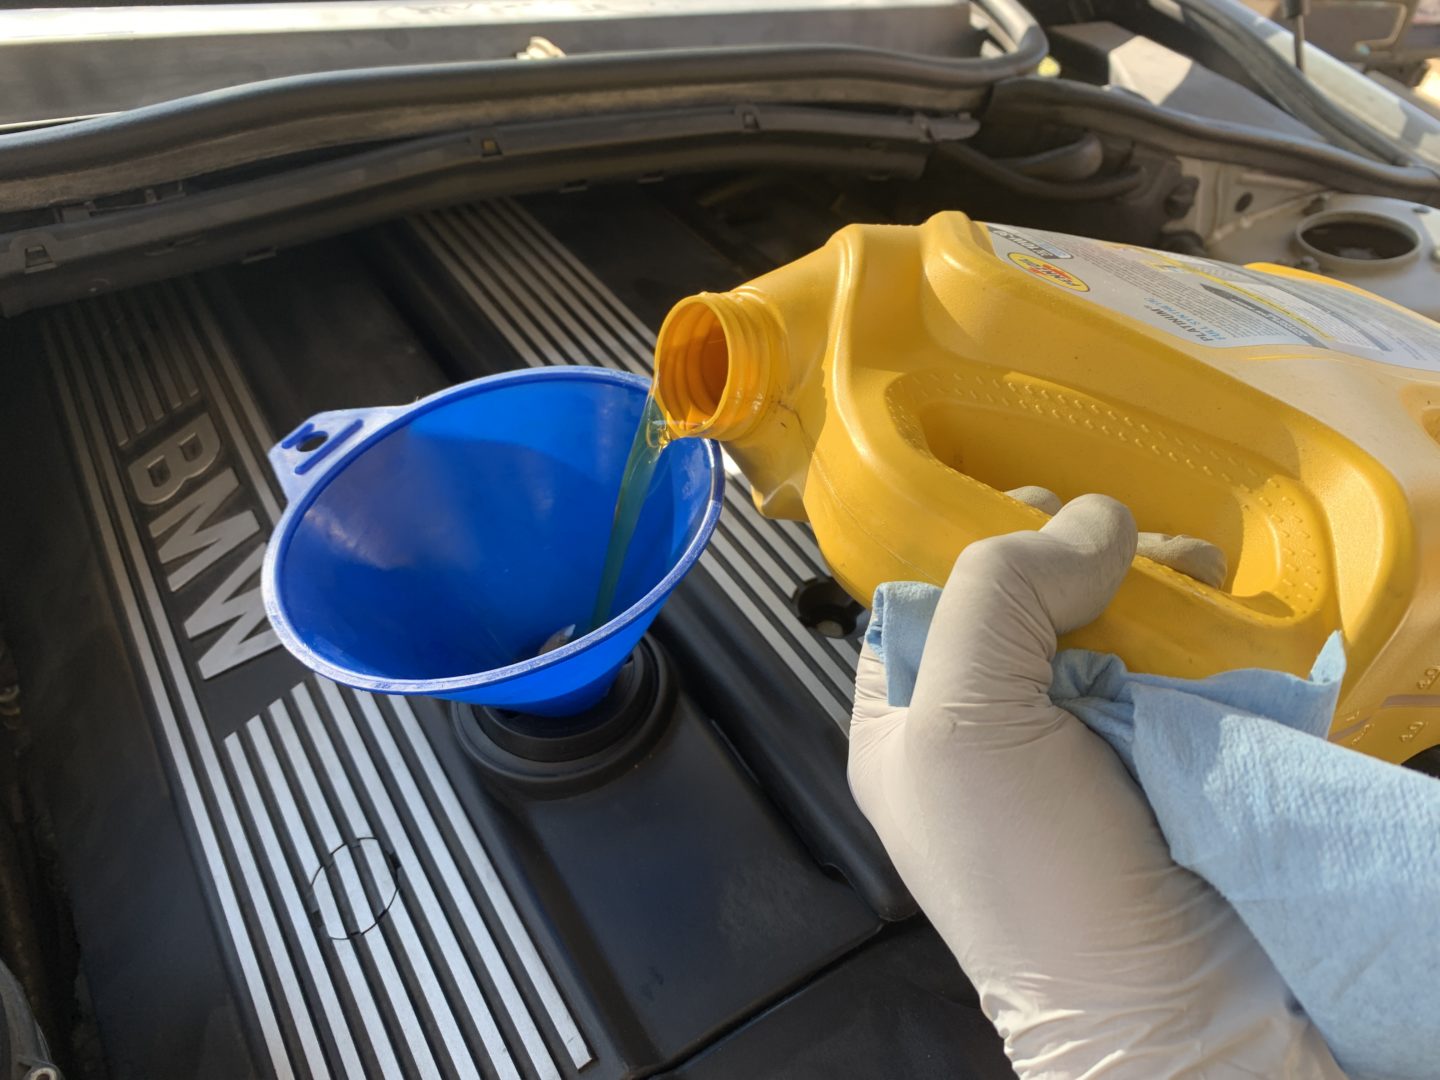
Cap the refill cap and start up the car to test out the vehicle. Make sure that the oil is no longer leaking before you go out for a drive in the case that it is actually still leaking. There’s a lot of things to remove for this job, but the oil filter housing gasket is not a terribly difficult job to complete. With basic hand tools (and a few extra specialty tools) and patience, you too can successfully complete this job on your E46.


