")
Almost all MK1 Audi TT owners with manual transmissions are going to experience the feeling of a loose or rattling shifter at some point. It’s only a matter of time for the shifter bushings and other various shifting parts to degrade and wear down over time. Luckily, there’s a kit out there made by Dieselgeek that will address this issue and revitalize your shifting experience.
If you have a loose shifter issue on your Audi TT, you’ll be familiar with the sloppy movement in the shifter, even when it is in gear. It can be loose in the left-right direction, and/or in the forward-backward direction. In my case, it was both. Dieselgeek sells a set of bushings in their Deluxe Bushing Kit, which comes with a few different bushings and parts that will firm up that shifter significantly.
Tools & Materials
I purchased this kit for $88 (at the time of this post), which just seems like a lot honestly. If you look at the parts in the kit, the materials don’t seem to be particularly expensive. So if you’re looking at a standpoint of if the materials themselves are worth the price you’re paying, it’s probably not. But if you look at the improvement you’ll see when shifting gears in your car due to the precise bushings in the kit, then it’s probably worth the initial cost.
Deluxe Audi TT Bushing Kit for 2000-2006 cars
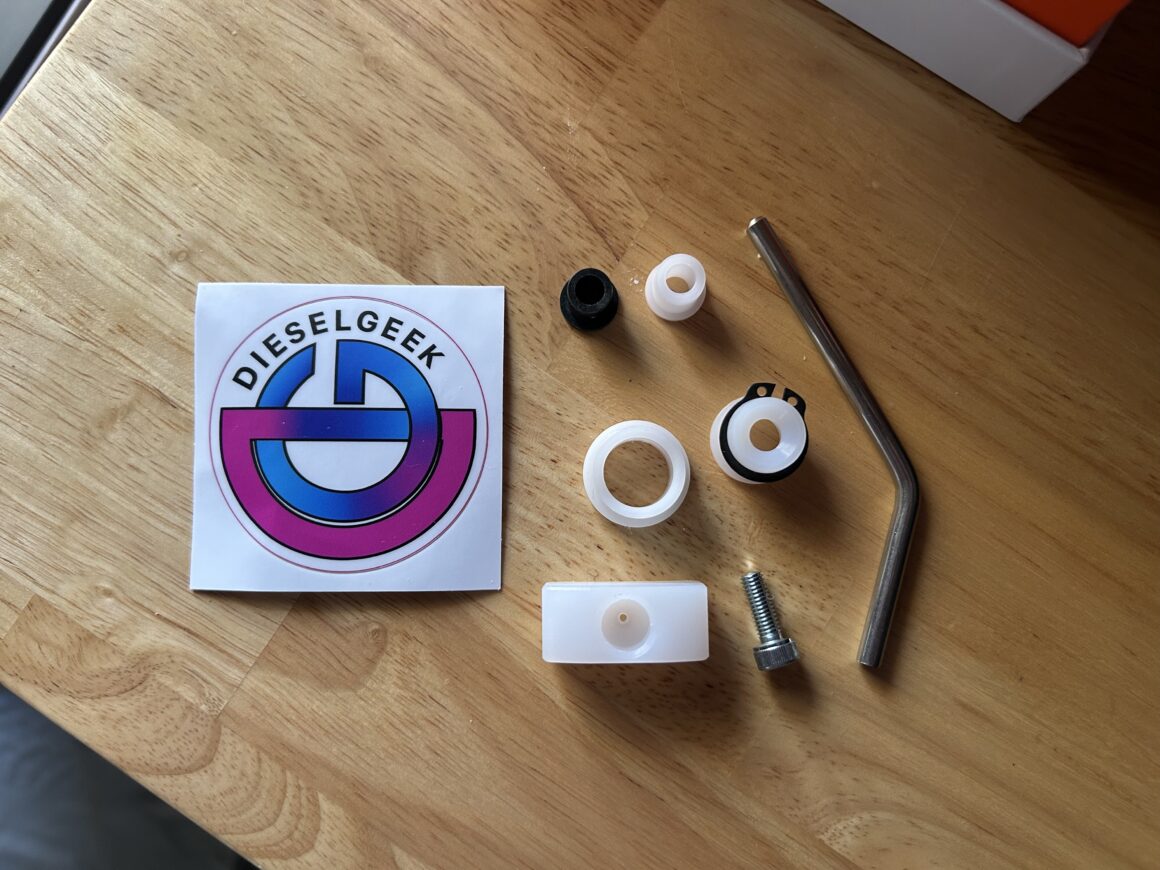
Before you begin replacing any of these parts, make sure you have a flexible retrieval tool on hand. There are so many little parts that you need to remove or install and it is almost certain you will drop them into the cavity beneath the shifter. So keep this tool on hand–it’s a lifesaver. I have also included other tools you’ll need to install the Dieselgeek Deluxe Bushing Kit below.
Torx Bit Set: Sedy 25-Piece Torx Bit Set (T5-T40)
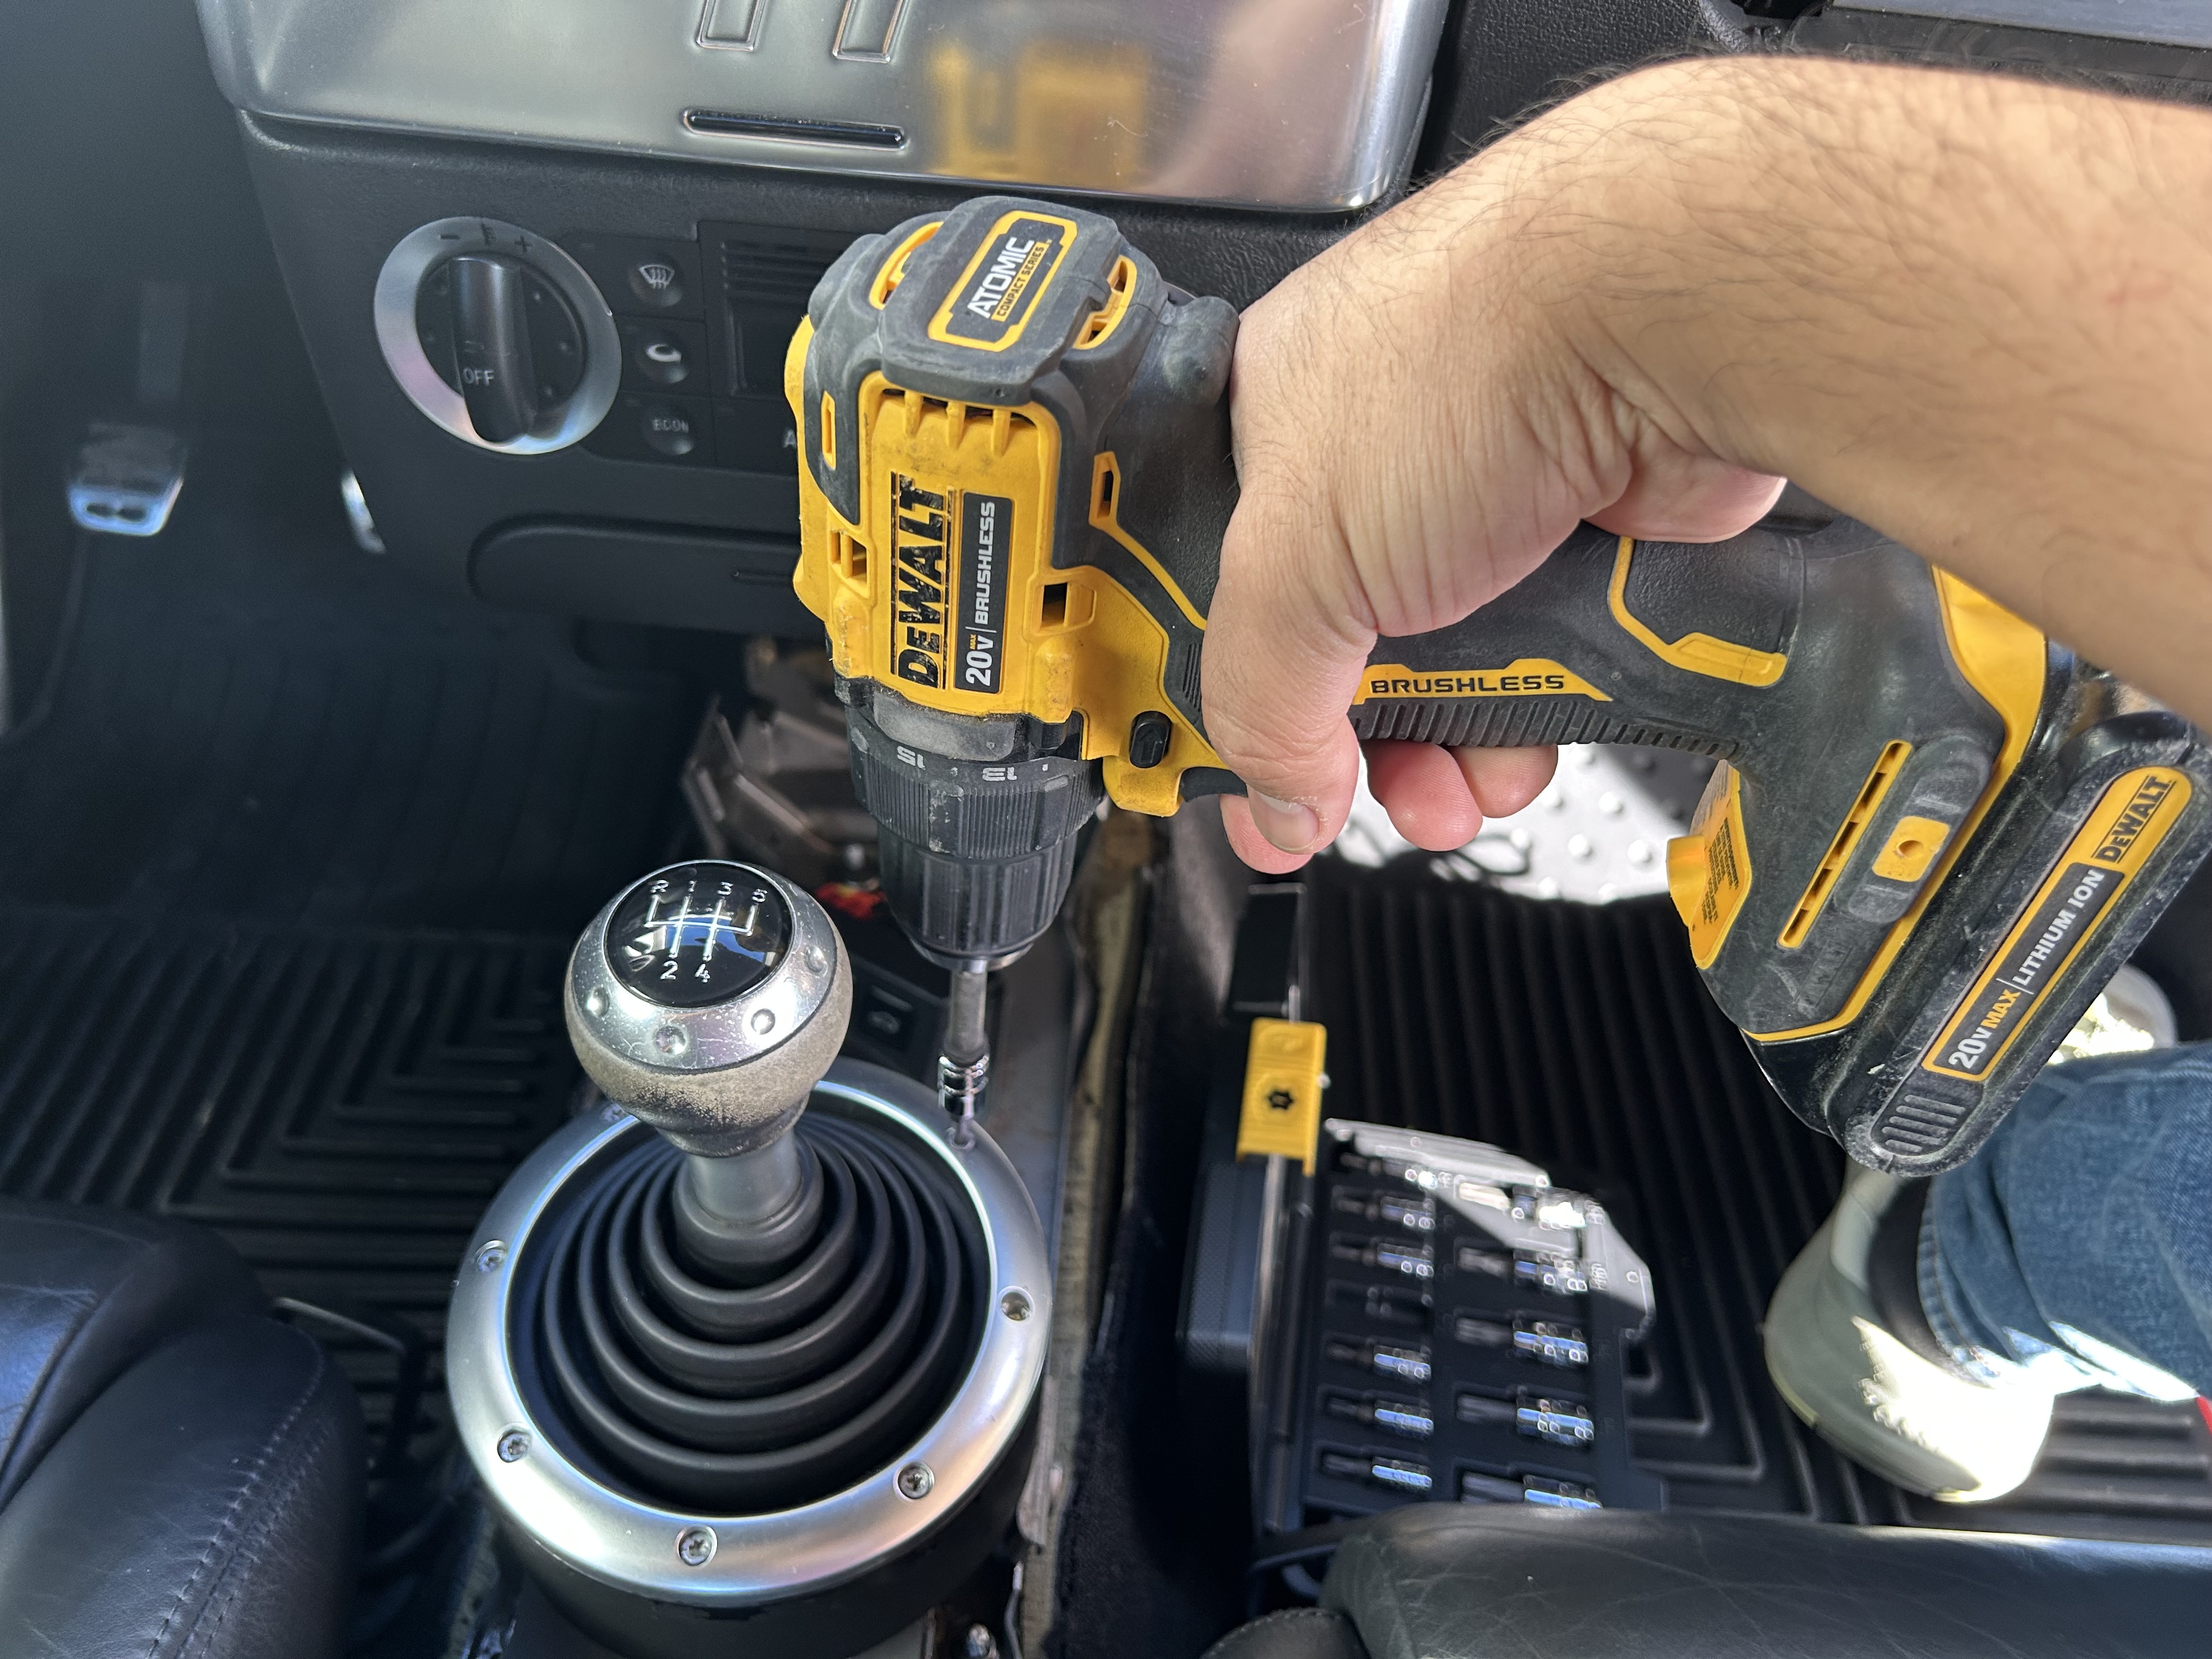
Power Drill: DEWALT 20V Max Cordless Drill Driver Set
Socket Wrench Set: EPAuto 69 Pieces – 1/4″ & 3/8″ Drive Socket Set
Pliers Set: WORKPRO 4-Piece Pliers Set
Hook and Pick Set: Craftsman 4PC Precision Hook & Pick Set
Flexible Retrieval Tool & Magnetic Pickup Tool: NoCry Pick Up Tool Set (2pc)
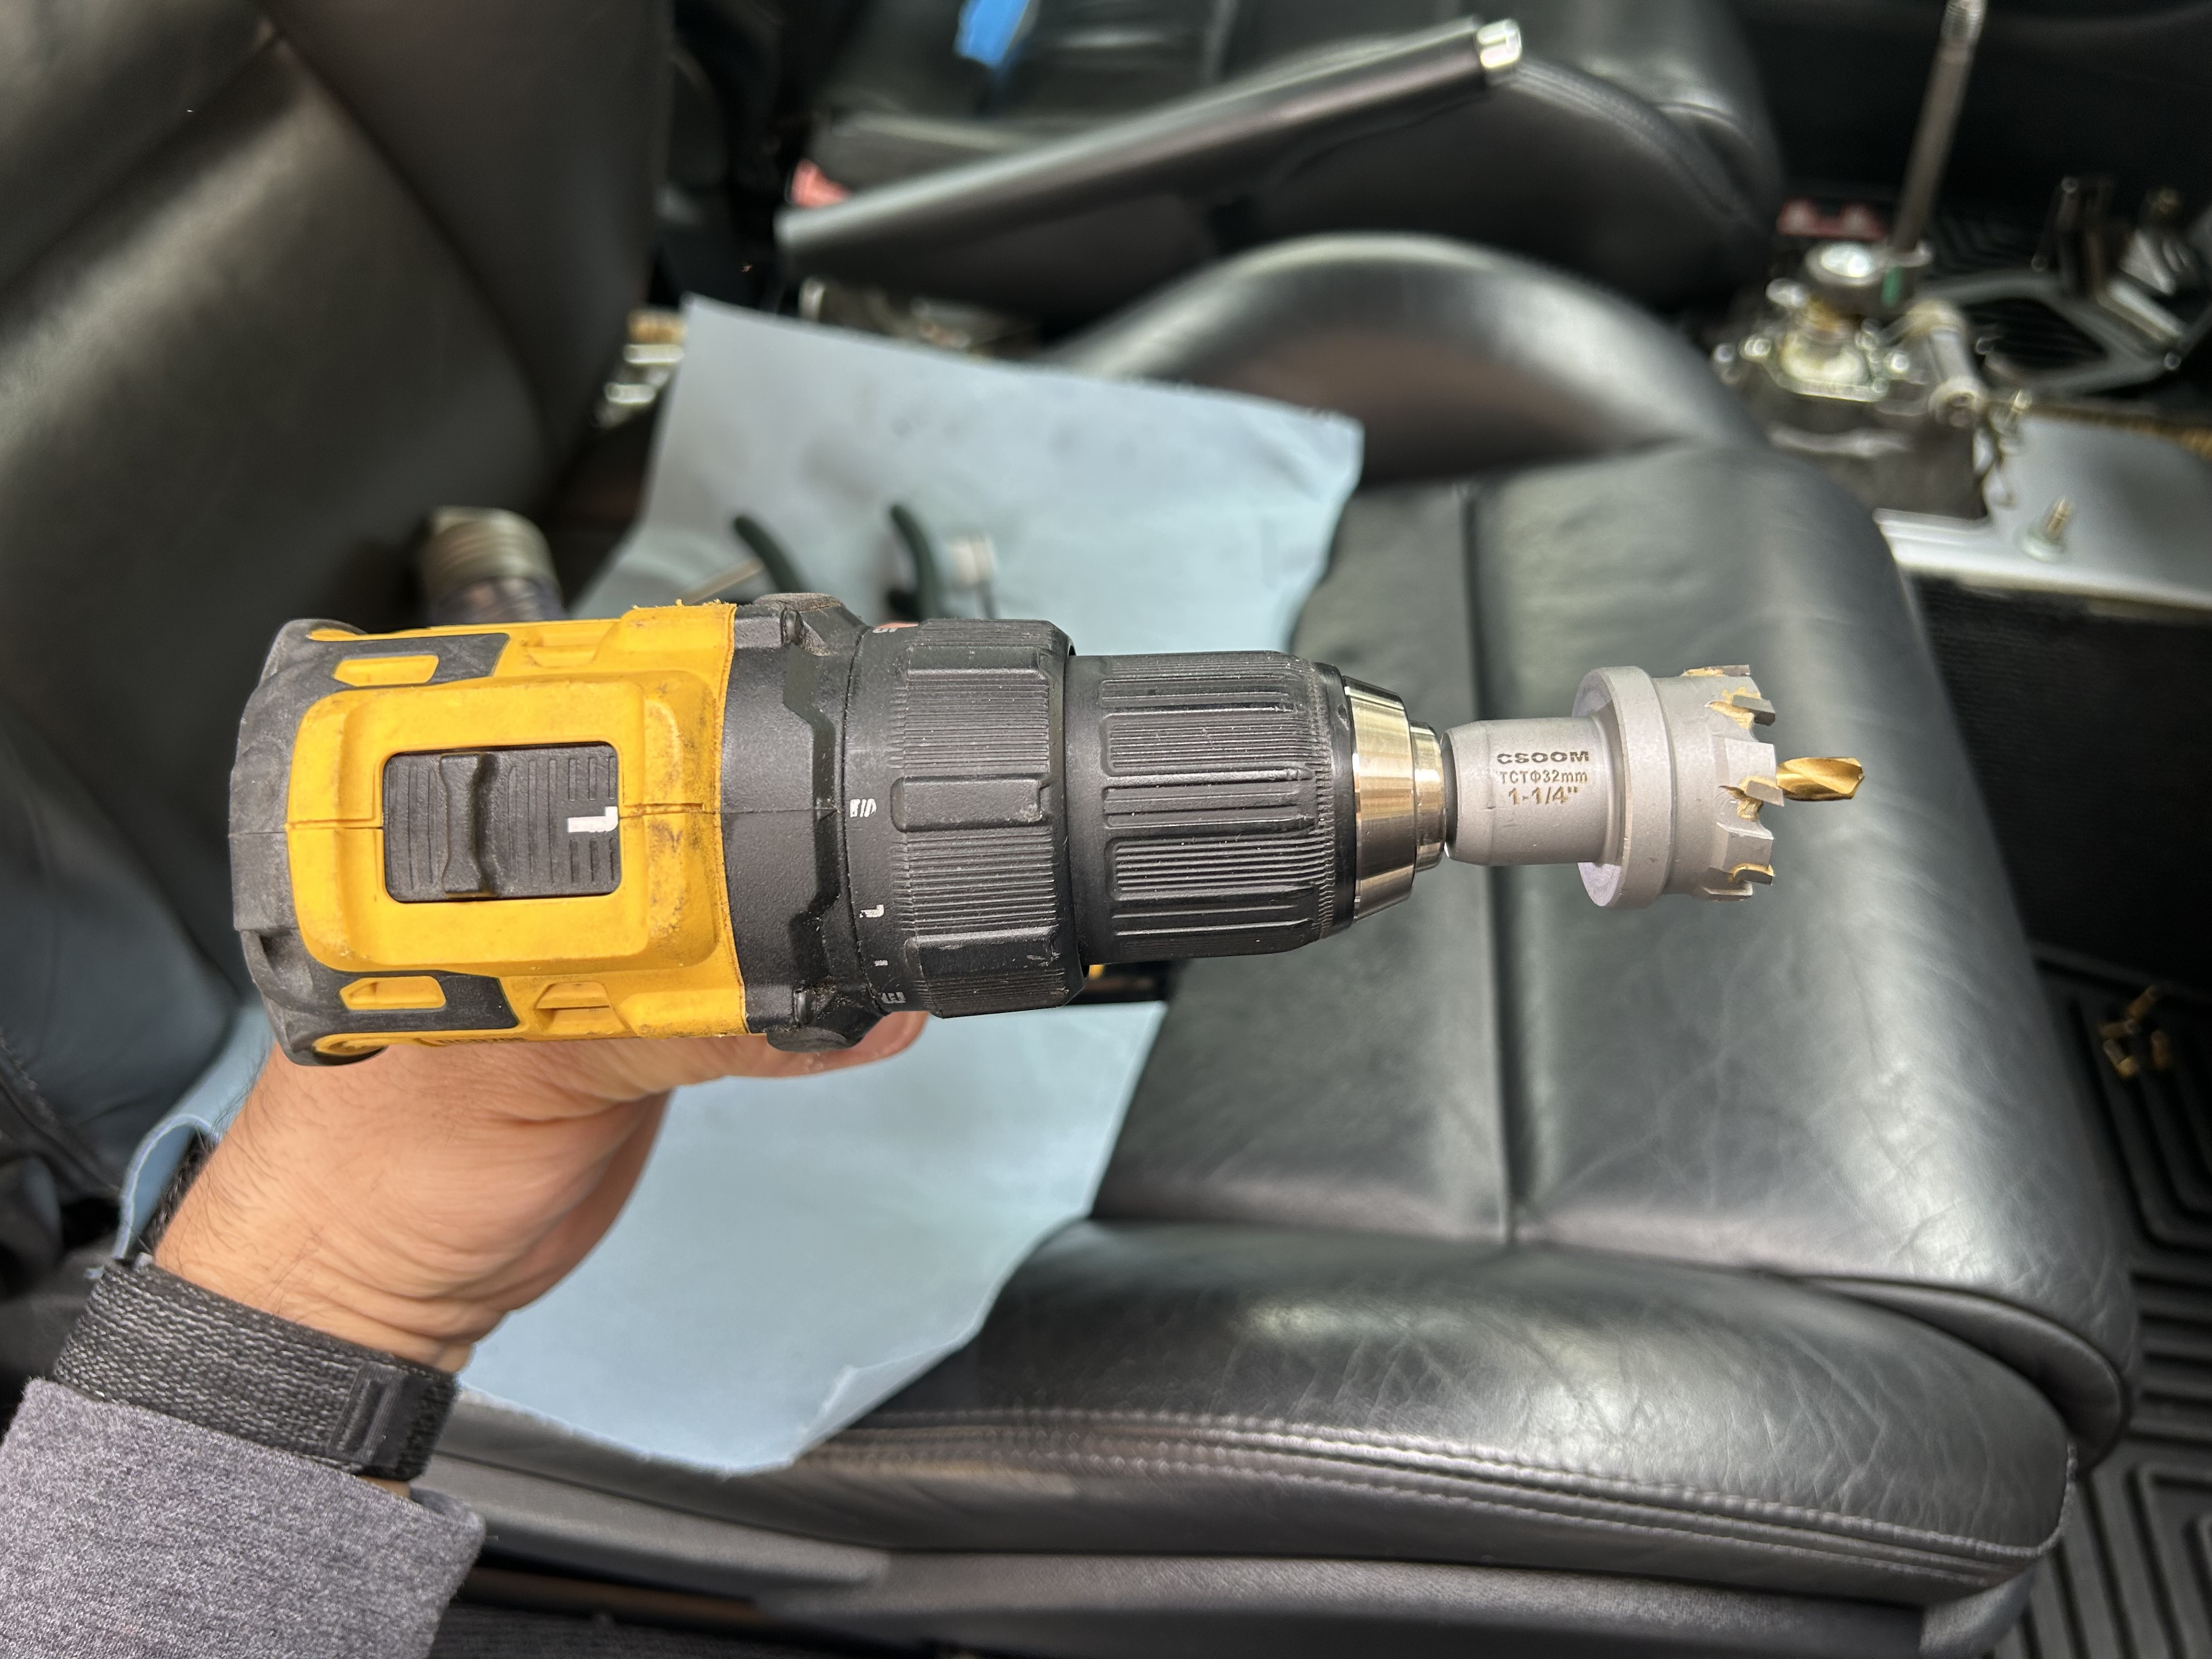
1-1/4″ Metal Hole Saw: CSOOM Carbide Hole Saw 5pc Kit
Snap Ring Tool: LFSEMINI Snap Ring Pliers Set, 4pcs
Shop Vacuum: Find shop vacuums on Amazon
Utility Knife: Amazon Basics Folding Utility Knife
Lithium Grease: Permatex 80345 White Lithium Grease, 1.5 oz.
Nitrile Gloves: Inspire Black Heavy Duty 6mil: SM / MD / LG / XL / XXL
Shop Towels: Scott Shop Original Blue Towels (12 Rolls of 55 Sheets Ea)
How To Install the Dieselgeek Deluxe Bushing Kit on the MK1 Audi TT (2000-2006)
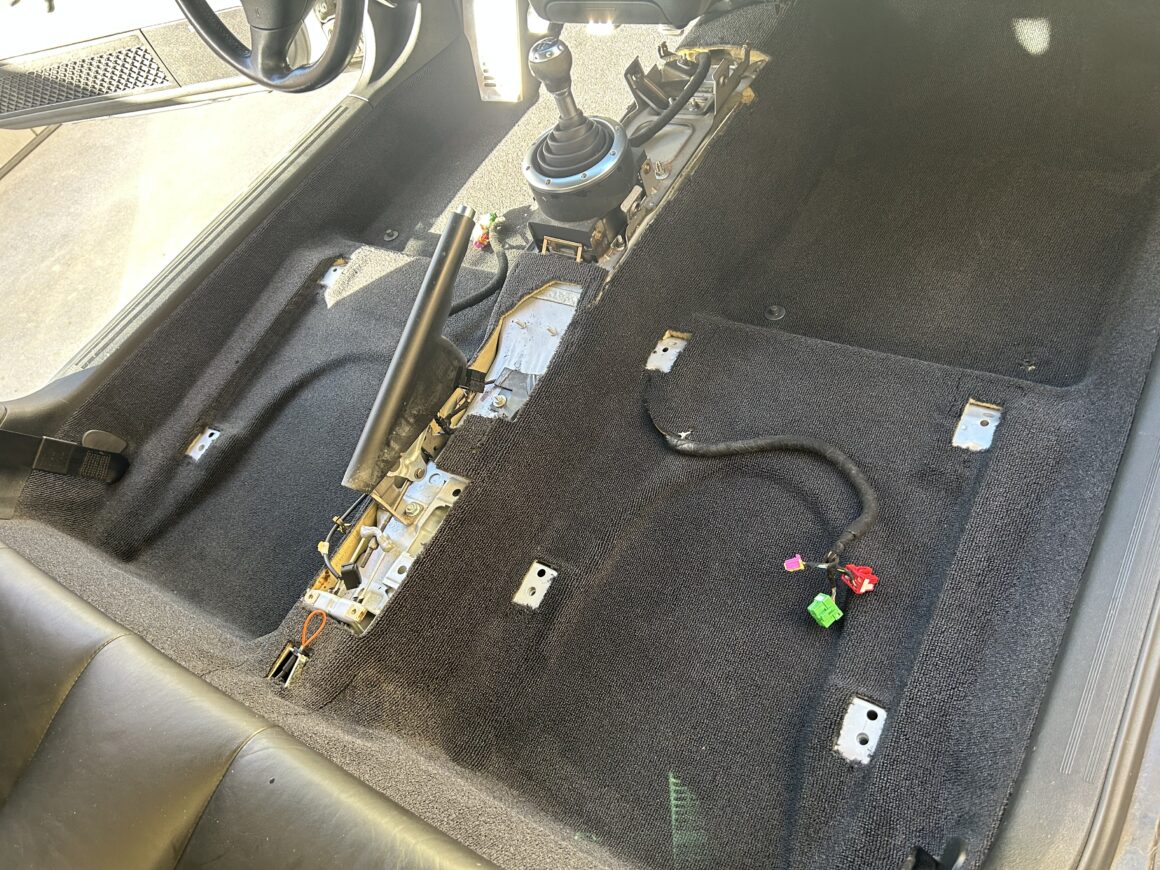
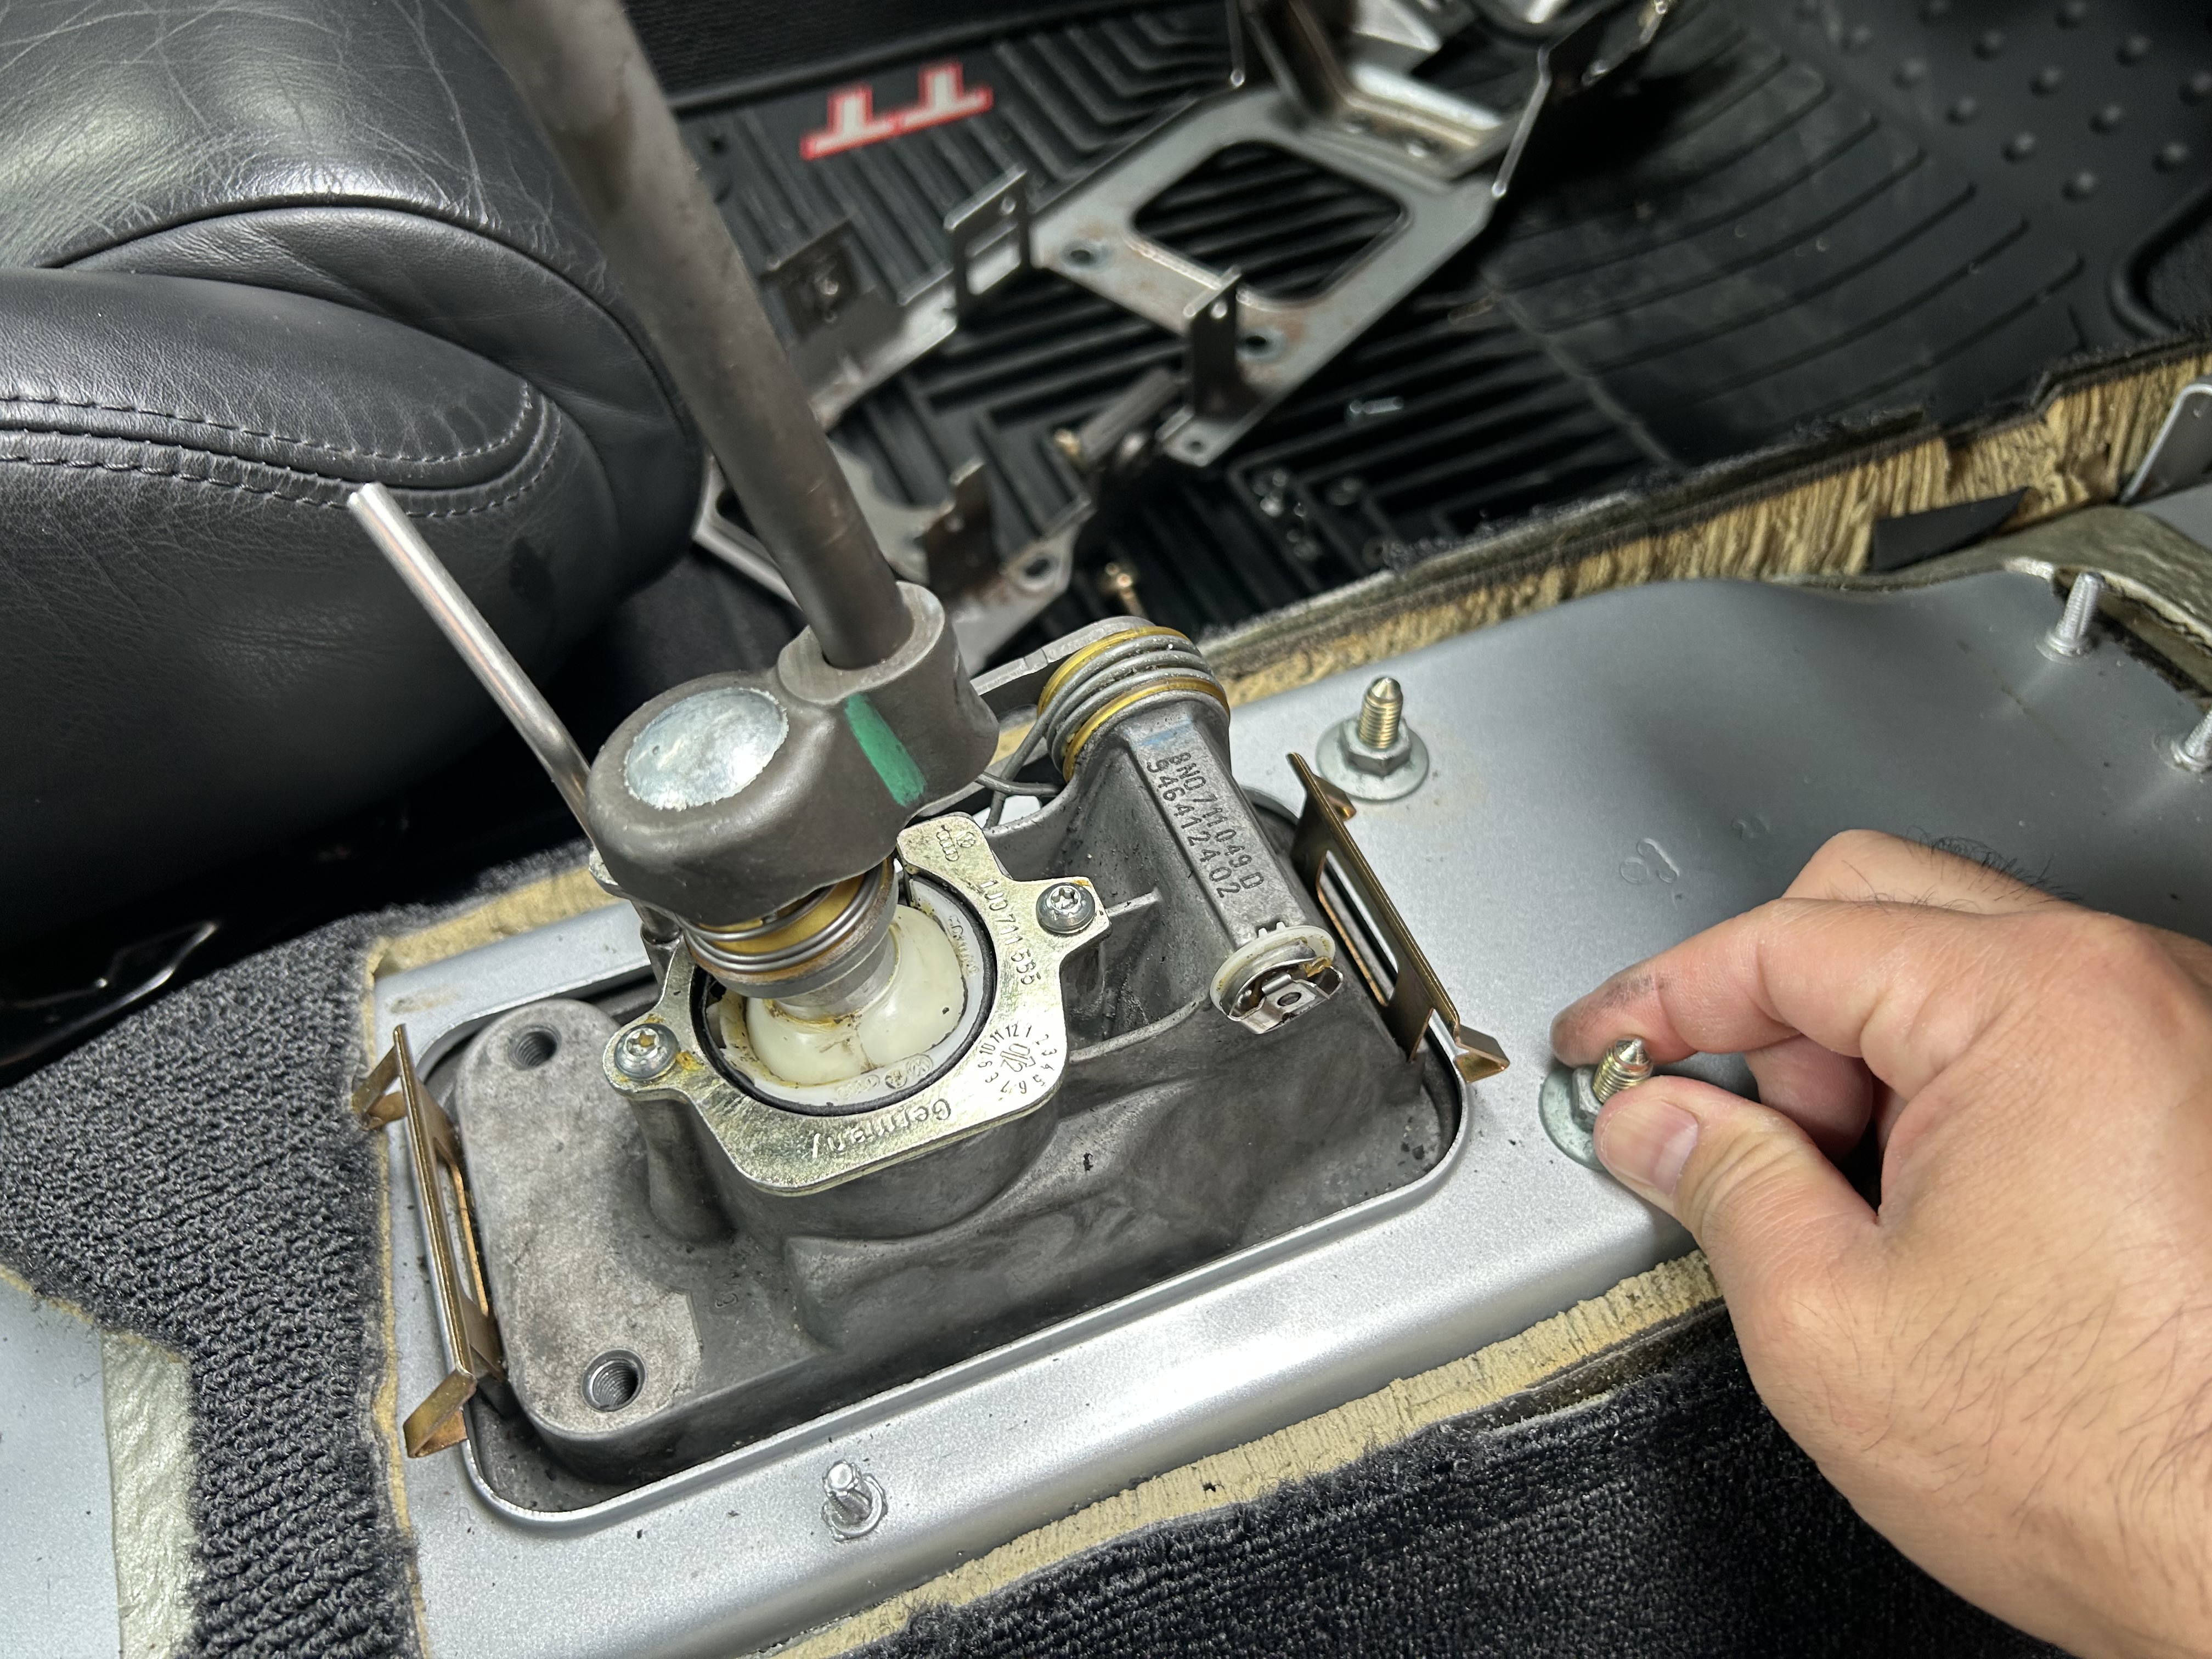
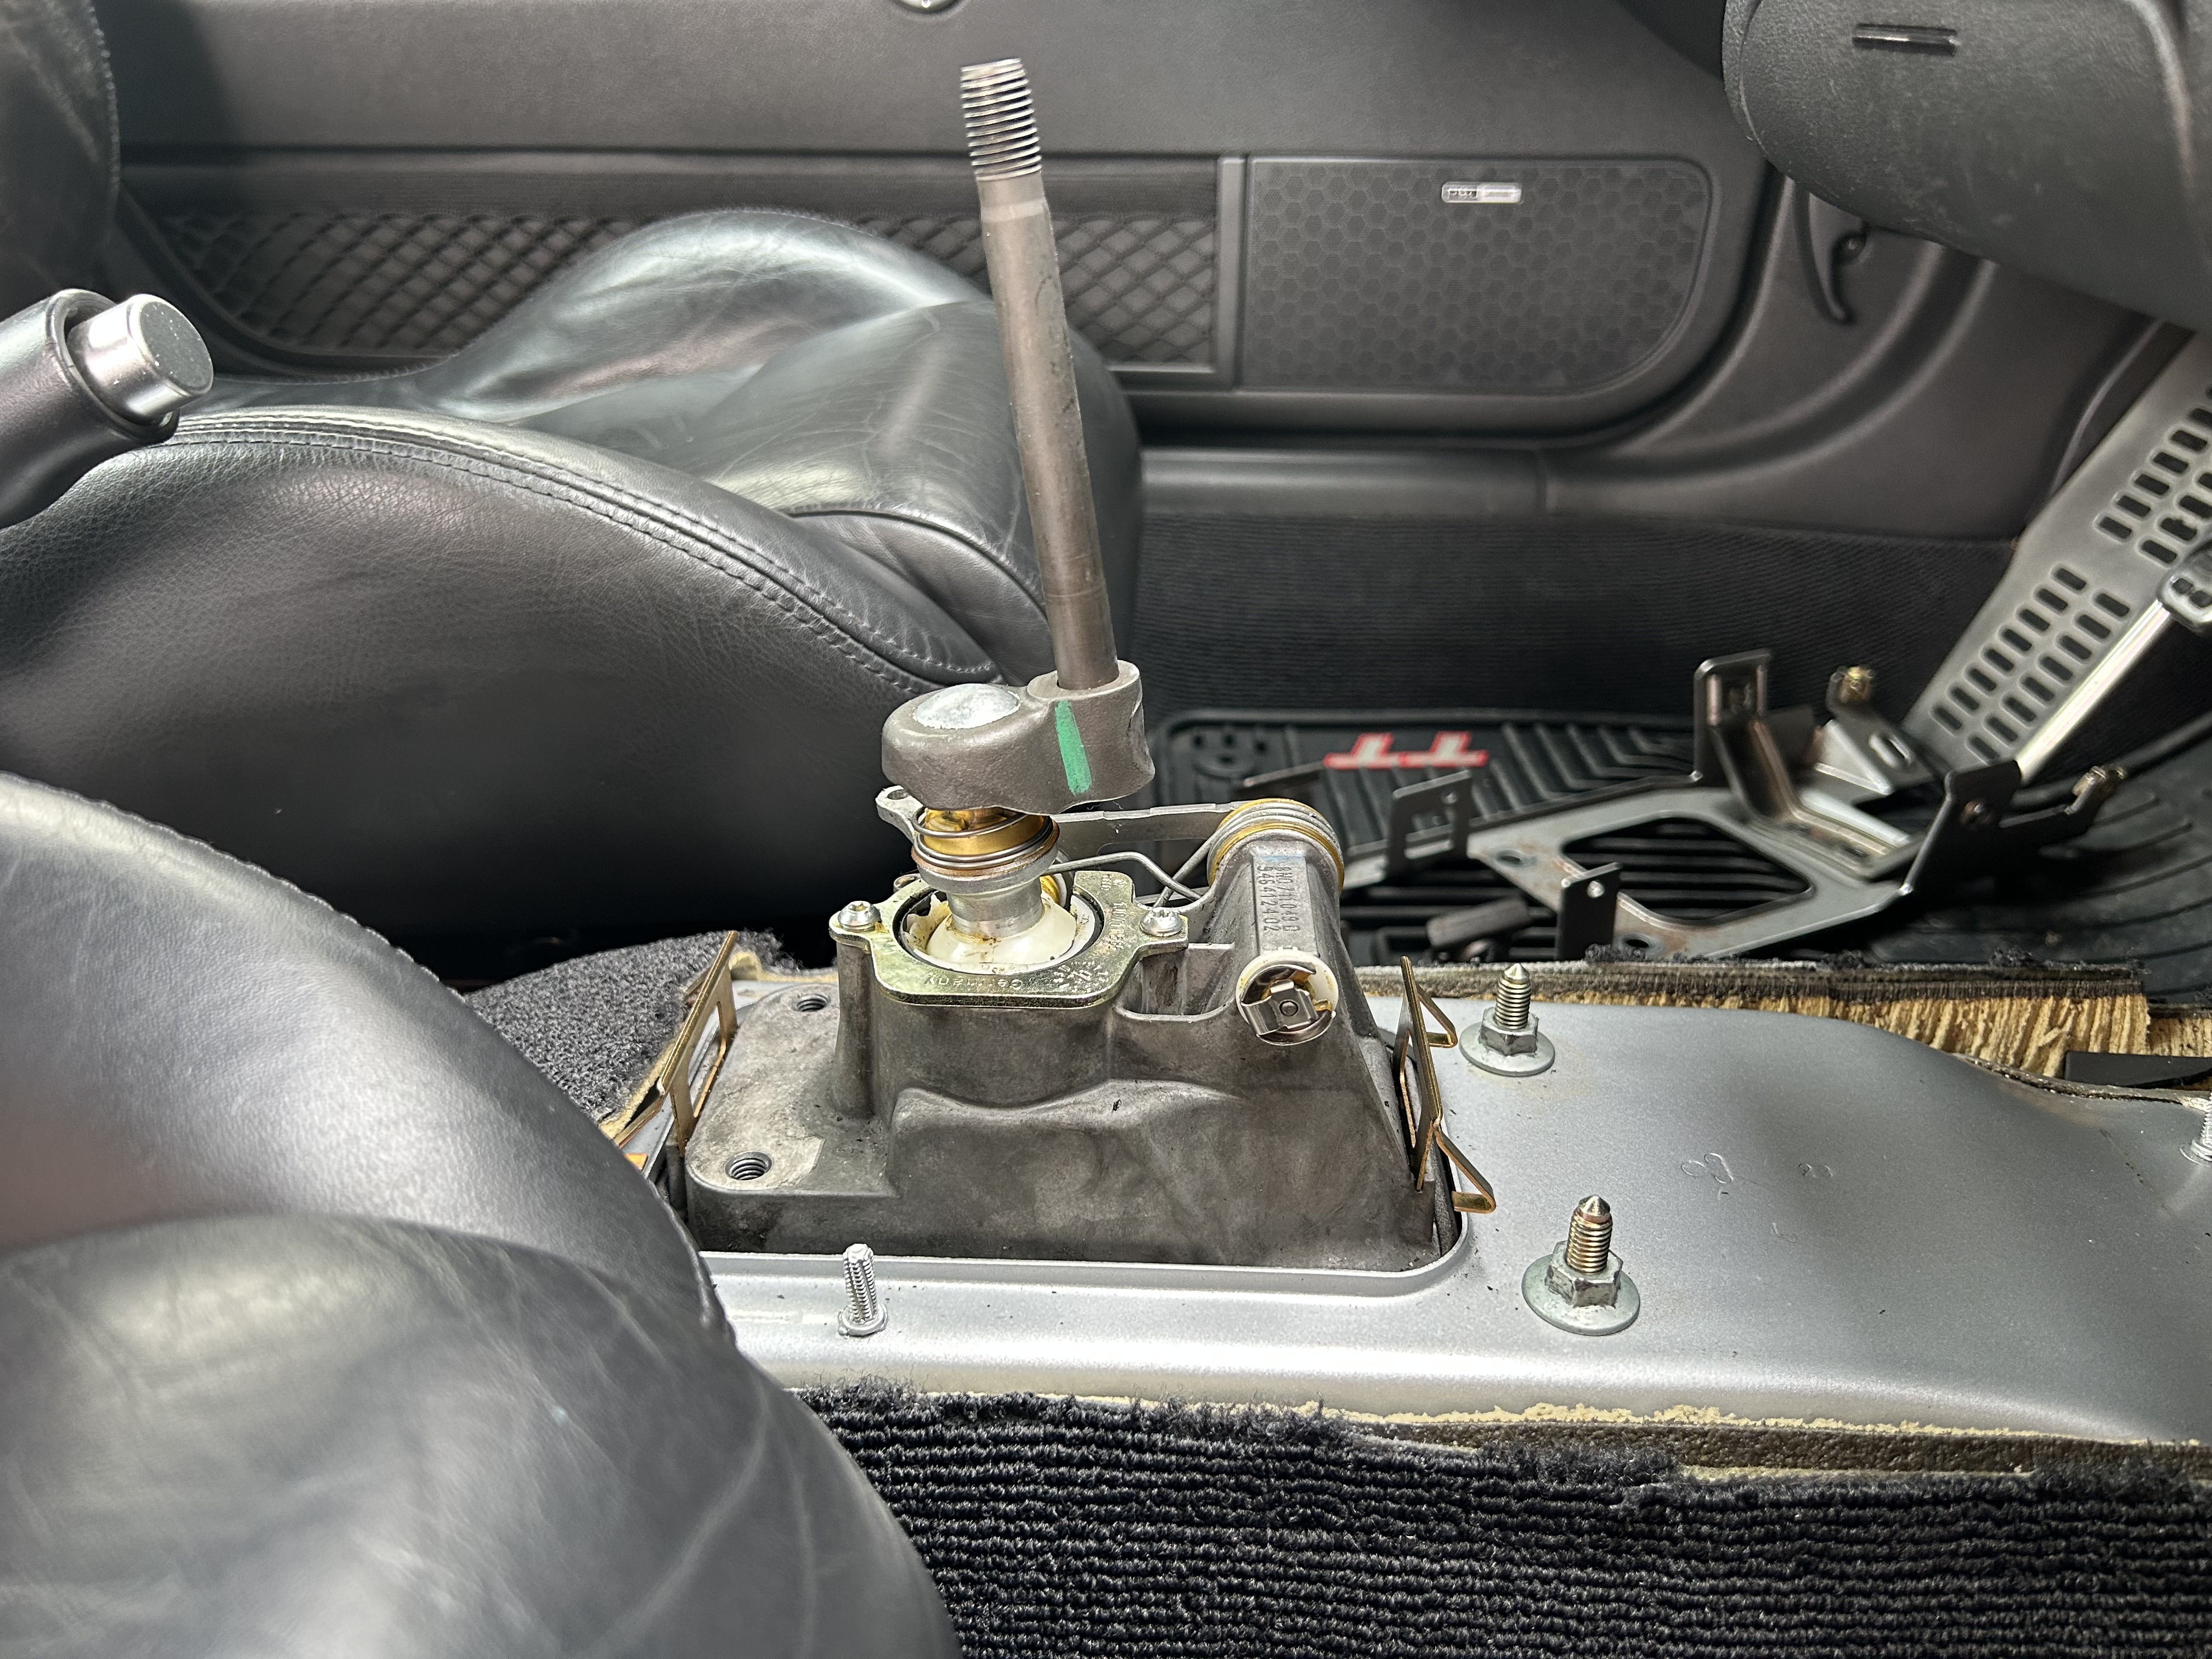
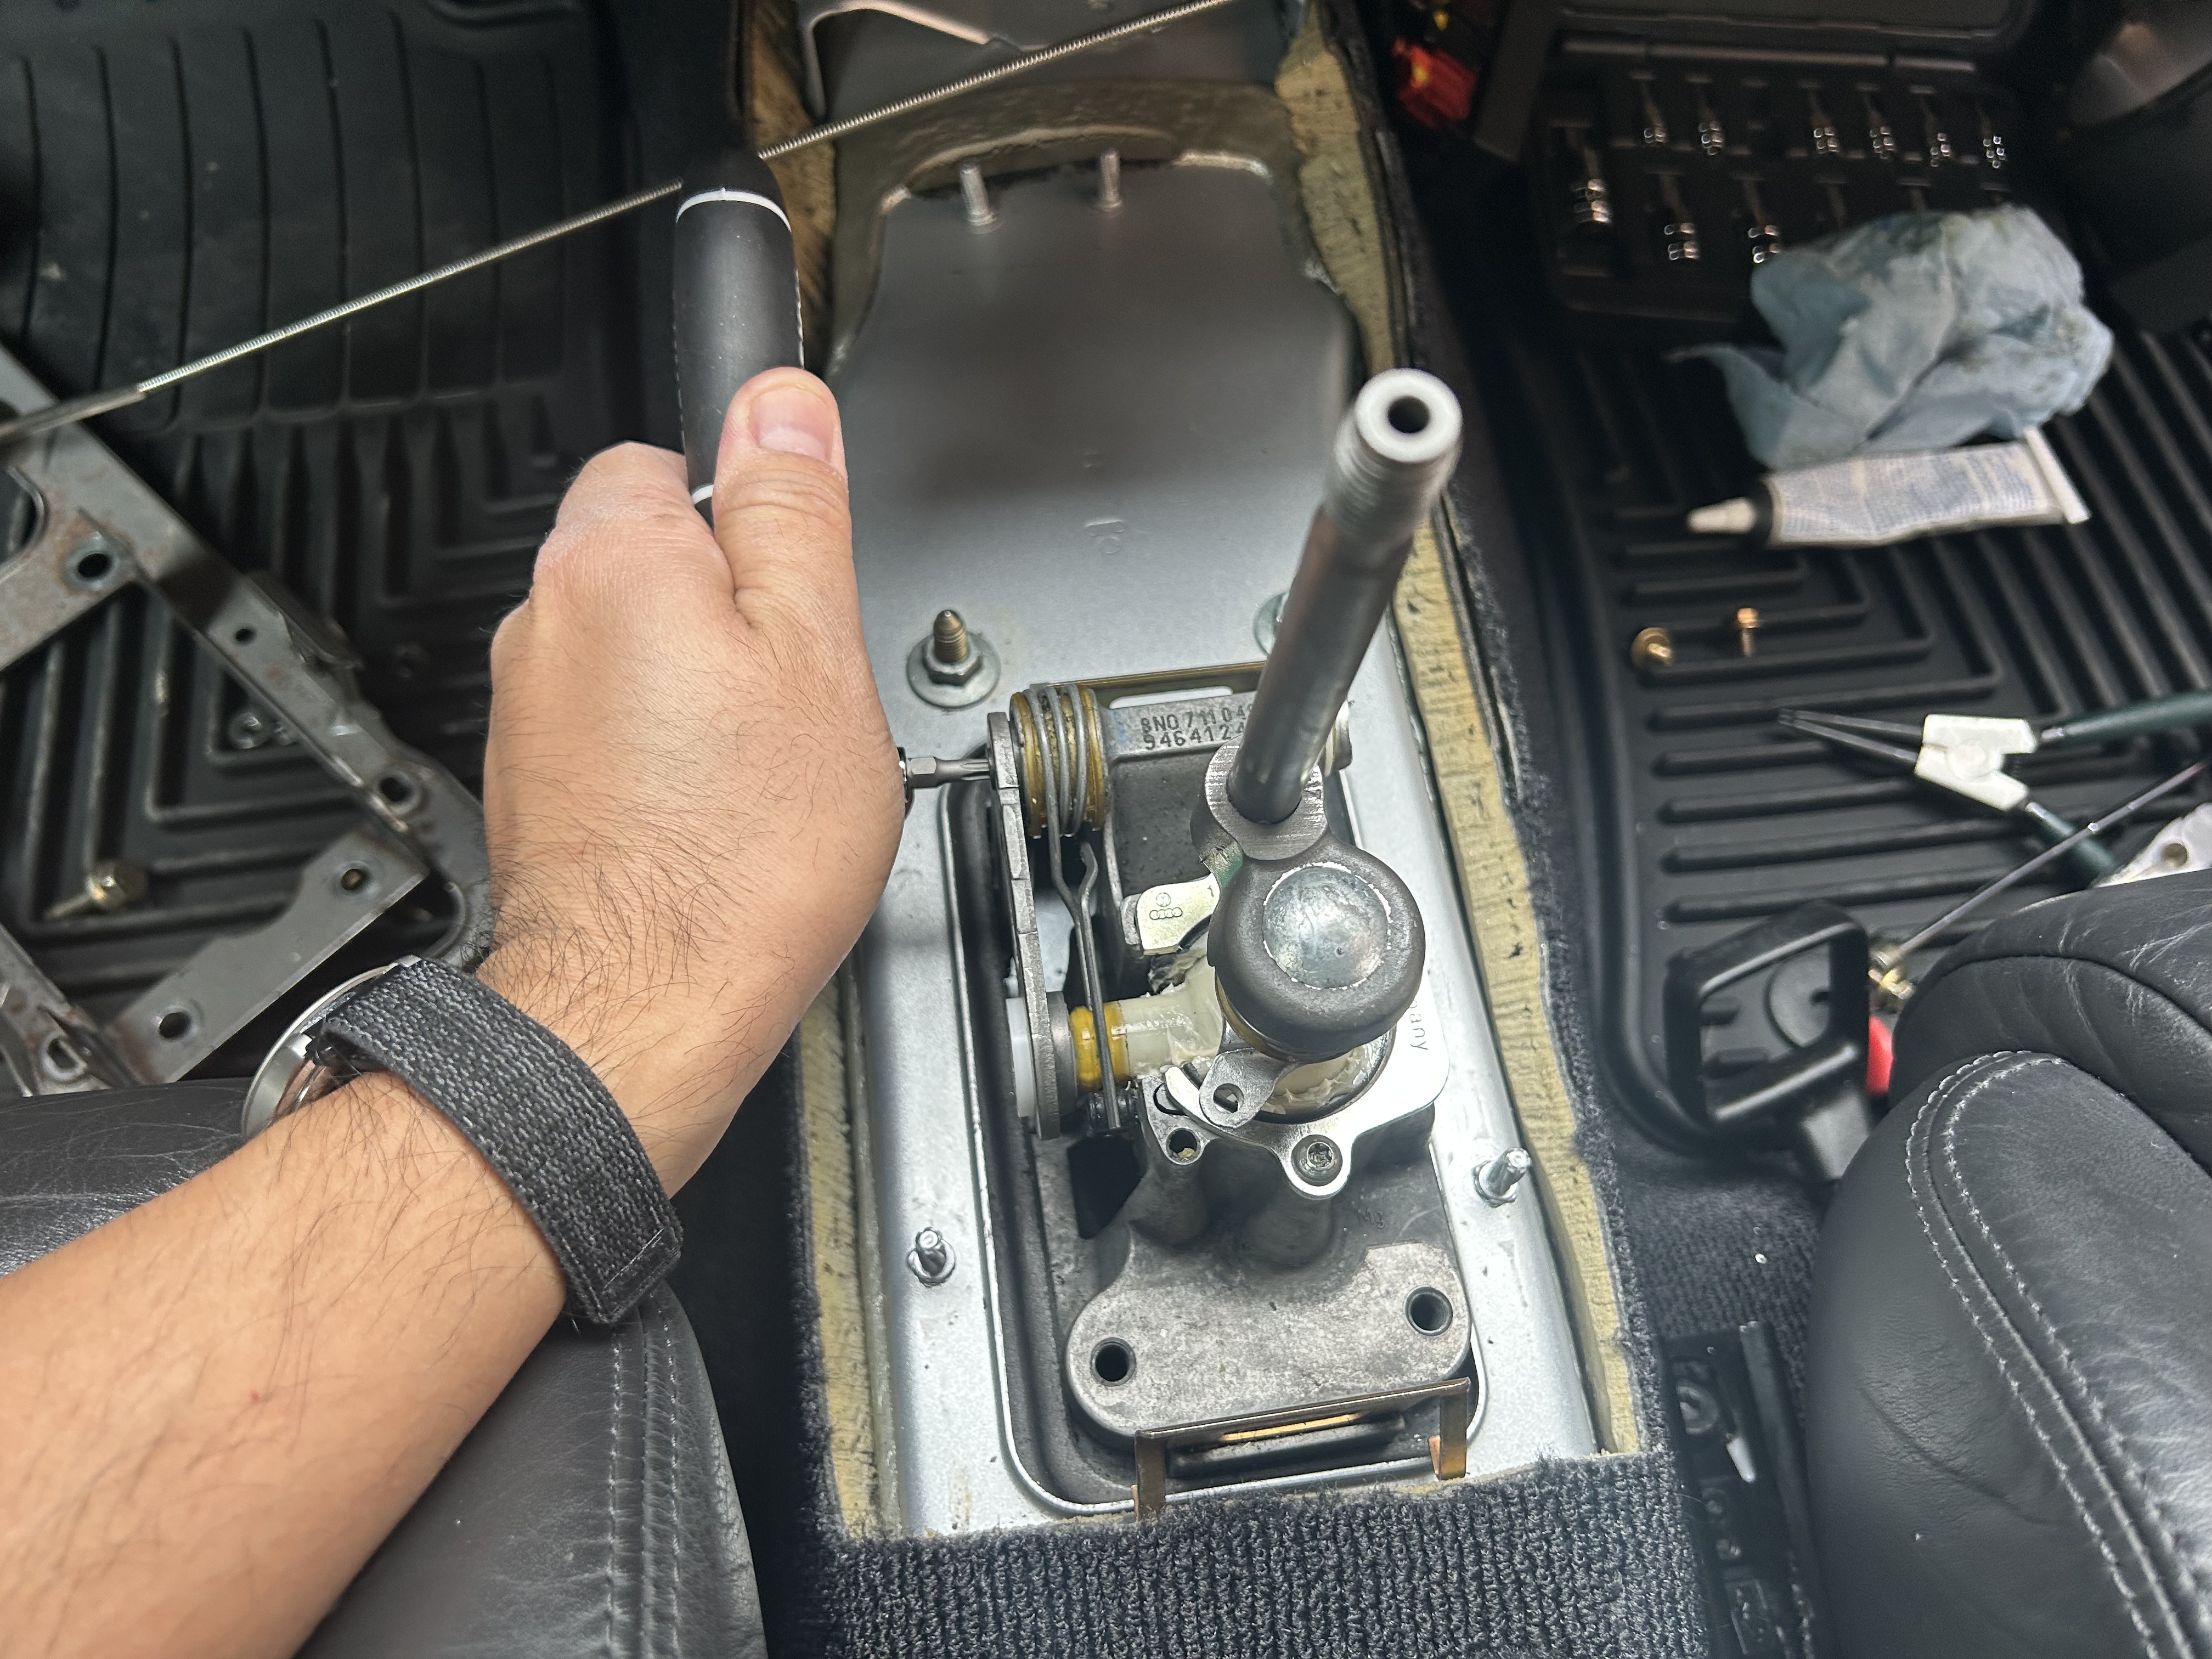
First, you’ll need to remove the center console. I have the steps detailed in this post here if you want to view it there. For this post, I wanted to focus solely on the Dieselgeek bushing kit install because there are quite a few steps involved and I don’t want to make it any longer than it already is.
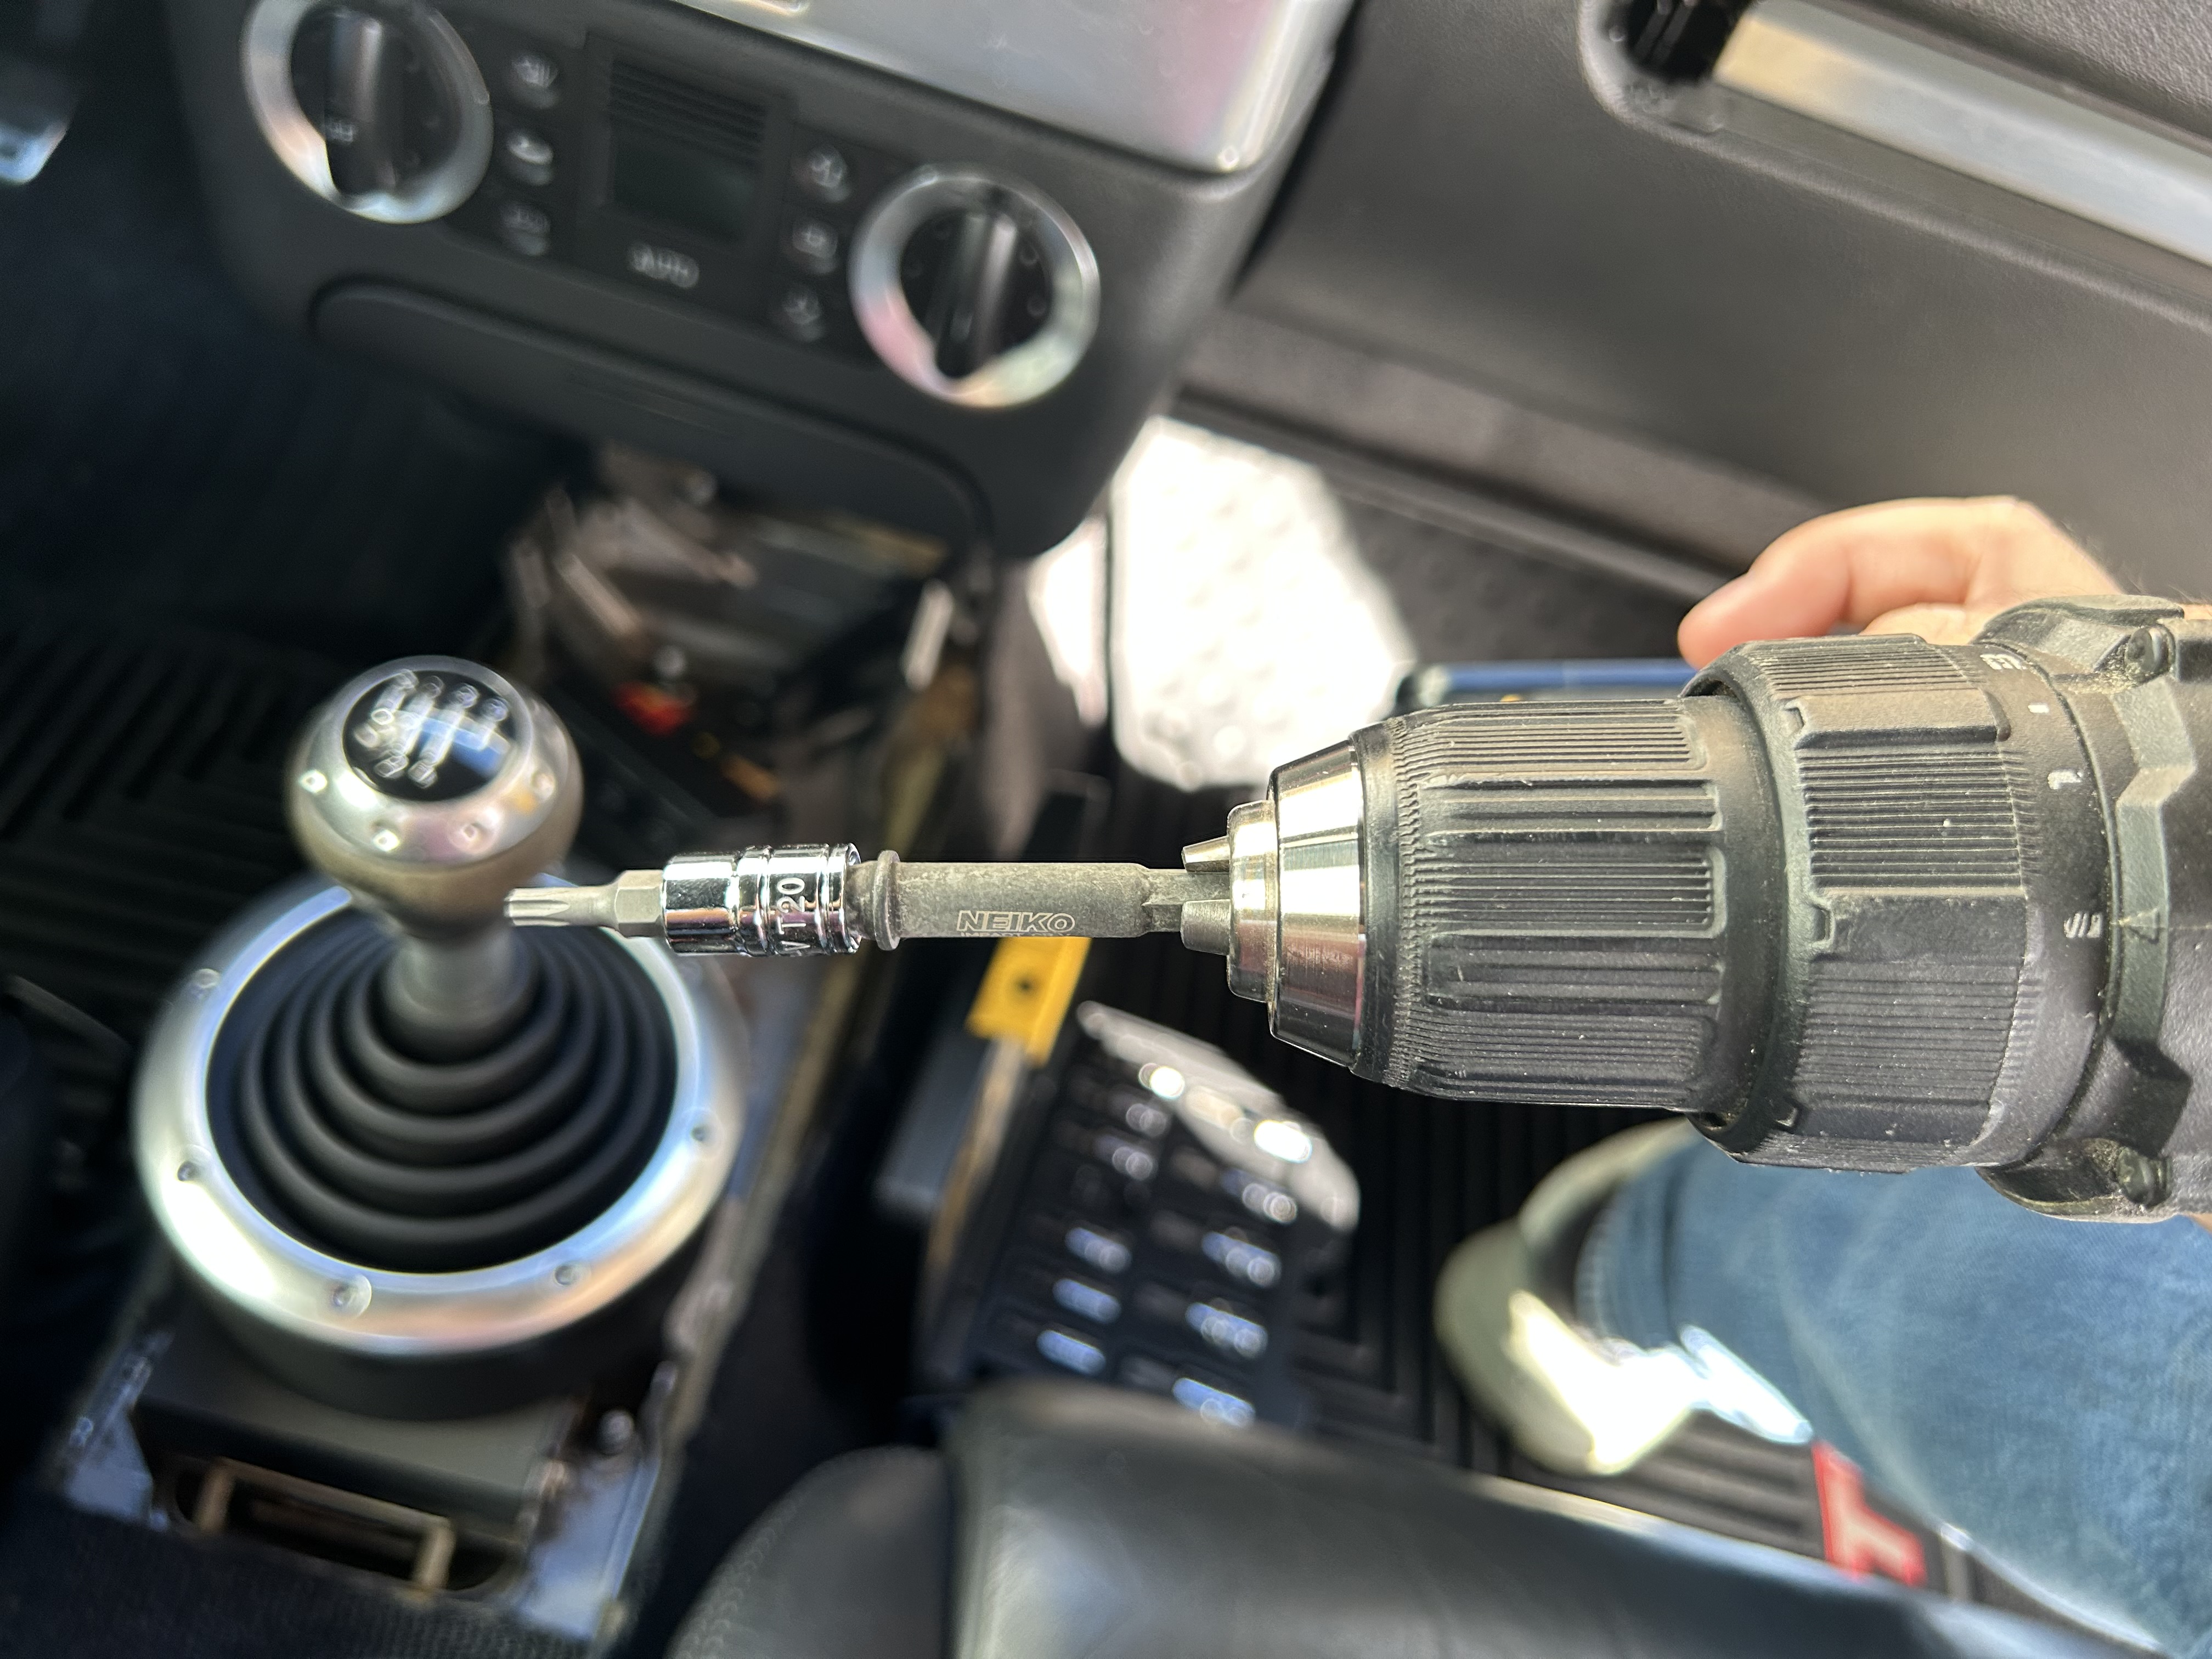
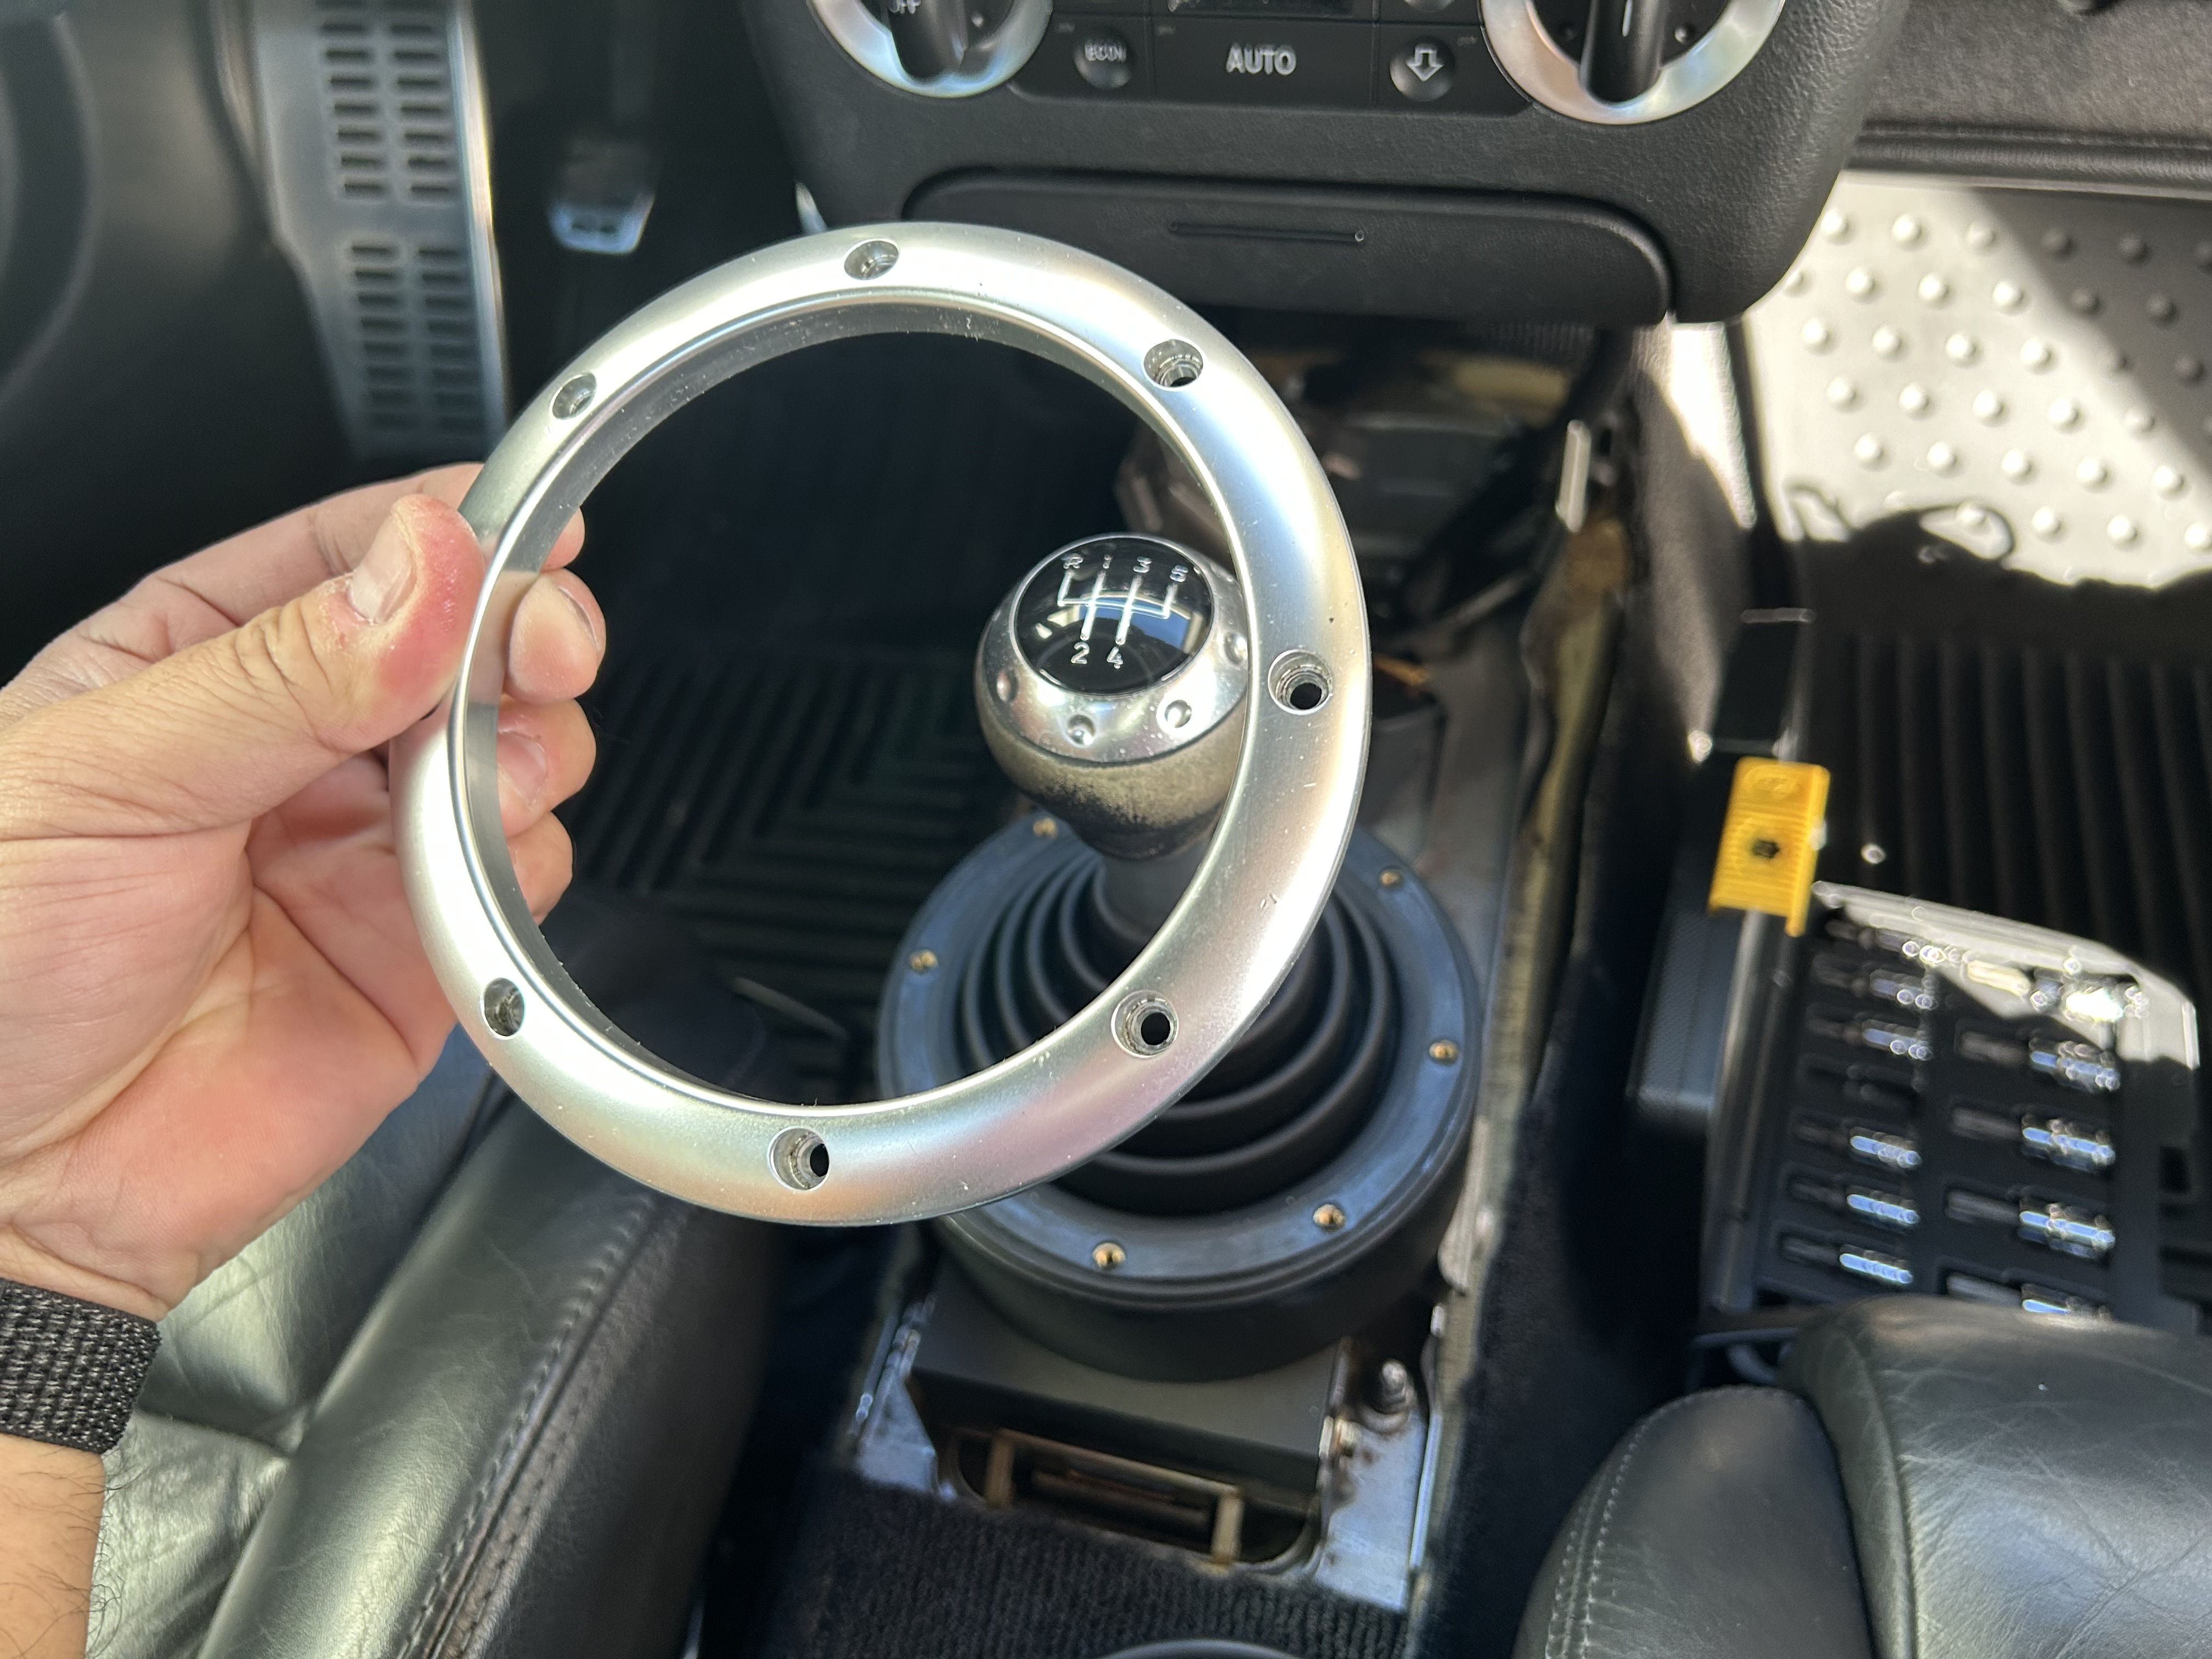
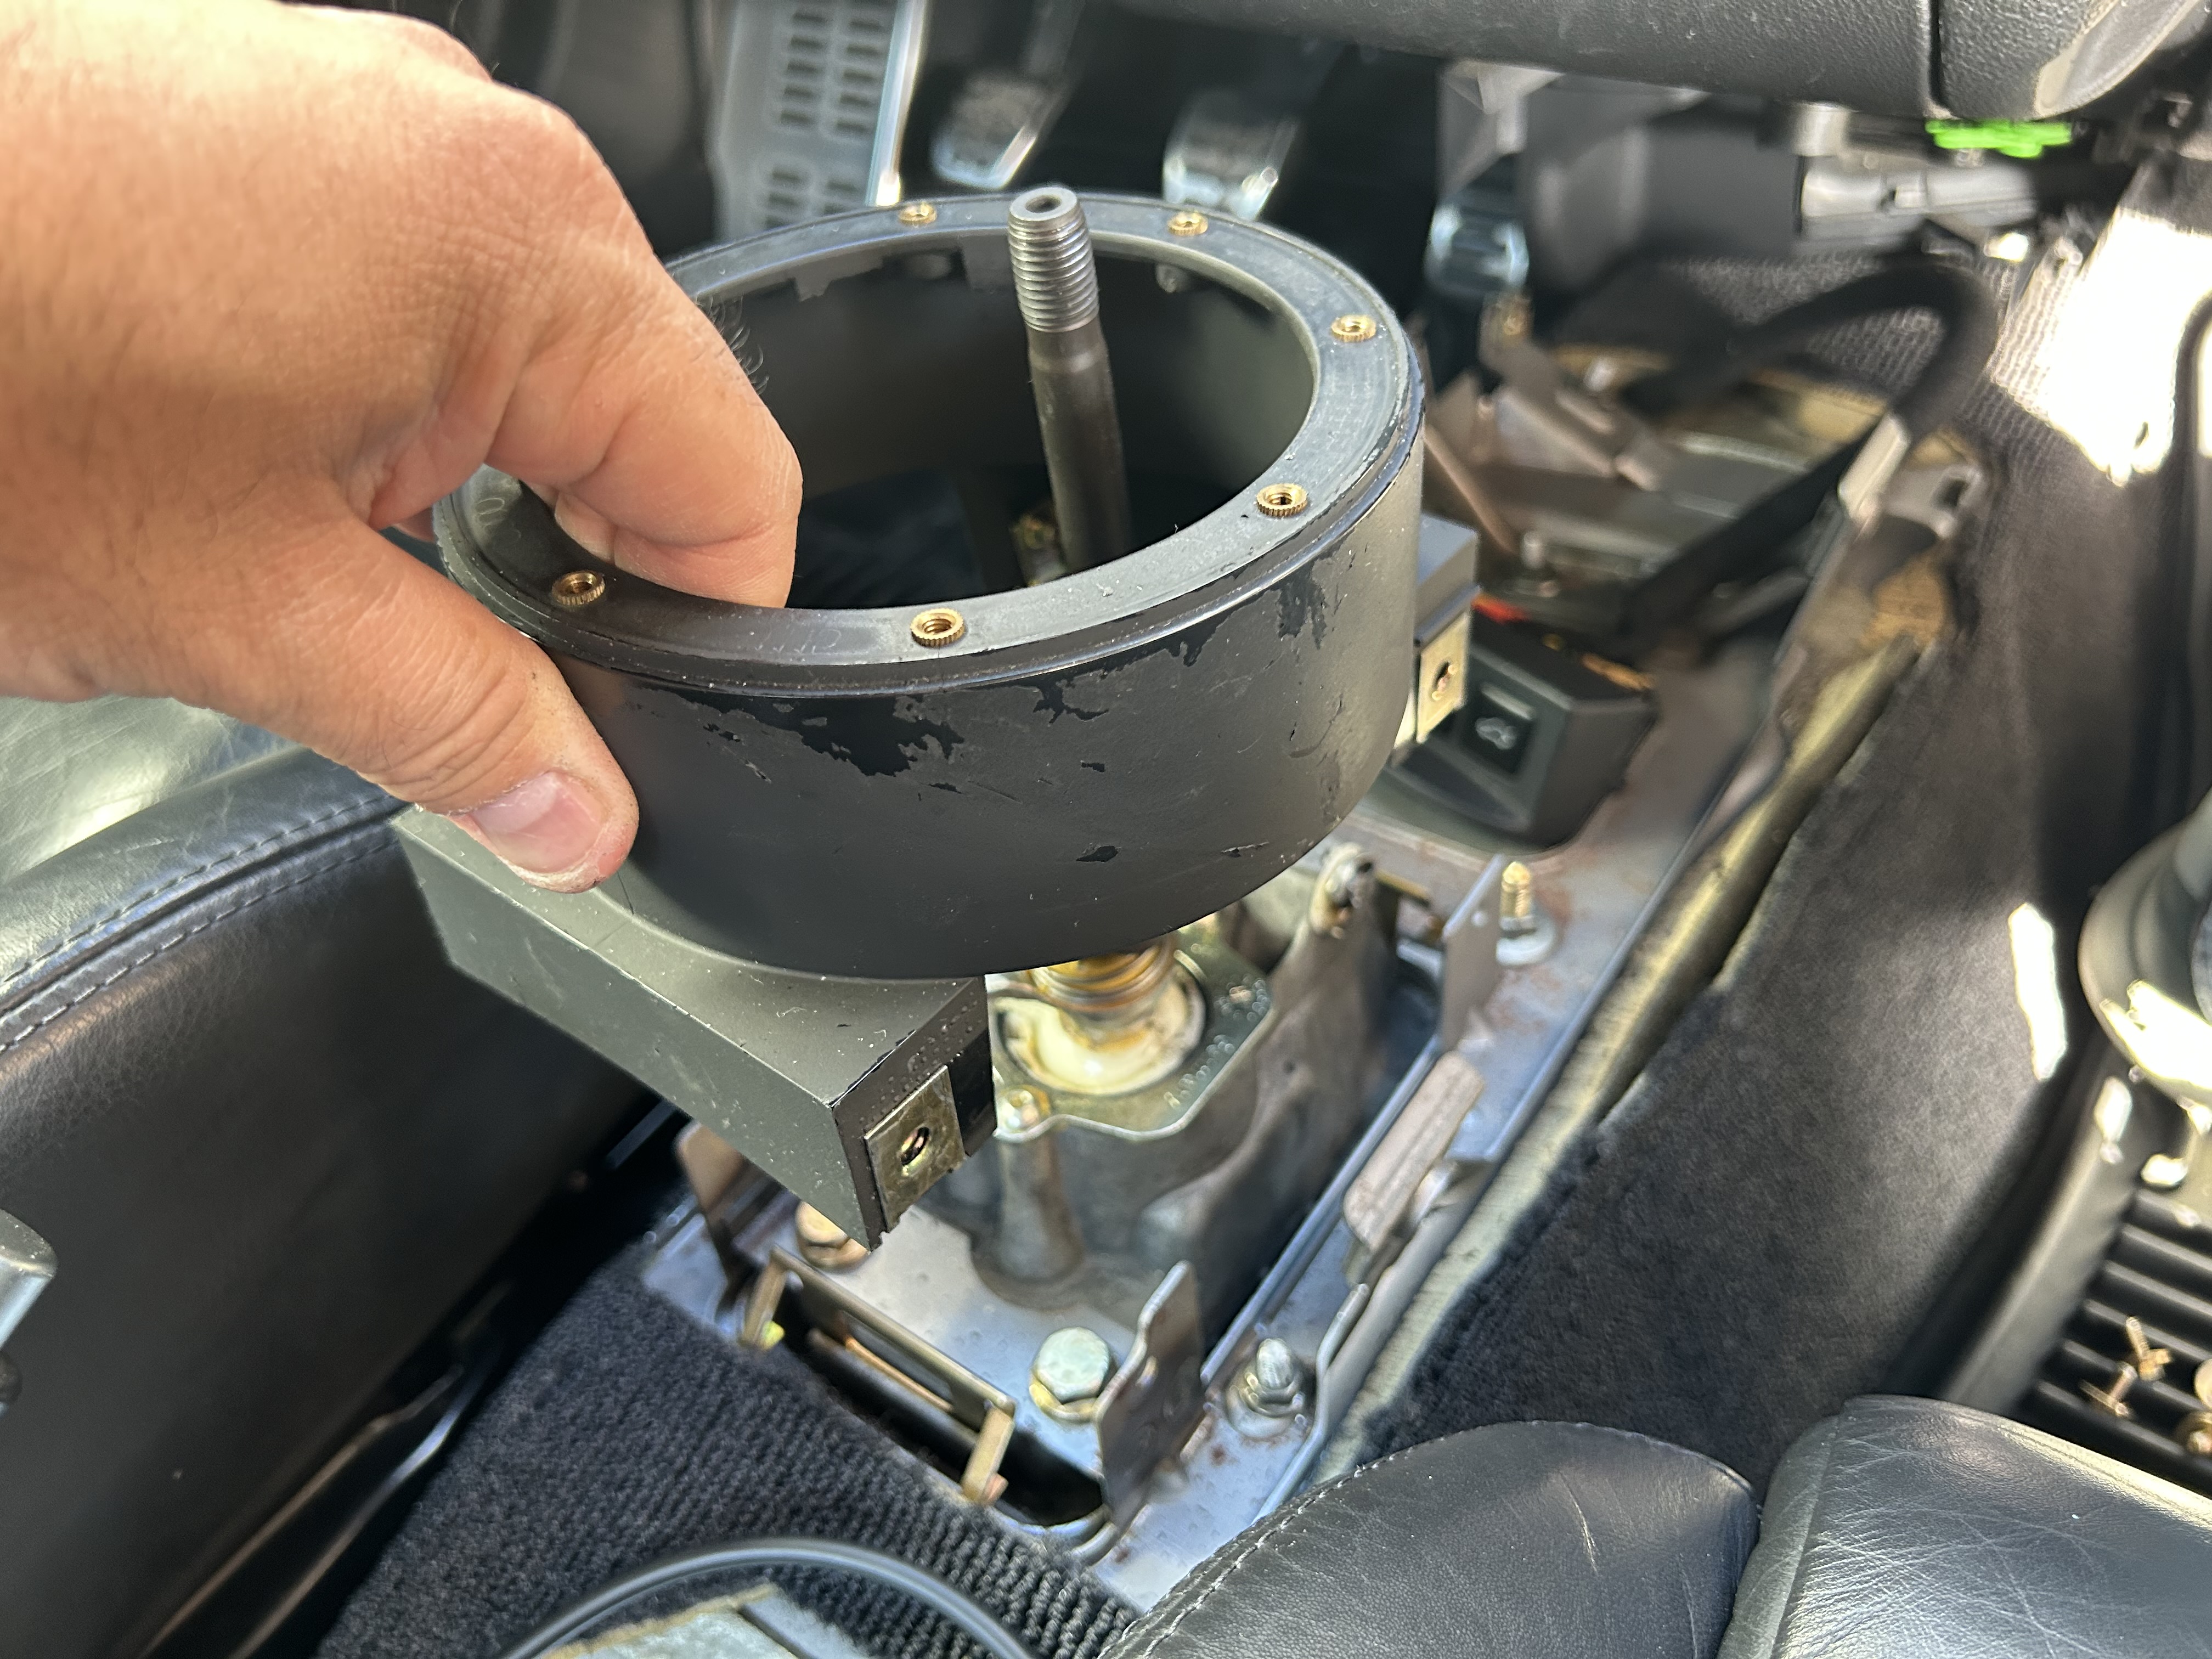
Now, use a T20 Torx bit to remove the (8 qty) bolts from the round shifter trim. Remove the trim piece.
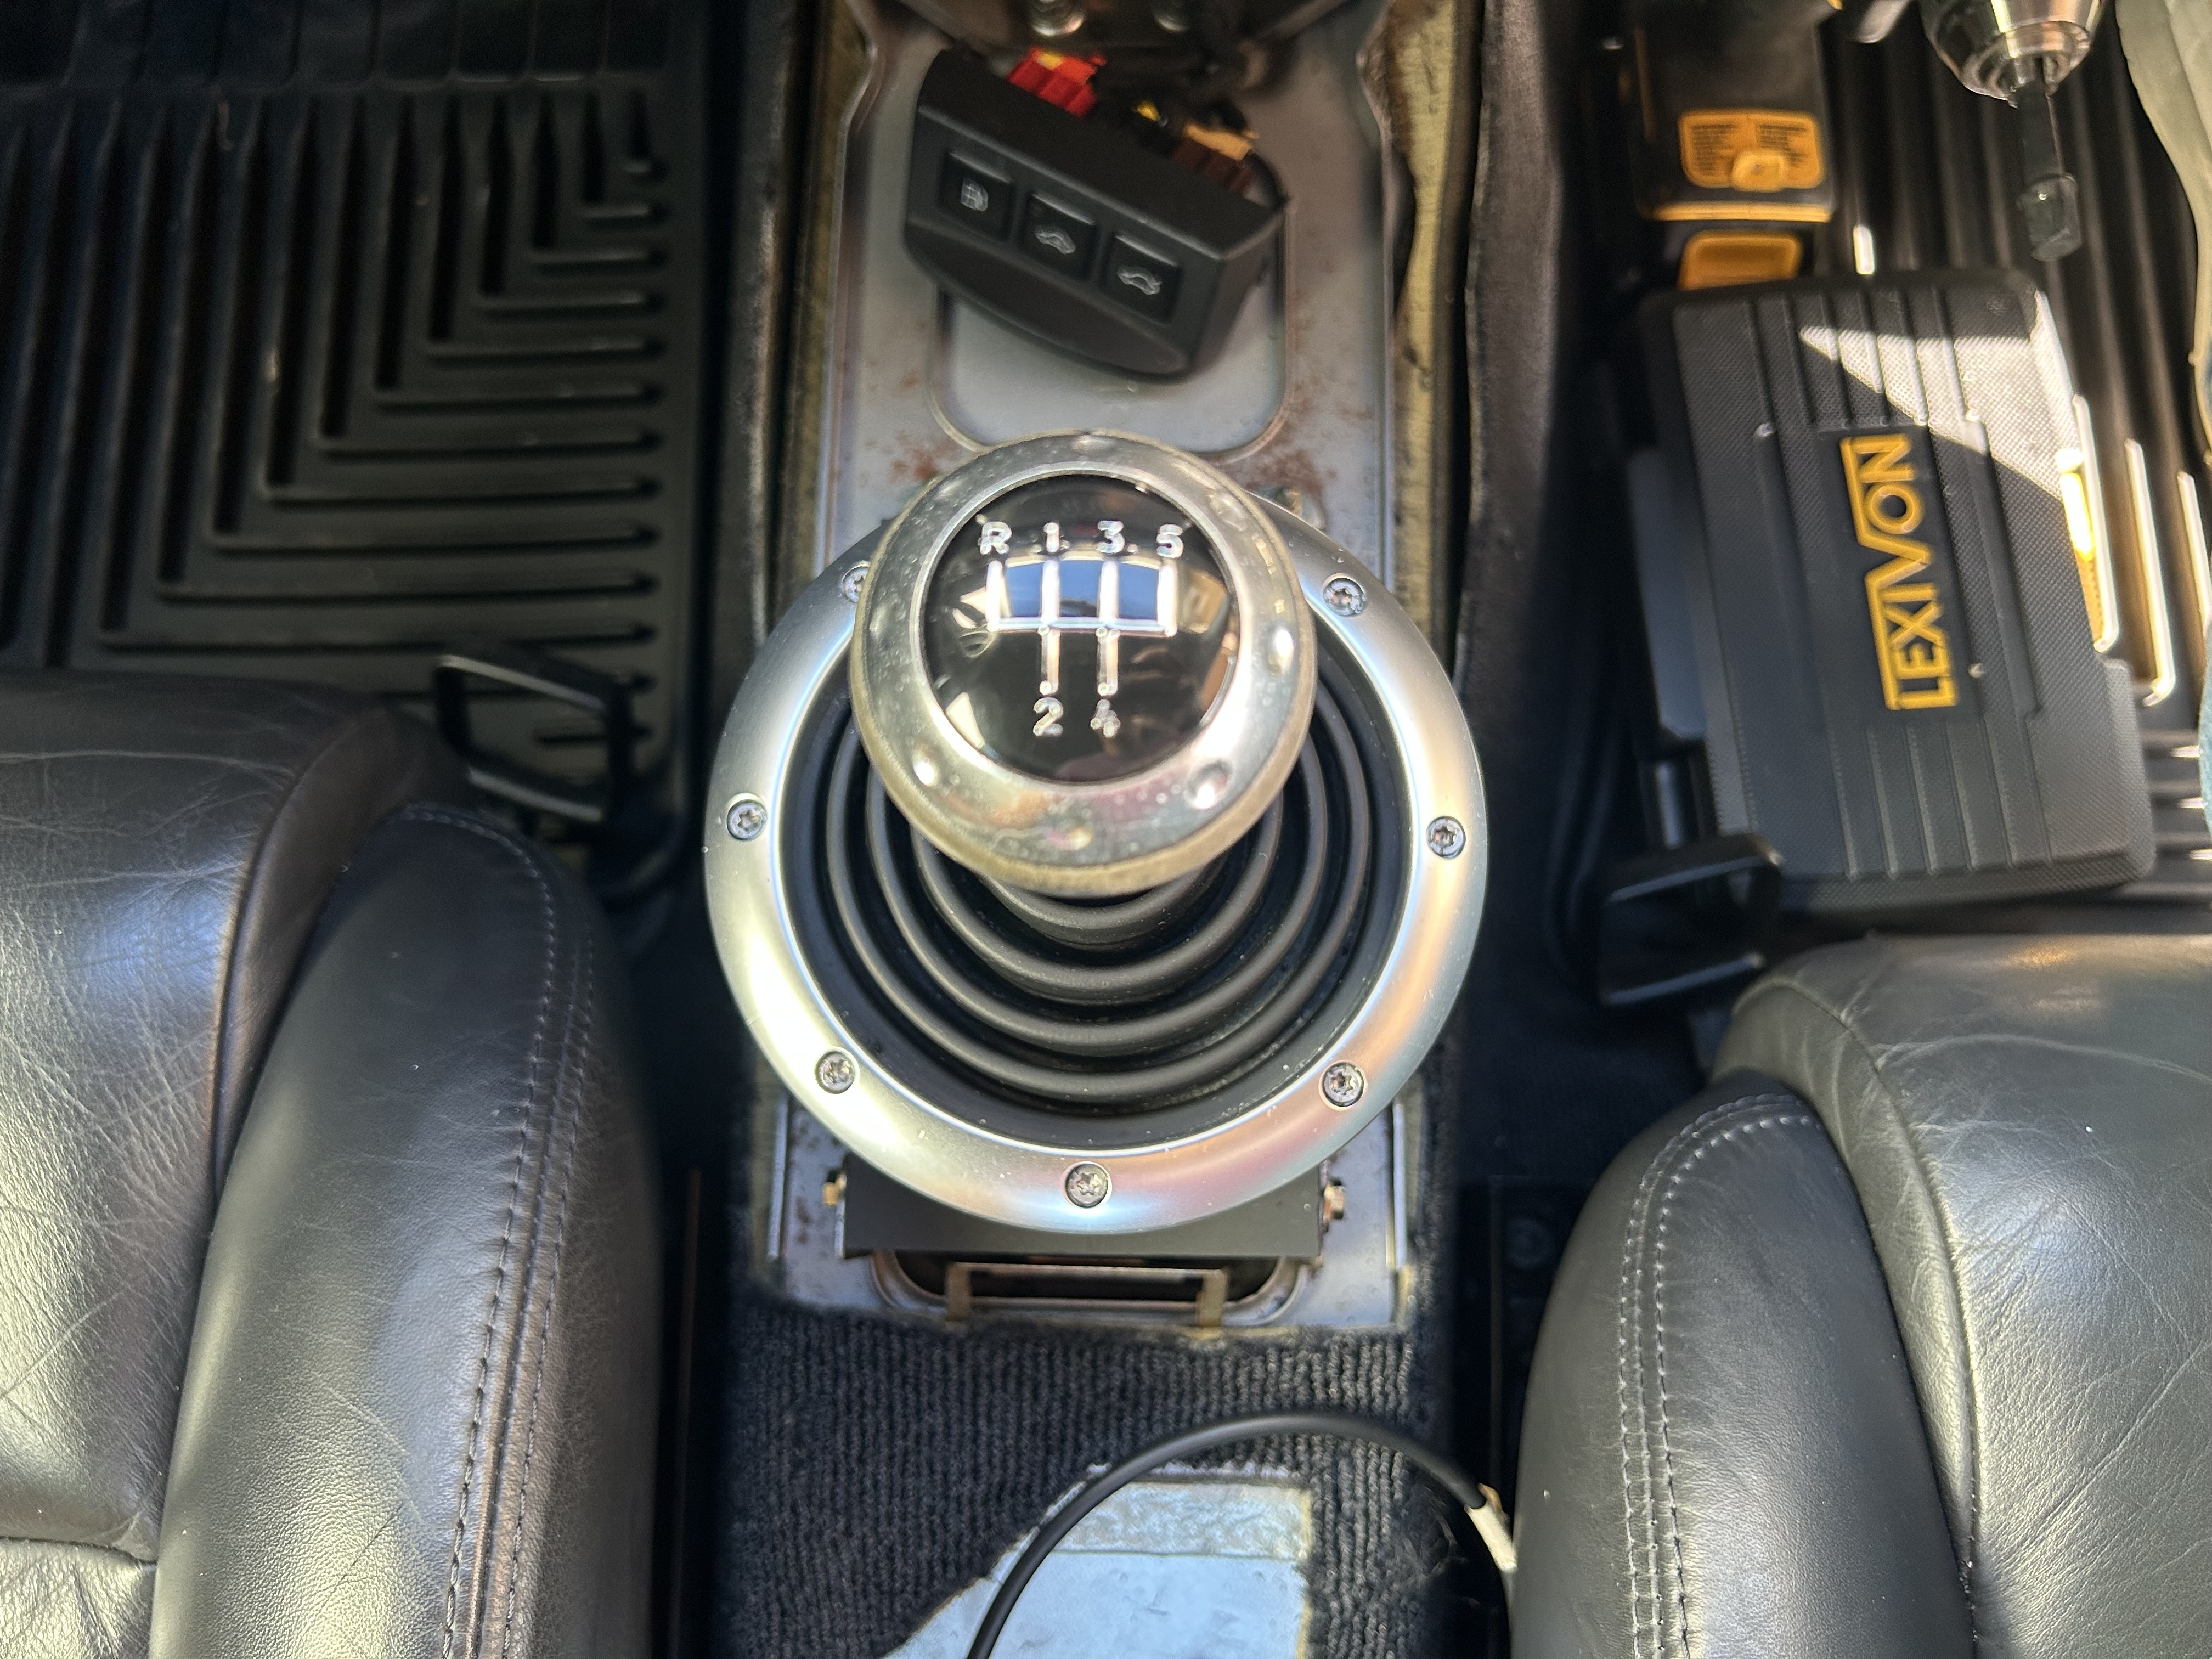
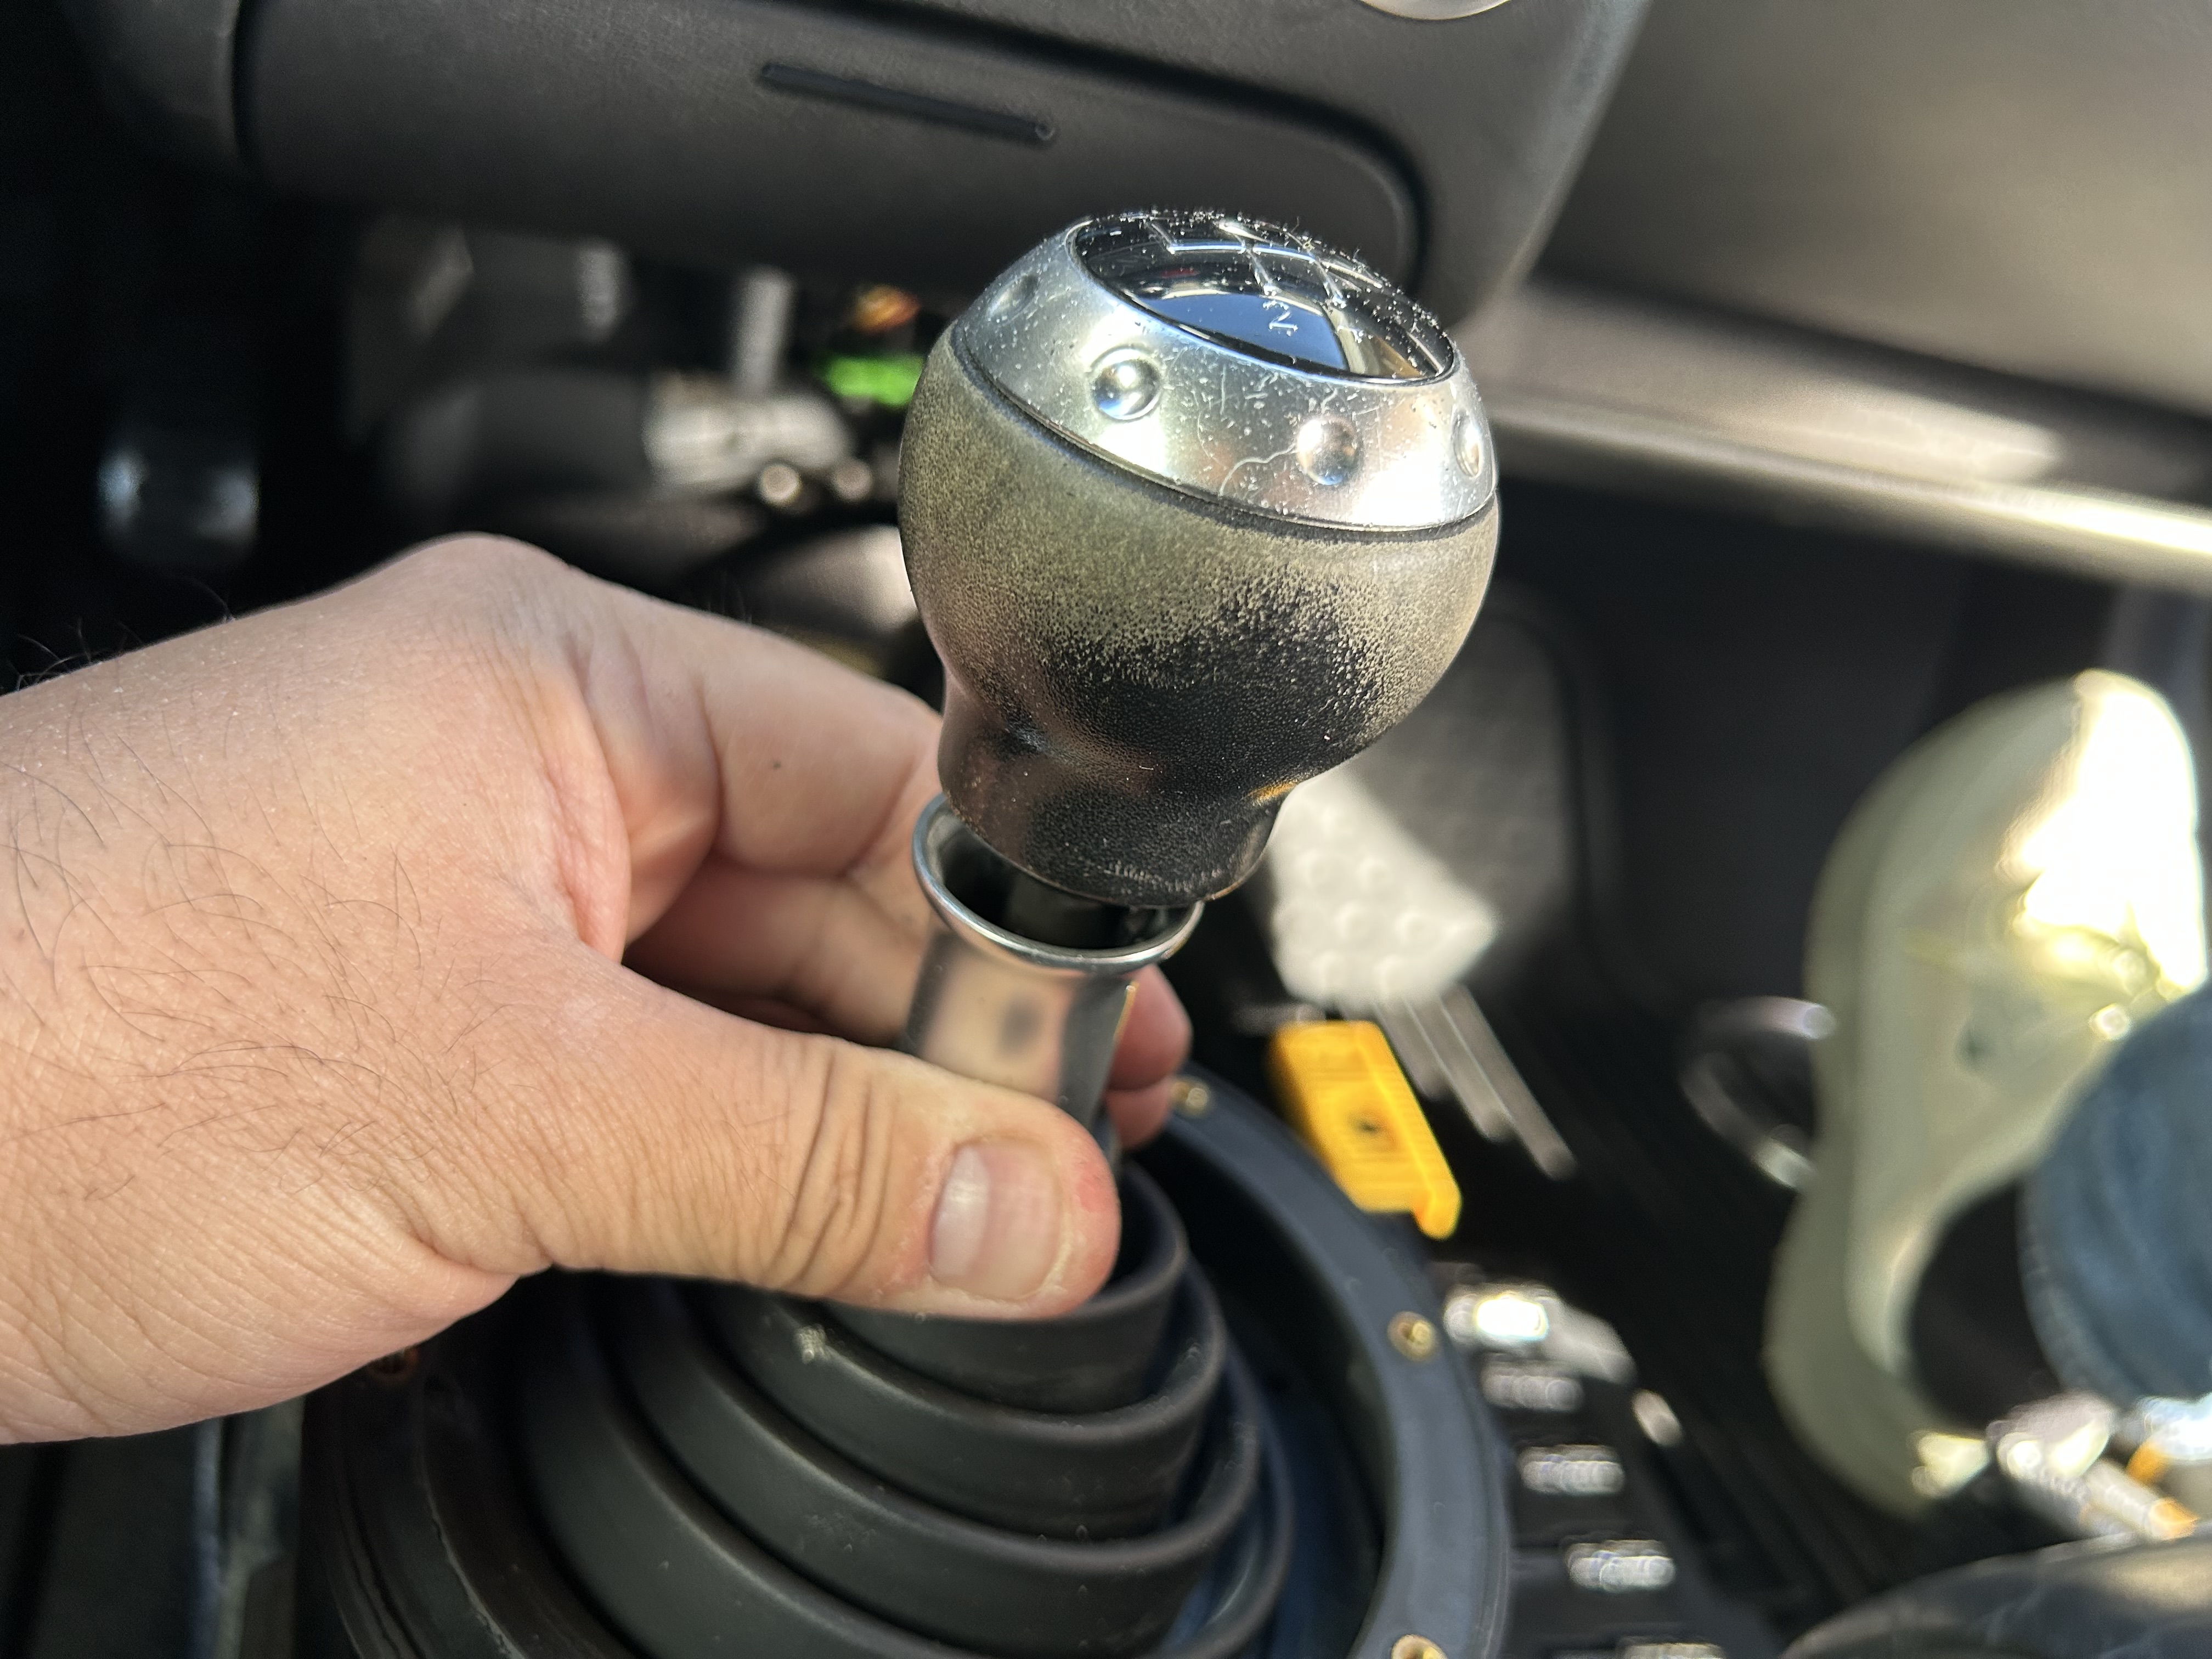
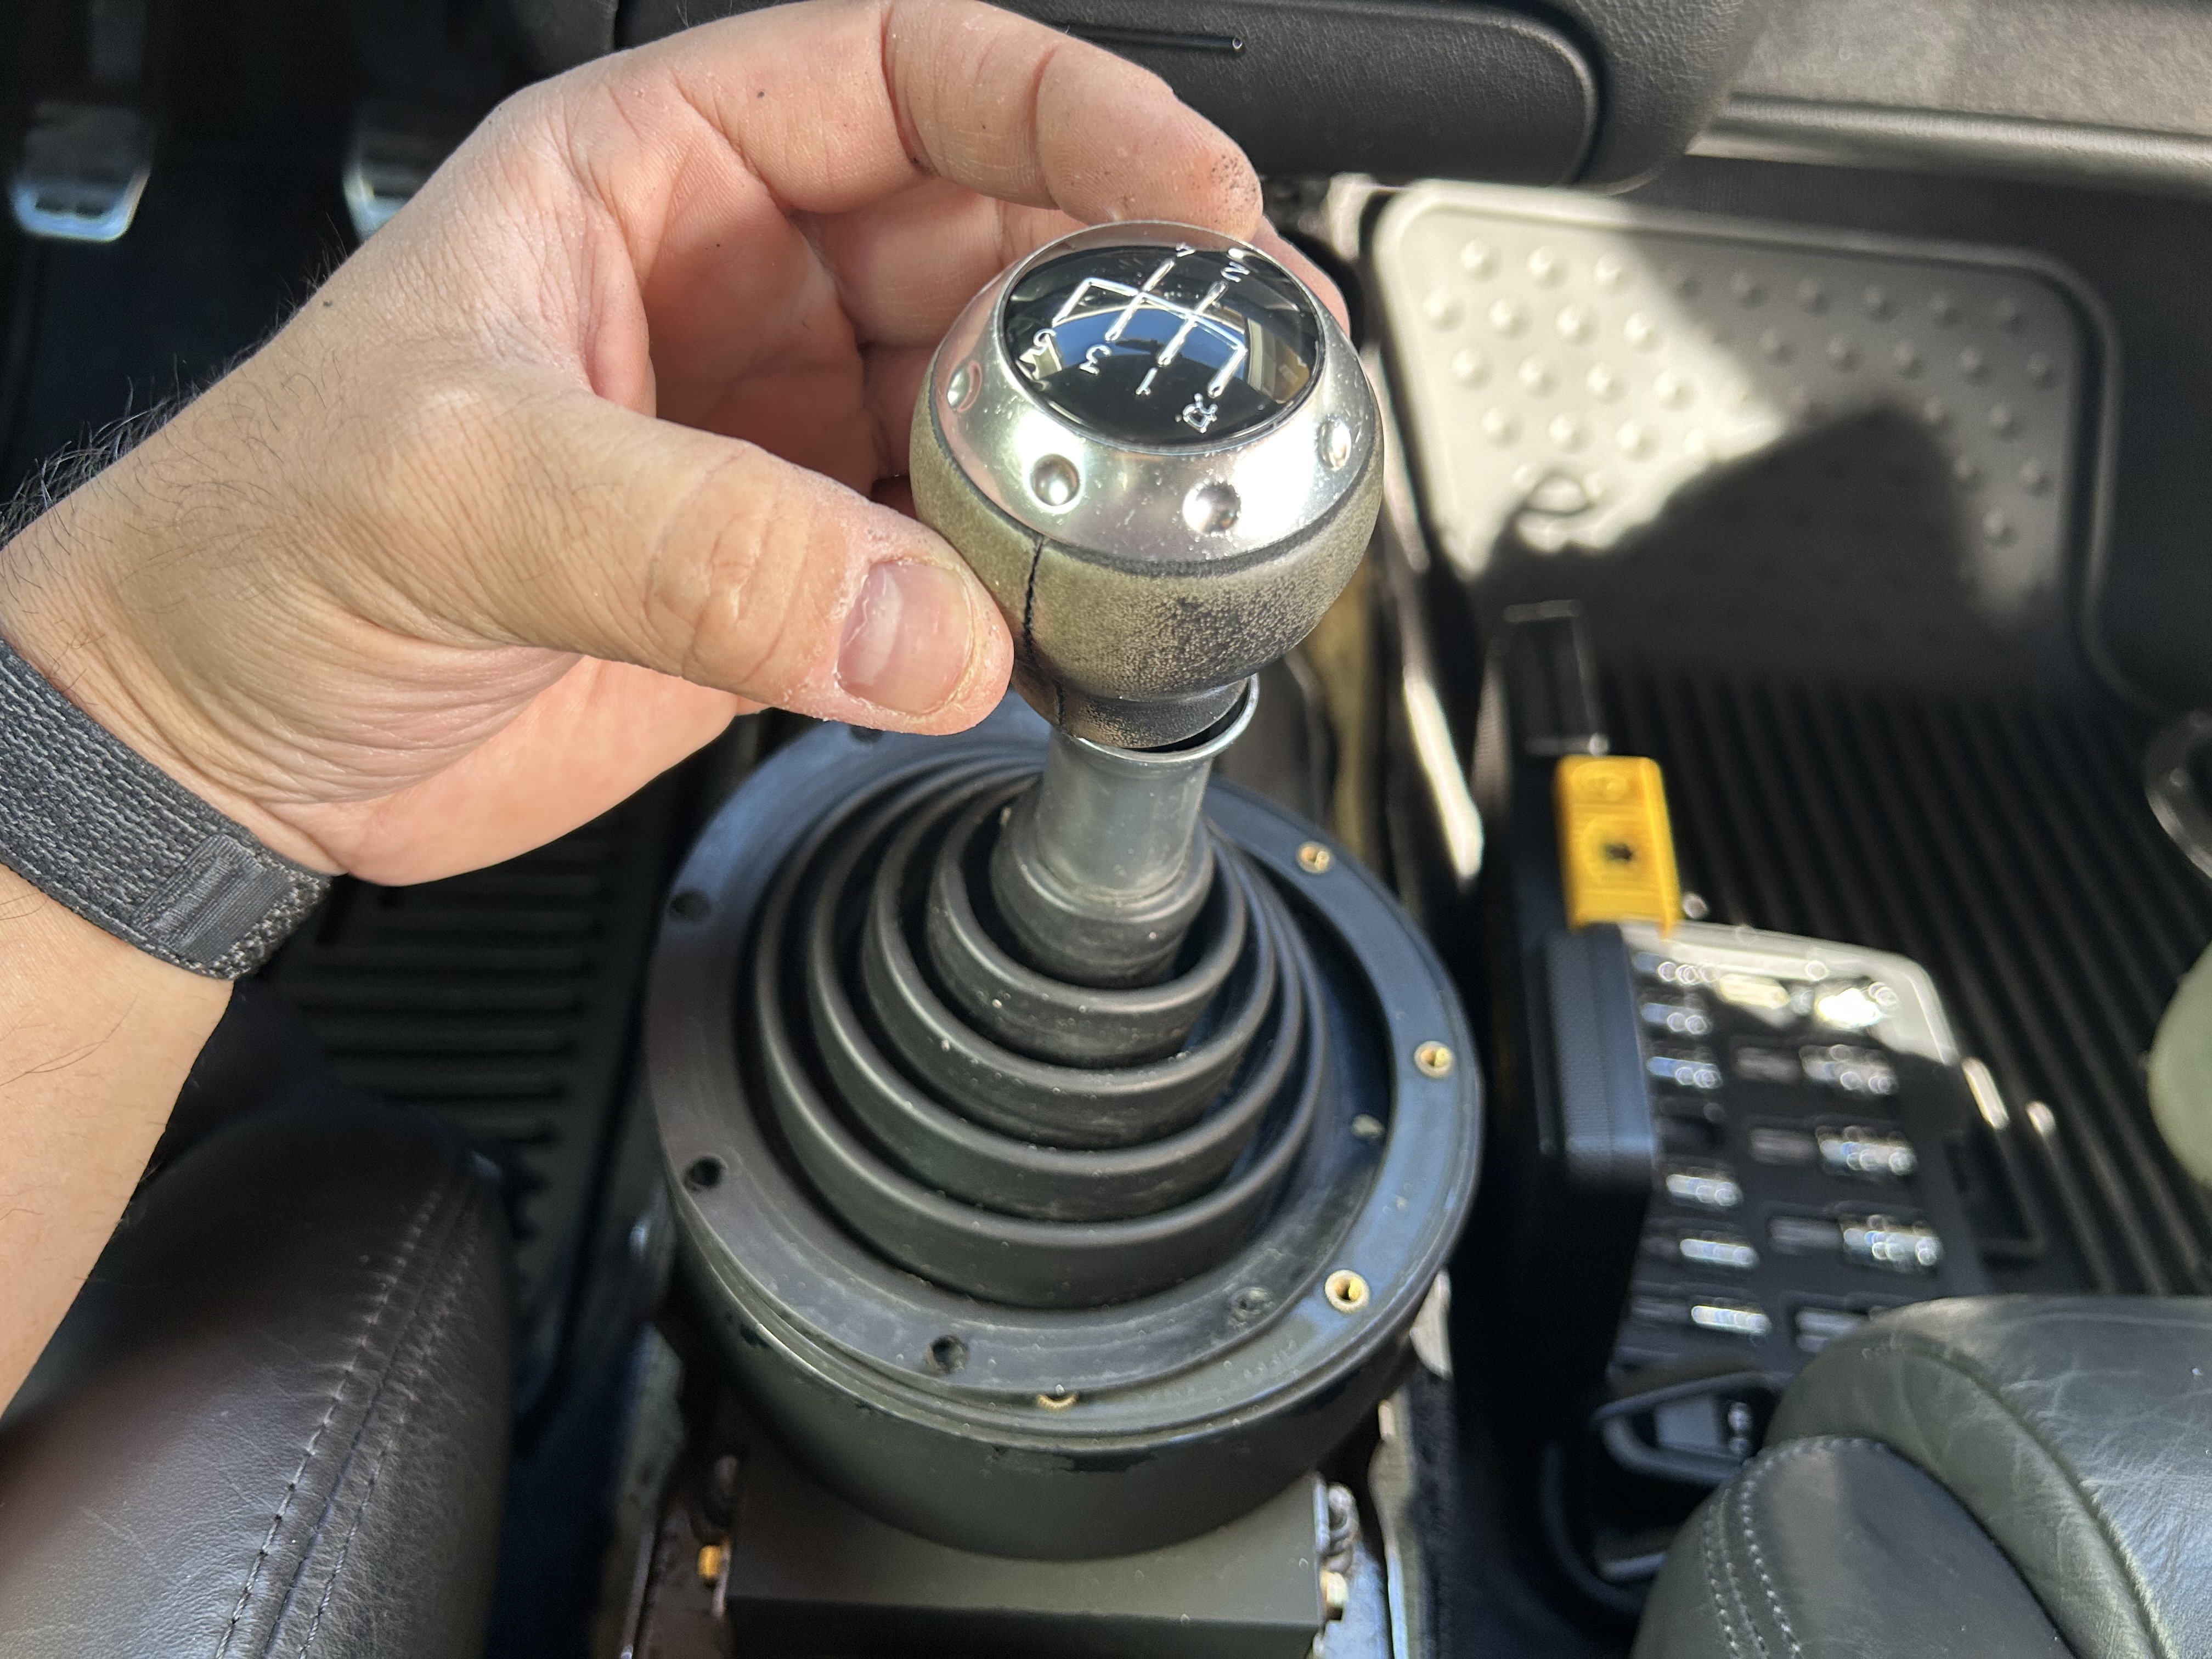
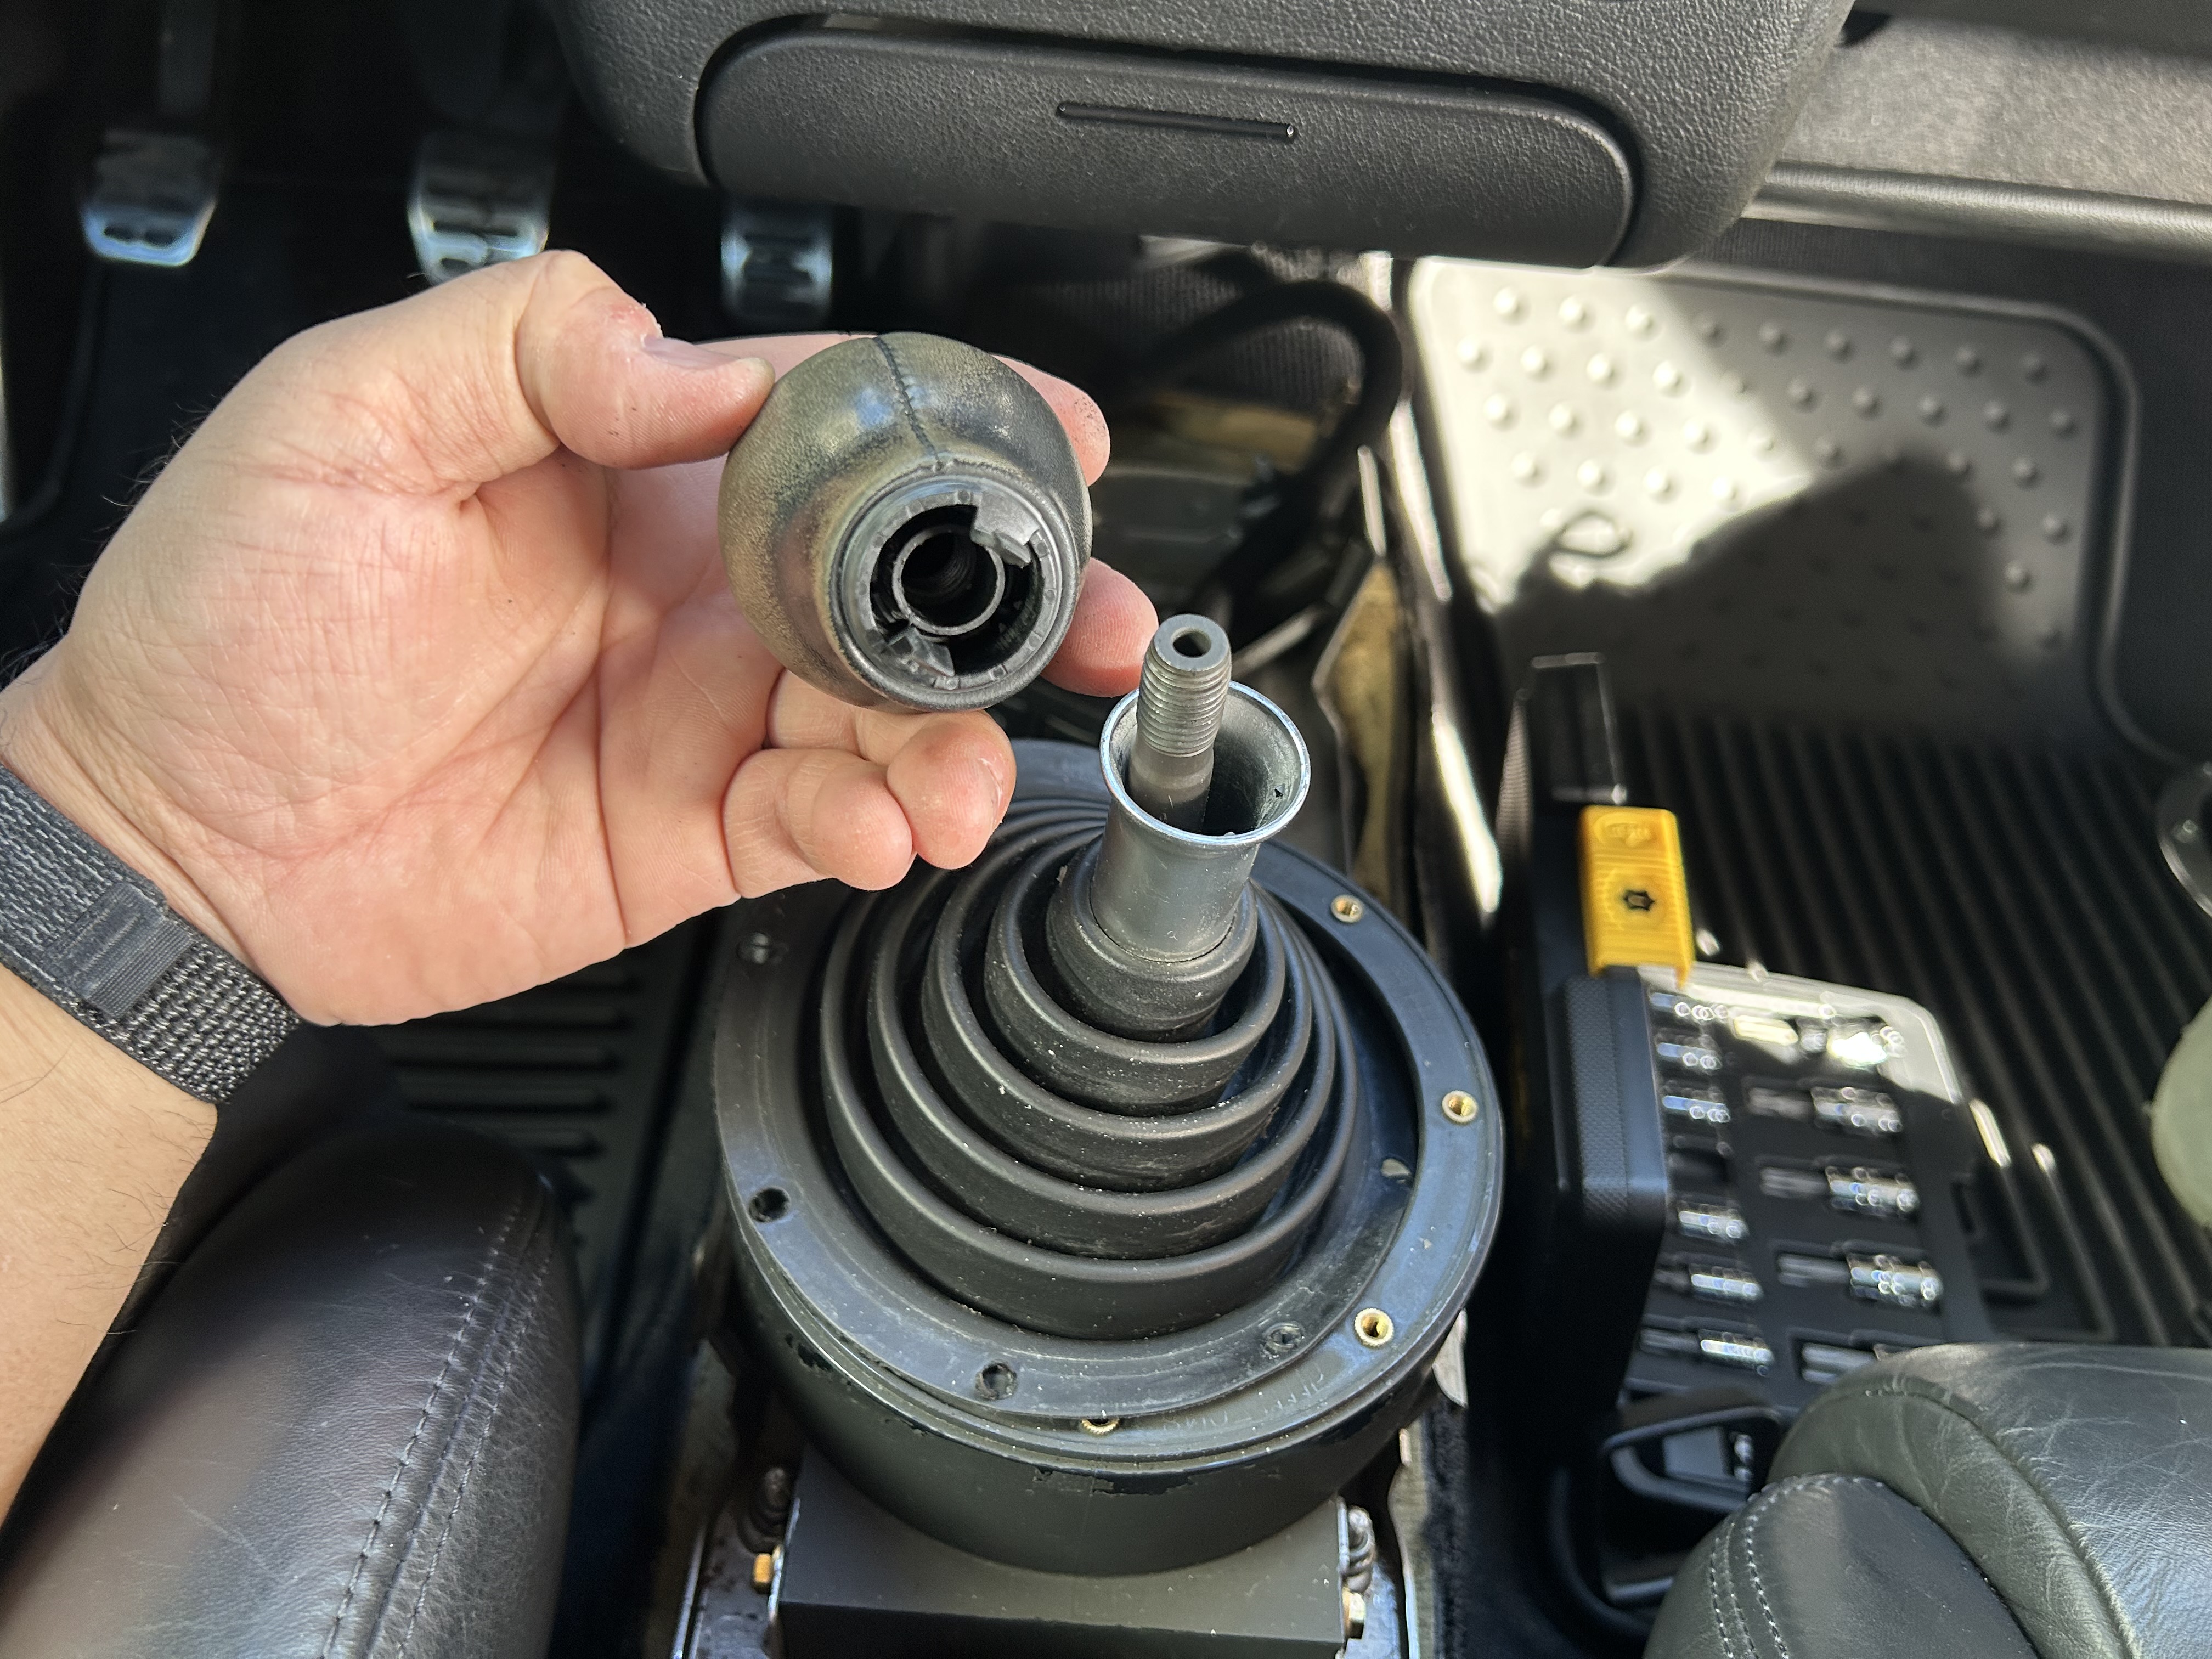
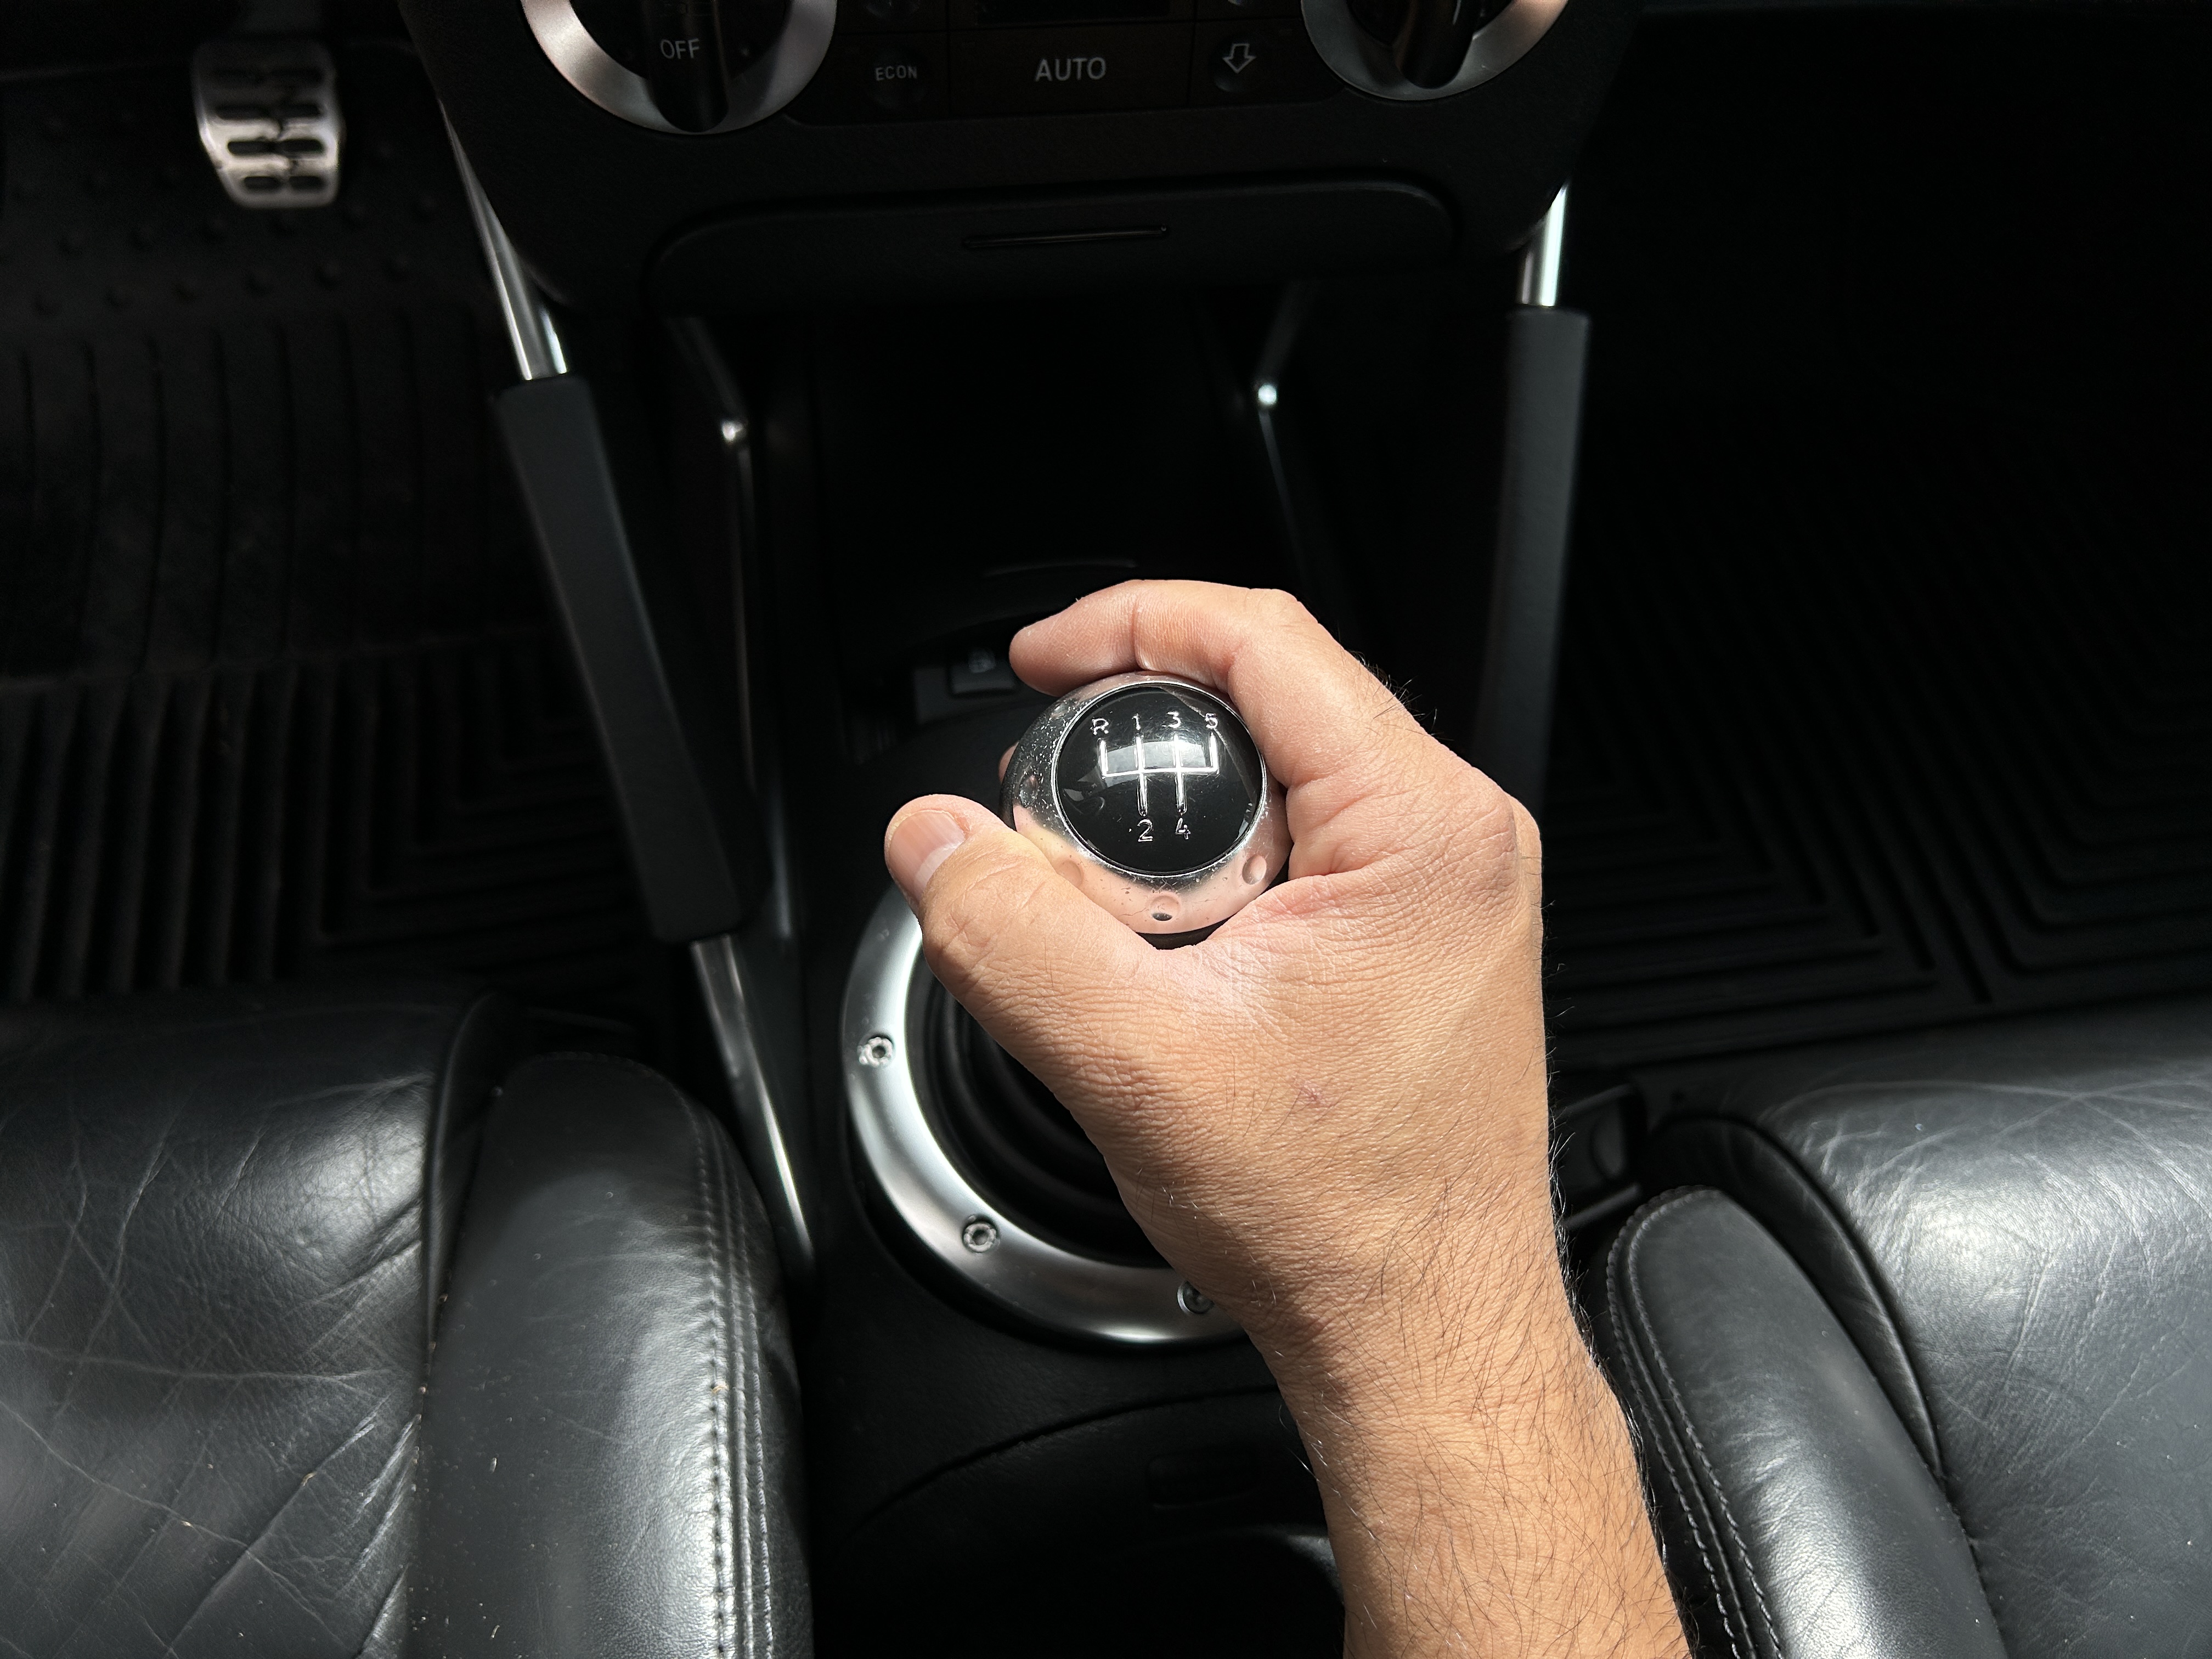
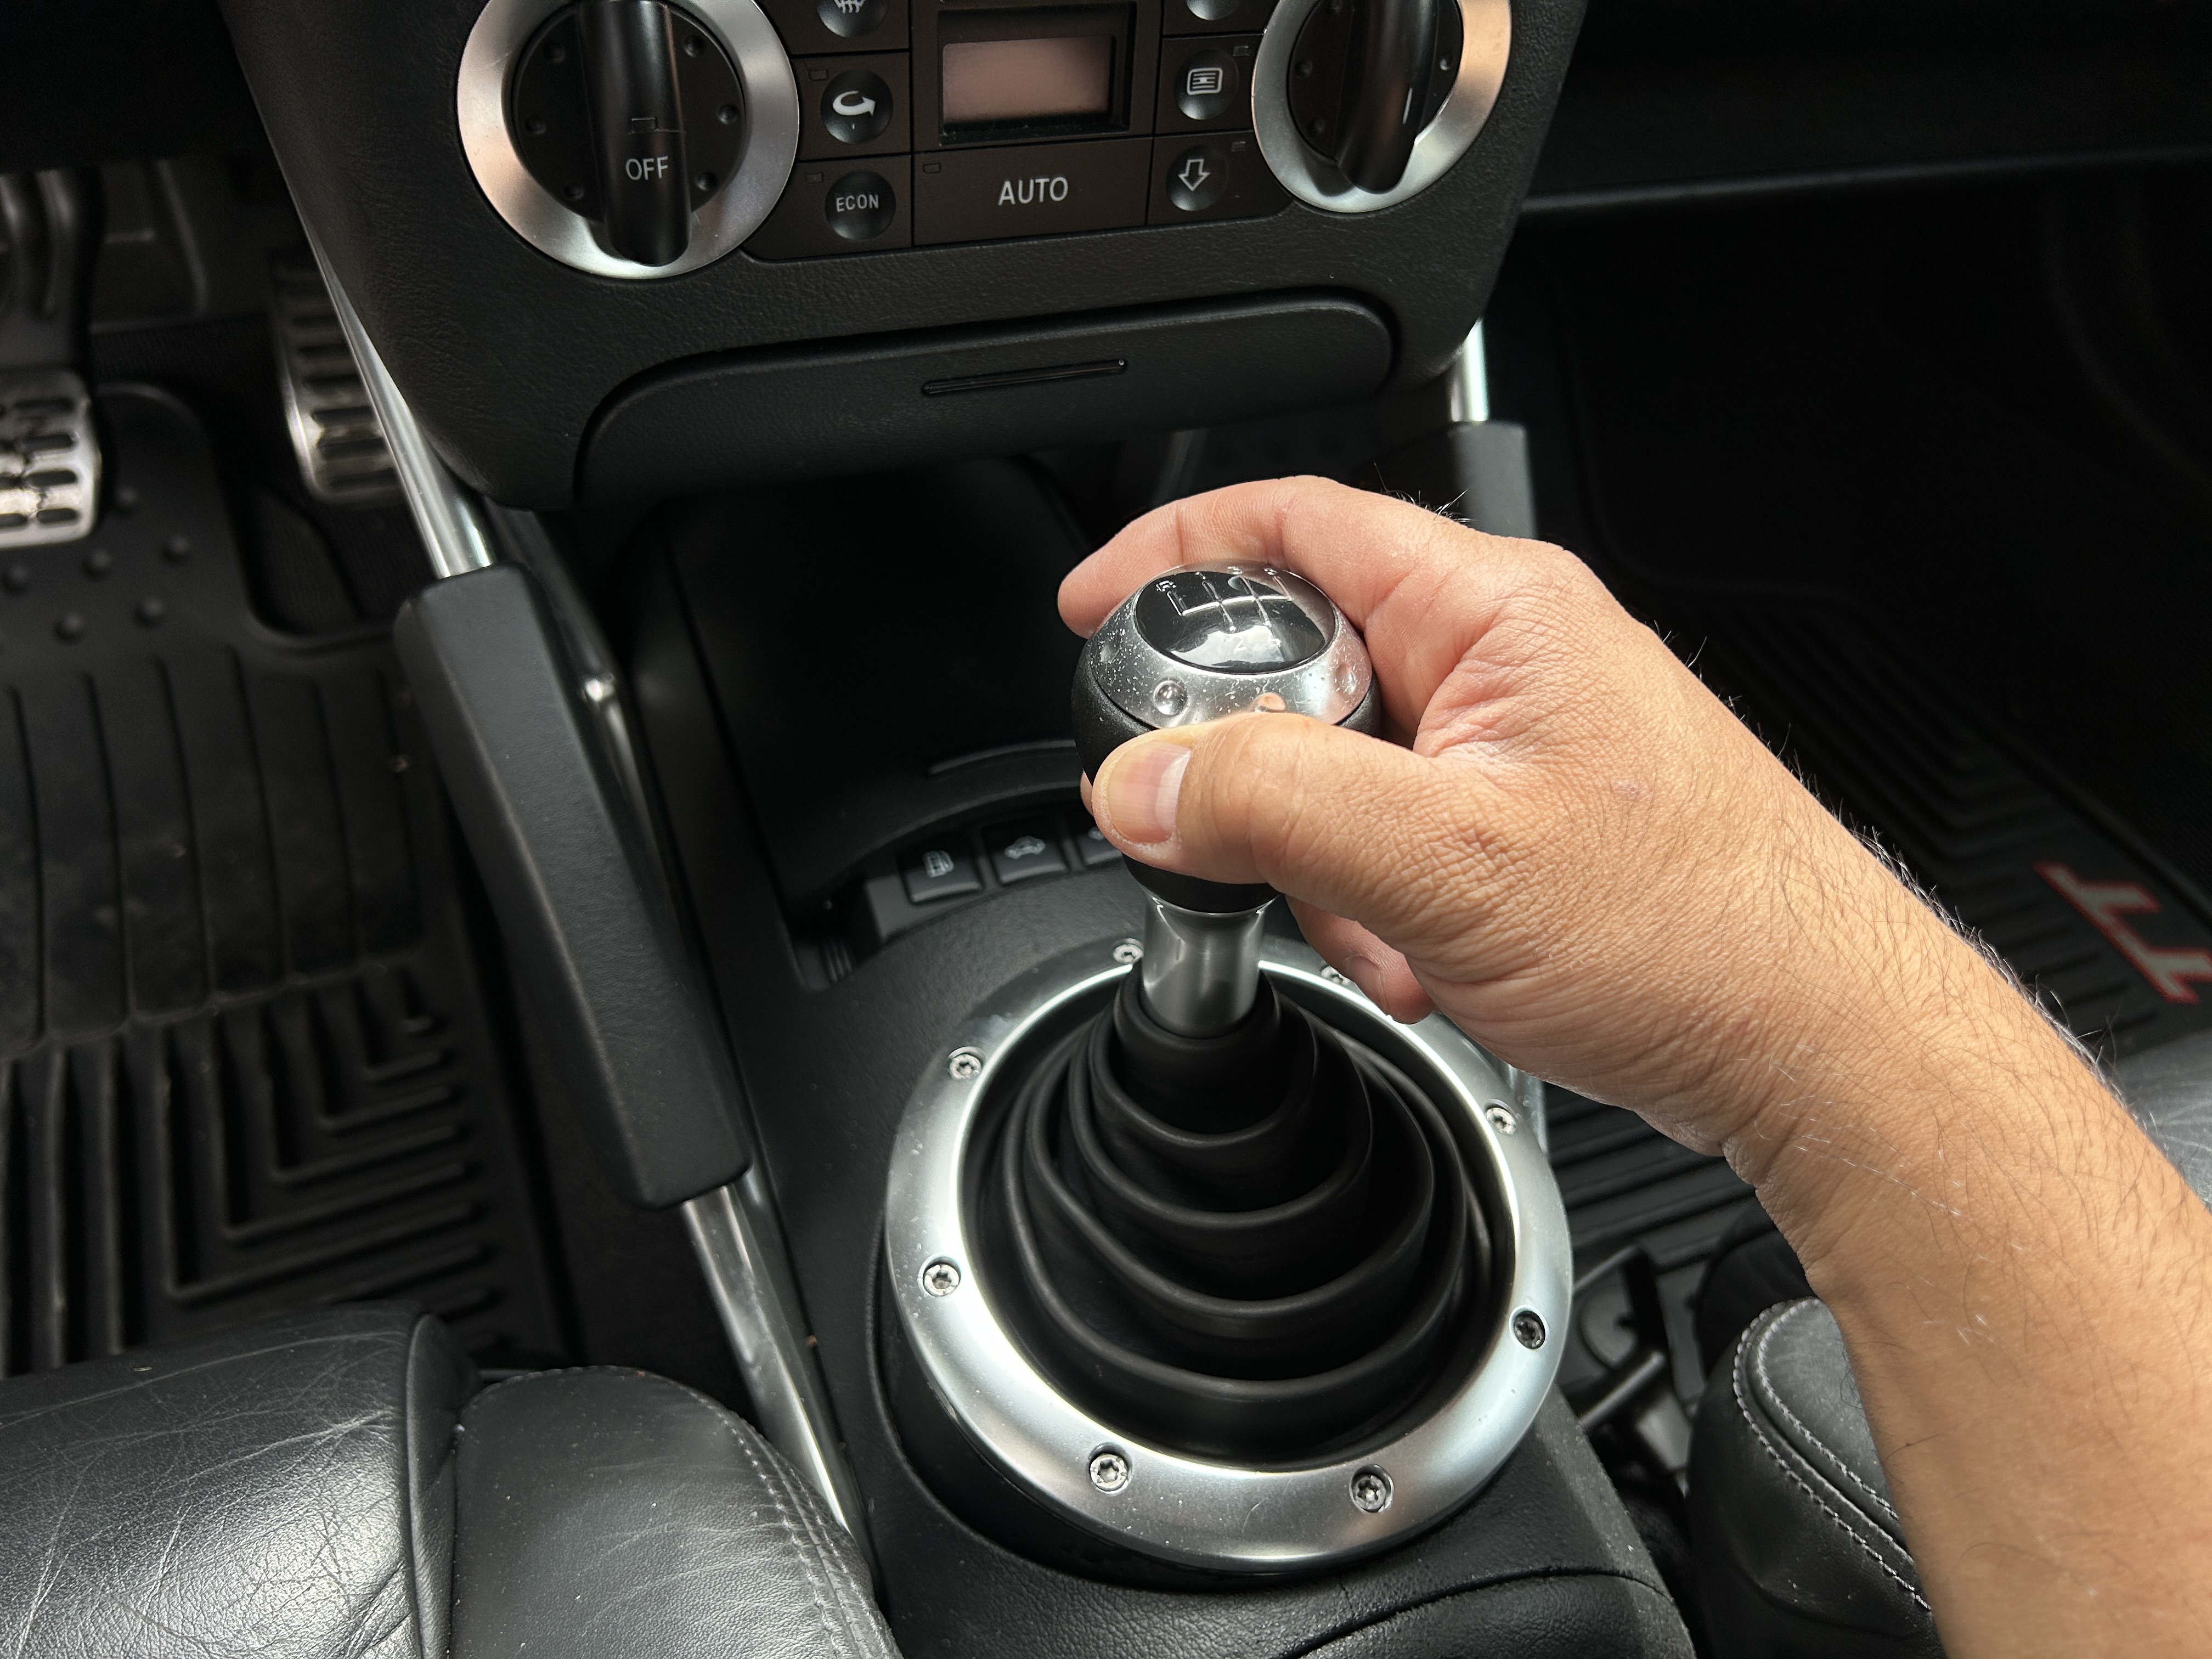
Next, you will remove the shift knob and shift boot. To remove the shift knob, move the center piece below the shift knob down as shown, until it dislodges from the shift knob. The shift knob can then be unscrewed off the shifter. The shift boot will now be able to be removed.
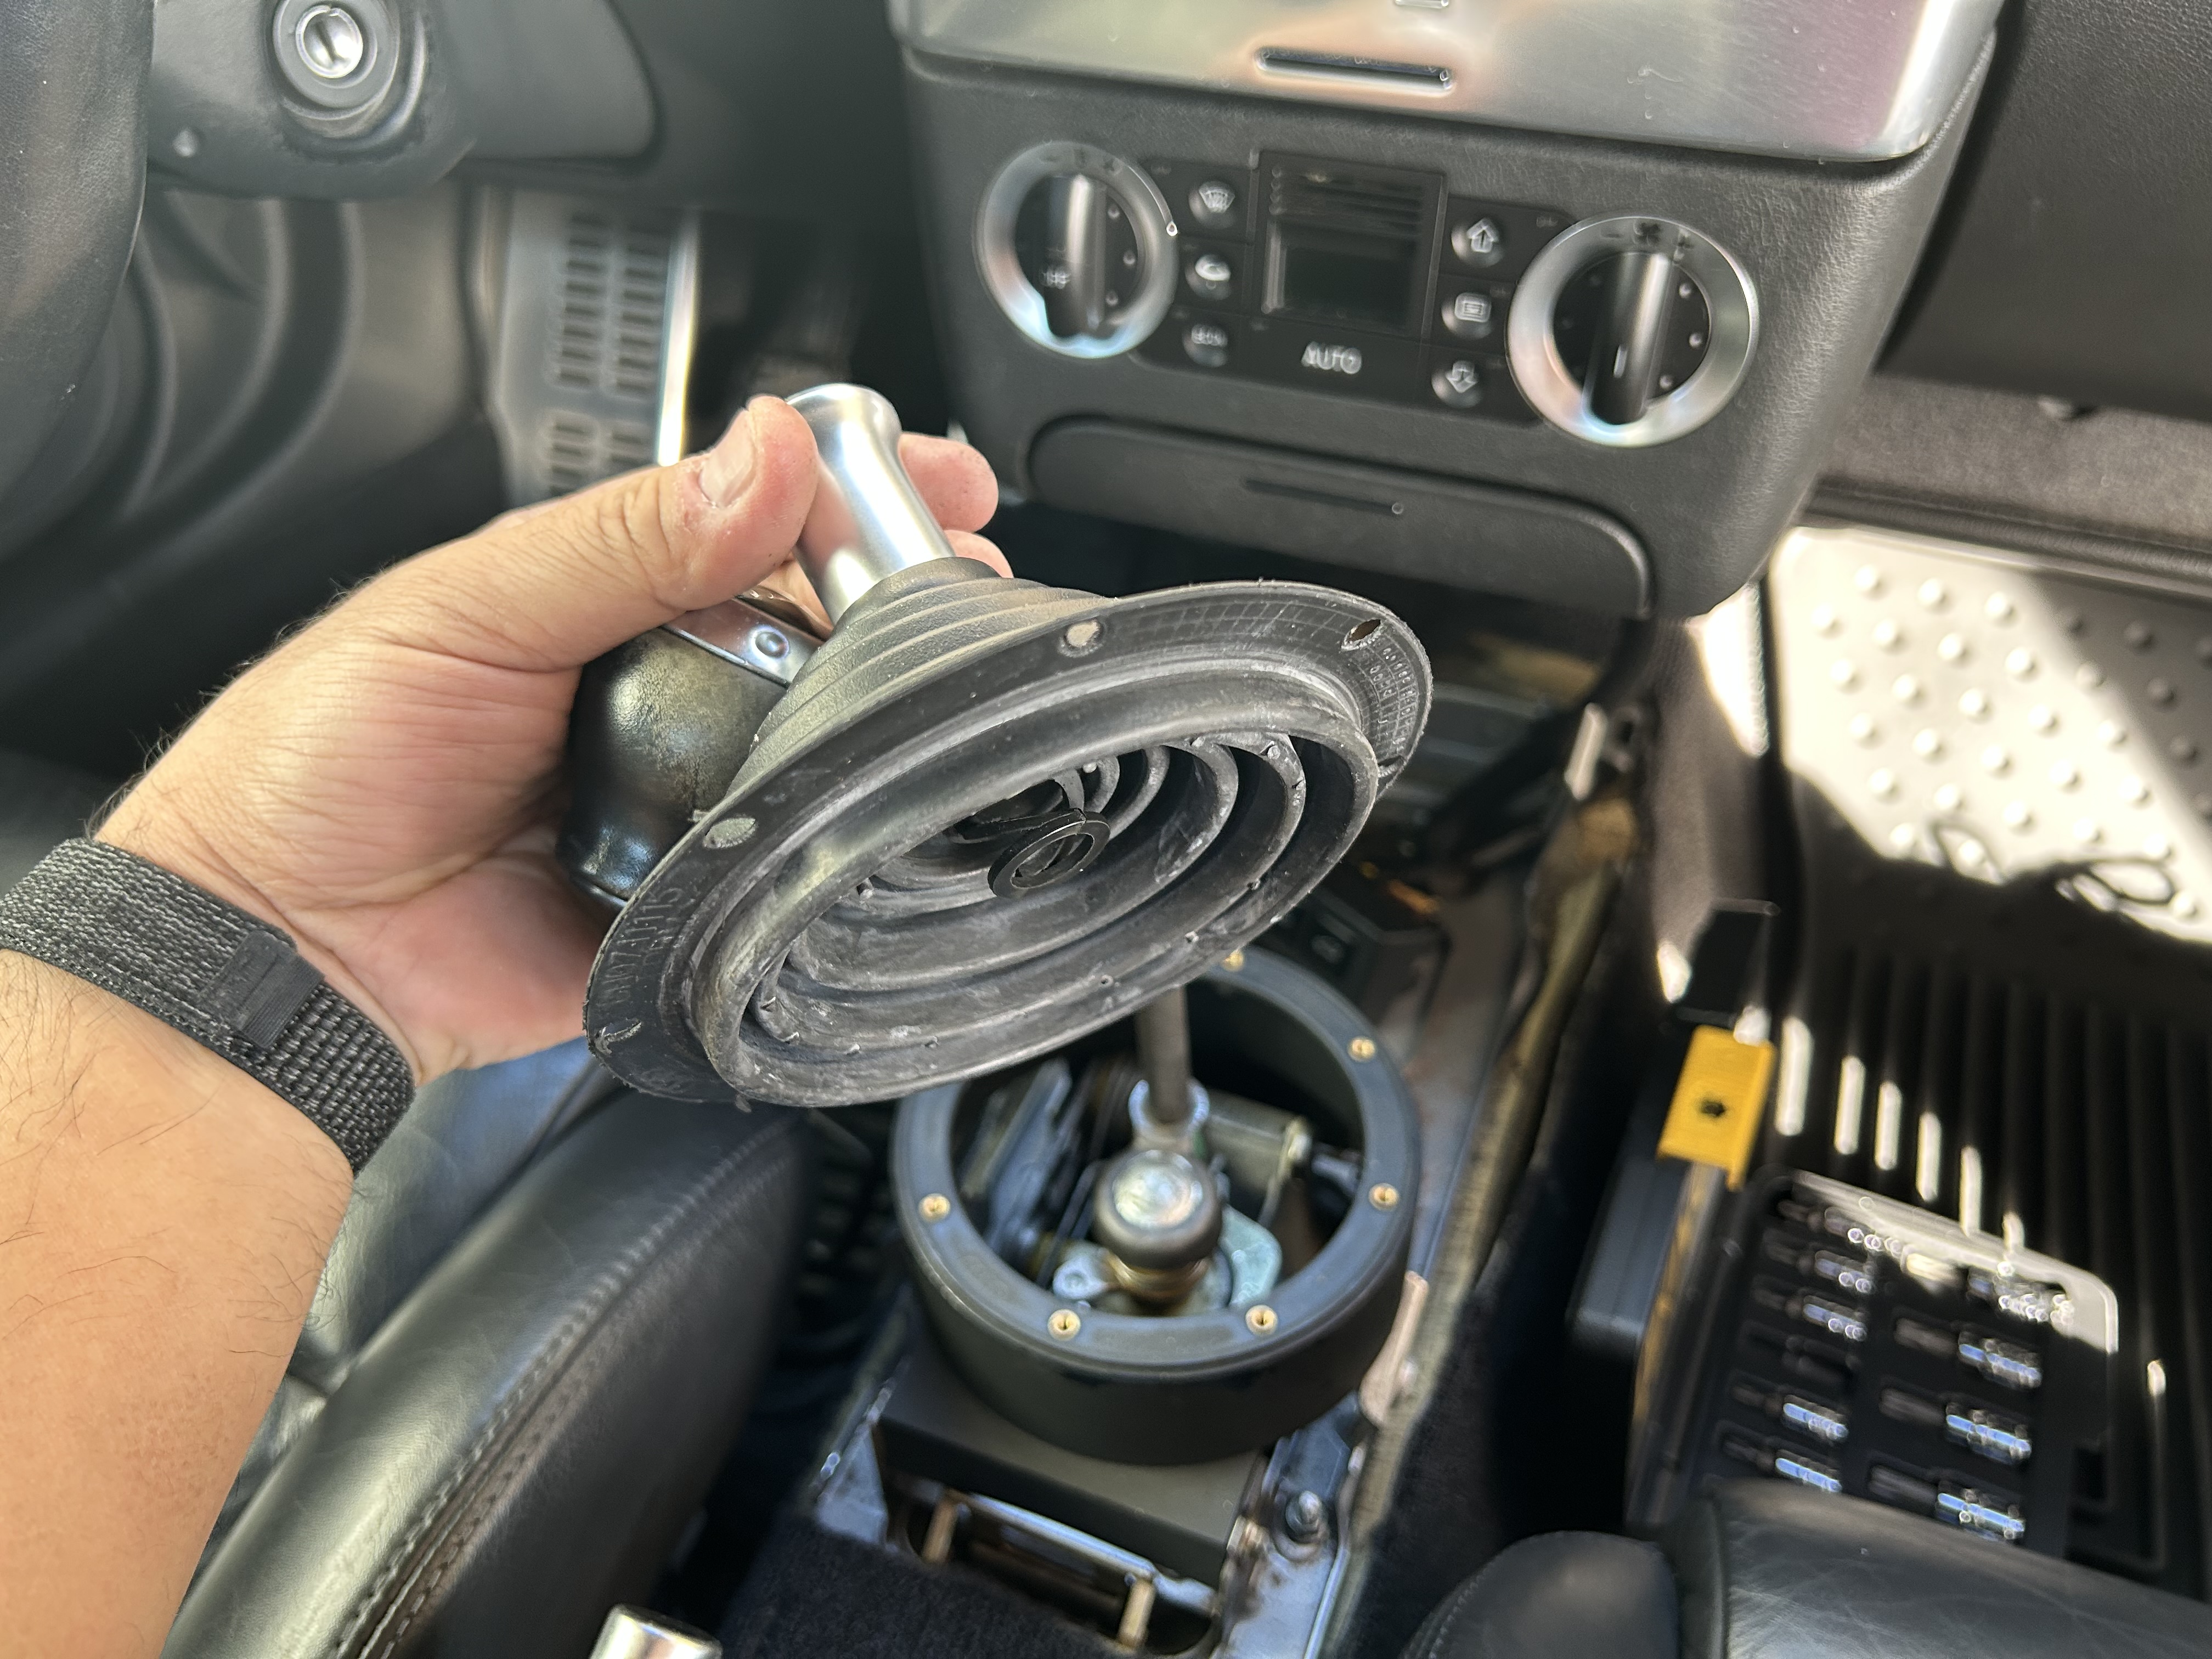
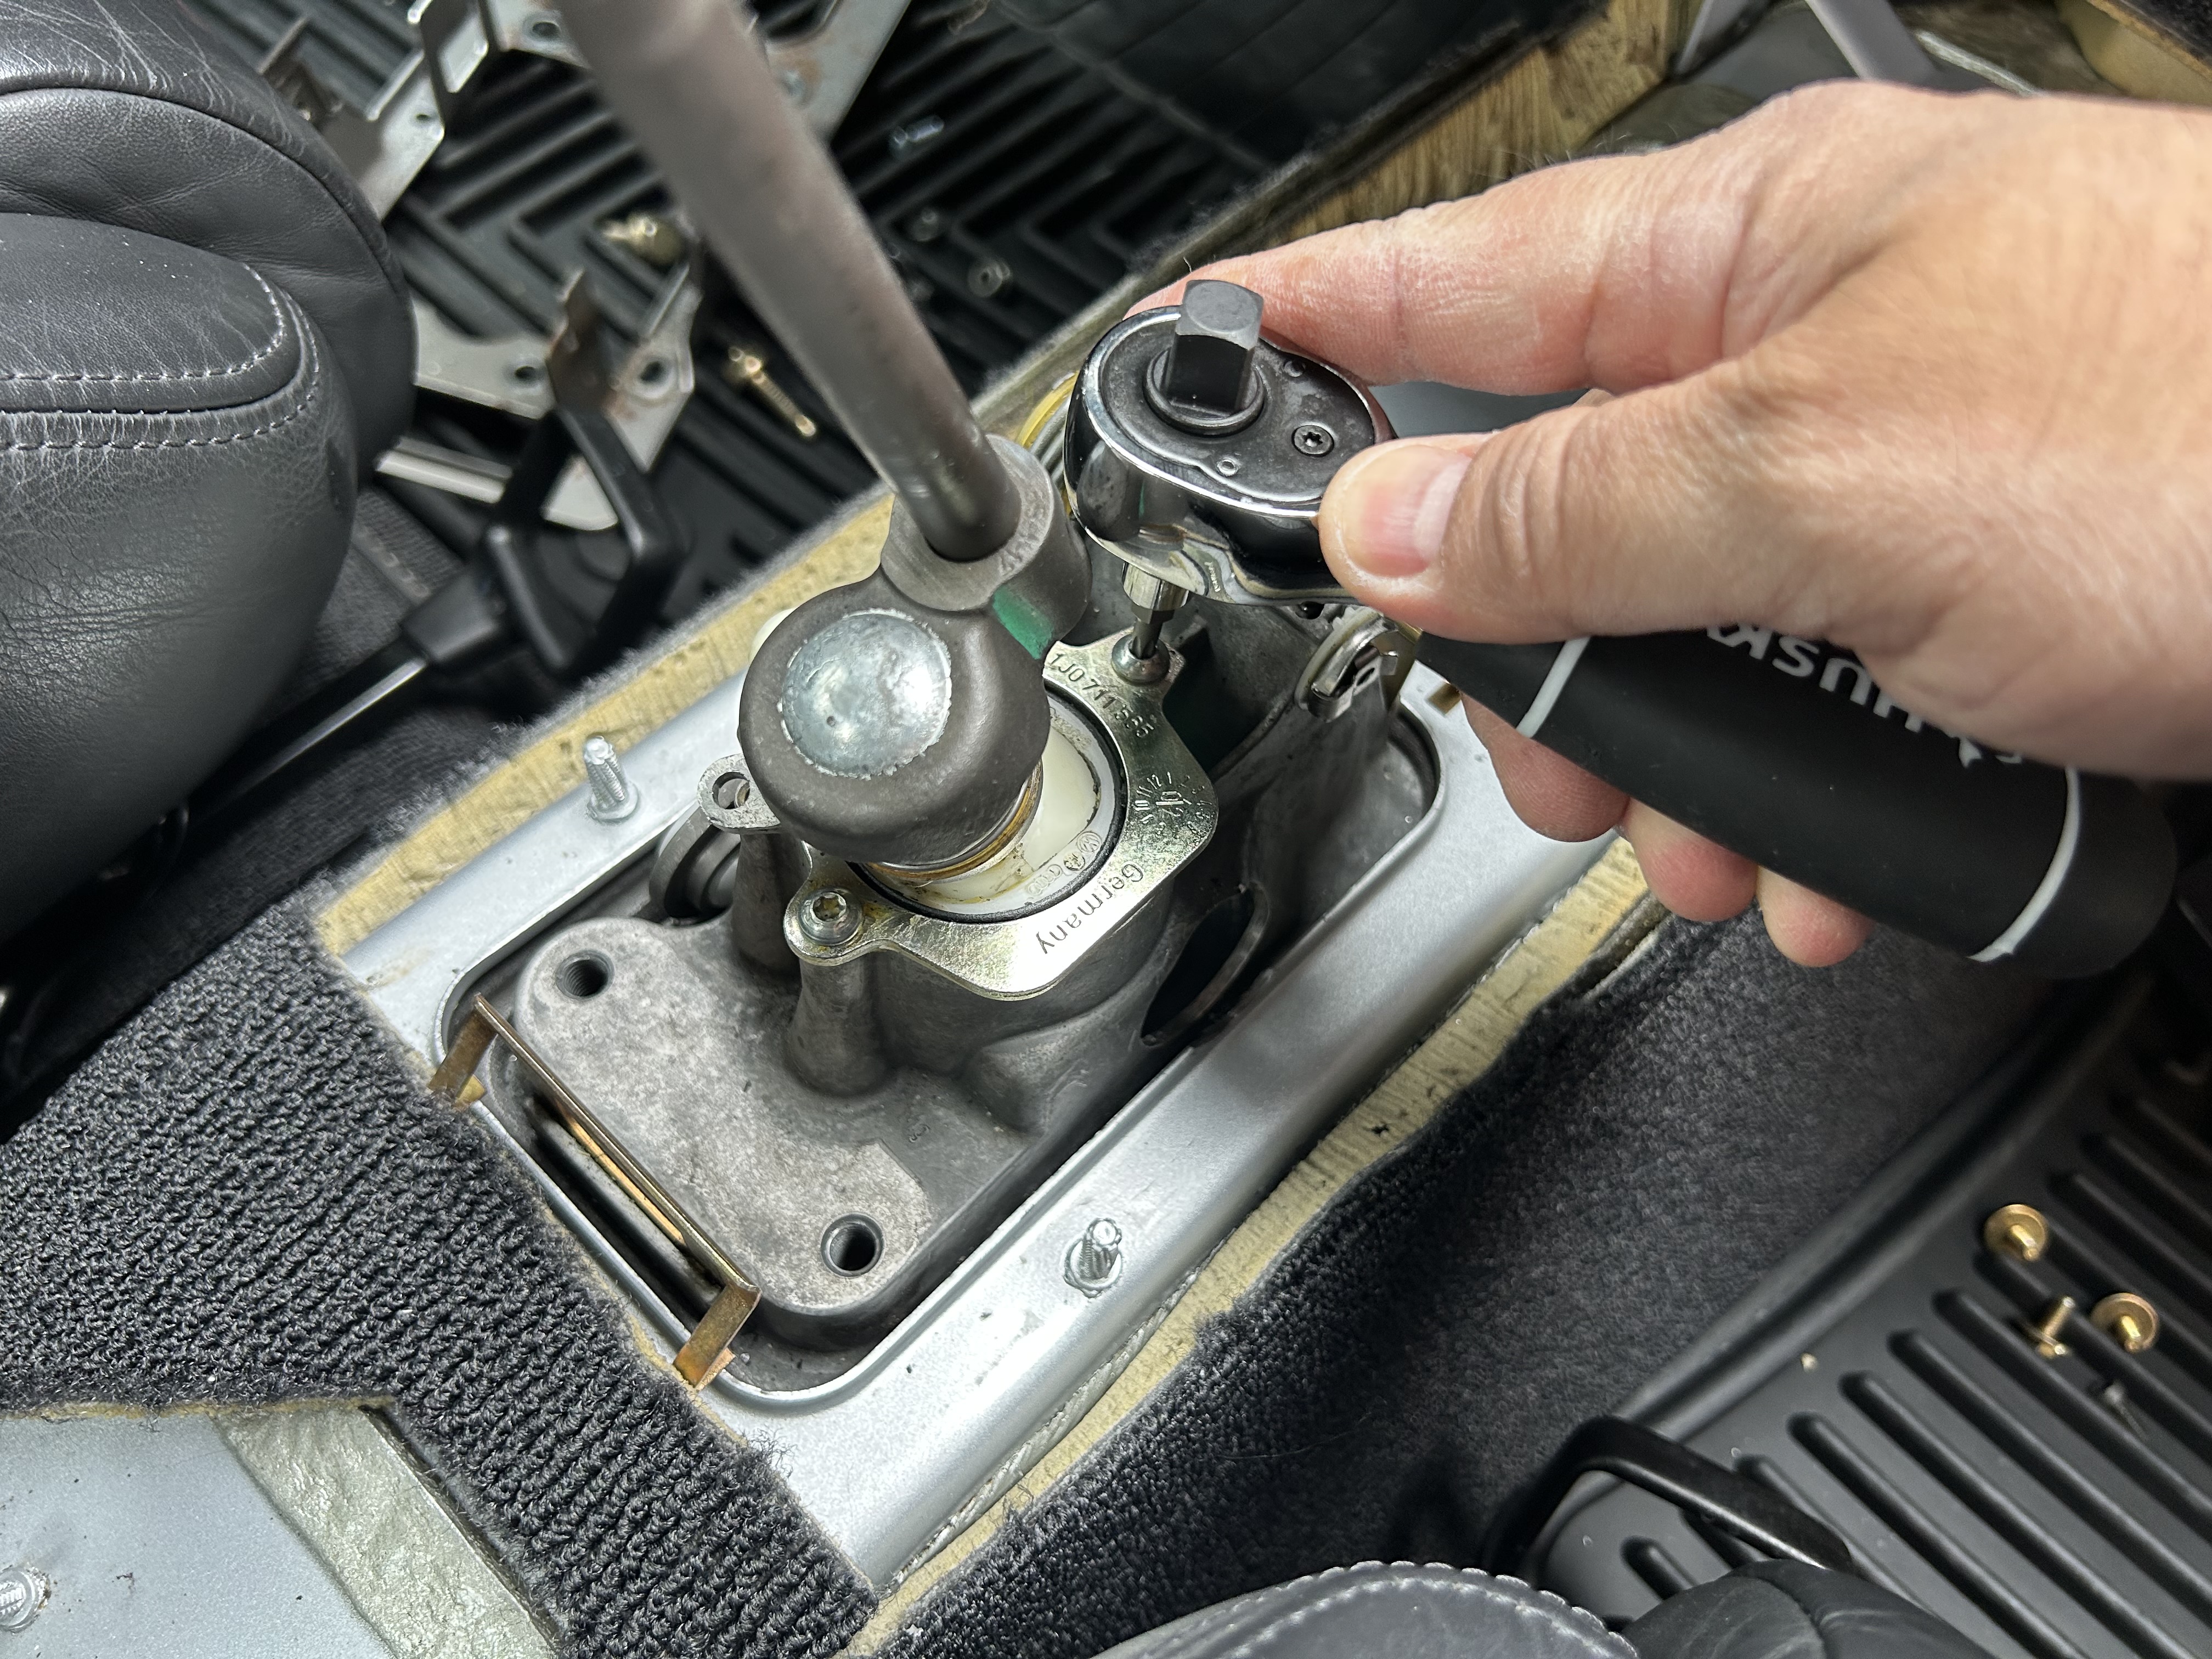
Remove the (1 qty) 8mm bolt on the left side of the shifter trim, and take out the trim.
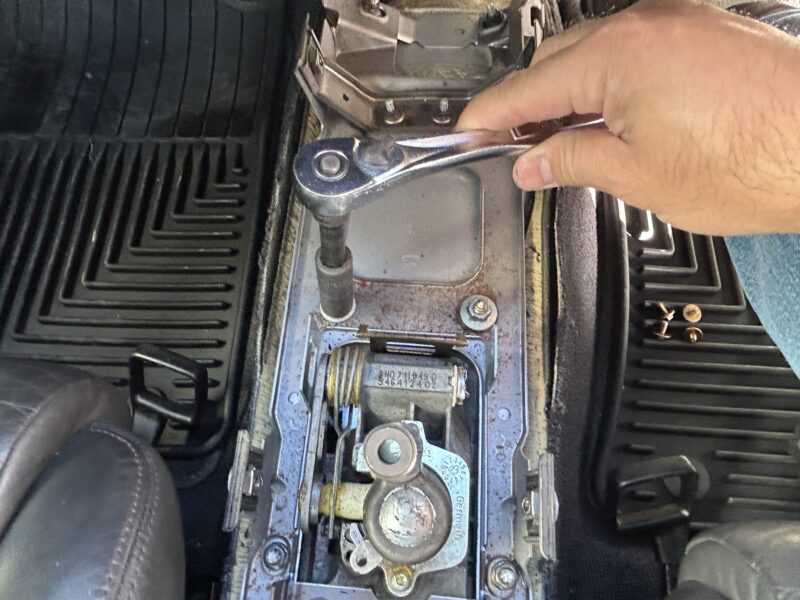
Next, use a 10mm socket to remove these nuts so that you can remove the center metal piece as shown.

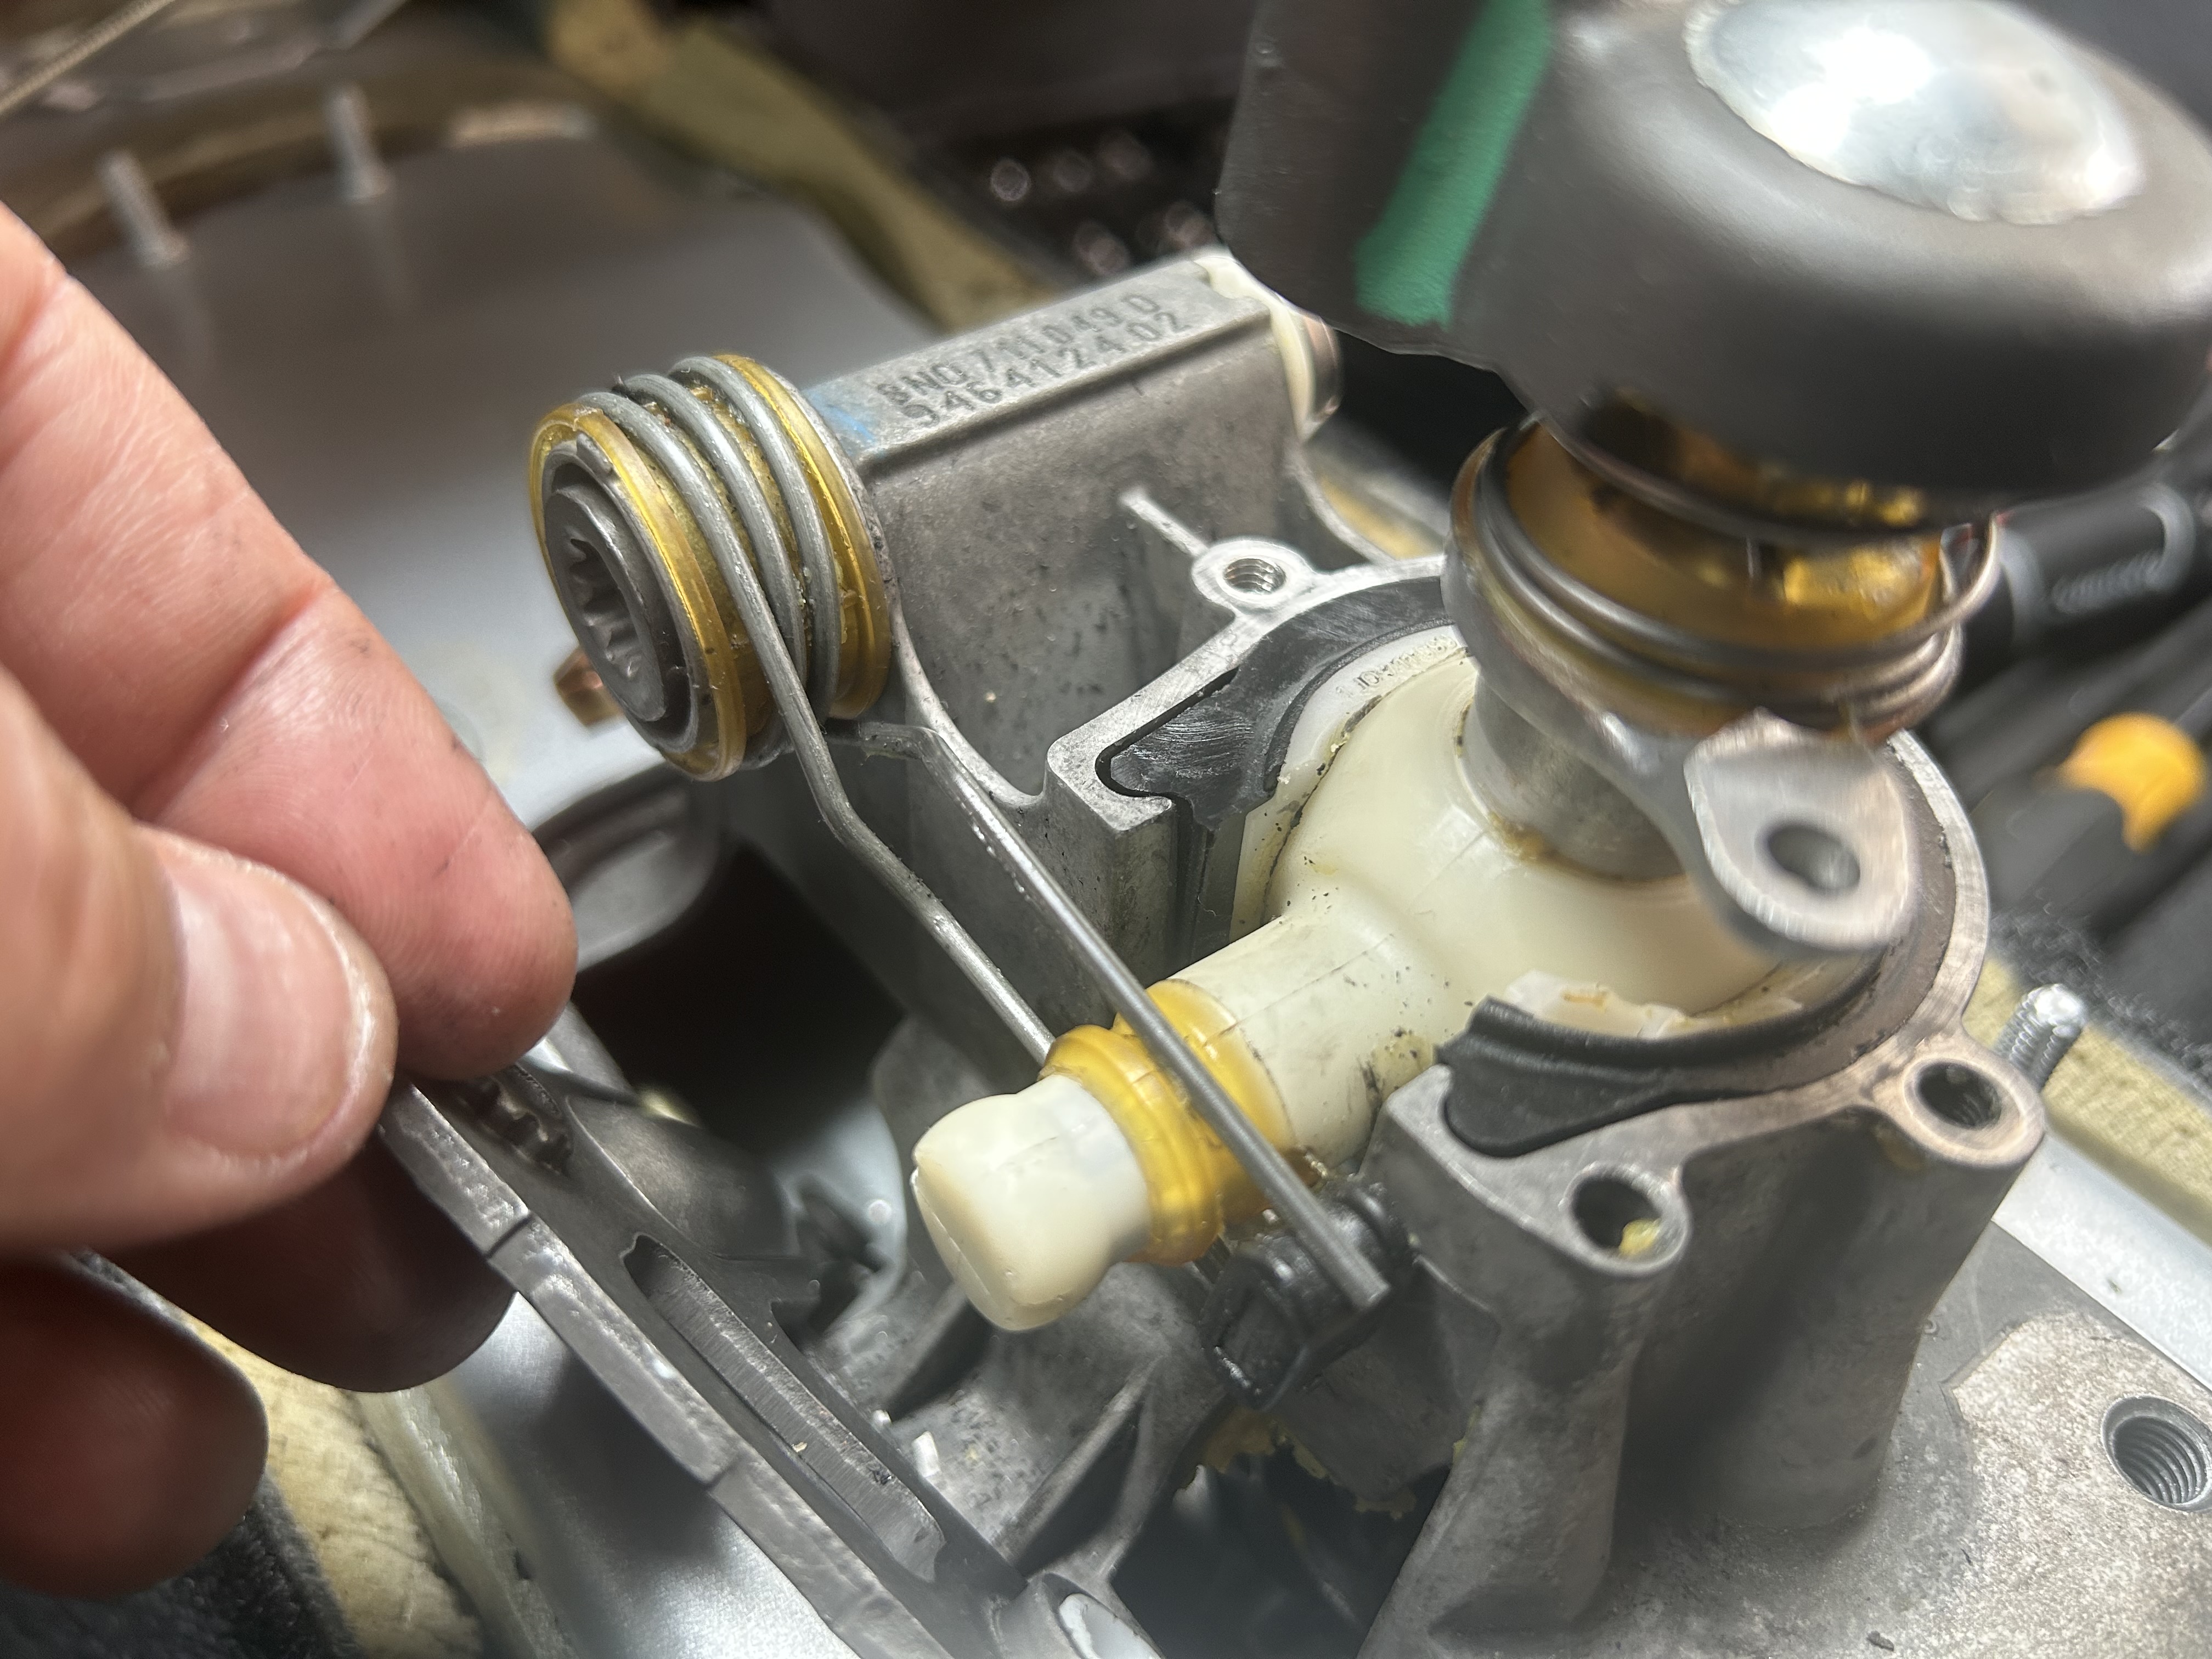
Cable Saver Bushings
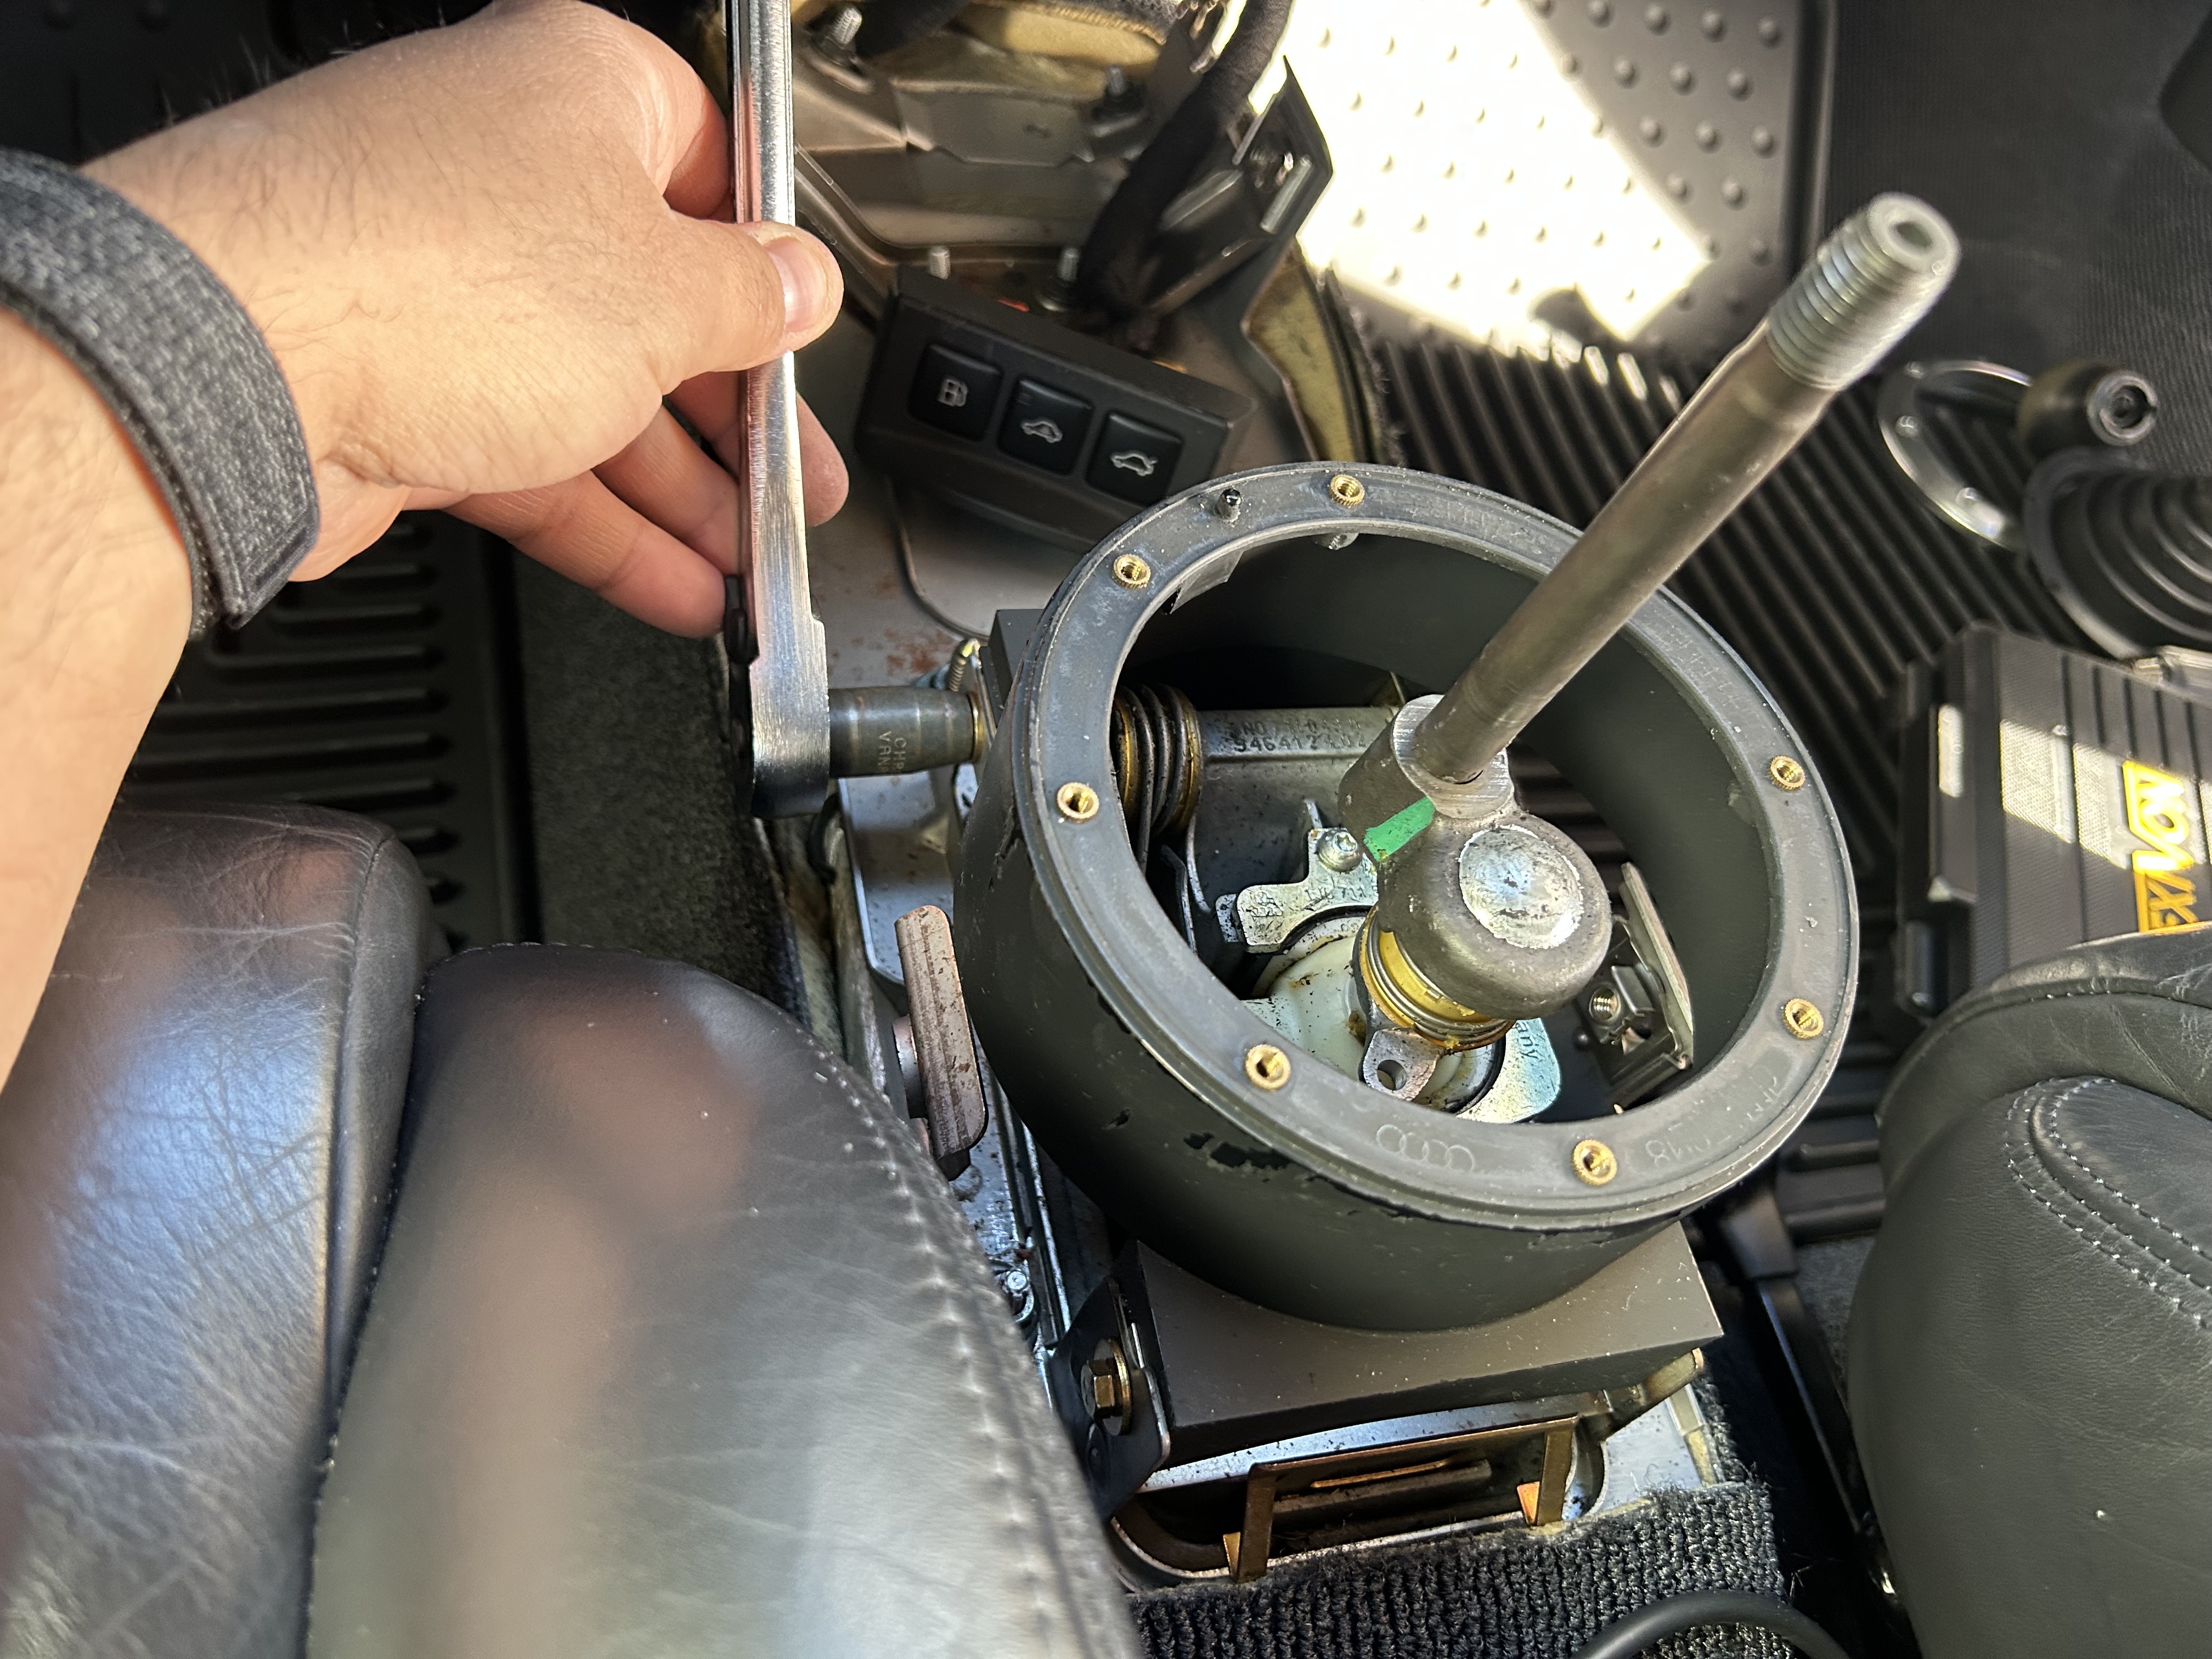
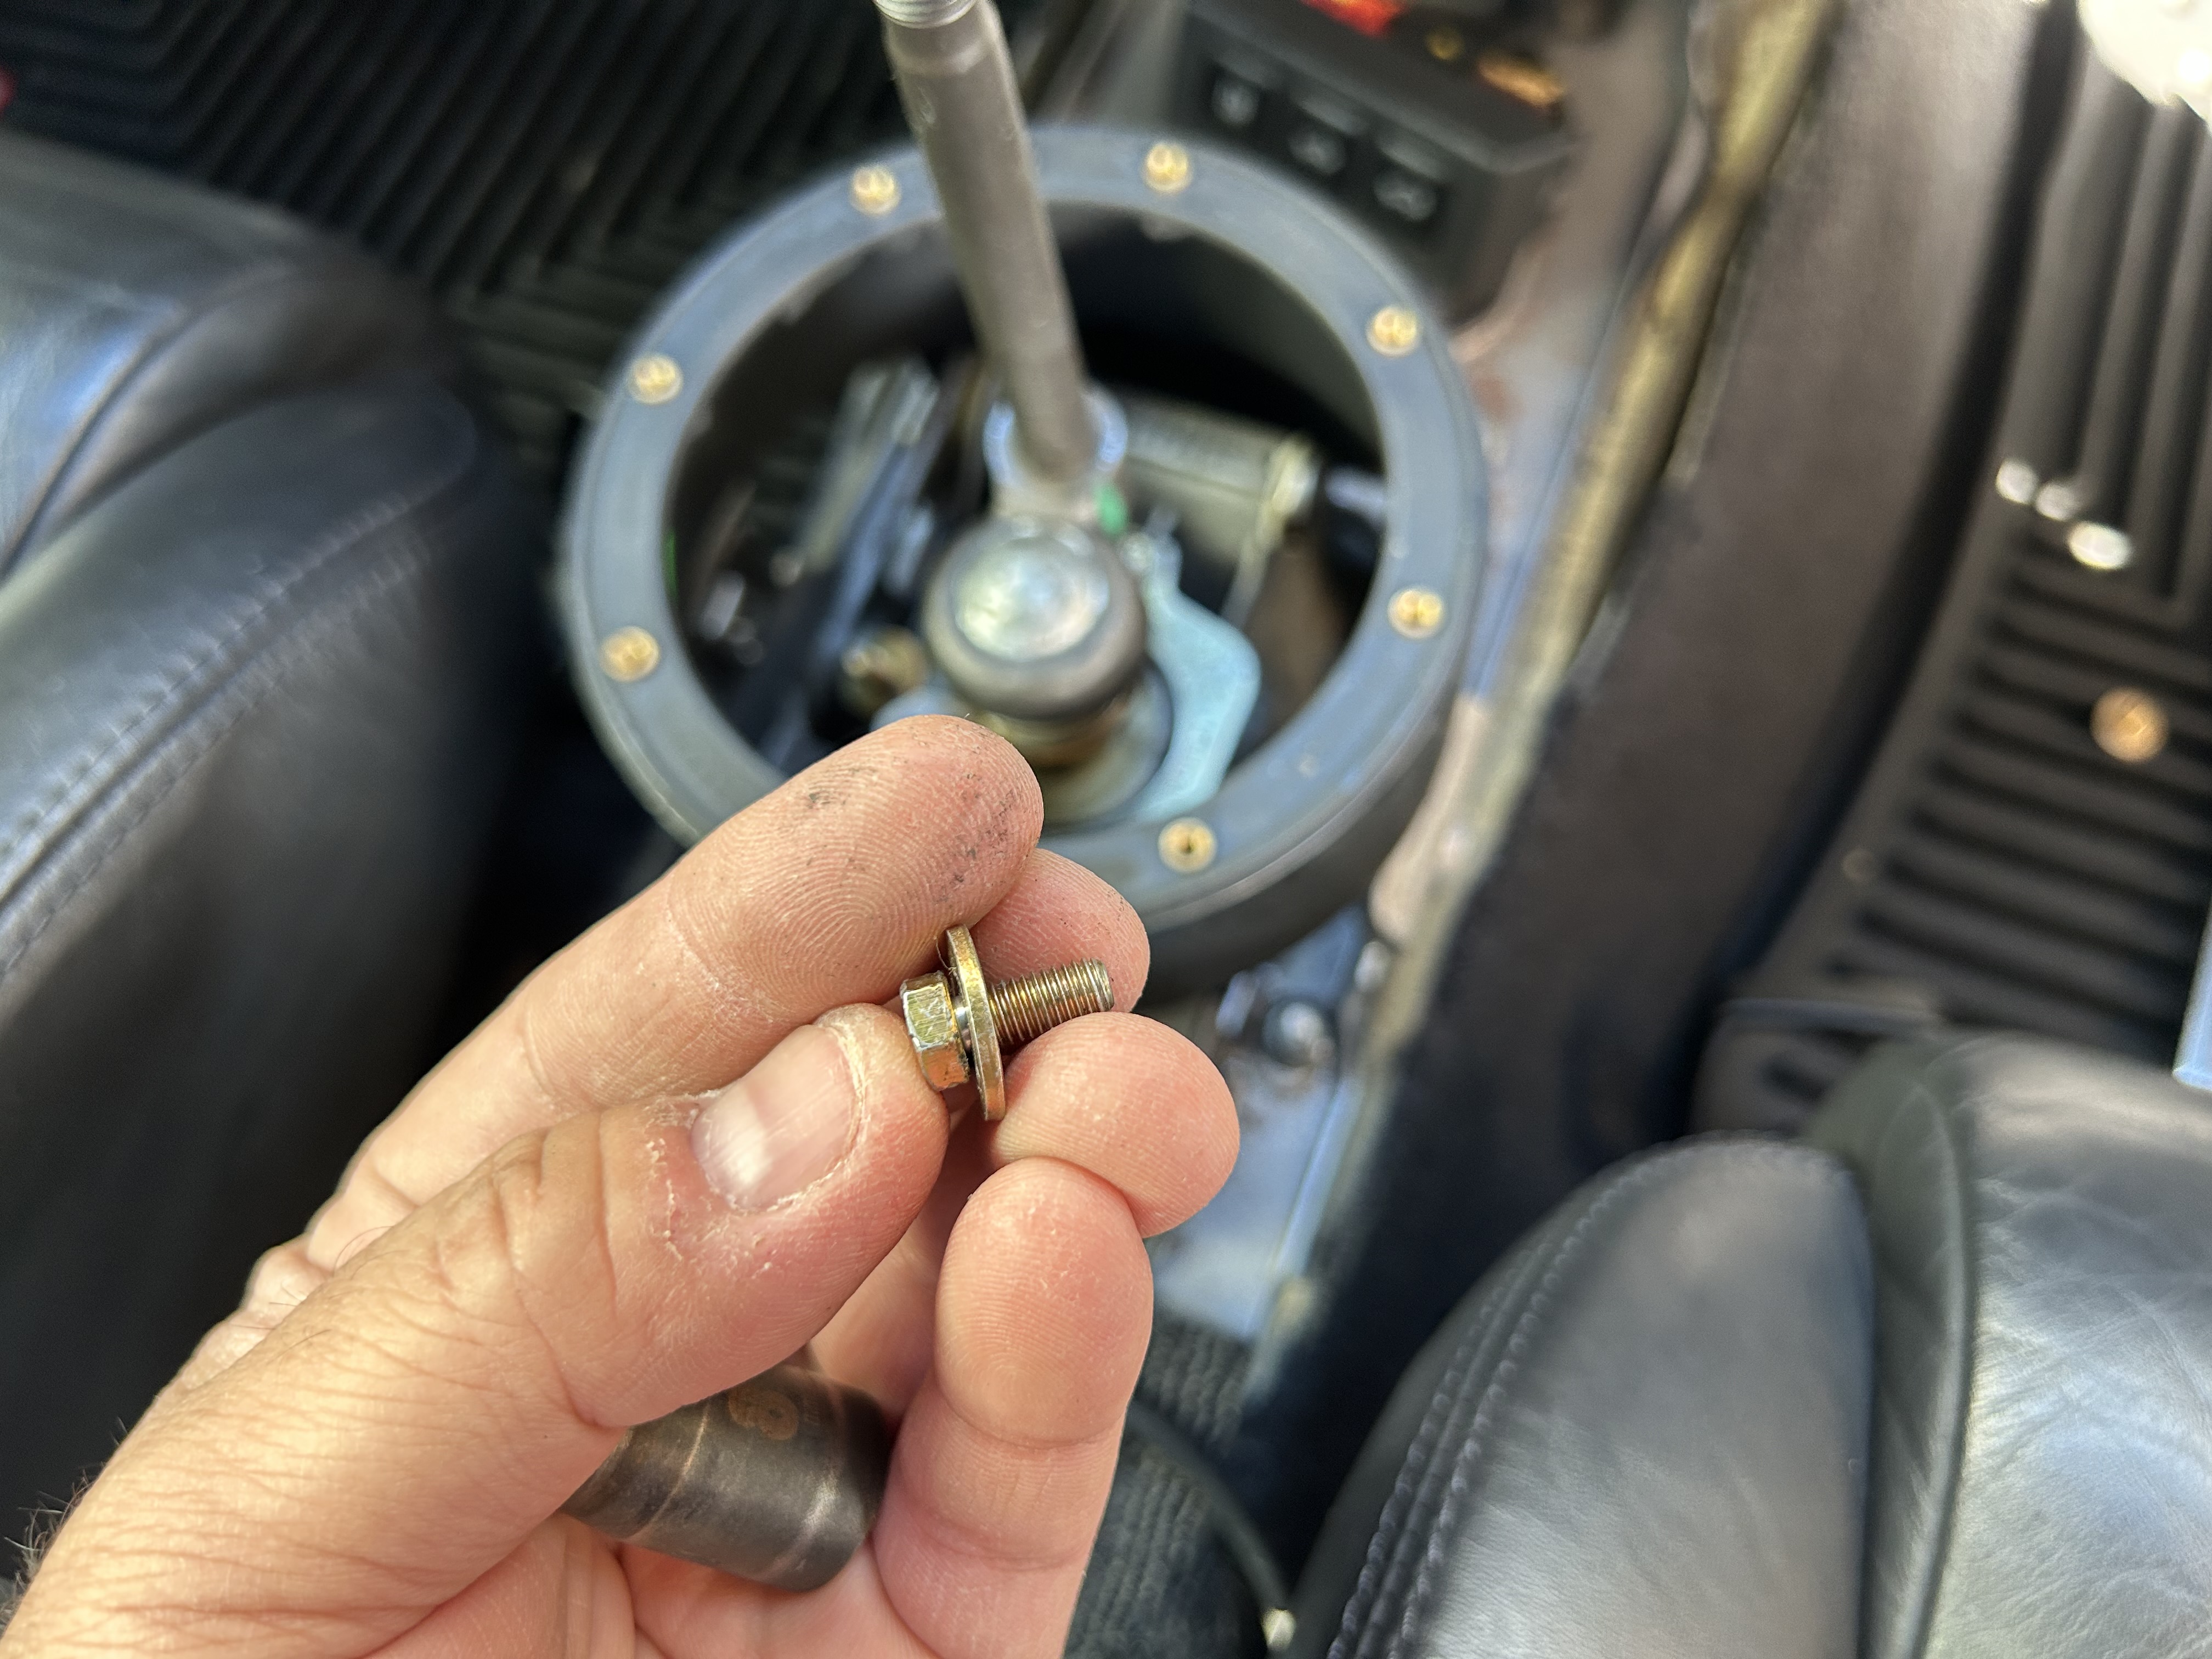
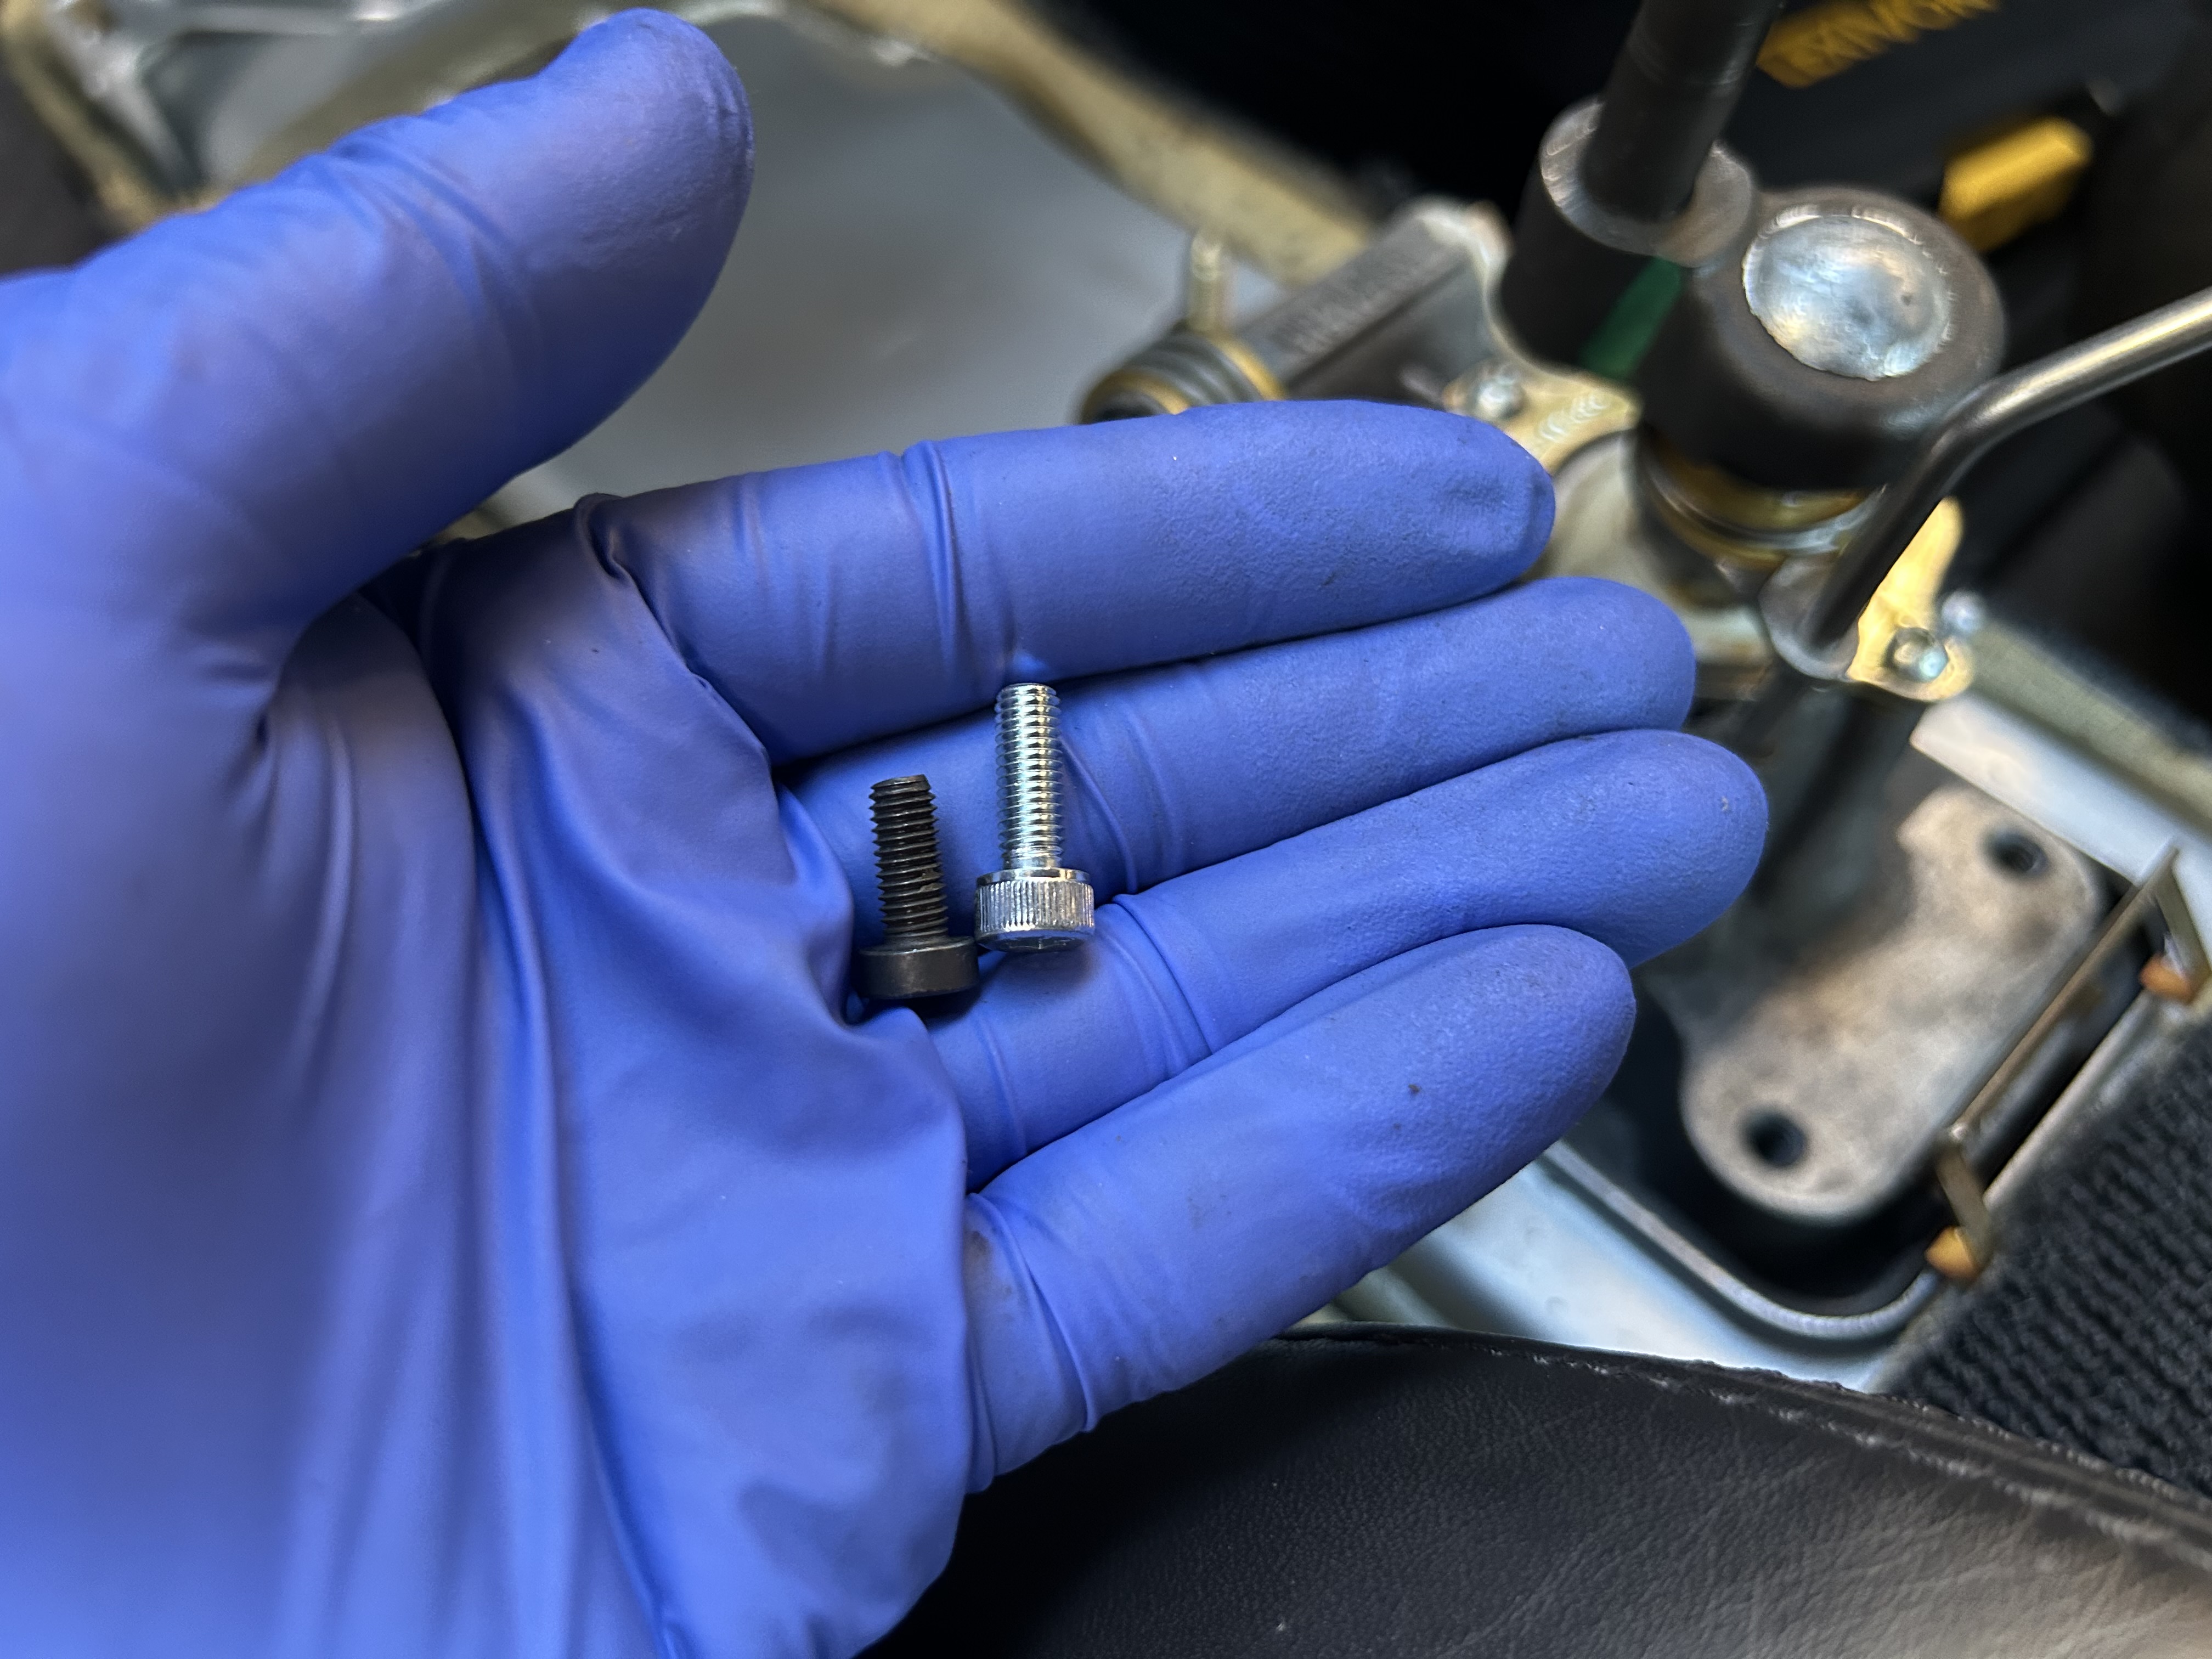
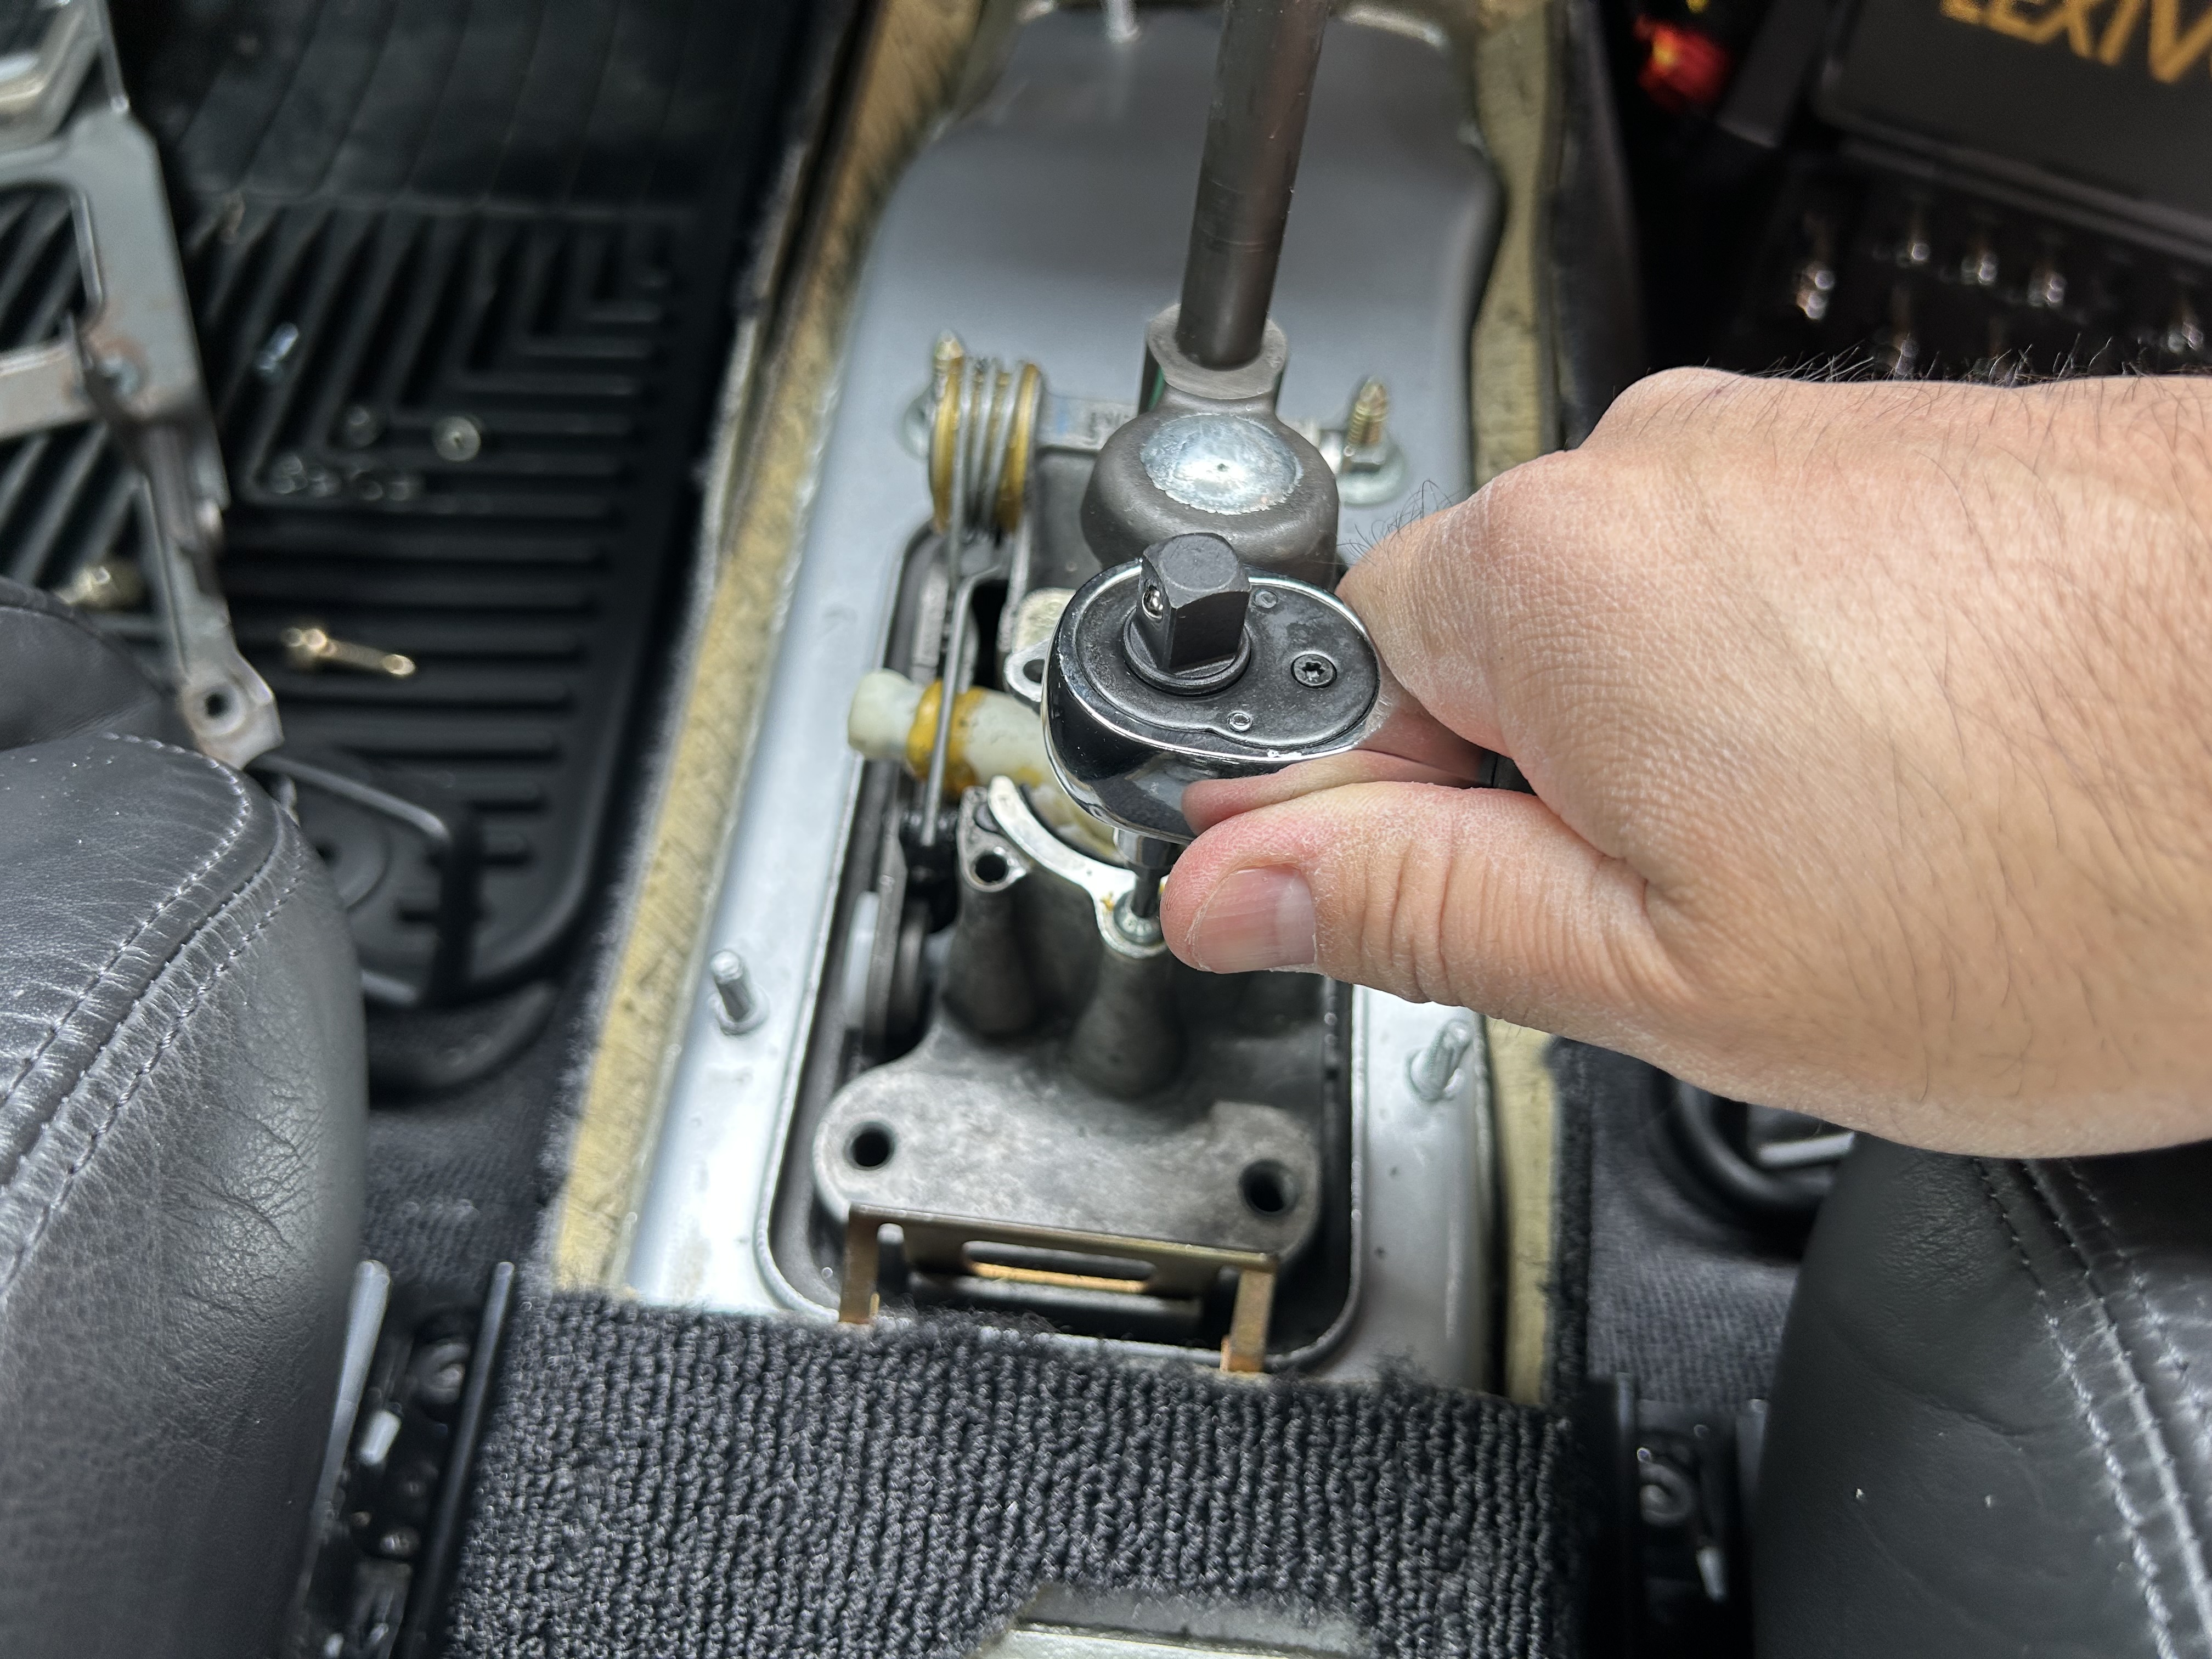
Use a T25 Torx bit to remove this bolt to the left of the shifter assembly– be careful not to use the same T20 Torx bit from when you removed the shifter trim as you risk stripping the bolt. In fact, this happens to often that Dieselgeek includes a new bolt for you in case you do strip this bolt. The original black T25 Torx bolt and new bolt are shown below.
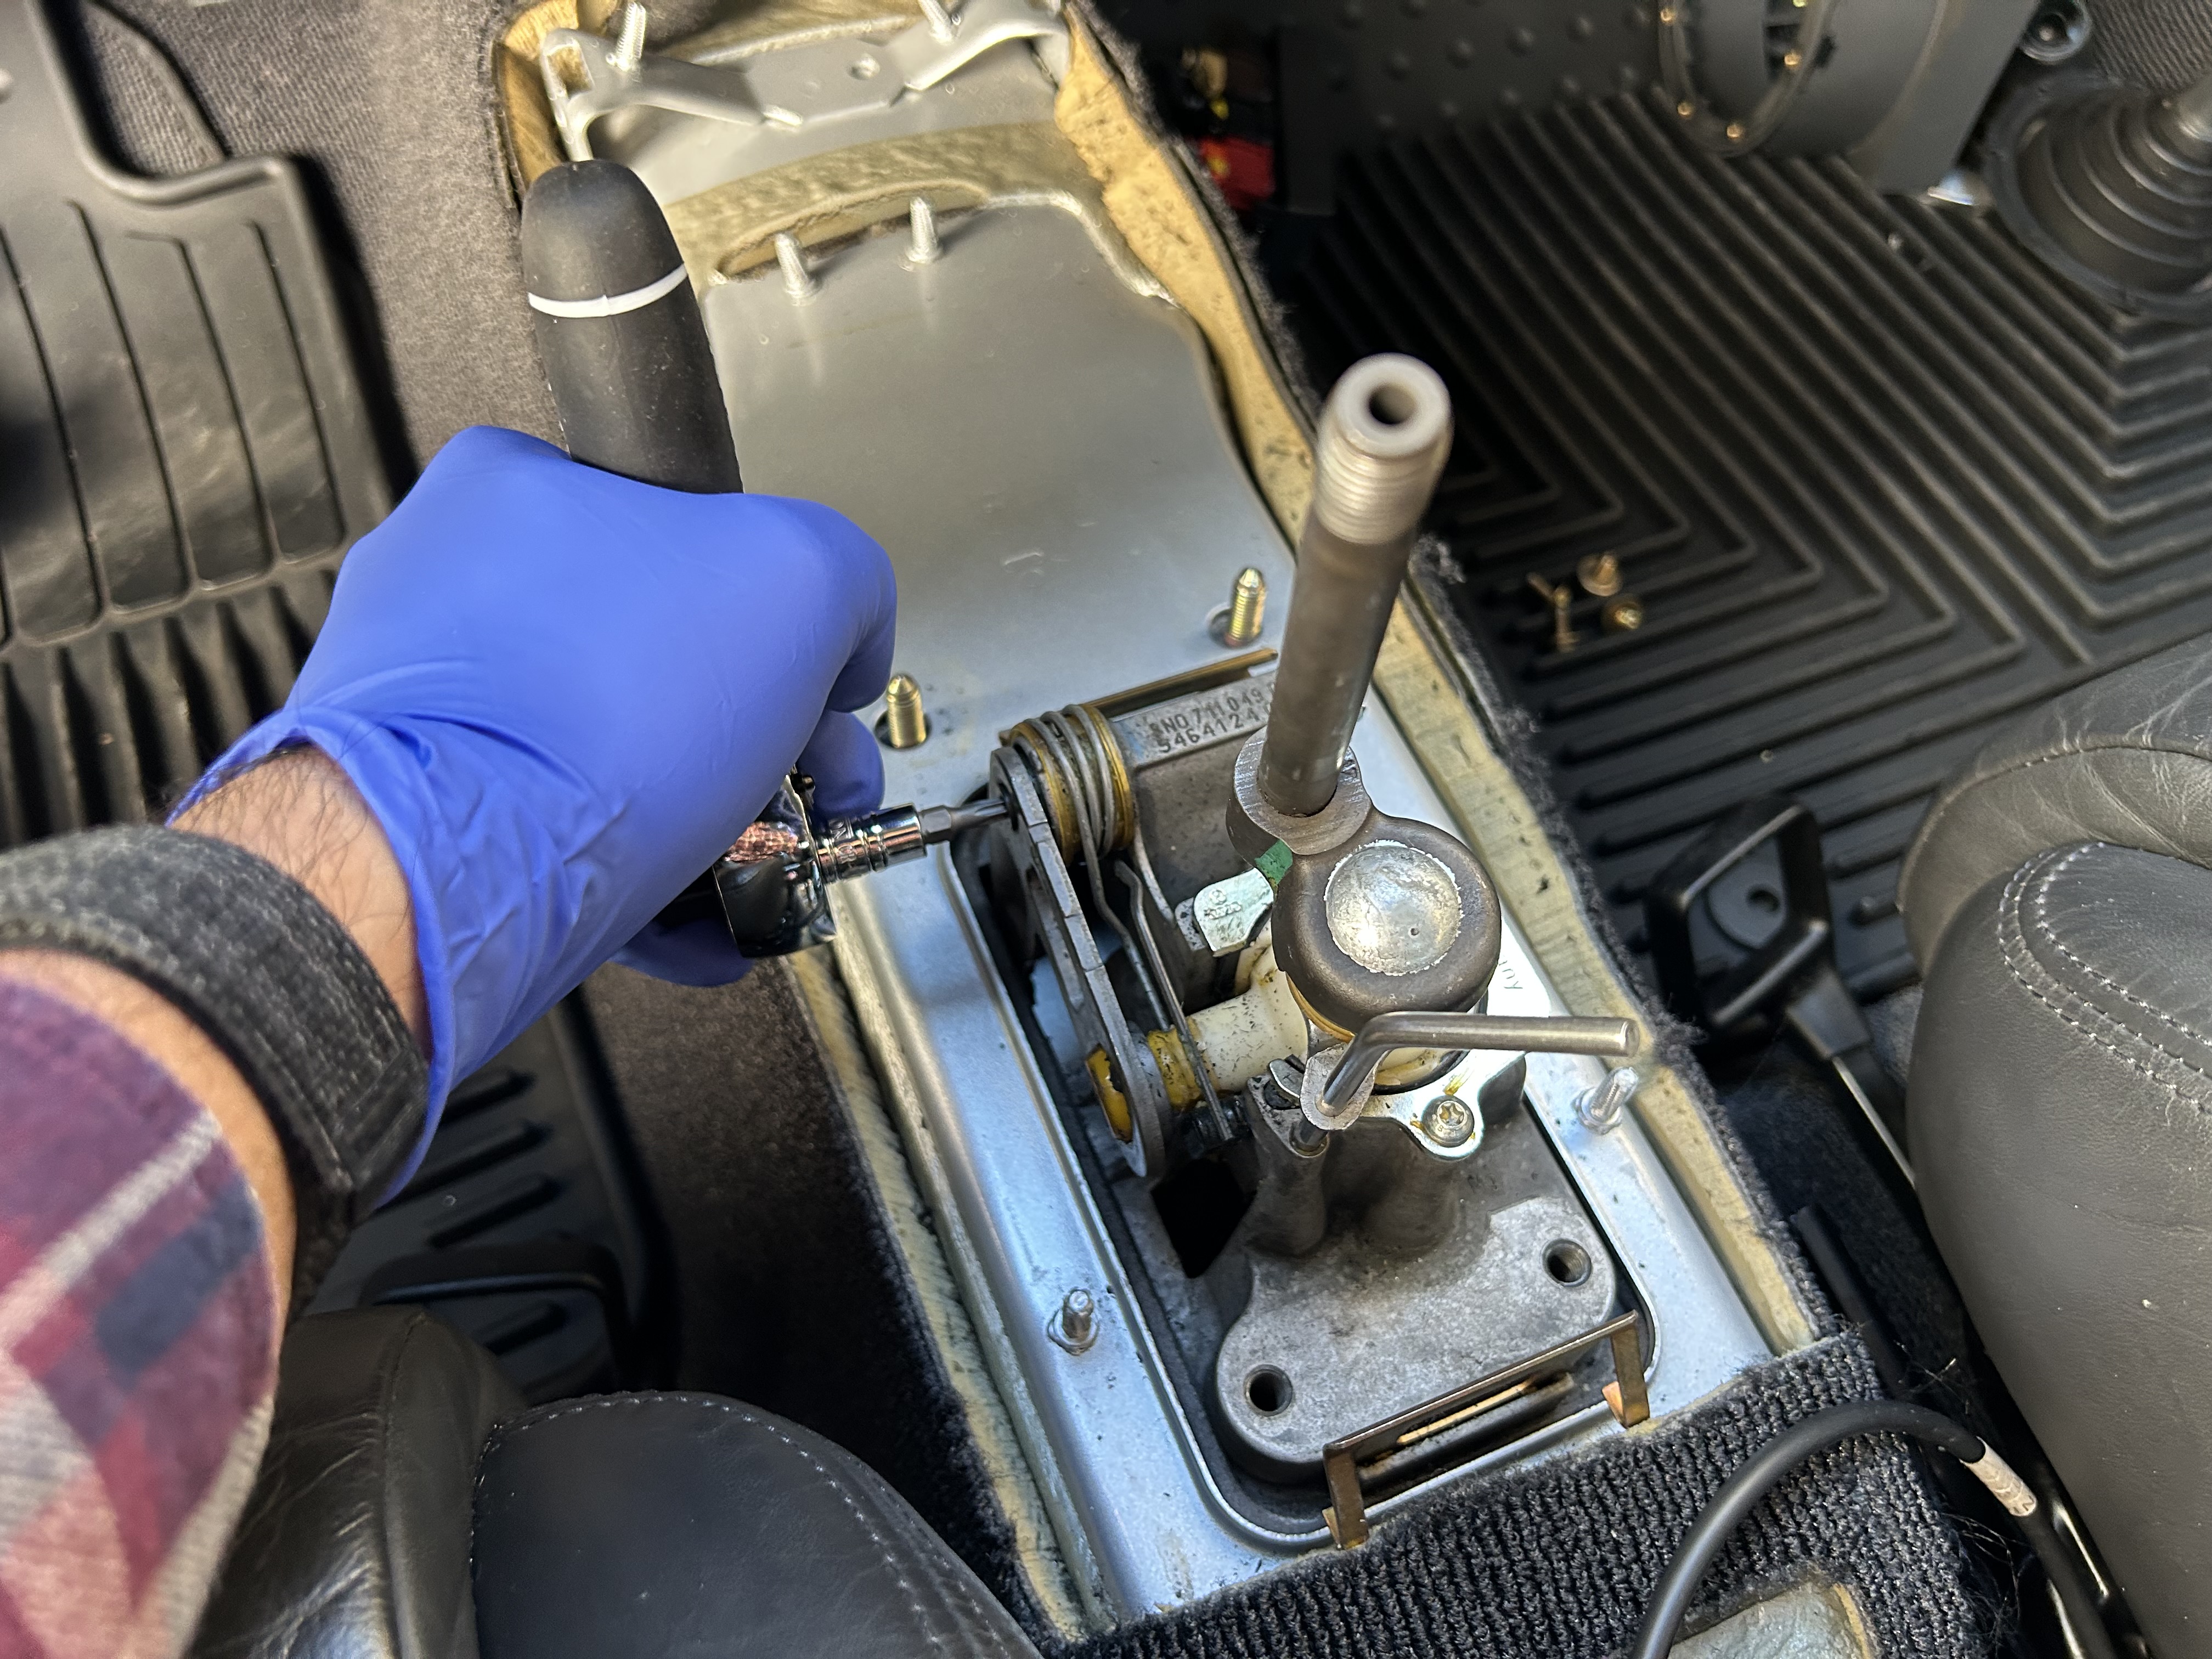
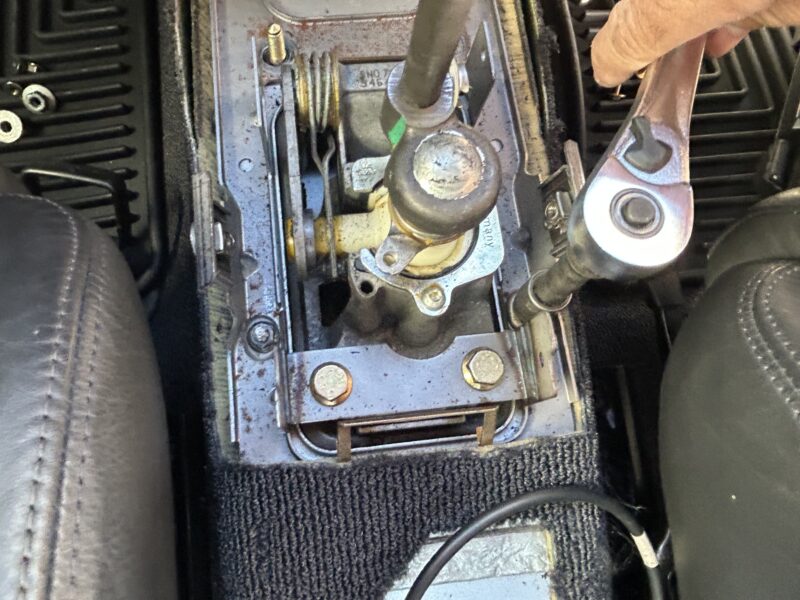
After removing this bolt, you will be able to pull this plate to the side. We will install the first gear getter soon, but first we’ll do the cable saver bushing that is located beneath.
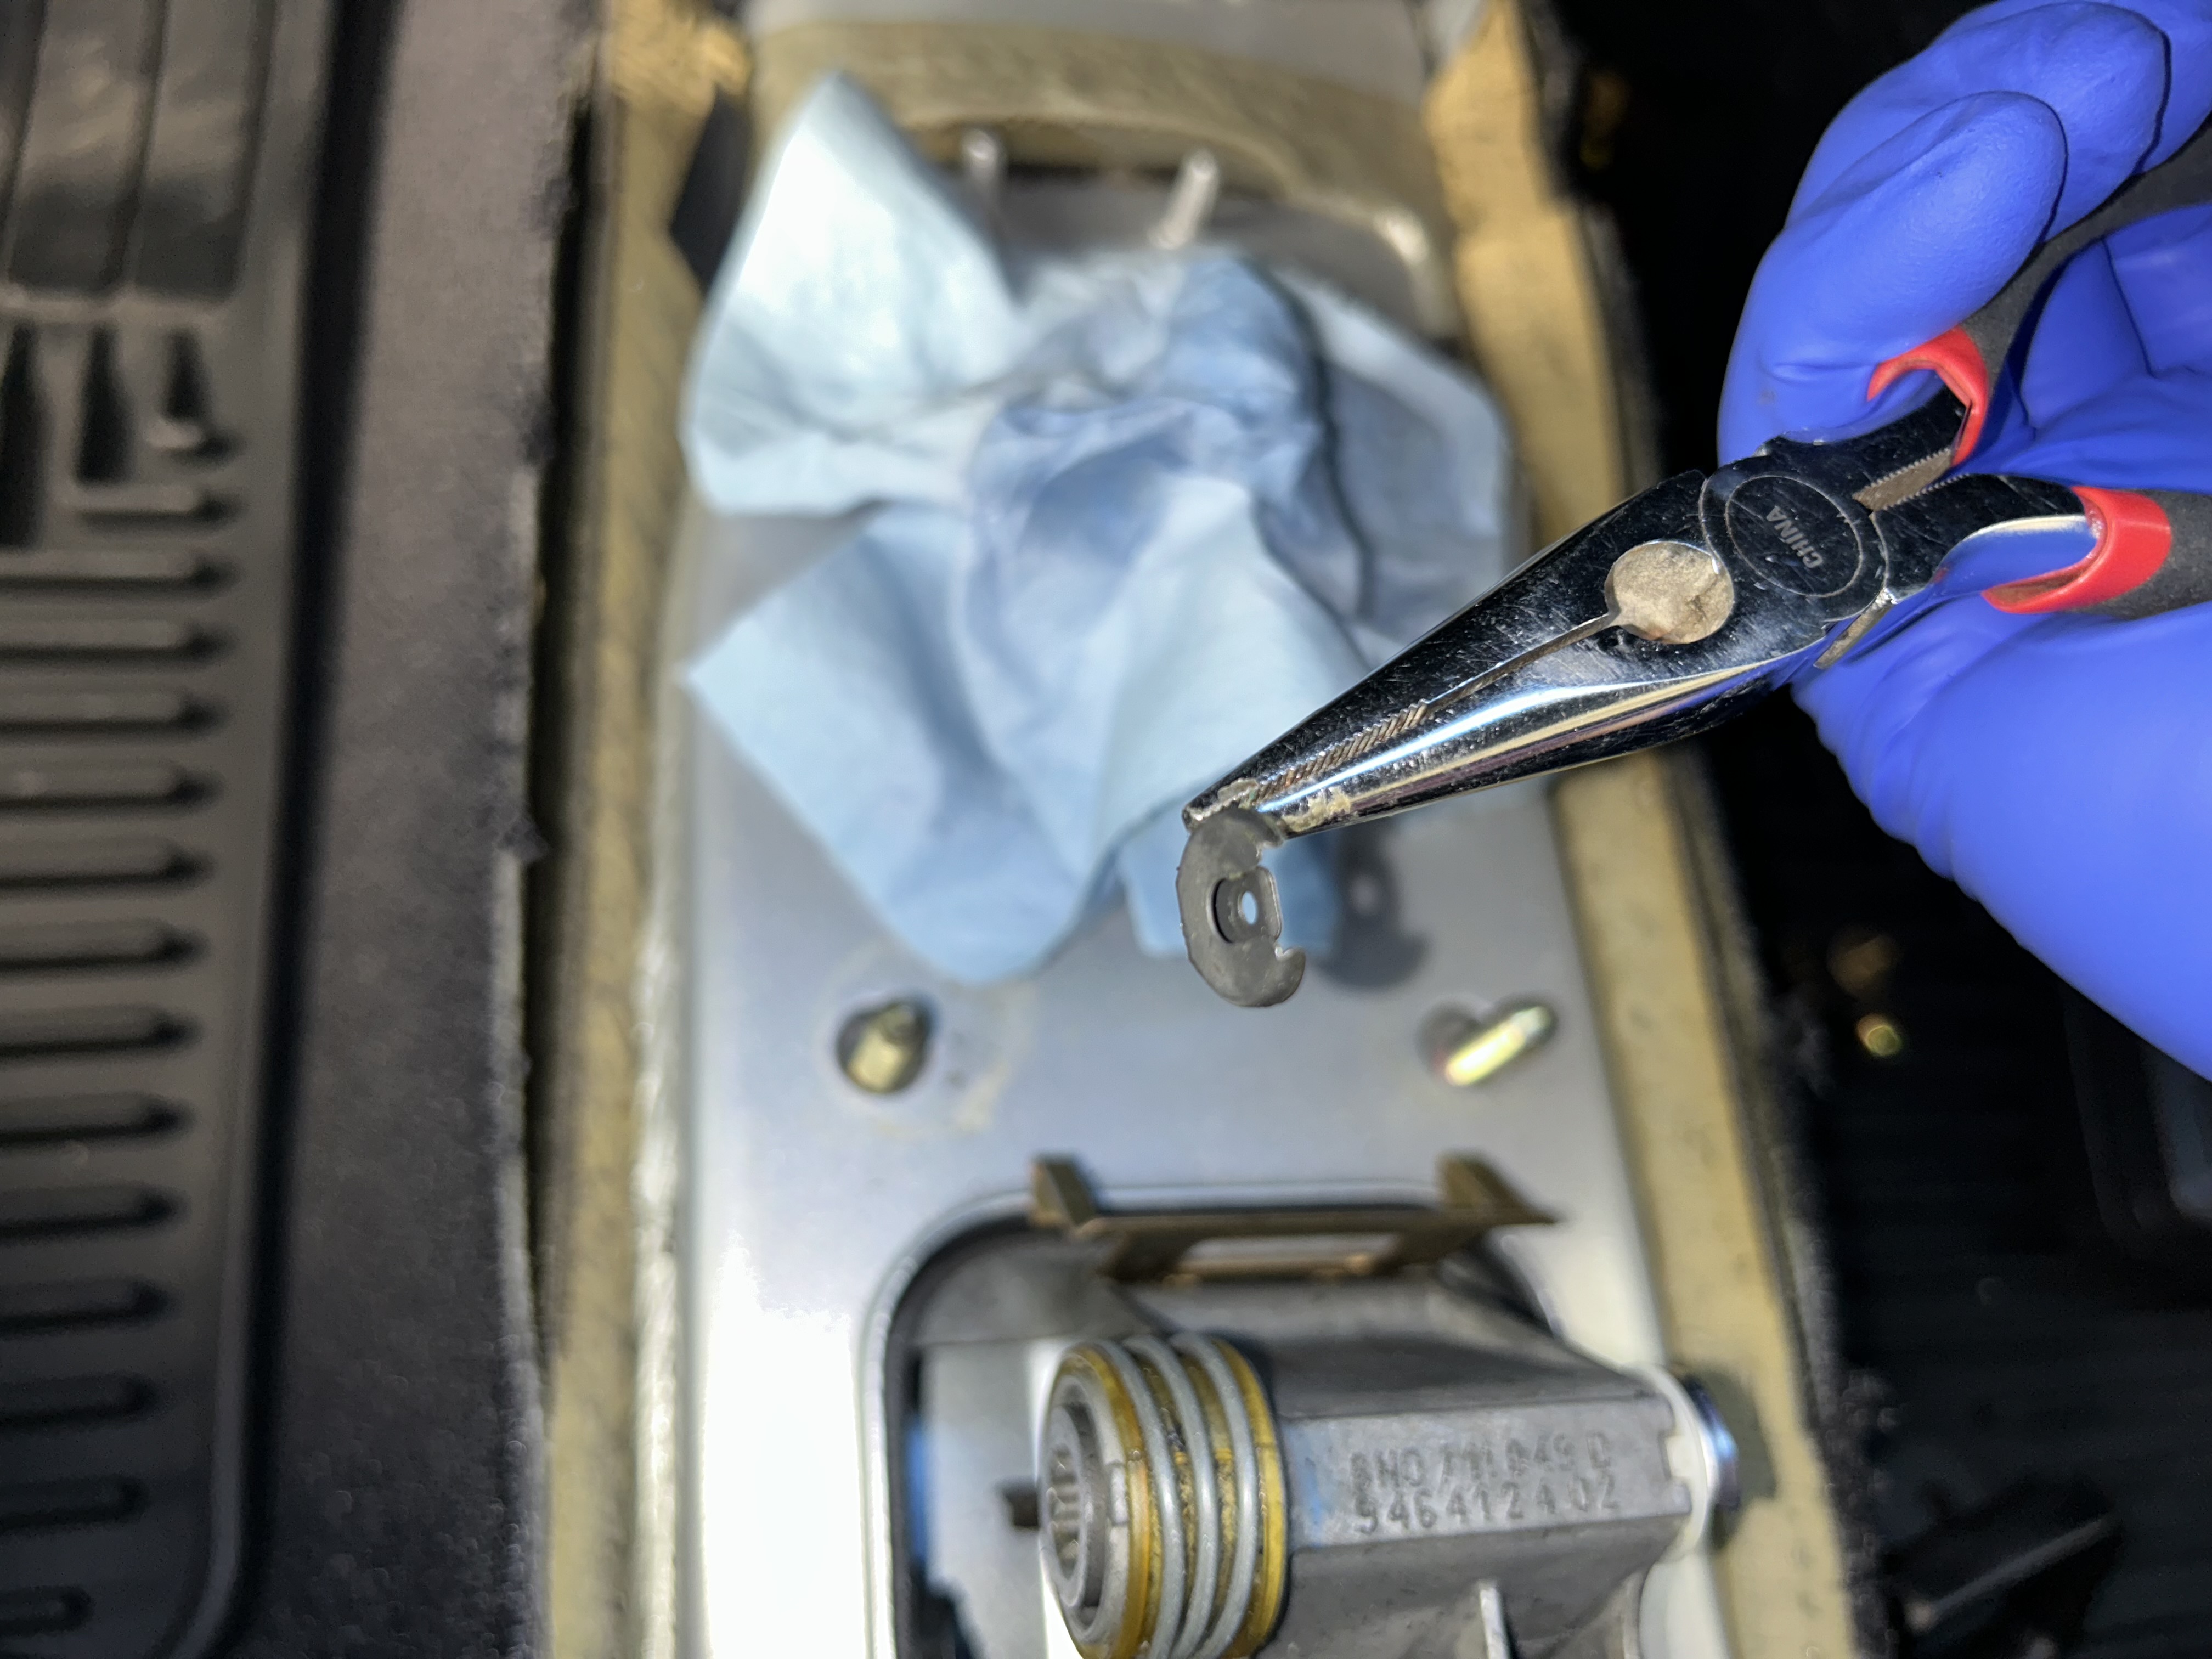
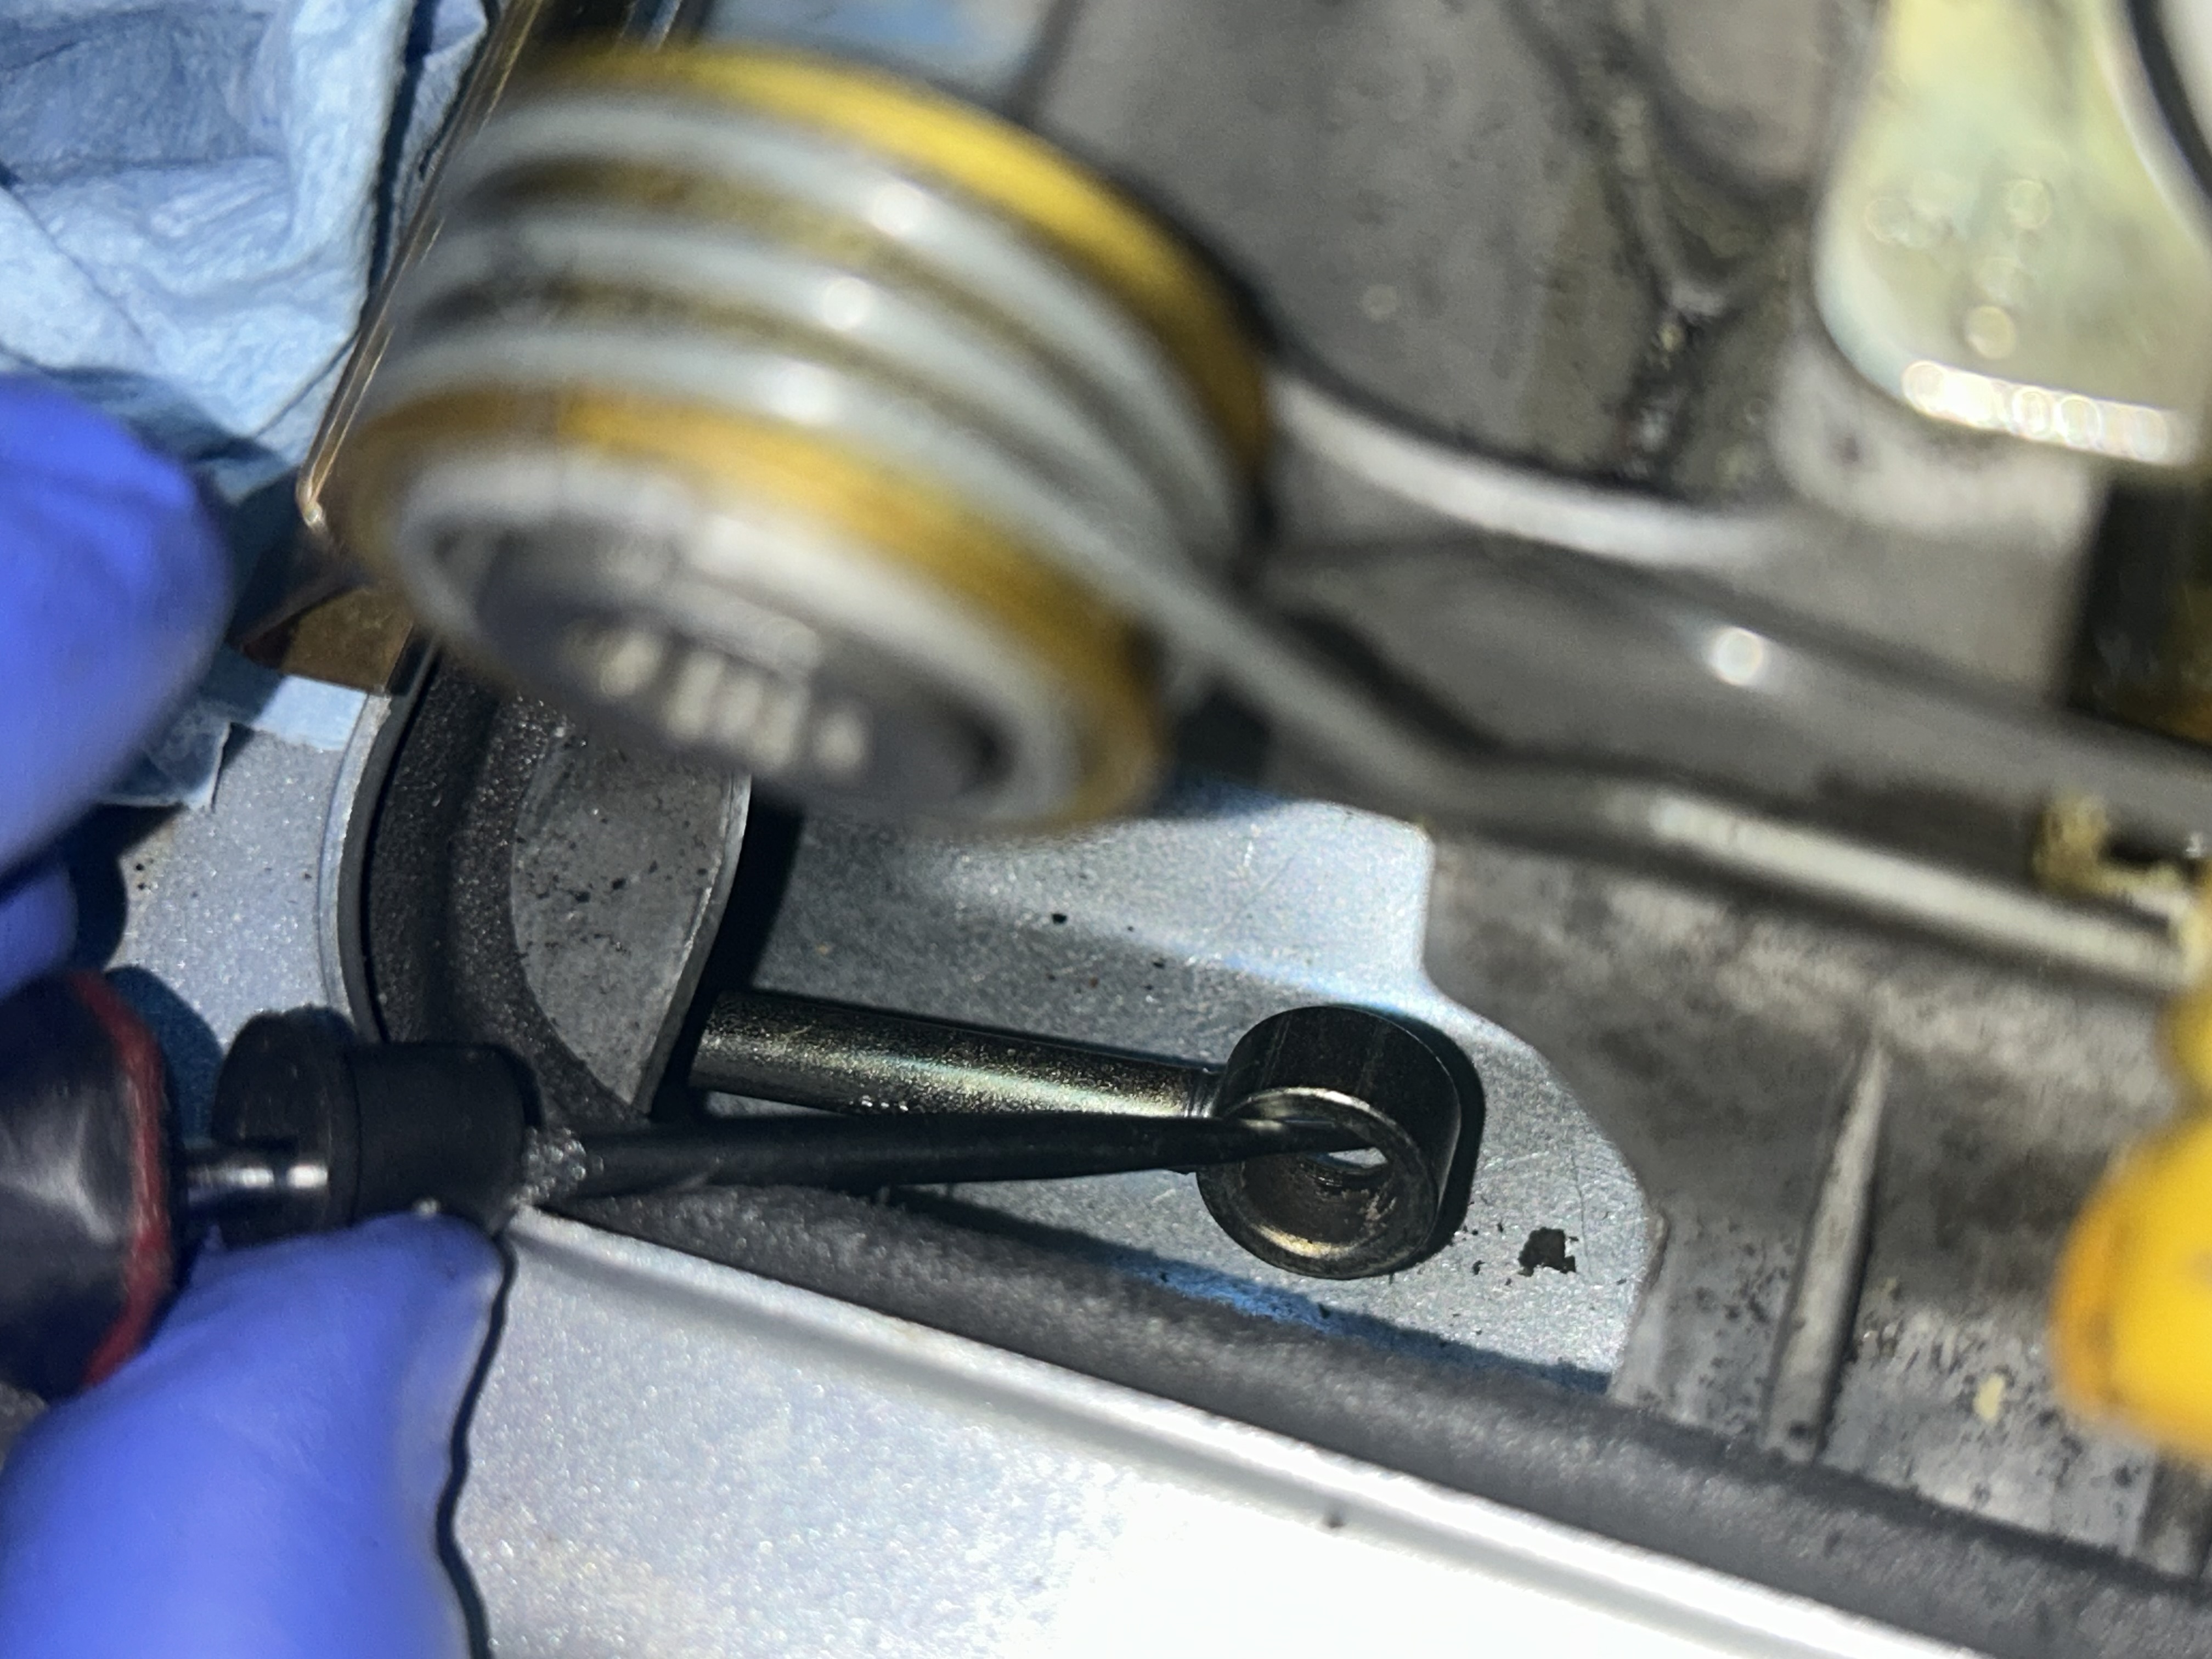
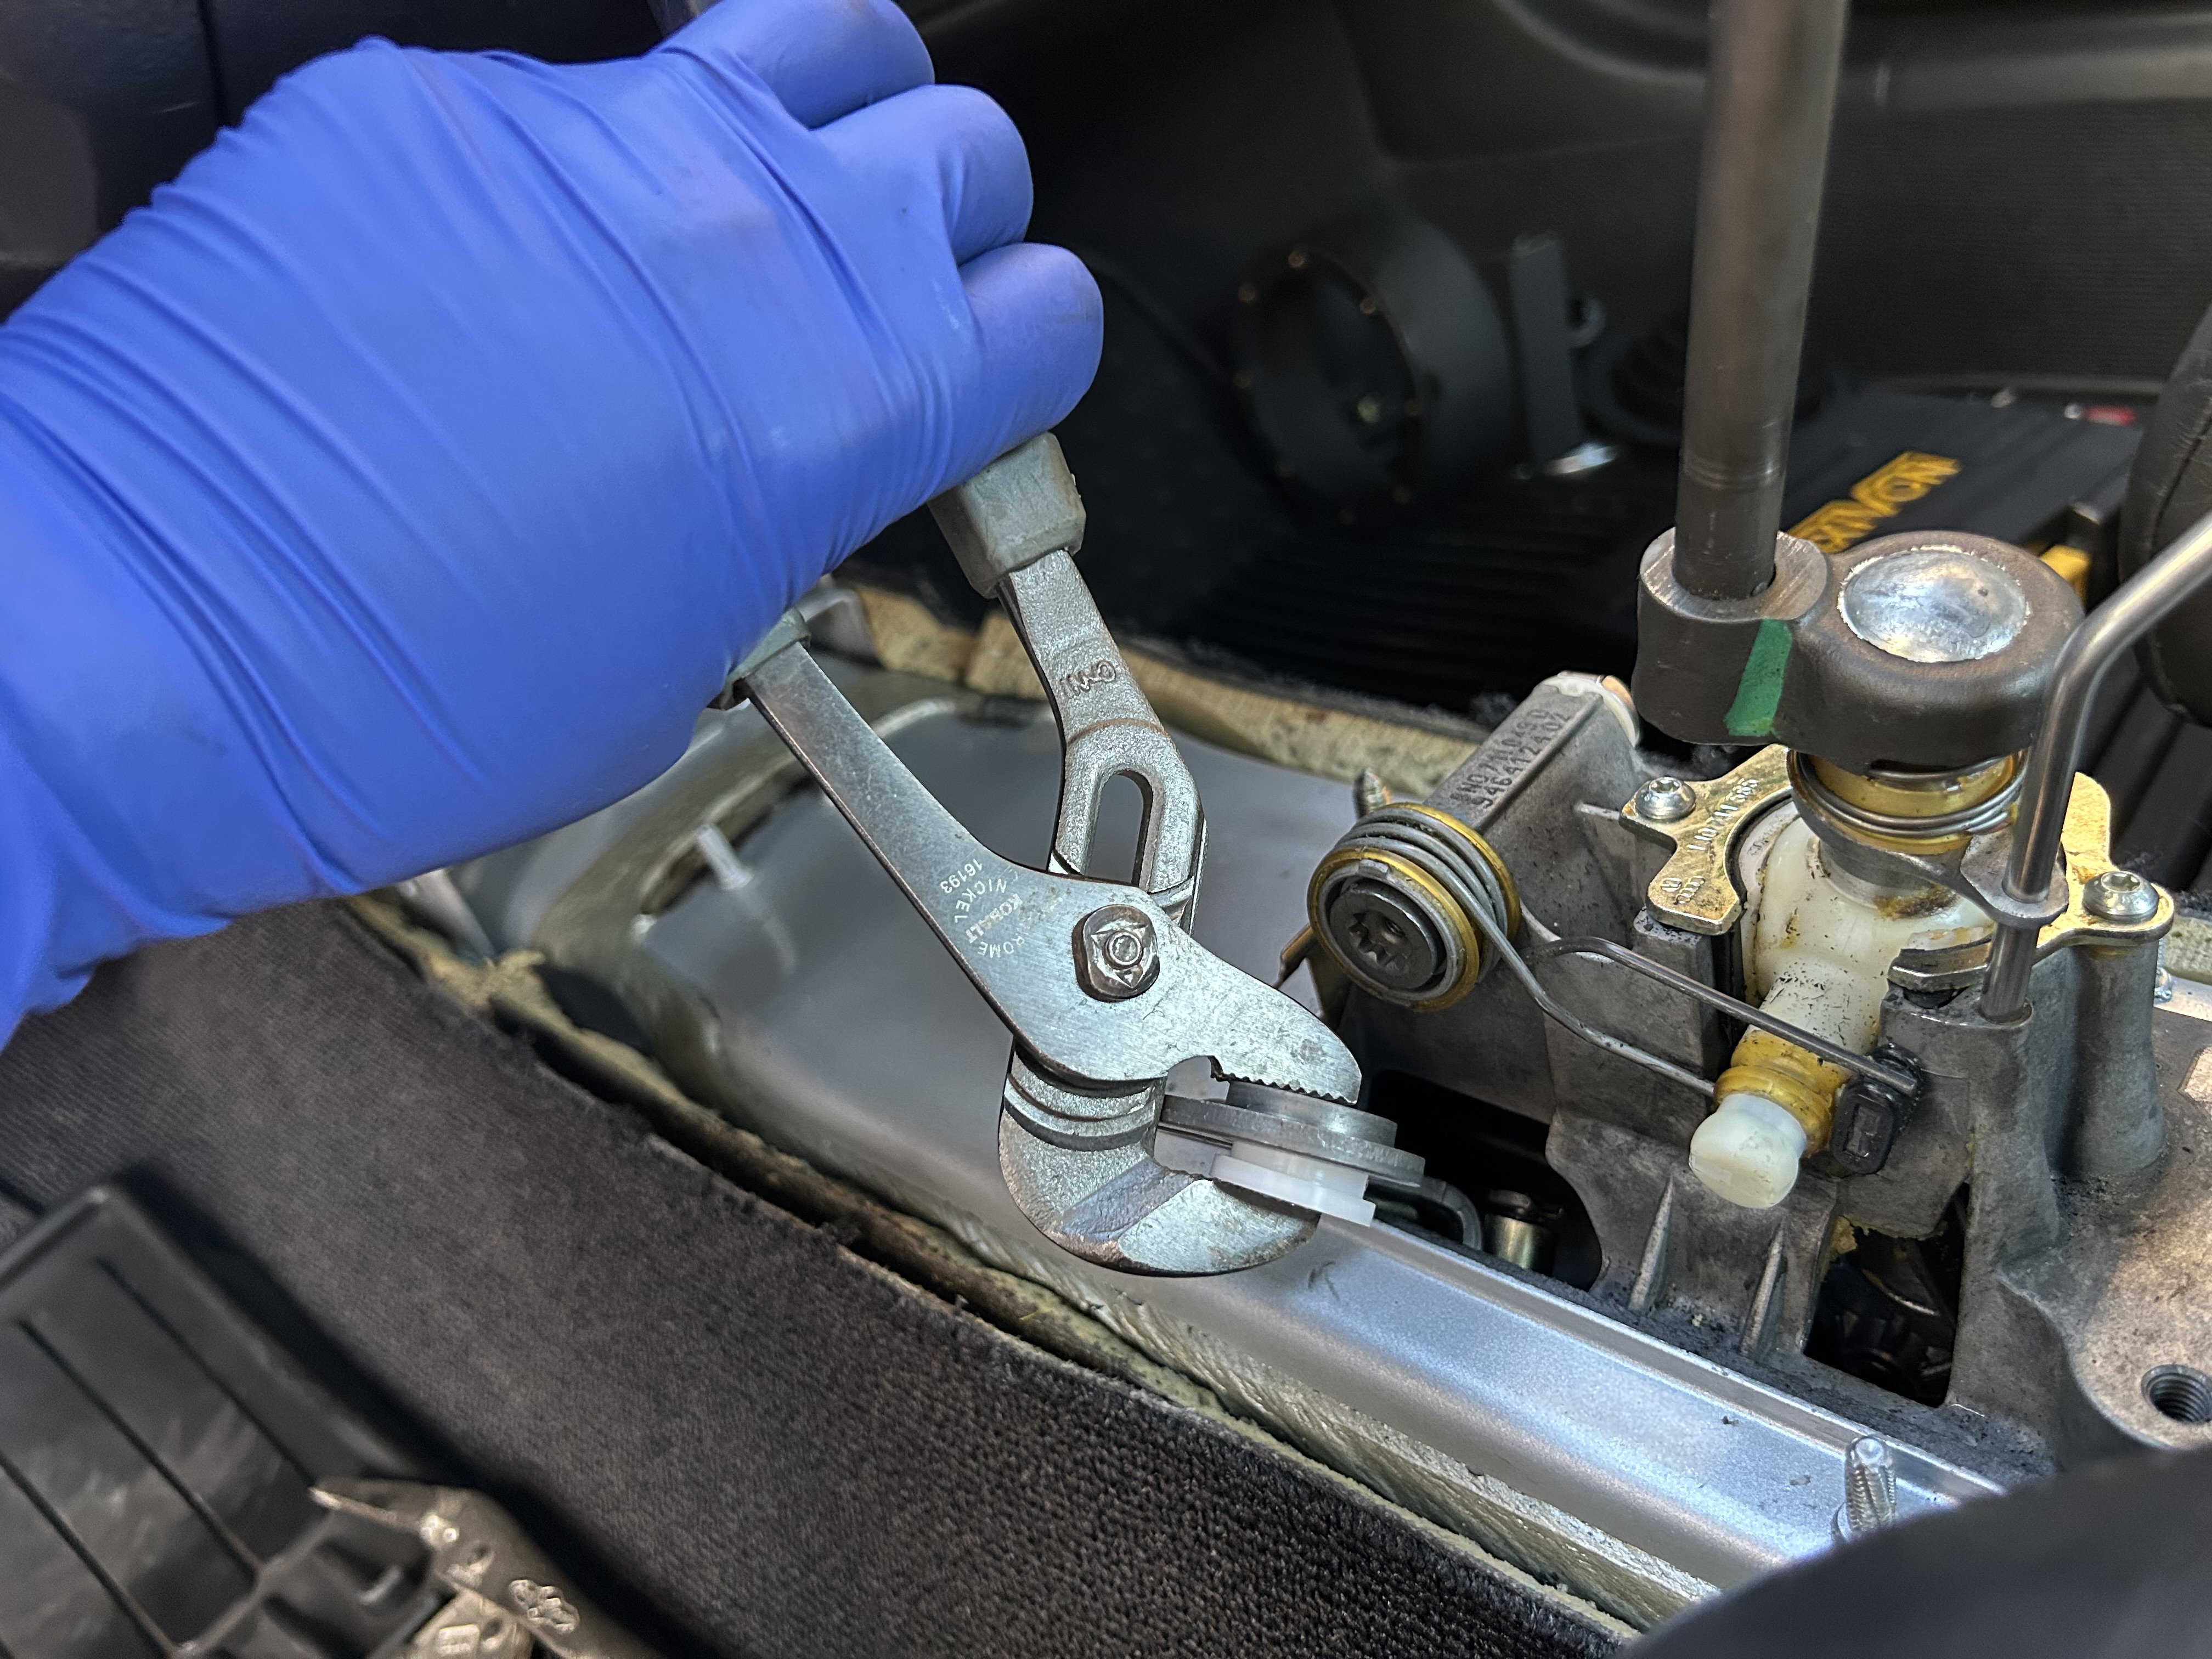
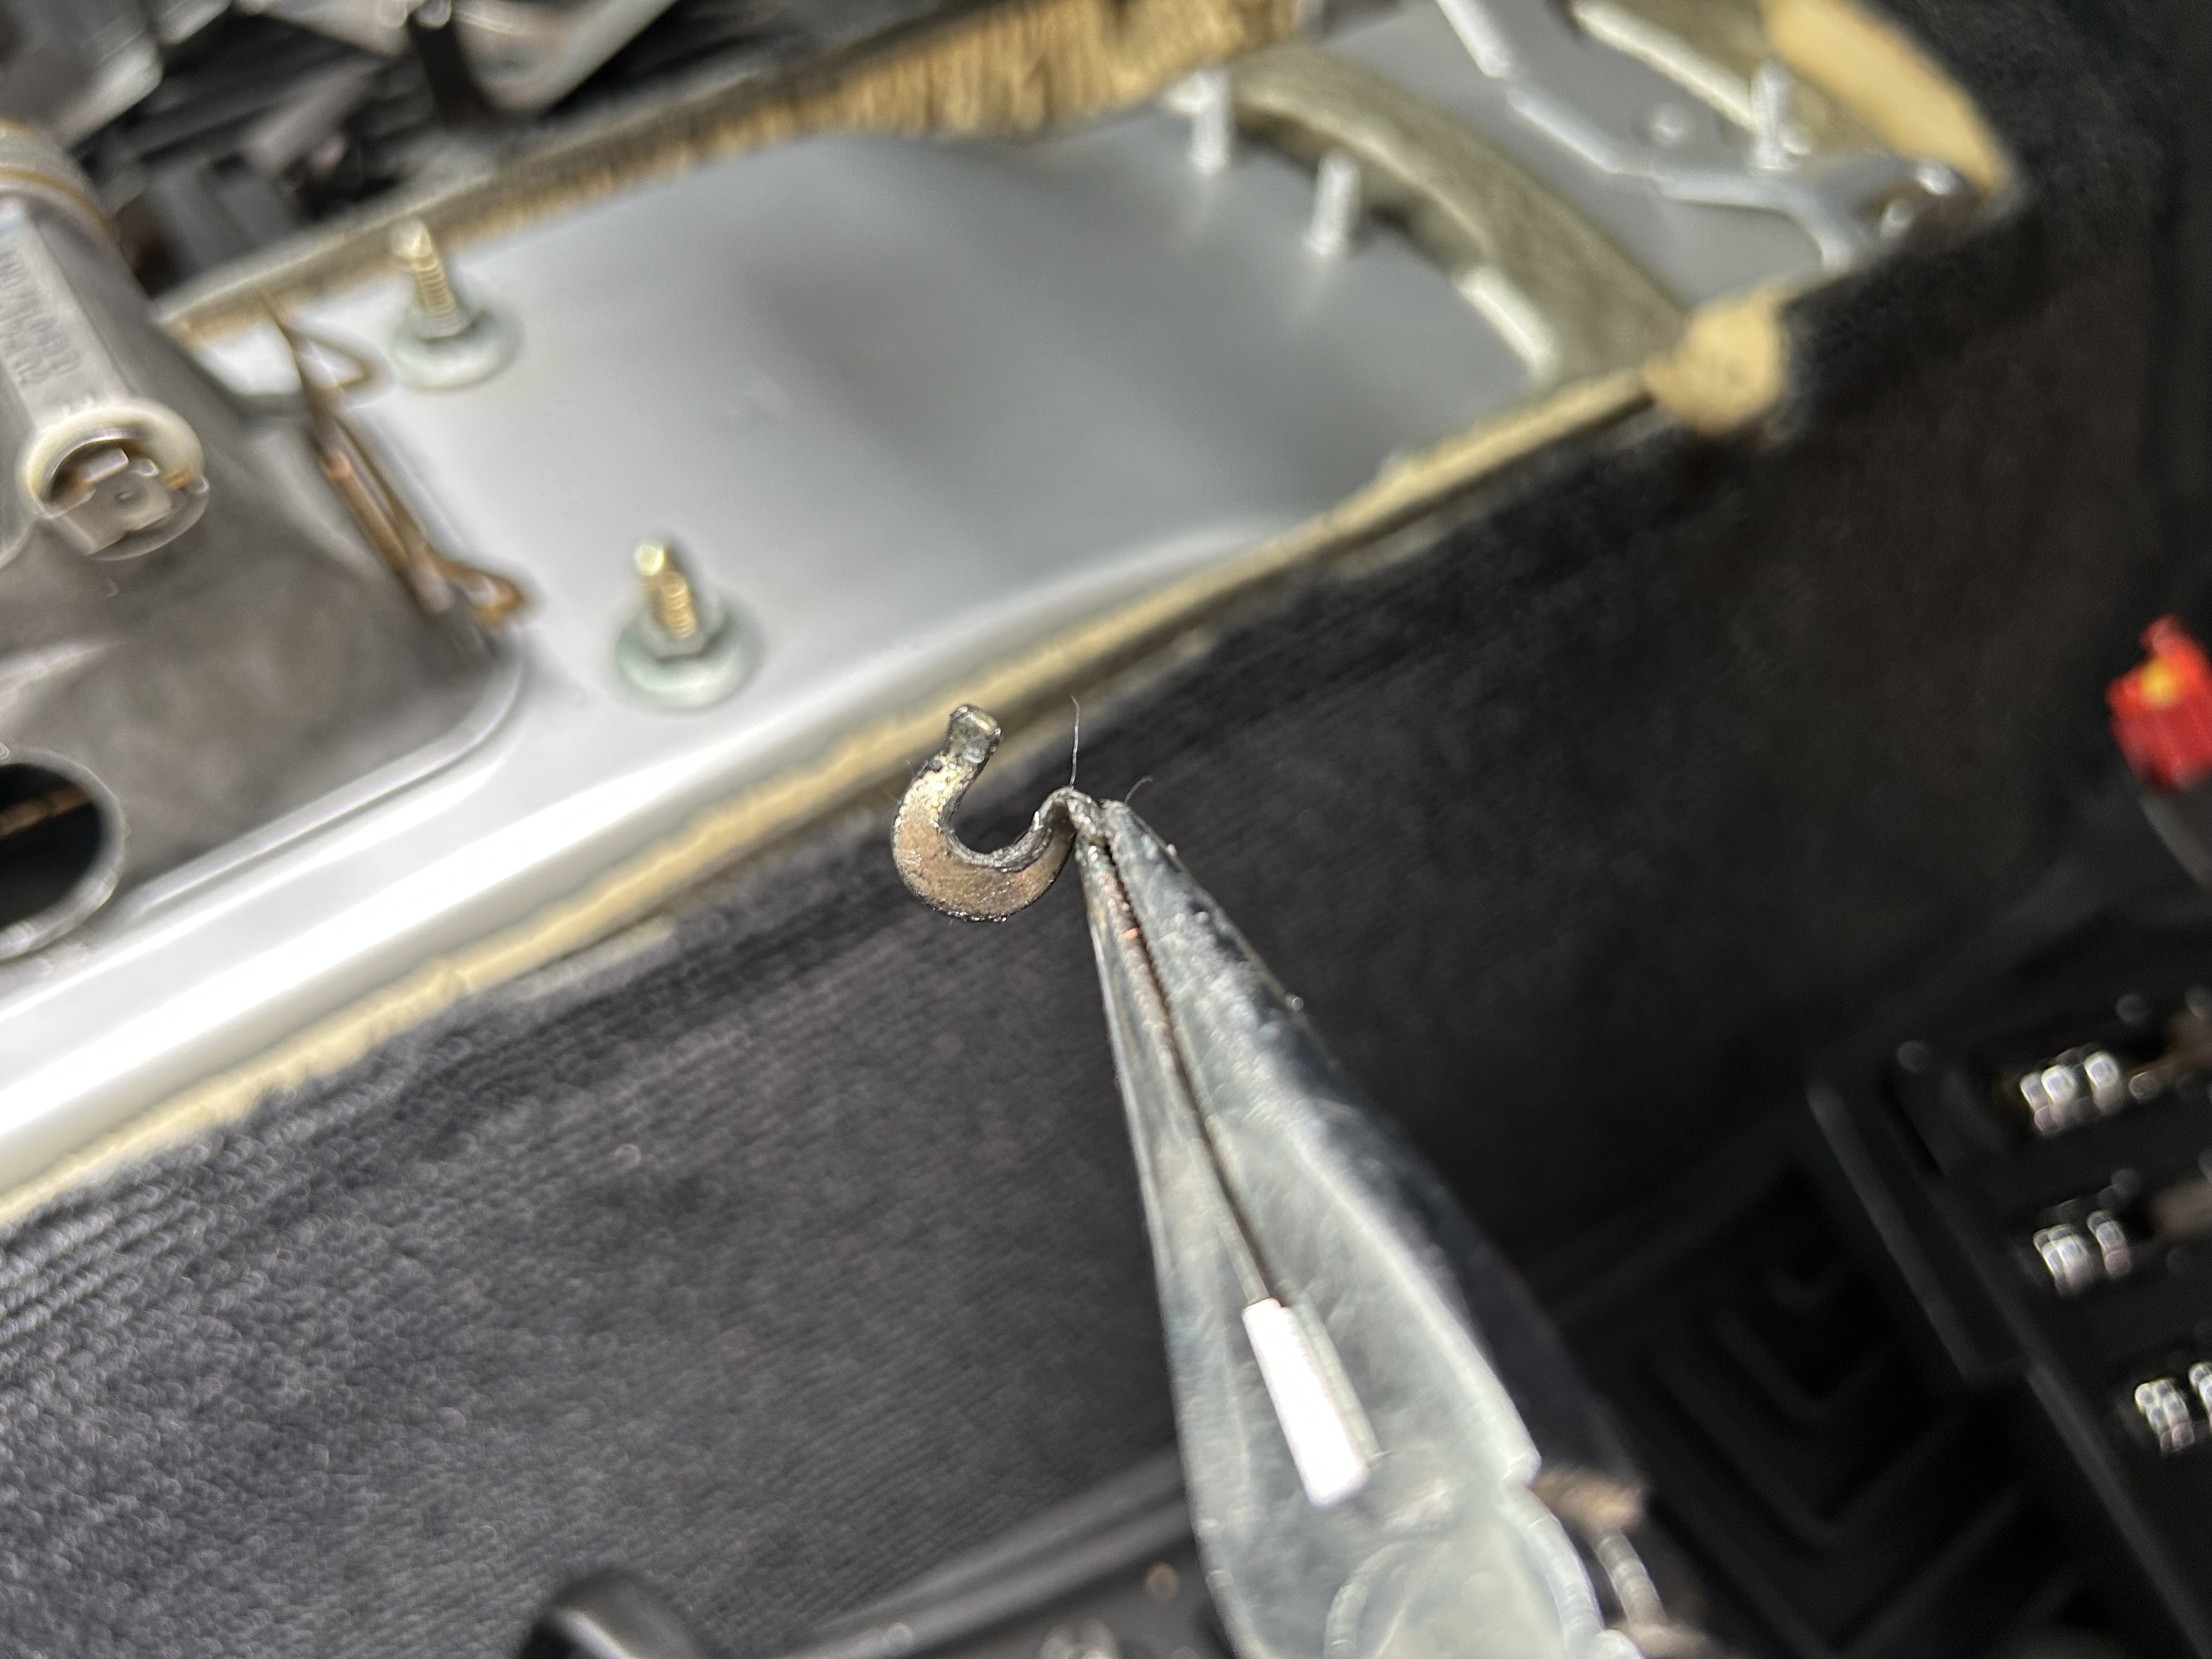
Pull the plate over to the left so that you can get a glimpse underneath at the linkage that you’ll need to get to. Remove the end clip with a set of long nose pliers. The shifter plate can now be separated from the shift linkage.
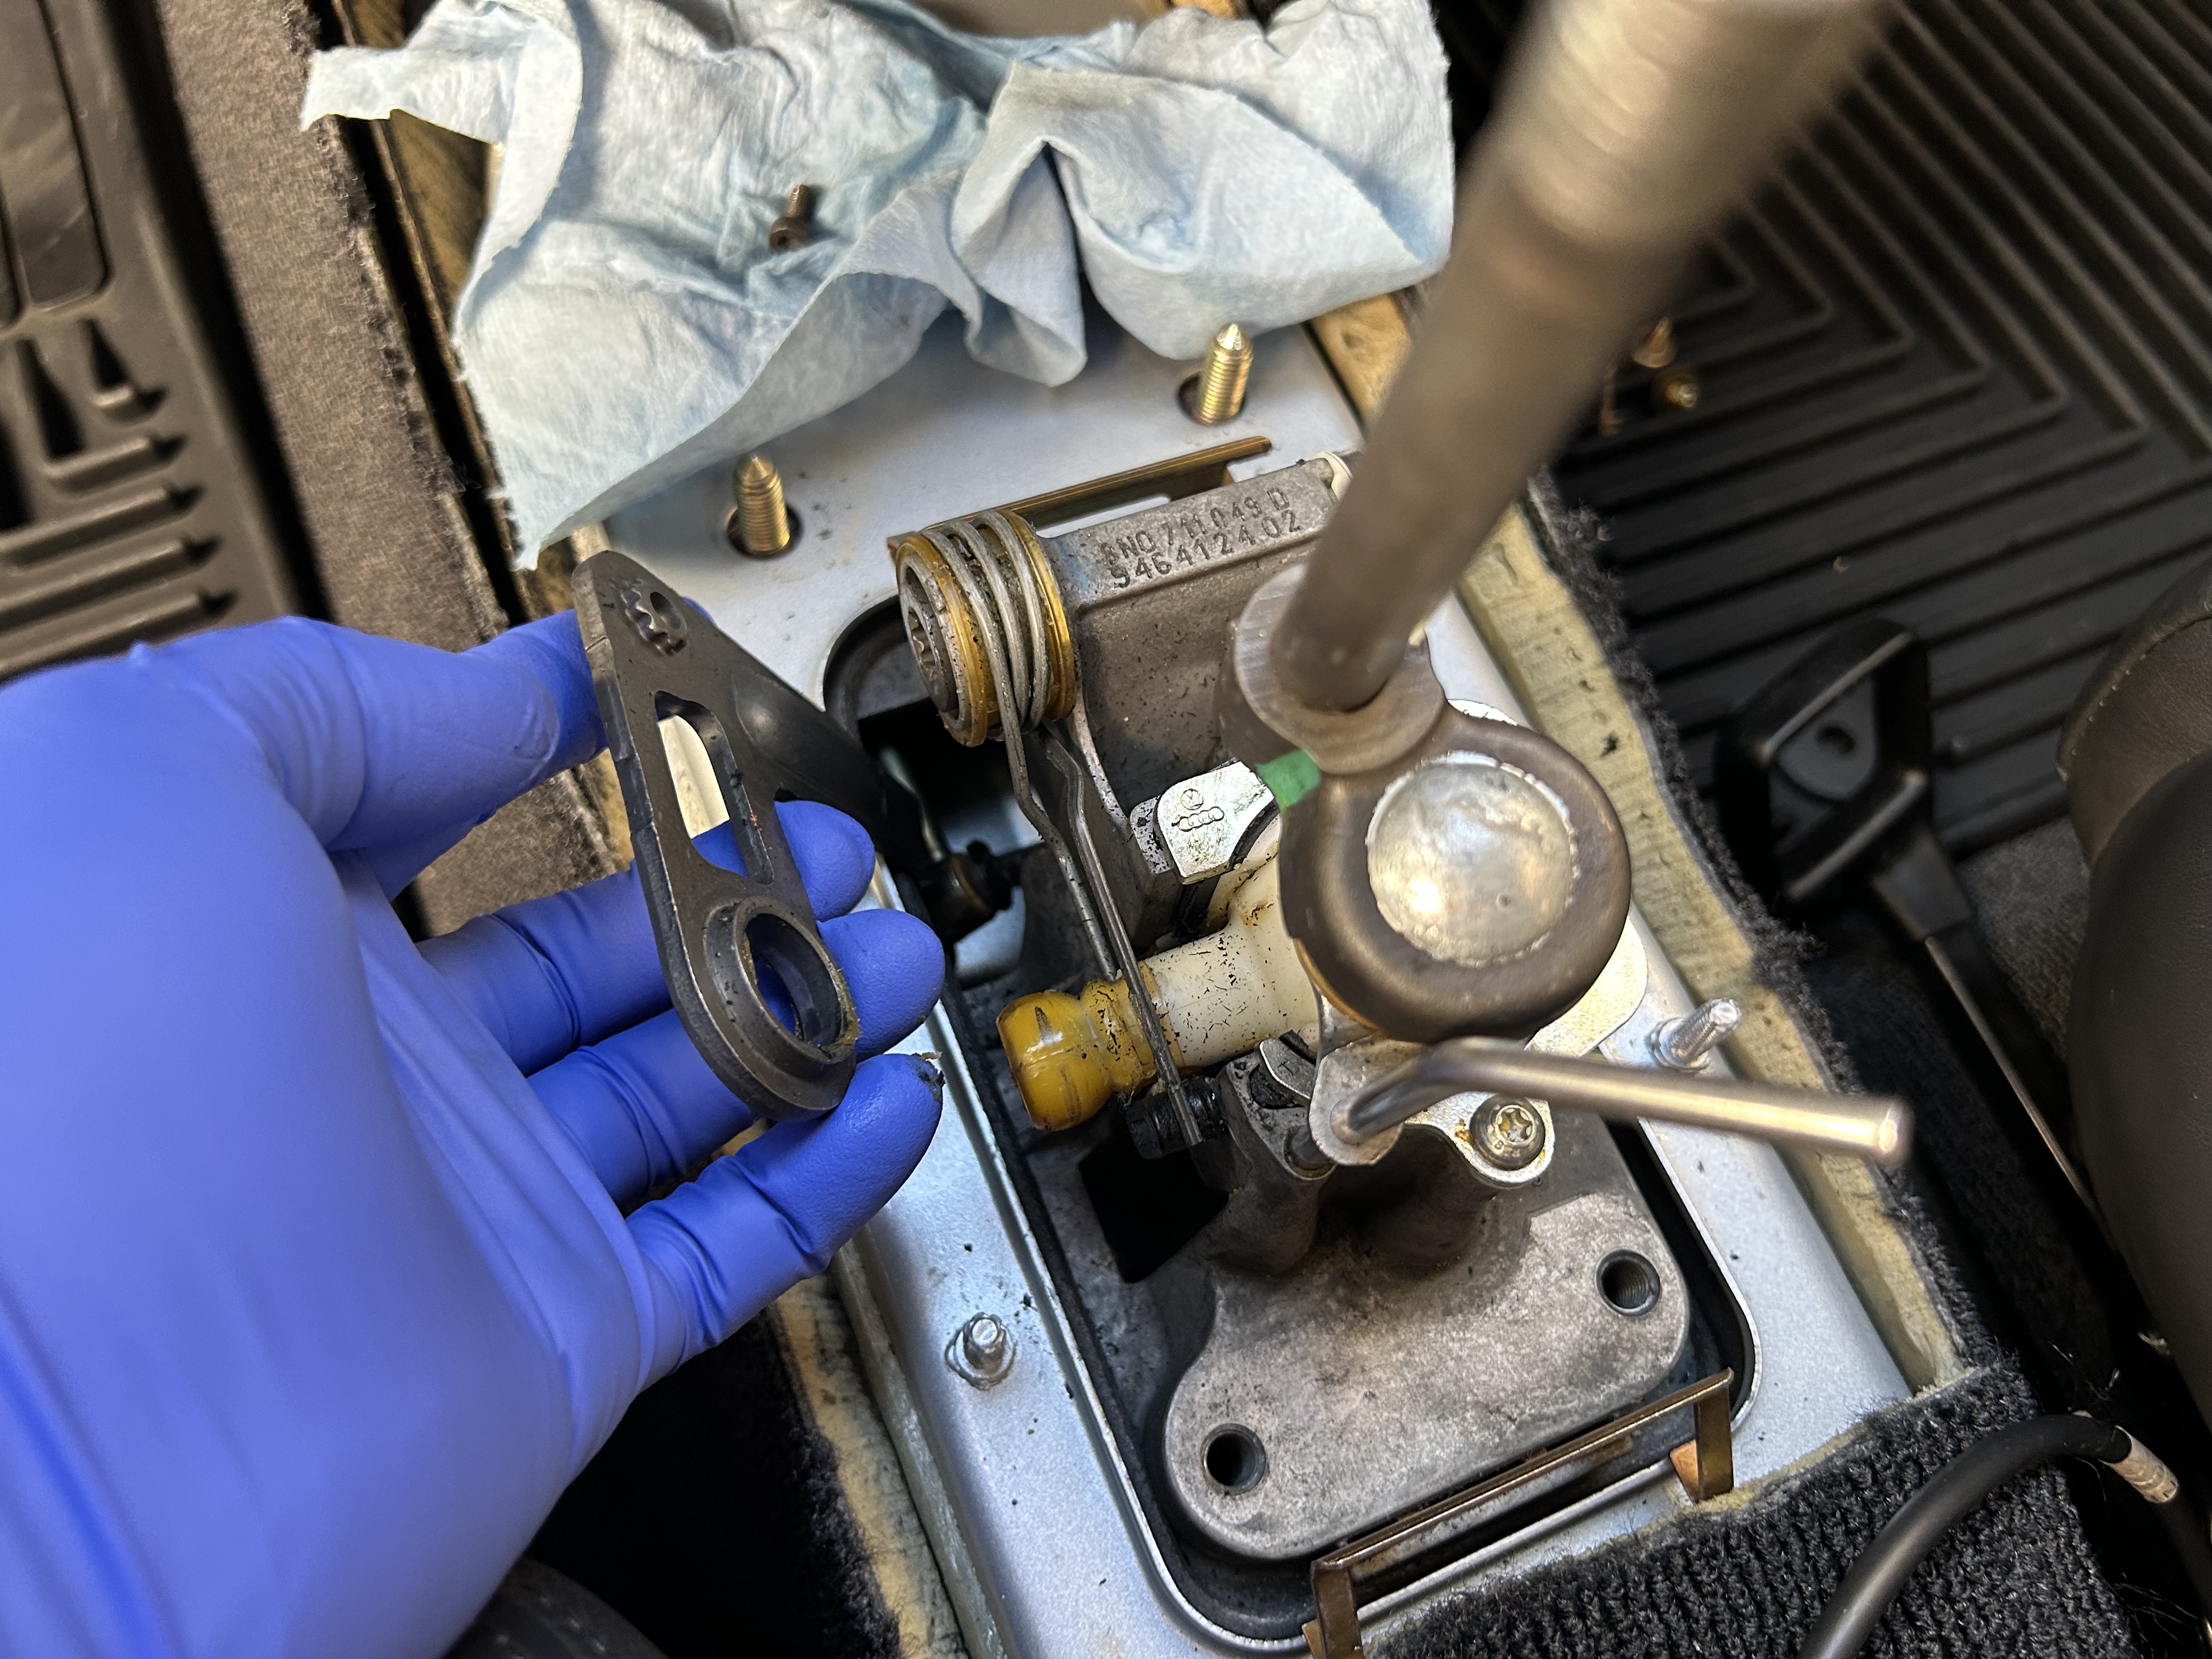
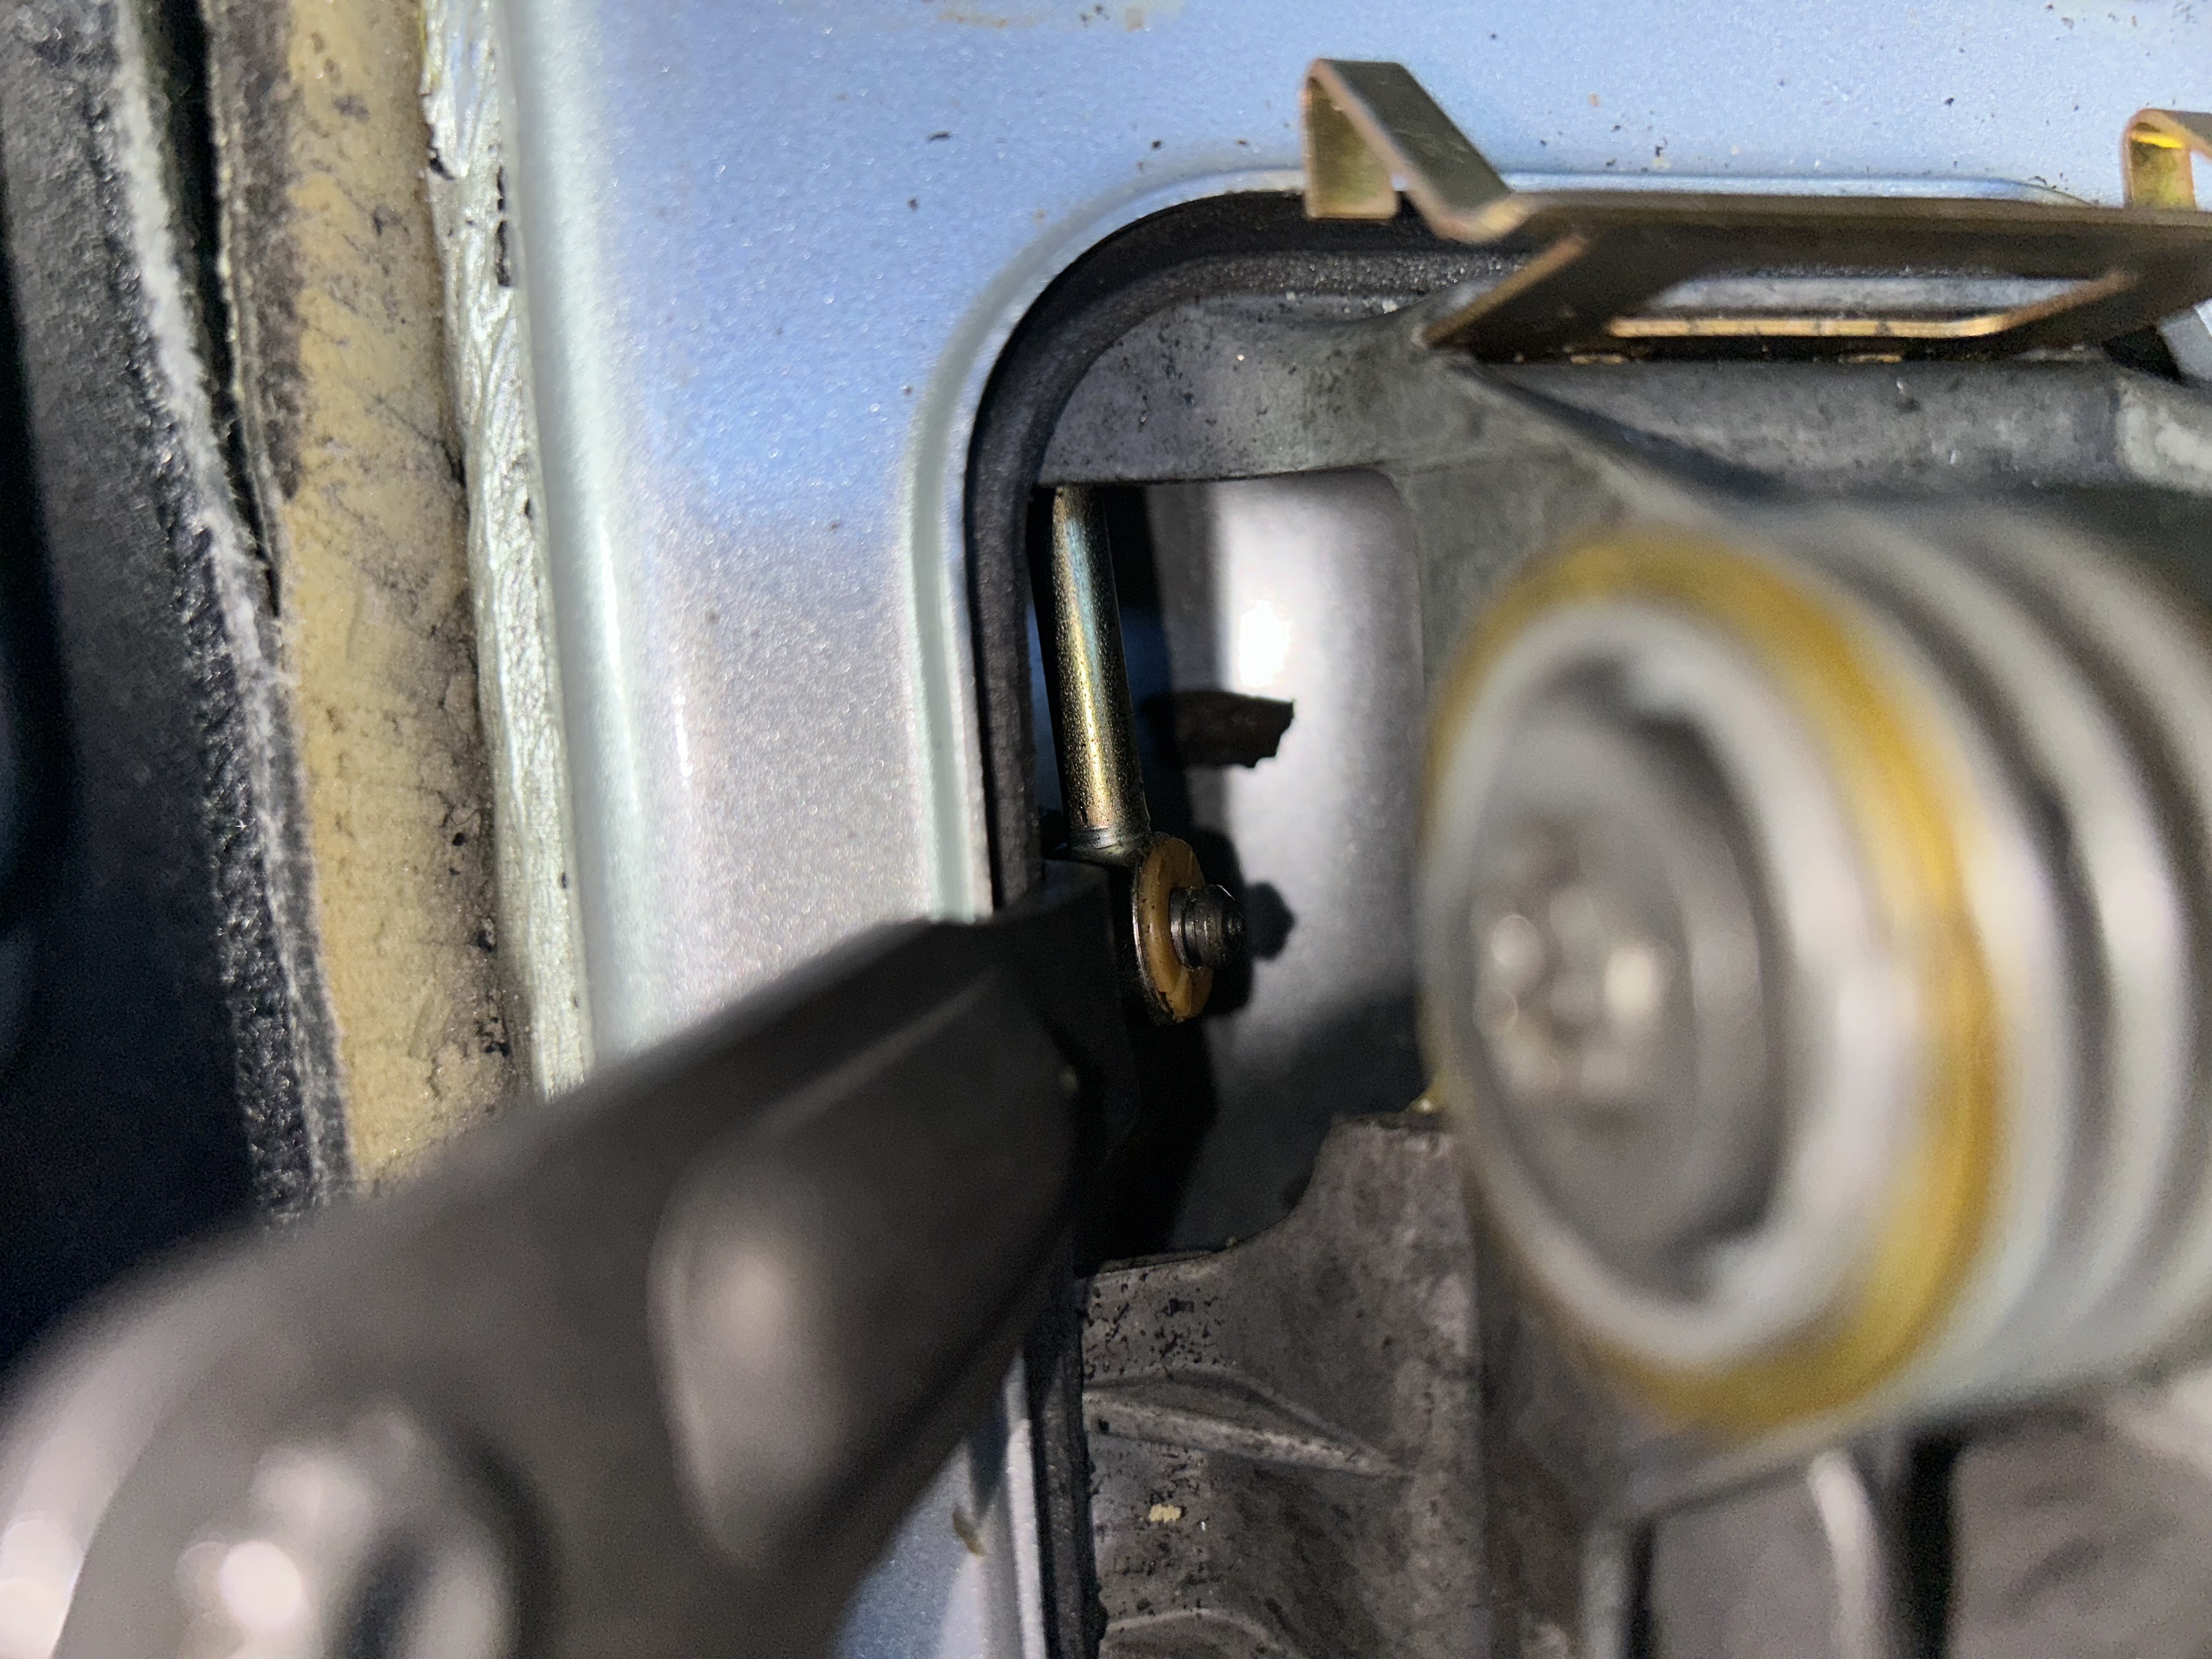
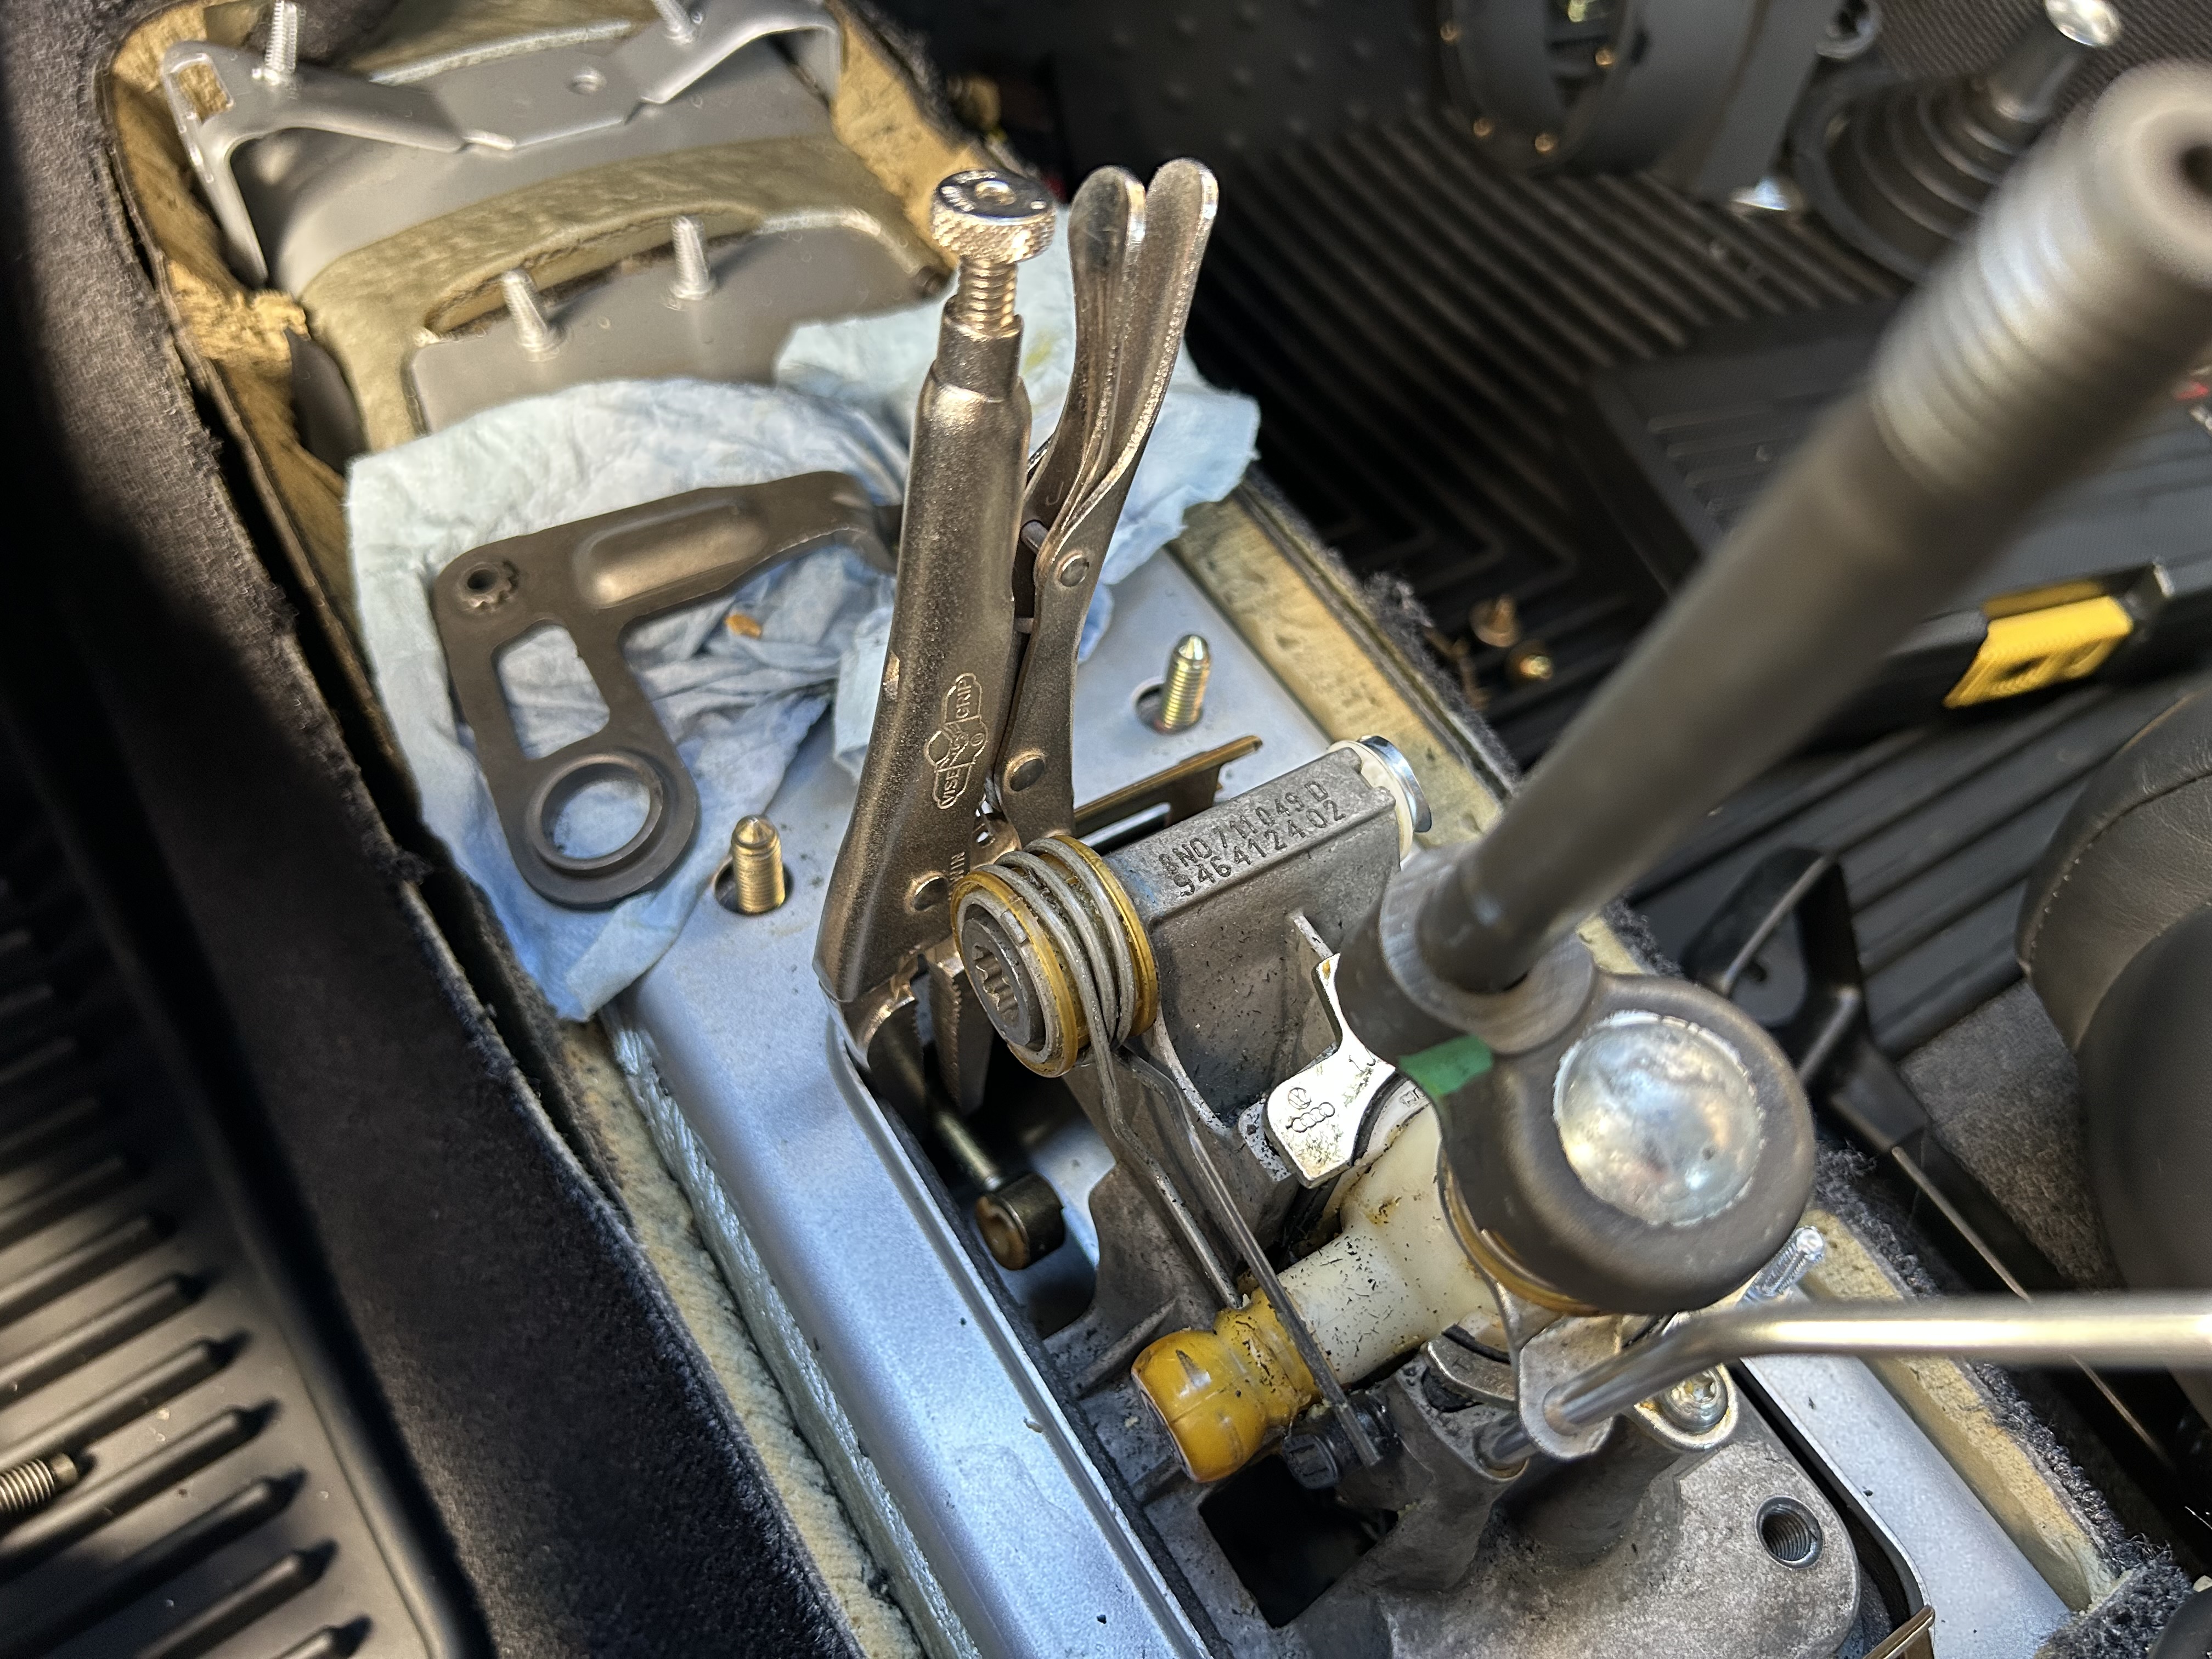
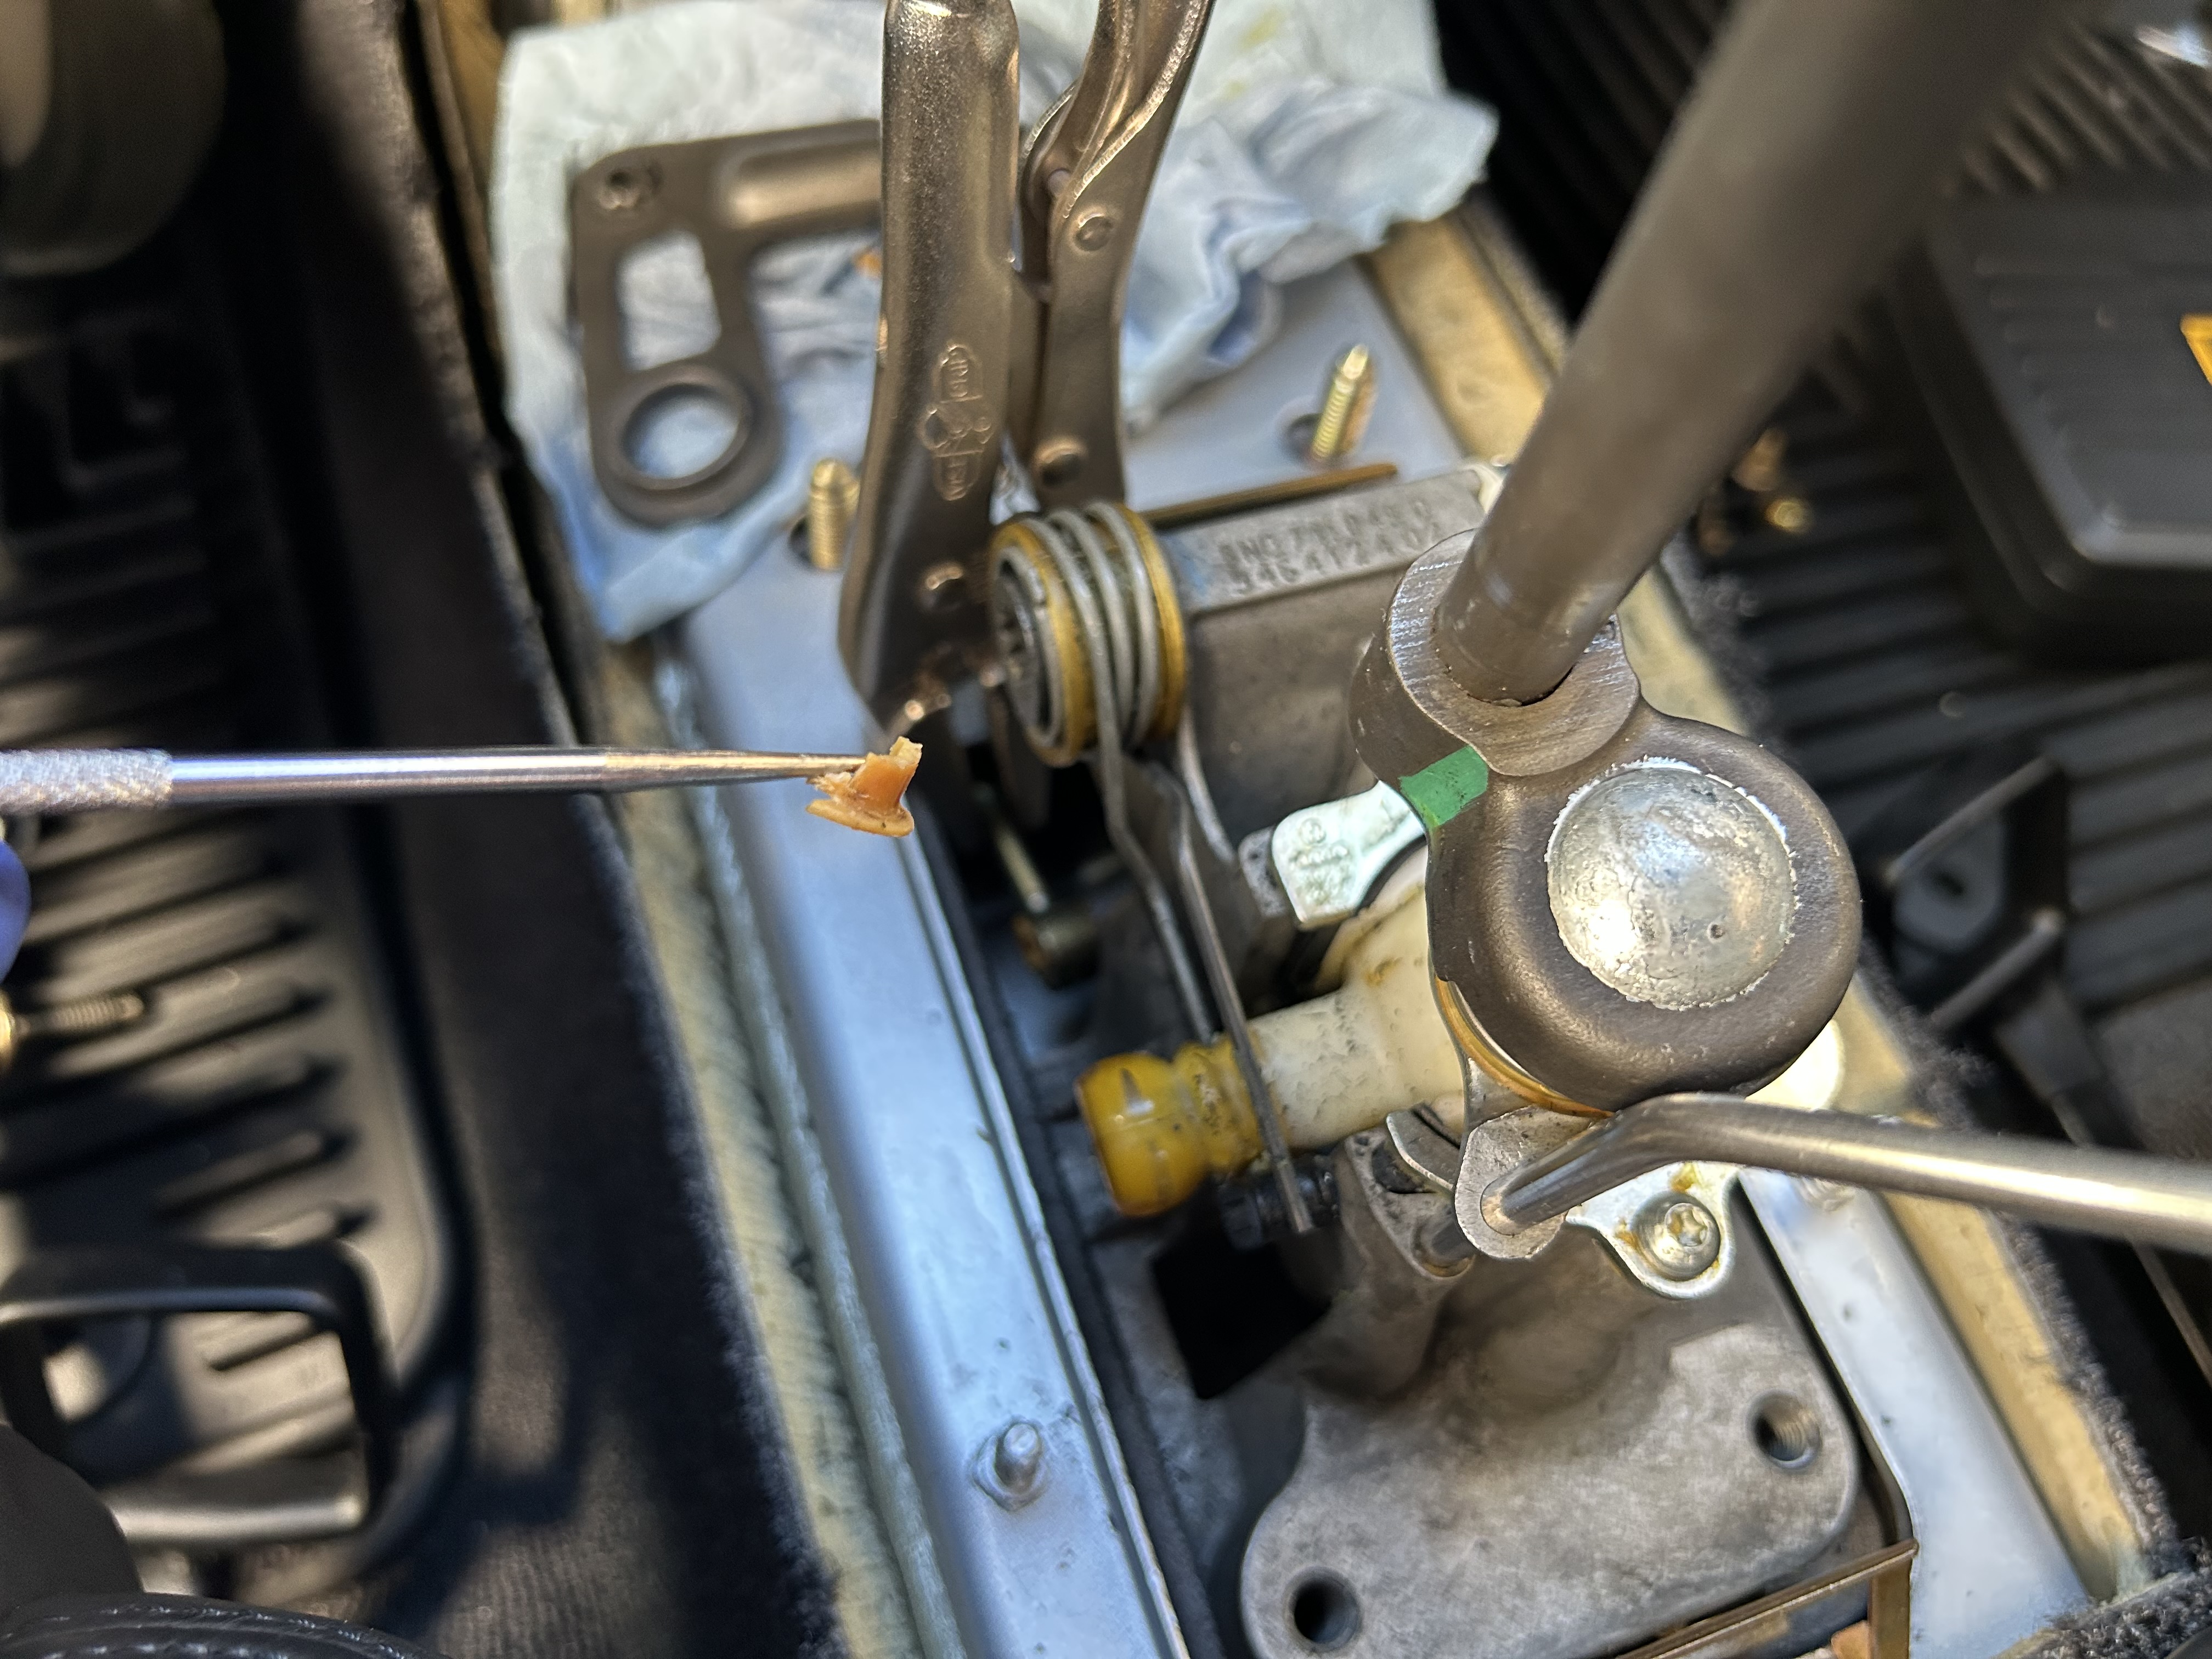
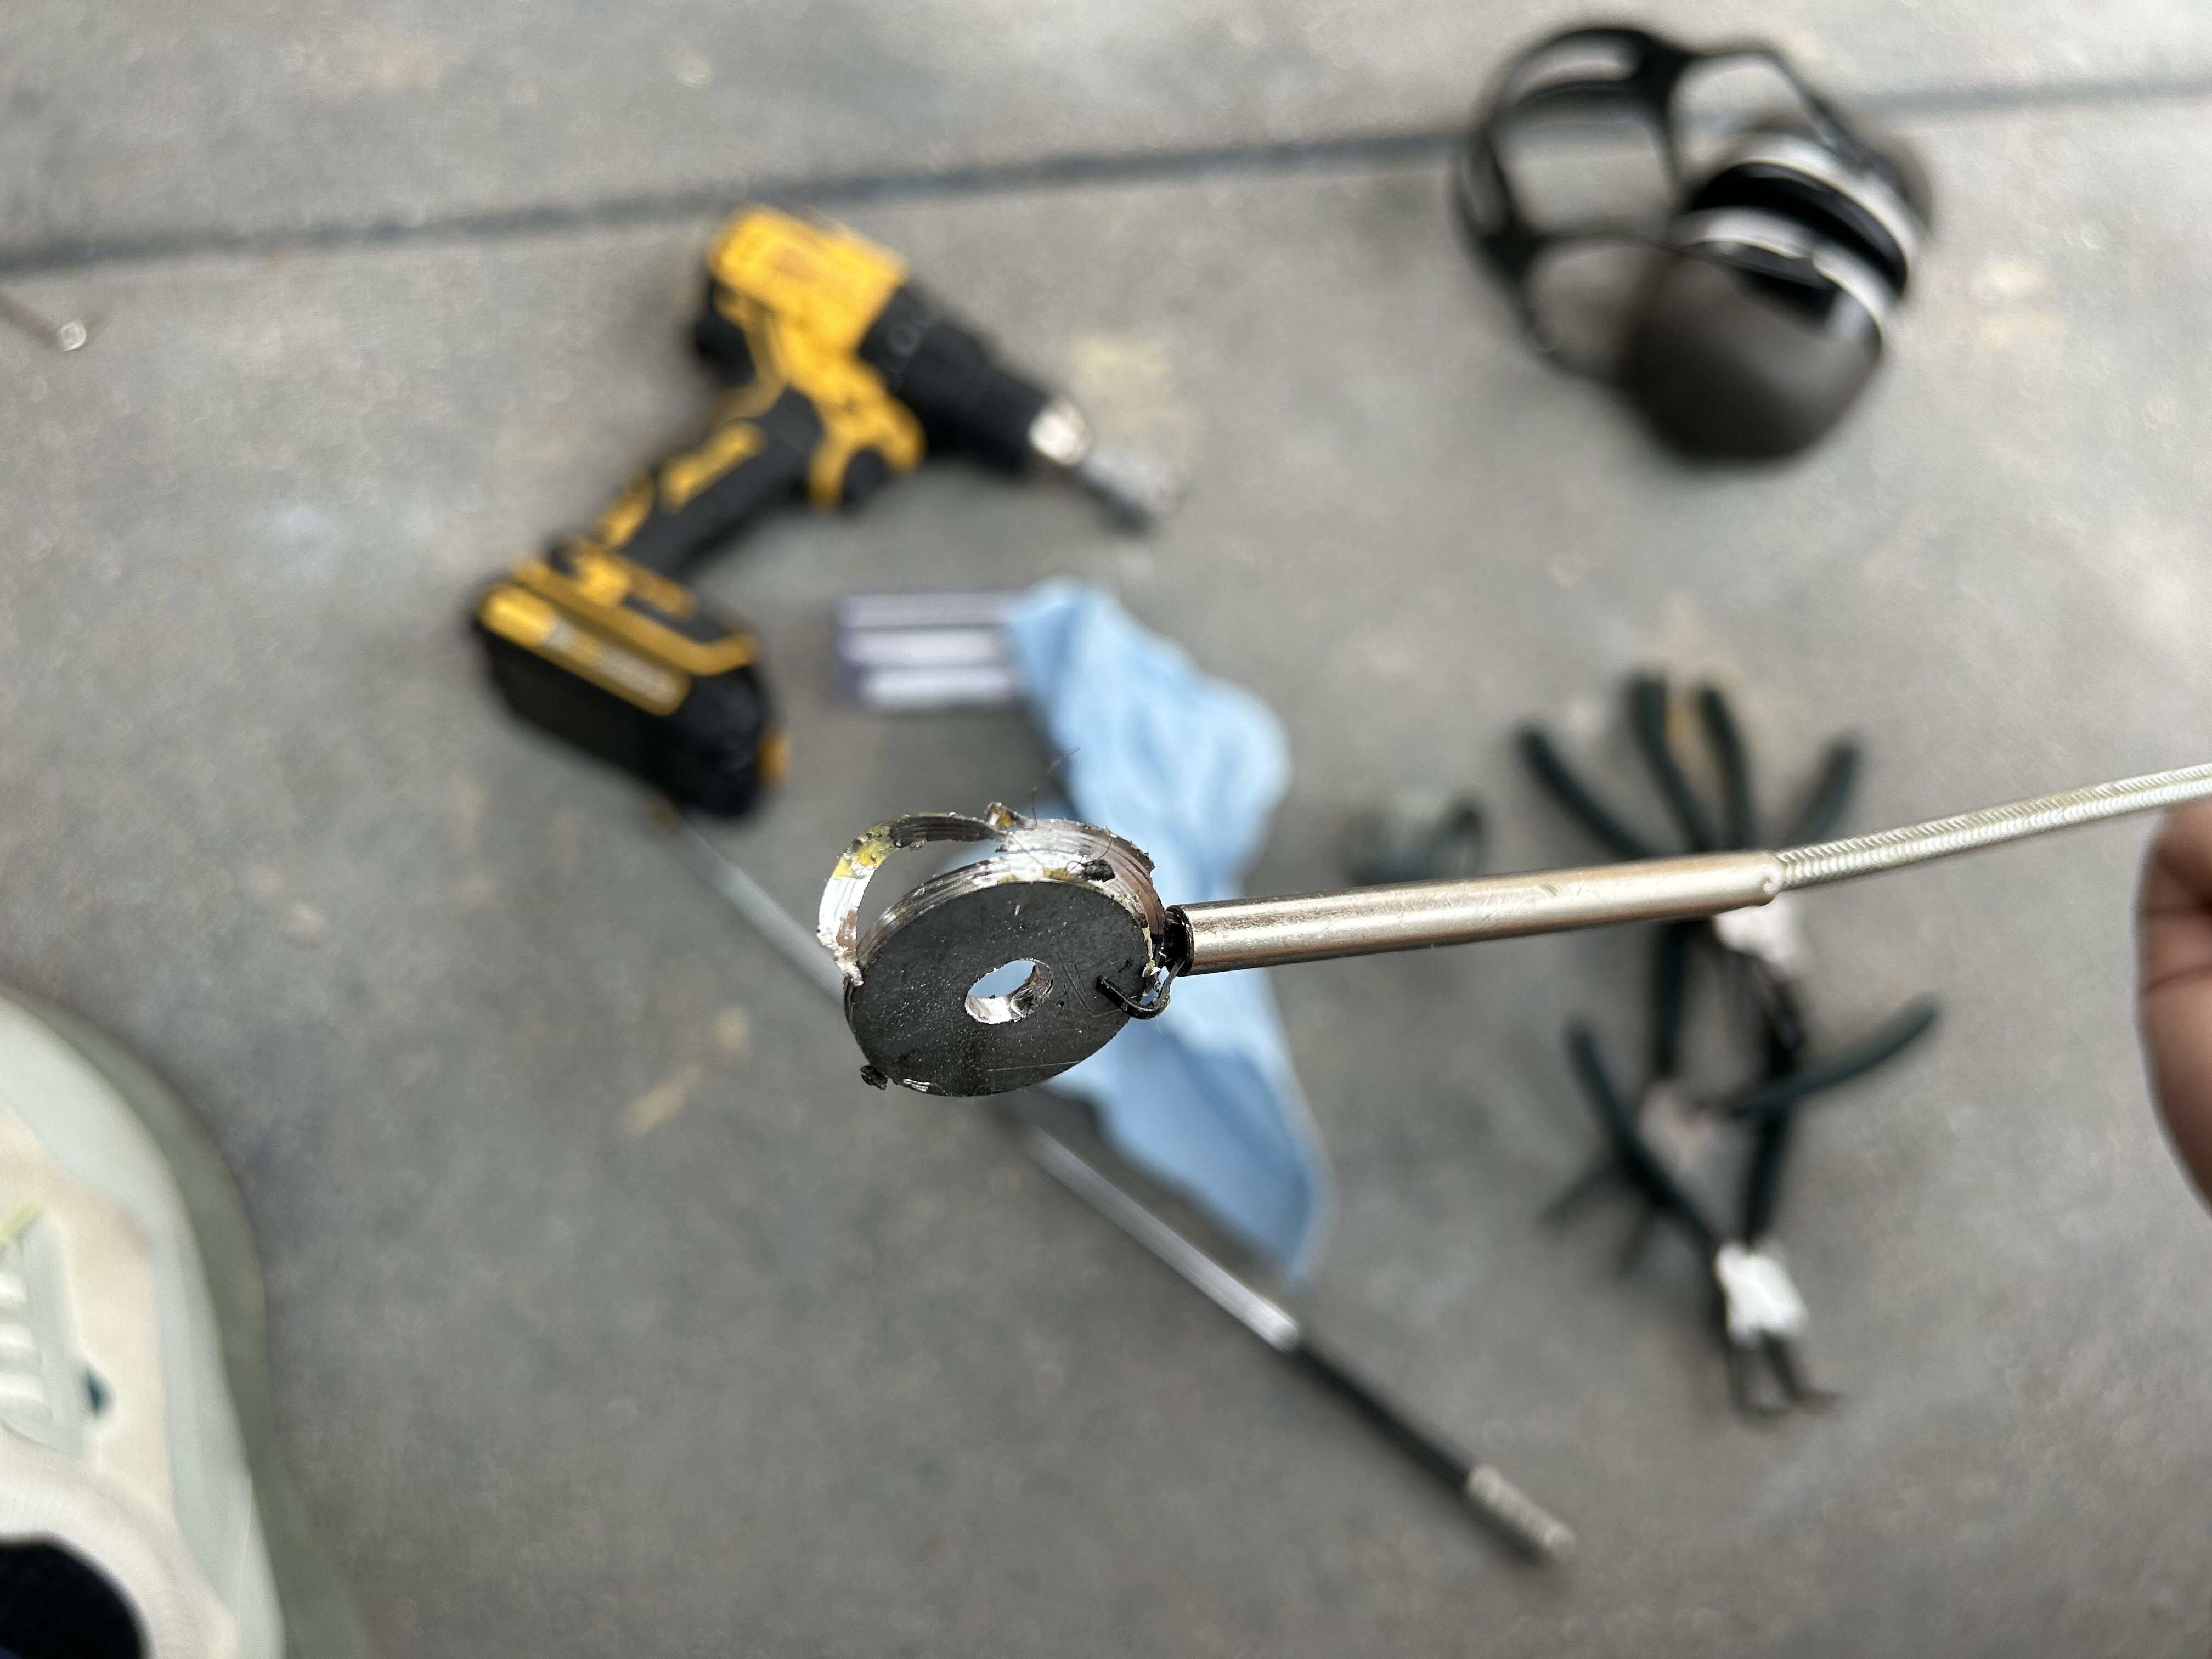
Use a set of locking pliers to hold the shift linkage so that it stays in a position that is accessible. Use a pick tool to break up and remove the existing bushing. It doesn’t really matter if you pull this bushing out whole, or if it comes out in pieces (it might break apart easily). If any pieces do fall down below, just use your flexible retrieval tool to pick them up.

Since you can’t get your hands down into this space, you’ll need to do this with a variety of tools. The way I was able to get the cable saver bushing in on the driver’s side was to use a couple of pick tools and a set of long nose pliers
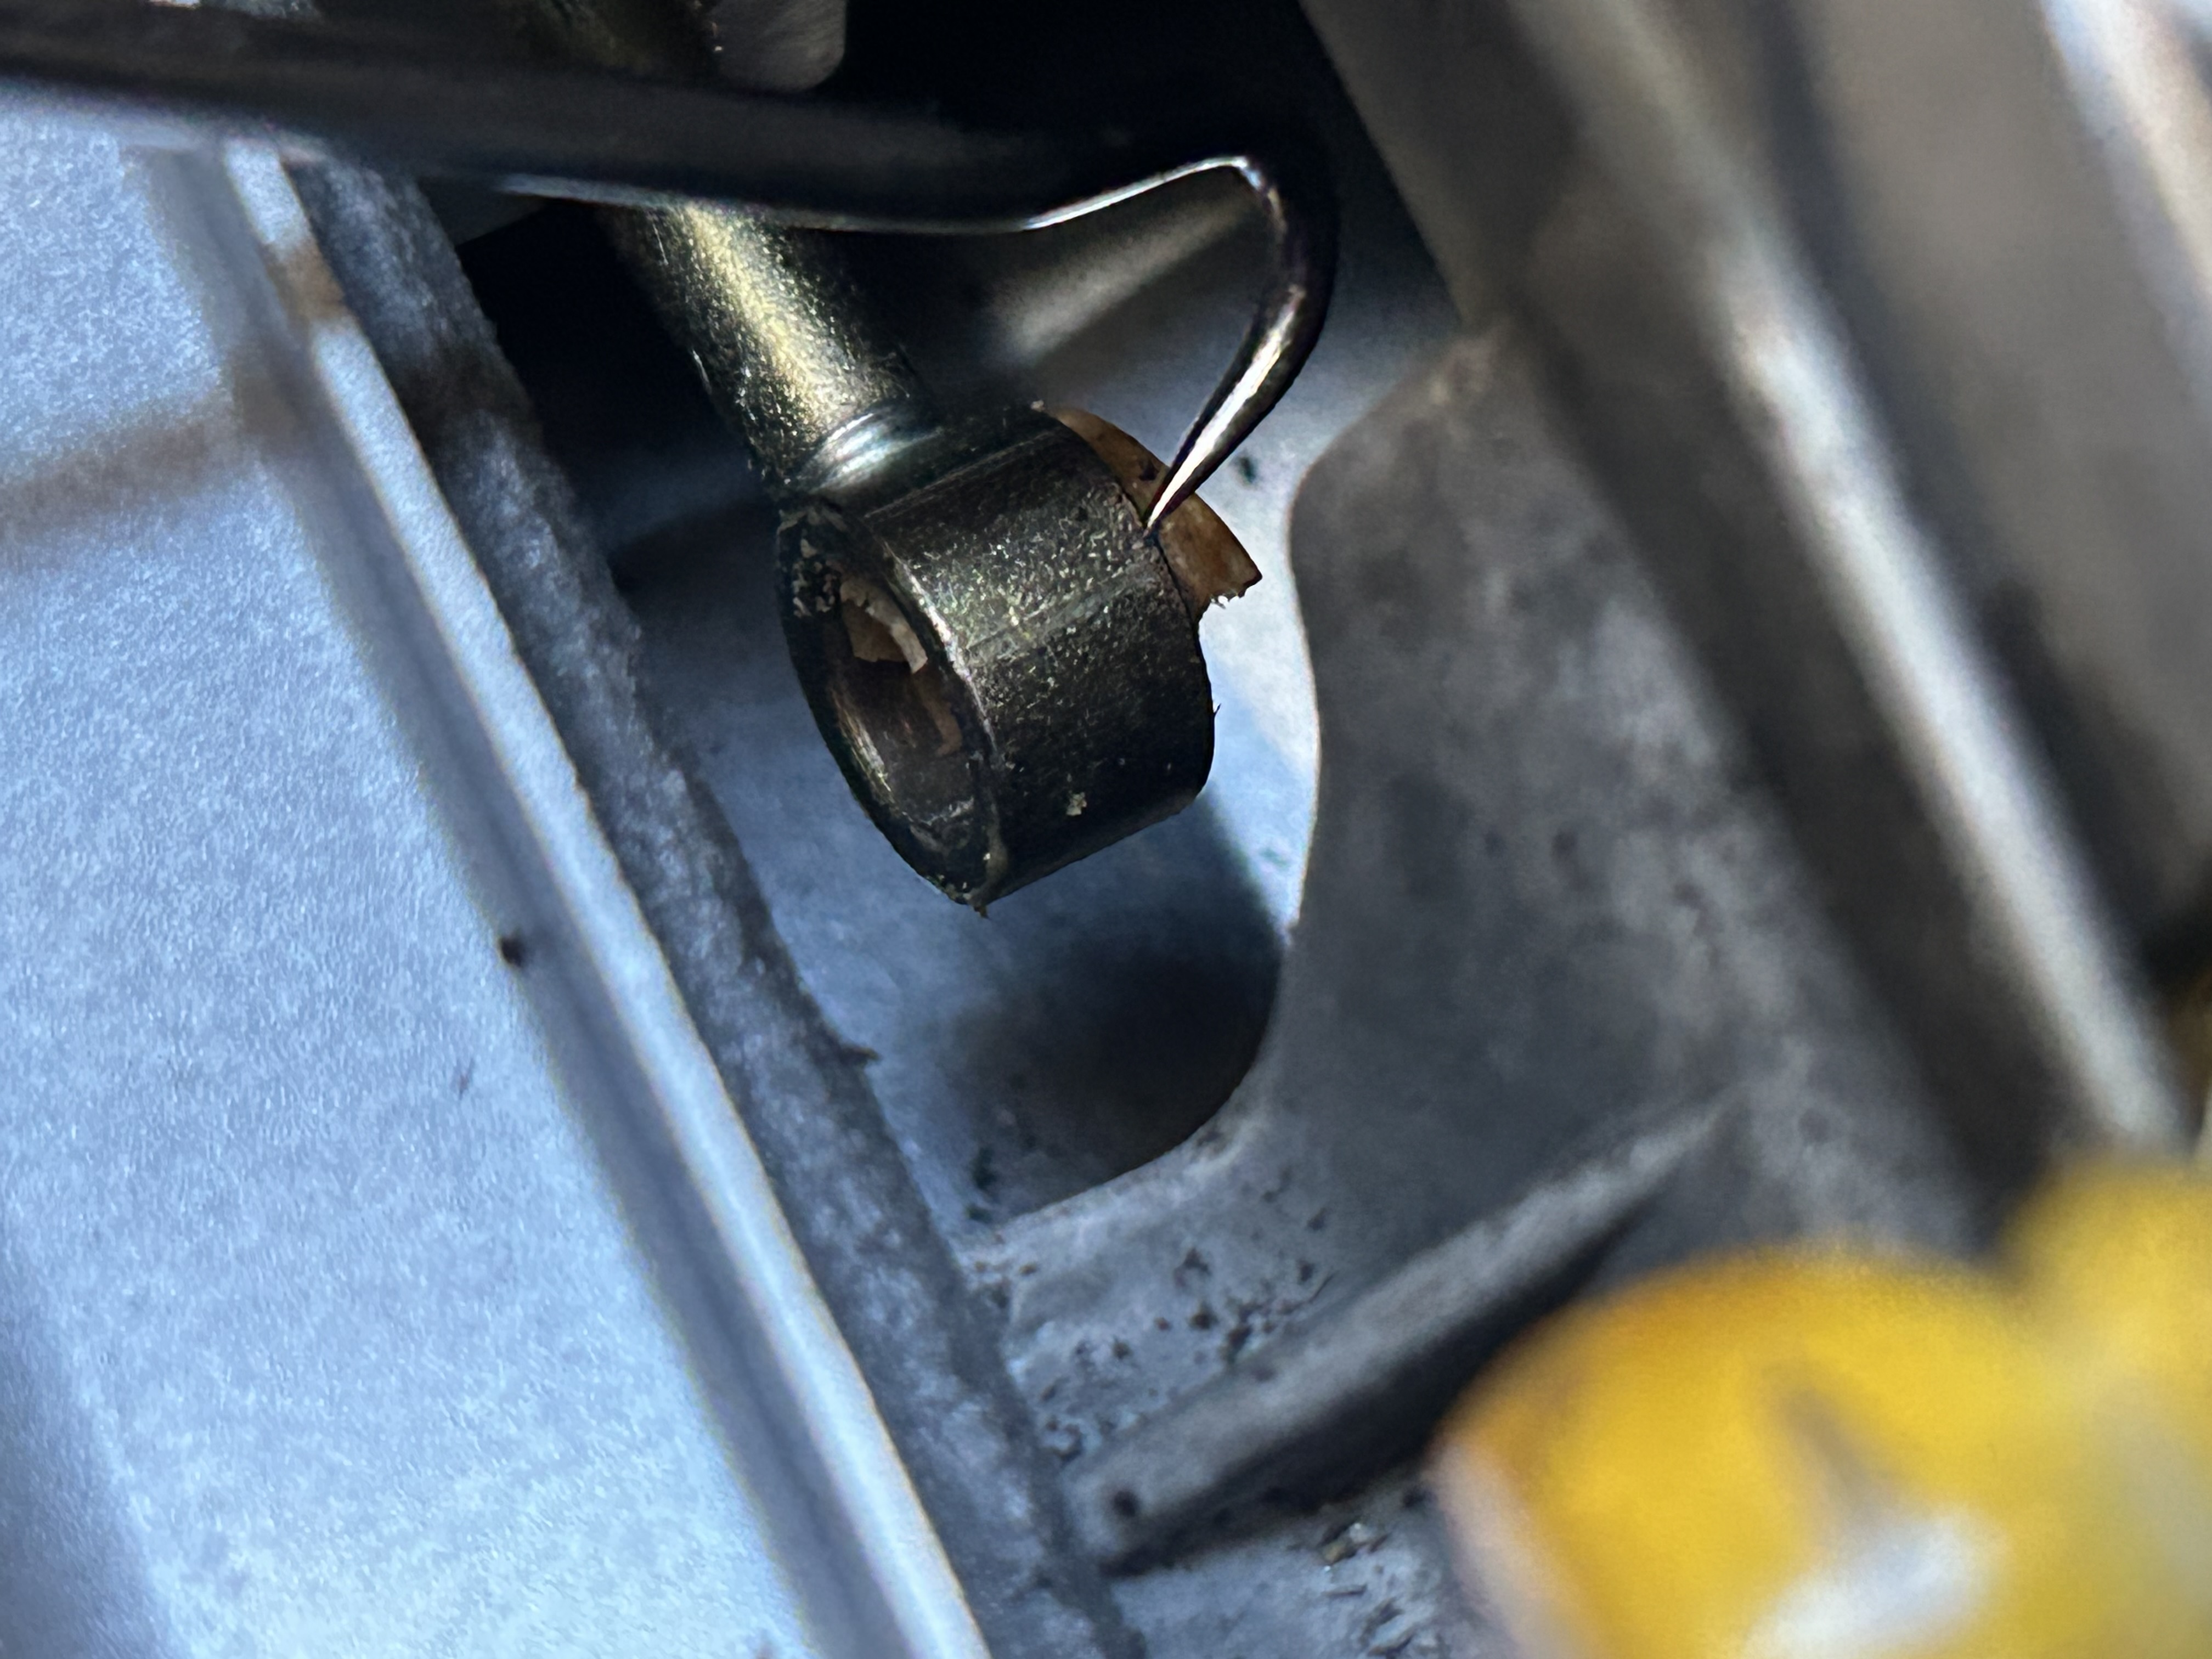
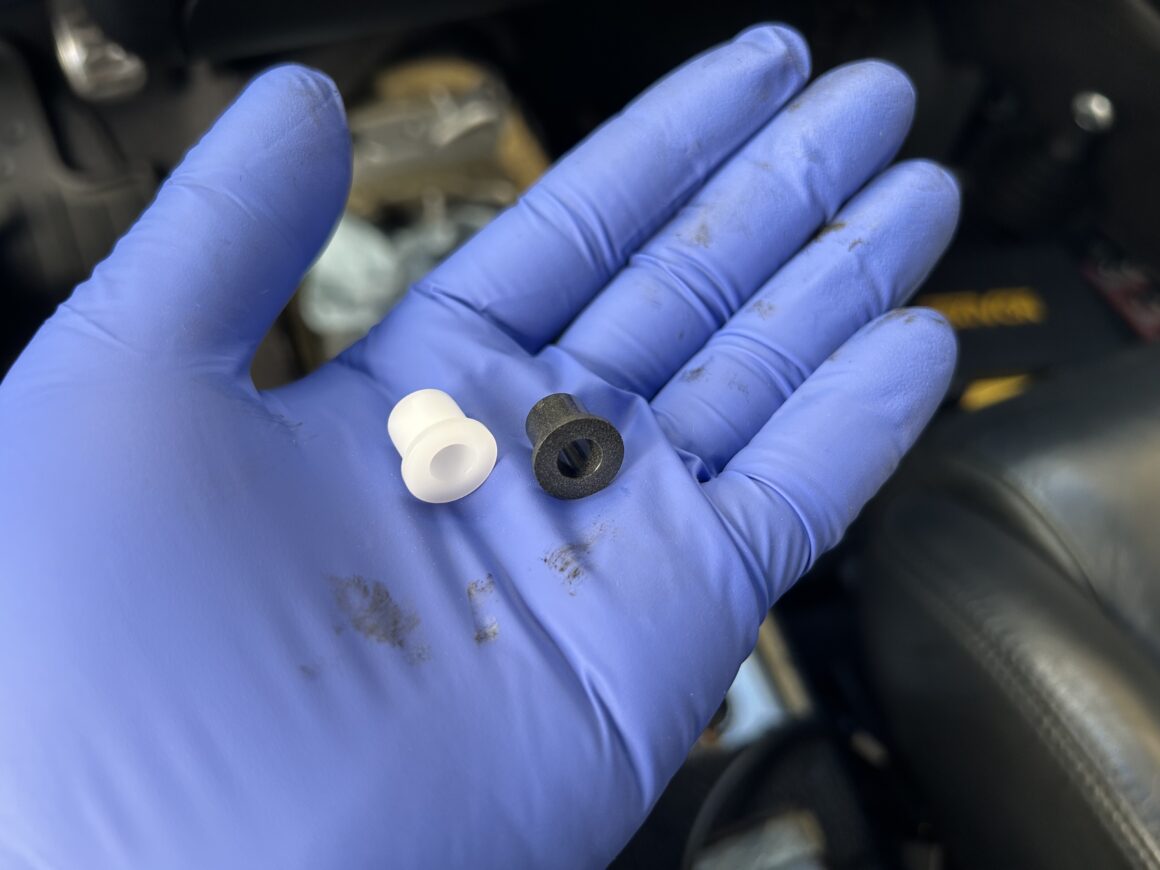
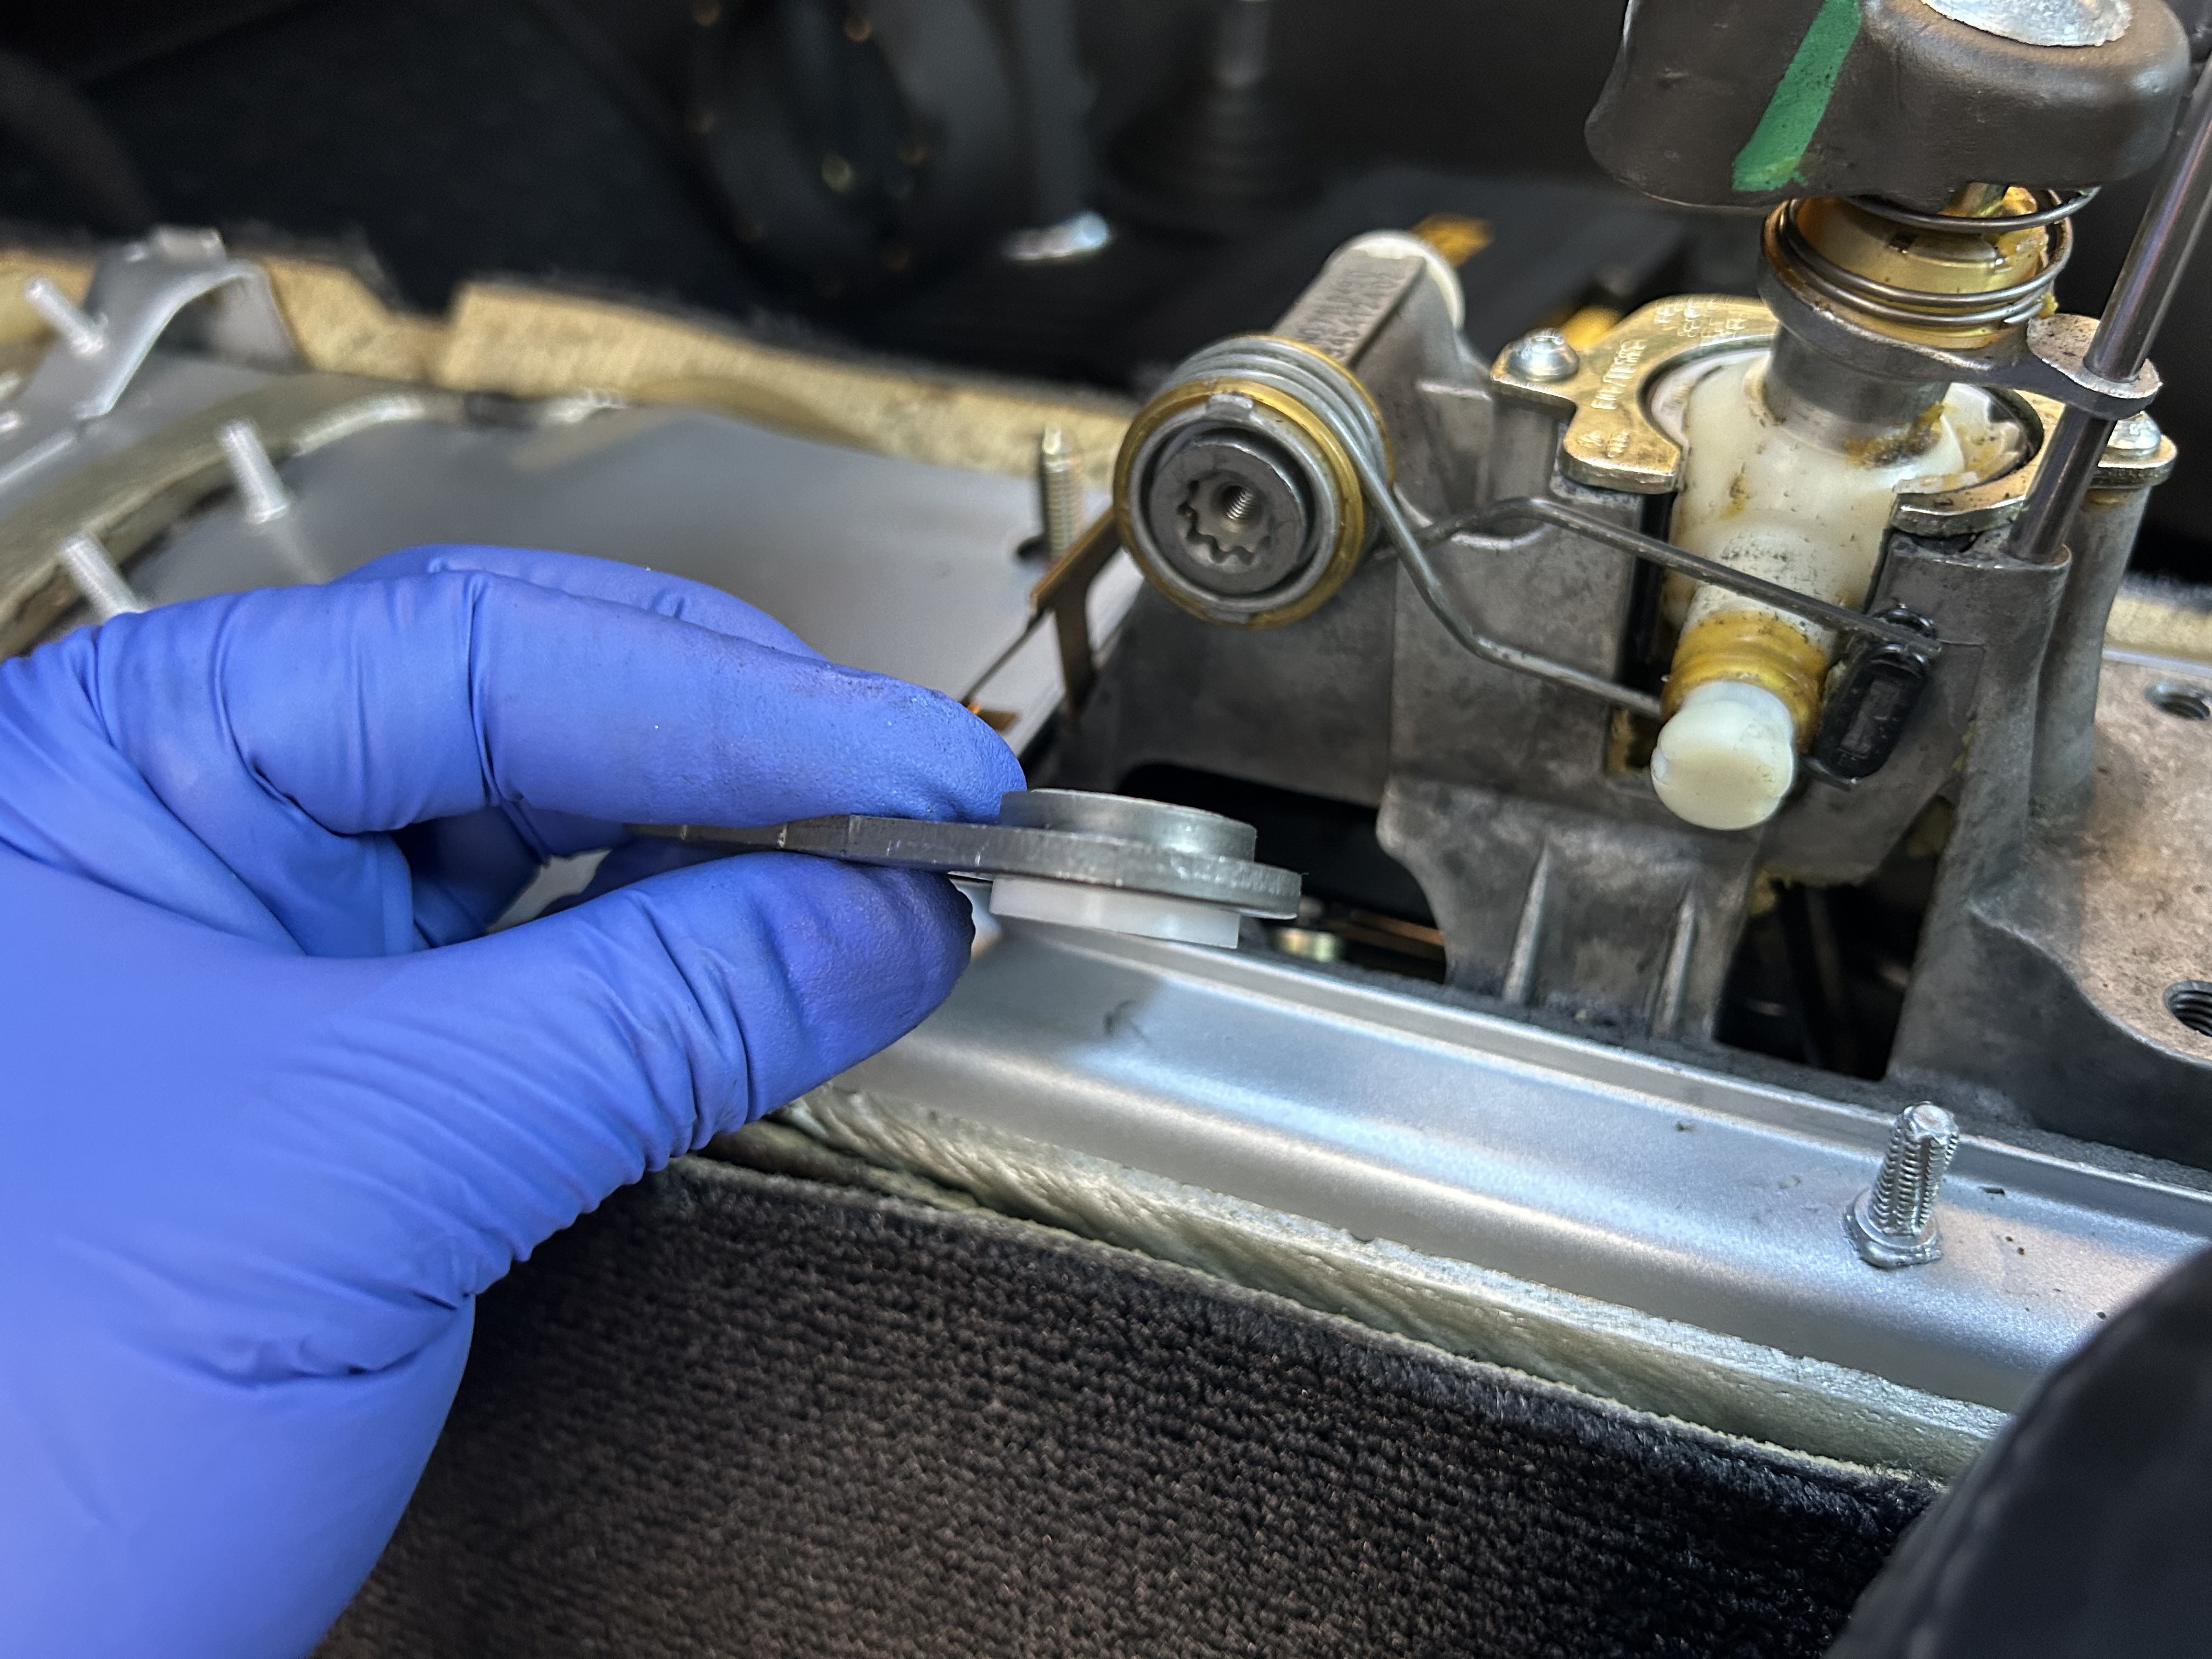
Note that the Dieselgeek Deluxe Bushing Kit comes with two cable end bushings: one black one which is a 9mm bushing, and one white one that is a 10mm bushing. If your cable end has a plastic end, then use the white 10mm bushing. If your cable end is metal like mine, then use the black 9mm bushing.
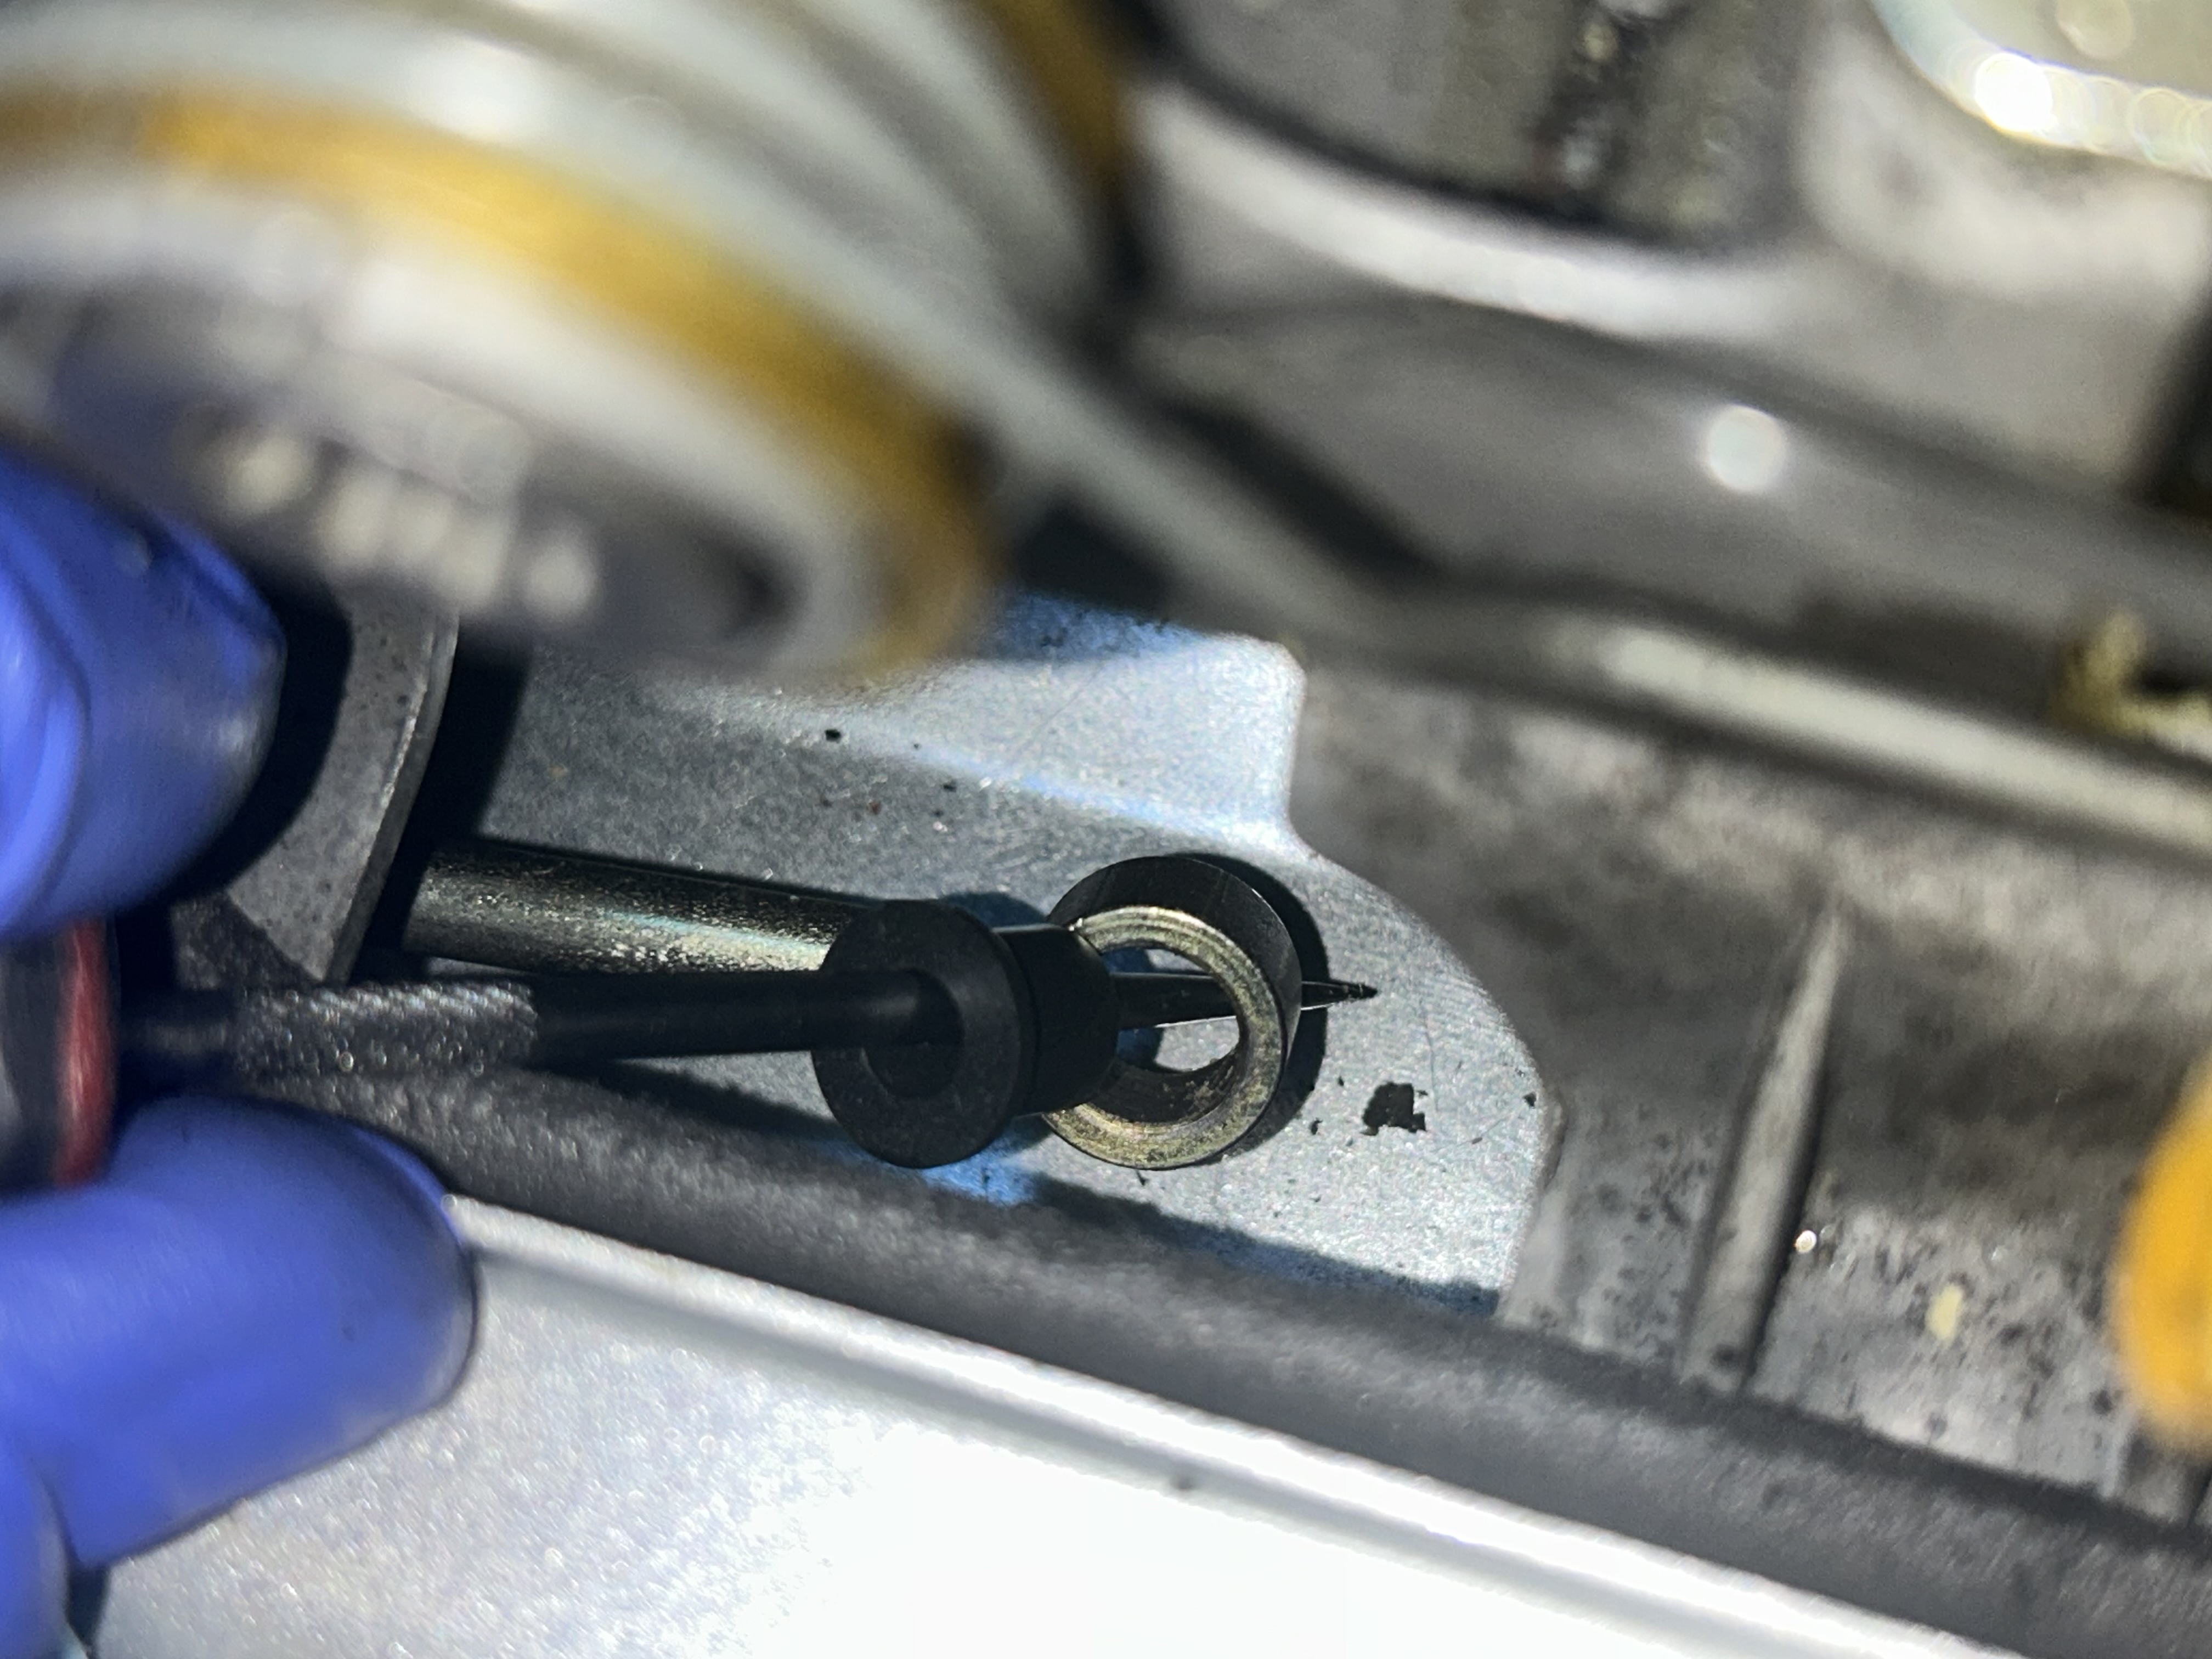
It makes it easier to get the bushing into the linkage opening by laying a straight pick through the bushing, then into the linkage opening. Let the bushing slide down to the linkage opening and then press it in. Use a hook tool to hold the linkage up and use long nose pliers to press the bushing into the linkage opening as shown below.
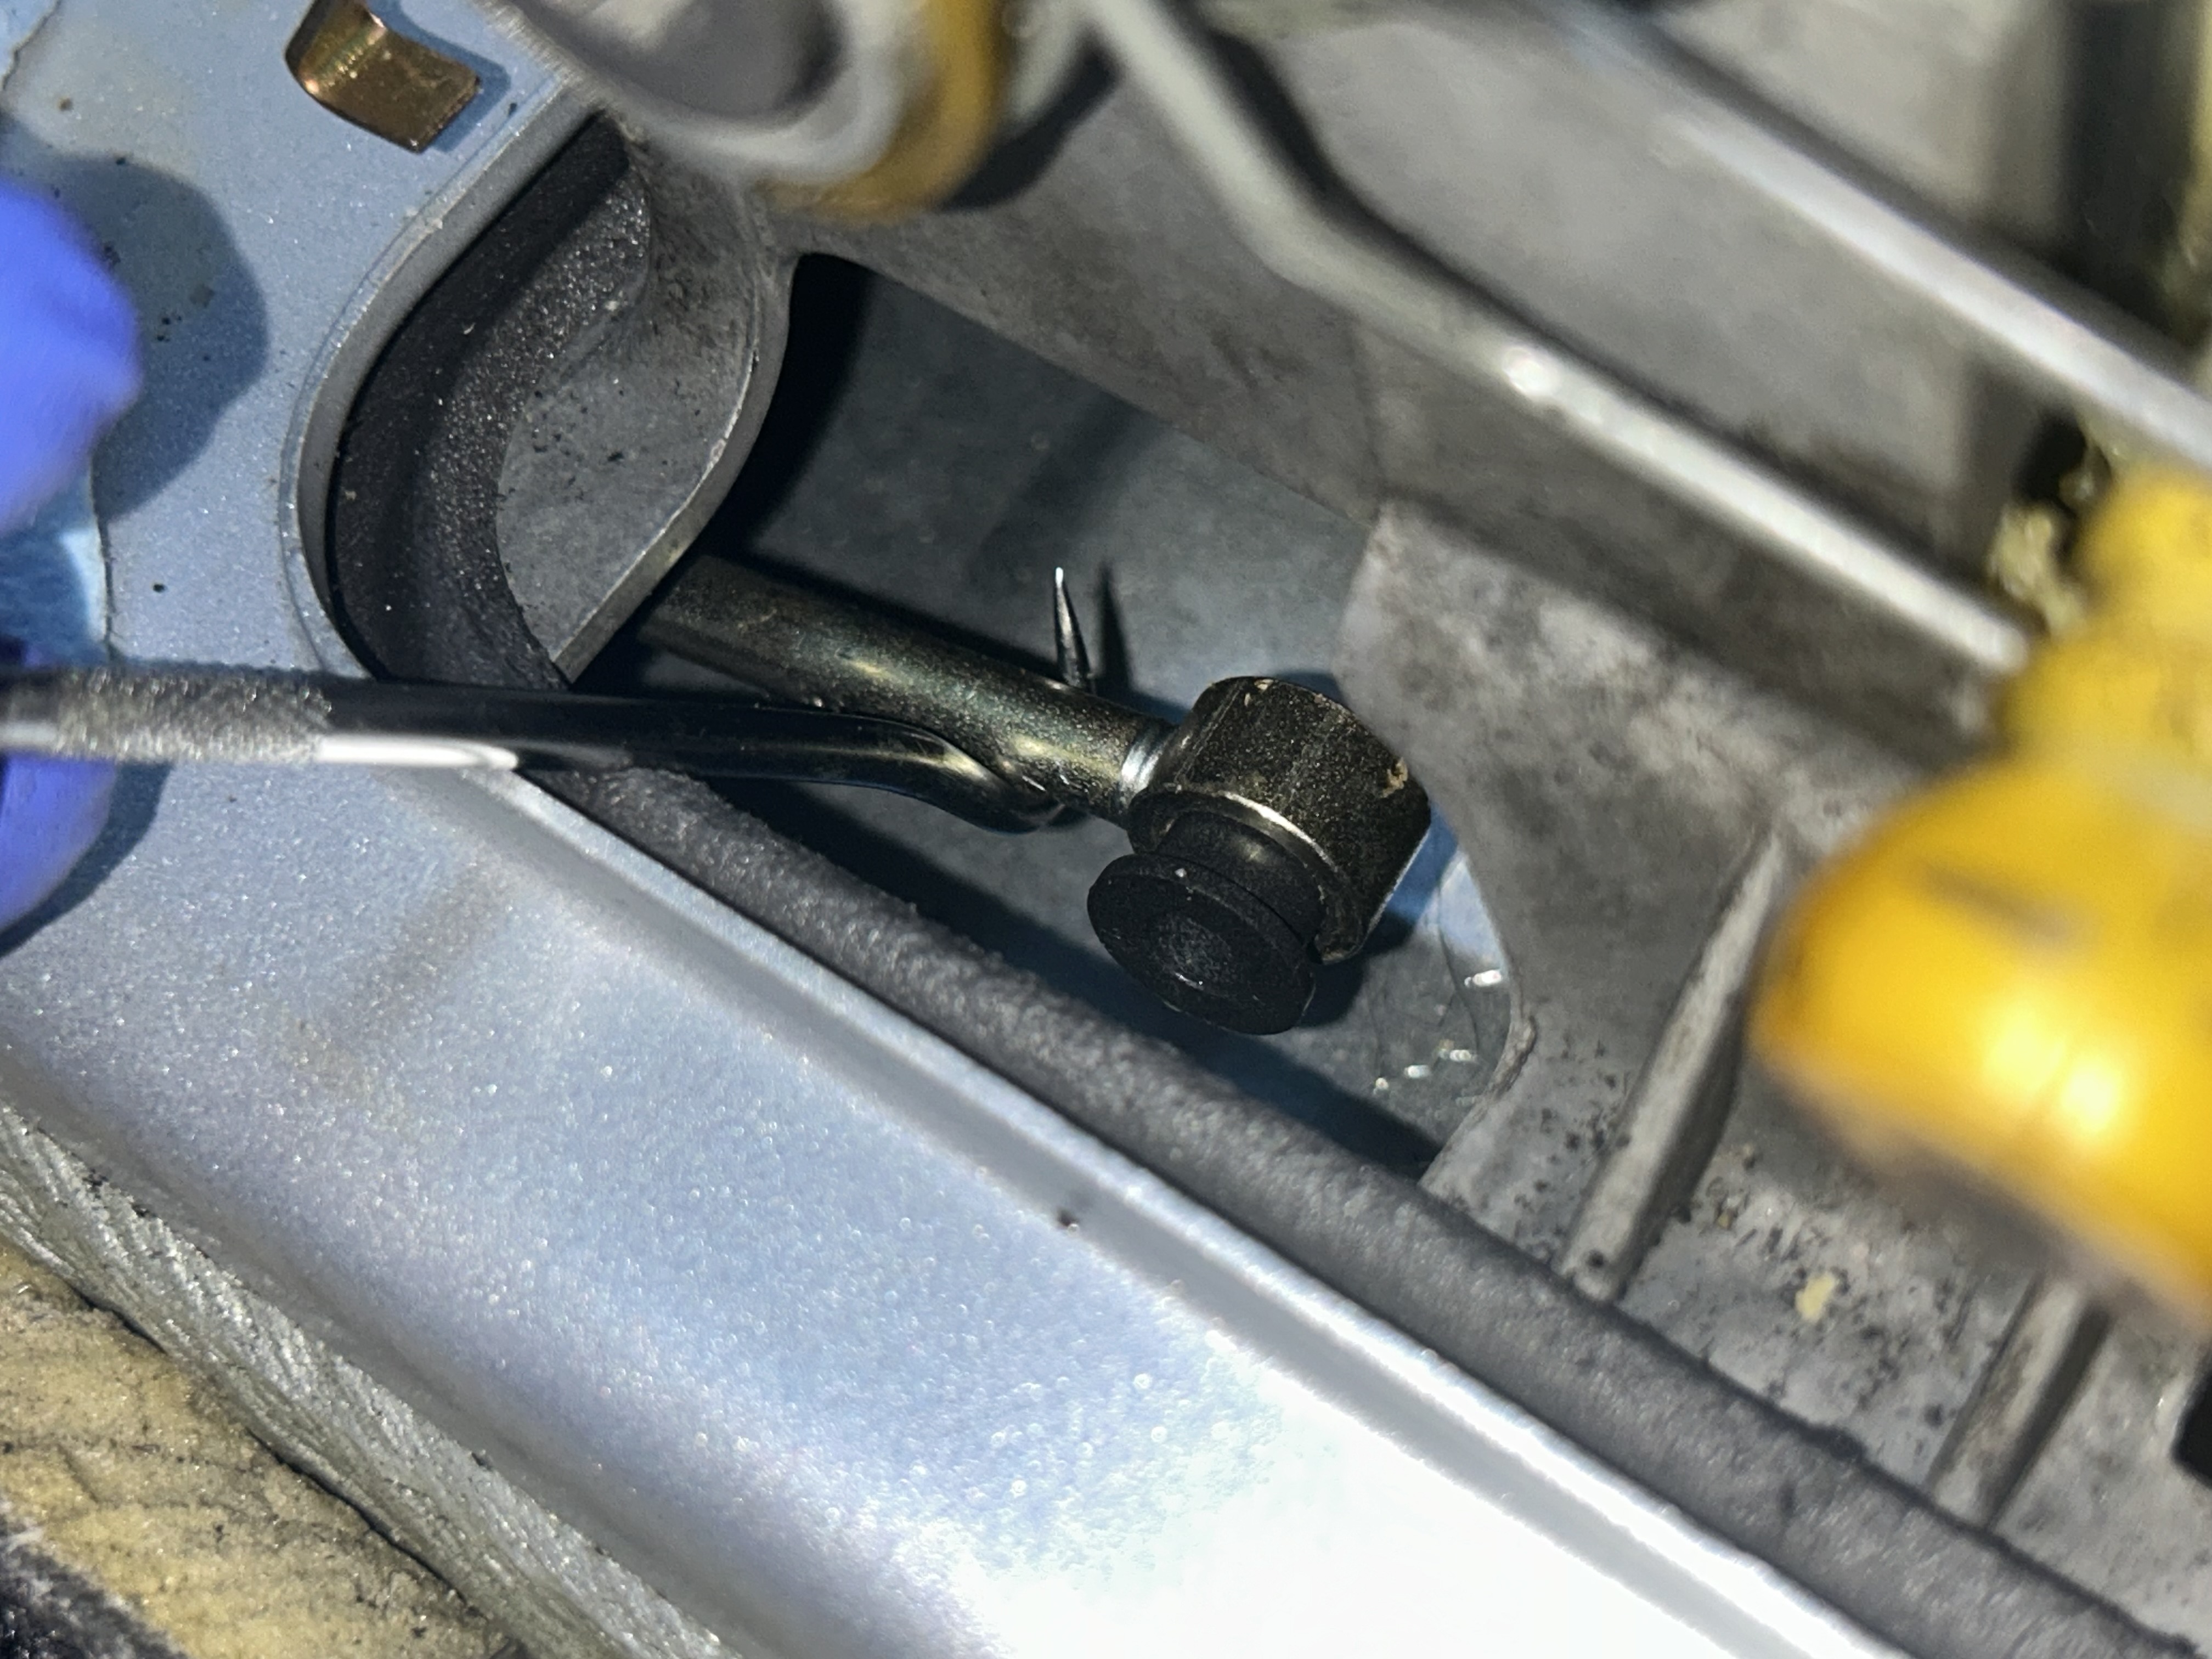
Now, put back the end of the shift plate, the shift linkage, and then the retaining clip with your fingers if you can or use long nose pliers. The clip will slide down onto the end of the nipple to hold the linkage in place.
First Gear Getter
The first gear getter is a bushing that is used in place of the original bulb cap between the shift plate and shifter. From the factory, the shifter has a plastic bulb (connected to the shifter) that is wrapped in a soft plastic shell which acts as a bushing that goes into the shift plate opening. This doesn’t give a very tight feeling when shifting, especially when the plastic cover has softened and worn down over time.
The first gear getter bushing replaces the plastic shell over the plastic bulb. However, you will be required to cut out the plastic shell first. Use a utility knife to cut around the bulb, then peel away the plastic shell with pliers.
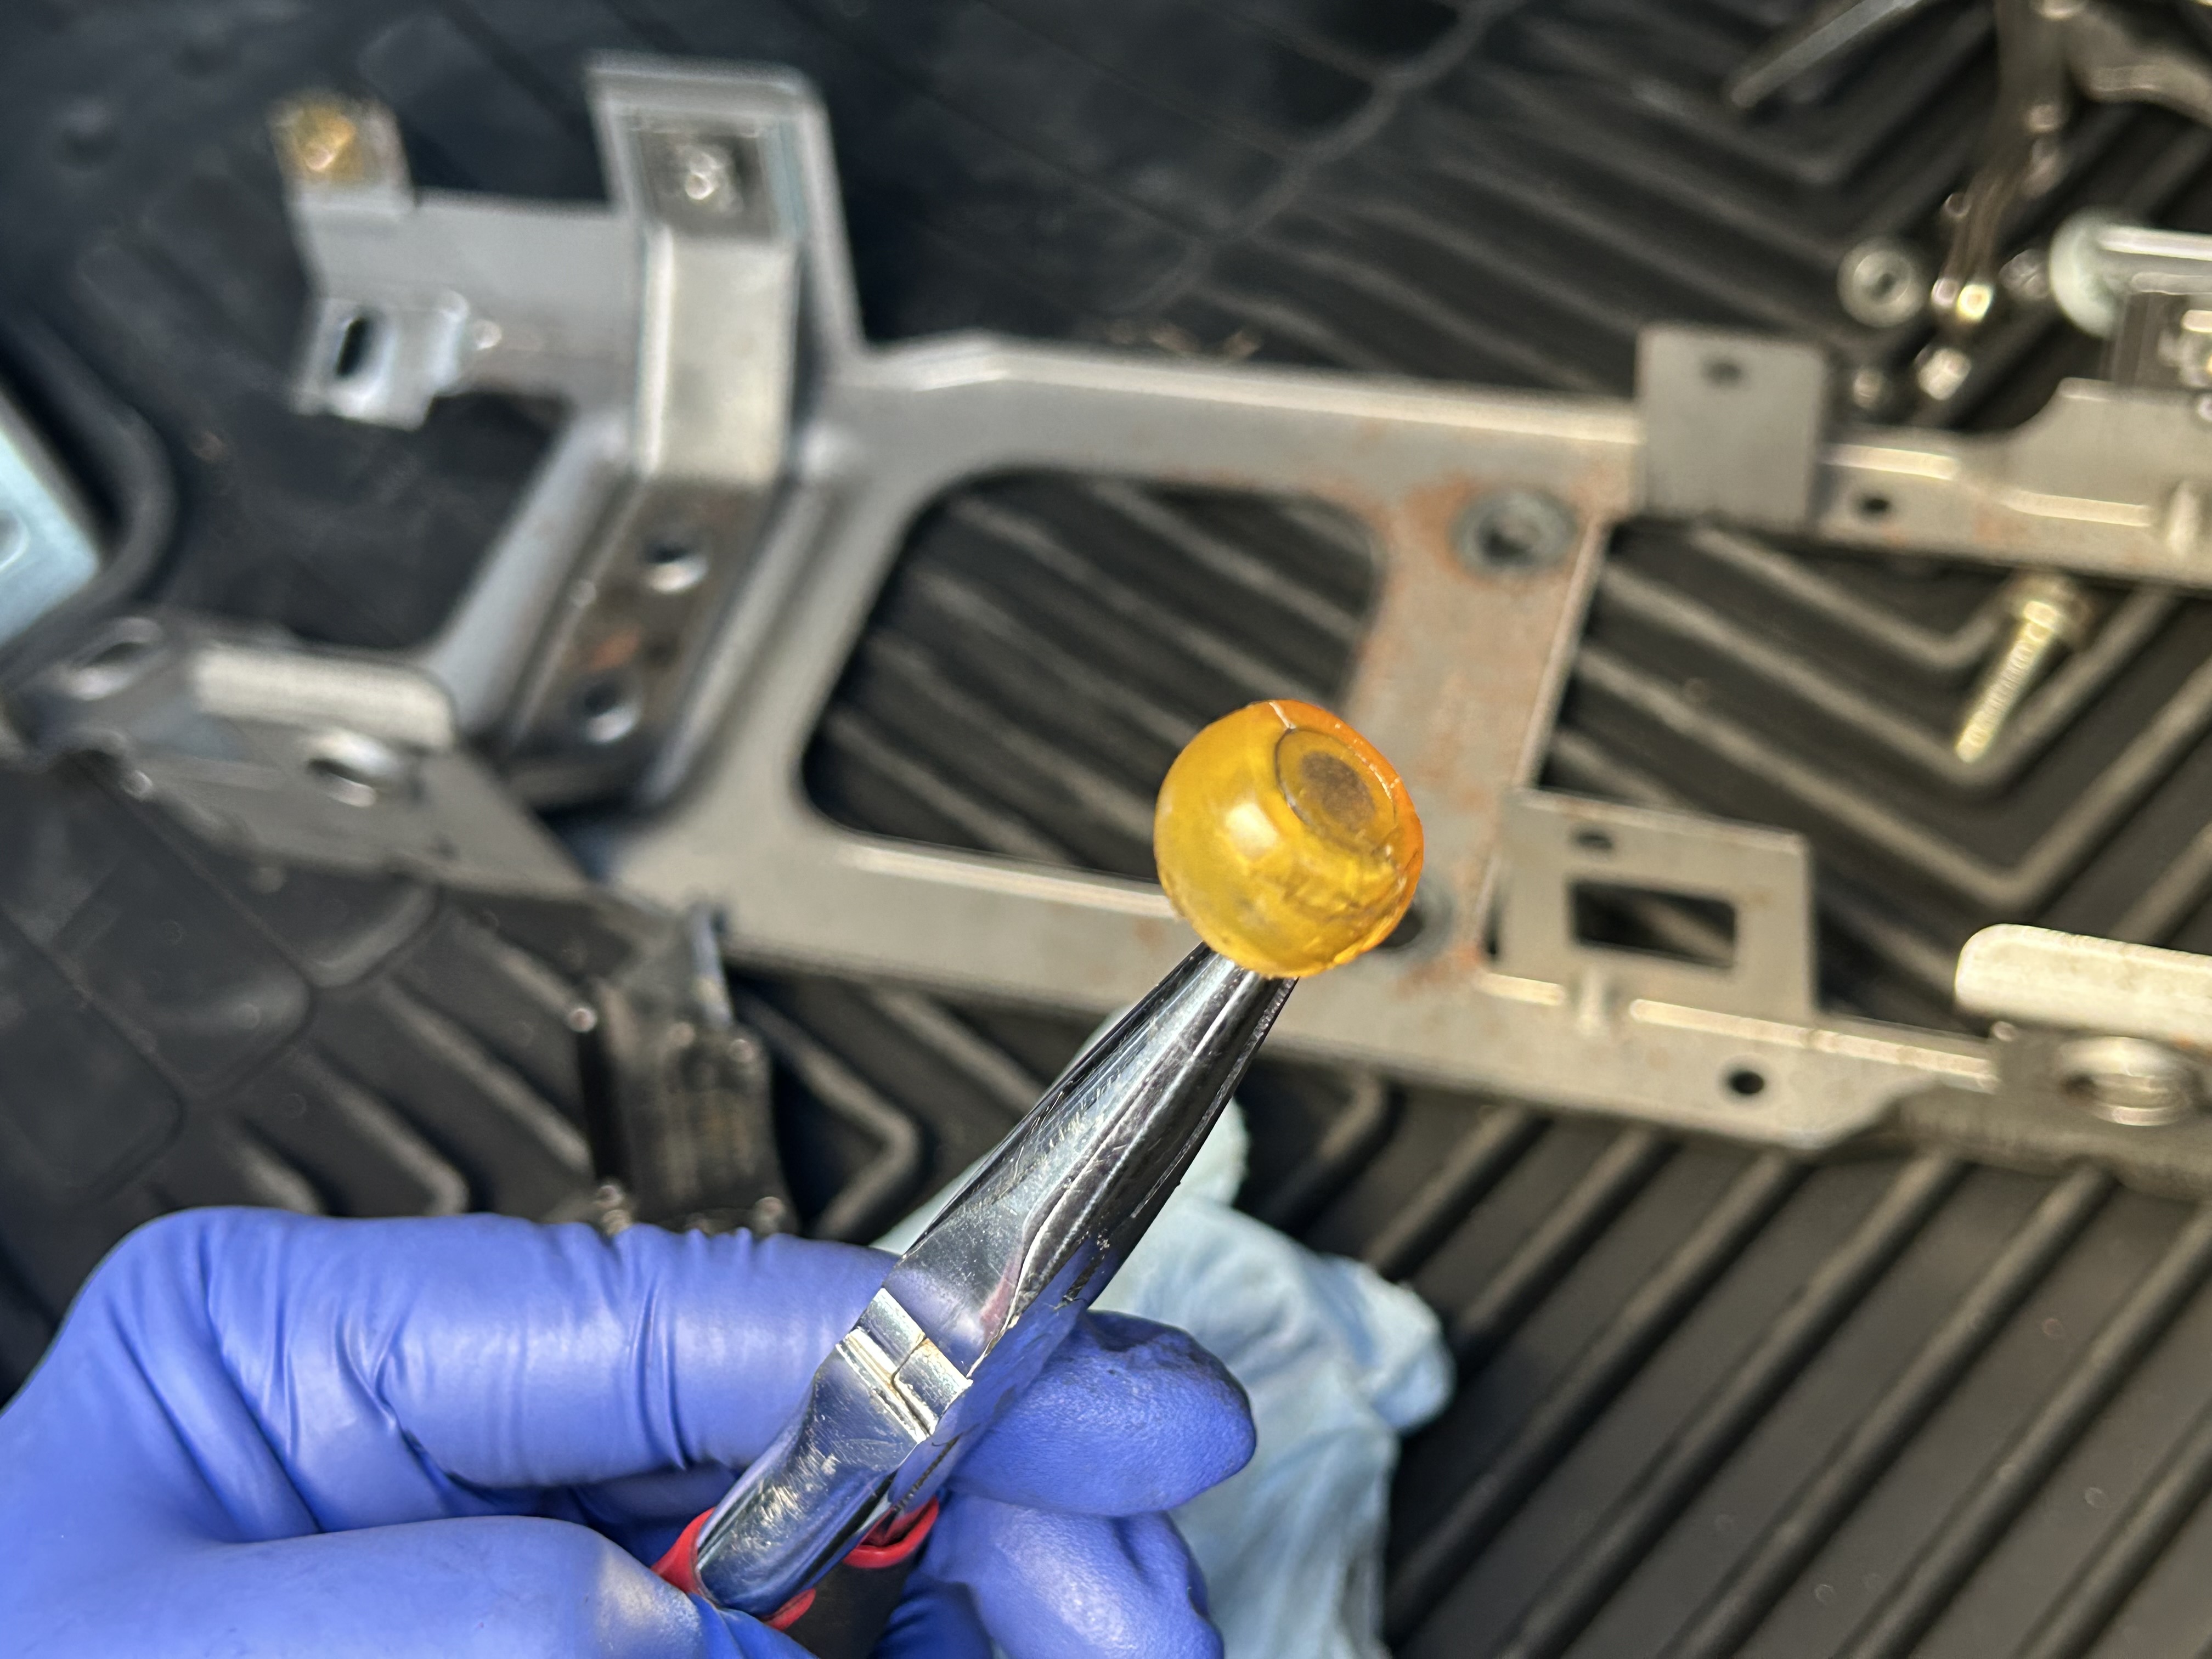
Now, the soft, yellowed plastic shell is removed so there is just the hard white plastic bulb of the shifter left.
Take the new first gear getter bushing, and press it into the shifter plate as shown. The precision on this bushing is quite tight, so you’ll probably need to press it in with a set of pliers. The bushings should press in tight all the way into the plate as shown below.
We won’t reinstall the bolt for the shifter plate quite yet; we still need to replace the other bushings first. When we are finally completed with all the bushing replacements and are ready to put everything back together, then we will install this bolt.
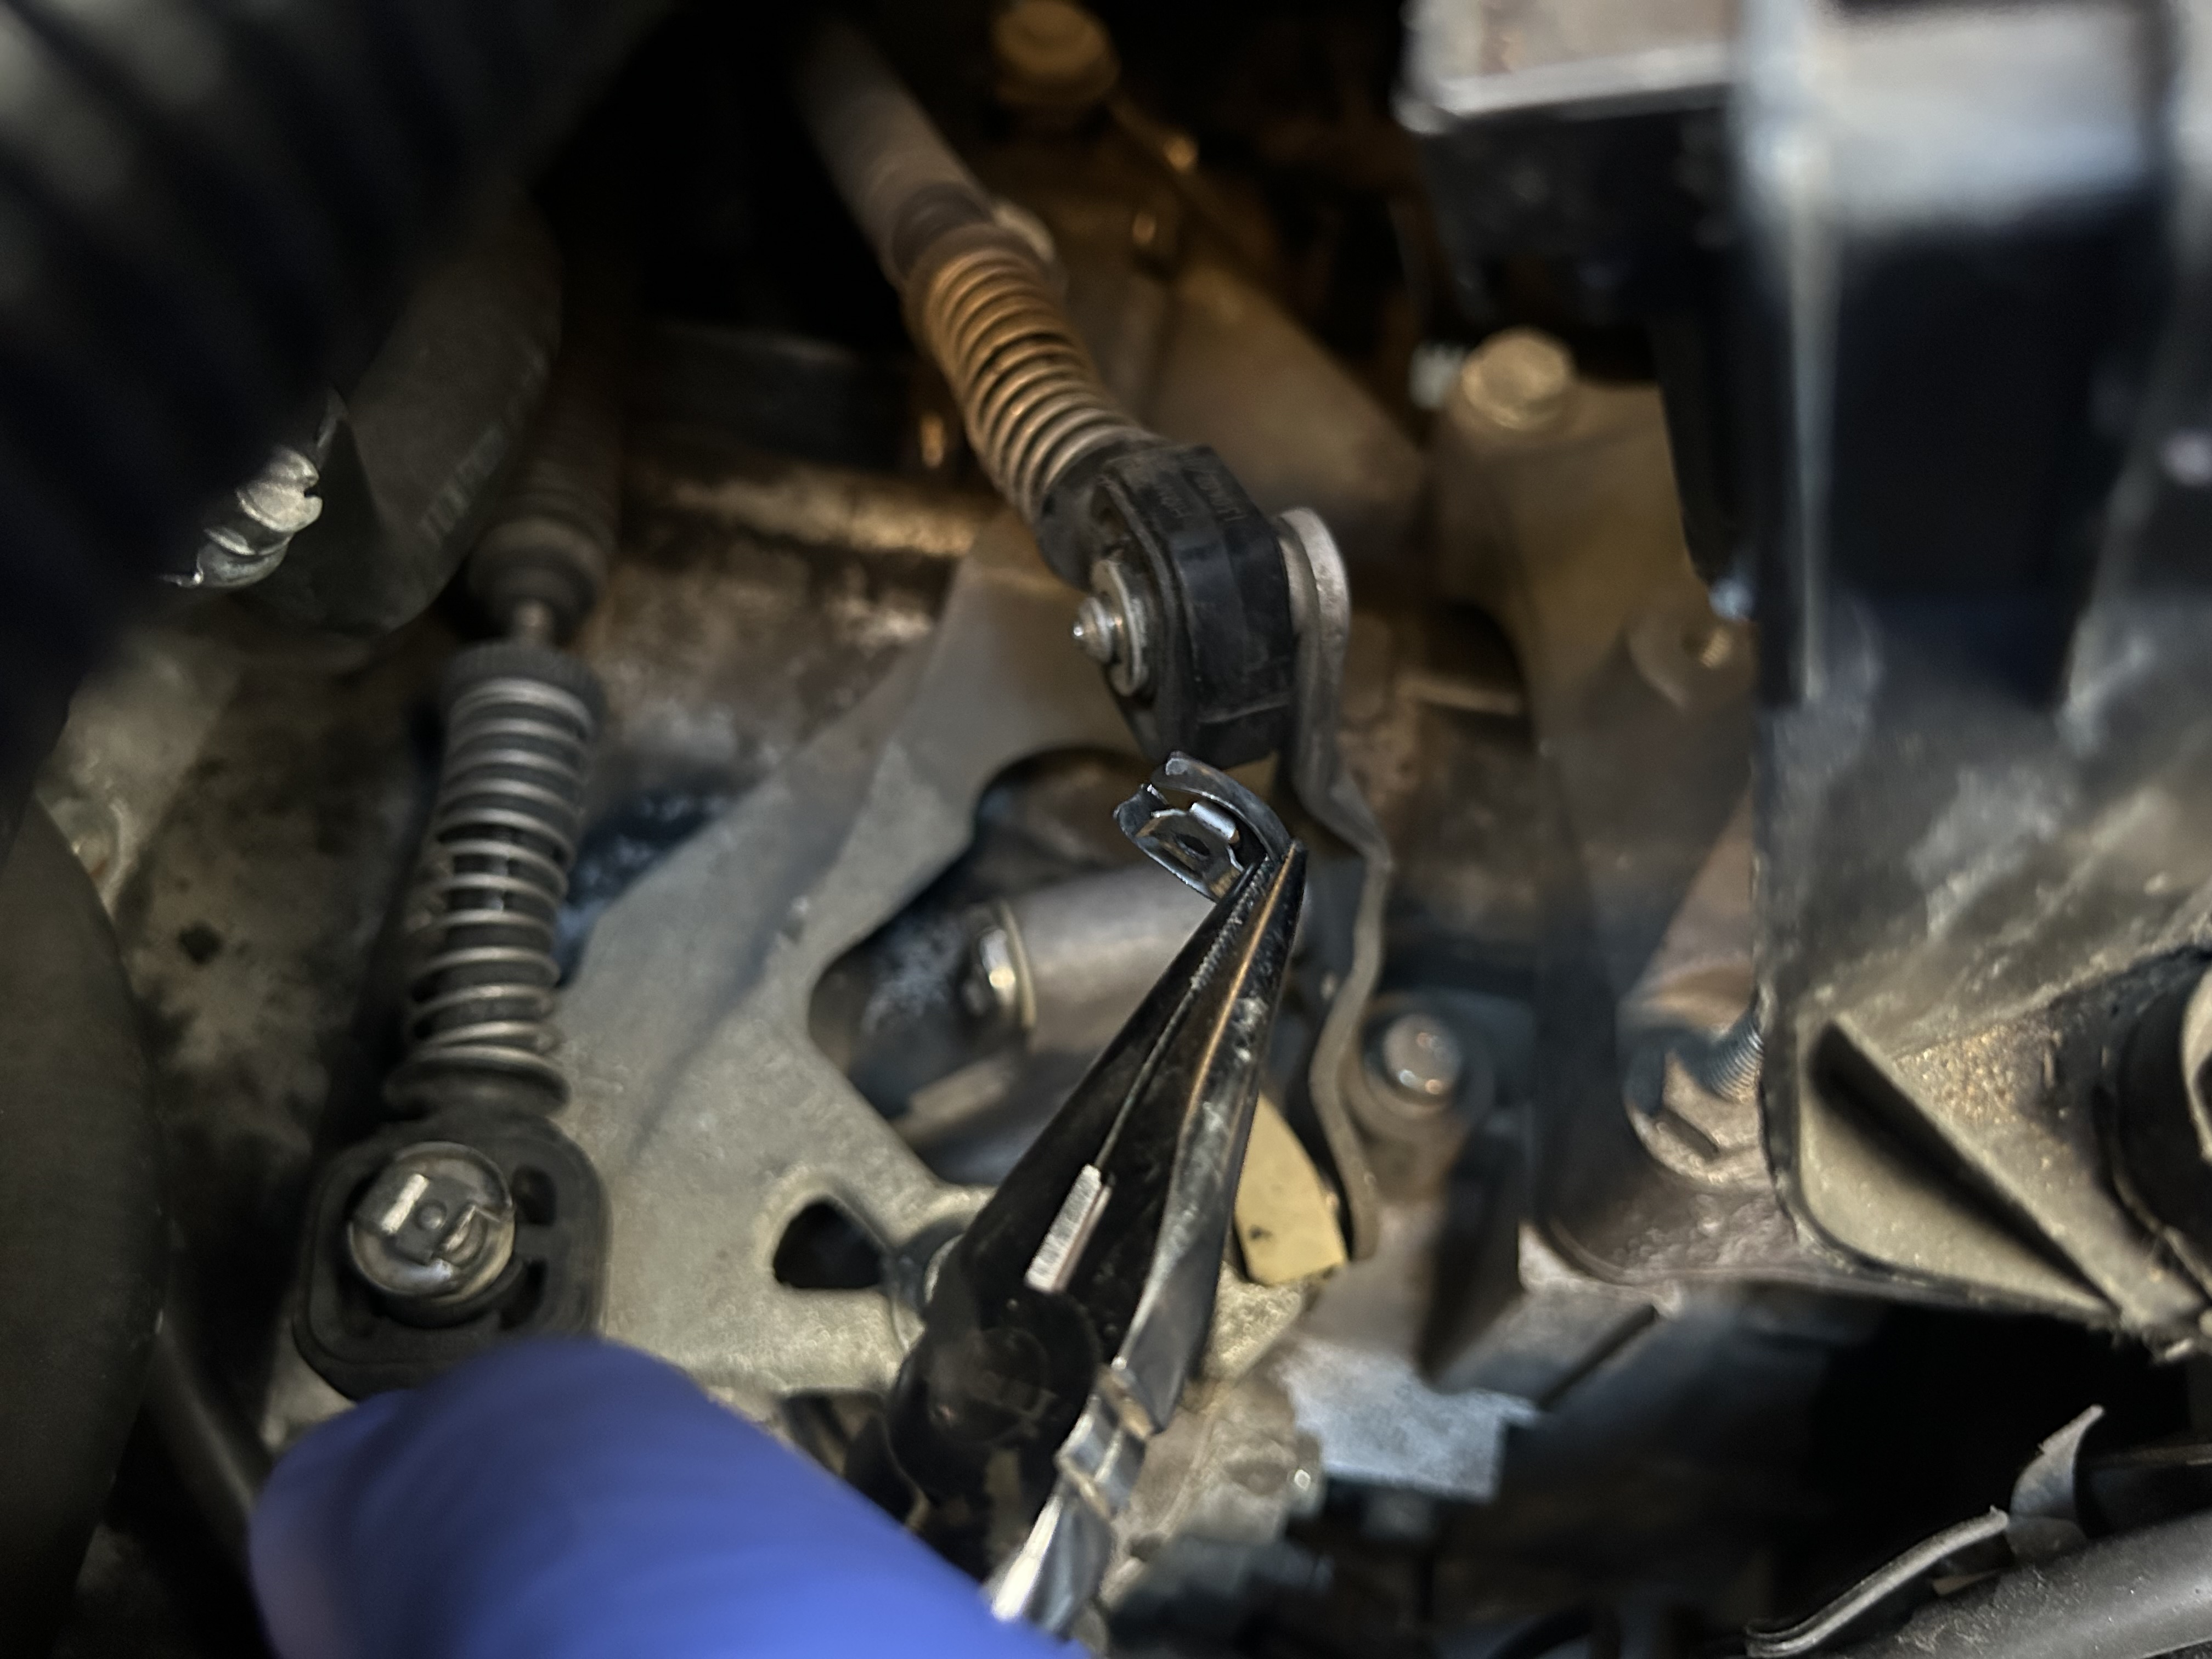
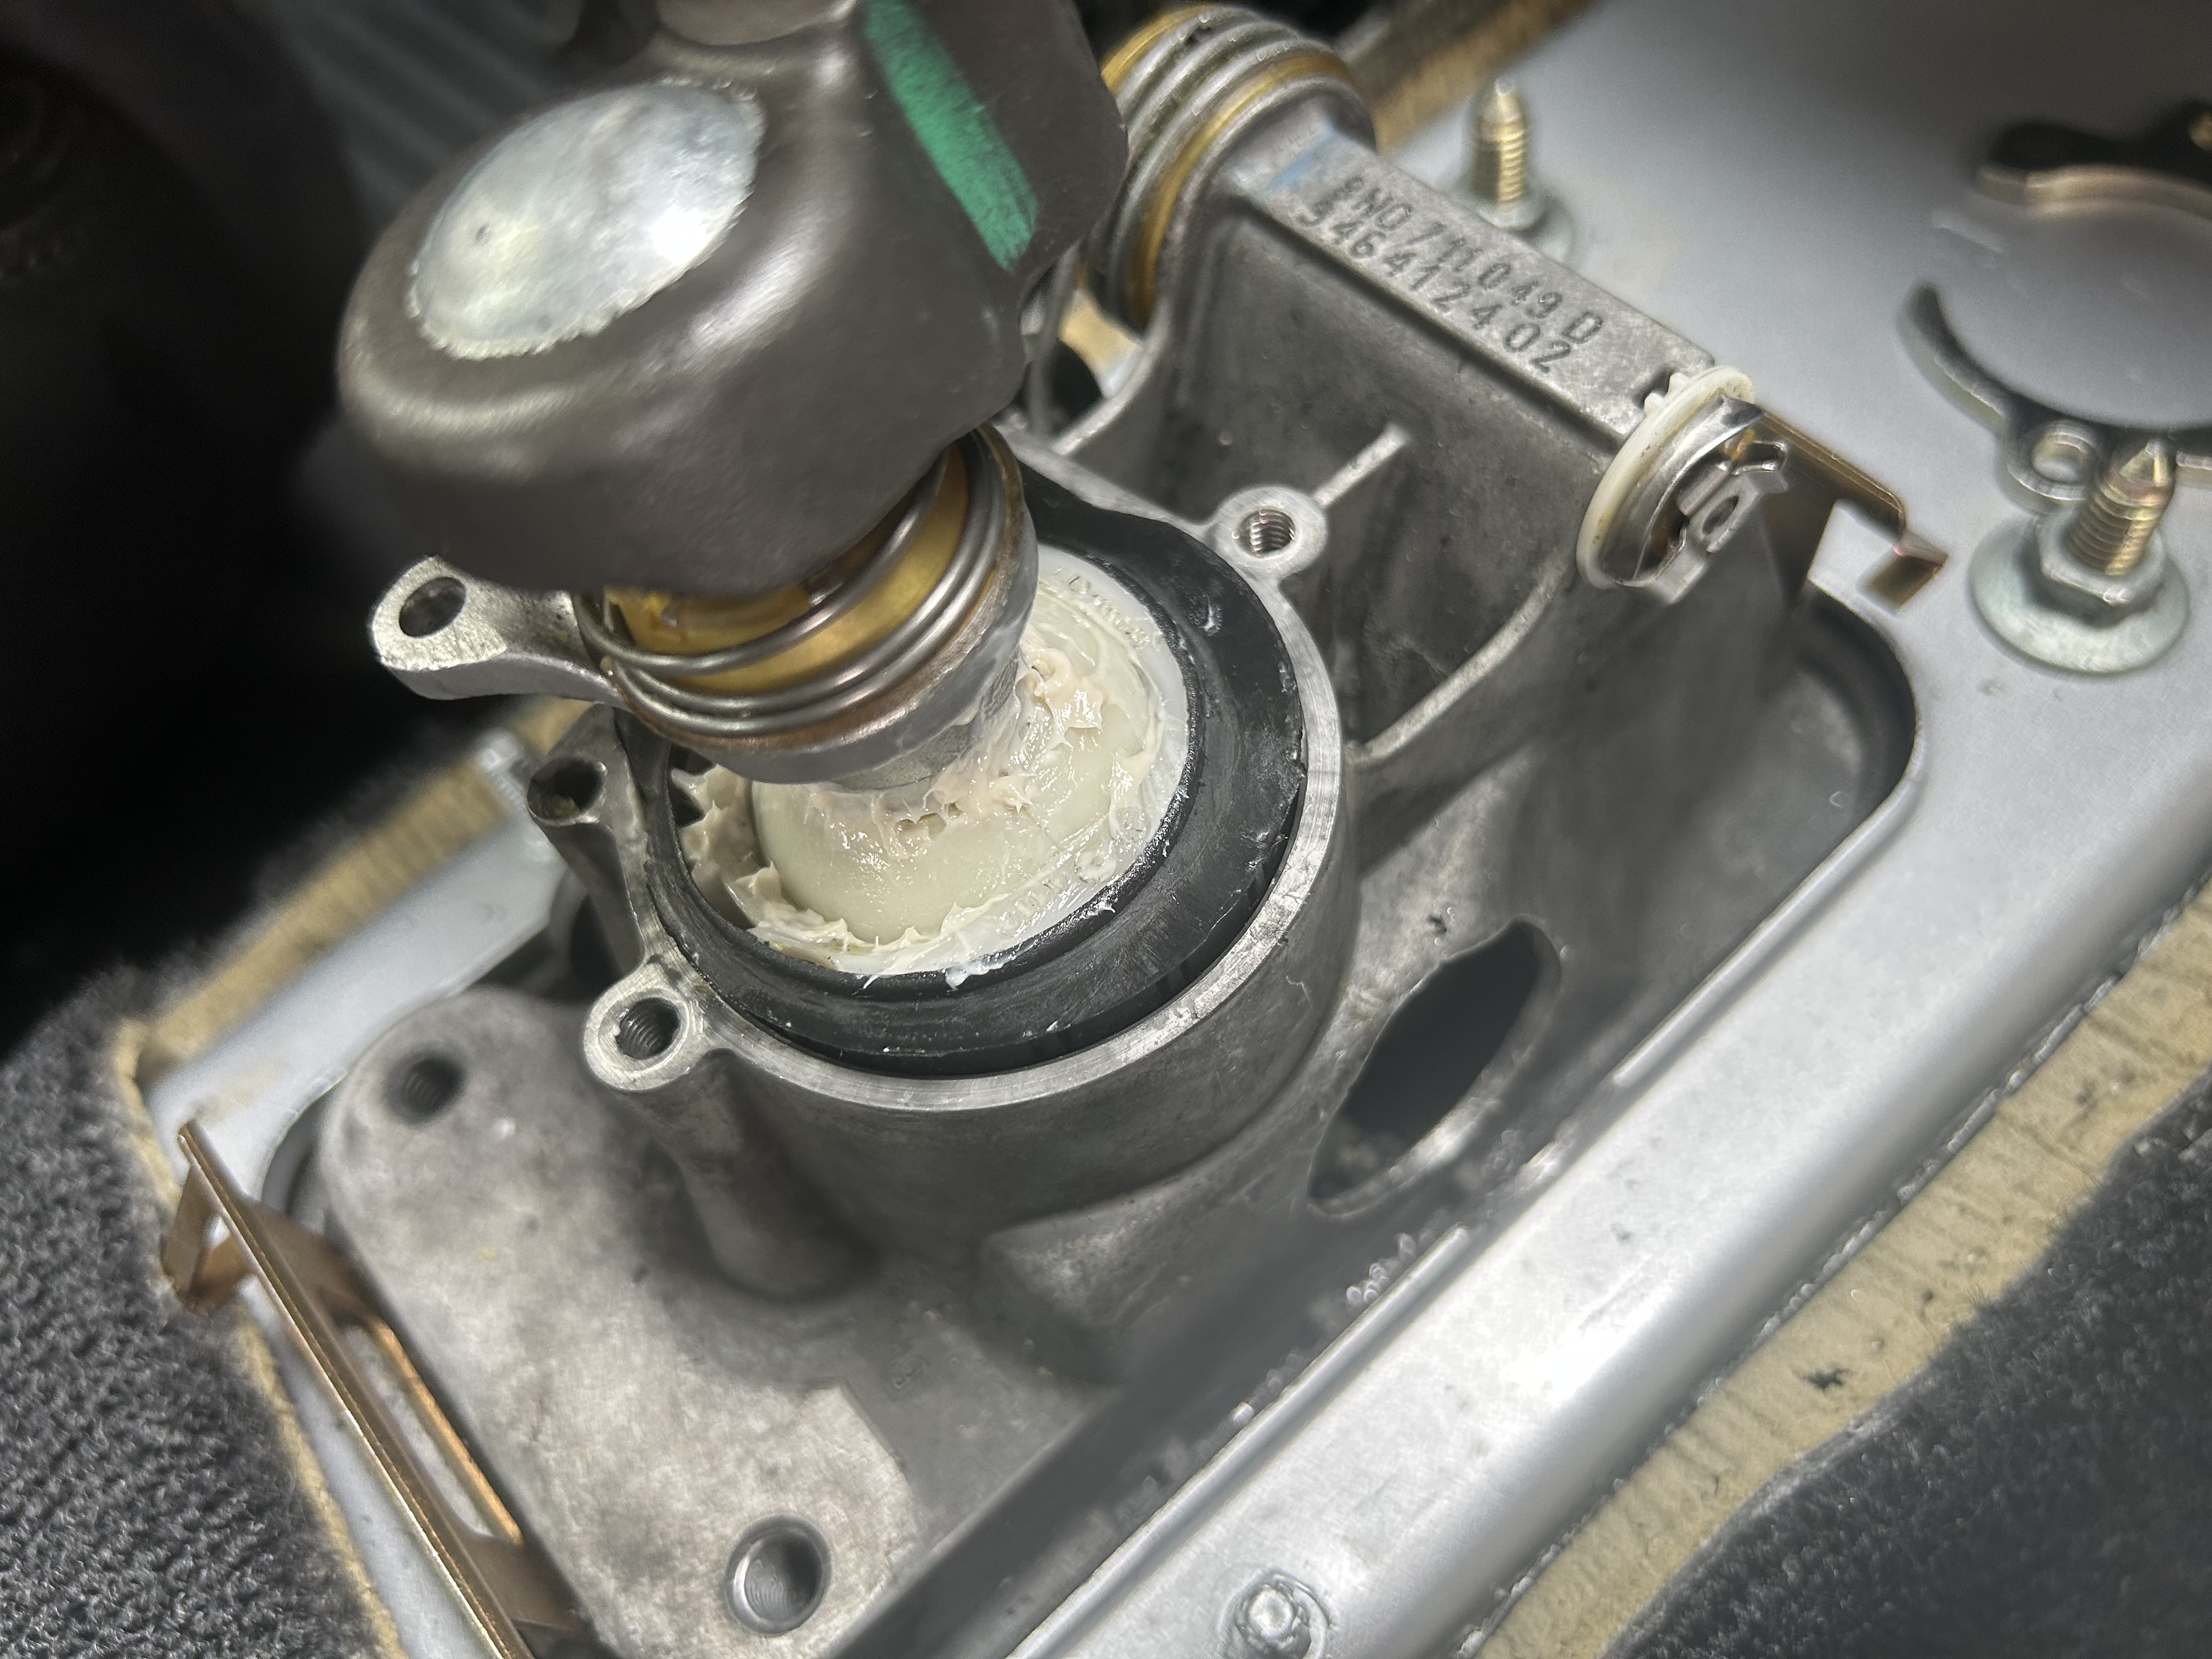
Super Slider
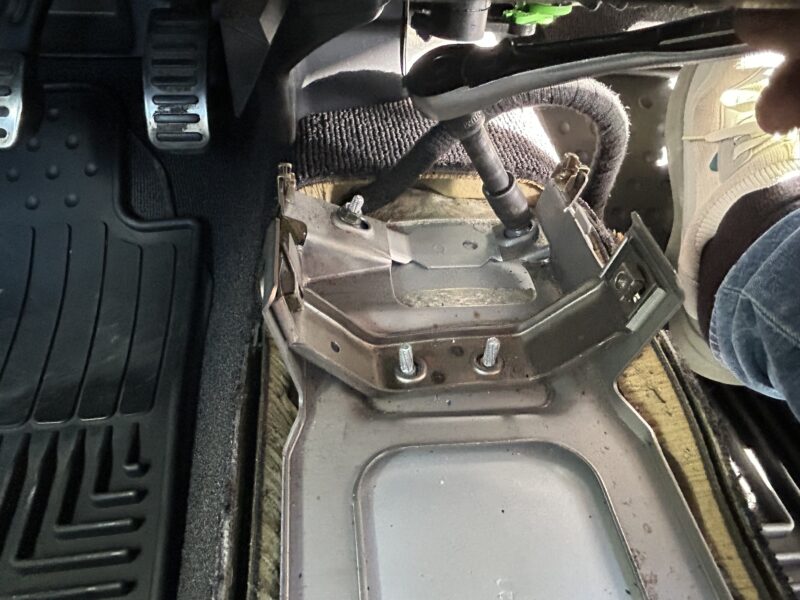
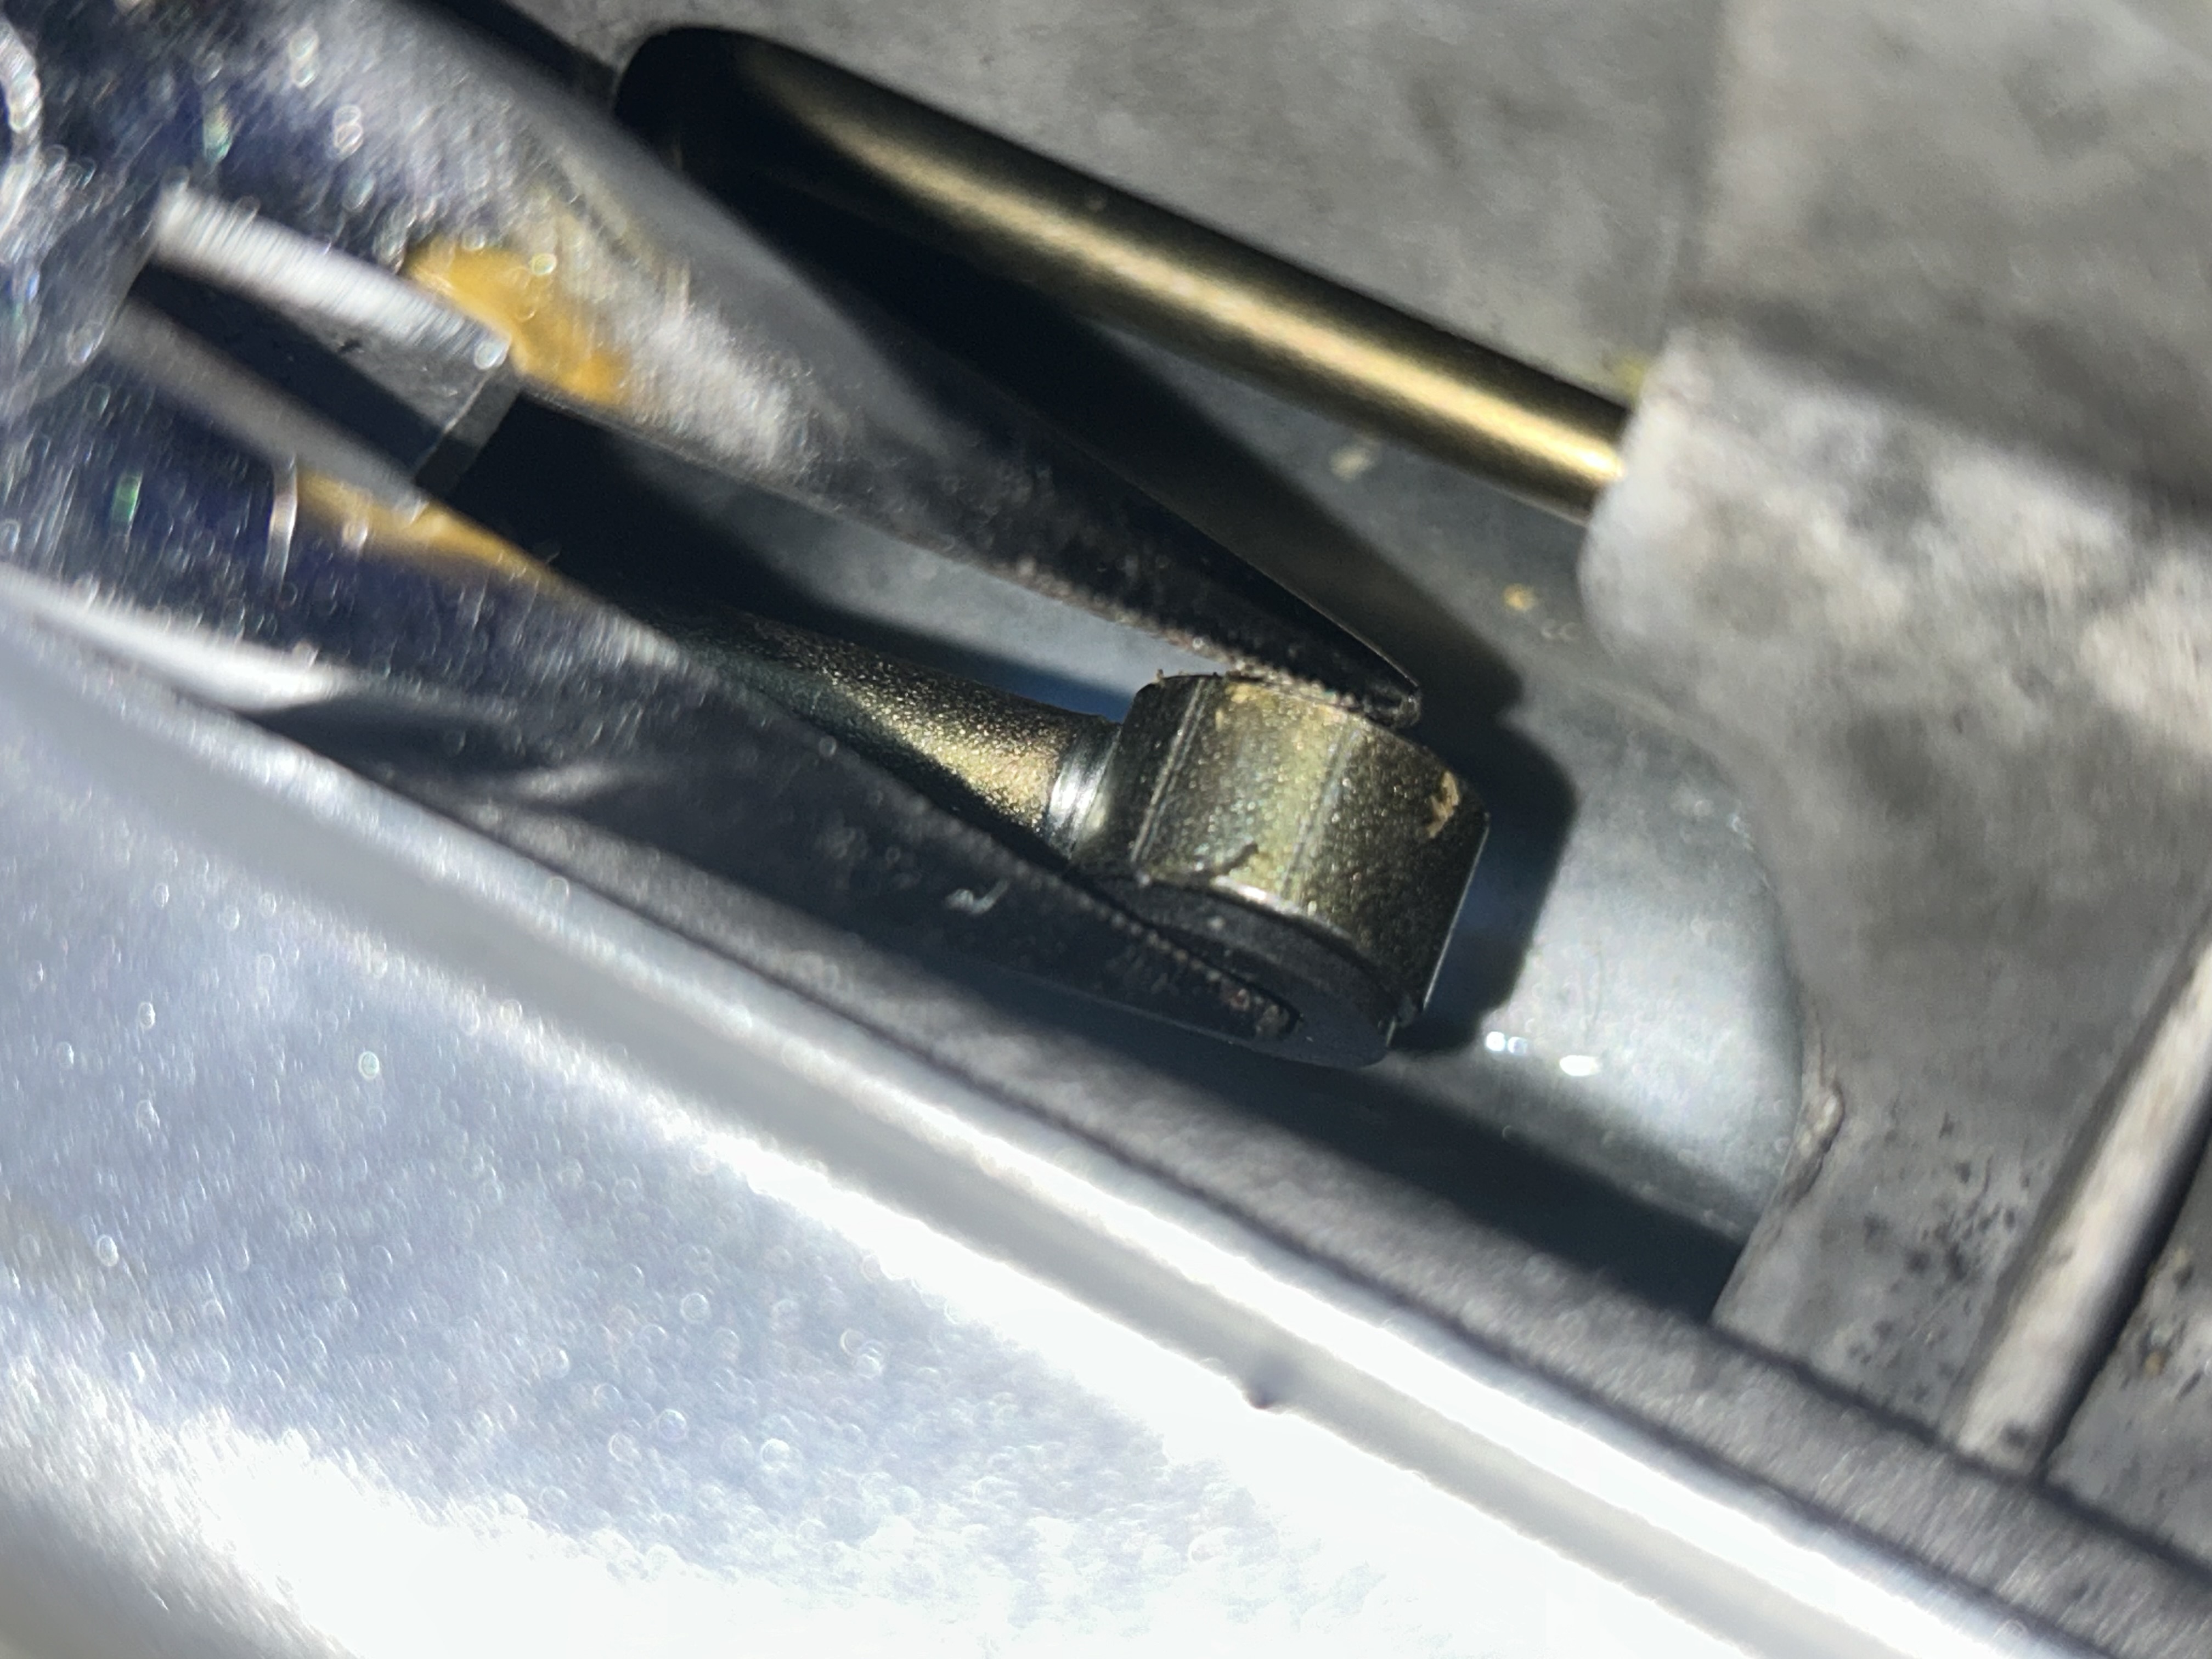
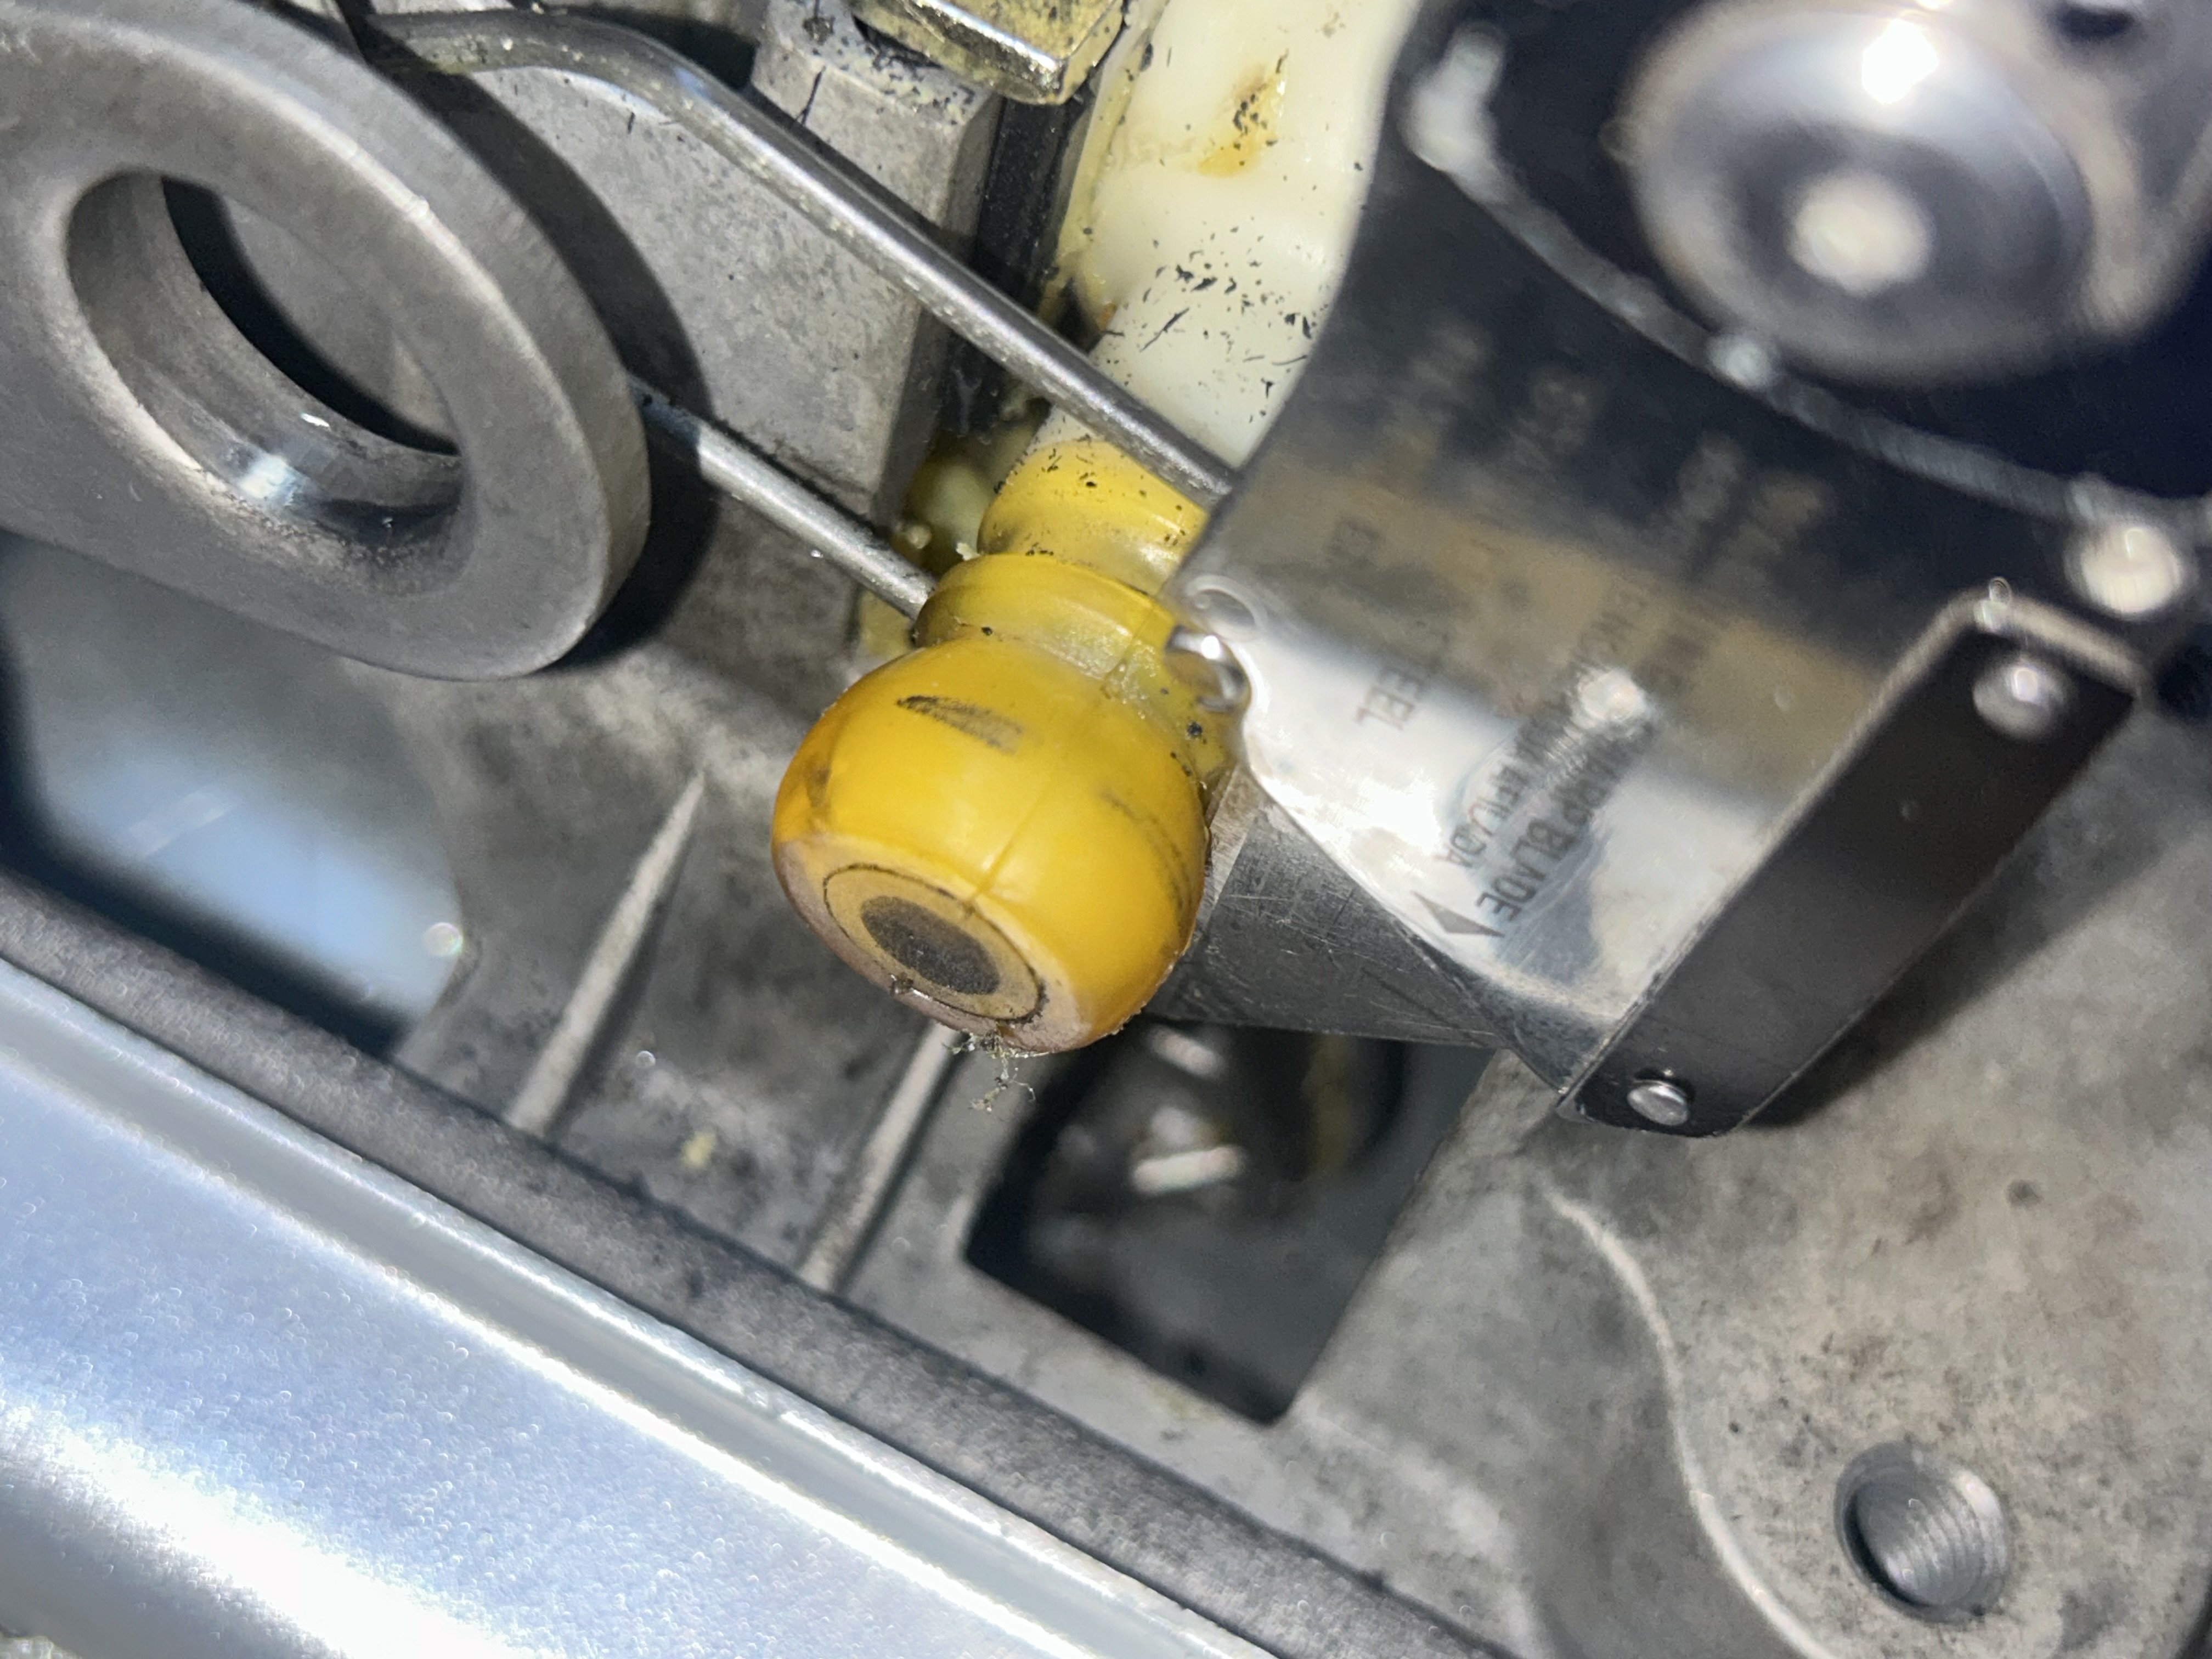
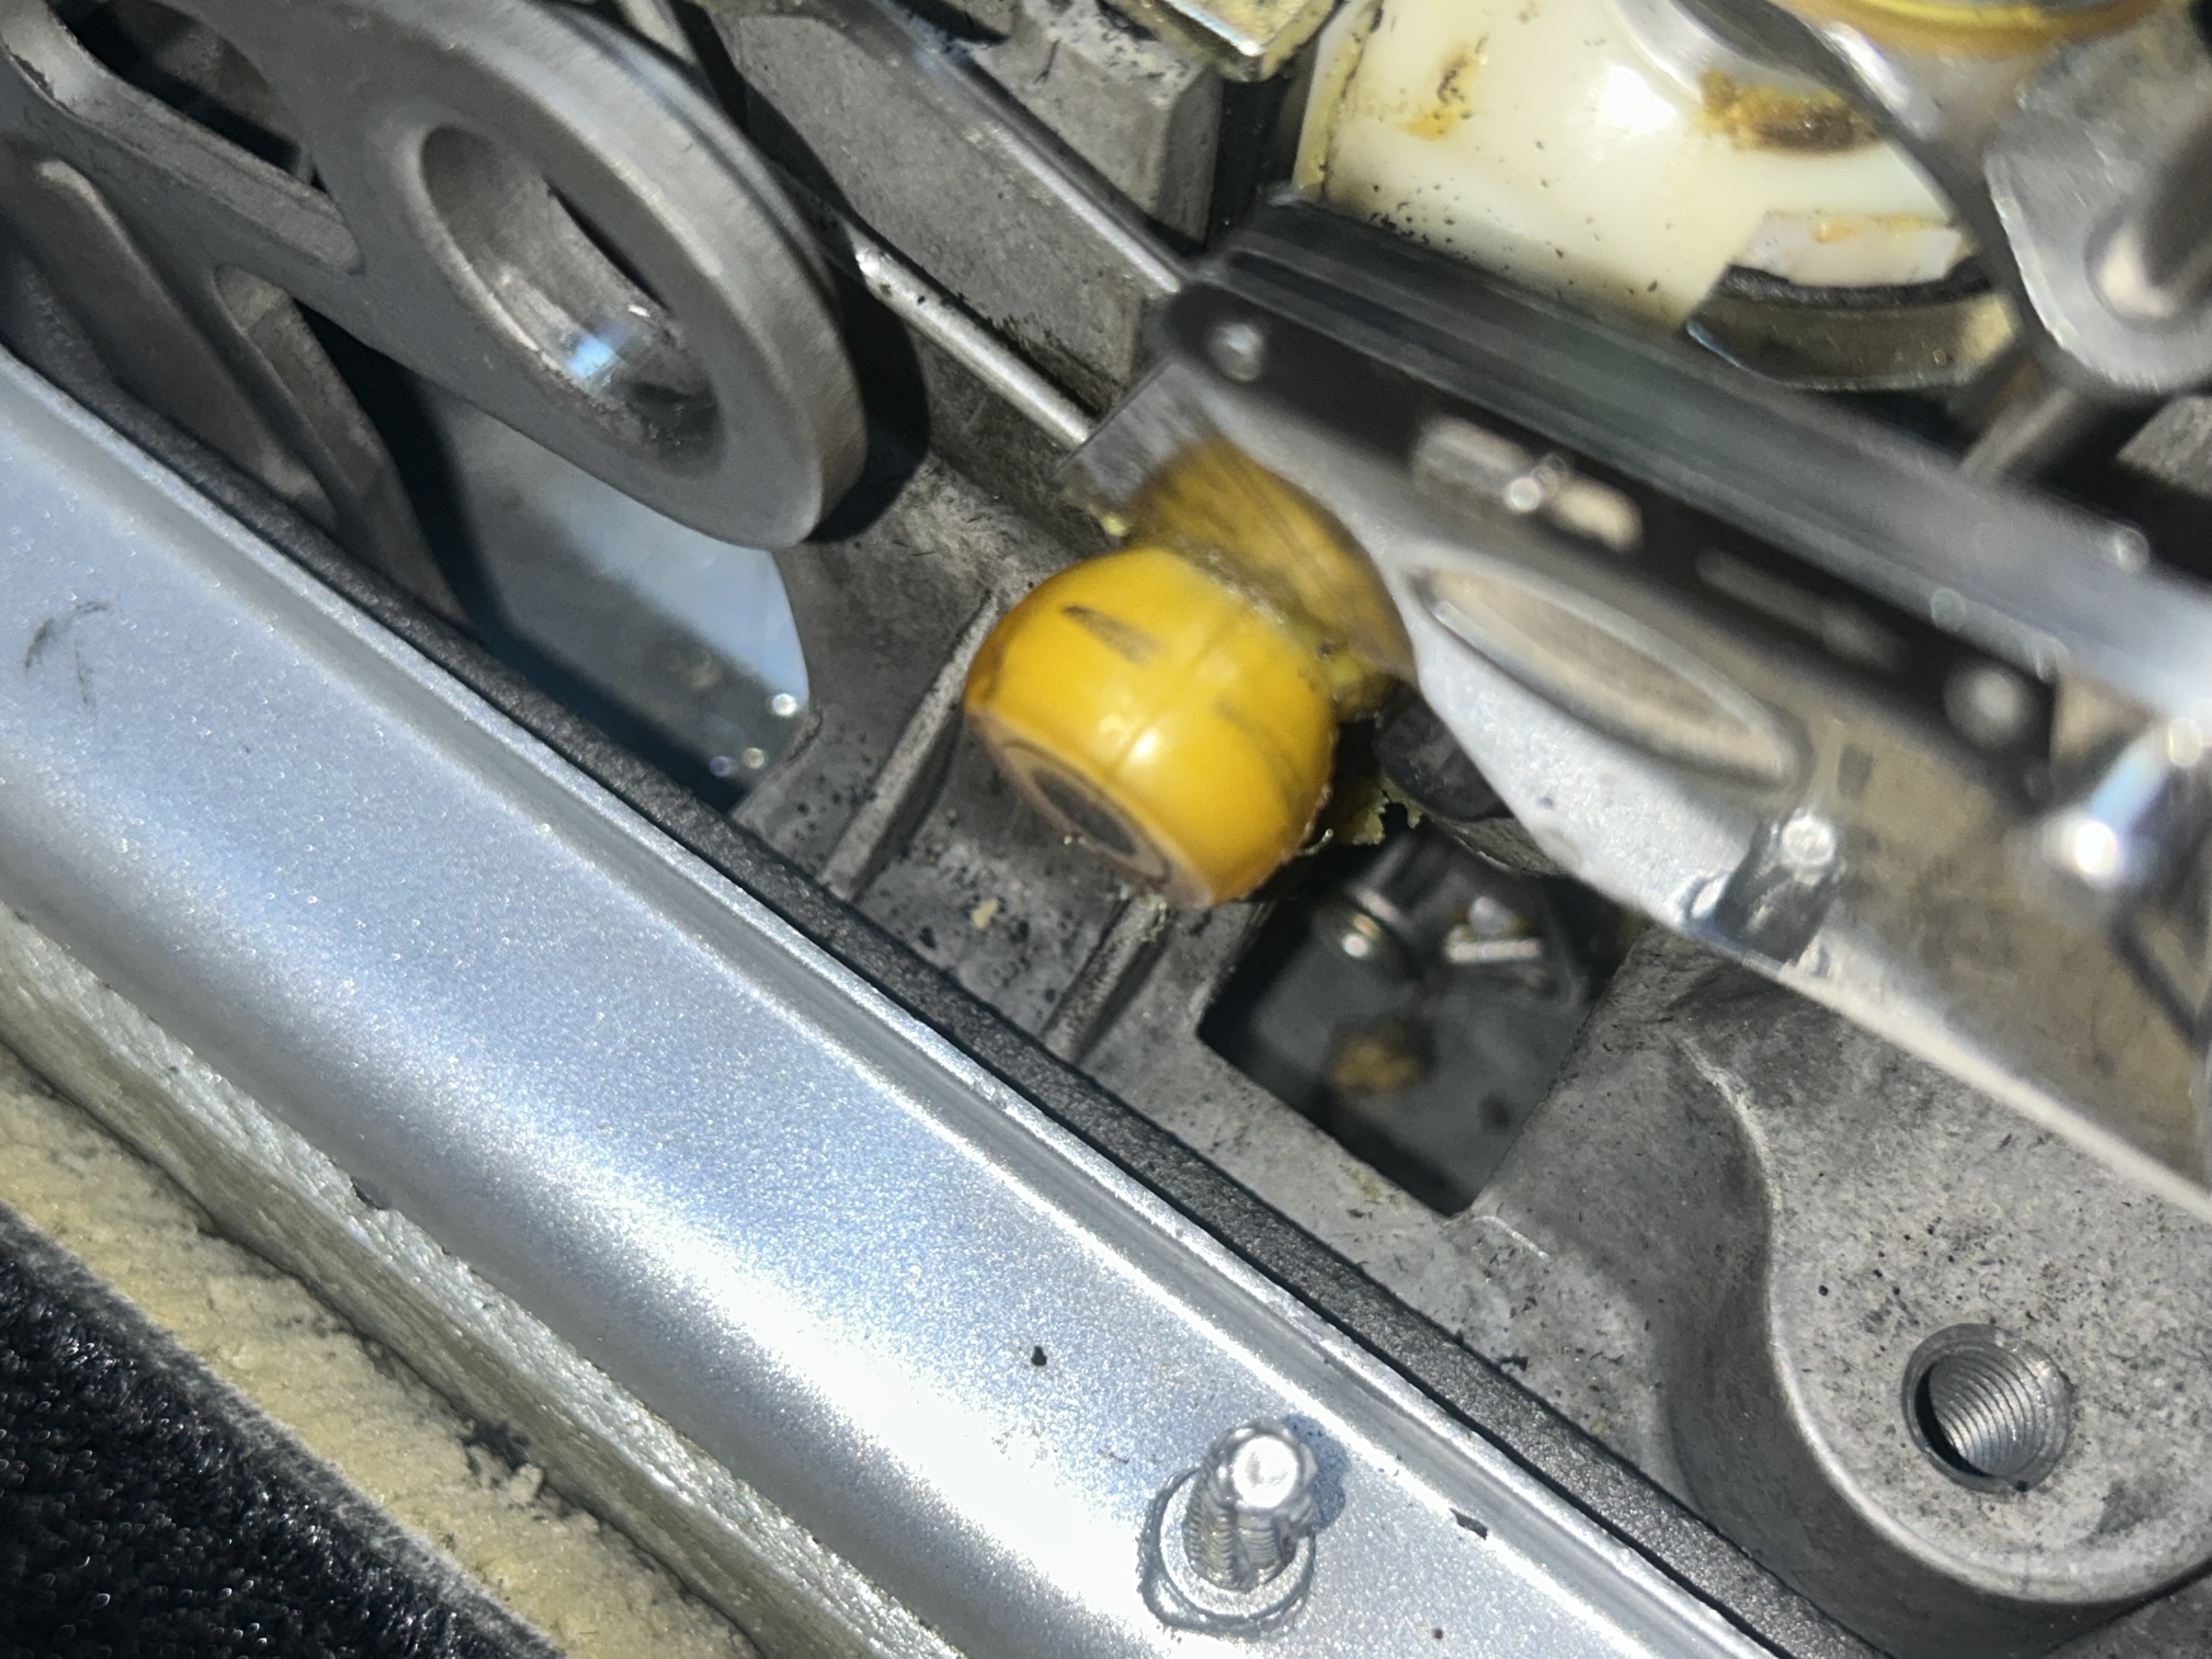
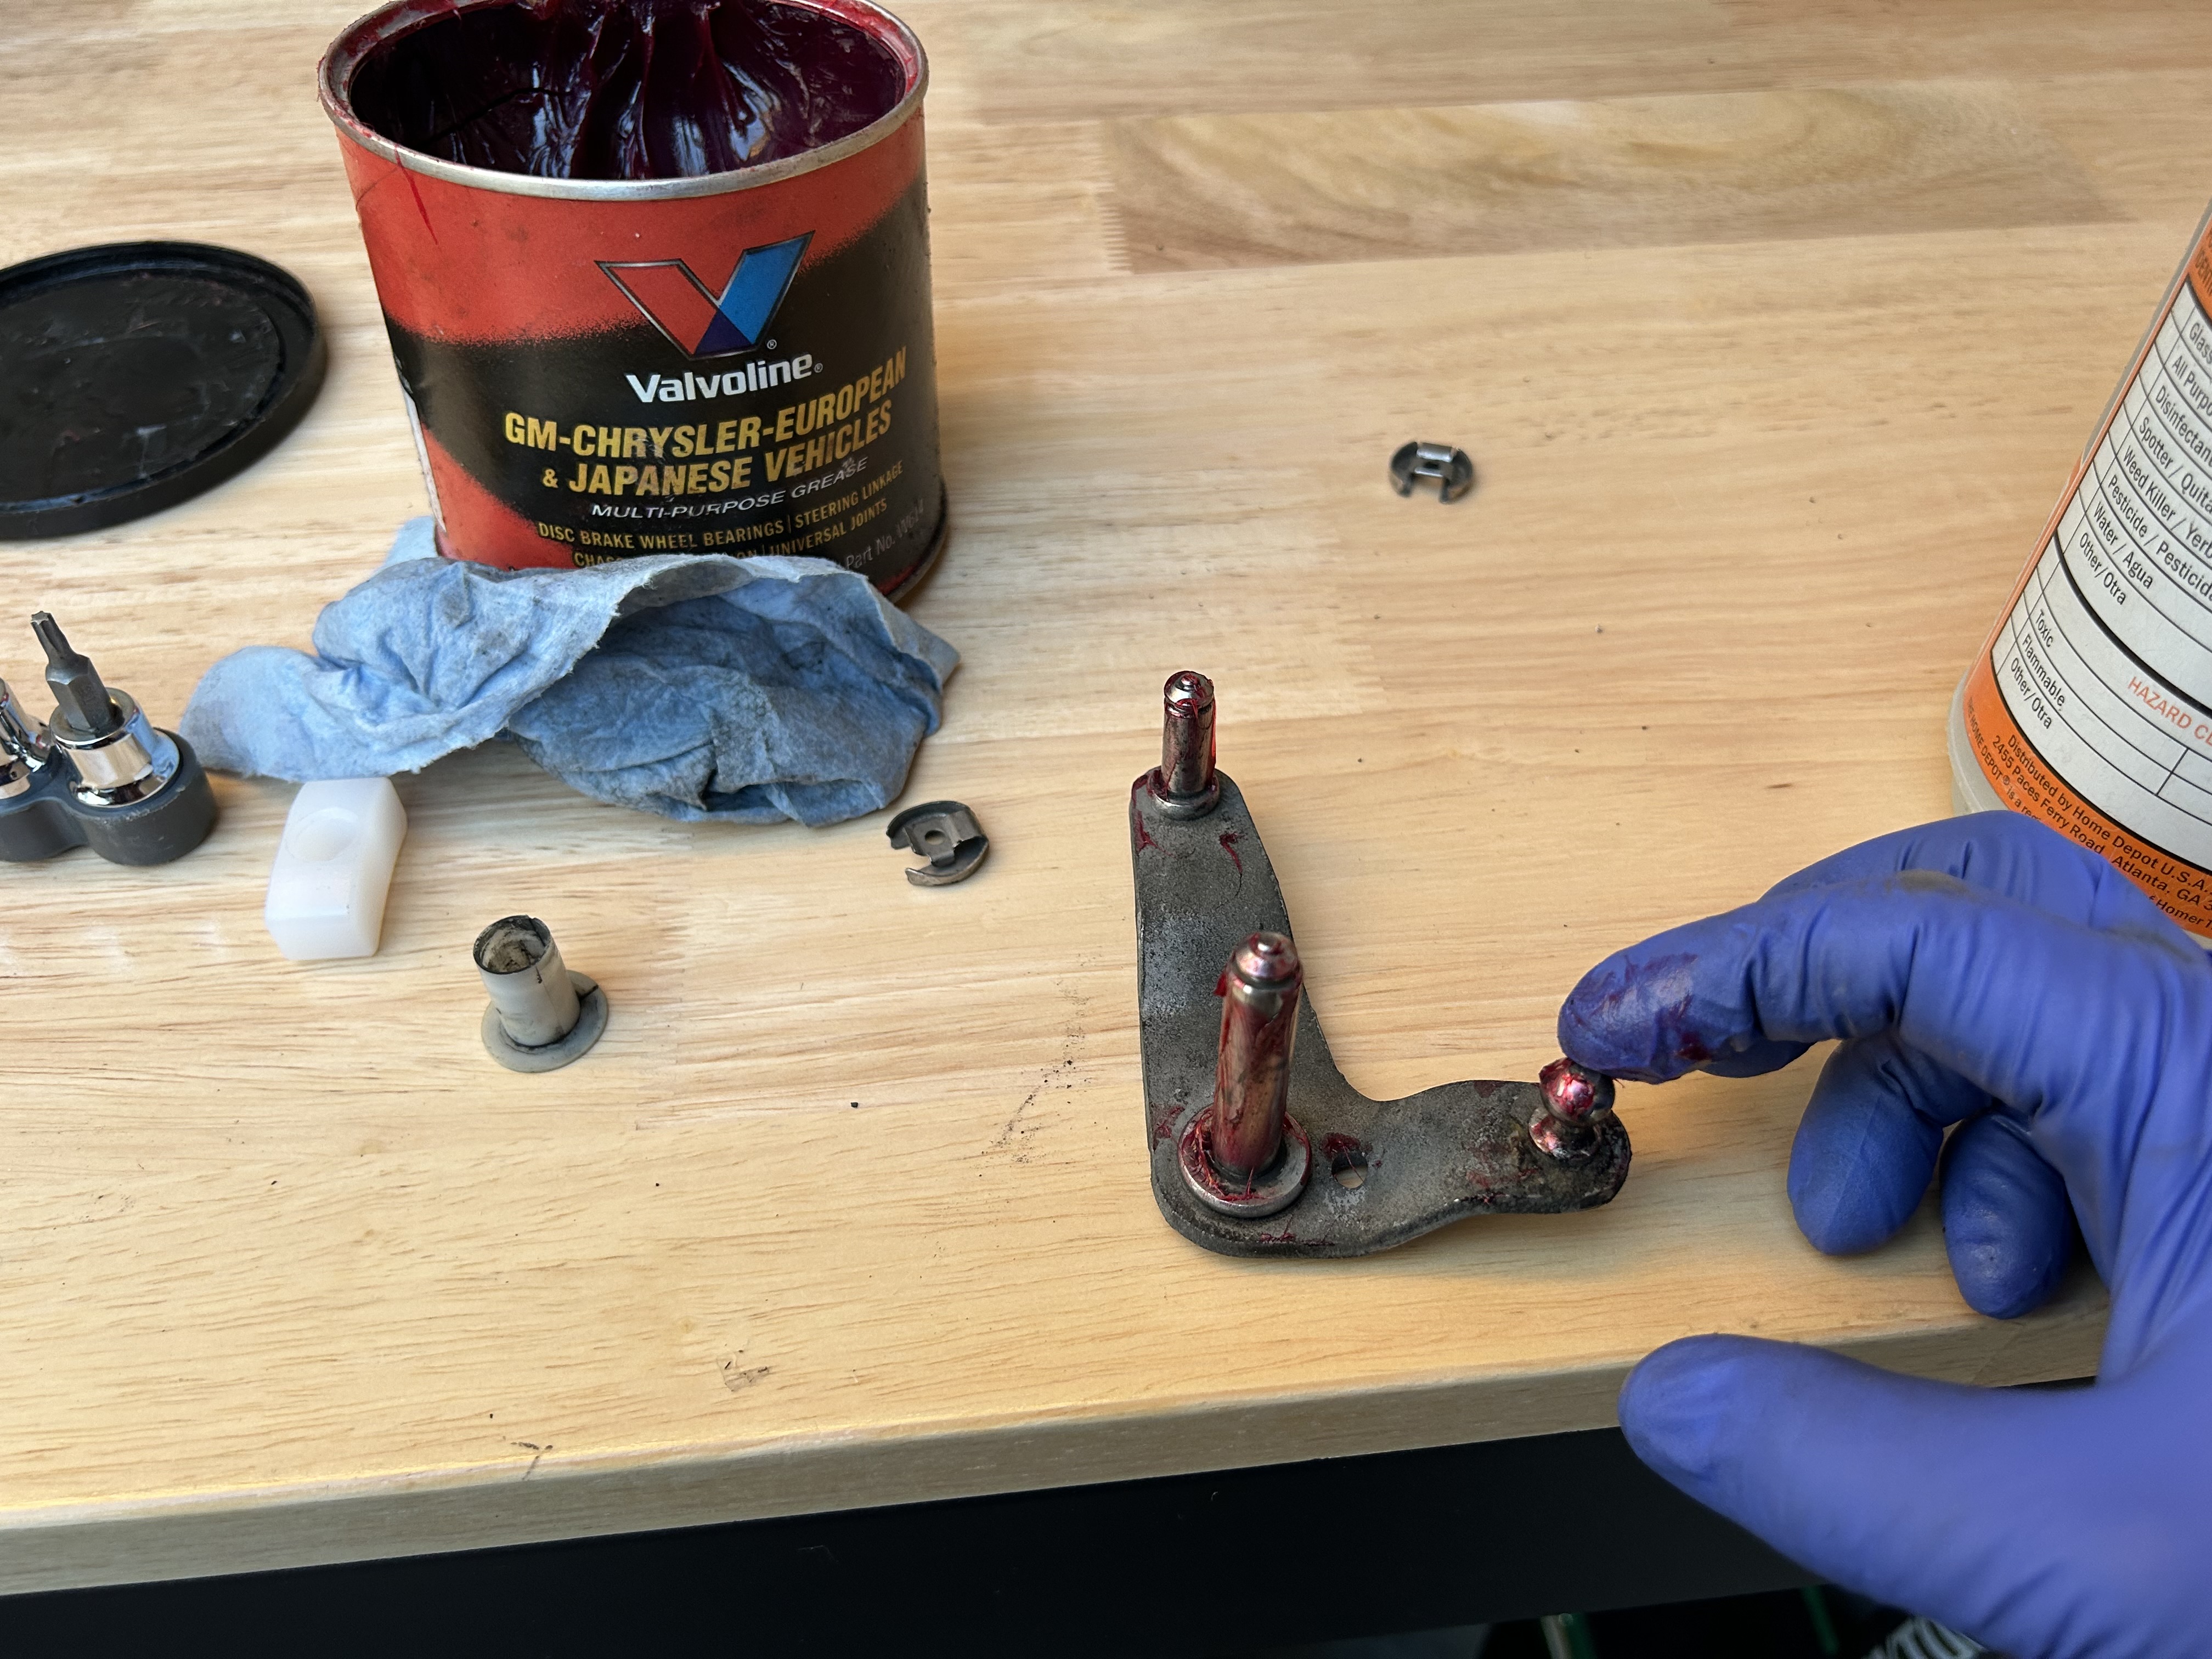
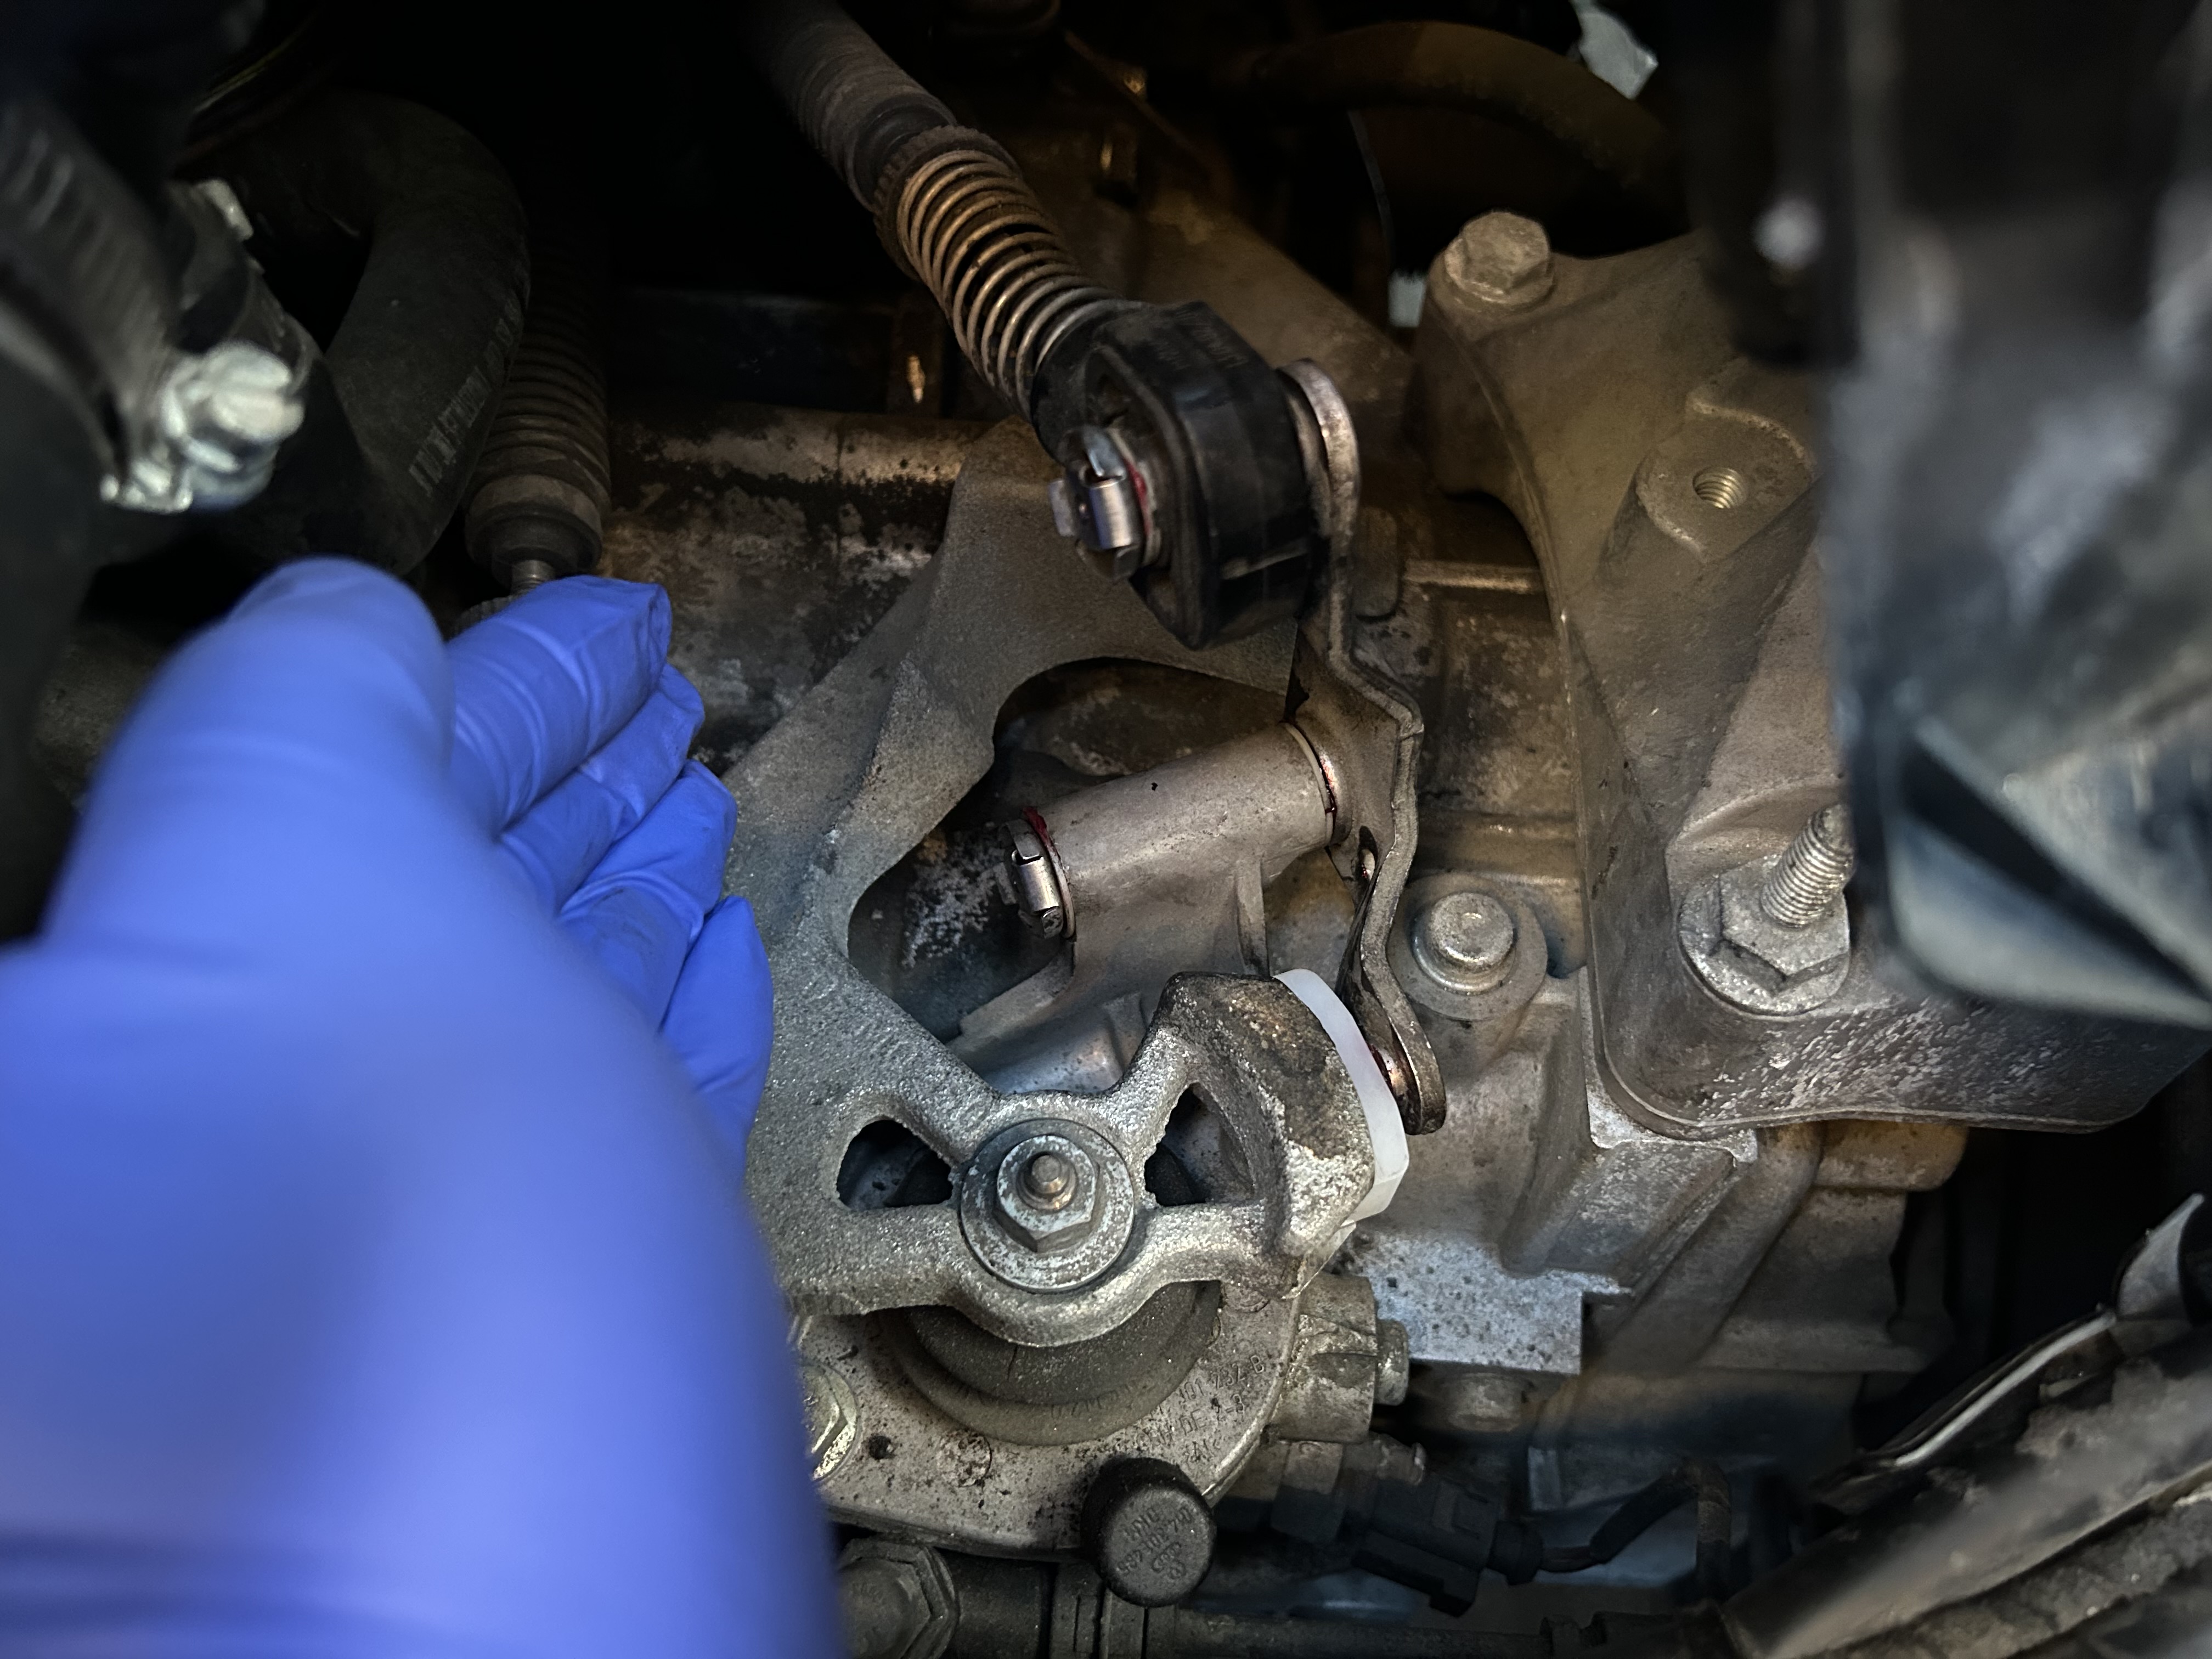
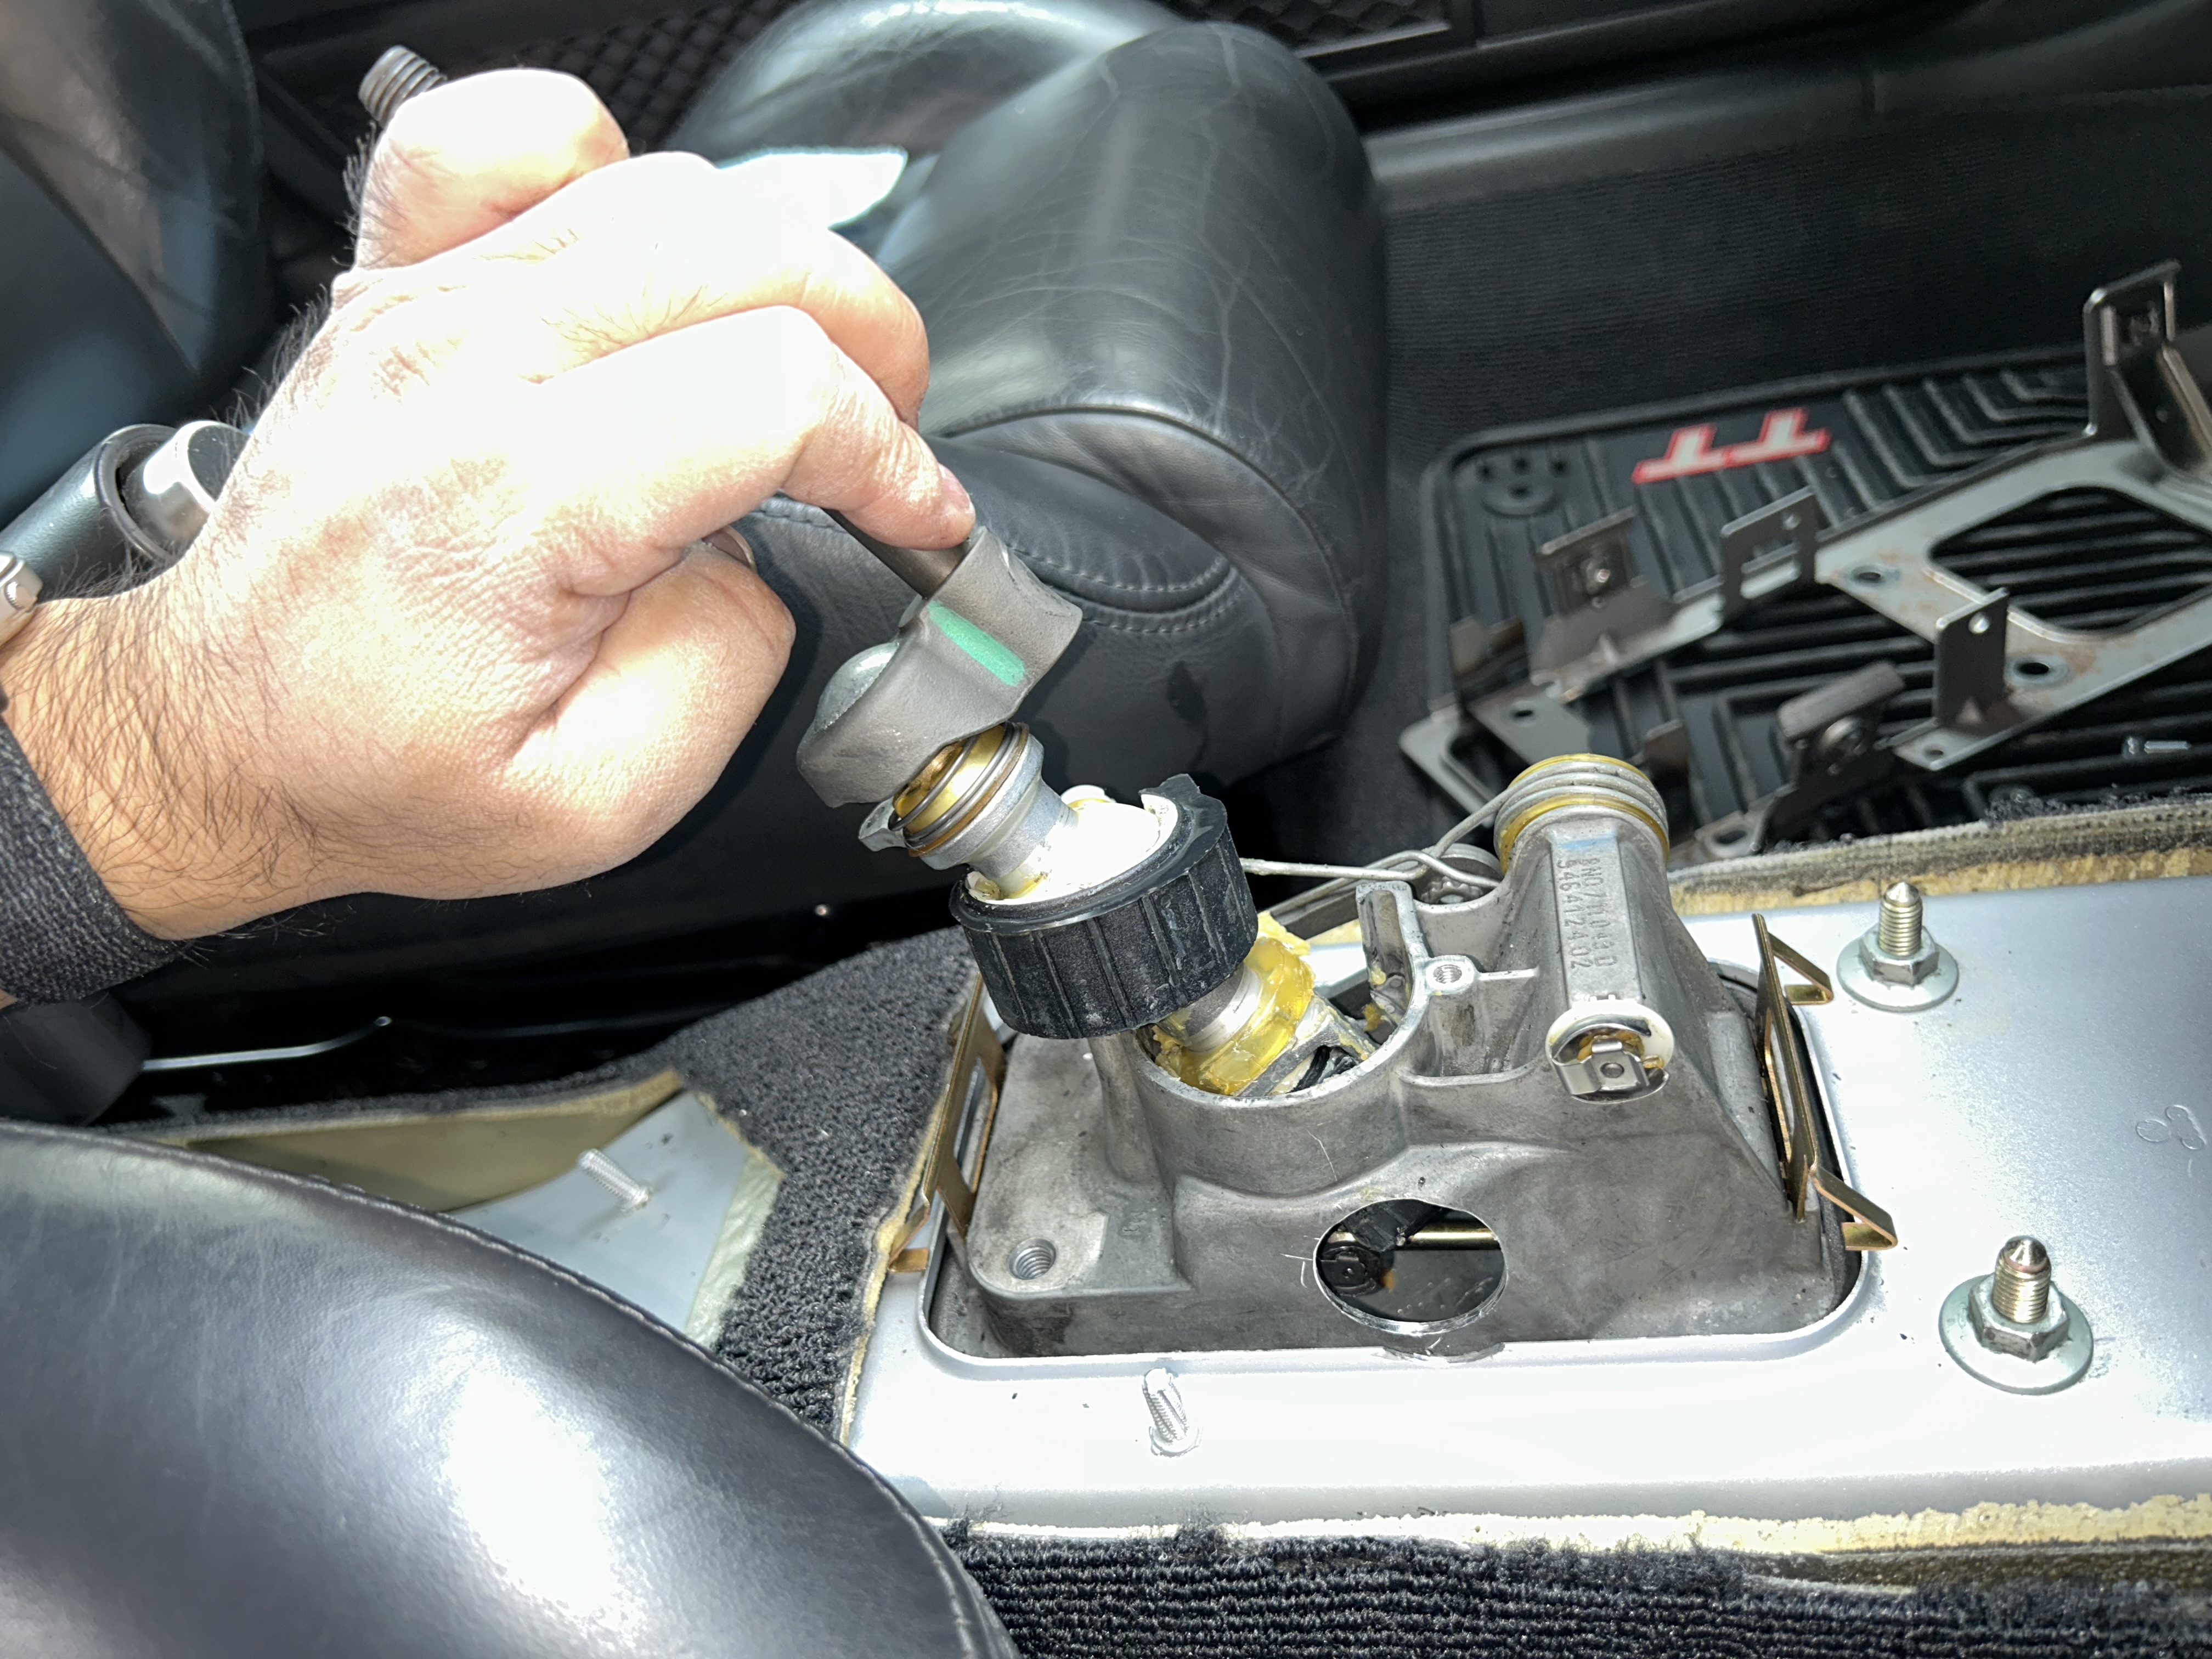
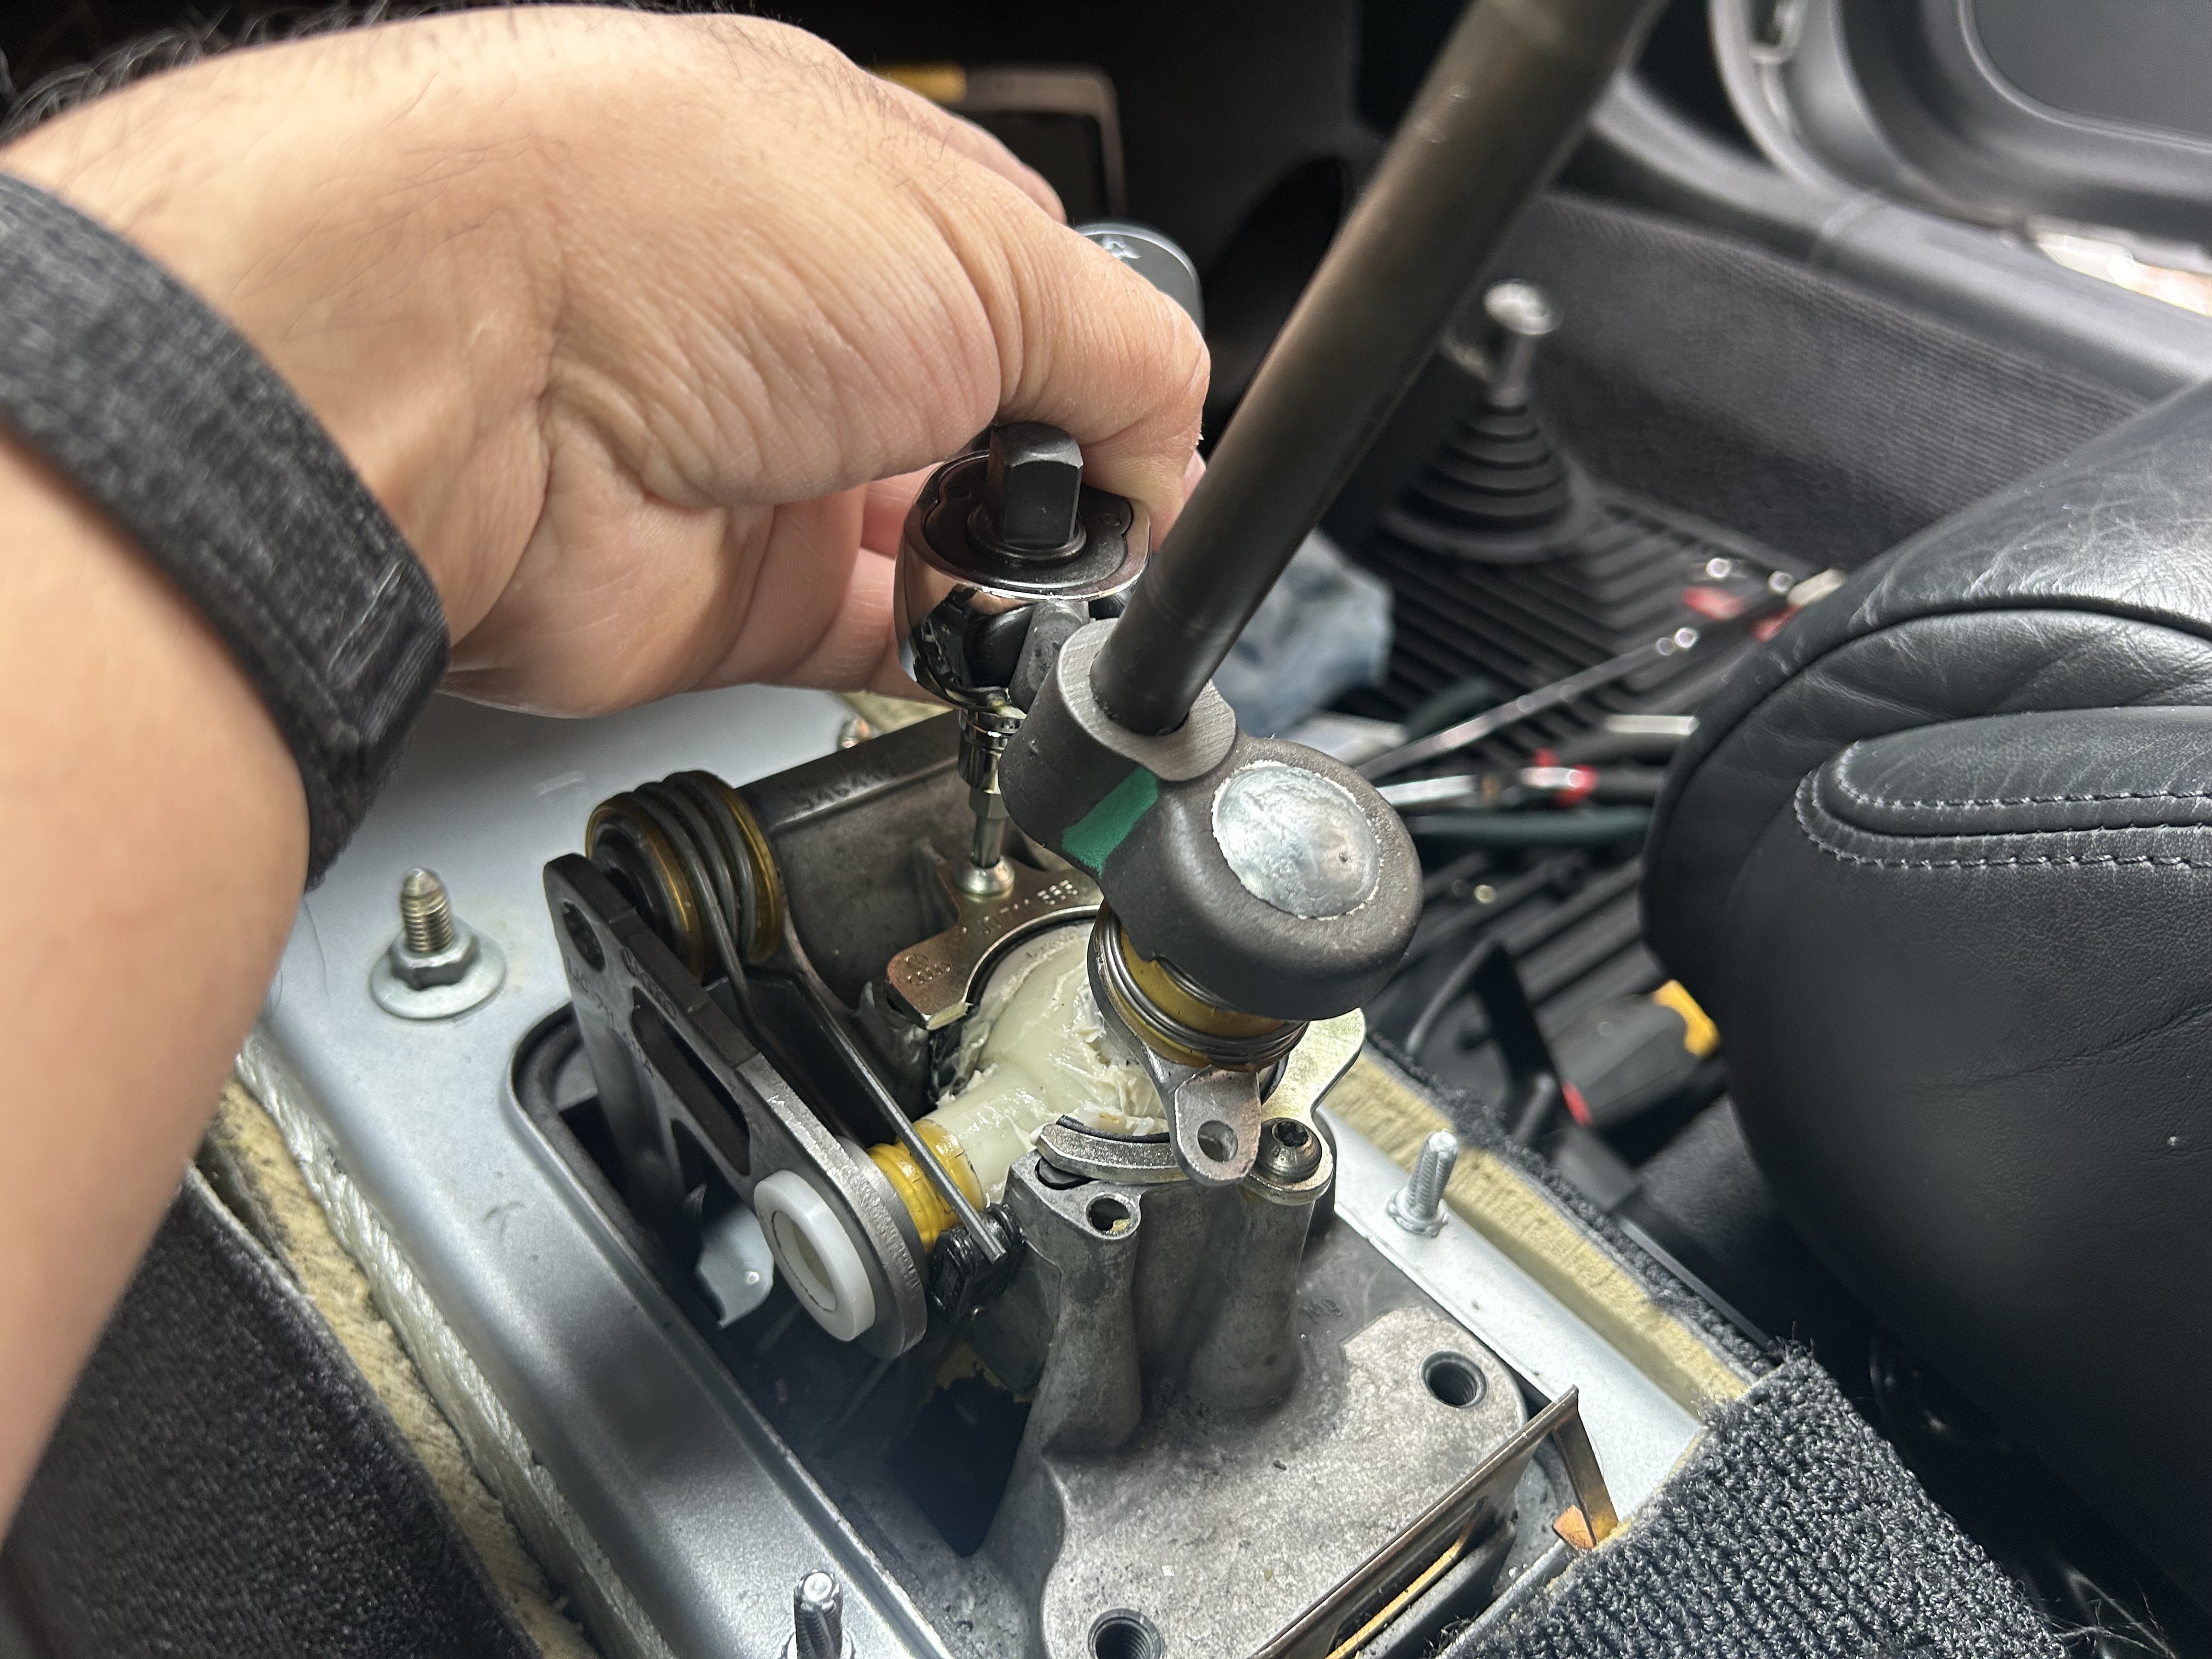
The shifter slide (the white plastic piece seen below in the engine compartment at the transmission) can break down, resulting in more sloppy feel when shifting. The Super Slider replaces this part resulting in tighter feel and reduces slop. For this, we’ll need to get into the engine bay to replace the shifter slide. Before going to the engine bay, insert the 5mm alignment pin at the shifter inside the cabin first.
Under the hood, remove the intake and battery to get access to the shifter linkages in the engine bay. It may be possible to install the Super Slider without removing the battery and intake, but I did it to get some extra working room.


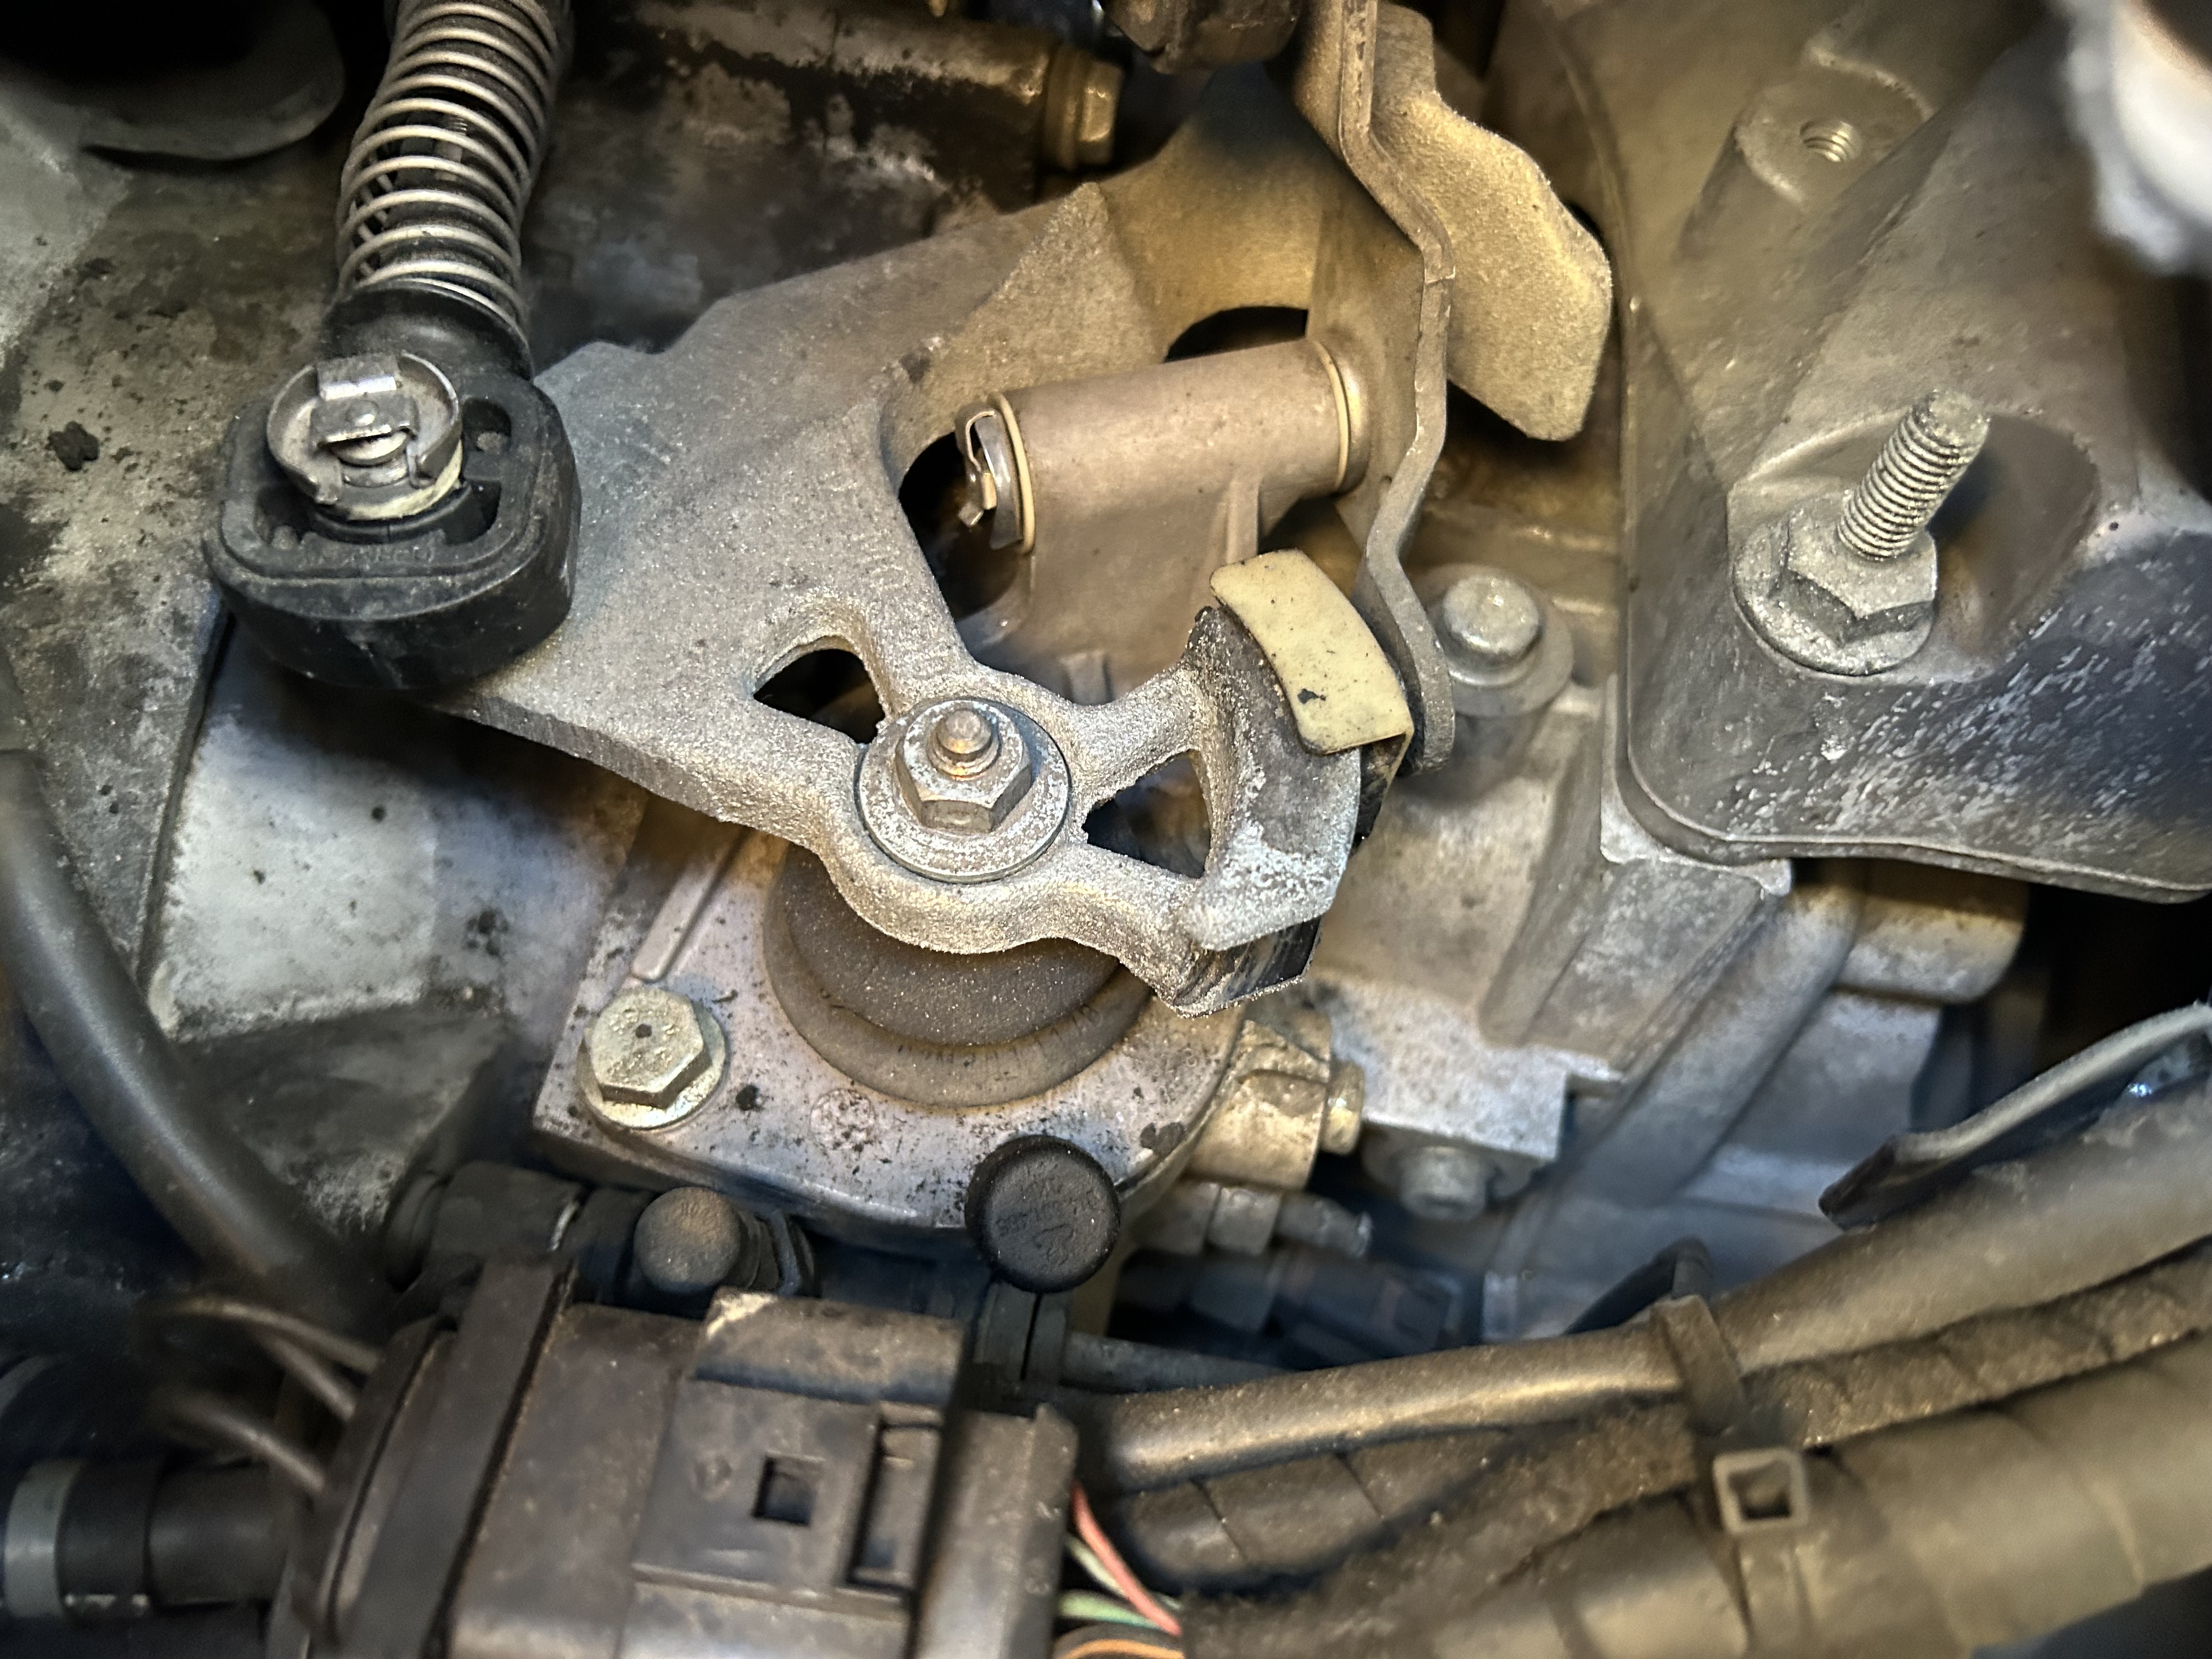
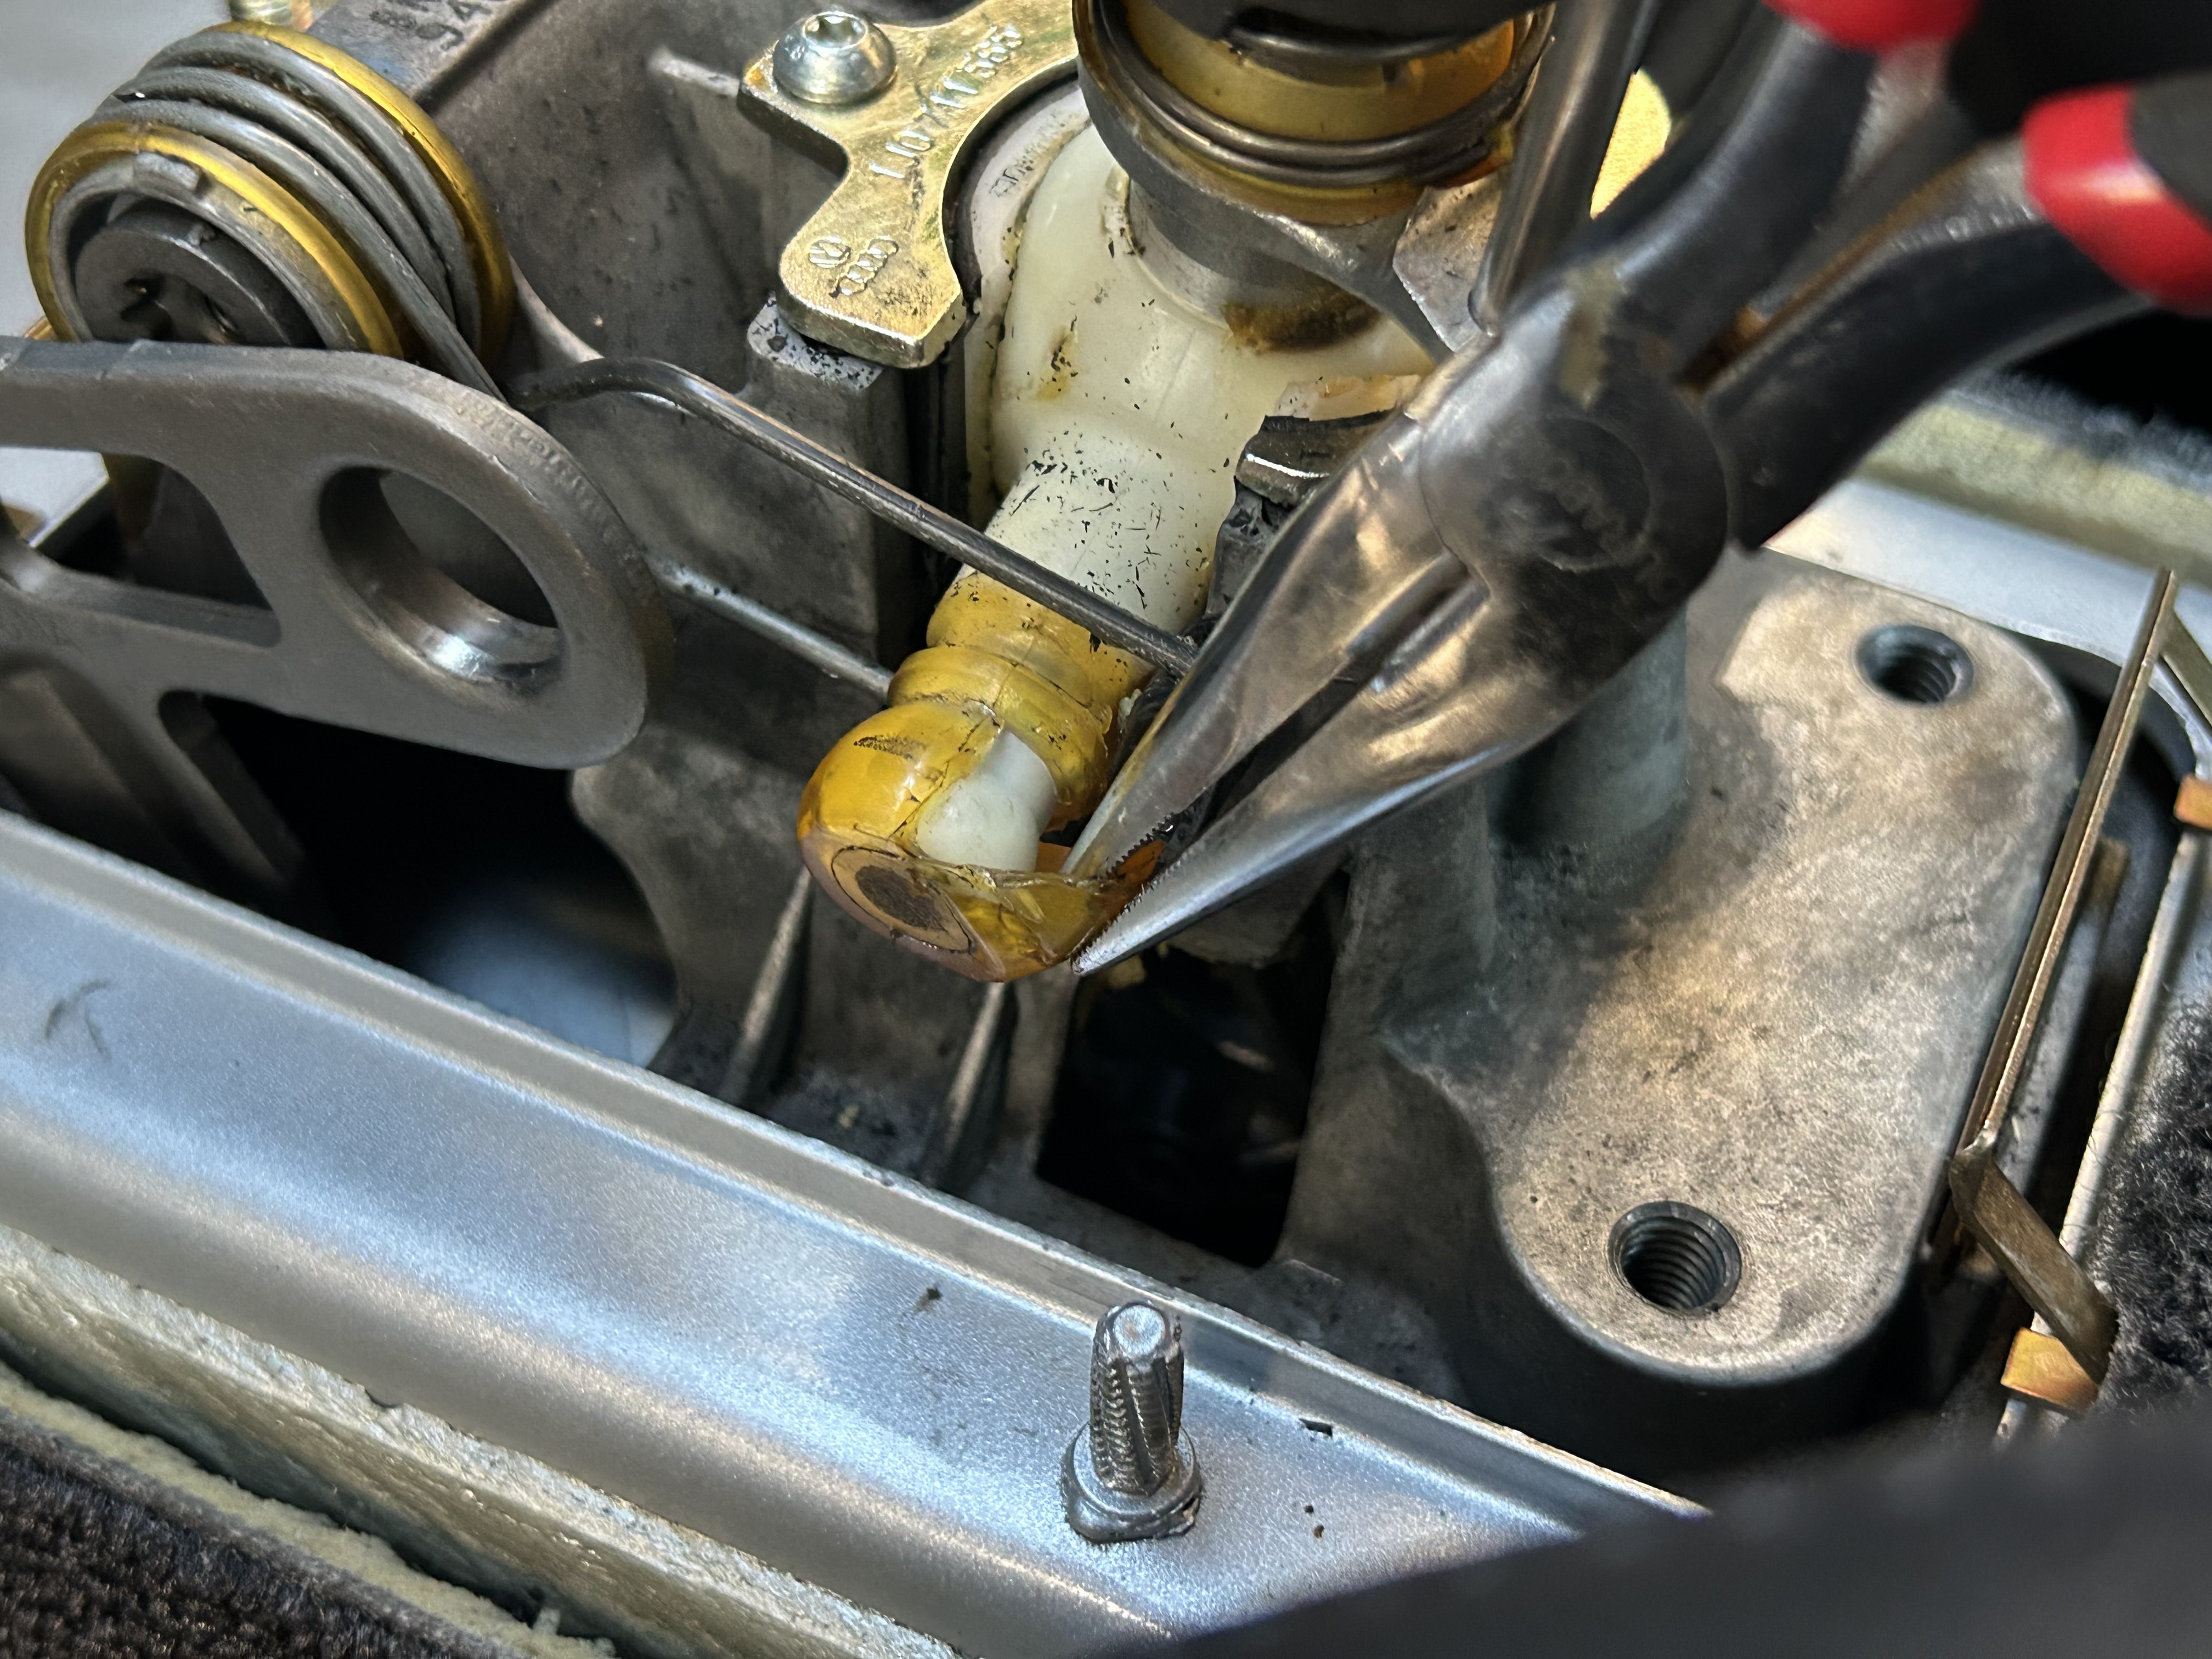
Use a set of long nose pliers to slide the end clip off the side-to-side bracket. The bracket should then be able to slide off and you can now access the shifter slide. The shifter slide simply pops off the side-to-side bracket. The new Super Slider part pops on the same way as well.
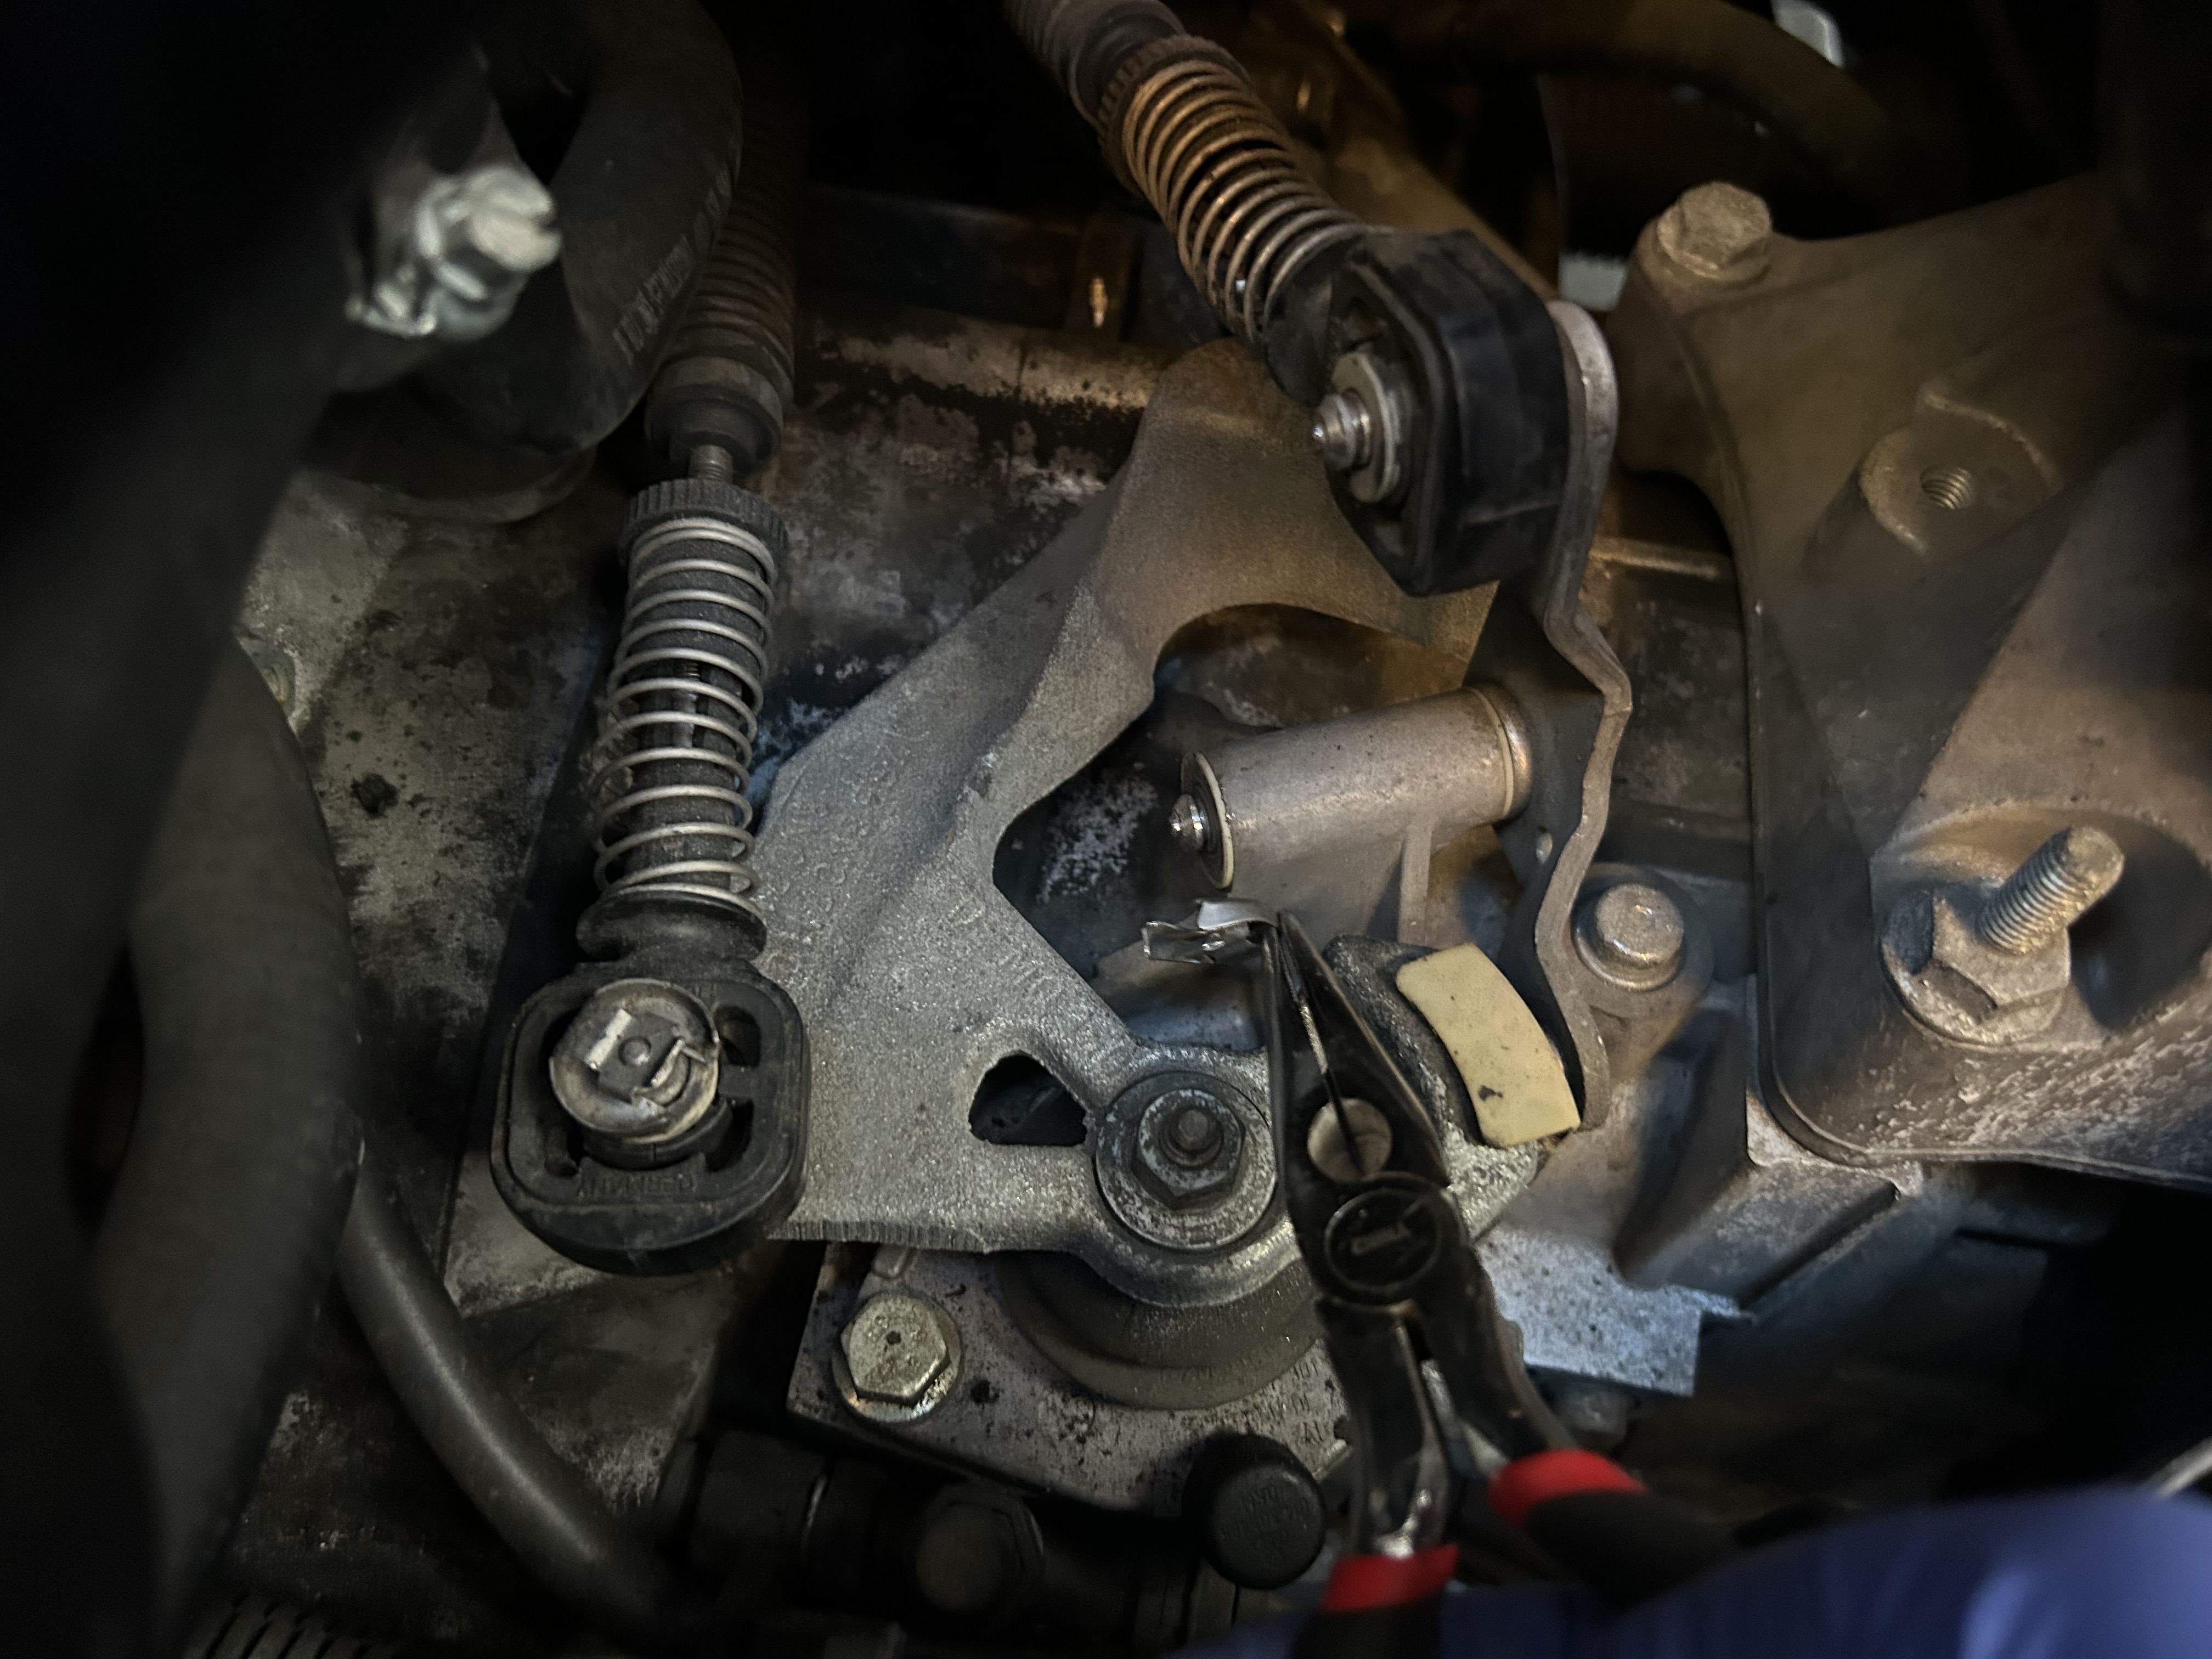
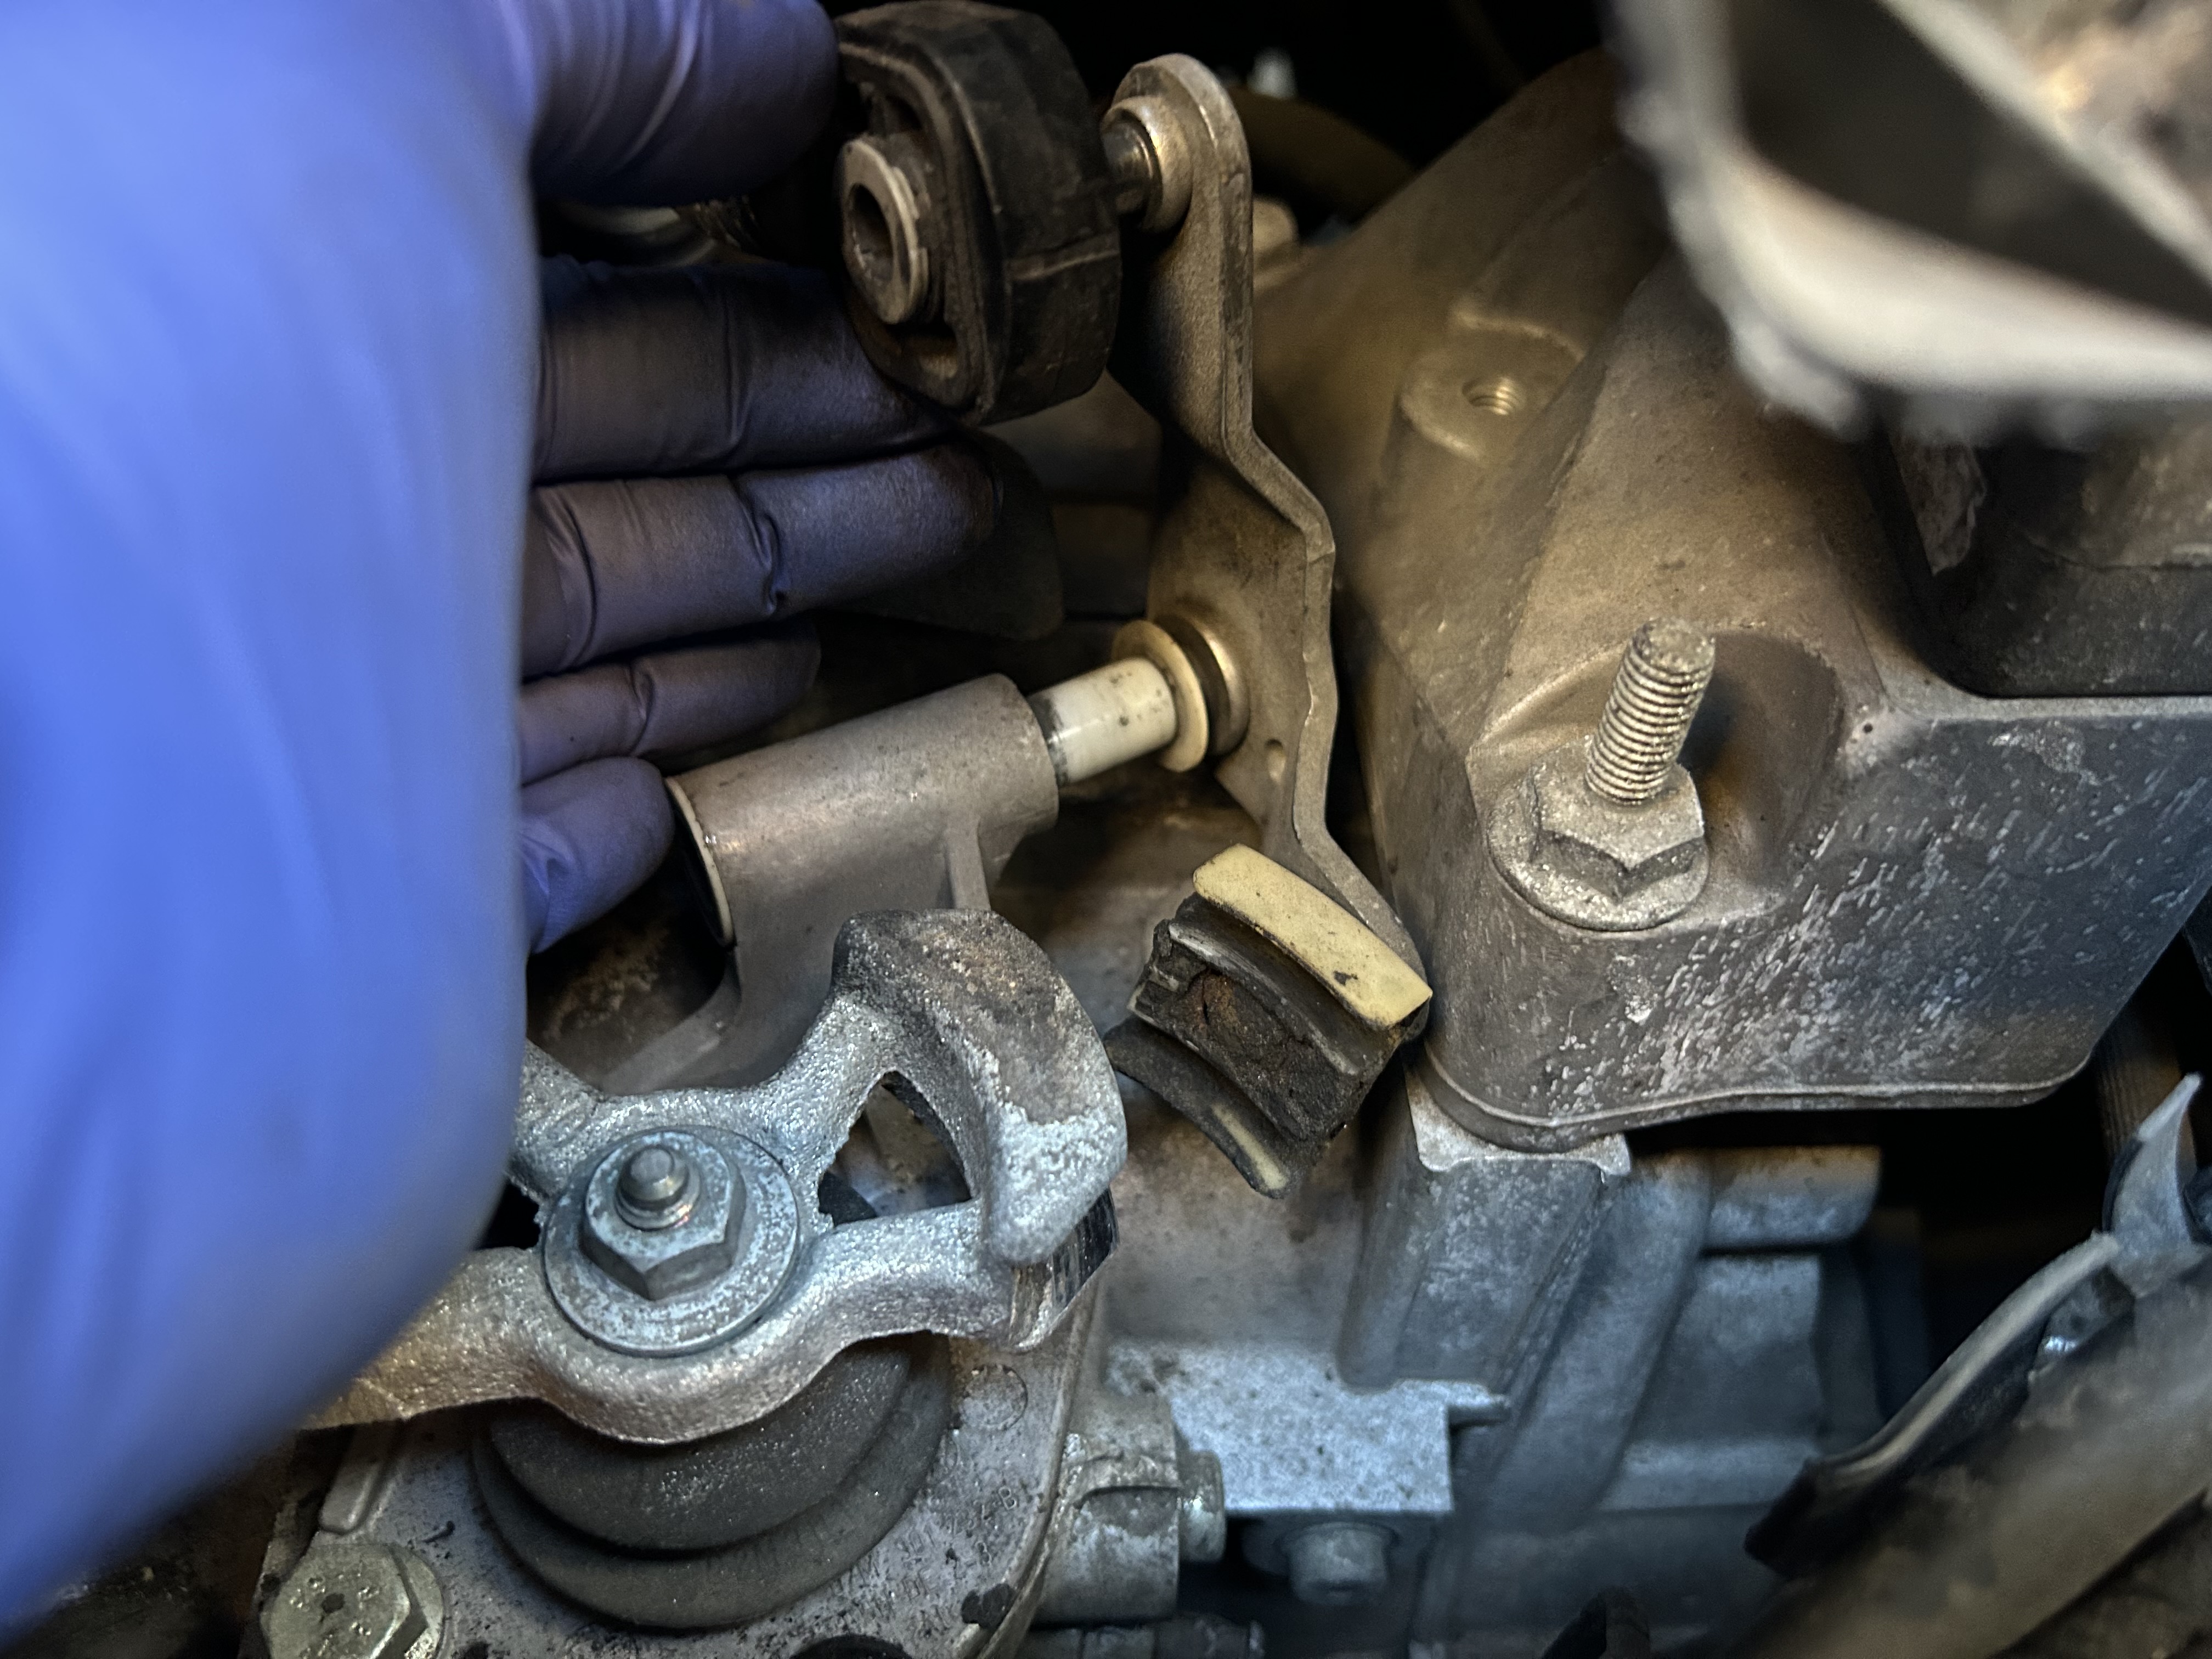
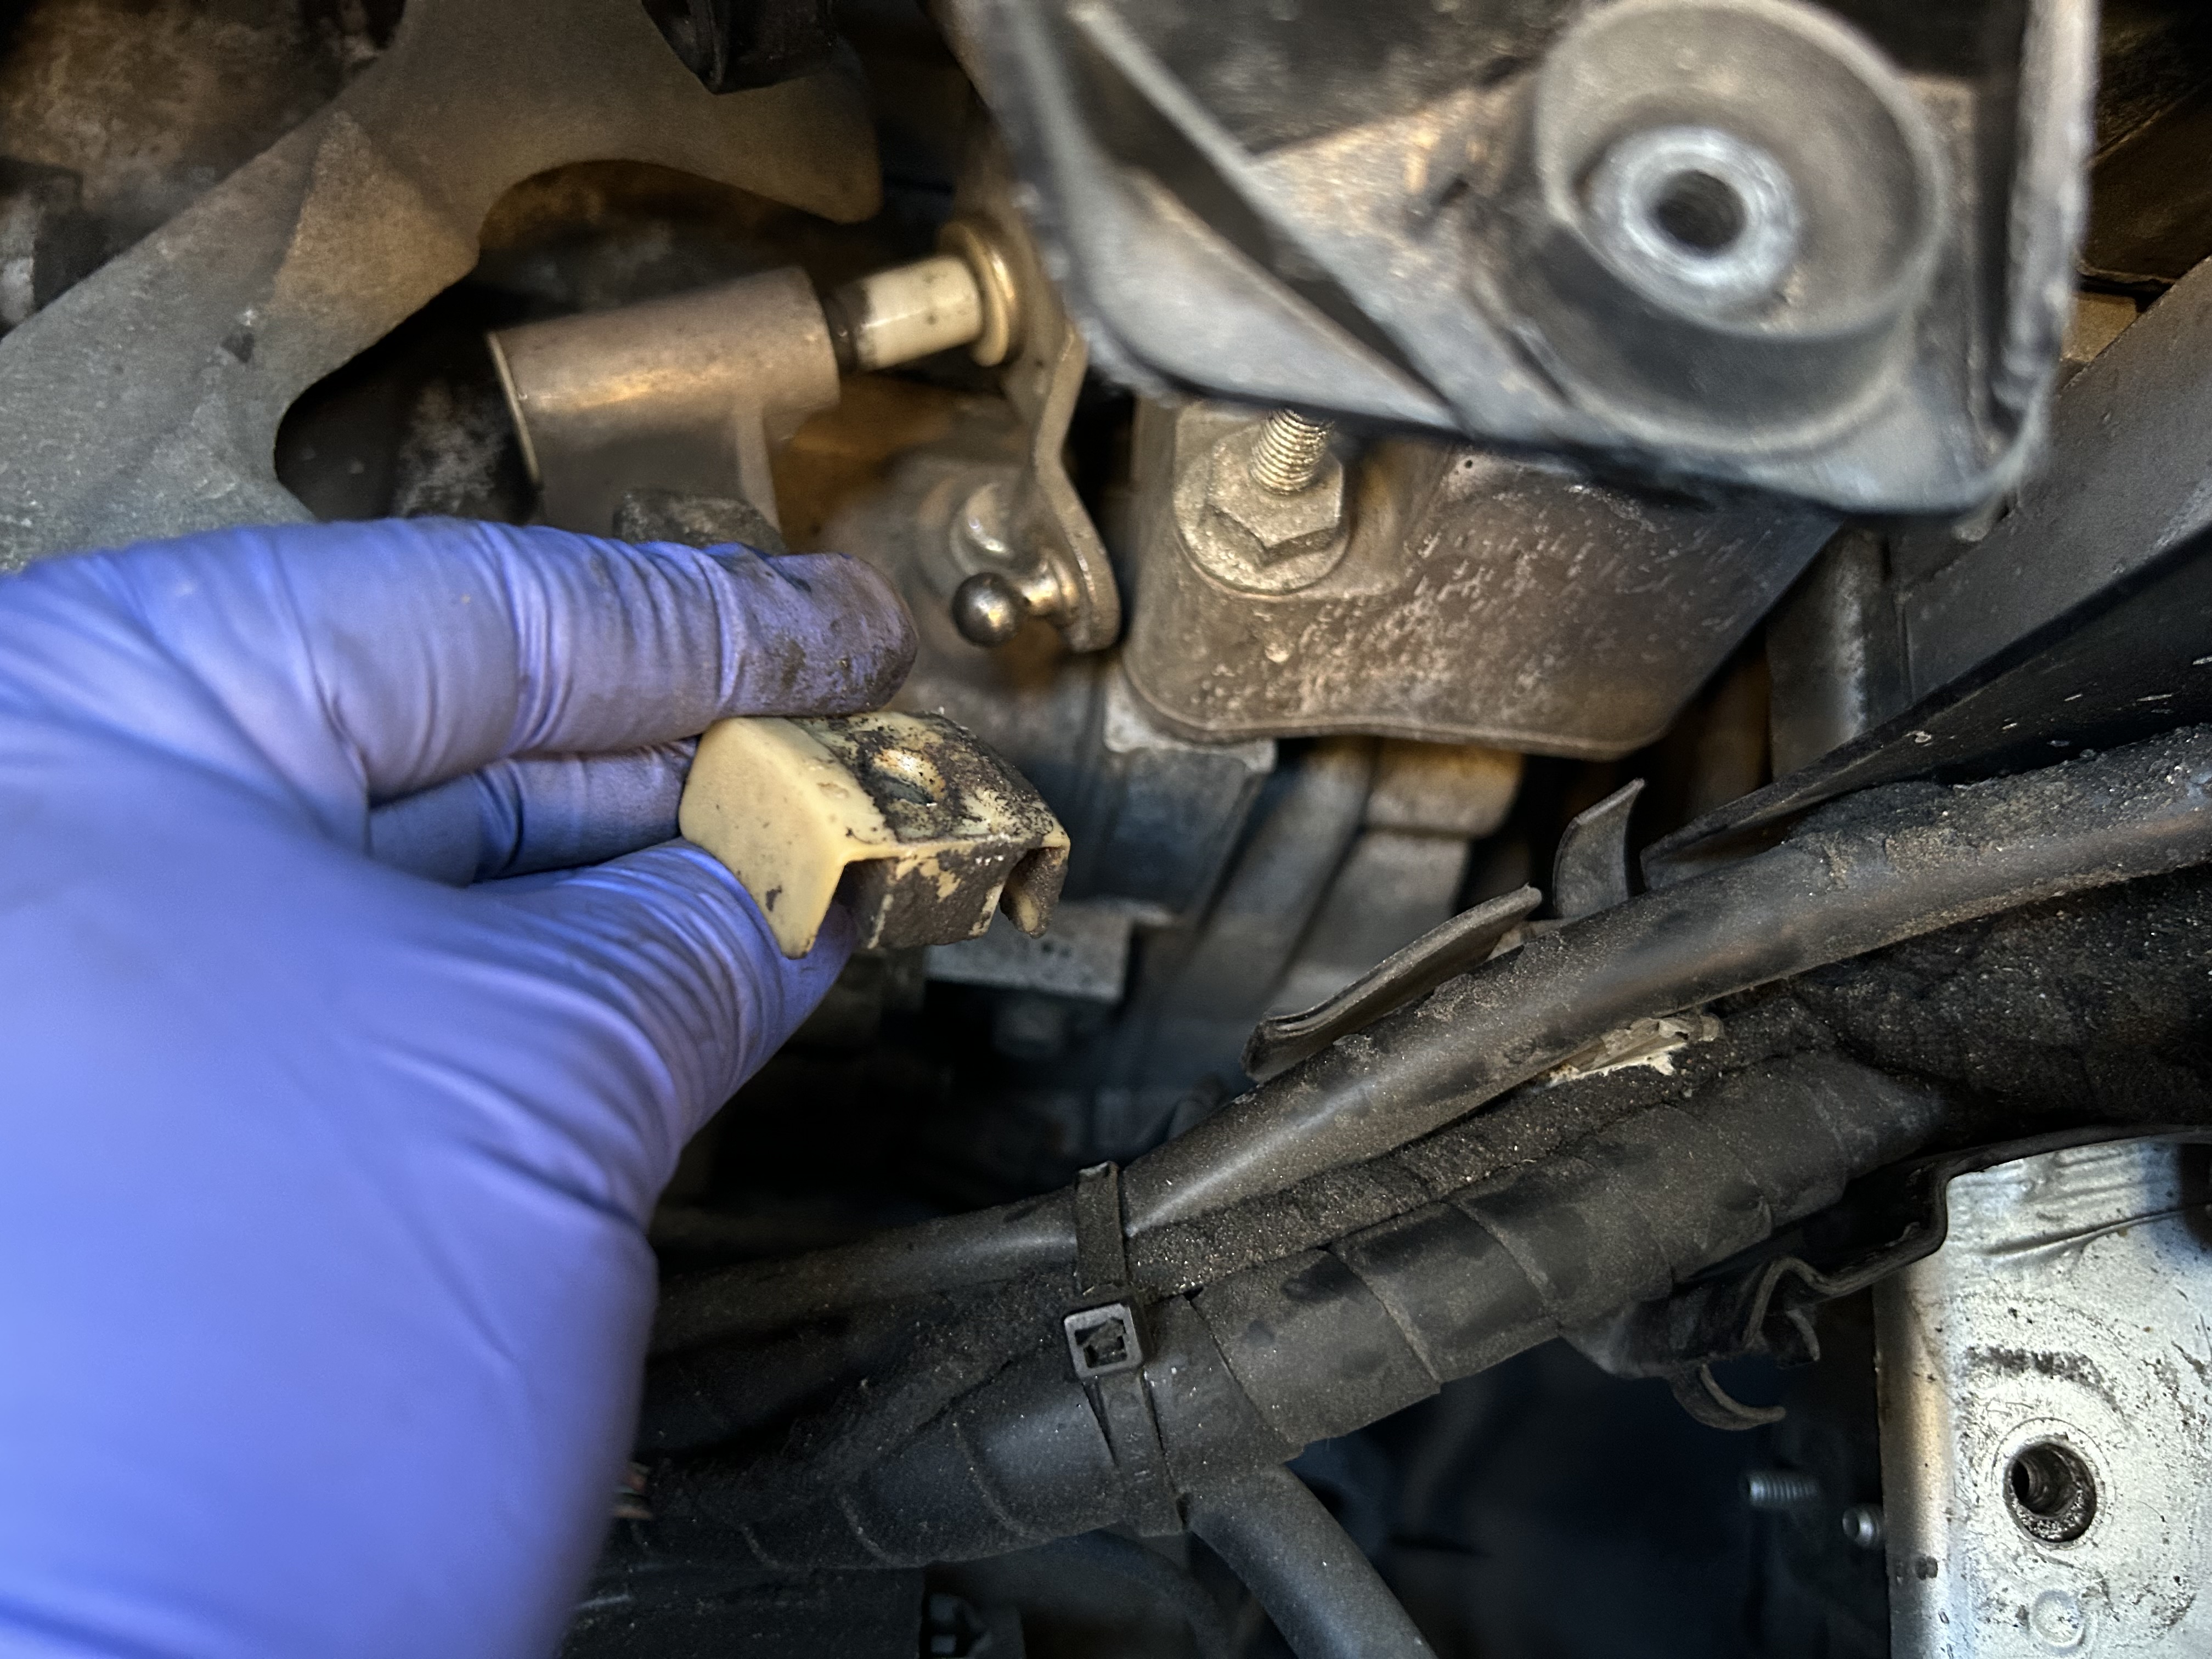
Personally, I removed the whole bracket by removing the other connected parts to re-grease. I also installed the Super Slider onto the bracket while it was off the car. Make sure the pivot bushings (the white half sleeve bushings) are in good shape and are reinstalled the same way they were originally installed.
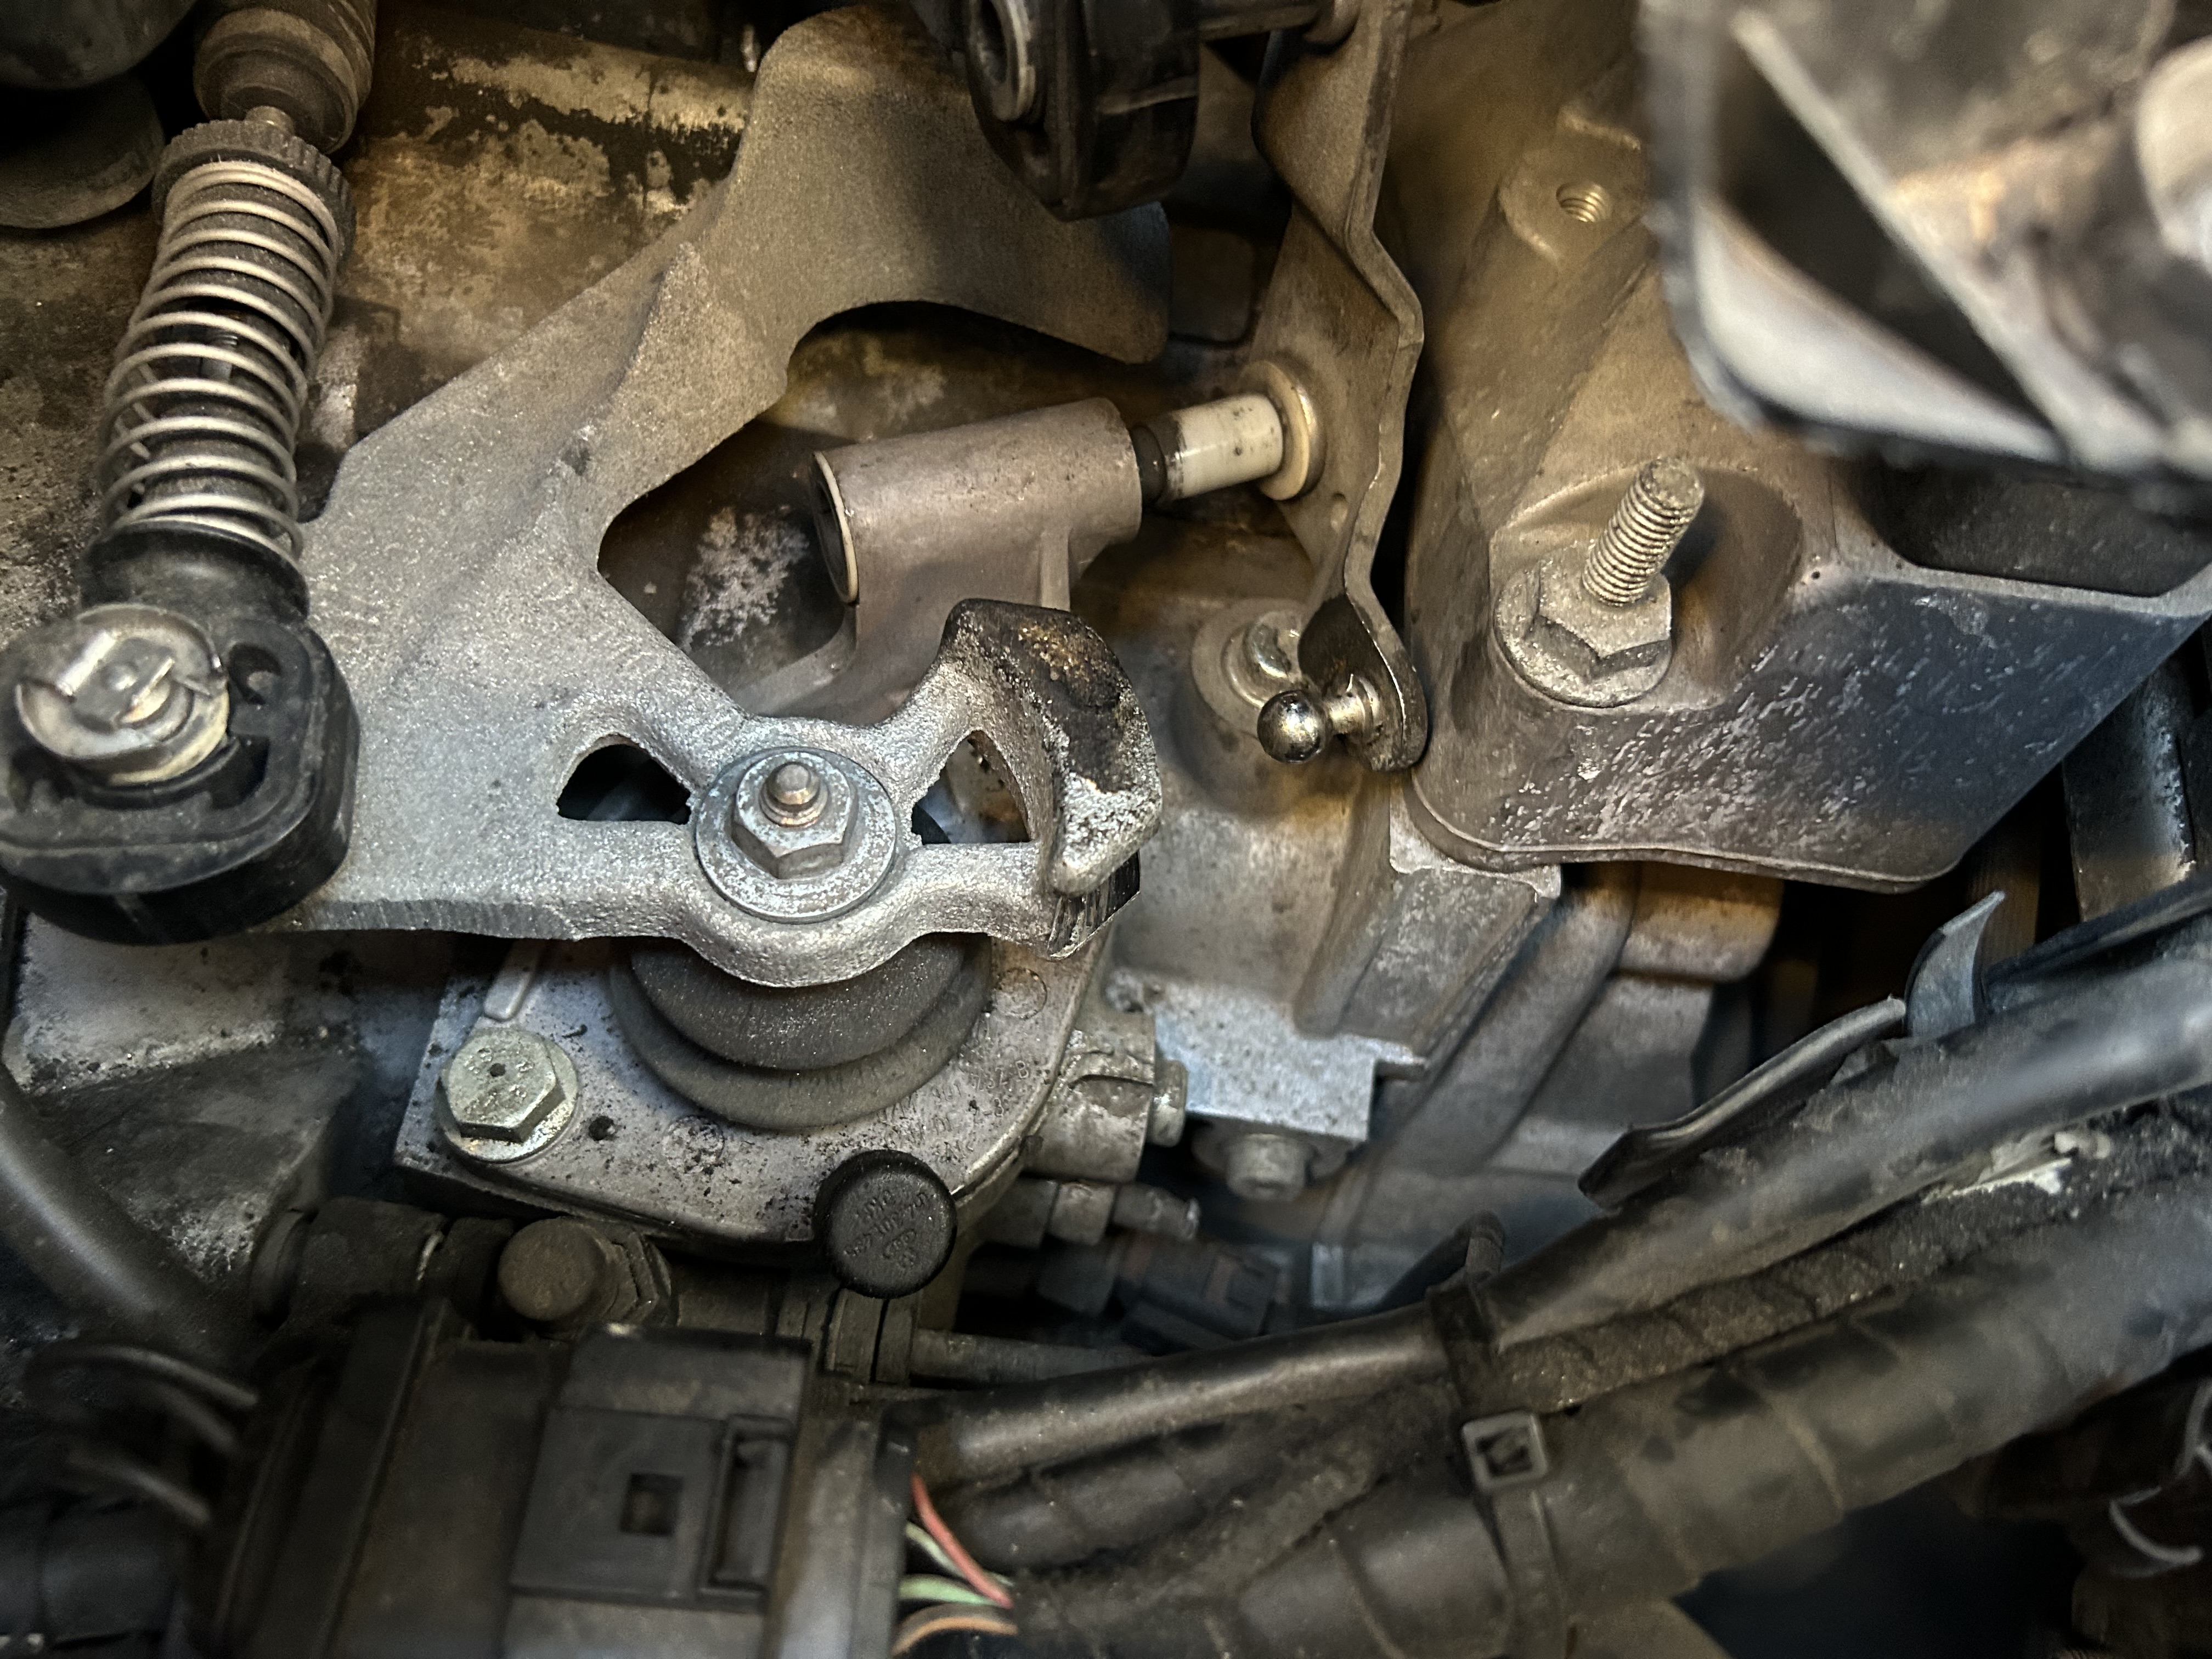

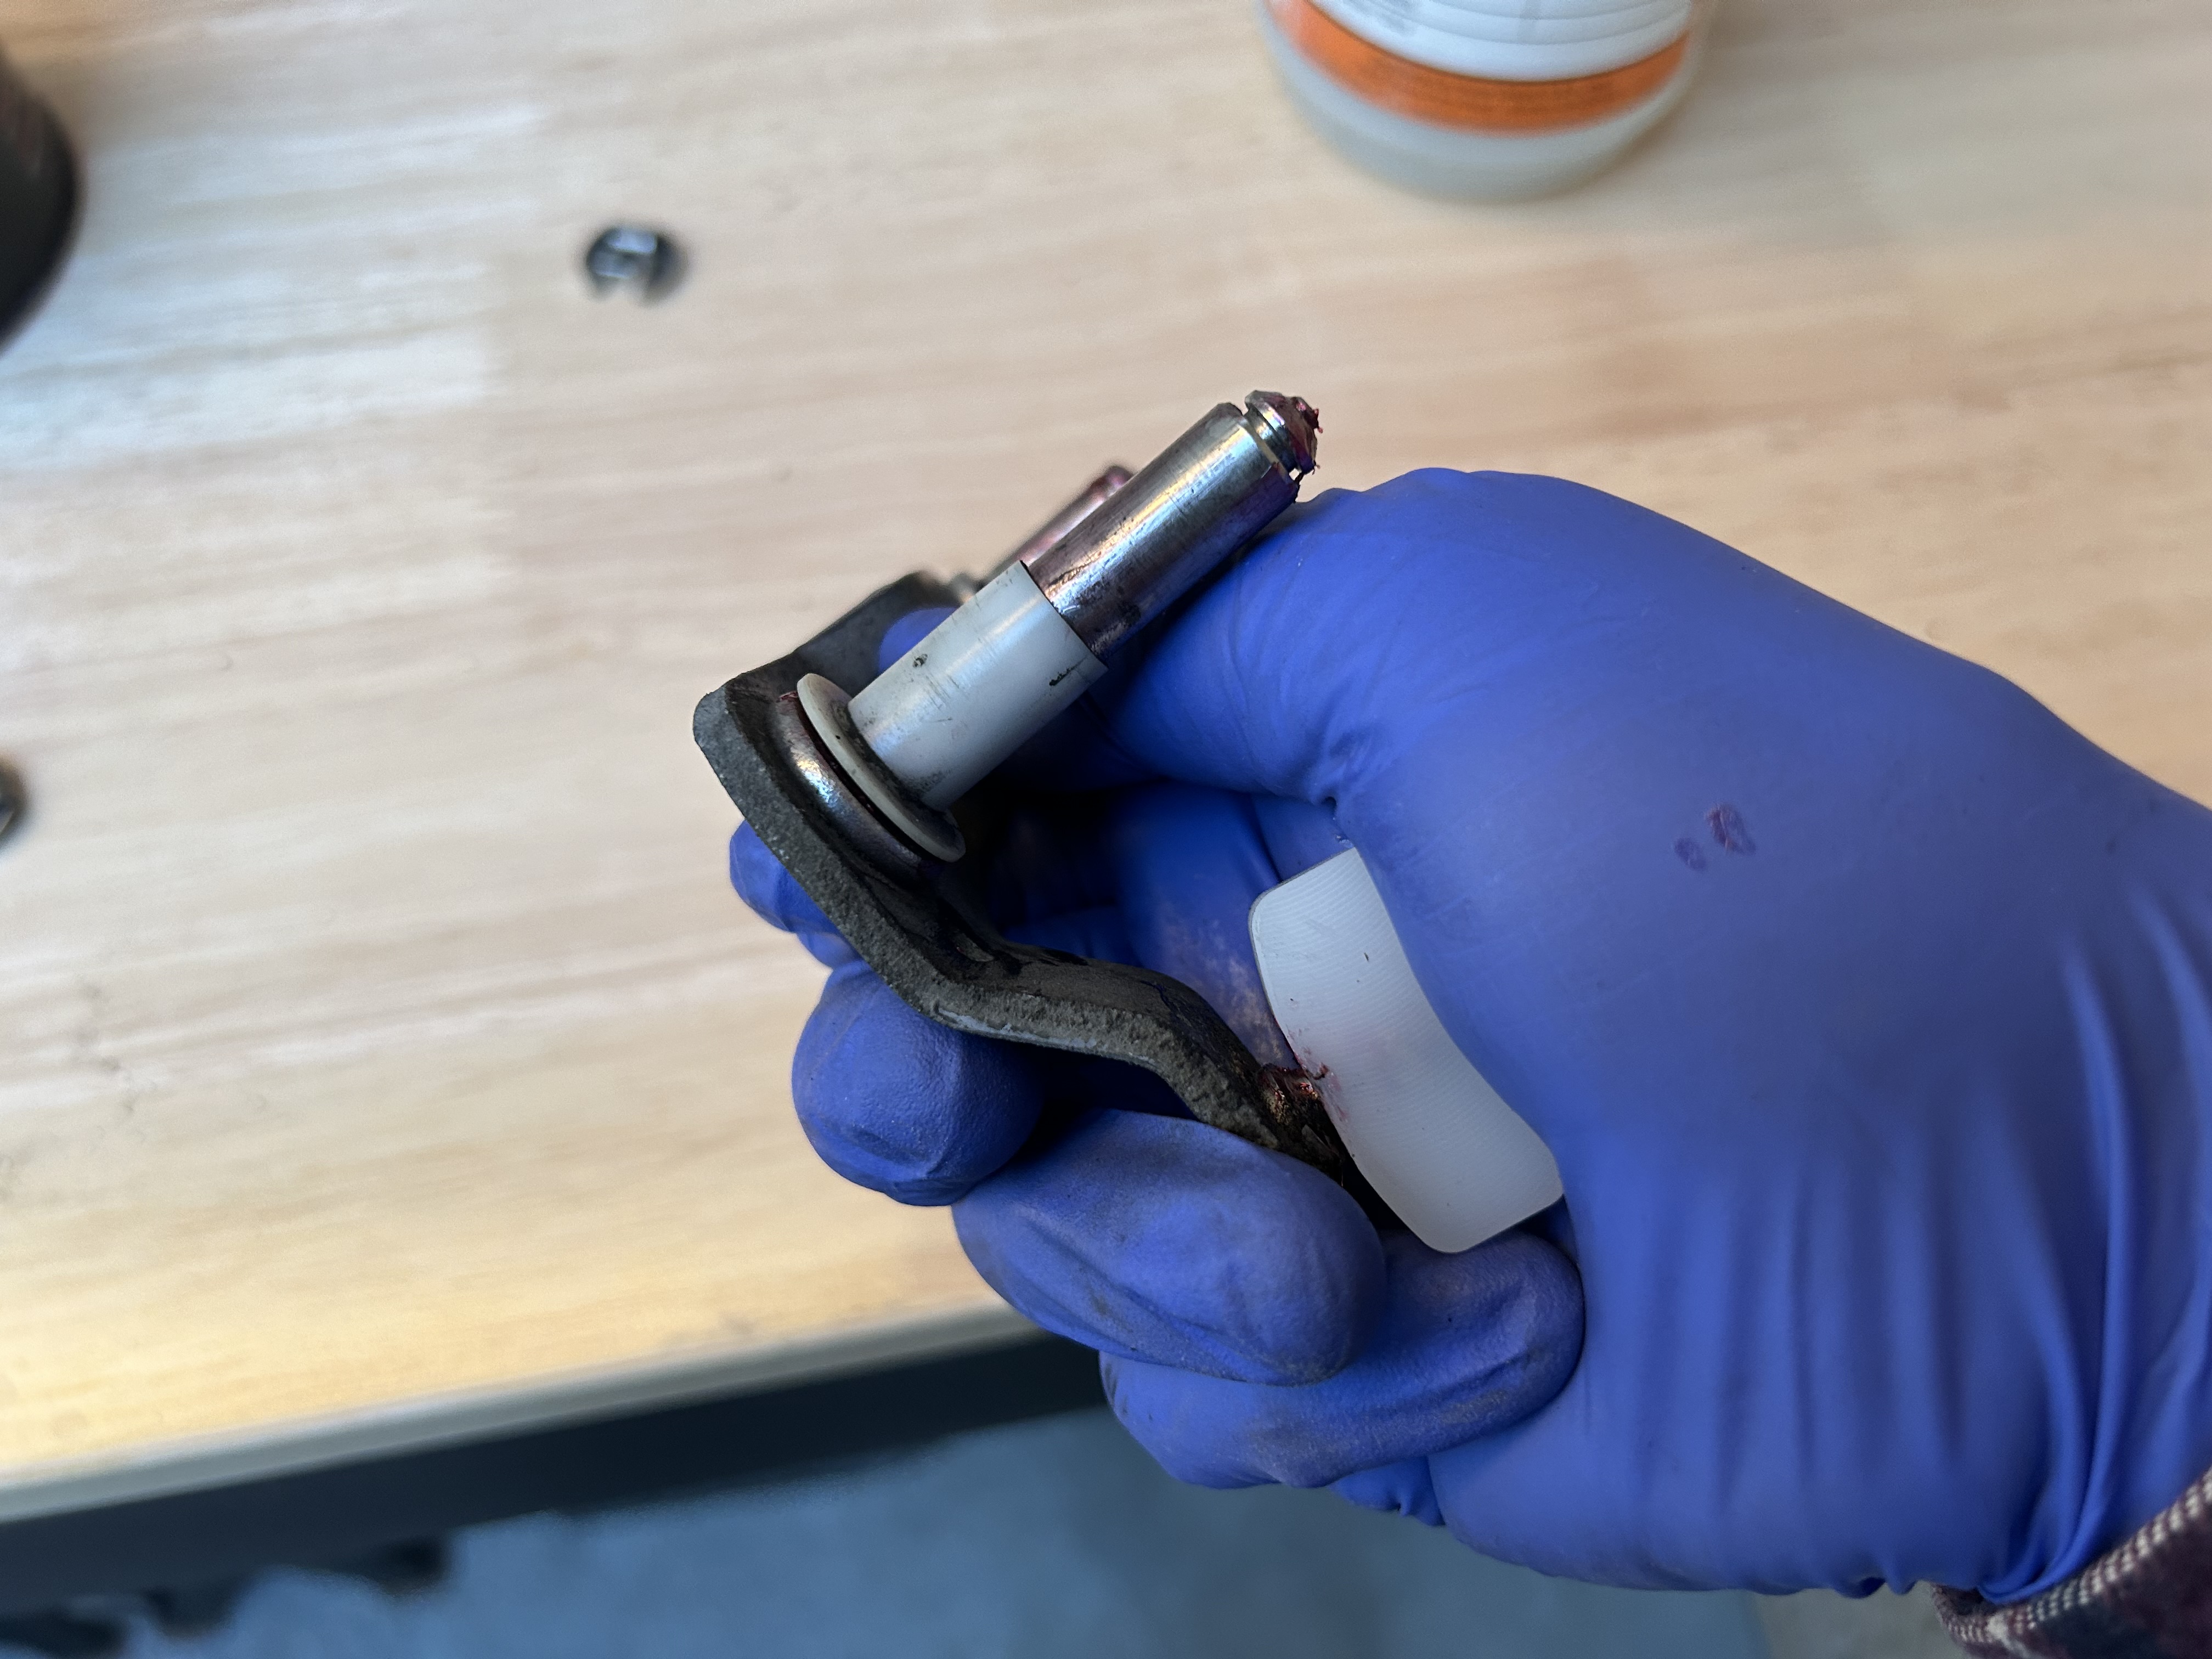
Reinstall everything back in reverse order of removal. You will now see that the Super Slider has a tighter fit in the shifting mechanism.
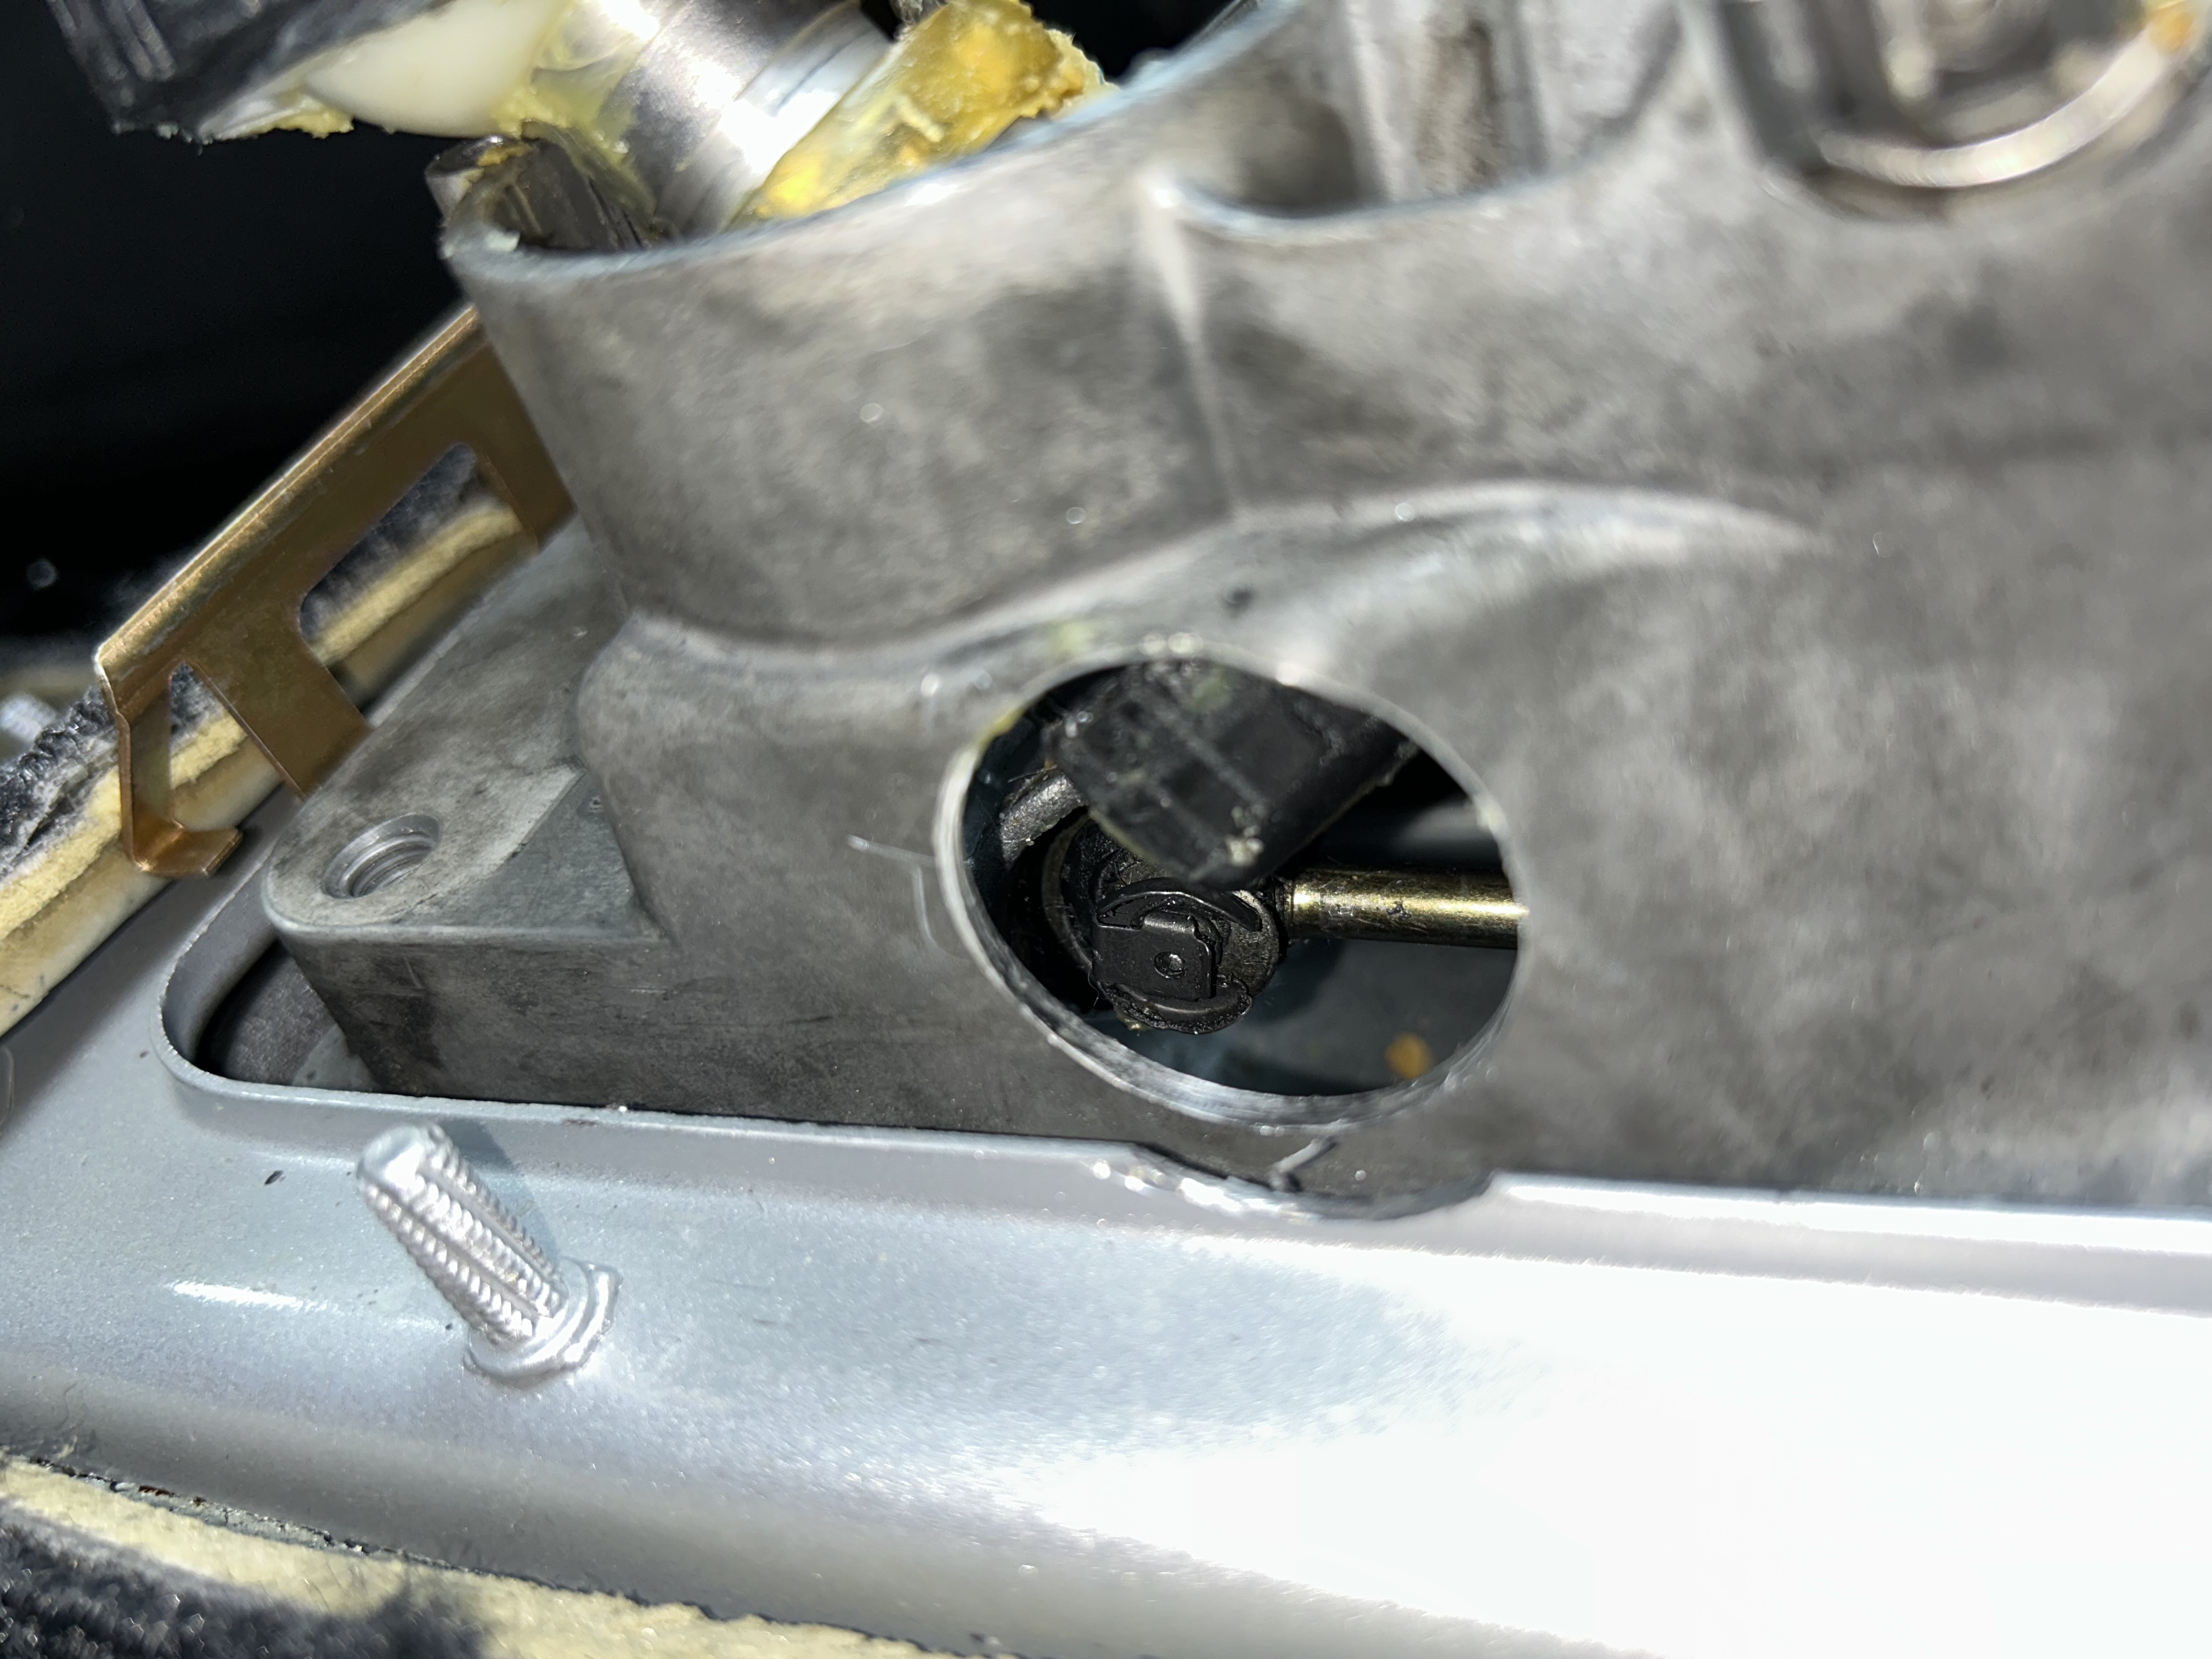
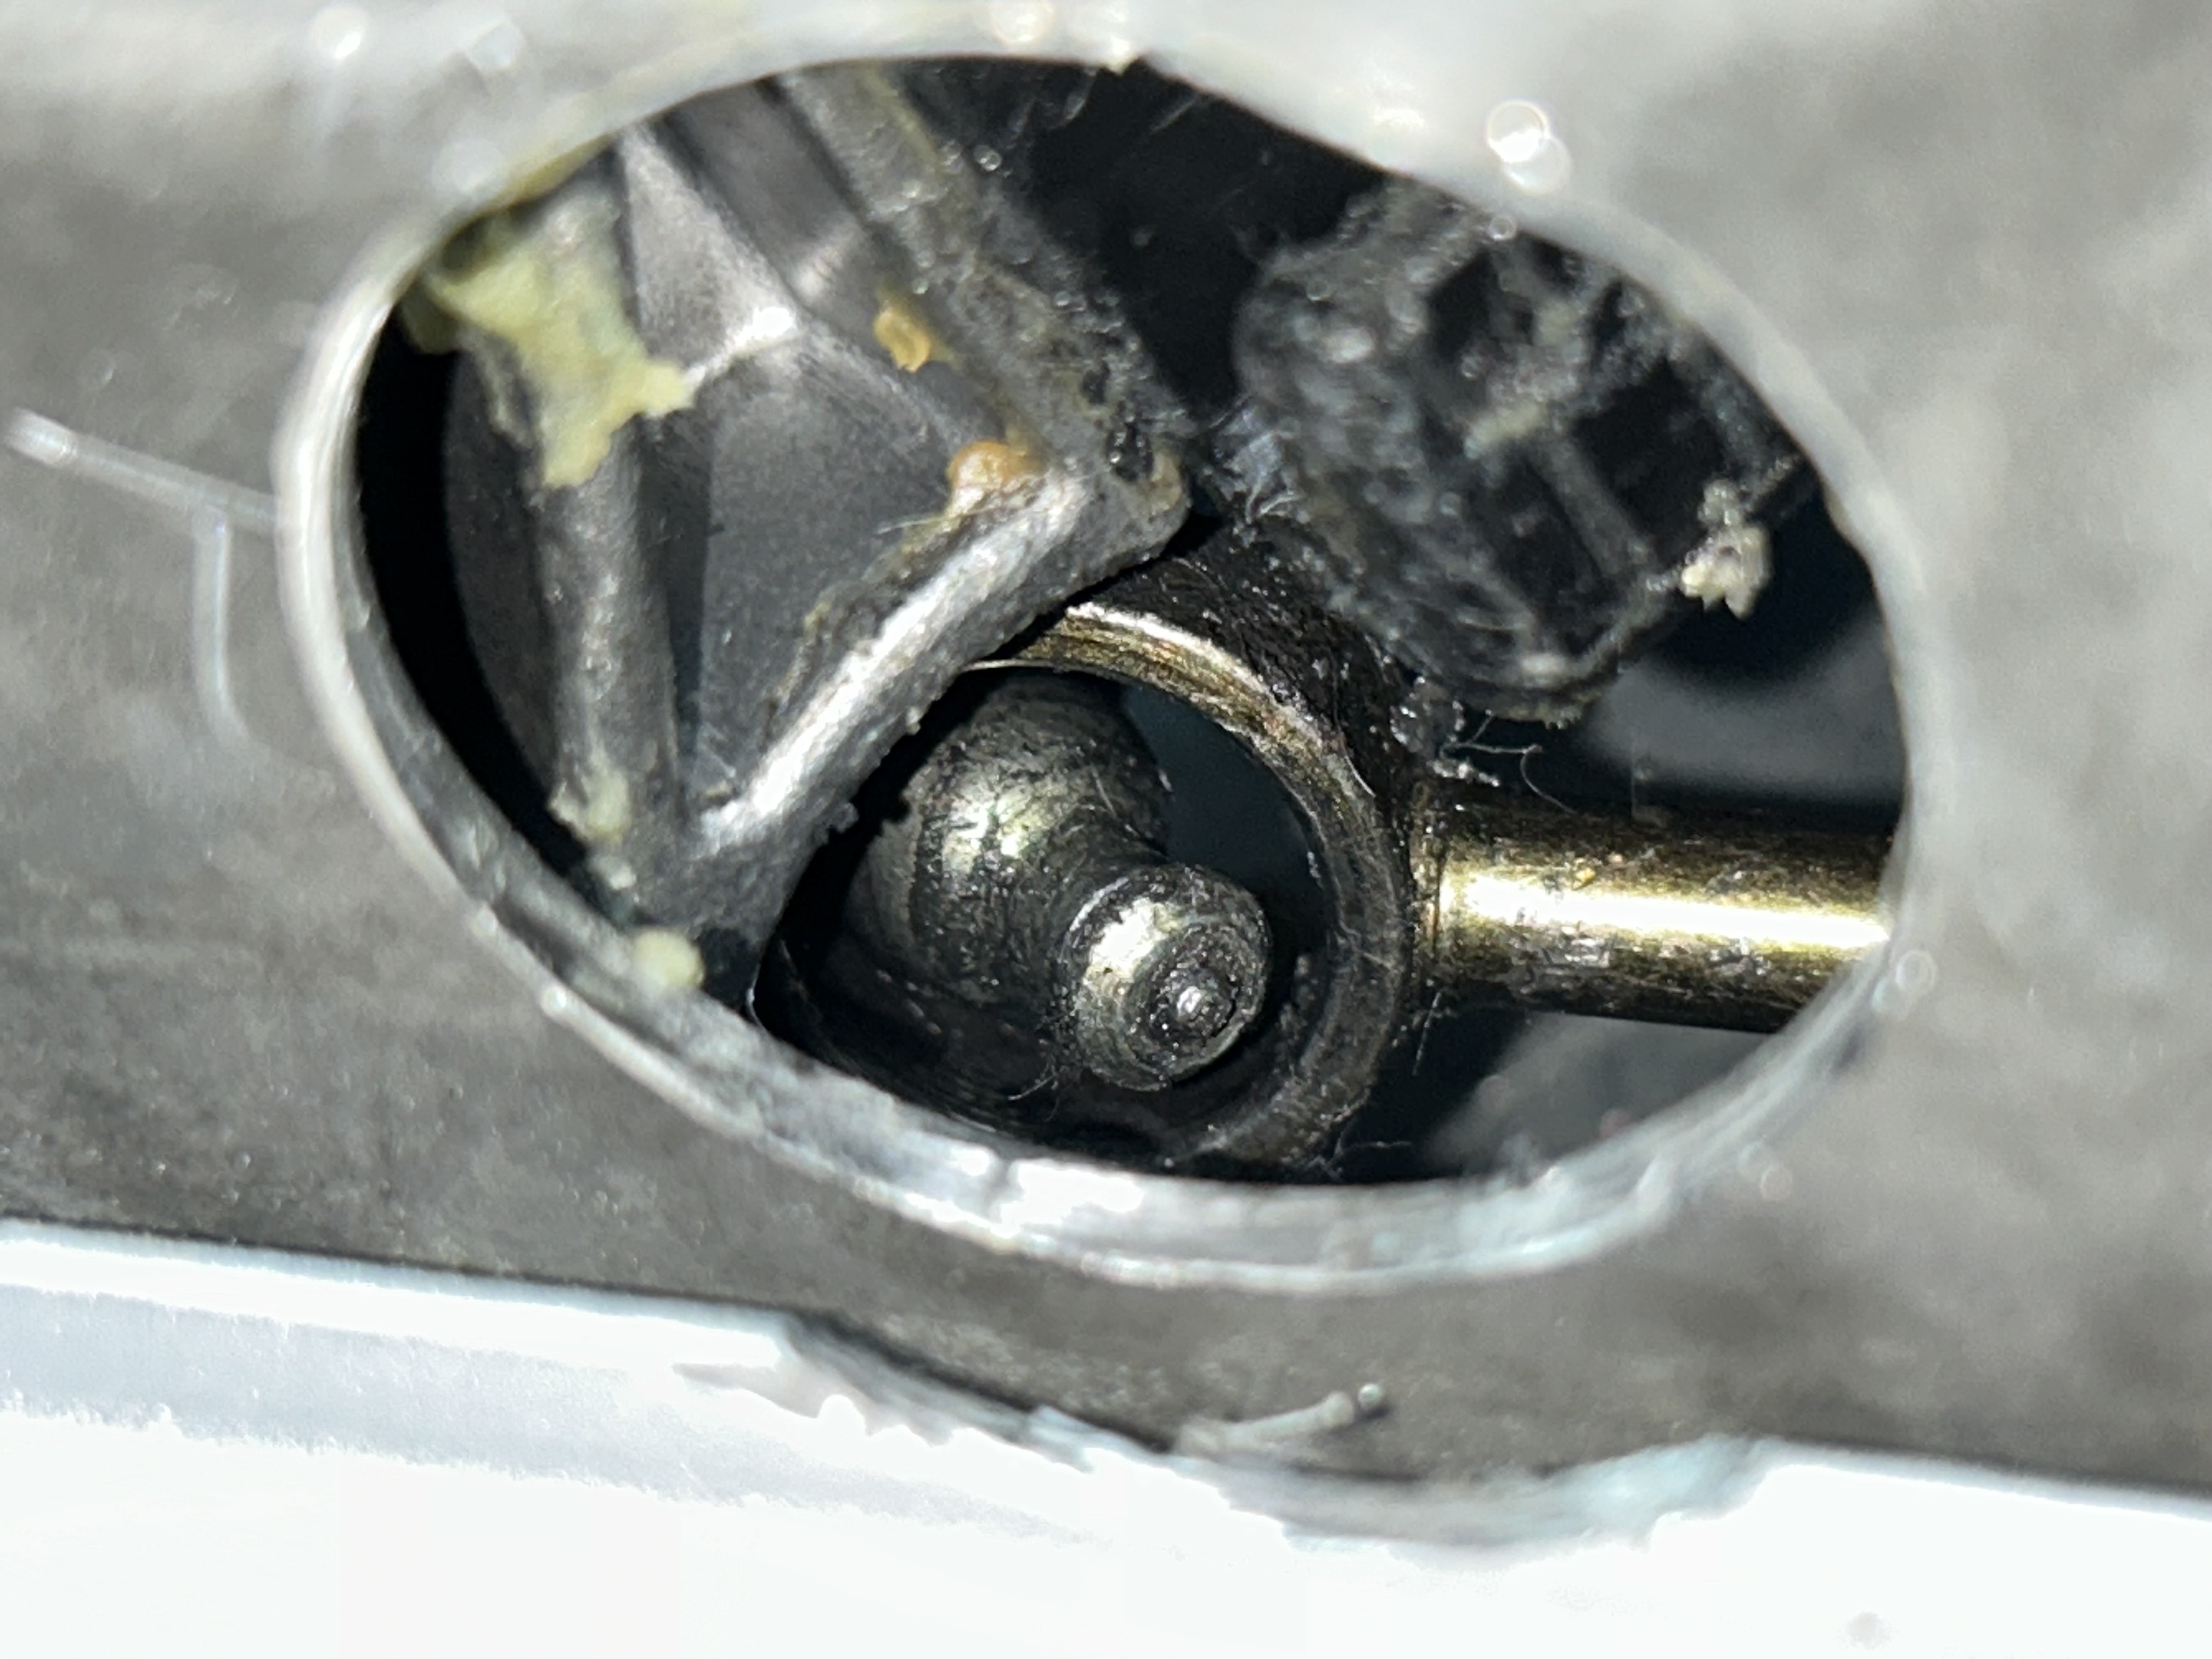
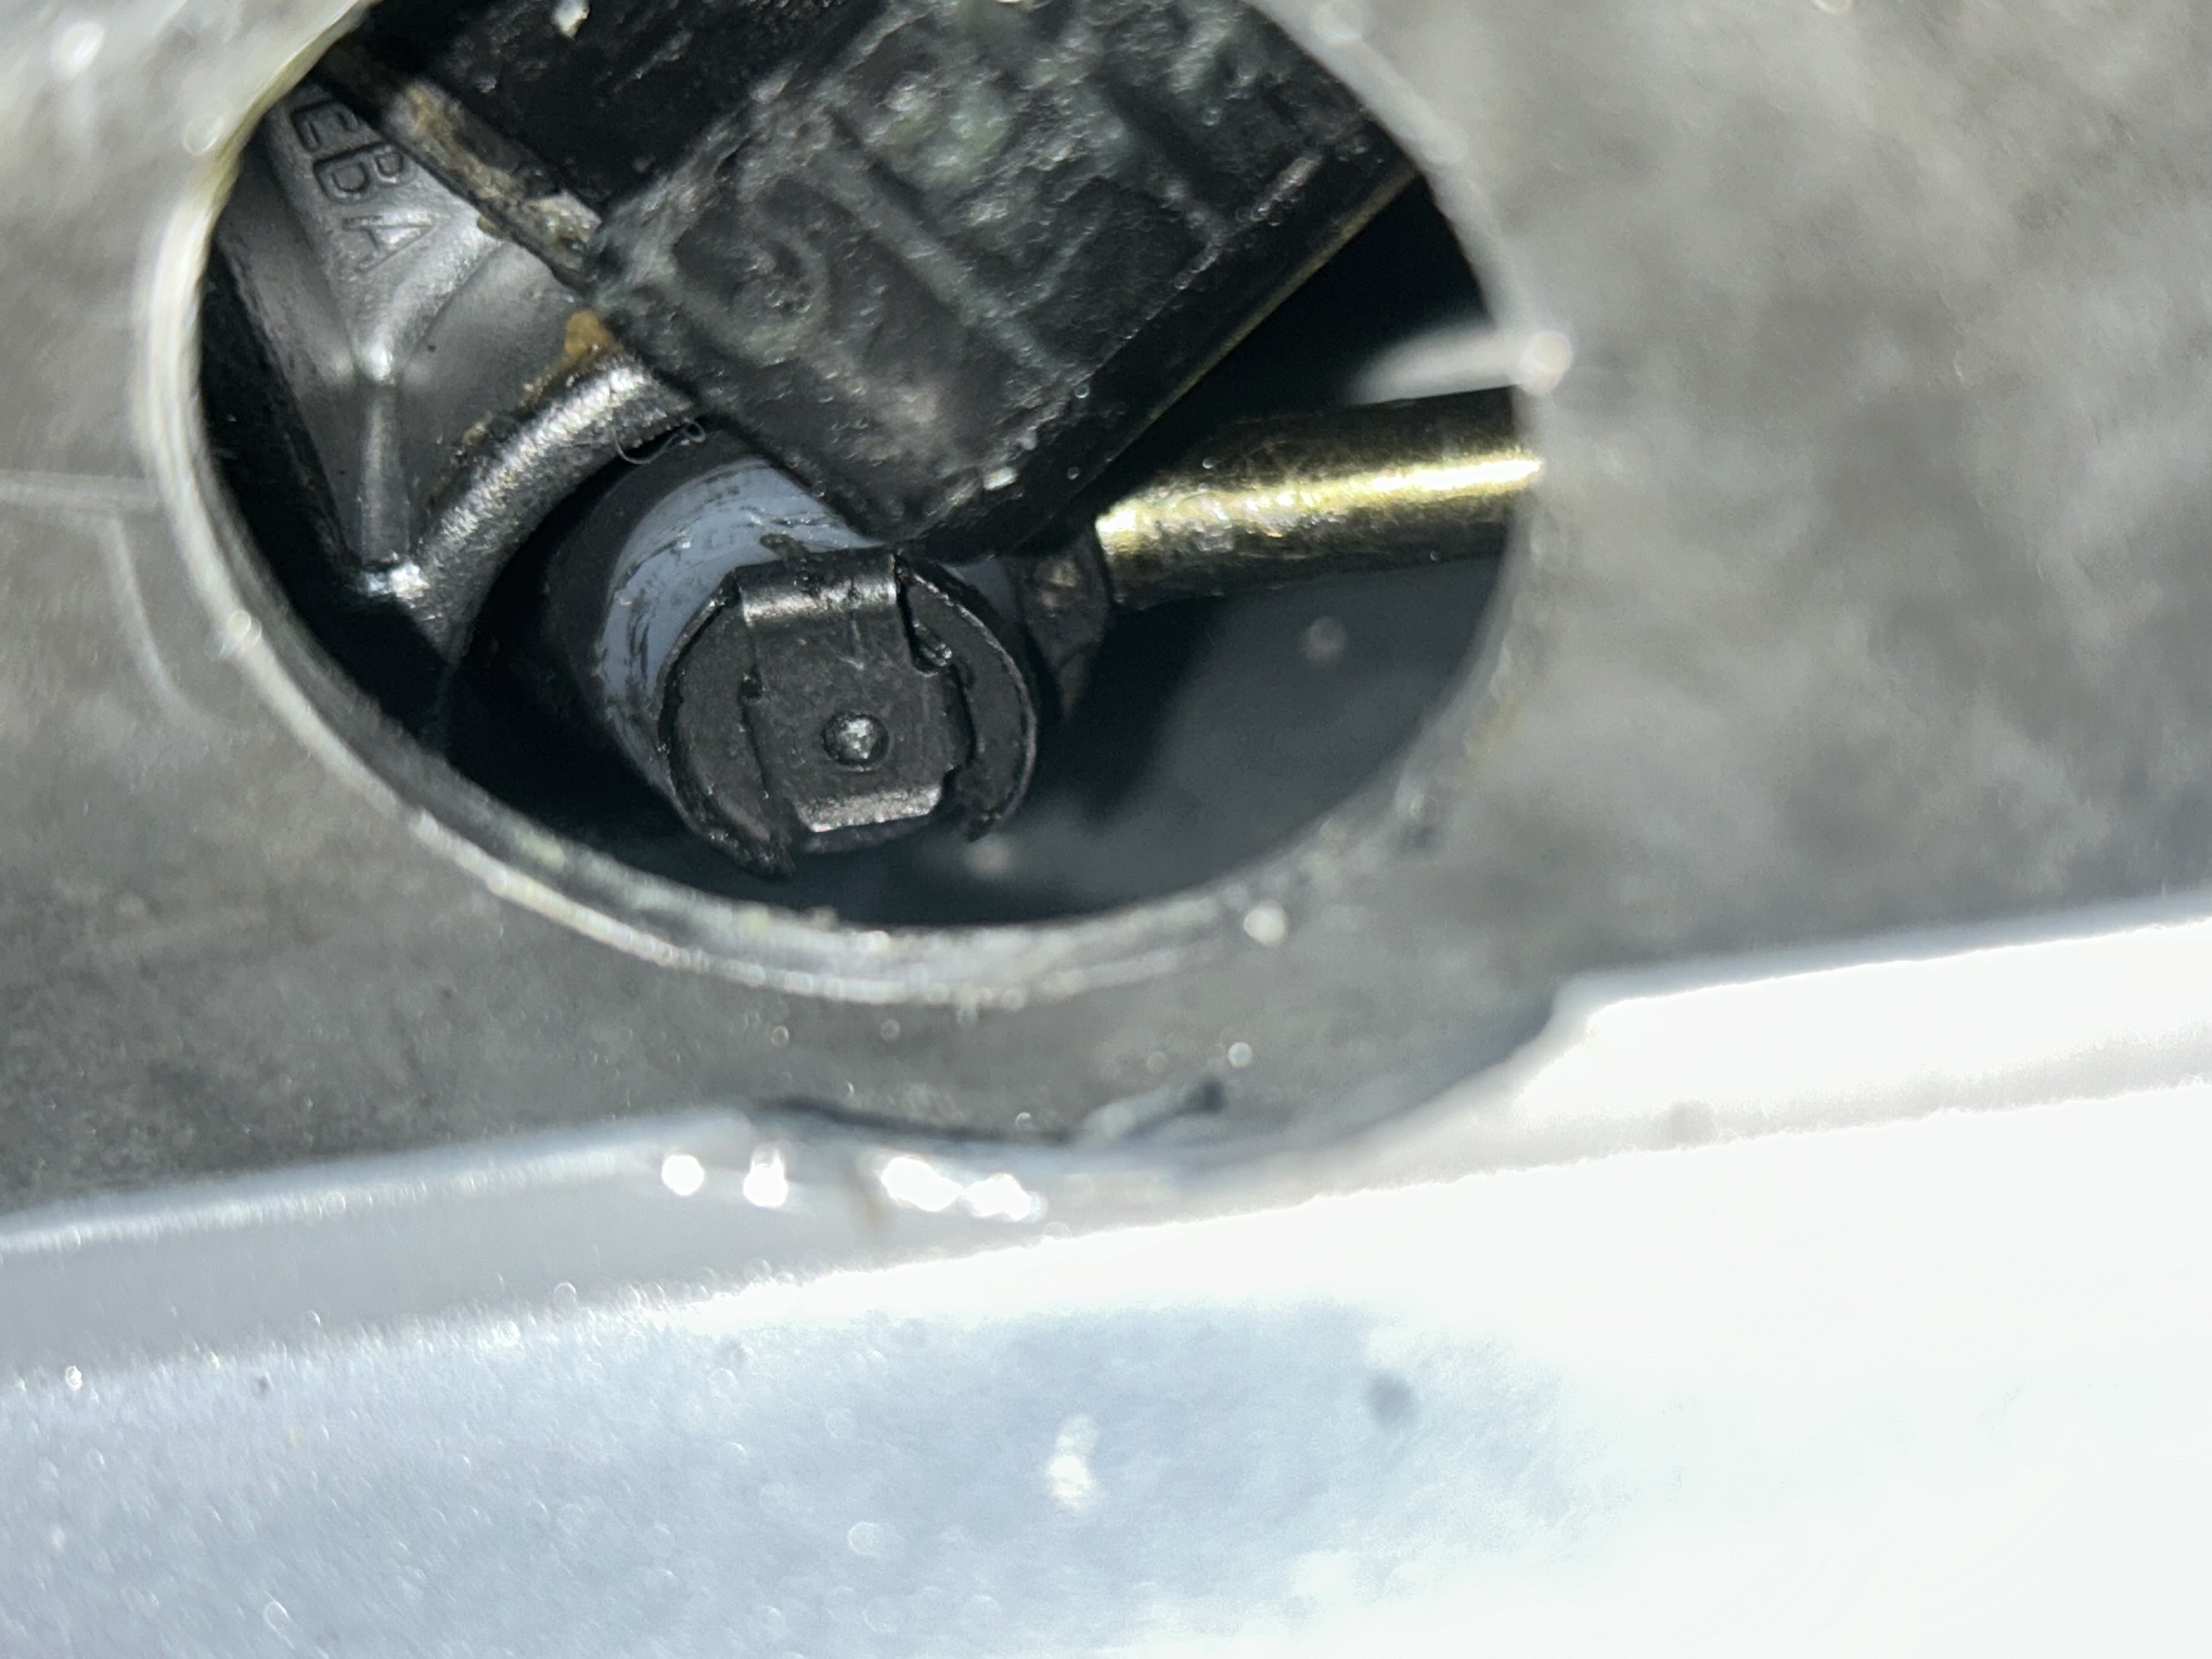
Using a Hole Saw to Access the Passenger Side Bushing
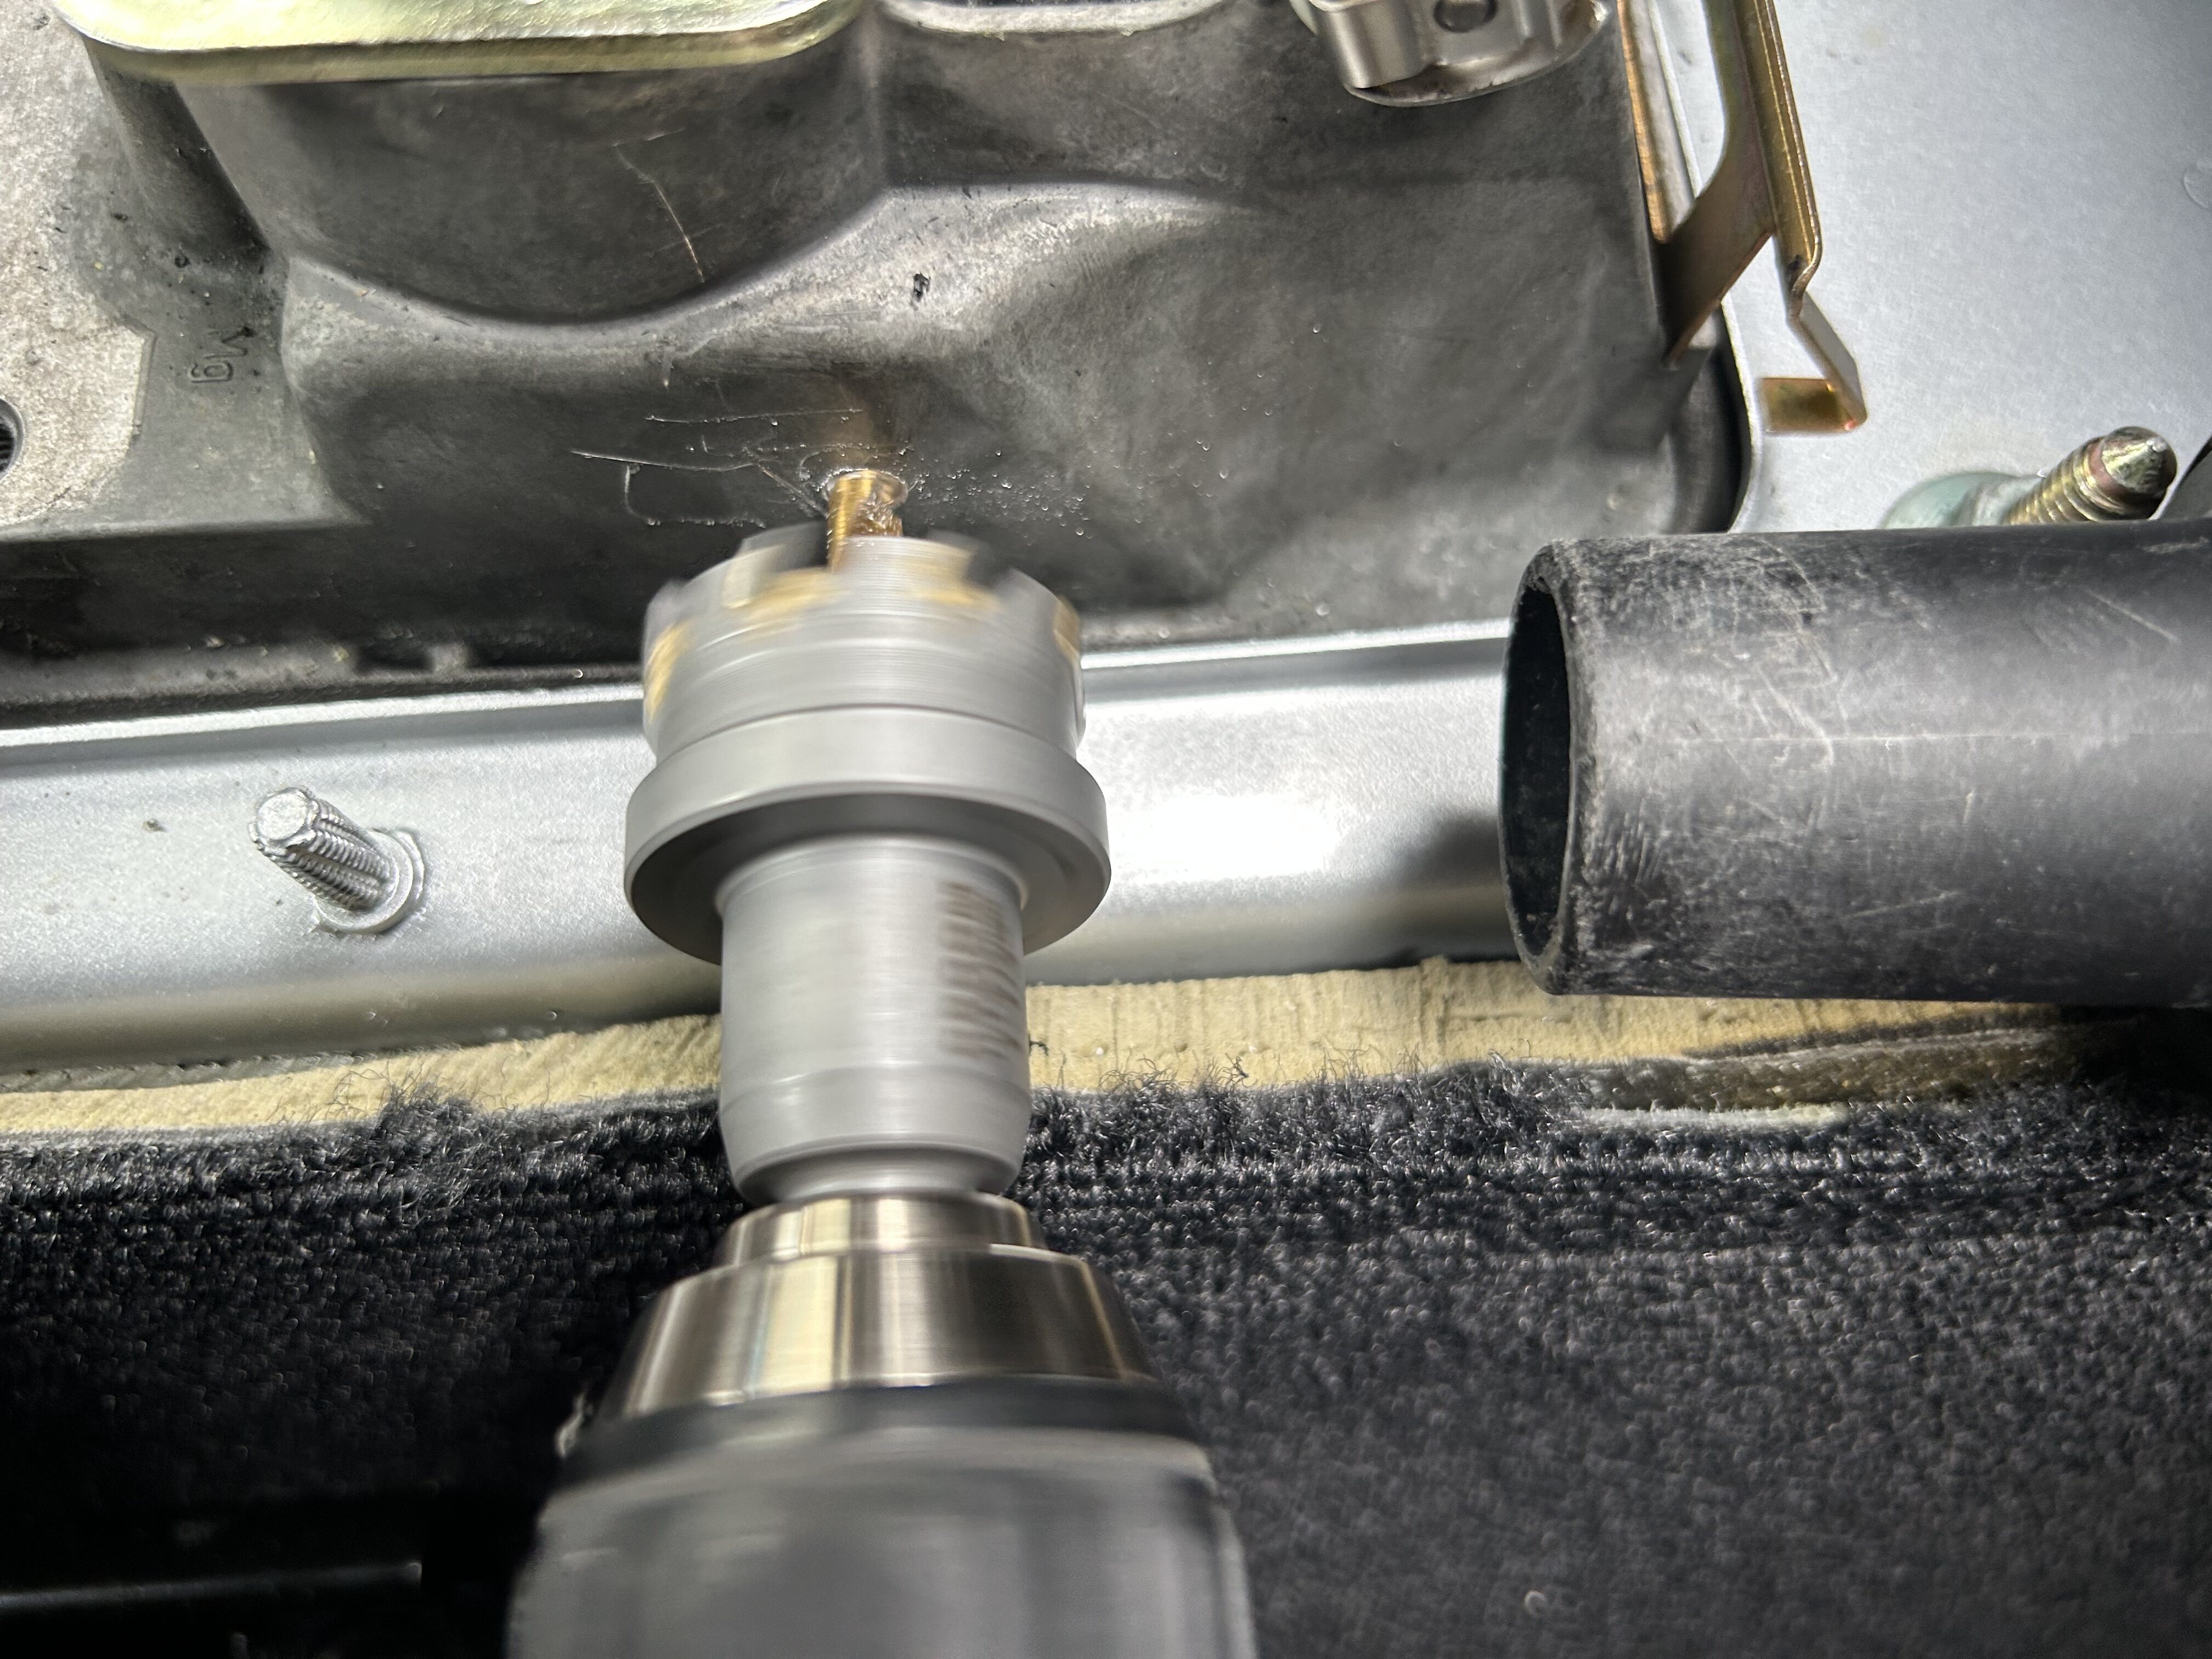
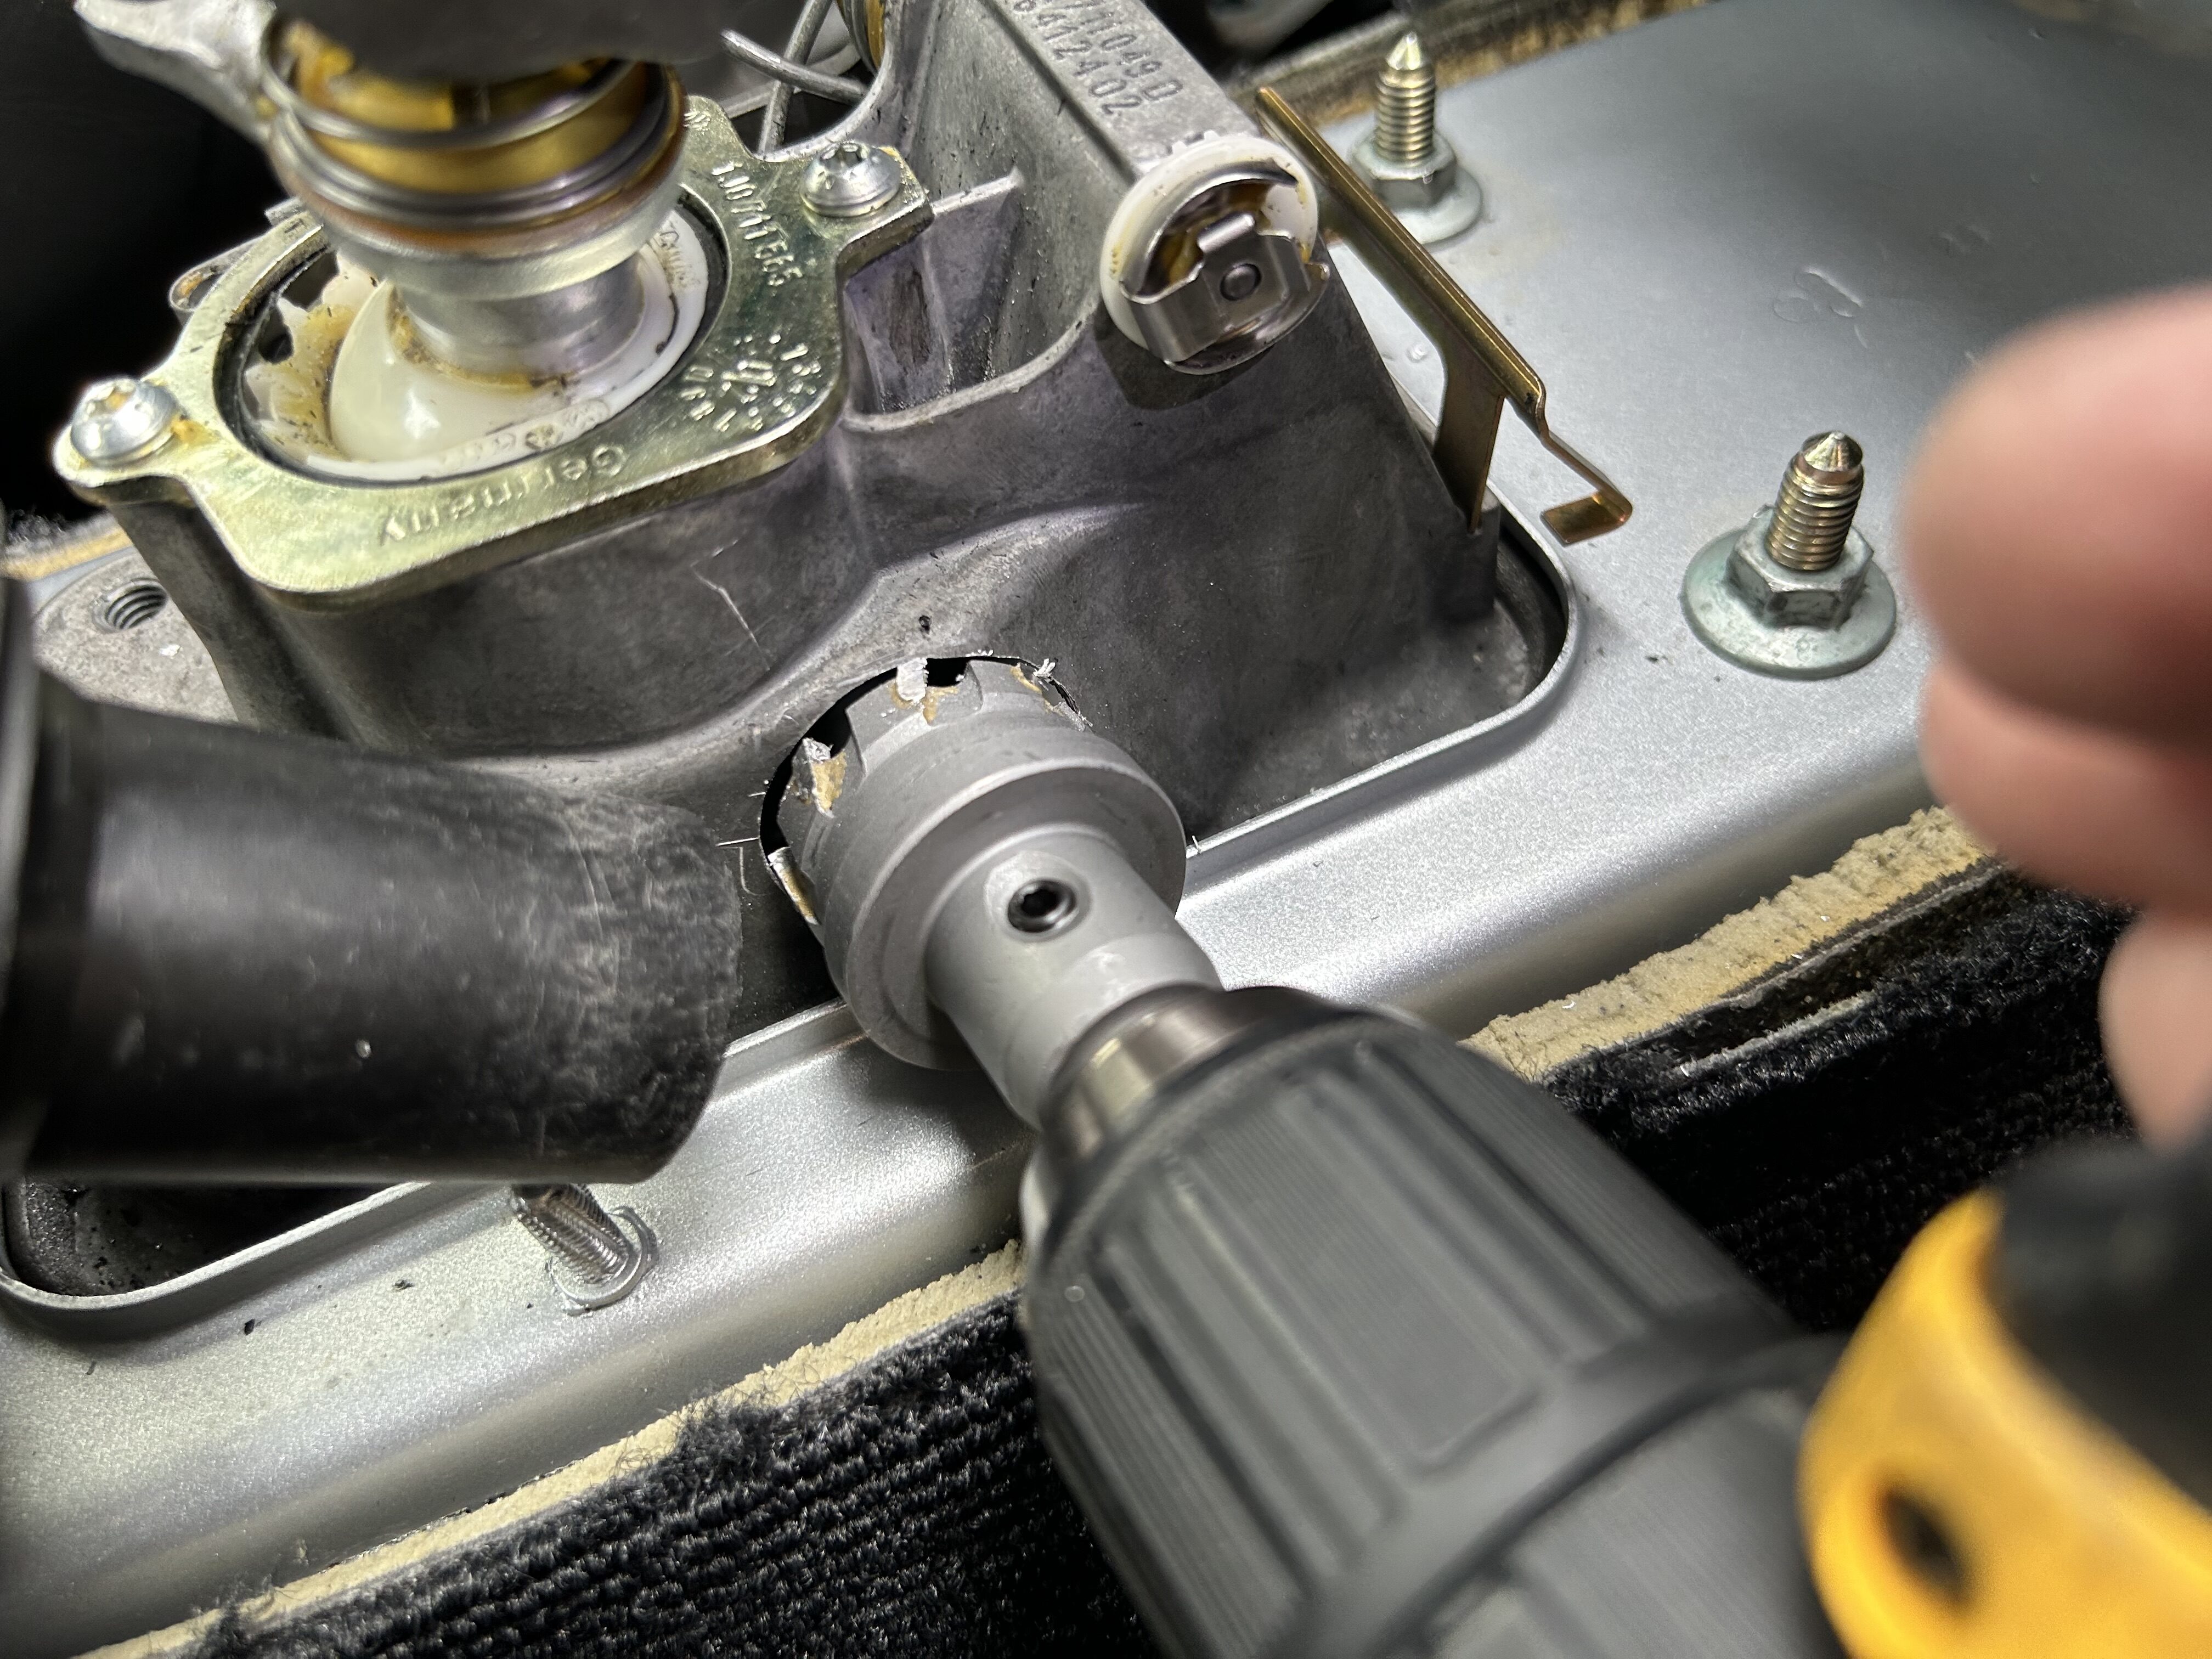
At this point, you need to gain access to the underside of the shifter. This part of the install involved drilling into the passenger side of your center console. Dieselgeek suggests you bore a hole into the side of your shifter housing in order to access underneath the shifter.
You’ll need a 1-1/4″ hole saw that is meant for cutting into metal. This is cut a large enough opening to give you ample room to replace the bottom shifter bushing. You will need to line up the hole saw to cut at the location as shown: just above the cutout of the shifter, and next to the shifter shaft. Before boring the hole, it’s helpful to reinstall some of the bolts to keep the shifter housing from moving around.
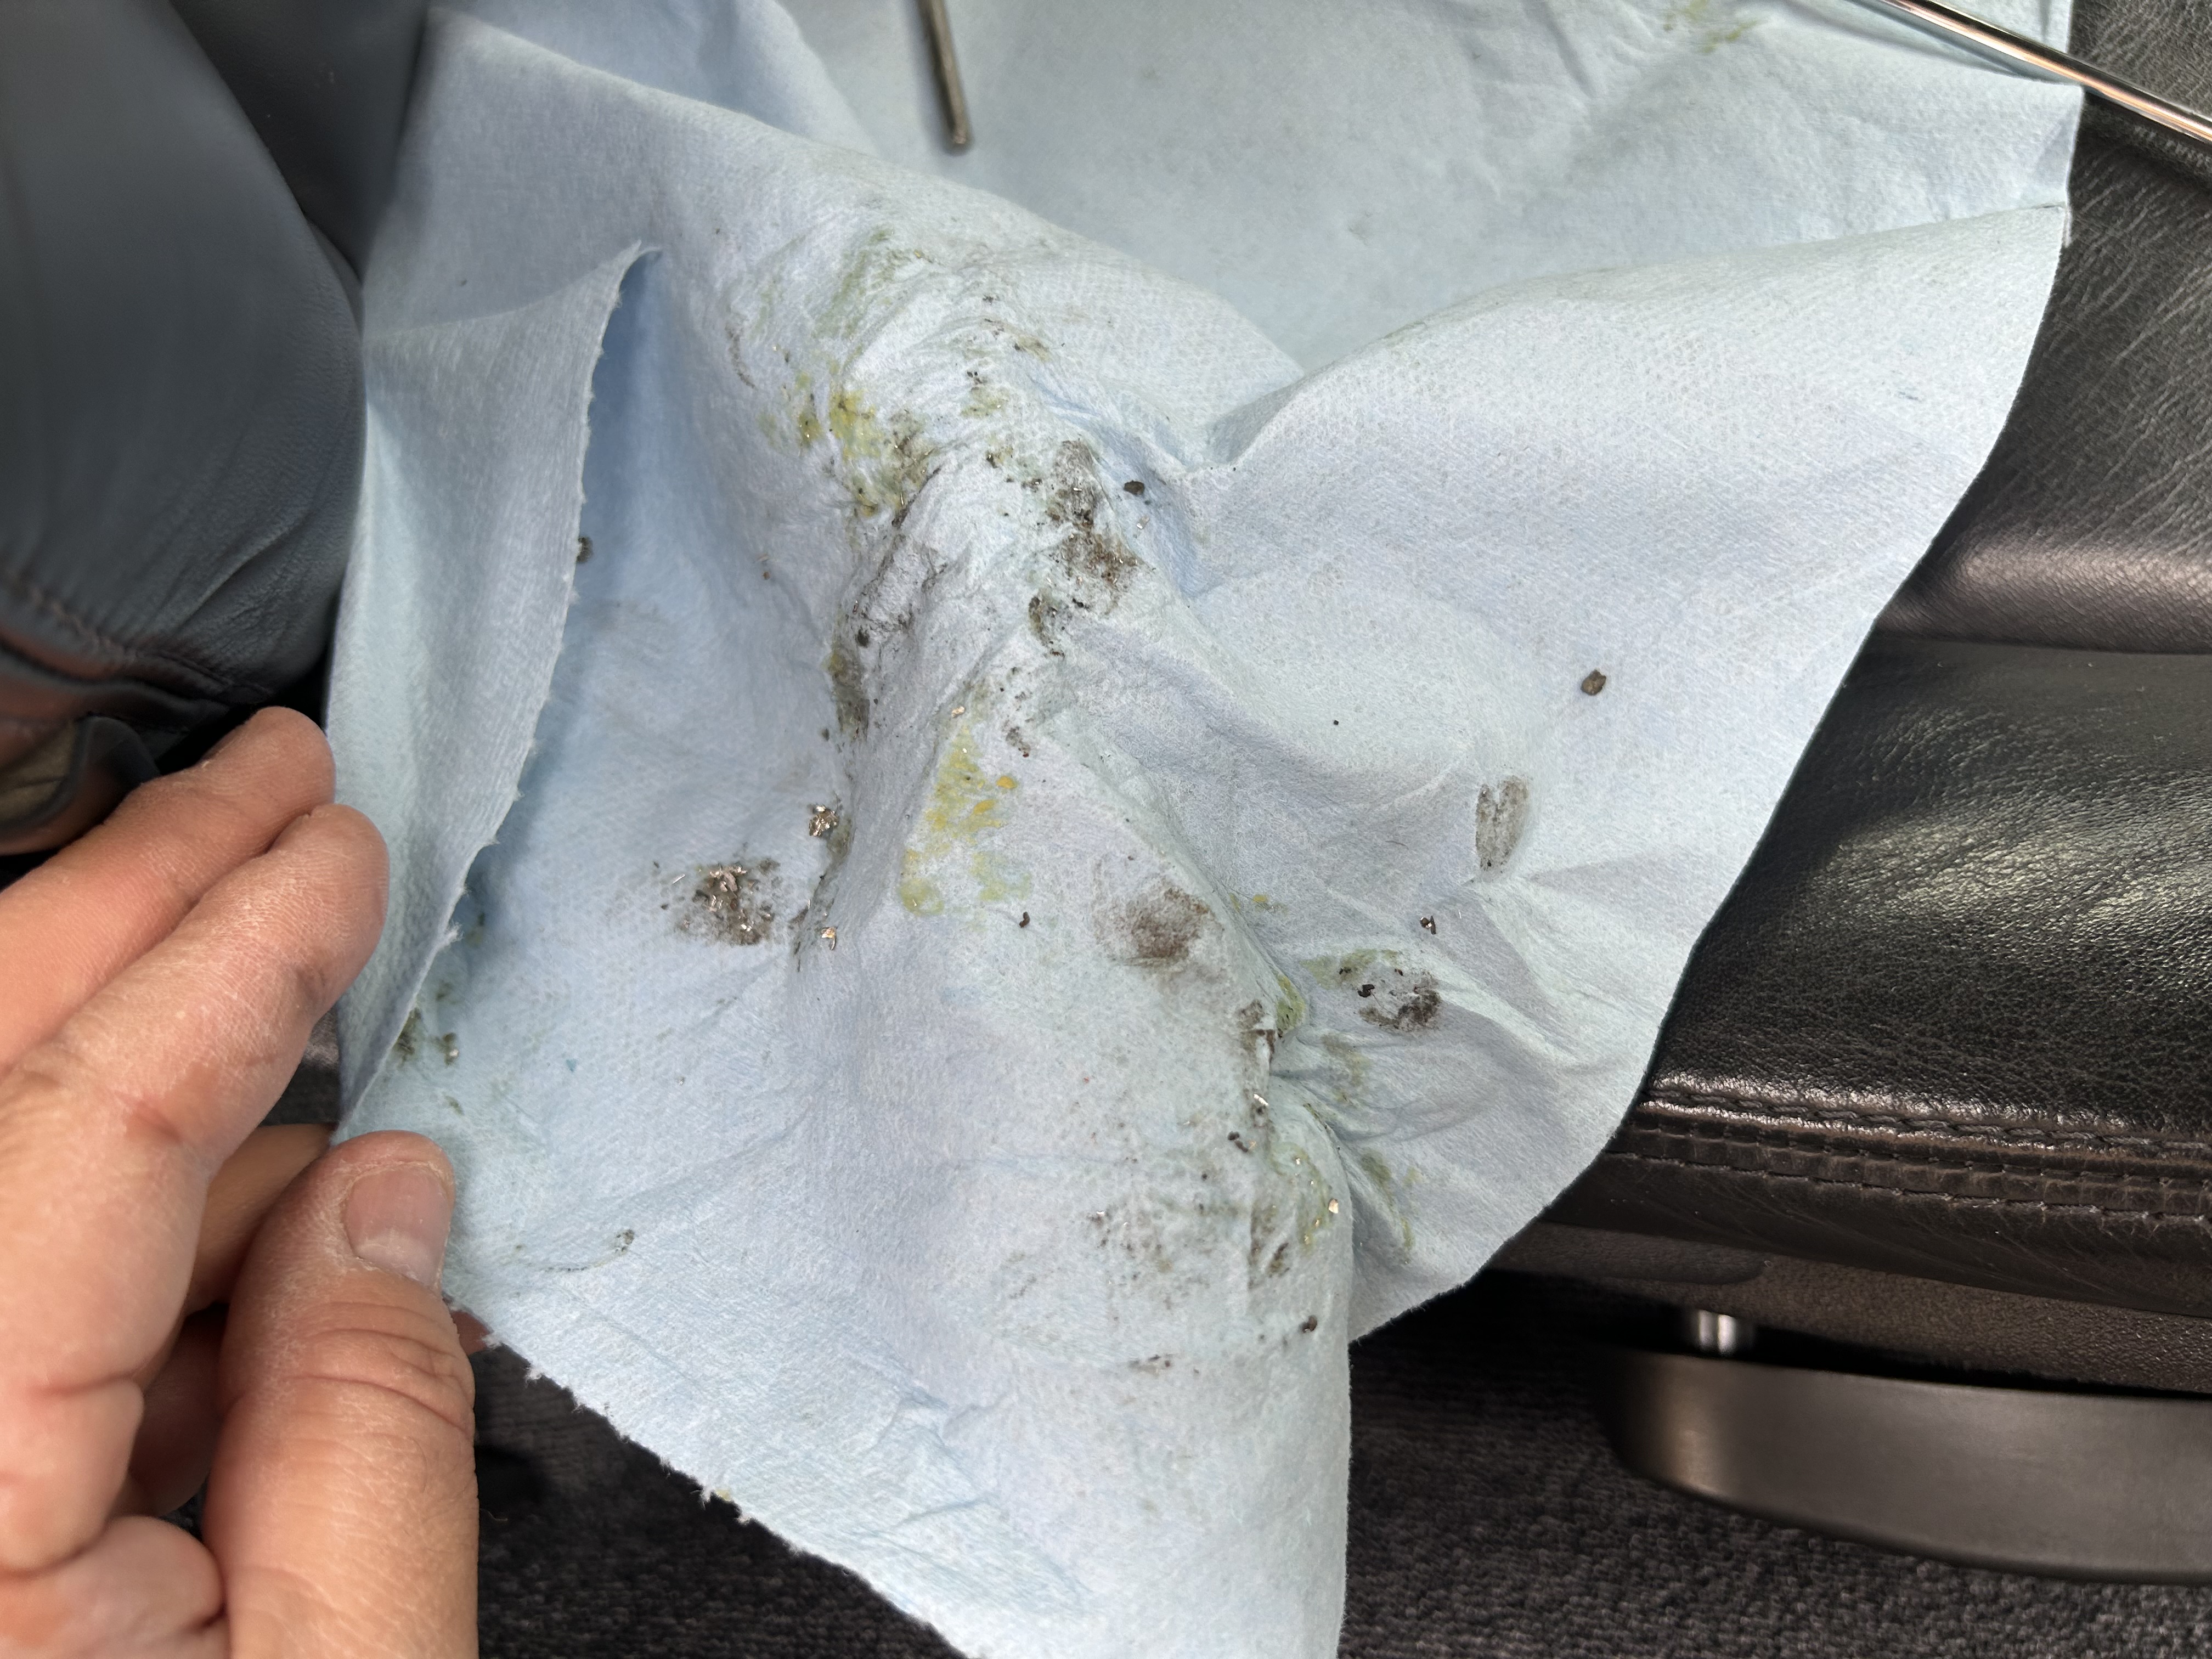
After boring this hole, you will use this as an access hole to get to the shifter linkage. I haven’t really heard anyone talking about it, but when you cut into the side of the shifter housing, the metal shavings fly all over the place when you bore this hole. Have a shop vac running while you’re boring through the metal to suck up as much of the flying debris as possible. Still, the shavings get all over the place, so you’ll probably need to vacuum up all the extra shavings when you’re done cutting the access hole.
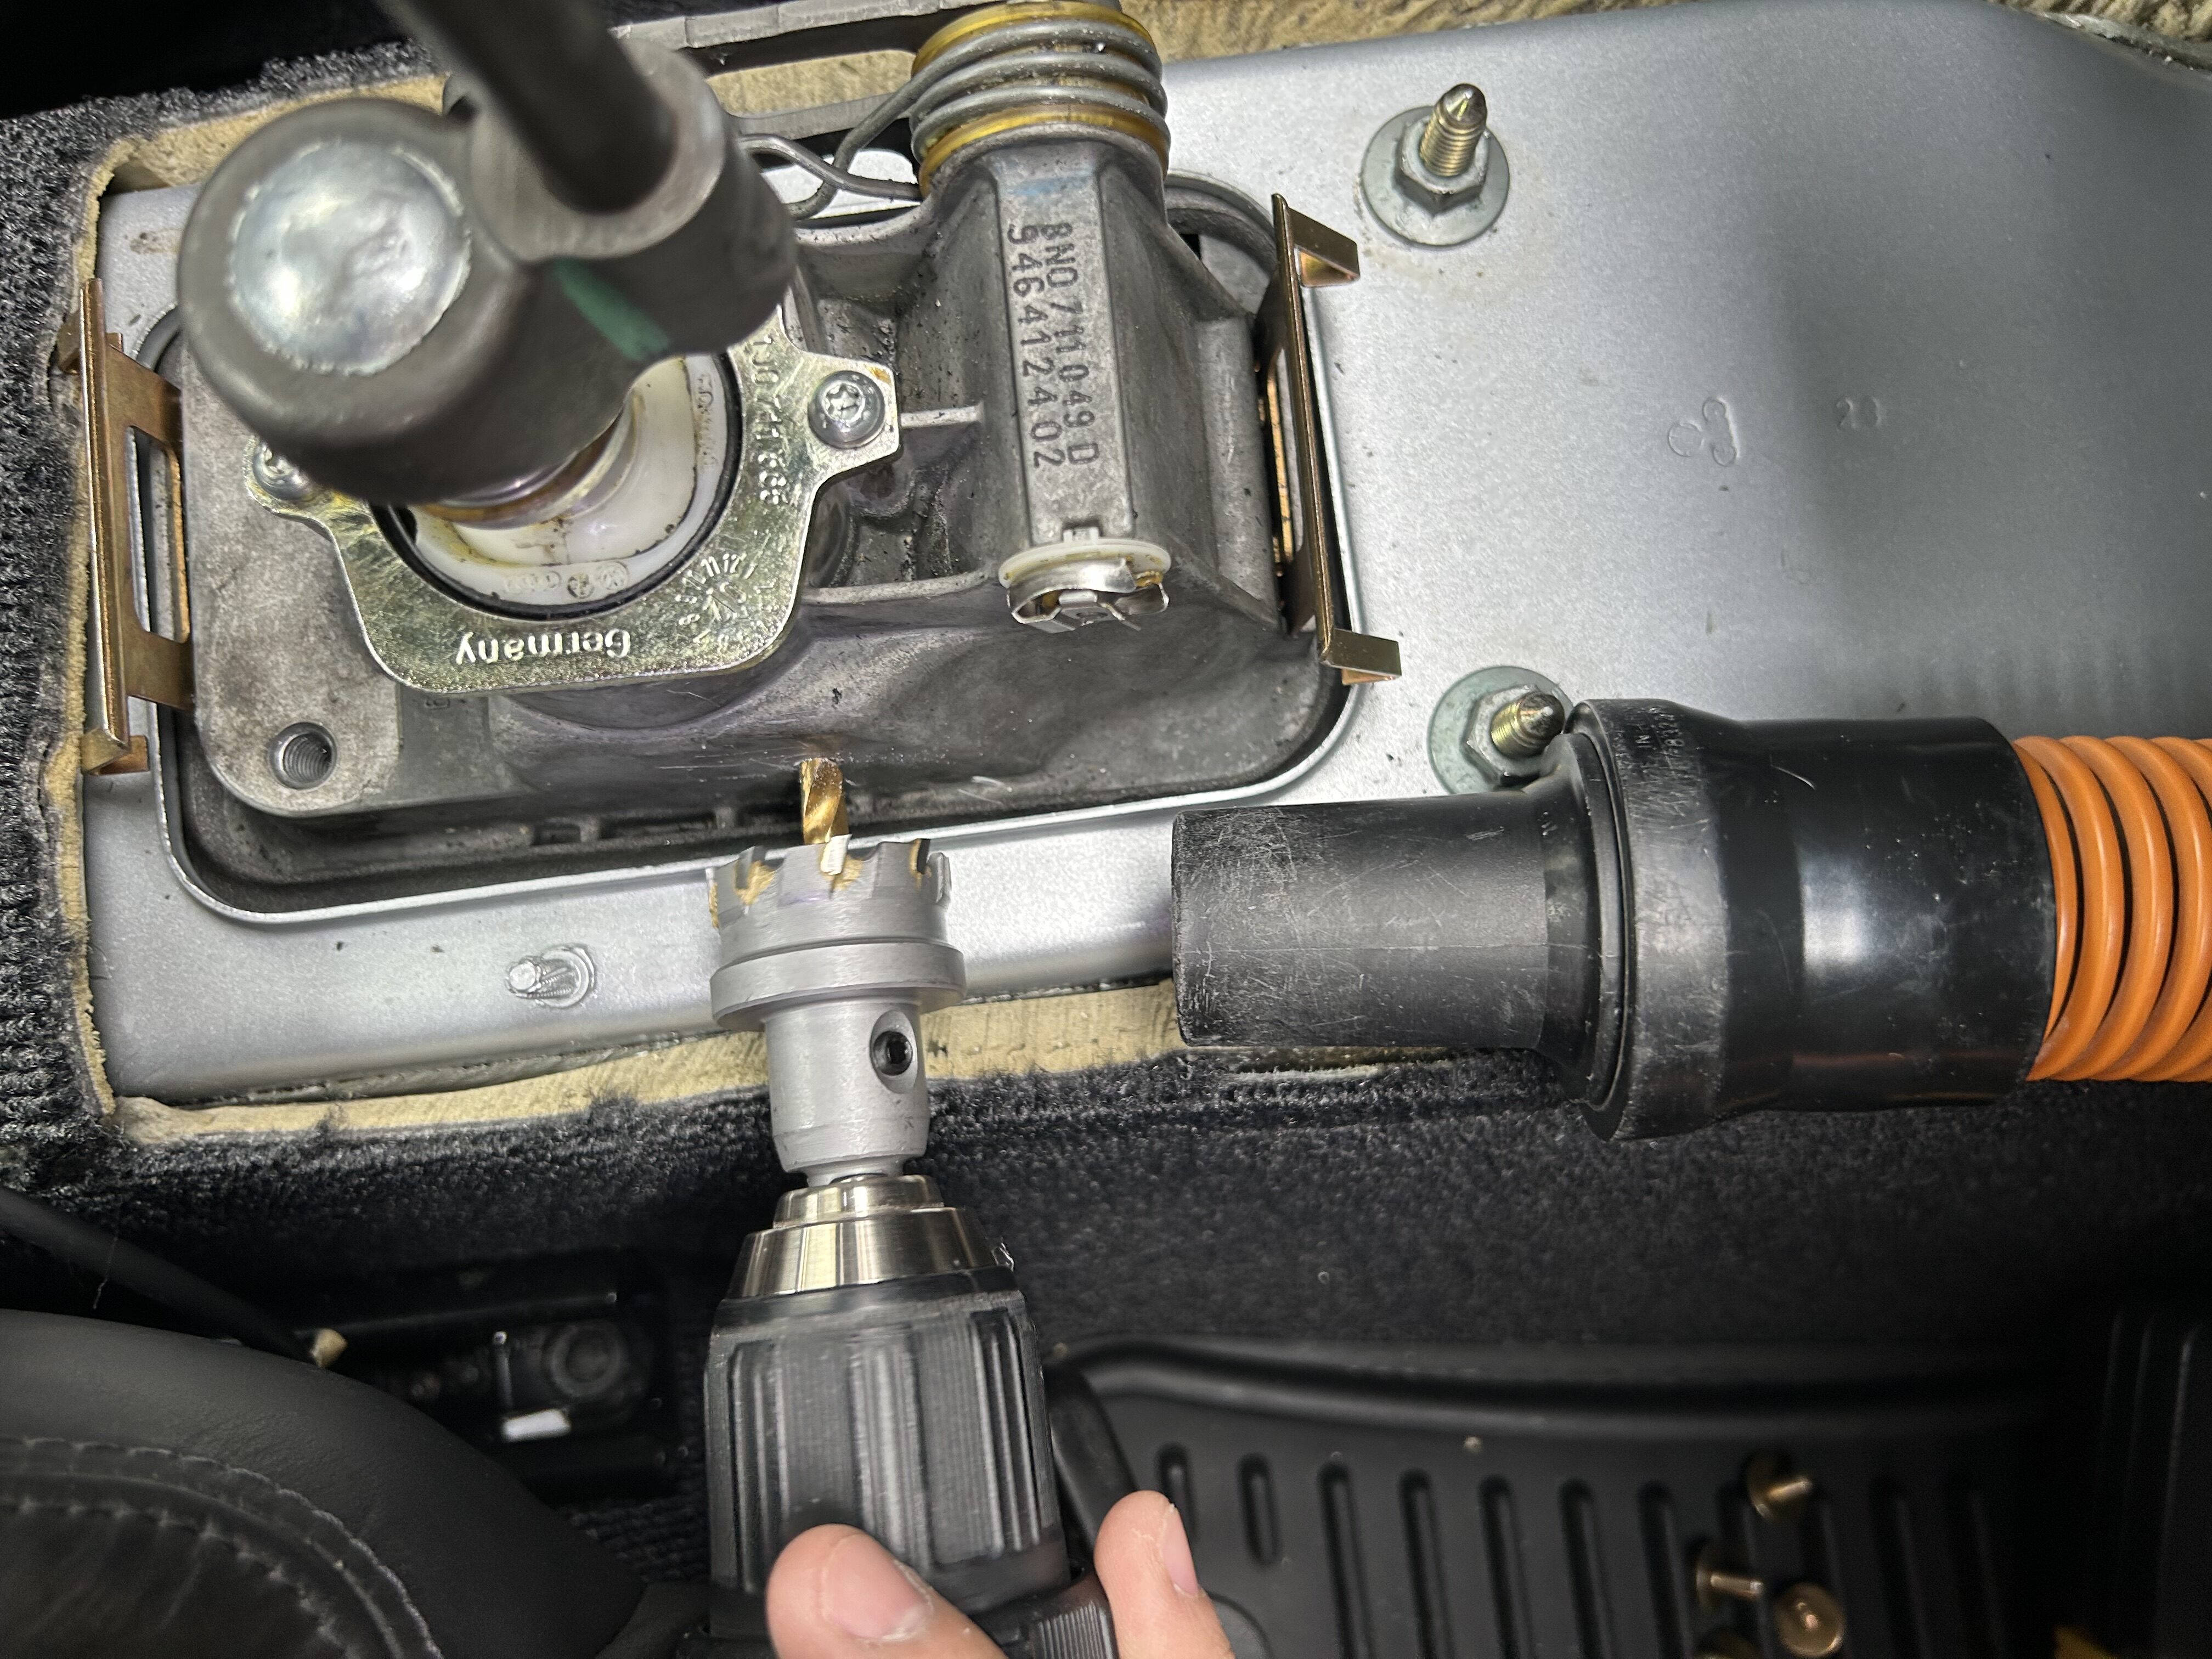
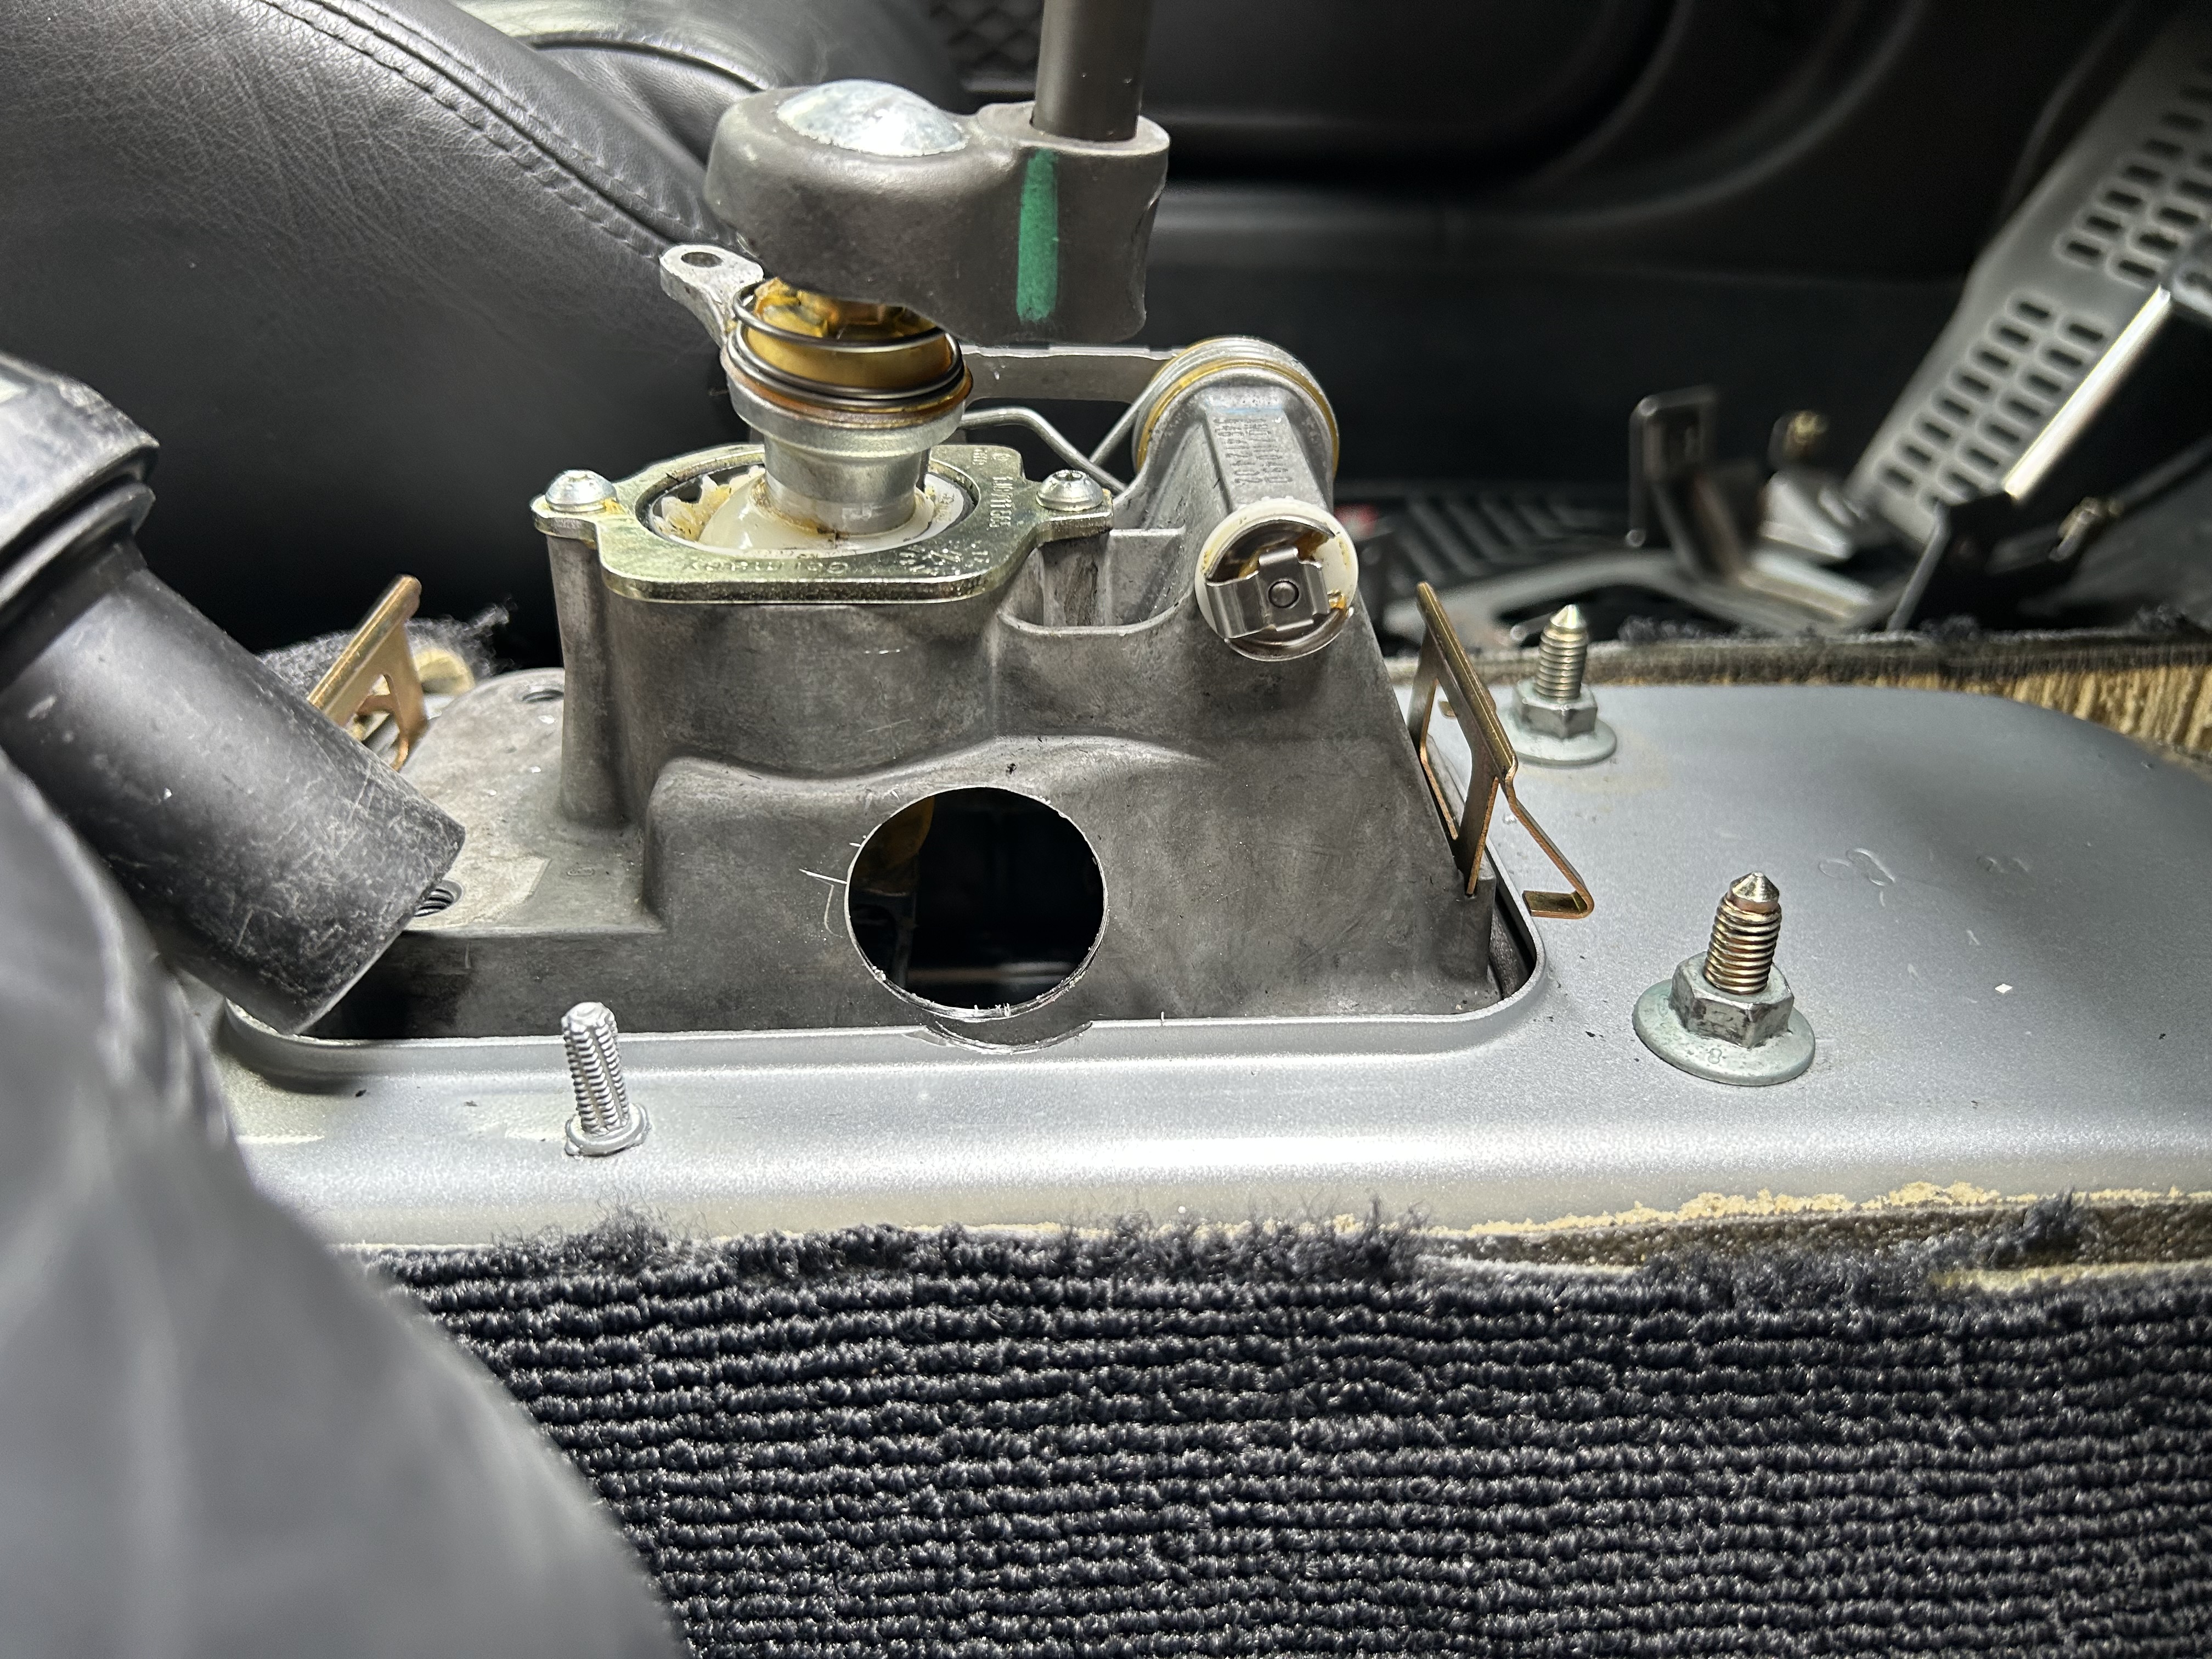
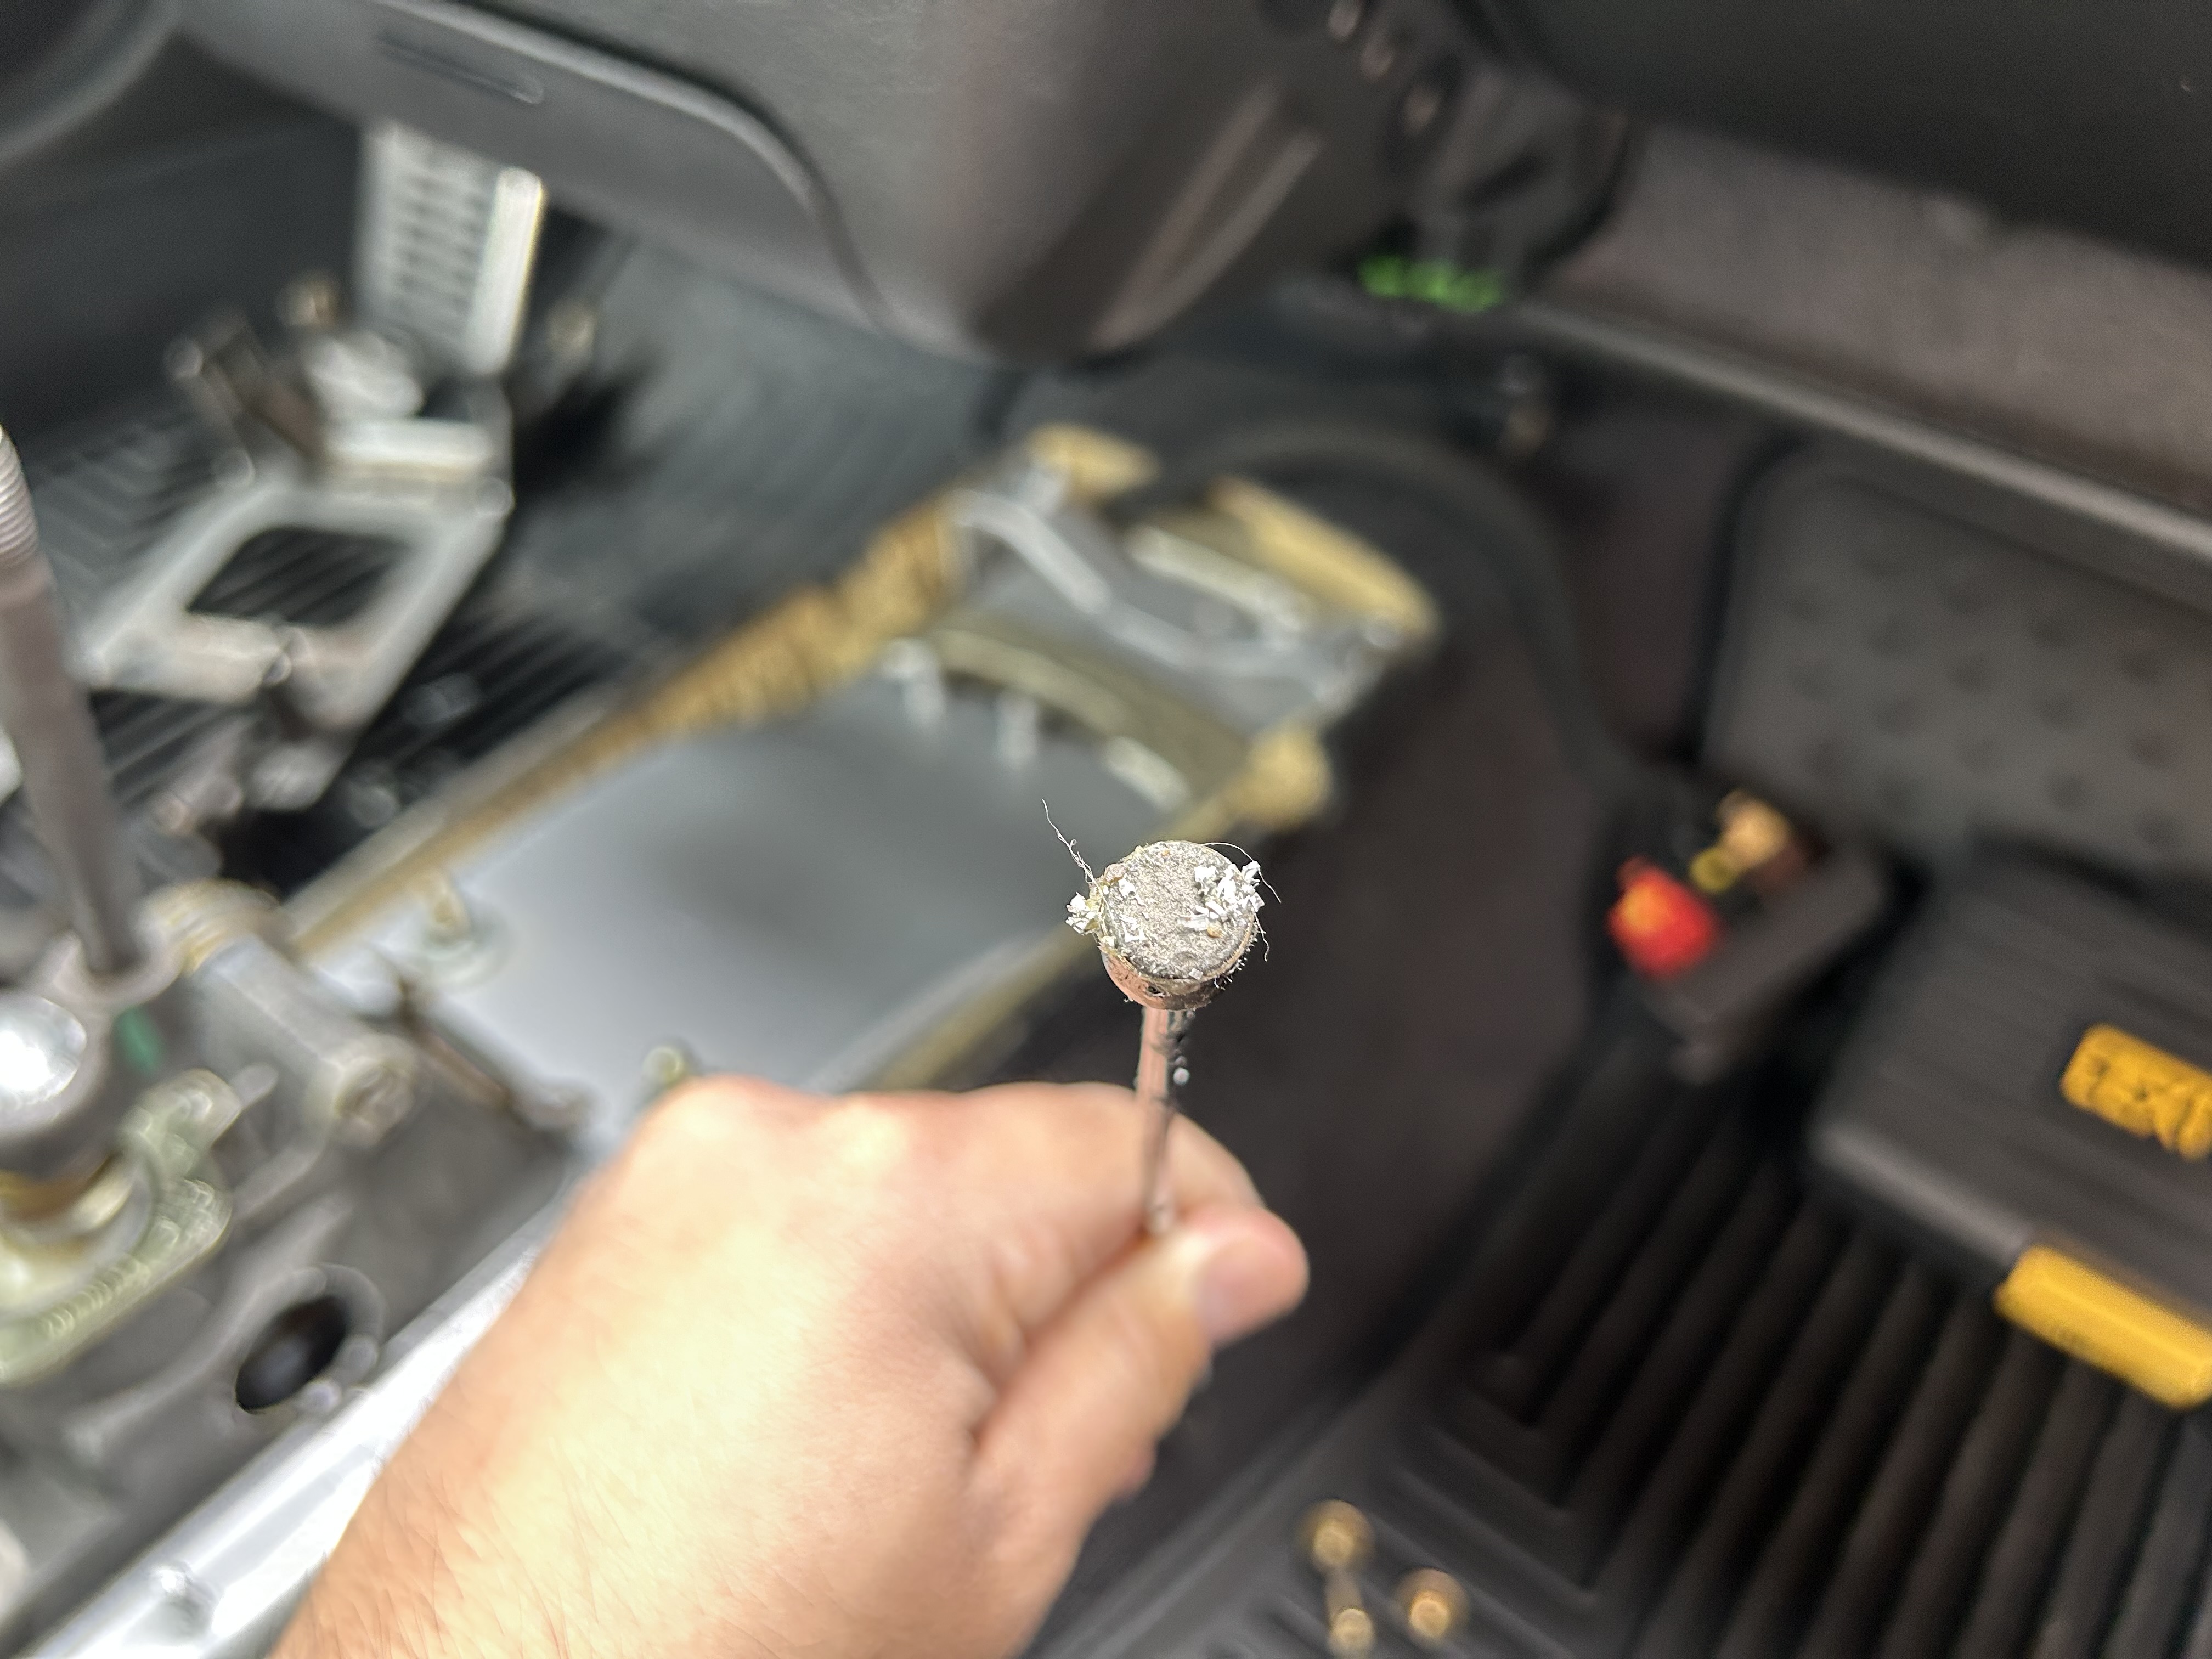
The metal shavings and cutout might even fall into the shifter housing, which you can retrieve using a flexible retrieval claw tool or a magnet.

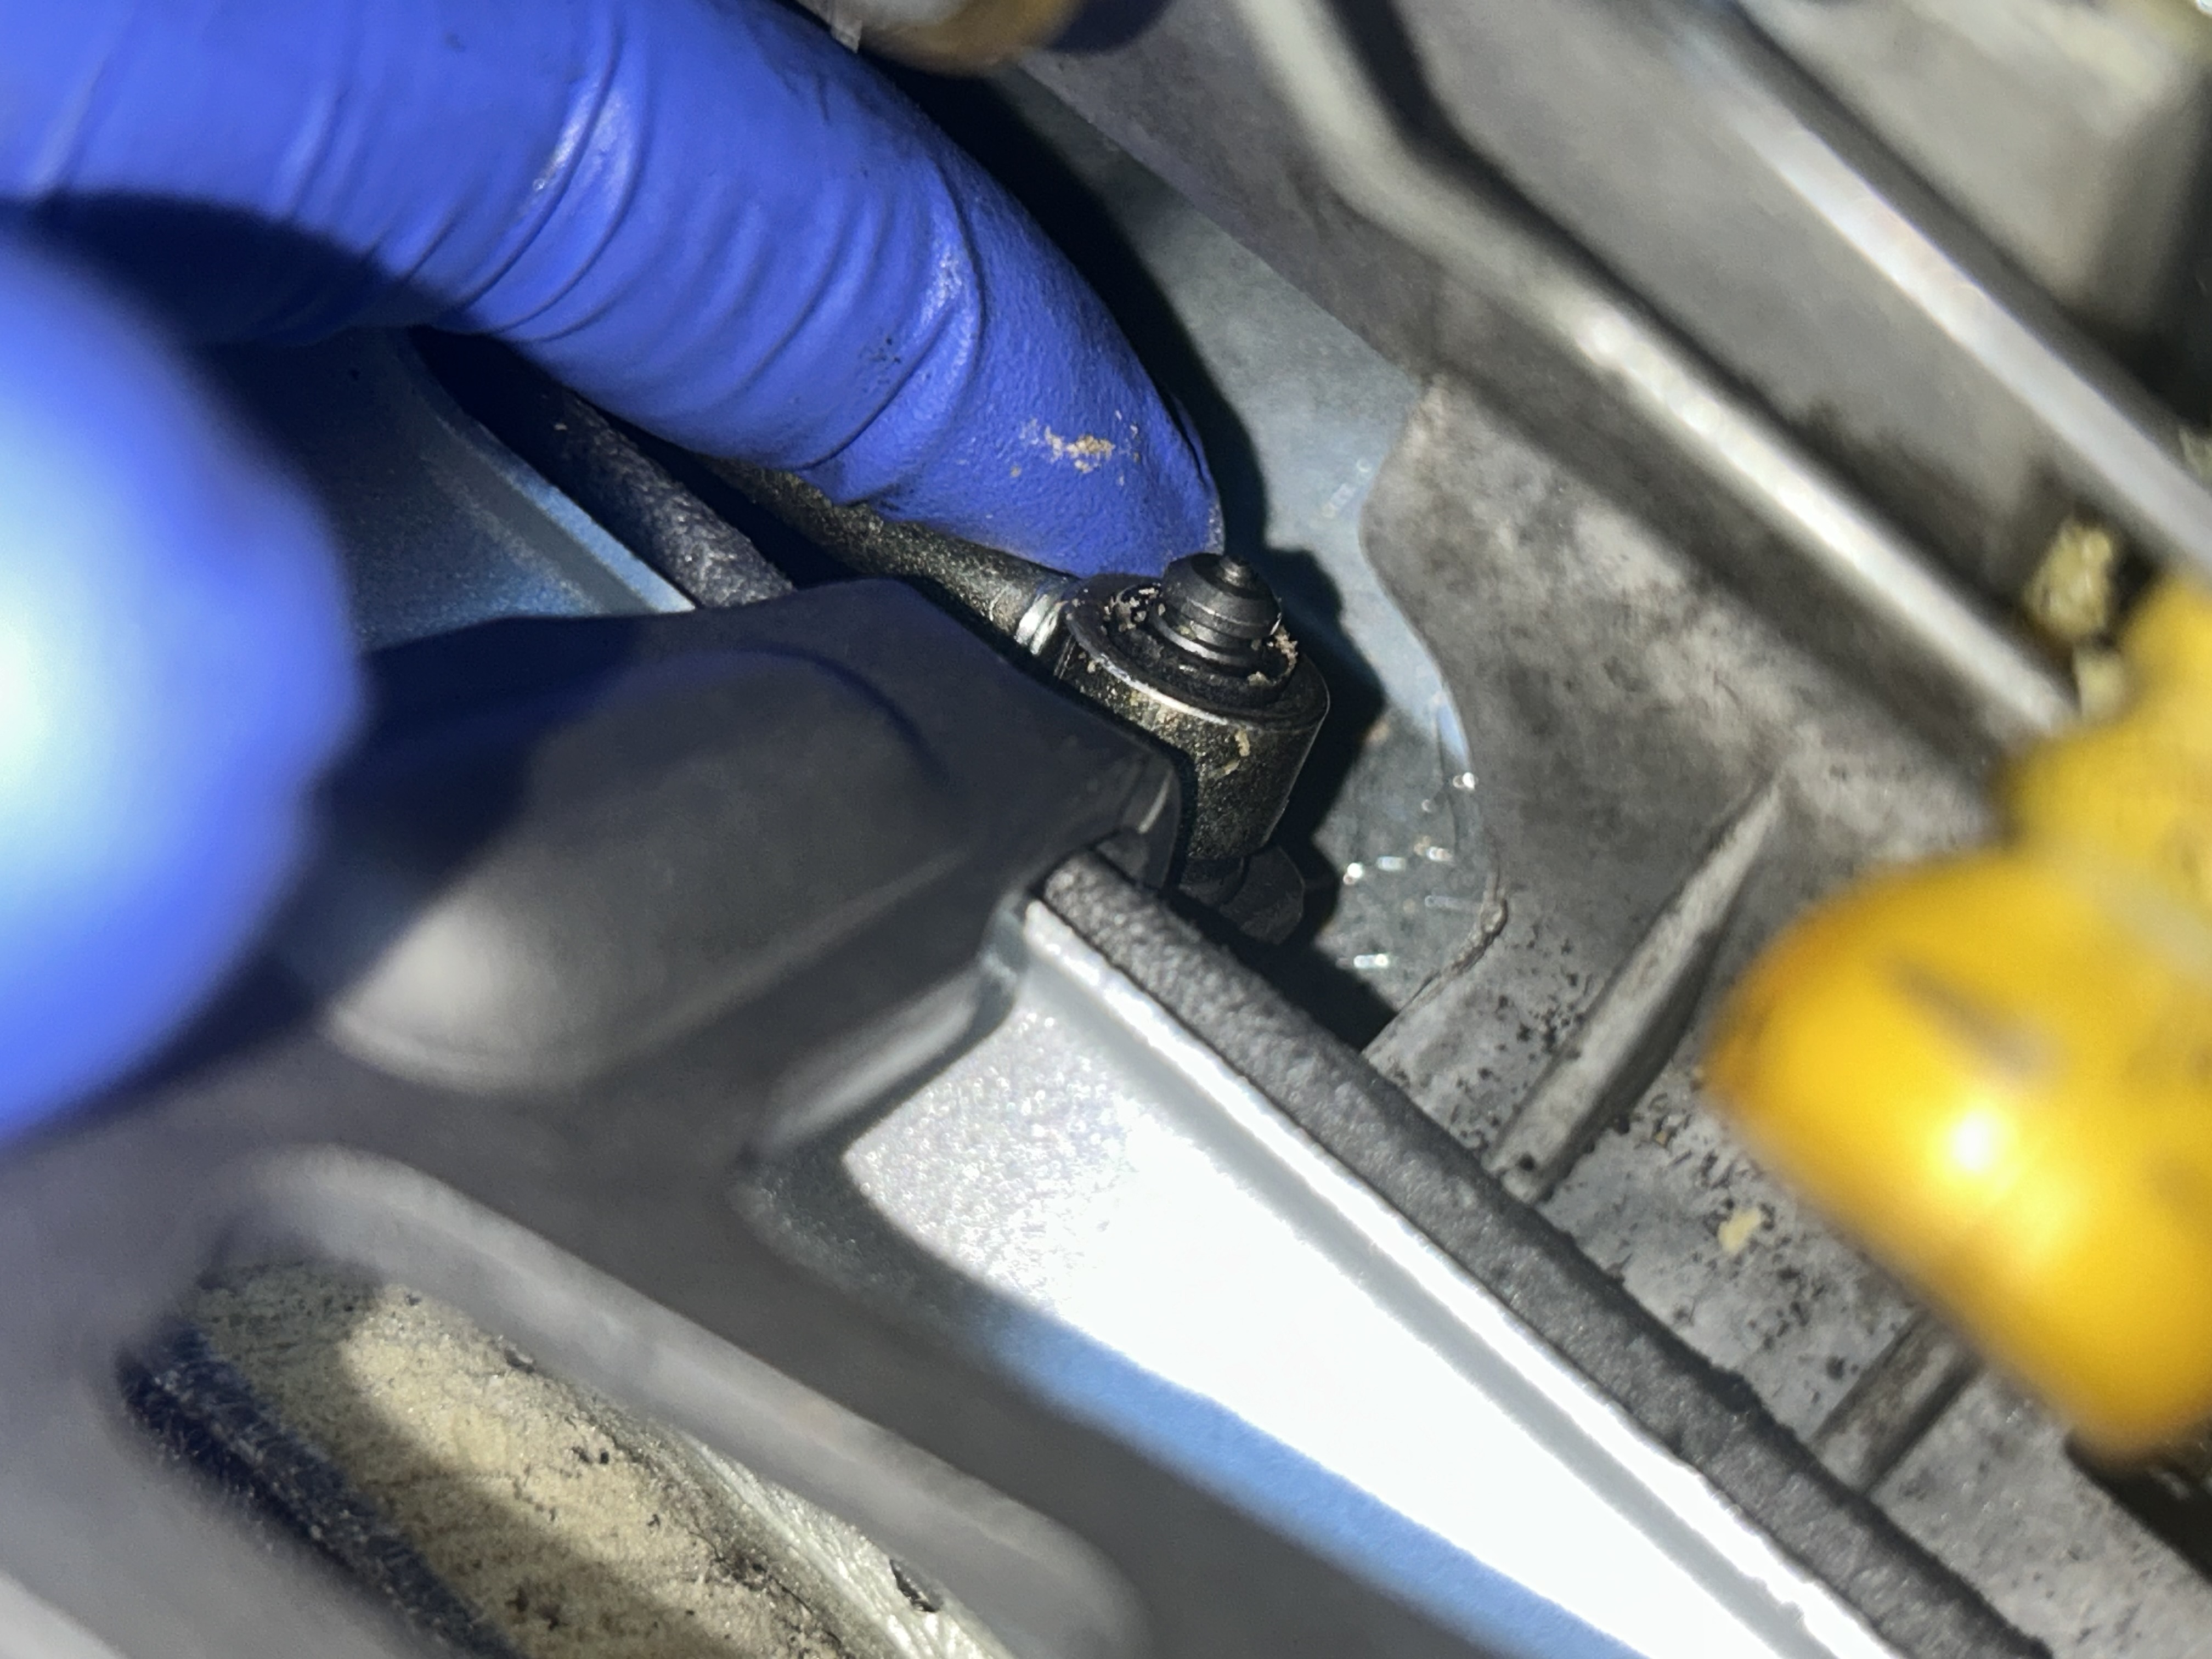
After boring the hole, I removed this C-shaped clip via the (2 qty) T20 Torx bolts. The plastic retaining clip can also come up and off, which allows more movement of the shifter. It’s not necessary to remove C-shaped clip, but I like to remove it so that I can clean it and re-grease it.


Now, you can bring the shifter all the way back, which allows you to now see the shifter linkage below in the opening cutout.
Now, remove the retaining clip, then the metal u-clip with a set of long-nose pliers.
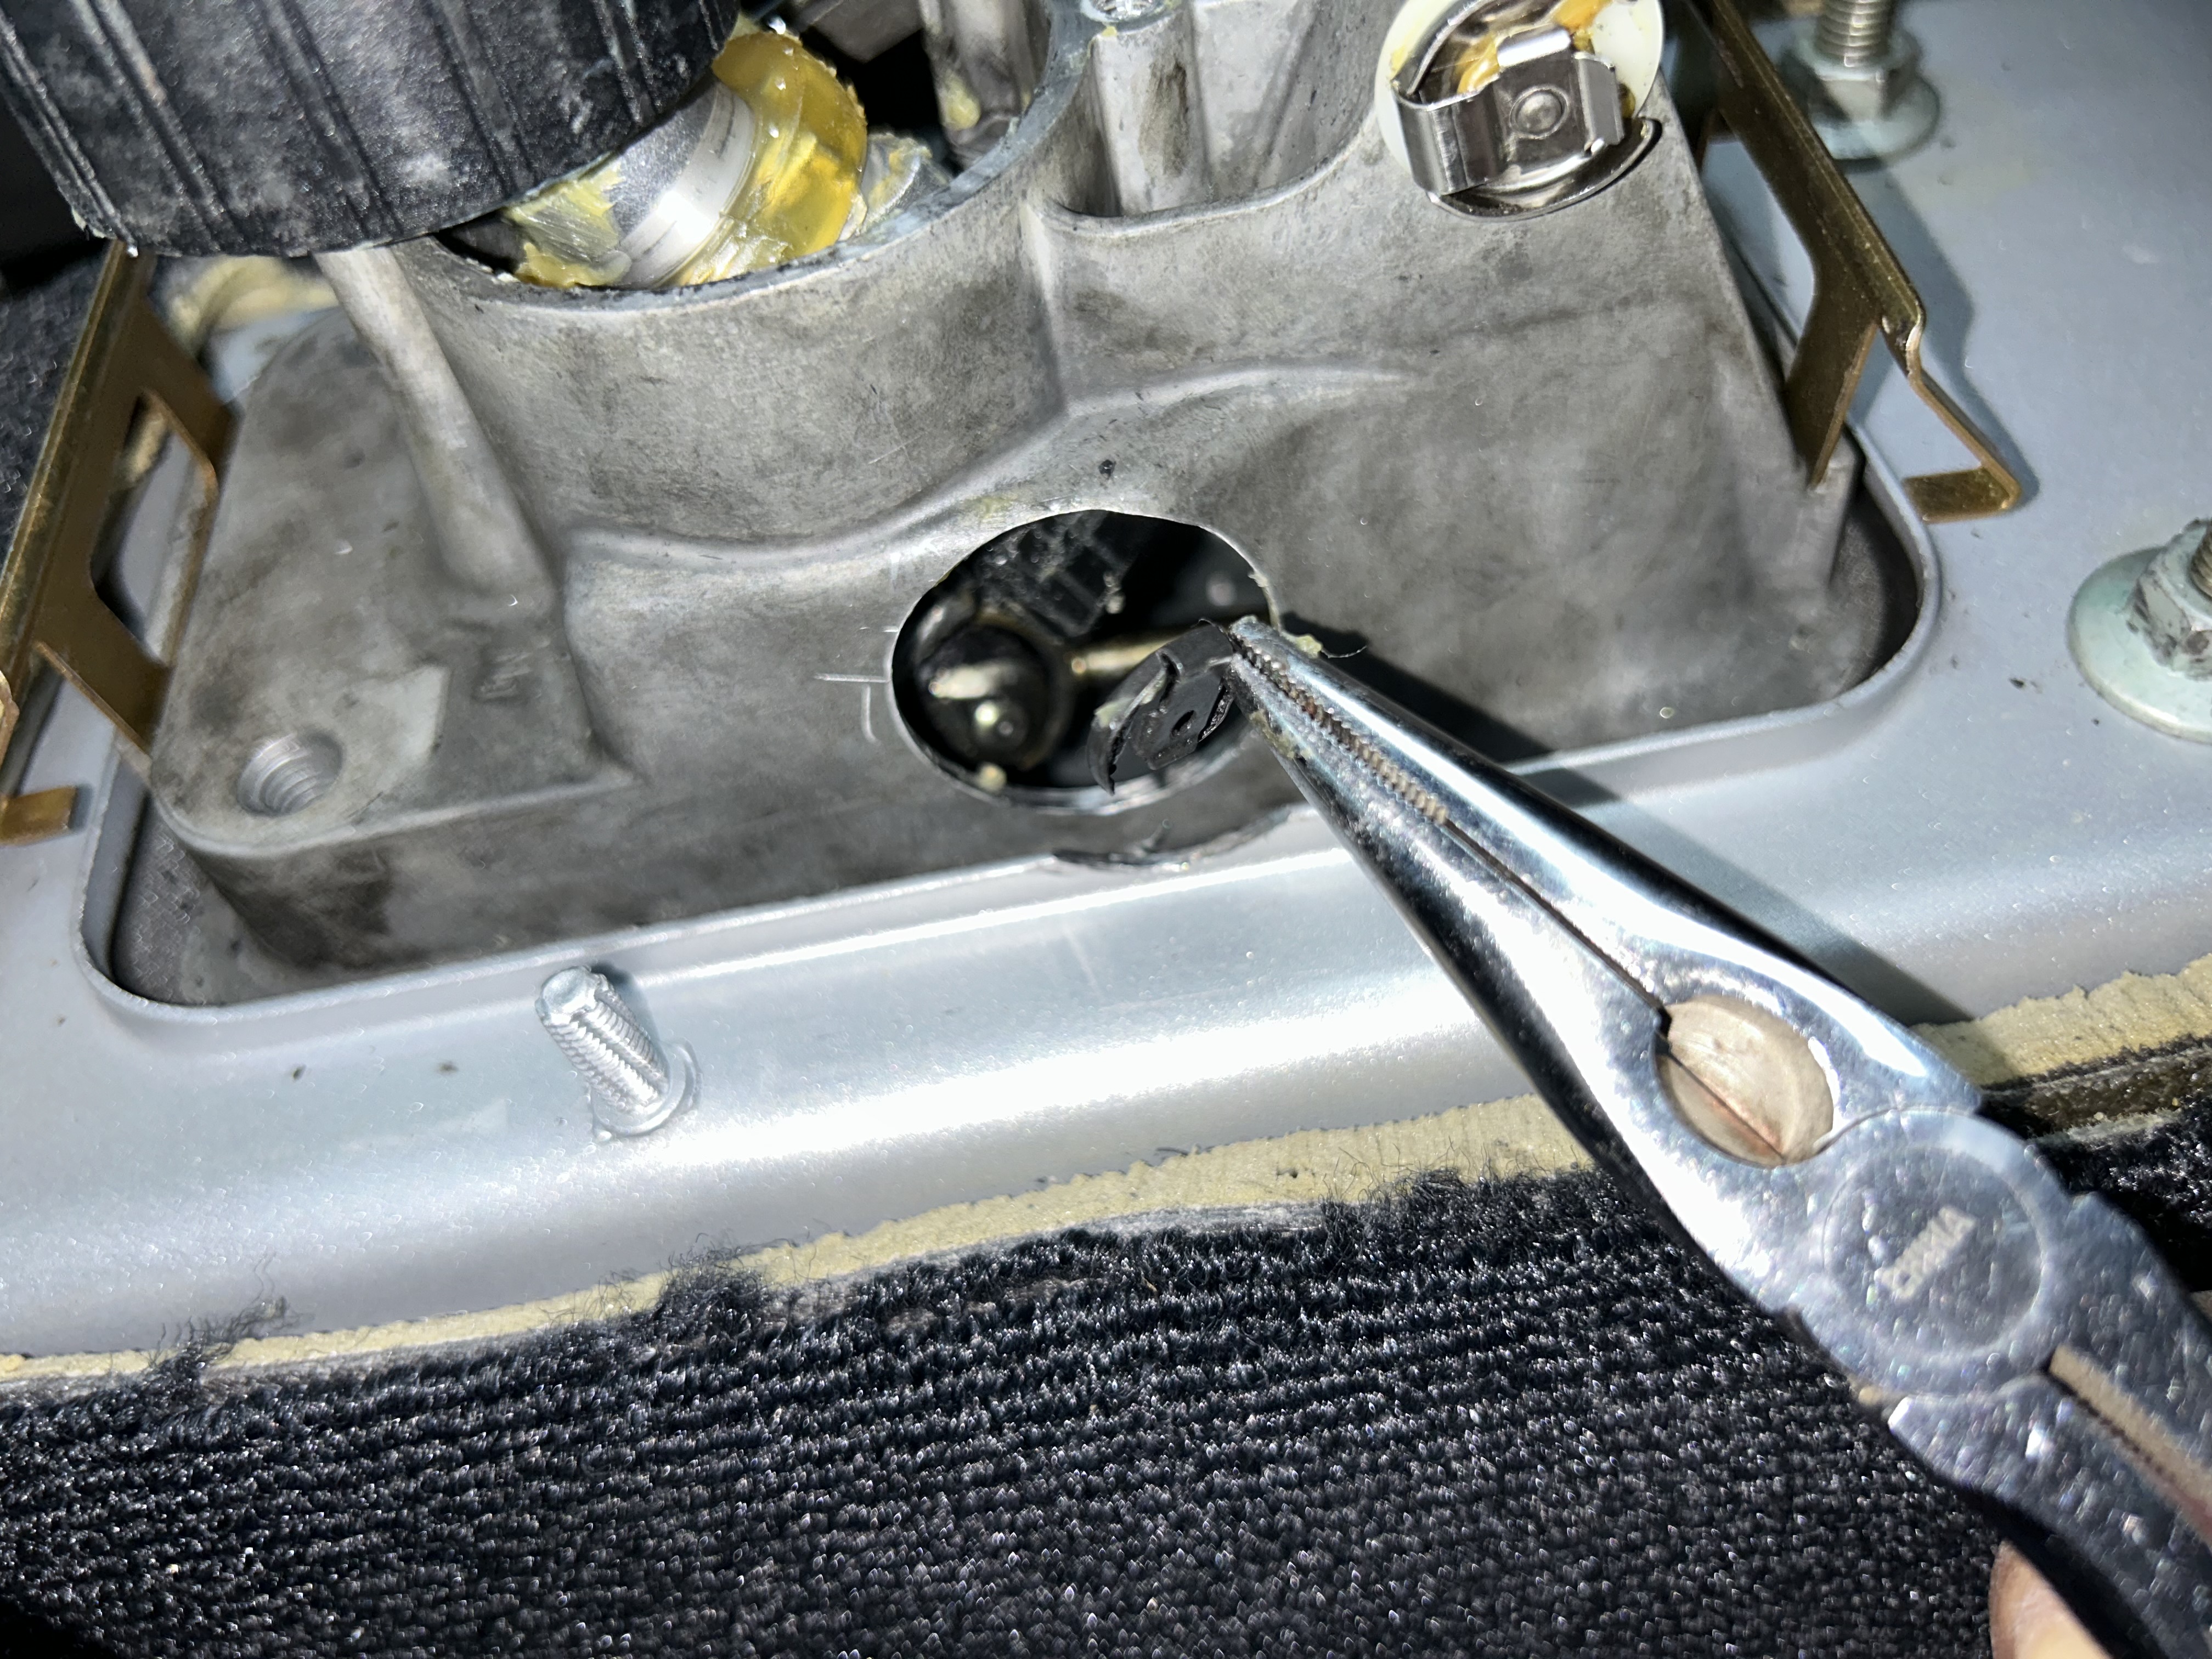

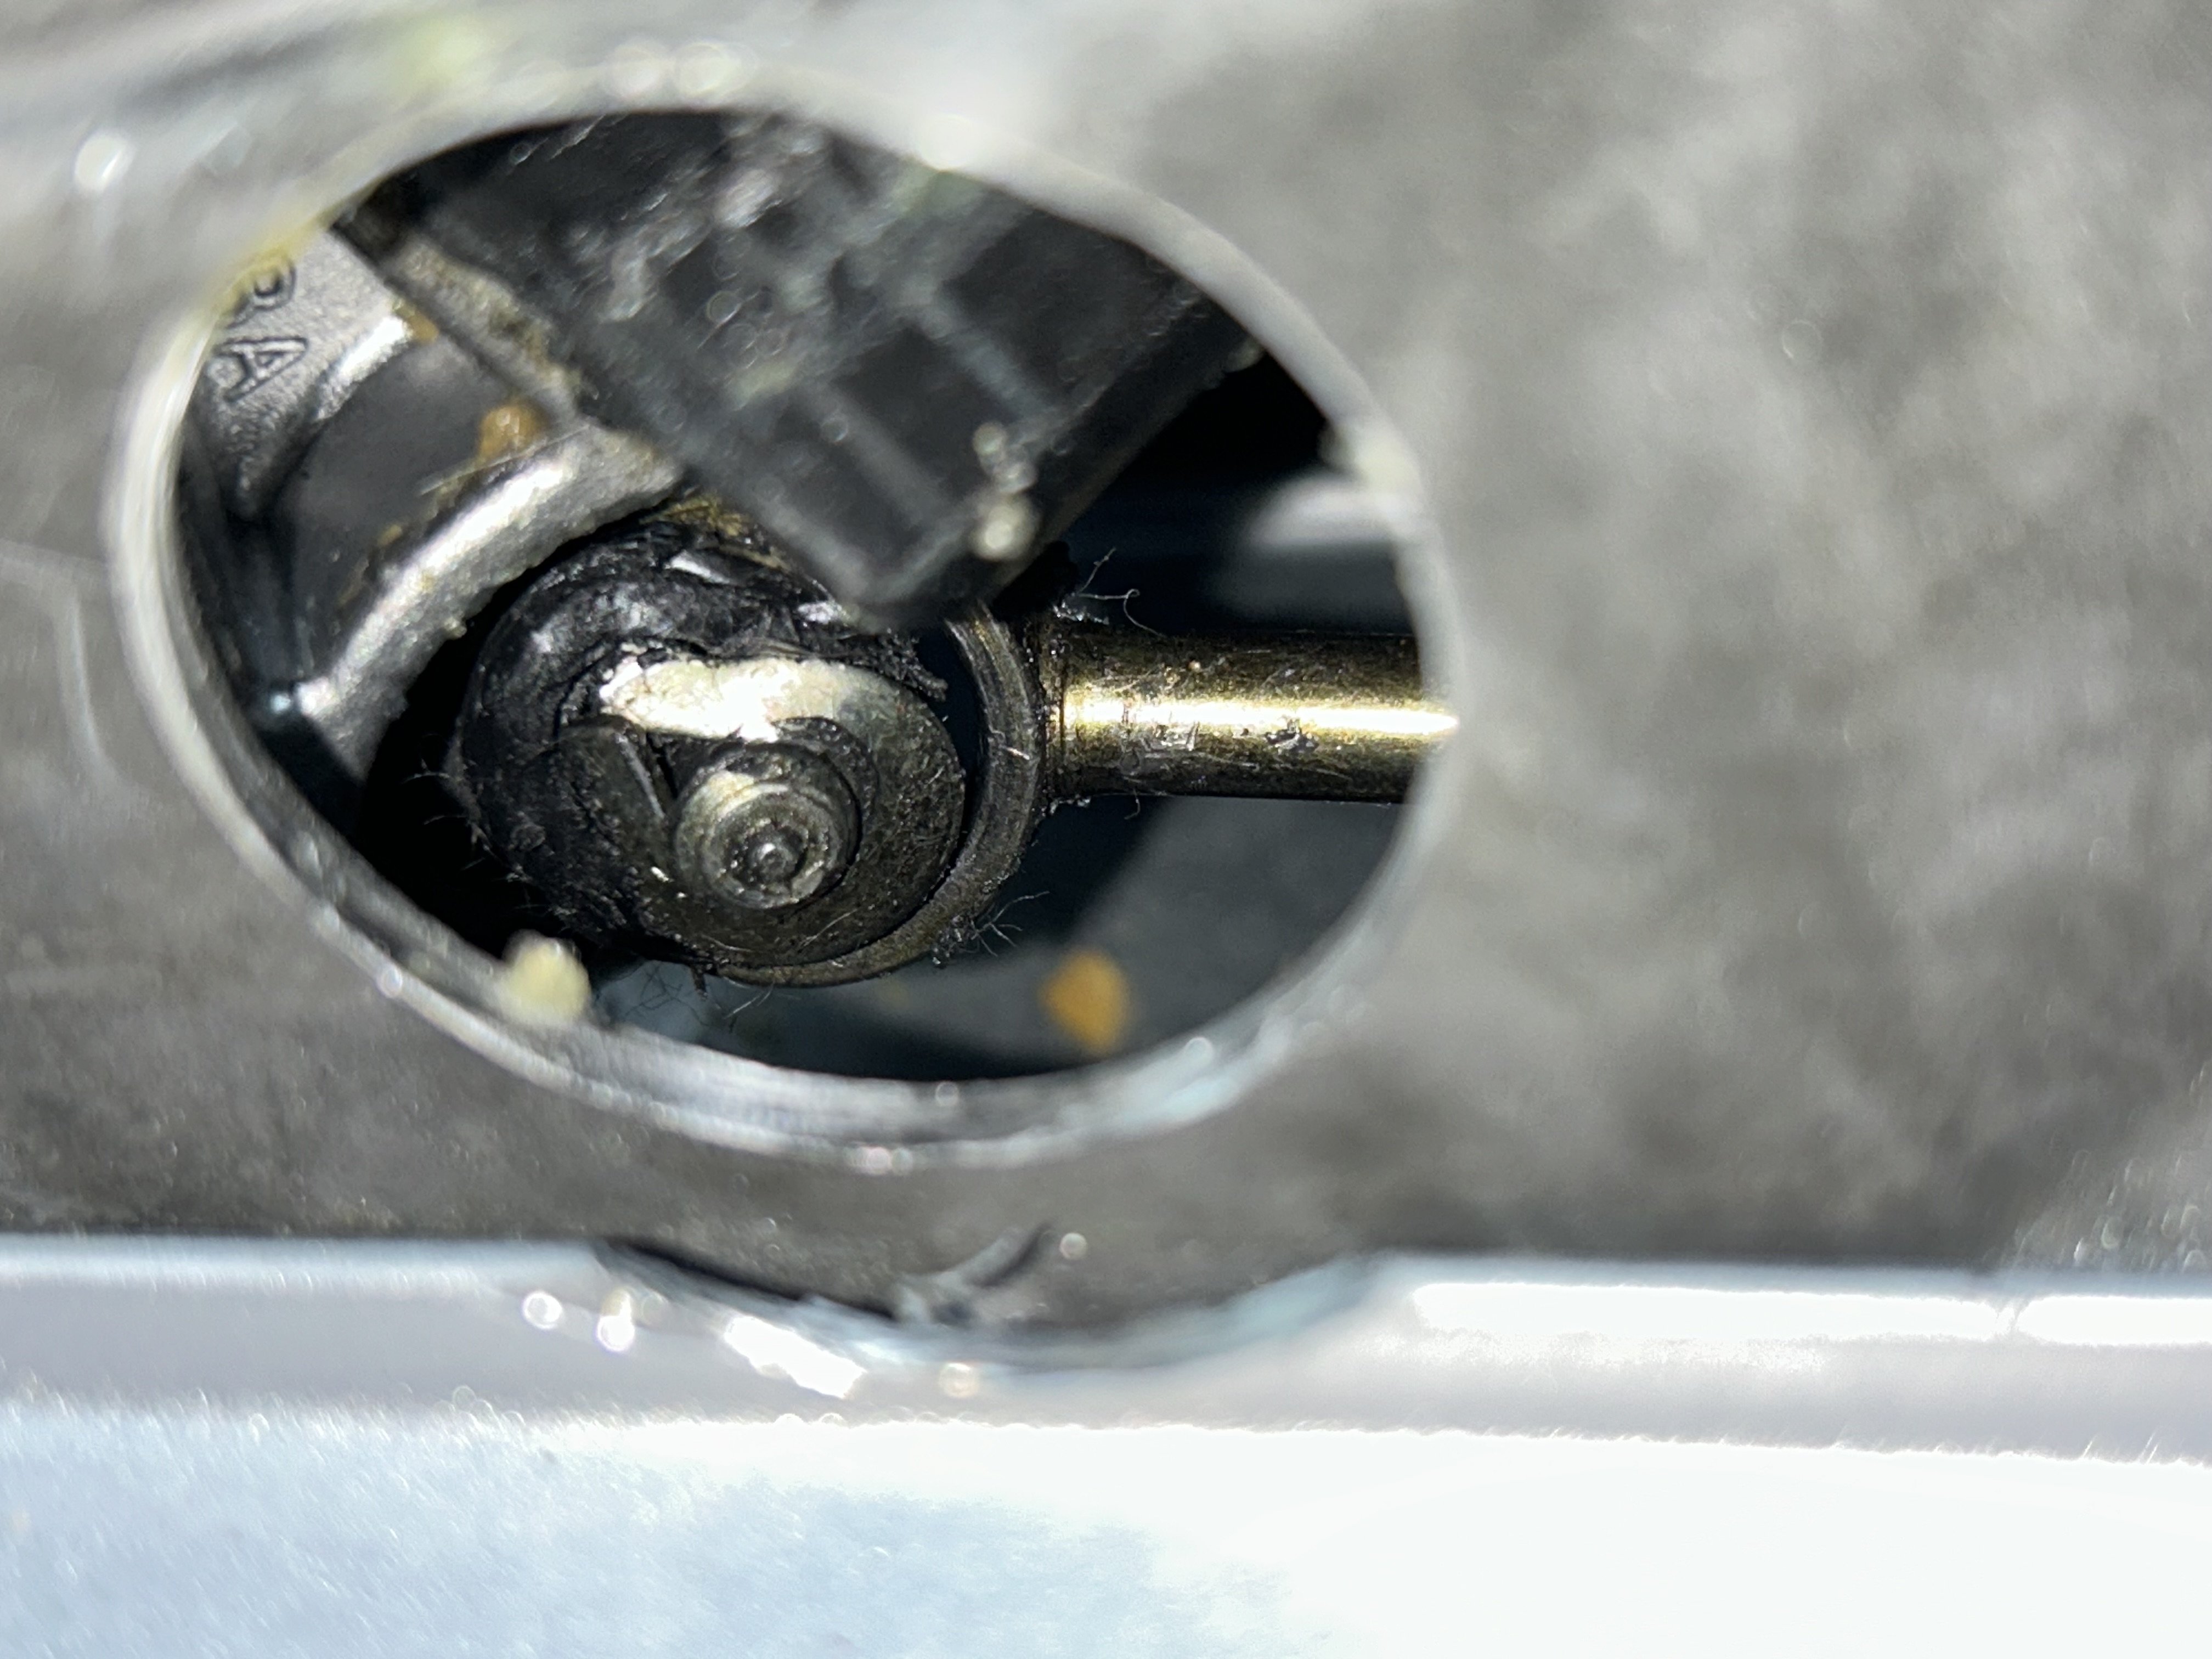
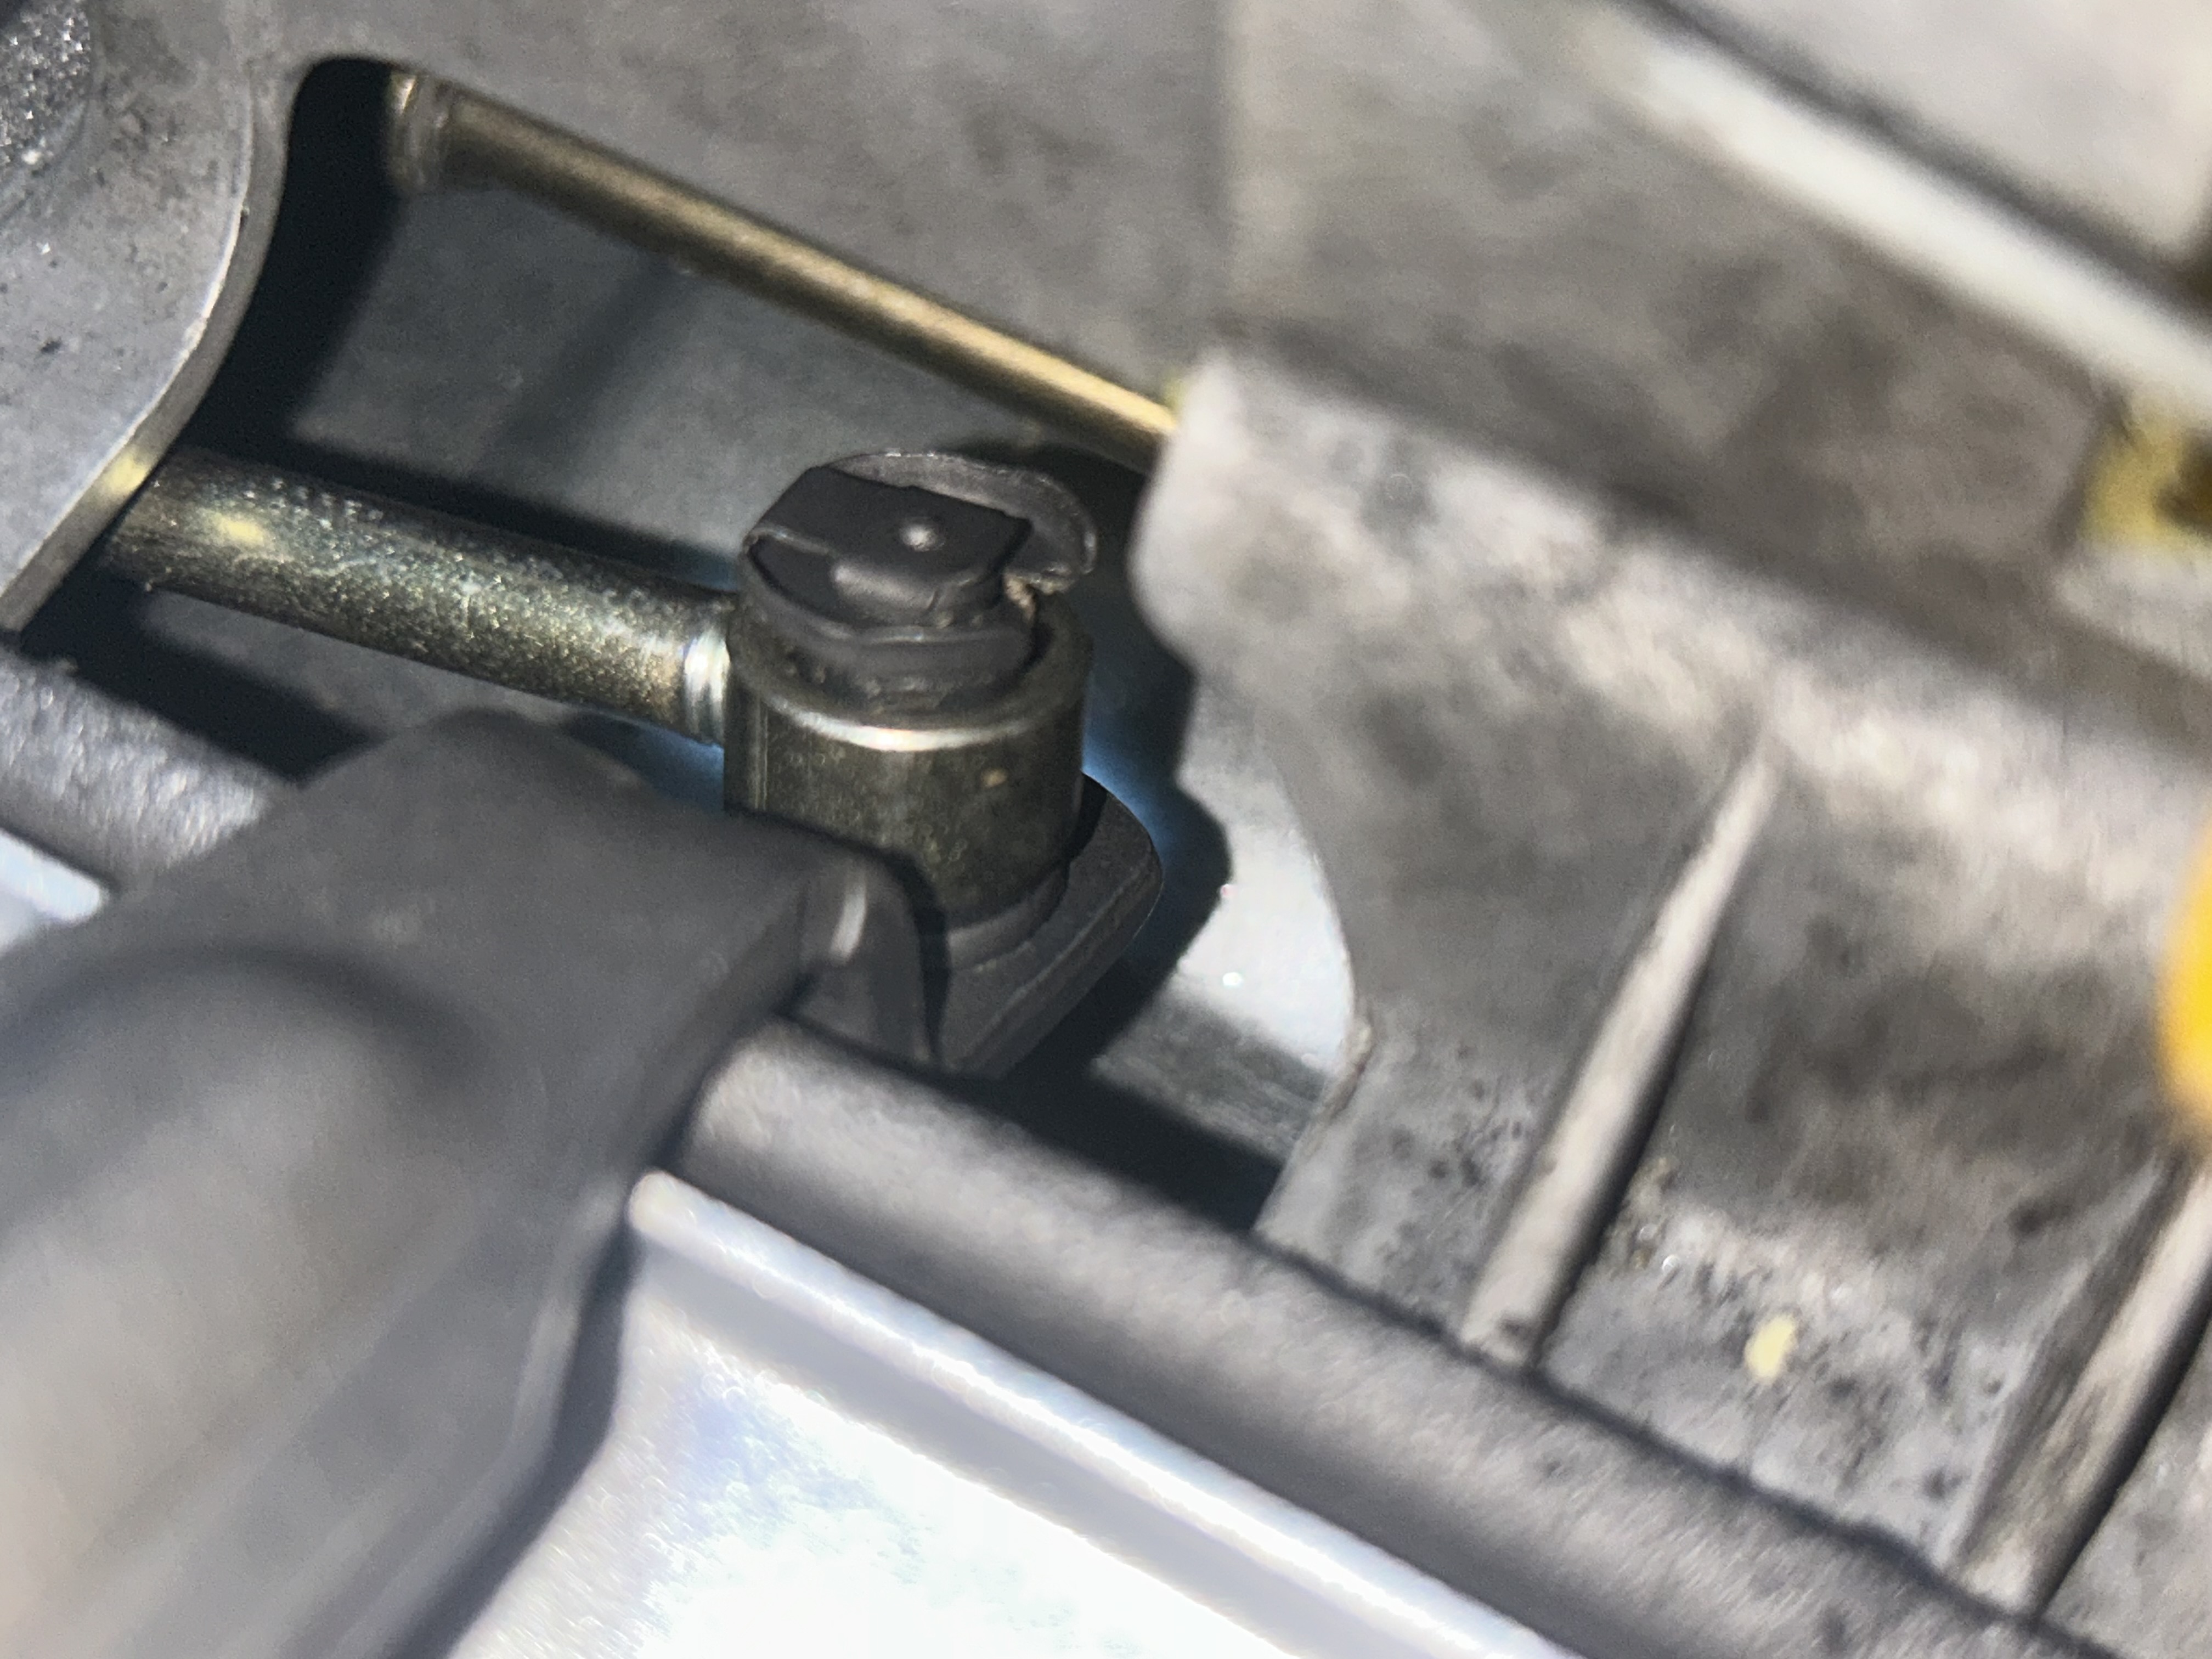
The new passenger side bushing will need to go through the shifter linkage end, which will then be secured to the linkage with this snap ring. The bushing has a slot that the snap ring fits into. Make sure to remove the snap ring from the bushing before inserting the bushing, otherwise it will be too tight and won’t go in.
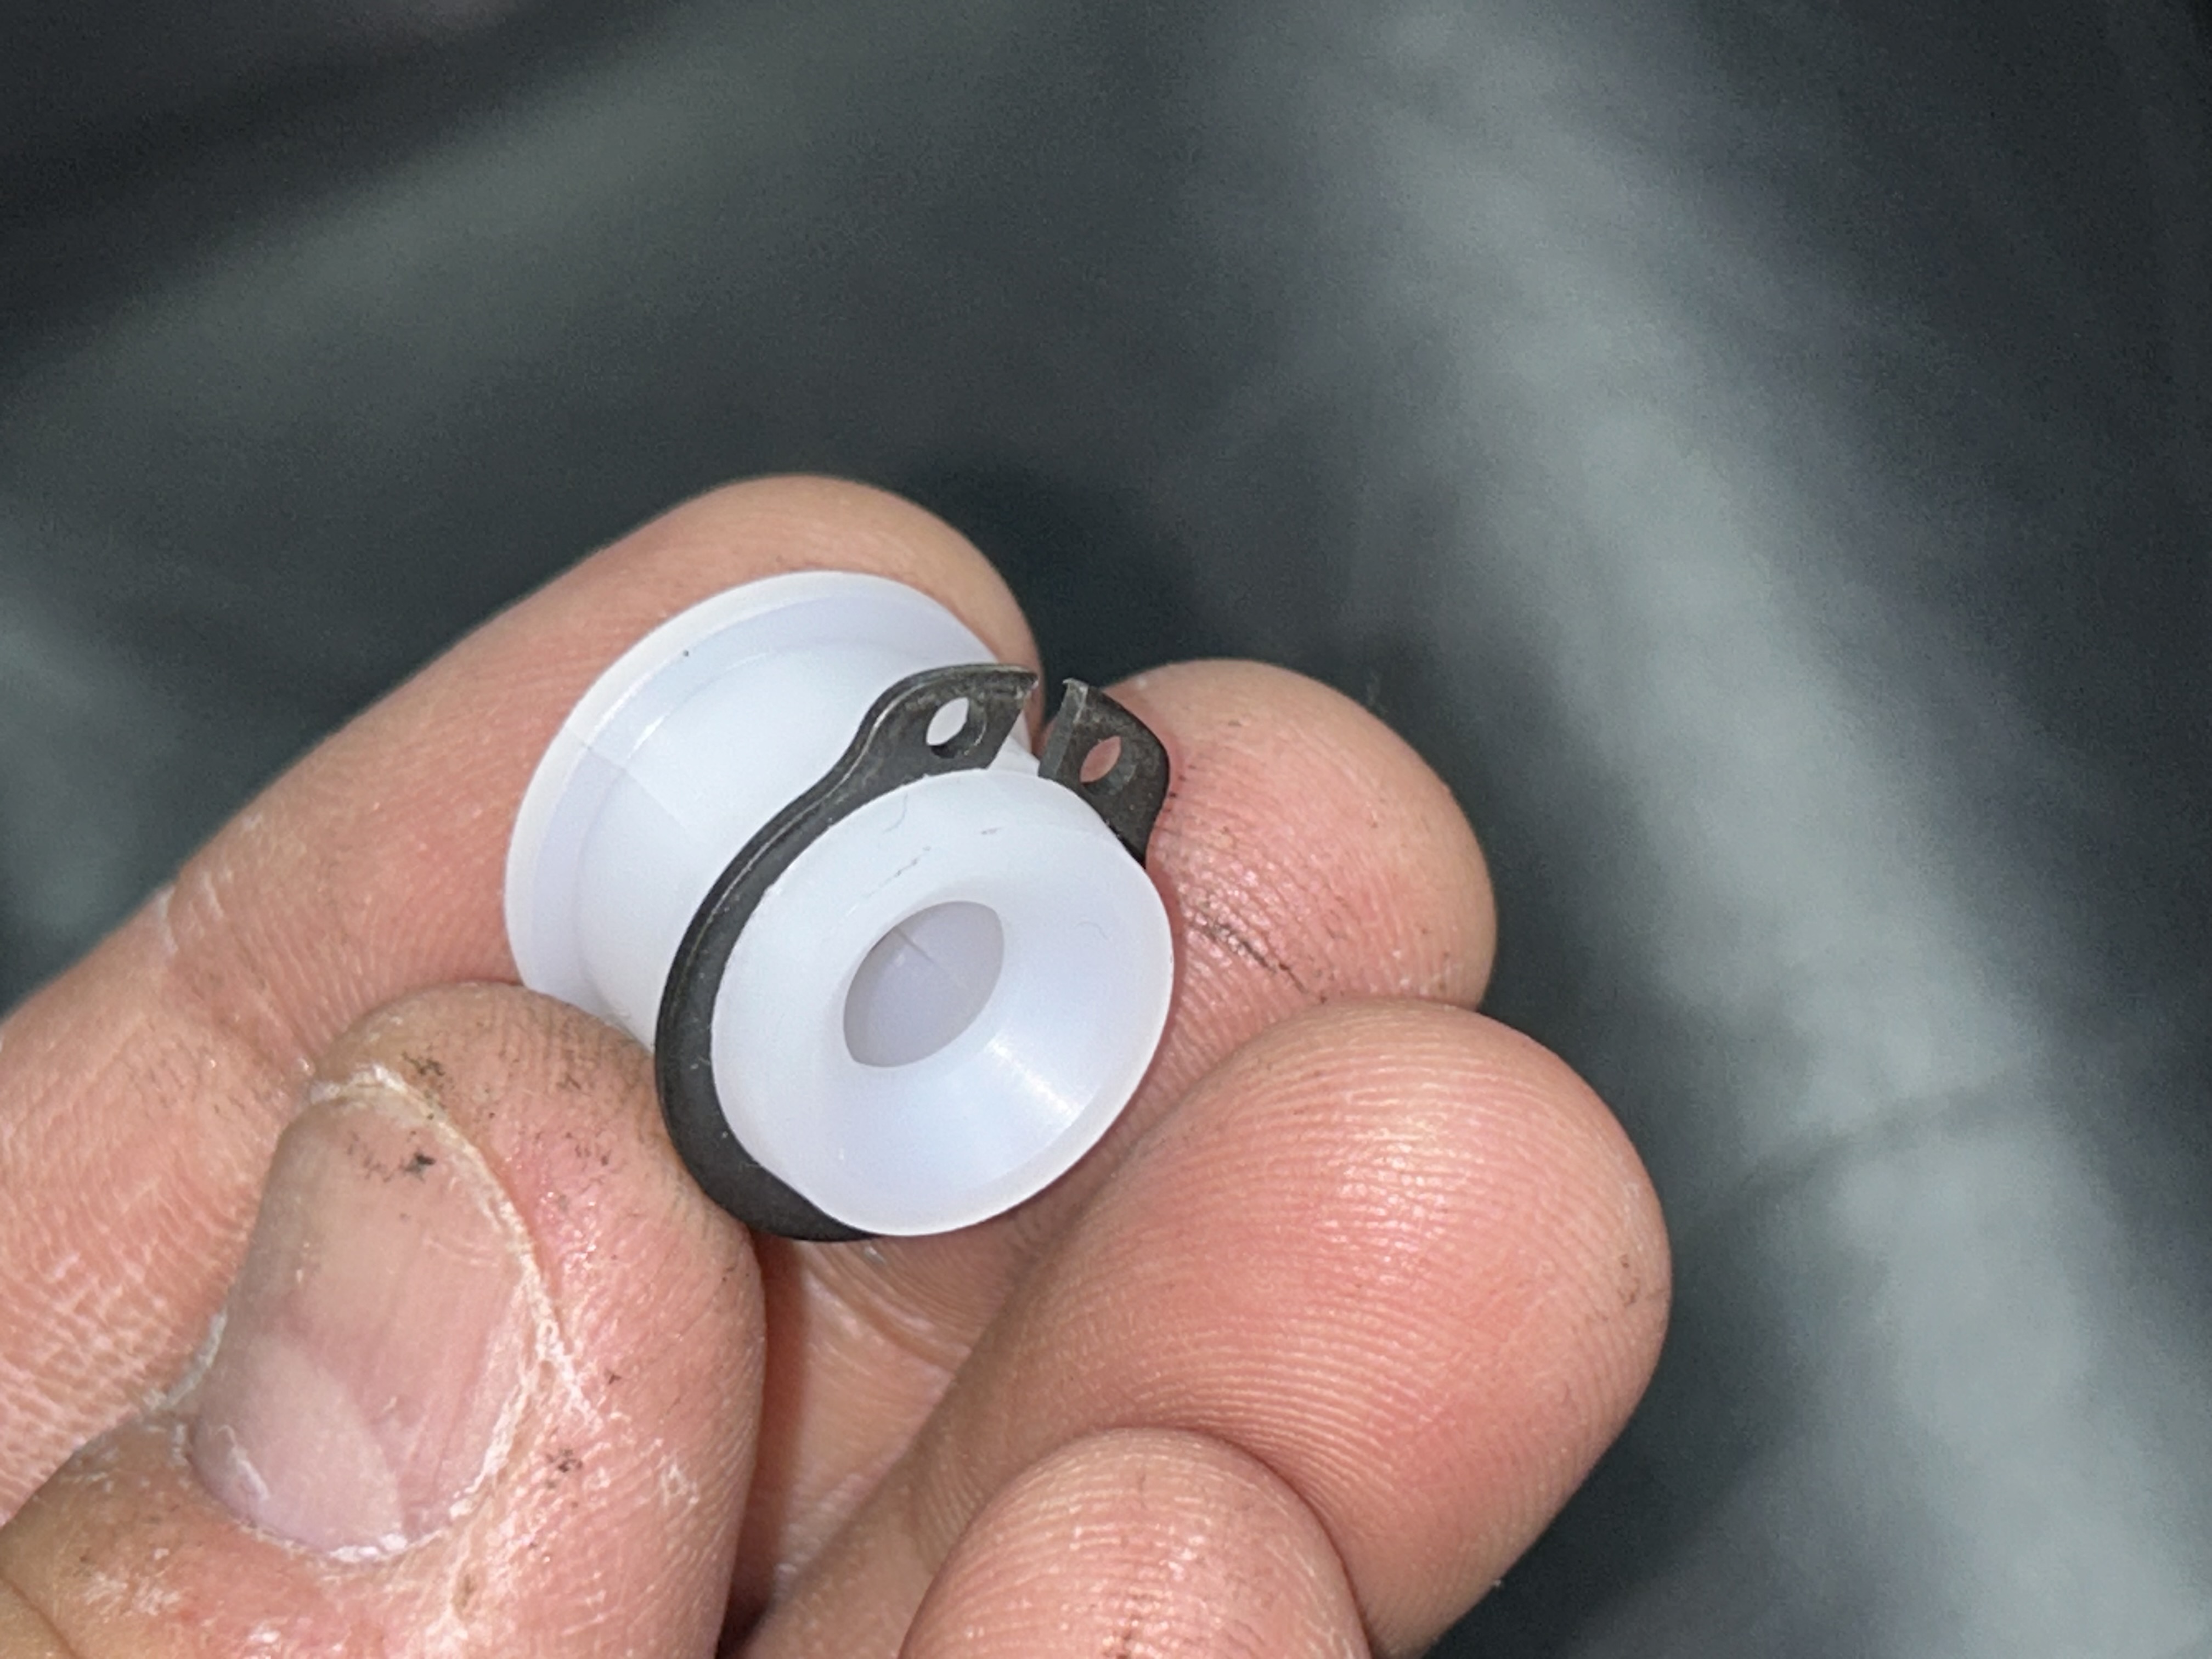
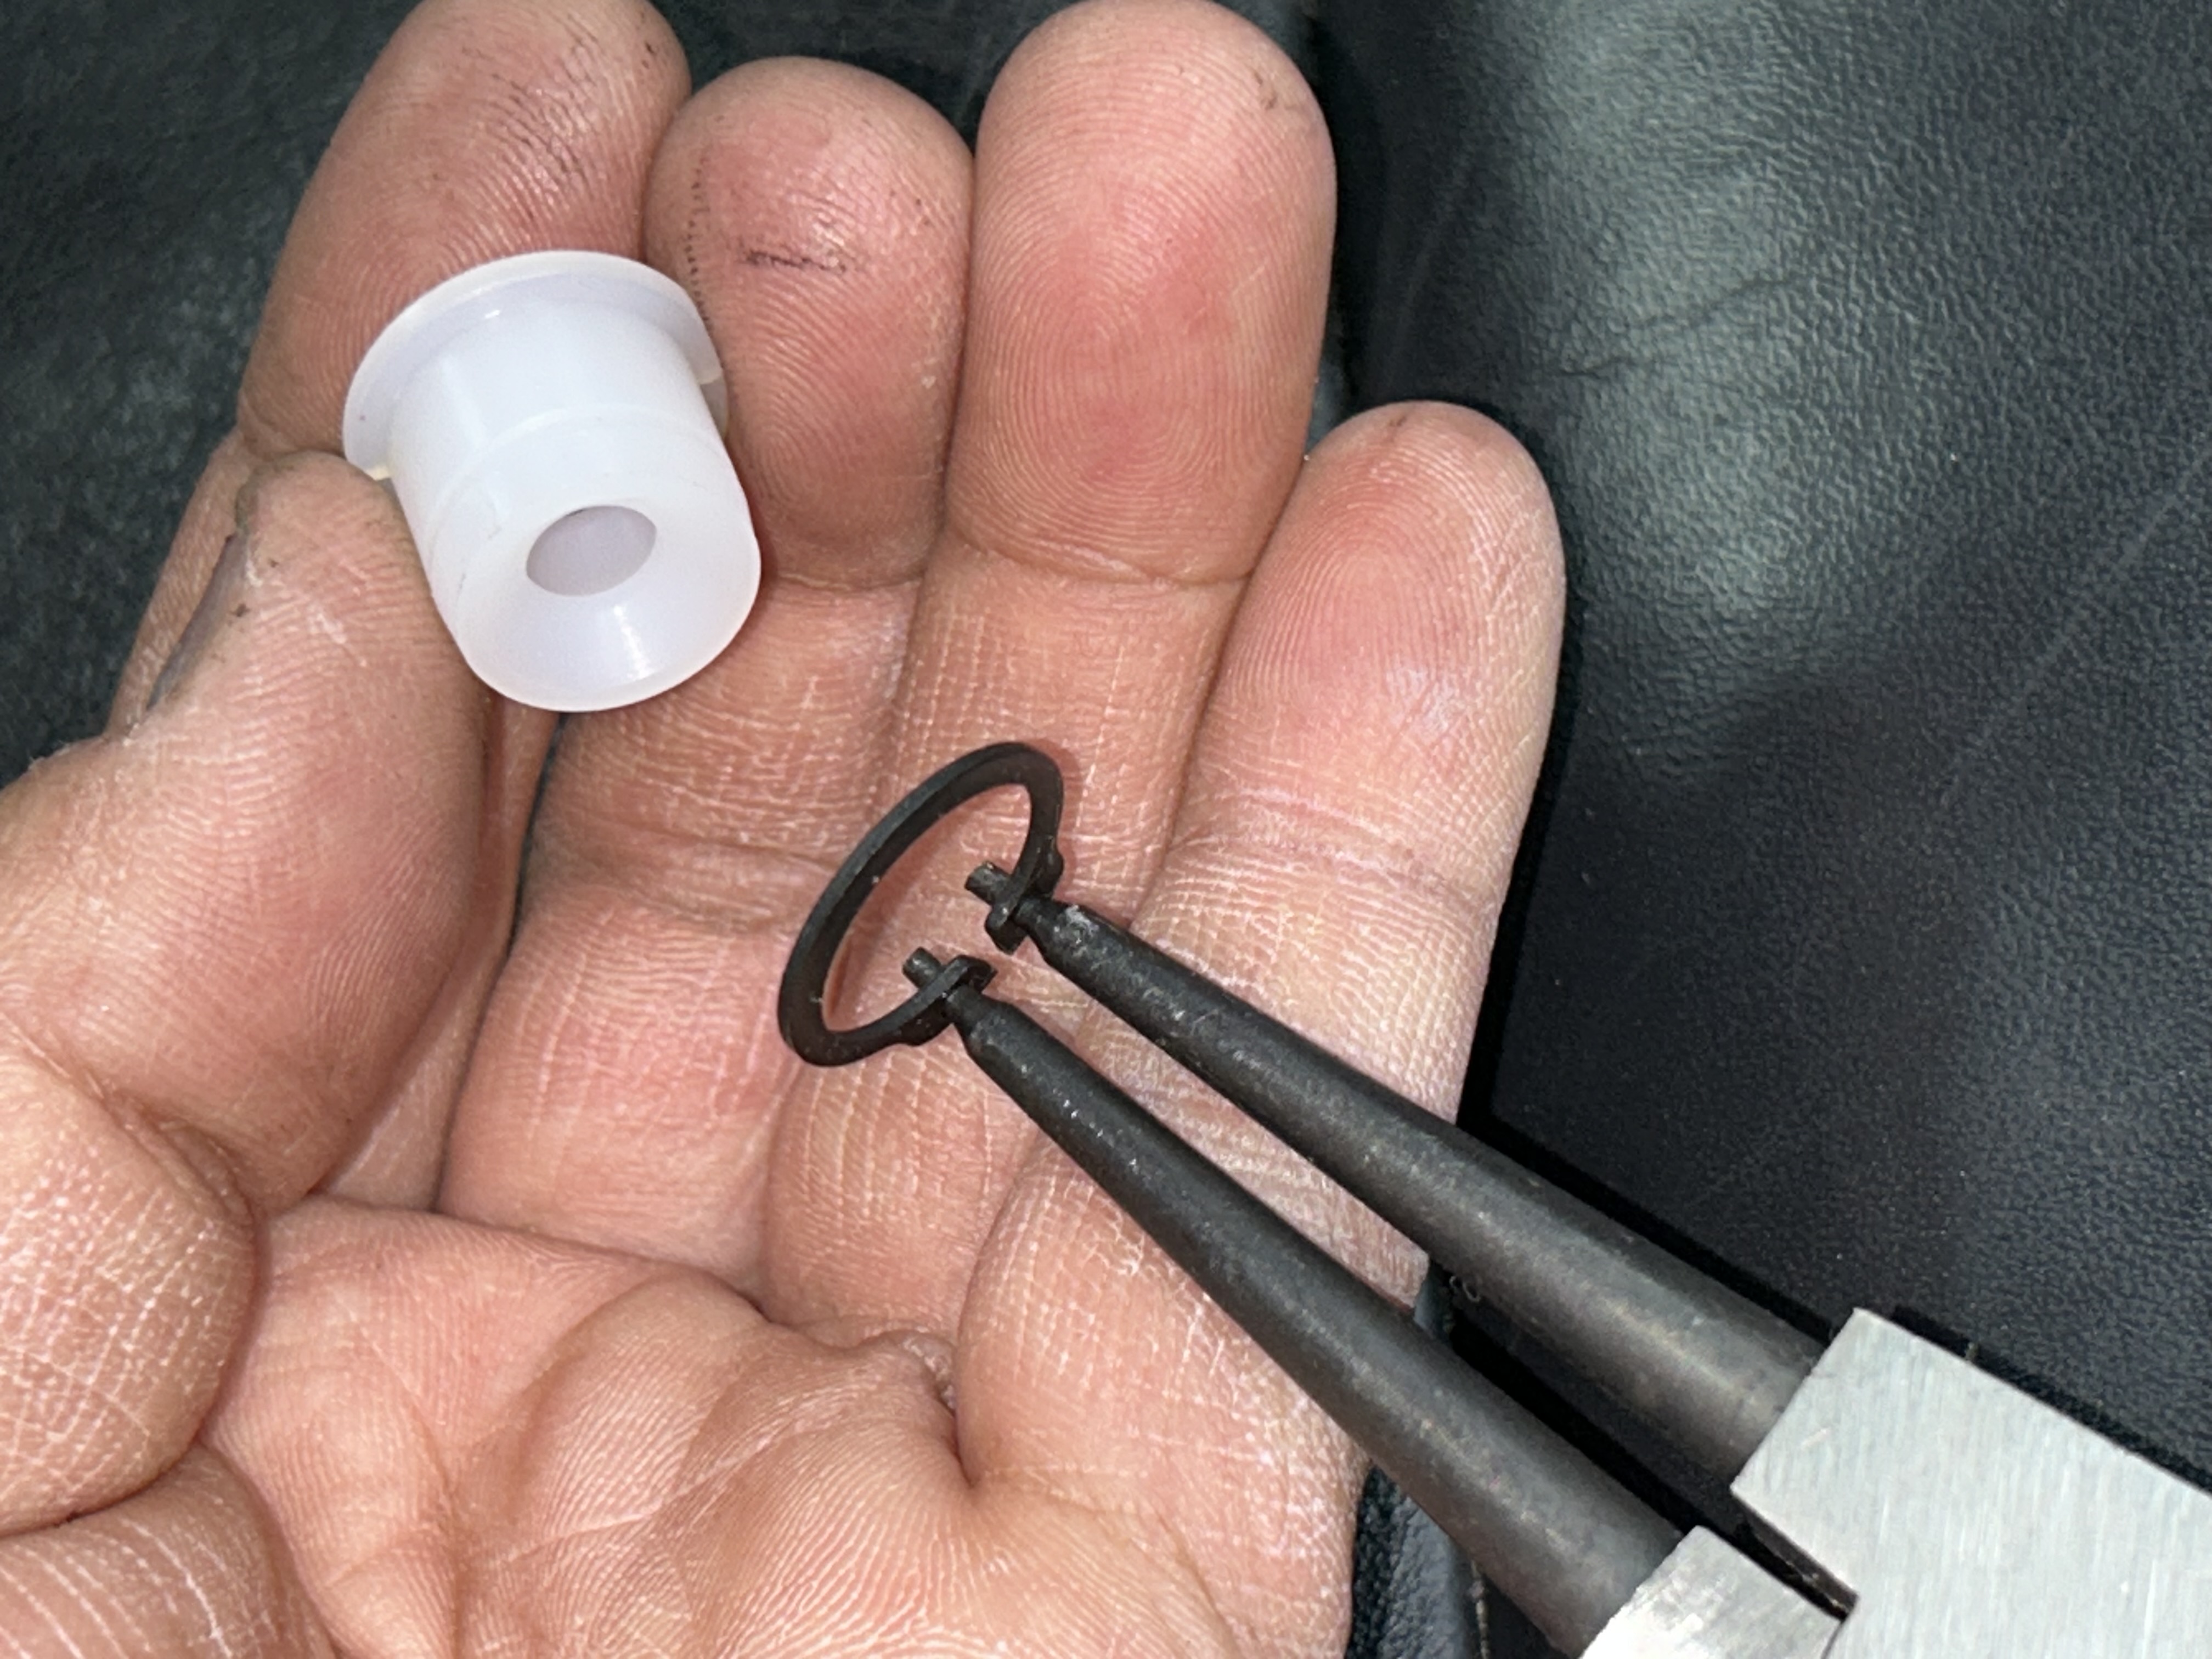
Use long nose pliers or a pick tool to help guide the bushing onto the loop end of the shifter linkage, then use a snap ring tool and slip the snap ring onto the slit of the bushing. Then, slide the end clip onto the end. I didn’t reinstall the old c-clip and it isn’t necessary to reinstall since the bushing already has the snap ring and the end clip.
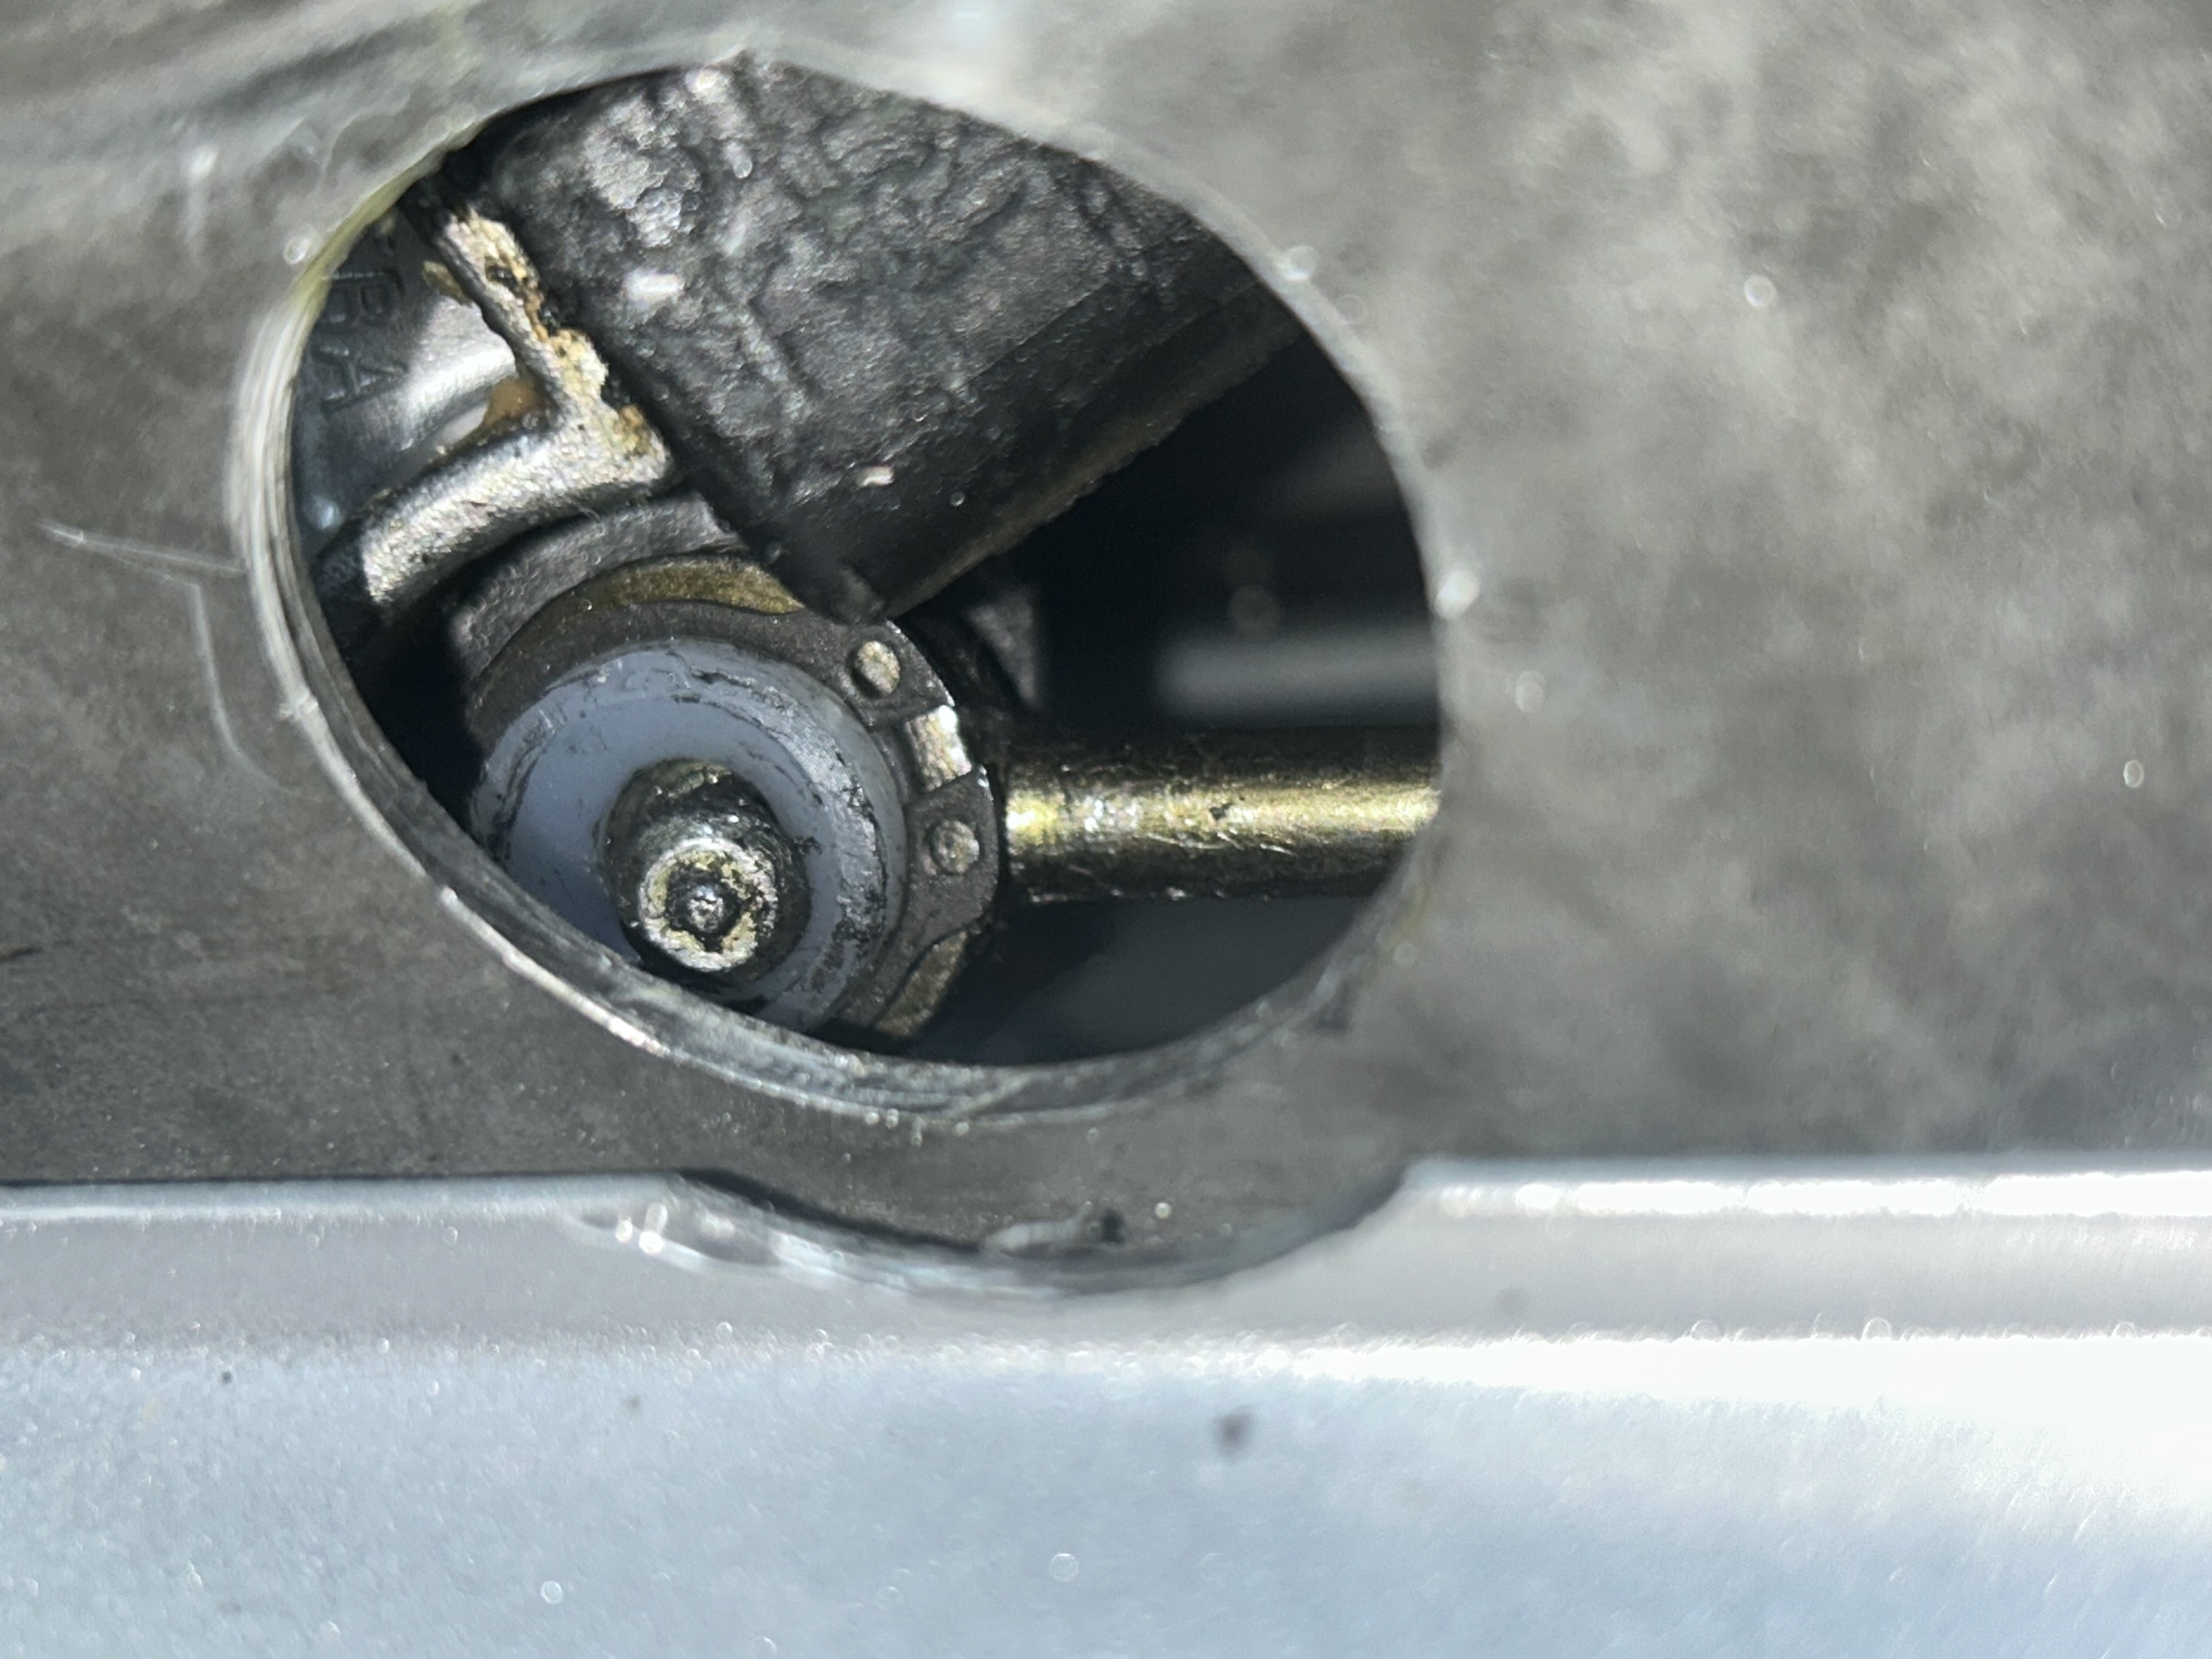
As this point, you can reinstall the shifter and the retaining C-clip atop the shifter via the (2 qty) bolts. I used white lithium grease to grease up the ball area prior to reinstall. Also, reinstall the shifter plate on the driver’s side with either the original Torx screw or with the new one included with the Dieselgeek kit.

That completes the install of the Dieselgeek Deluxe Bushing Kit on the MK1 Audi TT. After installing the kit, I could tell an immediate difference in the feeling of the shifter and it does certainly make the driving experience a lot more gratifying. Side-to-side and front-and-back slop was reduced quite a bit, and going into each gear feels more crisp.
On my own TT, the shifter bushings weren’t in that bad condition. On a scale of 1-10 in shifter feel (1 being the worst and 10 being the best, it probably went from a 4 to an 8. For those whose bushings are in much worse shape, you will probably notice an even more significant difference in feel. For the $88 I spent on this Dieselgeek Kit, I would say the improvement was just barely worth it considering the work involved to access and replace the parts. The shifter feel definitely improved and has made the driving experience more enjoyable.
")
")
")
")
")
")
")
")
")