When you make purchases through links on this site, The Track Ahead may earn an affiliate commission. Also, these posts are based off my own experiences. I am not responsible for any action you take as a result of reading this. Learn More
My Ordeal with the Last Shop
The last time I had my brakes done, I wanted this particular shop in Belmont, CA to replace all four brake pads and rotors. The materials would be provided for them since I received them as a gift. The Powerstop brake kit I had consisted of a set of cross-drilled and vented rotors with ceramic pads from Summit Racing, so I felt comfortable with the quality of the parts.
After the shop replaced the brake parts, I picked up the car and noticed right away that there was some vibration when I depressed the brake pedal. I did have vibration with the brakes prior to bringing it to the shop, but I thought that the issue resided with the rotors or pads. Therefore, if they replaced both rotors and pads, then the problem should be eliminated. I decided to do the procedure of embedding the new brake pads, which didn’t seem to make much of a difference.
The vibration got worse and worse, and finally I reached out to the shop again to see why this was happening. They informed me that they did not resurface the rotors because they normally don’t do that with new parts, however after numerous calls on the phone with them, they took the car back in and resurfaced the rotors. This helped the vibration a bit and I was able to continue driving for years after with minor to moderate vibration during braking.
When it came time to replace the brakes again, I decided handle the brake job myself. I believed the issue with the vibration of the brakes was caused by either the parts that I used in the past, or with a seized caliper. After my issues with the shop last time, I wanted to avoid that mess altogether and do the brakes myself.
Deciding on Brake Parts
Typically there are several braking characteristics of brake pads: noise level, braking power, and dust level. Typically you can have two out of the three, meanwhile compromising on the third. For me, dust was the least of my worries since this is my daily driver. I prefer less noise and better braking power.
After lots of research on T4R.org, I narrowed my choices down to OEM brake pads and Brembo Blank rotors. I found a good deal on some OEM brake pads on eBay by making an offer to a full set I found.
One important note on the OEM brake pads for the 4th Gen Toyota 4Runner is that there are two sets of part numbers. The original brake pad design was changed (braking surface becoming smaller) for the worse. Here is a breakdown of the parts showing the part numbers that you may want to consider for the older, but better braking pads.
| Older “Better” Design | “Cheaper” Design | |
|---|---|---|
| Front Brake Pads | 04465-35290 | 04465-AZ001-TM |
| Rear Brake Pads | 04466-60090 | 04466-AZ103 |
Brake Parts I Used on my 4th Gen 4Runner
Brake Pads: Toyota OEM Brake Pads (Front) / Toyota OEM Brake Pads (Rear)
C-Clamp: C-Clamps on Amazon
Disc Brake Quiet: CRC Disc Brake Quiet 05016, 4 Fl Oz
Brake Caliper Lube: Permatex 85188 Ultra Disc Brake Caliper Lube, 0.5 oz.
How to Replace Brake Pads

Alright, here we go! Many 4th Gen 4Runner owners complain about frozen calipers, but I’m glad I haven’t experienced it yet–knock on wood.

Closer section view of the front brake pads
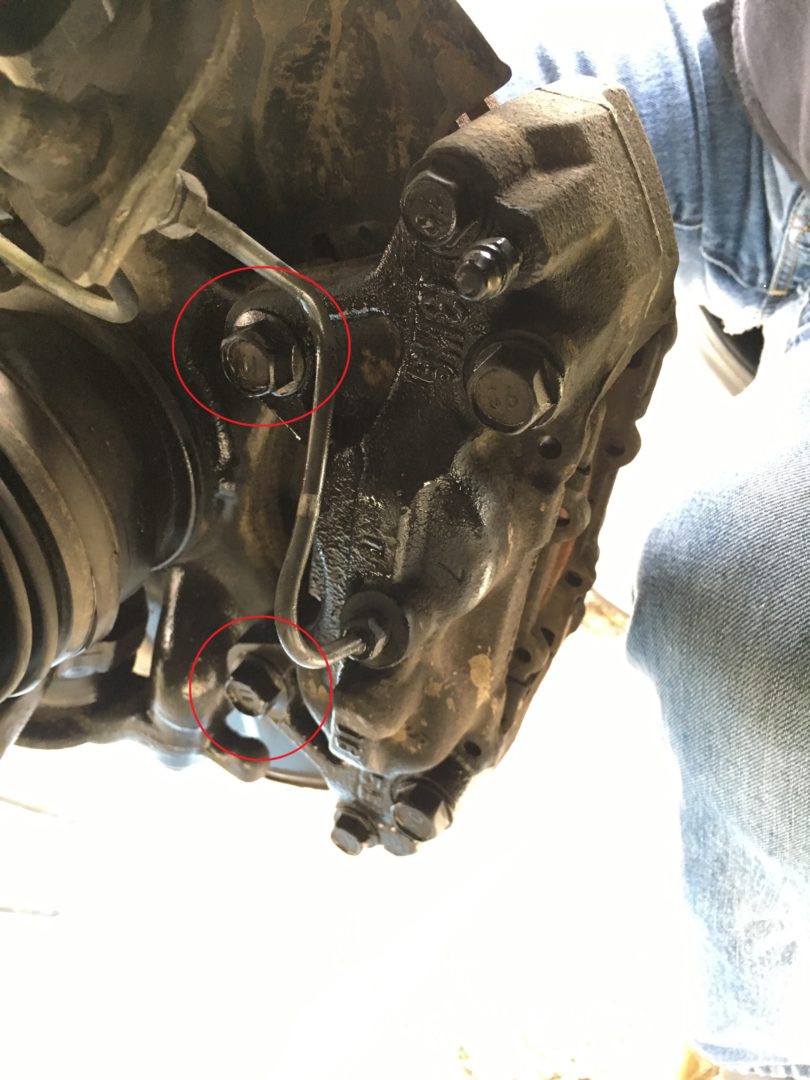
Back side of front brake caliper where you can see the two caliper mounting bolts (two larger bolts towards the top of photo circled in red) that hold the caliper in place. If you are only replacing the brake pads, you will not need to remove these mounting bolts necessarily, however since I was replacing the rotors as well, I had to take these bolts out.
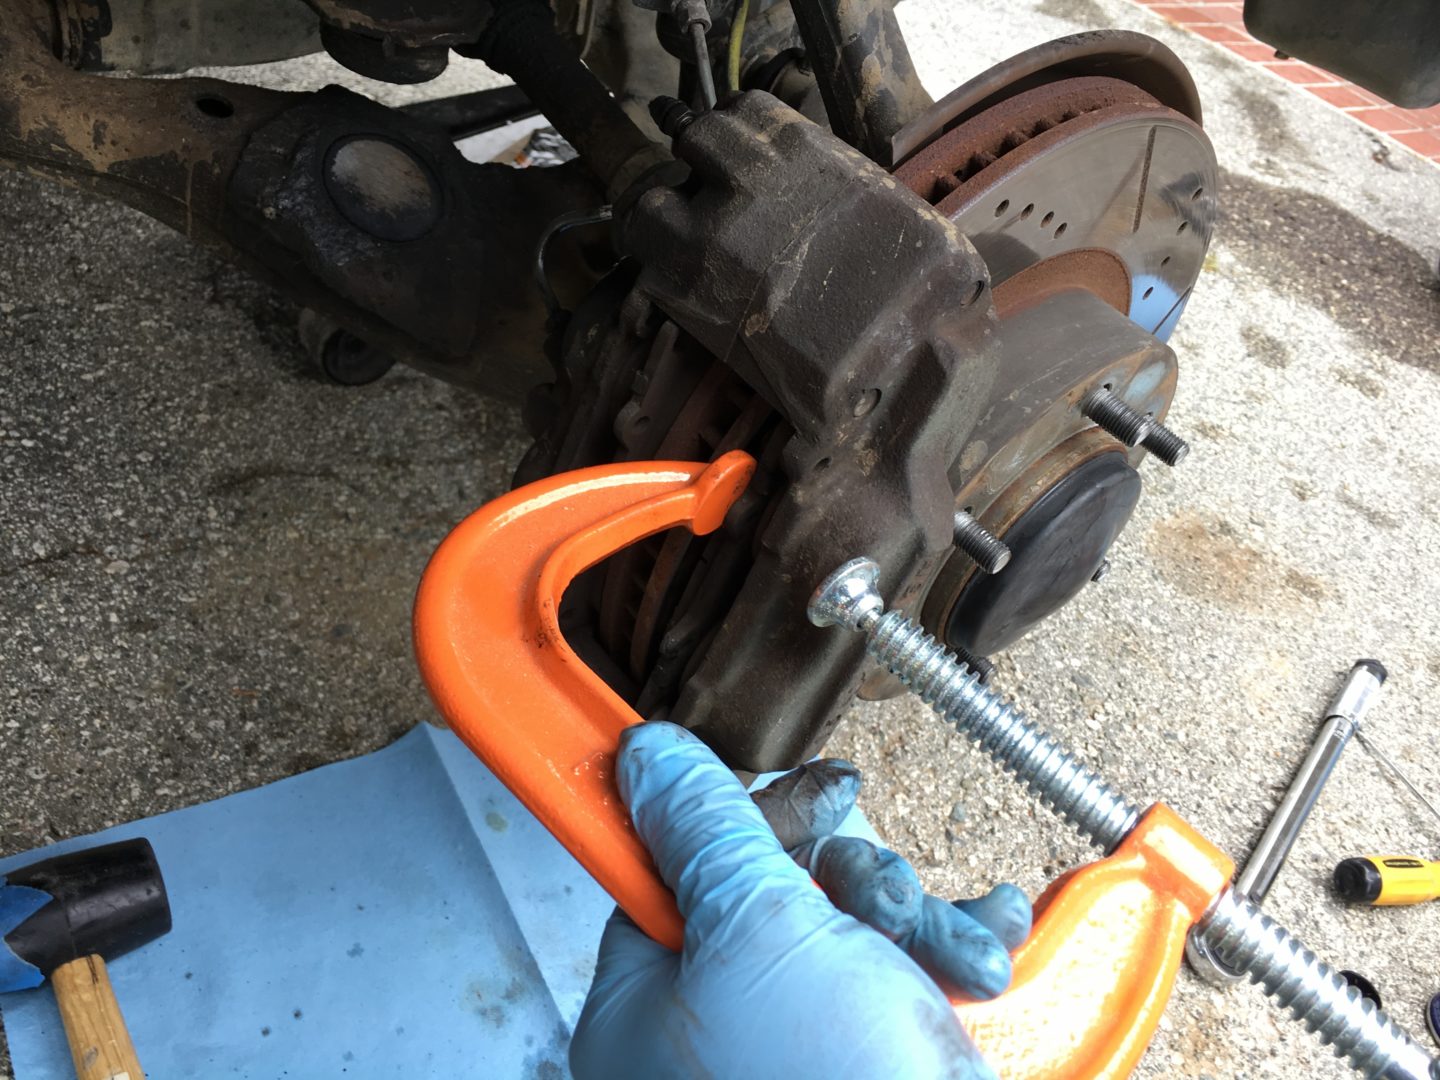
Start by using a c-clamp to depress the brake caliper pistons. Press between the brake pad and caliper itself to release pressure.
It’s a tad difficult to get a good surface to push against, but this was enough for me to loosen up the pressure. Repeat for all pistons.

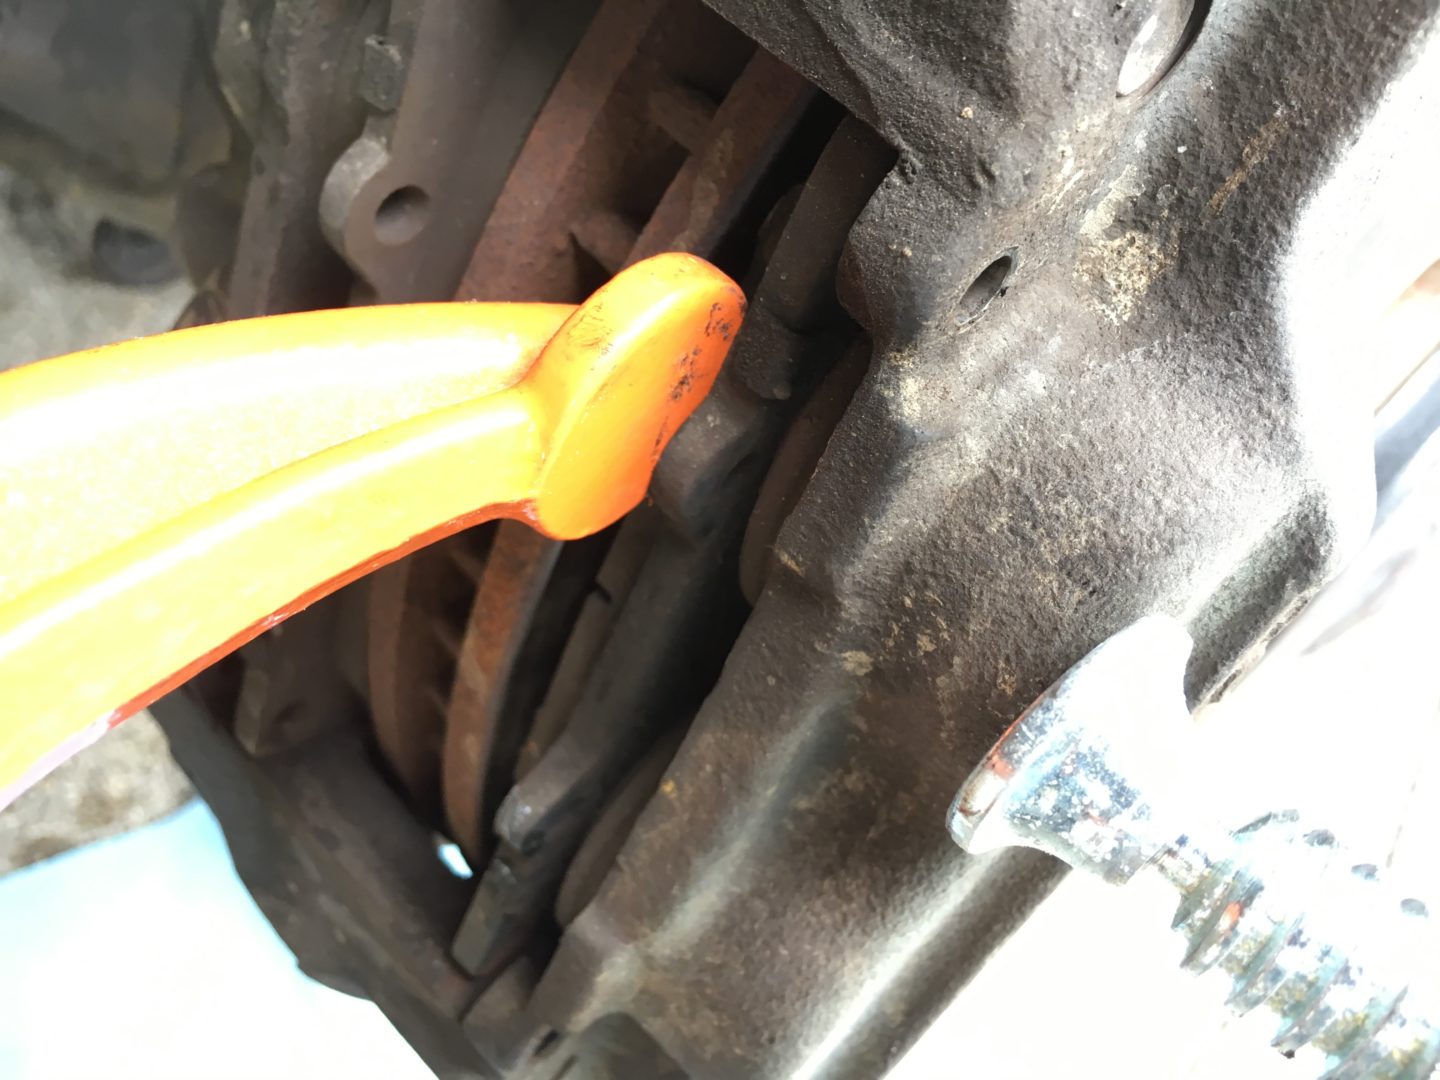
With the pressure loose and the caliper mounting bolts removed, the brake pads should be able to slide out and the caliper left hanging. You don’t want to let it hang and cause the brake line to break or rupture. I used a wire between the caliper mounting bolt hole and something secure above it.

You will find it difficult to fit brand new brake pads in if the caliper pistons are not fully depressed. Use a c-clamp to fully depress the caliper pistons on both sides.

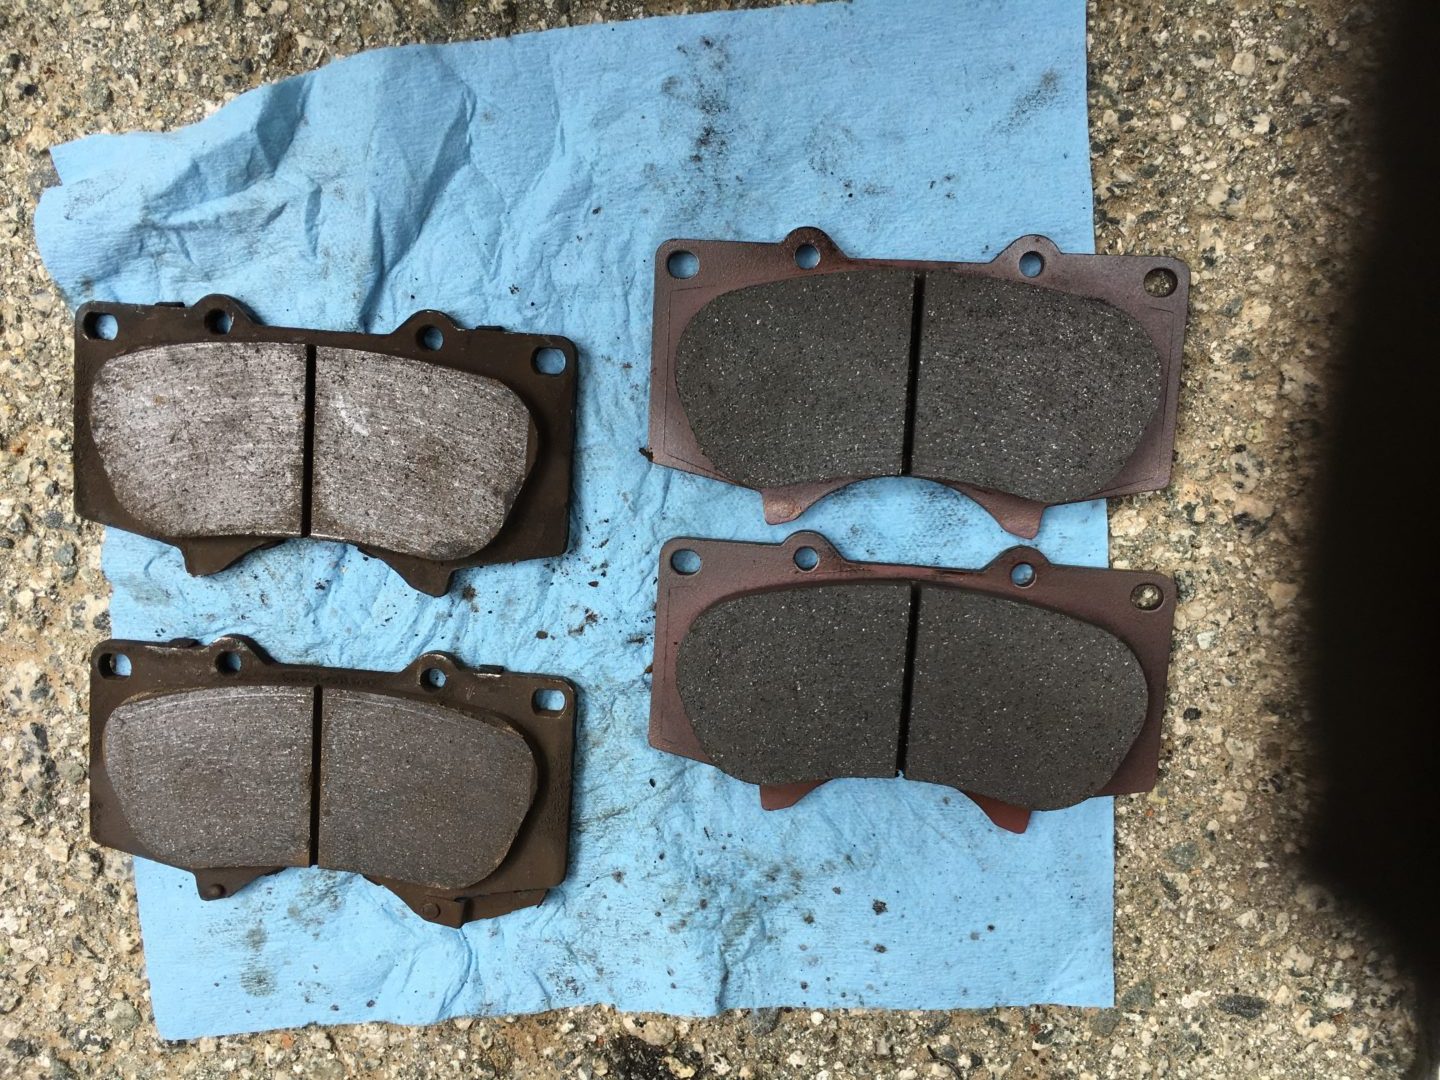
New Toyota OEM brake pads on the left, old brake pads on the right.

A section view showing the thickness of brake pad material between the new brake pads on the left and the old brake pads on the right.
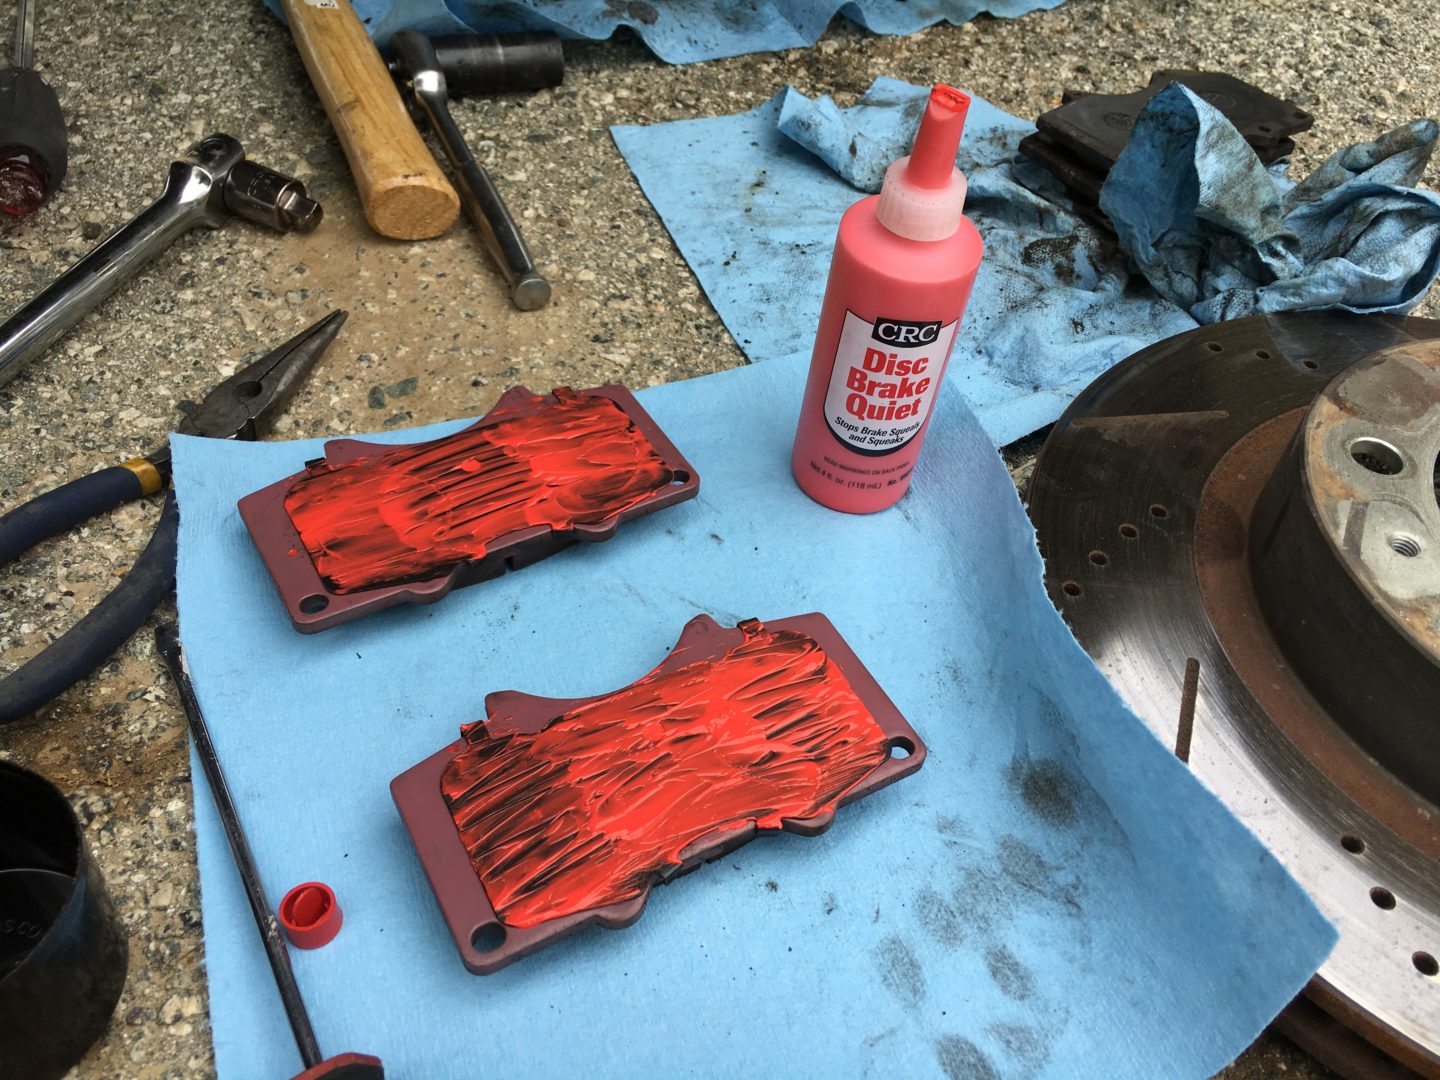
Applying a healthy dose of Disc Brake Quiet on the backside of the new brake pads to reduce any potential squeals during braking operation.
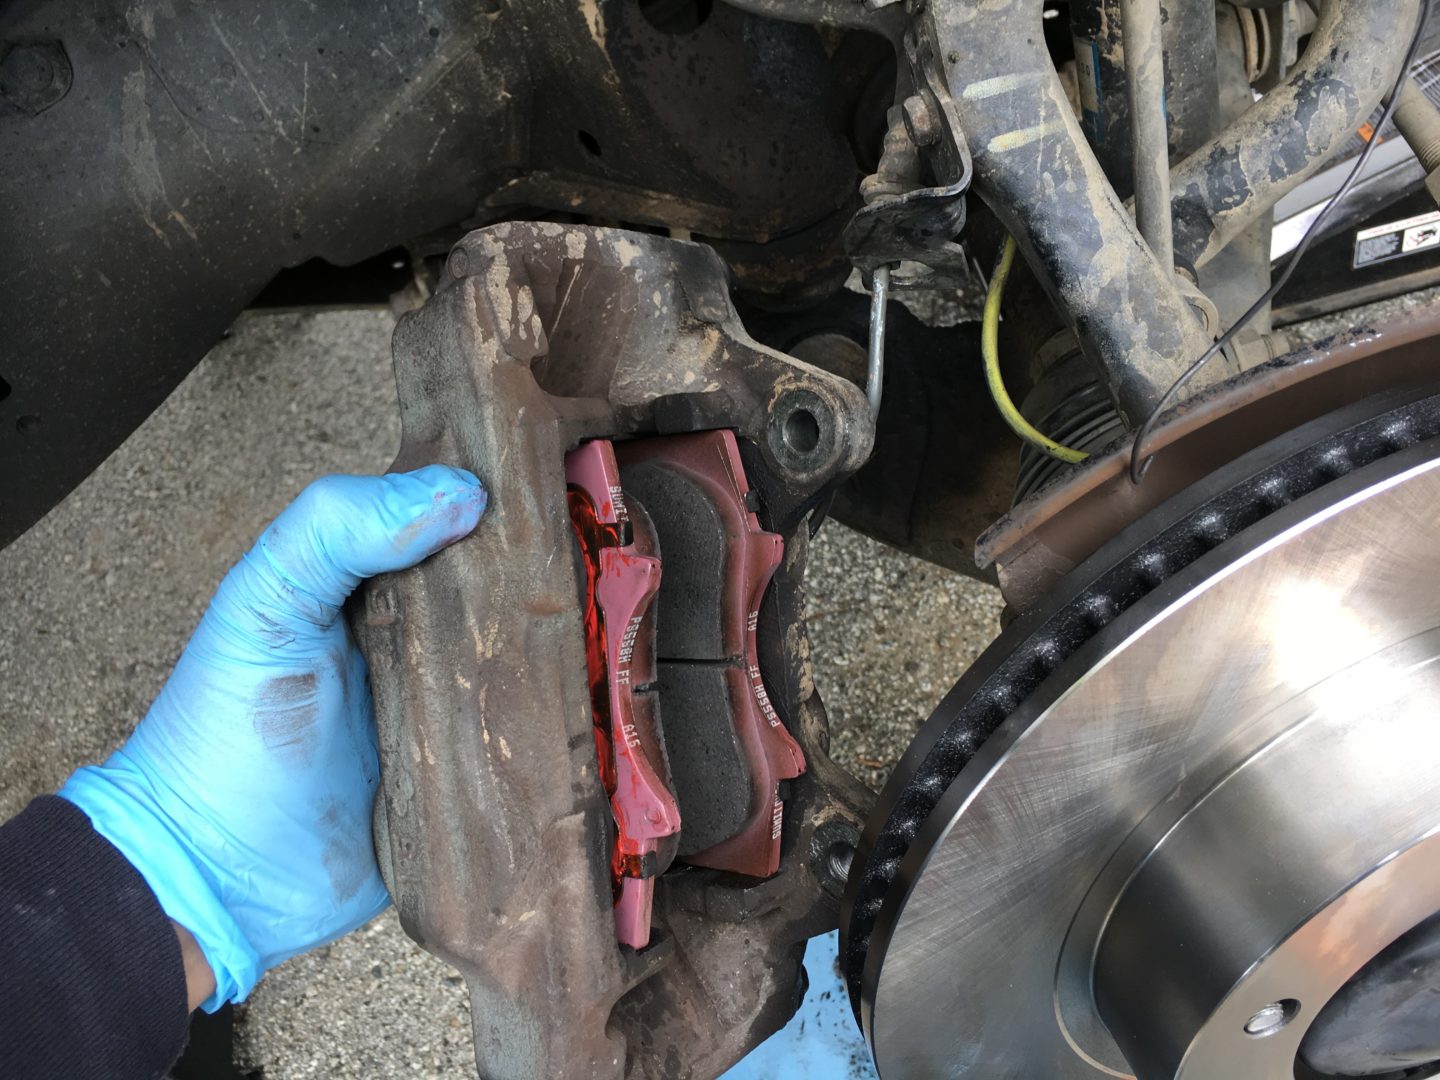
New brake pads inserted into the brake caliper ready to be put back on over the newly installed Napa Premium Rotors.

When putting the brake lines back into place, ensure the clip holding the line securely in re-installed properly.
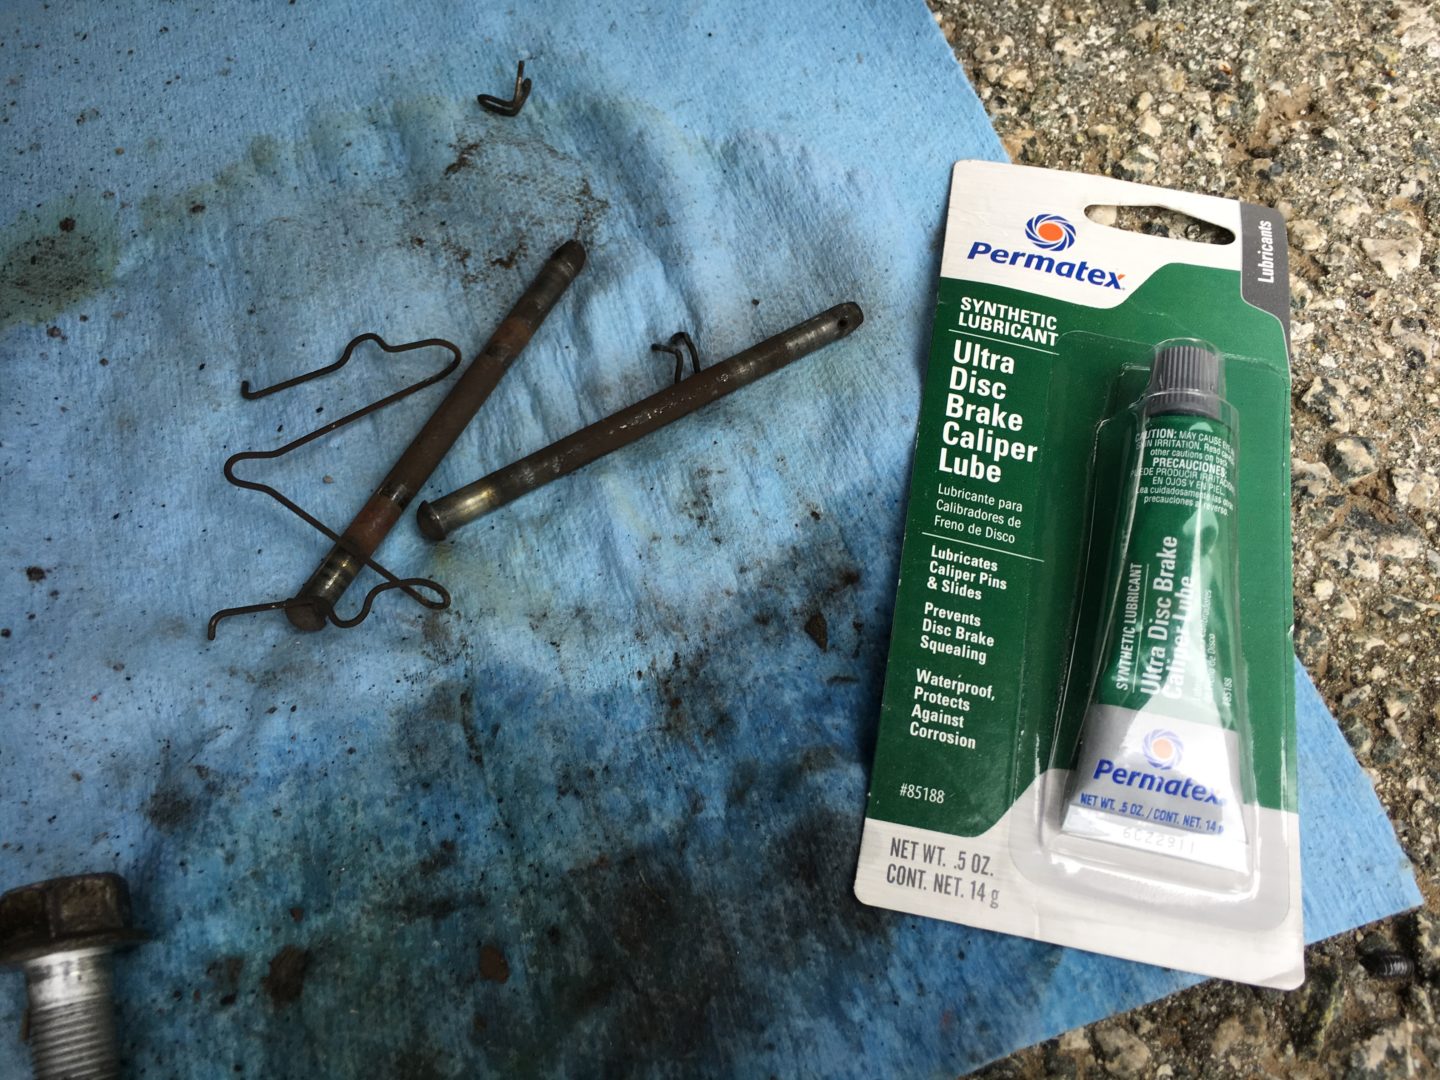
Oh, and don’t forget to lube up those pins and clips with lube to further reduce any noise during braking operation!

All lubed up and ready to put back in.

Ensure that the pins are inserted while the center clip is in place. The mini safety clip at the end will keep the pins from coming out.
Since the brake calipers were depressed manually when the brake pads were installed, the first few depressions of the brake pedal will feel loose. After a couple of pumps on the brakes, the brake pad should return back to normal.
If you’re looking for more write-ups on brakes on the 4th generation Toyota 4Runner, I have them here:
Brake Rotor Replacement
Brake Caliper Replacement
How to Bleed Brakes by Yourself
Brake Pad Break in
The last thing to do before operating the vehicle normally should be a proper embedding procedure of brake pads. This embedding process helps transfer an even layer of the brake pad onto the rotor, which can improve pedal feel, reduce or eliminate brake squeal, prevent (and often cure) brake judder, reduce brake dust, and extend the life of pads and rotors (Zeckhausen).
The general procedure is to make a series of hard but steady stops in order to heat up the brake caliper/pads. This allows the transfer of deposits from the brake pad to the caliper. Care must be taken not to keep the brake pedal depressed for a long period of time since they brakes are very hot. An excellent brake bedding in procedure can be found here from Zeckhusen Racing. Another good reference for a break in procedure for brakes is TireRack.
Final Result
It turns out that none of the brake calipers were frozen, which was great news. After a proper embedding of the brake pads, I noticed that the braking was smooth as butter. It was seriously a difference of night and day. Although my previous brakes were done by a shop and my new brakes were done by myself, I can’t say expect there to be a difference in the installation or replacement of the brake parts. I would have to chalk up the difference in the result in bad brake parts in the past. I’m just glad that I can now brake smoothly and safely with these new brakes.
: 4th Gen Toyota 4Runner")

: 4th Gen Toyota 4Runner")
: 4th Gen Toyota 4Runner")

: 4th Gen Toyota 4Runner")
: 4th Gen Toyota 4Runner")


2 Comments
Hey Scott, can’t seem to load your article about rotor replacement. I’d love to check it out! Thanks
Hi Martin, my apologies for the broken link. I’ve fixed the link so it should work now. I also have all my 4th gen 4Runner links on the projects page, thanks for letting me know about the link!