
When you make purchases through links on this site, The Track Ahead may earn an affiliate commission. Also, these posts are based off my own experiences. I am not responsible for any action you take as a result of reading this. Learn More
Seizing Calipers on the 4Runner
The 4th generation Toyota 4Runner OEM brake calipers are notorious for becoming seized over time. This can lead to symptoms as minor as uneven brake pressure while depressing the brake pedal, to something more extreme such as the brake caliper completely seizing up.
The process for replacing the brake calipers is not difficult, nor is it time consuming. What is difficult, is the gathering of information and parts for the brake caliper replacement. I’ve outlined some of the pitfalls that I ran into while replacing the brake calipers on my 2003 Toyota 4Runner, meanwhile providing a walk-through of my brake caliper replacement.
If you are replacing the brake calipers and the other brake parts haven’t been serviced for some time, it may be a good time to do them at the same time:
Brake Pad Replacement
Brake Rotor Replacement
Brake Caliper OEM Part Numbers
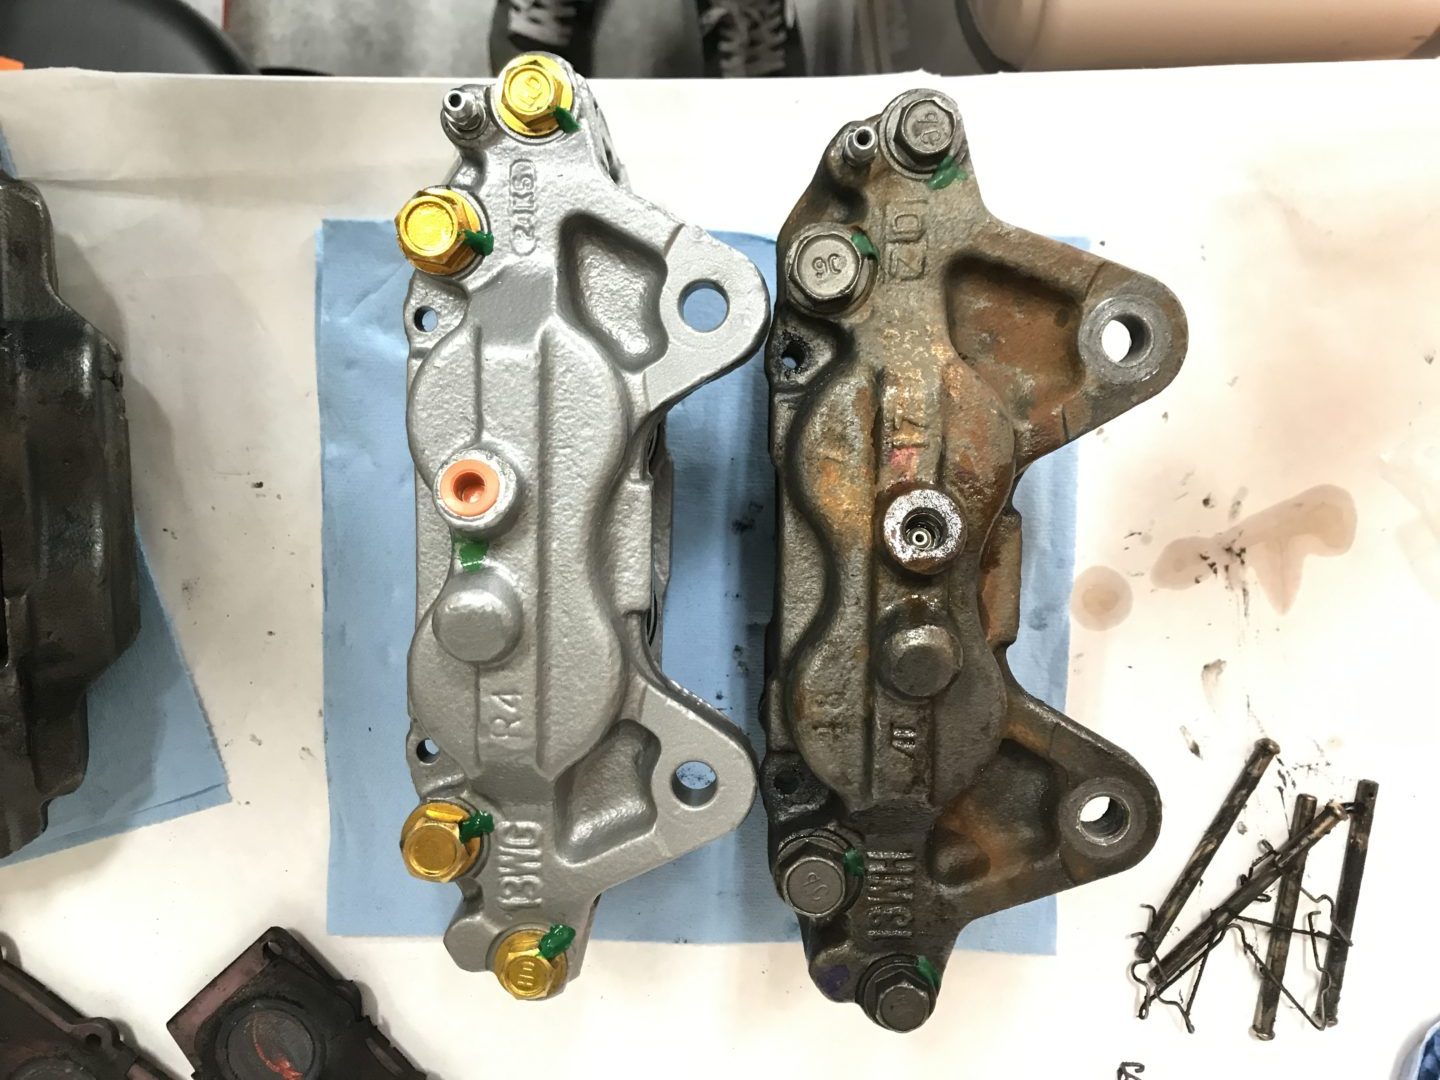
I normally like to use OEM Toyota parts if I can; I’ve included the part numbers below for your reference. Keep in mind there are some size variations of the front caliper depending on whether you have the SR5/Limited or Sport edition of the 4th gen 4Runner. The rear calipers are the same size no matter what trim you have.
Front Left
47750-60261 (stamped ‘WH’ – larger calipers for Sport Edition)
47750-35411 (stamped ‘WG’ – smaller calipers for SR5/Limited)
Front Right
47730-60261 (stamped ‘WH’ – larger calipers for Sport Edition)
47730-35411 (stamped ‘WG’ – smaller calipers for SR5/Limited)
Rear Left
47750-35170 (same size for SR5/Sport/Limited)
Rear Right
47730-35170 (same size for SR5/Sport/Limited)
* If you own an SR5 or Limited trim 4th generation Toyota 4Runner and are interested in upgrading to the Sport Edition brakes (larger calipers and rotors), you must change several out several things: calipers, rotors, and dust shields. The dust shield needs to be changed out or trimmed (at your own risk) in order to have the larger rotors fit. Brake pads are the same size no matter which trim you have.
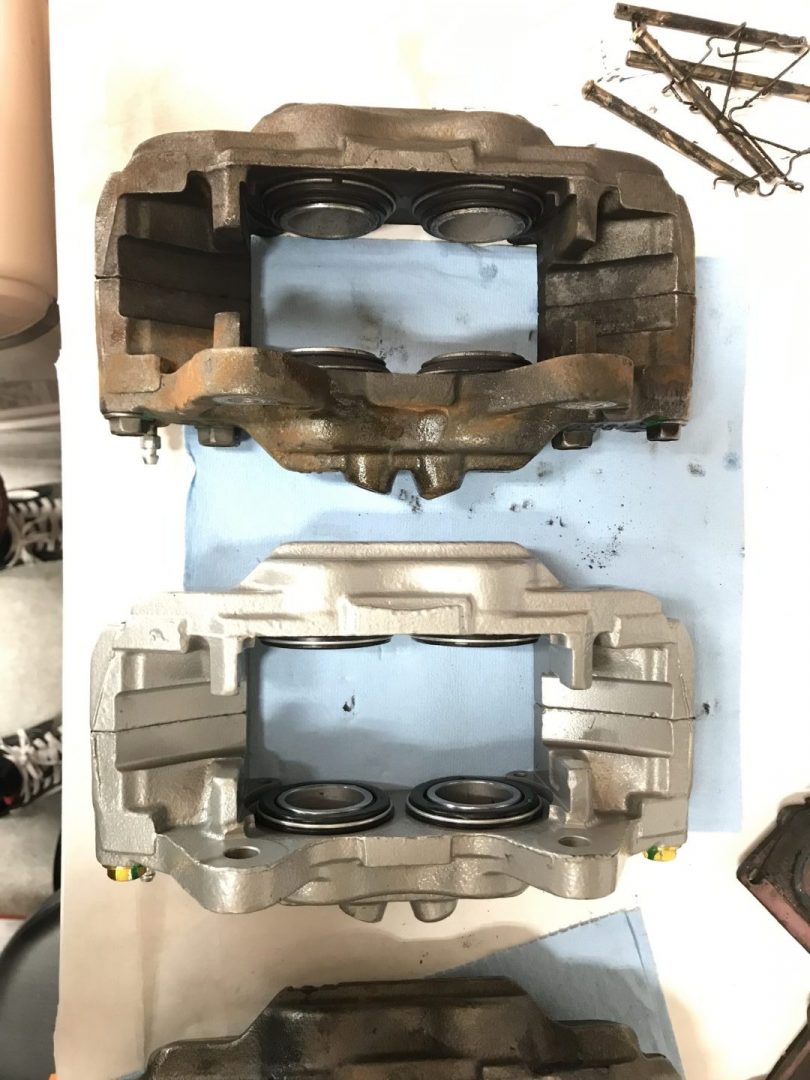
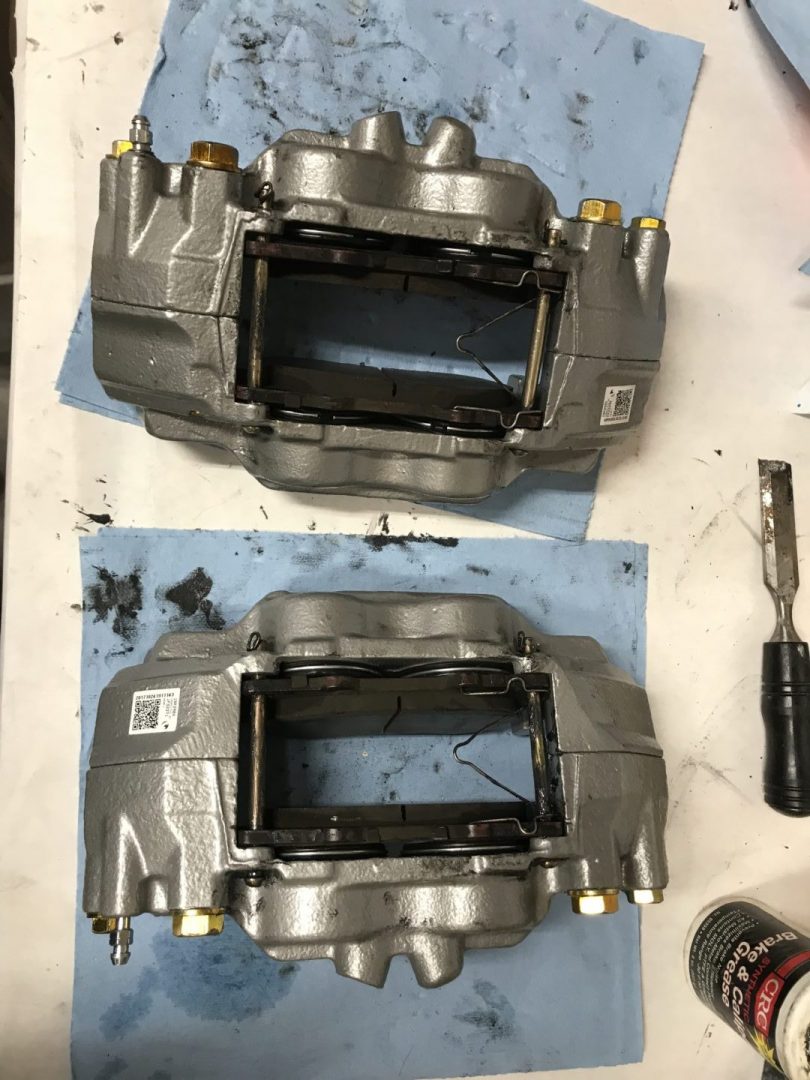
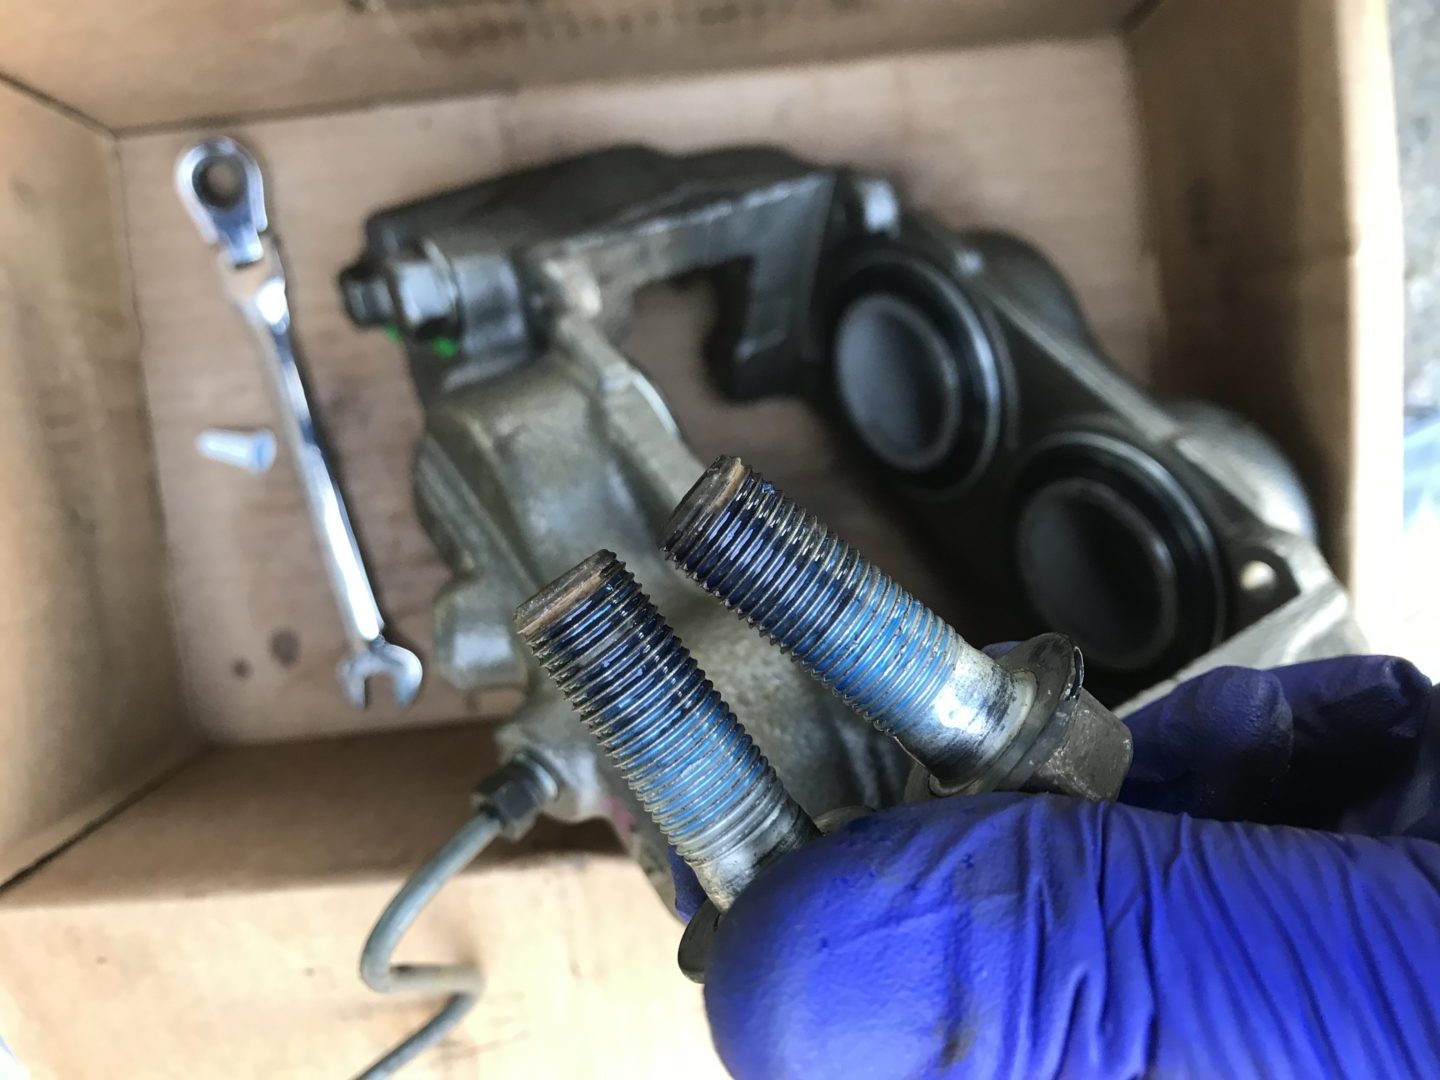
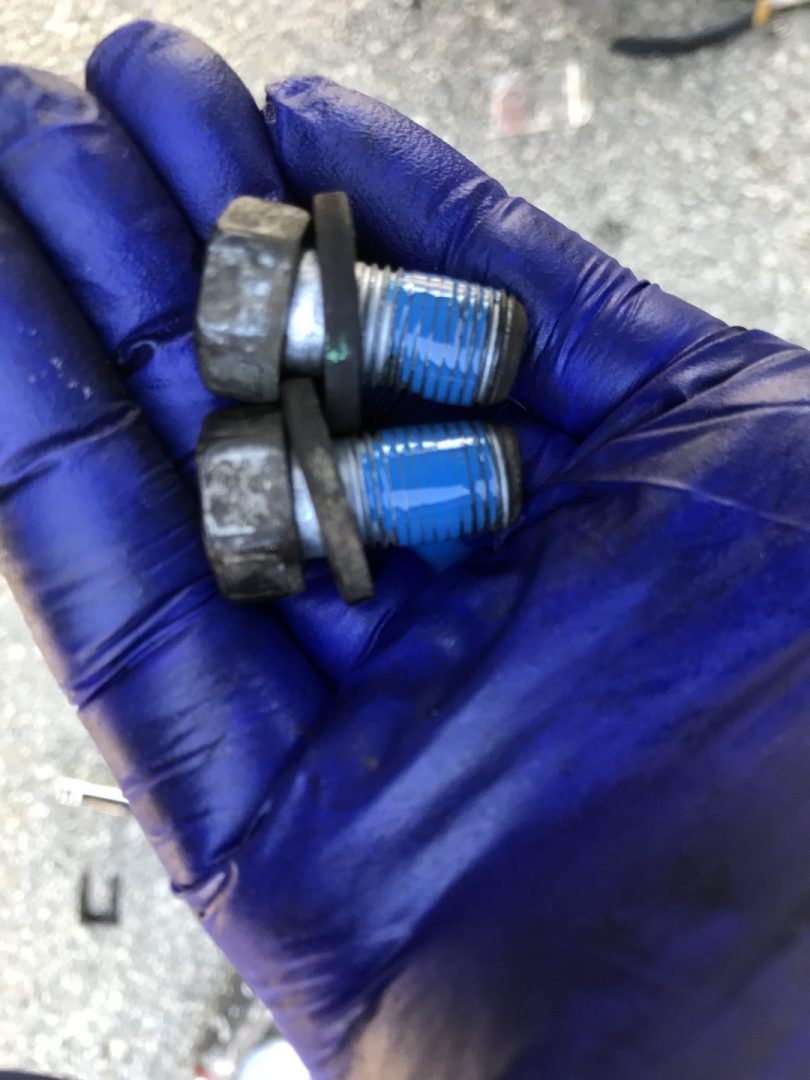
The pictures below show the differences between the larger Sport Edition ‘WH’ calipers (left) and the smaller SR5/Limited ‘WG’ calipers (right).
Brake Parts Used for this Project
Brake Calipers
Use Ebay or online Toyota OEM part sites (to search with OEM part #’s) or RockAuto (for cheaper aftermarket options).
For this project, I replaced all of my brake calipers with aftermarket calipers due to the significantly lower price compared to OEM. From my time reading about brake calipers both OEM and aftermarket, I’ve found that they all seem to exhibit seizing/freezing up issues over time. My conclusion is that it doesn’t matter which brake caliper you go with as they all tend to degrade in performance eventually.
Brake Hoses
Front Right & Left: both right and left front hoses are the same part
Rear Right
Rear Left
I chose to replace these brake hoses since I was already doing the calipers. These brake hoses can overheat over time and cause the rubber to stretch. With time, this can lead to softer feeling brakes. I chose to go with aftermarket hoses from RockAuto.
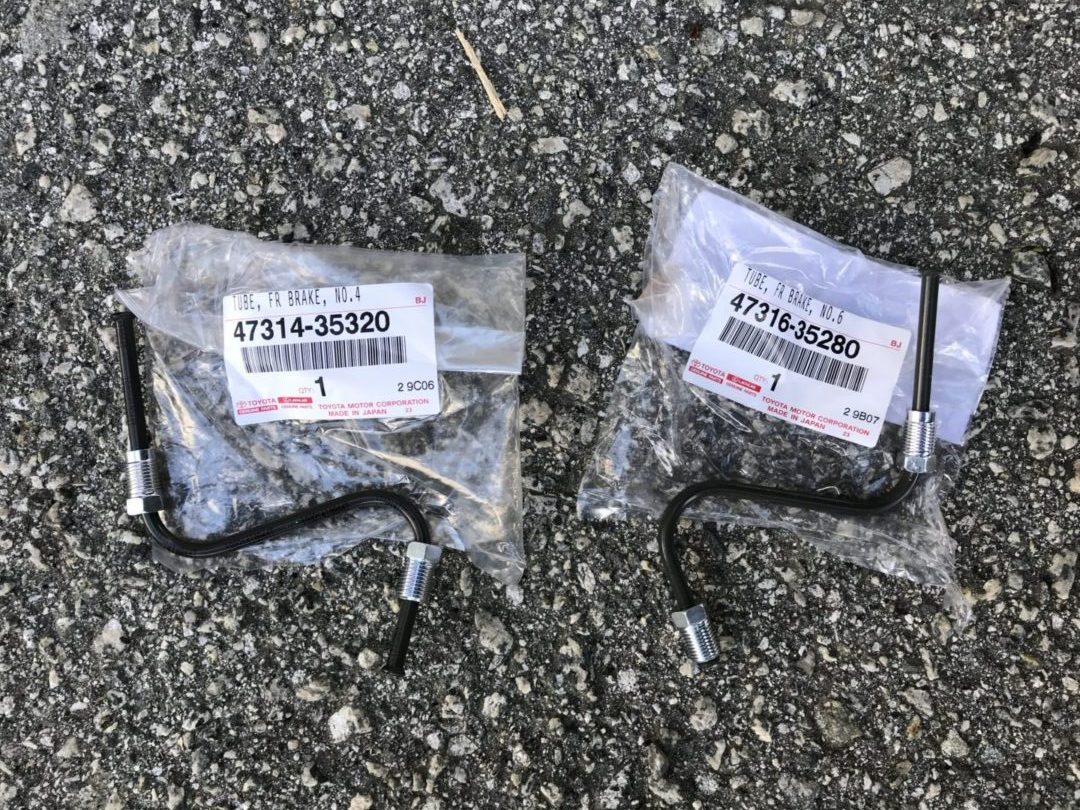
Brake Hard Lines
47316-35280: driver’s side front
47314-35320: passenger’s side front
These are the hard brake lines that connect directly between the front caliper and the flexible brake hose.
For some reason, all of the OEM Toyota online stores that would normally provide part diagrams just don’t have diagrams for the brake lines. For the diagram they do have, it is limited to only some parts of the brake system. However, I was able to find a complete diagram at a site called Japan Parts EU. Here you can see a complete parts diagram of the braking system on a 2003 Toyota 4Runner.
Brake Caliper Lube or Grease
Permatex 85188 Ultra Disc Brake Caliper Lube, 0.5 oz.
CRC 05359 Brake Caliper Synthetic Grease – 8 Wt Oz
Either one works fine, I think it works best to use the caliper lube as it provides a nice even lubricating coat all over the components. However, the grease comes with a brush attached to the cap, which makes it easy to brush on the brake hardware.
Brake Fluid
Any Dot 3 or Dot 4 for the 4th Gen Toyota 4Runner V6 (1GRE-FE), however you should make sure with your owner’s manual to be safe.
Since you’ll be introducing air into the lines during the replacement of the brake calipers (and even more so if you’re replacing the lines as well), you’ll need to bleed the brakes to purge any air in the system.
Blue Threadlocker
Search results for Blue Threadlocker on Amazon.com
This is used on the caliper mounting bolts to ensure that they stay bolted tight after re-installation. With so much vibration on these brake components, it is critical to use Threadlocker as an extra safeguard against the bolt loosening up on its own. A word of caution: do not use Red Threadlocker on these bolts. Red Threadlocker is higher strength and requires heat for removal. The ideal one to use here is medium strength Blue Threadlocker.
Penetrating Oil
Liquid Wrench L103 Penetrating Oil – 3 oz.
This is very useful for any corroded or rusted hardware, but in this case I found it very helpful on the hard brake lines. With the brake line nuts being so soft already and prone to stripping, spraying some of this penetrating fluid helps to break the hardware loose.
How to Replace Brake Calipers
Start by jacking up the car properly and placing the vehicle on jack stands. If only raising the front or the back of the vehicle, make sure to chock the wheels to keep the car from rolling. Remove all wheels and set them aside. I started with the front brake calipers.

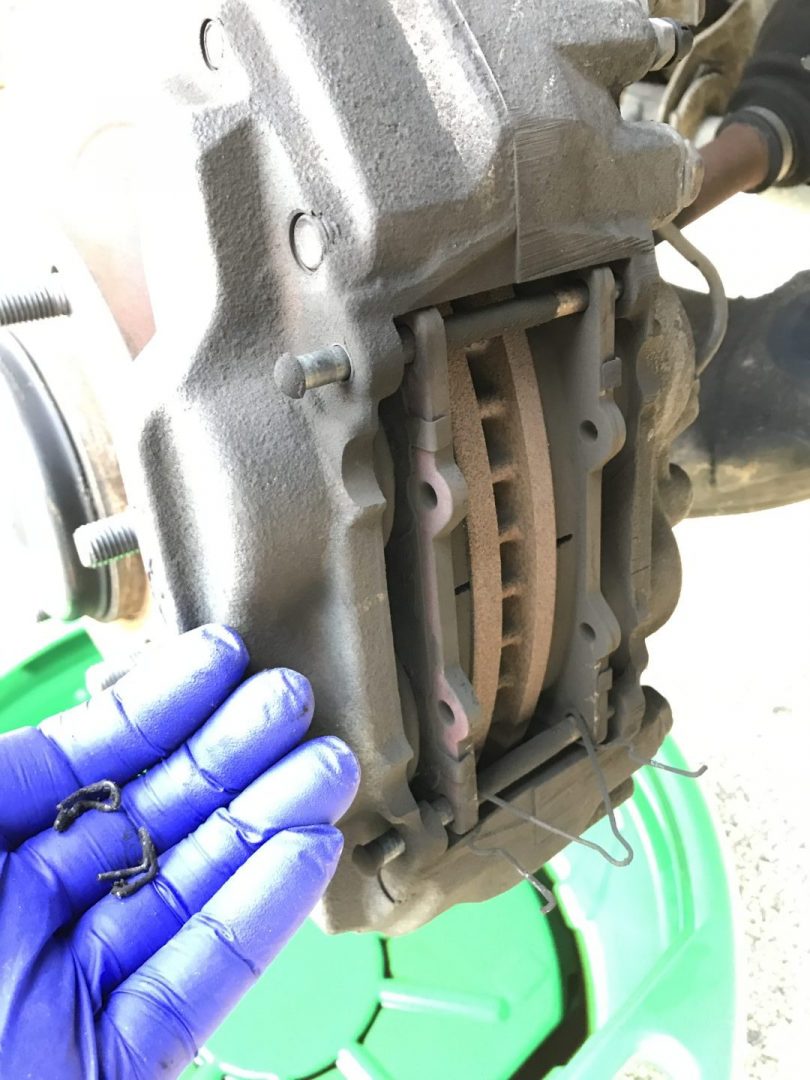
Begin disassembling the hardware by removing the c-clips, anti-rattle clip (m-shaped clip), guide pins, tension clips, and brake pads.
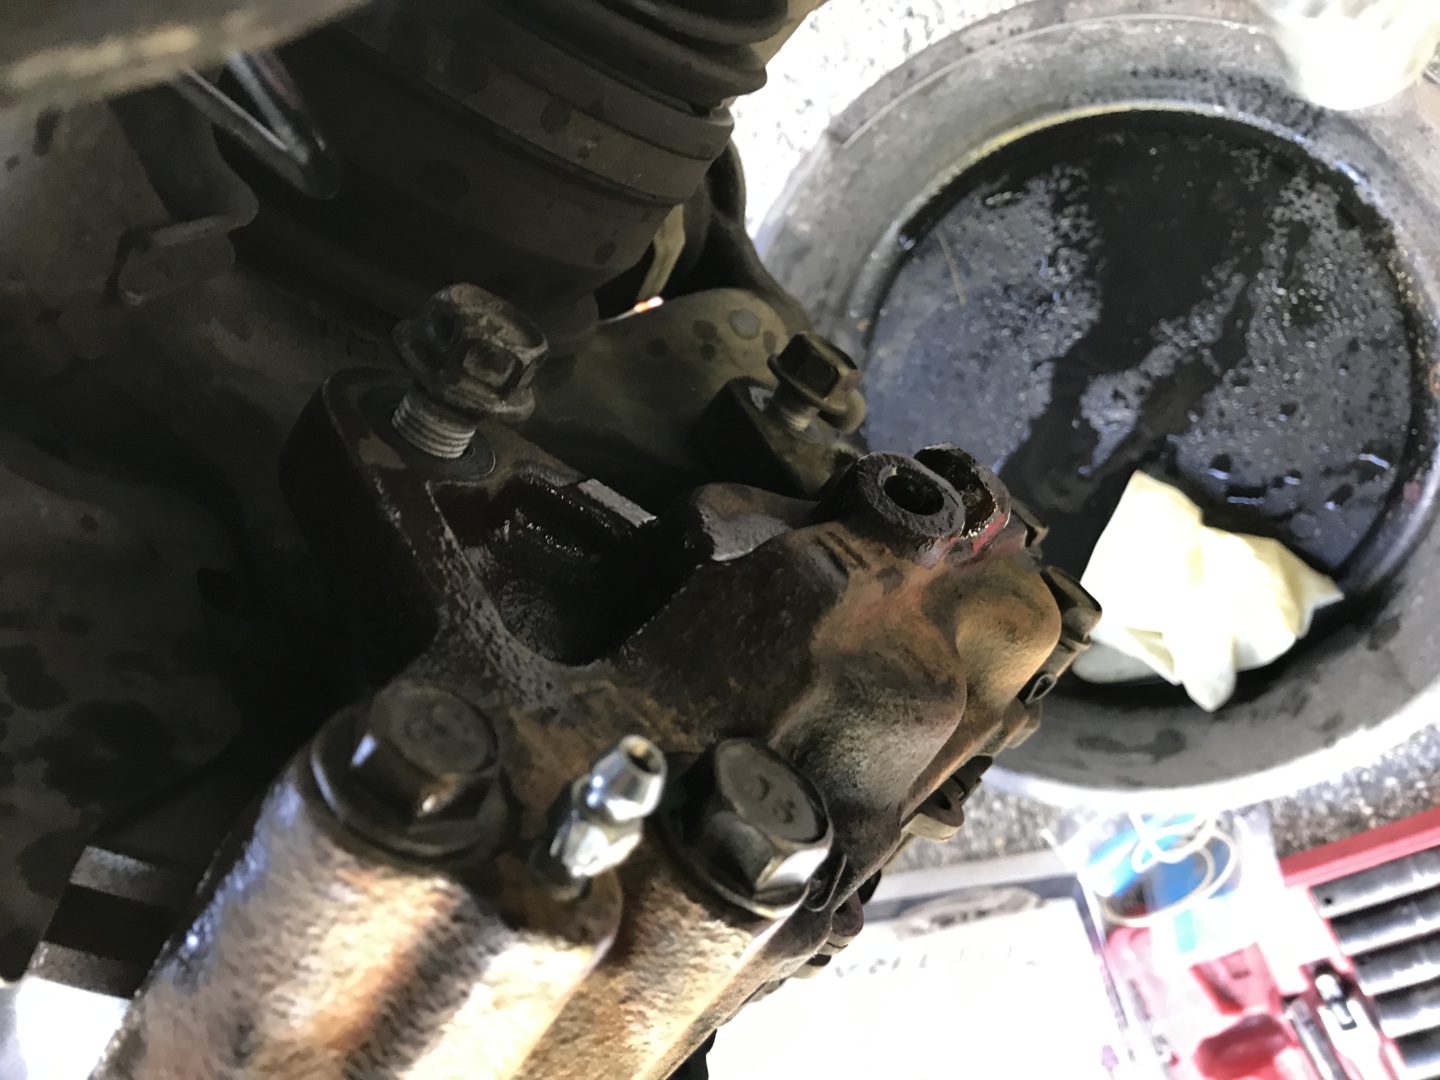
Prior to un-bolting and removing the brake caliper, it is best to break loose and remove the brake line bolts. Depending on which lines you plan to replace (if any), you need to use a combination wrench to break loose any nuts that are attached to the lines you plan to replace. Penetrating oil will be useful in loosening any hardware, which can reduce the chance of stripping of the hardware.
* Make sure to use wrenches that are of the exact size of the brake line nuts. These nuts tend to be made of softer metal and strip very easily. Using an adjustable wrench will increase the chance of stripping the nut, so avoid it if possible.
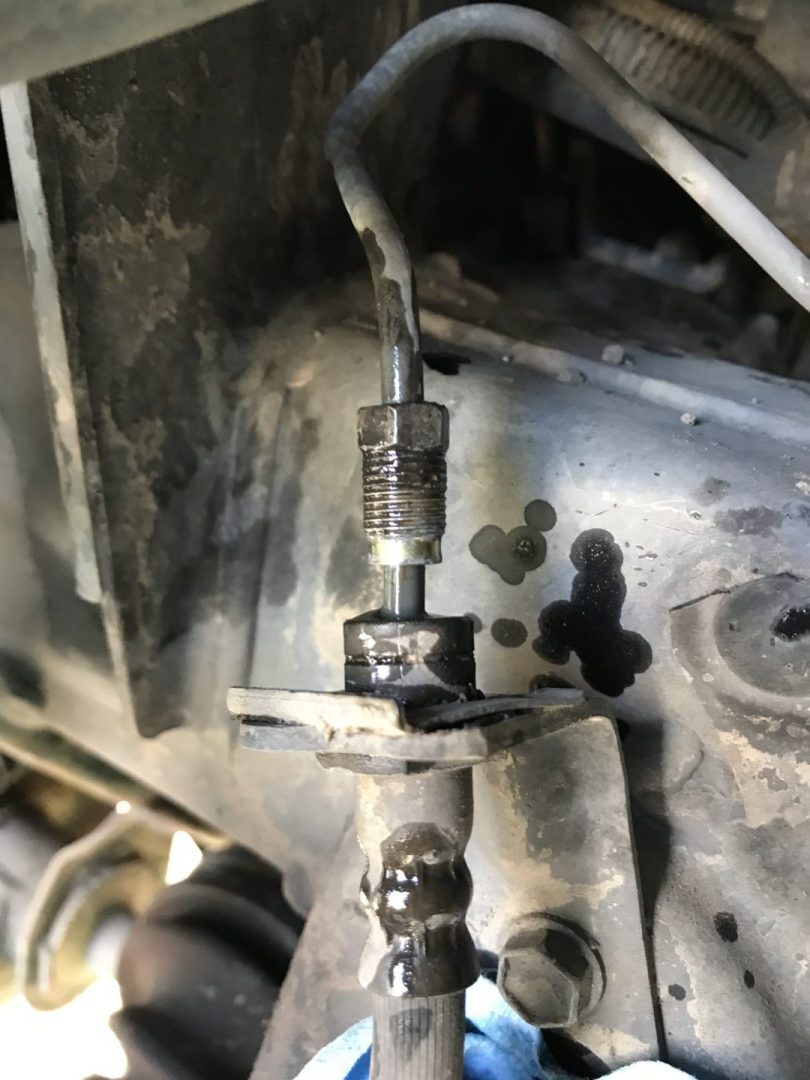
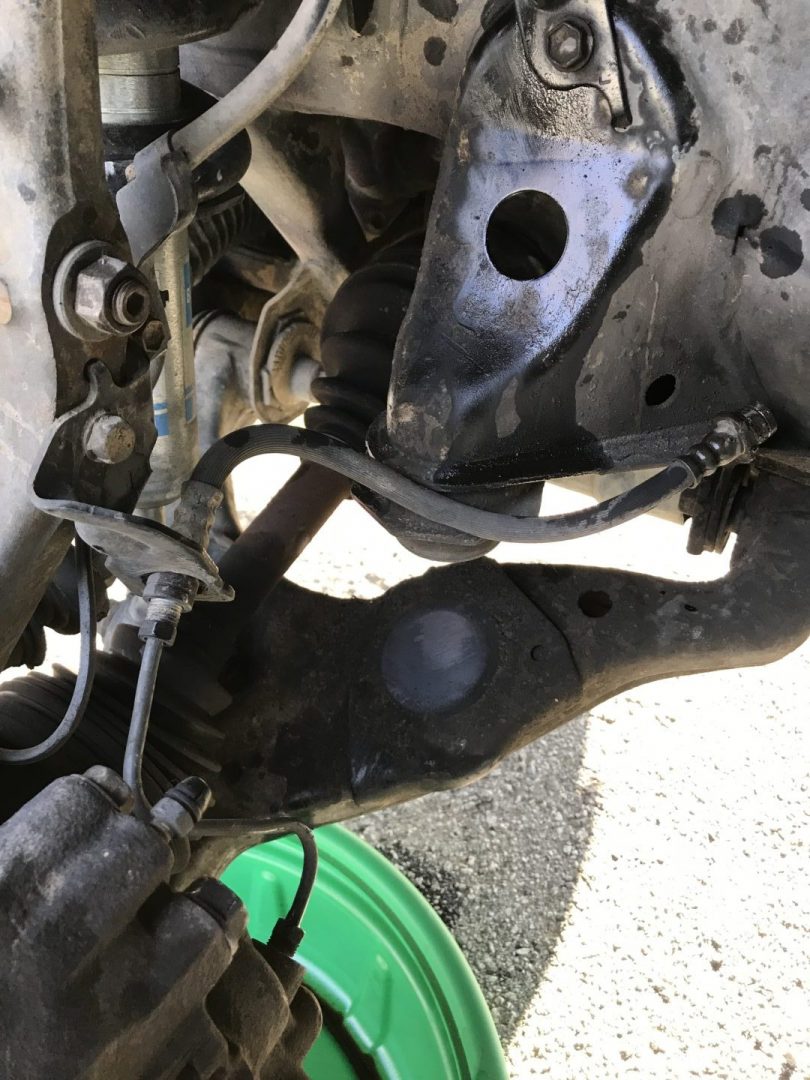
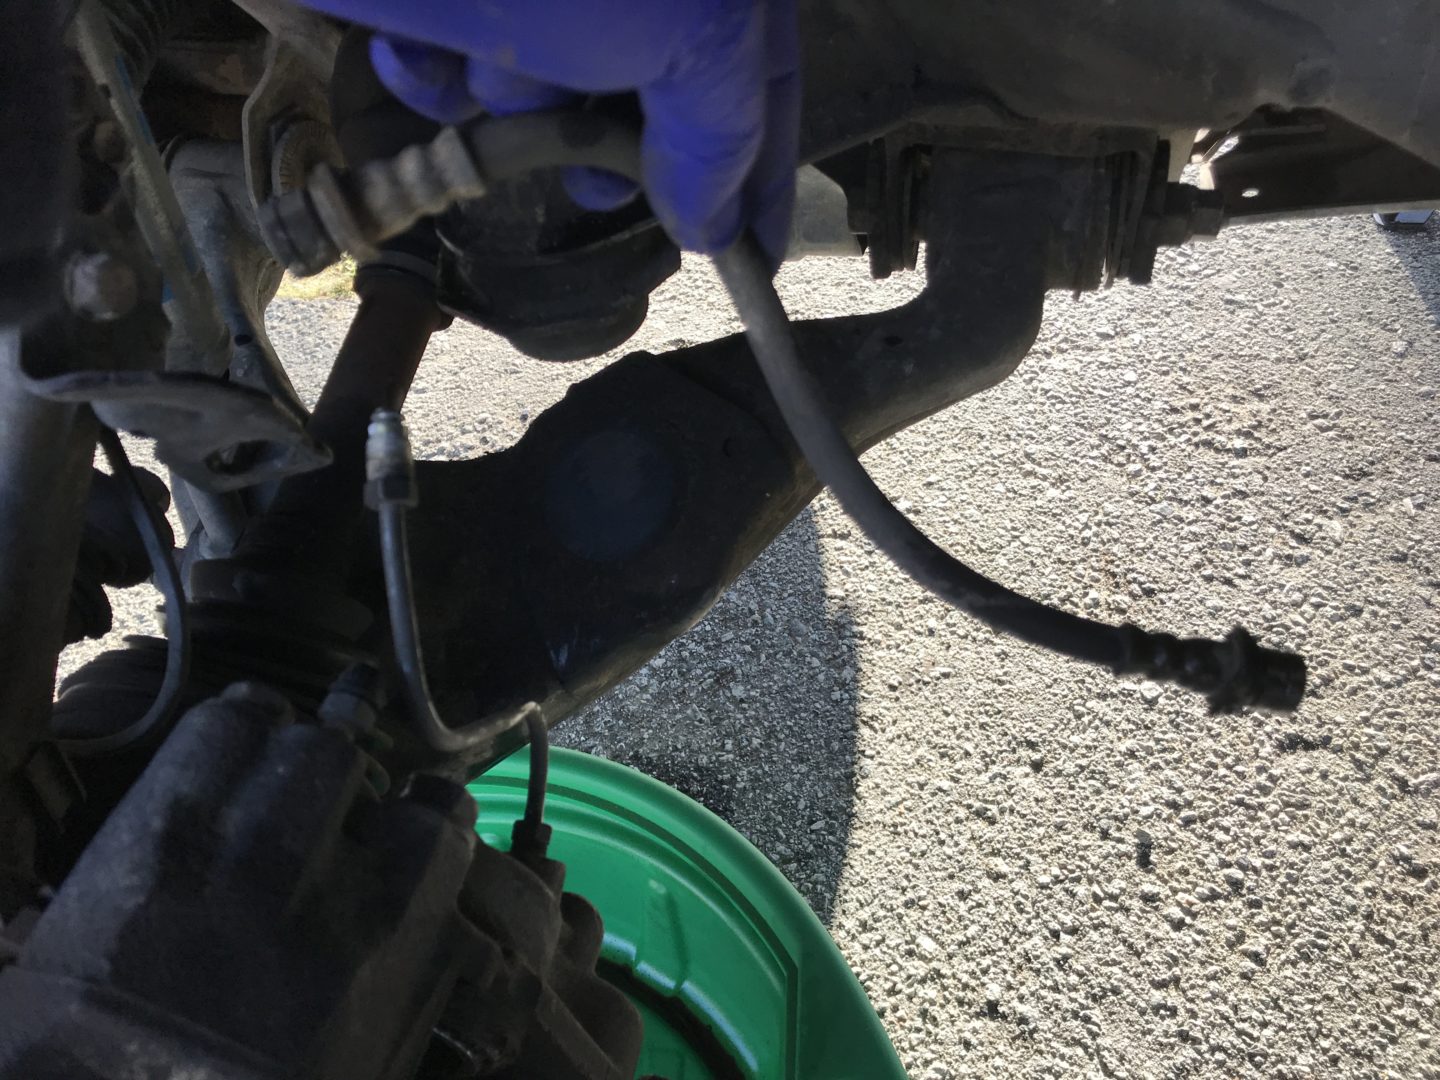
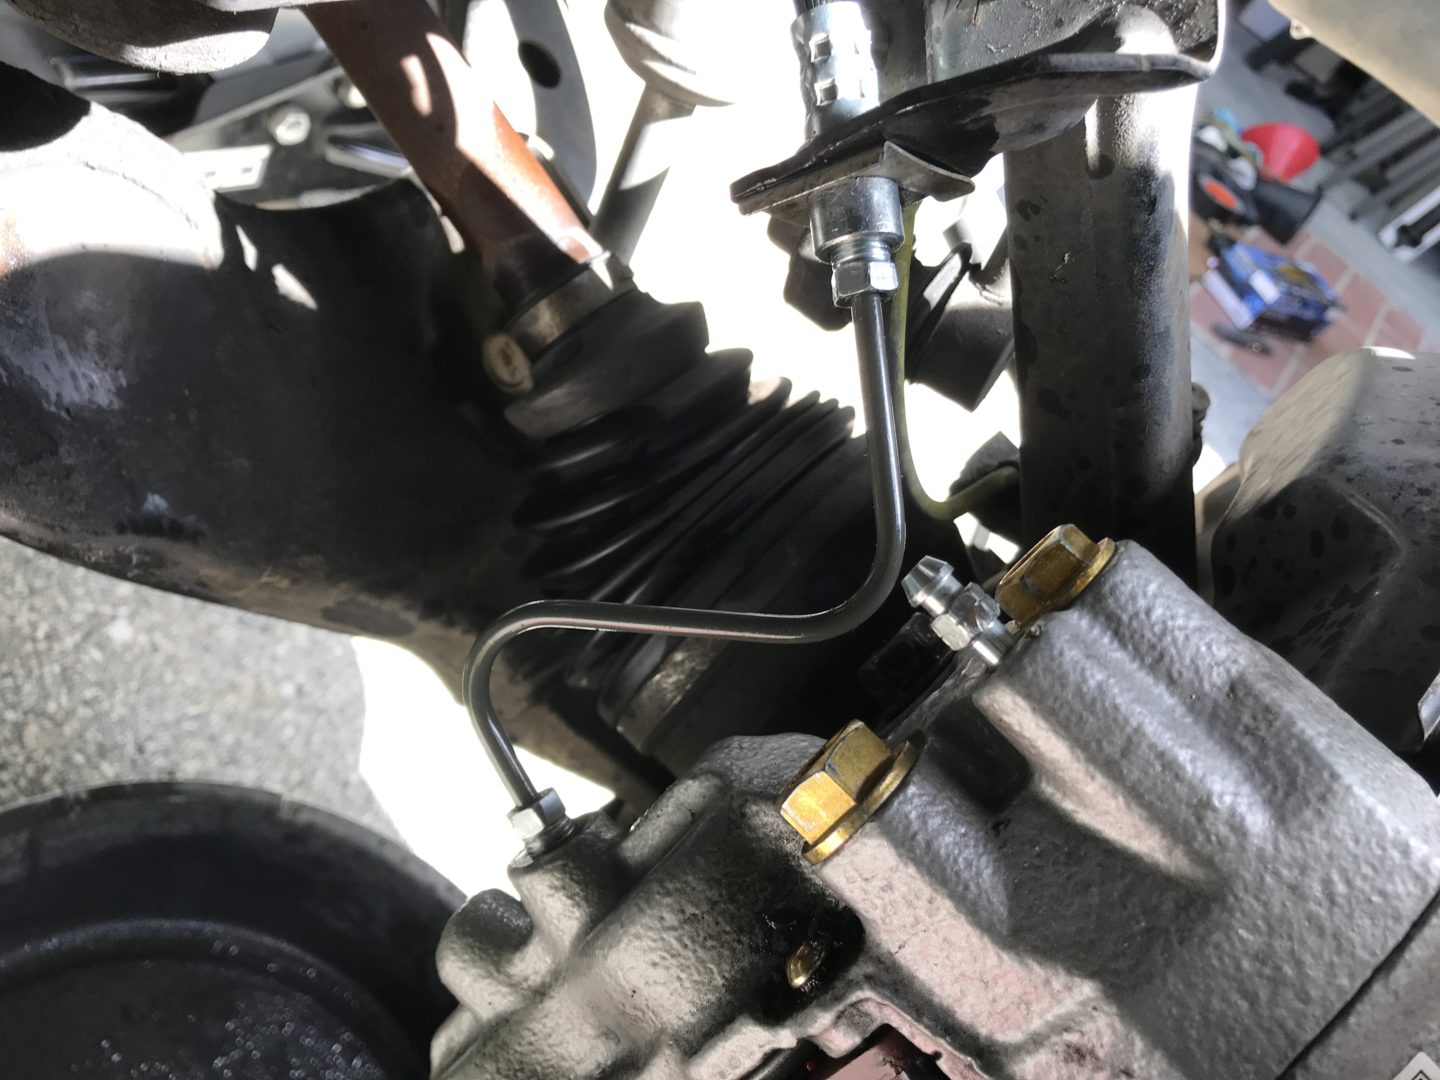
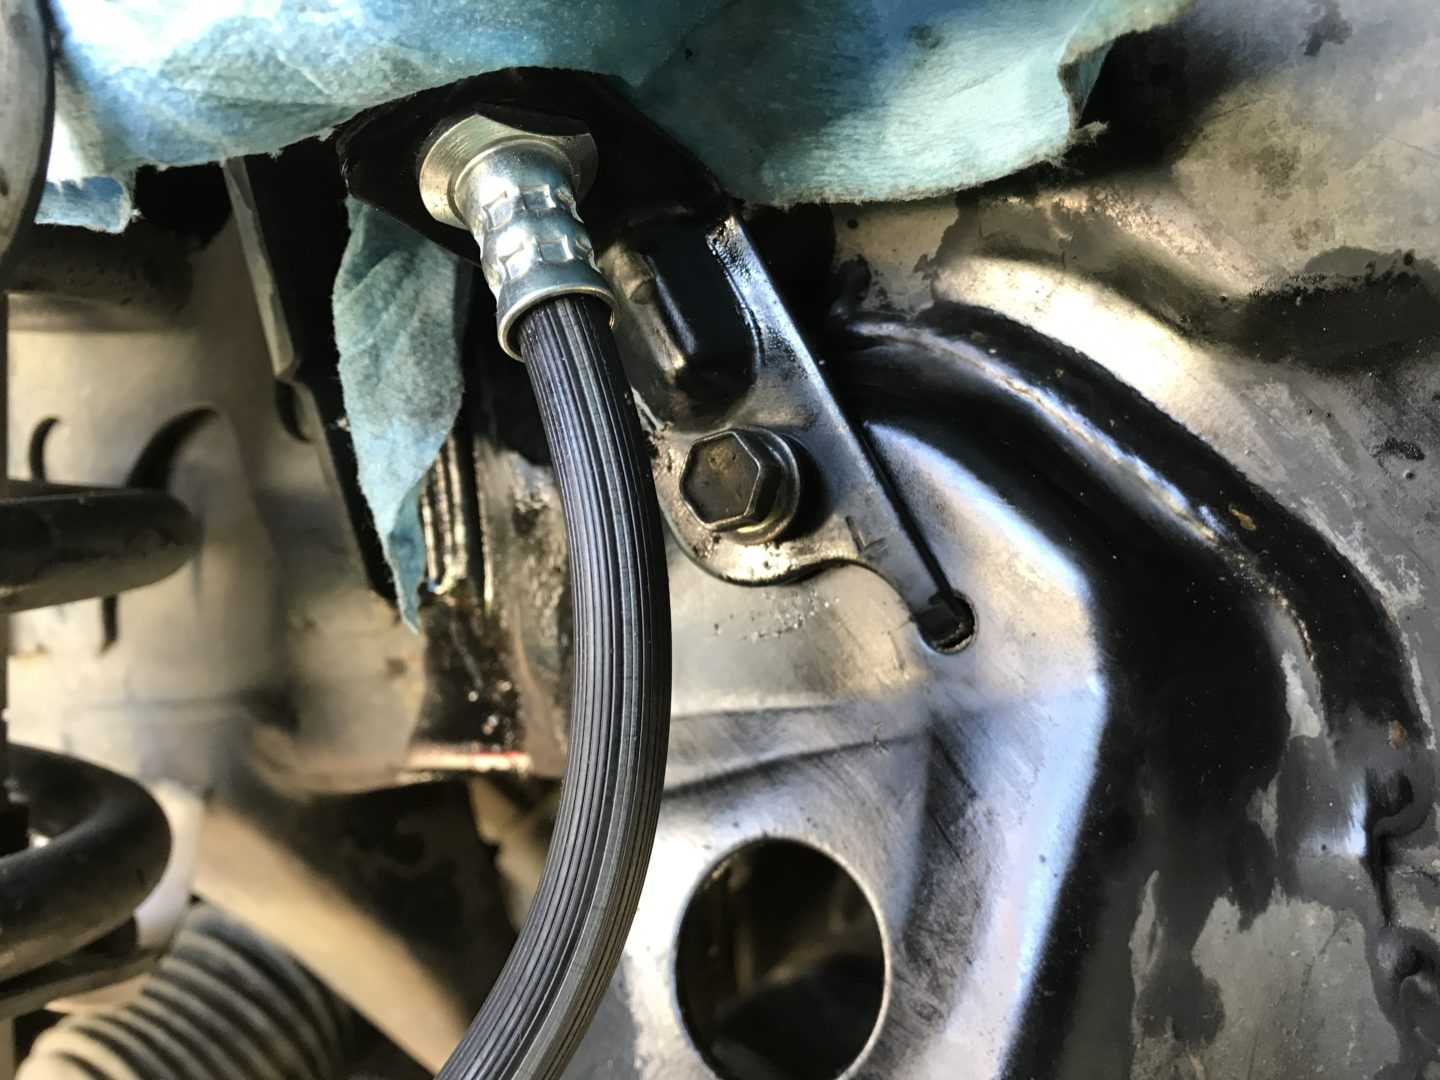
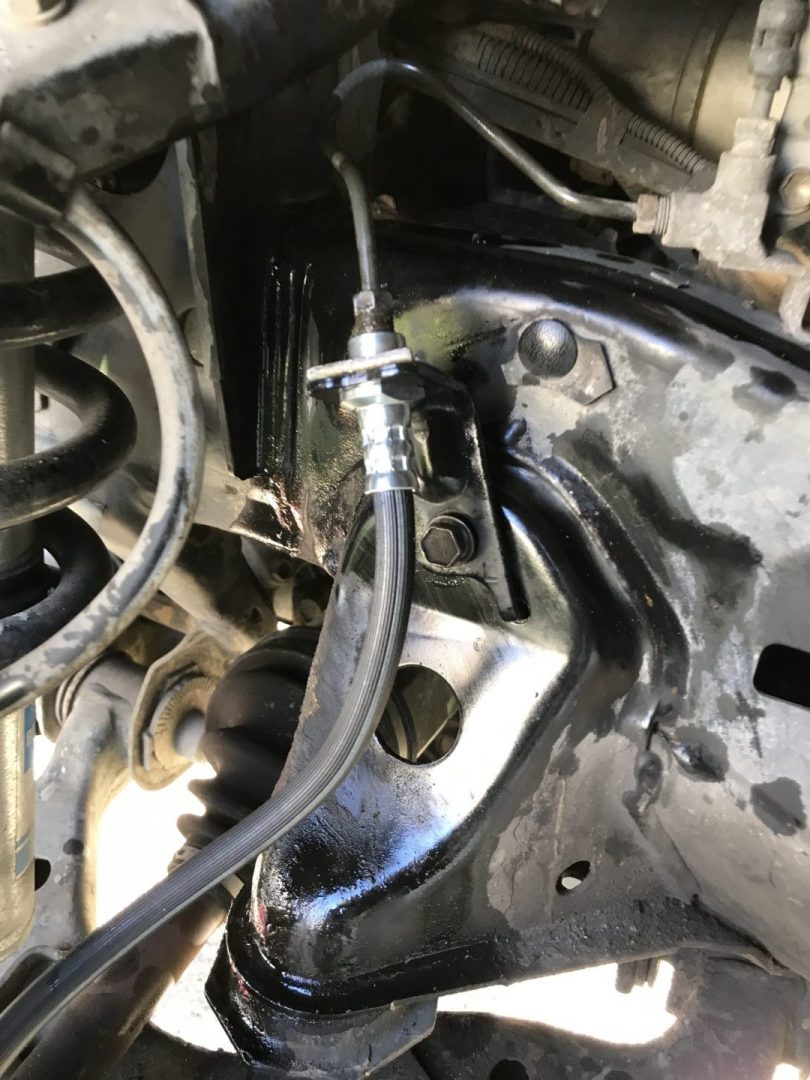
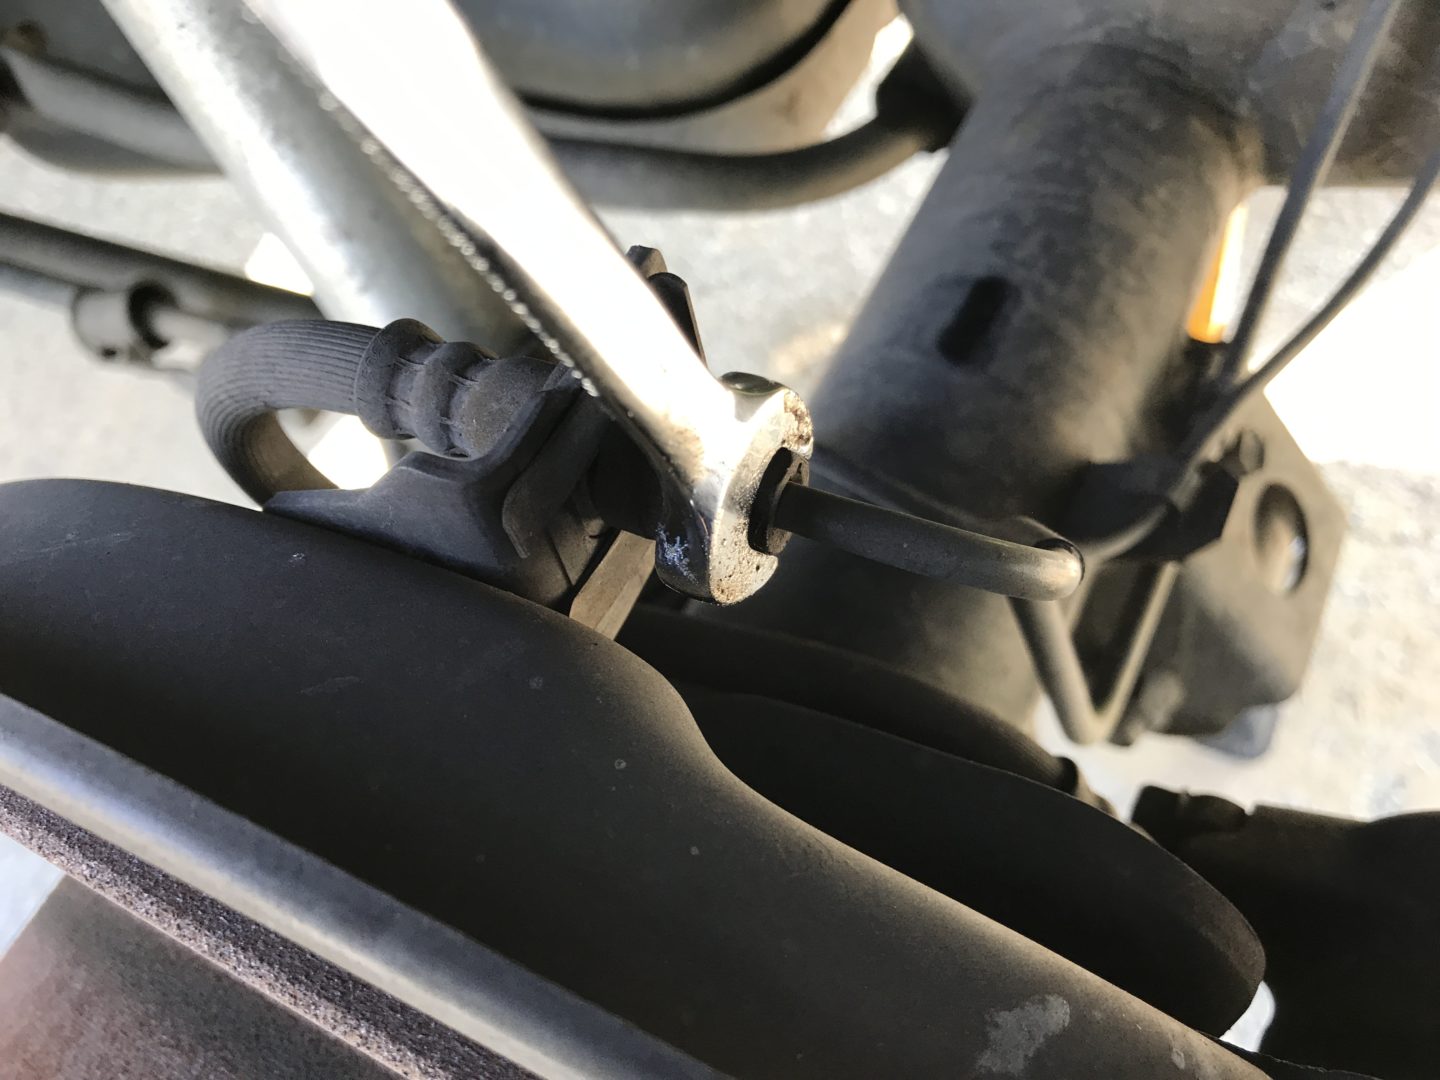
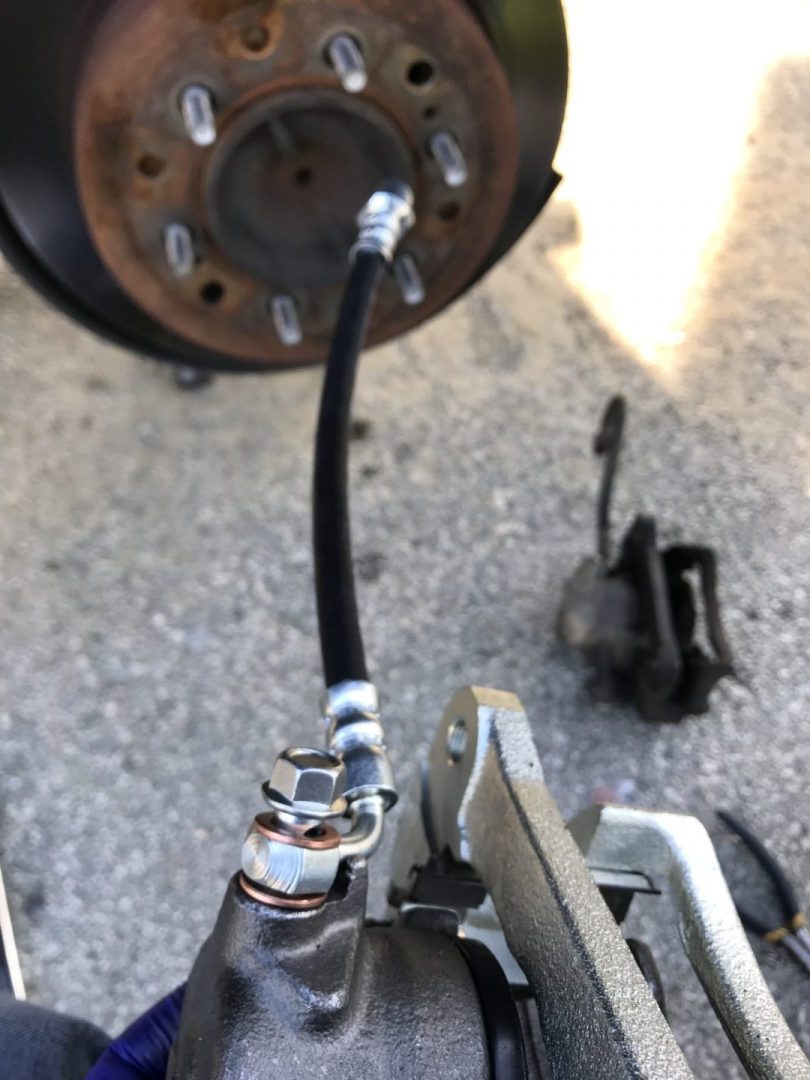
If you’re not replacing any lines, you’ll only need to break loose the nut from the hard line attached to the caliper. If you’re replacing the hard line coming right out of the caliper, you’ll need to break loose the nut behind the hard line. And if you’re doing both hard line and rubber brake hose, then you’ll need to break loose the nut behind the rubber line.

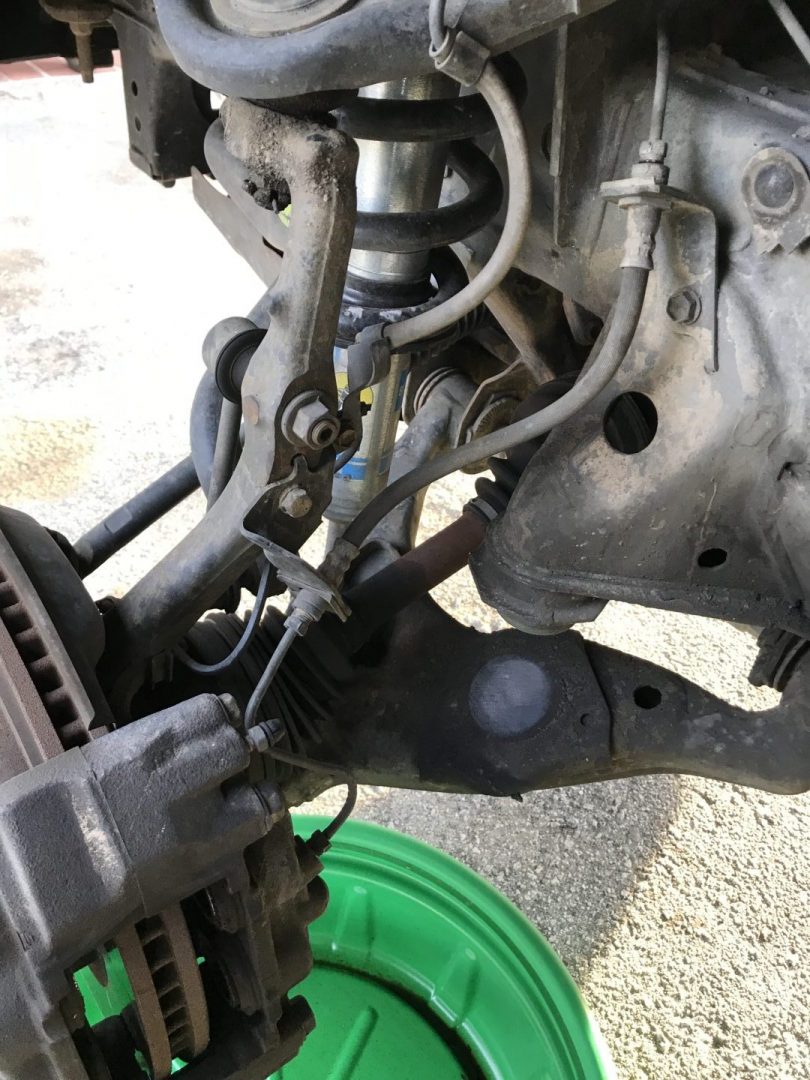
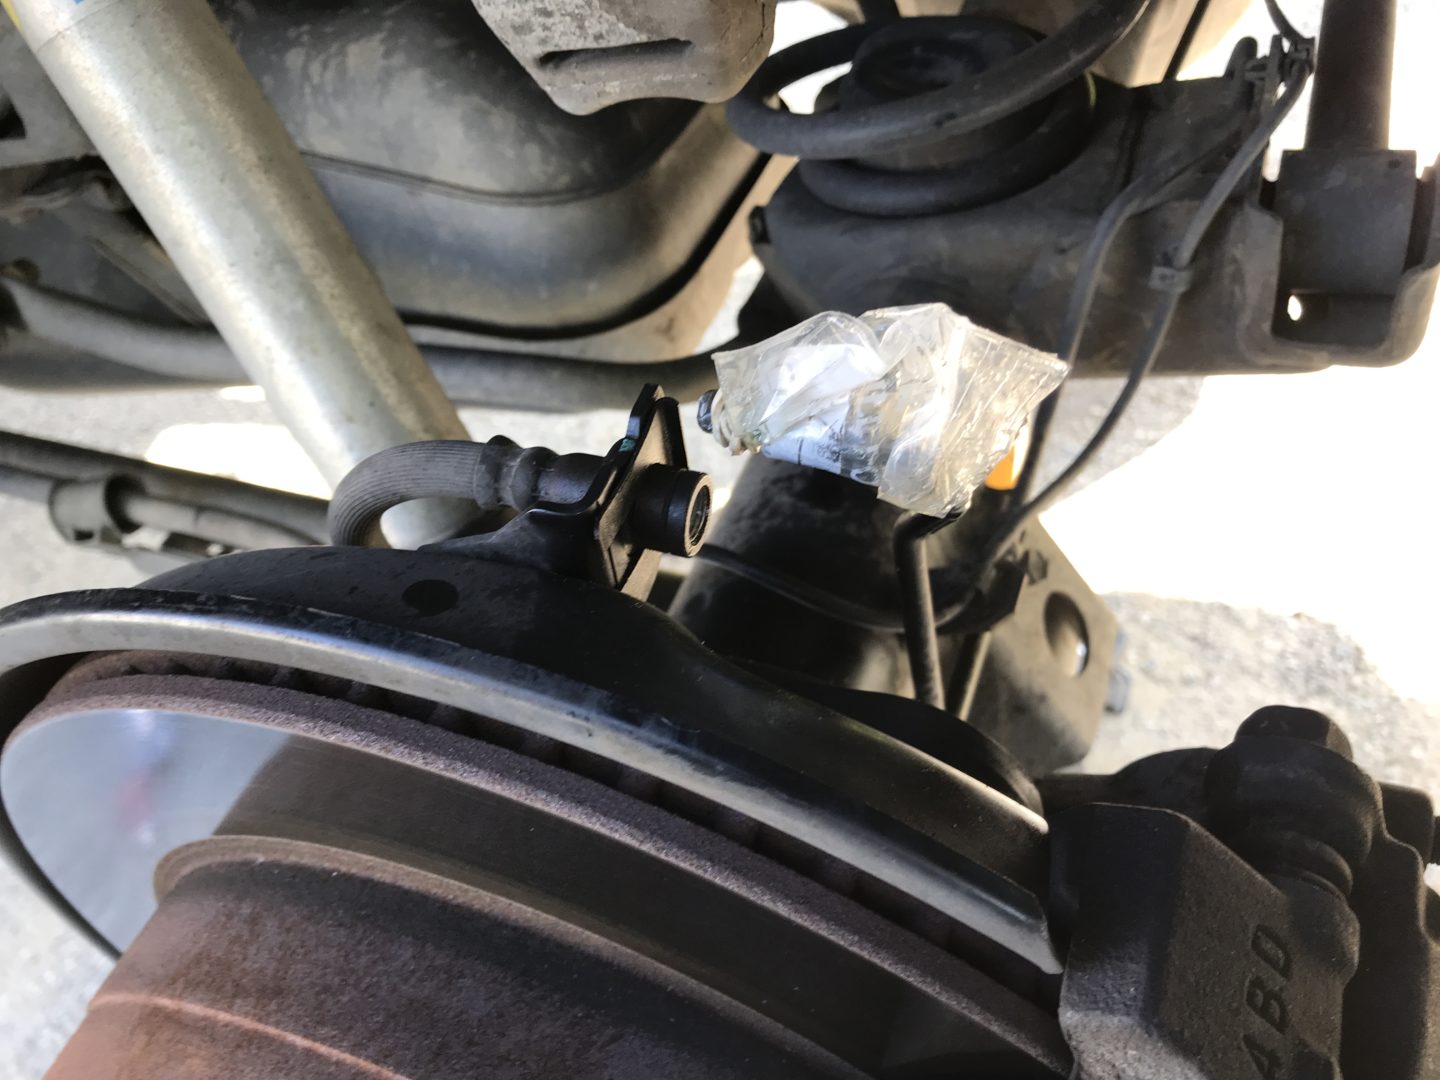
In the above photos, you can see how there is a hard brake line attaching the brake caliper to the flexible rubber brake hose. The rubber brake hose then attaches to another hard brake line. All of these lines are secured to brackets along the way with c-clips to hold them in place.
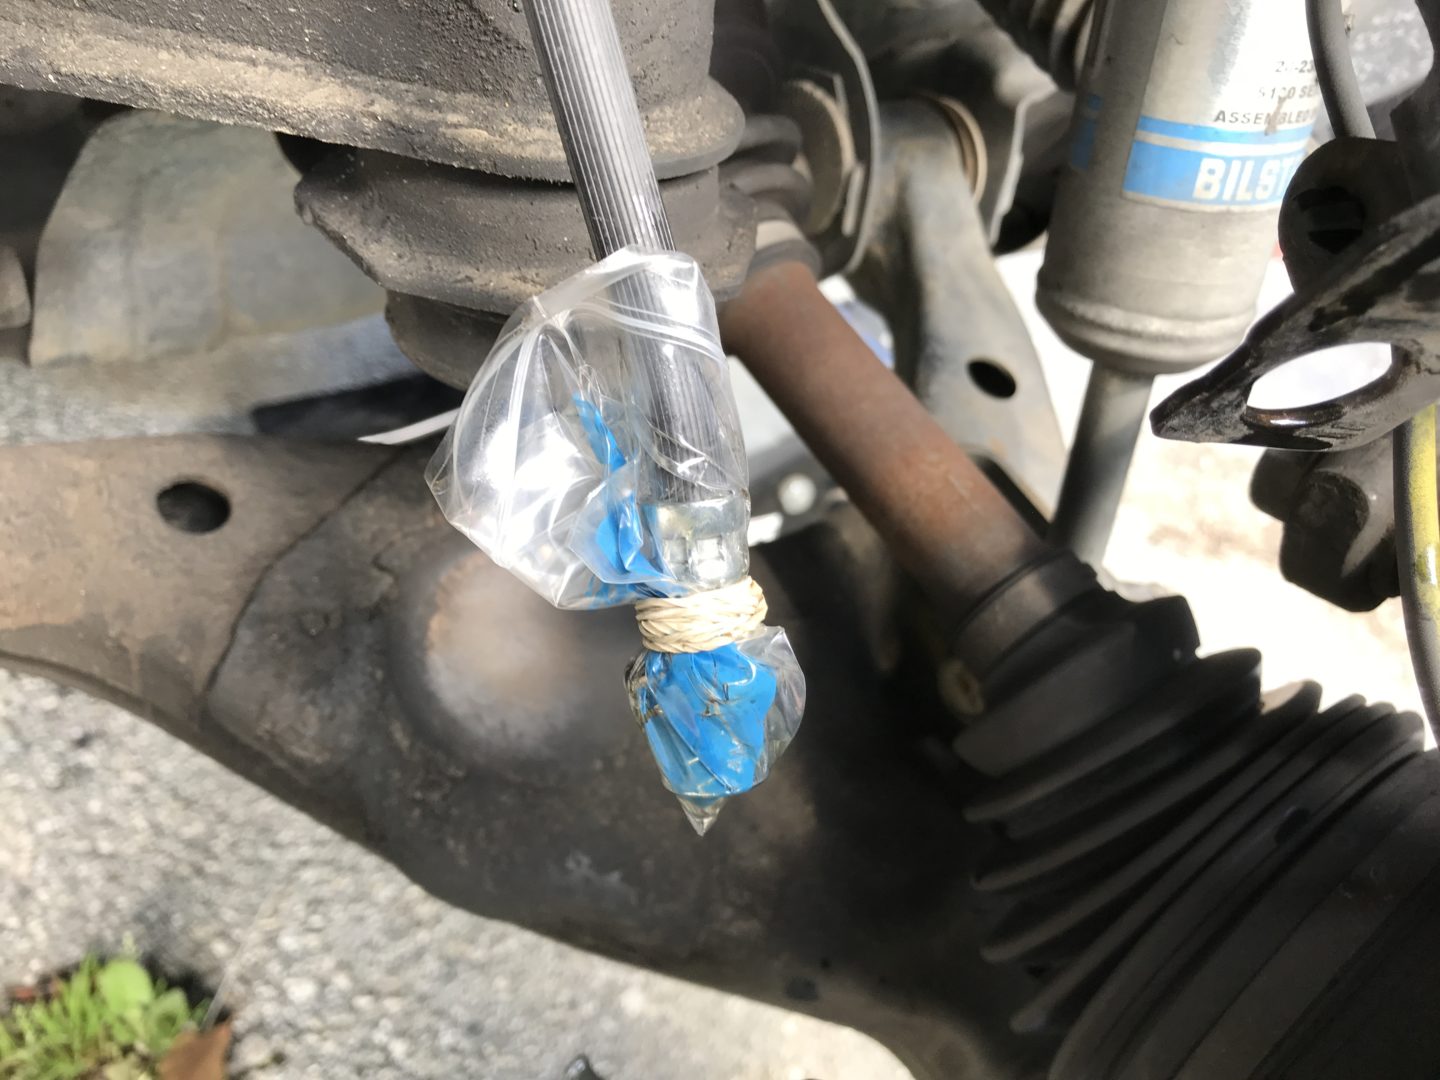
Undo all of the brake line nuts and block off the brake line. If you don’t block off the brake line, it will continue to leak brake fluid and things will get messy really quickly.
I used one of those small Ziploc pill bags (any kind of bag will do) and wrapped it around the brake line opening. I then took a rubber band and wrapped it around the bag as tight as I could. I wouldn’t say that this blocks off the brake fluid completely, but it definitely slows down the flow enough while you’re working on the brakes.
Proceed with removing all brake lines that you intend on changing out. The brake lines are all held in place with flat c-clips. These clips can be removed by wedging a flat head screwdriver between the lip of the clip and the hose, then working the screwdriver back and forth to dislodge the clip.
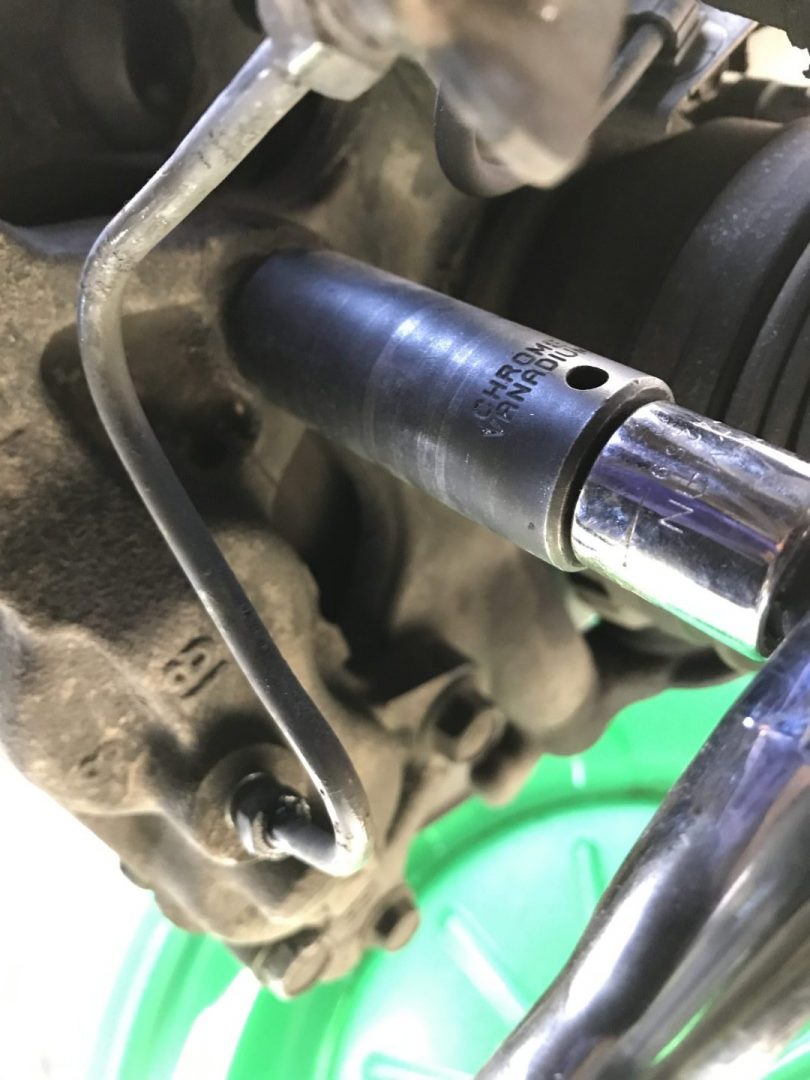
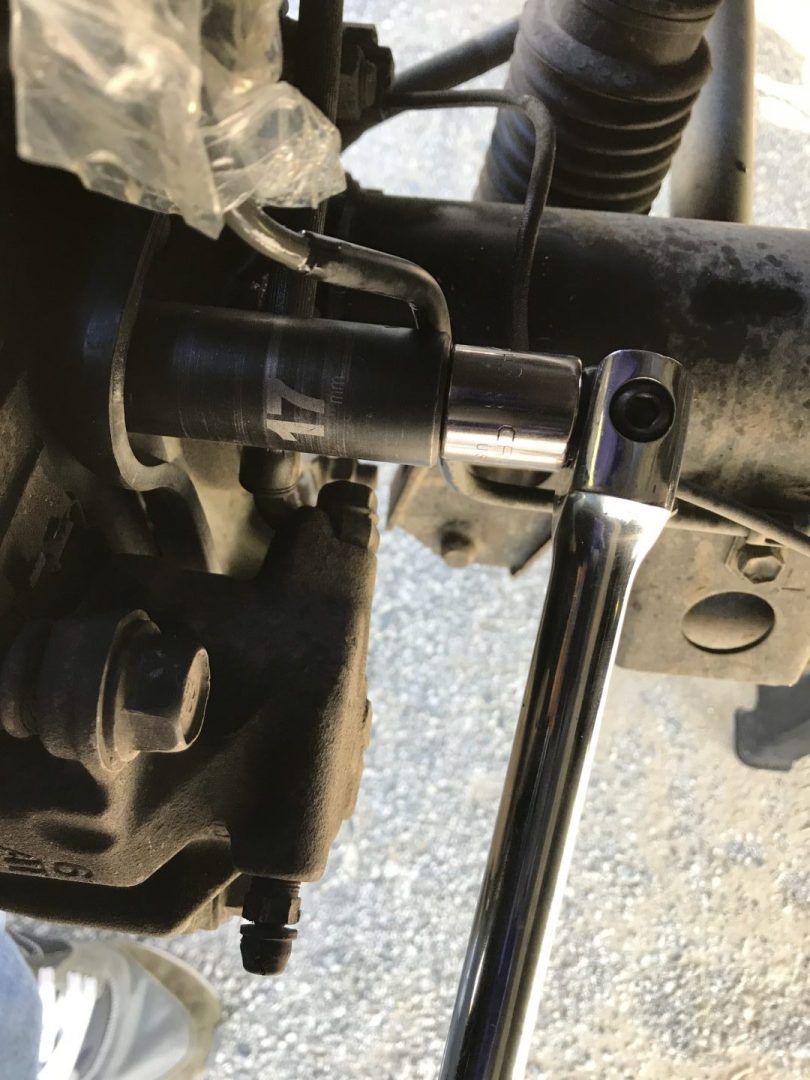
Then use a ratchet and 17mm socket to loosen and remove the two caliper mounting bolts. A breaker bar works wonders here.

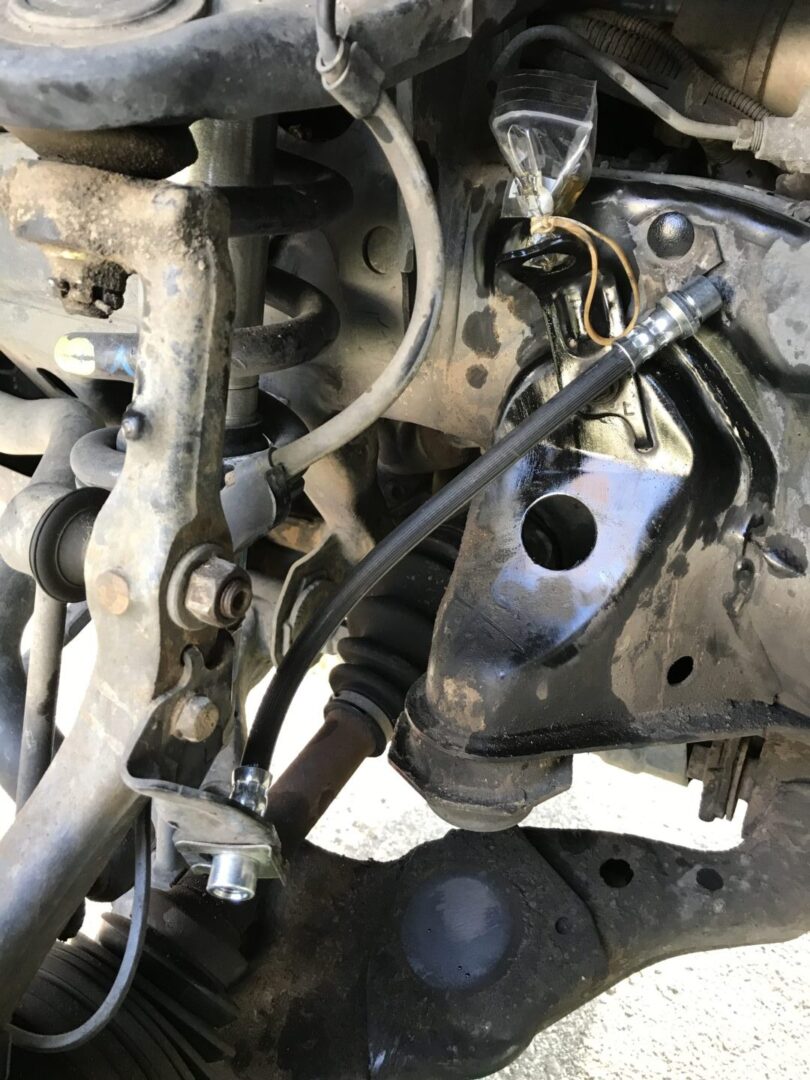
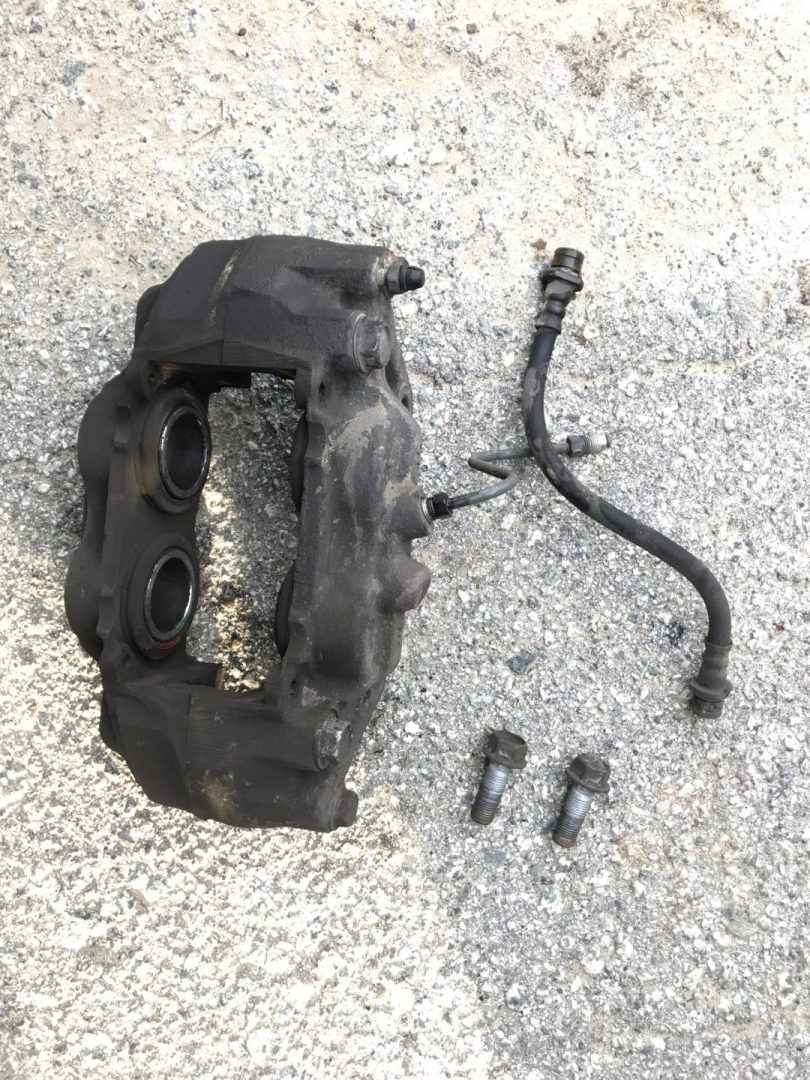
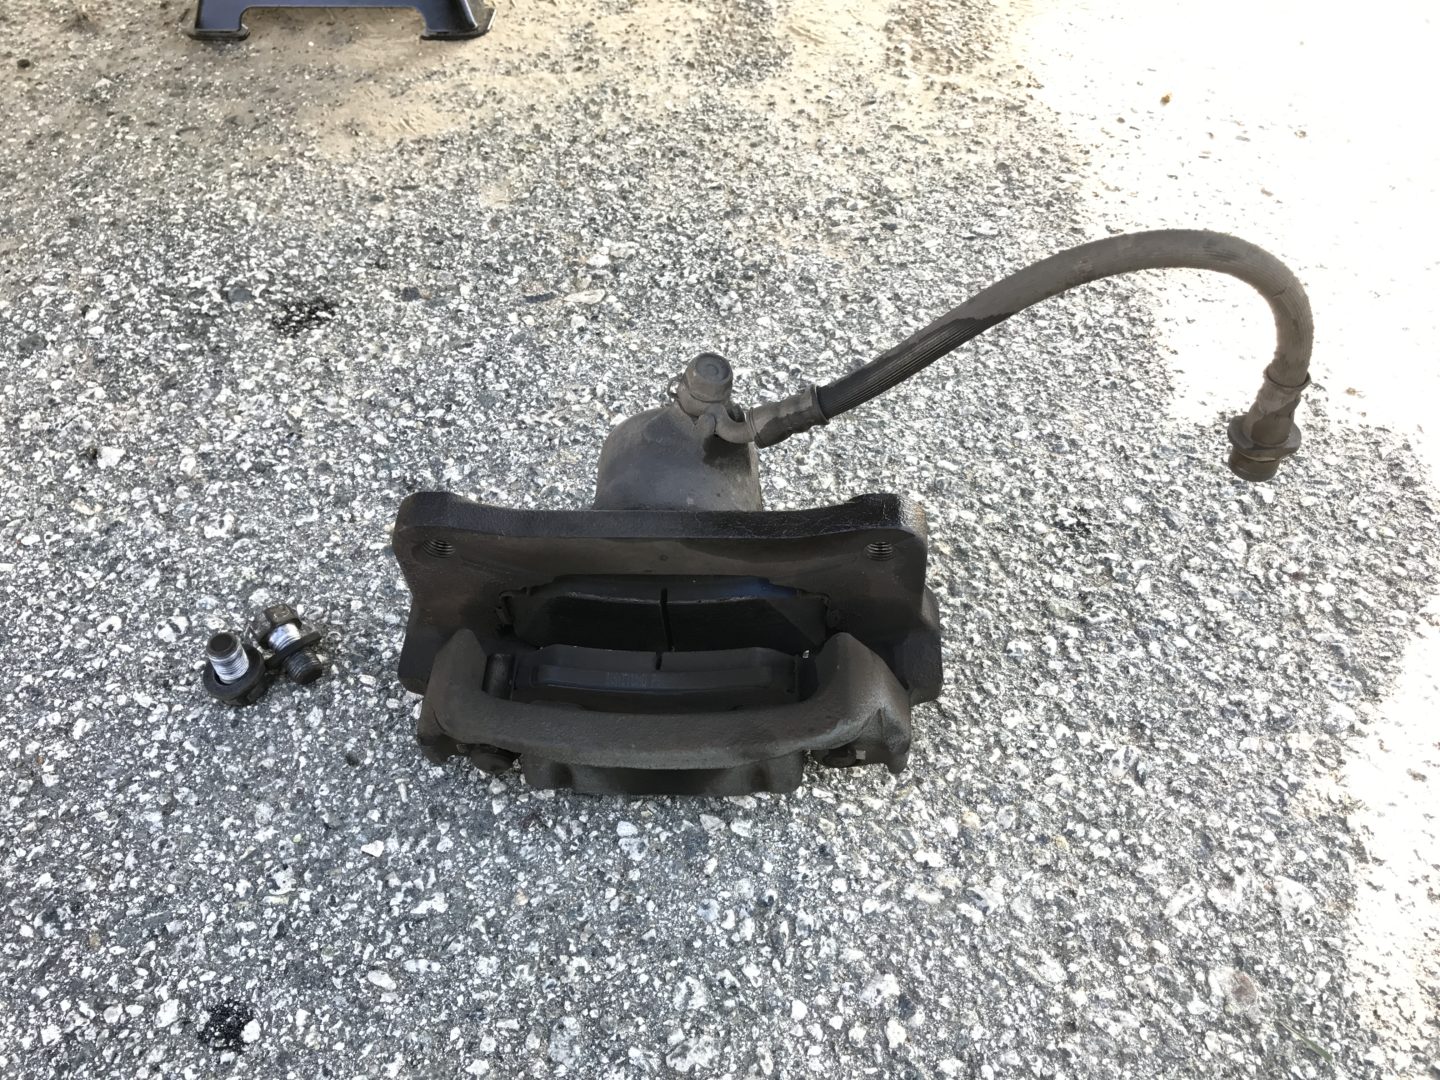
Here is the caliper, brake hose, and hard brake line removed. Pads and hardware are all removed as well.
Now, it’s time to install all of the new parts. Verify that the parts you are using are the correct ones for the right location.

You can choose to install the brake pads, pins and clips into the caliper now, or you can choose to install them after the brake caliper has been mounted. Both methods have their pros and cons, but both ways still work.
If you install the pads, pins, and clips now, then you will have a bit of difficulty with holding the pads apart while fitting the brake pads (and caliper) over the rotor during mounting of the caliper.
If you install the pads, pins, and clips after the caliper has been mounted, then it’s a bit frustrating to run the guide pins through the brake pads without them falling through the caliper during the install.

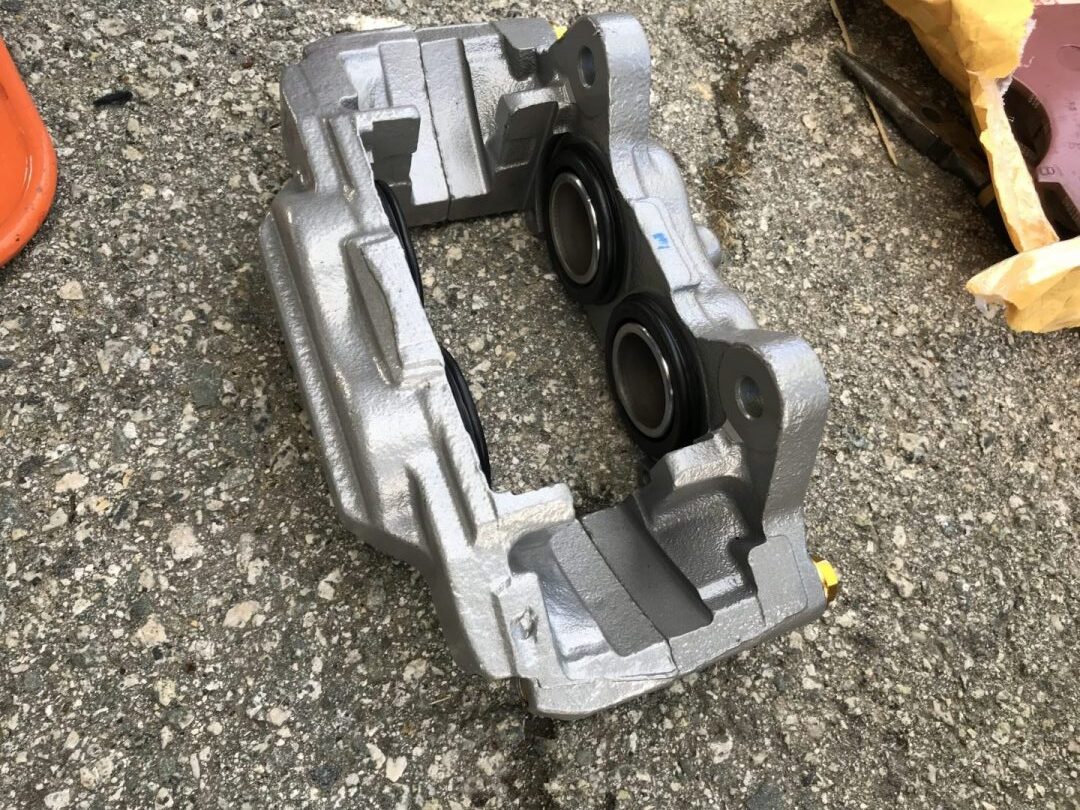
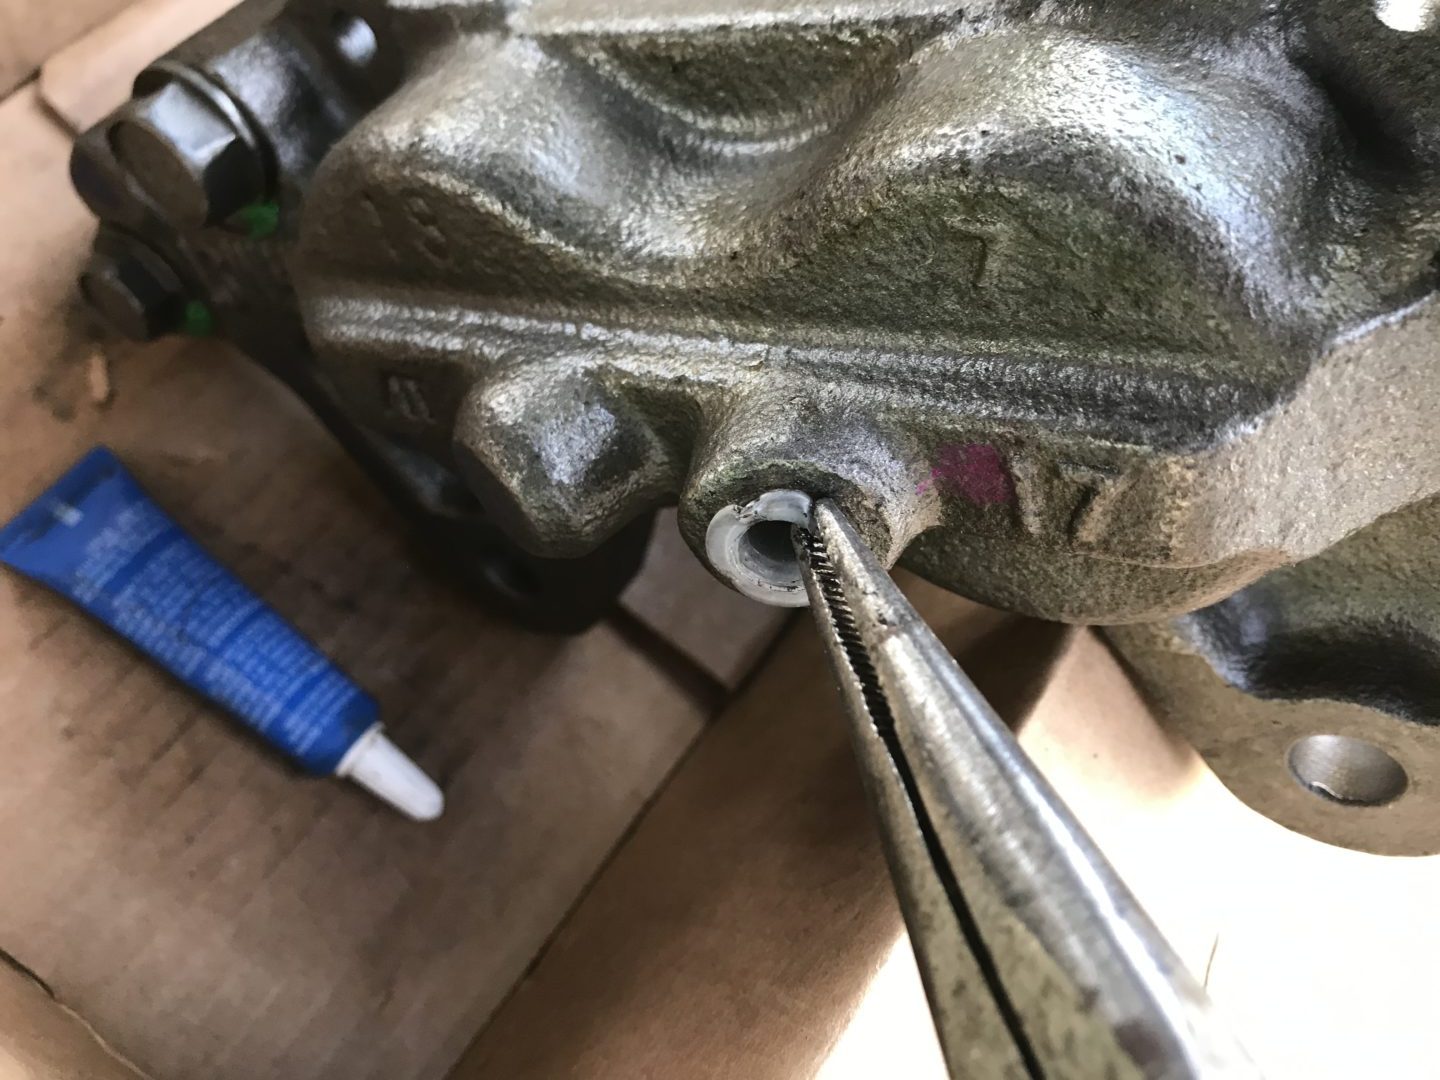
There is usually a plastic cap on the new brake caliper that protects the hole where the hard brake line enters. I use needle-nose pliers to grab the edge and turn counter-clockwise (the cap is threaded into the hole).
Prior to installing the caliper mounting bolts, make sure to use some blue threadlocker on the threads. Since these parts will experience a lot of vibration, it’s wise to use threadlocker to ensure it doesn’t eventually work its way loose.
Fit the new brake caliper over the rotor and line up the caliper mounting holes of the brake caliper with the holes on the steering knuckle.
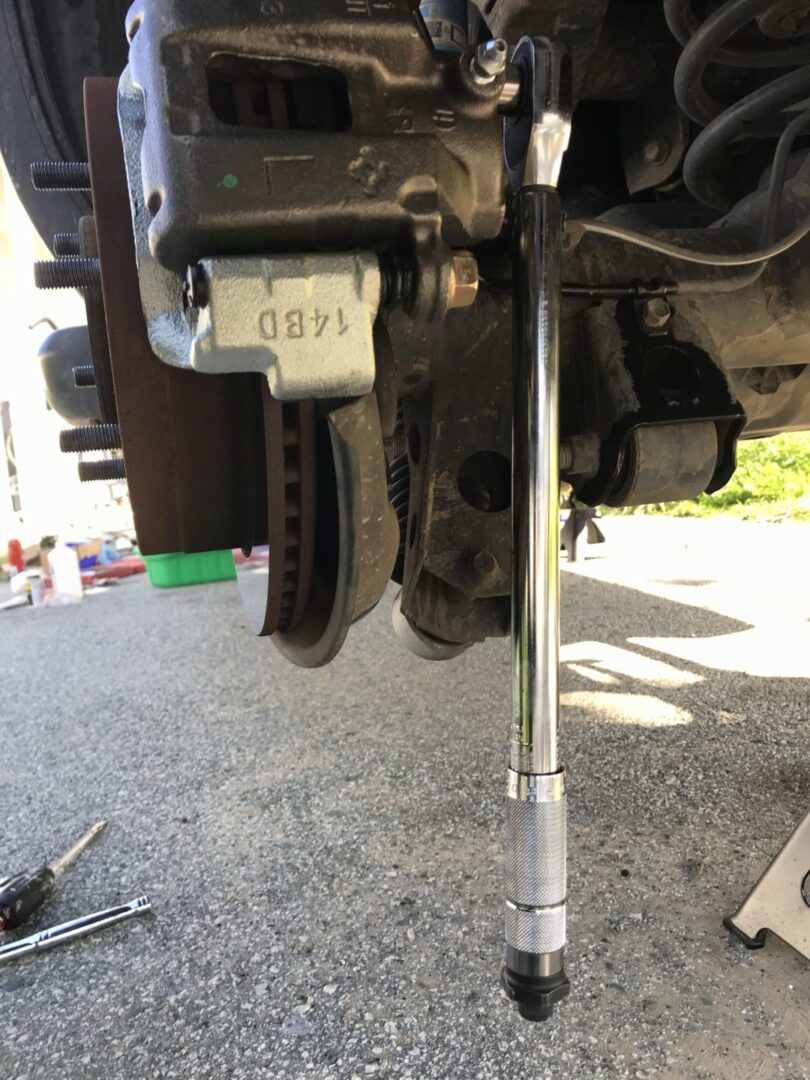
Torque down the brake caliper mounting bolts to the proper torque. On my 2003 Toyota 4Runner, the front needs to be torqued down to 91 ft-lbs.
Reinstall the new brake hose and hard brake lines. The hard brake lines take a bit of effort to get them to fit into place, but take your time and be careful especially if you’re reusing the existing brake lines. I had to replace my hard brake lines because my existing ones had stripped threads.
My experience with this hard line is that it might be better to tighten the nuts on both ends of the hard line before mounting the brake caliper. If you mount the brake caliper first, and then try to bend the hard line into place while tightening the nut at the same time, there is a higher chance of stripping the threaded nut.
Reinstall the brackets holding the brake lines if you removed them previously.
You can install the rest of the brake pads and caliper guide pins and clips at this point if you did not install them previously.
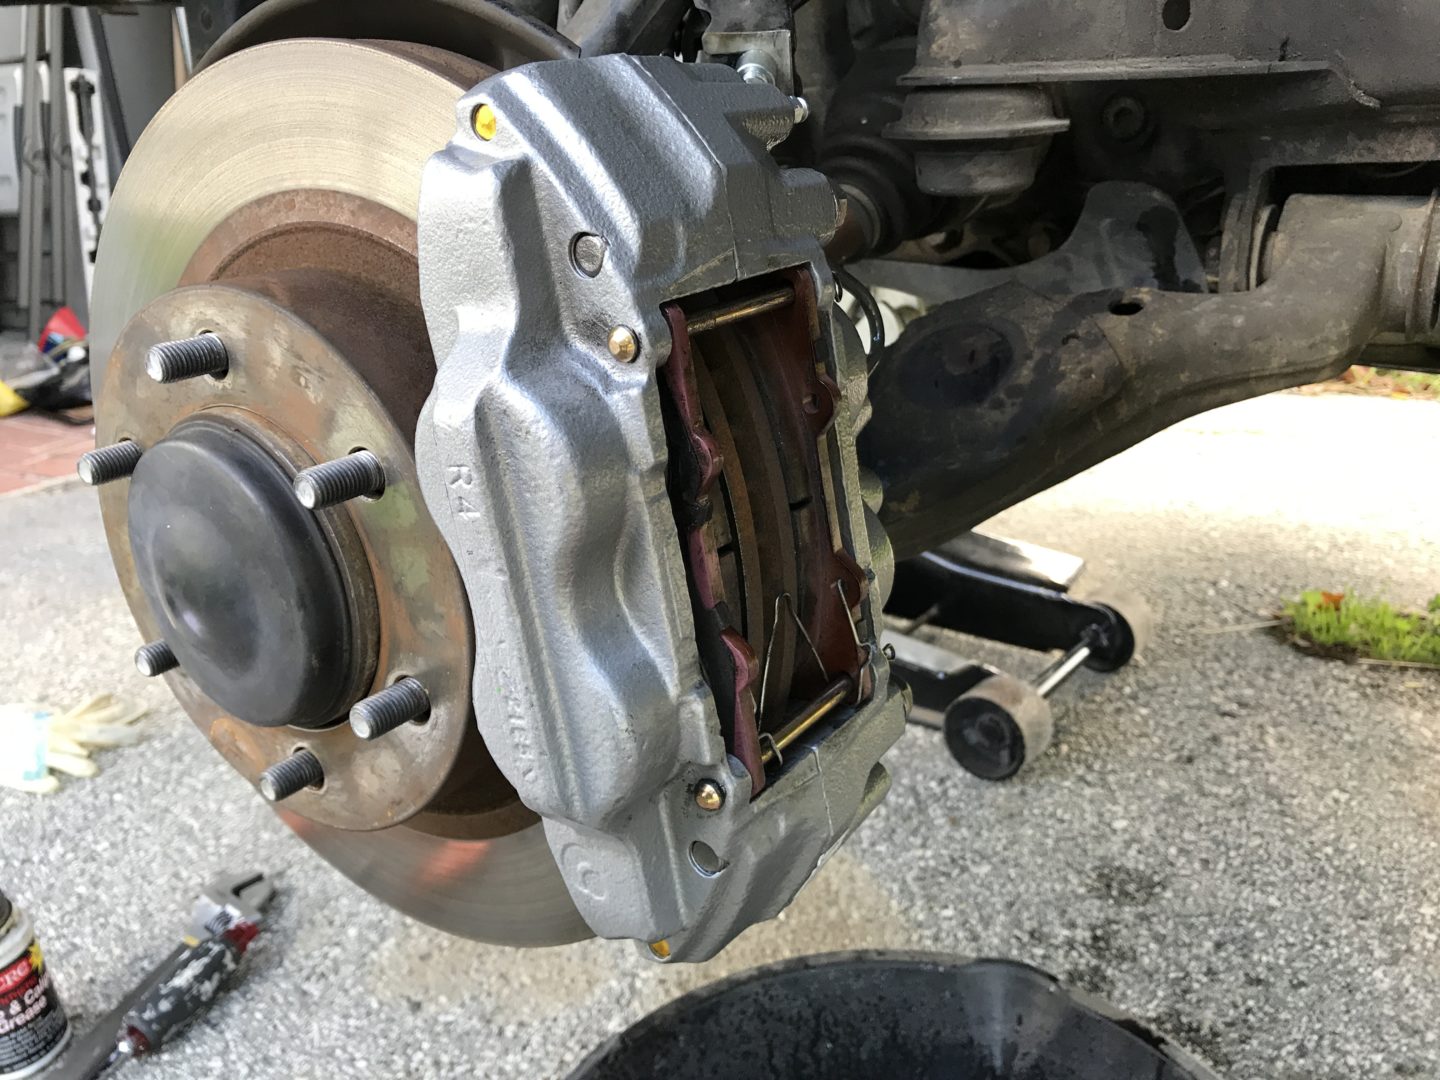

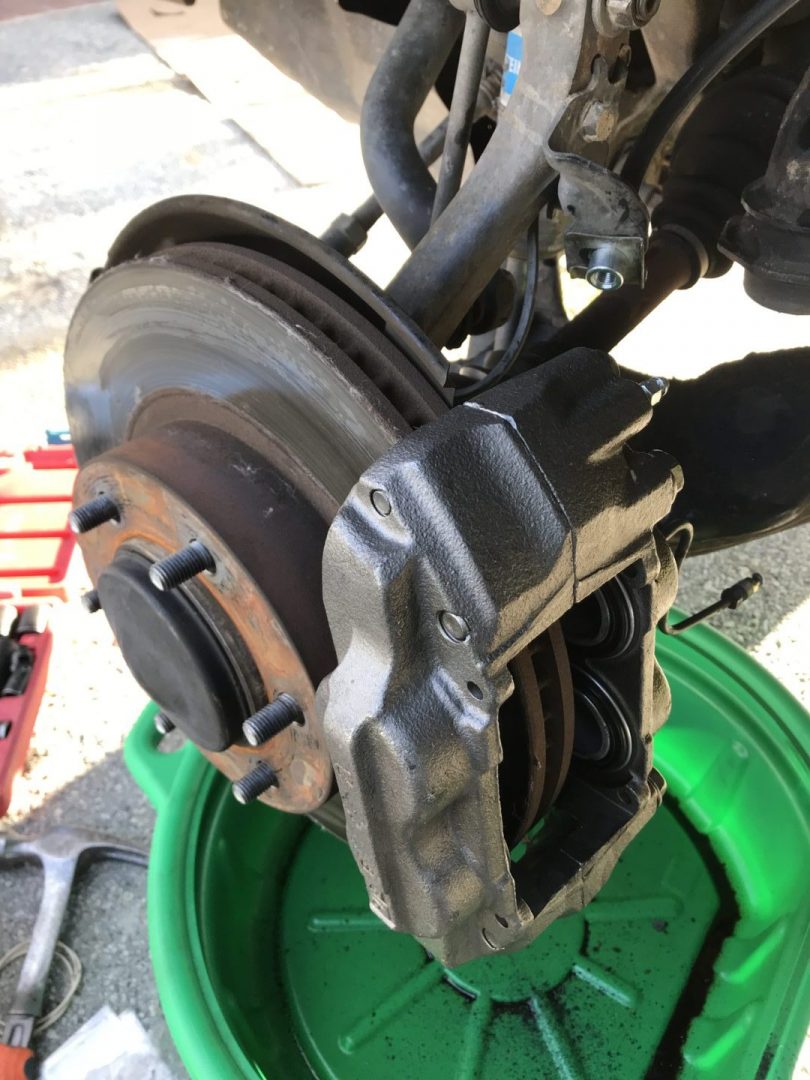
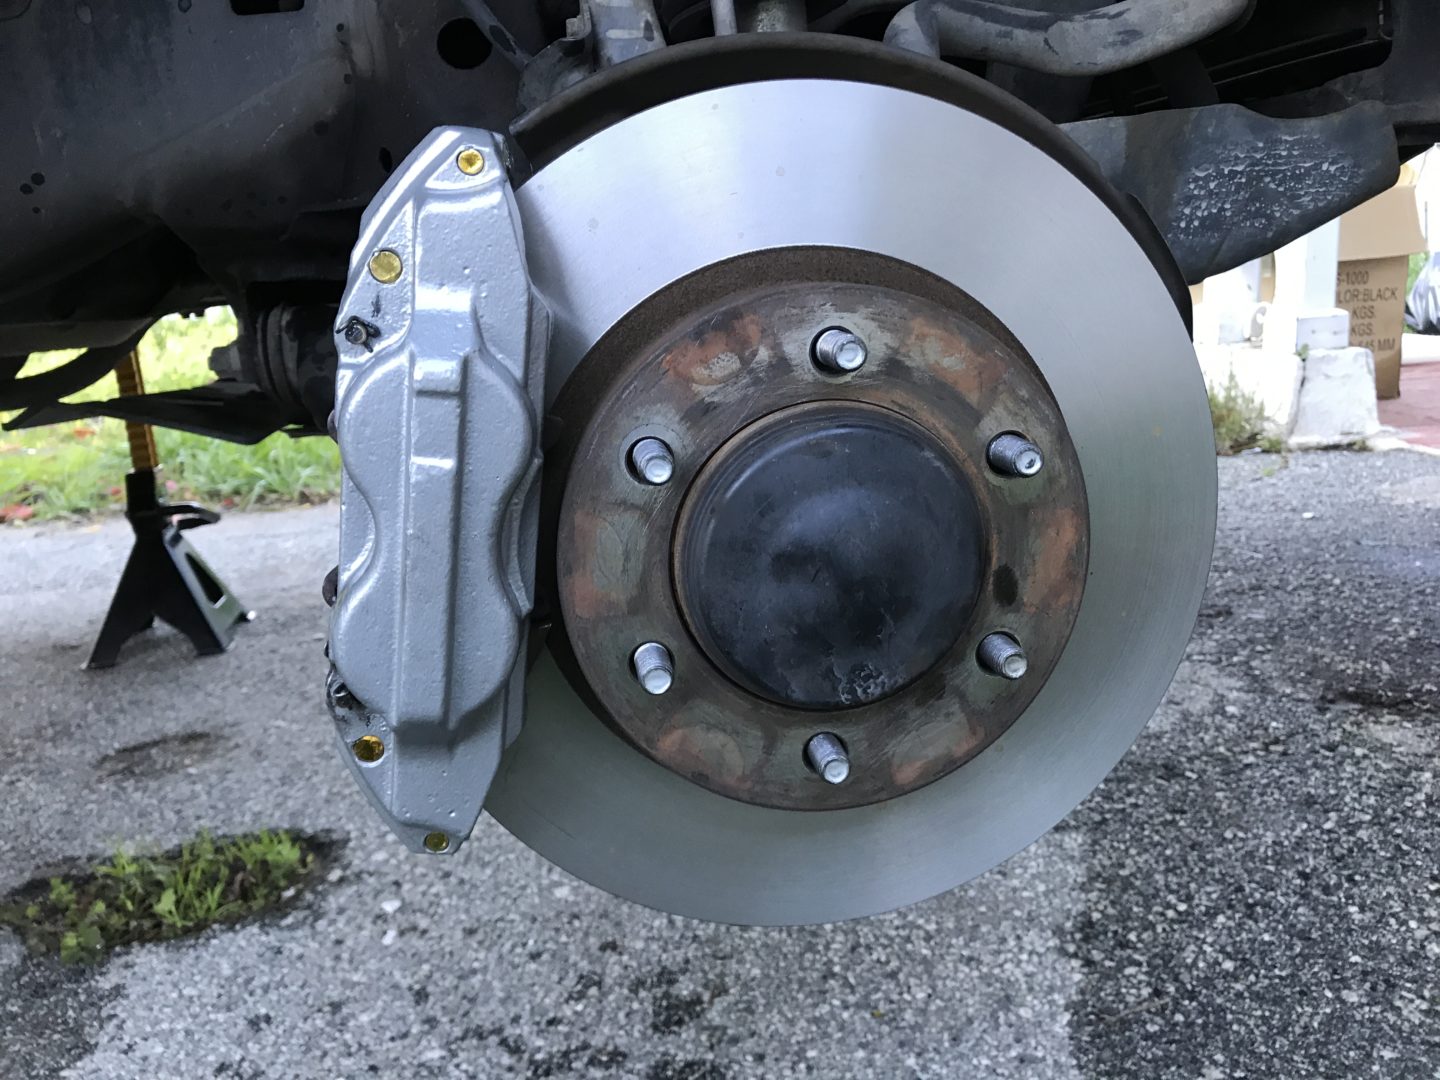
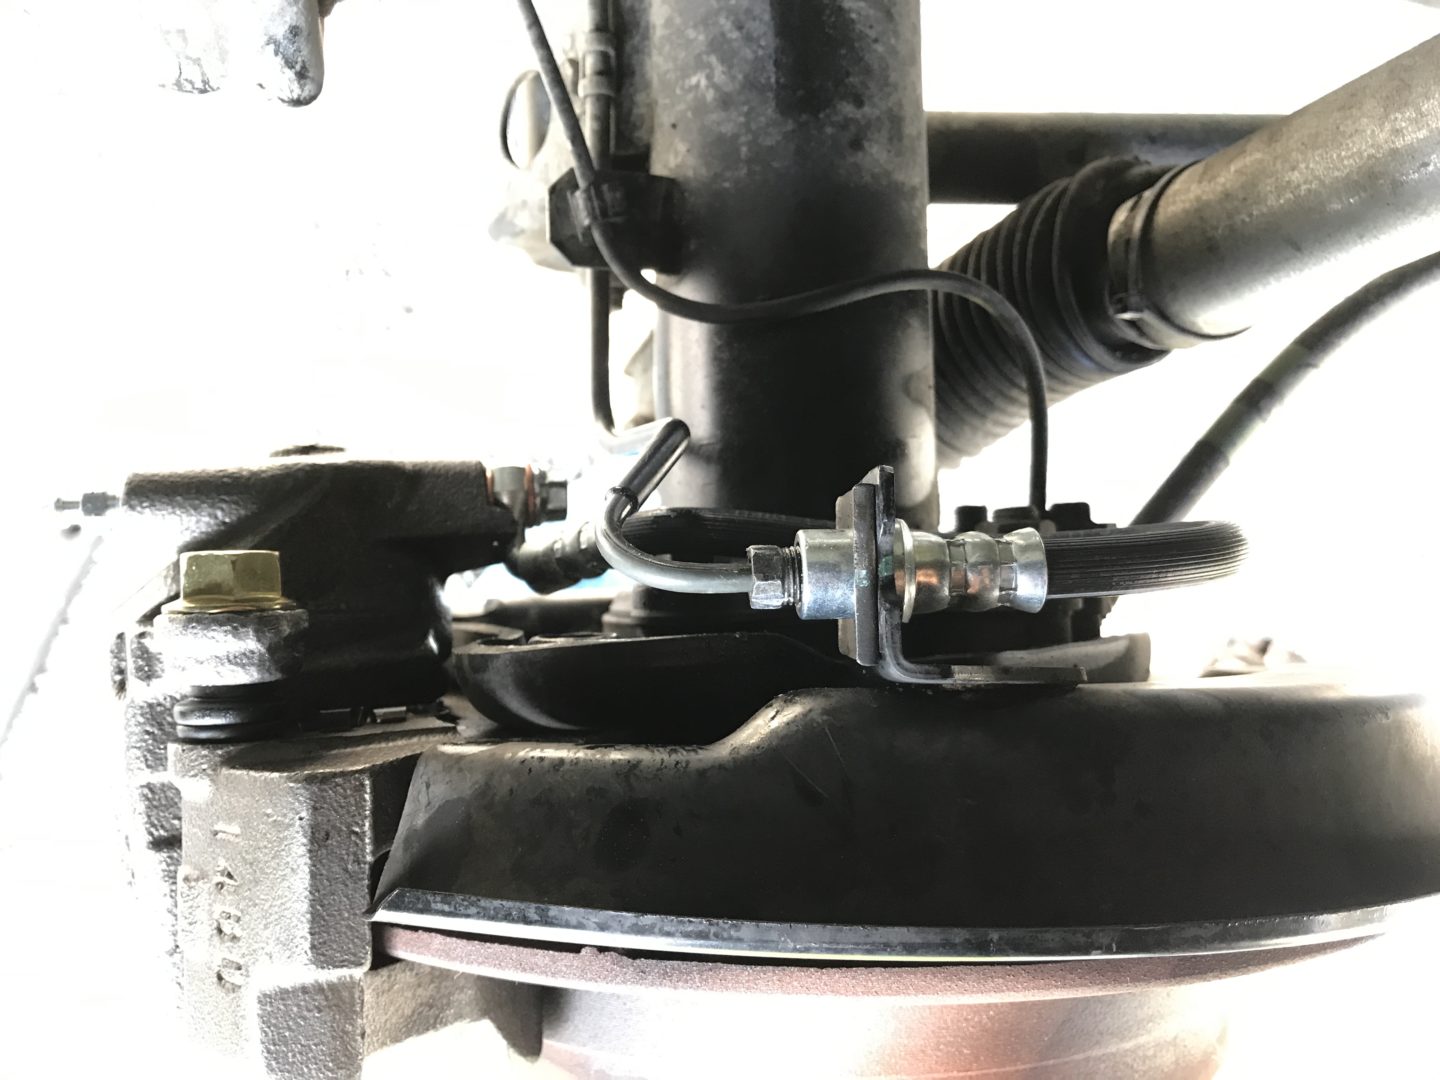
The finished front brake caliper (with freshly resurfaced front rotor).
Now, onto the rear brake calipers!
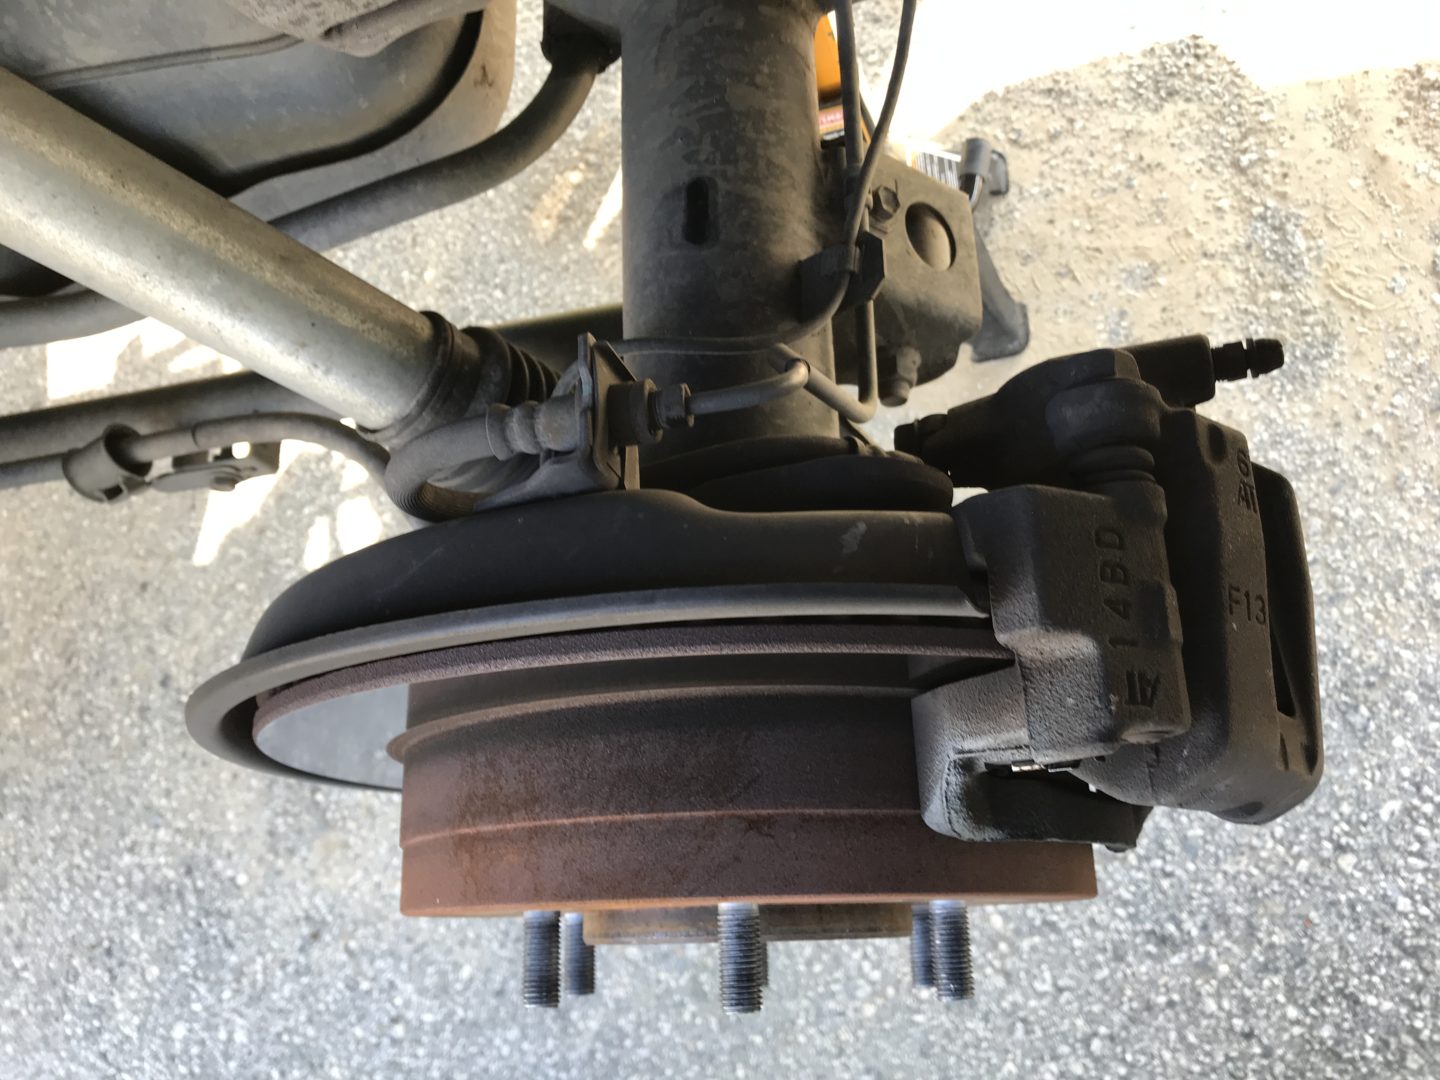
The parts may look a bit different from the front, but in terms of hardware, everything is almost the same. The brake caliper is still mounted to the knuckle with two caliper mounting bolts, however the brake lines look a bit different from the ones on the front caliper.
Use penetrating oil to loosen up all of the brake lines if you’re replacing them. Then use a box wrench to loosen, but be careful as it is quite easy to strip these nuts. Break loose all nuts while the caliper is mounted to make things easier as it is more difficult to loosen these parts when the caliper is not mounted.
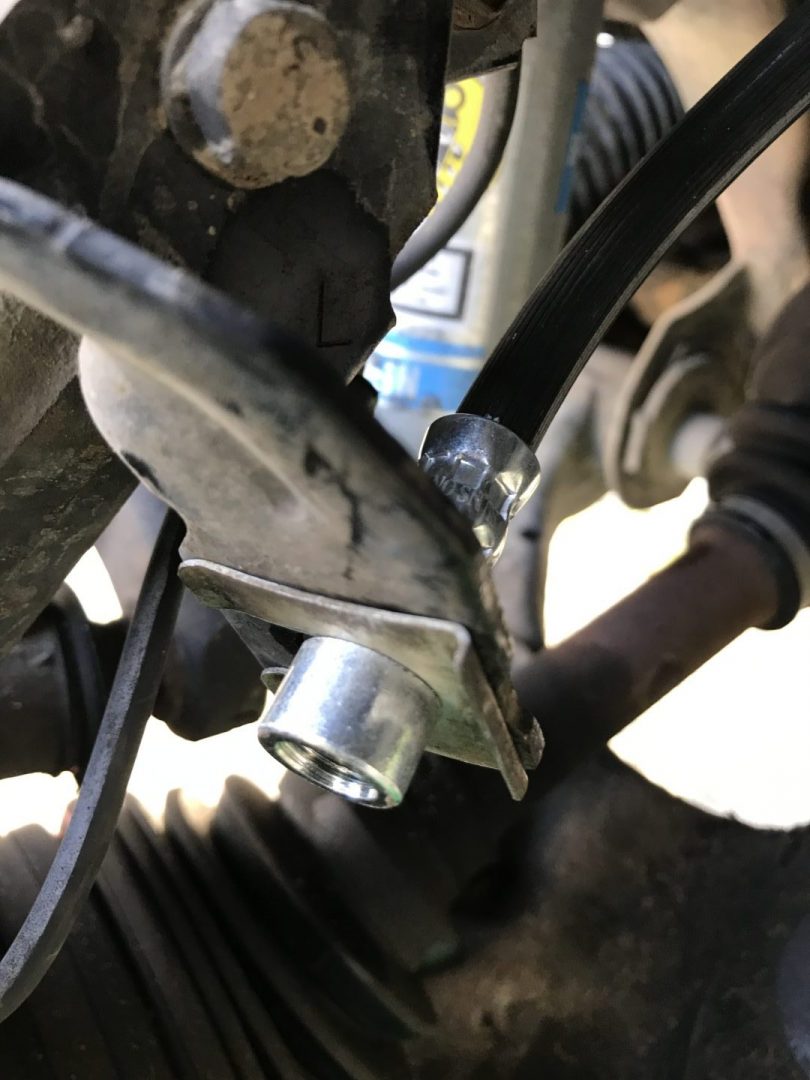
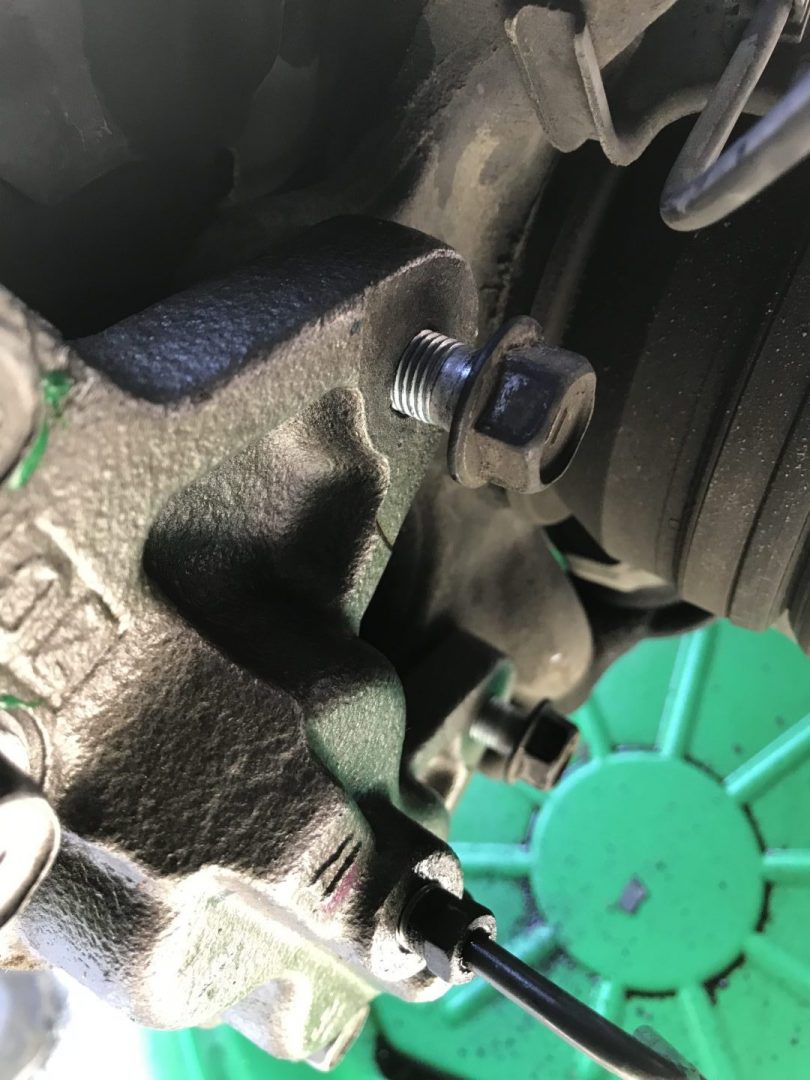
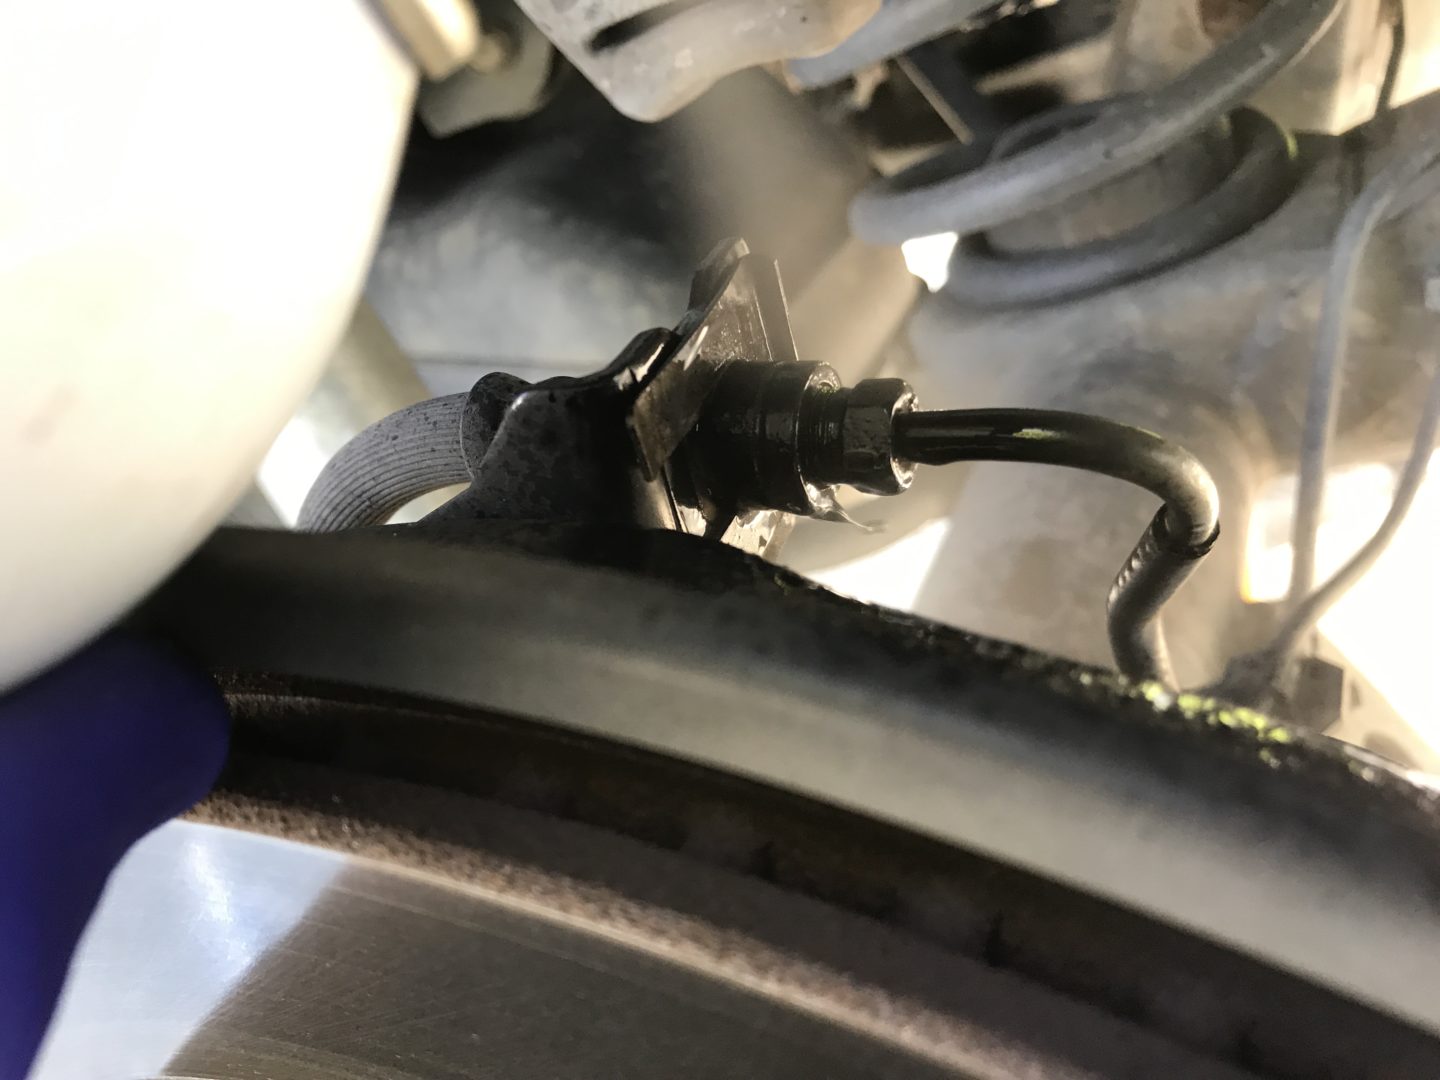
There is also a bolt that mounts the brake line to the caliper that needs to be broken loose if you plan to replace the portion of brake line from the caliper to the hard brake line. Otherwise, this can stay in place and the only part that needs to be removed is the transition between the rubber line and the hard line (pictured below).

Remove the brake line and use something to keep brake fluid from continuously flowing out. Again, I used a small Ziploc bag and tied a rubber band around the tip to mitigate brake fluid from getting all over the place.
Remove the brake caliper mounting bolts on the rear just like from the front.
Remove the rear brake caliper and associated lines you plan to replace.
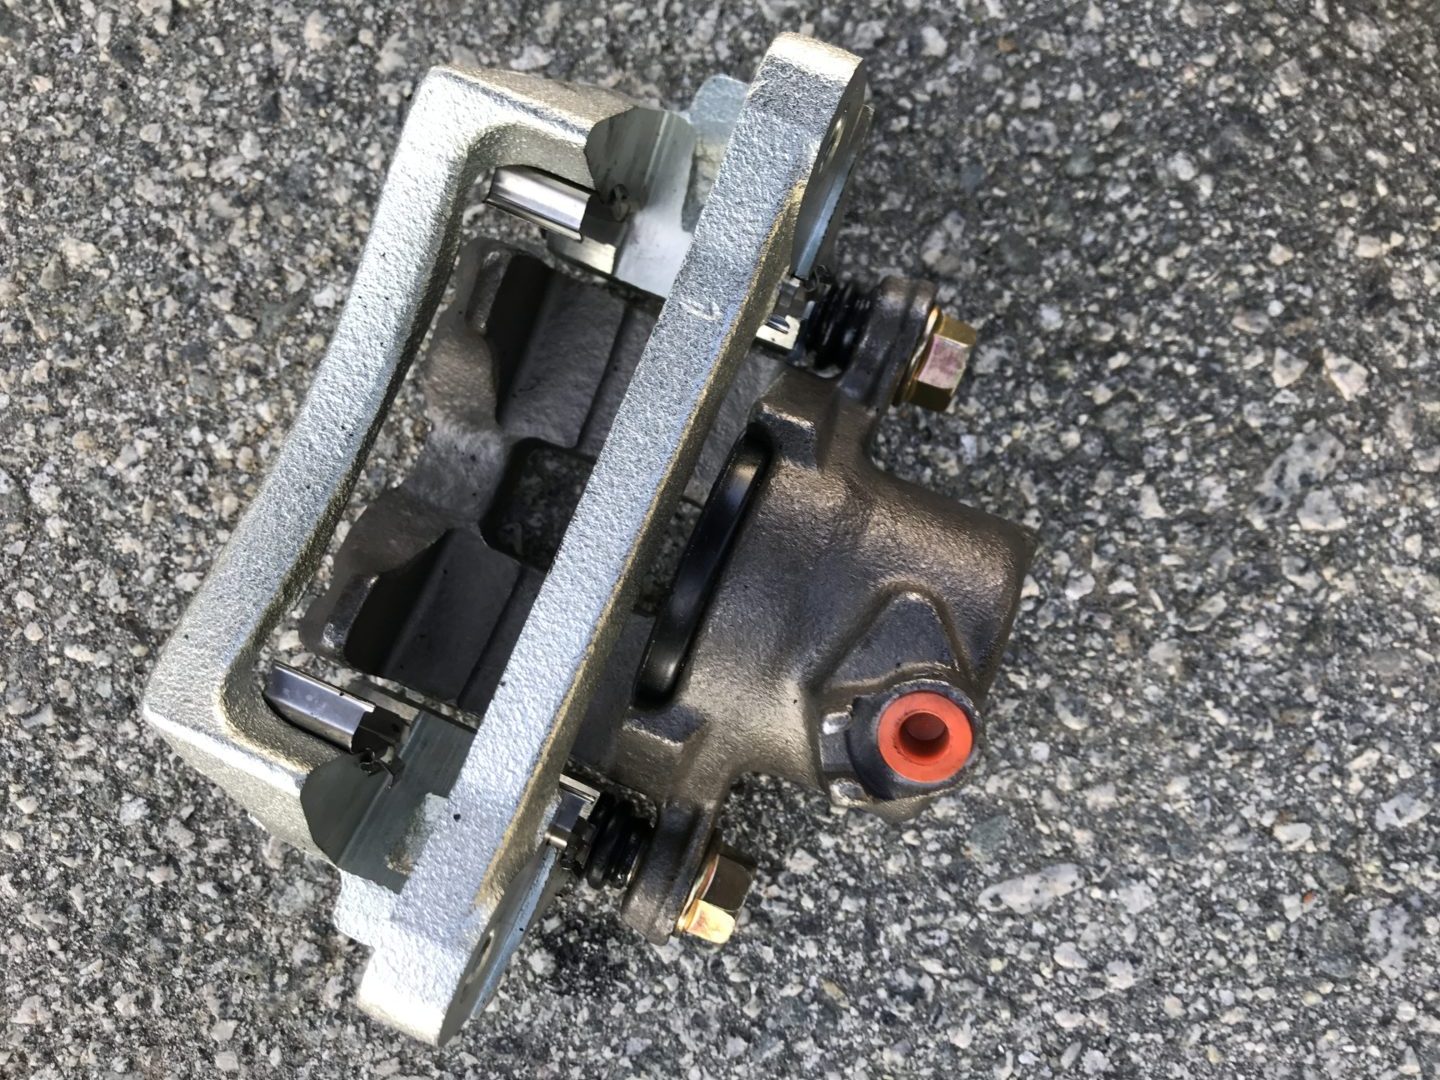
New rear brake caliper ready for installation…
If you plan to replace the rubber hose that exits the rear brake caliper, then install this onto the new brake caliper.

Blue threadlocker on the rear caliper mounting bolts.
Torque down the brake caliper mounting bolts to the proper torque. On my 2003 Toyota 4Runner, the rear needs to be torqued down to 65 ft-lbs.
I usually give the brake rotors a spray down of brake fluid to clean up any remaining dirt and grease.

Here are the new rear brake caliper and brake lines installed.

Bleeding the Brakes
Now that all the the brake calipers (and lines if you opted to do those as well) are replaced, there is air in the hydraulic brake system. This air was introduced into the system when the closed hydraulic system was opened during the caliper replacement. A brake bleed now needs to be performed in order to purge all of that air out of the system in order to ensure maximum braking operation. If you plan to do this yourself, you can check out this post.
: 4th Gen Toyota 4Runner")

: 4th Gen Toyota 4Runner")
: 4th Gen Toyota 4Runner")

: 4th Gen Toyota 4Runner")
: 4th Gen Toyota 4Runner")


10 Comments
Would you know the thread size on the rear caliper slide bolts?
I believe they are 17mm.
Mr. Lam – Thank you for this awesome write up. Very detailed and very helpful. You are the MAN!
Thank you!
Simply for the work you put in on creating this awesome site, I am going to do all i can to purchase my items through you website and ill post a link to your site on the signature of my T4R.org posts. You’ve helped a bunch
Well I do appreciate that! Glad it has helped you out!
Great write up! my 06 V8 Limited came with the 13WH calipers. 13WH requires the larger rotors (13.30 inches / 338 mm)
Oh wow, that’s interesting. Is it possible it was replaced in the past? I didn’t think that any Limiteds came with the larger caliper. That’s good for you!
Hey Scott.
Excellent step by step breakdown for the brake replacement! I have an ’03 V8 Limited 4runner with 300,000km and have changed the front calipers many times. So far, the only ones that haven’t seized up within a couple of years are the Raybestos Element 3 calipers. They are the stock size 13WG and work fine even when towing our boat.
Thanks! That’s good to know! I’ve always wondered which of the aftermarket ones are less prone to seizing… although the cheaper ones I got from RockAuto seemed to have held up. I no longer have my 4Runner, but I have been wondering about the Raybestos Element 3 brake parts since I came across them when I was shopping for my current car. I’ll keep your good experience in mind the next time I shop for brakes.