When you make purchases through links on this site, The Track Ahead may earn an affiliate commission. Also, these posts are based off my own experiences. I am not responsible for any action you take as a result of reading this. Learn More
This write-up has been broken up into two parts as there is a ton of information on doing an HID projector retrofit. This is Part 1 which covers the disassembly of the headlights, installation of the projector, and re-assembly of the headlights. Part 2 will cover the installation of the wiring harness, ballasts, and HID bulbs, as well as the final calibration of the whole setup.
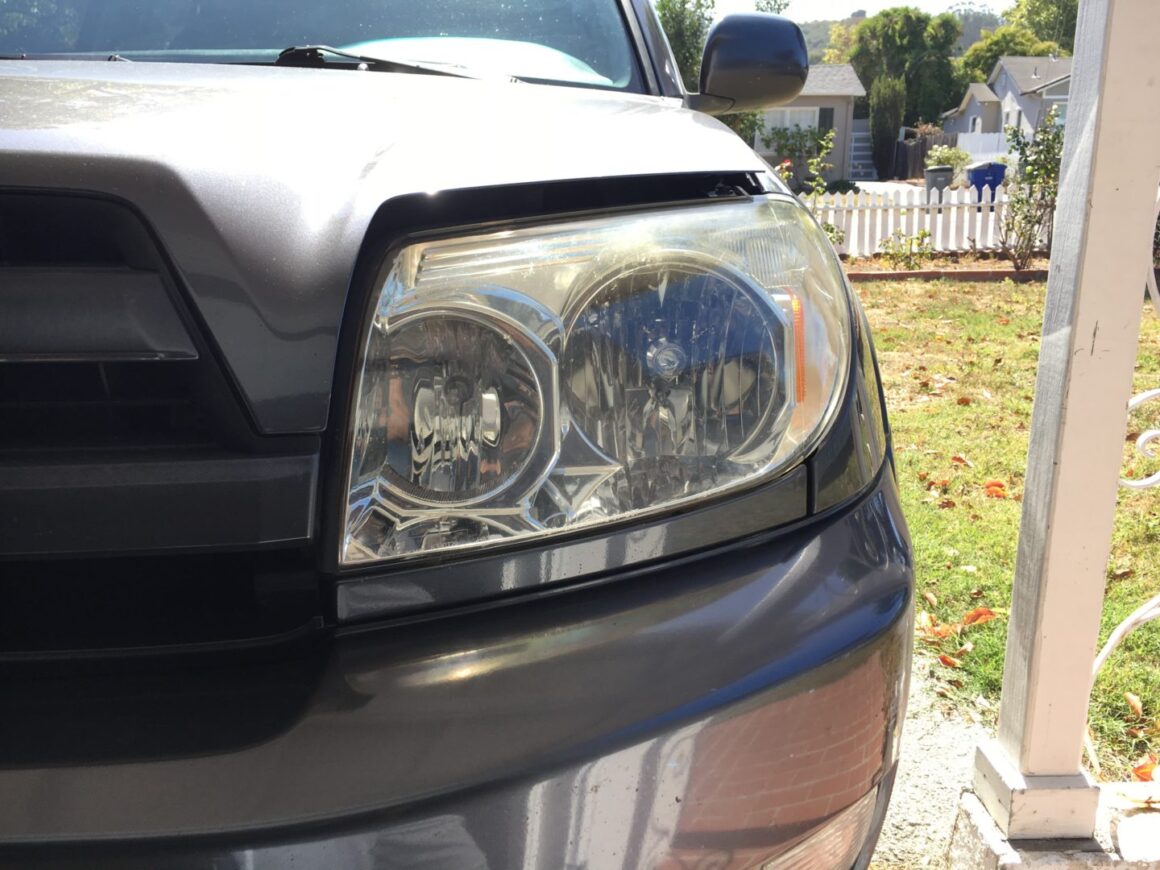
This HID projector retrofit write-up pertains to the ’03-05 model years of the stock 4th generation Toyota 4Runner. These stock halogen headlights work adequately for lighting up the front of the vehicle, but there is much more left to be desired. The halogen lamp that comes stock on the 4th generation Toyota 4Runner is pretty dim in today’s standards. I’ve ran the original OEM head lamps for many years, but wondered what options there were for the 4th gen 4Runner.
Headlight Year Differences
Within the 4th generation of the Toyota 4Runner (years 2003-2009), there was a mid-generational refresh for the year 2006 model, which affected the headlight design. Therefore, we must distinguish between the ’03-05 models and the ’06-09 models.
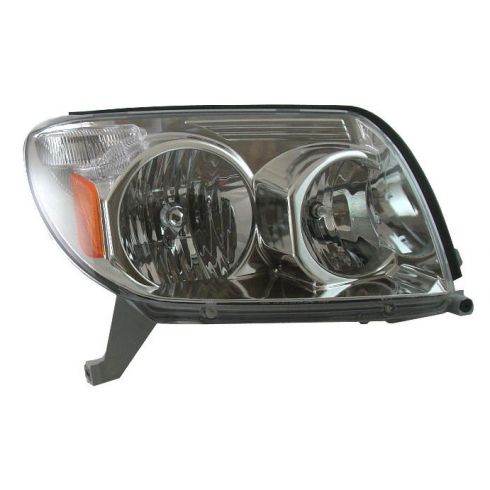
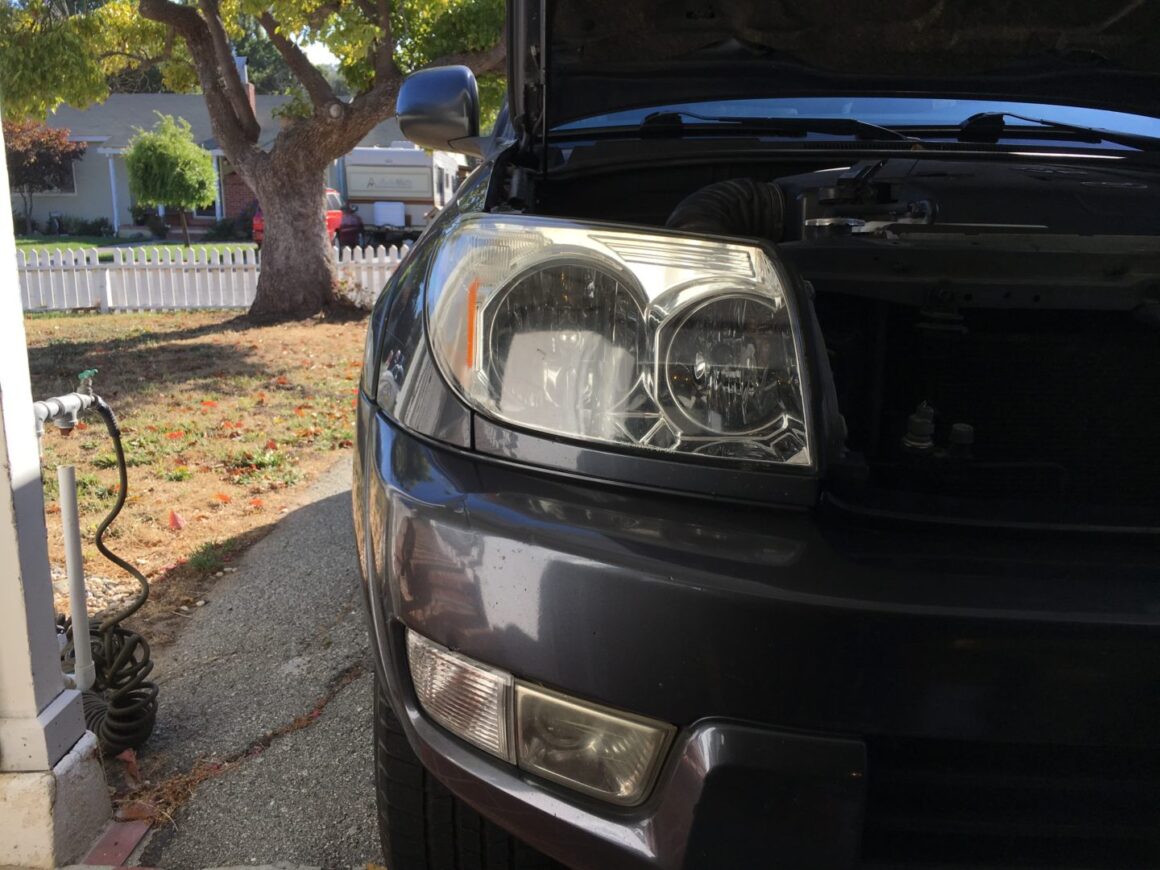
The ’03-05 years utilize a standard reflector halogen lamp in a reflector housing, meanwhile the ’06-’09 year models updated to a projector housing, yet still utilizing the stock halogen bulbs.
Toyota 4Runner: ’03-05 headlight (left) and ’06-09 Toyota 4Runner headlight (right)
Headlight Upgrade Options for ’03-05 4Runner
The ’06-09 headlights have projector headlamps and therefore upgrading lighting alone can be a nice upgrade for the lighting.
However, the the ’03-05 headlights utilize halogen bulbs as well as a standard reflector housing to produce its light. There are many options out there for upgrading the 4th generation Toyota 4Runner headlights, but it all depends on how much you’re willing modify on your vehicle.
If you’re planning to go the whole nine yards and do a full HID projector retrofit, it takes a few more steps to retrofit projectors into the existing housing, then installing the HID lighting system. However, this option may not for all.
I’ll run through all of the options available for upgrading the lighting on these generation 4Runners.
OEM Bulbs
The stock bulbs are the 9006 bulb for the low beams and 9005 bulb for the high beams. Replacements are simple, just plug and play. It’s easy to replace and they last for a decent amount of time. Visibility is relatively low compared to HID’s bulbs. OEM bulbs are readily available online or in your local auto parts store.
Search results for OEM bulbs can produce both stock halogen bulbs and aftermarket ones as well. If you’re looking for the basic halogen bulbs, look for the ones from Sylvania or Philips.
Amazon: 9006 bulbs (low beam) / 9005 bulbs (high beam)
Ebay: 9006 bulbs (low beam) / 9005 bulbs (high beam)
Aftermarket Bulbs
There are tiers of the standard halogen bulbs that still fit the 9006 and 9005 sockets. These are also plug and play, but offer various levels of performance. The lumens can vary with each offering, meanwhile the bulb filament may have a more precisely wound filament, effectively focusing brighter areas in desired parts of the headlight beam.
Furthermore, there are many frequencies that corresponds to various colors. This can vary from a yellow bulb to a whiter light. None of these characteristics necessarily mean one bulb is brighter than the next. They are simply at a different frequency and therefore emitting a different color light.
Some of these aftermarket bulbs may offer a better output of light or a more desirable frequency of light (depending on your preference), however they are not far from what the OEM bulb offers.
HIR Bulbs
HIR (halogen infrared) bulbs offer a newer technology over the stock 9005/9006 halogen bulbs. Essentially, the HIR bulbs have a round-shaped bulb as opposed to the stock tubular ones. These round bulbs are coated with a “durable IR reflective coating”, which allows for head to be maintained within the sphere and therefore allowing the filament to become hotter. This allows more light to be produced without overheating or producing more wattage that the stock wiring can’t handle.
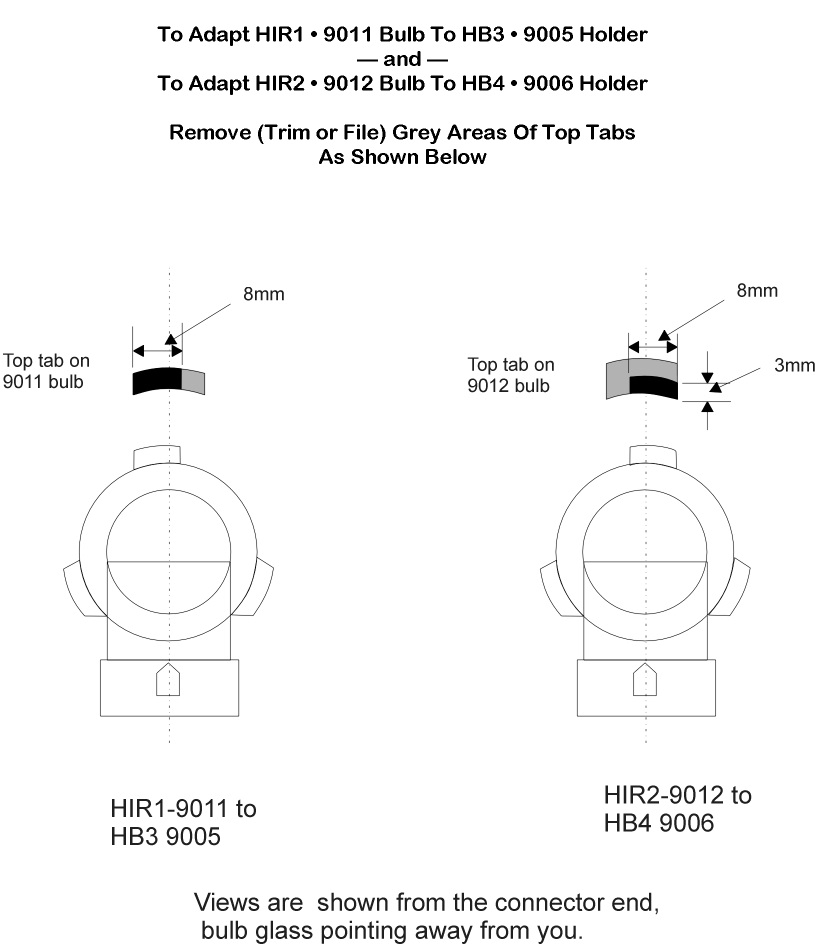
The HIR bulbs require a very minor modification to the HIR1 (fits 9005) and HIR2 (fits 9006) bulb tabs, which allows it to fit into the 9005/9006 slots. This modification is very easy to do and can be done with a dremel tool or even a small saw on the plastic tabs as shown below.
Here’s a comparison between the HIR bulbs and stock OEM bulbs:
| LOW BEAM Halogen | LOW BEAM HIR | HIGH BEAM Halogen | HIGH BEAM HIR | |
|---|---|---|---|---|
| Bulb Type | 9006 Halogen | 9012 HIR2 | 9005 Halogen | HIR1(9011) |
| Voltage | 12.8V | 12.8V | 12.8V | 12.8V |
| Watts | 55W | 55W | 65W | 65W |
| Lumens | 1006 lumens | 1875 lumens | 1700 lumens | 2530 lumens |
| Operating Life | 360 hours | 1000 hours | 320 hours | 400 hours |
Amazon: Philips 9011 HIR Bulb, 1 Pack
Candlepower: Philips 9011 HIR Bulbs
Amazon: Philips 9012HIR2 Bulb, 1 Pack
Candlepower: Philips 9012 HIR Bulbs
LED Bulbs in Stock Headlamp Assembly
With more and more LED options becoming readily available, aftermarket manufacturers are offering LED bulbs that allow consumers to plug these into the standard halogen bulb sockets. This may sound like an easy upgrade, but it’s actually more dangerous for both the driver as well as for other cars on the road.
It’s important to keep the beam of the headlight shining directly onto the road in front of you while ensuring it does not blind oncoming traffic. A standard halogen headlight emits light through its filament omni-directionally versus many aftermarket LED bulbs which emit light bi-directionally. This results in a beam pattern that is not uniform and leading to hot spots in places that are not desirable.
Furthermore, many of these products on the market are of low quality and therefore not built to the preciseness that is required of lighting products. Steer clear of these products as they are not only unsafe, but also won’t last you long.
06-09 Headlamp Assembly
Another option is to purchase the headlight assembly from a newer model (’06-09 year 4Runner) and install it in place of the ’03-05 4Runner headlights. This can bolt up correctly with the exception of a few things. The ’06-09 headlamp assembly’s shape is not the same as the ’03-05 and therefore if you do this swap, you will see a small gap between the lower corner of the grille and headlamp. Also, the daytime running lights (DRL) was moved from the lower bumper in the pre-facelift years to the headlamp assembly in the post-facelift models. This will need to be addressed if you go this route.
HID Projector Retrofit
Finally, the last option is to do a complete HID projector retrofit involving fitting universal projectors into the existing headlight housing. Then, installing an HID system to take the place of the existing halogen bulbs.
This may be the most involved option, requiring disassembly and modification of the headlight assembly, as well as installation of the headlight projector unit and HID lighting system. However, in terms of light output, I believe this to be the best option if you want to keep the stock look of the headlamp assembly, while significantly increasing light output from your vehicle.
The Retrofit Source
I purchased my ACME HID projector retrofit kit here and have been happy with both the product as well as the excellent customer service they provide. They offer different kits depending on what you’re looking for. I’d go with this company if you need their expertise to guide you through the purchasing process.
Amazon
I’ve noticed some universal kits on here, which have looked really interesting to me. If you like tinkering or customizing your options, this might be a good place to look. Be advised that you’re not going to have the help that you will get through The Retrofit Source, nor can you be rest assured about the quality of the product.
Tools & Materials Needed
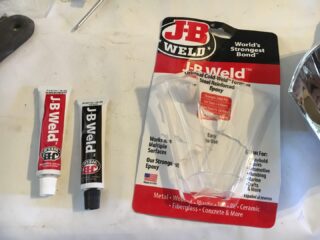
J-B Weld
Used to permanently glue the shroud to the reflector housing.
J-B Weld 8265S Original Cold-Weld Steel Reinforced Epoxy – 2 oz.
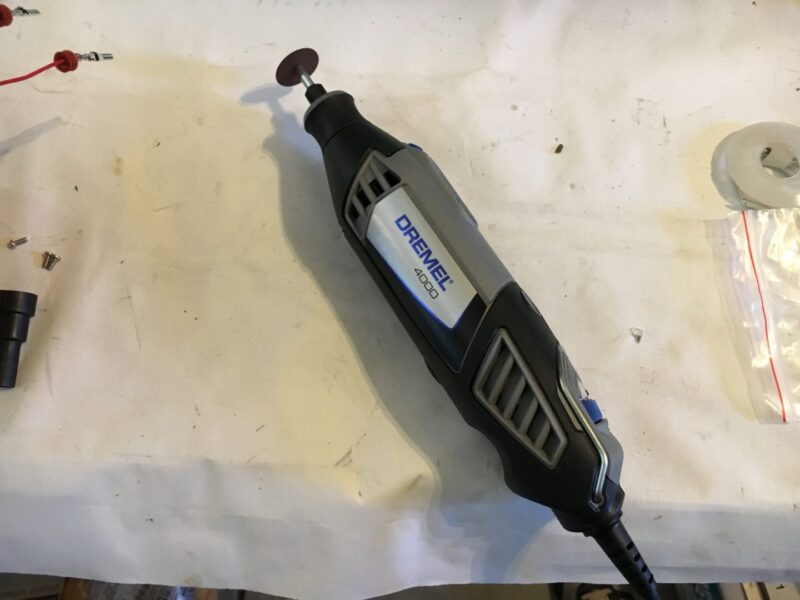
Dremel Tool Kit
The dremel is used to cut the back of the reflector housing so that the projectors will fit properly.
Butyl Tape
The existing butyl tape will be removed when separating the headlight assembly, so a new roll will need to be applied during re-installation.
Colormetrics Gray Putty Tape / Butyl Tape 1/8″ x 1″ x 30′ (Single Roll)
The HID Projector Retrofit Kit
I chose to order through The Retrofit Source as I’ve only heard good things about them. There are few other good options for vehicle lighting, however they have very good customer service. They were very helpful during my ordering process as I had many questions prior to putting in my order.
The HID projector retrofit kits vary in price from the lowest priced model at $130 up to over $300. I didn’t really need the best money could buy as I was simply wanting an upgrade to HID. I ended up choosing one of the lower priced options, the Bi-Xenon ACME H1 Super Projector System.
The cheapest option is the ACME H1 Standard, which is the base HID retrofit kit. According to Retrofit Source, this bulb is basically the same bulb that every other budget HID Mini H1 Bi-xenon sold. This kit starts at $130.
The next step up is the ACME H1 Super. Again, according to Retrofit Source, these projectors are similar to the 5th generation Morimoto Mini H1. There is more quality control and precision during the manufacturing of this kit than the ACME Standard kit. This kit starts $155.
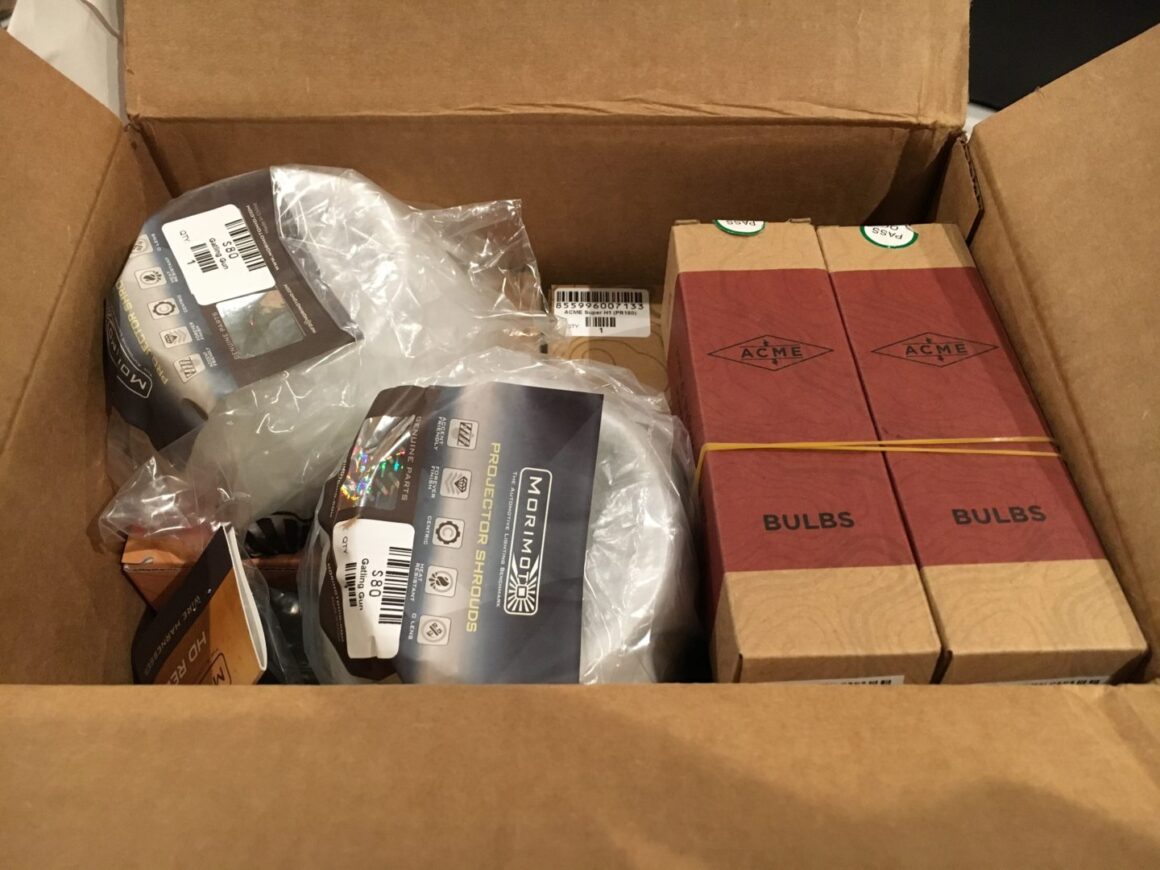
In the end, I went with the upgraded Bi-Xenon ACME H1 Super kit. There are several options to include with the purchase such as the shrouds, HID ballasts, HID bulbs, and wire harness. Here was my full order, which totaled $175 (free shipping for orders over $100):
Bi-Xenon: ACME H1 Standard Projector System CRK-ACME-H1 ($175.00)
| Component | Quantity & Component Info | Price | Part # |
|---|---|---|---|
| Bi-Xenon Projectors | 2 x Bi-Xenon: ACME Super Version (H1) | $50.00 | PR180 |
| Shroud Preference | 2 x Gatling Gun 1.0 | $25.00 | S80 |
| HID Ballasts | 2 x 35W: ACME SpeedyStart Ballast | $60.00 | BL90 |
| H1 HID Bulbs | 2 x H1: ACME HID (4300K) | $15.00 | B800 |
| Wire Harness | 1 x HD Relay: 9005/9006/9012/H10 | $25.00 | H10 |
HID Projector Retrofit How-To (Part 1)
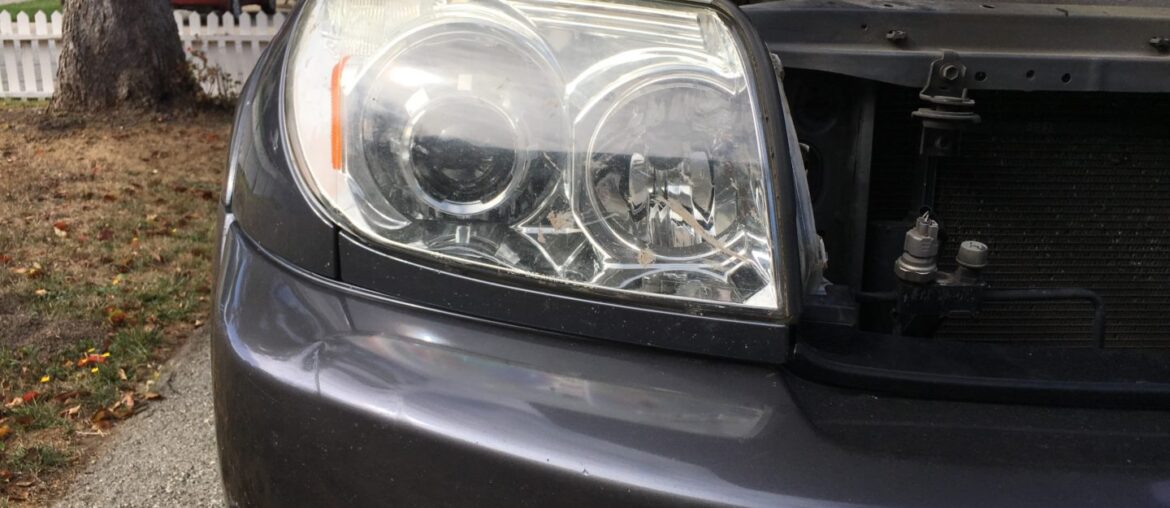
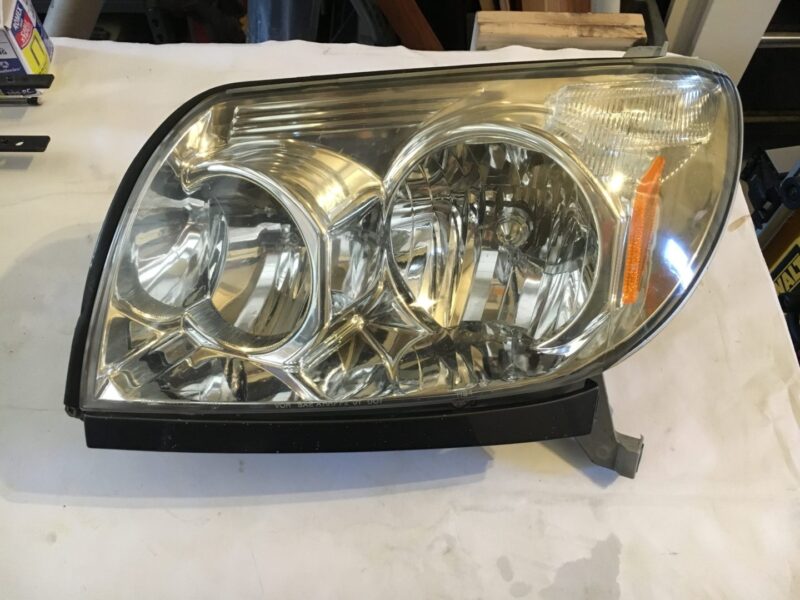
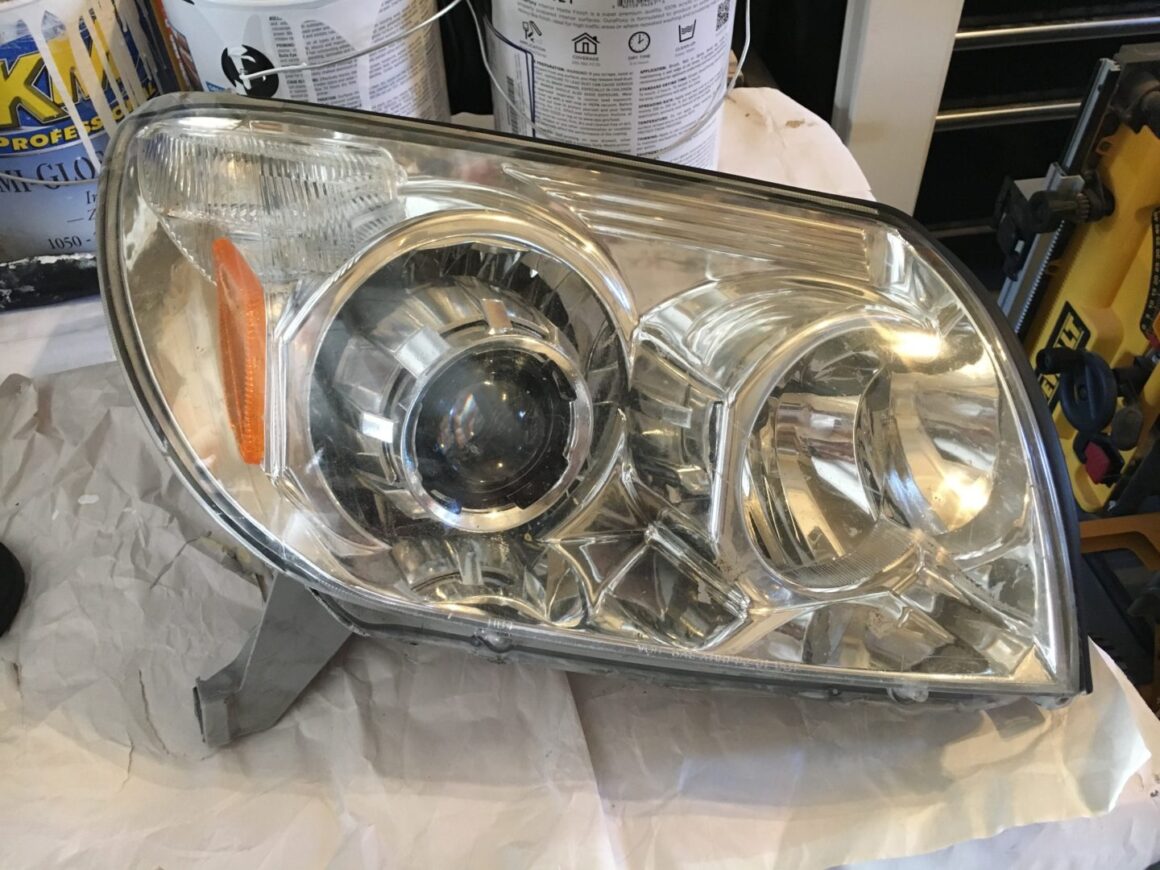
Here is the standard ’03-05 Toyota 4Runner headlamp assembly that we will be retrofitting with the ACME HID projector retrofit kit.
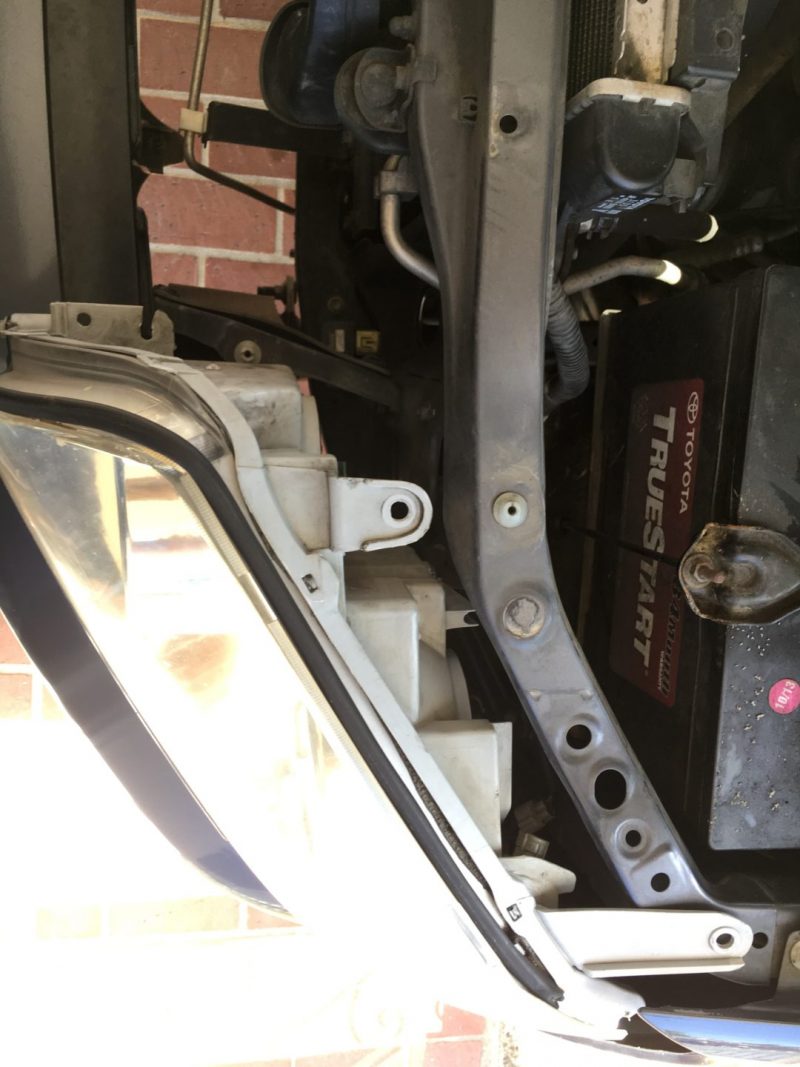
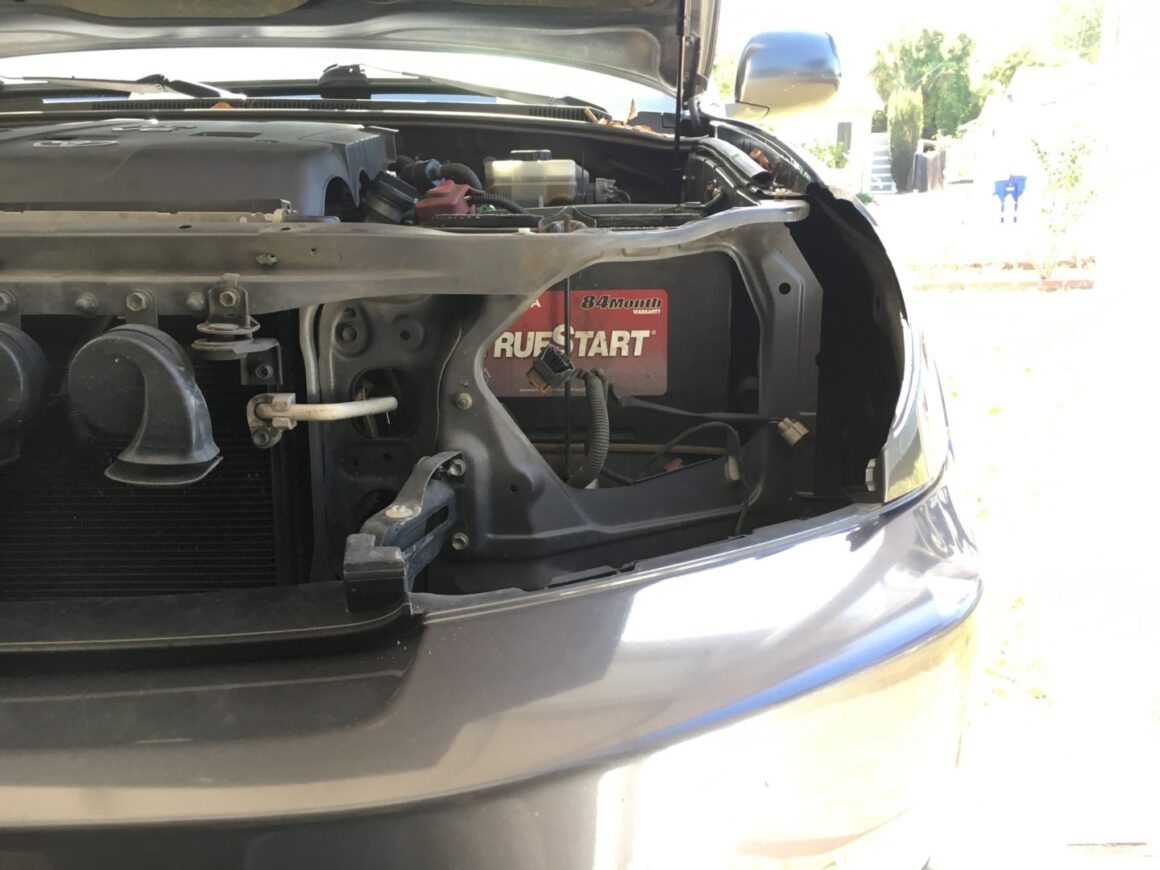
First disconnect the negative terminal of the battery, then disconnect all connections to the bulbs. Remove all the hardware that secures the headlights to the body and then pull the headlamp assemblies from the vehicle.
Headlight Disassembly
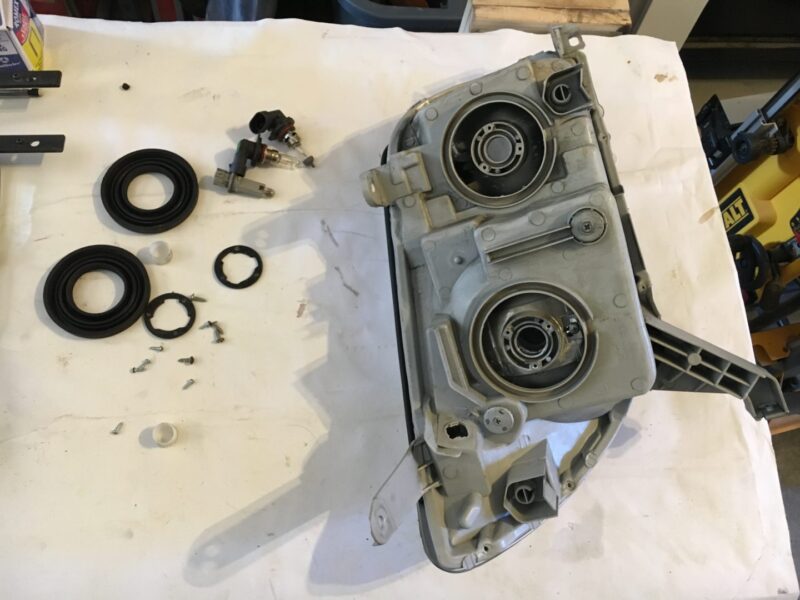
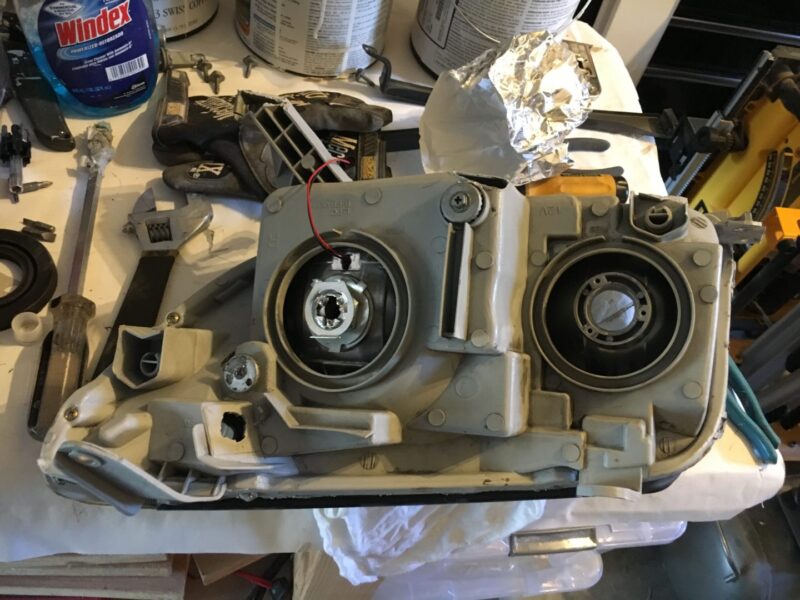
With the headlamp removed, remove the Phillips head screw that holds the trim piece at the lower end of the headlamp assembly. In order to separate the lens from the headlight housing, we need to heat up the assembly inside of the oven in order to soften the sealant the holds the two together. Prior to that, we must remove the rubber gaskets and all bulbs and plastics that are connected on the backside of the assembly.
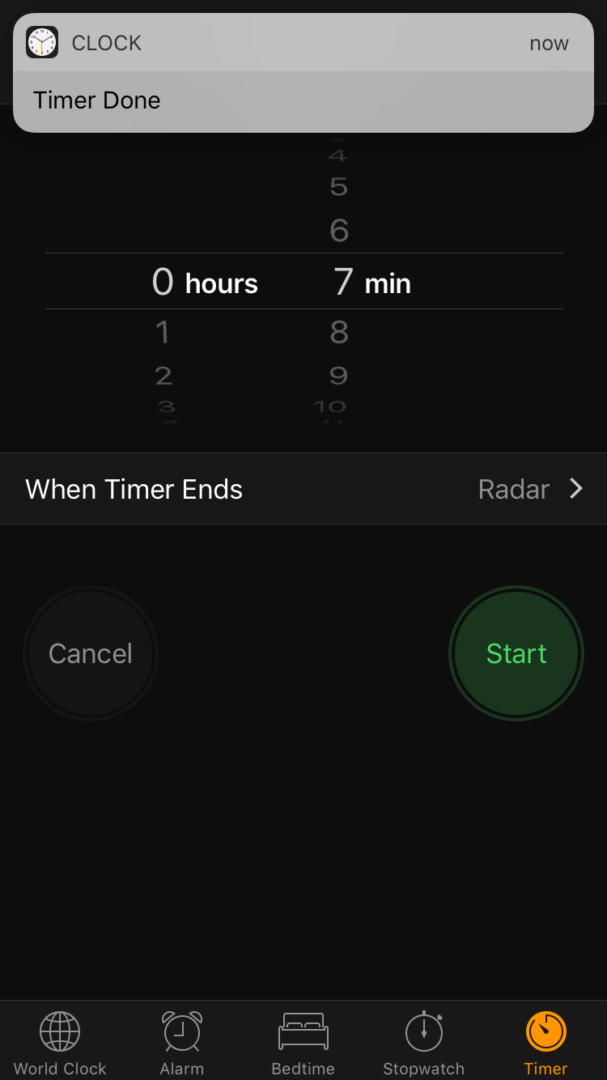
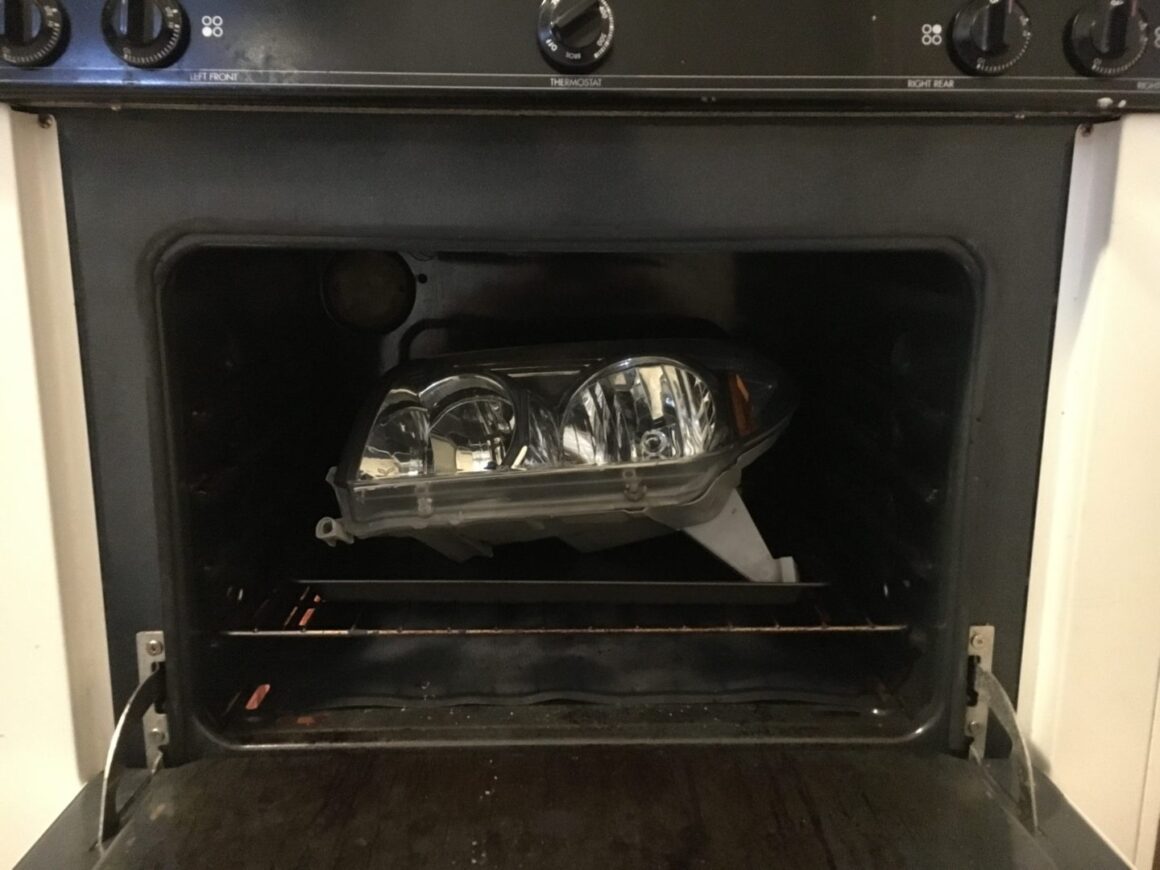
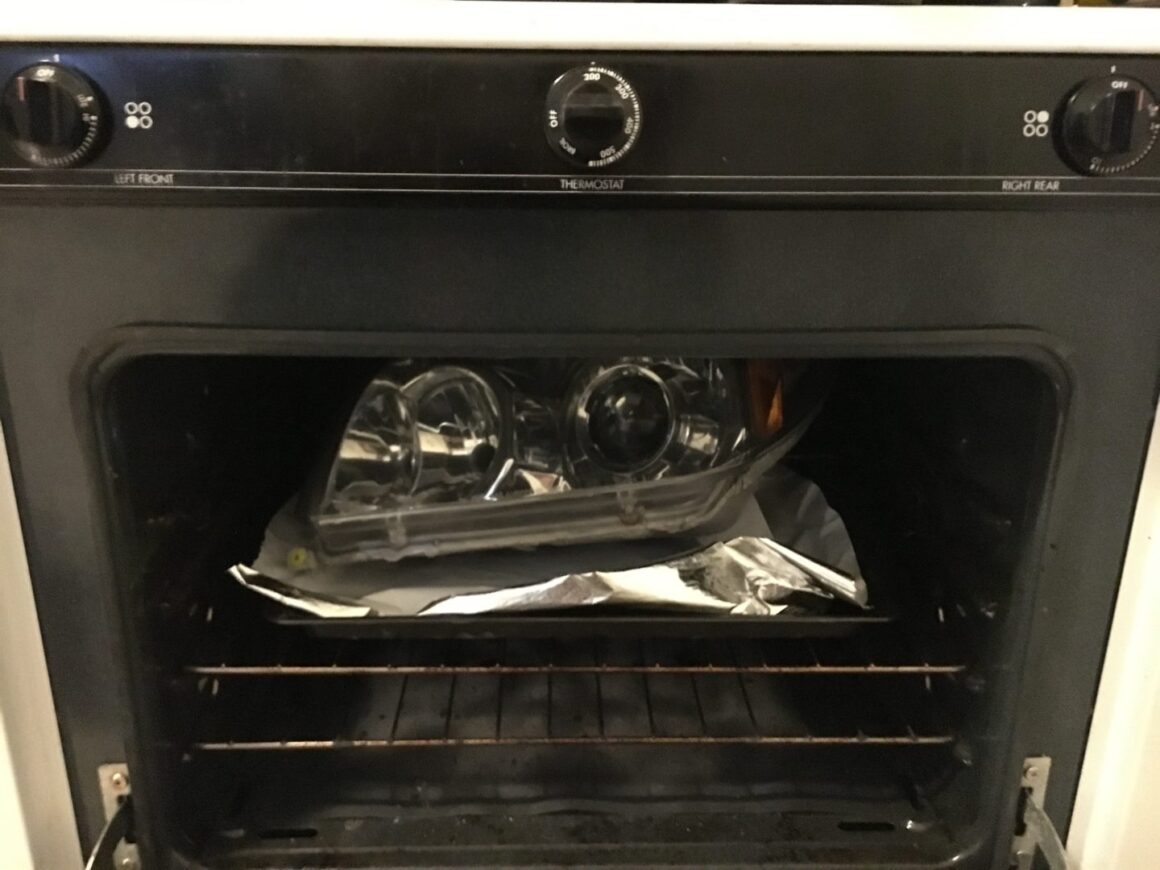
With all hardware removed from the headlamp, we are now ready to put the headlamp assembly in the oven to soften up the sealant. The oven needs to be set to 270 degrees F and run for 7 minutes. It seems that the instructions have been updated since a few years back and the temperature setting has been reduced to the currently recommended temperature of 270 degrees.
Heating at 270 degrees will likely prevent hot contact points between the headlight assembly and the baking sheet. Ultimately what you’re trying to do is heat the headlight enough so that the sealant will be soft enough to separate.
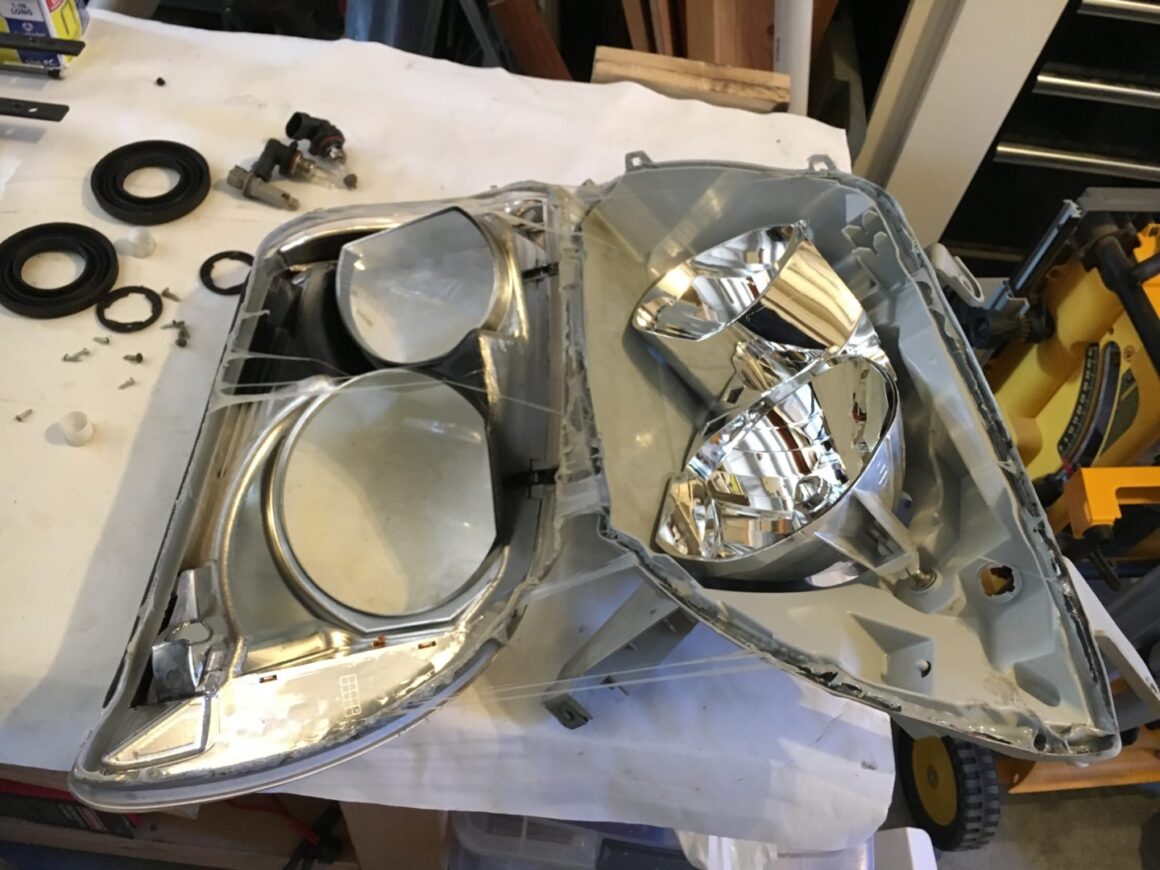
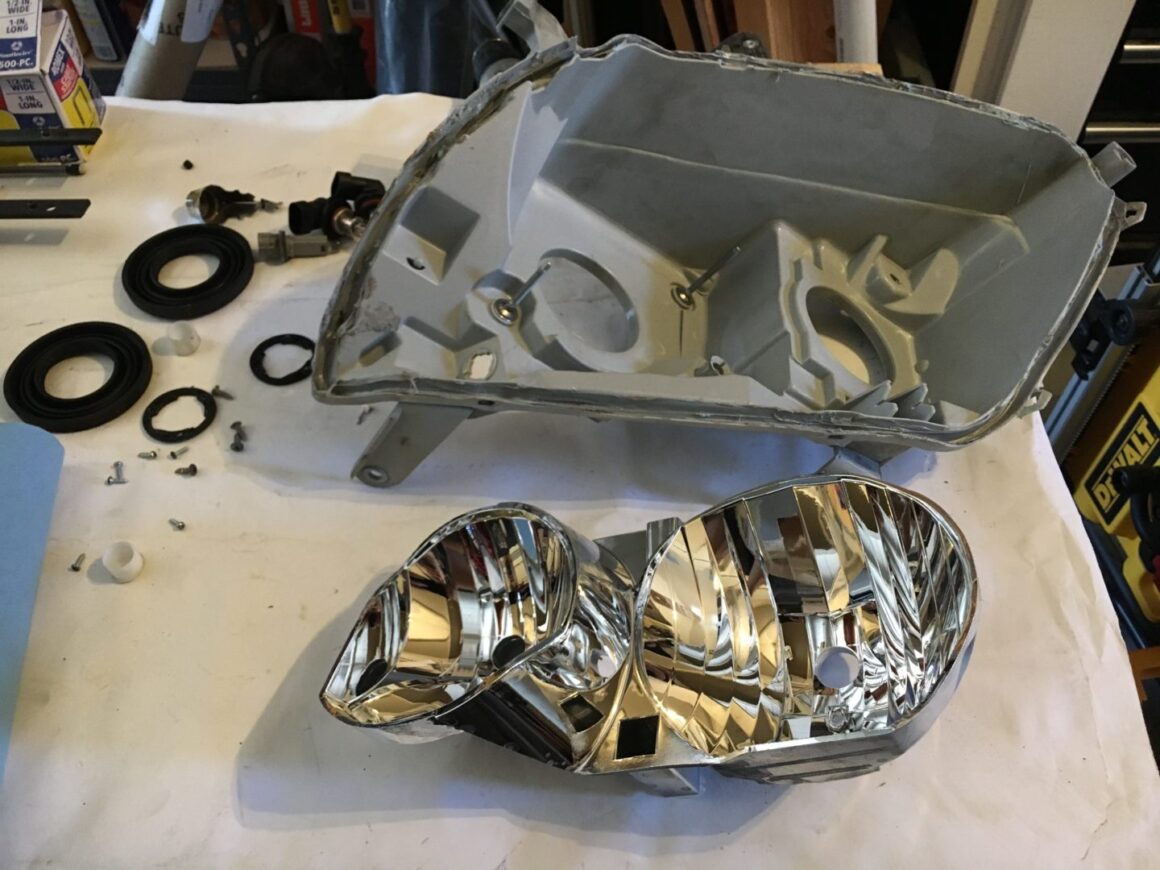
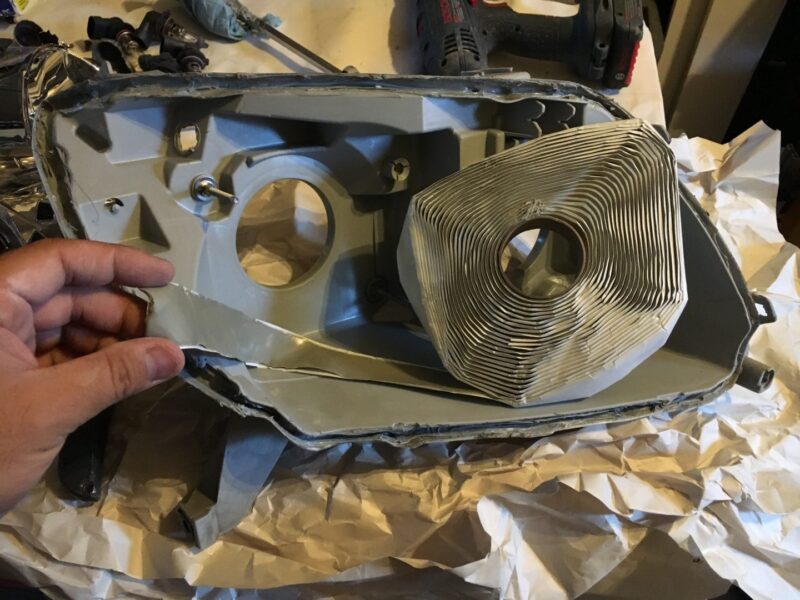
After 7 minutes, take the headlamp assembly out and start prying the plastic lens away from the housing with a flat head screwdriver. You’ll notice that when the sealant is heated up, it will soften and as a result, separate pretty easily. Using a box cutter will facilitate the removal of the butyl sealer. The removal process is extremely messy and hard to clean up.
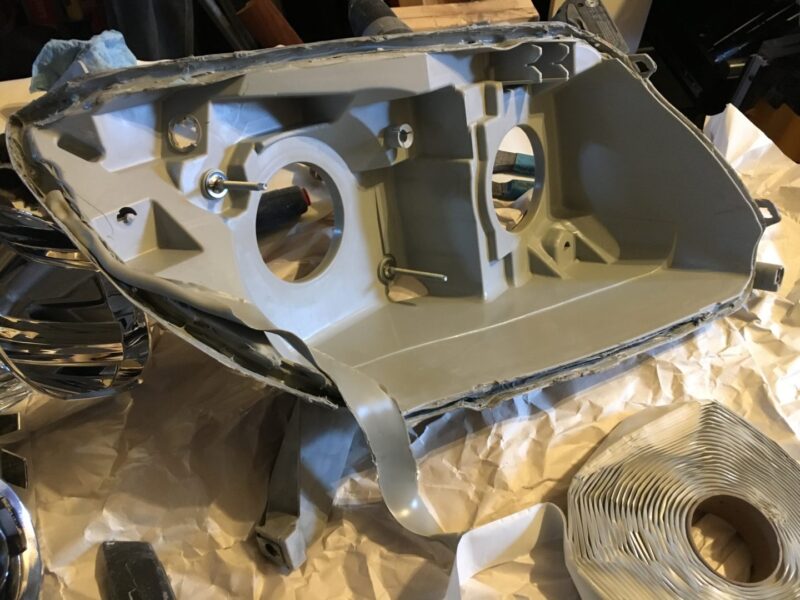
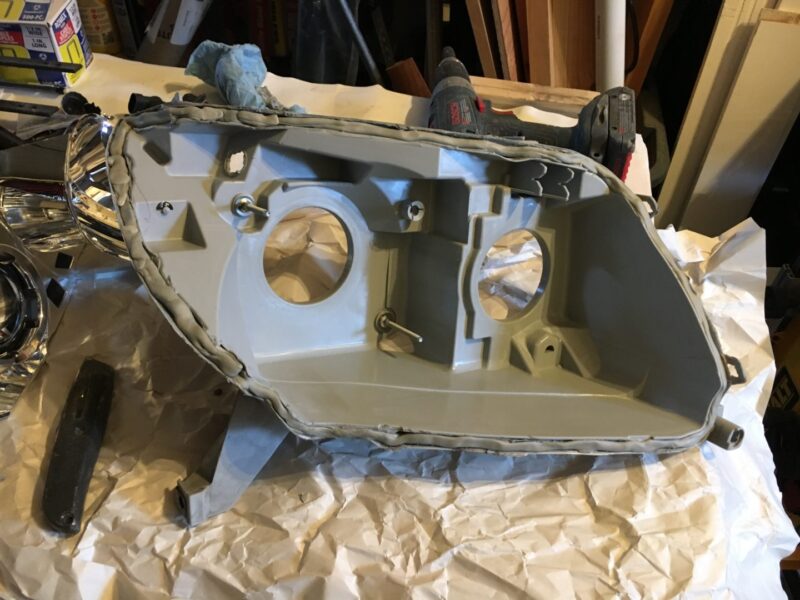
Attempt to remove as much of the butyl sealer without it getting everywhere. You will be using a new strip of butyl to seal the headlights again during re-installation. At this point, you’ll want to make sure you remove as much of the existing butyl as you can. As I said before, this stuff is really hard to remove, especially when it cools and hardens so scrape away as much of it while it’s warm.
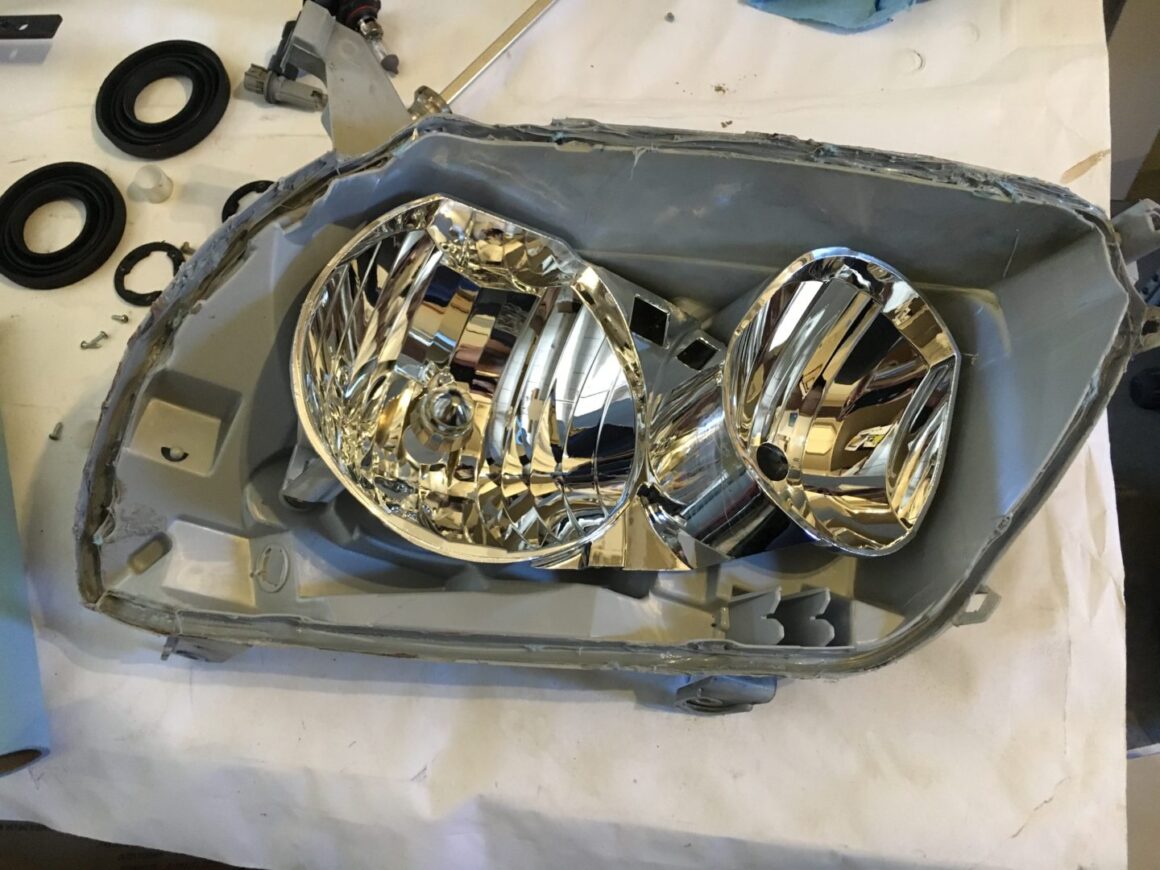
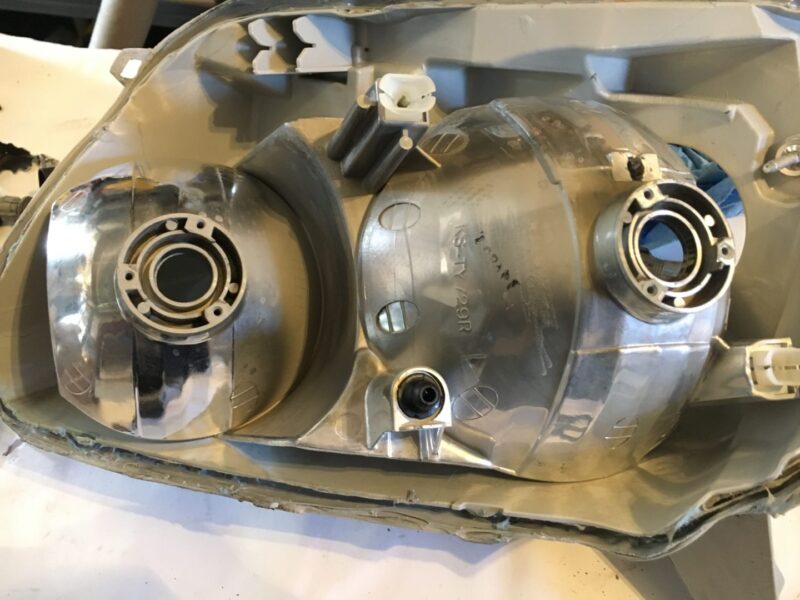
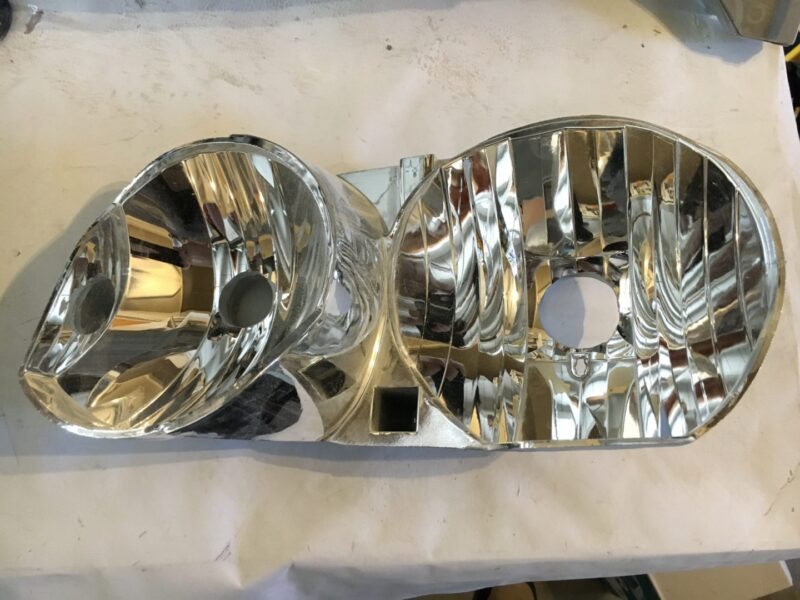
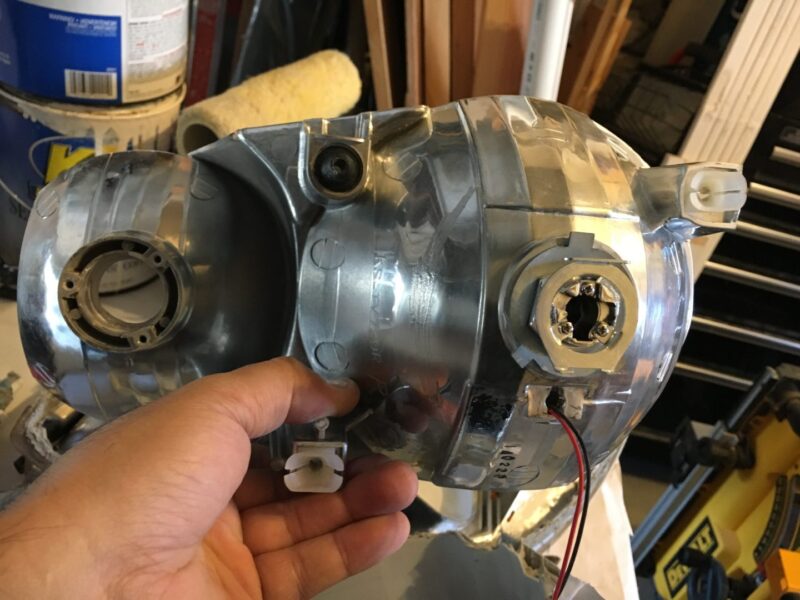
Separate the reflector away from the back portion of the headlight assembly. You will be modifying the reflector so that you can mount the new projectors to them.
Projector Installation
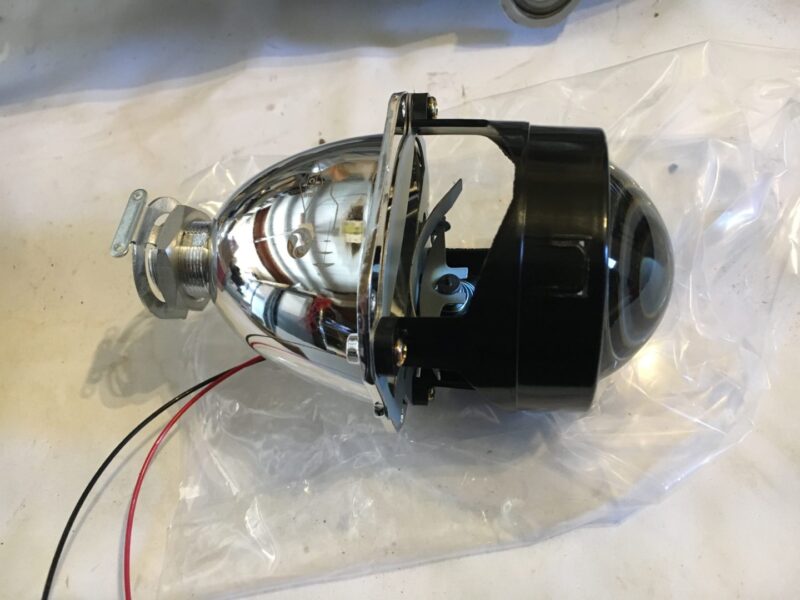
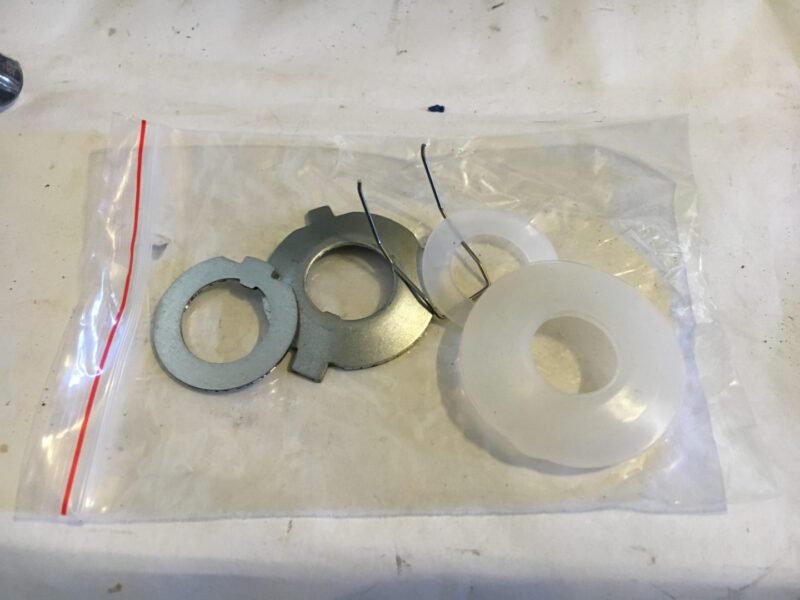
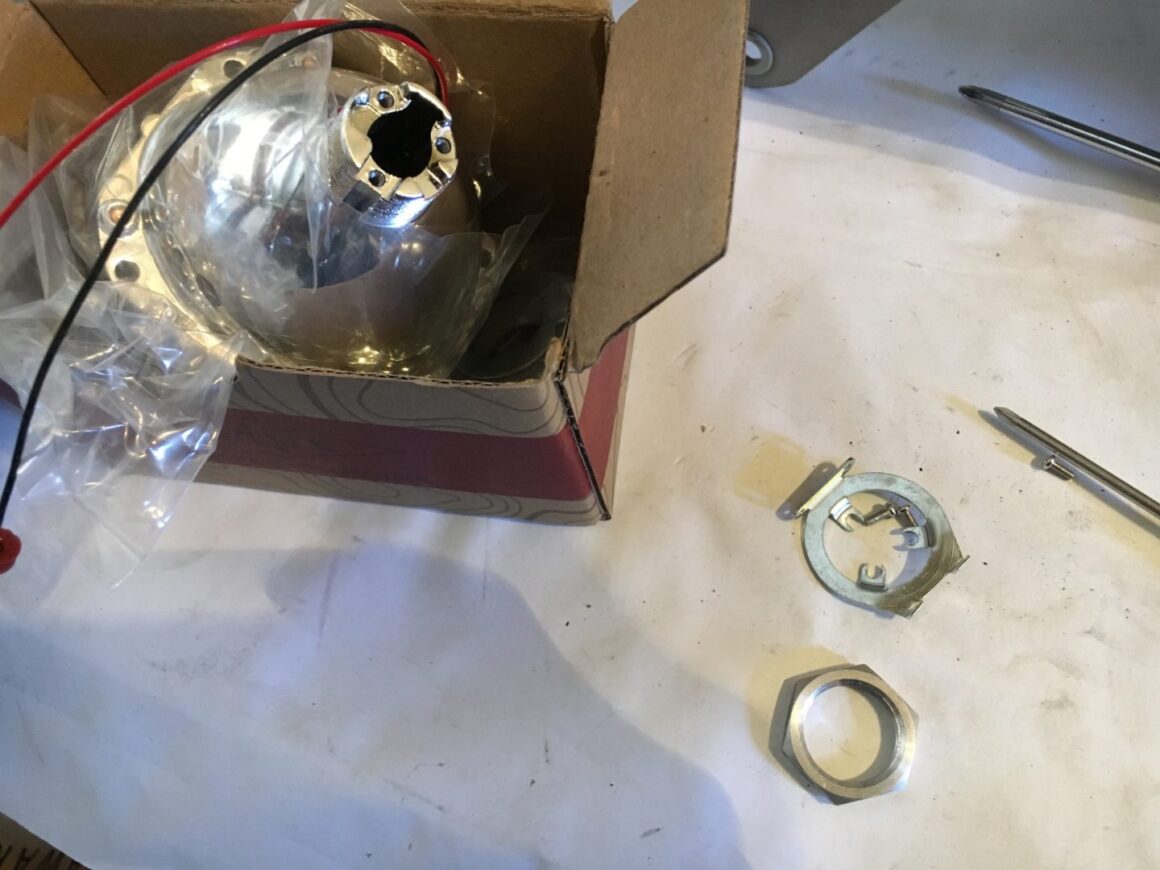
Remove the screws off the back of the projector, as well as the bracket and lock nut. The projector will come with two sets of washers (1 silicone & 1 metallic for each set) to fit either H7 or H4 based headlights. However, the larger H4 washer works better for the 4th gen 4Runner. Different applications may require the smaller washer ring, but in this case the larger one fits best.
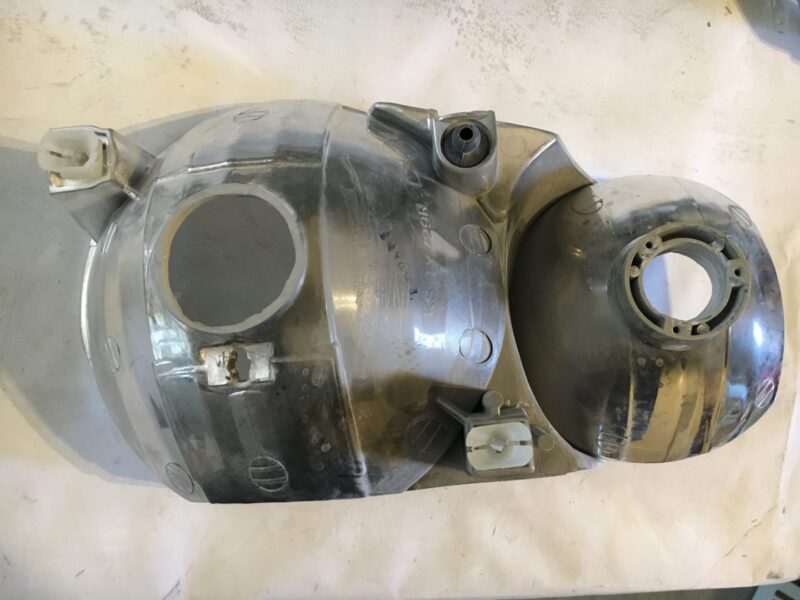
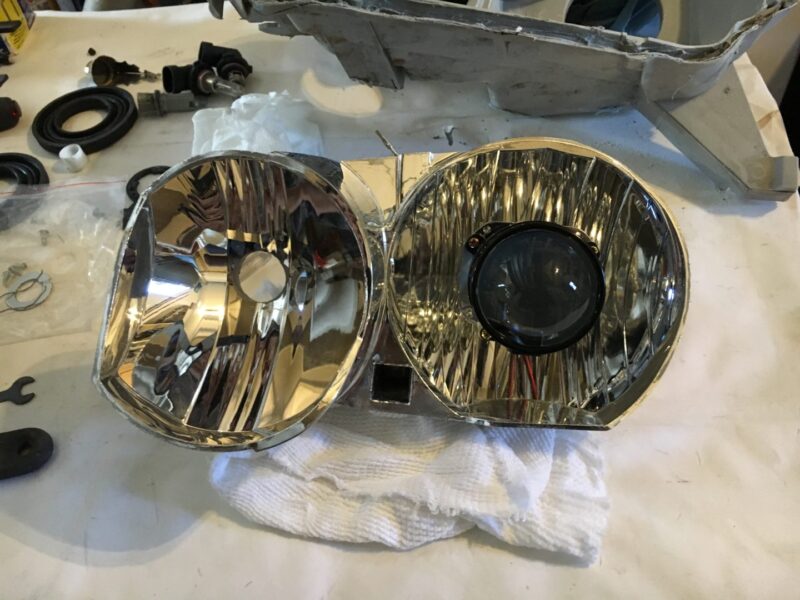
The projectors are meant to be installed in the place of your existing headlight bulbs. You can see from the existing reflector housing that the opening is not large enough for the threaded portion on the back of the projectors. Therefore, you will need to trim the rear opening so that the projector threaded shaft can fit through.
I used a Dremel with a cutting wheel to cut the end off of the bulb holder. Remember that you only need to cut the opening of the low beam bulb. This is because projector headlamps don’t work the same was as halogen ones do.
With halogen bulbs, there is a bulb for the low beam and a separate bulb for the high beam. On the other hand with projector headlights, there is an included shroud, which flips to allow for the beam of light to be redirected as a high beam. The high beam location can be left empty or you can leave a bulb connected so that the space is filled.
After enlarging the opening, grind down any sharp edges that remain. Since the projectors will be used and the reflectors won’t be of any use, the reflectors can be painted black if you’d like. I personally chose to leave it alone as I didn’t want to worry about the paint chipping or wearing over time.
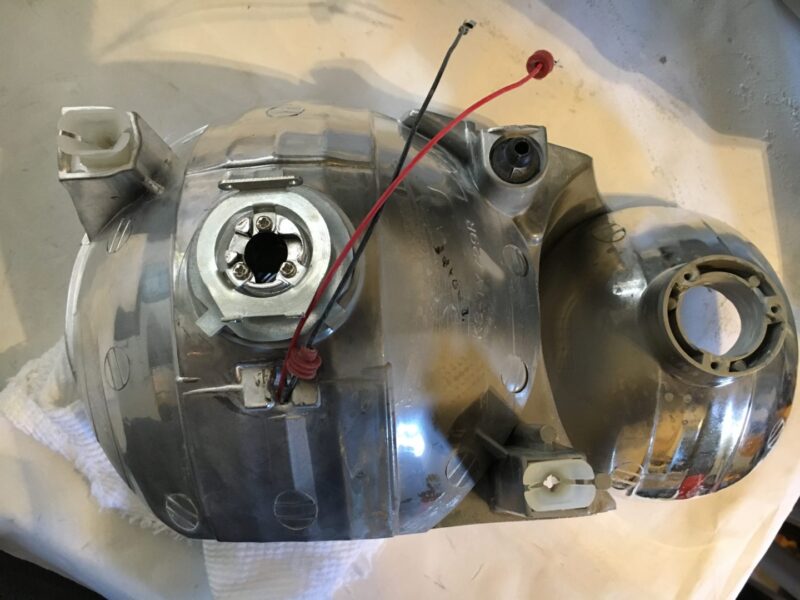
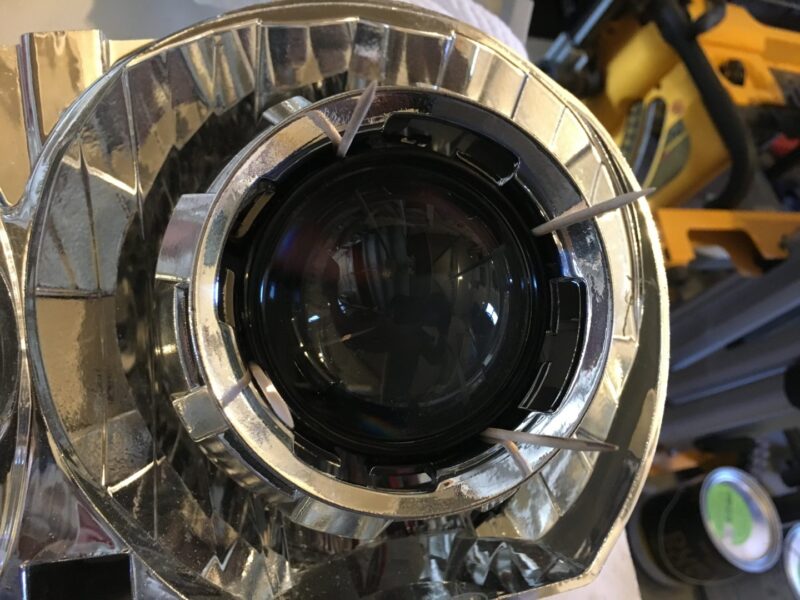
To attach the projector unit to the reflector, bring the projector into the opening you just enlarged. The projector comes with the retaining clip holder and lock nut already installed. Remove those pieces so that you can install the projector to the housing. Then grab the silicone ring that fits best for your application (in this case the larger silicone washer worked best) and fit it over the backside of the projector.
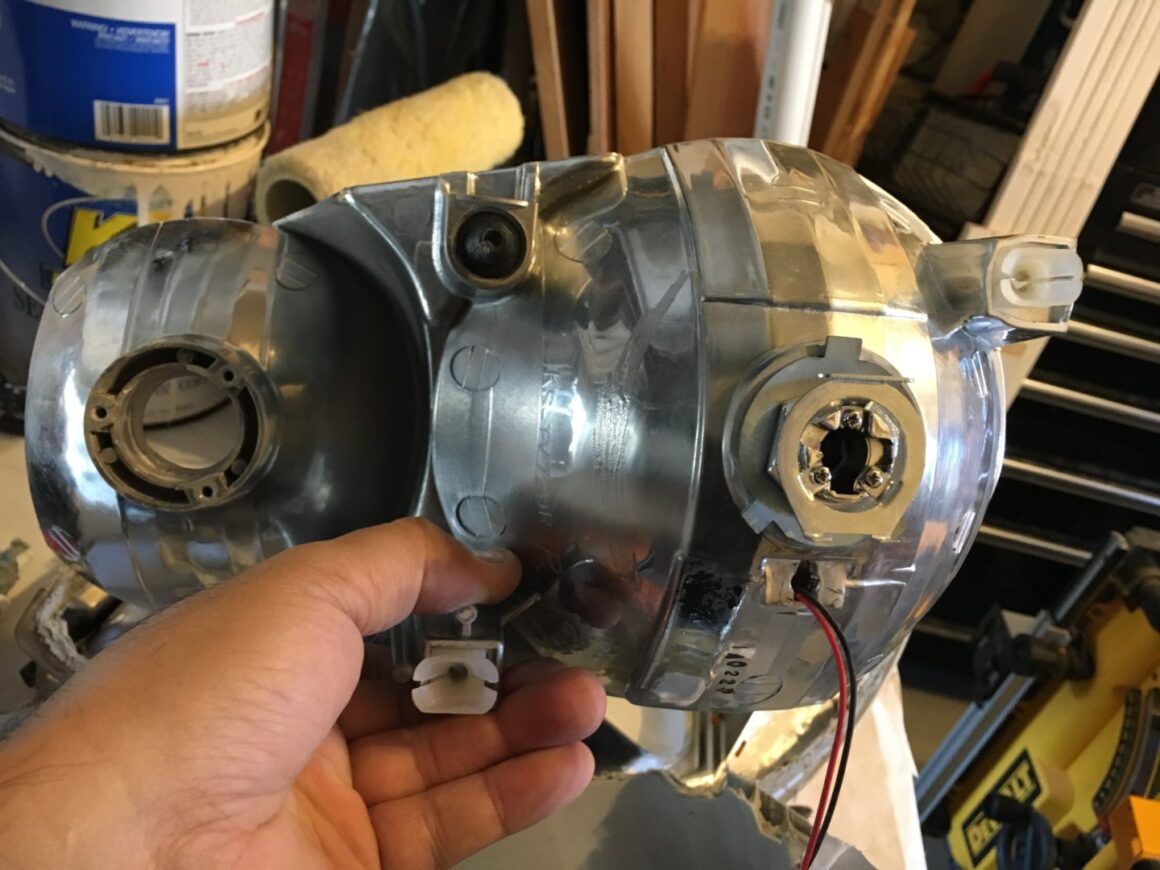
Make sure to fish the wiring through the opening in the reflector housing while you are bringing the projector through the reflector. Remember that the solenoid of the projector needs to face down at the 6 ‘0 clock position.
Ensure the projector fits snugly with the silicone washer to the reflector housing. The silicone washer acts as a thermal buffer between the projector and reflector.
Since the 4th generation 4Runner utilizes a 9006 low-beam originally, neither of the included washers fit perfectly. Because of this, you’ll need to choose the best fit options of the silicone washers and the adapter rings. Furthermore, the projector will need to be adjusted again once everything is installed.
Now, install the H4 washer (larger washer silicone washer) on the backside of the projector and then the lock ring. Snugly tighten the lock ring, but do not do a final tightening. As just mentioned above, you’ll need to make some more adjustments once everything is installed back on the car.
Finally, re-attach the bulb holder with the three small screws on the back of the projector.
Shroud Installation
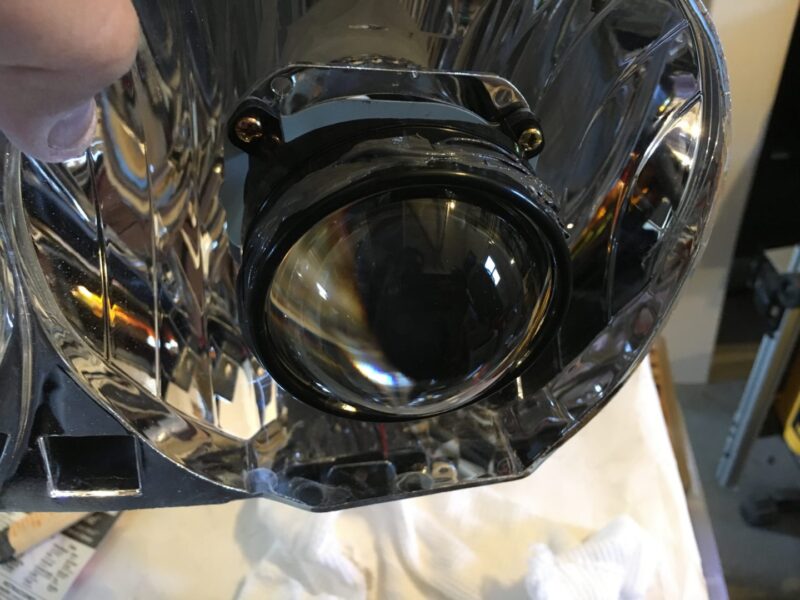
The next step is to install the shroud onto the reflector. The way this is done on this ACME projector kit is gluing it on with JB-Weld. This isn’t the most sophisticated way of securing the projector to the reflector, but the ACME kit is designed this way. But hey, it does the job.
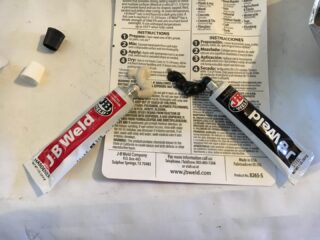
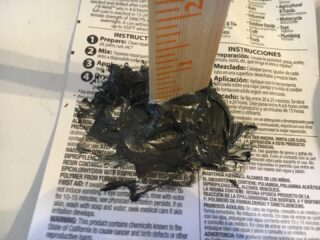
Mix up some JB-Weld and thoroughly mix until it becomes a consistent and grey color.
The backside of the shroud will be glued to the reflector housing. Carefully spread the JB Weld onto the back of the shroud. Slowly and firmly press the shroud centered over the projector and onto the reflector surrounding the projector. The JB Weld should meld the shroud to the reflector.
Make sure that the way you installed the shroud over the projector is exactly where you want it because once the JB Weld sets, you now have a permanent connection. From what I remember, the shroud is concentric so the rotation doesn’t matter as much as being centered over the projector lens.
Headlight Reassembly
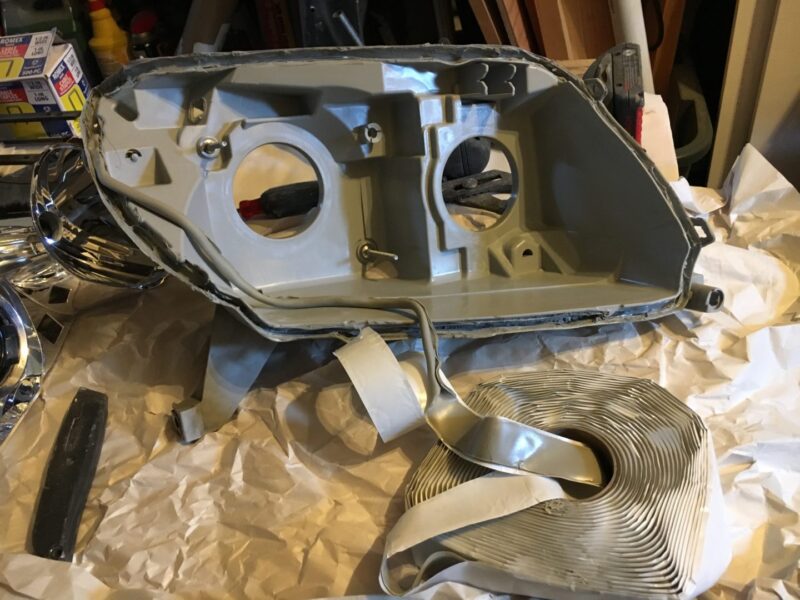
Now that the projector and shroud has been mounted, it’s time to re-attach the headlight assembly. Take a roll of butyl tape and roll it into a long bead in your hands. Then apply it to the channel in the headlight housing (where you previously removed the butyl from).
Once the butyl bead has been applied, re-fit the headlight lens (with reflector and projectors) back onto the headlight housing and press them together gently.
This whole assembly goes back into the oven for 7 minutes at 270 degrees Fahrenheit. Just like the removal process, make sure to keep the assembly on a baking sheet to prevent hot spots.
When the headlight assembly has finished baking, carefully remove it from the oven. Because the headlight assembly will be hot, you’ll want to use gloves and firmly press the two pieces together. The butyl should be soft since it has warmed up, so pushing the two pieces together will effectively meld the two pieces into one.
There is also a clip that holds the two pieces of the headlight that needs to be snapped together with a set of pliers. This will hook the two pieces together creating a strong seal between the two headlight pieces.
Allow the headlight assembly to sufficiently cool, then re-install into the vehicle.
HID Projector Retrofit: 2003 Toyota 4Runner Part 2 will be posted next
References
https://store.candlepower.com/








8 Comments
Wondering if you have an ETA for part 2? I already ordered all the same parts and looking forward to setting this all up when they arrive!
Hey Matthew,
I’ve been working on part 2 and I plan on posting it next weekend. Good luck on your install! It’s one of the best mods I’ve done on my 4Runner!
Can you build these for sale? It would be easy for to buy it. Lol. But for real , I would rather buy the projectors head light if you can build them.
If I had more time I would, but honestly I just don’t have the time. There are some options on Ebay (not exactly my taste, but perhaps there are some newer style ones available now) if you’re looking for already made ones, or you can go with the 06-09 ones if you don’t mind the small gap next to the grille.
Hello i have a 2003 toyota runner and i was getting tired of my boring reflector headlight housings and i wanted to get your input on switching over to a bi-led projector retrofit with the led technology vastly catching up and getting better i’ve kept my eye on some.
I’d think that’d be a great option and you are doing it right by going with the projector retrofit so that you can properly project the additional light that you’ll be getting from the LED’s. Sorry I can’t recommend any LED’s as I don’t have much experience with them, but I’d think you’d be good with a reputable brand from a trustworthy merchant. Good luck!
Thanks for taking to the time to write all this out and put it together with pictures.
Just researching my options at the moment but this was very helpful
You’re welcome! Good luck with the research!