When you make purchases through links on this site, The Track Ahead may earn an affiliate commission. Also, these posts are based off my own experiences. I am not responsible for any action you take as a result of reading this. Learn More
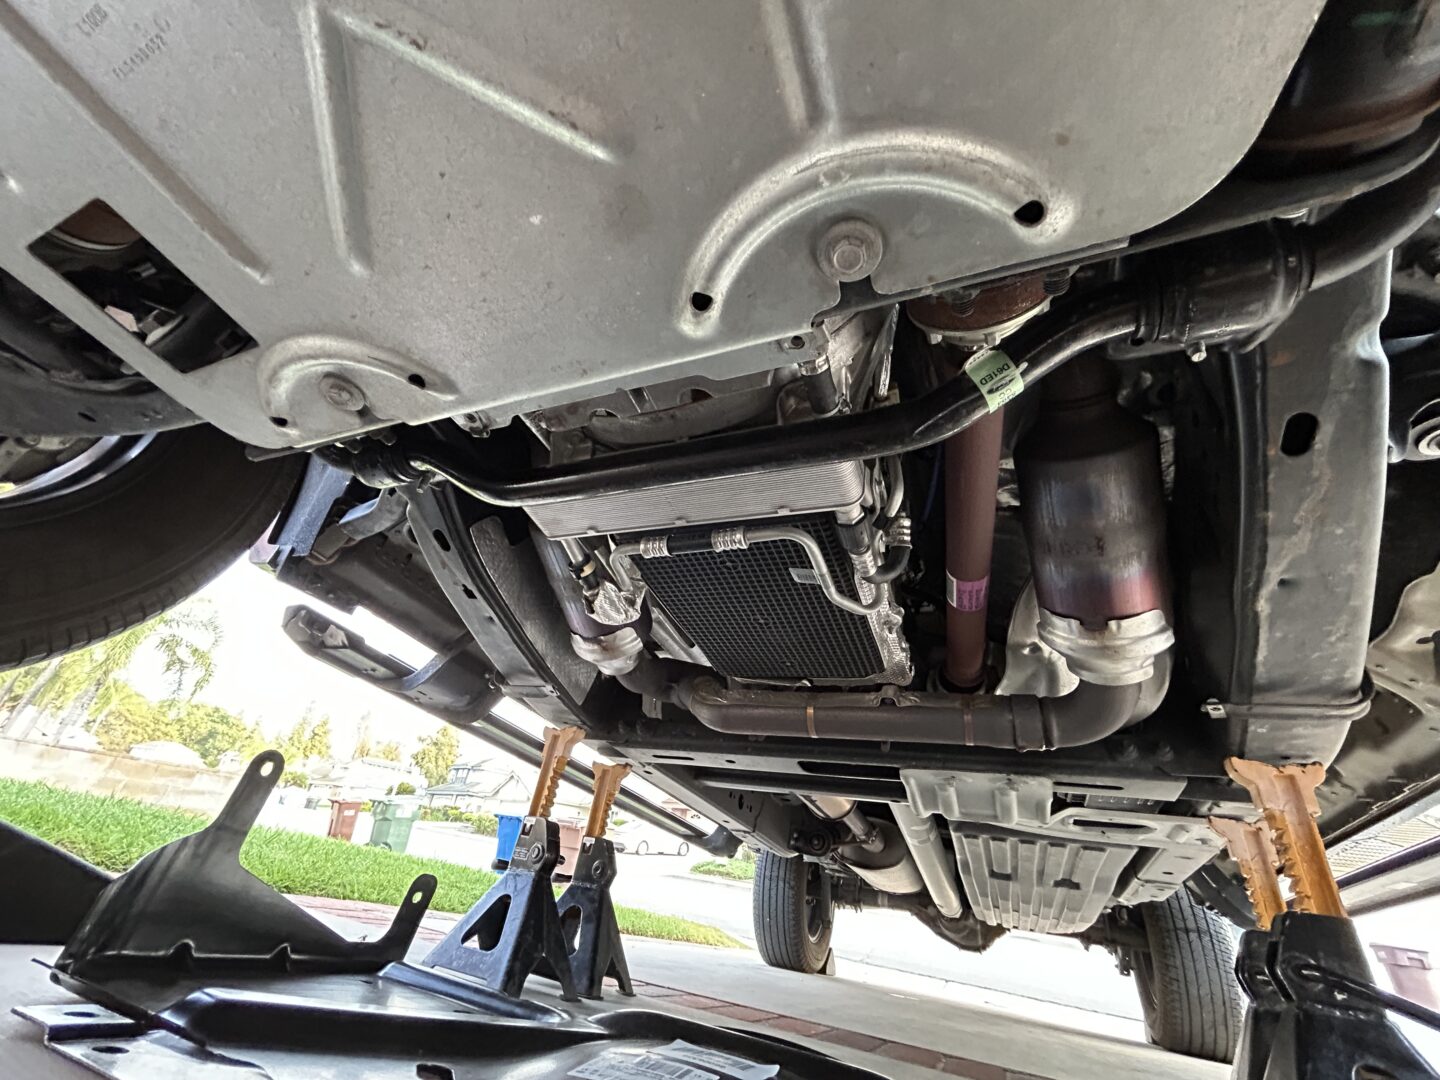
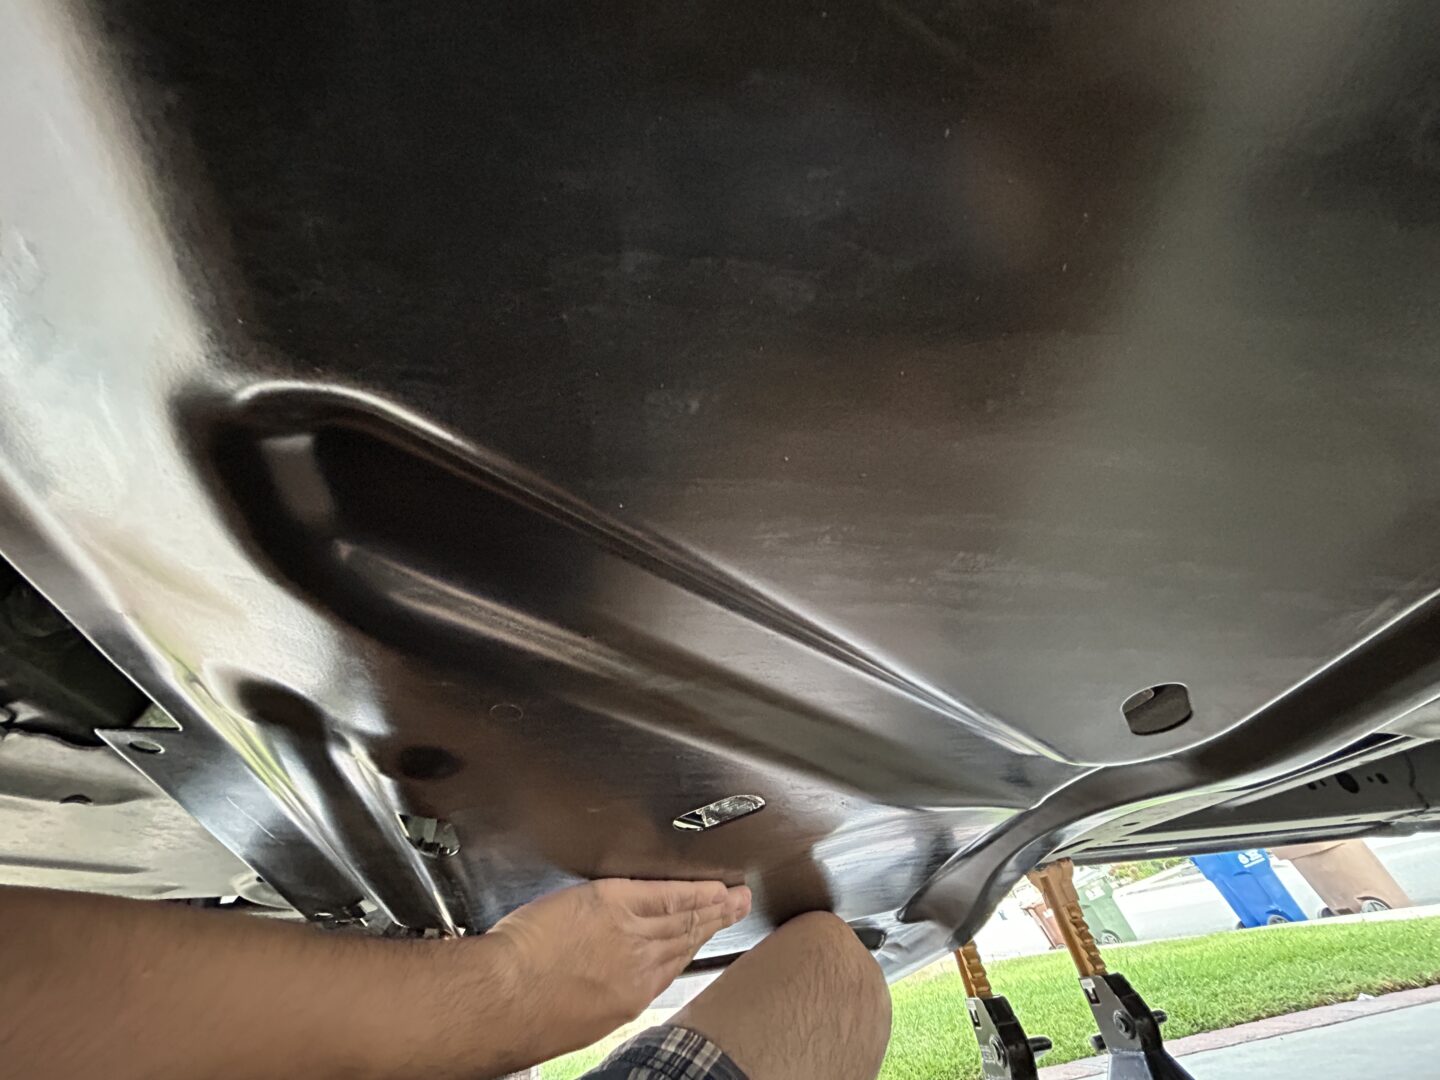
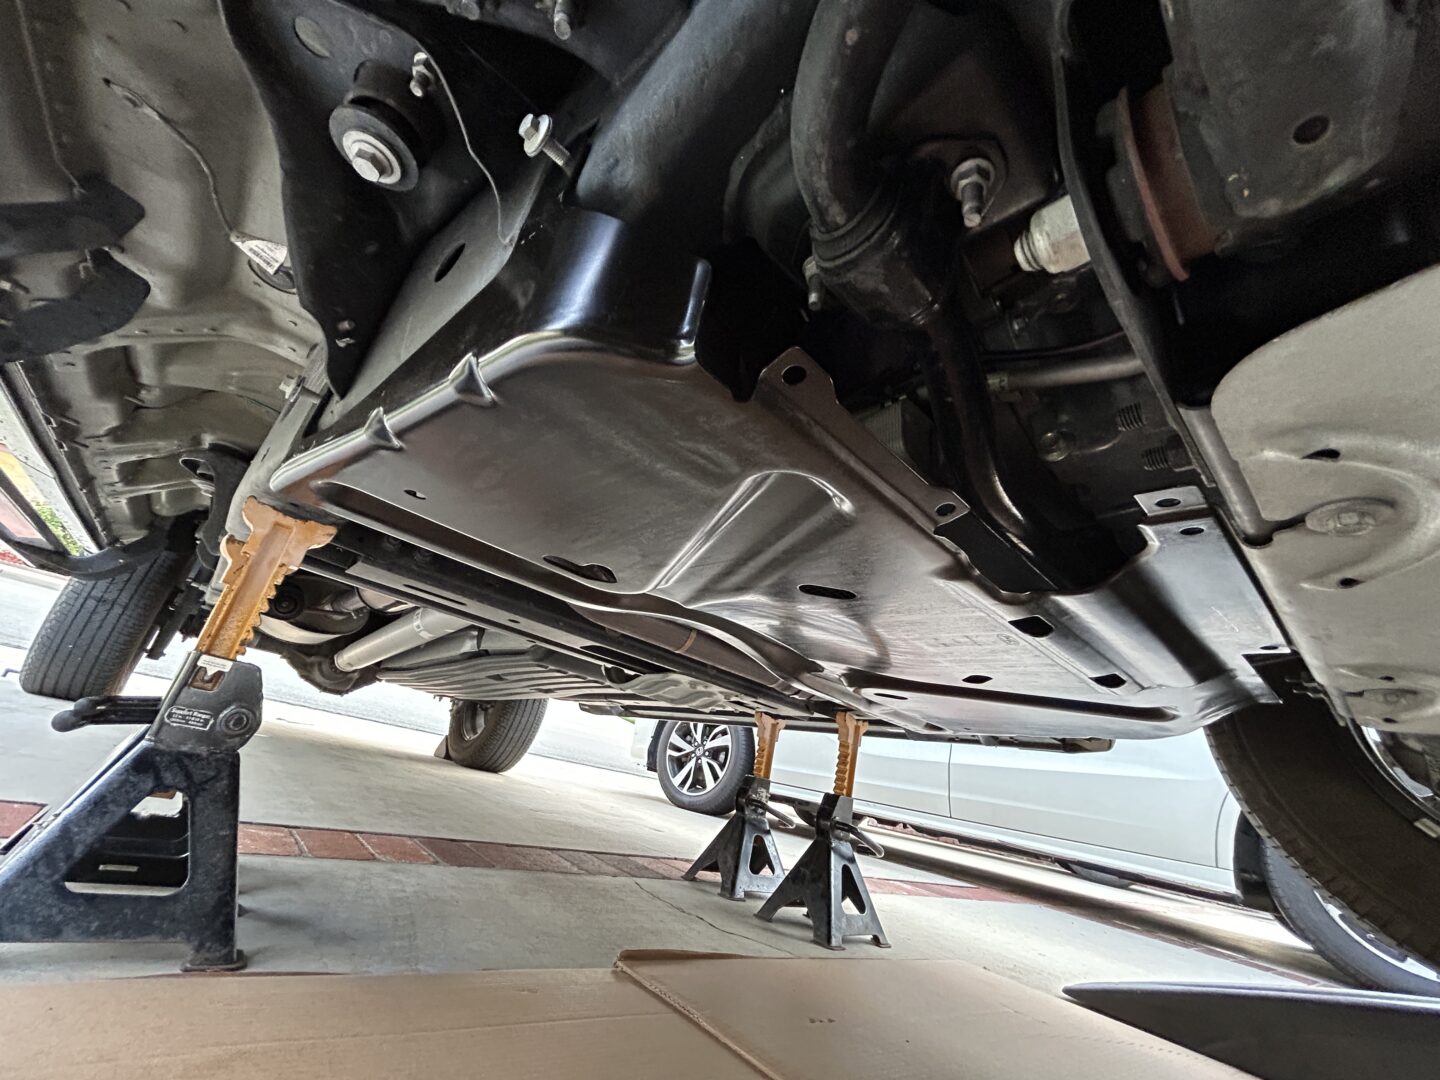
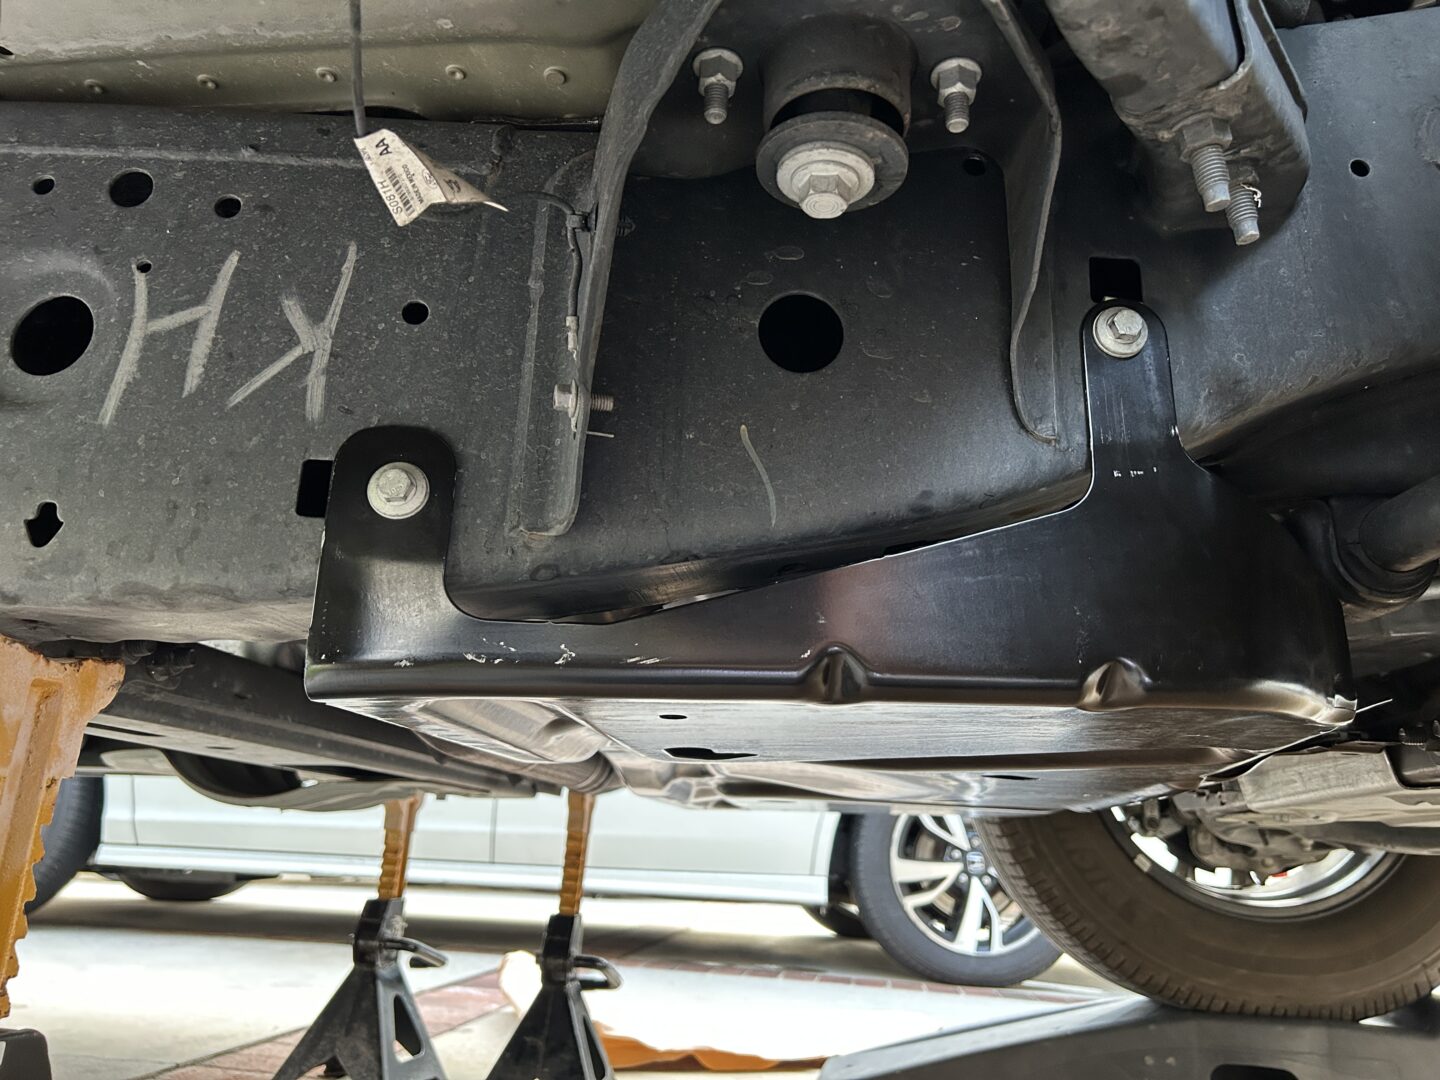
On the 13th generation Ford F-150, you may have this felt under cover installed under the transmission. This part is commonly referred to as a “diaper” rather than an under cover due to it being made of a fabric-like material and commonly soaking up fluids in the undercarriage. It’s main purpose is to reduce road noise, although it doubles as a catch for leaking fluid. In most cases, these diapers end up soaking up fluid and/or get ripped off, which results in the cover dragging on the road or even ripping off altogether.
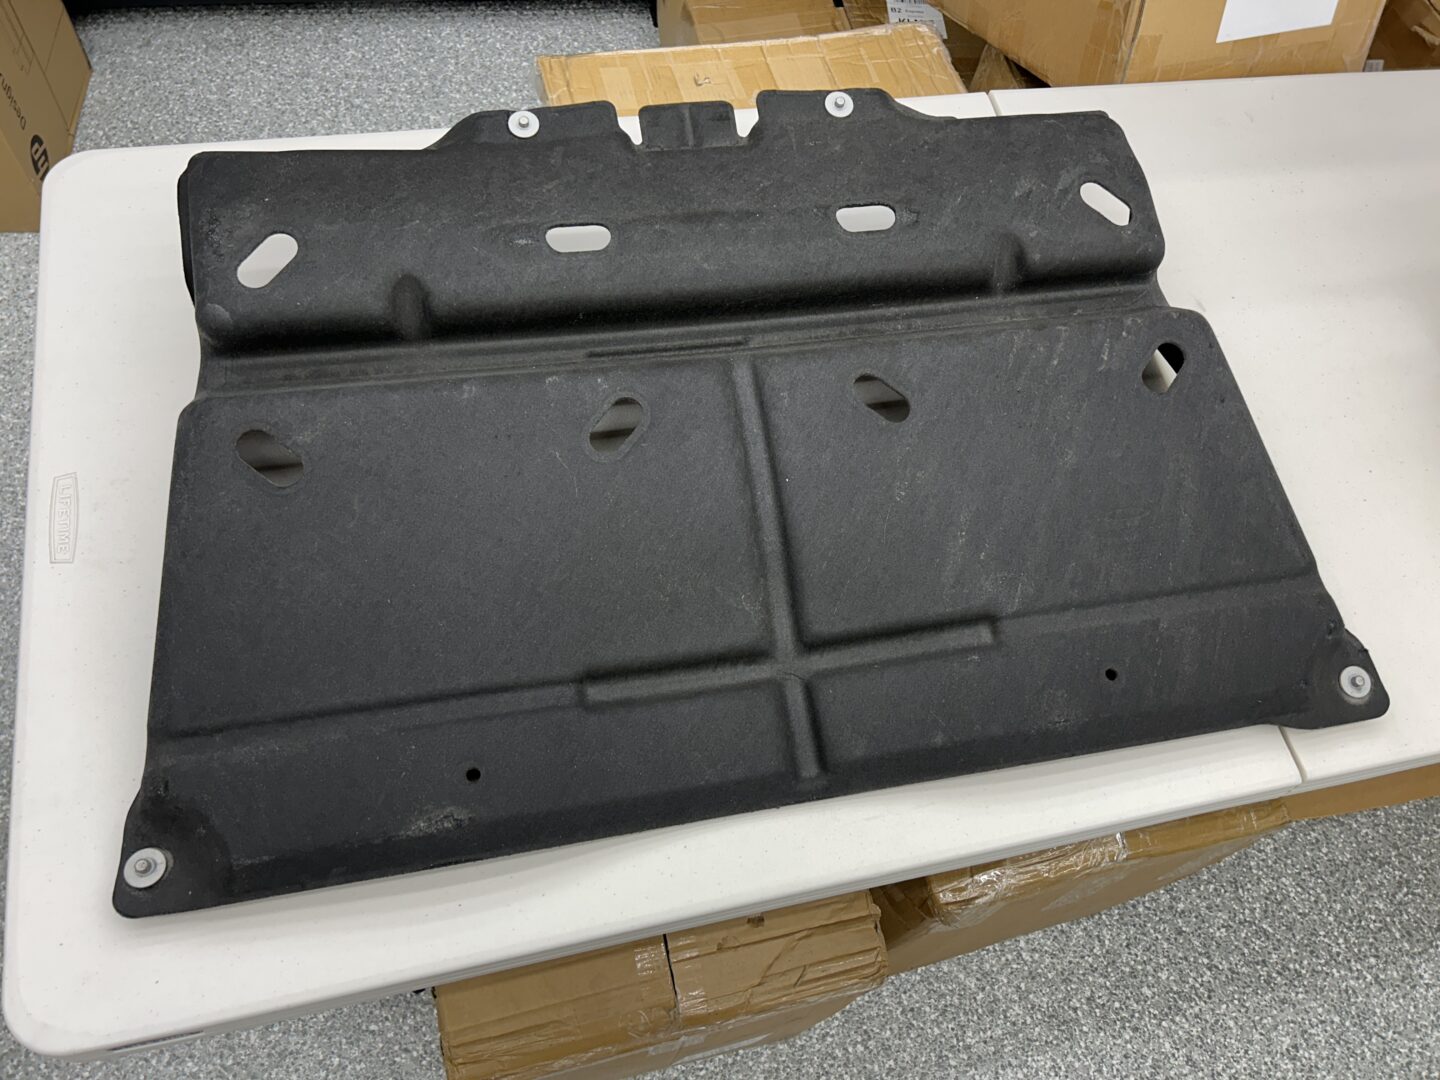
Another thing is whenever you do oil changes on your truck, this cover needs to be removed to do the oil change which can just add some more hassle to the job. A lot of people just remove diaper altogether to make things easier whenever you change the oil. However, if you still wish to have some protection to the undercarriage in this area, an option is to install a steel Raptor Transmission Skid Plate in its place.
Tools & Materials
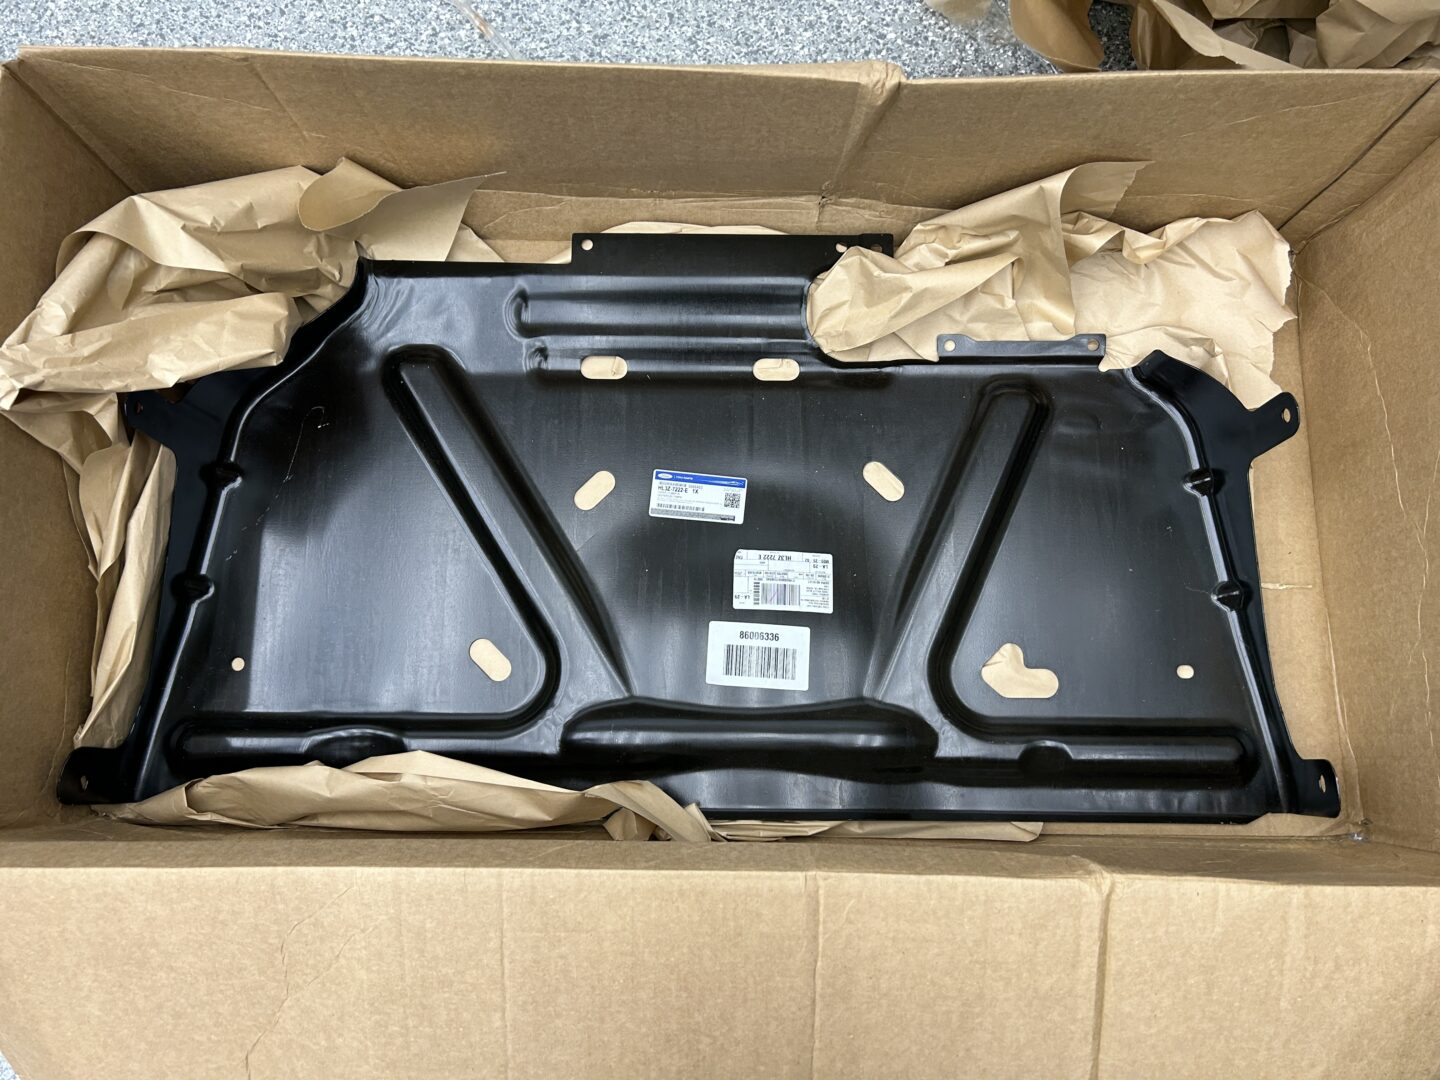
Raptor Transmission Skid Plate
The part number on the Raptor Transmission Skid Plate that goes under the transmission is part #HL3Z-7222-E. This will be a direct fit for your 13th gen F-150, and bolts up using (6 qty) bolts. Even 14th gen F-150’s (model year 2021+) can use this mod to replace the diaper with this protective under cover. This part comes from, you guessed it, the Ford Raptor. Since this is a factory part, you can find these skid plates for a decent price from the parts department at a local Ford Dealership.
If you can find a dealership near you, you might be able to save on shipping/frieght costs; I paid about $130 for mine and shipping was about $30. Ebay should be no more than $200 including shipping.
Find the Raptor Transmission Skid Plate (Part #HL3Z-7222-E) on Ebay
Bolts & U-Nuts
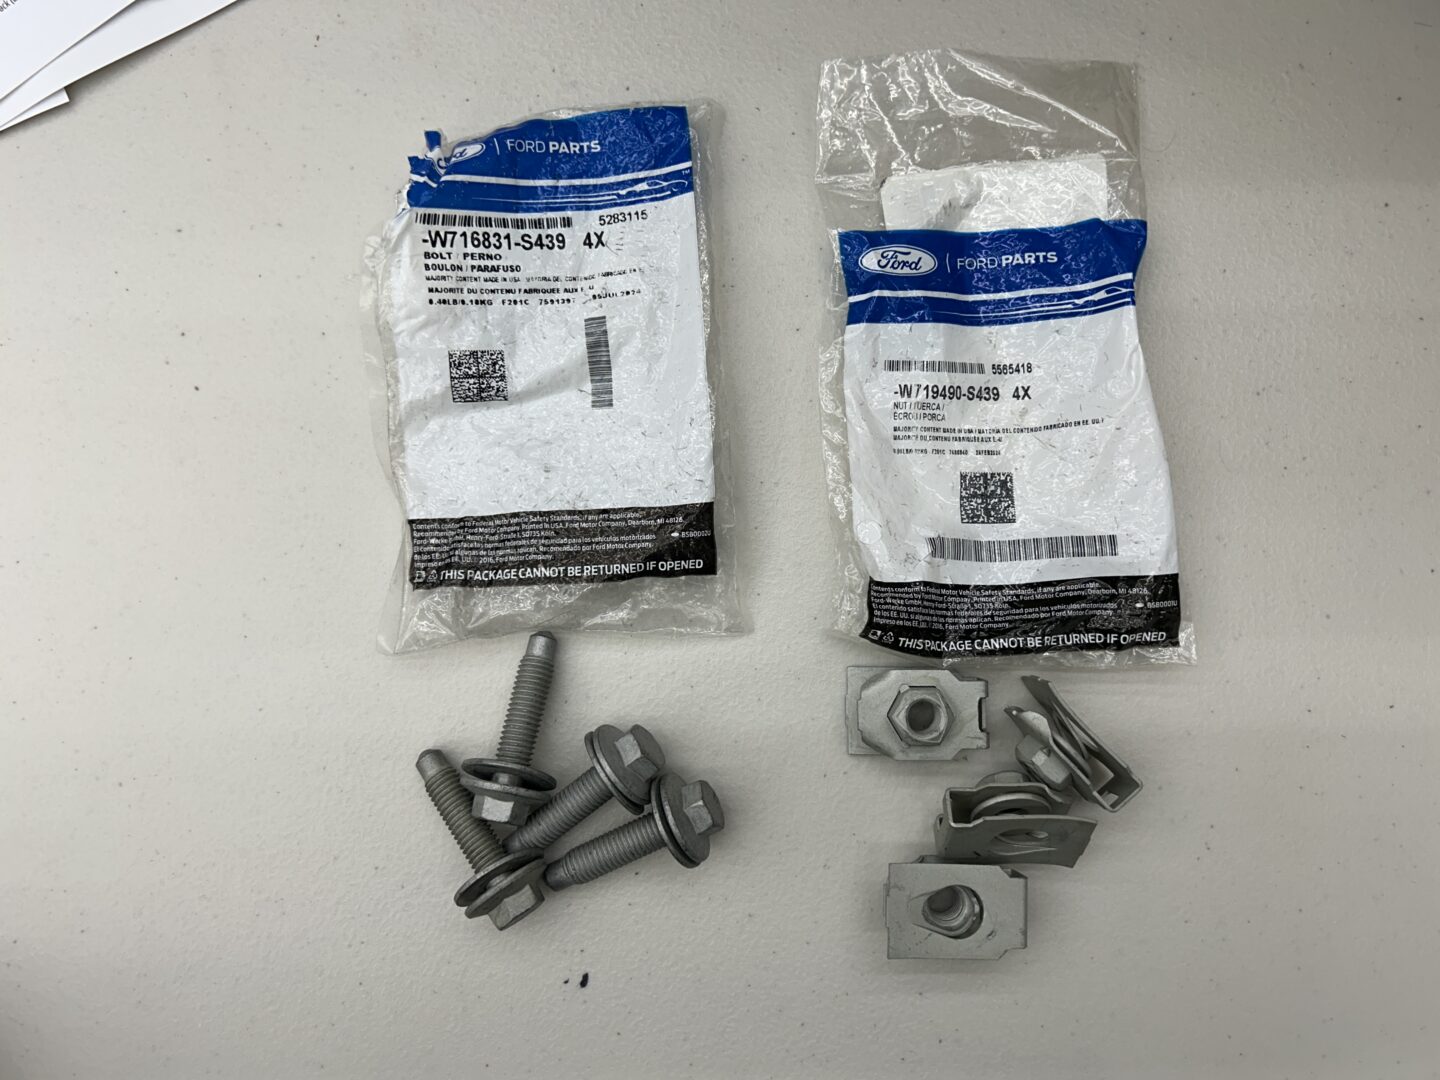
To bolt up the Raptor Skid Plate, you’ll need to use six bolts to screw through the skid plate into the U-nuts. You can reuse two of the existing bolts and U-nuts underneath the vehicle, so you may only need to purchase (4 qty) bolts and (4 qty) U-nuts. The hardware is quite large and are all zinc-coated, so I feel confident about its strength and durability. The bolts should be no more than $10 each shipped, or maybe a few dollars each at your local dealership.
(4 qty) Bolts: #W716831-S439
(4 qty) U-nuts: #W719490-S439
Other Tools Used
Jackstands: Pro-Lift Heavy Duty 6 Ton Jack Stands Pair
Wheels Chocks: MAXXHAUL 70472 Heavy Duty Black Wheel Chock 2-Pack
Socket/Mechanics Set: DEWALT Mechanics Tool Set – SAE/Metric, 205-piece
Screwdriver Set: ROTATION 6PCS Magnetic Tip Screwdriver Set, 3 Phillips and 3 Flat
Installation of the Raptor Transmission Skid Plate
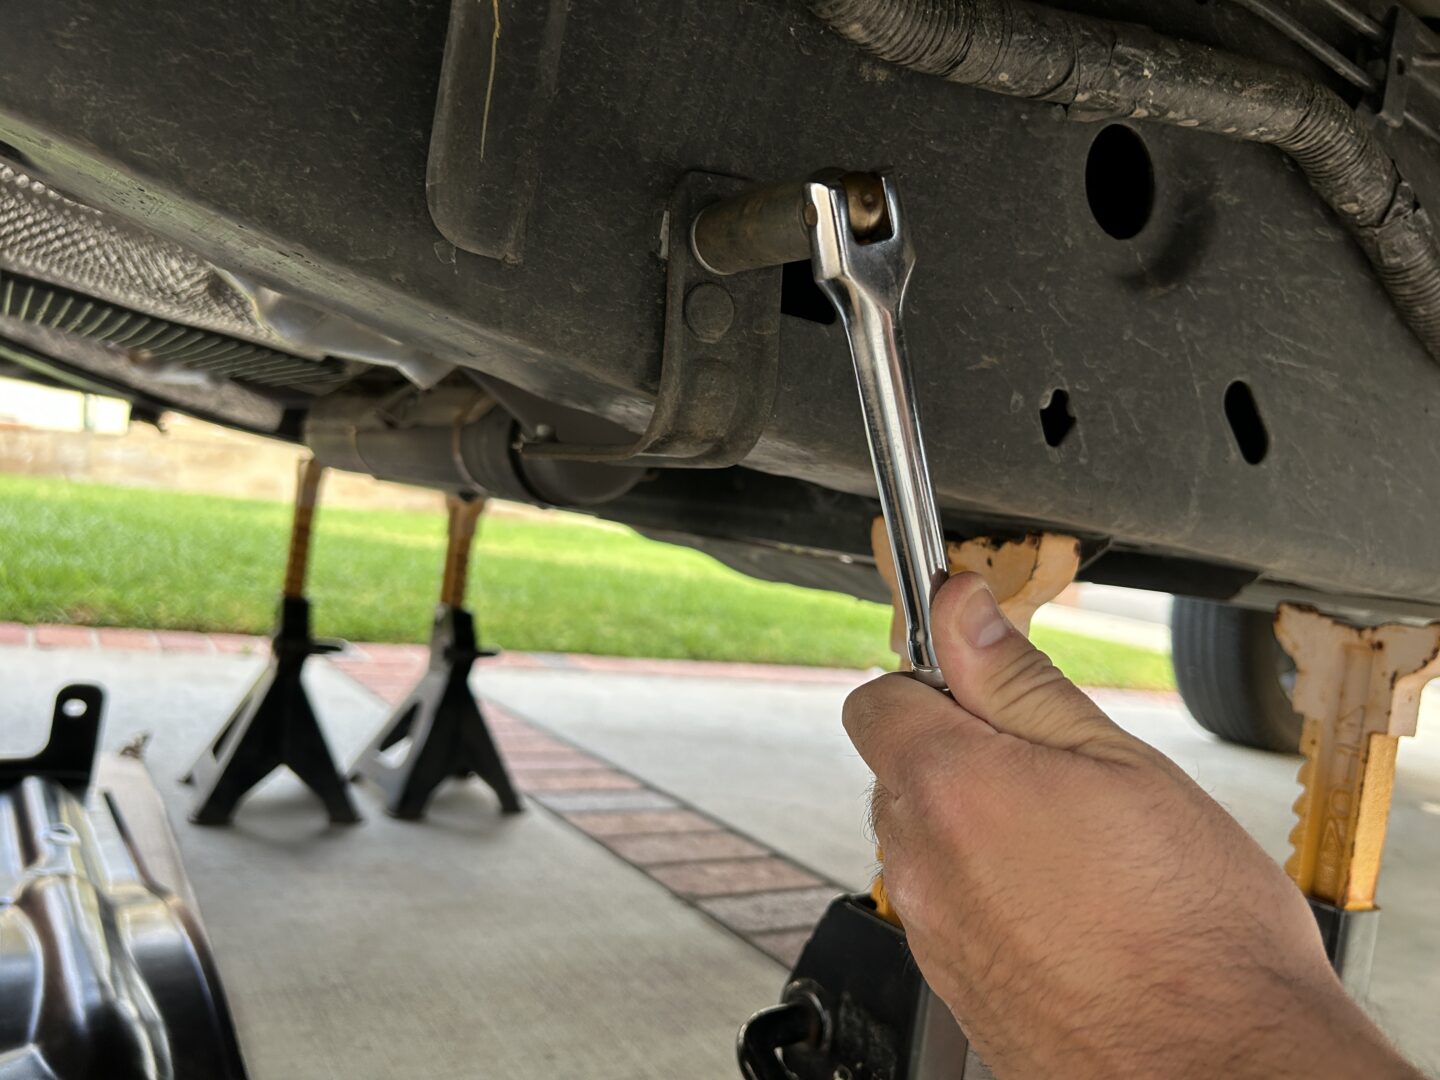
To ensure you have plenty of room to work underneath, lift up the truck at the front of the frame, chock your wheels to prevent it from rolling, and install jackstands.. Remove the (4 qty) bolts for the F-150 diaper and then bring the new Raptor skid plate over to prepare it for installation.
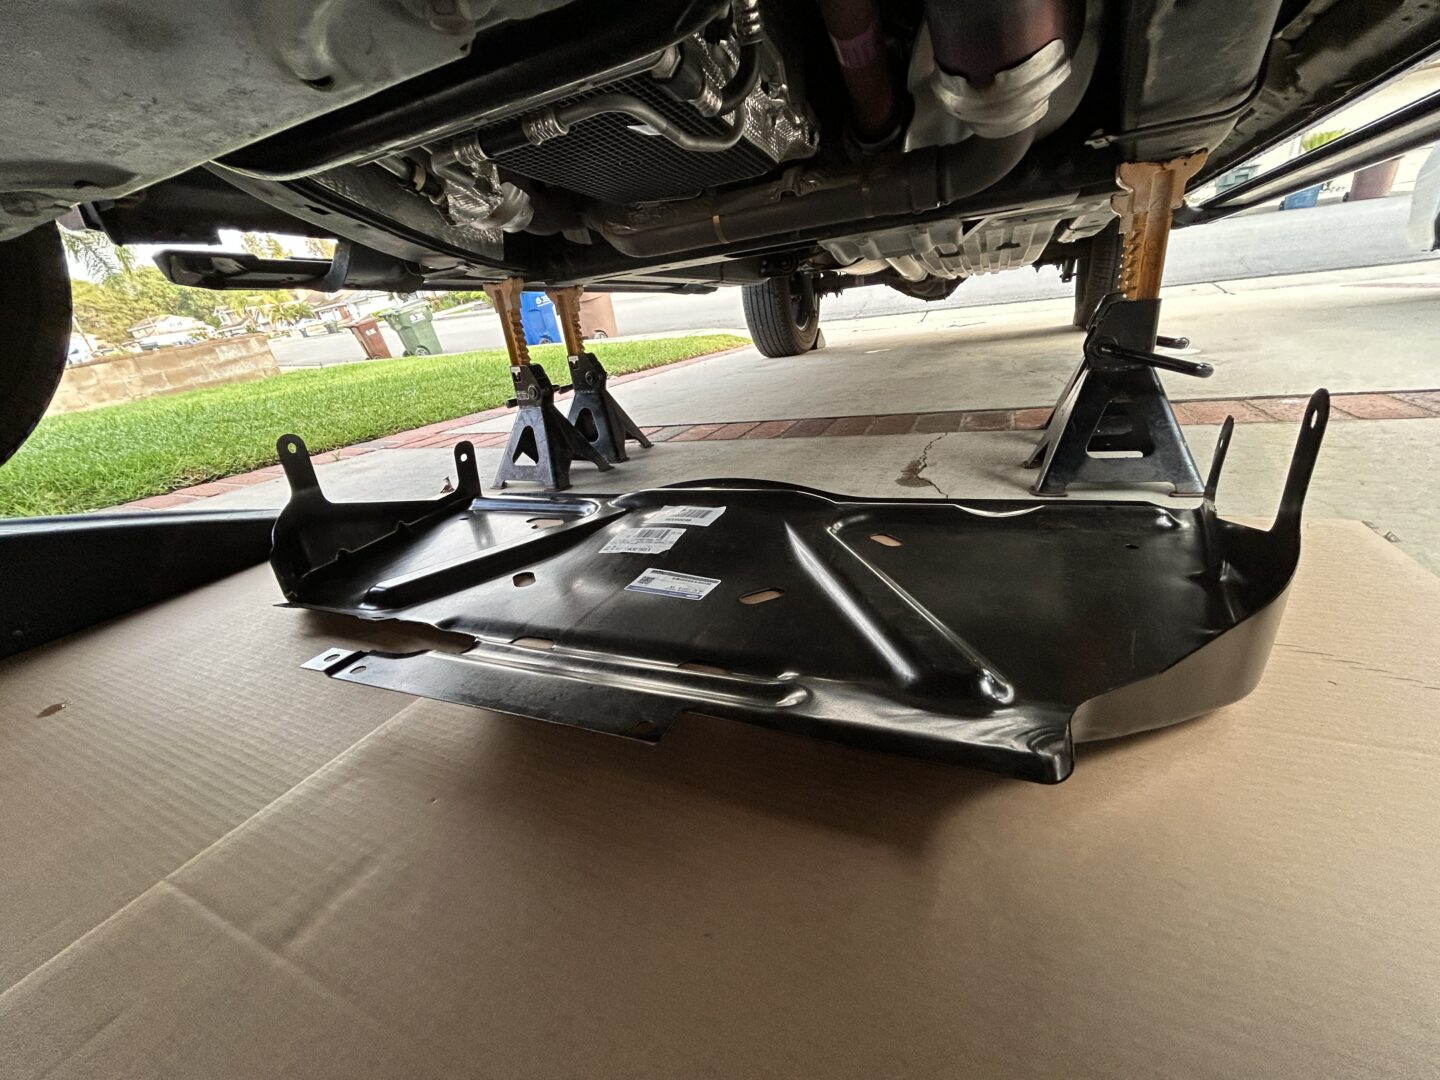
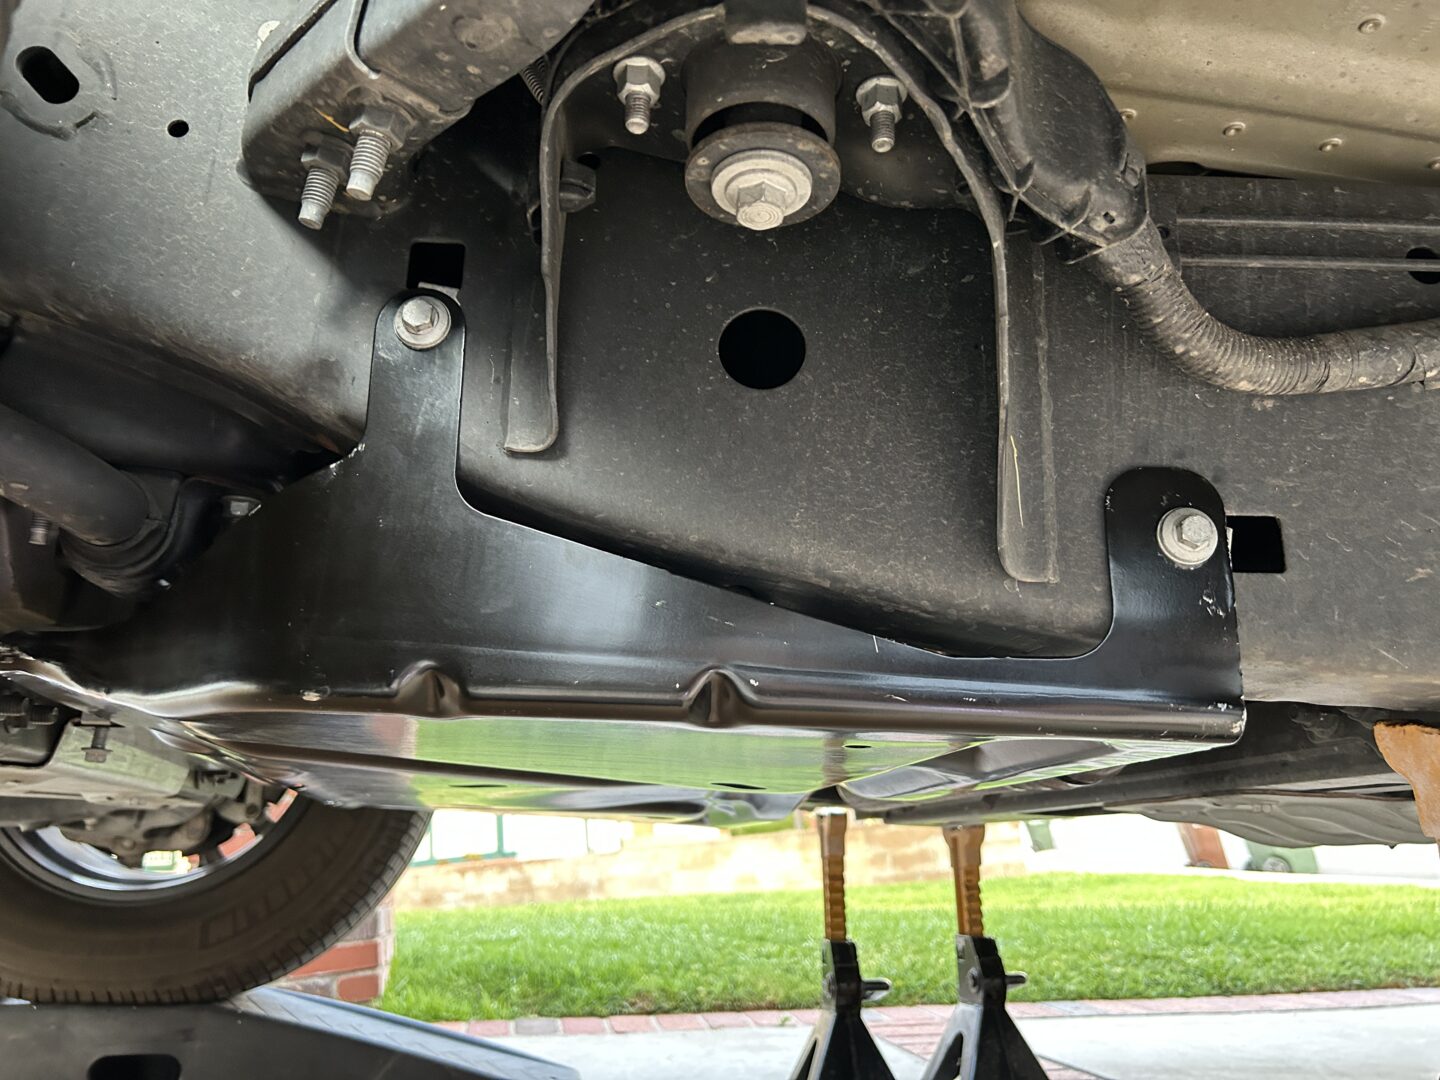
The skid plate is very heavy, so make sure you have everything set up and ready to go. You can see that on each side of the skid plate, there are these vertical arms that will bolt into the side of your frame.
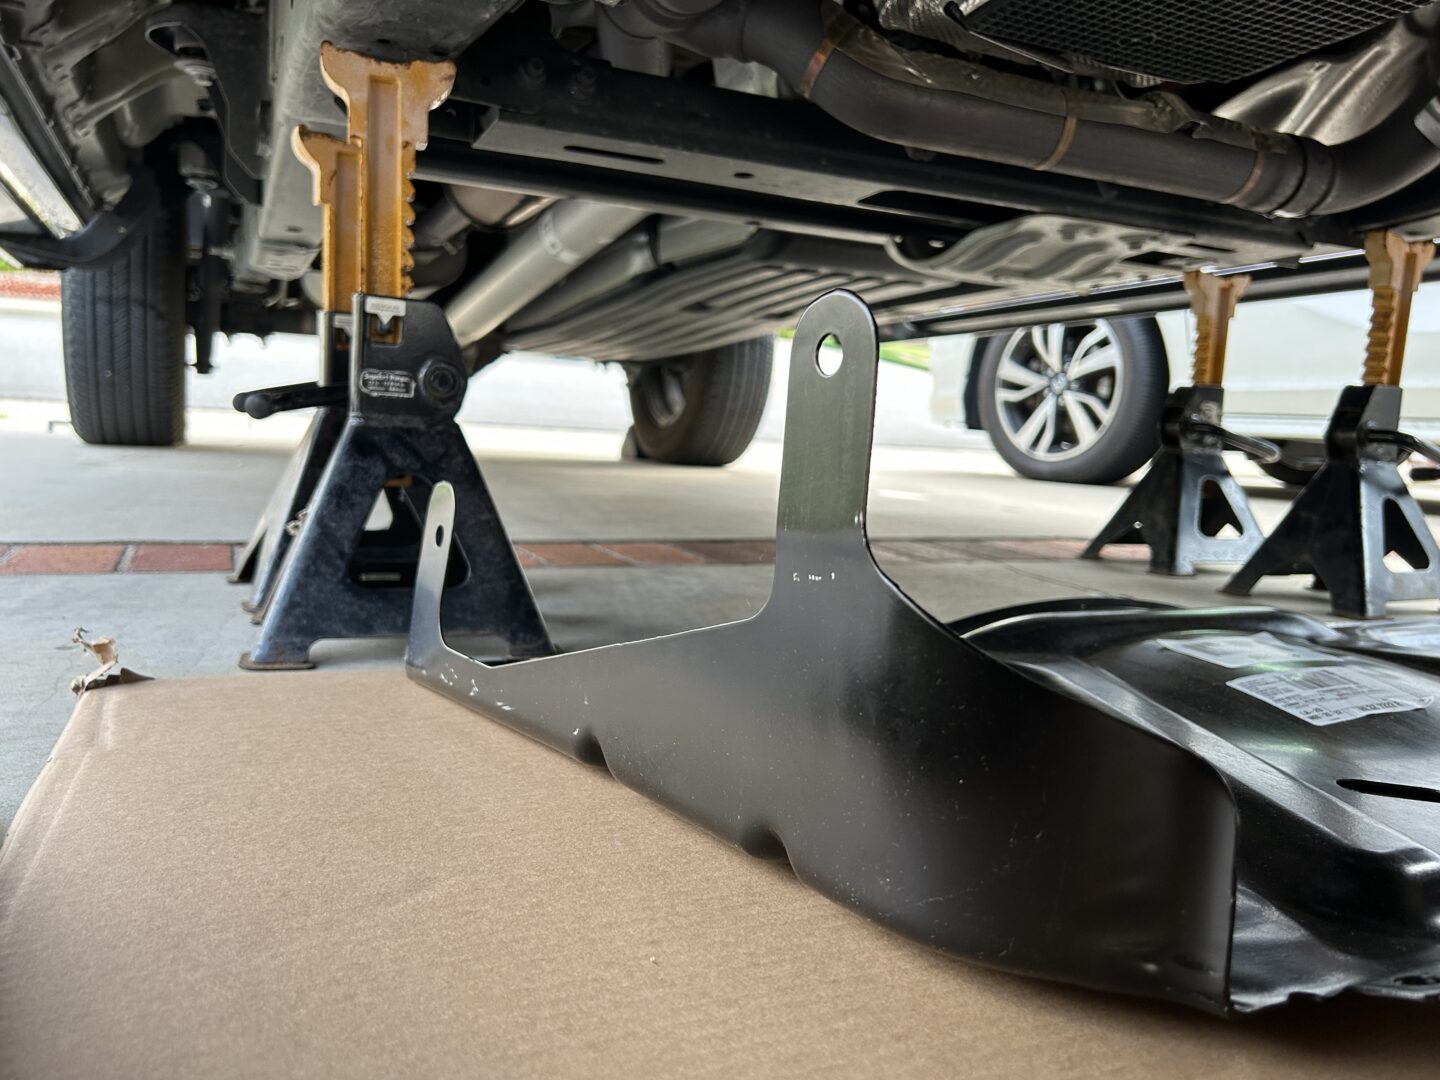
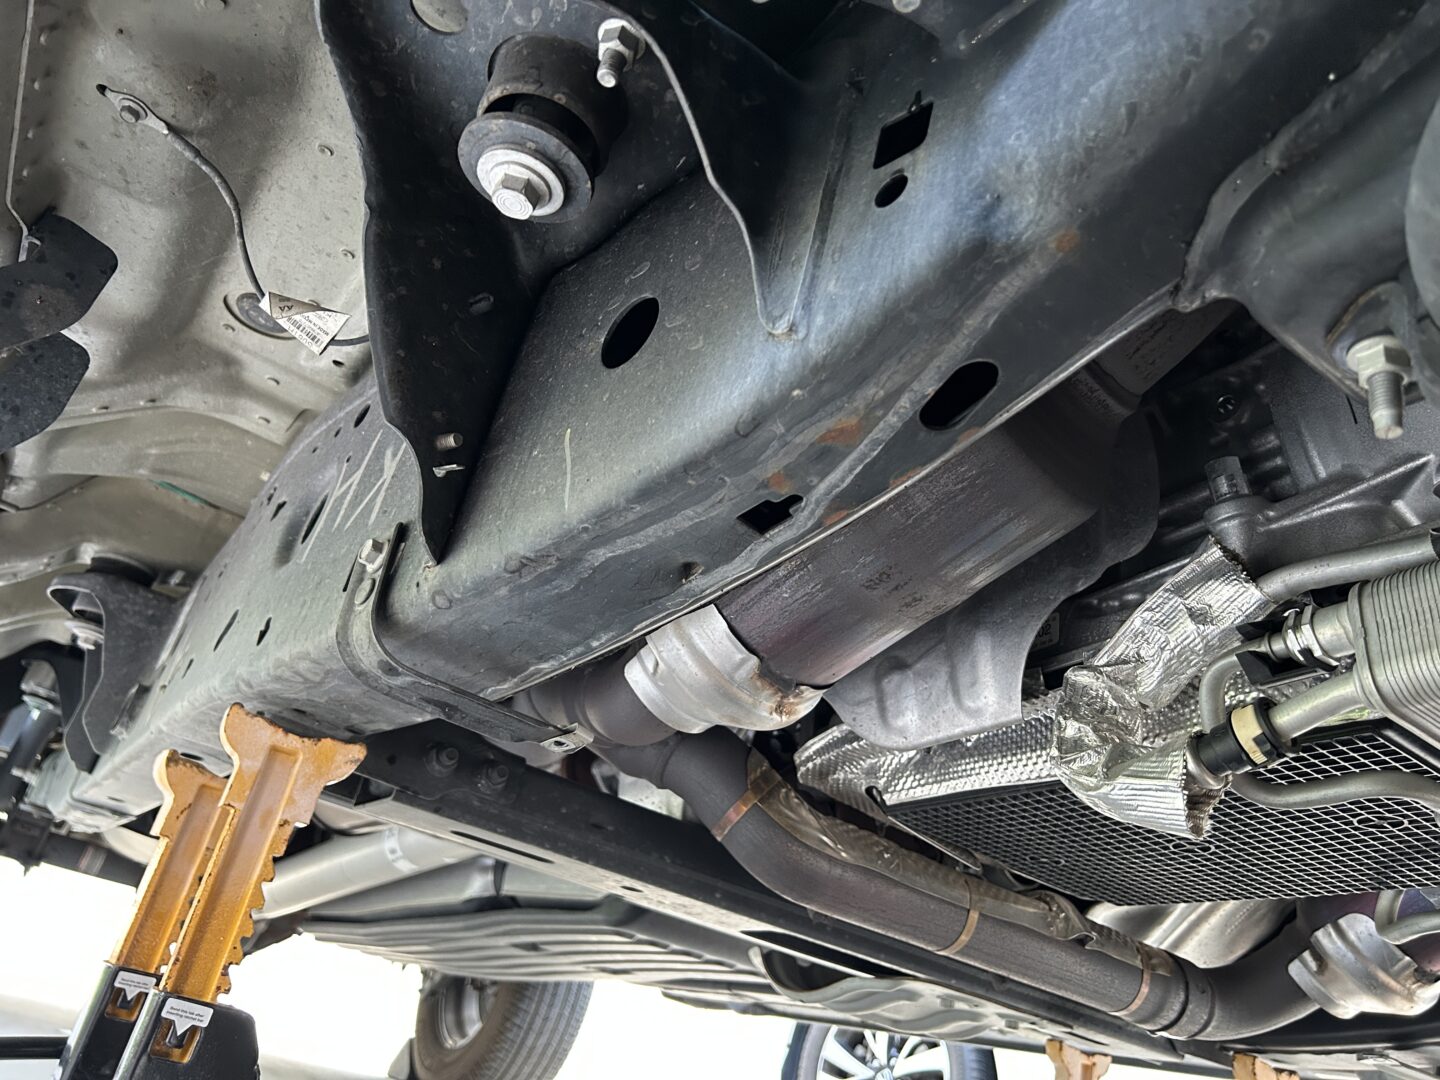
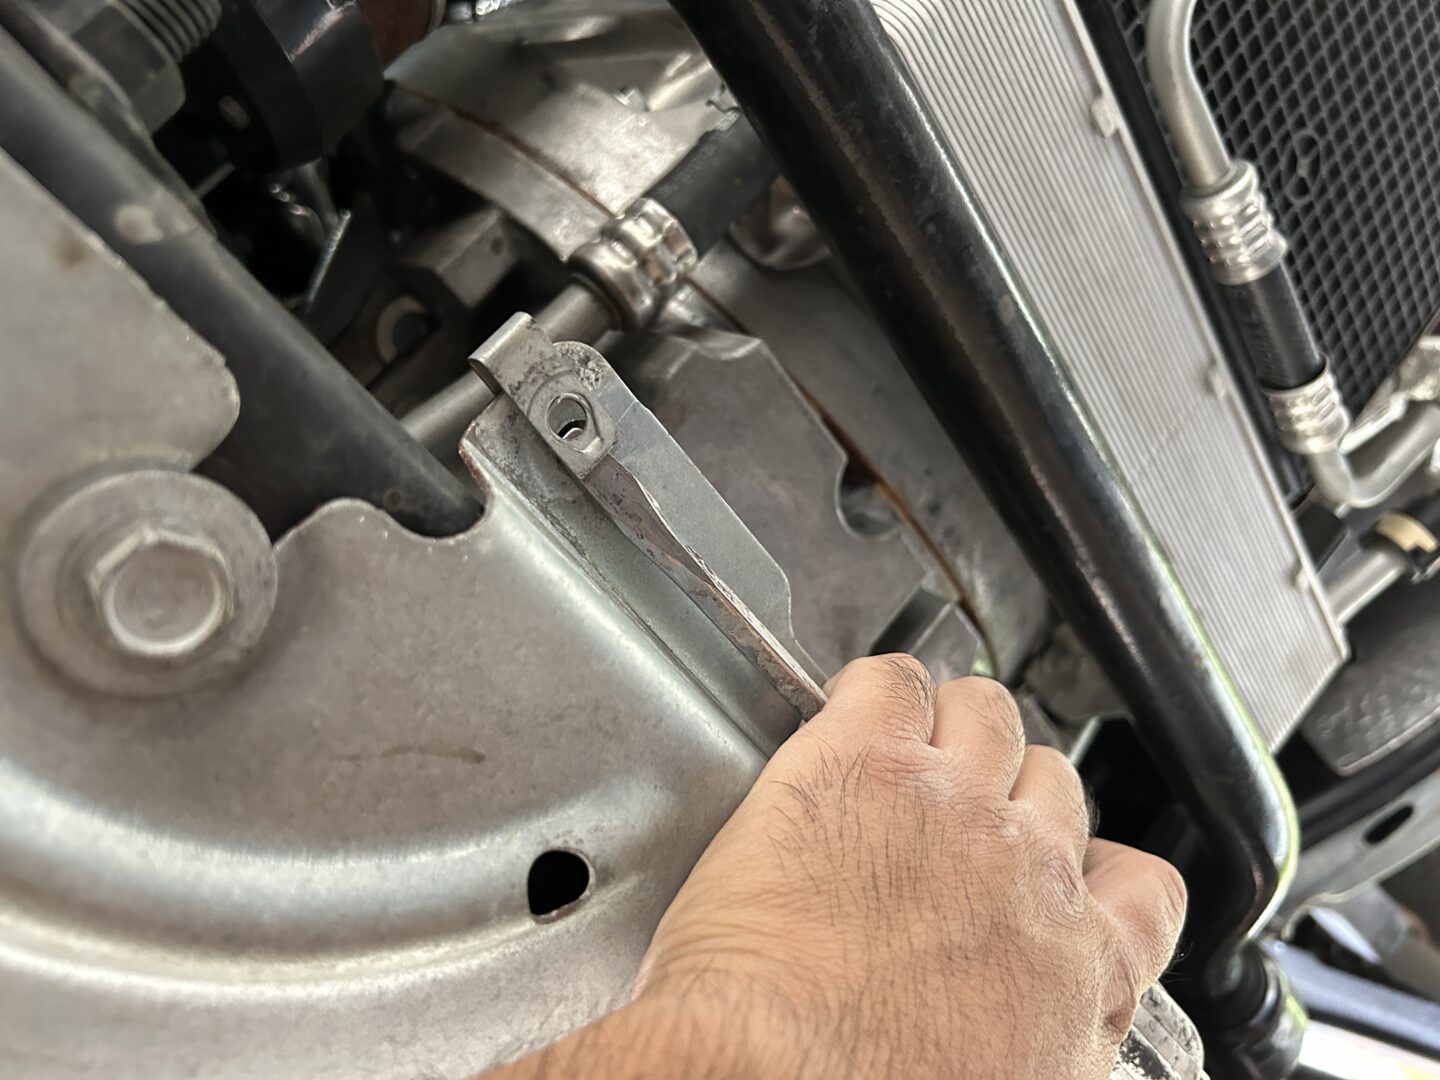
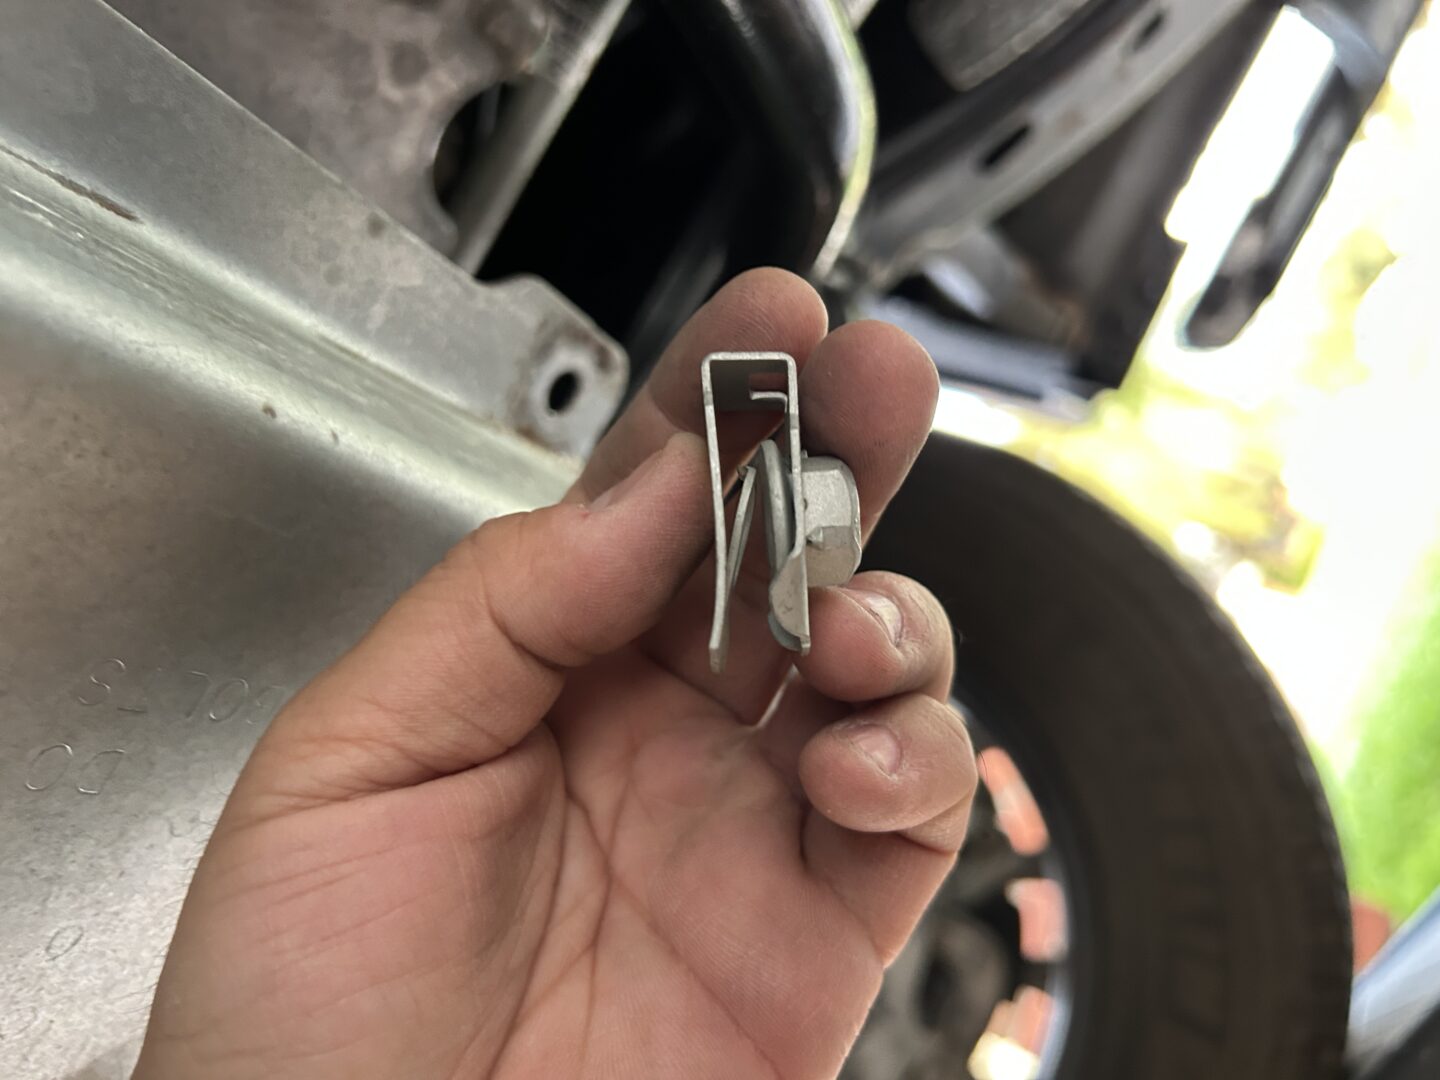
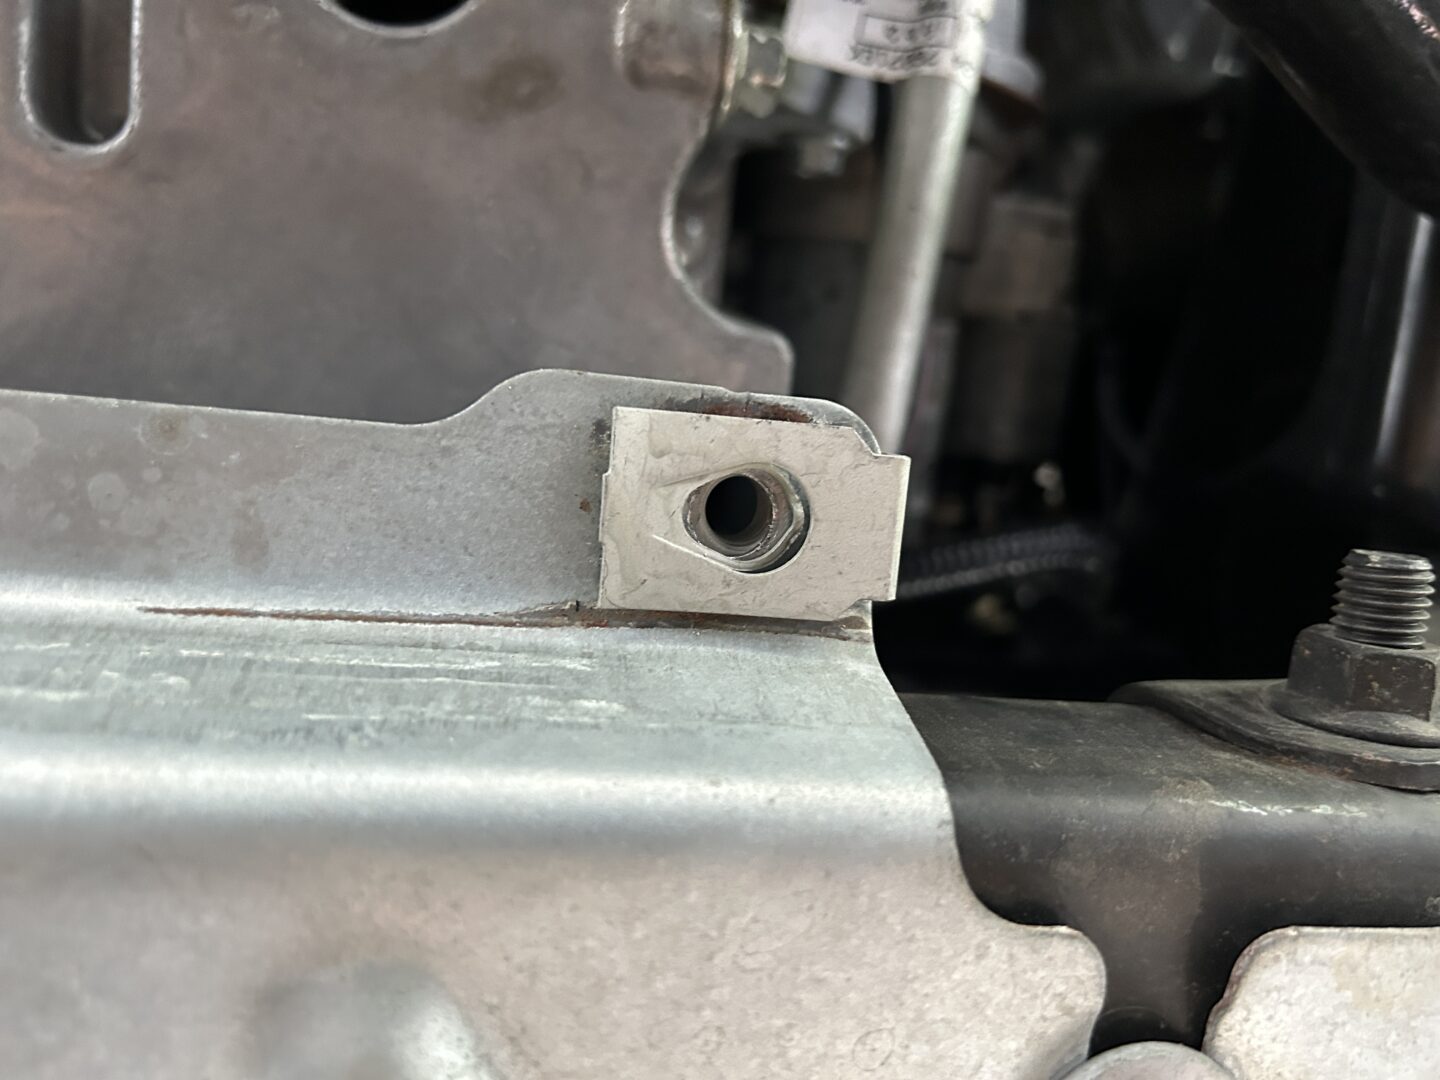
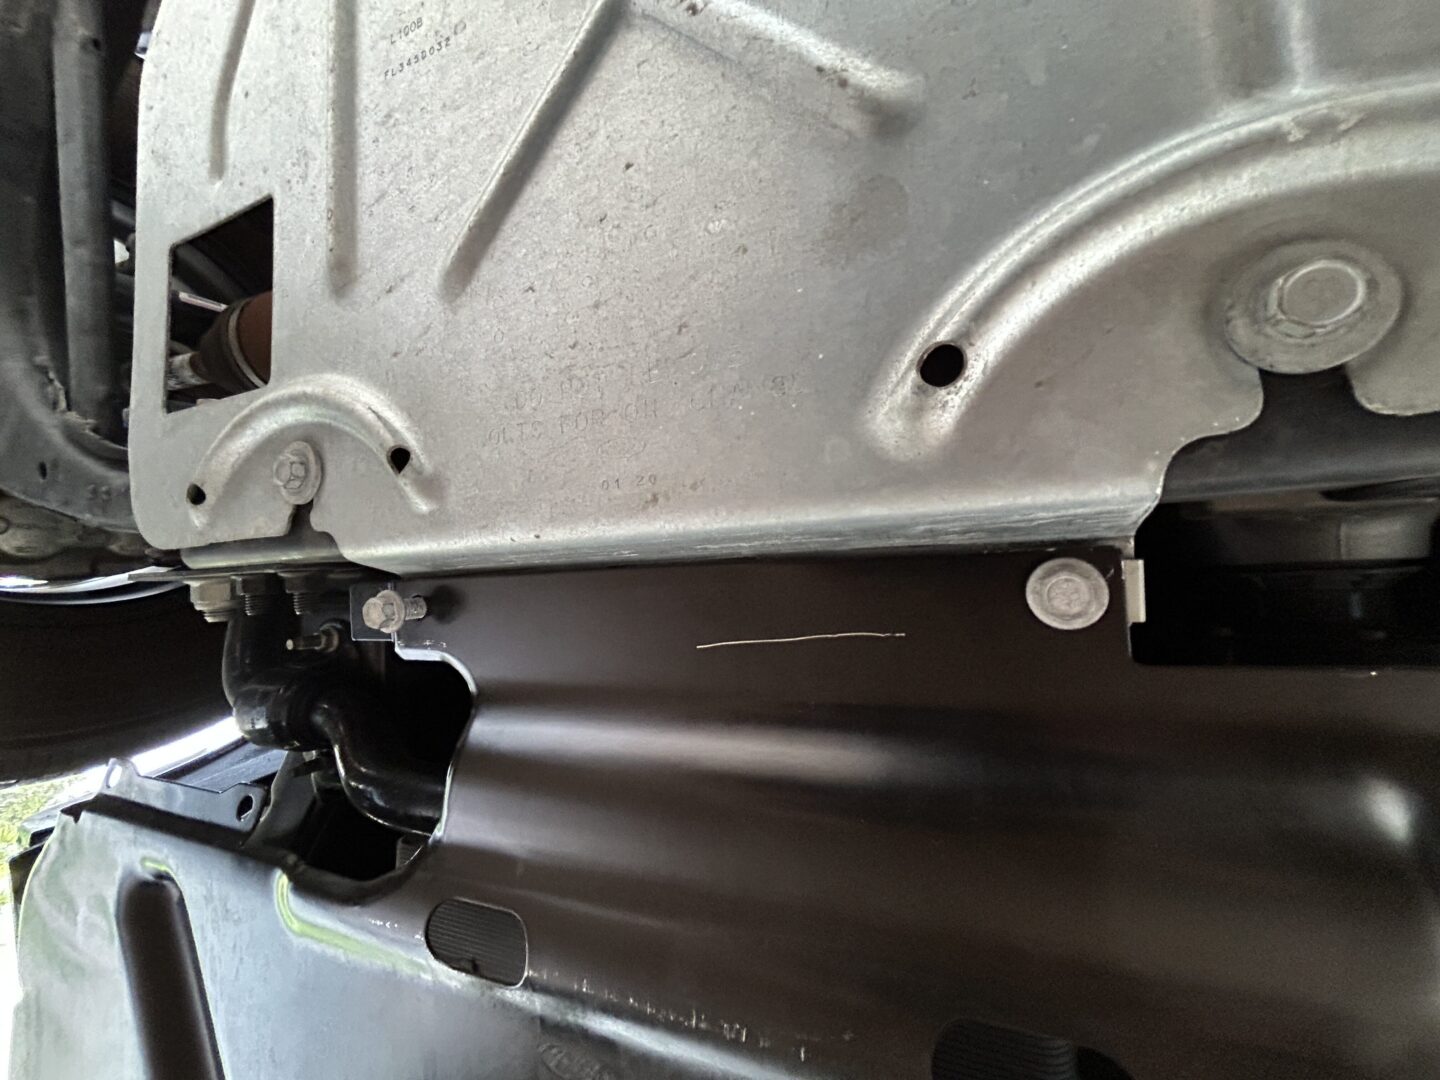
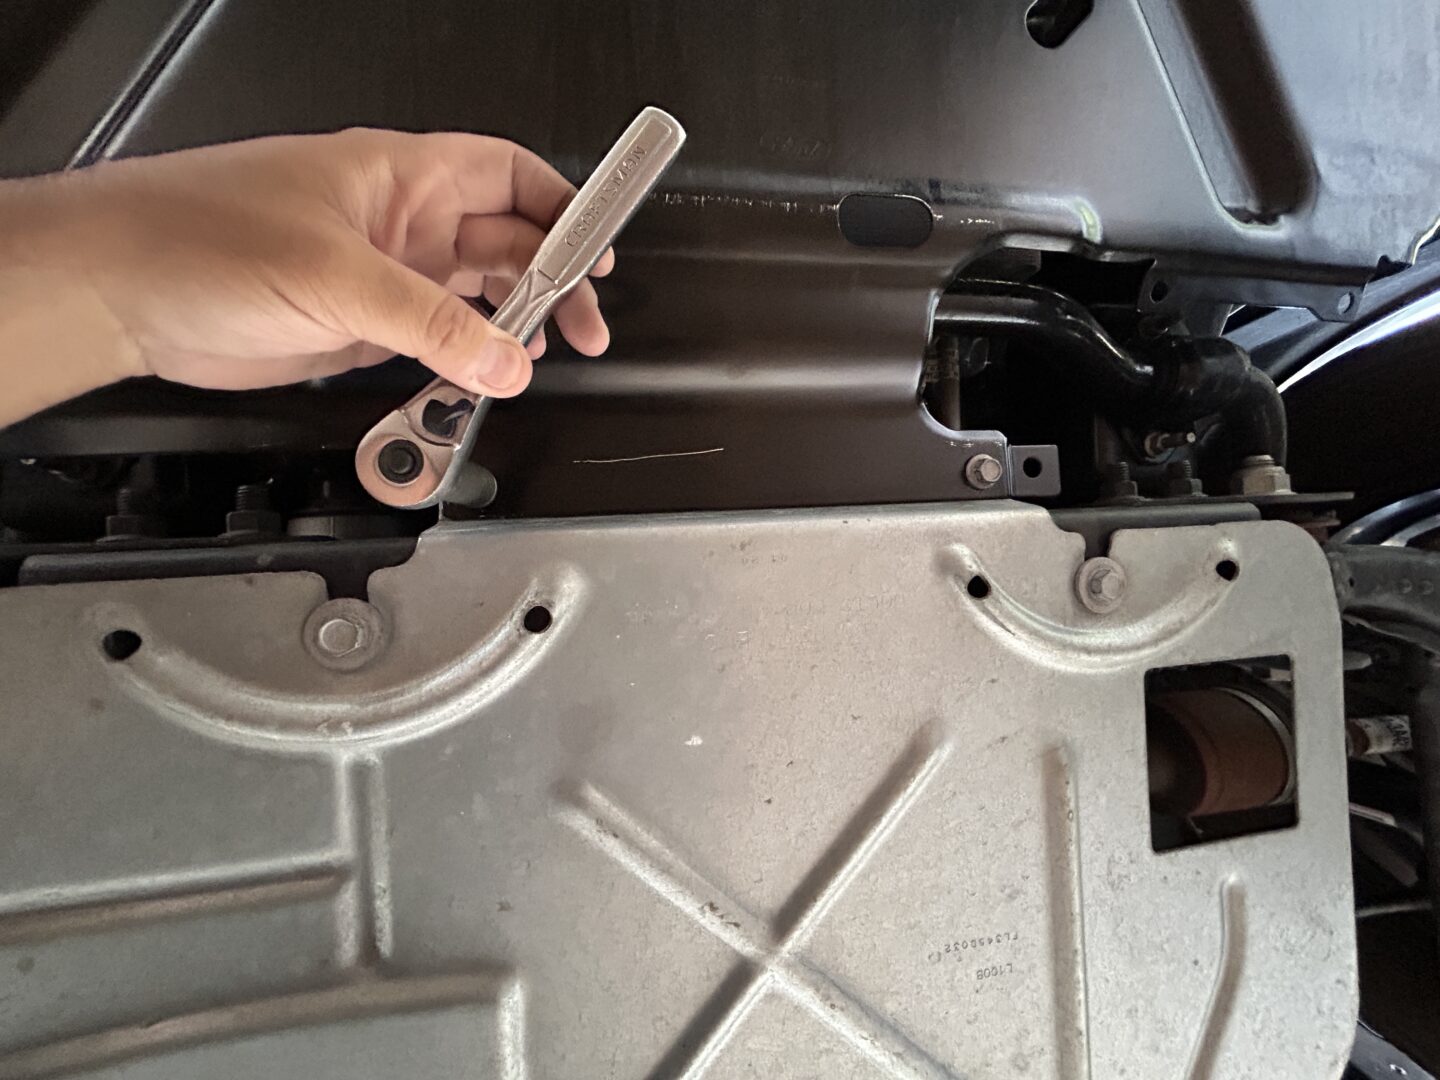
On each side, there are removable angles that are bolted into the frame, and 90-down to where your diaper previously bolted to. Remove these angles on each side of the truck, and remove the existing U-nut and bolt. The U-nut can be removed with a flat head screwdriver, un-wedging it from the frame. These two U-nuts and bolts can be re-used at the front center of the new Raptor Skid Plate.
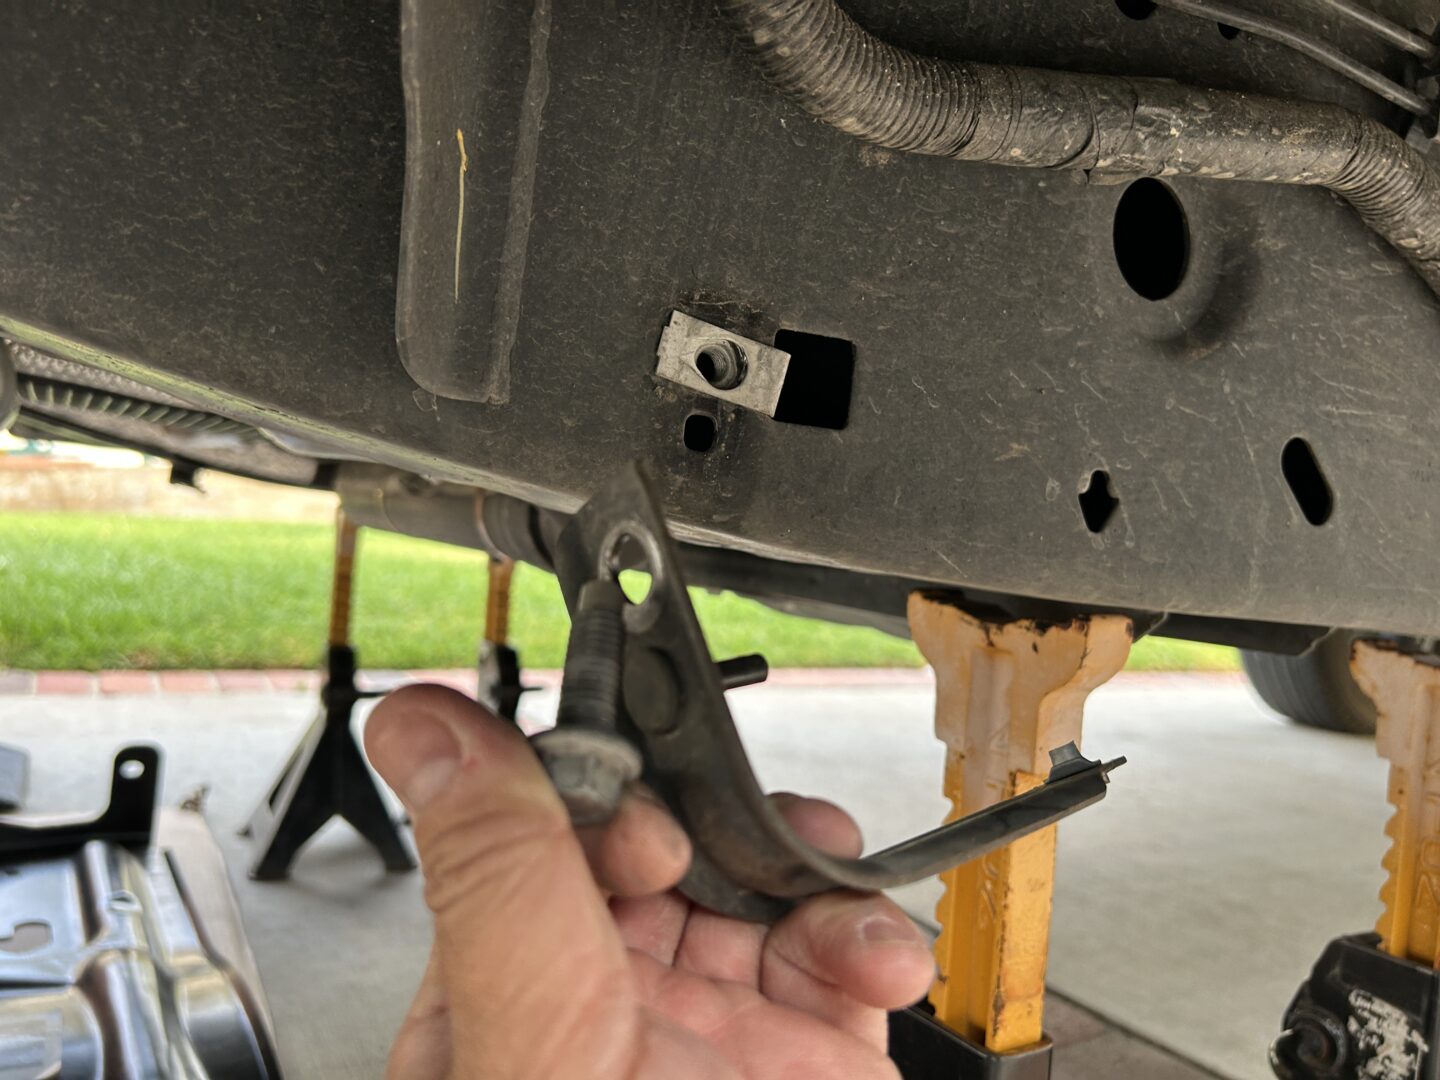
Install (2 qty) new U-nuts into the openings as shown on each side of the frame; they simply slide into plate. So you will have two U-nuts installed on each side of the frame, so a total of four.
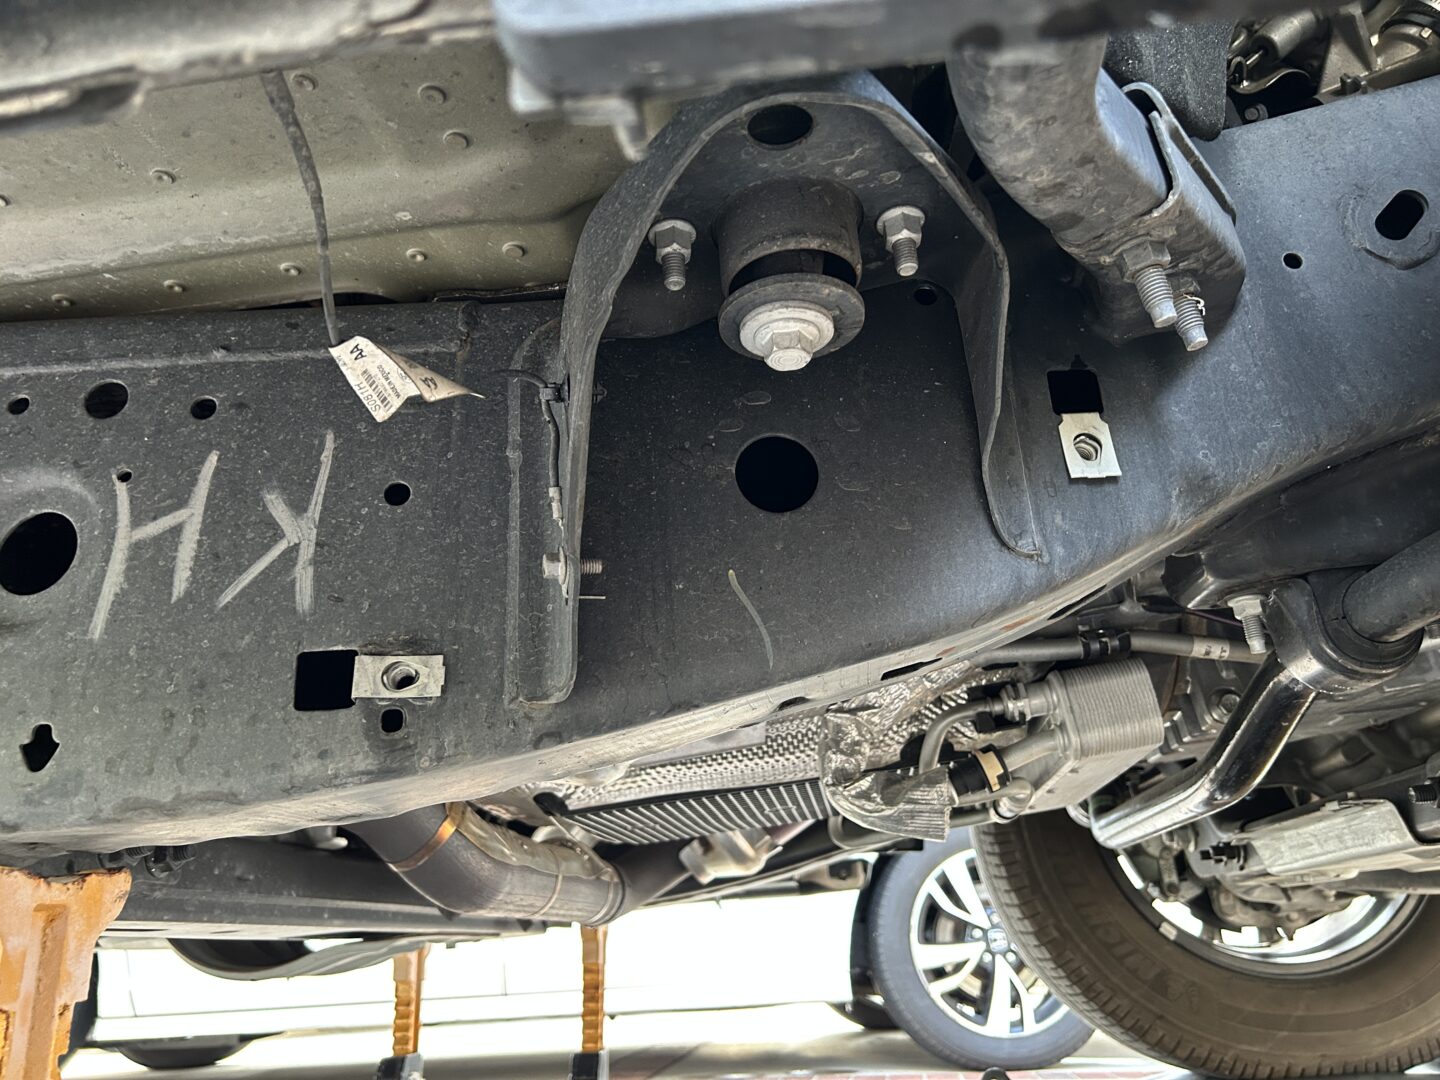
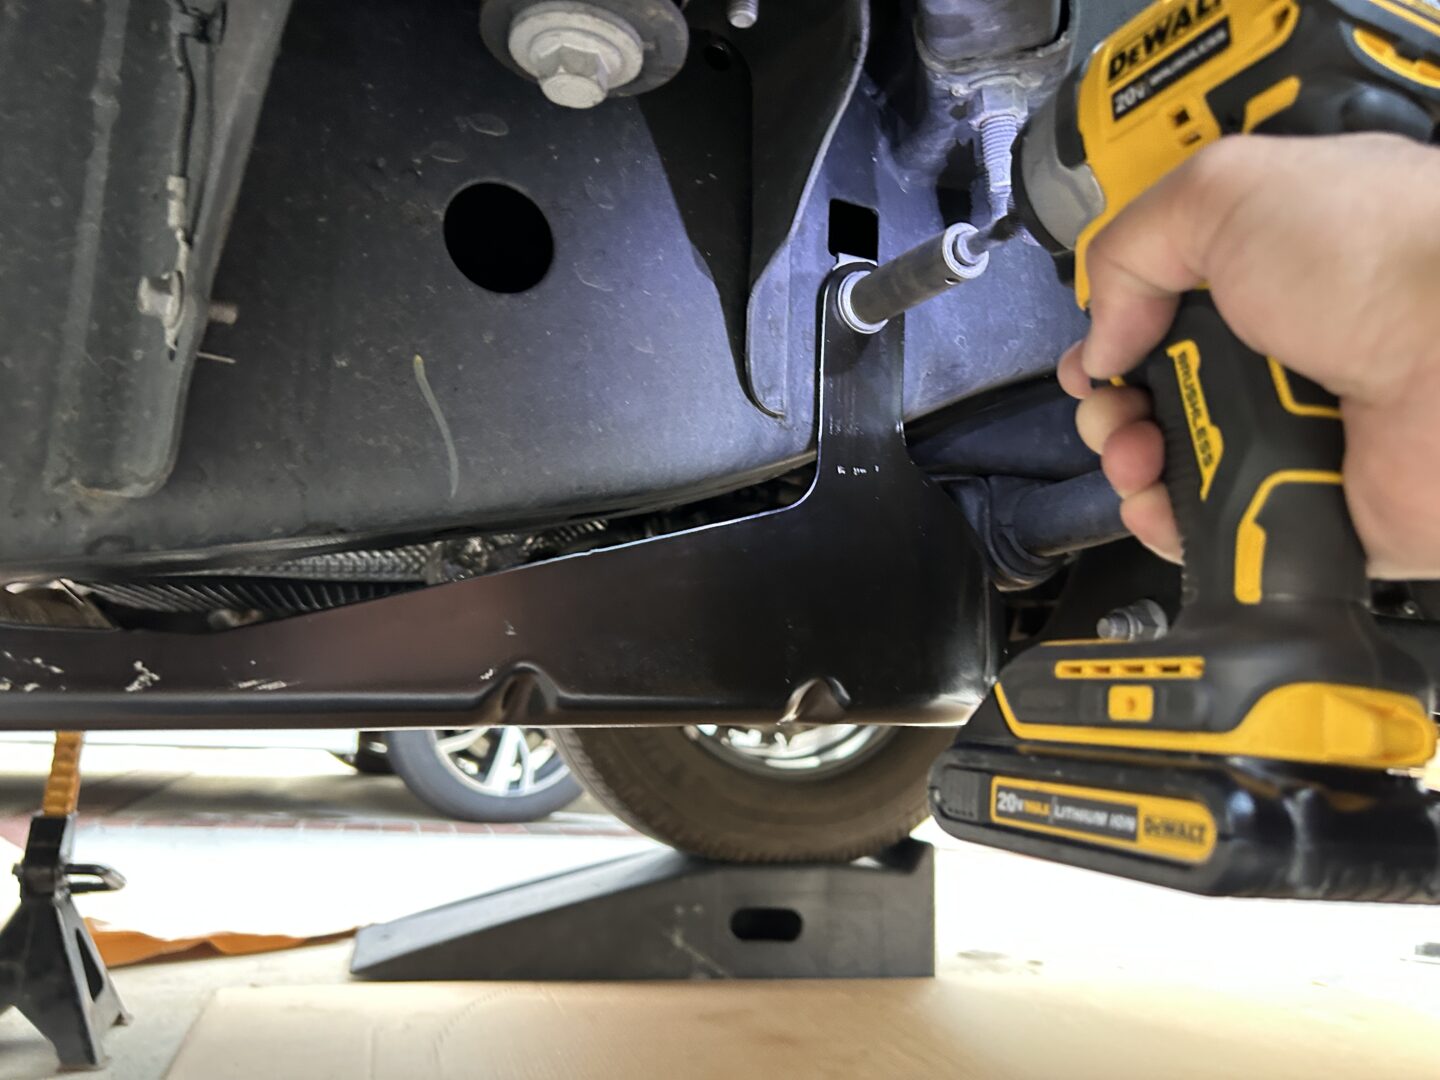
You will now have (2 qty) extra U-nuts and bolts (taken from the removed angles earlier), which can now be used for the front center of the new Raptor skid plate. I prefer using the larger bolts and U-nuts (the ones purchased for this job) to attached to the frame, which will provide much of the structural support of the heavy skid plate. The two smaller bolts and U-nuts will be attached to the front center to the front skid plate.
When I installed the skid plate, I positioned myself underneath the skid plate and used my body, legs, and hands to bench press the skid plate up while threading in the new bolts on each side by hand.
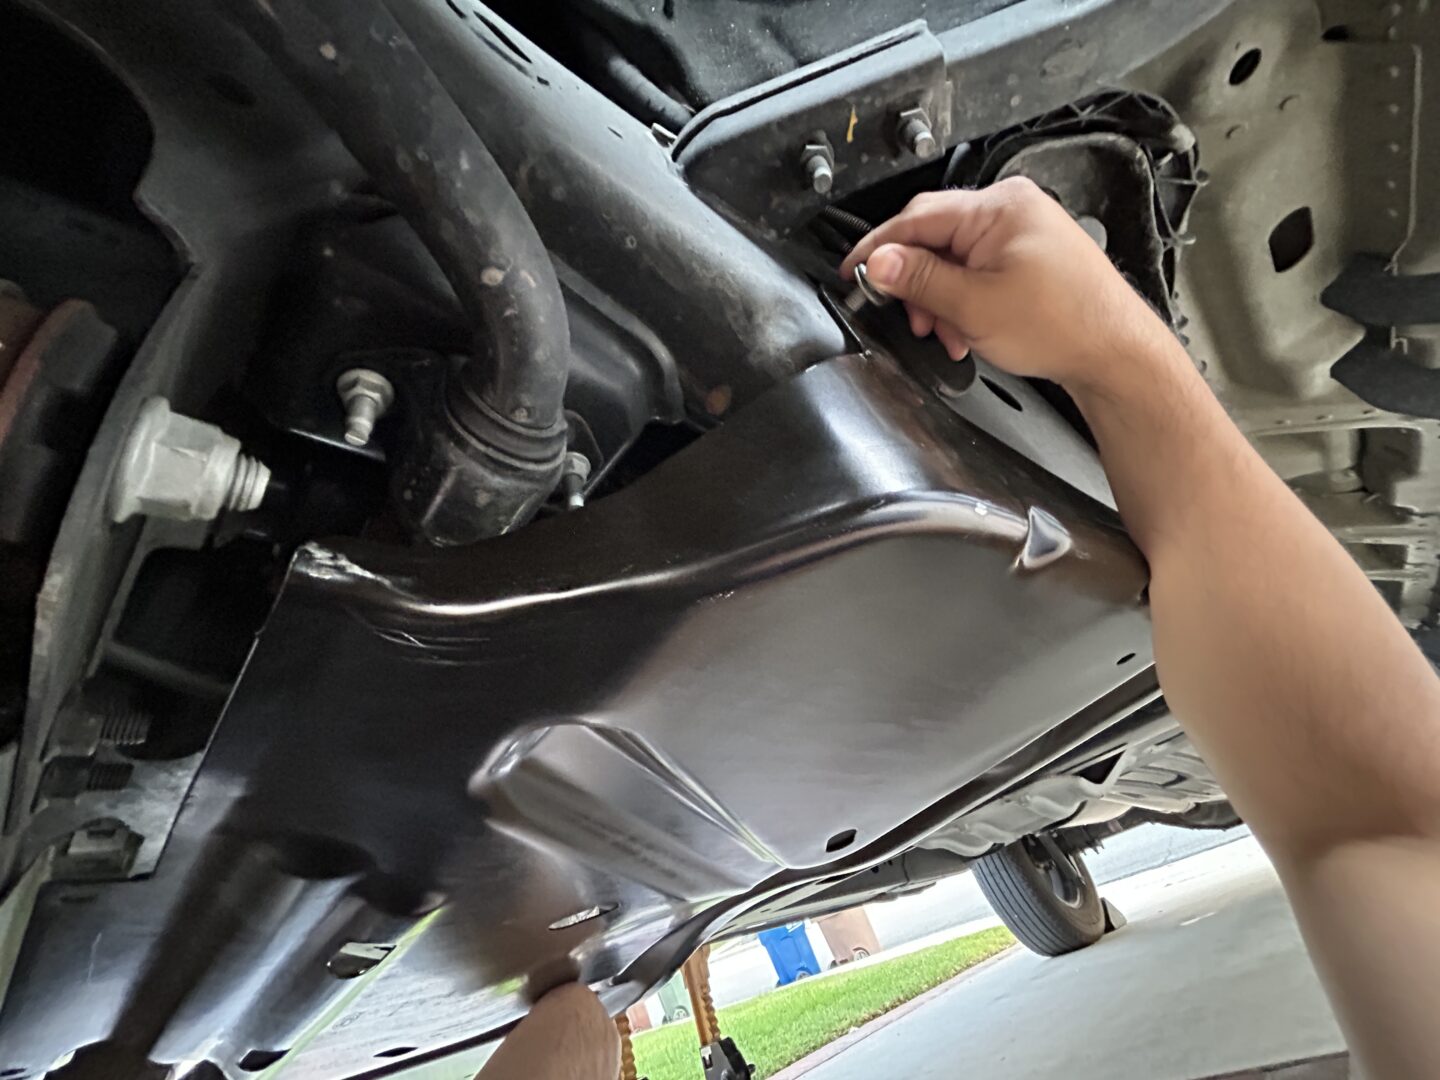

Screw in the (2 qty) new bolts at the front center.
Now that the skid plate is self-supported via the bolts, tighten them all snug. You can tighten these quite tight because of the stout size of the bolts.
And that is how simple of a job it is to replace the diaper that so commonly breaks and falls apart on our beloved Ford F-150. Now, there is much more protection in the center of the truck where the transmission and engine are located. As an added bonus, there is even some extra security for your catalytic converters too.

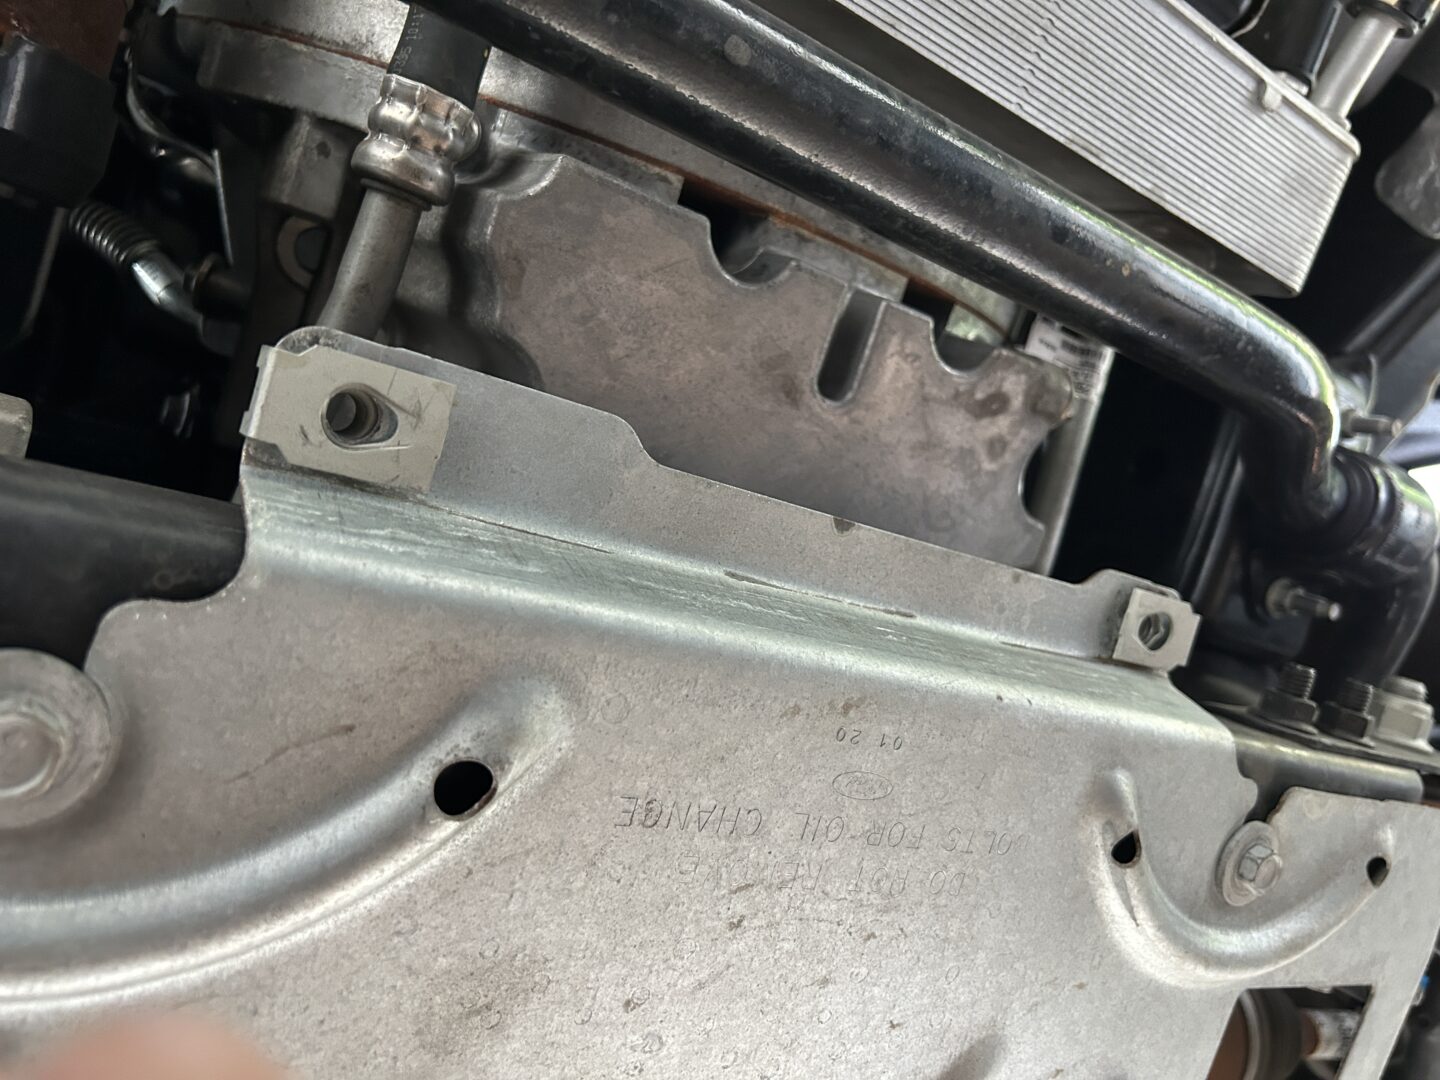
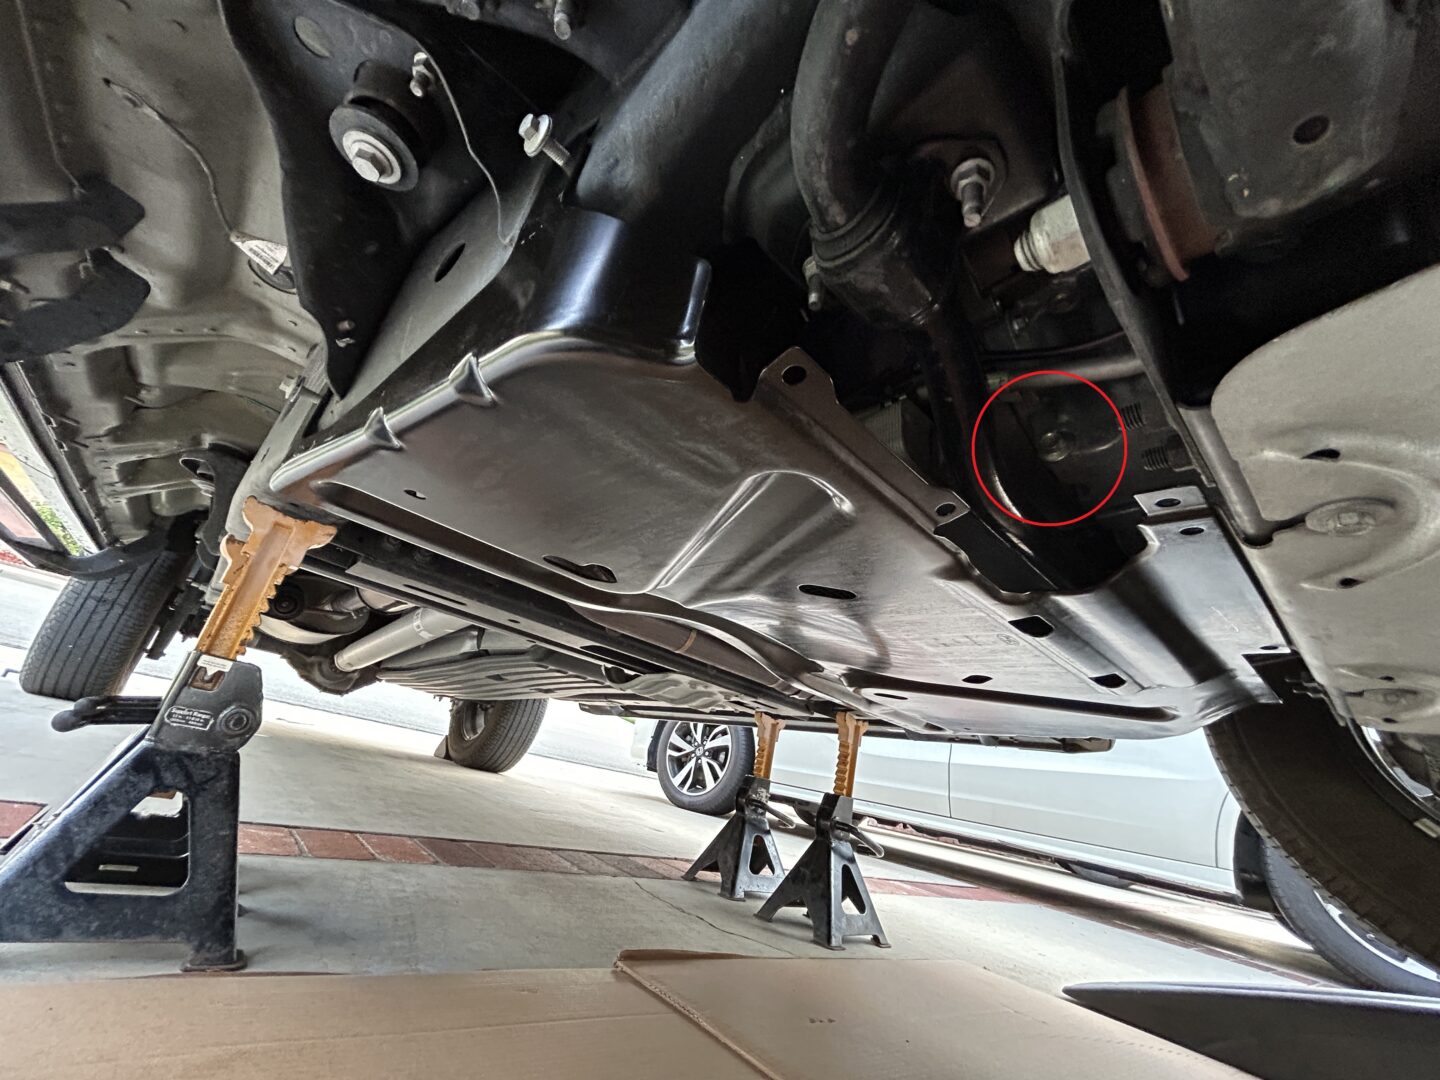
Also something I should mention is that there is a little opening that is for the oil drain cover, which is part #HL3Z-7222-F, but the price can be at least $70 plus shipping. It may not be worth it to you (it certainly wasn’t worth it to me) to get this cover, since without it, you still have adequate protection of the under carriage.
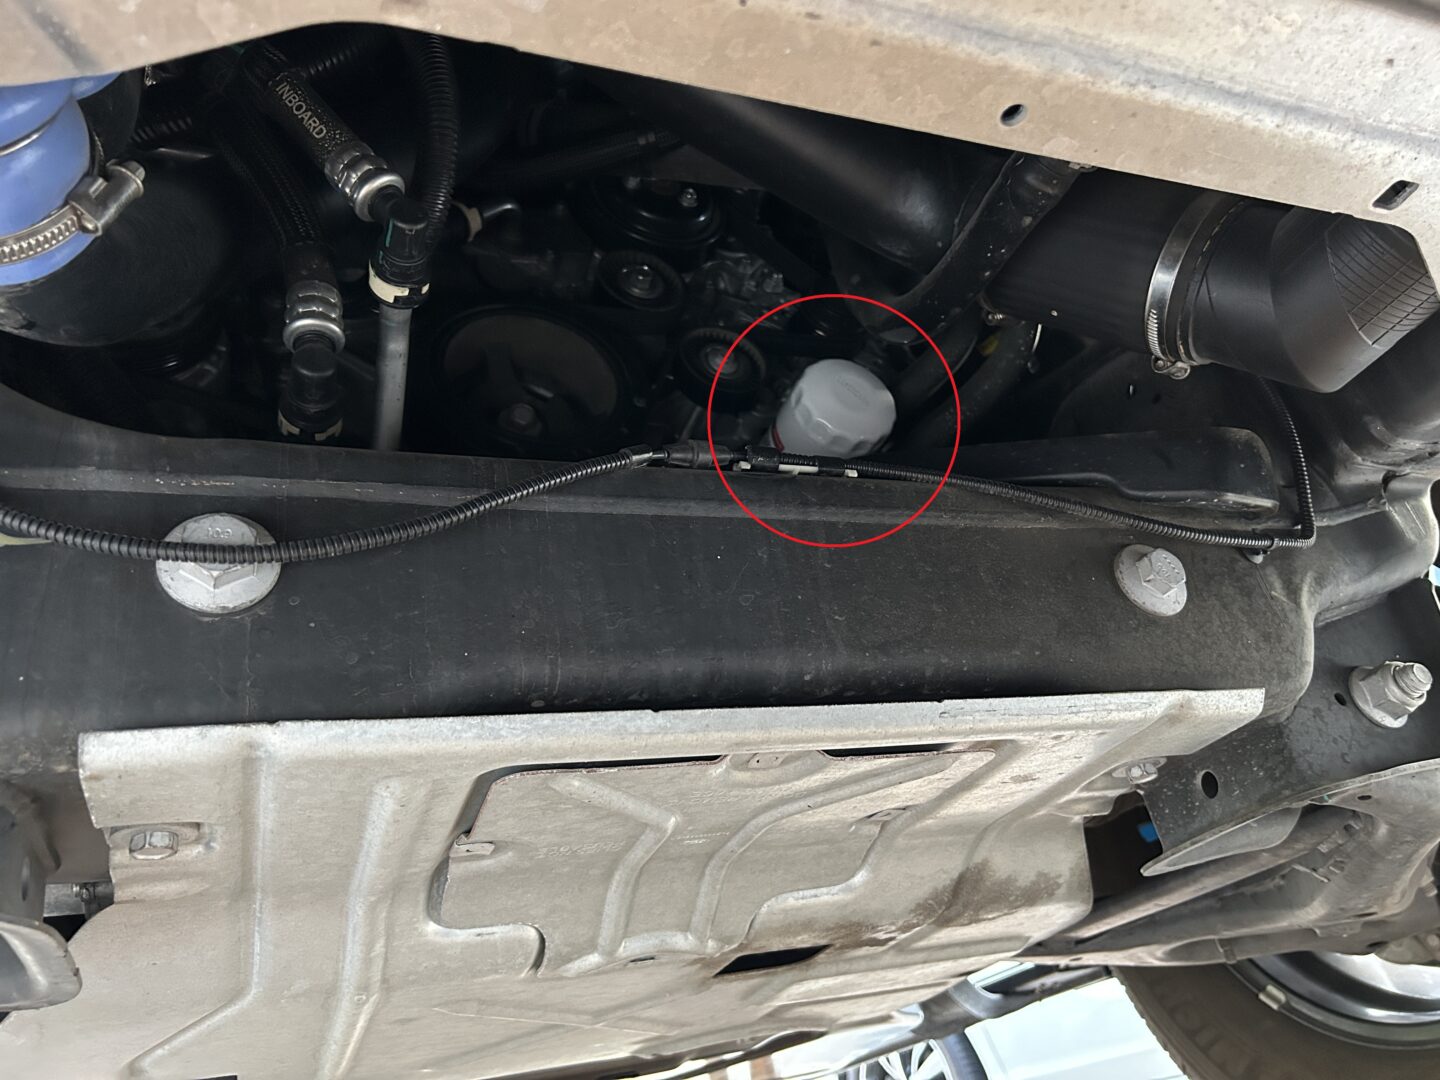
Now, with the added protection underneath the truck, we do need to do some things to make oil changes easier moving forward. The oil filter is still accessible at the front of the engine and the oil drain plug can still be reached through this little opening in the skid plate. However, to minimize the oil mess that can occur with the oil filter, we will need to rely on the bag method (or allow it to drain into the tray beneath it) to avoid the mess there. As for the oil drain plug, I have future plans to install a Fumoto Oil Drain Valve, which will allow me to run a hose down from it to drain the oil without causing a mess.
")
")

")


: 13th Gen Ford F-150")
: 13th Gen Ford F-150")
