When you make purchases through links on this site, The Track Ahead may earn an affiliate commission. Also, these posts are based off my own experiences. I am not responsible for any action you take as a result of reading this. Learn More
Climate Control Light Bulbs in the 4th Gen Toyota 4Runner
Pretty much every 4th generation Toyota 4Runner owner will find themselves with climate control bulbs that go out. The replacement is incredibly easy yet I hear many people putting this off (including myself). The reason for me was mainly because I found it would take a bit of time for me to get the right part numbers before doing the bulb replacements.
After some research, I put together some diagrams showing what part numbers would be needed depending on whether you have the SR5/Sport or Limited model, as well as what bulbs power what on the center dash. You may choose to replace the bulbs whole (bulb with bulb holder) or you might want to save some money by wiring up bulbs to the existing bulb holders. I’ve shown both methods below as well as the products you’ll need whichever way you choose to proceed with.
Climate Control Bulb Part Numbers
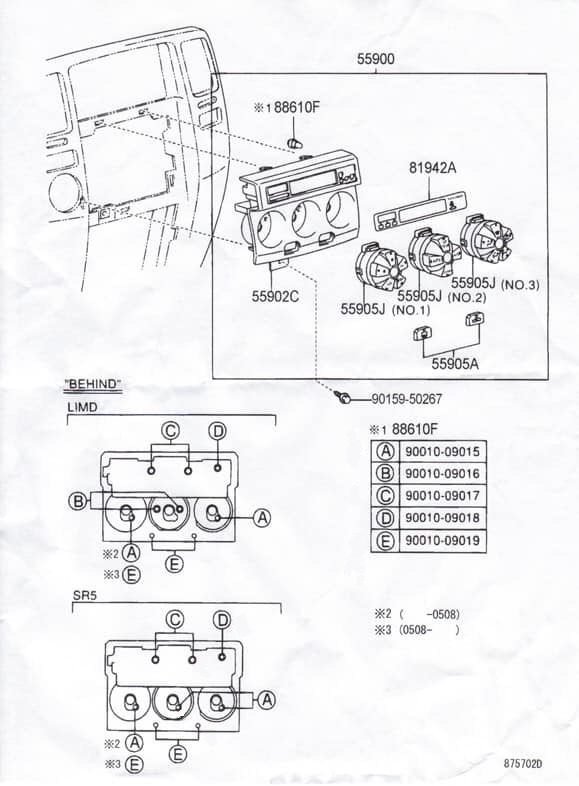
The SR5 and Sport models on the 4th generation Toyota 4Runner have the same climate control settings (pictured below). The Limited model has dual climate control, so the center temperature control dial will look different. The two variations will utilize different number of bulbs as well as different part numbers.
The front view of the climate control settings show which part numbers and bulbs light up which part of the front face.

The back view of the climate control console shows the location of the bulbs that correspond to the respective bulb and part number.
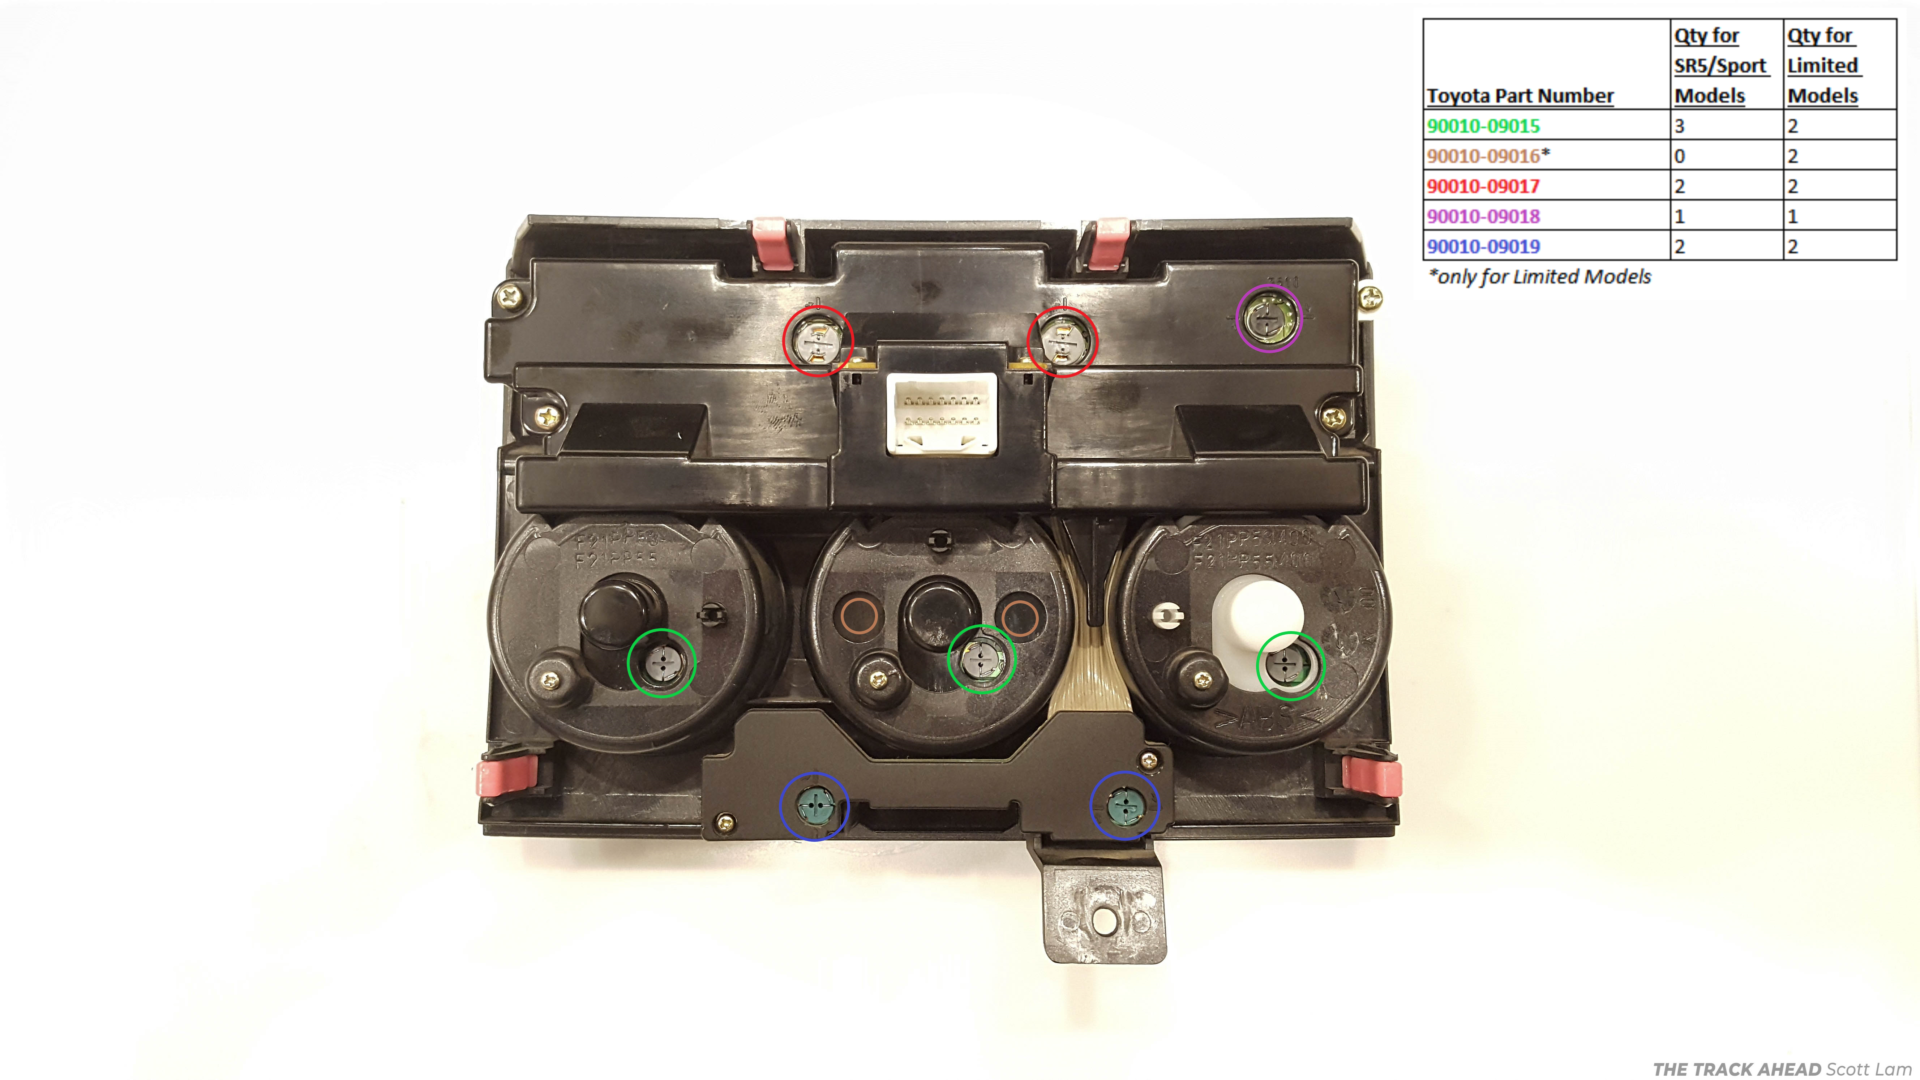
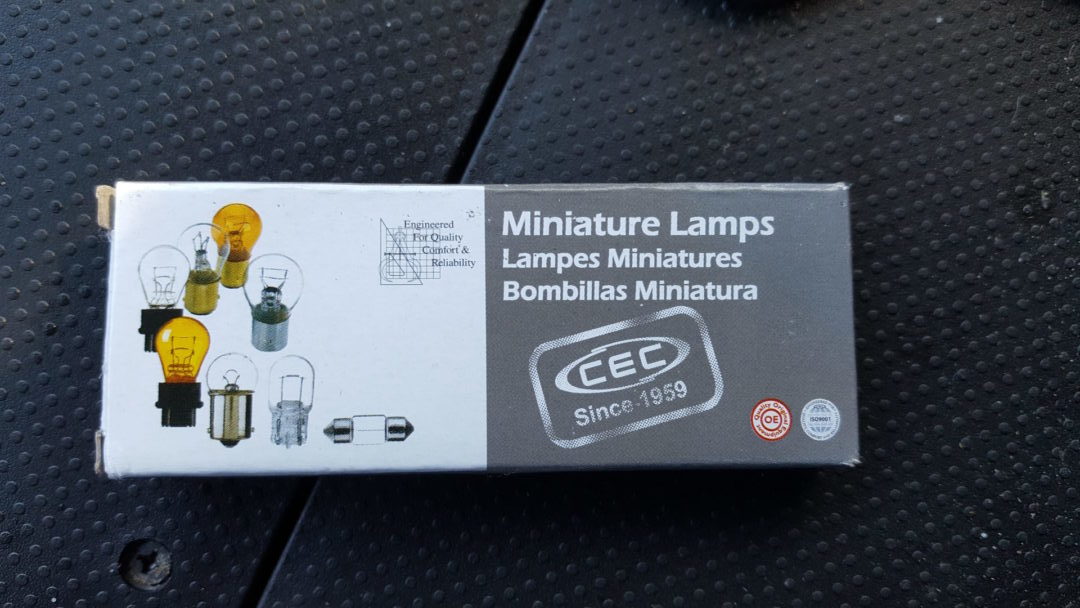
Bulbs can usually be found on Amazon if you want it quick, but they can usually be found for a tad cheaper on Ebay if you’re willing to wait a little longer for shipping. I also see a few listings with a whole set of bulbs so you don’t have to purchase them individually. However, since your mileage my vary depending on what model 4Runner you have, it’s best to use the bill of material on the photos above and make your purchase accordingly.
Part #90010-09015: Amazon / Ebay
Part #90010-09016: Amazon / Ebay
Part #90010-09017: Amazon / Ebay
Part #90010-09018: Amazon / Ebay
Part #90010-09019: Amazon / Ebay
Which Bulbs to Buy and Which Bulbs to Wire
The price can add up quickly if you’re purchasing more than one bulb. Each bulb is quite expensive (about $6-$7 per bulb), so purchasing a whole set of bulbs for your climate control unit can cost $50-$60.
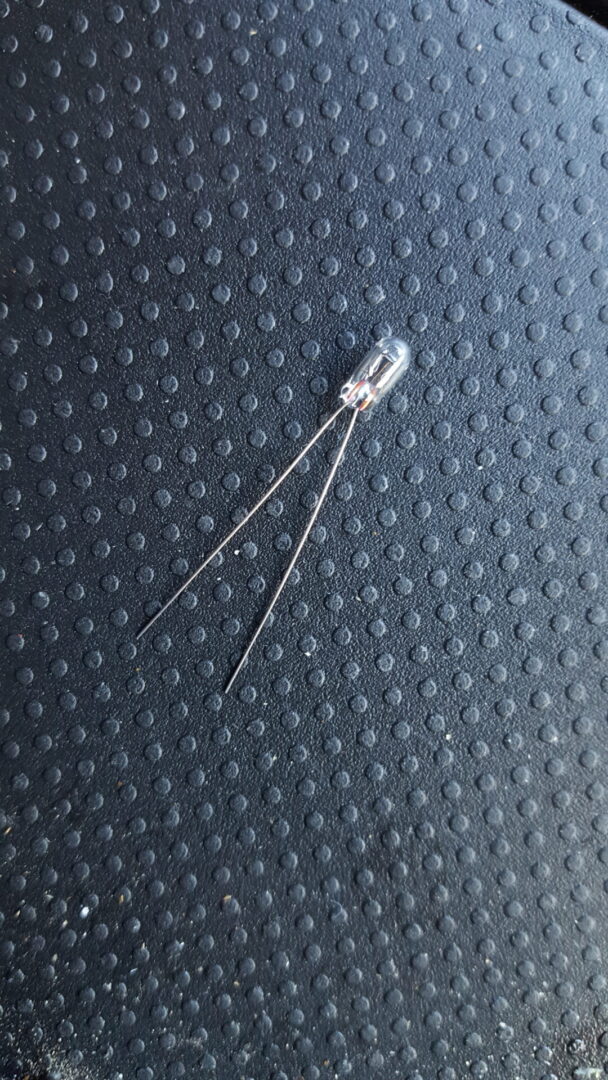
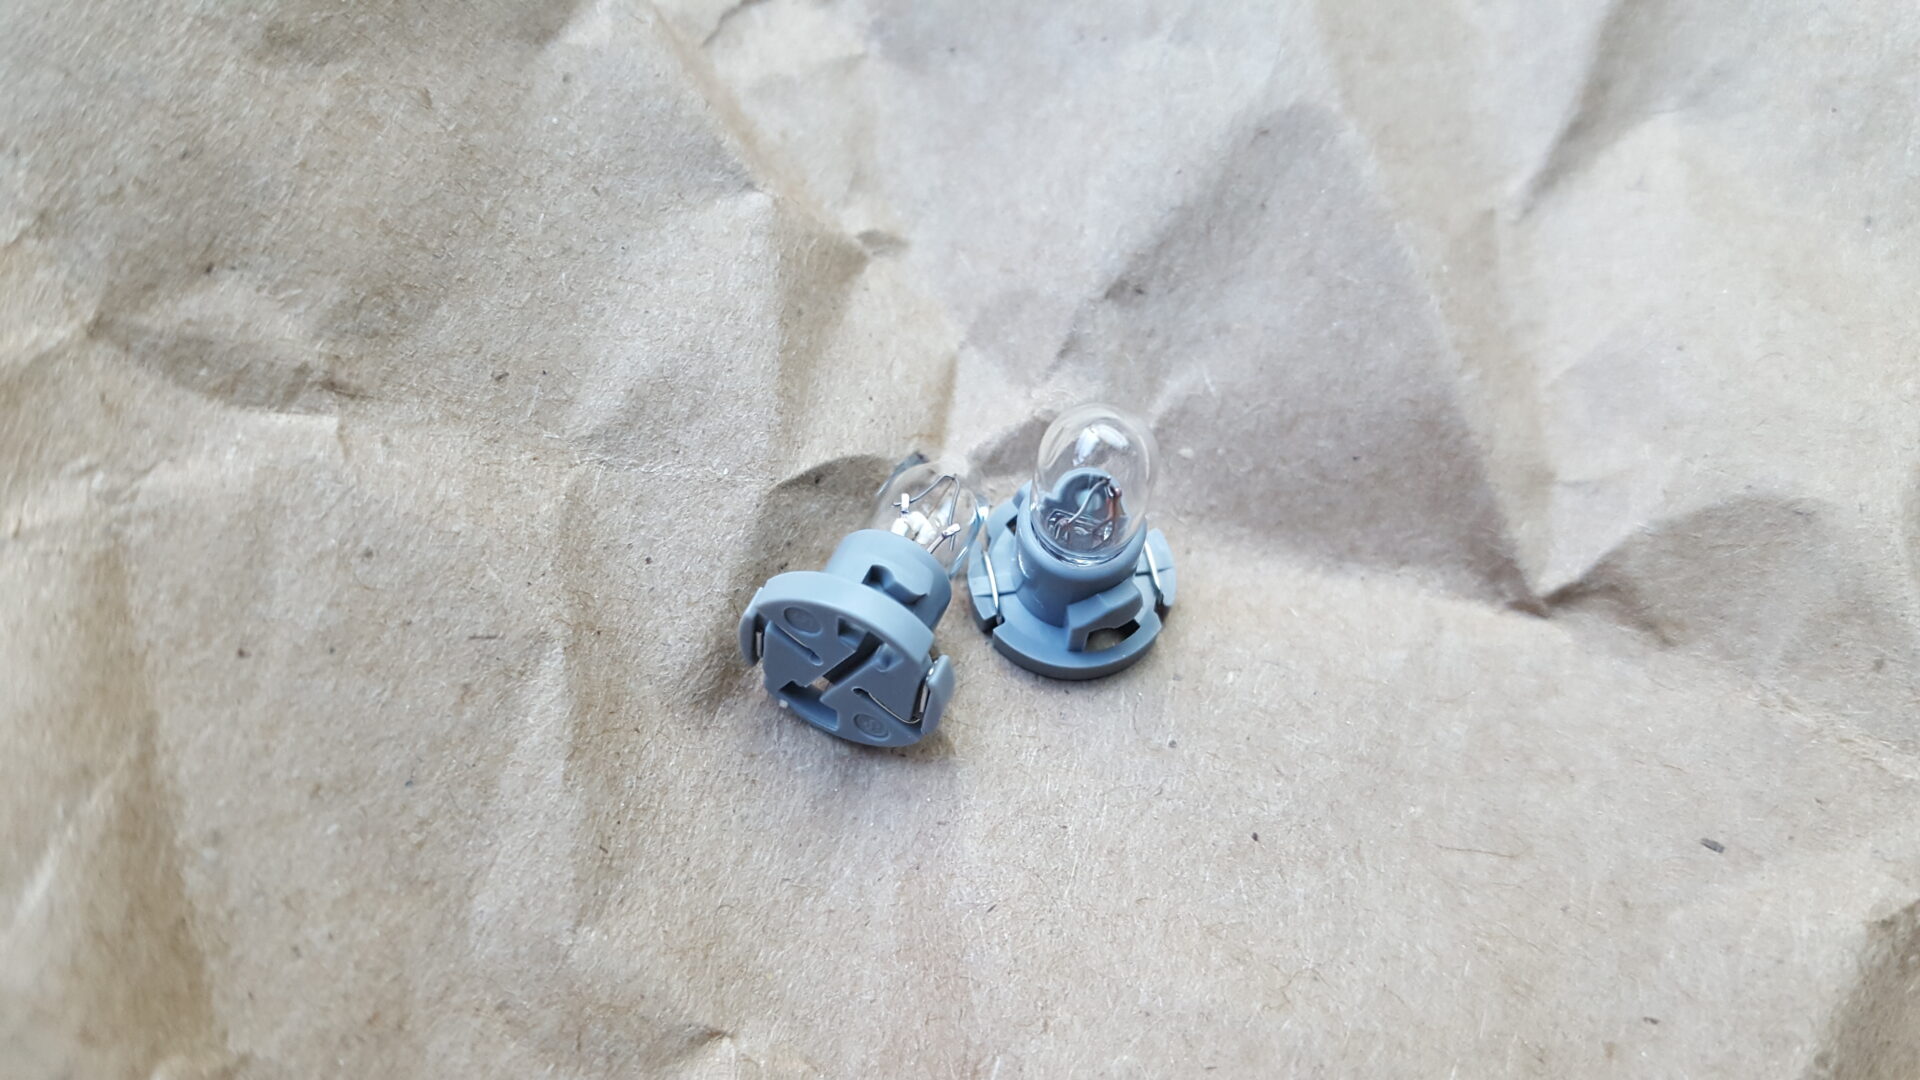
A cheaper alternative is to purchase individual bulbs with wire terminal leads. This is essentially the bulb with wire leads connected, without the bulb holder portion. These units cost about 75 cents each; you just need to wire it into the existing bulb holder. Therefore, you’re saving about $5-$6 per bulb by going this route. Either one of these options below from Amazon works for this application:
CEC Industries 7219 Bulbs, 12 V, 0.72 W, Wire Terminal Base, T-1 shape (Box of 10)
Memotronics 7219 Bulbs, 12 V, 0.72 W, Wire Terminal Base, T-1 Shape (Box of 10)
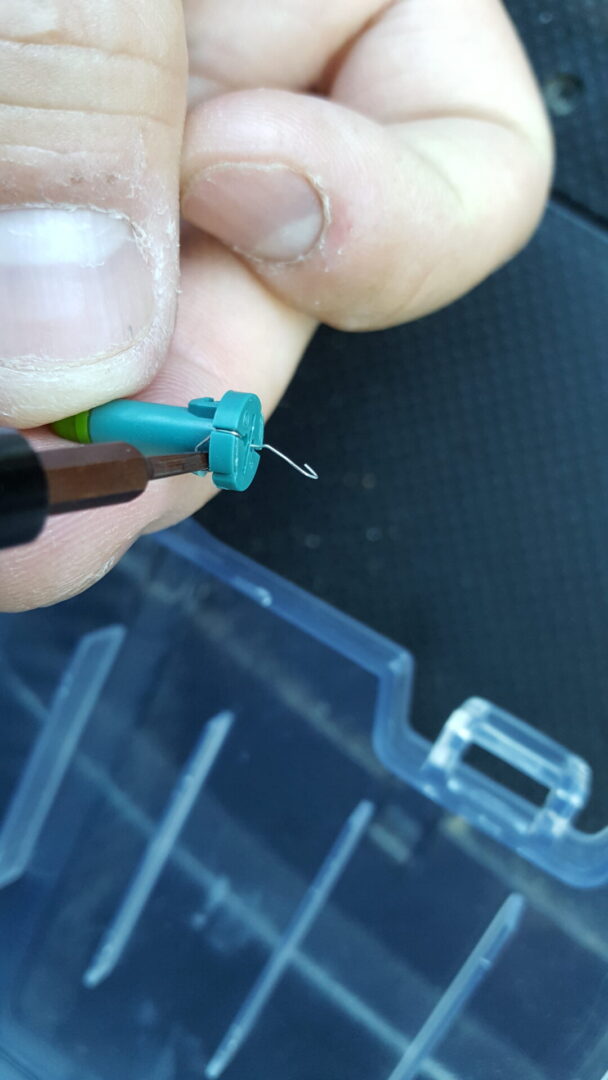
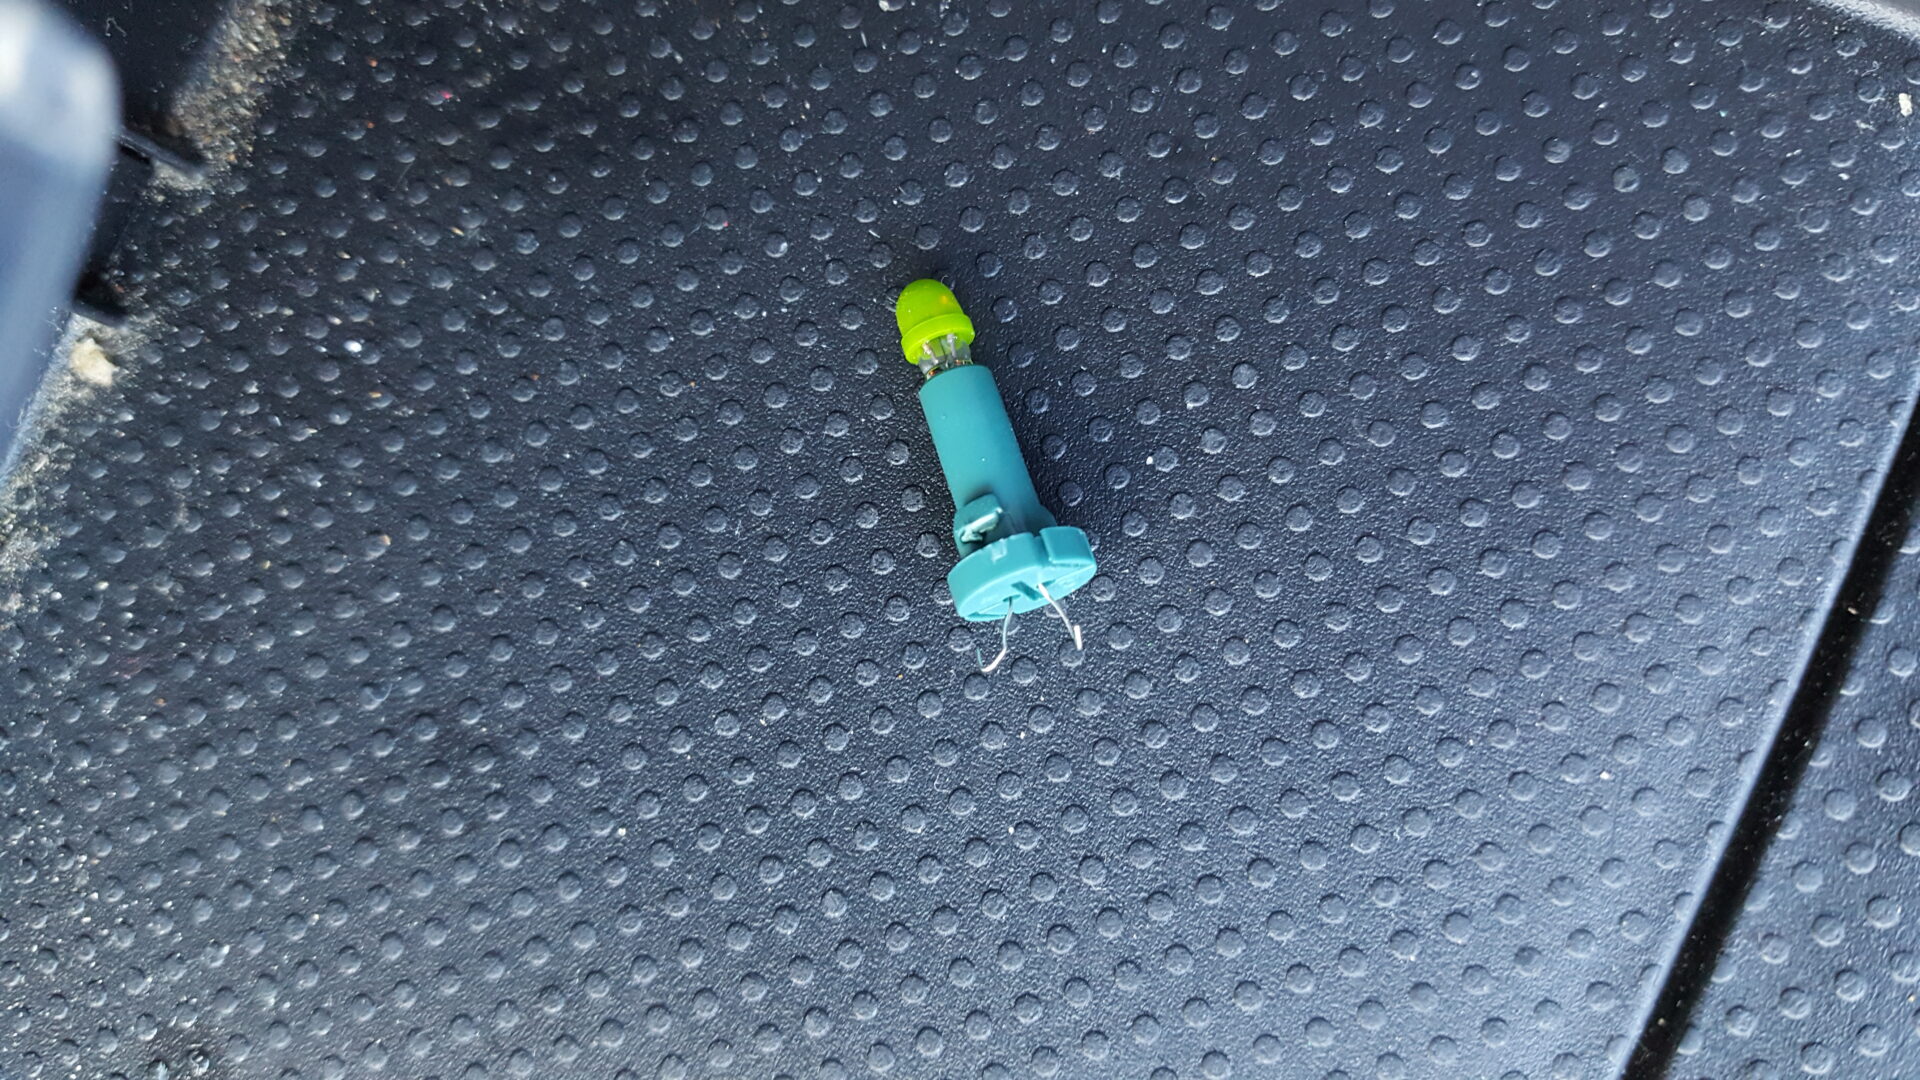
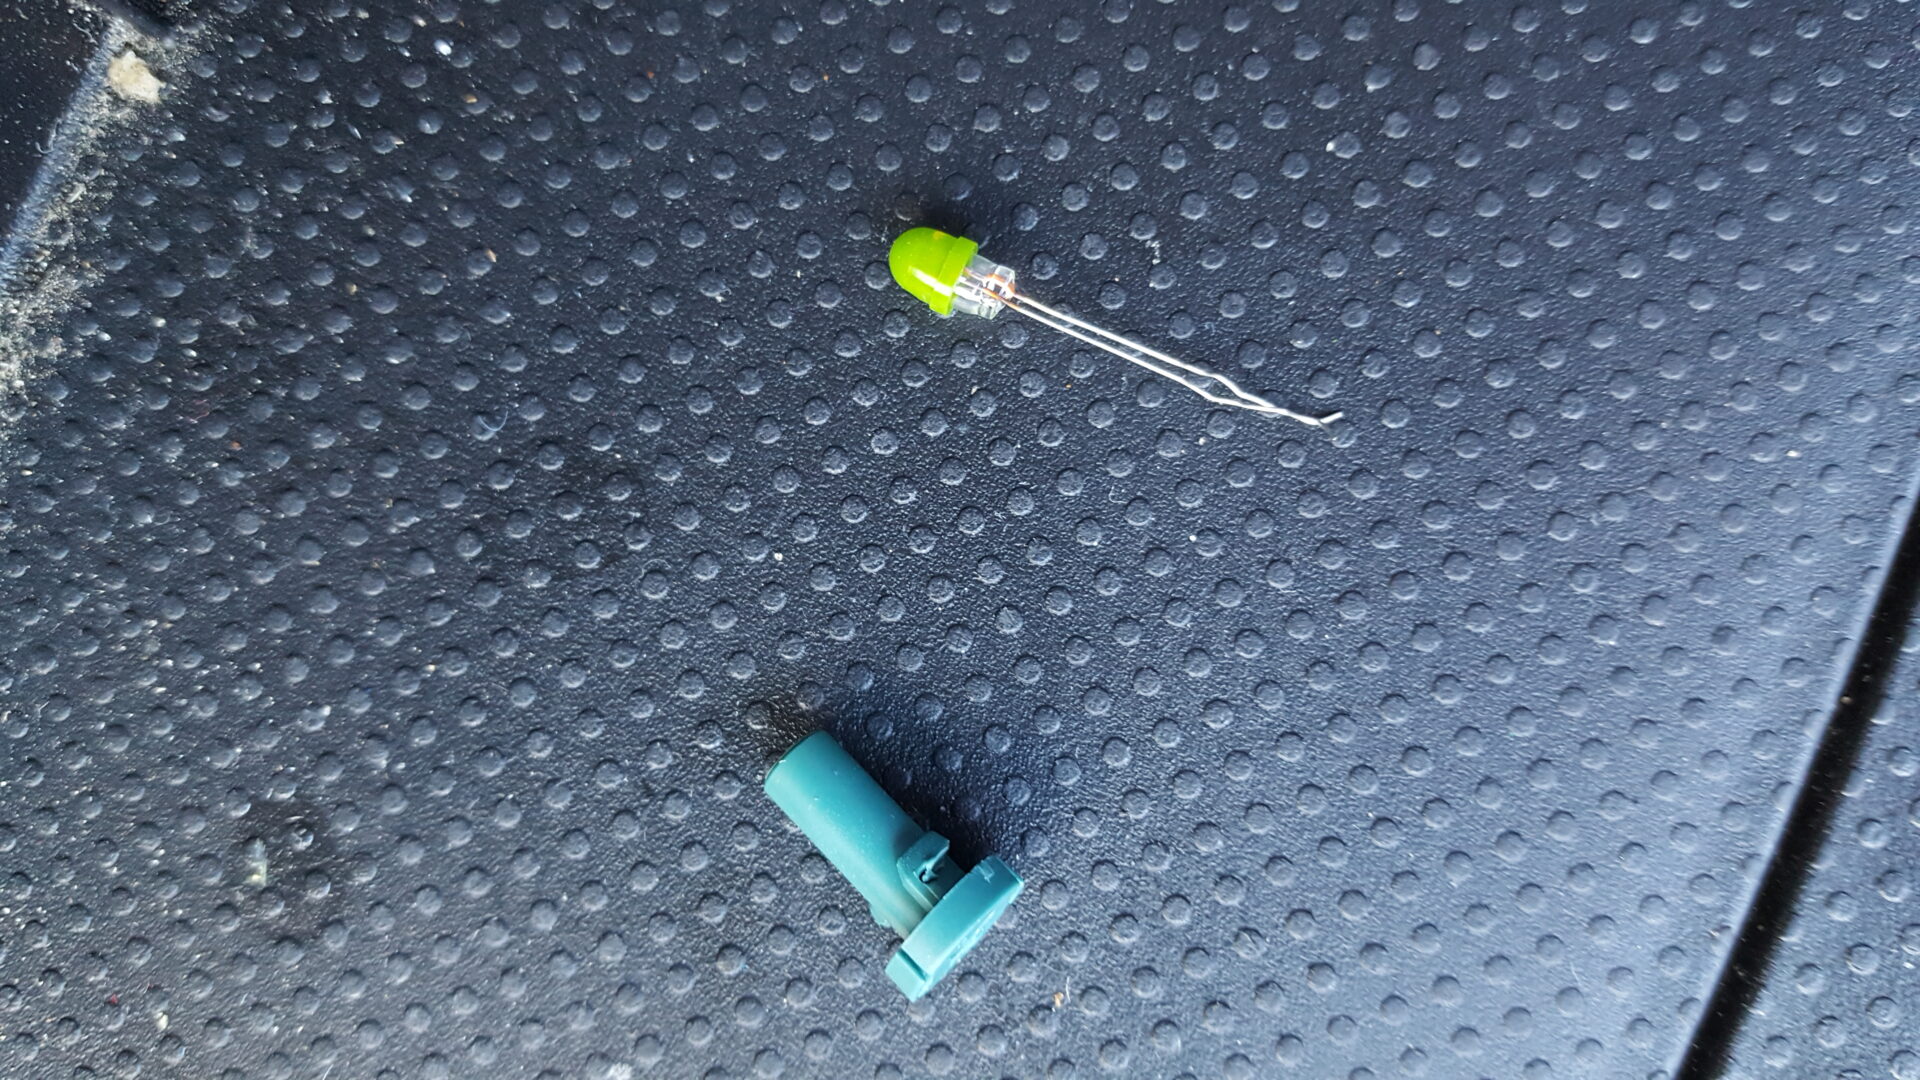
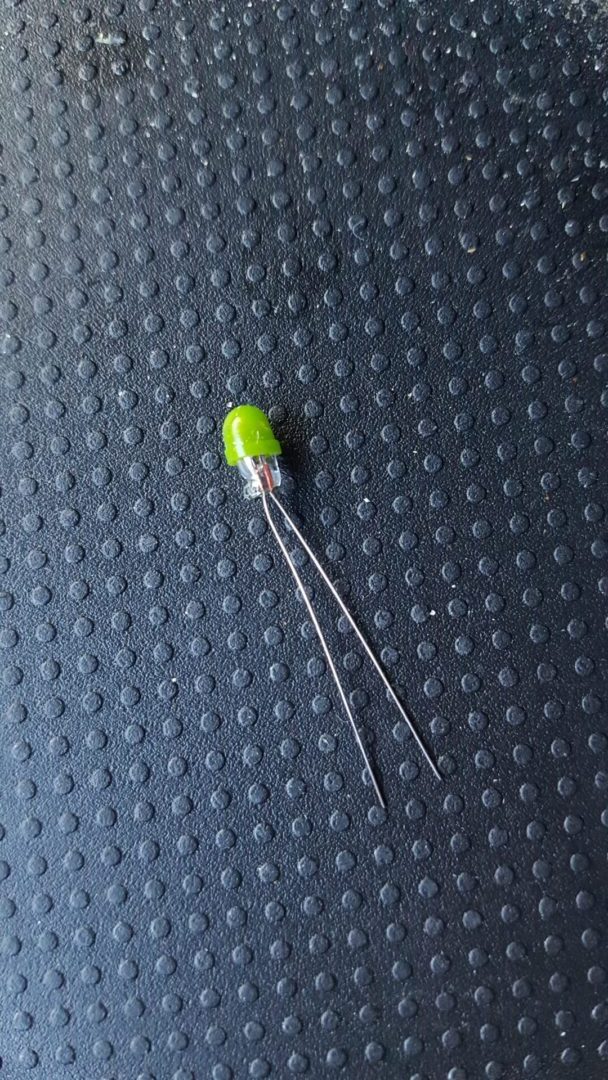
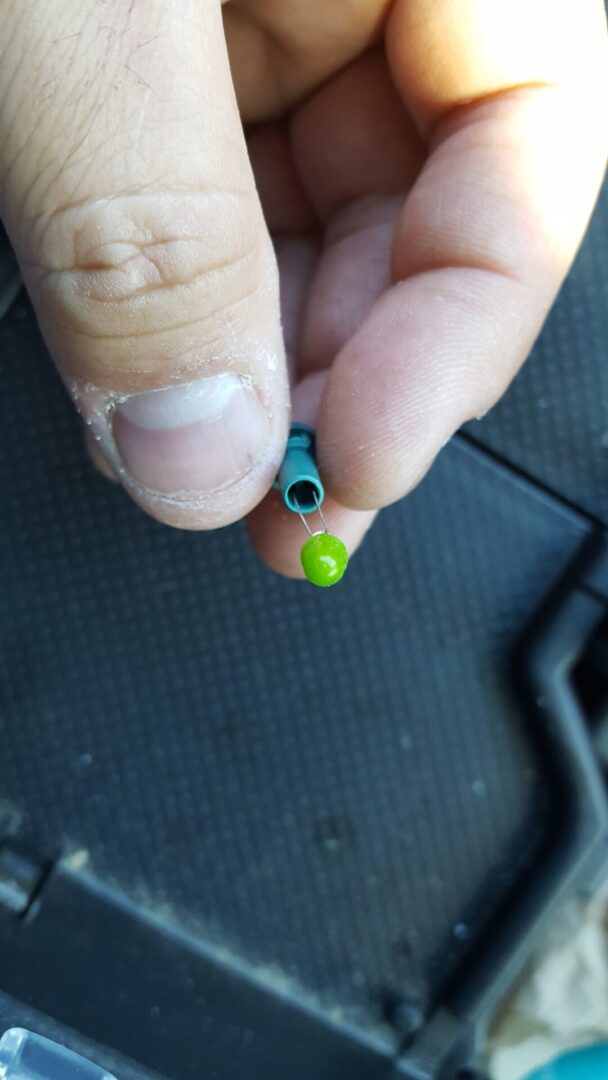
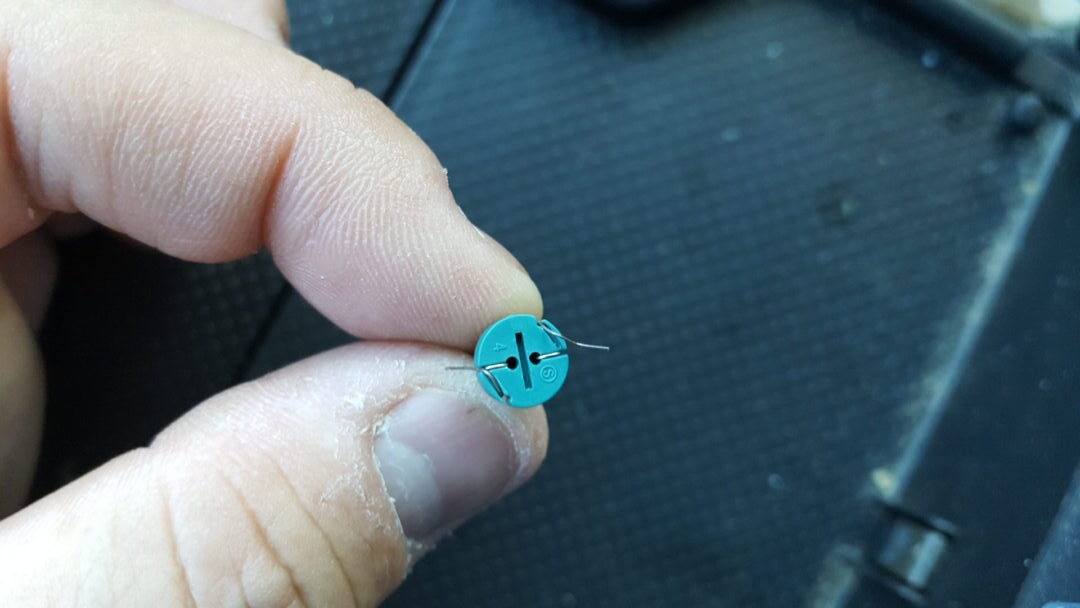
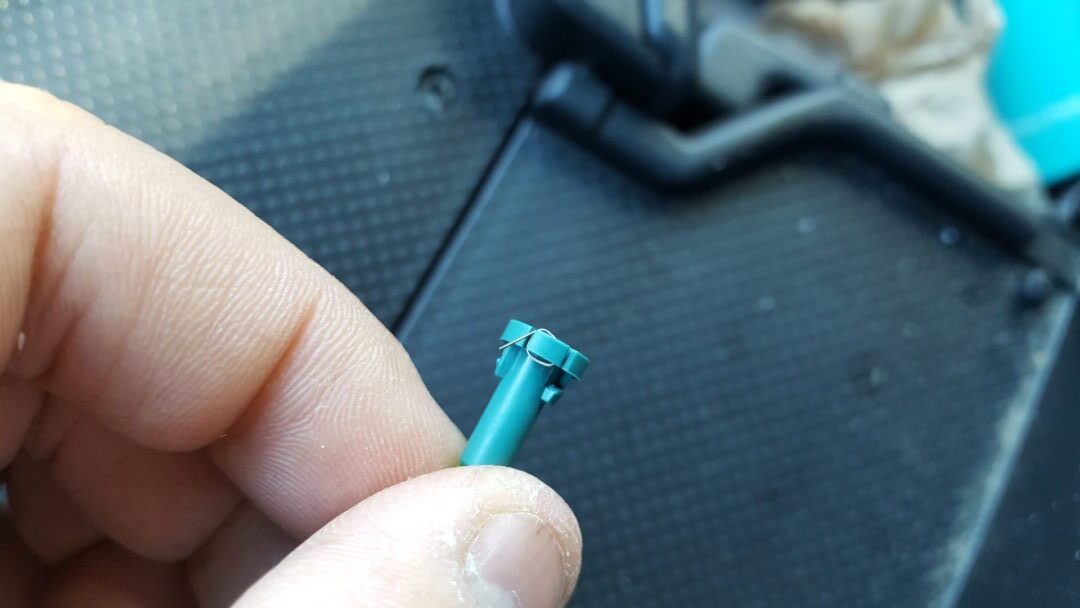
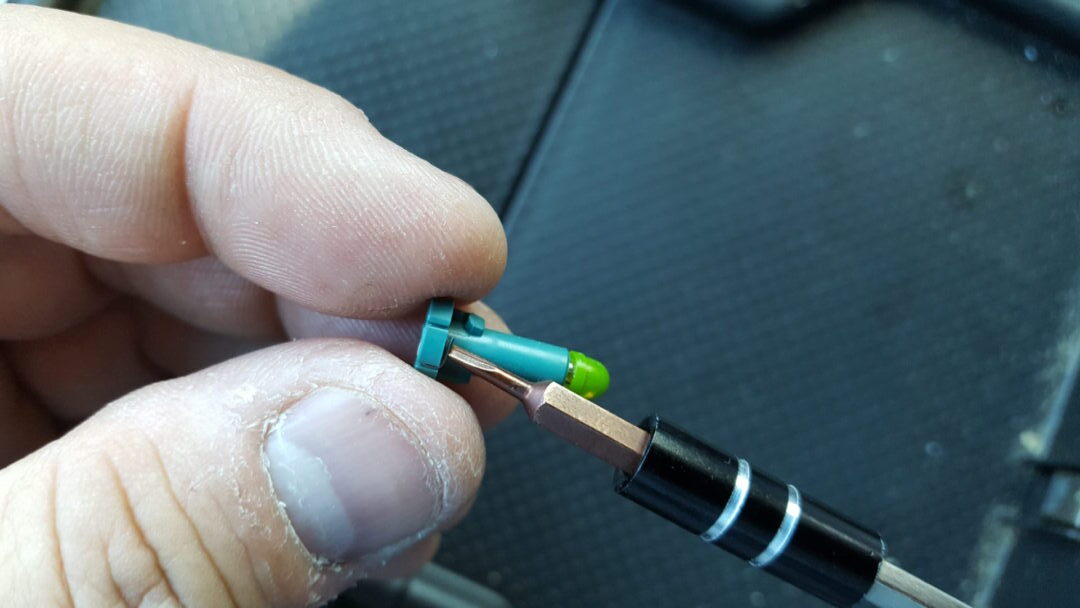
In my experience, the only bulbs that is difficult to wire up are the #90010-09017 (the bulbs that light up the LCD Panel). This bulb incorporates a metal contact system along with the wire bulb. Without specialty tools, it is virtually impossible to disassemble and re-assemble this bulb assembly without damaging the unit. As you can see below, my attempt at replacing only the bulb portion on the #90010-09017 proved futile.

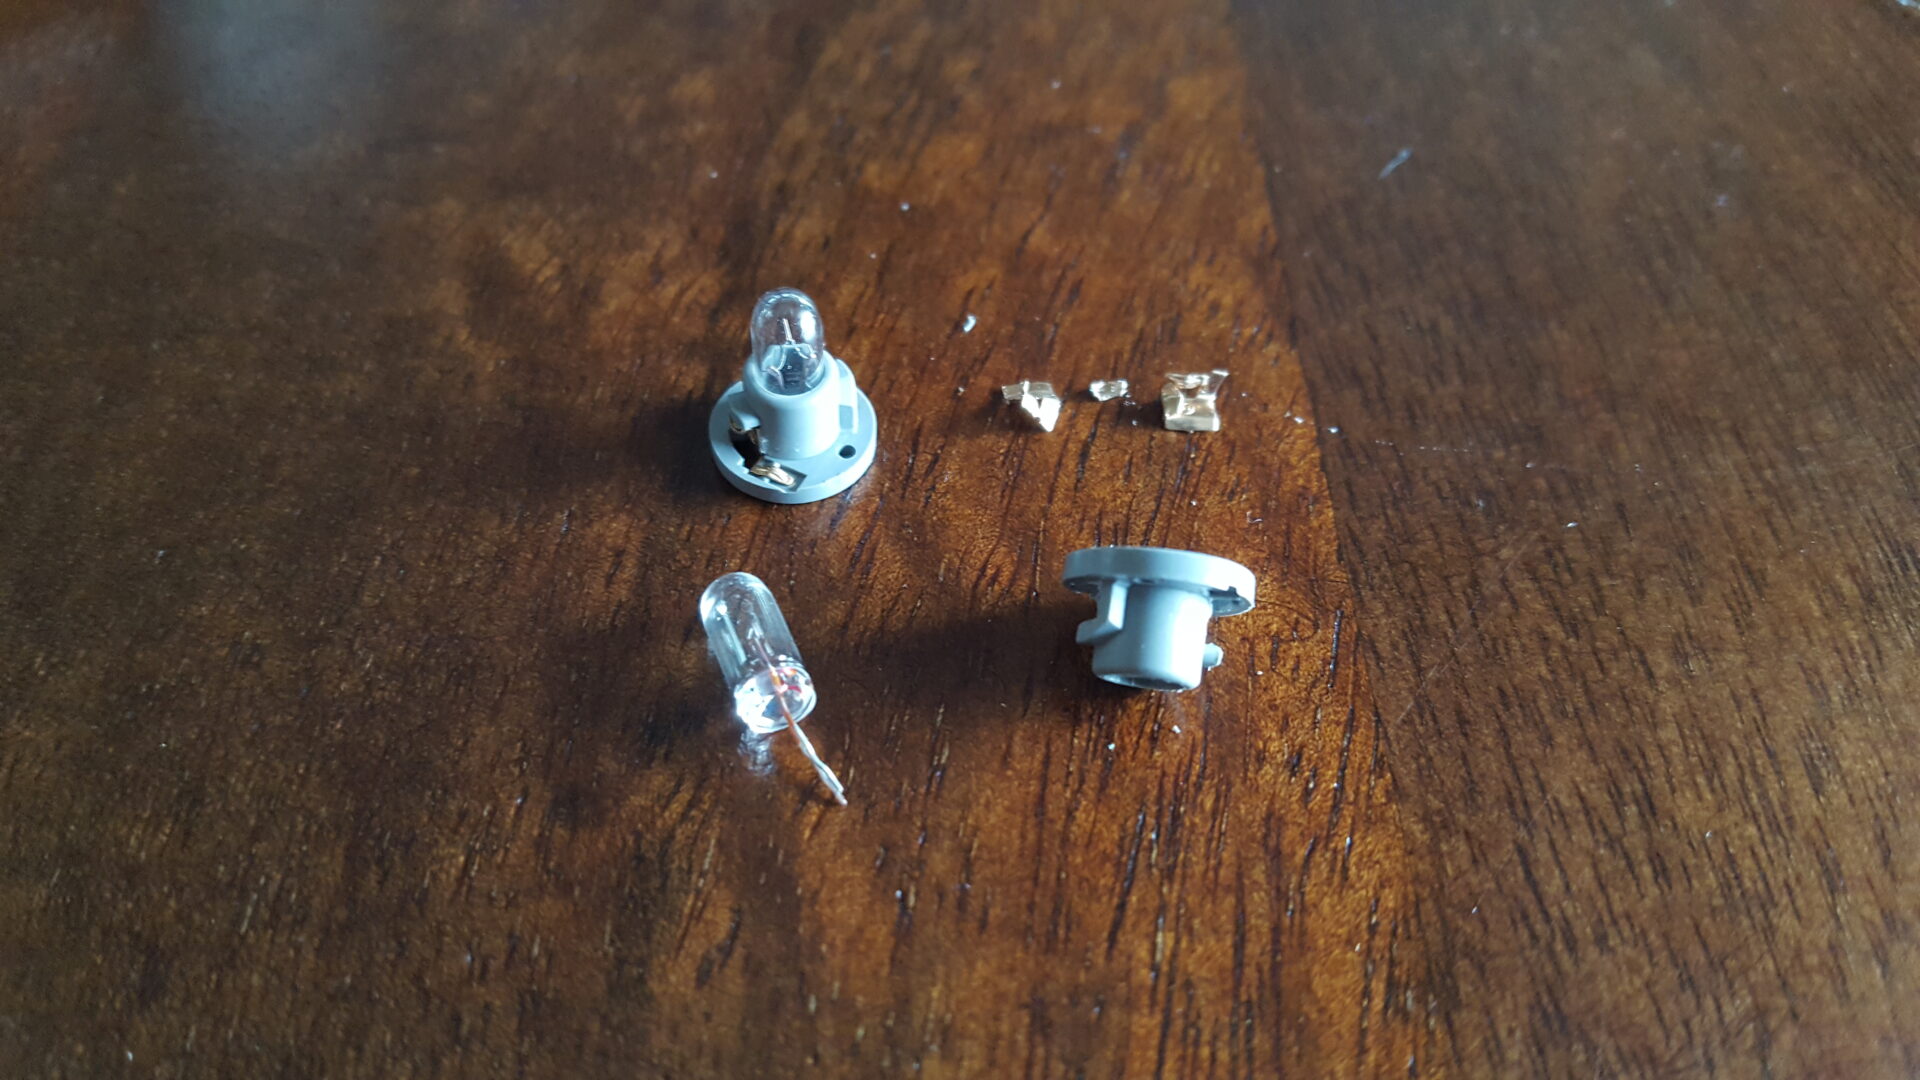

I recommend on these particular 90010-09017 bulbs to simply replace them completely. It may cost more to buy the bulb, but there are only two of these specific type of bulbs on the 4Runner’s climate control. If you’re only dealing with the climate control LCD panel that needs to be fixed, you can find that post here.
The rest of the bulbs can be replaced easily without the obstacle of the additional metallic contacts. Therefore, it is easy to disassemble and reassemble the bulb assembly in order to install the new bulbs with wire terminal leads.
Summary
90010-09017 bulbs: replace with complete replacements
All other bulbs: wire up with new bulbs with wire terminal base
How to Replace Climate Control Bulbs
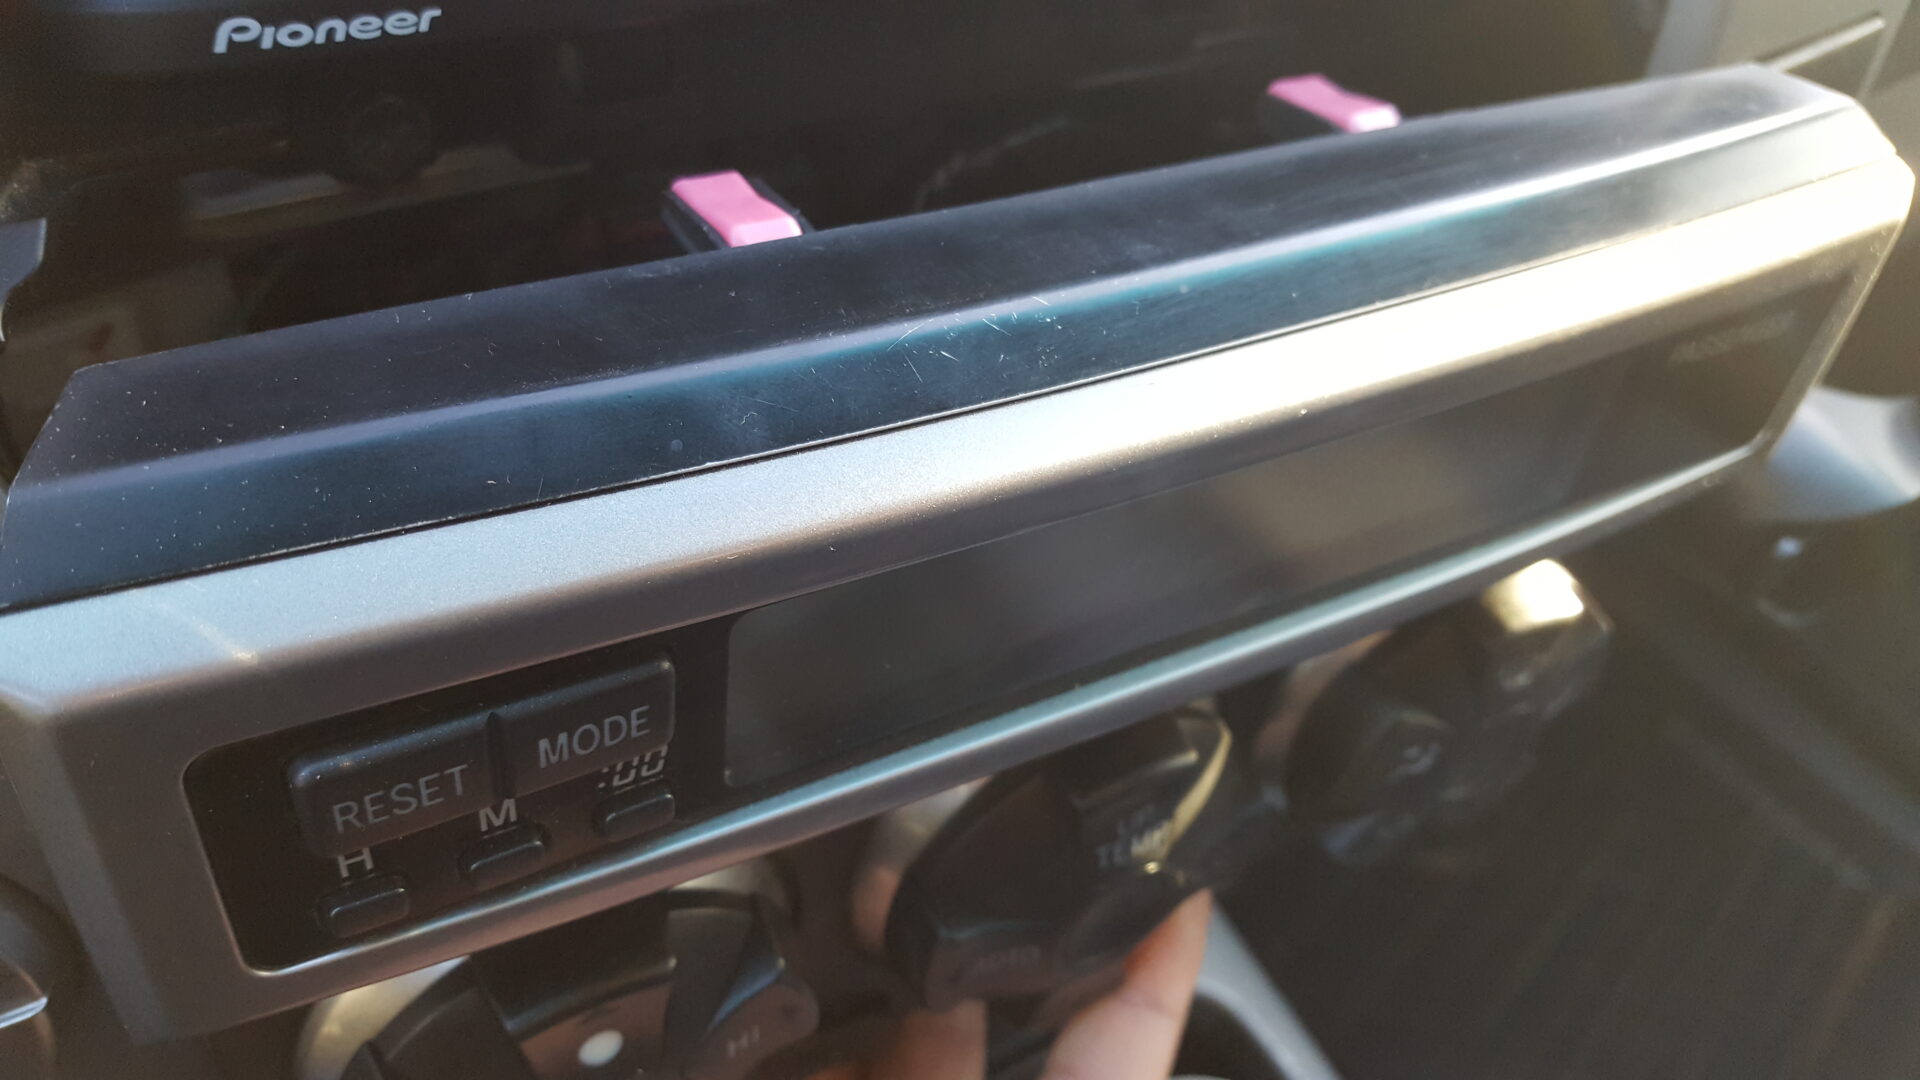
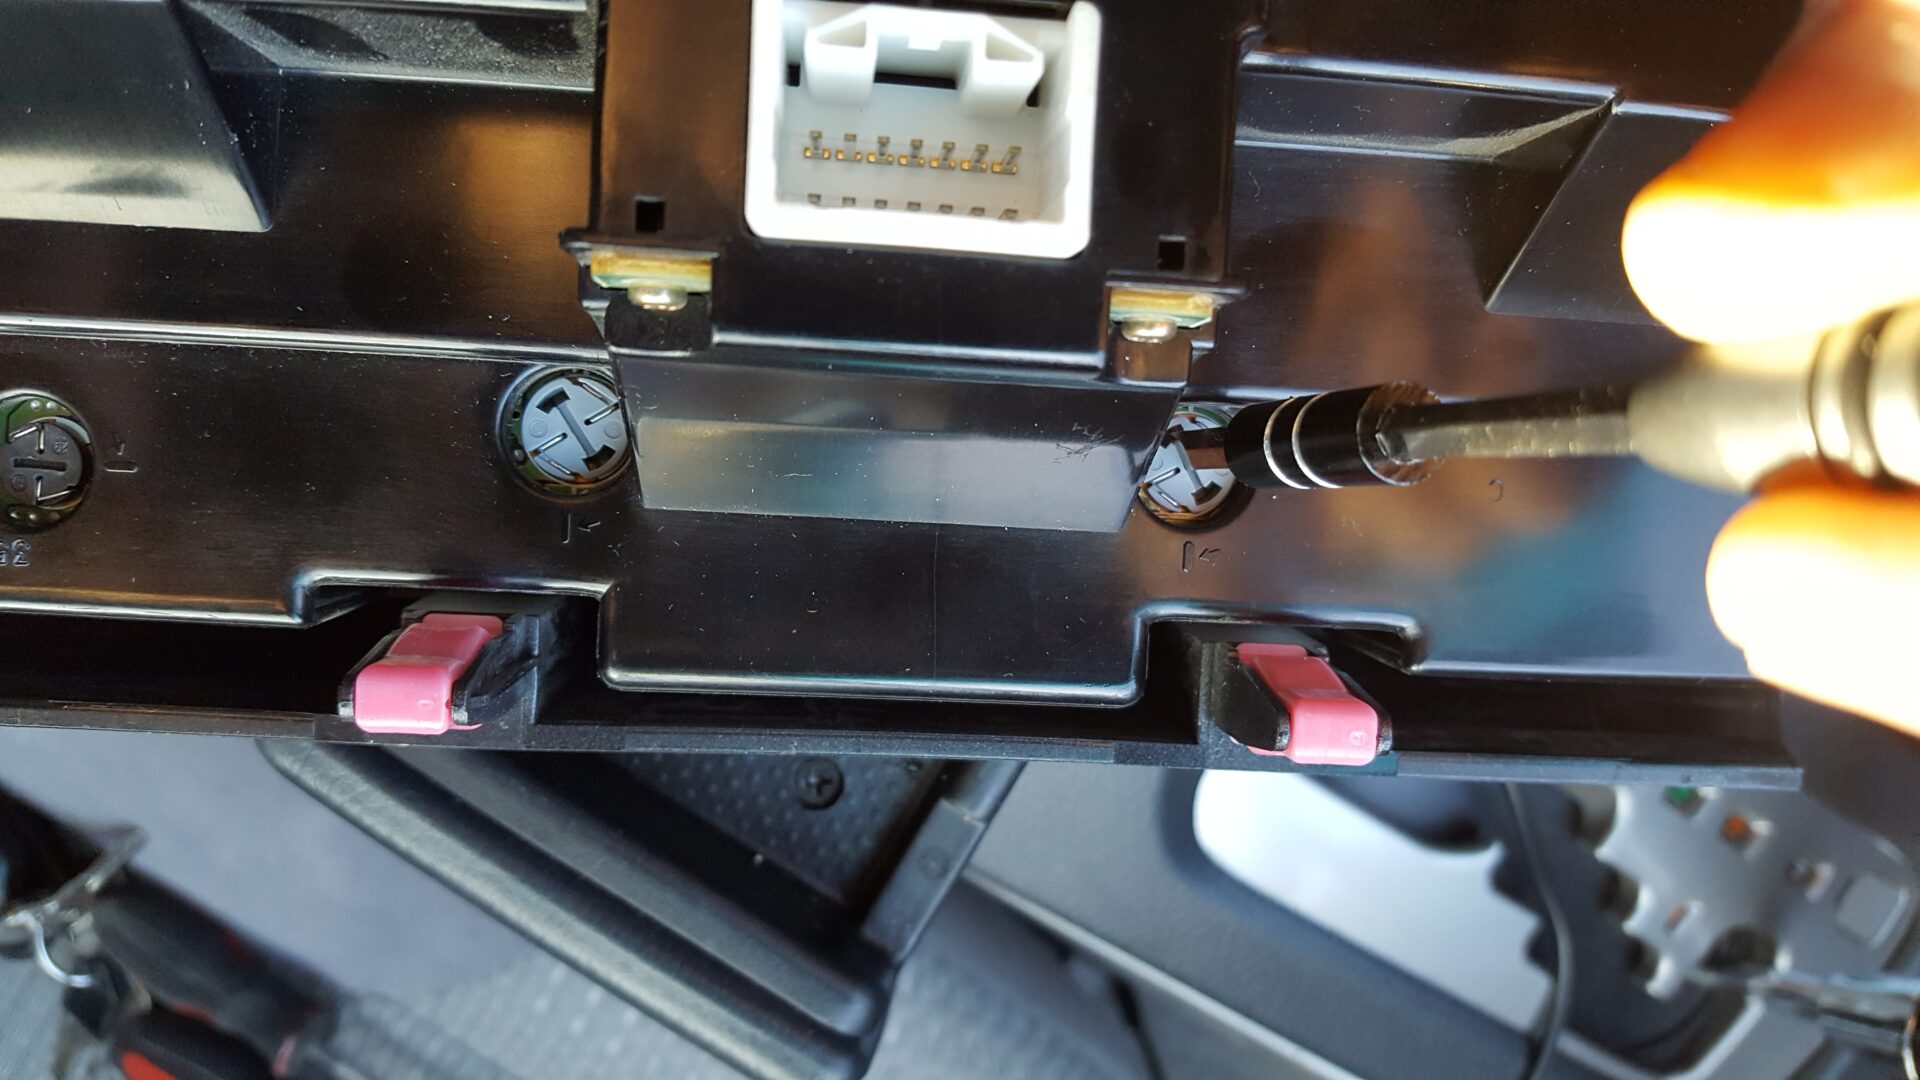
First, make sure the vehicle is off. Remove the tray right below the climate control settings. This will expose a Phillips head screw that will need to be removed.
The whole climate control unit can now be pulled off with your bare hands. Start by gripping the bottom part of the climate control piece and pull straight out towards you. This should pop the bottom two tabs out. You may then proceed to pull the whole unit by getting your fingers behind the unit. Once you pull the whole unit out, you will see how it is held in place. There are four tabs that secure the climate control unit.
After the unit pops off, there is still an electrical connector behind it that is still connected. Disconnect this connector and the unit should be disengaged from the rest of the car.
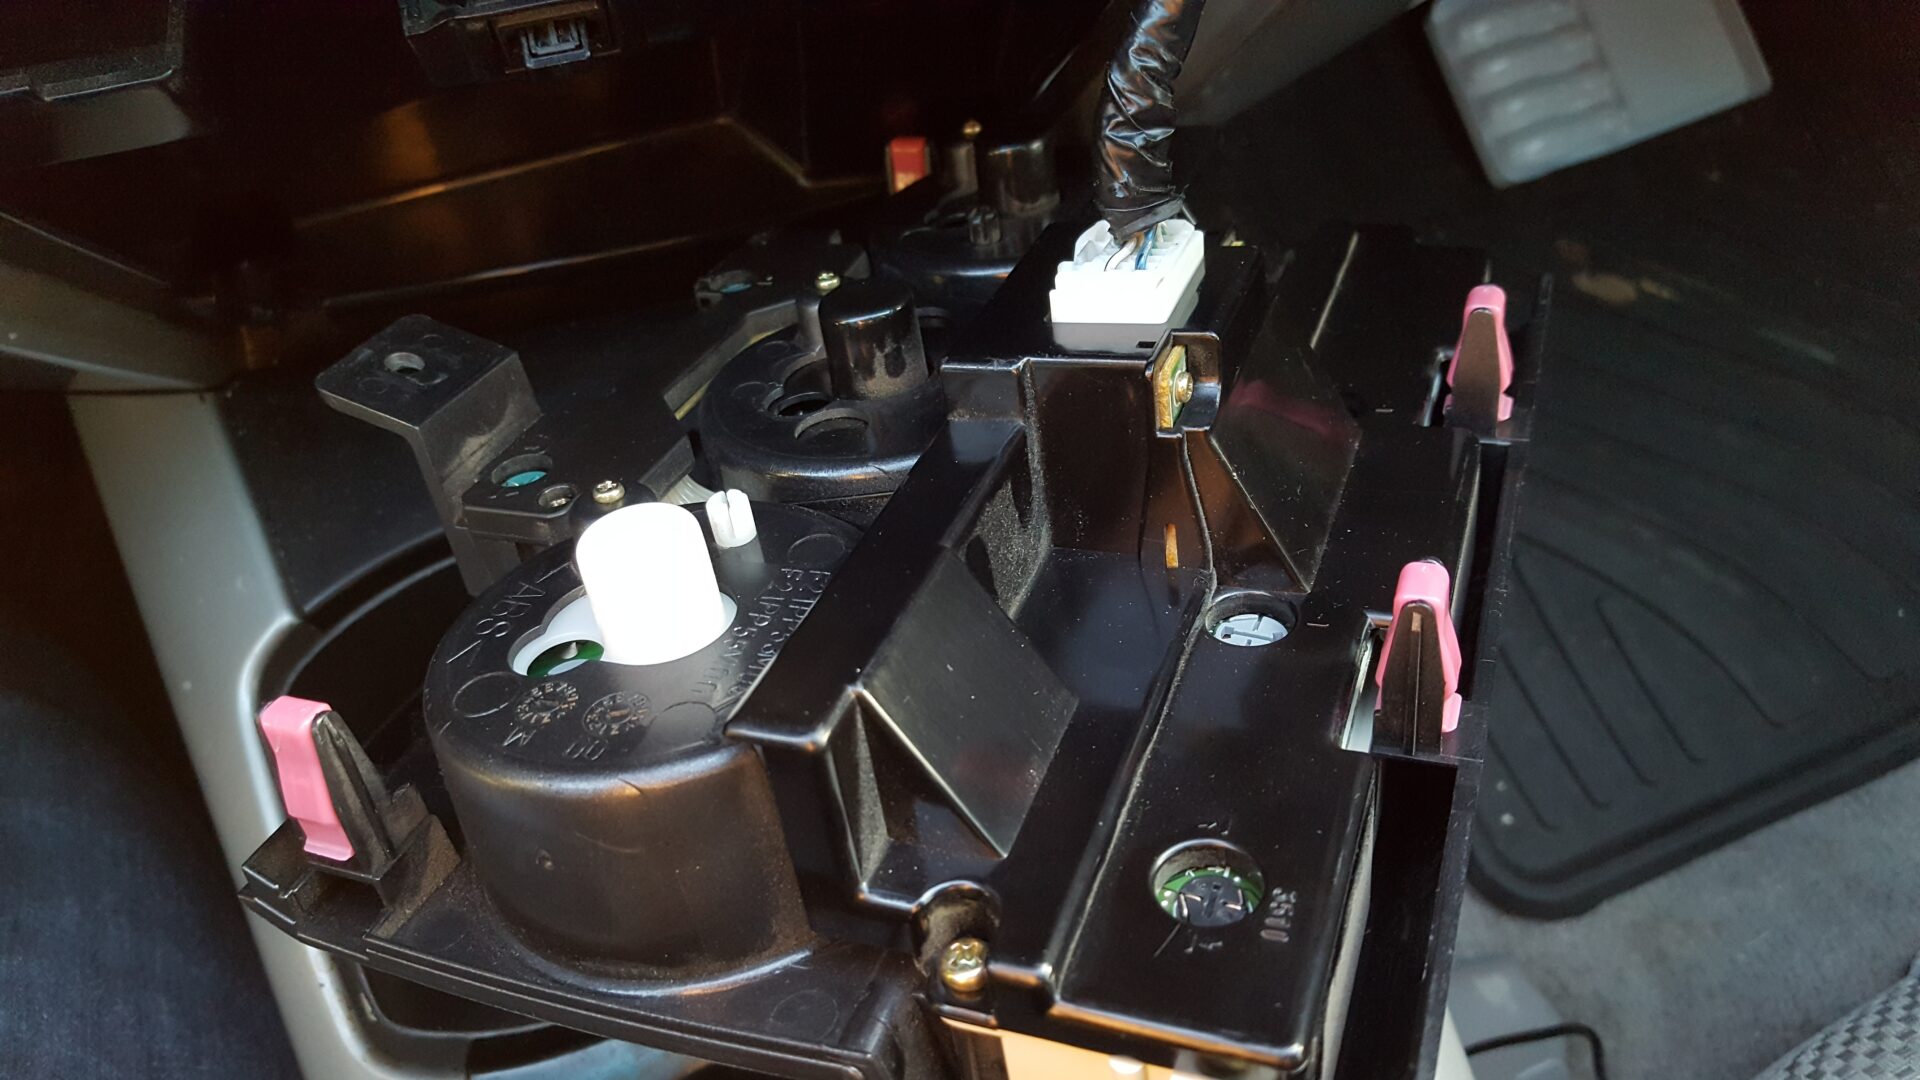
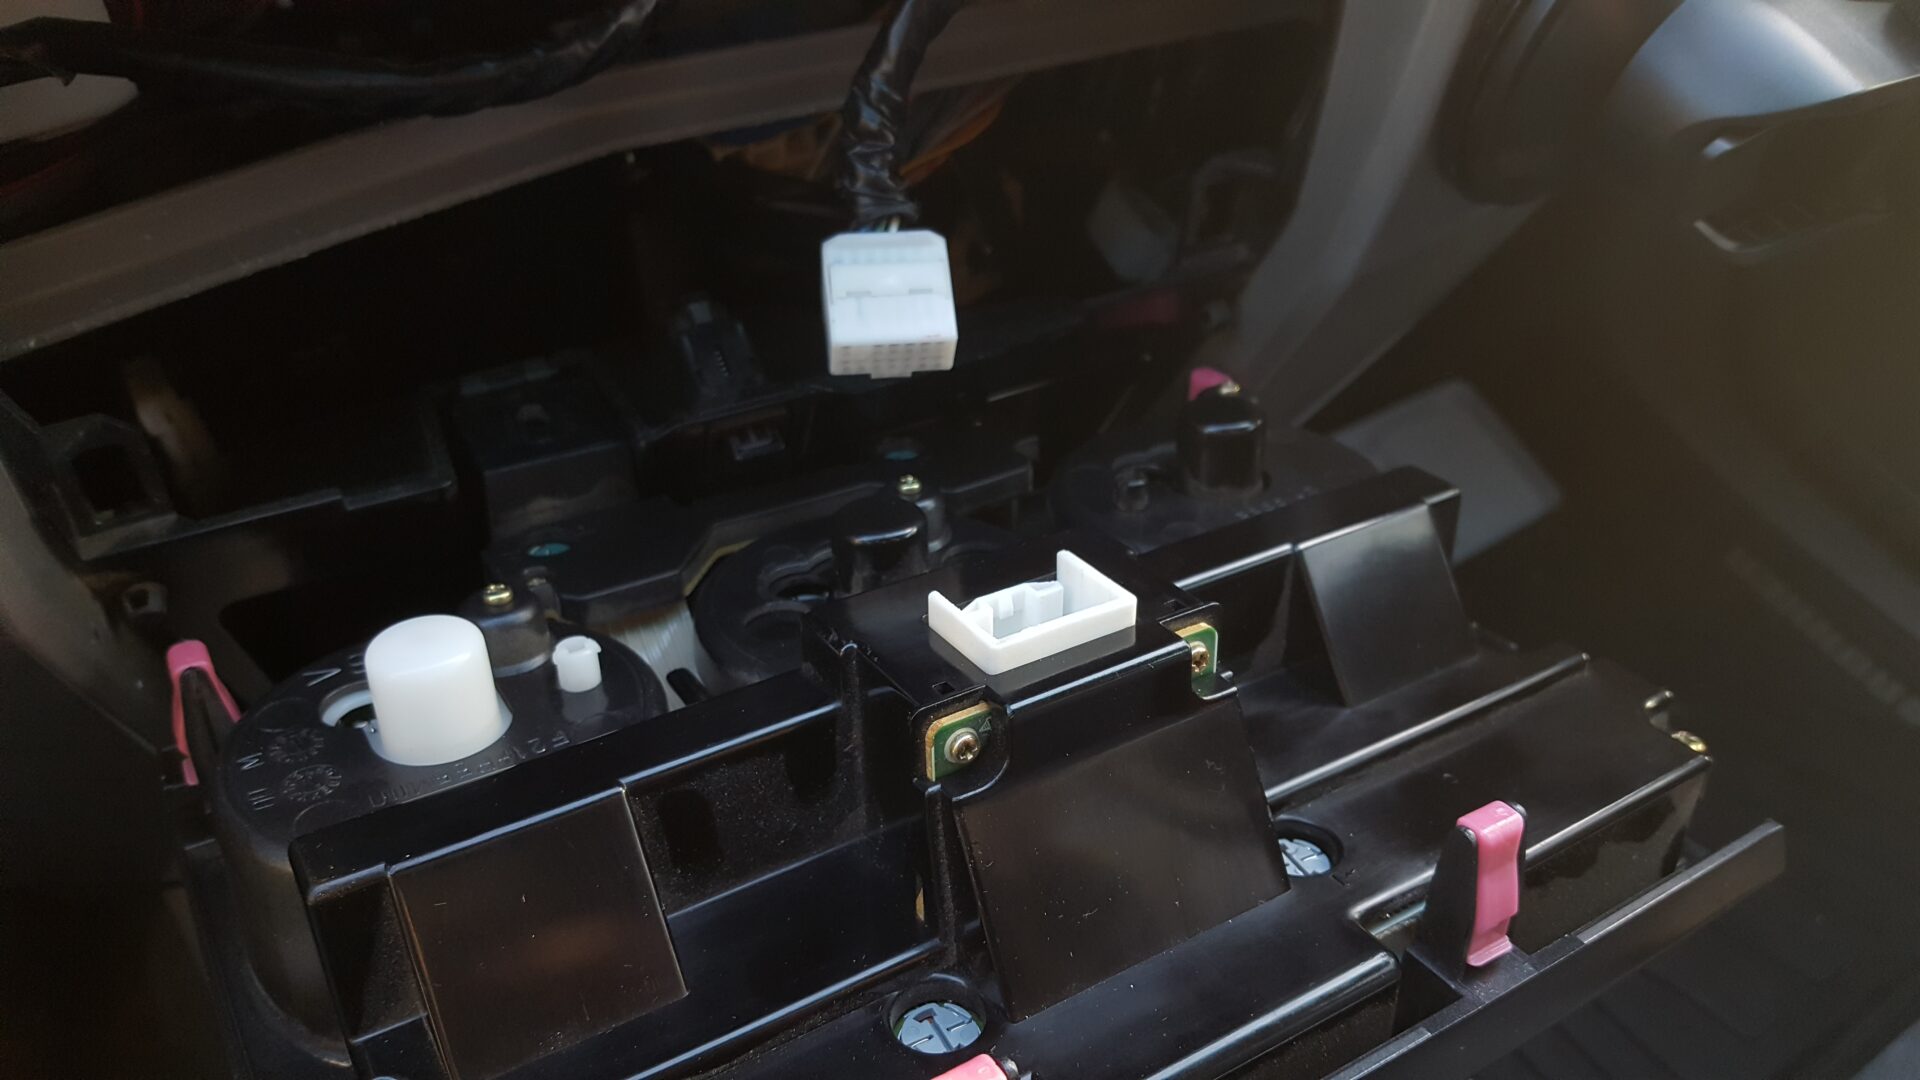
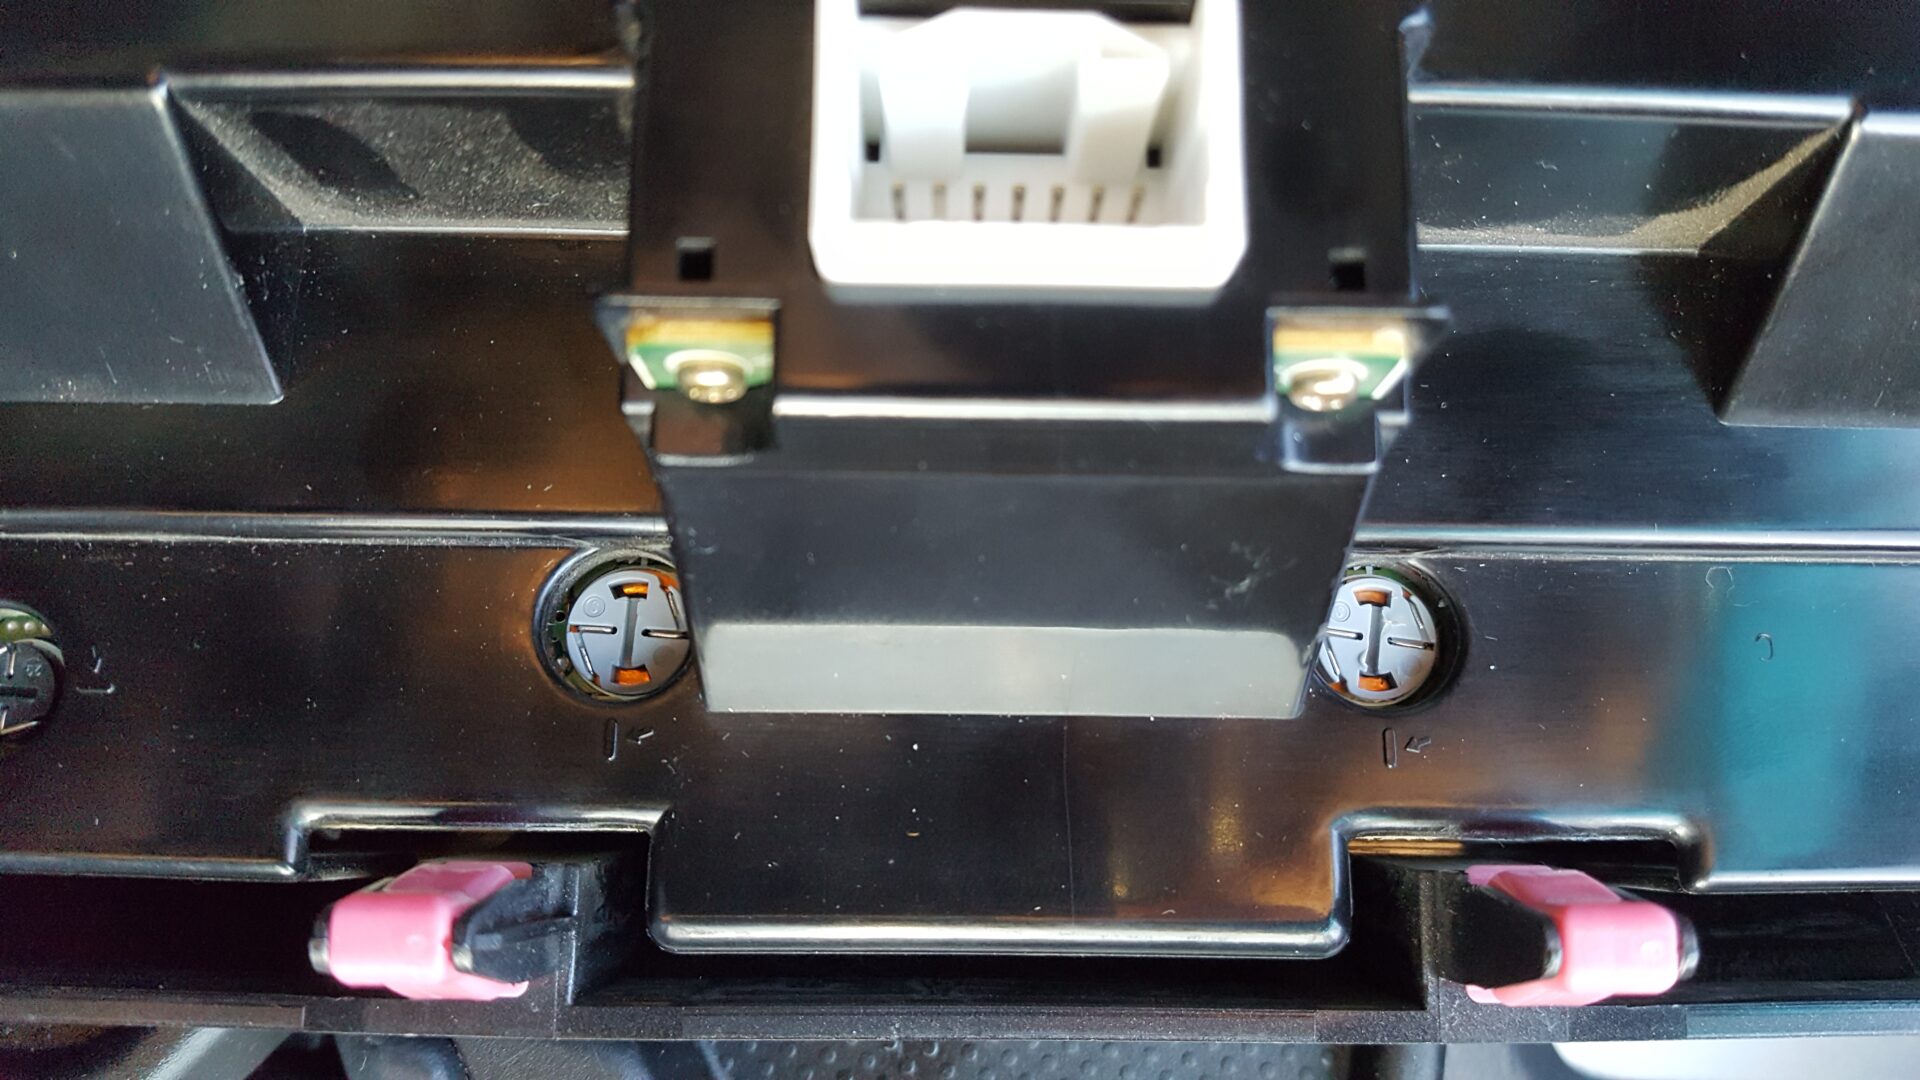
With access to the back of the unit, you’ll have access to all of the bulbs that may need to be replaced.

Using a flat head screwdriver, insert the flat tip into the back of the bulb holder and turn a quarter-turn counter-clockwise to release it from the unit. You might need to turn the unit upside down afterwards and give it a few light whacks for the bulb to pop out.

Take the new bulbs and insert into the opening, making sure that you line up the tabs of the bulb holder and the unit.
Take the flat head screwdriver again, press down on the bulb into the flat slot, and then screw the bulb clockwise a quarter-turn to lock it in place. The flat slot should line up with the line on the housing when it is tightened and secure.
How to Wire Climate Control Bulbs
If you purchase complete replacements, then it is as simple as remove the existing bulb, install the new bulb, and you’re done. If you opt to save some money by purchasing the bulbs with terminal leads and wiring up the bulbs instead, then you need to take a few more steps.
Take the existing bulb out, and use a thin flat head screwdriver (a knife or blade will probably work too) to insert between the wiring and bulb holder. Then pull or twist the tool so that the lead pulls loose.

You’ll be able to see how the existing wire is wrapped around the bulb holder once you remove it. After the leads are loose, the bulb itself along with the terminal leads is free and you should be able to pull the bulb out freely.

Make sure to remove the small bulb cover from the existing bulb and transfer it over to the new bulb.
Then insert the new bulb with bulb cover into the bulb holder, ensuring that the leads go through the two holes inside of the bulb holder.

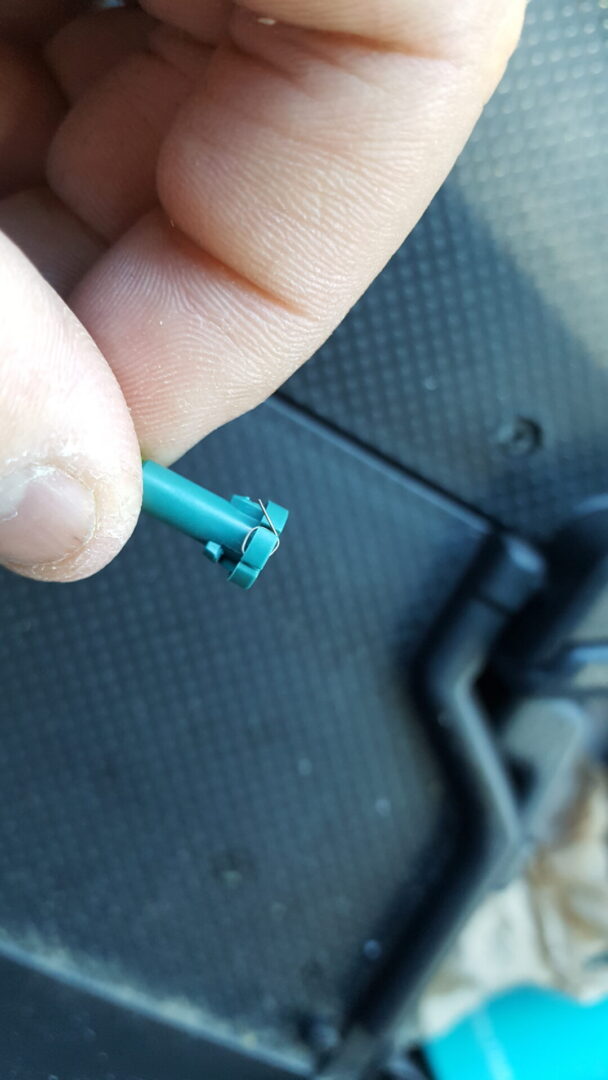
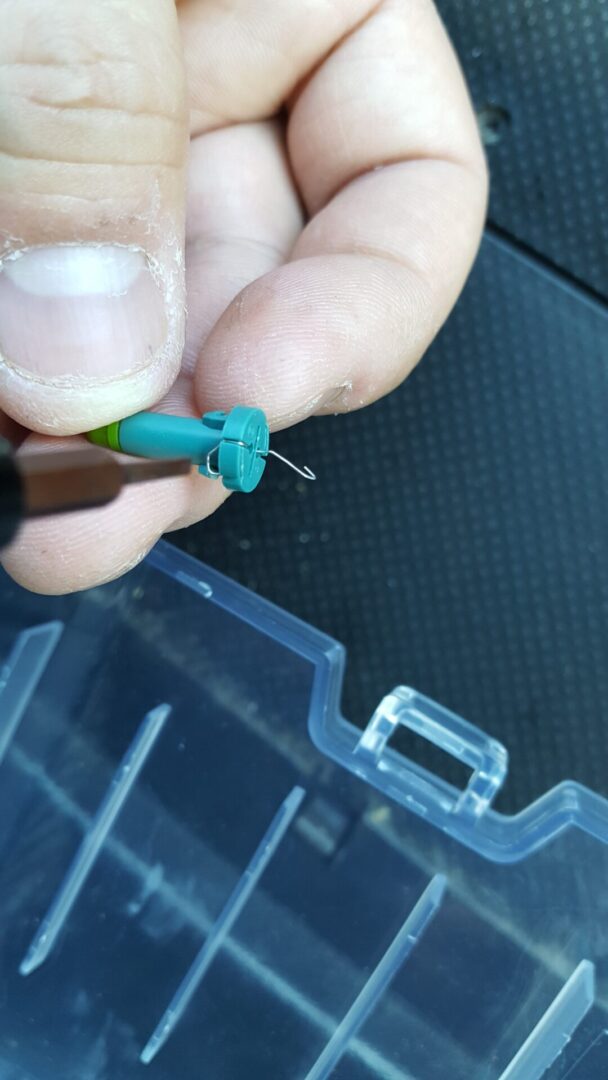
Then, spread the leads apart so that they line up with slots as shown. You can pretty much move these leads by hand, and then use a small/thin flat head screwdriver to press the wire against the bulb holder to ensure it fits as tight as possible.

The two wire leads can then be wrapped around the slots as shown below. You’ll quickly notice that the leads wrap around the bulb holder mainly to provide electrical contact on the bulb side of the holder and to hold it in place. Therefore, it’s not imperative to get this perfect, but it’s best practice to get this wrapped tight enough to be secure.

Some bulbs might require you to trim the leads to fit, but even if they are a little long, it will still do its job. Just use your best judgement; if you find that the leads seem abnormally long after wrapping it around the bulb holder once, then you can trim them to fit.

Replacing the climate control dash light bulbs are very easy. Even wiring new bulbs is easy too and will save you a ton of money. I replaced the two LCD screen panel bulbs with complete bulb replacements and re-wired all new lights on the remaining bulbs all during my 30 minute lunch from work.

I tried to make it very easy on this post to show what parts do what and what parts would be needed to do this job whether you choose to replace the whole bulb and holder or wire them up yourself. Hope this was useful to you if you’re in need to replacing the interior climate control bulbs.
For reference, I’ve also provided the official Toyota diagram of the climate control panel with associated part numbers below.
: 4th Gen Toyota 4Runner")

: 4th Gen Toyota 4Runner")
: 4th Gen Toyota 4Runner")

: 4th Gen Toyota 4Runner")
: 4th Gen Toyota 4Runner")


31 Comments
Your documentation is simply awesome Scott. It is ridiculous how useful this is. Thank you!
I do it to help and especially for comments like these. You’re welcome!
I put this off forever but decided I needed to do a few things to my 2008 4Runner to spruce it up. Been driving at night with none of this stuff working. This was a super easy fix. Instructions here were perfect.
Thanks and glad it helped you out! I was putting off for the longest time too… when you leave it for too long, you start forgetting that certain things are supposed to be lit up at night! =)
Get this man a cape! He is our hero!
Lol! Very much appreciate the comment.
GREAT writeup, simple yet detailed, Love it, Thank you for sharing.
Thank you! I appreciate the kind words.
Scott, I’ve replaced my climate control bulbs in the past and just reviewed your excellent instructions as a refresher since I think I’ve got one out and am about to do it again. I’m not sure, however, because on the air volume control on the left that has buttons for Off, Low, small dot, large dot, and High, the arrows at the perimeter of the buttons all light when the button is selected. It’s the words and symbols that don’t light. Since the arrows light, doesn’t this mean the bulb works and perhaps there’s a wiring issue?
Hi Kristin! I believe the little arrows are soldered on LED’s, so they are independent from the bulbs that we are talking about and what the post refers to. If you replace the bulb, it should take care of the fan speed illumination. Thanks for referring to the site again. Please let me know if you still have any questions.
I have the same problem. Did you find the fix?
This is VERY HELPFUL information. Thank you so much for posting!
You’re welcome! I’m so glad to have been able to help.
Have you ever replaced the standard bulbs with LED’s? Would sure like some parts numbers and how many for the LED’s. I think I have looked everywhere but the right place. Thanks!
Hi David, I never did replace them with LED’s. I’ve always liked OEM lighting on the 4Runner; I didn’t want anything too bright that would distract me from the road as I feel LED lighting can be. I don’t have my 4Runner anymore, but if I did and it wasn’t my daily driver, I would consider doing it.
I normally write these guides with a full set of photos to help guide the reader, so I could write something but it wouldn’t be very helpful without photos along the way. I know a ton of people have done it before, so you may want to try searching the T4R forums to see if you can find anything. Good luck!
Thank you. This article was very helpful!
You’re welcome! So glad it helped you.
Thank you for this incredibly useful article! I am another who has put off replacing lamps because of the need to look up part numbers as much as anything. You provide it all right here. The LCDs are the only ones completely out in my case, but I’ll probably replace everything, going with bulbs-only for everything except the LCDs, as you recommend. Thanks again!
You are welcome! Yes, the information is always out there but not always easily digestible. Glad this helped you!
How do you replace the little lights where it displays “passenger airbag”
I’m not sure, although I wouldn’t be surprised if it is one of those little LEDs you have solder behind it.
Angels like you make the world go around. You are da man! Thanks for taking the time to make this.
At least for those in the 4Runner realm. You’re welcome!
Thanks for the info Scott. very helpful
You’re welcome!
Compiling this information would have taken me countless hours. Thank you for putting everything in one location. Your website is easy enough to find on the Internet if you broaden the search.
As for destroying the plastic base, you might mention that years of heat (halogen lamps burn hot) will make the plastic brittle. Oftentimes skilled technicians, including those who are a paragon of patients, simply don’t stand a chance of success.
You’re welcome, I’m glad I could help. That makes me feel a bit better… =)
Don’t know if you’re still taking posts. Awesome job on the dash light replacement. 21 year old 4Runner. 390,000 miles. Thank you. Bought time I did this.
You’re welcome Frank! Now, THAT is is a high mileage runner, almost there to 400k!
Scott – amazing tutorial! Just changed the bulbs in my ‘08 4Runner in less than 30 minutes, just like you said, and saved a ton of money with the DIY. Super easy. Thank you!!
You’re welcome!!