 – 2nd Gen Acura CL Type-S")
When you make purchases through links on this site, The Track Ahead may earn an affiliate commission. Also, these posts are based off my own experiences. I am not responsible for any action you take as a result of reading this. Learn More
Crank No Start
During the COVID Pandemic, my Acura CL-S has been sitting a lot more than usual without the opportunity for me to take it out for a long commute to work to get the battery properly re-charged. There was a long stretch of time where the car sat a little too long and the battery depleted completely. After I fully charged my battery with a battery tender, I tried starting up the car again and it would not start. It would crank, but it just wouldn’t turn over.
When you run into a problem with a vehicle not starting up, you must think about the five things that you’ll need for an engine to start up properly. You need air, fuel, and spark as the typical items on the checklist to look for, but you also need to look at compression and ignition timing as well. However, it wasn’t like my car was sitting for years, or something significant happened that caused it to not start. It simply happened right after I had a dead battery one time.
That led me to believe that there was something else that was going on that may be related to perhaps a common problem on the Acura CL or something that I was just missing. I started making a list of the easy things that I might want to look at before I start pulling things out of the engine bay to start checking.
Troubleshooting Crank No Start
After doing a quick search online, I found two main things that would potentially be the cause of the my car not starting. One issue had to do with the immobilizer on the vehicle. The other was a common issue with many Acuras, Hondas, and other makes that use a relay called the PGM-FI relay.
Checking the Immobilizer
The immobilizer on the vehicle ensures that the key being used to start the car is the one that has been programmed to the ECU. If perhaps the key was duplicated, it could not simply be used on the car to start it up.
In some vehicles that have the immobilizer security function, the car may crank, but will not start. Other vehicles may not even crank if the correct key is not used.
Finally, there is a green light indicator on the instrument cluster that lights up when you insert your car key. To check if your key is programmed to the Acura CL’s ECU, the green light will turn off shortly after you insert your key. If the key inserted is not programmed to the ECU, then the green light will continuously flash.
When I inserted my key, the immobilizer light turned on, and then turned off after a few seconds. This indicated that my key was correctly programmed to the car’s ECU. So this probably wasn’t the issue; I went on to the PGM-FI relay.
PGM-FI Relay
The PGM-FI (programmed fuel injection) relay is used on many vehicles made by Honda and Acura. This relay is comprised of two individual relays that essentially supplies power to the ECU, fuel injectors, fuel pump.
The common issue that is identified on the PGM-FI relay is that the solder joints are known to fail over time. The regular cycles of heat and old eventually cause the solder to crack (sometimes almost invisible to the naked eye), which then cause a disconnection or intermittent connection on the relay.

After looking at electrical diagrams and understanding better how the PGM-FI relay operates, I checked several related fuses as easy things to check off my list. Those fuses checked out good. I also realized that when sitting in the car and turning the key to the ignition on position, I did not hear any noise. Typically the vehicle should make a humming or buzzing noise, which would be the fuel pump priming the fuel system. This led me to believe even more that it was the PGM-FI relay that was causing the problem of the fuel pump not turning on when the ignition was switched on.
Tools/Materials
The main things needed to inspect the PGM-FI relay are a typical mechanics tool set and a multimeter and some extra wire leads to perform testing of the PGM-FI relay.
Mechanics Tool Set
Most folks will have a set of tools that would normally be found in a mechanics tool set. In order to remove various interior parts to get access to the relay, you’ll need a socket set and a Phillips head screwdriver and a flat head screwdriver. If you are in need of a mechanics tool set or need some help choosing the right one for you, check out this article.
Multimeter
To troubleshoot the PGM-FI relay, you’ll need to go through a series of tests involving checking for resistance and voltage across different leads. A multimeter is a must for performing these tests.
AstroAI Digital Multimeter with Ohm Volt Amp and Diode Voltage Tester Meter Continuity Test
Extra Leads for Testing Relay
The multimeter will usually come with two leads, but you will need a set of extra leads with connectors to supply battery power to the relay for testing.
AstroAI 8Pcs Multimeter Test Leads Kit,Digital Multimeter
Location of the PGM-FI Relay in the Acura CL-S
The PGM-FI relay is located on the driver’s side below the steering column. Begin by removing the side dashboard trim piece by prying this piece off with your hands.

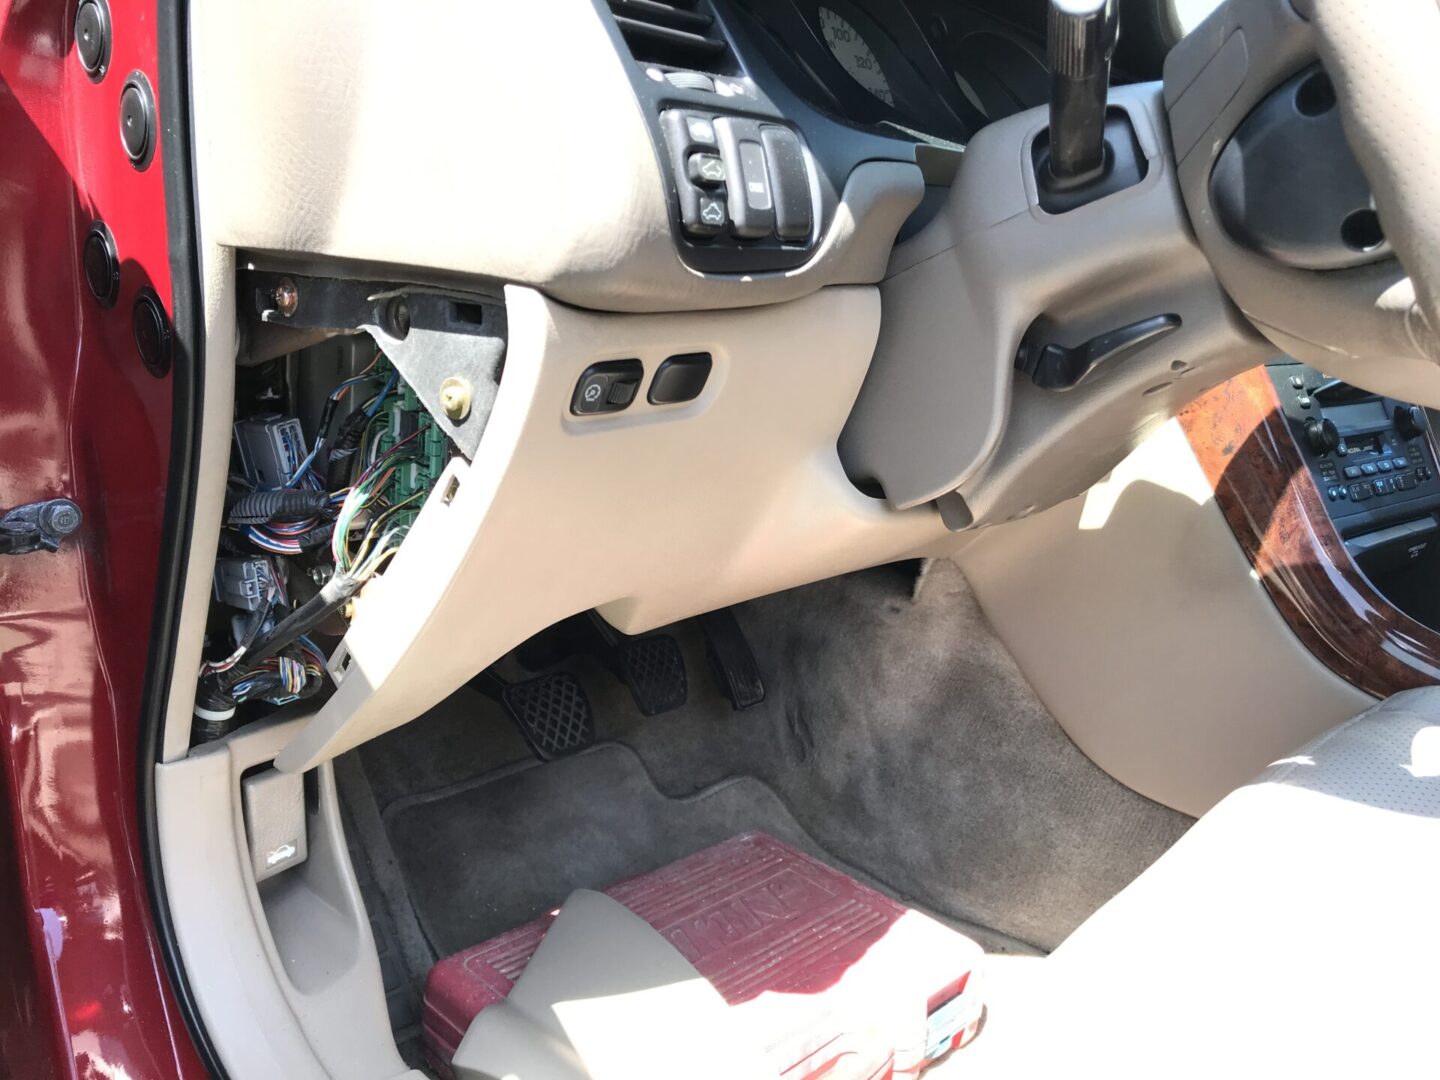
Remove the bottom Phillips head screw that holds the lower panel to the vehicle. Be careful of the connector that is attached for the instrument panel brightness. Disconnect this connector before continuing.

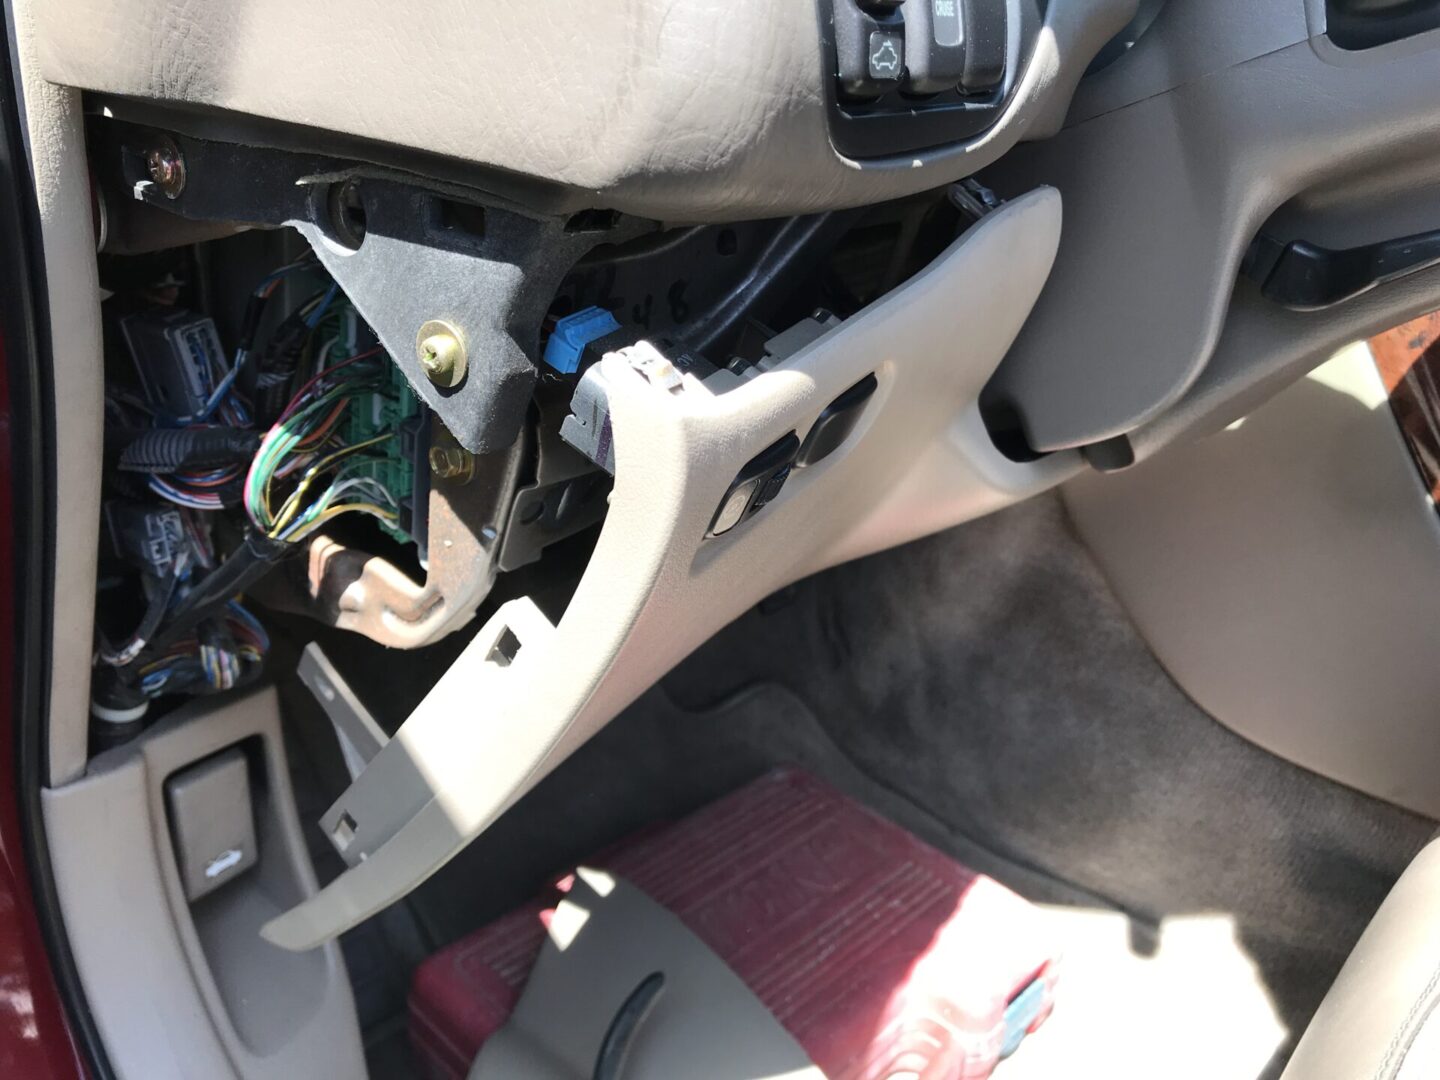
The rest of the lower panel is secured with clips, so you will be able to pull the lower panel off with your hands. Once removed, it can be moved out of the way.
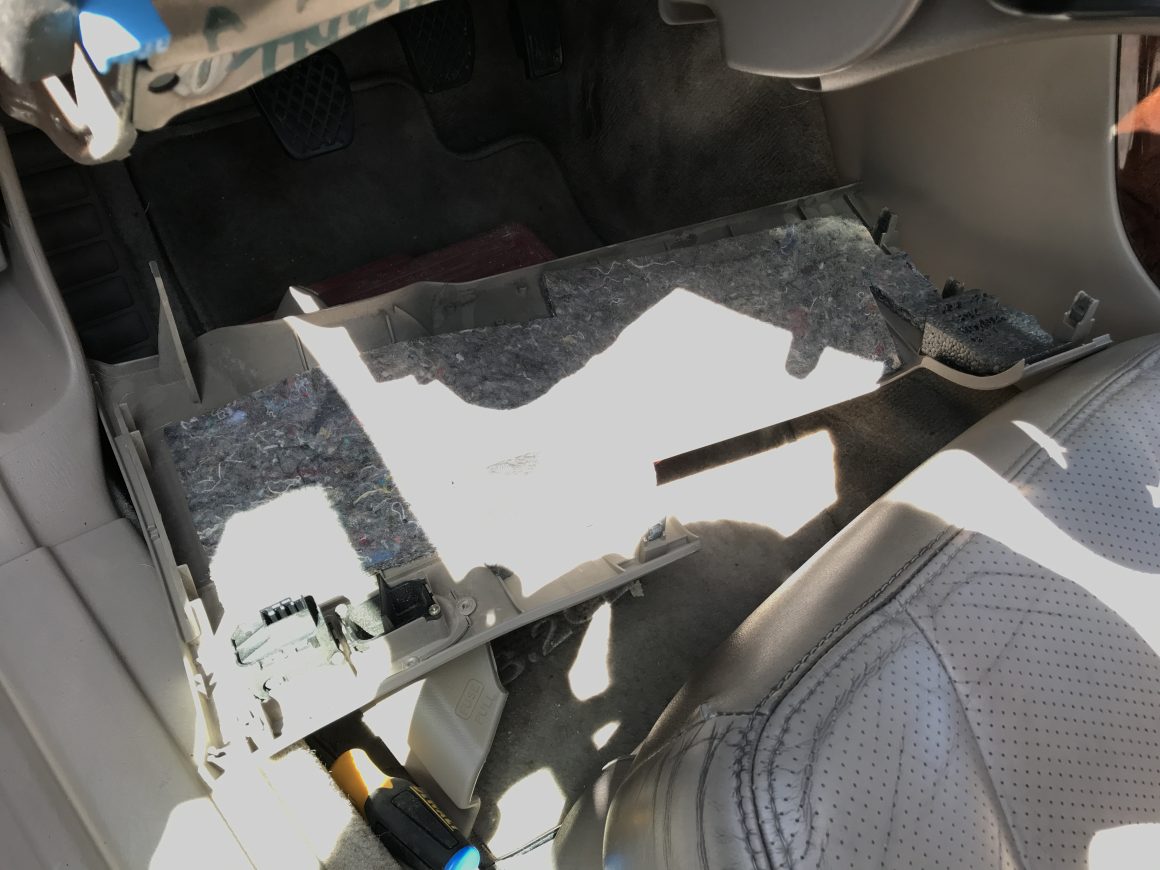
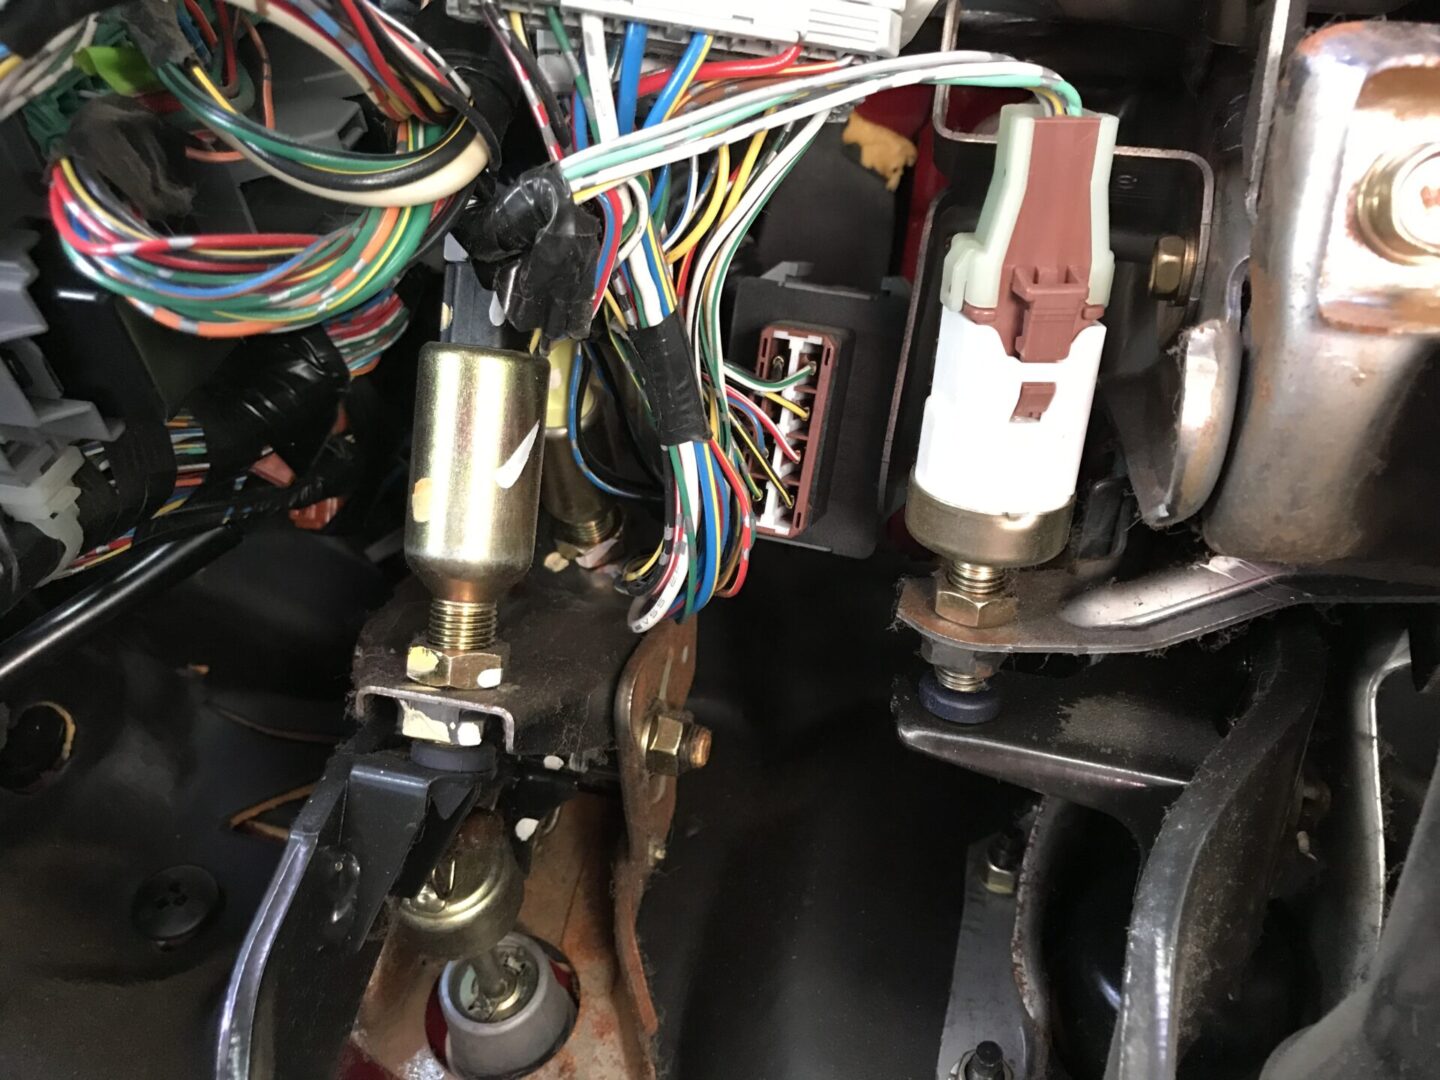
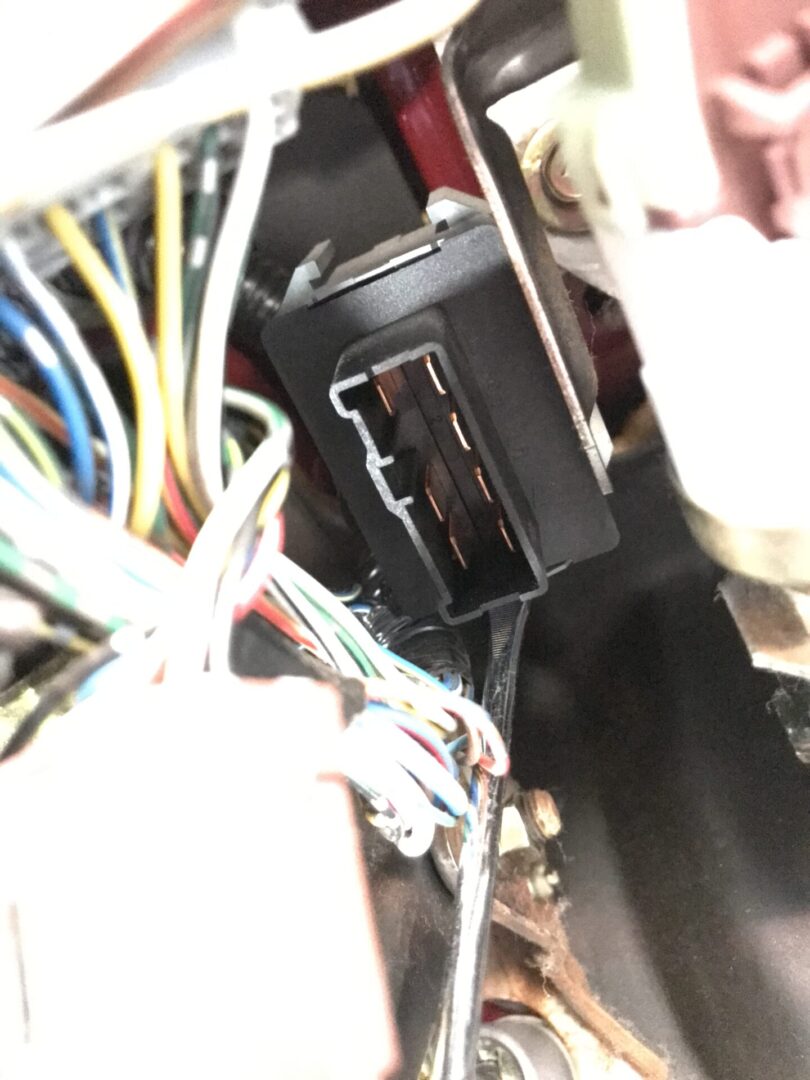
Now, you can move the drivers seat back, and lay down into the driver’s side footwell. Look up at the steering column and you will see the following brown connector. This brown connector plugs into the PGM-FI relay. Disconnect the connector.
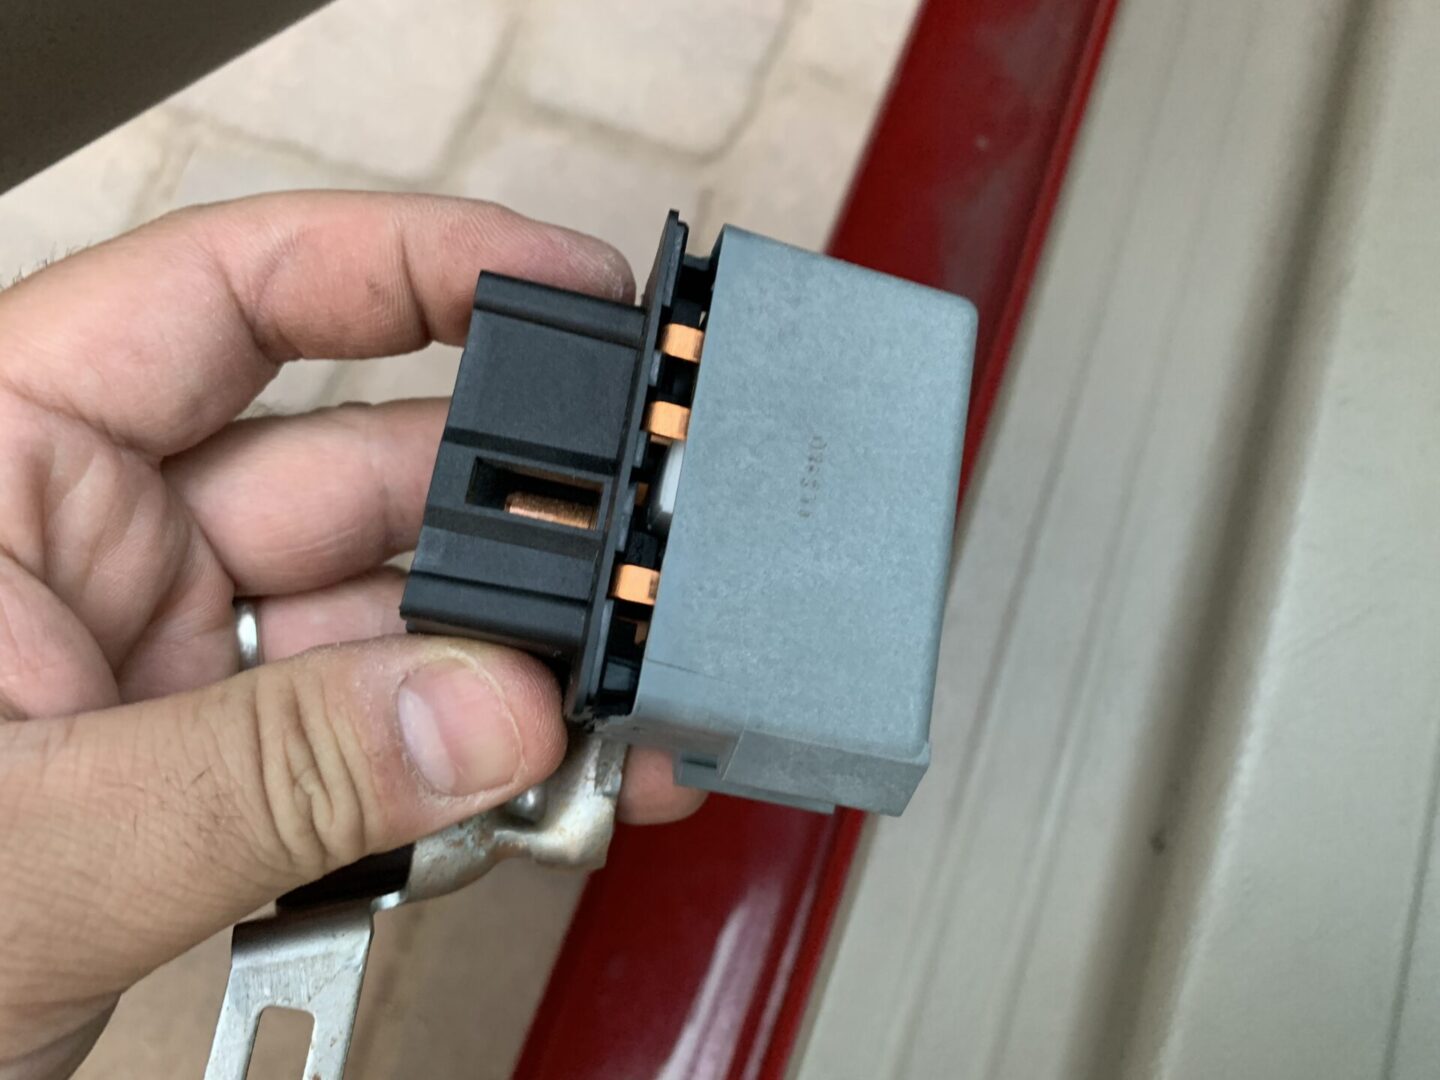
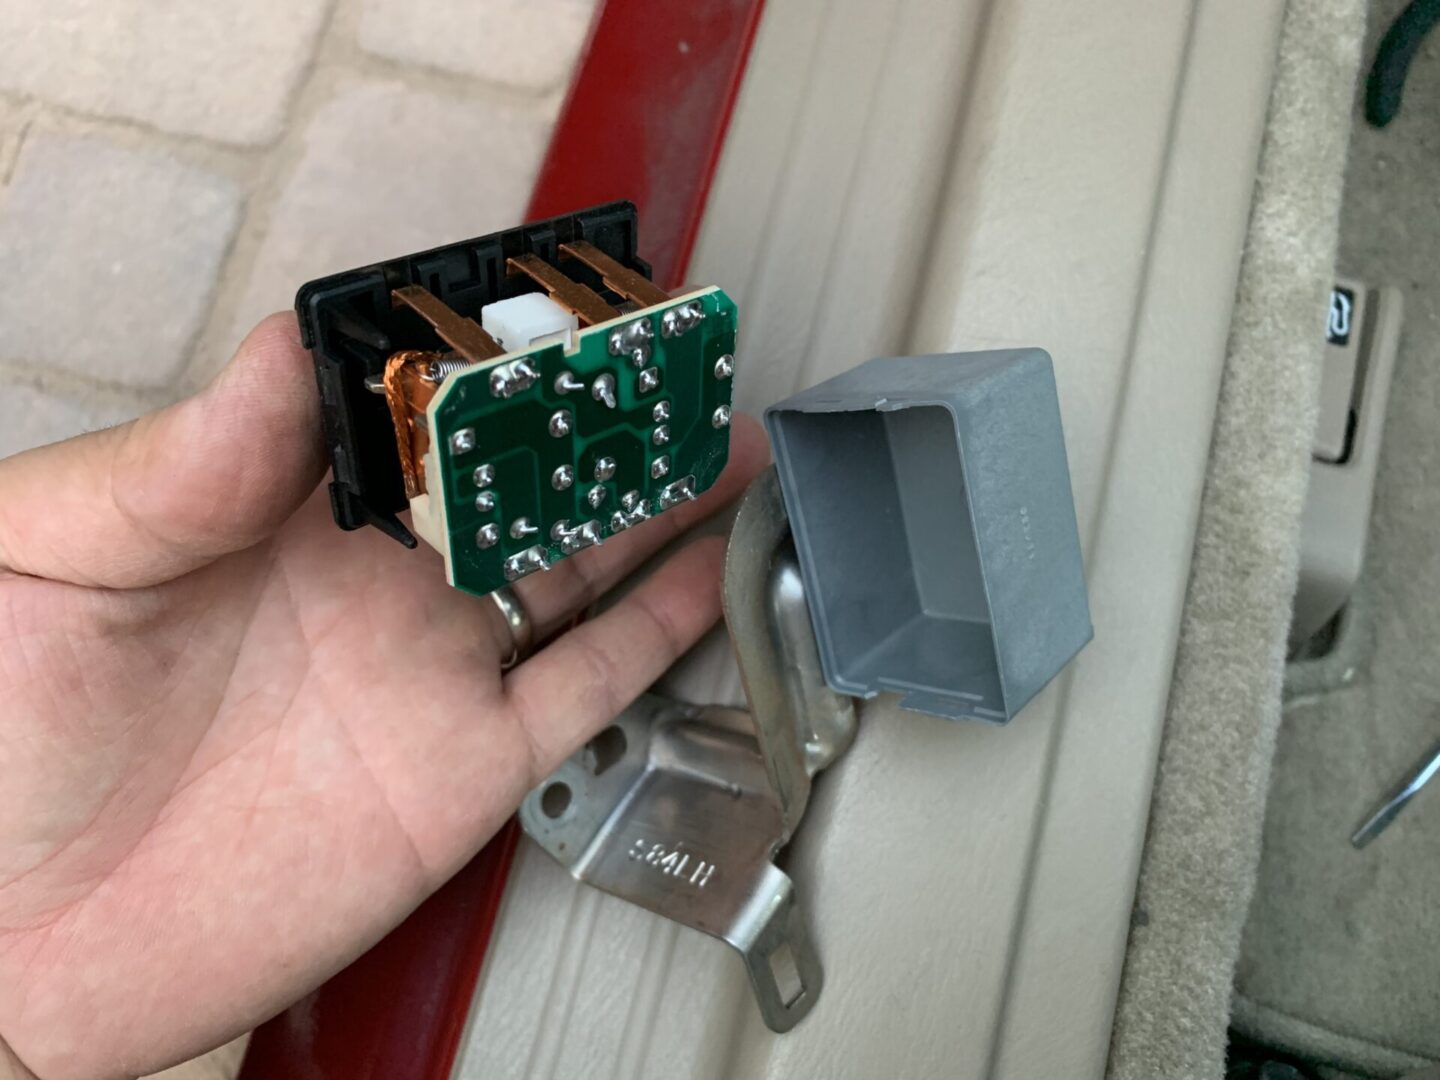
You can then either remove the entire PGM-FI relay (the black and grey casing) by removing the 10mm nut to the bracket that holds it in place, or you can use a flat head screwdriver to wedge between the black portion (PGM-FI relay) and the grey outer casing to separate them.

If you choose to remove the entire bracket and relay, you can separate them from one another later.
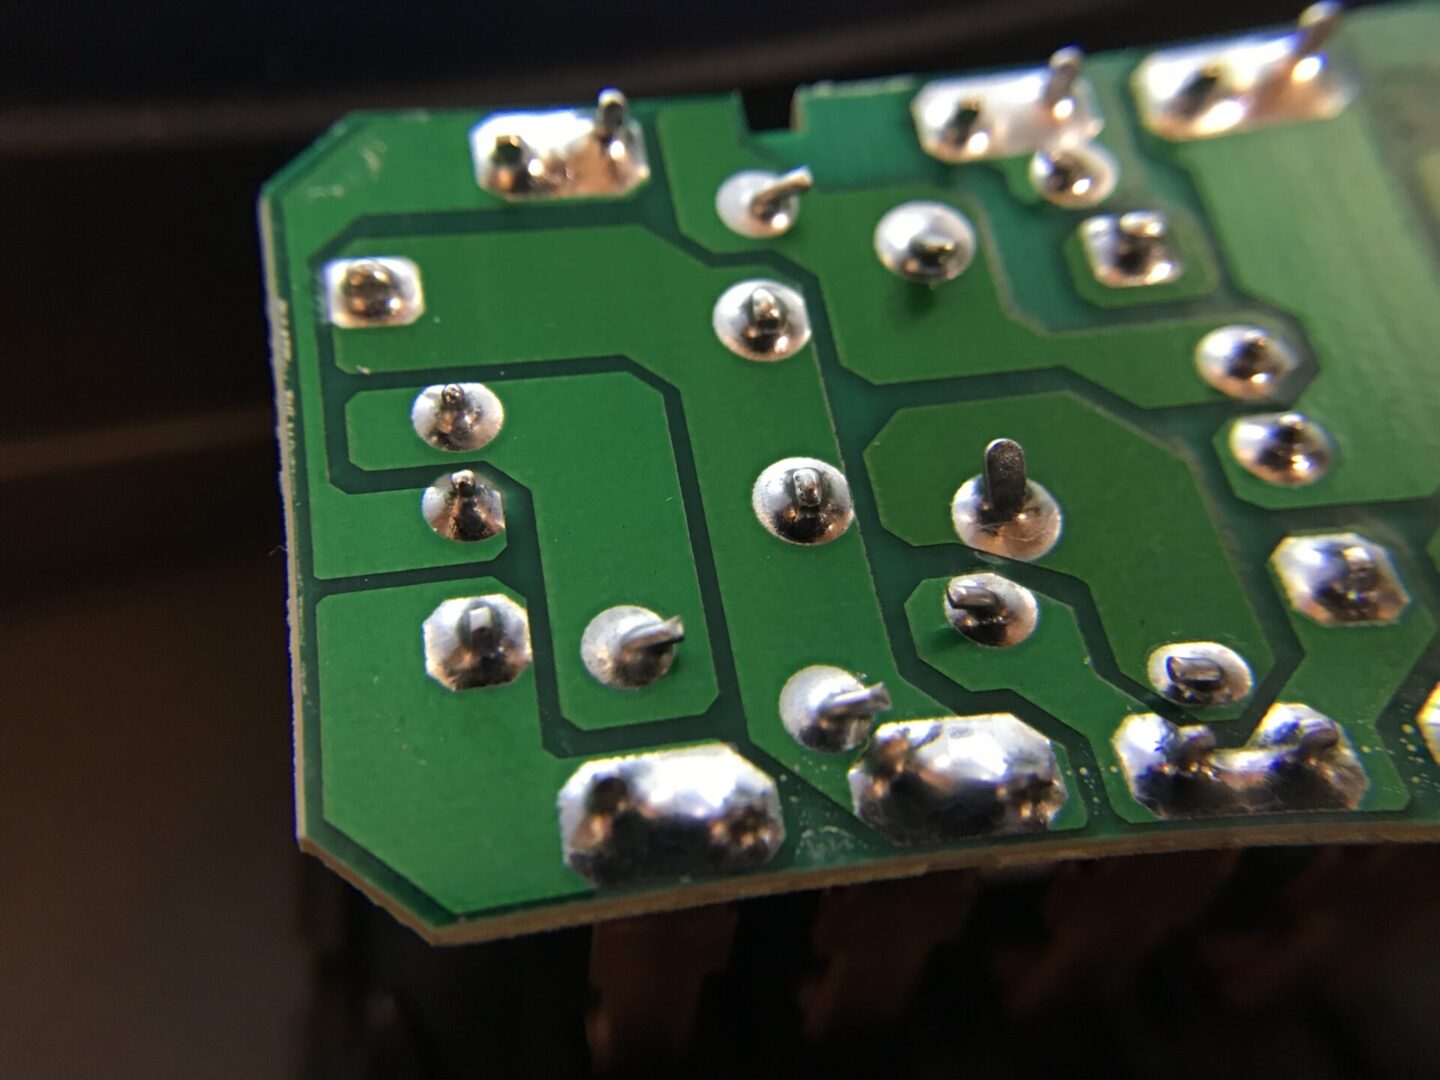
PGM-FI Relay Solder Failure
The most common failure of the PGM-FI relay is caused by cracks of the solder around the following connections. Because of these cracks, the connections become either completely disconnected or partially disconnected. Either way, it causes issues with the connections on this critical relay since the PGM-FI relay plays a big part in starting your vehicle.
I inspected solder joints on my relay and could not find any problems with the soldered connections. I took photos with a macro lens (shown below) and still could not see any compromised solder joints. If your PGM-FI relay indeed had those cracks that are oh so common on our Hondas and Acuras, then you would need to identify these joints and re-solder the connections.
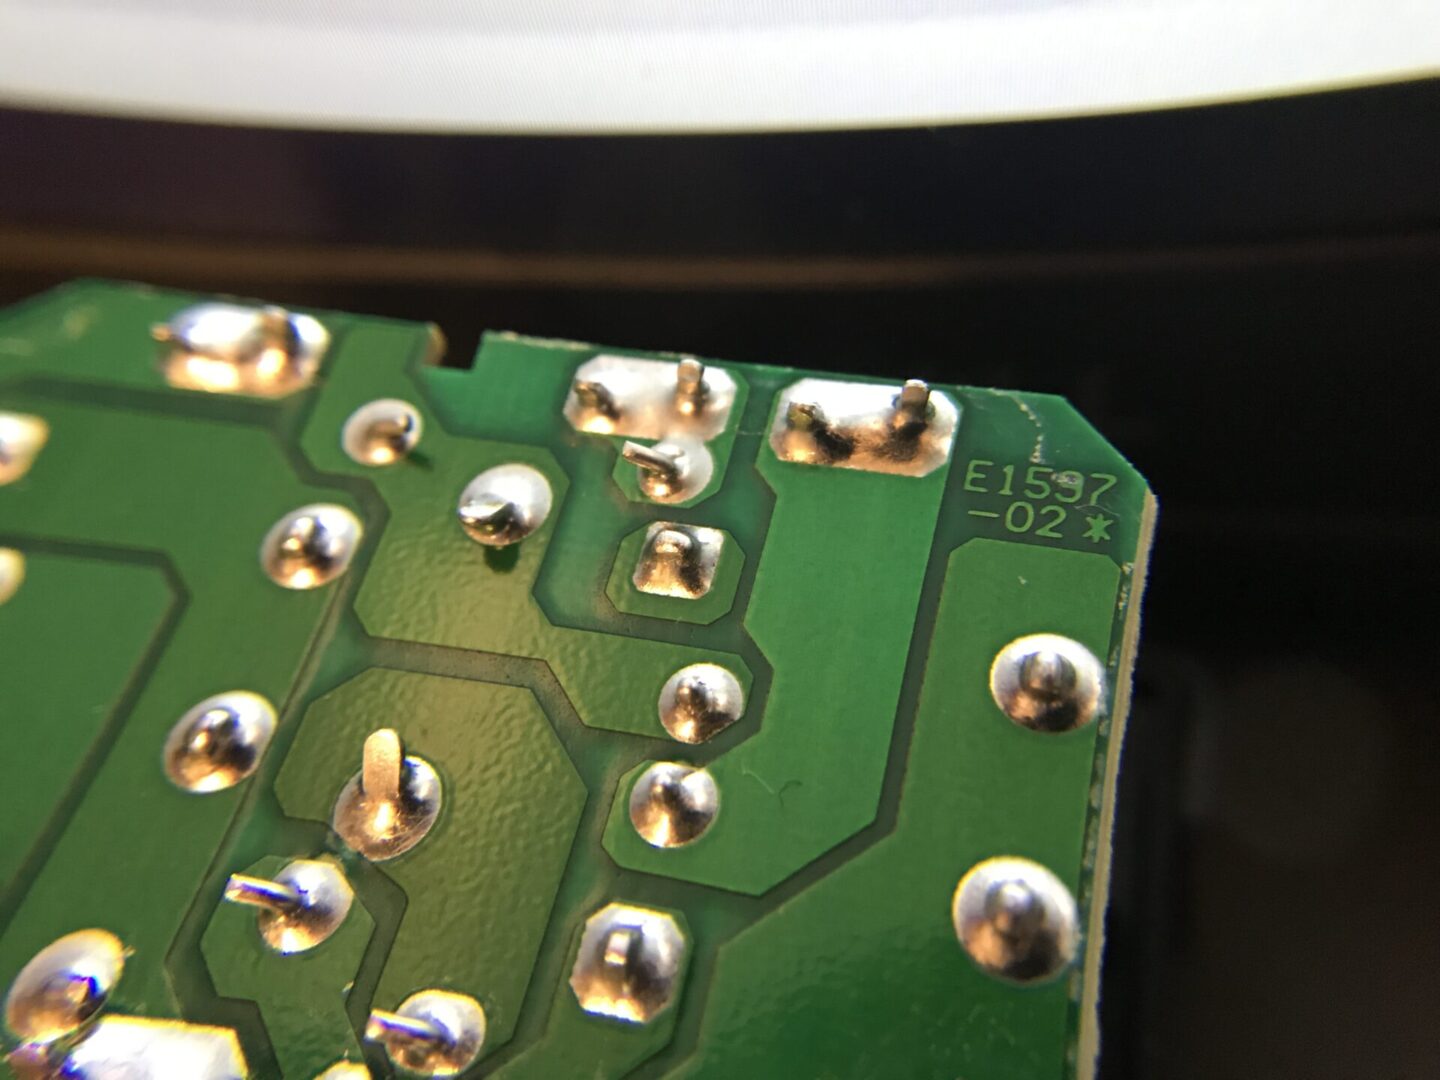

If you are able to identify solder joint failure, then repairing them should address the connection issue. If you don’t see any failure like I encountered, then you need to proceed with testing the relay. It is said that some solder joint failure is so small that you almost can’t see it with the naked eye. If that is the case, then testing the PGM-FI relay will confirm that.
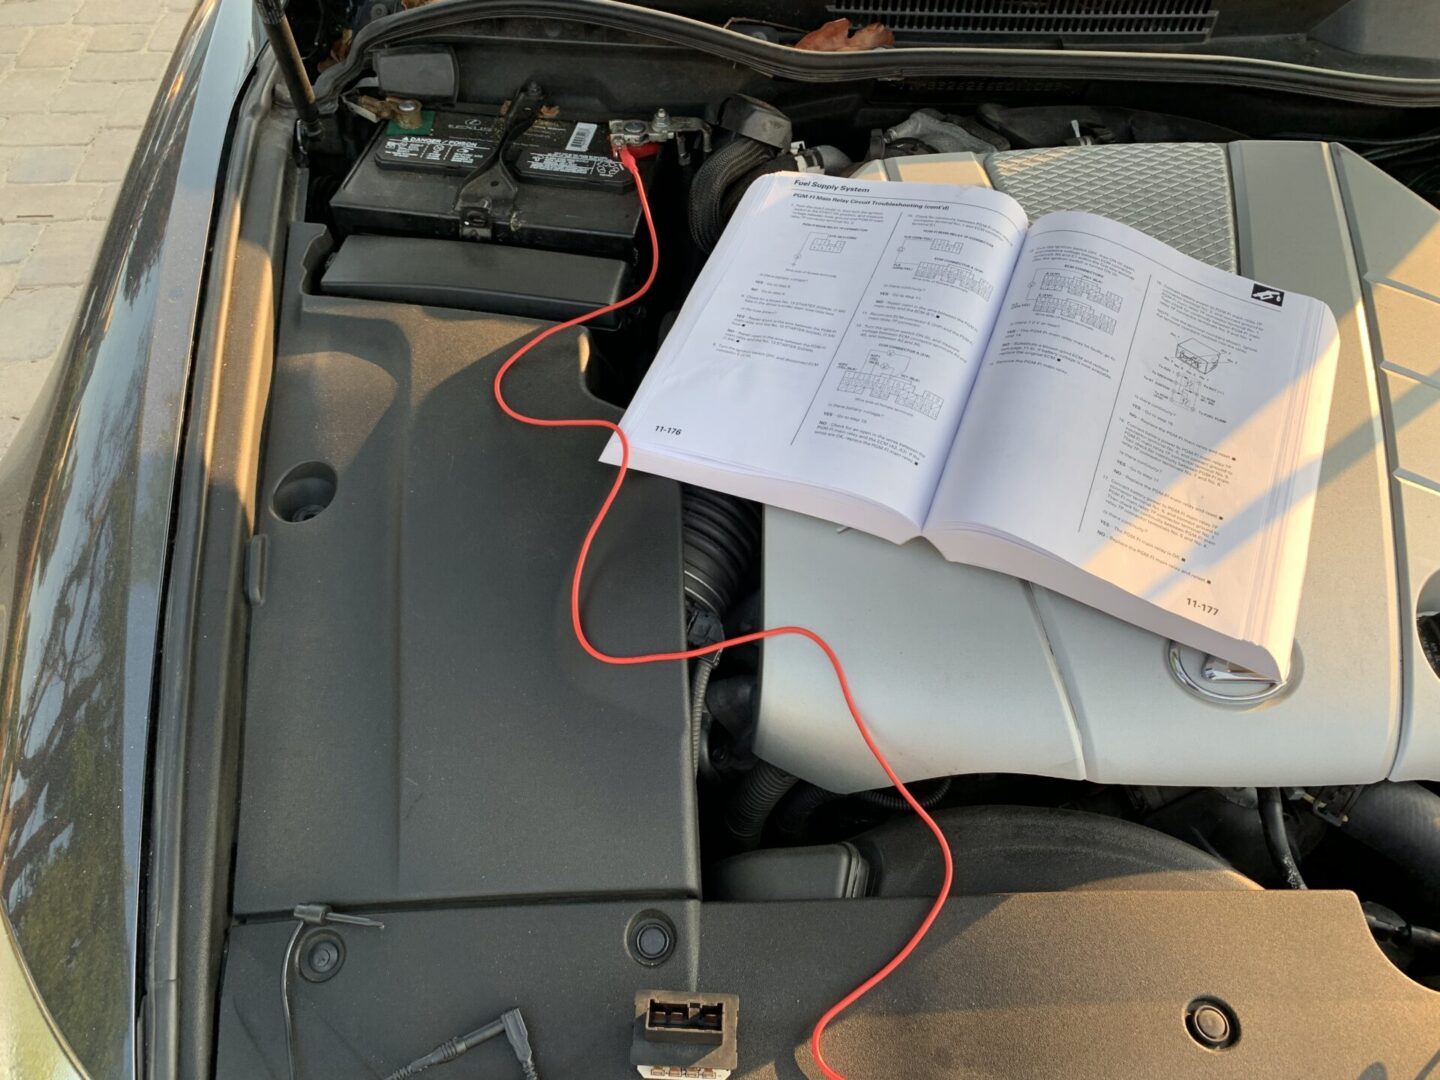
Testing the PGM-FI Relay
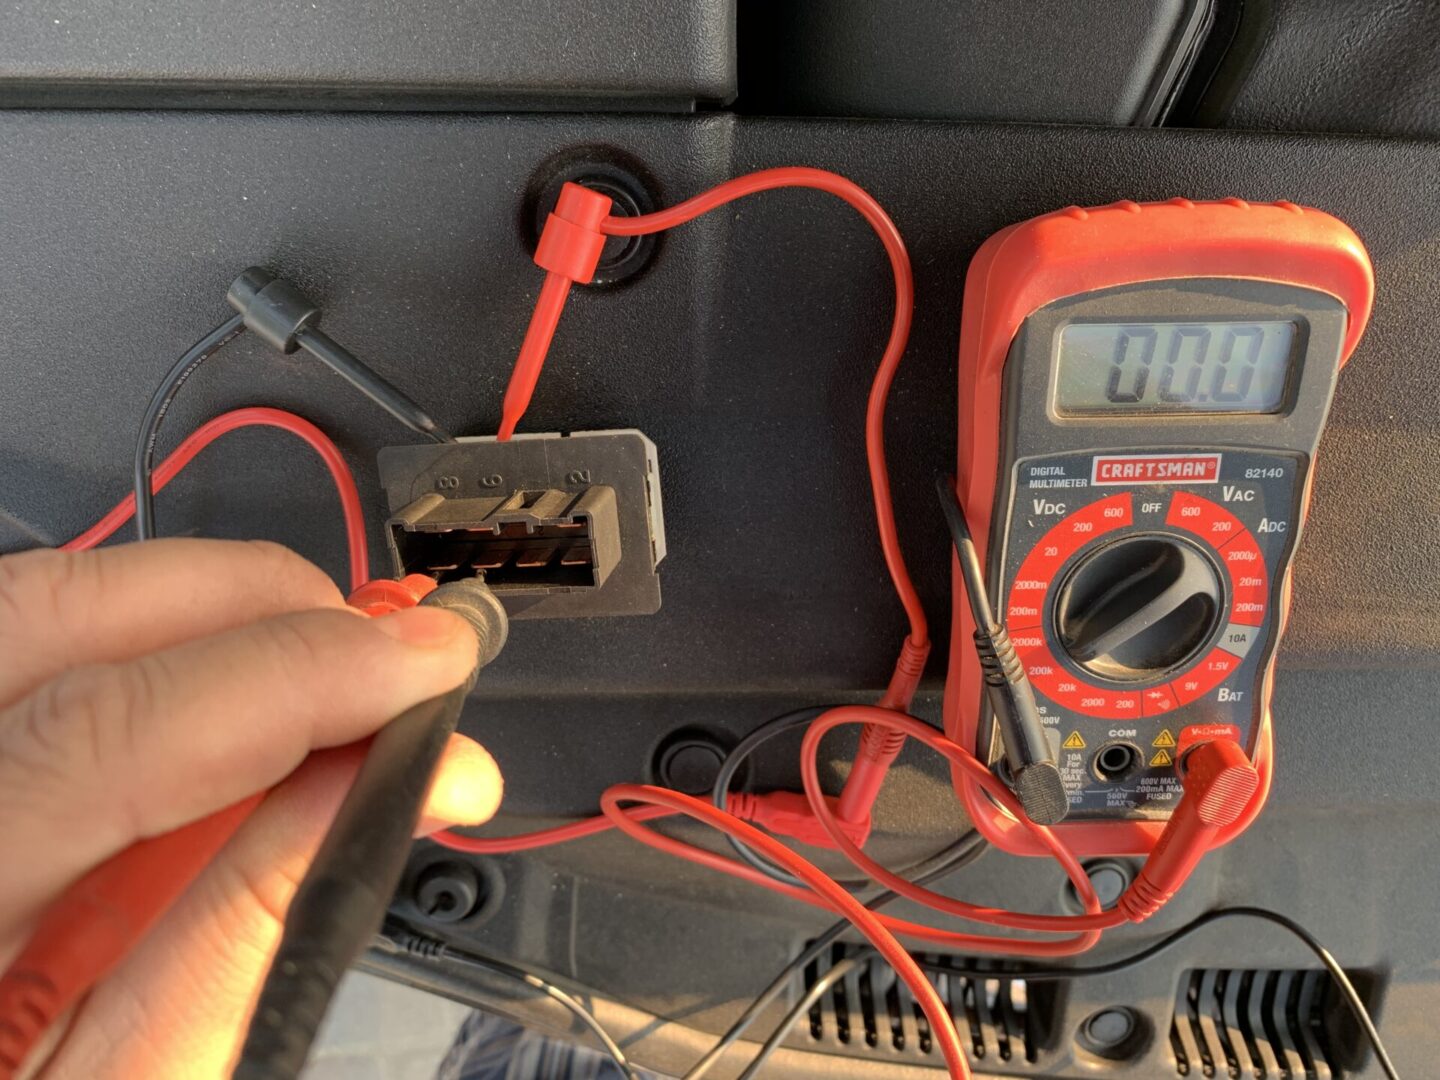
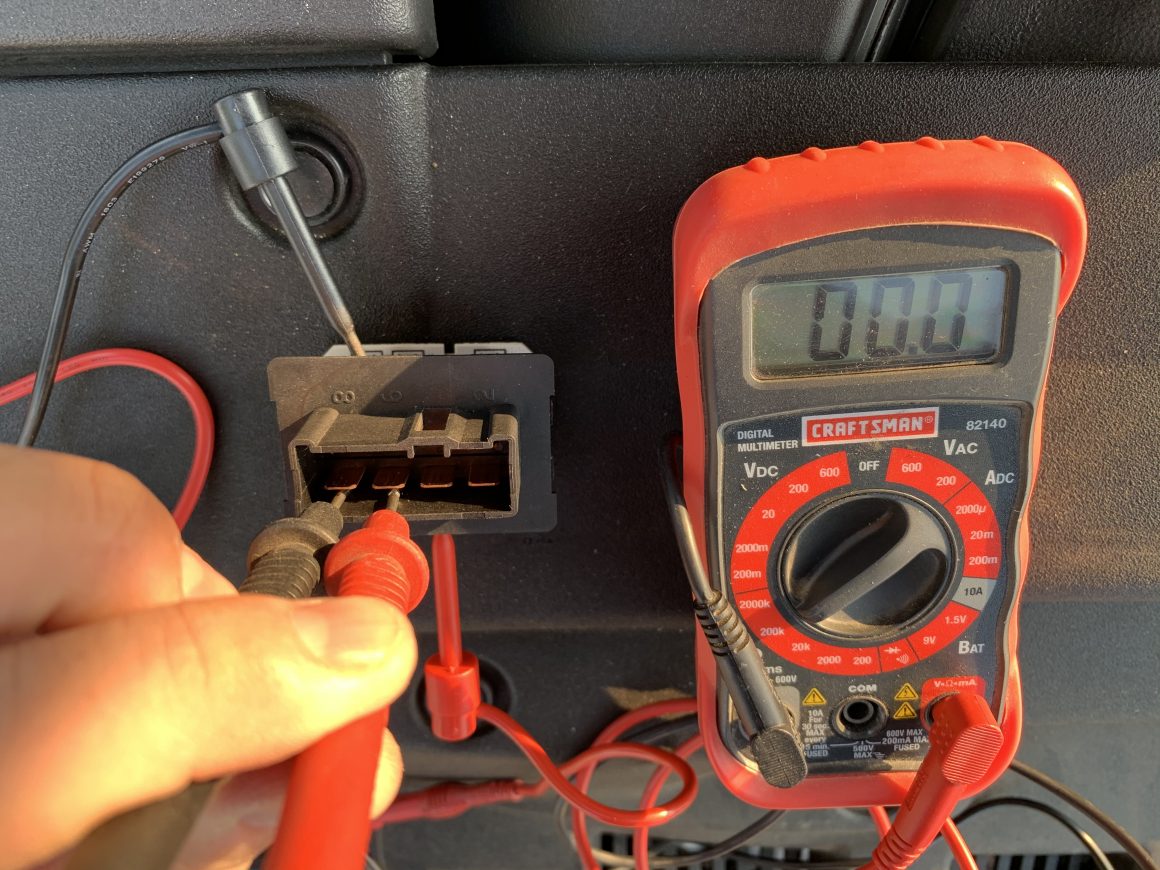
There’s a long list of troubleshooting procedures to determine issues related to the circuitry of the PGM-FI relay, but to test the relay itself, there are several steps to do so. Have the extra set of leads and connections ready so that you can connect battery power (red lead below) and ground (black lead below) to the PGM-FI relay. I used a bolt on the engine block as a ground. This is all part of the testing process, including the need for a multimeter to test voltage and resistance.

An important thing to keep in mind is that the numbers that are molded into the relay (the numbers that show up next to each lead on the relay itself) do not match the numbers that the service manual references.
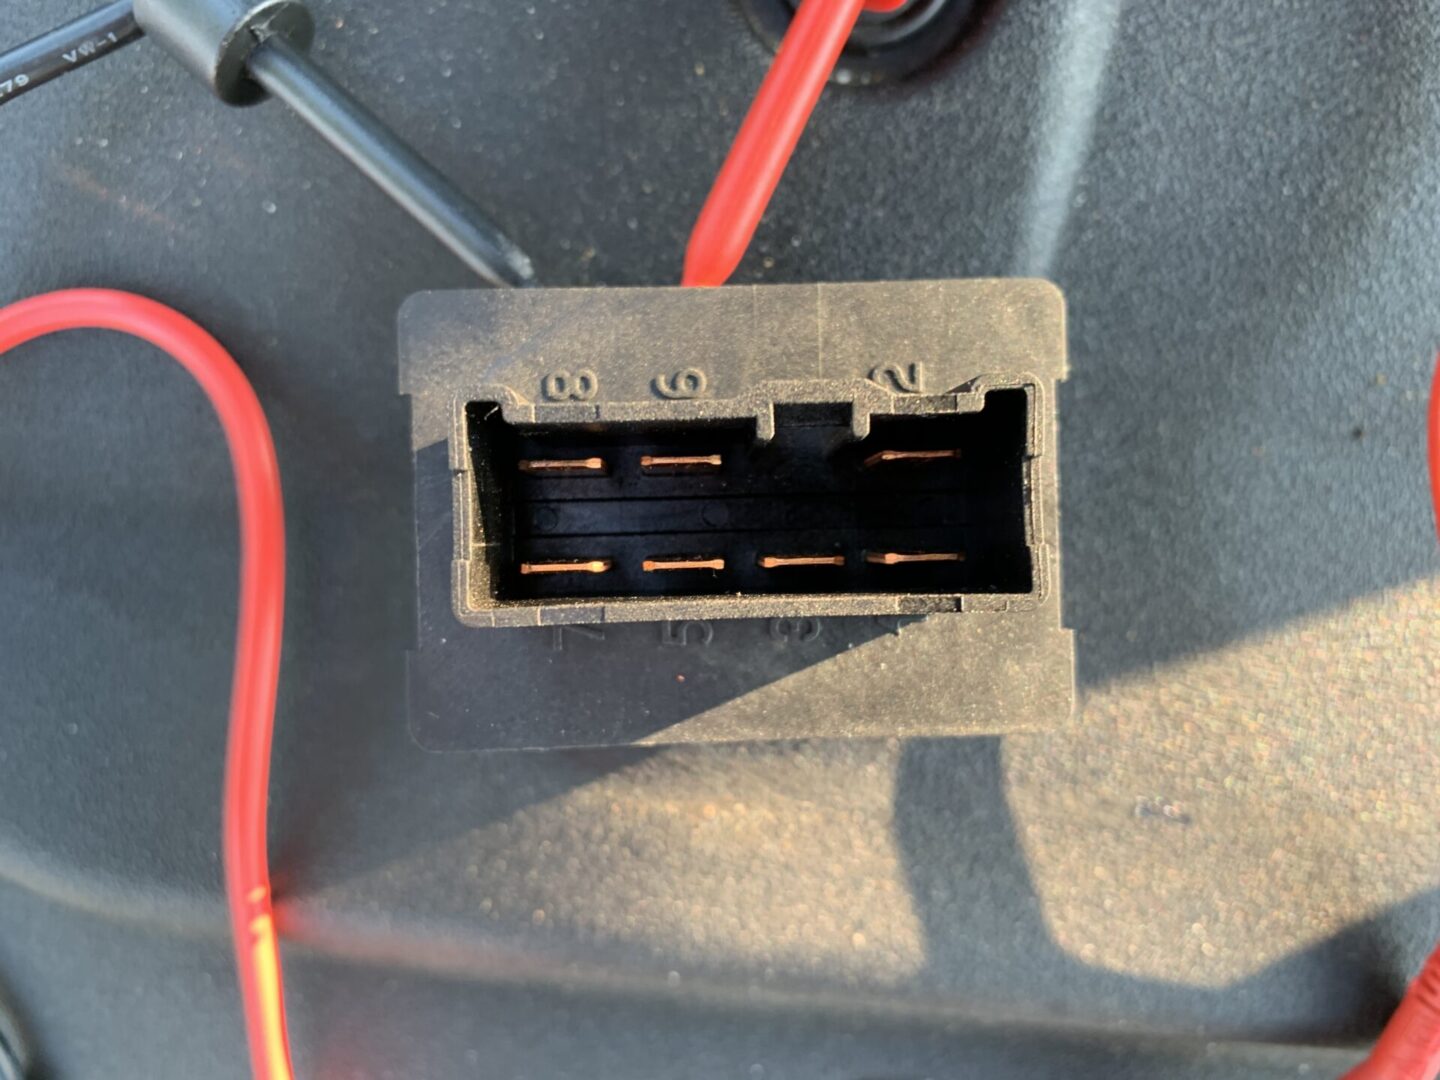
The numbers above, do not correspond to the numbers that the service manual uses below. However, when following numbering convention for testing the leads, follow the numbering show in the service manual (below.)
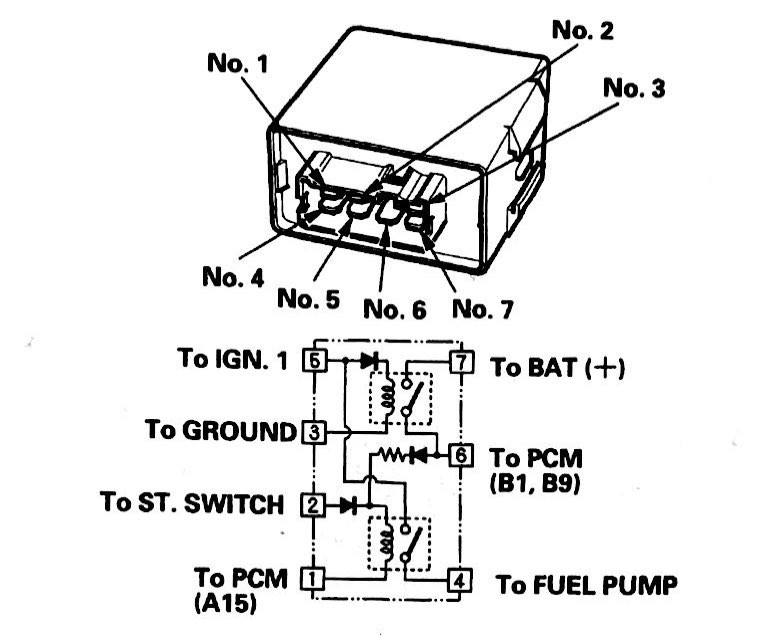
What you are testing for essentially are the relays located within this main relay. By providing a voltage from the battery and allowing for a path to ground, you are activating the relays and testing that the switch is closing. What you will notice when you connect the leads for power during the tests is that the relay will audibly open/close during the testing process.
First Check
Connect battery power to: #2
Connect ground to: #1
Check for continuity (0 ohm resistance) between: #4 and #5
If there is continuity, then continue to the second check. If there is no continuity, then replace the PGM-FI relay.
Second Check
Connect battery power to: #5
Connect ground to: #3
Check for continuity (0 ohm resistance) between: #6 and #7
If there is continuity, then continue to the third check. If there is no continuity, then replace the PGM-FI relay.

Third Check
Connect battery power to: #6
Connect ground to: #1
Check for continuity (resistance) between: #4 and #5
If there is continuity, the PGM-FI relay is working properly. If there is no continuity, then replace the PGM-FI relay.
After performing all three tests, I found that my PGM-FI relay was working properly; it passed every check. If you did not pass any of the tests, you will likely need to double-check your PGM-FI relay solder joints, or replace the relay entirely.
The interesting thing that I noticed was that upon hooking up the leads to the battery and ground for the first time, the switch on the relay was much audibly much louder than the subsequent tests. After I performed all of the tests, re-checked all the solder connections on the PGM-FI relay, I put everything back into my Acura and fired it up one more time.
Believe it or not, the car fired right up. I turned it off and tried again. Without hesitation the car cranked and started. The only logical explanation I could come up with was that the relay was not receiving enough voltage to properly activate the relays within and so the PGM-FI relay was kind of frozen stuck. It wasn’t until I had a fully charged battery and connected it directly to the relay that perhaps the relay switched close/open.
Now, with the car running again after the battery being completely depleted before, I need to make sure I go through a relearn/drive-cycle procedure to get the car ready for smog.
")
")
")
")
 Including Type-S")


6 Comments
Awesome write up…had an issue yesterday and has to resort to pushing and clutch kick it to start. Will indeed check mine. Thank you.
Thanks! Curious what you find. I found that my CLS was doing the same thing again, so I may either have another issue or perhaps the solder cracks are too small for me to see. I may resort to resoldering every contact on the relay.
thank you sooooooo much for this. my car started almost after a long sit then nothing then i opened the hood to check and found everything fine thought i would try one more time befor call in to work and it stared and ran fine after work 9hrs later it woulnt start …..
i worked for a stereo repair shop and the repair guys would just solder complete boards and solve so many intermintent issues so this seems to make a lot of sense to me will pull relay and just solder all, if it works will again respond thanks kenny
You’re welcome! I just want to make sure you saw my follow-up post: https://thetrackahead.com/projects/2003-acura-cl-type-s/how-to-replace-the-pgm-fi-relay-2nd-gen-acura-cl-type-s/
Basically, I still had intermittent start issues later down the road so I just swapped out with an aftermarket PGM-FI relay and I never had the problem again. I was a bit skeptical, but the aftermarket part works well. And since it’s so cheap, it makes so much more sense swapping it out for me. If you want to resolder, that may work as well and won’t cost you a thing; however for me I couldn’t even find any solder failure… so I think it was just the relay itself that had gone out. Anyway, good luck with what you decide!
Hi My wife’s 2003 Acura cl has had the same crank no start issues for about three years. She retired about 9 years ago so the car mostly sits idle. The weird thing I’ve had it towed into my mechanic three times since and then the car would start right up and run great for the mechanic.He could fine no issues with the car. The car ran great all this year 2023 till a few days ago so this time when the tow truck moved the car from the parking spot set it down the car started right up running great again. It seems the car being moved by the tow truck up and down and jostled around had some kind of effect.We had it towed to the Acura dealer.
Anyway the Acura dealer could fine nothing wrong with the car either. But I’m tossing the dice based on all the feed back about the relay and having a new one installed so We will see if that works.
It’s an incredibly annoying problem because it seems to have issues randomly so it’s hard to diagnose. Anyway, crossing my fingers for you!