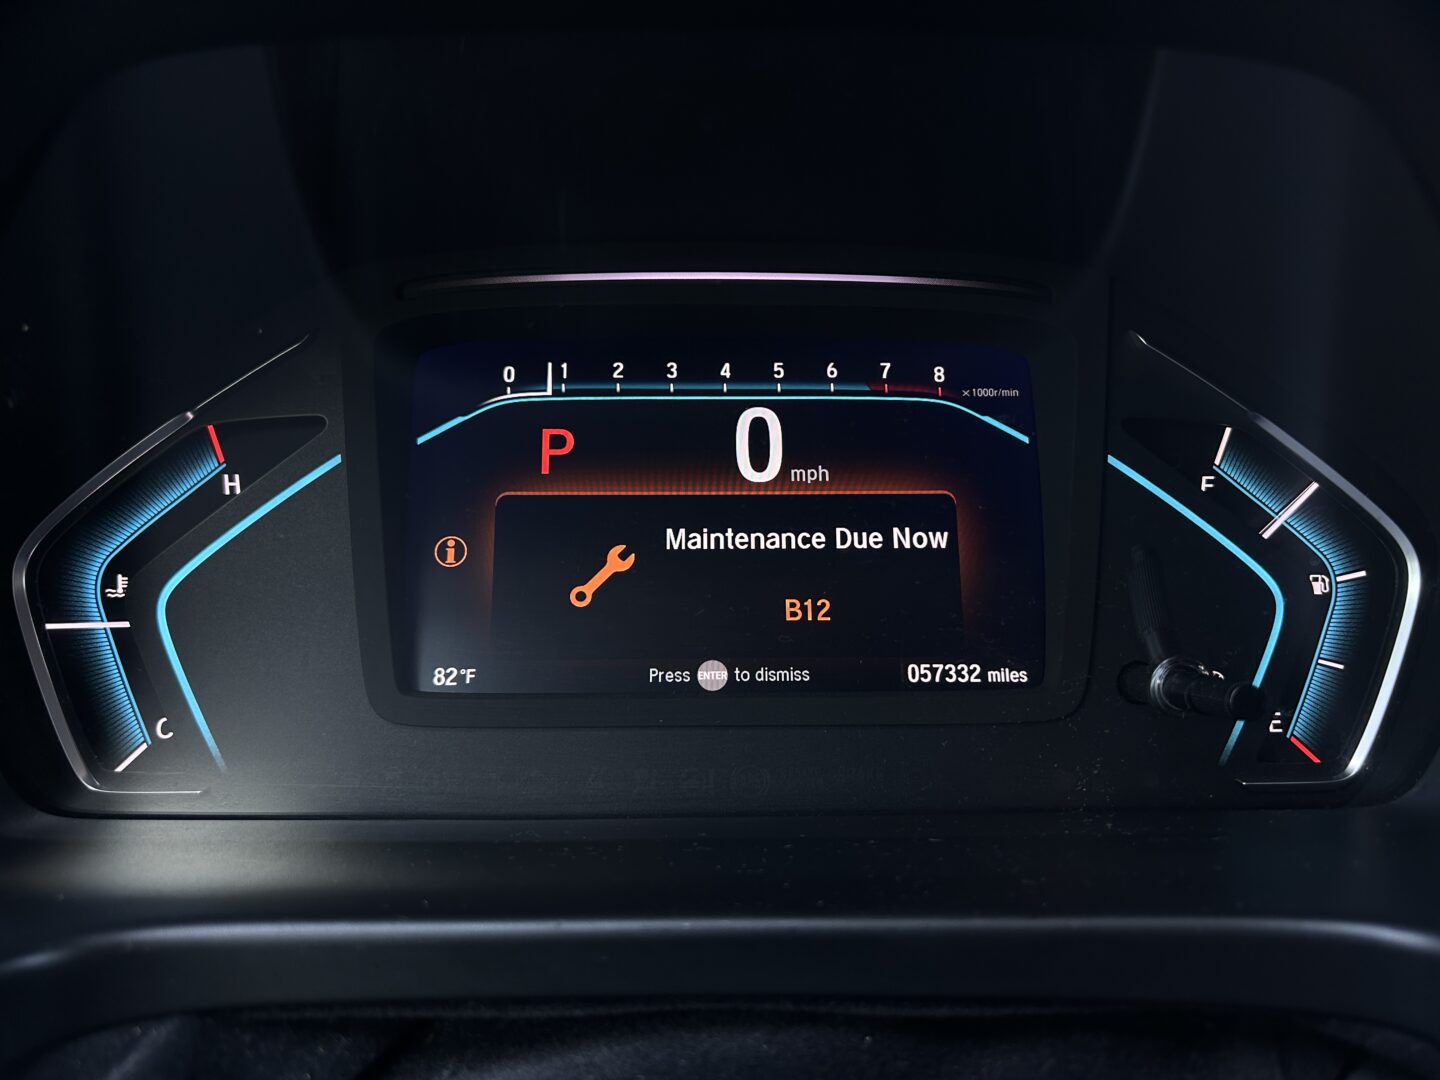
When it’s time to change the cabin air filter in your 5th Generation Honda Odyssey (years 2018-2024), the Maintenance Minder will alert you with a maintenance sub code of 2. In my case, I had a B12 show up on my instrument cluster, which means that I’m due for an oil change and inspection (B), along with an engine air filter (1) and cabin air filter replacement. For more detailed information on what the various codes mean and how to reset the Maintenance Minder System when you’ve completed your service, check out this post.
The cabin air filter (or as Honda refers to as the dust and pollen filter), is a part that can easily be replaced by yourself at home. No tools are needed, just the cabin air filter itself. You might need a few extra tools like a flexible pickup tool if you need to clean up the blower fan area behind the cabin filter.
Tools & Materials
Cabin Air Filter (a.k.a. Dust and Pollen Filter)
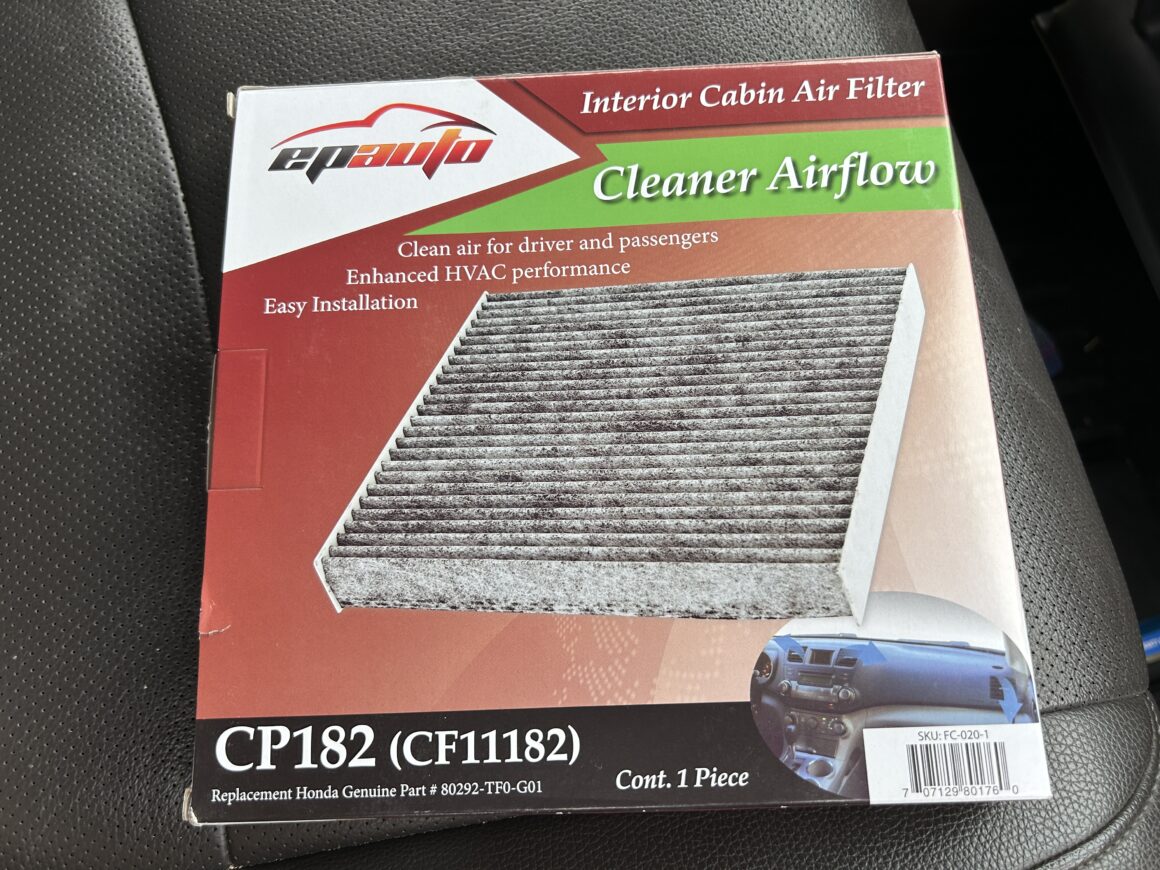
There are tons of options for cabin air filters, but mainly you’ll find the standard paper element style (like the OEM one that came with the car), or one that is charcoal activated and/or with baking soda to help with reducing odors in the cabin. Here are some of the most popular aftermarket ones on Amazon costing around $10-$15:
ECOGARD XC36080 Premium Cabin Air Filter
EPAuto CP182 Premium Cabin Air Filter includes Activated Carbon
Spearhead Odor Defense Breathe Easy AC & Heater Cabin Filter (BE-182)
Flexible Pickup Tool
CRAFTSMAN Flexclaw Pickup Tool
How to Replace the Cabin Air Filter
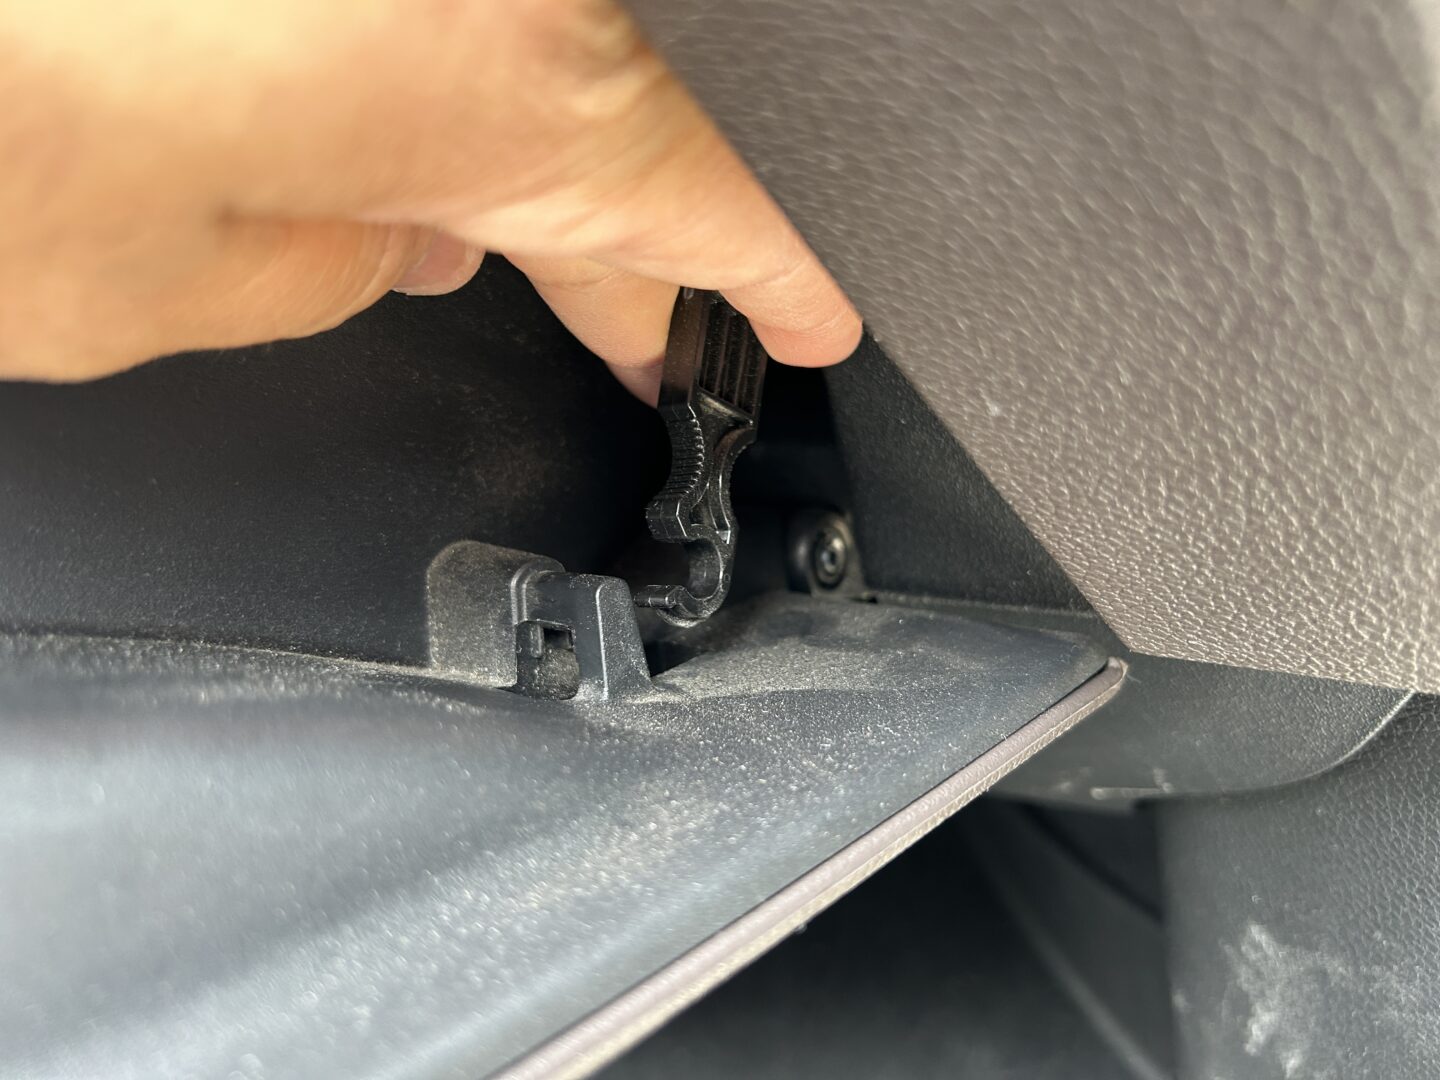
First, open the glove compartment. On the right side of the opened glove compartment, you’ll see this plastic arm hook that you can detach by pulling it off of the glove compartment. You’ll now be able to open the glove compartment even more open by pressing in on both sides and pulling it down more.
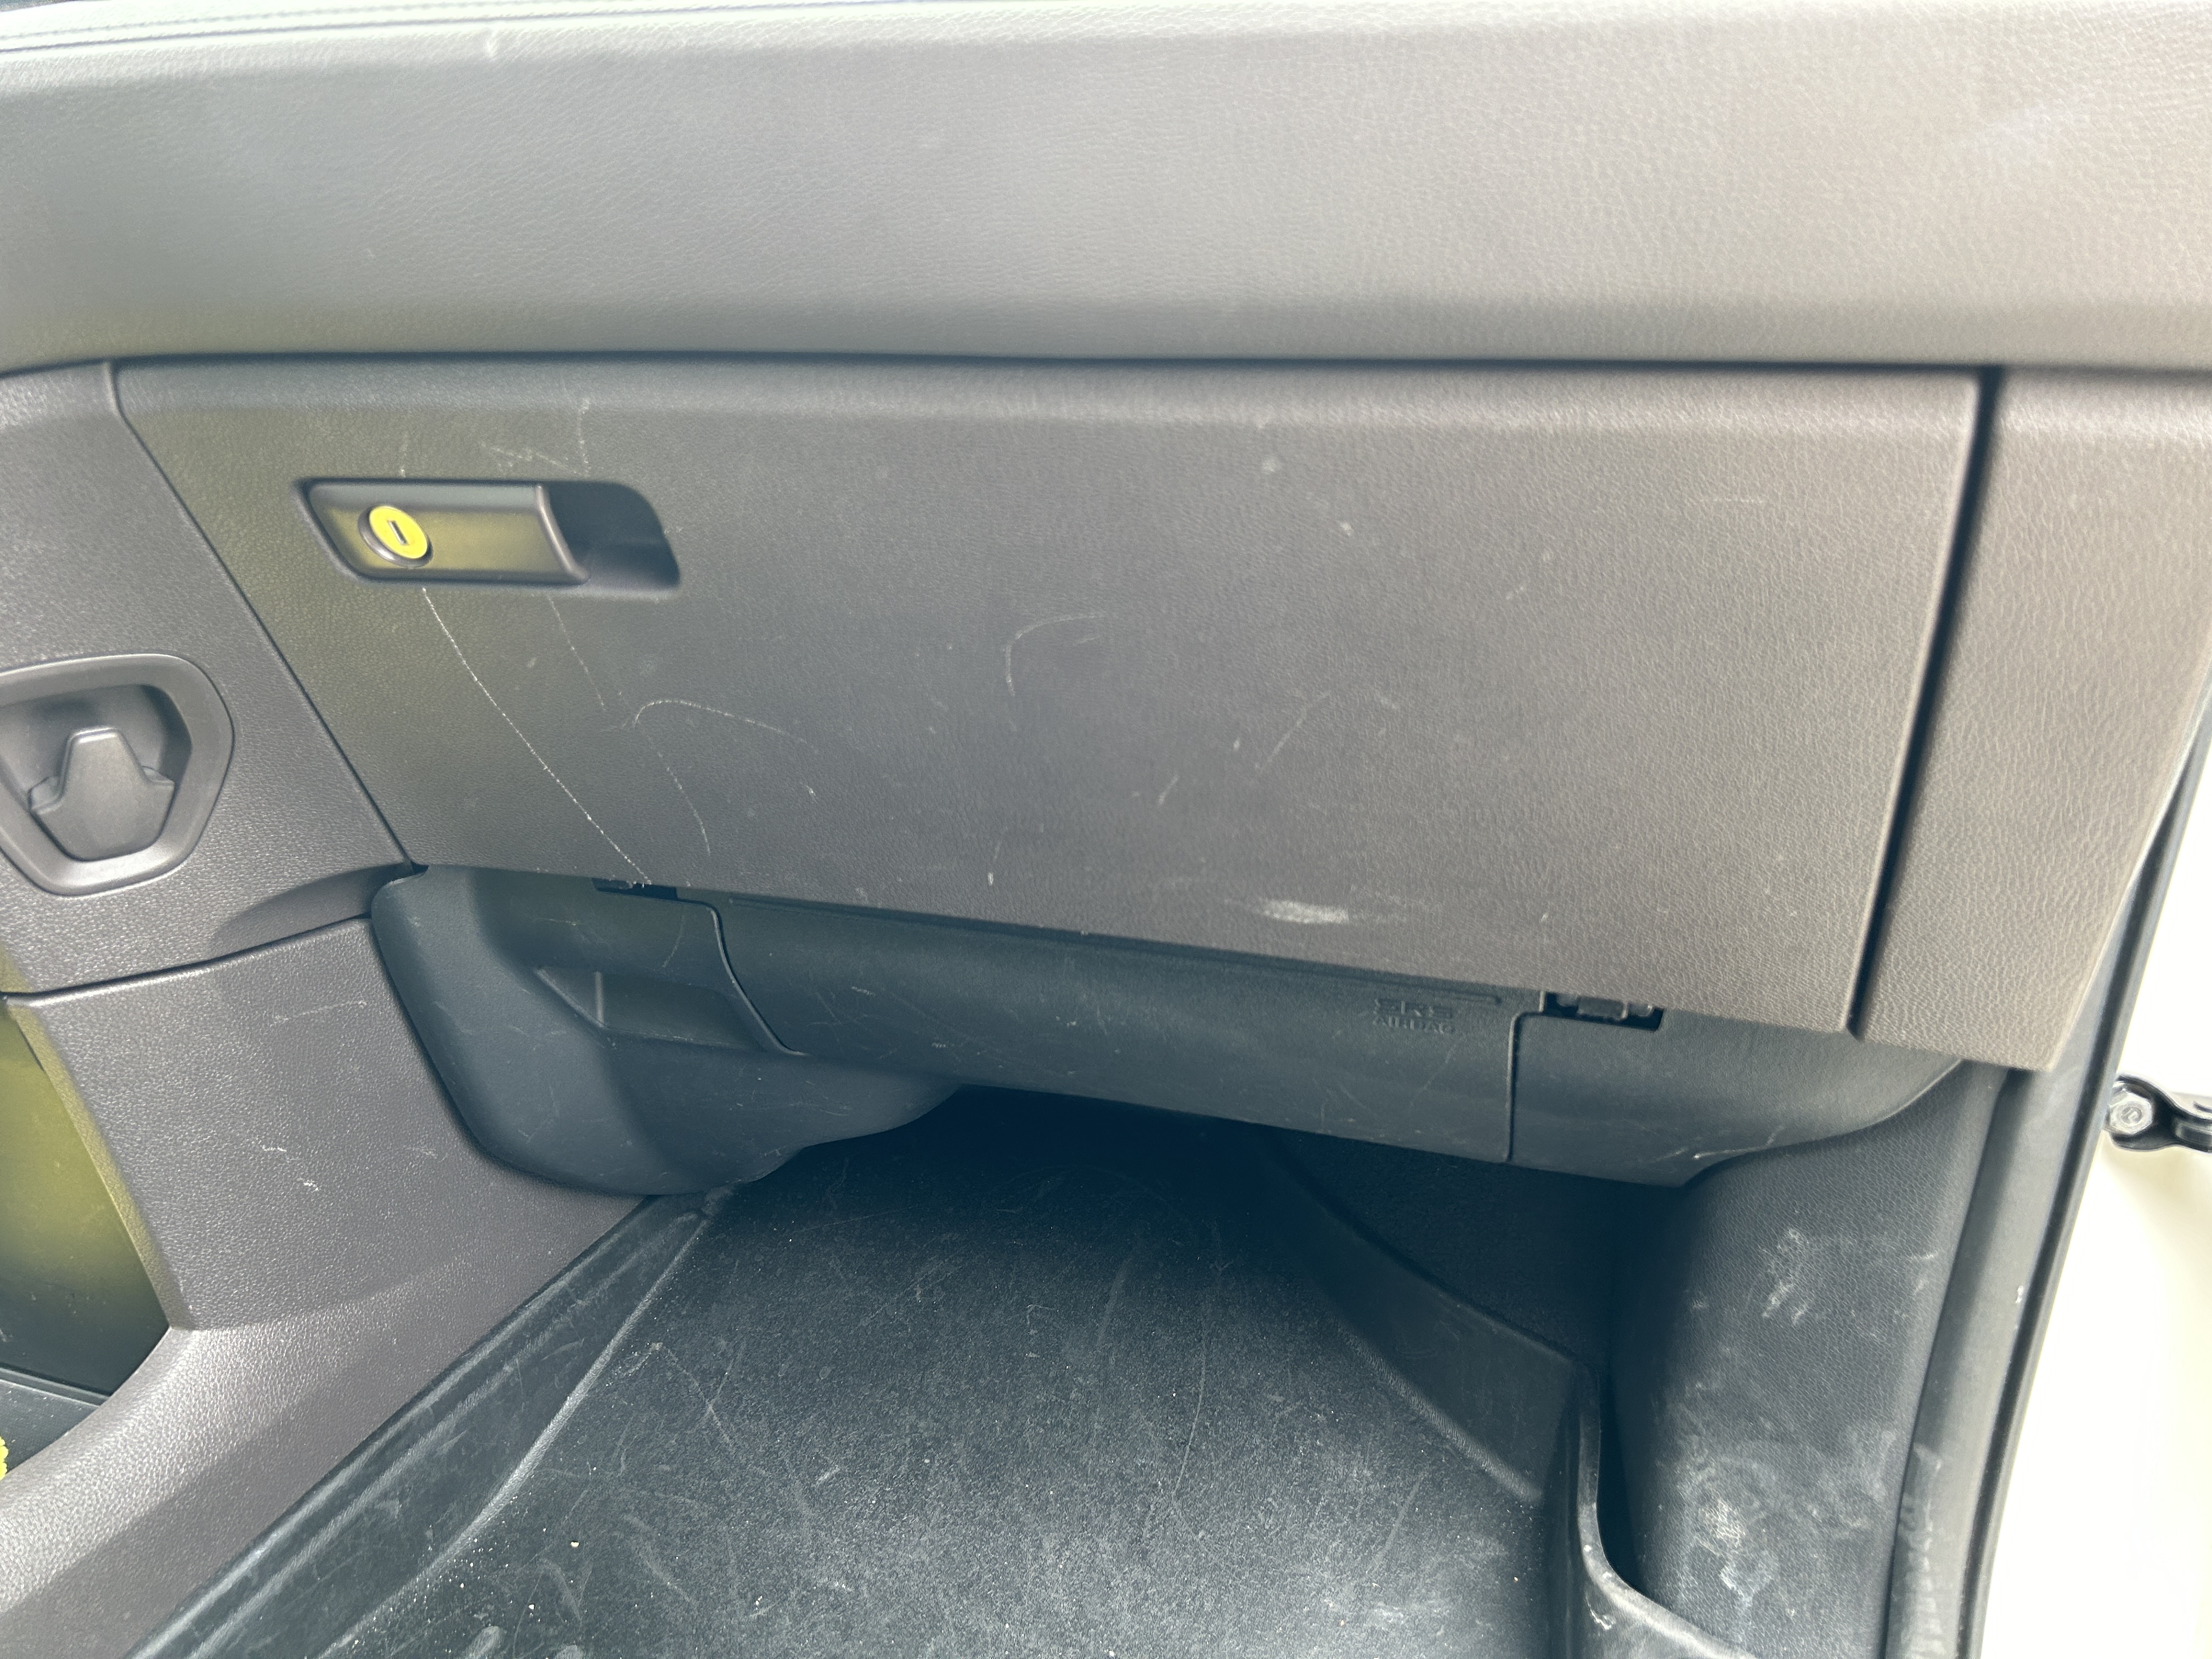
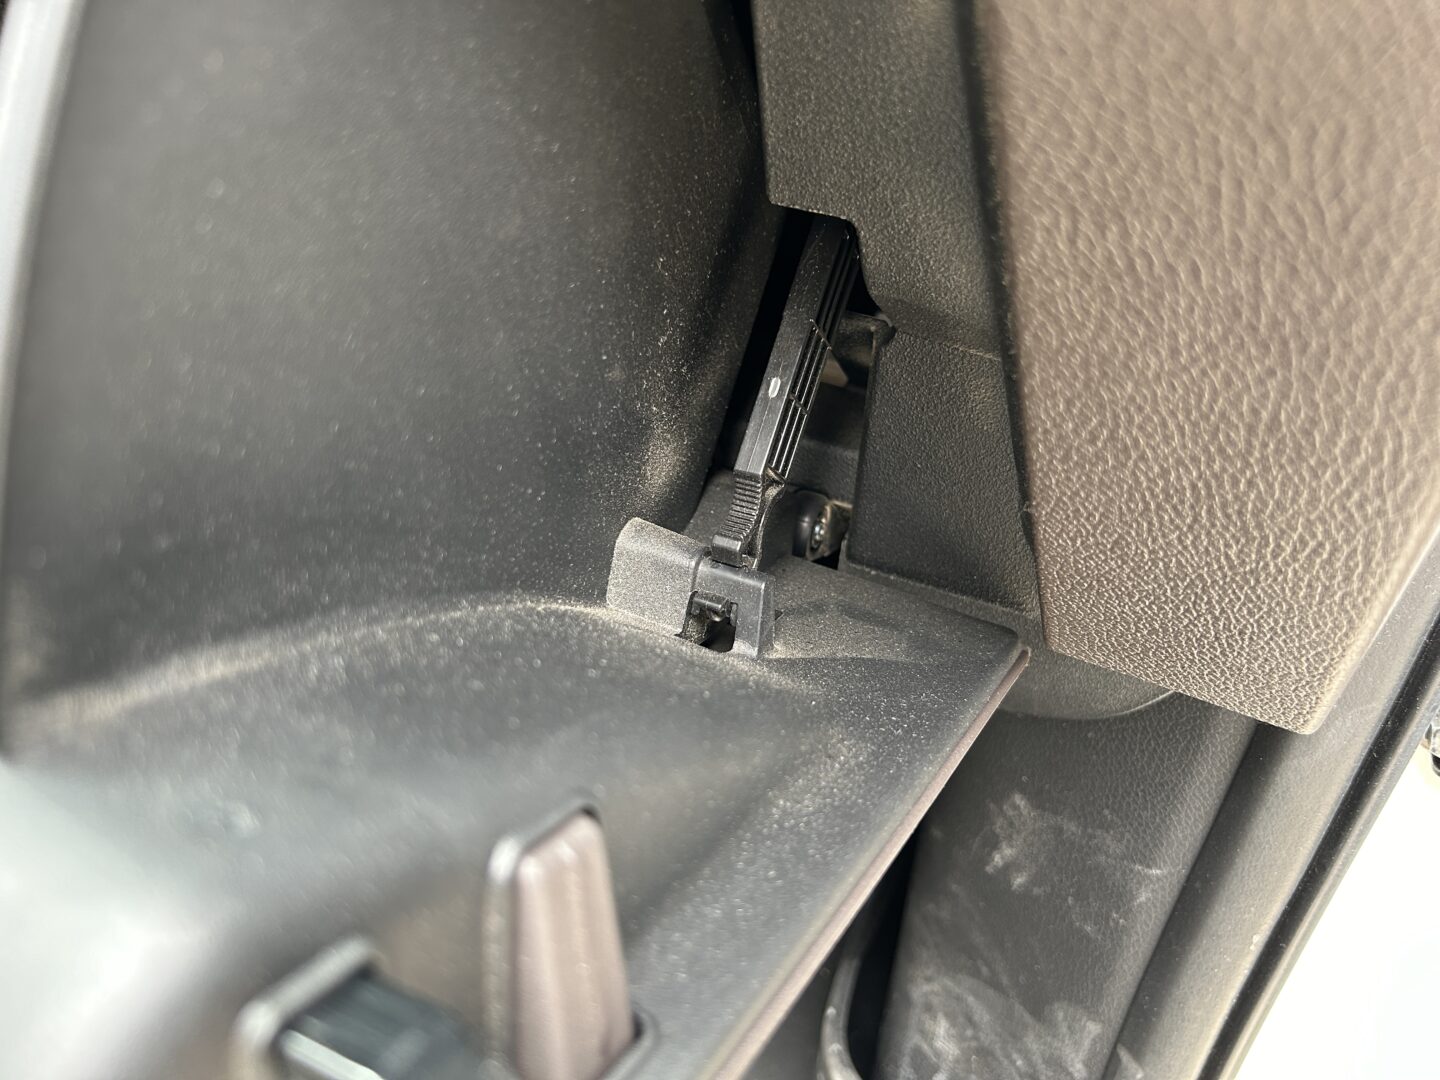
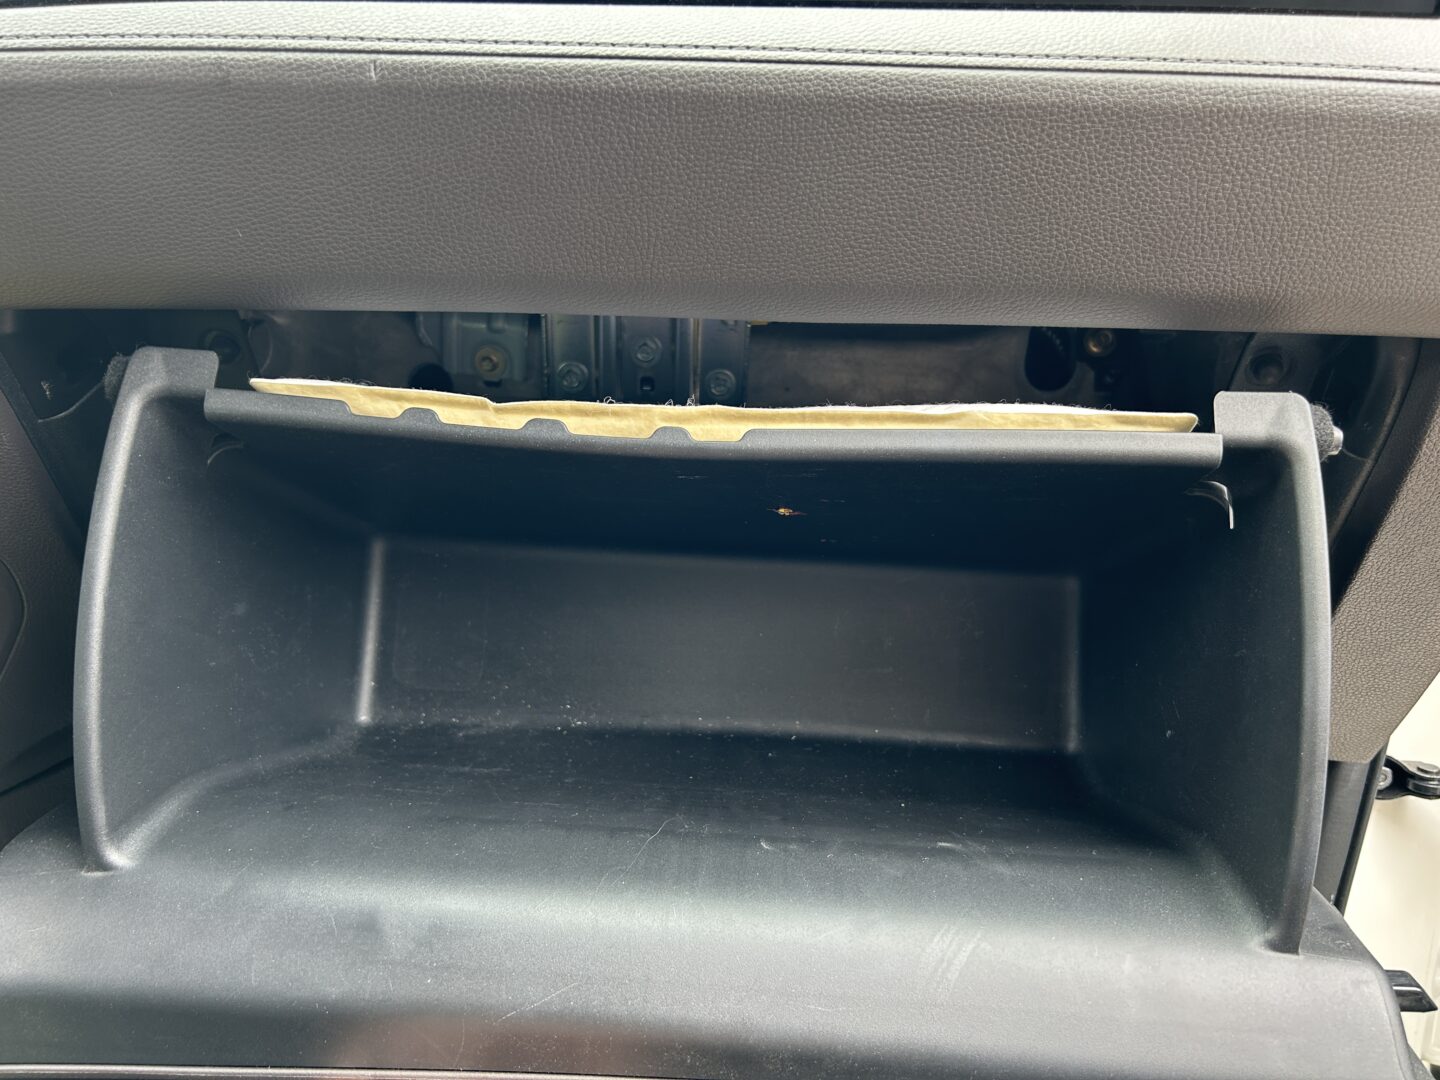
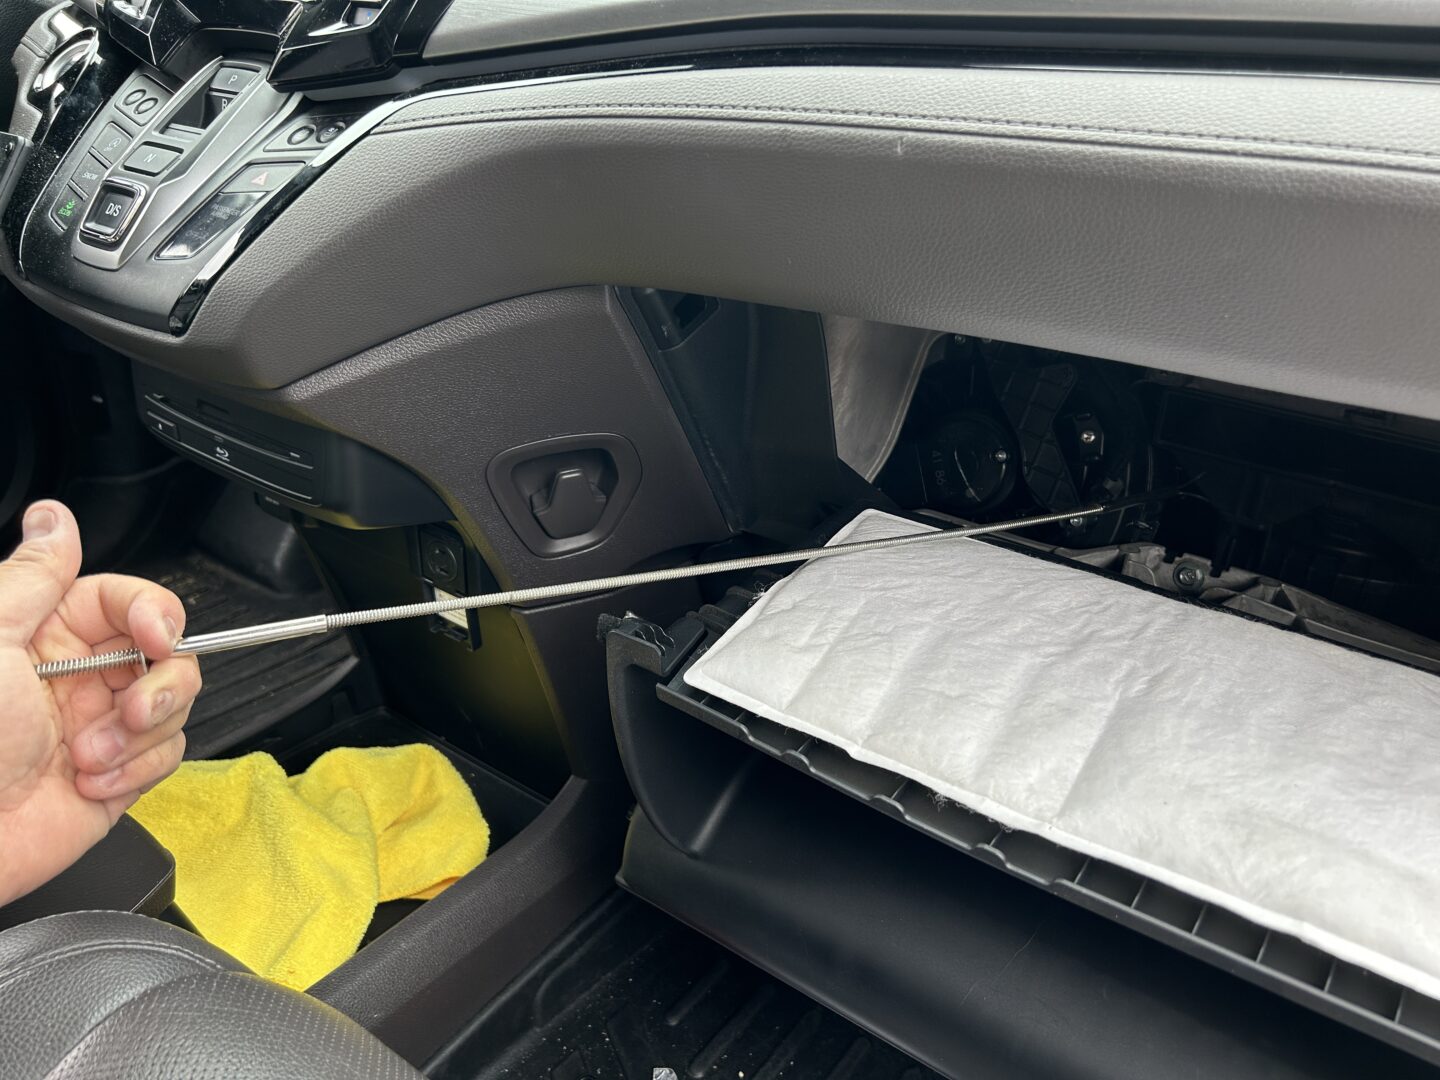
Behind the glove compartment, you’ll see the cabin air filter door, which can be removed by pulling the tabs off from both sides. Then, use two hands (one hand pulling on each side of the filter) to pull the entire cabin air filter out. The strong points of the cabin filter are along the left and right sides of the filter, so pulling along the sides is the way to pull the whole thing out without possibly making a mess.
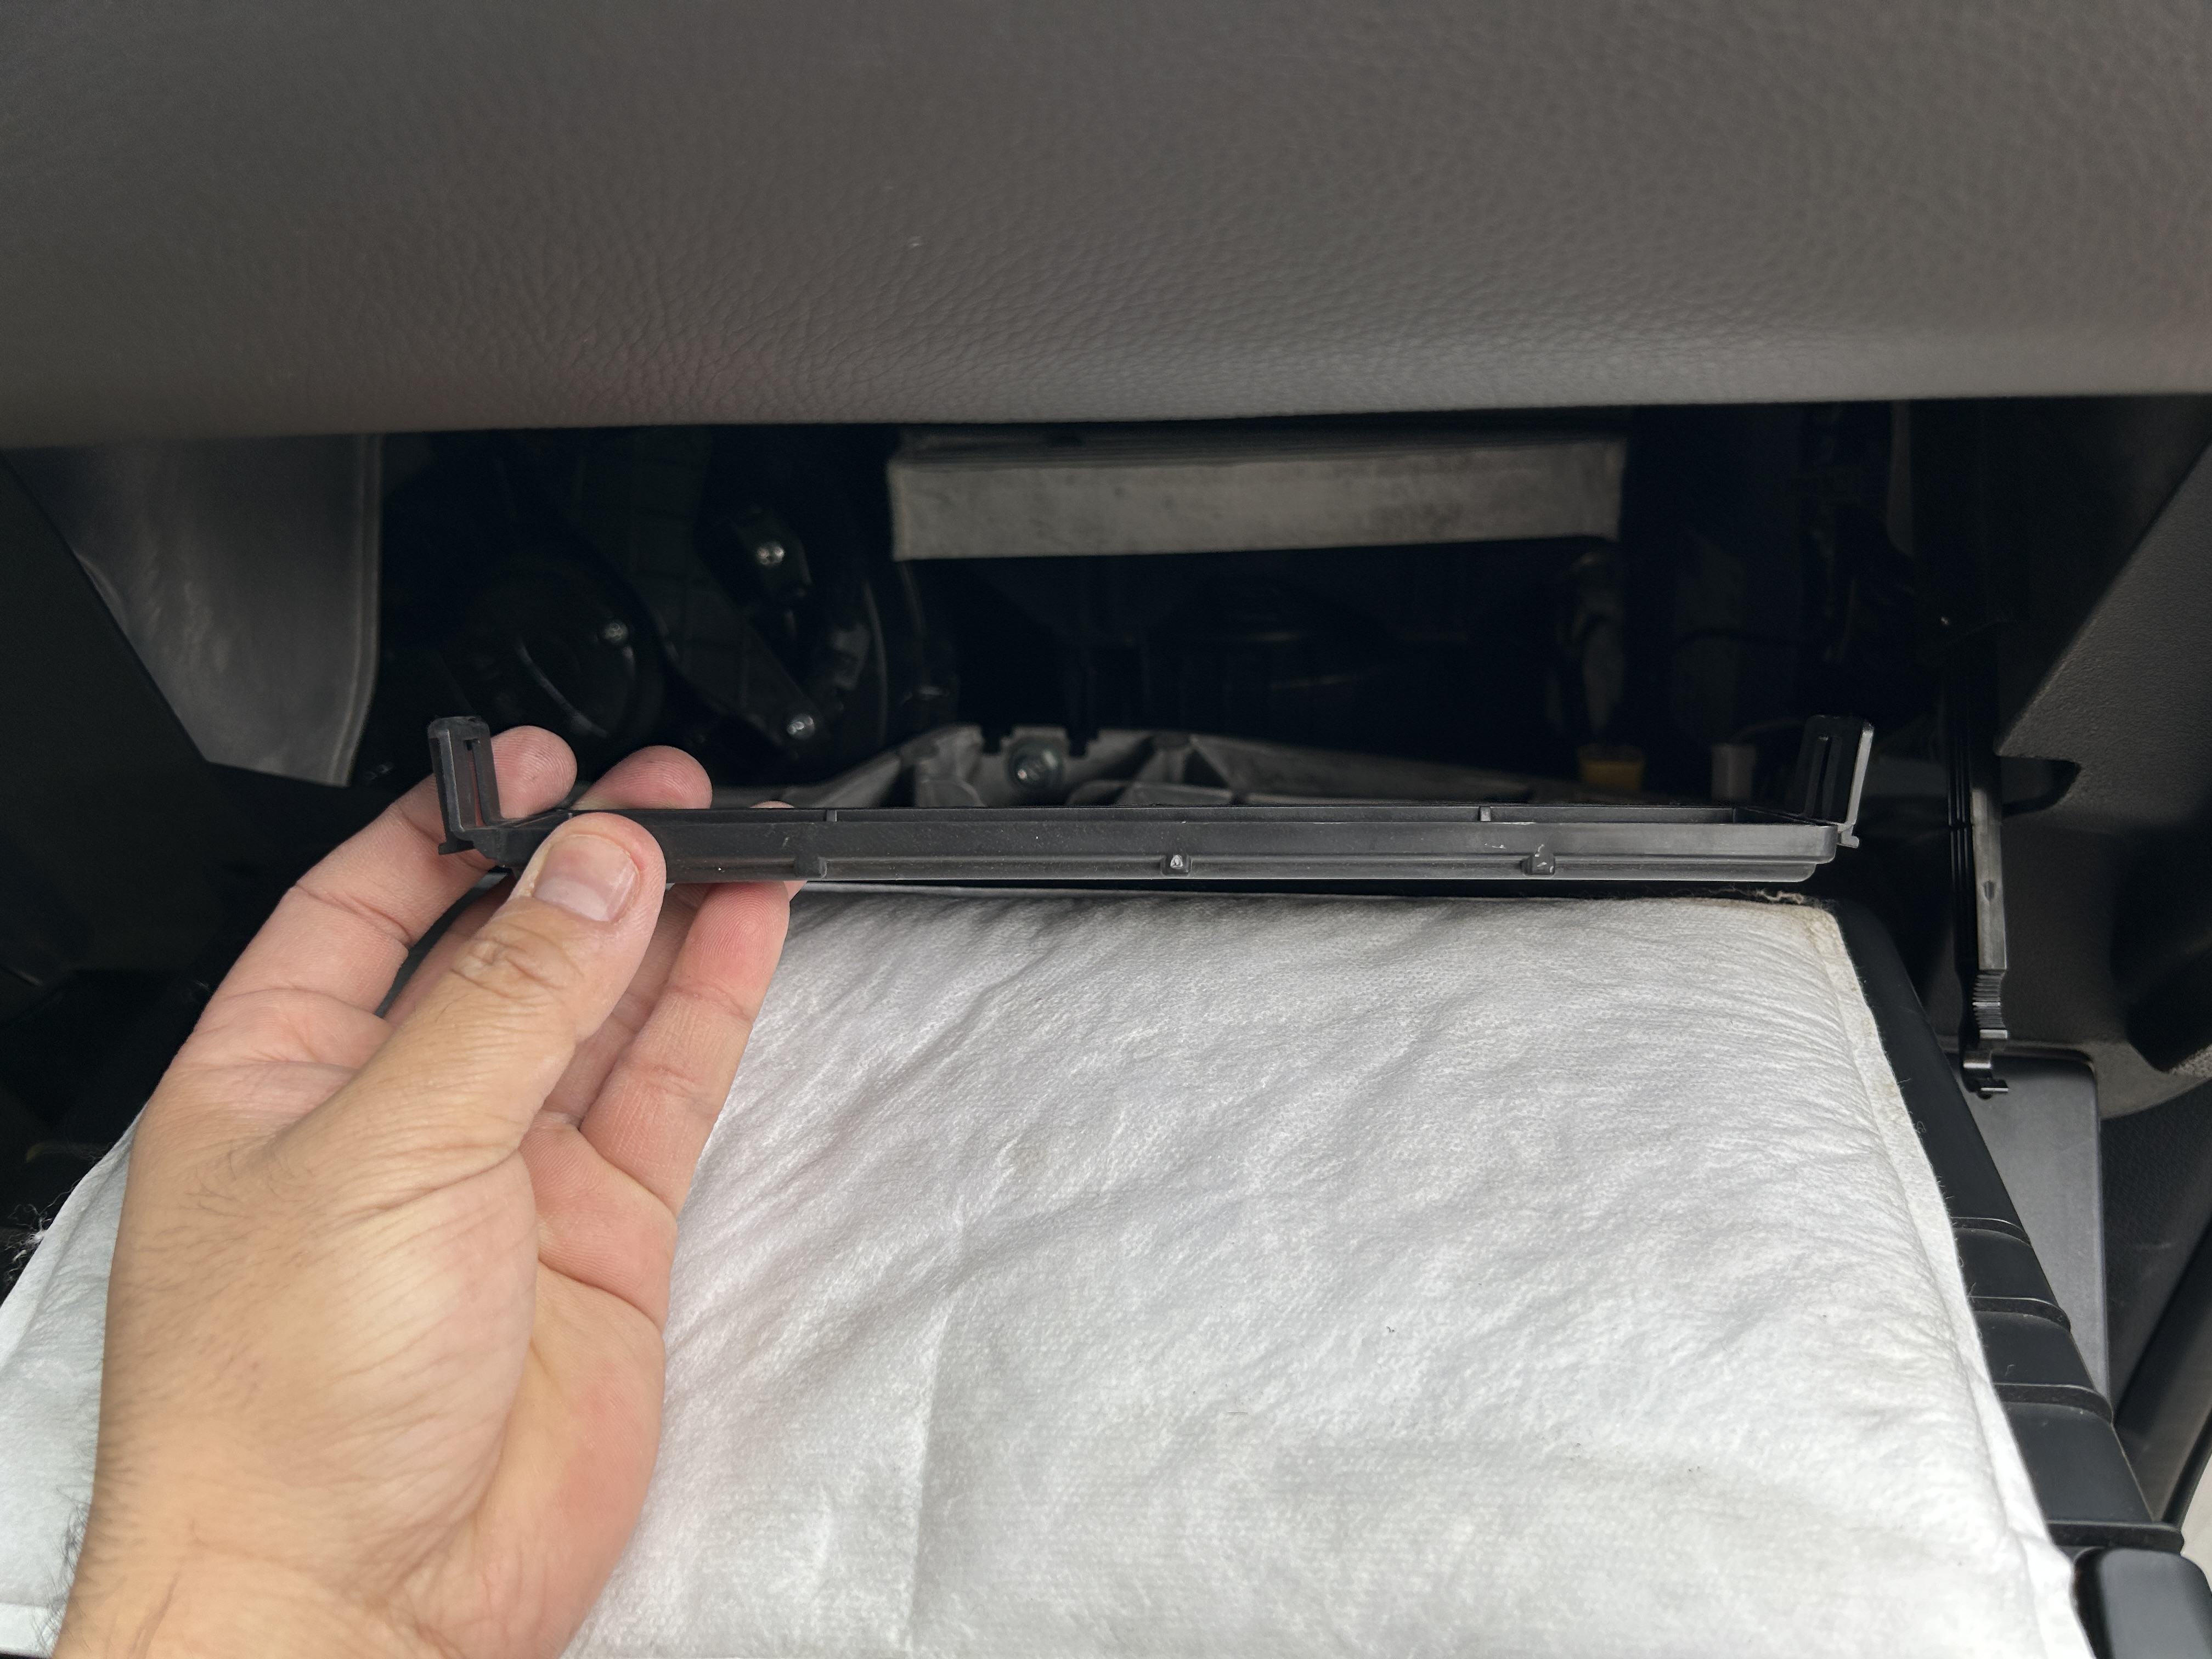
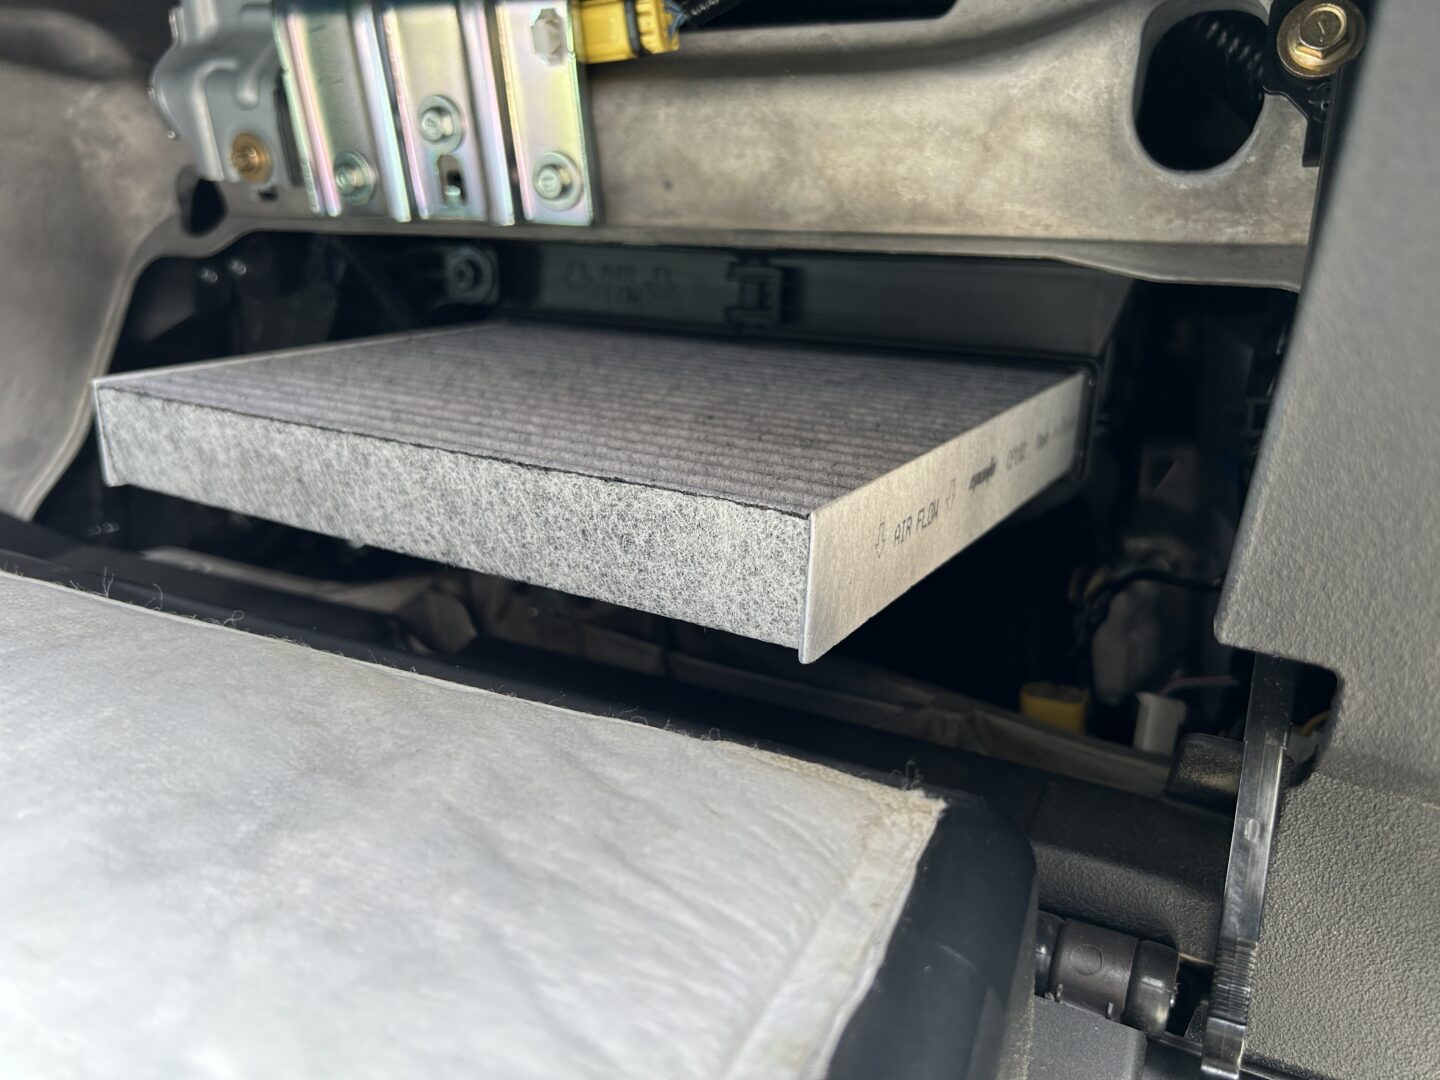
Keep note of air flow arrow on both the plastic filter door and on the air filter itself. The new cabin filter will have the air flow arrow that you’ll need to point in the correct direction (down).
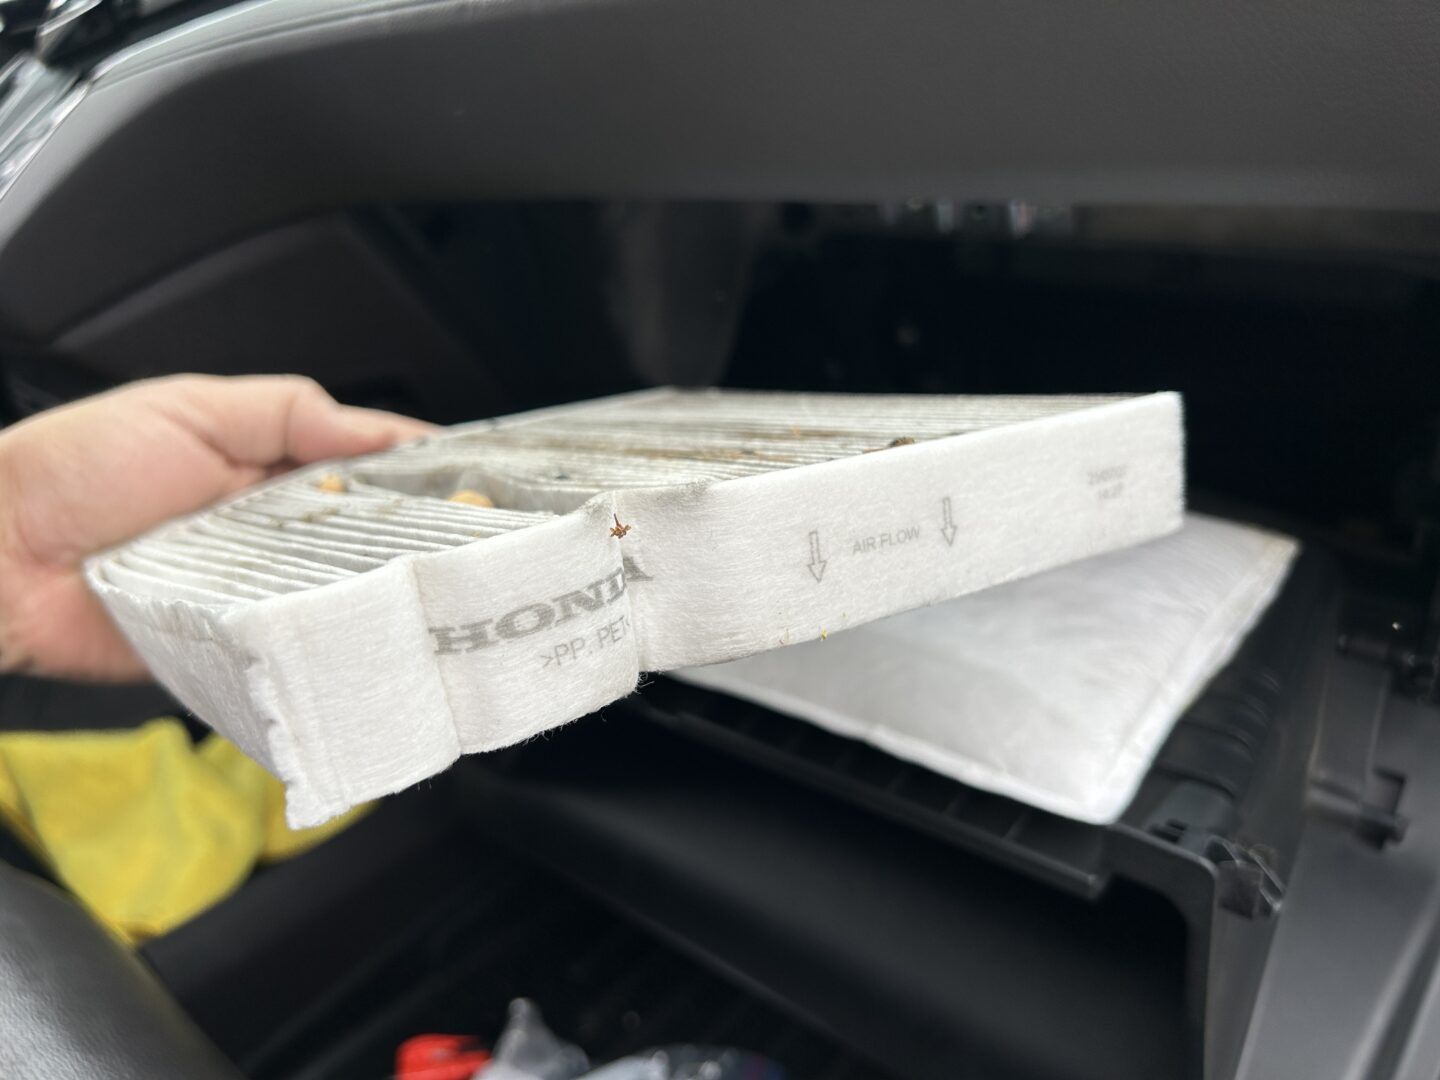
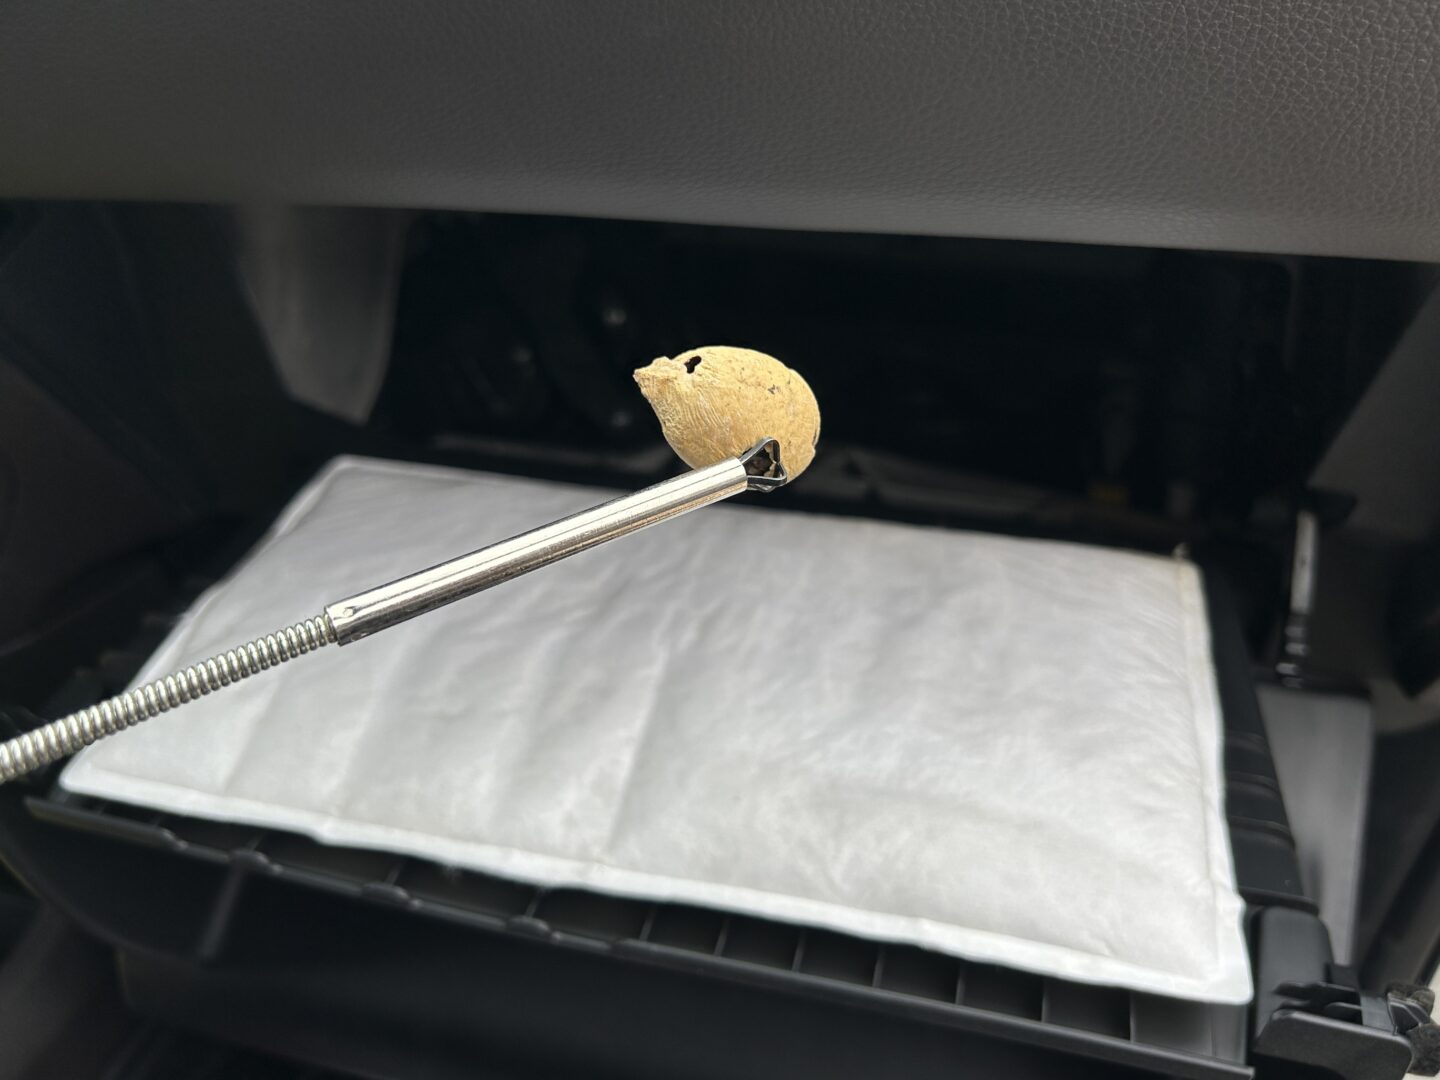
The Maintenance Minder lets you know to change the cabin air filter at periodic intervals, but based on how my cabin filter looked, I would probably inspect the filter in between these service intervals just to check the condition of it. Aside from the filter somehow getting crushed, it also was extremely dirty and had nuts stashed inside of it.
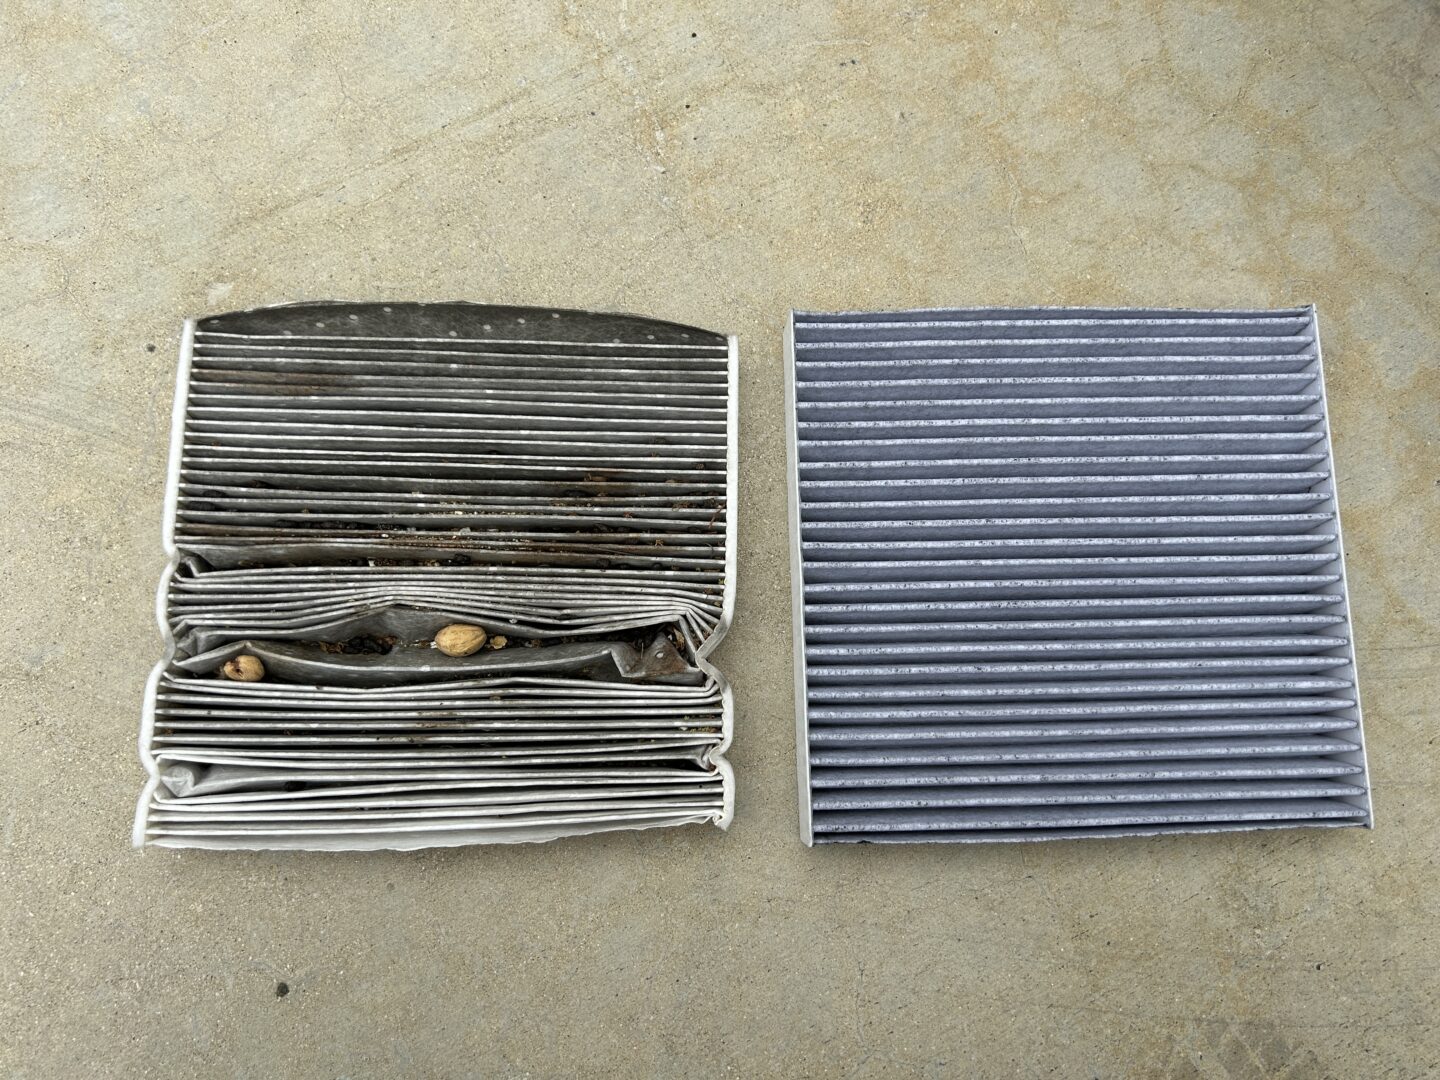
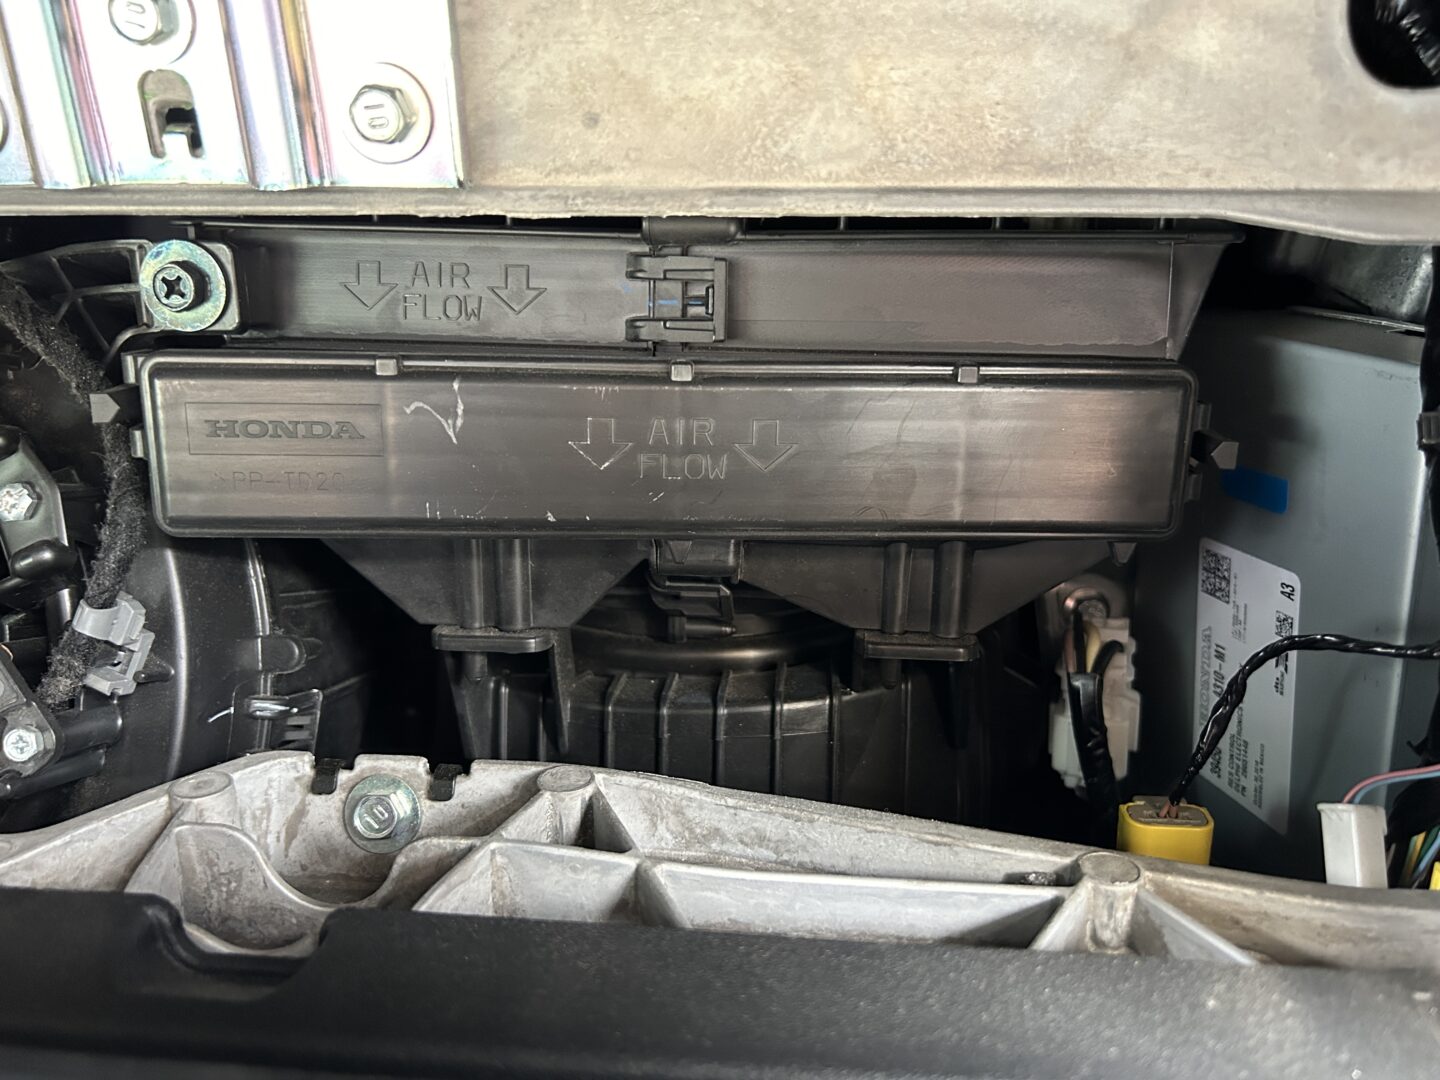
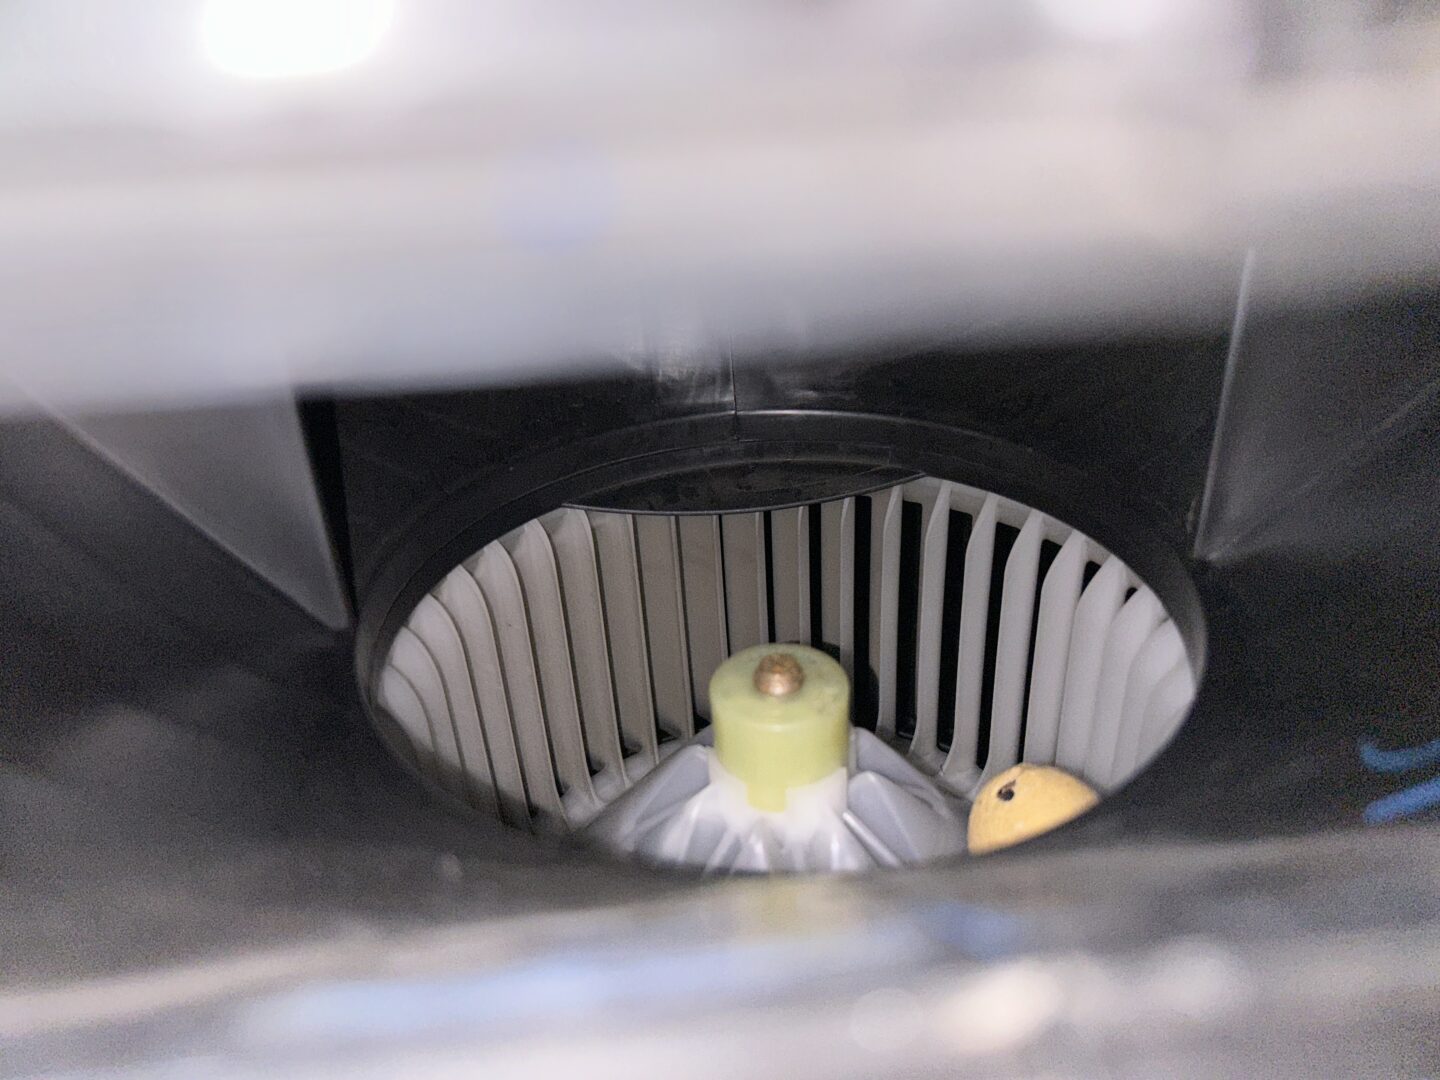
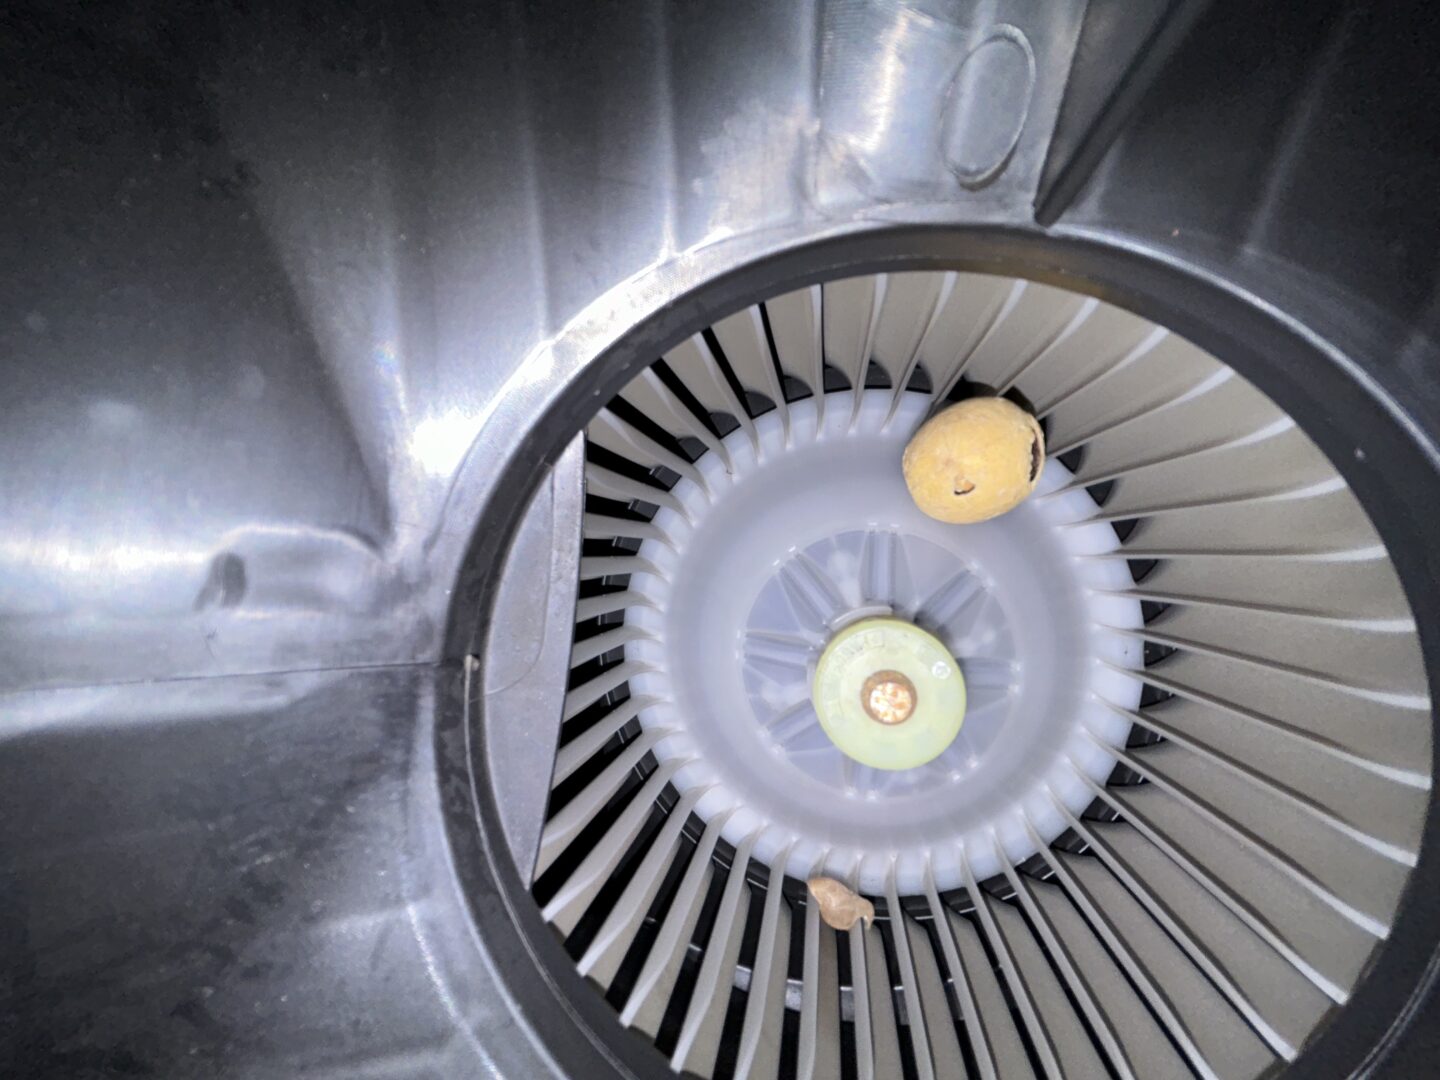
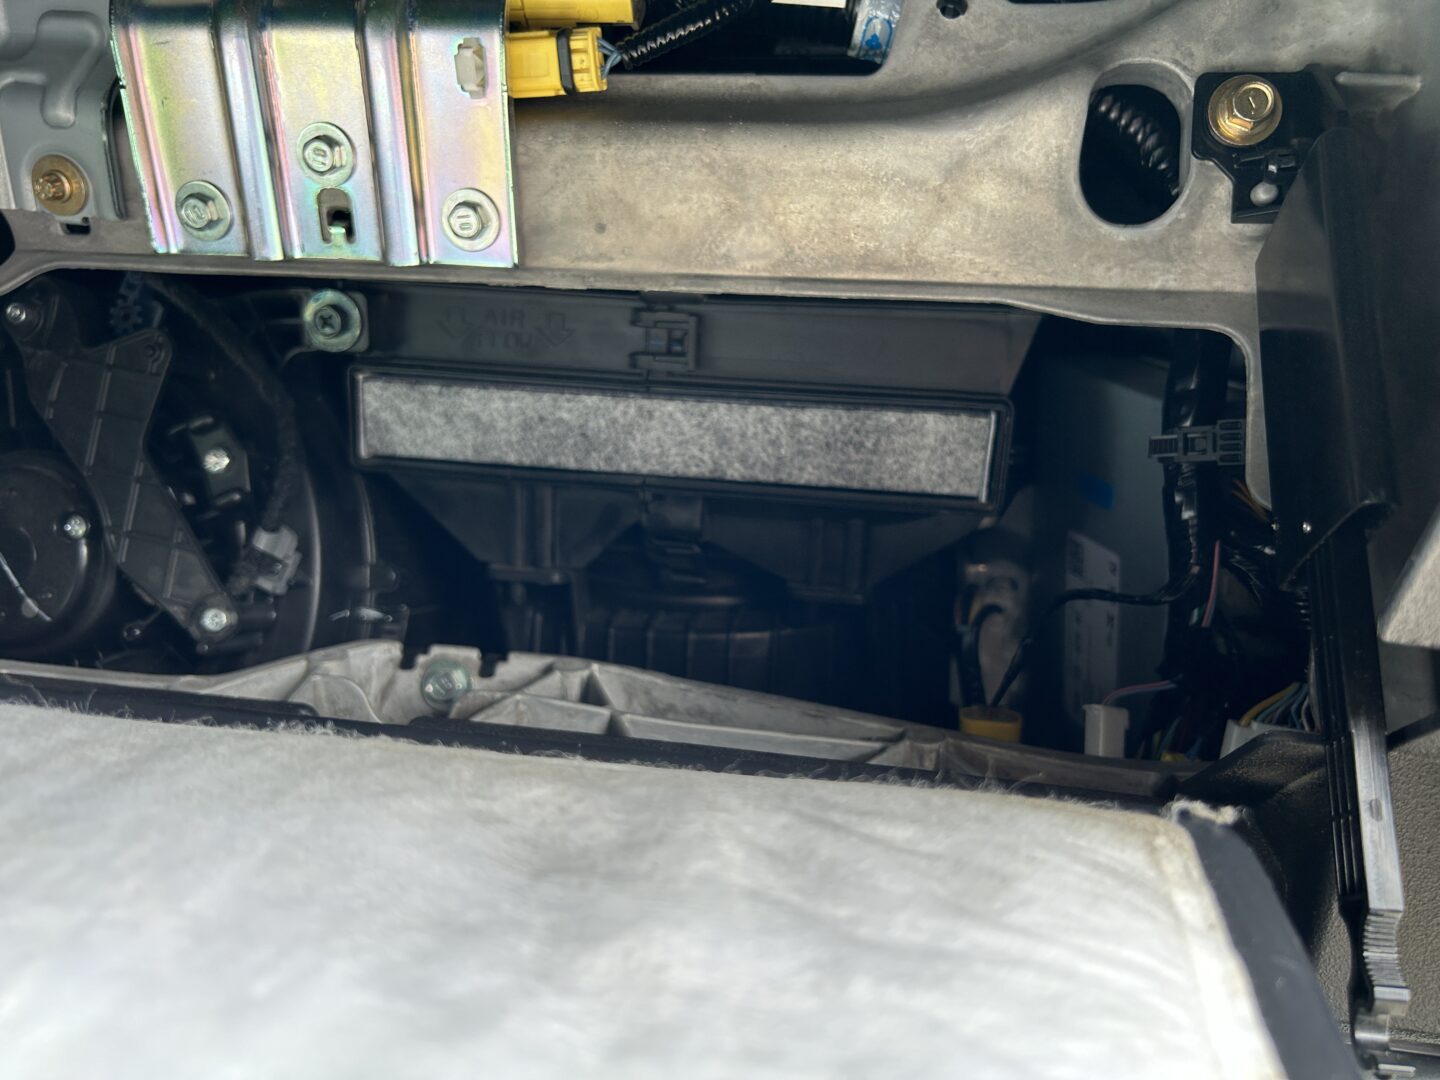
It looks like at some point a rat made its way into my air ducts because of the nuts, debris, and rat droppings that I found inside the filter. Some of these nuts fell into the blower motor as I pulled the filter out. If I had just replaced the cabin filter at this point without cleaning out the blower motor, I would probably hear a bunch of rattling whenever running the fan. So check your blower fan and make sure it’s clear before you install the new filter.
It’s difficult to get access to the top of the blower motor; I used my phone to take photos so I could get a close up view of the debris that would have to be removed. You can’t really get your hands into the slot of the cabin filter to reach into the blower fan area. This is where a flexible pickup tool, along with some patience and careful manuevering will help you in removal of debris.
After cleaning everything up, reinstall the cabin air filter with the air flow arrow pointing down.
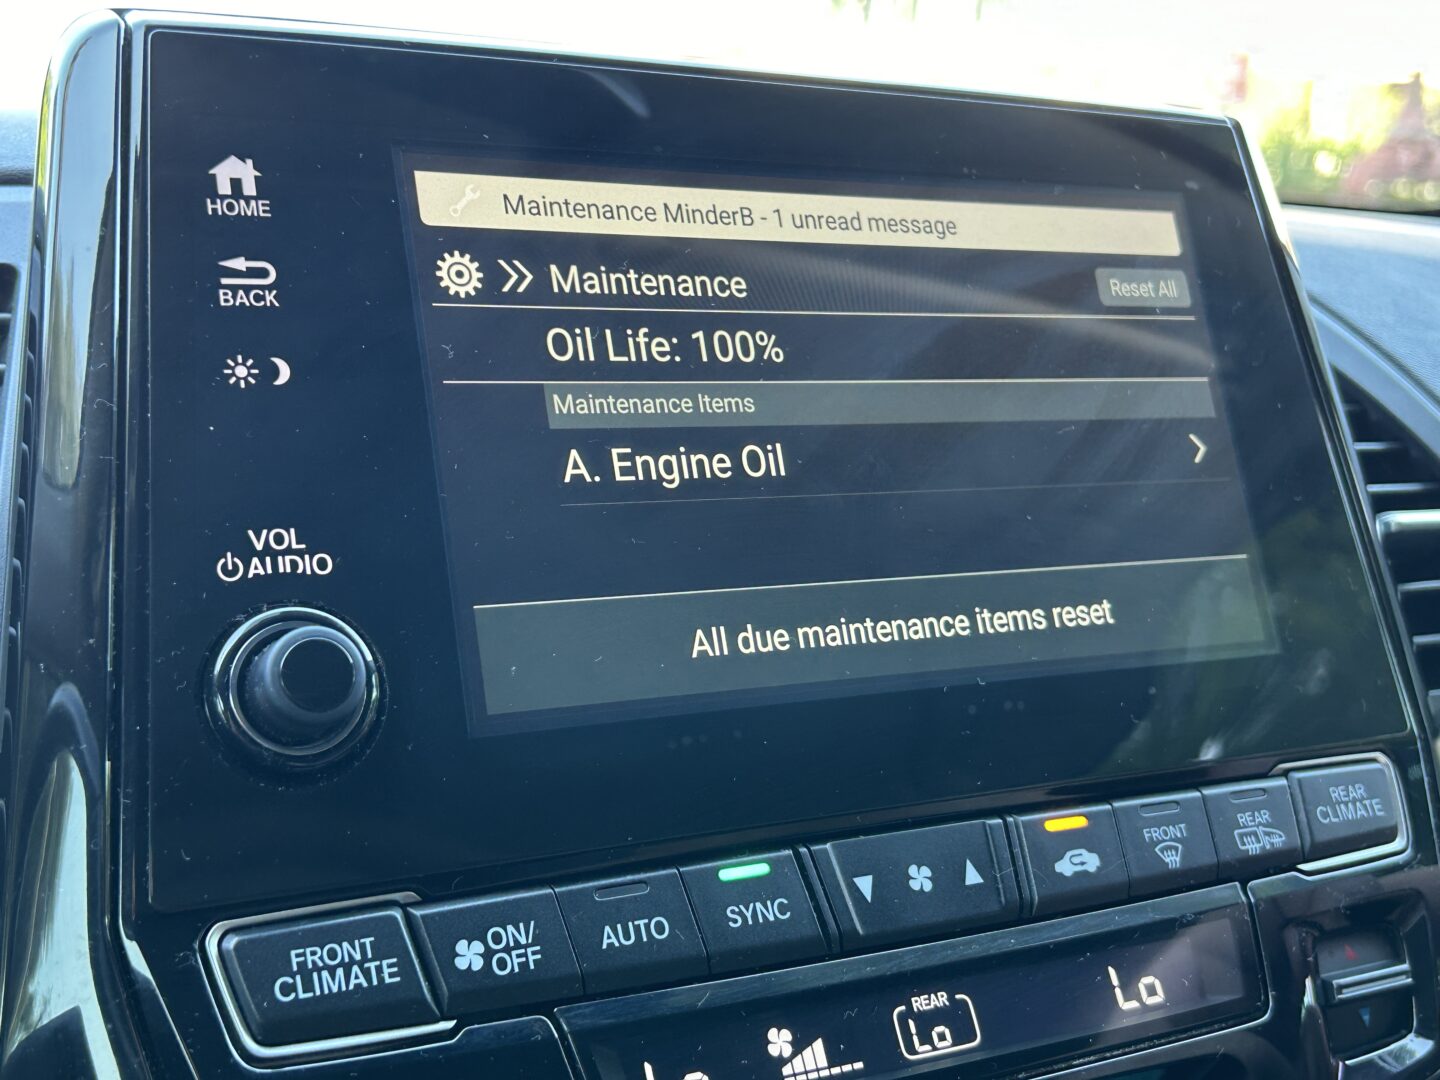
With the cabin filter back in, reinstall the plastic door, put the glove compartment door back in reverse of removal and you’re all finished with this job. Don’t forget to go into your Maintenance Minder on your infotainment system under select Settings, Vehicle, and Maintenance Information to reset the maintenance items.
")
")
")
")
")
")

")
")