")
When you make purchases through links on this site, The Track Ahead may earn an affiliate commission. Also, these posts are based off my own experiences. I am not responsible for any action you take as a result of reading this. Learn More
When you’re searching for a cell phone mount for your vehicle, you’ll find that there are so many brands and types of phone mounts available. There are ones that stick and suction directly onto your dashboard, ones that mount into the cupholder, ones that mount inside of the cd player slot, and ones that clip to your vents.
I’ve tried these options in the past and they all work, but each have negatives associated with them. For example, mounting to your dashboard will almost always cause some level of damage when you come to eventually remove it. Dashboards are difficult to repair and are expensive to replace. Vent-mounts are usually not strong enough to support a phone securely; they also block air flow from your heater and air conditioning. Other options usually take away a particular function or feature of the vehicle and tend to be located in odd locations, which may cause accessibility issues for the controls on your dashboard.
My preference for installing a car phone mount has always been to install one that will not cause permanent damage and doesn’t take away any functionality within the cabin. Typically, I prefer to use a suction cup mount and mount it to a hard surface so that it can easily be removed and cleaned up so that no residue is left behind. But every car is different, and some may simply not have a readily available hard surface for a suction cup mount.
Finding a Car Phone Mount for the 5th Gen Honda Odyssey
My biggest struggle with finding a car phone mount for the 2018-2024 Honda Odyssey is that there’s just no good place on the dashboard to mount one. I don’t want to mount anything to the soft dashboard material that will cause damage to it in the long run. I found that a lot of people like to either use mounts that go in the cupholder or the vents, but I just don’t like those types of phone mounts for reasons I mentioned earlier. I guess you could mount it to the windshield, but then you’ll have the wire for your charger dangling off of it and it might impede your vision out the front.
I discovered another option: mounts that are made specifically for the the 5th generation Honda Odyssey (years 2018-2024) that utilize a clip which connects to the left side or the right side of the center console. The most popular brand for this type of custom mount is called Pro Clip USA. Another brand that I came across is called A-Tach Mounts and it costs less than the popular Pro Clip ones. They offer a very similar type of product, which are also custom-made for these vehicles. I reached out to A-Tach Mounts and they offered to provide these products so that I could test and write this post.
Both brands offer a phone mount that is secured to the trim seam on both the lower right side of the center dashboard. Pro Clip USA has another one that mounts to the upper left side of the center console. On the other hand, A-Tach Mounts offers a left side mount that is located on the lower left side of the center console which is much better in my opinion.
A-Tach Car Phone Mounts for the 5th Gen Honda Odyssey
When you get a car phone mount from A-Tach, you’ll need to get the dashboard mount, as well as a phone holder. The dashboard mount (as the name suggests) is the piece that attaches to the dashboard. The phone holder will then be permanently affixed to the dashboard mount, which will then hold your phone. A-Tach offers two different dash mounts depending on which side you prefer the mount to be located, and a variety of different phone holders–all of which can be attached to either of the two dash mounts.
Dash Mounts for the 5th Gen Honda Odyssey (2018-2024)
A-Tach #50165 Left-Side Dash Mount
A-Tach #50438 Right-Side Dash Mount
Phone Holders that Attach to the Dash Mount
For these phone holders, you can see more details and photos of each item on the product pages on the A-Tach website. This may help you with your selection depending on your needs and preference.
#10120 Universal Qi Wireless Charging Phone Holder (shown in this article)
#10801 Magnetic Phone Holder for Non Wireless Charging Phones (shown in this article)
If you’d like to purchase through my affiliate link on the A-Tach website, you can use this link and receive a 10% discount on your purchase.
A-Tach Left-Side Dash Mount (#50165) Install
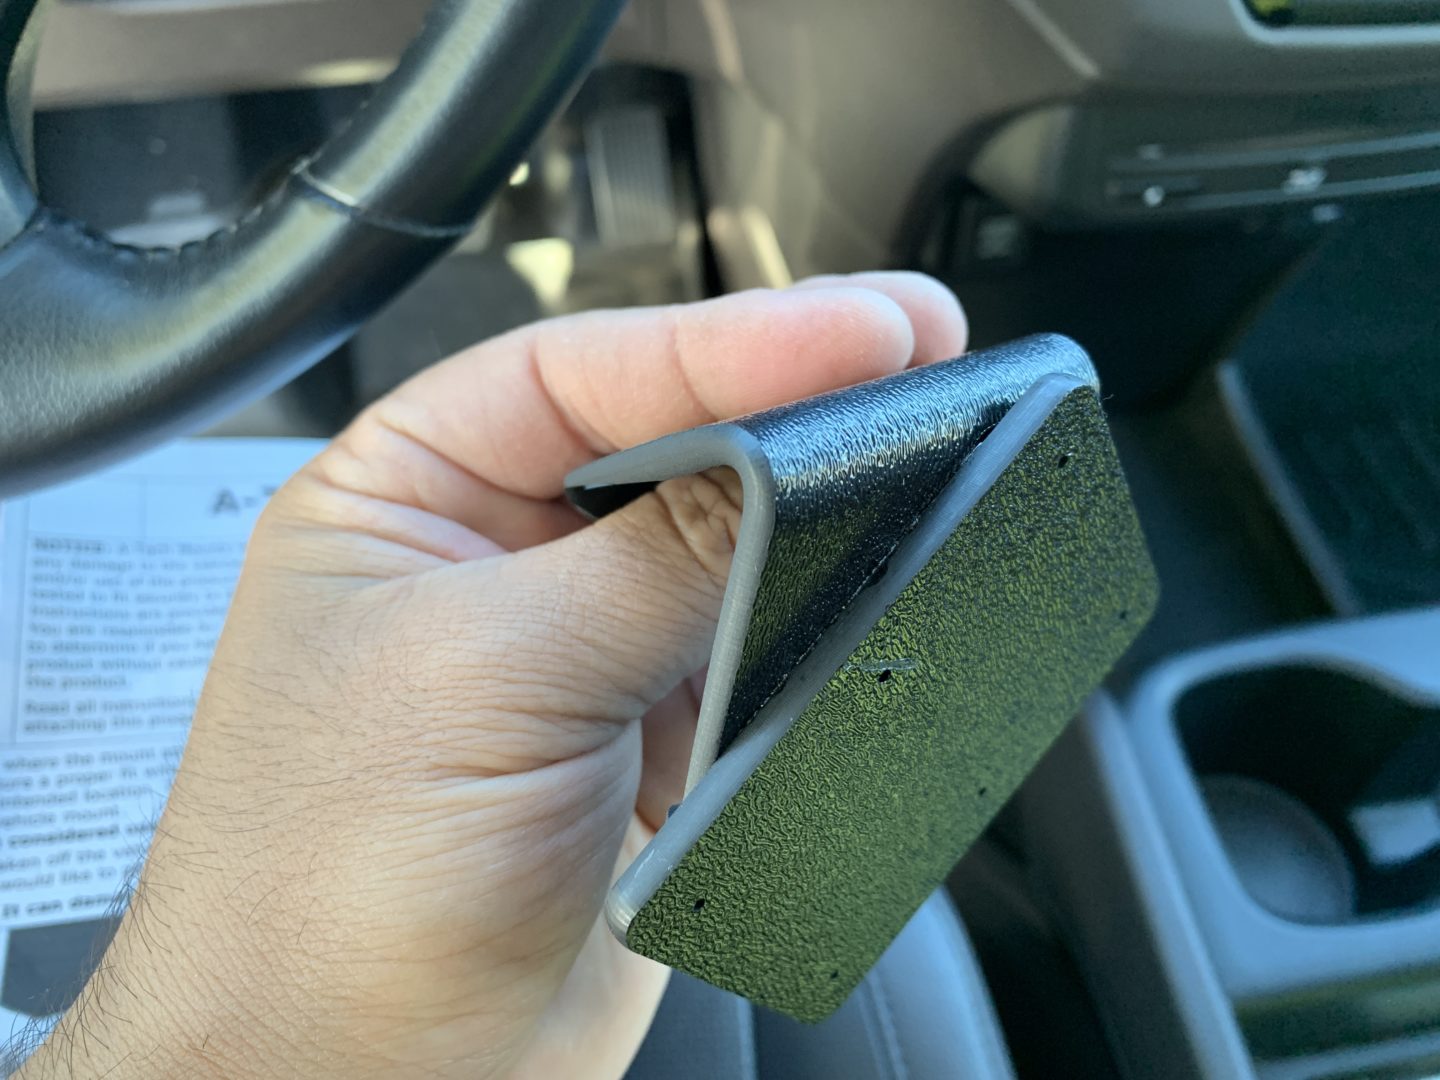
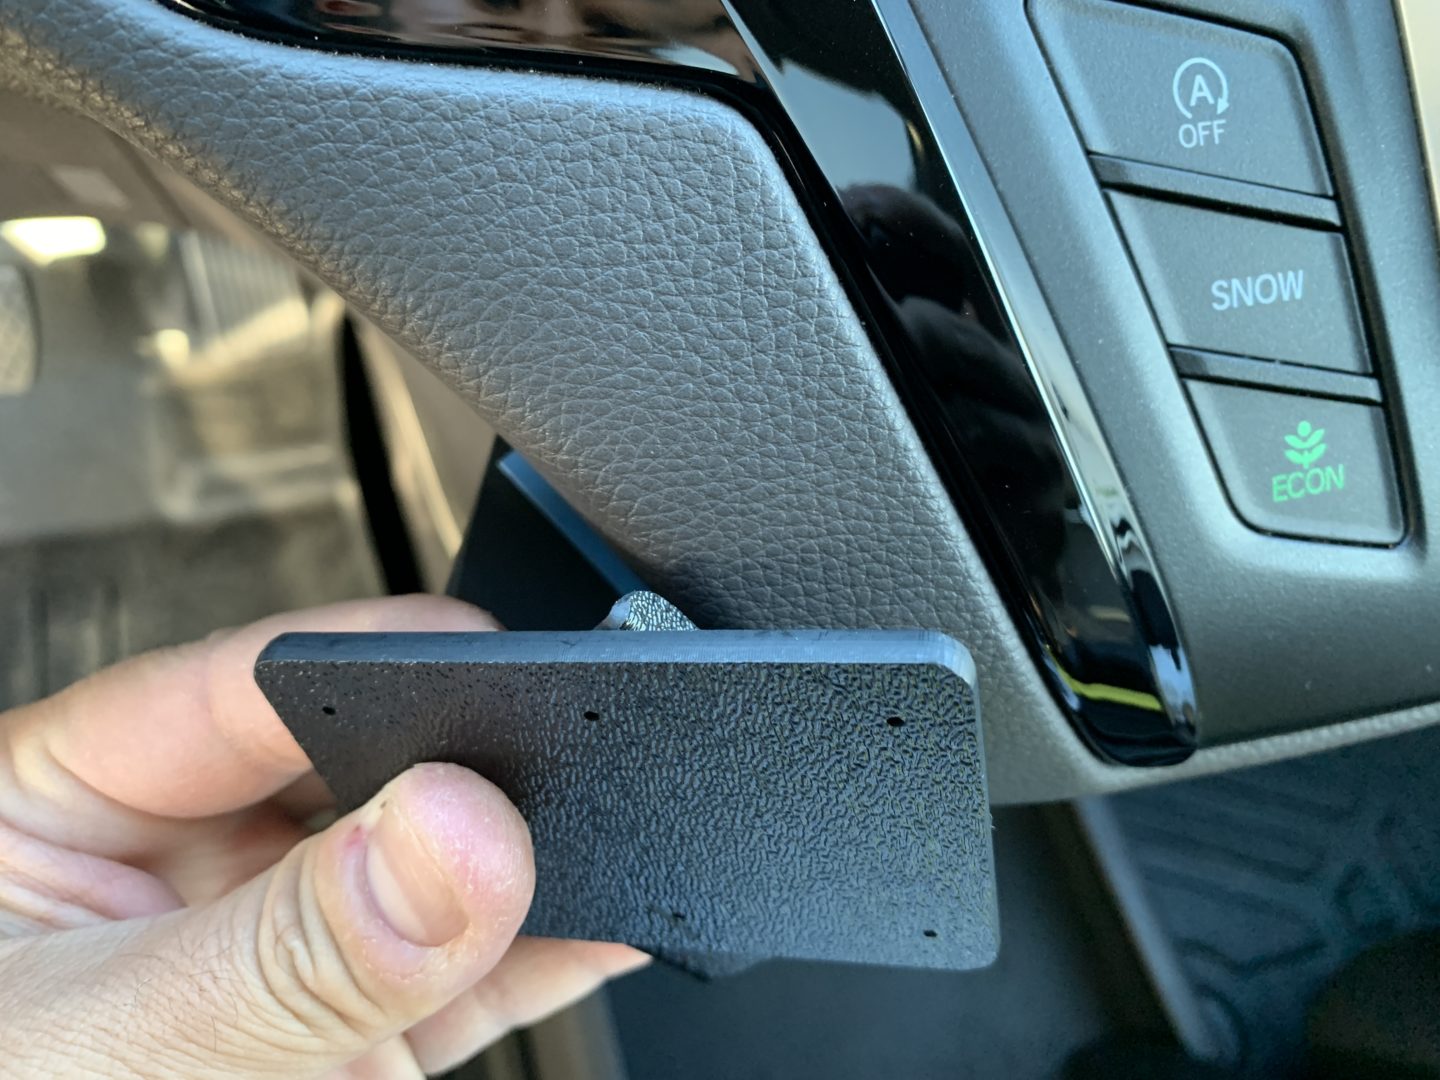
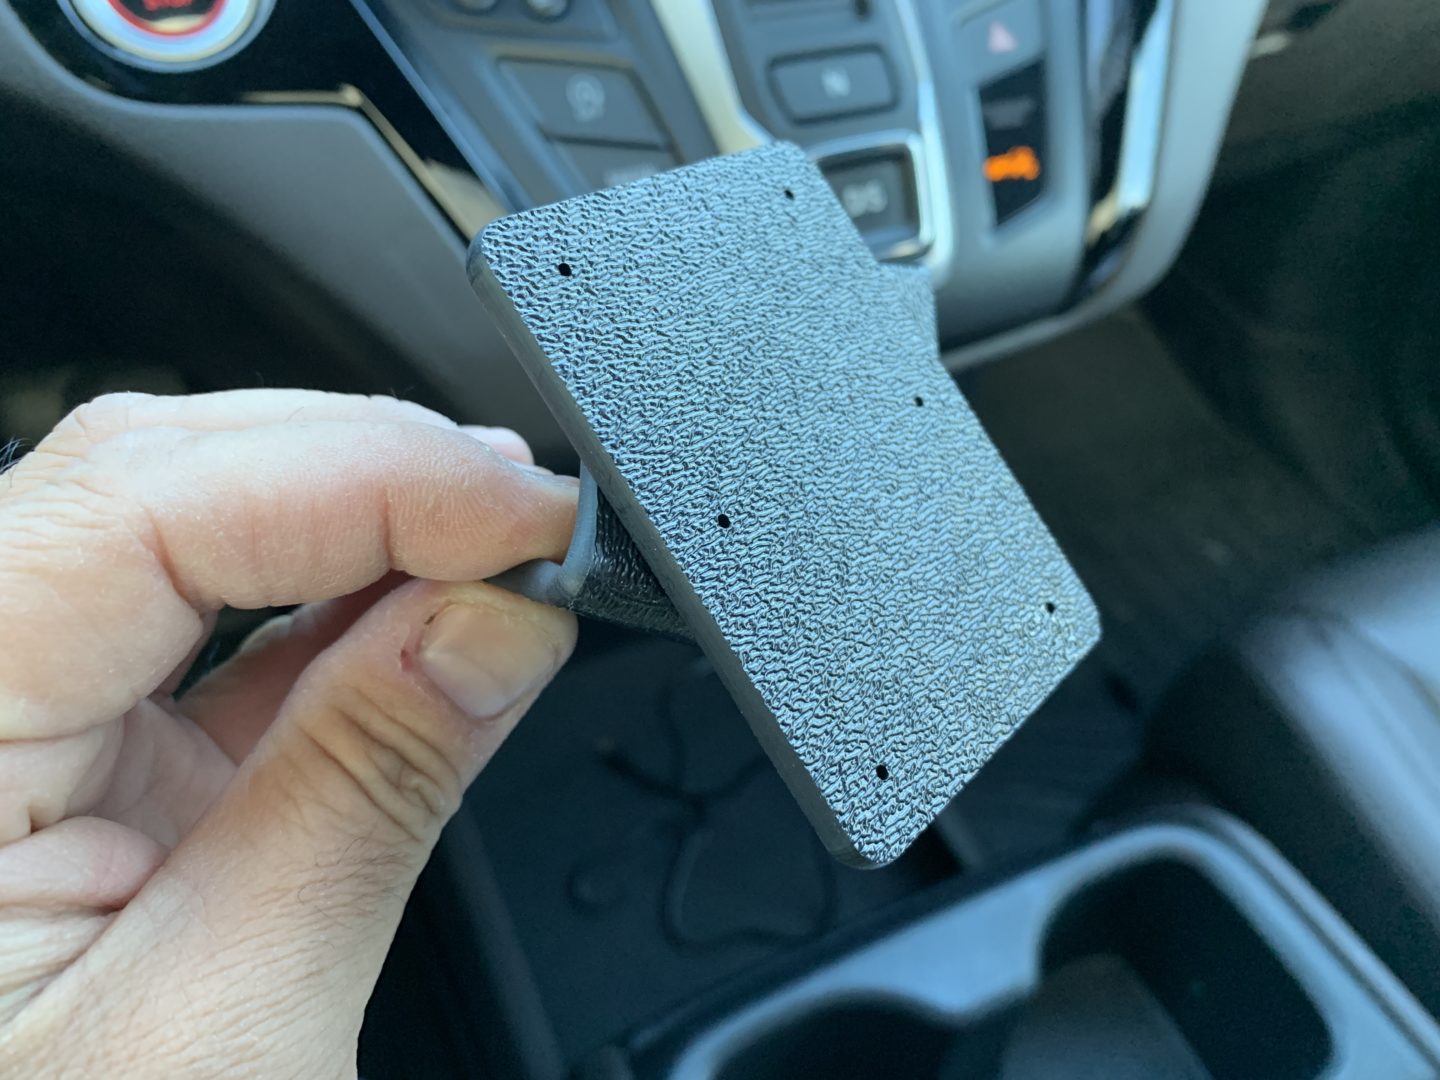
For the dash mount, you can expect two pieces of ABS plastic material glued to each other. The angled piece is the part that hooks into the seams of your dashboard trim and the flat piece attaches to the device holder that you choose.


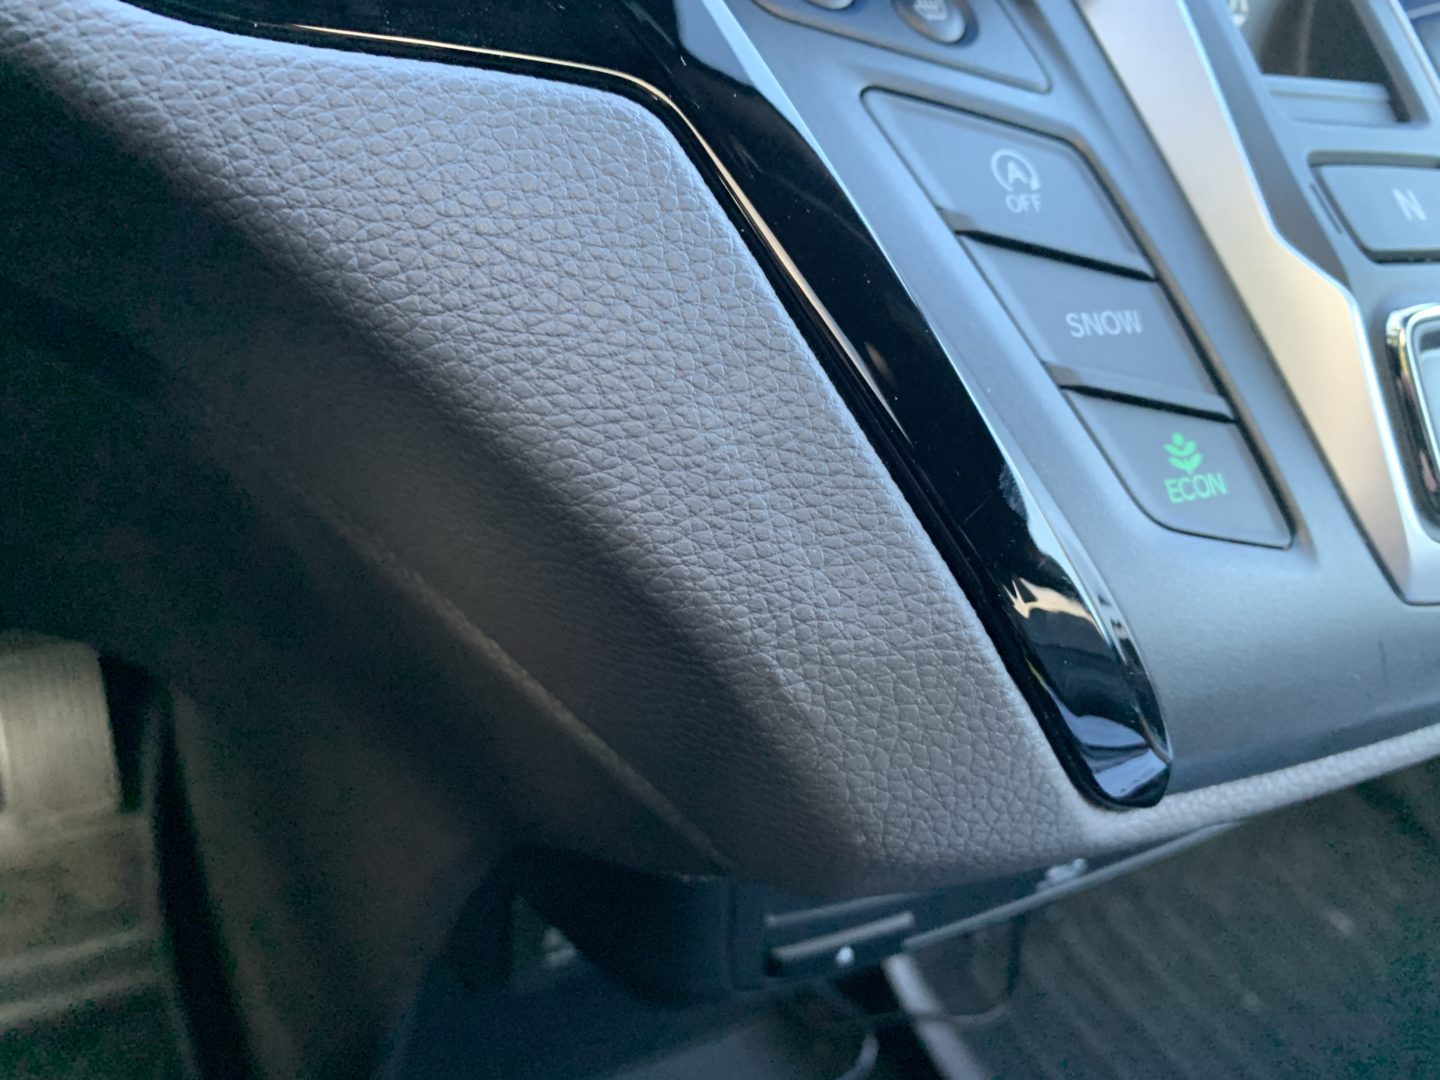
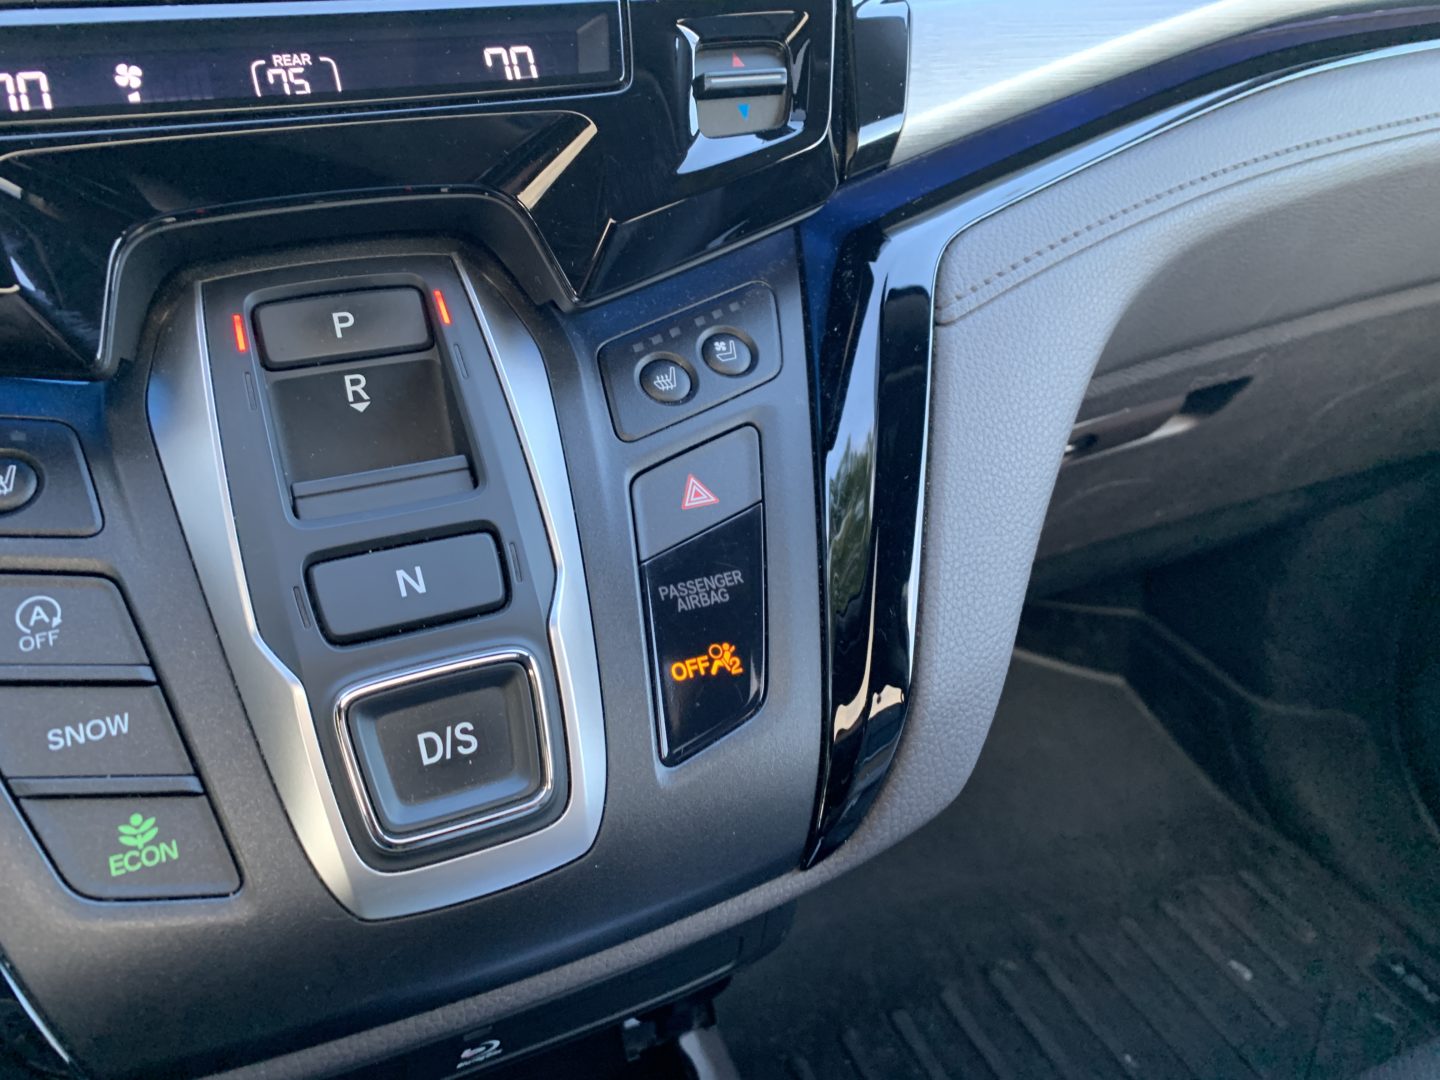
Below is the left side of the center dashboard that this Left Side Mount will attach to. The phone mount will basically attach to two seams: the seam visible on the lower left of the photo and the seam between the soft material and the glossy hard material.
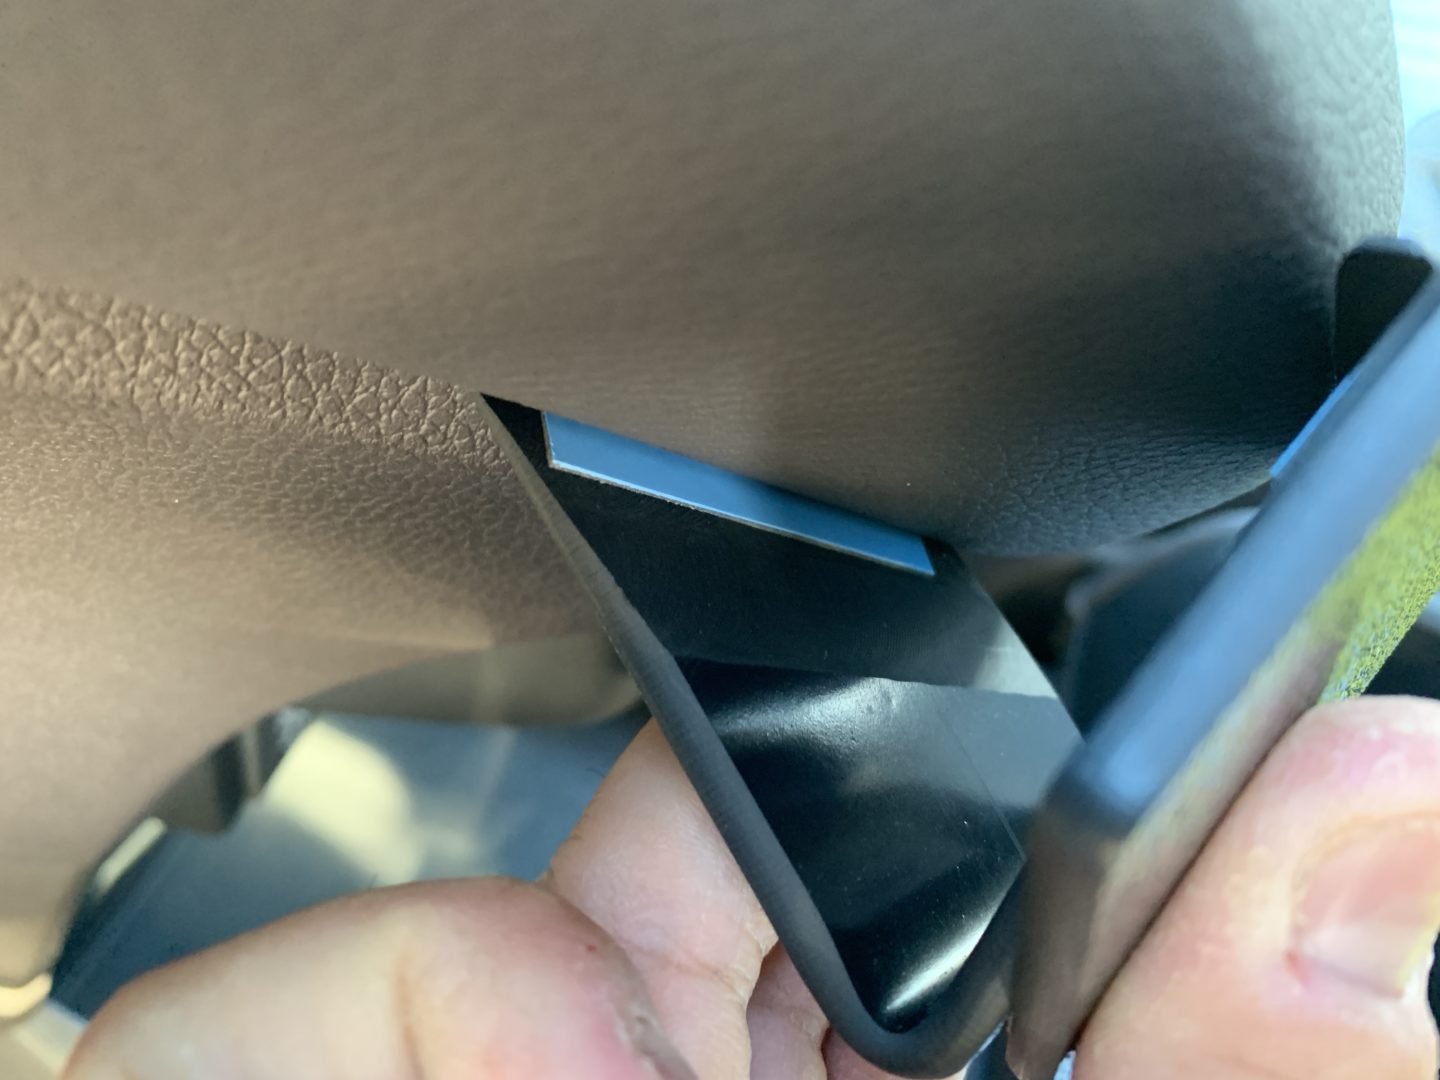
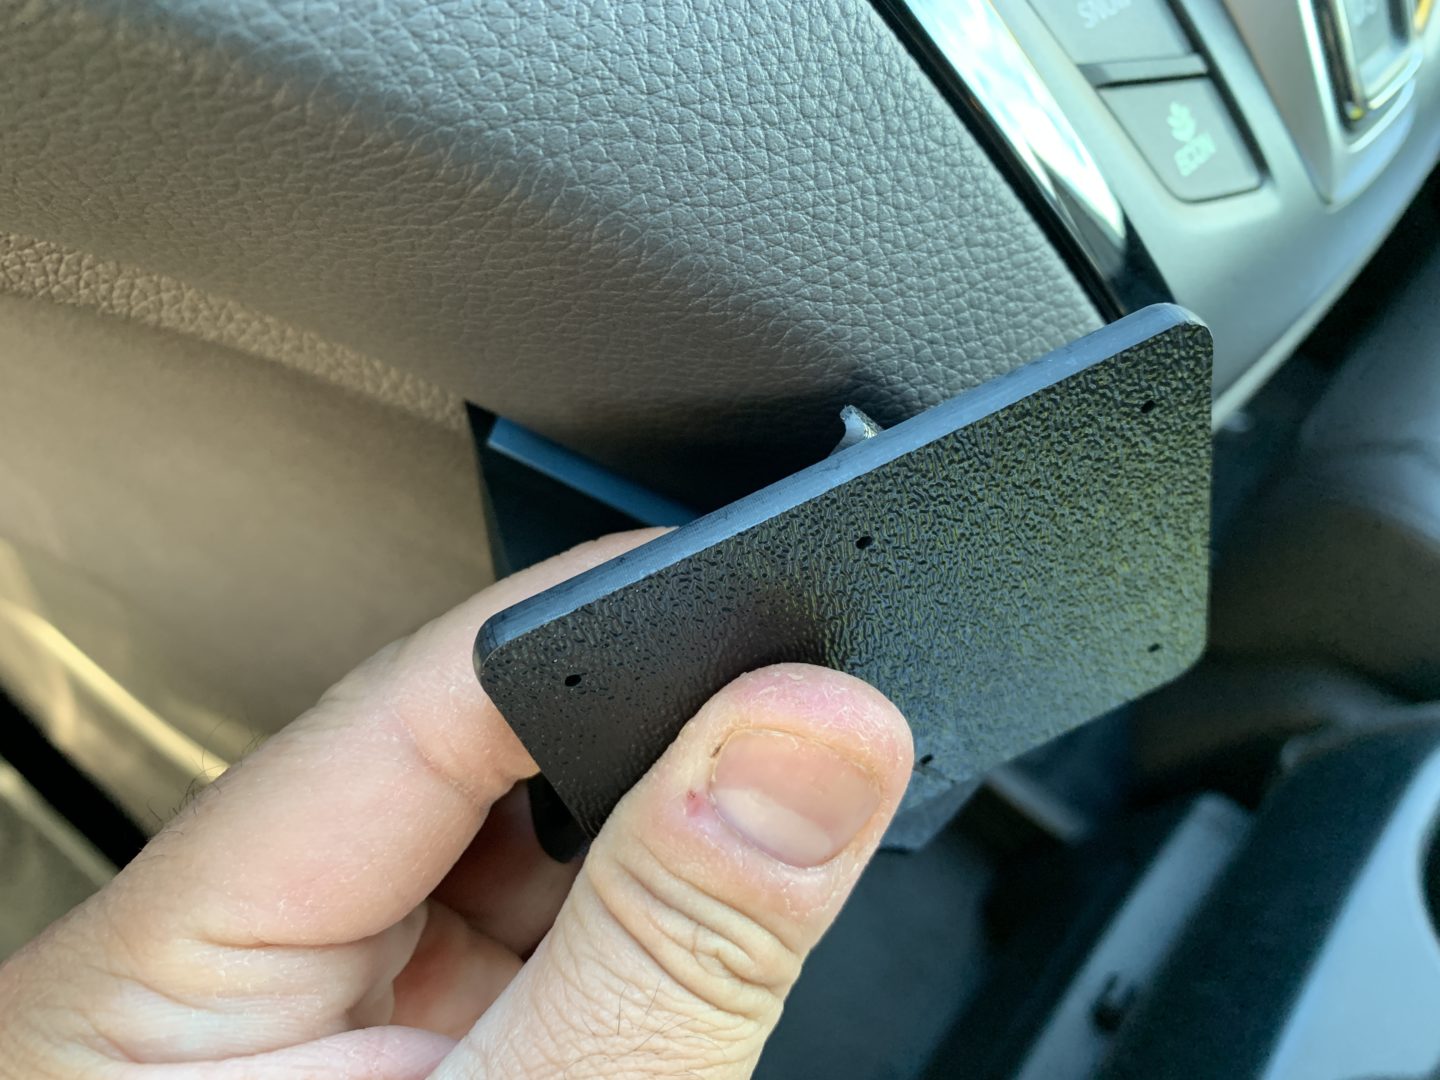
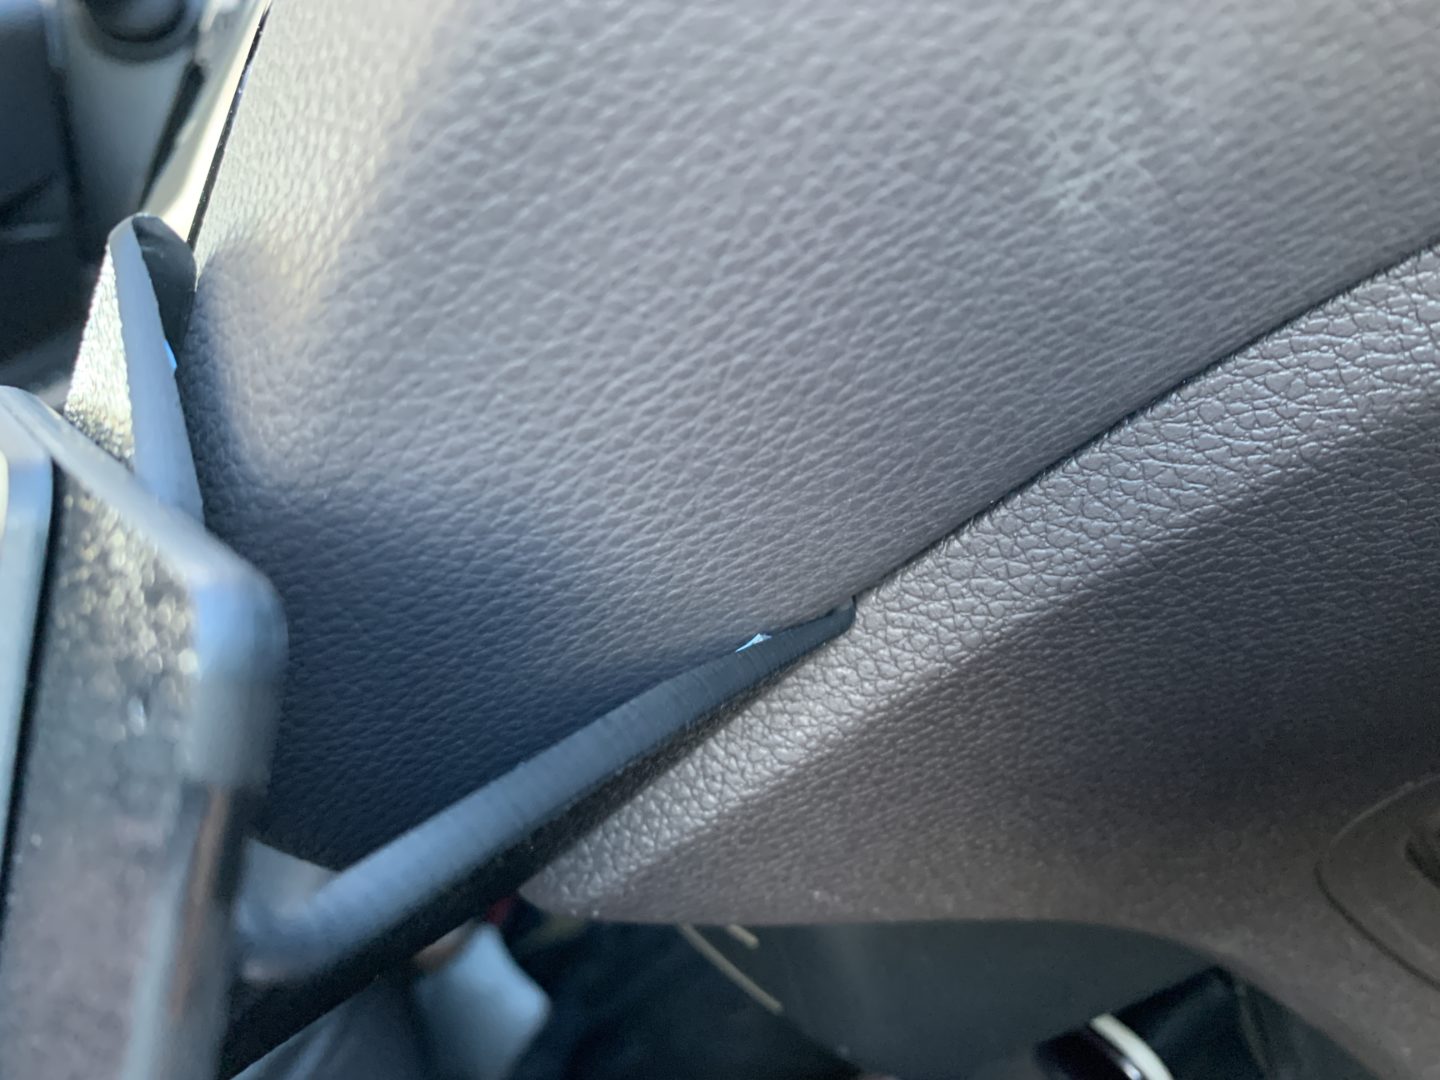
There’s no need to remove any trim to install this mount. You first need to insert one edge into the bottom seam; as you slide it up into place you will see that it can hook securely into this seam. You’ll then need to slide this up to the position you want the mount to be eventually situated.
Then with some force, pull the other angle leg up and over until the leg can seat into the upper seam (the one between the soft material and the hard black glossy trim piece.) This should also clip into the seam and hold firm. And that is it, the dash mount is installed! Keep in mind that the instructions say that this mount is not intended to be constantly removed and installed, otherwise it can damage the dash.
I’d like to add that if you do not use enough force to pull the angle piece up-and-over the soft dash piece, it will probably scratch or scuff that soft dashboard surface. The dash mount is hard ABS plastic and the edges are a bit sharp, so you really need to pull up the second leg of the angle, bring it over the soft portion of the dash, and then hook it into the seam by the hard plastic trim in order to prevent damage.
*I showed how to install this mount without a device holder, however it is advised you install the device holder ball joint to the dash mount first before installing. This prevents you from trying to mount it while the dash mount is installed–leading you to scuff up and damage the surrounding trim on your dashboard.


Qi Wireless Charging Phone Holder (#10120) Install
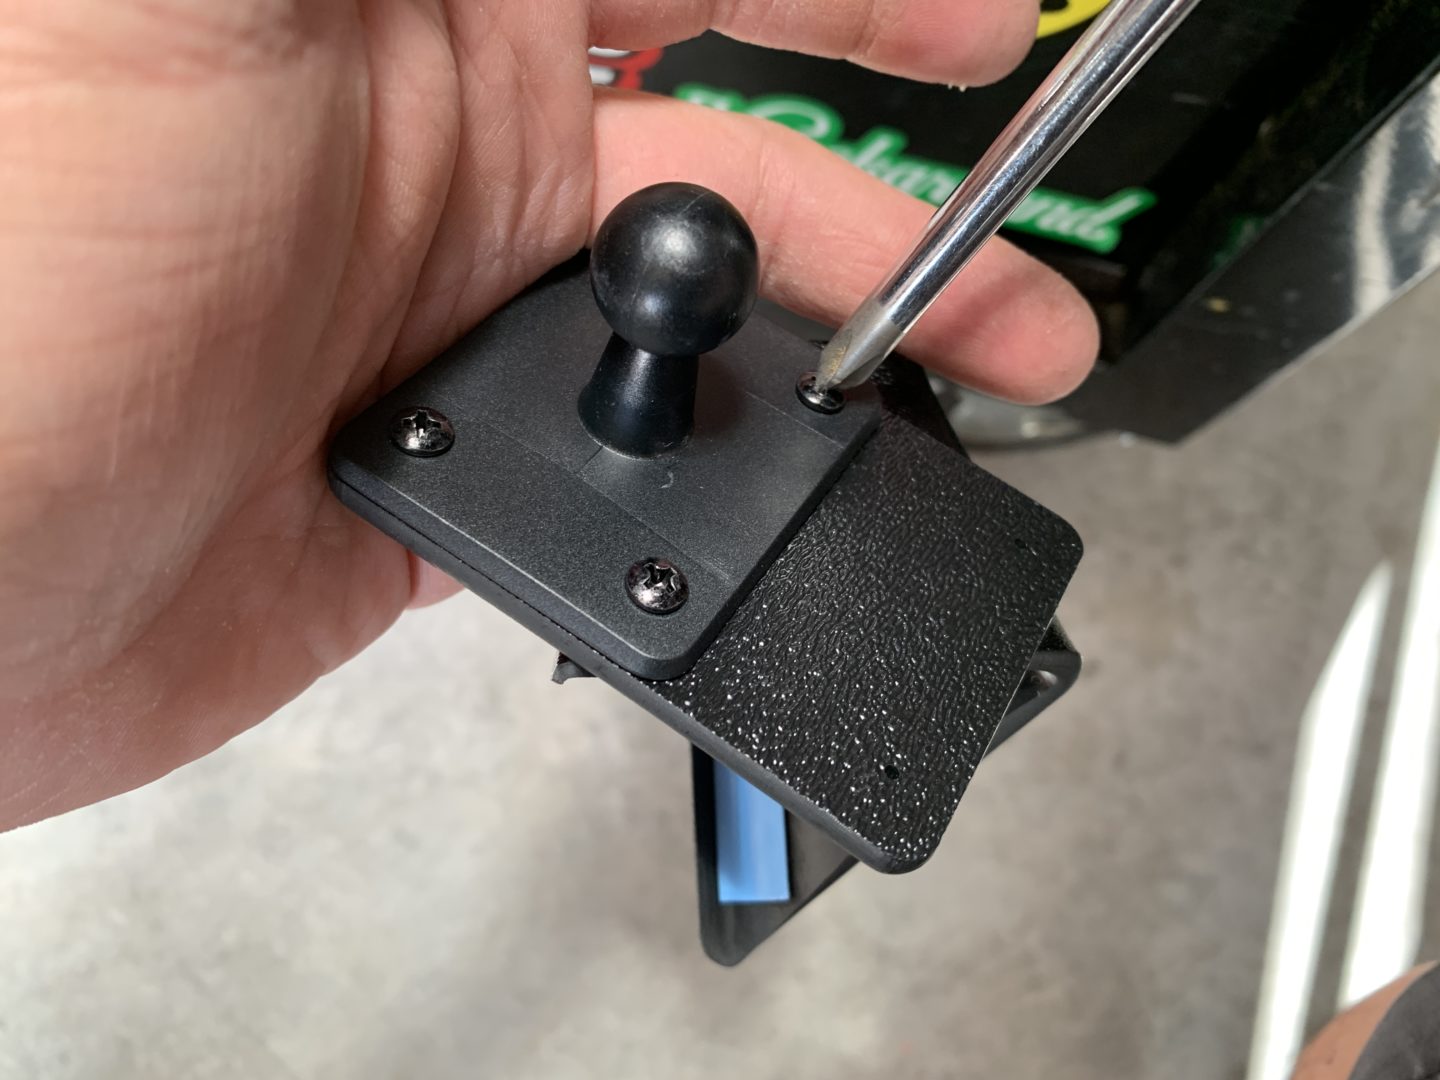
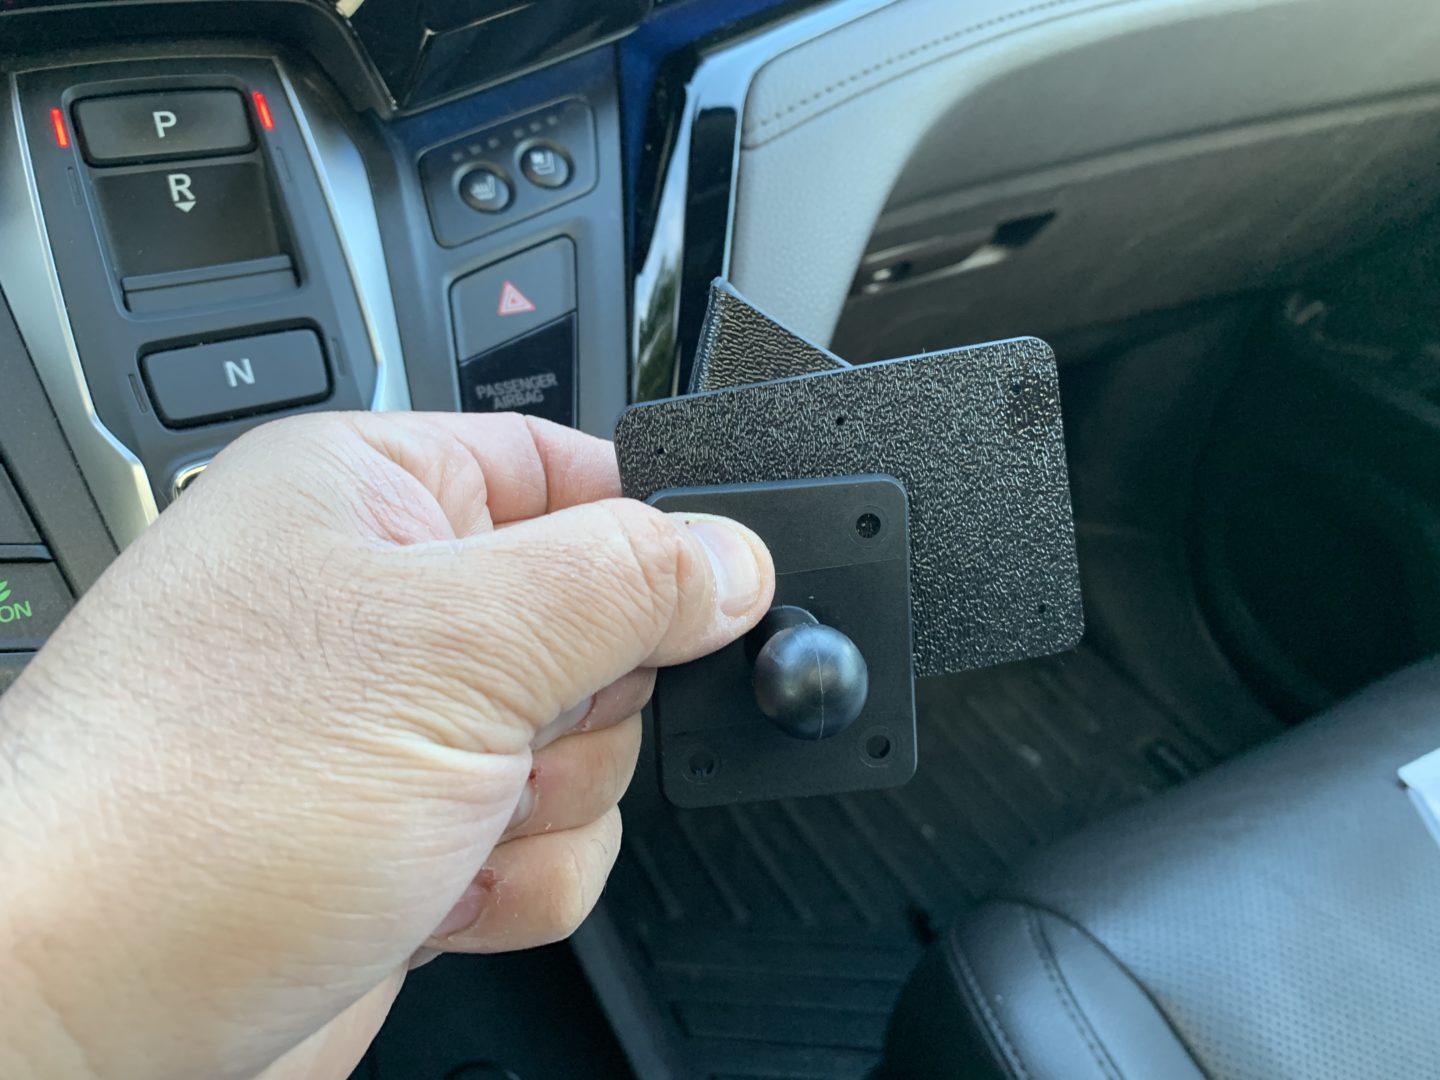
Now, you will use your device holder to install to the dash mount. On this Left Side Dash Mount, I’m installing a Qi Wireless Charging Phone Holder. First, the holder will need to be separated from the ball joint. The ball joint should be installed first to the dash mount first as this is the only way you’ll be able to access the mounting screw holes.
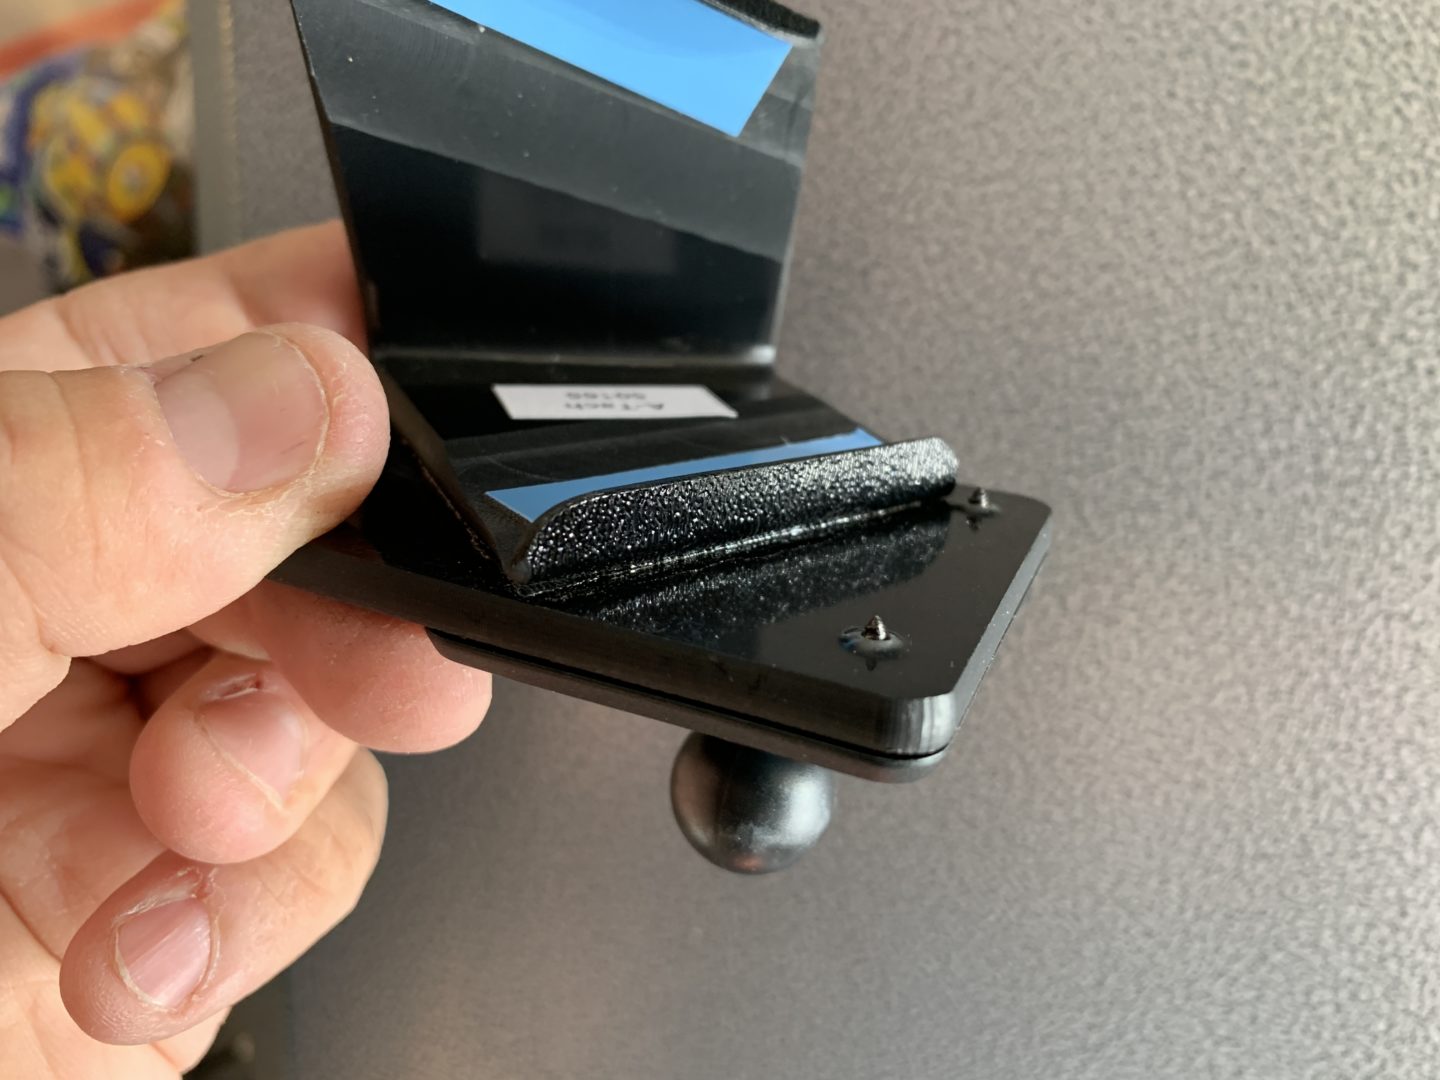
There are two mounting positions depending on whether you prefer the phone to sit a bit to the left or a bit to the right of this mount. The mounting screws supplied with the phone are a bit too long in that they protrude out the back. This doesn’t cause any problems, but there are sharp points sticking out a bit in the back but it doesn’t present a problem as it didn’t touch anything.
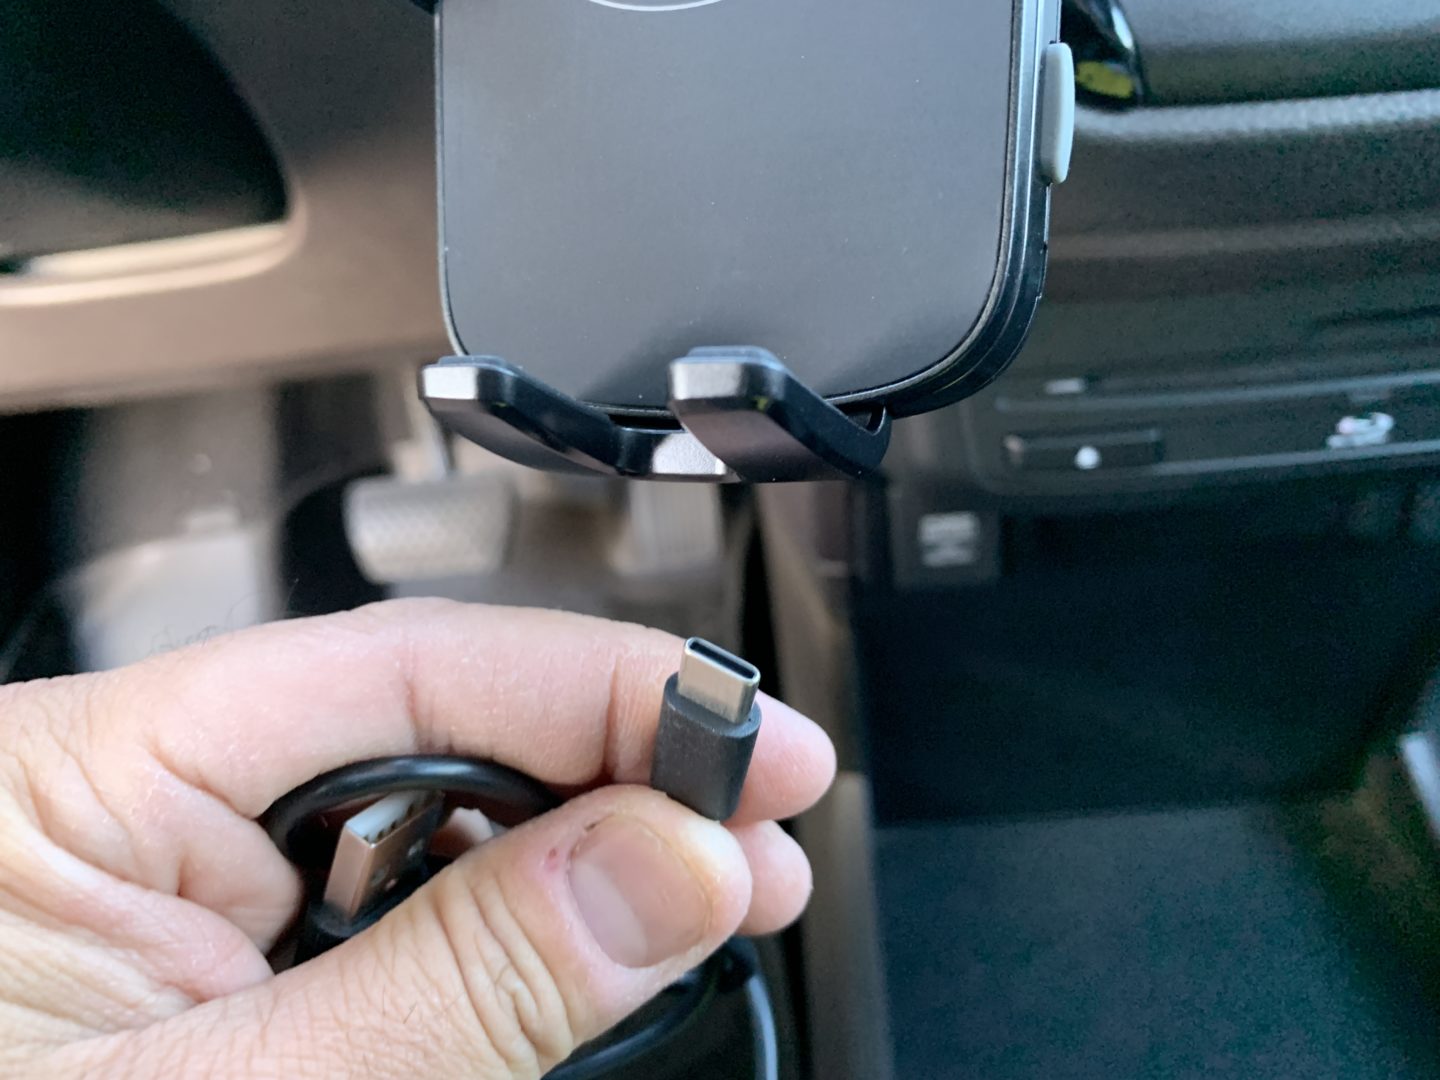
Then you can put the tightening ring over the ball joint, pop the Qi Wireless Charging Phone Holder into it, and then tighten the tightening ring as necessary. Then plug in the charger (it includes a USB-C charging cable, but no power adapter.)

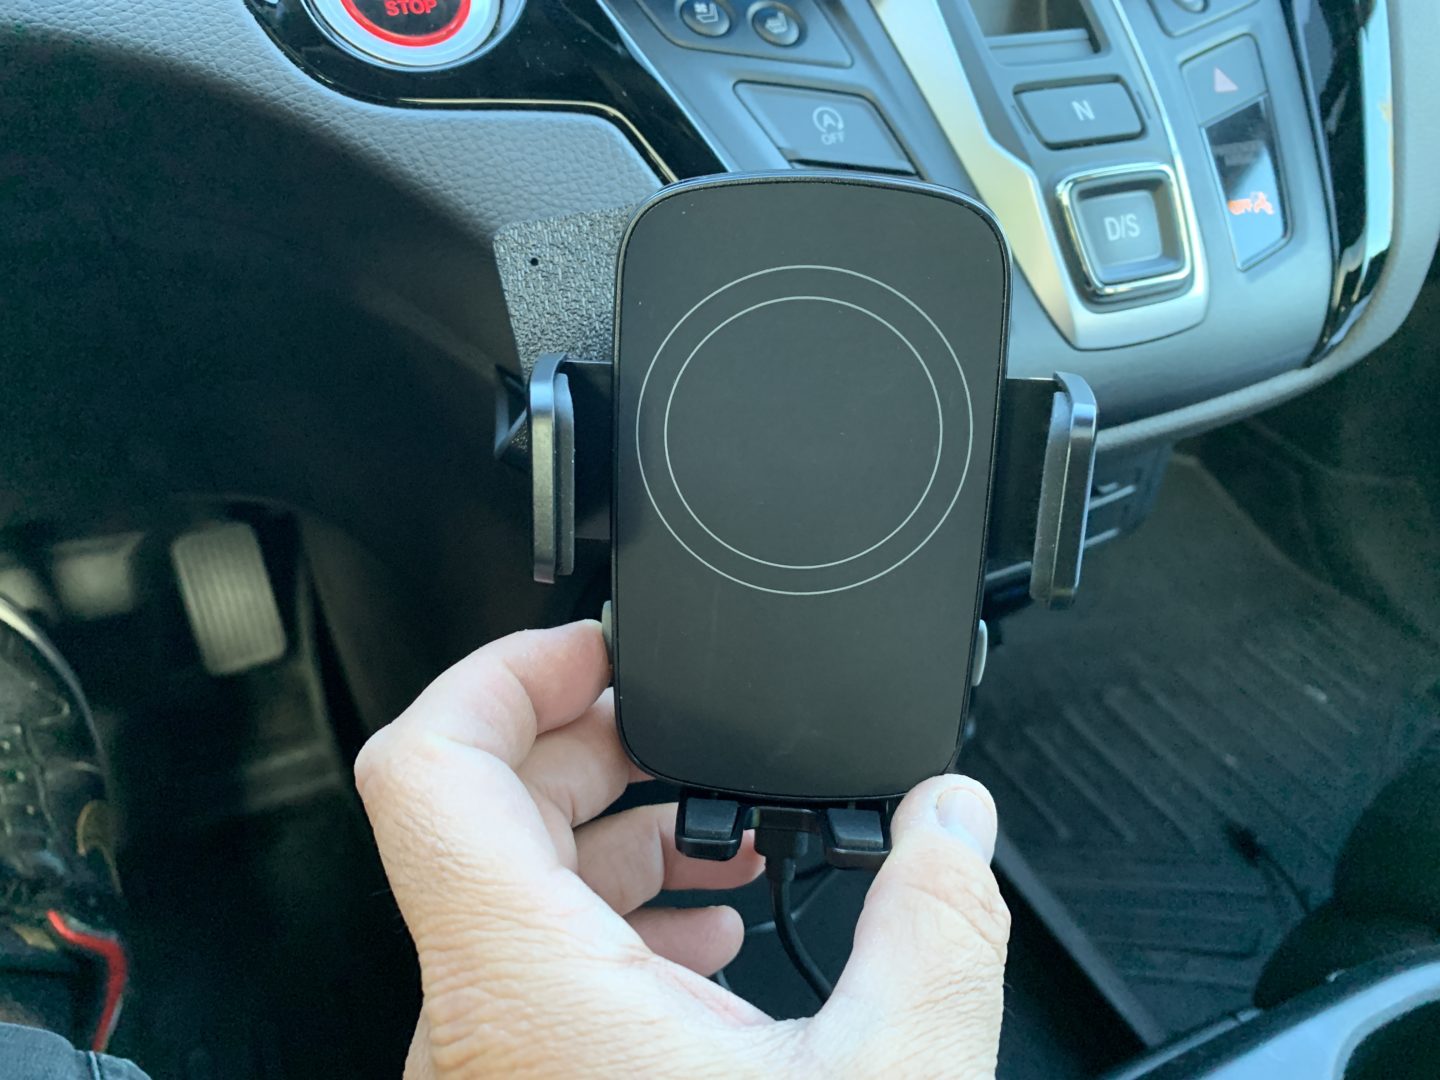
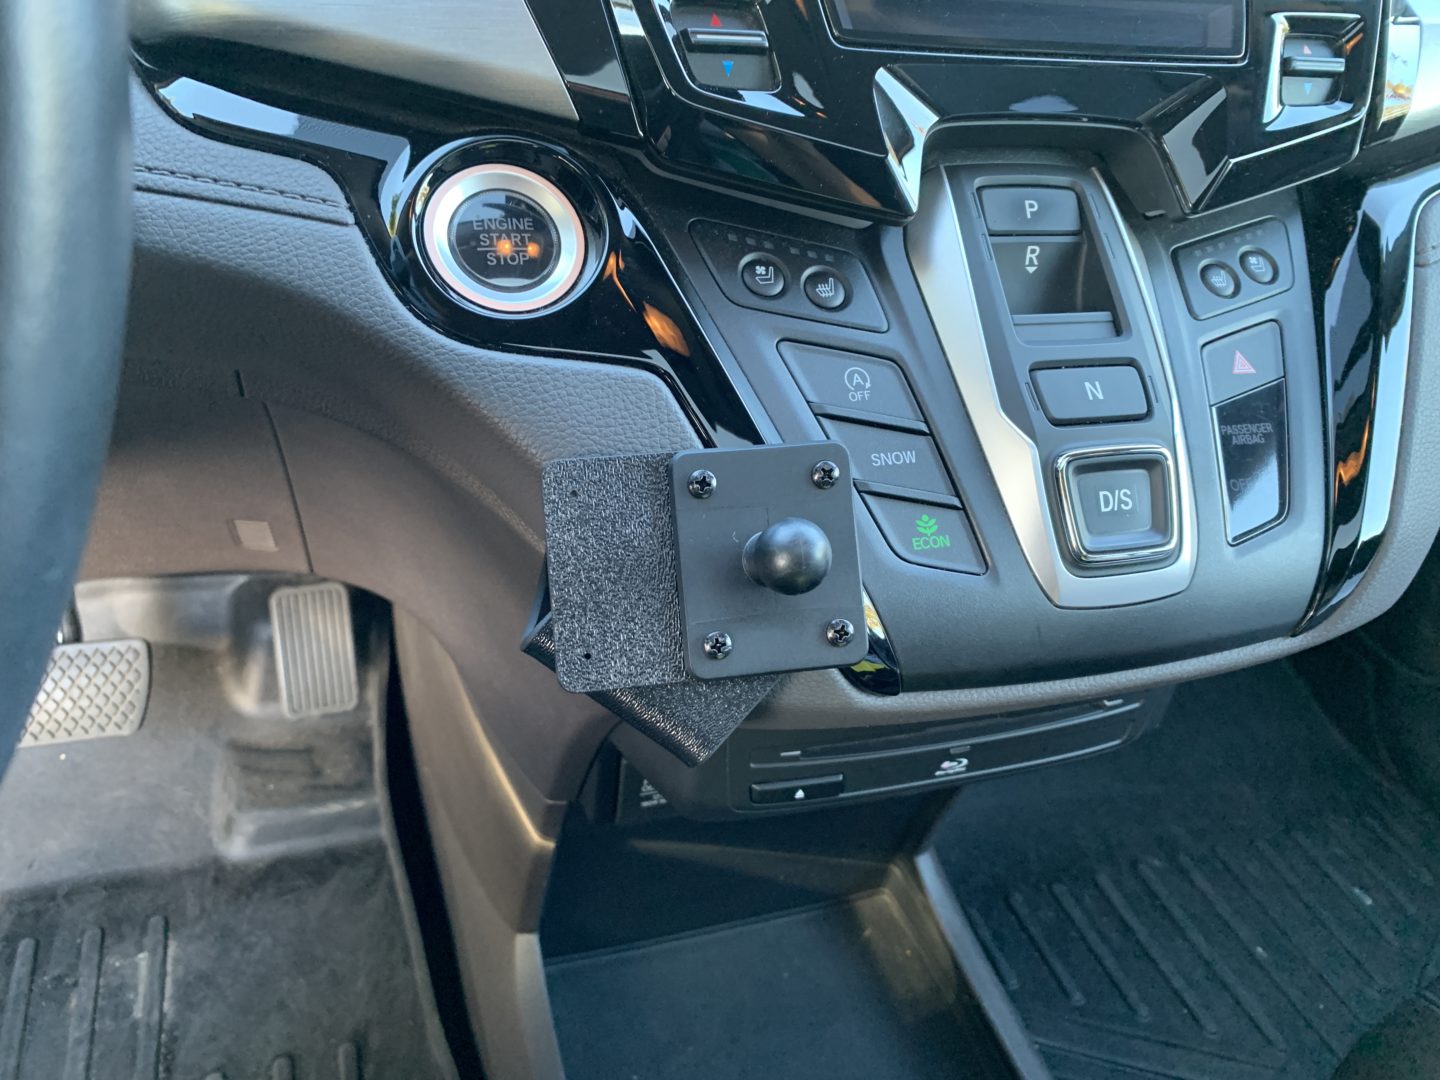
Once you have it all hooked up, you just place your phone in the holder and it wirelessly charges your phone. This Qi Wireless Charging Phone Holder has electronically-controlled side clamps, which are activated using either of the grey buttons on the side of the holder. Once the device holder is charged up, the side clamps can move even if the cable gets disconnected.

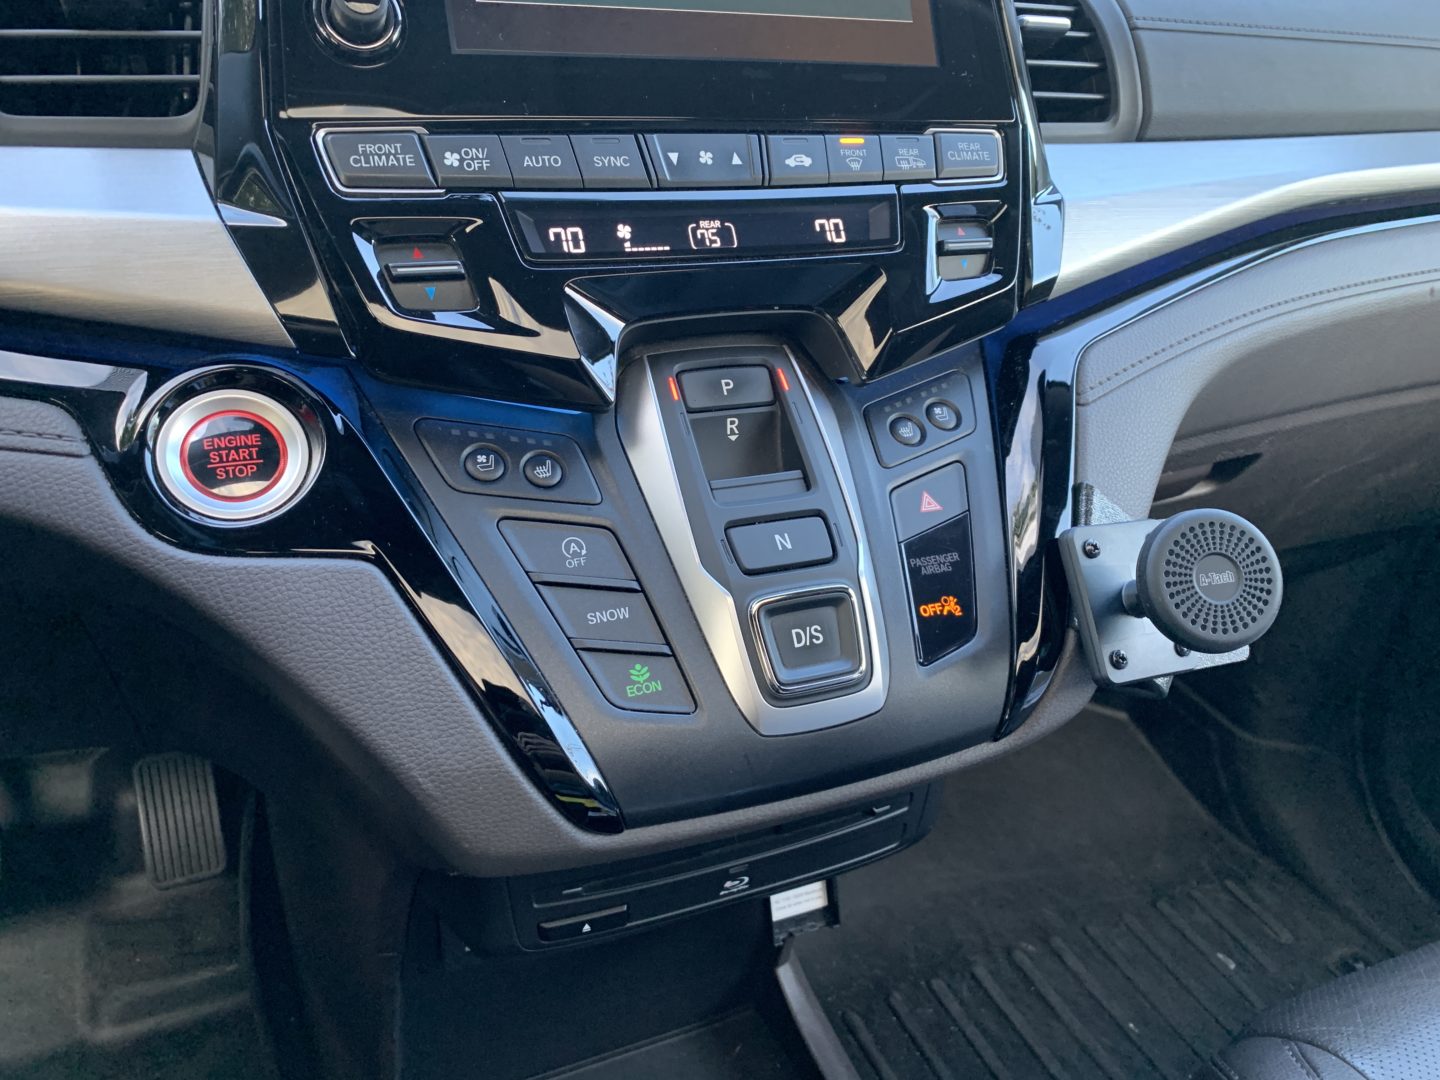
For this Left Side Dash Mount from A-Tach, I like its placement over the Right Side Dash Mount. It allows for easy access from the driver (the right side mount is a bit too out of reach for me.) And the only downside for me is that it does block direct access to three buttons on the center dash: the Auto-Start Stop Disable, Snow Mode, and ECO Mode. This doesn’t bother me much because these are probably the three least-used buttons that I use on the dash.
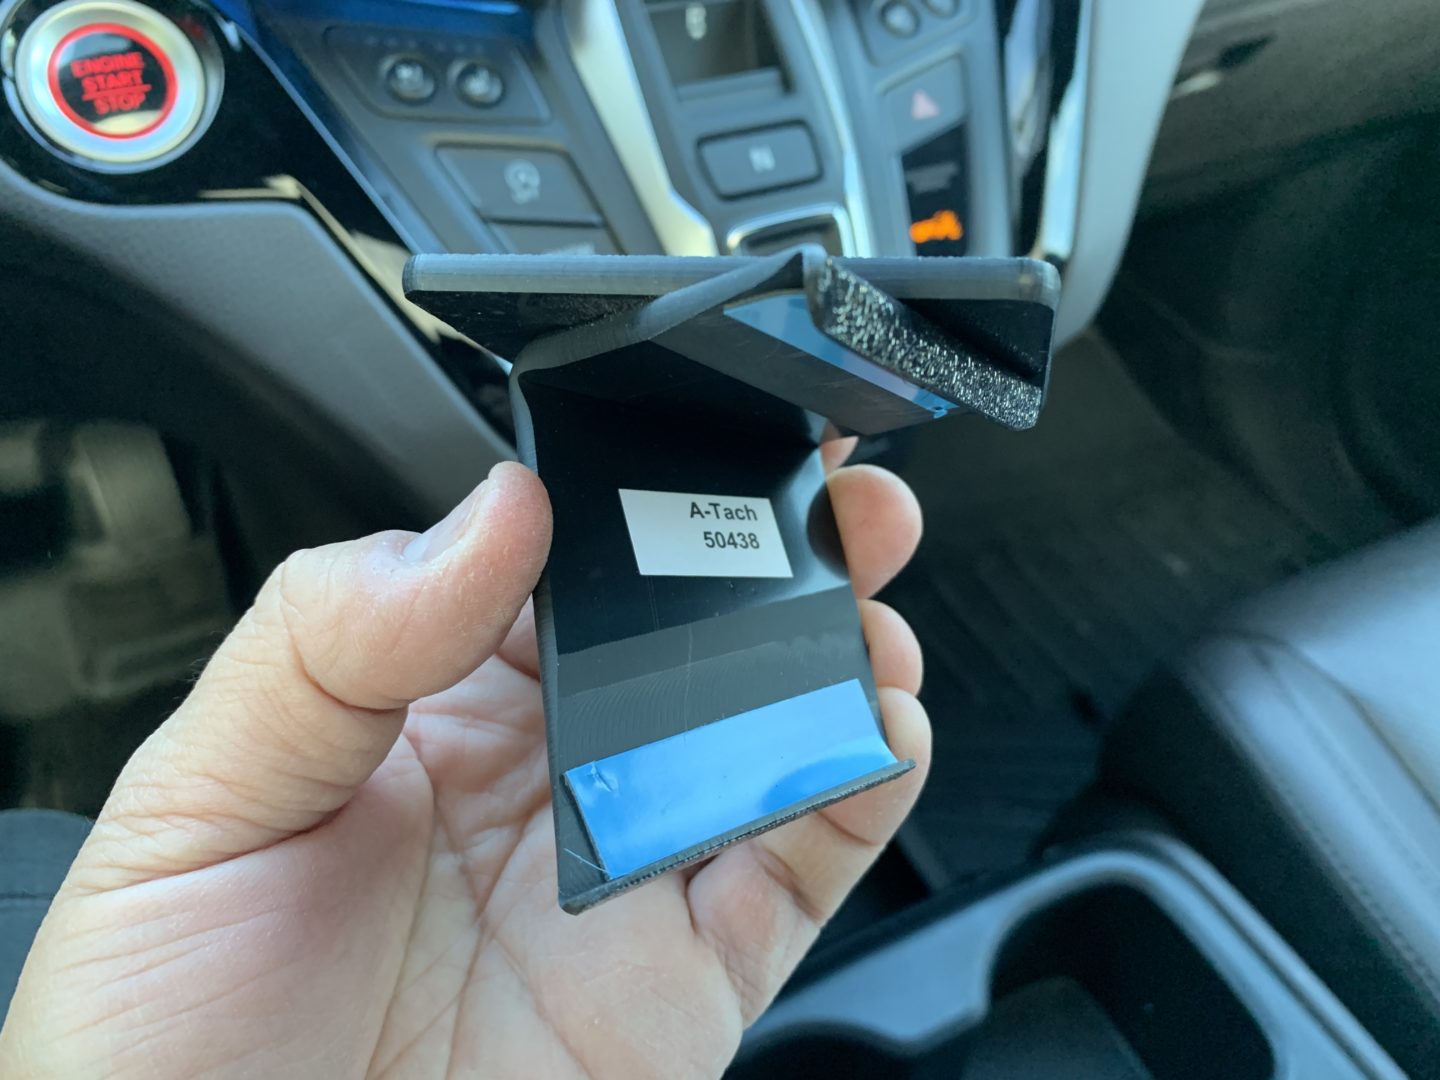
A-Tach Right-Side Dash Mount (#50438) Install
Just like the Left-Side Dash Mount, this right-side mount is made the same way with hard ABS-plastic and made of up two pieces glued together. The angled part of the ABS-plastic hooks into the seams of the right side of the center dash and the flat piece is used as a mounting board for the device holder you choose.
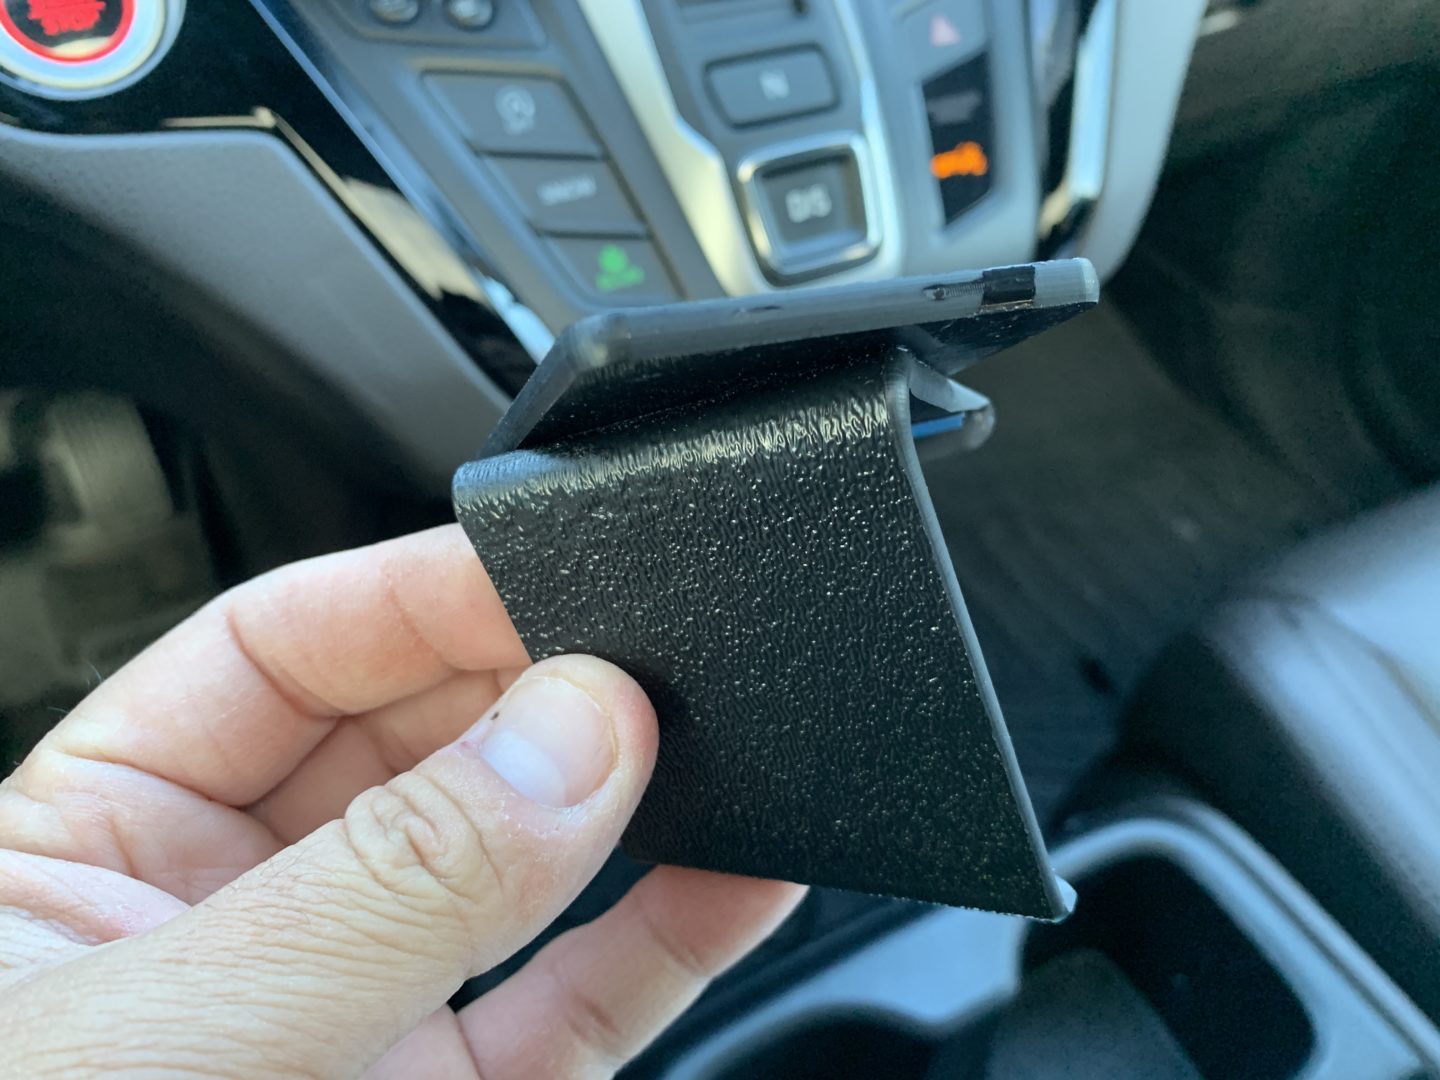
The installation of the Right-Side Dash Mount will look identical to the install for Left Side Dash Mount. You will also be clipping the dash mount into the seams of your right-side dash.
Prior to installing the dash mount, you should install the ball joint for the device holder you are using first. As I mentioned earlier in this post, it ensures you’re not moving the mounted dash mount, which can cause damage to your dashboard and trim. Similar to the Left-Side Dash Mount, the screws provided are a bit long so they protrude out the back of the dash mount. I didn’t encounter any issues with this, but just know that the tips of the screws are pointing out the back by maybe a couple millimeters or so.


A-Tach Magnetic Phone Holder (#10801) Install
To mount the phone holder, slide the bottom leg of the angle up and behind the seam as shown. Slide it further up to the location you want the mount to be located and then carefully pull the other angle with force up-and-over the soft dash until it can fit into the seam between the soft dash material and the hard glossy black trim piece.

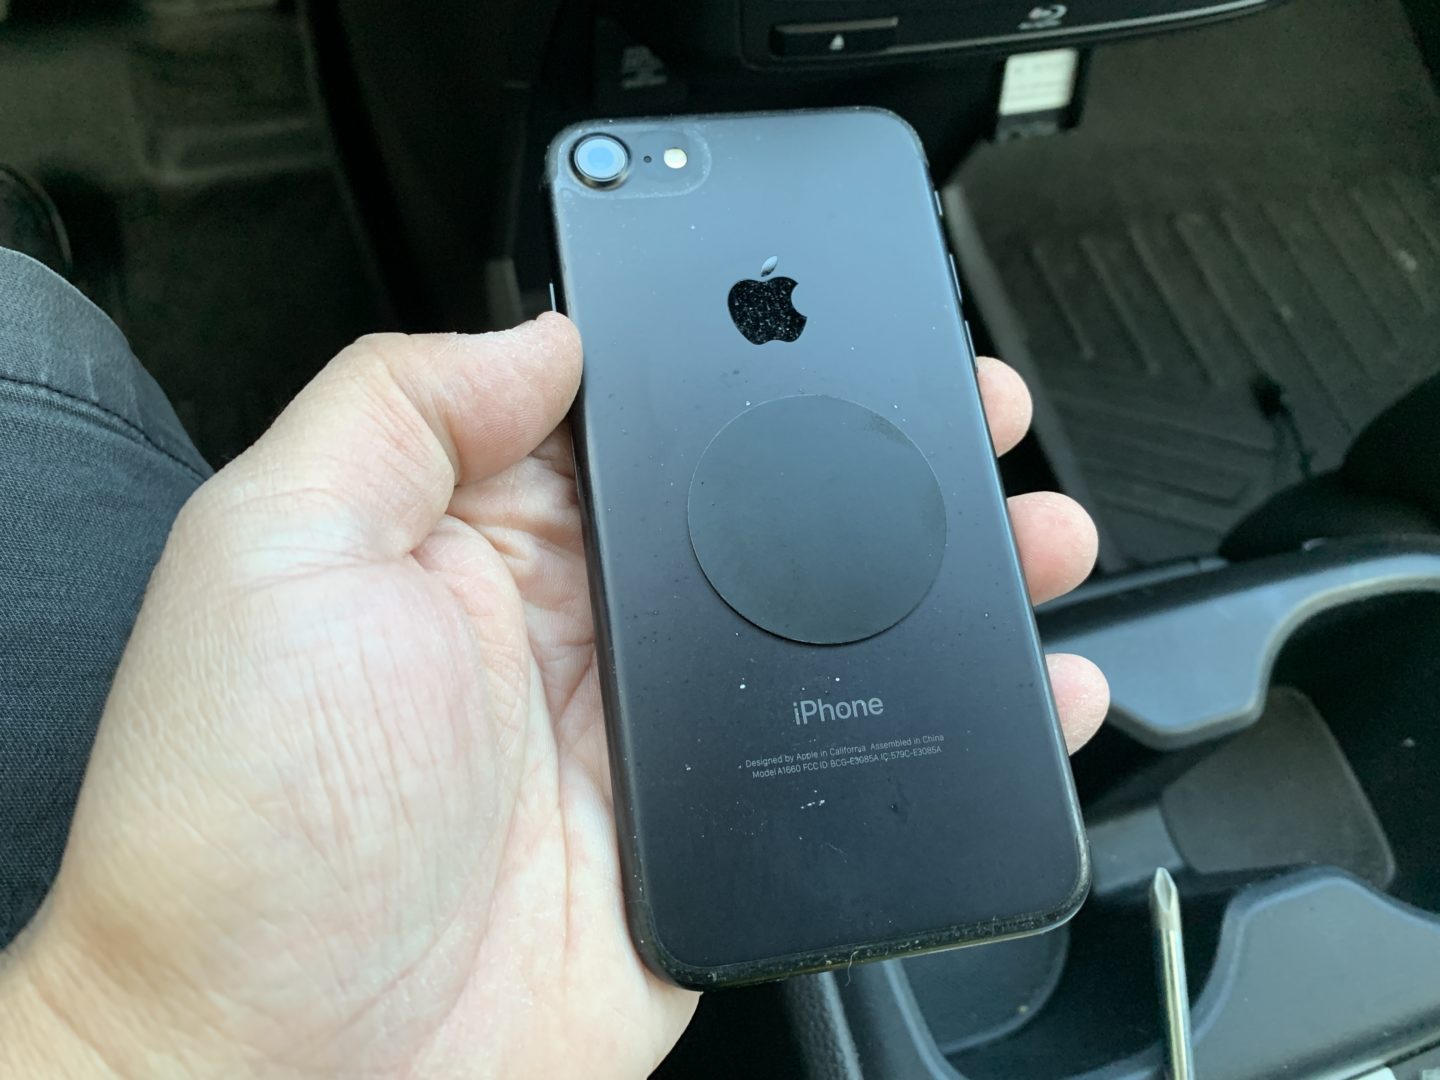
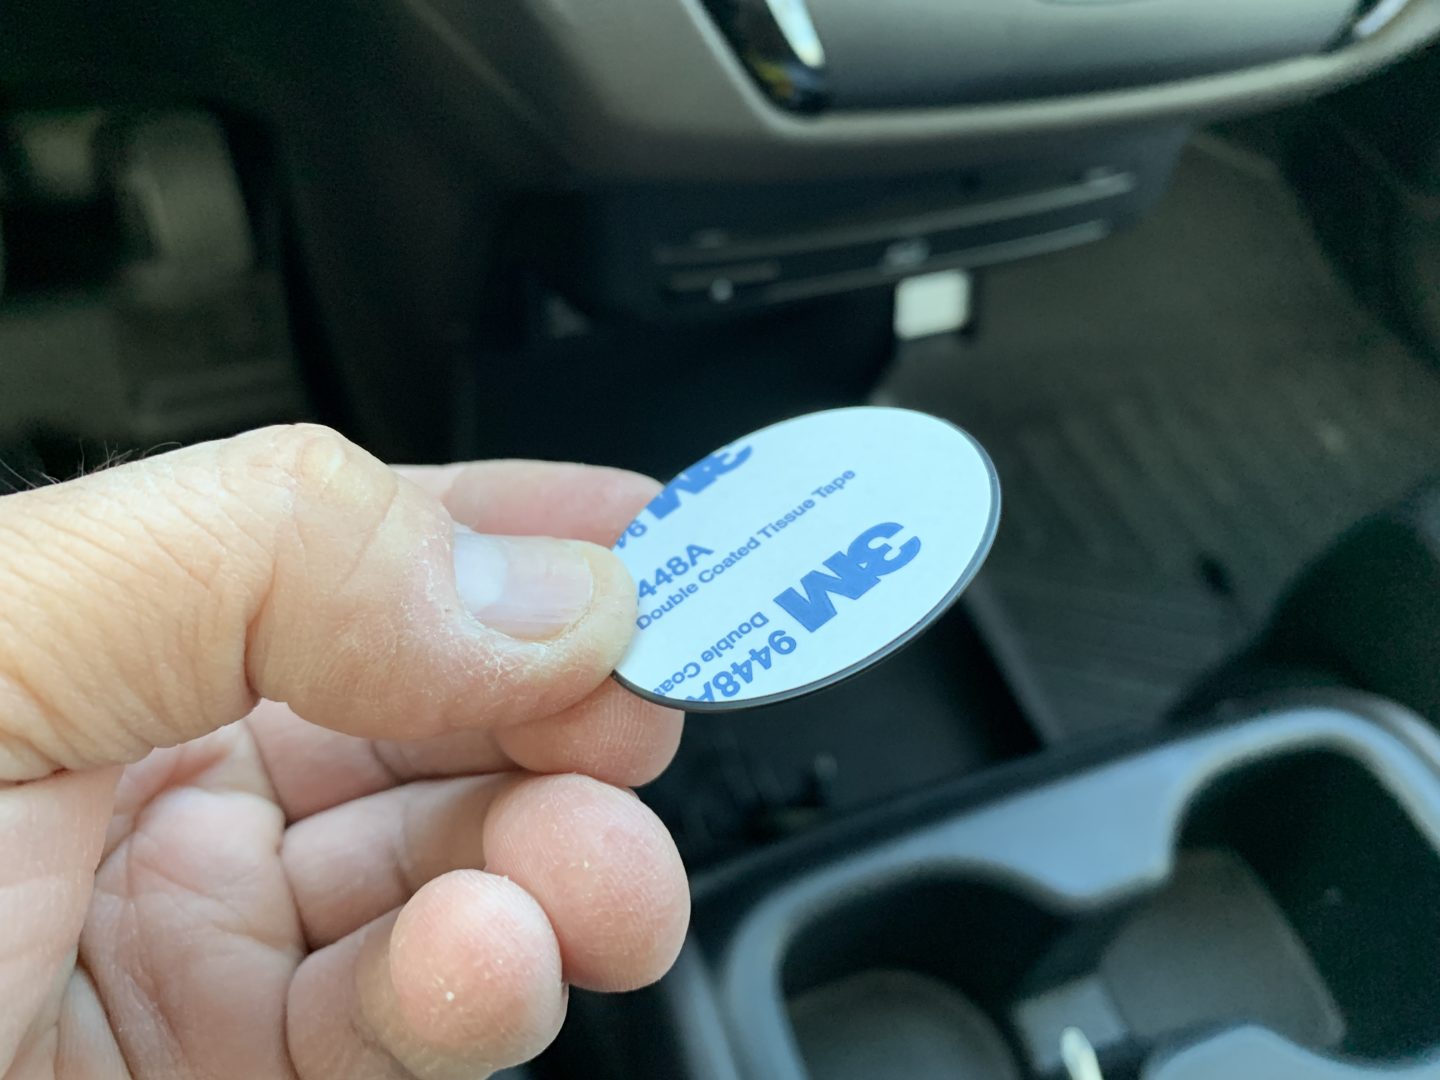
Included with the magnetic phone holder are two magnets that stick to your phone or phone case. One magnet is round, the other is more of an oblong shape. The magnet is very strong, so when the phone is attached to the mount, it holds very secure.
Although this right side mount was more out of the way and did not block any of the center dashboard controls (as the left side did), it just seems a bit out of reach for me. Now, if you’re getting this mount for the passenger to use, then it works great. Also, it could be useful if you just want the phone out of the way, but still mounted in a specific place on the dashboard.

My Final Thoughts on the A-Tach Car Phone Mounts
Overall, I like these A-Tach phone mounts and they are about $10 cheaper than the Pro Clip USA ones. They have a perfect fit as they are custom-made for the 5th Generation Honda Odyssey (2018-2024). Both left side and right side dash mounts work similarly, mounting to the seams in the dashboard trim. As I stated my preference earlier, I much prefer a mounting system that does not permanently damage the car’s interior, and so far I think this type of mount is the way to go.
The dash mount material looks 3D-printed and has some hard edges. I wish that the protective strips they added to the dash mounts weren’t just strips, but actually covered more of the plastic for more protection. Also, the screws that hold the device holder to the dash mount need to be slightly shorter so they are not protruding out the backside.
In addition to the Qi Wireless Charging Phone Holder and the Magnetic Phone Holder, there are a number of other phone holders that are offered by A-Tach that can be used in conjunction with the dashboard mounts. They even offer some tablet mounting options as well. If you are okay with installing a magnet on your phone or phone case, then I think the magnetic phone holder is the cleanest looking option.
Overall, the A-Tach Car Phone Mounts have an excellent fit that keep you from damaging your car or removing certain features in order to install a mount for your phone. I think these mounts lack a few fine finishes, but they do the job and they do the job well. These types of mounts offer a clean way of getting your phone mounted off to the side so you’re not storing your phone in the cupholder or on top the center console (what I used to do.) Most importantly, I think that they offer a great price compared to the more expensive Pro Clip USA brand, and they have a better left-side mounting location, which I much more prefer.
")
")
")
")
")
")
")
")
