When you make purchases through links on this site, The Track Ahead may earn an affiliate commission. Also, these posts are based off my own experiences. I am not responsible for any action you take as a result of reading this. Learn More
What is Orange Peel and Why Would you Remove it?
Orange peel is a texture on automotive paint that resembles the outside of an orange peel. It’s texture is wavy and not smooth. When vehicles are painted and then clear coat is sprayed on as a finishing protective layer, it leaves behind some degree of orange peel. Almost all vehicles from coming from the factory will exhibit some level of orange peel. Below is an extreme example of orange peel after spraying paint.
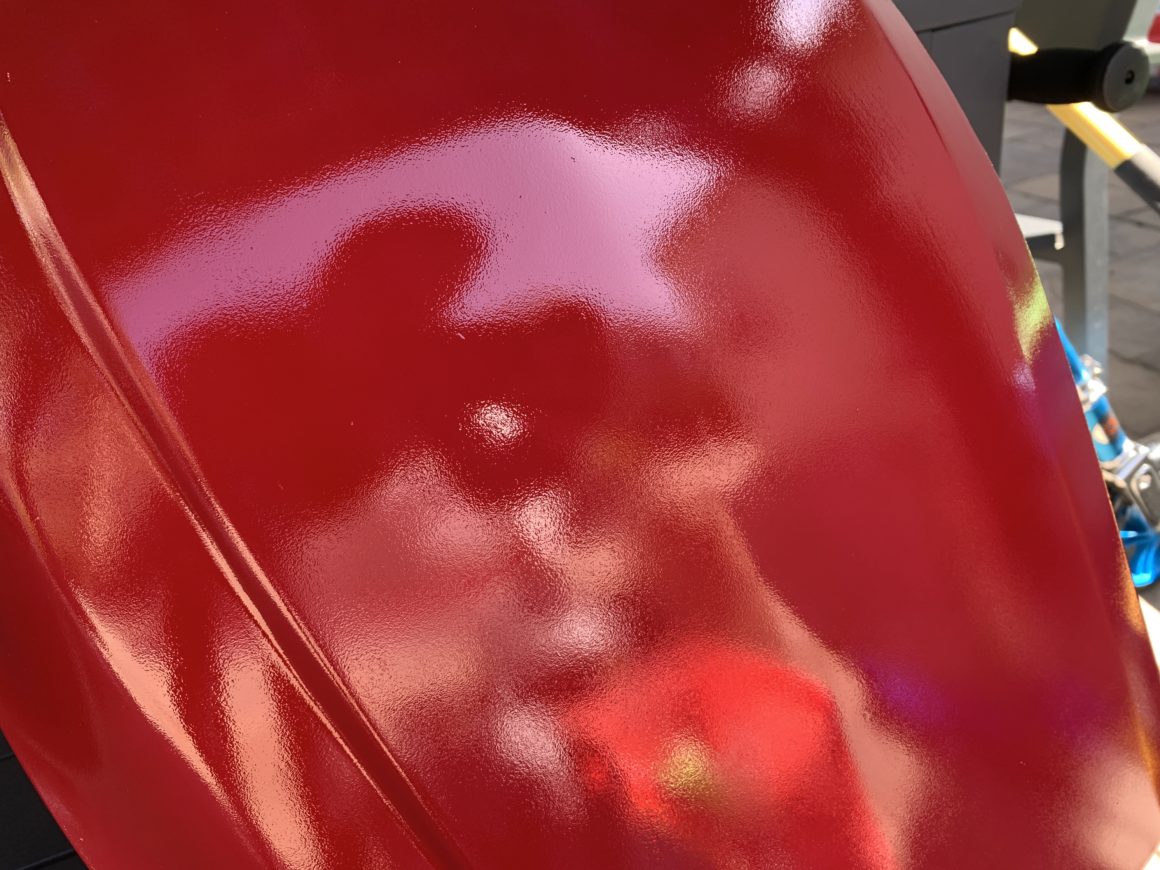
Because the texture of the clear coat on this paint is wavy like an orange peel, it is not perfectly smooth. Therefore, when light reflects off of it, you see this unclear reflection. On the other hand, if you had a surface that was completely smooth, it would reflect back a mirror image on the panel.
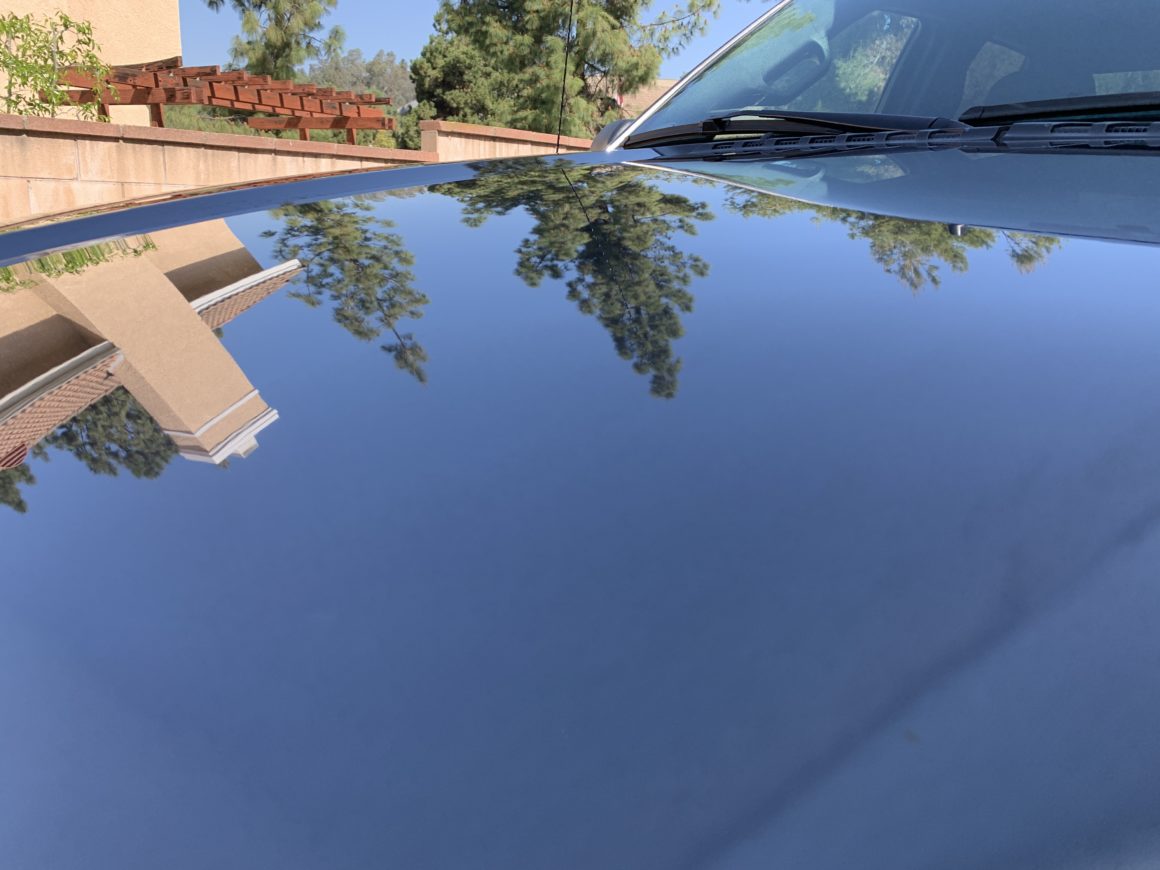
There are varying levels of how much orange peel a paint surface has. For example, factory automotive finishes and high quality paint jobs can have minimal orange peel and exhibit a nice reflection such as the below image. This is pretty close to a mirror image, but even still it is not a 100% perfect reflection.
In order to remove orange peel, you will need to remove a small thickness of the clear coat in order to smooth out the surface. If you can imagine the surface of an orange peel, it has high spots as well as valleys that are the low spots. In order to get the orange peel surface to be a completely smooth surface, you’d have to grind down the high spots to be level with the low spots to make it level across the entire surface.
With a car’s paint, this can be achieved by polishing and/or sanding the clear coat. Polishing the car using polishes or compounds is a less aggressive way to smooth out the paint surface, meanwhile sanding (or wetsanding) the surface will be more aggressive in nature. The sanded surface would then need to be followed up with a polish to remove those larger scratches created from the sanding.
So when you are determining if you need to remove the orange peel from your car’s paint, you should consider a couple things. One, how much clarity in your car’s reflection do you actually want? And two, how much of the clear coat (protection) are you willing to sacrifice in order to achieve it?
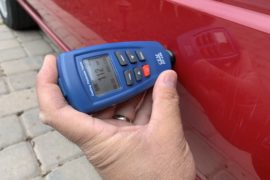
Since you would be removing more clear coat when you do more aggressive sanding techniques, this would lead to less protection of your car’s paint as a result. If you have checked the thickness of your car’s paint (see this guide if you want to learn how), and you absolutely want to have a mirror-finish, then you’d go with the more aggressive sanding methods to achieve this. However, if you are okay with a small bit of orange peel but want to add a bit more clarity to your car’s finish, polishing it alone will probably get you what you want without sacrificing too much of the clear coat. And finally, if you are totally fine with some orange peel on the car, don’t even bother polishing it at all to preserve as much of the clear coat as possible.
Sometimes it’s almost necessary to sand and polish the car’s paint to remove orange peel such as if the car was repainted and there was too much orange peel. If a car has extreme orange peel (usually the case if the car was not painted professionally), it usually needs the orange peel to be removed in order for the car to look finished. Without removing the orange peel in this situation would leave the car not looking so good.
On this guide, I’m focusing on removing heavy orange peel and the techniques used to do this. Typically the process involves sanding or wet-sanding the vehicle from lower to higher grit, then following up with an aggressive compound to buff/polish the small scratches out. I will be demonstrating both dry and wet-sanding techniques, as well as following up with a Meguiar’s compound, microfiber cutting pad, and a long throw polisher to finish it off.
Tools & Materials
Sandpaper (Wet or Dry)
The first thing you’ll need is sandpaper. You can use wet sandpaper, which is the more traditional technique. This involves using water along with with the wet sandpaper to sand the surface of the paint. 3000-grit is the least aggressive wet-sanding you can do, and if you go with 1500-grit (more aggressive wet-sanding), you will need to follow-up with 2000-grit, then 3000-grit. It depends on how aggressive of a wet sanding you need; the best way to know what you need if you’re looking to get a perfectly smooth surface is to test it out. Start with the least aggressive grit and sand a test-spot on your car, if you can produce a sanded but smooth surface, then you don’t need to go any further.
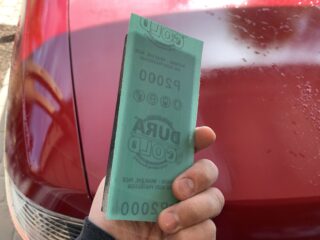
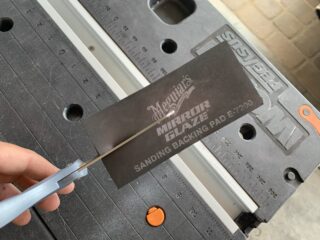
You’ll also need a backing pad along with the wet sandpaper that you need; it’s best used with dipped in a bucket of soapy water. Using soapy water with the wet sandpaper helps the sandpaper move along the surface, but it also helps to carry away the sanded particles so that it doesn’t clog up the sandpaper. I personally used the Dura-Gold ones below which have the hook & loop backing, but I used it with a regular foam backing pad that is flexible. I also cut the foam backing pad to make it easier to get a good grip on the sandpaper over the pad. No matter what wet sandpaper you use, make sure it’s a good quality one, otherwise they tear apart really easily and are not worth the hassle.
Dura-Gold Hook & Loop Backing Sandpaper Roll, 2-3/4″ Wide, 12 Yards Long:
1500 grit / 2000 grit / 3000 grit
Another option is to use 3M products which are tried-and-true, but can be pricier. If you’re sanding your entire car, you probably need to get the larger bulk packaged sheets. Otherwise, 3M offers some smaller assorted packages as well.
3M Wetordry Abrasive Sheets, 5 1/2 x 9 in, 50 Sheets: 1500 / 2000 / 2500 / 3000
Sanding Backing Pads: Meguiar’s (2.5″ x 5.5″ x 0.5″ thick) / 3M (2.75″ x 5″ 0.375″ thick)
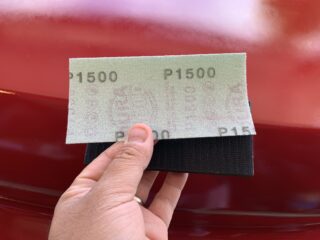
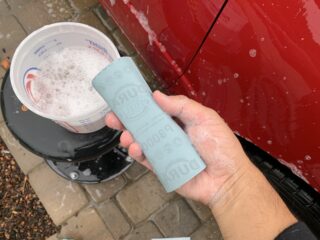
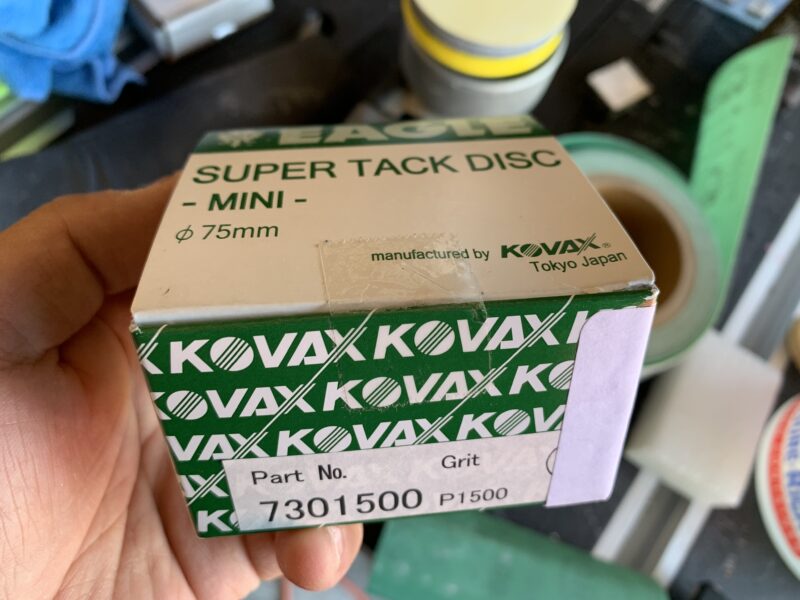
Another option to wet sanding is to sand using a dry sandpaper. This can be done by hand or with a machine DA polisher/sander. I’ve used these Kovax Super Tack 3 inch sanding discs with my Porter Cable 7424XP DA machine polisher. Using a machine offers you better results as it doesn’t leave behind as much sanding lines as sanding by hand and it leaves you with a very smooth surface. The downside is that you need more equipment like special Kovax sanding discs, foam backing interface pads, and a DA polisher.
Eagle – 3-in Super-TACK Mini Yellow-Film Discs – 50 Discs/Box:
P1500 grit / P2000 grit
Porter Cable 7424XP Machine DA Polisher
3-inch Hook-and-Loop Soft Buffering Pad, 5-pk
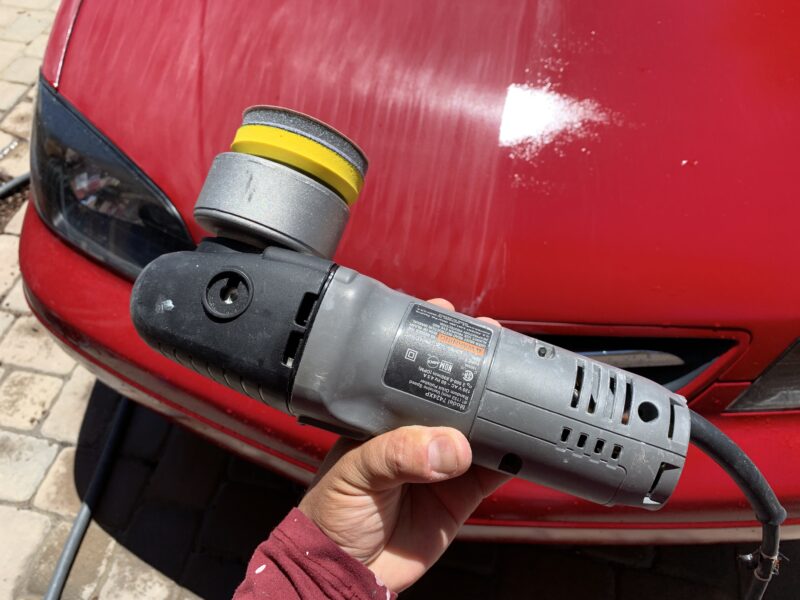

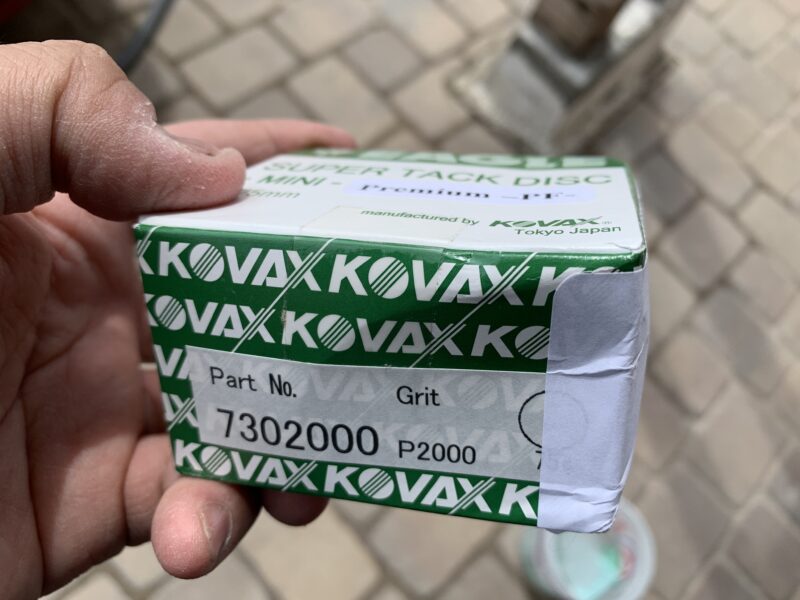
My personal preference is to use wet-sandpaper with a flexible foam backing pad, and sanding the paint by hand (dipped into a bucket of soapy water). I found that when I tried to sand dry with the machine polisher, it was clogging up the sandpaper way too quickly. I like taking my time with the wet-sandpaper and having more control with my hands.
Long Throw Dual-Action Machine Polisher
After you’ve sanded your vehicle with sandpaper through the various grits until it is left with 2500-grit or 3000-grit sand scratches, you will need to polish it out with a long-throw polisher such as the one pictured below. You can use a rotary polisher with a wool pad, but a safer and still effective option is to use a long-throw DA polisher with a cutting pad.
There are some really good long throw polishers out there like the Rupes LHR21ES. If you want a more affordable option, try a Maxshine M21. A budget option would be the Bauer Long Throw Polisher from Harbor Freight.
On this tutorial, I’m using the Bauer Long Throw Polisher upgraded with a 5-inch backing plate. If you want to know more about this unit, check out this review.

Microfiber Cutting Pads
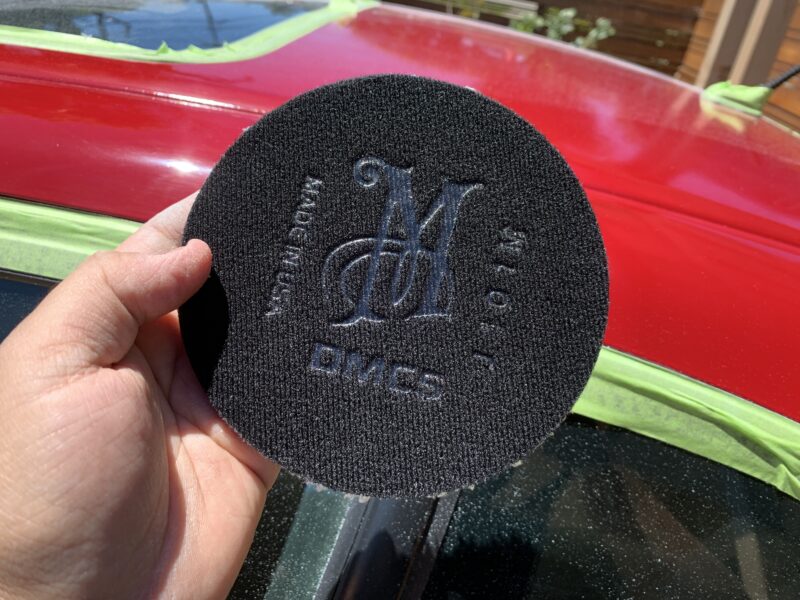
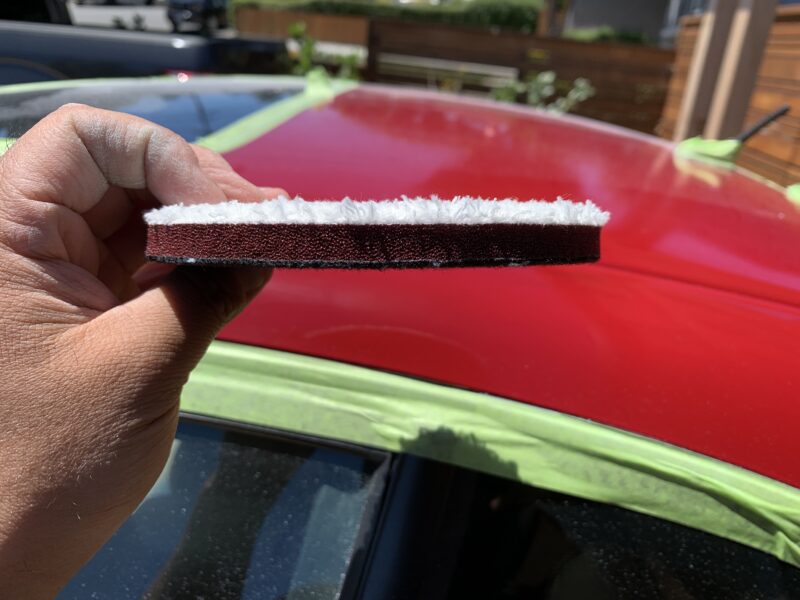
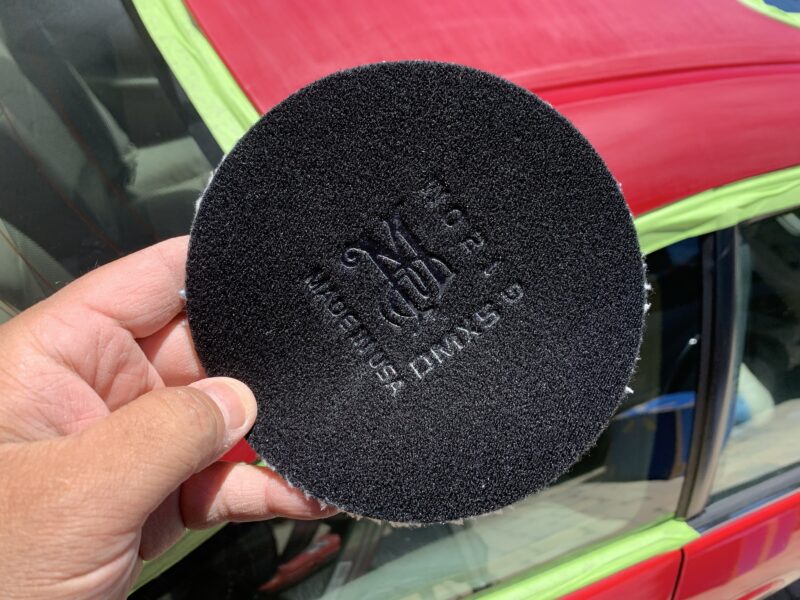
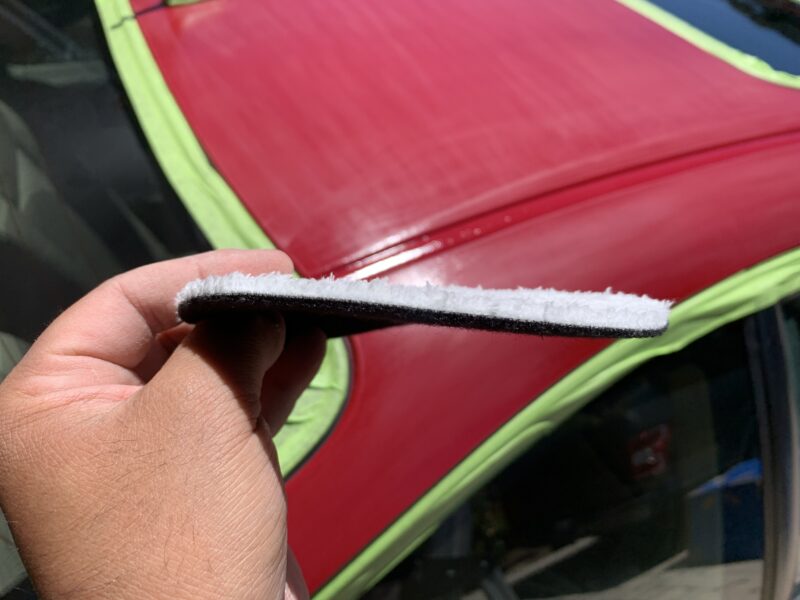
To go with the long-throw machine polisher, you’ll need some heavier cutting pads such as these. Meguiar’s was kind enough to provide these microfiber cutting pads for this tutorial. The Xtra Cut Disc cuts slightly quicker than the Cutting Disc, but it tends to clog up with compound easily. Personally, I prefer the use of the Cutting Disc for most of my polishing.
Meguiar’s Microfiber Cutting Disc, 2 Pack: 6-inch / 5-inch
Meguiar’s Microfiber Xtra Cut Disc, 2 Pack: 6-inch / 5-inch
Cutting Compound
Finally, you’ll need a compound that has the grit the polish out the sand scratches from the sanding step. Meguiar’s sent the M100 Pro Speed Compound, which is similar to their popular M105 Ultra-cut Compound, except that it doesn’t dust as much. The M100 compound advertises that “quick removal of 1200 grit scratches”, but I’ve found that to be a little far-fetched. It may remove up to 1200 grit scratches, but it is by no means quick. I’ve had to do somewhere between 5-6 separate passes over the same area (with the Meguiar’s Cutting Disc) to fully remove the 2000-3000 grit scratches I’ve put in. It would take 4-5 passes with the Meguiar’s Xtra Cut Disc.
Meguiar’s M100 Pro Speed Compound, 32 oz
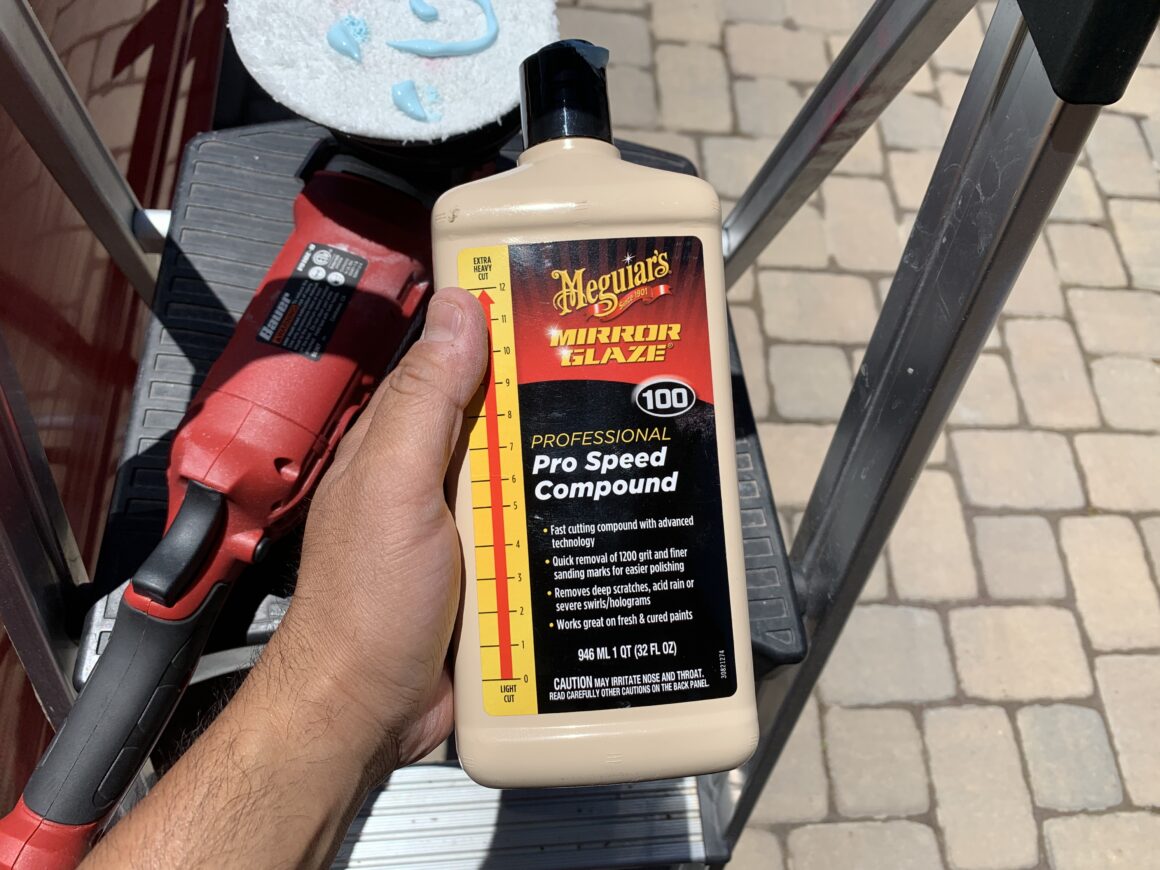
The amazing thing about this Meguiar’s compound is that it can be used as a one-step. This means you polish the paint with this compound, and you don’t need to follow-up with an additional polish afterwards to remove scratches. Of course, if you want that added deep shine afterwards, the polish can help with that.
Microfiber Towels
Most likely you have some microfiber towels already. These are needed to wipe away the area you’ve just polished of dried compound.
Chemical Guys (6-Pack) / Zwipes (48-Pack) / AmazonBasics (24-Pack)
Inspection Light
If you’re working outdoors in the direct sun, you can probably get away without using an inspection light. You can use the sun as a light source to check your work after you’ve polished a section of the paint. This will allow you to find any remaining scratches that still need to be polished out.
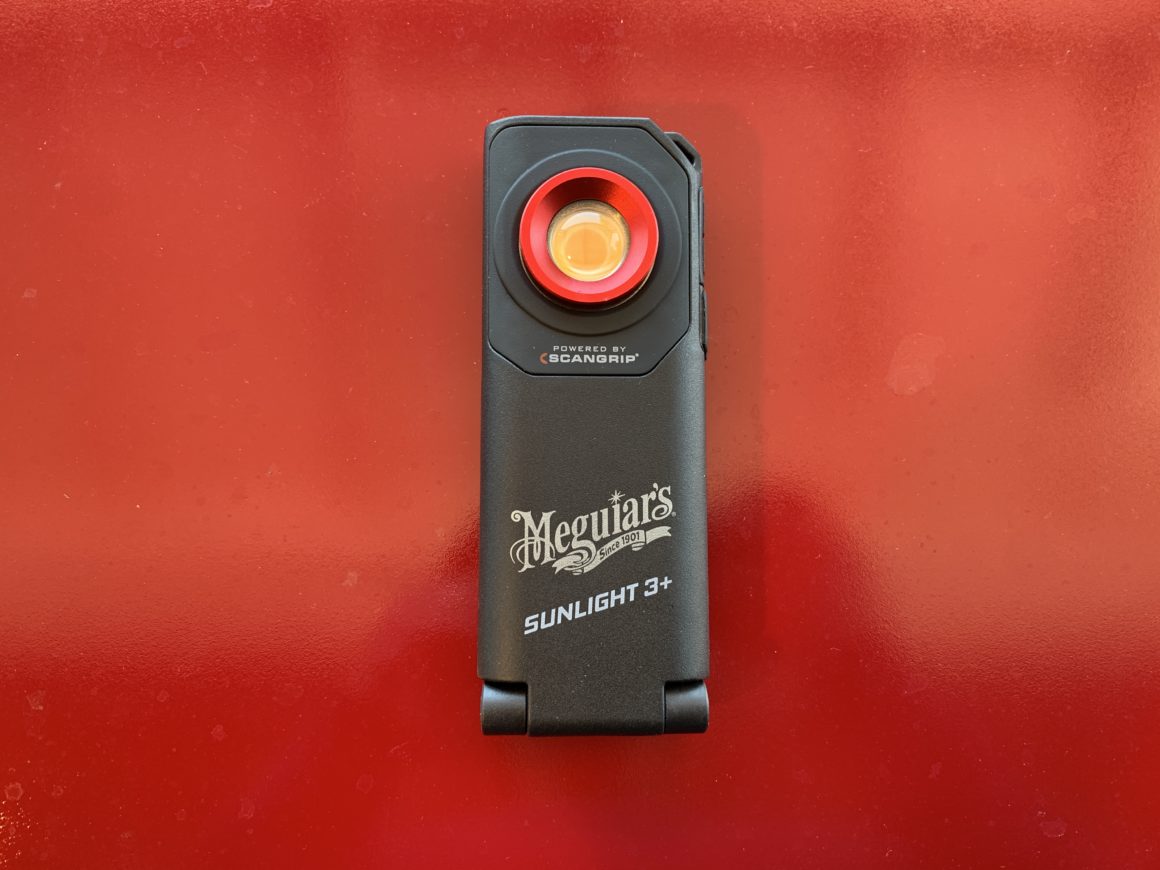
However, if you are polishing the car in the garage or a shop, or even if you are working under shade, you will need an inspection light so you can inspect your work. A popular inspection light is the Scangrip inspection lights, which sends a high-powered beam of light off the paint of your car so you can check for remaining scratches. The one I’m using in this post is this high-powered inspection light that Meguiar’s provided me with.
Meguiar’s Sunlight 3+ MT103 Detailer Inspection Light
Automotive Tape or Painters Tape
It’s not completely necessary to use automotive or painters tape to mask off the areas you don’t want sanded or to get compound on, but I highly recommend it. Not only does it protect unwanted surfaces from accidentally getting sanded (e.g. headlight lens), but it also protects your trim from getting compound stuck on it, which can be a bear to remove.
3M Automotive Refinish Masking Tape, 06654, 36 mm x 55 m, 1 Roll
How to Remove Orange Peel from Car Paint
If your car has orange peel because it was just recently painted, you may want to wait for some time so that the clear coat is properly cured before you start sanding/polishing. You should check with the person who painted the car so that you know what the adequate curing time is for the clear coat used. If the clear coat is already cured or your car is not repainted, then you should be able to start the process of removing the orange peel right away.
The first thing you need to do is to make sure the car’s paint surface is completely clean. That means doing a full car wash. Now with the surface of the paint clean, we can start sanding the paint.
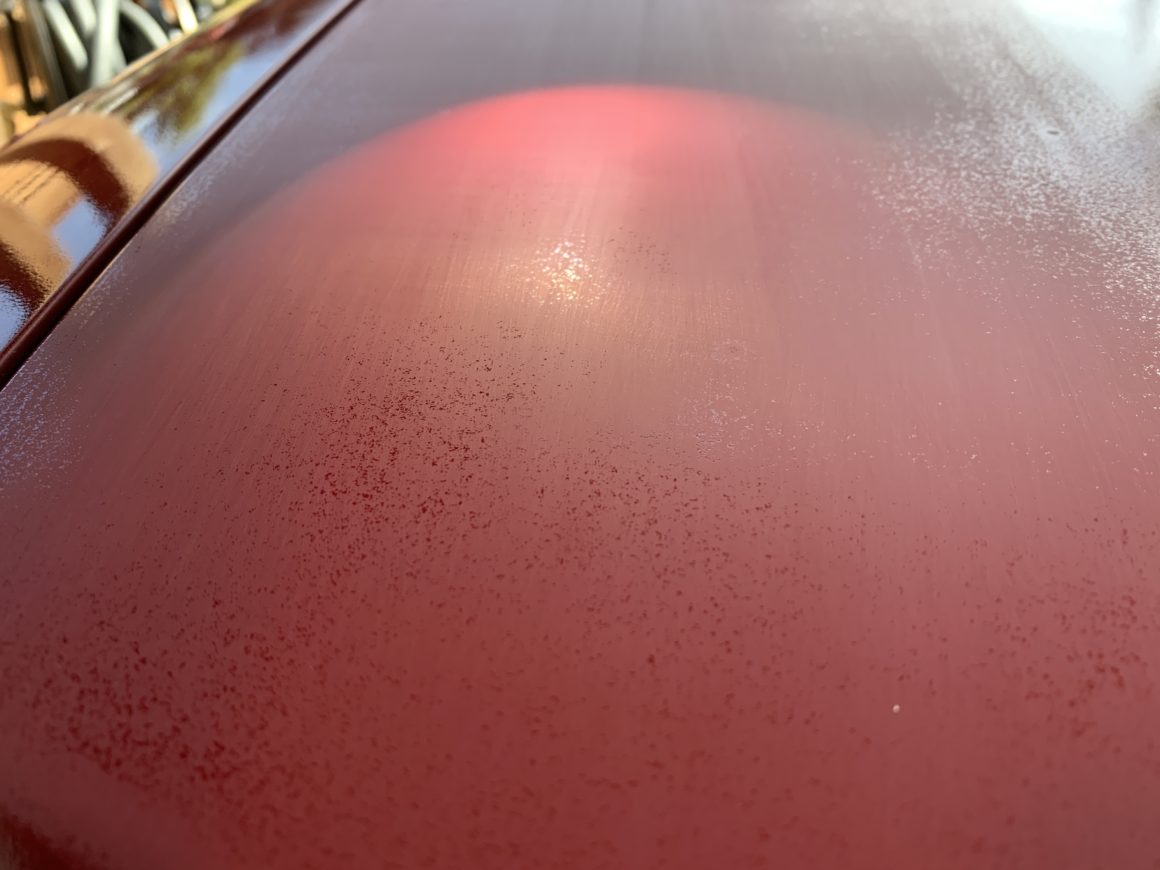
On a new repaint in this example, we have a significant amount of orange peel on the car. You should start with a higher grit sandpaper like 3000-grit with a backing pad and sand the surface of the paint. If you sand it and it has pockets of areas that are untouched (like the lower part of the photo below), then you may need to go with a more aggressive grit sandpaper.
You’d then go with a more aggressive sandpaper like a 2500 grit, then a 2000 grit, then 1500 grit. It is possible to go with an even lower grit if you need to, but personally I wouldn’t go further than a 1500 grit unless I knew I had plenty of clear coat to spare. But again, you have to balance how far you’re willing to go for how much of an improvement of appearance. Also keep in mind that the lower of a grit you go with (more aggressive sanding), the more you have to sand and polish out later. In this case, this was a repaint that had heavy orange peel, so I ended up going with a 1500 grit, then 2000 grit, then 3000 grit, then compound.
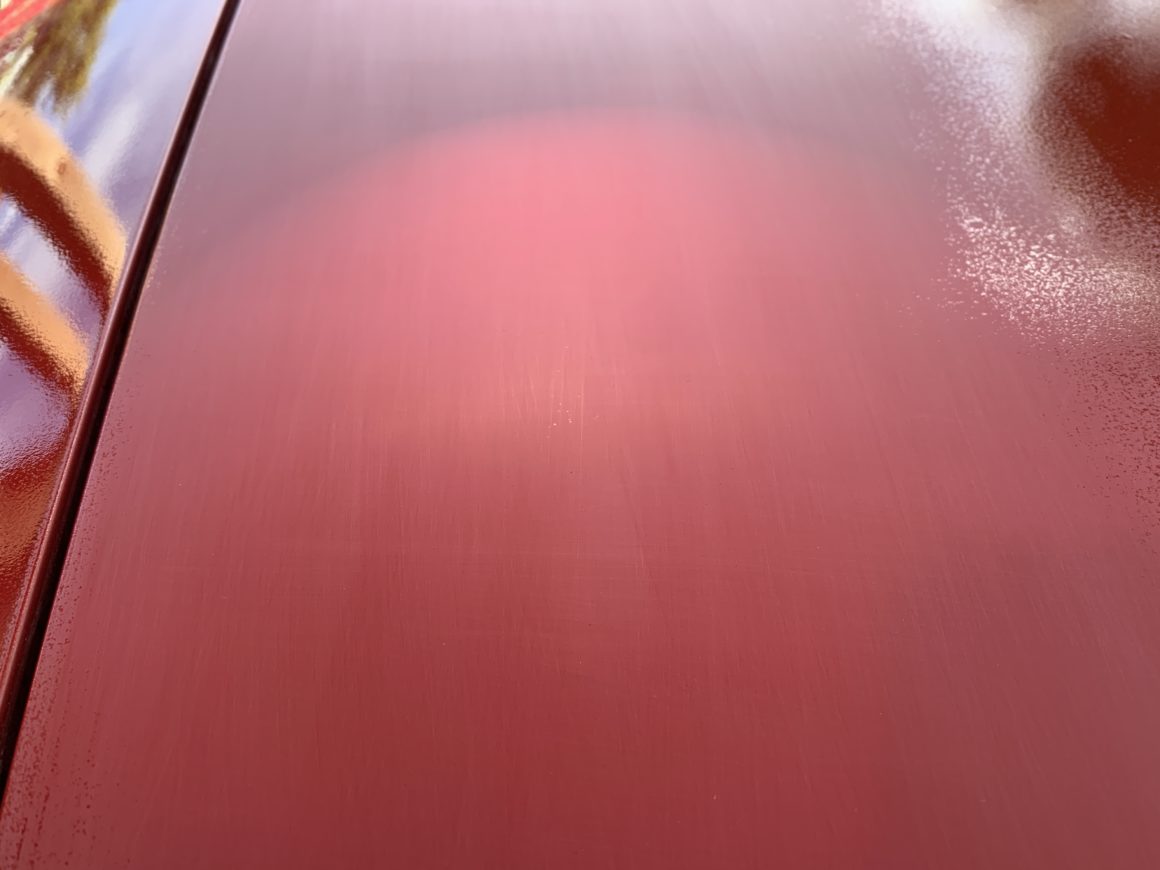
Once you’ve determined what grit sandpaper you need to go with, you’re basically going to sand down the panels that you want to remove the orange peel from. If you’re doing the entire car, then that means you’re sanding down the entire vehicle.
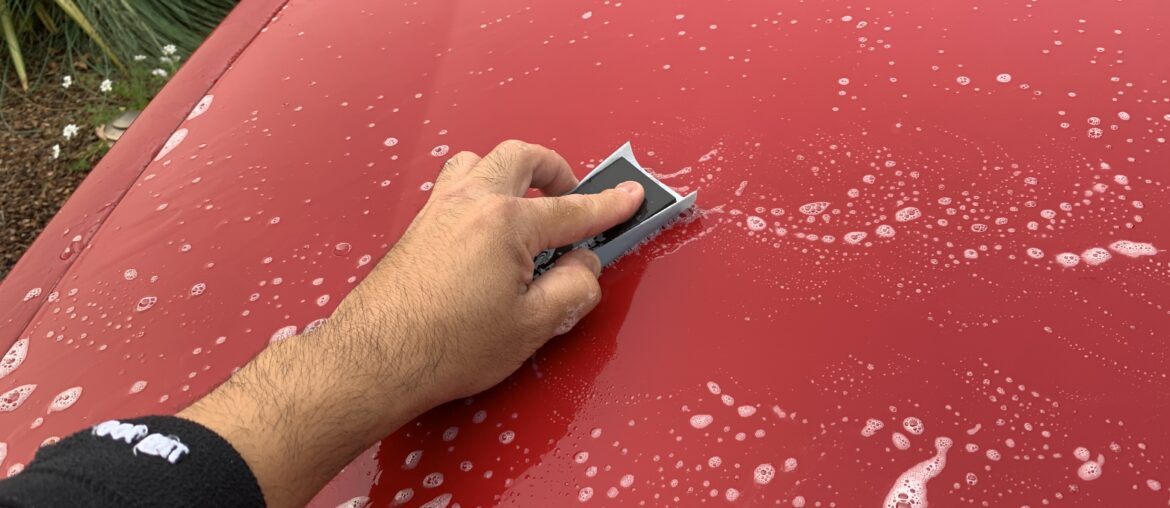
Use a small bucket full of soapy water and dip your wet sandpaper with the foam backing pad and sand the paint surface. I’ve seen and tried different techniques for wet-sanding including sanding in a V-shape (back and forth across the surface, then doing the same rotated 90-degrees), as well as a circular motion. I believe both techniques work, however I know that when I tried the V-sanding, it would leave some lines that were hard to polish out later. But, at the same time the circular motion is hard to keep track of your progress, so you end up missing spots.
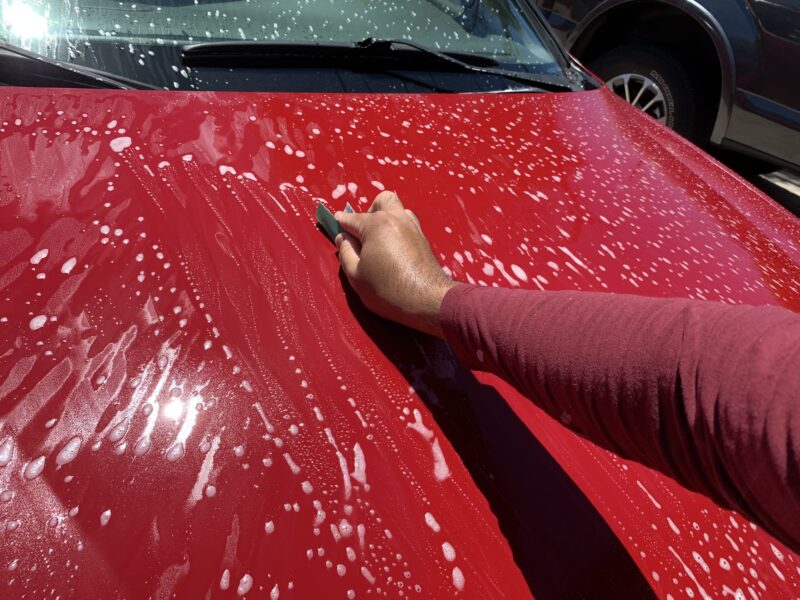
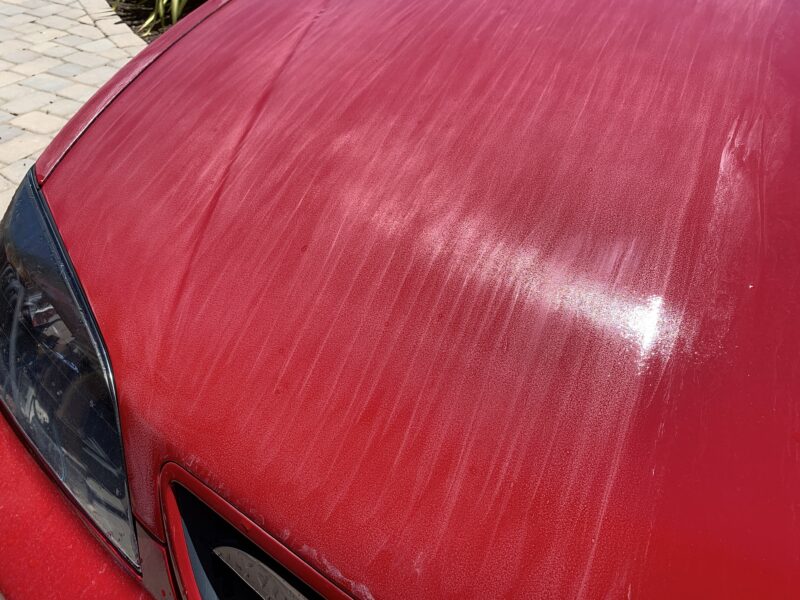
The important thing here is that you’re sanding down the entire surface without missing any spots. Honestly, it is very easy to miss spots because of how you apply pressure and the fact that wet-sanding and polishing hits the paint differently. For example, when you’re polishing with a pad on a machine polisher, you do a cross-hatch pattern and typically you’ll have hit every spot on that area. Contrary to that, if you do the same motions and process with wet sanding, you will miss areas in between your passes.
So, take your time and sand meticulously. If you were to overlap your passes when polishing paint with a polishing pad by 25%, you probably want to overlap your wet-sanding passes by 50% to ensure adequate coverage.
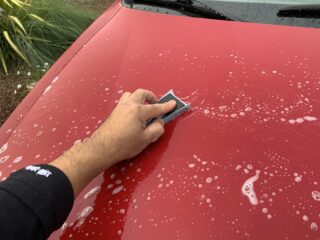
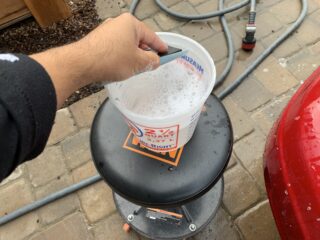
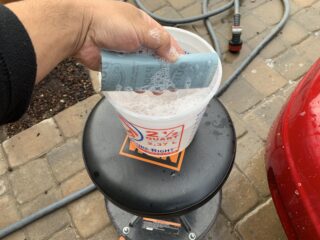
Also, be careful of any foreign debris getting into your sandpaper, otherwise it will introduce larger scratches when you’re sanding and it will be practically impossible to remove later. This is why dipping your sandpaper into a bucket of soapy water helps to dislodge any particles in the sandpaper.
I personally like the use of a foam backing pad that is flexible for wet-sanding paint. I don’t like the firm pads because usually cars have more curved surfaces than completely flat. Therefore, flexible backing pads just have more practical use in my opinion.
Also when sanding, you may want to cut your foam backing pad so that the sandpaper can wrap around and gives you a secure grip. It can be frustrating when your pad slips out of the sandpaper because you don’t have a good grip.
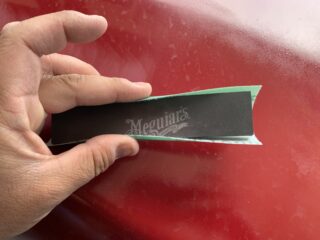
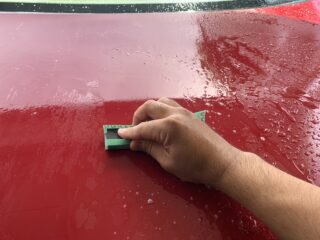
I also want to point out that unless you really want a 100% perfect Concours-quality paint job, you absolutely do not want to sand to the edge of any part of the paint. Not only is the paint thinner on the edges, but you also will apply greater pressure on these edges because of the flex of the backing plate.
The difference between sanding up to the edge and sanding up to an inch away from the edges is almost negligible. This is because if you ever looked at a car’s paint reflection, you’re looking at it in on the visible part of the panel. You wouldn’t look at the edges and expect for a clean reflection on the edge. The risk is very high for burn-through if you sand near and/or on the edge. So I highly recommend you do not do this as the risk is, in my opinion, not worth the reward.
The other option for sanding is using a machine polisher or air sander to dry-sand the paint. It does make the job go quicker and it tends to result in a better, smoother sanded surface. When I used it on a 3-inch flexible foam backing plate and a machine polisher, it resulted in a nice smooth surface, however I went through a lot of these pads because it would get clogged so quickly.
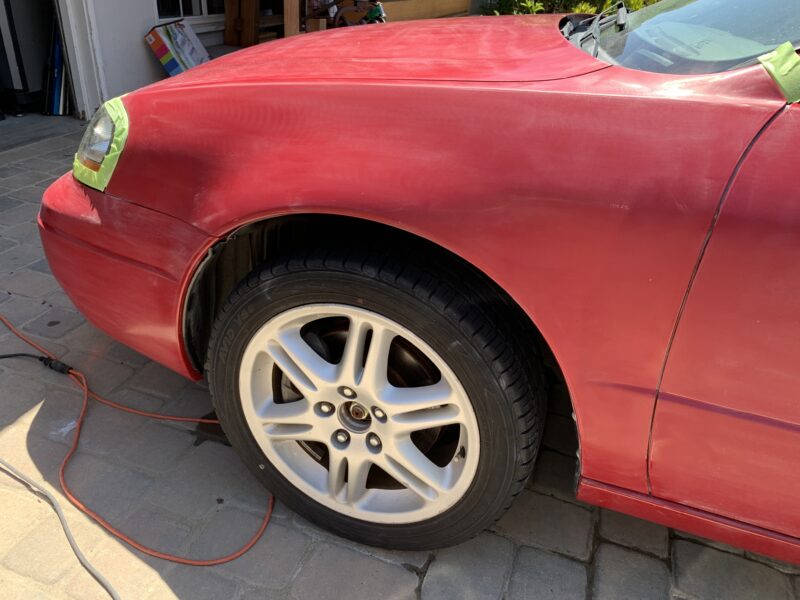
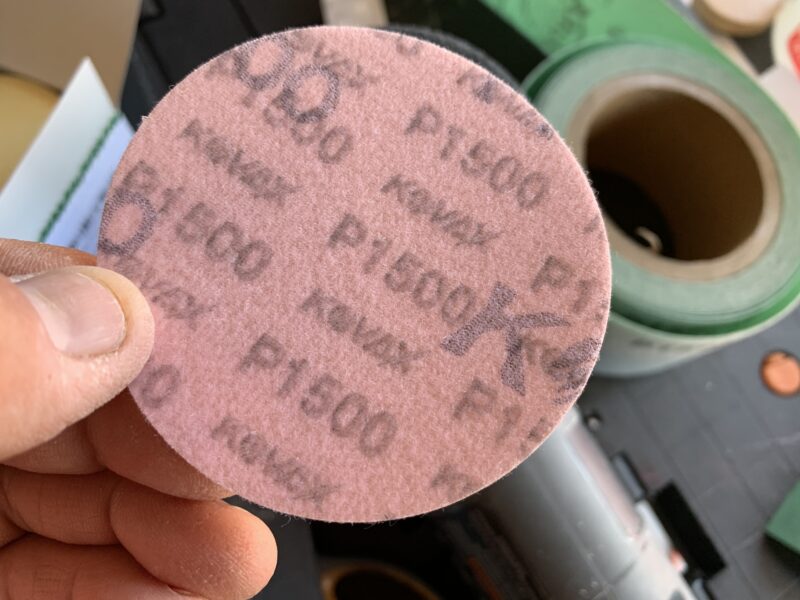
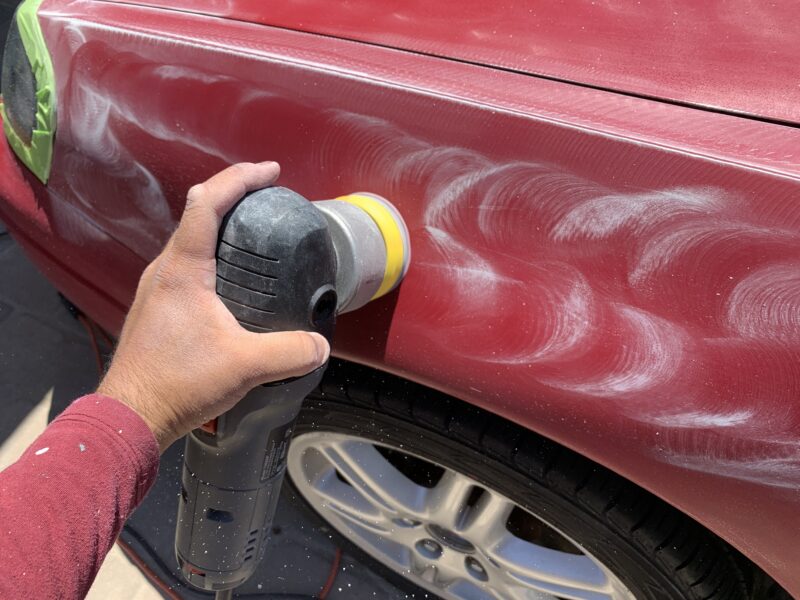
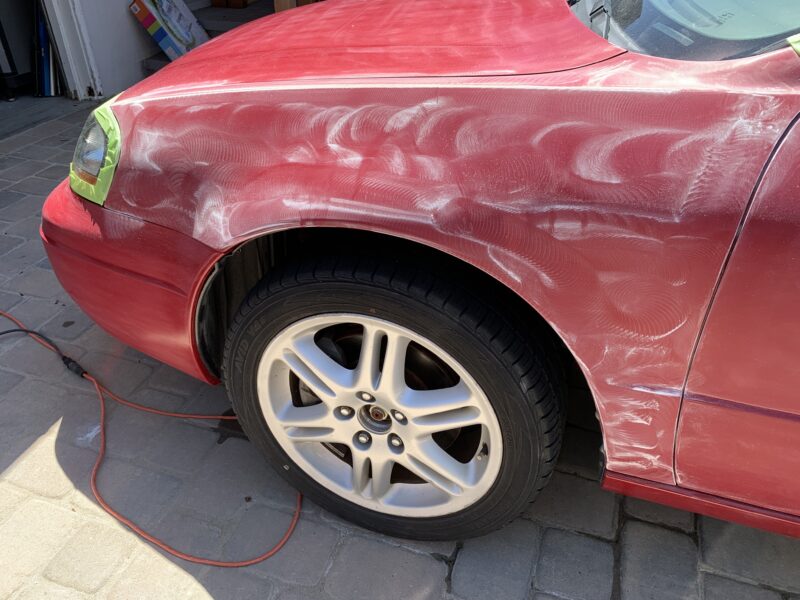
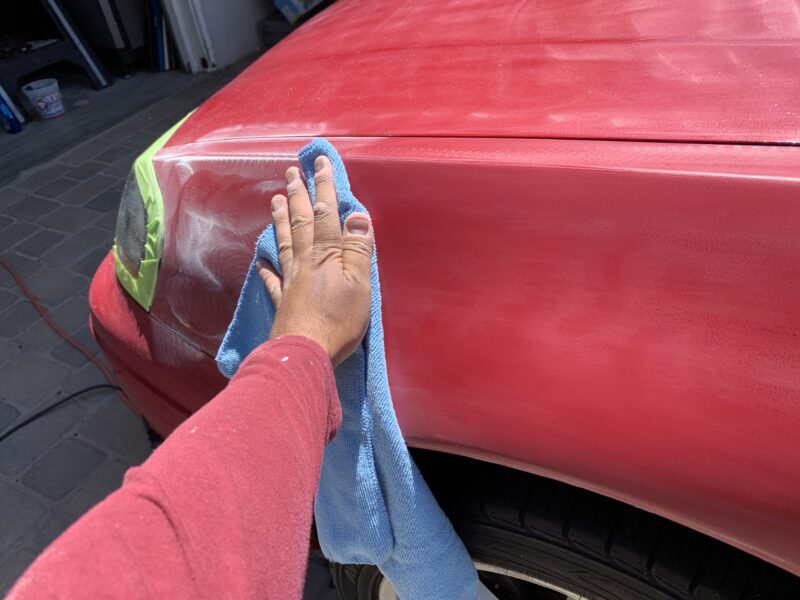
To compare, you can see that using the dry sandpaper on a DA polisher on this front fender, results in a much smoother appearance than the wet hand-sanded hood. You can still do either method, but you will need to spend more time wet-sanding by hand. Also, it is harder to check your work when you wet-sand, because when the paint surface is wet, you can’t see the sanding scratches in the paint until you dry it. If you dry sand the surface, you can simply wipe off with a microfiber towel and you can see if you’ve sanded sufficiently.
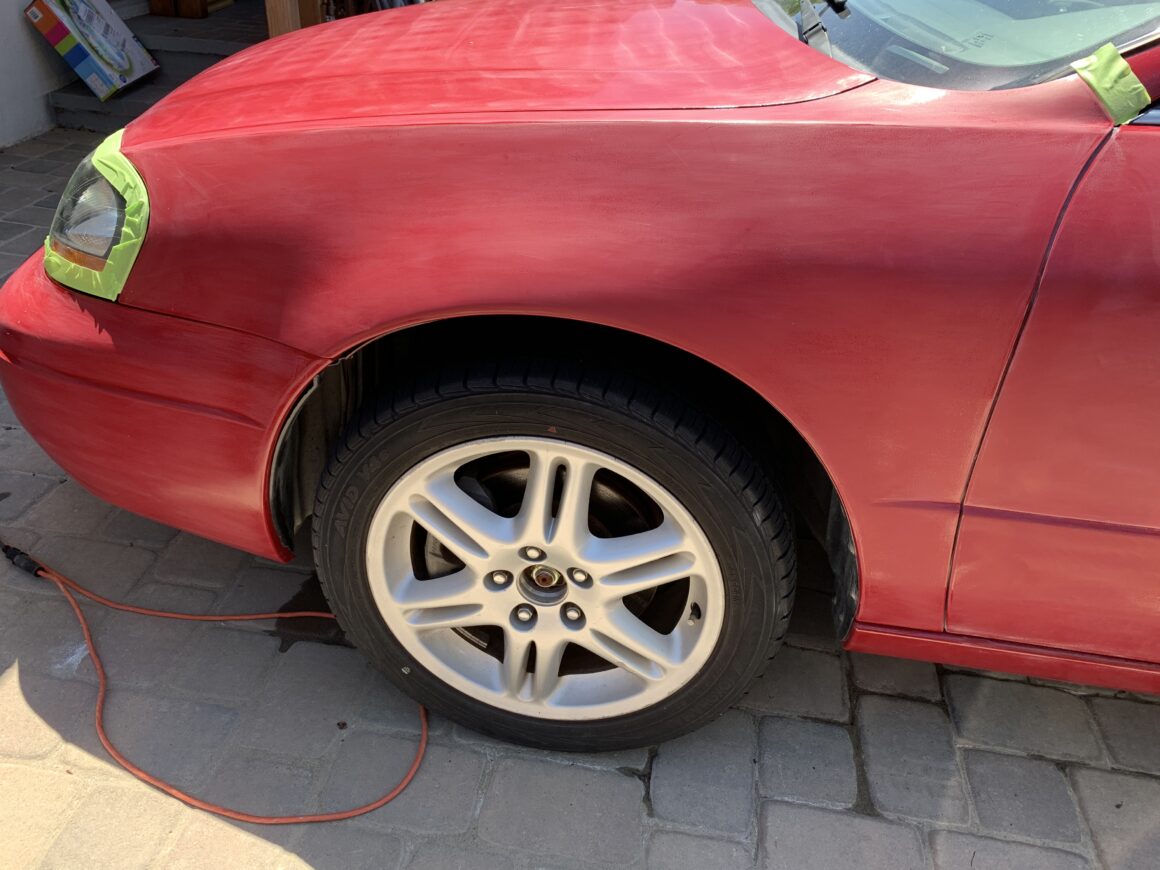
The process of sanding or wet-sanding the paint on your car is extremely tedious and time-consuming. It’s important to keep a straight head and to not rush the process. You want to go sand enough so that you have a smooth surface across all the areas that you want orange peel removed. The surface will be hazy, but it should be smooth.
When you’re satisfied with the sanding process, you can then move onto the polishing process. I’d recommend washing your car at this point once again to clean off any sanding residue from the car. Then completely dry.
If you don’t want to get compound stuck on all of your rubber or miscellaneous trim, I’d recommend taping off all of the areas you don’t want compound getting on.
Using your long throw polisher, attach a microfiber cutting pad and apply some compound to the pad. You must first “prime” your pad by spreading the compound into the fibers of the pad first. Then apply a few drops onto the pad, spread it onto the area you want to polish, and then polish away.
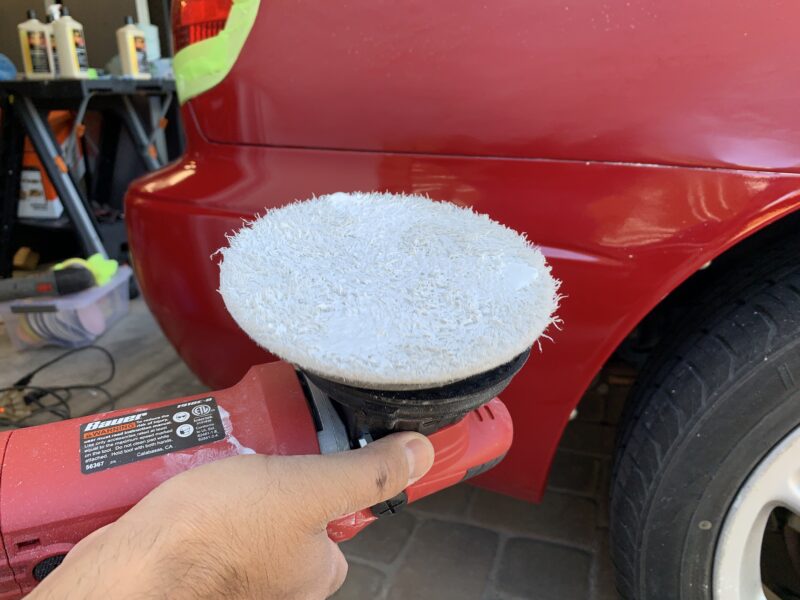
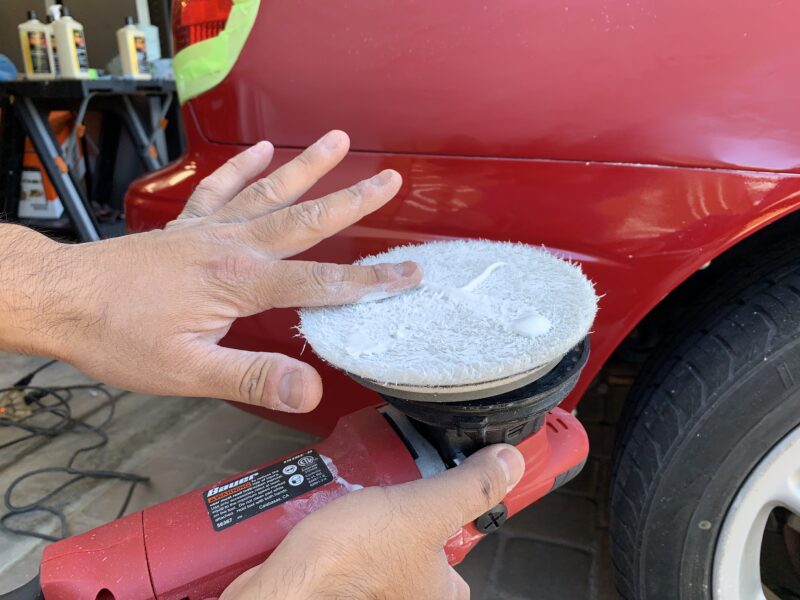
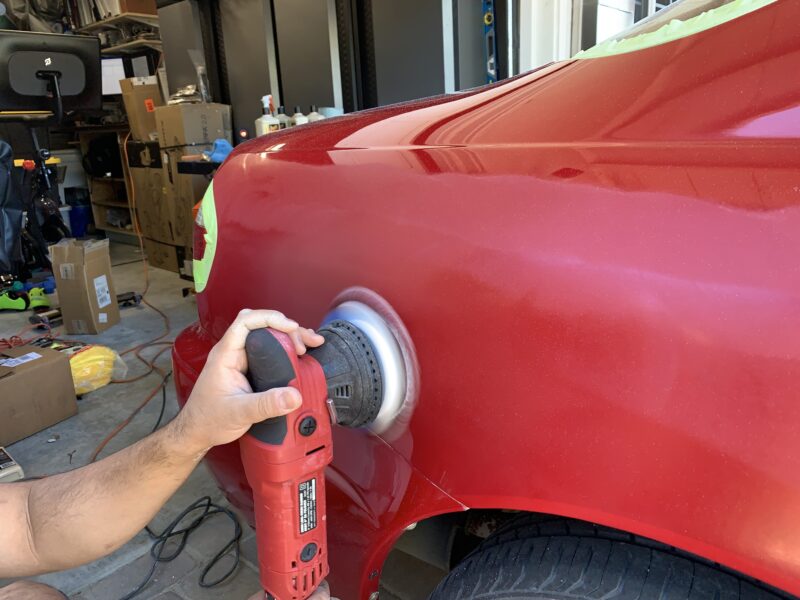
When polishing, try to stick to a 2-ft by 2-ft area at a time. This ensures the compound doesn’t dry out and that it effectively polishes away the sanding scratches. The surface of the pad should be completely flat and parallel with the paint surface and ideally you want to do a cross-hatch pattern on the panel. After polishing with a cross-hatch pattern, wipe away with a microfiber towel and inspect. You may need to do a number of passes to completely remove those sanding scratches from the previous step. As you can see below, I’ve polished this rear quarter panel with compound 1-2 times and it looks like this.
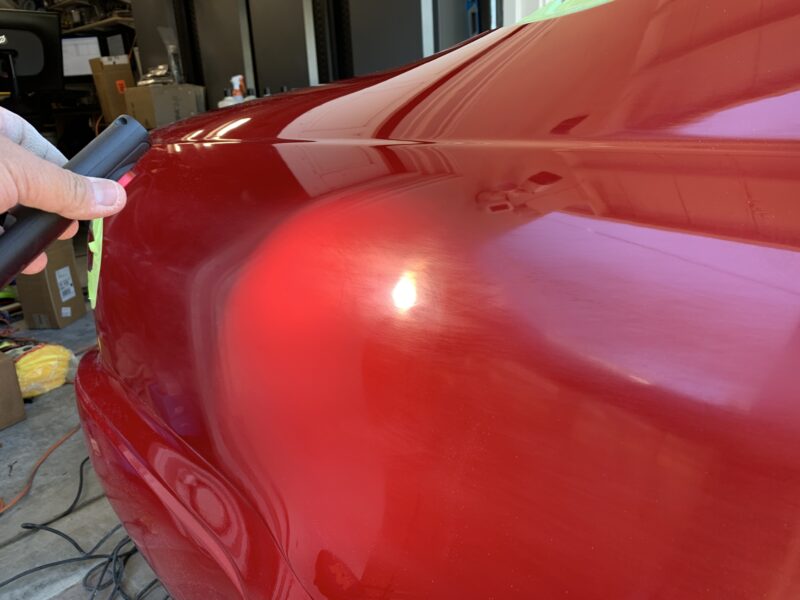
Another couple of passes, and it still has a number of scratches.
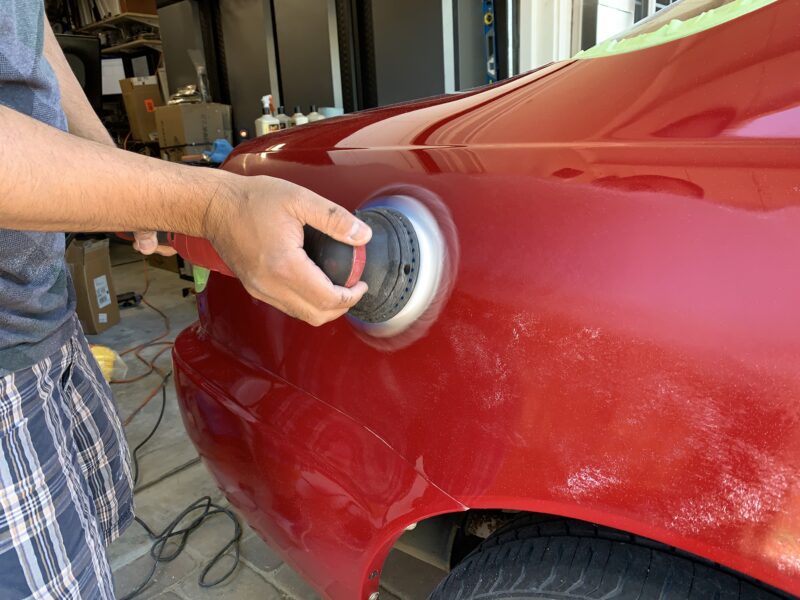
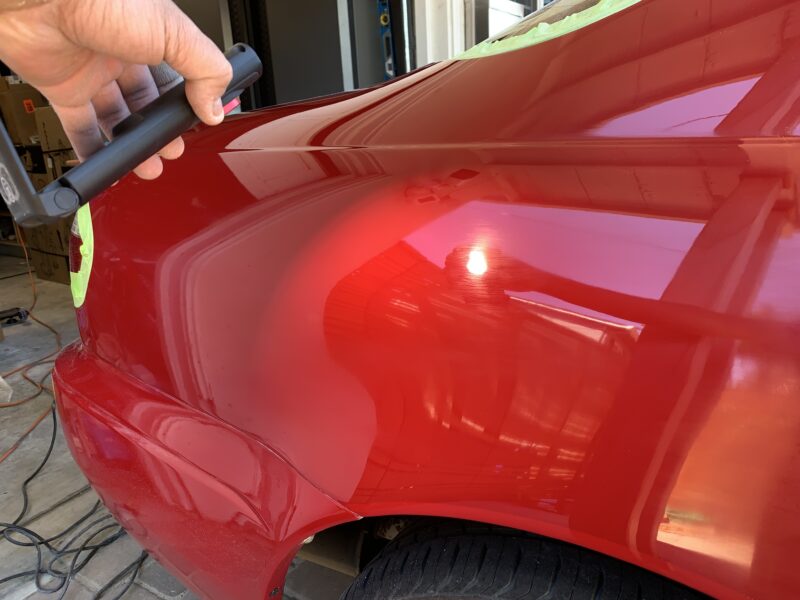
Another few passes and I finally have a result that I’m happy with.
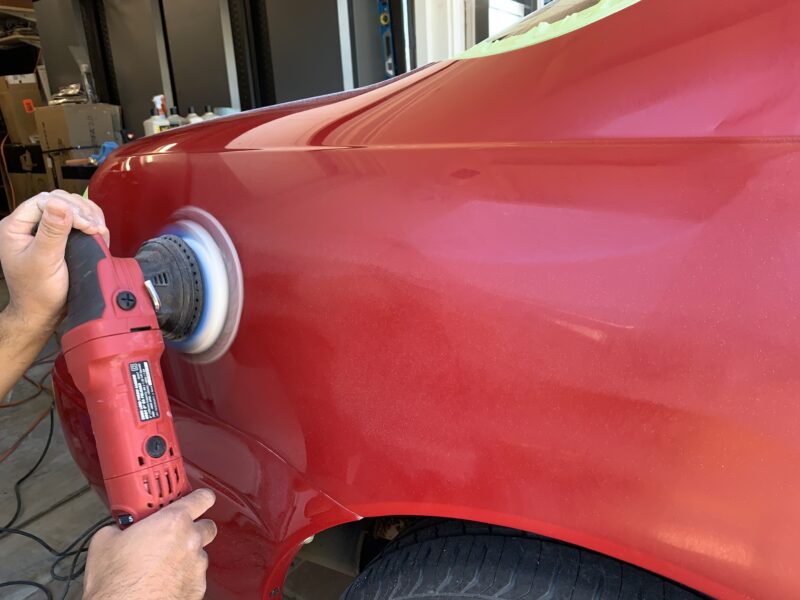
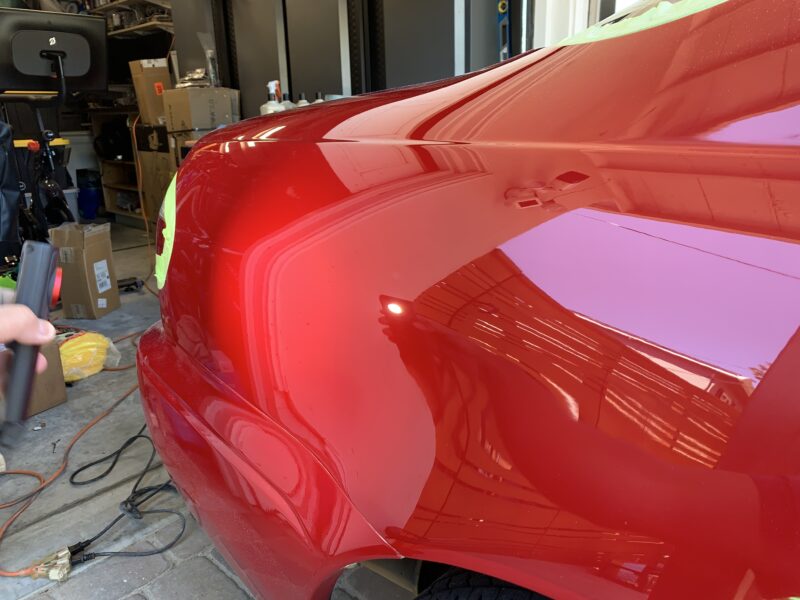
As you can see from this close-up, we have very good clarity on this paint surface. But, this is the result of a lot of sanding from 1500 grit, to 2000 grit, to 3000 grit, to machine polishing this area with compound about 5-6 times.
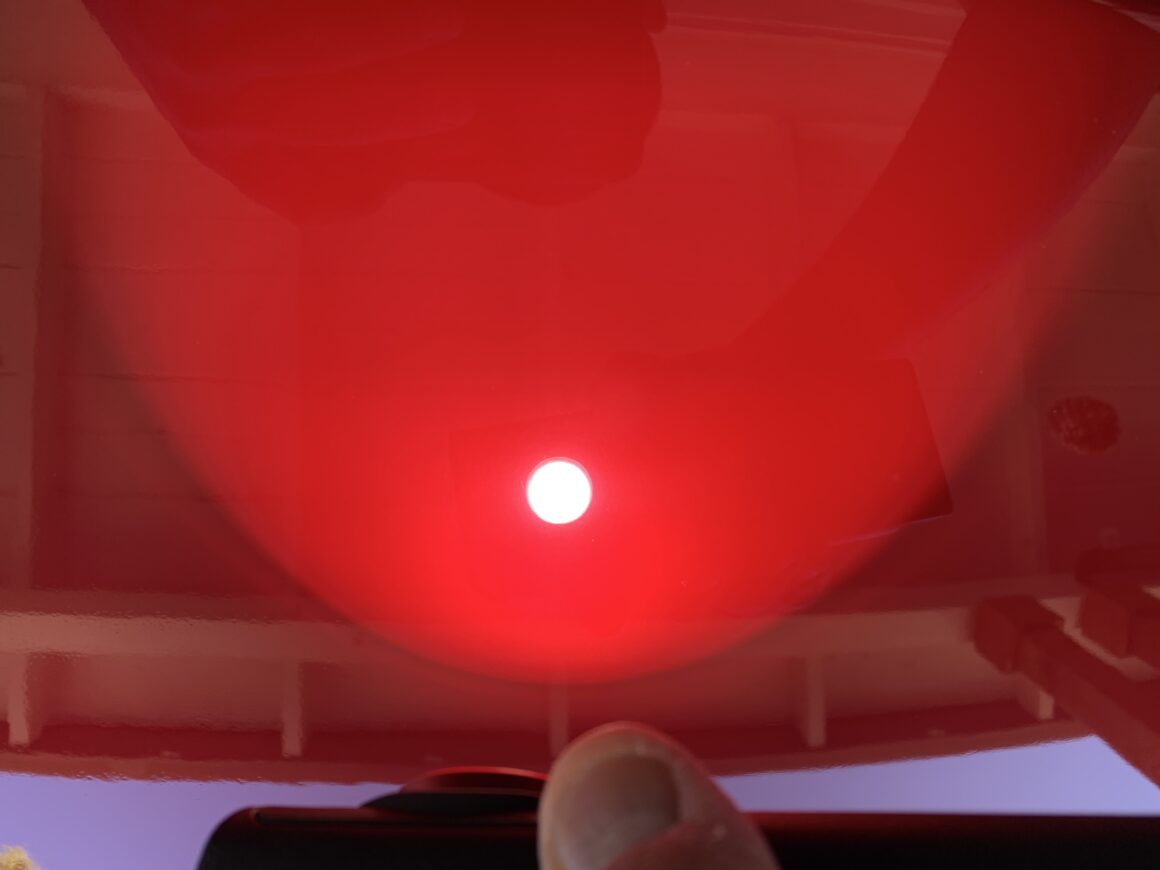
Just like the sanding process, polishing the car with compound can be quite tedious and time-consuming as well. You should still be meticulous and ensure that you don’t polish over edges as you can still burn through the paint. It may take a bit more to burn through the paint, but it’s still very doable. So be very careful around those edges.
If you take your time and keep checking your work after each pass, you’ll be rewarded with an incredibly stunning car at the end. When you’re sanding the car, it generally looks terrible. Then you polish it out with compound and the color starts coming back, but you still are left with a lot of visible scratches. Then after some passes, you will suddenly no longer see scratches, but instead of clean and scratch-free surface. Do this for the entire car and it can look even better than when it came from the factory.
