When you make purchases through links on this site, The Track Ahead may earn an affiliate commission. Also, these posts are based off my own experiences. I am not responsible for any action you take as a result of reading this. Learn More
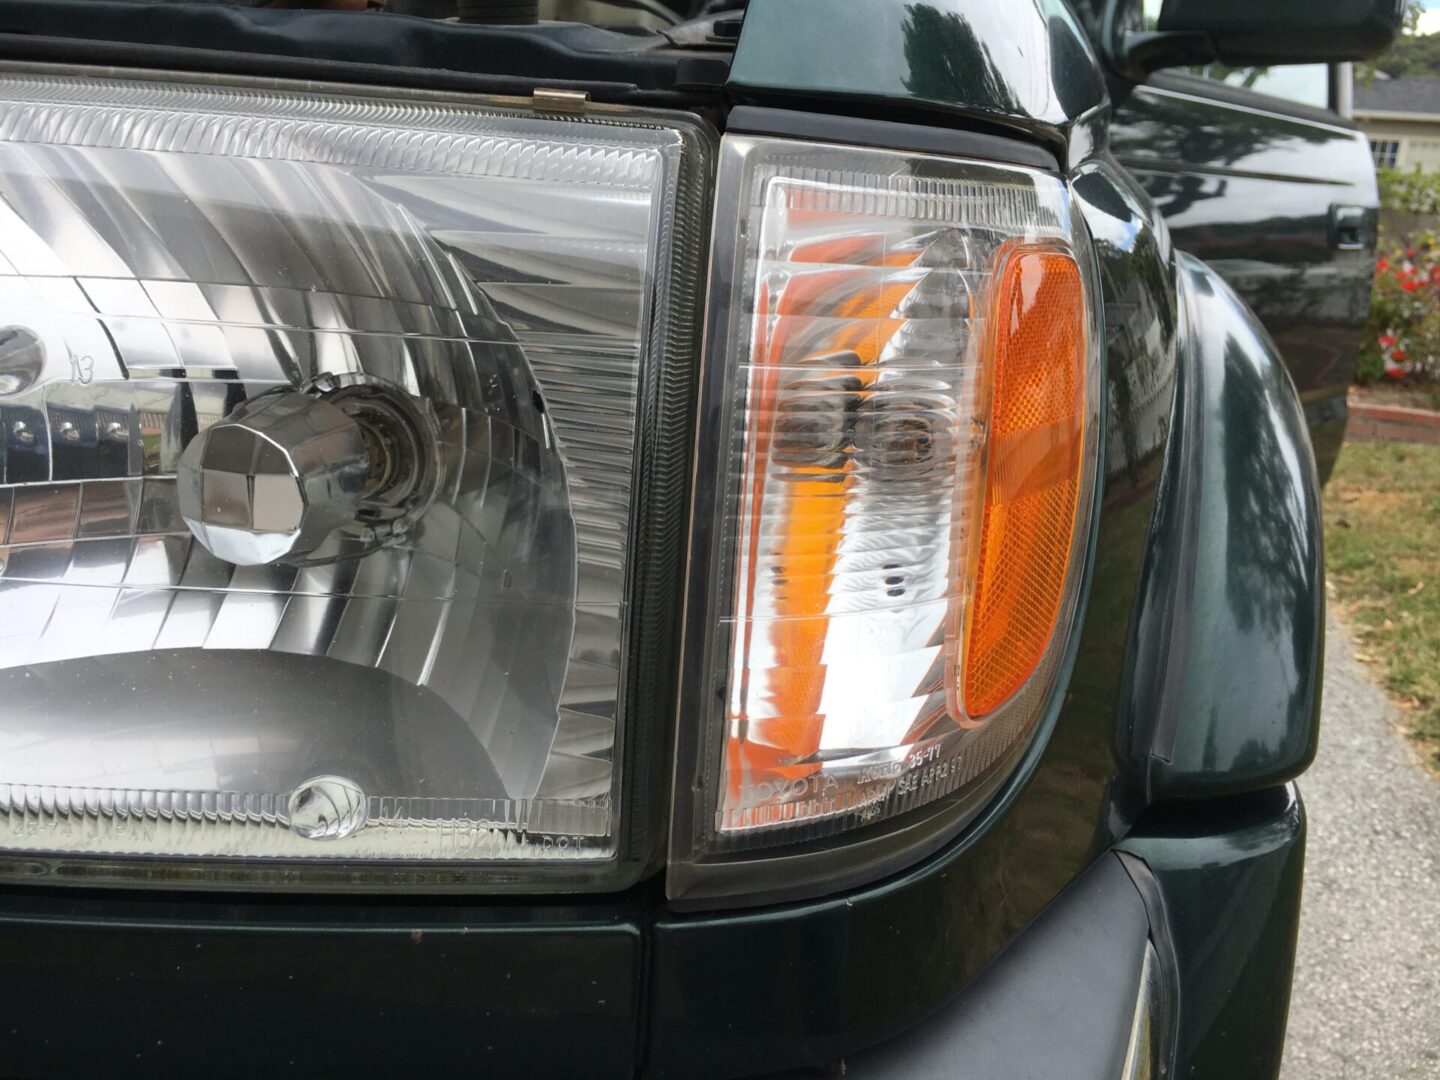
There’s something about the simplicity and ease of maintenance work on older cars that pleases me. This front side marker light bulb went out on this 2002 Toyota 4Runner the bulb needed to be replaced. The replacement is a simple change-out of the bulb, but there are a few things to keep in mind when changing out the bulb that will make the replacement easier and prevent any damage to the nearby body panels.
Bulb Replacement Part Number
The front side marker light uses a 2825 Bulb that can be found at auto parts stores or online. It’s really easy to order these online and Amazon is the easiest and quickest way to get these. There are also a ton of aftermarket options that are interesting to me, but I opted to do a simple like-for-like replacement of the halogen bulb.
Find 2825 Replacement Bulbs on Amazon.com
How to Replace Front Side Marker Light Bulb
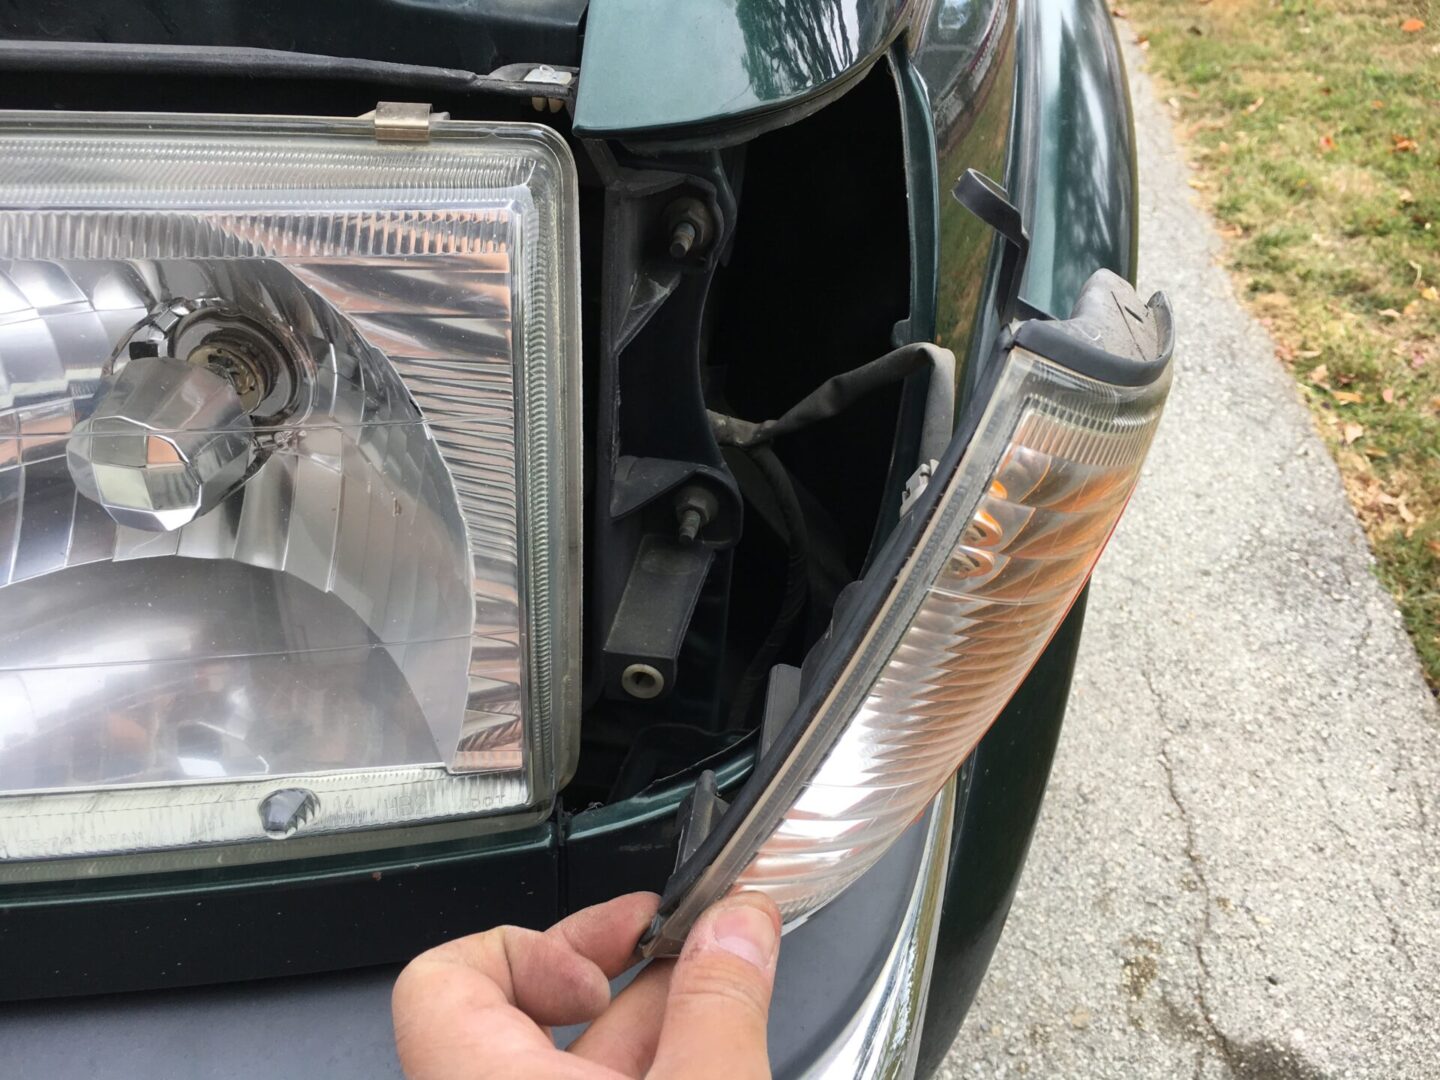
Since the only thing you’ll be disconnecting electrically is an electrical connector to the side marker bulb, you don’t really need to disconnect the battery. Open the hood and using a Phillips screwdriver, unscrew the screw that holds the side marker housing in place.

After the screw is removed, the front side marker light housing will need to be removed. I’ve seen some tutorials use a flat head screwdriver to pry the light out and it makes me cringe when I see that. Doing that will likely cause you to chip the paint next to the side marker light.
Know that the side marker light will need to be pushed towards the front of the vehicle in order for the whole piece to slide out of its location. Therefore, you can use your hand and either slowly push the side marker light towards the front of the vehicle to press it out, or you can use the palm of your hand to lightly hit the side marker light housing towards the front of the vehicle.
This will get the side marker light out of its spot and you will be left with an electrical connector that needs to be disconnected.
After disconnecting the connector, rotate the side marker light bulb holder out of its socket (use a cloth to wrap the back of the bulb holder and use plier to twist counter-clockwise out.)
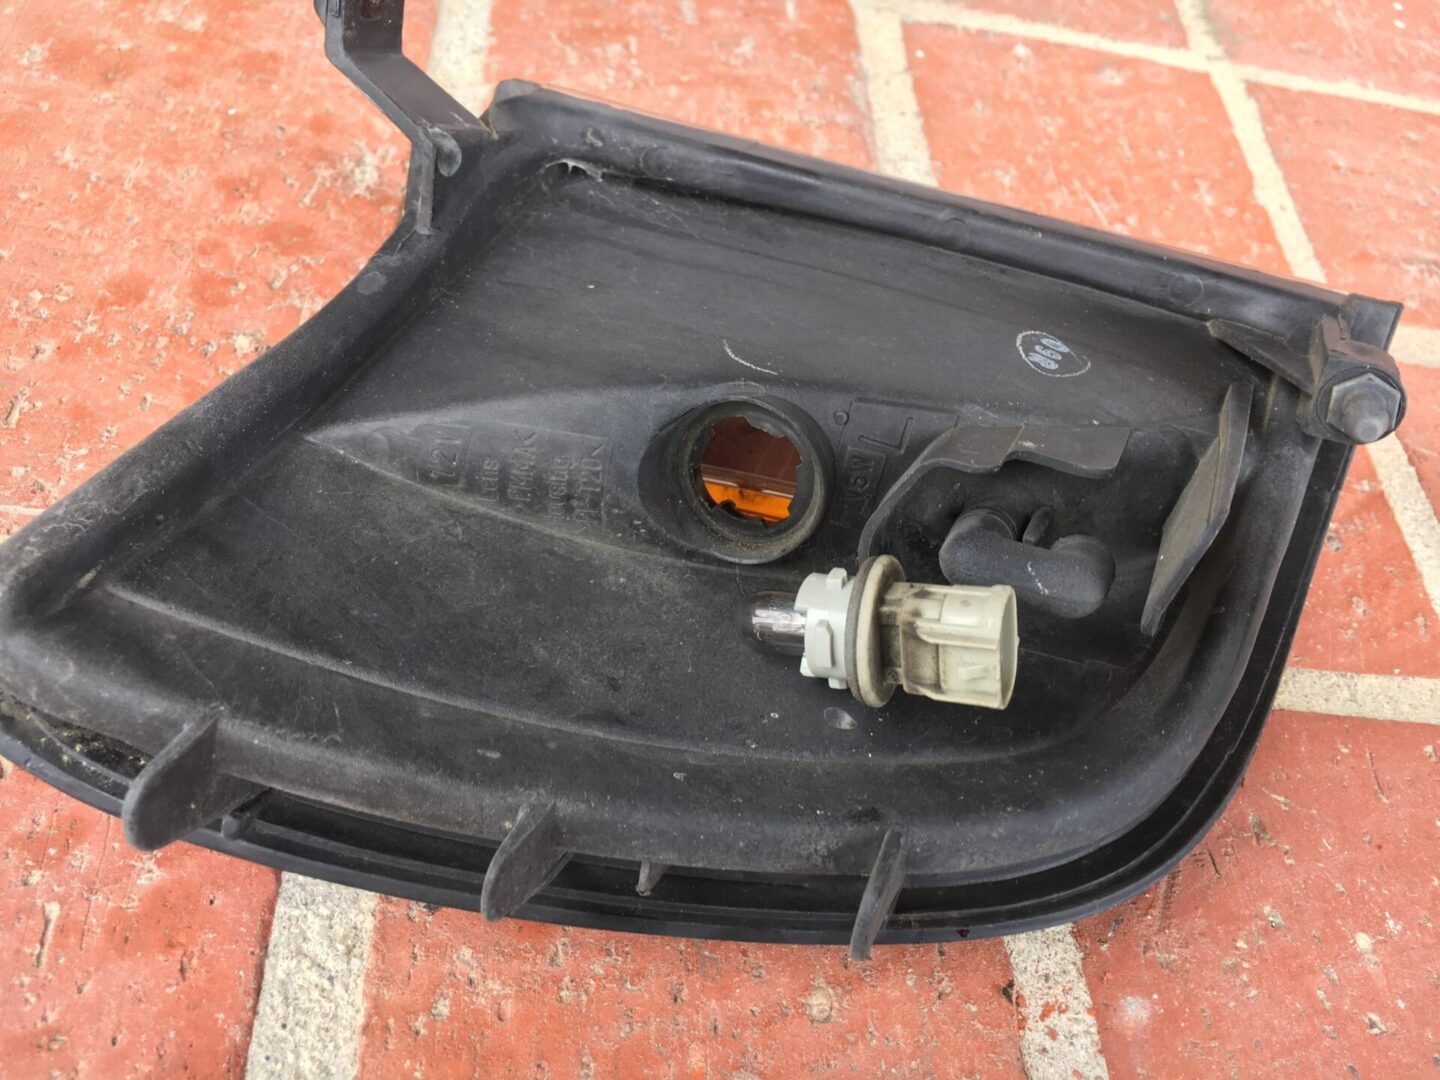
The 2825 bulb pulls right out and the new replacement bulb will push right in. Try to use gloves to prevent getting oil and grease from your hands onto the surface of the bulb. Then turn the bulb holder with new bulb into the socket clockwise and it’s locked in place.

Connect the connector wire back into the back of the bulb and install the front side marker light housing back into place. Re-install the screw to secure the side marker light in place. Turn on your lights to test and verify that the light is indeed working. Easy peasy.


2 Comments
Thank you. You broke down so thst this 80 year old may be able to accomplish a bulb swap-out. I would have found it helpful to see the actual bulb. Thanks again.
You’re welcome.