")
When you make purchases through links on this site, The Track Ahead may earn an affiliate commission. Also, these posts are based off my own experiences. I am not responsible for any action you take as a result of reading this. Learn More
If you need to do a full brake job on the 5th generation Honda Odyssey (years 2018-2026), it may take the good part of an afternoon to do. However, if you don’t need to replace the rotors and only need to change out the brake pads, then you can get it done in an hour or less. This is good to know because sometimes (especially if it’s your main driver for the family) so you can plan the work around your busy schedule.
Typically, it’s a good idea to replace the rotors at the same time you replace the brake pads due to the higher likelihood of getting “warped rotors” on these minivans. In fact, the rotors don’t usually warp, but the brake pad material unevenly transfers onto the rotors, or the rotors are no longer straight, causing you to experience vibration during braking. If you do need a full guide to replacing the brake pads and rotors on your 2018-2026 Honda Odyssey, I have a full DIY walkthough here.
If you’ve replaced the brake rotors in the past and now only the brake pads are in need of replacement, you may just want to replace the brake pads since you know that the rotors may still be in good shape. The important thing to do however after replacing just the brake pads is to do “bed the brakes”, which is a process of braking the vehicle from different speeds so that the brake pad material can transfer evenly from the new pads onto the rotors. This minimizes the chance of getting “warped rotors” in the future.
Personally, my wife told me that our 2019 Honda Odyseey had a loud screeching noise while braking on a Sunday morning. I went out to check and found that the brake pads were already very low and needed replacement. In a pinch, I picked up some ceramic brake pads from the local Autozone (not my preferred, I’d rather pick up brake pads of a different brand online). I was able to replace the front and rear brake pads in about an hour. Based on my experience, I’ve written this DIY guide to show you how to replace the front and rear brake pads quickly in the most efficient and pain-free way possible.
Tools/Materials for this Job
Popular Brake Pad Options for the 5th Gen Honda Odyssey
Powerstop Z23 Evolution Sport CF/Ceramic: Front (Z23-2089) / Rear (Z23-1698)
Powerstop Z16 Evolution Ceramic: Front (Z16-2089) / Rear (Z16-1698)
Wagner QuickStop Ceramic Brake Pads: Front (ZD2089) / Rear (ZD1954)
Honda OEM Brake Pads: Front (45022-THR-A01) / Rear (43022-TZ5-A11)
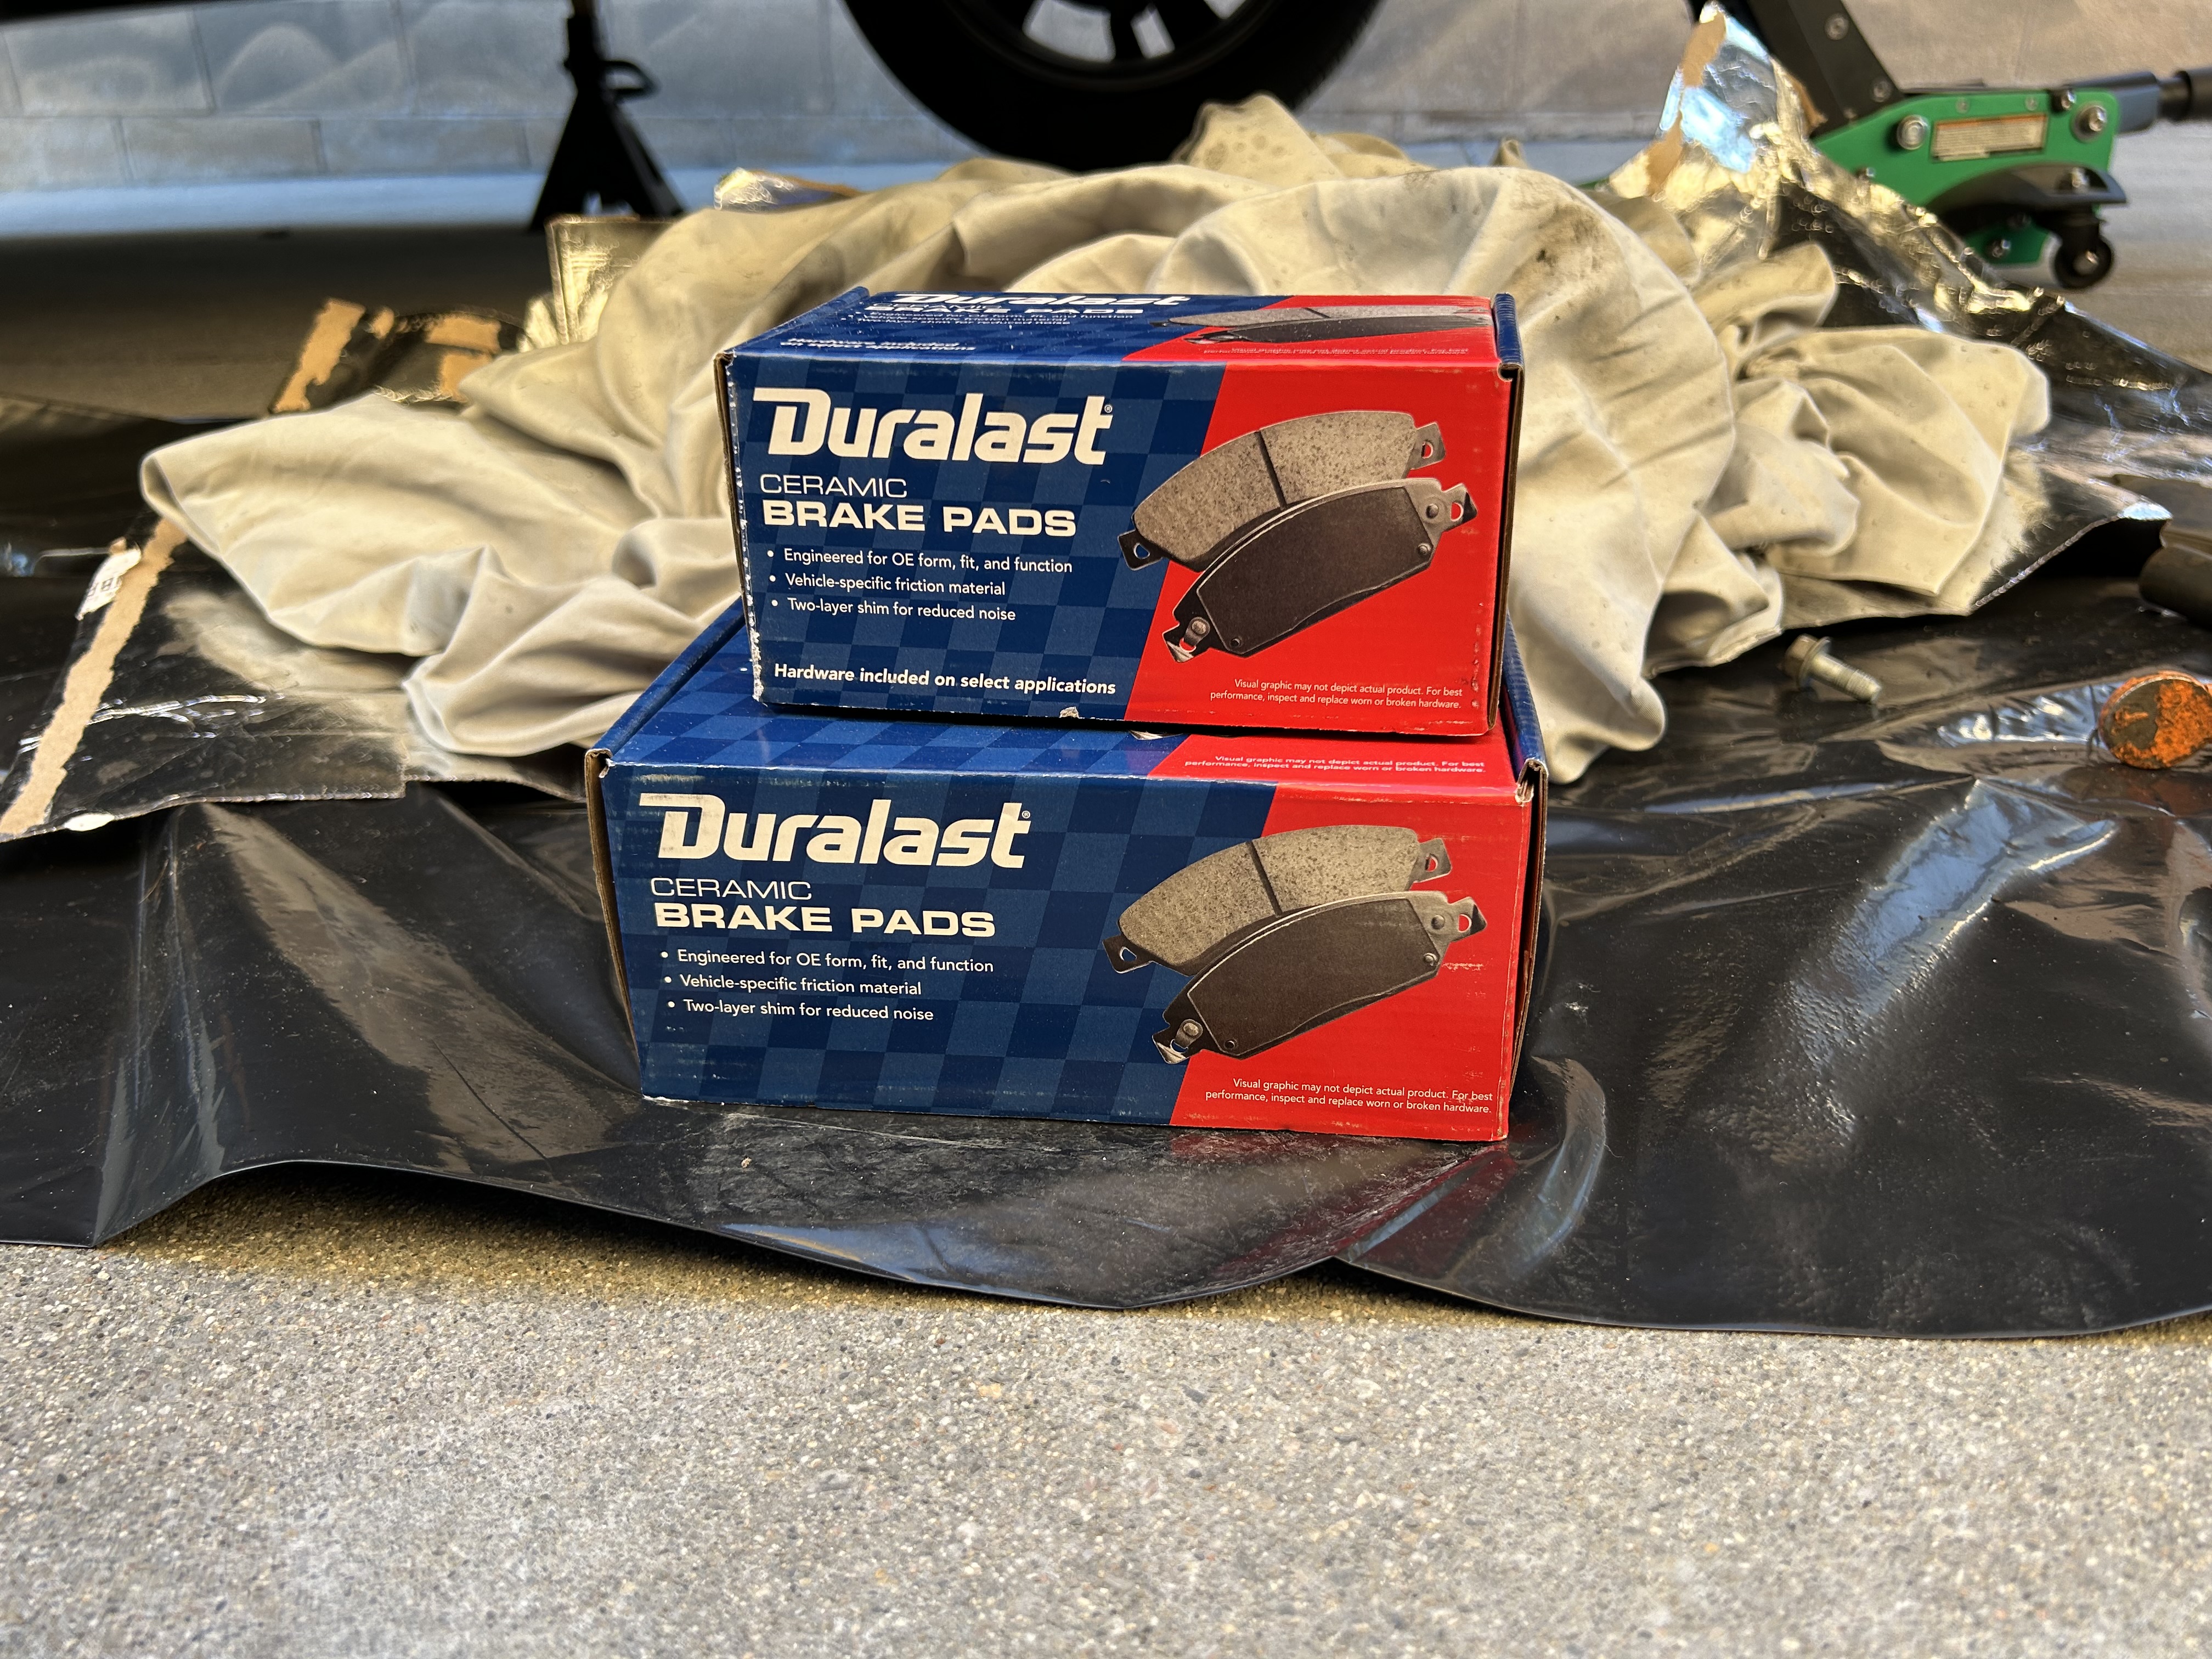
On this guide, I’ll be installing these Duralast Ceramic Brake Pads that I purchased locally at Autozone. I’d prefer one of the above options, however I needed brake pads the same day for this install, so I went with these. The Duralast Ceramic brake pad part numbers I used are as follows: D2089 (front) and D1698 (rear).
Other Tools/Materials Used For This Job
Torque Wrench: TEKTON 3/8 Inch Drive Click Torque Wrench (10-80 ft.-lb.) | 24330
Brake Caliper Compressor: Lisle Dual Piston Brake Caliper Compressor or Irwin 6 in. C-Clamp
P100 Respirator: 3M Half Facepiece Reusable Respirator with P100 Particulate Filters
Brake Parts Cleaner: CRC BRAKLEEN Brake Parts Cleaner – Non-Flammable -1lb 3 Oz
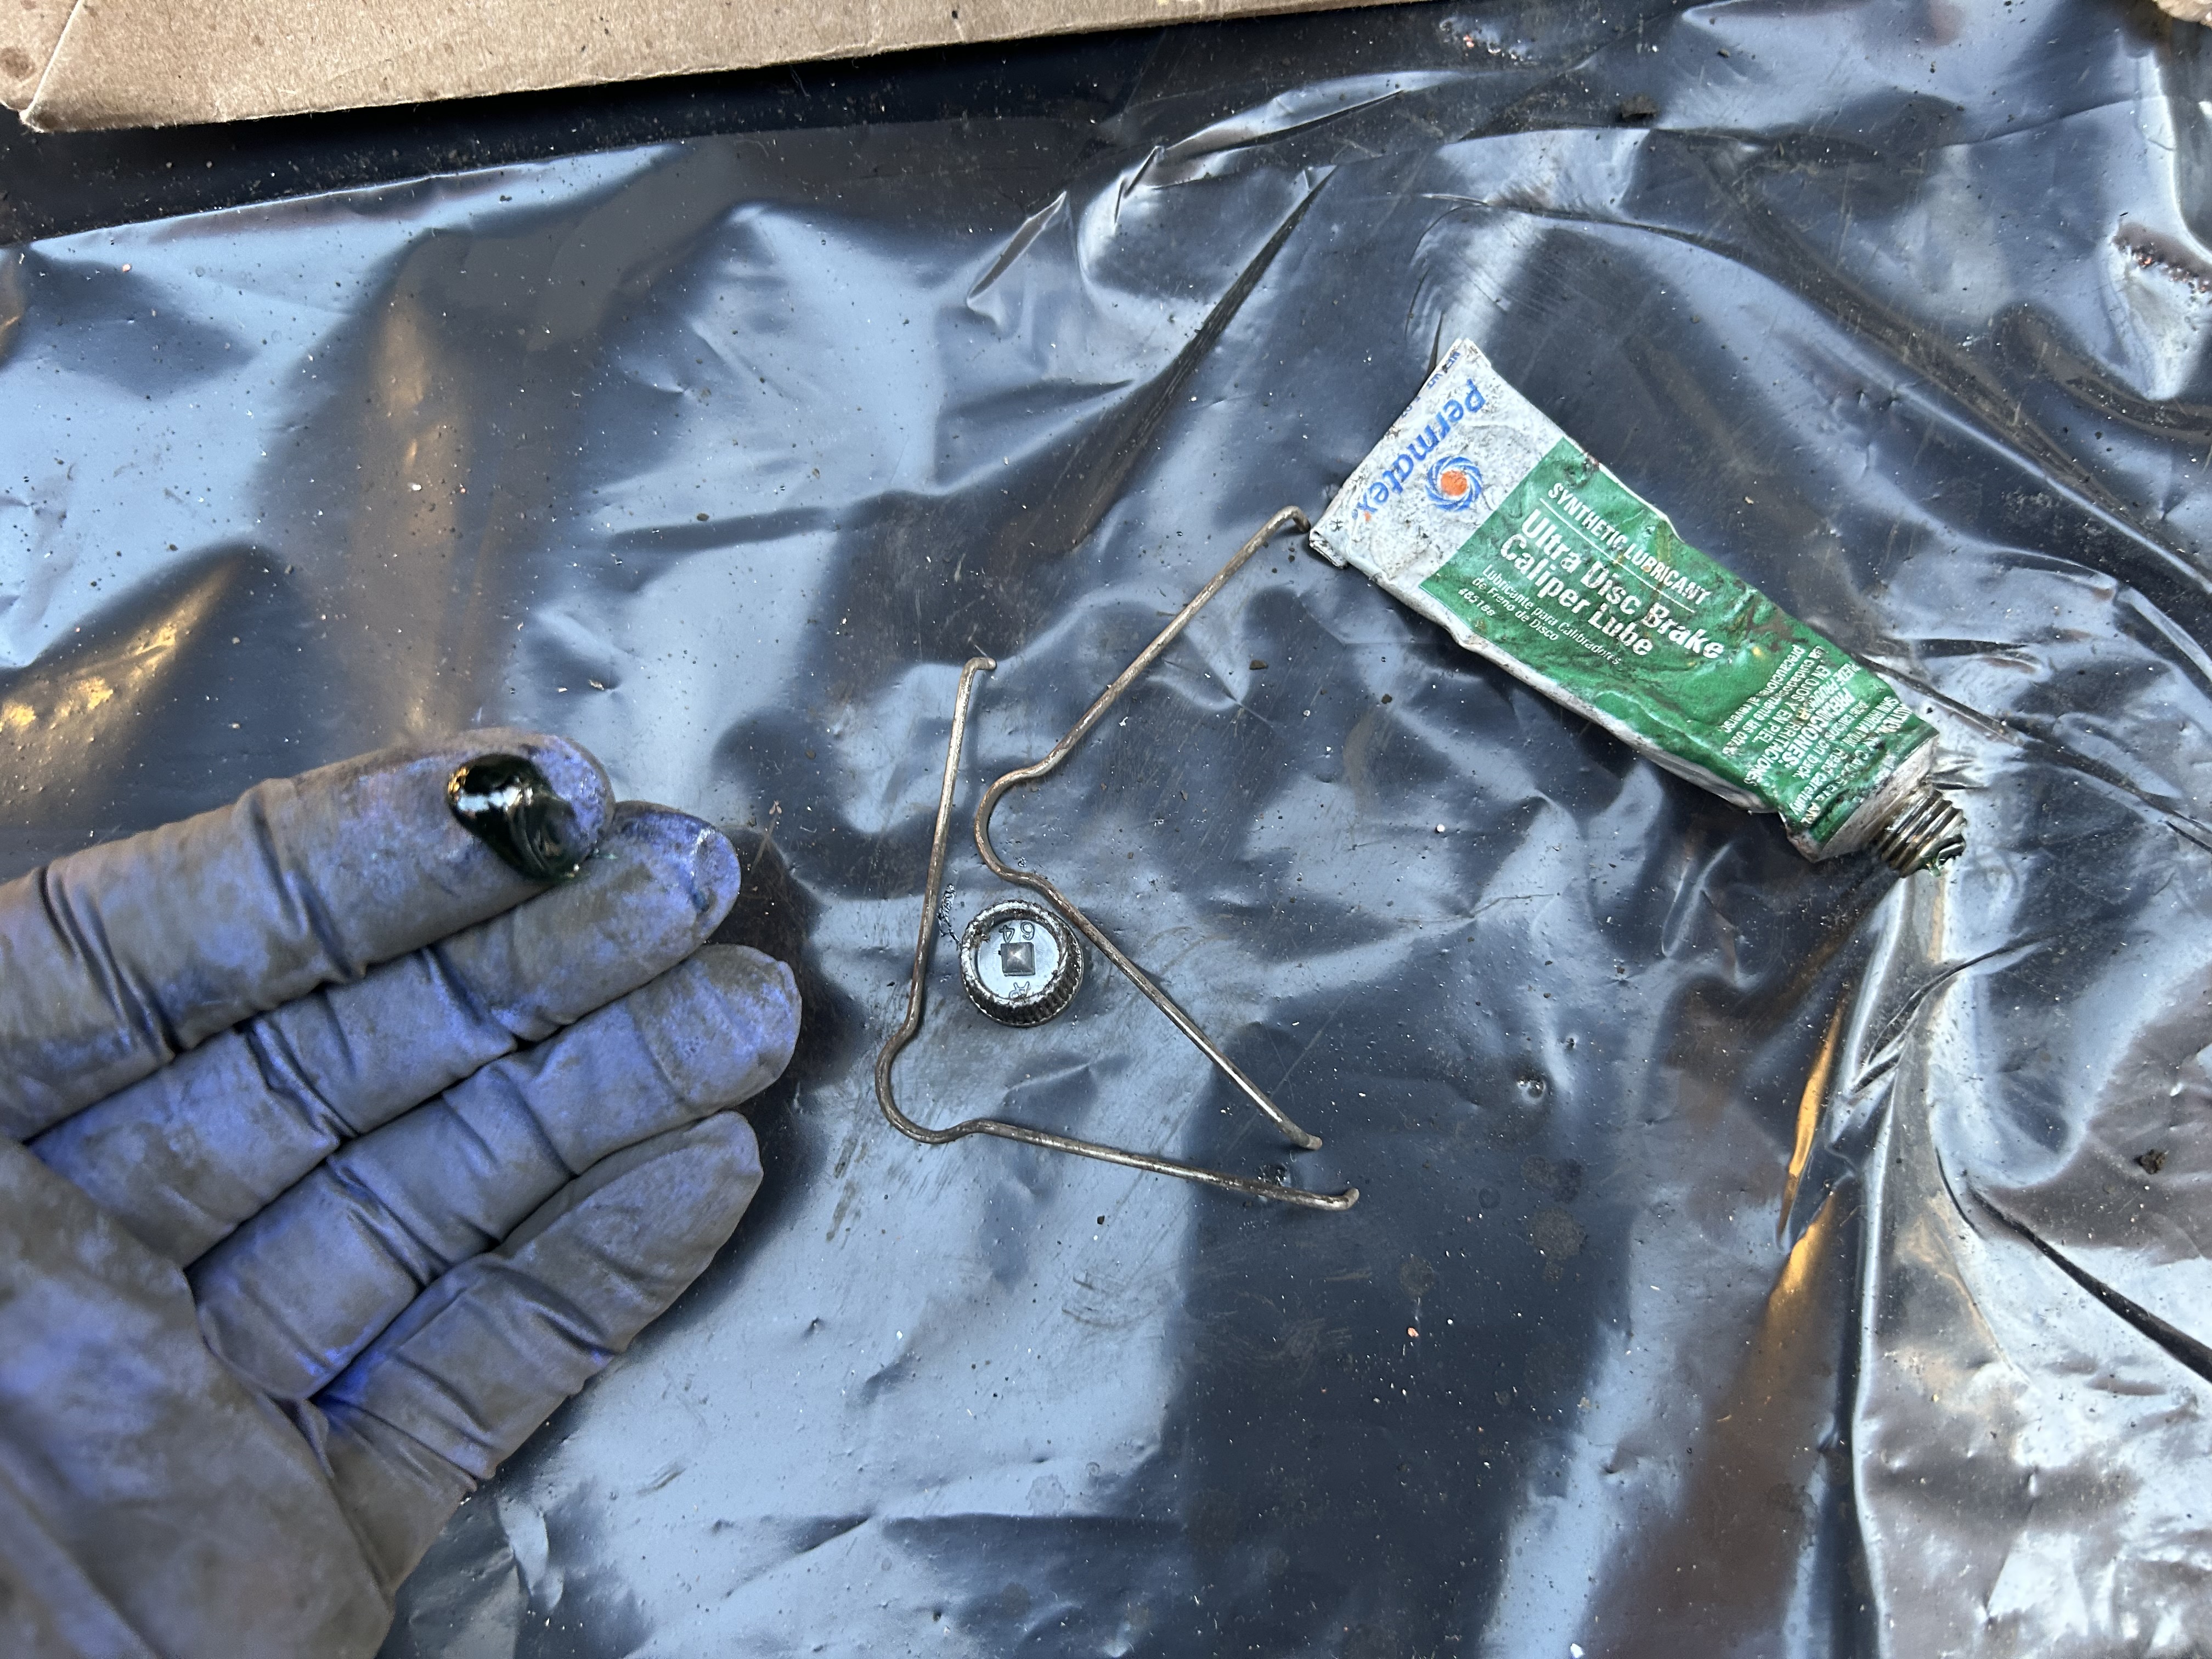
Brake Hardware Lubricant: Permatex Ultra Disc Brake Caliper Lube, 0.5 oz.
Socket Wrench Set: Amazon Basics 201-Piece Mechanic’s Socket Tool Set
Nitrile Gloves (Box/100): Small / Medium / Large / X-Large
Floor Jack: BIG RED Torin Low Profile Aluminum/Steel Floor Jack, 1.5 Ton (3,000 lb) Capacity
Jack Stands: Big Red Torin Steel Jack Stands: 3 Ton (6,000 lb) Capacity, Red, 2 Count
Wheels Chocks: MaxxHaul Rubber Heavy Duty Wheel Chock (2-Pack)

How to Quickly Replace the Brake Pads On Your 2018-2026 Honda Odyssey
Front Brake Pads
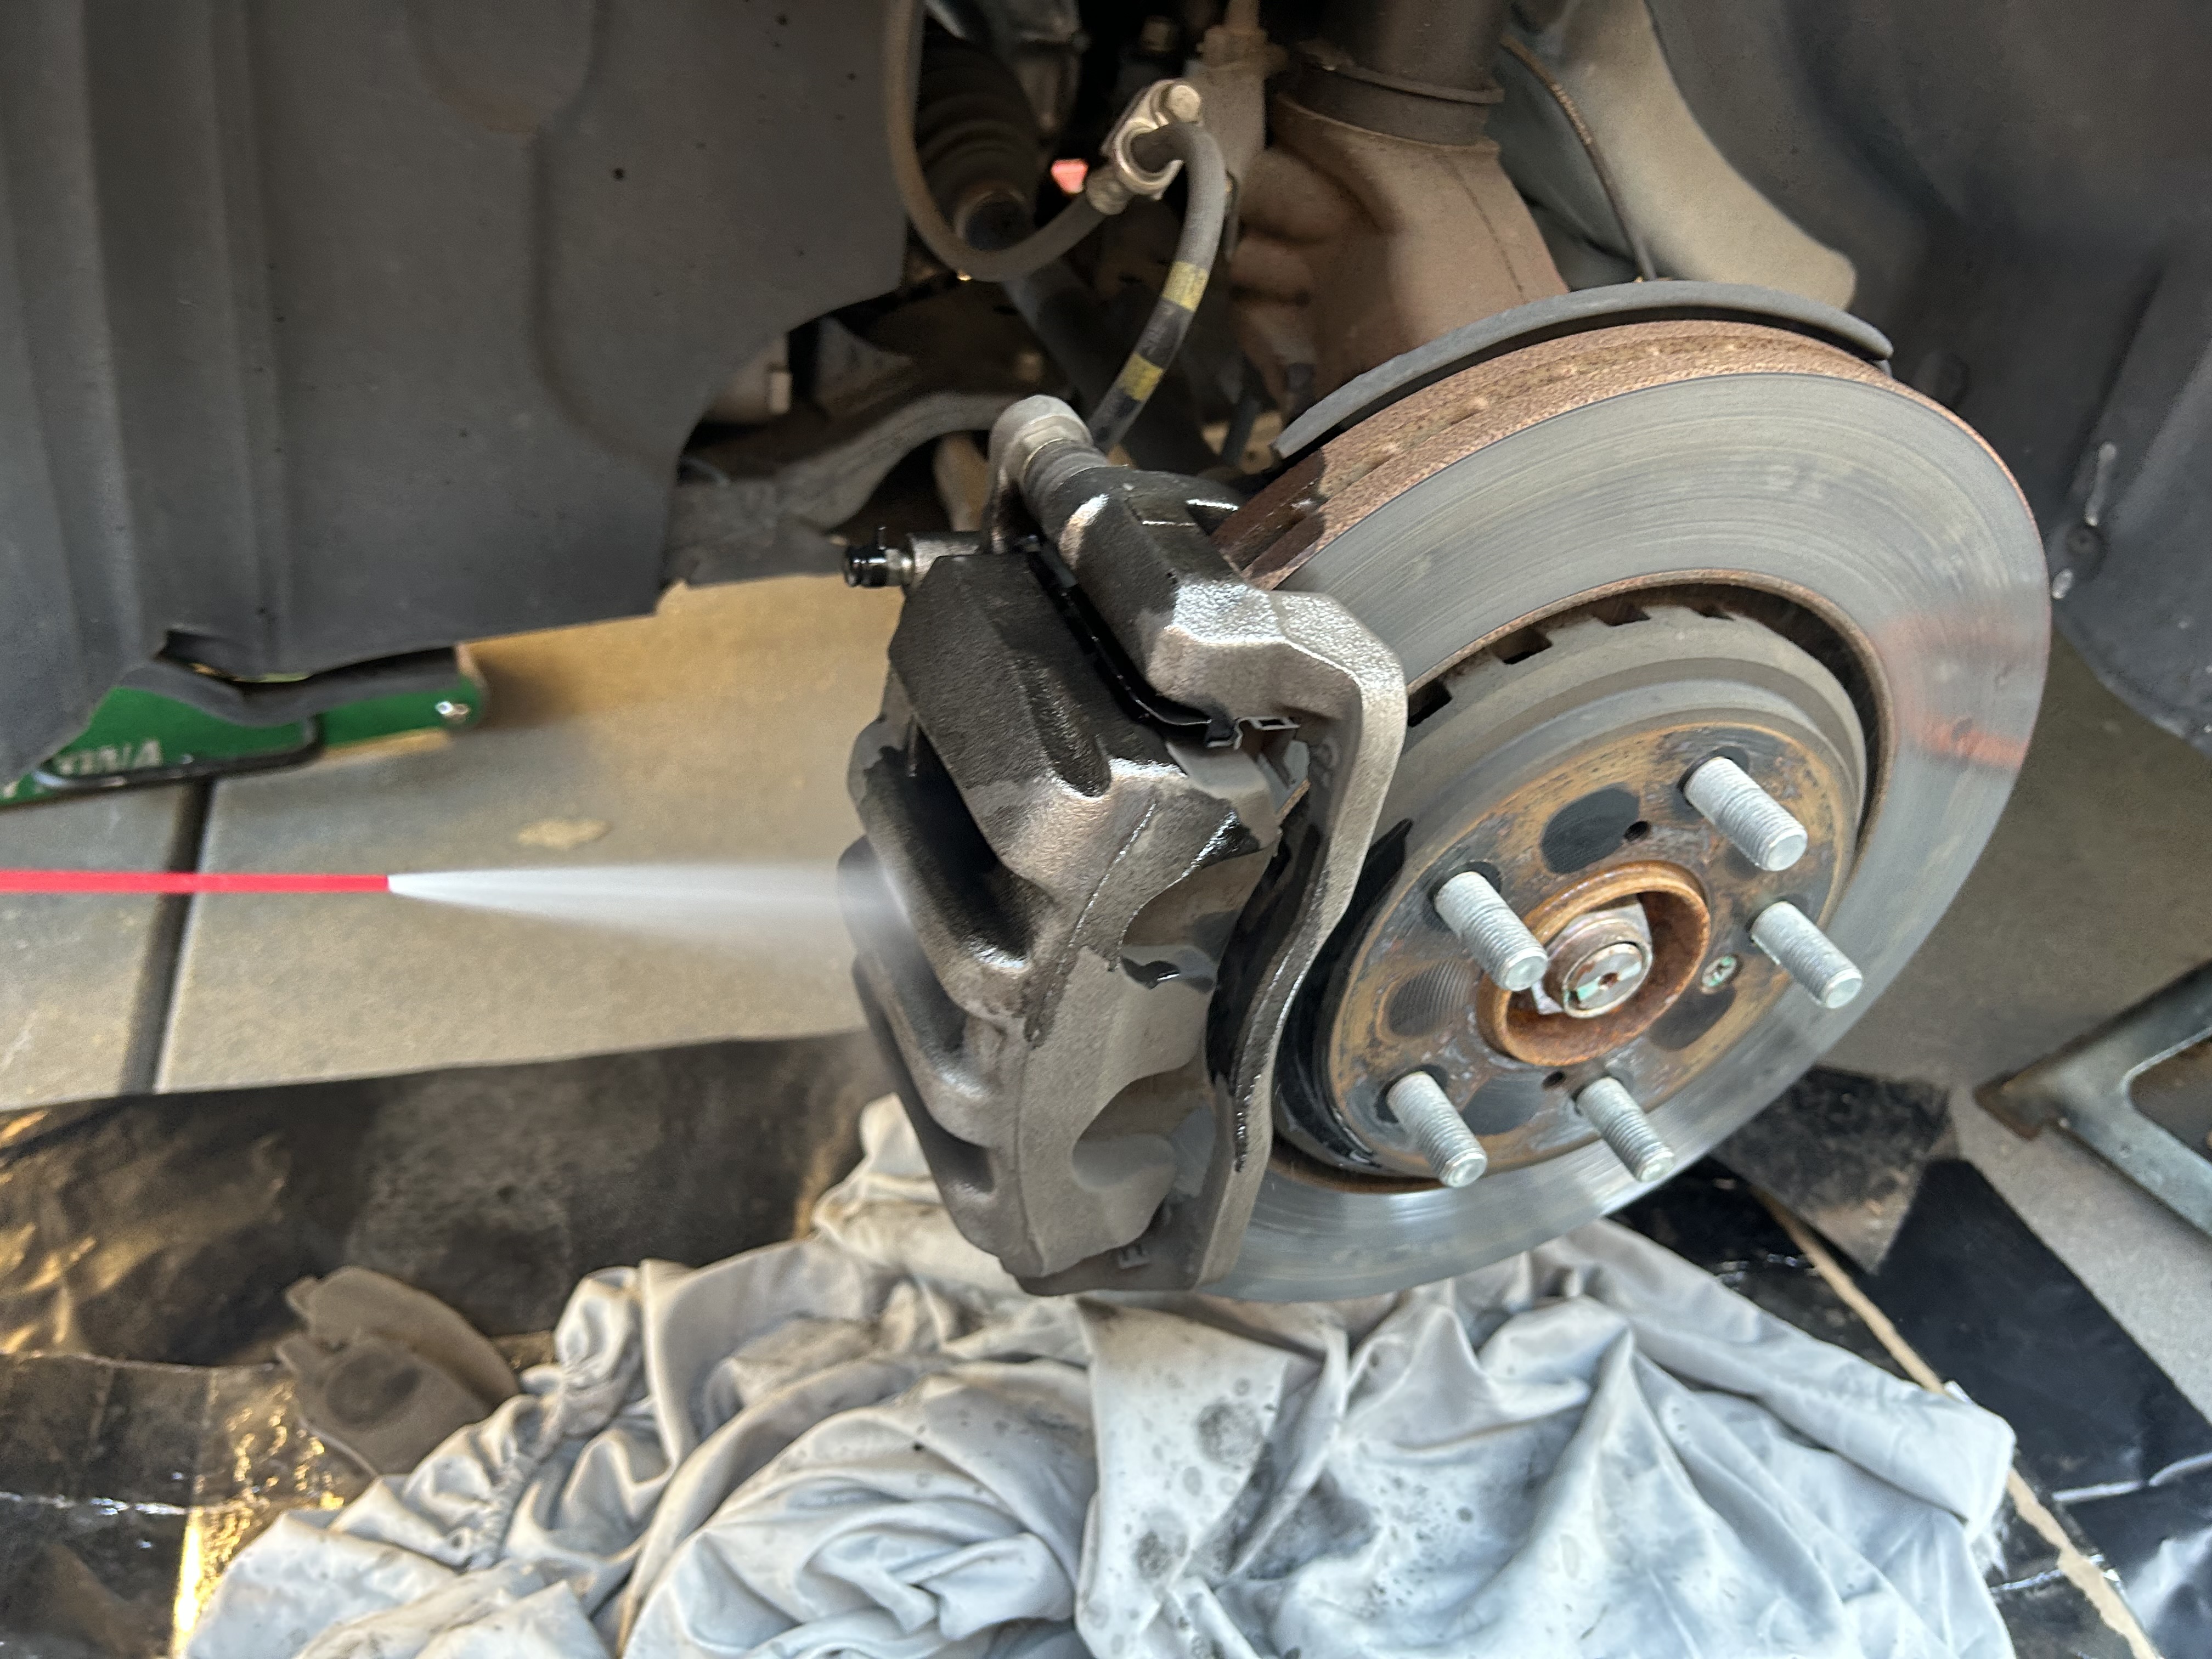
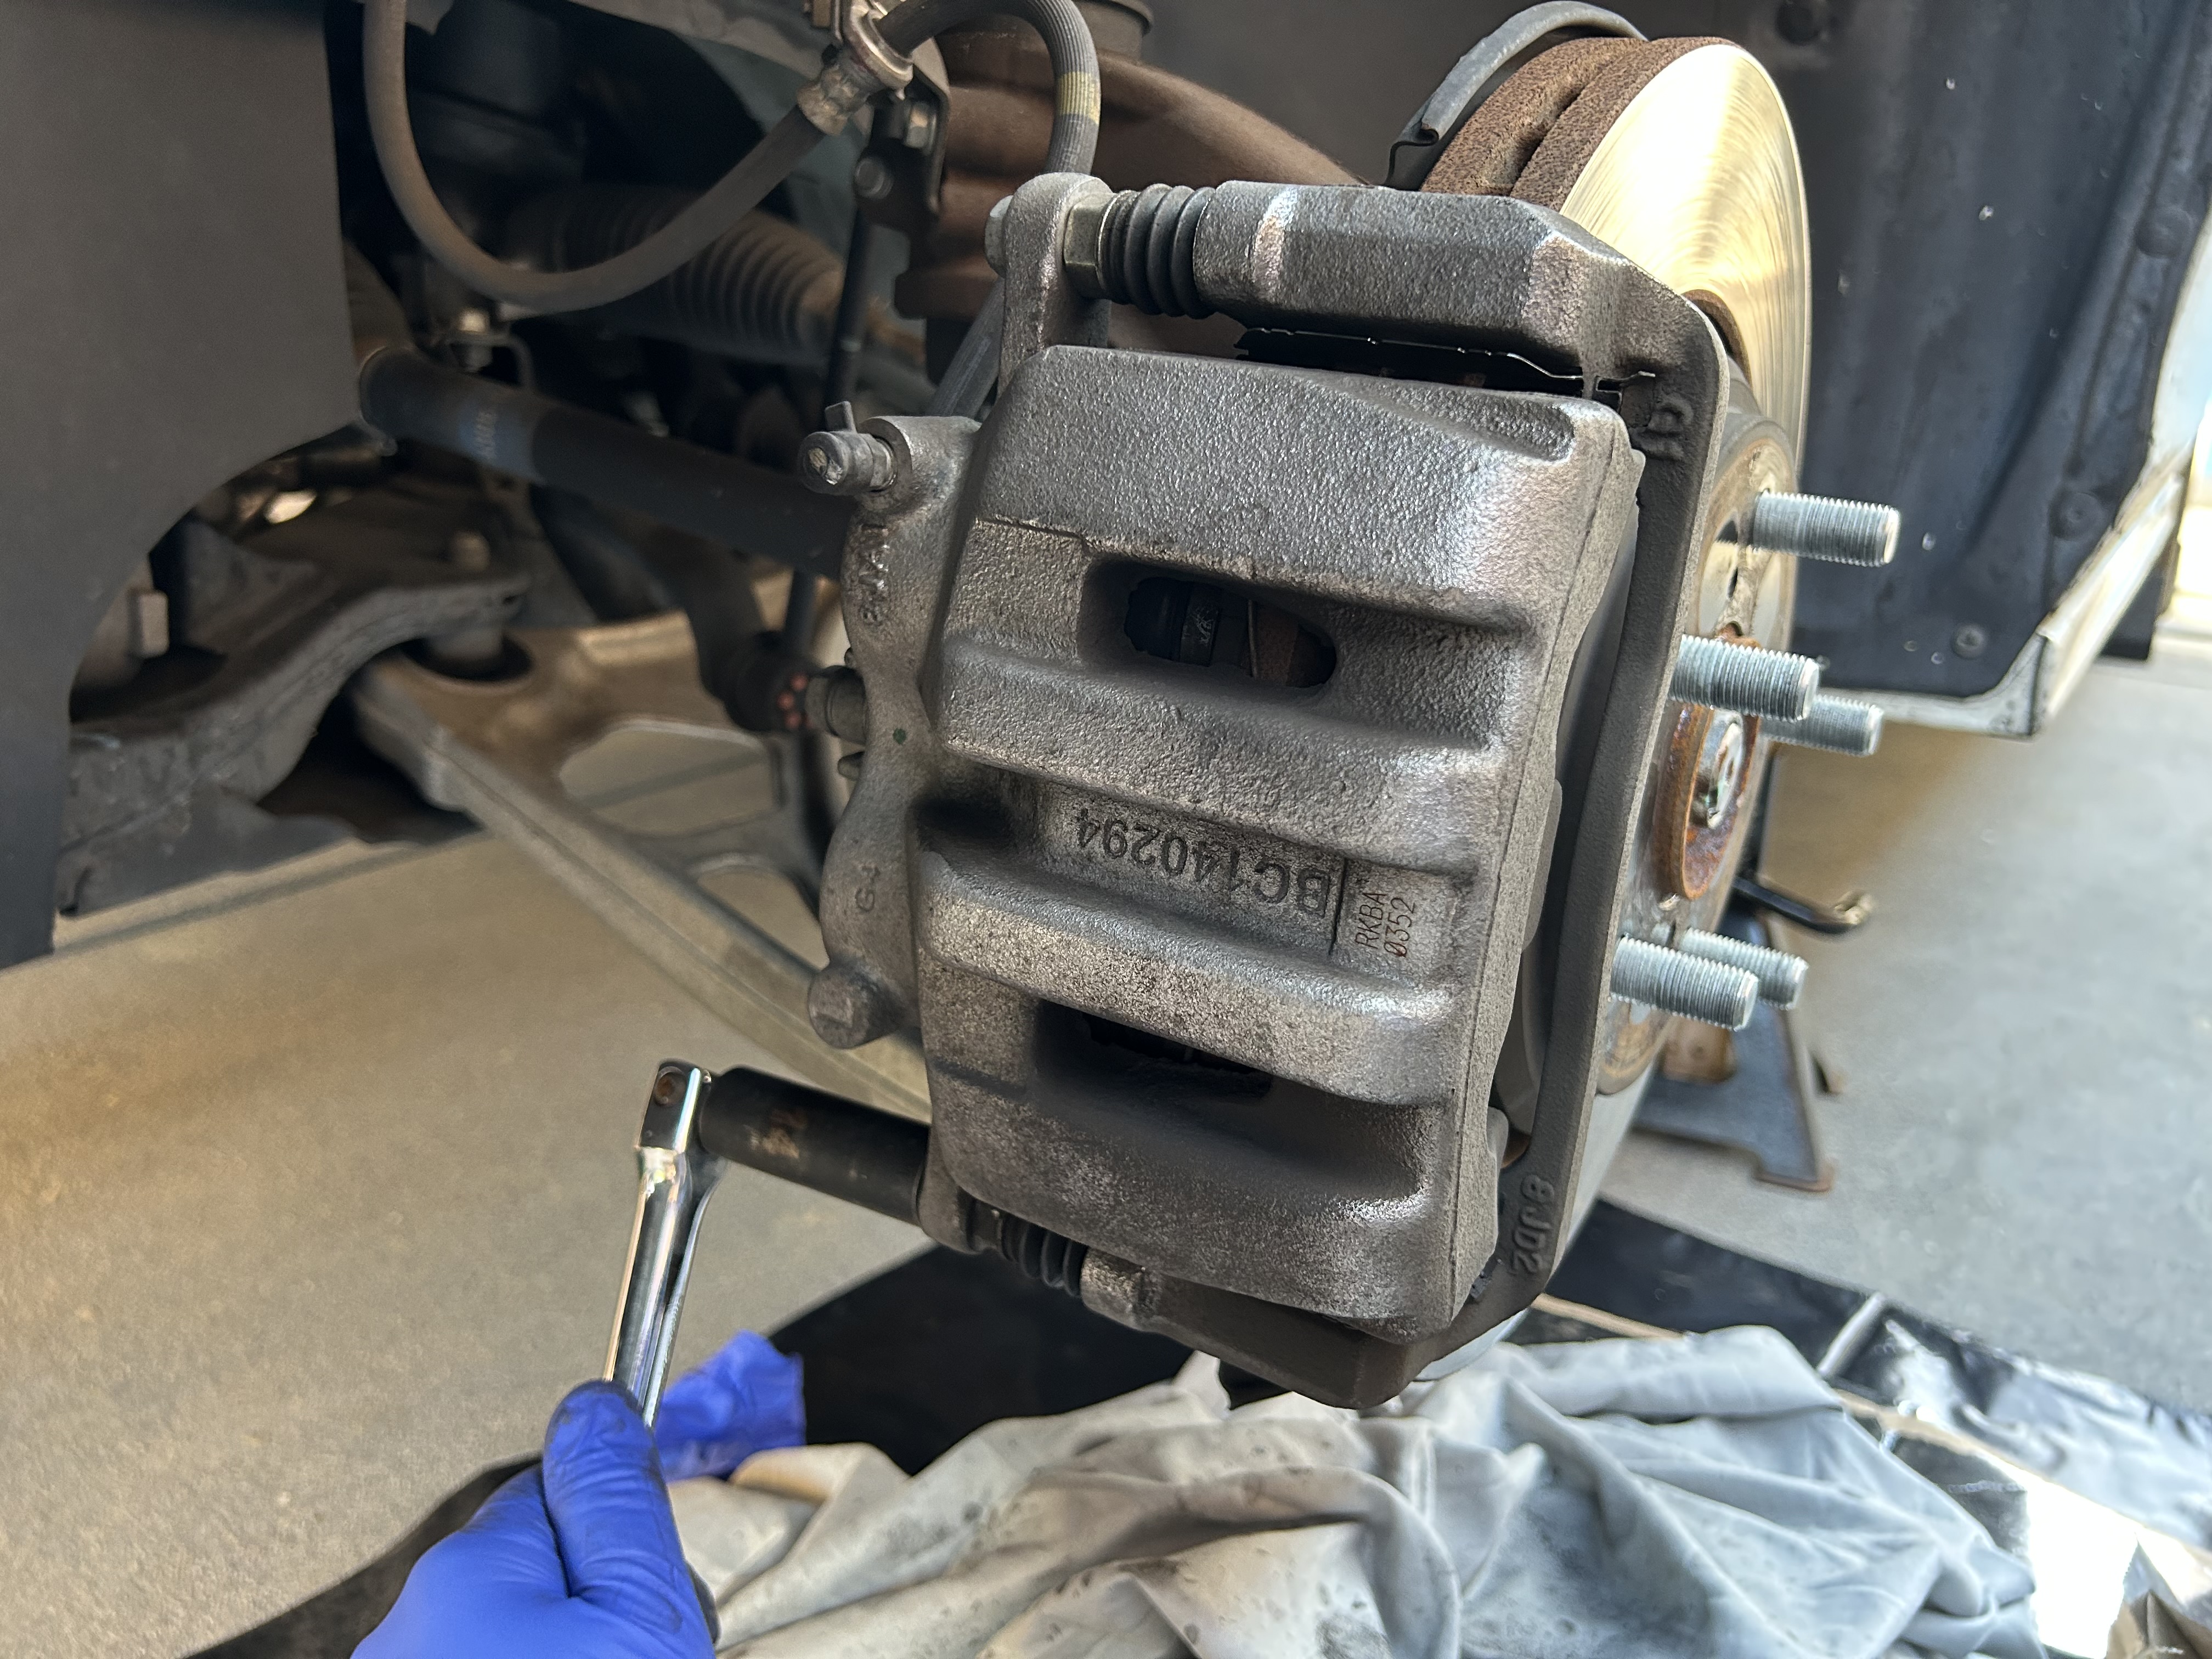
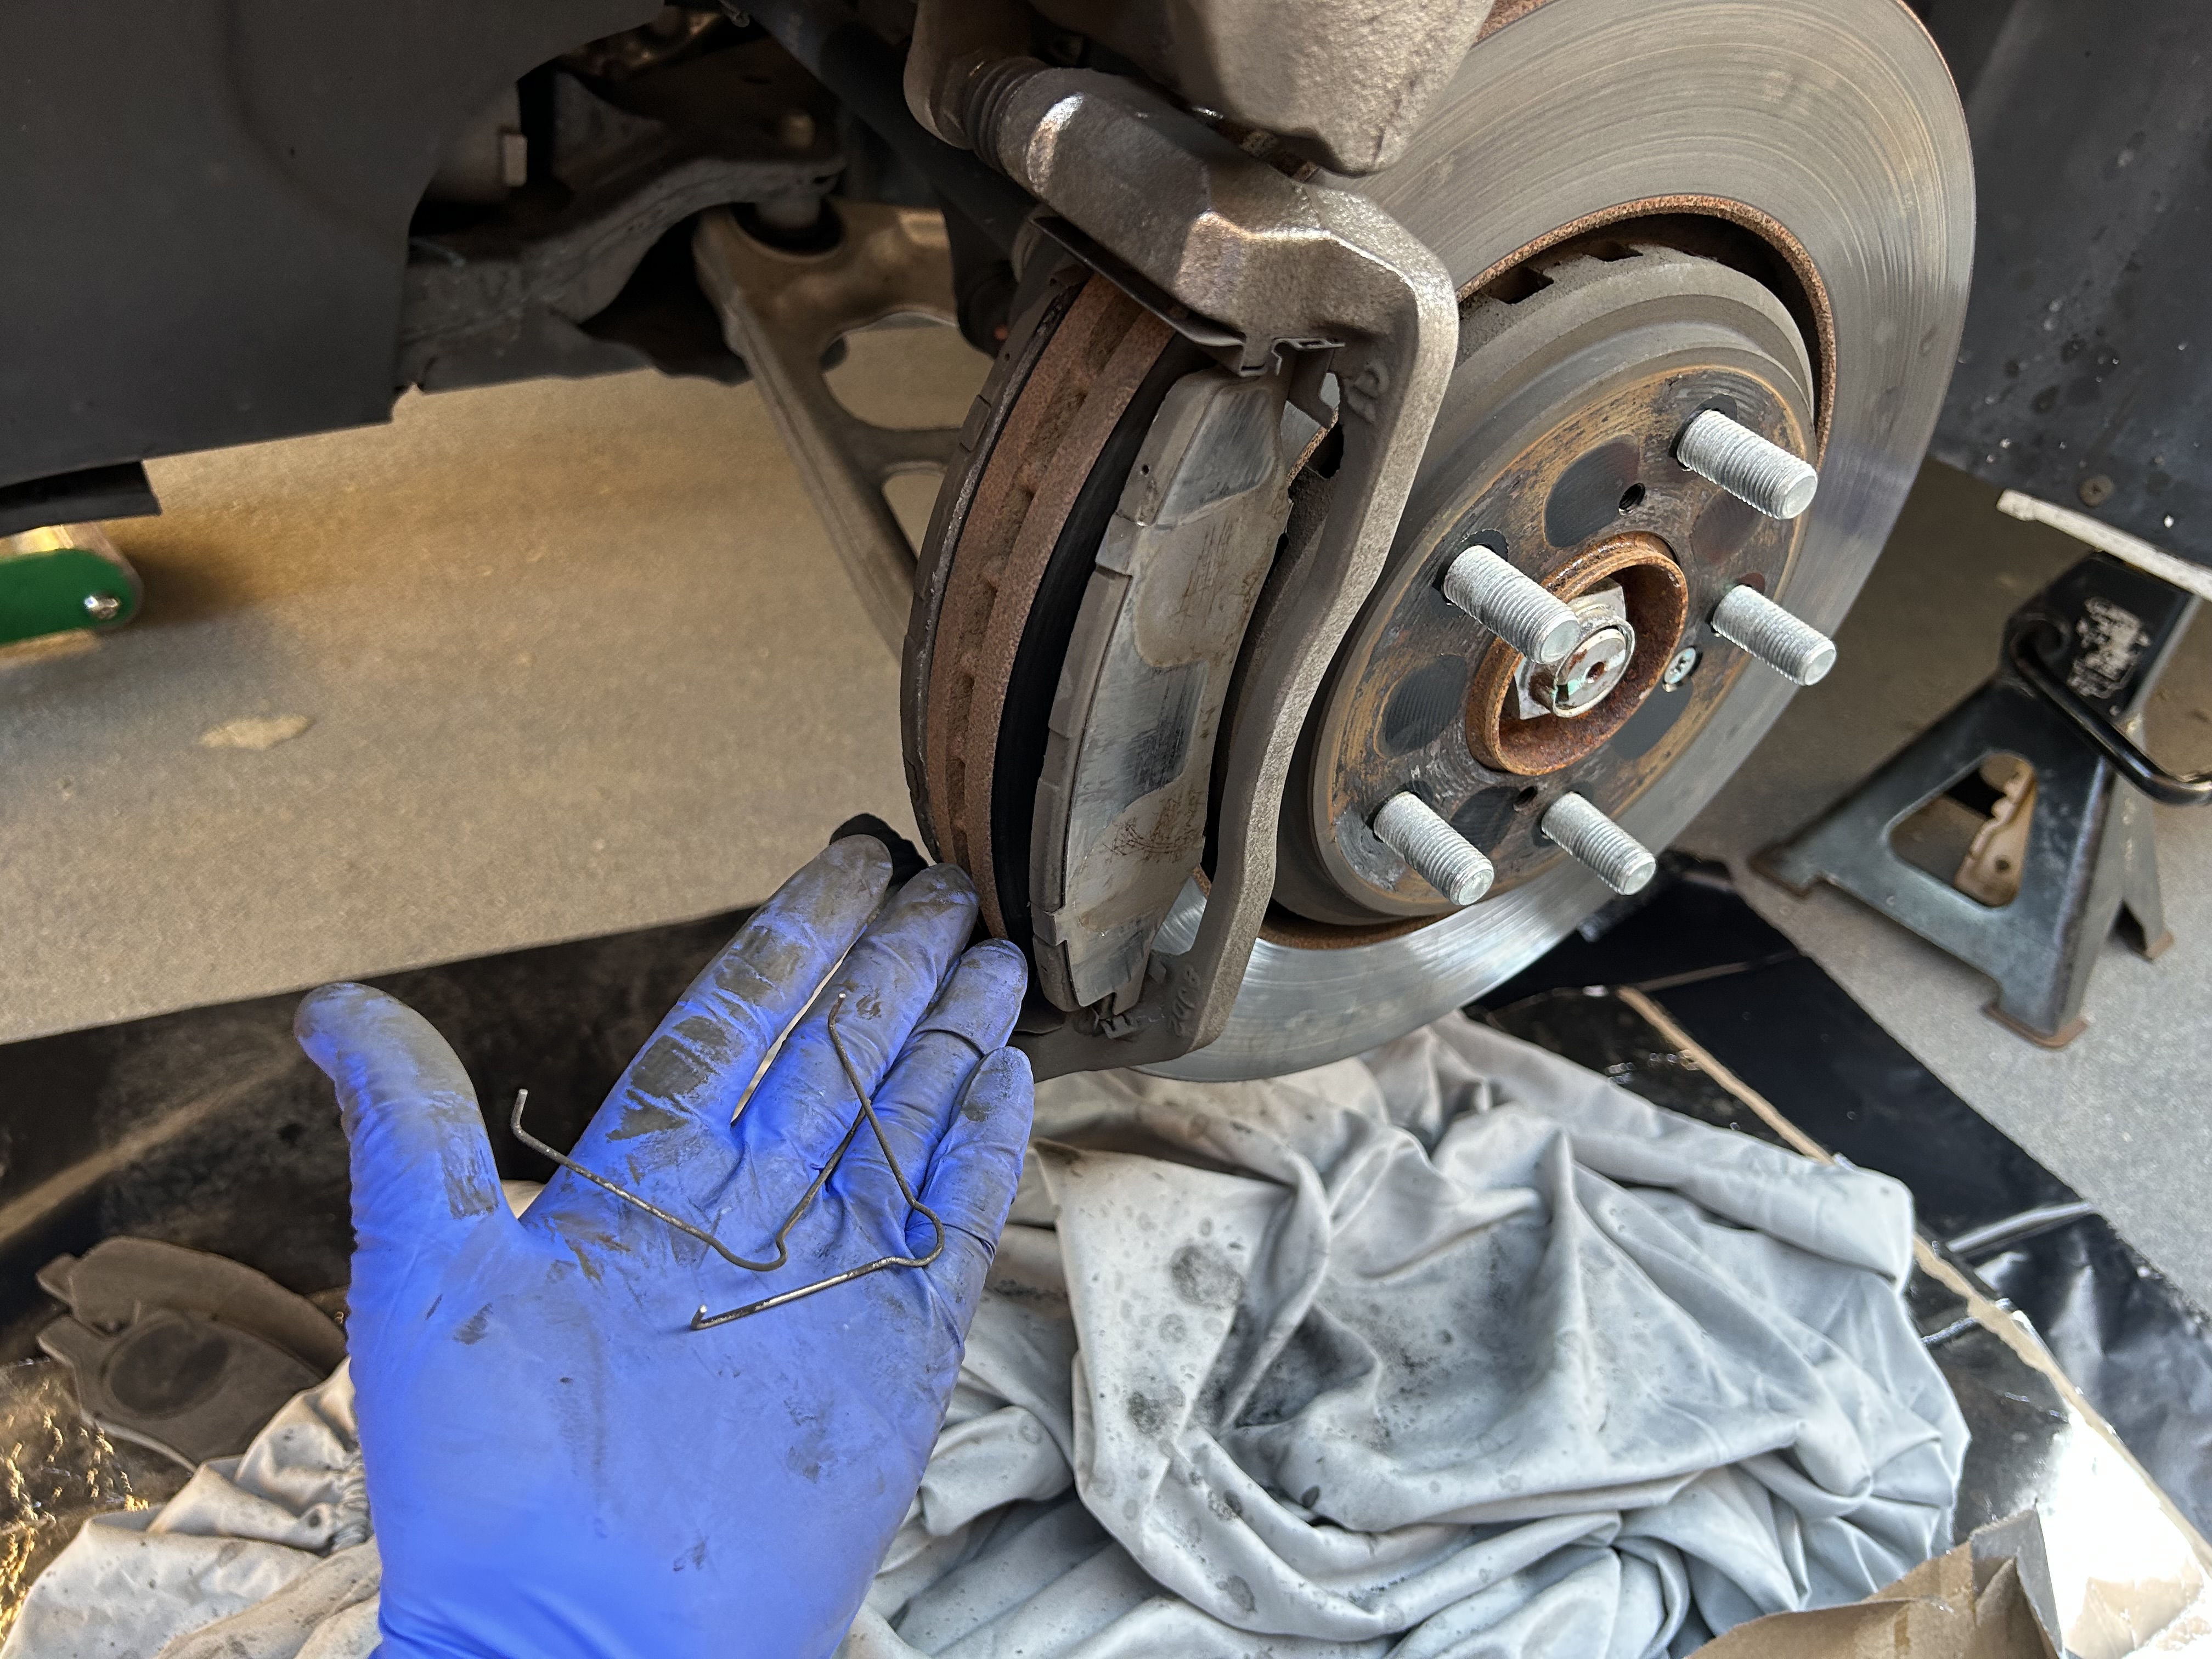
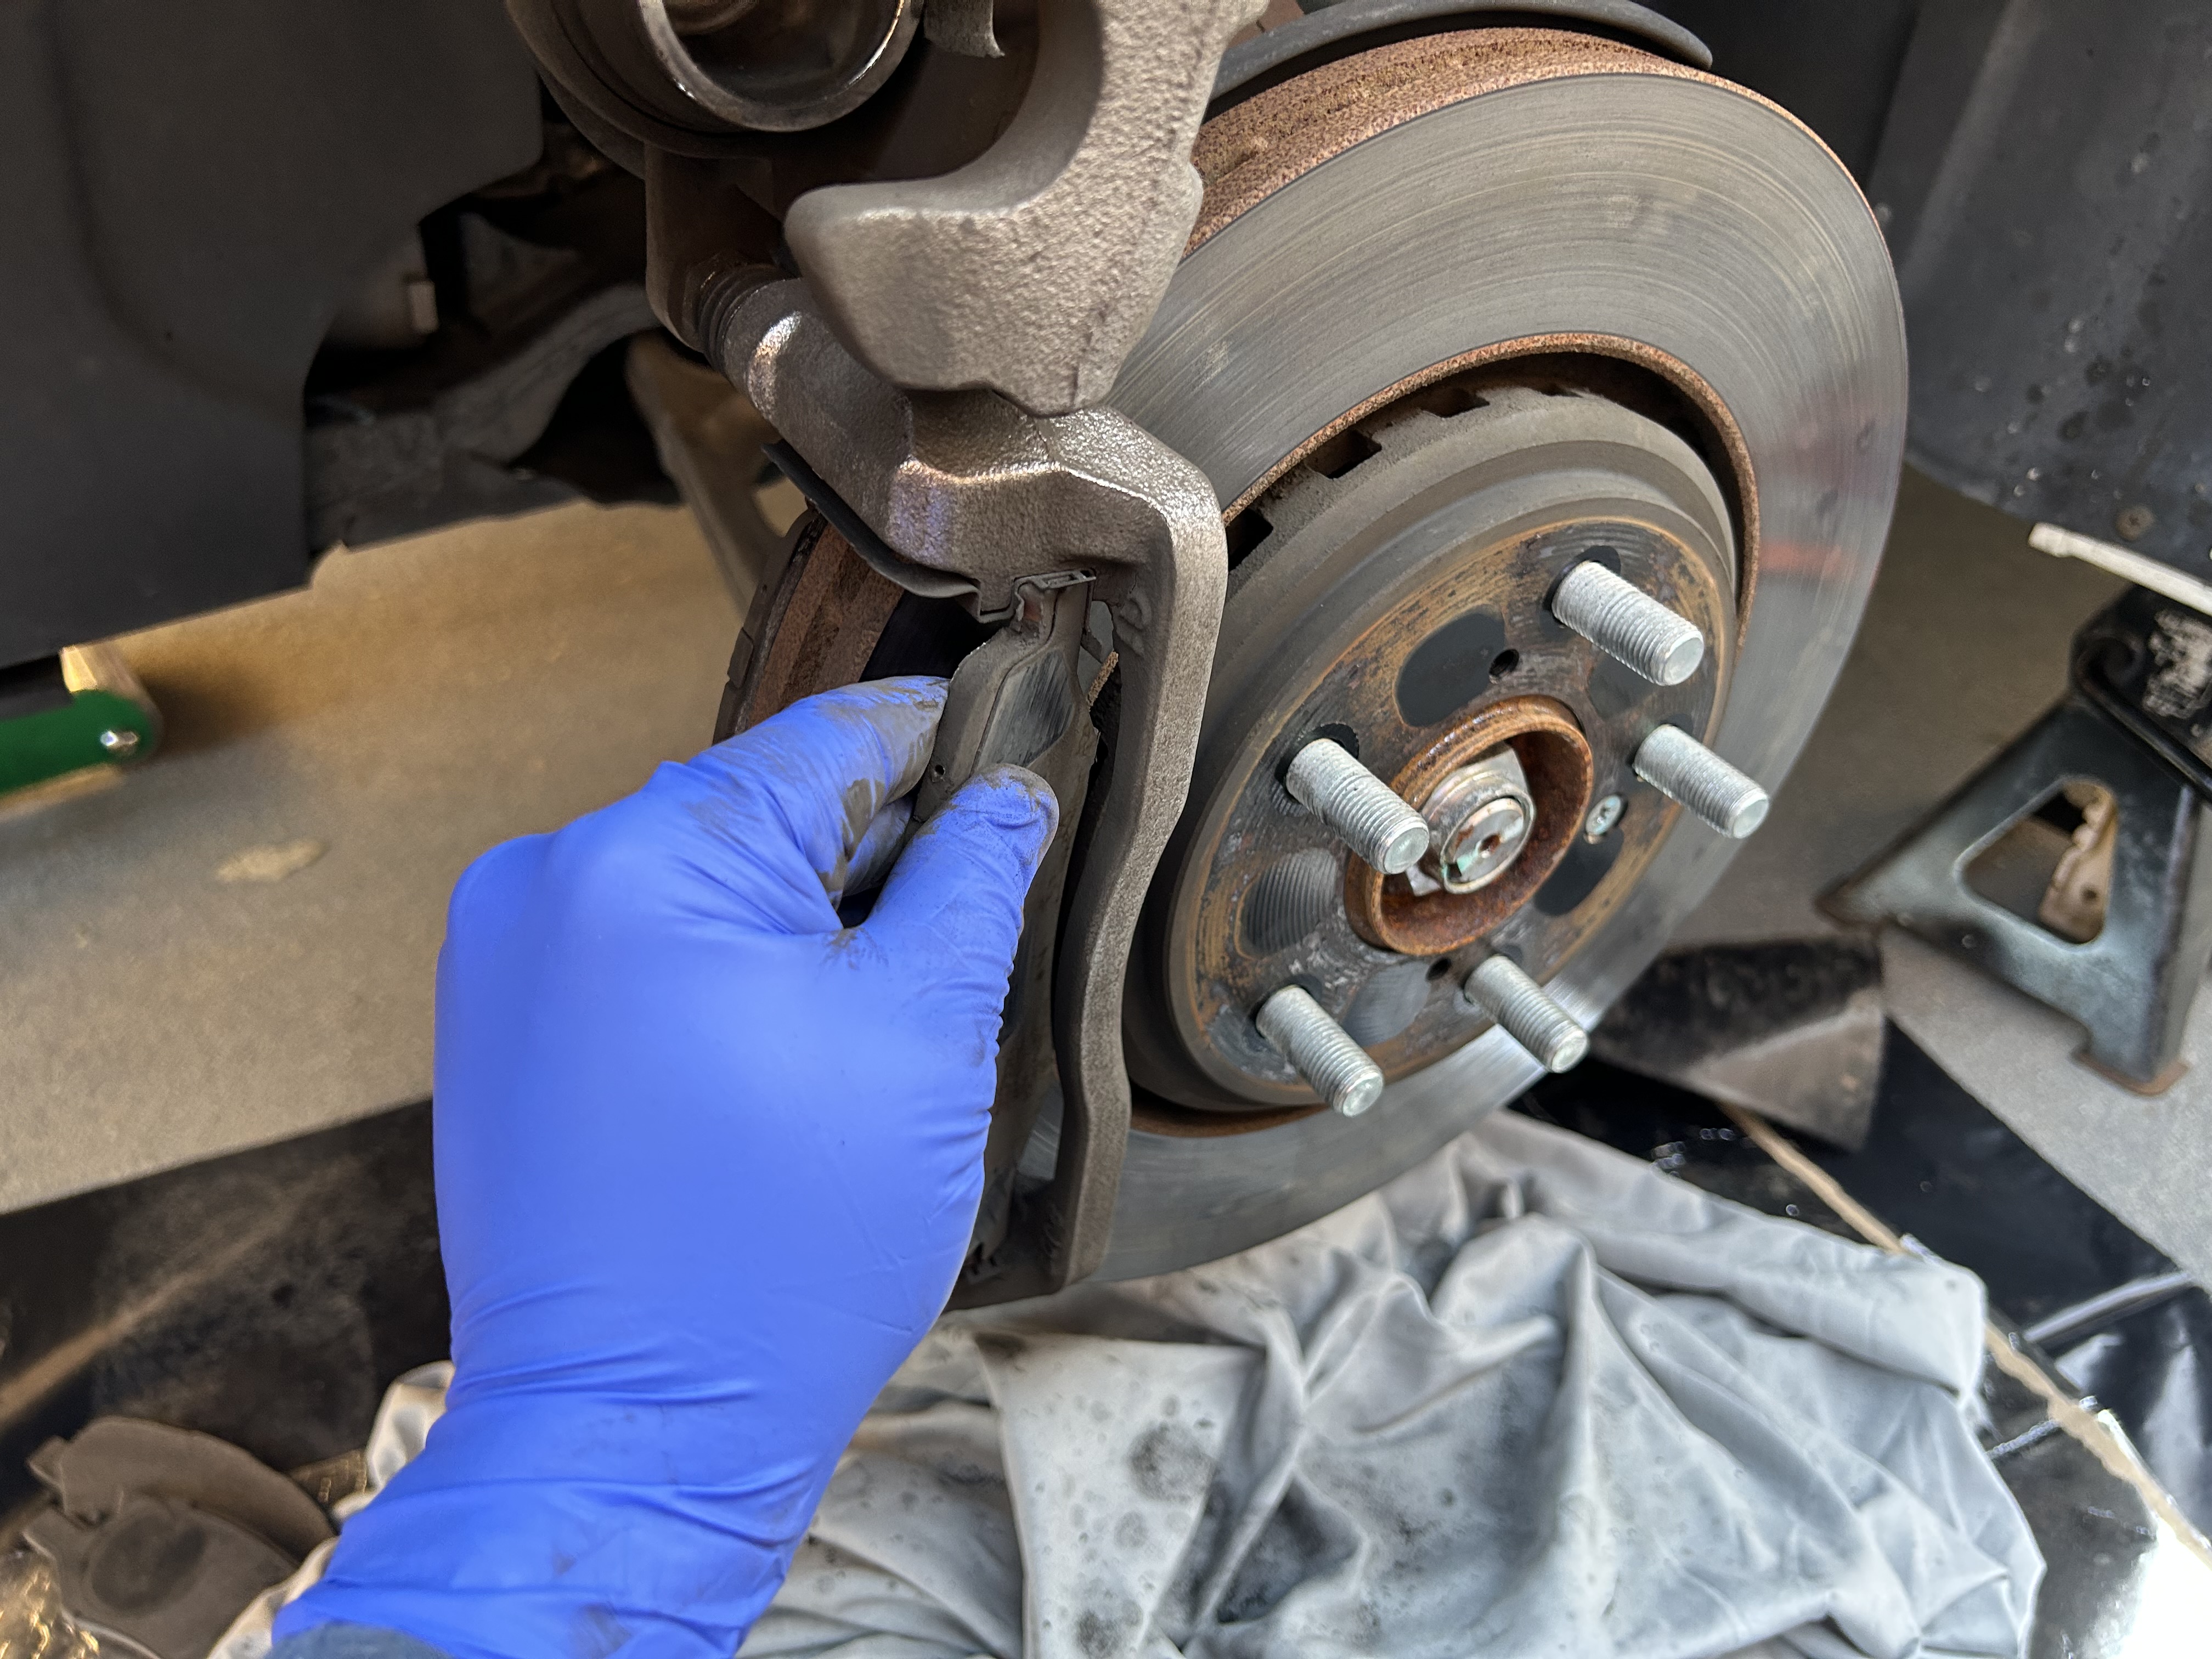
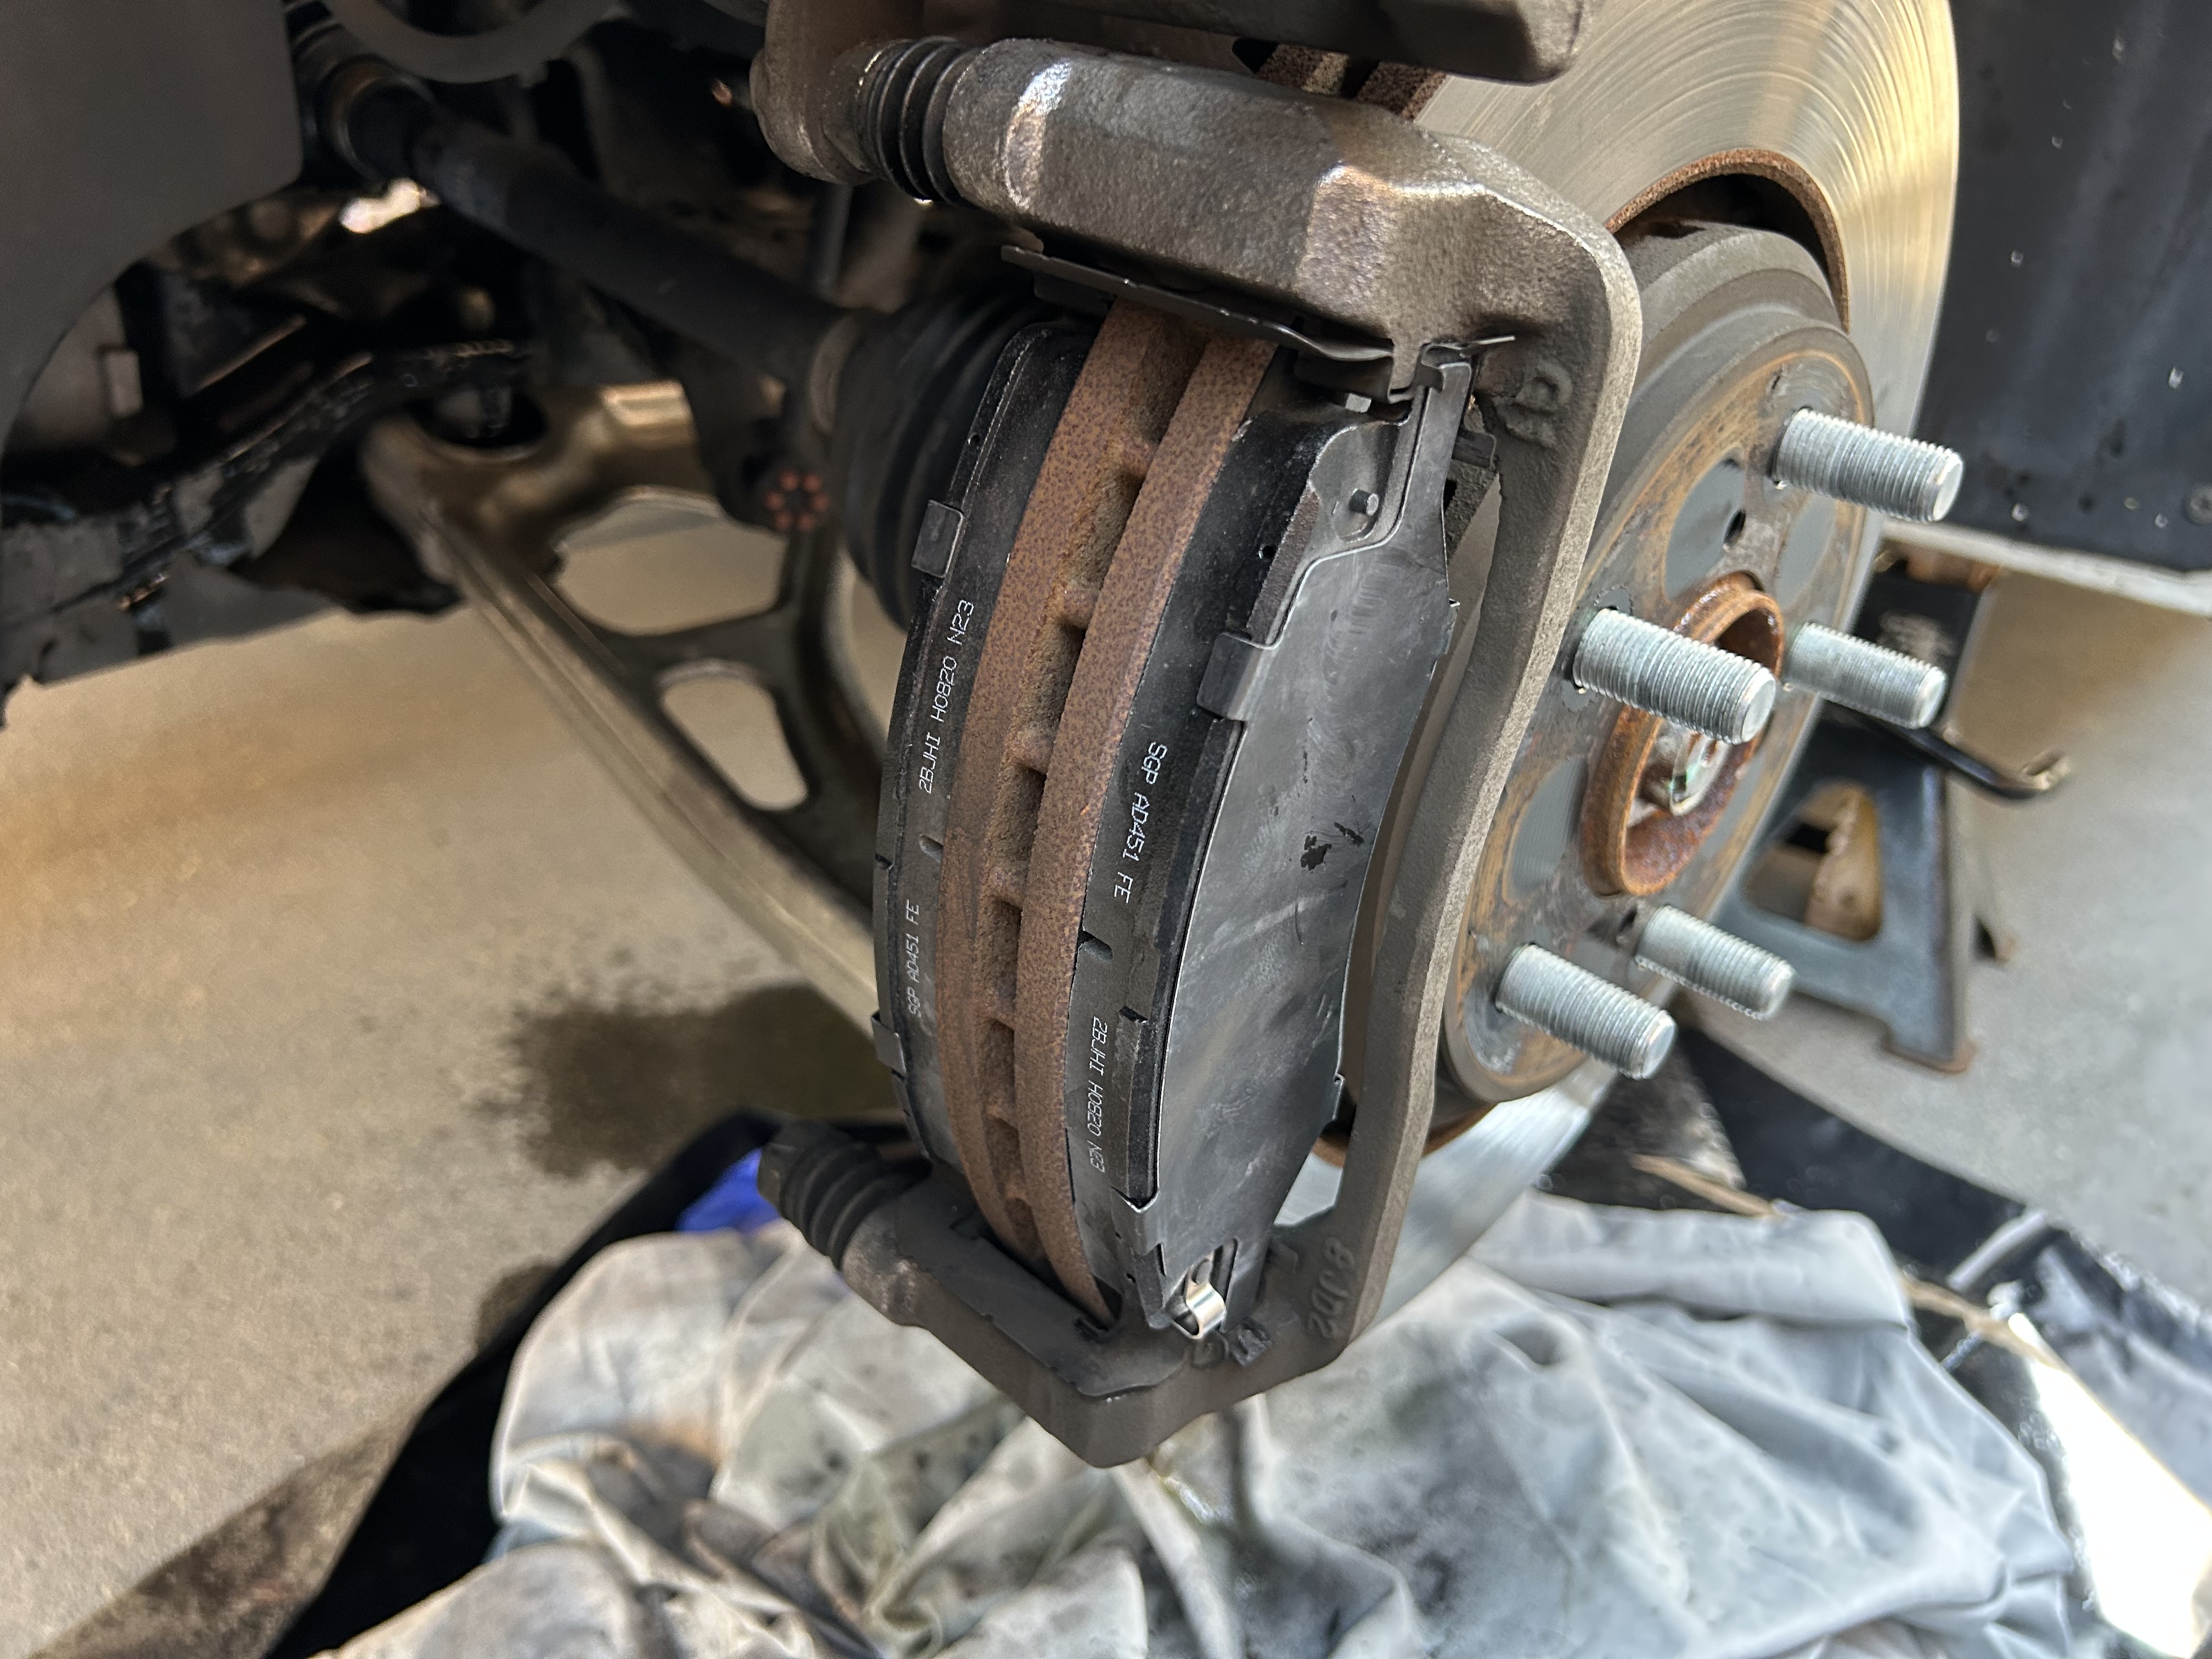
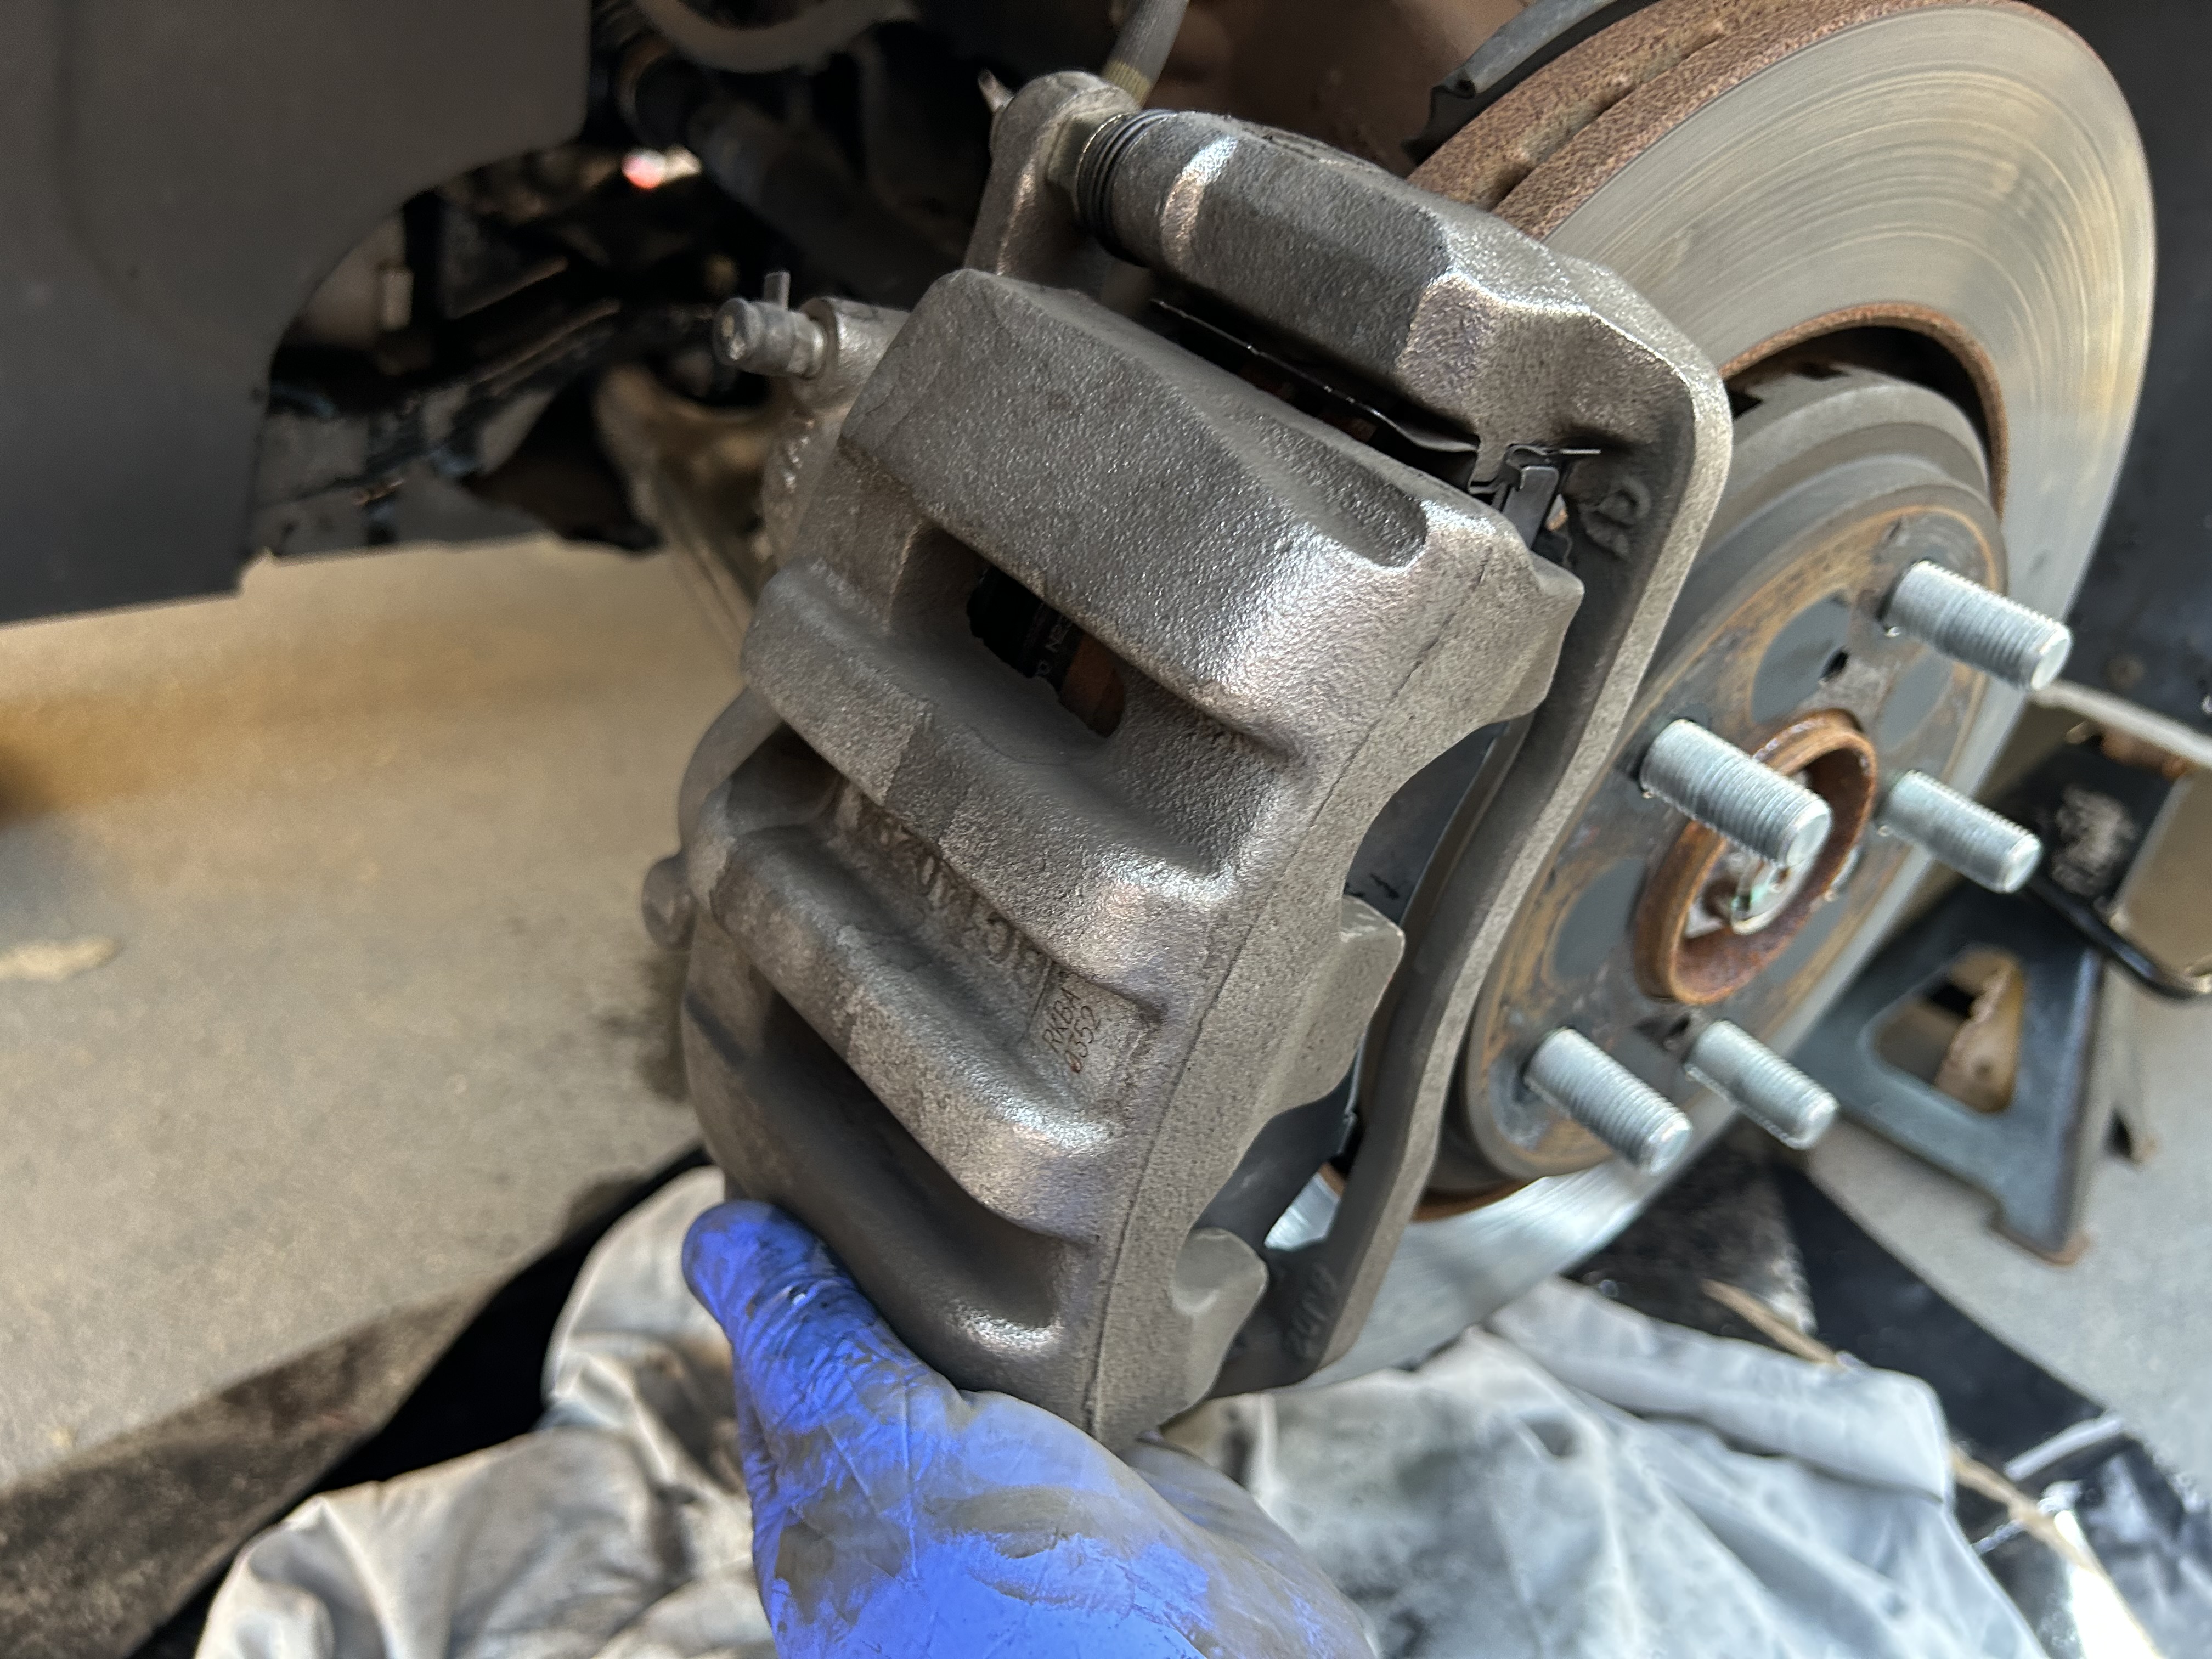
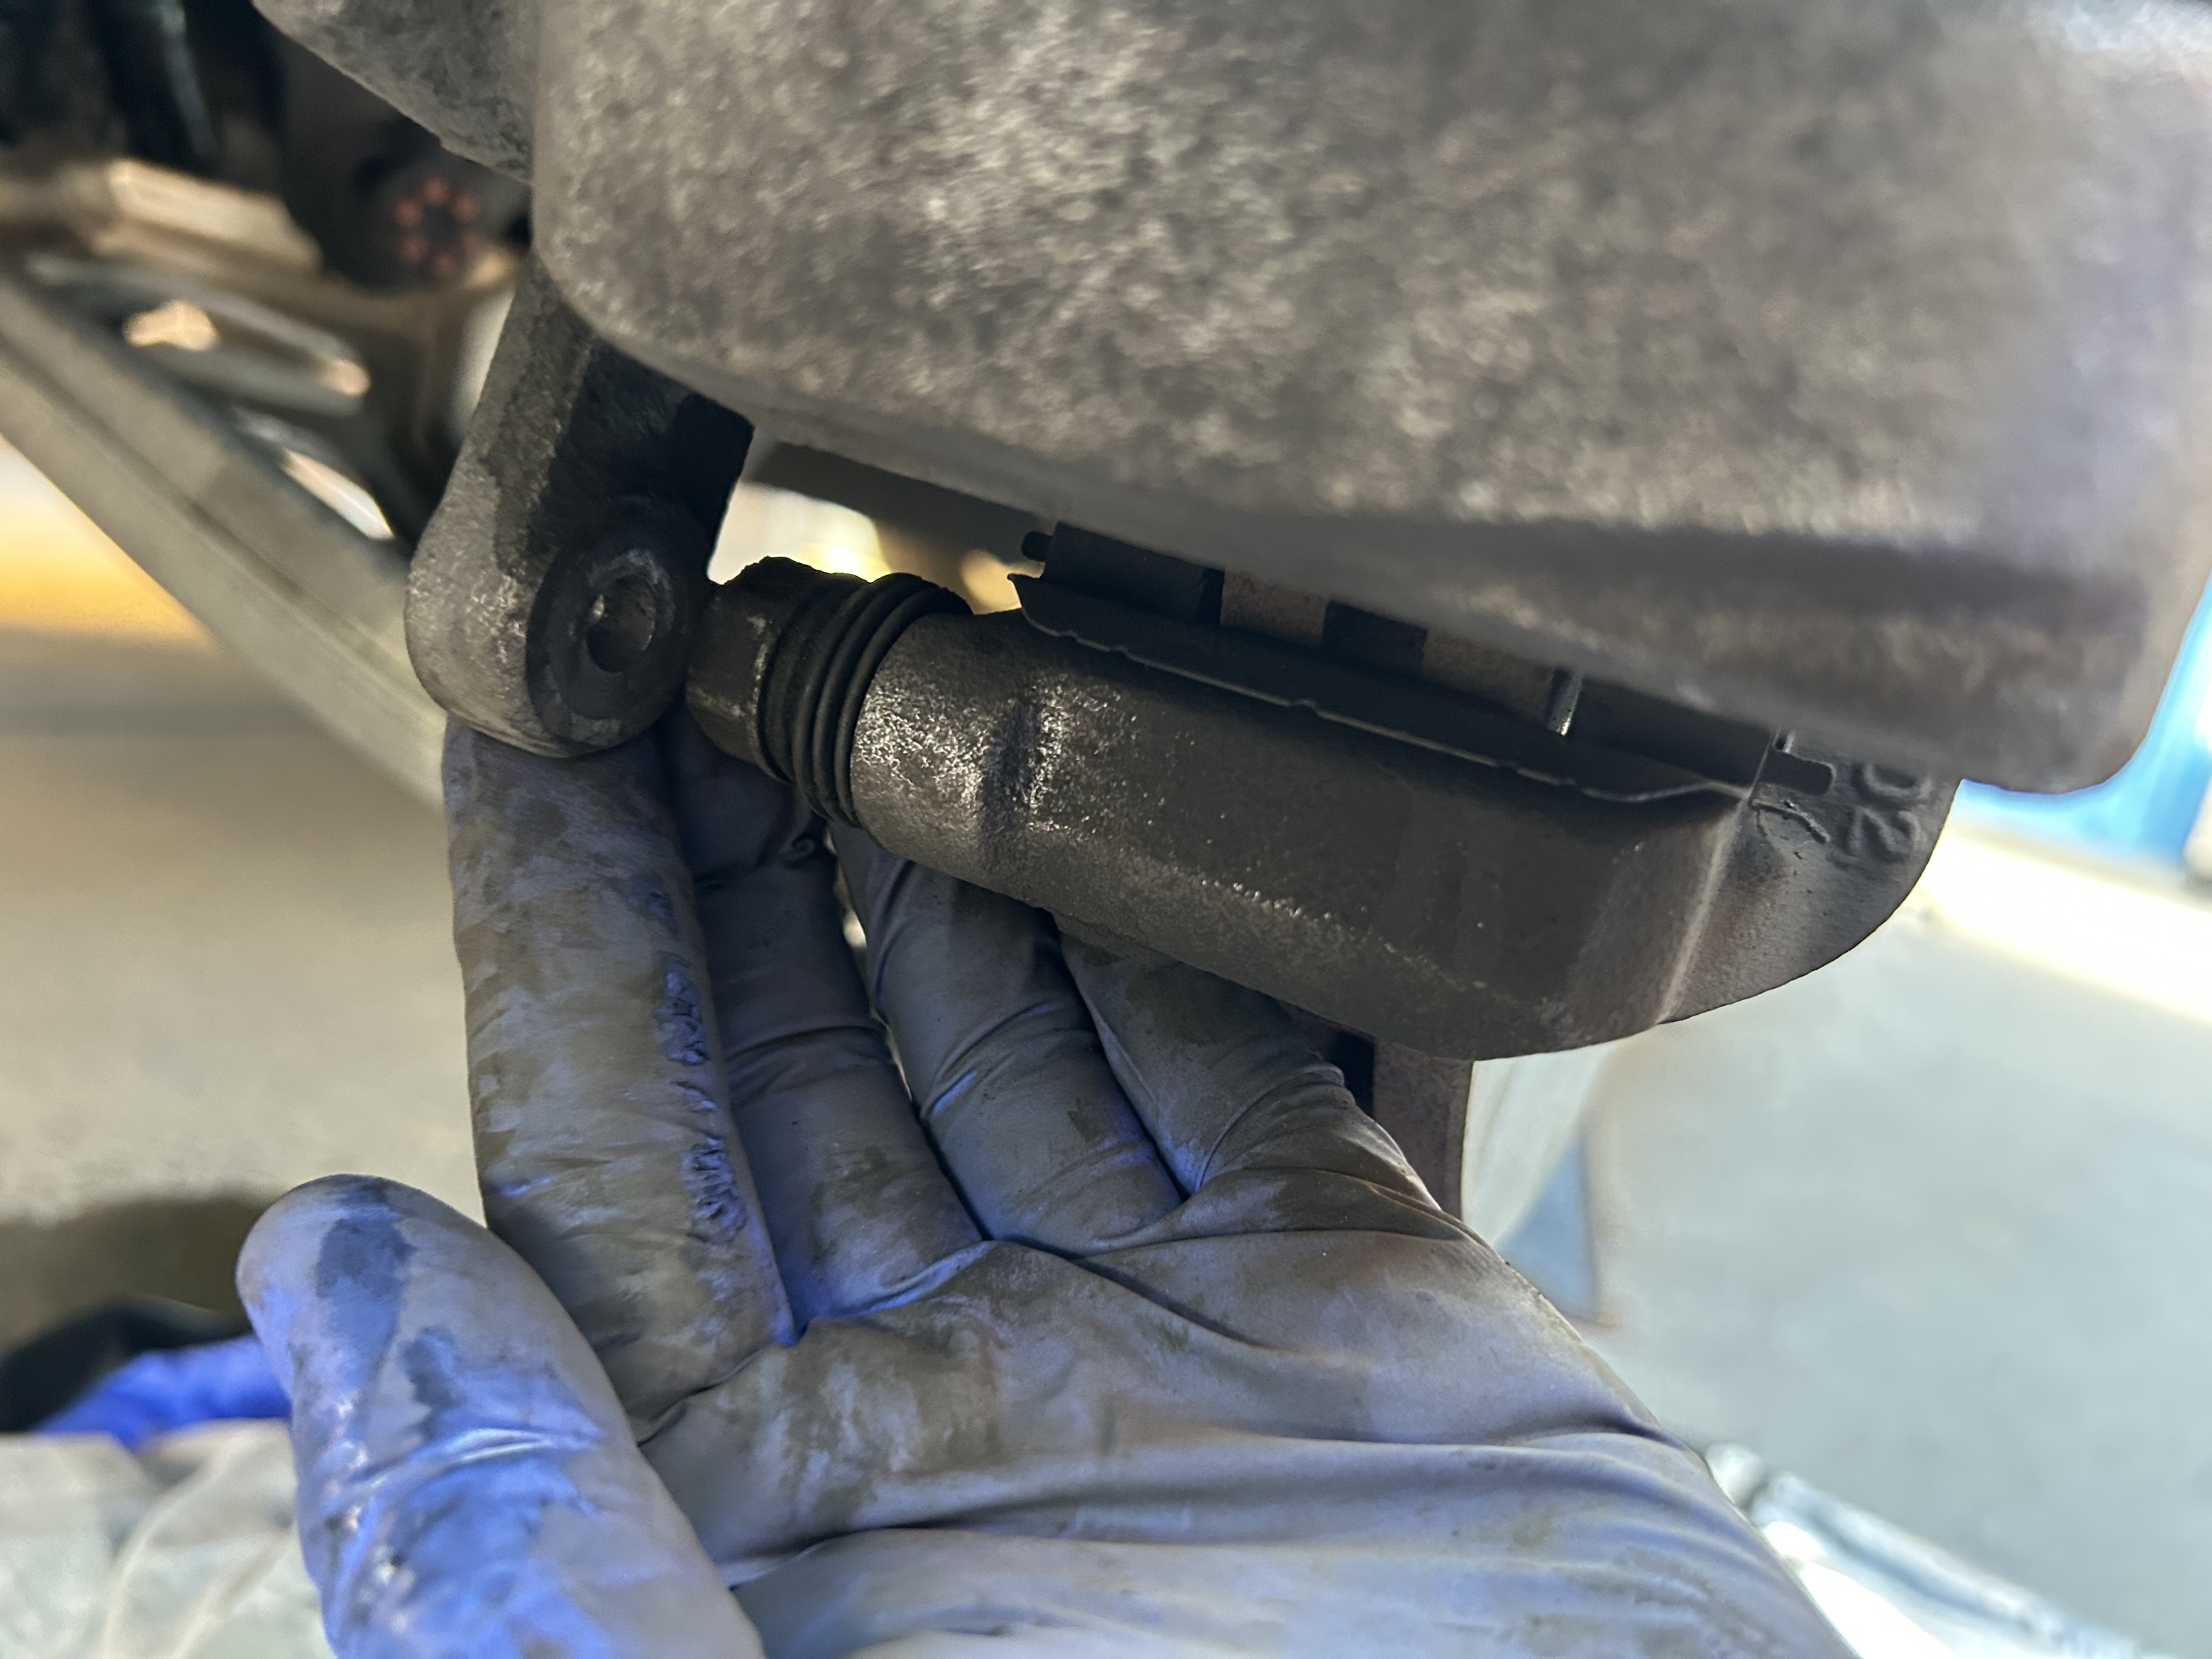
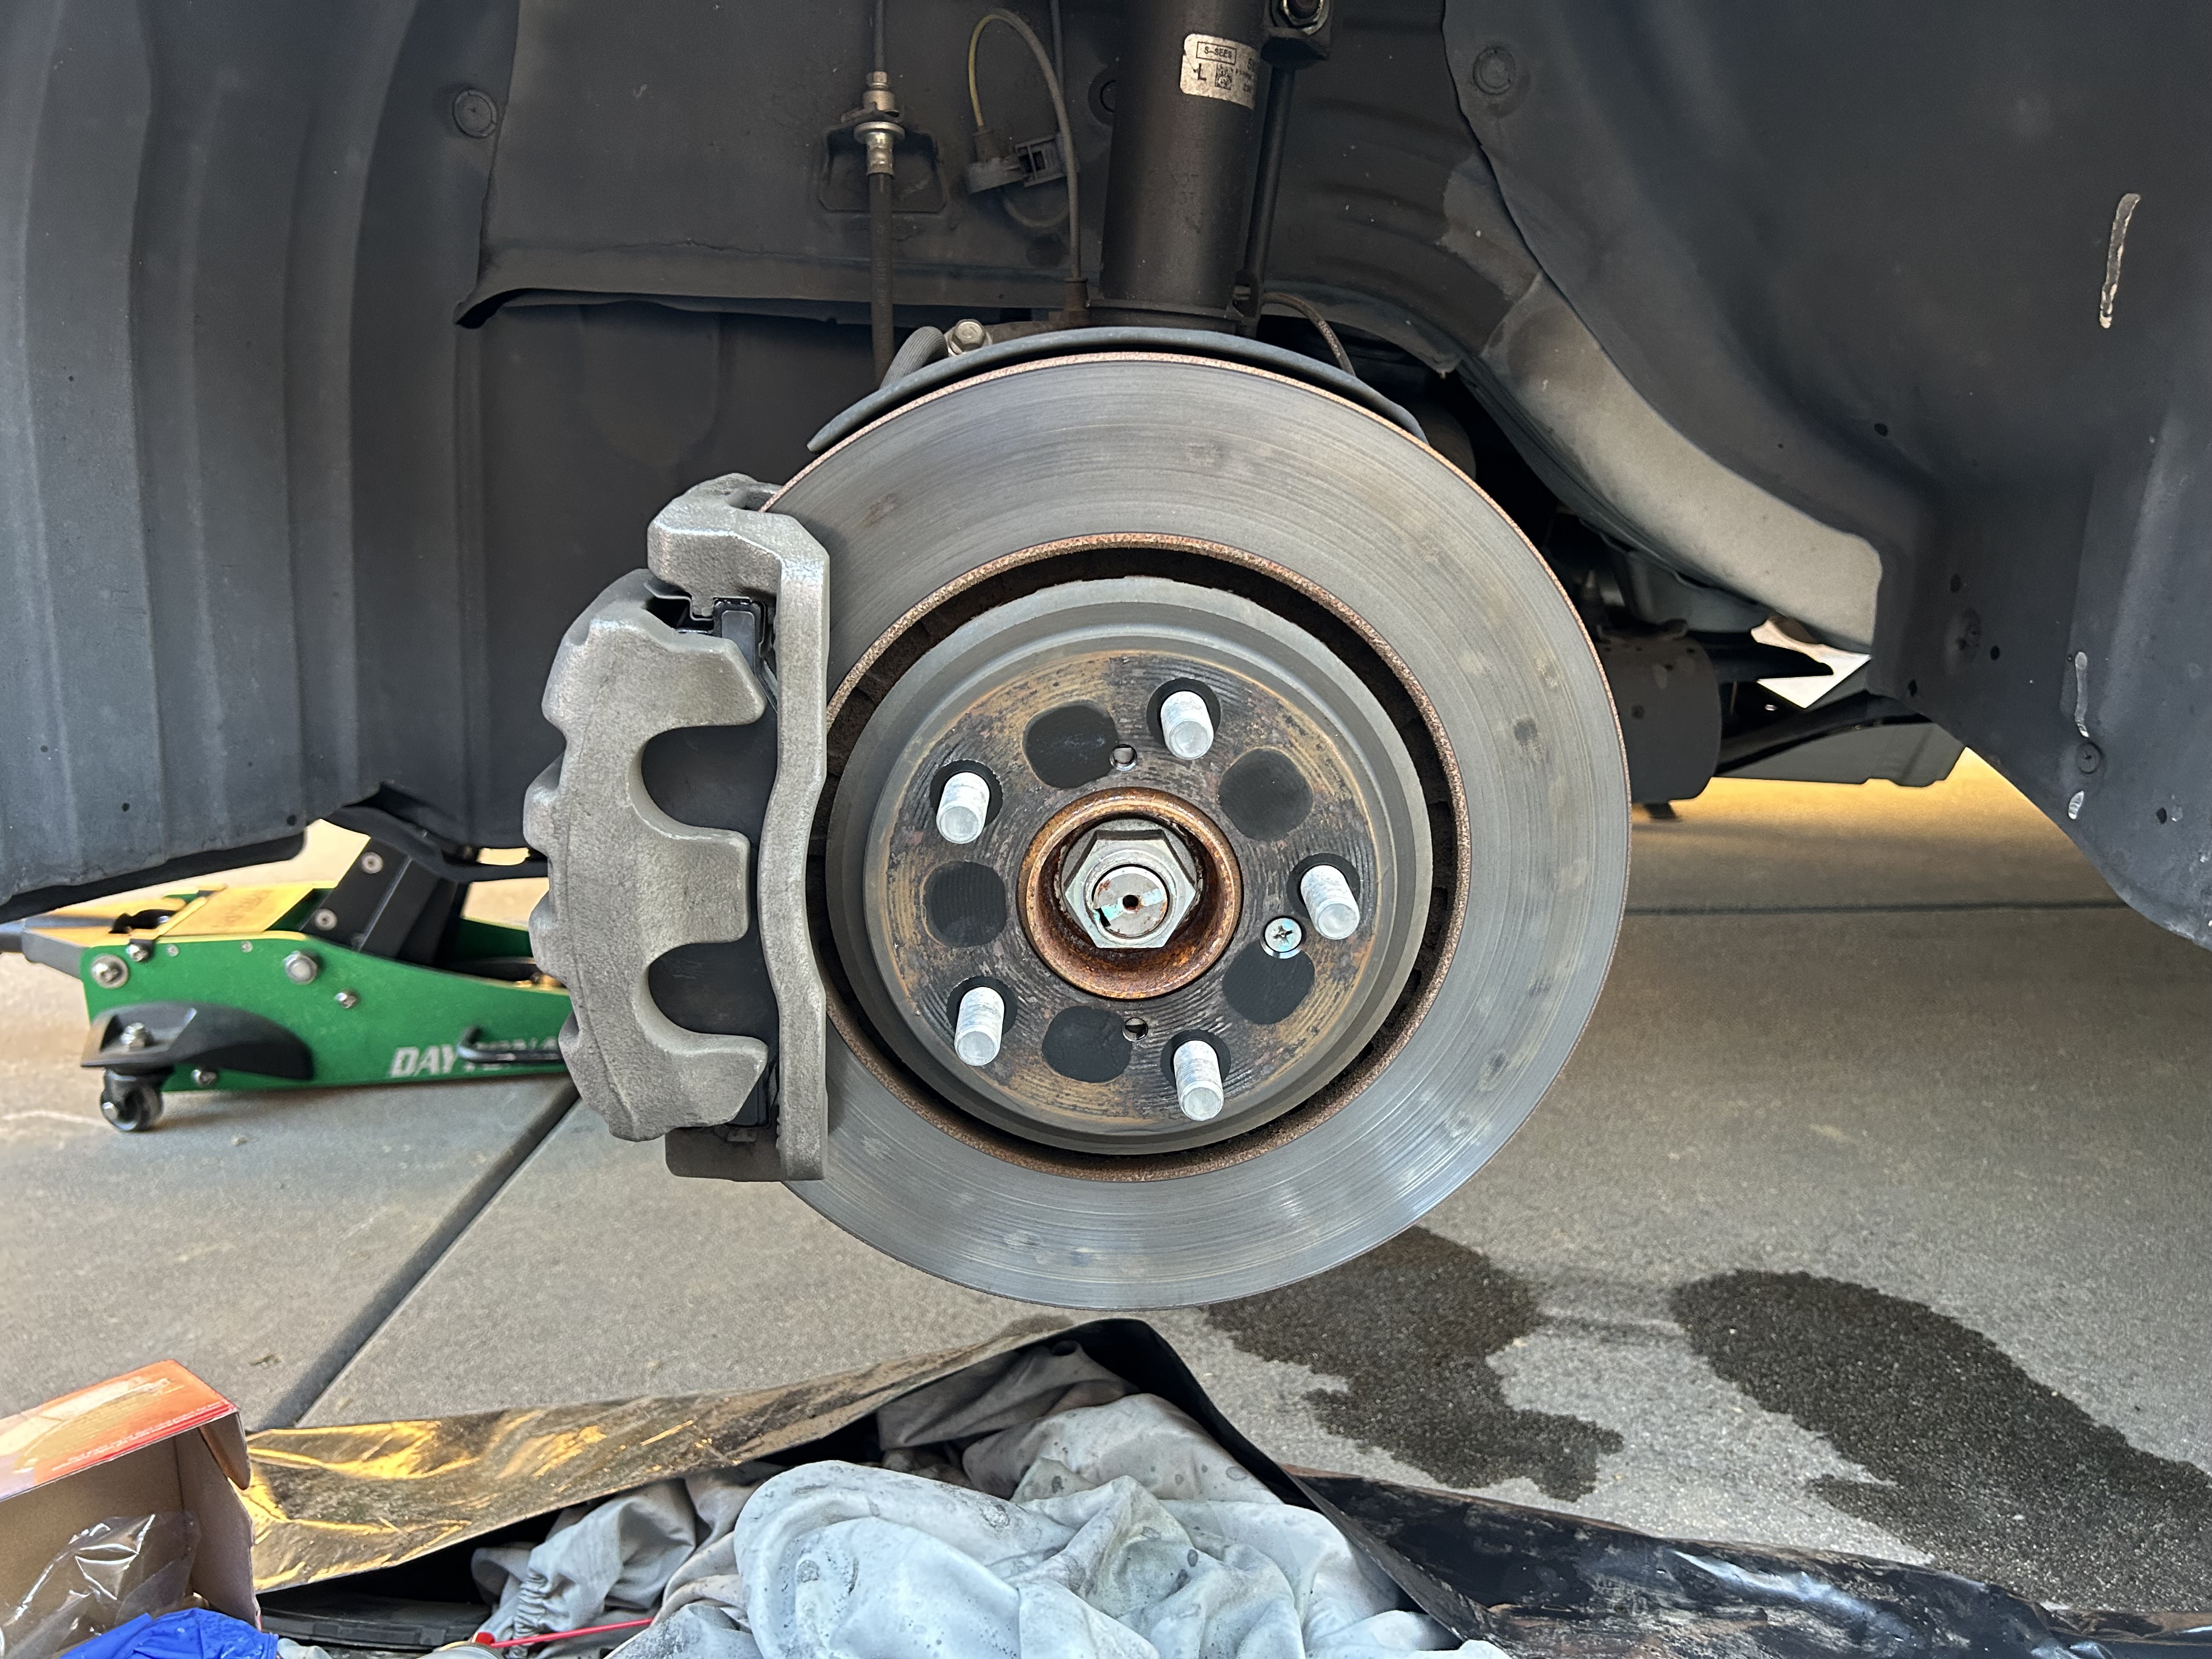
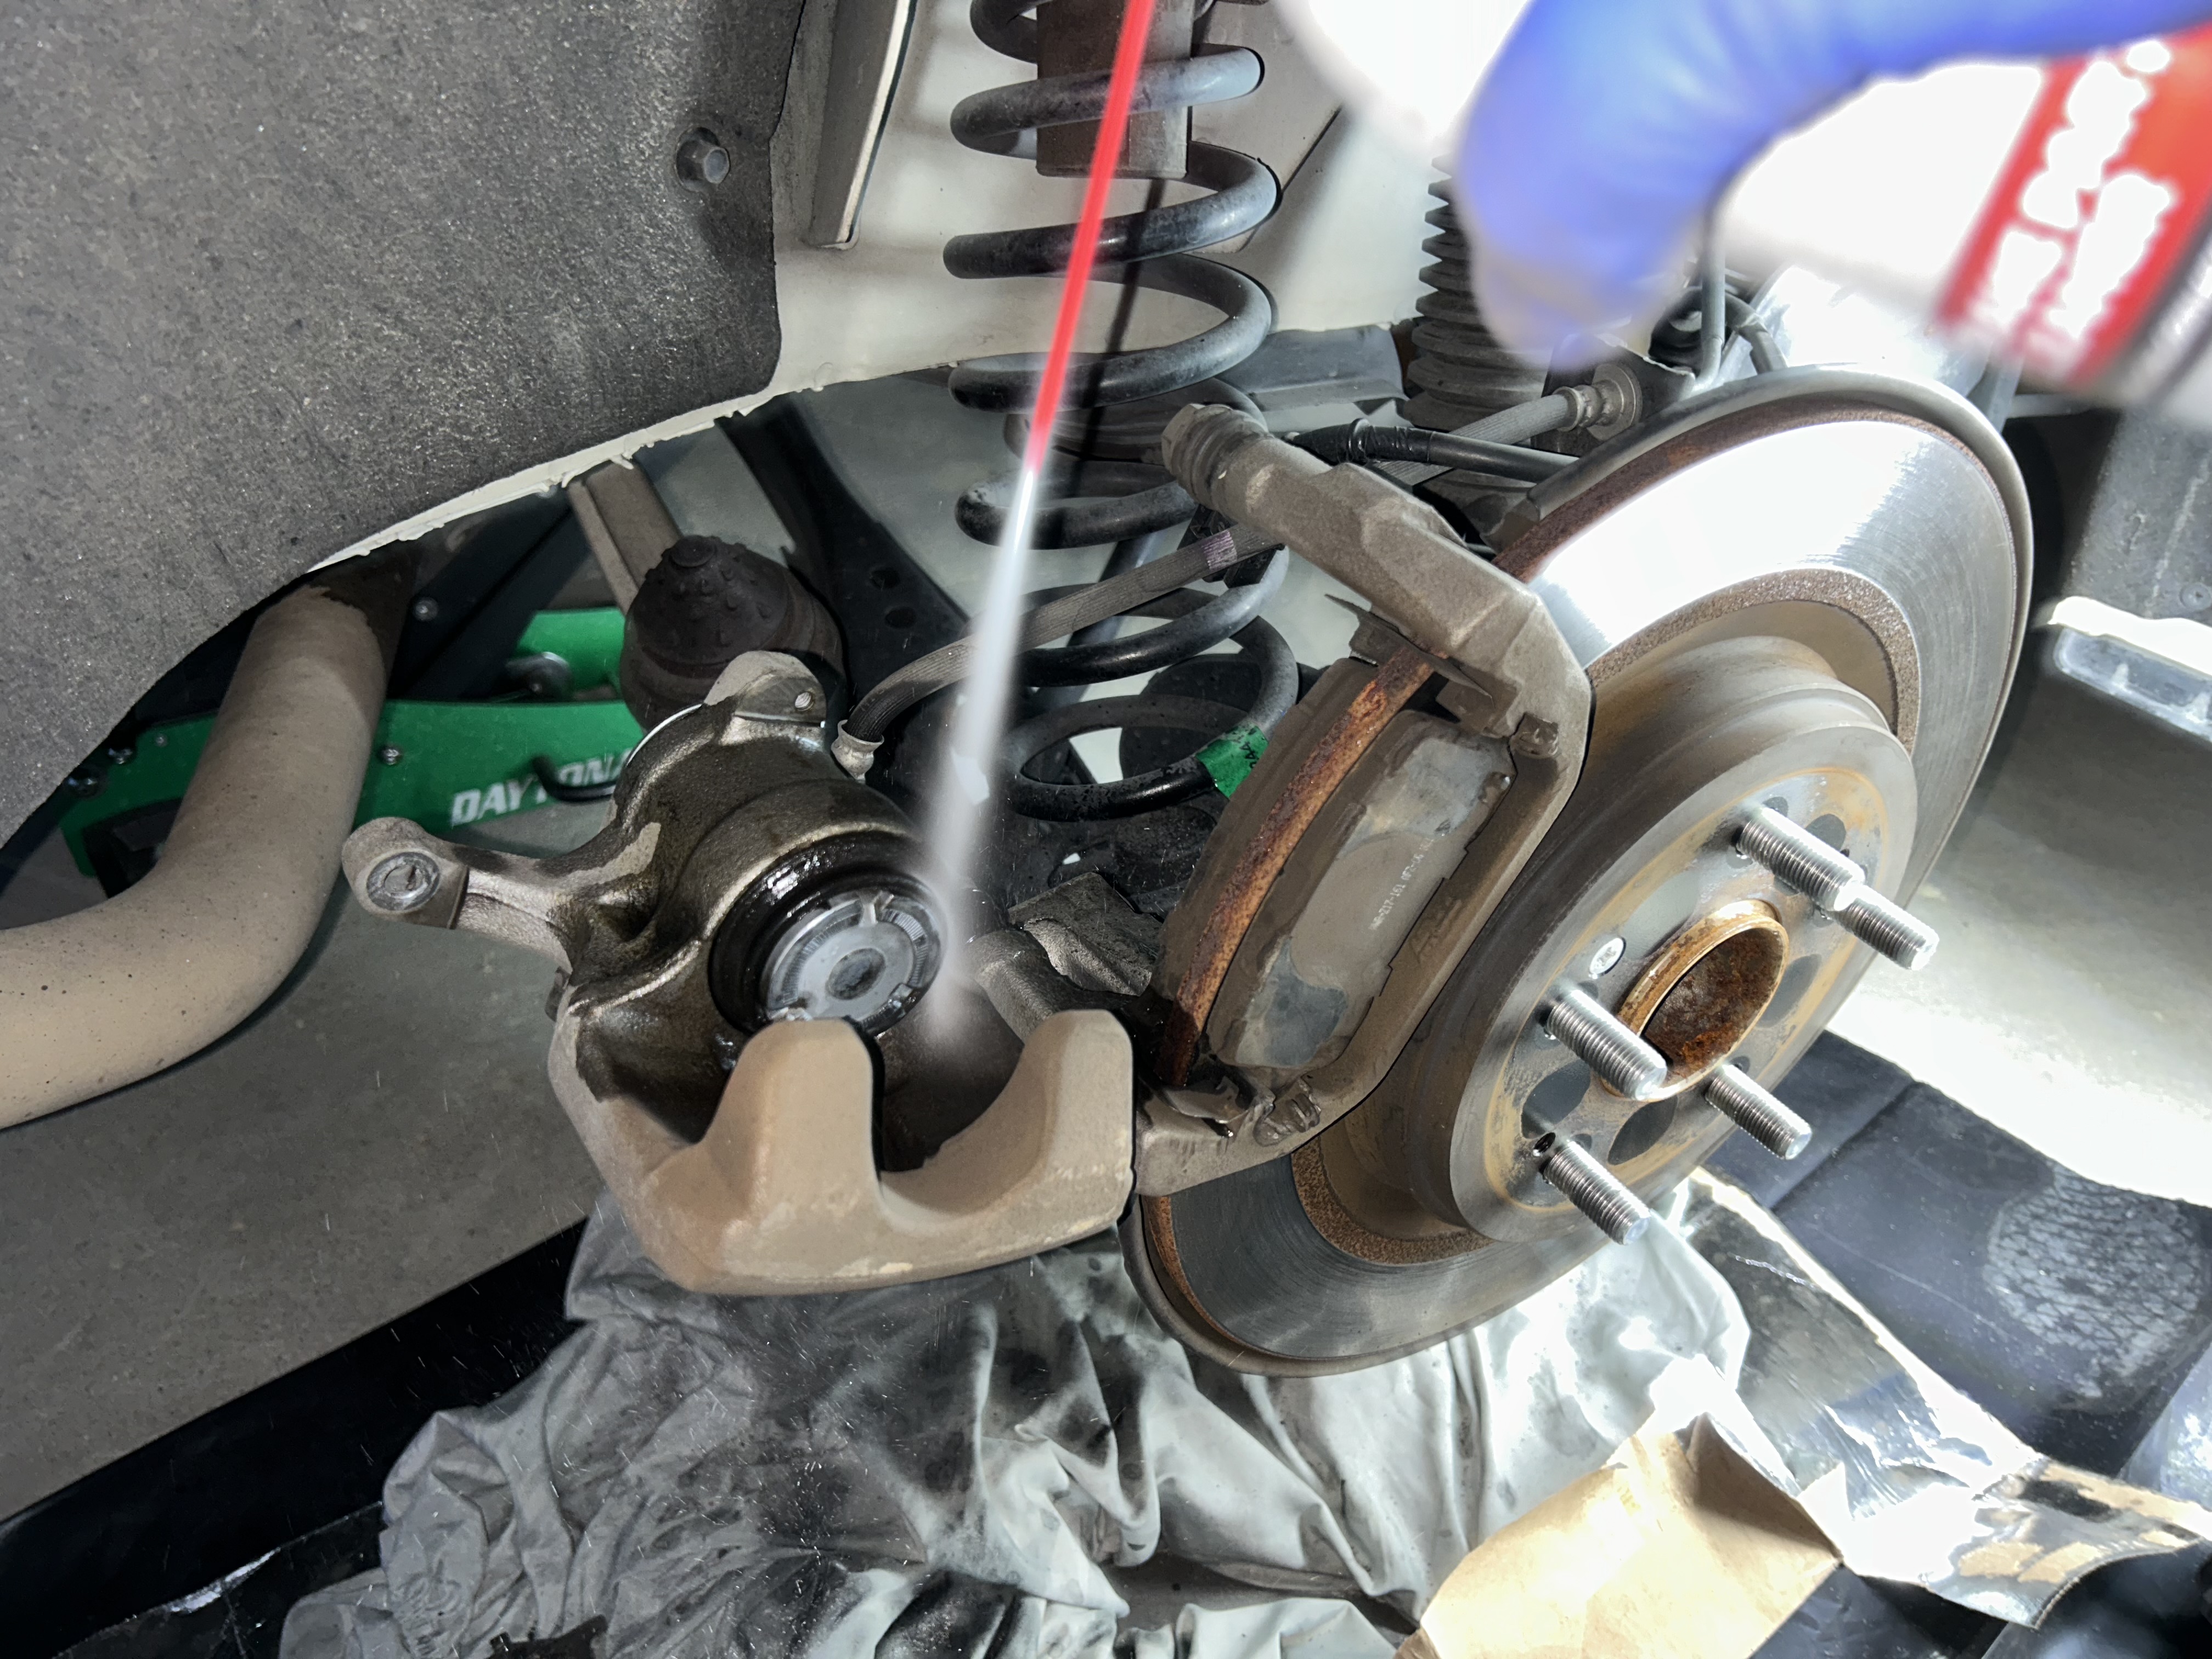
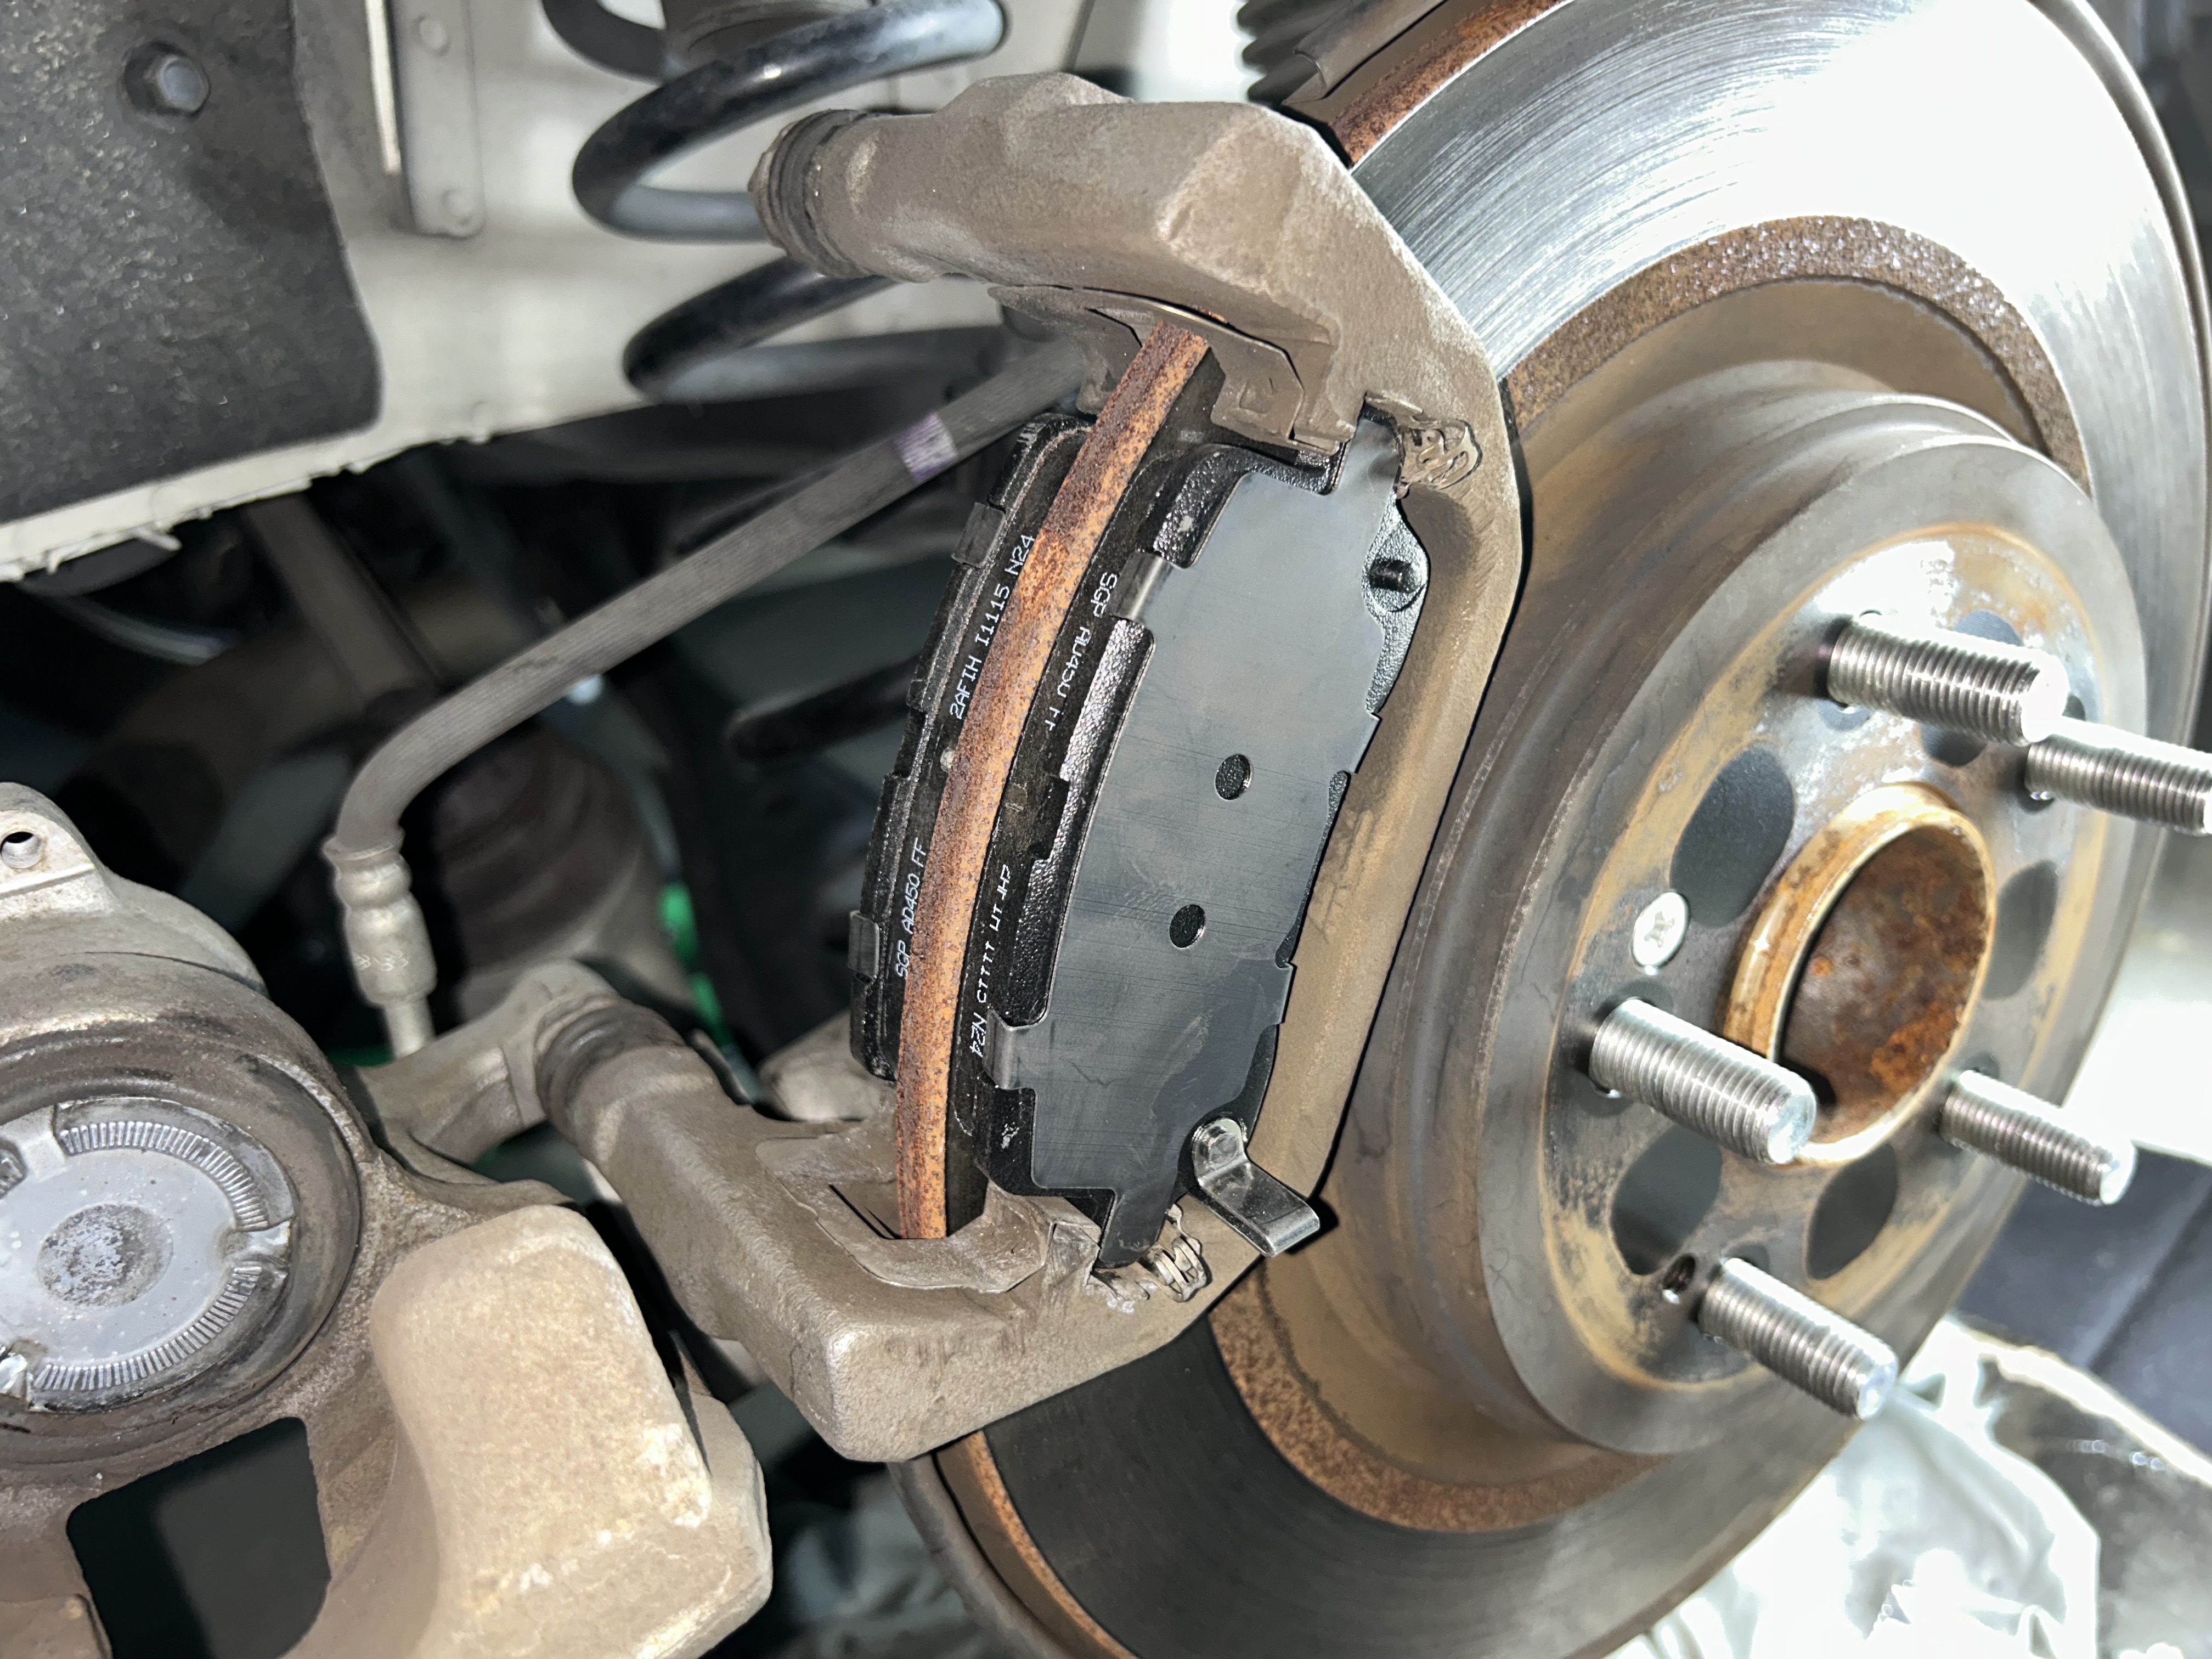
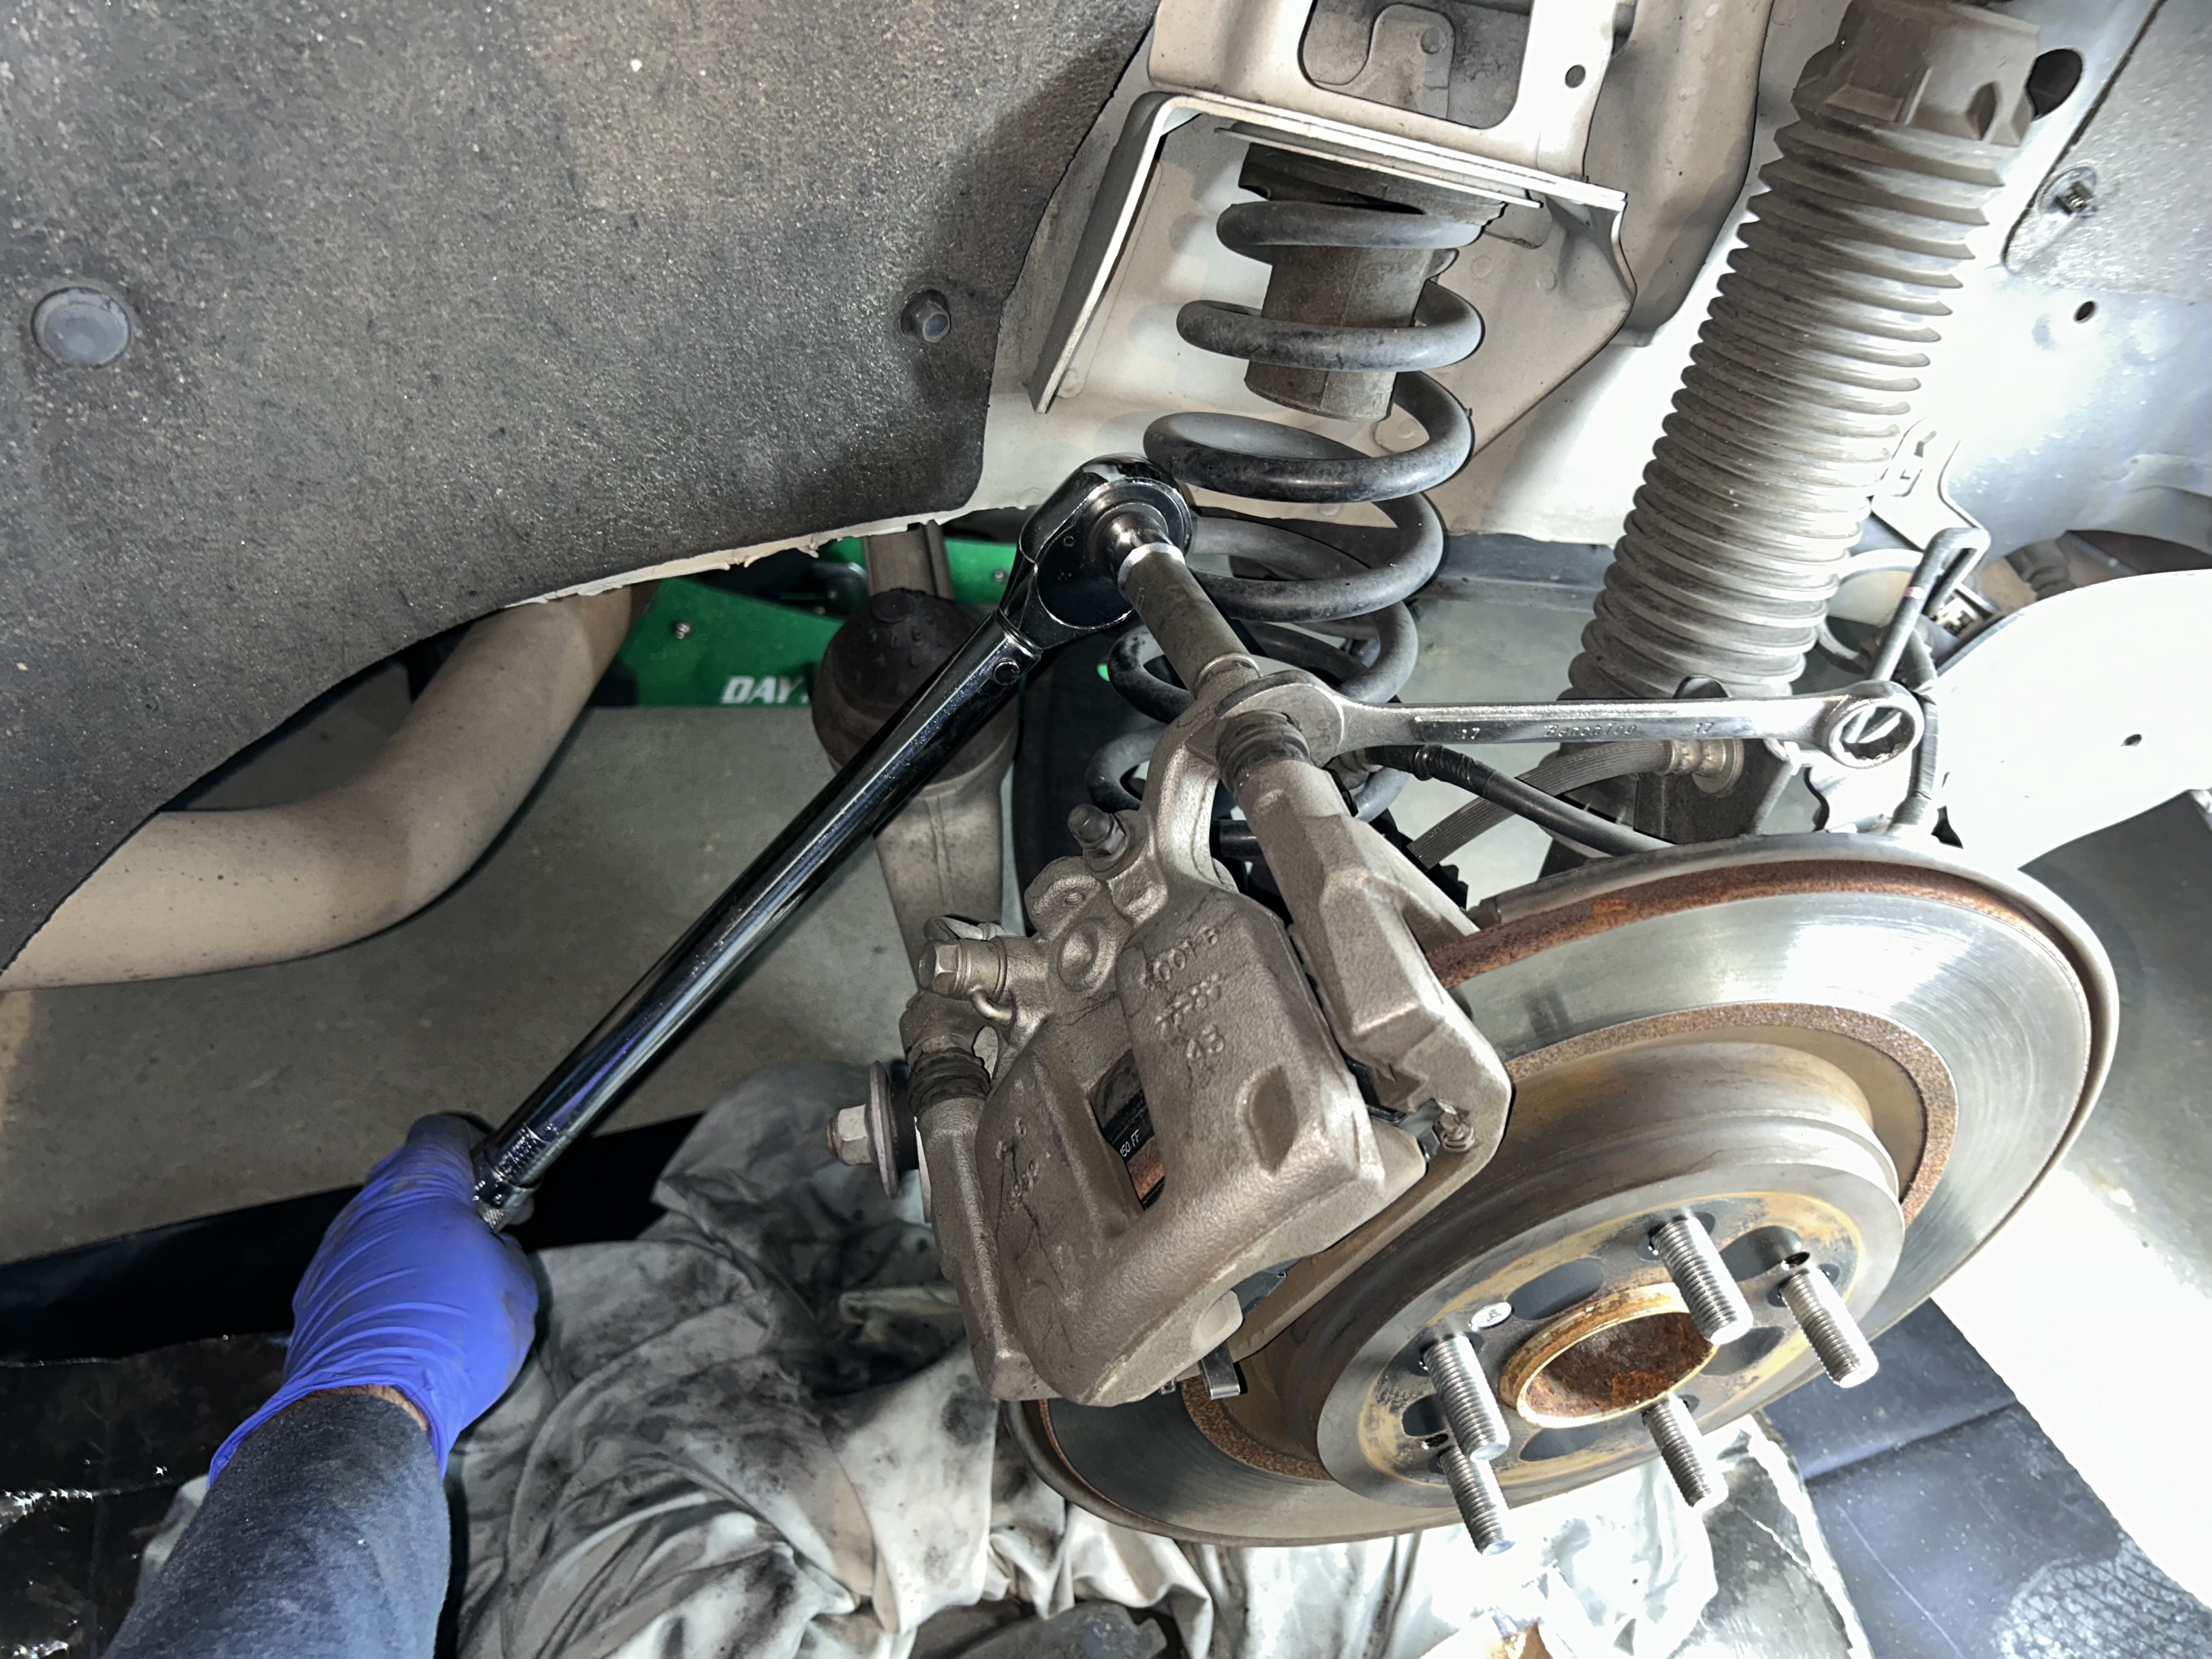
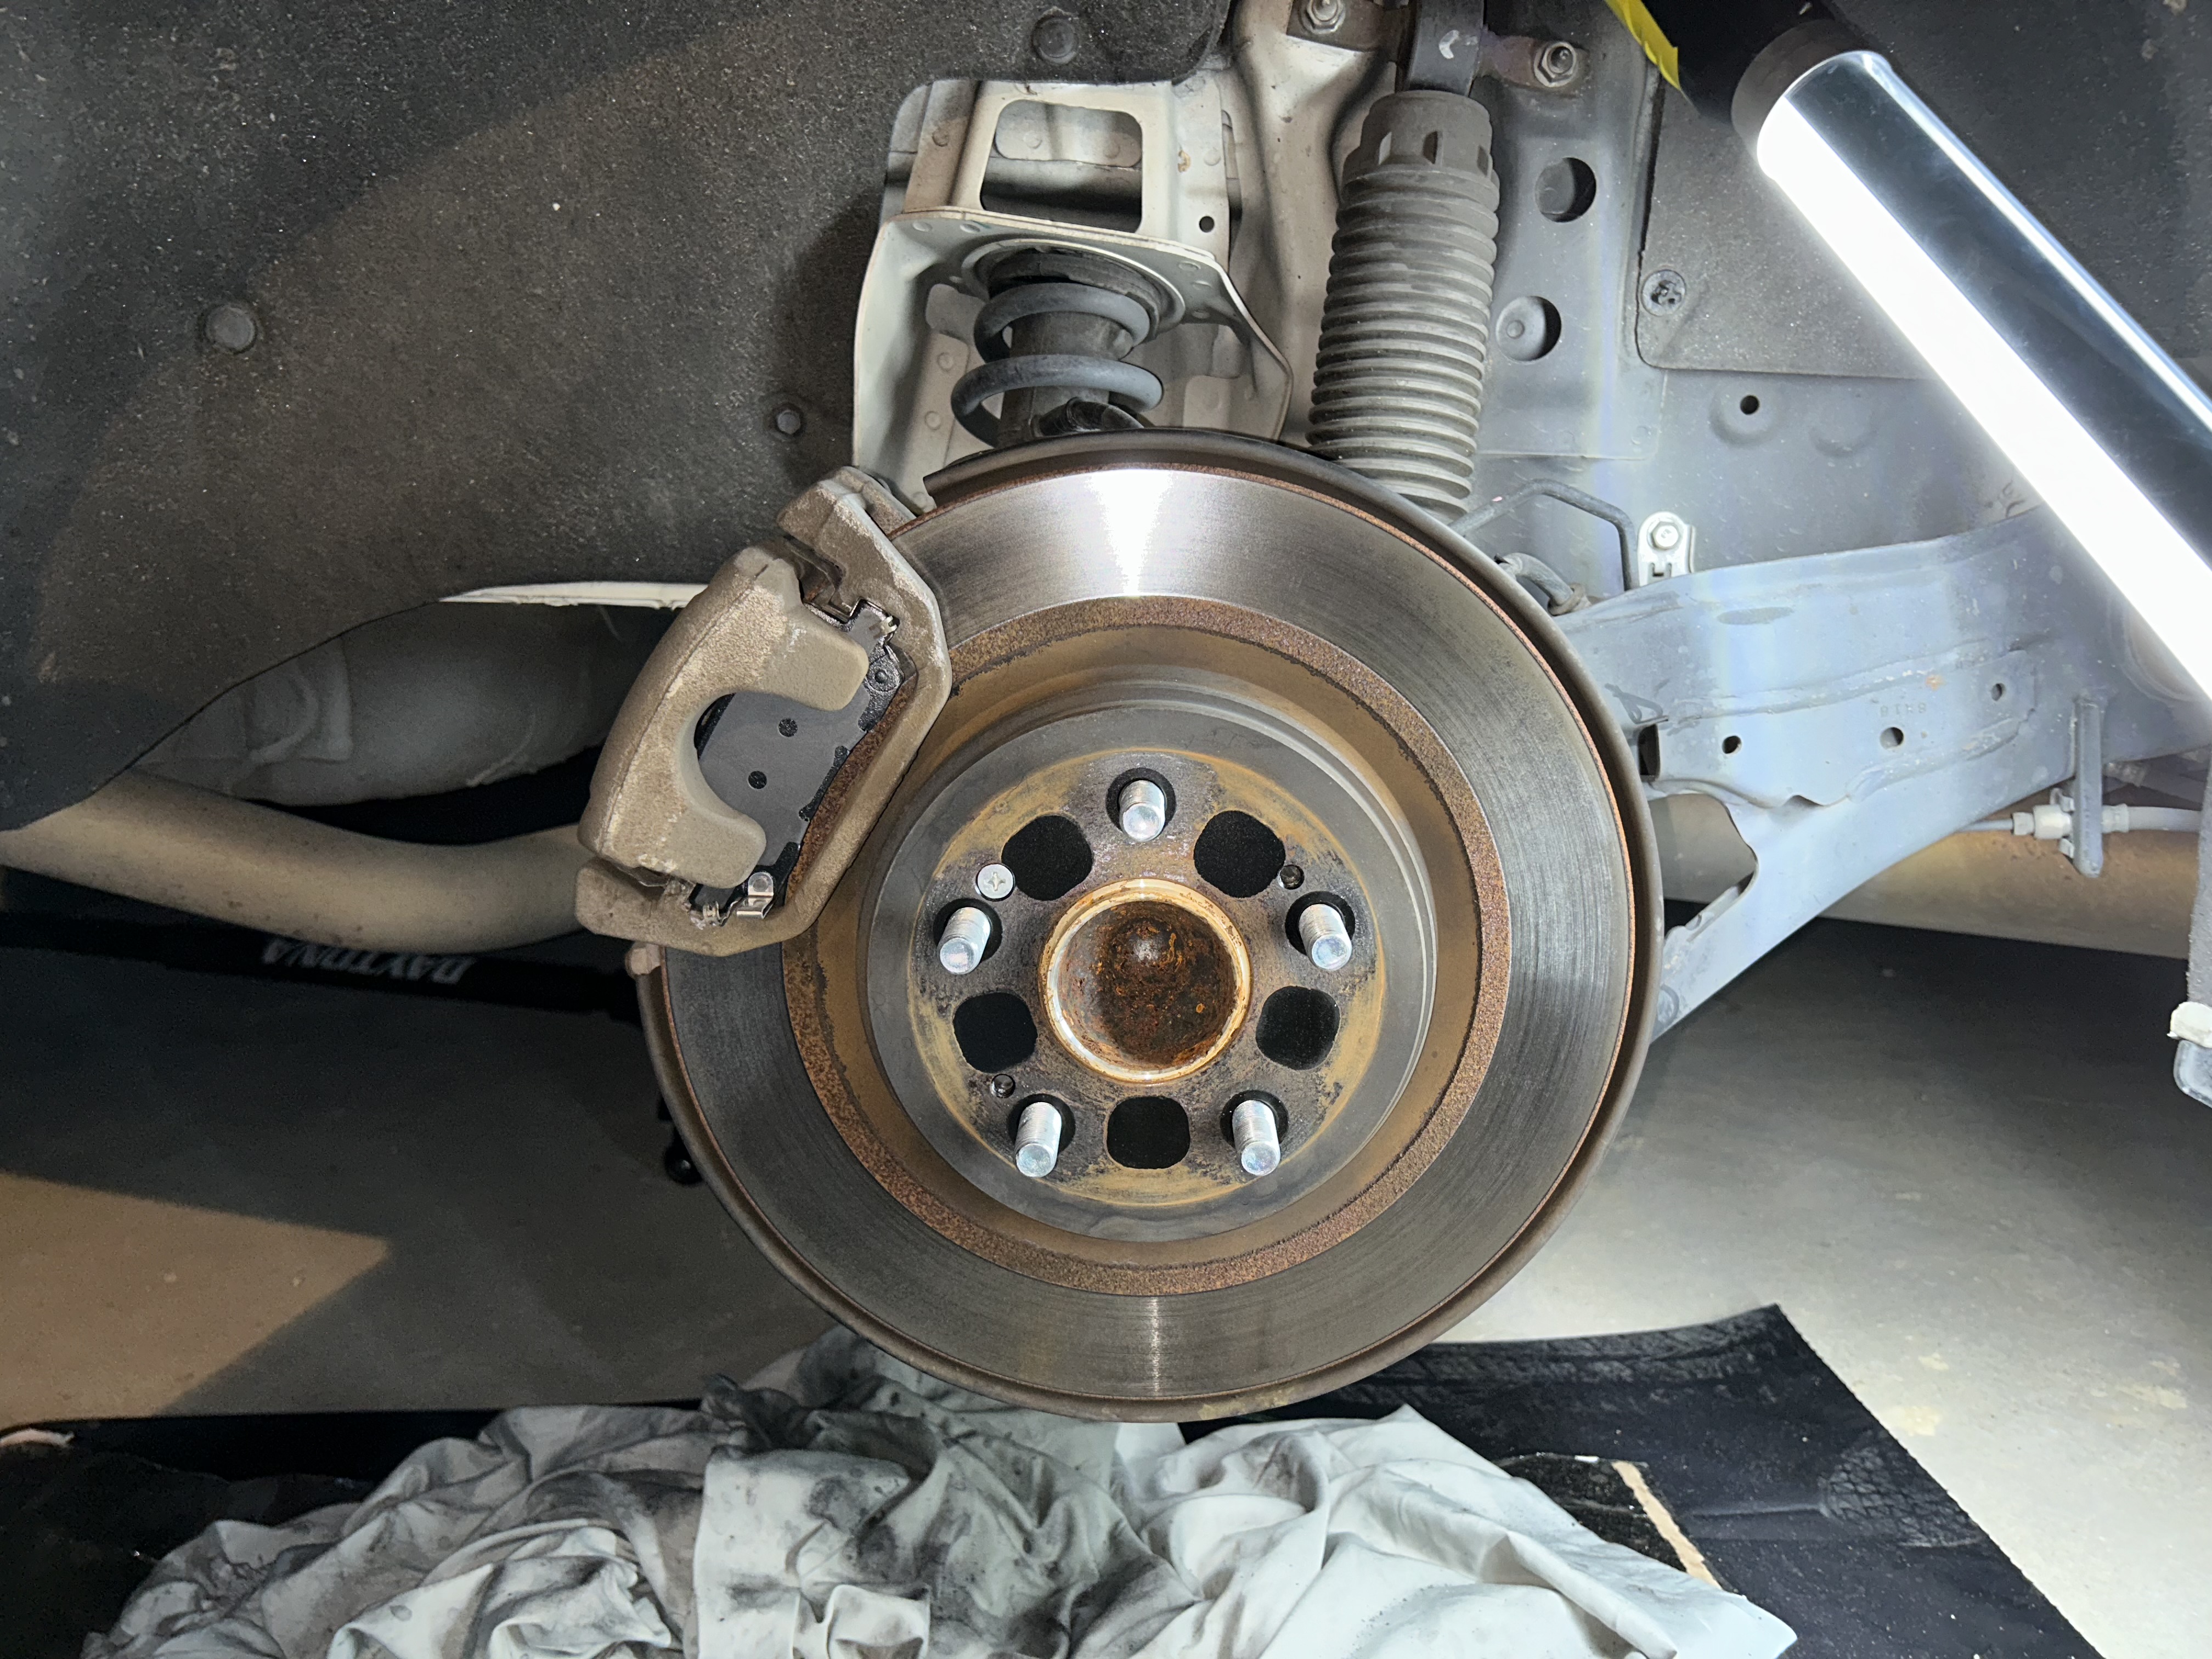
Once you jack up the front of your vehicle, chock the wheels, support it on jack stands, and remove the wheel, spray down the area with brake parts cleaner. Then, use a 13mm socket to remove the bottom caliper bolt. After removing the bolt, you can swing the caliper up to expose the brake pads.
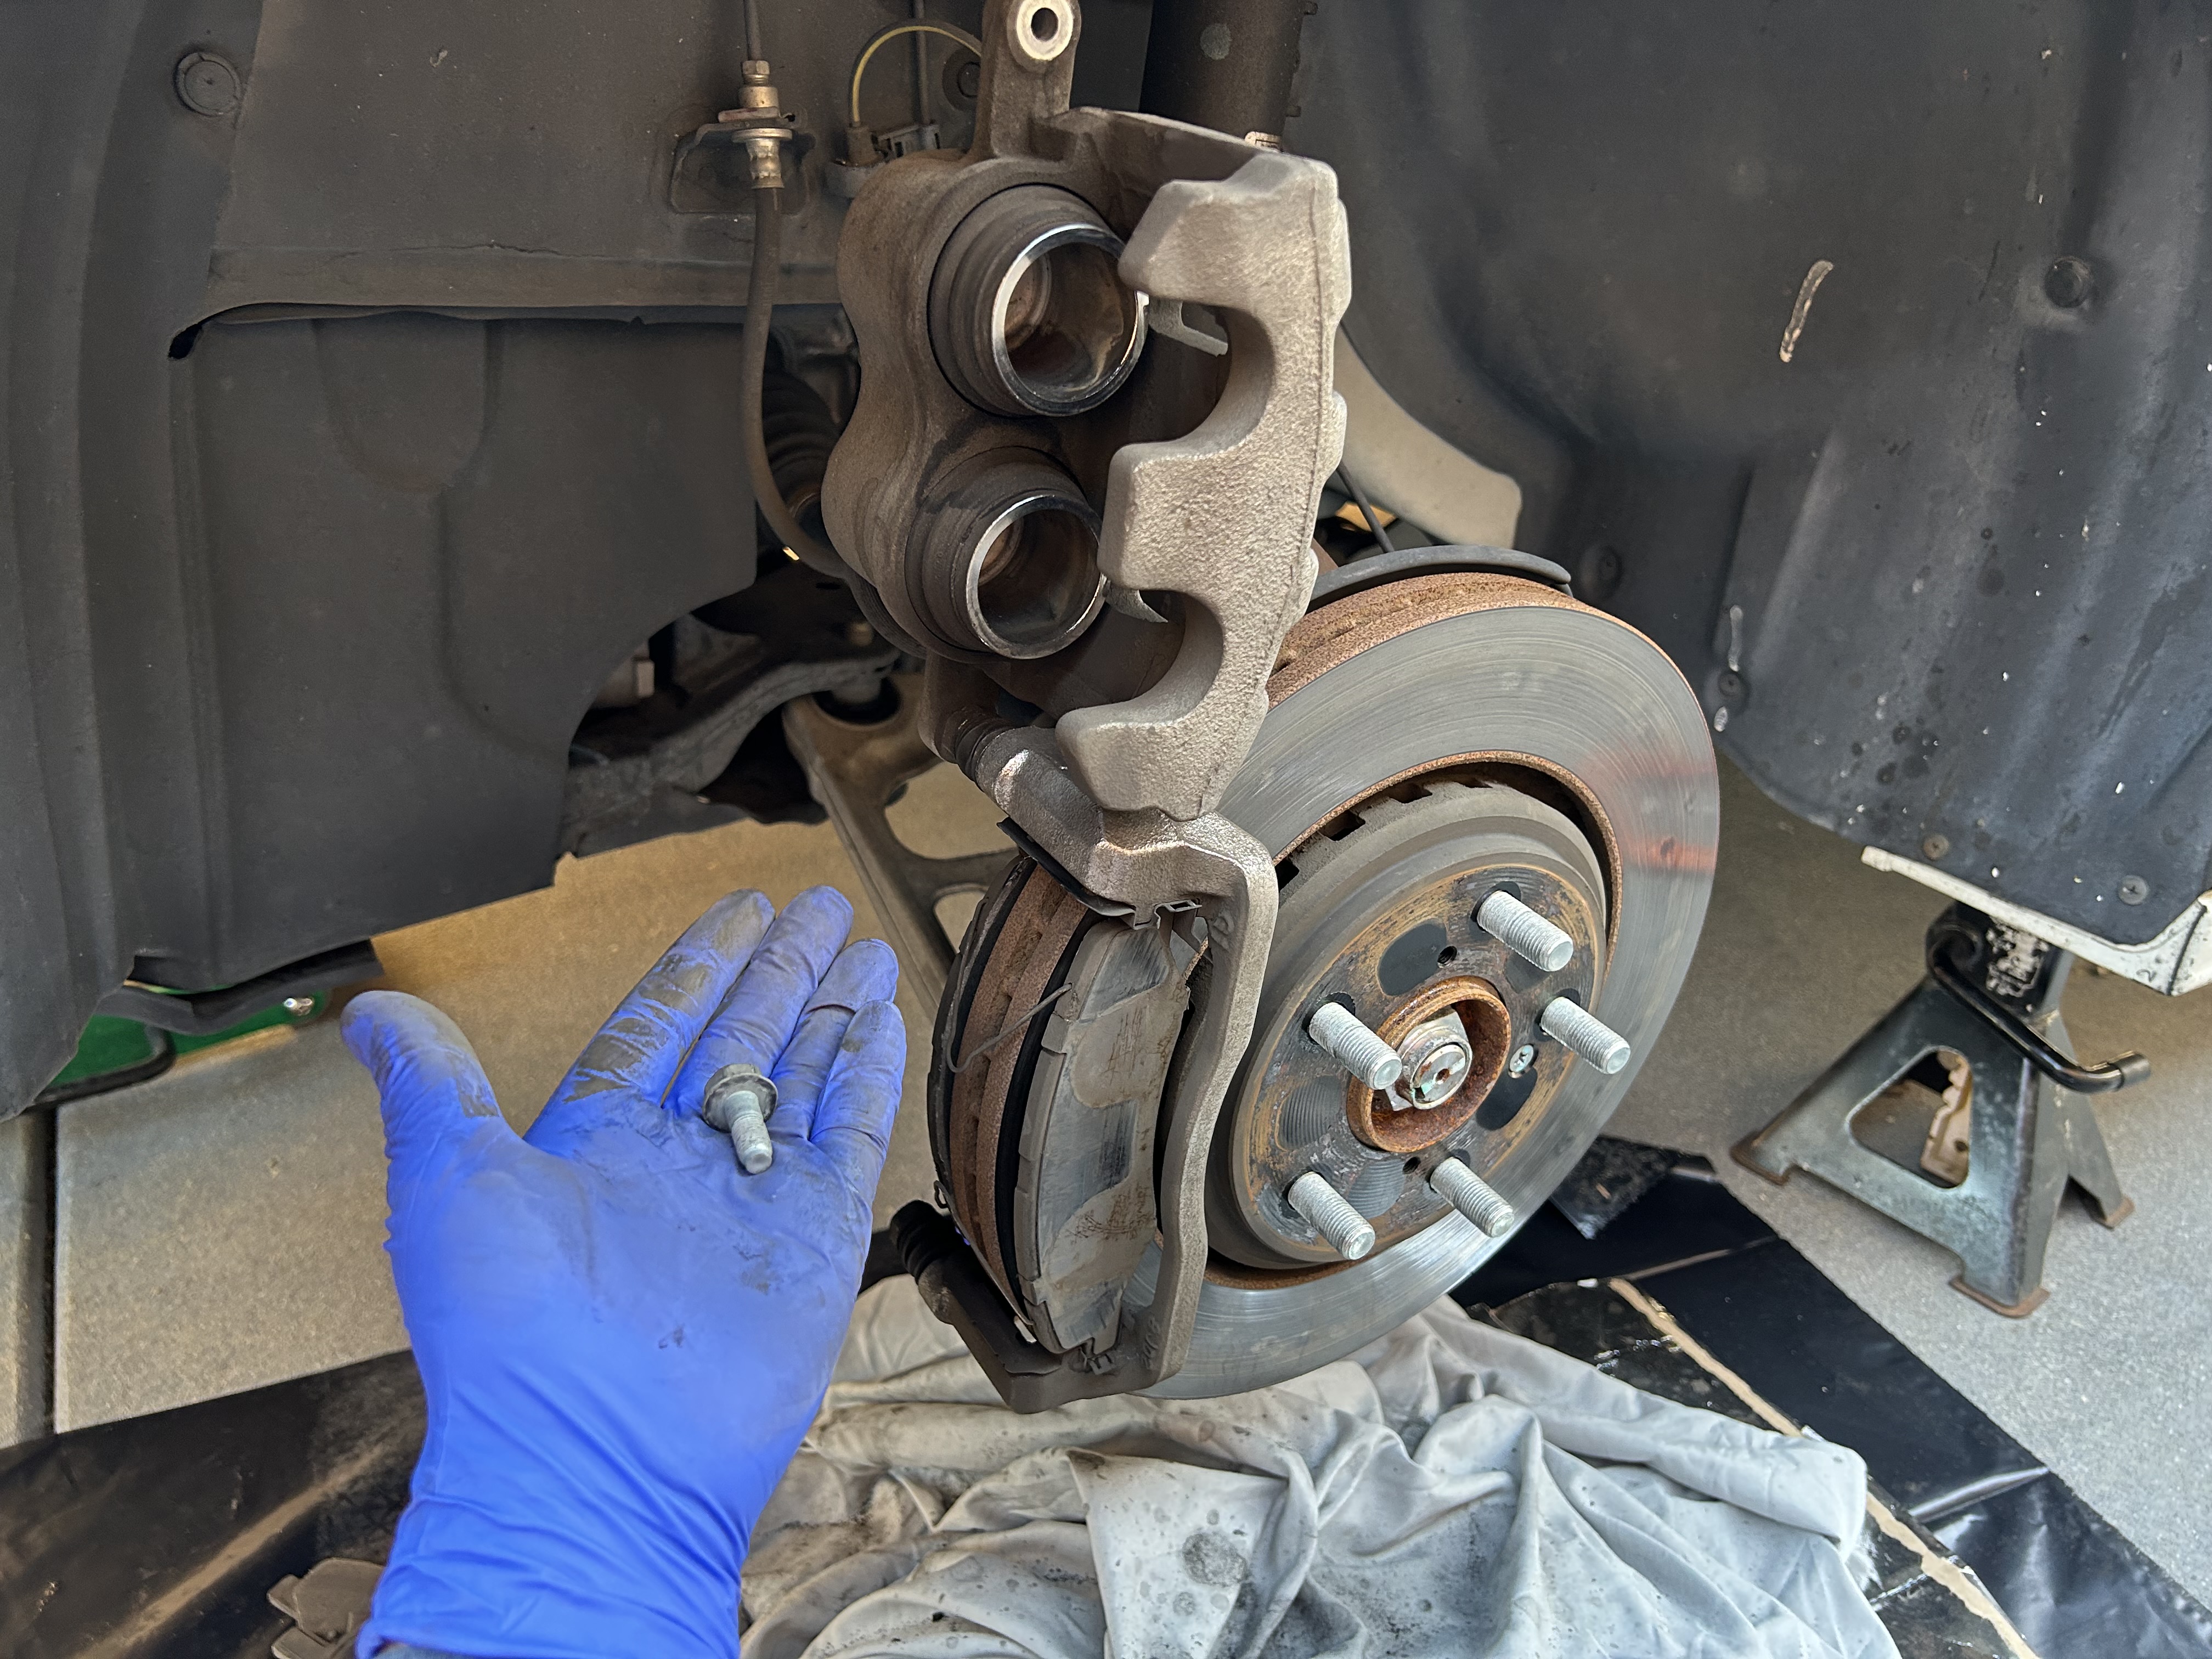
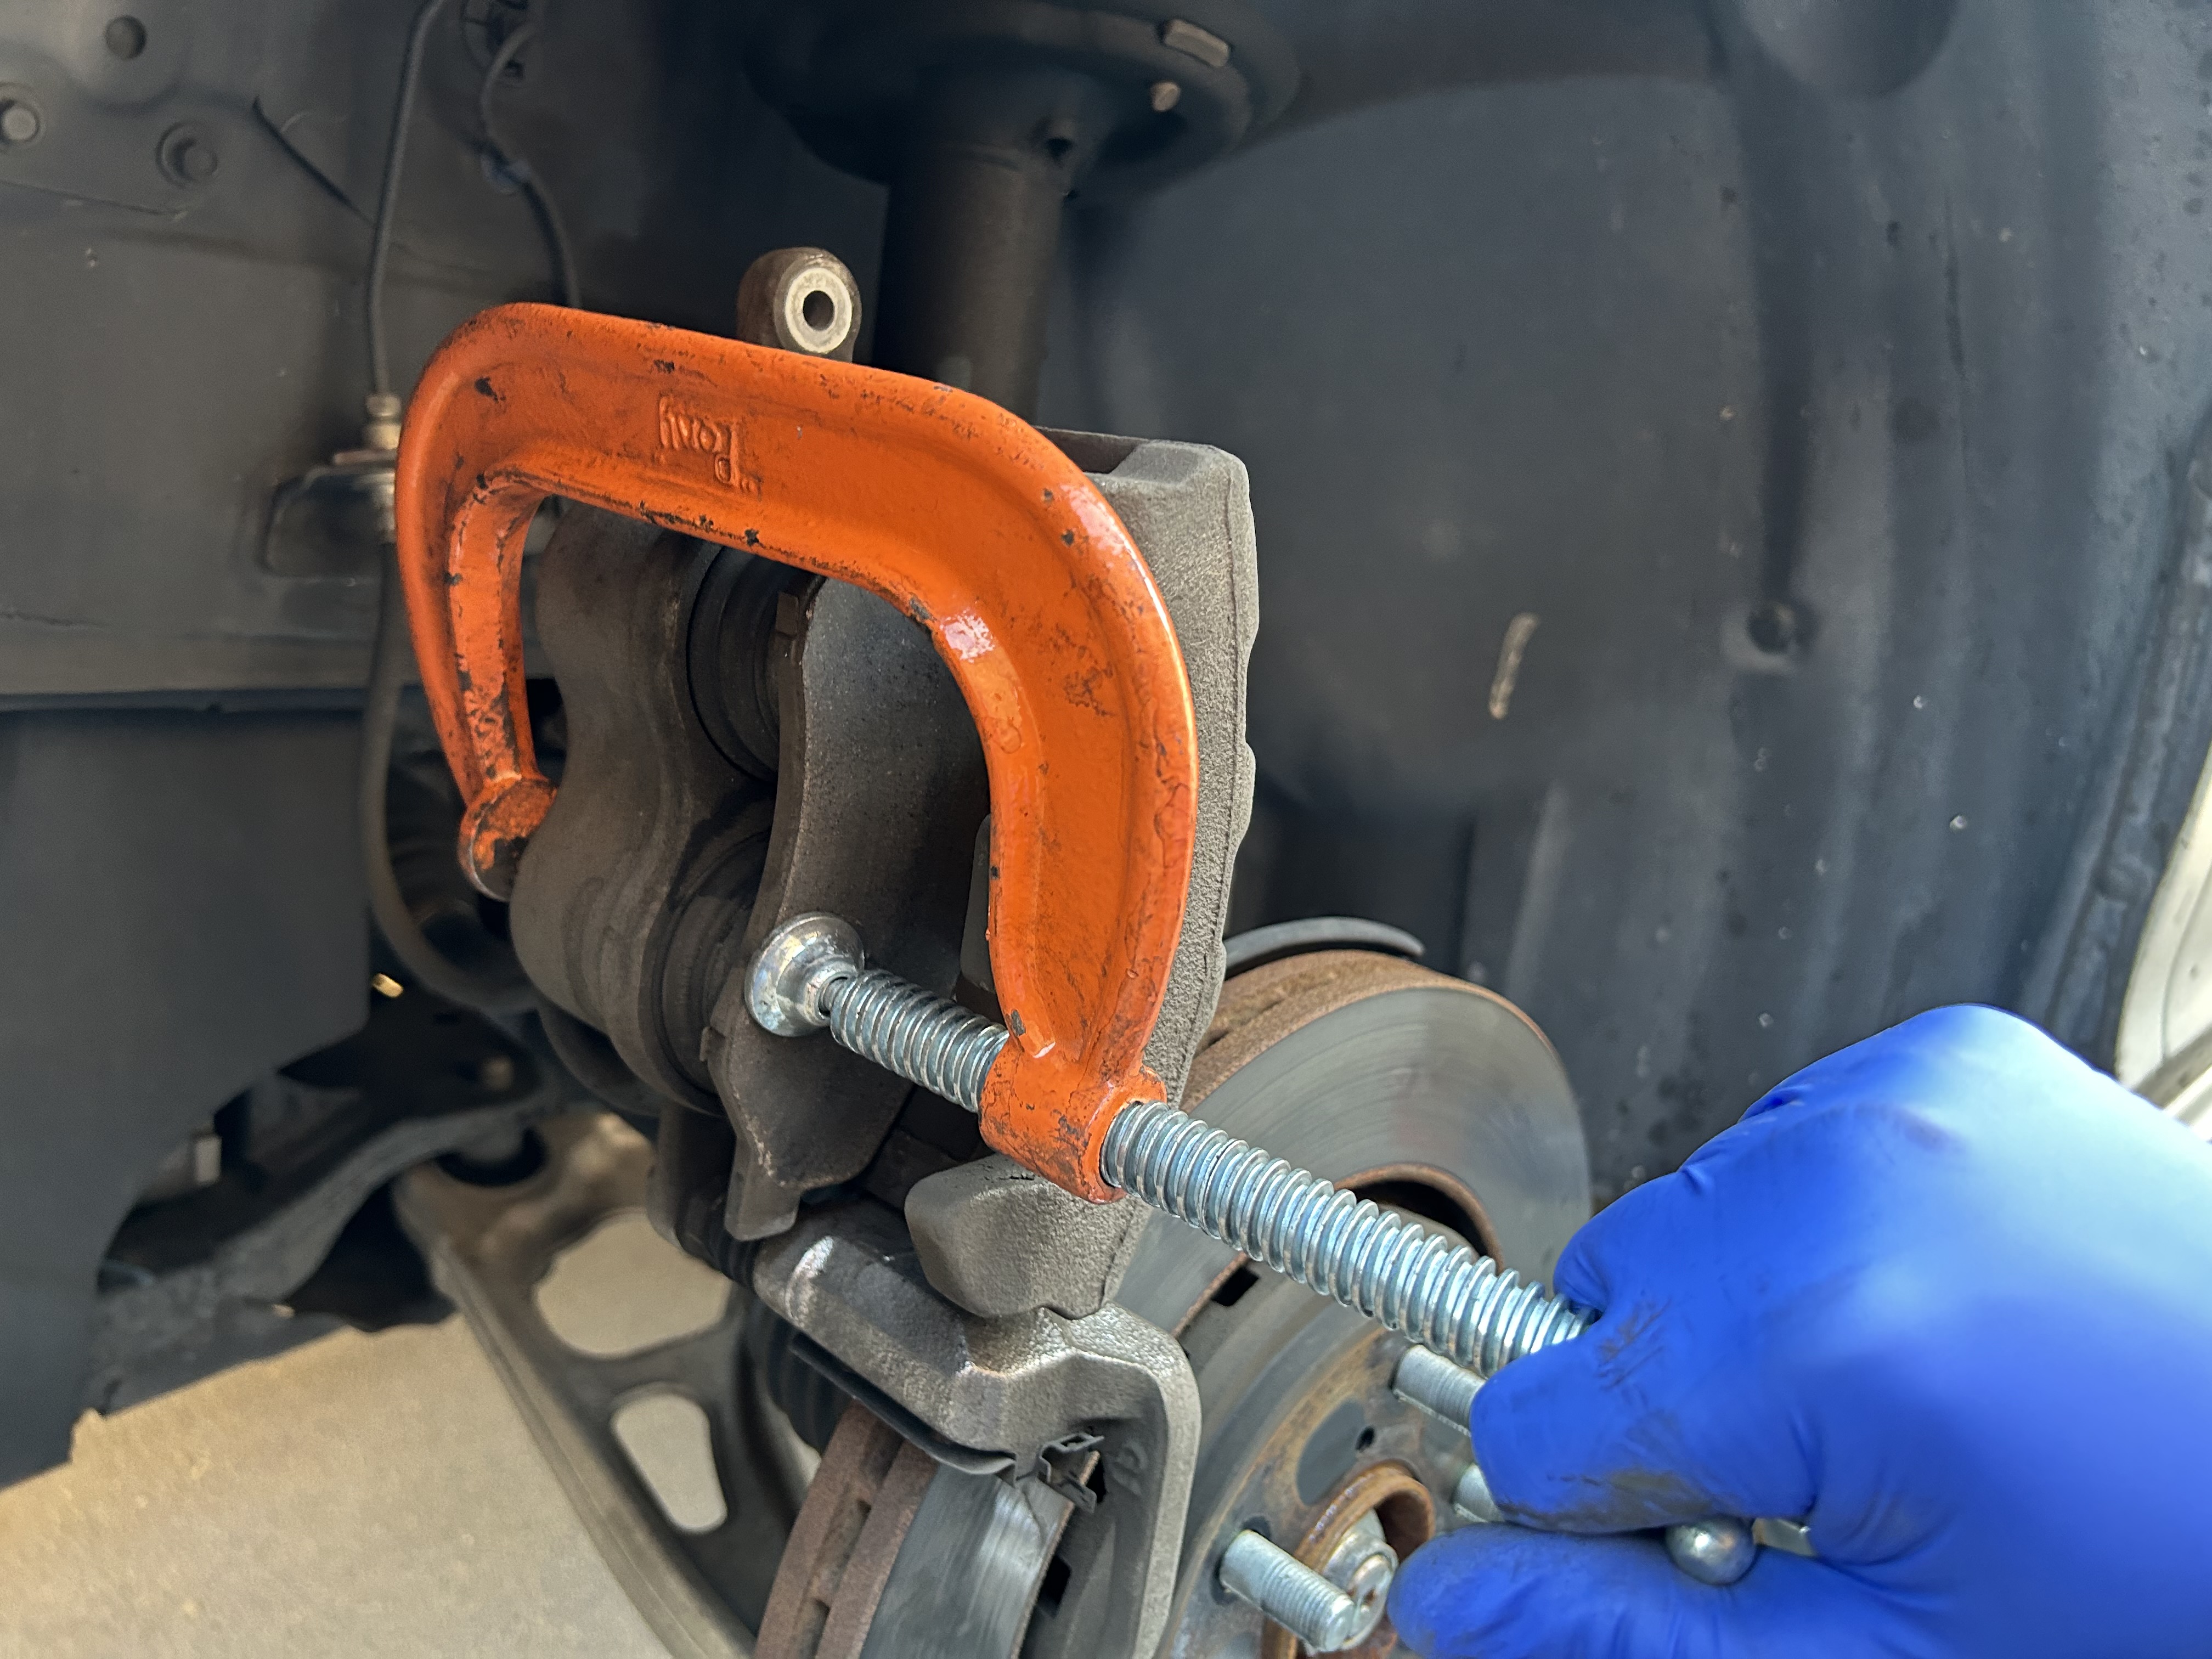
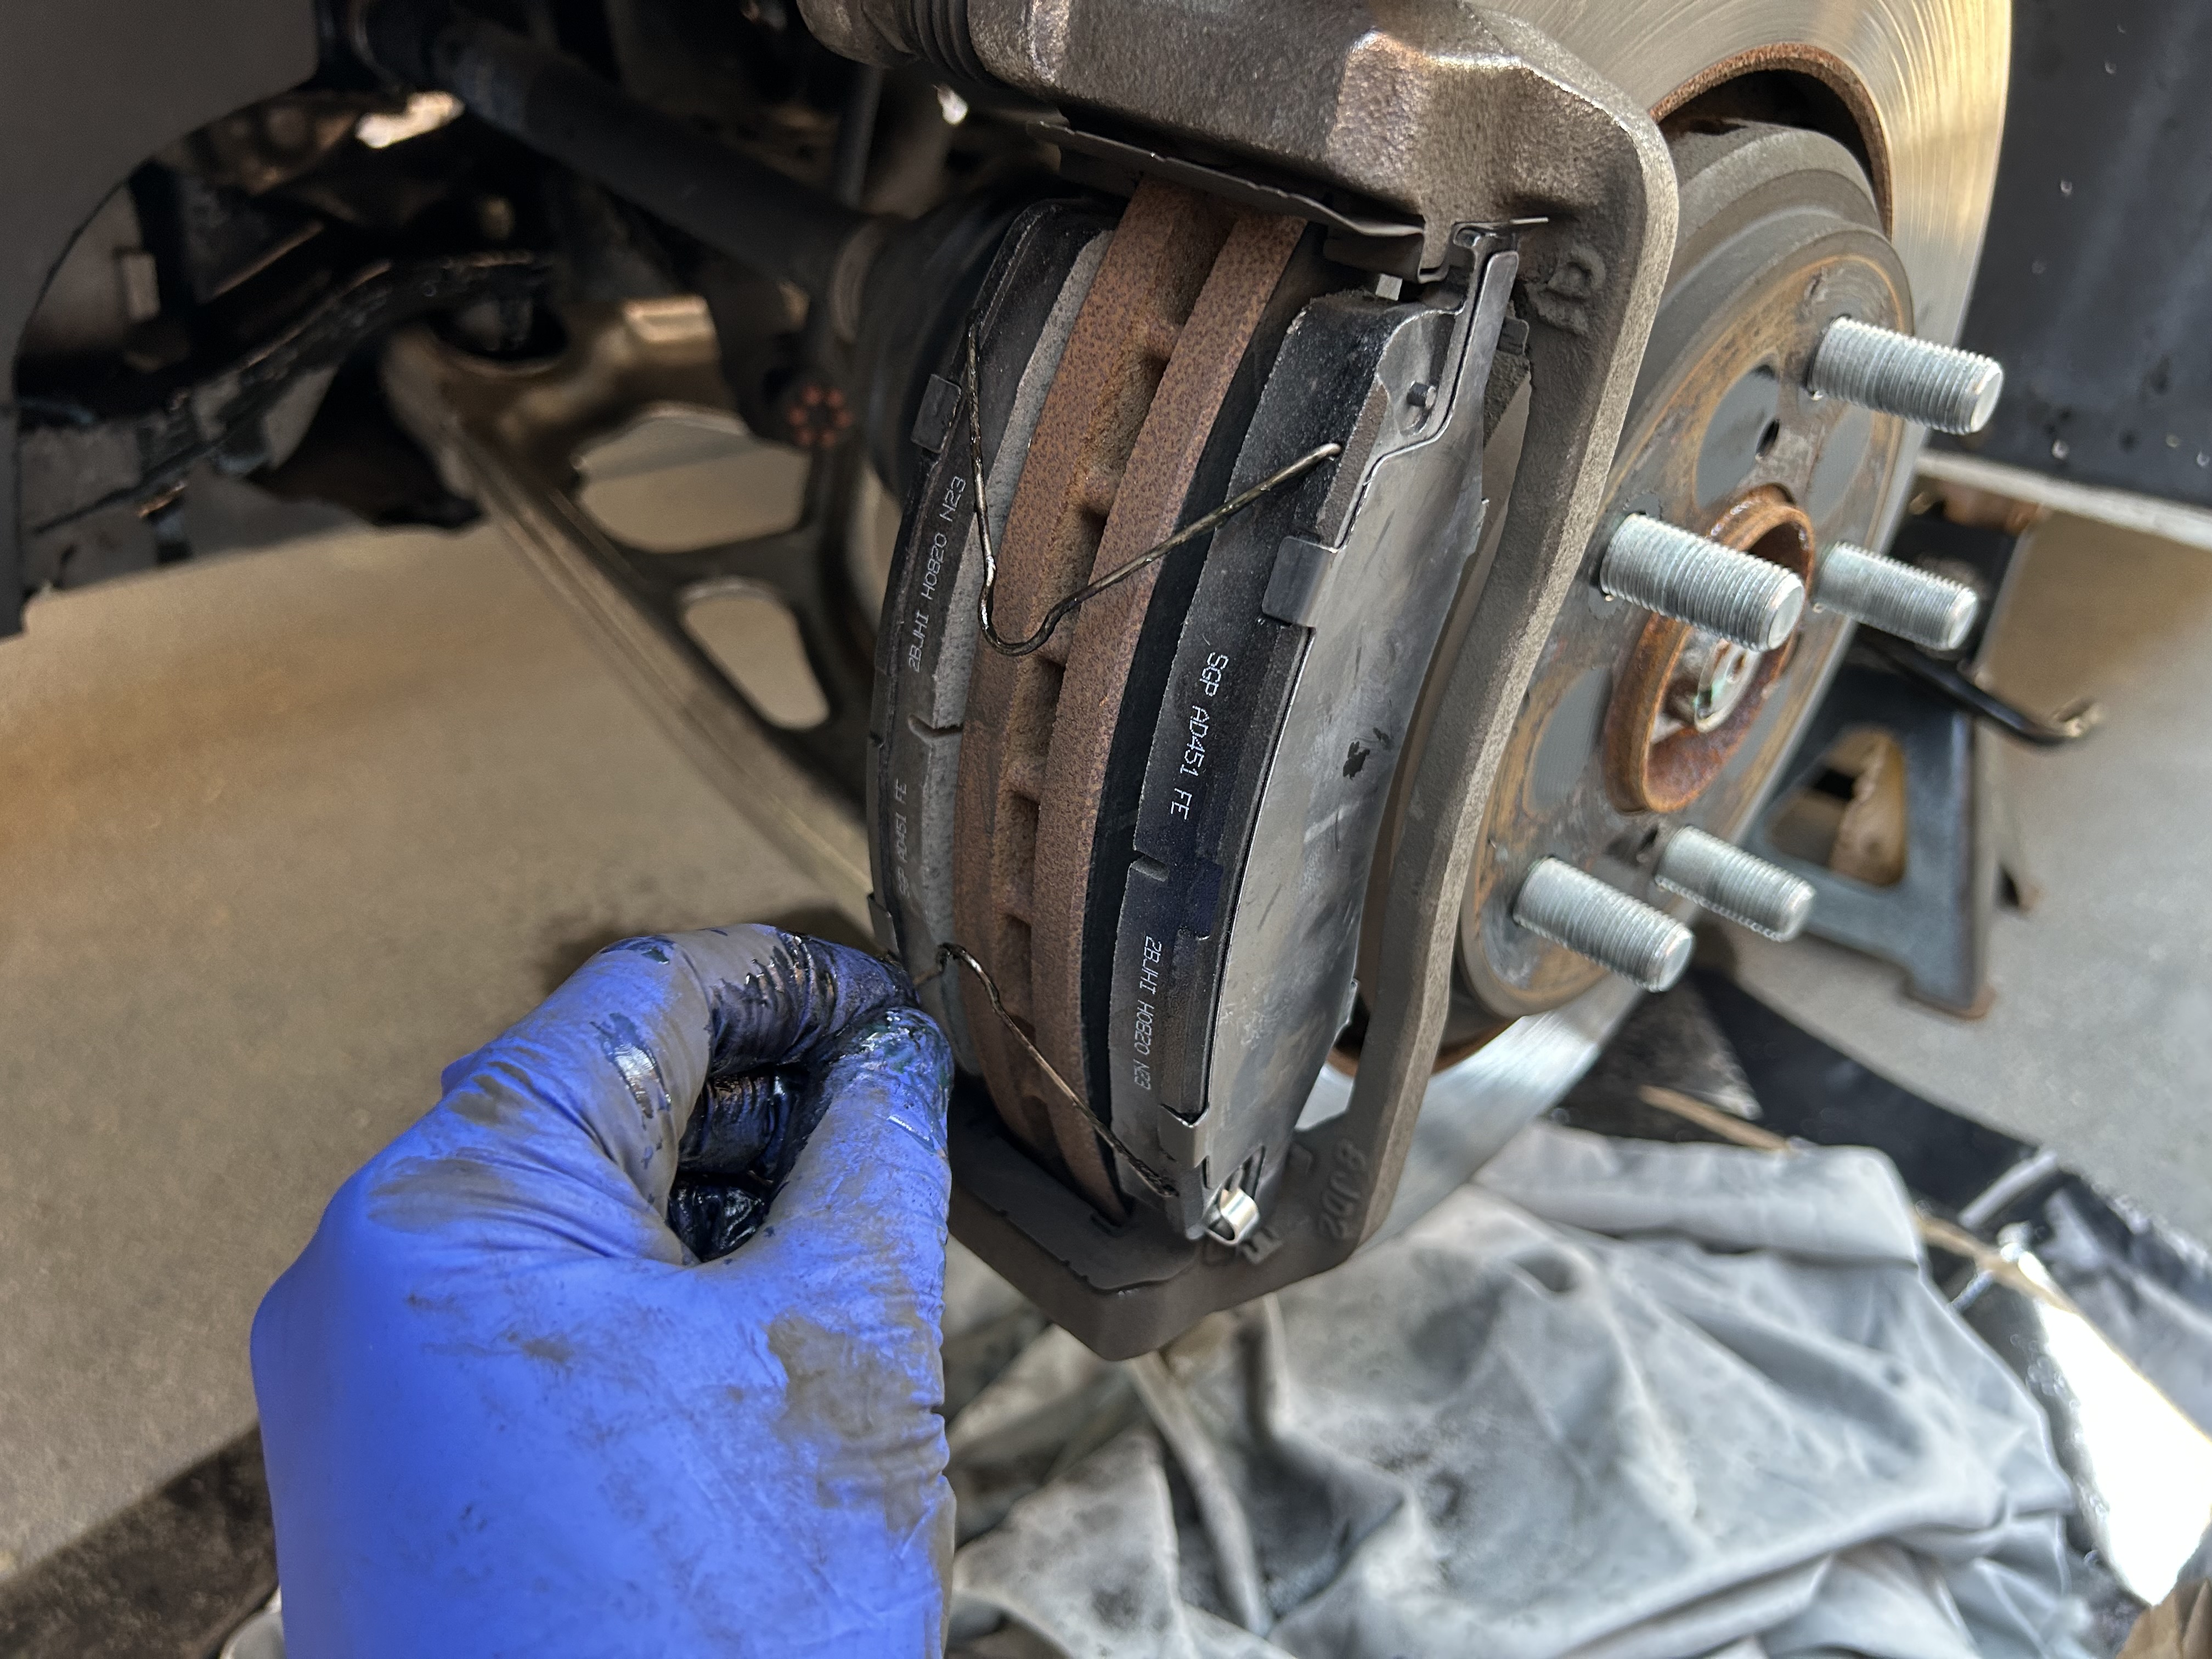
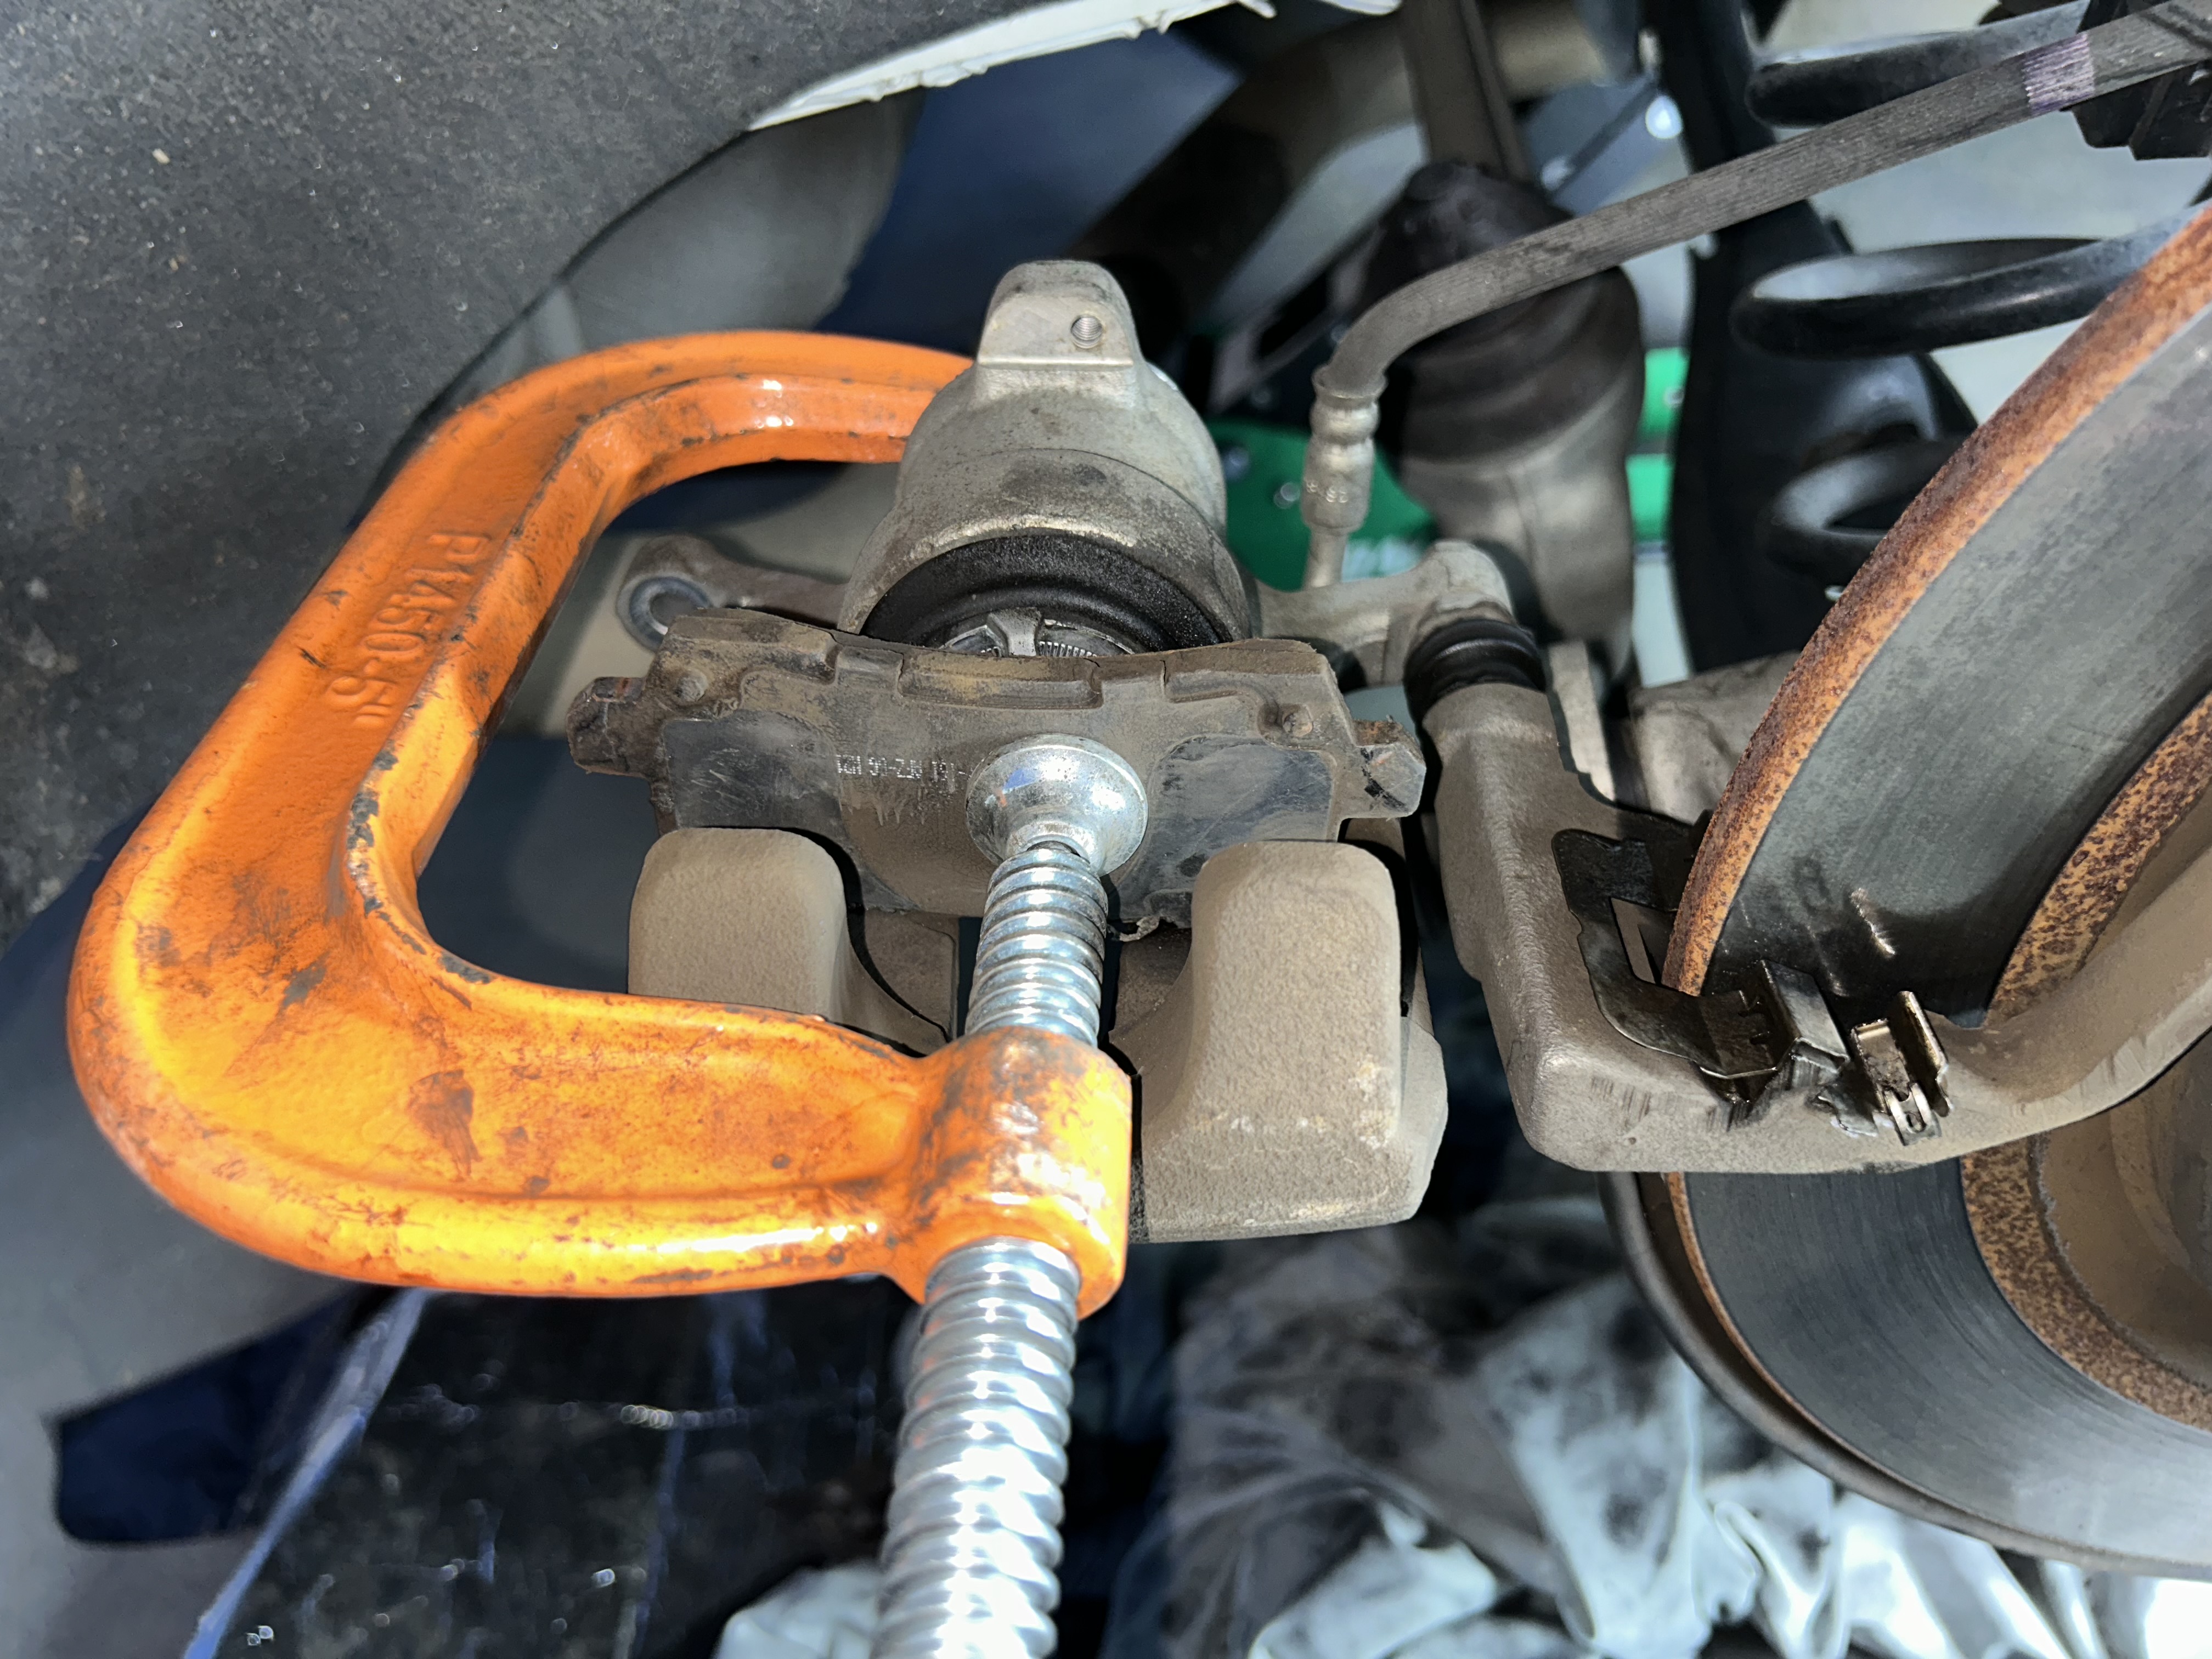
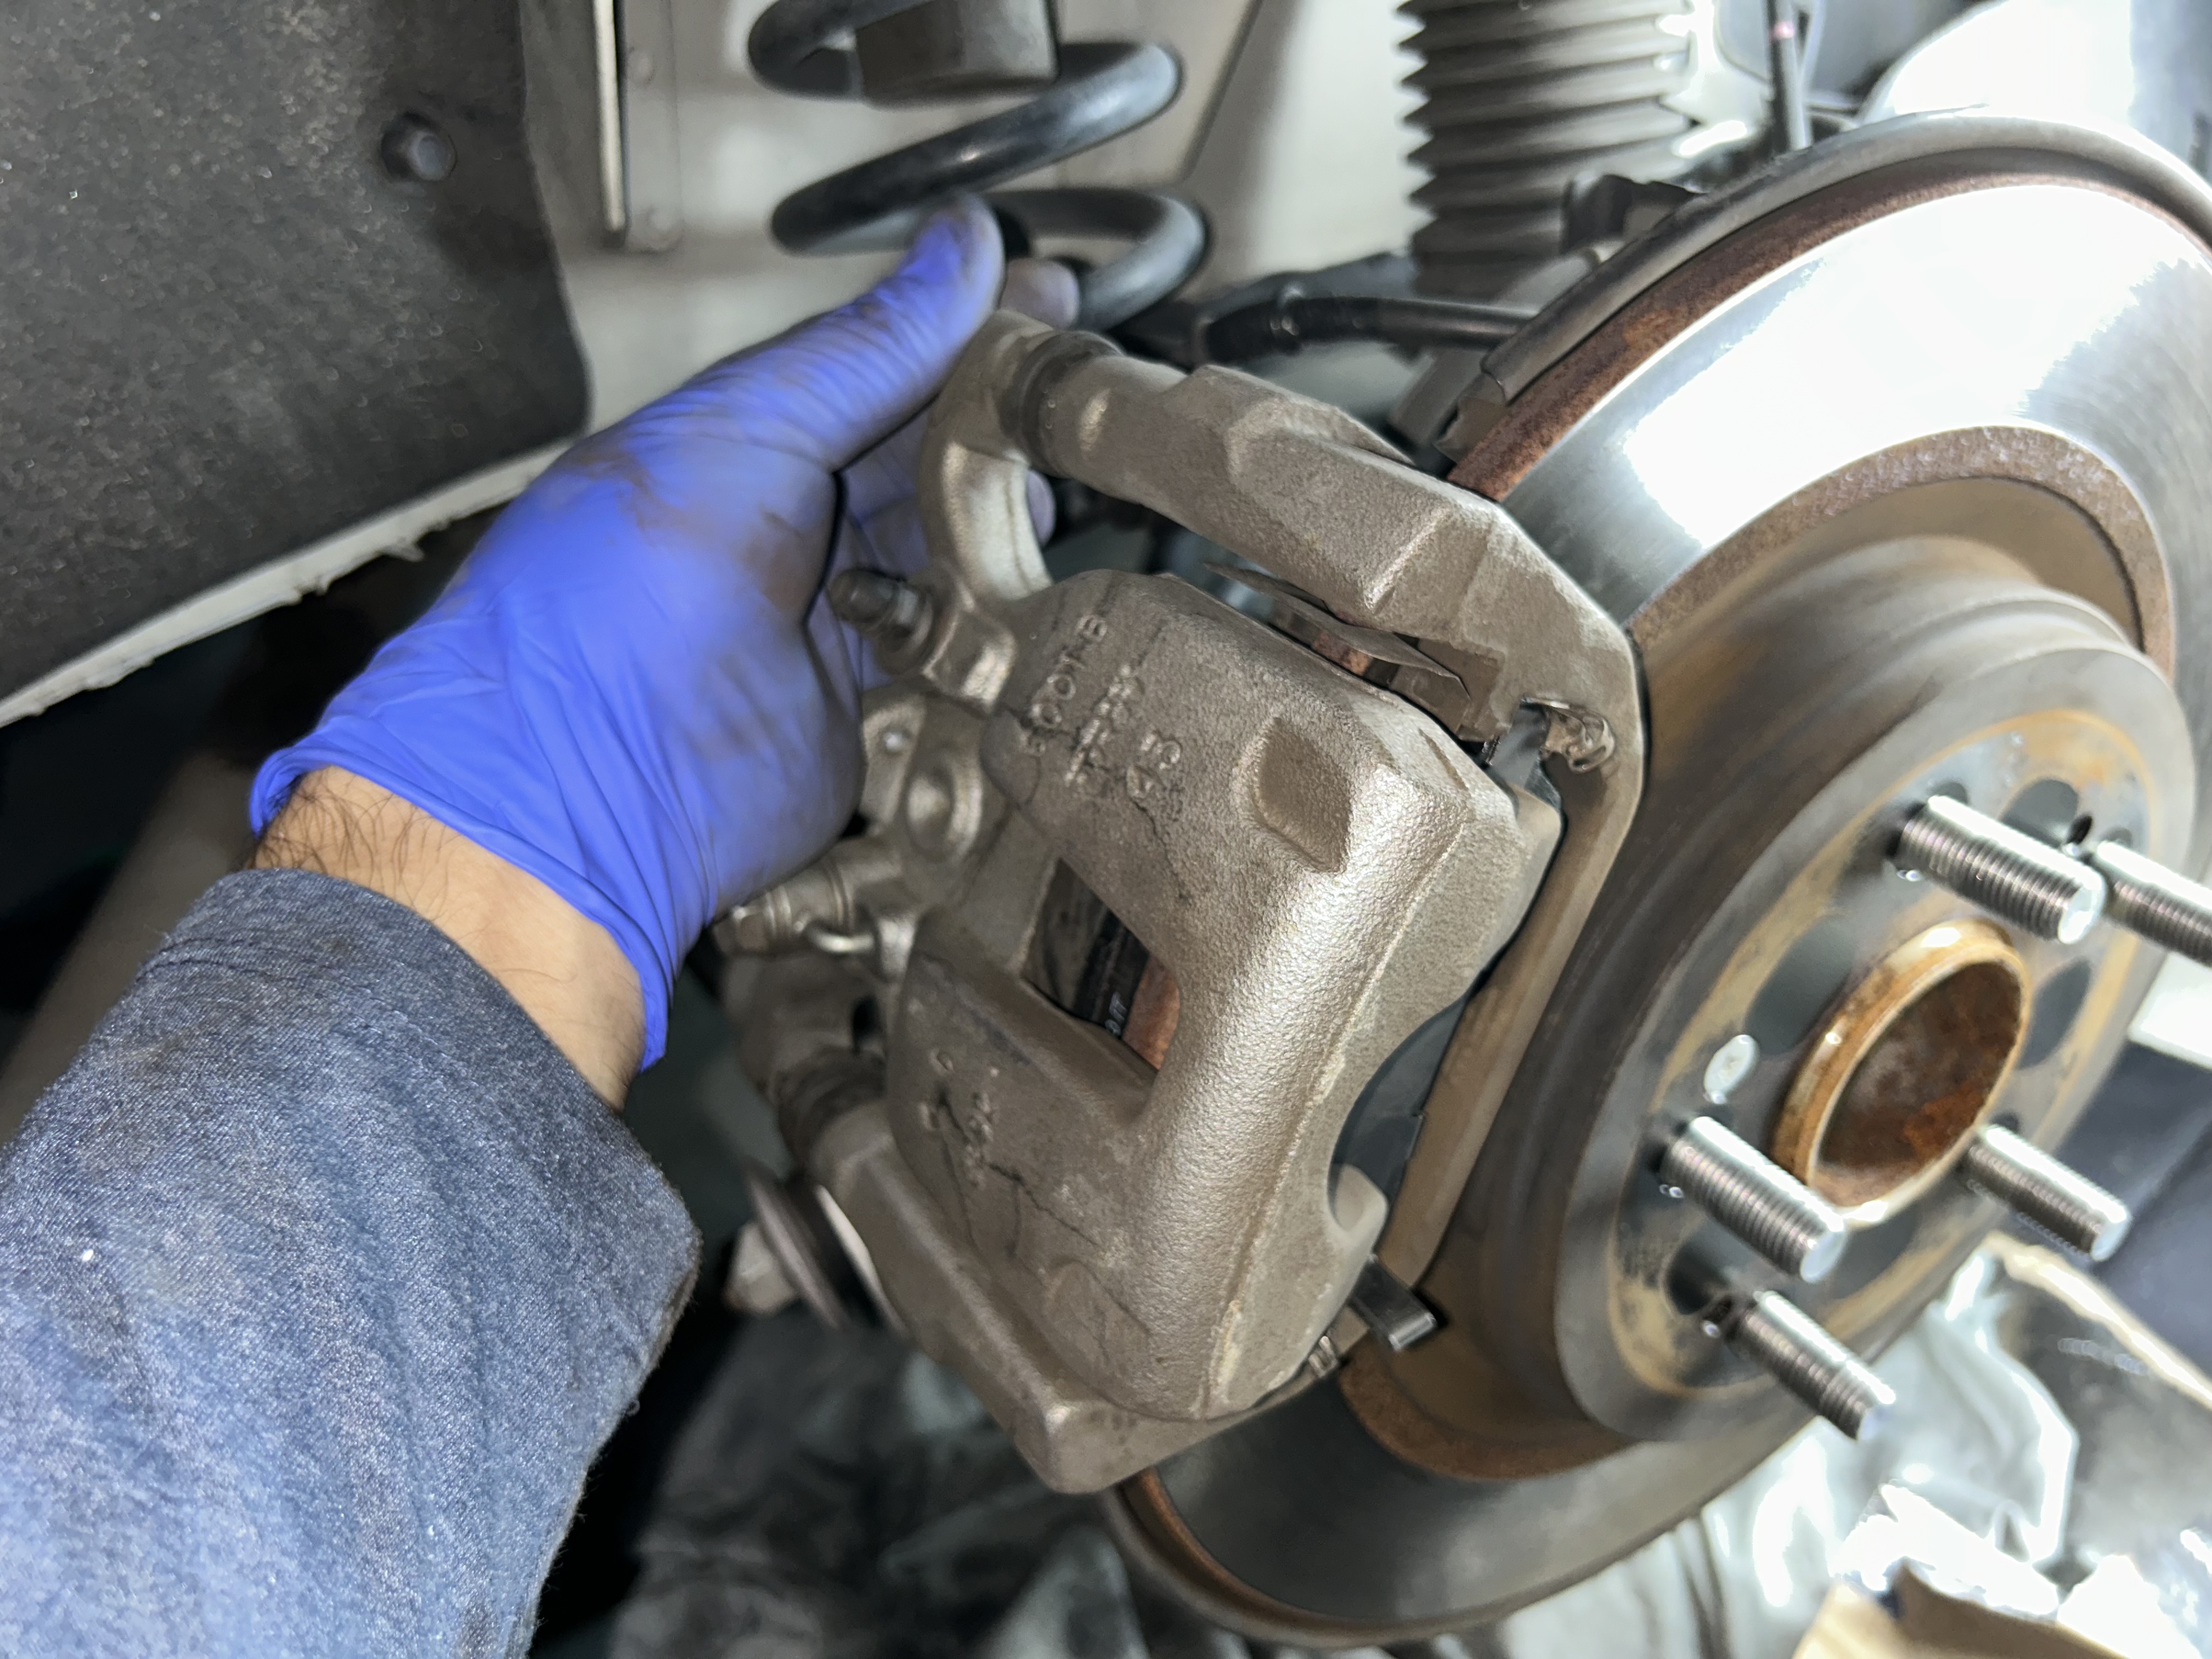
Remove the retaining pin, and then pull out each of the brake pads. Compress the brake calipers with either a brake caliper compressor, or use a C-clamp with your old brake pad to protect the caliper piston while compressing.
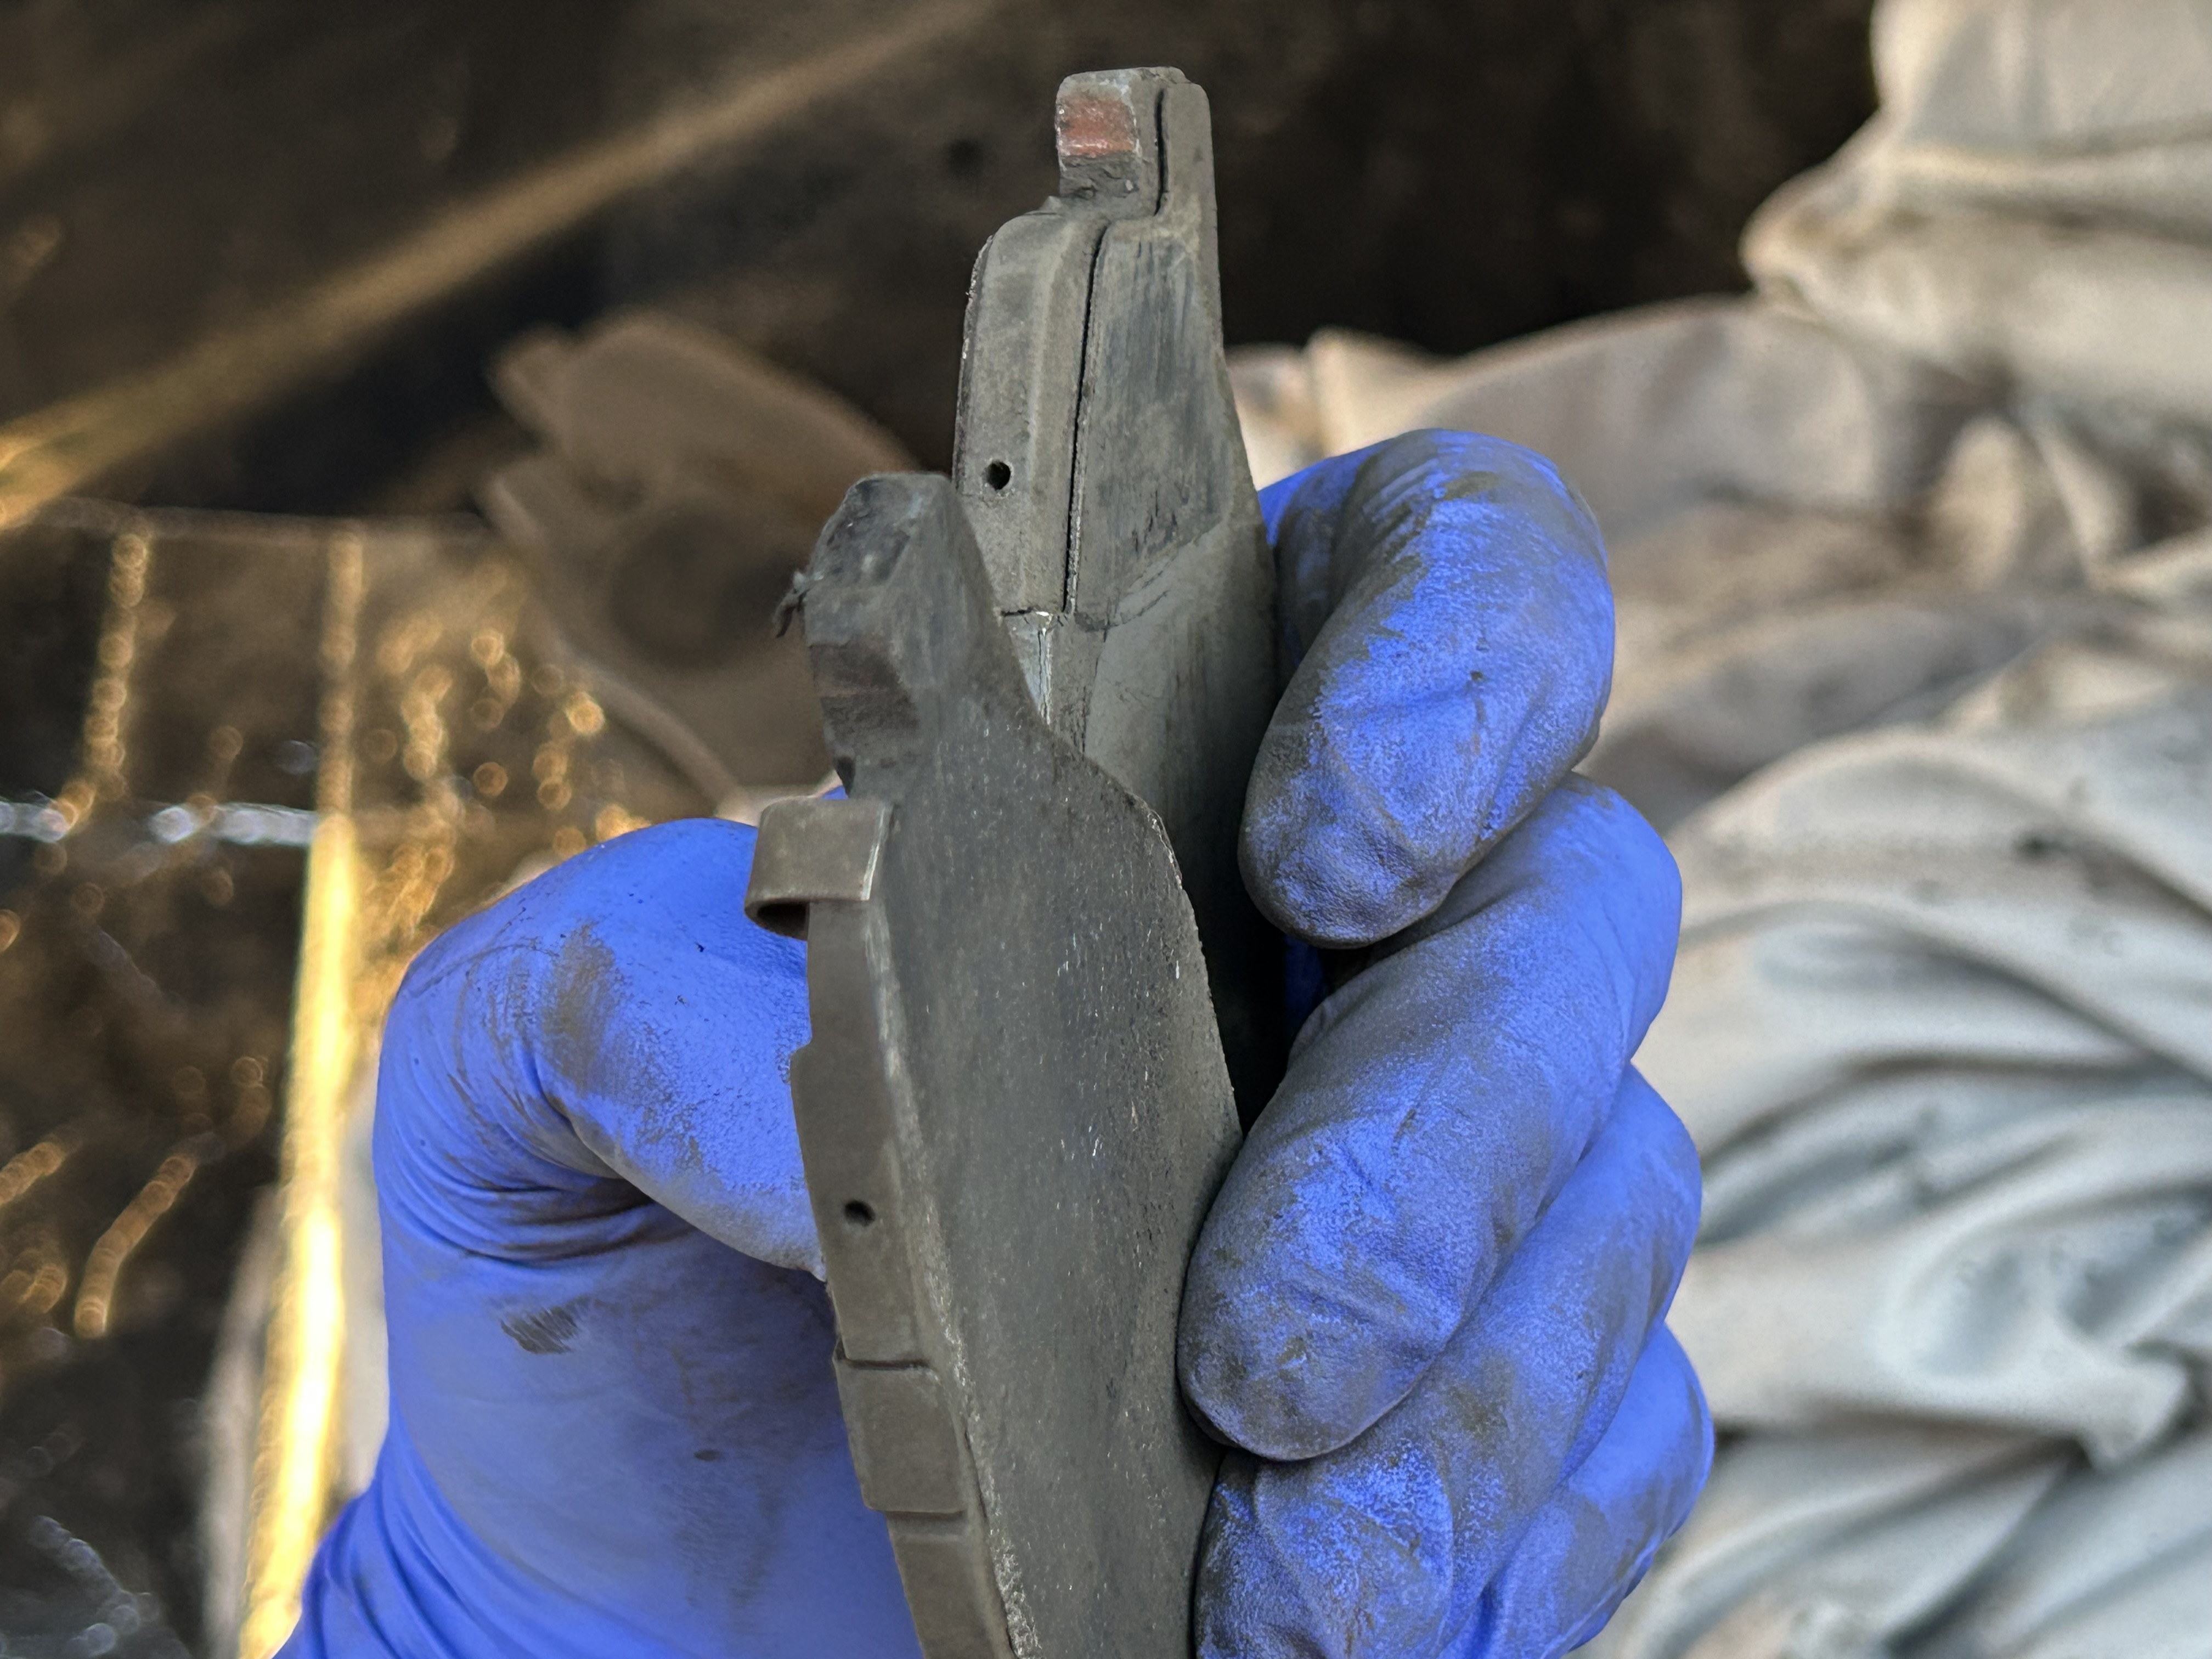
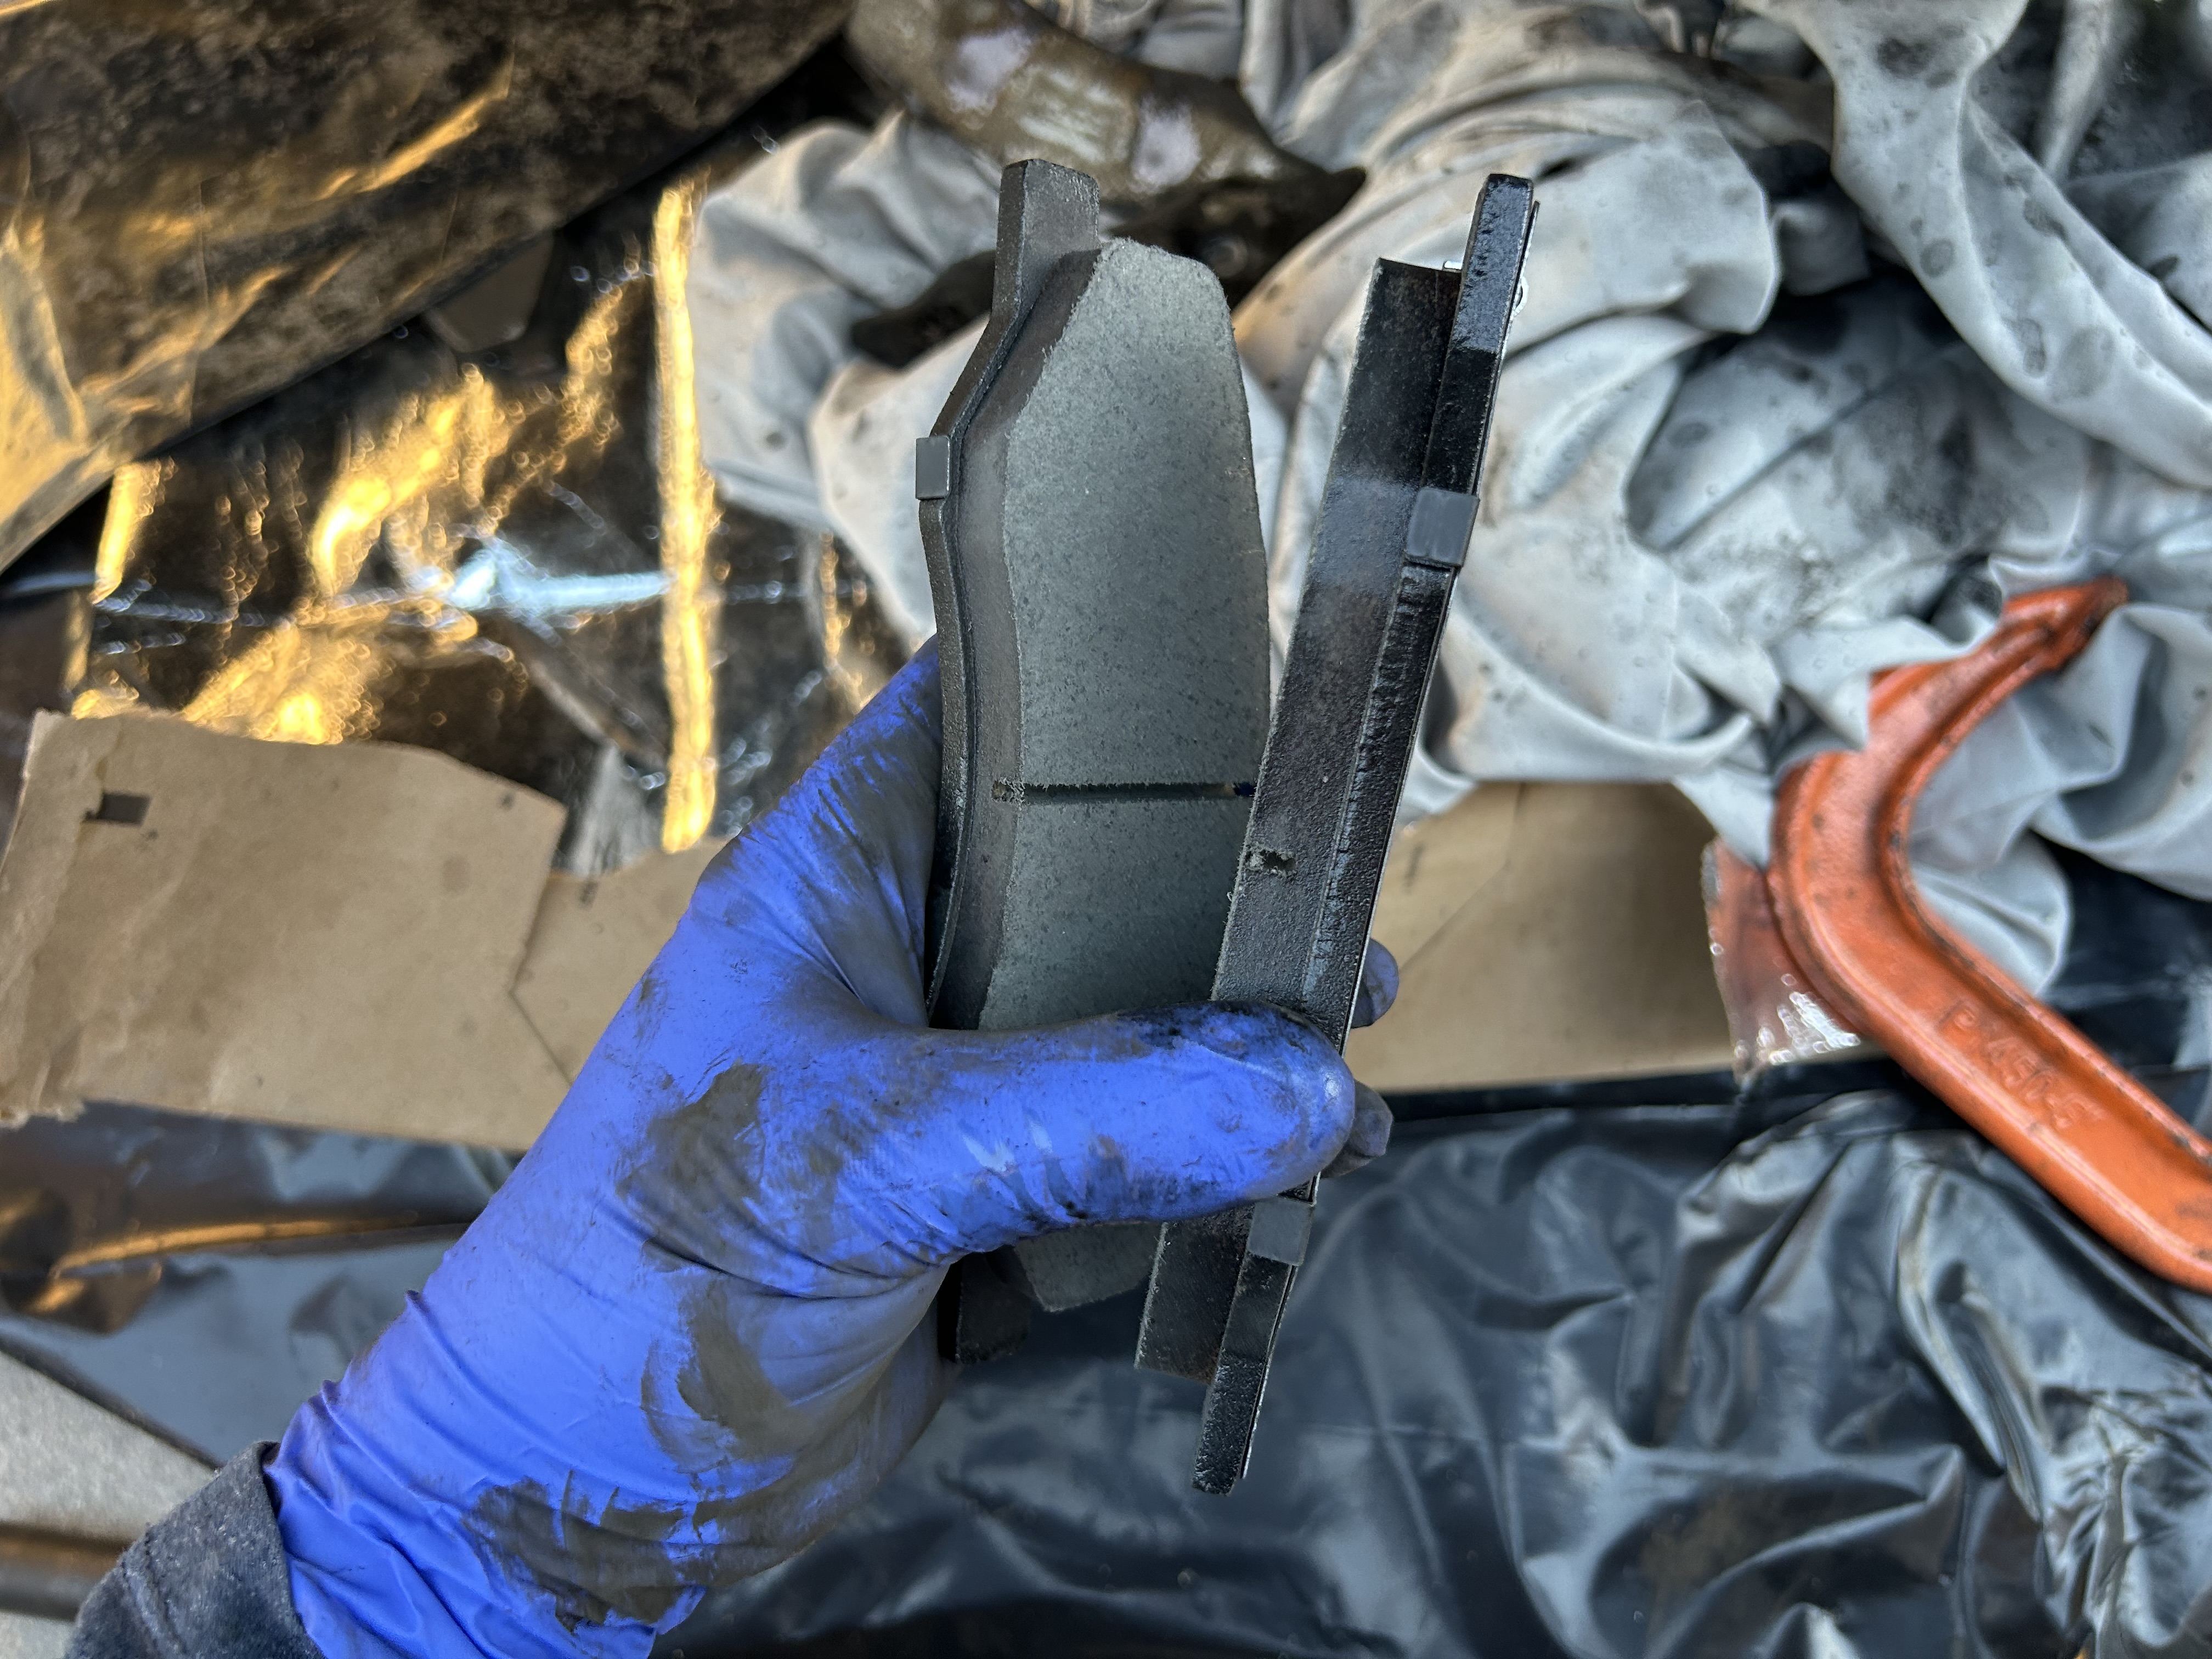
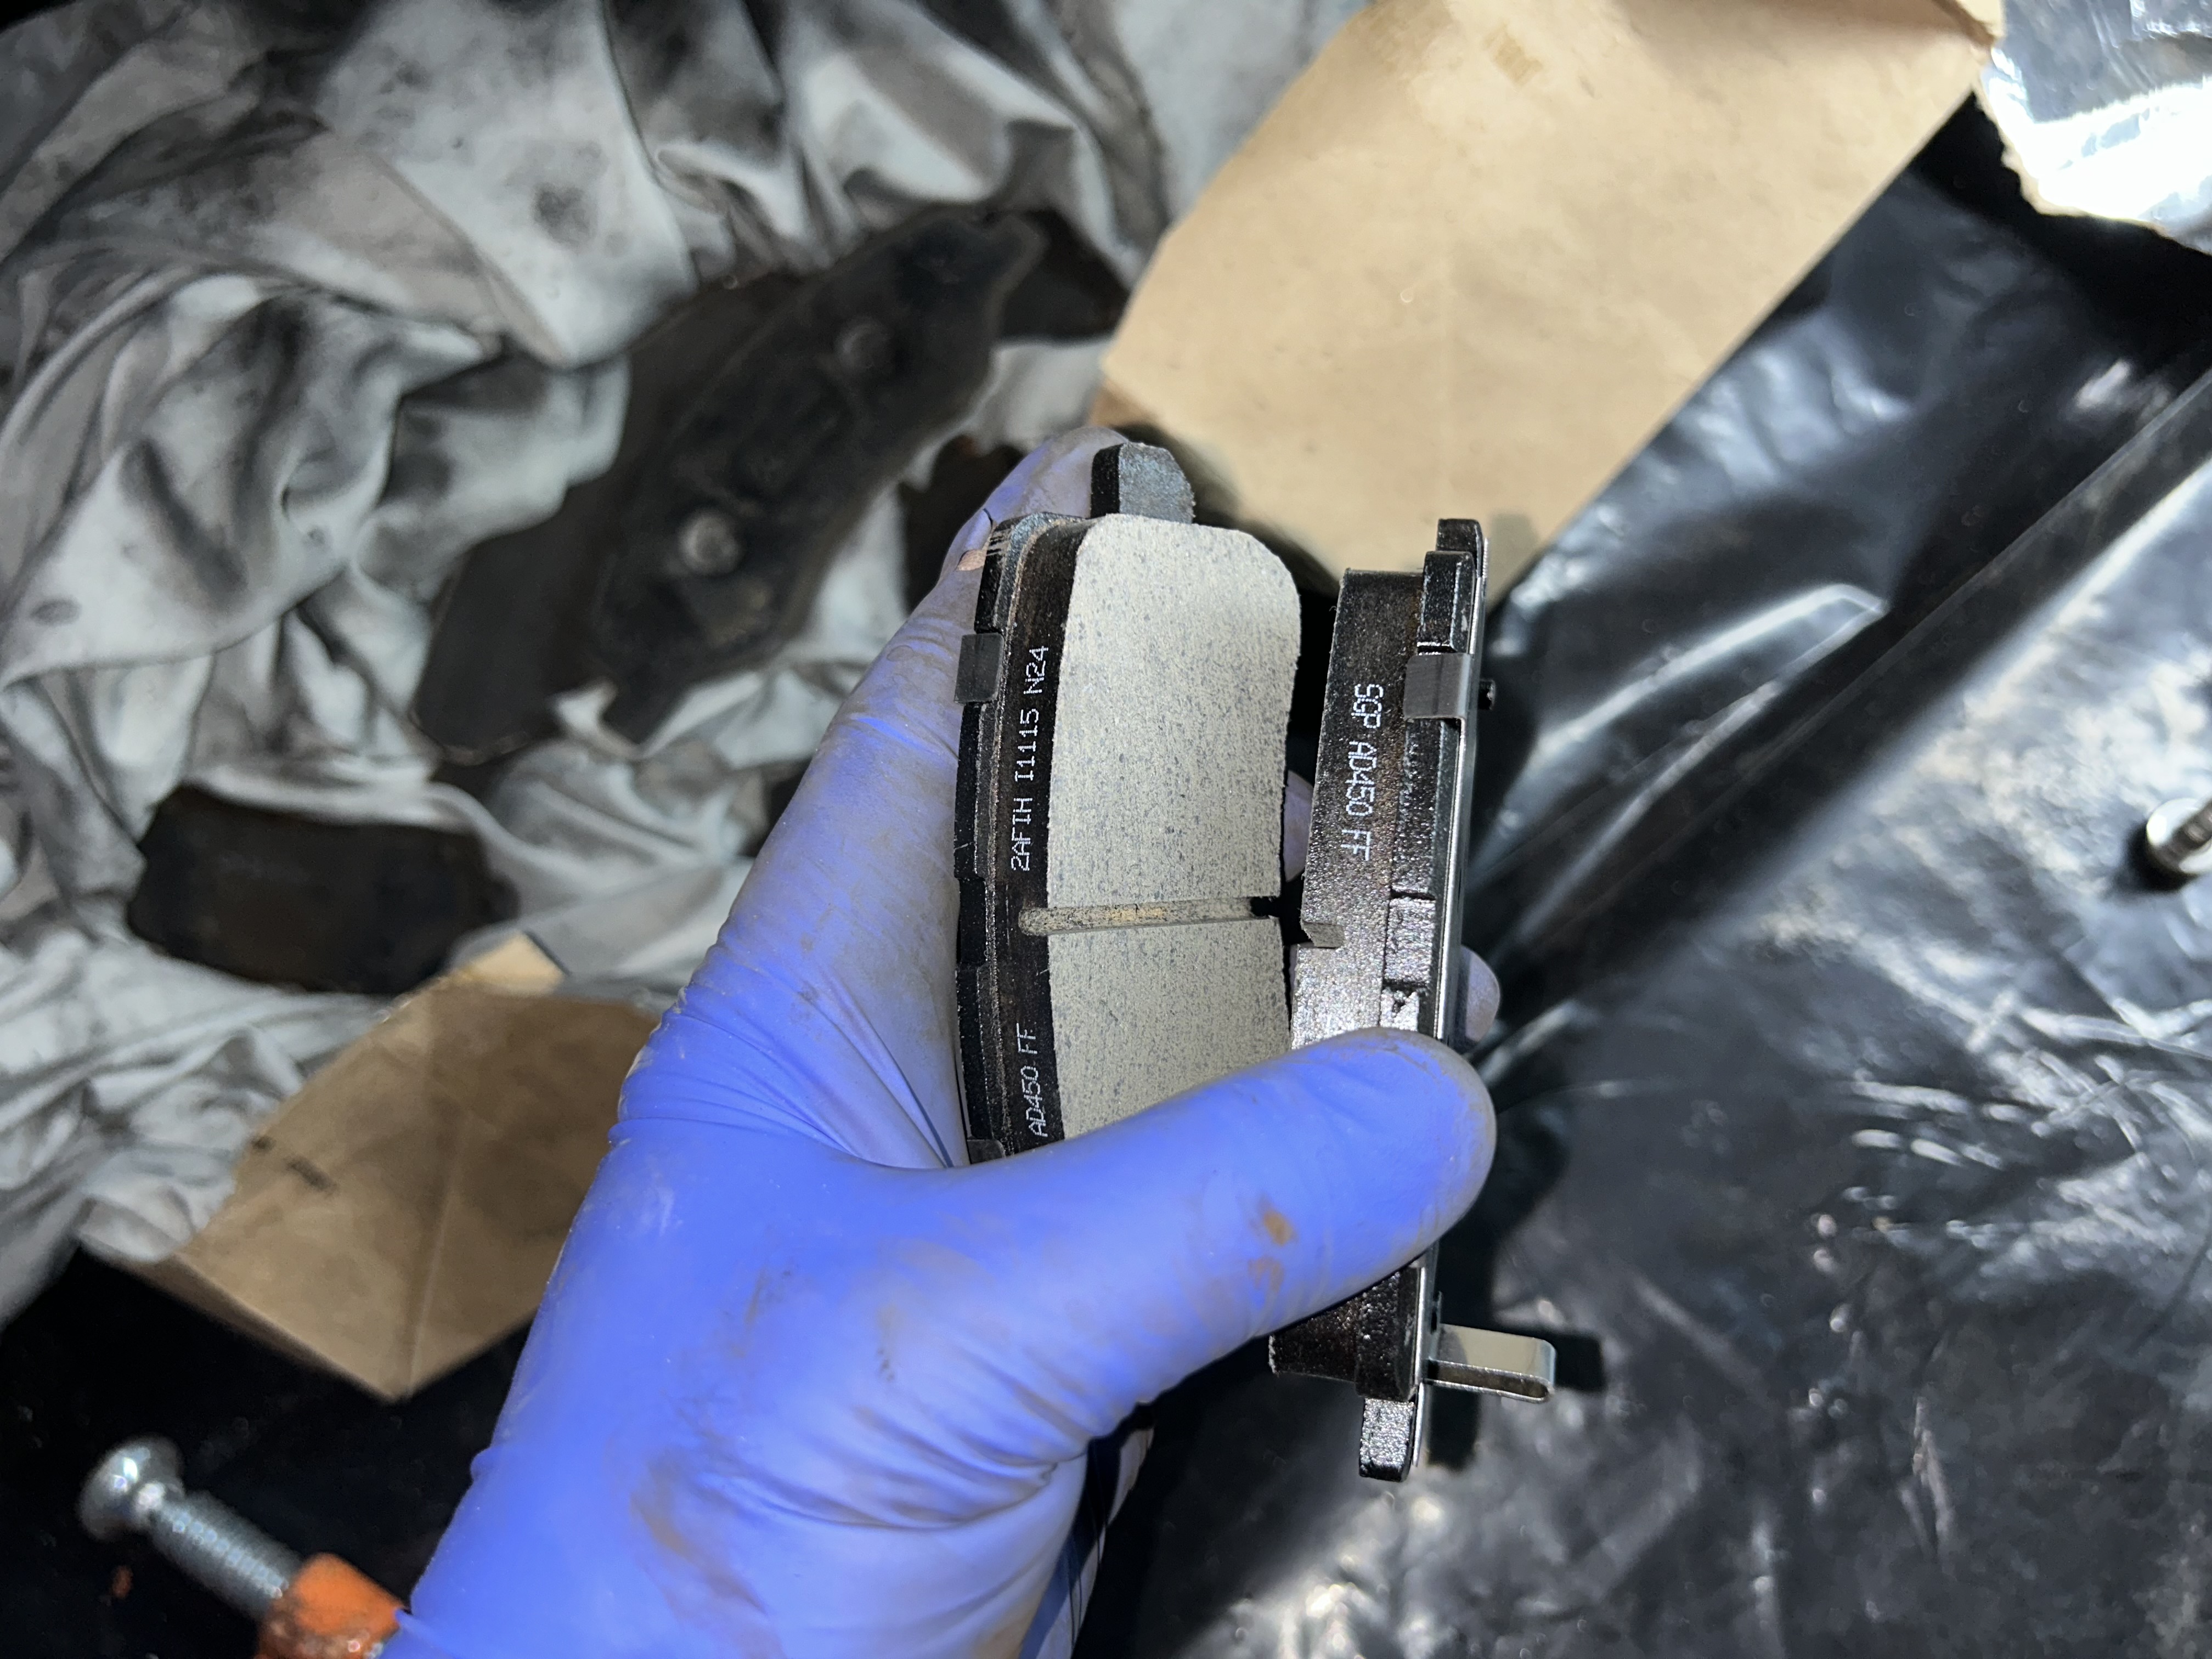
With the caliper pistons fully compressed, spray everything down with brake parts cleaner again. Get your new front brake pads and ensure that for each brake caliper, you are installing one brake pad with a pad indicator (little metal tab attached to the brake pad backing) and one without. This ensures you have a pad level indicator on each side of your brakes. The brake pads just slide in across the metal brake hardware. If your brake pads came with replacement hardware, you can replace it if you wish. Also use brake lube if you want to on the metal brake hardware to reduce the chance of brake noise.

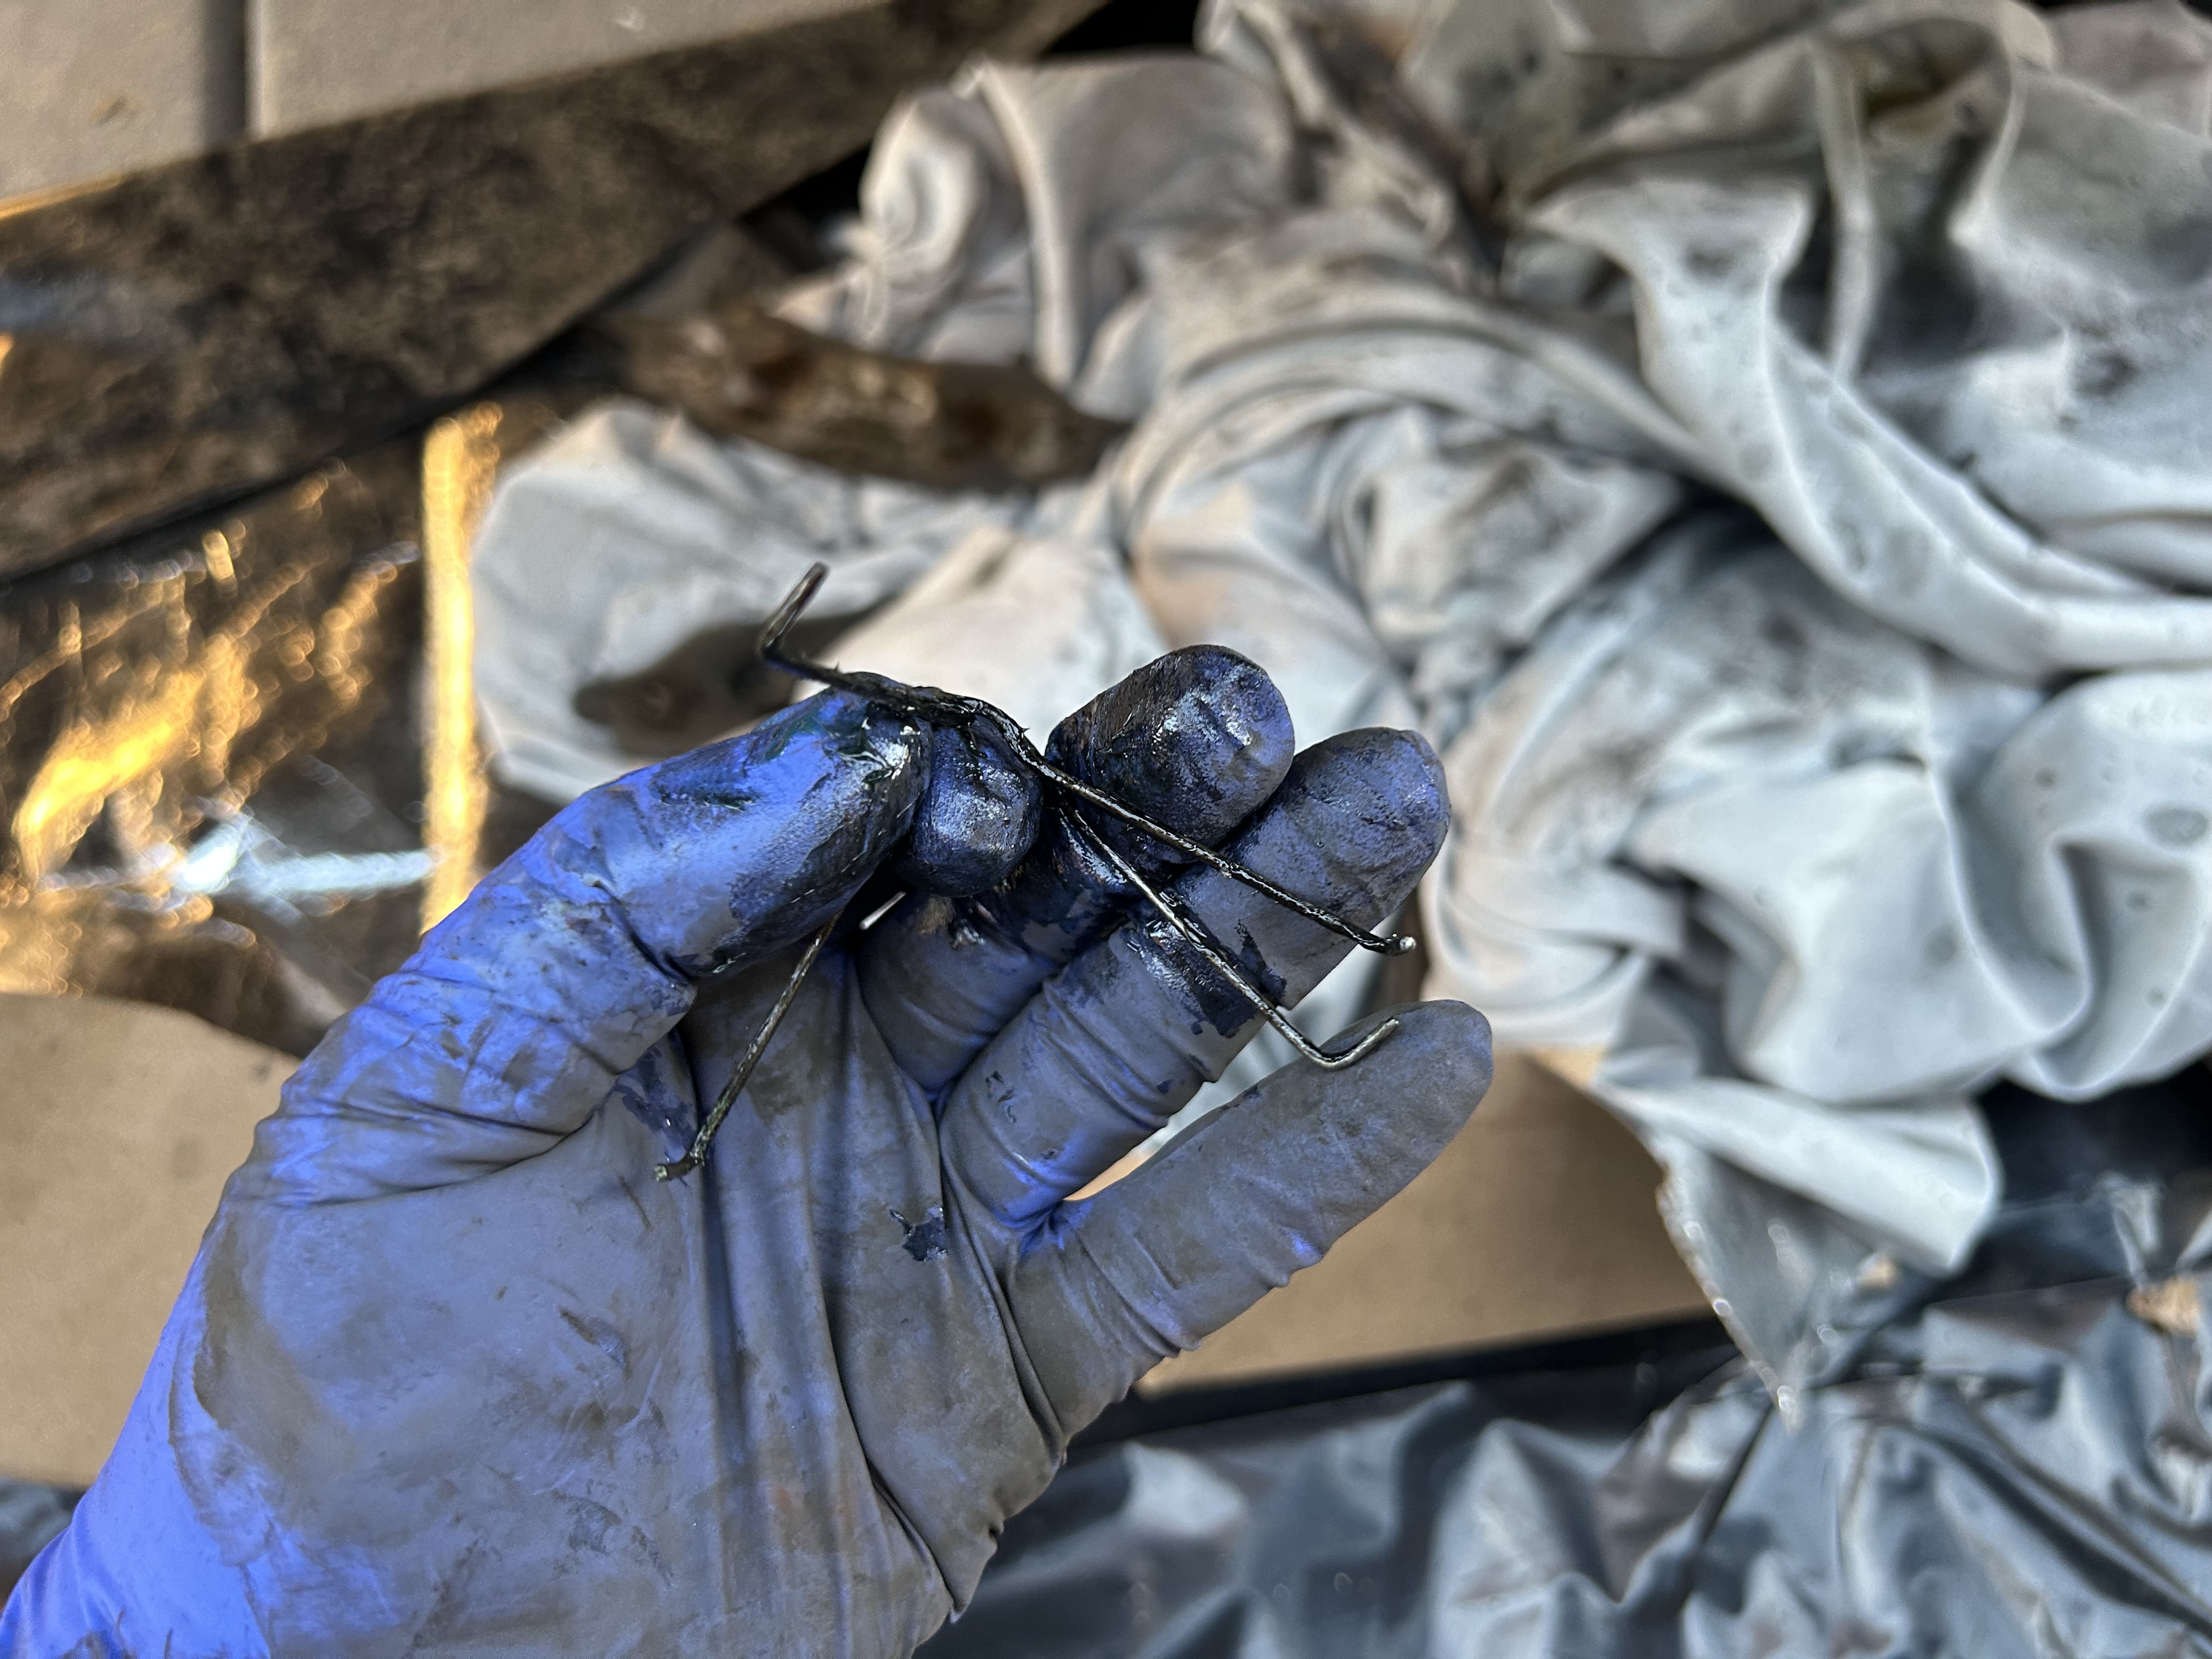
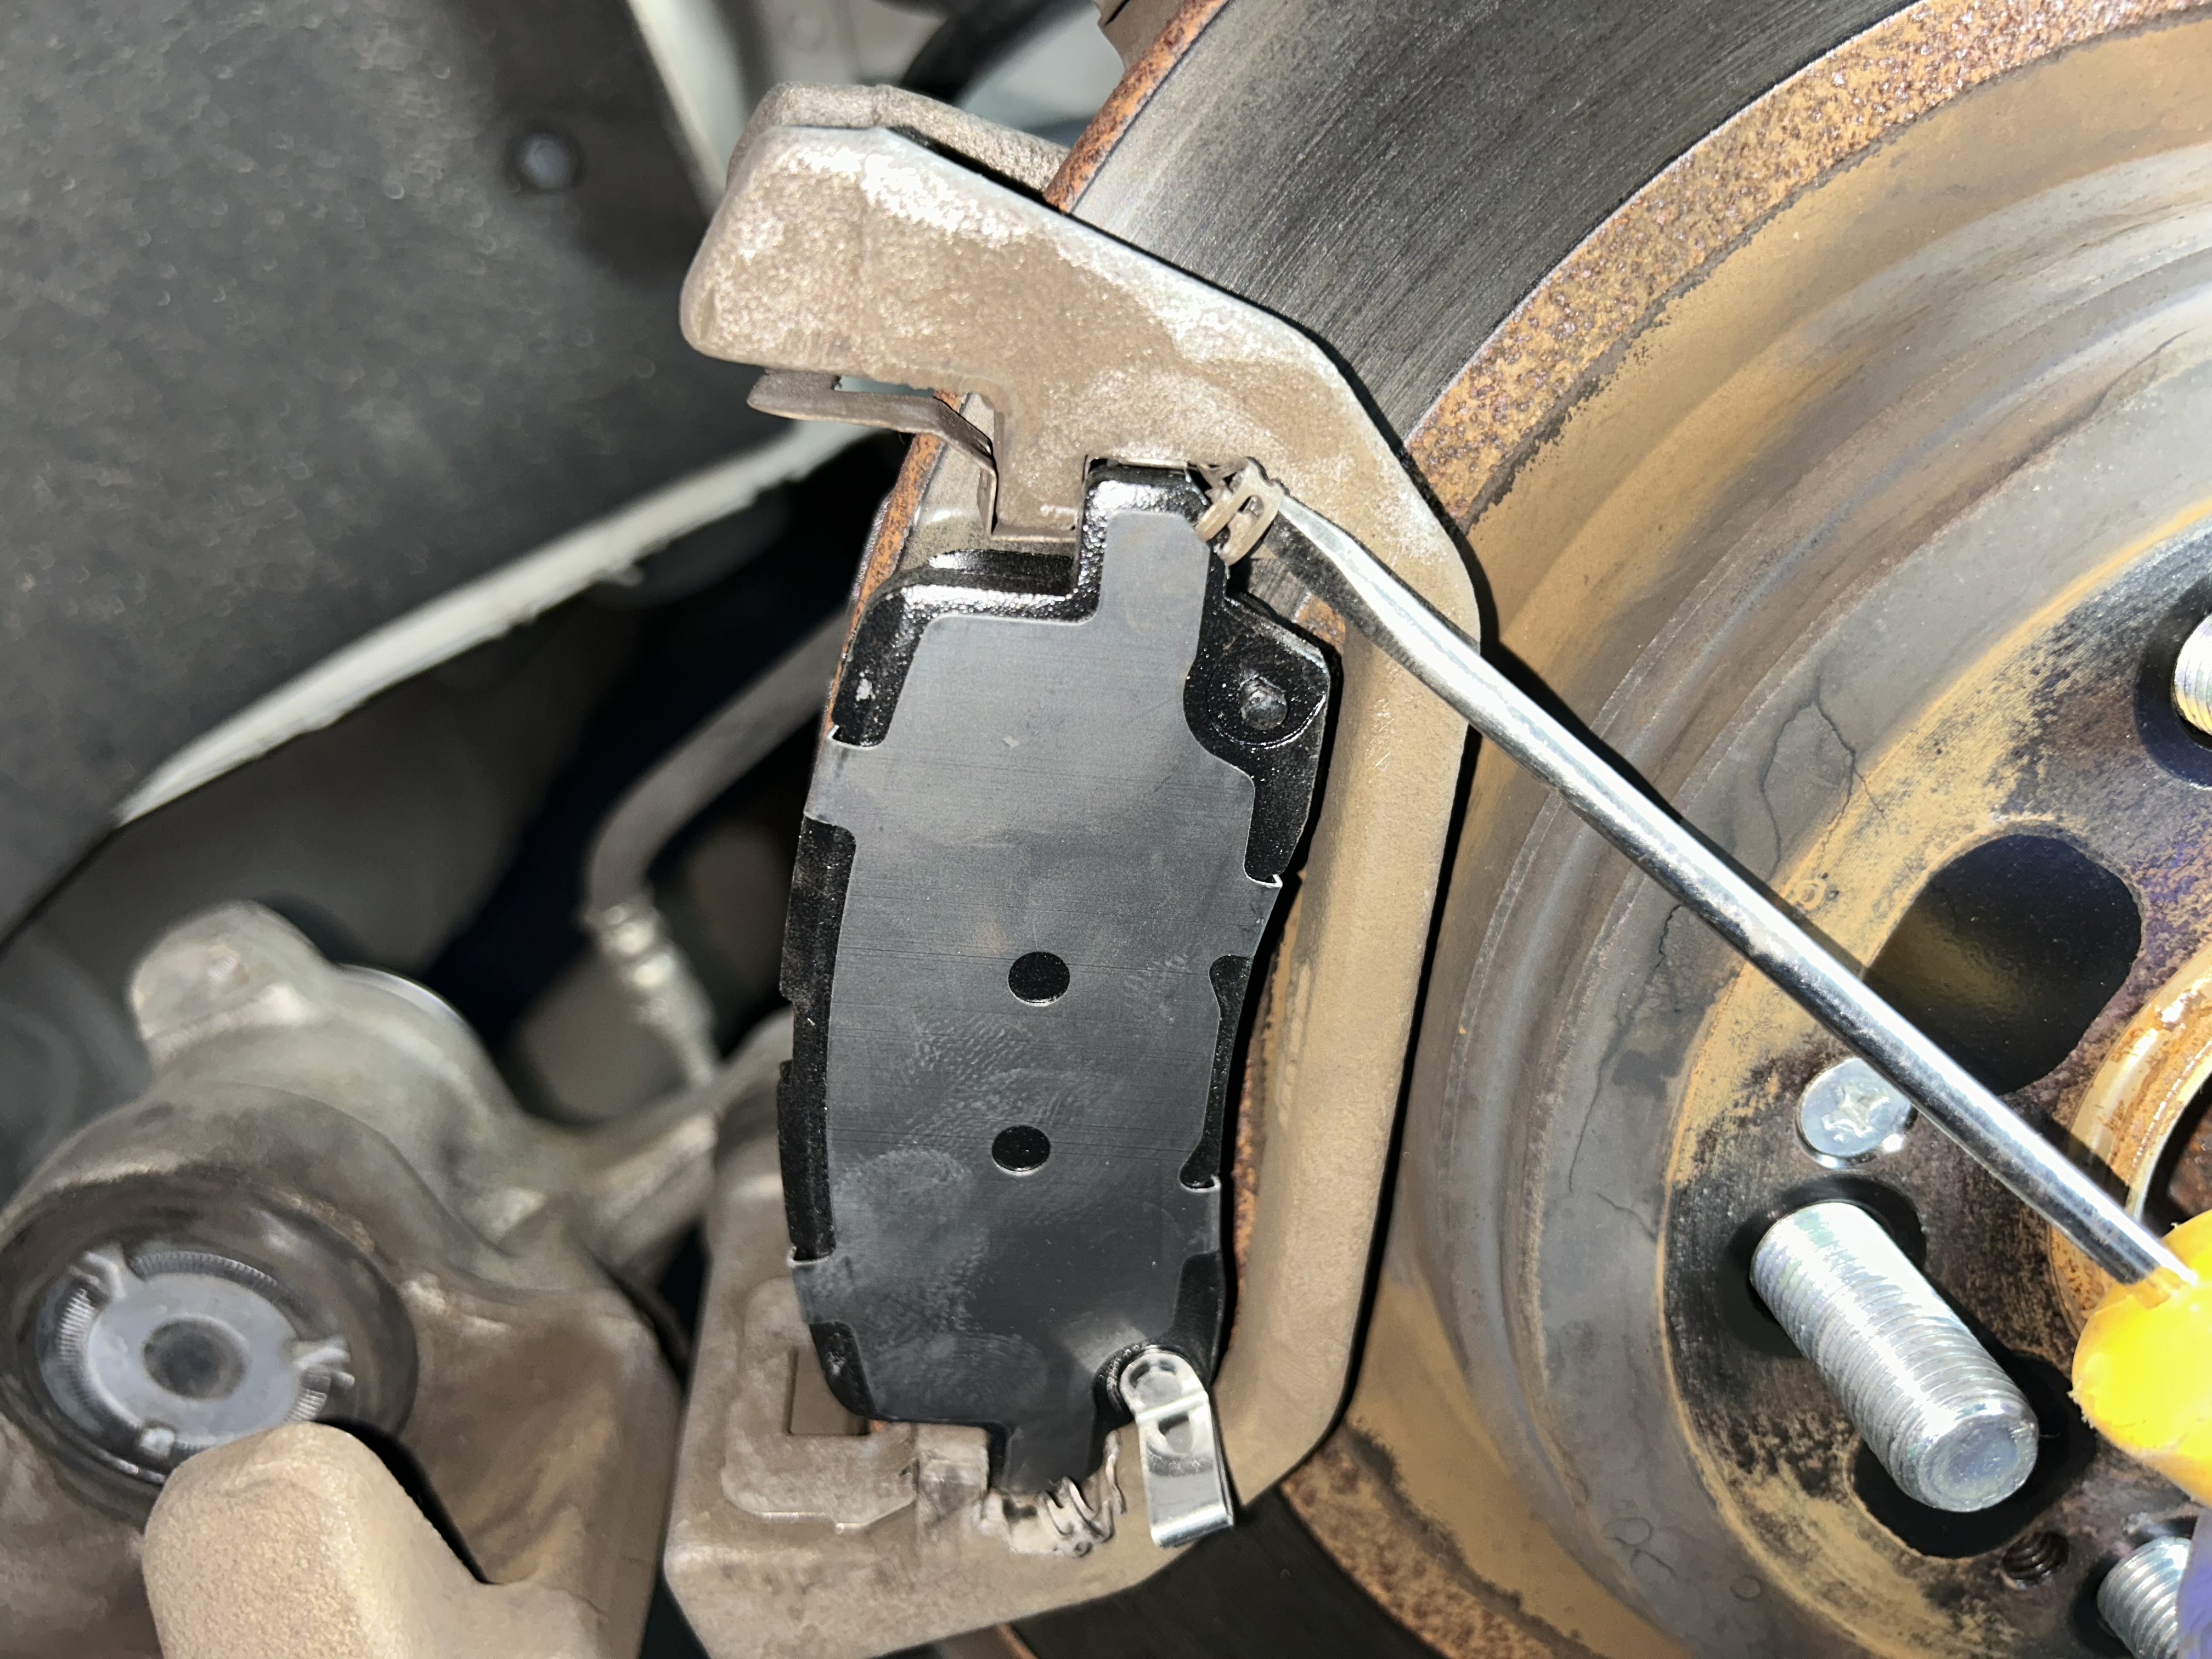
Apply brake lube to the retaining clip and reinstall it on your brake pads as it was previously installed.
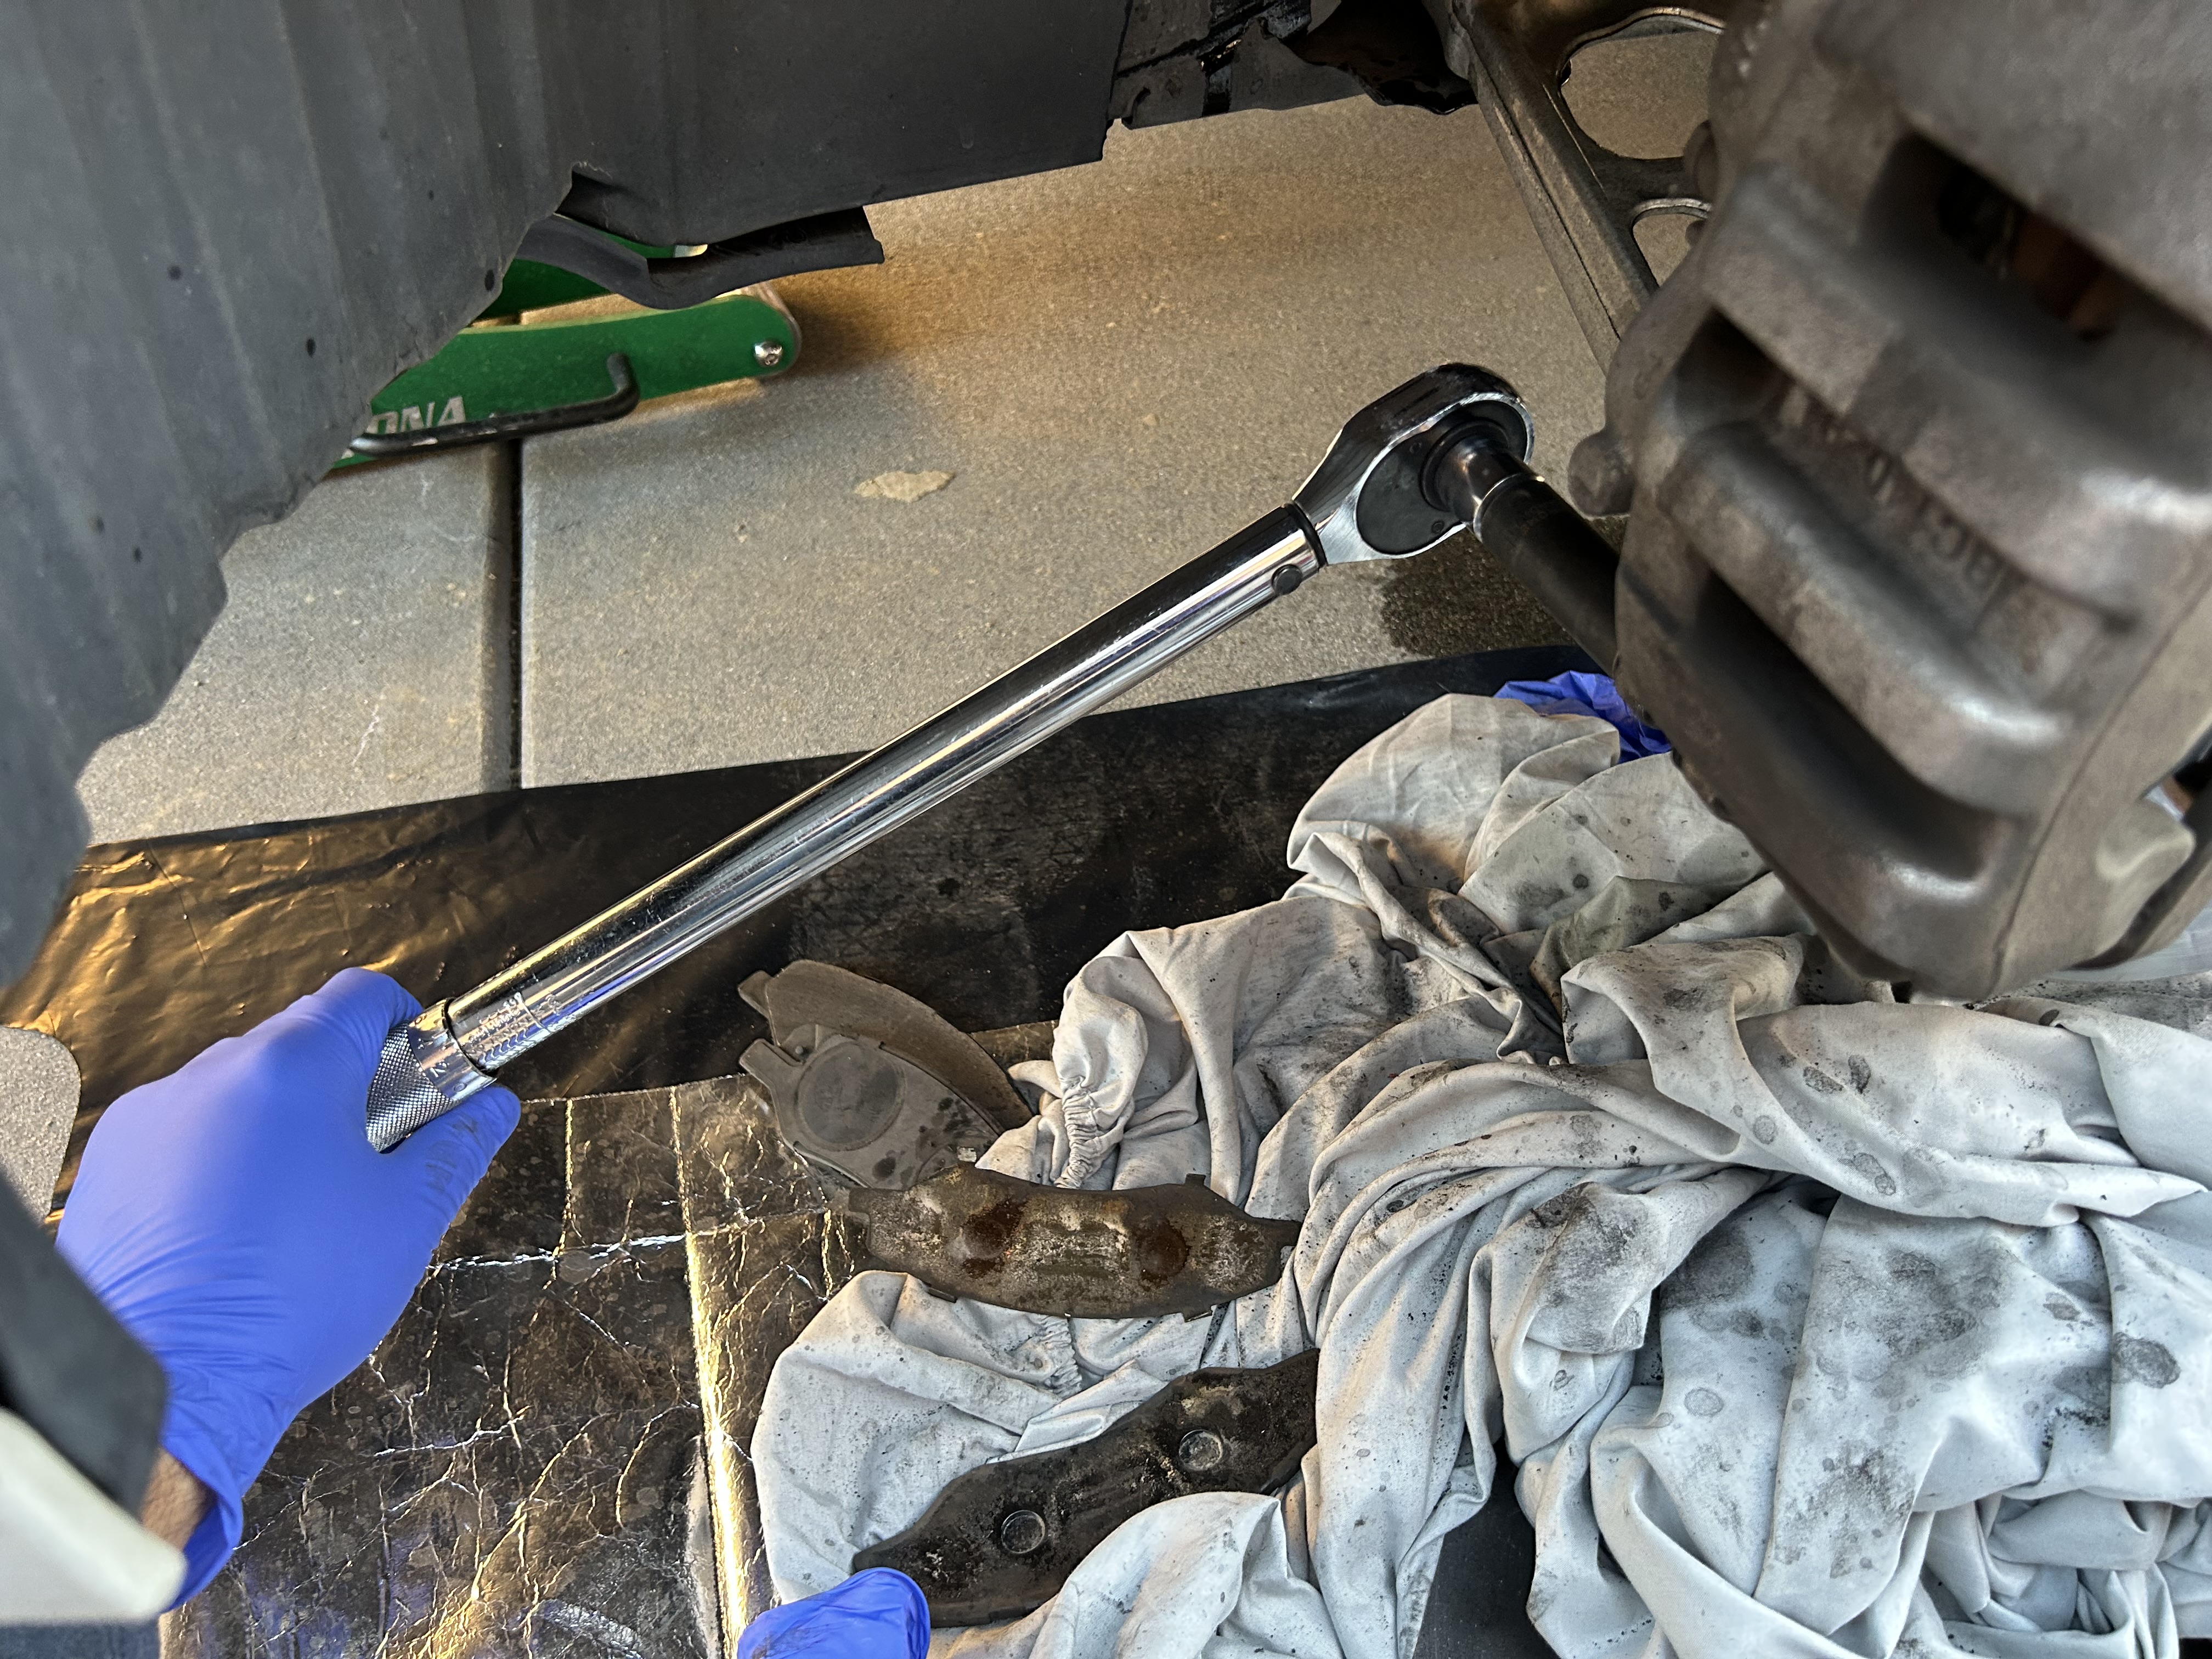
Swing the brake caliper back down so that it fits around the new brake pads. Ensure that the caliper mounting bolt holes line up before reinstalling the 14mm bolt and torque it down to 30 ft-lbs torque.
Confirm everything has been put back together correctly and then reinstall the wheel. Do the same process for the opposite side front brakes.
Rear Brake Pads
The rear pads are replaced in a similar manner as the fronts, however you have to deal with the Electric Parking Brake (EPB) first. Luckily, you don’t need a diagnostic tool to unwind the EPB– you can do it manually.
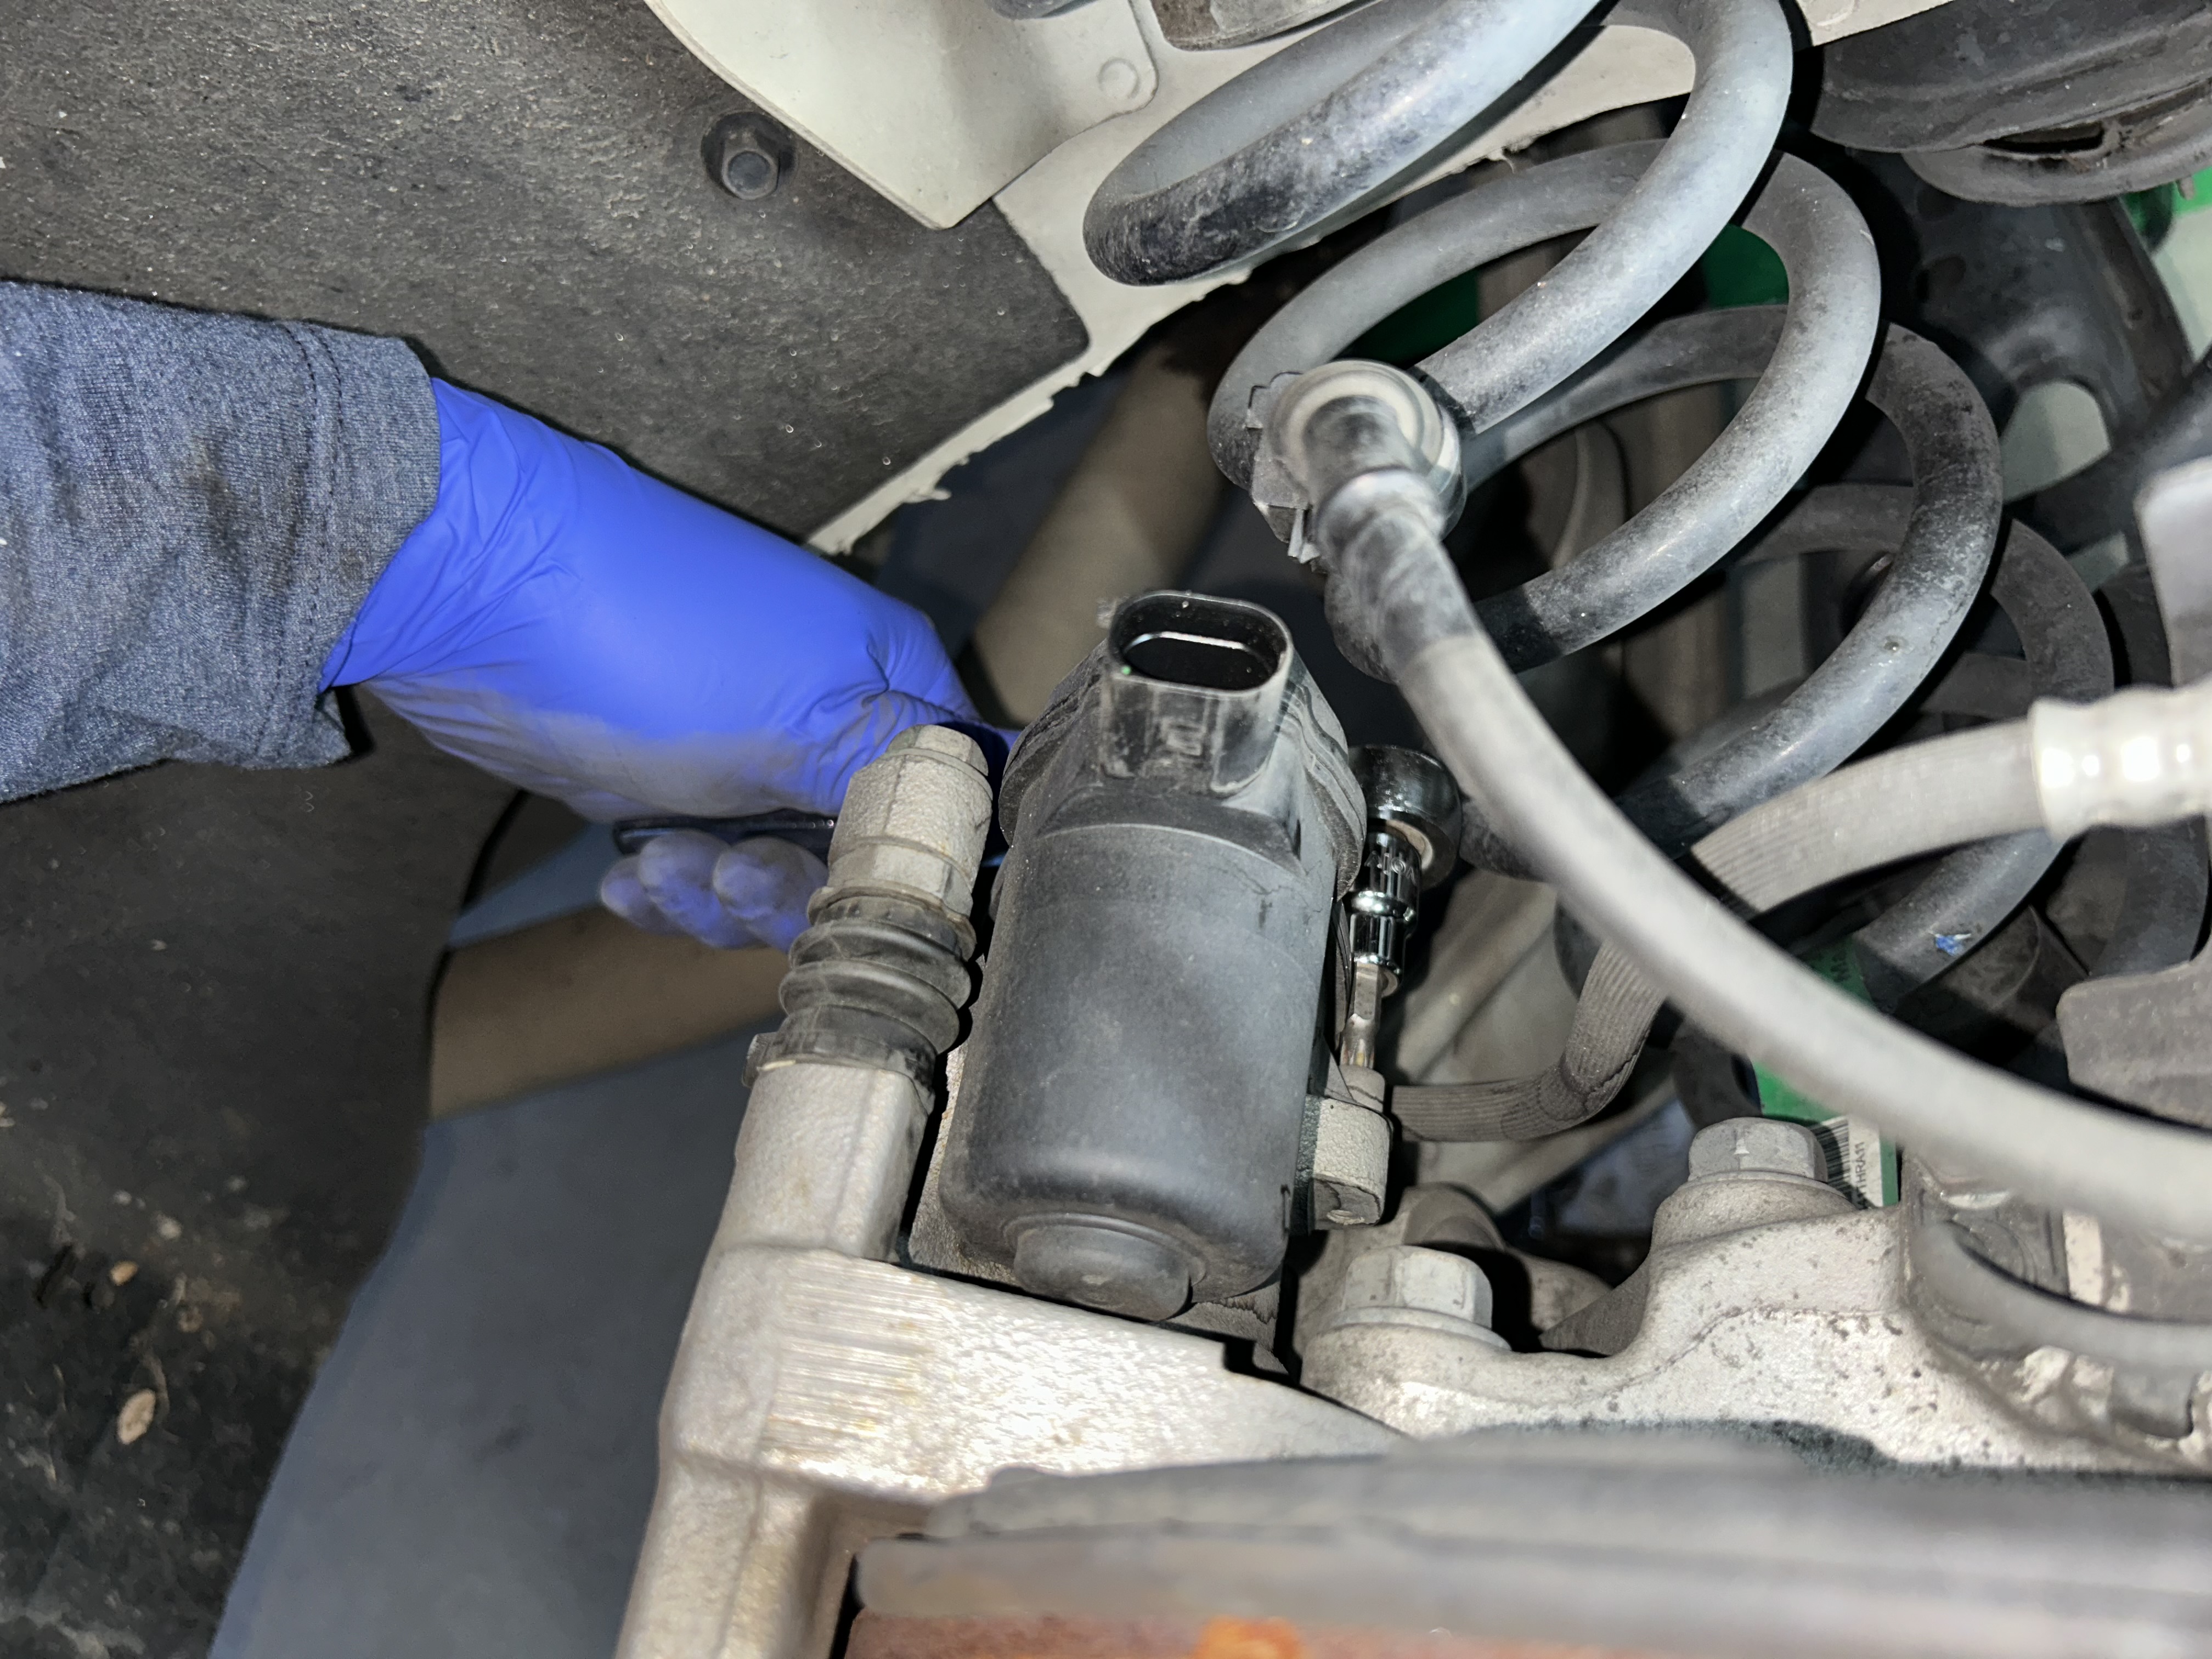
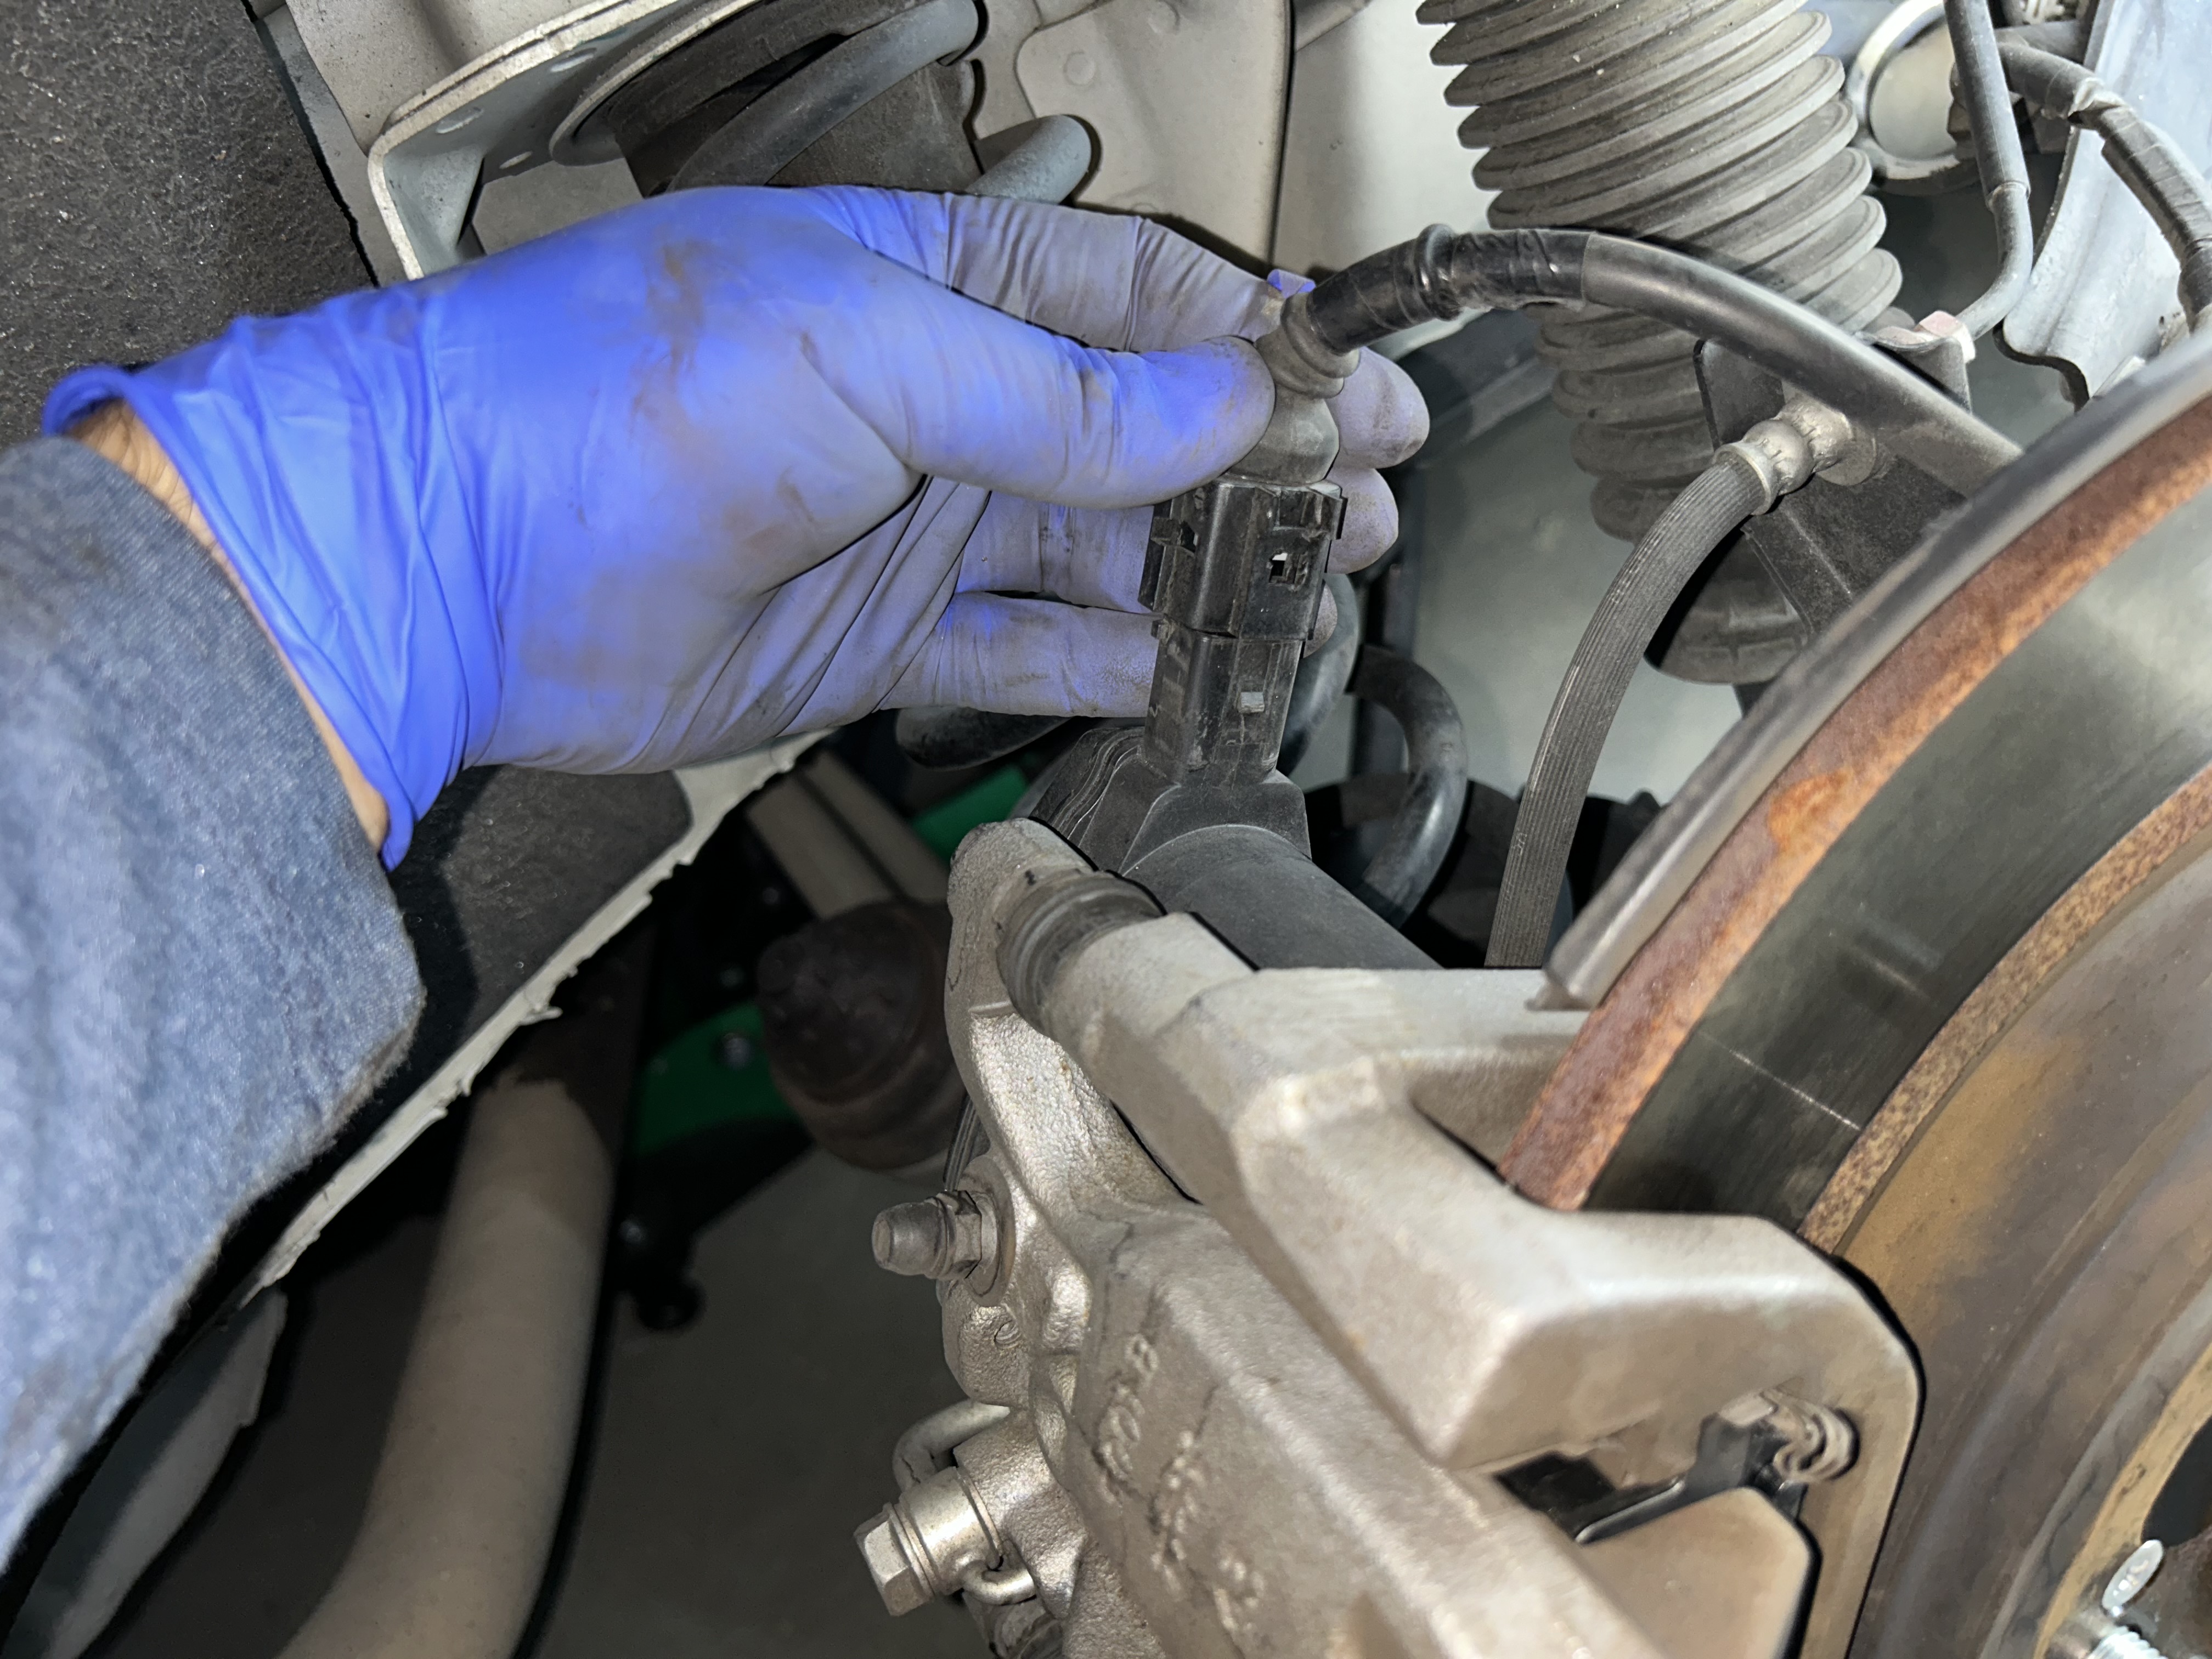
Remove the electrical connector to the EPB, being careful not to break the connector. It is a bit difficult to remove even with a flat head screwdriver to release the tab that sets it free. You might need a 90-degree pick tool to get underneath the connector tab to free the electrical connector.
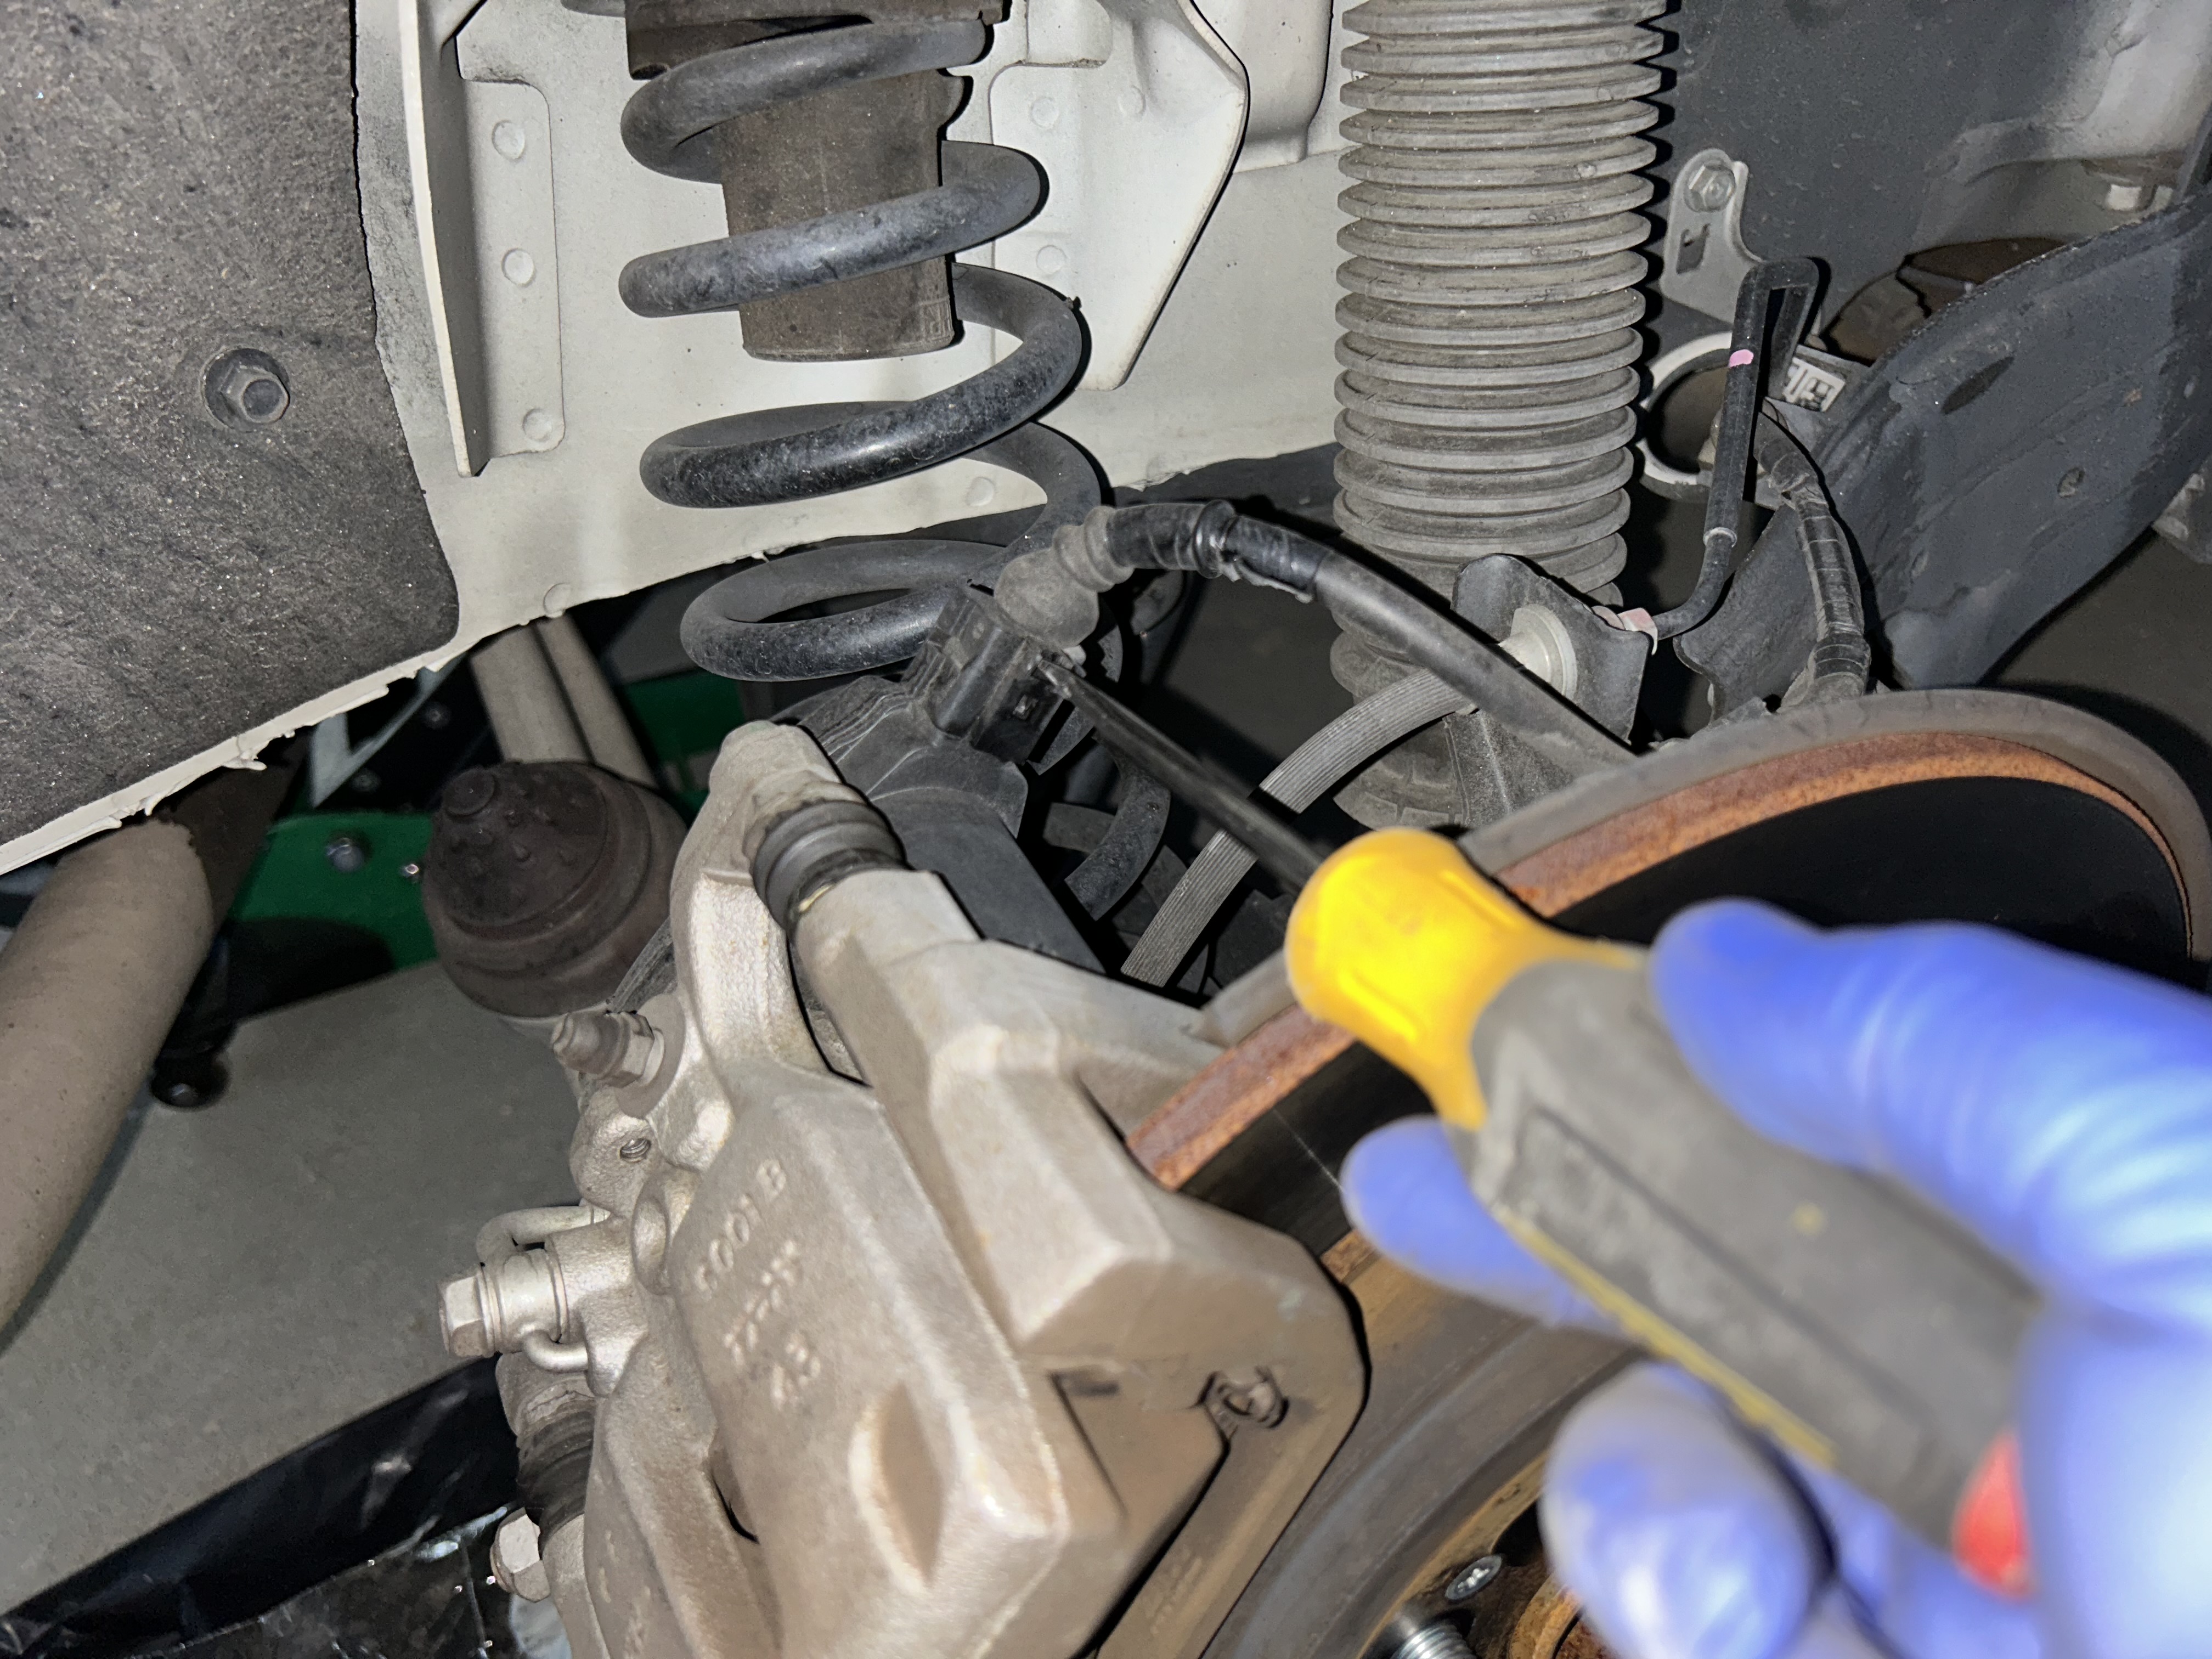

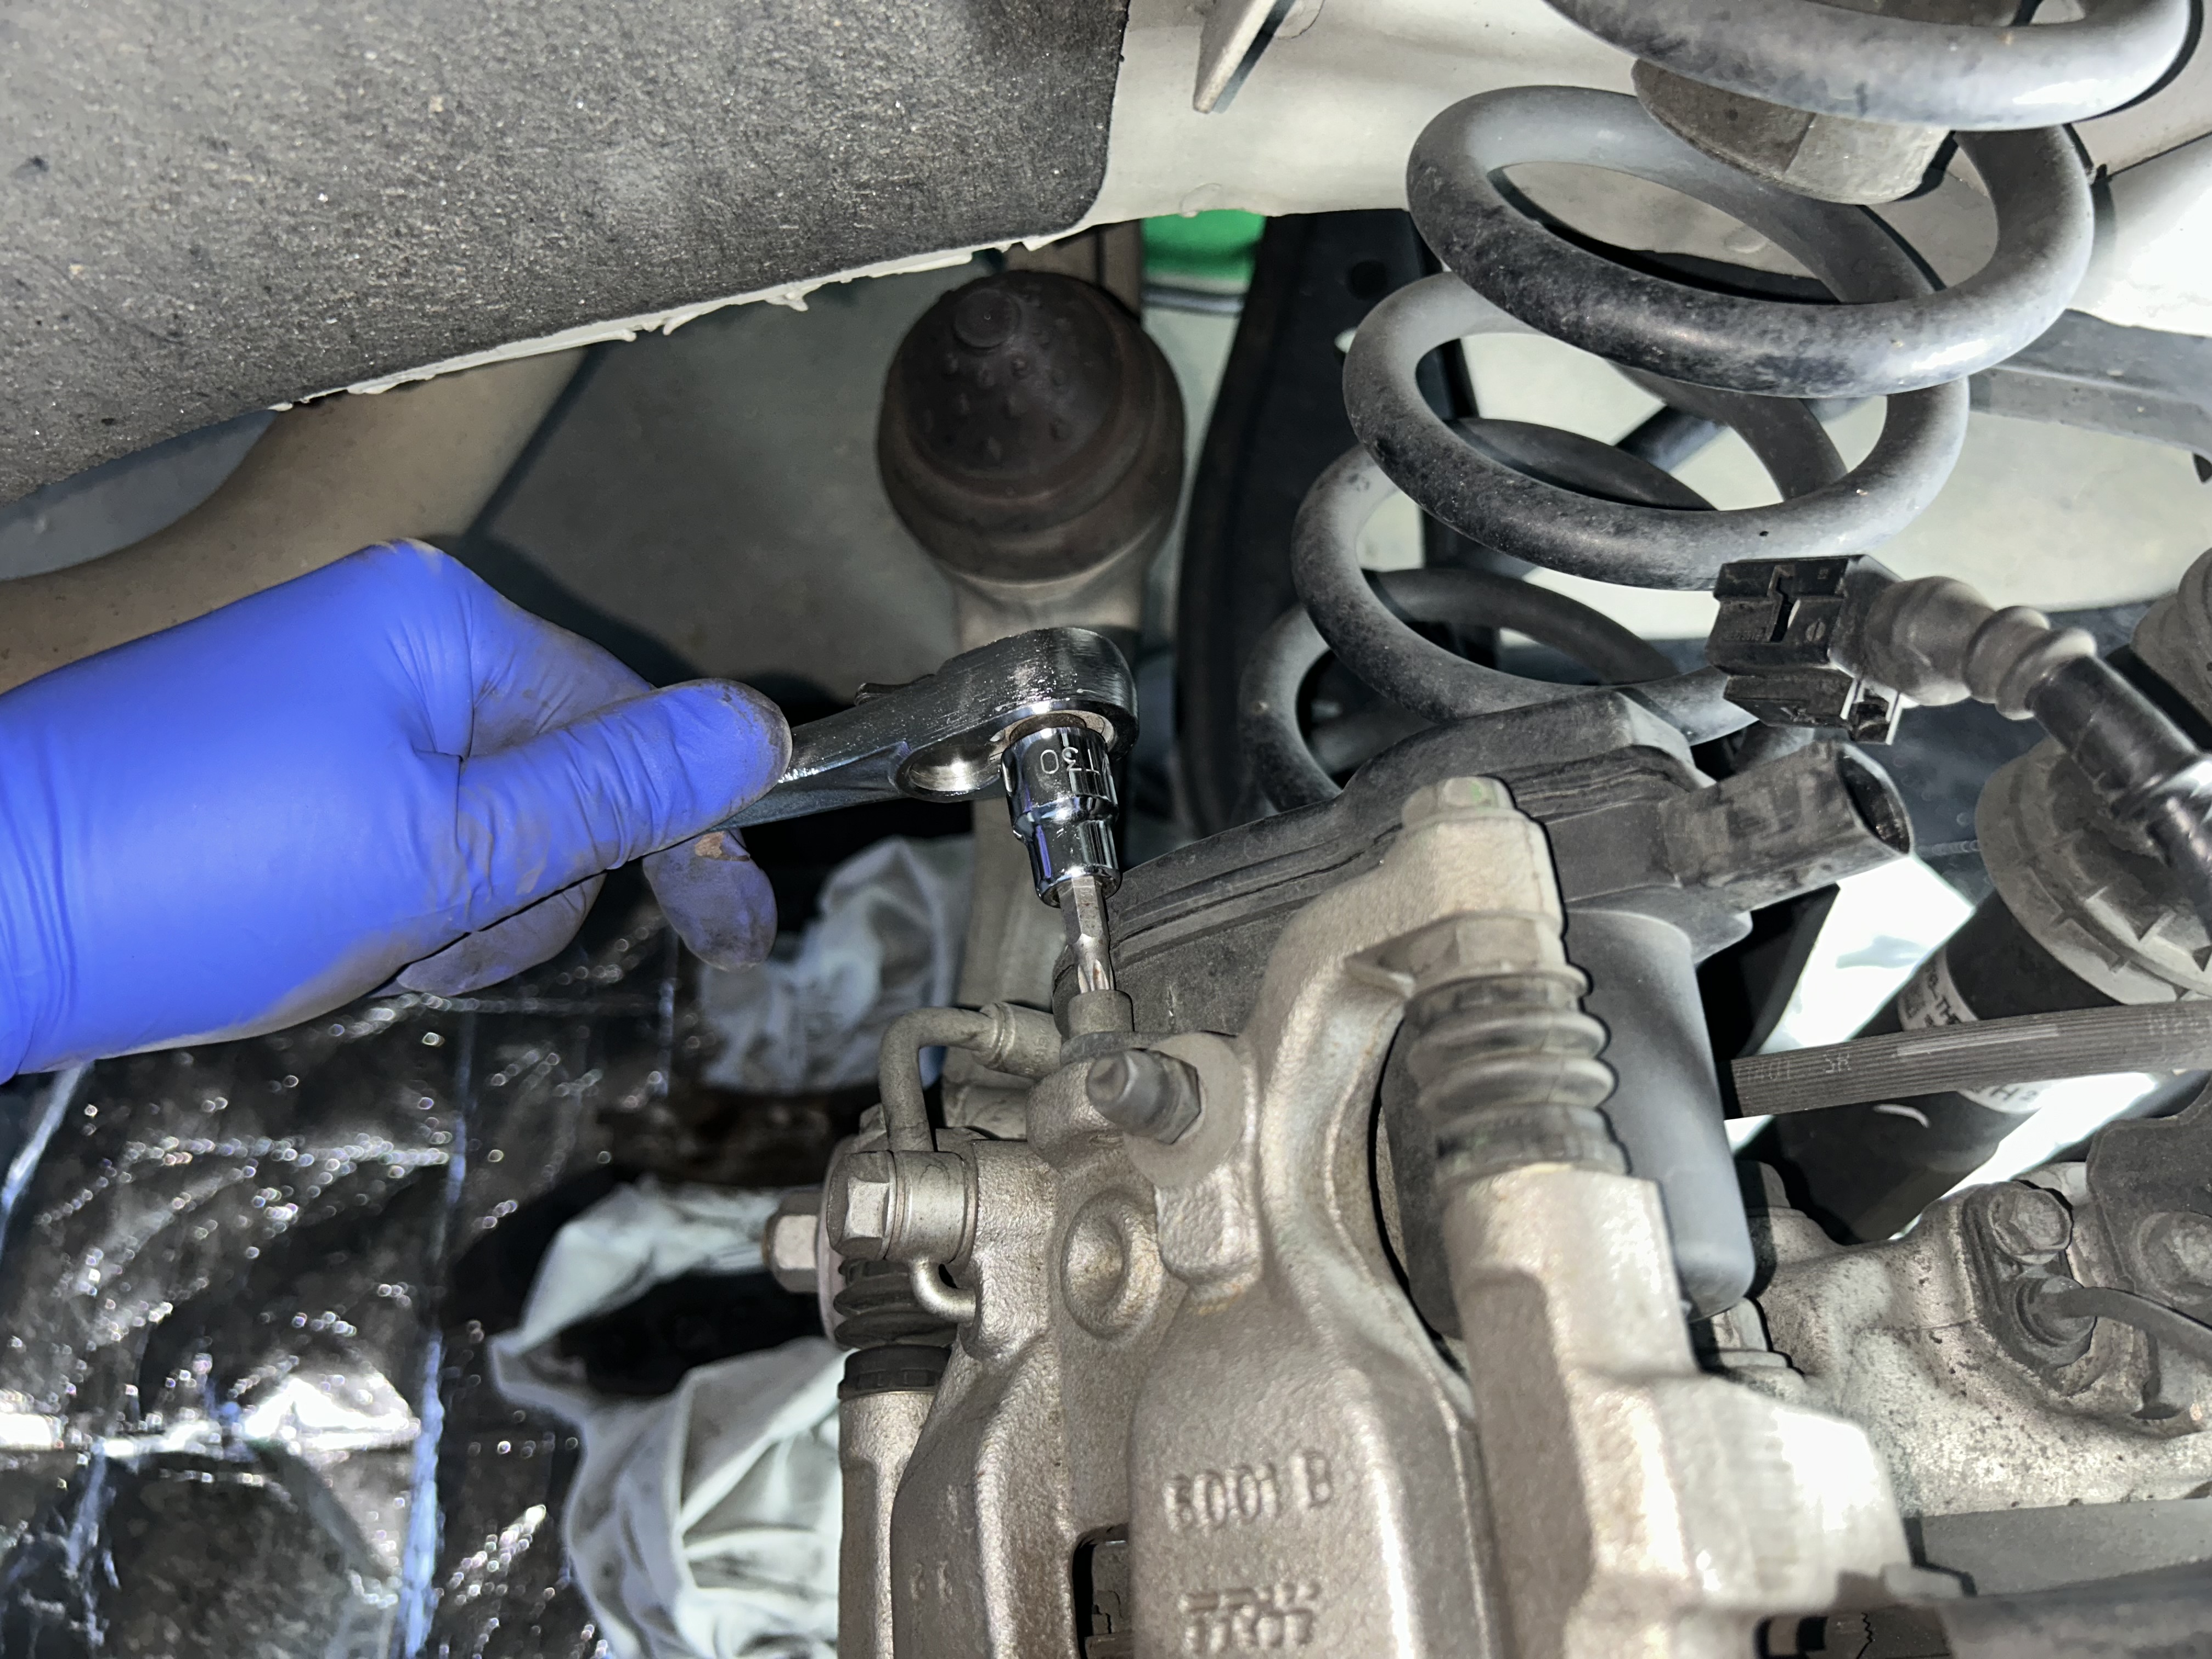
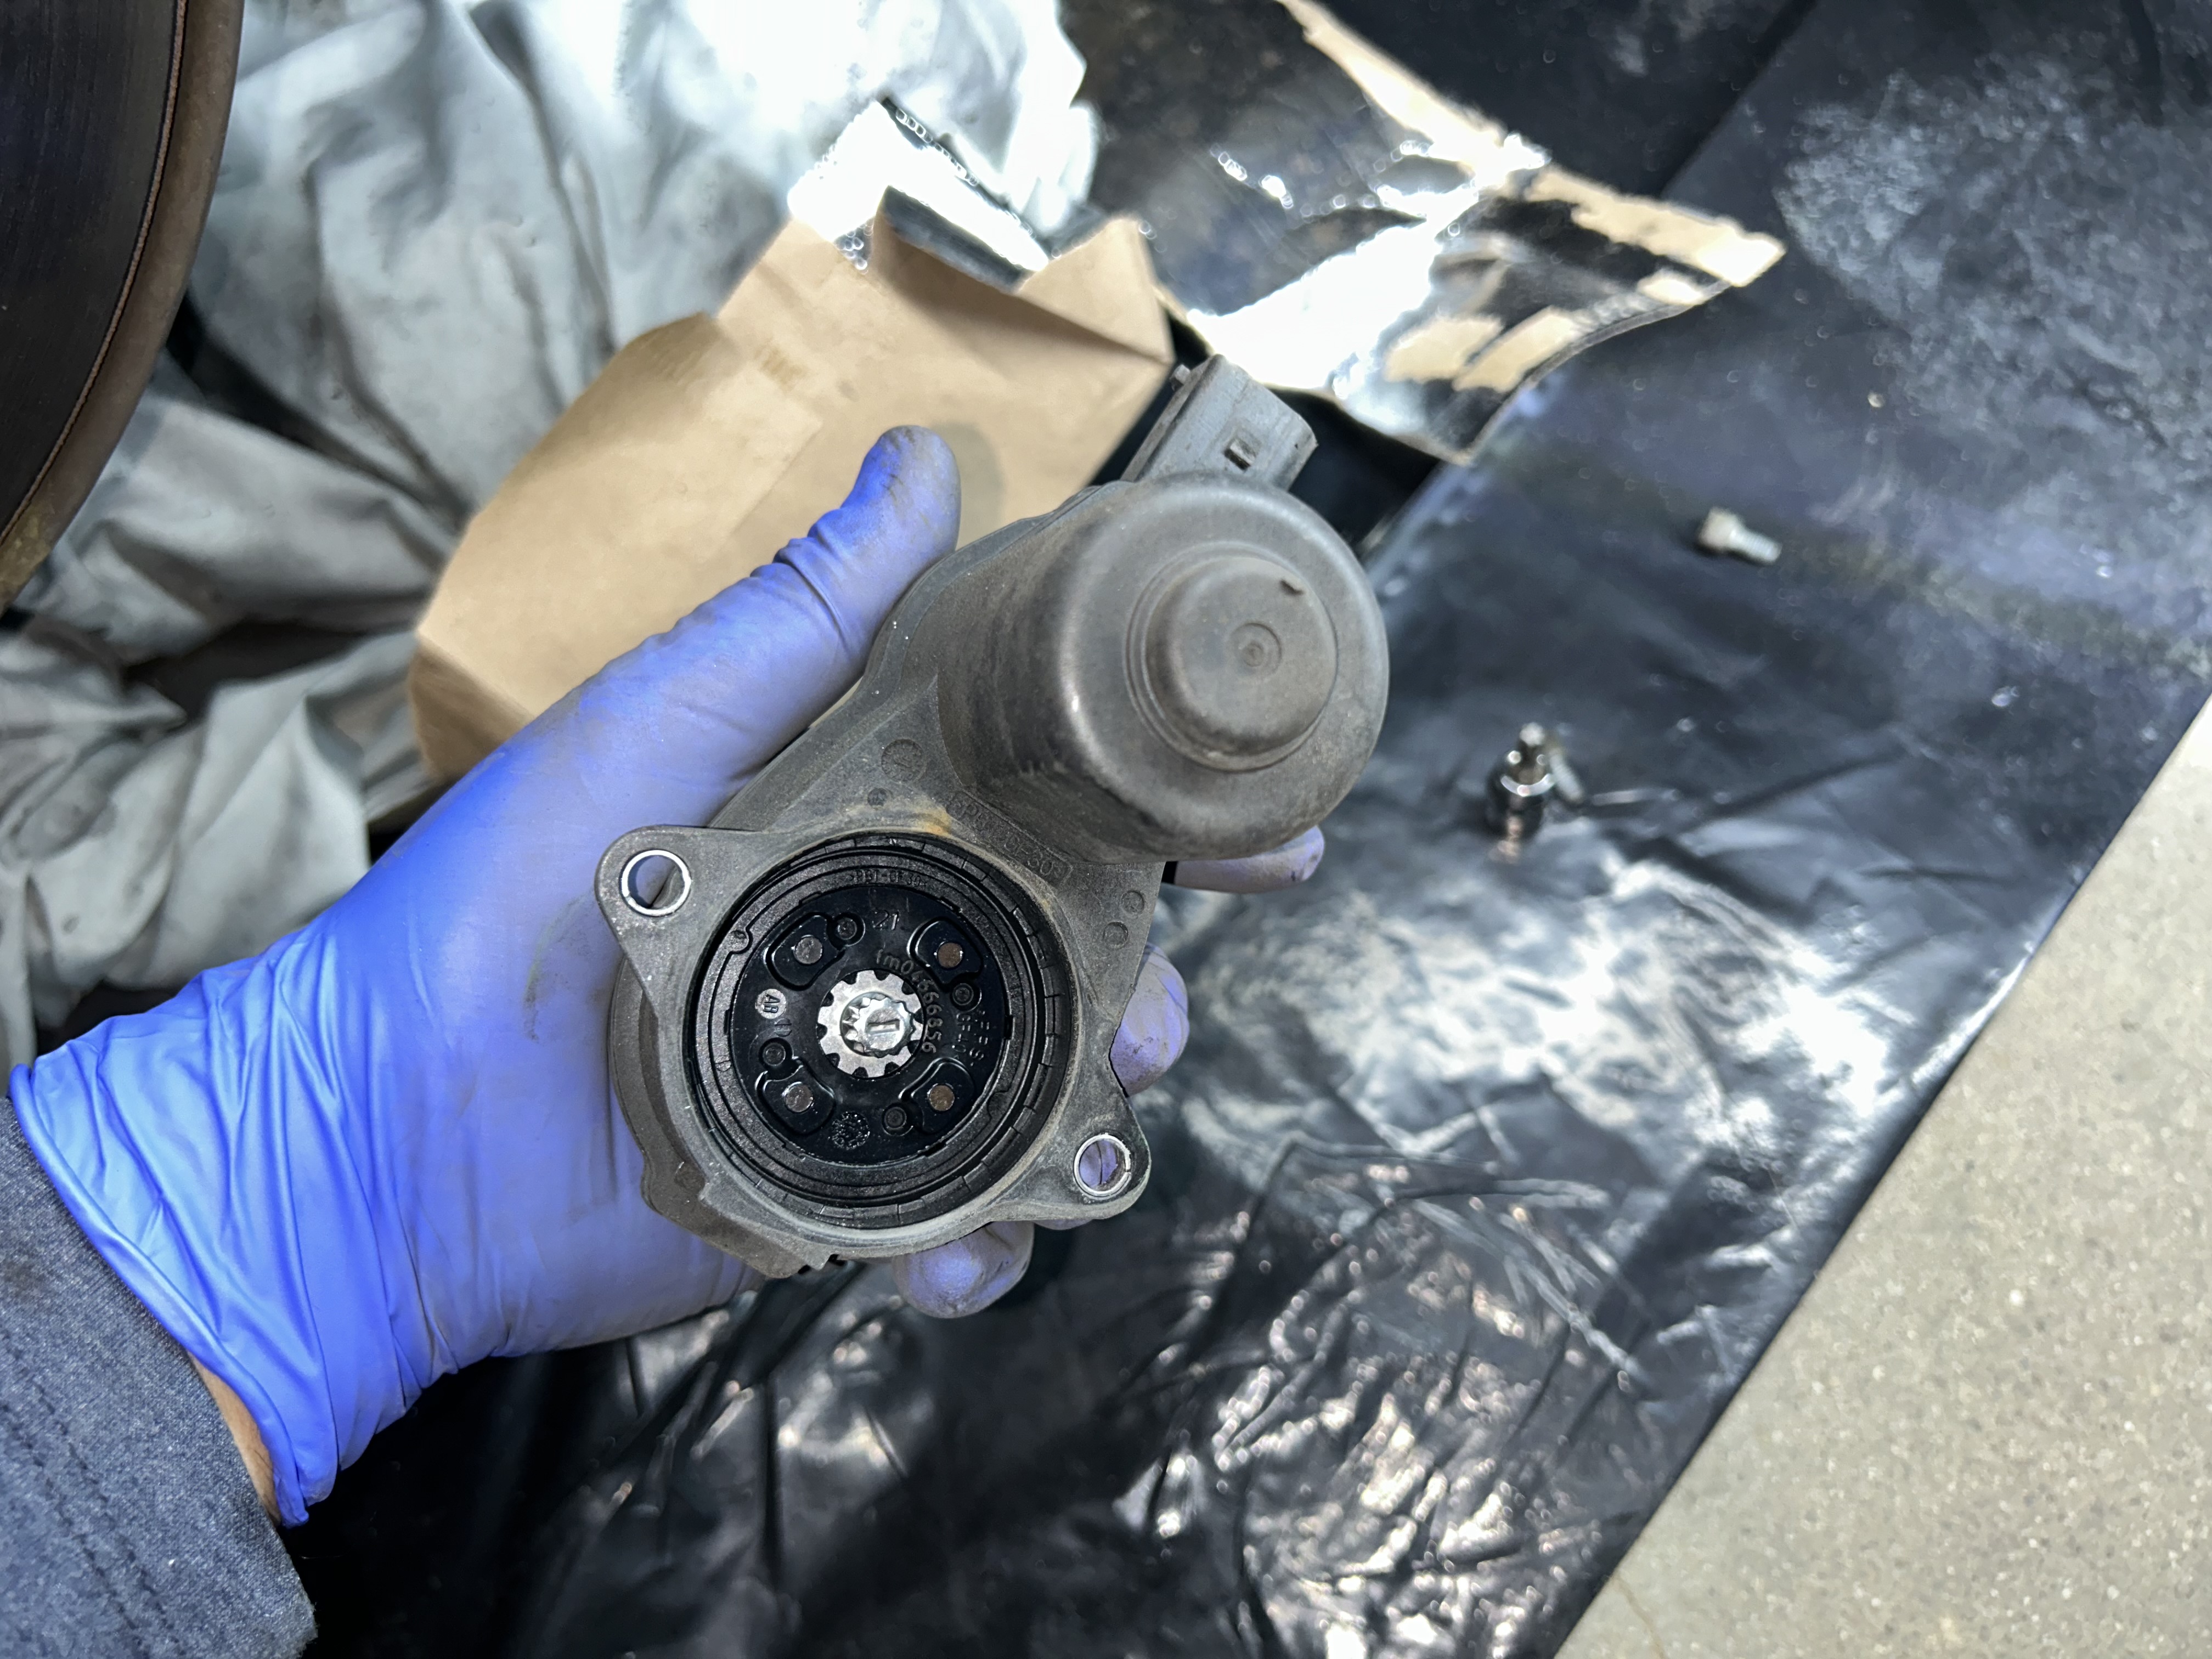
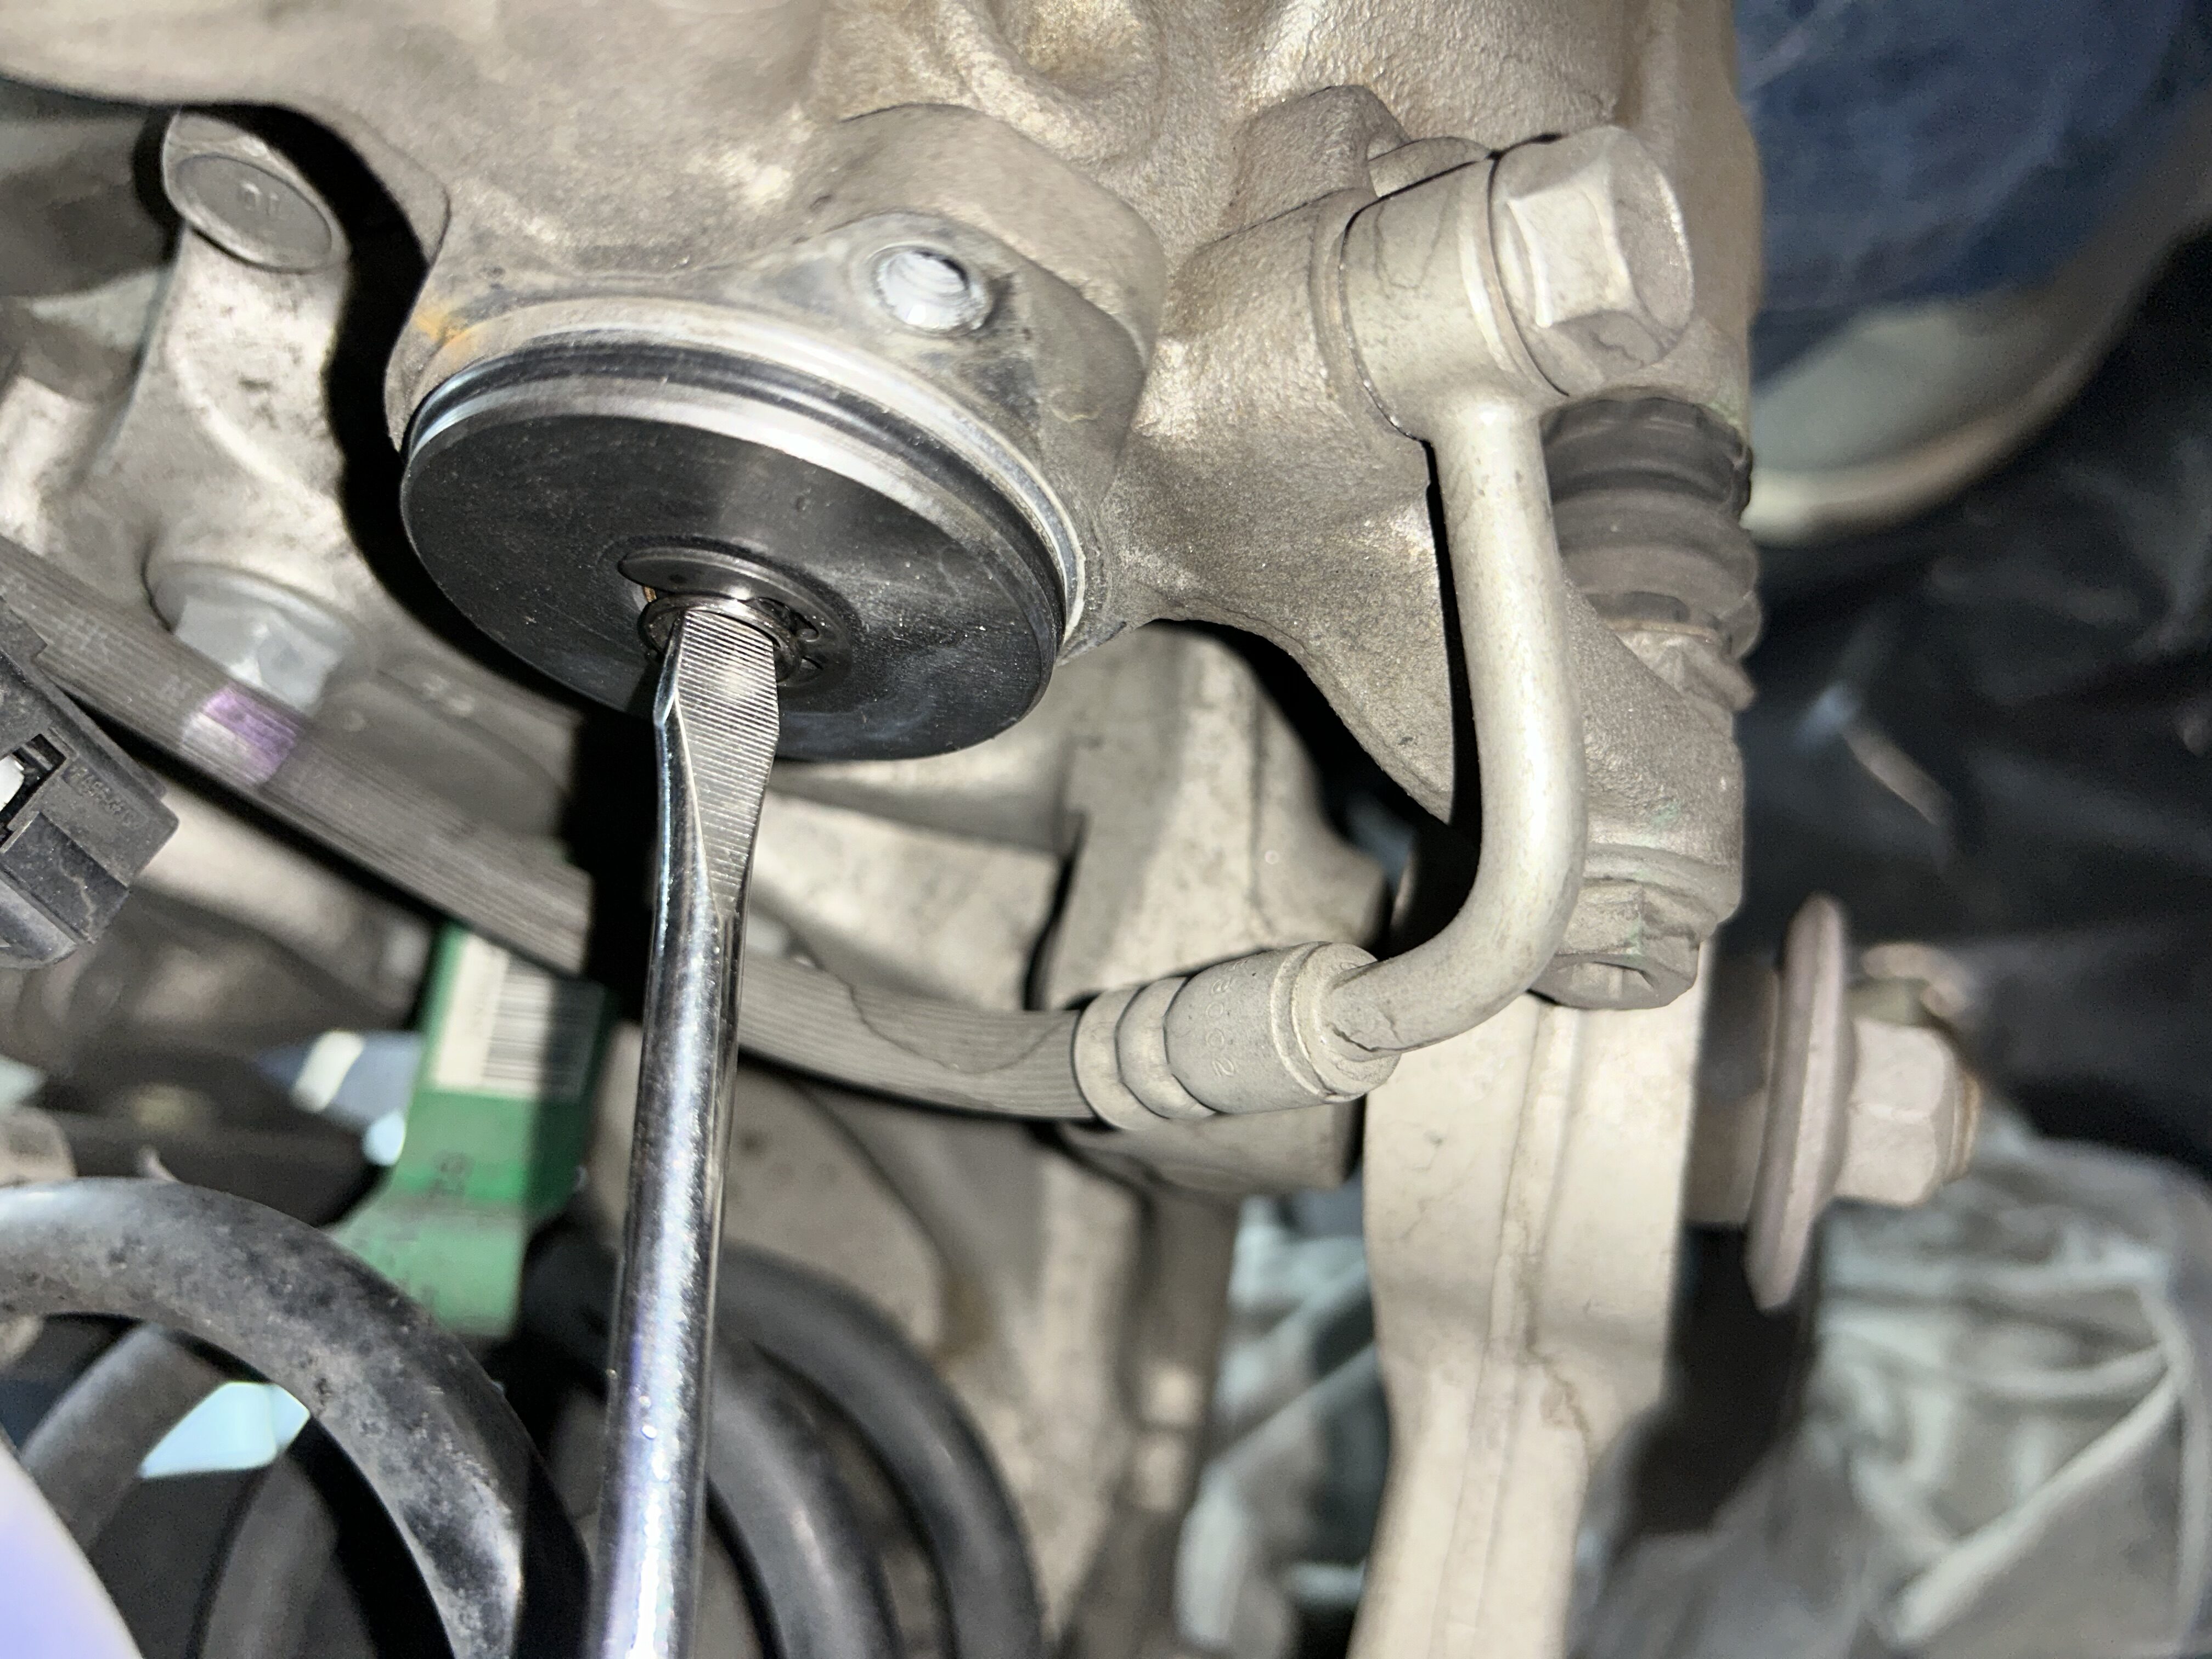
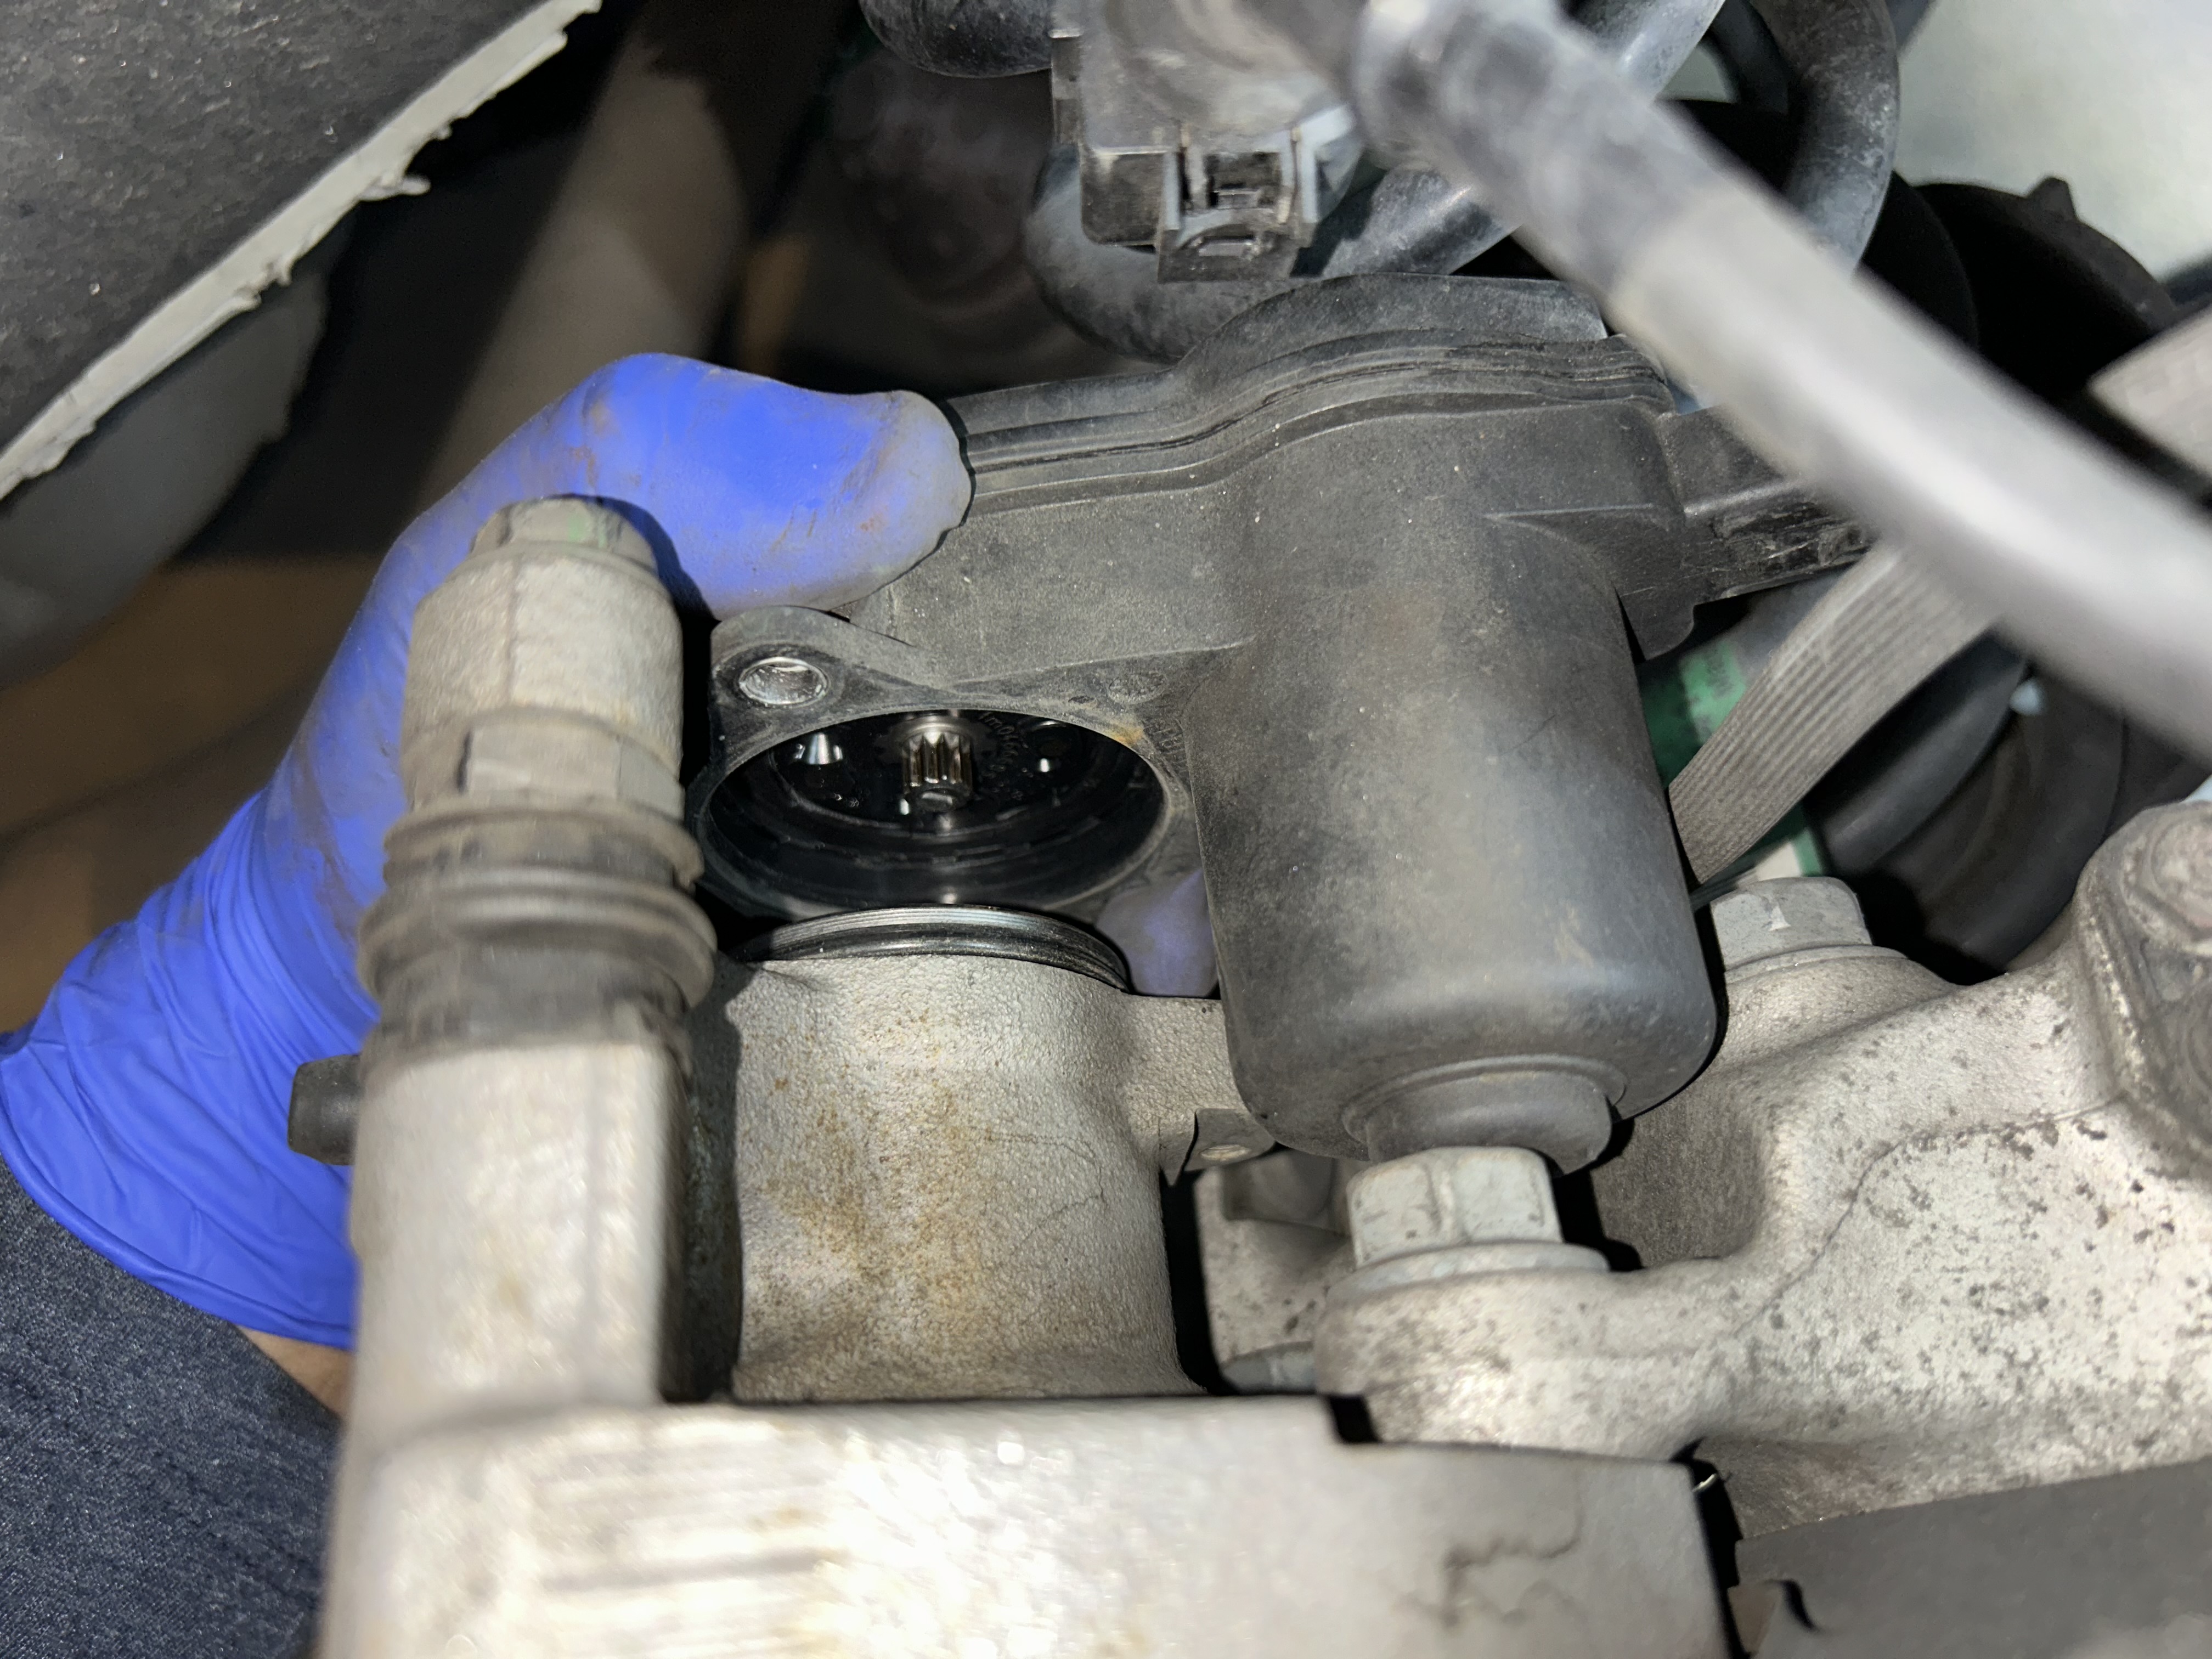
Use a T30 Torx bit and unscrew the (2 qty) Torx screws that hold the EPB to the brake caliper. Pull the EPB actuator unit away from the caliper. On the back side of the EPB that is still connected to the brake caliper, you can use a large flat head screwdriver to fit into the teeth of the spindle.
Turn the spindle clockwise all the way until it comes to a stop. When you turn it clockwise (facing the spindle from behind the caliper), the spindle retracts to allow you to compress the caliper pistons later. If you don’t perform this step of retracting the spindle all the way, you will damage it when you’re trying to compress the caliper pistons.
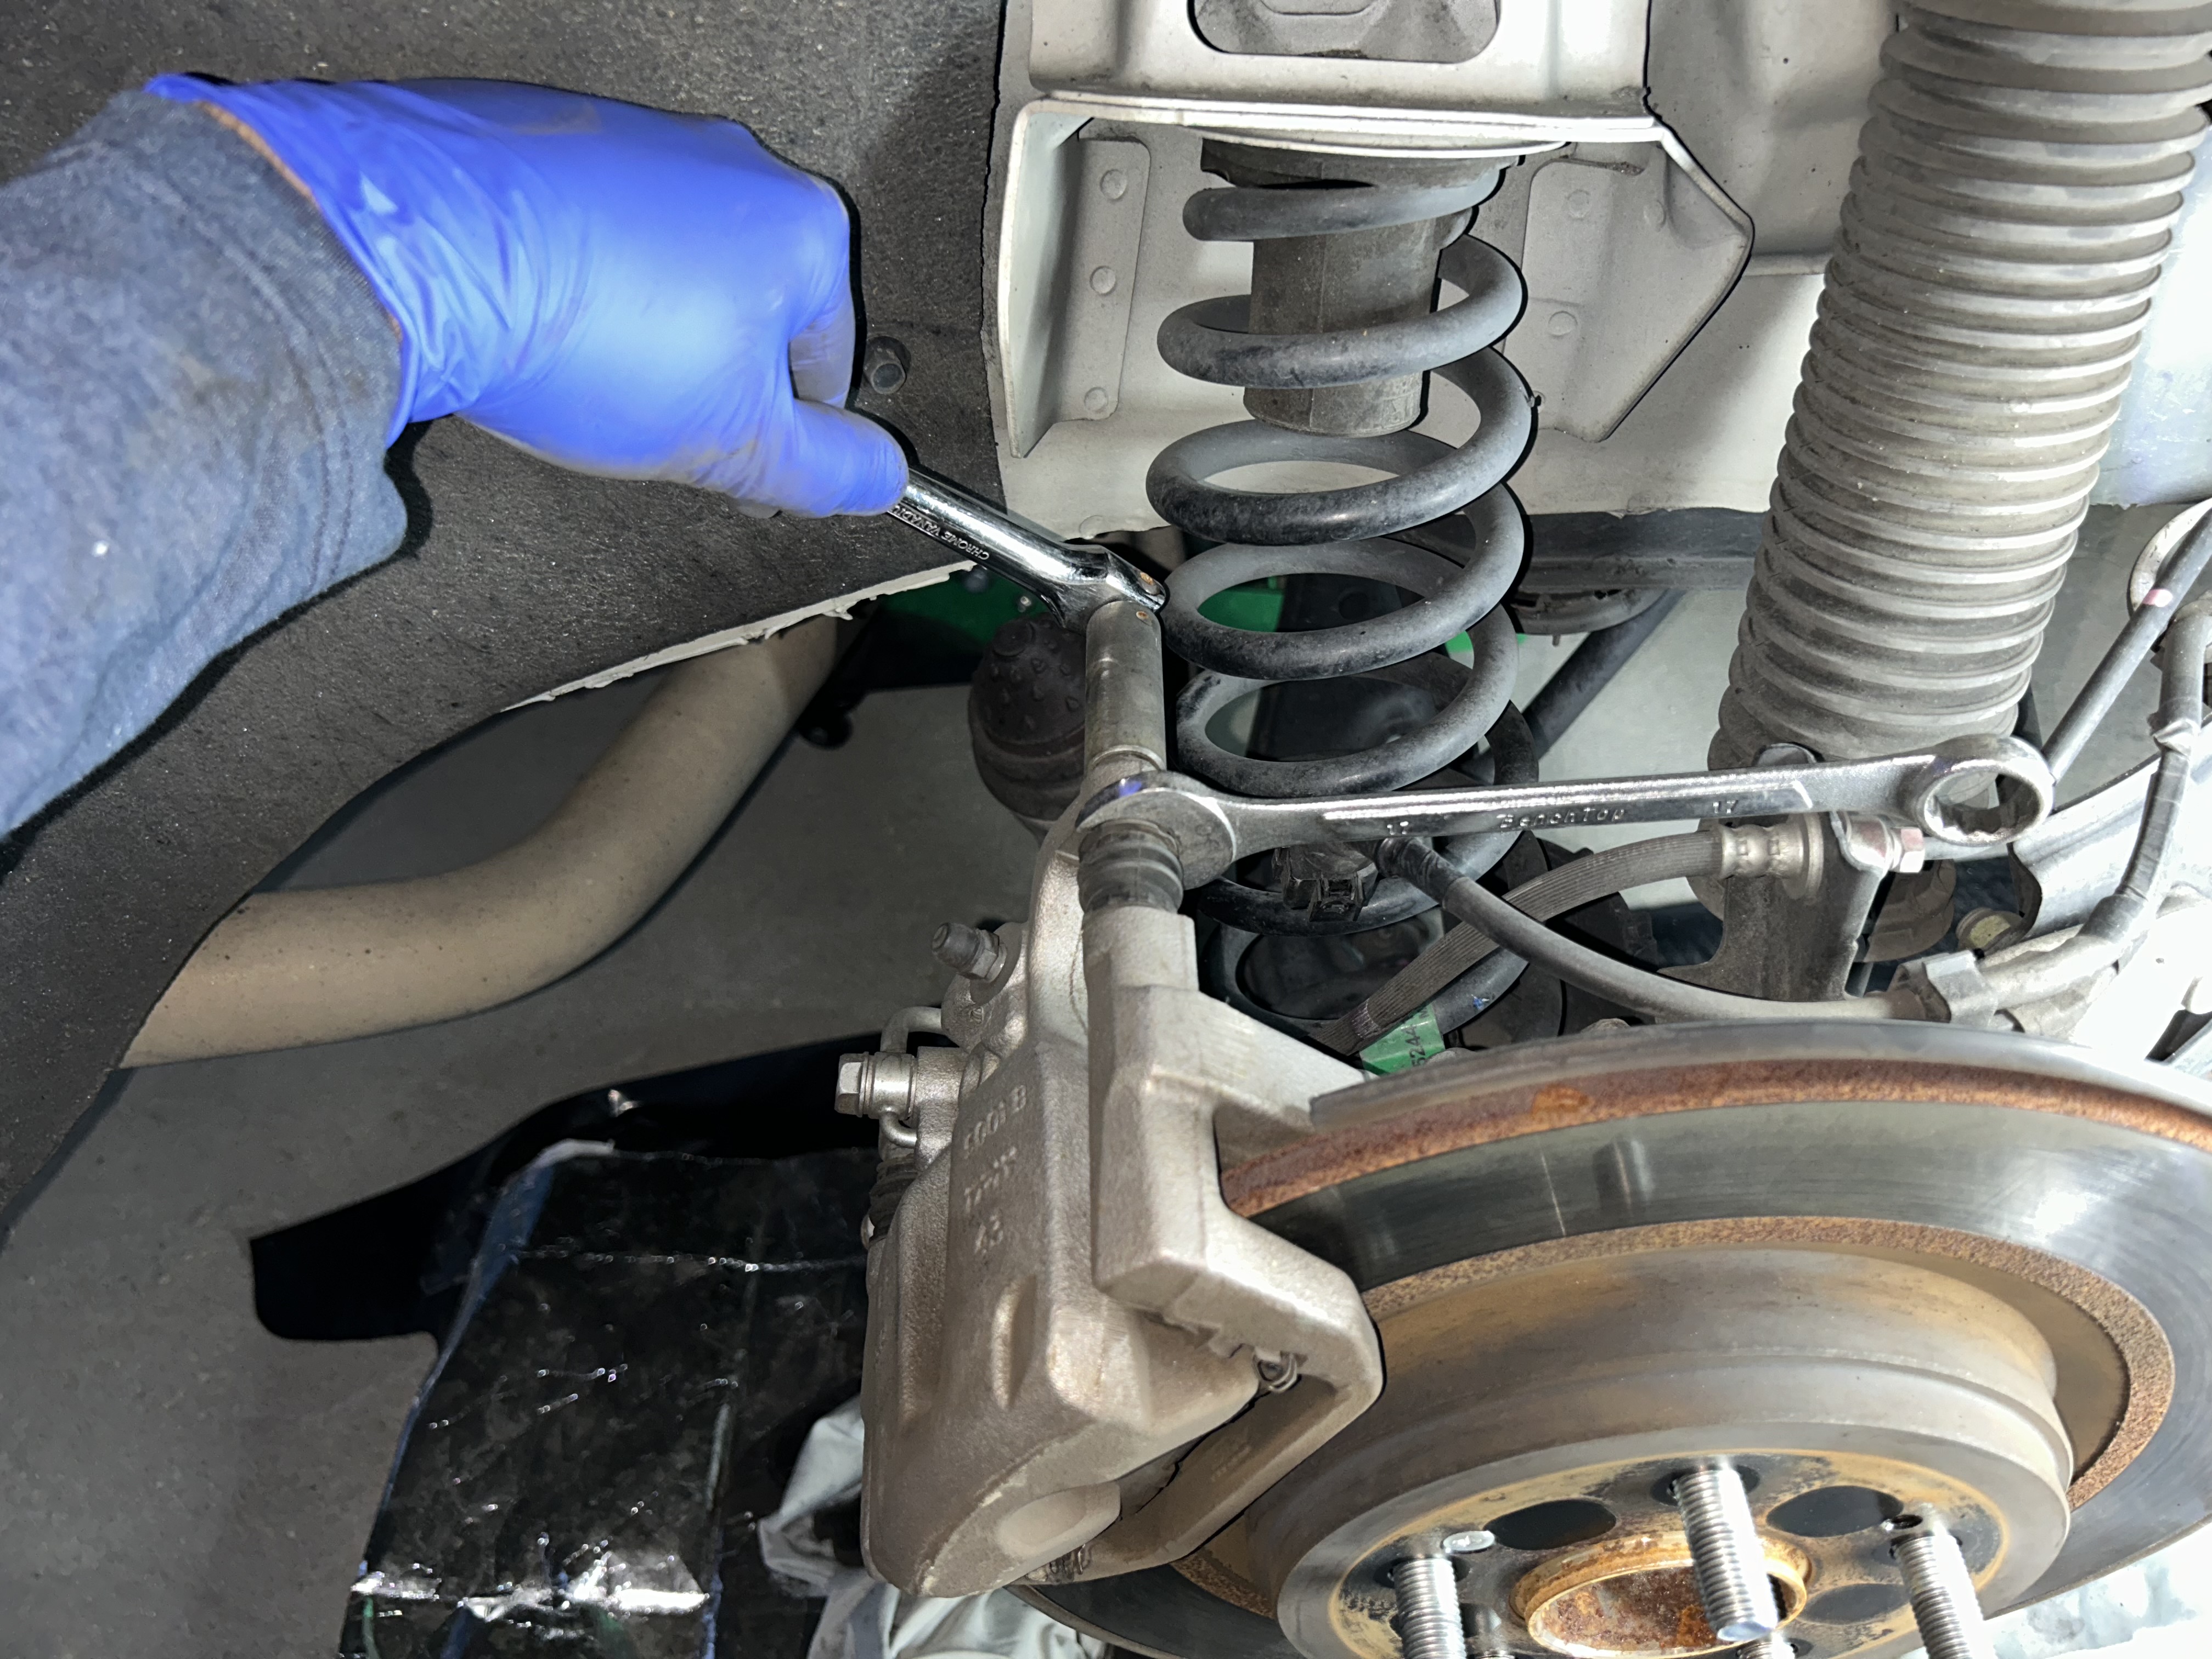
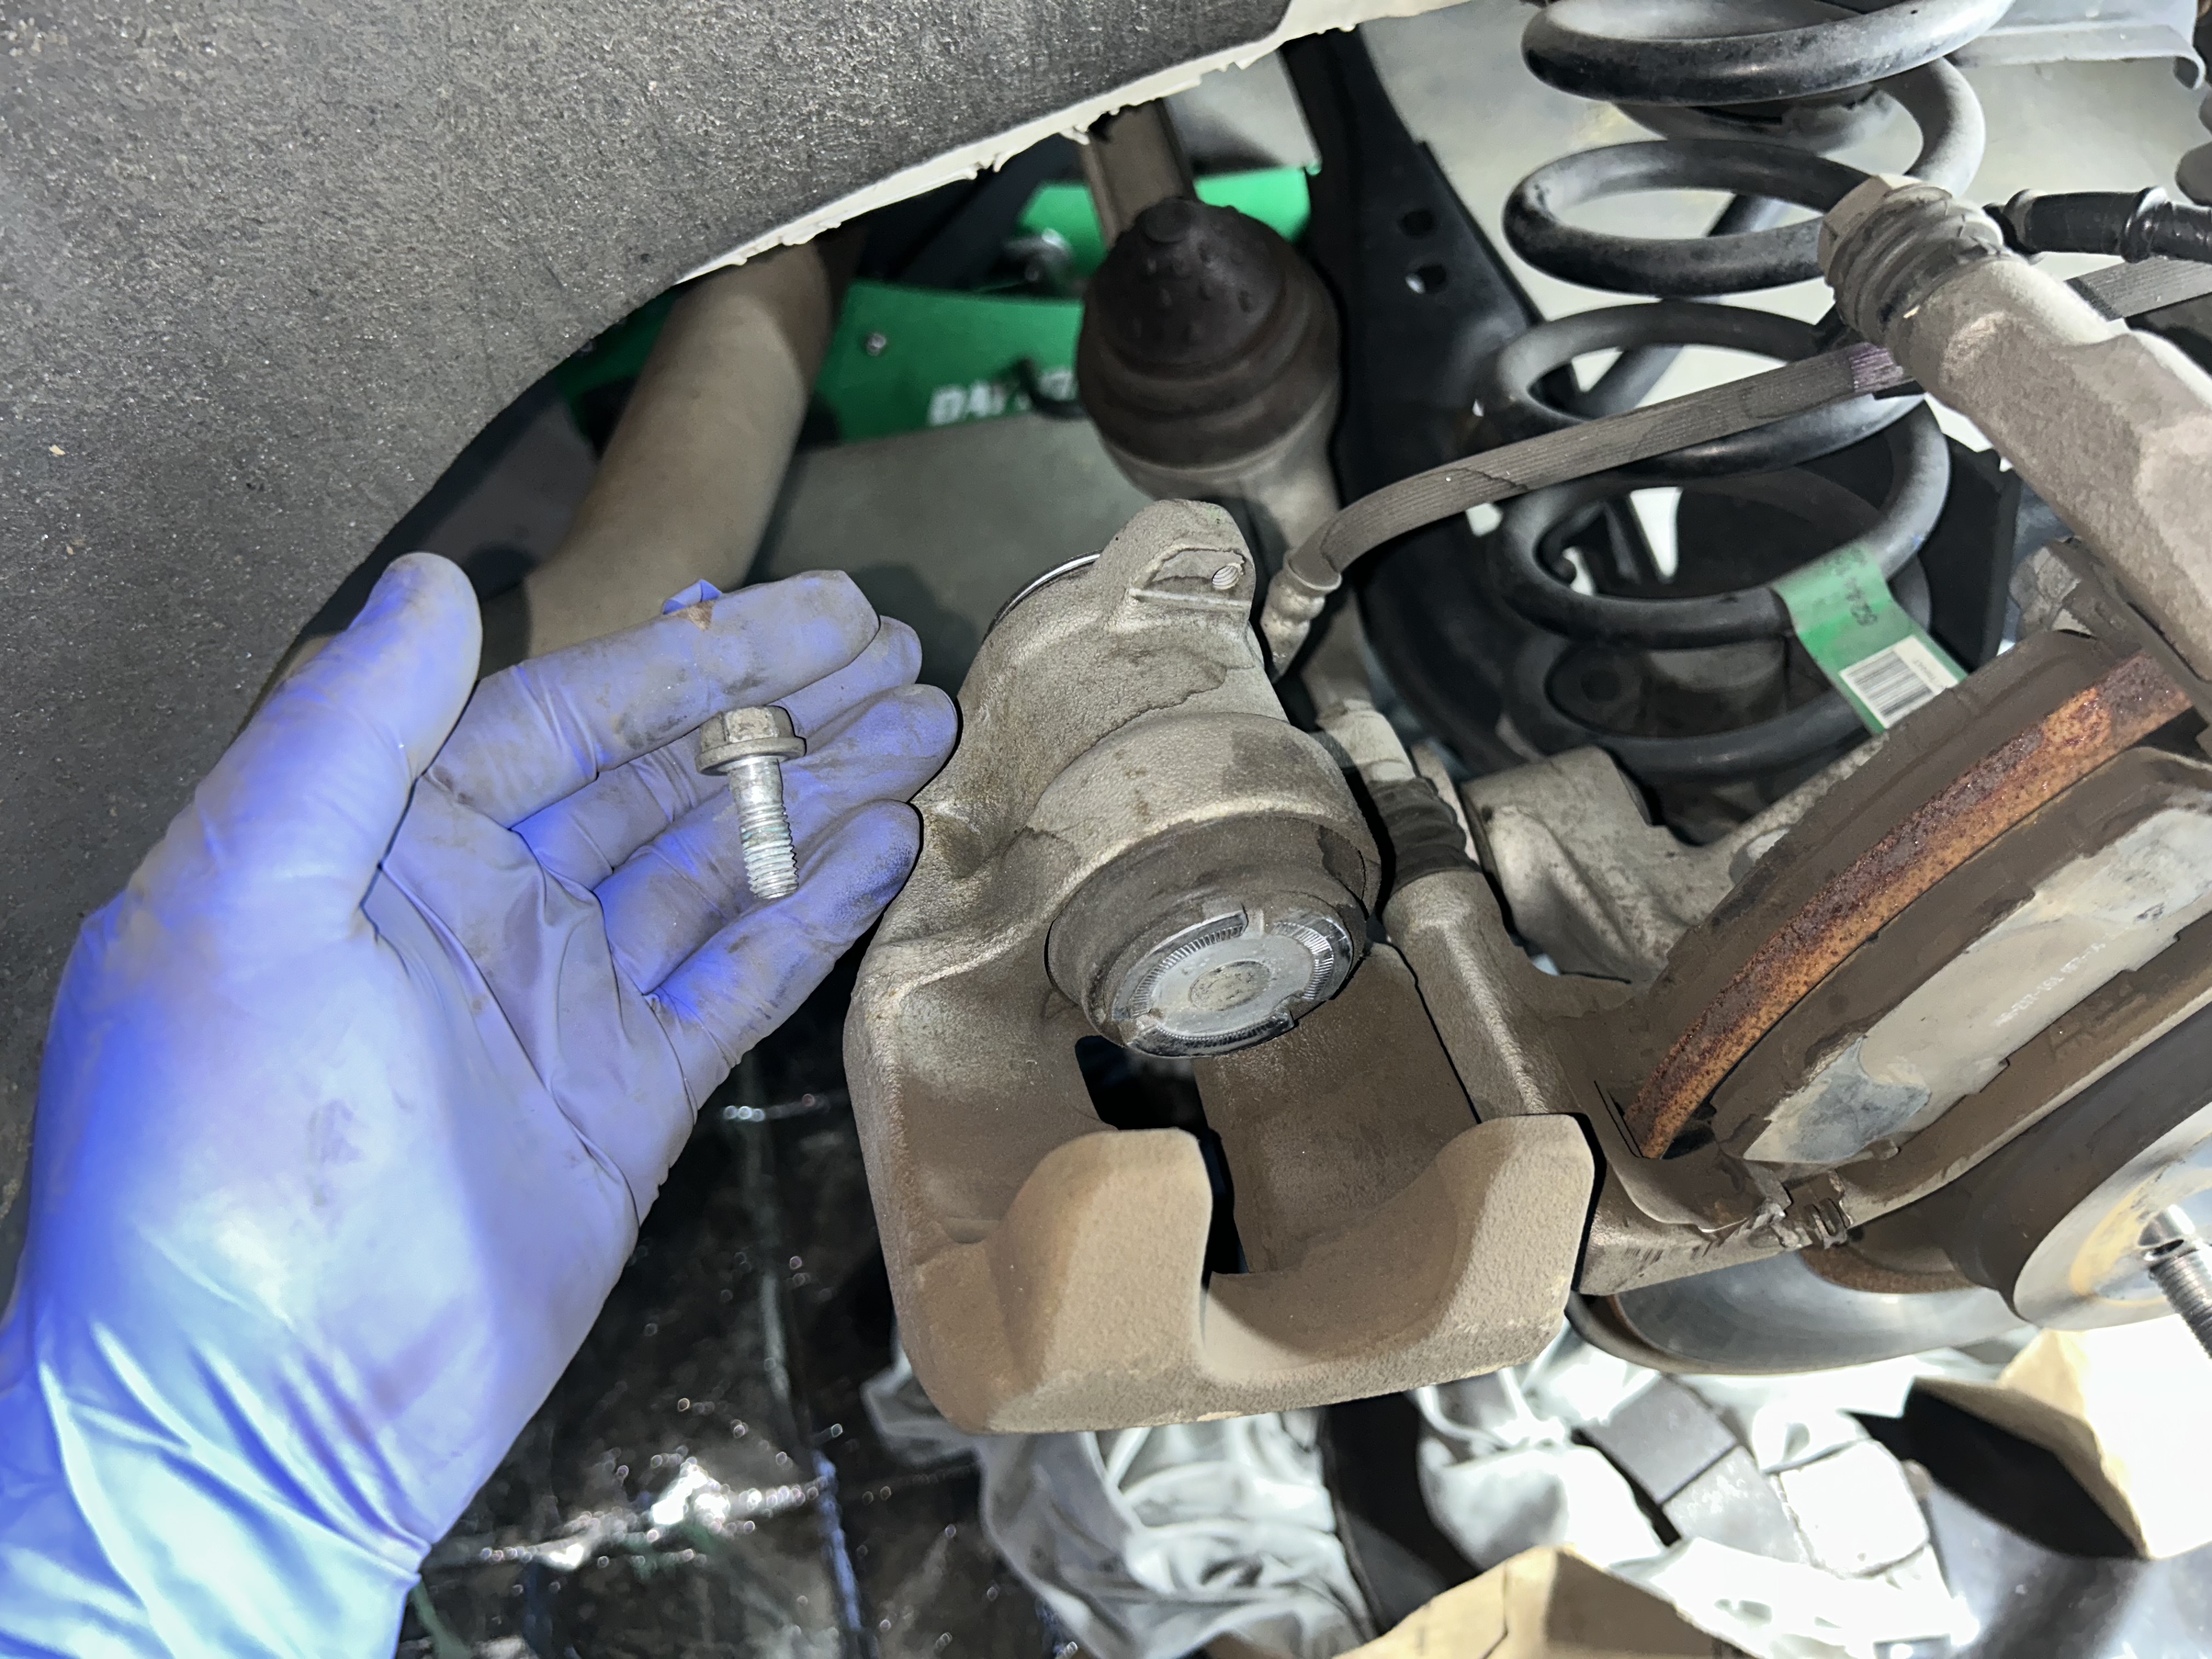
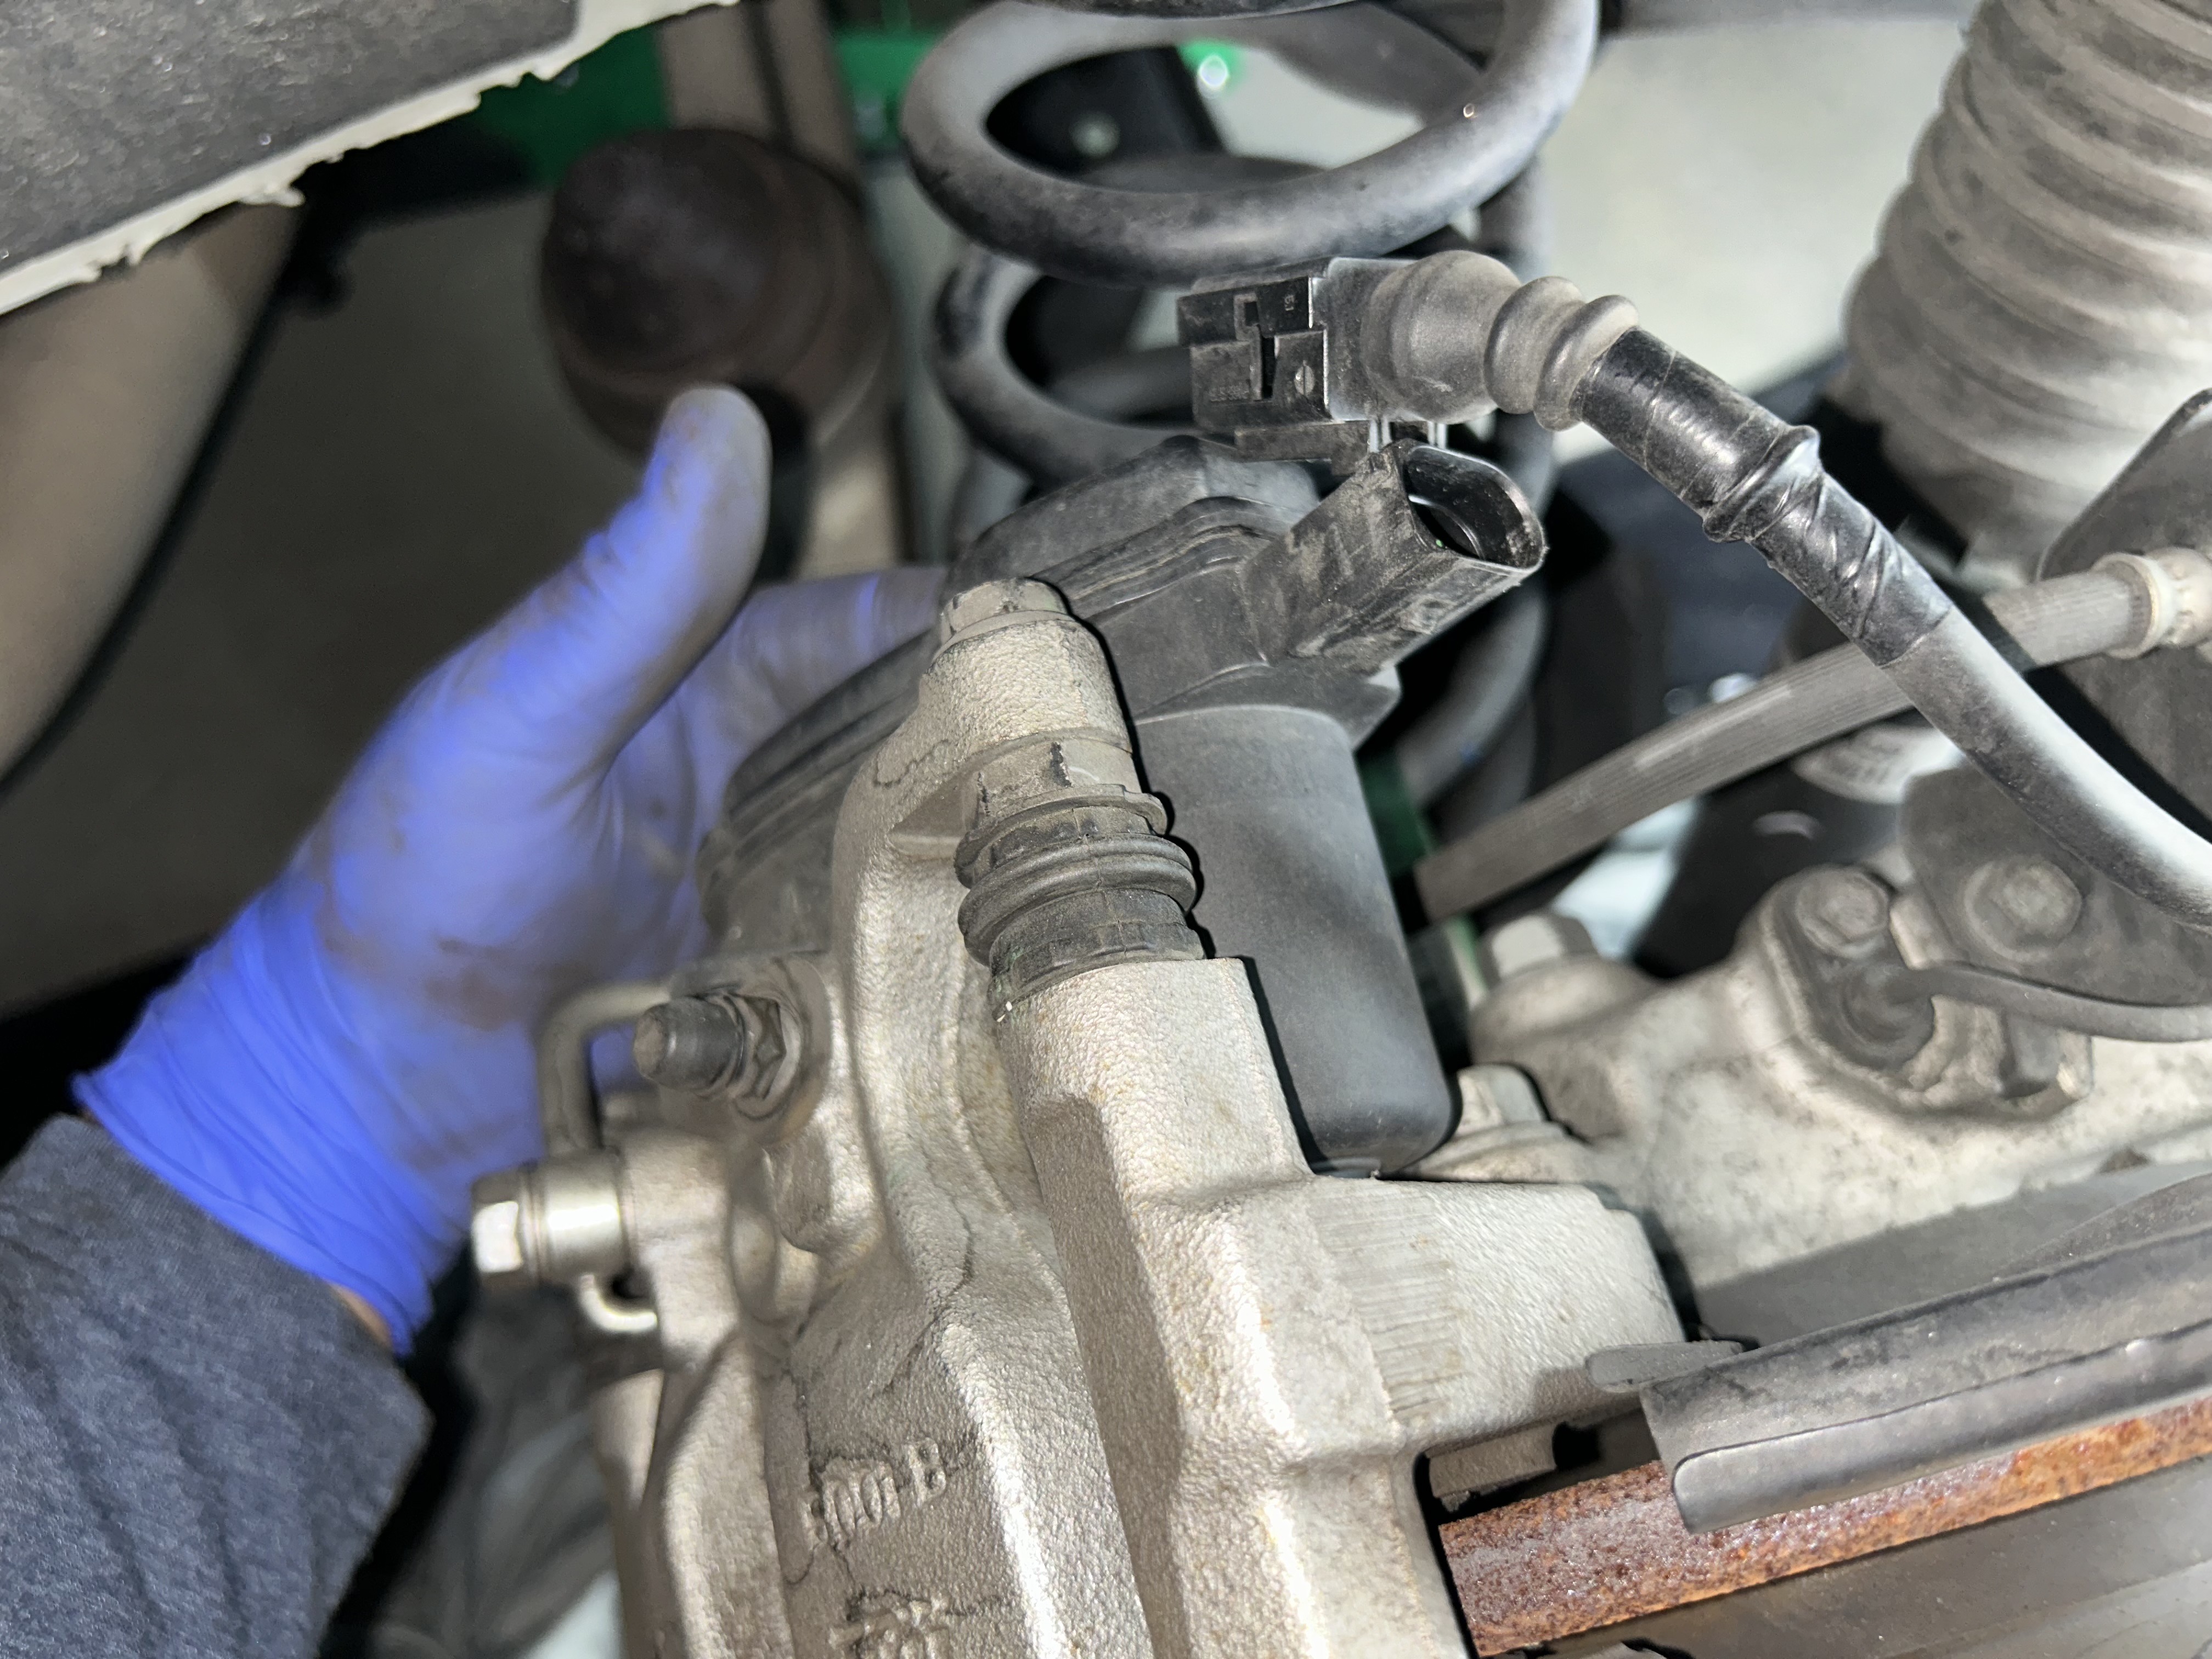
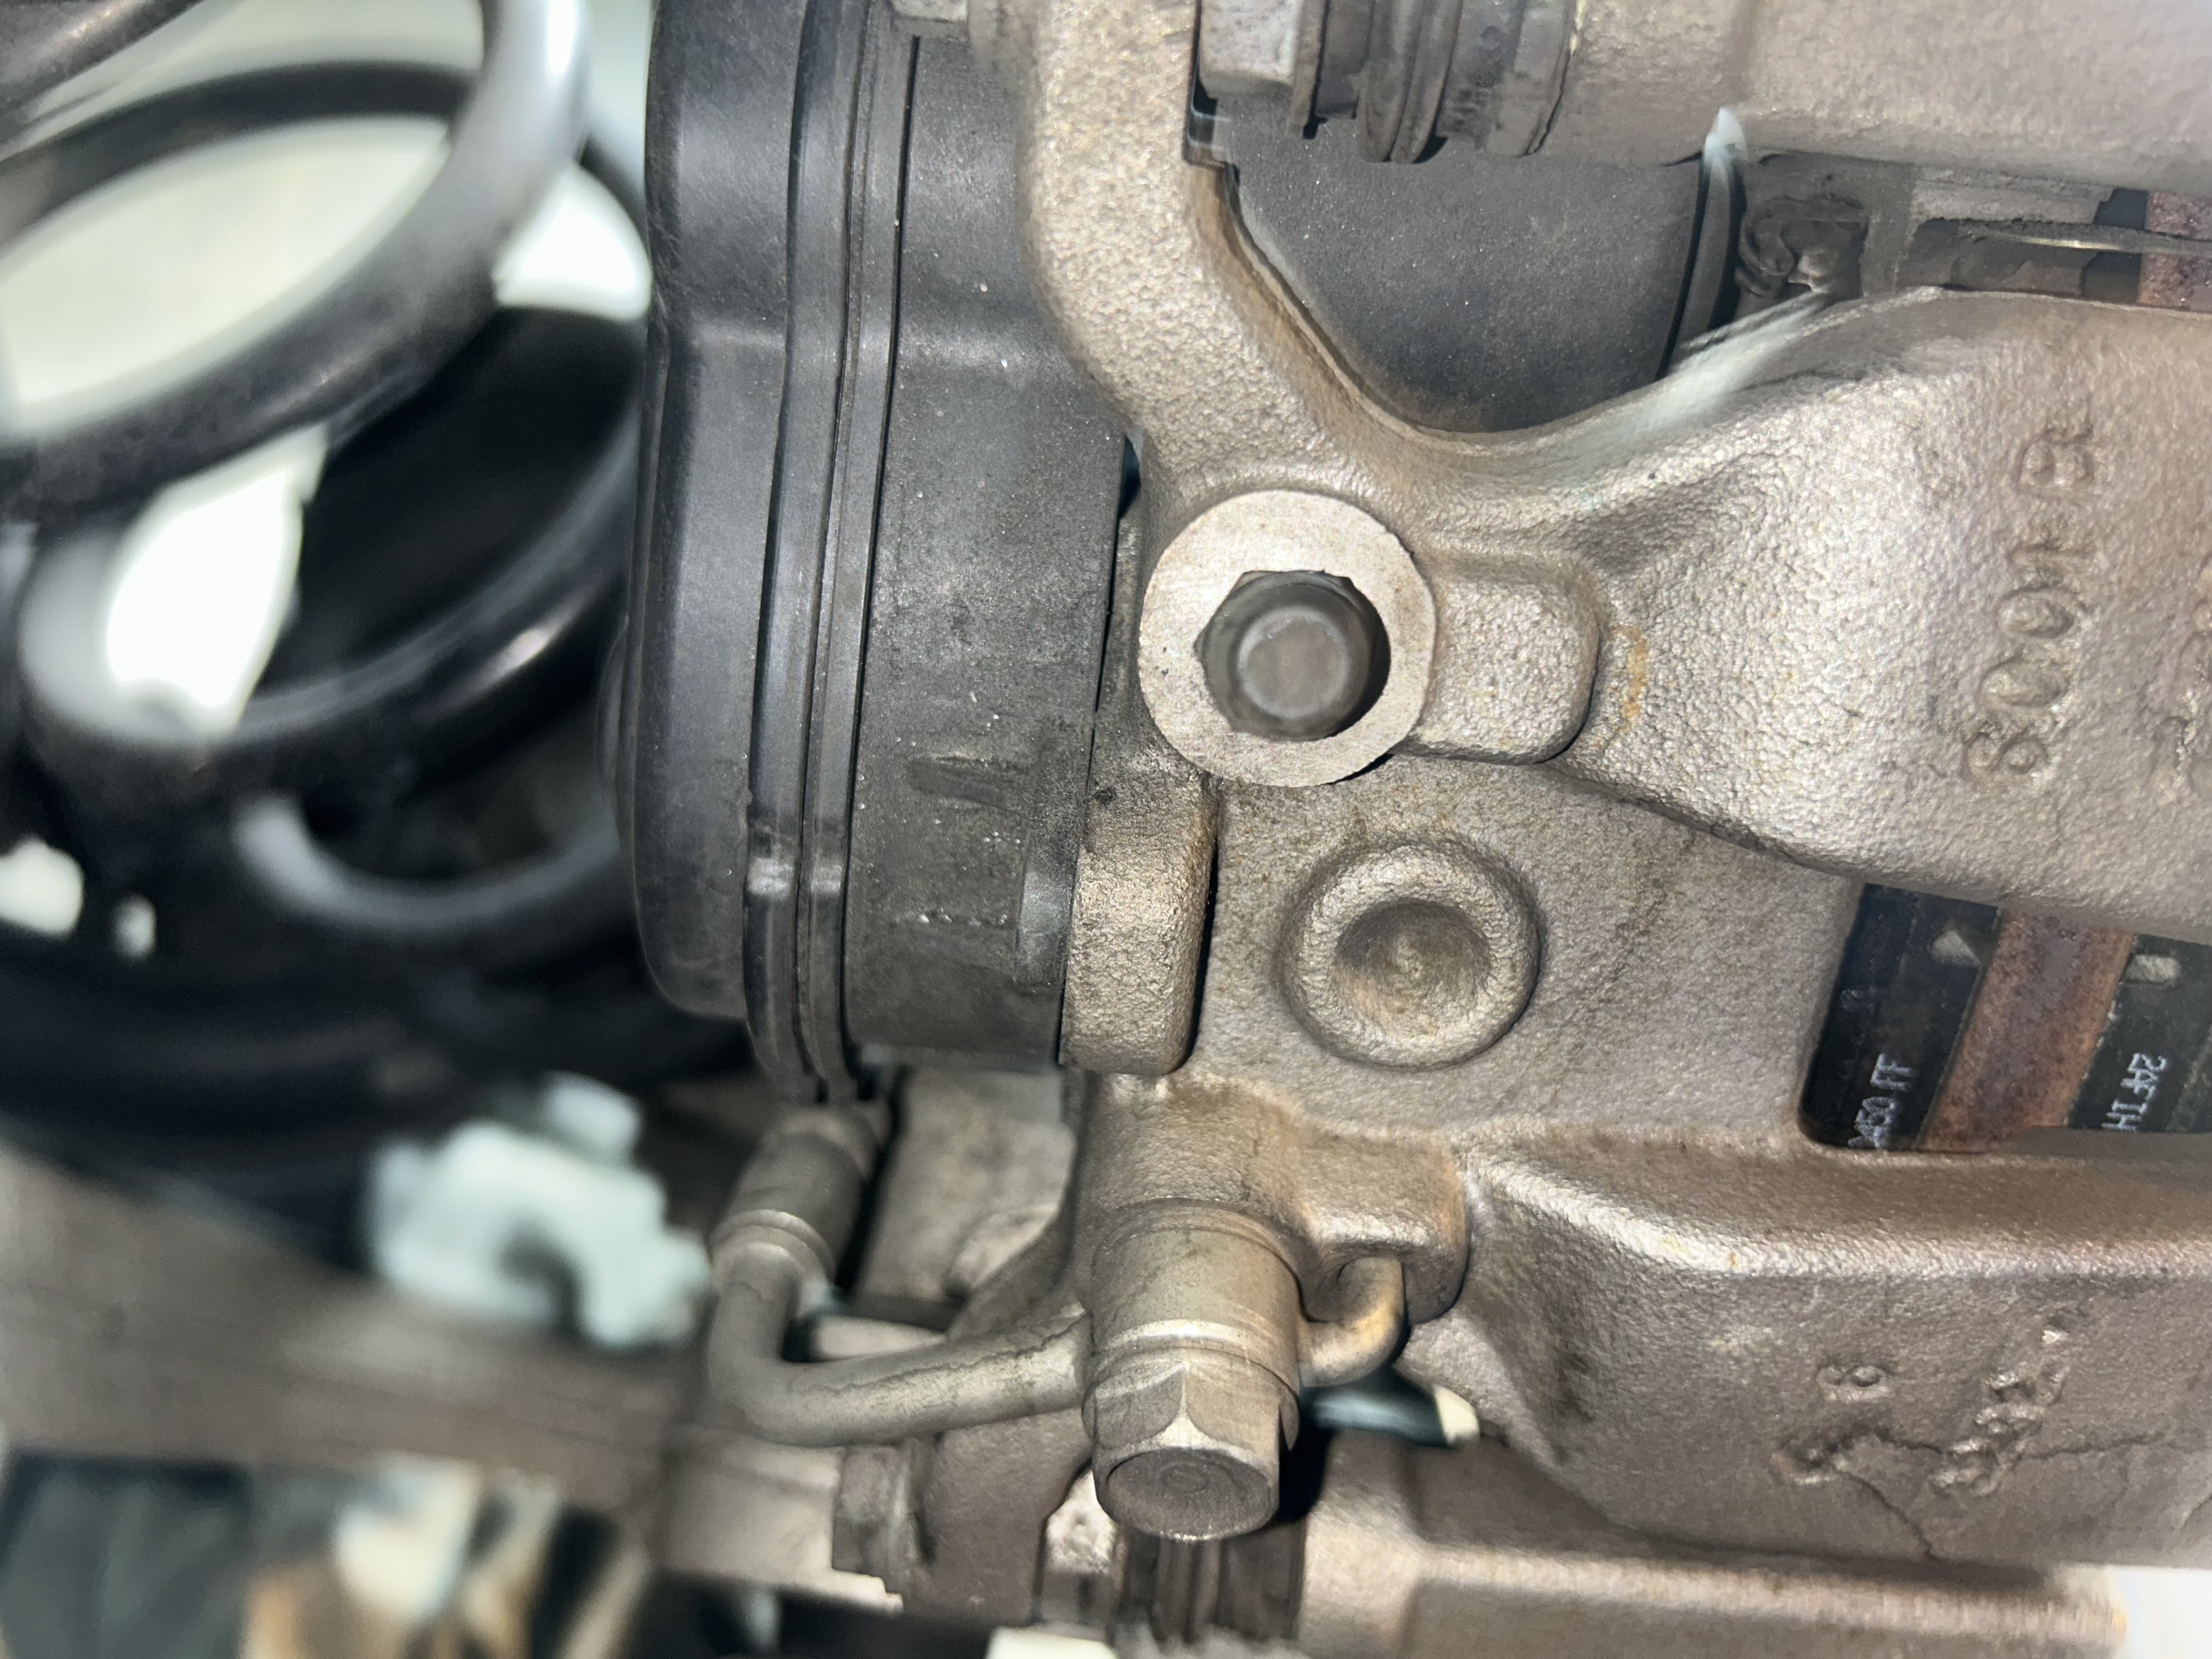
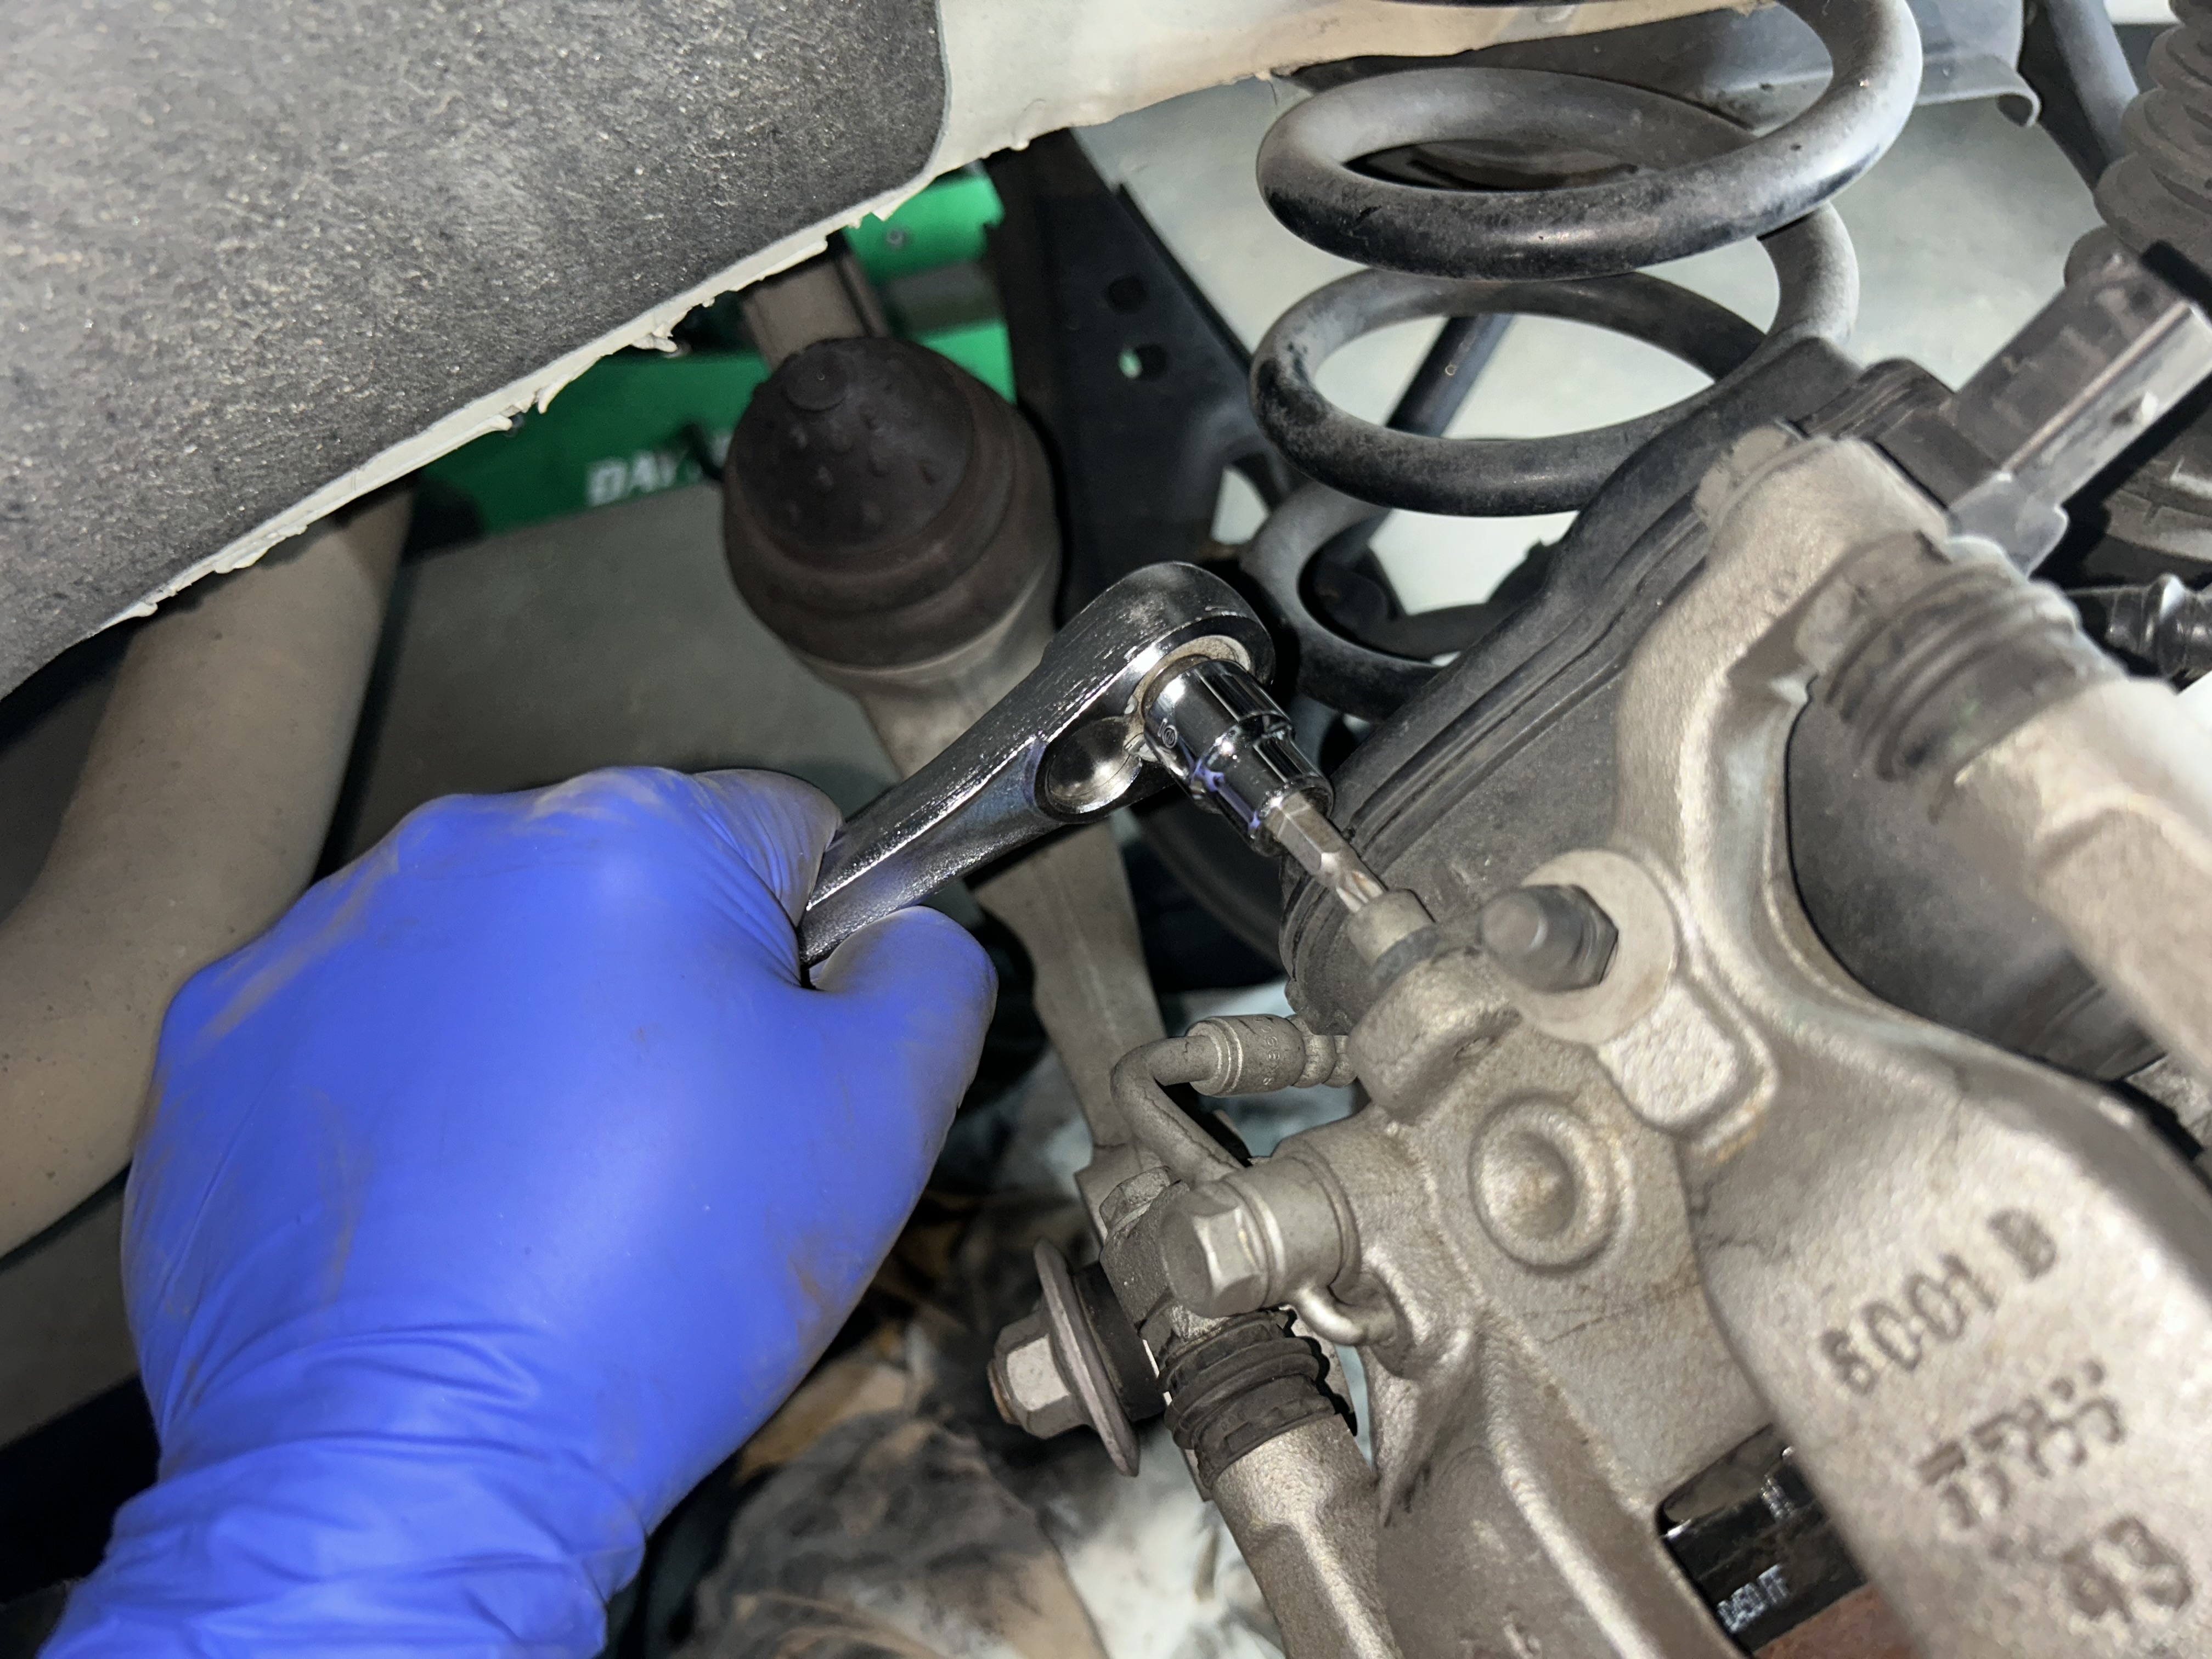
Once the spindle is fully retracted (turning it clockwise all the way until it stops), use a 14mm socket to remove the top brake pad flange bolt. Then swivel the caliper down and spray down with brake parts cleaner. Compress the brake caliper piston with a caliper compressor tool or C-clamp with old brake pad to get the piston compressed back to fit the new pads.
Install any new hardware clips if they are included with your new pads and lubricate them with brake hardware lubricant. Install the new brake pads ensuring the pads with wear indicators are installed so there is one per pair. Slide the caliper back up and reinstall the 13mm flange bolt.
Reinstall the 13mm flange bolt and torque it to 26 ft-lbs of torque.
Reinstall the EPB actuator, ensuring that the unit is installed fully and properly into its place. The (2 qty) T30 Torx bolts should install easily and be torqued down to 9 ft-lbs torque.
Replace the electrical connector for the EPB. Spray down everything with brake parts cleaner one more time before replacing the wheel.
Do the same on the opposite side and bring the car back down onto the ground.
Reset the Electric Parking Brake
You’ll now need to reset the Electric Parking Brake: Turn the vehicle to ON mode, but don’t start it (press the start button, but don’t press on the brake). With the car on, apply the parking brake, then release it. Apply the parking brake again for a second time, then release it again. The brake system indicator on the instrument cluster (in red) should turn off. Turn the vehicle off.


Bedding in the Brakes
It’s important to perform a bedding procedure, which basically involves driving the vehicle and braking aggressively from various speeds until an even layer of brake pad material transfers onto the new brake rotors. Follow this bedding procedure here: How to Bed In Your Brakes.
After bedding in your brakes, you should be good to go until your next brake job. My goal with this post was to show you the quickest and easiest way to replace your brake pads if that is all you need to do for your brake job. Once you’ve done it once, it will only get even quicker and easier the next times you do it.
")
")
")
")
")
")
")

")