When you make purchases through links on this site, The Track Ahead may earn an affiliate commission. Also, these posts are based off my own experiences. I am not responsible for any action you take as a result of reading this. Learn More
The 1st generation Toyota Tacoma with the 3.4L V6 (5VZ-FE engine) has six twin ground electrode spark plugs. Toyota recommends that these spark plugs be replaced every 30,000 miles, however there are many accounts of 5VZ-FE owners who have driven on the same set of spark plugs for double and triple that mileage. I personally wouldn’t let it go to 90,000 miles, but I also wouldn’t necessarily follow the 30k-mile change interval either. My parents’ Tacoma is about 15 years old with only 30k miles on the clock, so we decided to replace the spark plugs more so due to the age rather than the mileage interval.
Parts/Tools for Spark Plug Replacement
Spark Plugs
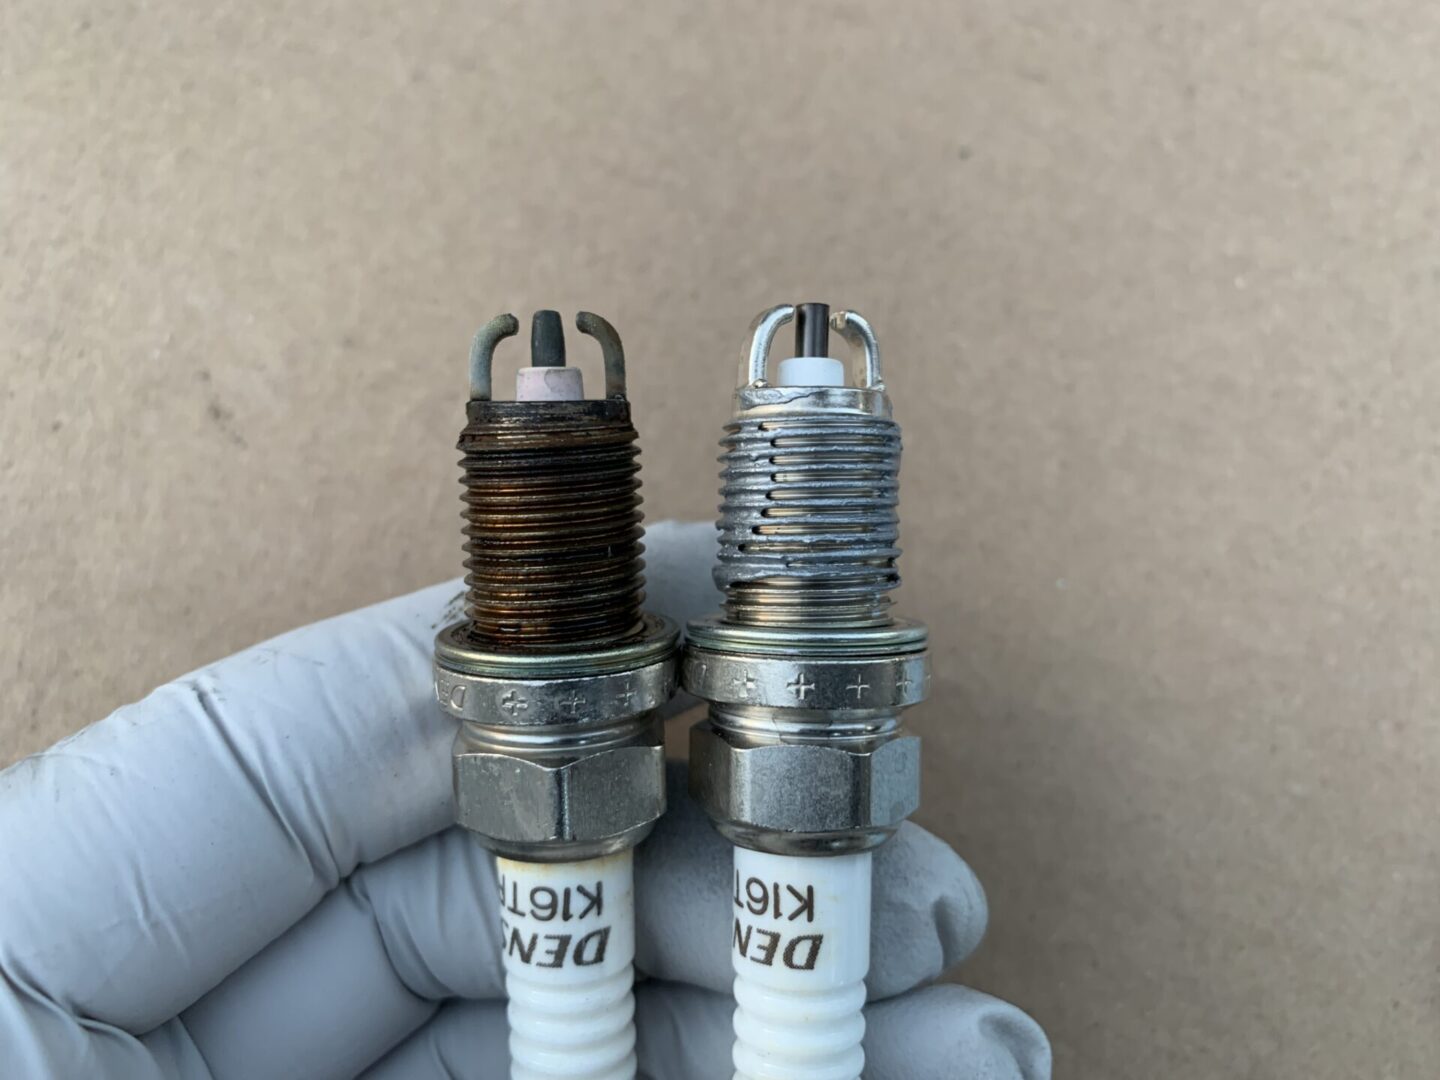
For the 3.4L V6 5VZ-FE engine in the 1st gen Toyota Tacoma (also 3rd gen Toyota 4Runner), the spark plugs used in the stock engine is half Denso K16TR11 spark plugs and half NGK BKR5EKB-11 spark plugs. Both are twin ground electrode spark plugs and are spec’d to have a gap of 0.043 in.
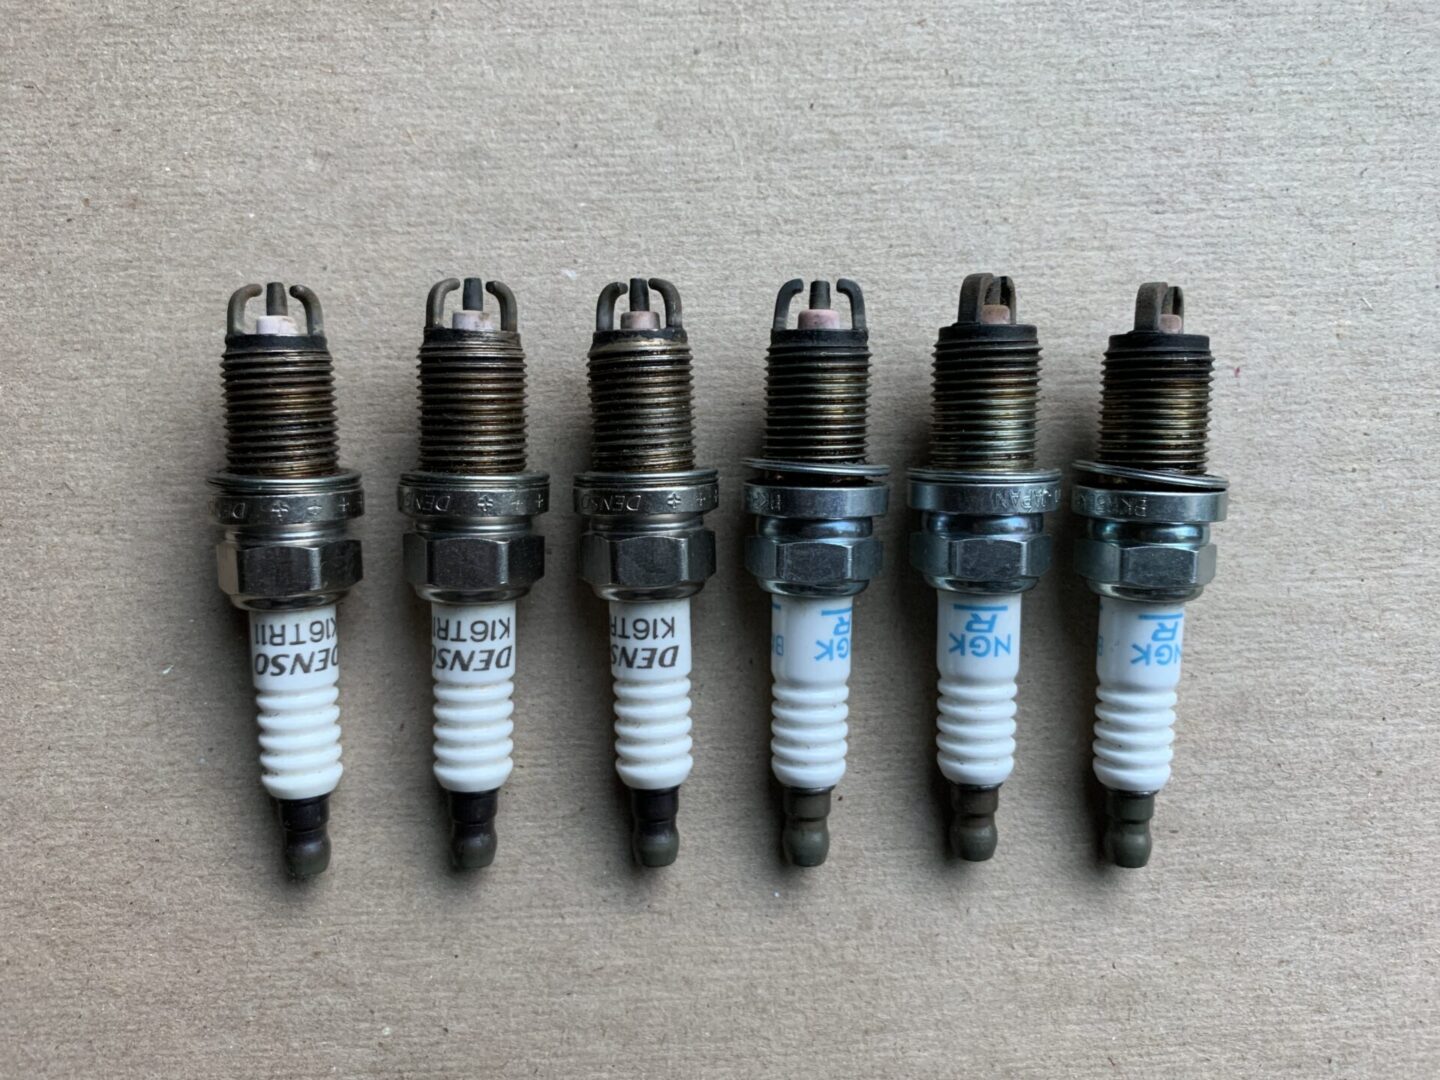
When replacing the spark plugs, you don’t have to install (3) Denso plugs and (3) NGK plugs, you can choose one or the other. I chose to order and install (6 qty) Toyota OEM Denso spark plugs. If purchasing spark plugs off Amazon, beware of counterfeits.
Denso K16TR11 Spark Plugs (Toyota OEM Part #90919-01192)
NGK BKR5EKB-11 Spark Plugs
Wire Gap Gauge
I highly recommend checking the gap of spark plugs before you install them. They’re supposed to be pre-gapped, but you never know if they get altered from being knocked around during shipping and transport. In order to check the gap on twin ground electrode spark plugs, you will need a wire gap gauge tool rather than the traditional coin or feeler gauge spark plug tools. More information on this in the section below about spark plug gapping. Your typical coin-style or feeler gauge spark plug tools will not work for these spark plugs.
It’s a bit difficult to find a wire gap gauge tool that covers the full range of measurements you need to ensure you have a 0.043 in. gap. Therefore, I recommend doing one of two things:
- Find an older wire gap gauge on Ebay or on Craigslist. Look for a single tool that has a measurement smaller than 0.043″ and one bigger than 0.043″. A search on Ebay comes up with plenty of used wire gap gauges that meet this criteria. This will allow you to get or get close to 0.043″ gap on your plugs.
Search Results for Wire Gap Gauges on Ebay - Purchase a wire gap gauge that goes up to size 0.040″ and then purchase another wire gap gauge that goes from 0.044″ and up. These tools are more readily available for purchase. Combining these two separate tools will give you the required gauge for measuring under and over the required 0.043″ gap.
Stanley Proto J000K Wire Gap Gauge (up to 0.040″) & Stanley Proto J000J Wire Gap Gauge (from 0.040″ & up)
Anti-Seize Thread Lubricant
This will be used to apply in small amounts to the new spark plug threads to prevent issues with removing them in the future. This is a small bit of preventative work to avoid the possibility of a much more difficult spark plug job in the future.
Permatex Anti-Seize Lubricant, 1 oz. Tube
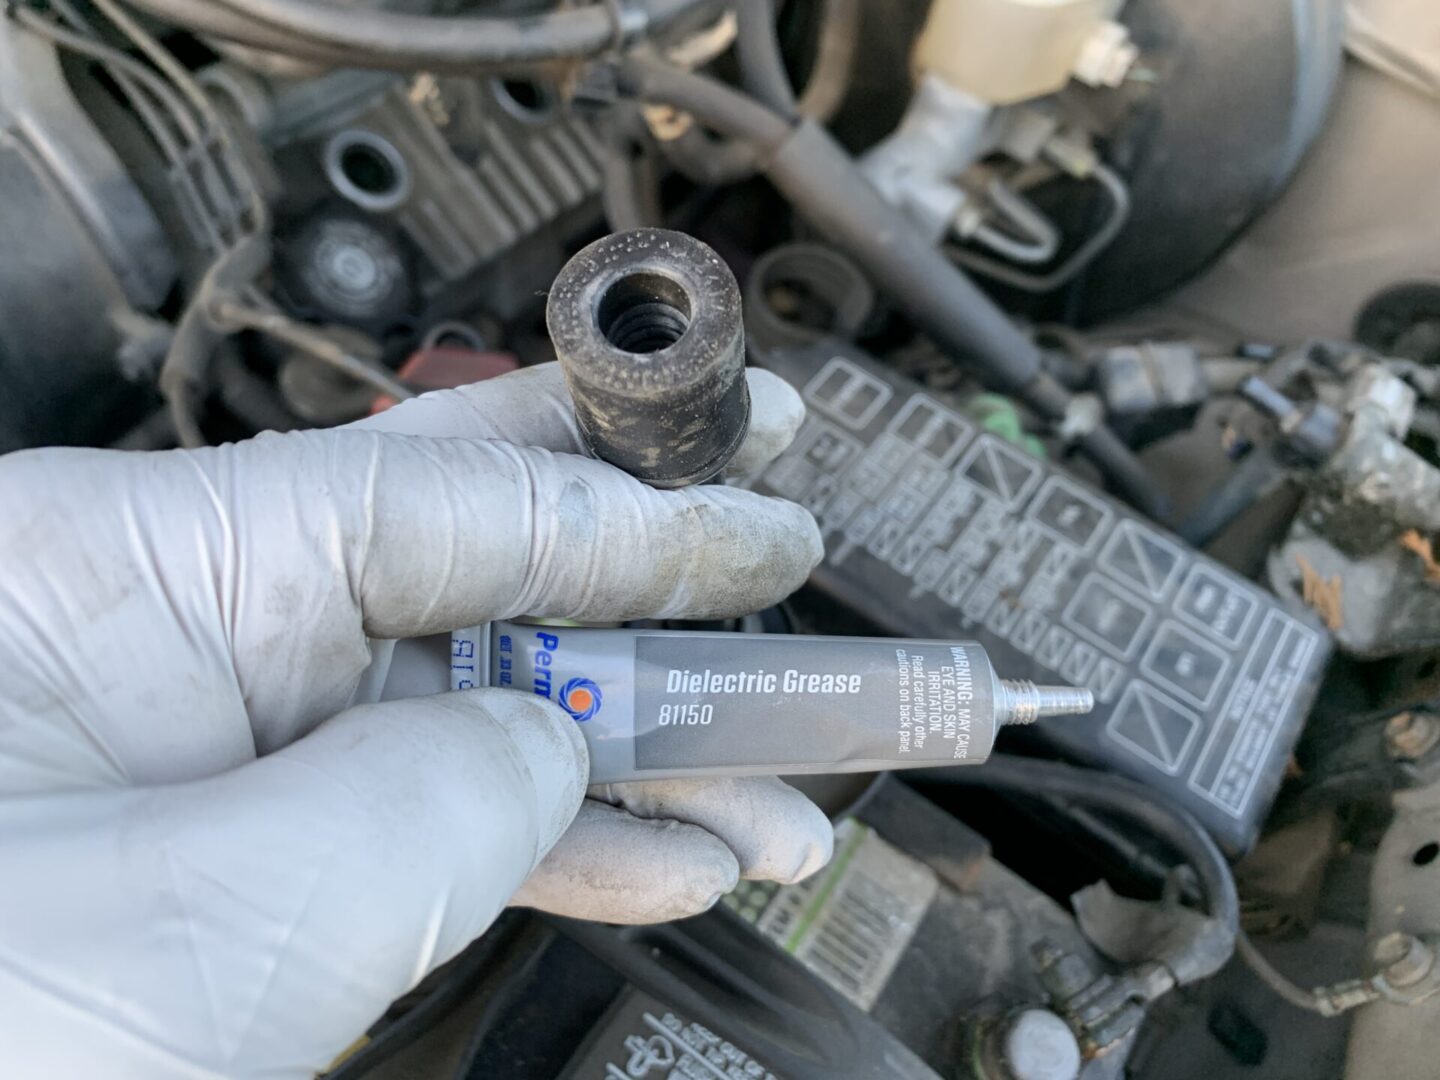
Dielectric Grease
Dielectric grease is applied to the inner portion of the ignition coil boot to prevent voltage leaks and protect electrical connections from salt, dirt, and corrosion.
Permatex Dielectric Grease, 0.33 oz. Tube
Socket Set & 5/8″ Spark Plug Socket
Typically a mechanics tool set will include a 5/8″ spark plug socket. If you are looking for a mechanic’s tool set, check out this guide to choosing the right mechanic’s tool set. If you do not have a 5/8″ spark plug socket, then you can find a standalone one here:
CRAFTSMAN 5/8″ Spark Plug Socket, 3/8-Inch Drive
You will also be needing the extensions included in your typical mechanics tool set in order to reach deep into the combustion chambers for access to the spark plugs. The socket wrench along with various metric sockets that are found in the mechanics tool set will be needed for removal and installation of various parts in the engine bay during the spark plug replacement process.
Torque Wrench
Sure, you can tighten the spark plugs in by hand, but I don’t like to risk it. A torque wrench ensures you don’t overtighten and strip the spark plug threads, which will leave you with a much bigger job when you come back to do the spark plugs the next time around.
EPAuto 1/2-inch Drive Click Torque Wrench
Nitrile Gloves
Nitrile Disposable Gloves (100pcs) – Medium | Large
Checking Spark Plug Gap for the 1st Gen Tacoma 3.4L V6 (5VZ-FE)
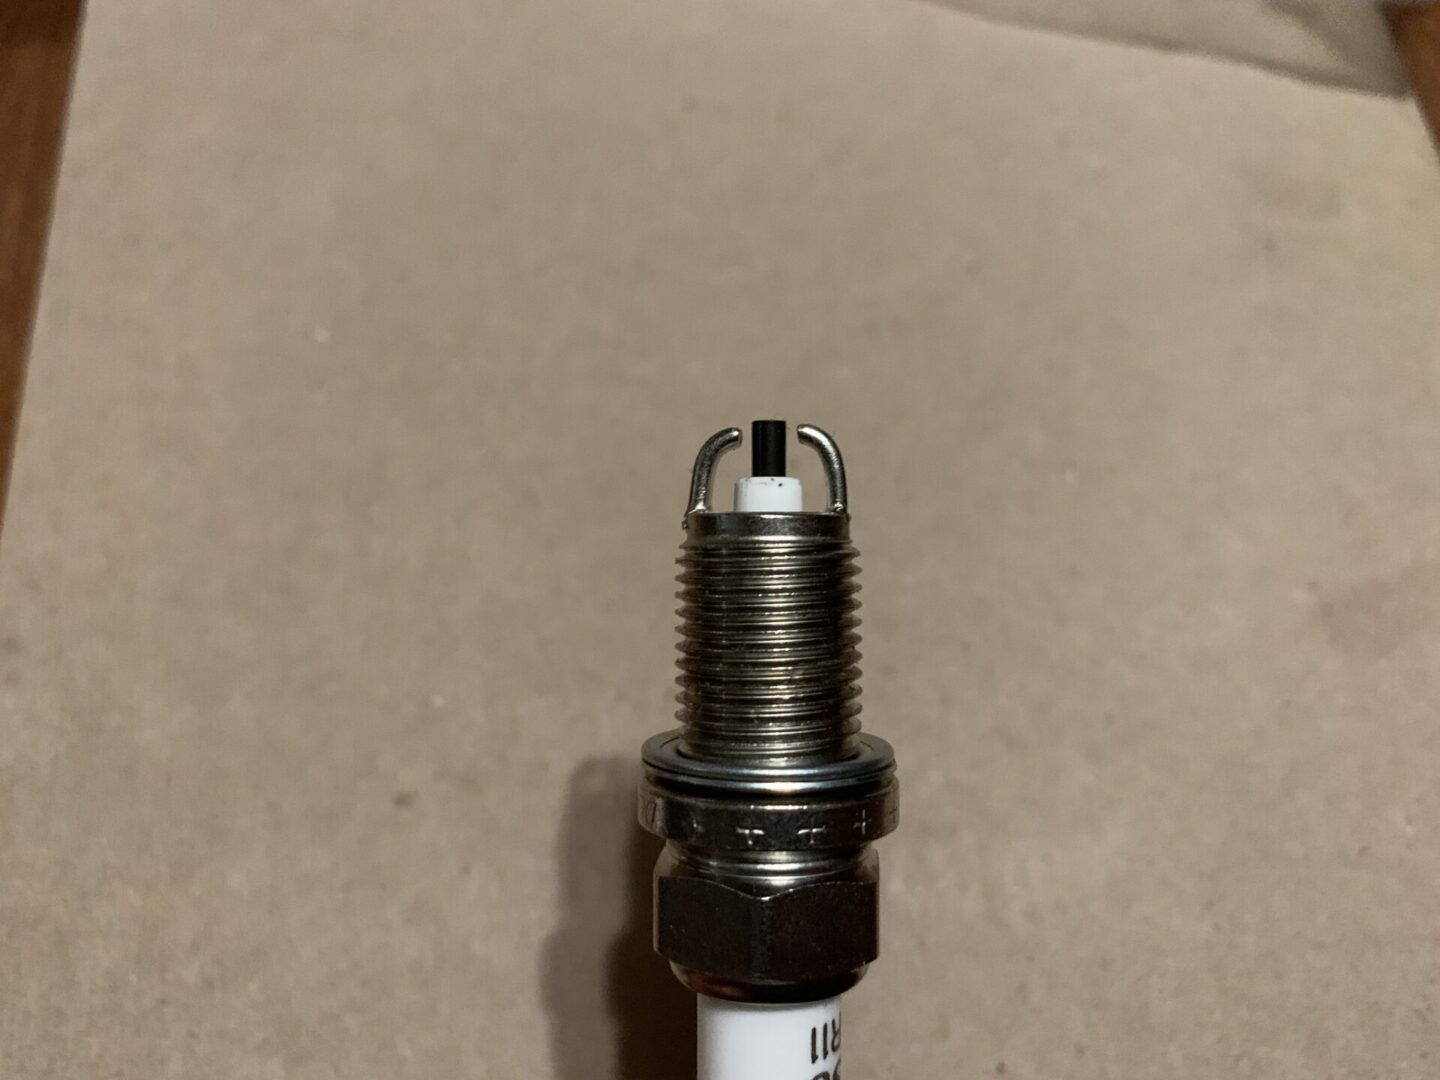
The first thing you will need to do is to prepare your new spark plugs. This means opening them all up, checking to make sure there is no damage and that they are indeed the correct ones. Also, checking the gap to make sure they are within spec.

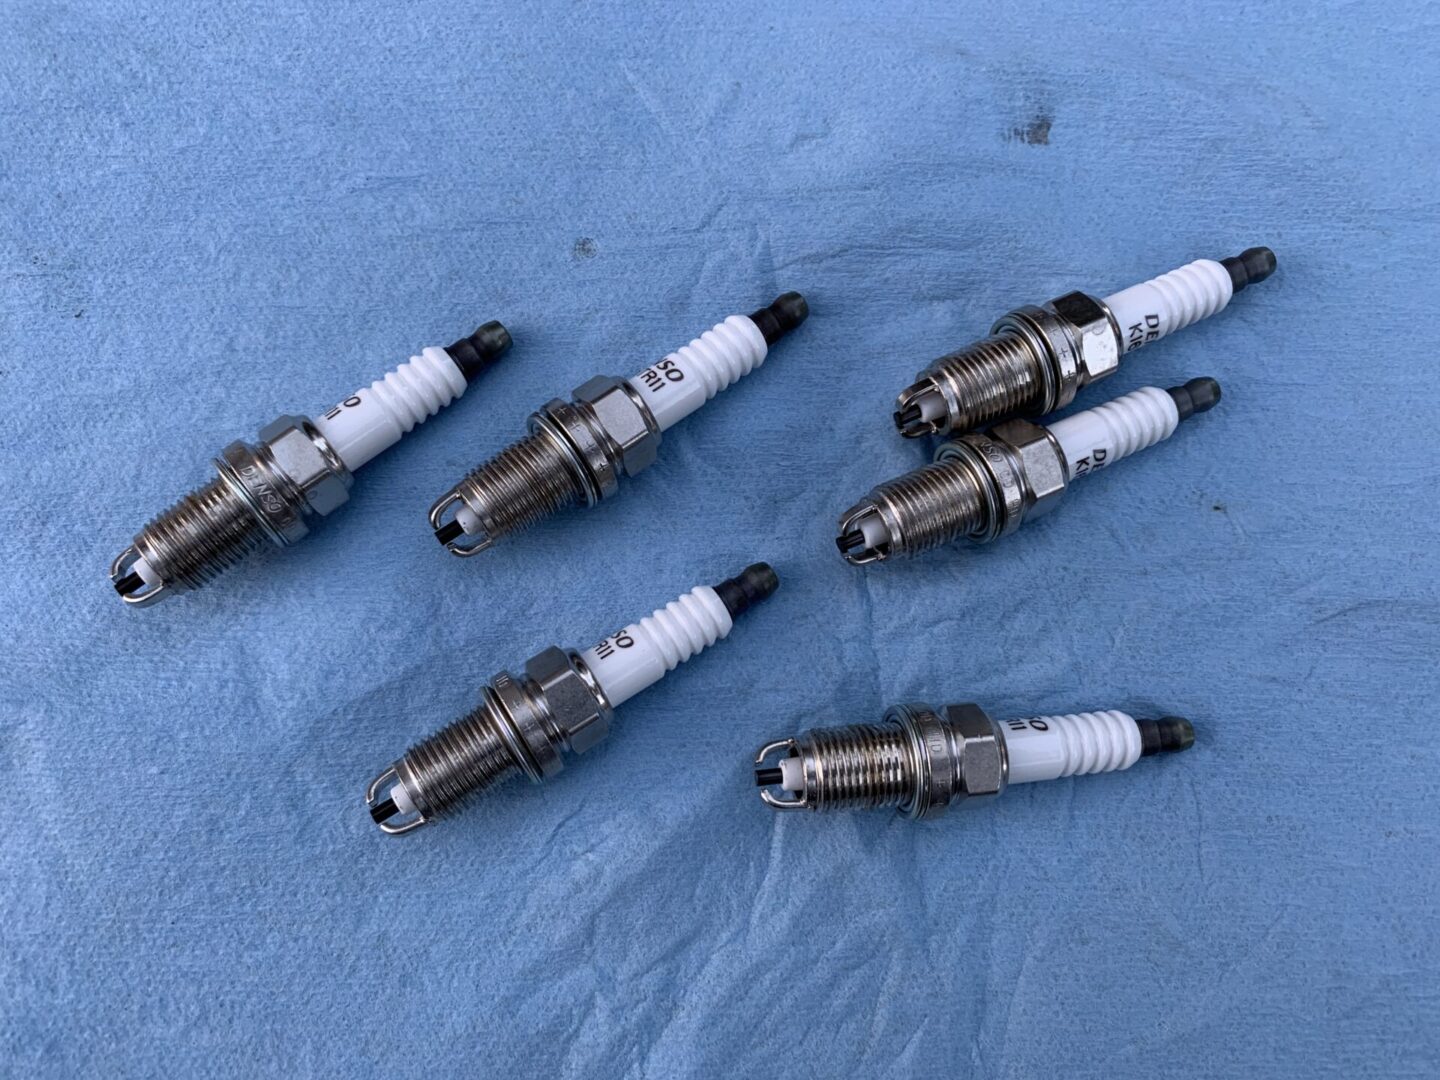
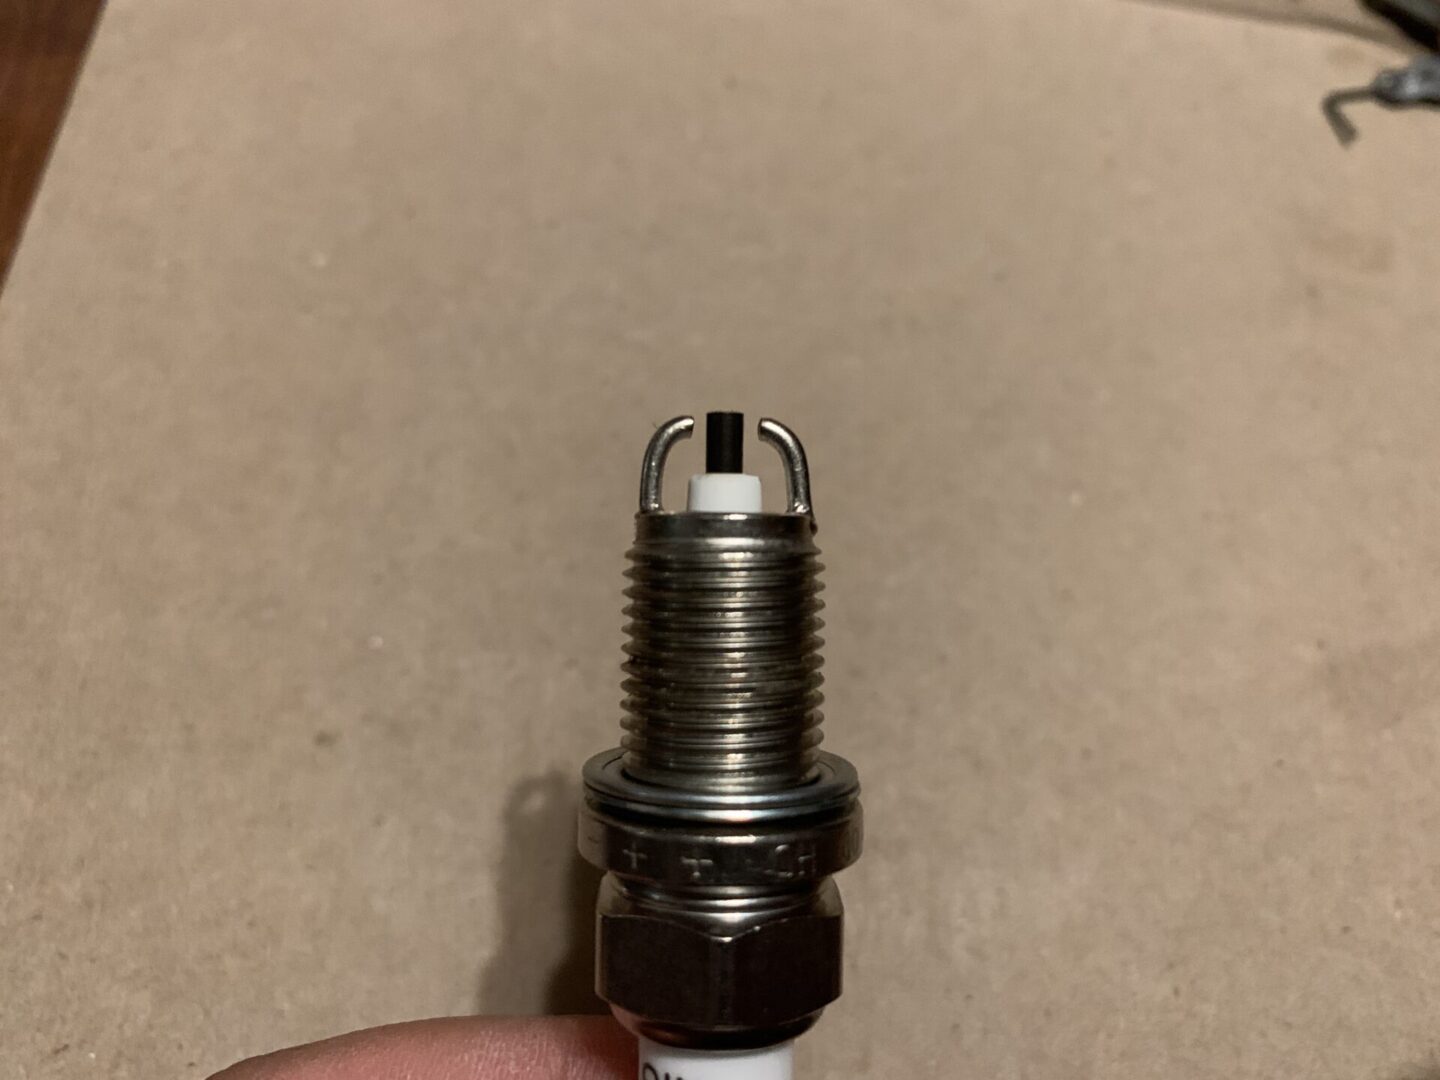
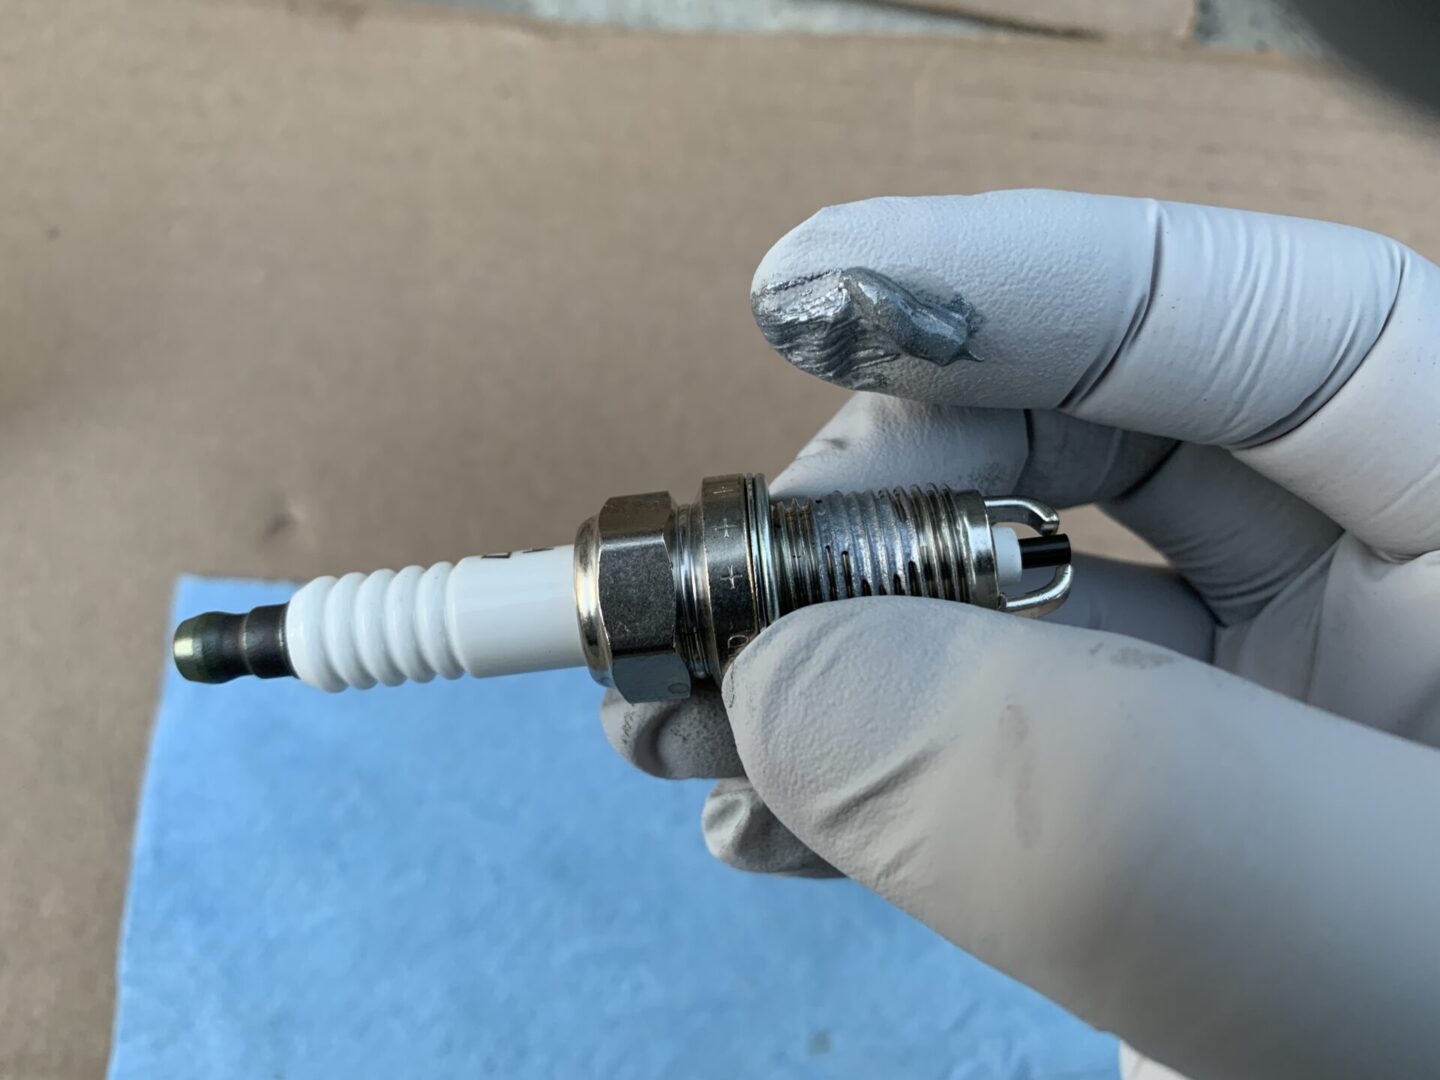
The spark plugs on the 3.4L V6 5VZ-FE engine uses a twin ground electrode spark plug with a unique U-shaped electrode as seen below (you might have to look real close to notice it.) The required gap is a 0.043″ gap for this engine. Although spark plugs are supposed to come pre-gapped, you should always try to check the gap to ensure the gap has not changed from the time it was produced until it is in your hands.
The difficult thing about reading these twin ground electrode spark plugs is that the gap reading has to be taken at the trough or the middle of the U-shaped ground electrode. Because of this, using a coin-shaped gauge or feeler gauge will not give you the correct reading. If you look at the close-up photo below, you can see that feeler gauges (and the same with coin style gauges) will only get you the reading between the edges of the ground electrode and the center electrode. Since the reading needs to be taken at the center of the electrode, you’ll need a wire gap gauge to take a proper reading.

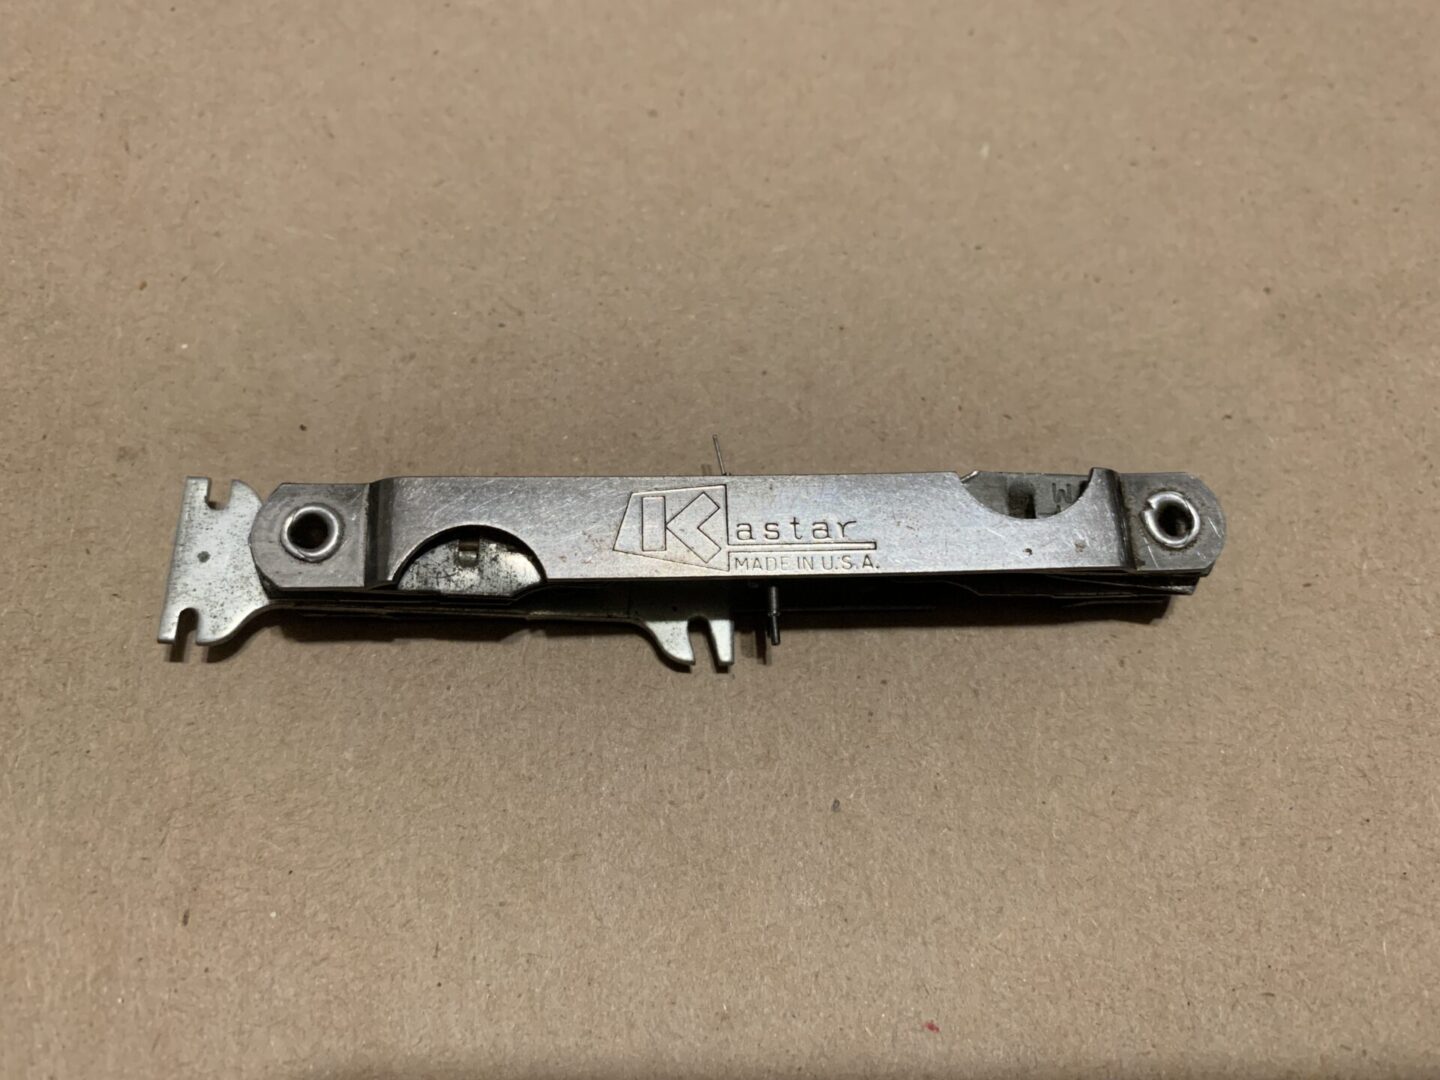
To properly measure the double-electrode spark plugs, you’ll need a wire gap gauge, which is not as common as other types of spark plug tools on the market. More unfortunately, finding a wire gap gauge that has readings to get you the 0.043″ gap reading you need is more challenging. And to make things even more frustrating, the more common ones you find only go up to 0.043″ or go from 0.043″ and up. For some reason, older ones seem to have the readings smaller than as well as larger than 0.043″.
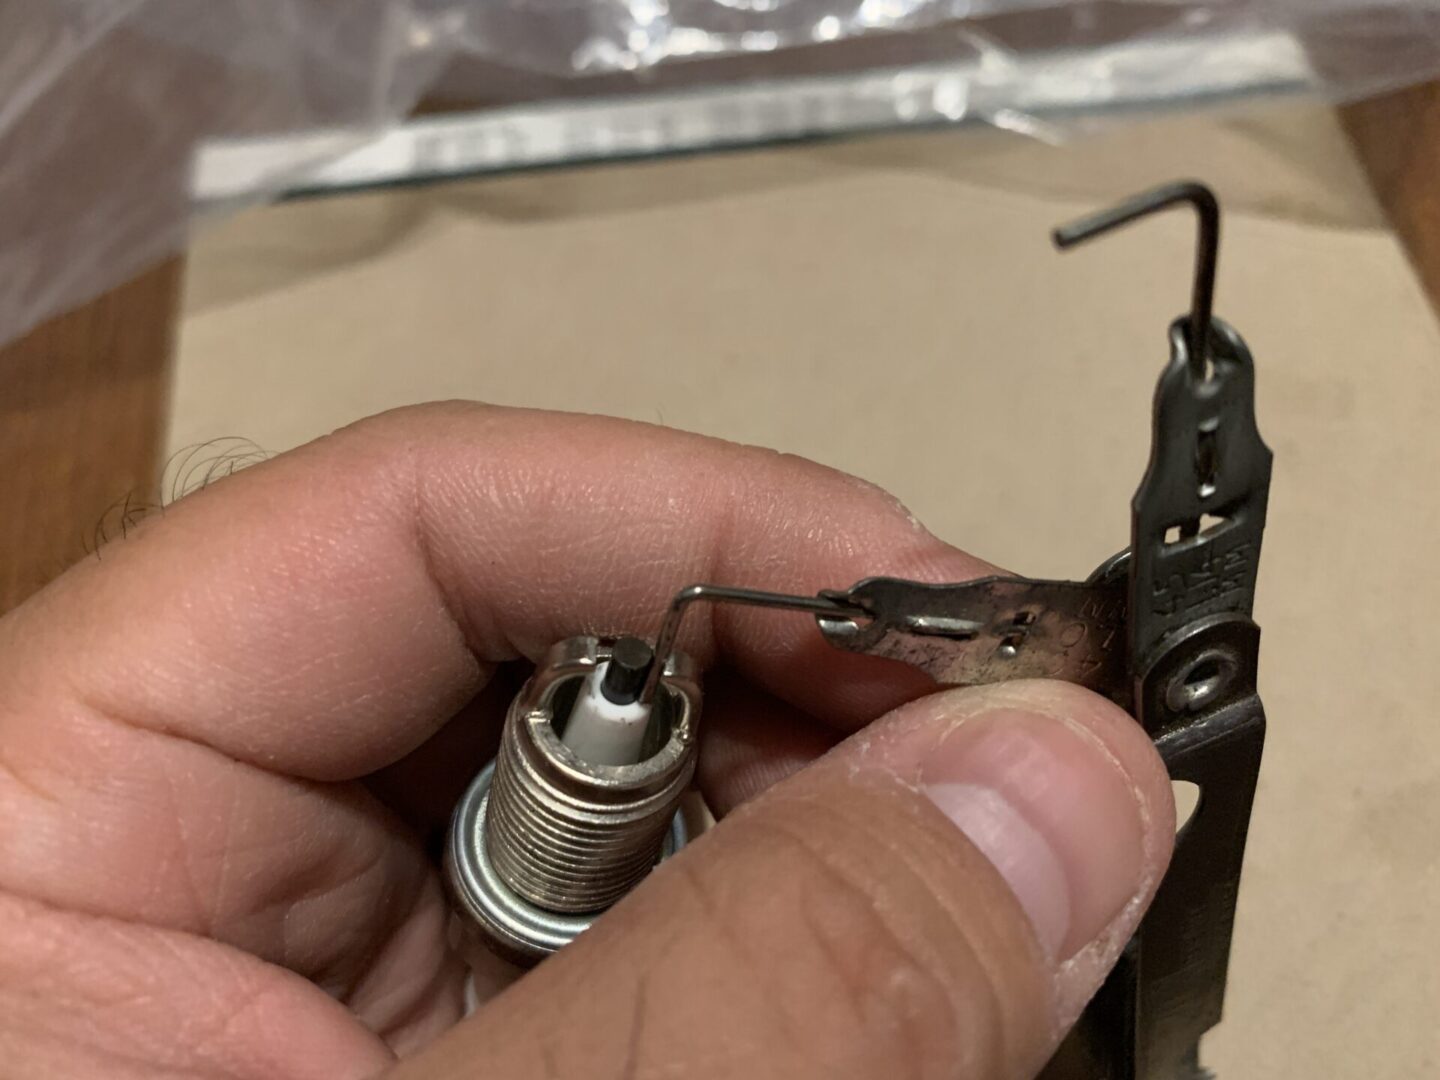
The tool below belongs to my dad and it does have a reading of 0.040″ gap and 0.045″ gap. It’s not ideal, but it at least gives me a decent gauge as to whether the spark plugs from the factory are still gapped properly or not.
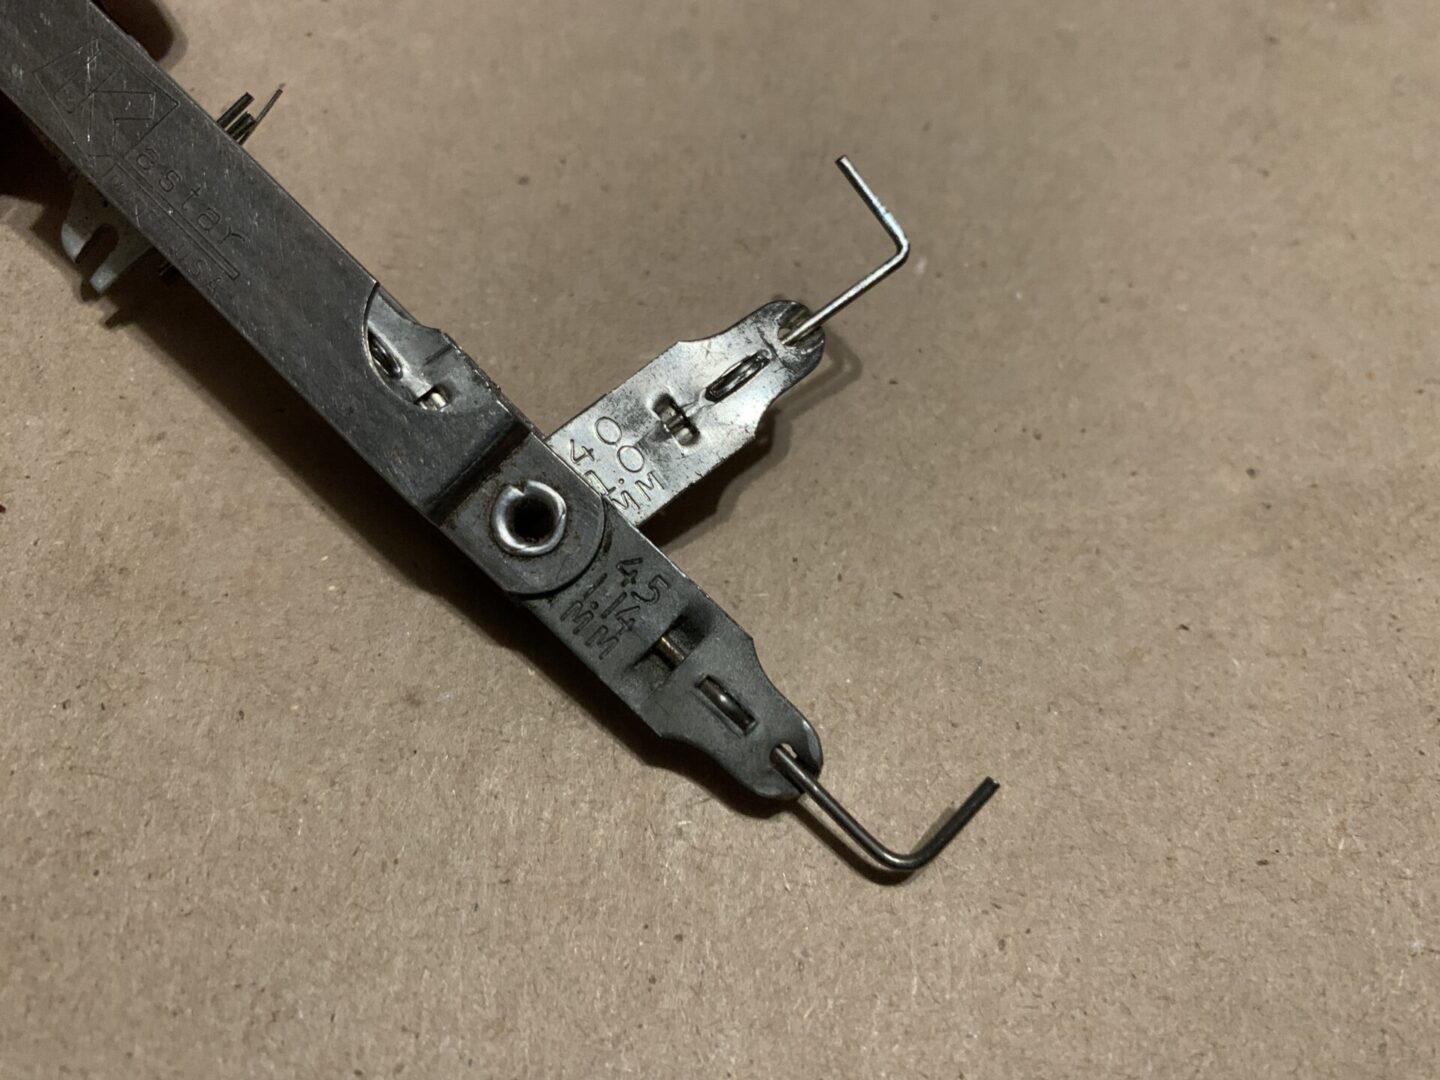
When checking the spark plug gap, use the wire gap gauge to check the gap on both sides of the center electrode. The L-shaped wire of the gauge should fit directly between the middle of the U-shape of the ground electrode and the center electrode. Make adjustments with the adjustment tool included with the gauge as necessary to get both sides to a 0.043″ gap.

How to Replace Spark Plugs on a 1st Gen Tacoma 3.4L V6 (5VZ-FE)
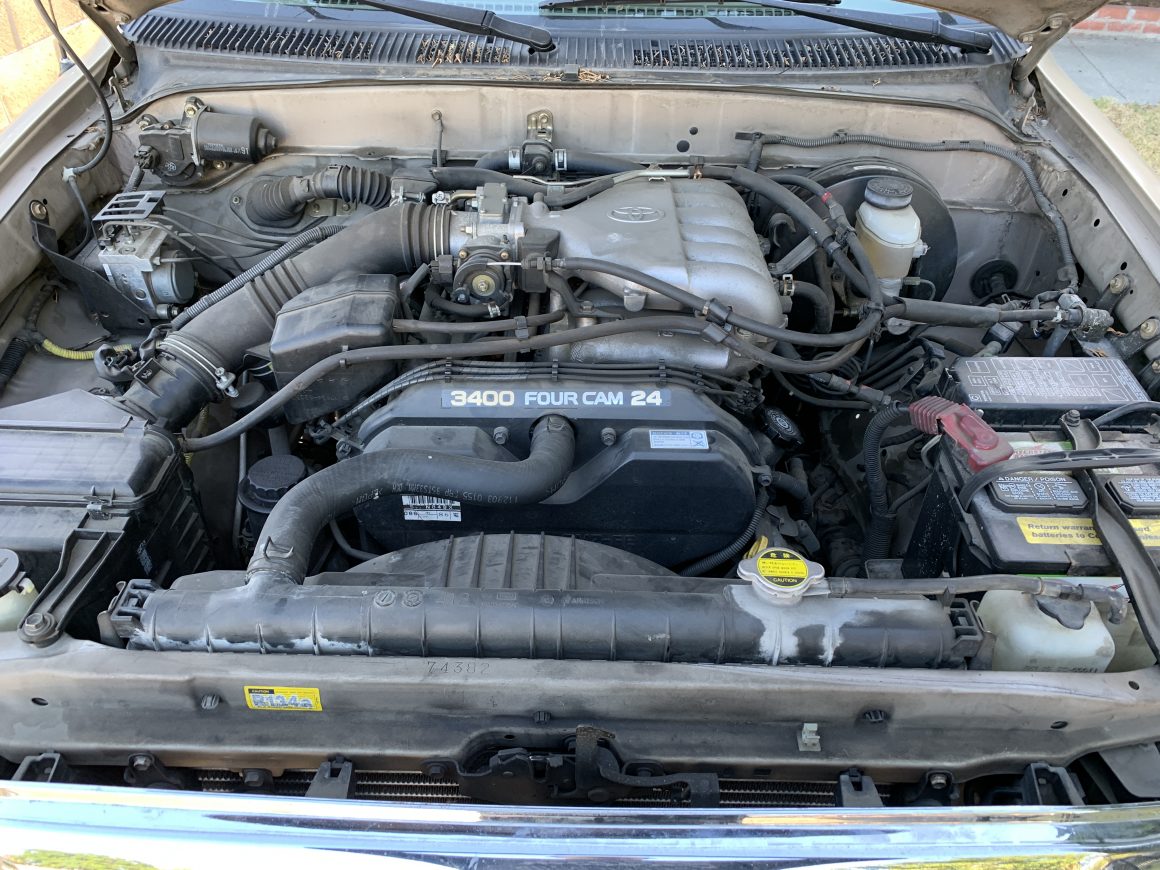
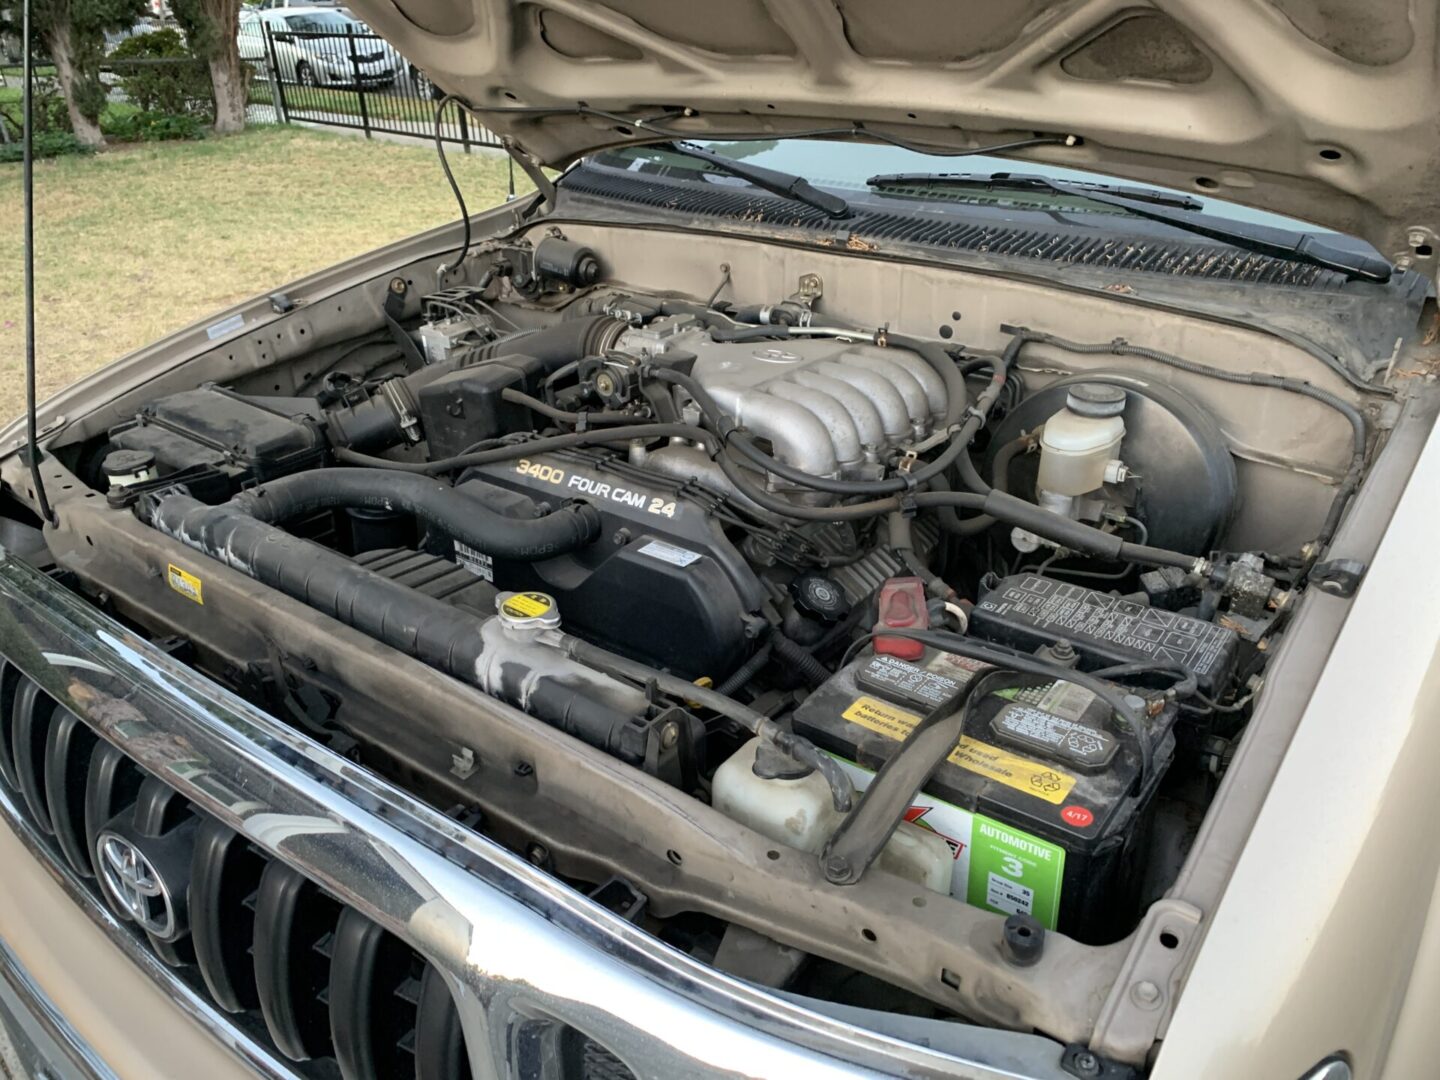
To start, open the hood and determine which side you want to start on. The driver’s side has more components to remove and reinstall than the passenger’s side. I like to work the more difficult side first, so I started with the driver’s side.
Replacing Spark Plugs on the Driver’s Side of the 3.4L V6 (5VZ-FE) Engine
On the driver’s side, you will have a number of components you’ll need to disconnect. It’s imperative to keep track of what you’ve disconnected or removed. A good way is to label or take photos along the way so you know how to put everything back when you’re done.
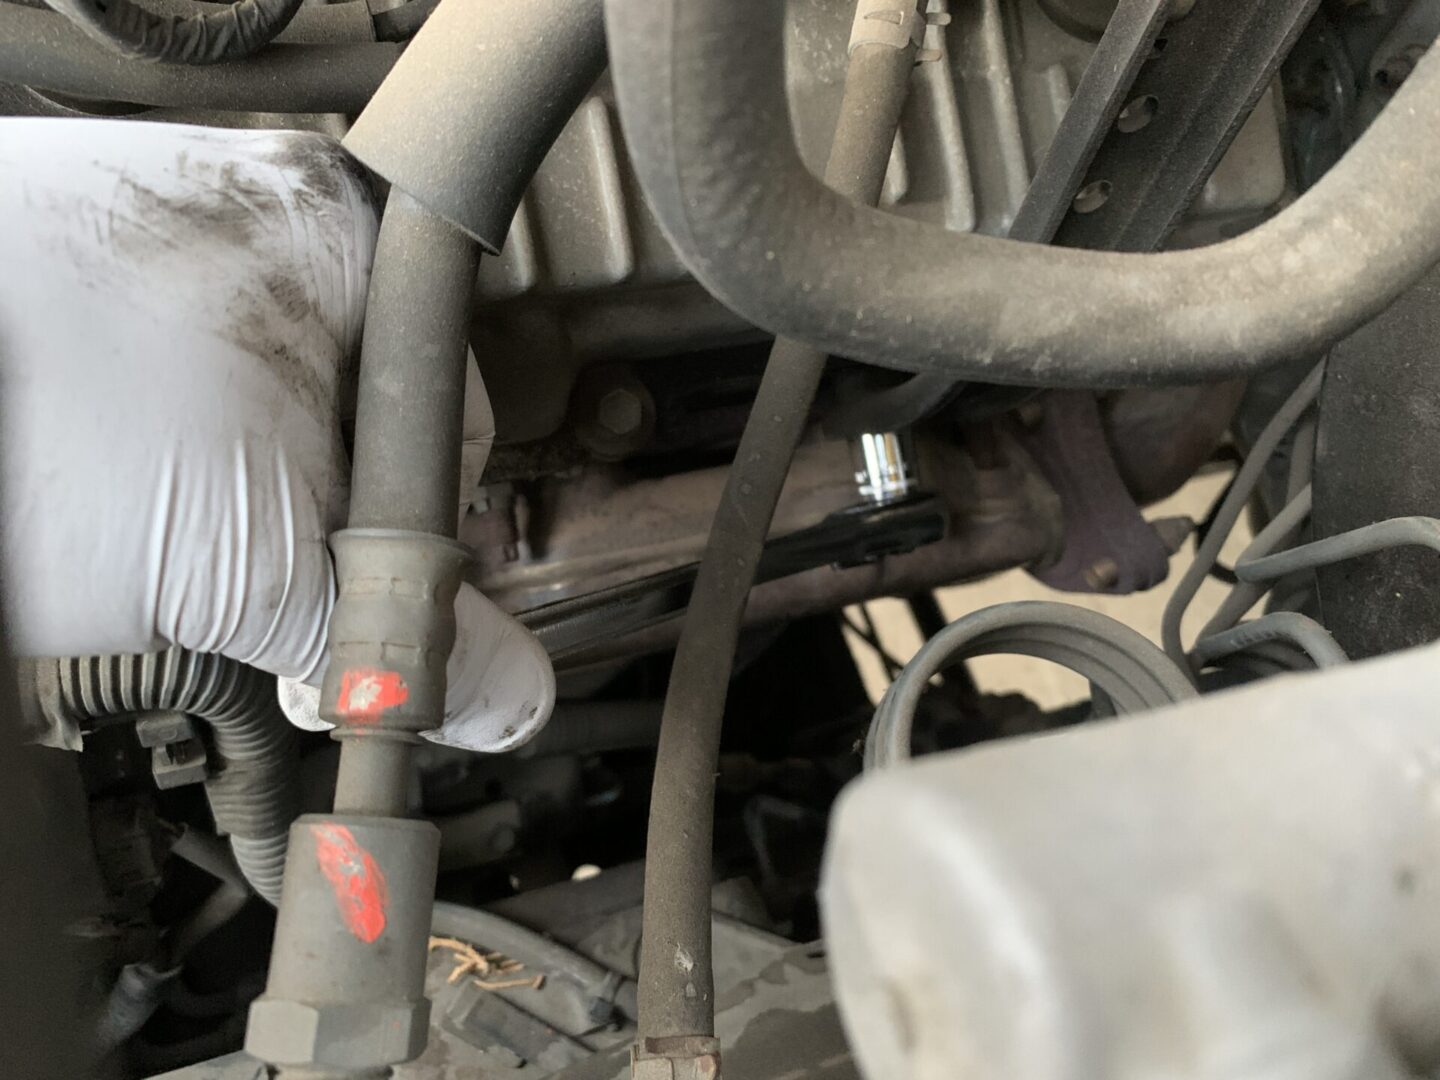
First, remove the following two hoses by unclipping the hose clamp, sliding it back, and then pulling off the hose. If the hoses get stuck, you can twist them slightly left and right to break it loose before pulling it off.
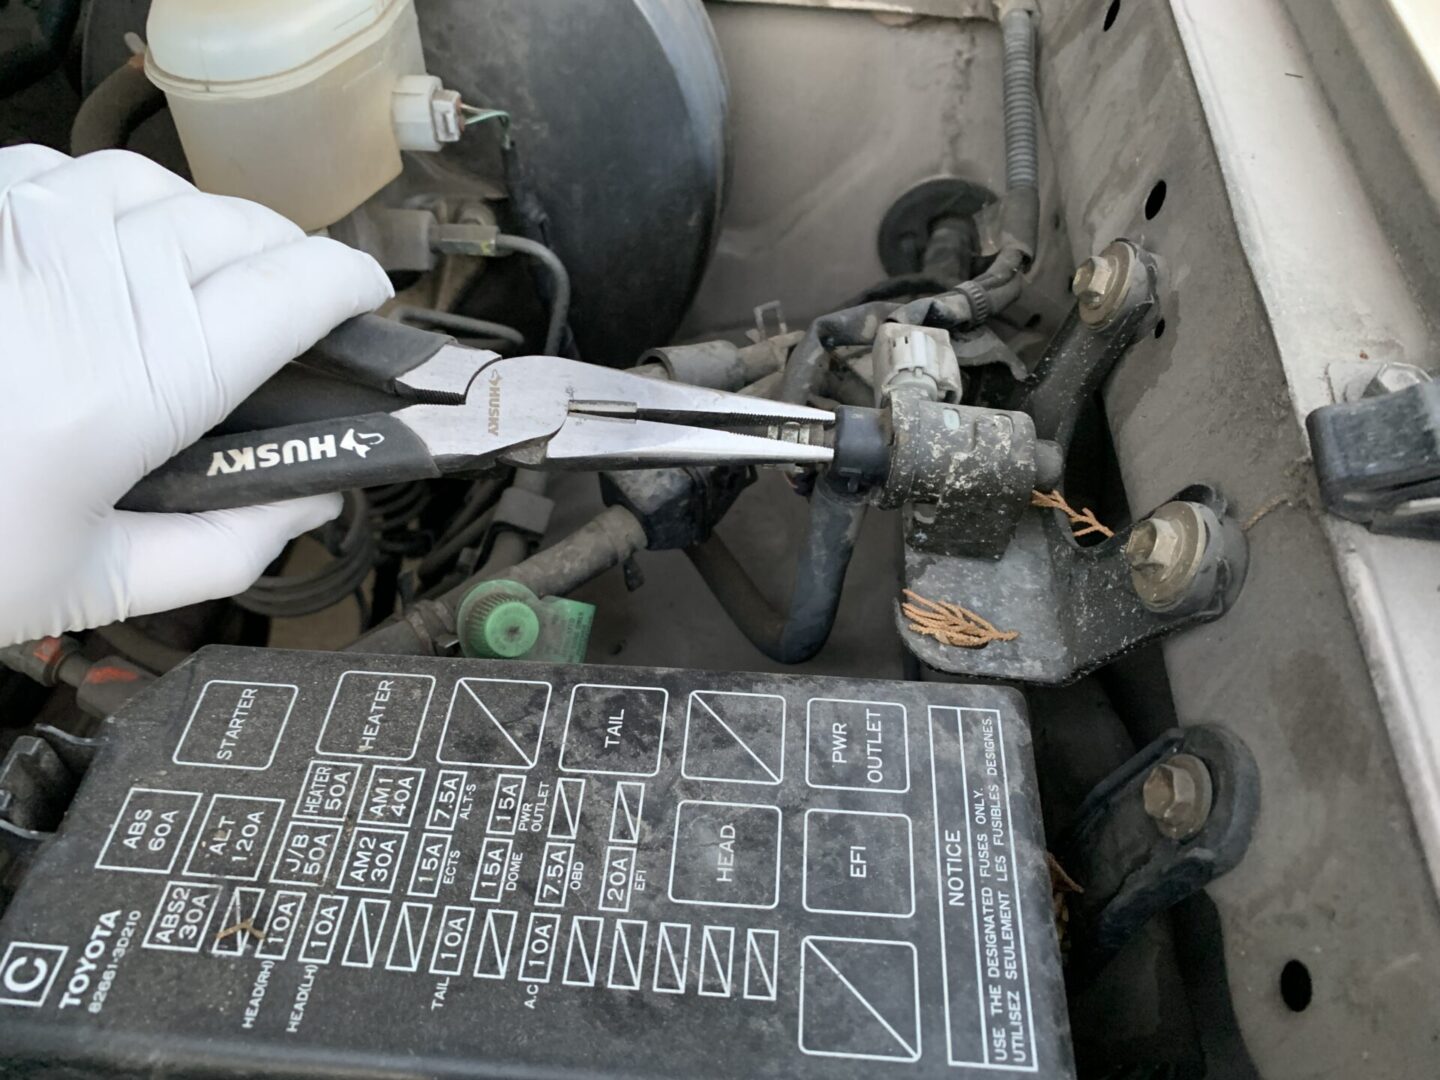


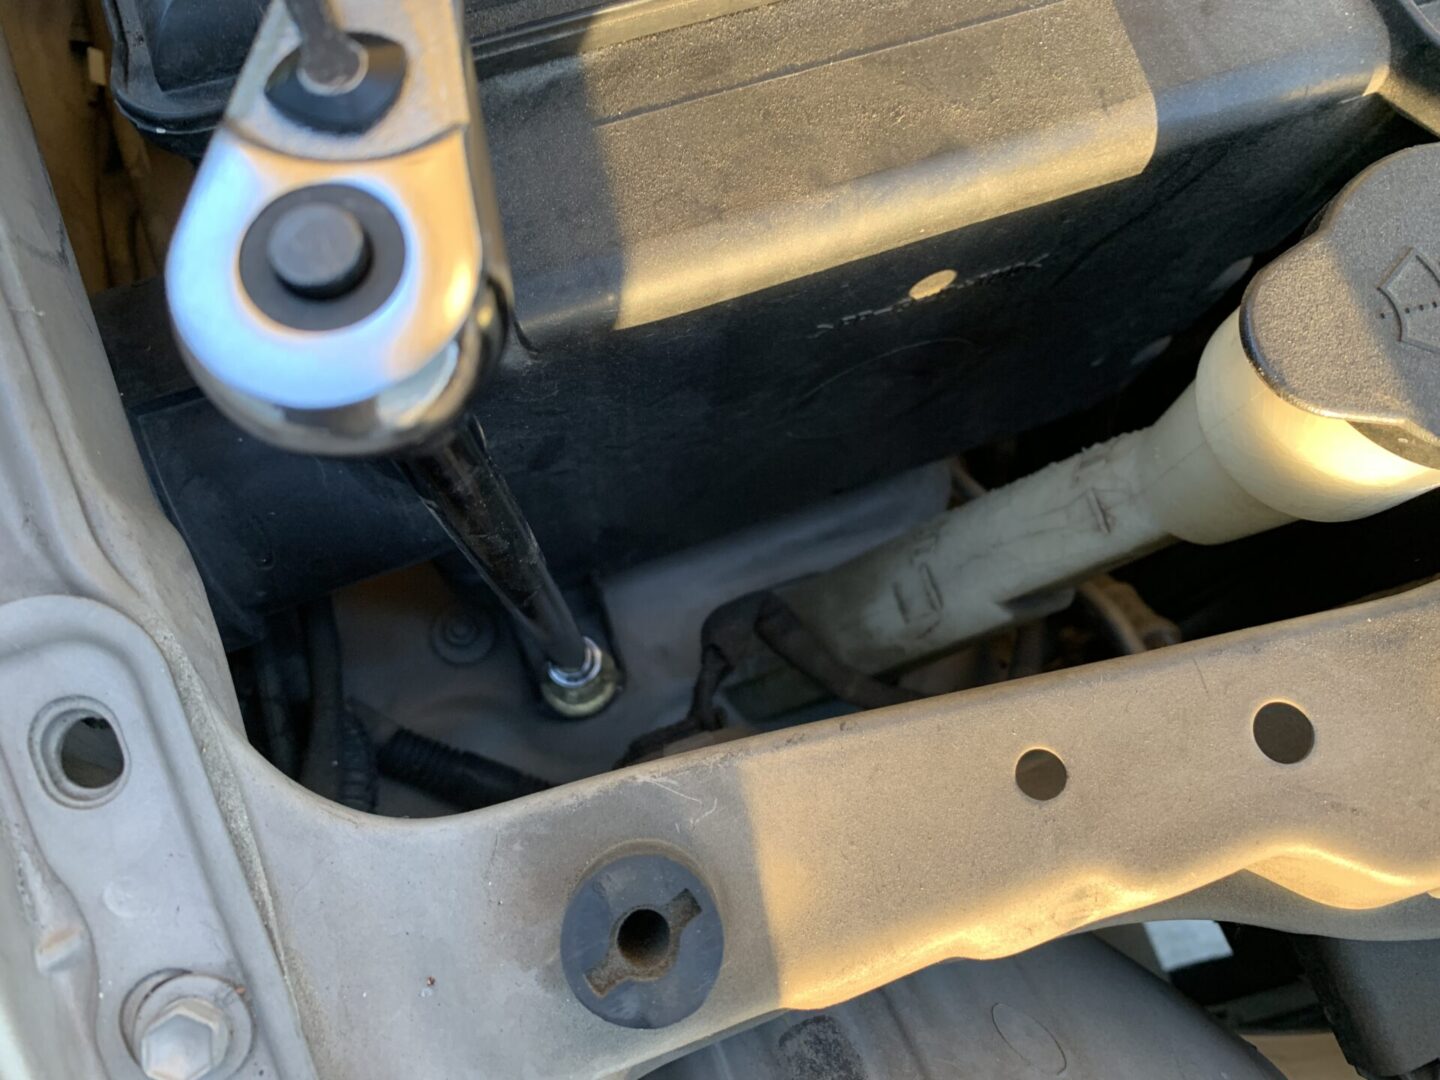
Next, using a 10mm socket and remove the ground strap and the bracket as shown below.

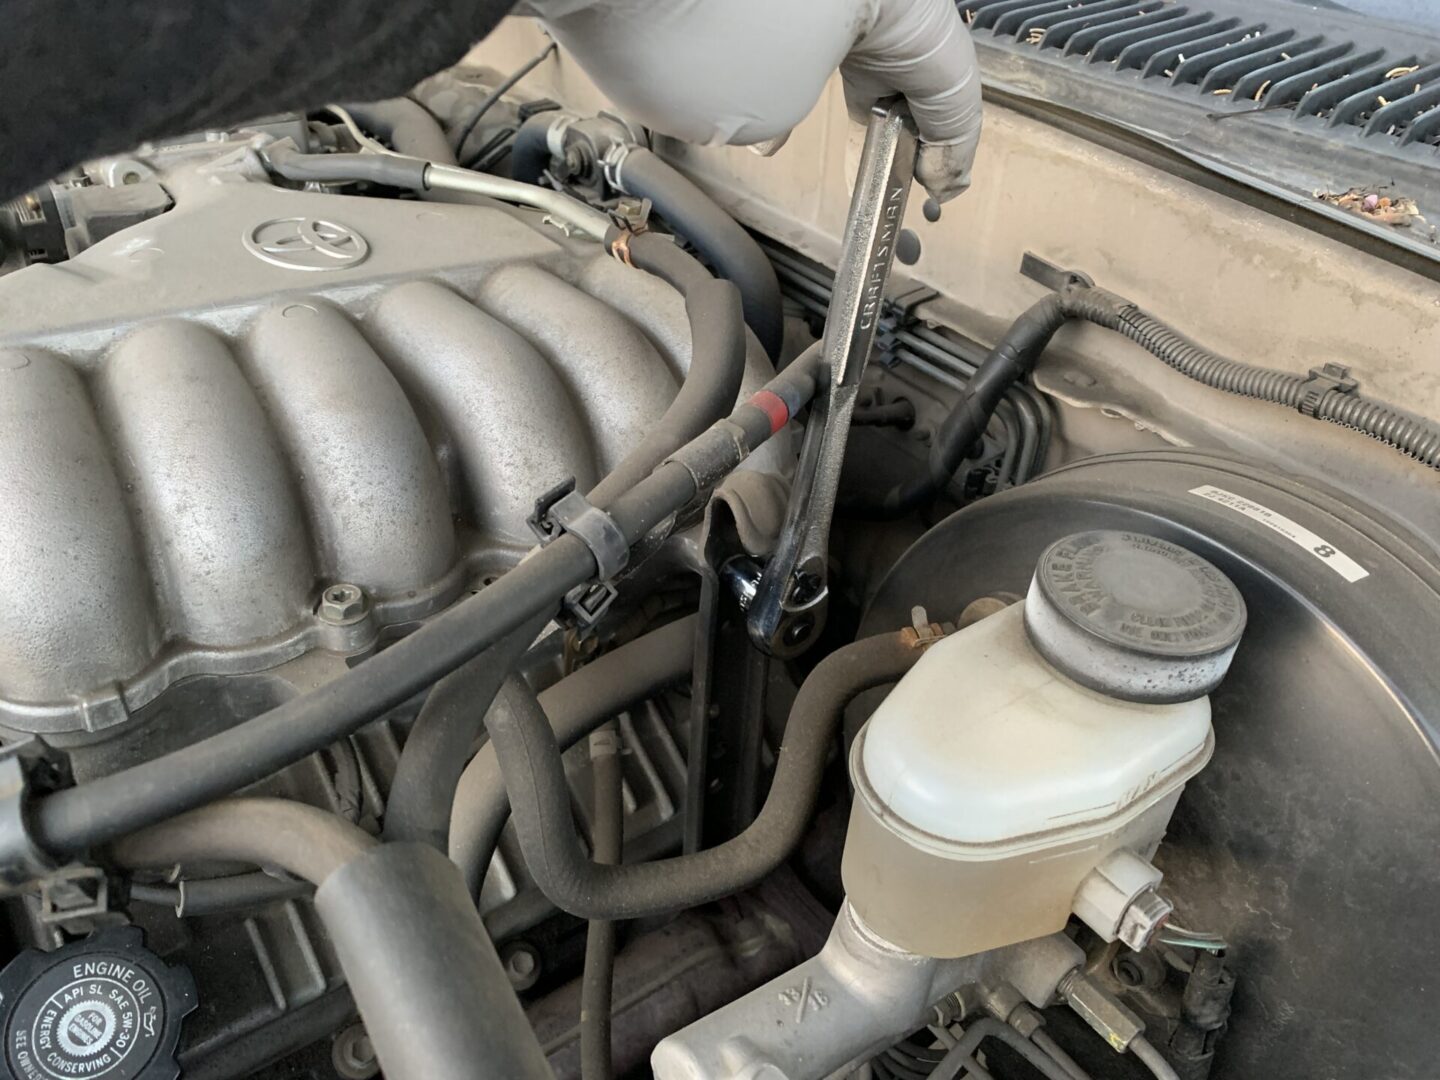
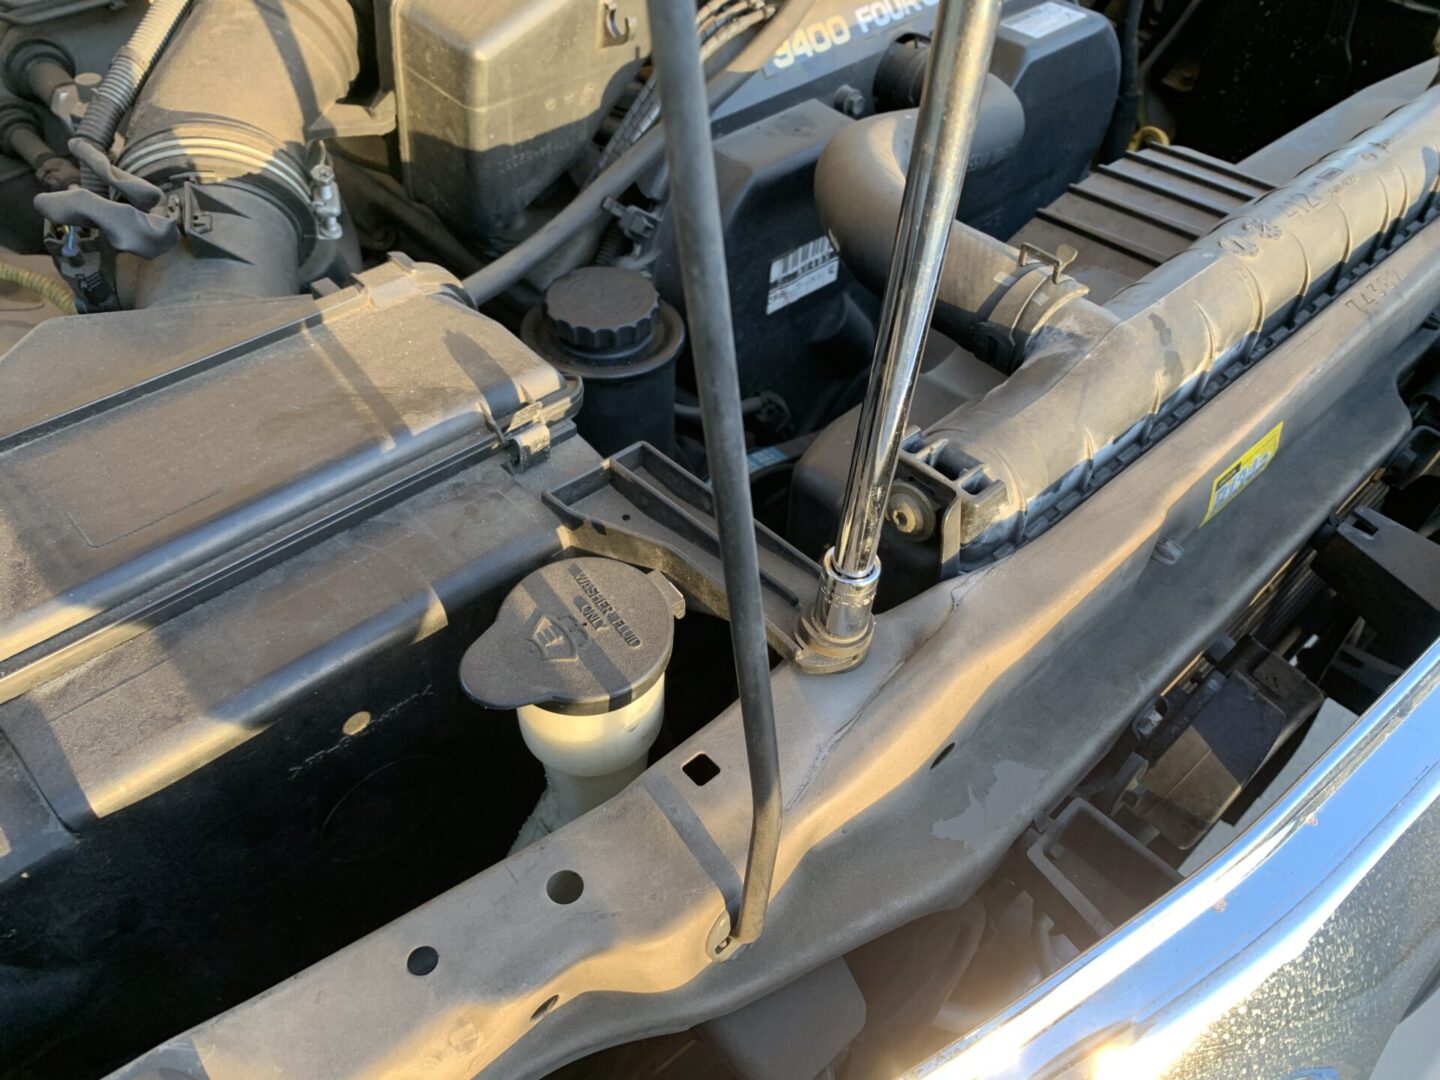
Then, the bracket that is attached at the rear of the engine will need to be rotated out of the way. To do this, use a 12mm socket to remove the bolt at the top of this bracket. On the bottom side of the bracket, you’ll need a 14mm socket to loosen the bottom mounting bolt. After loosening the bottom bolt, you should be able to rotate the whole bracket about this lower bolt. Rotate the bracket towards the rear of the engine for more room to work.

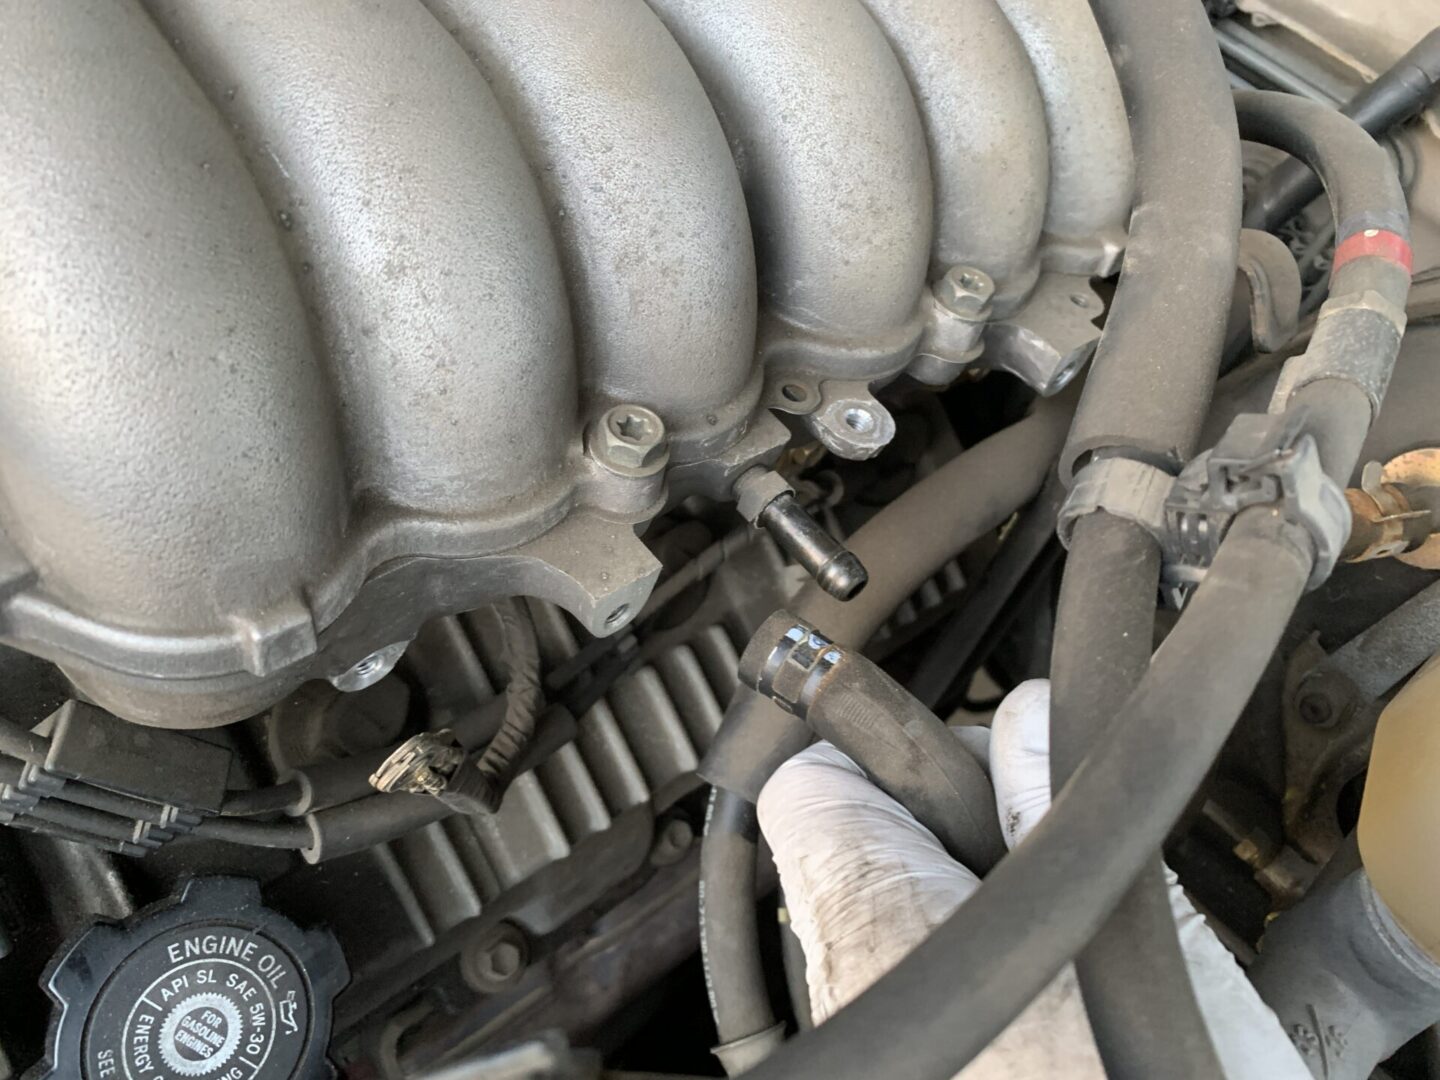
Disconnect and remove this center hose as well.

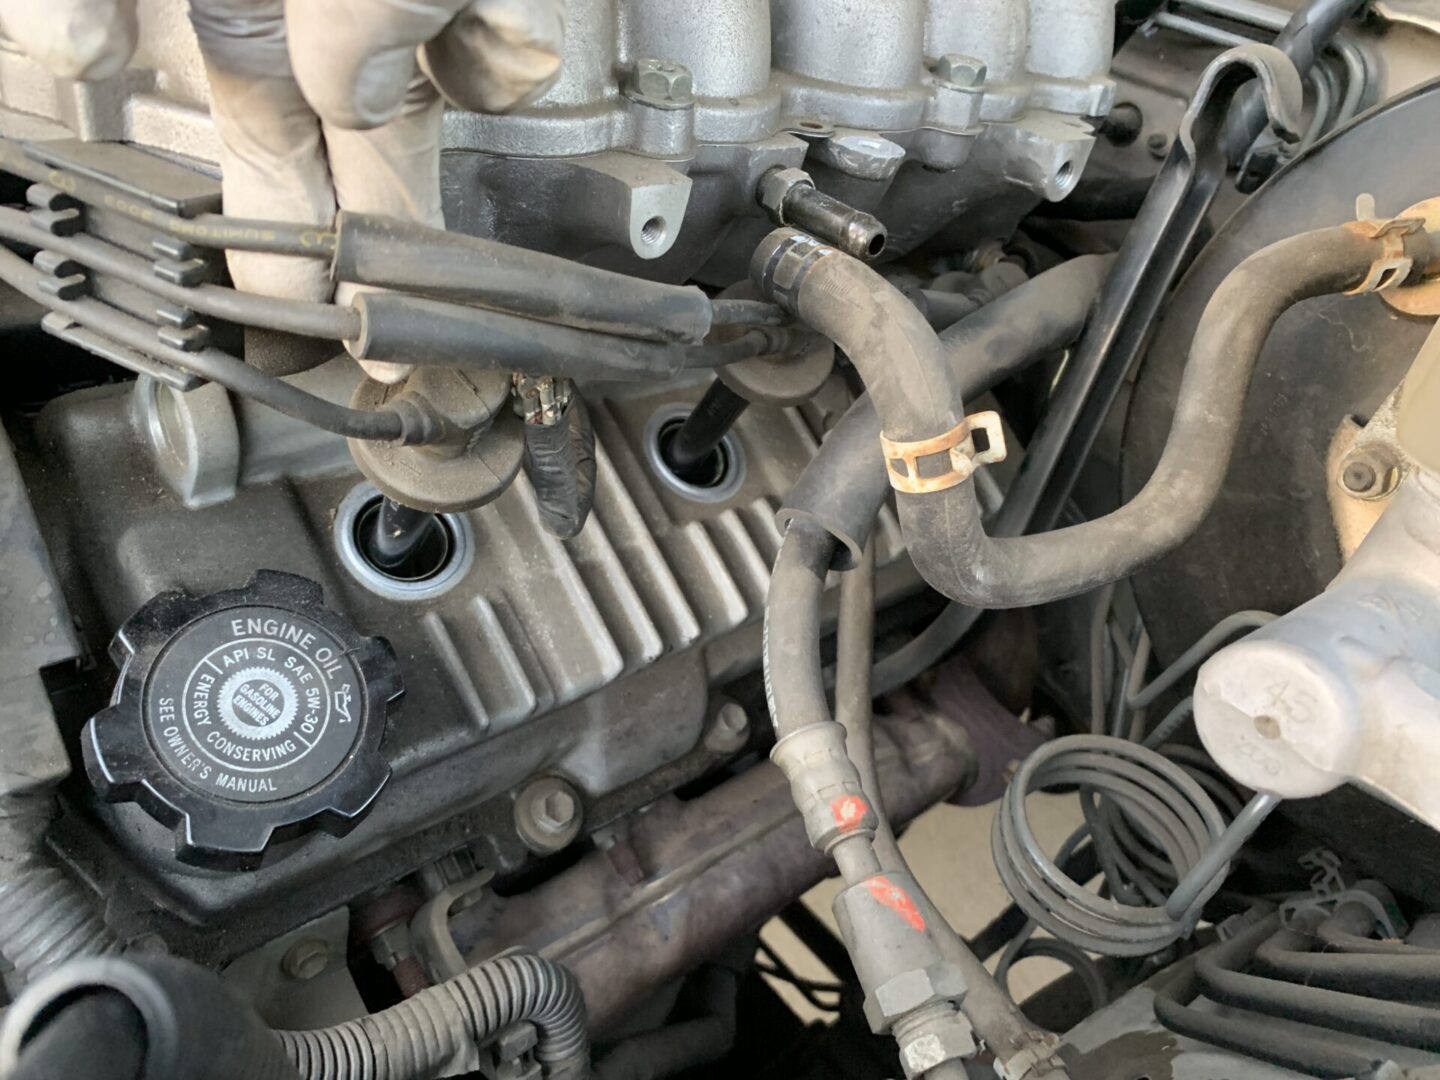
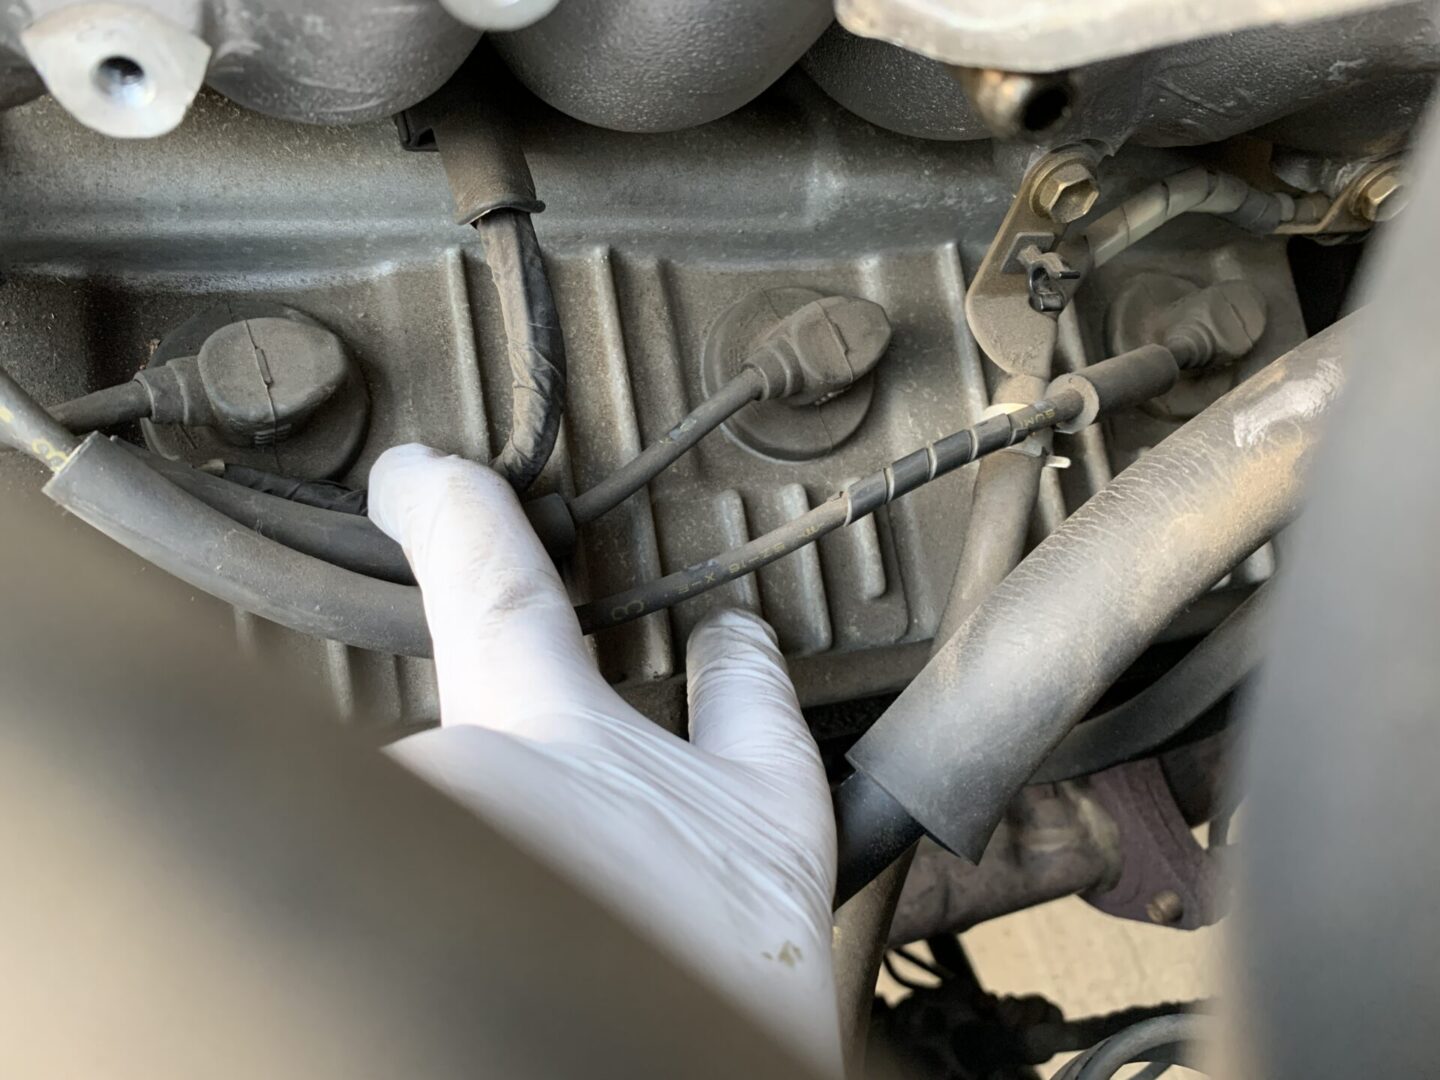
You should now have adequate space to remove the (3 qty) spark plug boots and spark plugs. For a lower chance of something dropping into any of the combustion chambers, consider doing the spark plugs one at a time.
Remove the spark plug boot and set it aside.
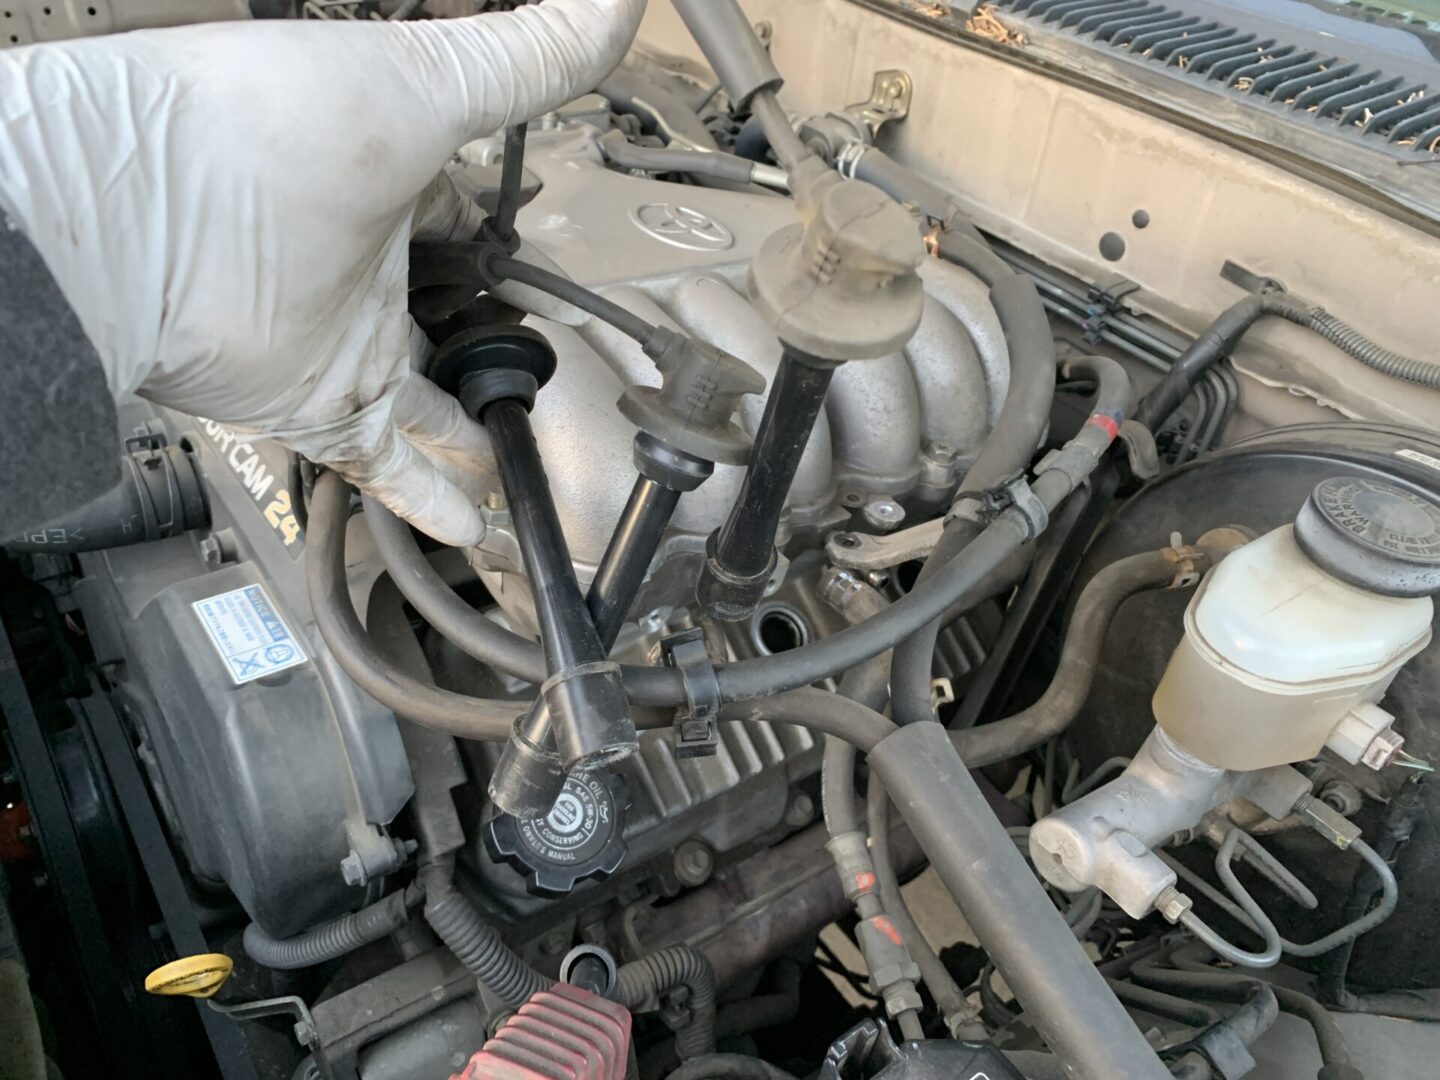
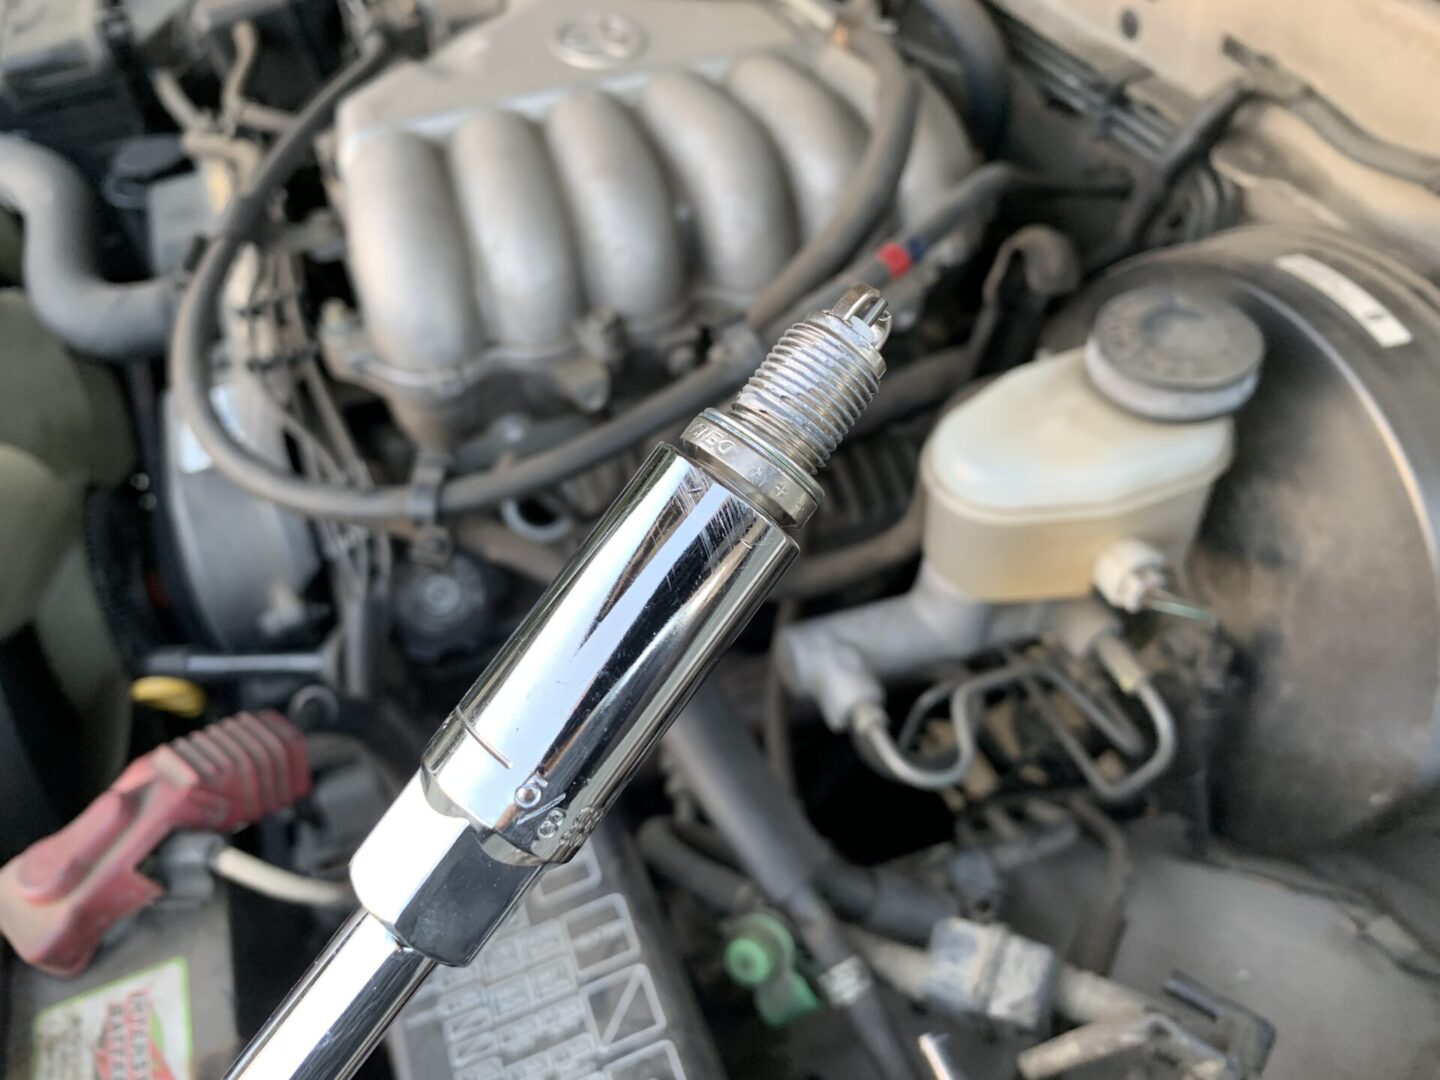
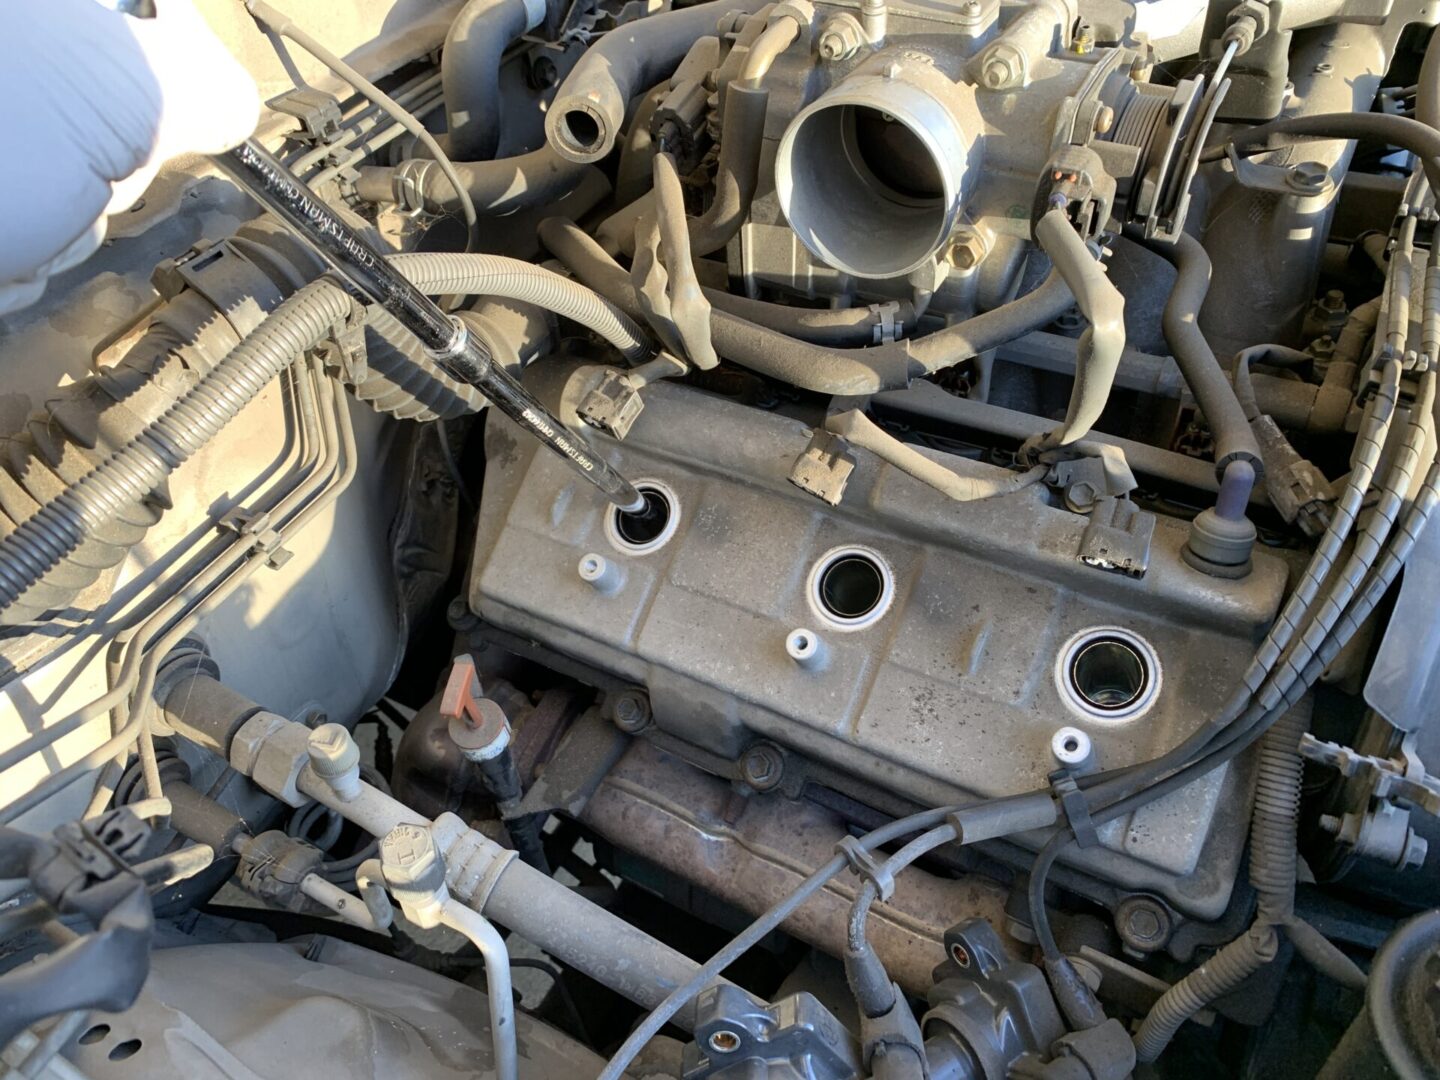
You will need extra long extensions so that you can get your 5/8″ spark plug socket deep into the combustion chamber. Remove the spark plug.
Get a new spark plug, apply a small dab of anti-seize onto the threads and spread it around. Position the spark plug inside of the spark plug socket (along with long socket extensions), insert into the combustion chamber, and thread it in by hand. You should be using just your hands with the spark plug socket and extensions (no socket wrench yet) so that you can be sure the spark plug doesn’t cross-thread.
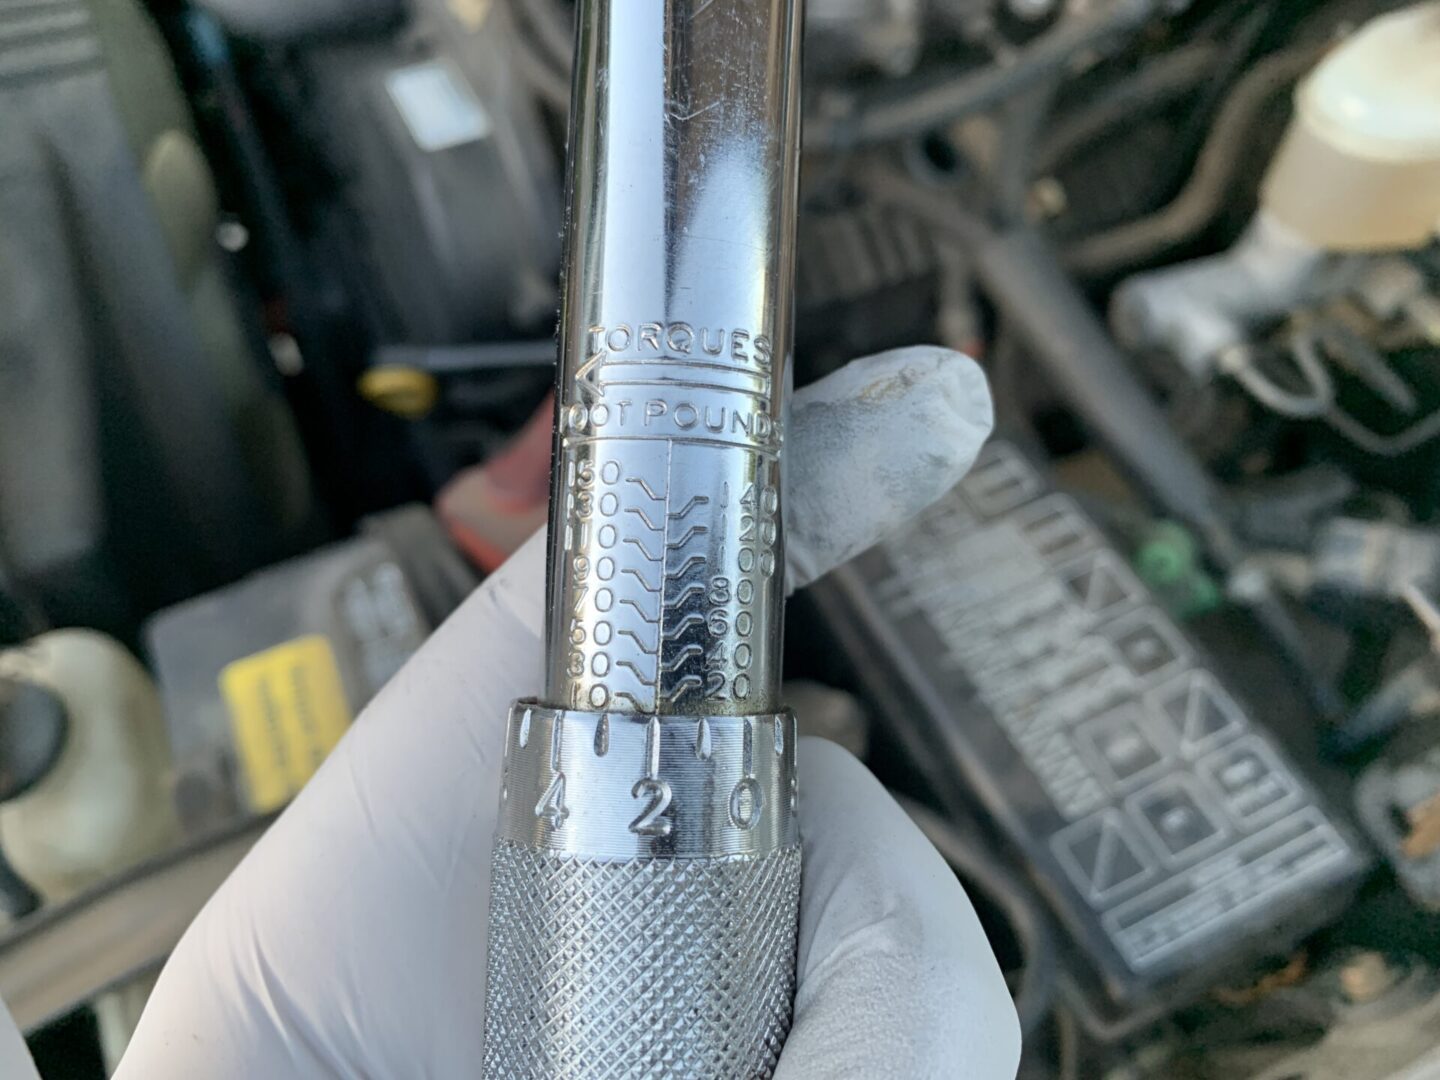
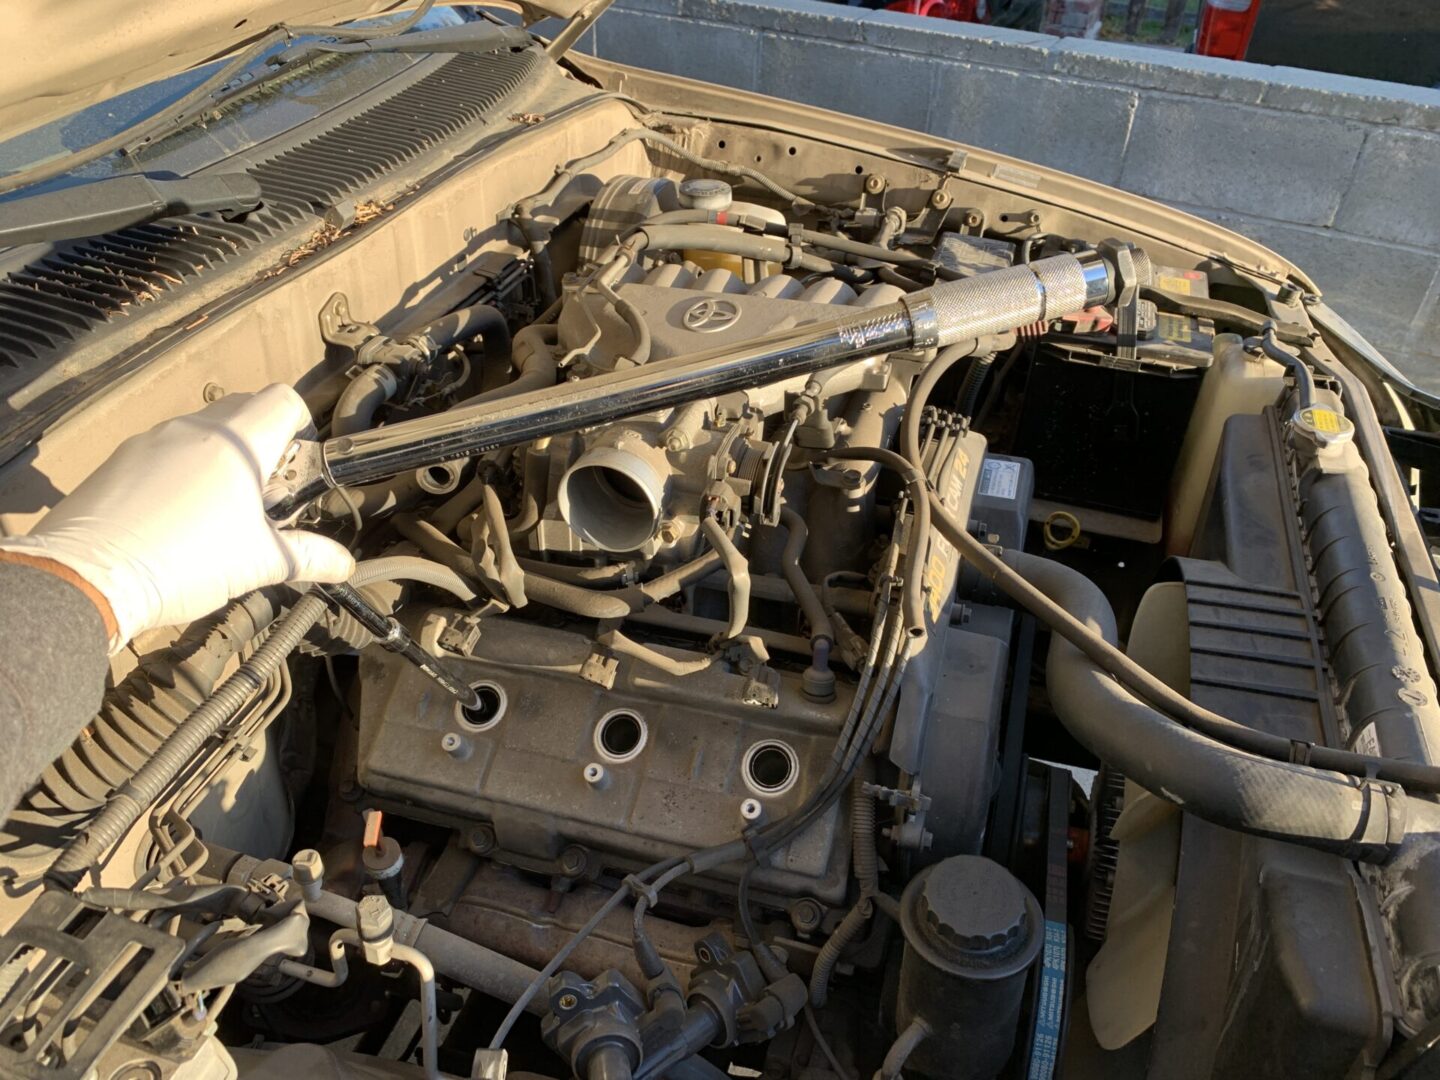
Torque the spark plug down with a torque wrench to 13 ft-lbs. If you don’t plan on using a torque wrench, you might be able to get away with hand-tightening and then tighten an additional quarter turn. However, I always advise using a torque wrench over doing it by hand to be safe.
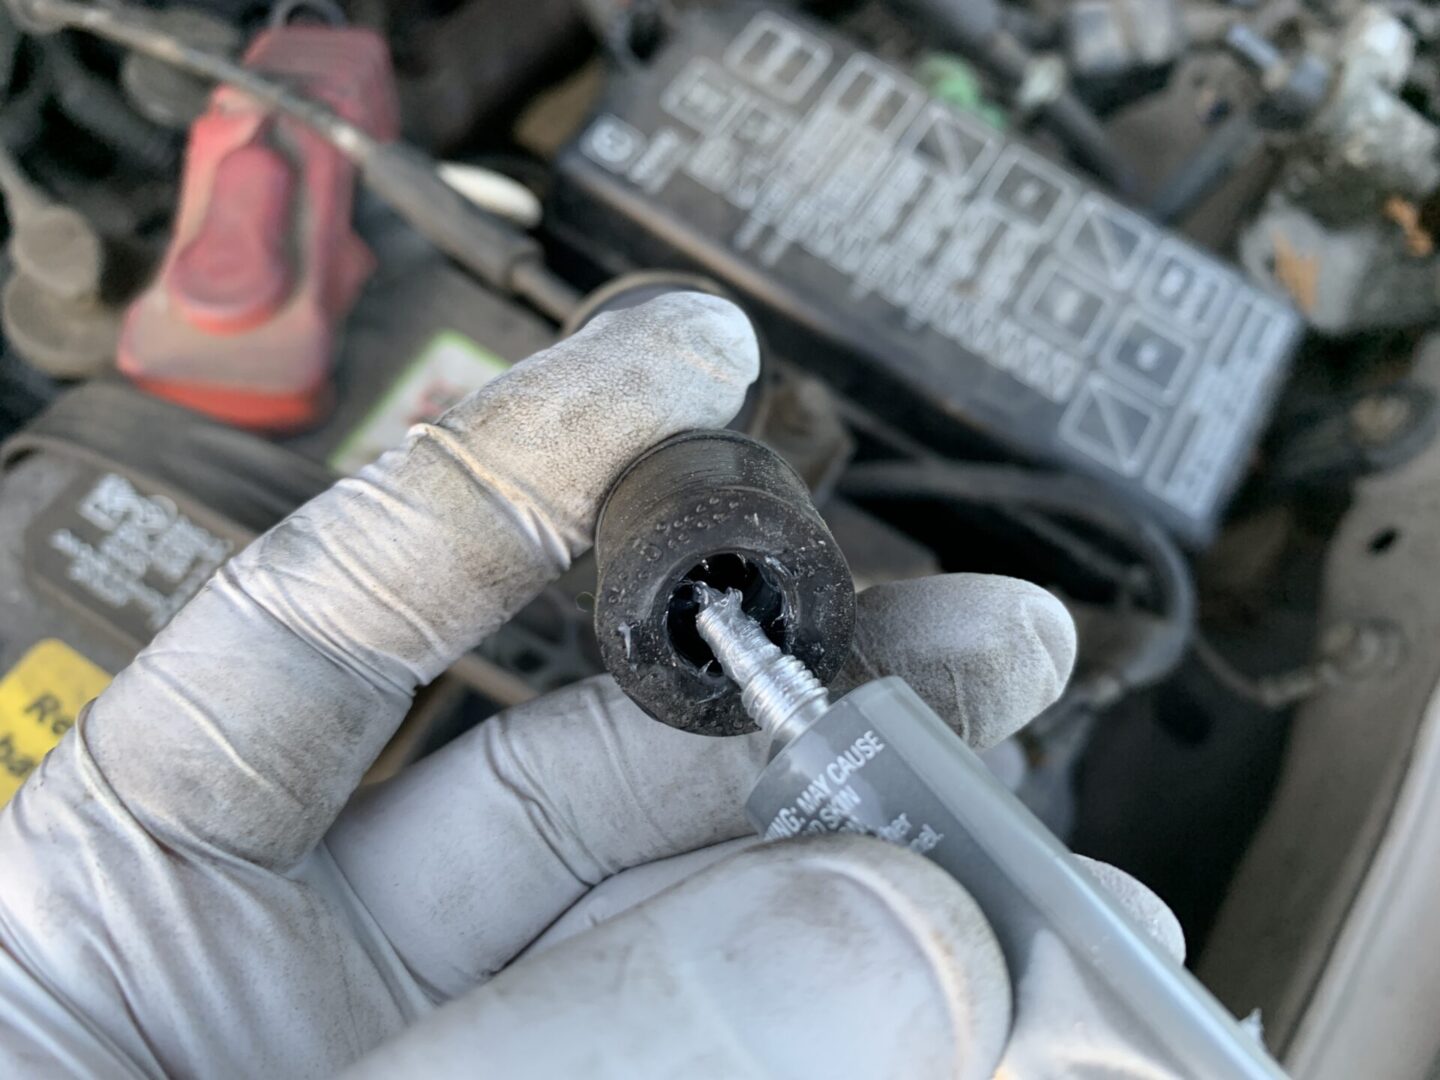
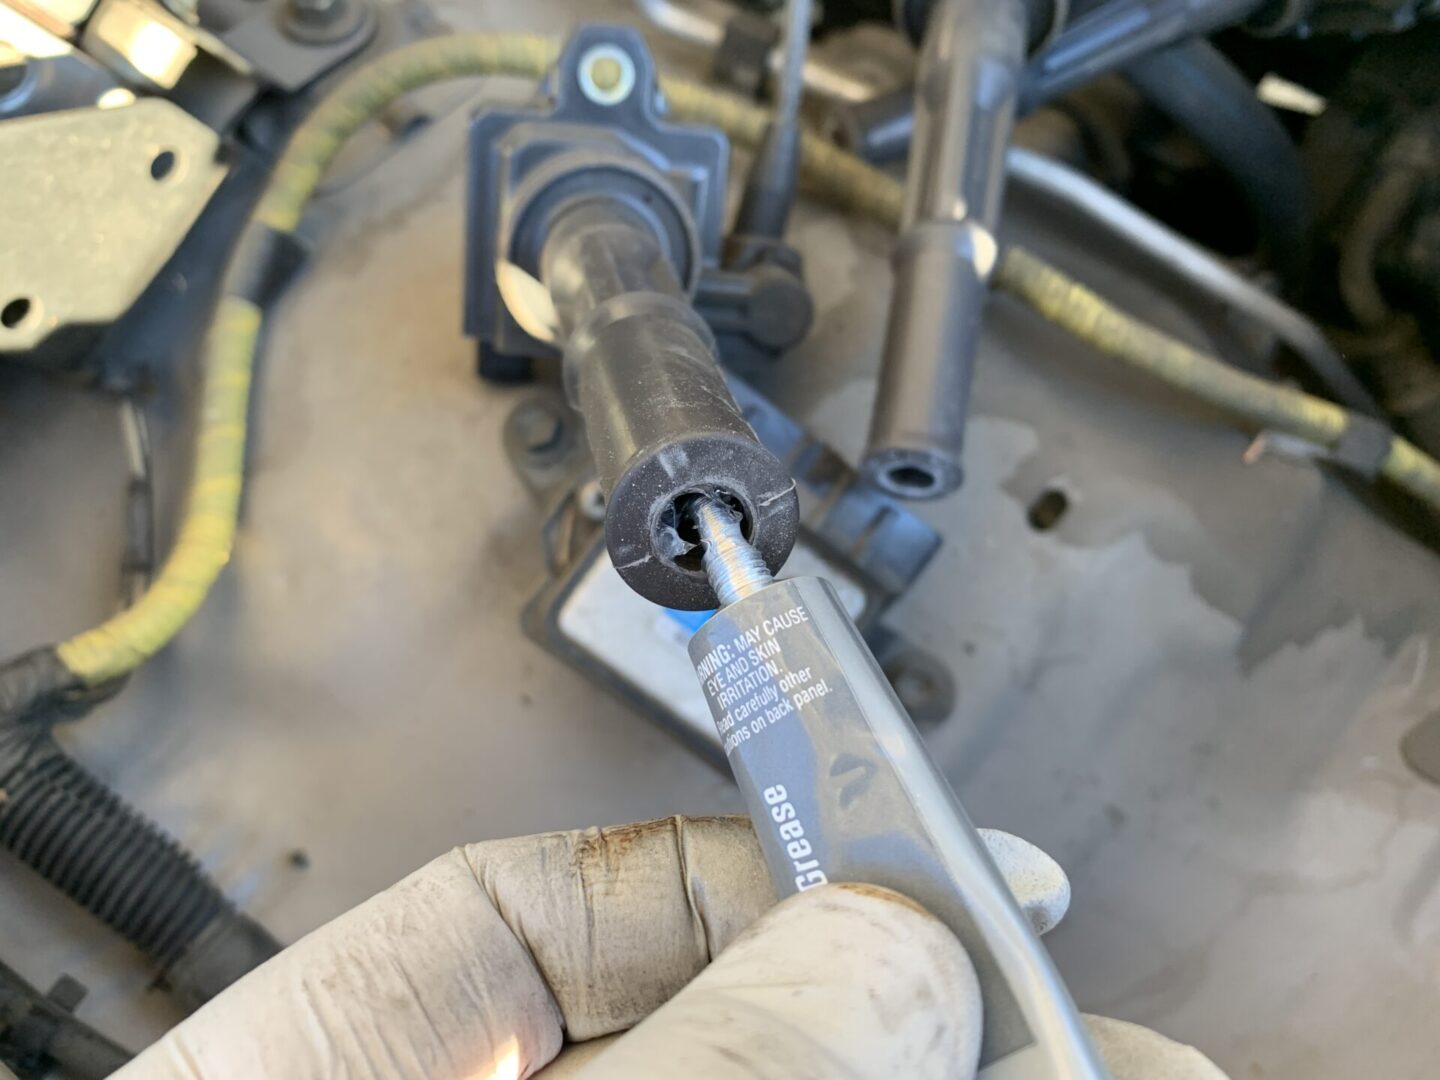
When replacing the spark plug boot, use a bit of dielectric grease and using the nozzle on the tube, spread it around the inside perimeter of the boot. Then re-install the spark plug boot.
After replacing all the spark plugs and re-installing the spark plug boots, re-install the rest of the components you removed back in reverse of removal. You are now completed with the driver’s side spark plugs.
Replacing Spark Plugs on the Passenger’s Side of the 3.4L V6 (5VZ-FE) Engine
For the passenger’s side, you mainly just have to worry about getting the air intake out of the way in order for you to replace the spark plugs.

There are different ways of getting enough space to do the passenger’s side spark plugs, but my preference is to simply remove the entire air intake along with the air filter housing. Some folks only separate the intake hose from the intake manifold and bend the hose out of the way, but this can damage your intake hose especially on older vehicles such as this one.
Using a 10mm socket, remove the following (3 qty) air filter housing mounting bolts. This will free the air filter box from the frame.
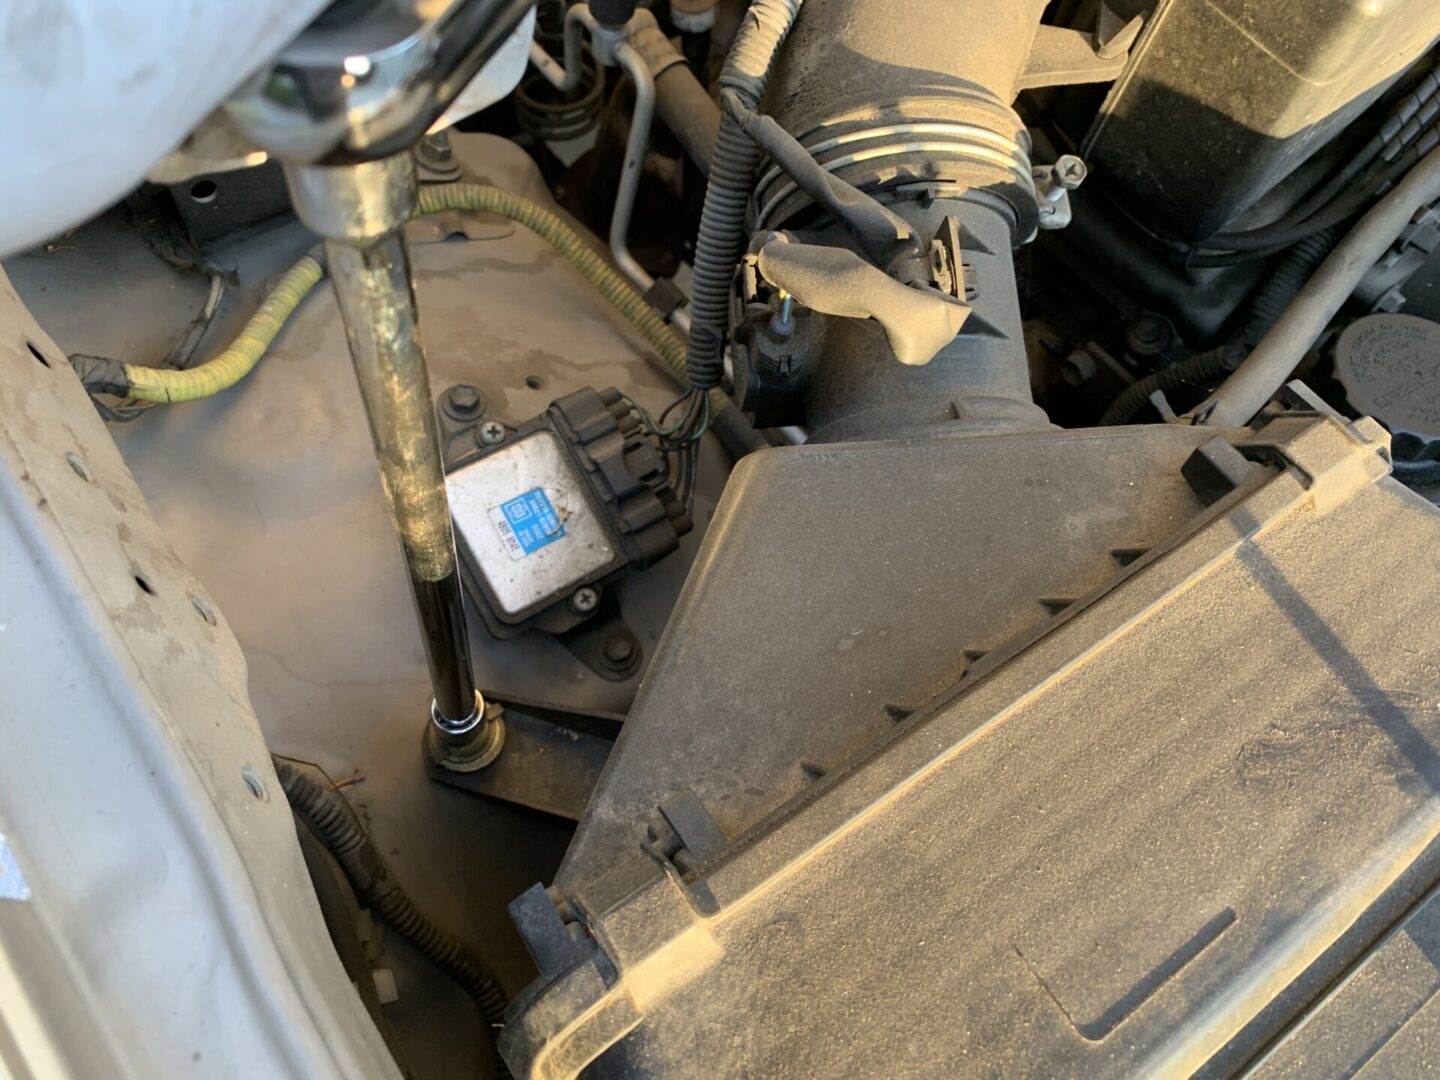

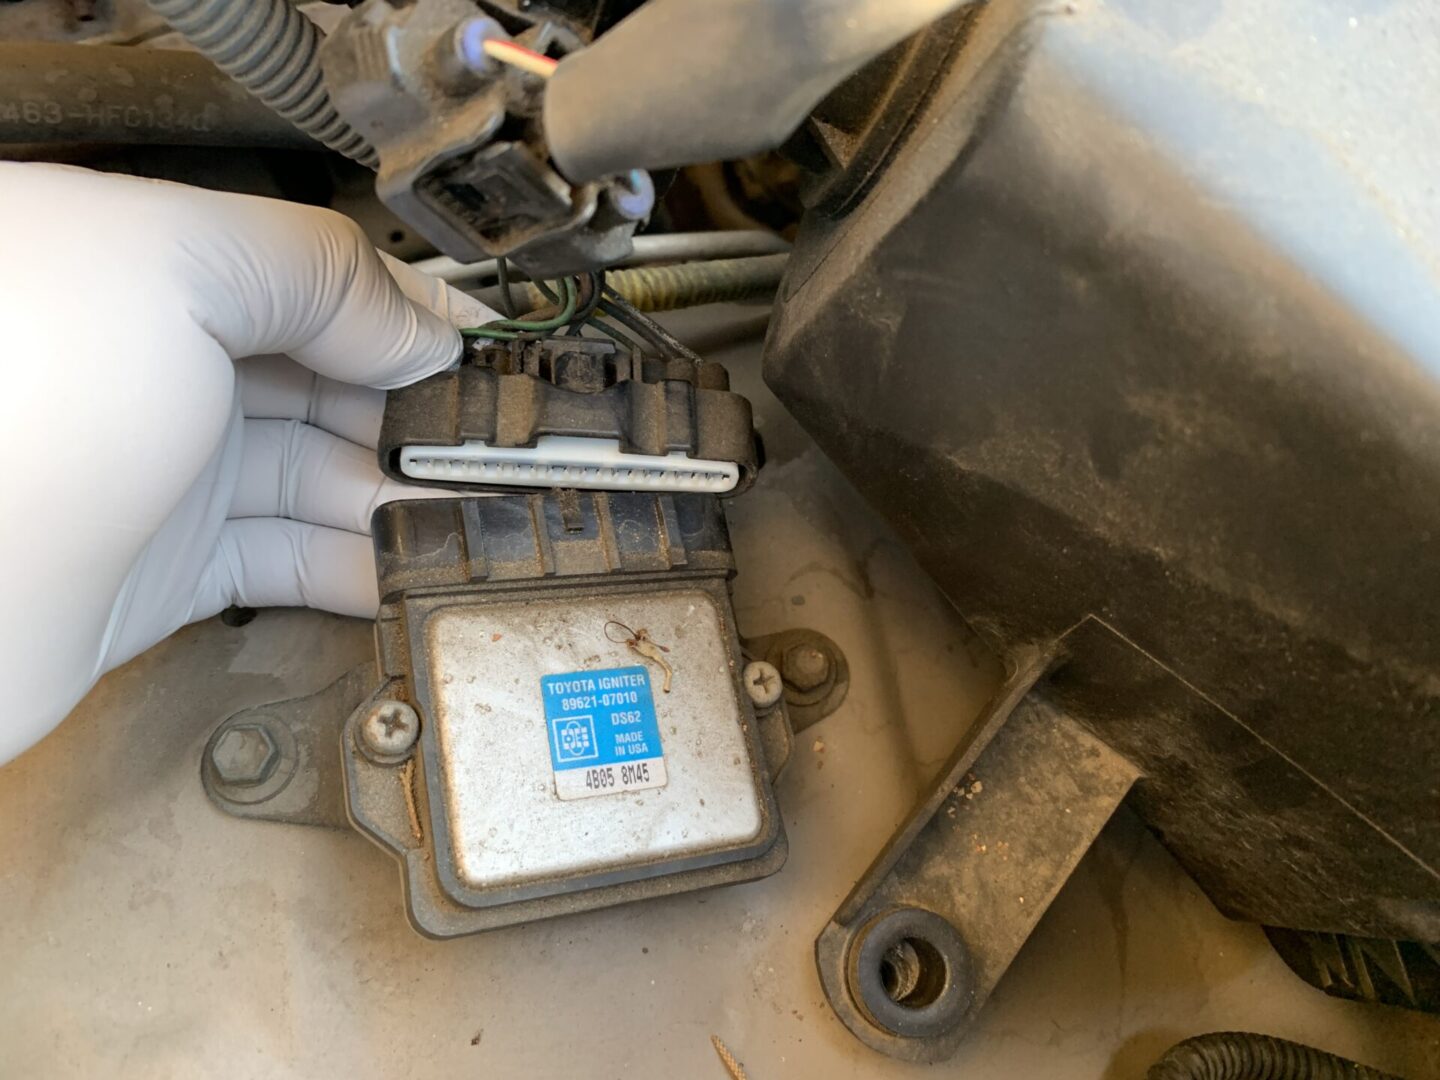
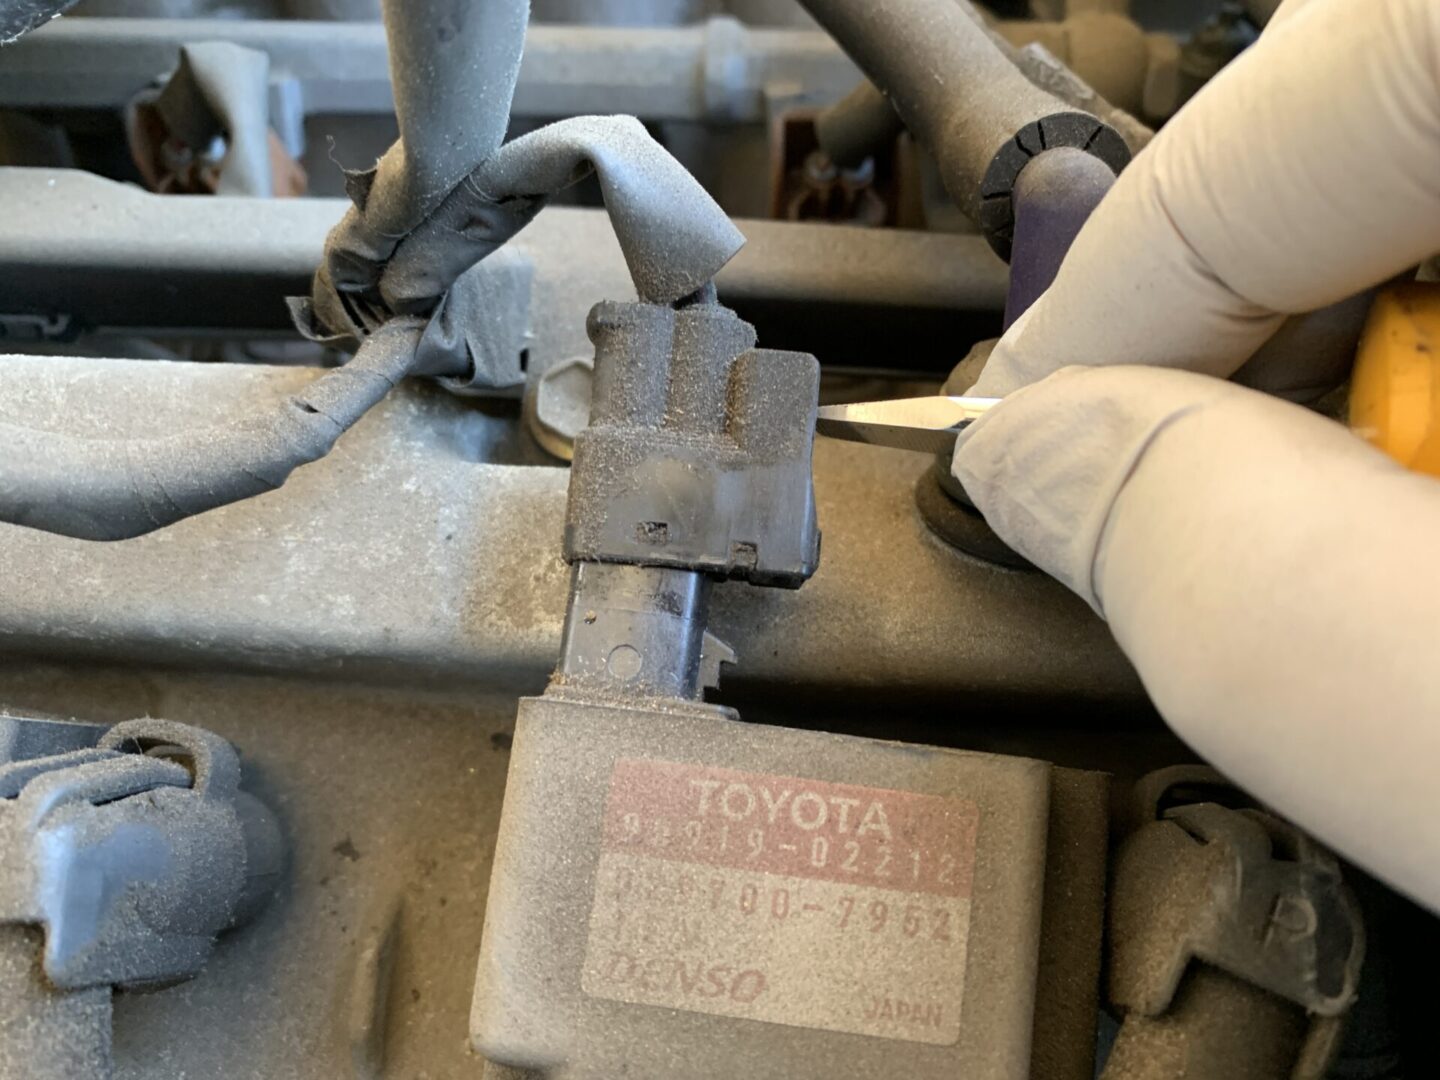
Disconnect the following connectors and free up the attachments as shown. These are connectors for the ignition control module (wider connector) and MAF sensor (smaller connector). Move these out of the way as you will be pulling out the entire air intake box and intake hose.


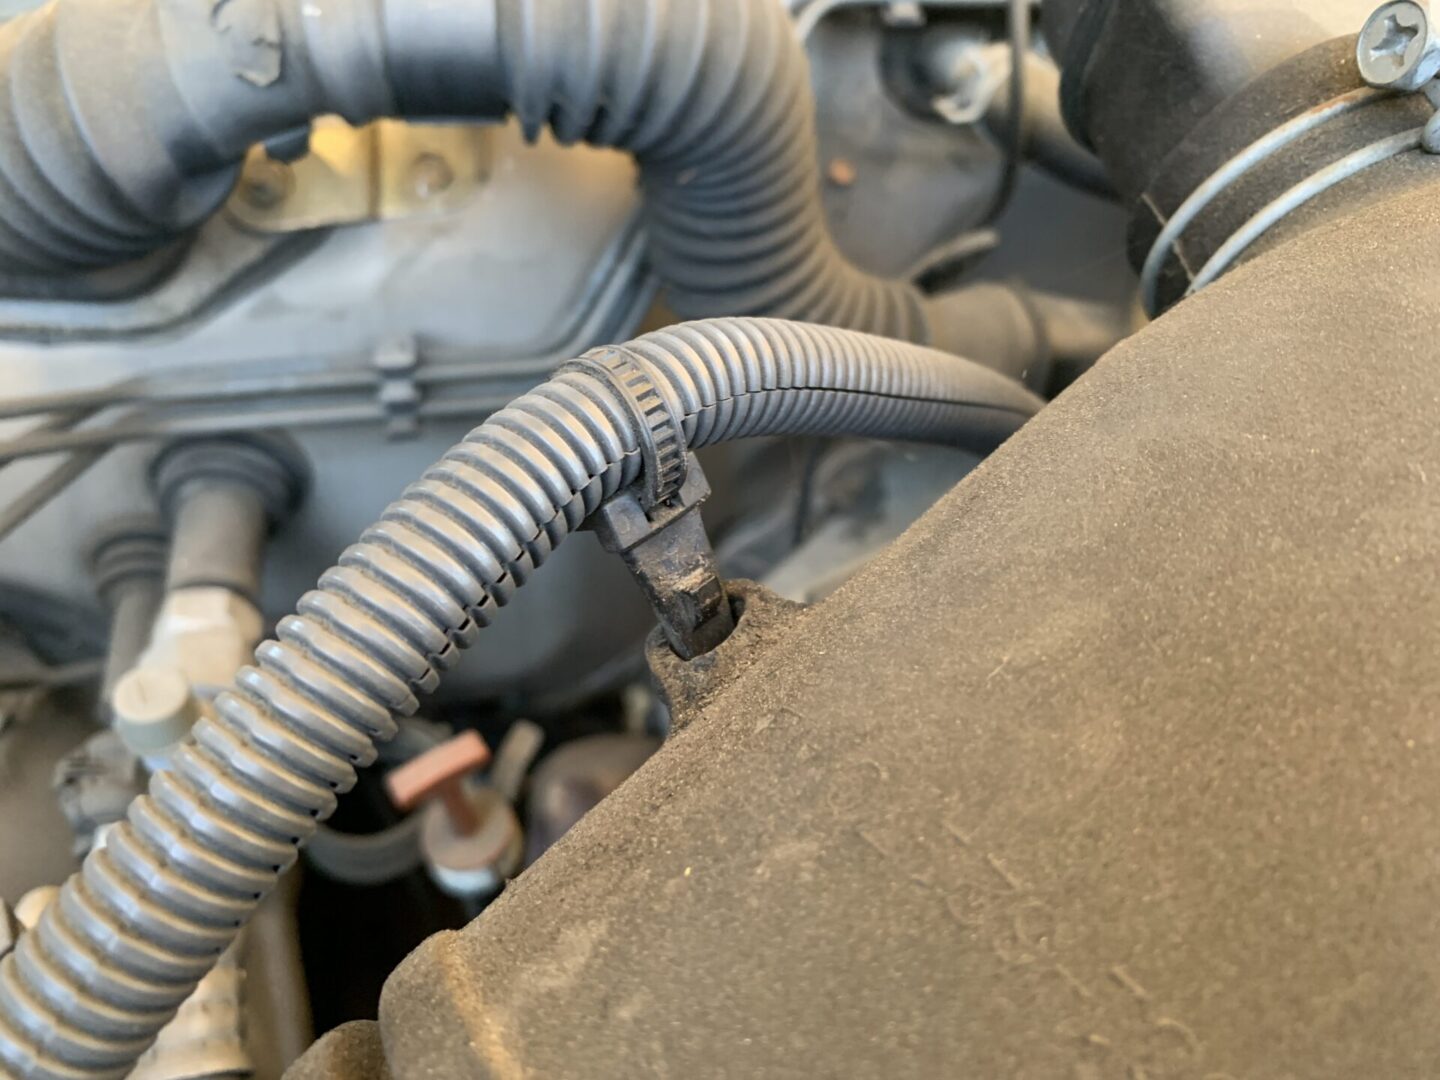

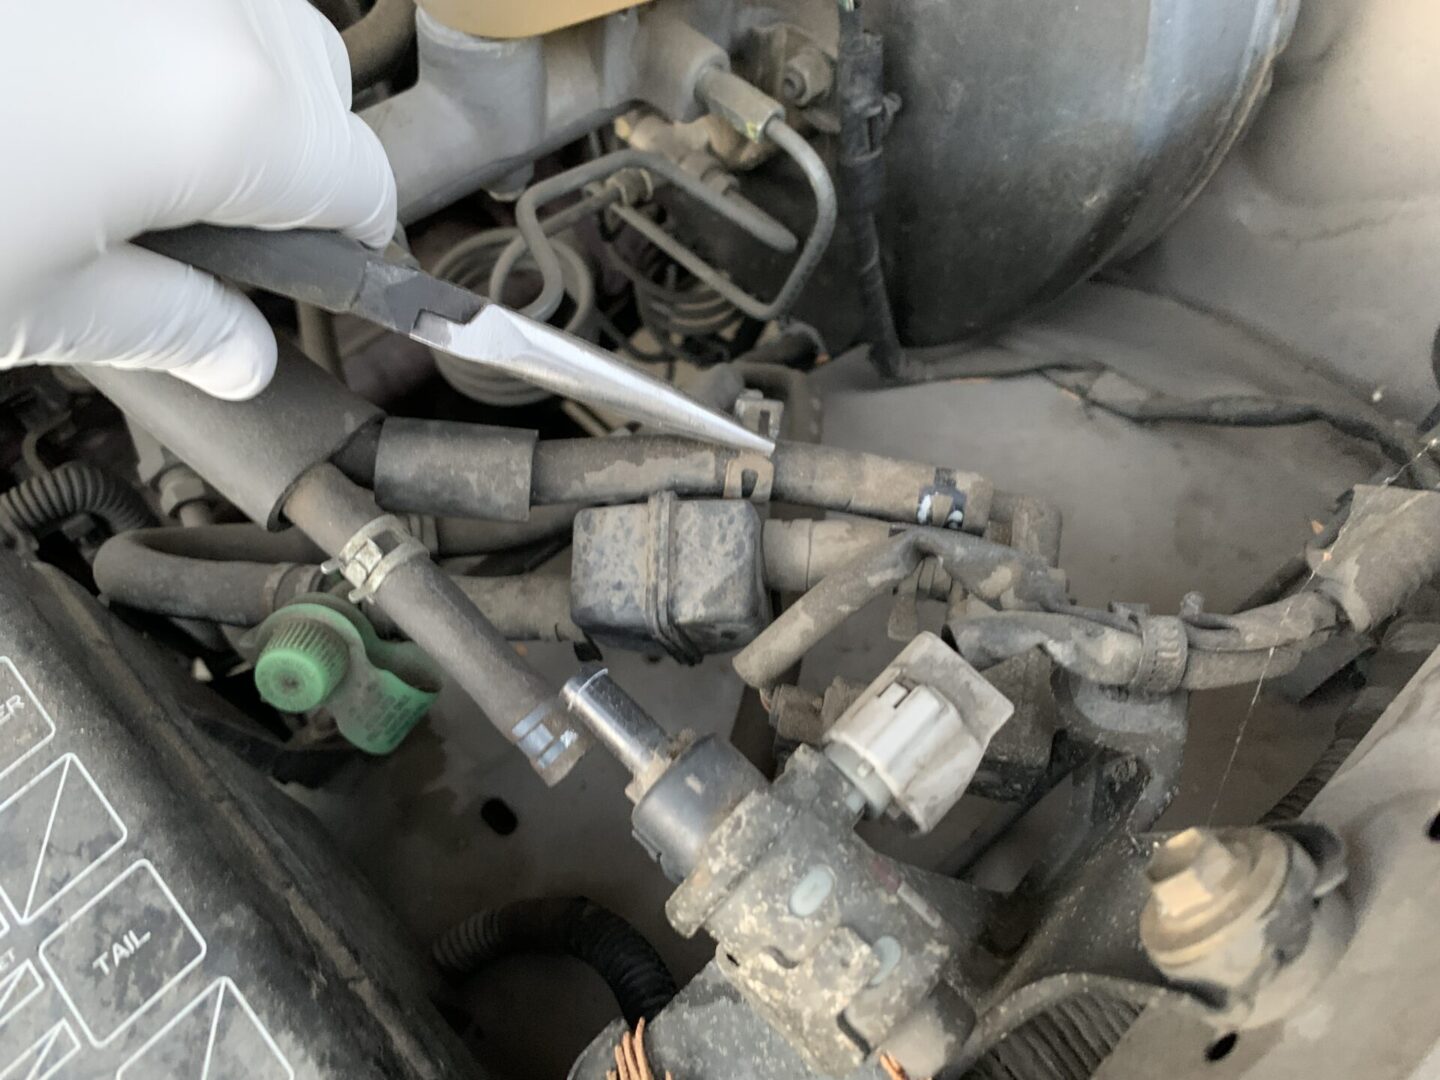
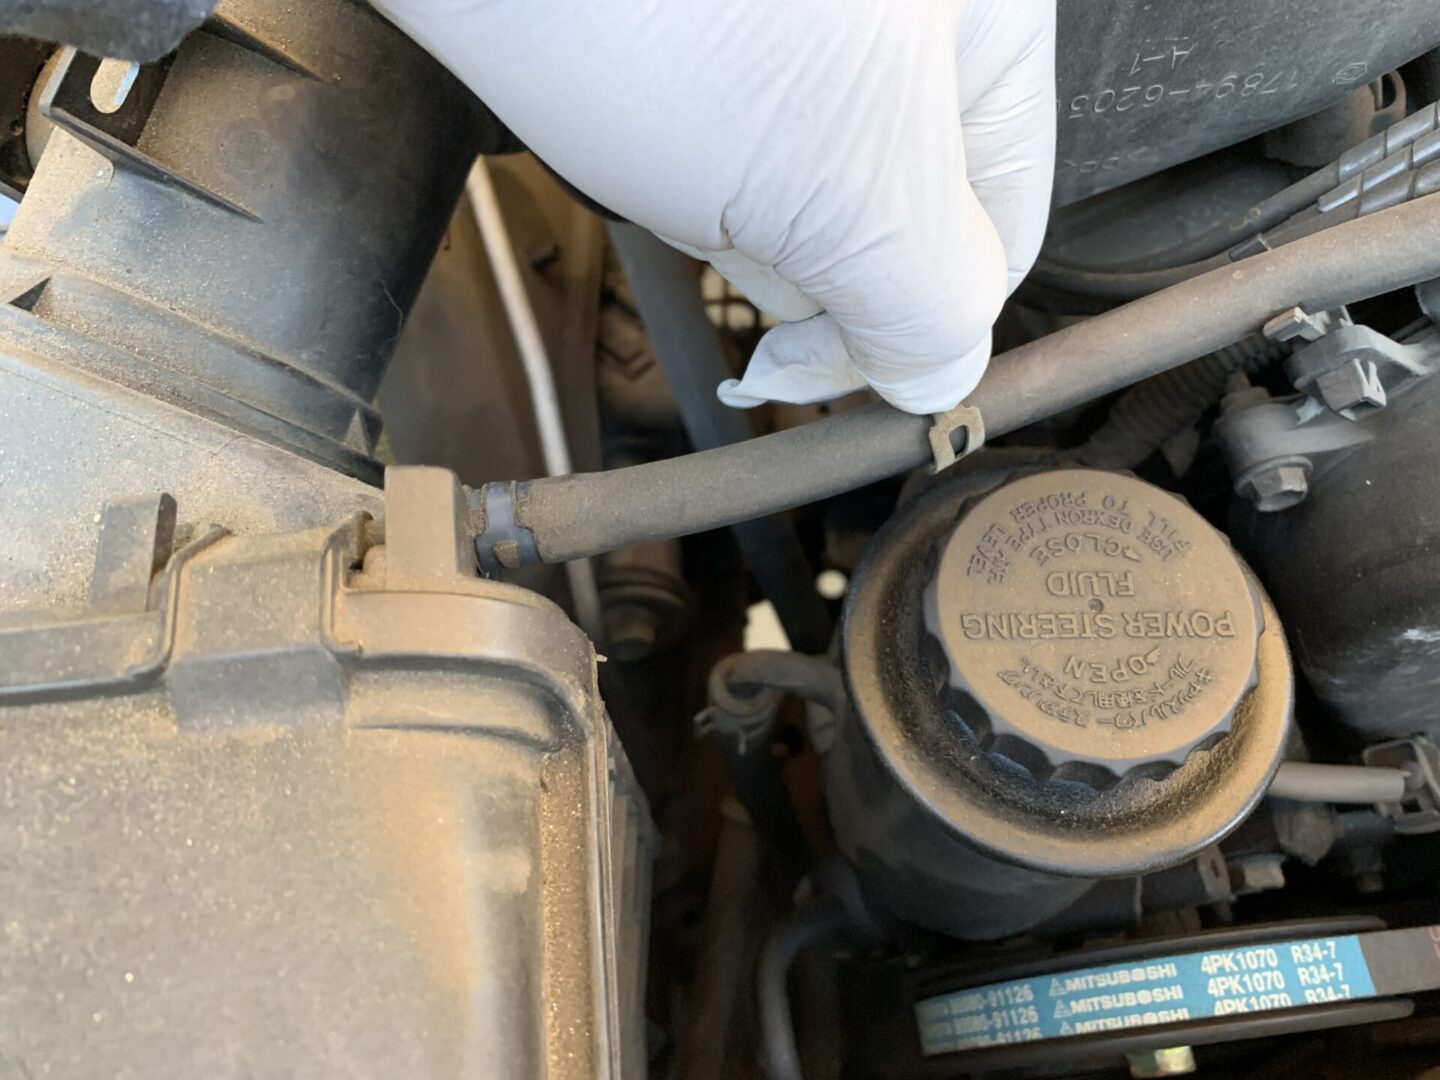
Disconnect the following vacuum hoses that are attached to the air intake.


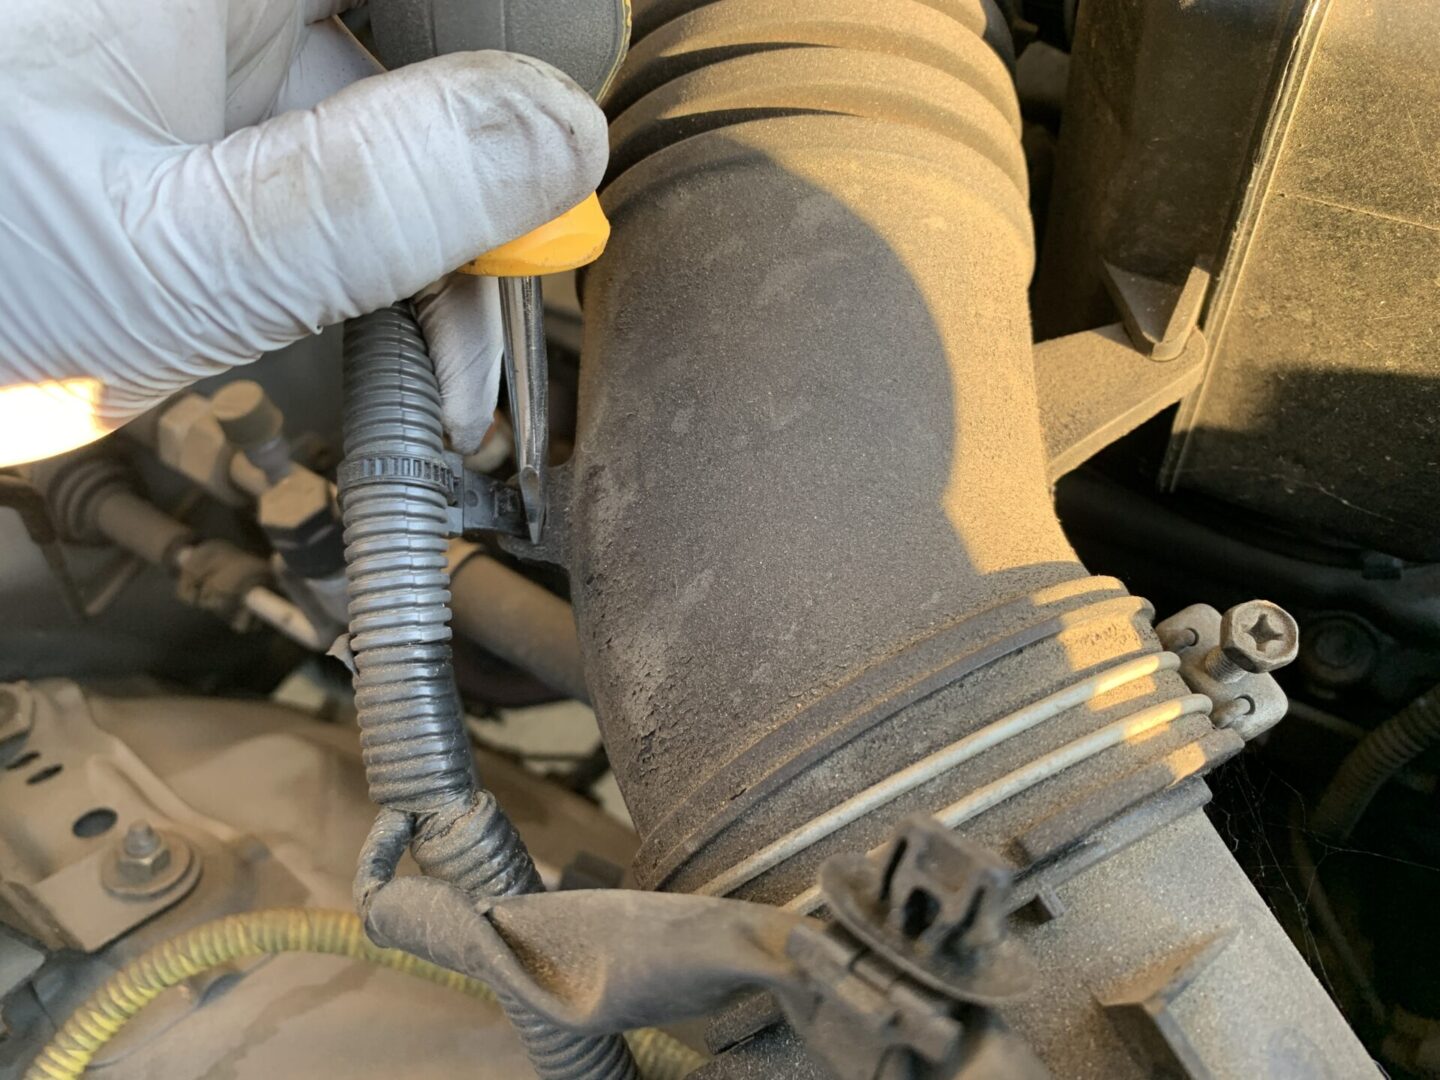
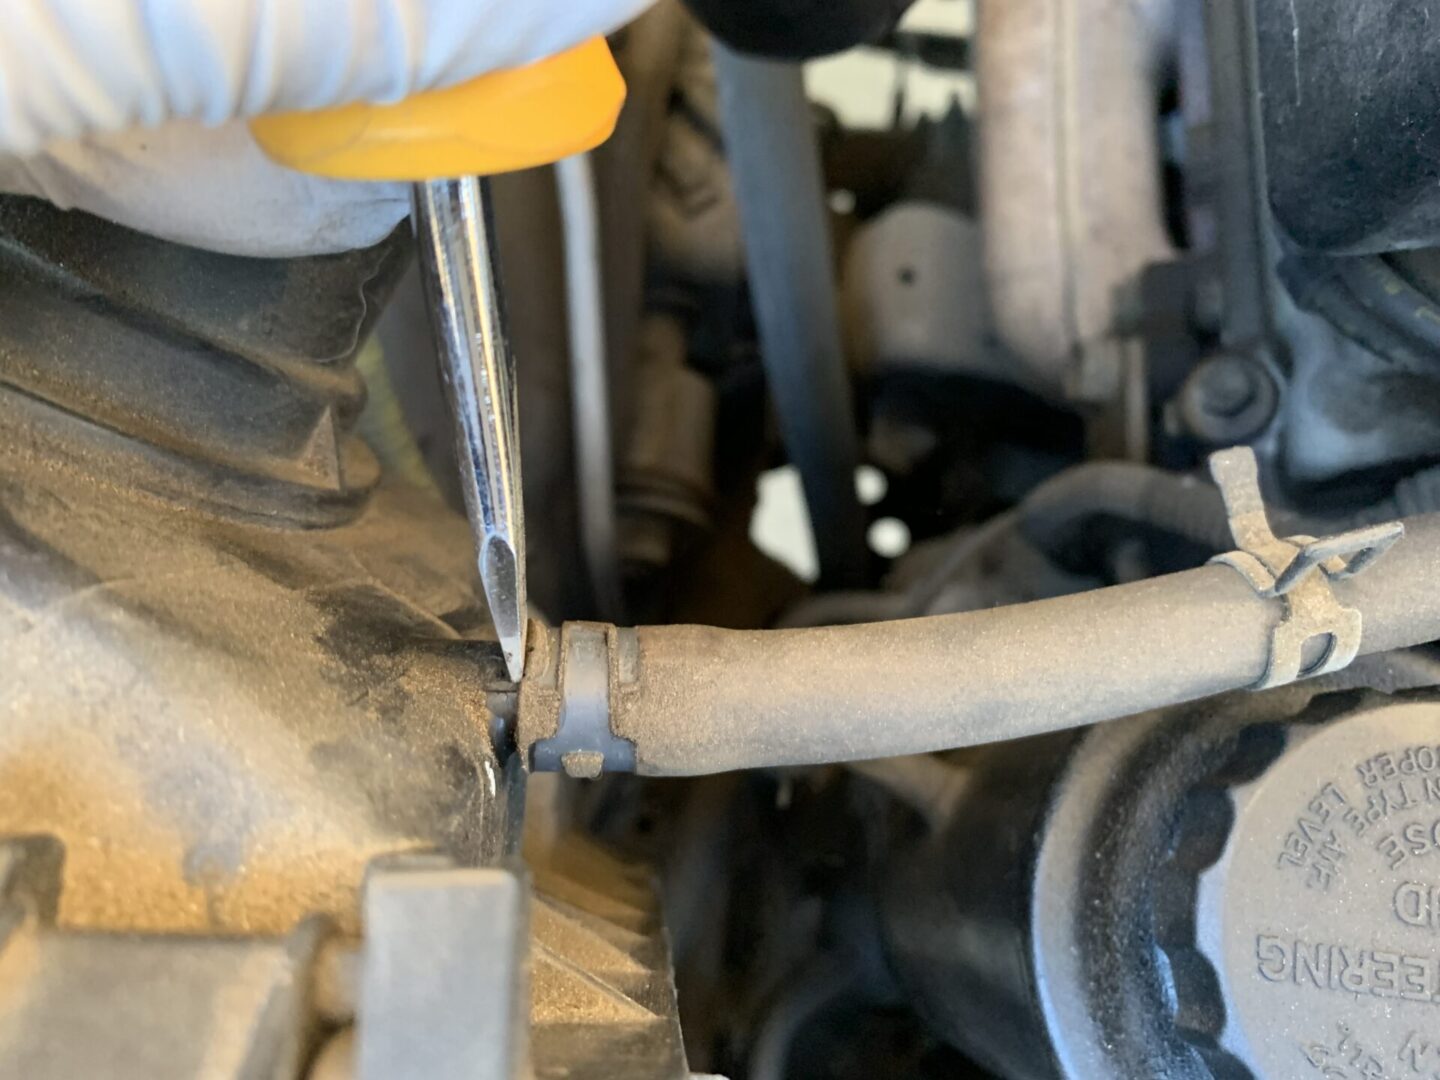
Be very careful with removing vacuum hoses as they can be quite brittle and possibly already damaged. They sometimes can get stuck and simply twisting them off may not work. My preferred method is to use a thick flat head screwdriver and pry it off gently all around the hose and then pulling it off by hand.


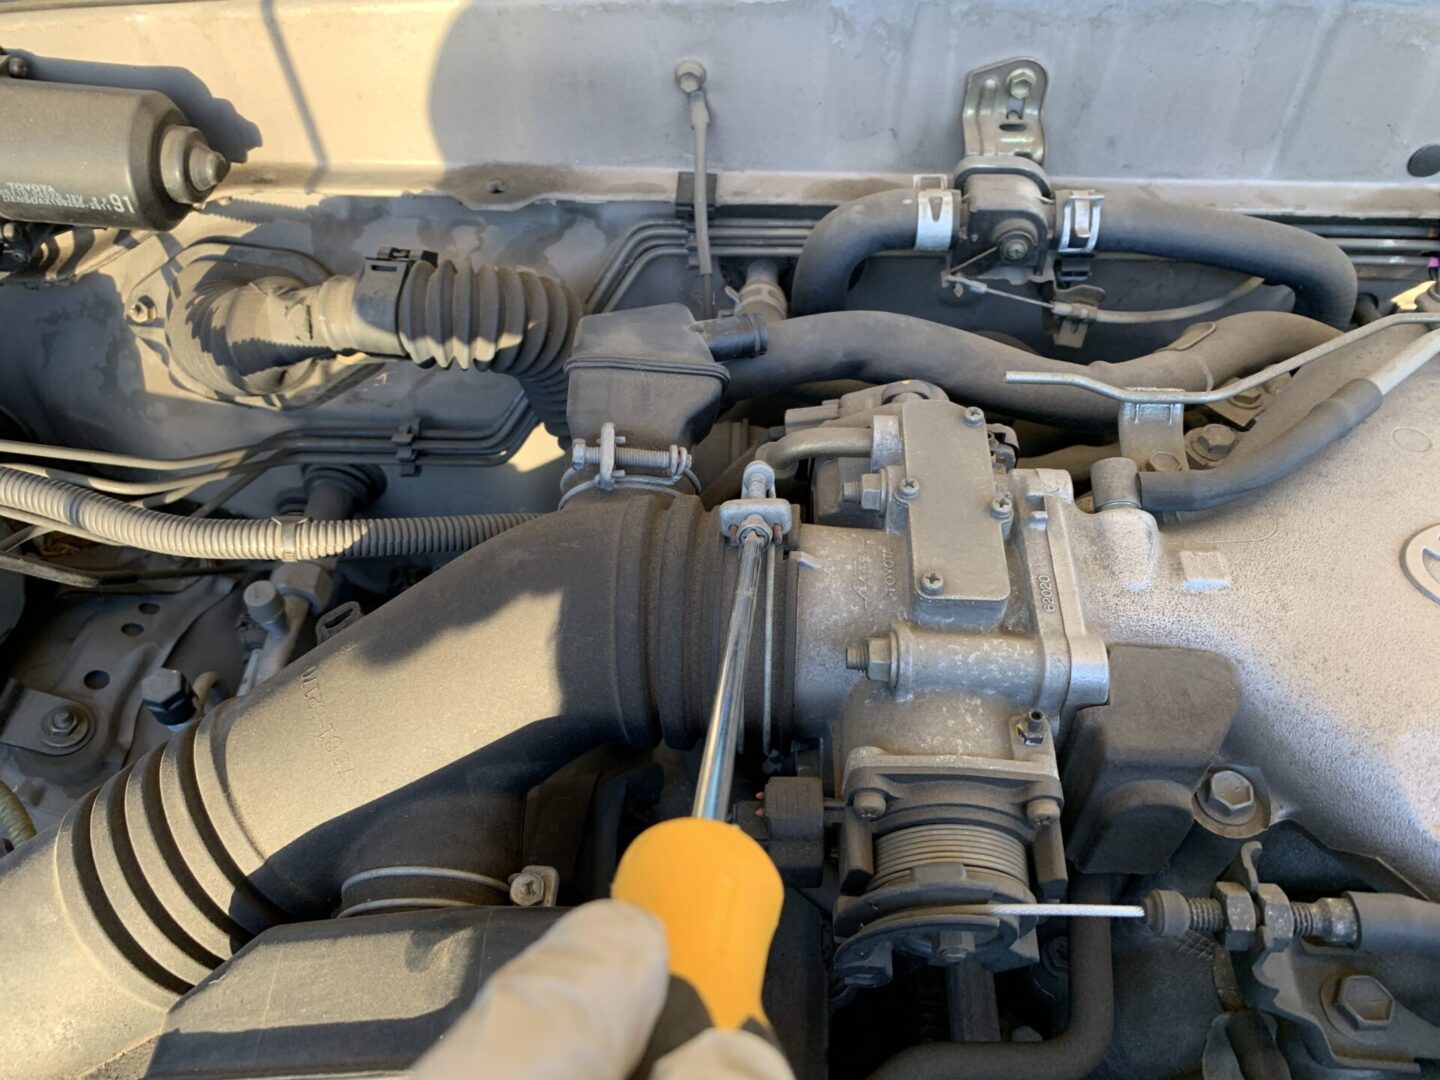
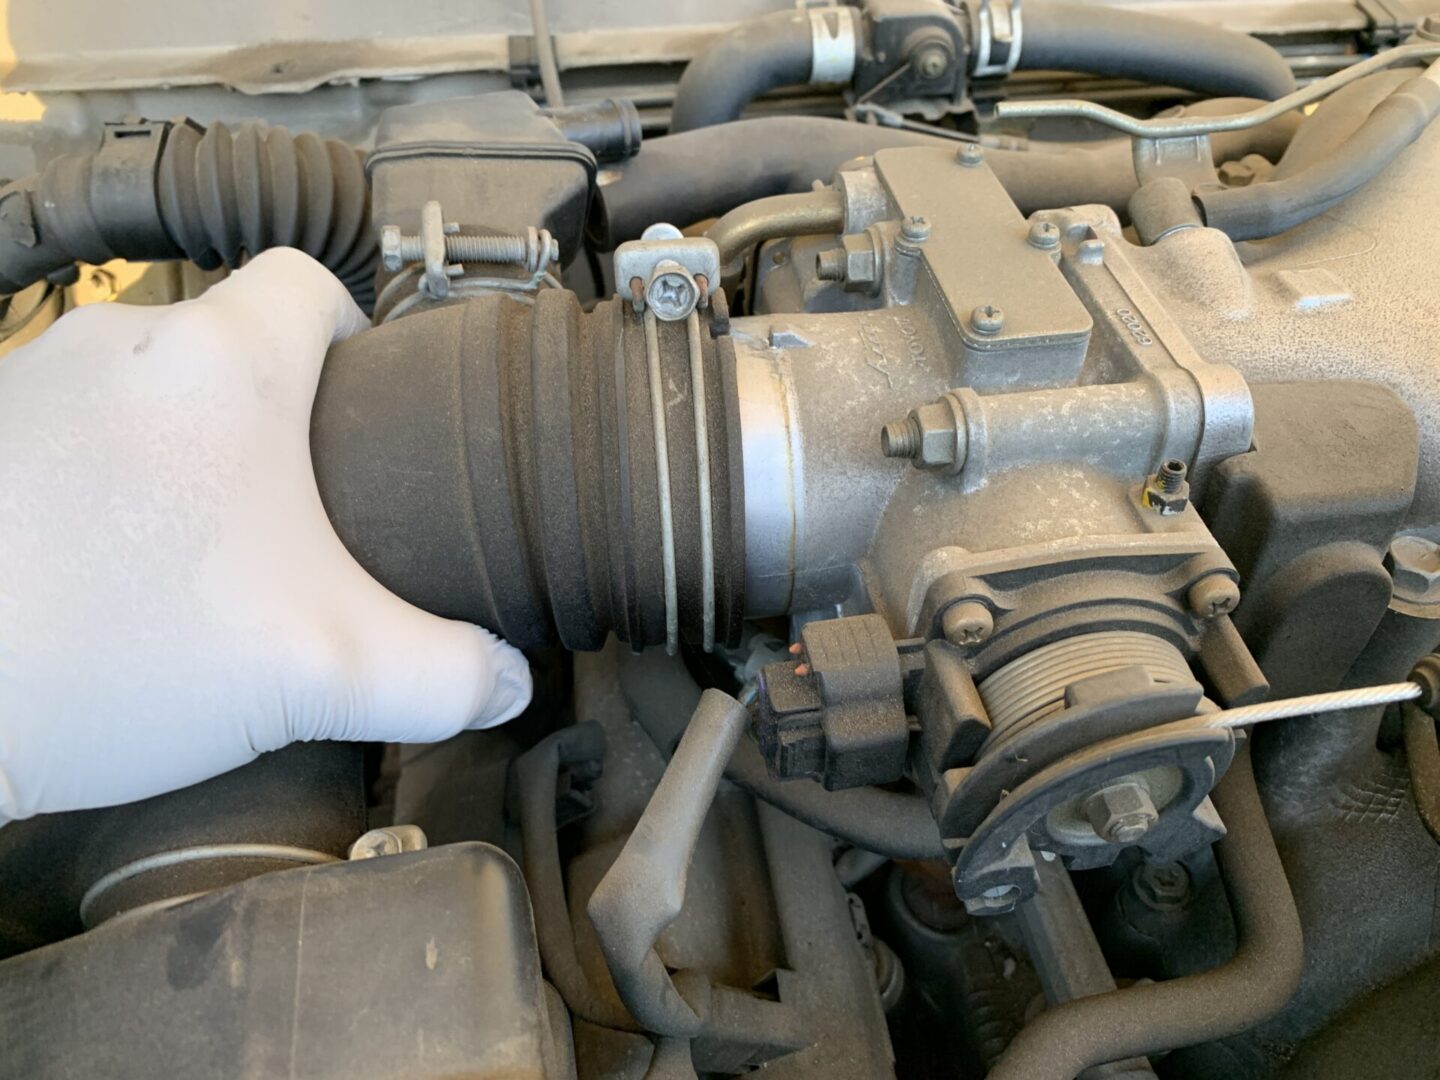
Finally, use a Philips head screwdriver to loosen the bolt for the clamp that holds the air intake hose to the intake manifold. Once loosened enough, the whole intake can be pulled off of the manifold along with the rest of the intake and air filter housing.


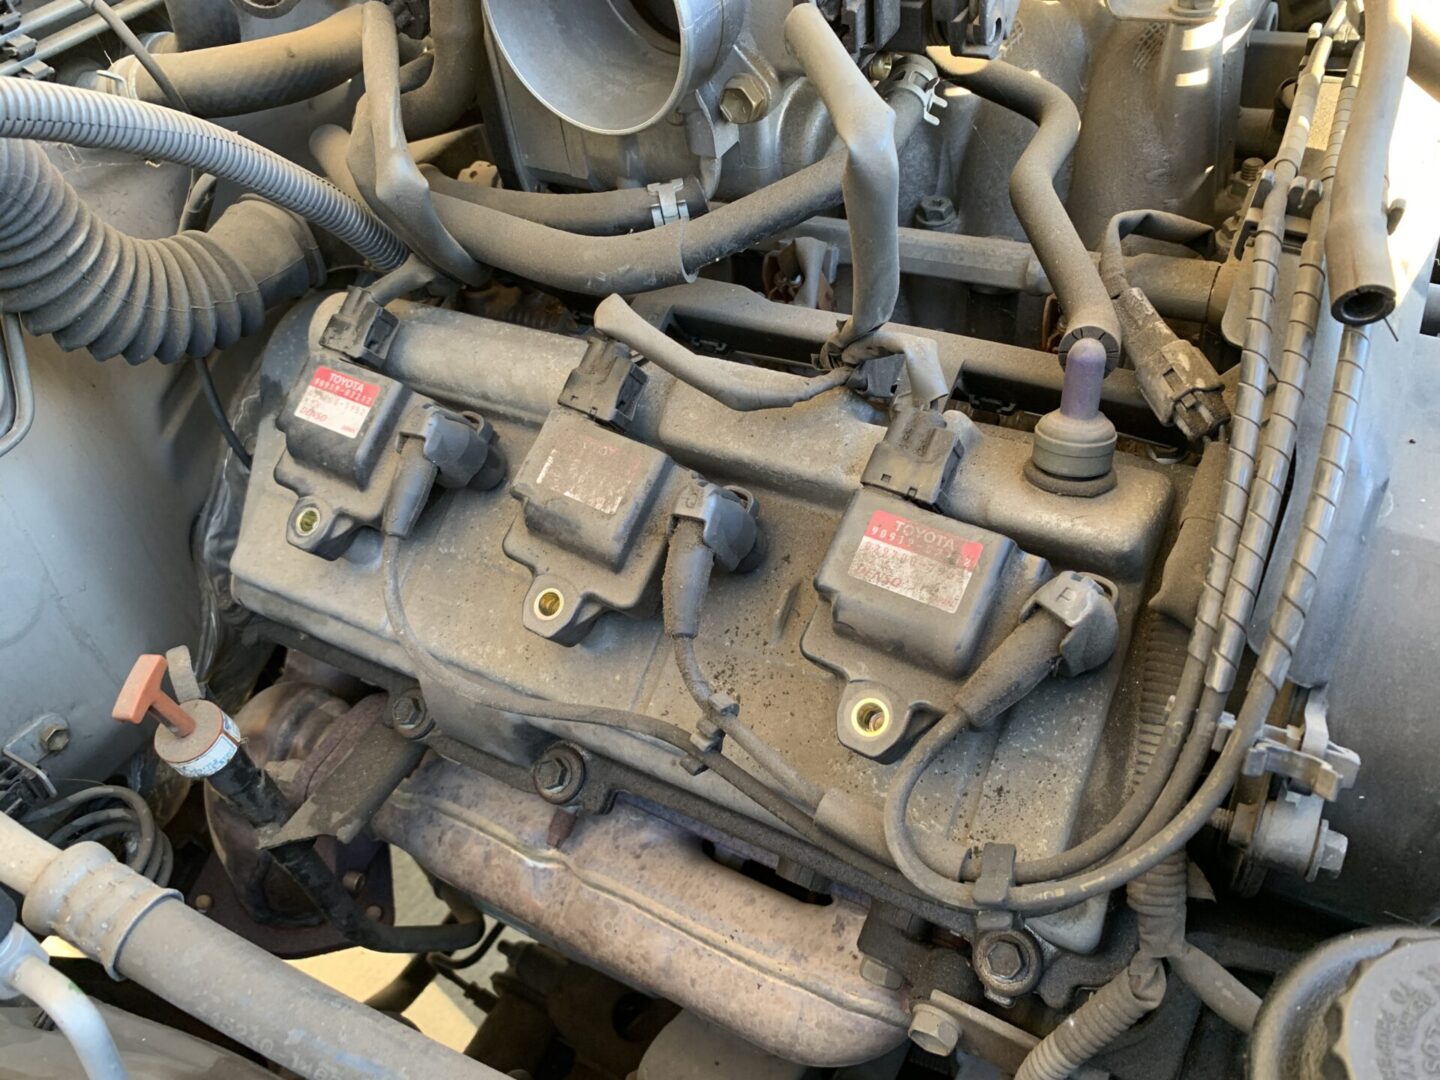
Now, you have full access to the passenger’s side ignition coils and spark plugs. You’ll notice that this bank is different from the driver’s side with the use of ignition coils versus spark plug boots as seen on the driver’s side.

Use a flat head screwdriver or fingers to press on the release and pull off the ignition coil connectors.

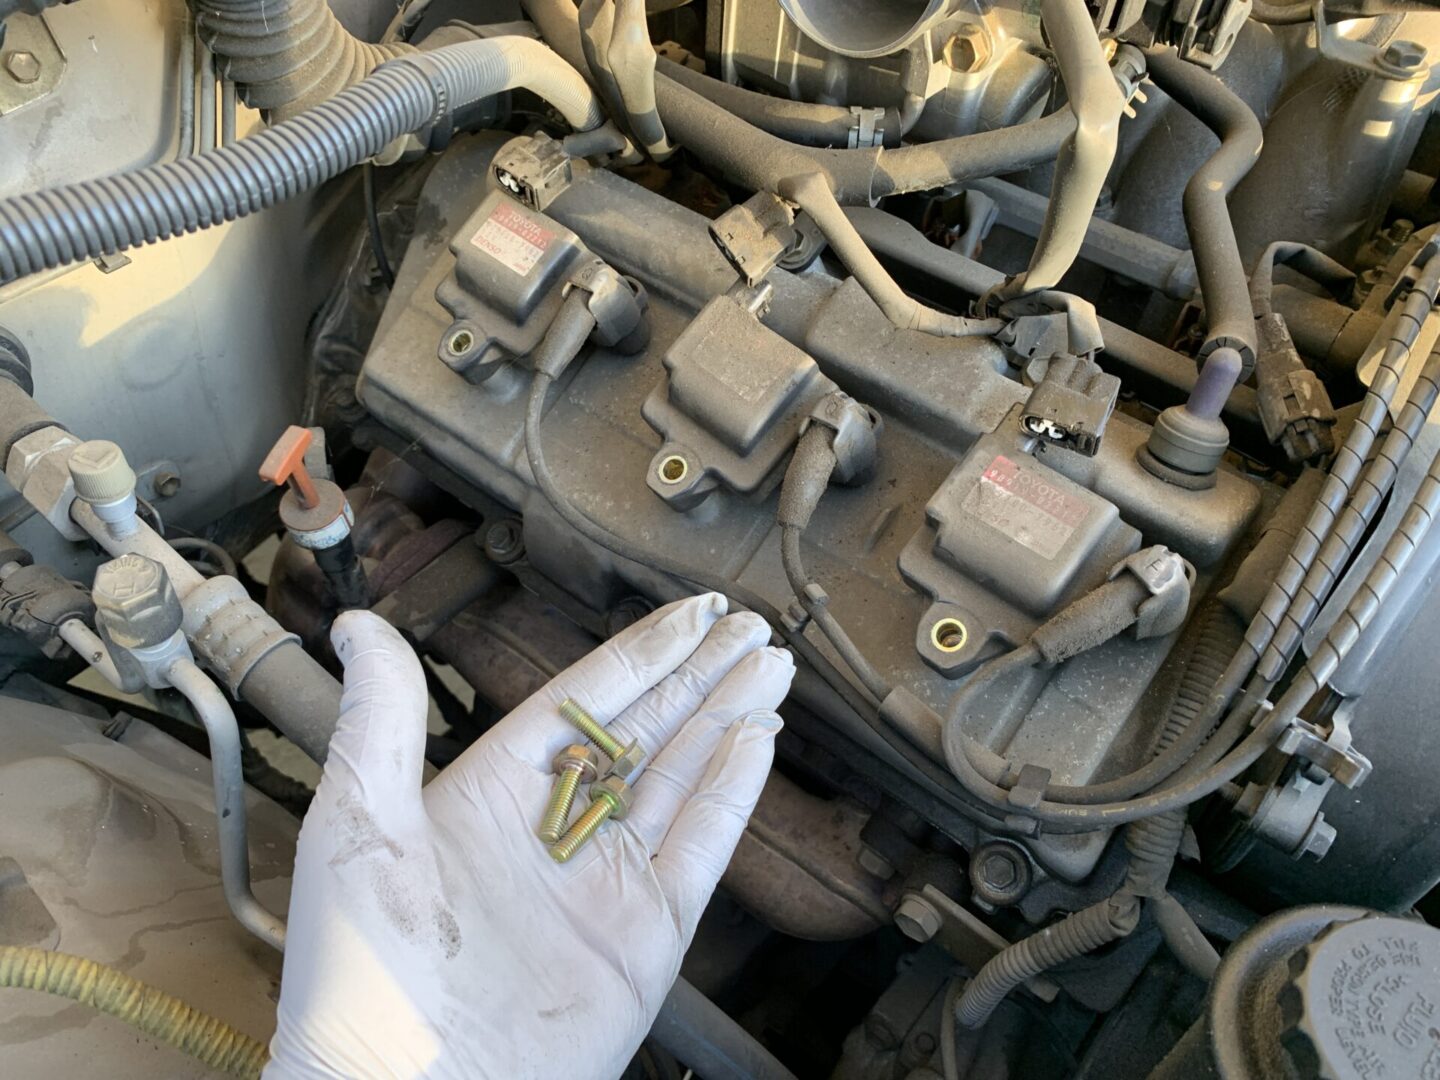
Then using a 10mm socket, remove the 10mm bolts that hold the ignition coils in place.
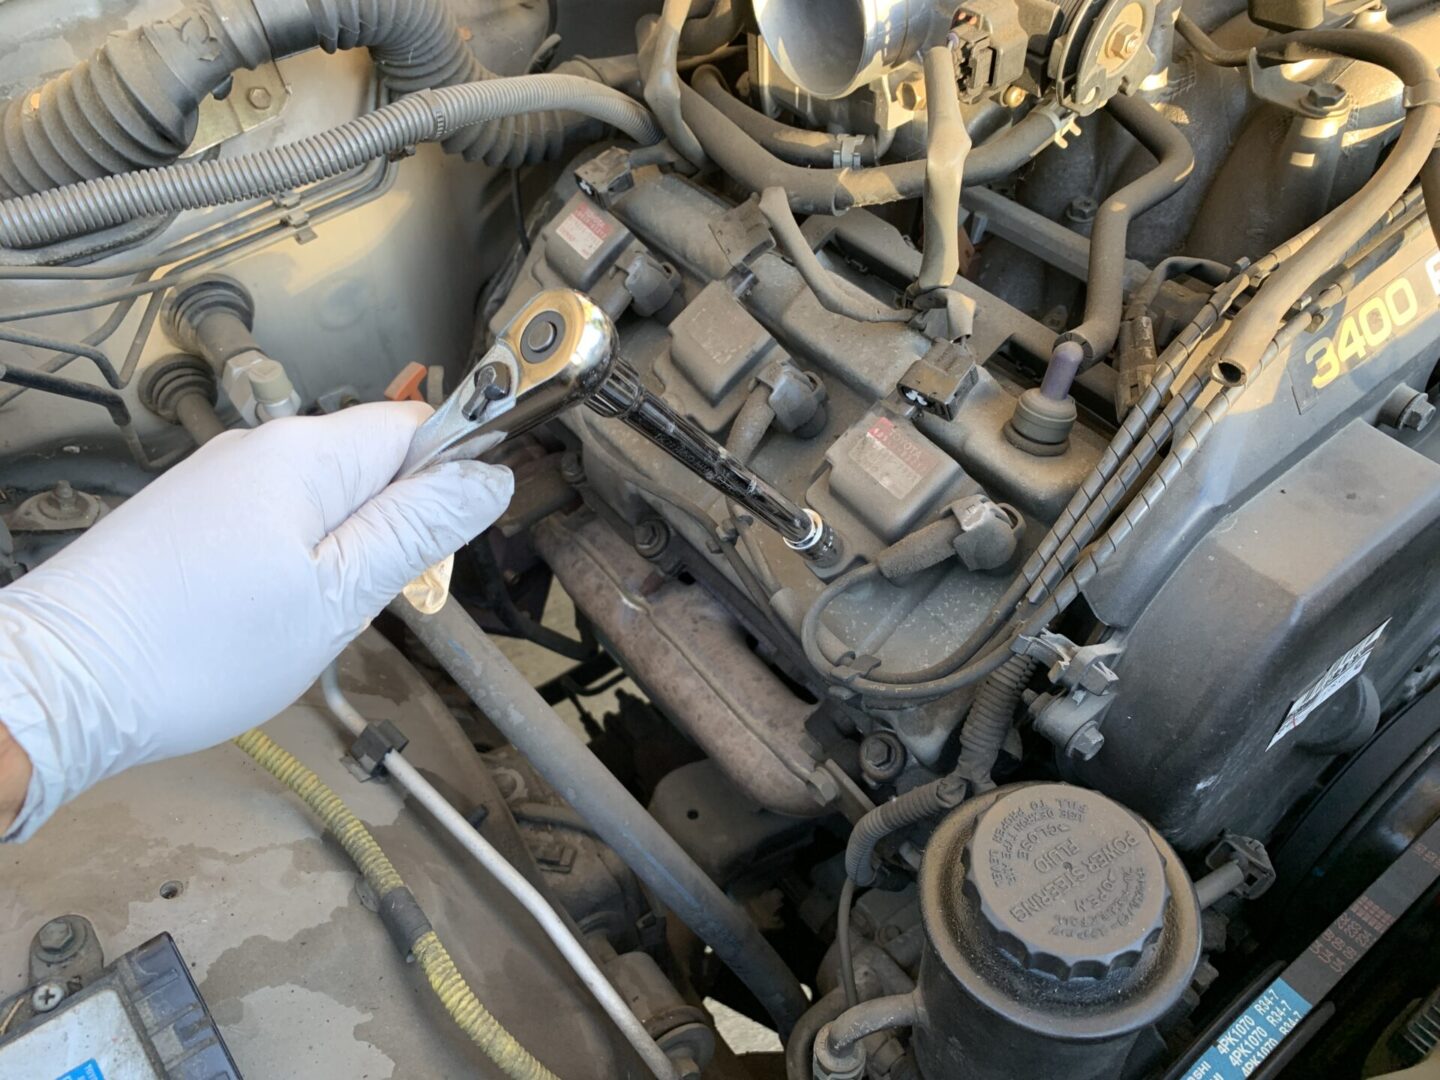
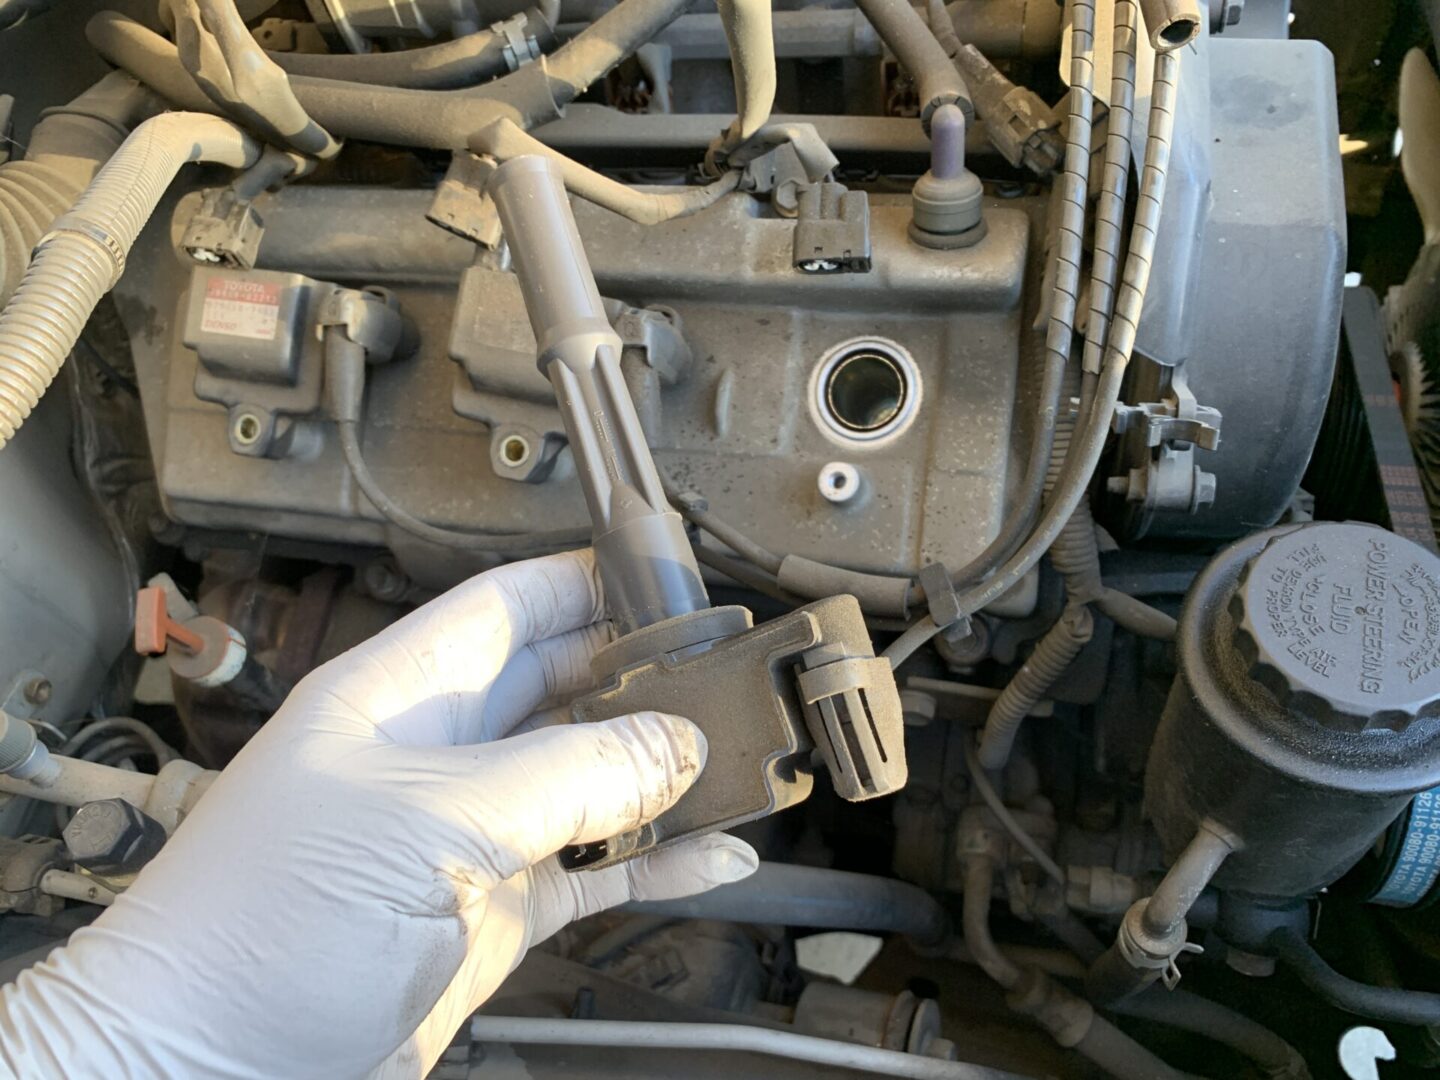
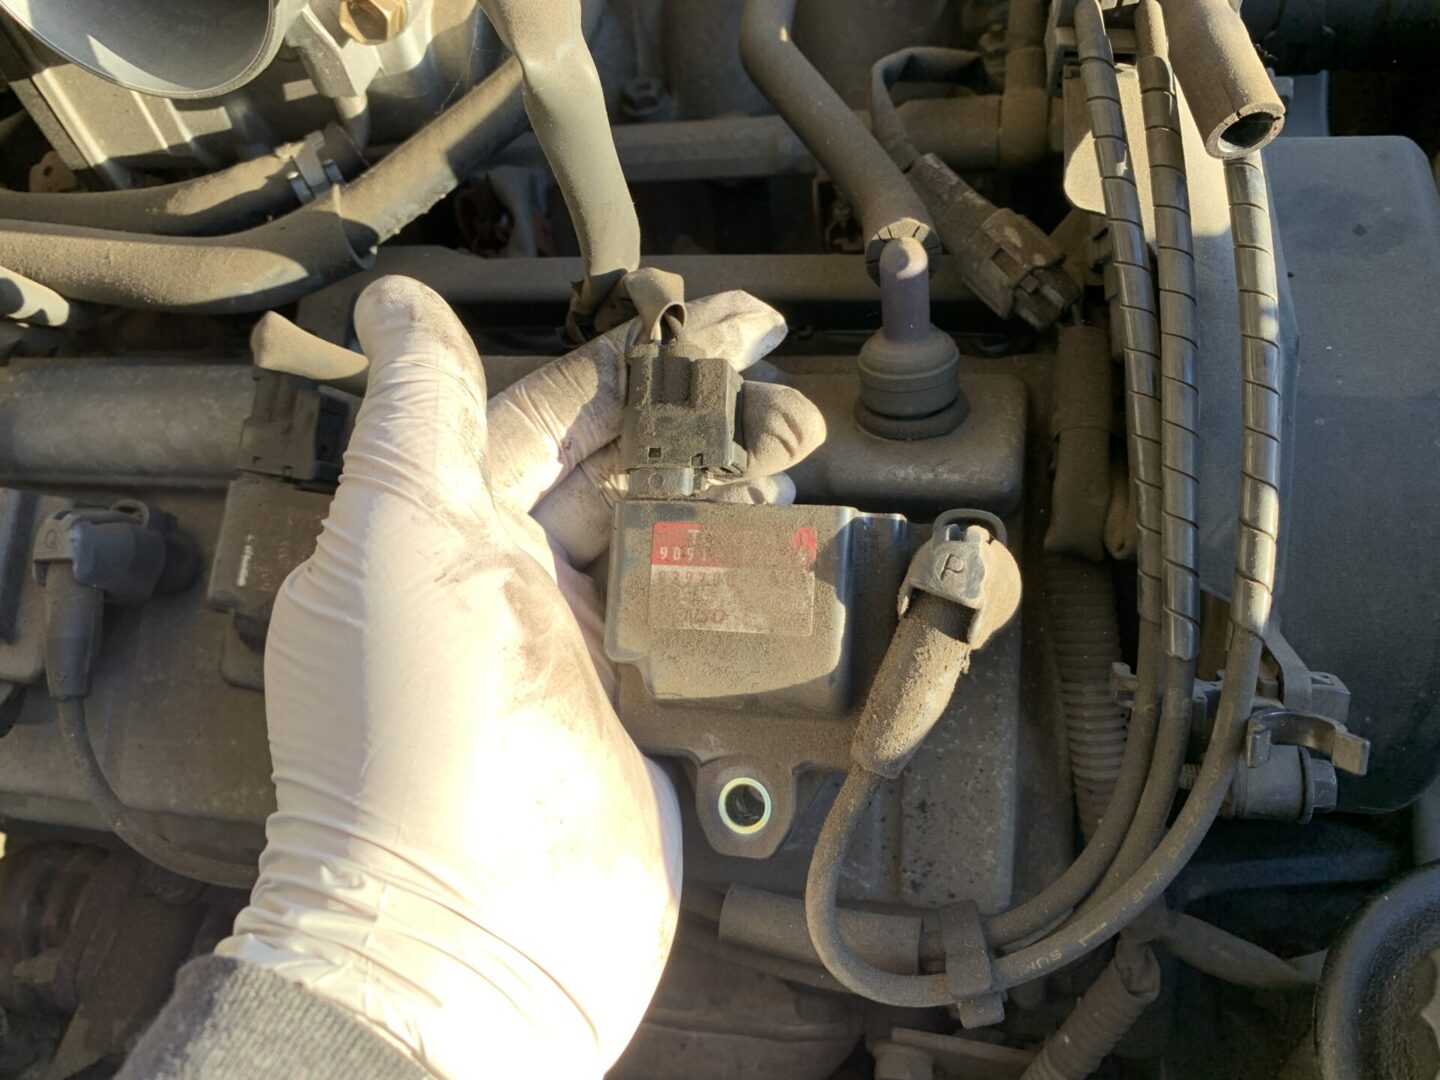
Remove the ignition coil by pulling it out by hand. It’s a good practice to do these one-by-one, but if you pull them all out at once, it is easy to match the correct coil to the combustion chamber due to the spark plug wire lengths.
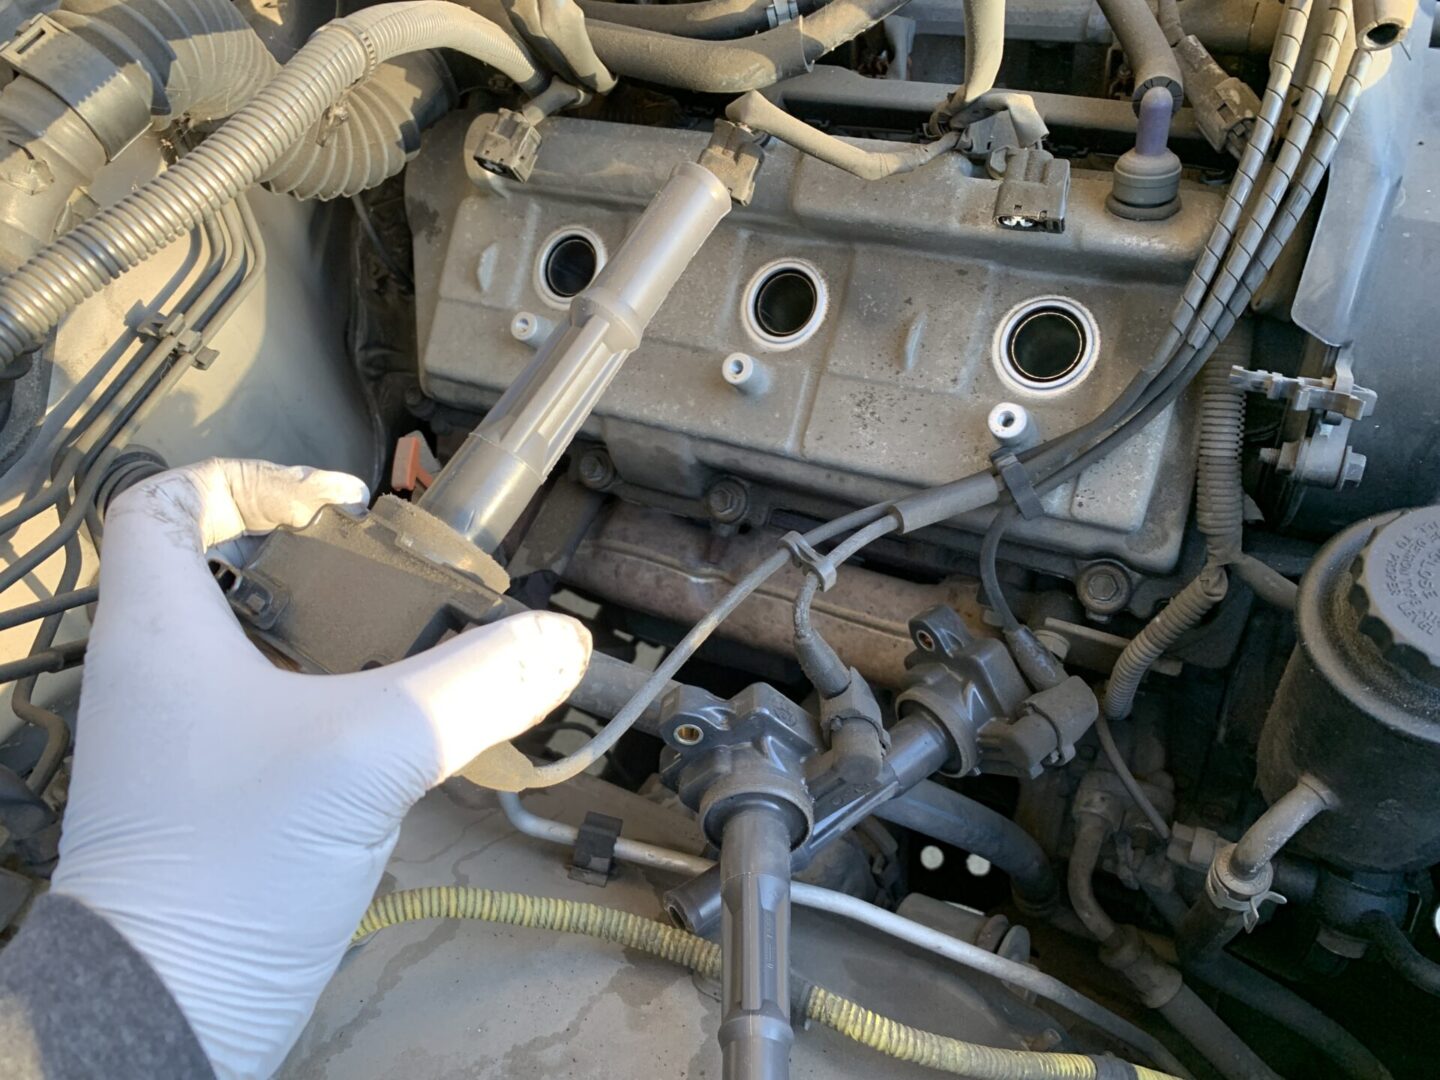
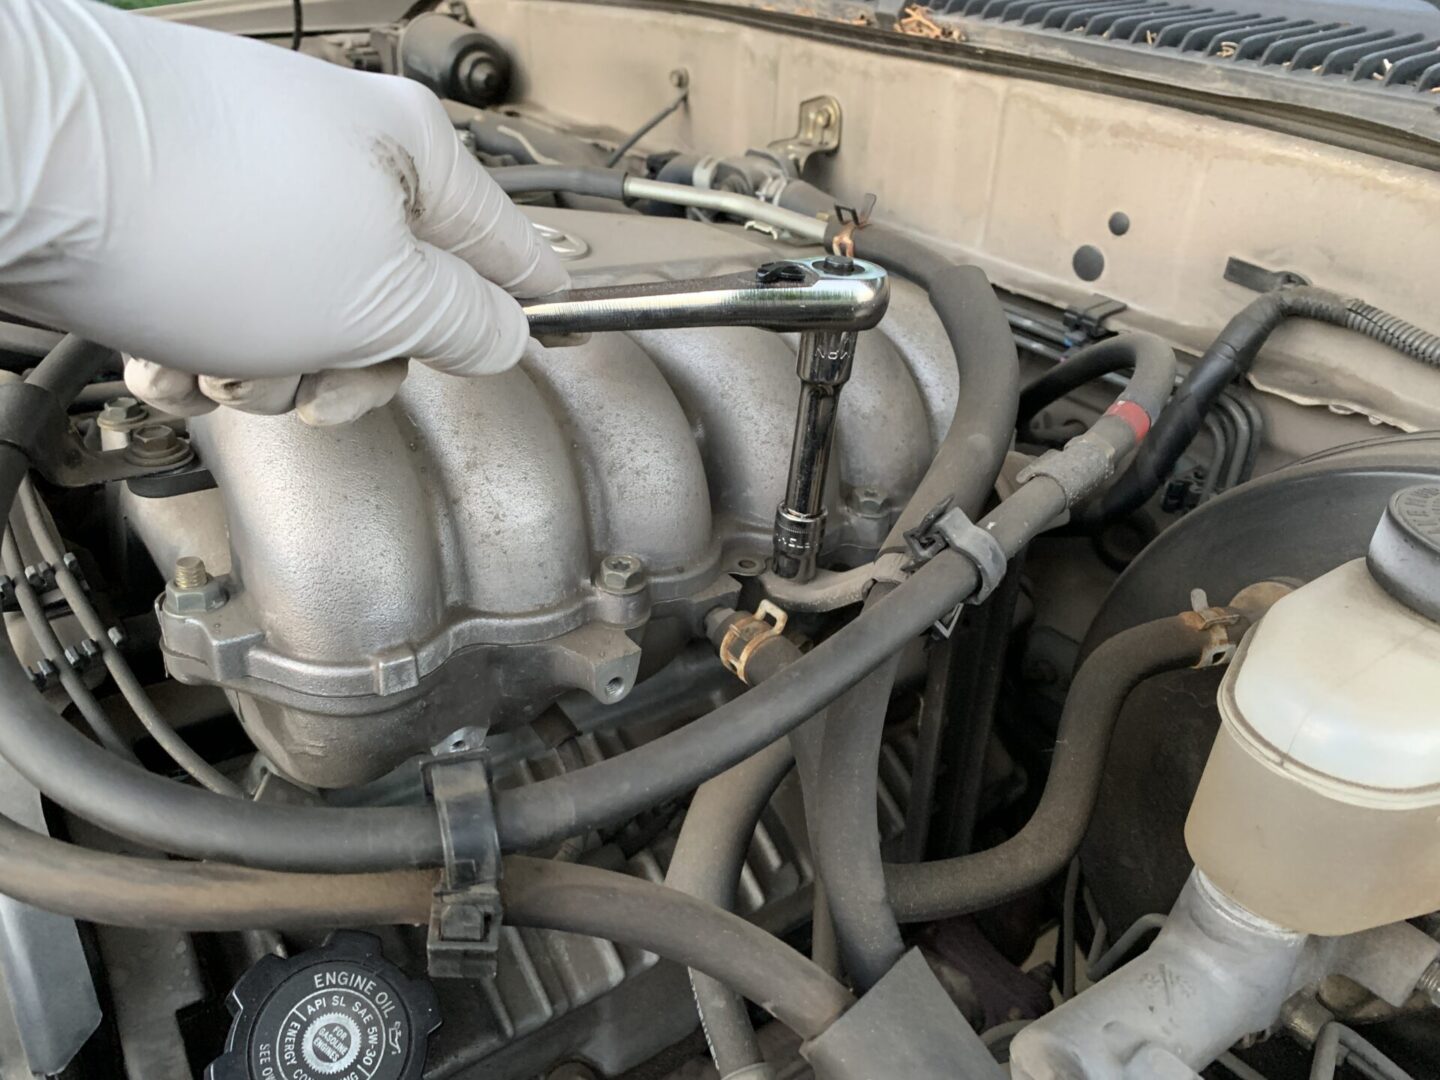
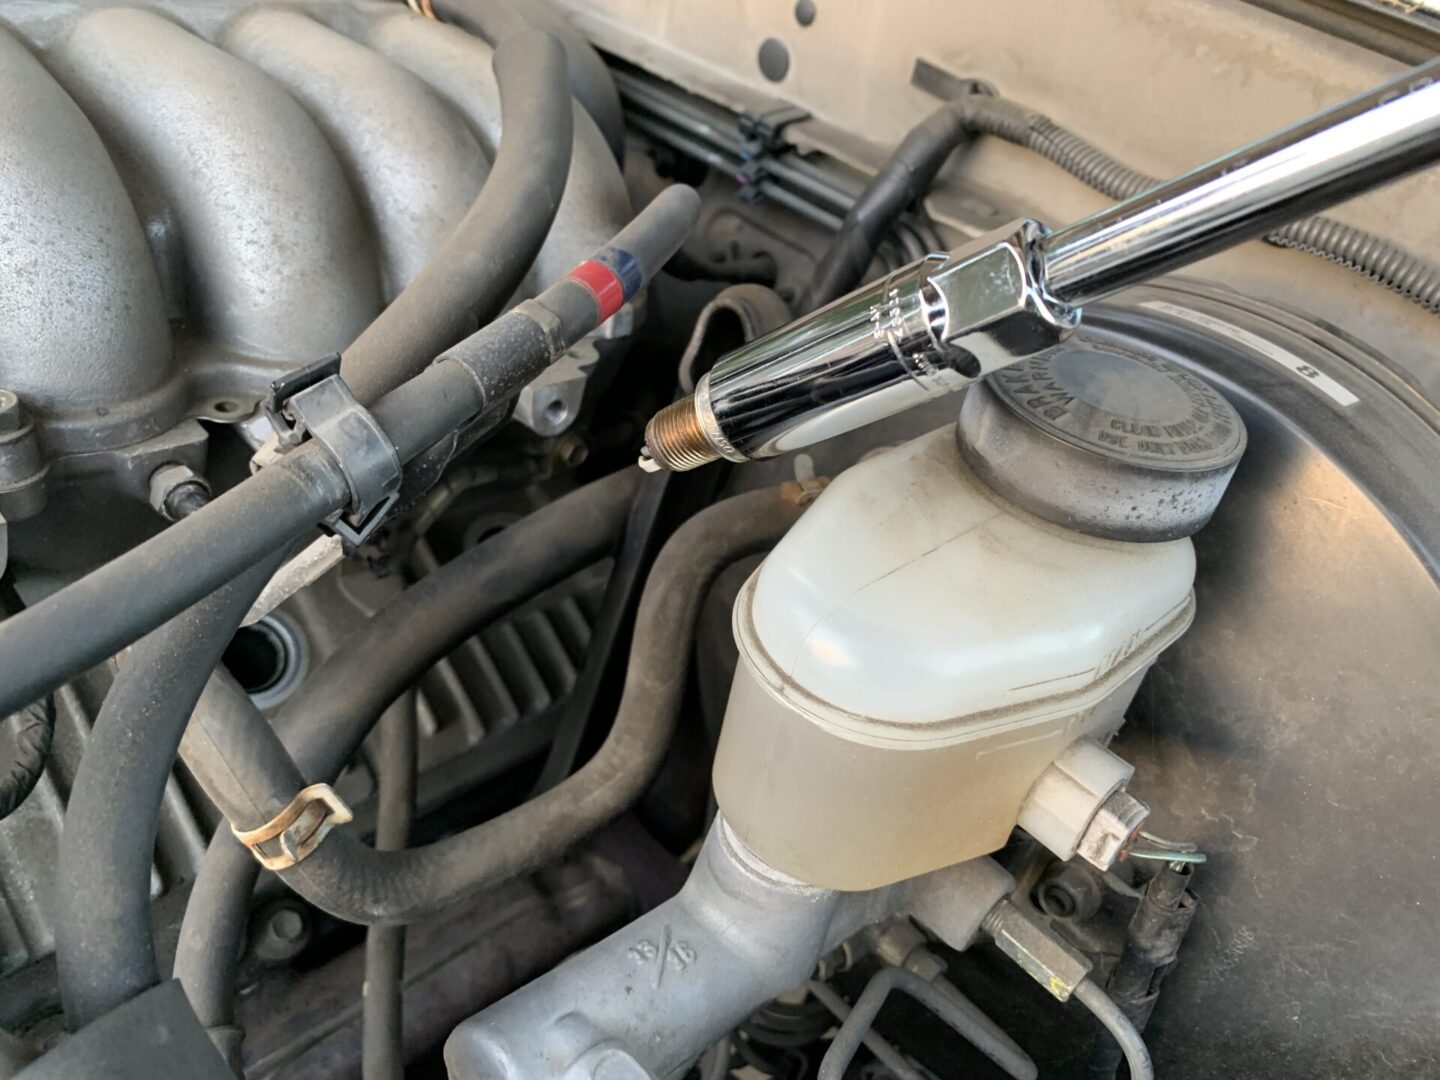
Using a socket wrench with long extensions and a 5/8″ spark plug socket on the end, loosen the spark plug and remove.
Install the new spark plug on the end of the spark plug socket with extensions and thread it in carefully by hand. Then once it is fully threaded in by hand, then use a torque wrench to torque to 13 ft-lbs.
Apply some dielectric grease to the inner perimeter of the ignition coil boot and spread it around inside. Install the 10mm bolt to secure the ignition coil and then re-attach the connector to the ignition coil. Repeat for all spark plugs on the passenger’s side engine bank.

Now with all spark plugs replaced, reinstall the air intake and housing along with all associated connectors and vacuum hoses in reverse of removal. Now, you are completed with your spark plug replacement on the 5VZ-FE 3.4L V6 engine.

Replacing the spark plugs can go seamlessly if you keep track of everything you removed so that everything gets put back properly. I did experience one hose that split due to old age and I replaced it by matching up the part and buying it from a Toyota dealership. The whole spark plug replacement job didn’t take a very long time and it was easy to keep track of everything. I contribute that to taking photos and notes along the way. Once you’ve replaced all of the spark plugs, it is necessary to start up and test drive the vehicle to make sure everything is running smoothly.


: 1st Gen Toyota Tacoma")
: 1st Gen Toyota Tacoma")

: 1st Gen Toyota Tacoma")

: 1st Gen Toyota Tacoma")
