When you make purchases through links on this site, The Track Ahead may earn an affiliate commission. Also, these posts are based off my own experiences. I am not responsible for any action you take as a result of reading this. Learn More
If you’ve ever polished the paint on a modern day car, you’re usually polishing the outer-most layer of the car which is a clear coat layer. Most times, this can be done many, many times before you wear down the clear coat. For this reason, you are generally safe when polishing your car using abrasives such as a polish or a compound. Other times, you may want to do a paint correction with more aggressive techniques (that can produce a better looking result), but may wear down your clear coat more quickly.
Therefore, if you are going to be doing any kind of paint correction via polishing or even sanding, it is critical to know how much clear coat (and paint) you have on your car so that you don’t accidentally burn through your paint. If you want to know how much paint you have on a car before doing a paint correction, you need to use a paint thickness gauge in order to determine the coating thickness on your car prior to doing any work.
There are different types of paint thickness gauges out there— mainly magnetic/Eddy-current gauges and ultrasonic gauges. The ultrasonic gauges are rather expensive, therefore these are usually purchased and used by those who do this work professionally. A lower-priced option are the magnetic/eddy-current gauges (around $50-$100), which most people opt for since they tend to be more affordable.
The main difference besides the technology between these two types of gauges is that the magnetic/Eddy-current gauges are only able to measure the total thickness of the coating on a vehicle. Because a vehicle typically has many layers such as clear coat, paint, primer, and a corrosion protection layer, this type of gauge will only give you the thickness reading of the combination of all the layers. Essentially it tells you how thick this combined coating is, on top of your metallic substrate (body of car). This type of thickness gauge only reads over a metallic substrate and won’t work on the bumpers of a car (non-metallic). Ultrasonic paint thickness gauges offer more granularity in providing in the thickness reading for each layer.
Instead of spending hundreds to thousands of dollars on an ultrasonic paint thickness gauge, we can instead use an affordable magnetic/Eddy-current gauge as long as we have an understanding what the typical layers on a modern day car are, what the thickness of these layers are. By knowing the typical thickness of each layer that encompasses a “paint job”, we can have a general idea of how much clear coat we have before we wear down to the paint, primer, or even substrate.
Understanding Thickness of Paint
Generally, modern day cars are painted using a process that involves dipping/electric-coating the metal shell (for corrosion protection), applying a primer coat, then a base coat, and then a clear coat. These layers make up what we’ll call a coating on a vehicle. Understanding this is necessary if we want to use a magnetic/Eddy-current paint thickness gauge to know how much protection there is. Keep in mind that the magnetic/Eddy-current gauges do not work on bumpers (polycarbonate/plastic) or non-metallic parts as they don’t have the ability to work on non-metallic substrates.
Obviously, it’s impossible to know exactly much thickness of each coating you have on your vehicle (unless you have a pricey ultrasonic gauge), as these thicknesses can vary depending on the make and model of the vehicle, the environment it was originally painted in, and other varying factors. Therefore, we rely on general known coating thicknesses in the industry. This isn’t a perfect system, but knowing these general average values can help you determine how much “paint” you have on your vehicle.
Below is a paint thickness diagram showing the coating thicknesses on an average modern-day vehicle. Depending on who you ask and where you find this information, it can vary but the values tend to be close to one another. I did my best to average out the values in an effort to make it simple. I’ve also included both values (mils and microns/micrometers) depending on what type of measurement you want to go by. Microns and micrometers (µm) are two names for the same thing.
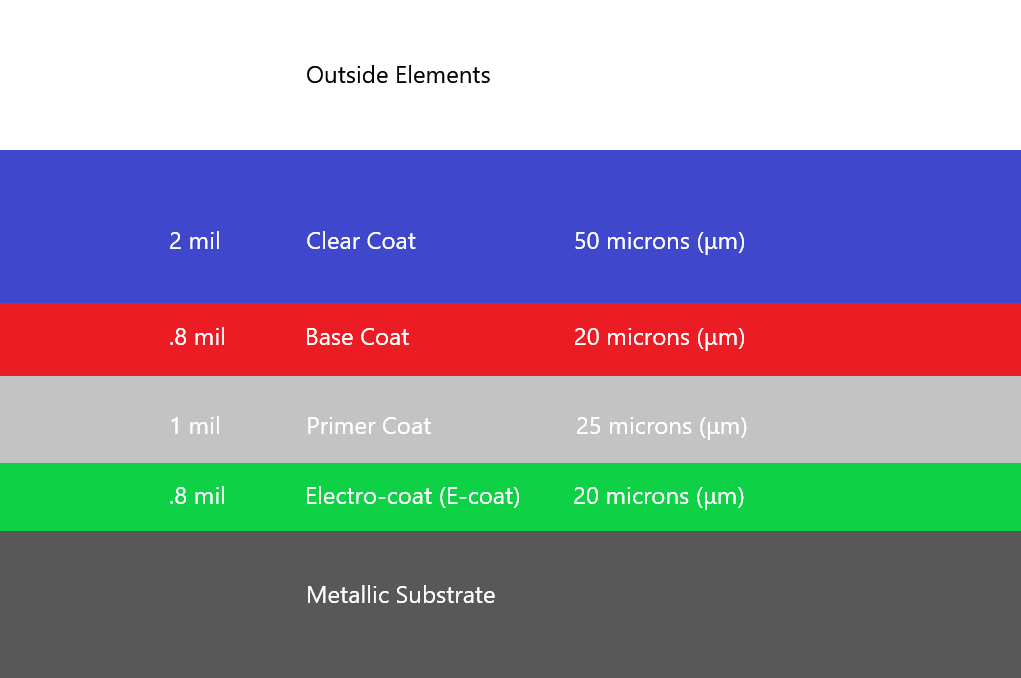
In the diagram above, the metallic substrate would be the vehicle, with various coatings on top of the car, and then the “outside elements” being the open air environment. As for the individual coats, clear coat will typically be your thickest layer, followed by thinner coats of base coat (paint), primer coat, and electro-coat. The overall thickness of the coatings shown here amount to 115 microns (µm) or 4.6 mils. This is an average value, so keep in mind that your vehicle could have a thicker or thinner overall coating, but again in general, this is your typical modern clear-coated vehicle.
Paint Thickness Gauge that I Use
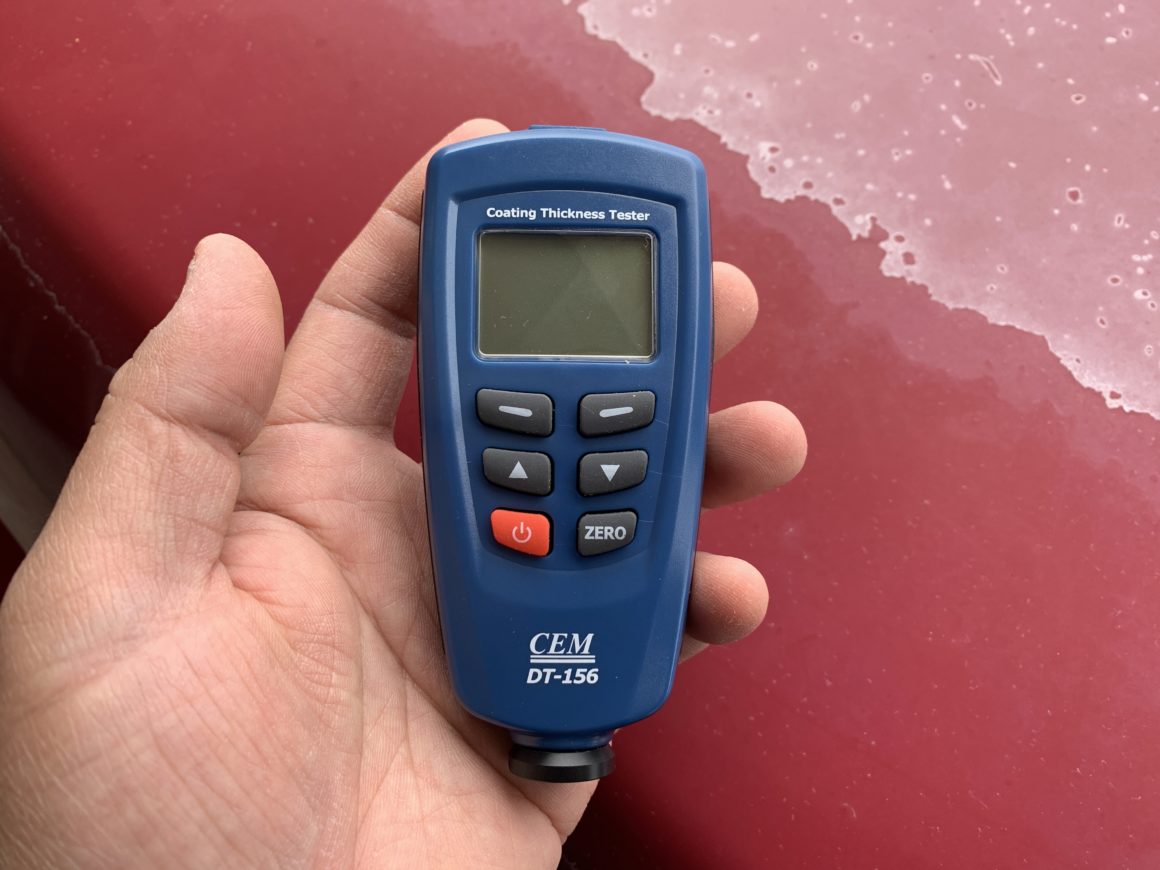
Below is the paint thickness gauge that I’ve used in this article and for my own personal use. It is one of the most highly recommended gauges used by car detailers and enthusiasts and the reason that I purchased one for myself. I also see a similar unit on Amazon that has good reviews and costs only $50, but I can’t attest to the quality of it as I haven’t used it myself. If you want to go with the one that is widely recommended, the CEM DT-156 is an affordable, tried-and-true unit that costs around $100-$150.
CEM DT-156 Paint Coating Thickness Gauge 0-1250um: Amazon / Ebay
How to Check Paint Thickness on a Car Before Polishing or Sanding your Paint
When you first use your paint thickness gauge, follow the instructions that comes with the unit as it will show you how to properly calibrate your gauge. Once you have it calibrated, you will be able to start taking measurements on your vehicle.
These paint thickness gauges are really easy to use, simply turn on, place the probe side onto the paint surface, and it will take automatic readings. It also keeps track of your previous readings and displays the average. This can be useful for taking multiple measurements on different parts of a panel and coming up with an average for a section of the car.
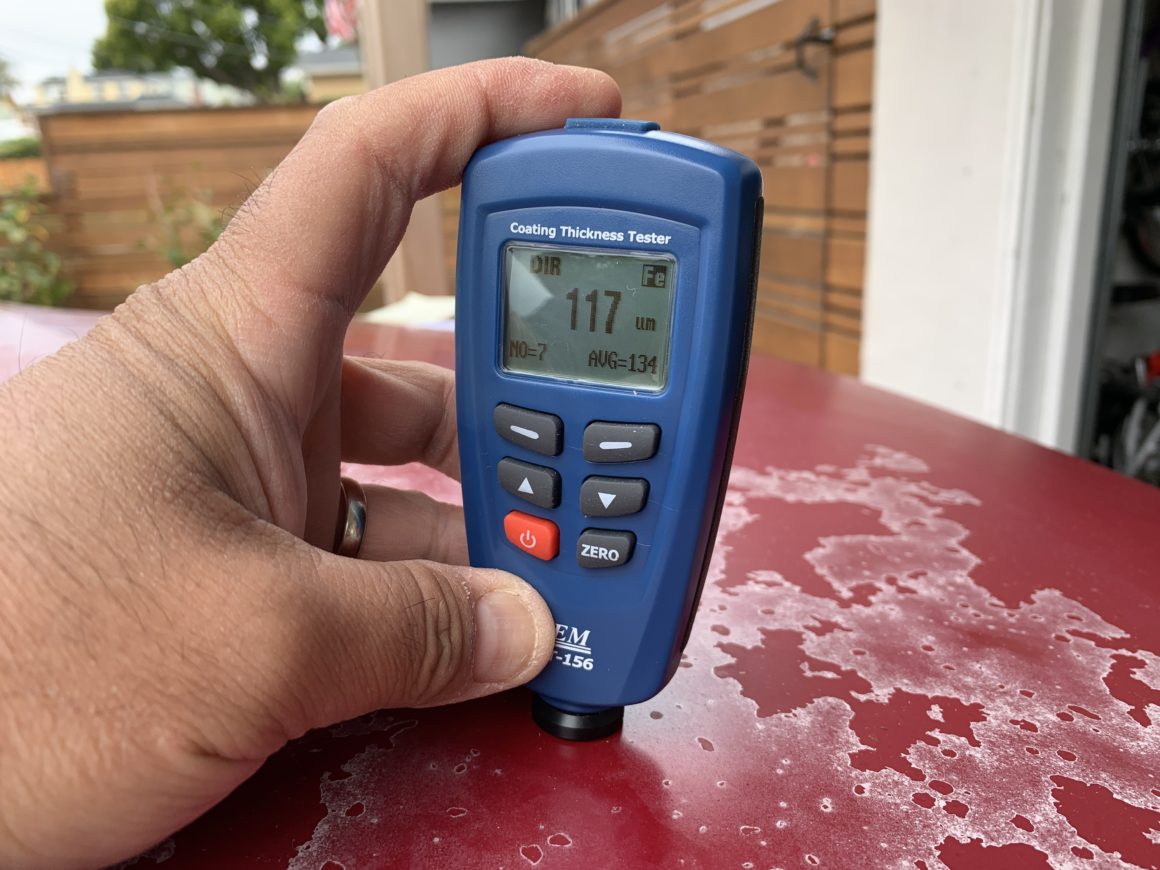
Just to show some examples of readings, I have a trunk of a car that has very bad clear coat damage. There are spots where there is still clear coat on the vehicle, and then are other areas where the clear coat has completely failed.
Below, I’m taking a measurement of the area where there is still clear coat on the car. The reading is 117 microns, which is consistent with paint that still has clear coat intact. Since we know that generally cars come from the factory with at least 115 microns of coating thickness, we can make a guess that the clear coat is still very much intact here.
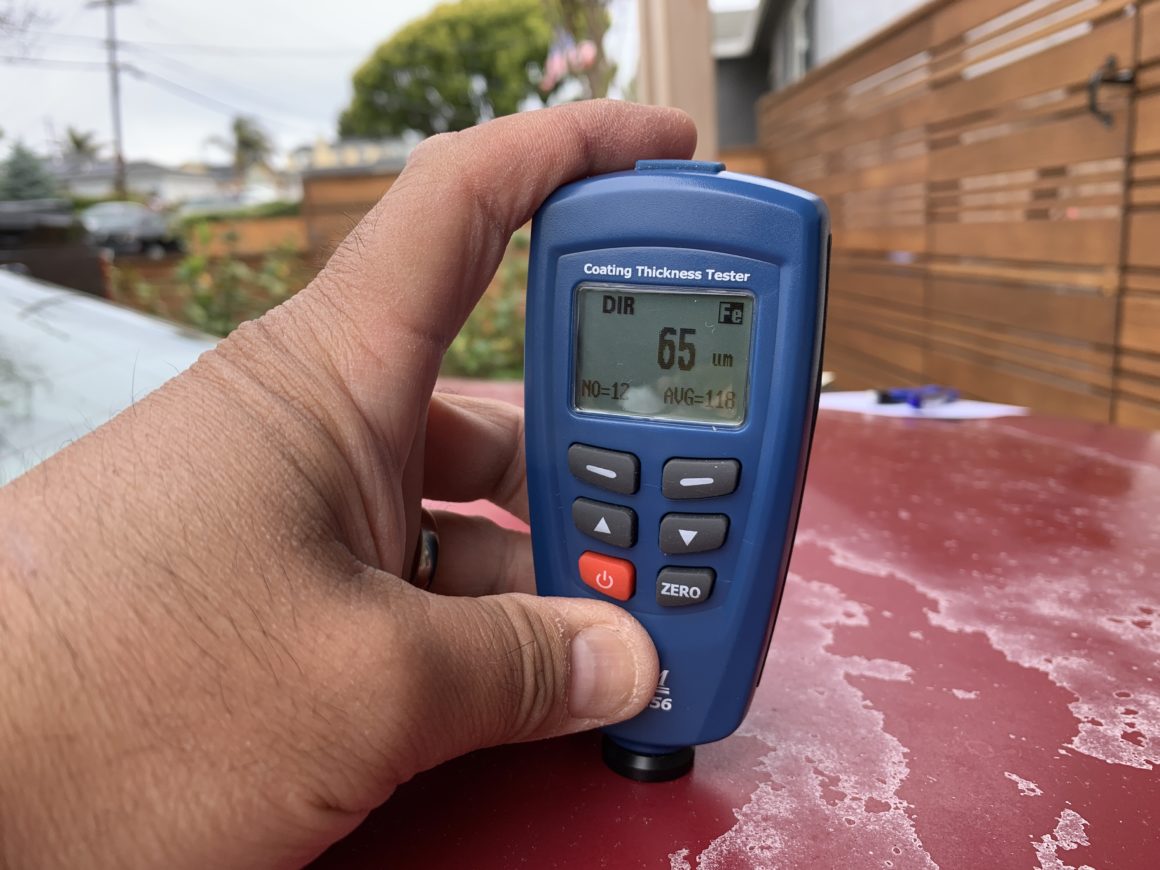
On another part of this panel where there is obviously clear coat that has failed, I take a reading of 65 microns. This is shows that I have lost about 52 microns of coating, which is probably the clear coat layer and a bit of the paint layer. This seems consistent with the fact that the clear coat layer is more or less 50 microns thick.
In general, if you’re taking paint thickness readings and you’re still seeing over 100 microns (or 4 mils of thickness), you still have plenty of clear coat left. For reference, you will normally take away about 5 microns of clear coat when you polish the paint and about 10-15 microns if you wet sand and polish the paint. This is an oversimplified average of values, but you get the point.
So if you know that normally cars come from the factory with about 115 microns of coating thickness, then you can do the math to see how much the clear coat has worn away since the car was new. Then, you can make a determination on how much clear coat has worn off, and how much you have left to work with. If you purchased the vehicle brand new, you have the opportunity to take readings of the paint when it is new and log that information for future reference. This will give you the ability to most accurate identify how much clear coat wears away over the years.
Another benefit of using a paint thickness gauge is to identify areas where there may have been some repaint work done in the past. Of course it is possible that a panel may have been completely stripped and repainted the proper way, which in that case it will have been built up with the proper layers of primer, paint, and clear. So if it was repainted the proper way, the coating thickness reading you get may seem ordinary.
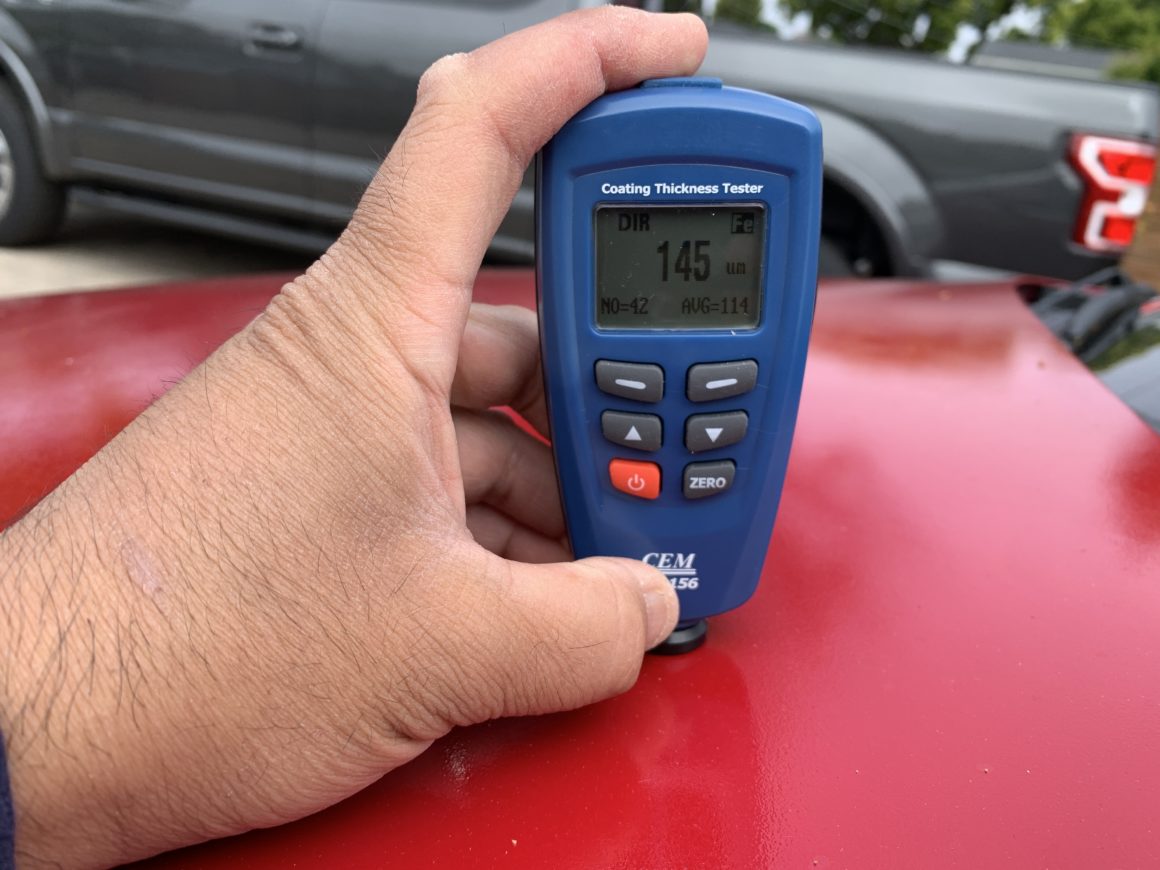
But, if the car was repainted improperly, or if it was painted over existing paint (which is still okay as long as it was prepped properly), you may get a much higher reading. Here’s a reading of 145 microns, which is higher than the usual ~115 microns of a full coating. This is because this part had paint and clear coat applied over the existing paint.
Alternatively, you may find readings that are much lower than other parts of the car. It may be slightly lower than your new-from-the-factory 115 microns, which means the clear coat has worn away slightly or the paint was polished in the past. If you get readings that are much lower such as 60-100 microns, then either your clear coat is no longer there or is in danger of being gone soon. If you’re seeing 40-60 microns, you probably don’t have any clear coat and in order to preserve the paint that you have there, you need to be extra careful so as not to burn through to the primer coat.
Conclusion on Using a Paint Thickness Gauge
In most cases if the car you’re working on hasn’t been messed around with in the past, you’ll probably have no issues if you want to do some mild paint corrections such as using polishes or compounds with a DA (dual-action) machine polisher. However, if you’re able to shell out $50-$100 for a magentic/eddy-current paint thickness gauge and you know the general concept surrounding the thicknesses of the coating on a car (clear, paint, primer, etc.), then you can have some assurance on how much protection you still have on your car before you begin polishing or sanding your car.
Remember that the values for thicknesses that I provide in this article are general values and your vehicle’s coating thickness can vary. It is good to understand these general or average values so that it gives you a ballpark understanding of how thick these various “paint” layers are applied. This knowledge paired with the use of a magnetic/Eddy-current paint thickness gauge can provide some insurance when you’re performing a paint correction on a vehicle.


