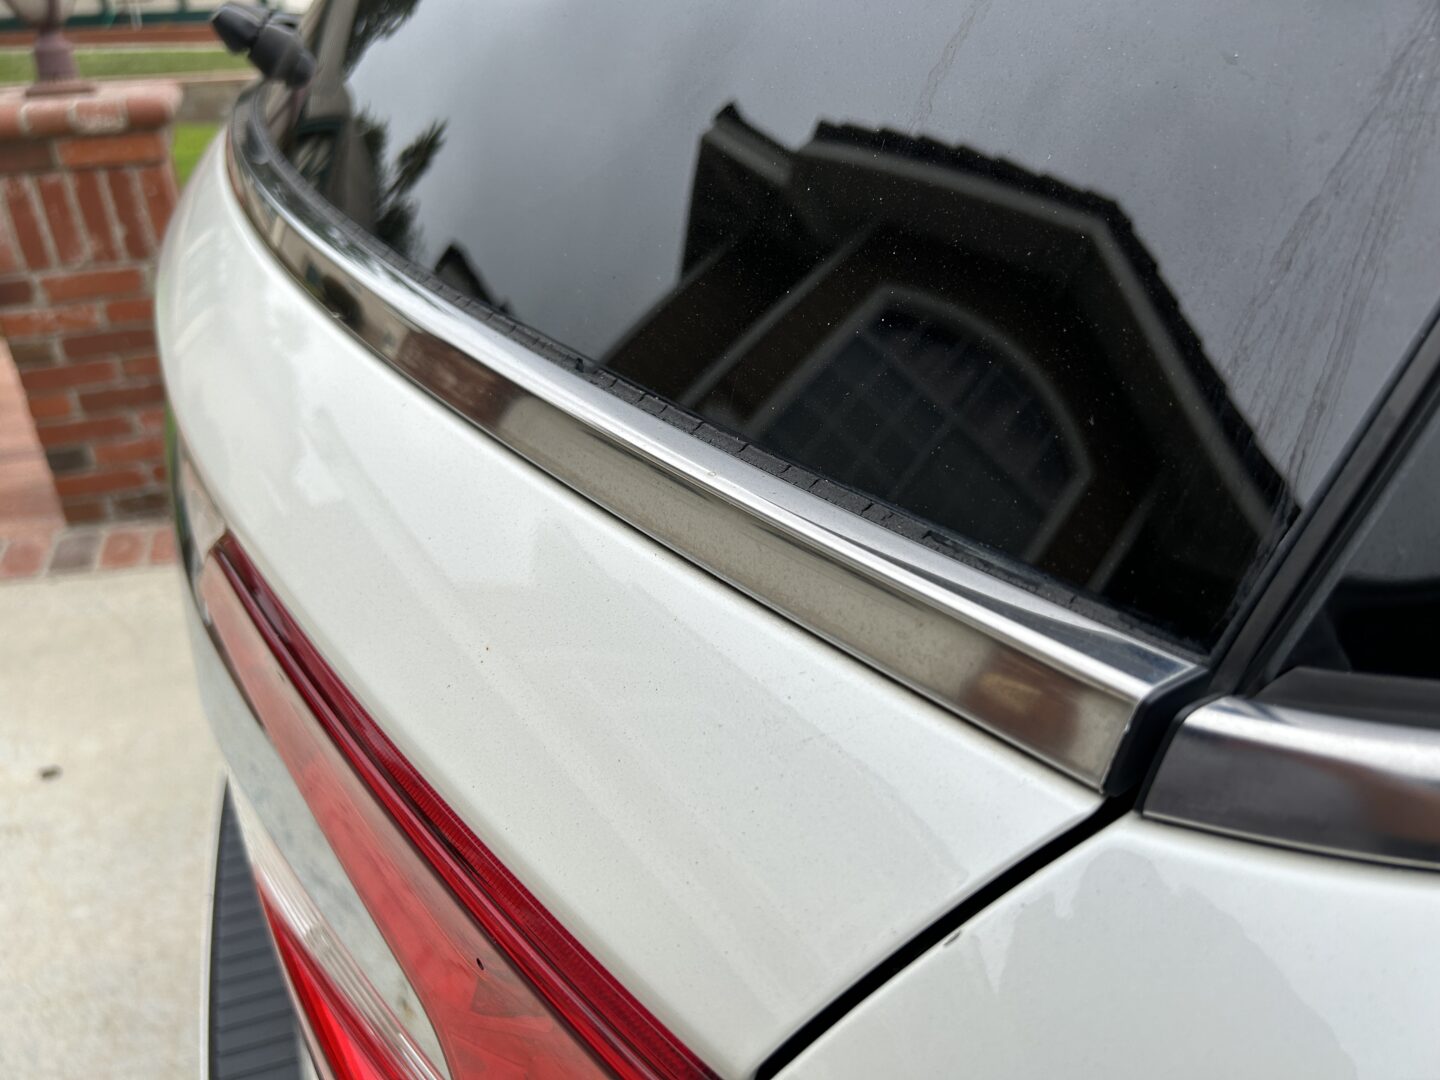
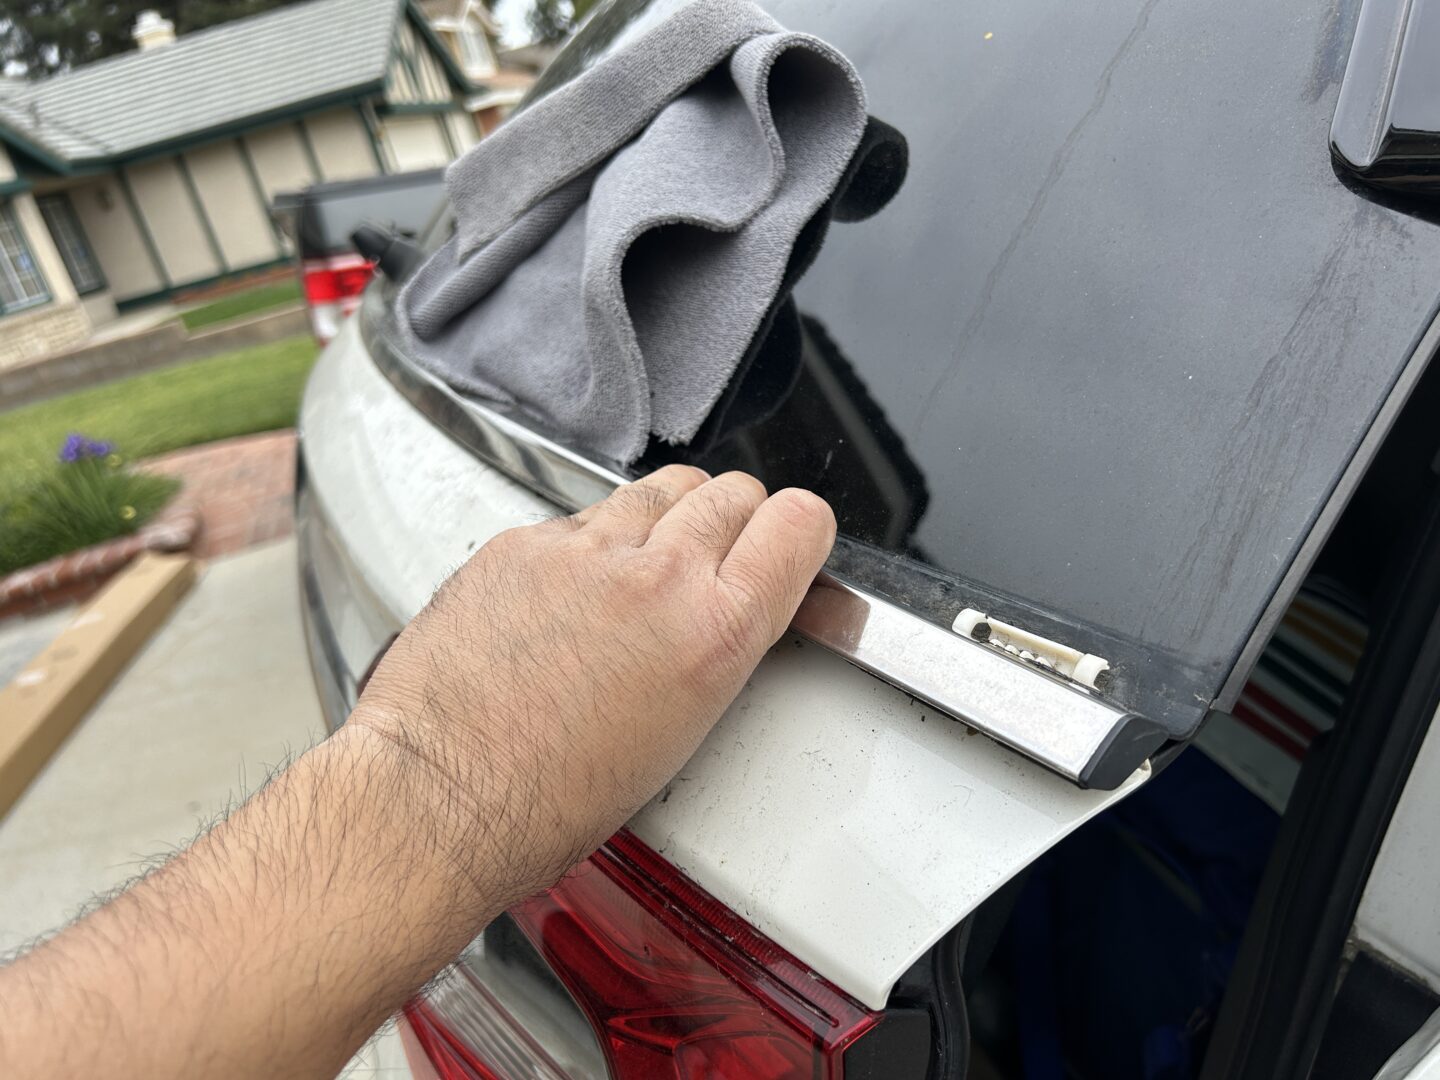
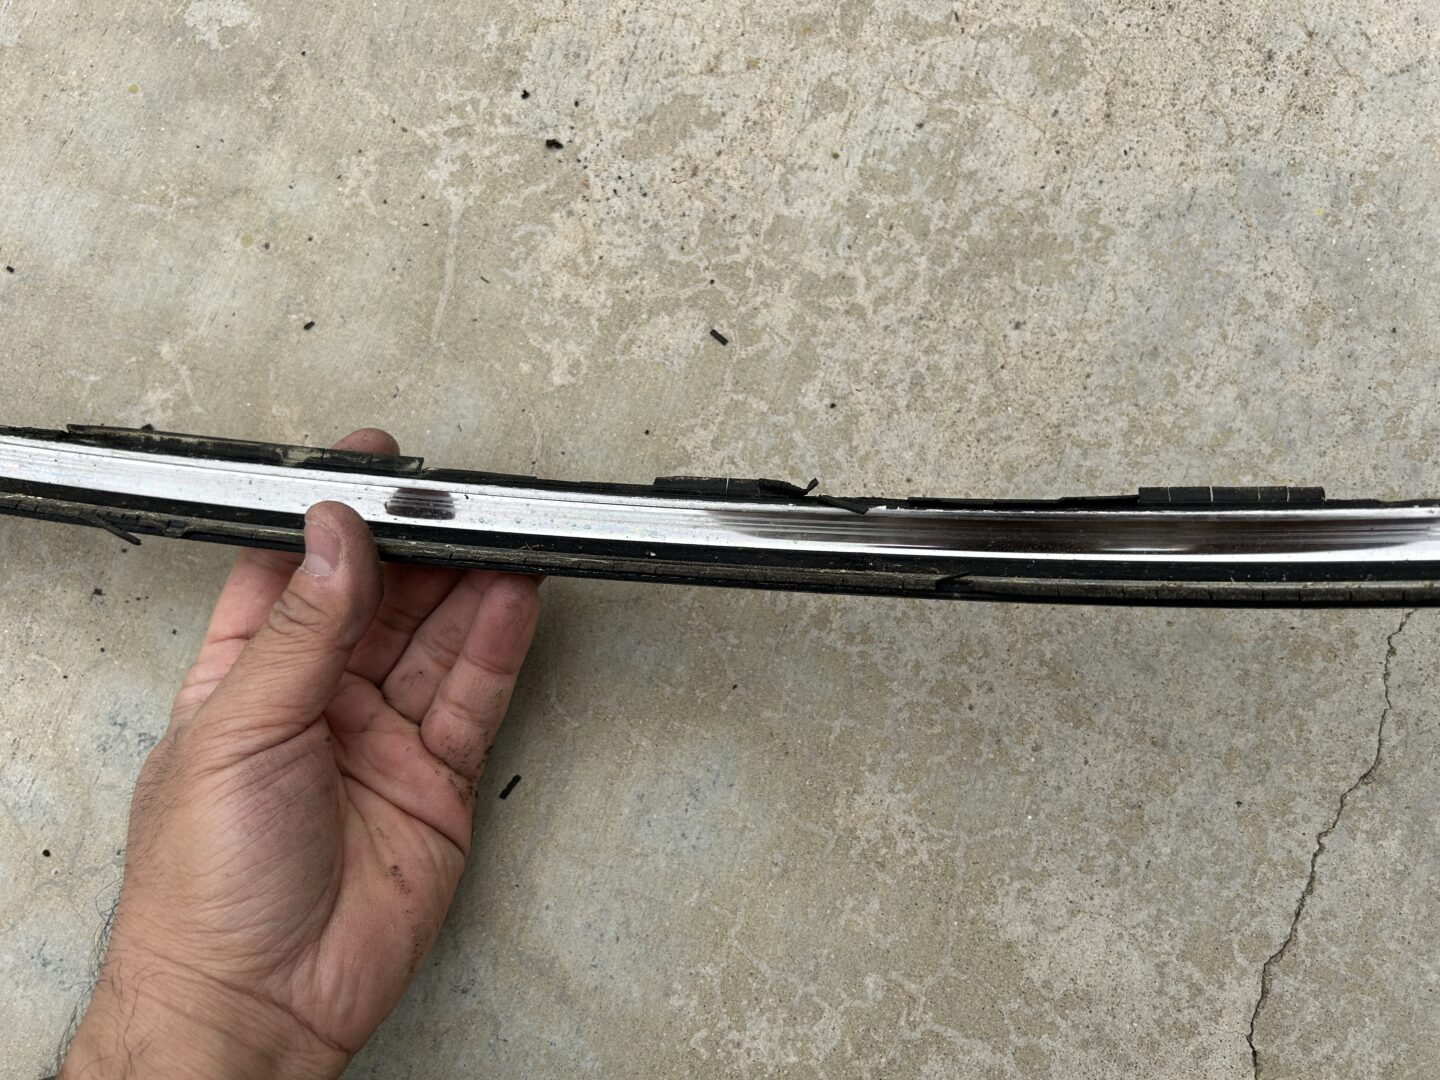
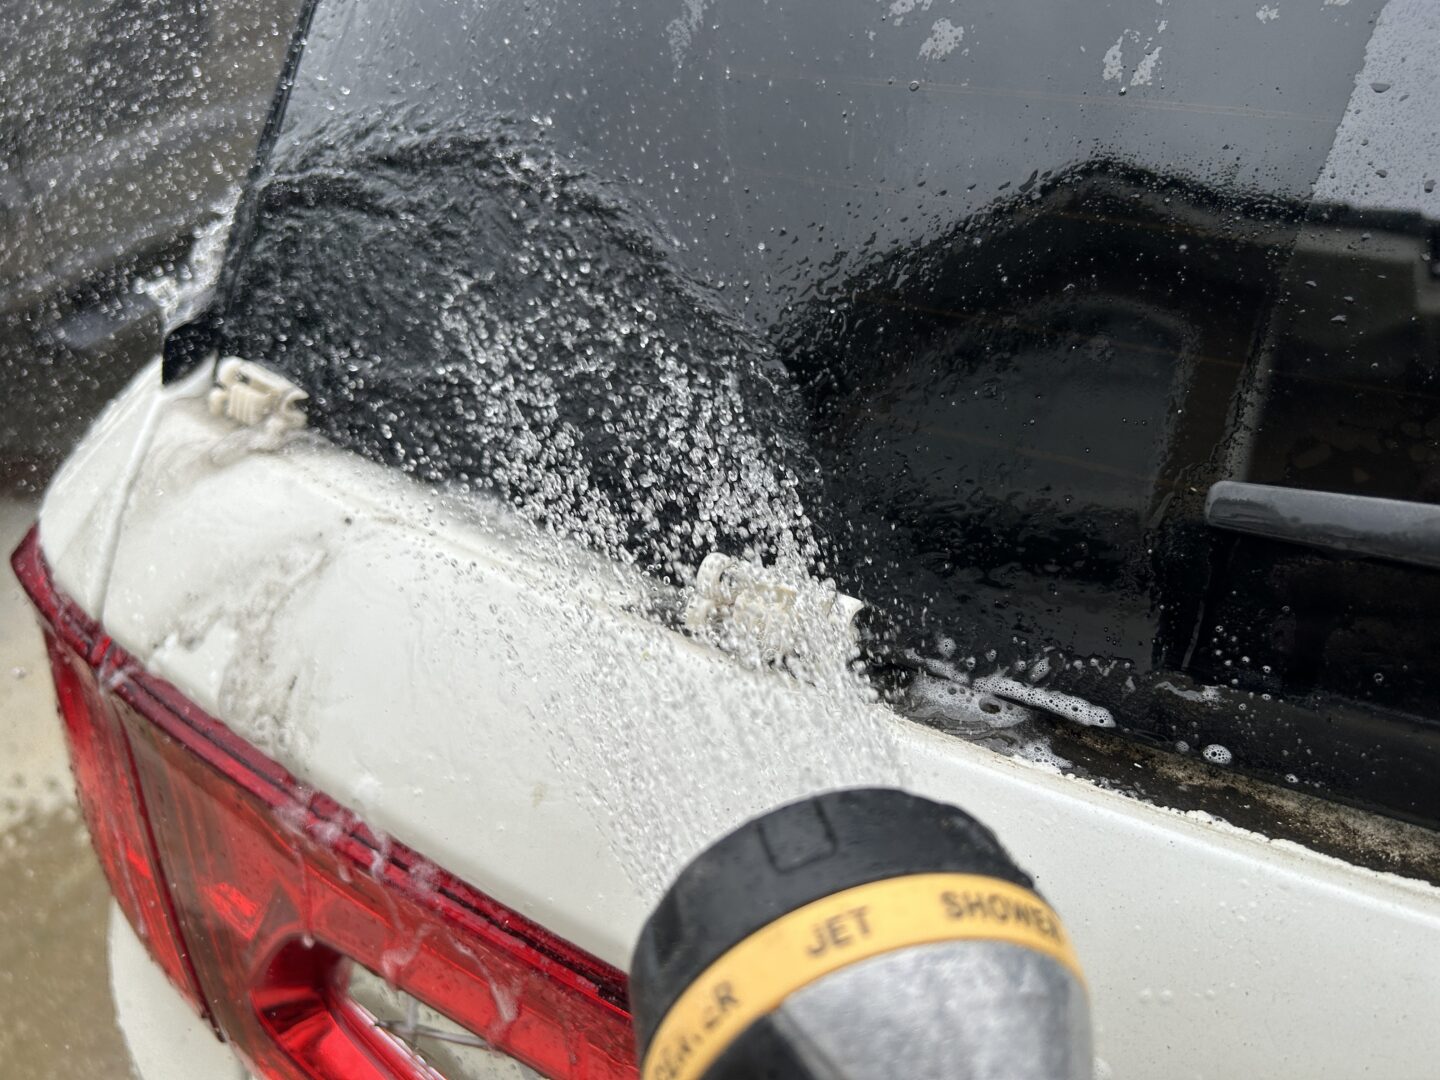
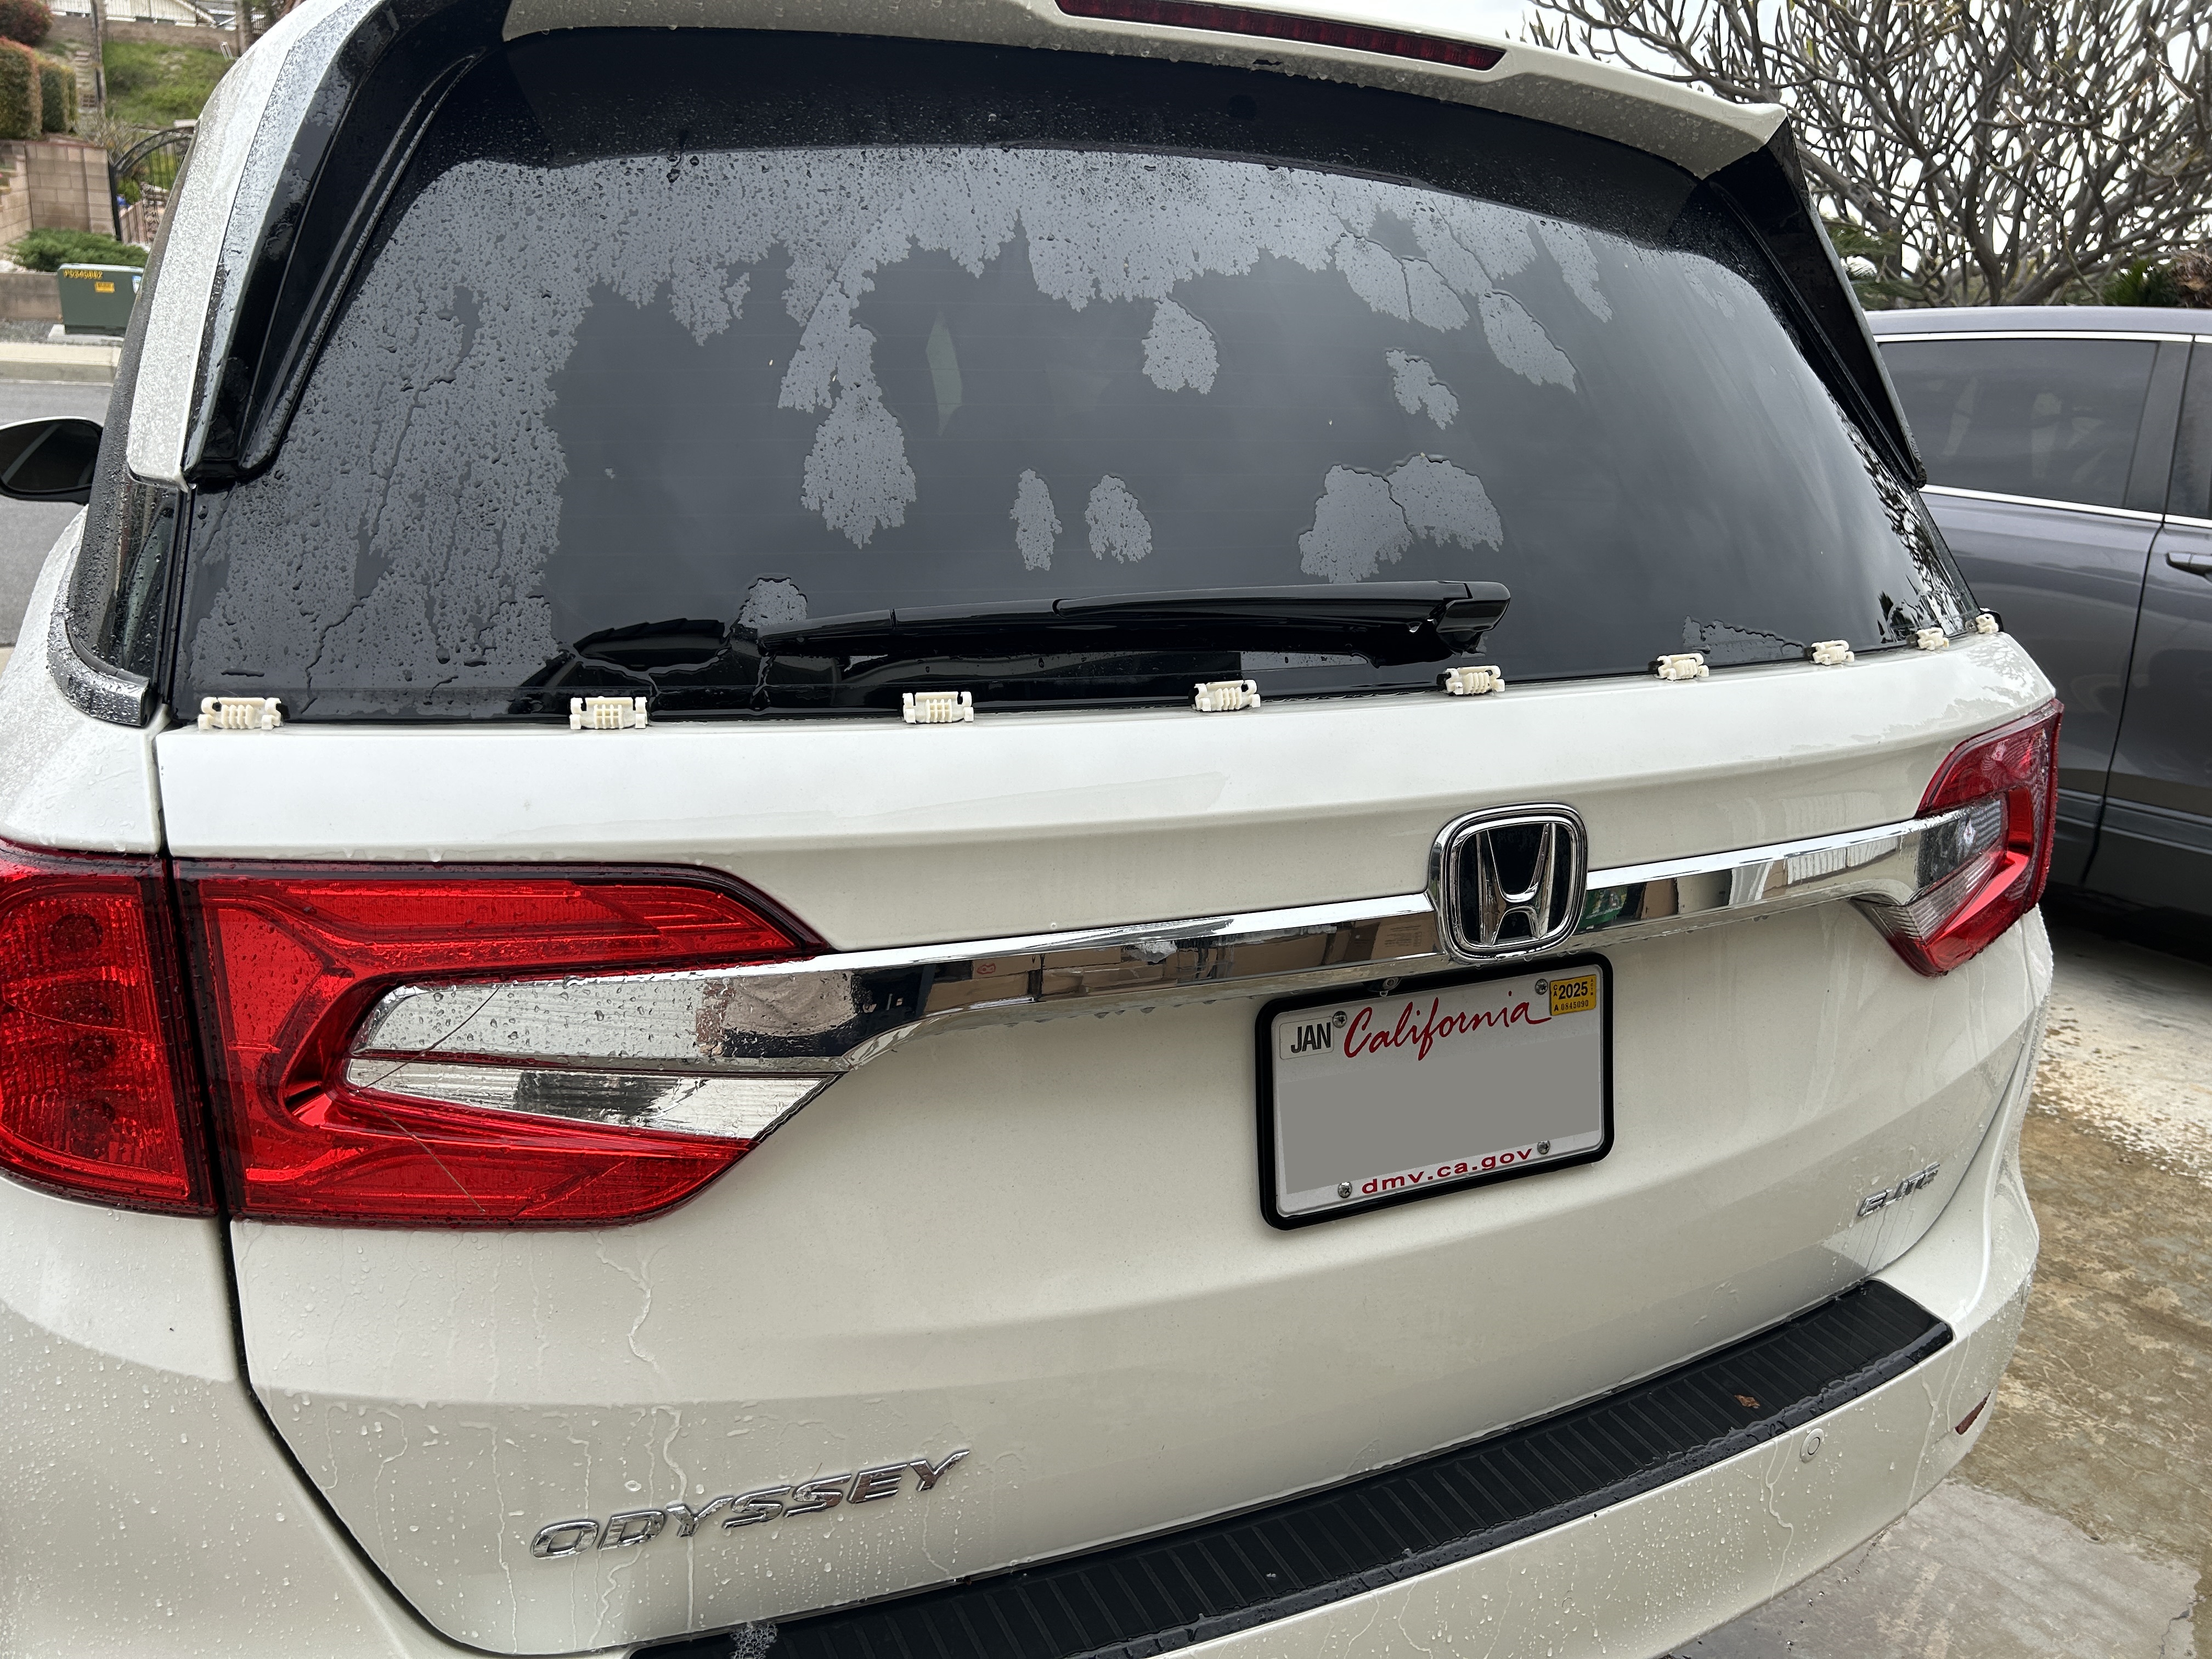
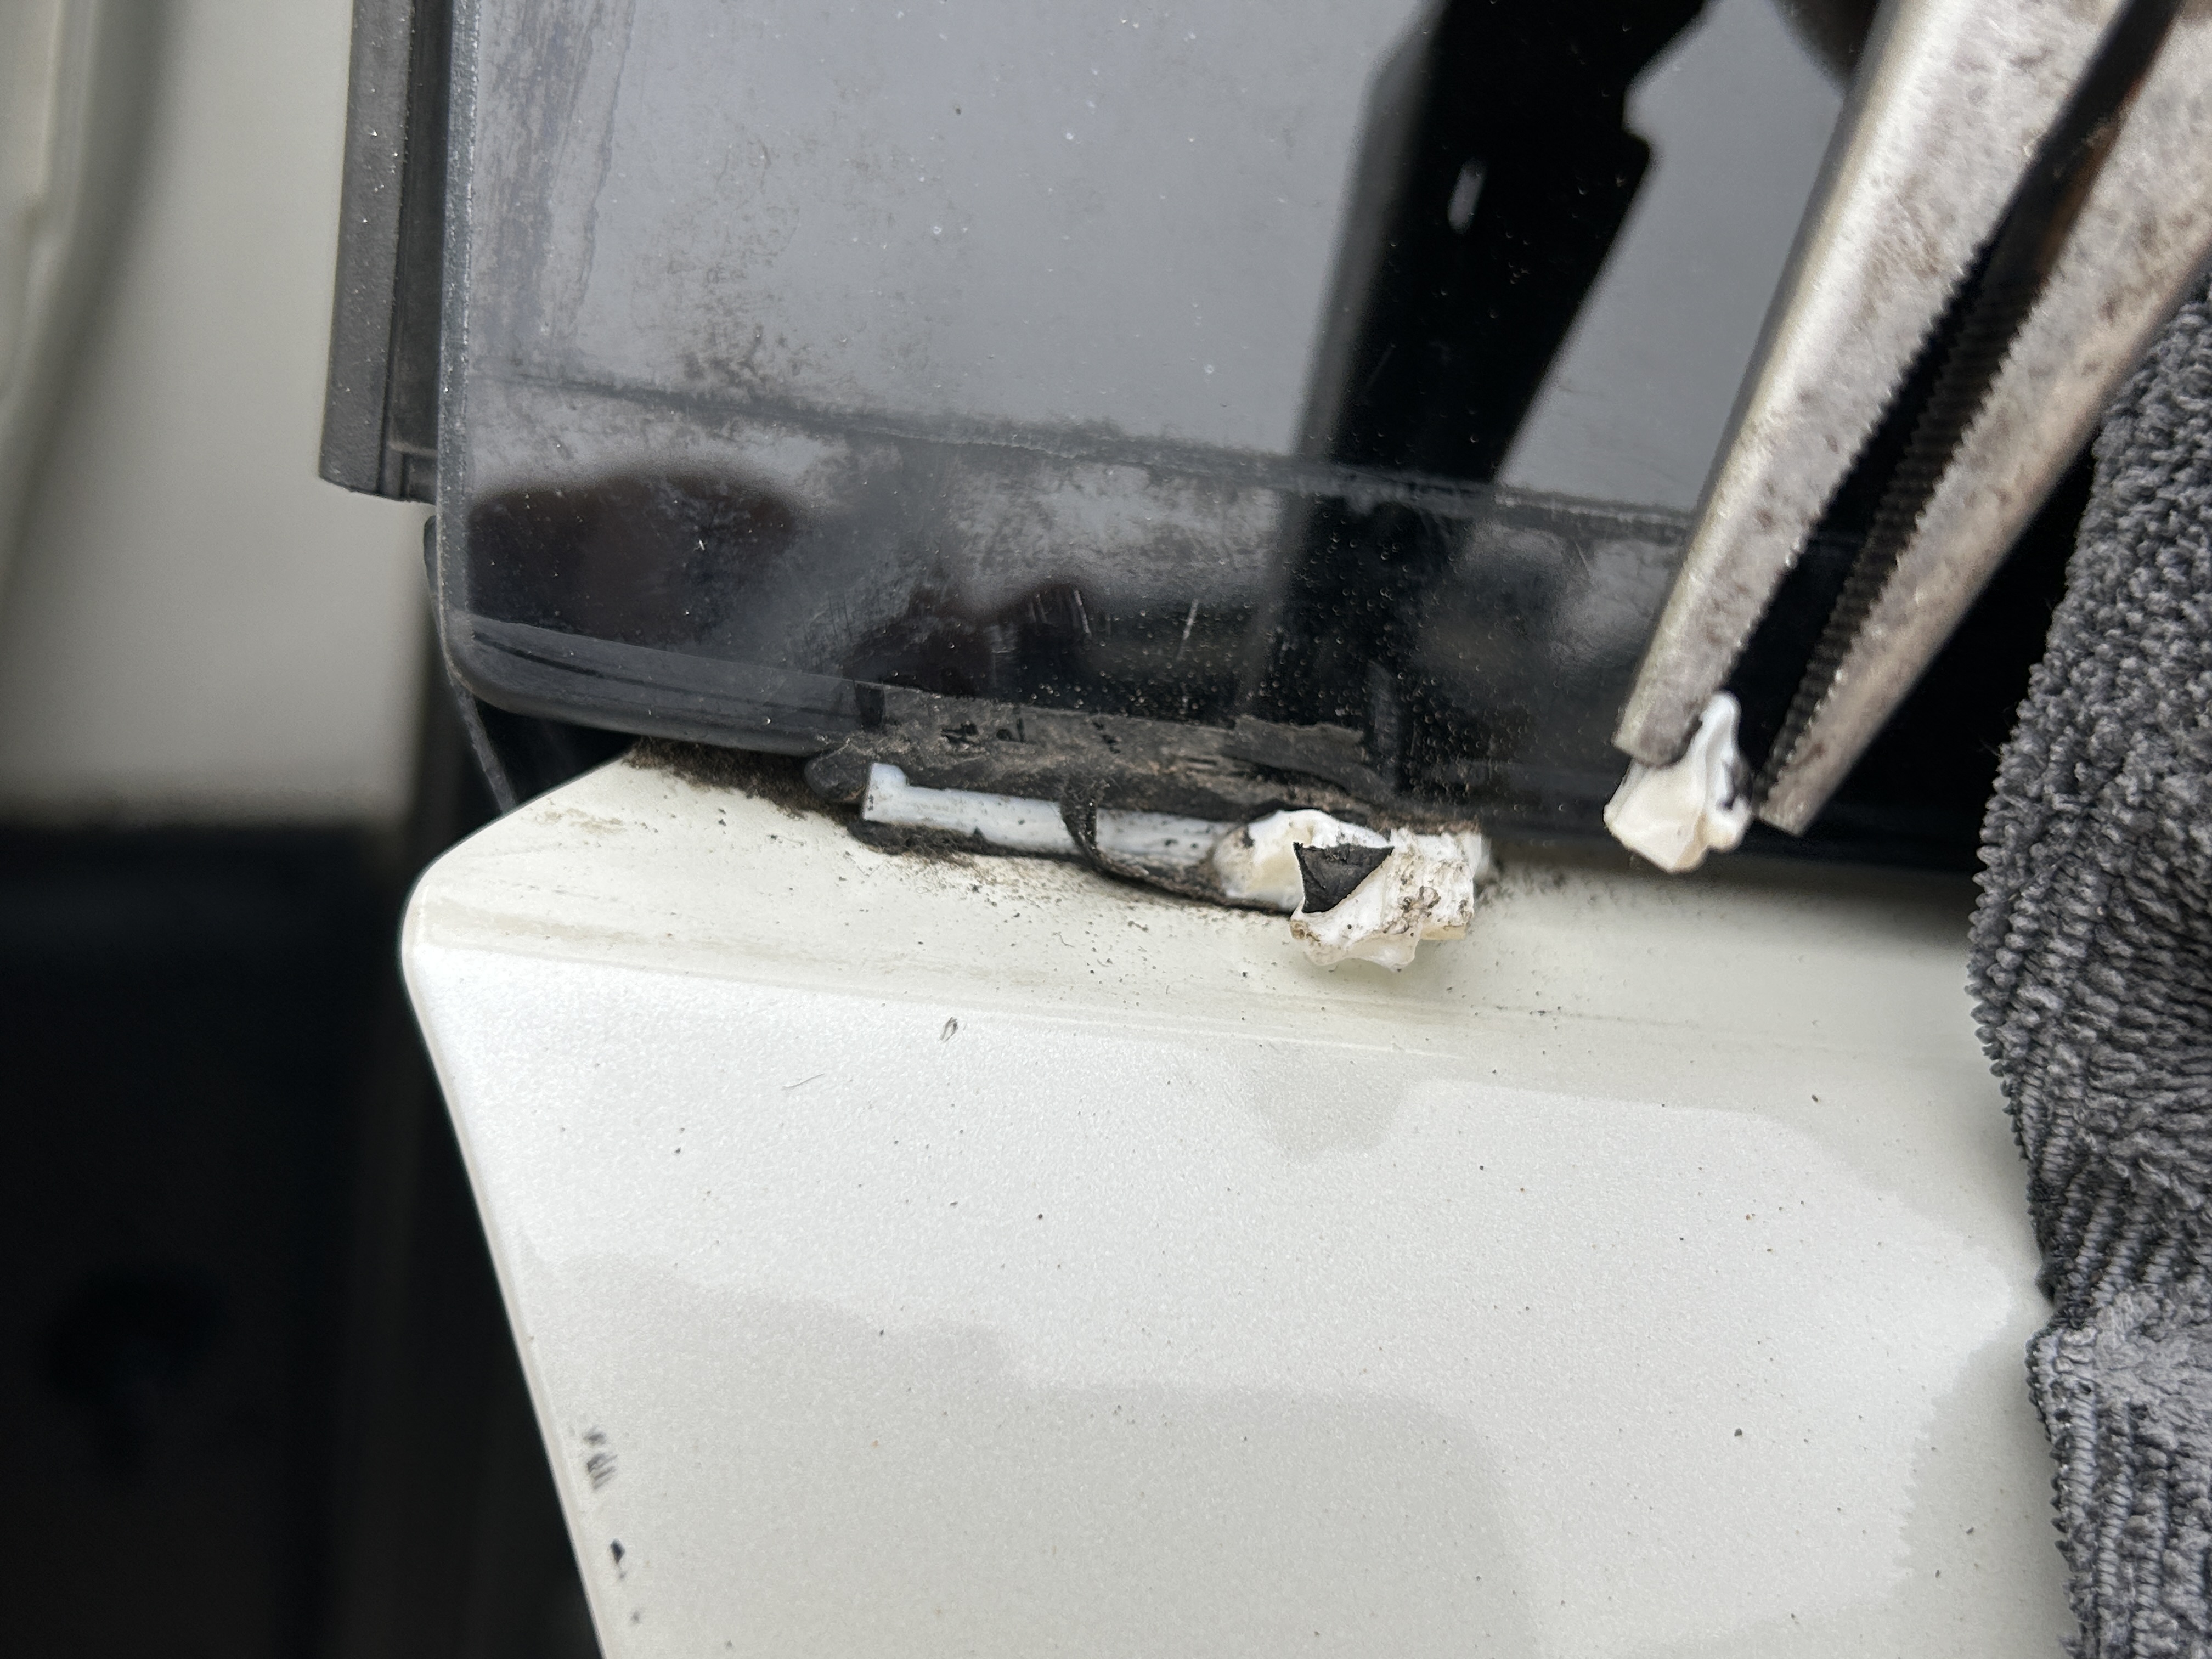
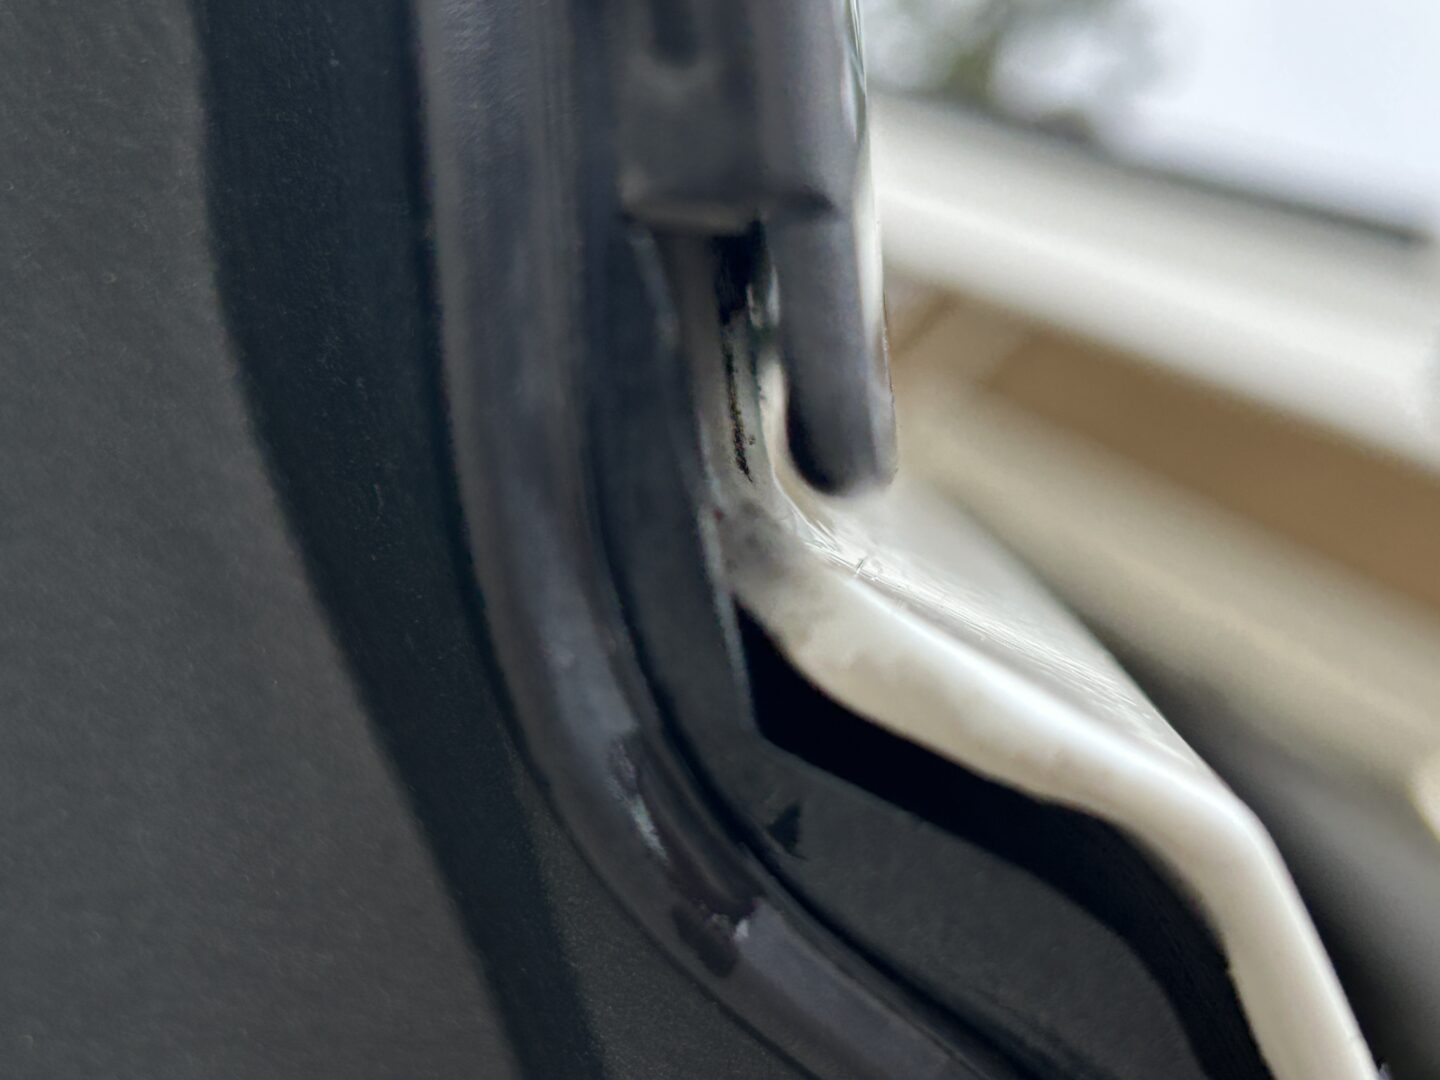
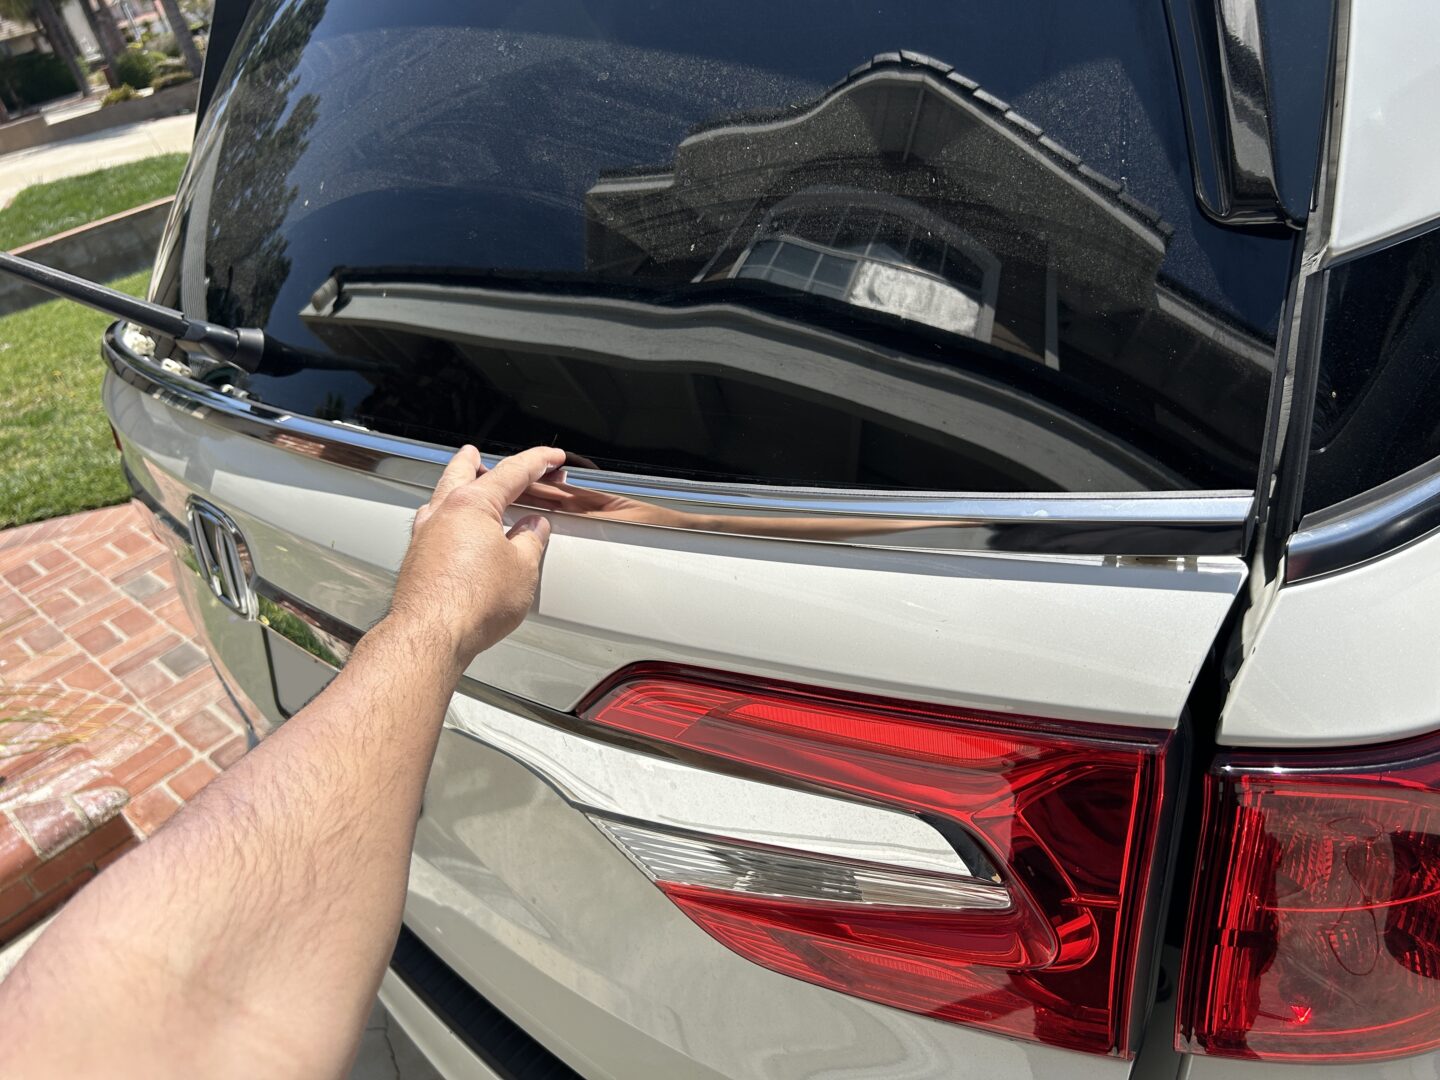
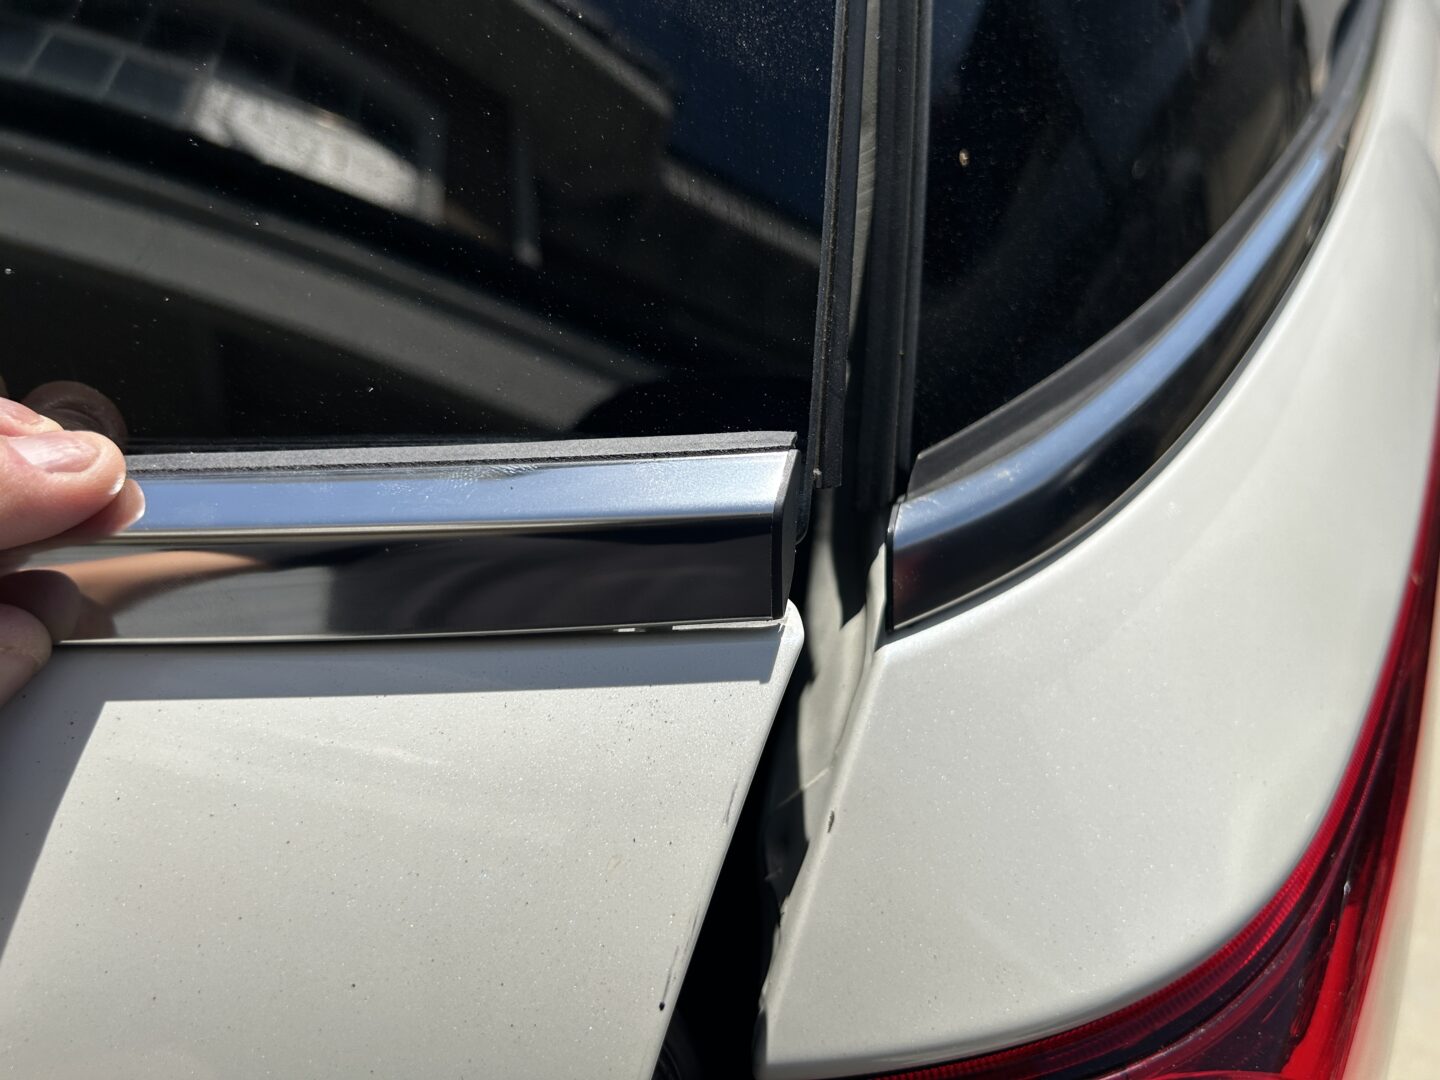
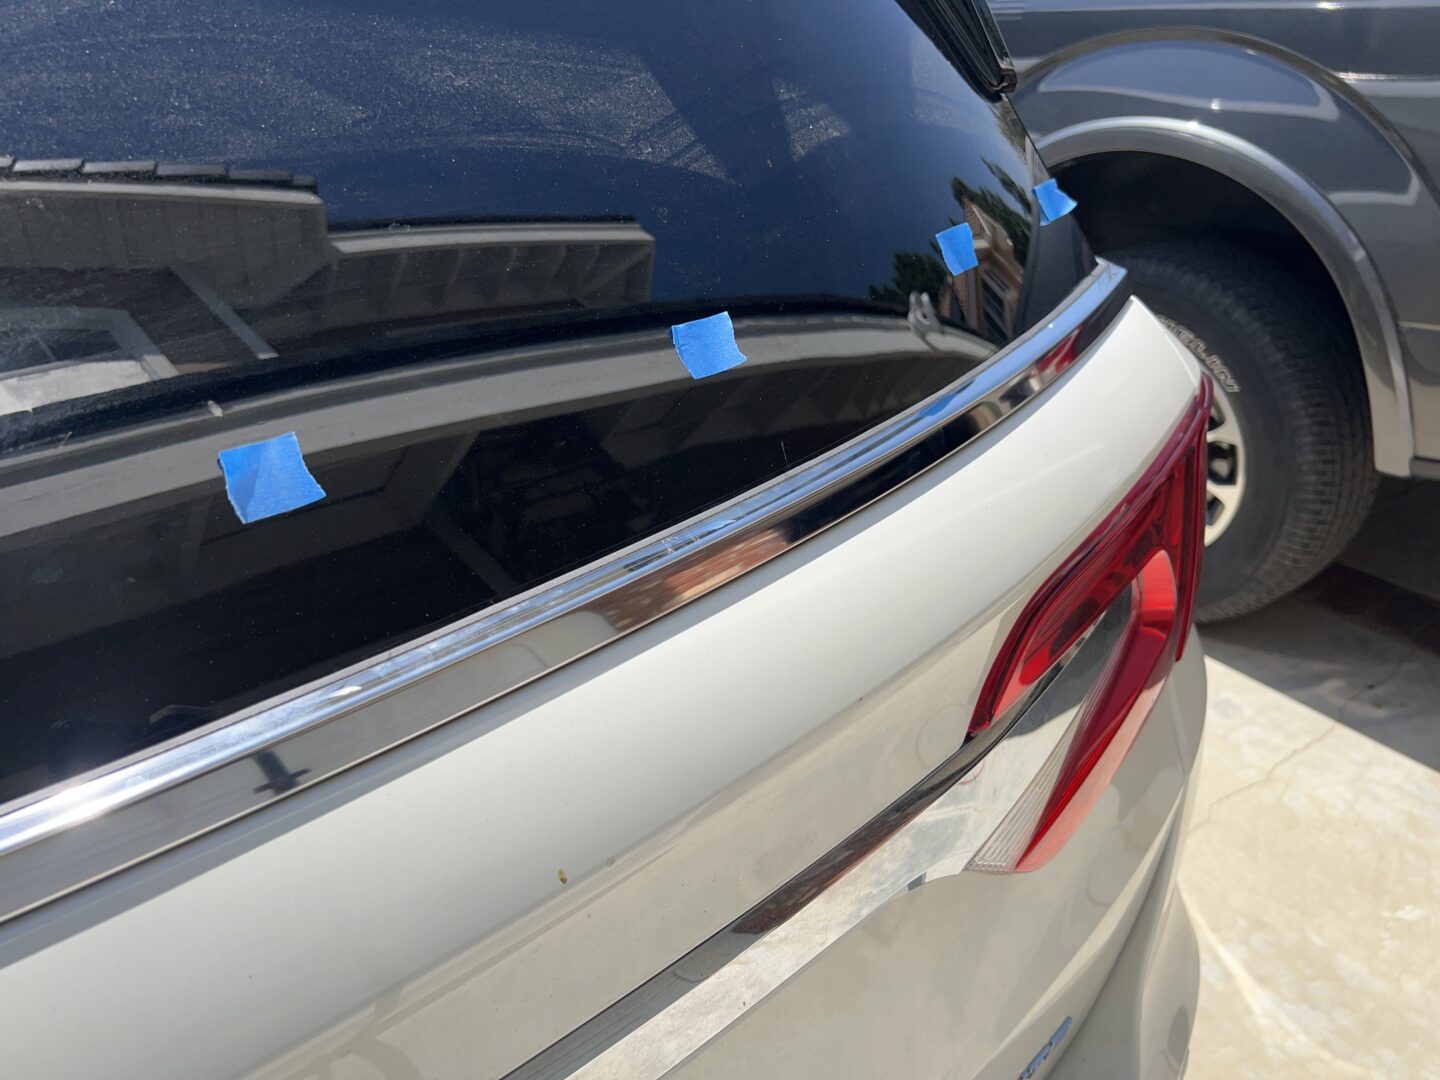
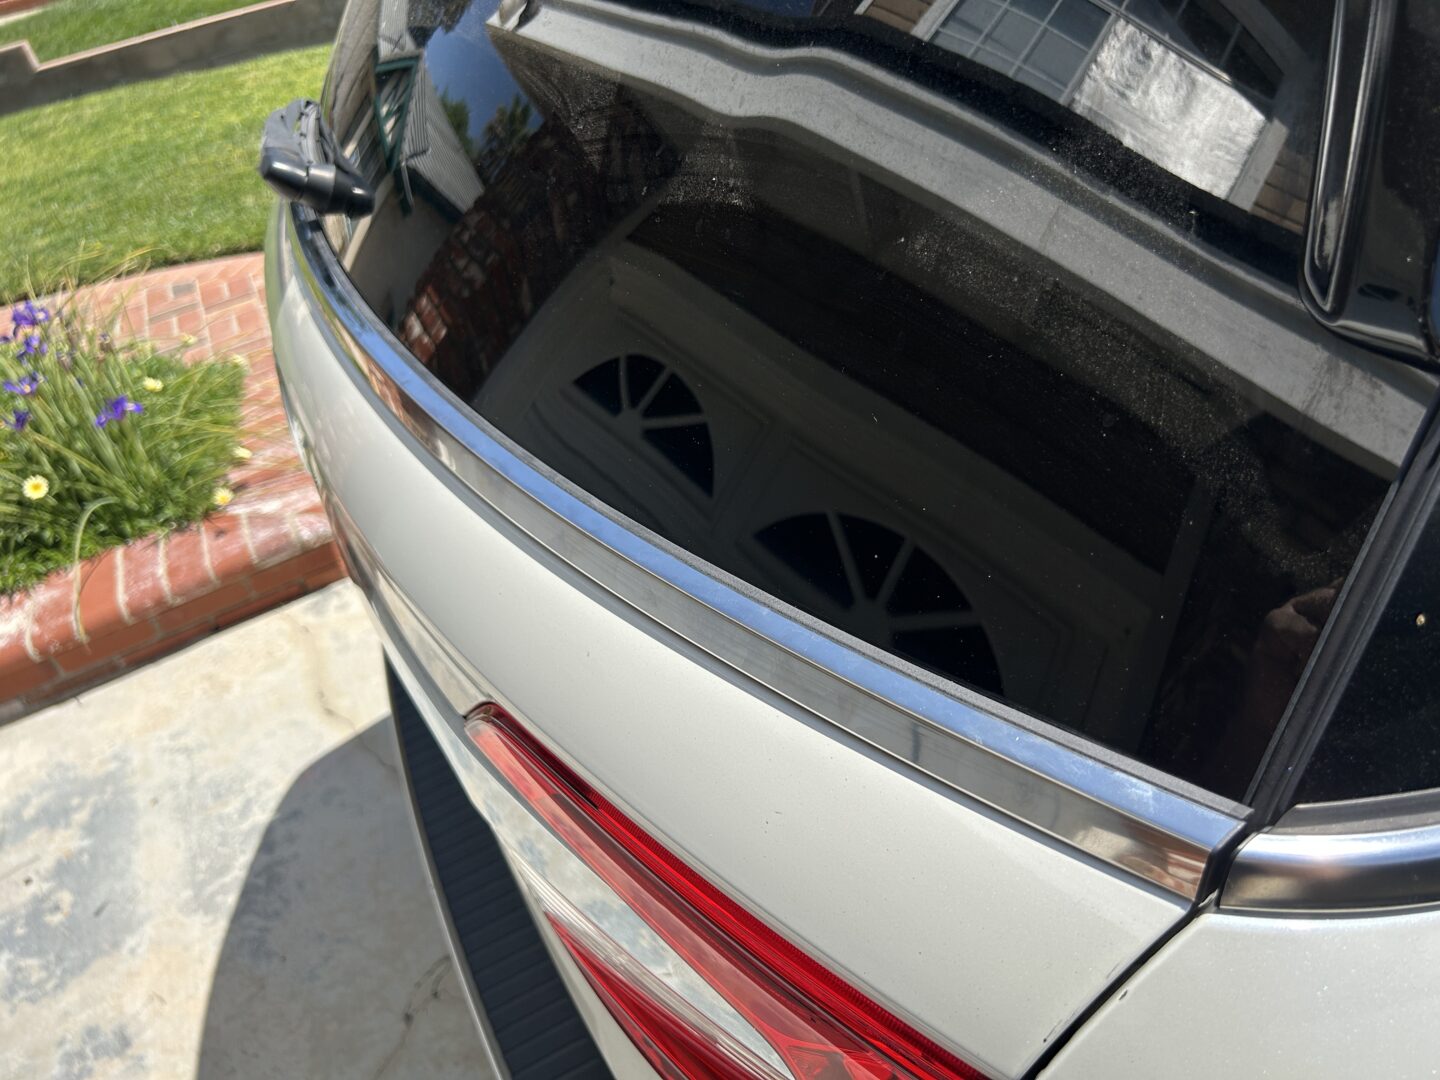
A common, but relatively minor issue on the Fifth Generation Honda Odyssey is the inevitable deterioration of the molding on the rear tailgate trim. This becomes evident when you see the molding either cracking, or even breaking off in pieces where the rear trim meets the tailgate glass.
Even if the rear tailgate molding is broken, it doesn’t mean that water will get into the trunk area of your minivan. There is a separate issue on certain Honda Odysseys from this generation where the window seal between the rear window and the tailgate is flawed, allowing water to get in from outside, resulting in a pool of water in the trunk after some rain. However, the rear tailgate molding issue generally does not cause water to leak into the trunk area.
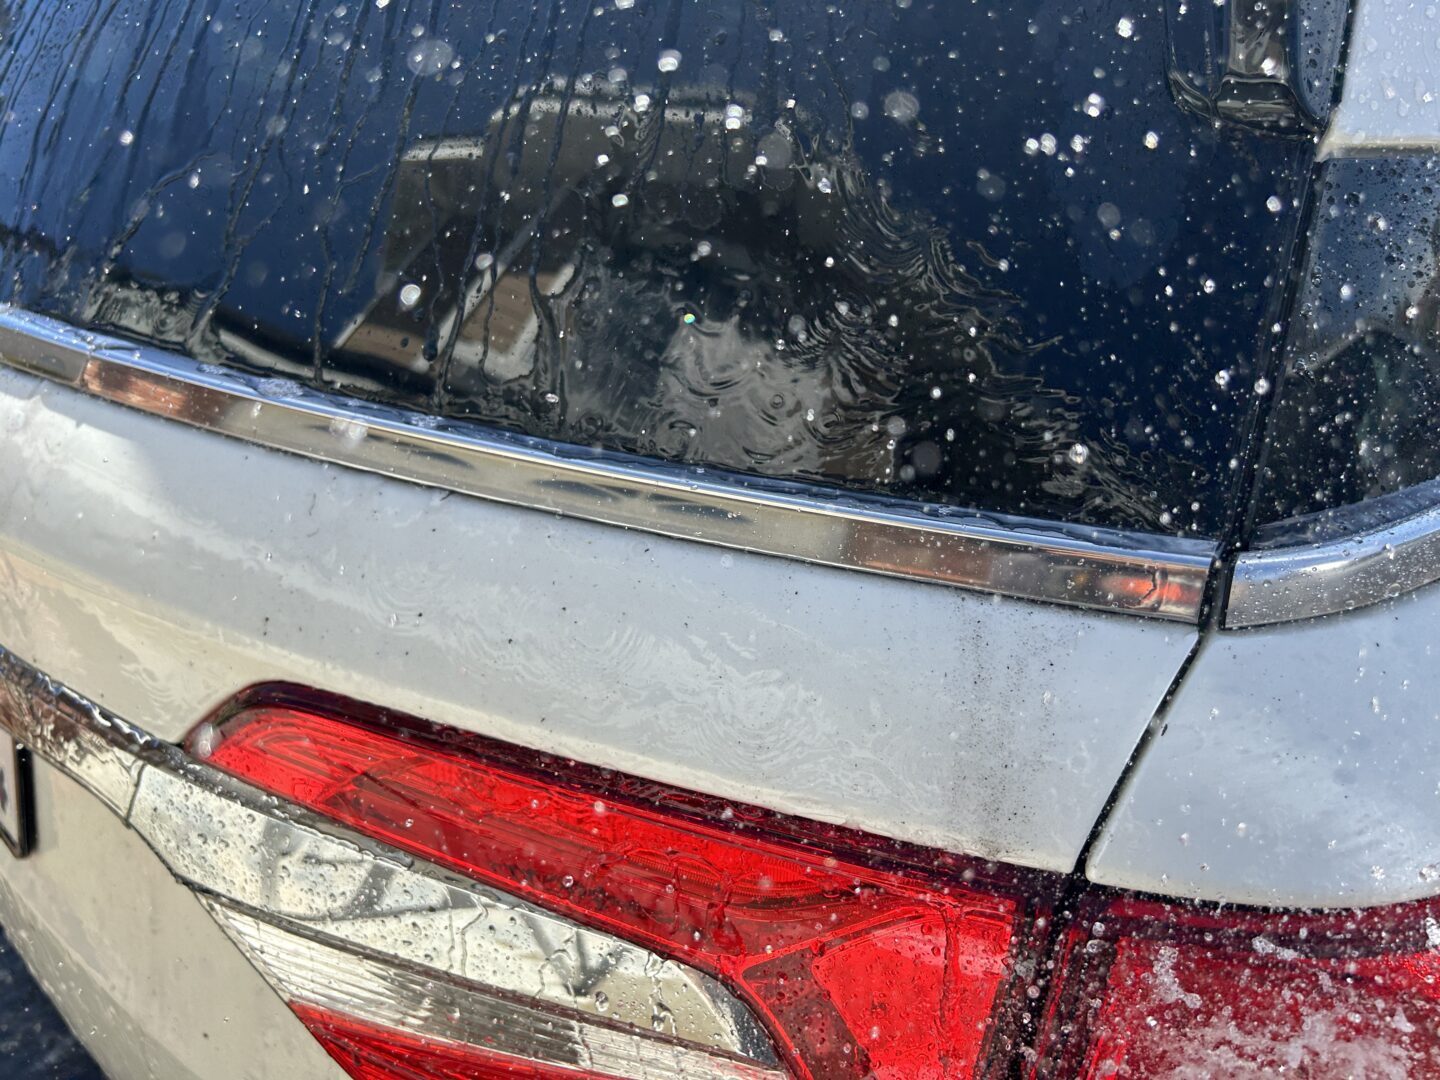
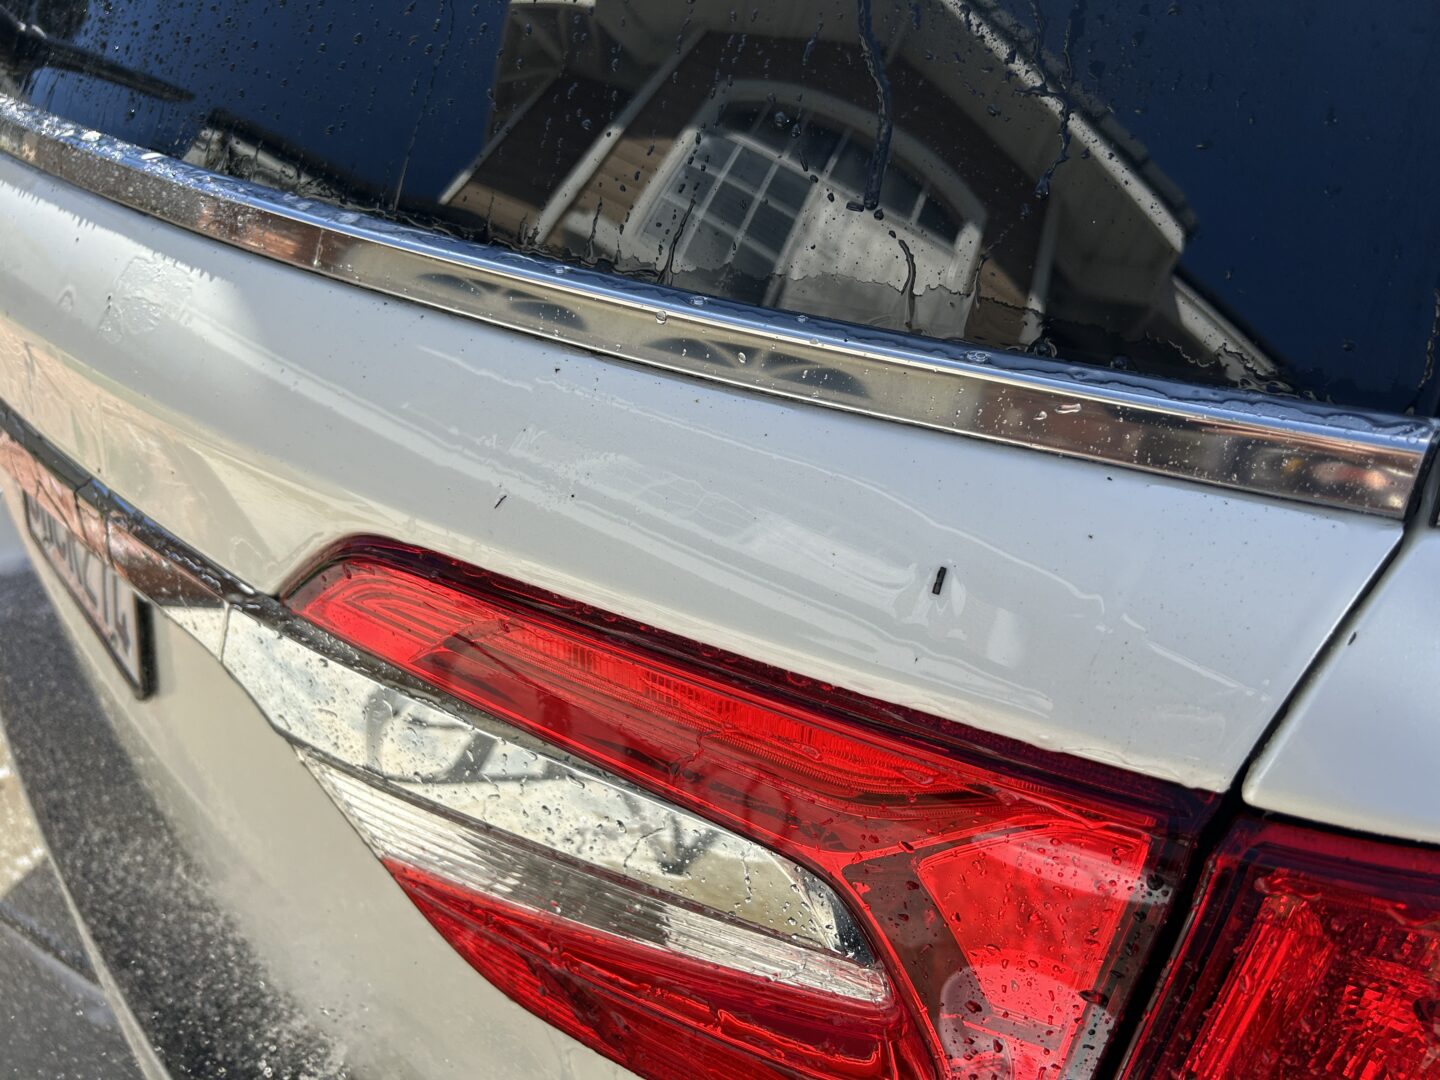
If you left the damaged molding the way it is, you likely won’t experience any issues with water leakage into the trunk. The only thing that you might encounter is that whenever you wash your car and you rinse this area, it will almost never rinse clean. This is because either dirt has collected in the space behind the trim which slowly breaks apart every time you rinse with water, or the molding itself breaks off every time you rinse with water. Either way, anytime you wash your car and rinse this area, you’ll find that water never runs clean. This is frustrating especially when you’re done with washing your car and are doing a final rinse down.
If you do plan on replacing the rear windshield molding, you have to pull the whole trim piece off of the clips that are situated at the bottom edge of the rear glass. The trim and the molding are one piece, so to replace the molding you will need to replace the whole trim and molding together.
I will just say right now that this job is an extremely frustrating job to do. A lot of dealerships will say that the rear glass will need to be removed in order to replace this trim piece and after completing this job, I have to say I agree. The 9 clips that hold the trim piece, hook into the bottom of the rear windshield glass (between the glass and the tailgate) and are very difficult to remove and install. The trim piece itself is also difficult to snap into the clips as well, which adds to the difficulty of this job.
Most of us who are trying to do this job ourselves are not willing to pay the hefty price that comes along with that amount of work quoted from the dealership. There are a lot of people out there wanting to fix/replace their rear trim molding, but there’s not a whole lot of good information out there on how to do it. I tried different methods and deliberately went through everything that could go wrong, so that I could write a complete tutorial to help you both understand and complete the replacement of this rear trim molding and the associated clips if necessary.
Tools & Parts
The rear windshield trim piece and rubber molding are integrated as one piece, which I refer to in this post as the rear tailgate trim molding. The best way to get this part is to go to your local Honda dealership and special order this item (if they don’t have it in stock already). This allows you to inspect the item when you pick it up so that you don’t take it with you if it is already damaged.
If you order this item online, you should just be prepared in case that it comes damaged and dealing with the return process from the place you purchased it from.
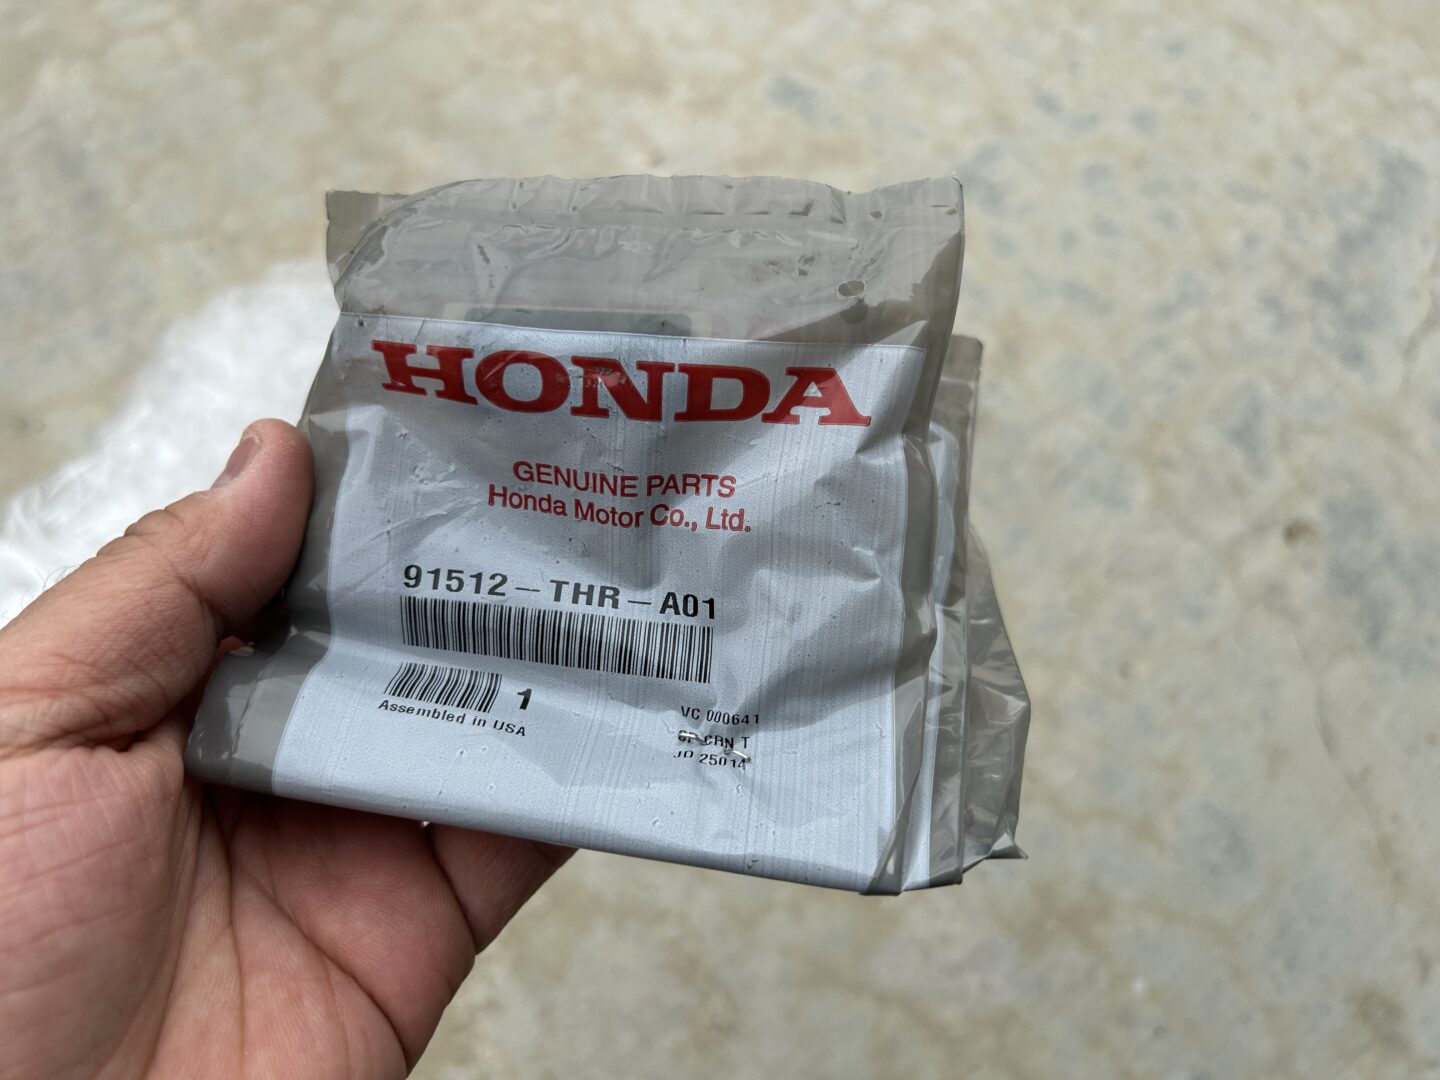
Part#: 73220-THR-A01 – Molding, RR. Windshield (LOWER)
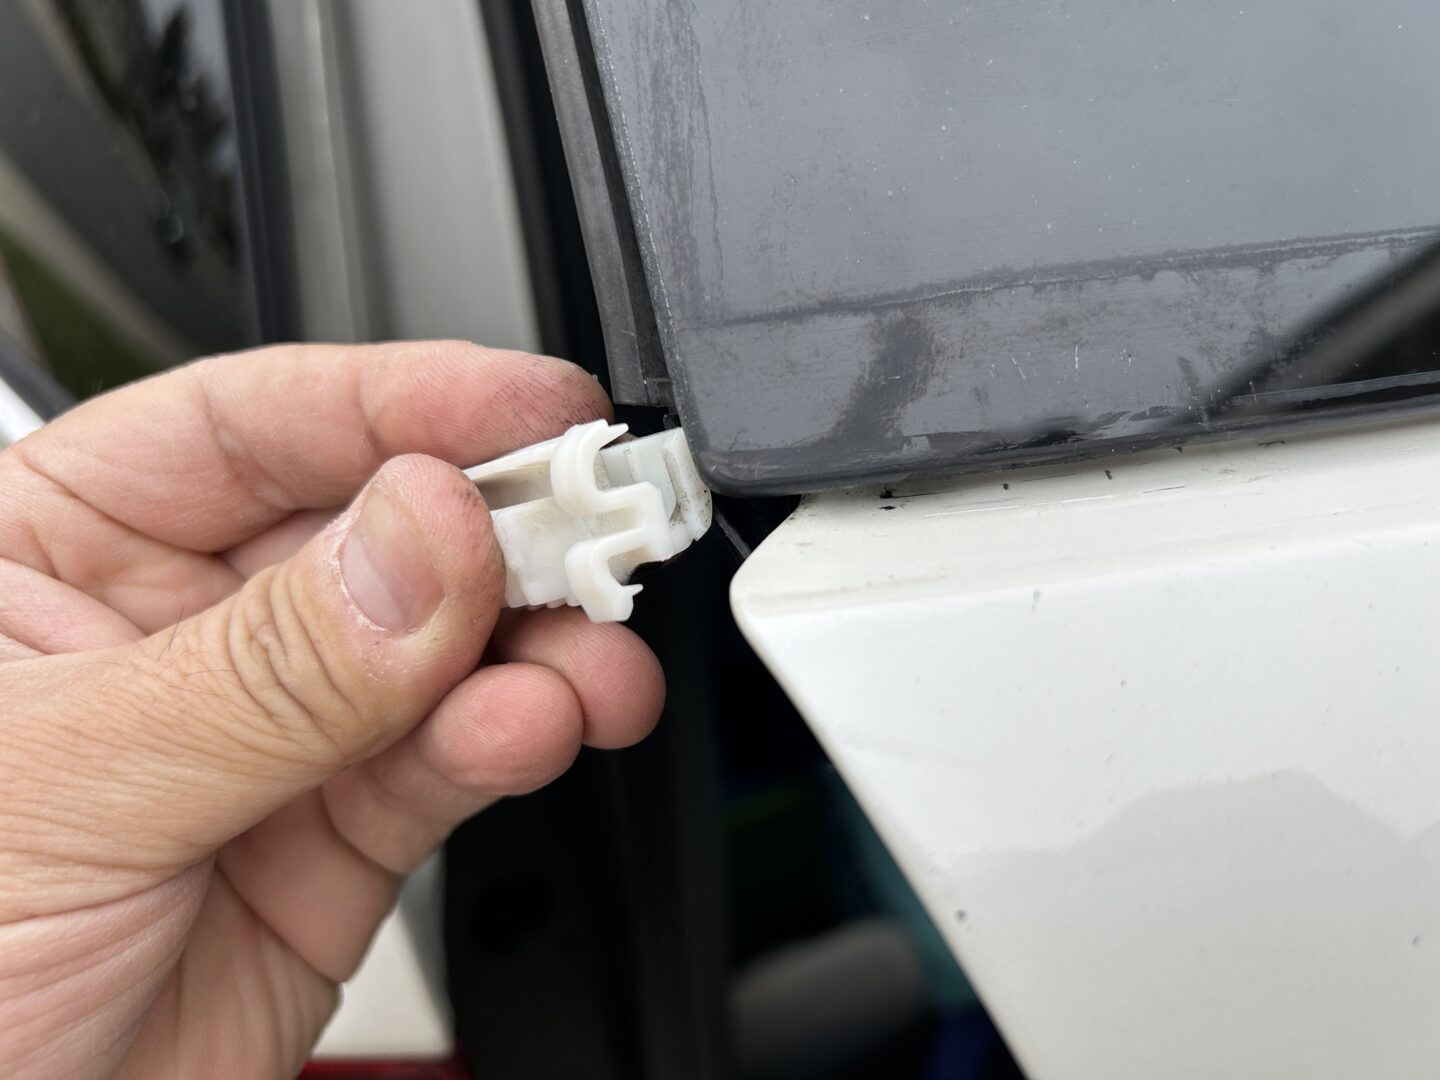
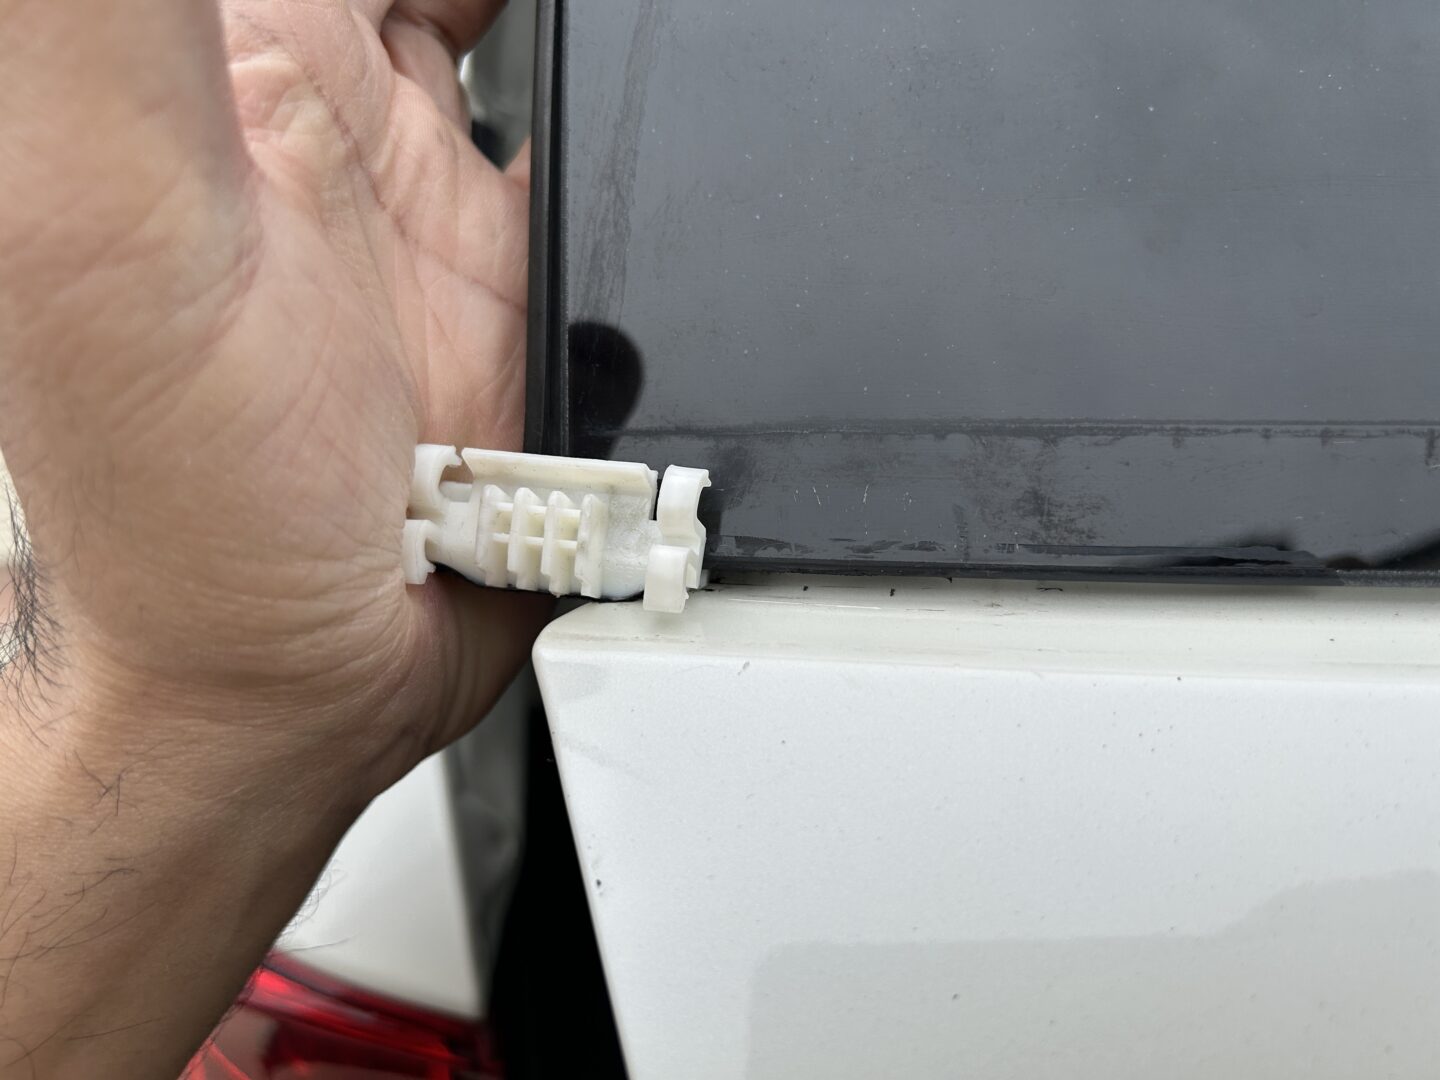
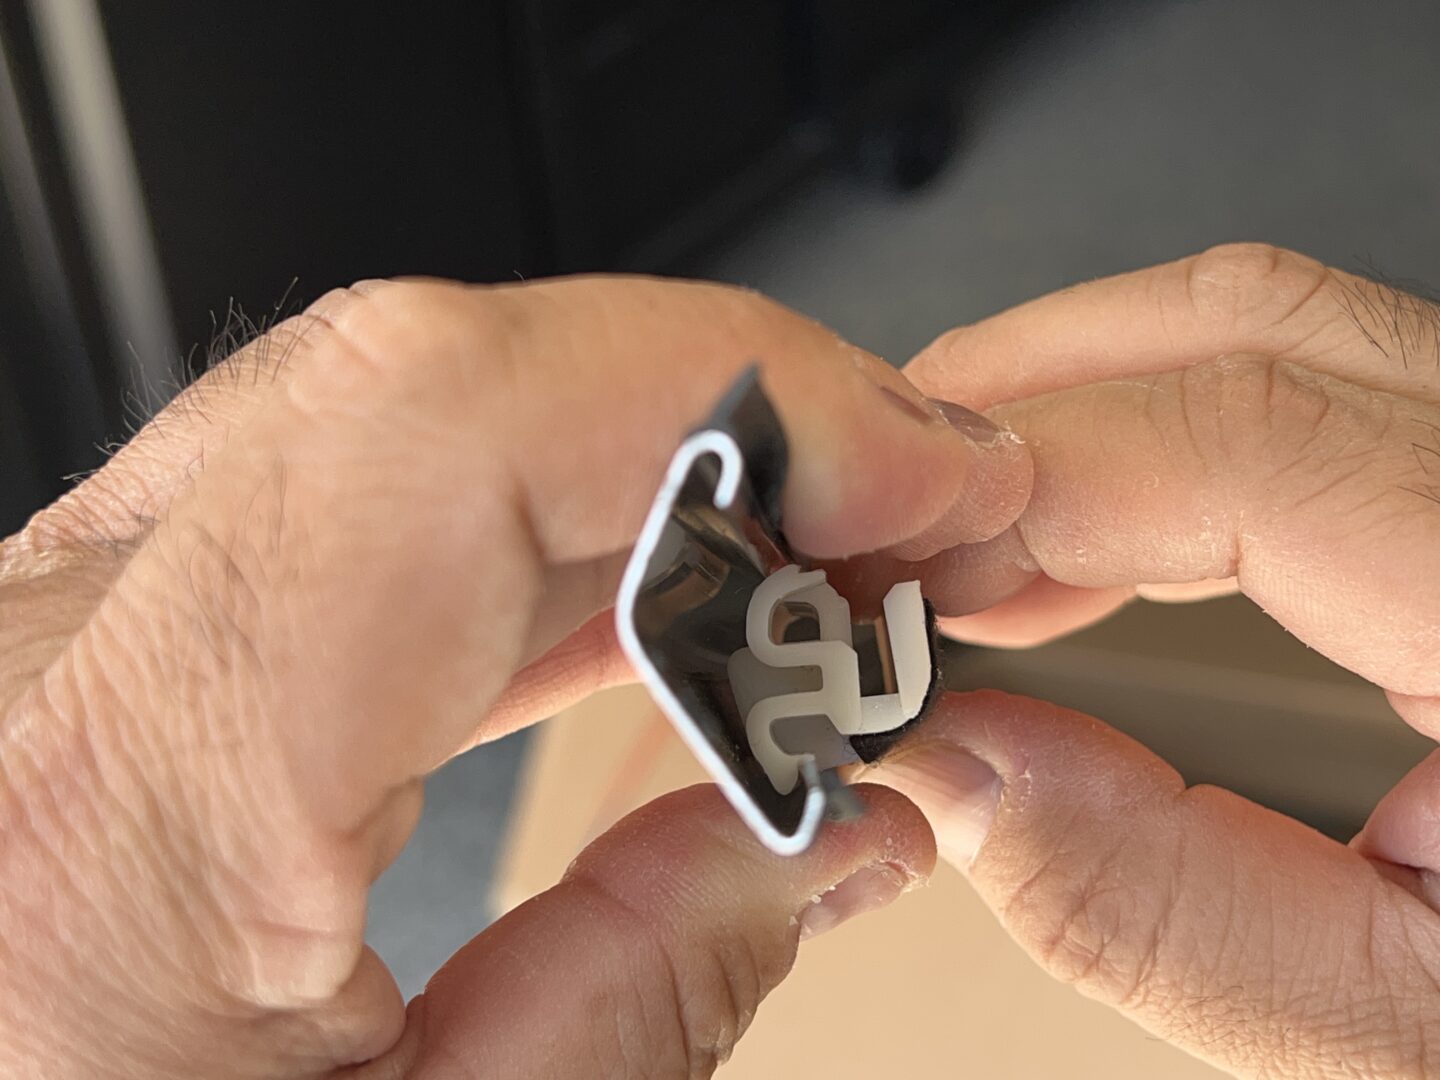
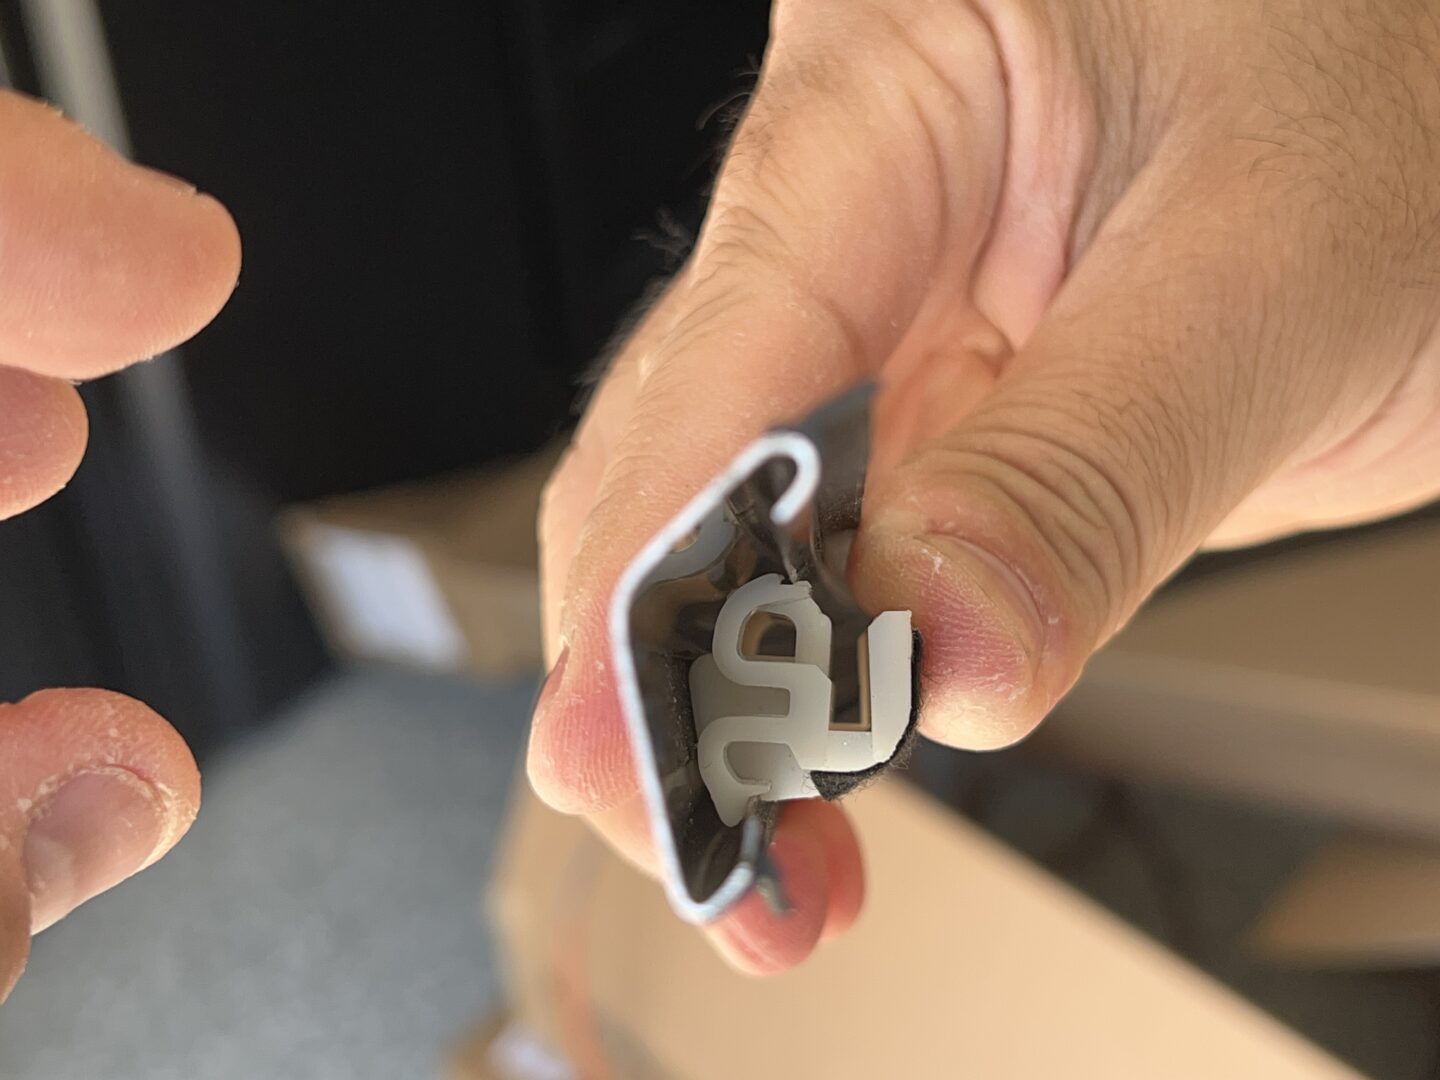
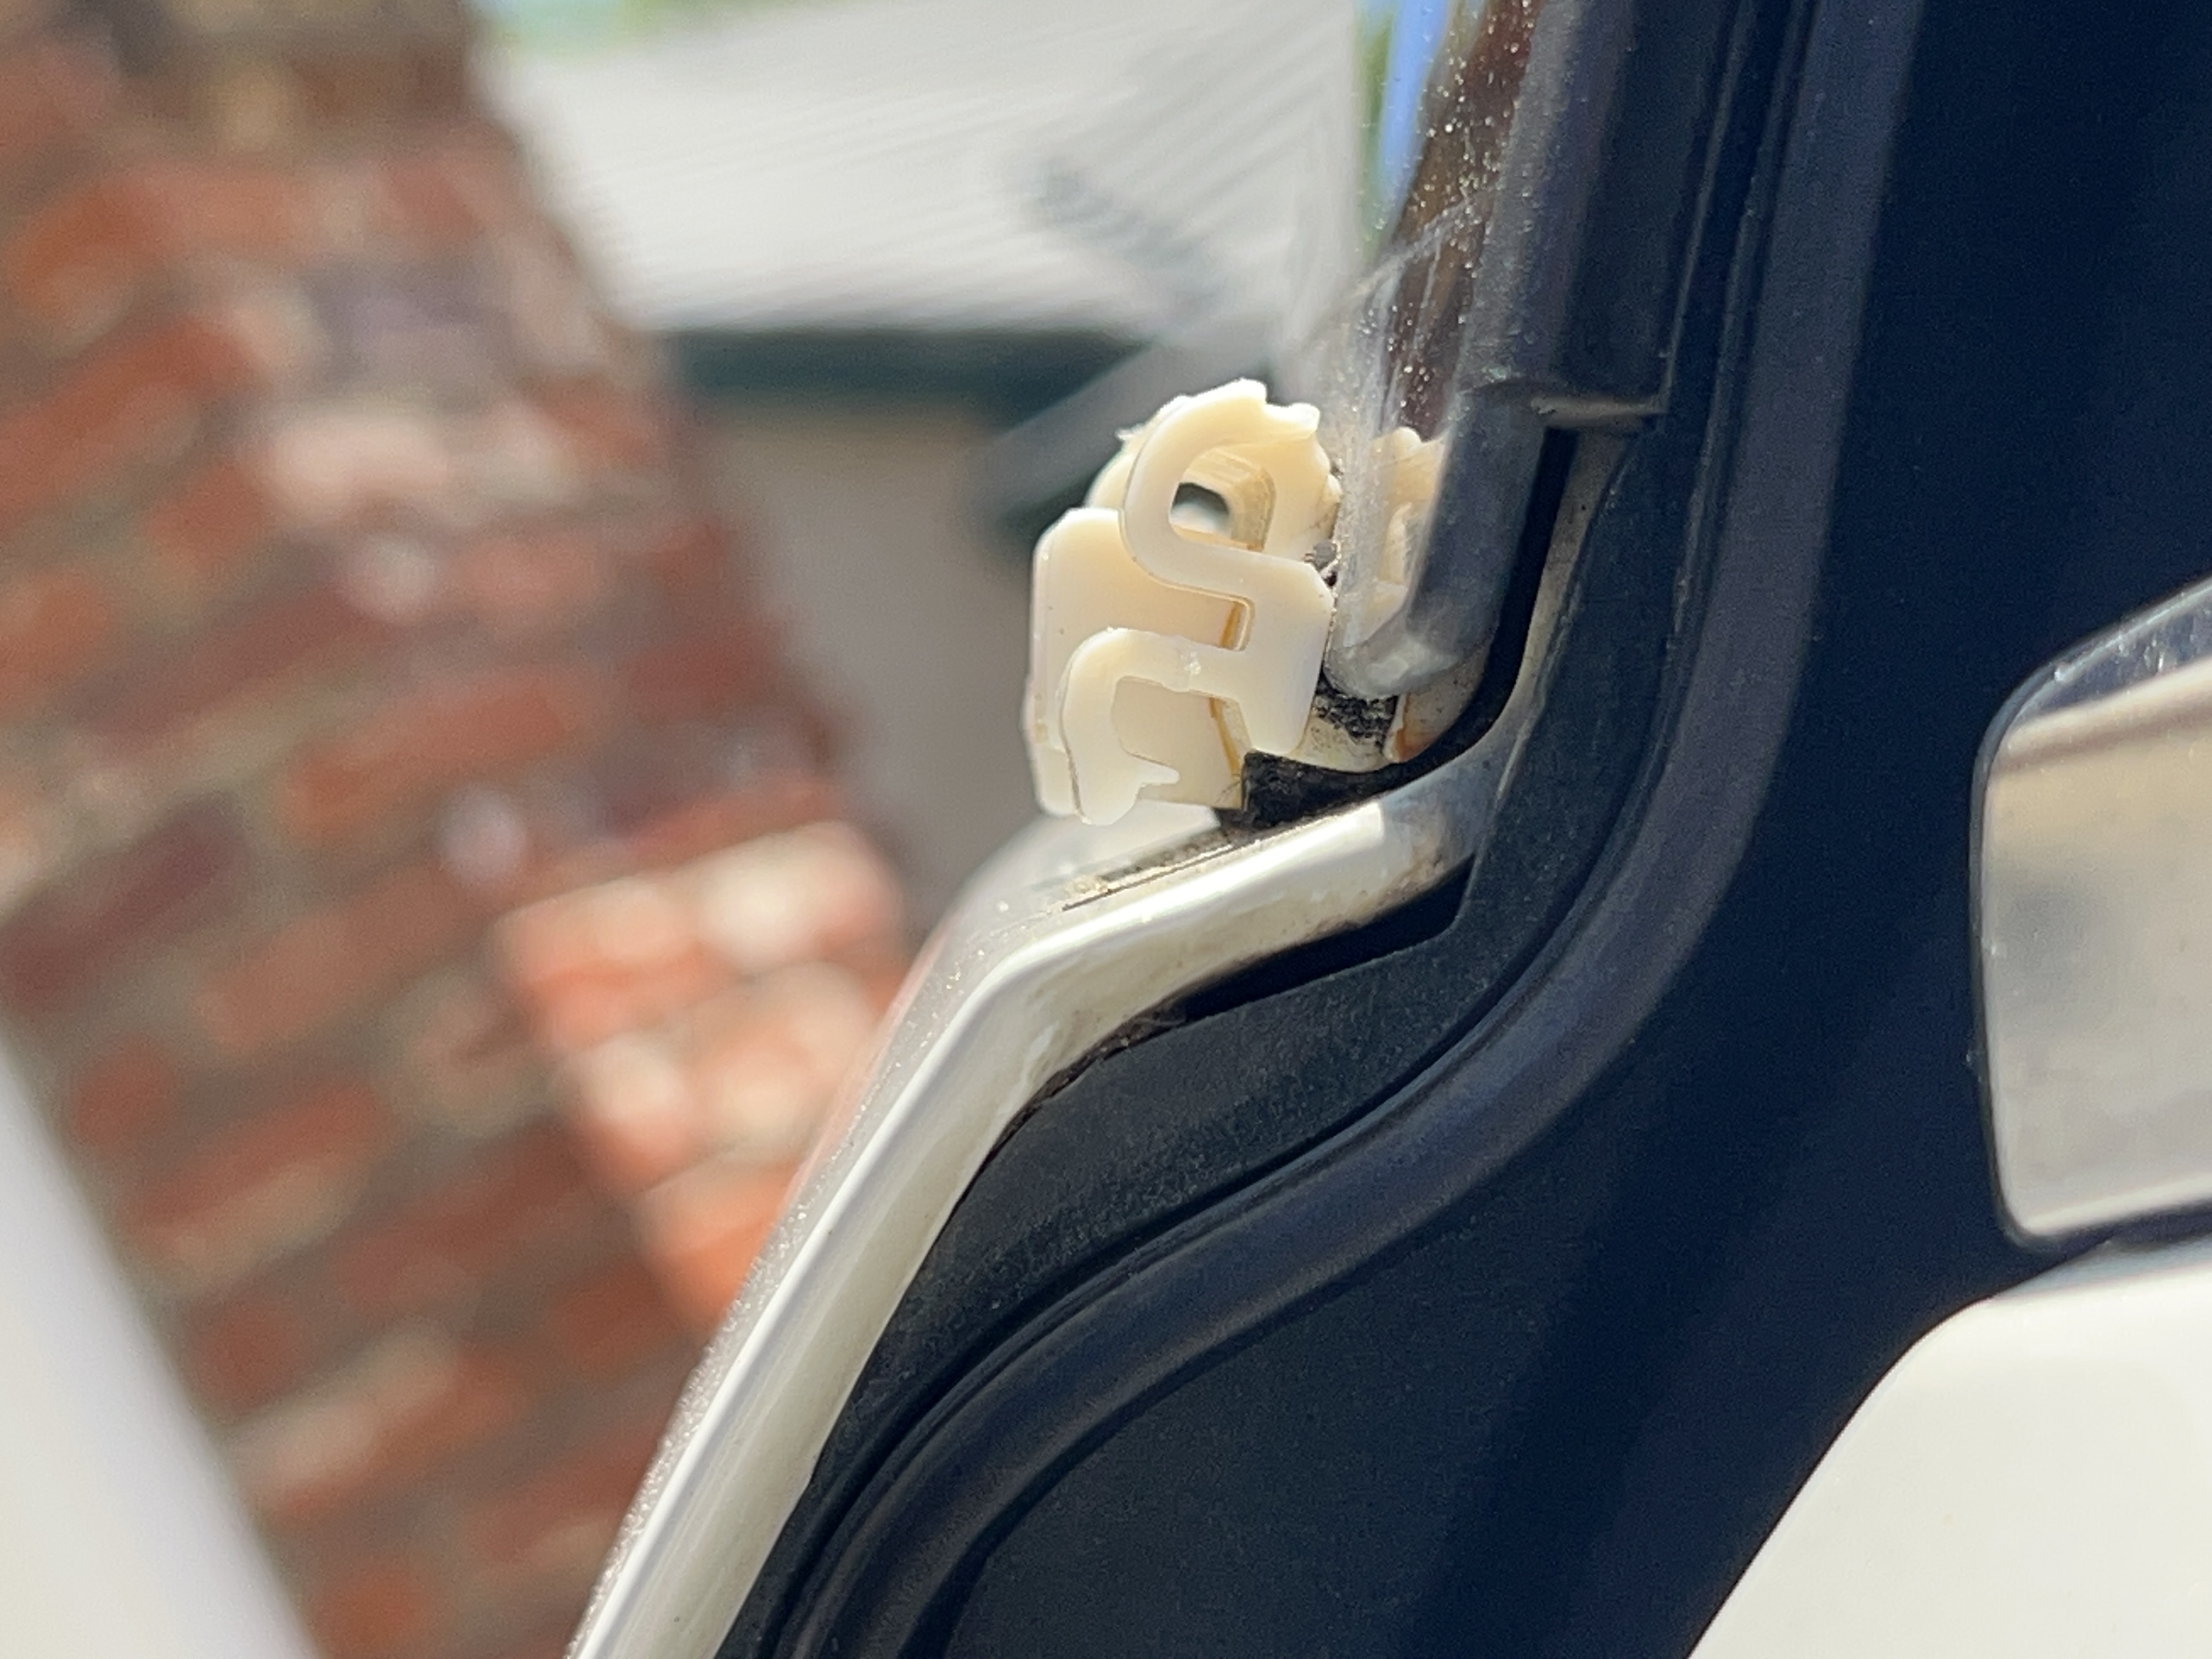
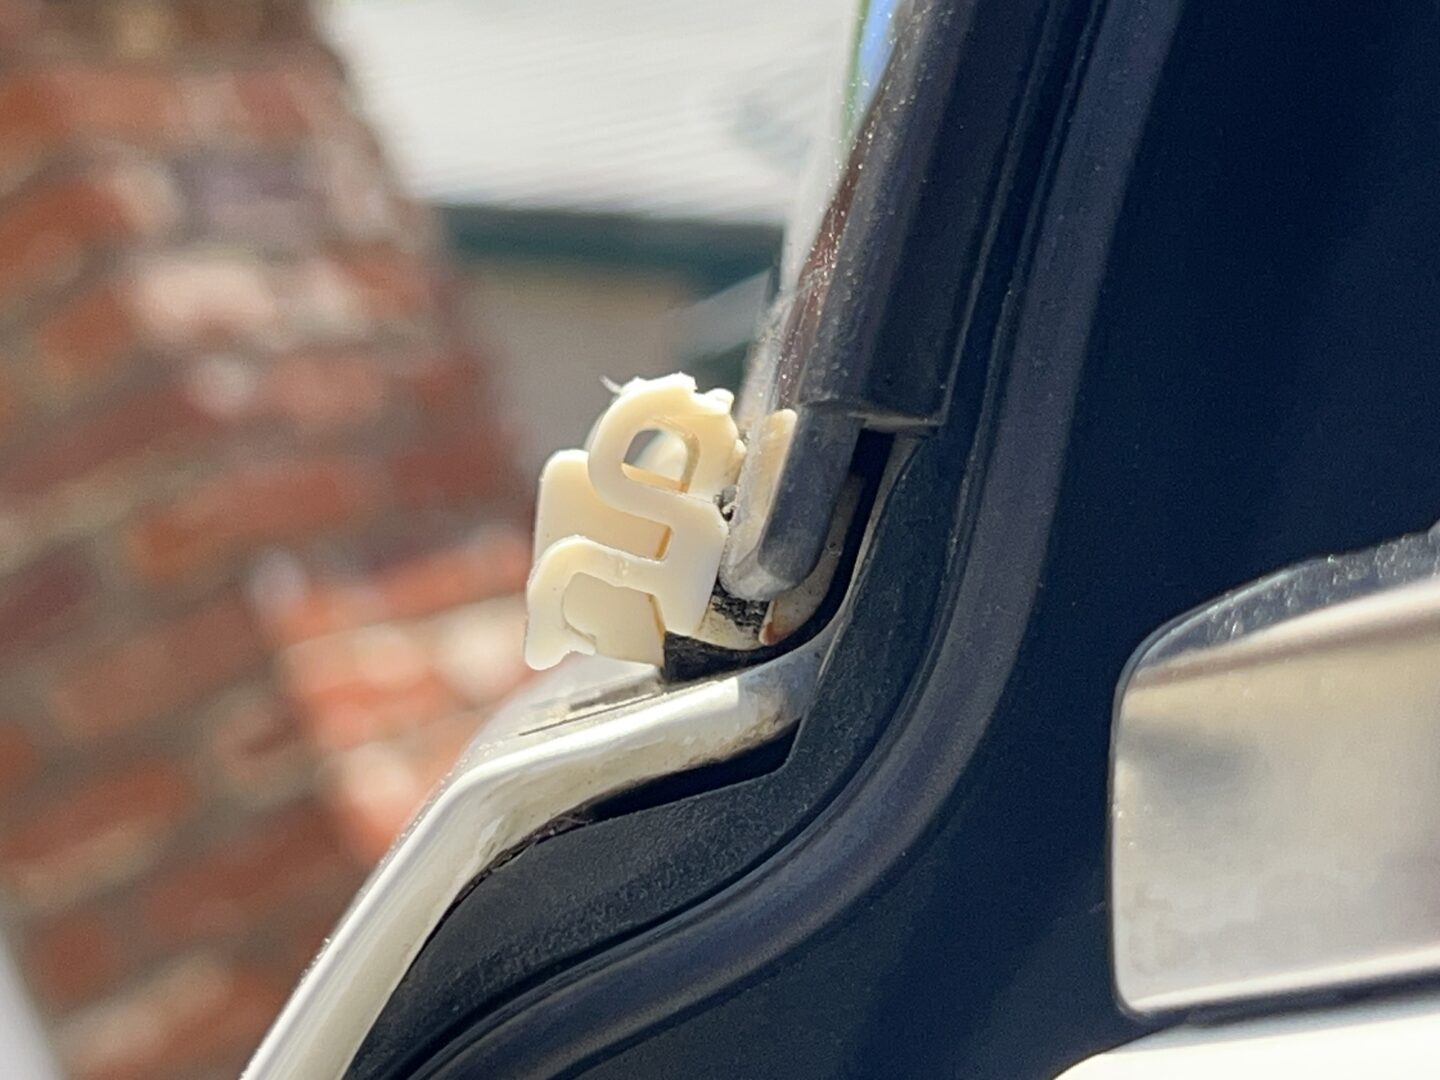
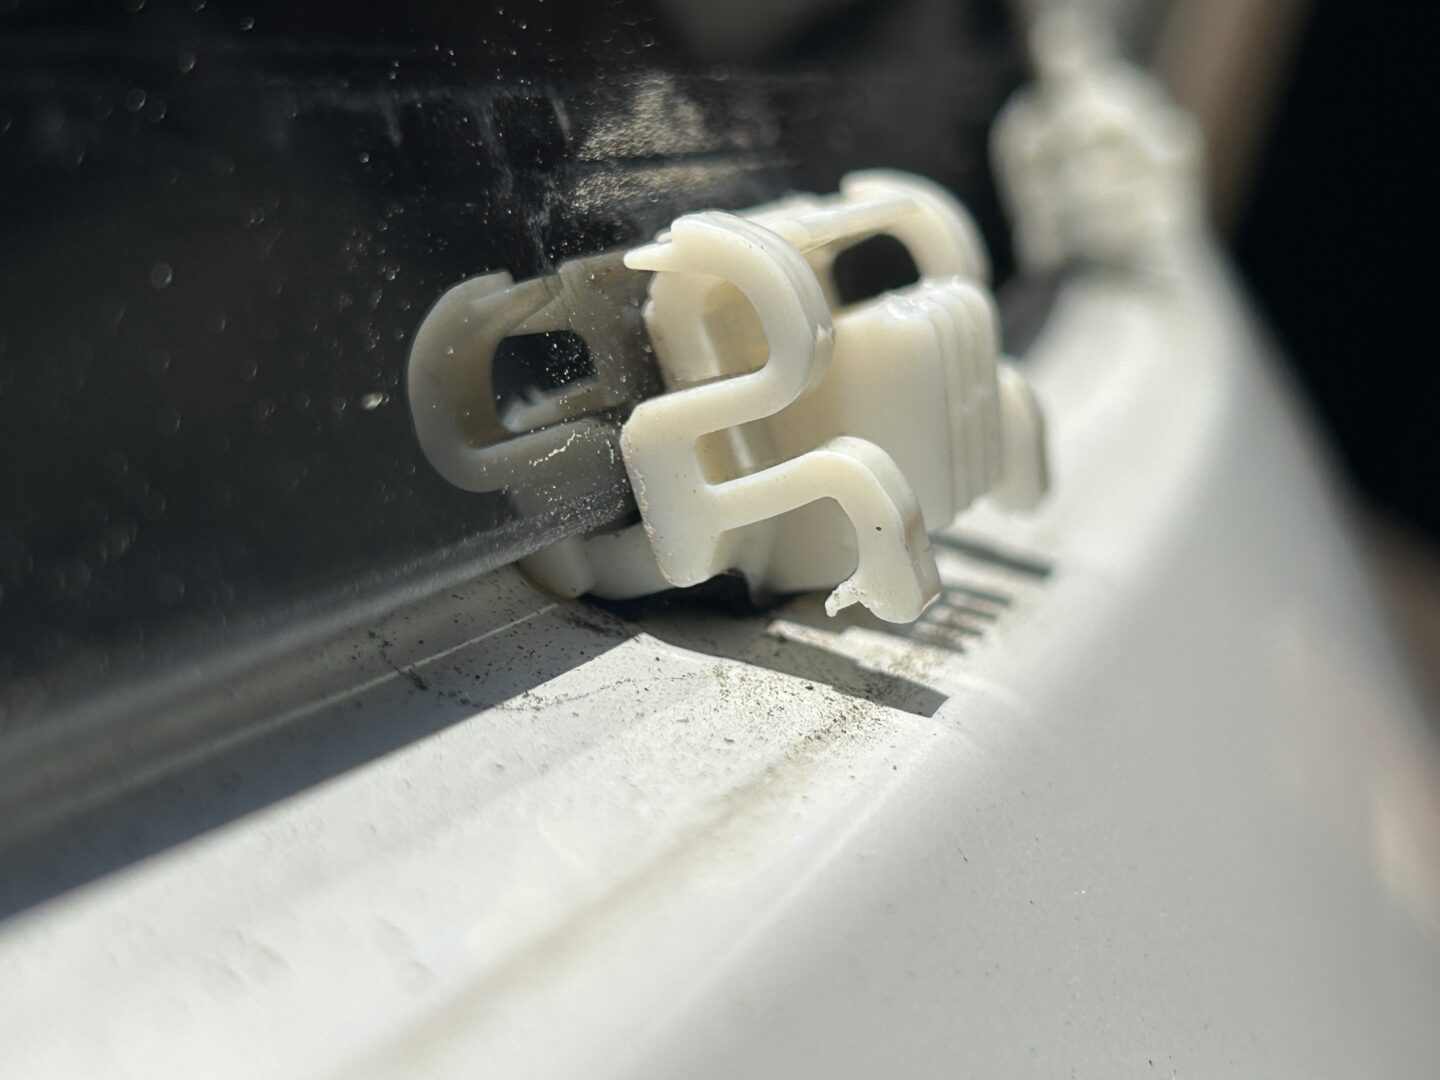
The way that the trim piece is installed is that it snaps into these plastic clips that clip into the bottom of the rear windshield. It is possible that the clips can break when you remove them, requiring you to replace them.
Part#: 91512-THR-A01 – Clip, RR. Windshield Molding
Here is a diagram showing how the clips go into the bottom of the rear windshield. There are 9 of these mounting clips, with the 3 clips on the far ends and at the center being glued into place. The other 6 clips can be slid back and forth, but you won’t be able to do the same with the edge and center ones.
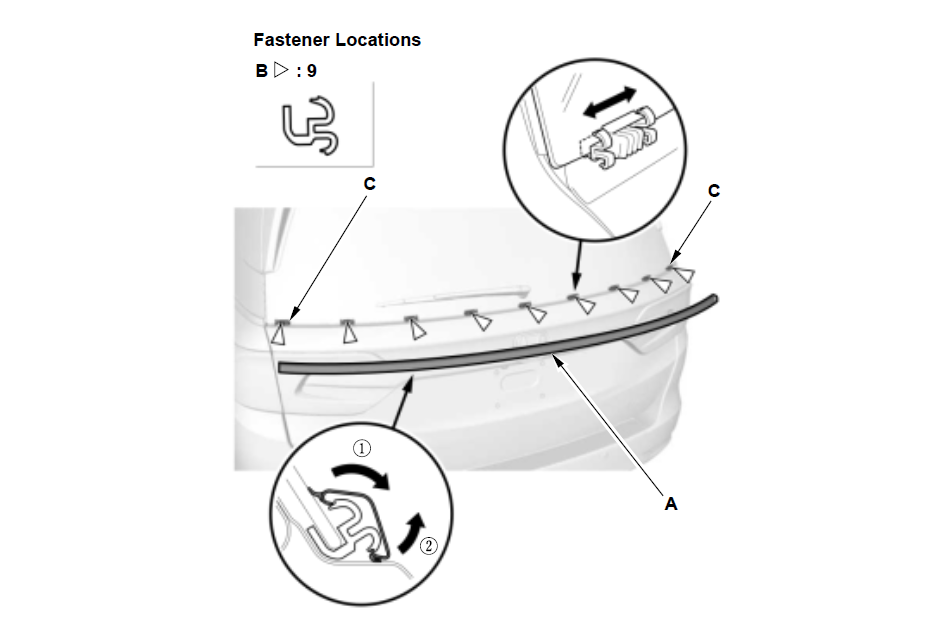
The rear windshield trim molding snaps into the mounting clips along the top and bottom of the whole trim piece. However, if you think that removing and installing the trim piece is as easy as the diagram shows, you are sorely mistaken. The trim molding doesn’t exactly just snap in place as it shows, although removing isn’t too difficult.
As for the clips, it’s practically impossible to install and remove them without sliding them in and out at the sides. And because the mounting clips on the ends are glued in, you have to physically break them apart to get them out. You also can’t just twist them in and out of the bottom of the windshield glass because you just can’t physically do it.
Other Tools Used
Trim Tool Set
Microfiber Towels
Car Detailing Brushes
Heat Gun
Utility Knife
Long Nose Pliers
Hammer
90-Degree Hook Tool (usually in a hook/pick tool set)
Automotive Tape
Removing the Rear Windshield Trim Molding
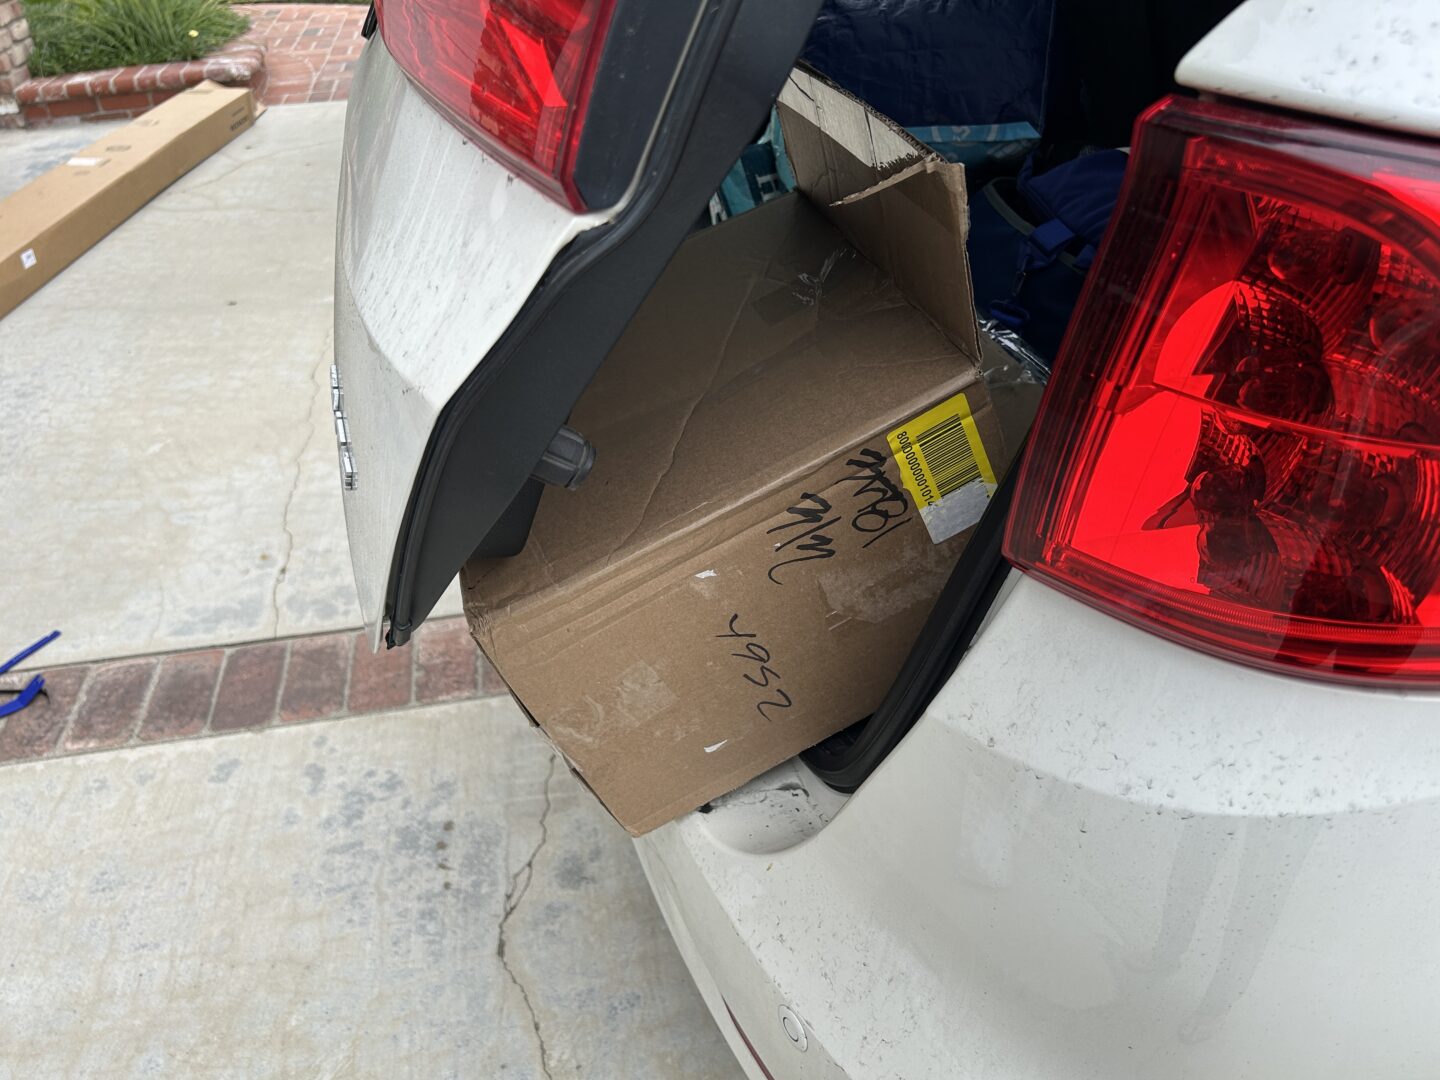
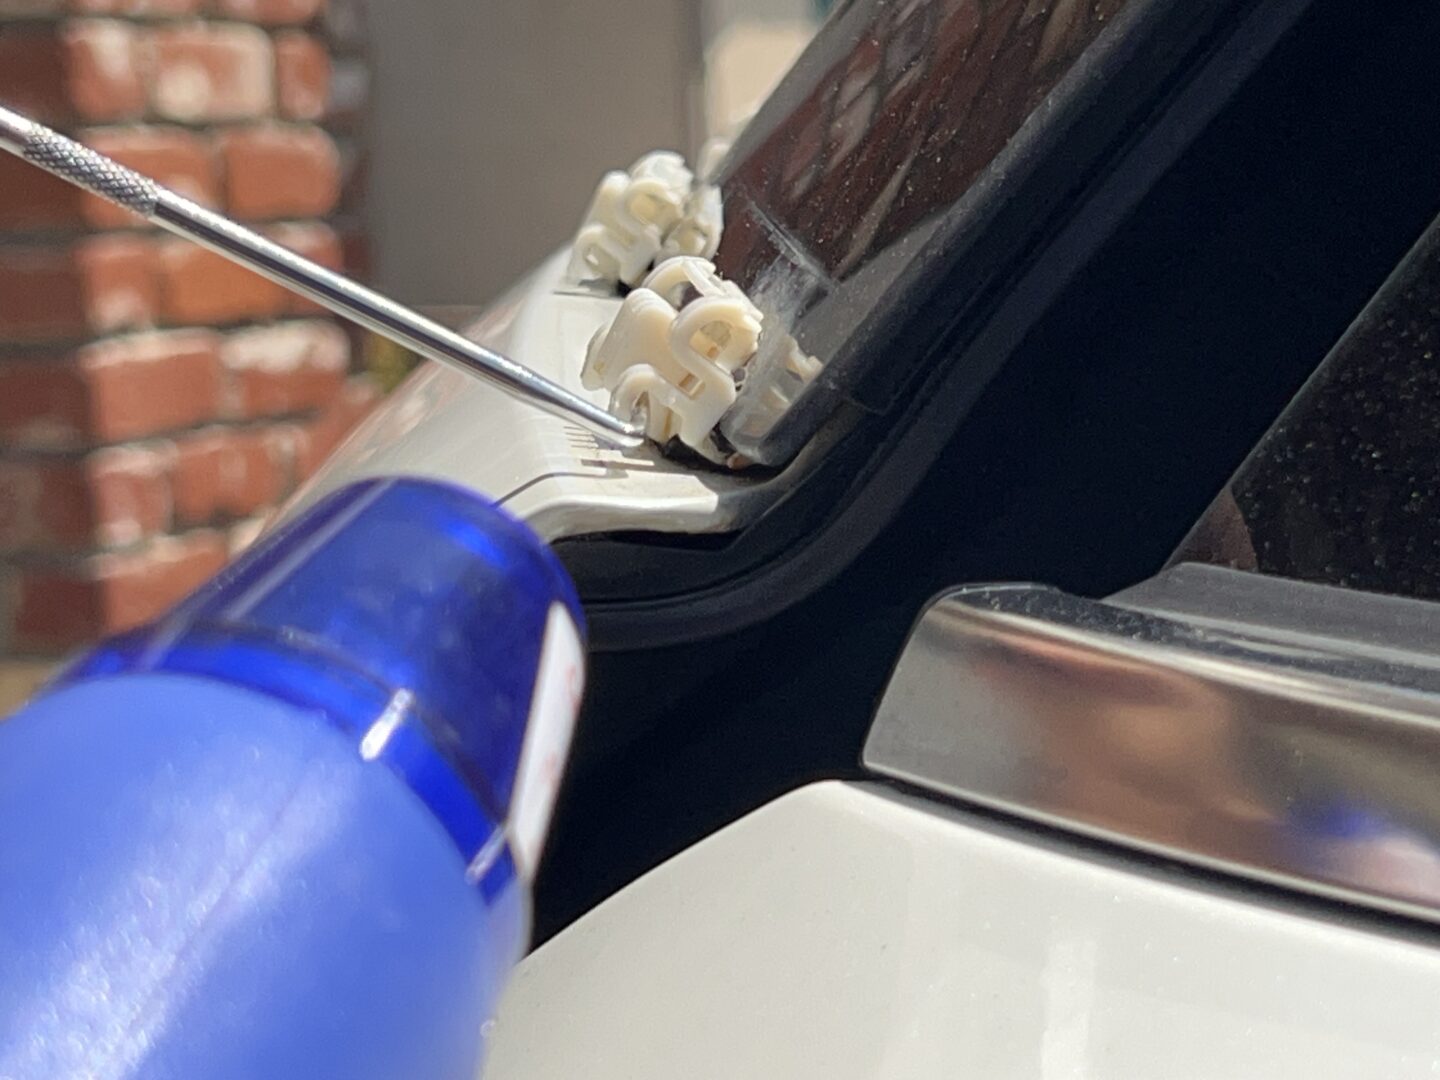
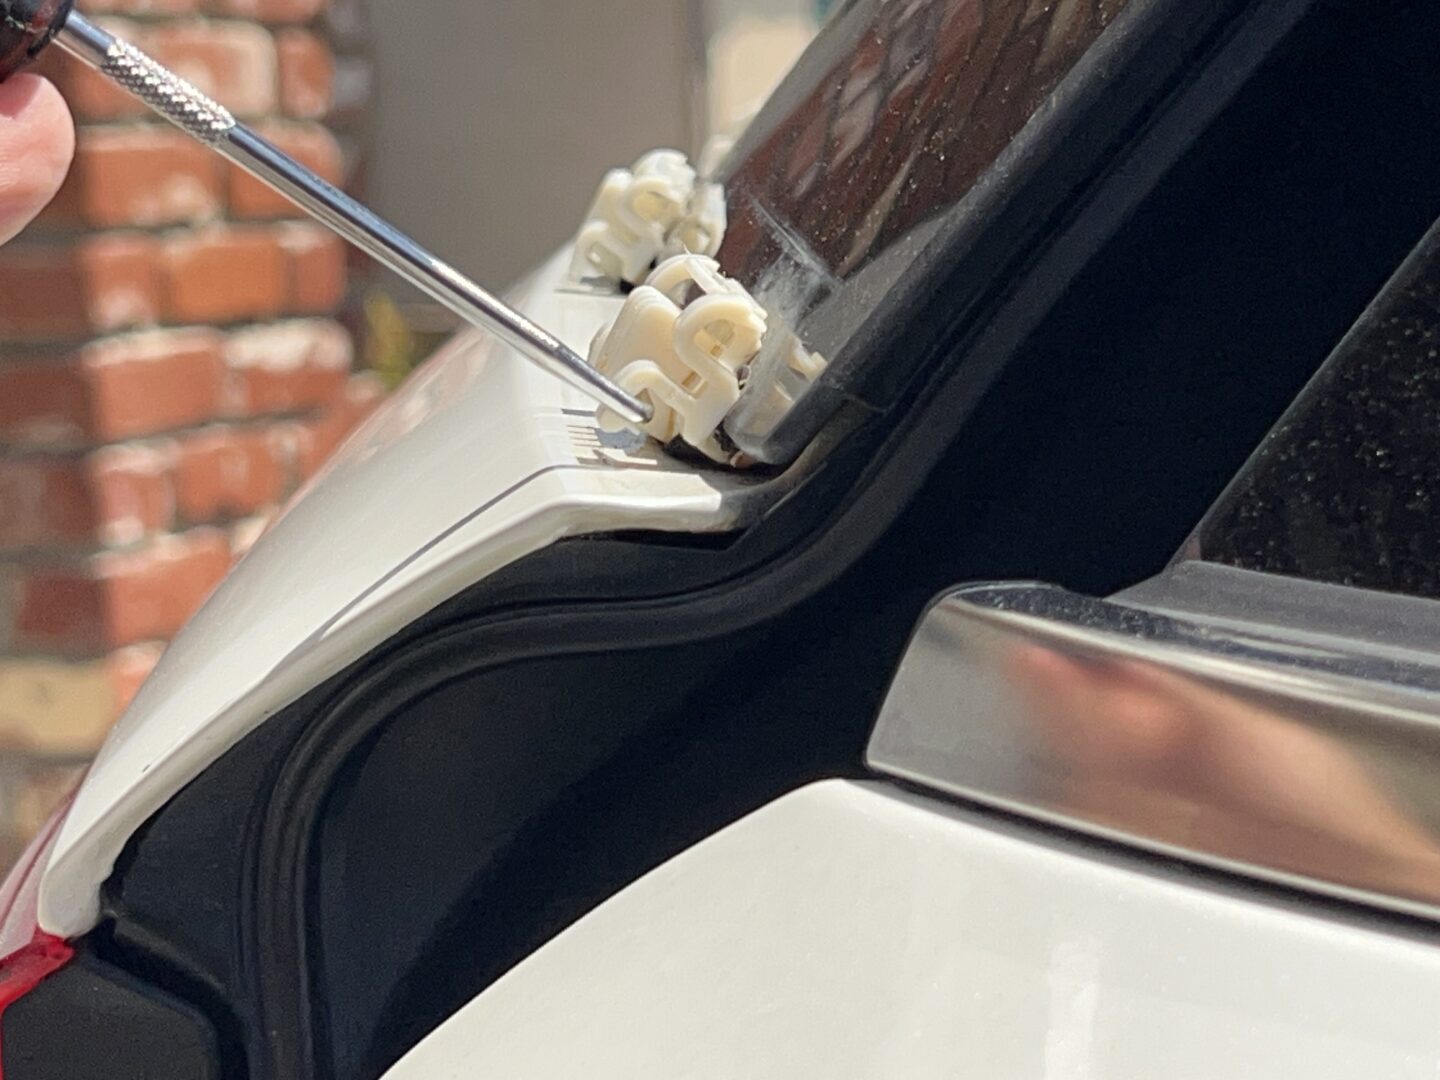
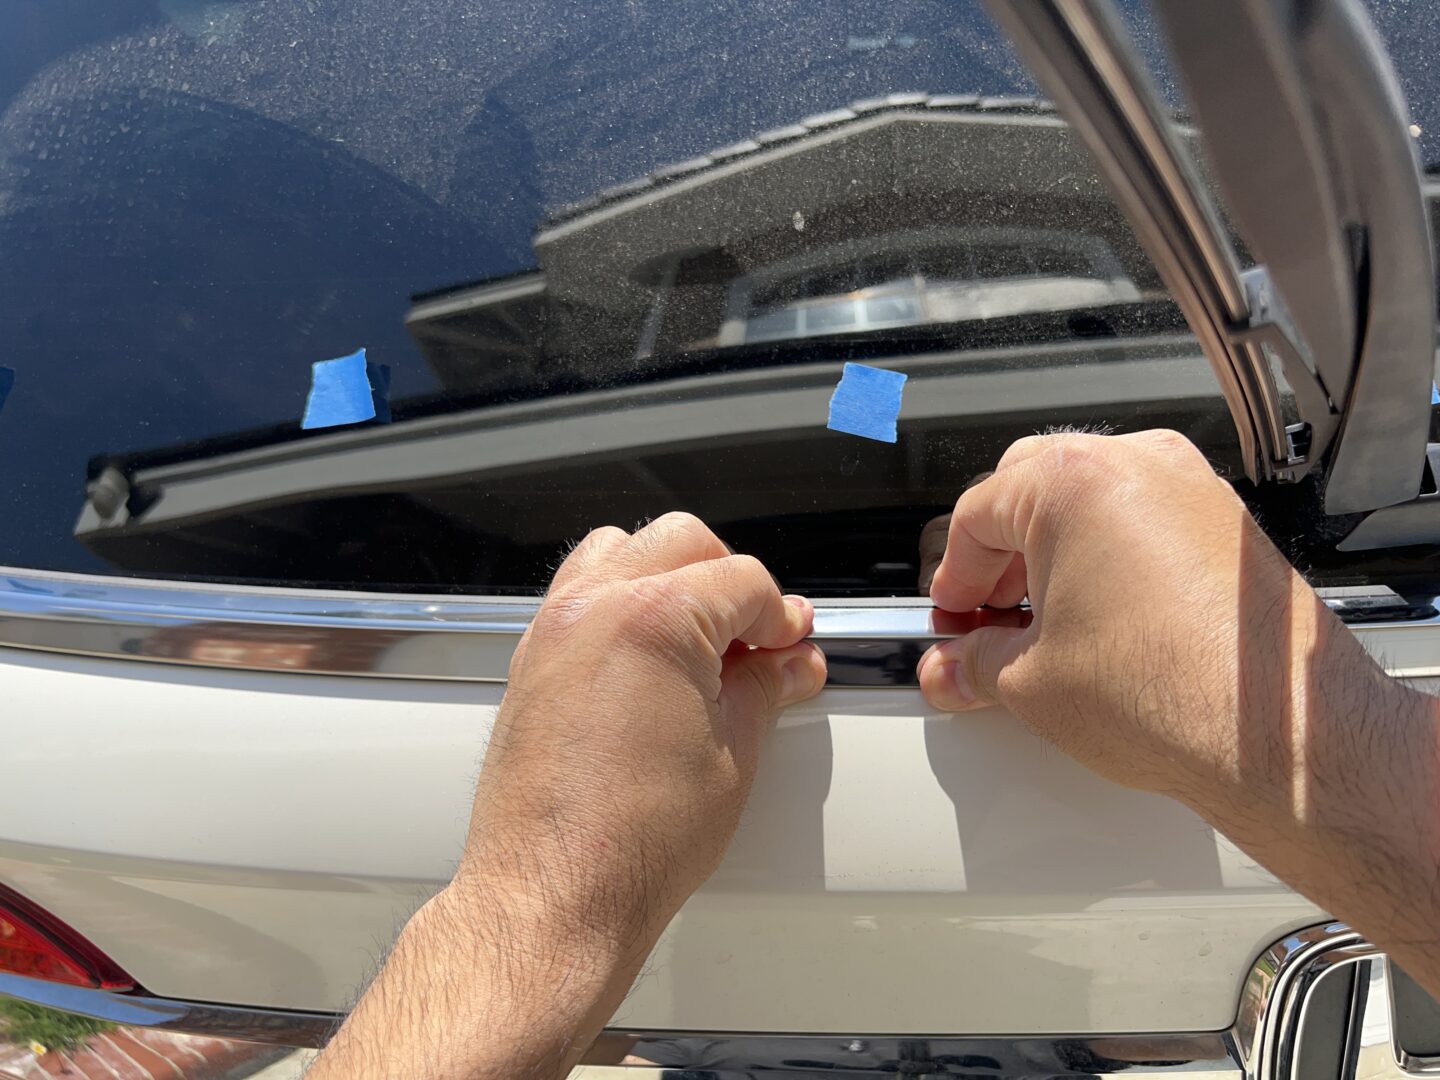
To start this job, you’ll need to have the tailgate slightly open. It’s necessary to prop the tailgate open with something since applying pressure on the tailgate while it is manually open will just cause it to close on its own. I used an empty box to wedge it open.
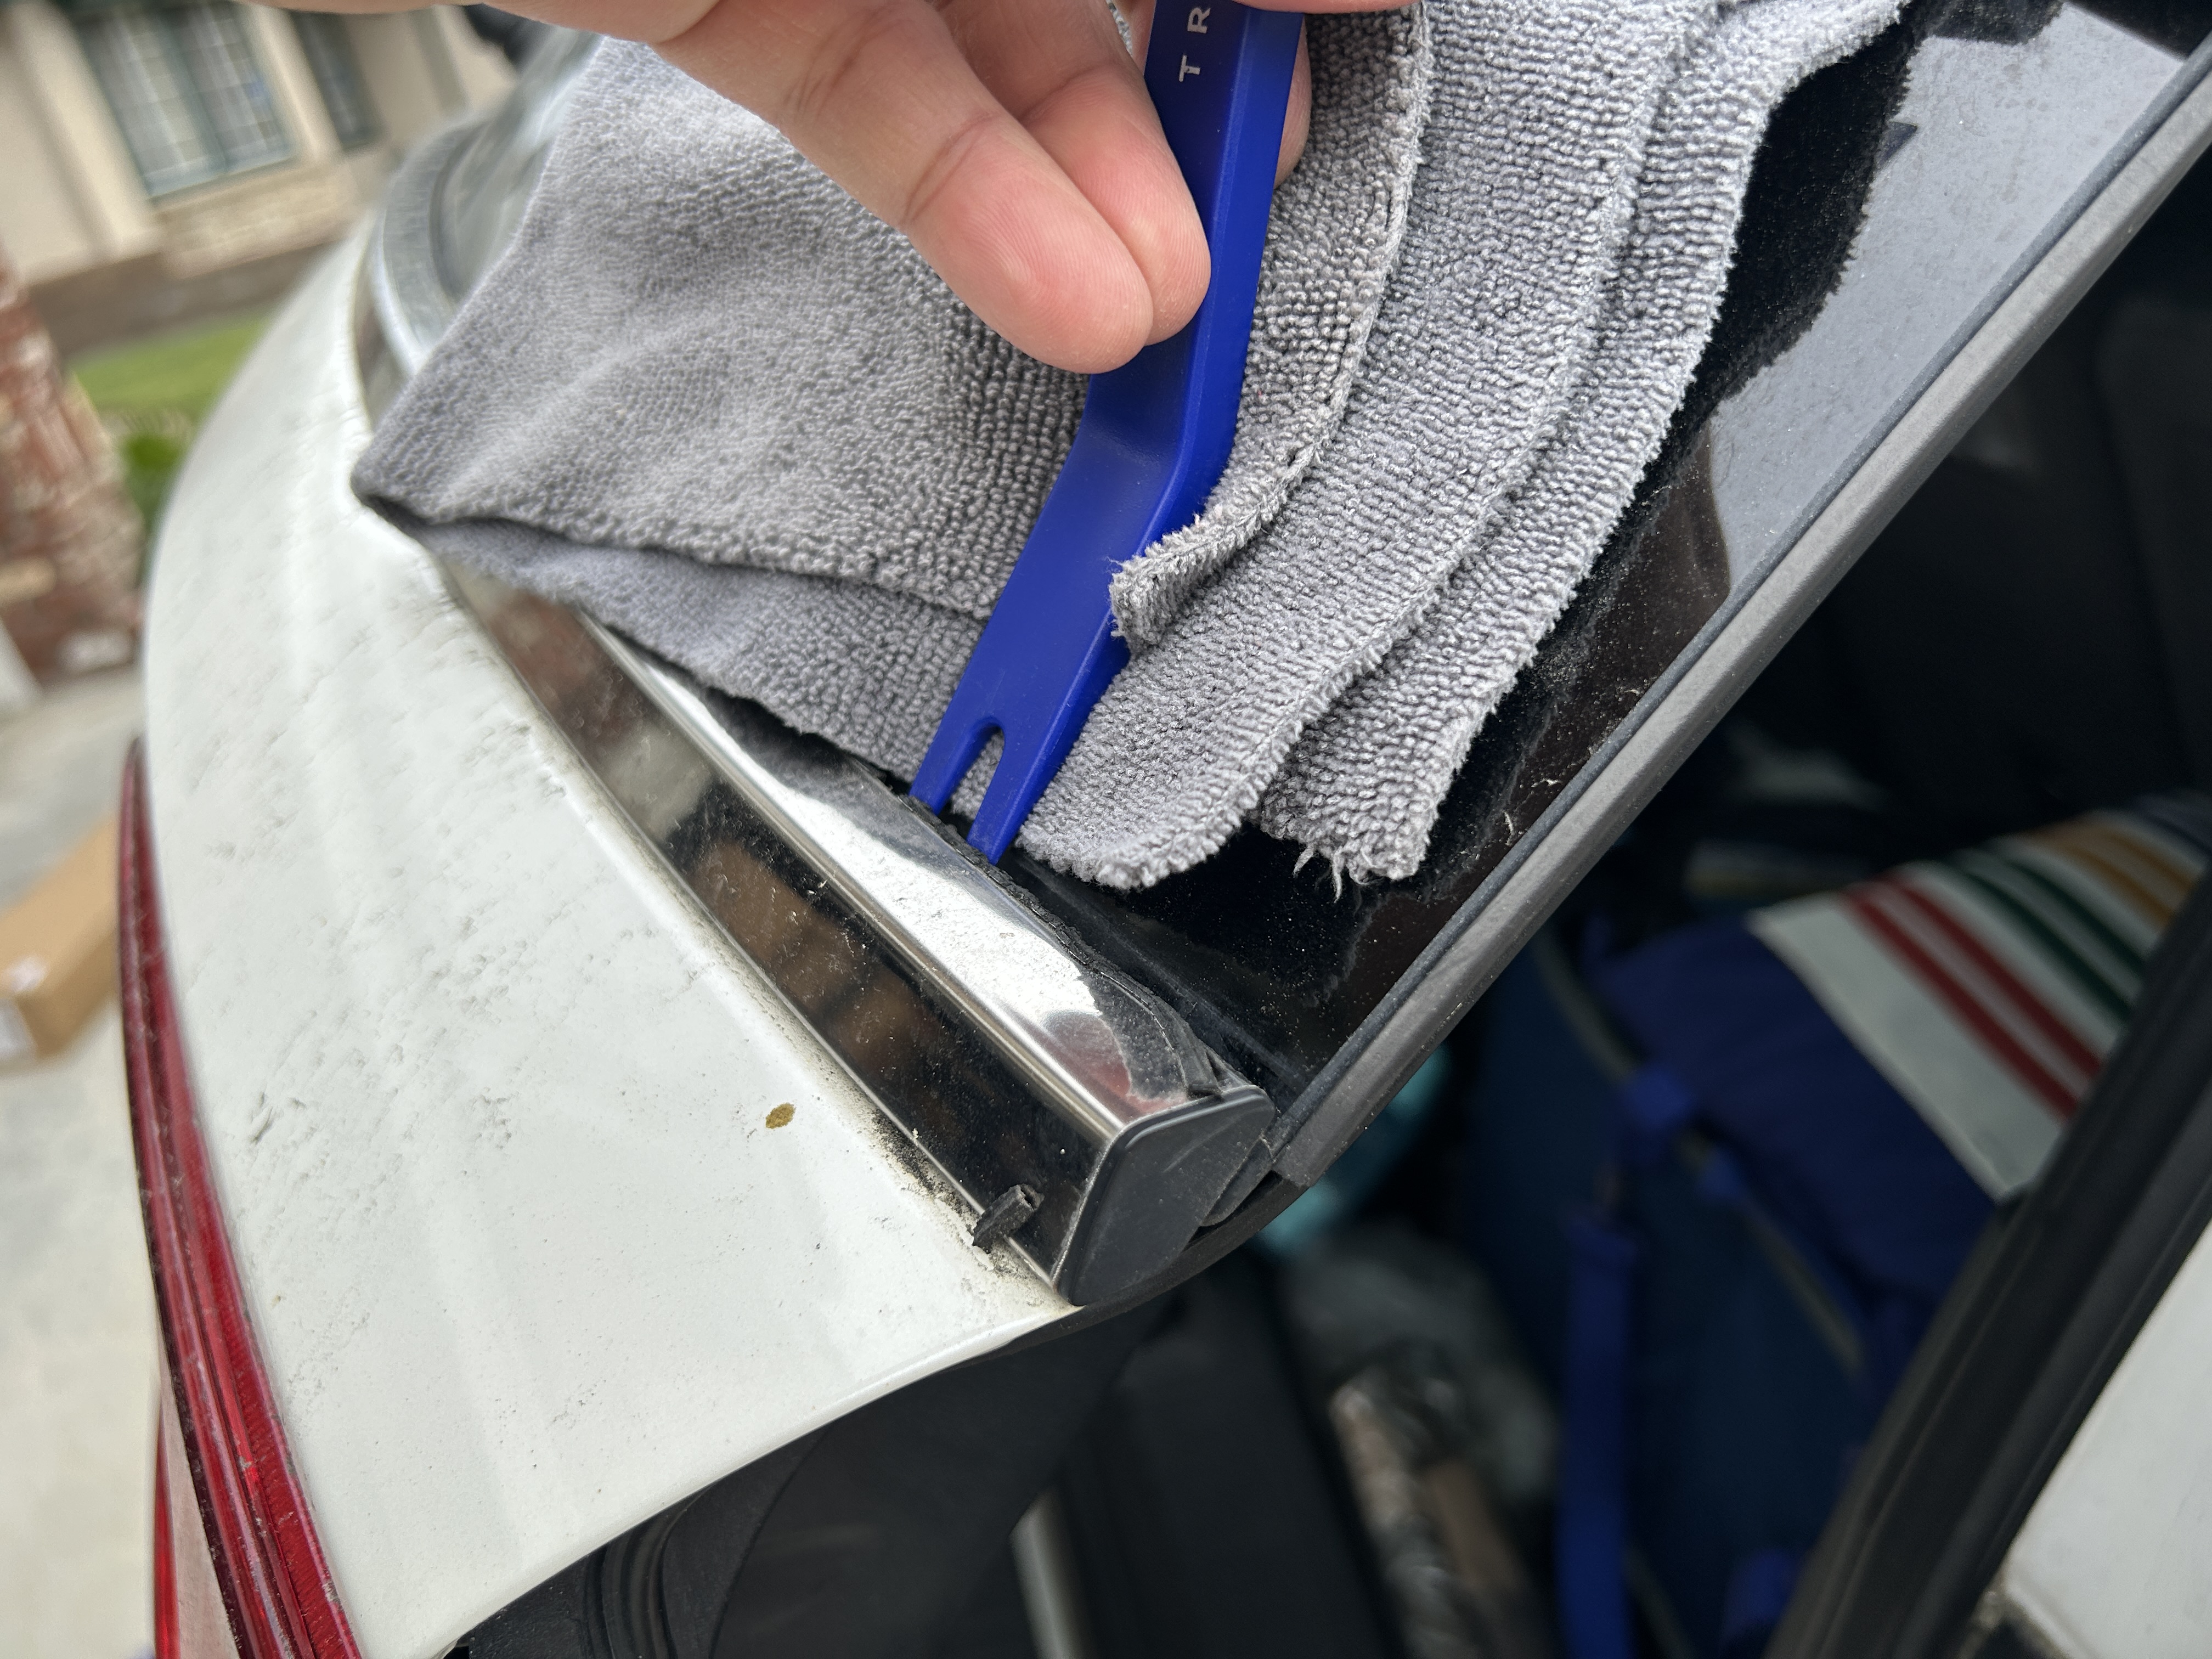
To start getting the trim off, use a microfiber towel folded over several times to protect the rear glass. Starting at one edge of the trim, use a plastic trim tool and pry off of the microfiber towel and pull on the top portion of the trim. Then, hold the trim with two hands and rotate it down to unclip it from the bottom edge.
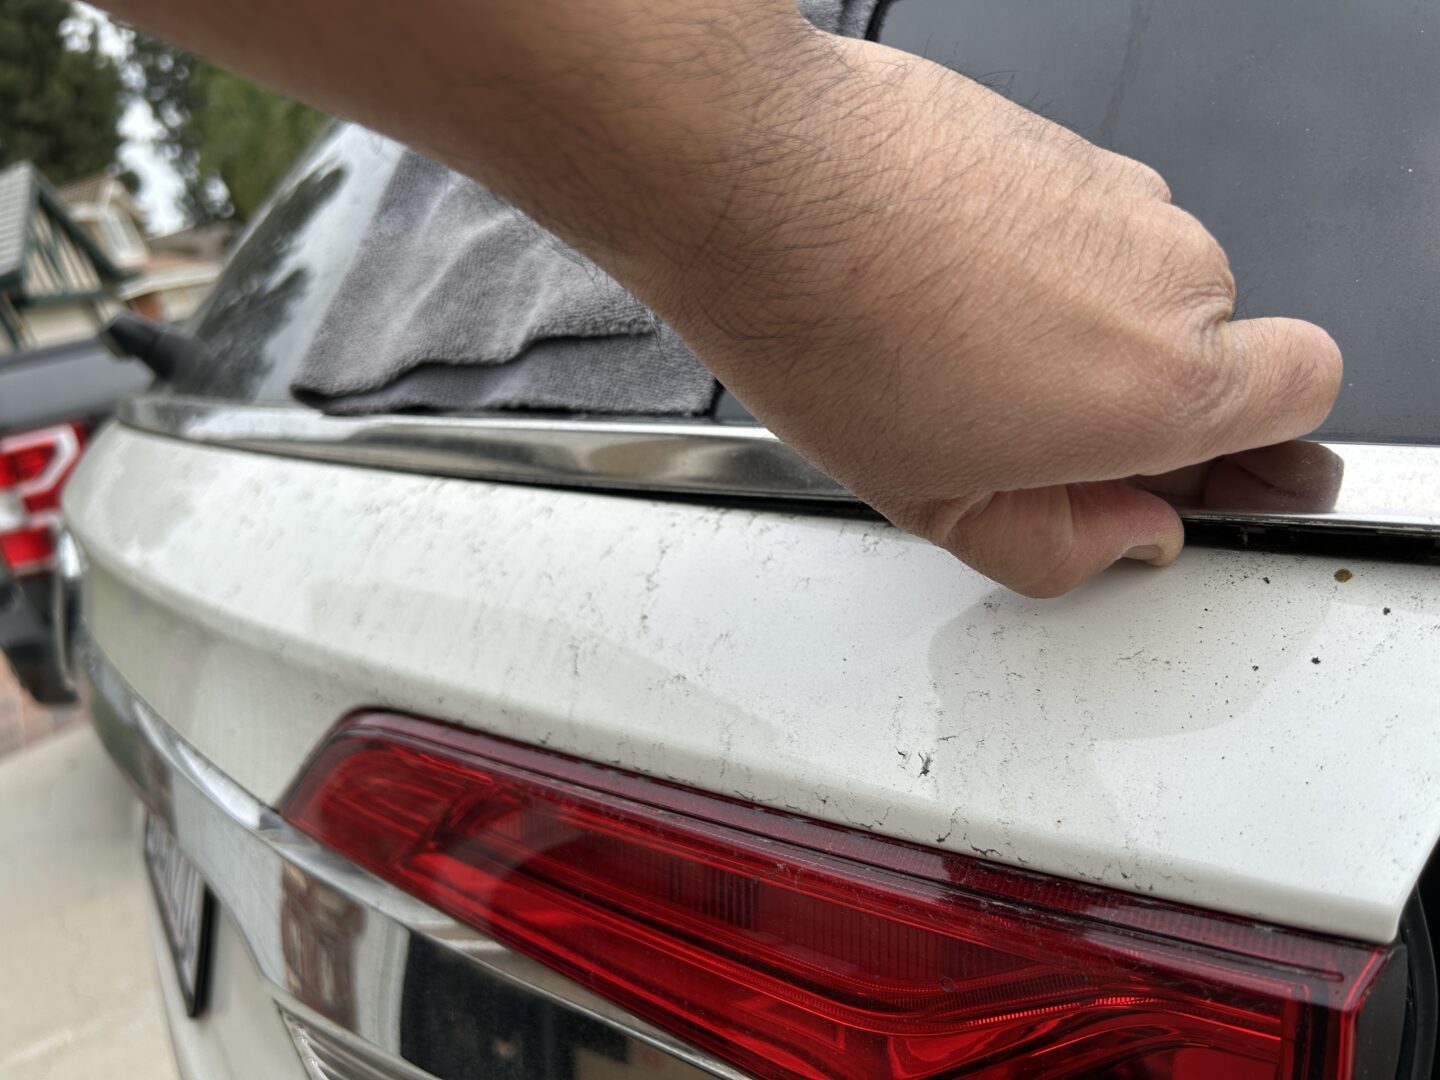
Work your way down the trim following the same process. Pry the top part of the trim off the next mounting clip, then rotate the trim piece down by hand so that it unclips from the bottom edge again.
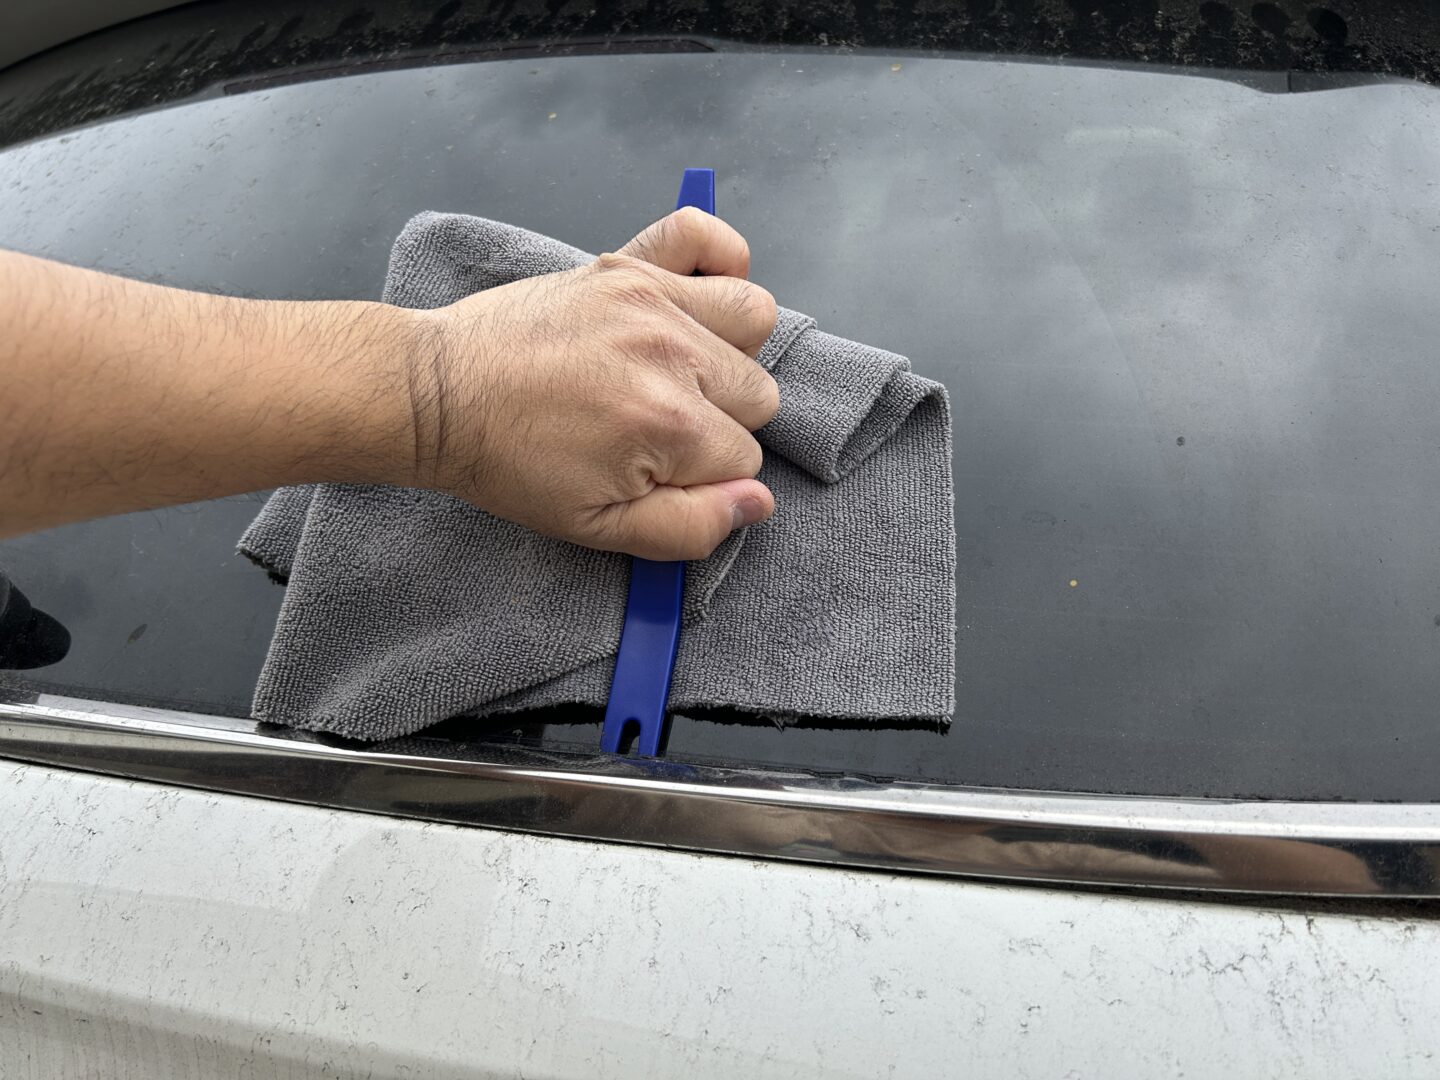


Work your way all the way down the trim molding unclipping it off of the molding clips one-by-one. You won’t need to pry on the later clips; you can just use both hands to rotate the trim piece upwards to unclip it from the top of the molding clip, then rotate it downwards so that it unclips off the bottom of the molding clip.
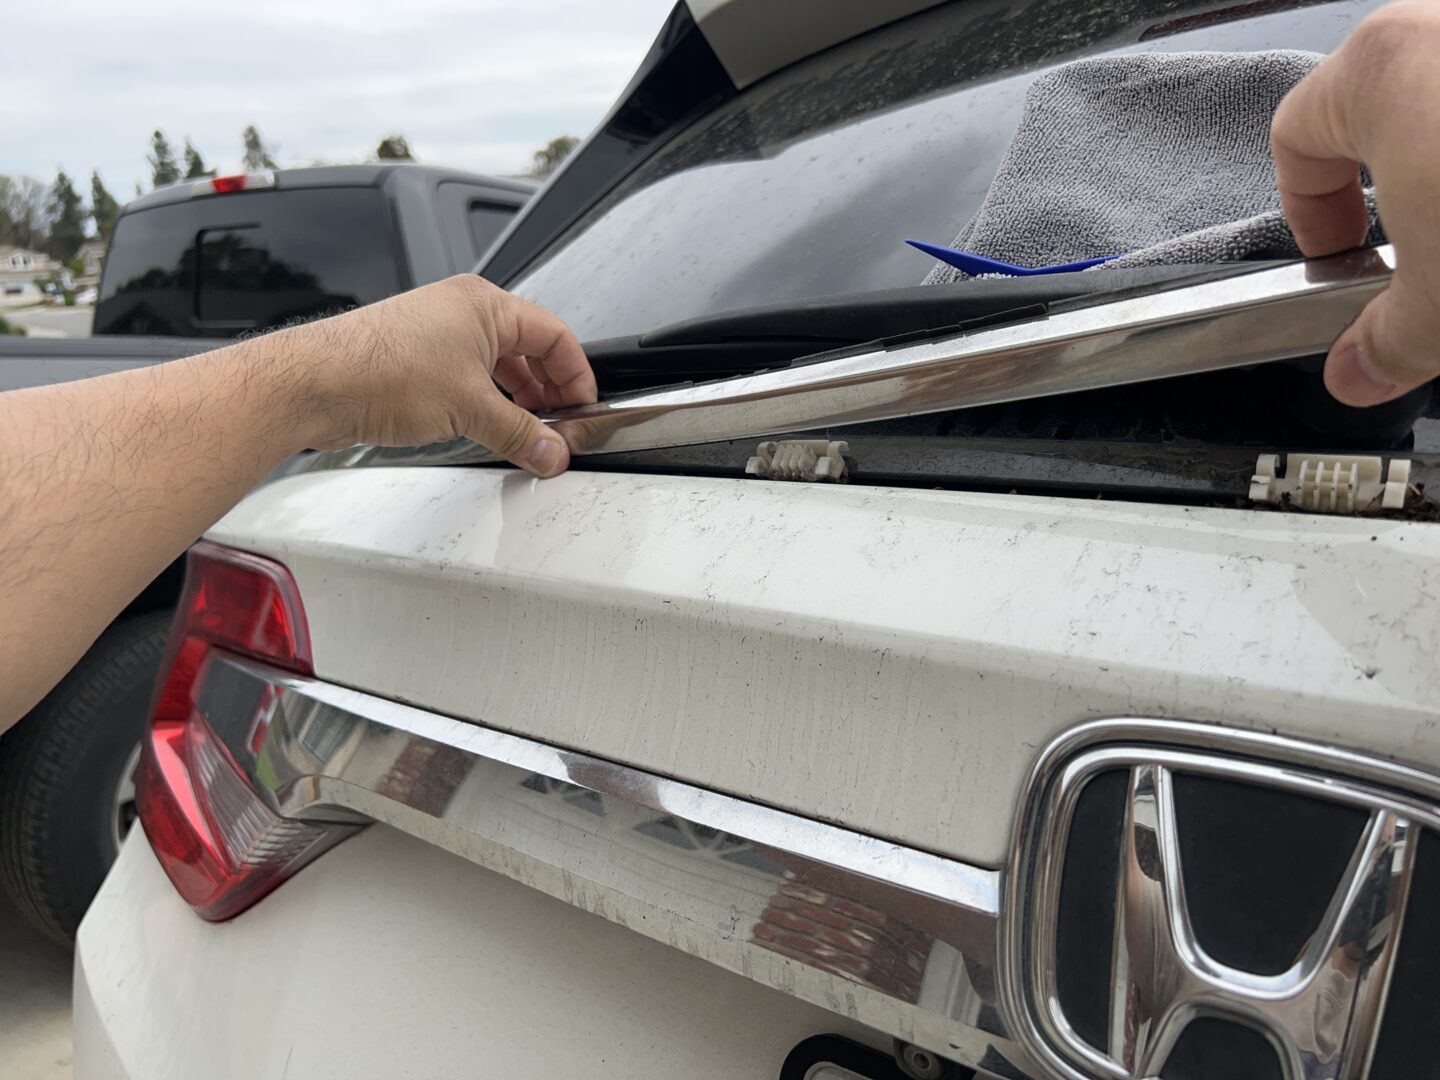
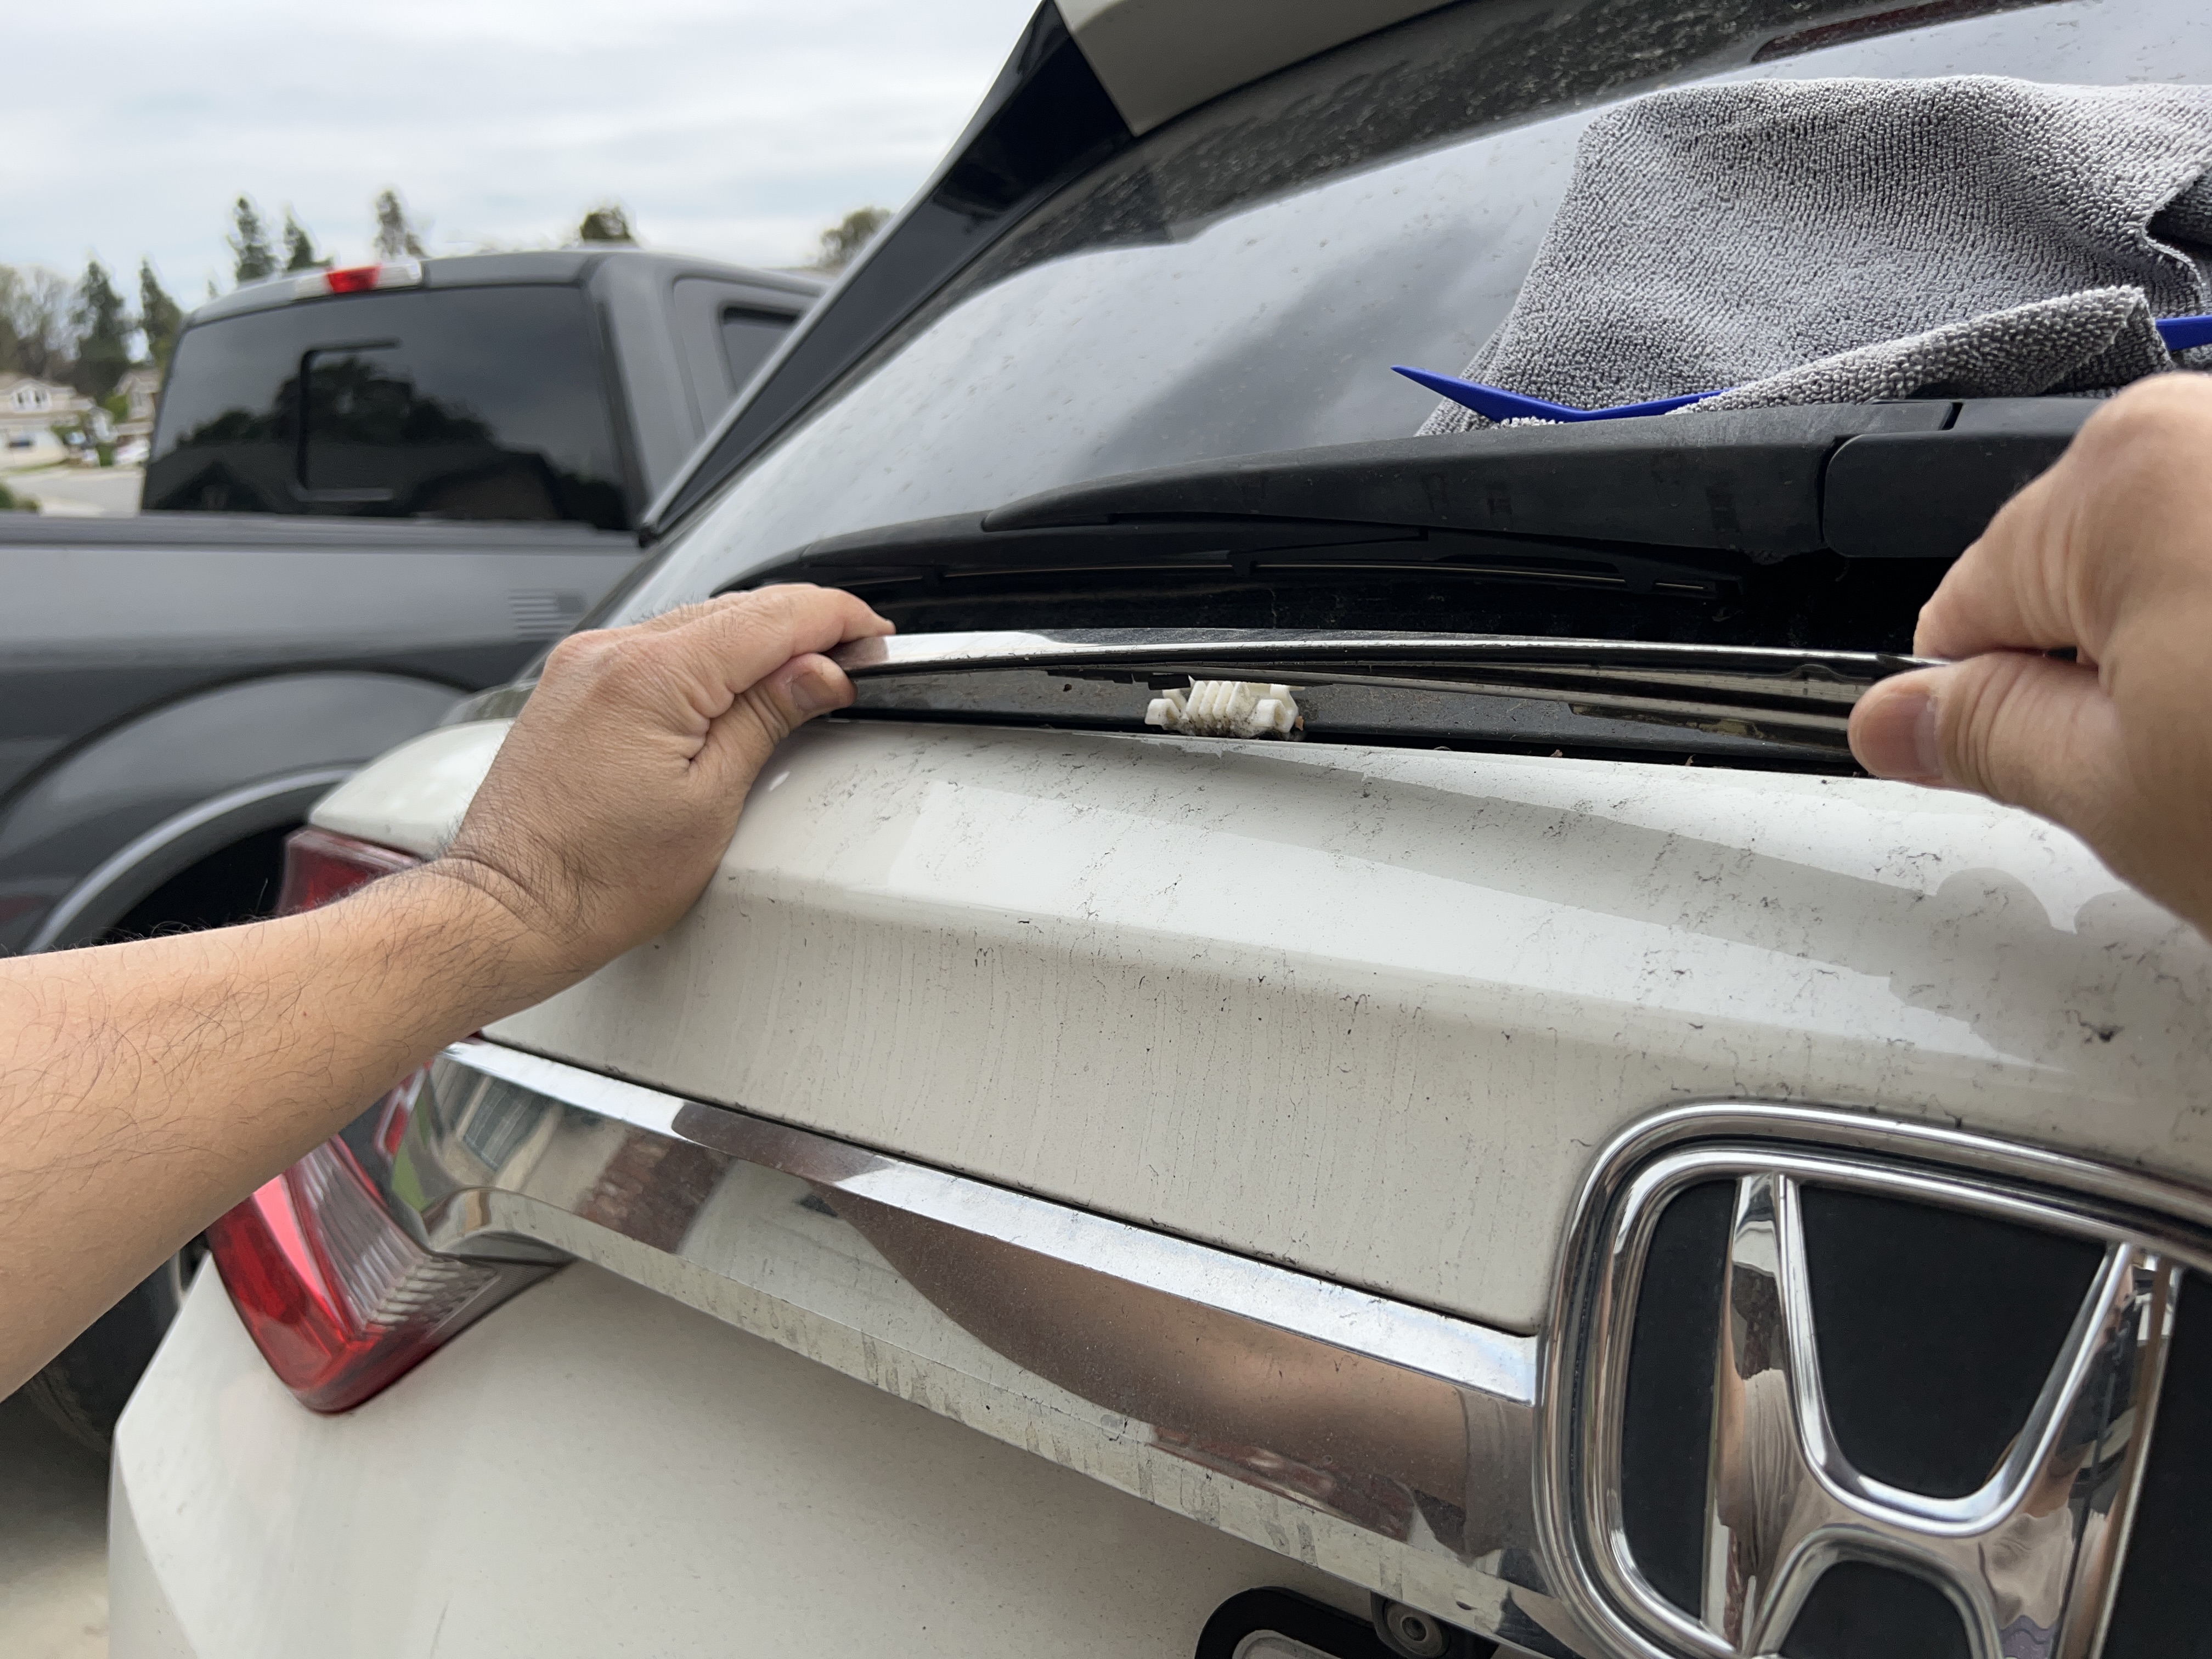
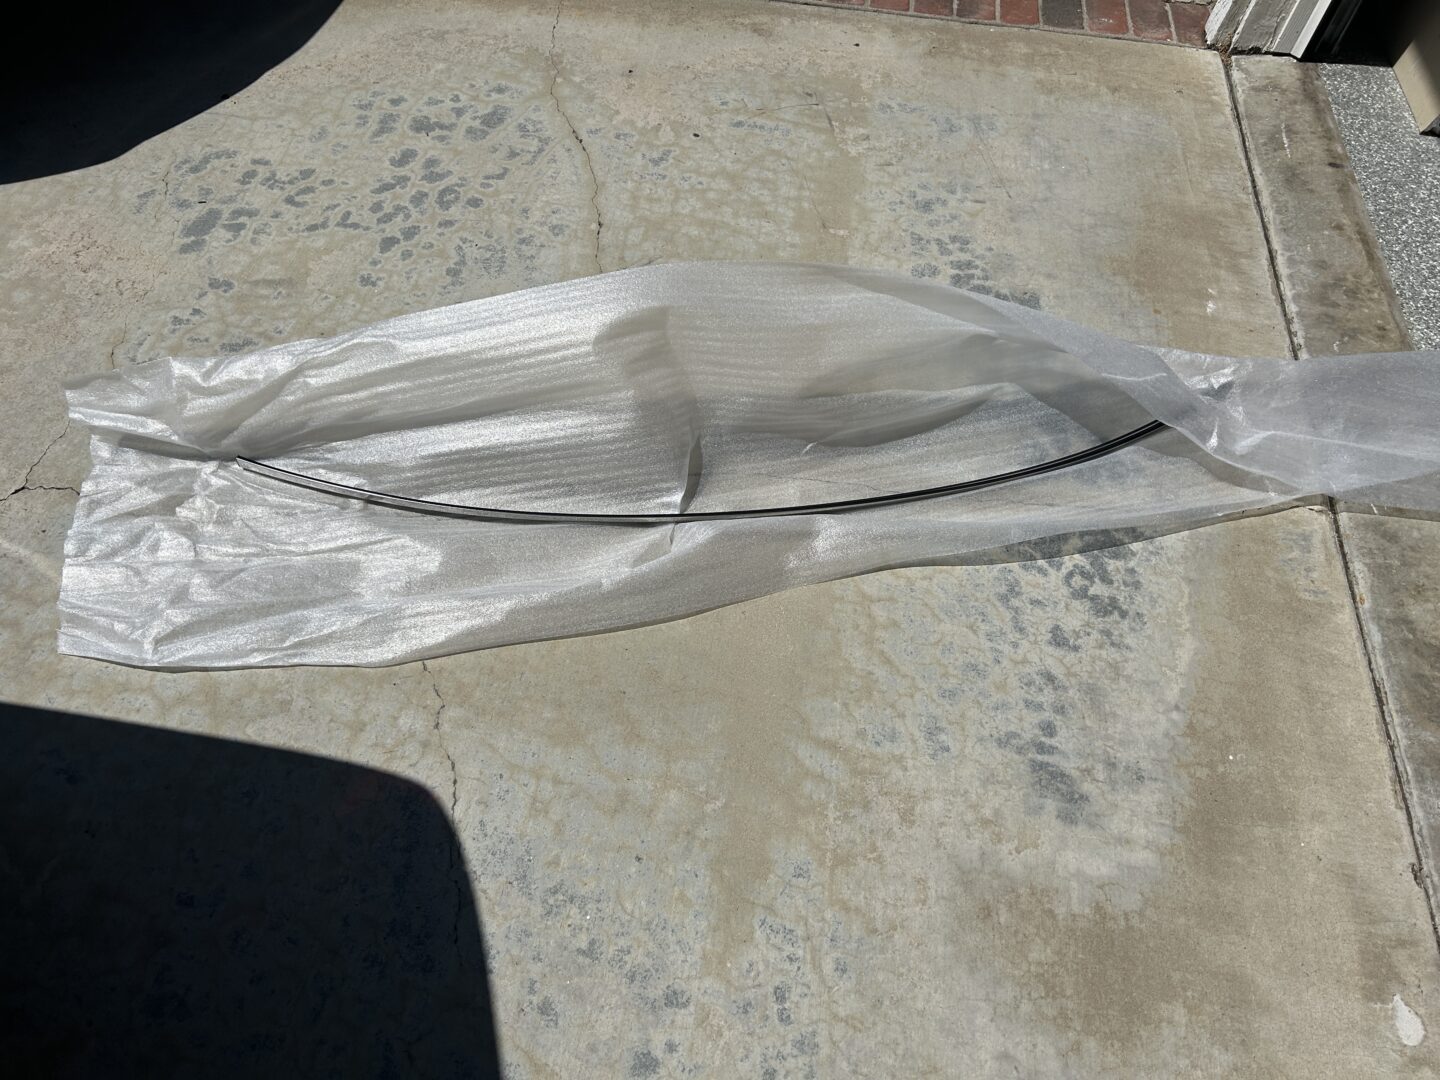
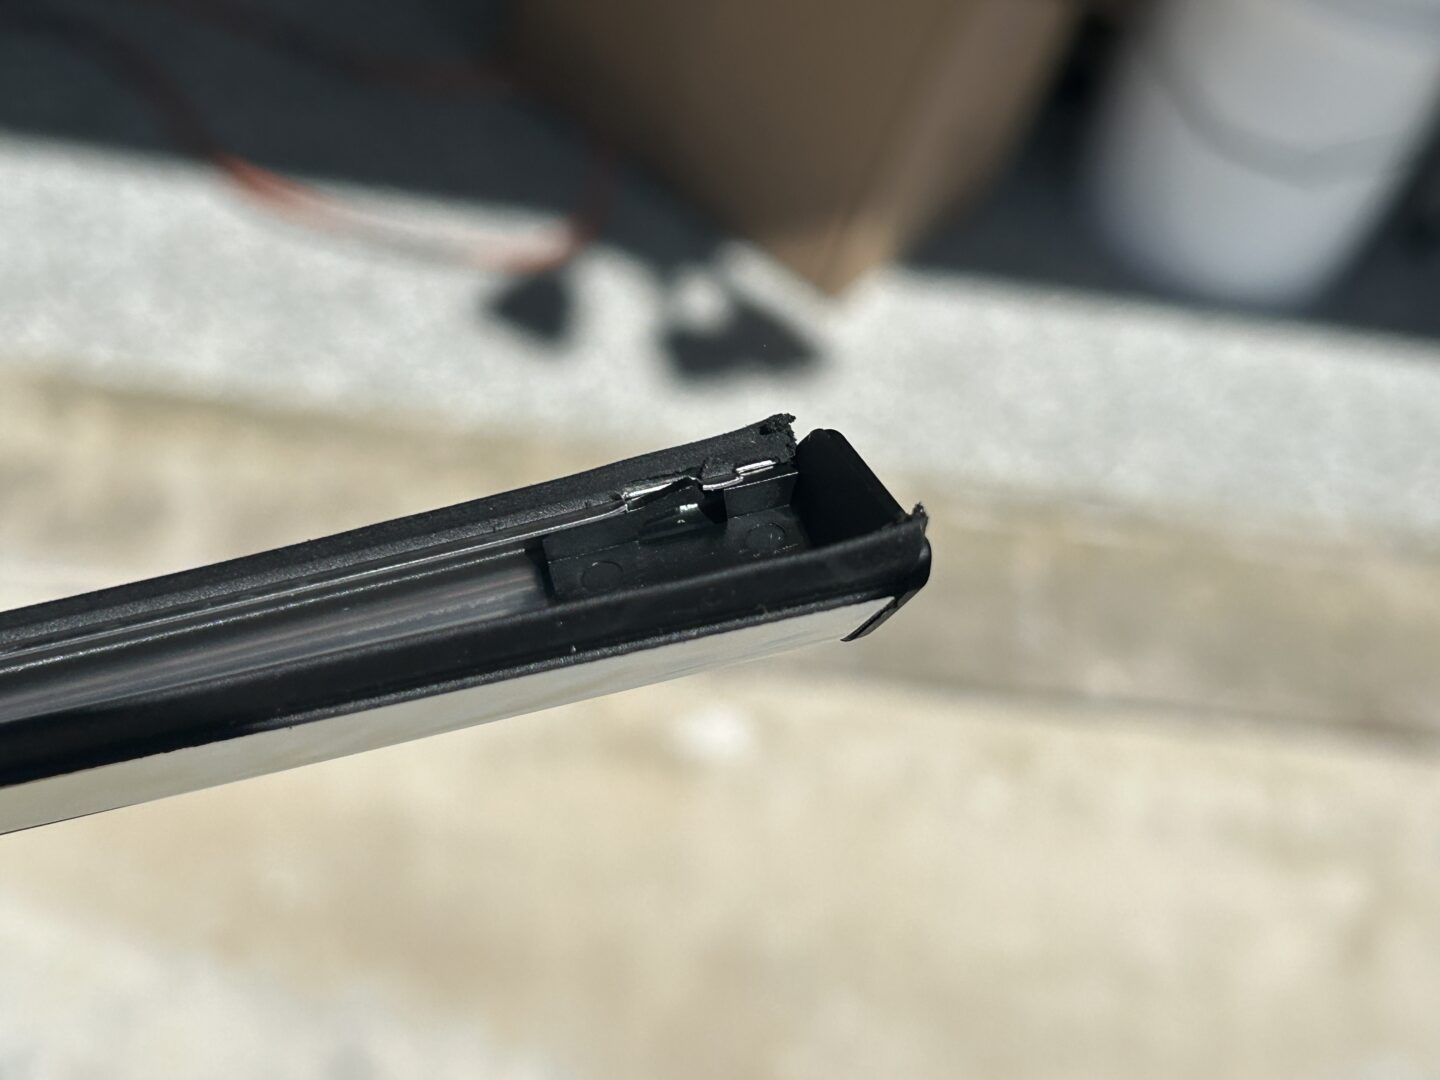
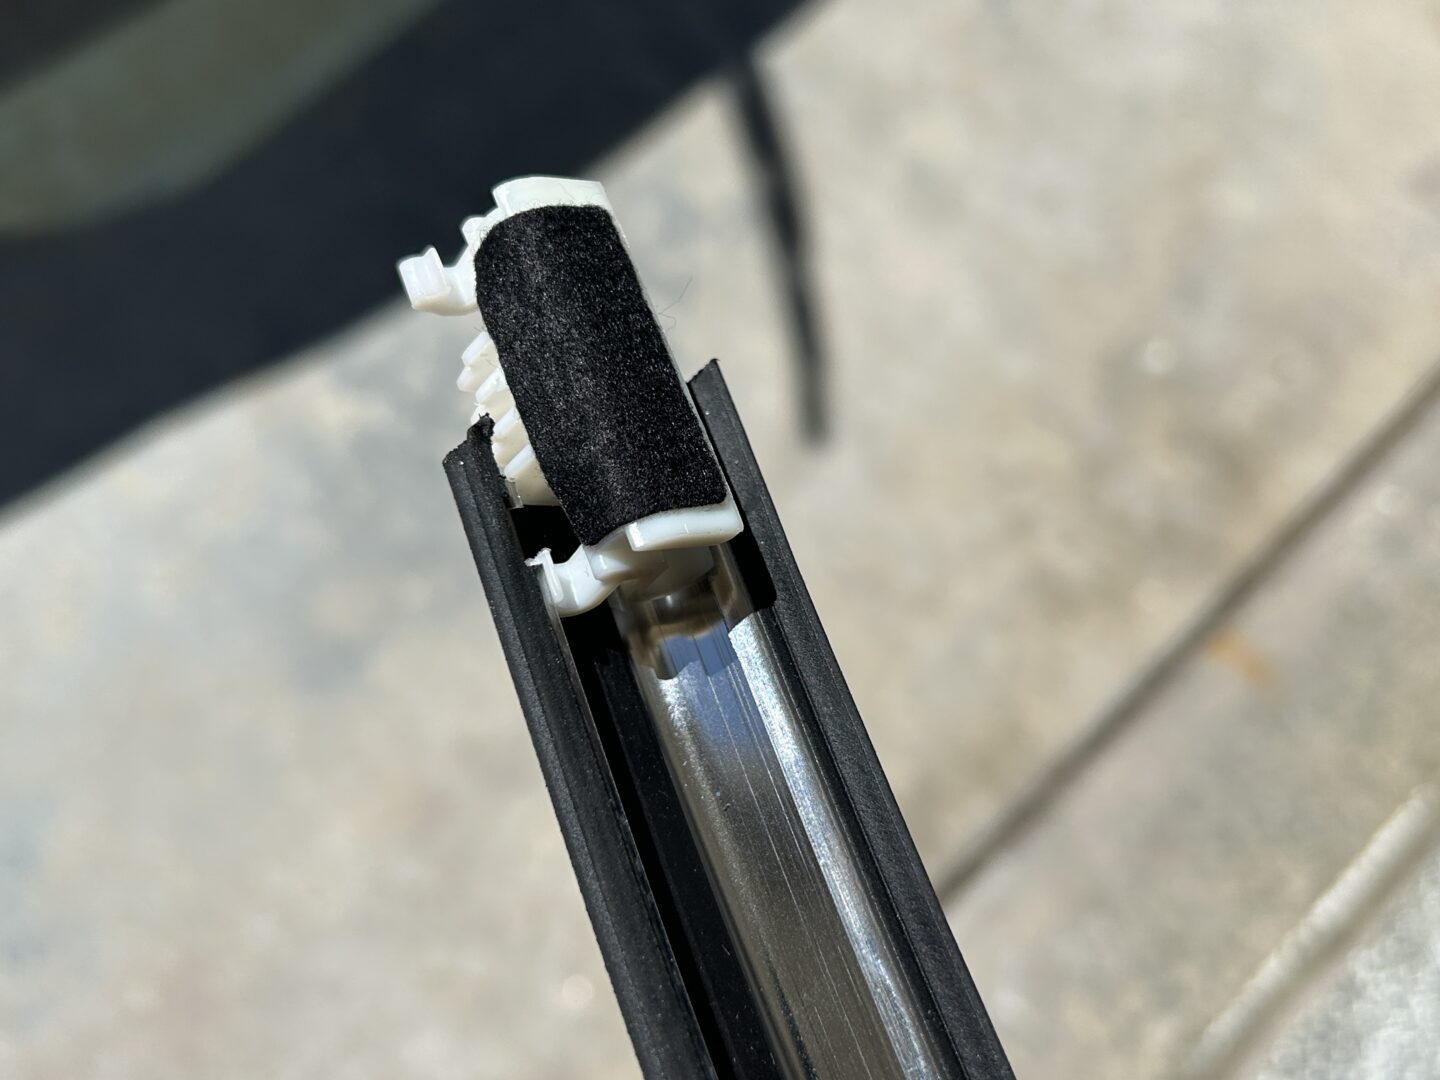
Eventually, you’ll be able to remove the rear window trim molding completely with this process. Here is what the whole part looks like off of the car–probably looking similar to what you have if you have the same issue.

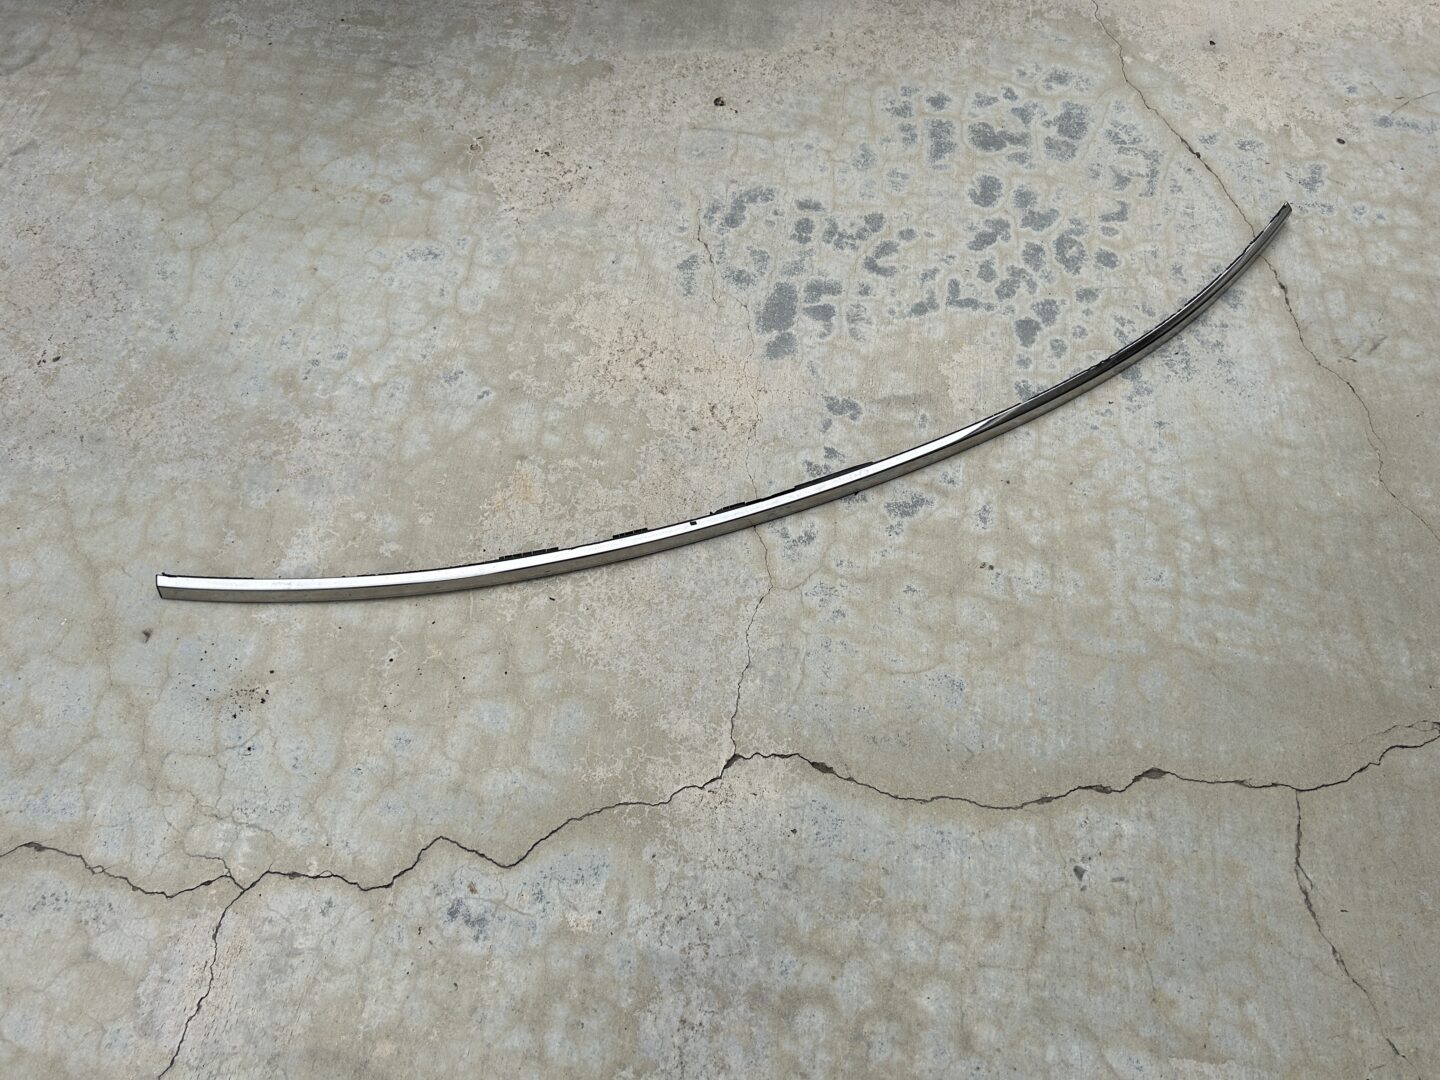
I was able to get my whole trim molding off without damaging any of the plastic mounting clips. If your clips did not break during the removal, then you are in luck because this will save you a lot of trouble during the reinstallation of the new trim piece.
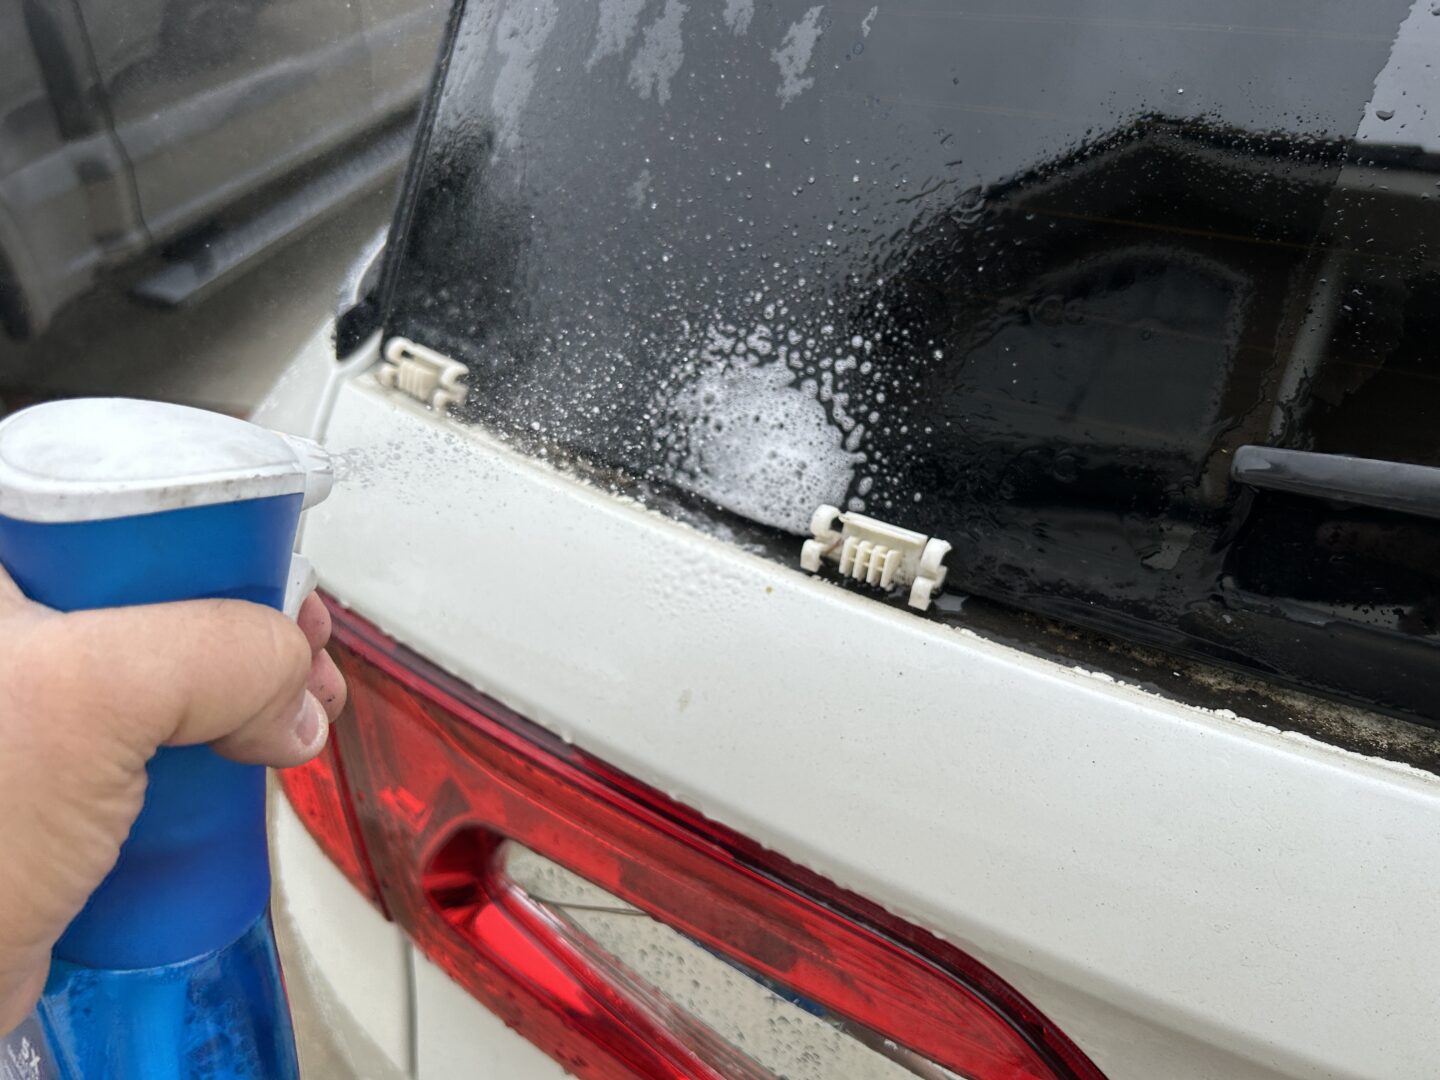
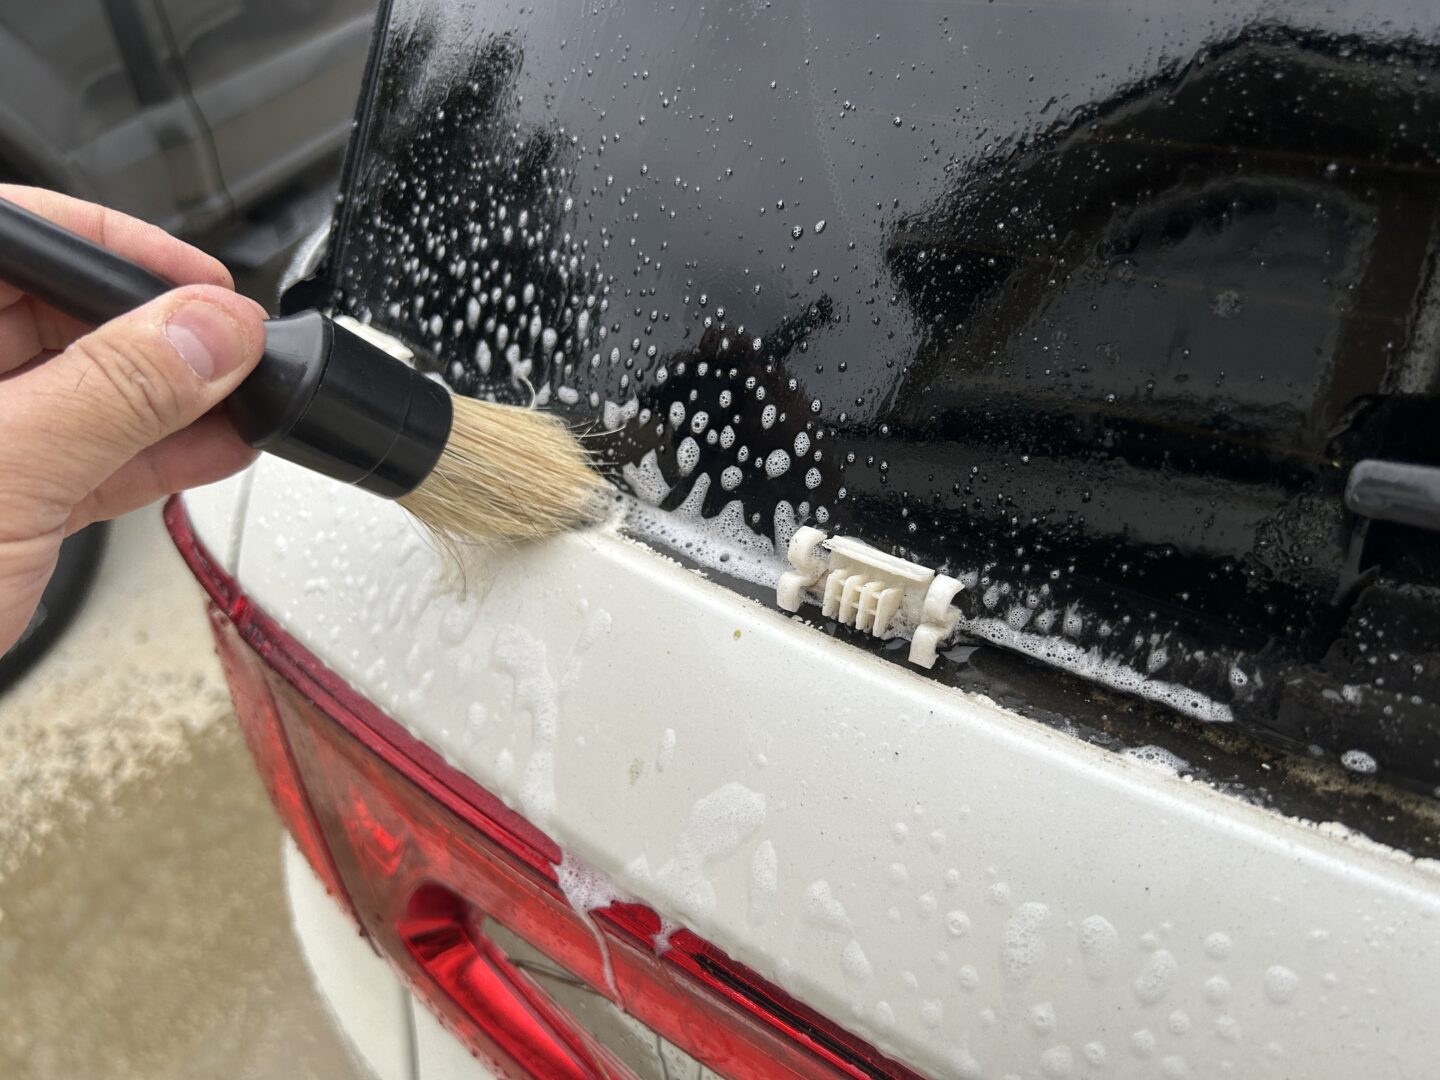
Use some car wash soap or all purpose cleaner with a detail brush and clean up the area prior to reinstalling the new trim molding.
Replacing Broken Molding Clips
Don’t worry if you’ve broken your molding clip during the removal. I deliberately broke one of my clips so that I could show you all how to replace it, should you accidentally break any during the removal of the trim molding.
Remember that the edge and center clips are glued in place (3 qty total). Any broken clips will require you to physically break the edge clip out in order to slide in/out replacement clips. If you’ve broken any of the edge mounting clips, then you’ll just have to break/cut those out and replace.
Usually window glass is pretty resilient, being able to take some impact on the main face of the glass. But, if you hit or pry along the edge of a piece of glass, it can shatter quite easily, so you need to be very careful working near the edges of the rear glass.
Removing the glued in mounting clips is very hard to do. Since adhesive is used on the U-shaped part of the clip that hooks on the bottom glass lip, it makes the removal that much harder. That means that the glue you need to cut out and remove is both on the surface of the clip on both outside of the glass and on the inaccessible portion inside of the glass.
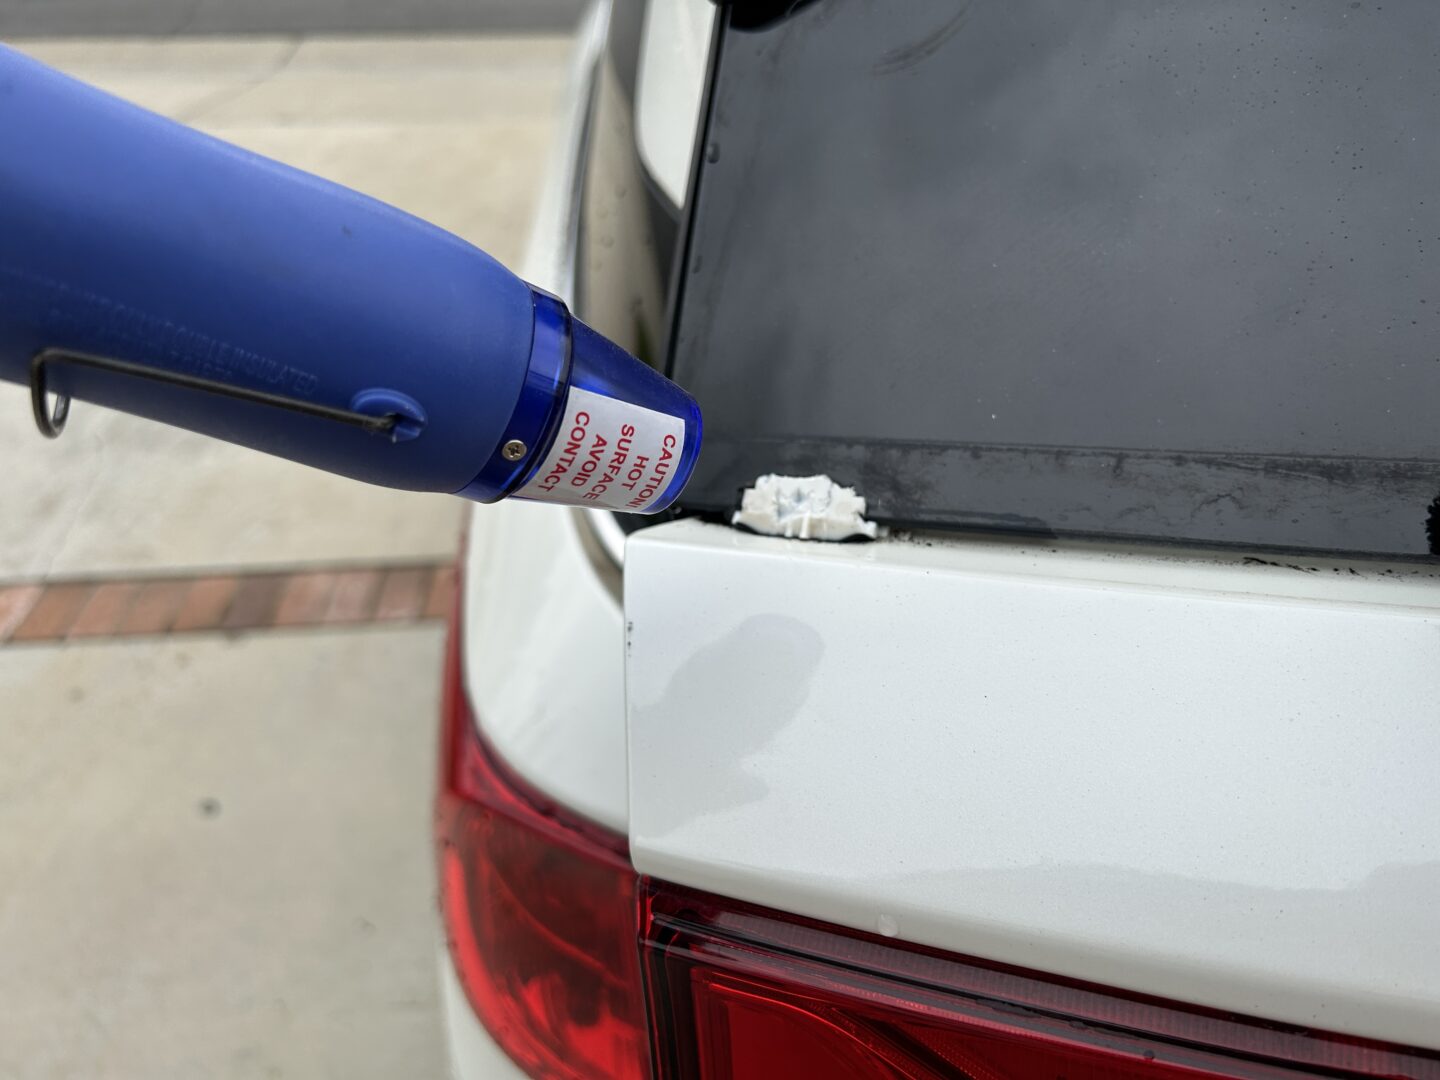
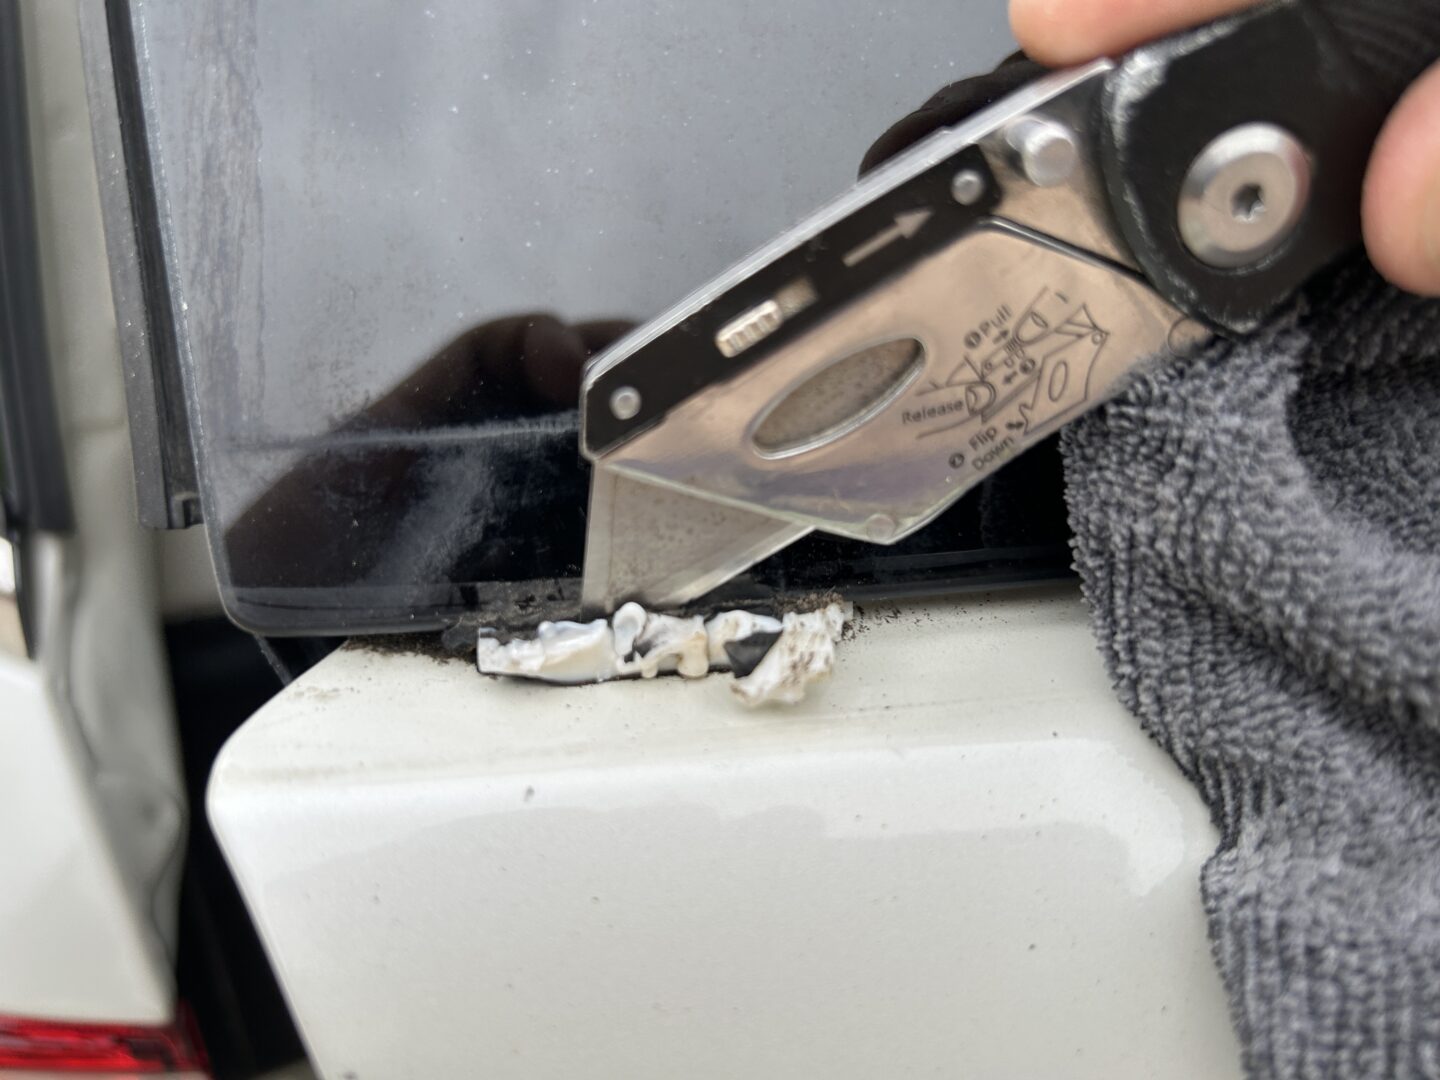
The way to remove these clips without removing the entire rear windshield is to use heat from a heat gun to soften the plastic of the clip, cutting it with a utility knife (be careful not to cut the surrounding paint), and using long nose pliers to pull/break off the bits of the clip. Heating up the plastic of the molding clip makes it much easier to cut. Think of using a knife cutting into a thawed block of butter, versus cutting into a cold one.
I didn’t do it here, but I think it would be a great idea to use some automotive tape (or several layers of masking/painters tape) to cover the tailgate paint right below this clip area. That way when you’re providing some protection of the paint during this cutting/removal stage.
Keep heating and slicing the plastic of the clip away as much as you can. The more you are able to cut away, the less of the clip (and contact patch of adhesive between the plastic and glass) is present.
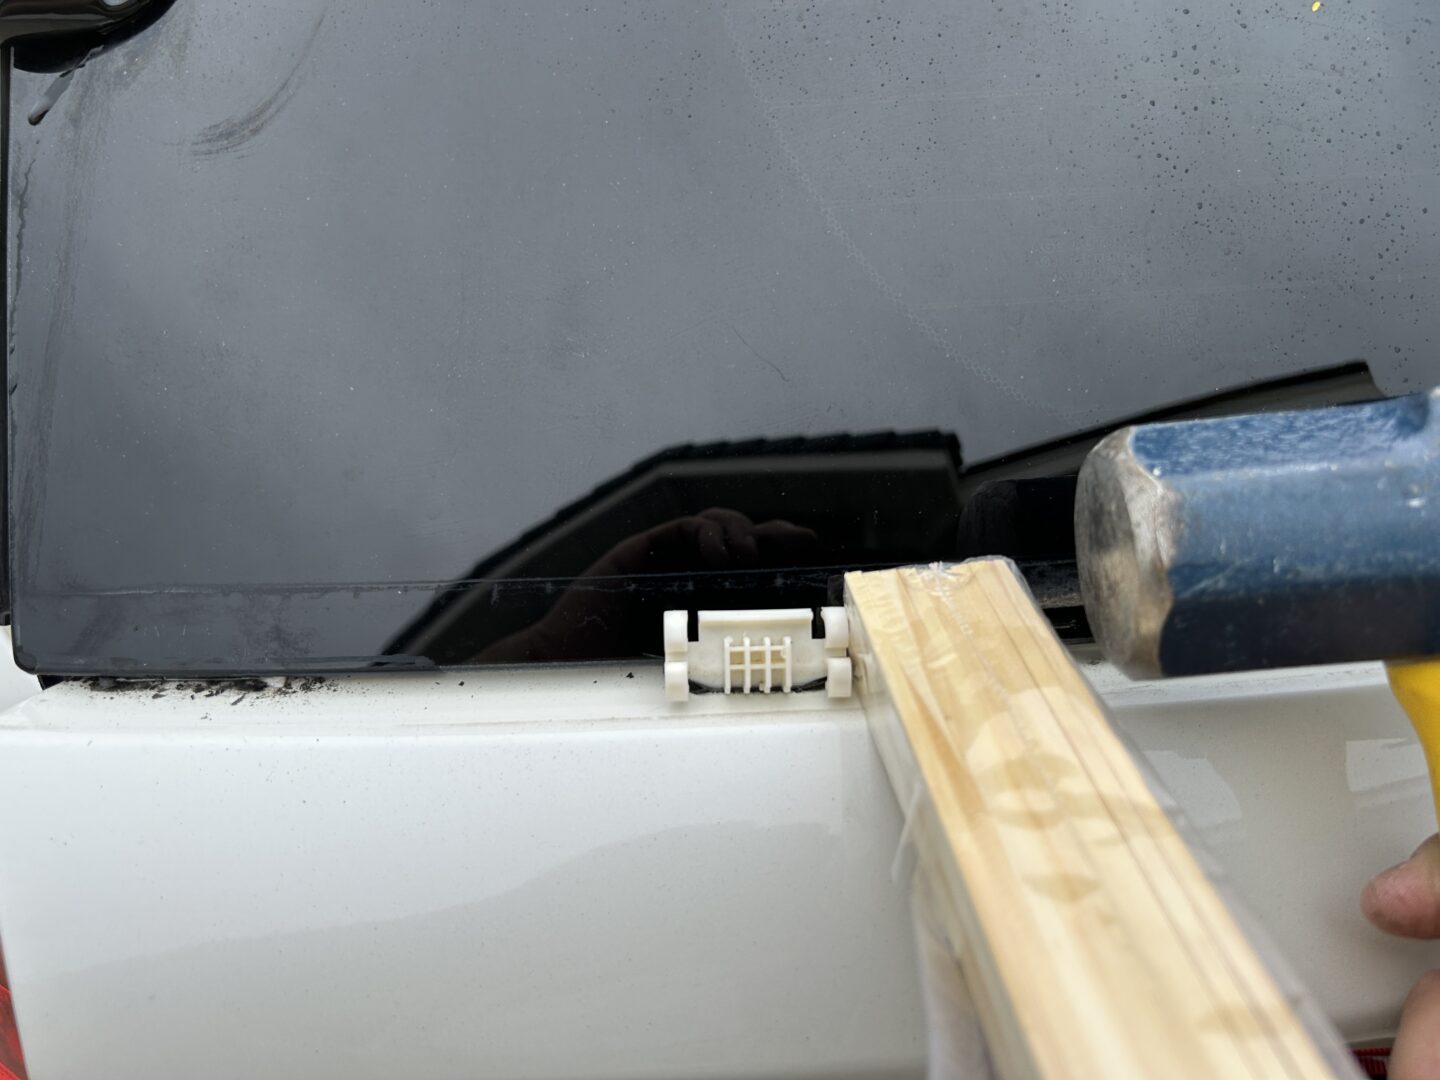
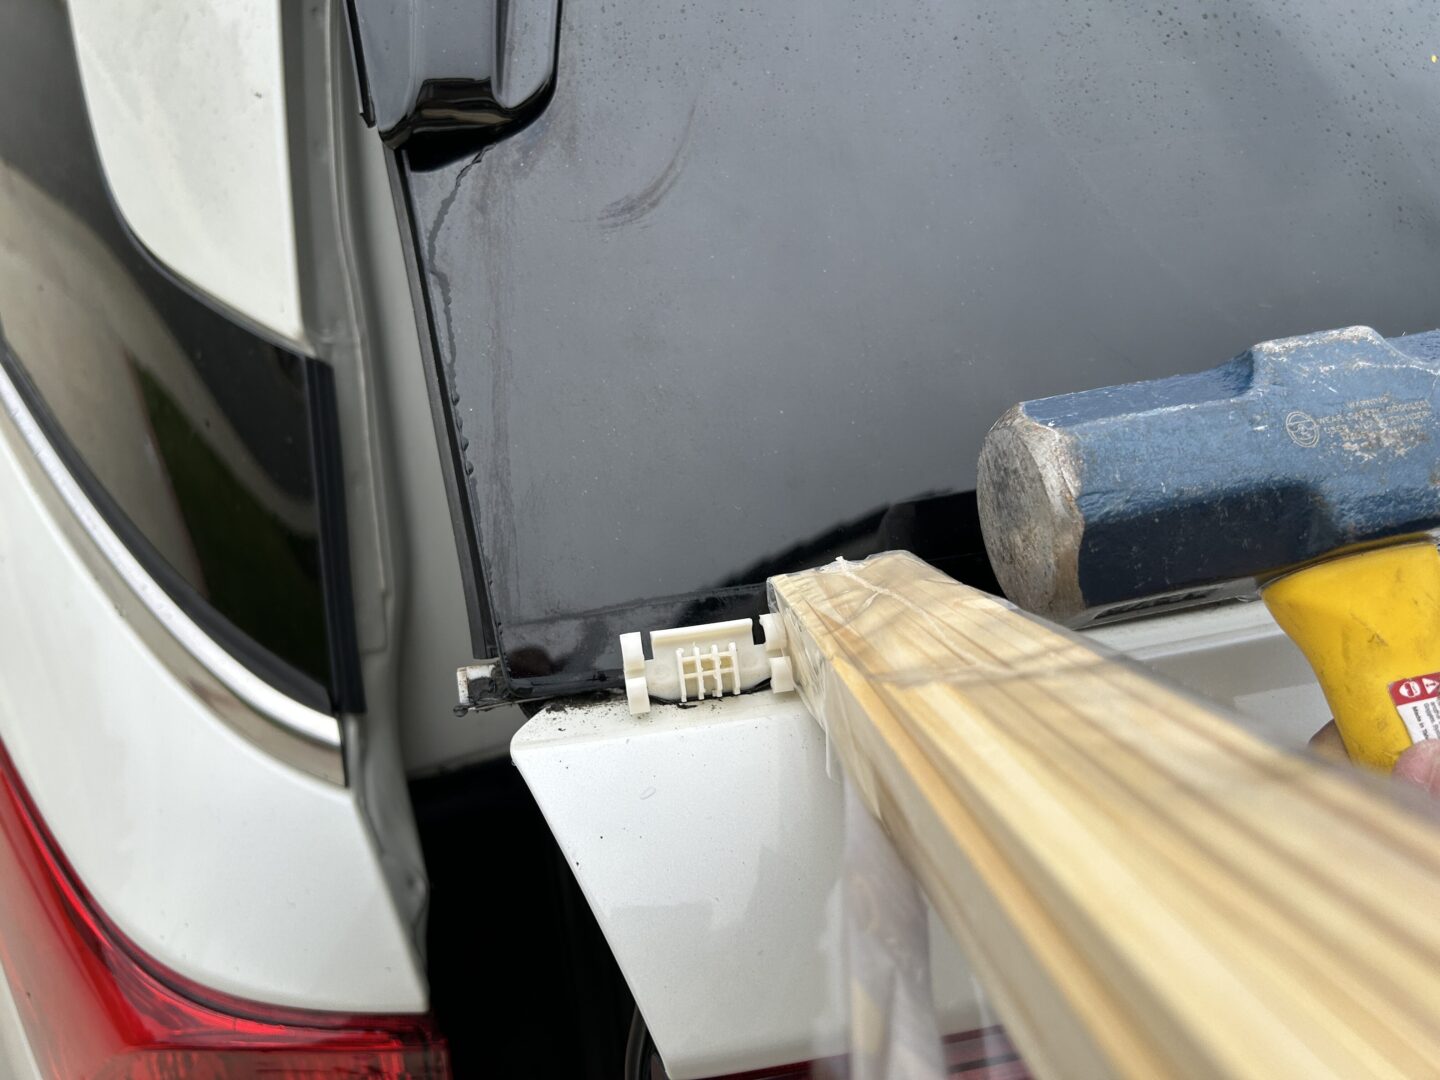
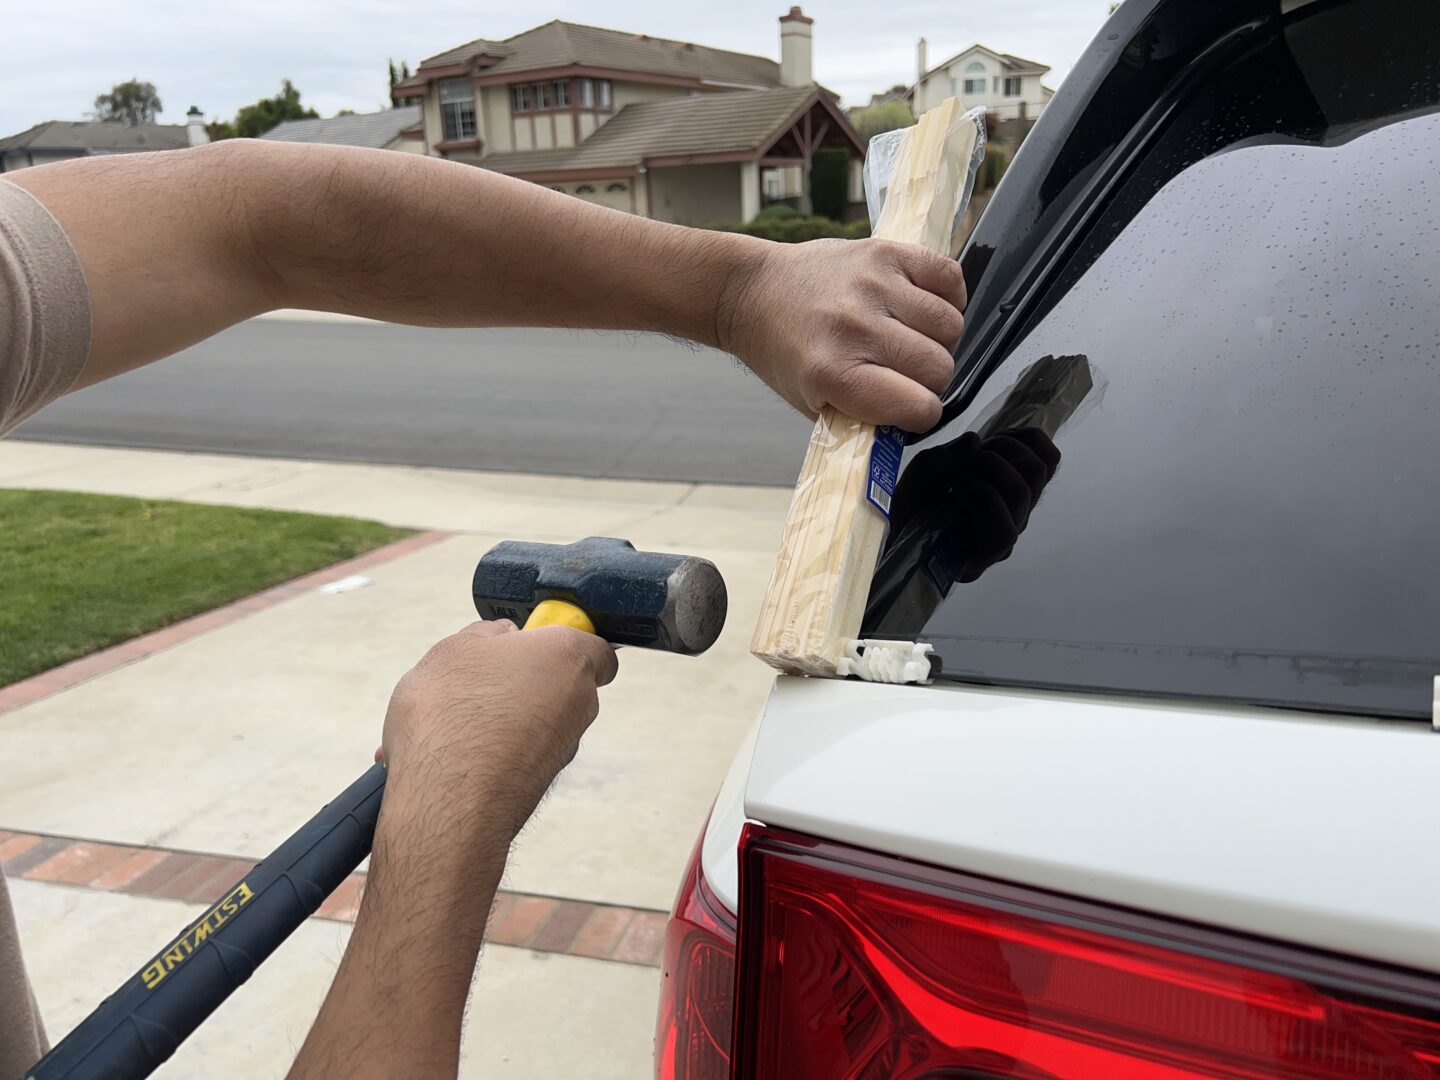
Next, utilize the adjacent clip that can actually slide (clip next to the one at edge). Slide it over towards the edge and use this piece to punch against the glued in remnants of the original edge clip out. To do this, use a block of wood or something similar to hold against the edge of the sliding clip, and hit it out gently with a hammer. If your sliding clip is not sliding, hit it gently left and right multiple times to un-wedge it from the caked on dirt that is probably keeping it stuck in place. Eventually, you’ll be able to use the hammer to tap against the block of wood, which hits the sliding clip, and finally hits the remants of the edge piece (that you broke/cut apart) out of the edge of the window.
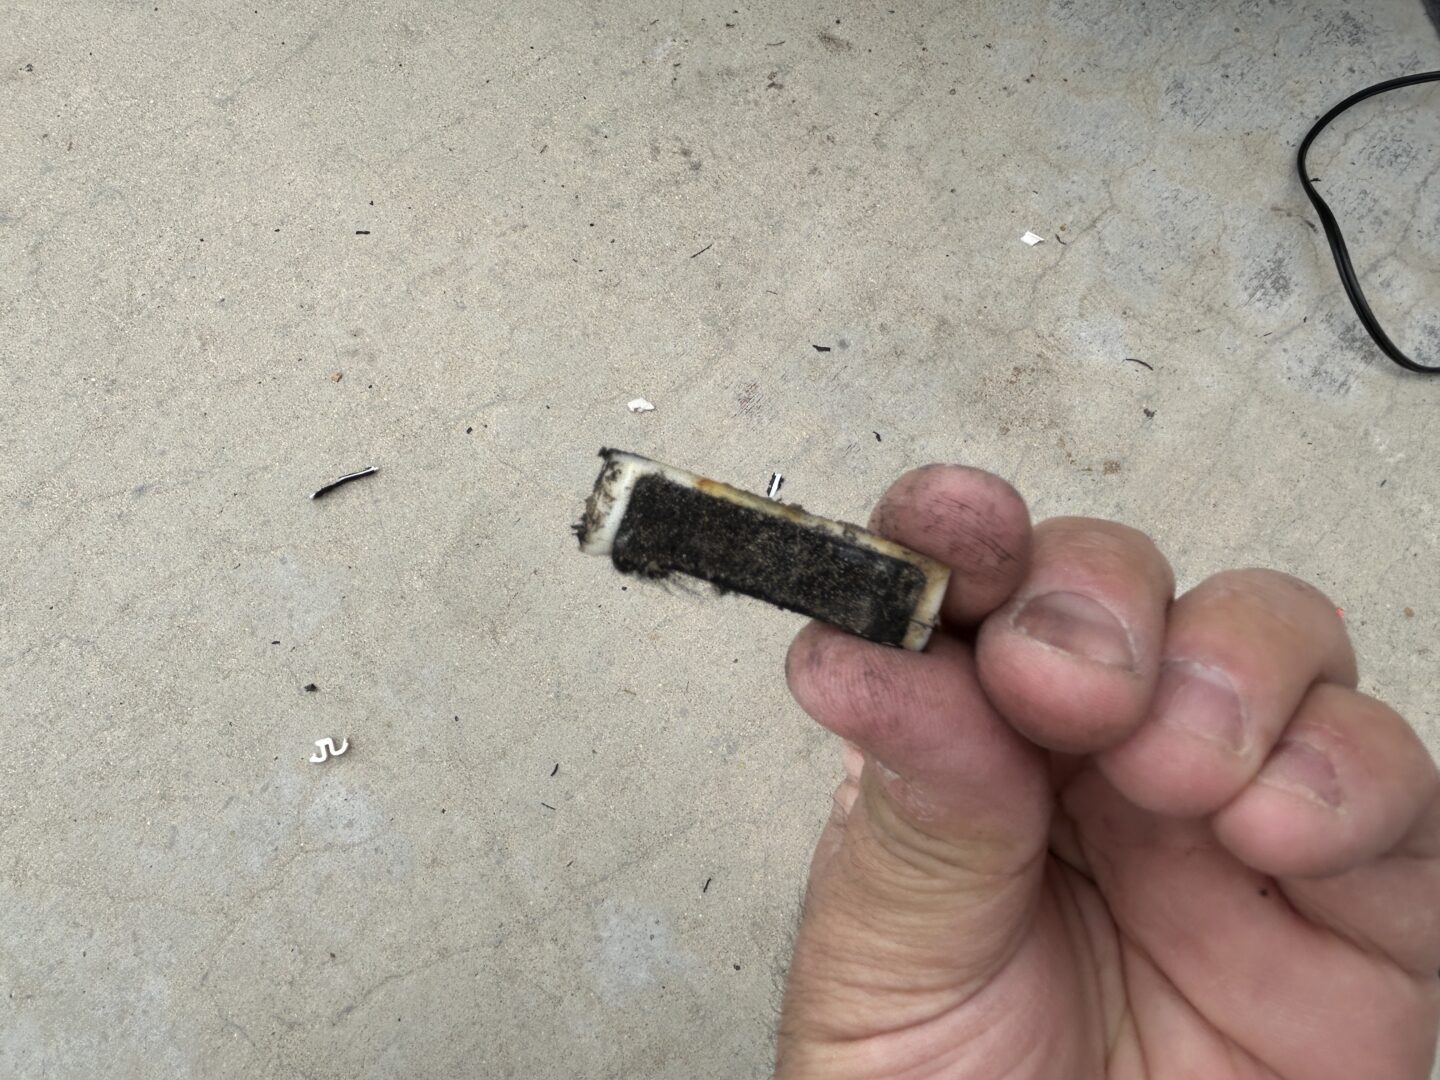
I was successful using this process to get a broken mounting clip off without damaging the rear glass. If you’ve removed any clips, make sure to clean the entire area with a detail brush and cleaning solution to ensure it is clean of dirt before installing a new mounting clip into place.
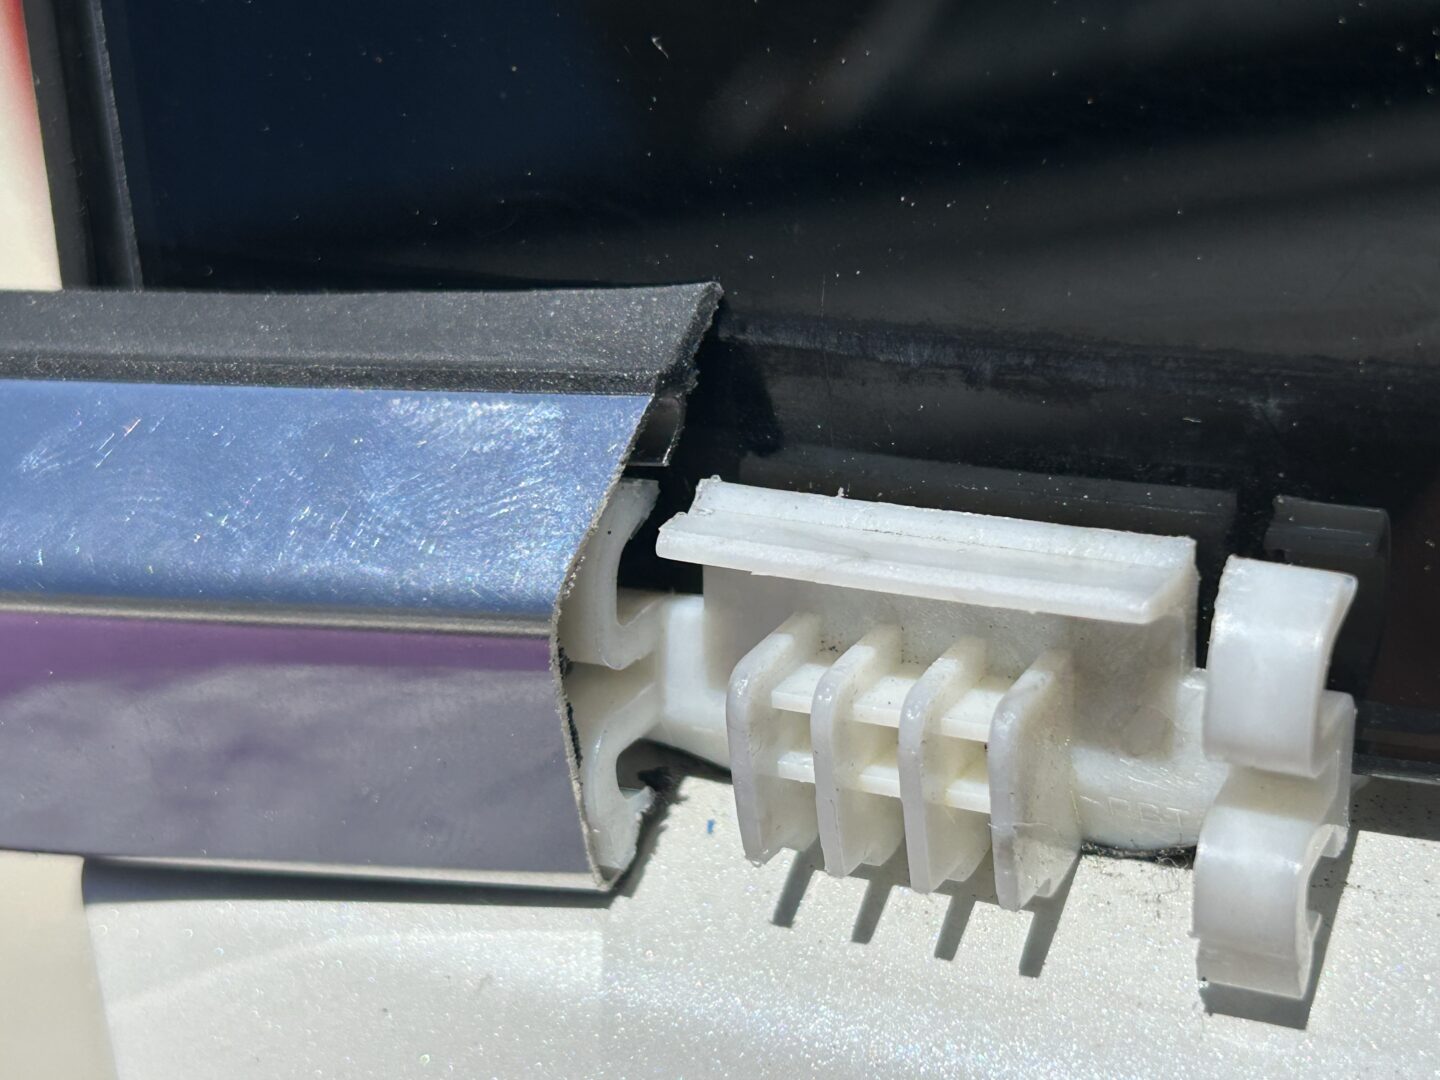
After cleaning, slide your new mounting clips into place as needed. As you can see, there is so little room in this little area between the bottom lip of the glass and the body of the car. I can’t imagine anyone being able to pop one of these mounting clips into the bottom lip of the glass without breaking something. Once you get the mounting clip onto the bottom lip of the glass on one side, use the same method tapping a piece of wood against the clip and lightly tap it across and back into its place.
Installing The New Rear Windshield Trim Molding
With all of the molding clips in place, you are now ready for yet another difficult part of the job, installing the new trim molding. Ensure that all 9 clips are in the correct position (reference the diagram earlier in this post showing where all clips should be.)
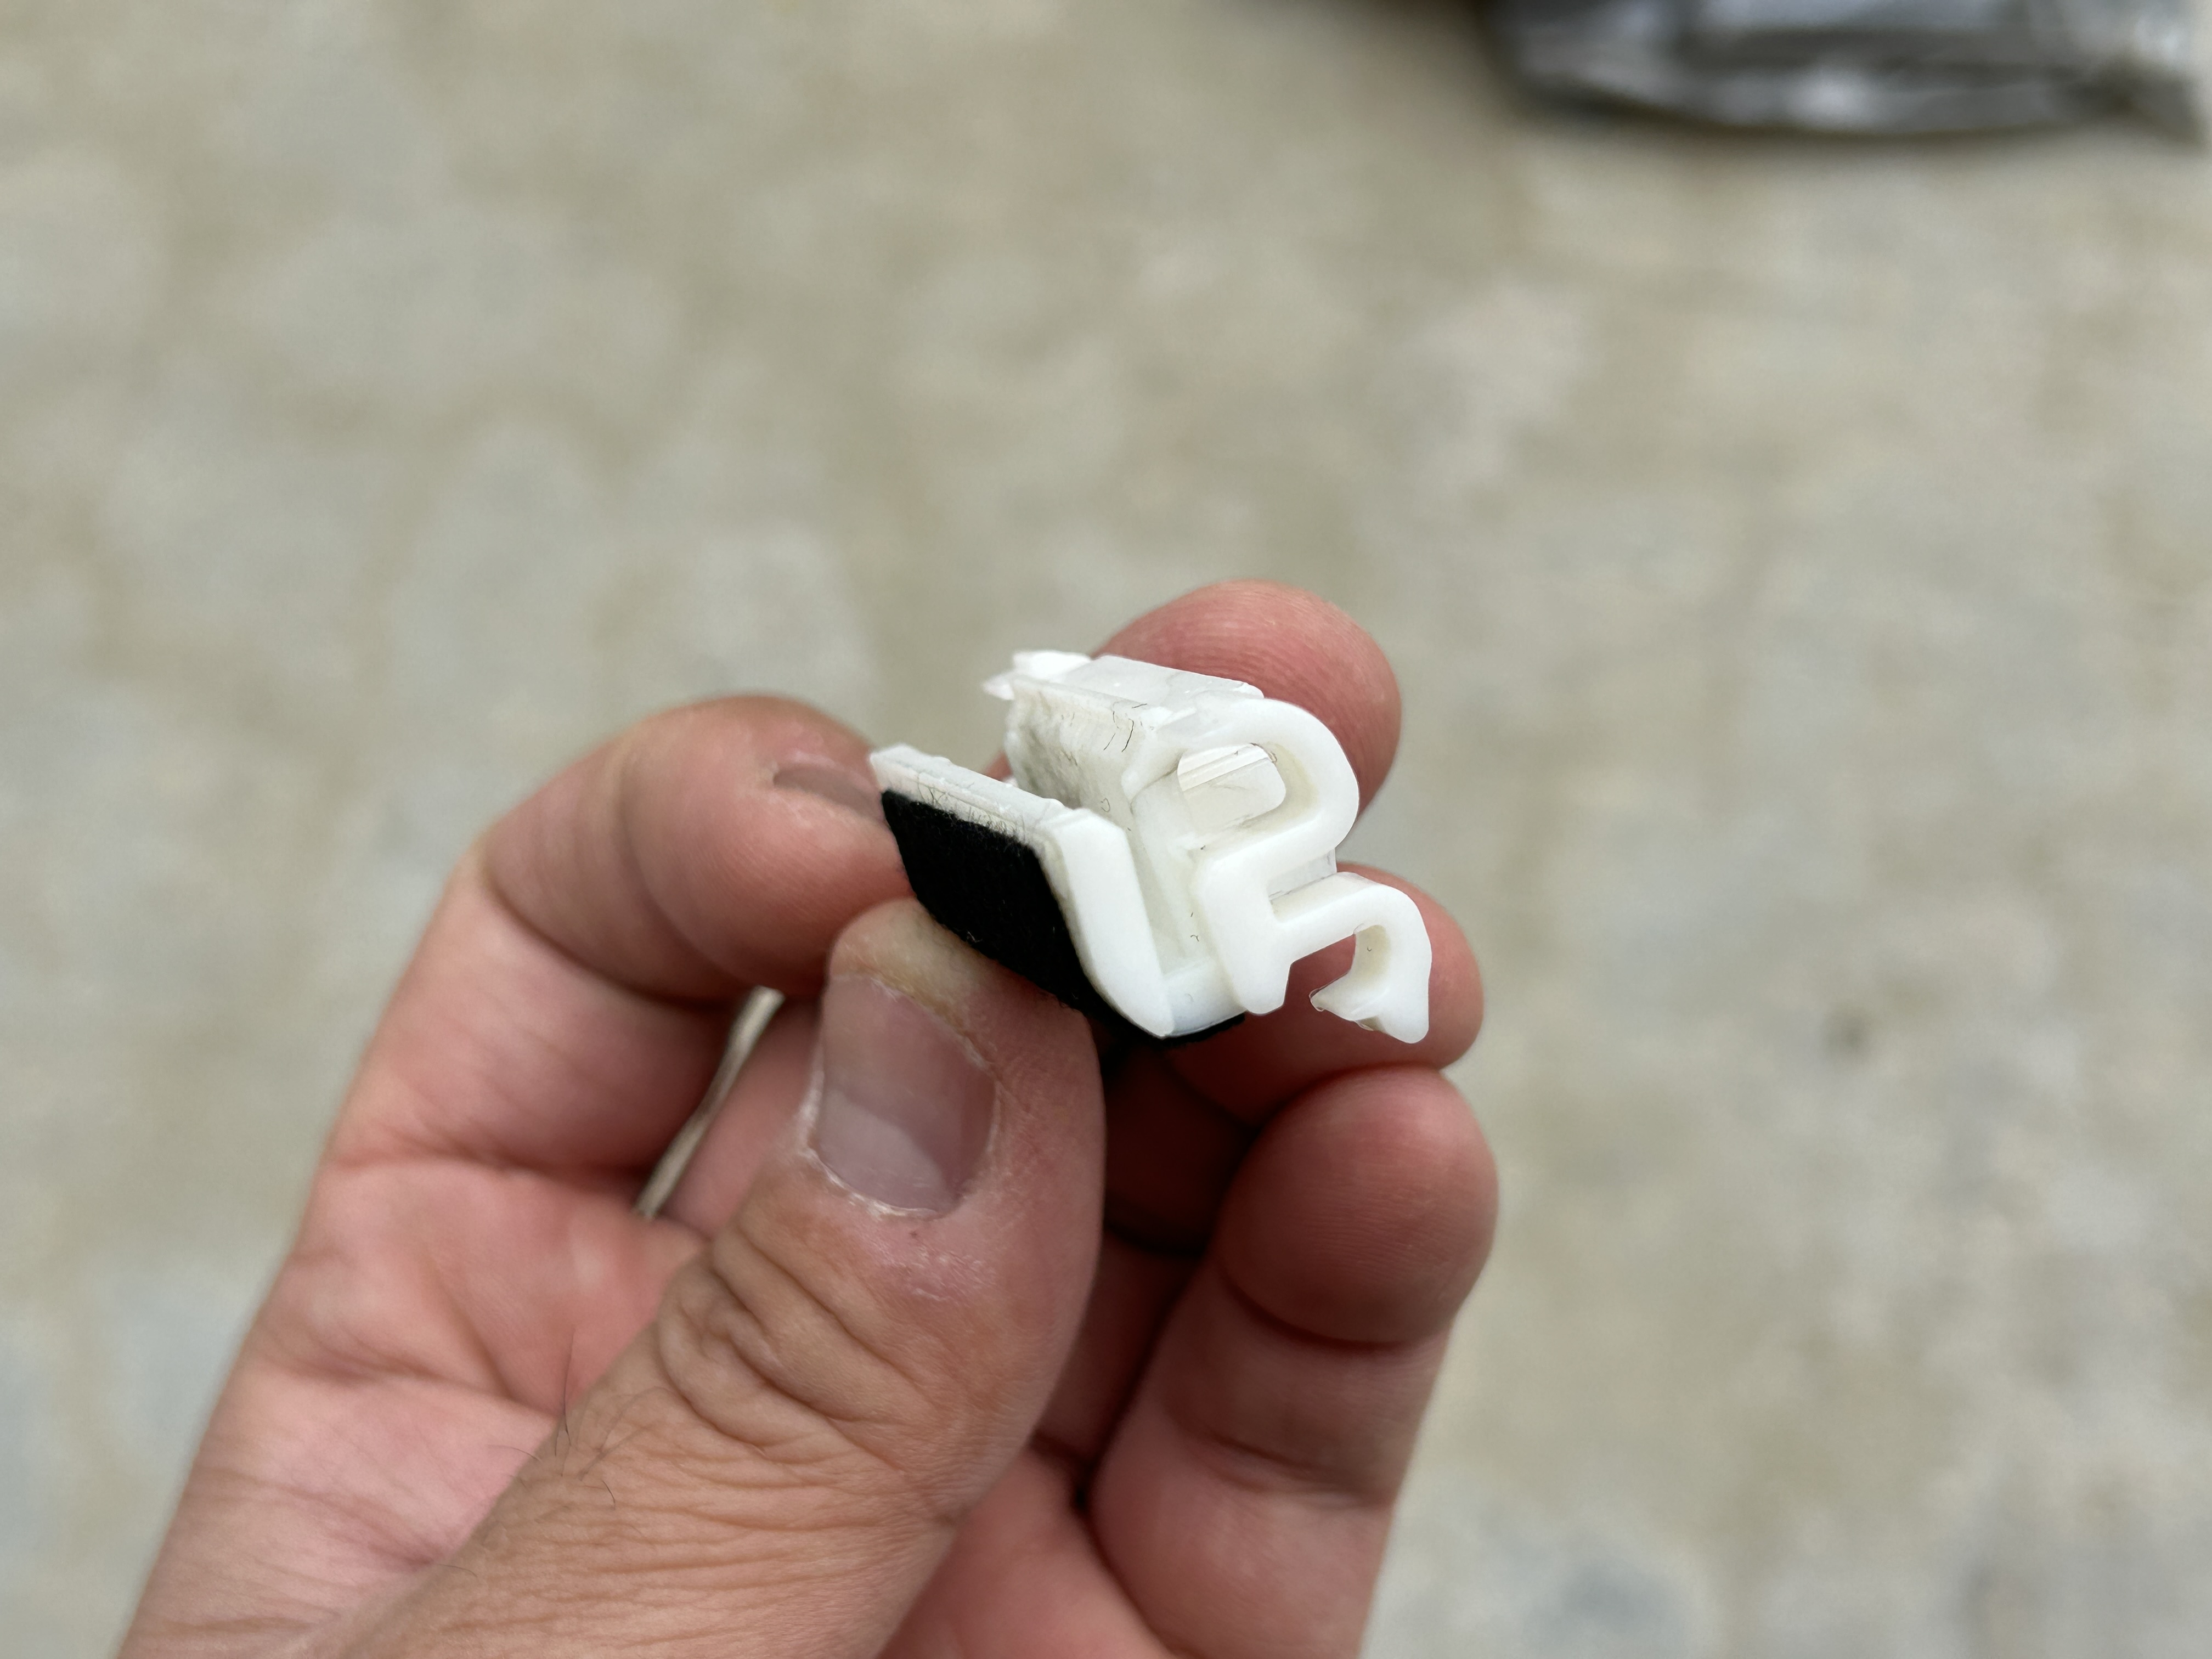
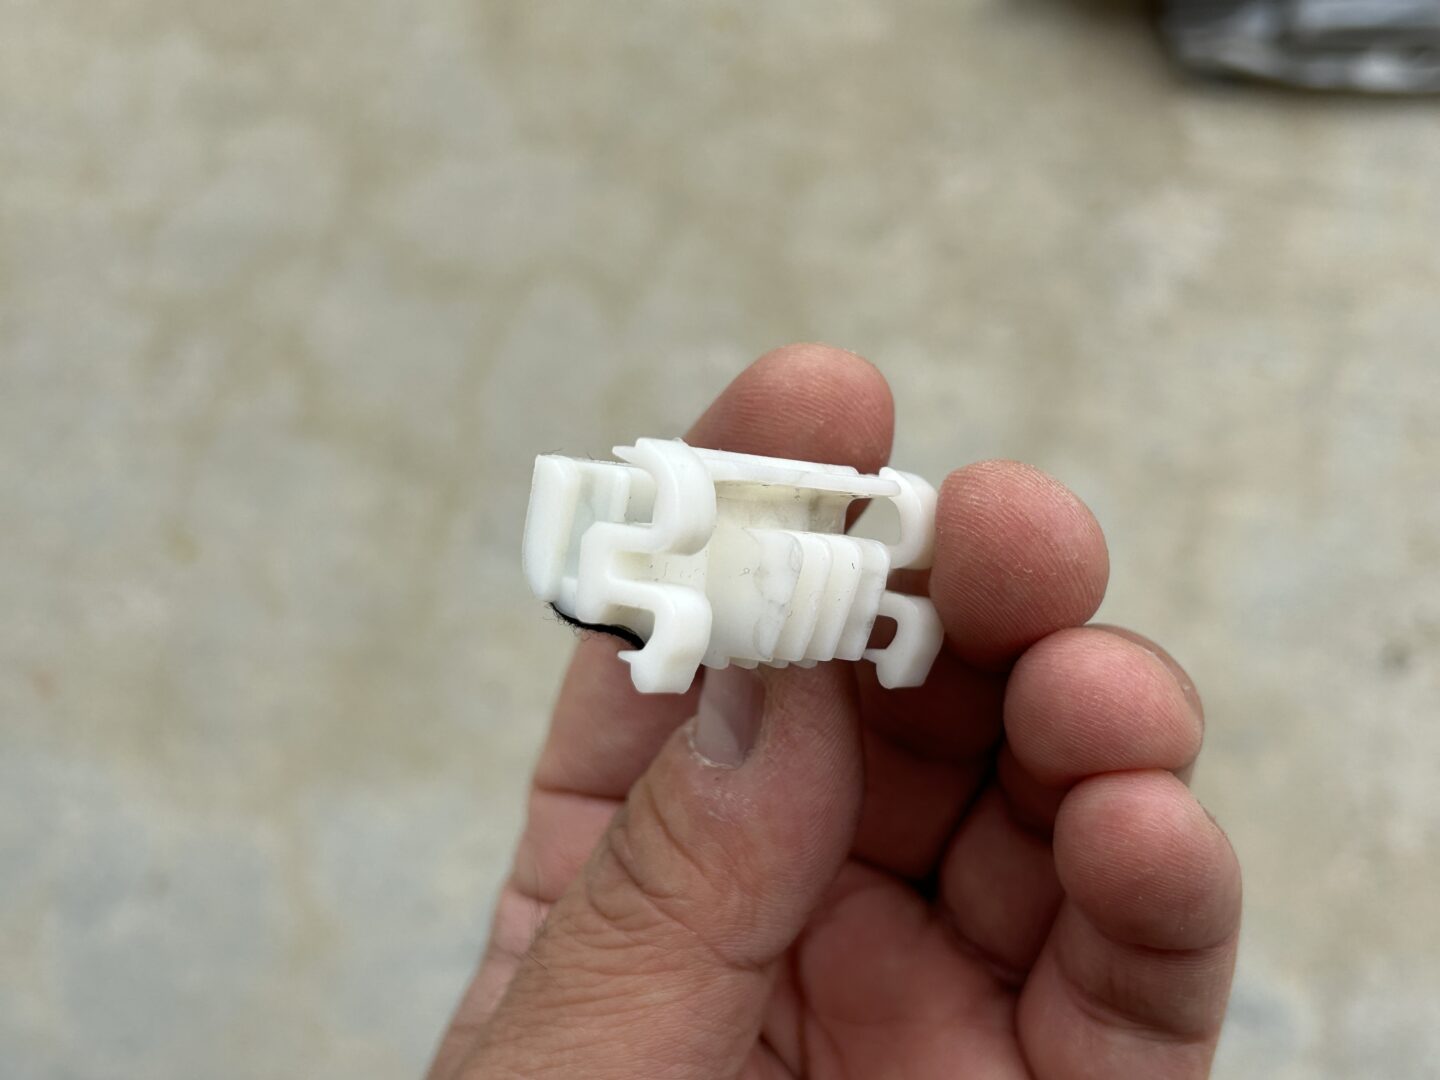
If you look at a section cut for how the trim piece is supposed to snap onto the molding clip, you can see that the trim is intended to first clip into the bottom, then into the top when installing. Note that the trim doesn’t actually clip completely into the plastic hook of the mounting clip at bottom and top hooks. It clips into the little grooves of the hook, as well as against the center of the mounting clip as shown below.
Wrong Ways to Install the Trim: Sliding In & Tapping In
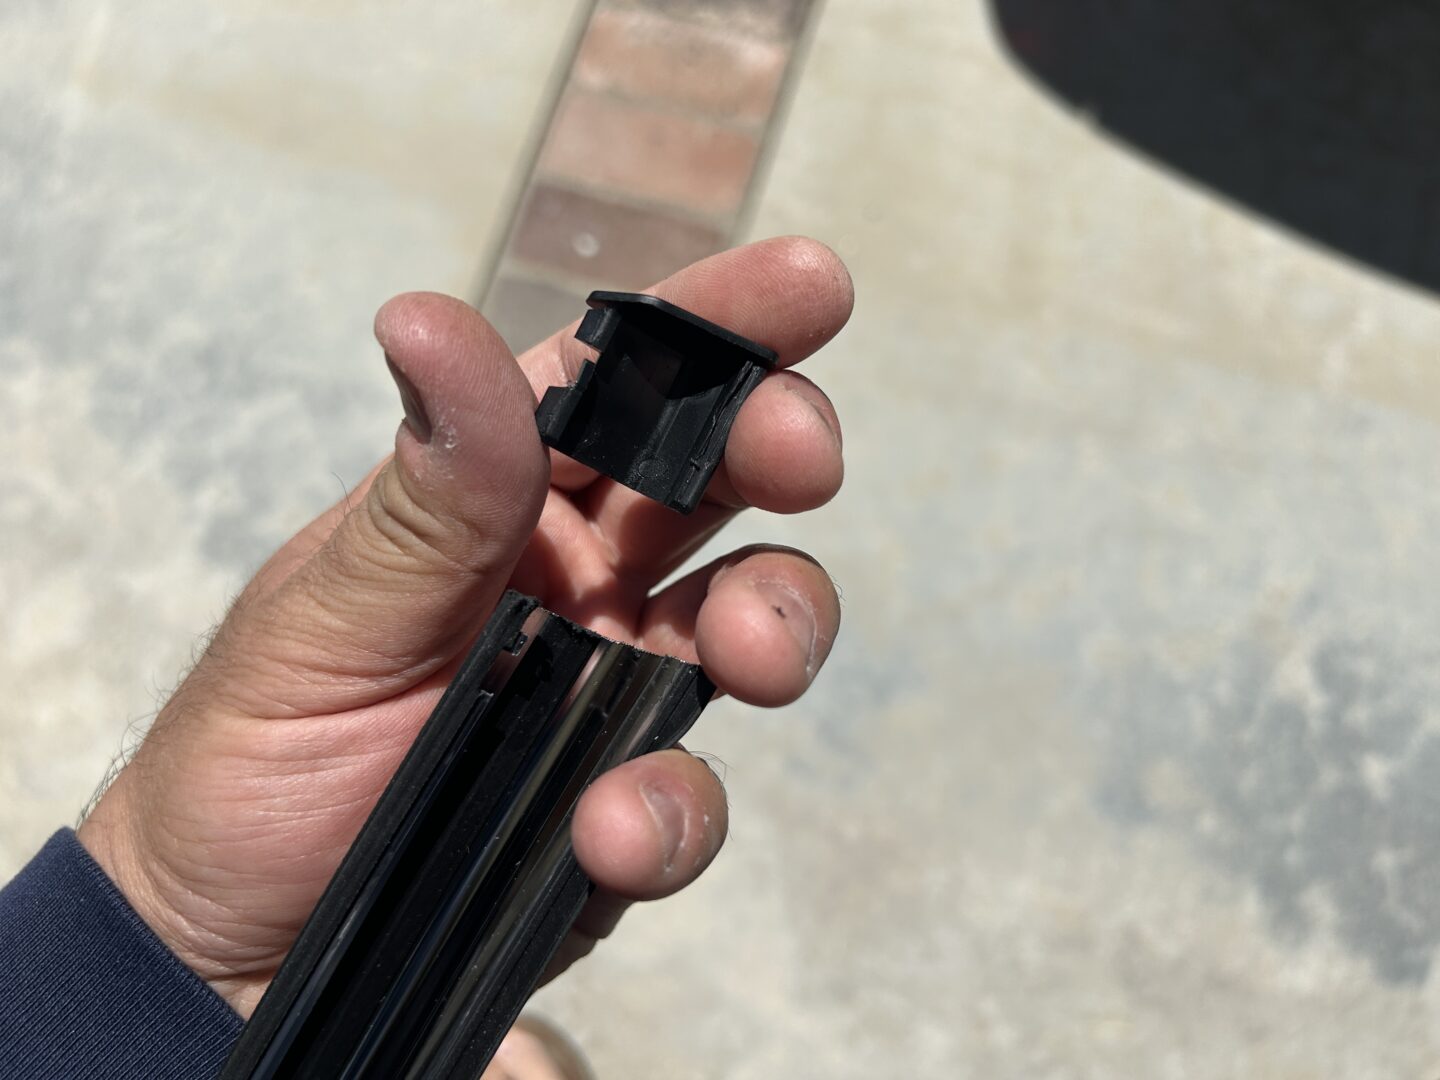
Clipping the trim onto the molding clip while off of the car is easy enough. But when you try to do the same thing with the molding clips on the car, it is really, really difficult to do. This is why a lot of people suggest a method of sliding the trim piece through each of the mounting clips instead. The way this works is by removing the end cap off the new trim and sliding the whole piece through all the clips. In my opinion, this method simply doesn’t work and risks hurting yourself and damaging your car’s paint.
This method sounds like it can work in theory, but what you might experience (as I did) is that the trim piece has these grooves cut into them at the edge to lock in the plastic end piece. These grooves keep you from easily sliding it through each of the installed molding clips. As you try to slide the edge of the trim piece into each molding clip, you’ll find it practically impossible to get it through without forcing it and probably scratching the sharp aluminum edge along your paint or your hand in the process. In my opinion, this is just not the way to go for the reasons just mentioned.
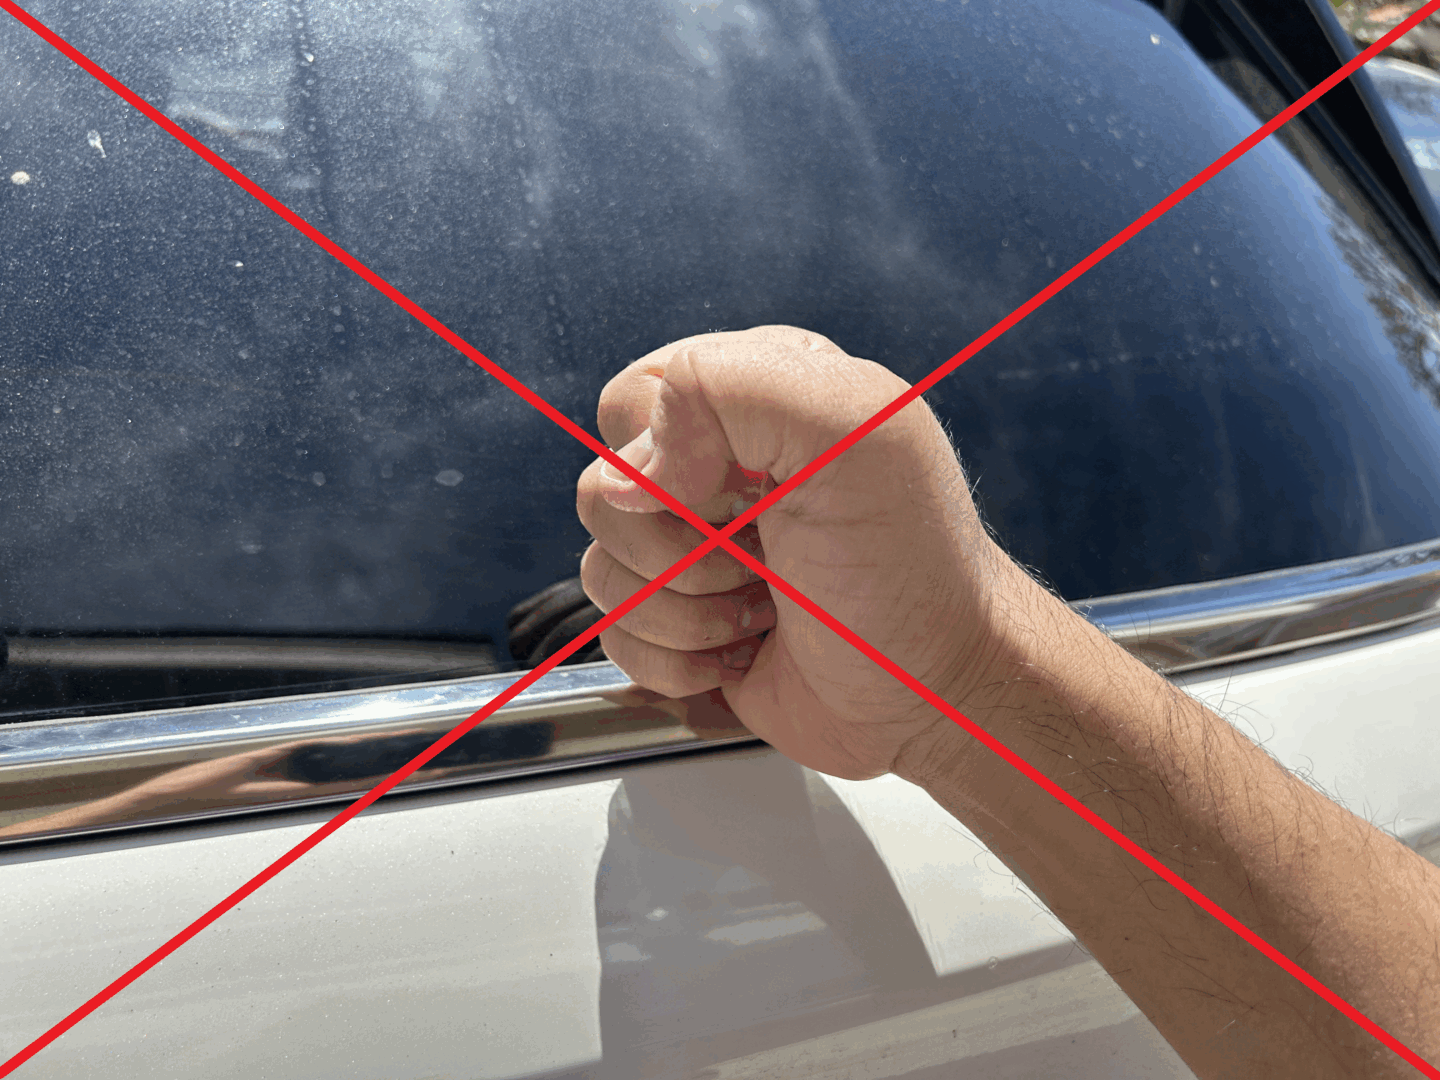
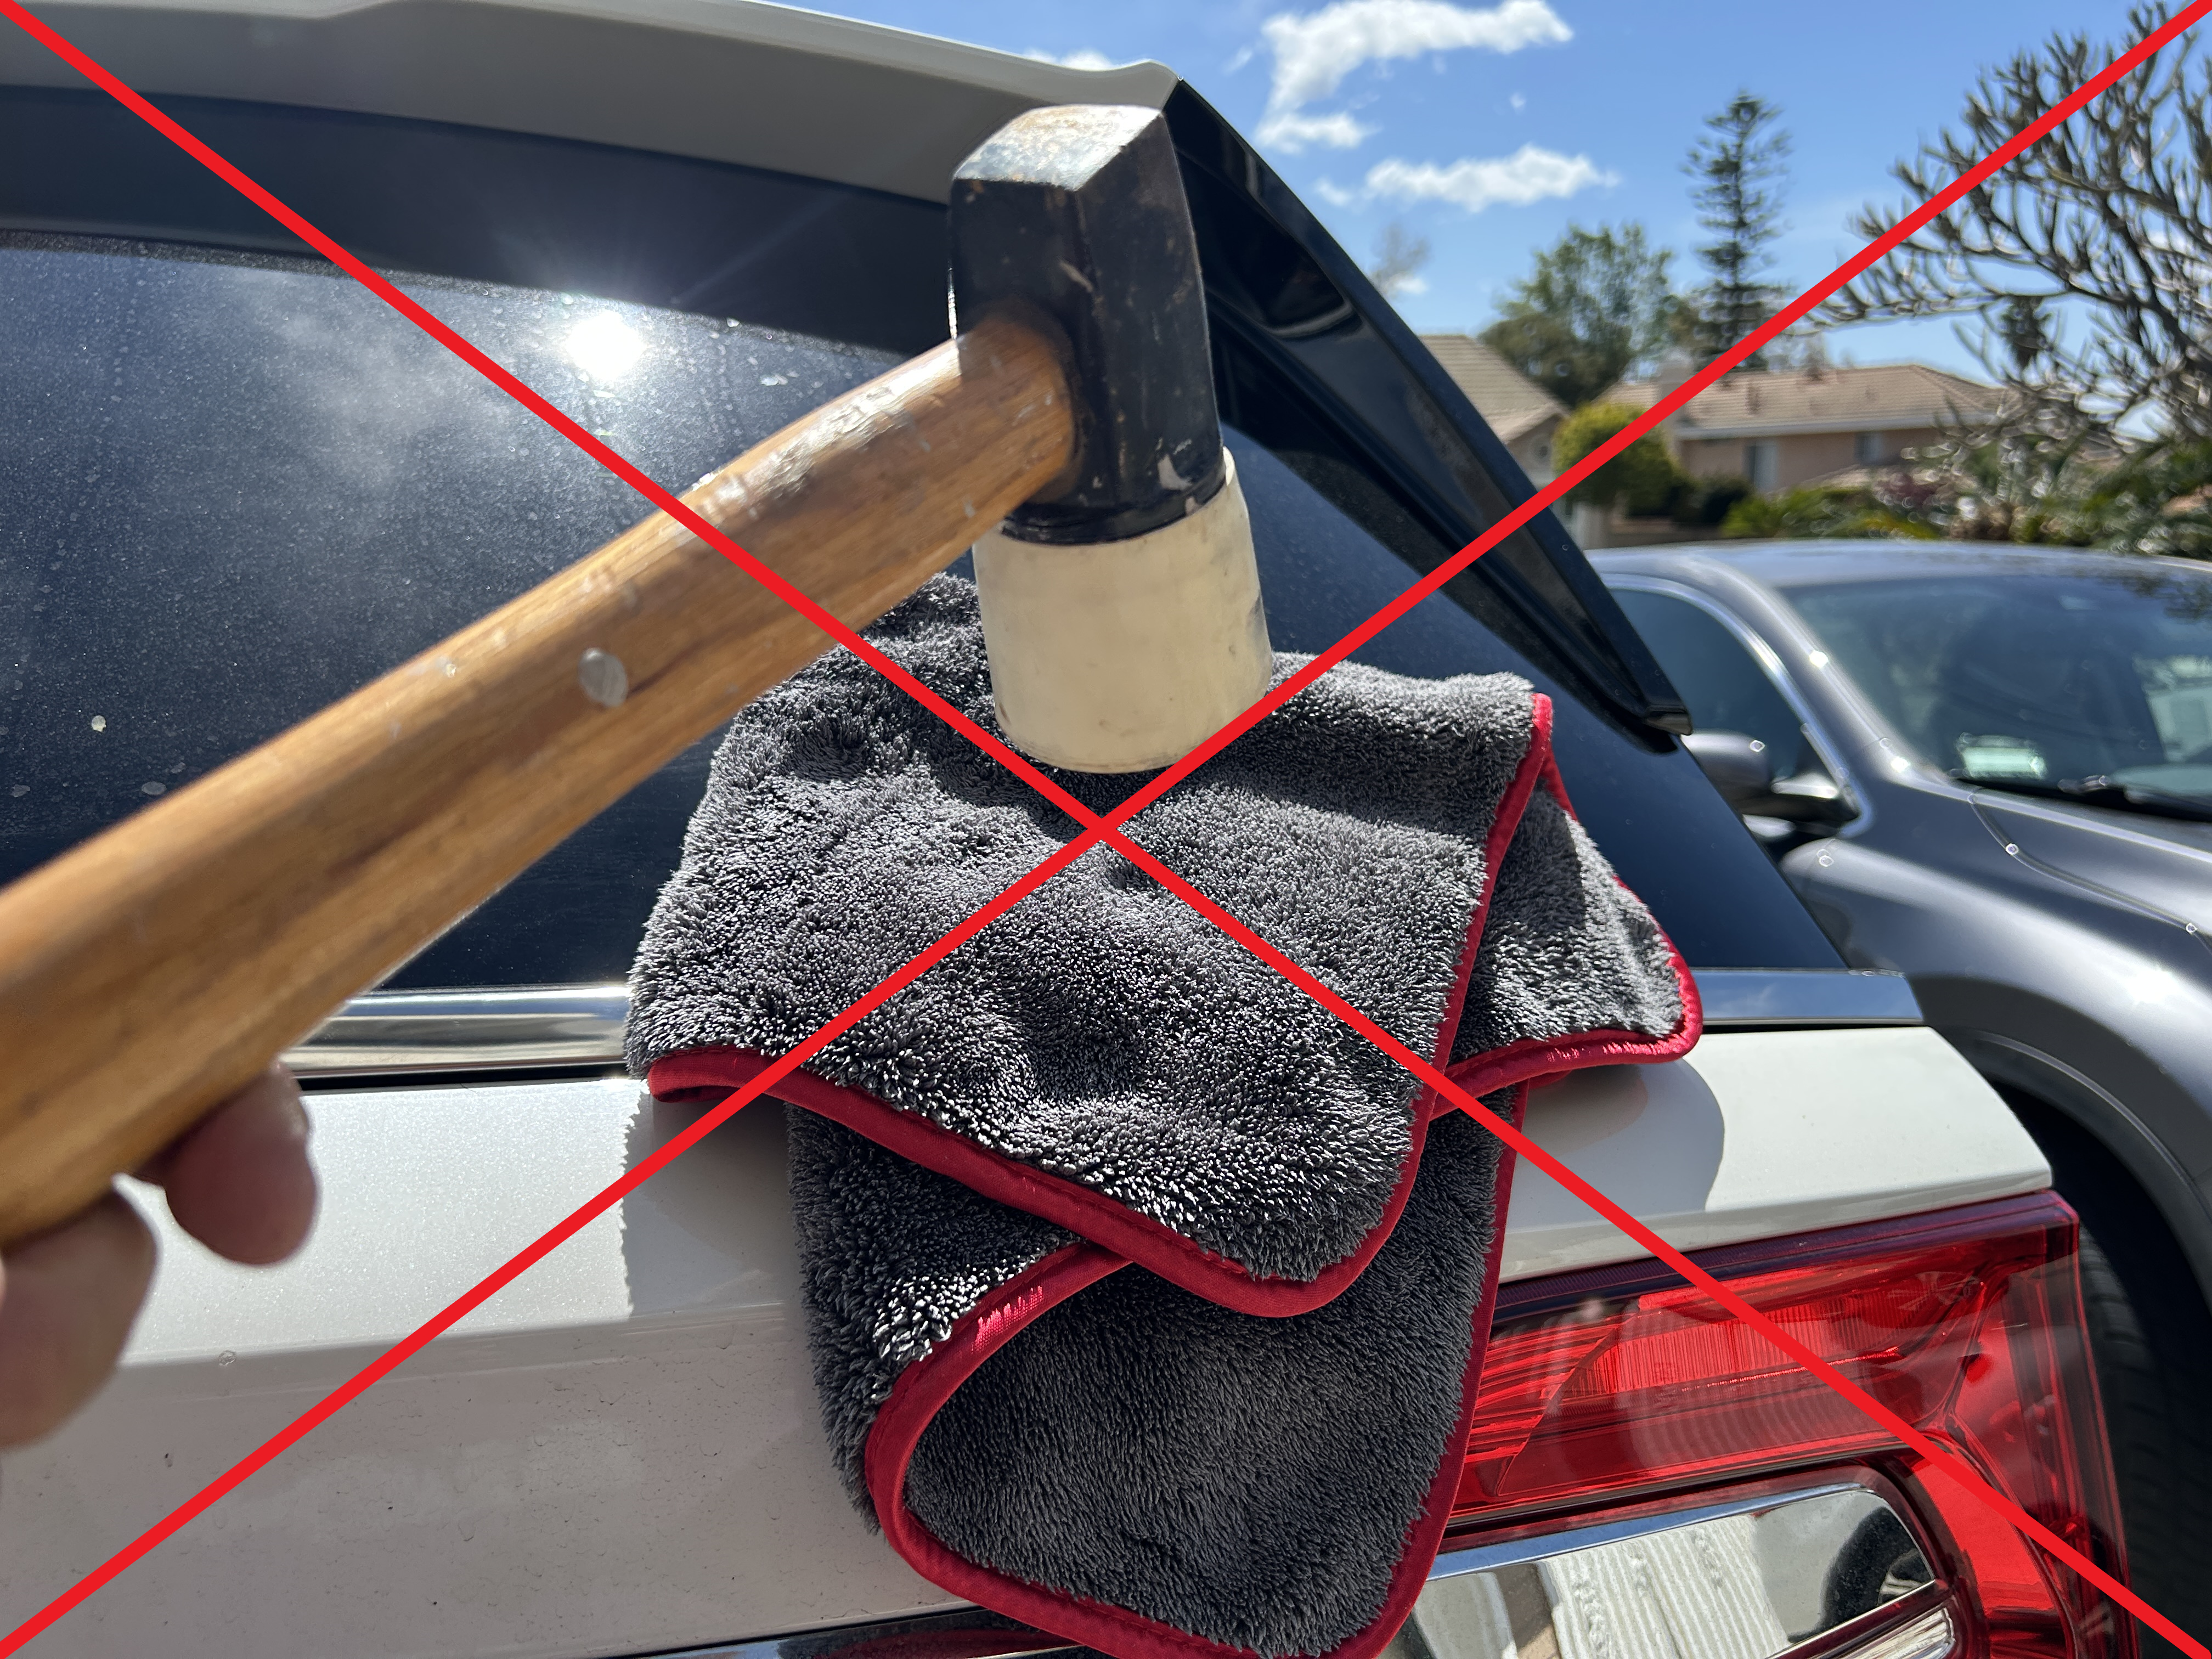
I also want to give a warning to anyone doing what I thought would work because it absolutely does not. Do not try to snap the trim into the mounting clips by hitting it into place. I tried using my fist (lightly pounding the trim into place), and also using a mallet tapping onto a padded microfiber towel to get the trim to snap onto the installed molding clips.
The trim piece is made of a thin piece of aluminum, so pounding it in (even lightly tapping it in) actually will snap the trim onto the mounting clips, but it makes these miniature dents into the trim. This damage is very noticeable, especially when the sun reflects off the little dents making visible light reflections along the tailgate. I had to throw away a brand new trim molding because I thought this method of installation would work.
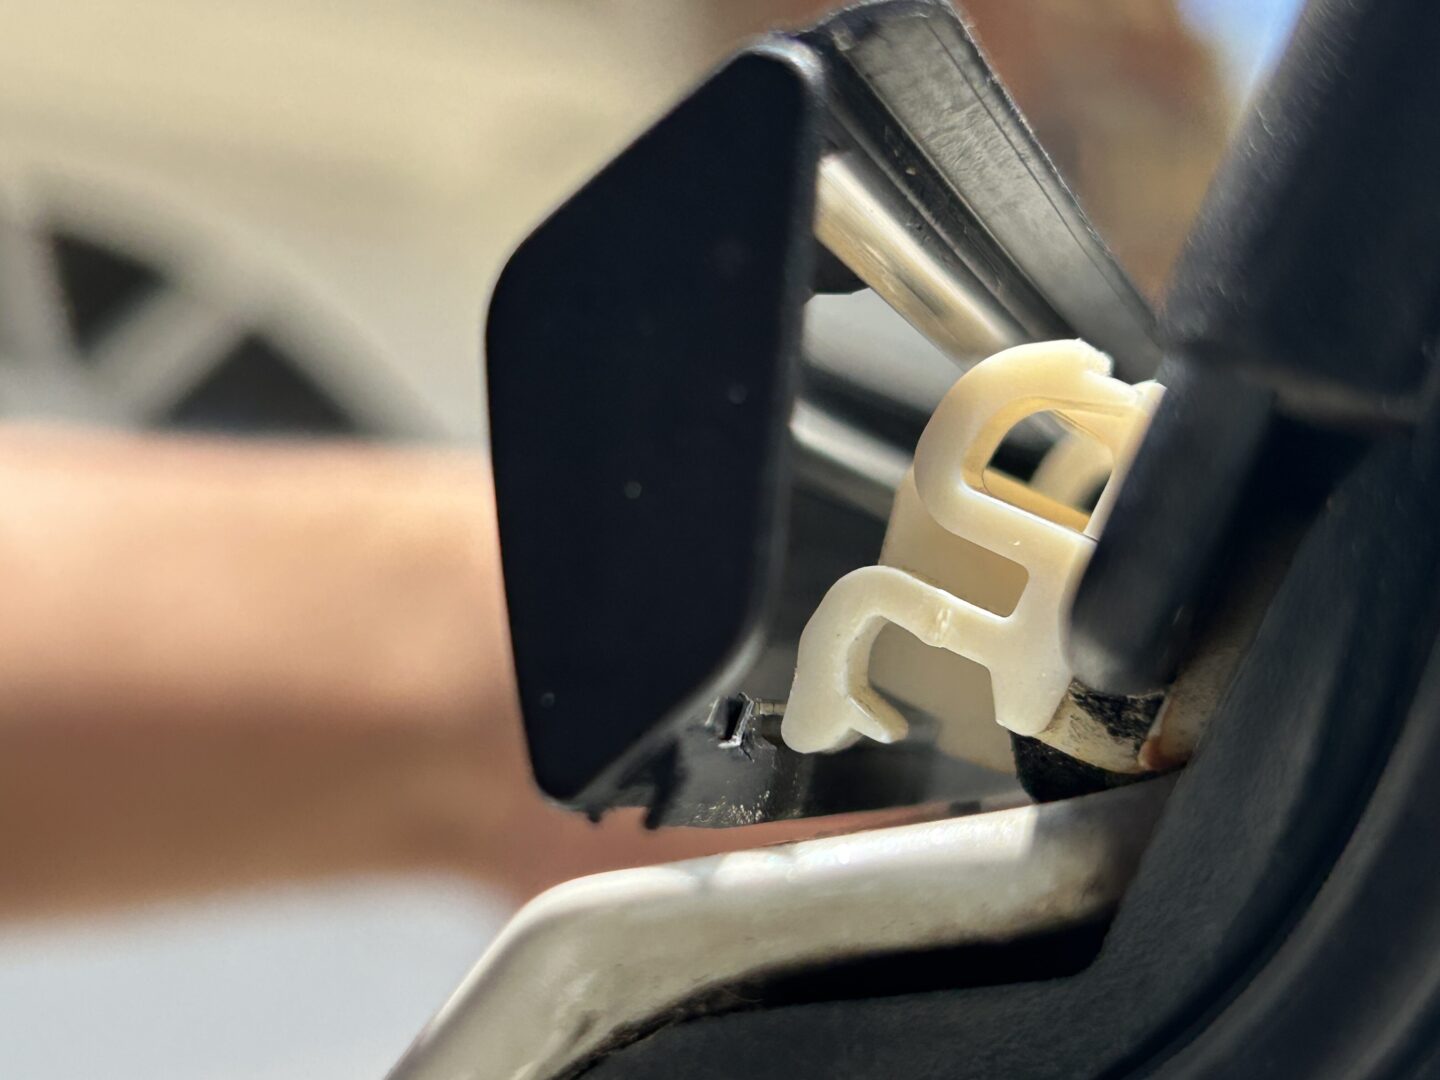
Right Way to Install the Trim: Heating & Remolding The Clips
To install the rear window trim molding without causing any damage, you must use a heat gun and an angled 90-degree hook tool. I want to credit this method to this specific Youtube video by frogisme, who suggested this method in the first place. They used a set of needle nose pliers, but I think the tool I’m suggesting is more effective.
For this method, you’ll use the heat gun to apply heat to the plastic molding clip at the bottom hook while it is on the car. Apply the heat while using the hook the lightly pull on it until the plastic softens from the heat. Remove the heat, lightly pull on the bottom hook of the mounting clip outwards. You will feel the bottom hook move; hold it in place until it cools and hardens again.
What you’re doing here is re-molding the bottom hooks so that the trim piece can more easily snap into the bottom hooks of the mounting clips. Before re-molding these mounting clips, if you try to press the trim piece into the bottom hooks, they just won’t clip in. The trim piece ends up hitting against the body of the tailgate before it is even able to snap into the mounting clips. Below, you’ll see what the molding trim looks like originally (left) and what it looks like after you re-mold it with heat and the hook tool (right).
After doing this for all nine of the molding clips, you’ll have these bottom clips more readily able to accept the trim piece. If you compare this after side profile with the before, you’ll notice that the hook is opened up more. You should be able to get the bottom of the trim piece clipped in by hand now.
Bring your trim molding back to the tailgate, and center it so that it is spaced evenly from each end of the tailgate. I use some tape to tape the glass above where each of the mounting clips are located. This tells me where I need to push the trim so that they snap into each mounting clip.
Working from one molding clip to the next, use both hands to press the bottom part of the trim into the clip, then pushing in the top part. You should be able to hear the click of the trim snapping into each of the molding clips when doing this. Do this until the entire trim is snapped into all of the clips.
If the trim does not install properly into any of the molding clips, you may need to remove the whole trim and check the clips again. If the trim cannot snap into any of the clips, readjust the bottom hook of those clips with heat and the hook tool again. Be careful to not pull the hook too much after applying heat– doing this can lead to the trim being able to snap in but not have a good snug fit against the rear glass.

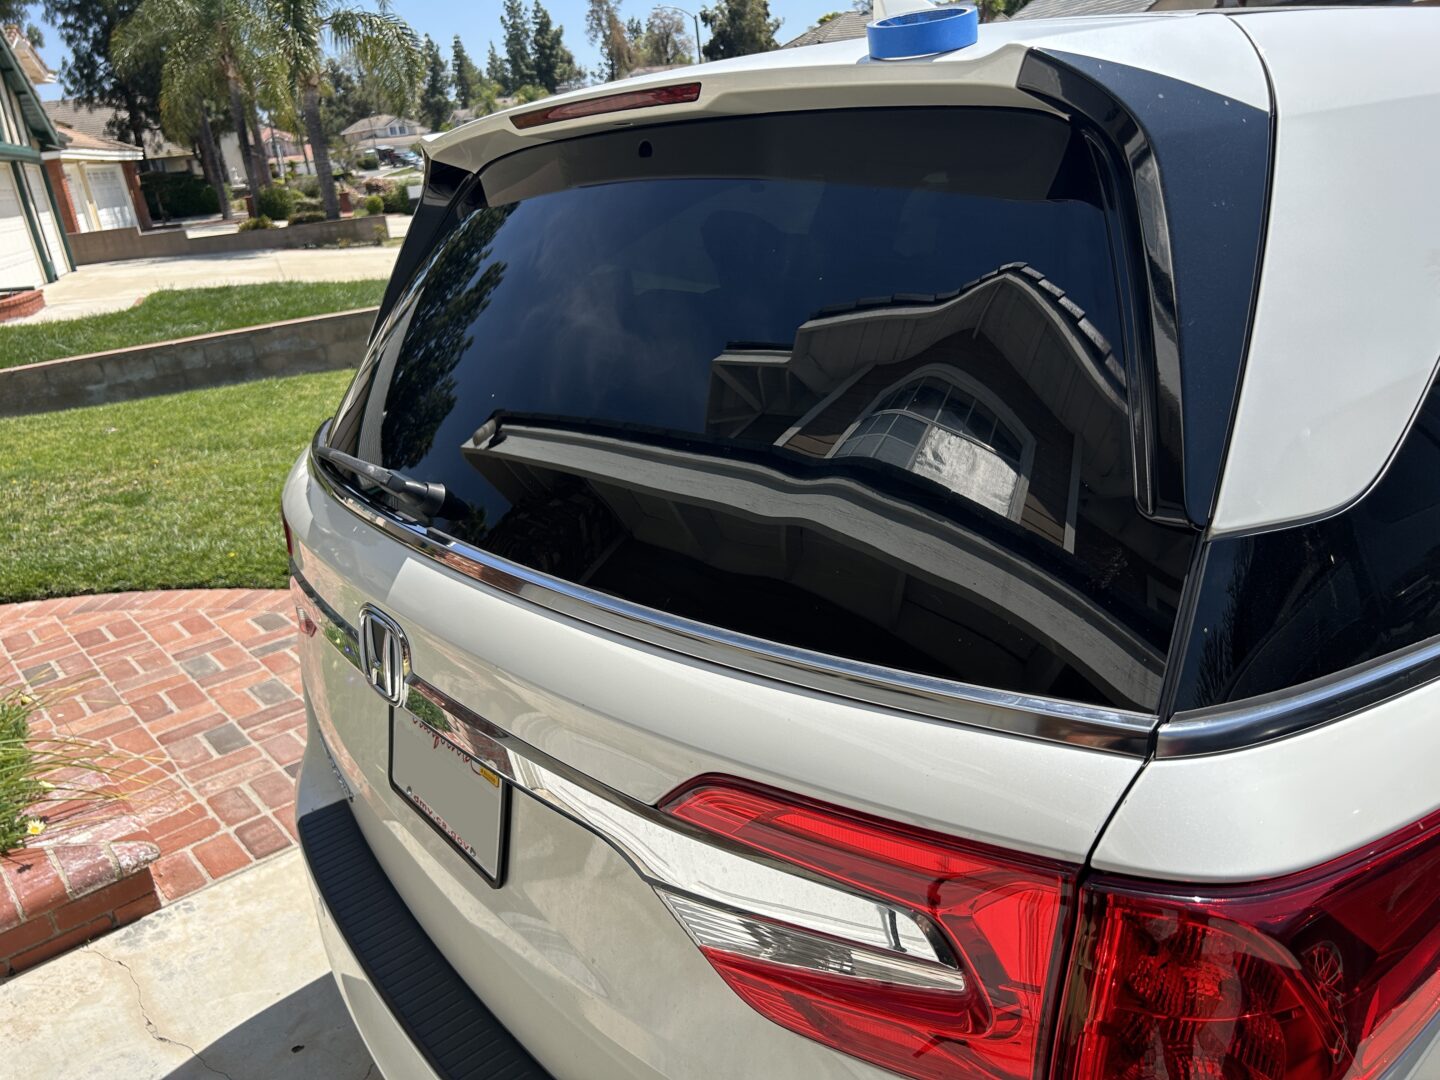
This method is in my opinion the best way to install the rear window trim molding. I’m sure that the rubber molding is not going to sit as tight to the rear window as it had originally, but that’s okay. If you think about it, if you were able to install the trim back onto the clips without remolding the plastic, then it might fit exactly as it did before. But because you had to remold the clips to give the needed give for installation of the trim, there is going to be a little bit more space between the trim molding and the glass. In the end, if you move the plastic in the mounting clips only slightly for each clip, you should still have a very good fit when you are all done.
I’m hoping that this post gives you the confidence to take on this job as so many of us 5th Generation Honda Odyssey owners are experiencing this same issue. There is not a lot of info out there with guidance as to how to tackle this very difficult job. My goal was to be as in-depth as possible and showing you what I believe to be the best way of replacing the rear windshield trim molding on these cars.
")
")
")
")
")
")
")

")
8 Comments
Appreciate the write up on this for sure, everyone was telling me the rear window has to come out. But this detailed of a write-up and DIY how-to.
No problem! I’ve been wanting to write about this topic for a while, but I wanted to go through the whole process of replacing it (and going through all the pitfalls along the way) before writing knowledgeably about it.
This is a great explanation, and so thorough on the issues that could be encountered, but after reading all this it seems the easier thing to do is to remove all the deteriorated seal debris, and use black silicone to seal the gap. With care it can look exactly like the original seal.
As an aside, it seems this seal was not meant to be replaced, considering the impossibility of snapping back onto the clips without modifying them. The trim was clearly applied onto the glass before it was put into the door. The mistake was not using a “lifetime” material for the seal.
Hi Tim, I agree with you that the easier thing to do is to silicone seal the gap. However from all of the photos showing people who have done this, it looks a lot worse… especially when you’re looking at it near the car. Also, if you’ve ever used silicone before, it can be very messy and you can’t quite run a nice bead line like you would be able to with some acrylic caulk.
Everything else you’ve mentioned are the same thoughts that have gone through my head. Unfortunately, we as the owners have to deal with the issue down the line.
Hey there just bought wife 2018 odyssey and got my 2007 back super clean want to make it lil more sporty for me with lowering it on some nice rims give it that Japanese touring look any any suggestions were to start i am in greenville tx from California
Thanks
Sorry I don’t have any suggestions as I haven’t done any suspension on the Ody quite yet. There’s lots of resources on odyclub.com, which I’m sure can point you in the right direction!
Also thanks on the tailgate window trim👍
Of course! It’s a pain, ain’t it?