When you make purchases through links on this site, The Track Ahead may earn an affiliate commission. Also, these posts are based off my own experiences. I am not responsible for any action you take as a result of reading this. Learn More
It has been almost two years now in the midst of the Covid-19 Pandemic and we are all by now aware of the importance of keeping our hands clean. We’re now accustomed to constantly washing our hands and using hand sanitizer whenever hand-washing is not possible. I’ve been playing with the idea of making a portable hand washing station to keep in our vehicle because my family and I are always trying to find ways to wash our hands while on-the-go.
After making this hand wash station and placing it in the back of our Toyota 4Runner (along with a bottle of hand soap), it has become extremely useful in keeping our family’s hands clean. We are always transporting the kids around and running errands, and it’s not always possible or convenient to find a restroom to wash our hands. Now, it’s as simple as opening the tailgate and having soap and running water to wash our hands anytime we need to.
Tools & Materials Used
I’ll start off by saying, it is very appealing and convenient to buy a water storage container (usually made for camping) that already has a spigot attached in order to use as a hand wash station. These typically are all made of thin or flexible plastic and generally smaller than the modified hand wash station shown in this tutorial. If you’re interested in just purchasing one instead of making one, check out the last part of this post about alternative hand wash stations.
The reason I chose to make my own hand wash station was because of a few reasons: I already had a spare Scepter 5 gallon water container to use, I like to make and modify things for fun, and I knew if I made one myself, I could guarantee it would not leak like many of the ones you buy online.
The only products necessary for this tutorial is the Scepter water container, Whale hand-operated water pump, silicone tubing, and silicone rubber sheet. The rest of the tools/materials listed below are ones that I used while making this hand wash station, however not all are necessary. If you are interested in making your own hand wash station, I recommend going through the whole post and determining what tools/materials you absolutely need; you may even have a lot of these tools already.
Scepter 5 Gallon (20L) Water Container
You can probably use any other water container that has a similar style cap as you will need to drill a hole through the cap to install the hand-operated water pump. I already had one of these water containers at home so that’s what I used in this write-up.
Scepter 5 Gallon True Military BPA Free Water Container
Whale MK6 Hand-Operated Galley Water Pump
There are some other types of hand-operated water pumps, but I felt this one was one of the better-looking ones. It does require one hand to operate with both a pull and push stroke for pumping water. Although I prefer a pump that doesn’t require any hands to operate (so that I can wash both hands at the same time), it wasn’t going to be possible without some sort of auxiliary power. I wanted this build to be simple and not connected via any wiring, so I stuck with a hand-operated pump.
Whale GP0650 V Pump Mk 6 Hand-Operated Galley Water Pump, 2.2 GPM Max Flow Rate
1/2″ ID / 5/8″ OD Clear Silicone Tubing
This is the required tubing size that would connected perfectly into the Whale MK6 hand-operated water pump. If you use another water pump, you should check with the manufacturer on the model you’re using to determine the correct tubing size. If you’re using this as drinking water, you should ensure that the tubing is at least food grade.
Clear Platinum Silicone Tubing – Food & Medical Grade – High Temp Hose (3 Feet, 1/2″ ID x 5/8″ OD)
Silicone Rubber Sheet
This is a great gasket to use, which fits between the water pump bracket and the water container cap. However, this sheet is 8 in. x 8 in., which is way more than you need. If you can find something else to use as a gasket or can find a smaller size, that would be ideal. I ended up buying this whole sheet, but only used about 5% of it.
Rubber Silicone Sheet Roll High Temp, Red 8×8″, 1/8″ Thickness
Other Tools & Materials Used
As mentioned earlier, not all of these tools may be required, but may make things easier. You can make your own judgement on what you absolutely need and what you may be able to forego. I used all of these products on this tutorial.
Hole Saw Kit: DEWALT Hole Saw Kit, Standard Electrician’s Set
Cordless Drill: BLACK+DECKER 20V MAX Cordless Drill / Driver, 3/8-Inch
Utility Knife: Amazon Basics Retractable Utility Knife with 3 Blades
Heat Gun: BLACK+DECKER Heat Gun, Dual Temperature
Wood Clamps: Jorgensen 6″ Spreader/Bar Clamp Set, 4-pack
Blue Tape: 3M Duct Tape Blue, 1.88 Inches by 20 Yards, 1 Roll
Flush Cut Saw: IRWIN Dovetail Saw, 7-1/4-Inch
Chisel: Hurricane 4 Pieces Wood Chisel Set
Duct Tape: Gorilla Black Duct Tape, 1.88″ x 12 yd (Pack of 2)
How to Make a Portable Hand Wash Station for your Car
The modification that needs to be done on the Scepter water container is mainly on the cap itself. This gives you some assurance in the case that if you mess something up, it is just the cap that will need to be replaced. Also, if you ever do plan on using the water container in its original form without the altered cap and hand water pump, you just need to swap out the cap.
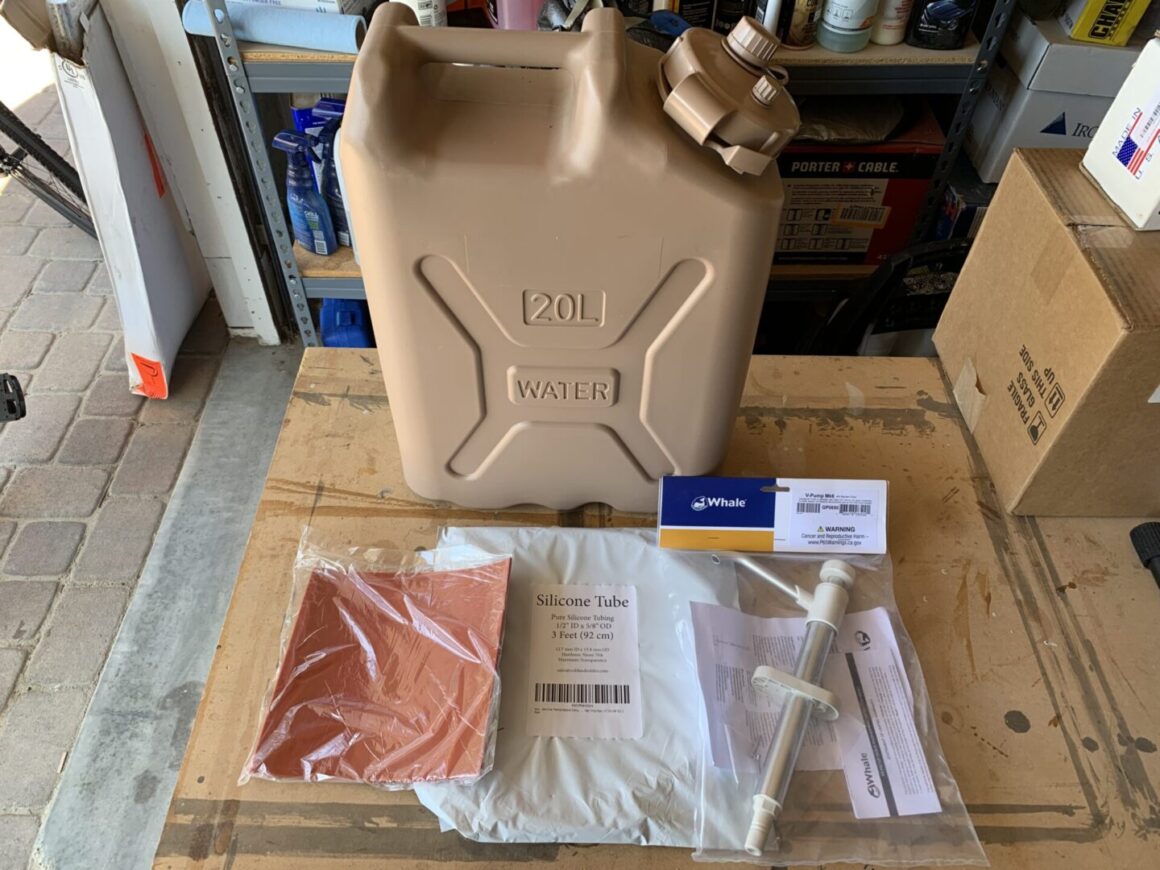
Start by gathering all the parts that you’ll be working with so you can see how things will fit together. You can remove the cap off of the Scepter water container and see how the Whale hand pump has a bracket that will fit over the top of the cap. The bracket also has a tightening system, which allows you to tighten a screw to secure the hand pump to the shaft securely, as well as a couple of screws to secure the whole unit to the cap.
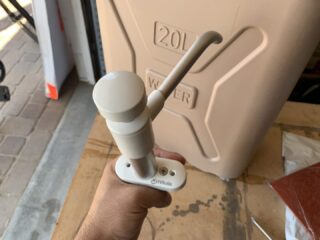
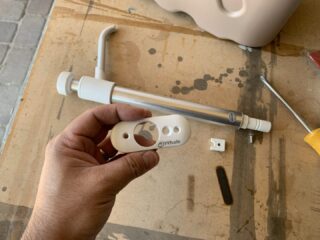
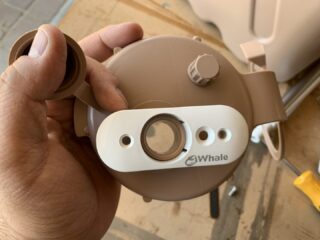
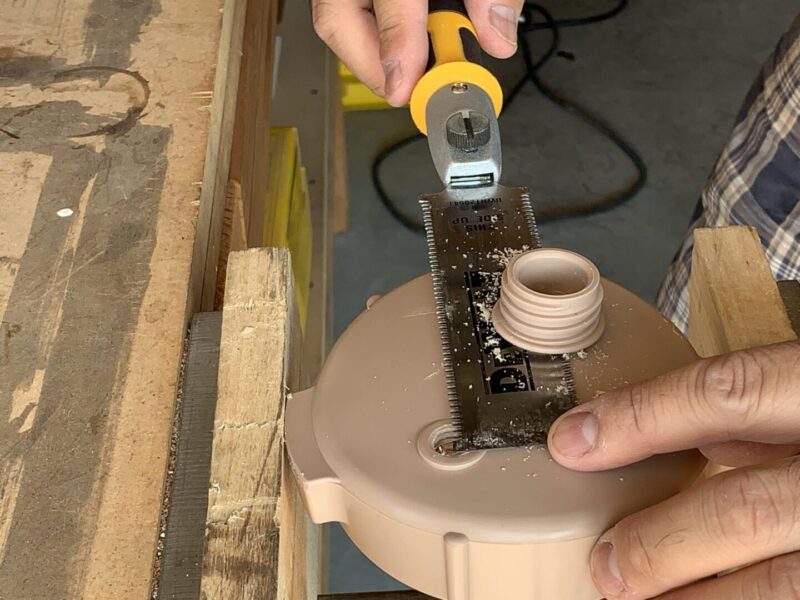
Using a utility knife, score a line across the edge of the cap as the ring portion will need to be cut off. Continue to score this line deeper and deeper until it is cut off completely. You can use a utility knife or a chisel to clean up the edge as needed.
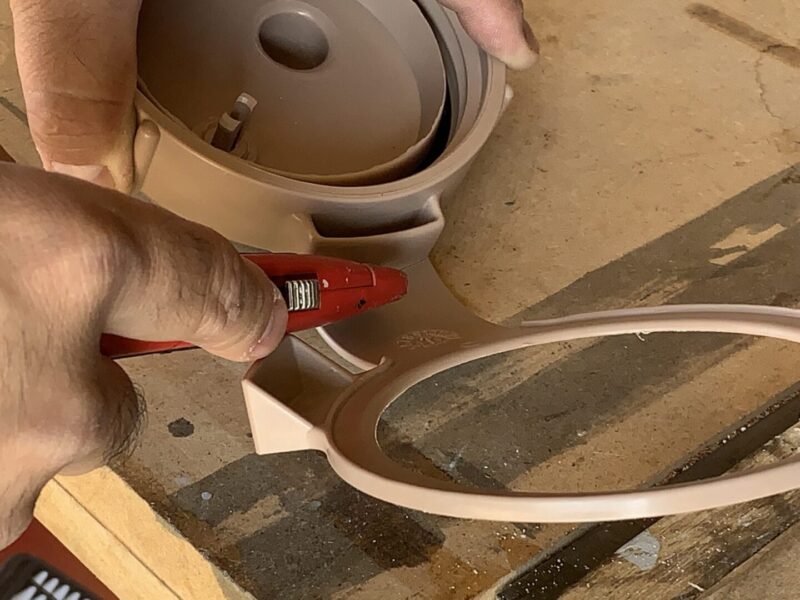
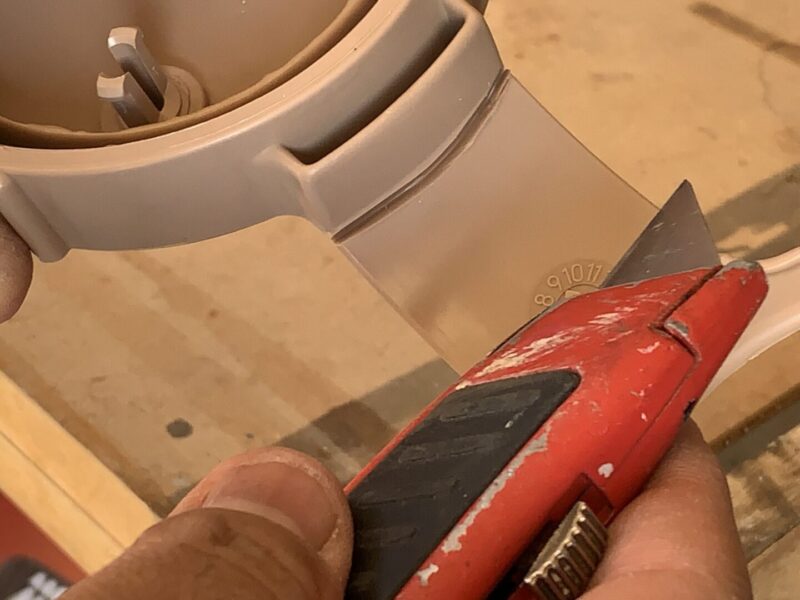
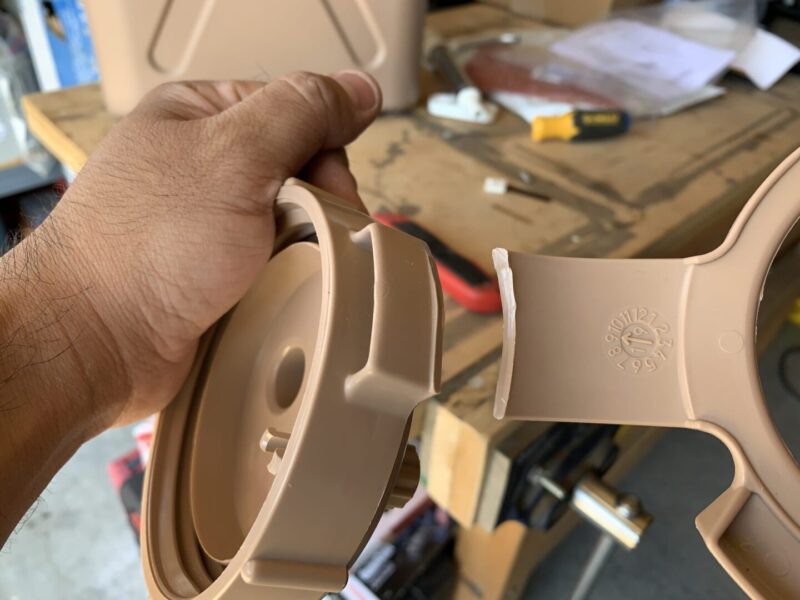
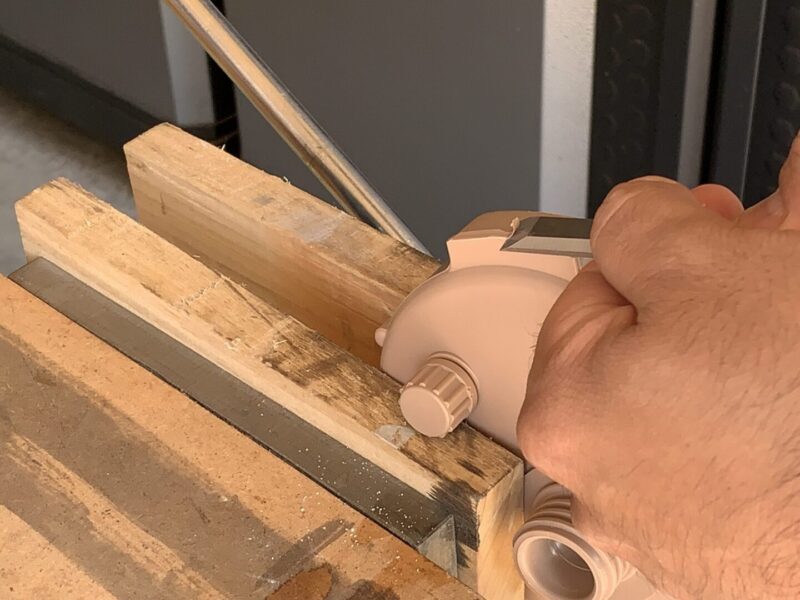
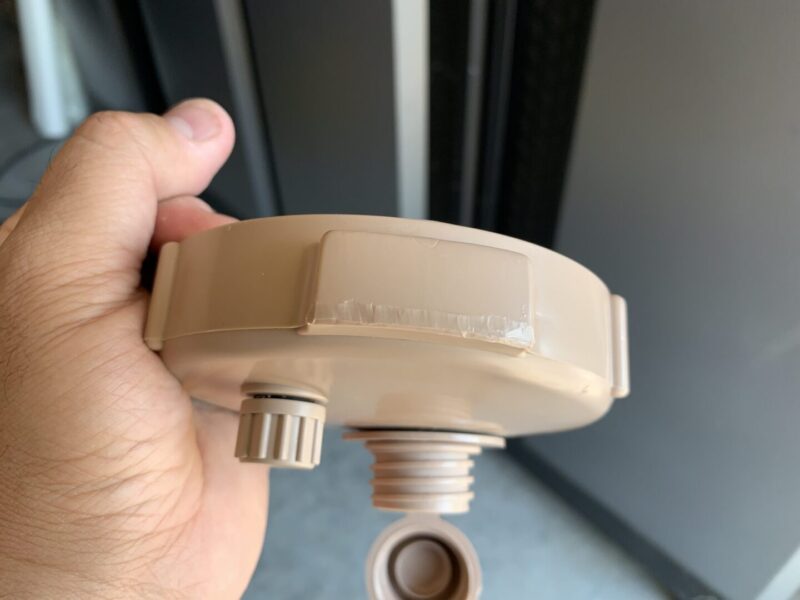
I personally cut off the spout opening, but I realize I could have probably just skipped this step and cut the hole with the hole saw. If the hole saw fits over the spout then I could simply just do that to bore the hole. If not, then I’d probably just bore the hole from the inside instead.
If you do choose to cut off the spout first, here’s what I did. I’ve found that a flush cut saw works pretty well here as you can bend the saw slightly to fit the contour of the curved cap and cut along the curve. I didn’t do it at first, but it would be wise to use some masking tape or painter’s tape and tape up the top of the cap to protect it from damage while cutting. As you can see I made some marks because I didn’t tape it up beforehand.
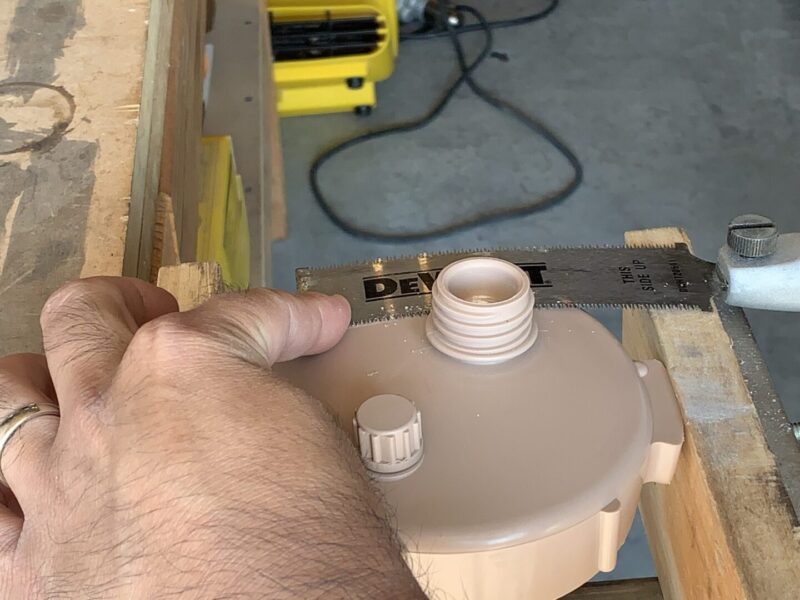
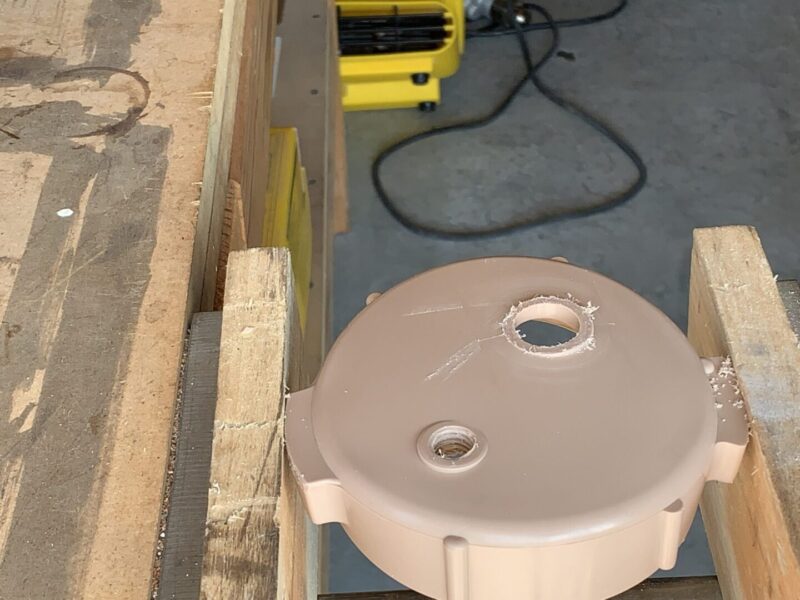
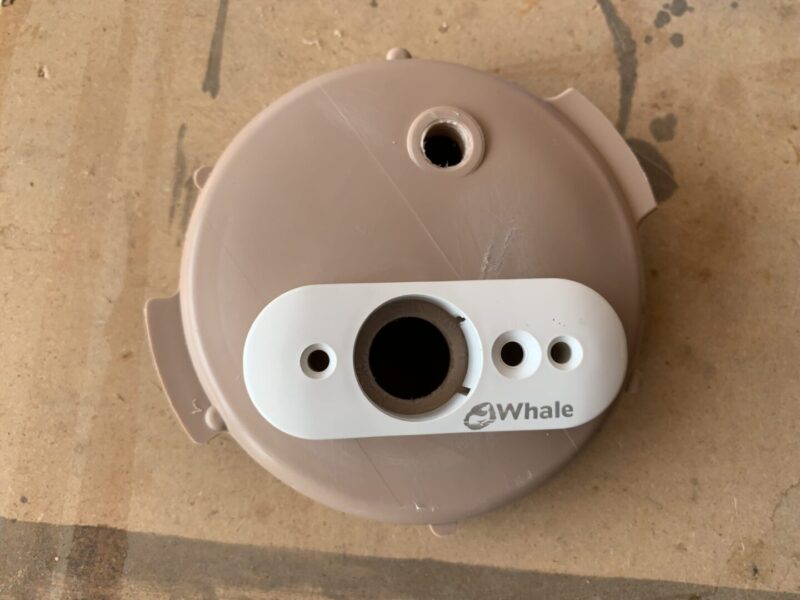
Dry fit the Whale water pump bracket onto the cap again so you know where you need to bore the hole.
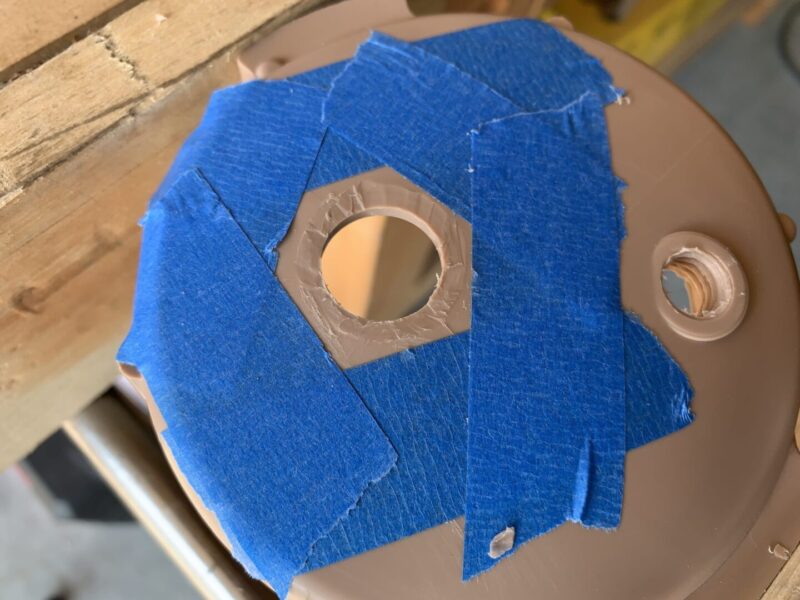
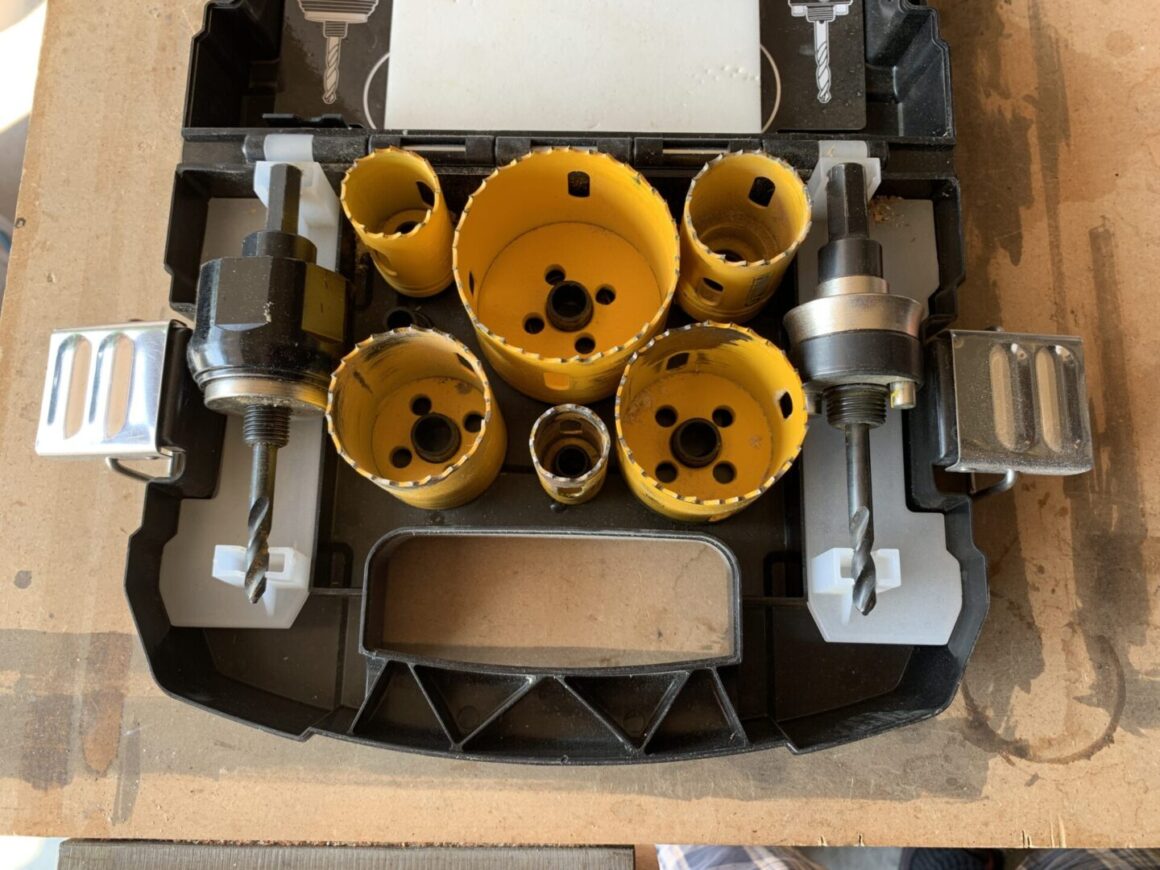
I used a hole saw kit that I already owned that is typically used for wood. Because of that, the teeth are quite large and so it is very likely to walk all over the place (since you have to bore a larger hole out of a smaller hole.) Because the hole saw works by centering the hole saw via a drill bit, if you don’t have a solid center for the drill bit to drill through, then the hole saw becomes very unstable (you’ll see more on that next.)
Below, you’ll see what happens when you try boring a larger hole in an existing smaller hole. There’s nothing there for the center drill bit to drill into and hence hold the hole saw securely as it cuts. Therefore it “walks” all over the place and doesn’t allow you to bore a clean hole (if at all).
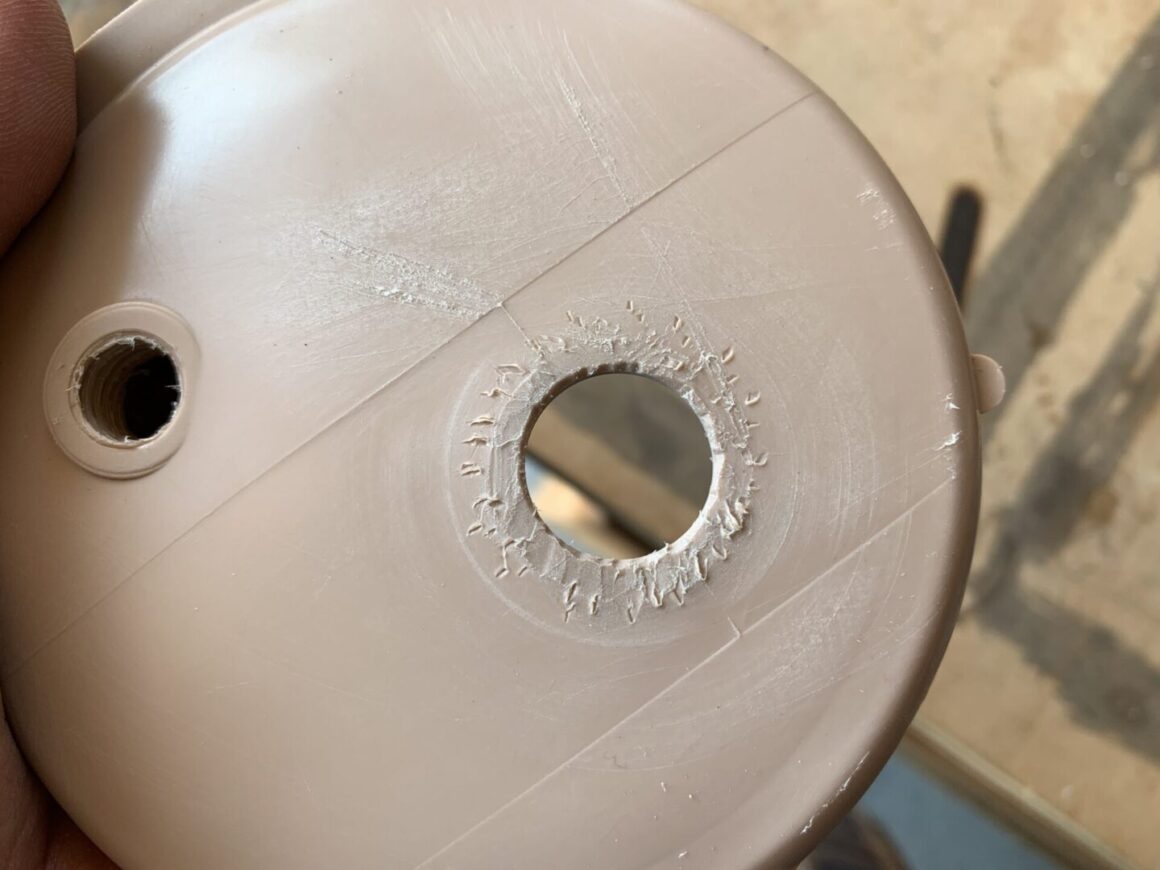
I’ve heard of tricks like drilling counter-clockwise first to get the hole started and then turning it back clockwise and boring the rest of the hole. This did not work for me one bit. I did come up with a different trick that worked like a charm for me.
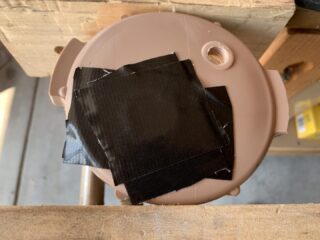
I took several thick pieces of duct tape and taped it over the hole, which filled in the hole so that I could use it for the center drill bit. After creating a hole for where I wanted the center to be, I could use the drill bit and hole saw to bore a clean hole. The center drill bit went through the thick duct tape and stayed within that hole, ensuring it did not walk the hole saw all over the place. Once the hole is bored, remove the tape and make sure everything looks good.
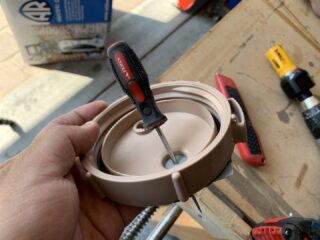
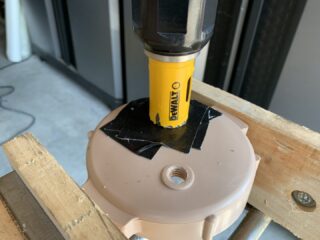
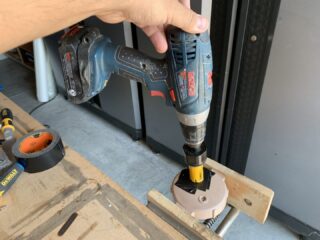
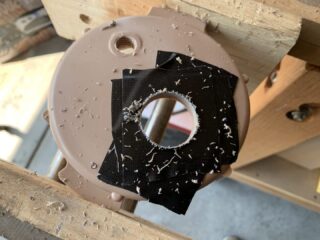
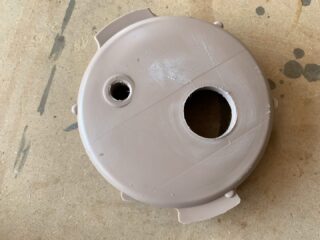
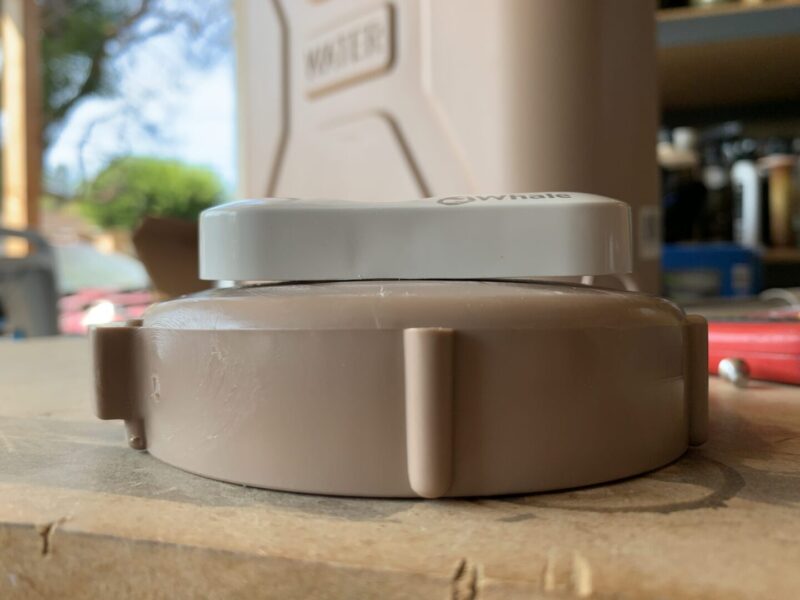
The next obstacle has to do around the Whale MK6 hand water pump bracket design. I got the idea of this style hand pump wash station from this post and I noticed that the design of the water pump bracket that they used had been updated. It now looks like the white bracket as shown in the photos on this post.
Ideally, a smaller bracket works better because the Scepter cap has a curve to it and using a more square bracket along with a gasket would sufficiently seal the bracket to the cap. Since the bracket has been updated to a longer one, you now have a bigger gap at the ends since the bracket is flat and the cap is curved.
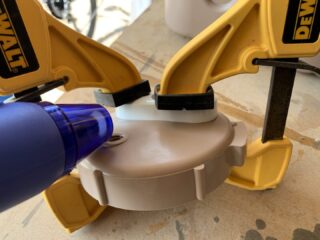
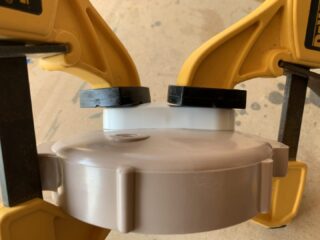
The solution here is to bend the bracket so that it fits better on the cap. I used a couple of wood clamps to hold it against the cap and then used a heat gun to soften the plastic and allow it to bend more. I continued to tighten the clamps and then let the plastic dry. Once it dries, it holds the desired shape.
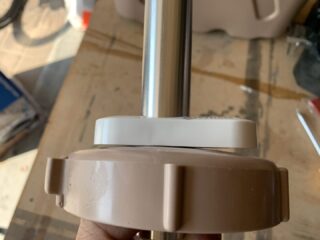
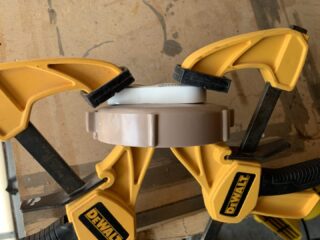
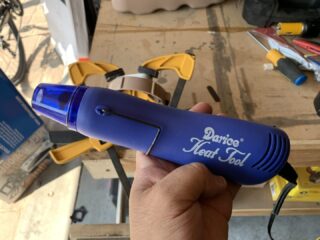
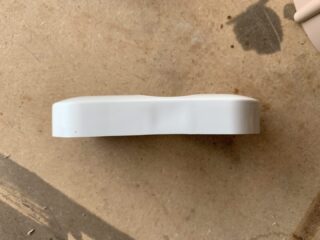
Next, I used the Whale bracket as a template to cut out a piece of the rubber silicone. Then, I drew outlines of the middle opening, cut out the opening with a utility knife, and then cleaned up the edges.
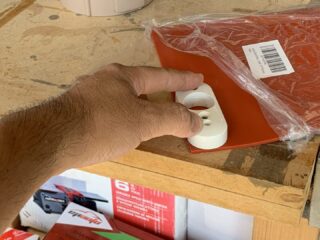
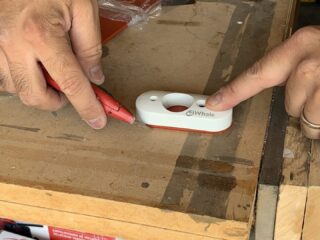
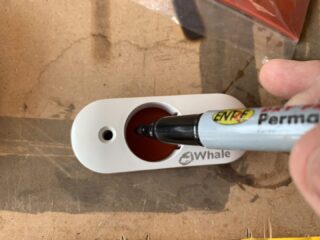
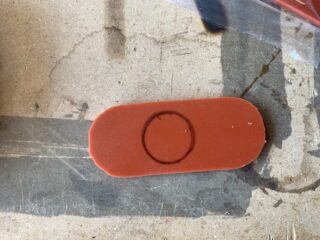
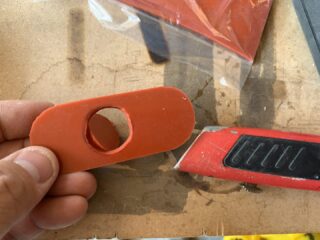
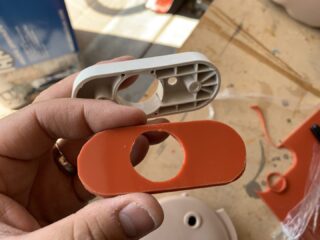
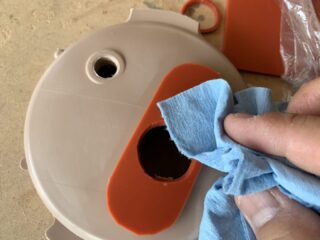
I used some cleaner to clean off the leftover permanent marker lines and then fit everything up. Next, place the gasket, then the cap on top and rotate it until you get it into the final position. Use the supplied mounting screws to screw the cap through the gasket into the cap. This should result in a tight seal between the mounting bracket and the cap.
Adjust the hand pump shaft up and down until you get it at the height you want and tighten the Phillips head screw to hold its position.
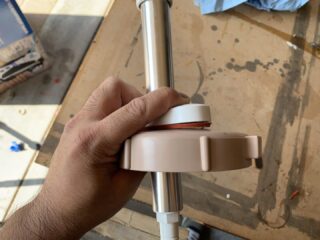
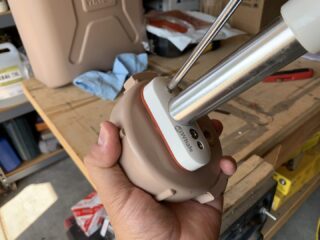
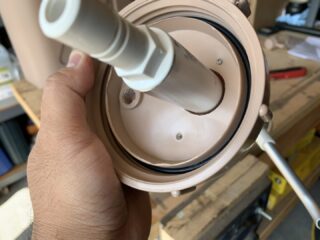
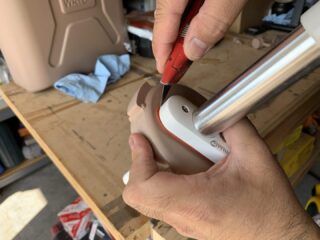
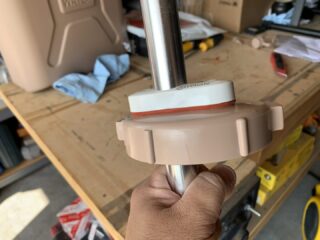
Now, take the silicone tubing and measure out the length from the cap down to the bottom of the Scepter water container and cut the tube a little longer than you might need. Then insert the silicone tubing over the bottom end of the water pump shaft until it is fully attached. Replace the cap and test fitment again and shorten the length of the hose as needed.
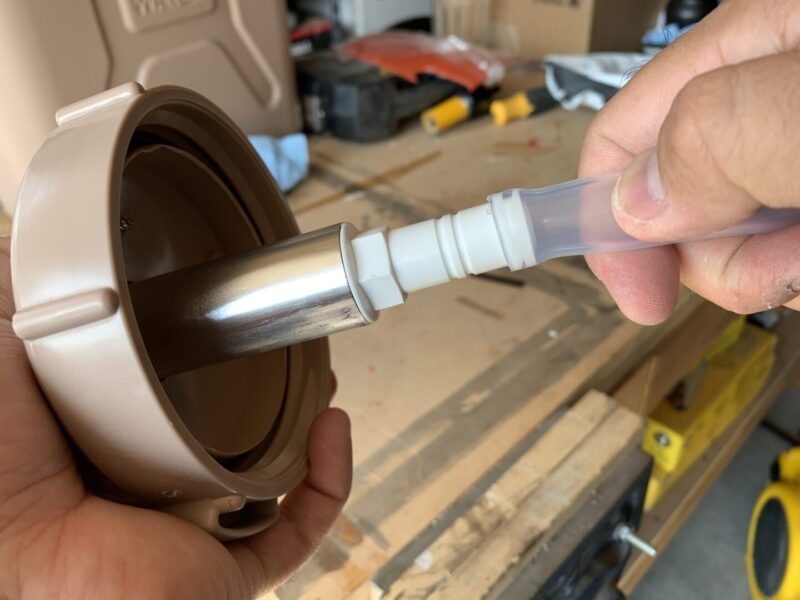
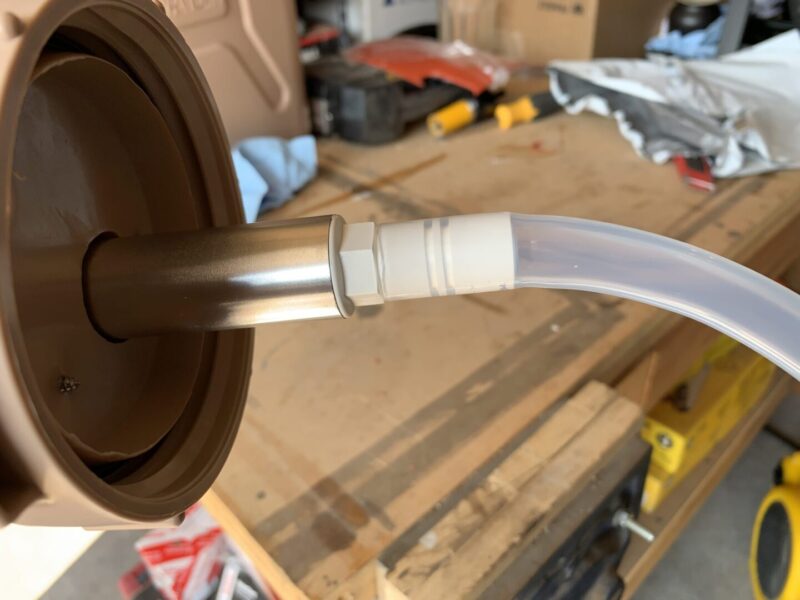
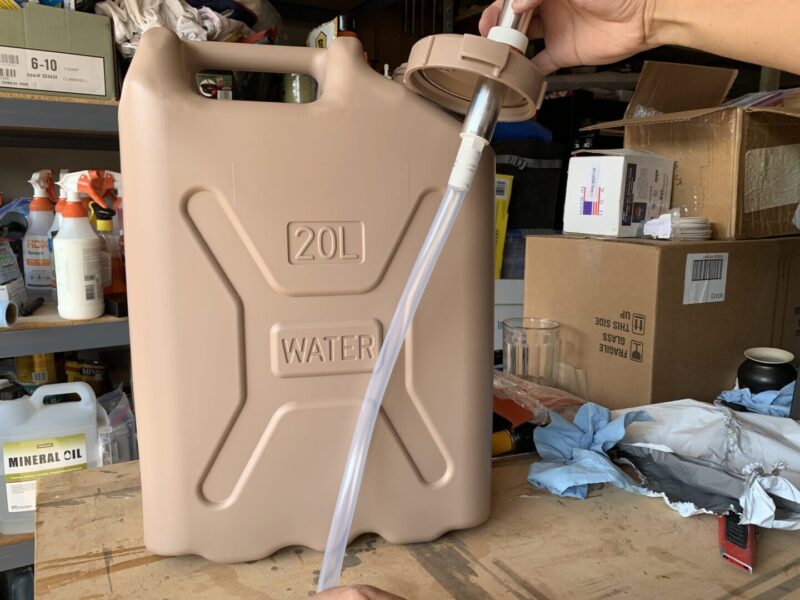
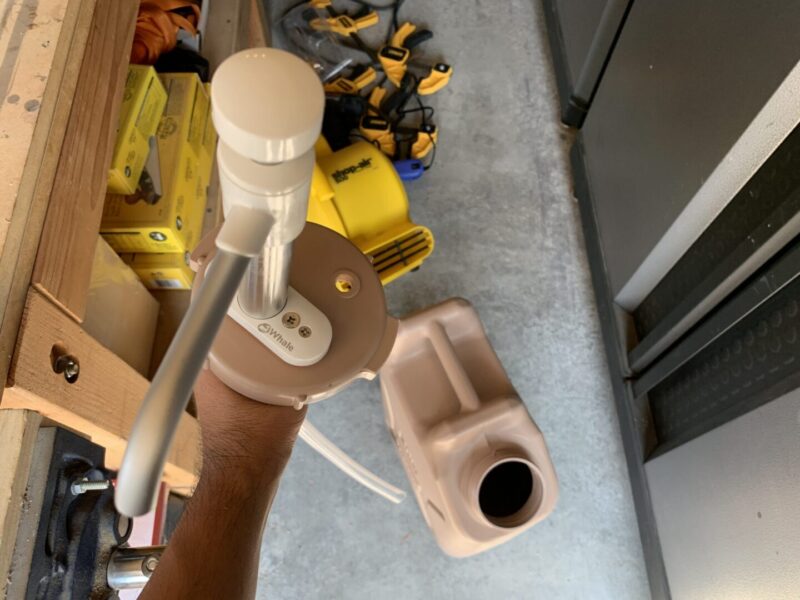
We’re finally at the end! Now it’s time to fill up the Scepter water can.
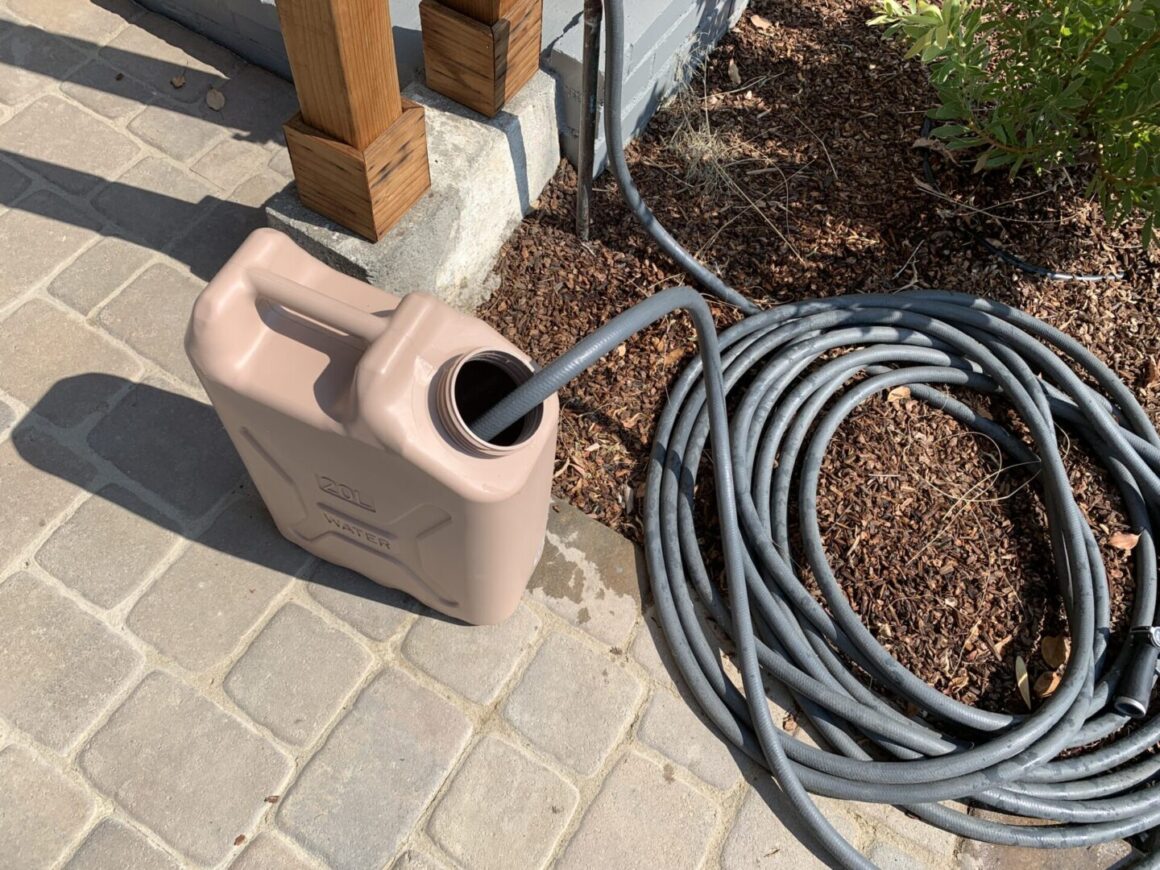
Re-attach the cap with the water hand pump and test out your new portable hand wash station. The Whale MK6 hand-operated water pump pumps water out on both the push and pull strokes of the handle.
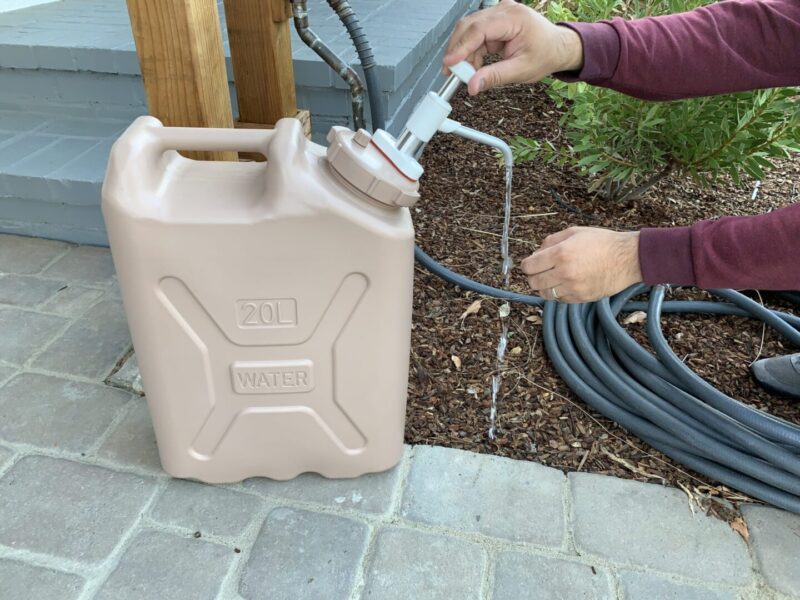
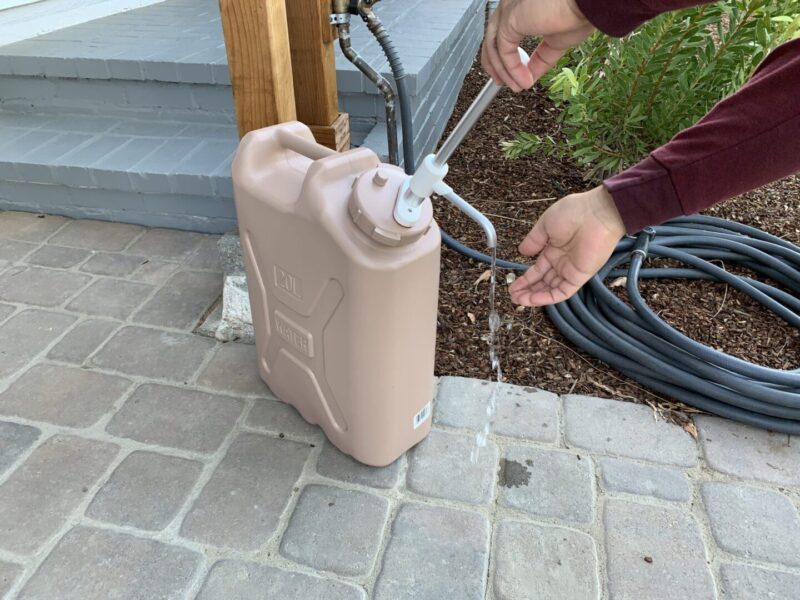
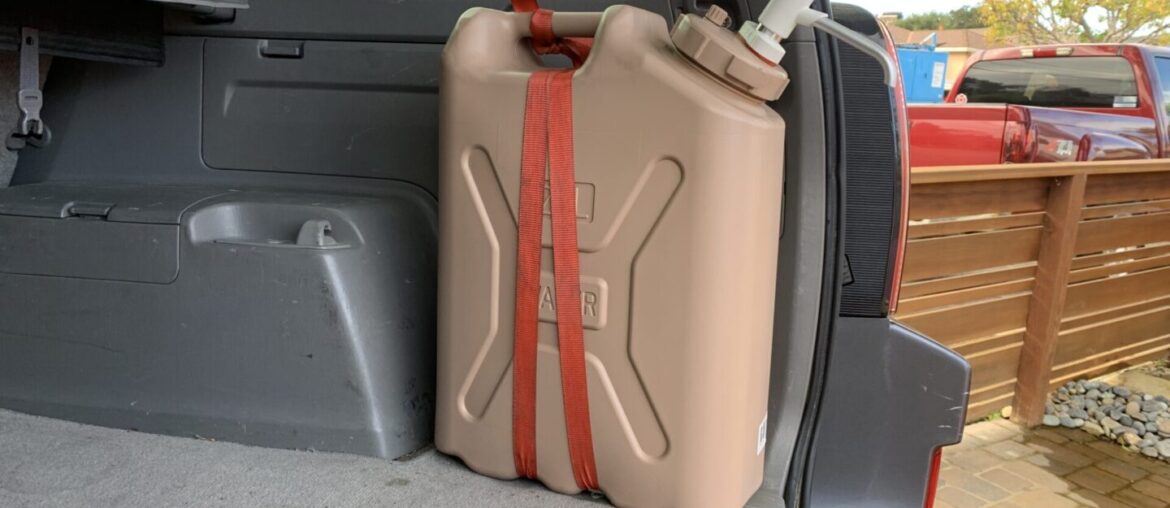
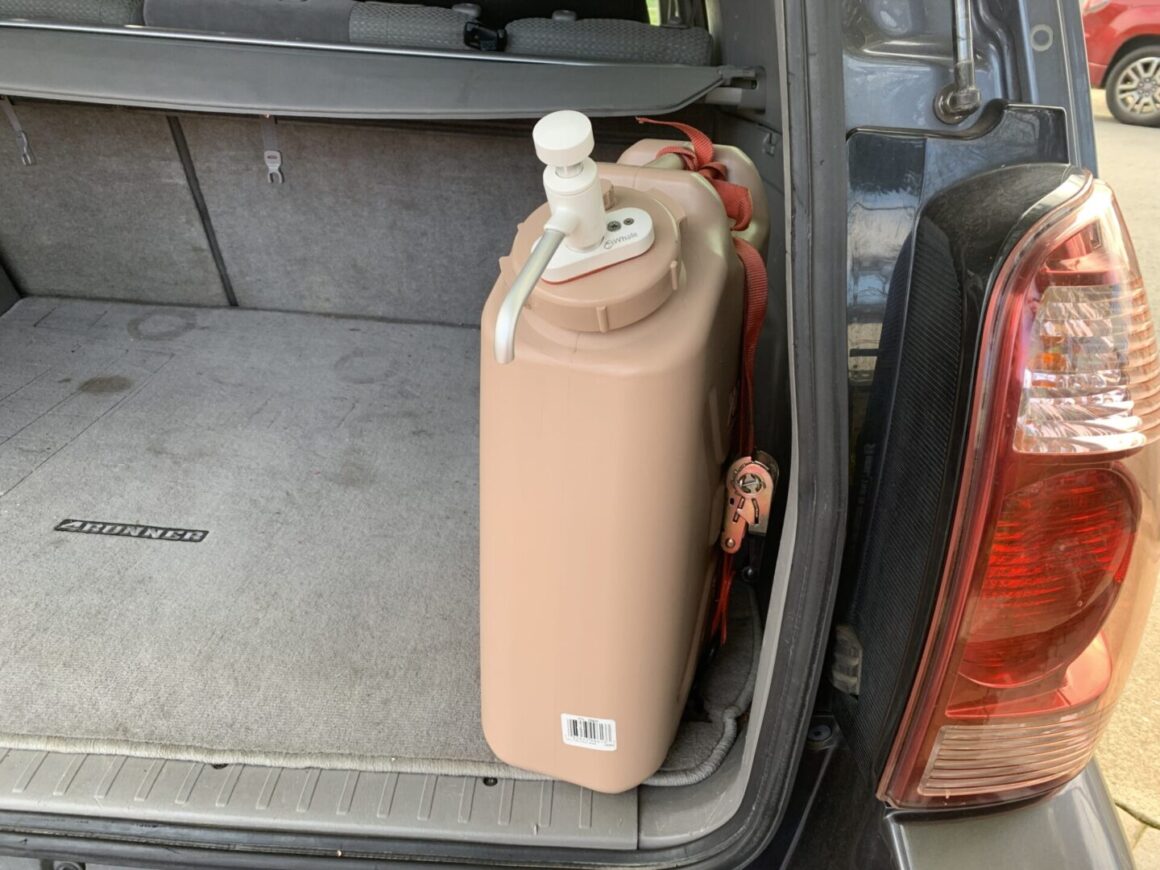
Here is where I have my hand wash station installed in the back of my Toyota 4Runner. It sits out of the way right in front of the passenger’s side wheel well hump and still leaves plenty of room for cargo in the back.
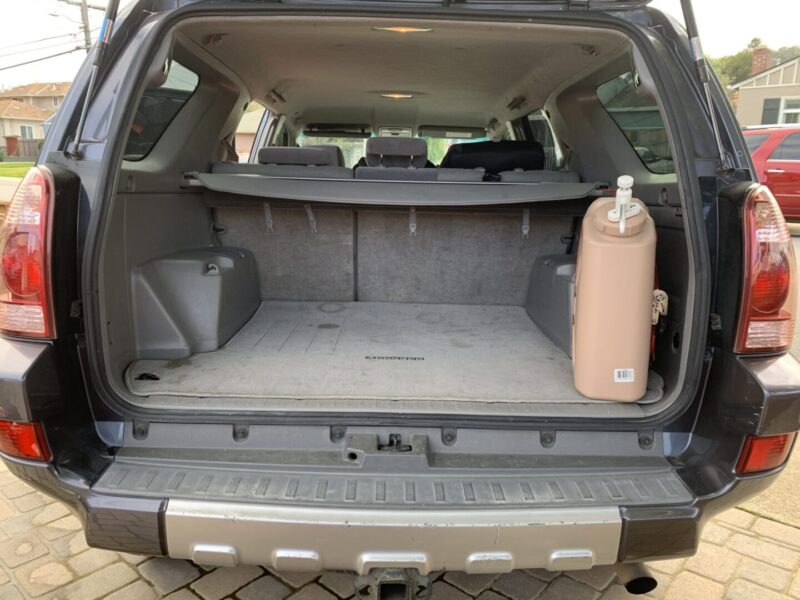
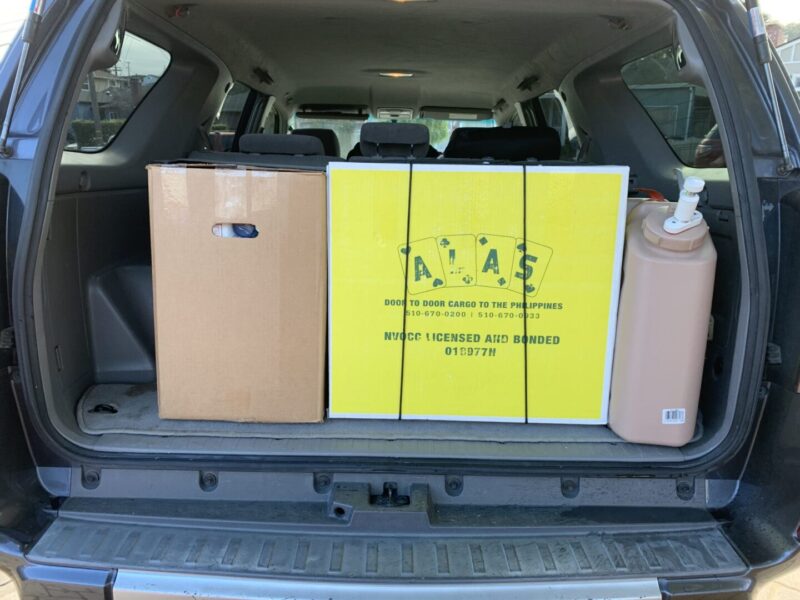
The hand wash station is secured by strapped down to an existing tie-down hook using a ratchet strap. Whenever I need water, I open the tailgate and turn the spout around 180-degrees facing out and use the hand water pump. When I am done, I turn the spout back around 180-degrees and am able to close the tailgate. I can even operate and secure the cargo cover and with some maneuvering.
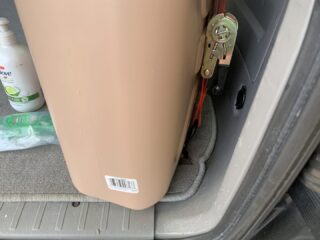
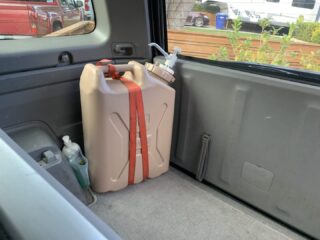
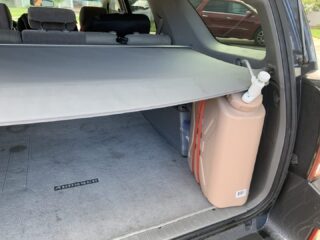
Finally, I leave some hand soap in the vehicle right by the hand wash station so our family can use it when we wash our hands. For hand washing, I recommend using foaming hand soap as it is more easily washed away. Using another type of soap may require more water and more scrubbing to remove. If your car lives in cold weather, then the water coming out of the hand wash station may be very cold. Because of this, you may need to wash your hands a little more quickly. Plus, if you are trying to wash your kids’ hands, you may get lots of complaints and even refusal to wash hands in such cold water.
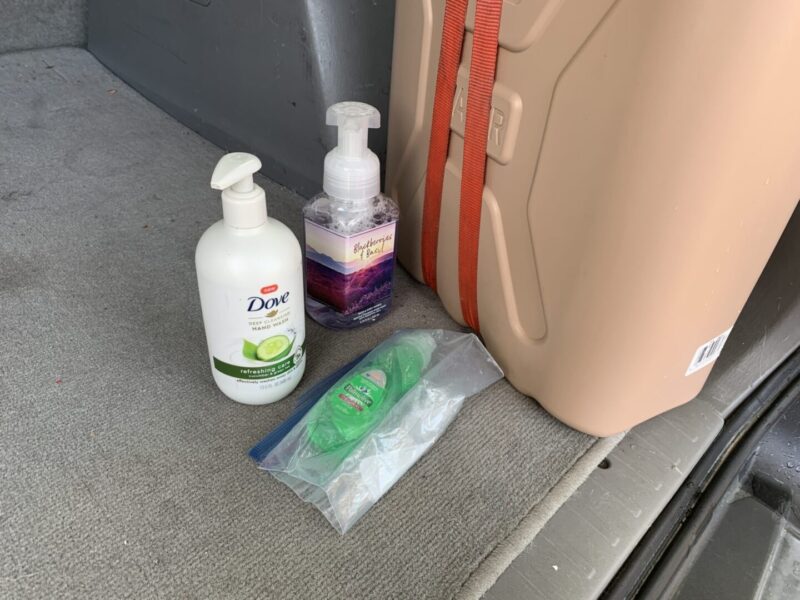
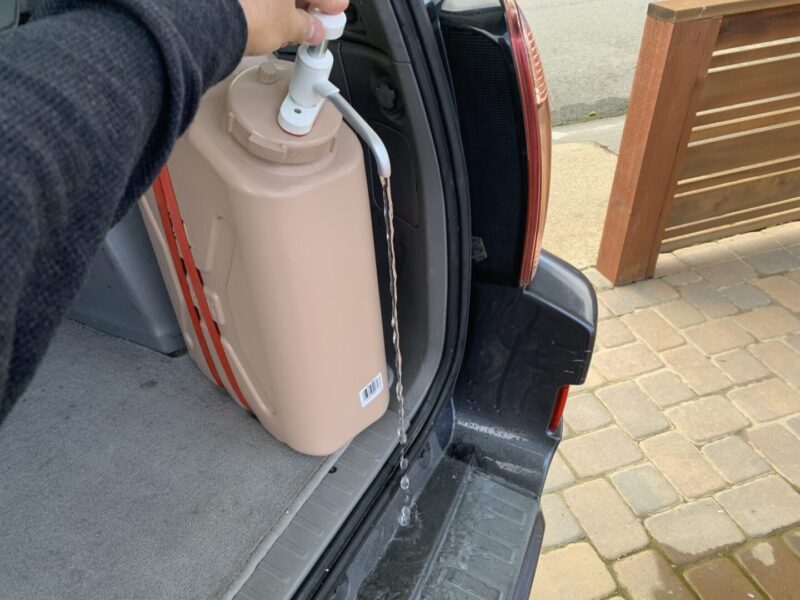
All-in-all, this is one of my favorite things that I’ve done on my vehicle. It’s not your standard car modification, but it is one that has been keeping my family and I safe during this dreaded Covid-19 Pandemic. It has proved itself invaluable for all of the times we’ve had to wash our hands while running errands and going on trips.
Where to Store a Hand Wash Station in your Vehicle
Depending on what type of vehicle you have, you may need to store it and secure it in a different way. If you own a truck, you may be able to store it in the bed of your truck and secure it using a mount or tie-down. Since the Scepter container is intended to sit upright, it is ideal to have it securely strapped down or mounted.
I’ve even seen vehicles with fuel can mounts that will use one of these hand wash stations mounted in them. This provides easy access to the hand wash station whenever you need it.
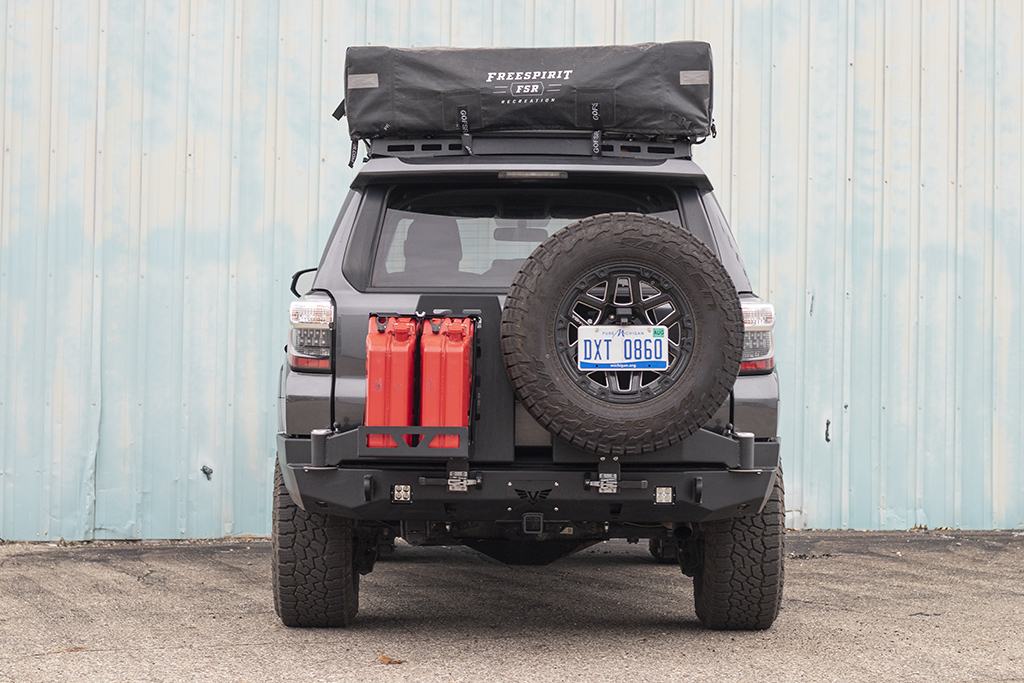
For me personally, I use my 4Runner for almost all of my commuting, errands, and taking my family anywhere we need to go. I don’t own any mounts on the outside of the vehicle, so I simply put the hand wash station inside of the cargo area behind the tailgate. I of course had to securely attach it to the vehicle, otherwise it would fall down as soon as I made any turns.
I used a leftover ratchet strap I had and wrapped it over the top under the handle and tied it down to a cargo mounting ring inside the vehicle. It holds the hand wash station securely and can easily be removed whenever I need to refill the container. It also fits nicely because it is located off to the side of the cargo space and it also allows the tailgate to close if you swivel the spout out of the way.
Alternative Hand Wash Stations
If you want an easier option or just don’t want to deal with making modifications, yet you want a hand wash station in your vehicle, you can easily just buy a water storage container with a spout. These are readily available for purchase labeled as portable water storage containers usually made for camping. There are a range of sizes and shapes that may better fit your particular needs, although some don’t look as nice as a handsome modified hand wash station such as the one shown in this tutorial.
Flexible Plastic Option: WaterStorageCube BPA-Free Collapsible Water Container with Spigot, Food-Grade Camping Water Storage Carrier Jug for Outdoors Hiking Hurricane Emergency, Foldable Portable Water Canteen (1.3 Gallon)
Rigid Plastic Option: REDCAMP 2.1/2.8/3.2/3.4/4/4.9 Gallon Portable Water Container with Spigot, Water Storage Camp Water Jug for Camping Outdoor Hiking
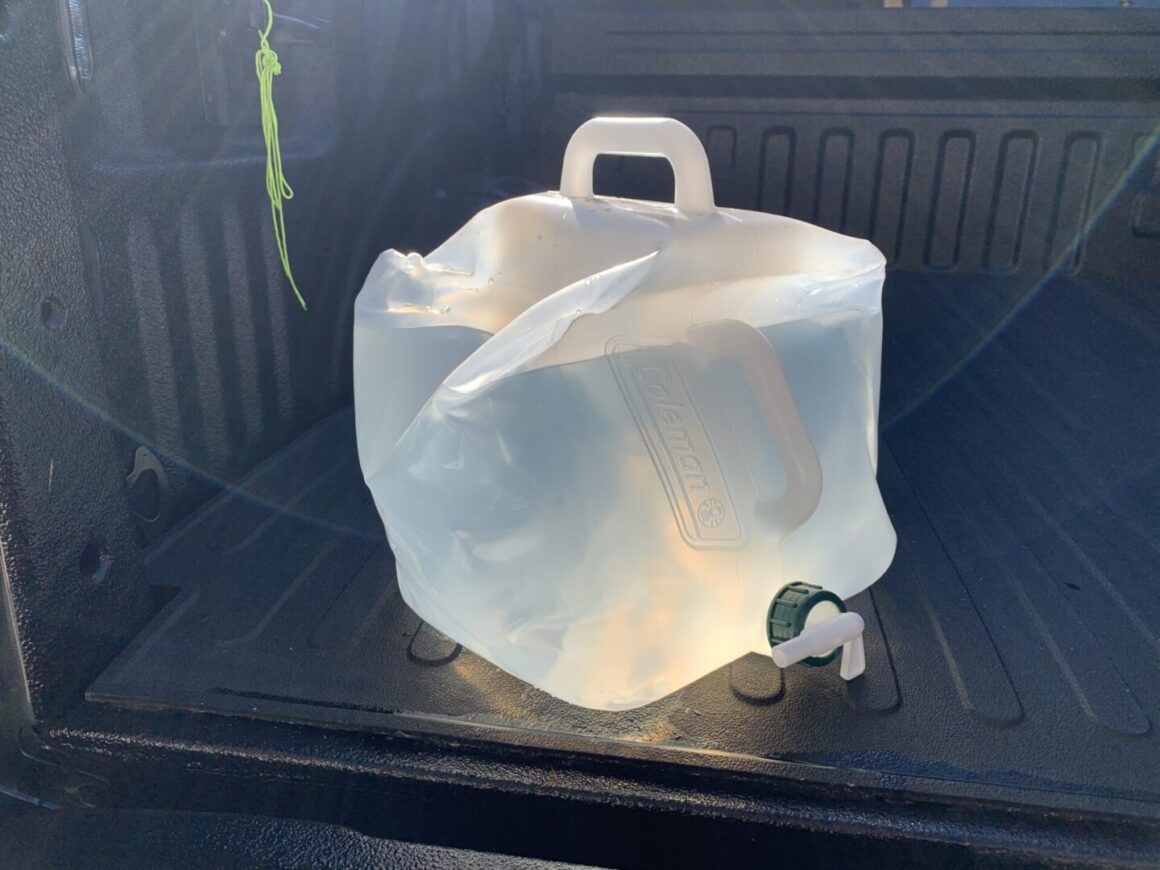
The biggest problem with these ready-for-purchase water containers with spigots is that they have a major problem with leaking. Look at practically any reviews on Amazon products and you’ll see a lot of people having problems with leaking. Even the Coleman one that my wife purchased below leaks (see the second photo below.)
In addition to the leaking problem, you should be aware of a few things when you purchase one of these as a hand washing station, as you can quickly tell from the images below.
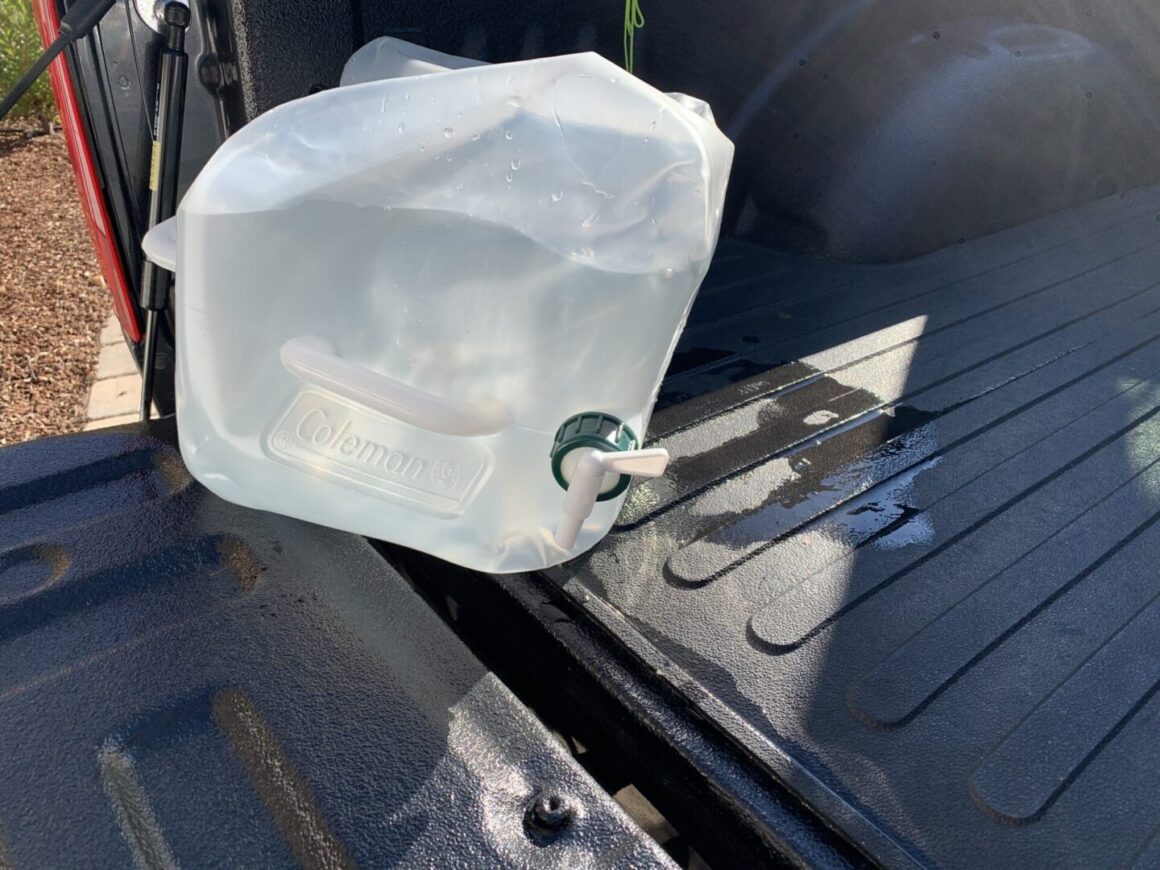
Spigot Leaks
First, check reviews to see if there are significant complaints about leaks. A quick search on Amazon for some of the top rated water containers with spigots have a slew of bad reviews talking about leaking spigots. If you have one of these hand wash station stored inside of your vehicle, you definitely don’t want any possibility of it leaking inside your vehicle. Since there can be a considerable amount of water in these containers, having it leak into the carpet or upholstery in your car can cause a serious mess and necessitate an extensive clean-up effort.
It may be hard to find a product without an issue with leaks, but perhaps you can find one with minimal issues. Leaking water is one of the main reasons I went with my own modified hand wash station.
Size and Shape
Obviously, you can go with a variety of different sizes for your hand wash station. A smaller one is quicker to fill up and easier to move around, but it also requires refilling more often. You also might find yourself in an inconvenient situation where you need more water and you’ve run out.
The shape is also something you want to consider. If the water container is taller, then you definitely need to secure it to the vehicle somehow to make sure it doesn’t keep falling down when you’re driving. This becomes more problematic especially when the container is filled up.
If the shape is more square or wider, then it is more stable and you may not need to tie it down at all. Regardless, you should be mindful of where the spigot is located. The spigot is generally located lower on the container since it relies on gravity for water to flow out of the spigot. A lot of these containers can be stored in one position so it doesn’t easily get knocked over, then it can be rotated 90 degrees so that spigot ends up on the bottom for dispensing. The water container can then be rotated back for more secure transport.
Container Material
Some containers are made of a rigid plastic material; these will have a definite shape. They are typically a bit more durable than the flexible plastic containers; these usually will need to be secured during transport as they can more easily knock over especially when filled with water.
Other containers are made of a flexible plastic material. These are usually marketed as emergency or camping type of water storage containers. These can also be used as a hand wash station. When transporting these containers even with filled with water, they tend to have a little more stability compared to rigid plastic containers.
References
https://www.dangerrangerbear.com/scepter-water-can-hand-pump-conversion/

