One very common issue on the 4th generation Toyota 4Runner is an oil leak that occurs at the front corner of the passenger side valve cover. Changing out the valve cover gaskets on both passenger and driver sides can be a bigger job, but mainly because it can be a bit overwhelming with the amount of parts you need to disconnect or remove. Therefore, it’s very important to be organized when removing parts and to document everything you take apart. Photos along the way help tremendously in guiding you to put everything back in the right order. I hope this guide helps you if you need to replace the valve cover gaskets on your 4.0L V6 (1GRE-FE) 4th Generation Toyota 4Runner.
One of the most common encounters that you’ll have when you start increasing the size of your wheels and tires is the front tires rubbing on the fender liner of your 4Runner. The rubbing will normally occur when your wheel is turned full-lock to the left or to the right. Since there are countless different combinations of wheels, tires, and lifts, everyone will experience something different. This guide will outline the steps it takes to do a fender liner mod so that you can eliminate the front tires rub.
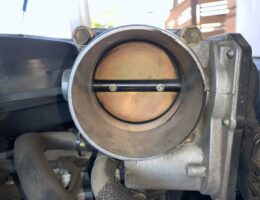
Cleaning the throttle body on a 4th generation Toyota 4Runner (1GRE-FE 4.0L V6 engine) is not a difficult job. It requires removal of the air intake and air filter housing to gain access to the throttle body. You should also consider replacing the throttle body gasket since you will already have access to it.
The Mass Air Flow (MAF) sensor is a device that is located at the air intake, which measures how much air is coming into the engine and then tells the vehicle how much fuel it needs to inject. Over time, the MAF sensor can become dirty and require cleaning. Since the sensor on these vehicles utilizes an extremely delicate “hot wire”, used to measure air flow, it cannot be cleaned with regular cleaners or even brake cleaner. A mass air flow sensor cleaner is required to safely clean the hot wire.
If you own a 4th generation Toyota 4Runner and are still running OEM wheels, you may be looking into upgrading your wheels. One of the common things that people look to do is to upgrade to wheels that have more negative offset. This effectively pushes your wheels out towards the outside of the vehicle for a more aggressive stance. A popular option and one that I’m a big fan of is using 5th generation Toyota 4Runner OEM wheels to replace the stock 4th generation ones.
The serpentine belt (also known as the drive belt) is a reinforced rubber belt that delivers power from the crankshaft to multiple accessories of a vehicle such as the air conditioning, alternator, water pump, etc. Since it drives critical components of a vehicle, it is important to perform regular inspections of the serpentine belt and to replace it when it is required to do so. he replacement of the serpentine belt can be a quick and easy job if you are aware of a couple things that could possibly throw you off-course.
The spark plug replacement on a 4th generation Toyota 4Runner is a job that you will need set aside 2-3 hours for. The replacement of the spark plugs themselves doesn’t take long, but most of the time will be spent removing components in the engine bay to get access to the spark plugs. I recommend using a step stool to get some additional height as you will be working closer to the middle and back of the engine bay; this is especially needed if you have a 4Runner that has a lift on it. This guide is written for the 4.0L V6 (1GRE-FE engine code) on the 4th Generation Toyota 4Runner.
It’s a common issue on the 4th generation Toyota 4Runner to encounter the ‘VSC TRAC’ and ‘VSC OFF’ warning lights come on randomly and stay on. These lights may come on whenever you have an engine trouble code, which will be apparent when the engine light also comes on at the same time. However, if you are experiencing only the ‘VSC TRAC’ and ‘VSC OFF’ lights on without the check engine light on, then there might be a quick fix to getting rid of those lights.
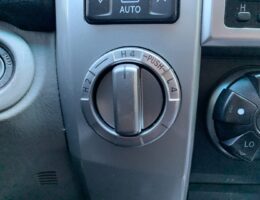
If you’re a 4th generation Toyota 4Runner owner, you may have heard of the phrase, “use it or lose it” being used. This term basically means that you should use your four-wheel drive system on a regular basis, otherwise it may stop working later down the road. The electronically-controlled 4WD actuator that is located inside of the transfer case can potentially seize up if not used for prolonged periods of time. Since the actuator is located inside of the transfer case, the transfer case itself needs to be opened before gaining access to the actuator. As you can conclude, if the 4WD actuator fails, you will end up with a costly repair. So “use it or lose it” to save yourself from future headaches.


