Wagner Spraytech Spray Tent: Amazon / Walmart
Not everyone has a garage where they can spray paint freely without the worry of flying debris getting on their paint surface. Even if you do have the shelter of an enclosed space, you’ll still have to worry about overspray. If you’ve ever sprayed paint before, you’ll know how important it is to keep your paint surface clean and how much overspray can travel.
Personally, I’ve needed to paint some parts on my car and I only have a single-car garage that has a bunch of stuff in it. Therefore, I don’t have room inside to paint, nor can I afford to get overspray on any of the items inside my garage. I also don’t really have a place outdoors to spray paint freely. I needed a solution to this problem, which is where a spray paint tent comes in.
There are a number of paint tents available on the market, with many looking similar to one another. I needed a very large one that would fit car bumpers as I needed to paint mine. I also wanted a paint tent from a more well-known brand so that I could be a little more reassured on the quality. Furthermore, I could rely on some customer support if I had any issues with the tent. The one that fits the bill is the Wagner Spraytech Large Spray Paint Tent and will be the one I’m reviewing here.
Wagner Spraytech Spray Paint Tent Size
The large version of the Wagner paint tent measures 9′ wide, 5′-5″ high, and 6′ deep. If you don’t need as large of a spray tent, Wagner also sells a medium paint tent (4′-7″ wide, 5′-6″ high, 4′-7″ deep) and a small paint tent (2′-11″ wide, 3′-3″ tall, 2′-6″ deep).
| Wagner Spraytech Spray Paint Tent | Width | Height | Depth |
|---|---|---|---|
| Large | 9′ | 5′-5″ | 6′ |
| Medium | 4′-7″ | 5′-6″ | 4′-7″ |
| Small | 2′-11″ | 3′-3″ | 2′-6″ |
Assembly of the Wagner Spraytech Spray Paint Tent
The entire large spray tent comes packaged in this carrying bag. Once you take it out, you’ll find the tent itself and poles that will need to be extended and assembled.

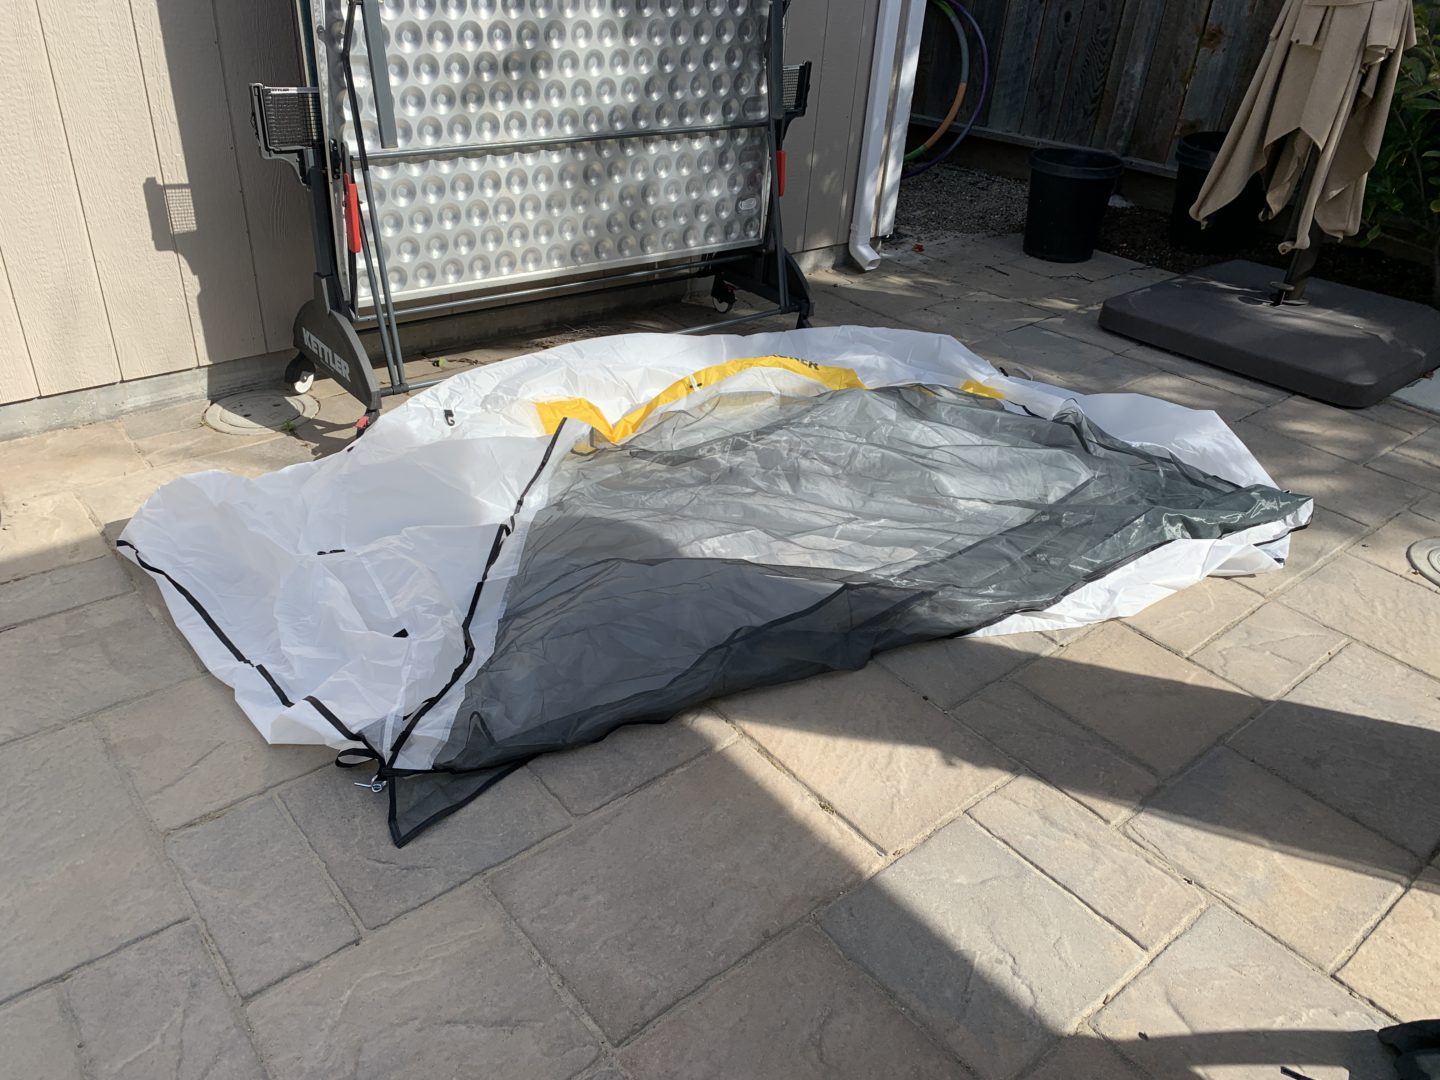
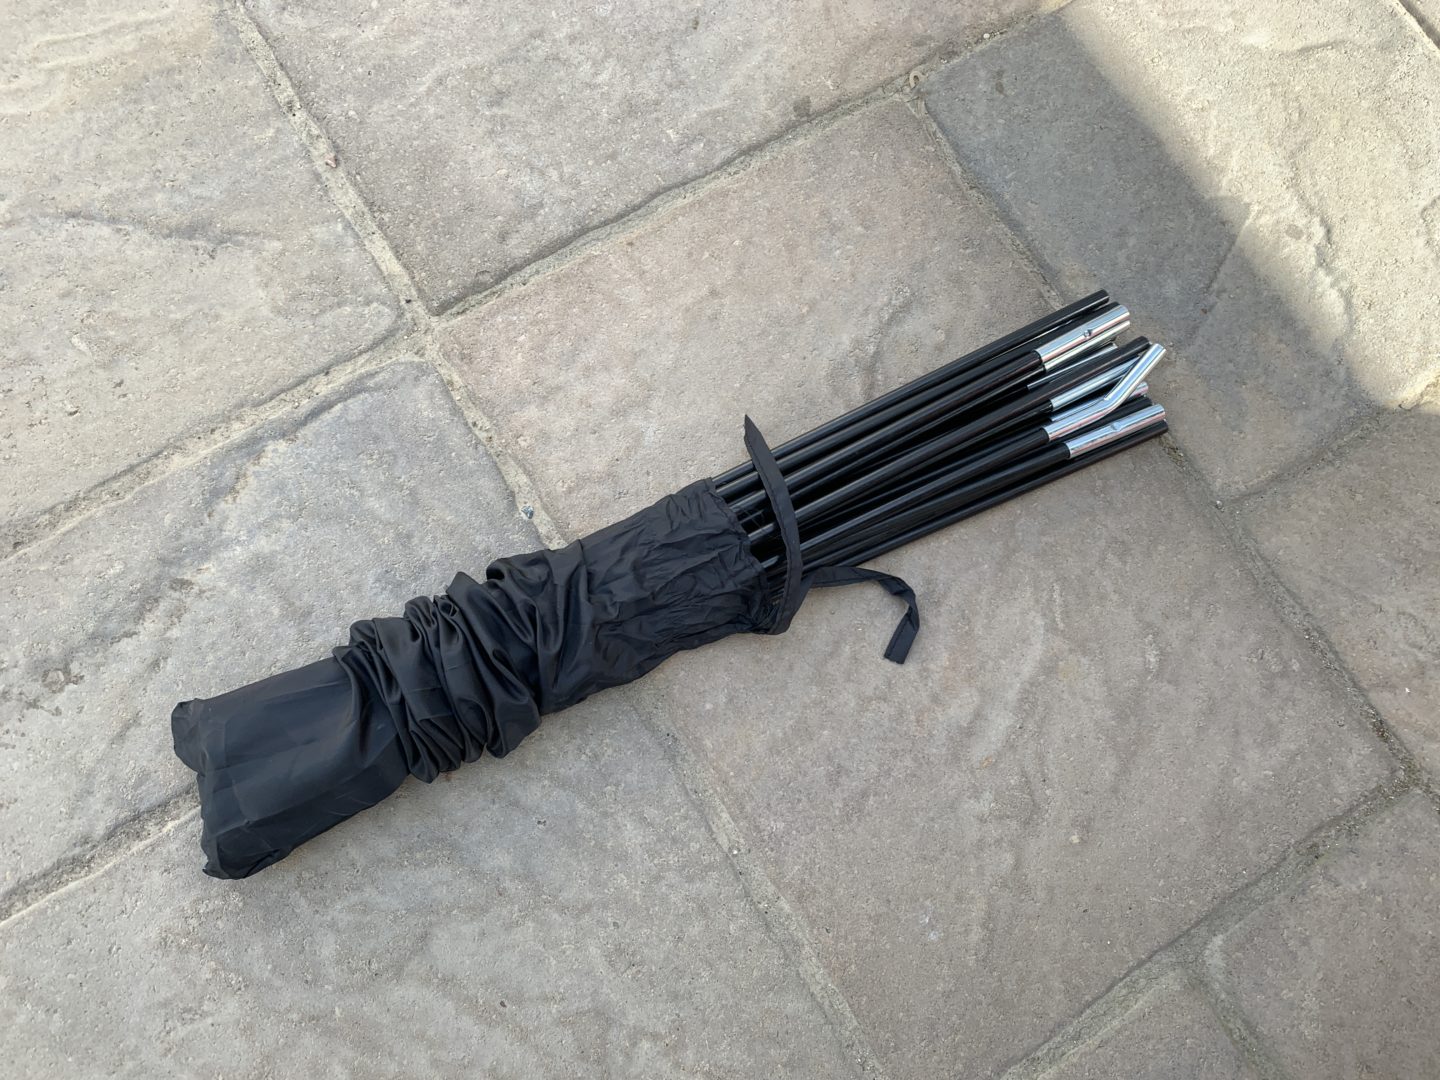
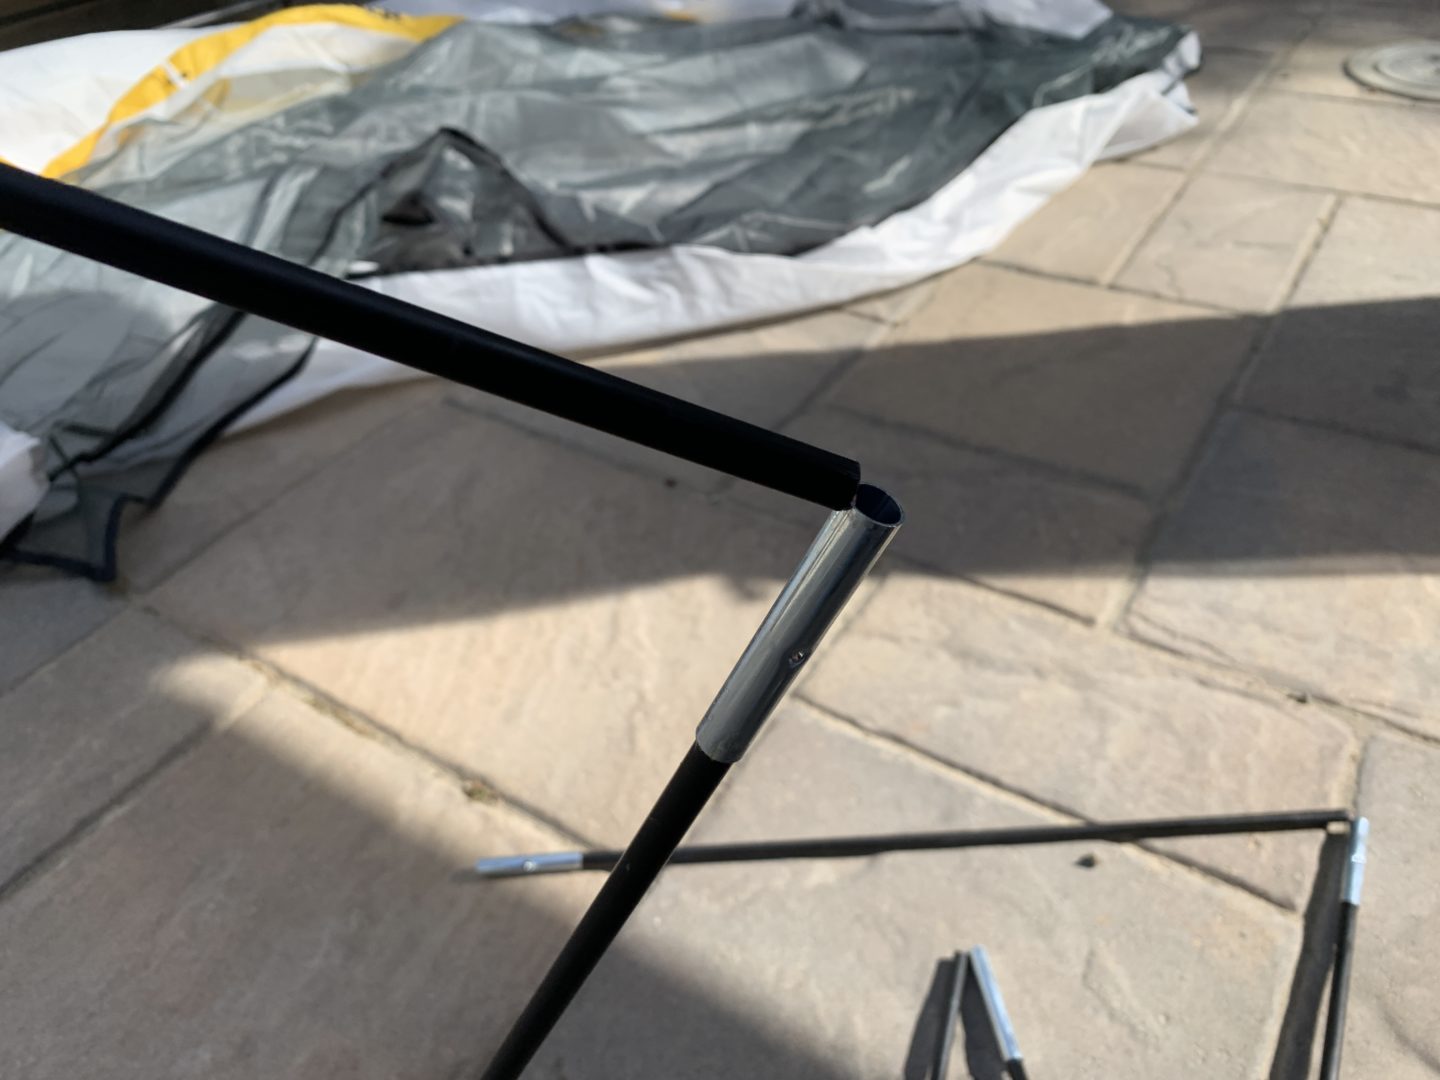
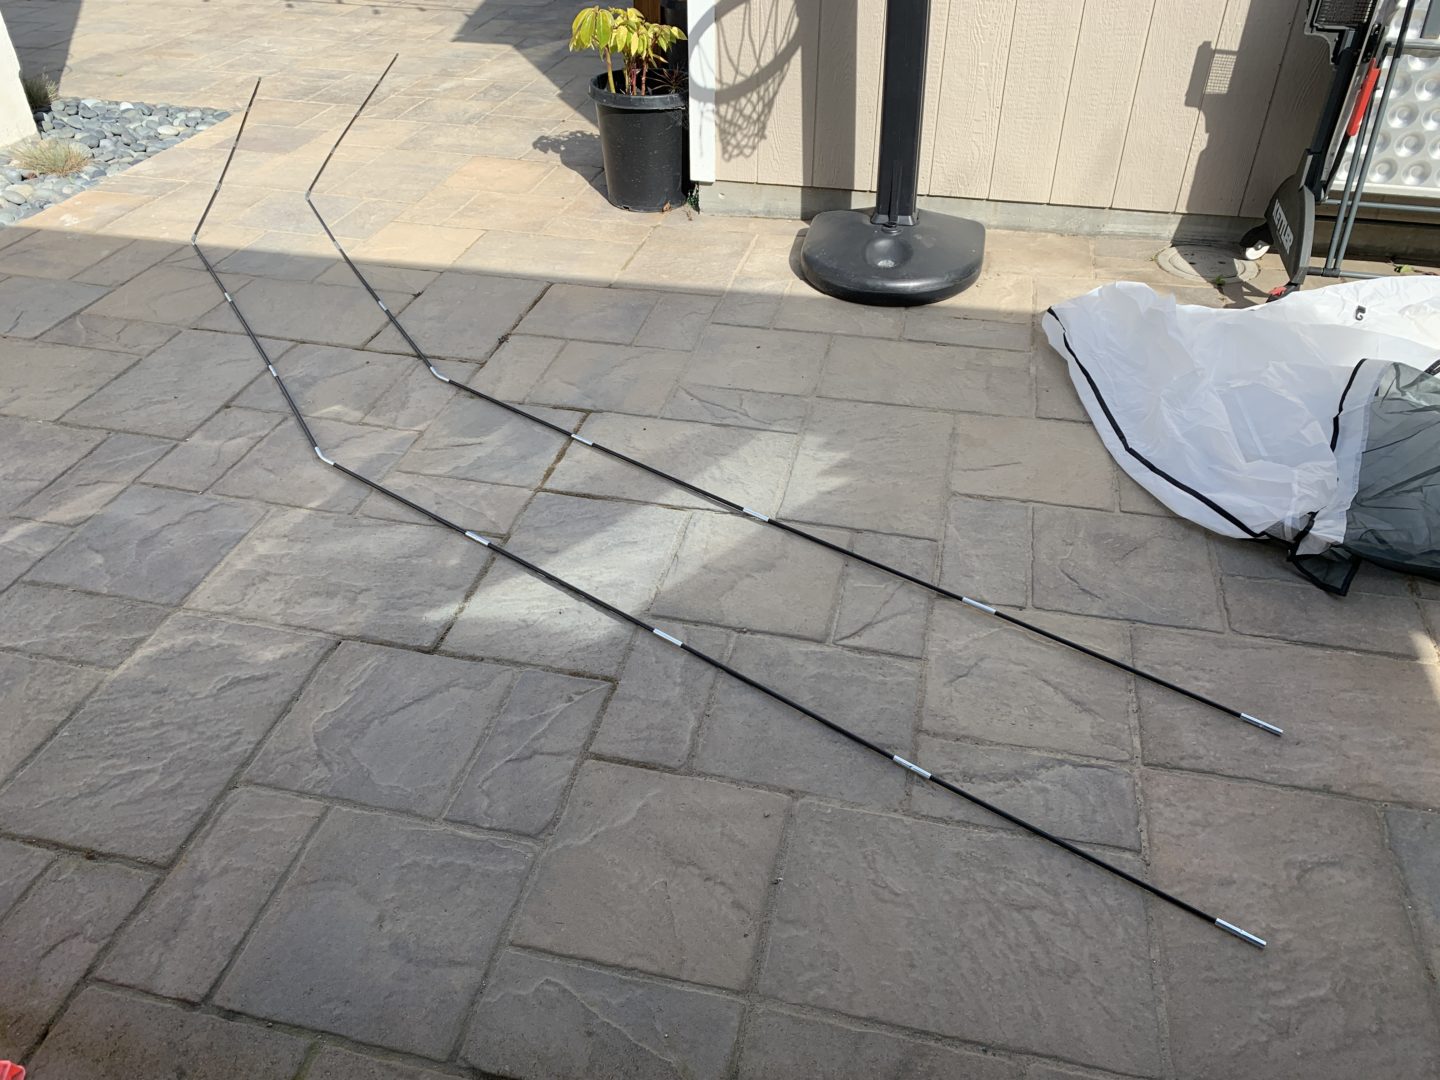
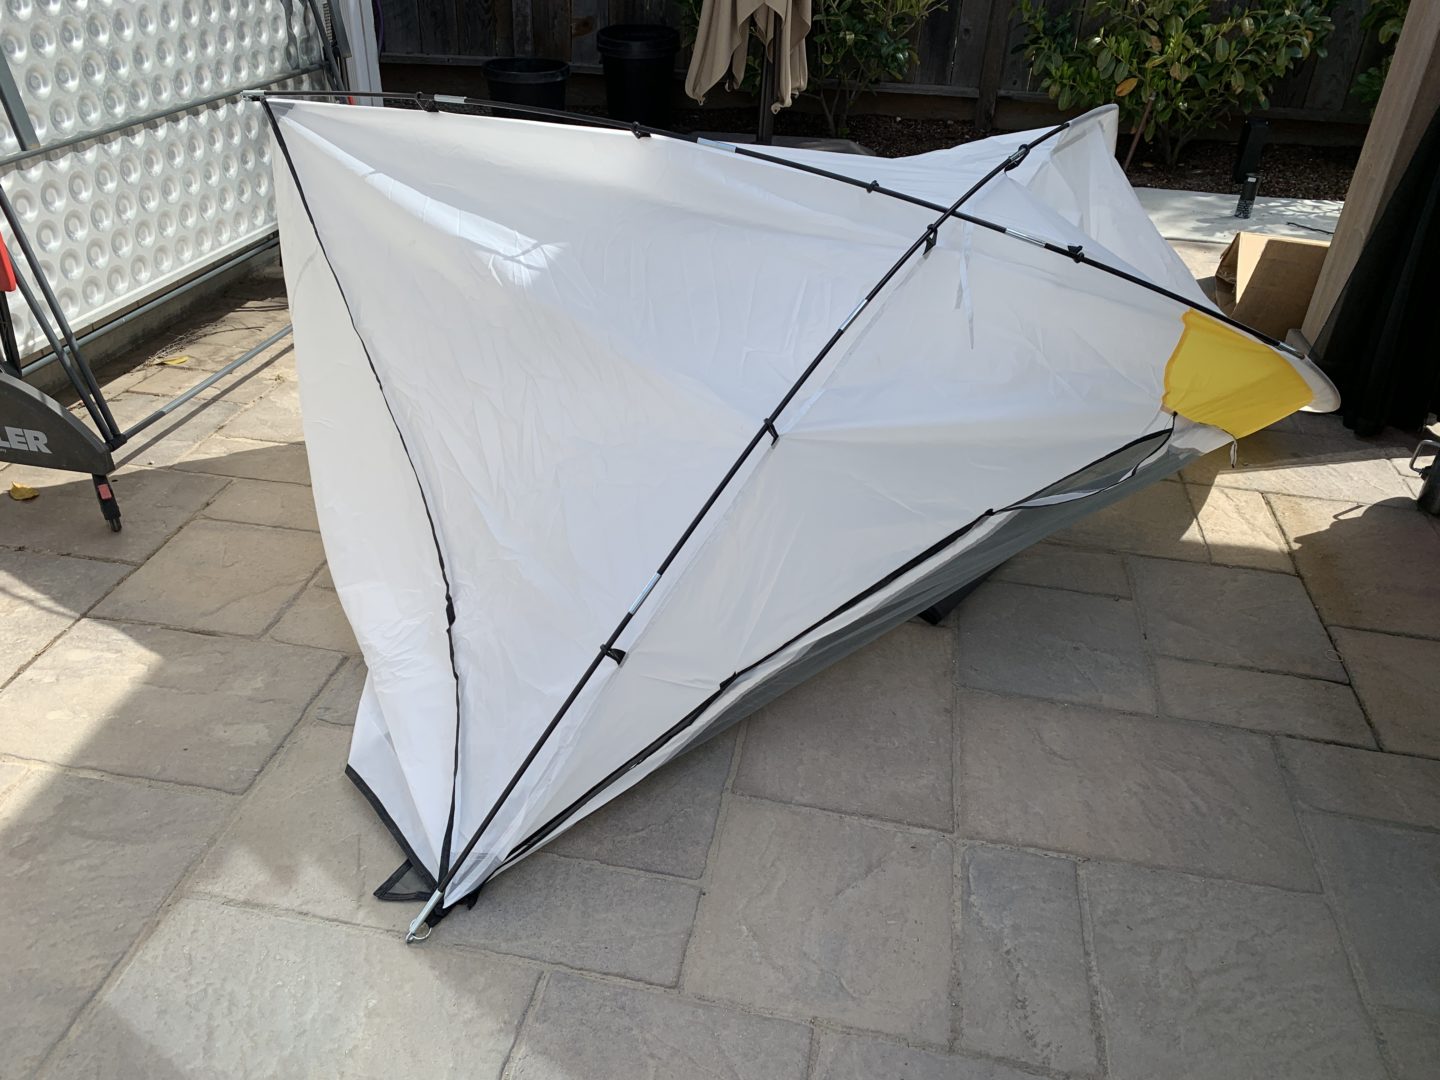
You will need a lot of room when you extend the poles. The poles have a stretchy rope run internally and are connected via metal links. To connect them, you simply insert the poles into the metal links until it is fully lengthened. When completely extended, it will look like the 3rd image below.
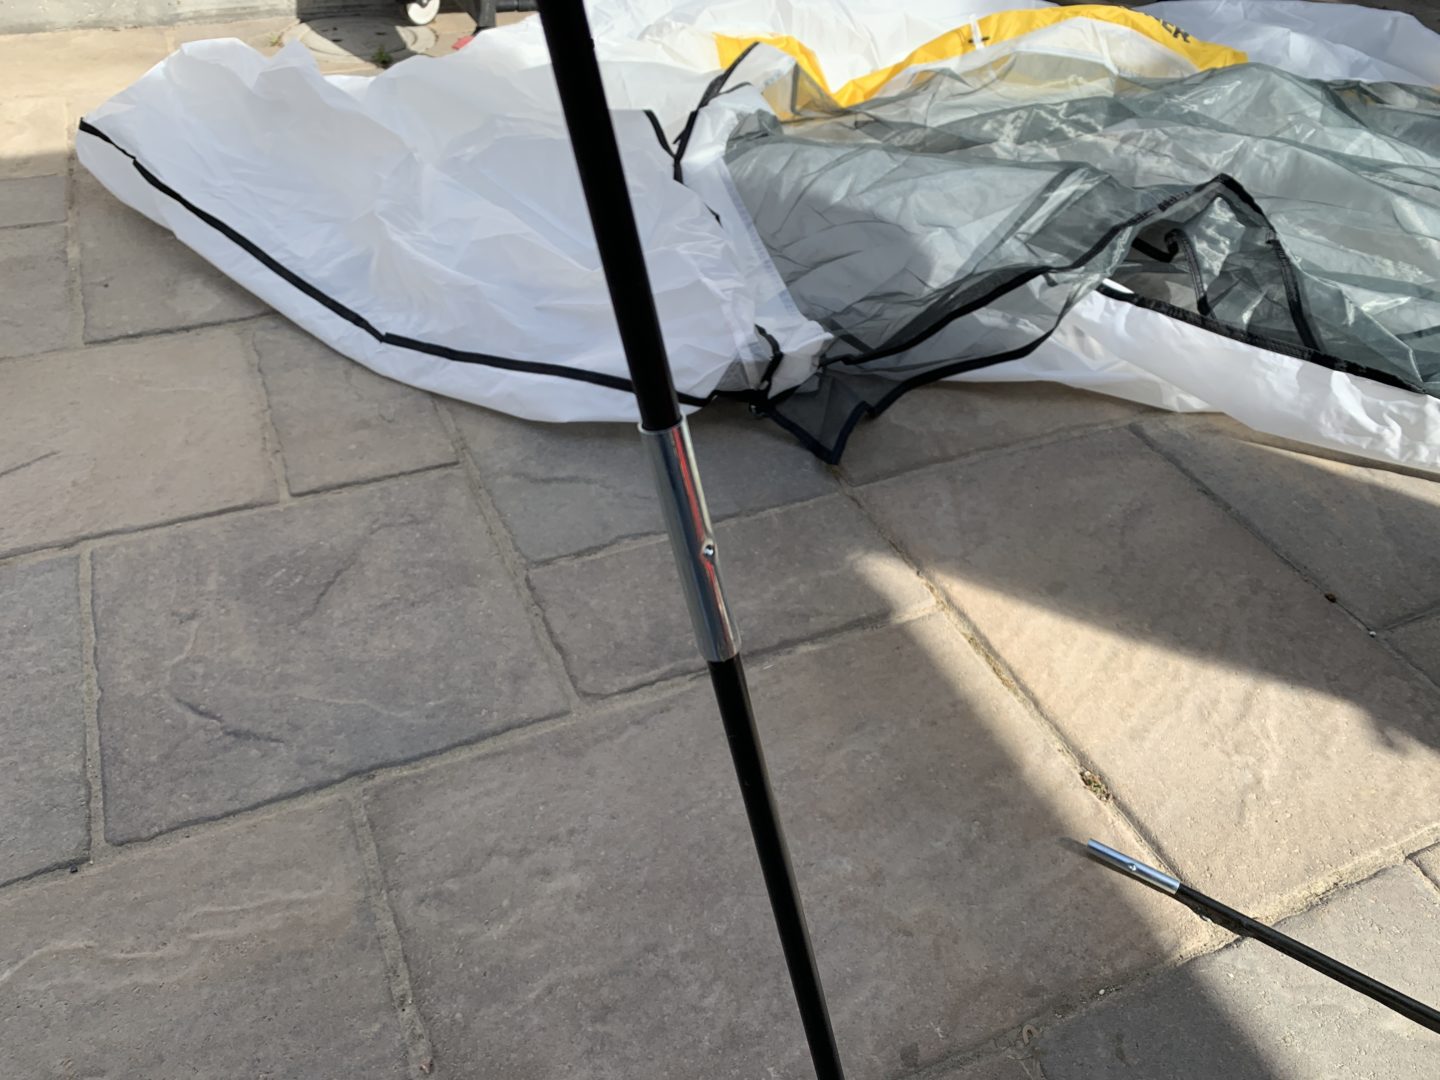
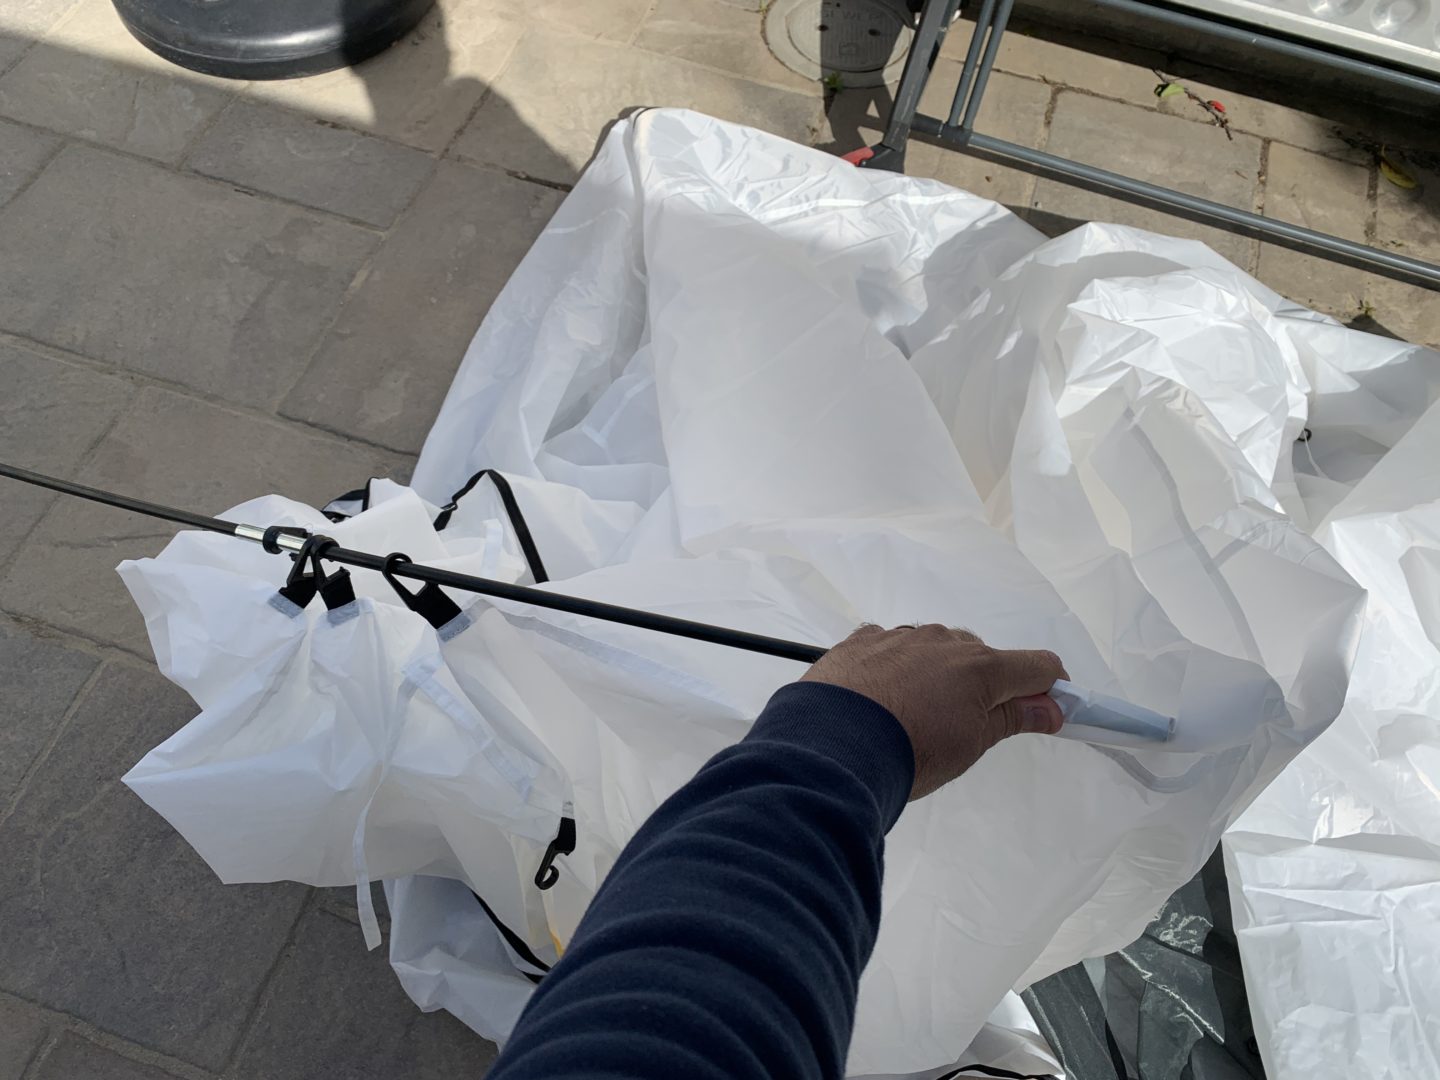
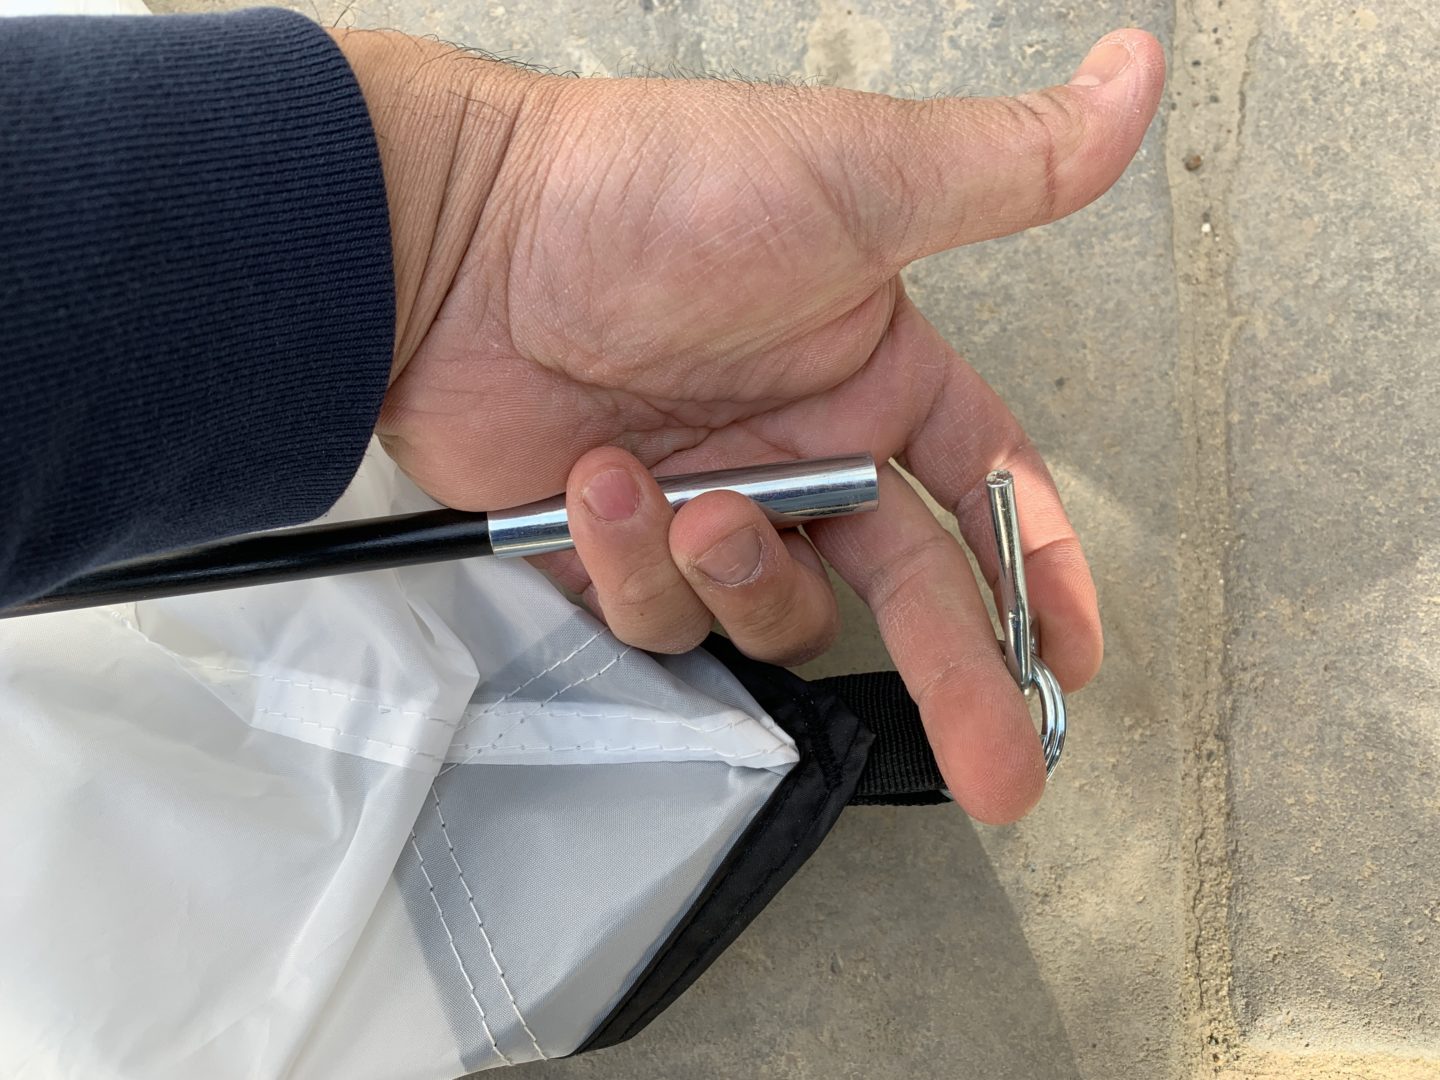
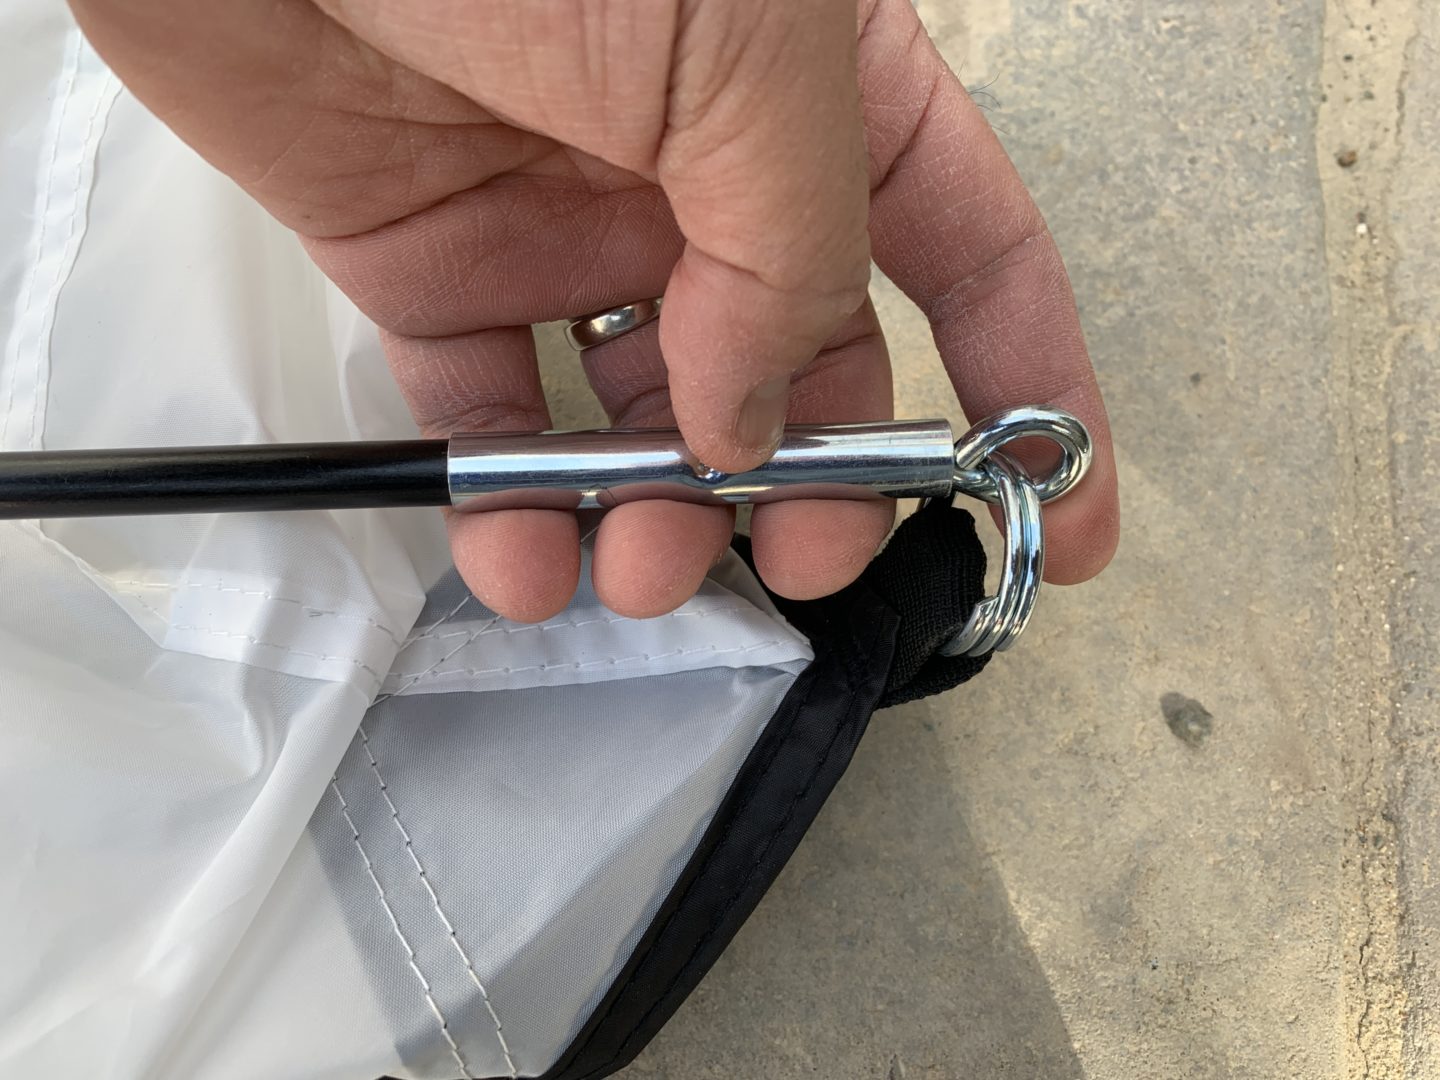
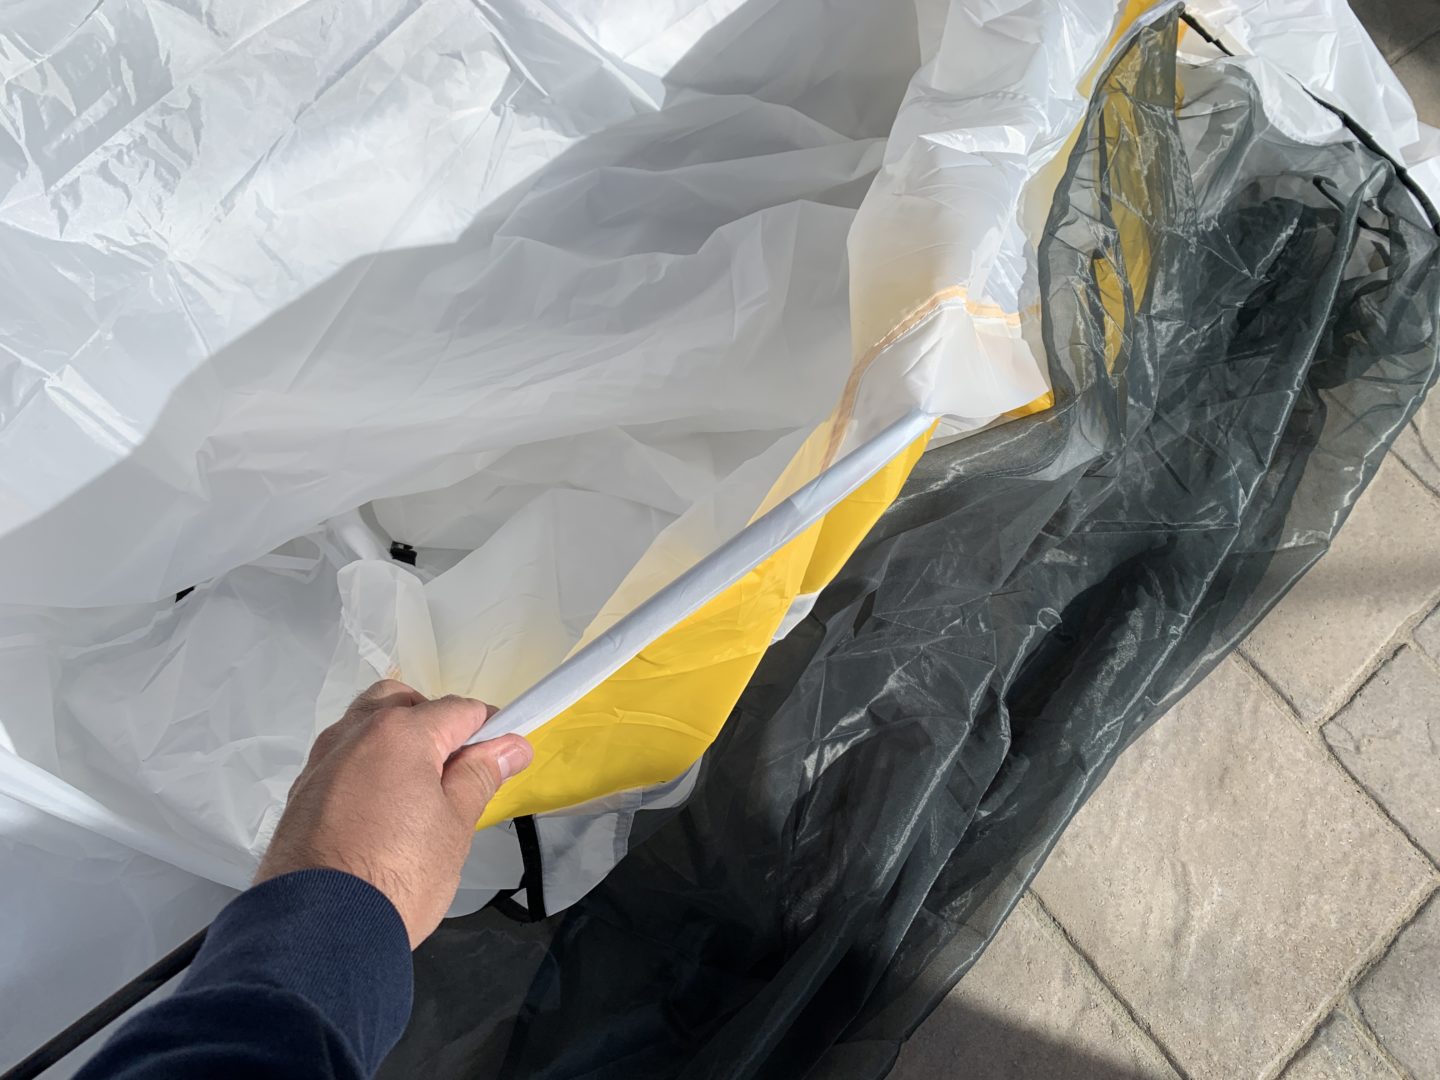
Run one of the extended poles through the center sleeve of the tent, and on both ends, you’ll need to insert the pin into the opening of the pole end. Then clip the plastic clips onto the pole. Follow the instructions provided with the tent and the image of the completed spray paint tent to see how the pole should be run.

Then, run the second pole through the other sleeve in the same fashion as the first pole. The poles should be run in an X-pattern and should look like the images below. The poles should be crossing on both the left side and right side of the tent.

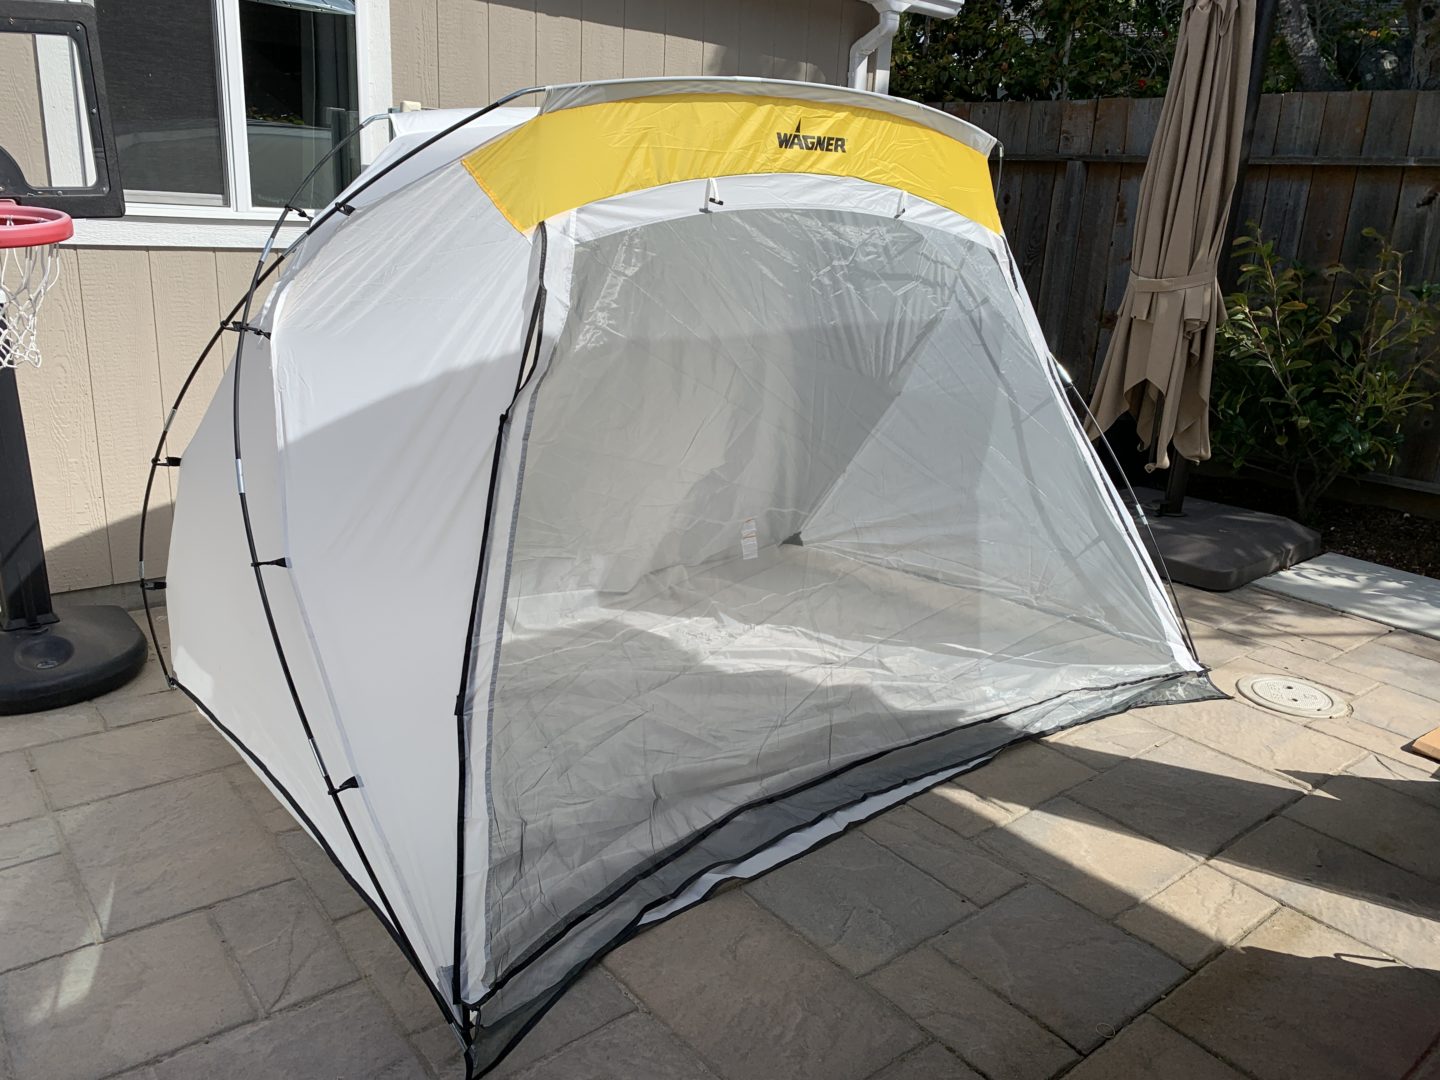
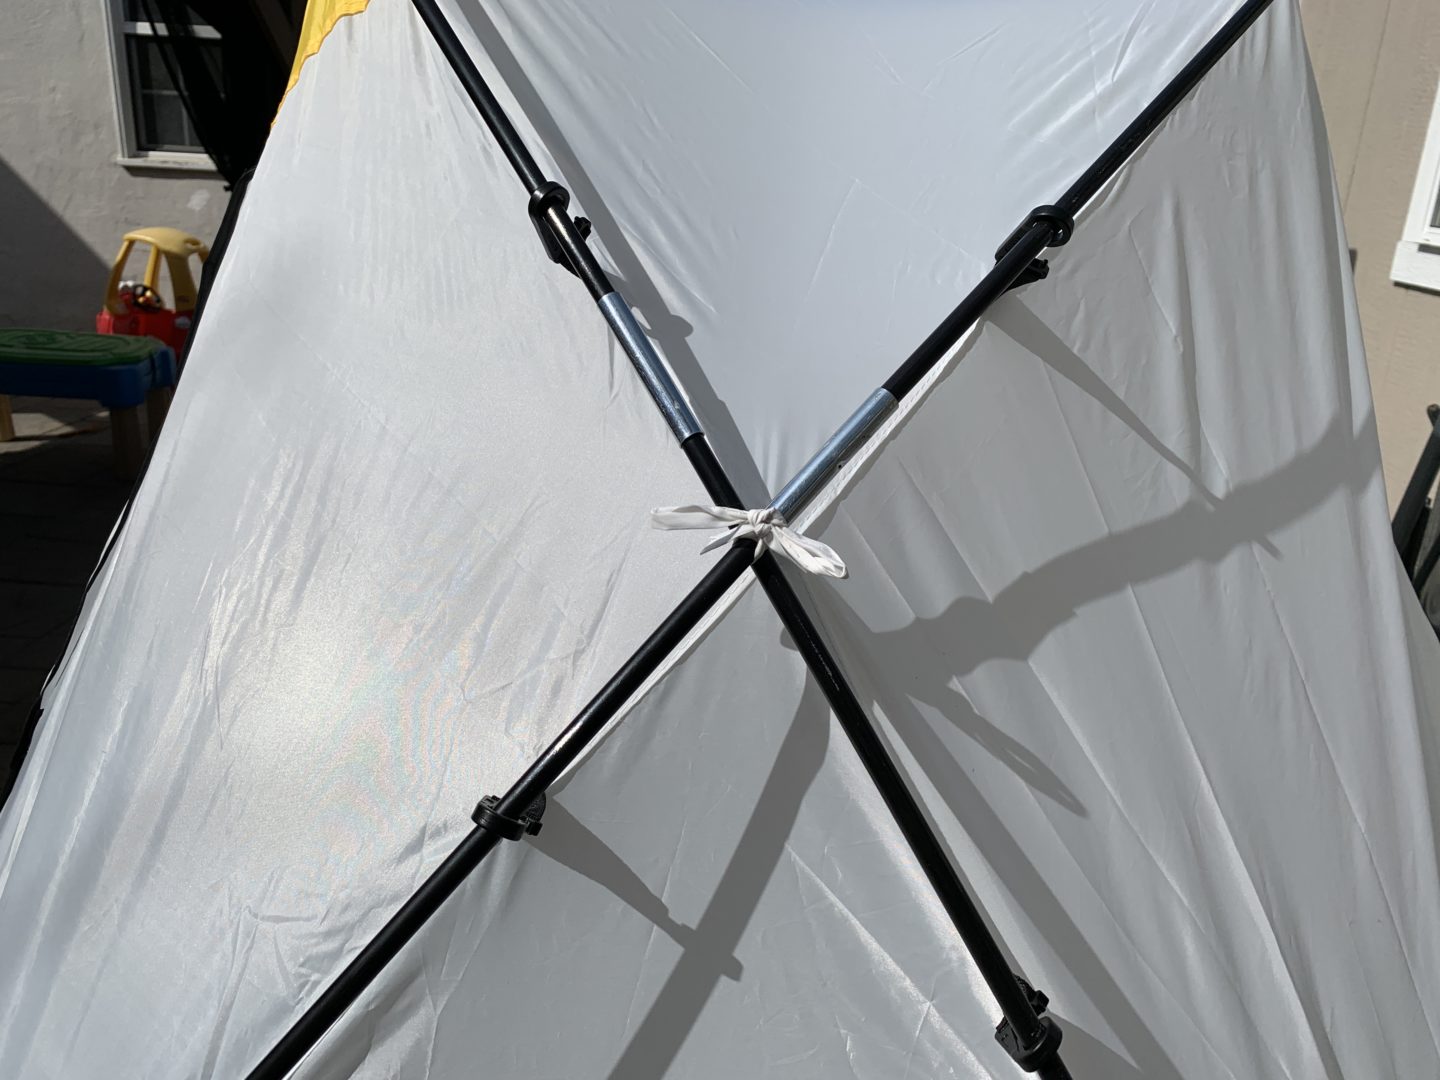
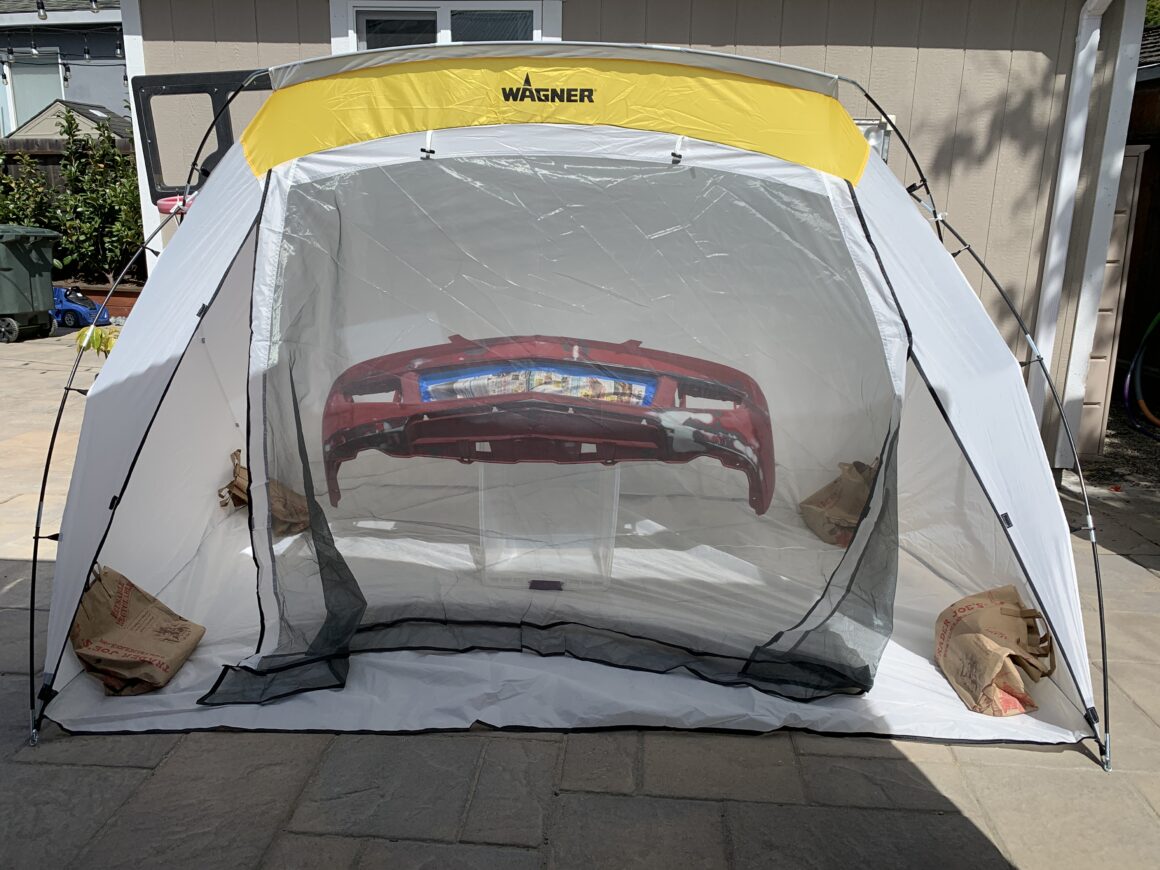
Finally, the large spray paint tent should look like this once assembled. The last thing you need to do on both sides of the tent is to tie the ribbons where the poles intersect.
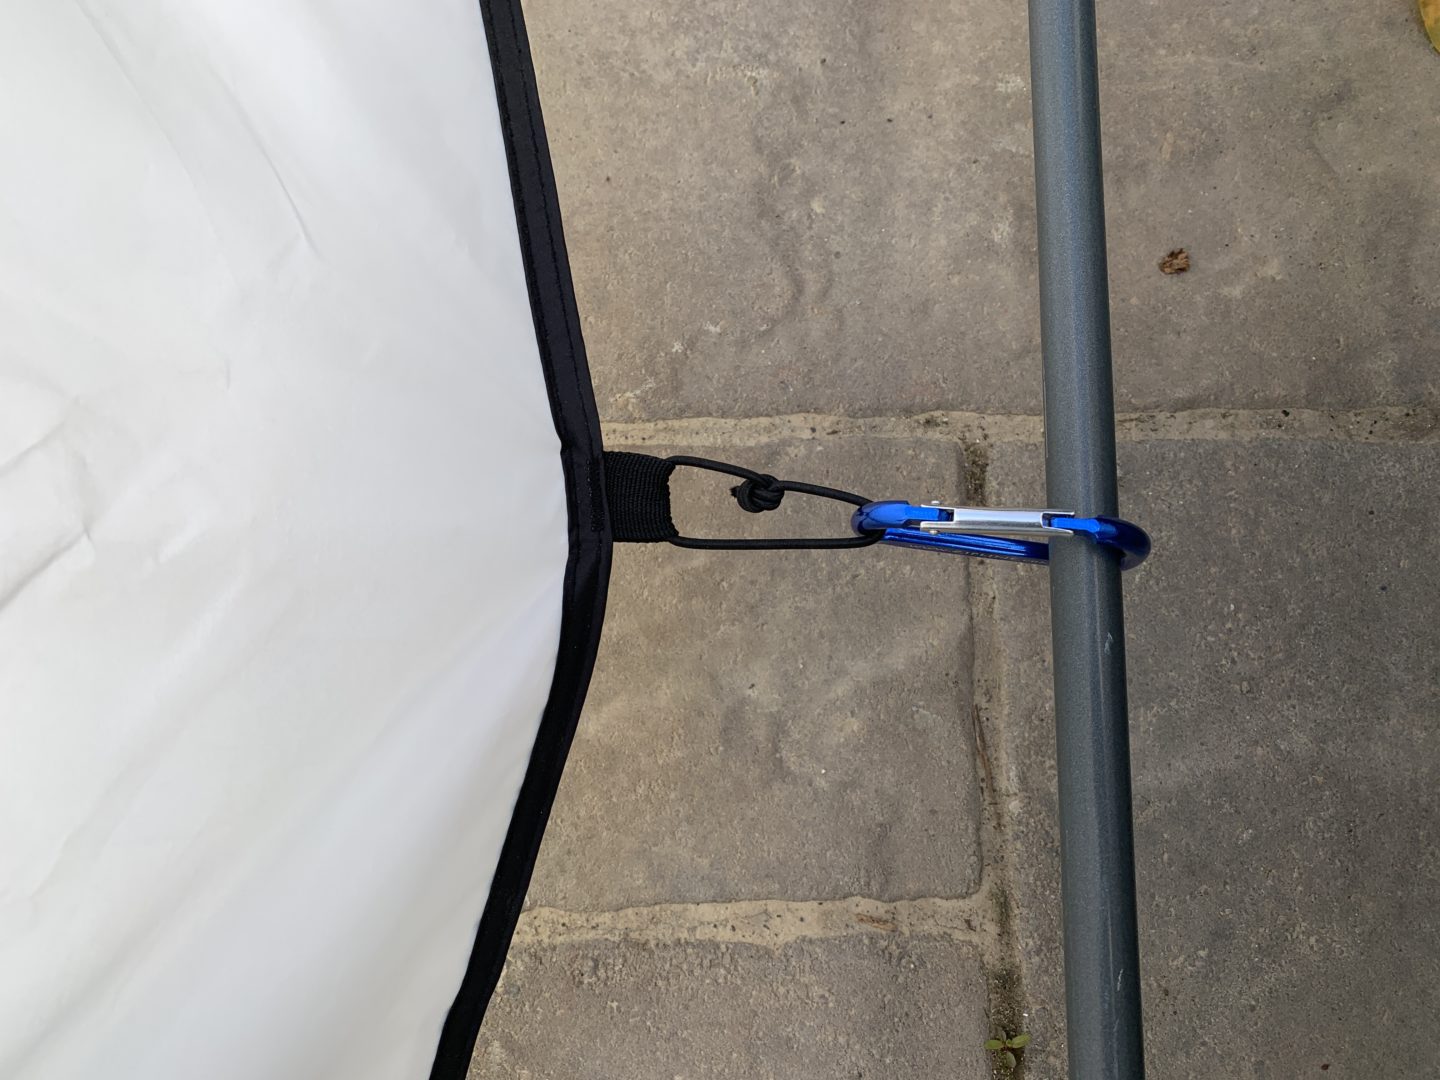
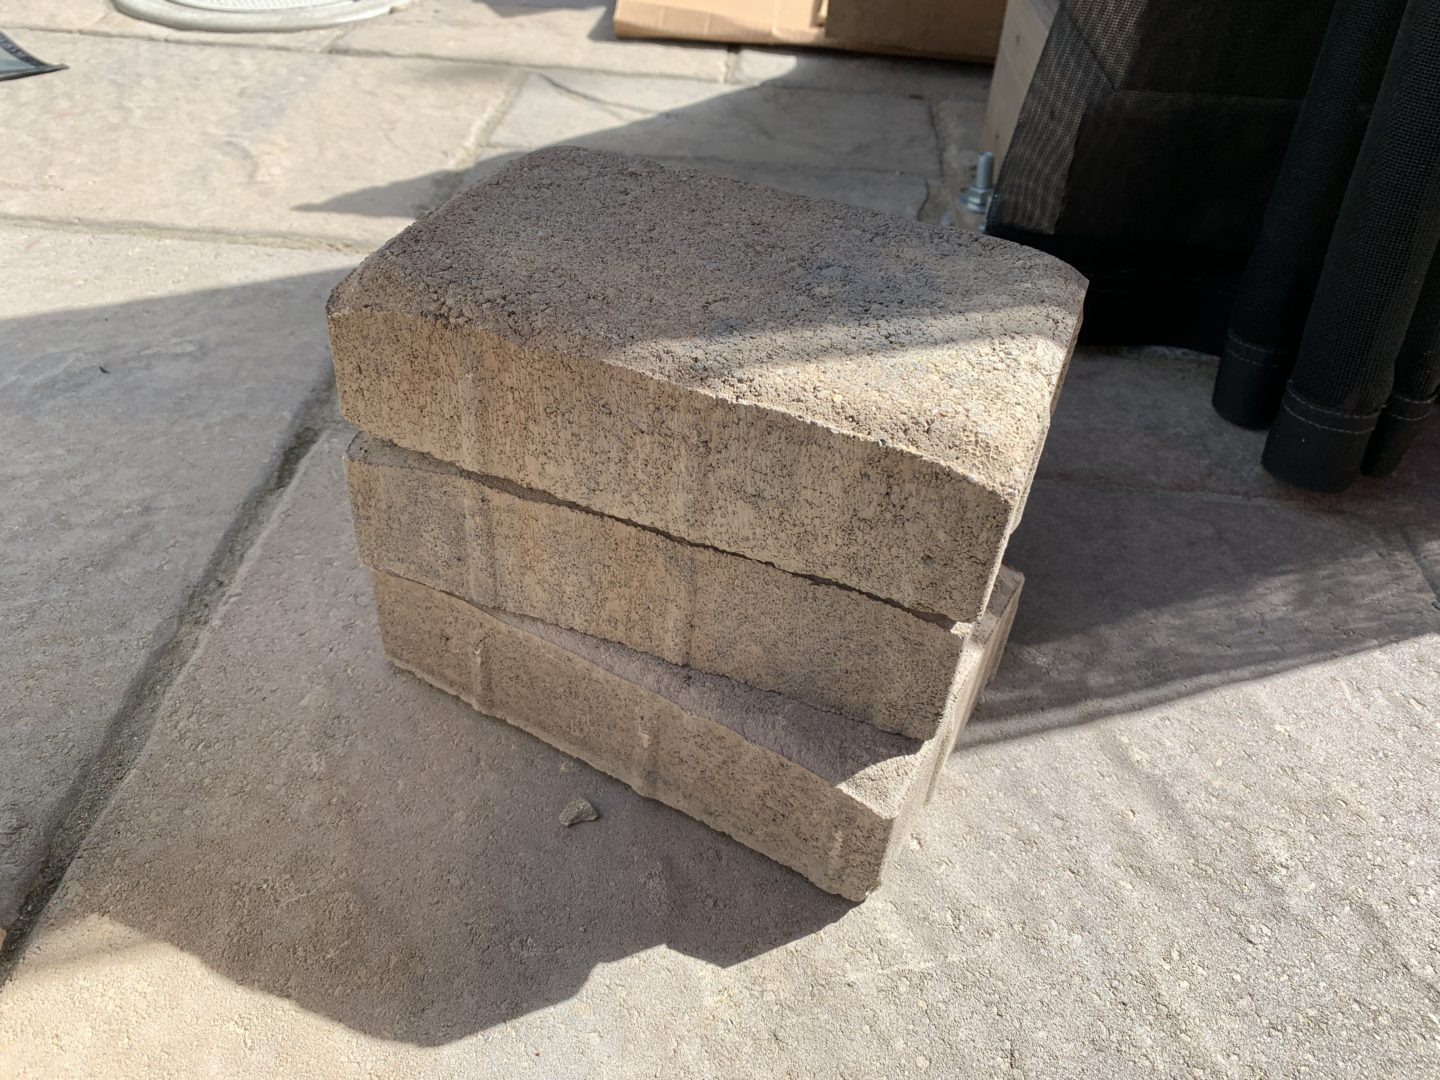
Where I live, we’ll get around 10-30mph winds pretty consistently. I used a carabiner to attach to the rear and secure it so that the whole thing doesn’t fly away. In addition to that, I added some pavers (I placed them into paper shopping bags to protect the tent floor) inside of the tent on each corner. Wind can blow the tent around and possibly cause the tent to contact the painted item inside.
Large Wagner Spraytech Spray Paint Tent Review
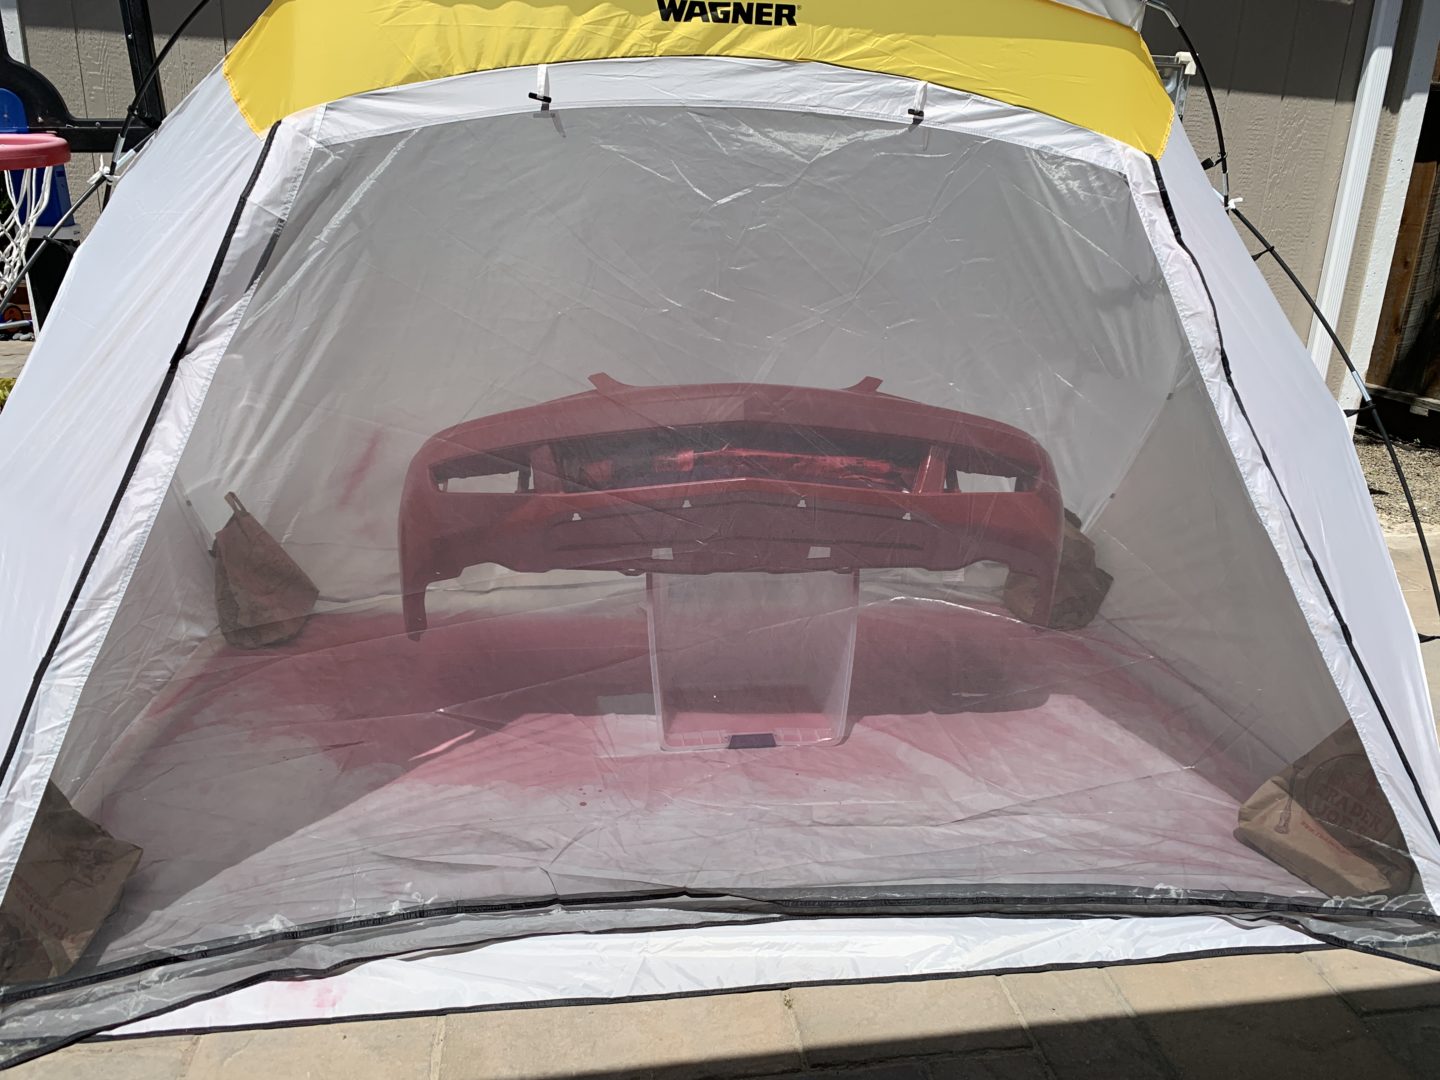
After assembly of the paint tent, I found the size to be quite large. As you can see below, even a full bumper can be placed inside the tent with some room for me to get around it and paint. I’d say that if you don’t need that big of a tent, I’d go with a medium or small tent as assembly, disassembly, and storage can be a bit more difficult to manage with such a large tent.
One of the things I was worried about was the spray tent coming without a floor. I saw some reviews on Amazon saying that there was no floor to the spray tent. However, I was pleasantly surprised to find that there was one built into the tent. It seems that Wagner redesigned the tent to include the floor, which I was very happy about. However, the floor is thin, and I easily created a few small holes in the floor simply from walking around inside and causing a puncture because of small rocks ripping through the floor.
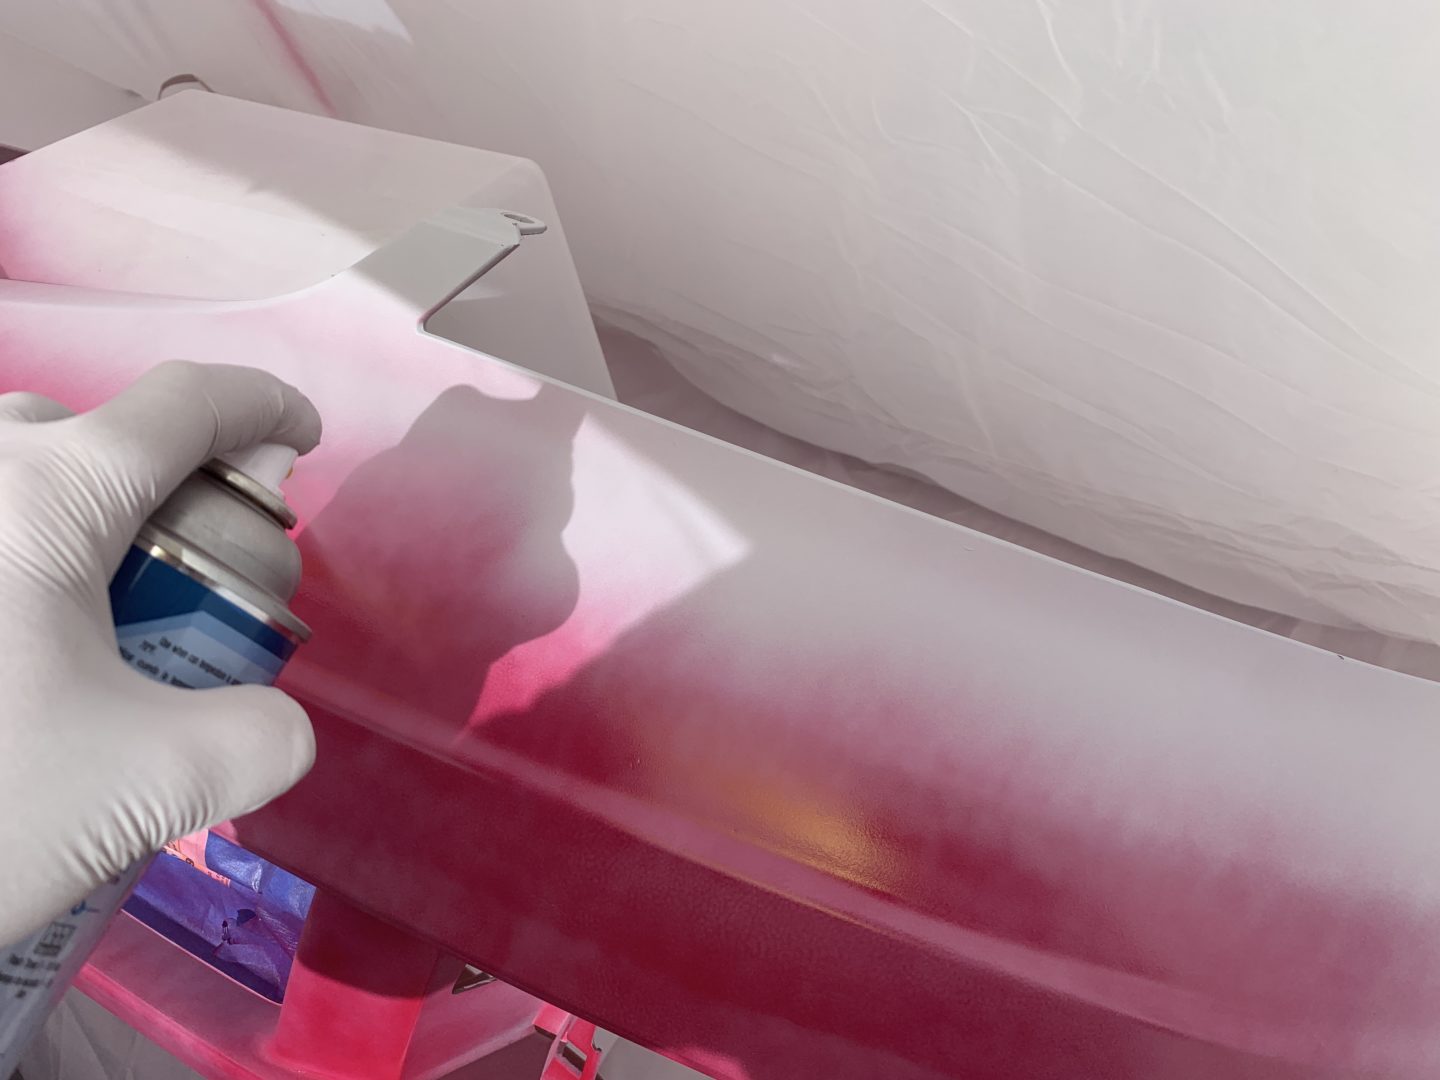
The front of the spray tent features a protective mesh screen, which keeps falling leaves and debris as well as bugs from getting onto your fresh paintwork. For me, it did a good job at preventing this from happening, however it’s not perfect. Even with the mesh screen velcroed on the sides, the bottom is free to move. Because of this, if it’s windy, it may blow some debris from the floor up through this opening at the bottom. I’ve experienced some dirt and debris getting onto the paintwork closer to the floor level. Furthermore, I was not too happy about the small velcro tabs on each side as they sometimes disconnect easily.
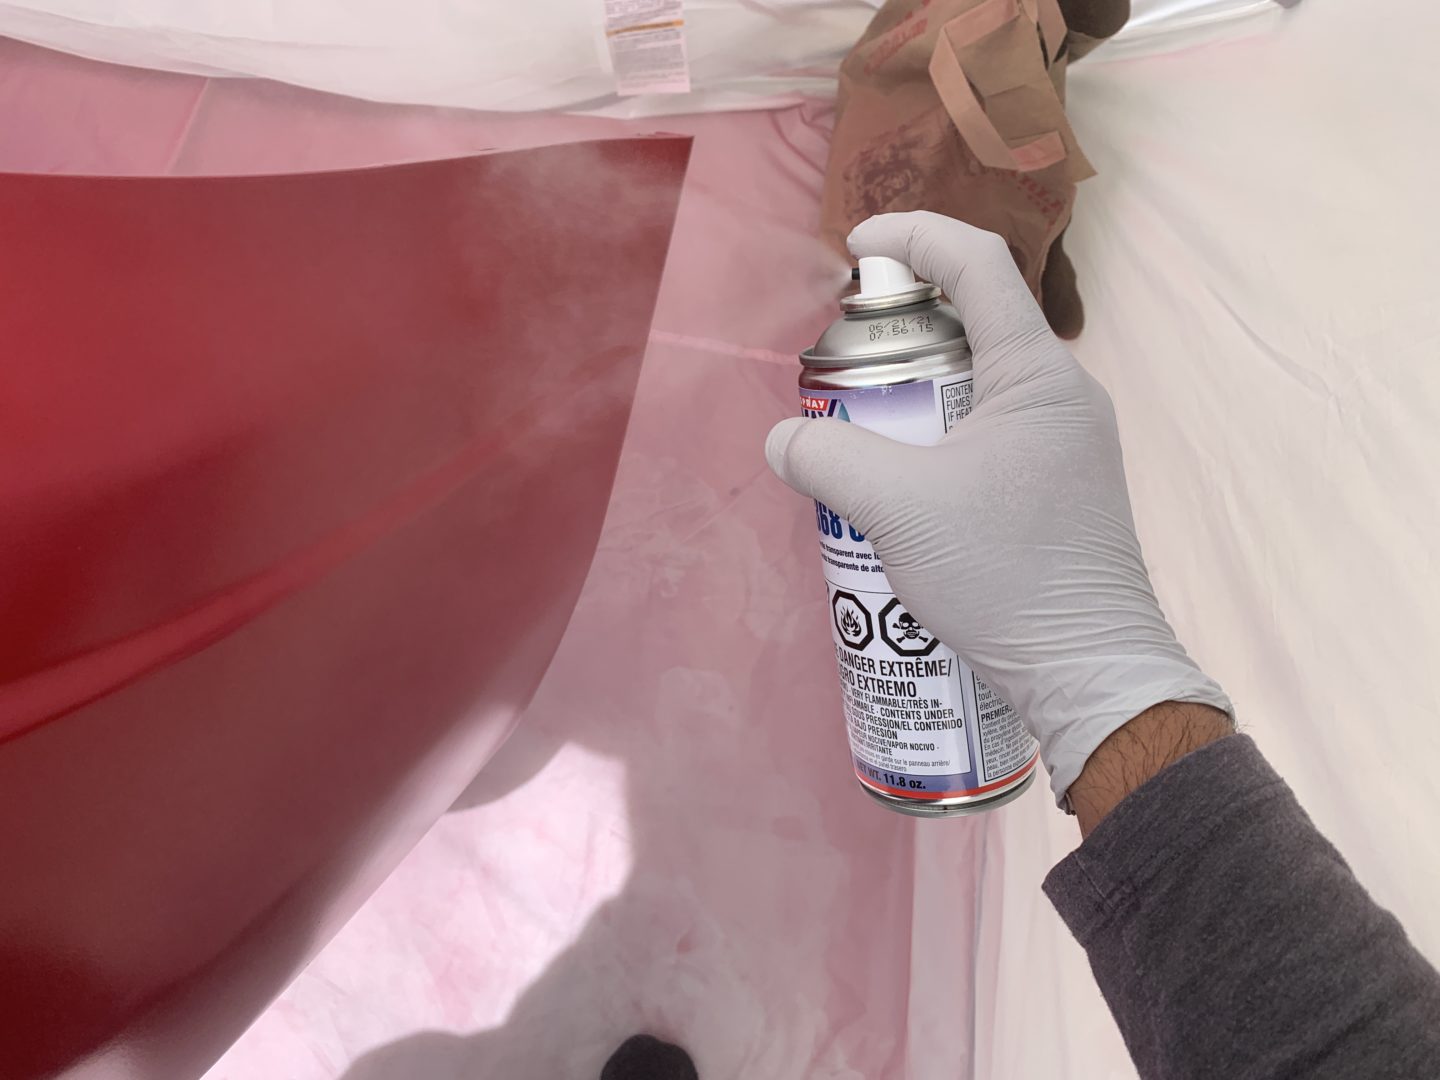
Once you get setup with the spray tent, it provides a pretty decent shelter for painting. You don’t have to worry about overspray nor do you have to worry about bugs or debris from getting onto the paint. The protective mesh allows the paint to breathe, which is a must for a paint tent in order to allow your piece to dry and cure.
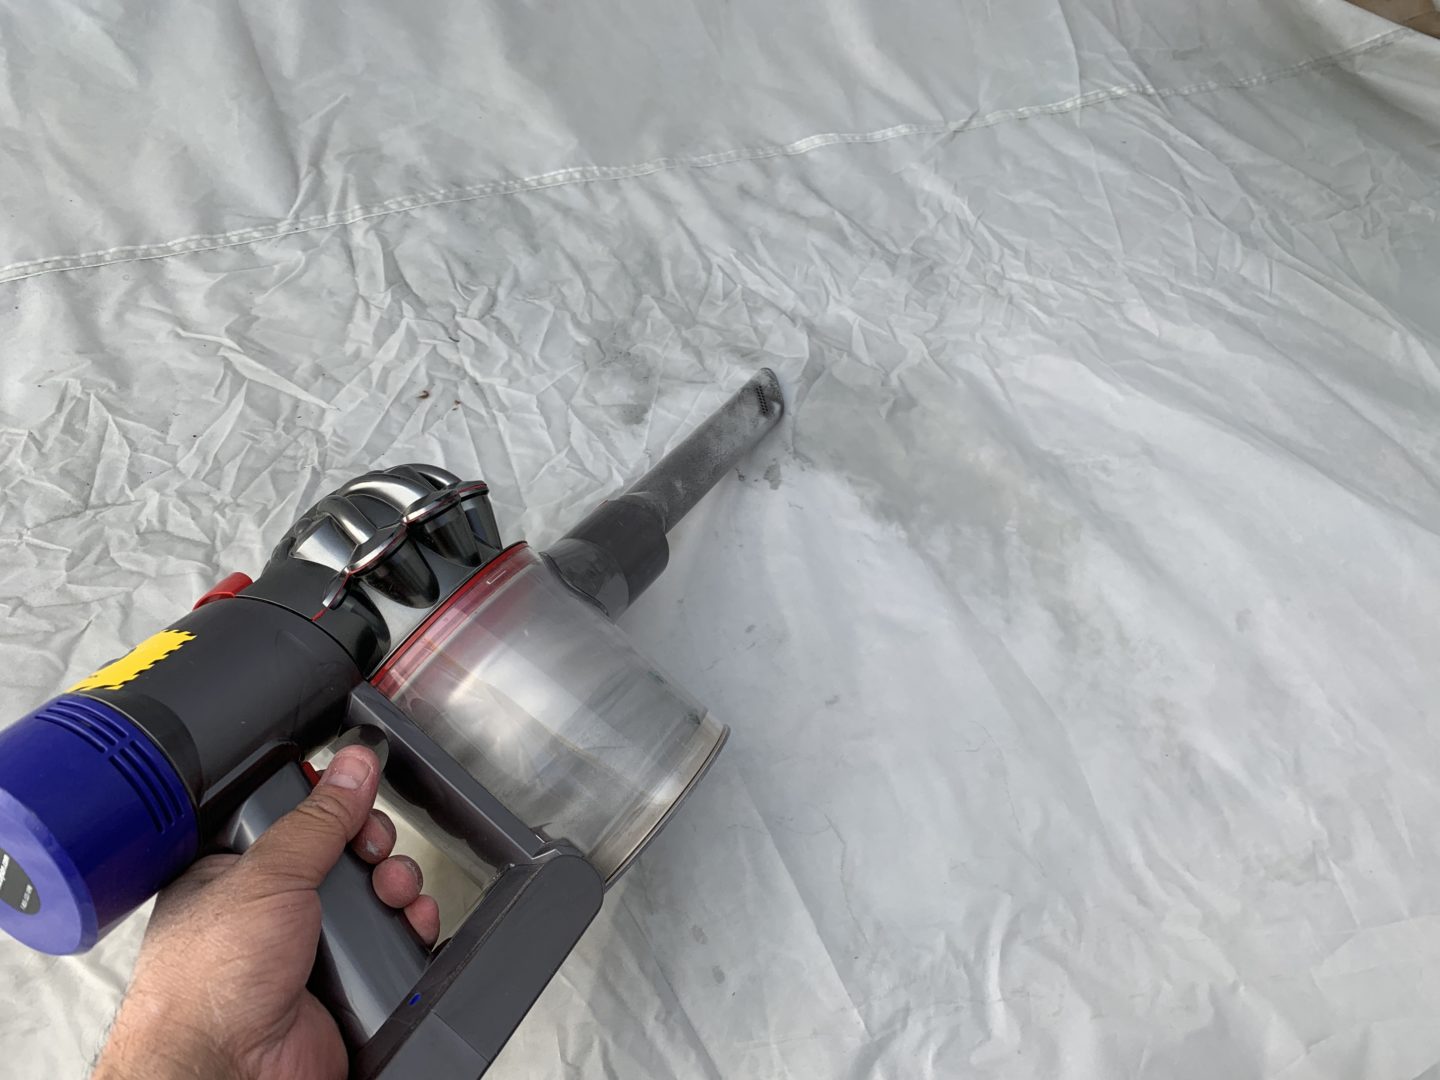
After your piece has dried, you can remove it from the paint tent and clean the inside of the tent. I use a vacuum to clean up the overspray dust that sits on the floor and a wet microfiber towel or rag to clean the inside before I paint again. Otherwise, there’s risk of kicking up this stuff when painting the next time. You can also tilt the whole tent forwards to empty out dust and debris.

If you don’t have to paint any huge items and can get away with a smaller tent, I would stay away from the large one simply because it is really, really big. I put mine away temporarily and didn’t even want to take it back out to assemble and set up for my next project because it is so unwieldly. However, once you get all set up, it really is a lifesaver when you don’t have a dedicated indoor space to spray paint.

