If you own a Mk1 Audi TT, you’ve probably got your hands full with issues under the hood. The most common problem considering these cars are about two decades old now is aged rubber hoses in the engine bay. OEM rubber hoses are an ideal replacement for these hoses, but using universal hoses tend to be more economical and can still work well as direct replacements.
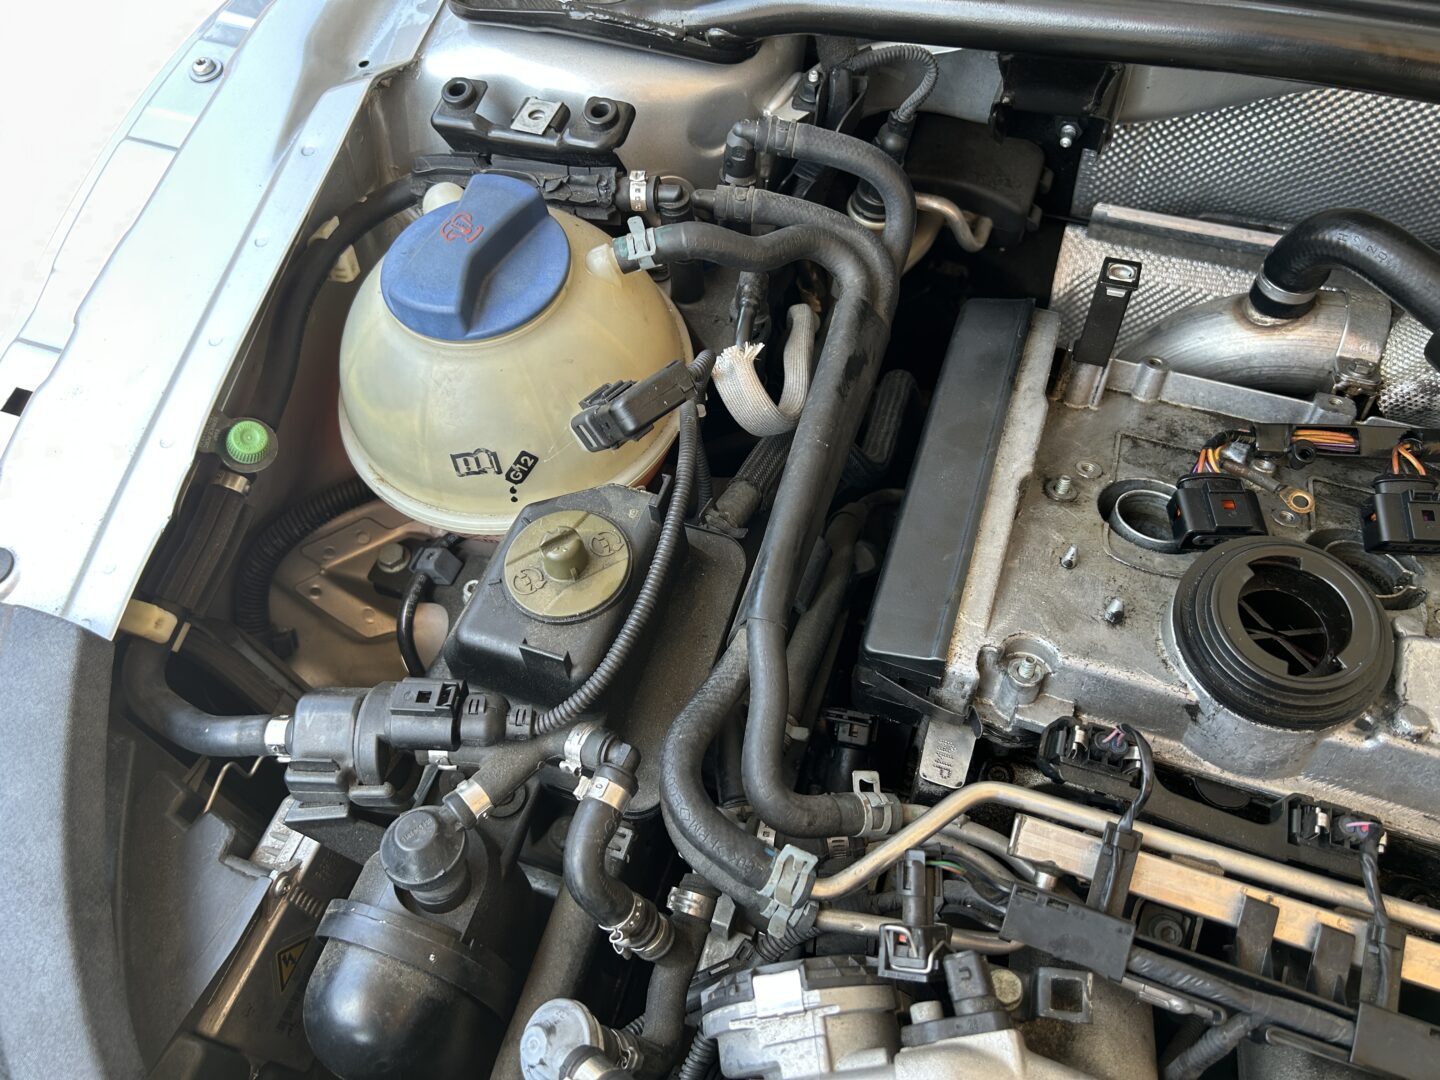
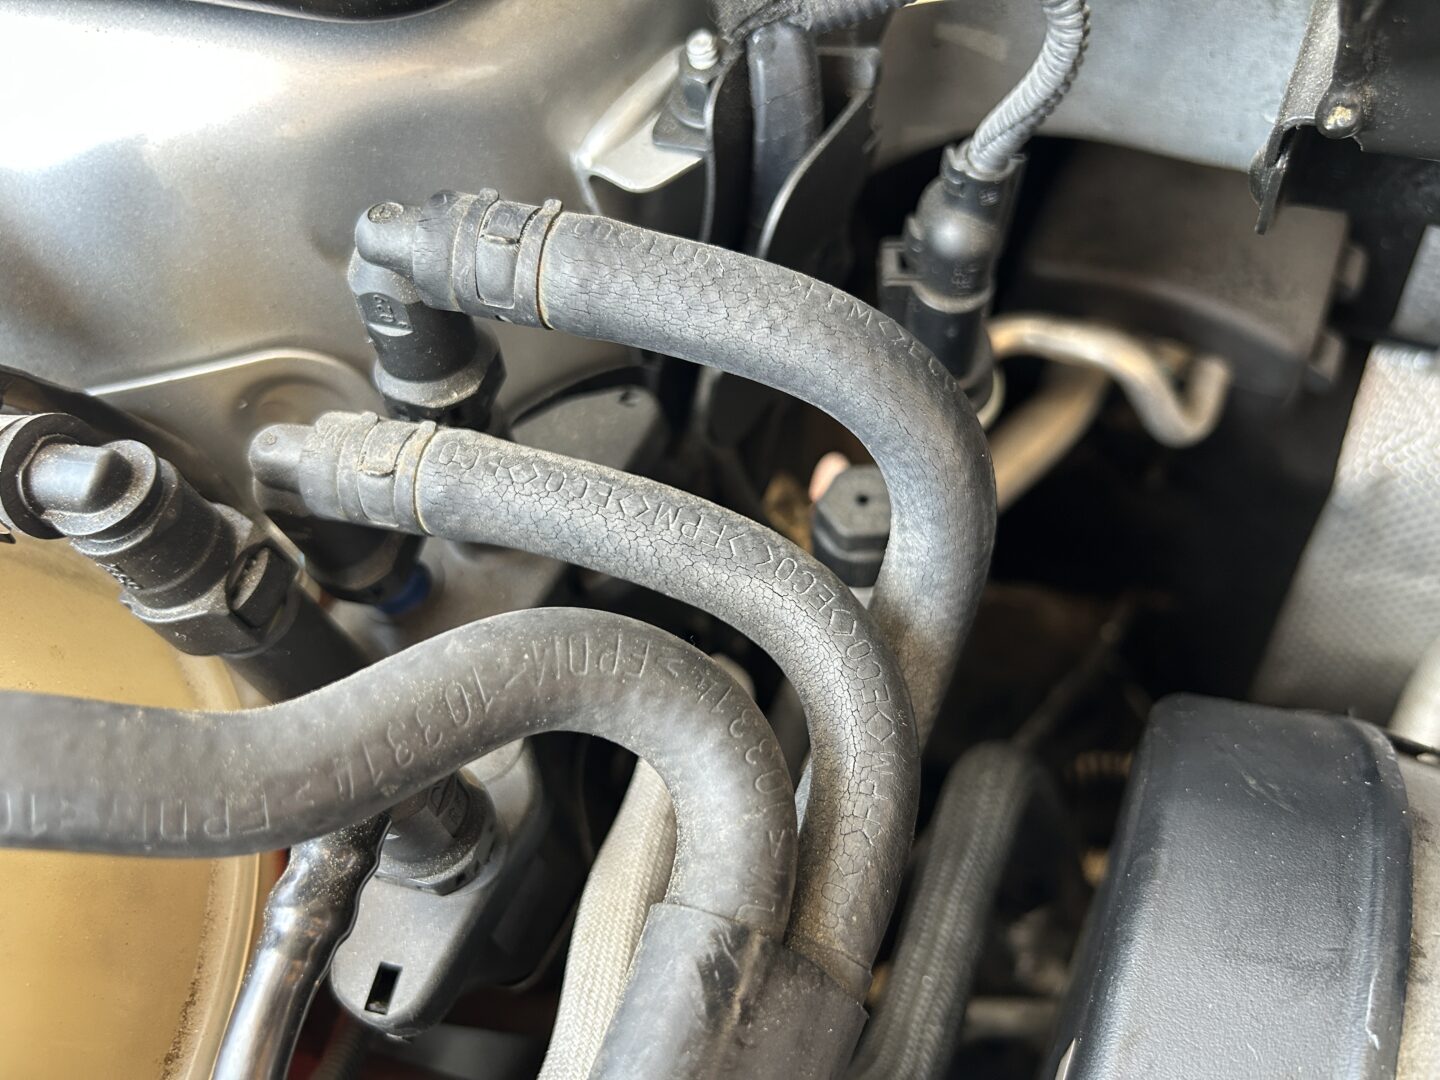
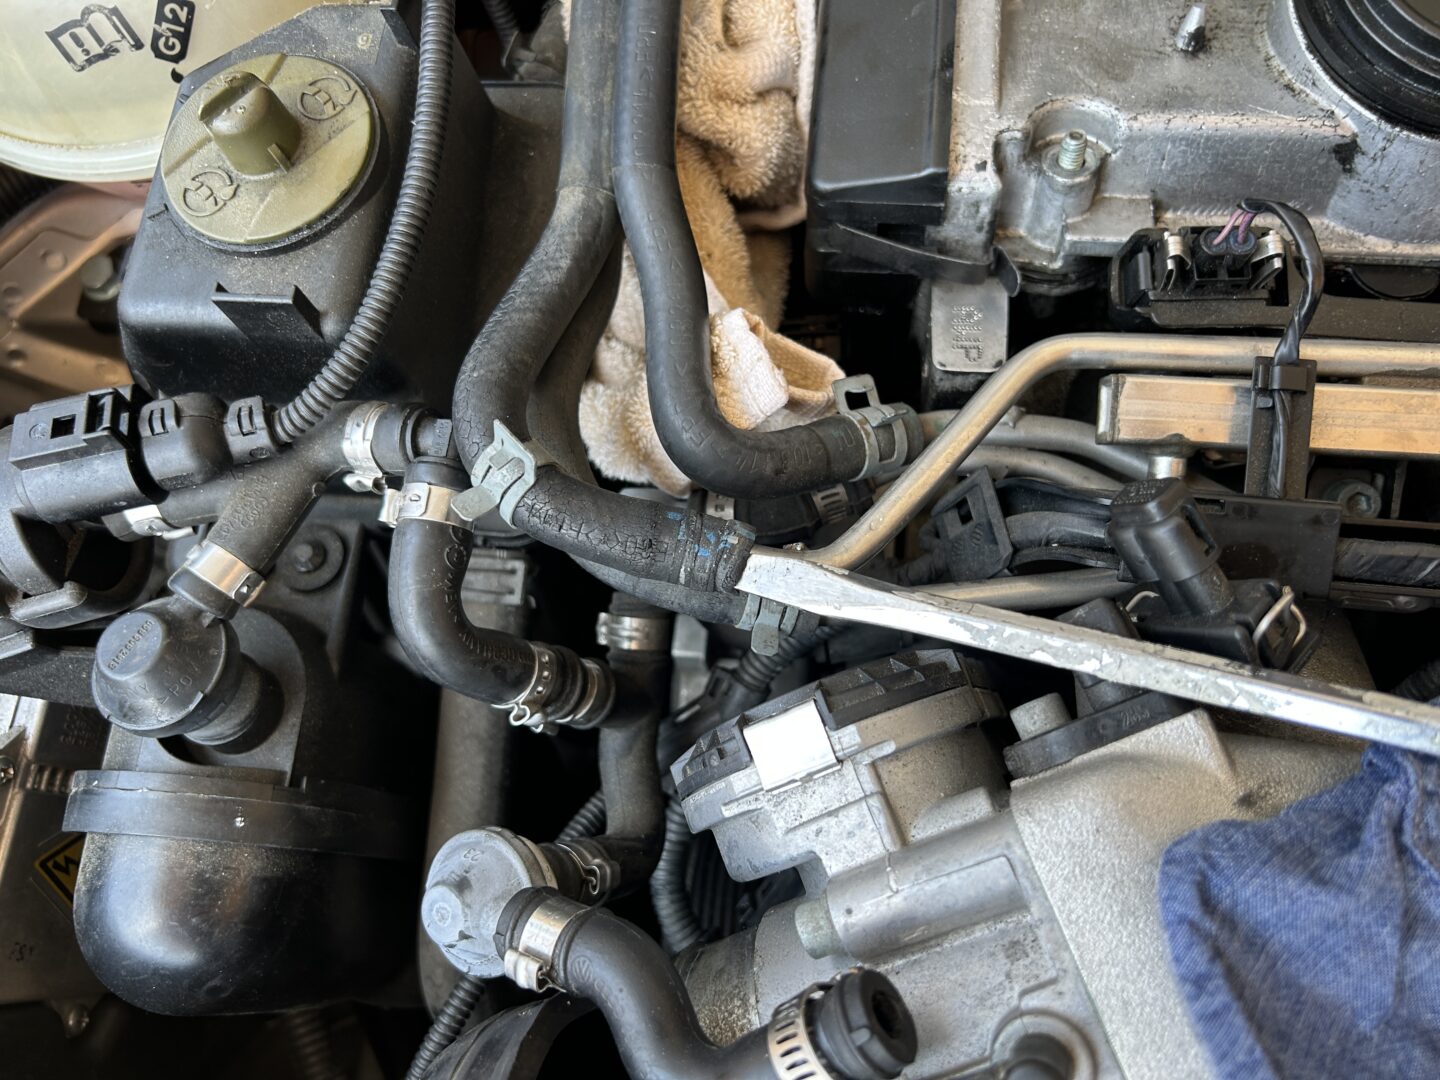
One specific issue under the hood that I encountered was the deteriorated and cracked fuel hoses that run to the fuel rails. These fuel hoses are the fuel rail supply and return hoses. These two hoses come together as one part with the part number: 8L9 133 986 C. Unfortunately, they are harder and harder to come by these days, so you may have to purchase universal fuel hoses to replace them with.
Parts & Tools Needed
Wire Harness Tape: XFasten Wire Harness Tape, 3/4-Inch x 50-Foot (5-Pack)
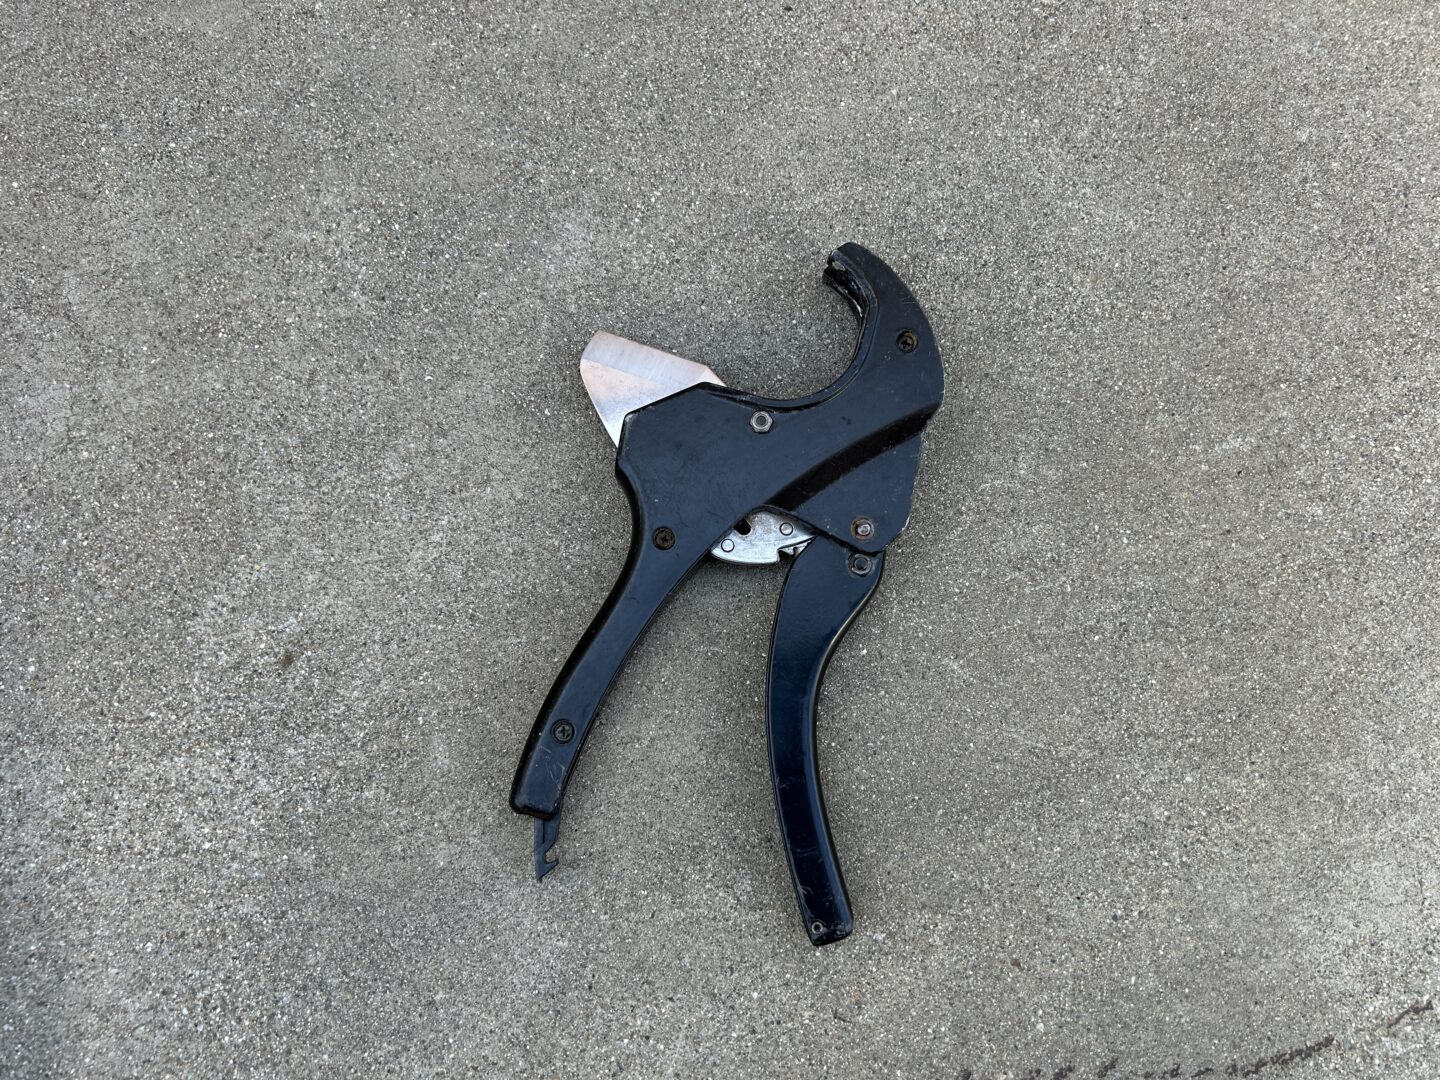
Pipe Cutter (for cutting hose): Bates- PVC Pipe Cutter, Cuts up to 1-1/4″
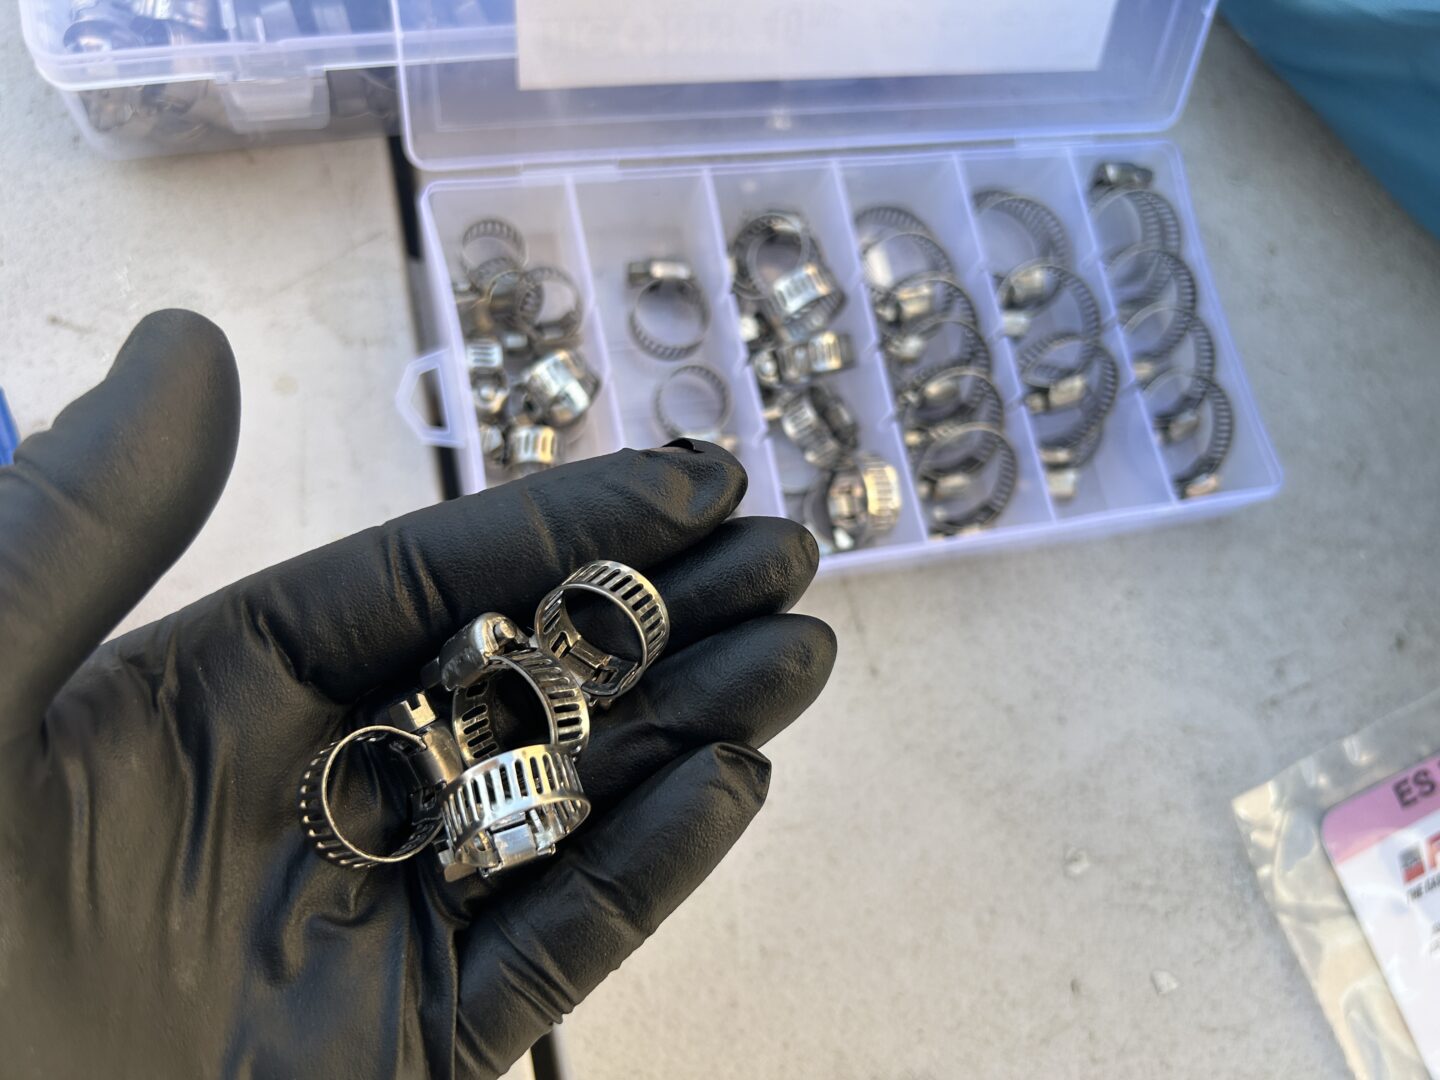
Hose Clamp Set: TICONN 40PCS Hose Clamp Set – 1/4”–1-1/8”
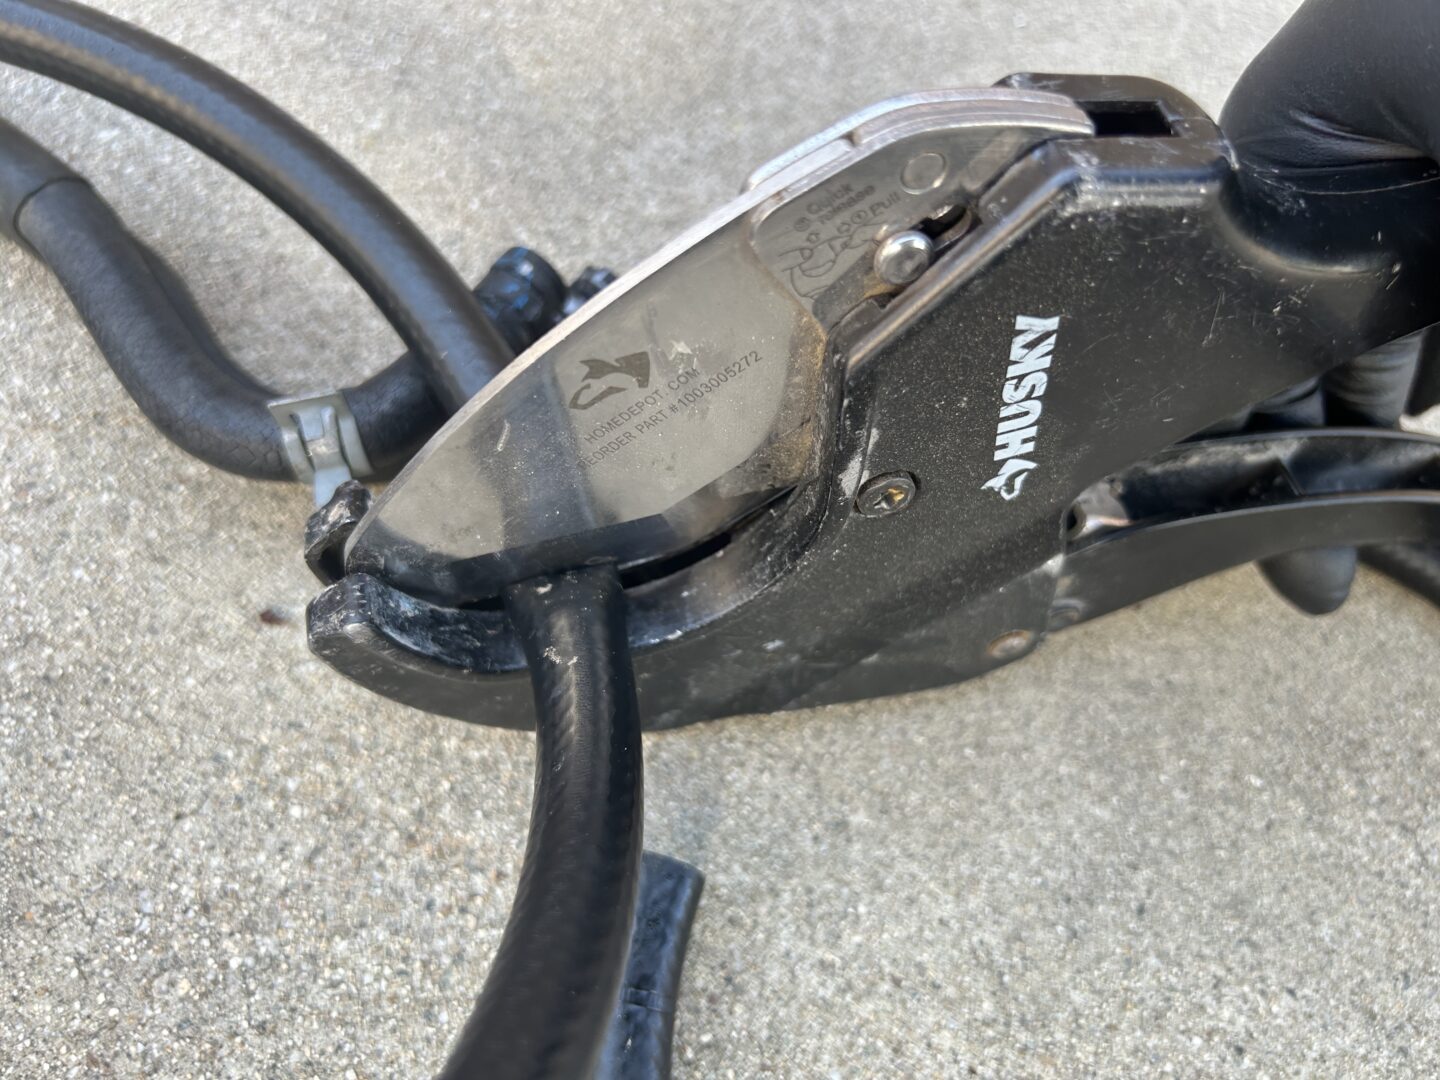
Pliers/Cutters: AKIHISA 9 inch Ear Clamp Pliers / Klein Tools Diagonal Cutter
Universal Rubber Fuel Hose: 5/16 Inch (8mm) ID Fuel Line Hose 10FT


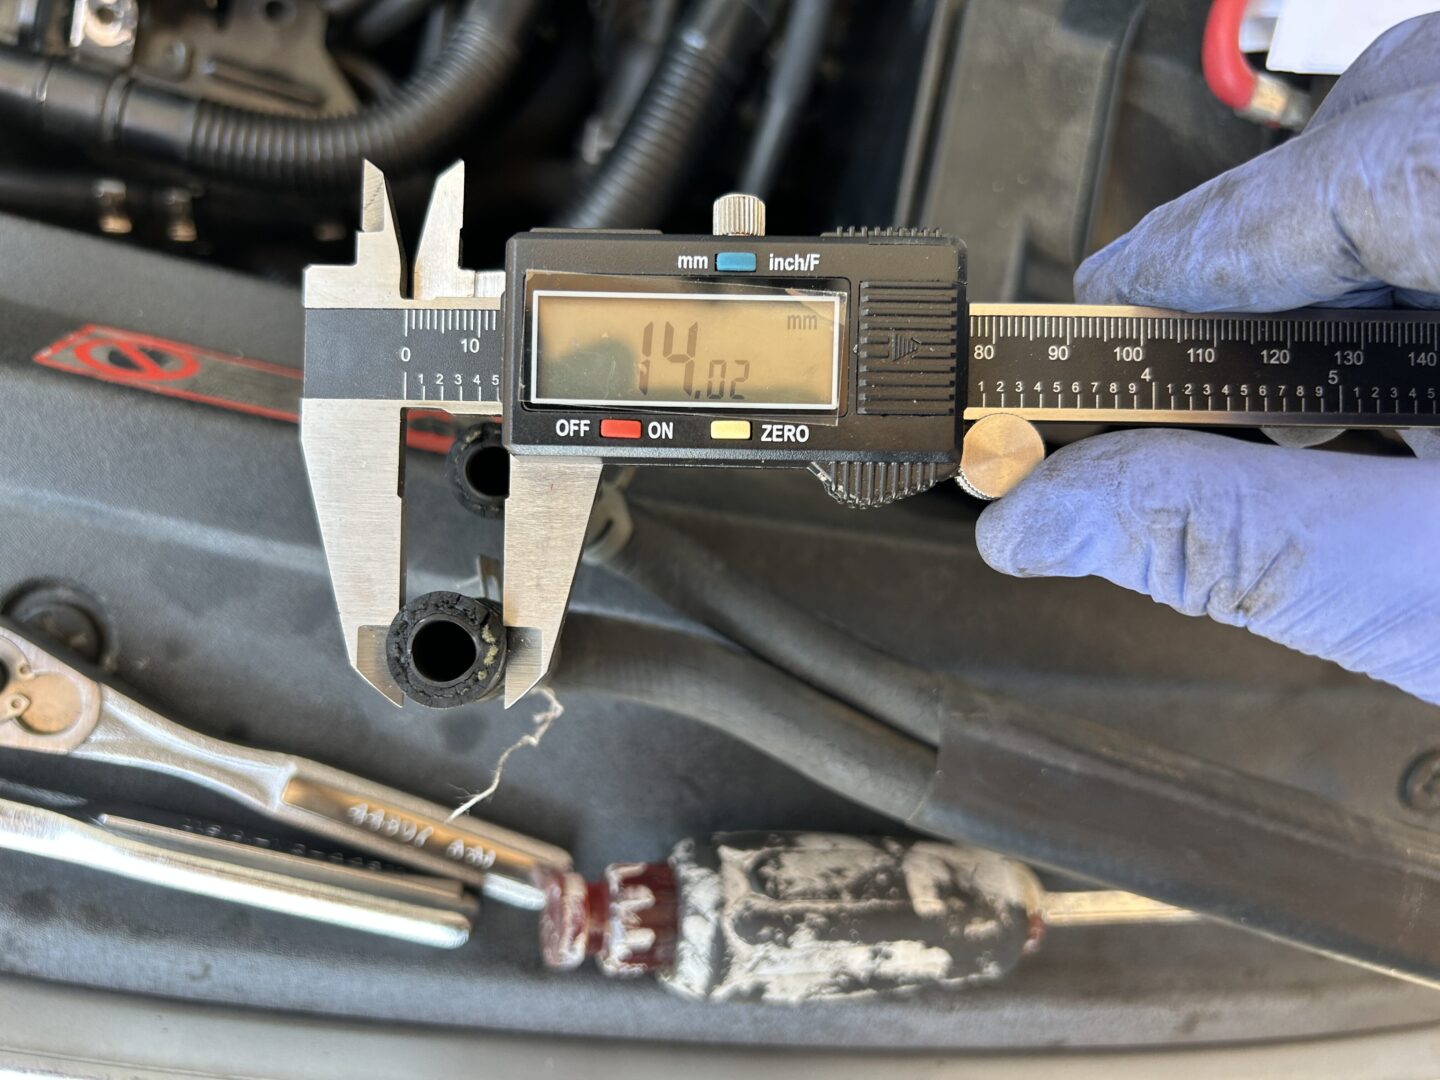
If you measure the inner and outer diameter of the two fuel existing hoses, they come out to be about 1.4mm ID (inner diameter) and 8mm OD (outer diameter). When you buy universal fuel hoses, they are usually sold by the outer diameter– in this case, you’ll need to replace the hoses with an 8mm fuel hose.

How to Replace the Fuel Supply & Return Hoses
First off, your vehicle should be off when doing this work. If the car is off, then the fuel system will not be under pressure and you can remove the fuel lines. There will still be some fuel spillage due to the current fuel in the lines, but it will be minimal. Set a rag underneath when you’re removing the fuel lines to catch any spilled fuel.
If you have the 225 hp variant of the MK1 Audi TT, you’ll need to get the charge pipe out of the way before proceeding with the fuel hose replacement. Otherwise if you’ve got the 180 hp version, you can continue with the tutorial below.
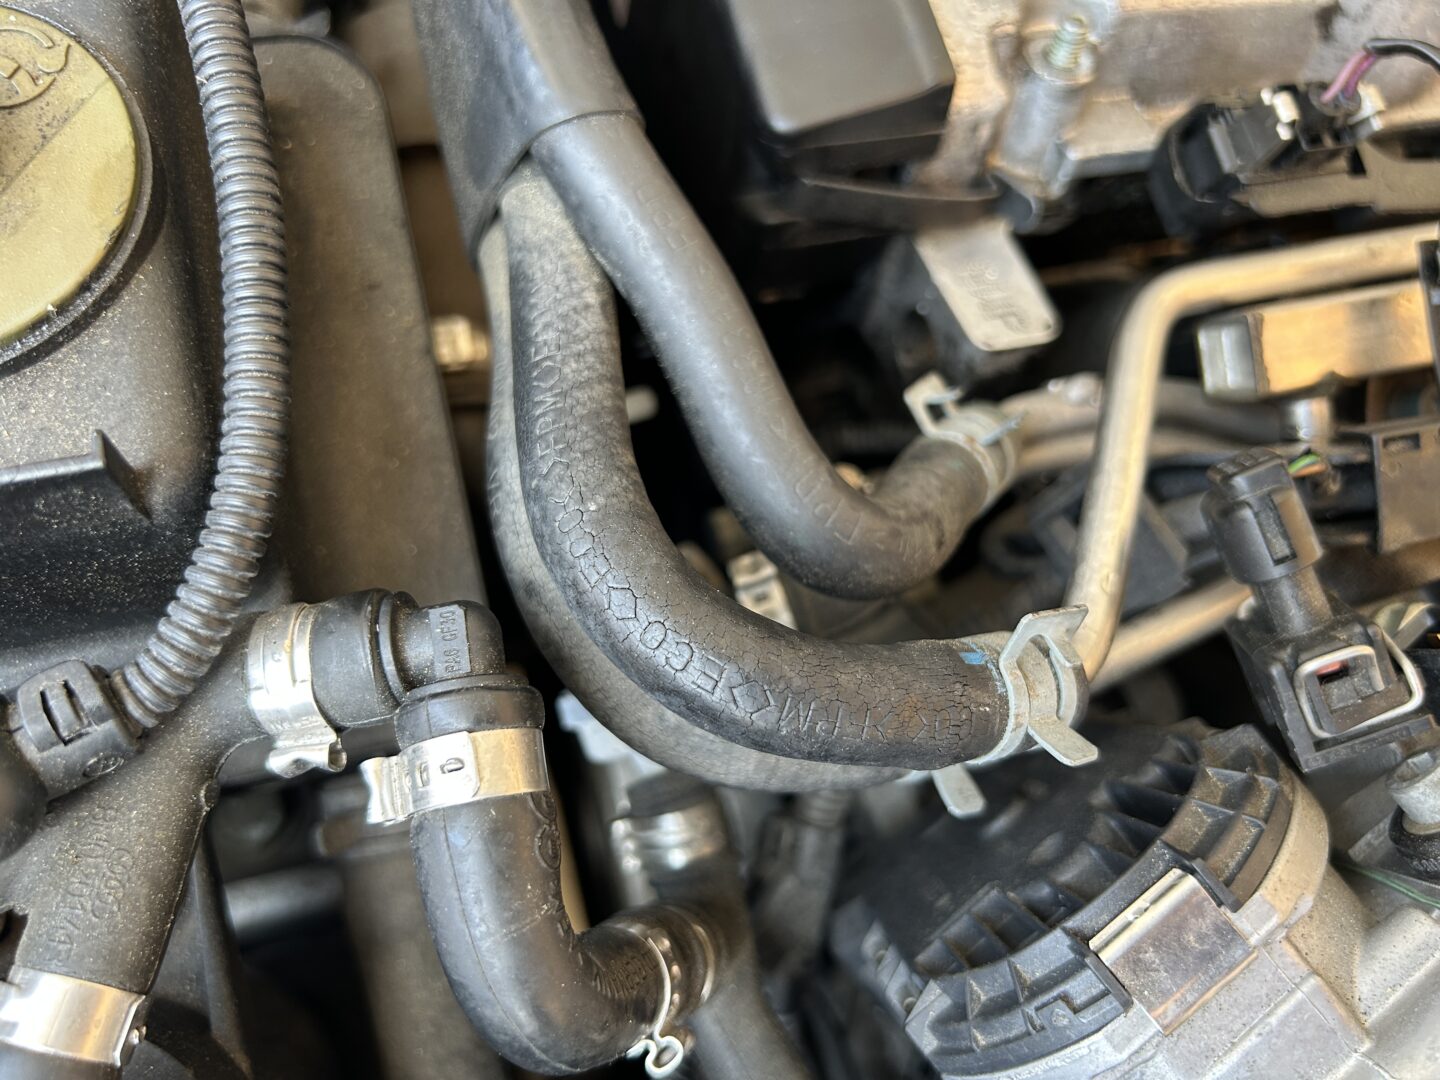
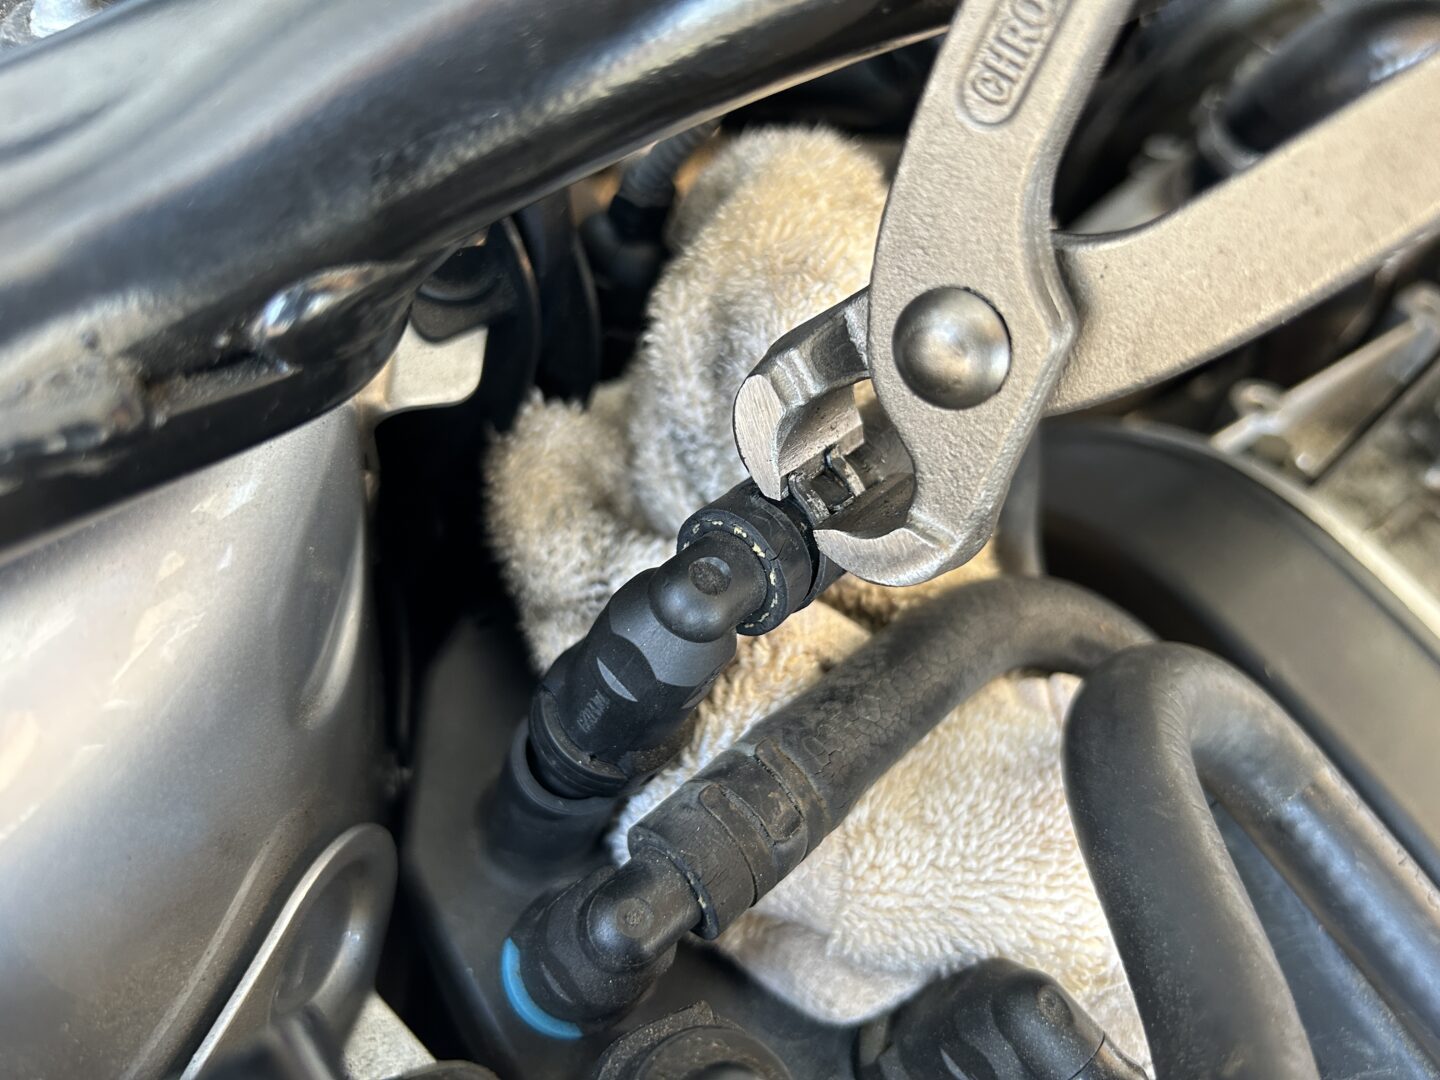
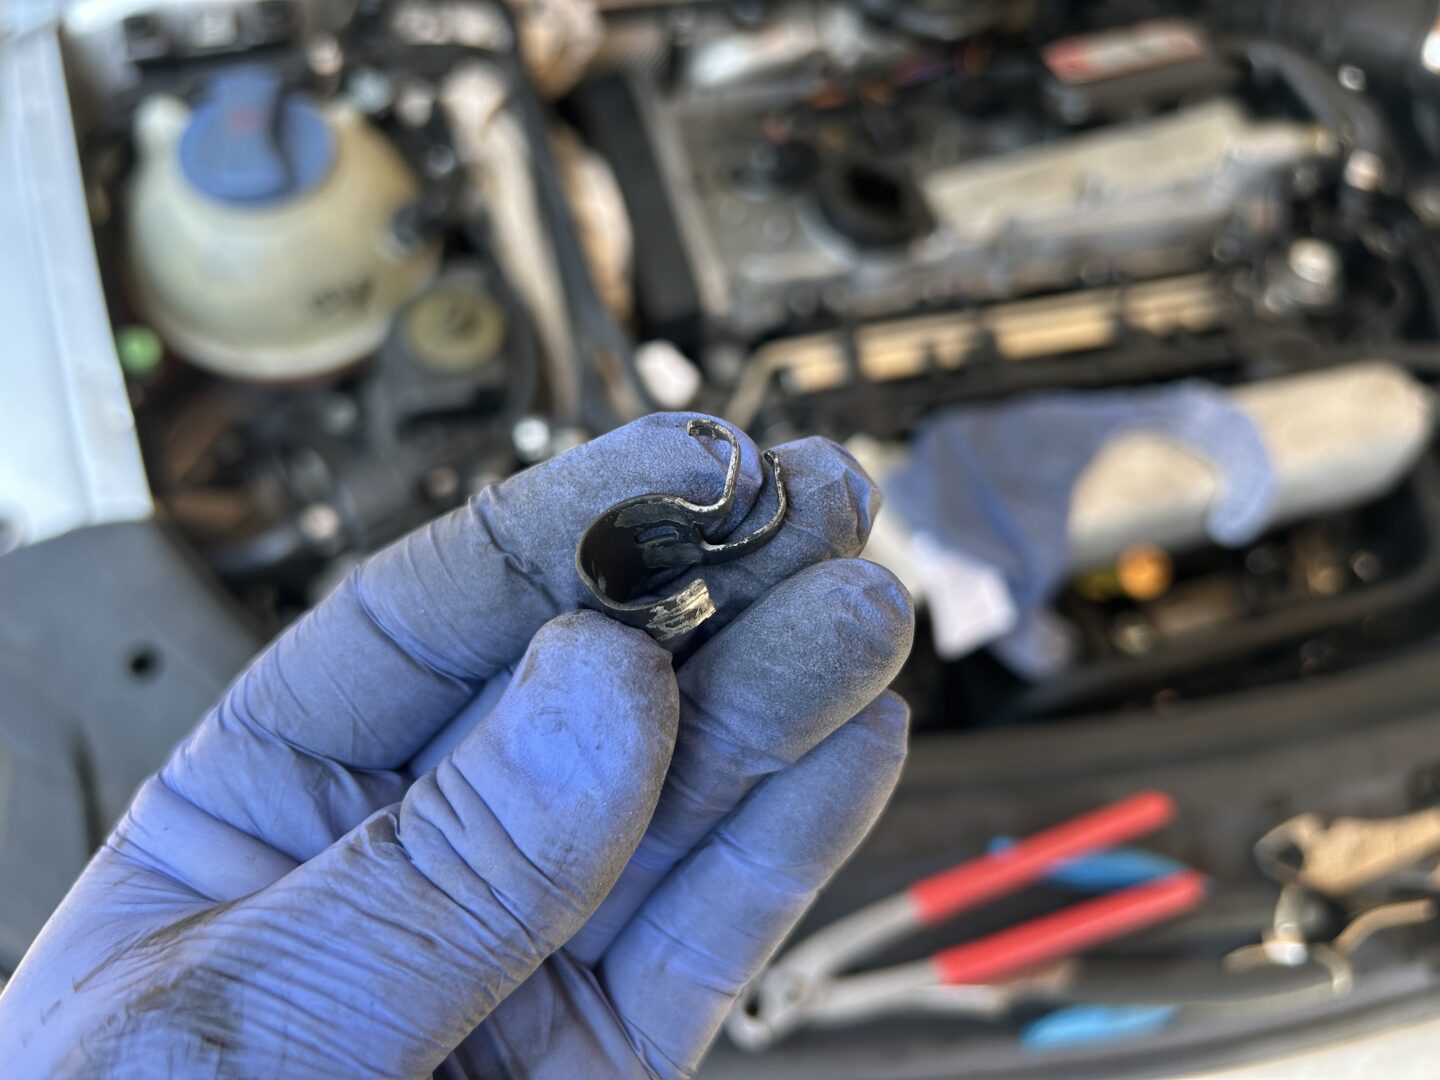
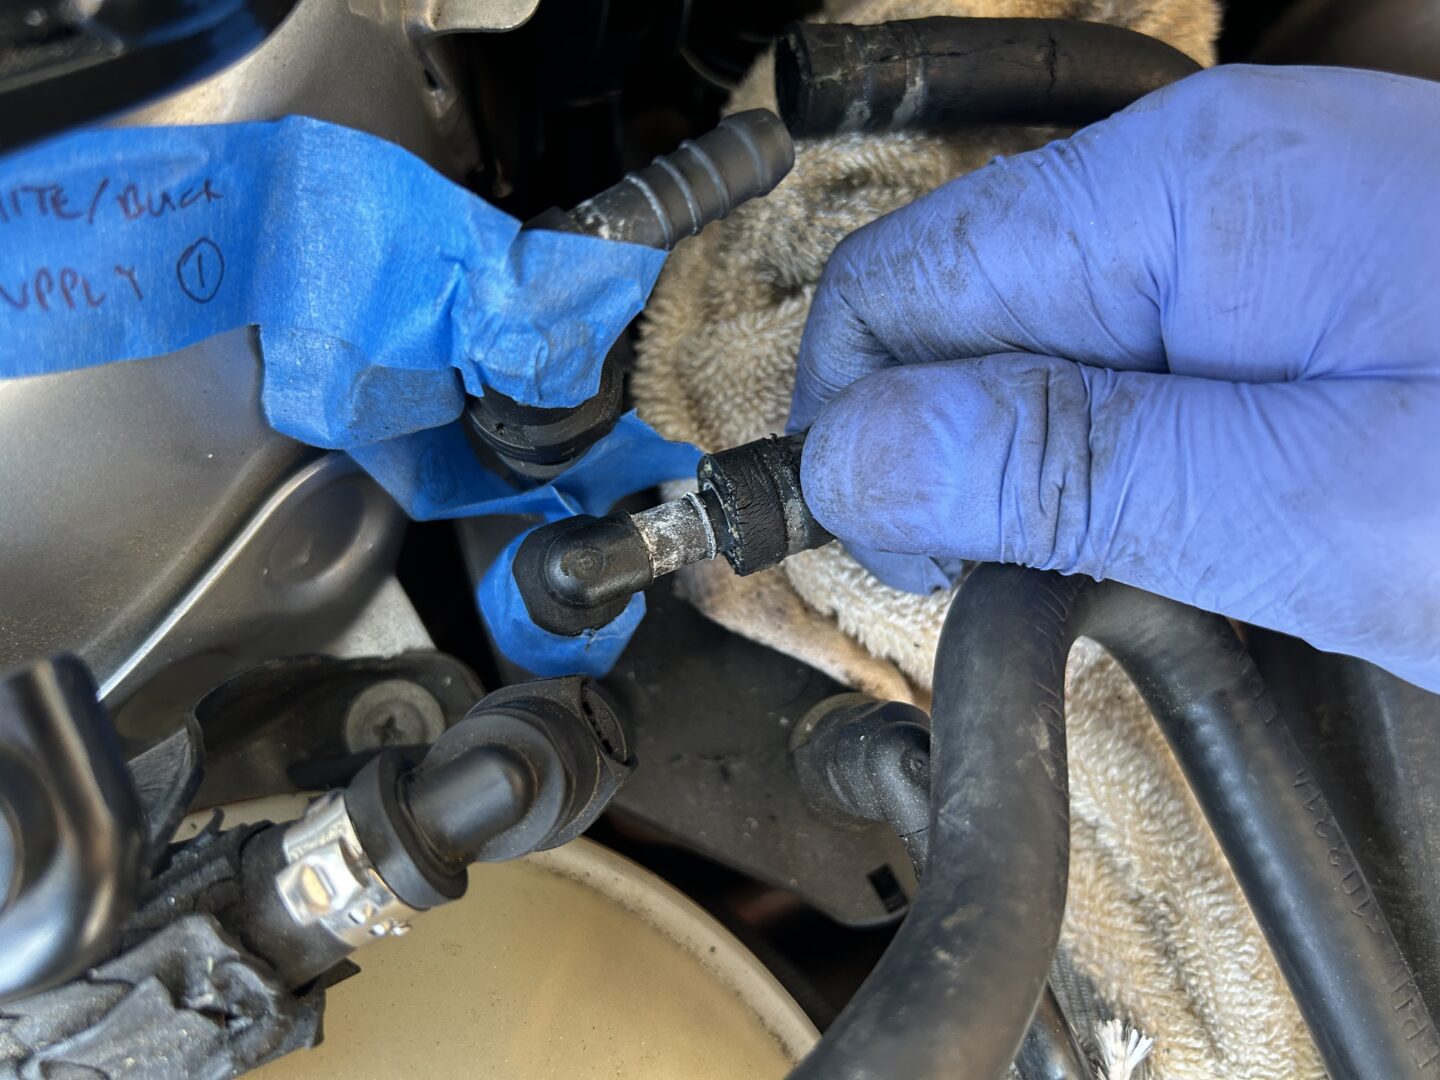
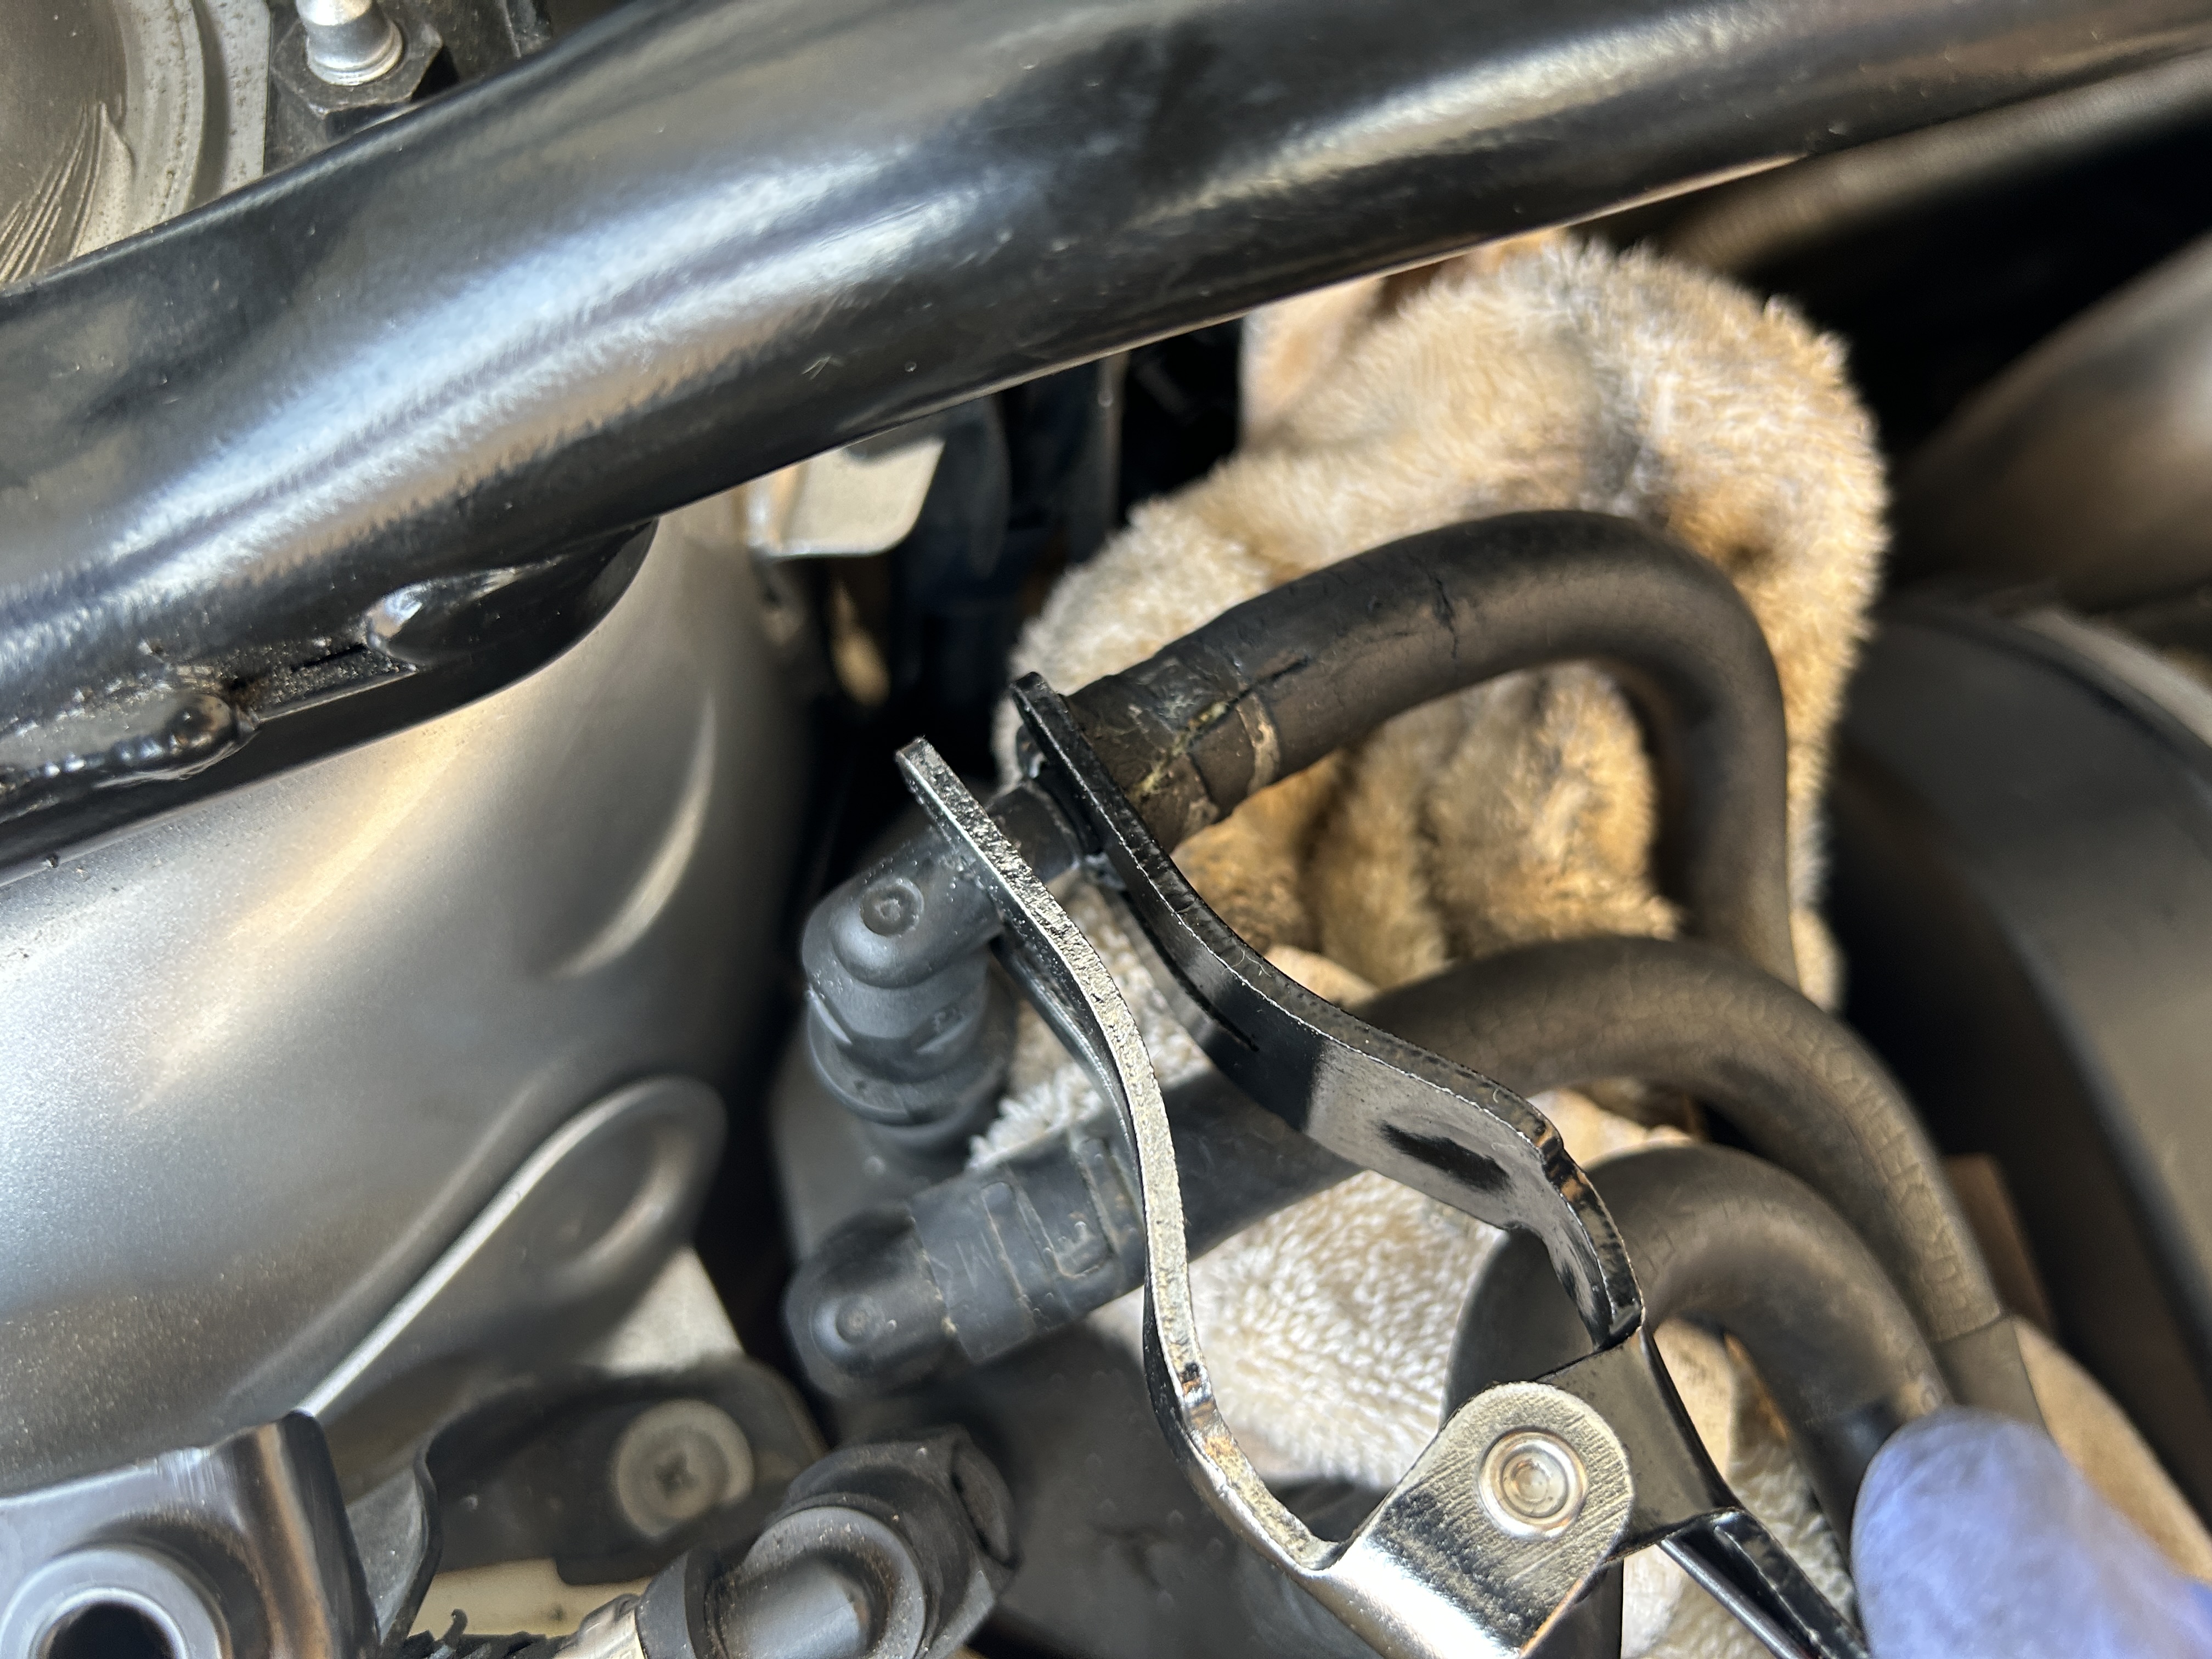
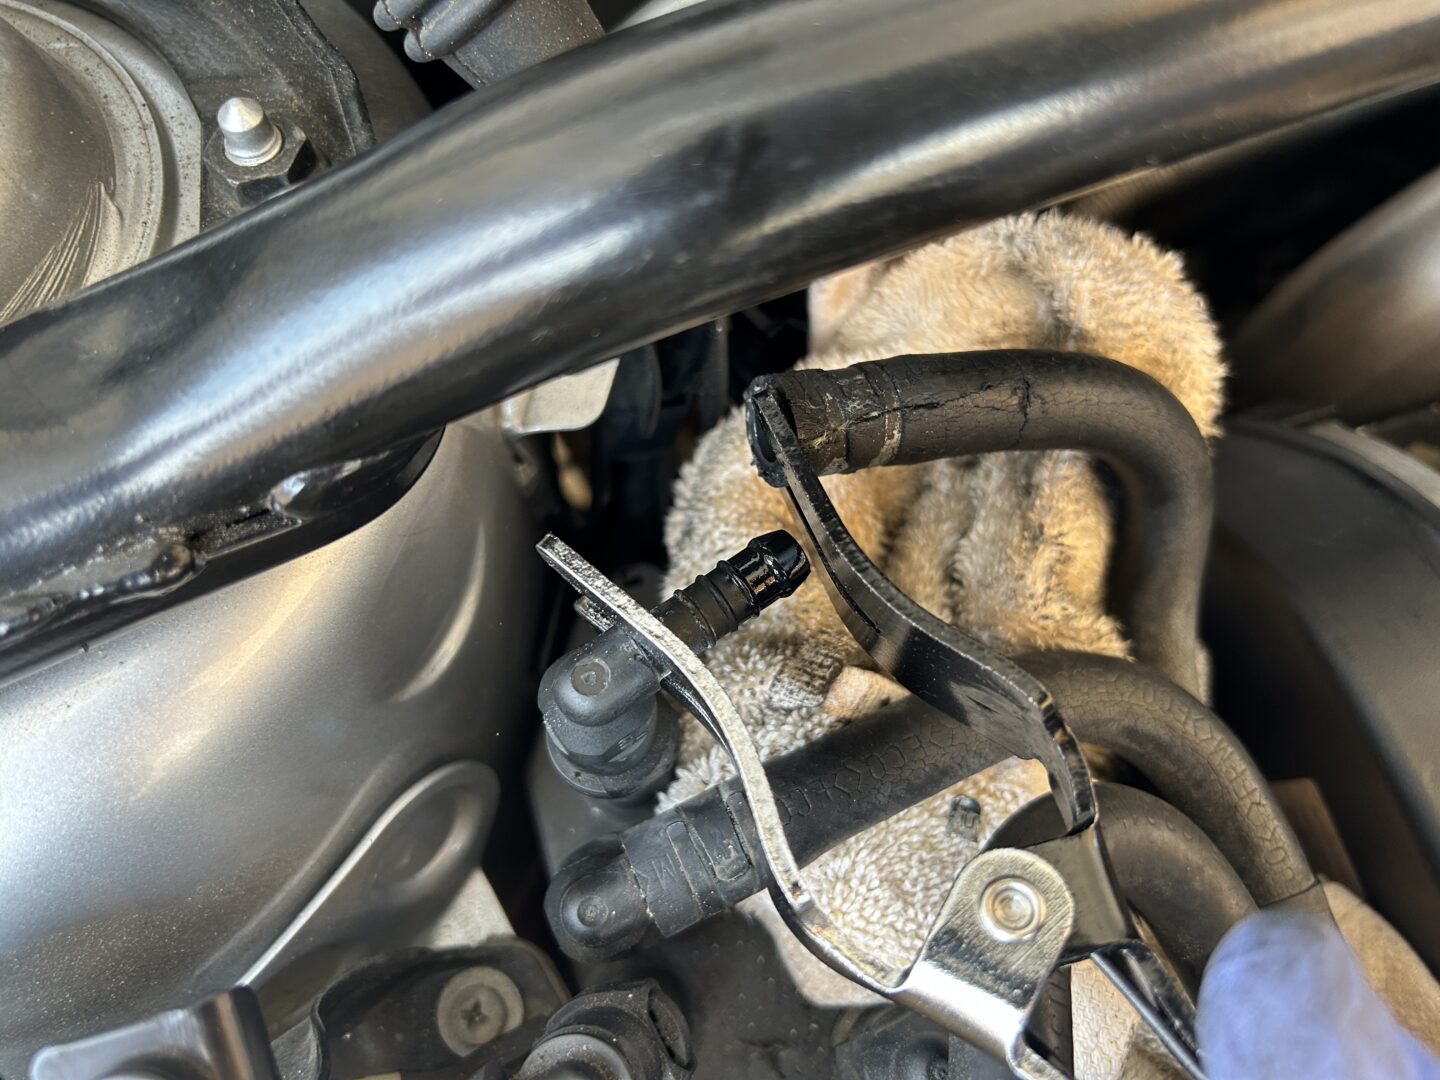
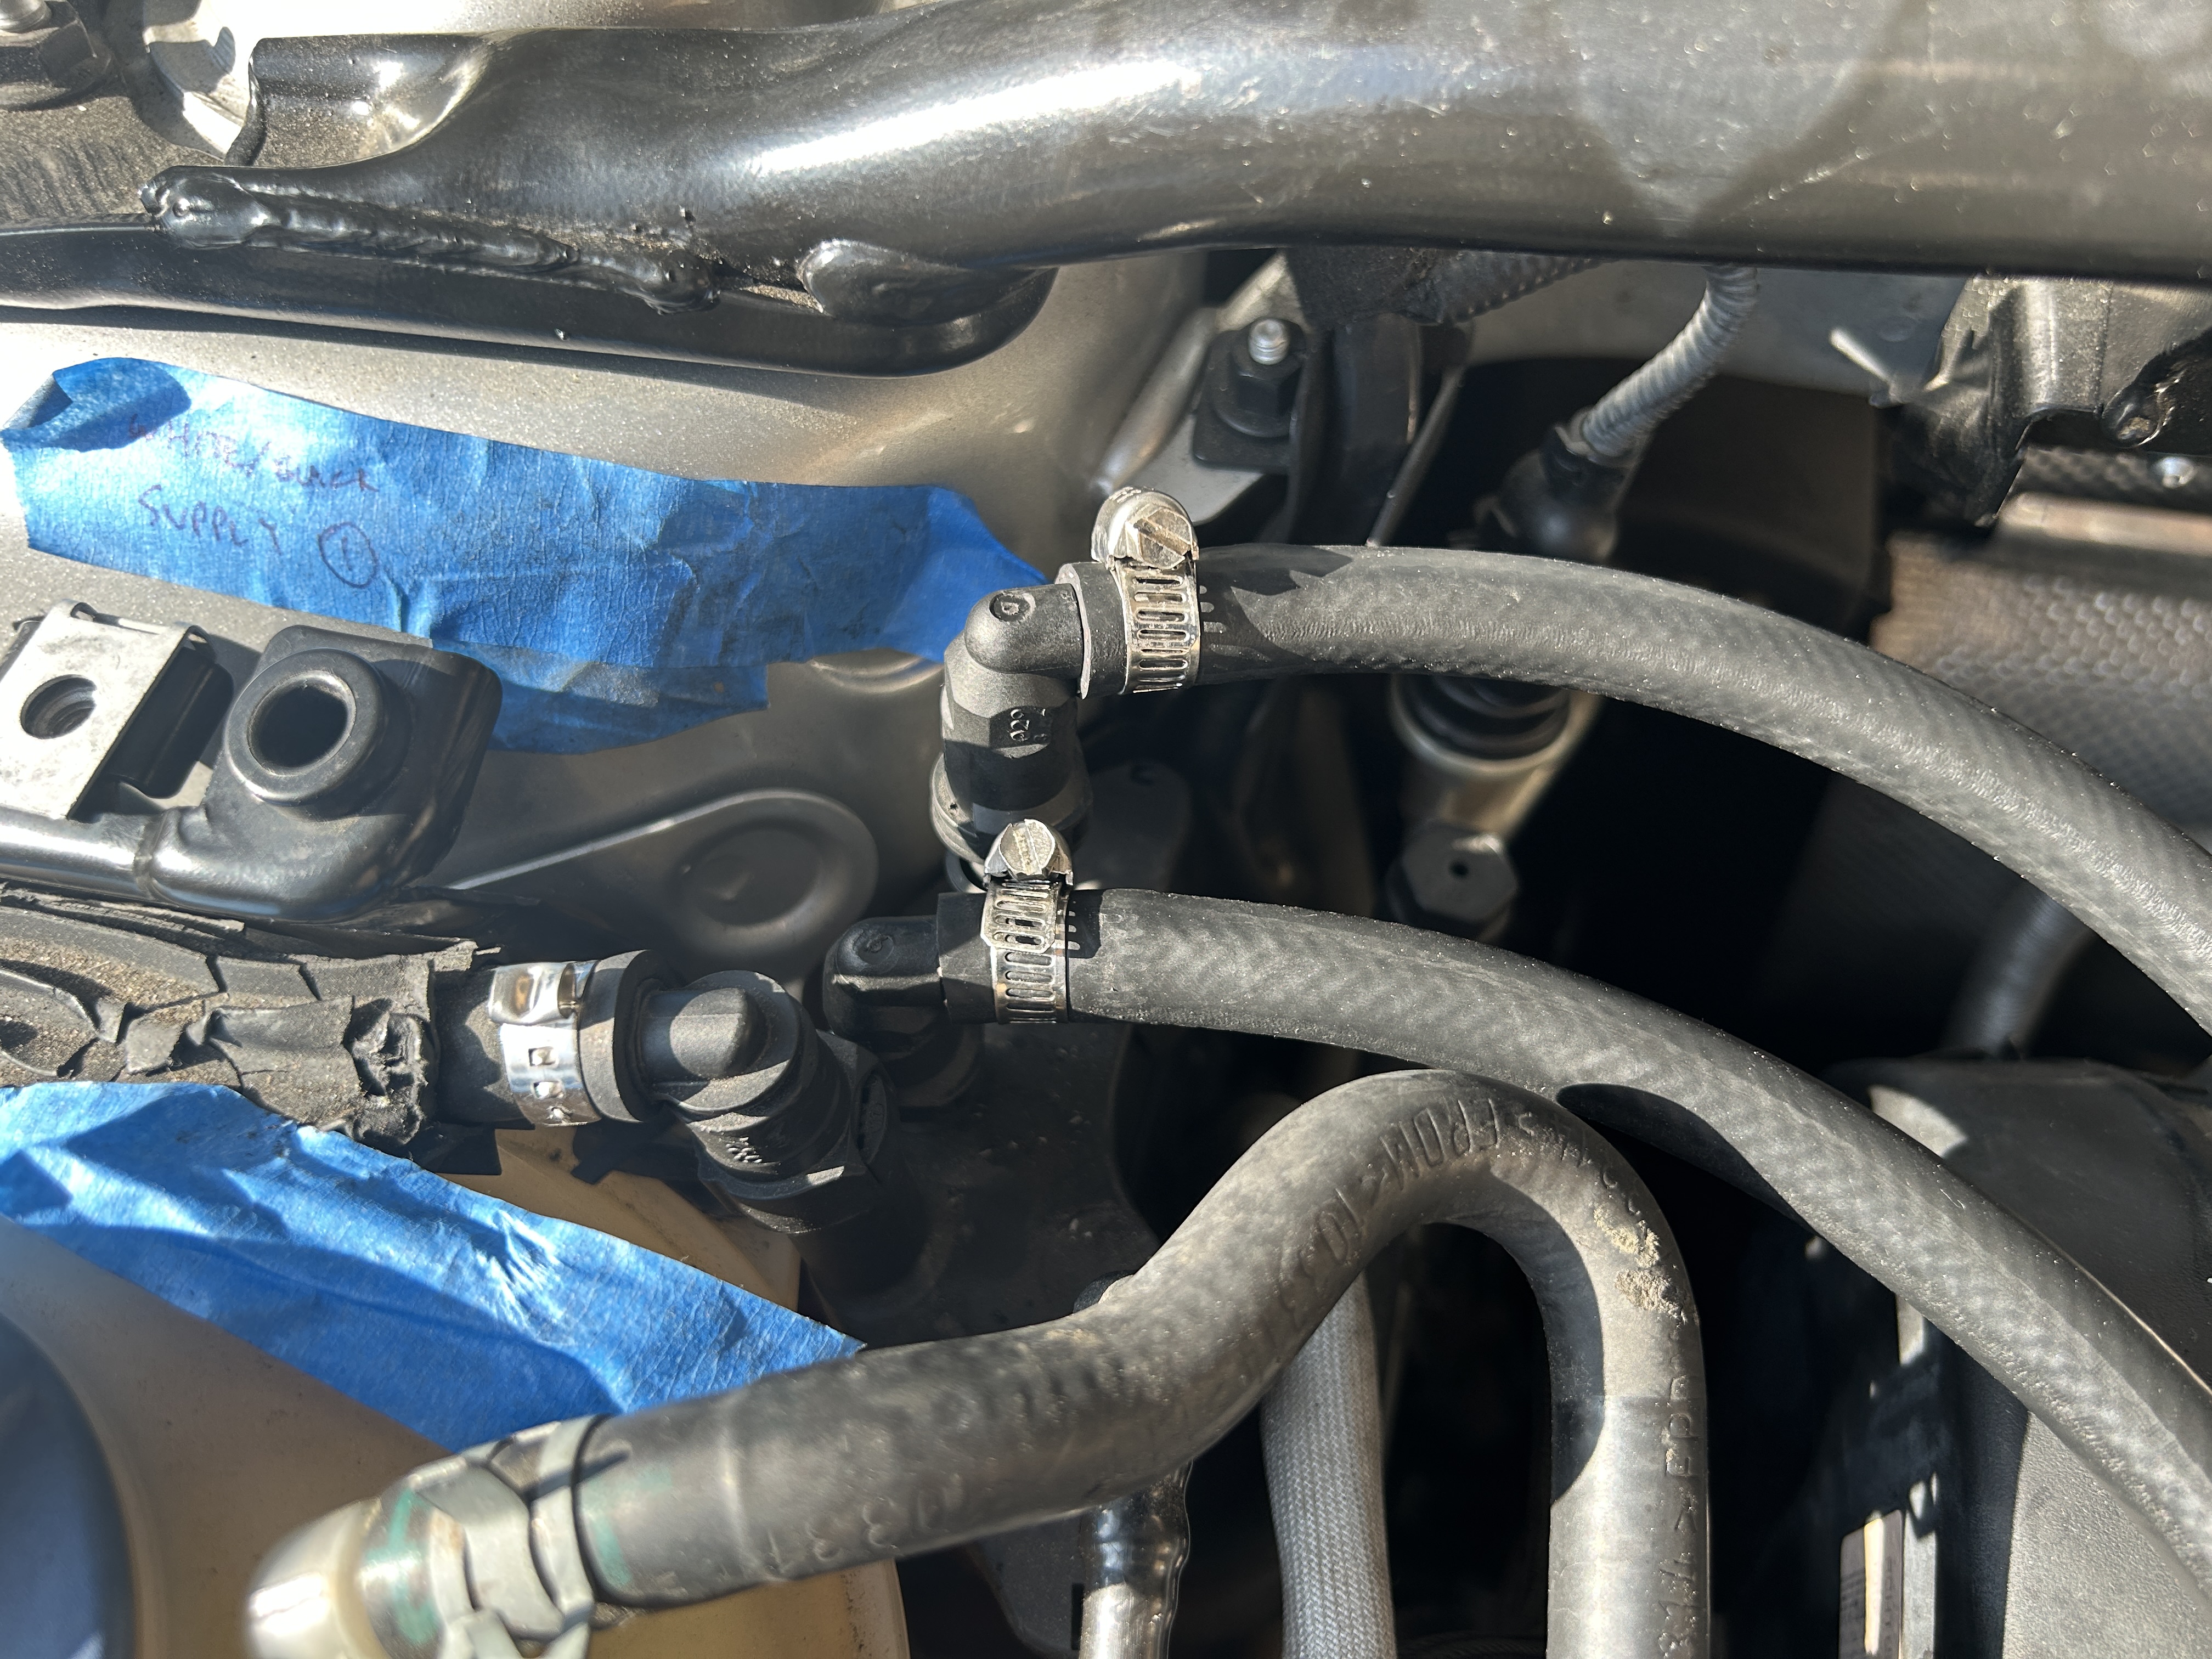
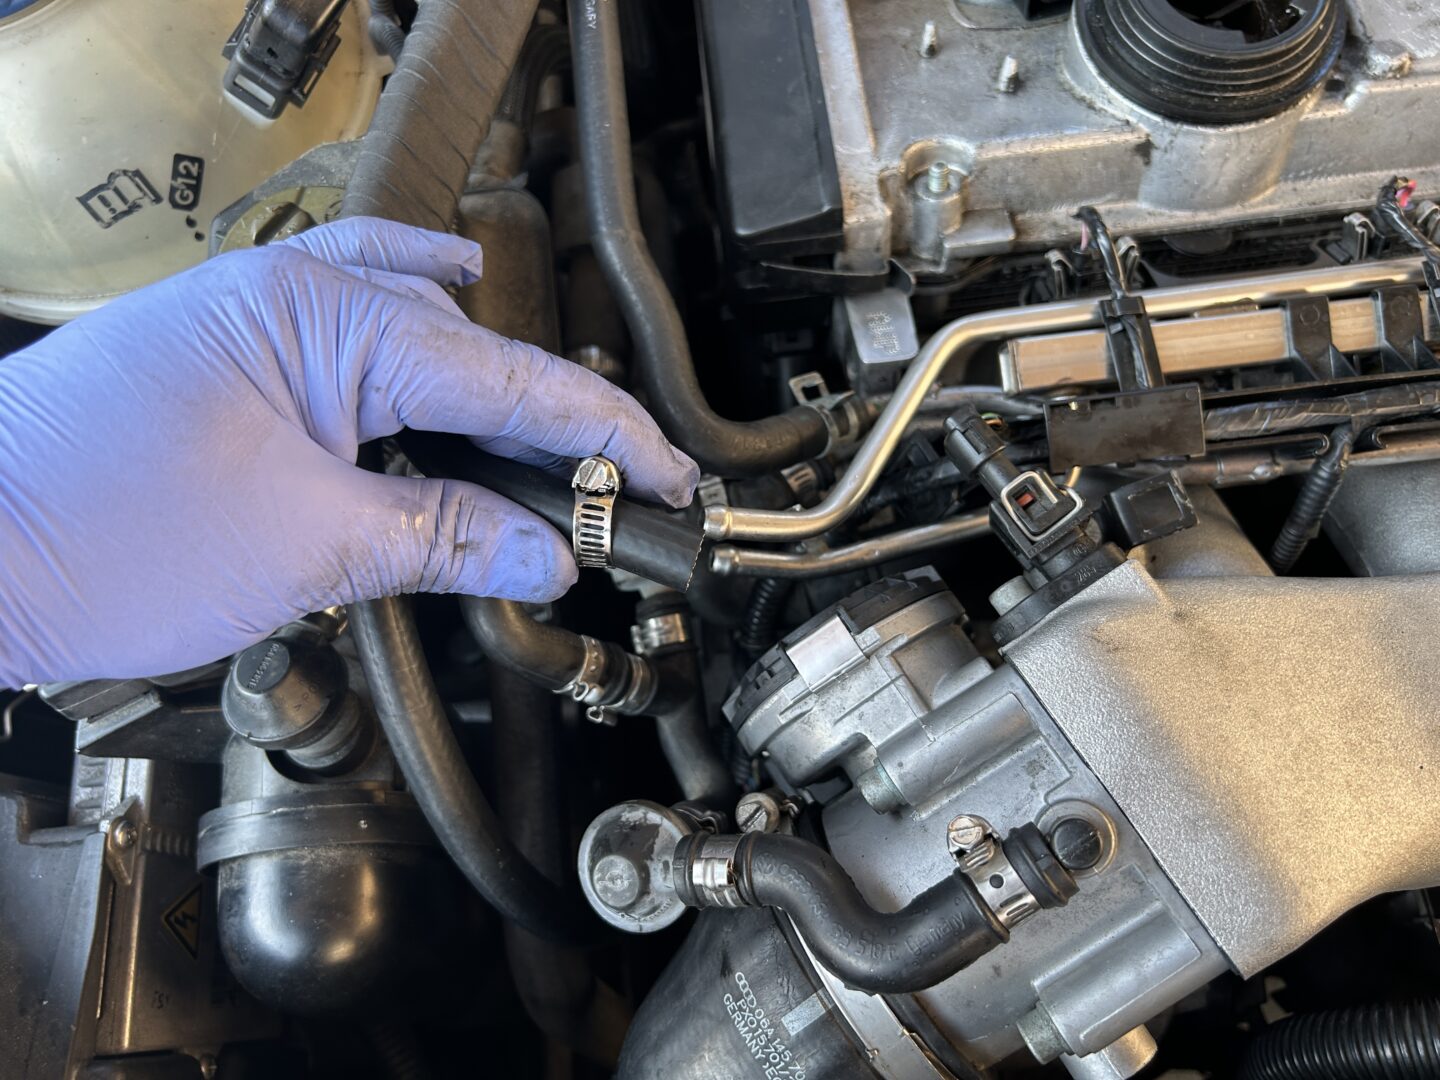
On the top side of the fuel hoses, there are quick releases for these lines, but from my experience, they are difficult to remove. It was easier to just replace the hoses by unclamping them from the quick releases. These clamps can be tough to get off, but you can get it removed by using ear clamp pliers to squeeze them and pull them off. Or, you can use diagonal cutters to basically bend these clamps apart. Once you are able to get these clamps off, you can remove the hose by pull them off.
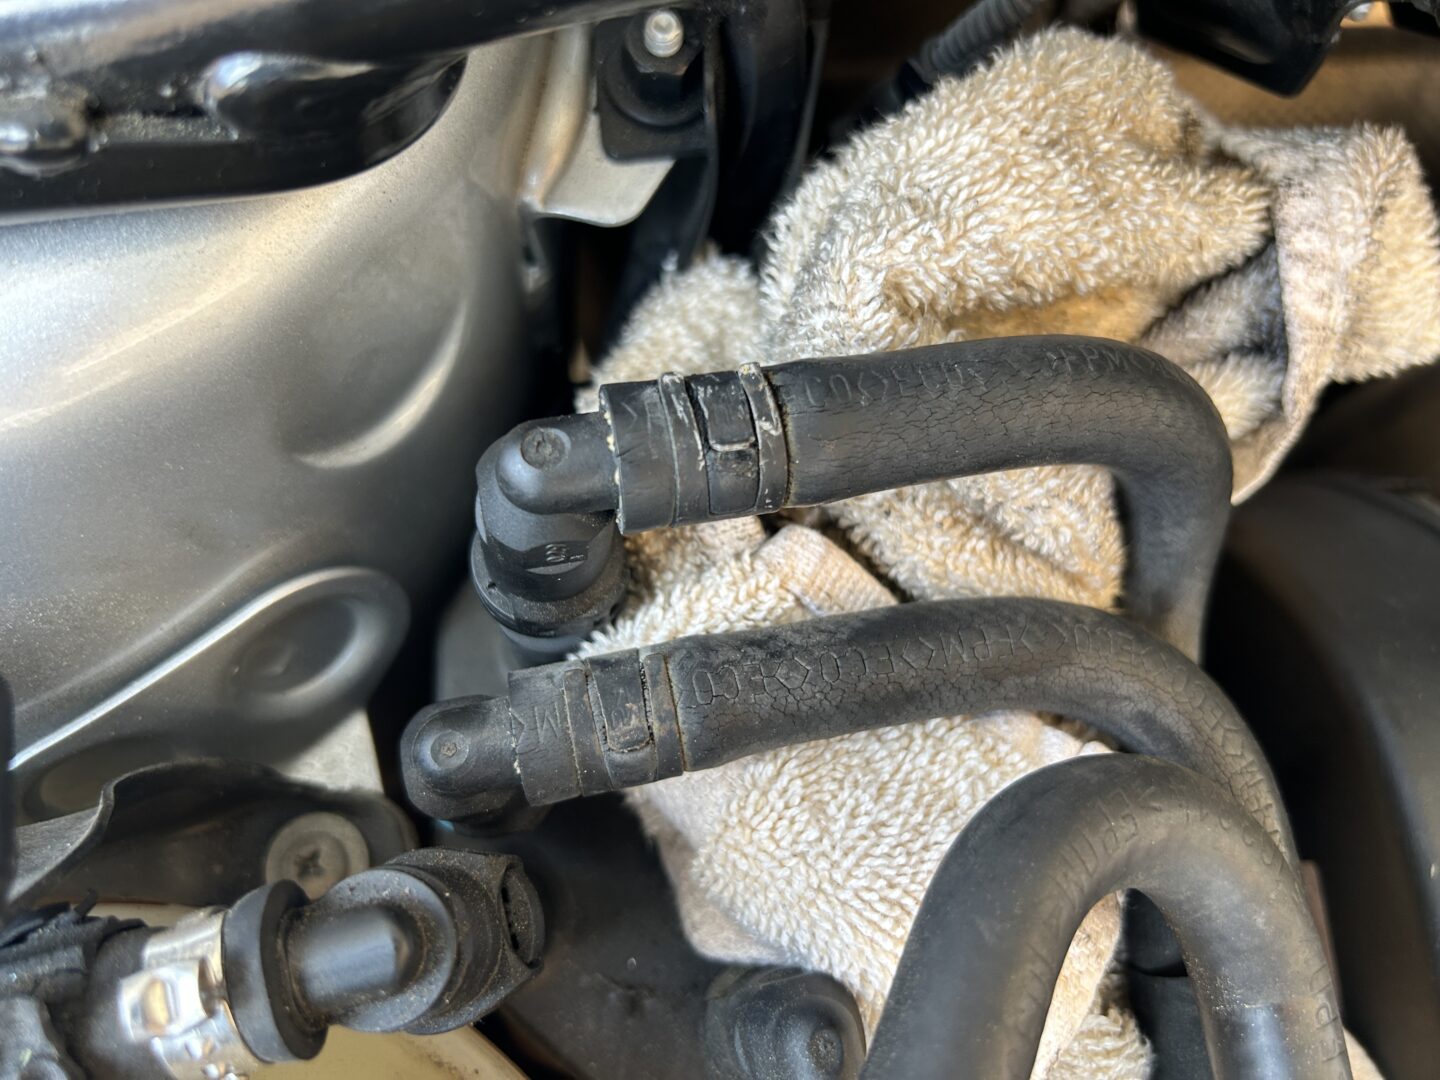
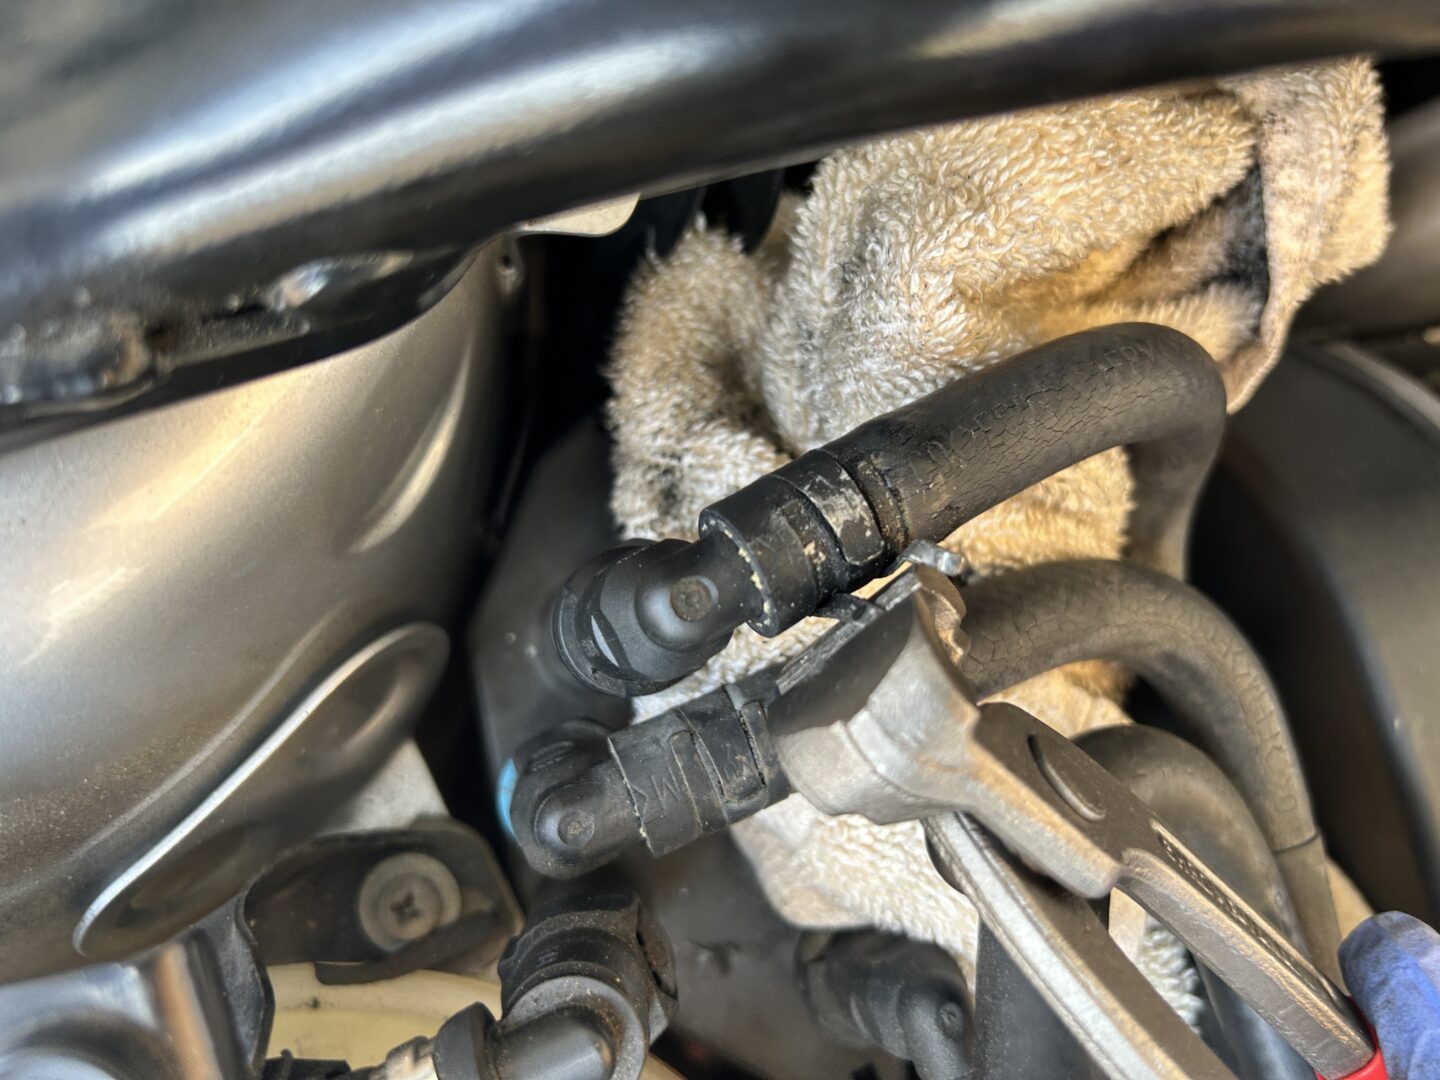
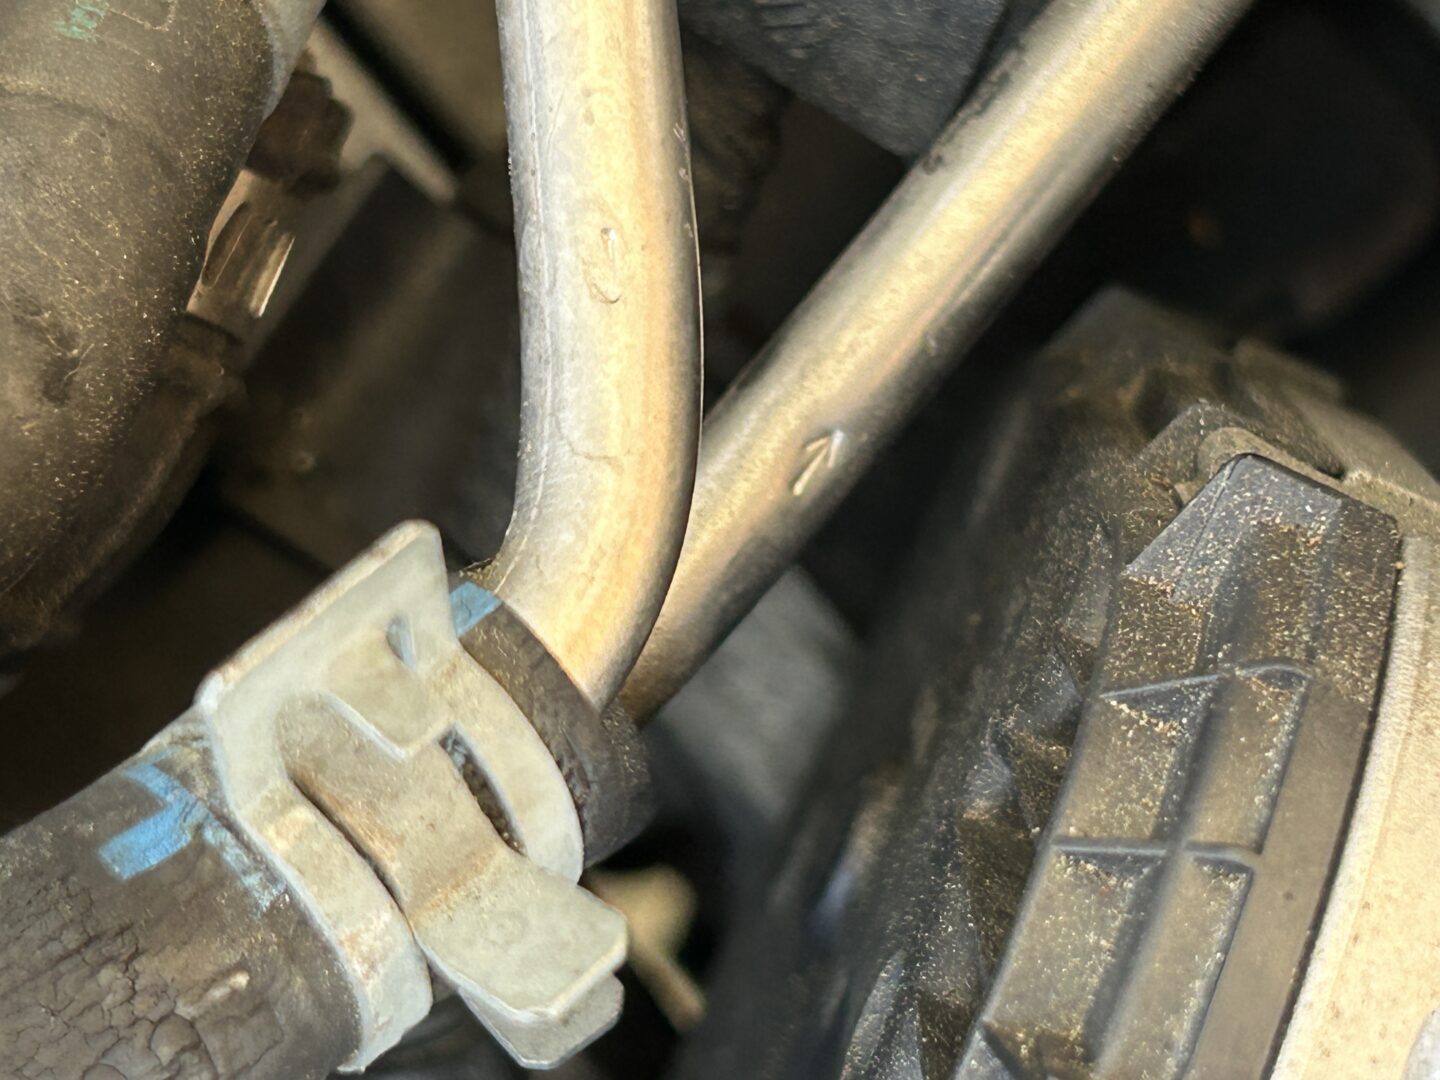
Keep in mind that there is one hose that is the fuel supply line and another one that is the fuel return line. You should be able to find a small arrow imprint on the metal line that the hose connects to, which indicates the direction of the fuel flow. This will in-turn tell you whether it is a retun or supply line.
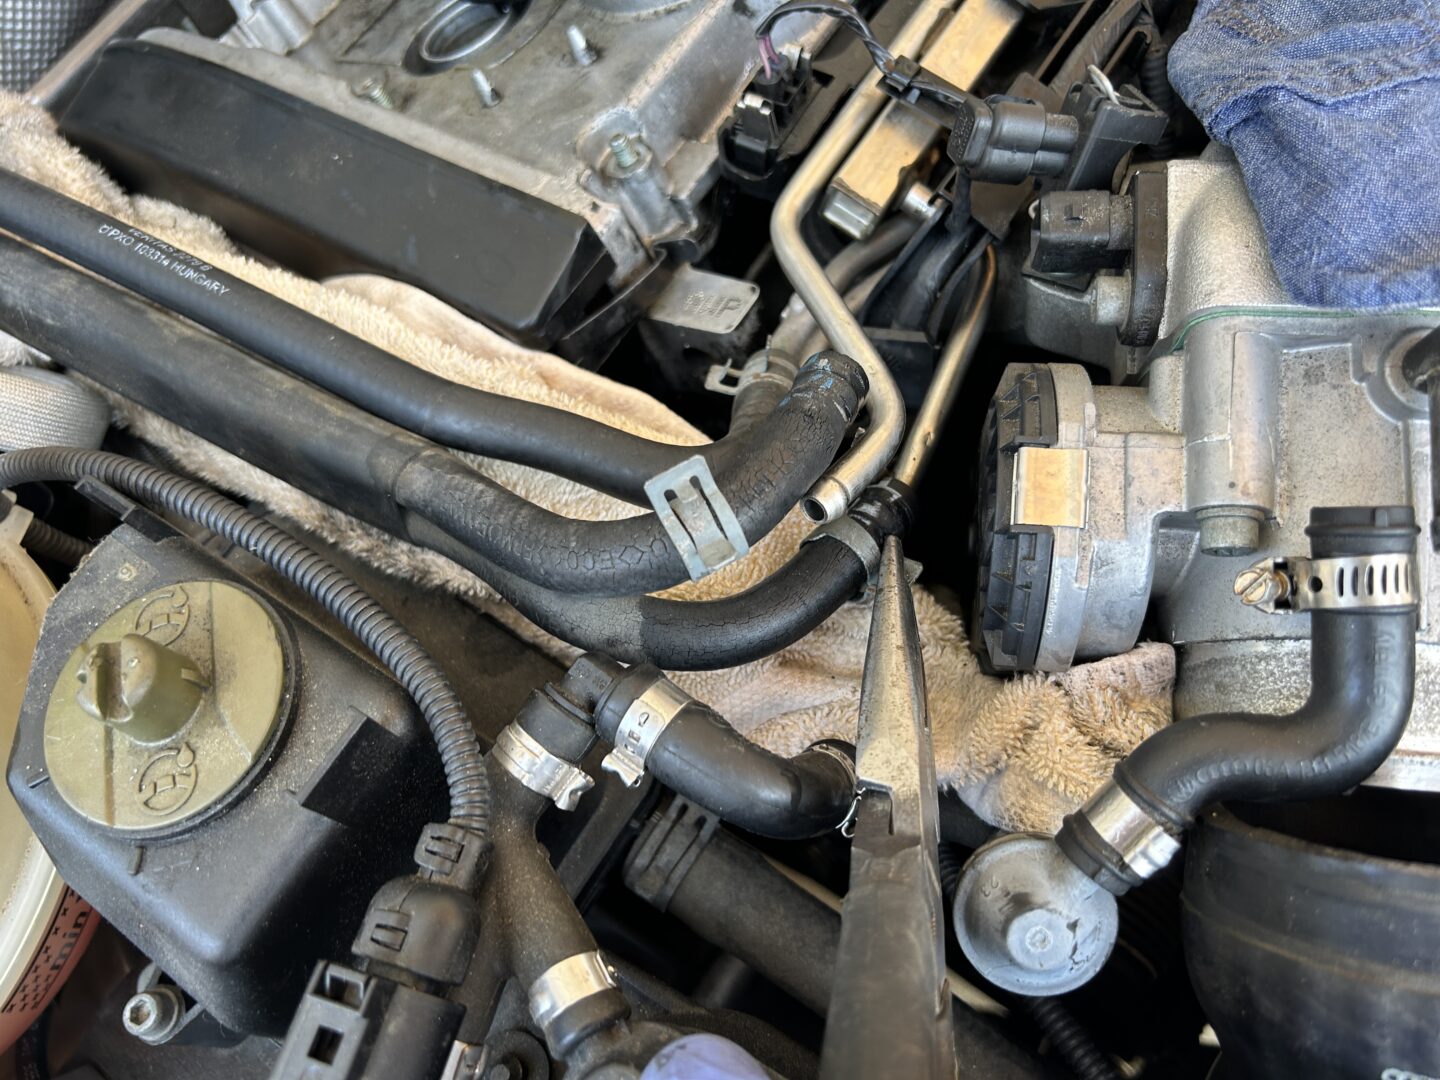
I highly recommend labeling the hoses and connections so that when you reinstall them, you can guarantee that you install the new hoses to the correct places. After the clamps are removed or twisted out of the way, you can use a hose remover tool or just pull the hoses off the metal lines.
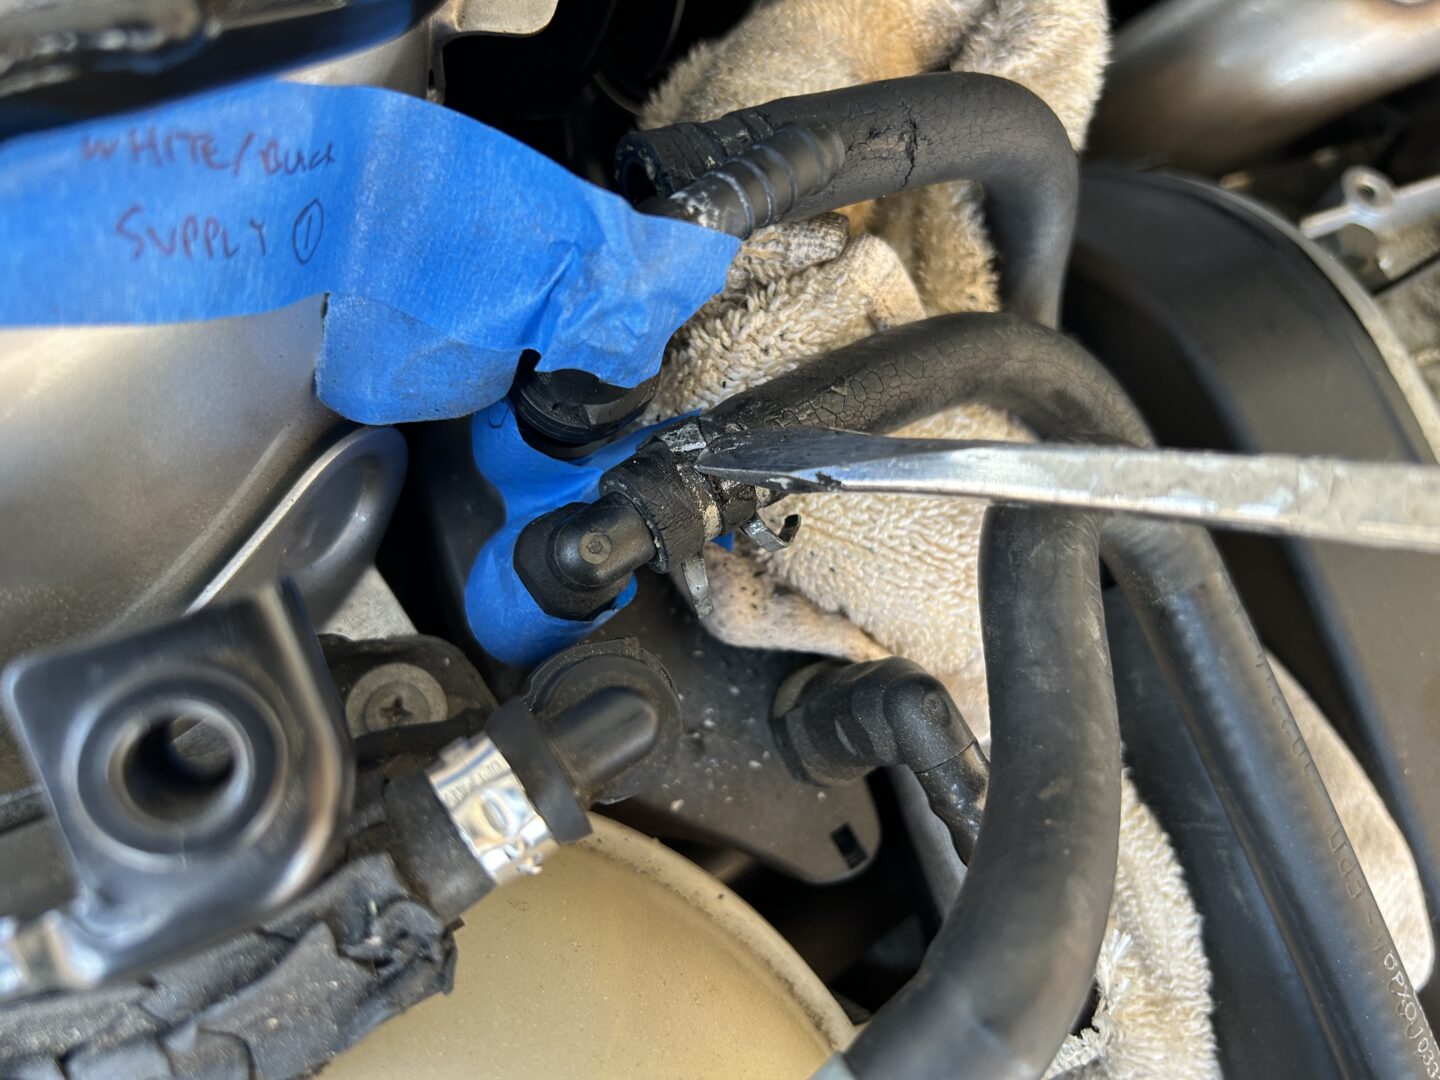
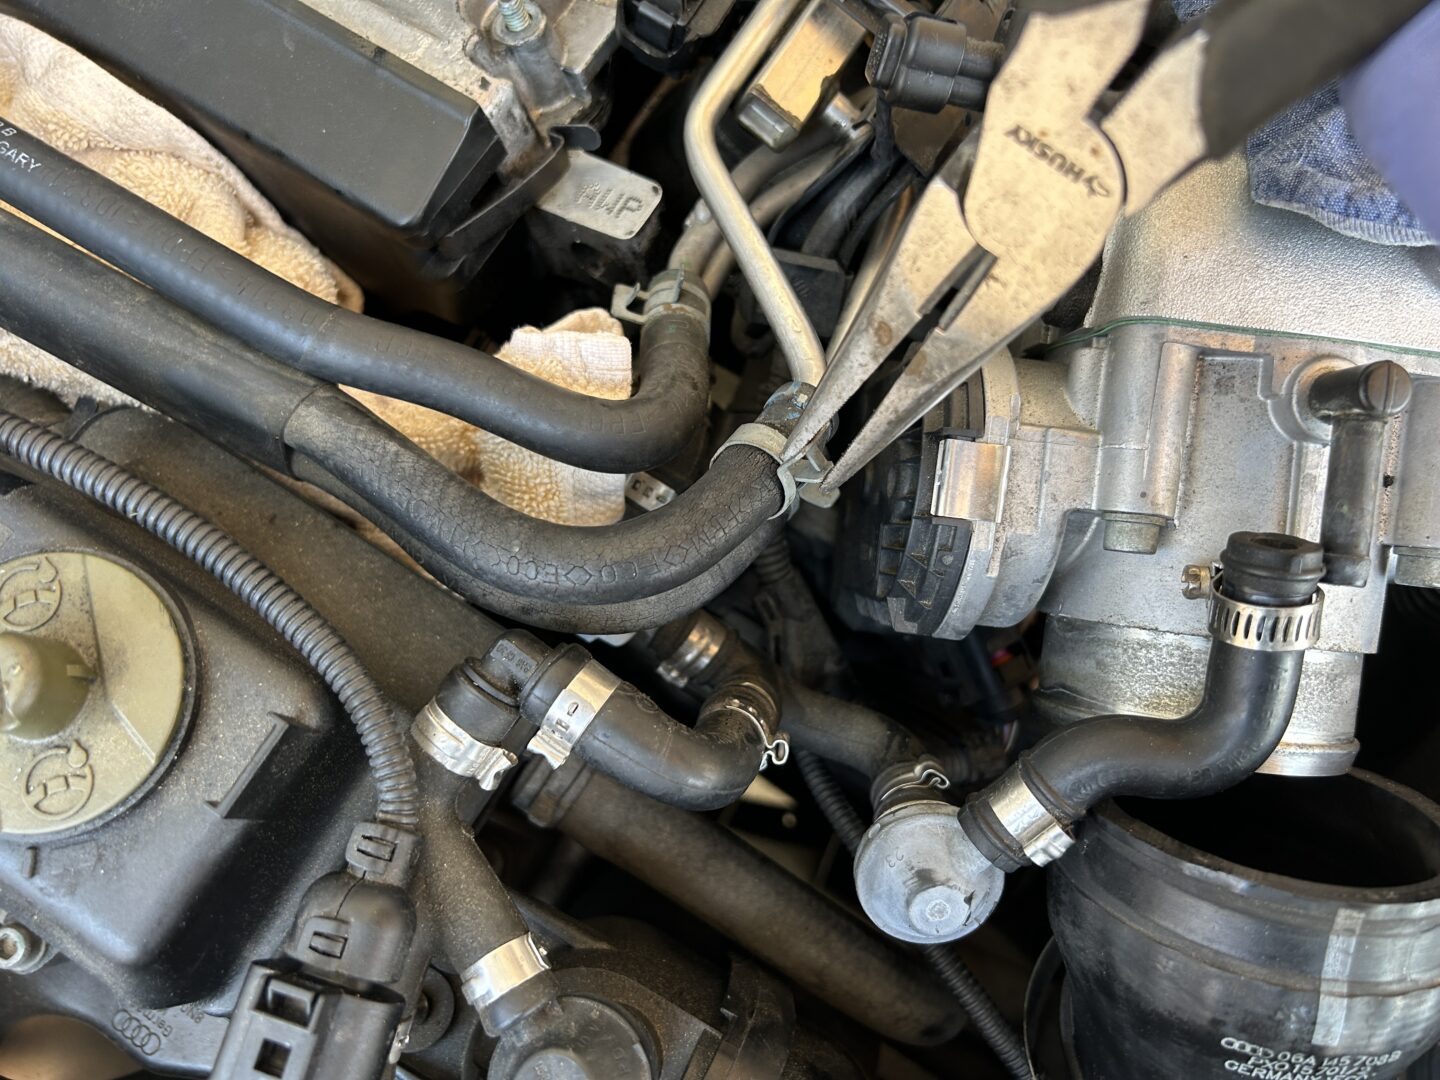
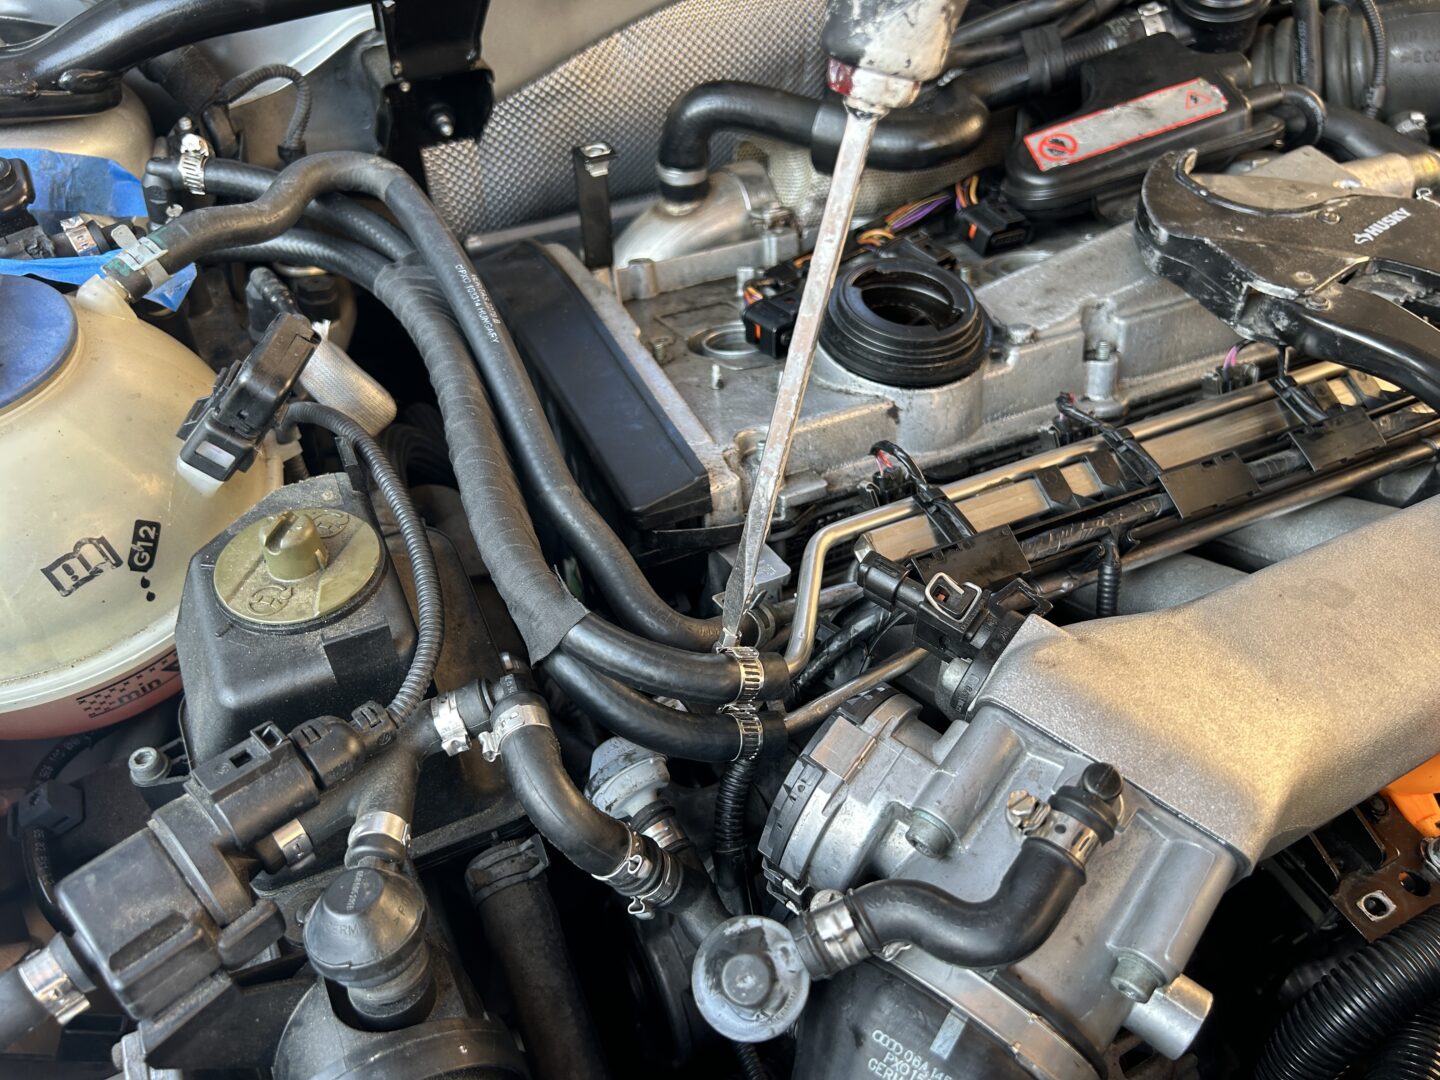
Next, you’ll go to the fuel rail side and do the same thing. Remove the clamps, and pull the hoses off. Label these if you need to so that you can put them all back in their correct places later.
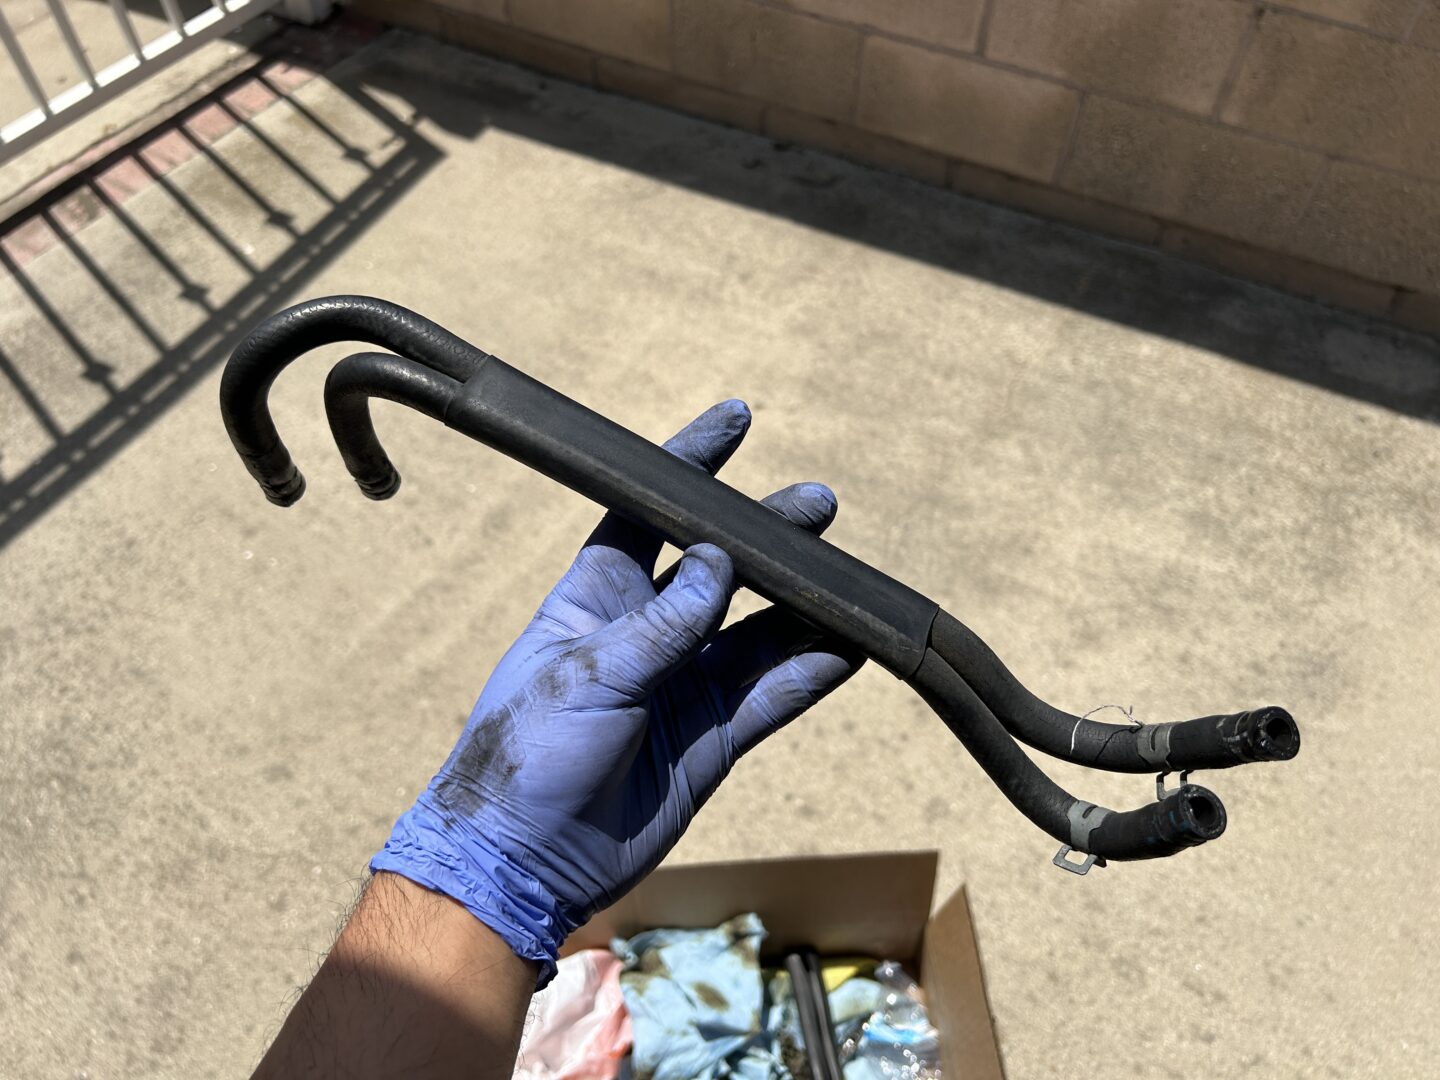
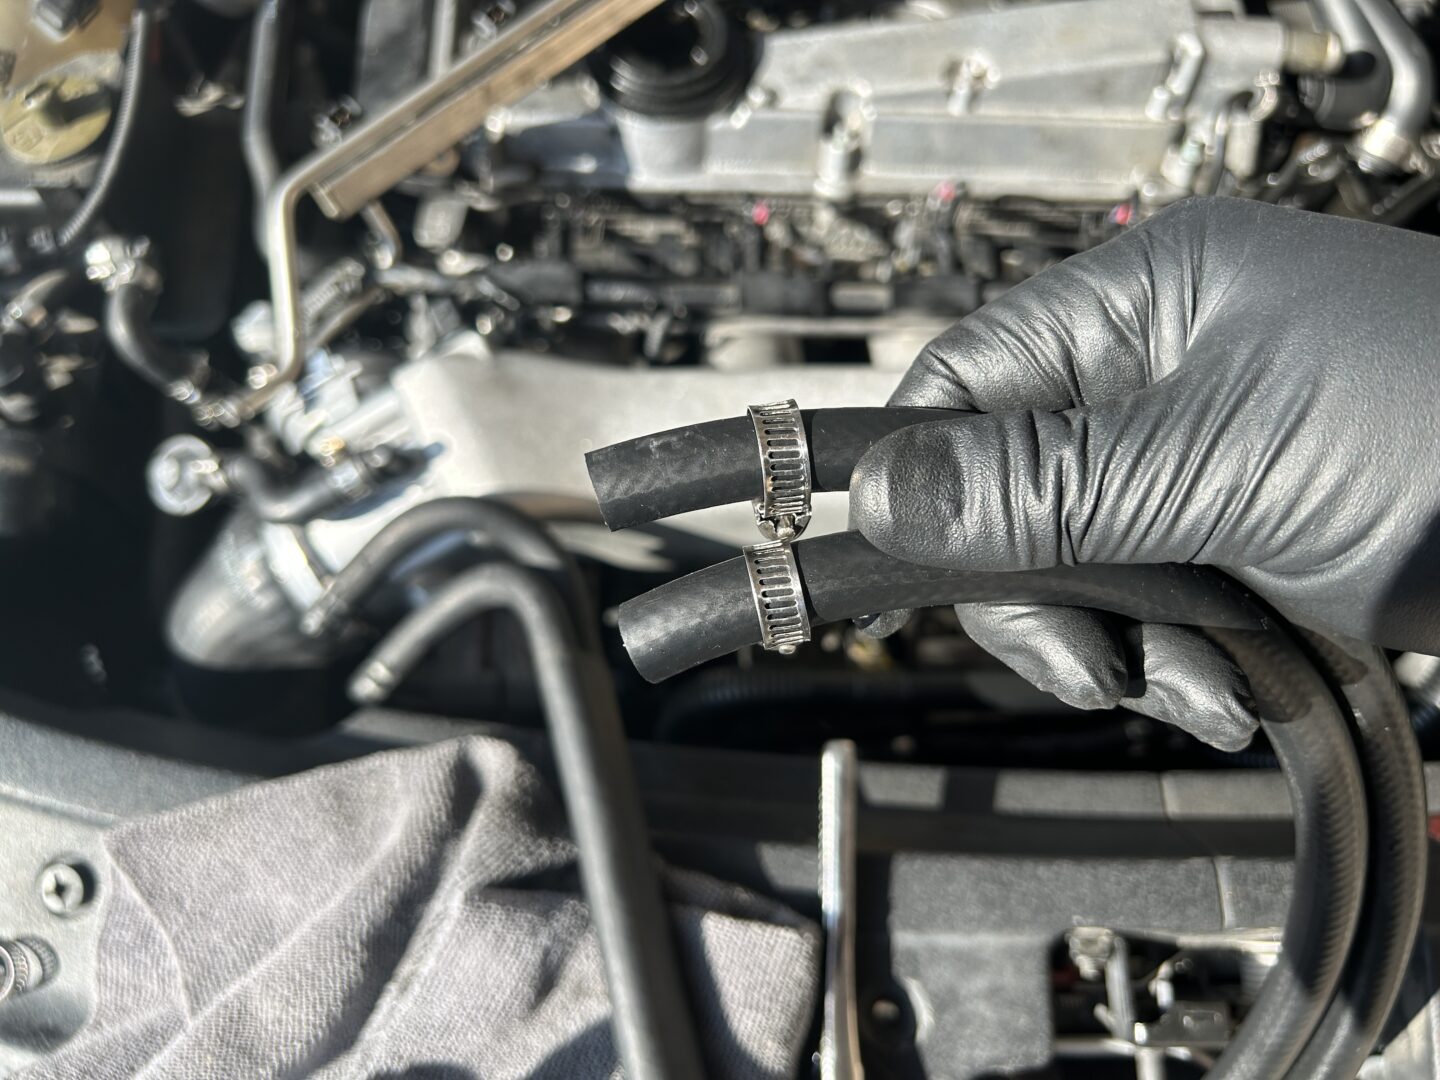
Now, take the new universal fuel hose and measure out the same lengths as the old ones by match it up side-by-side. Follow the bends of the existing hoses and you should be able to get the same lengths (even if the universal hoses aren’t pre-bent). To cut the fuel hose, you might be able to use a utility knife, but to get a nice clean straight cut, you should use a ratcheting pipe cutter tool.
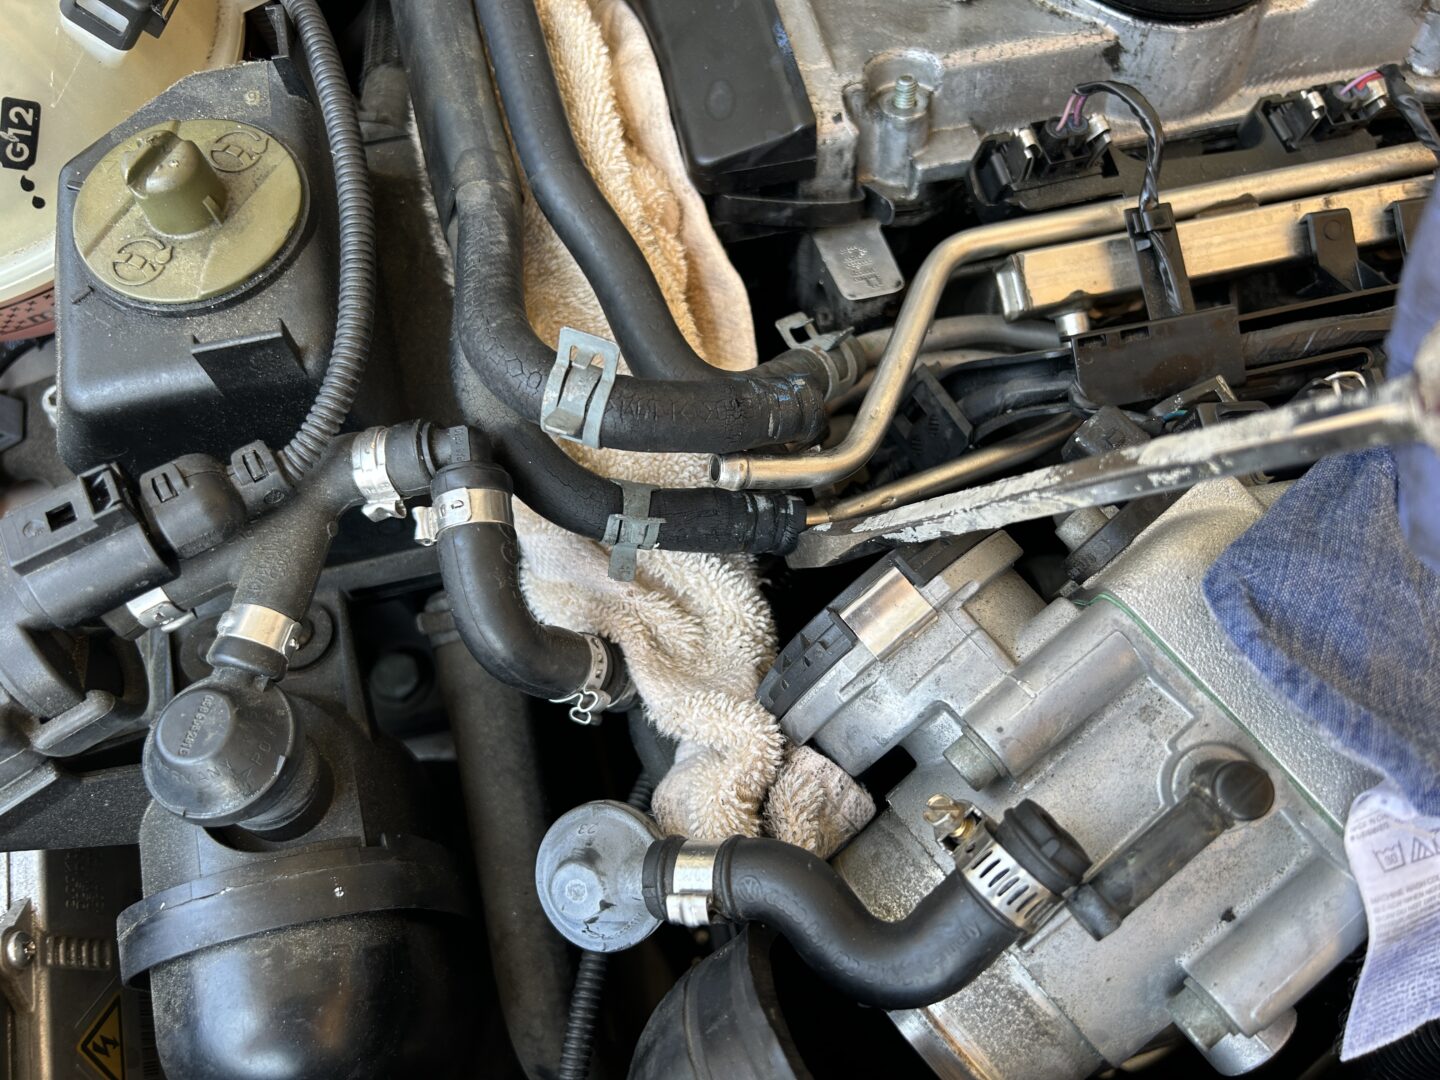
With the two new cut fuel hoses and new worm drive clamps, reinstall them onto the quick clamps as shown.
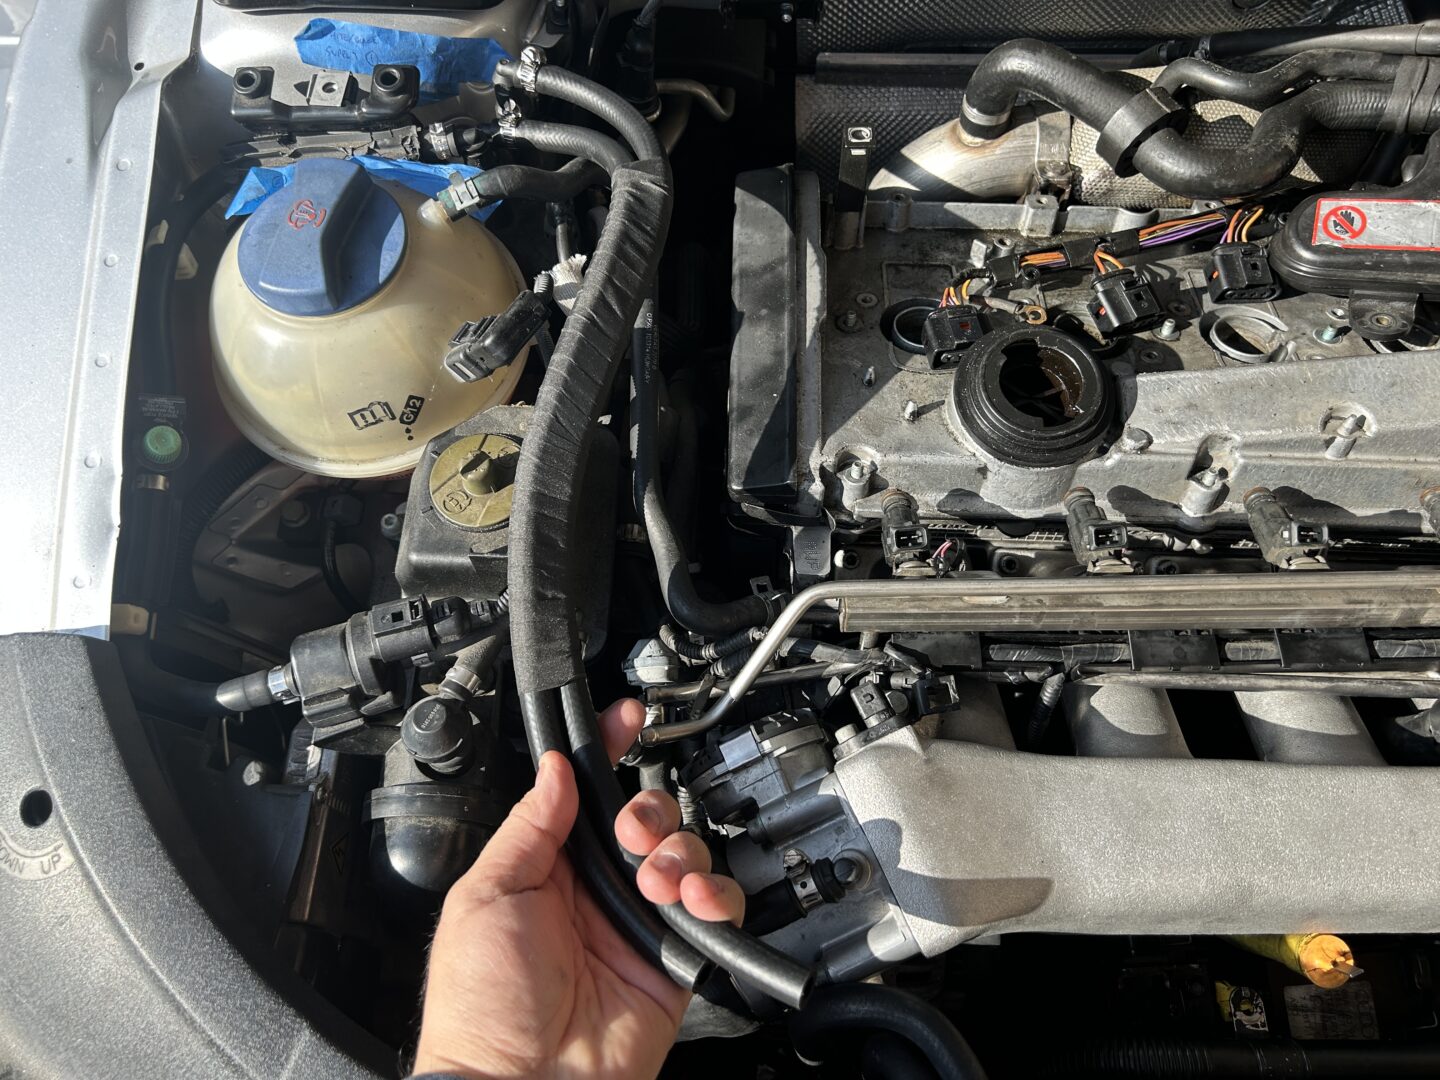
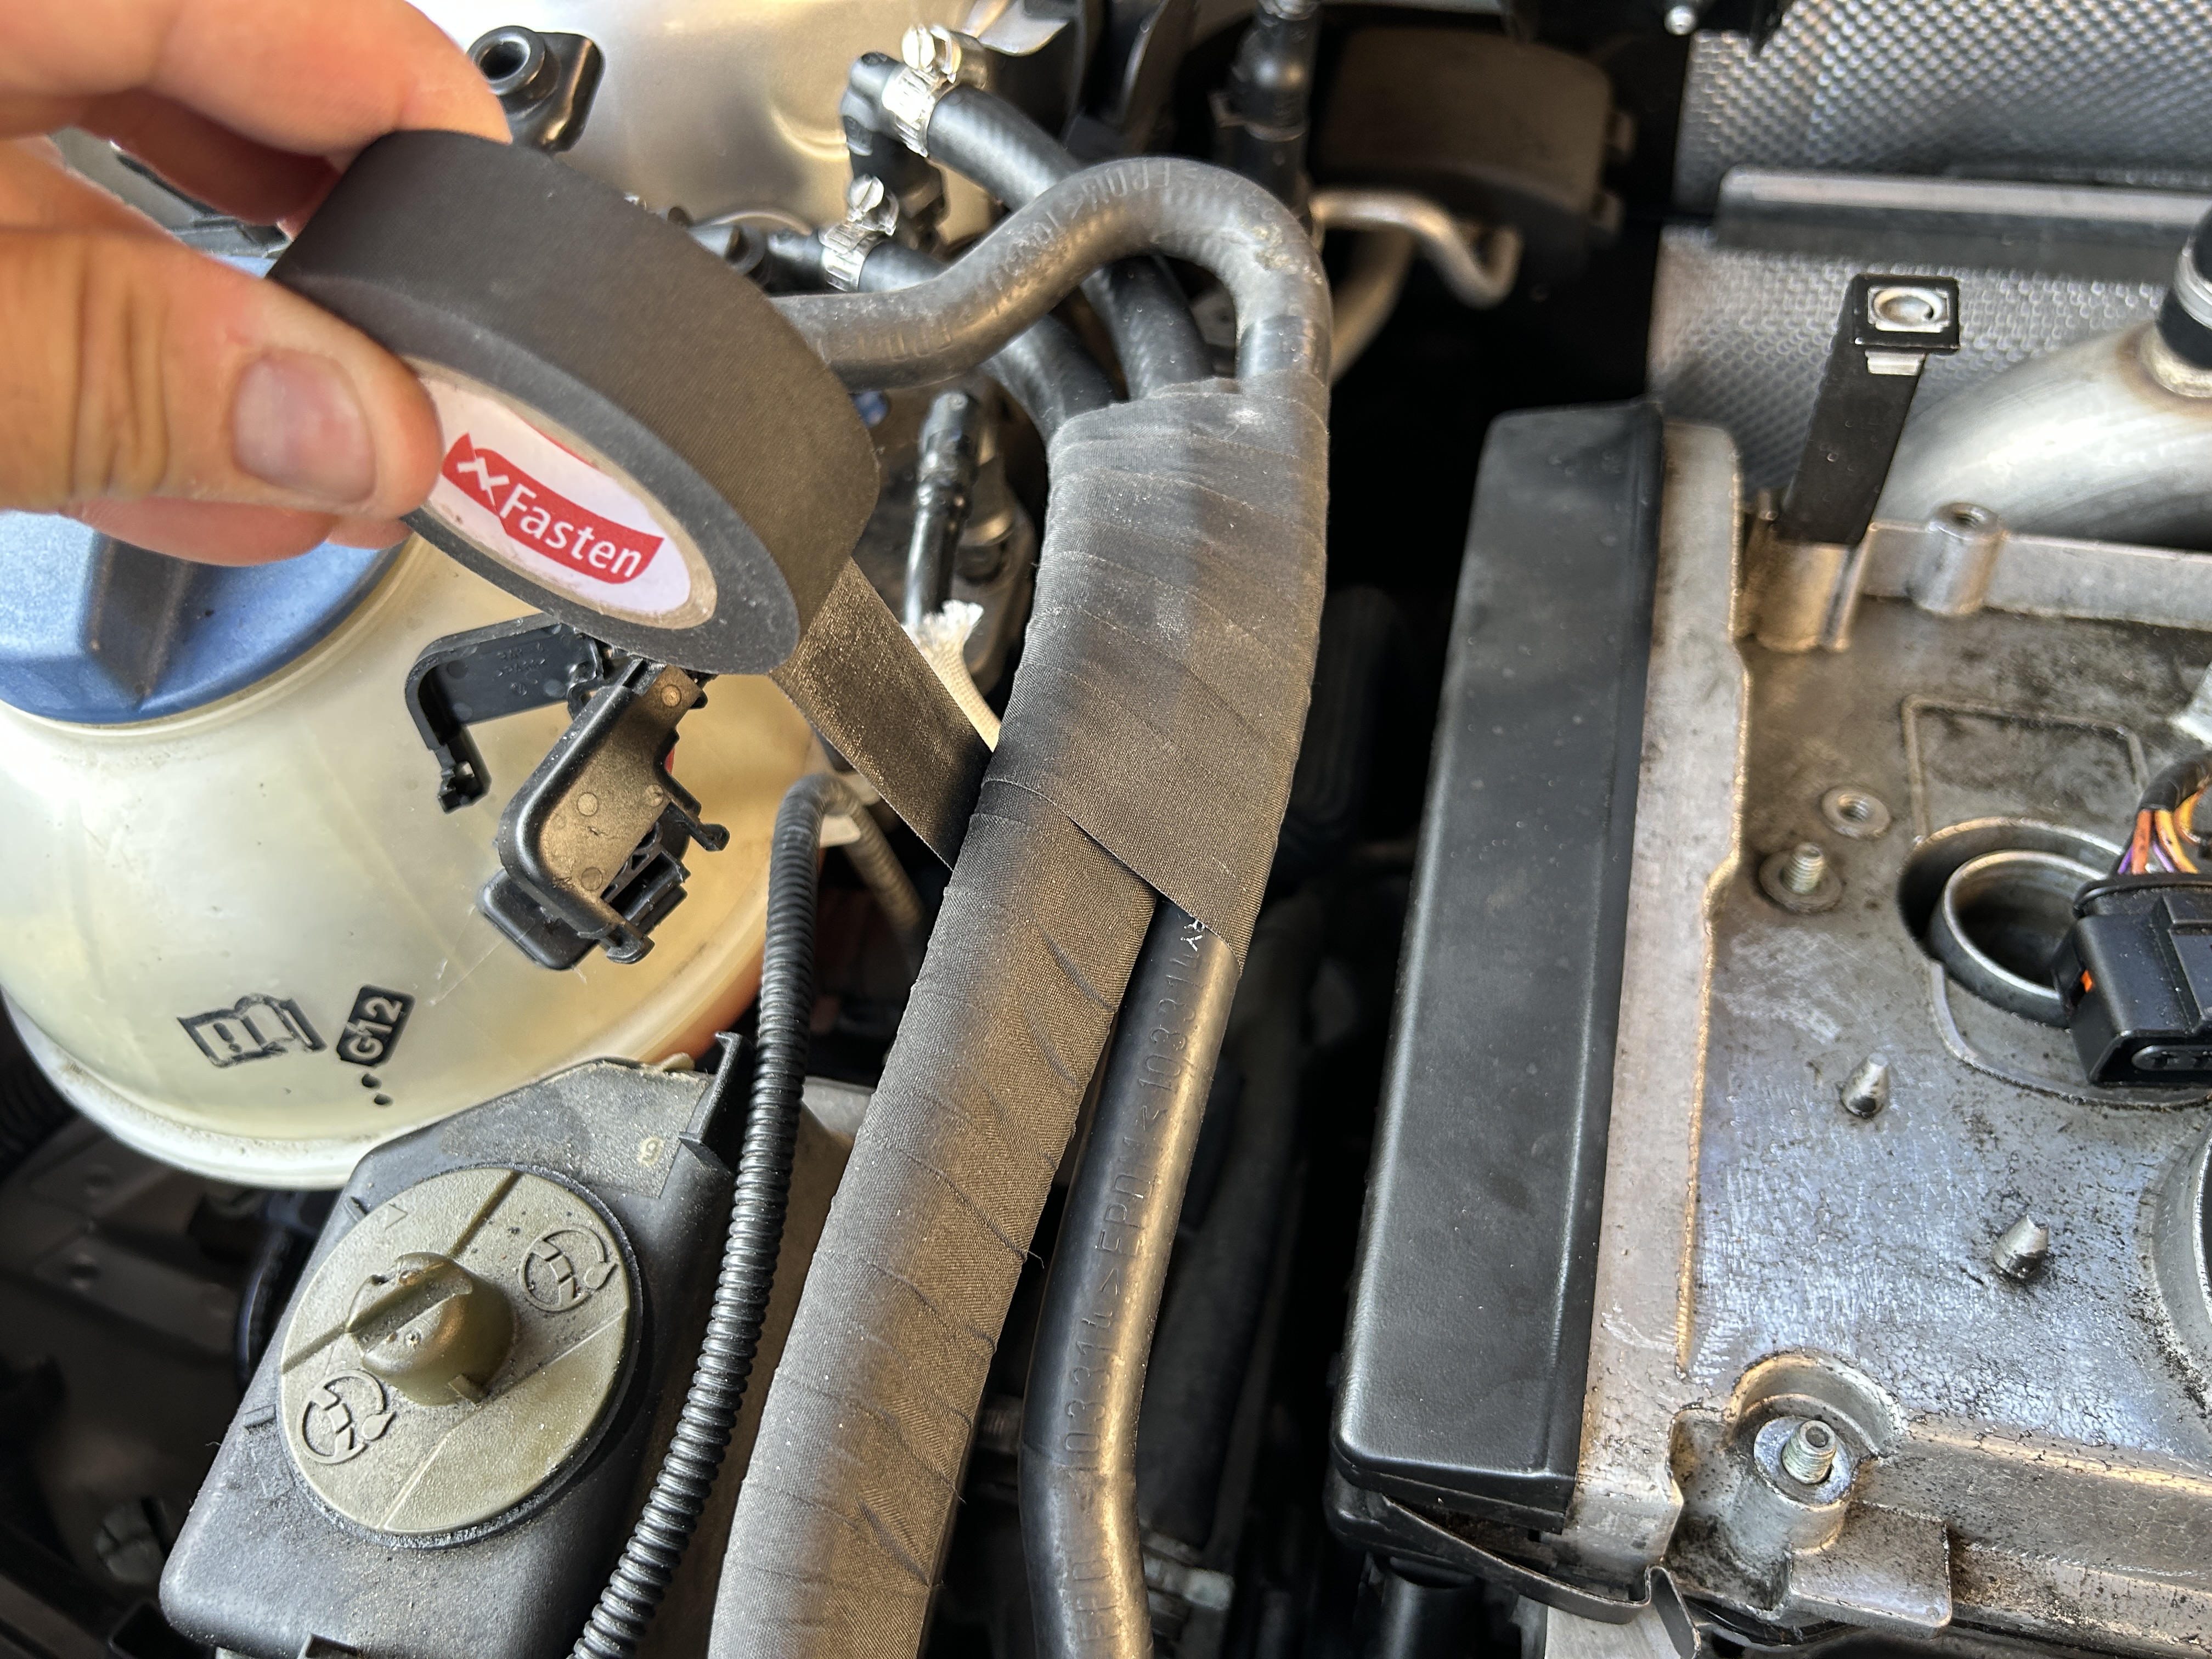
Now, we need to get the bends on the hoses since they aren’t pre-bent. To do this, simply bend the hoses and then use wire harness tape to wrap it. As you bend the hoses and wrap the two hoses together, the tape will help hold the desired shape of the hose.
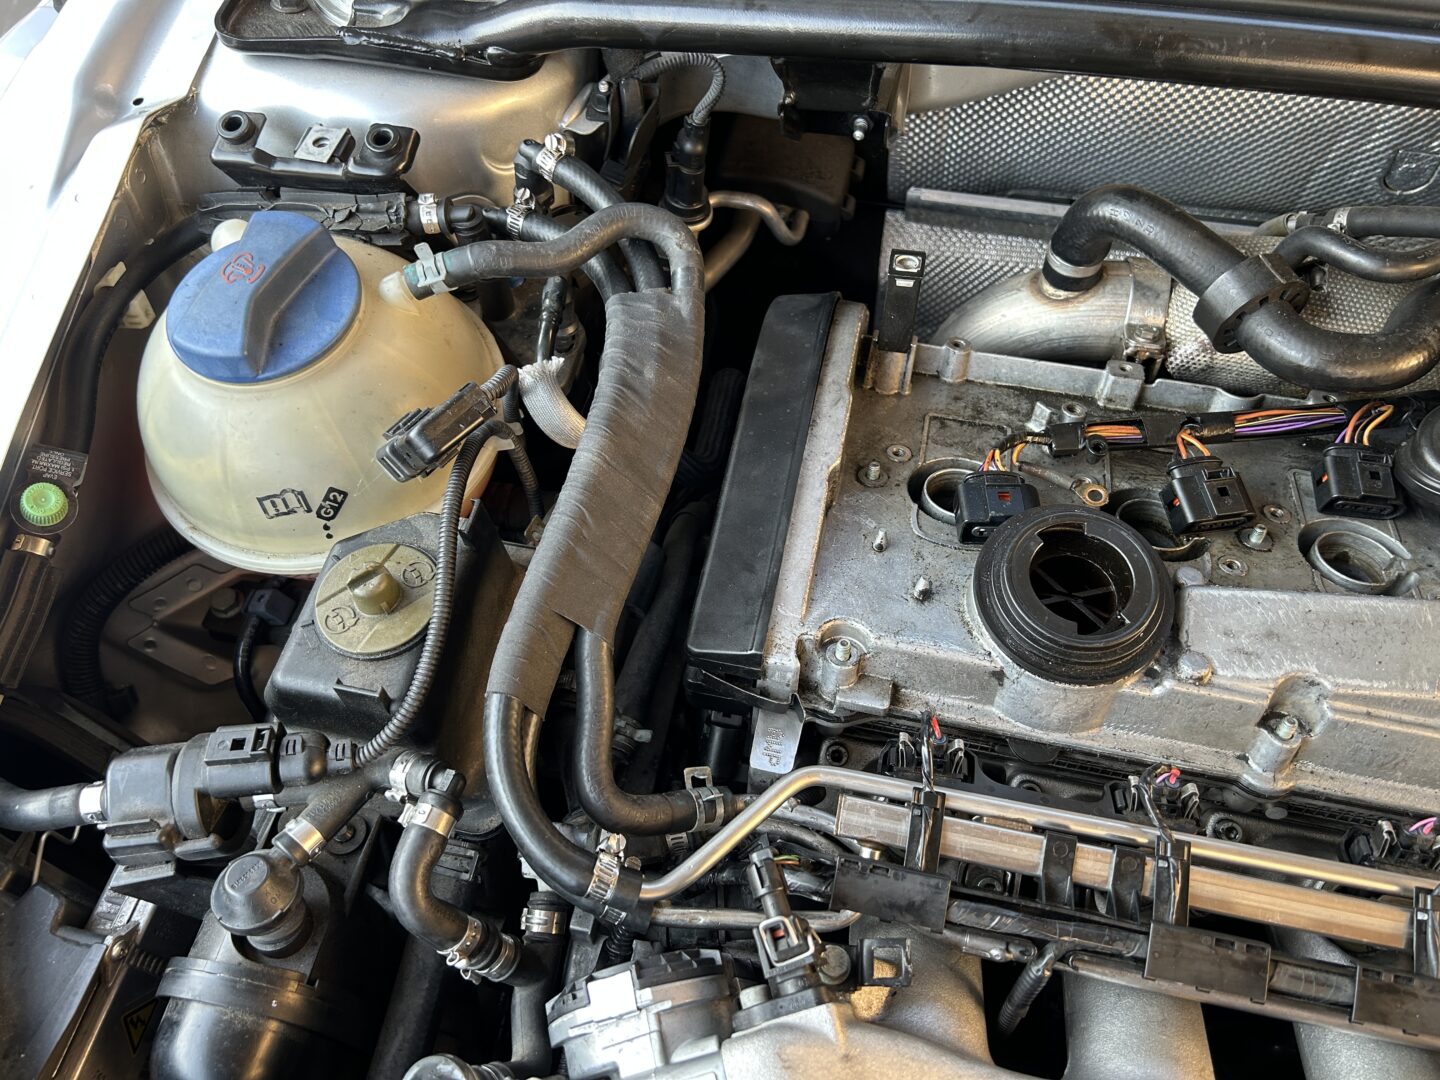
Then, go to the other end and make sure you are connecting the correct hose to the correct return/supply line. Then, tighten up the worm-drive clamps on both ends snug. Then, you can wrap the adjacent hose to the already wrapped fuel hoses just to keep them all together.
And that’s what it takes to replace the fuel return and supply hoses on the Mark I Audi TT. Universal fuel hoses work just fine as replacements for your old ones since direct replacements are no longer readily available. The only difficulty you might have with the universal hoses is getting the bends on the hoses, but bending them and wrapping them at the same time accomplishes this goal.
Finally, I would recommend letting the clamps settle on the new fuel hoses and then re-tightening the clamps again. I believe that the clamps need to be tightened very snug in order to prevent fuel from leaking. Because there will be some fuel pressure when the vehicle is on and running, the clamps on both ends of the fuel lines need to be clamped very tight. The fuel hoses are more robust, so they can take the added clamp pressure. Try running your vehicle and then check these hoses again to ensure that there are no fuel leaks.
")
")
")
")
")
")
")
")
")
3 Comments
Pingback: How to Change the Intake Manifold Gasket: Audi TT MK 1 (2000 – 2006 – Blog
dude youre the best love how detailed you are and listing exact hose sizes etc really cuts out a lot the research i gotta do on this car
You’re welcome!!