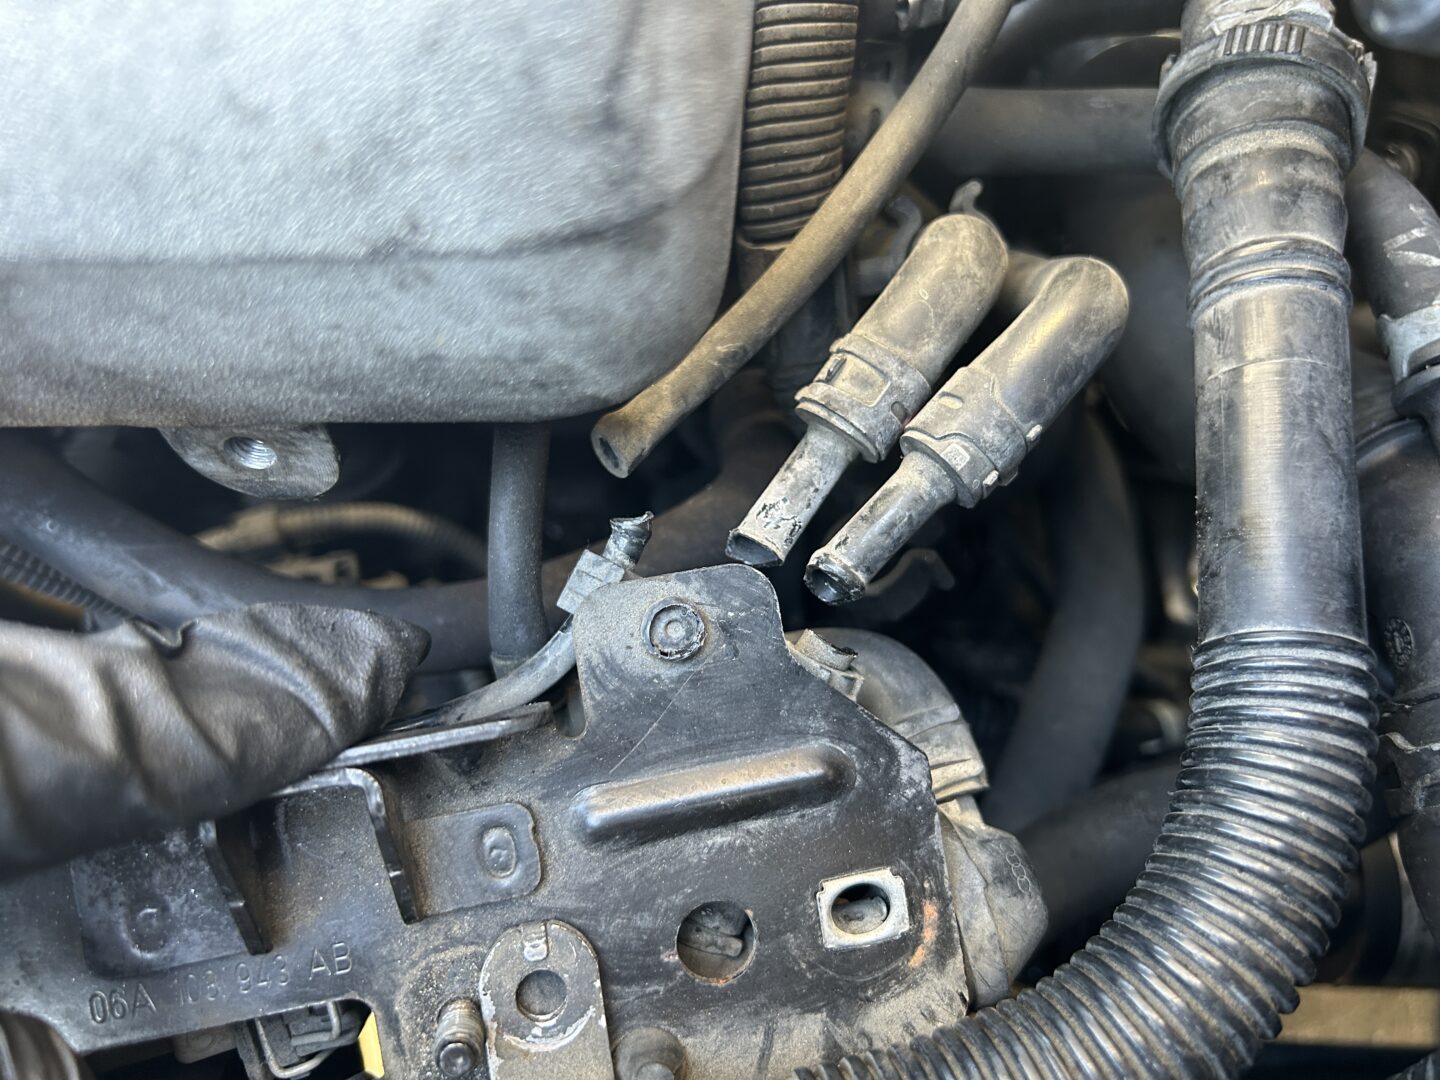
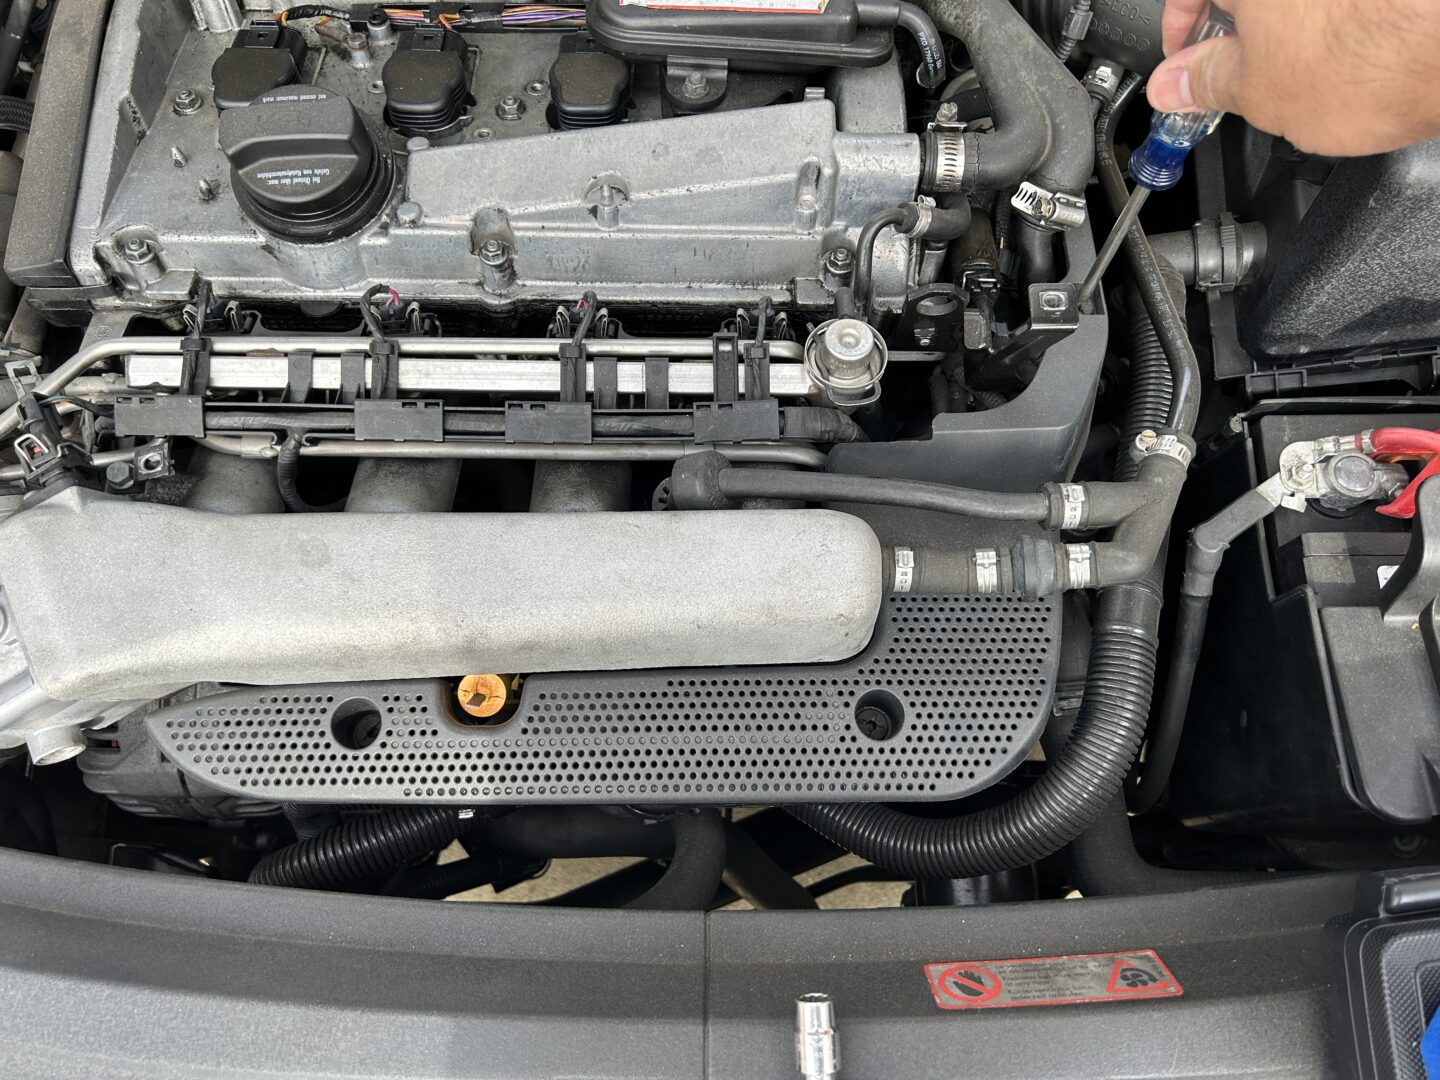
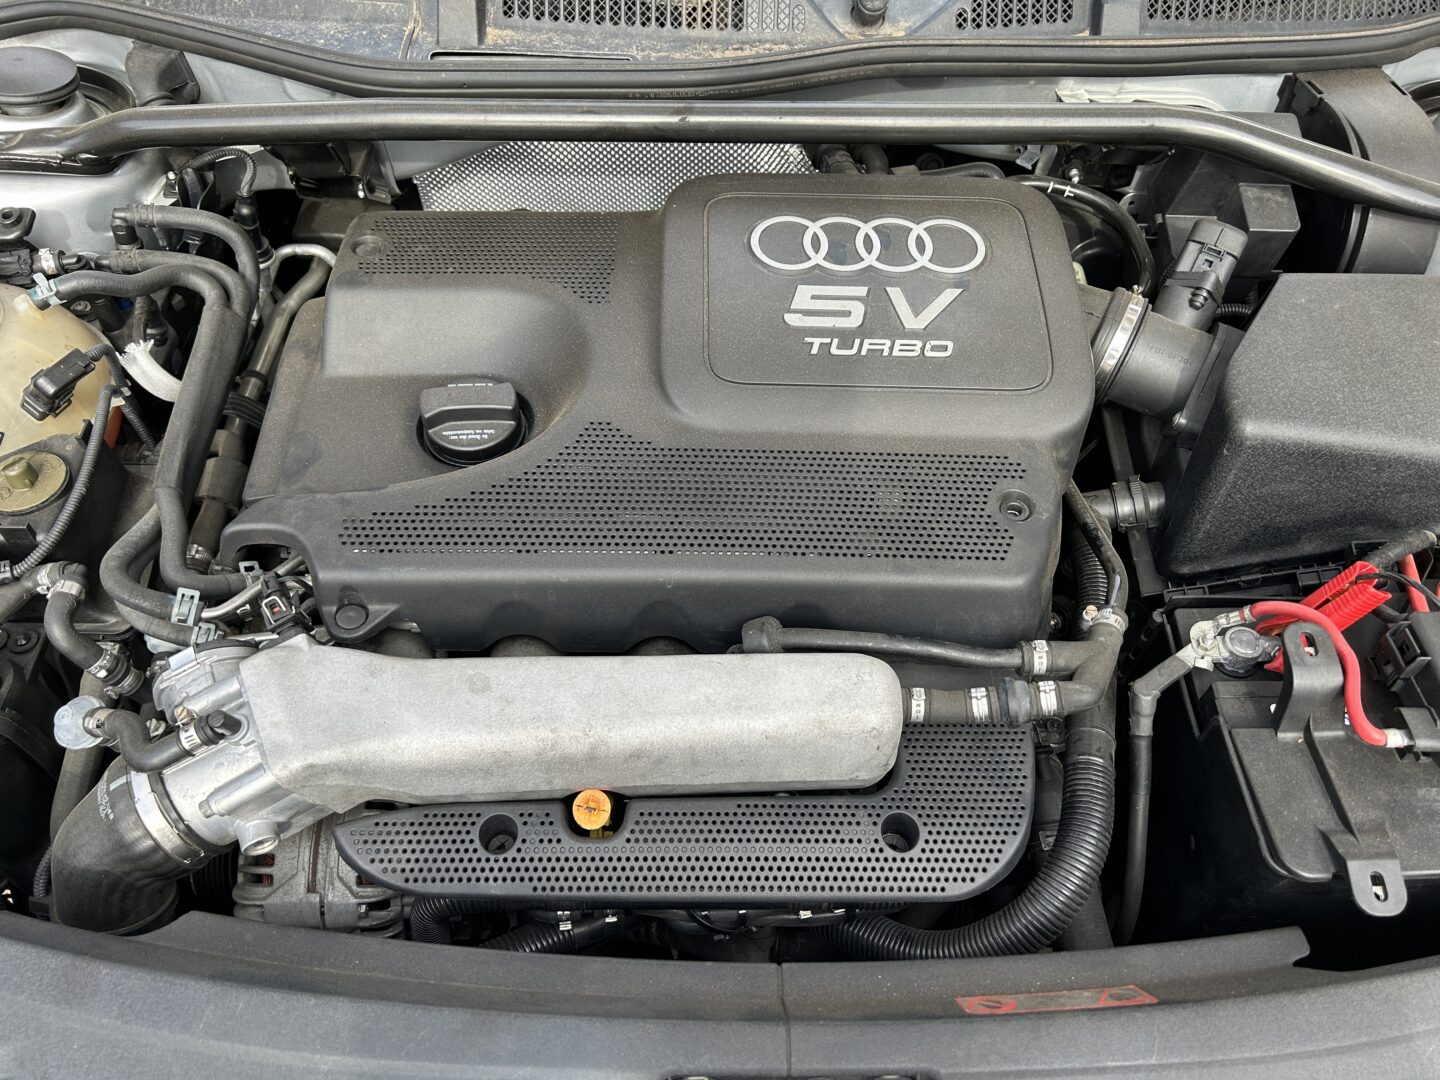
As I work through the issues on my new-to-me 2002 Audi TT, I discover more and more things that need to be fixed. While I was fixing the secondary air pump in the engine bay, I happened to come across a set of hoses in front of the engine that were broken. These hoses are part of the N249 system, which is related to emissions. Because of the age of the vehicle and the exposure to heat from the engine, the piping on the N249 system tends to break, which can cause a vacuum leak in the emissions system.
Many people delete the N249 system on the Mark I Audi TT because it gets rid of the bunch of hoses that are located in front of the engine, leaving you with a tidier-looking engine bay. You should also still be able to pass emissions without it. I can also see that people might do this to eliminate potential future failure points with the N249 vacuum system.
I don’t understand the full extent of the benefits of the N249 system, but from what I roughly understand, it allows for optimal operation of the diverter valves and more overall efficient engine operation. If you want to read more about the N249 system (and why you may not want to delete it), I recommend reading this informative post on Audizine from forum member julex about the topic. Nonetheless, some people still remove it to clean up the engine bay. Don’t believe anyone who says that they feel performance gains from deleting the N249 system.
I chose to keep everything intact and to replace any parts that were damaged. One of the obstacles was trying to find the exact part numbers for each of the parts that were broken. I eventually realized that if one of these parts had easily broken, then other similar parts nearby will probably be susceptible to breaking as well. Therefore, it might make sense to replace all of the vacuum hoses on the N249 system. The problem however would be that it would probably cost a lot of money.
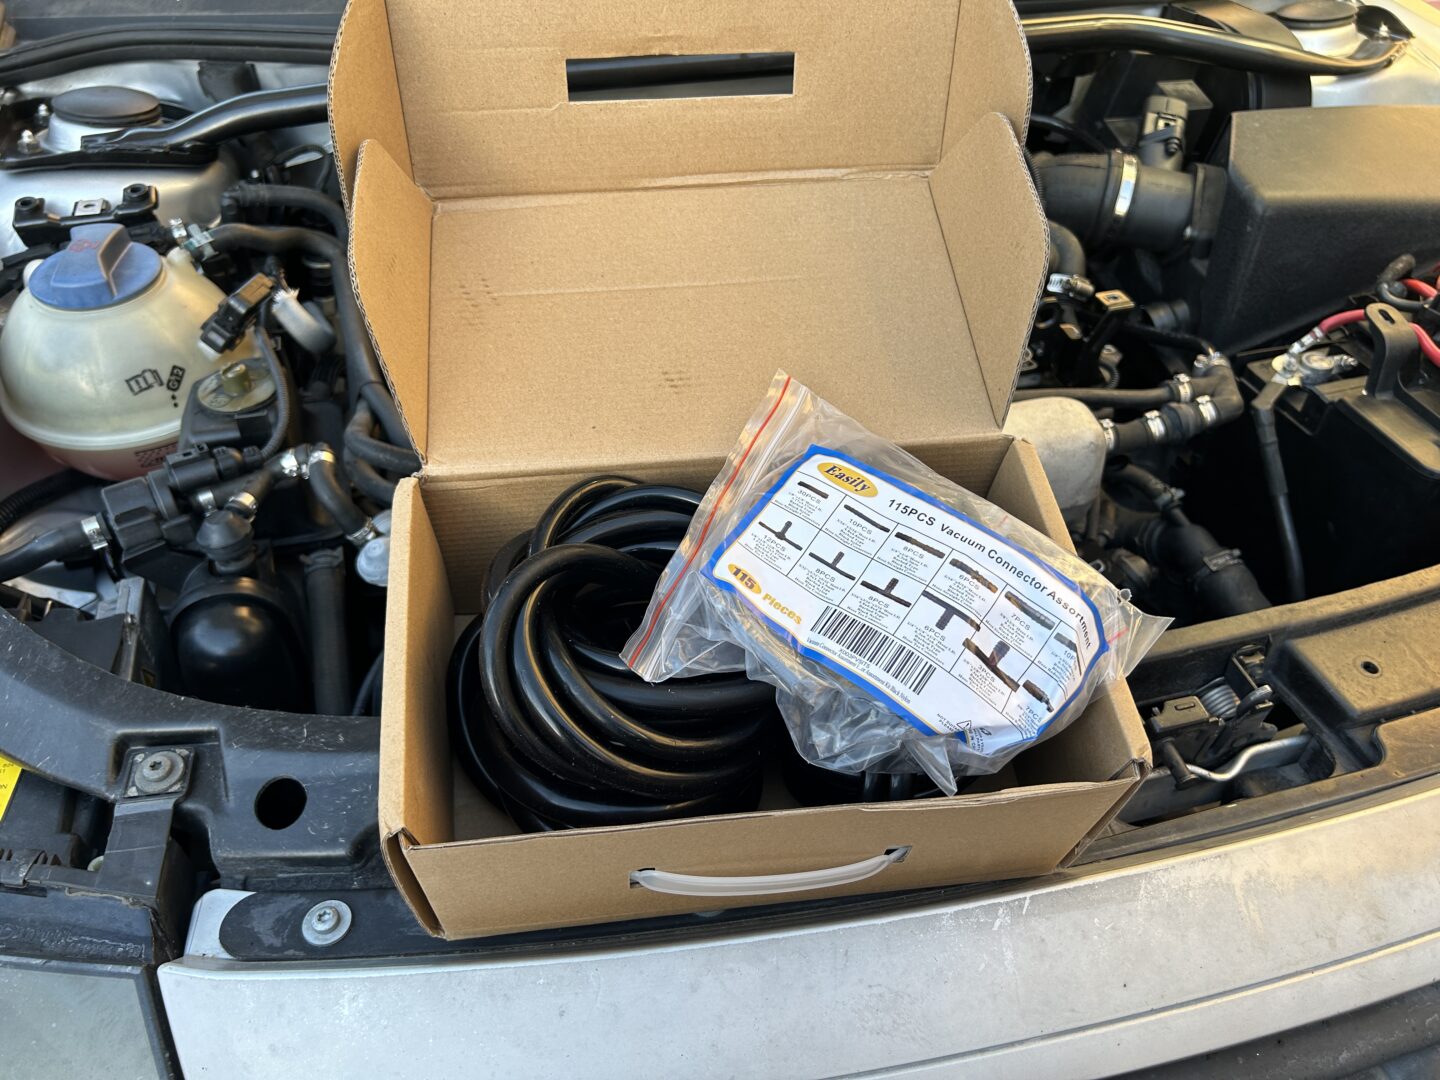
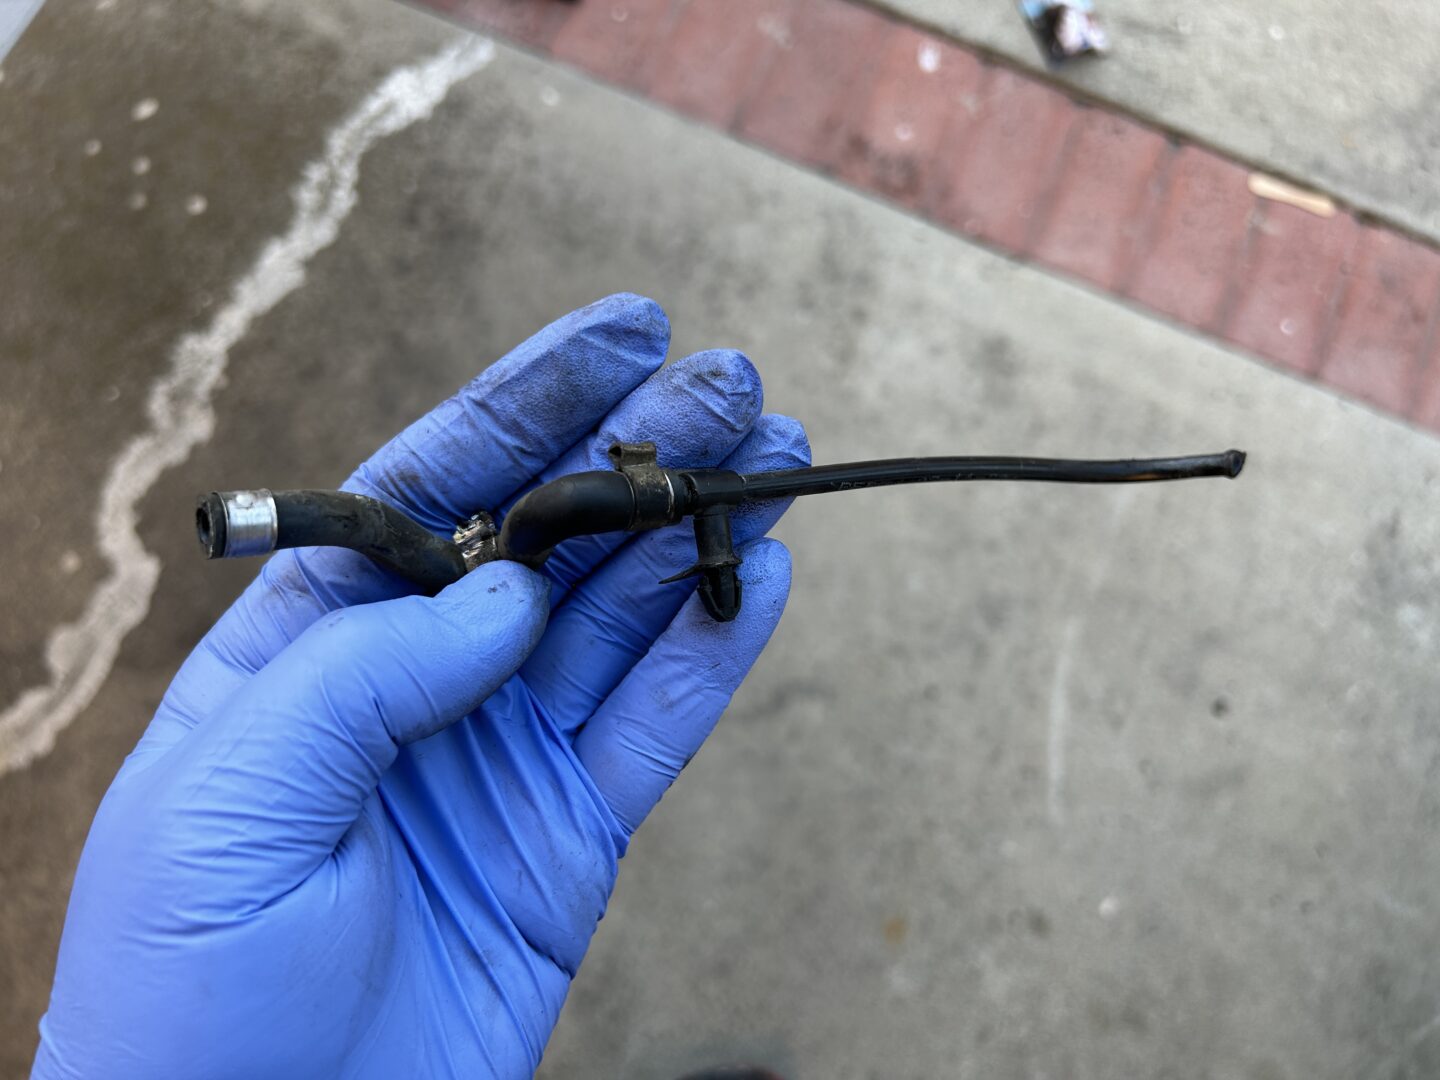
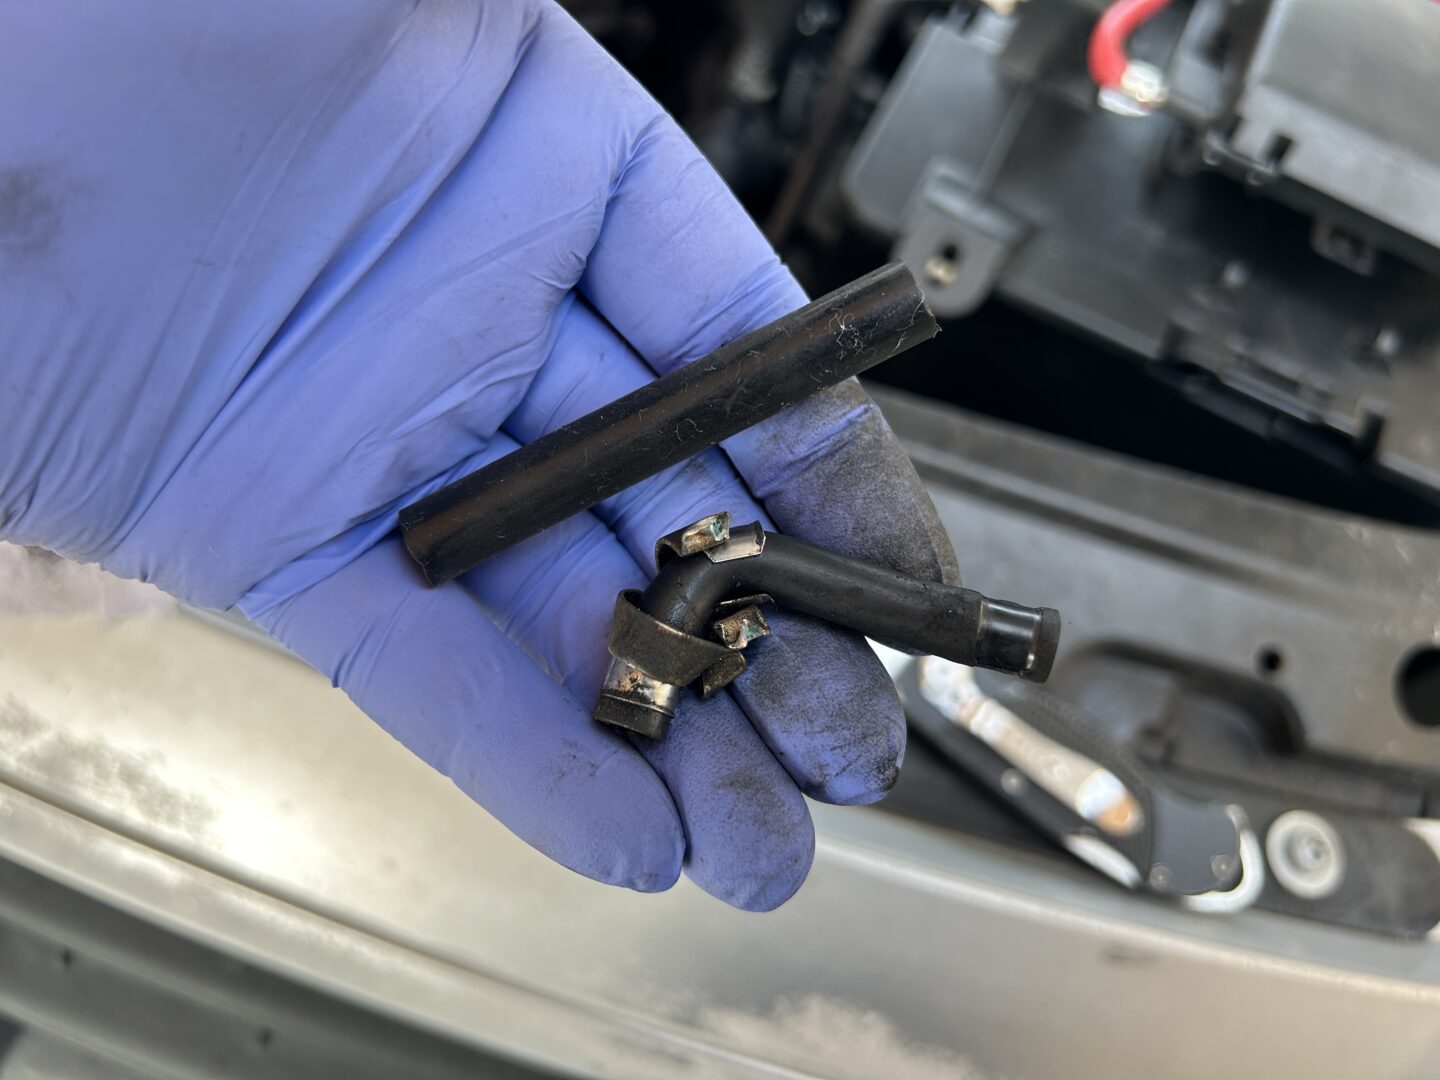
Because these are all in essence vacuum lines (with a few other inline components), I decided to replace all the hoses with universal silicone vacuum lines. Silicone will last longer than rubber and will be more resistant to heat in the engine bay. Upon handling what I thought were broken piping, I discovered that they were actually hard rubber pipes. This would make replacing everything fairly straightforward as long as I had enough differently-sized vacuum hoses to replace them all with.
Parts & Tools Used for This Job
Set of Silicone Vacuum Hoses With Connectors: Easily Silicone Hoses & Connectors Set
Ratchet/Socket Set: EPAuto 40 Pieces 1/4-Inch & 3/8-Inch Drive Socket Set
Hex Tools: Hex Bit Socket Set / Hex Key Set
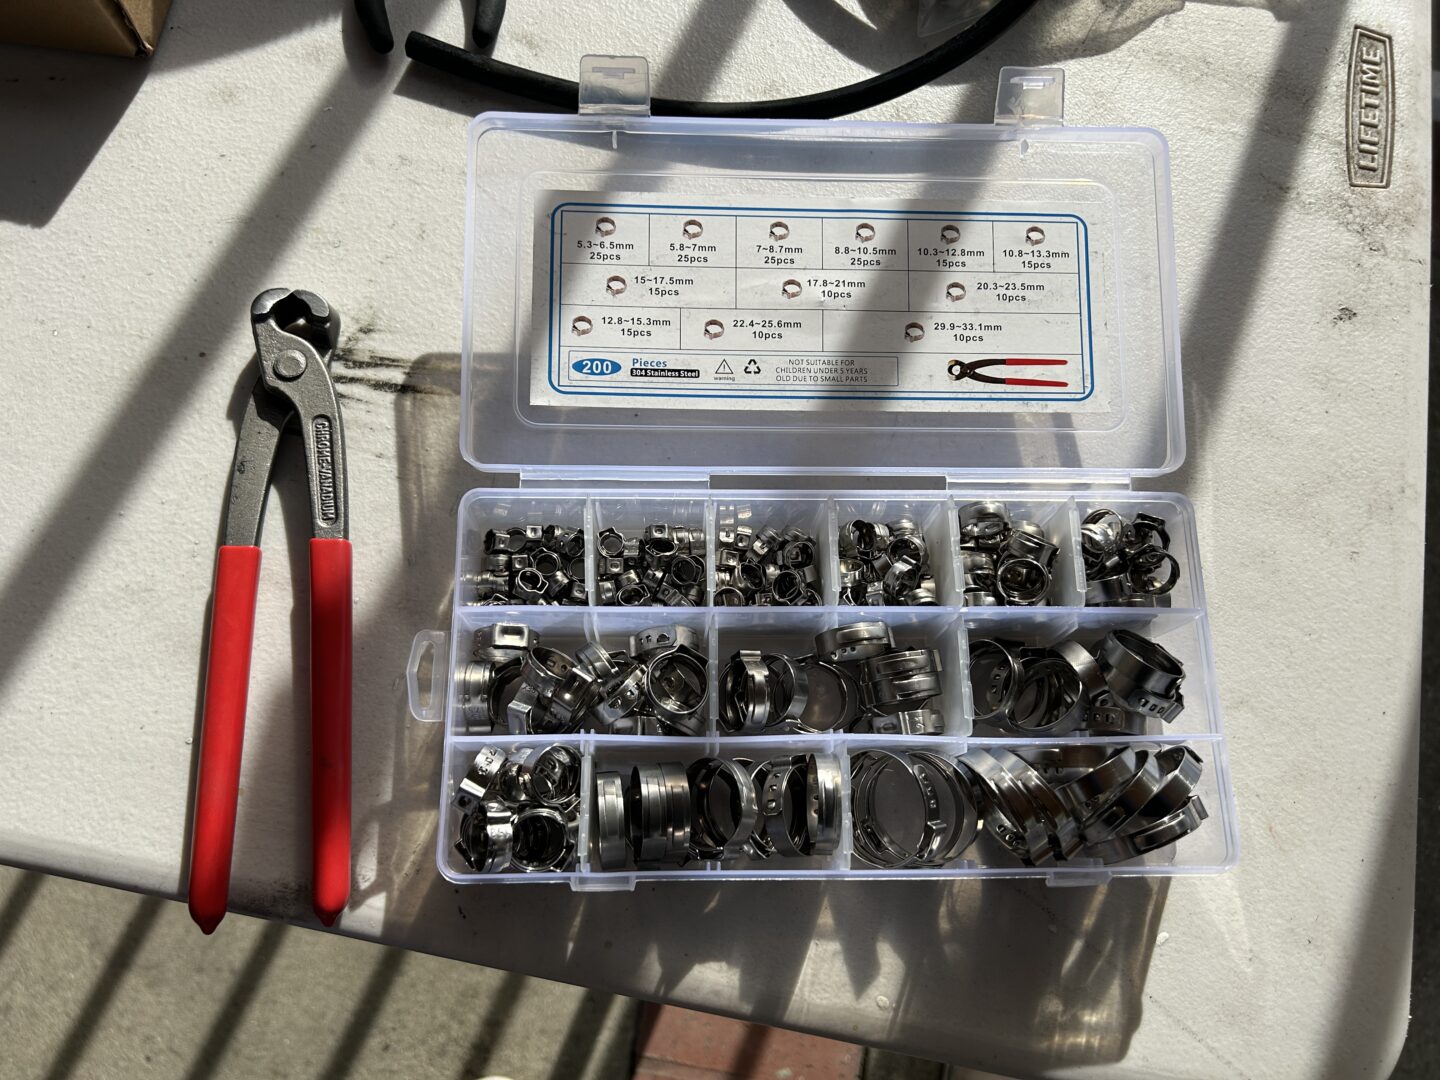
Ear Clamps and Tool: 200 Pcs – 304 Stainless Steel Stepless Single Ear Clamps With Tool
Utility Knife: Husky Folding Sure-Grip Lock Back Utility Knives 3-Pack
Wire Harness Tape: XFasten Wire Harness Tape, 3/4-Inch by 50-Foot (5-Pack)
Nitrile Gloves: MedPride Nitrile Exam Gloves (100 qty) – Small | Medium | Large

Replacing The N249 Piping And Hoses
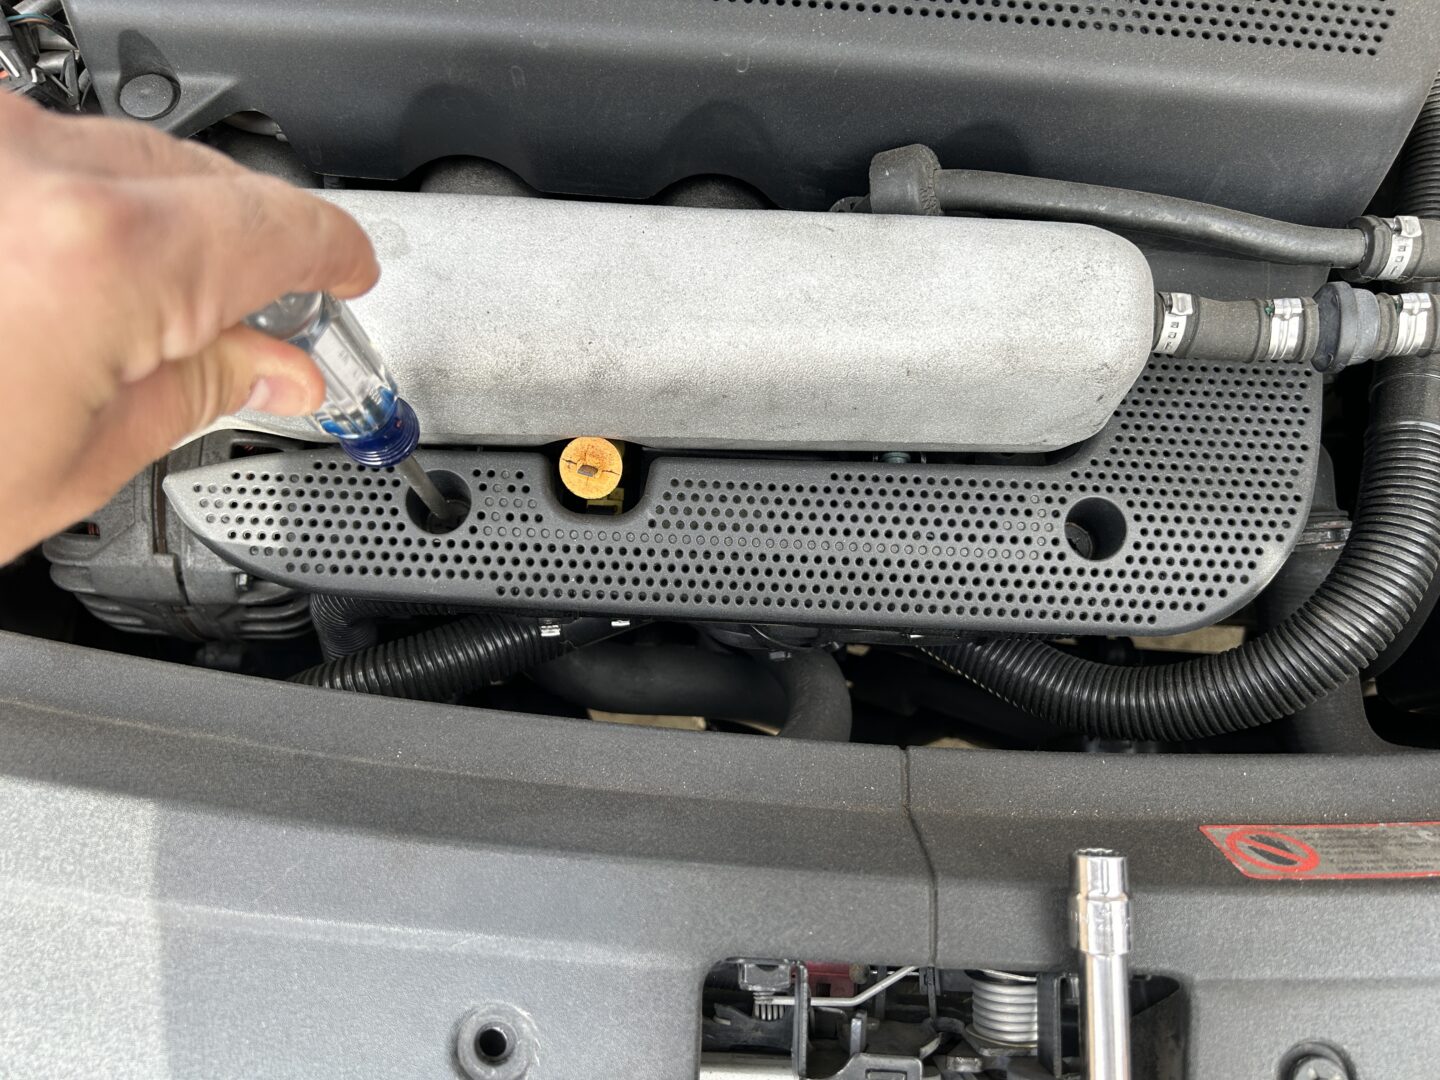
Remove the perforated cover in front of the engine so you can access the N249 system. This requires removing the engine cover first with the large plastic bolts, and then the (3 qty) plastic bolts that secure the perforated cover.
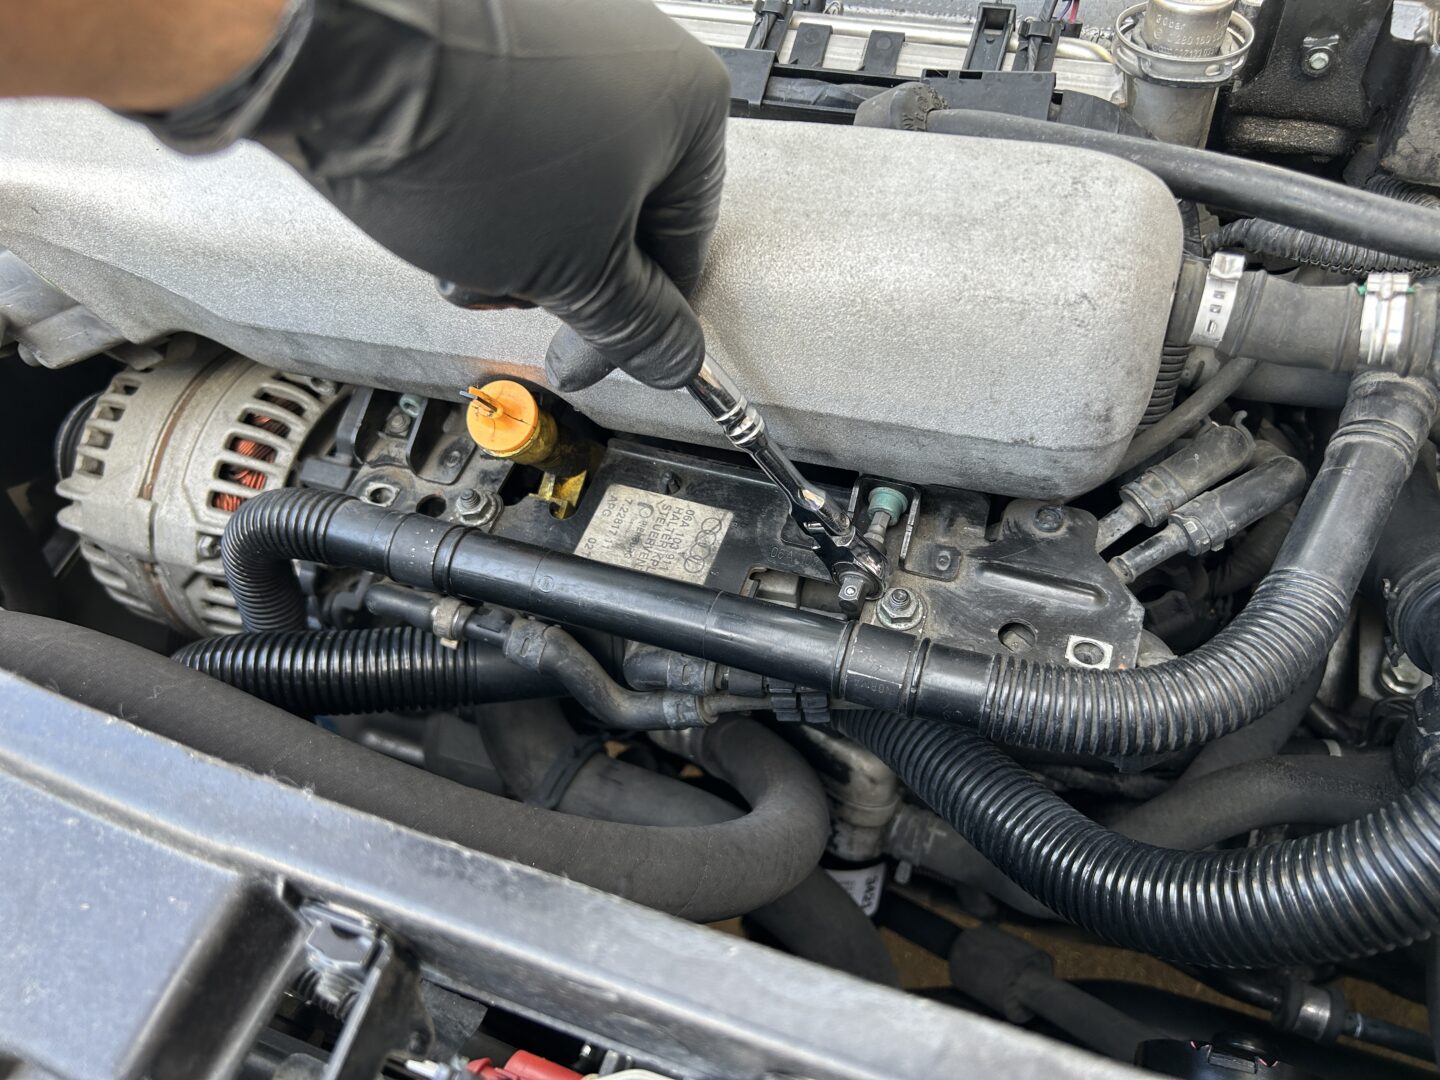
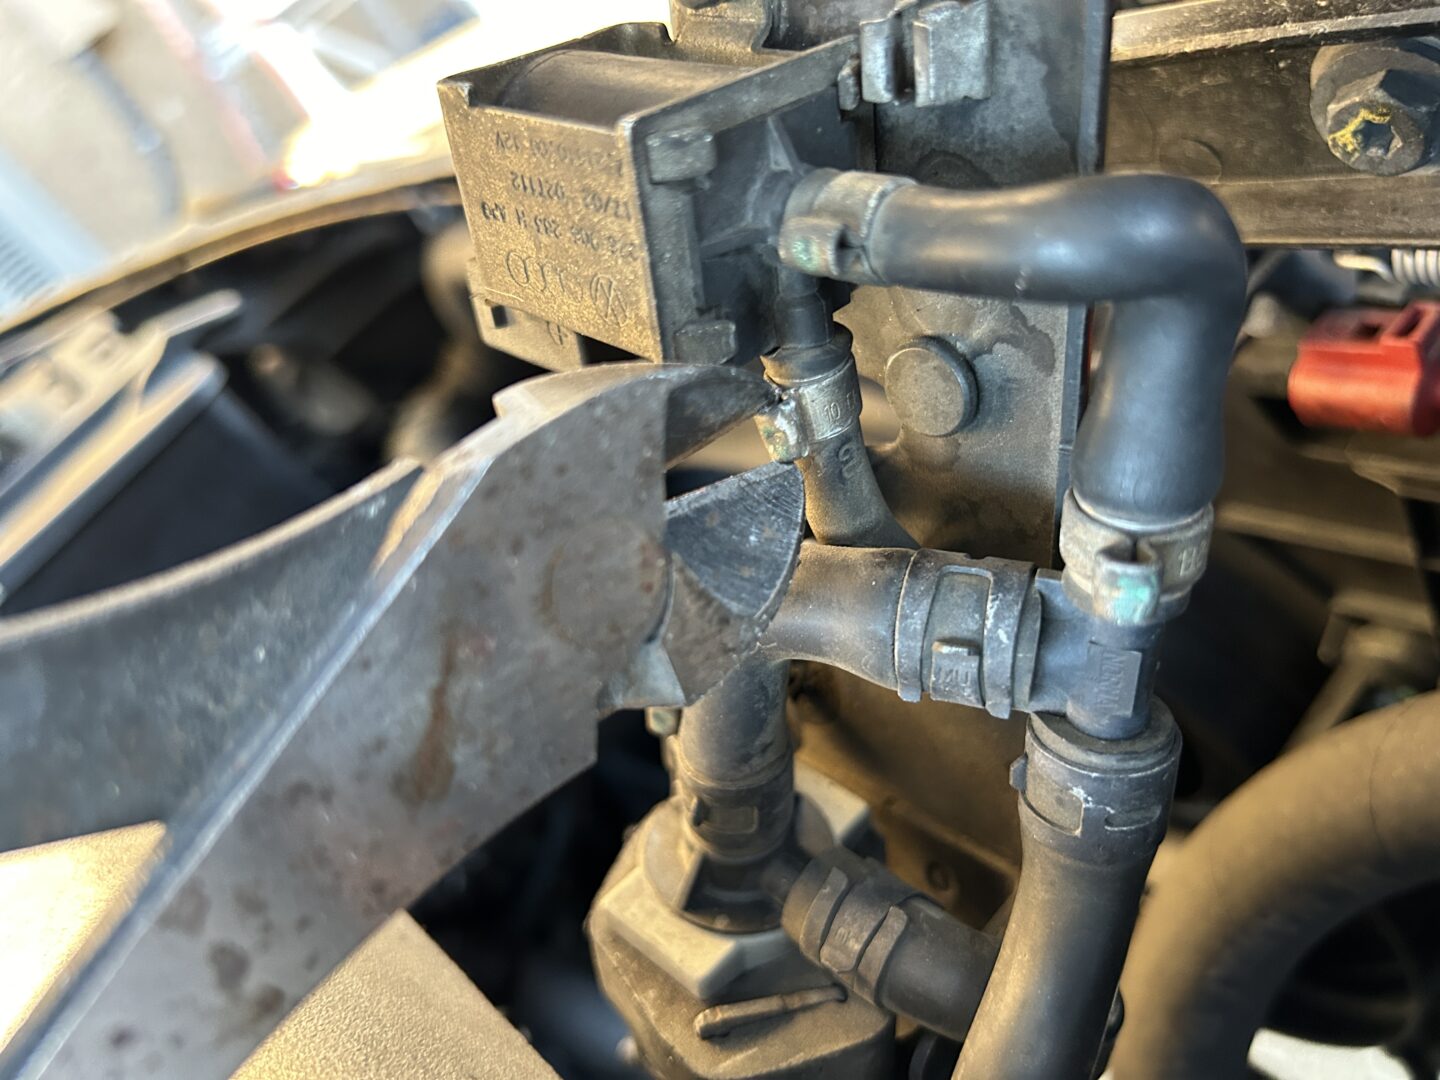
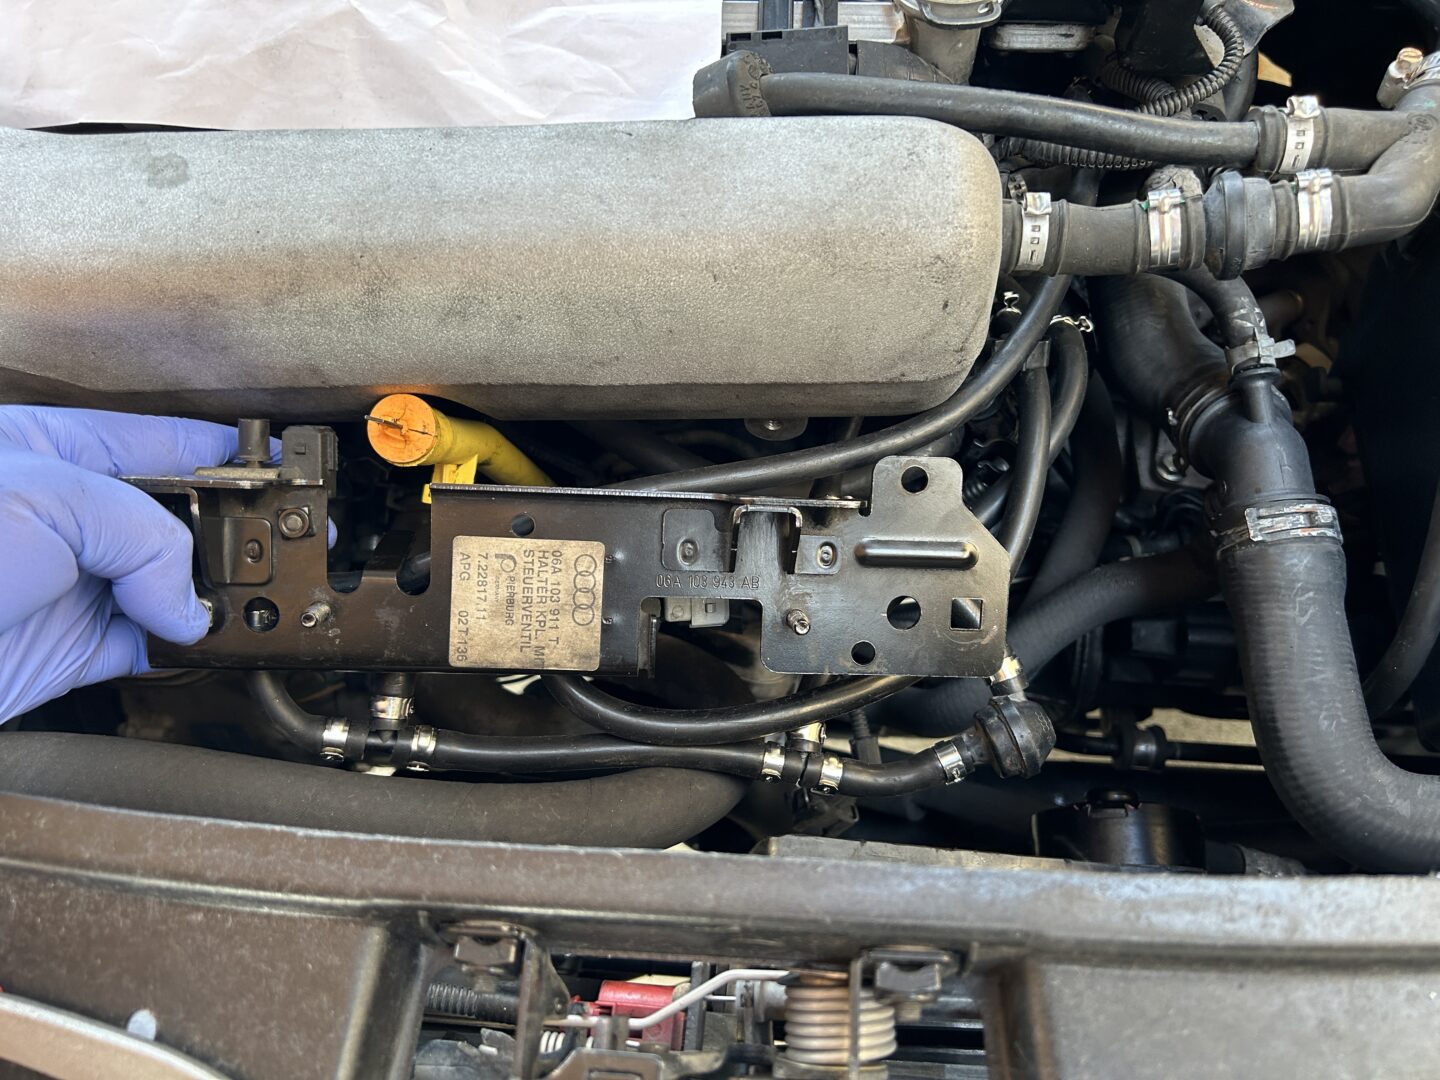
Remove the (2 qty) 10mm nuts that hold one of the secondary air pump hoses to the N249 bracket. This allows you to pull the hose and the brackets away so that you can get a size 5 hex wrench/socket in there to remove the (2 qty) hex bolts, which hold the N249 bracket in.
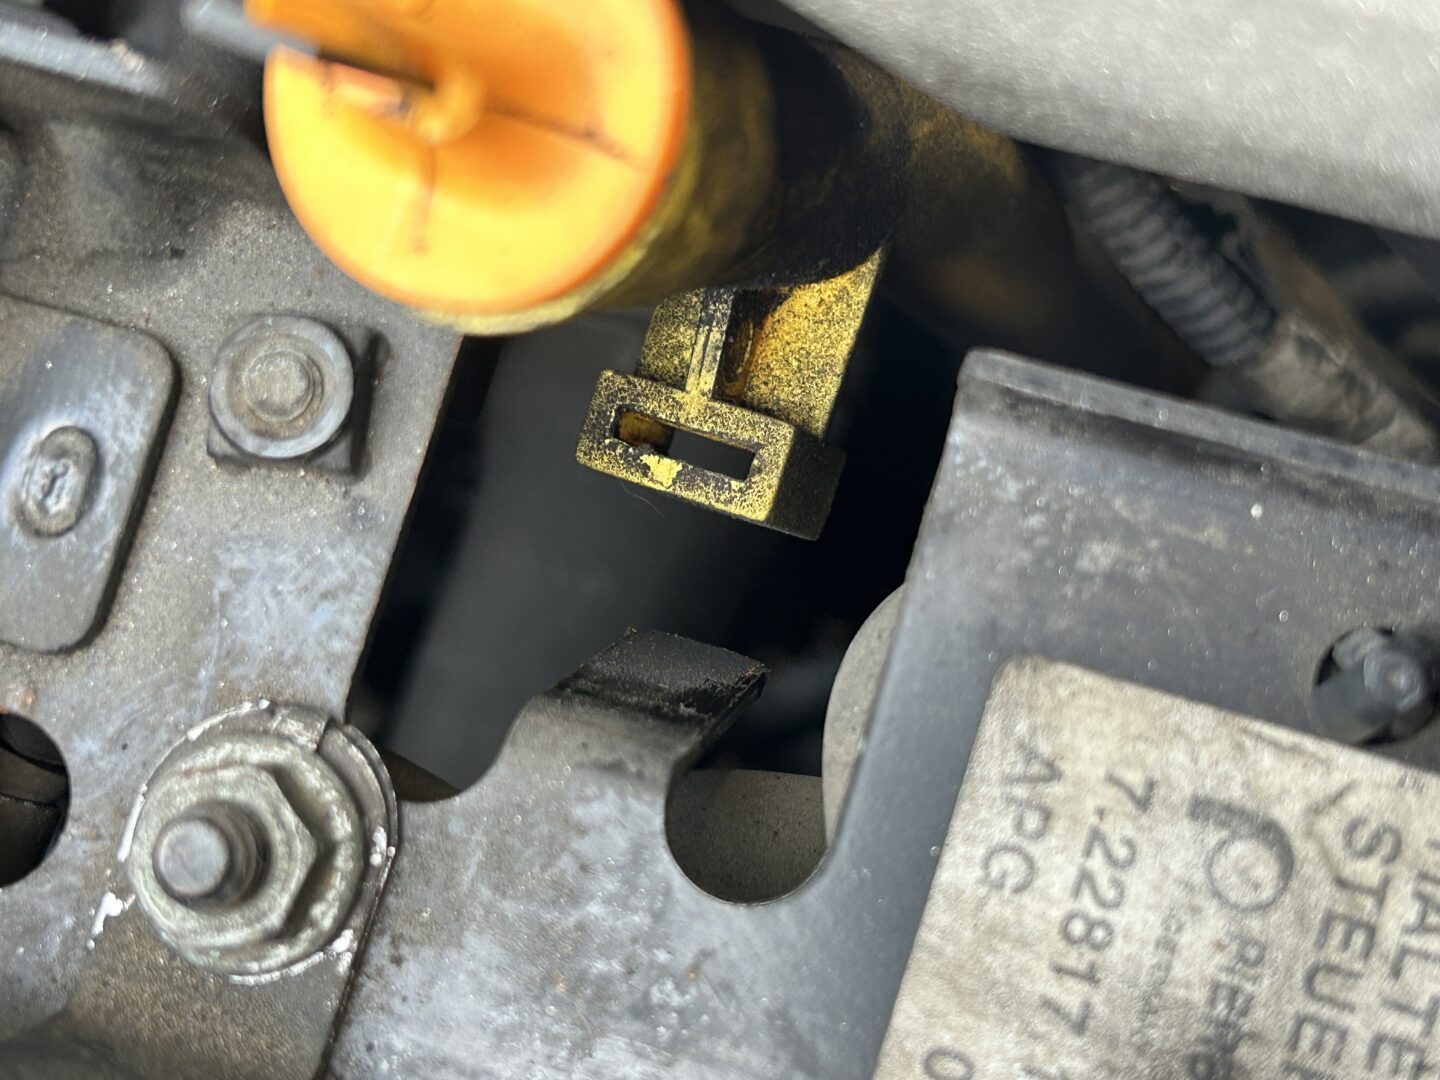
There is also a 10mm nut that holds a bracket for the other secondary air pump hose, which needs to be removed. As you pull the bracket away, you will also need to separate the tab of the N249 bracket from the oil level tube, and also remove the electrical connector from the back of the bracket as well.
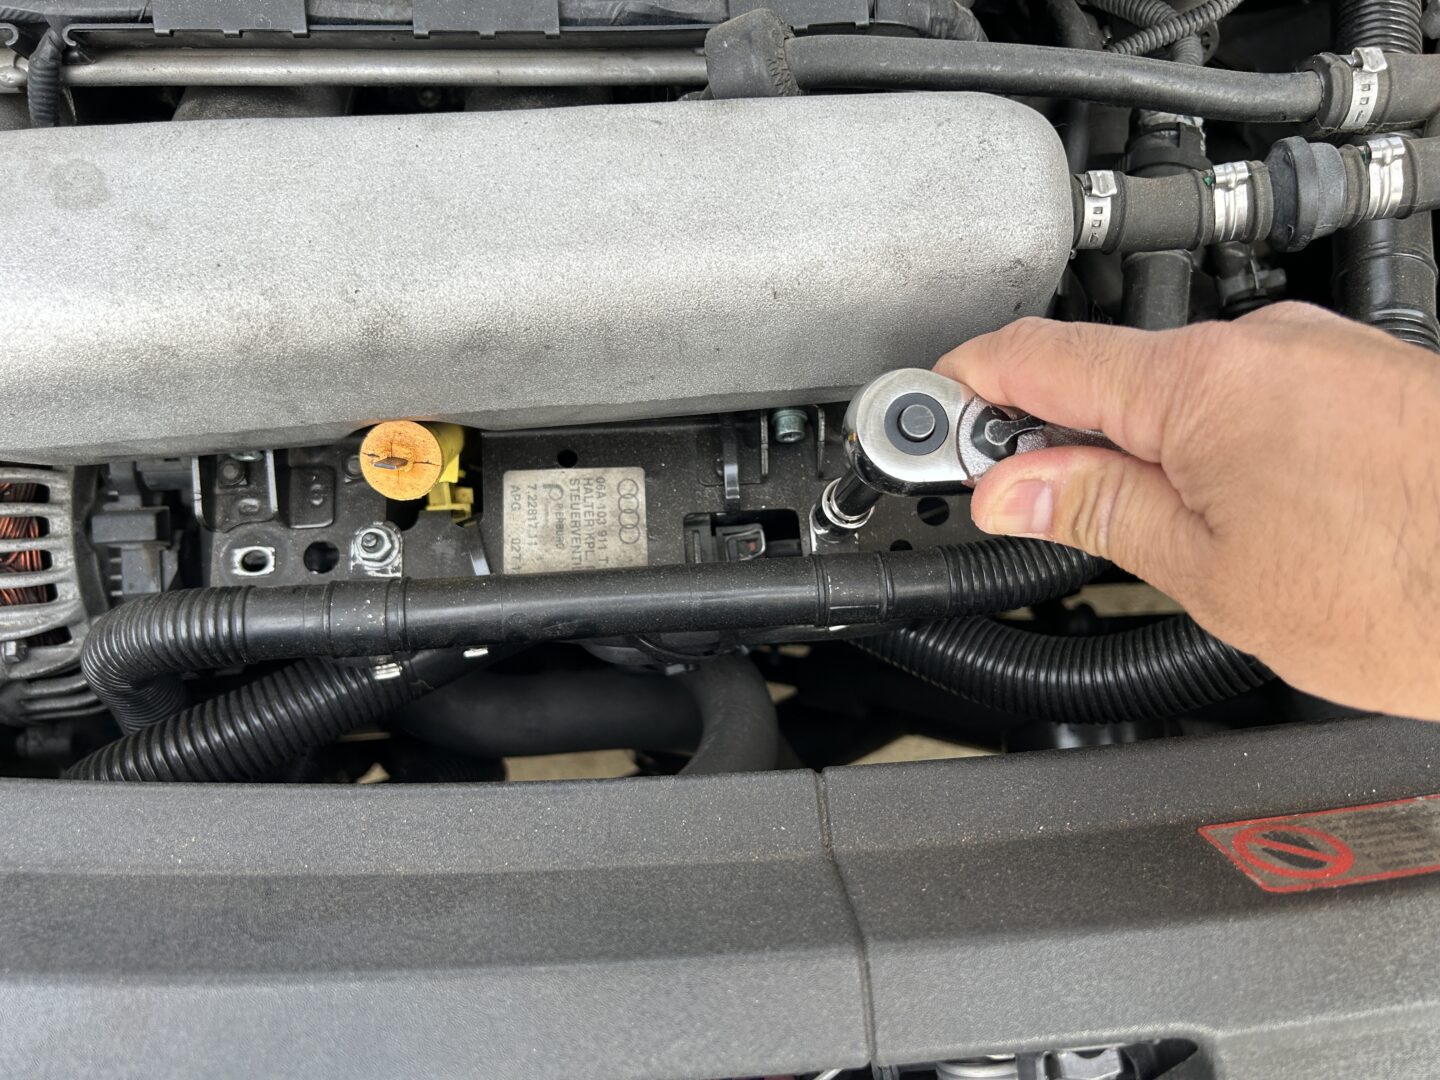
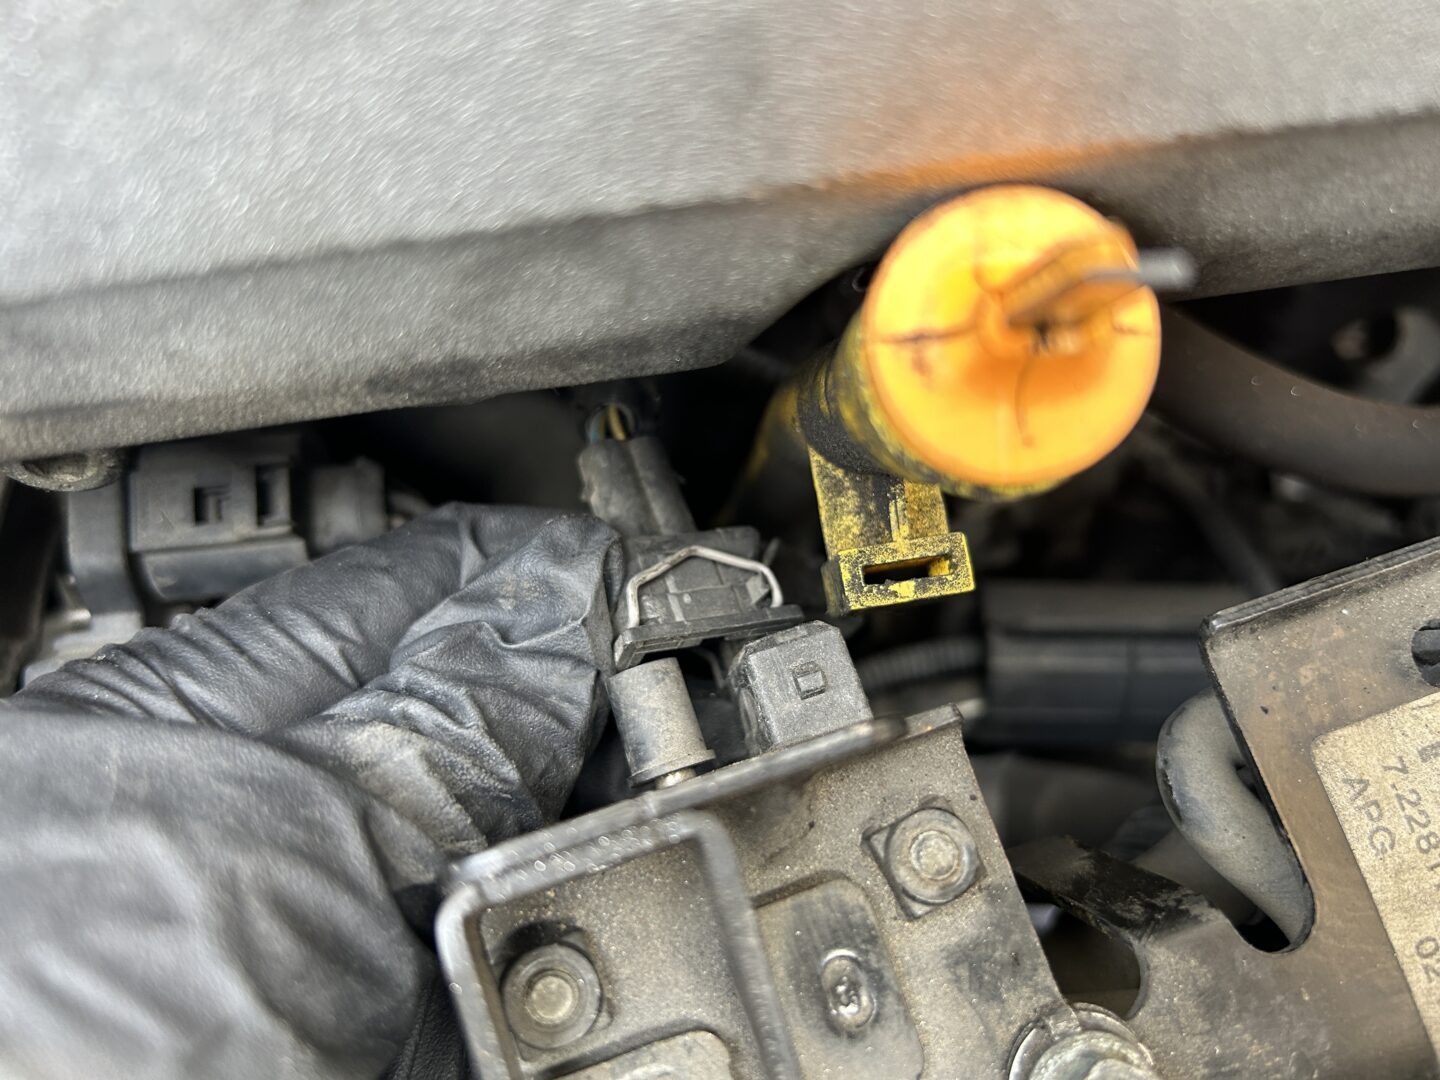
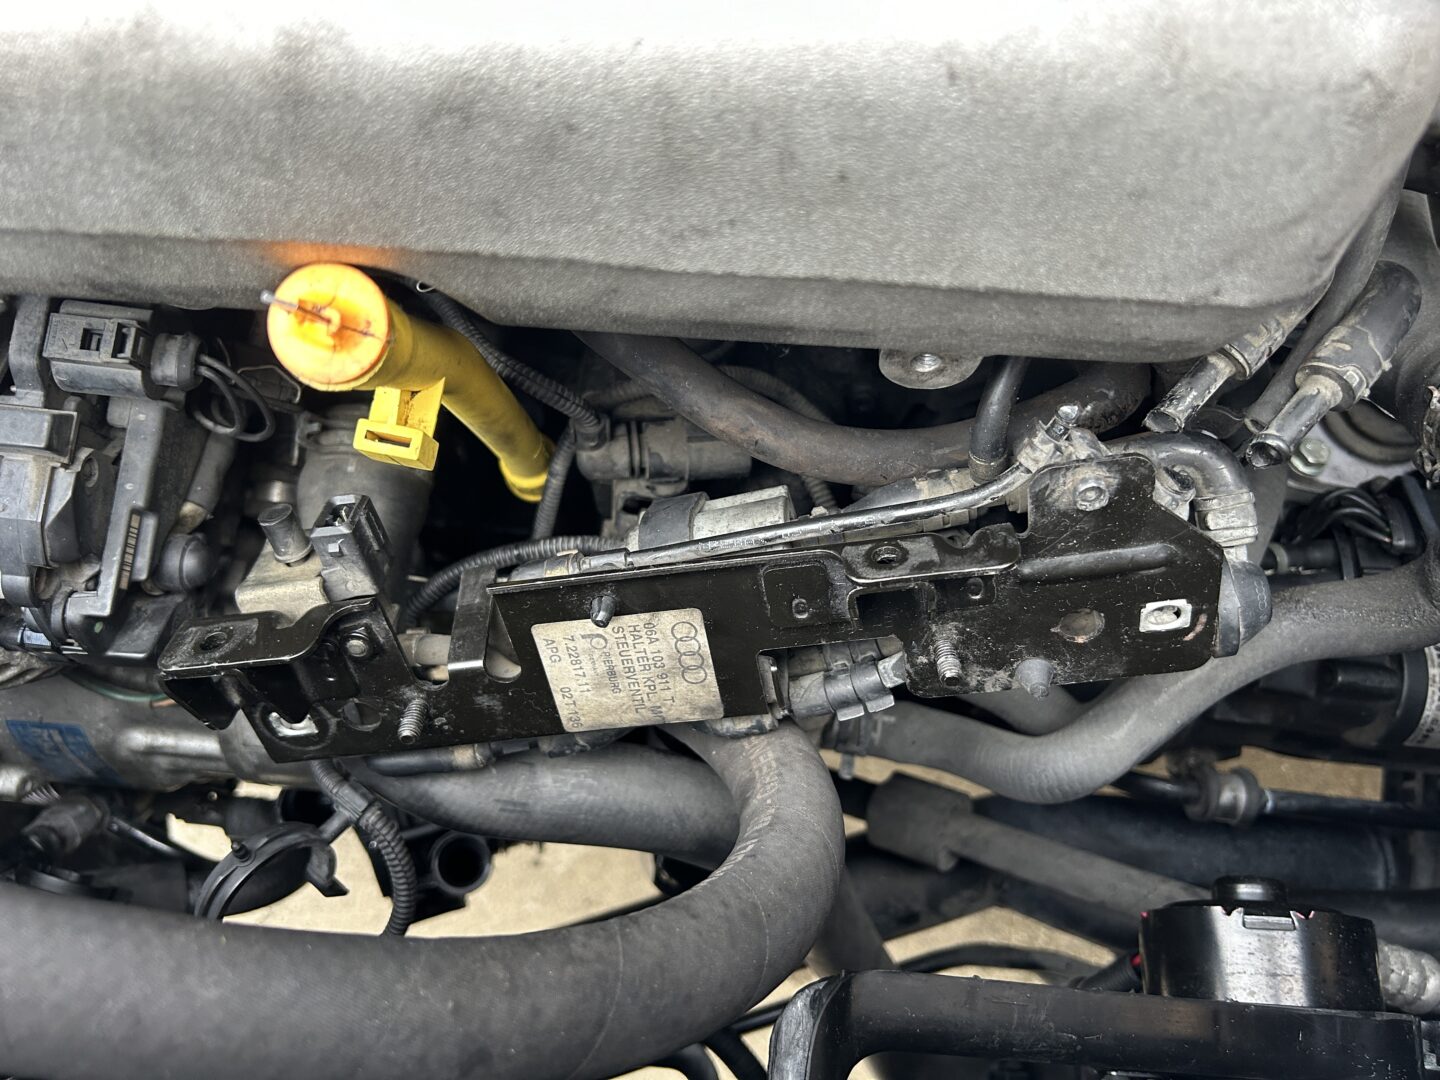
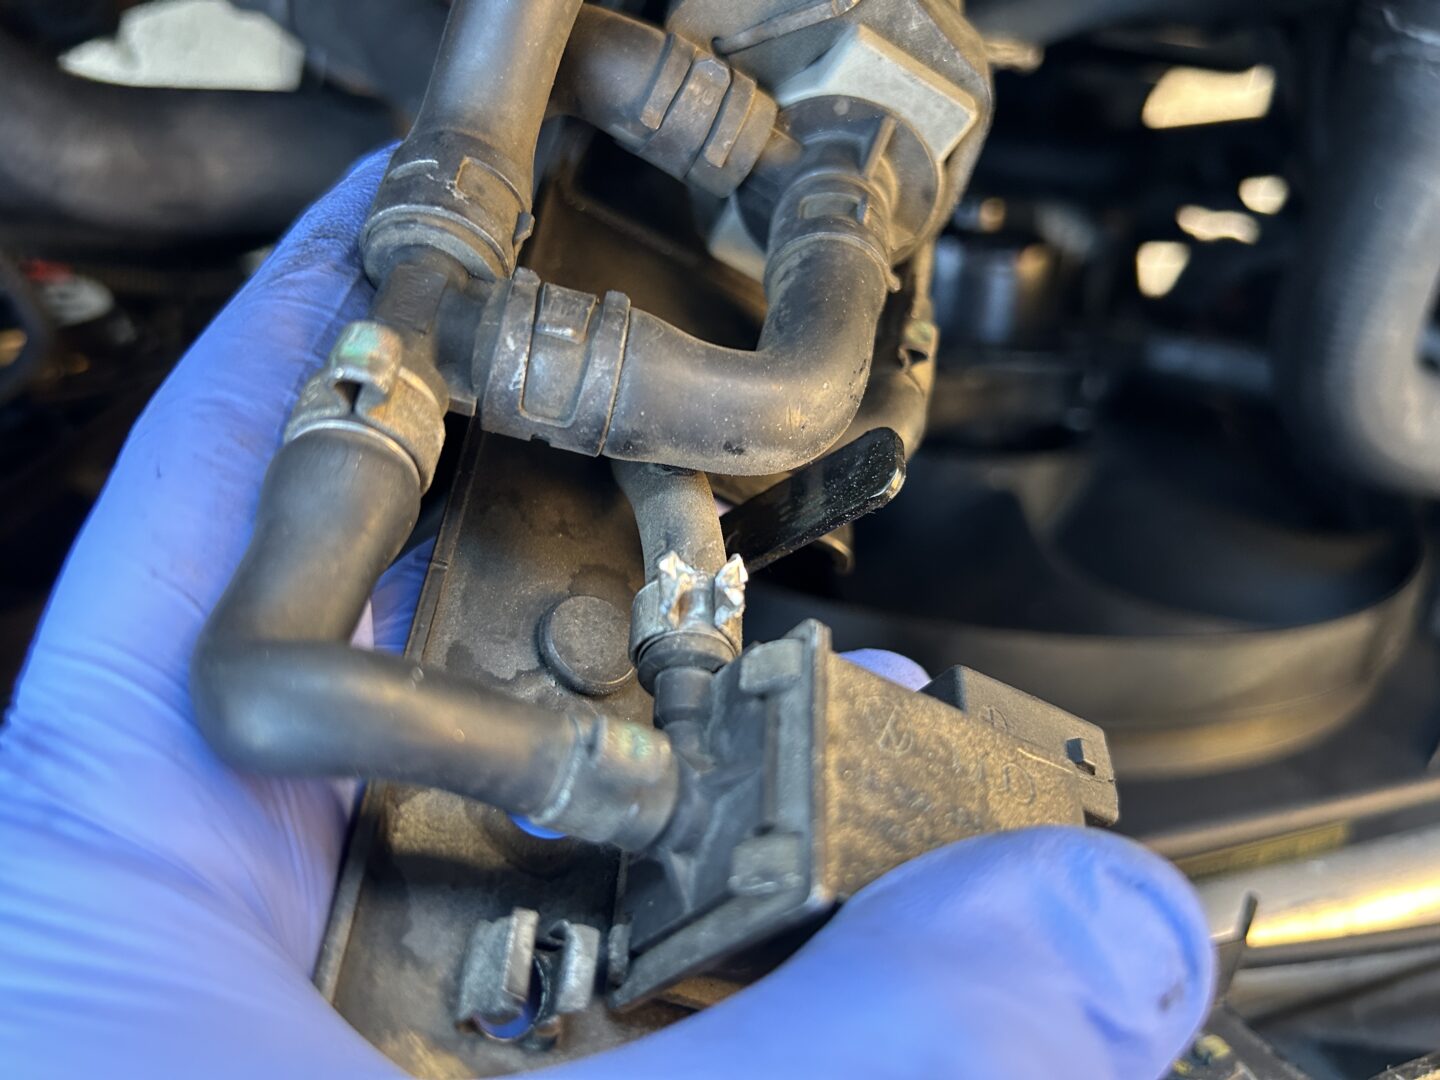
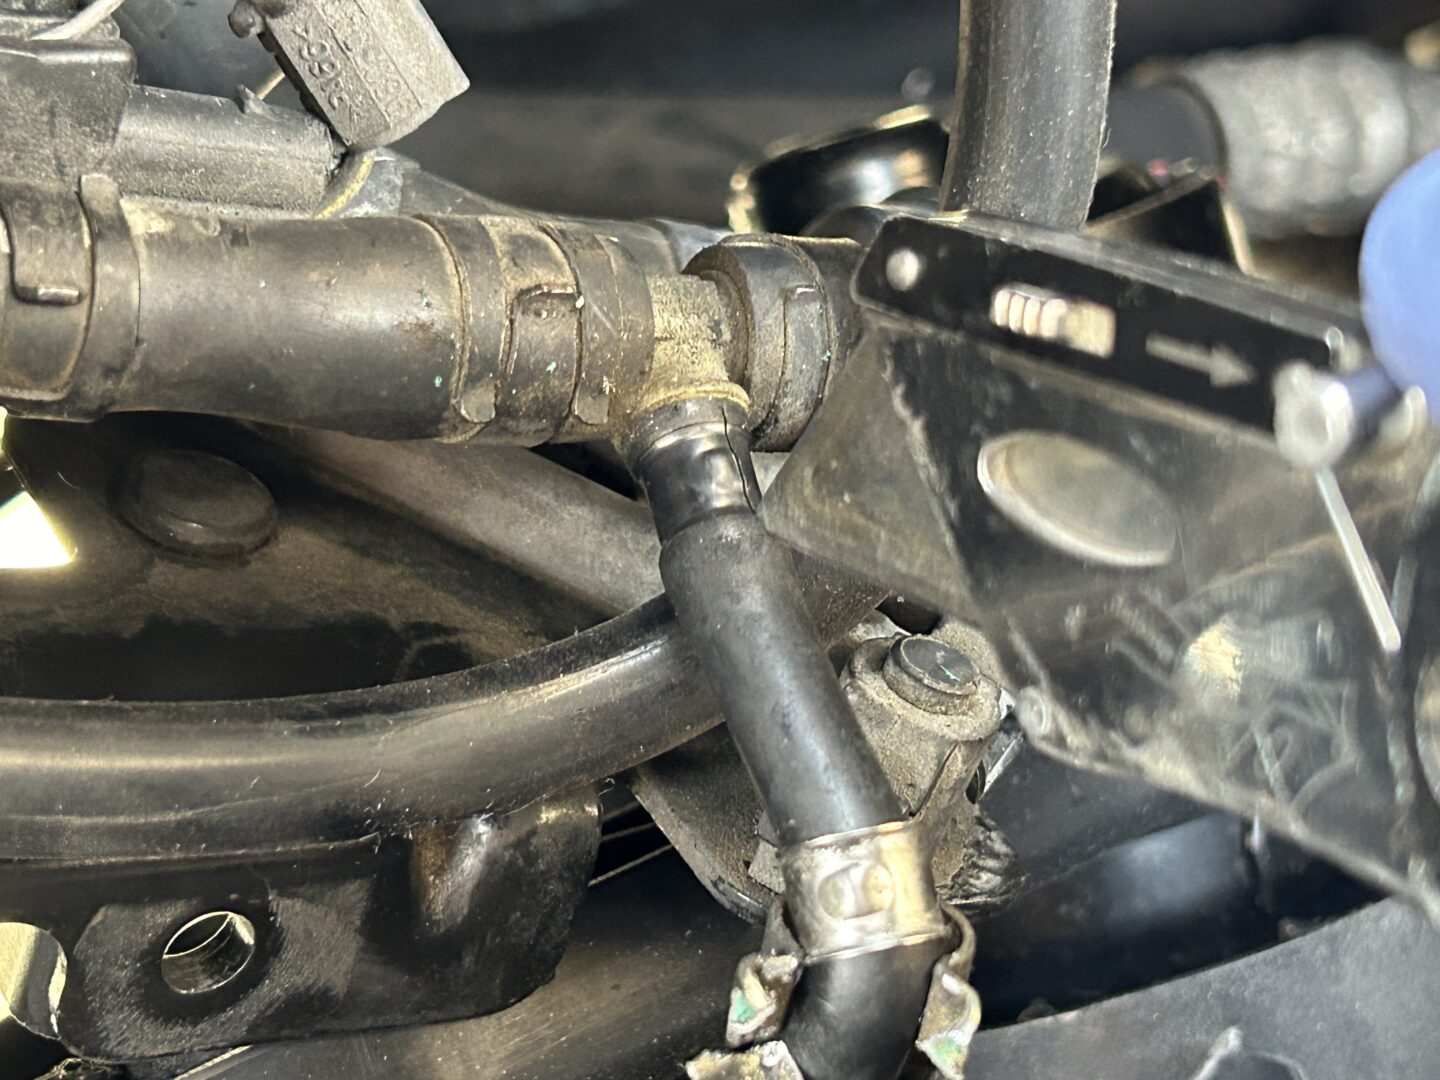
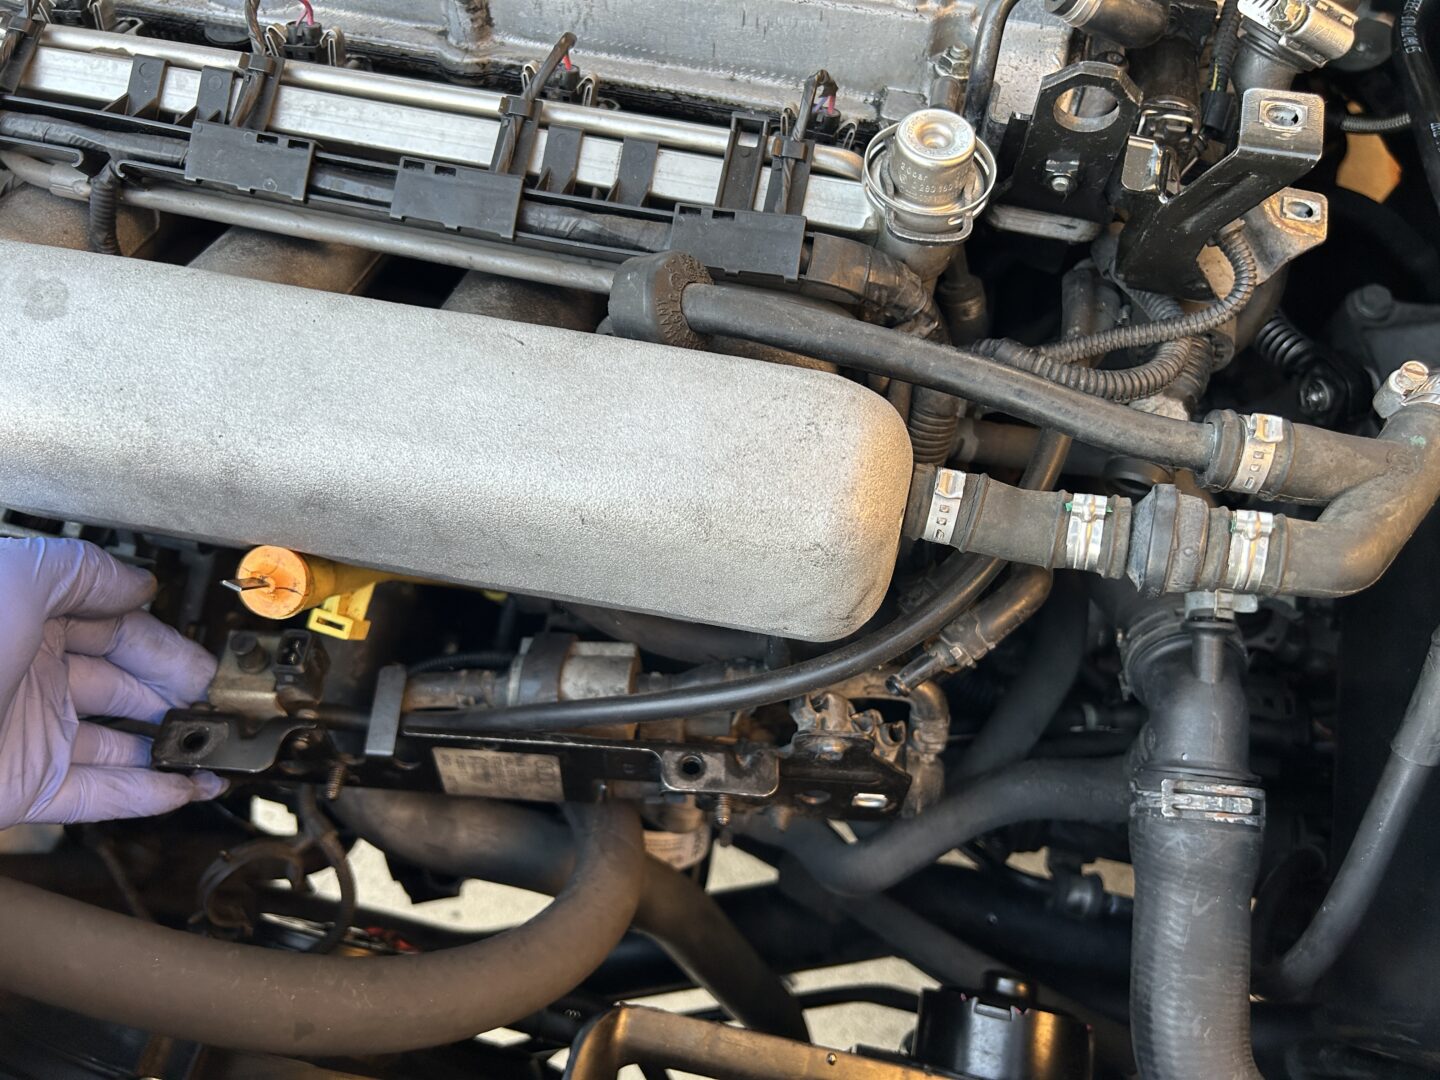
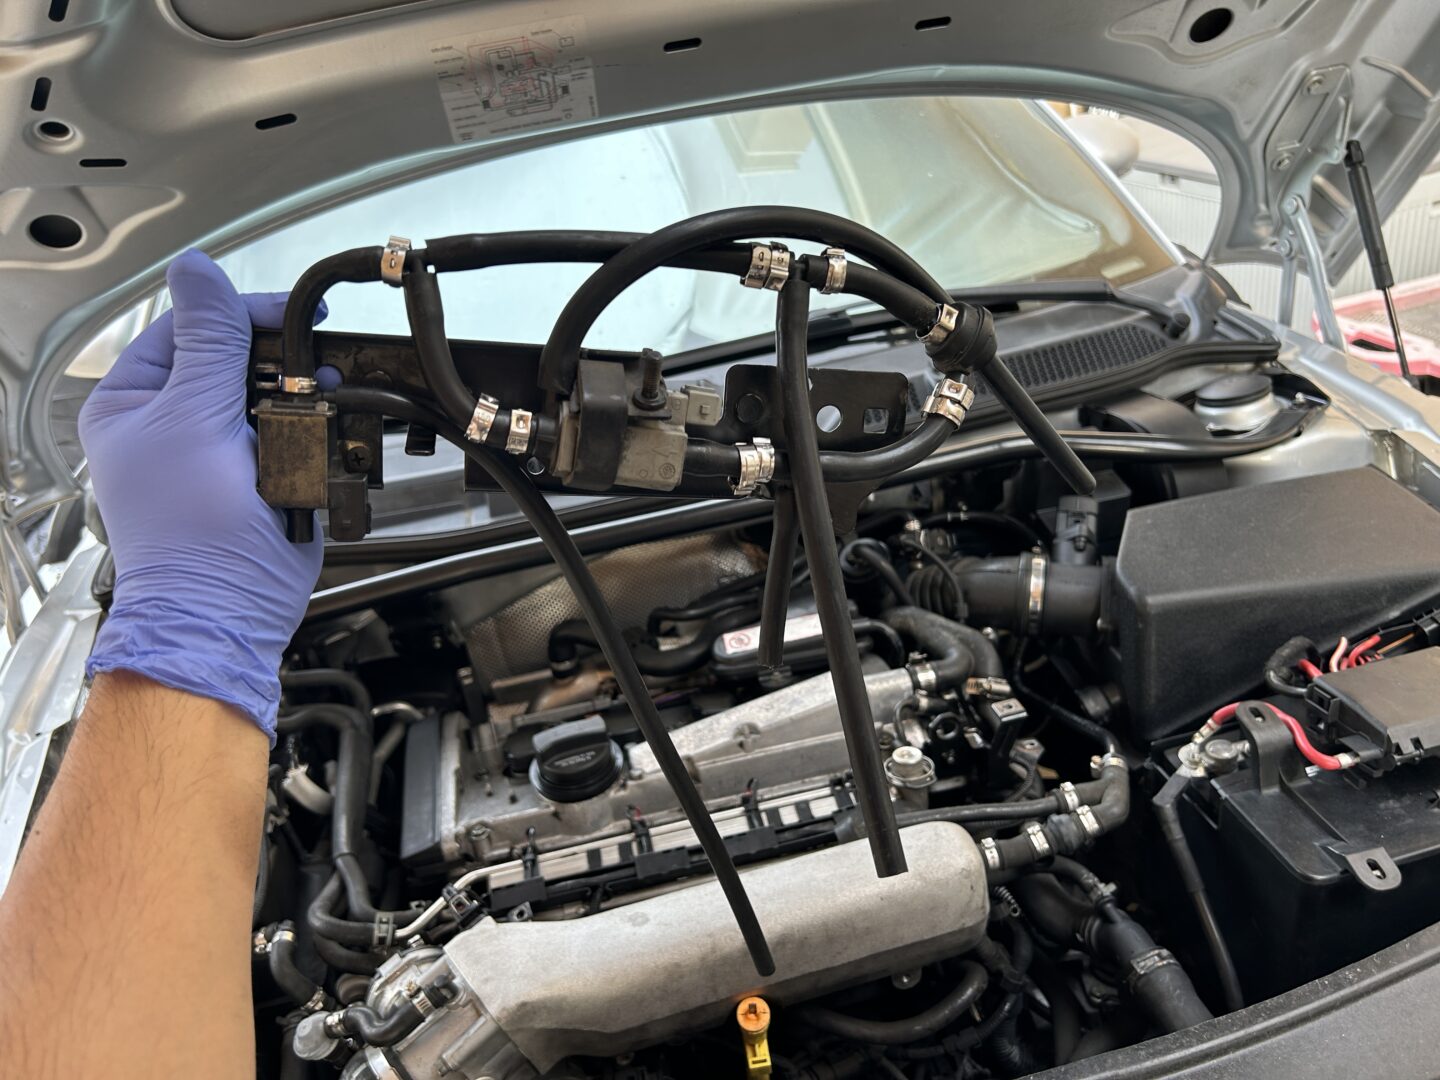
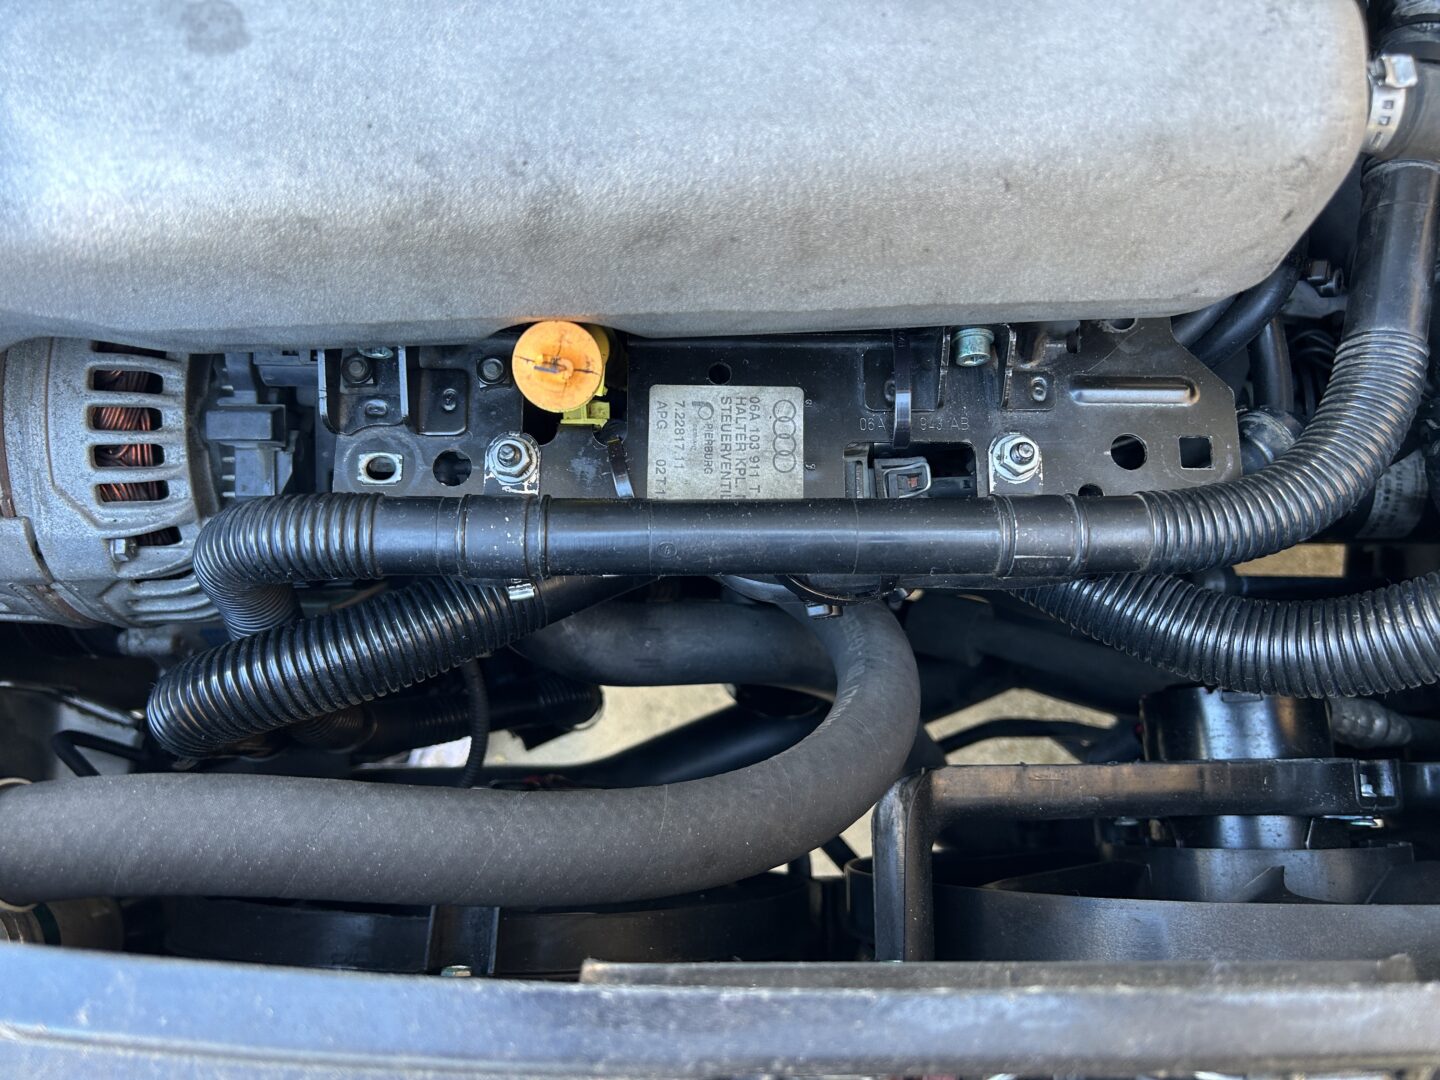
You should now be able to pull the bracket away to take a closer look at the N249 system as all of the hoses and components are mounted underneath the bracket.
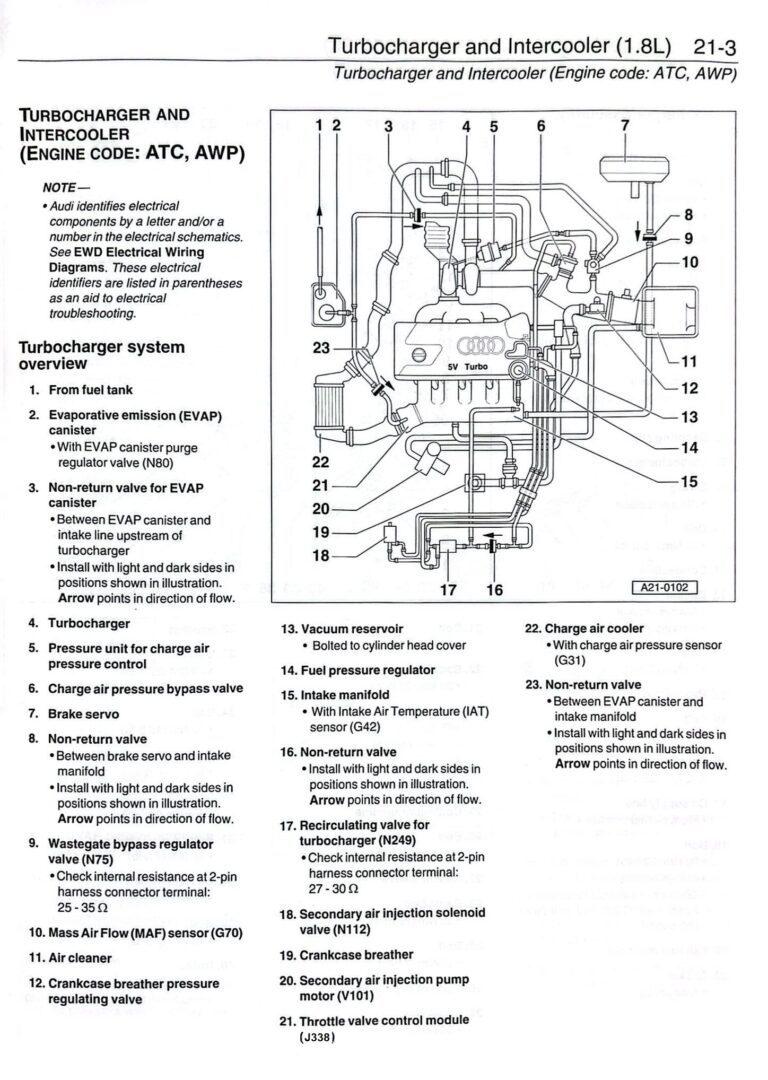
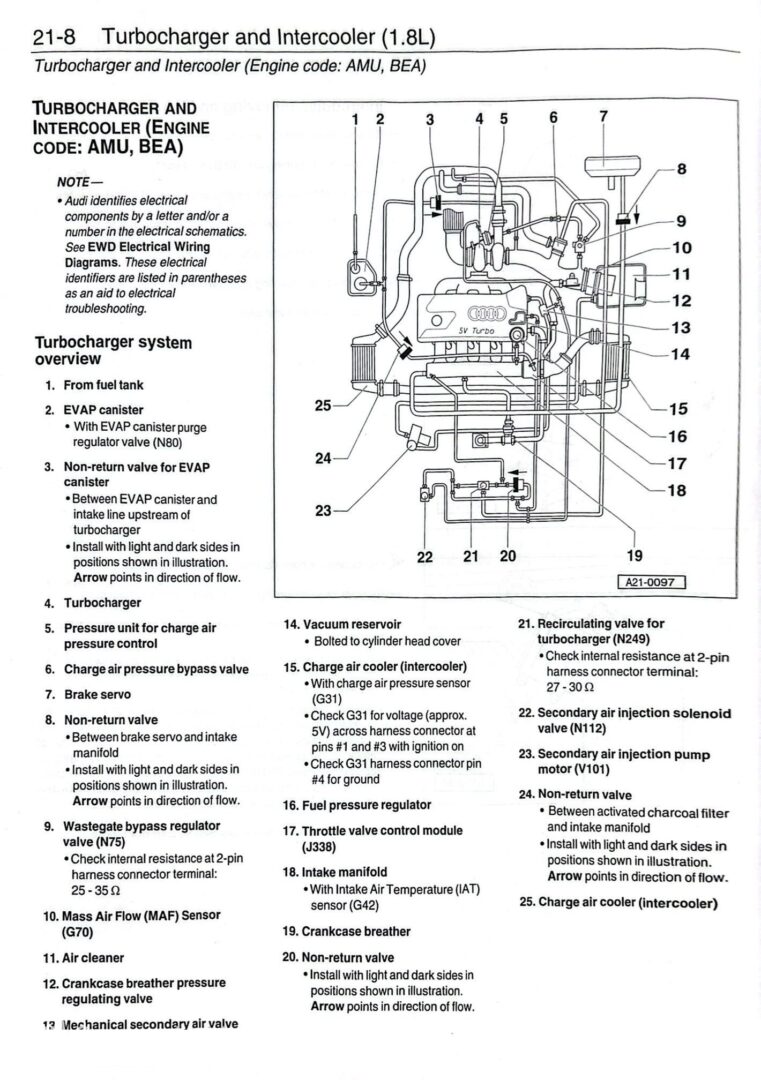
Here are a couple of parts diagrams for the ATC/AWP (180hp engine) on the left, and for the AMU/BEA (225hp engine) on the right, for your reference. It is great to have these on-hand so you know what hoses connect to what.
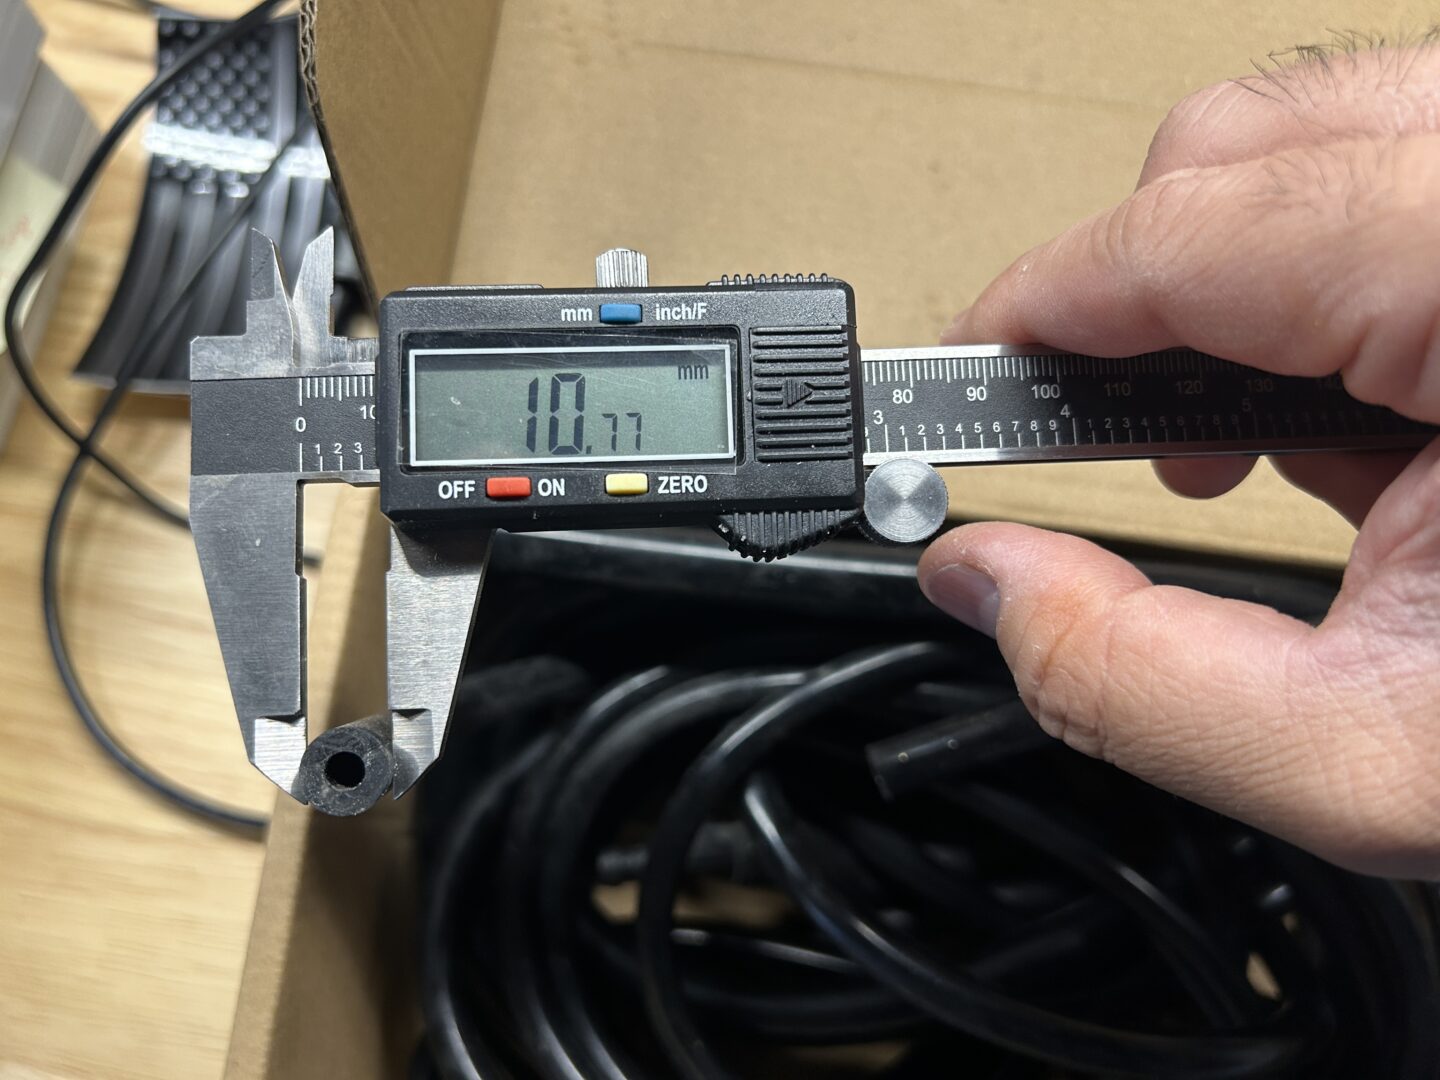
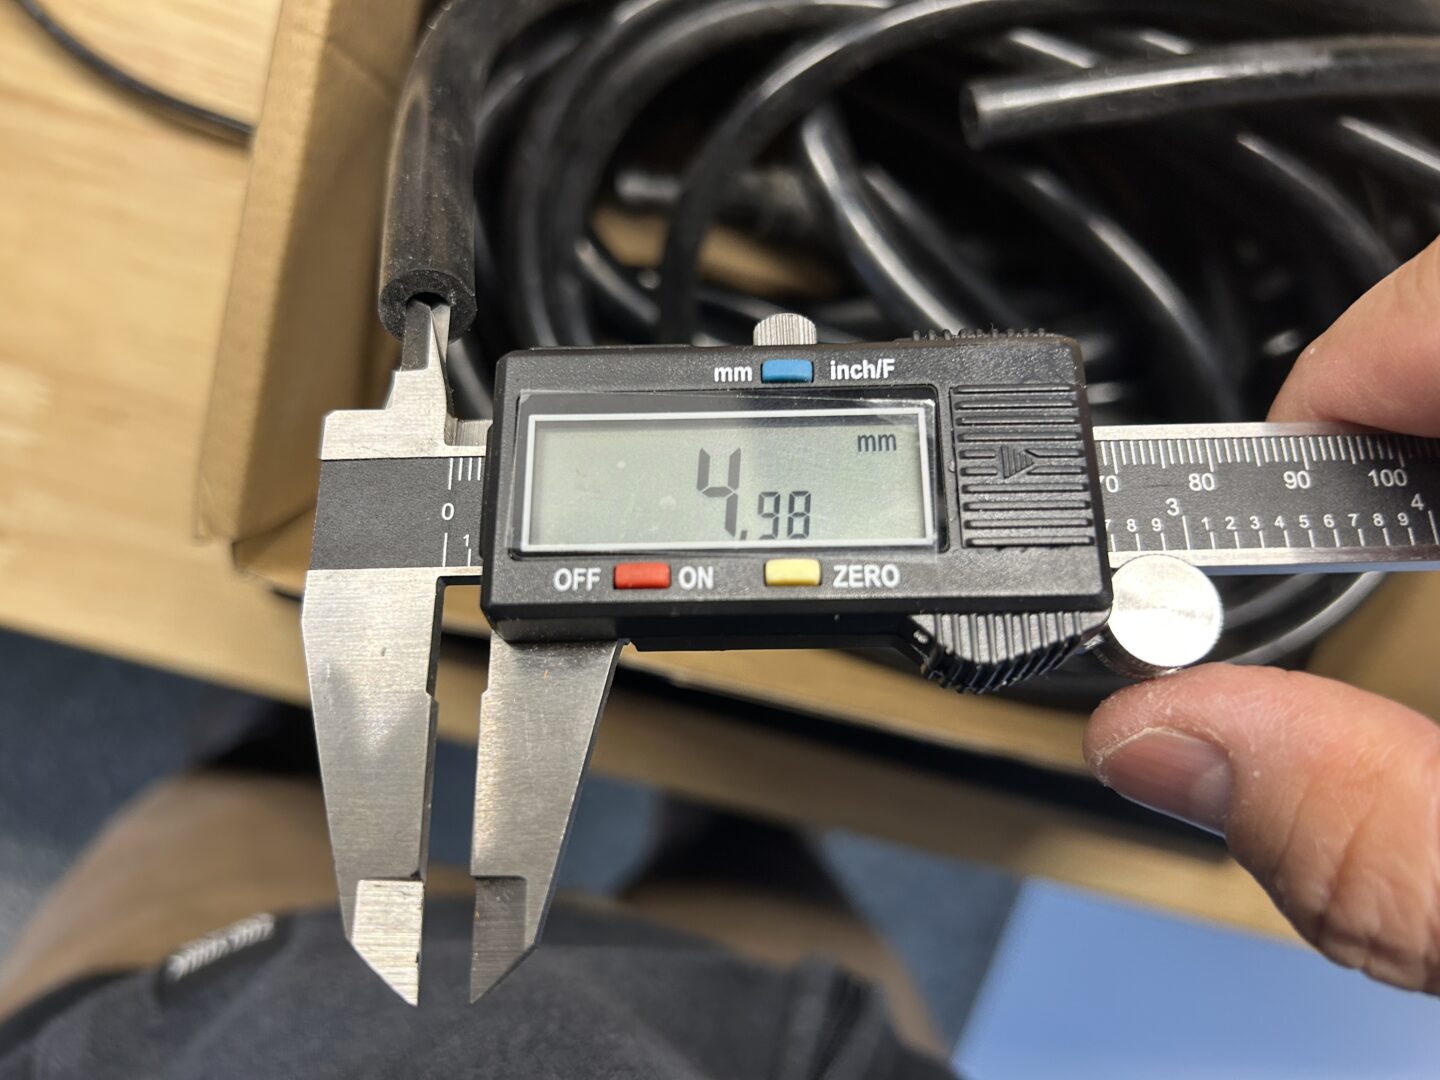
For this job, I used a vernier caliper to measure both the inside and outside diameter of the existing hoses as I replaced them. To make things easy, I purchased a universal hose kit that had different sizes of hose so I could have it all ready during the replacement. There’s not a whole lot of length needed on these hoses, so for the hose kit that I linked to earlier in the post, it was more than enough.
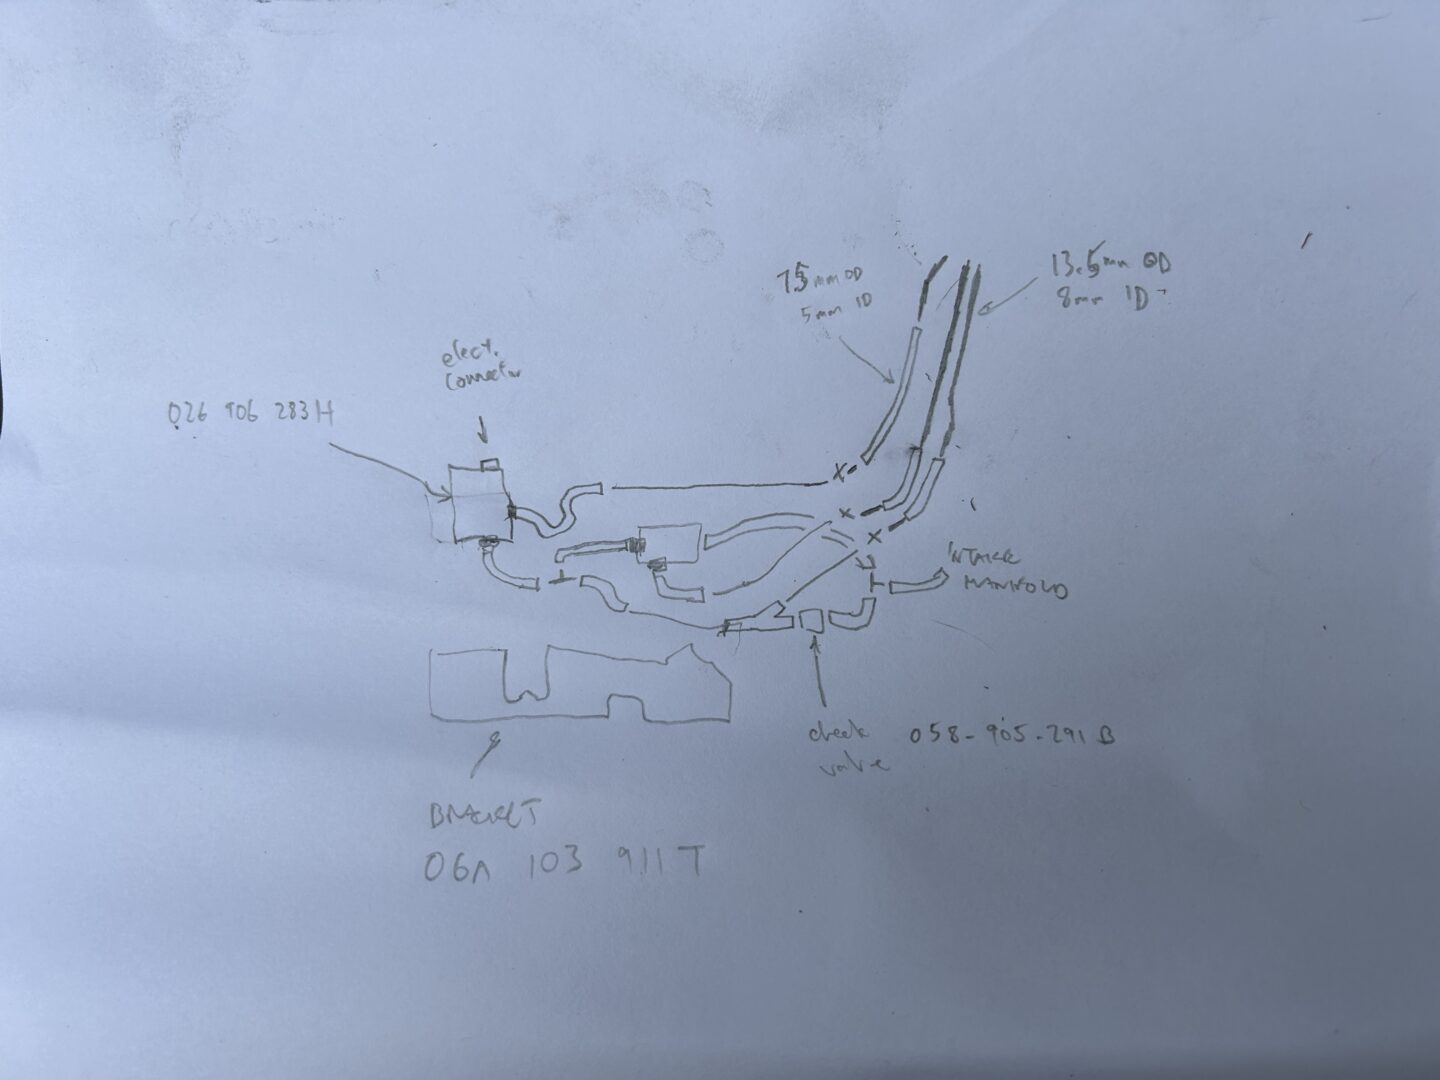
It might also be helpful to draw out a diagram of your N249 system so you know how everything goes back in place. It can get a bit confusing with all of the hoses running all over the place.
If you’re looking to replace certain components attached to the bottom side of the N249 bracket, you can just order the part number that is shown on the bracket itself. On my particular one, the part number is: 06A-103-911. If you search Ebay for this, you’ll find the whole set of used N249 hoses and components connected to the mounting bracket. This is just another alternative to replacing all the hoses with new ones, which might be a solution for some.
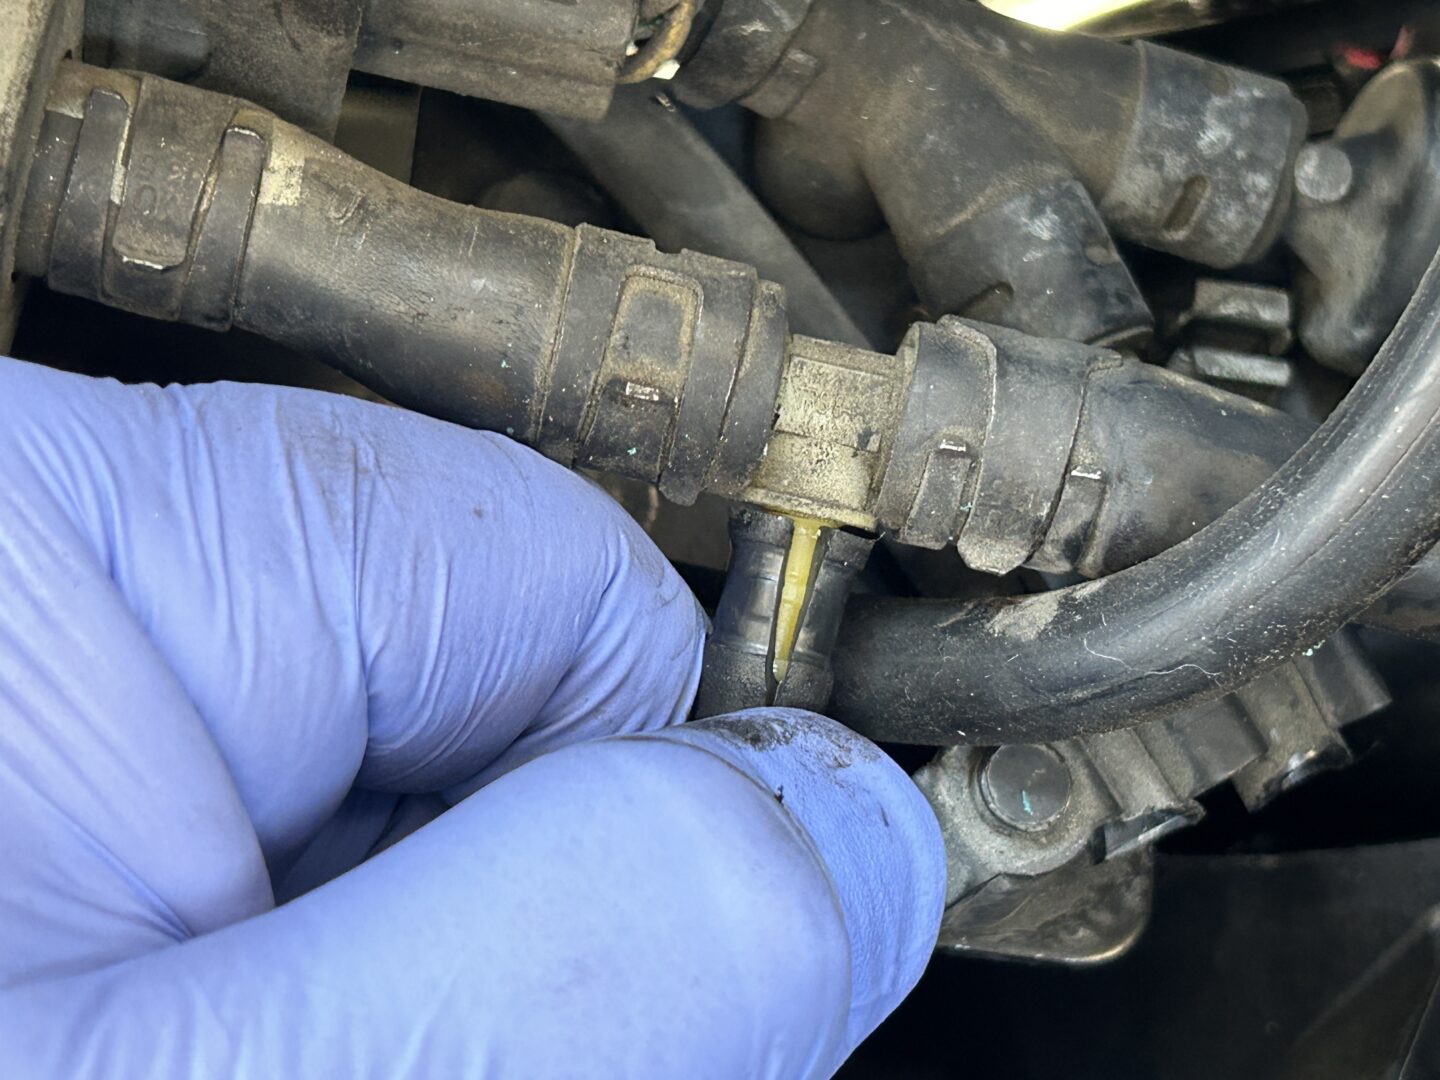
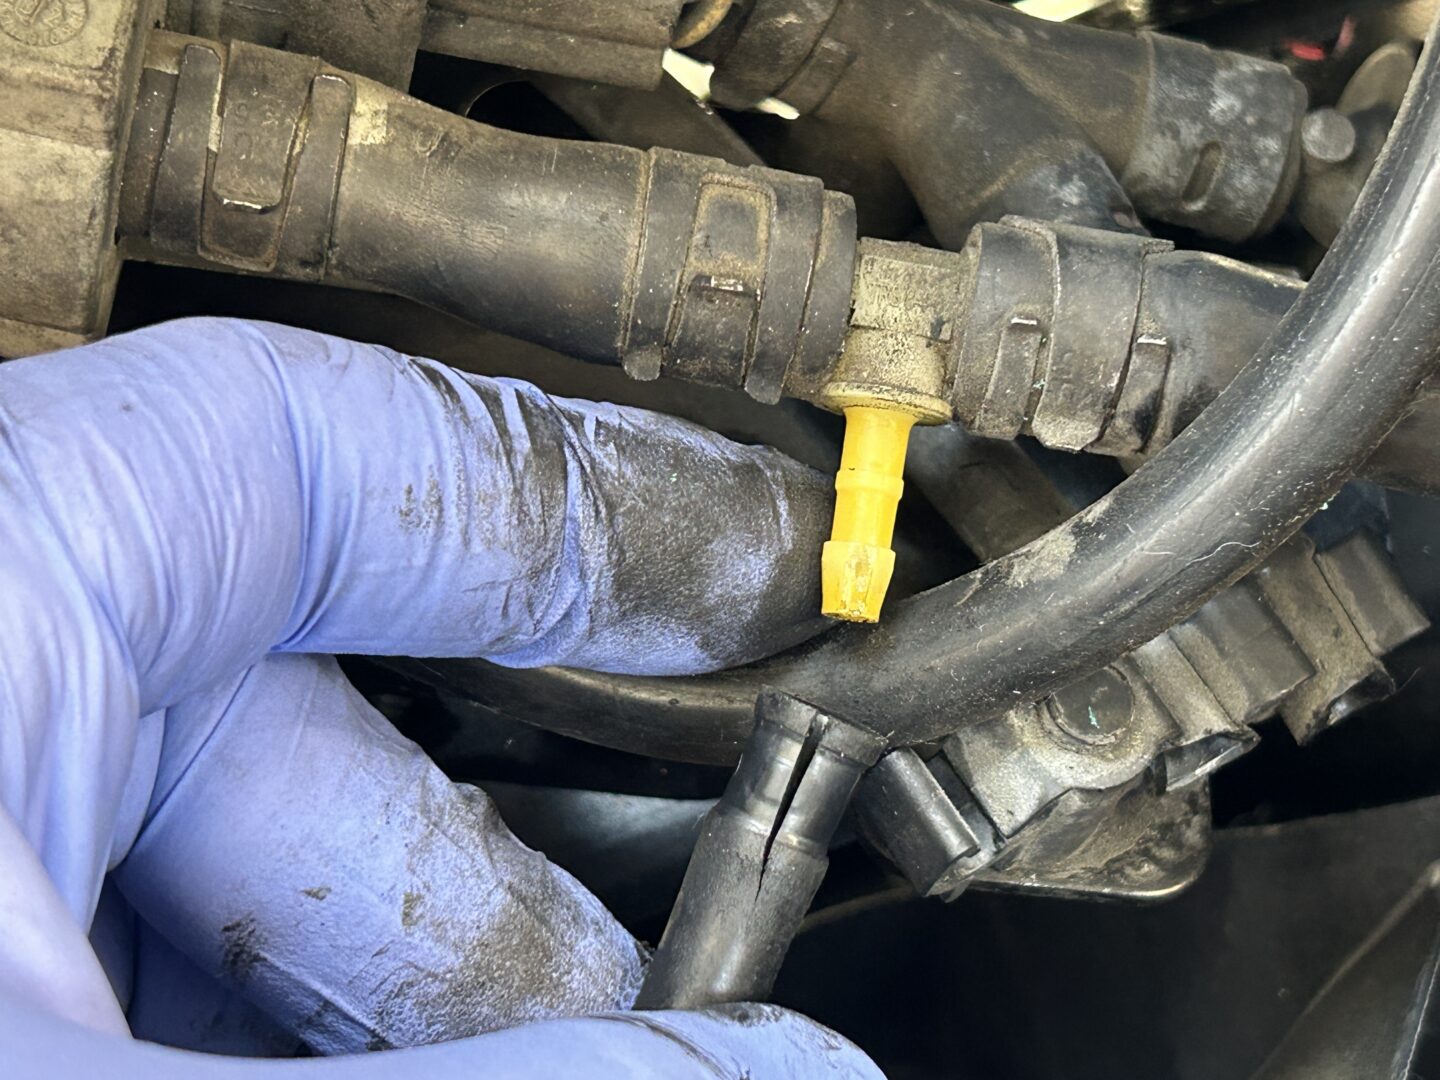
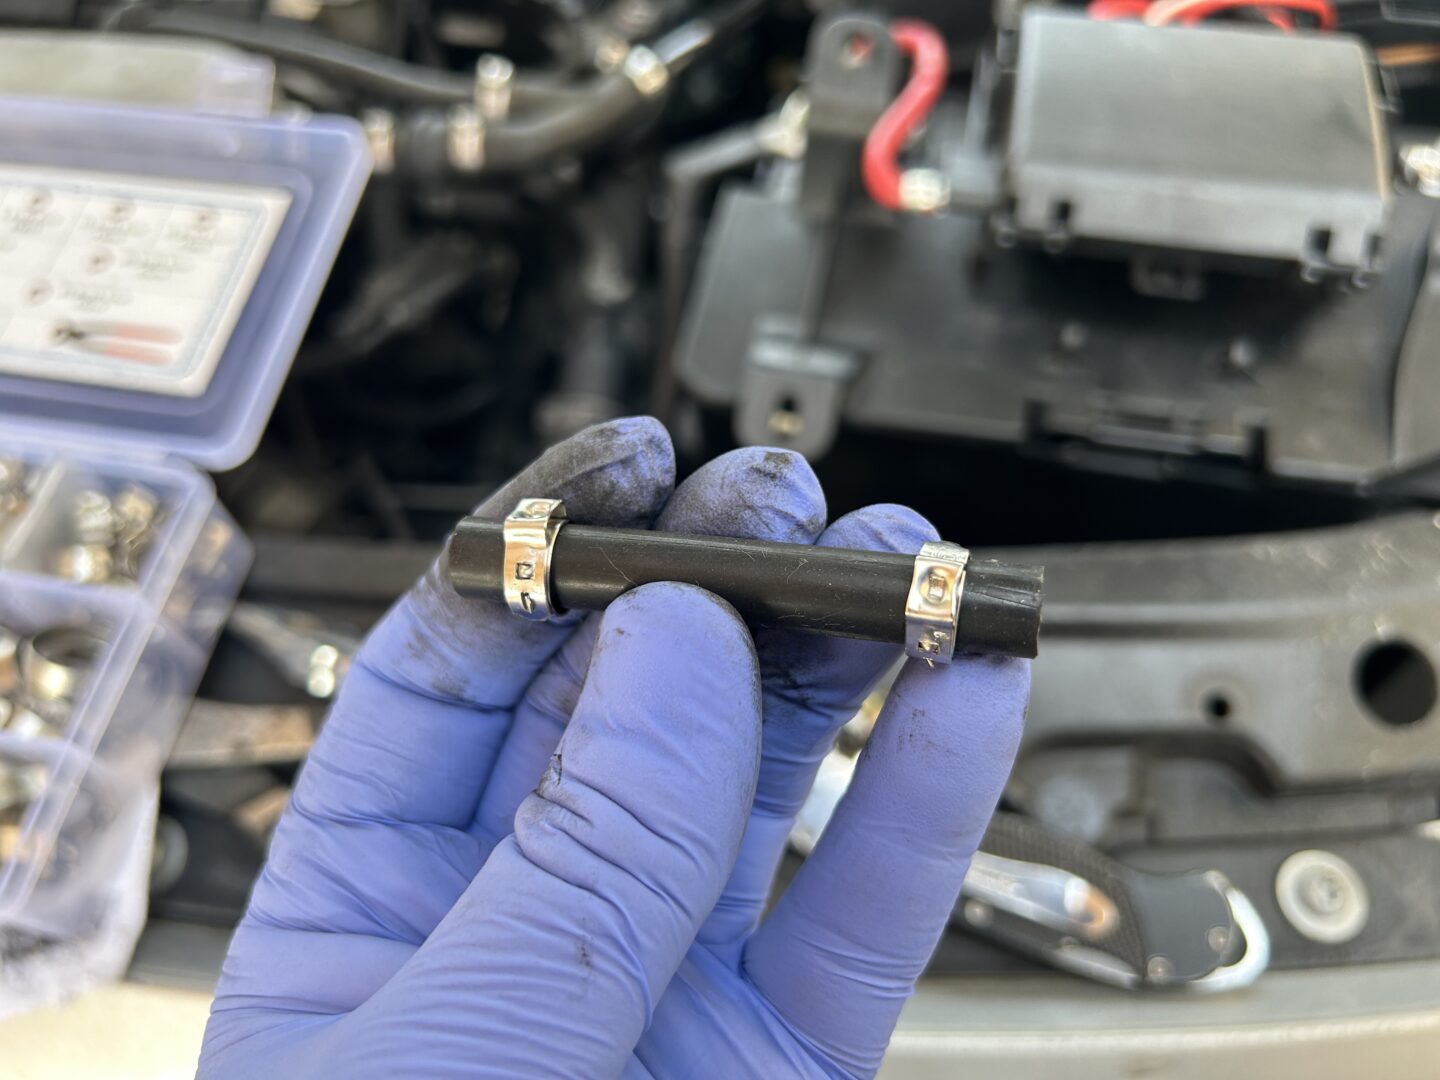
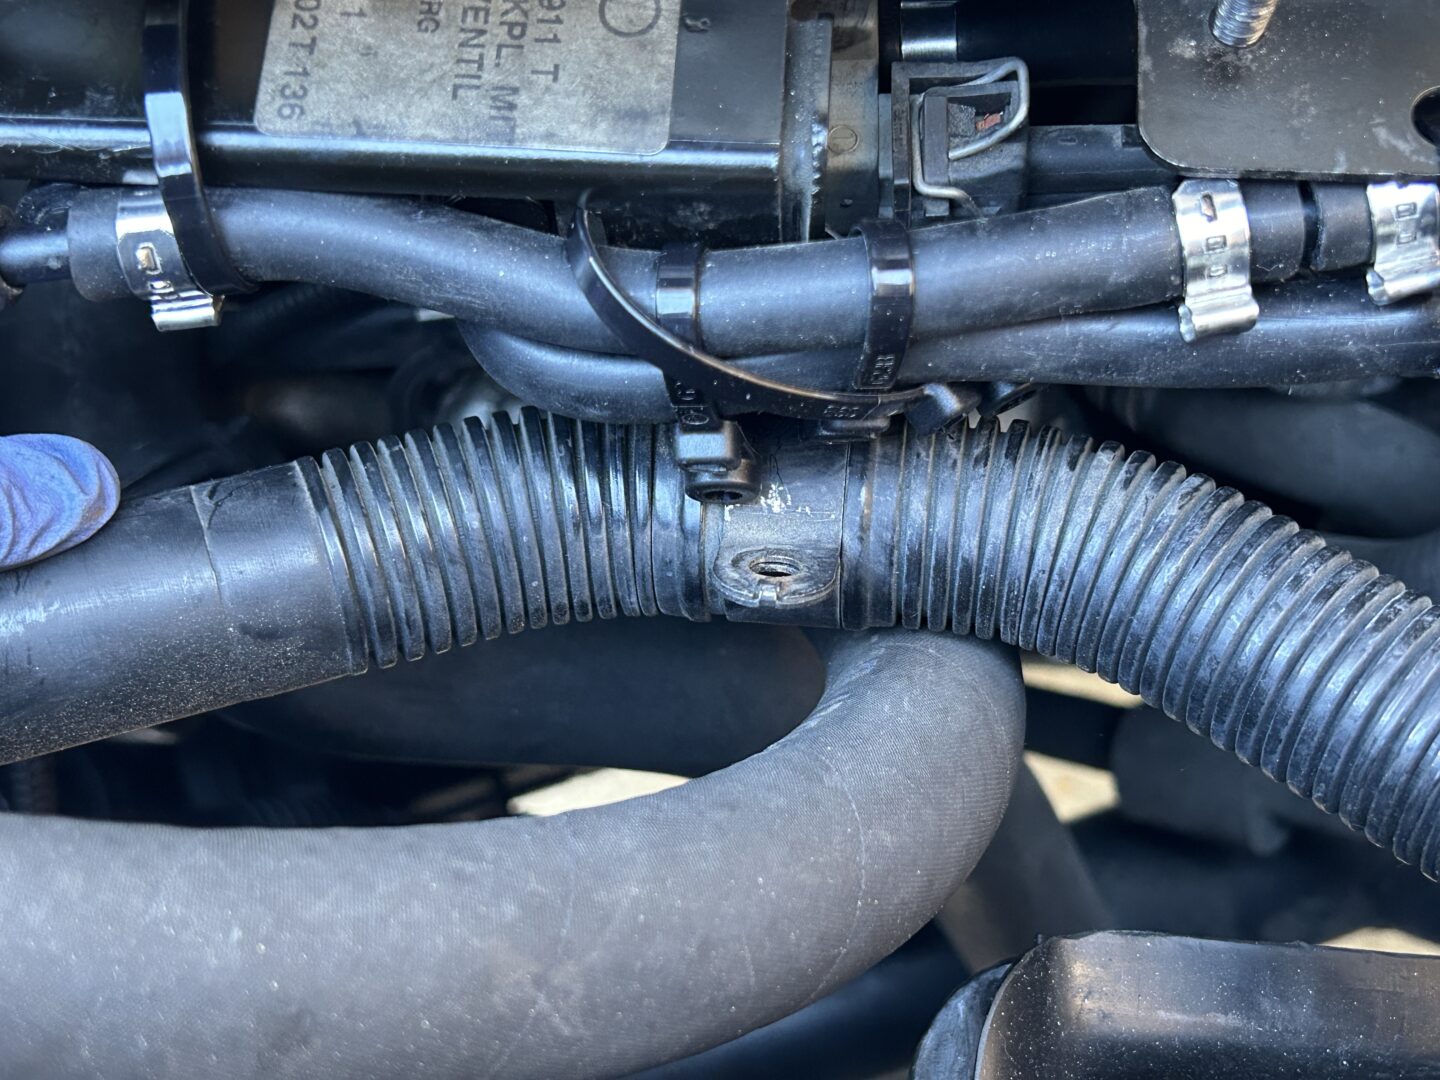
I planned on replacing the hard piping (indicated by the single lines below) in addition to the rubber hoses. The hard piping has a smaller overall diameter than the hoses on either side of them. I realized that if I were to make this replacement simple, I could just run a full length of vacuum hose to replace the hard piping and the vacuum hoses on each end.
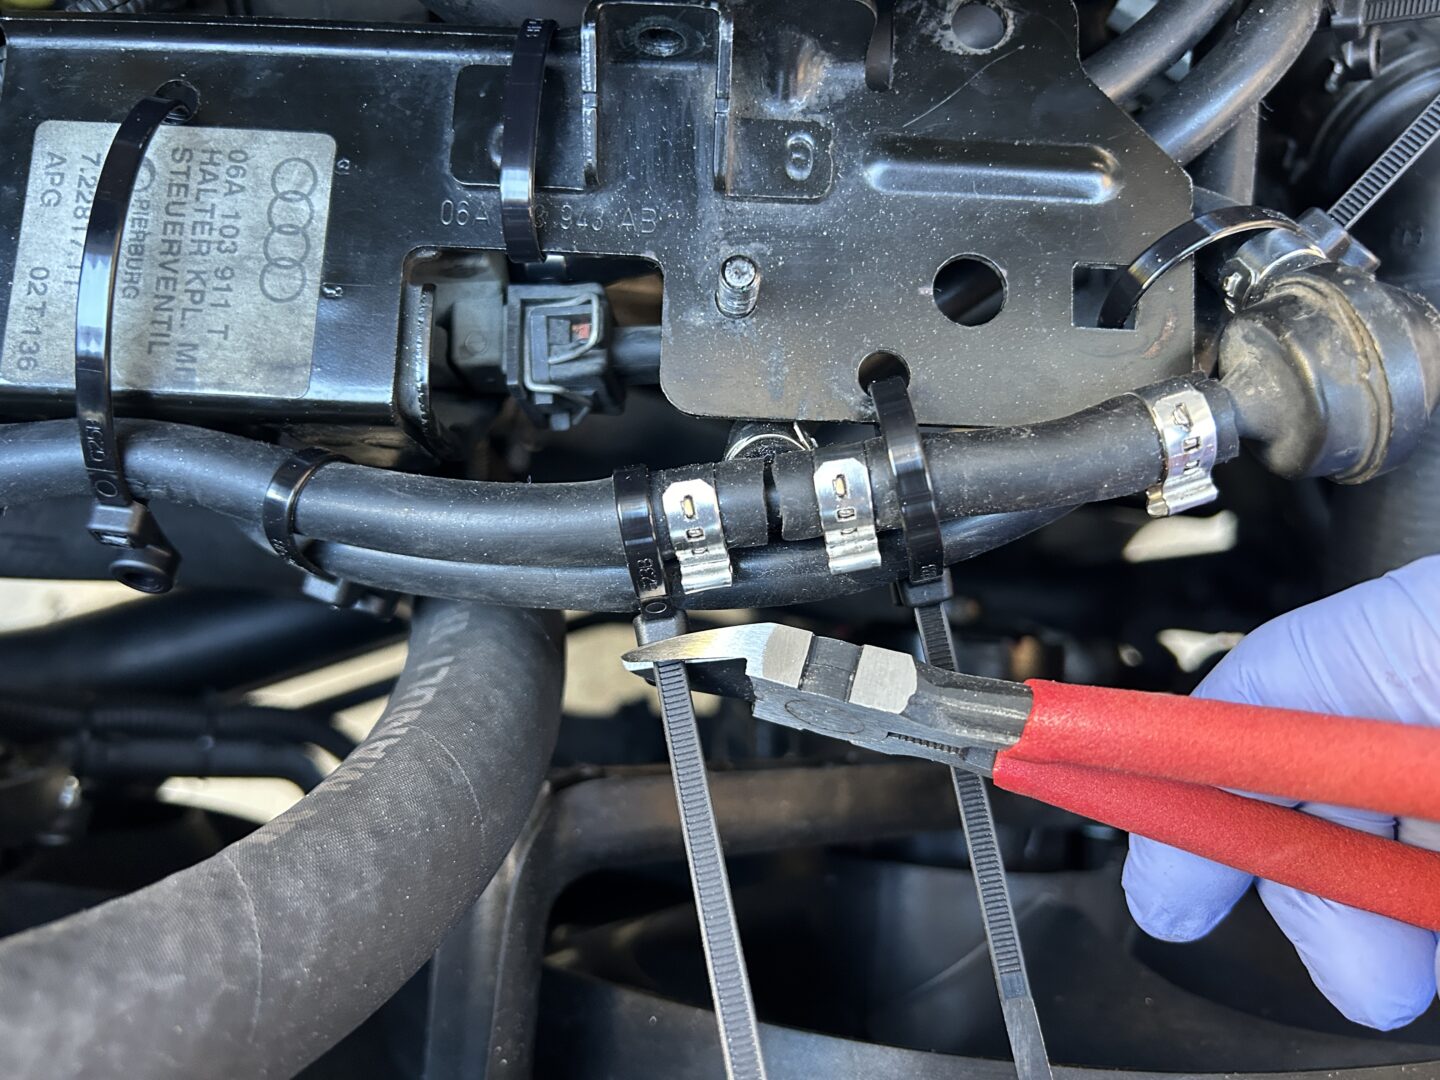
Doing it this way simplifies the replacement, but may not result in as clean of an install. This is because the original piping is actually bent to fit nicely underneath the mounting bracket, but since we are using universal hoses, it will just kind of flop around there. To address this, we can use zip ties and wire harness tape to make it look a bit cleaner.
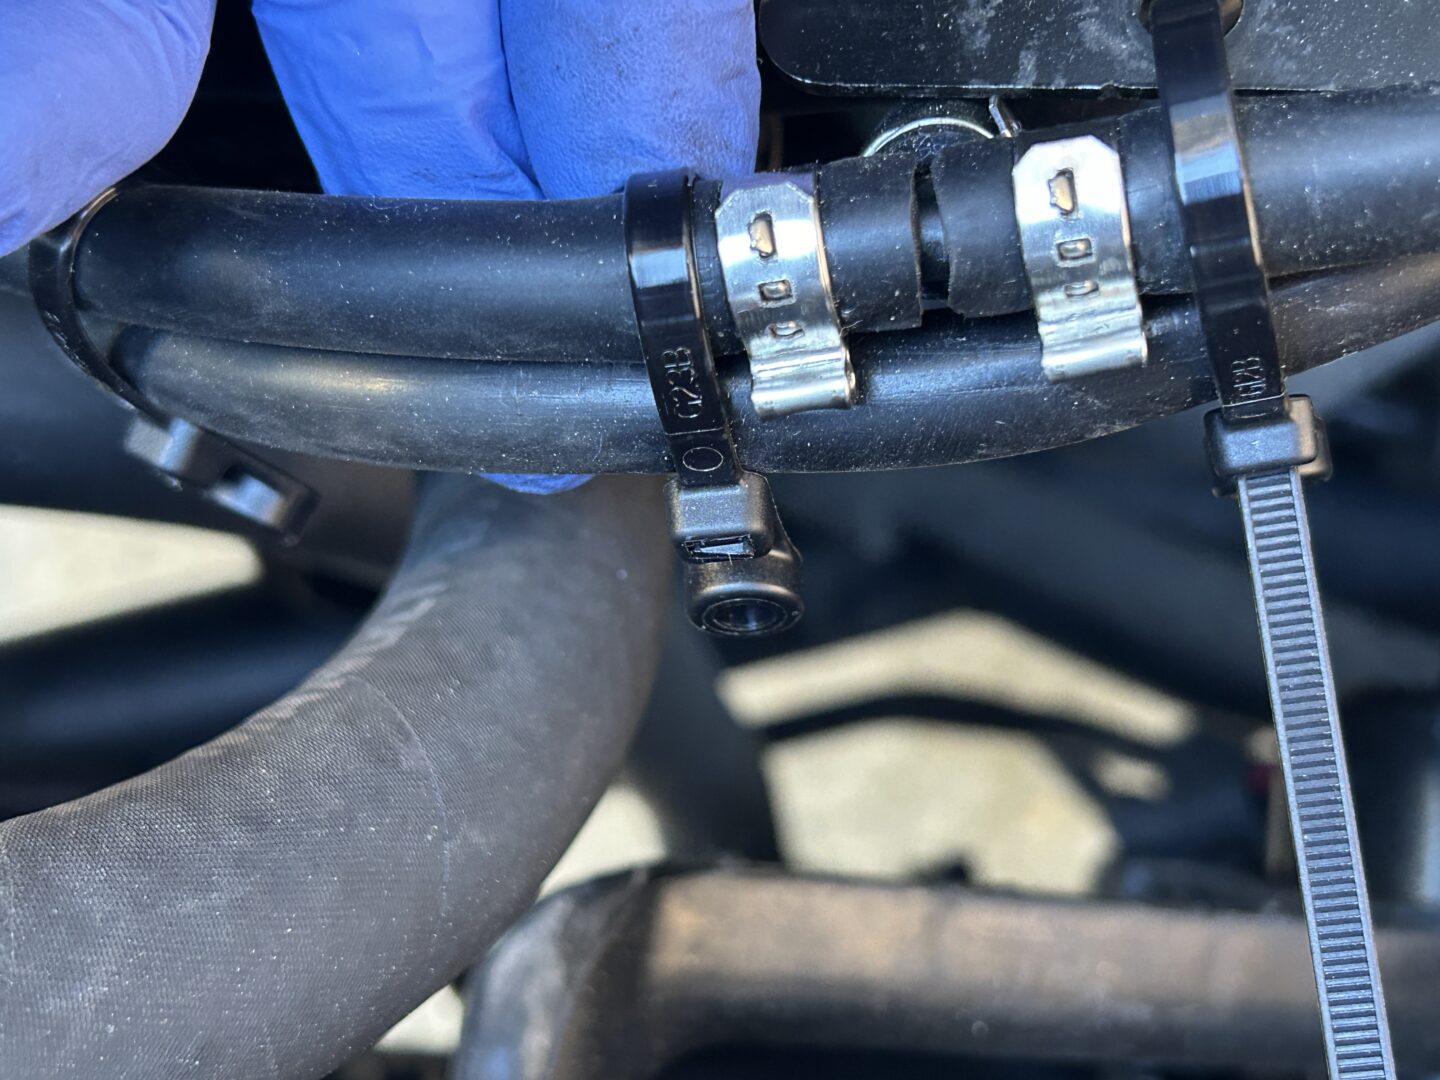
Single ear clamps were originally used to secure the vacuum hoses from the factory, so if you want to replace these clamps like-for-like, then you’ll have to use new ear clamps as they are single-use. It’s up to you if you prefer to replace them with something like spring clamps (the ones where you squeeze with pliers to open and release to clamp down), or with worm gear clamps (ones where you use a screwdriver to tighten the band down). Generally, single ear clamps are known to be a more reliable connection, so I replaced them all with the same single ear clamps.
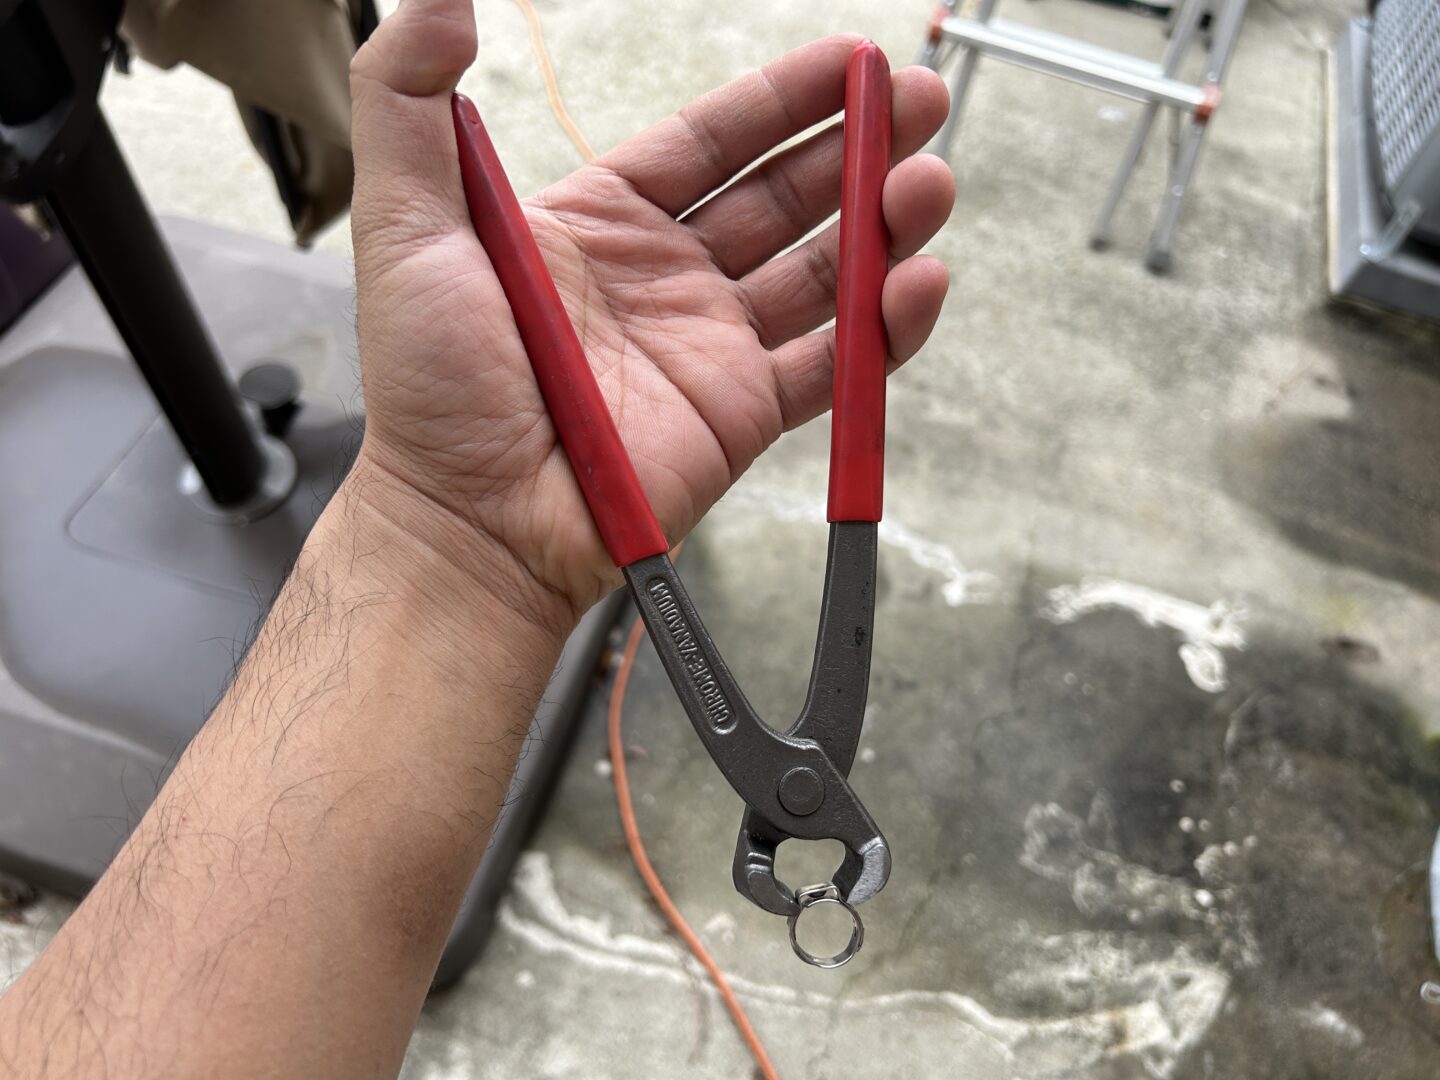
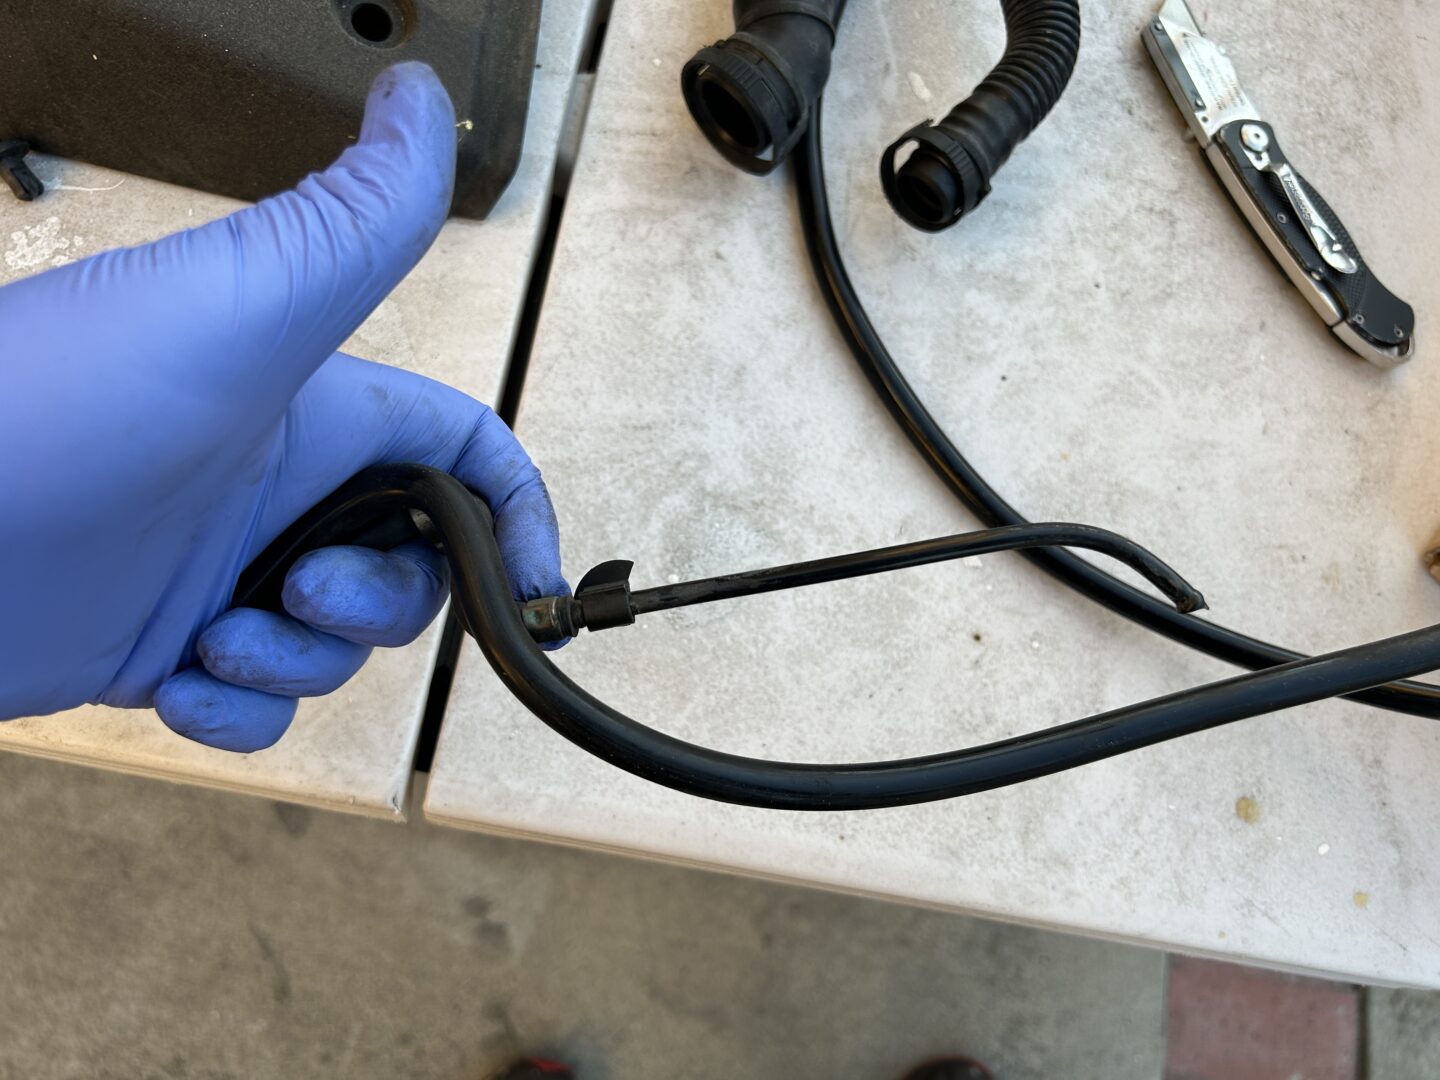
To remove single ear clamps, you need a set of cutting pliers so that you can cut the ear part of the clamp. Once you cut this part open, you can use a set of needle nose pliers or similar tool to force the clamp apart. Then, there is an inside ring that can be moved once you cut that outer clamp out. Finally, you can pull the hose off of the connection.
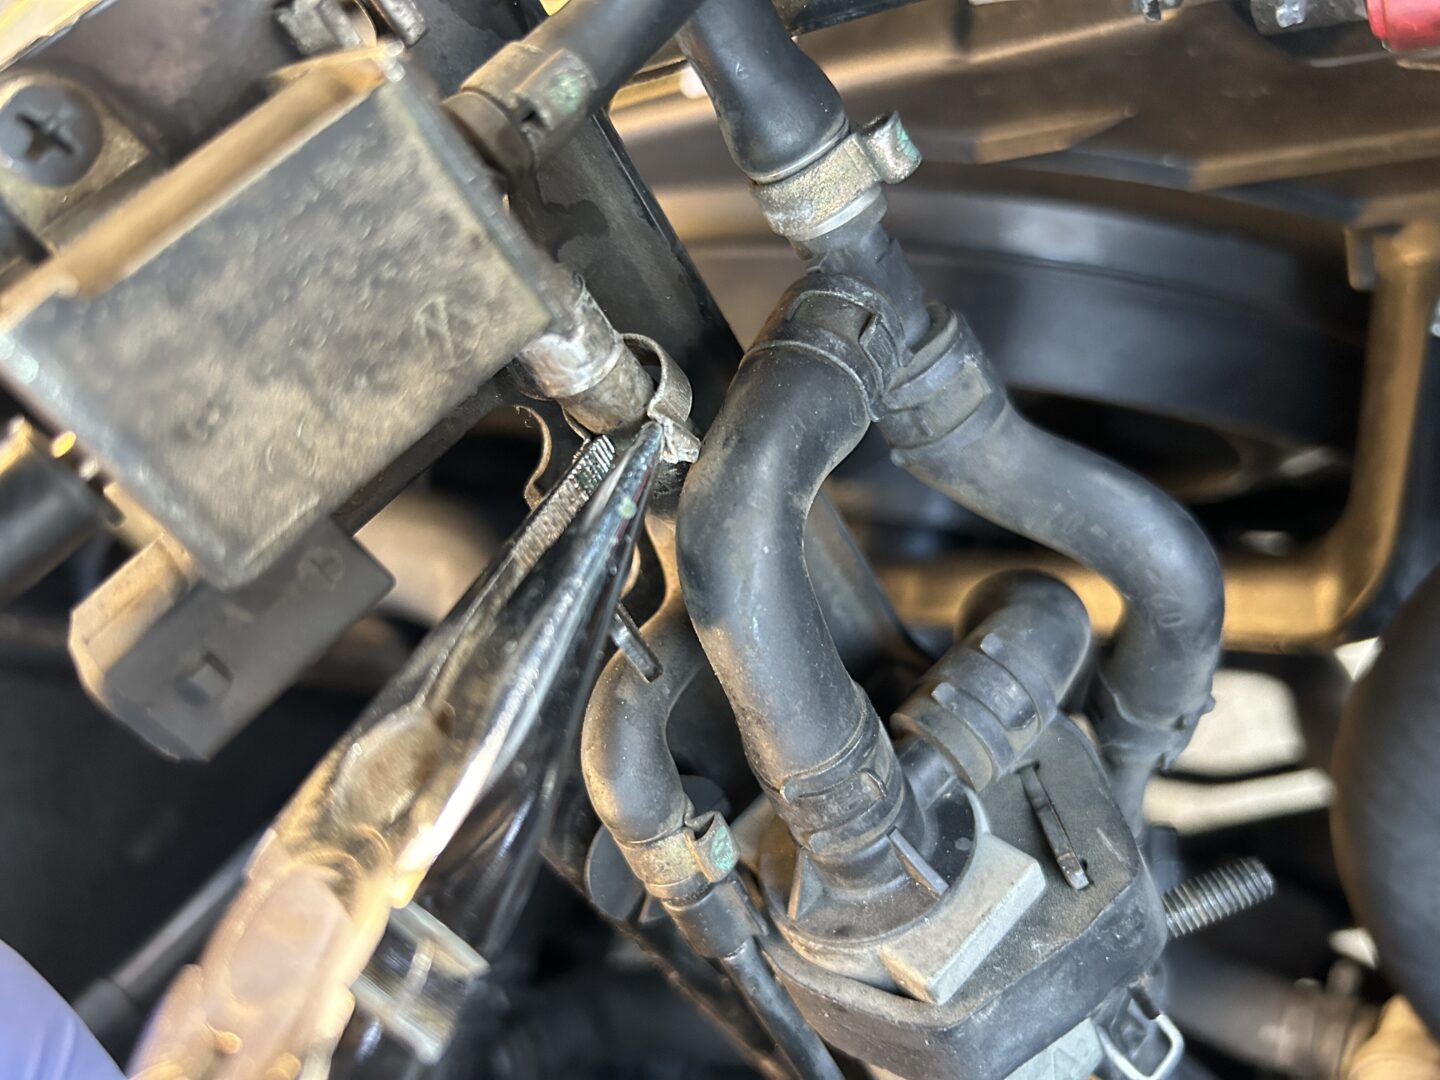
If you haven’t worked with old vacuum lines before, I’ll warn you now that you need to be extremely careful. A lot of times these vacuum hoses are connected to various nipples that are made of plastic and for this reason are very brittle. When you pull hoses off any connections, pull straight out– do not wiggle them as any lateral force can cause the nipple to break off. If it is difficult to remove, use a flat head screwdriver to wedge between the part you’re pulling off of and the end of the hose and gently pry around the nipple until the hose comes off.
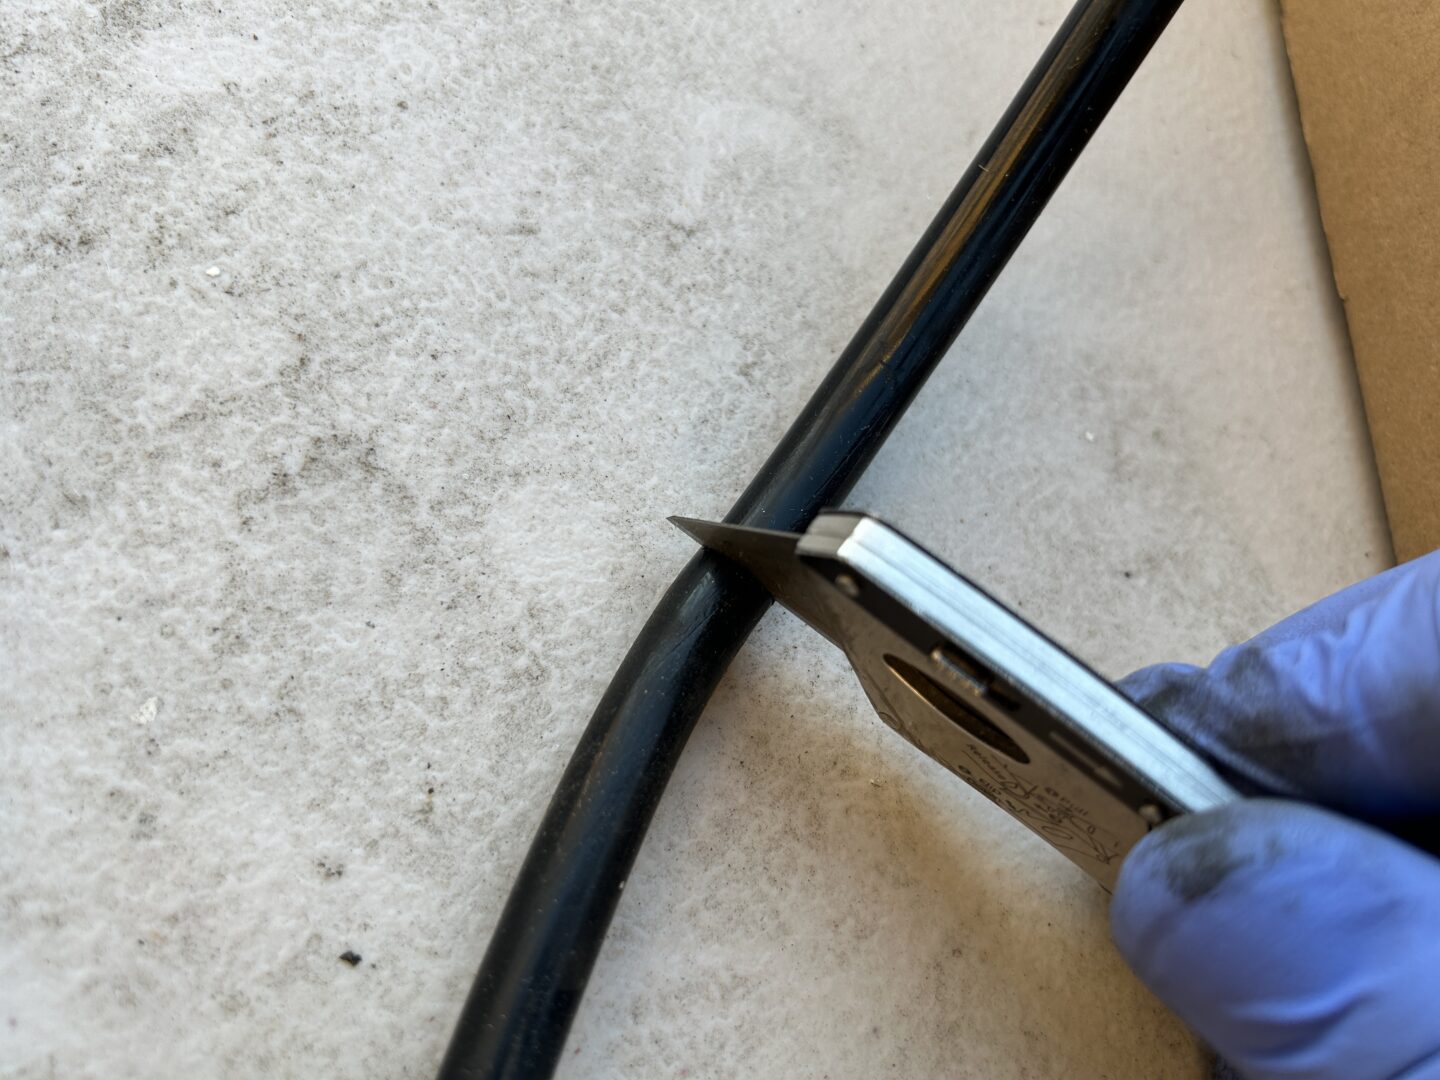
Another way to deal with very stubborn stuck-on hoses is to use a utility knife and slice along the length the hose at the connection so that it is loose enough to remove. Slicing it at the end loosens up the grip that the hose has on the connection. Because these hoses are all being replaced, it doesn’t matter that it’s being cut during removal. Just be careful to slice just enough of the hose so that you do not cut into the actual nipple underneath.

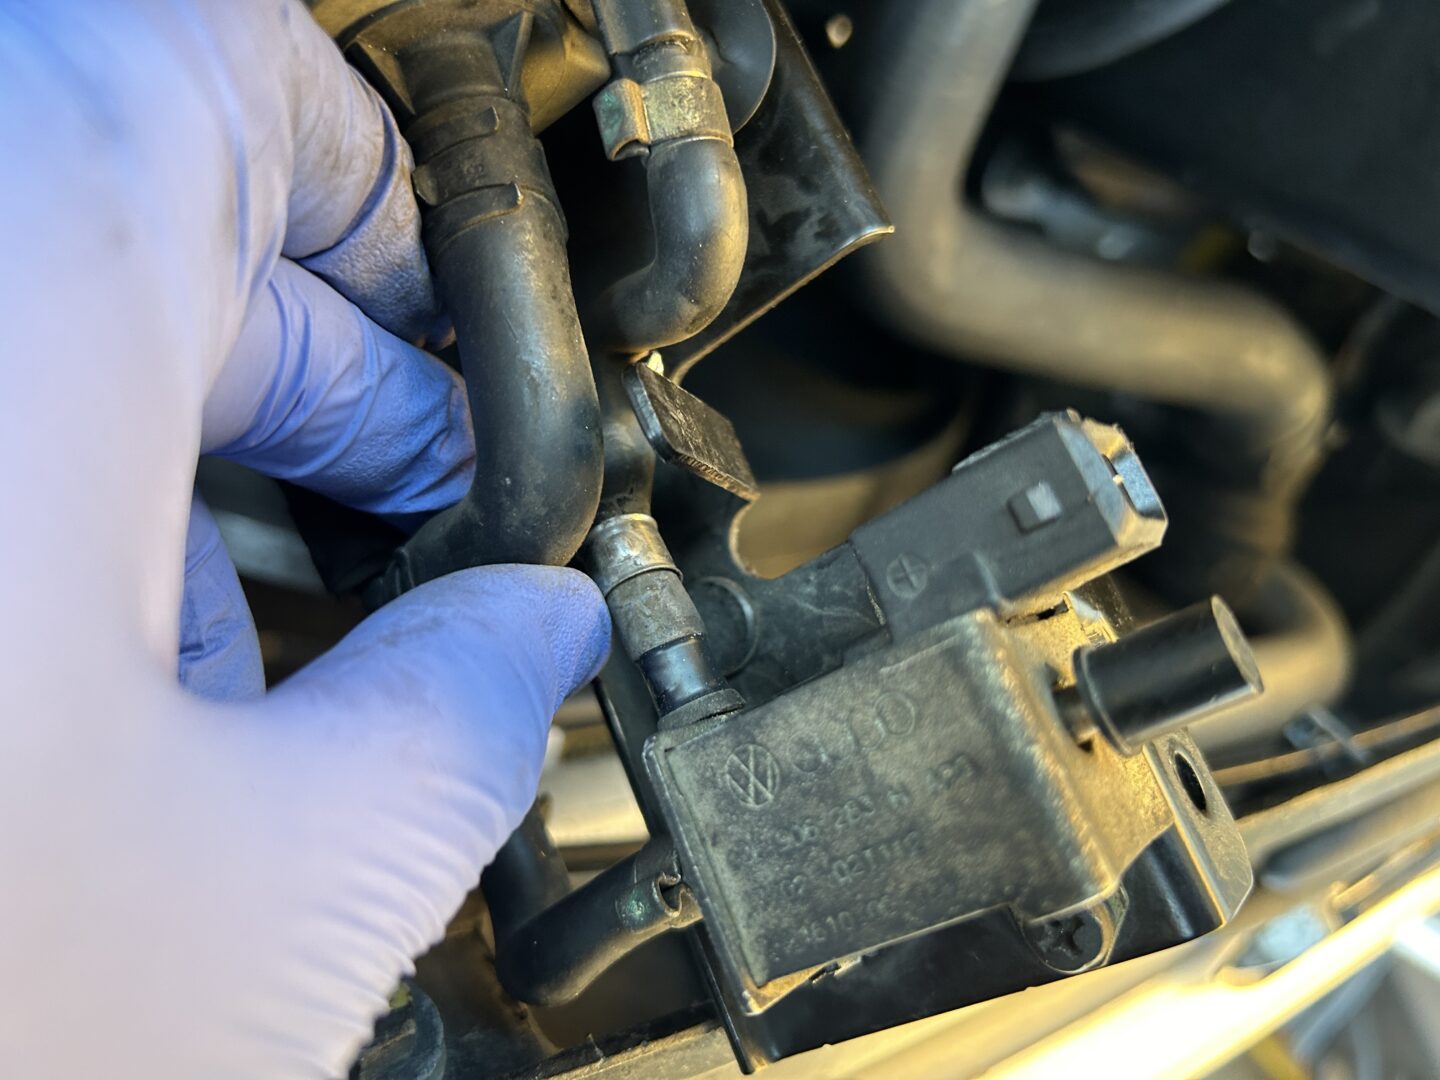
Work your way through each hose one-by-one, measuring out a new length of hose with matching inside diameter, cutting it with a utility knife with a straight cut, and replacing it.
When you have your new length of cut-to-length hose, you will slide on two ear clamps– one on each end, before you reinstall the hose. Once you connect the hose on each end, the ear clamps can then slide onto the connecting ends, where you will then clamp down with the clamping pliers.
If you take the entire set of hoses and components mounted to the N249 bracket off of the vehicle, then you can do all of the hose replacements off the car which will be much easier to do. For the remaining hoses that connect to the engine side, you will slide on the ear clamps on prior to connecting the hoses and crimping down the clamps.
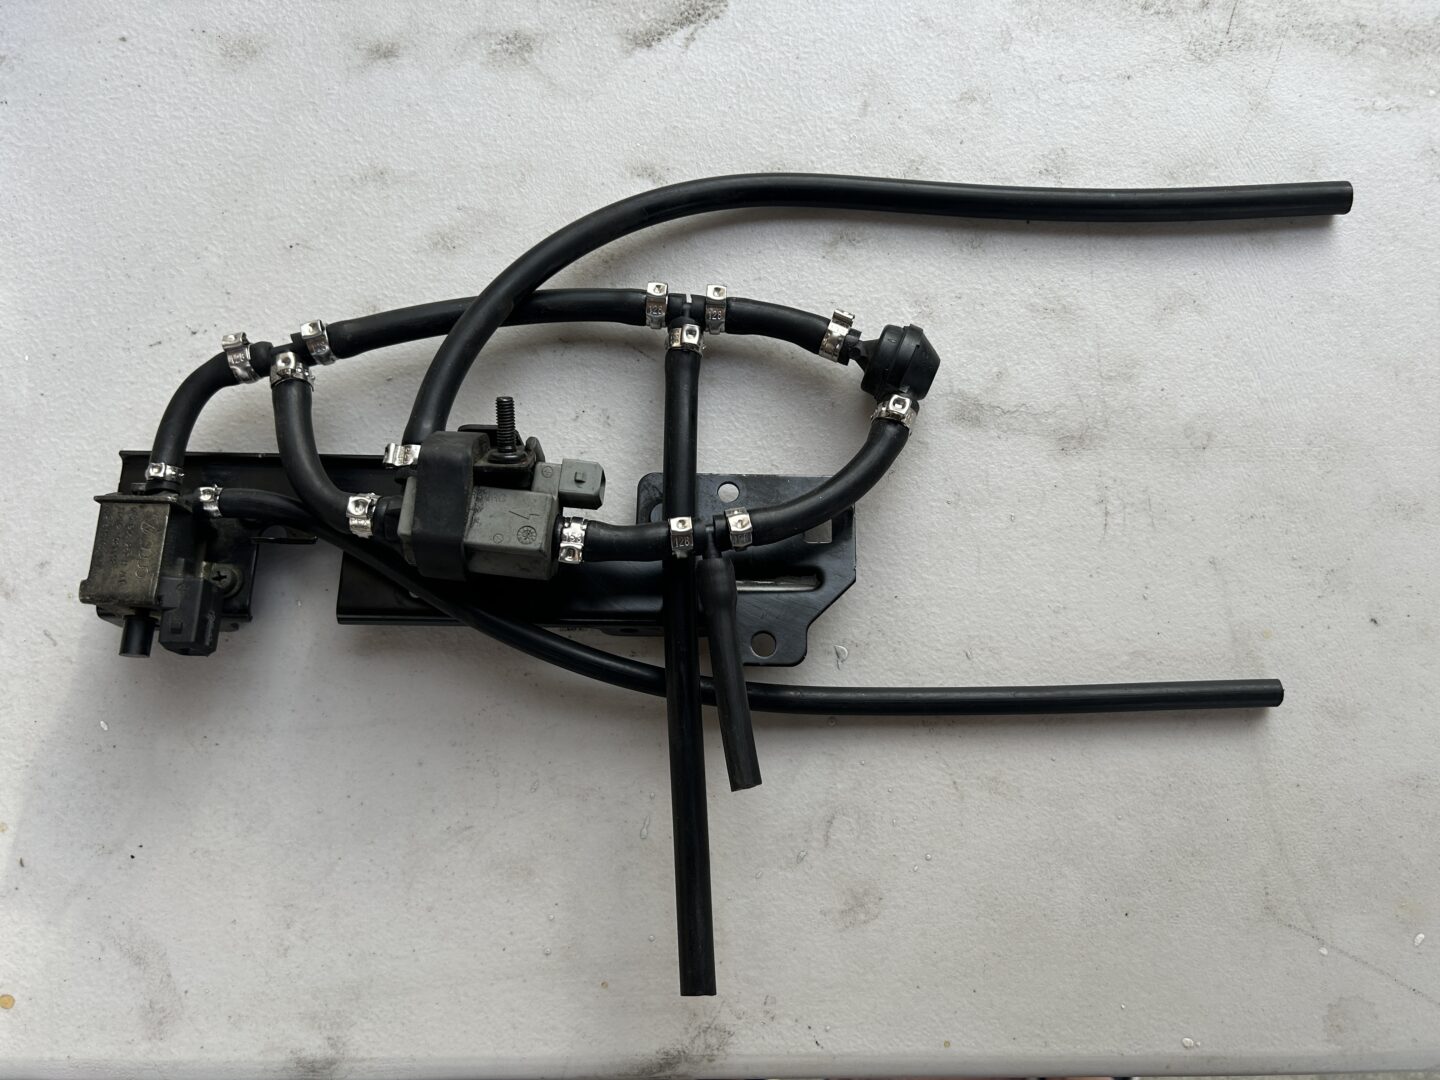
The existing hoses that we replaced were formed hoses that held tight to the bottom side of the mounting bracket, which resulted in a clean look. Although replacing the existing hoses with universal vacuum hoses is cheaper, the downside of using universal hoses is that they don’t look as neat. So, we’ll use some zip ties to better hold these hoses together and even to the mounting bracket itself. You can also use some wire harness tape to wrap around the hoses to hold them together for an even cleaner install.
Finally, reinstall the (2 qty) size 5 hex bolts and the (total 3 qty) 10mm nuts that hold the secondary air pump hoses to the bracket.
Reinstall the engine covers and start up your vehicle to ensure it runs properly.
")
")
")
")
")
")
")
")
")
4 Comments
Just wanted to say that I found this extremely useful! Like you, I recently acquired a MK1 TT and I’m on a similar journey, learning about the car and fixing it up. I’m gearing up to tackle all of the vacuum and breather hoses soon. Keep up the great content!
Awesome! I will doing some more work in the coming months so stay tuned for more posts. What did you pick up? Would love to hear from someone on the same journey!
Thanks for useful info! I broke a small connector coming off the harness and cant seem to access under to see – advice?
Hi David, you’ll need to follow he instructions in the post if you want to get access. It’s really hard to access from above, so you will need to remove that bracket that holds all of the hoses (on the underside) so that you can actually see what hoses you’ll need to replace. I also replied to your email with a photo attached.