When you make purchases through links on this site, The Track Ahead may earn an affiliate commission. Also, these posts are based off my own experiences. I am not responsible for any action you take as a result of reading this. Learn More
Losing Power on the Highway
Signs of a failing alternator can be an excessively noisy alternator, a burning smell coming from the alternator, and flickering of vehicle lights under electrical load. Unfortunately in this case, the car completely lost power while on the highway.
Initially, I went about replacing the car battery since it was an older battery and it would be much easier and quicker to do than to replace the alternator. But after replacing the battery, the car still eventually lost charge and wouldn’t start again. The car was towed to our home and I began to check out the alternator.
How the Alternator and Battery Work
The alternator converts mechanical energy (from the drive belt connected to the crankshaft) into electrical energy. A typical 12 volt battery consists of six cells. Each cell is 2.1 volts, a lead-acid 12v car battery therefore has a total of 12.6 volts.
The car battery doesn’t really supply the car with most of its electrical power. In fact, it acts more like an electrical storage tank which only supplies power when the alternator falls below its normal operating ability. It also supplies the power to start the car with cold cranking amps (CCA rating) playing a big part in colder climates.
In fact, the alternator does the bulk of the work for supplying electrical power at over 1500 RPM’s. In order to test the electrical output of the alternator, we’ll check voltage across the car battery terminals.
Testing the Alternator
First, I use a multimeter to test the voltage across the positive and negative terminals of battery while the the car is off. The voltage I get is 12.29 volts, which is over 12 volts. Anything over 12 volts is typically considered charged. I did trickle charge the car overnight so getting this voltage would be typical.

The alternator usually needs a minimum output of about 13.8 volts just to begin to charge with normal driving. However, charging at this voltage may take a very long time to fully charge the car battery.
It’s more reasonable to have an alternator output of between 14.2 volts and 14.5 volts during typical driving. This means driving at over 1500 RPM’s. In order to test the alternator, I had my wife hold the accelerator at 1500 RPM’s while I tested the voltage again. This time, the voltage went up to 12.43 V.

This reading is far below the recommended voltage for normal driving, which would be at least 14.2 volts. The battery is also not fully charged so I expect the voltage to be lower, but this is far below the recommended range. Therefore, I believe the battery is not being sufficiently charged while the car is being driven.
Replacing the Alternator
The alternator is not too difficult to do, however it does require some time. The drive belt needs to be removed and there are few difficult bolts to get to. However, it is a direct replacement so in all it can be done successfully if you take your time.
Tools & Materials
Alternator
I’ve haven’t heard too many bad things about any alternator options out there for the Lexus IS350. Just make sure that they fit your year/make/model; you don’t want to go with any universal fit options. Also I wouldn’t recommend any used alternators; it’s just not worth the risk. However, I am a fan of refurbished products as long as it’s from a reputable dealer.
I chose not to go with OEM because they can be two or three times the price of the other options. Since I’d prefer to go with an OEM option but not willing to pay the premium, I purchased a brand well-known to supply OEM parts: Denso.
My recommendation is to go with an option that not only has good reviews, but offers a core return. Typically the local auto parts stores have good core return fees for your used alternator. Other online options don’t have as good ones. The only exception I could find online was RockAuto.
OEM Alternator (Part #27060-31060): Ebay
Denso Alternator (Part #2100657): Amazon | Ebay | RockAuto
Other Options: Advance Auto
Mechanics Ratchet Set
Find a set that includes some deep sockets and attachments that allow you to reach hard-to-reach spots in the engine bay. Another attachment that is helpful is an extension that swivels to allow for extra flexibility in reaching tight areas.
Search for on Amazon.com
Multimeter: Any multimeter will do; the essential part of the multimeter for the purpose here is the voltmeter. We will be checking the voltage across the positive and negative terminals of the battery.
Search for multimeters on Amazon.com
Magnet Tool
This is one of my favorite tools to use and it comes in very handy on this job. Since you’ll be working in a tight space, it’s very easy to drop bolts/nuts into the void of the engine bay. When this happens it can make an easy job become increasingly difficult. This tool telescopes and allows you to magnetically pick up these small parts without delaying the job.
SE 30” Telescoping Magnetic Pick-Up Tool
Step-By-Step Procedure for Replacing the Alternator
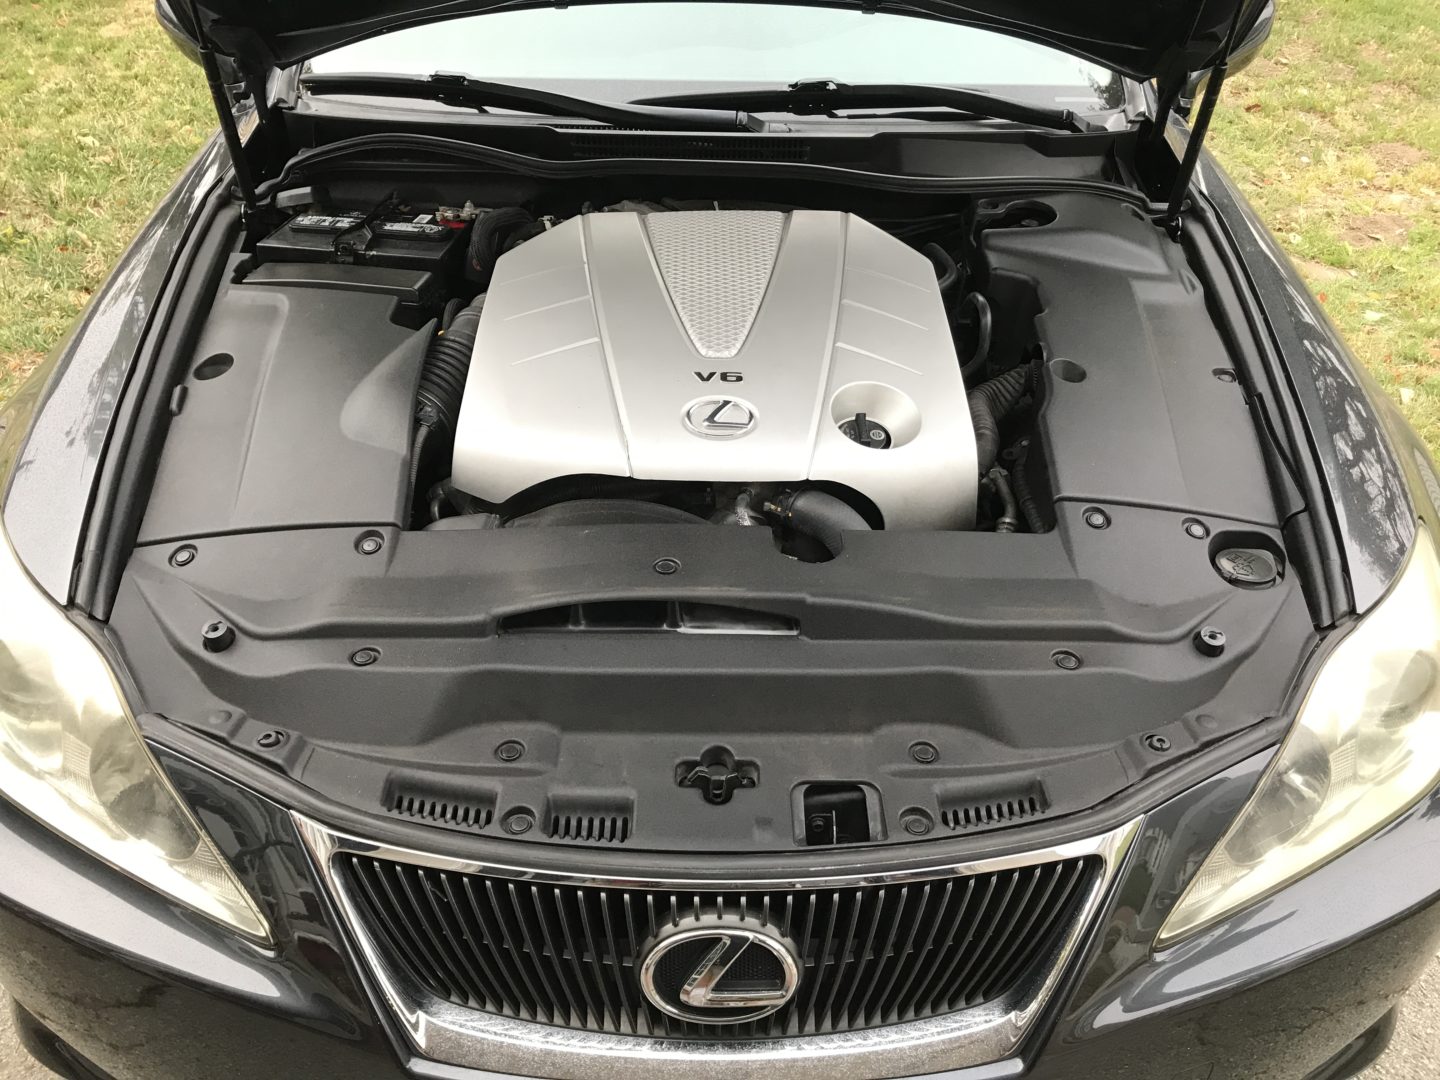
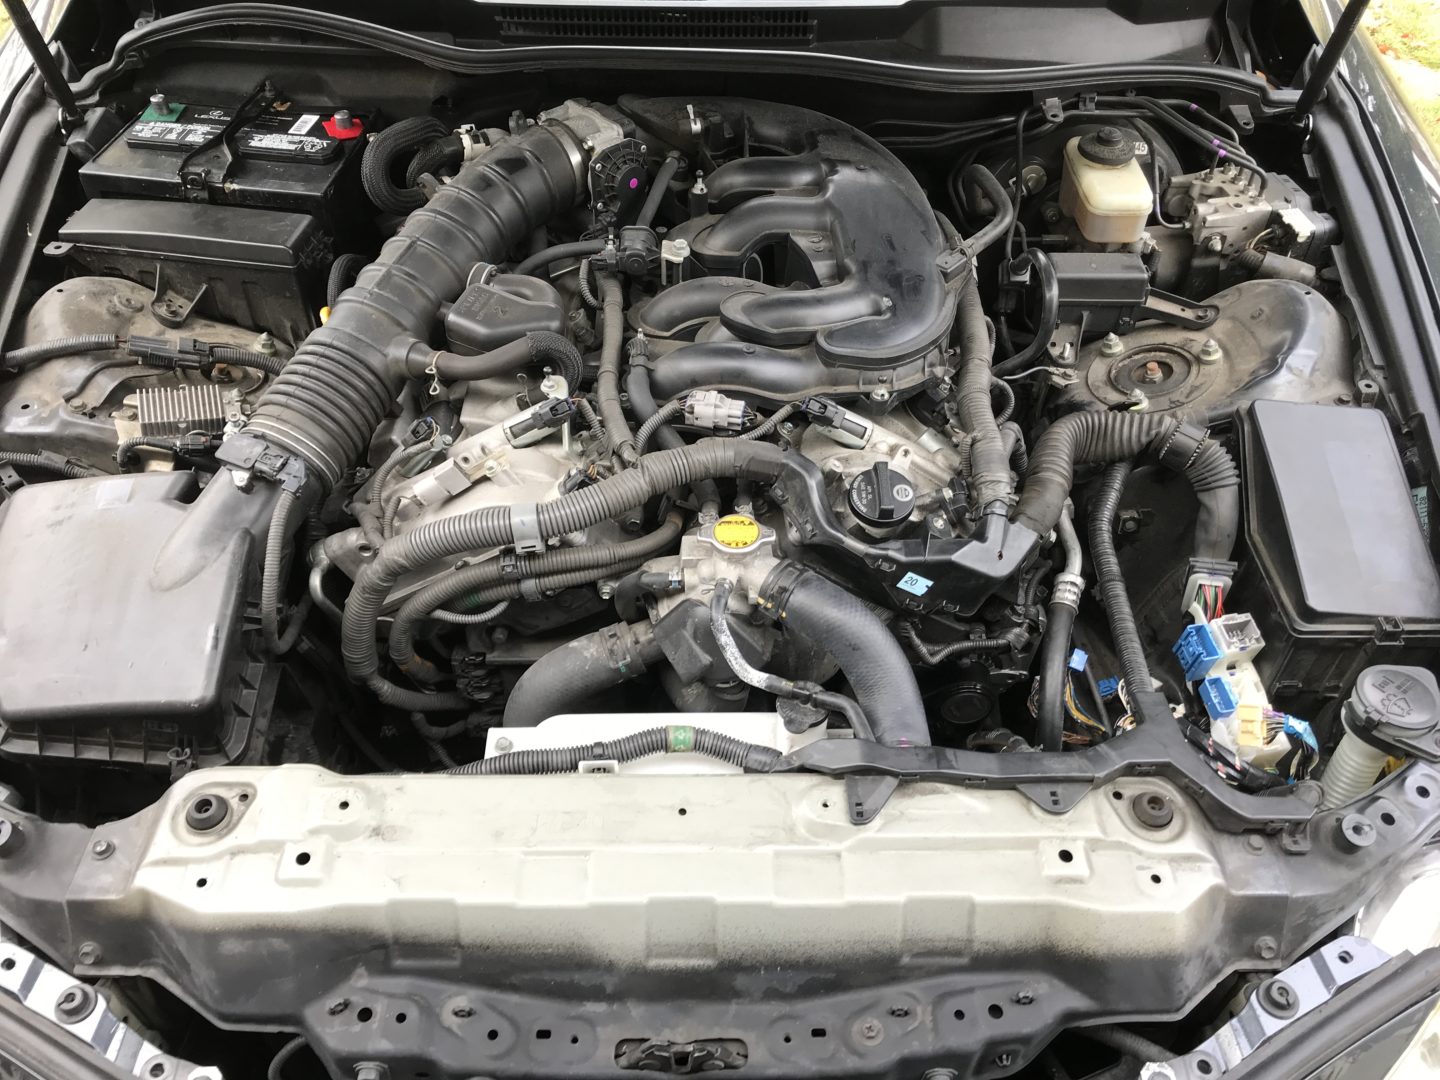
Start by removing all the black trim pieces under the hood. There is one on the left, one on the right, and one in the front. They can all be removed with a flat head screwdriver. The silver engine cover can be removed by pulling up on it.
Also, remove the front air duct and ECU cover.


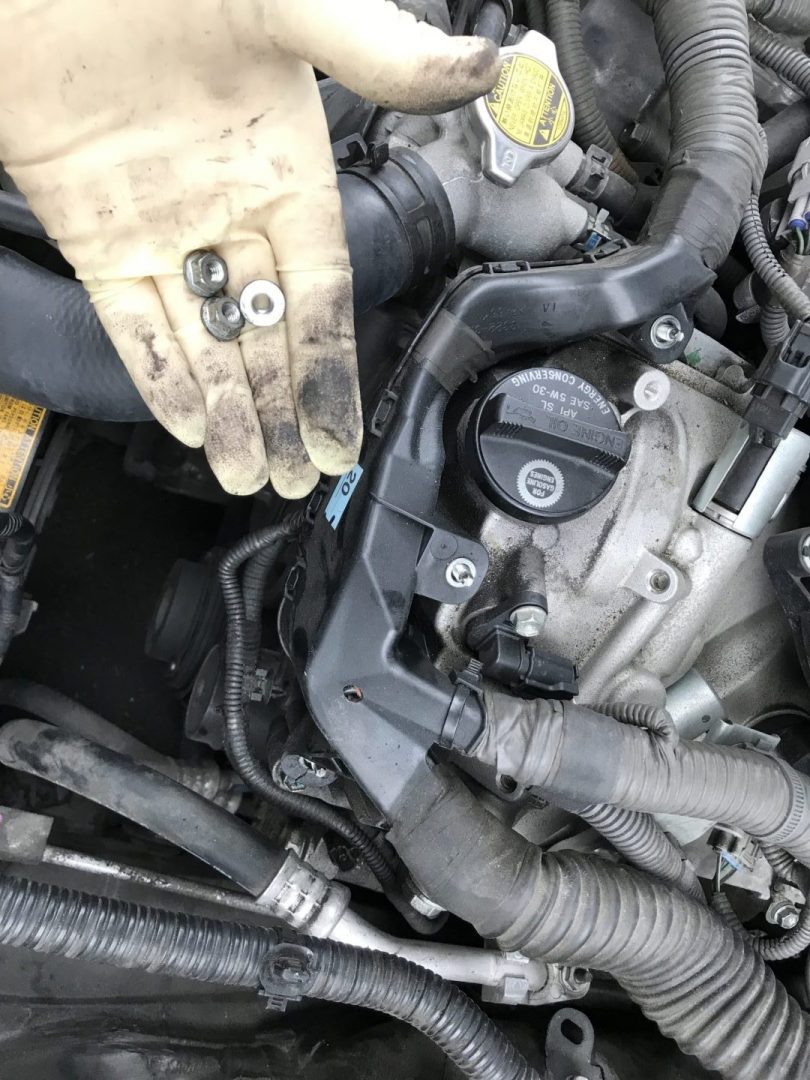
Remove the two 10mm nuts below.
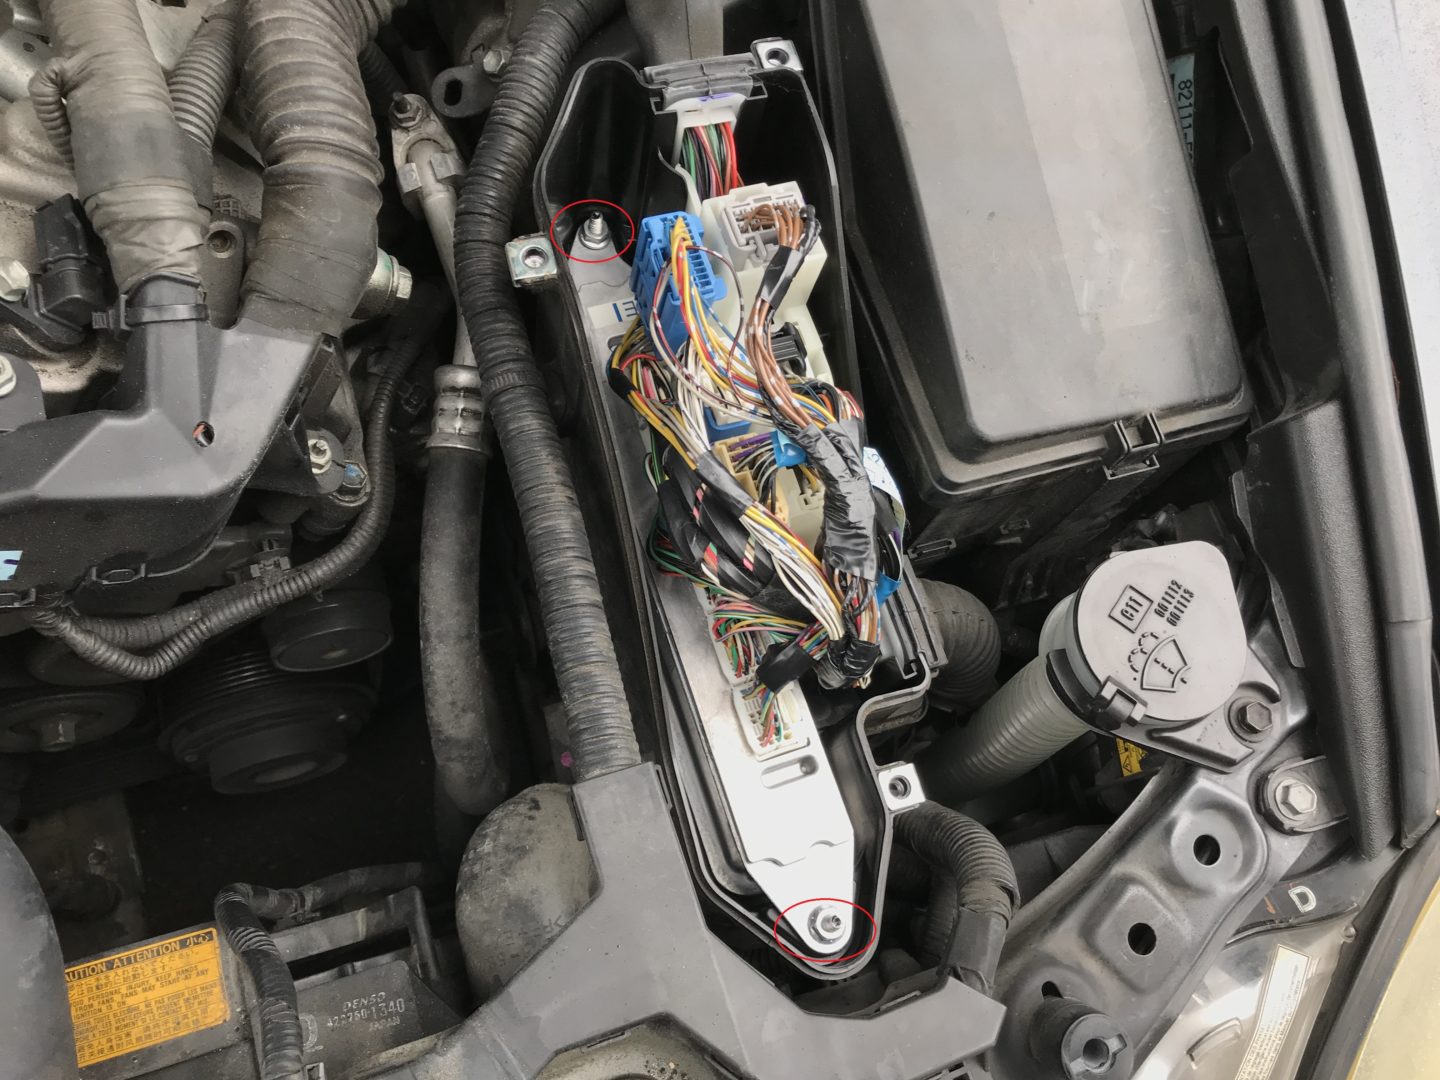
Also unclip the two plastic clips with a flat head screwdriver and pull this piece out. It also helps to remove the connectors to facilitate the removal of this piece.

With one side removed, move it out of the way.
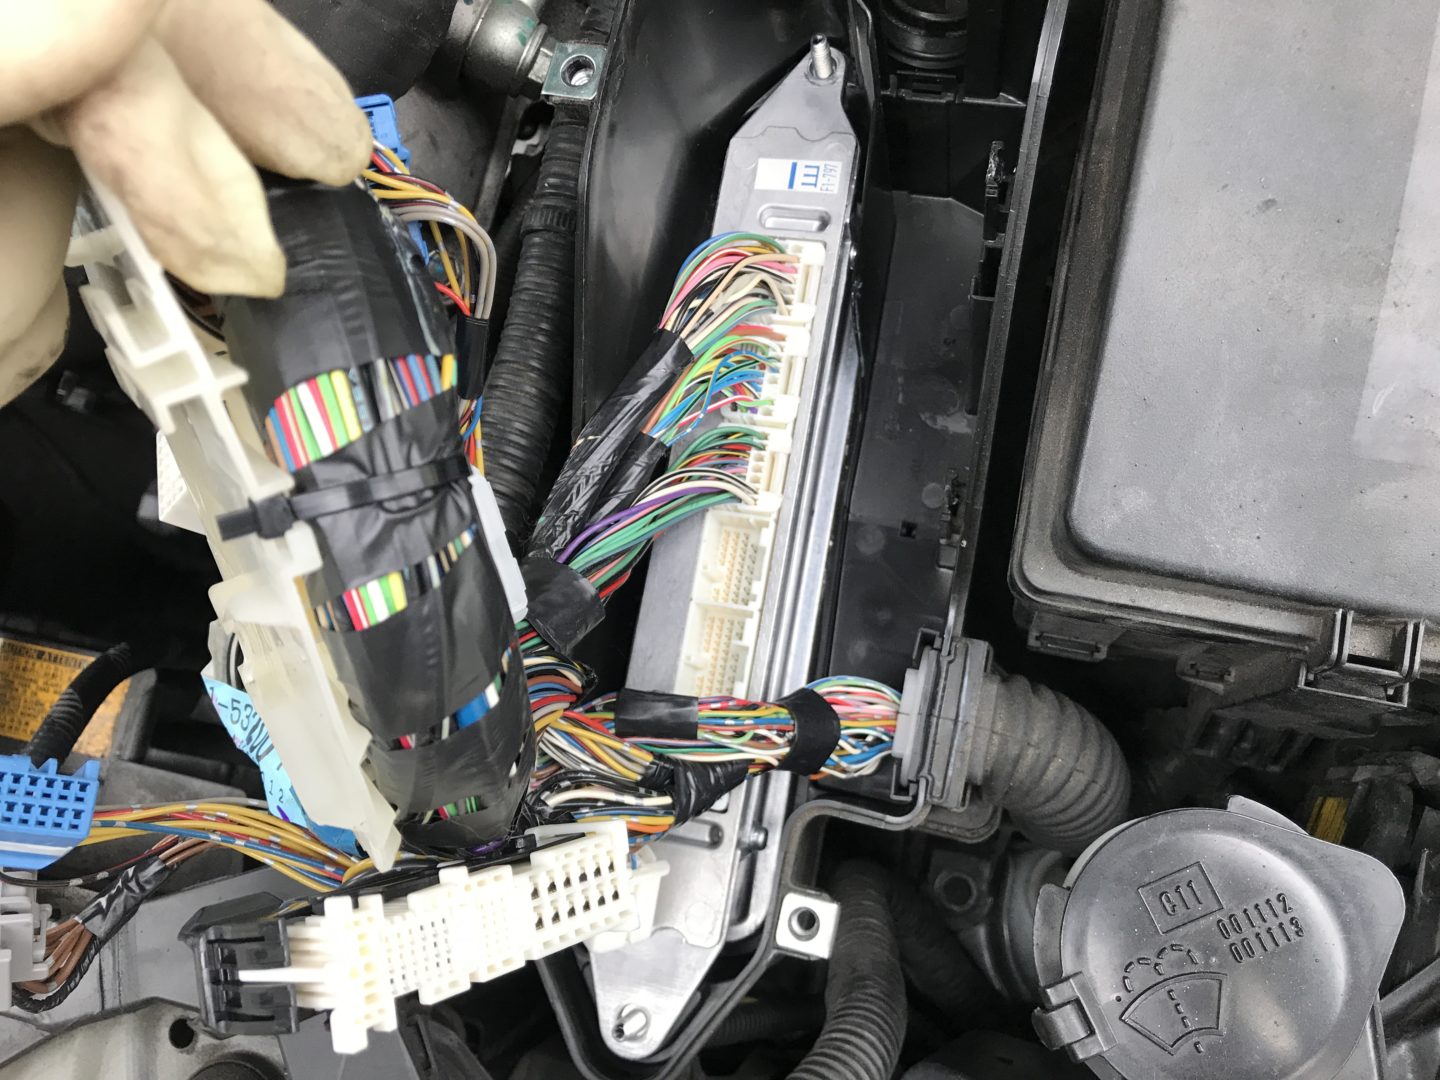
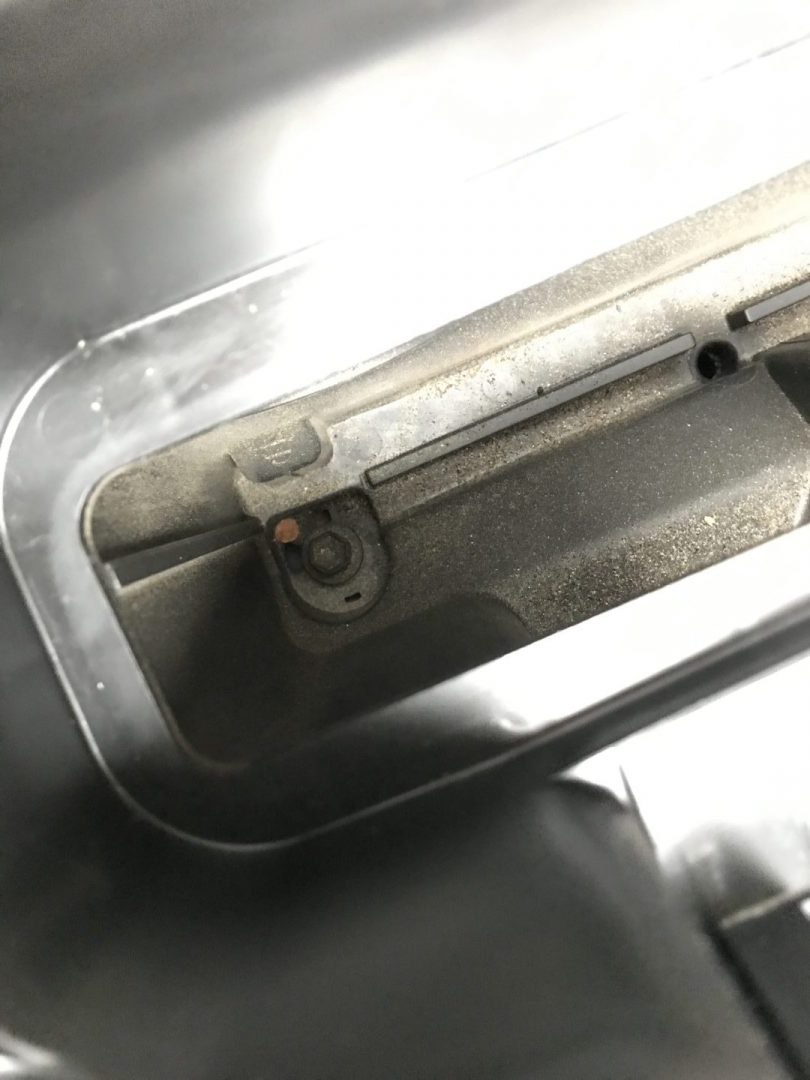
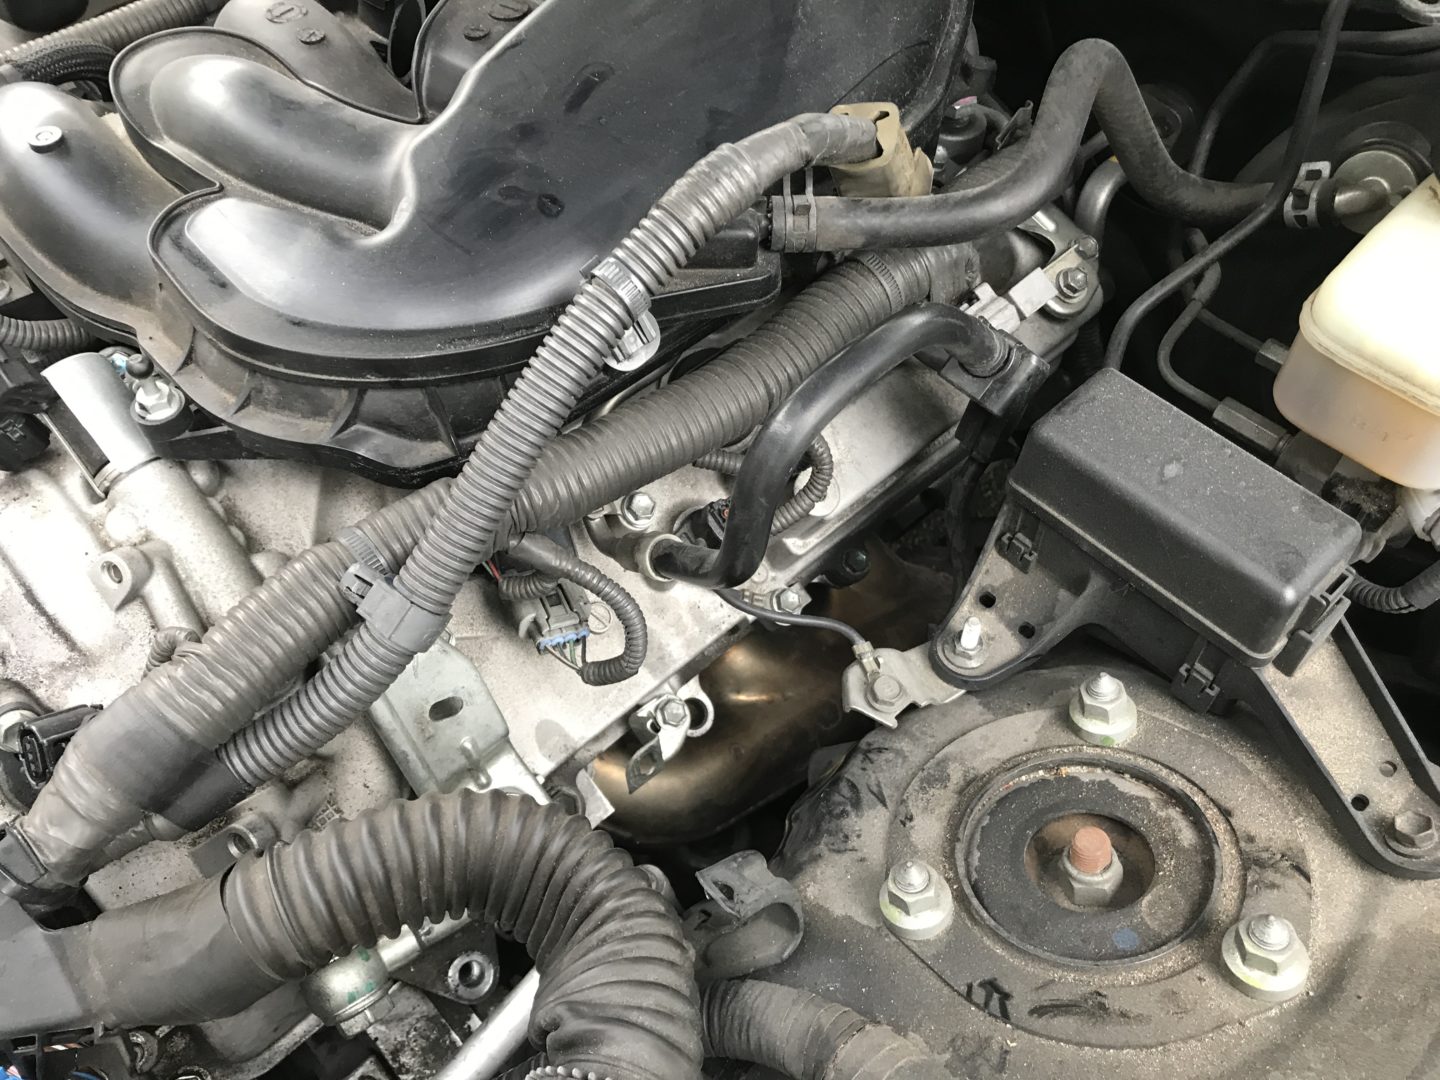
Three nuts/bolts need to be removed in order to release the ECU box from its mounting point.
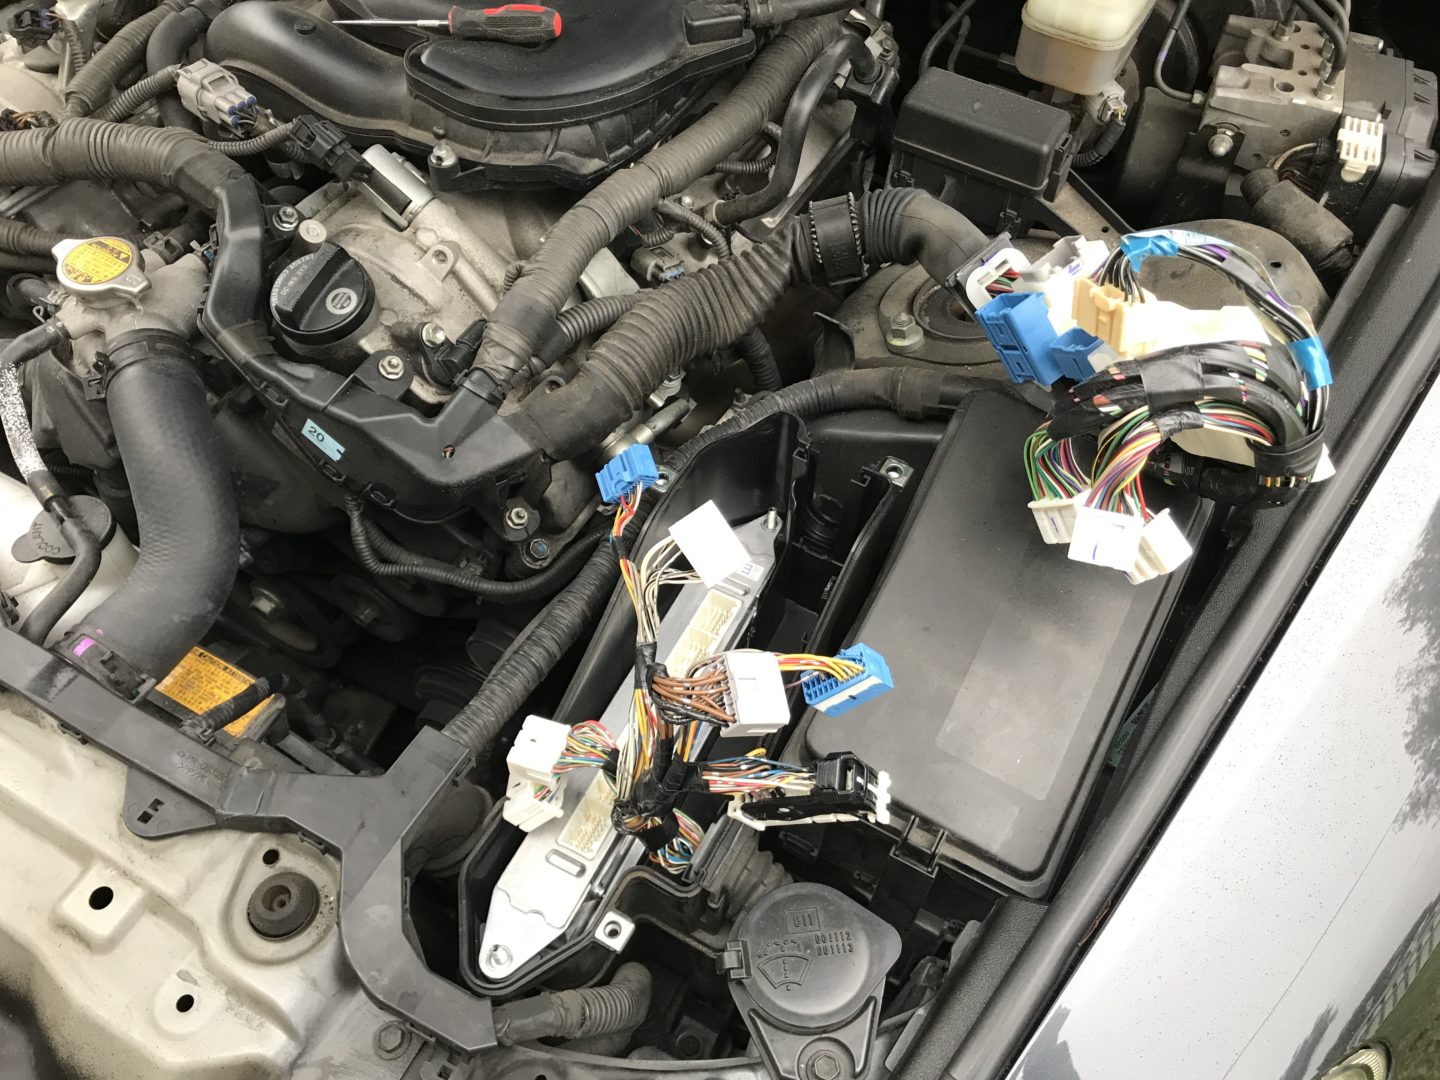
With the ECU box removed, there is now access to the alternator. To get even more room, remove these three nuts for the plastic wiring harness holder. You can then pull the whole harness with trim a bit more out of the way.
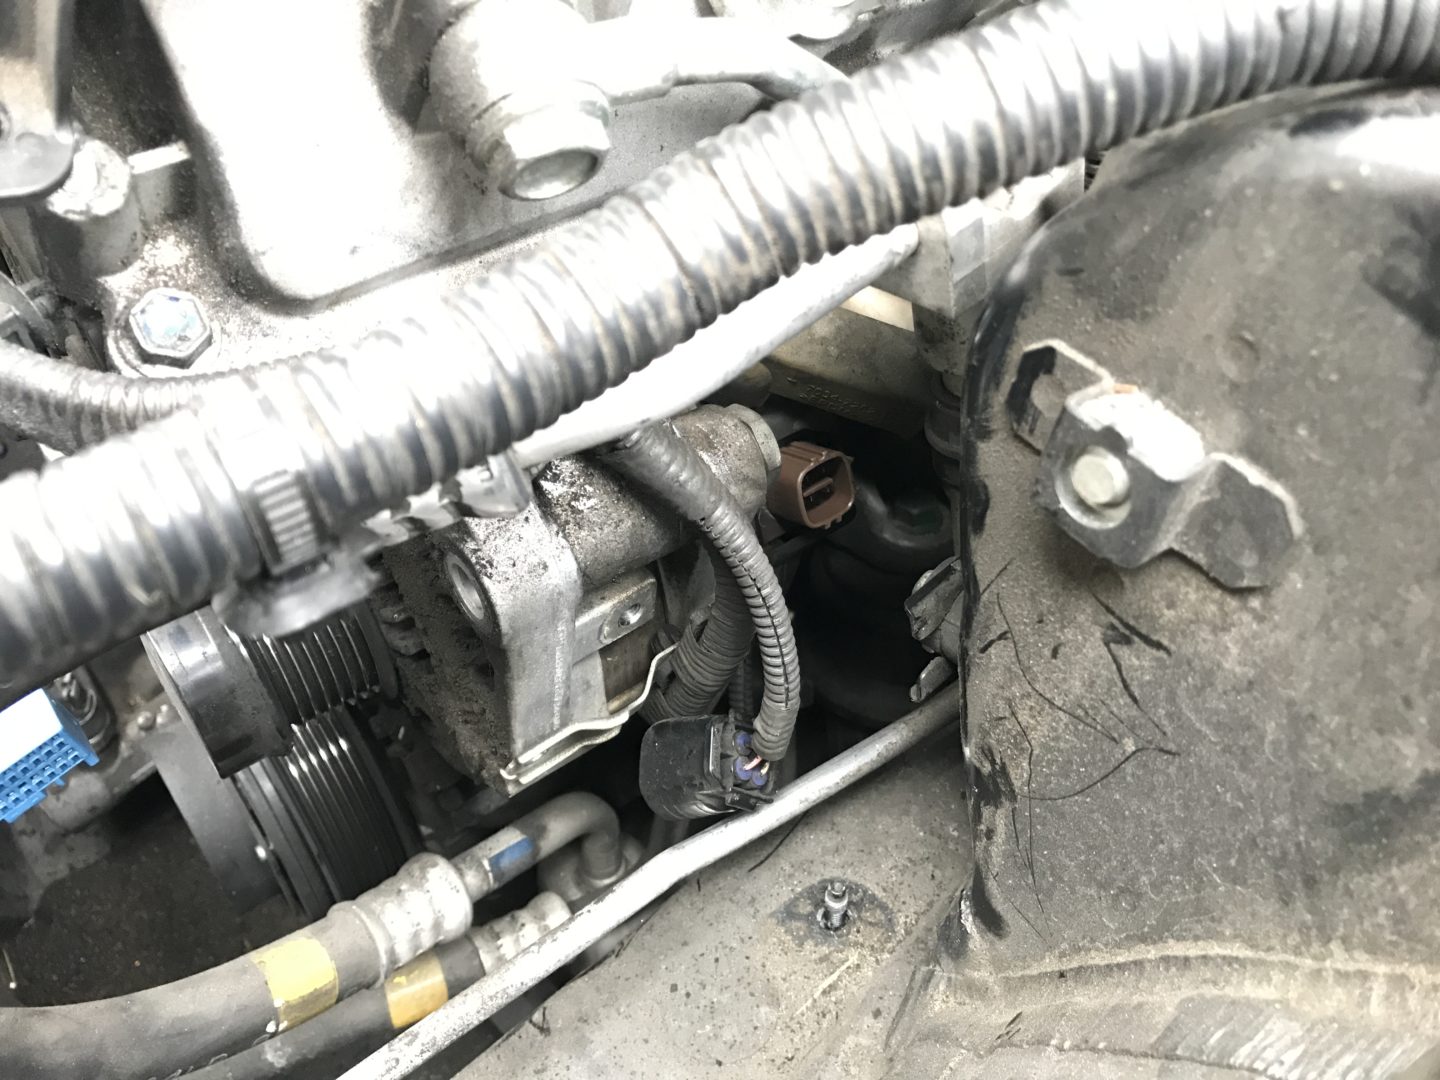
Now, you’ll begin to see that there is enough room for the alternator to be pulled out and removed from the engine bay. There is an A/C hose here that will likely need to be pushed aside to allow for the alternator to be removed.
There is a wiring harness that you can also see in the photo below that may need to be moved out of the way. This harness is held in by clips as well as a 10mm bolt.

Removing the Drive Belt
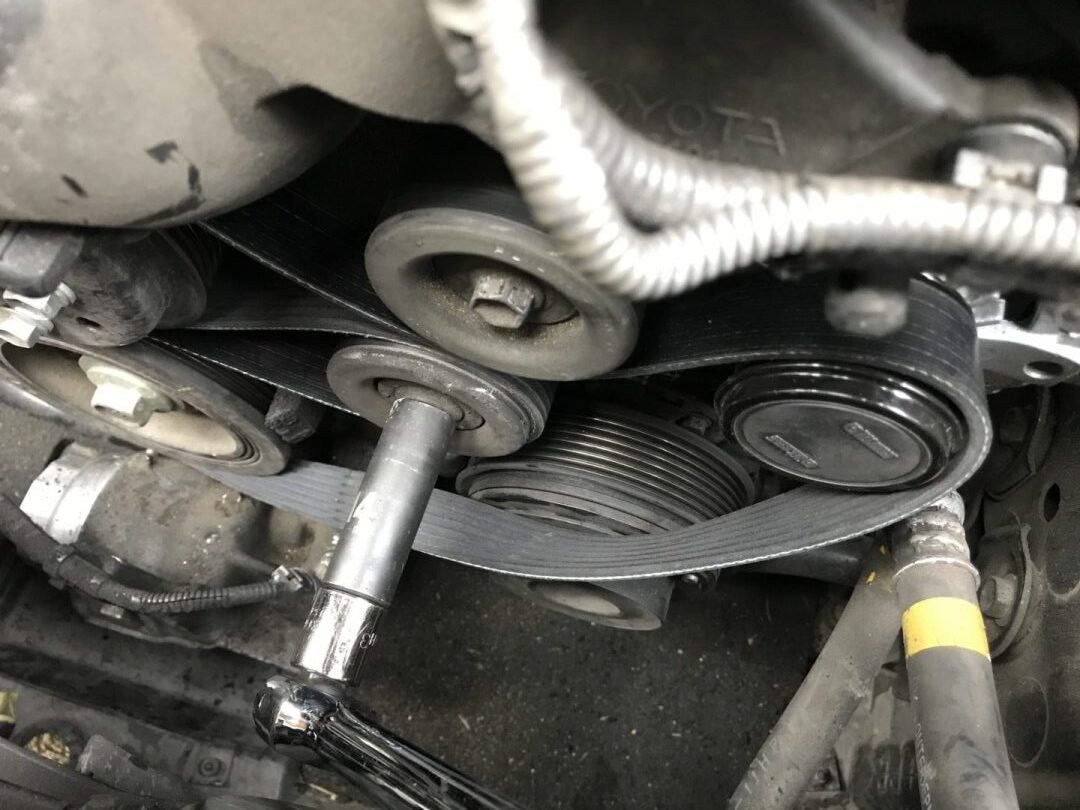
Next, we need to remove the drive belt. In order to do so, you need to release tension on the belt by using a 14mm socket and pulling back on the tensioner pulley. This will contract the pulley allowing slack in the drive belt. I like to use a small breaker bar for this purpose (it helps to not have a ratcheting-action wrench here).
Take a few pictures of the belt so that you know how to re-install it when you put everything back together.

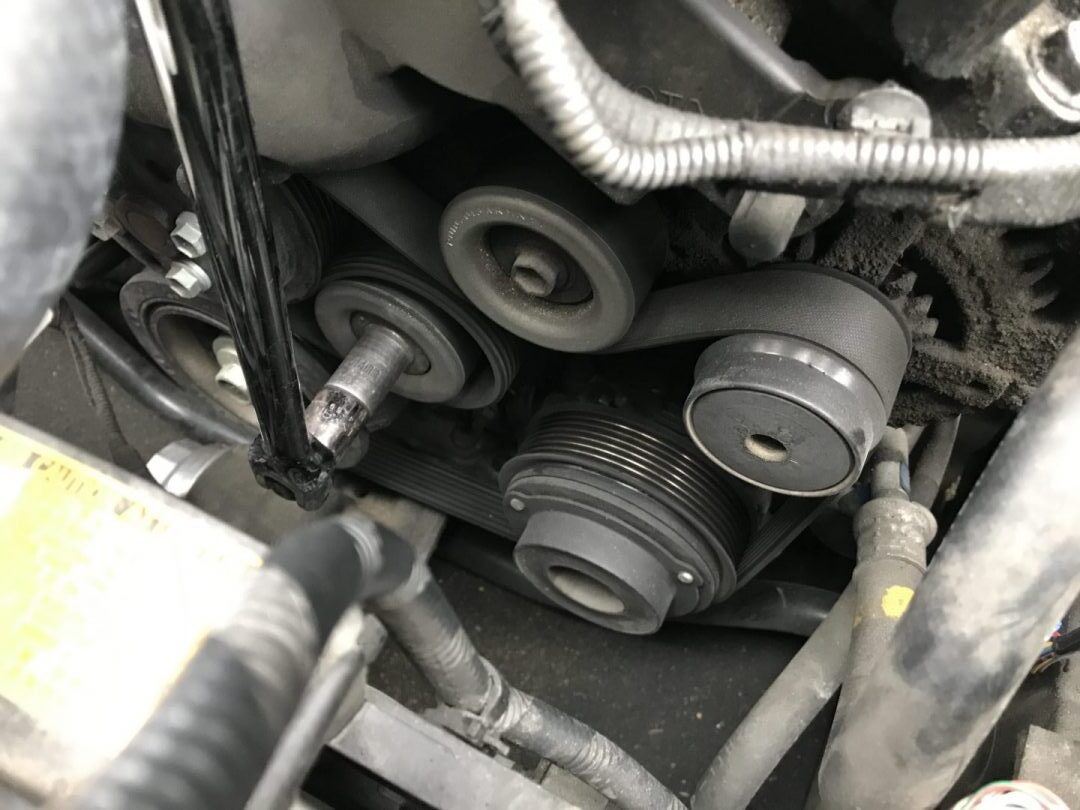
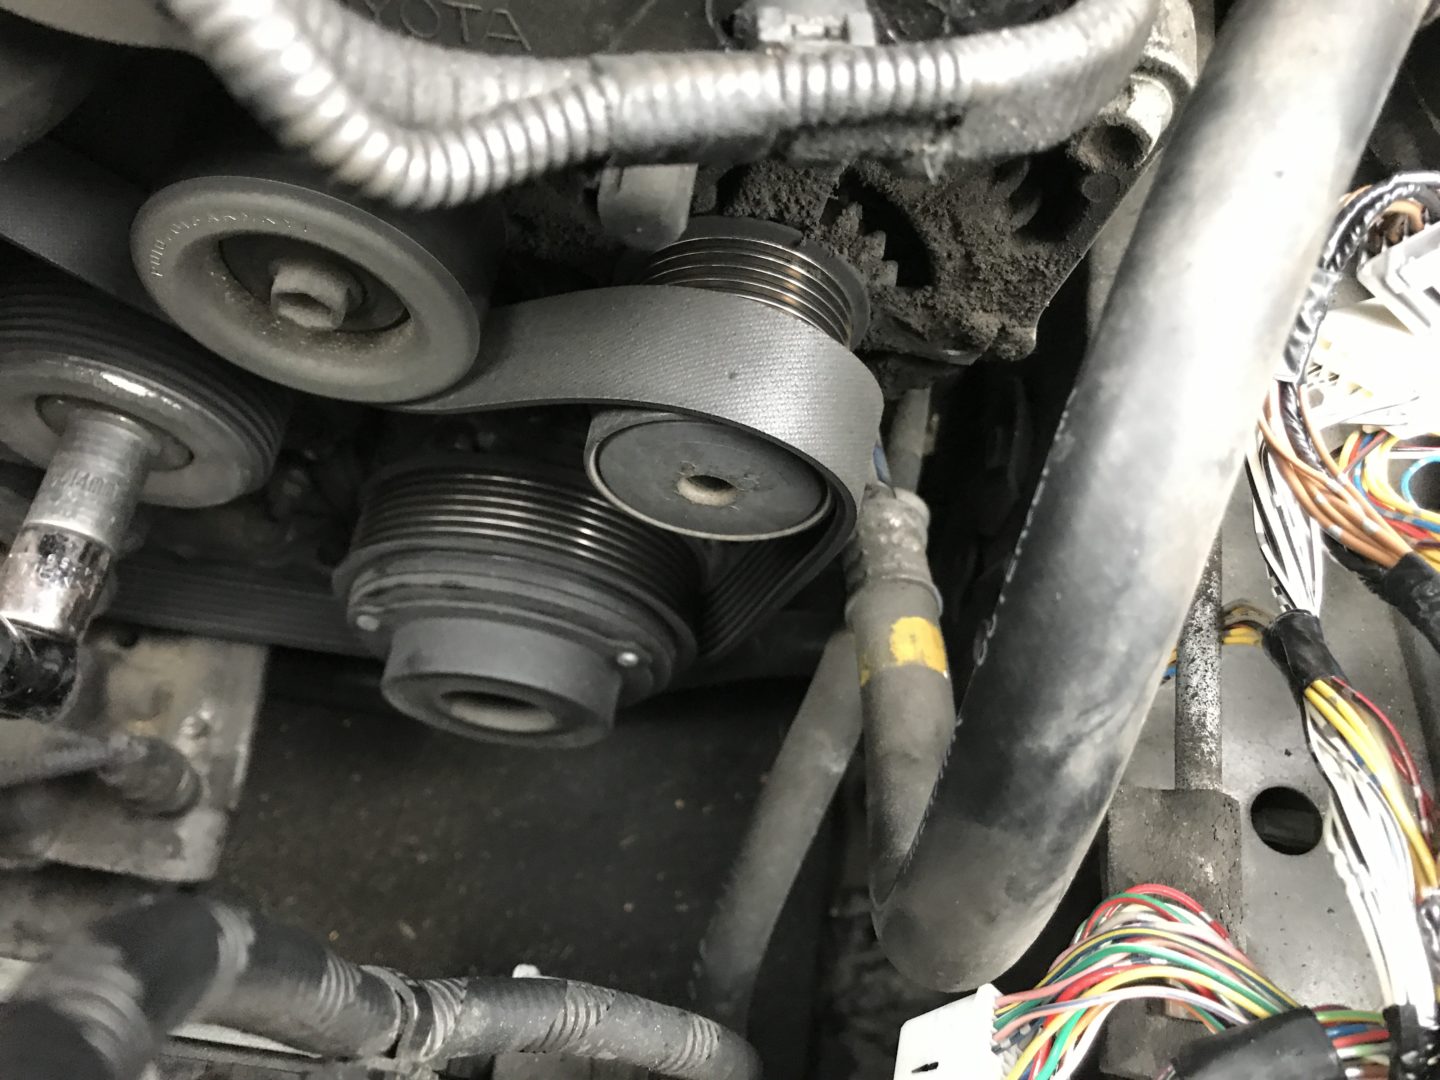
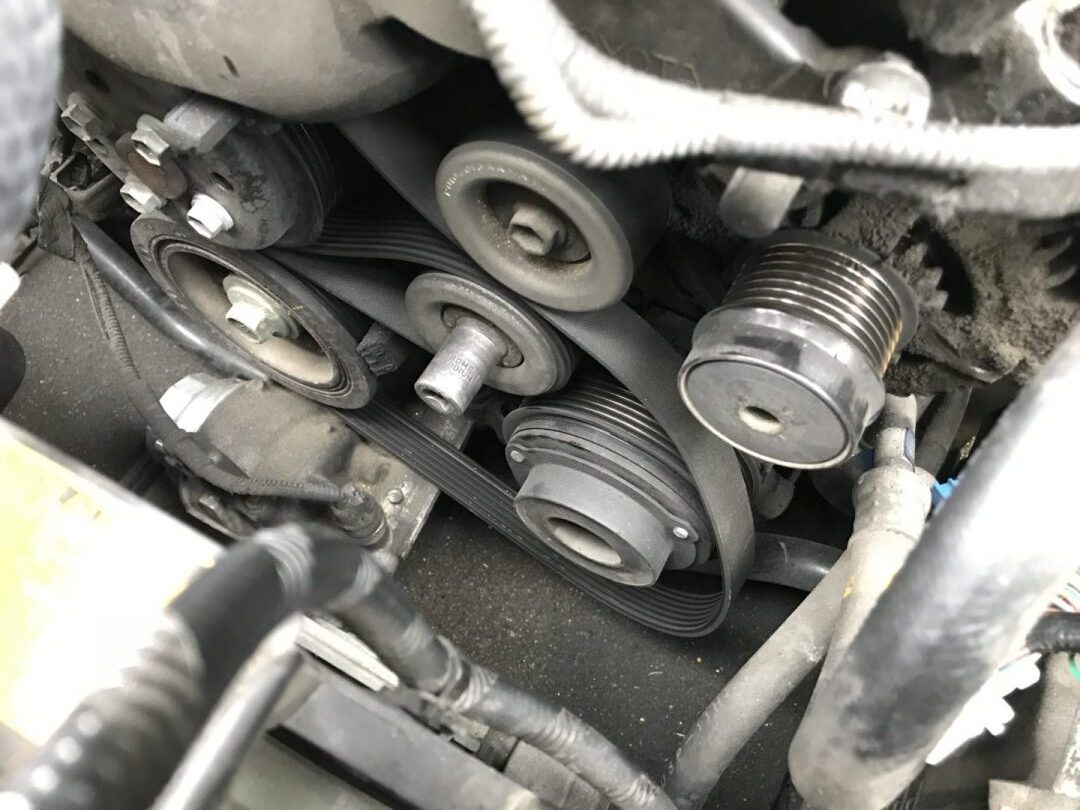
Now the drive belt (also known as the serpentine belt) can be removed.

Go ahead and toss the belt if you plan to replace it. However, if you do intend on reusing the belt, inspect the belt for any damage, cracks, oil stains, etc.
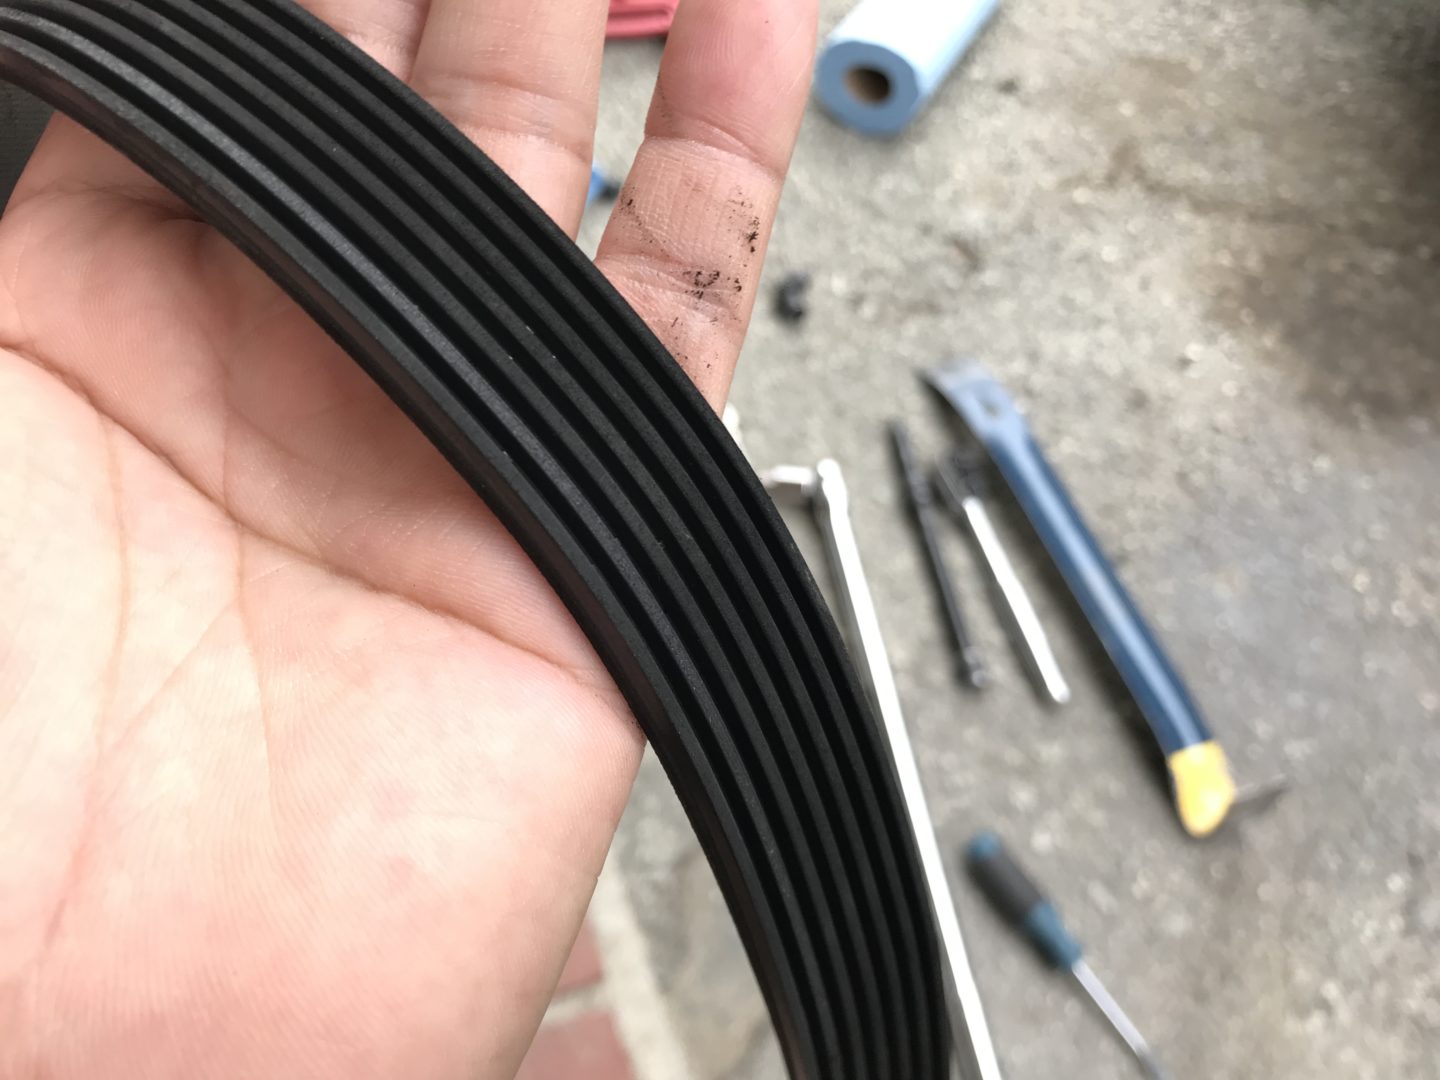
My belt was surprisingly in excellent shape and although I wanted to reuse it, I already had a brand new one that would insure no problems in the future.
Removing the Alternator
There are two 14mm bolts that need to be removed. One of them is pictured in the middle of the photo here; the second is opposite of it (behind the pulley in the photo). There is also a 10mm bolt on the right side of the photo that needs to be removed.
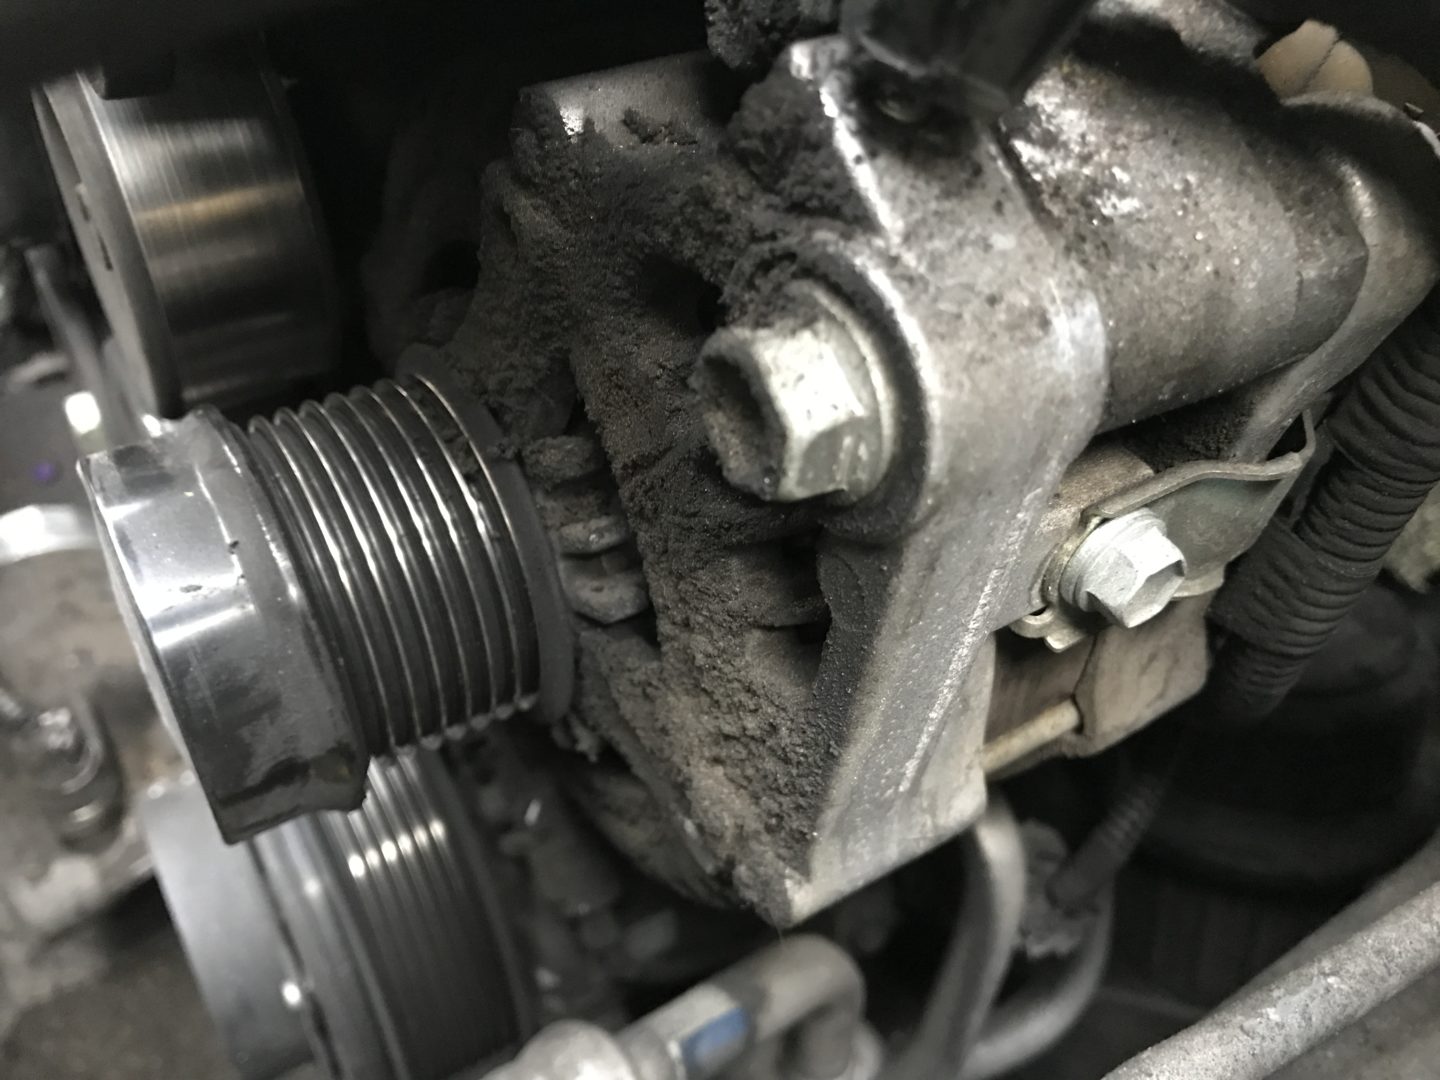
The picture below is of the second 14mm mounting bolt that was hidden behind the pulley in the photo above. This bolt has a shorter length than the other 14mm bolt shown in the above photo.
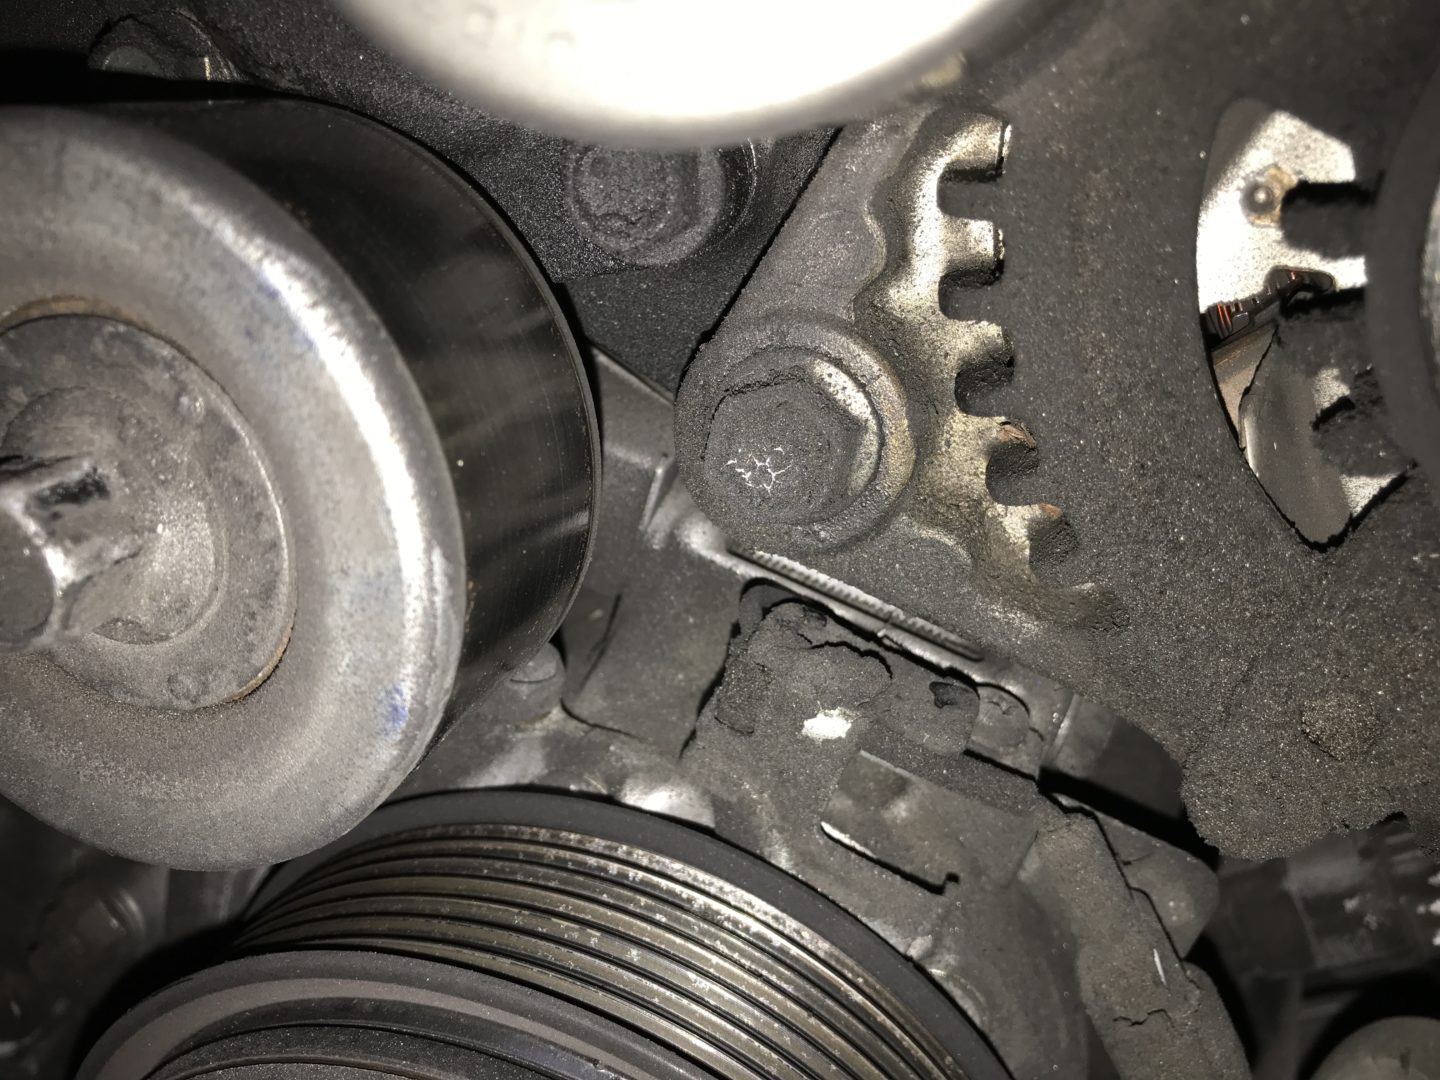
There is also a 12mm bolt that needs to be removed (on right side of bottom left photo). You can see that this bolt holds the alternator to this bracket. The right photo shows the bolt removed.
There is a connector that needs to be removed (photo on bottom left). There is also a 10mm nut that needs to be removed that connects to the positive terminal of the battery (photo on bottom right). This bolt is covered by a rubber boot, which will need to be slid out of the way in order to access the bolt. A magnet comes in very handy here since the space is tight. The bolt will need to be pulled out carefully so as not to drop it.
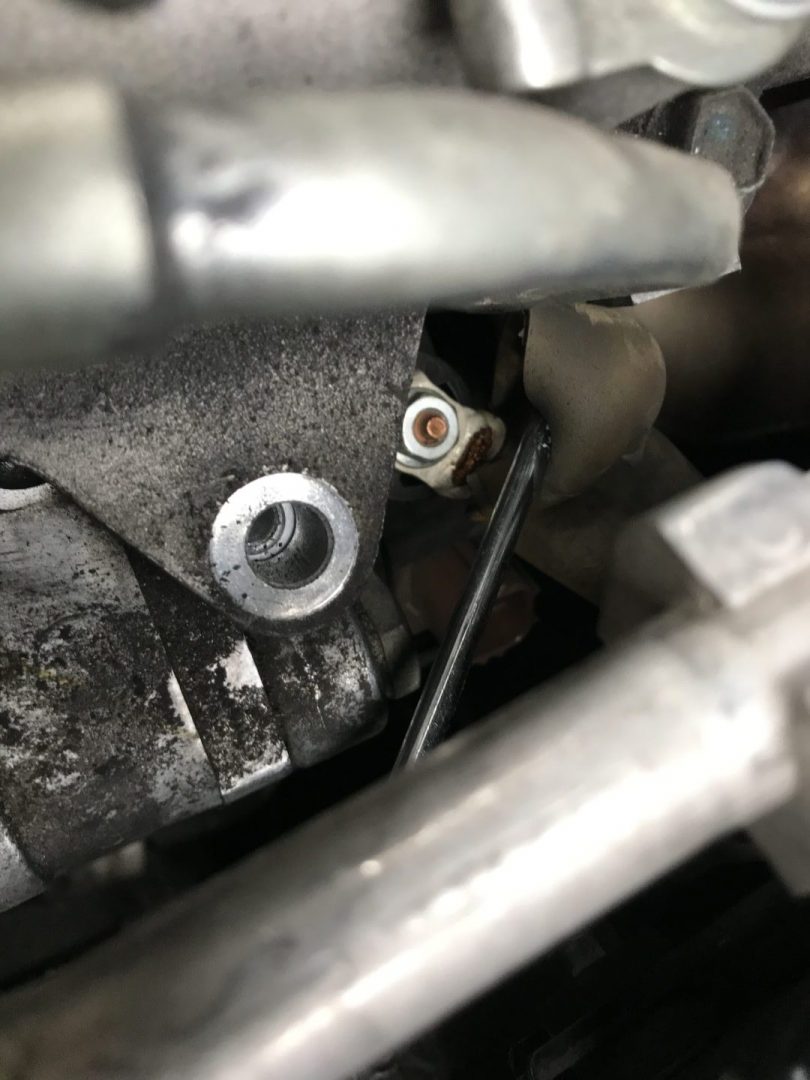
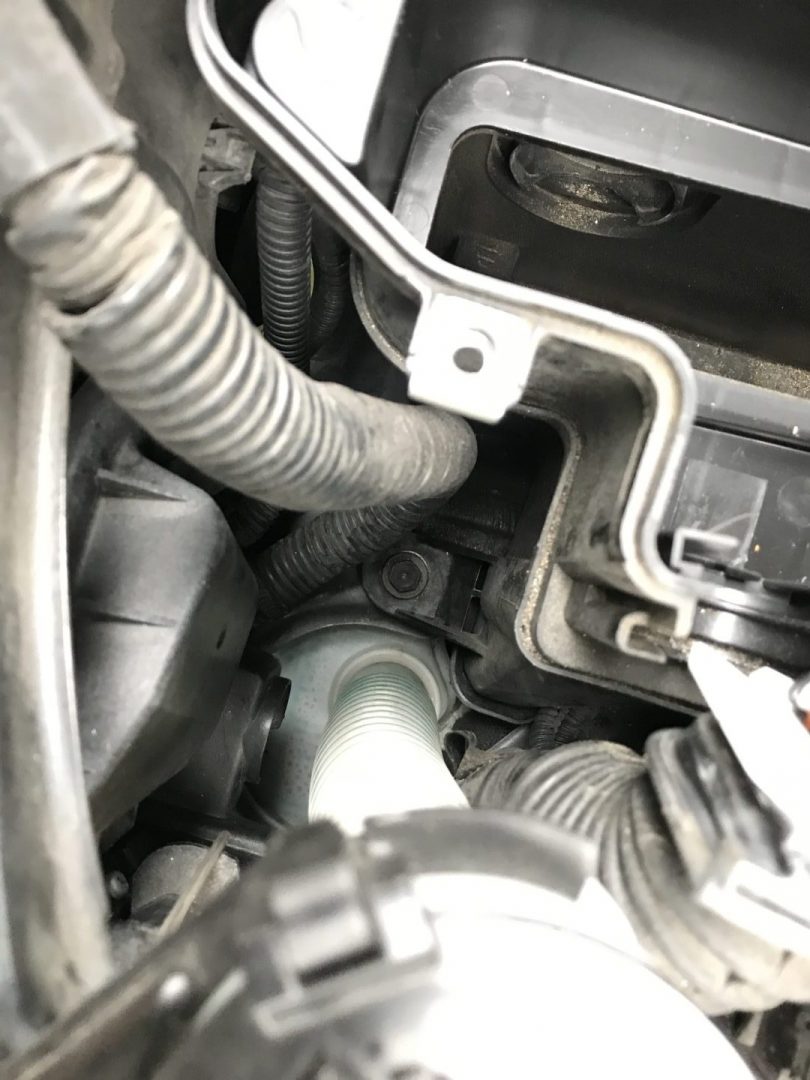
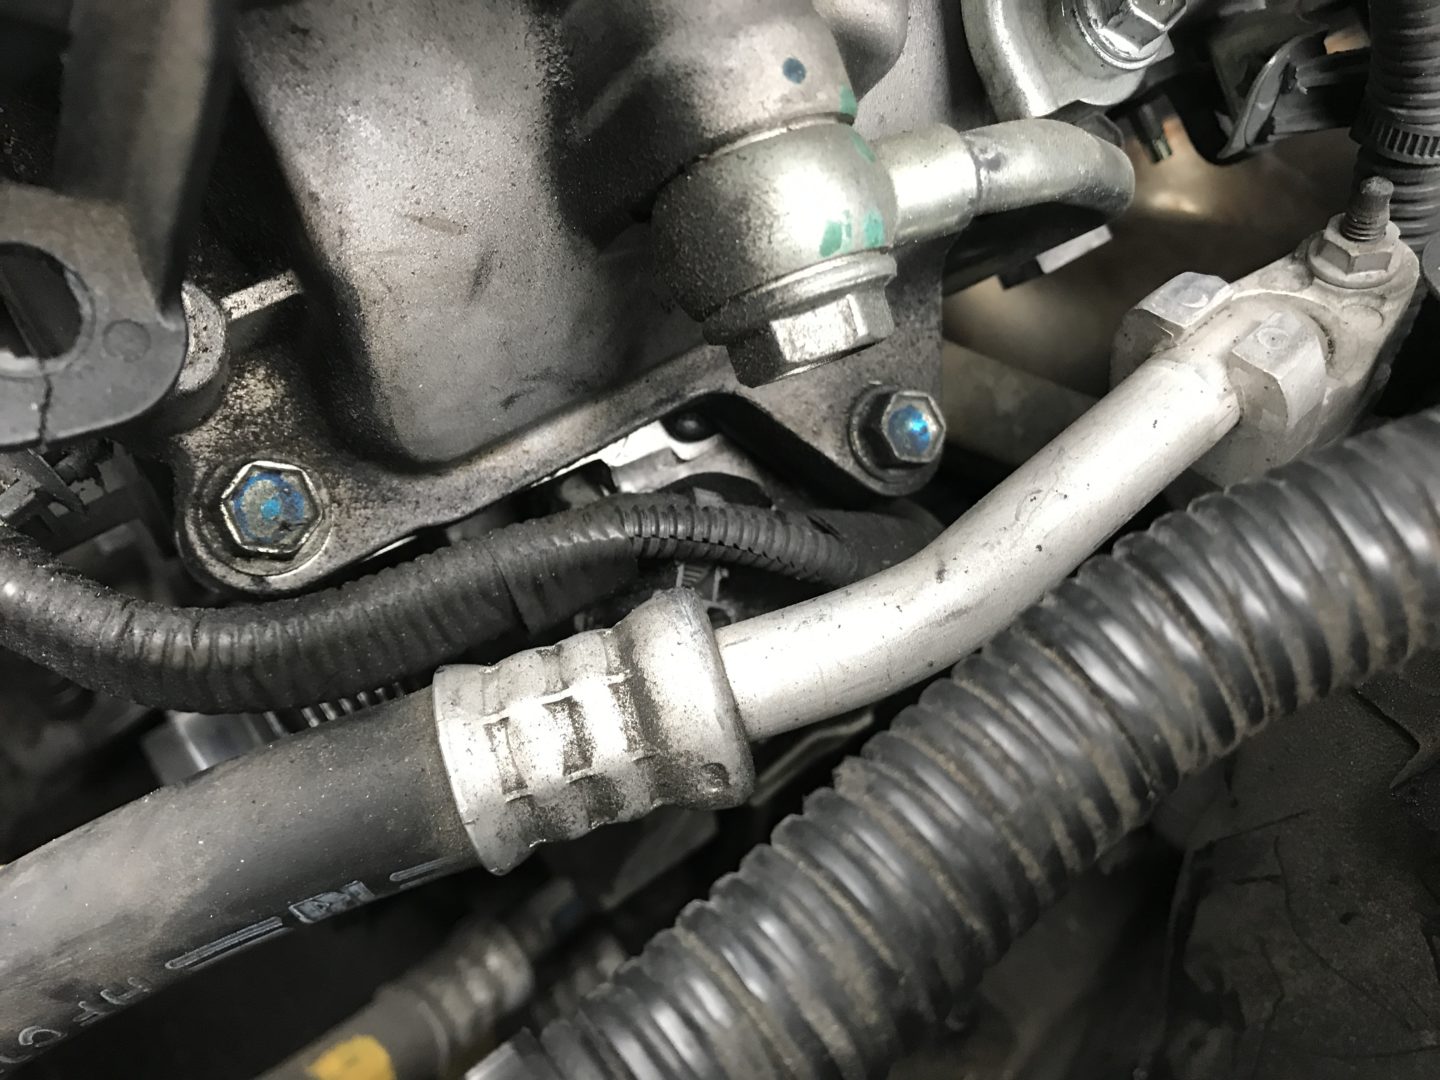
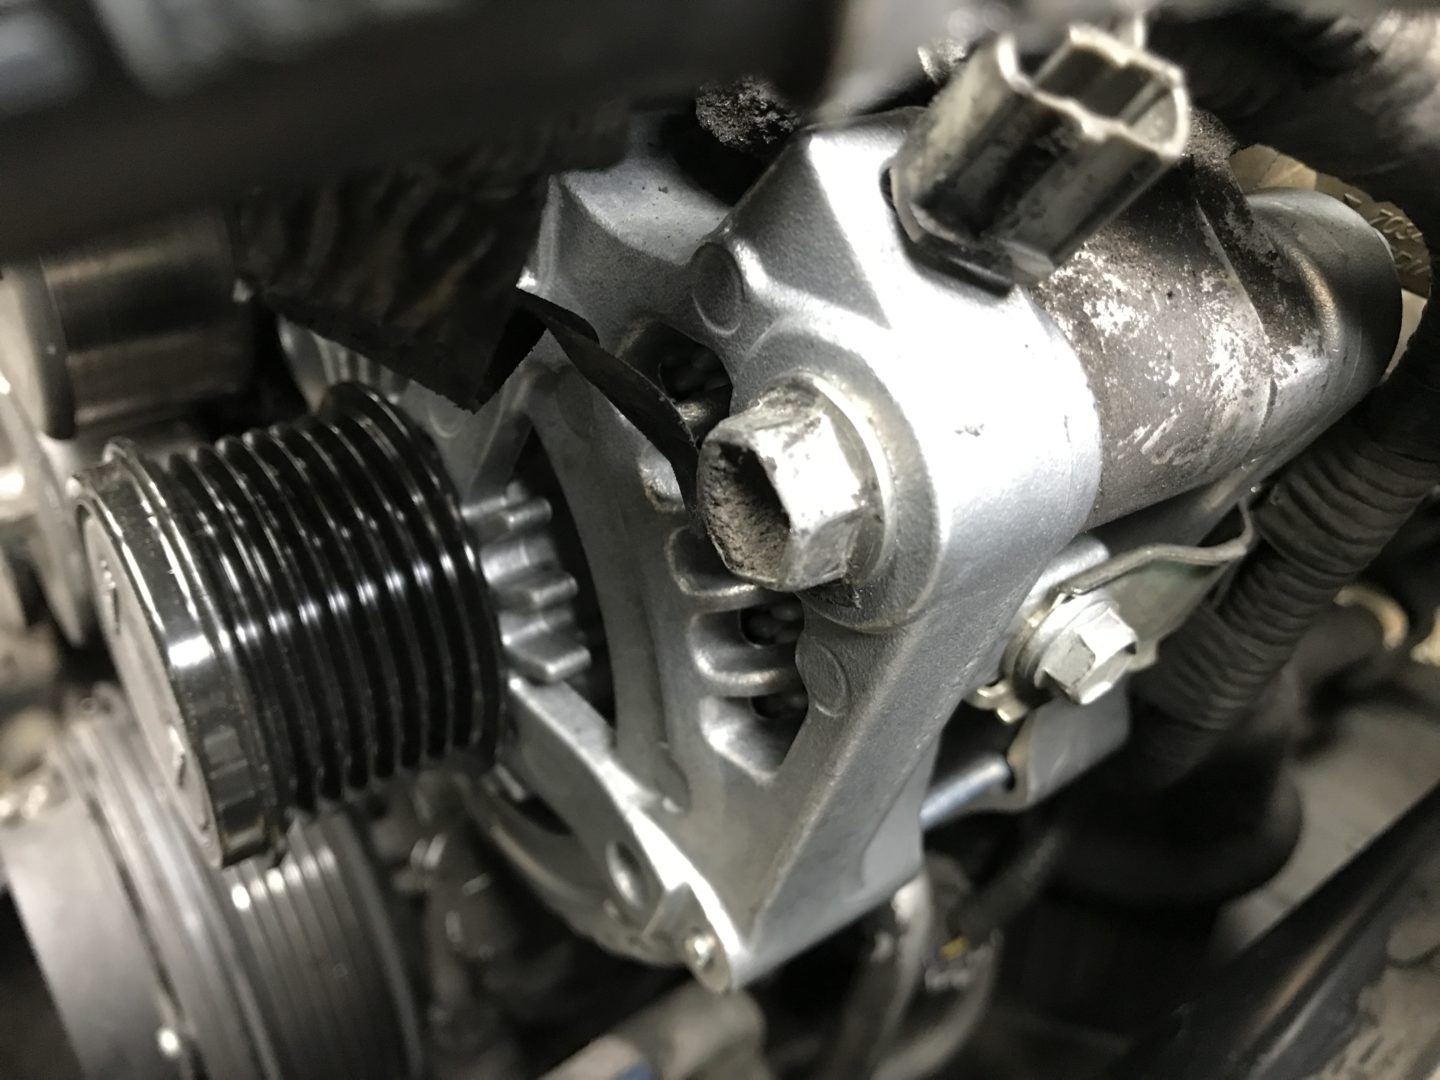
Now comes the most difficult part of the alternator replacement. It is locating and removing the 12mm nut on the back side of the alternator. If you look at the photo below, the nut sits right below the exhaust header.
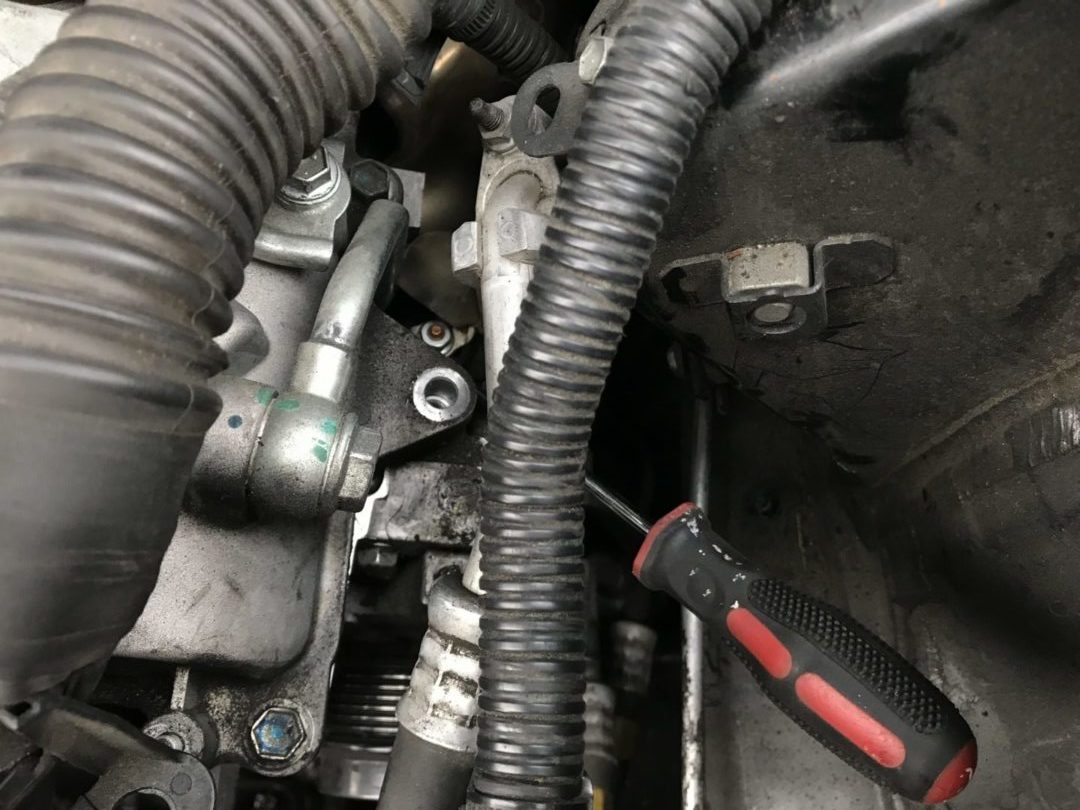
If you see how I have my ratchet set up, you will see where this hidden 12mm nut is located. The funny part about this is that when you first get your 12mm socket into this area, you’ll almost always start undoing the header nut instead by accident. For some reason when you get your socket into this spot blind, it’ll seem like you’re going after the correct nut but you’re not.
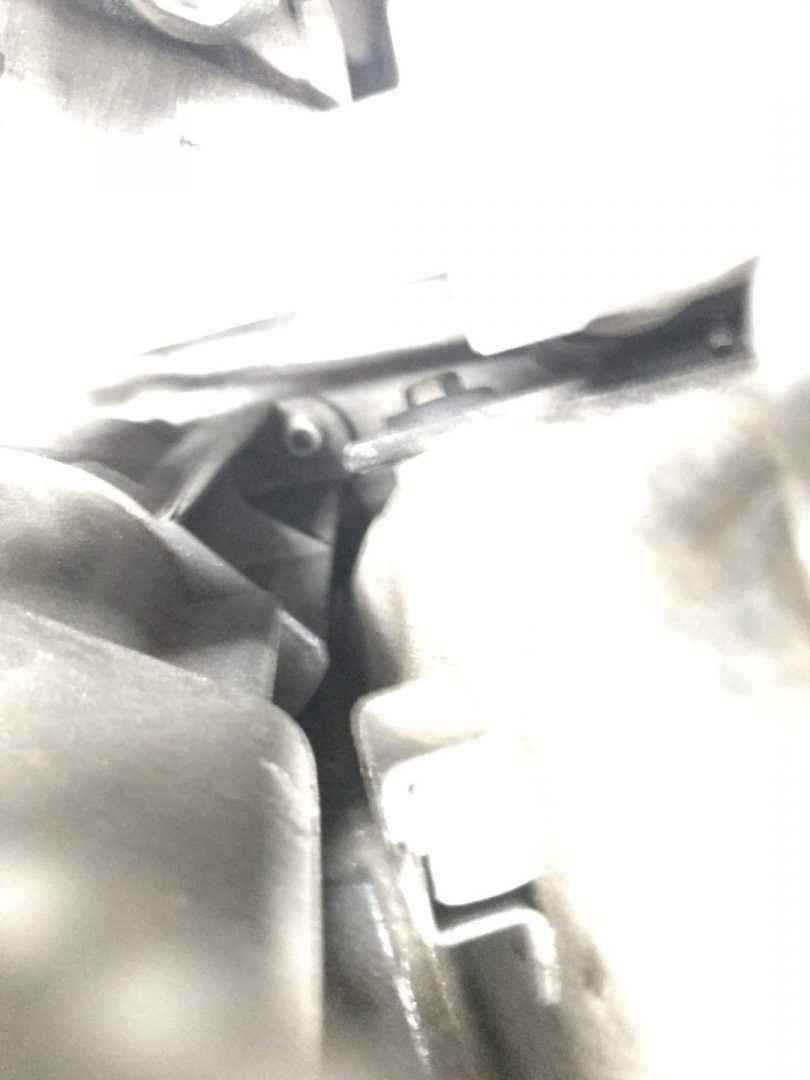
You can’t see where you’re going, so you’ll need to go by the photos and by feel. Getting a camera down there to take some photos helps too.
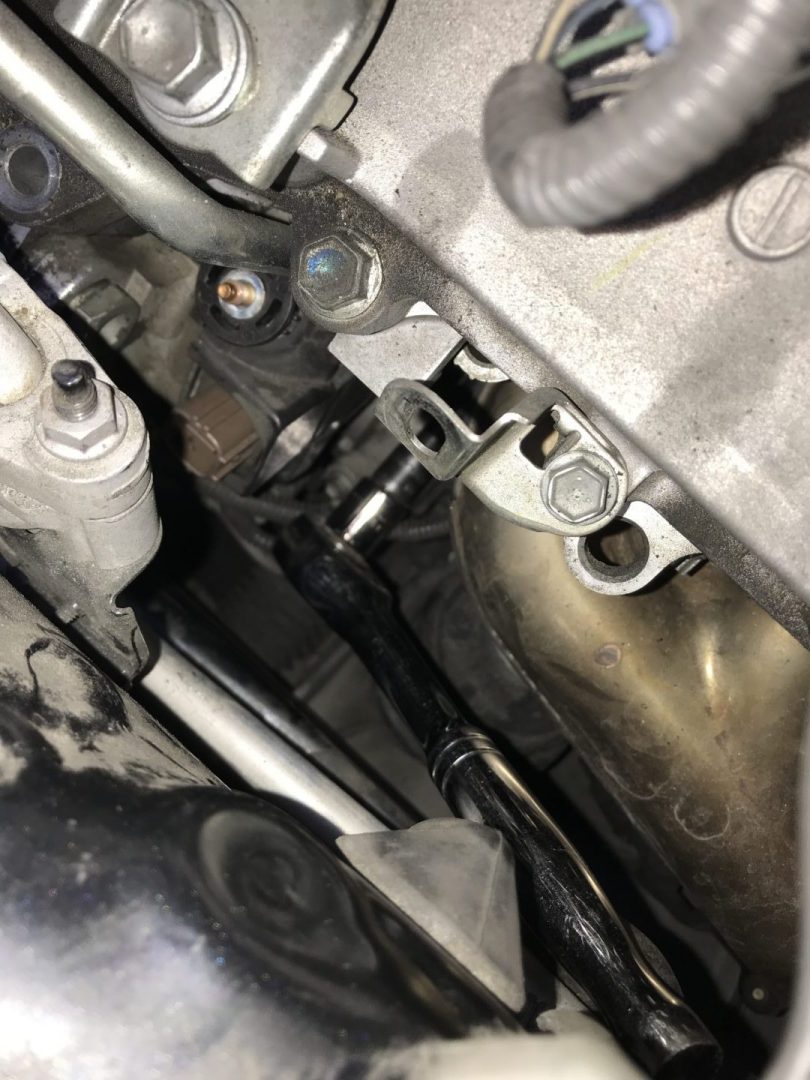
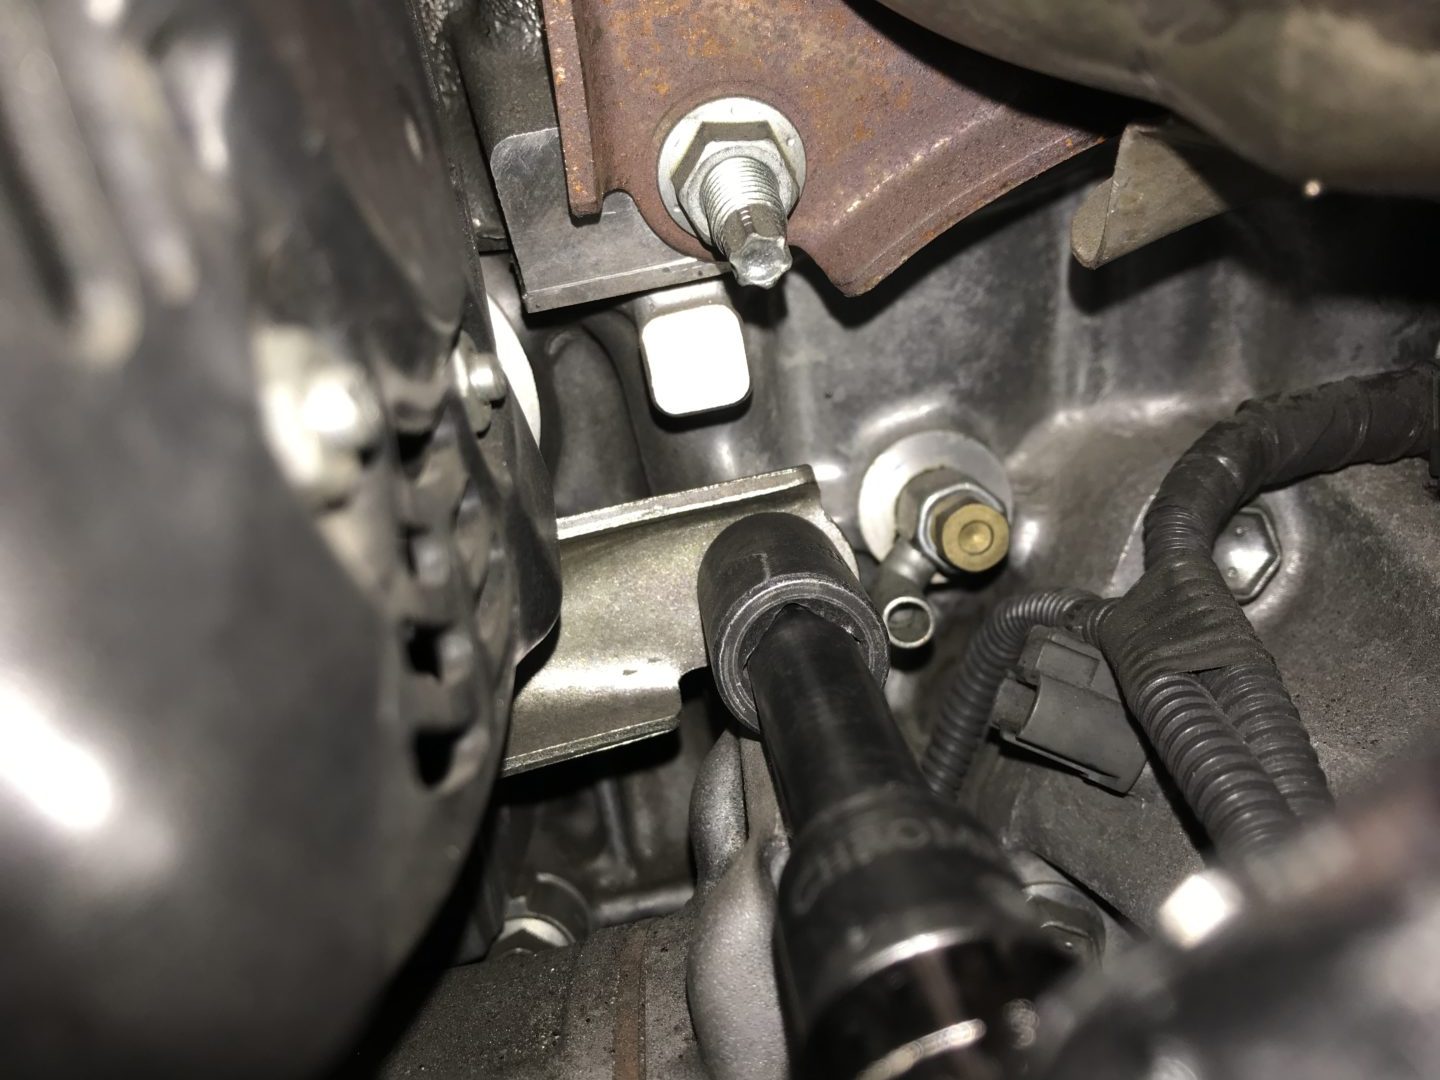
Here’s a close-up of the header nut (lower part of bottom photo) that you don’t need to touch. The 12mm bolt (on top of bottom photo) is what you need to remove. You can see this 12mm nut holds the alternator bracket to the engine.

Now that that last nut is removed, the alternator should be completely free. In order to remove the alternator, it needs to be jostled loose, then pulled downwards in order to free it. Then, it can be pulled out of the engine bay.
If you look at the photo below, you can see that the alternator has bolt studs sticking out which helps you understand why the alternator needs to first be pulled downwards (to get the studs out of the mounting holes) to get it free.

Be careful when removing the alternator as it can snag on the A/C line and/or electrical wiring harness.
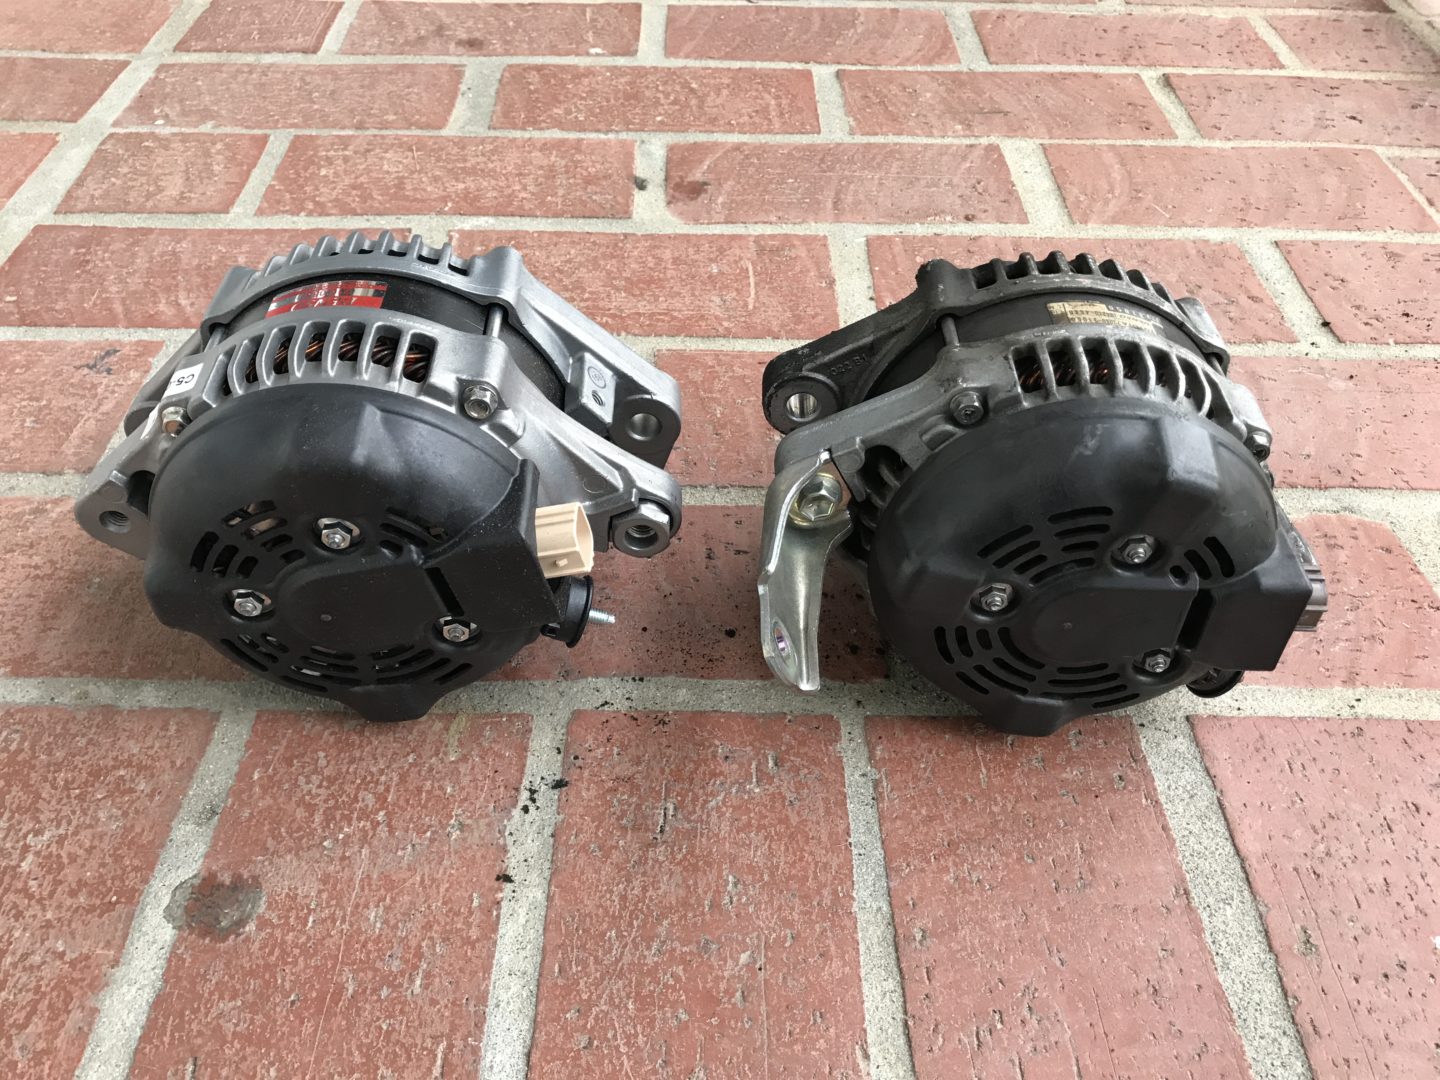
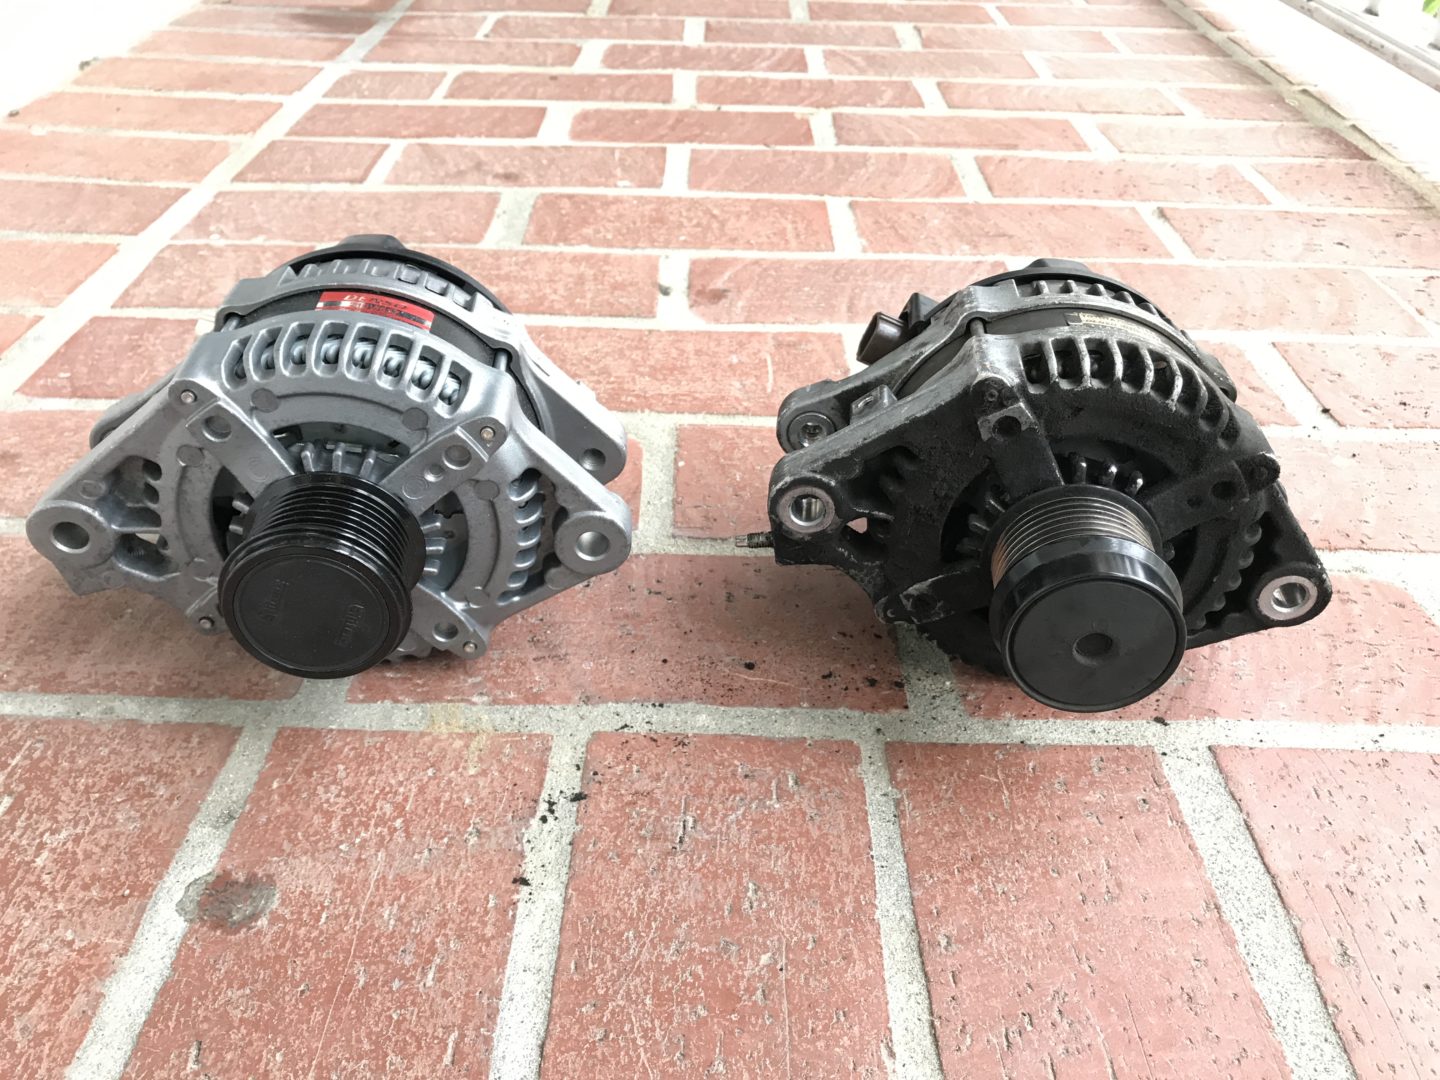
Here is the new alternator on the left and the used one on the right. The bracket on the old alternator needs to be transferred onto the new alternator in order to be re-installed correctly.
Reinstallation
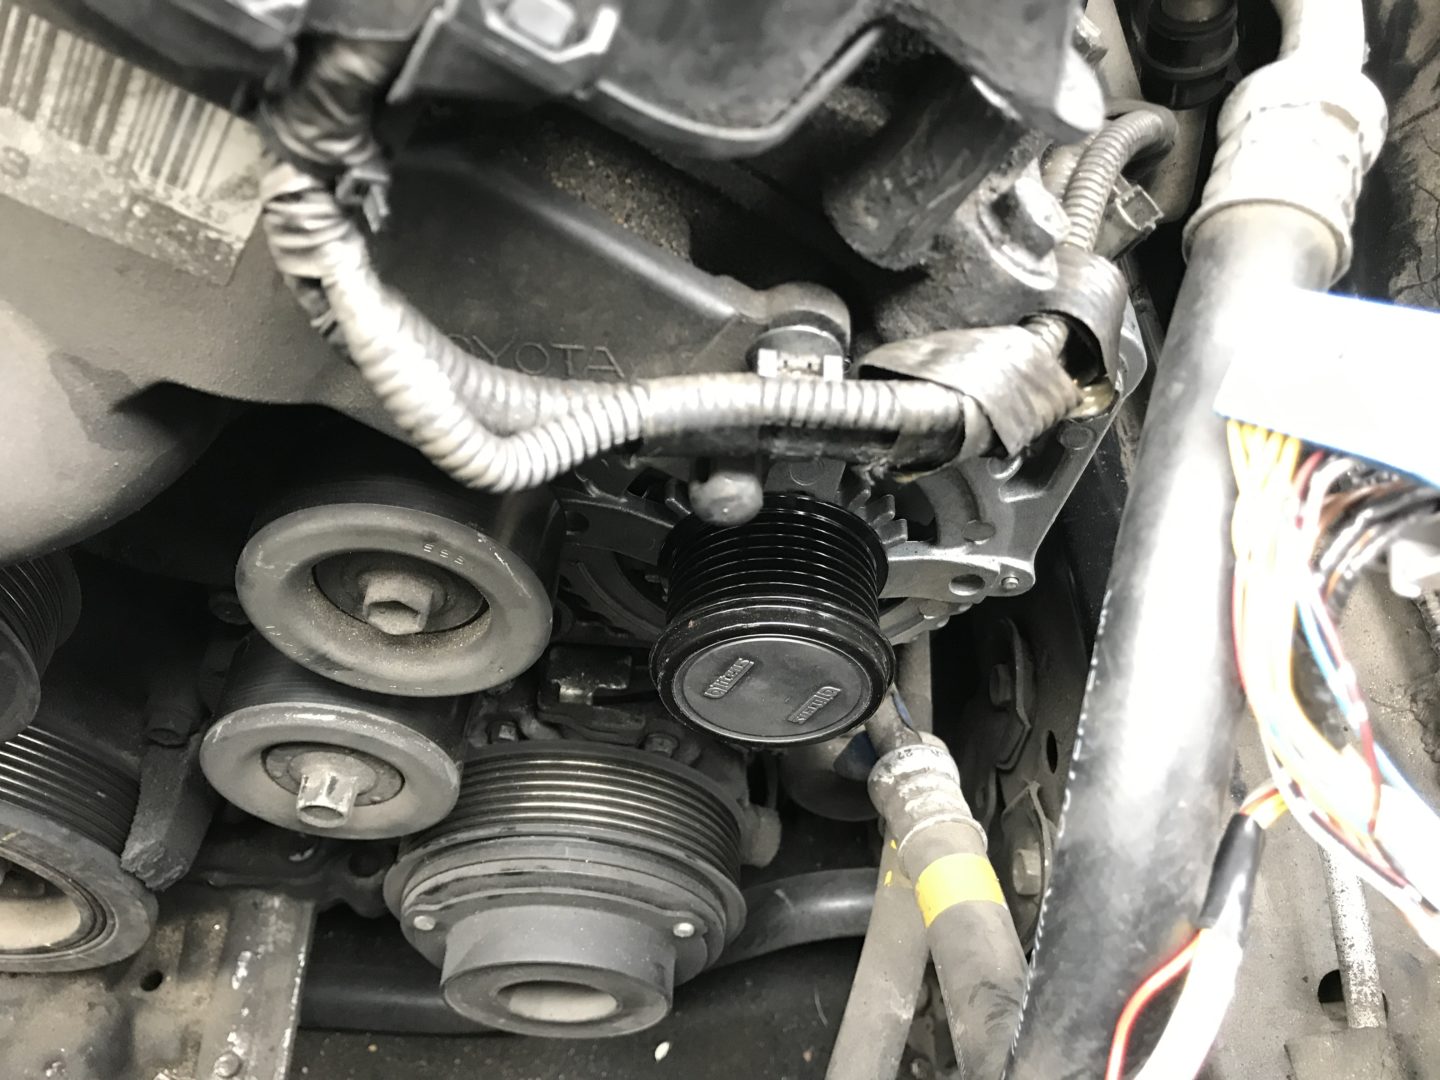
Re-install of the alternator is the reverse of the removal. Here is the new alternator in place.
Install a new drive belt or re-use the old if it is in good condition by contracting the 14mm bolt on the tensioner pulley and routing the belt through the proper route.
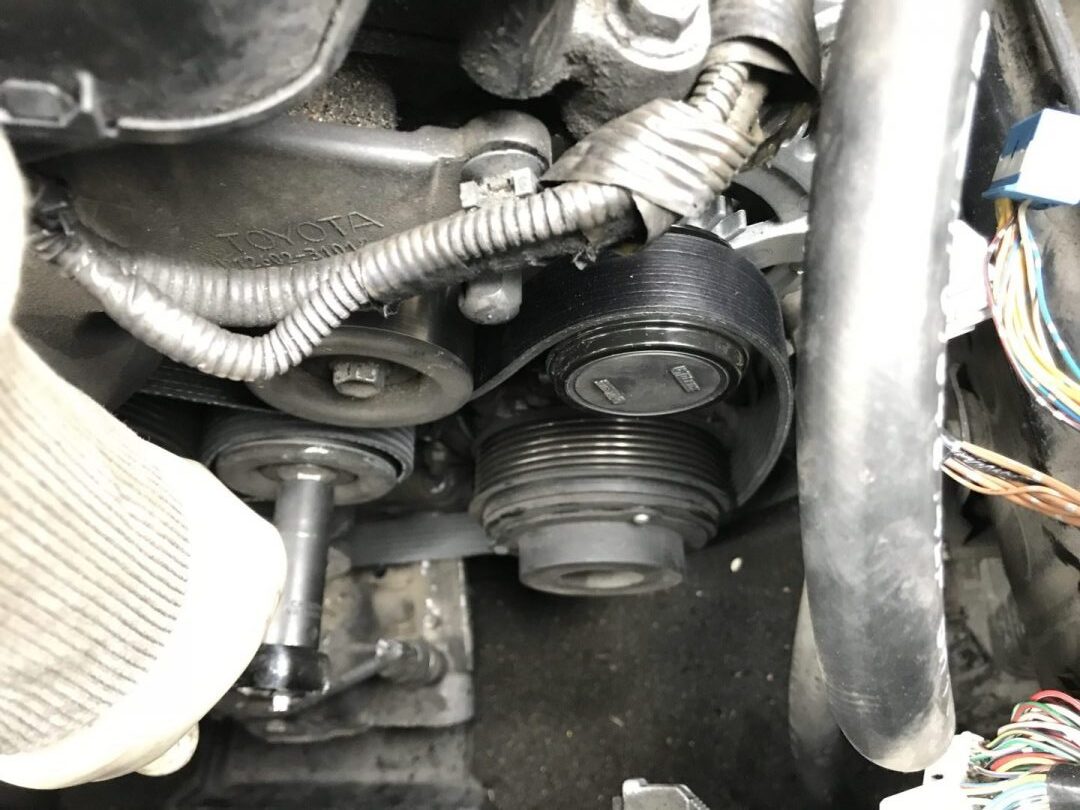

Check that the ribs on the belt match up with the ribs on all the pulleys. With everything back together, I checked the battery voltage once more.
Testing the Alternator
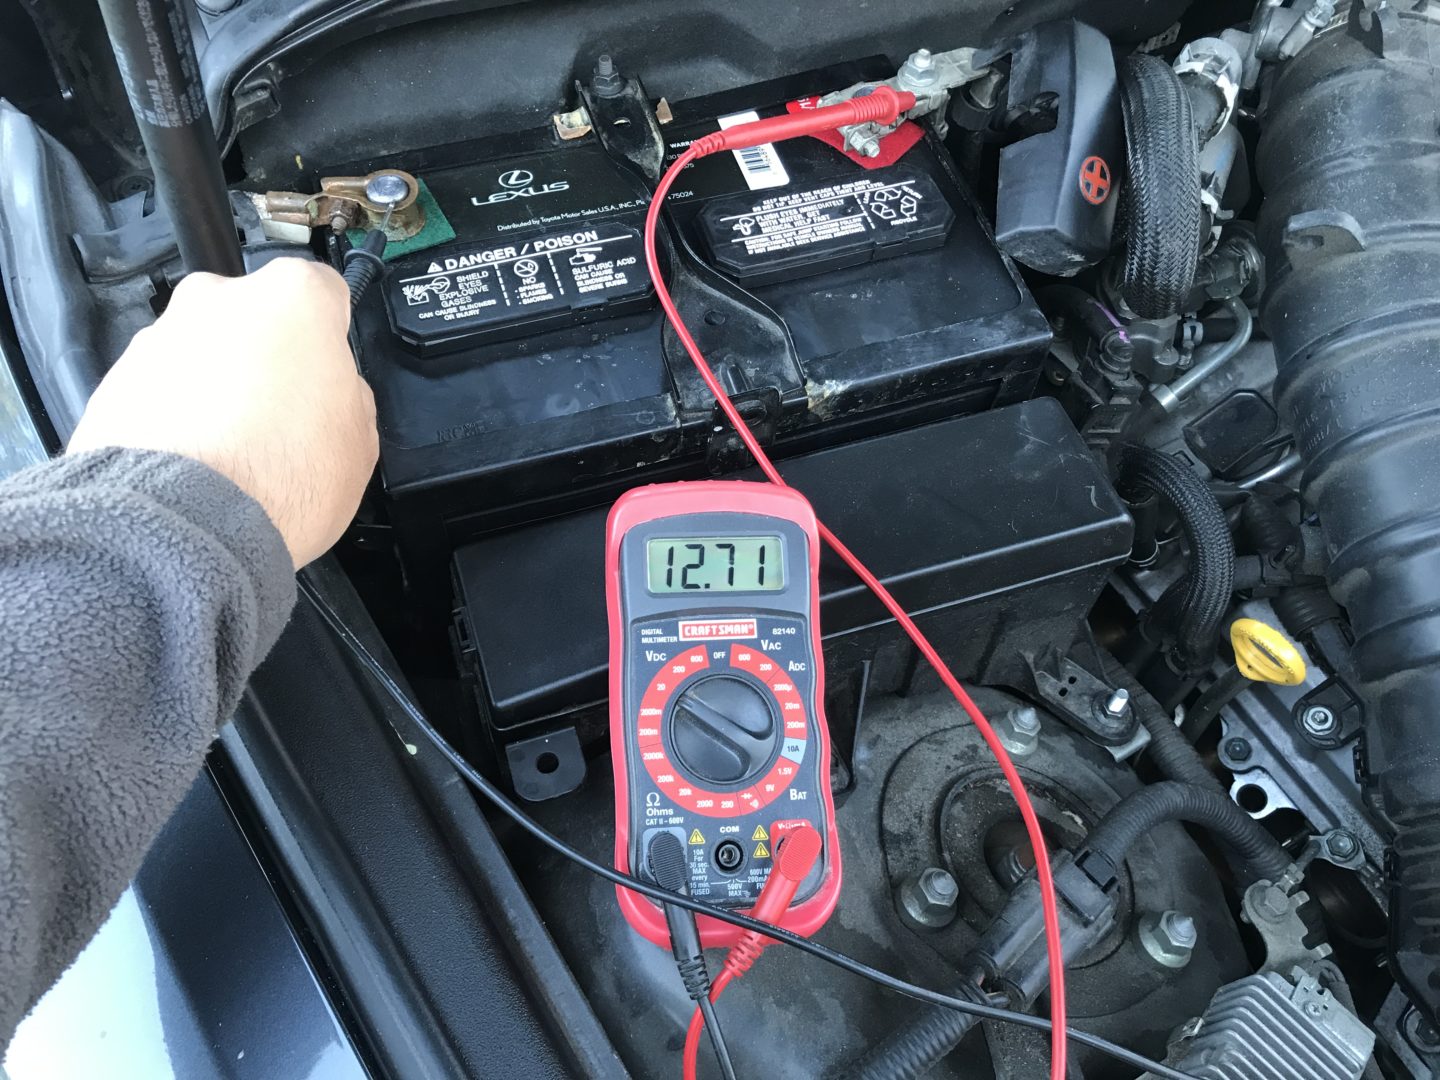
While I was working on the car, I had been trickle-charging the battery so that it would be fully charged when I re-installed the alternator. As a result, the battery voltage is at 12.71 volts, which means it has a very good charge.
I also turned on the car and had my wife hold the car at 1500 RPM’s to check voltage. The reading was 13.94 volts. Although this voltage is not at the ideal voltage of 14.2 V to 14.5 V, it is still above the bare minimum of 13.8 volts for charging.
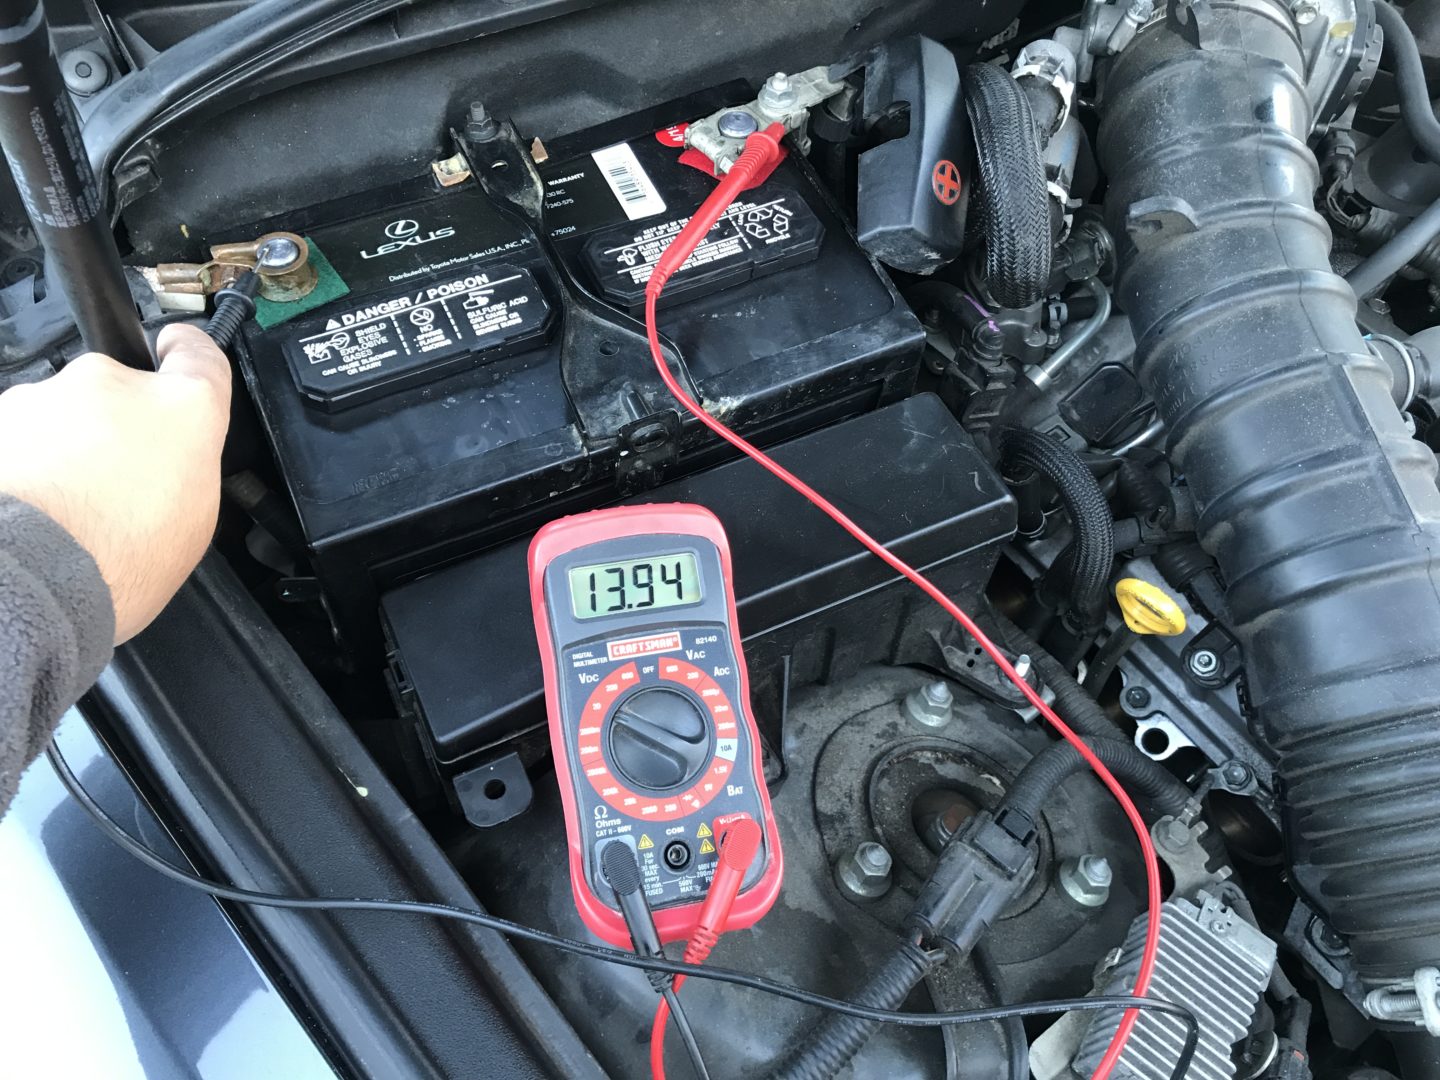
As the car is driven, it will be revving at higher RPM’s further increasing the alternator output. It appears that the new alternator has fixed the issue on the Lexus IS350 and the car has been driving wonderfully since.
References:
https://www.w8ji.com/battery_and_charging_system.htm


: 2nd Gen Lexus IS350")