
When you make purchases through links on this site, The Track Ahead may earn an affiliate commission. Also, these posts are based off my own experiences. I am not responsible for any action you take as a result of reading this. Learn More
Replacing the brakes on a brake drum and shoe system can be a bit overwhelming upon first glance as there are quite a few different parts to work with. To successfully replace the brake drums and shoes on the rear brakes (in this case a 1st gen Toyota Tacoma), it is important to work methodically and keep track of your progress. I found it very helpful for the brake job to document the process along the way, but you may also reference this guide to help you with the removal and installation of the brake drums and brake shoes.
If you are replacing your front brake pads and/or rotors, check out my other tutorial here.
Parts/Tools Needed
Rear Brake Shoes
If you know me, you know I like using OEM parts, so I opted for OEM Toyota brake shoes. With OEM parts, you know that you won’t run into fitment issues. Check your specific vehicle year, model, and trim to make sure you get the correct brake shoes for your vehicle. For this 2004 Toyota Tacoma PreRunner, the OEM part number for the rear shoes is: 04495-35250.
Amazon: Genuine Toyota 04495-35250 Brake Shoe Kit
Ebay: Toyota OEM Factory Drum Brake Shoes (04495-35250)

Rear Brake Drums
If you plan on replacing your brake drums, simply replace the drums while replacing the brake shoes (which requires removing the brake drums anyway.) In this case, I chose not to replace the brake drums, but if you do plan on replacing them with OEM parts, here are the relevant part numbers.
Rear Left (Driver Side): 42431-35151
Rear Right (Passenger Side): 42431-35210
I find that OEM brake drums are a bit more difficult to find online. I’d recommend either going to the Parts Department at your local Toyota Dealership or go with aftermarket brake drums if you need to replace them.
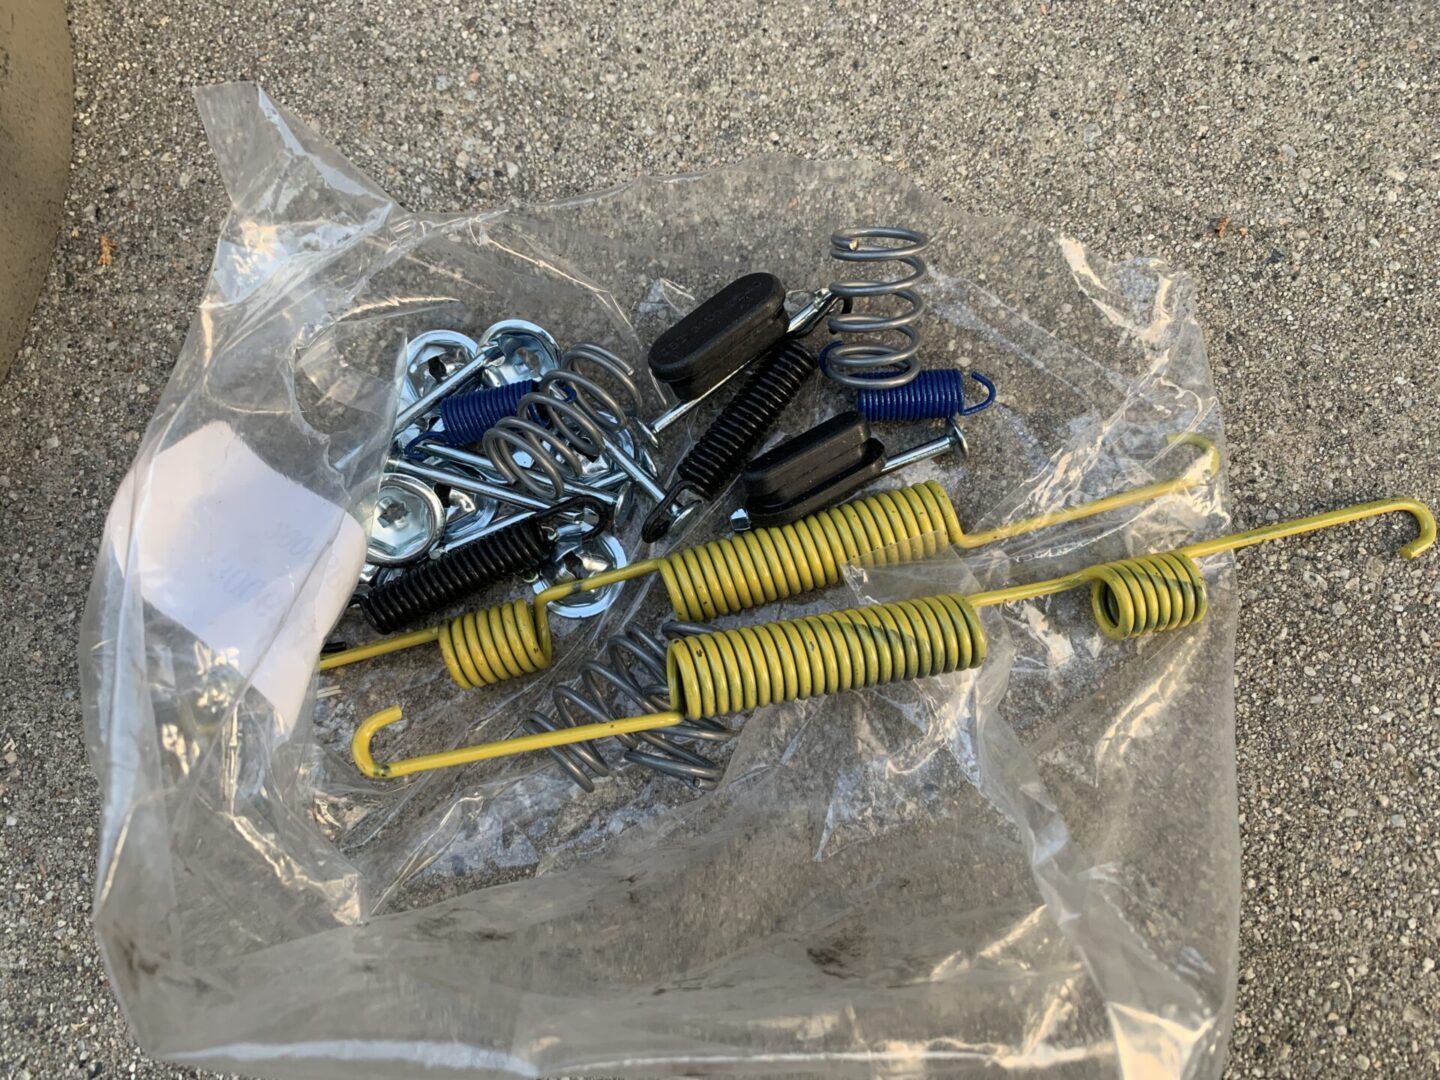
Brake Drum Hardware Kit
Consider buying a brake drum hardware kit; this kit includes many of the parts that can be found on brake drum/shoe systems. Although it may not be completely necessary to replace these parts, you may want to consider doing so since much of the existing brake hardware can wear and stretch out over time.
Centric Parts 118.44008 Brake Drum Hardware Kit
Brake Parts Cleaner
A vital thing to have when working with brake parts. Carcinogenic brake dust can kick up and become airborne when working with brake components. Liberally spraying down the brake components will not only clean the surfaces you’re working on, but can prevent much of the brake dust from becoming airborne.
CRC BRAKLEEN Brake Parts Cleaner – Non-Flammable -1lb 3 Oz (05089)

N95 Mask
The brake cleaner certainly helps with keeping the brake dust down, but brake dust can still kick up causing you to breathe it in. It’s not a bad idea to have an N95 mask when working with the brakes. At the very least, use a surgical/face mask of some sort, but if you want to guarantee that you safe from breathing in brake dust, stick with an N95 mask.
3M N95 Particulate Respirators, 20/Dispenser (Pack of 20)
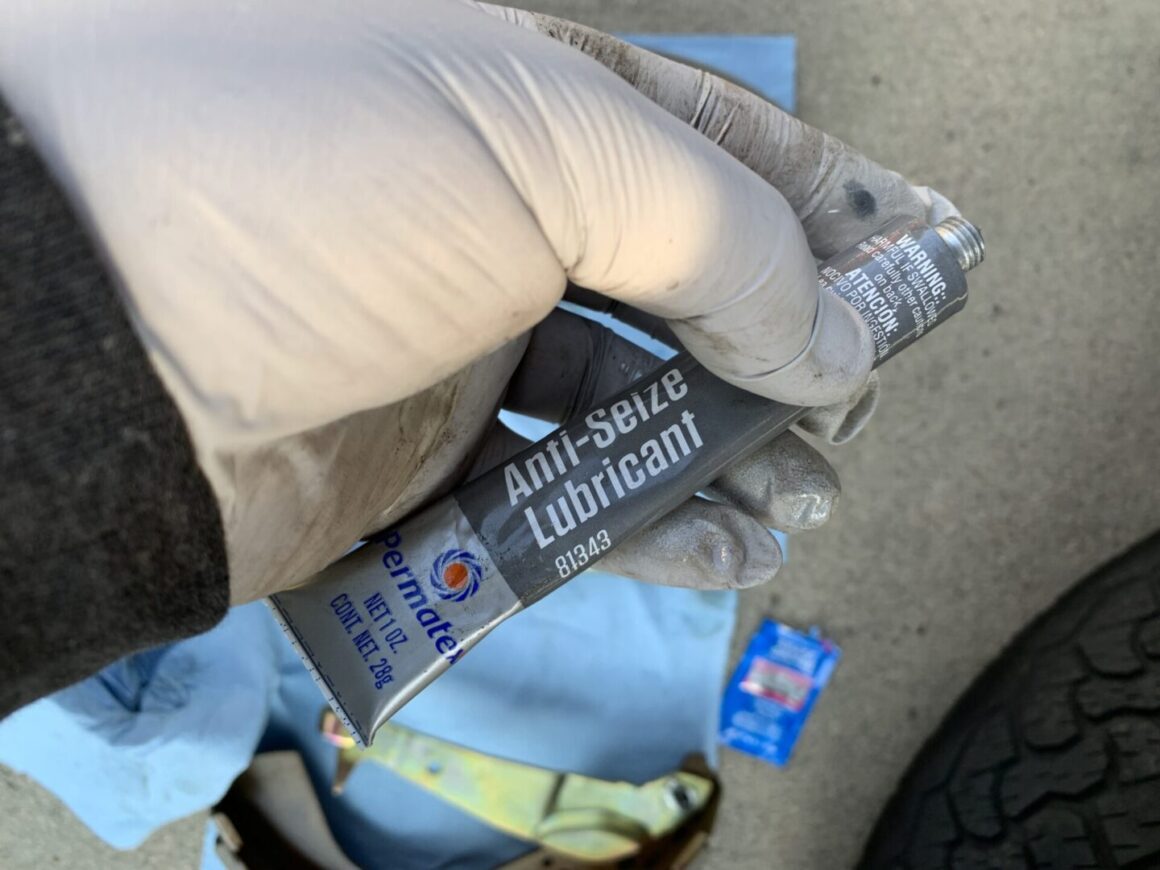
Anti-Seize Lubricant
When replacing brake shoes, it’s recommended to use anti-seize lubricant on the backing plate before you install the new brake shoes and hardware. This prevents seizing up of the brake parts behind the brake drum and ensures optimal operation of the rear brakes.
Permatex 81343 Anti-Seize Lubricant, 1 oz. Tube , White
Brake Lubricant
This may be labeled on the packaging as brake caliper lube, but it is used for lubricating any brake hardware that has moving parts. This would be a synthetic brake lubricant; different from the anti-size lubricant used on the backing plate.
Permatex Ultra Disc Brake Caliper Lube, 2 oz.
Socket Wrench Set
A socket wrench set would mainly be used for screwing in the bolts to remove the brake drums. If you need help picking a mechanics tool set which will usually have most socket sizes that you’ll need, check out this article.
40 Pieces – EPAuto 1/4-Inch & 3/8-Inch Drive Socket Reversible Ratchet
Brake Drum Tools or Vice Grips
The removal of worn springs is not that difficult and can be done with a set of pliers, but getting new springs on is a whole ‘nother story. If you want to be fully prepared, you can purchase a full brake drum tool kit that comes with every tool you might need for a job like this. At the very least, you should consider a set of brake spring pliers to work alongside some vice grips.
ABN Brake Drum Tool Kit 15-Piece Service Brake Kit
HAUTMEC Brake Spring Pliers HT0013-AP
WORKPRO 5-Piece Locking Pliers Set
Nitrile Gloves
MedPride Nitrile Exam Gloves, Powder-Free Box/100 – Small | Medium | Large
Floor Jack & Jack Stands
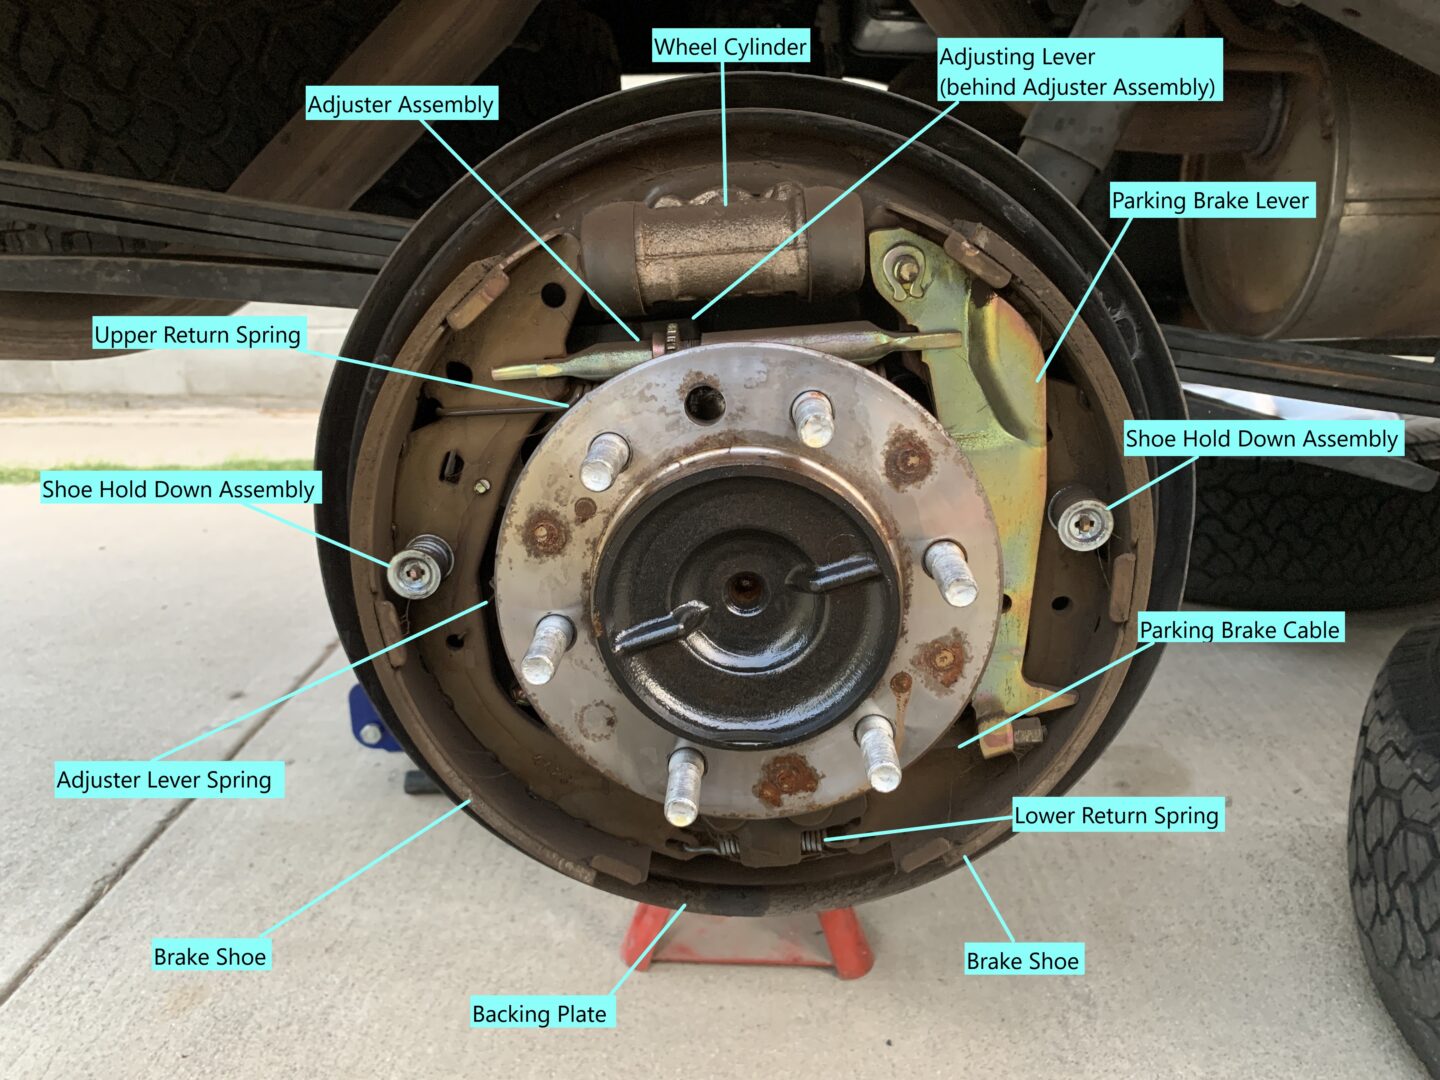
Brake Drum Assembly Diagram
Here’s a diagram I put together showing the various parts of the brake drum assembly on the 1st generation Toyota Tacoma. Keep in mind that people use different names for different components, but these are commonly used. Also, this particular brake drum assembly can look different from other vehicles, but the general concept is the same. For clarity on this How-To, I will be referring to the parts as shown in the diagram below.
How to Replace Front Brake Pads and Rotors: 1st Gen Toyota Tacoma
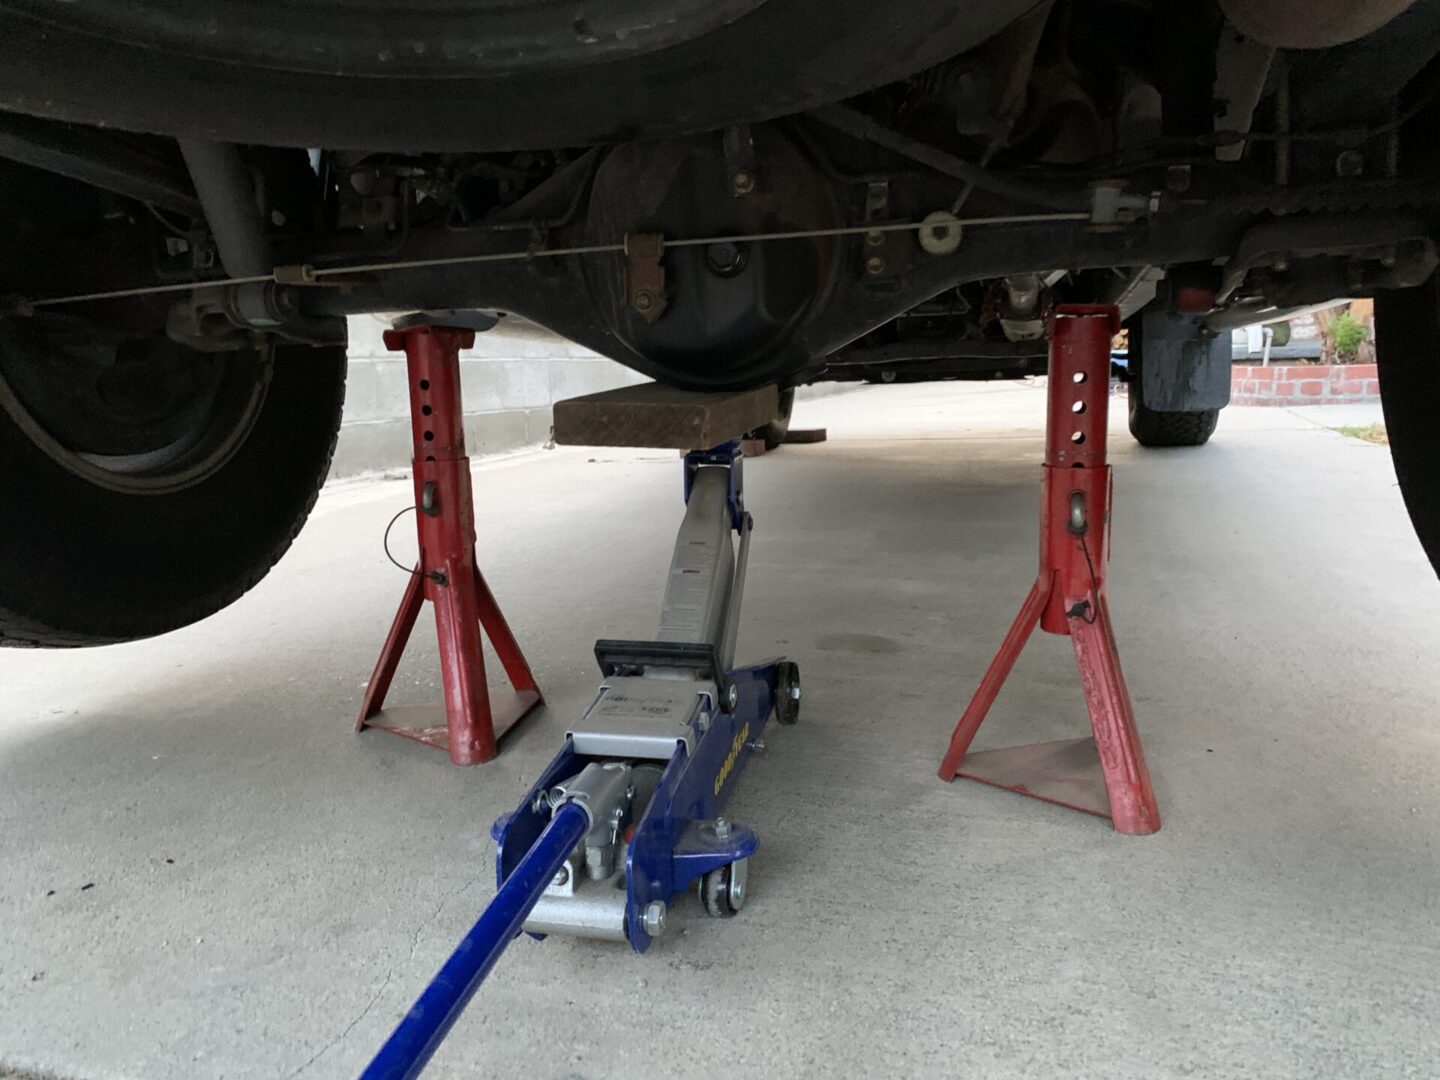
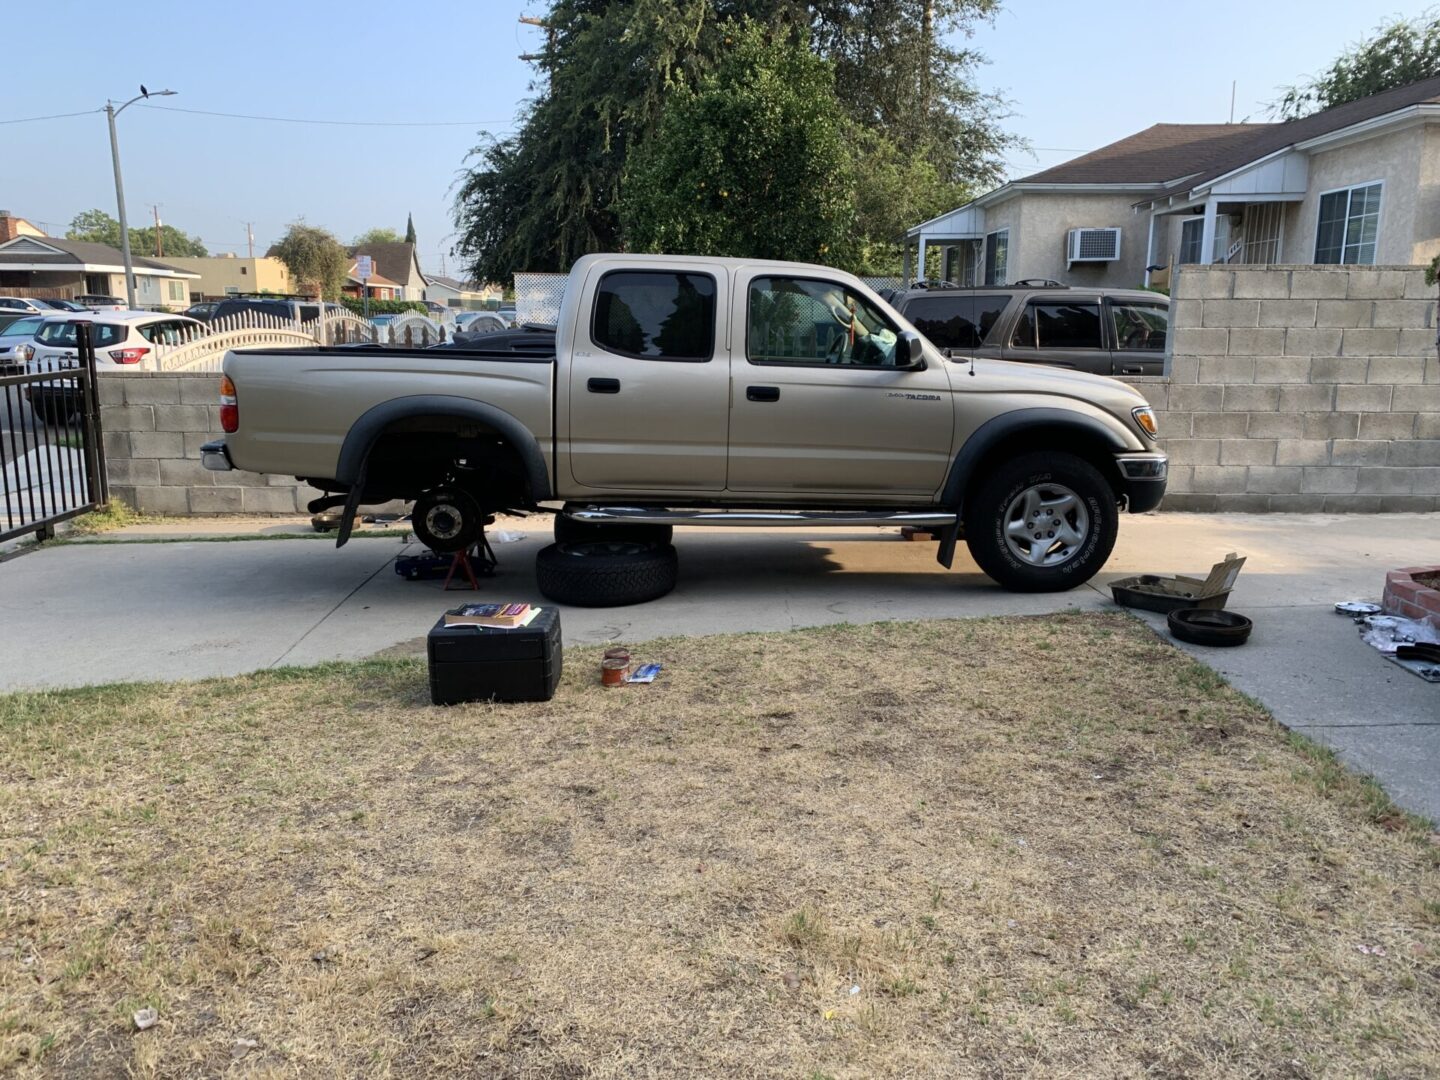
First, loosen lug nuts and jack up the truck via the rear differential. I used a block of wood between the floor jack and the to protect the rear diff housing. Then support with jack stands on both sides of the differential.
Chock the front wheels and remove the rear wheels. You may place these wheels under the vehicle as a second backup to the jack stands for additional safety.

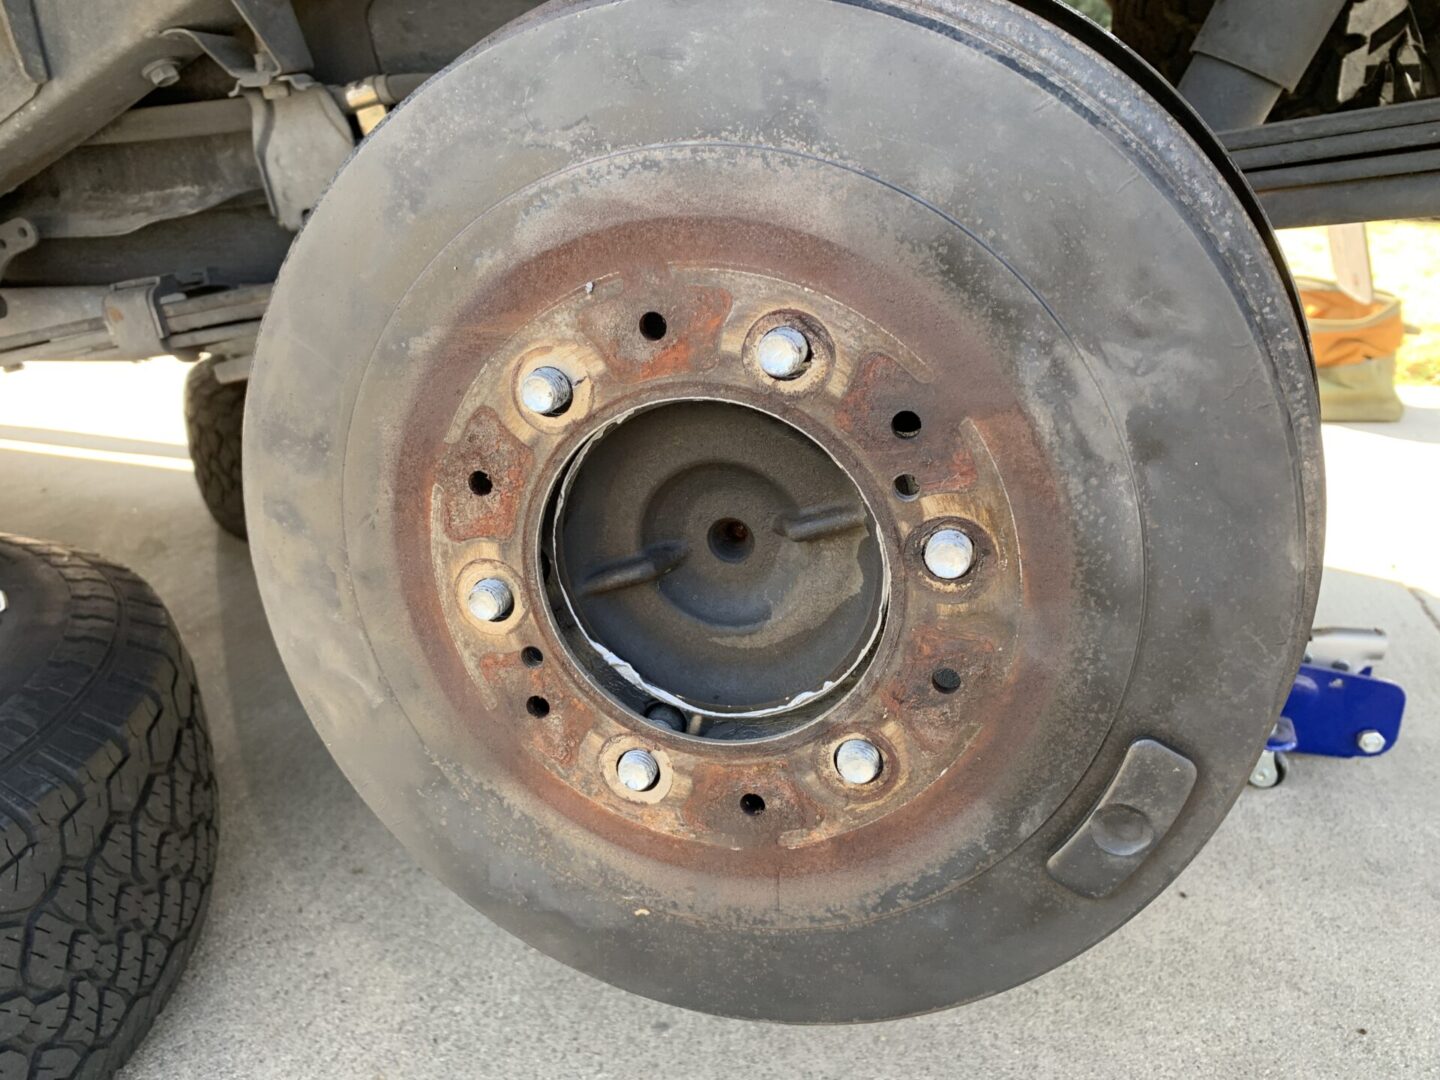
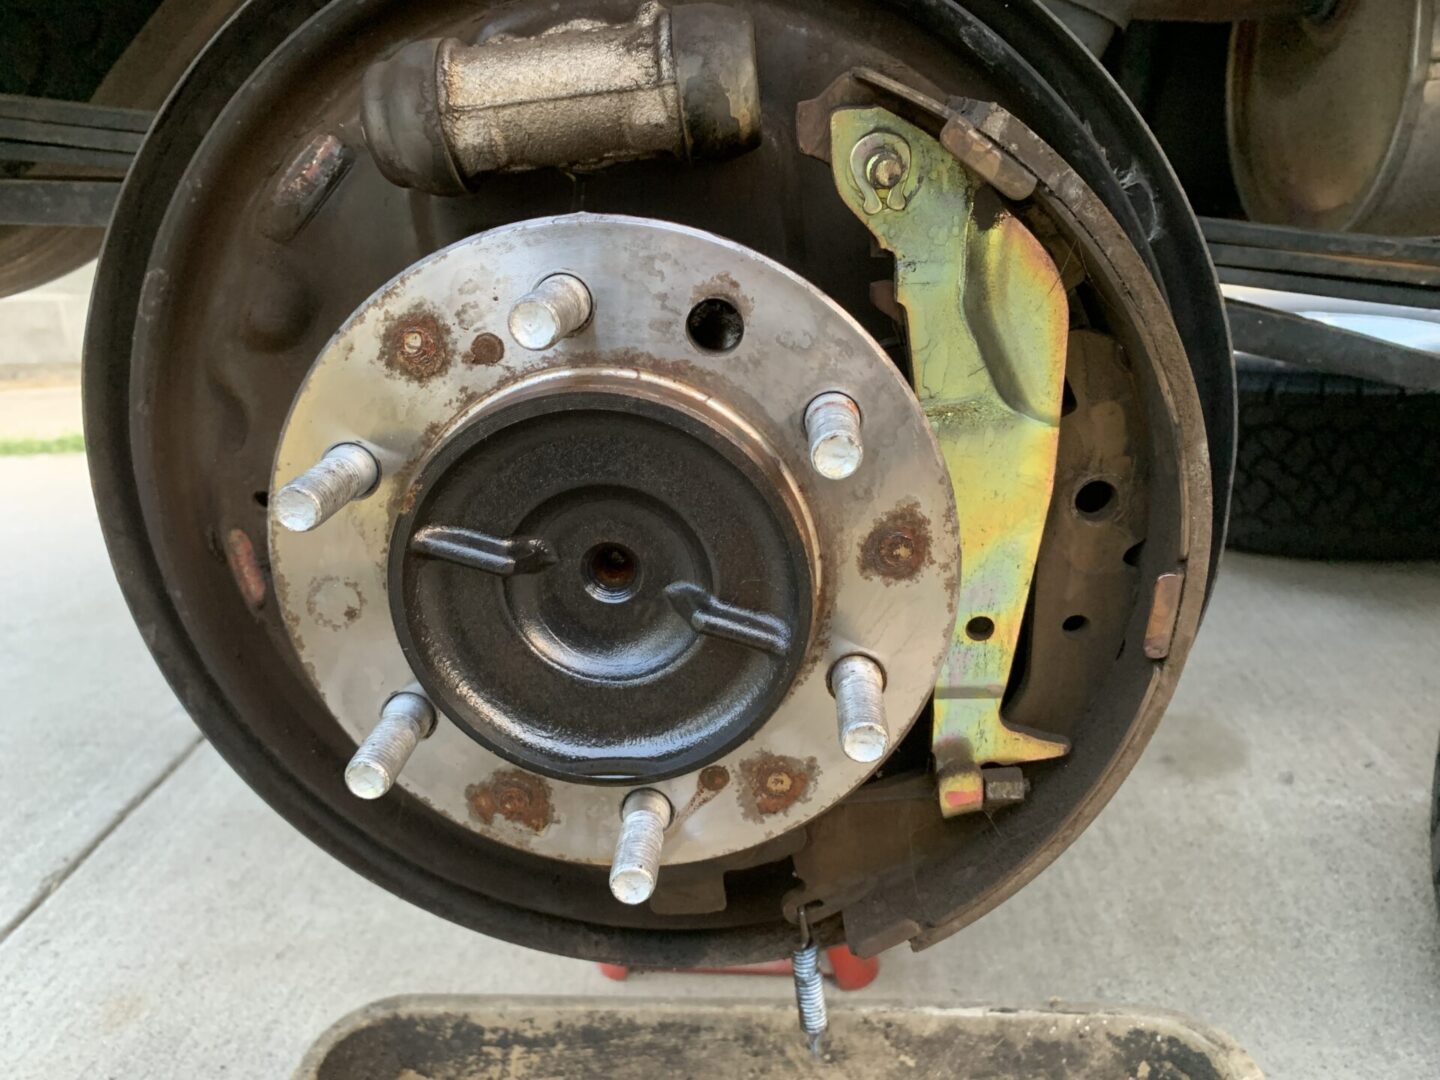
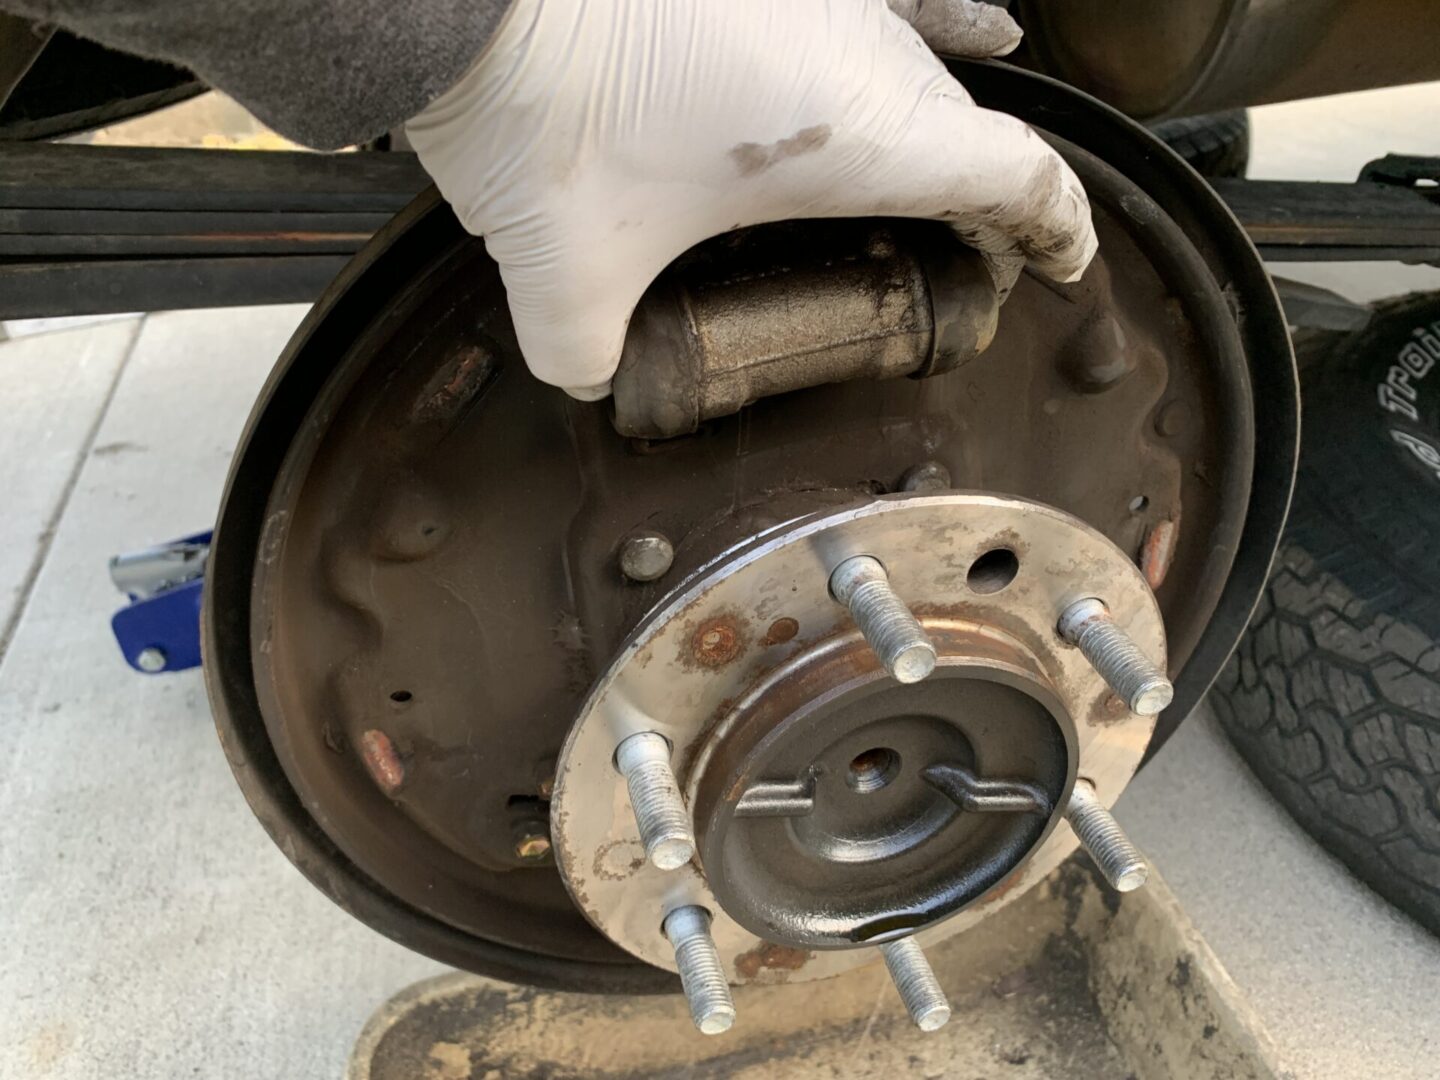
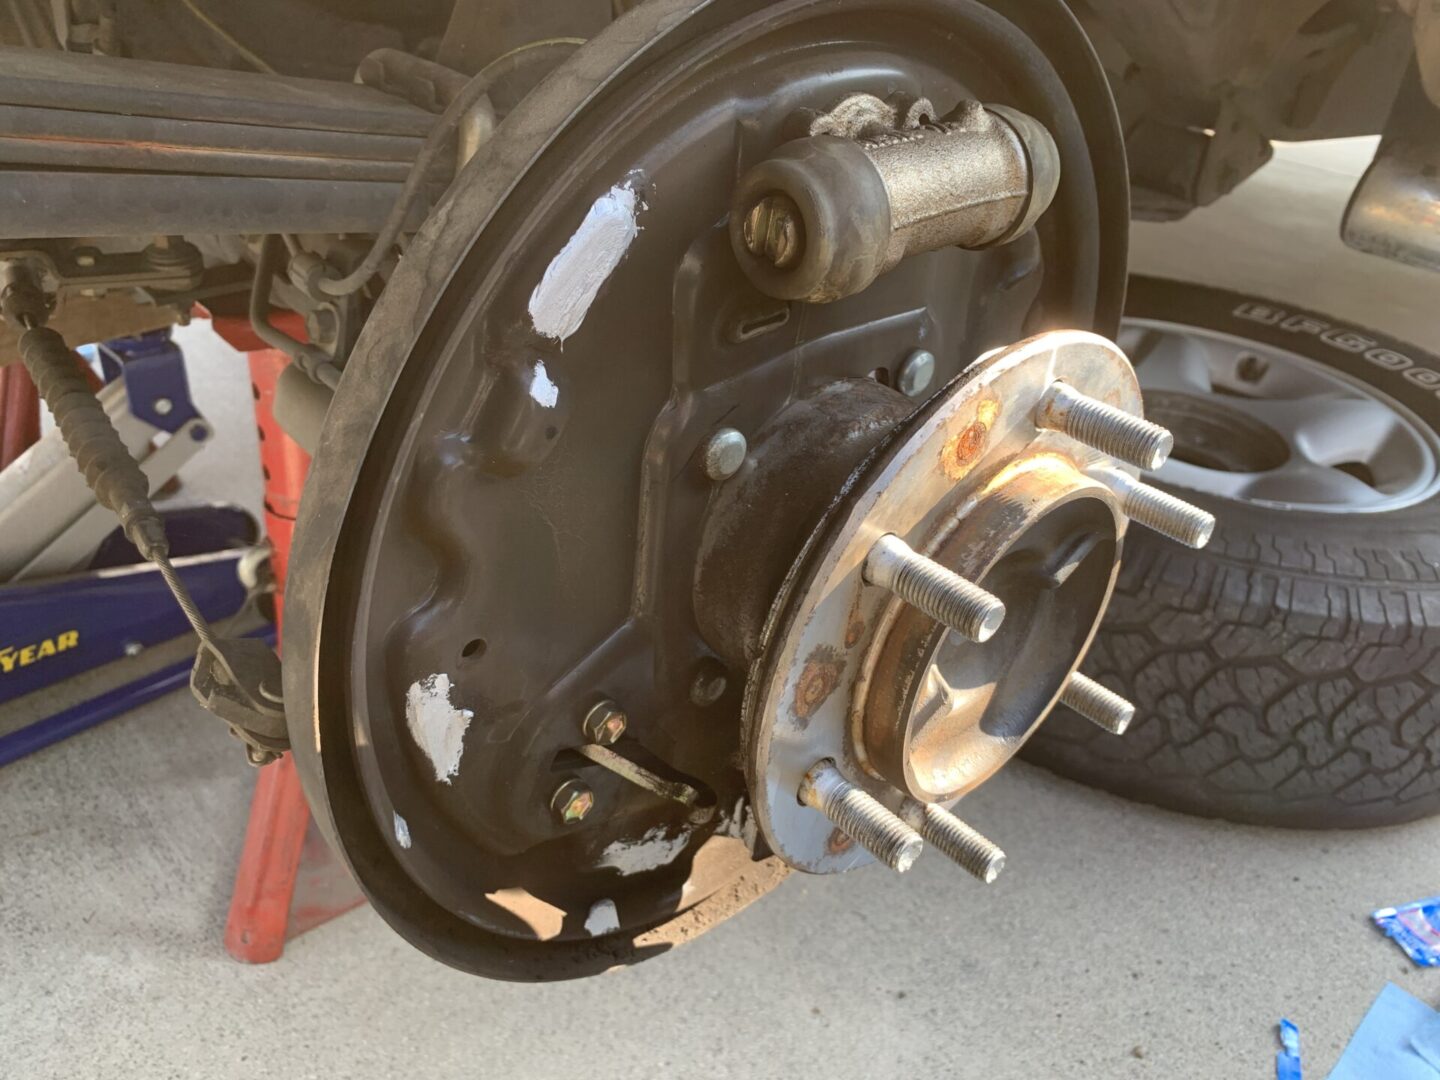
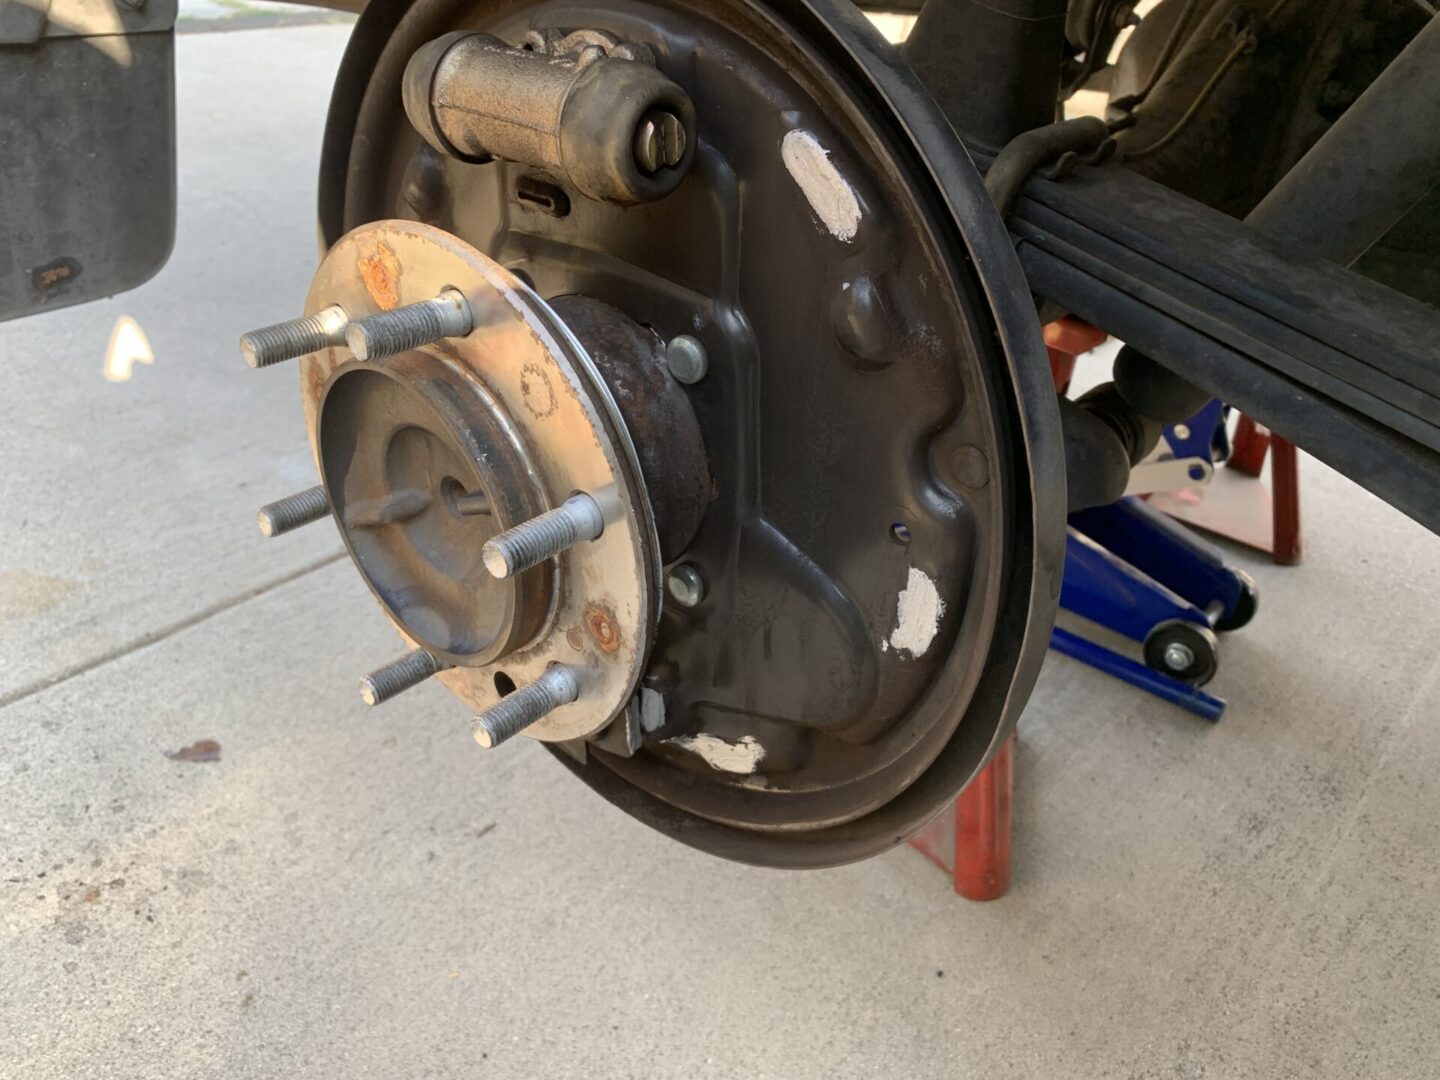
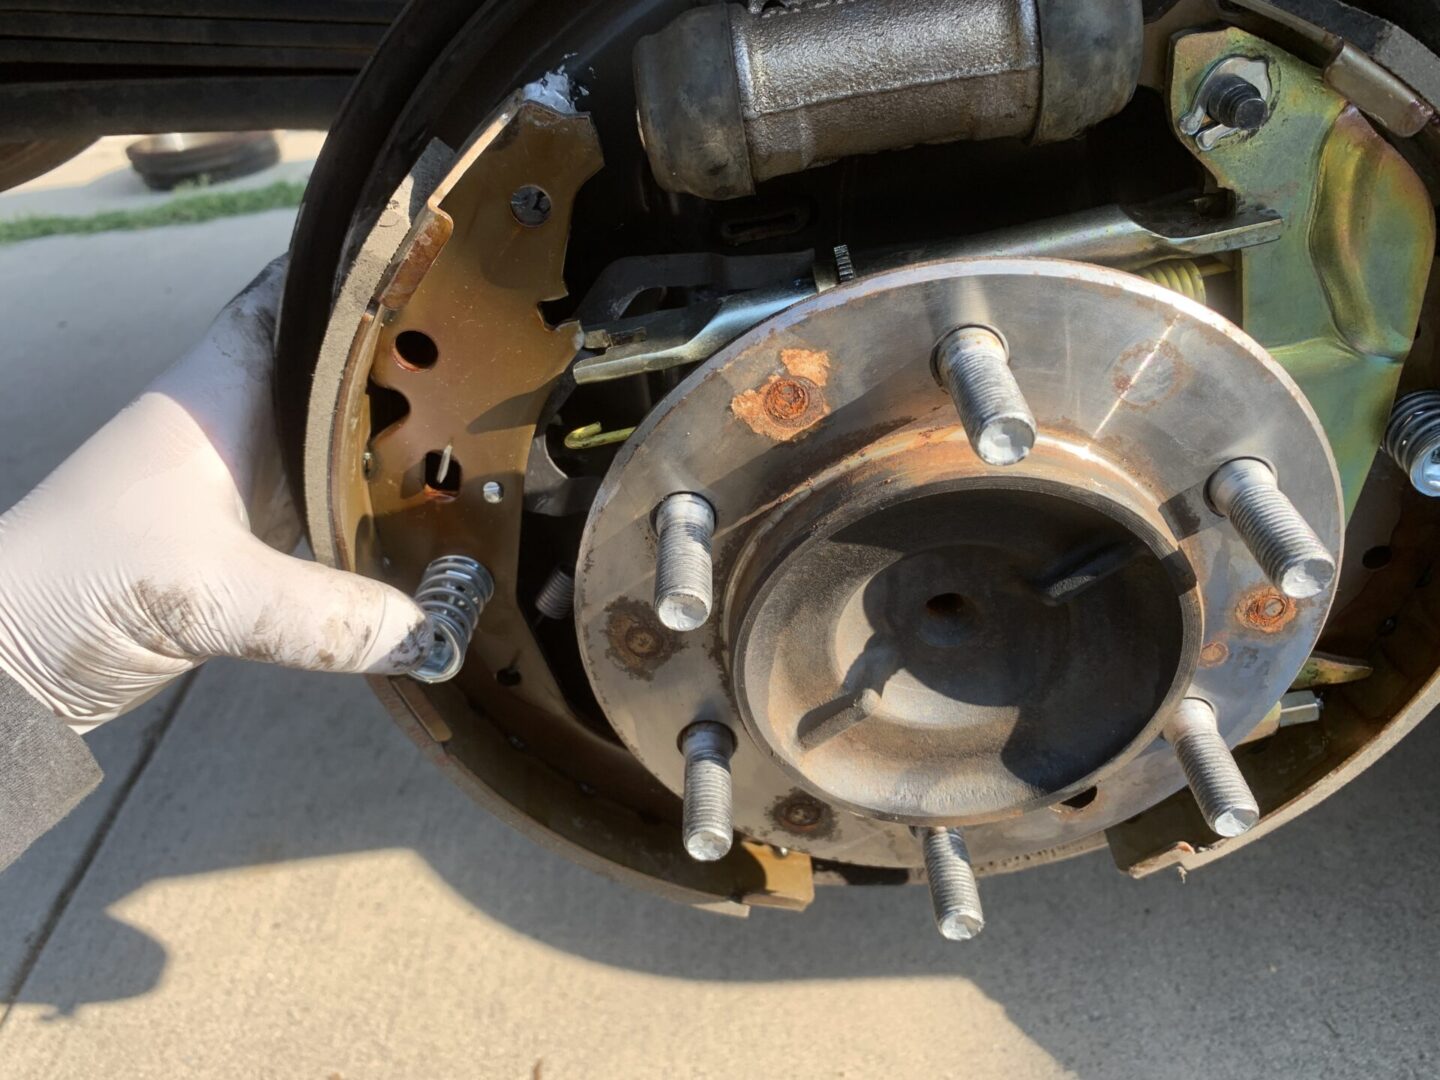
Make sure the parking brake is off before beginning. Next, remove the brake drum. It’s a good idea to wear safety glasses as a safety precaution.
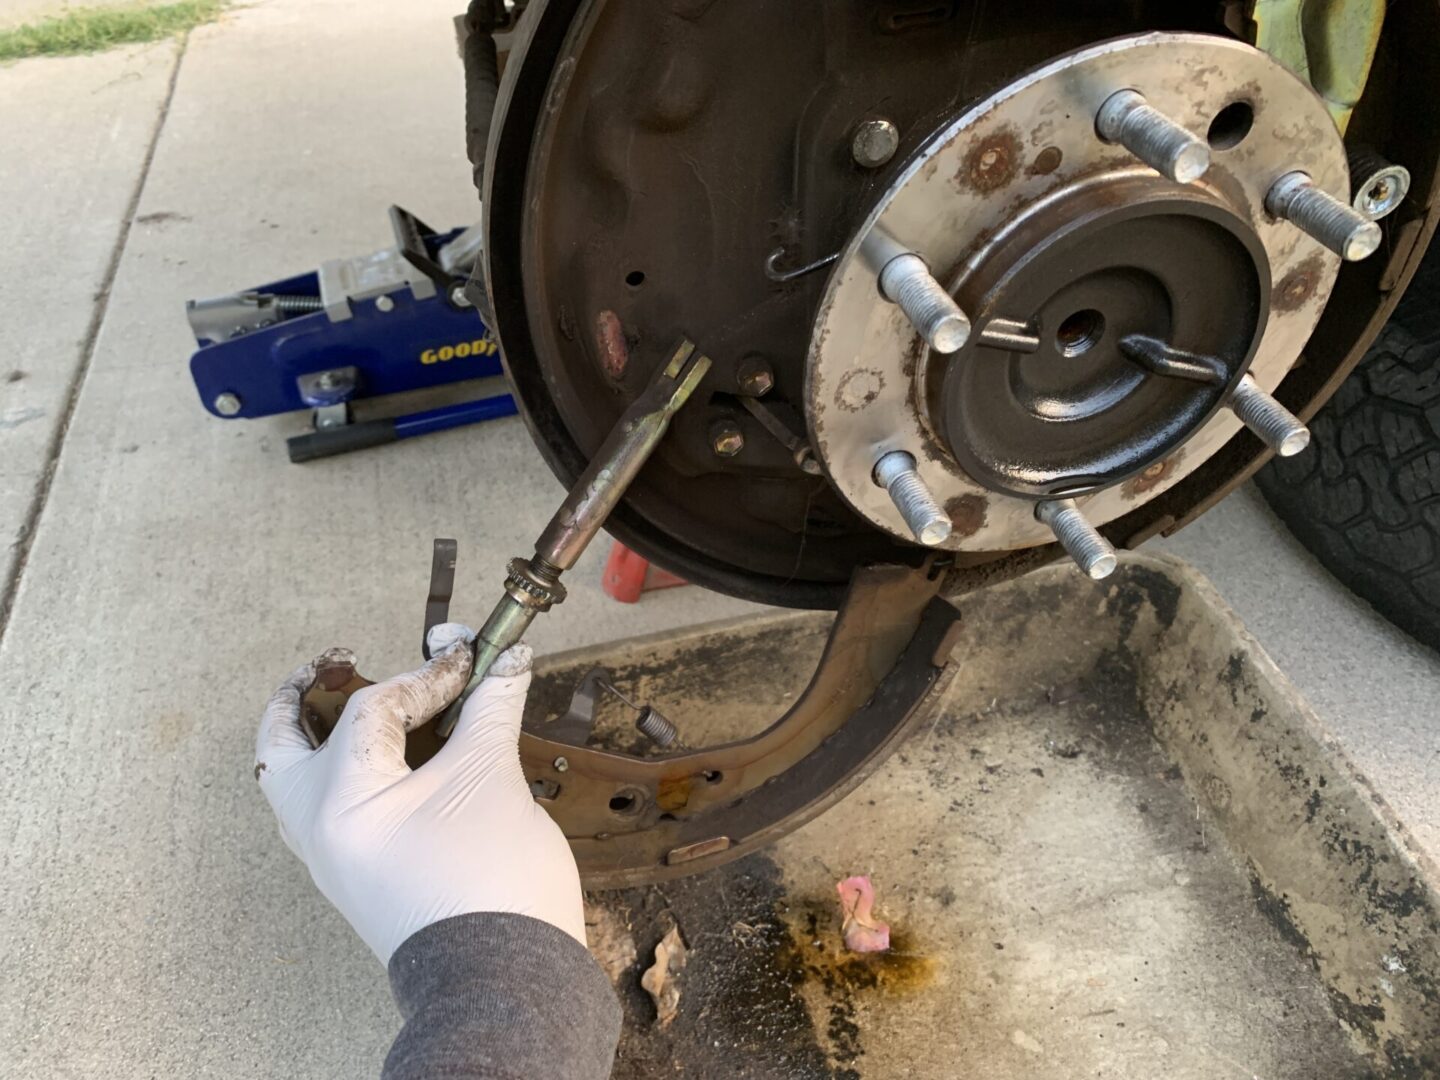
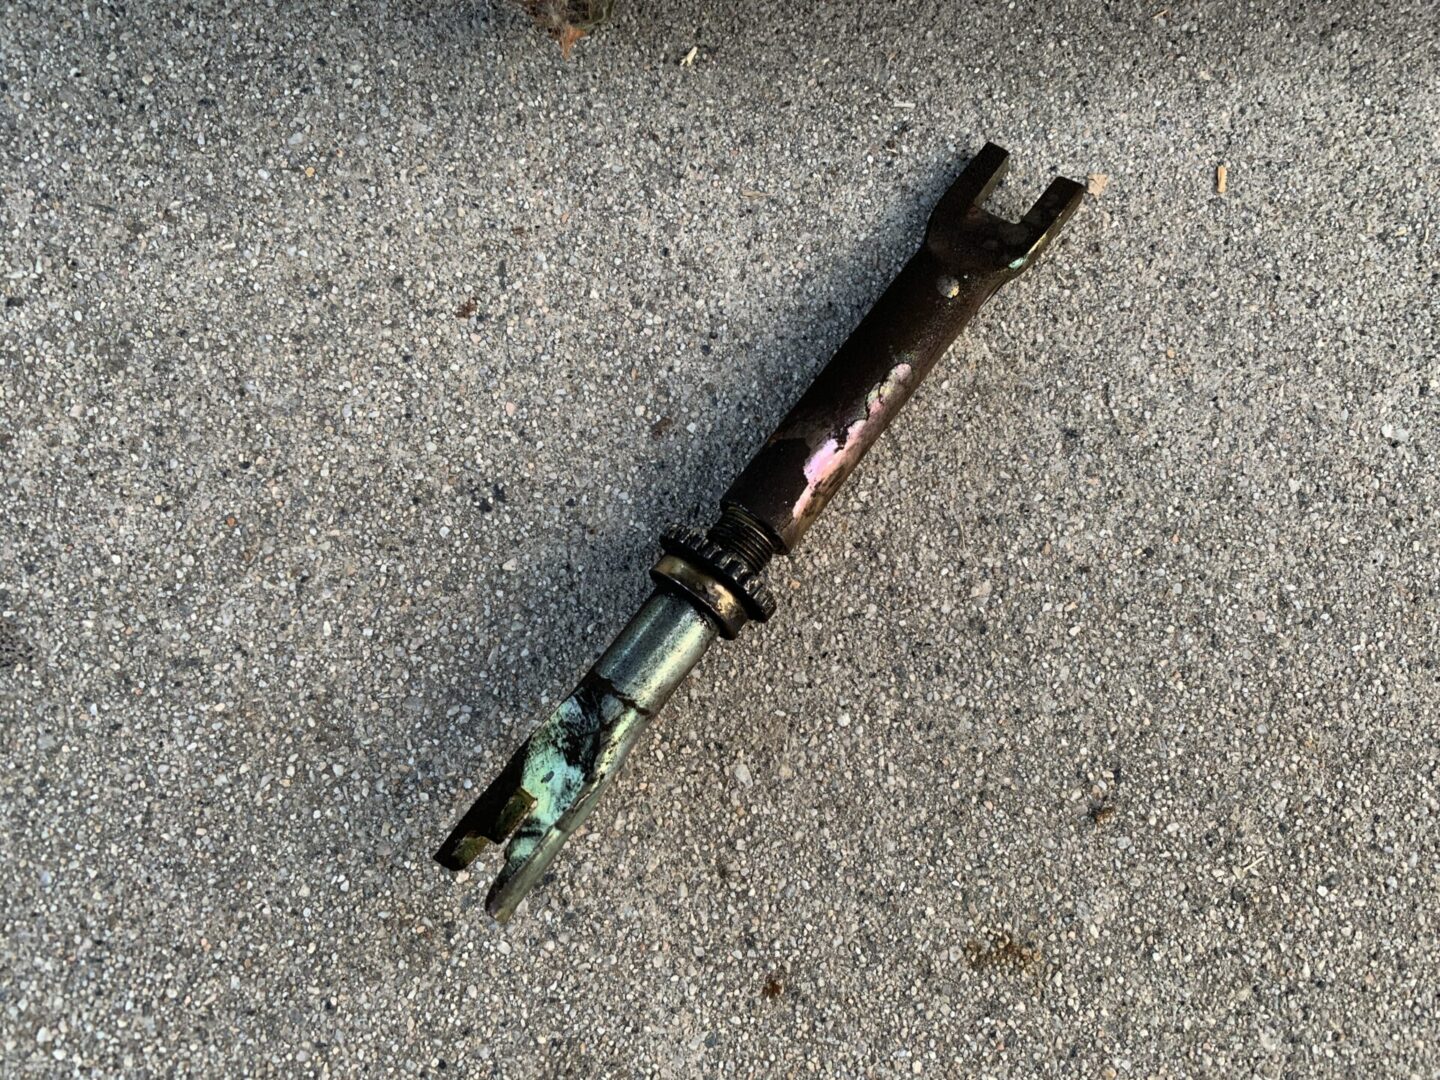
You may be able to smack the brake drum off with a mallet, but this might take a long time to do (if you are able to.) The better and easier way to remove the brake drum is to use two M8x1.25mm bolts and screw them into the threaded holes in the drum. Then tighten one bolt some, then the other bolt some, and go back and forth until the brake drum pops off. Doing it this way saves a lot of headache and potential damage to your brake components.
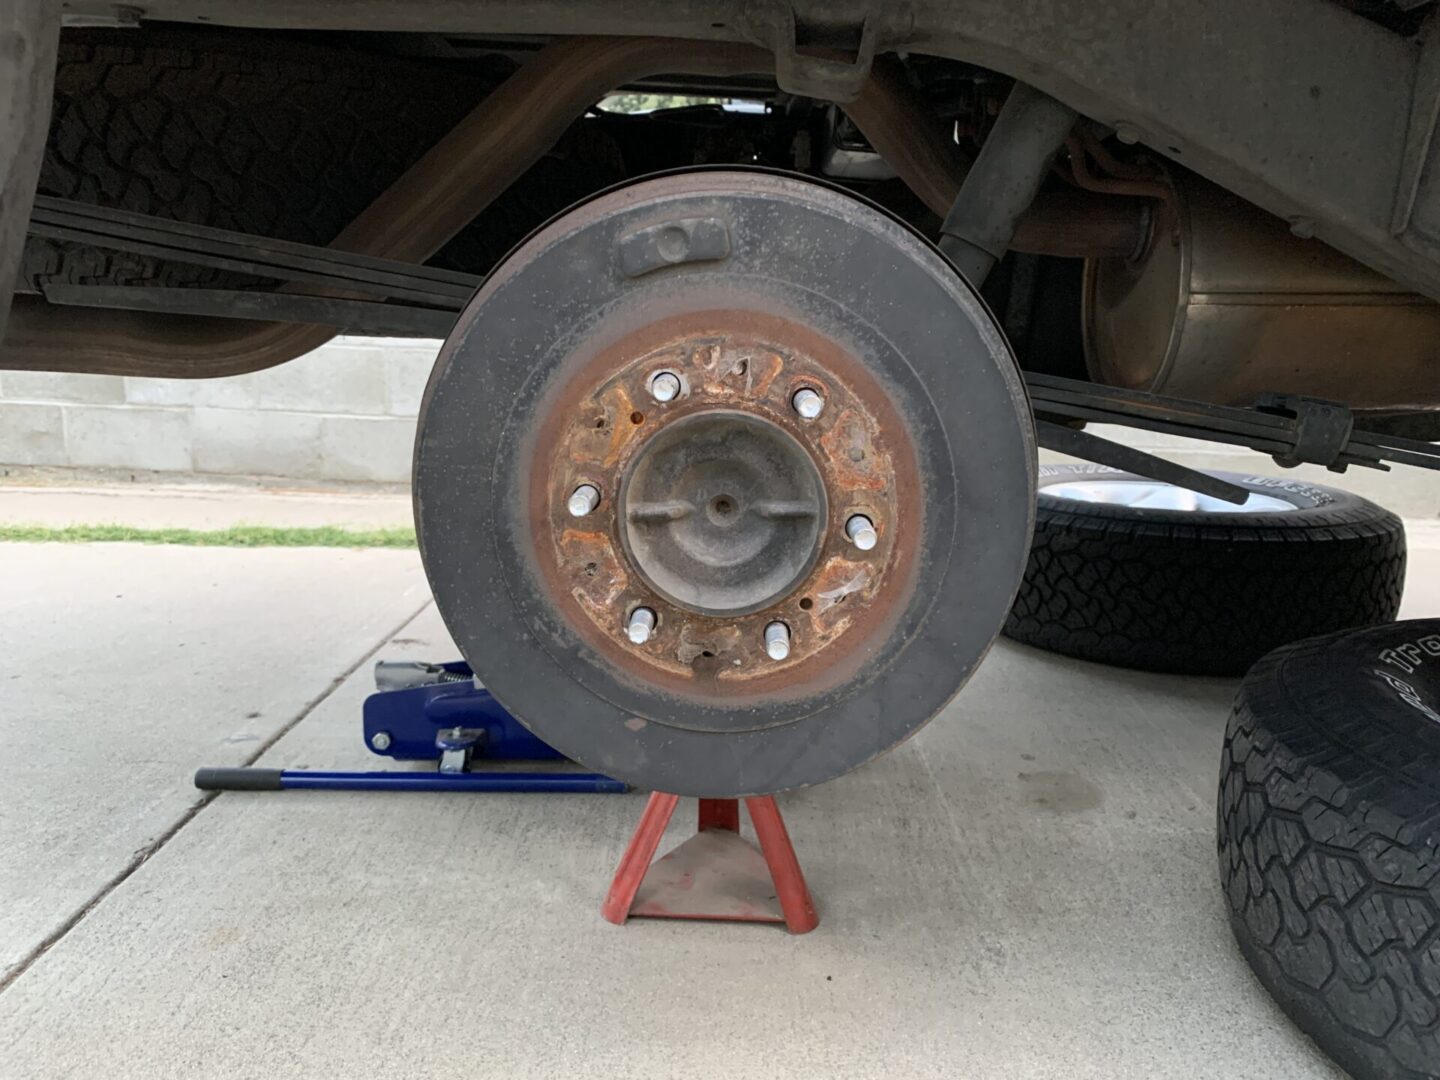
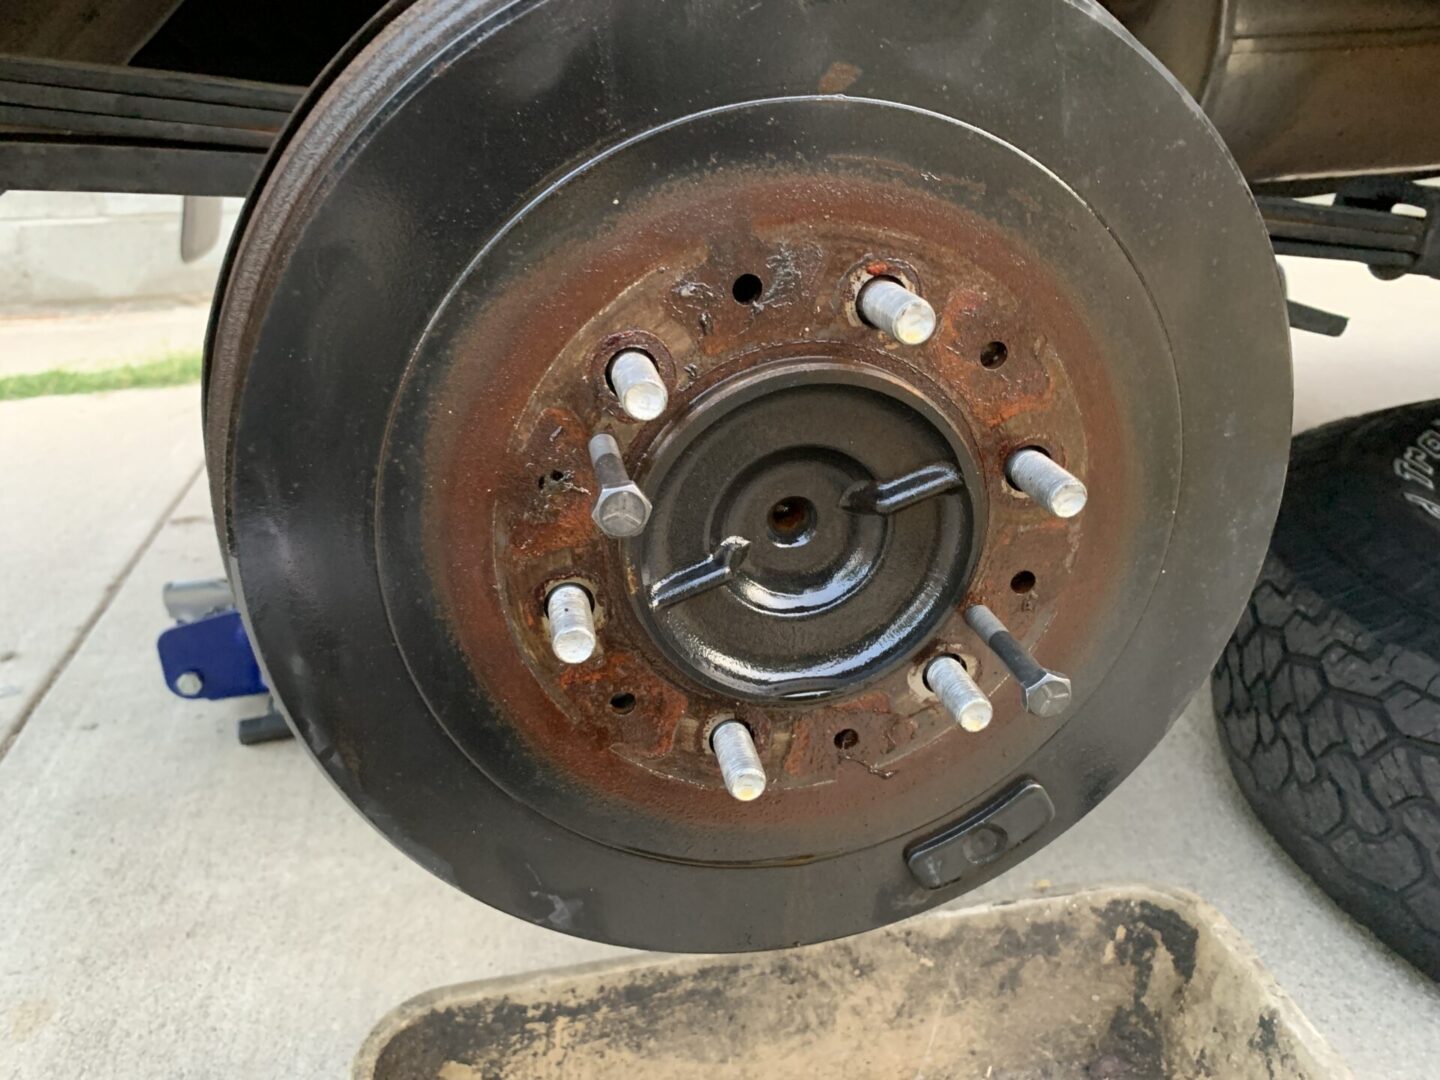

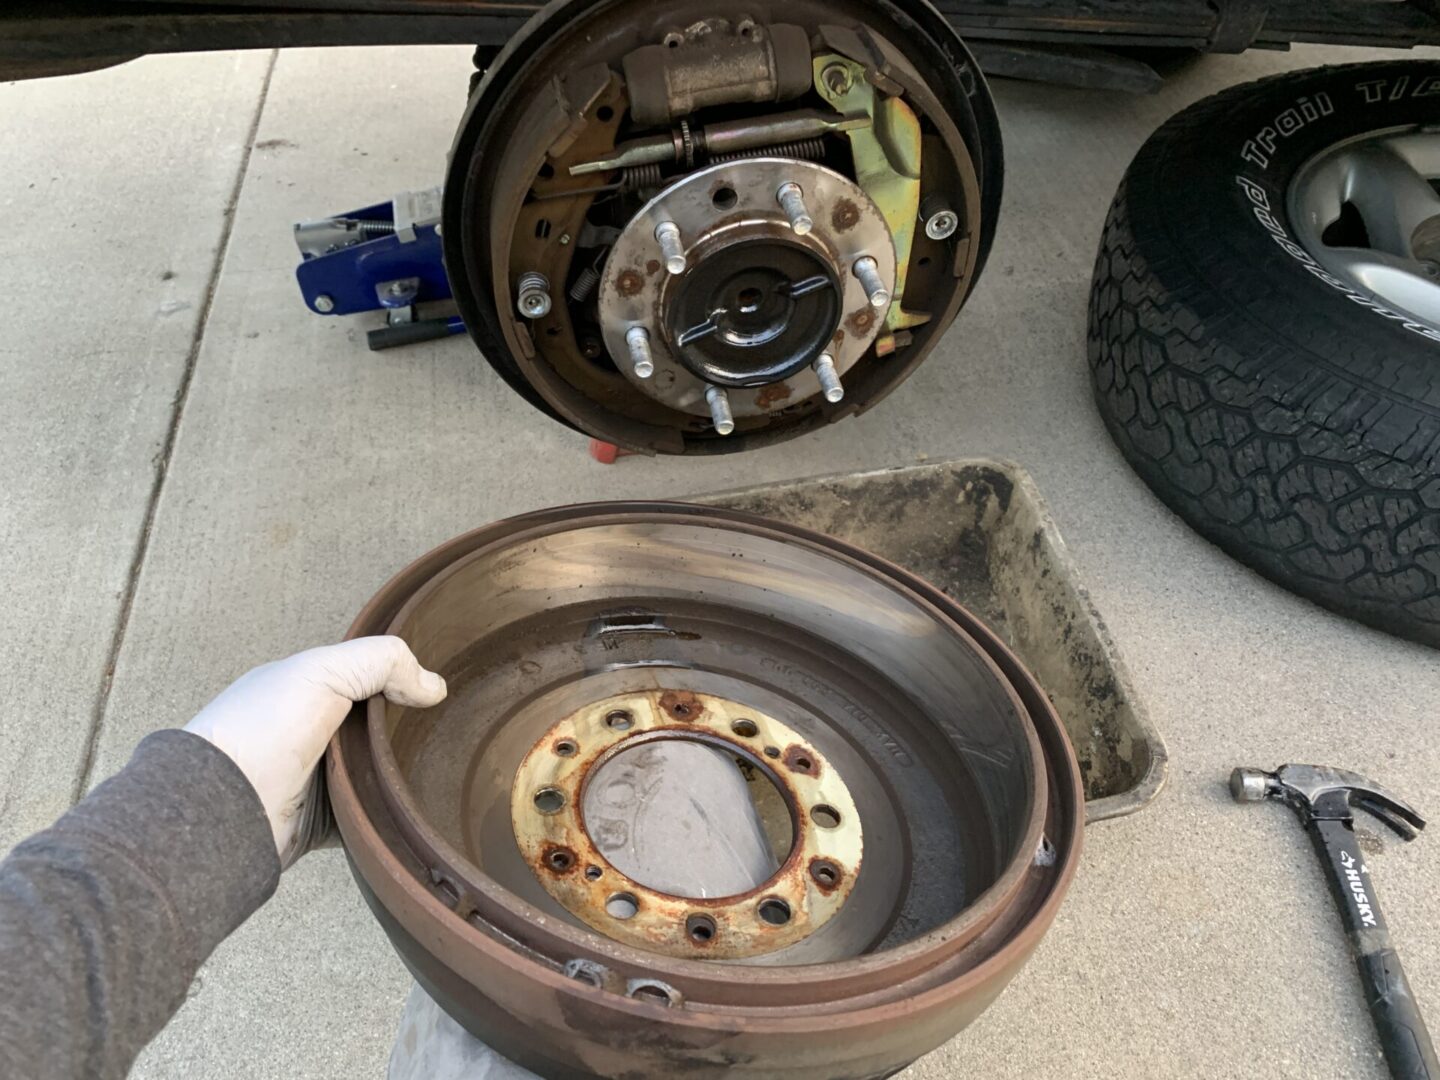
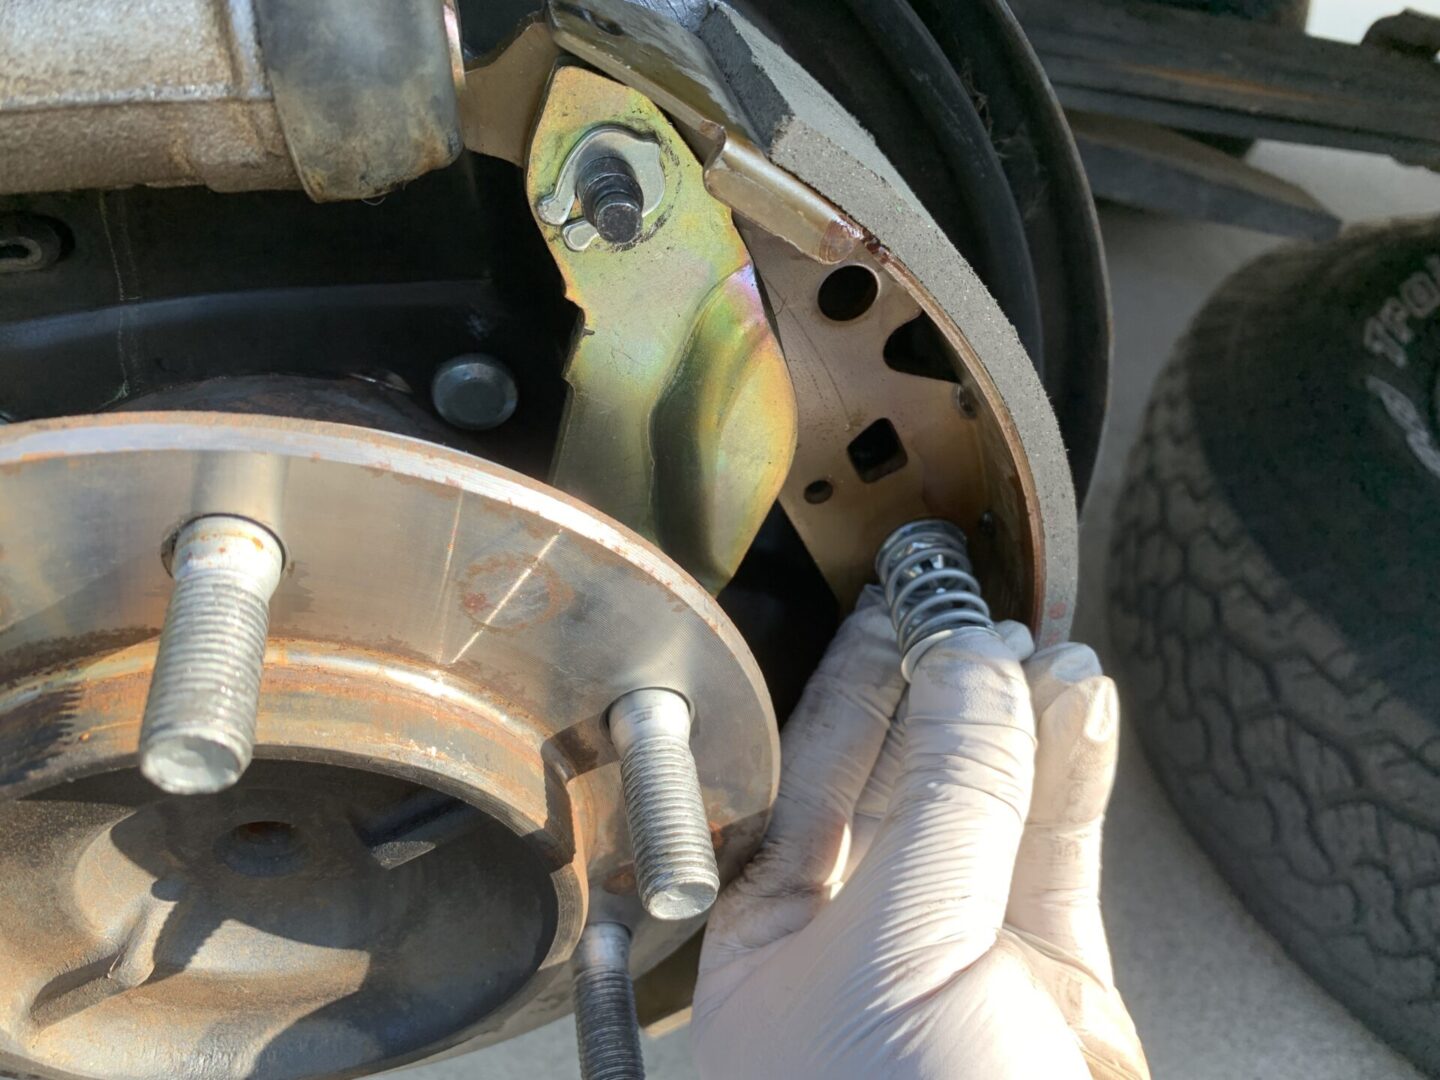
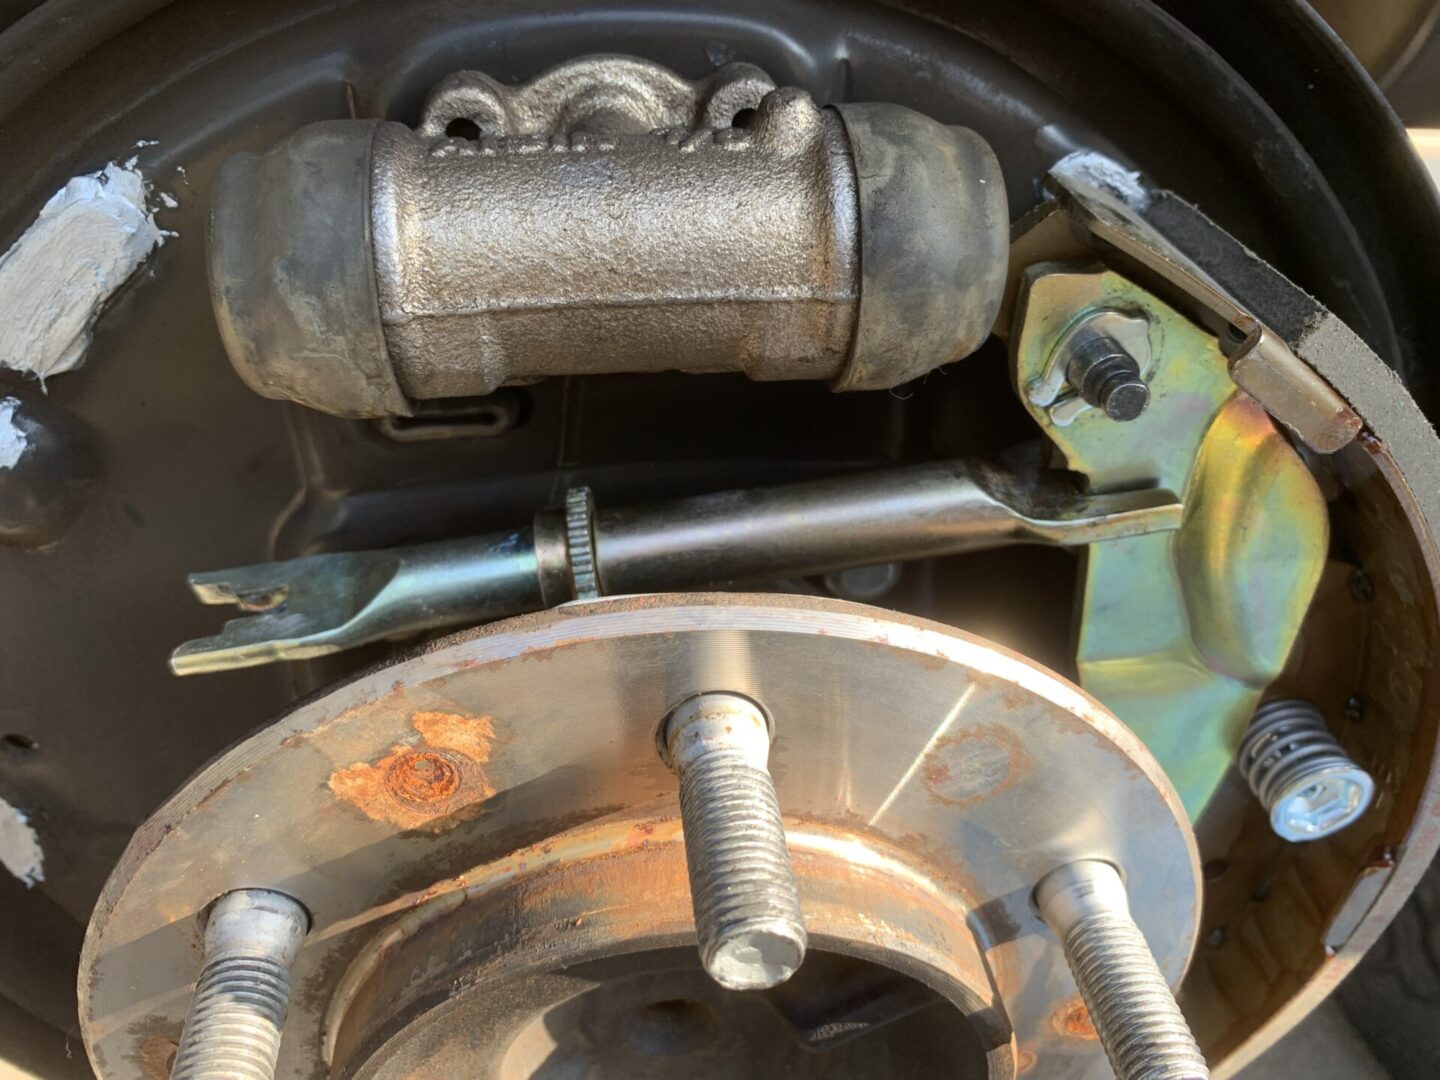
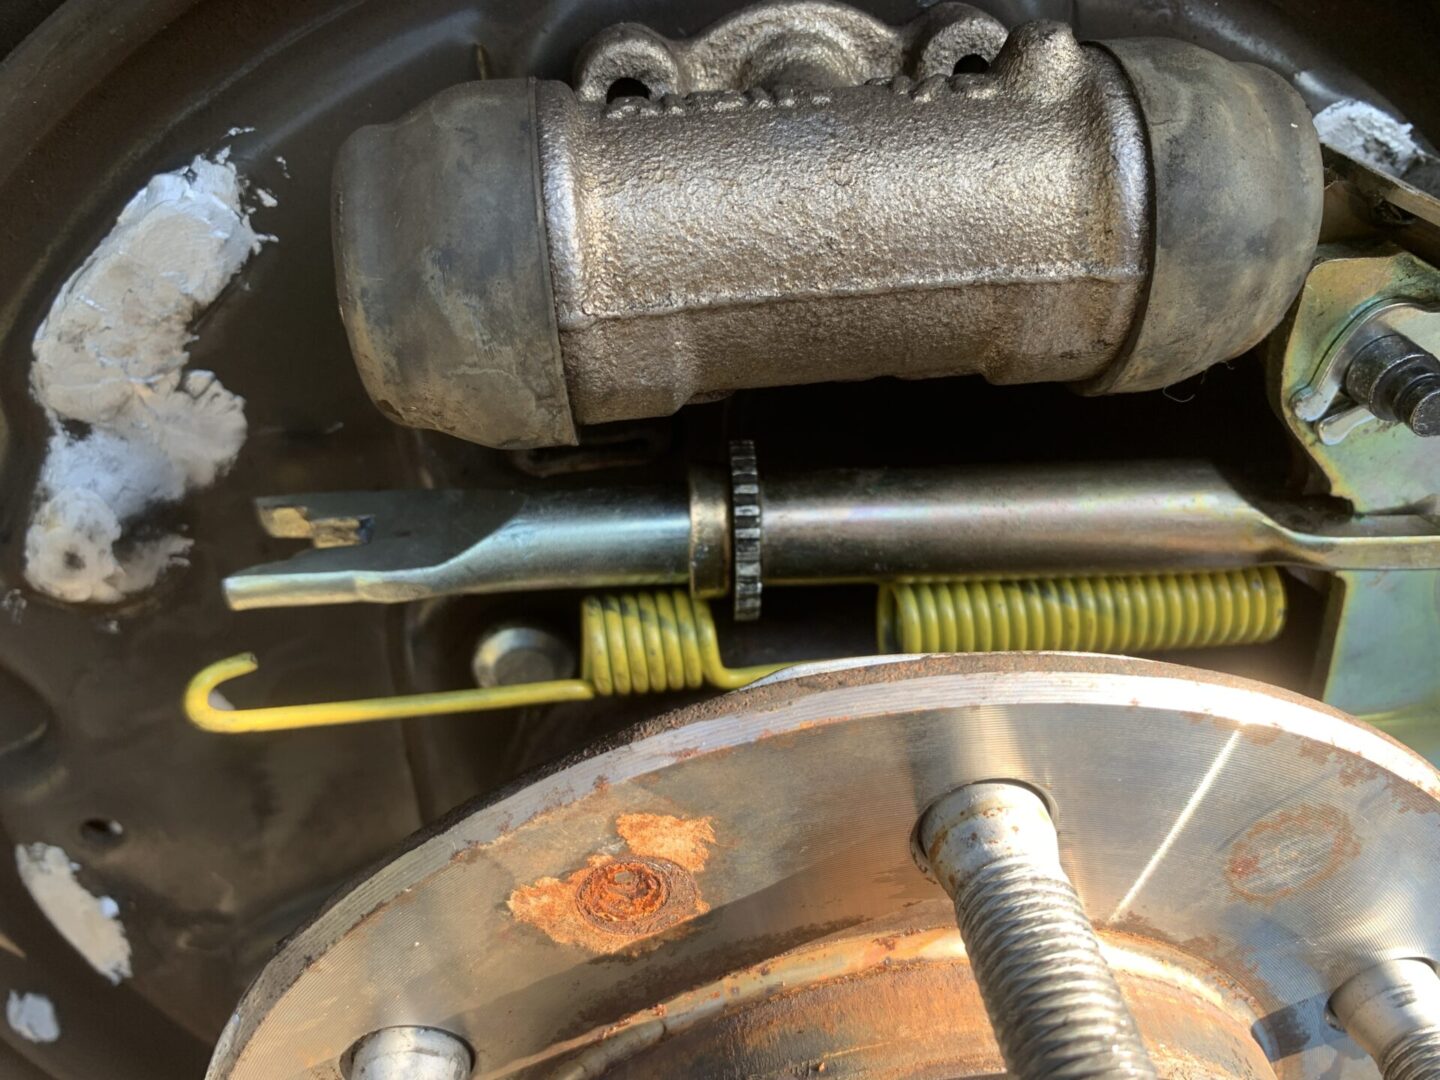
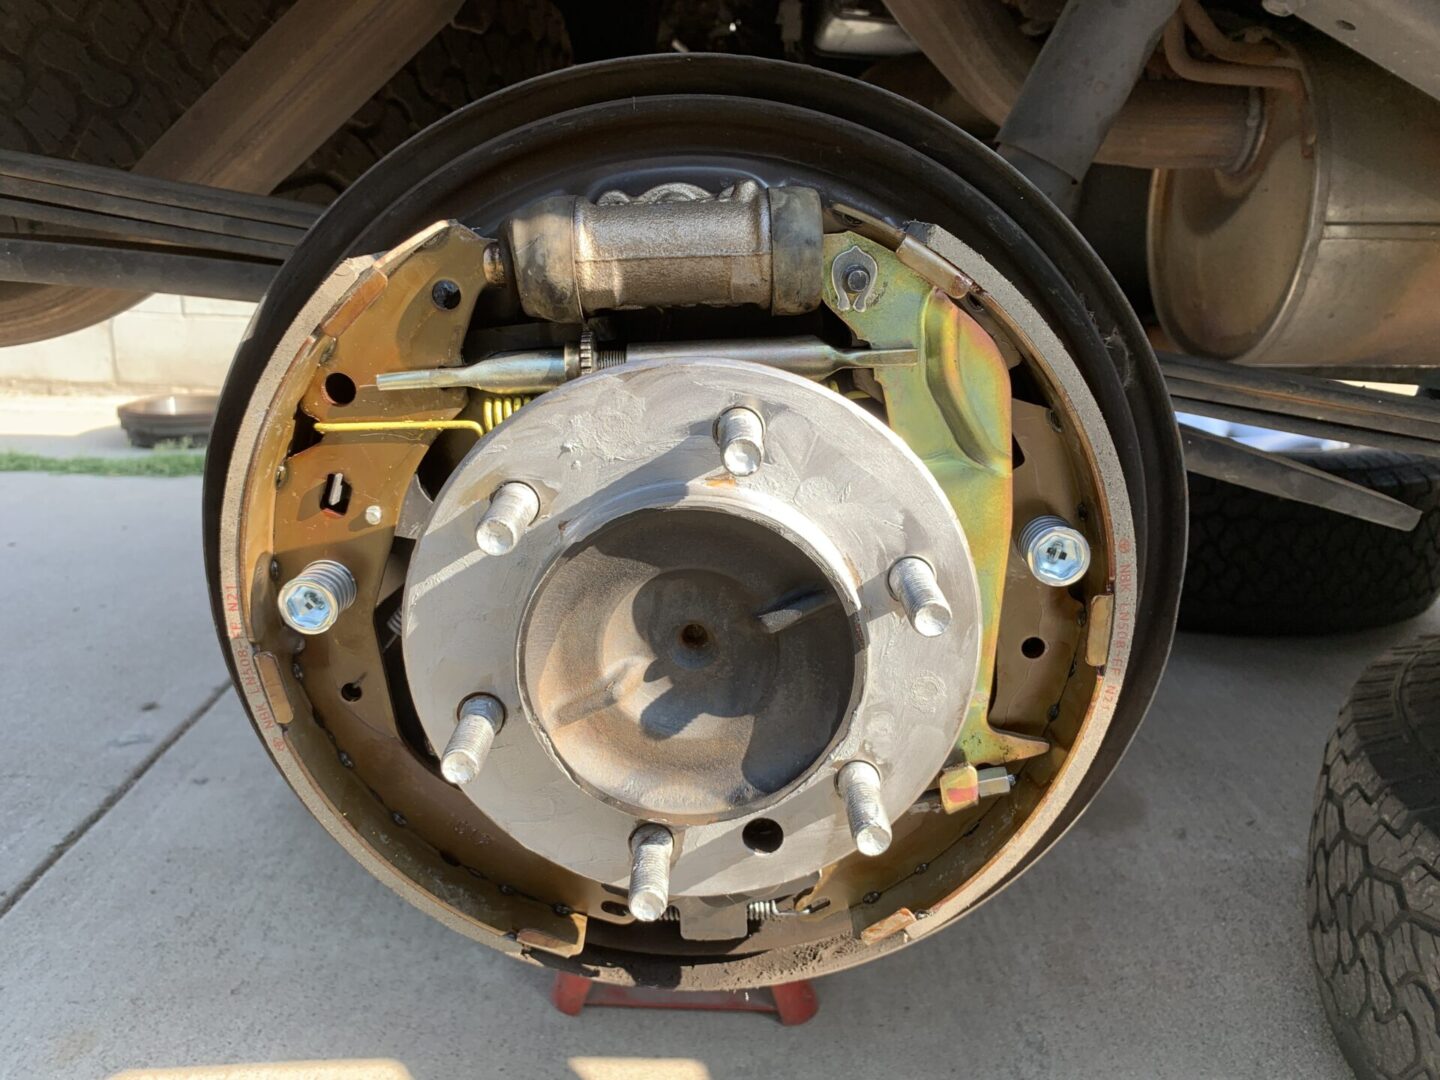
Now, you’ll have access to your brake shoes and the associated brake hardware.
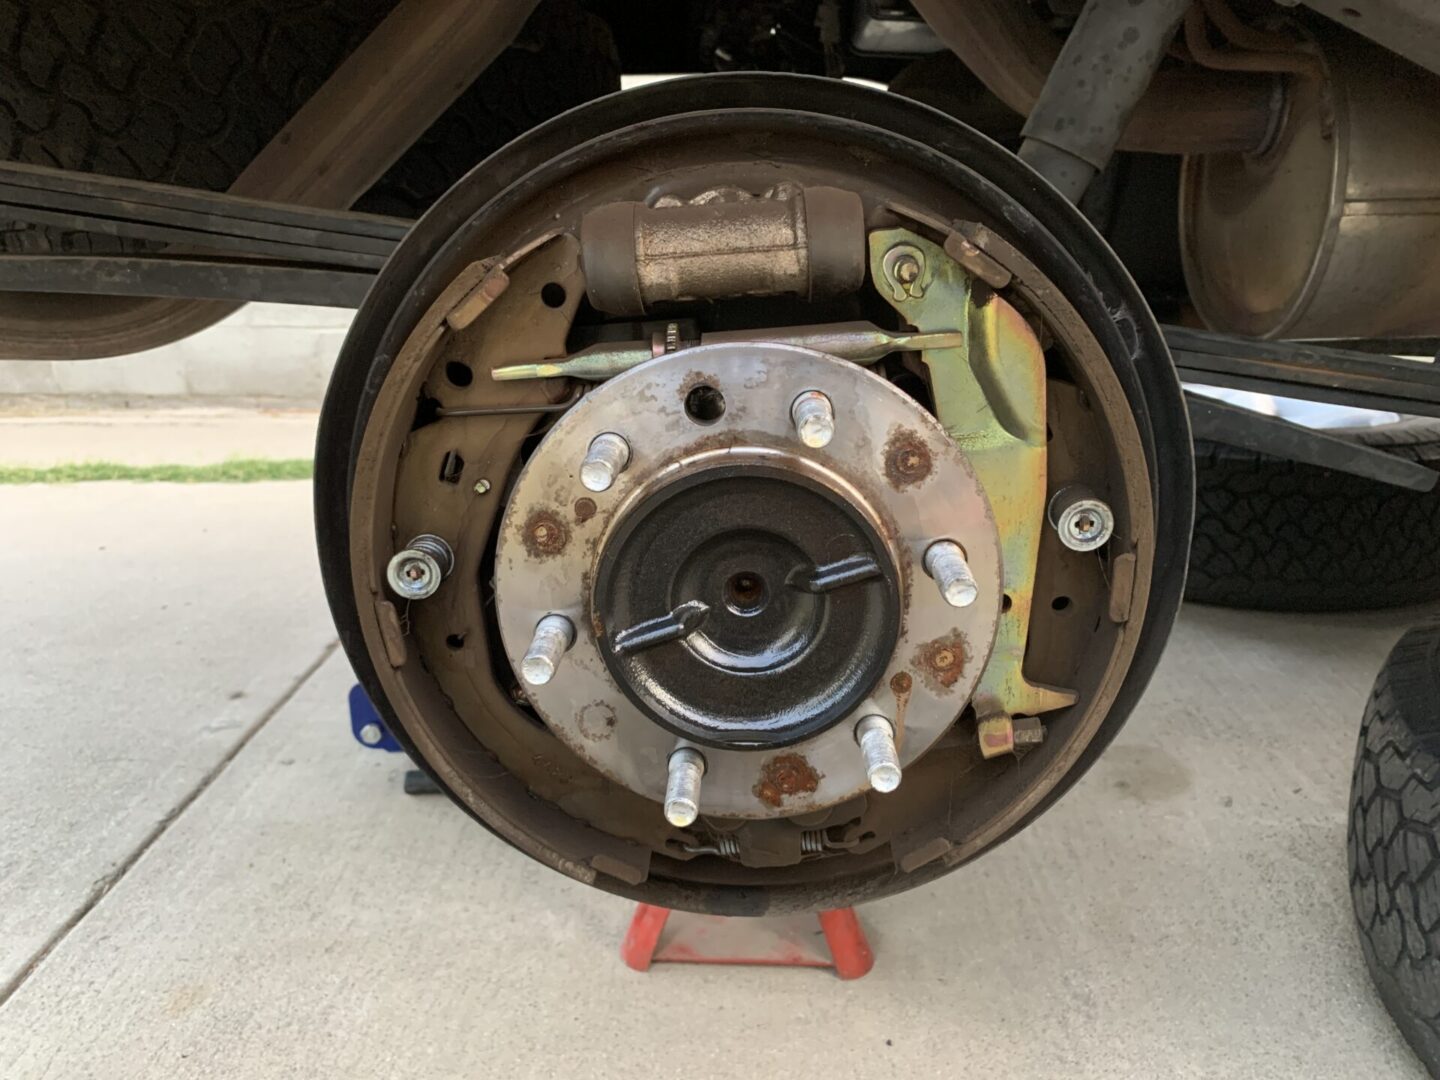
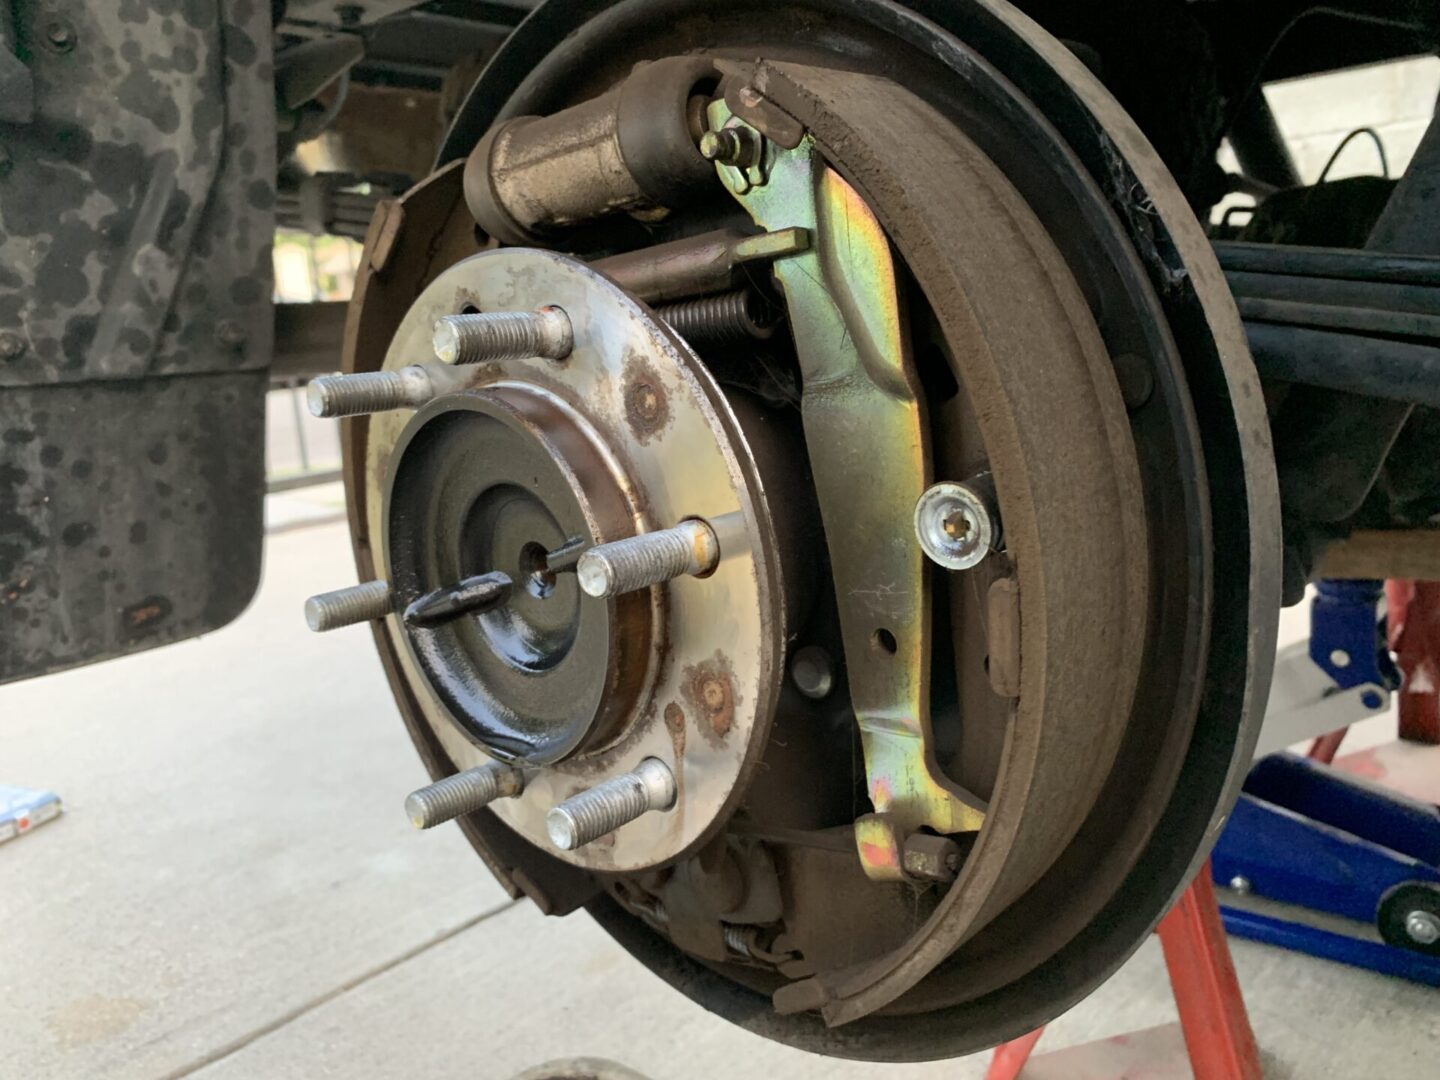
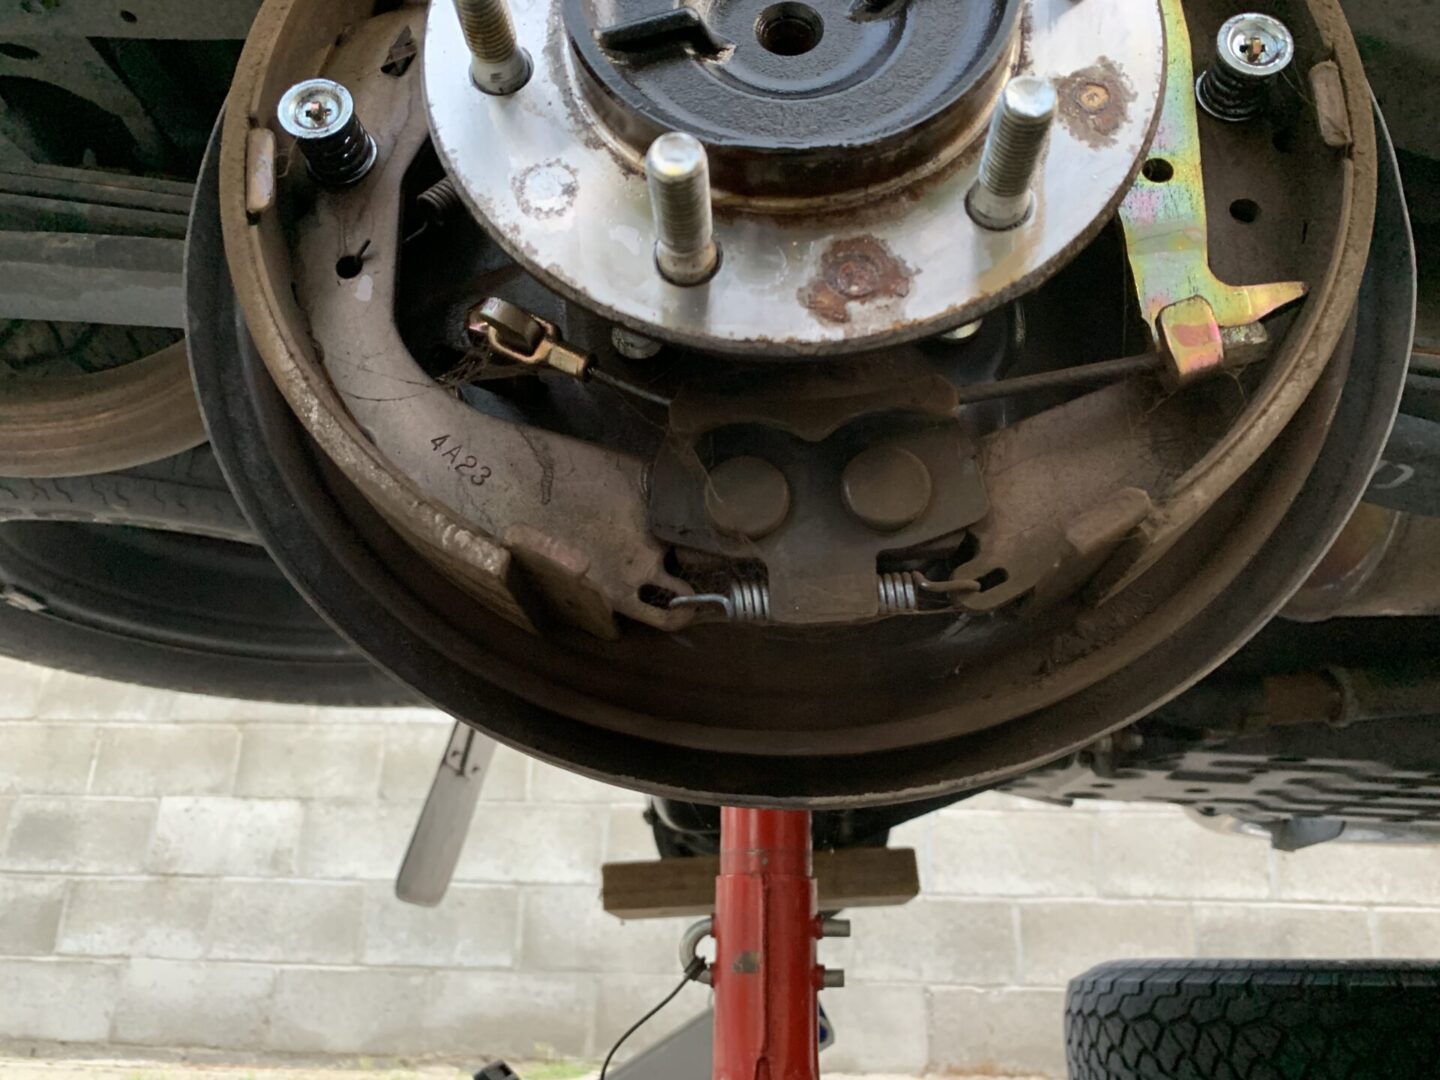
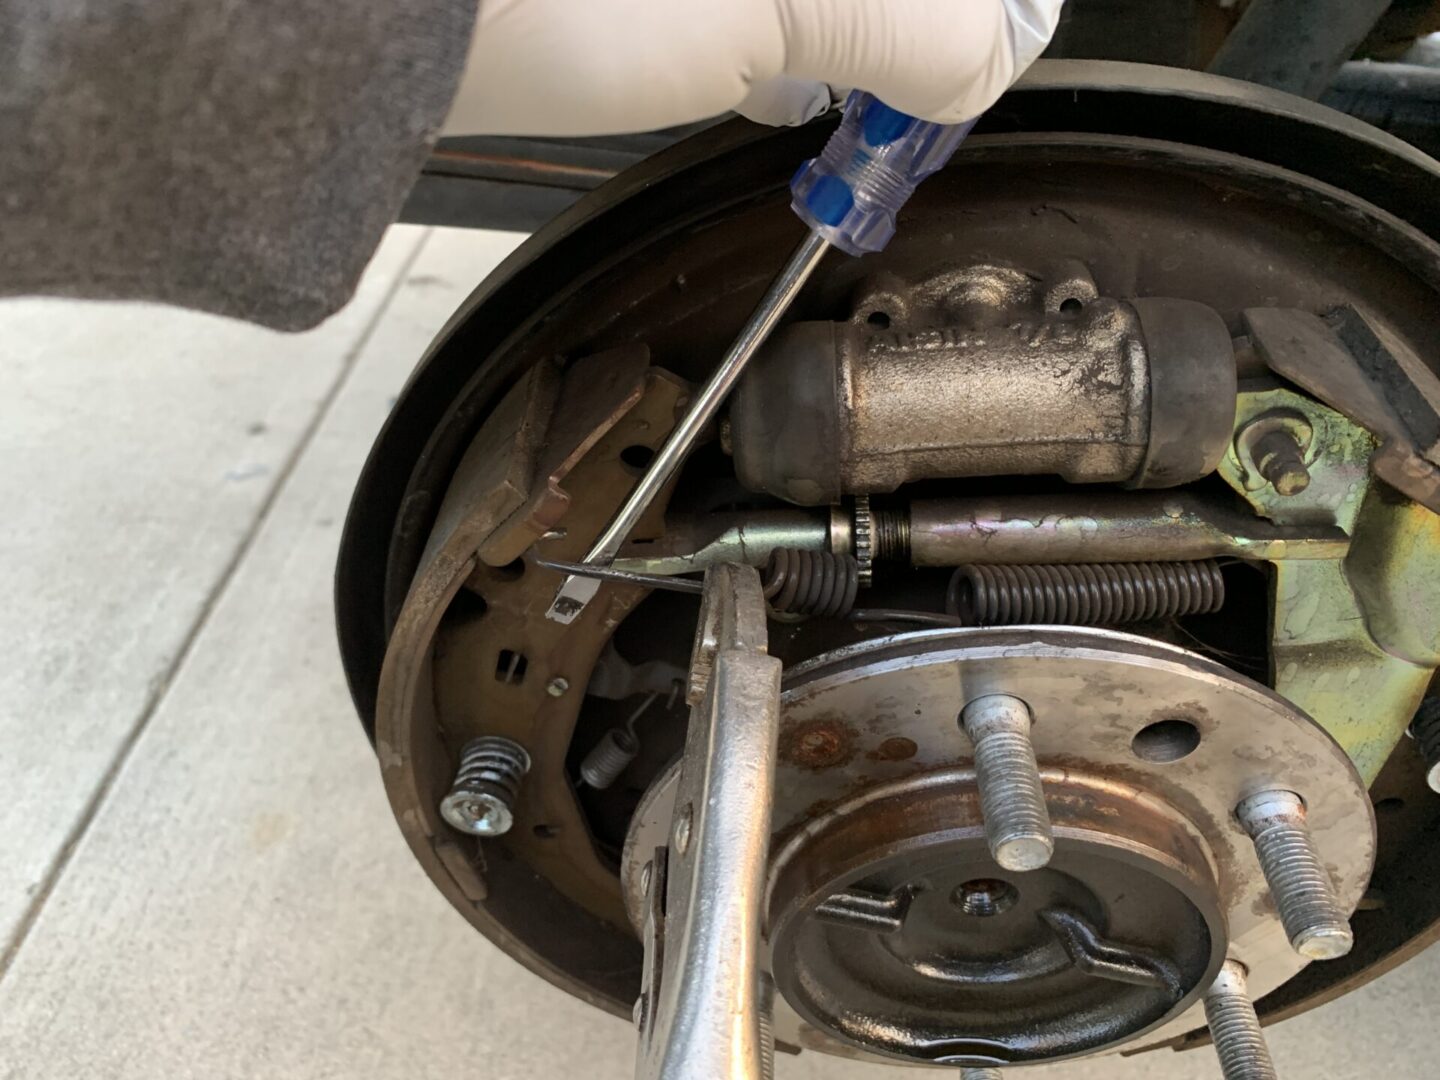
The brake drum/shoe assembly is more complicated than a brake pad/caliper setup, so here are some photos from different angles to get you familiar with the various components. Also refer to the diagram I put together earlier in this post for reference to the various part names.
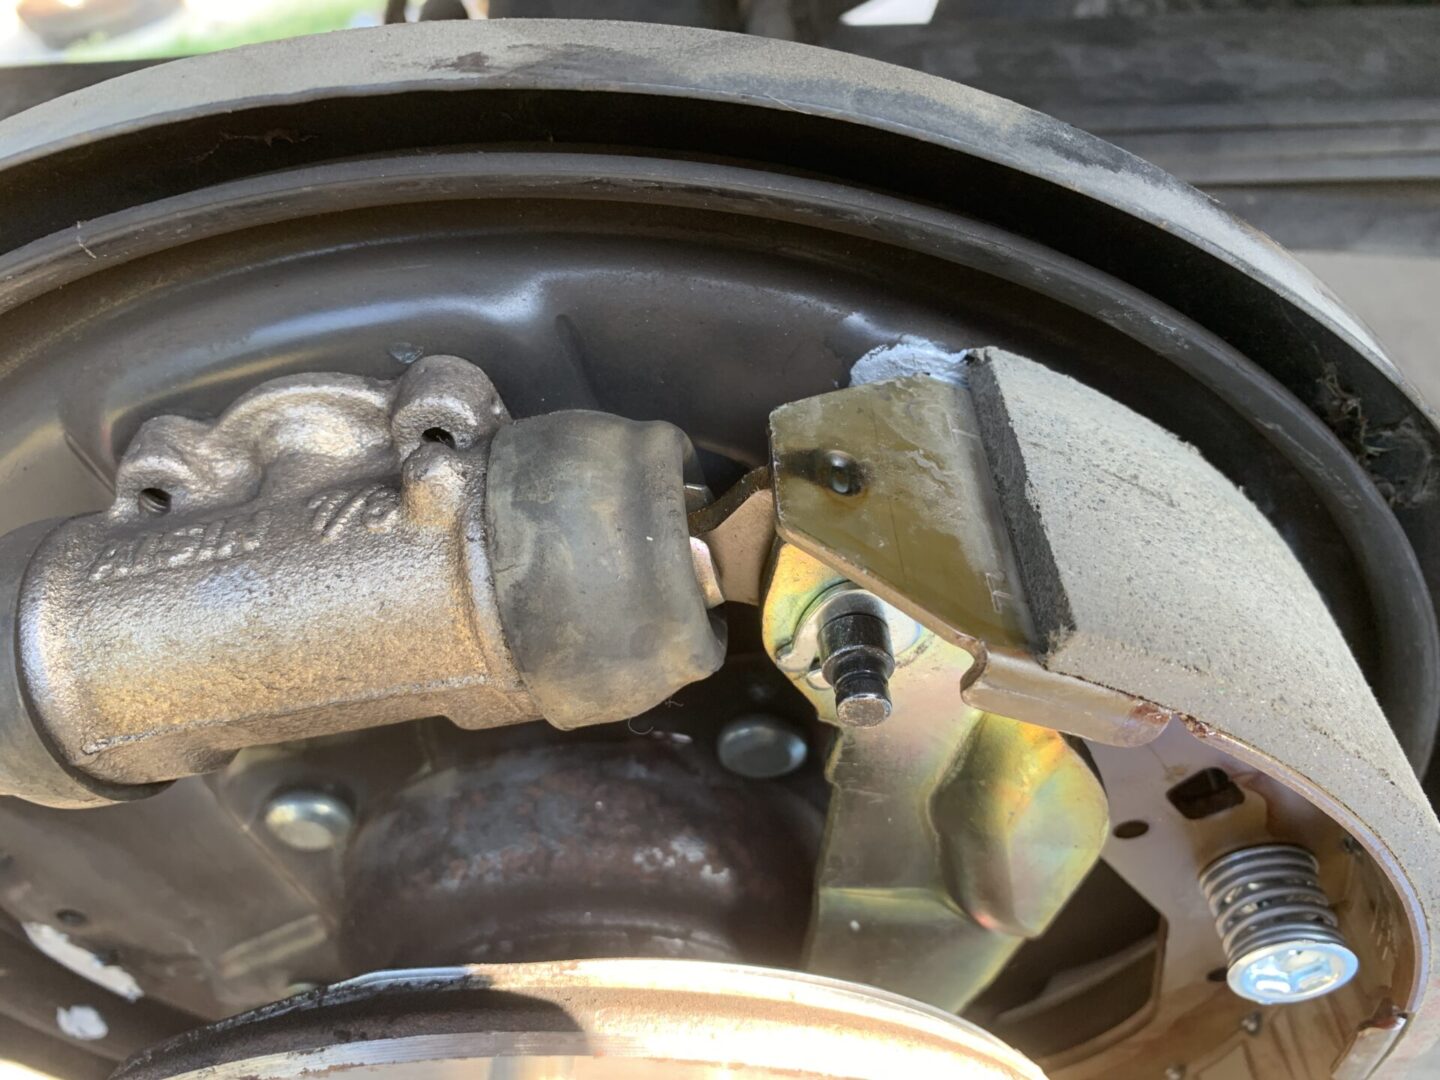
In terms of brake operation, if you press on the brake pedal, you will see the wheel cylinder (at the top) press outwards, which in turn pushes the brake shoes against the drum. This is what causes the rear wheels to slow down and stop.
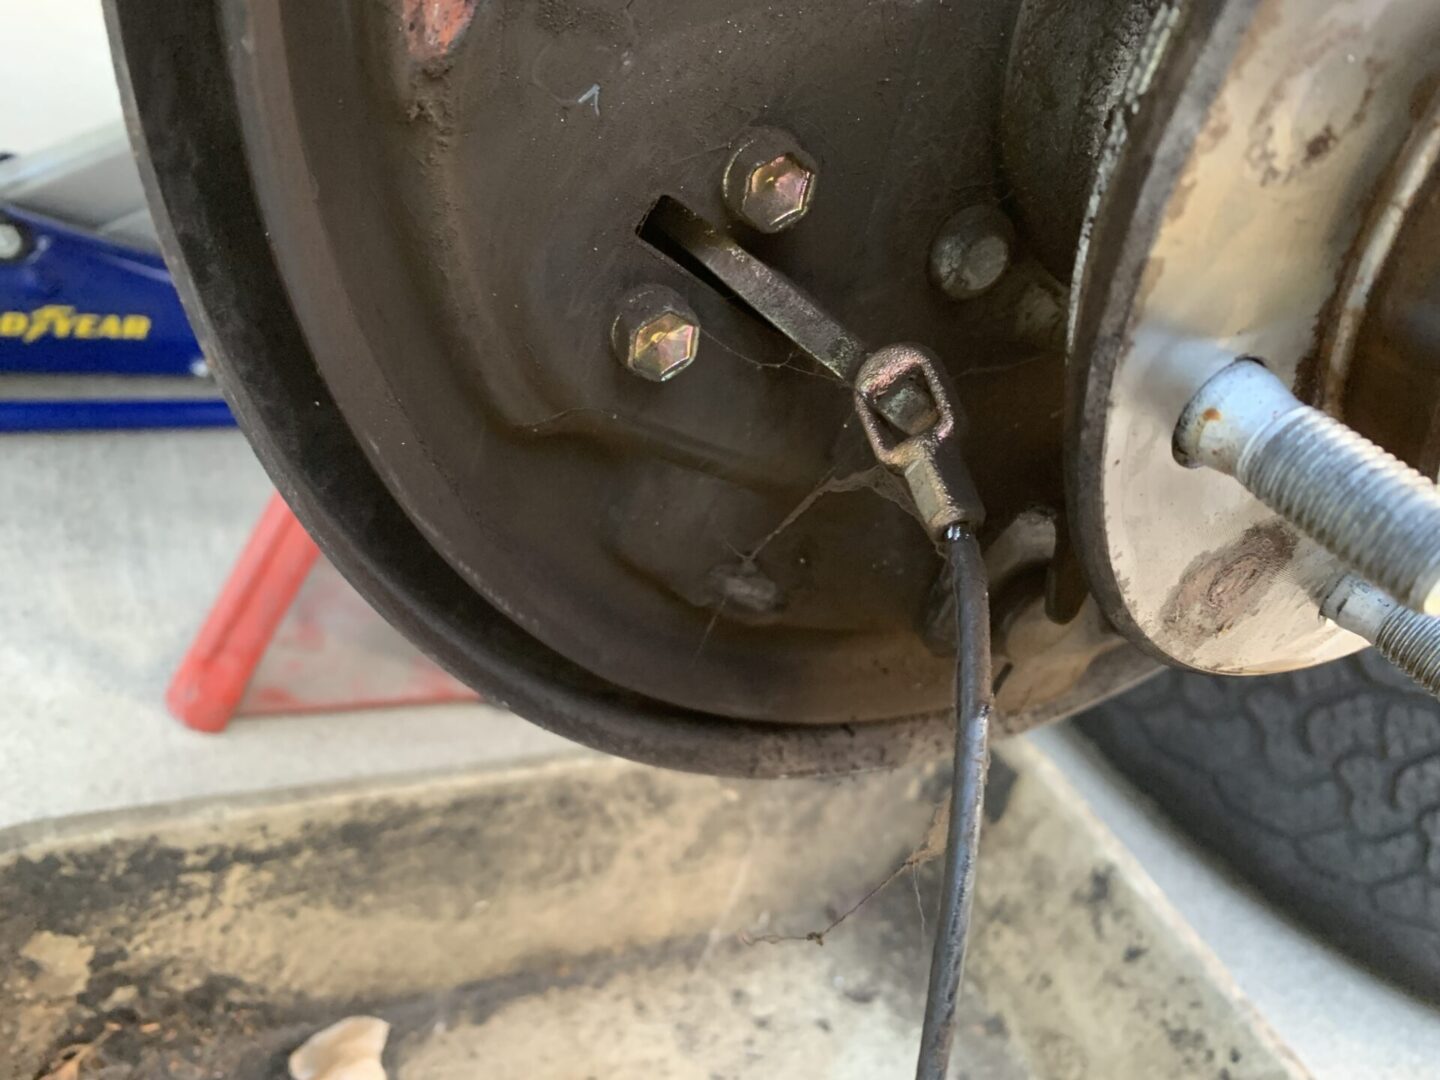
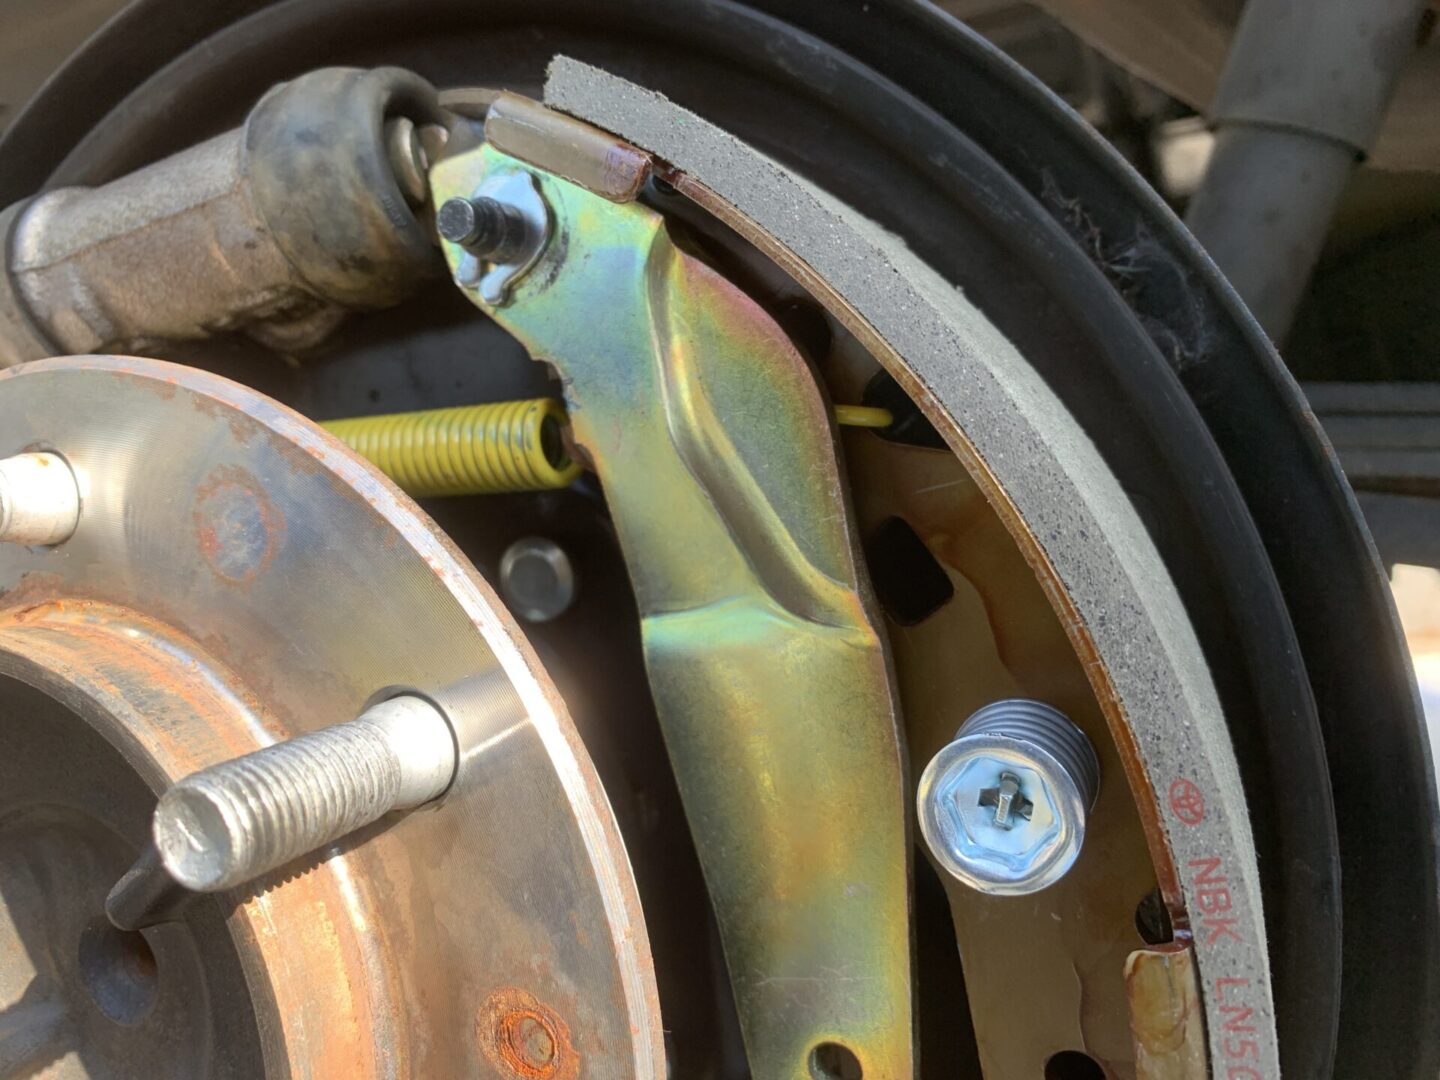
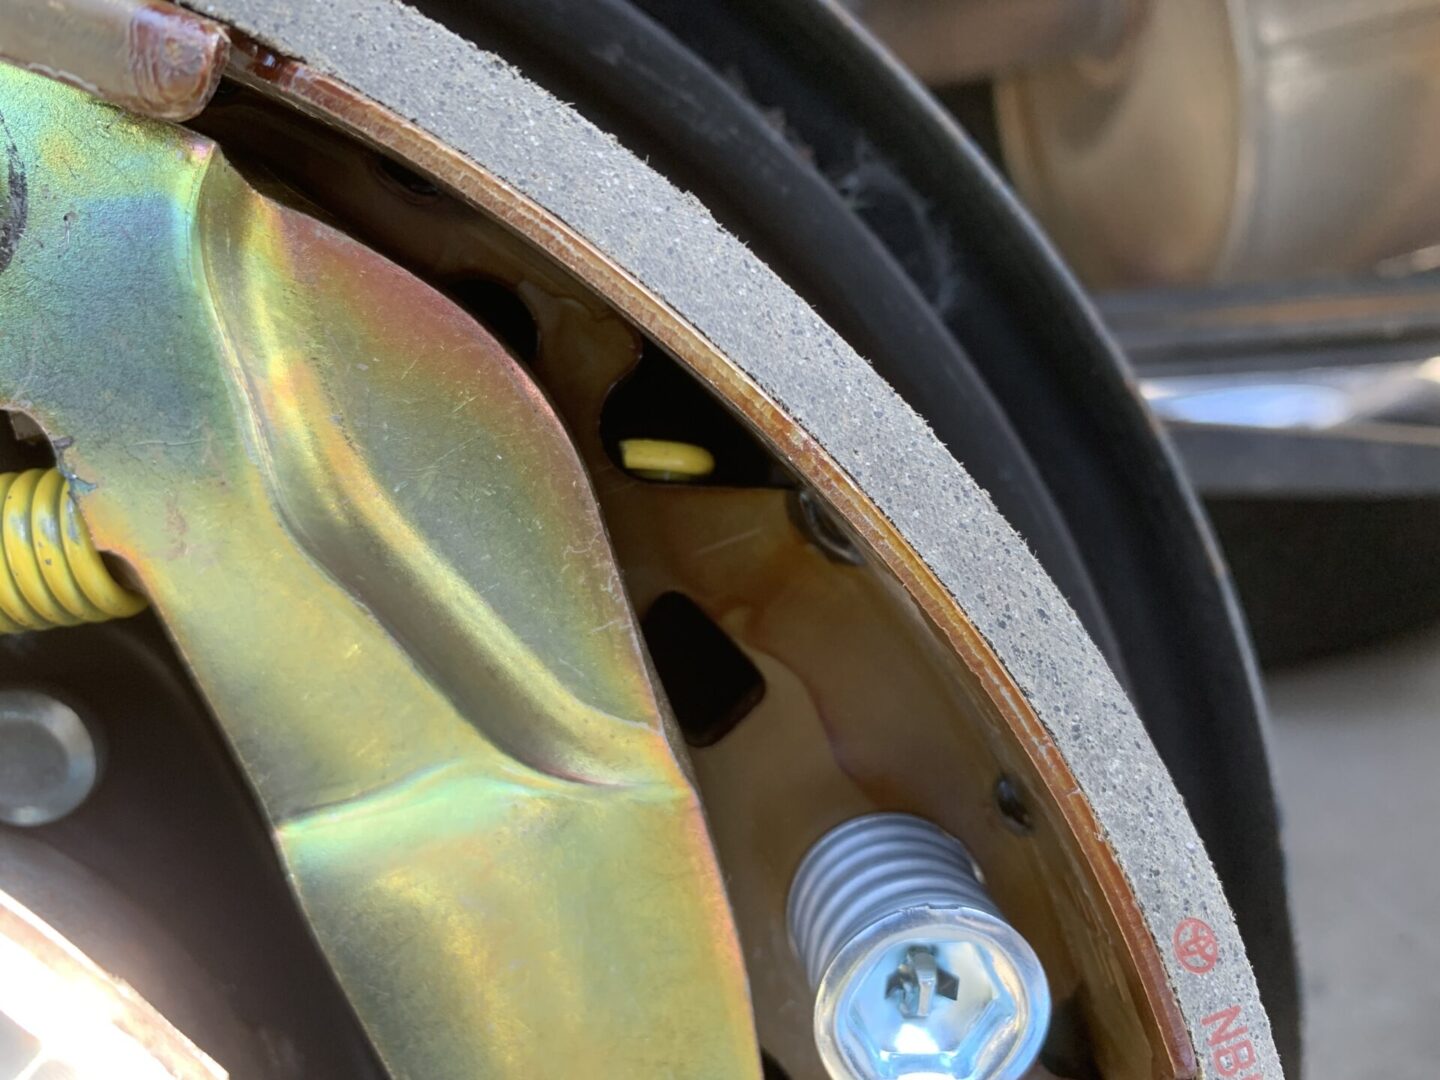
The rear wheels also have an incorporated parking brake. The parking brake cable, parking brake lever, adjuster assembly, and adjuster lever all work together to perform the parking brake operation.
You also have various springs, pins, and other hardware that hold the shoe assembly together. You can use these photos for reference, but it may be a good idea to take your own photos to help with putting things back together later.


Before starting, consider loosening the adjusting ring by pulling back on the adjusting lever in order to free up the adjusting ring. The adjusting ring (on the adjuster assembly) spins freely in one direction which presses the brake shoes outward. In order to spin it the opposite way (resulting in retracting and bringing the brake shoes inward), you will need to pull the adjusting lever catch away from the ring; this allows the adjusting ring to freely spin.
Retracting the brake shoes inward results in less tension on the return springs making it easier to remove. However, this step may not be entirely necessary if your springs are old and already have lost some tension.
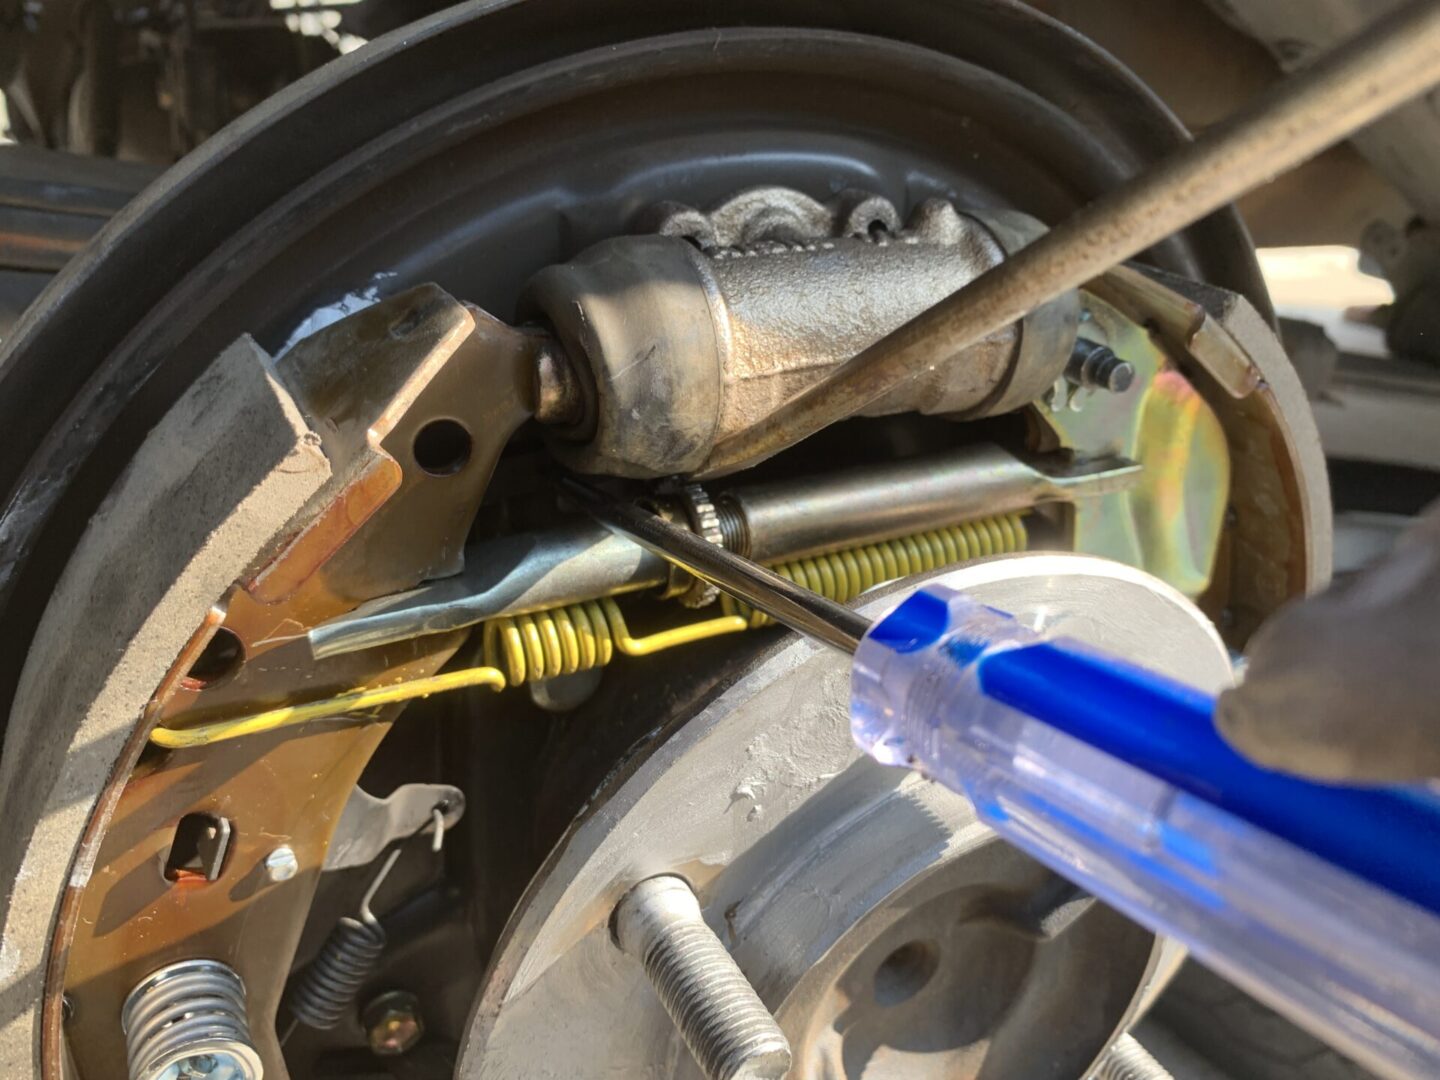
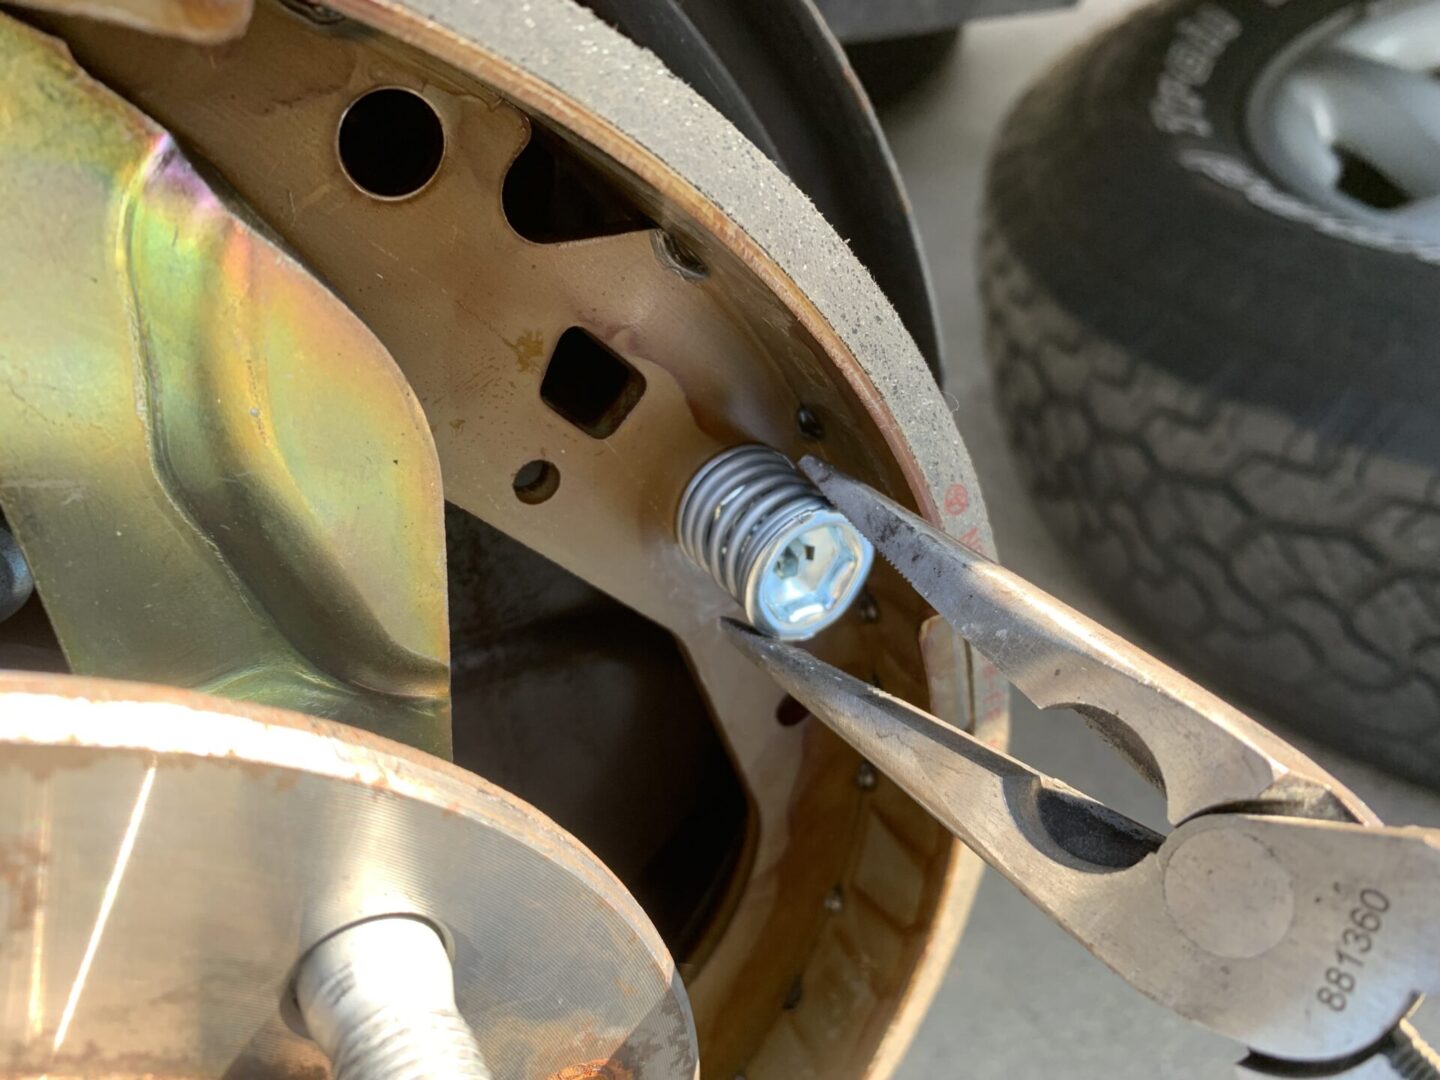
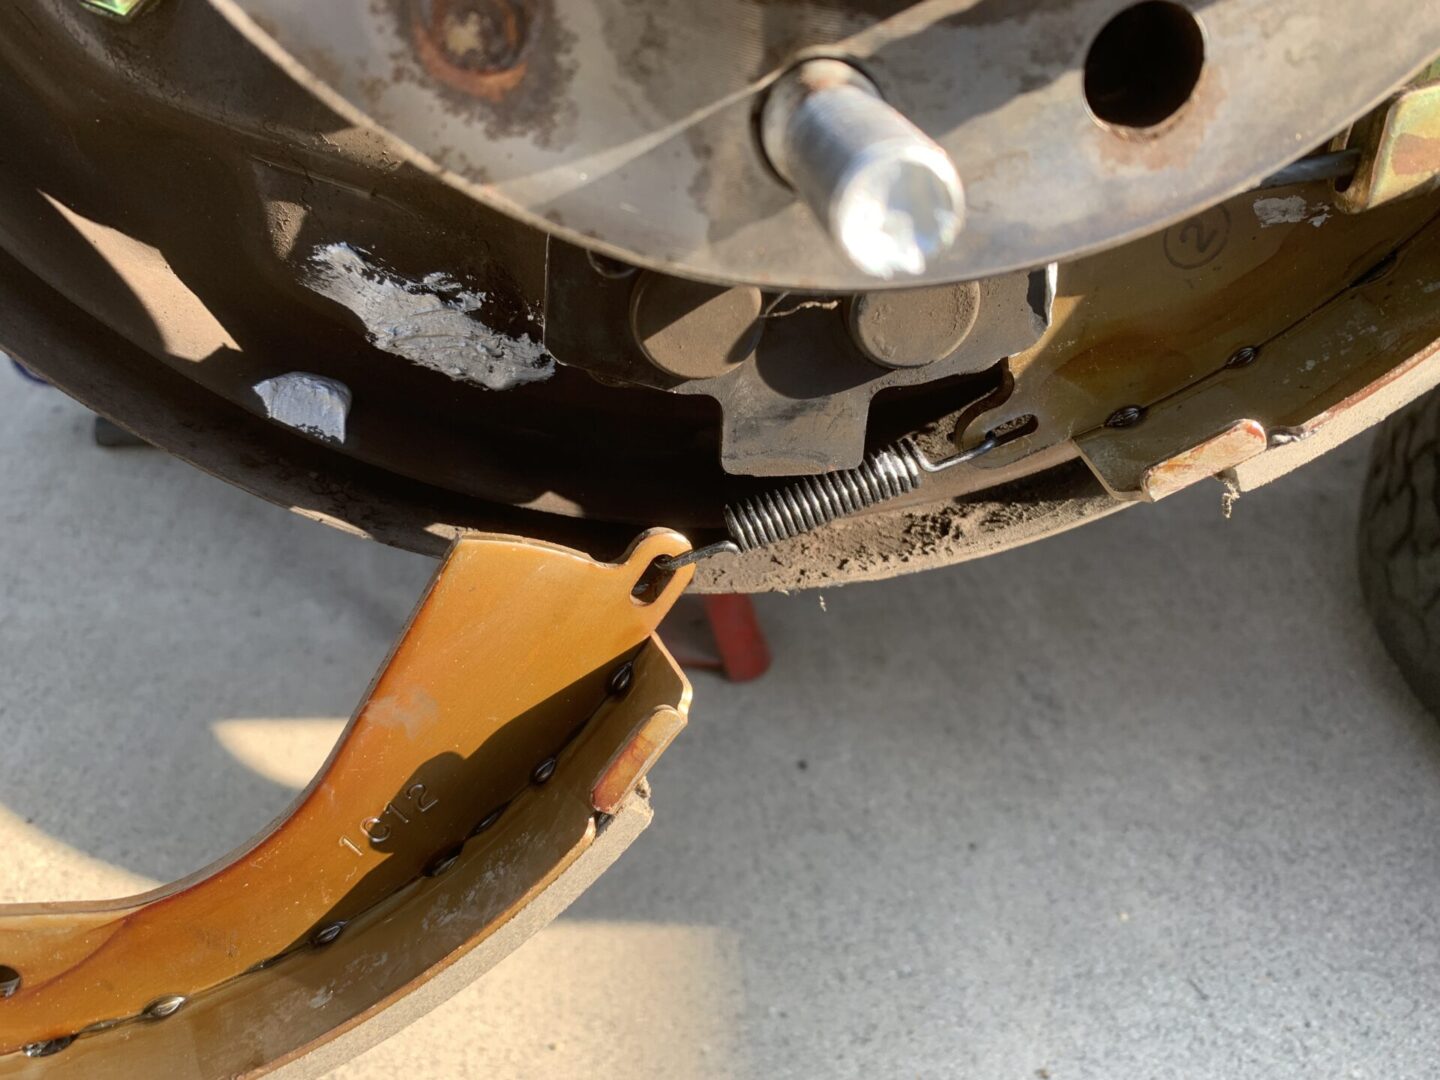
Since the upper return spring on this Tacoma was aged and has lost tension, I didn’t need to loosen the ring on the adjuster assembly prior to removing it. I just needed a vice grip clamped onto the upper return spring and a flat head screwdriver to unhook it from the brake shoe.
Next, remove the shoe hold down spring by holding onto the cup with pliers, pressing in, and then rotating it 90 degrees to pull it off. You will see that the cup has a slot that you will need to line up with the retaining pin in order to remove it.
Put the shoe hold down spring assembly to the side (consisting of a retaining pin, spring, and two cups), and let the brake shoe down on one side. You should now also be able to remove the adjuster assembly, which you can also set aside.

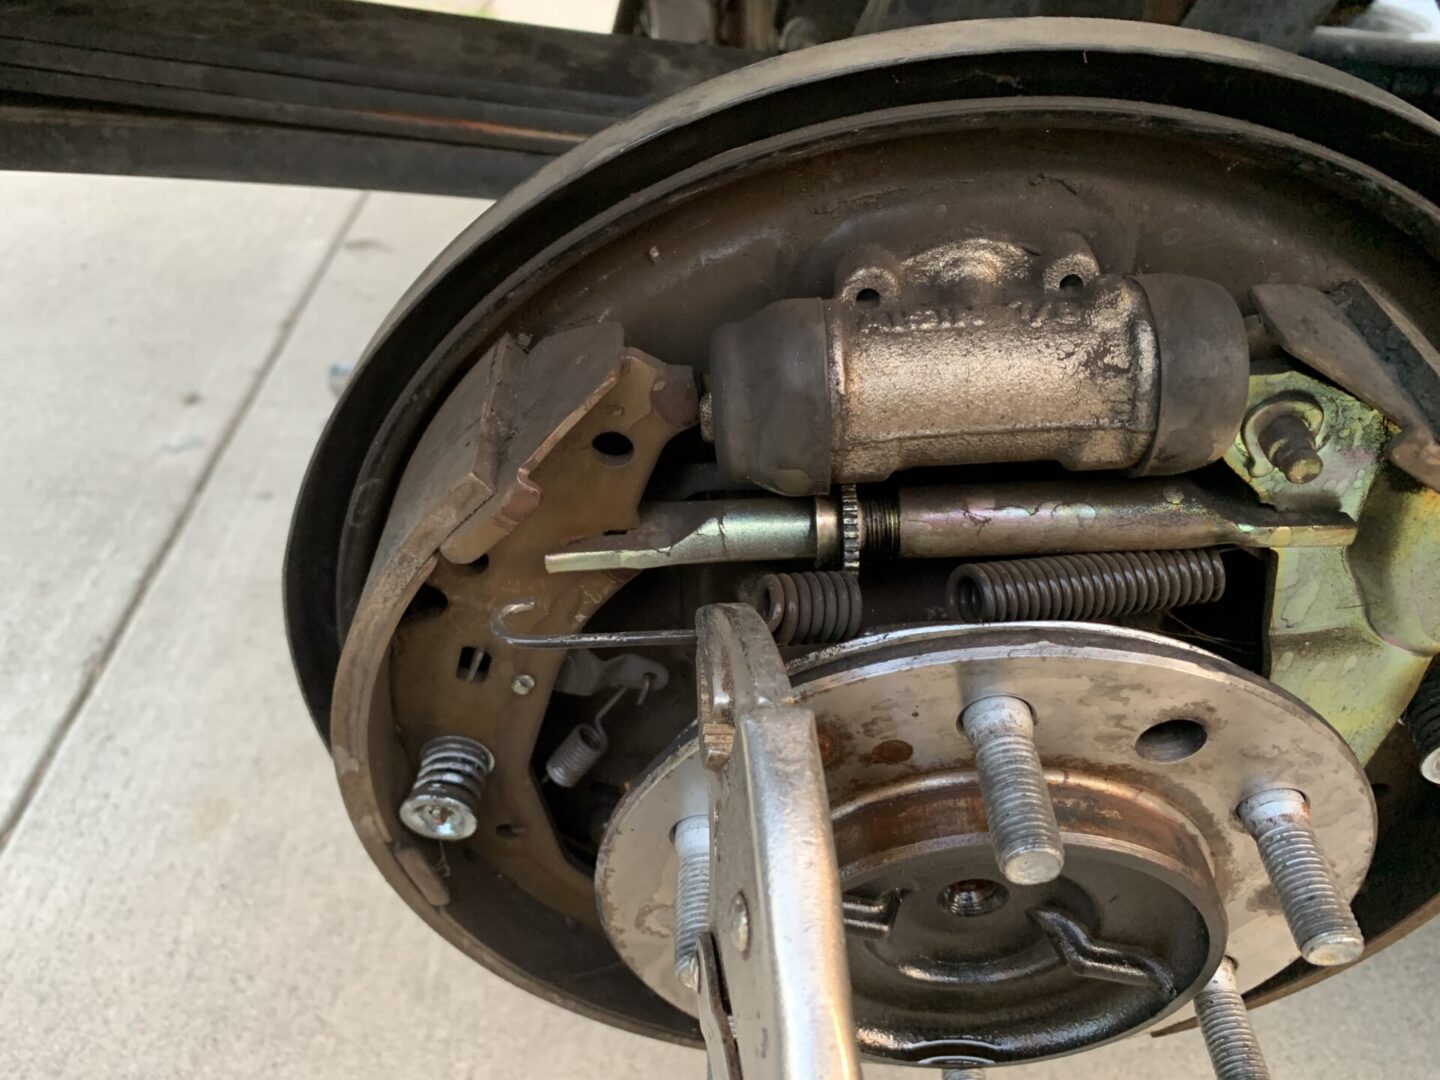


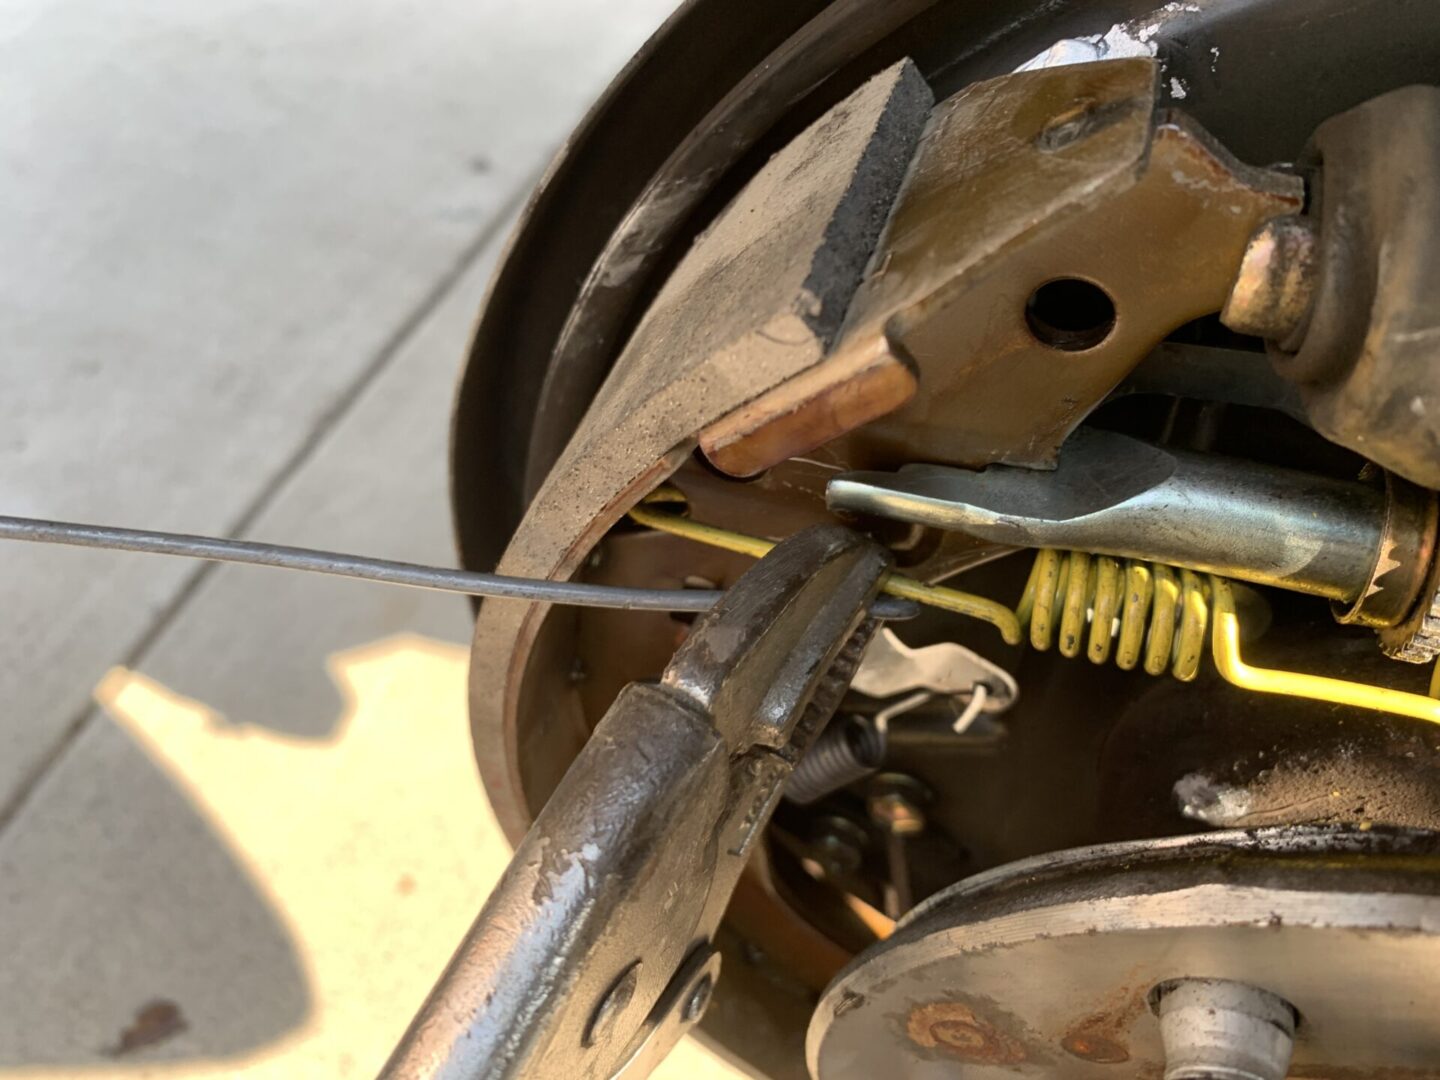
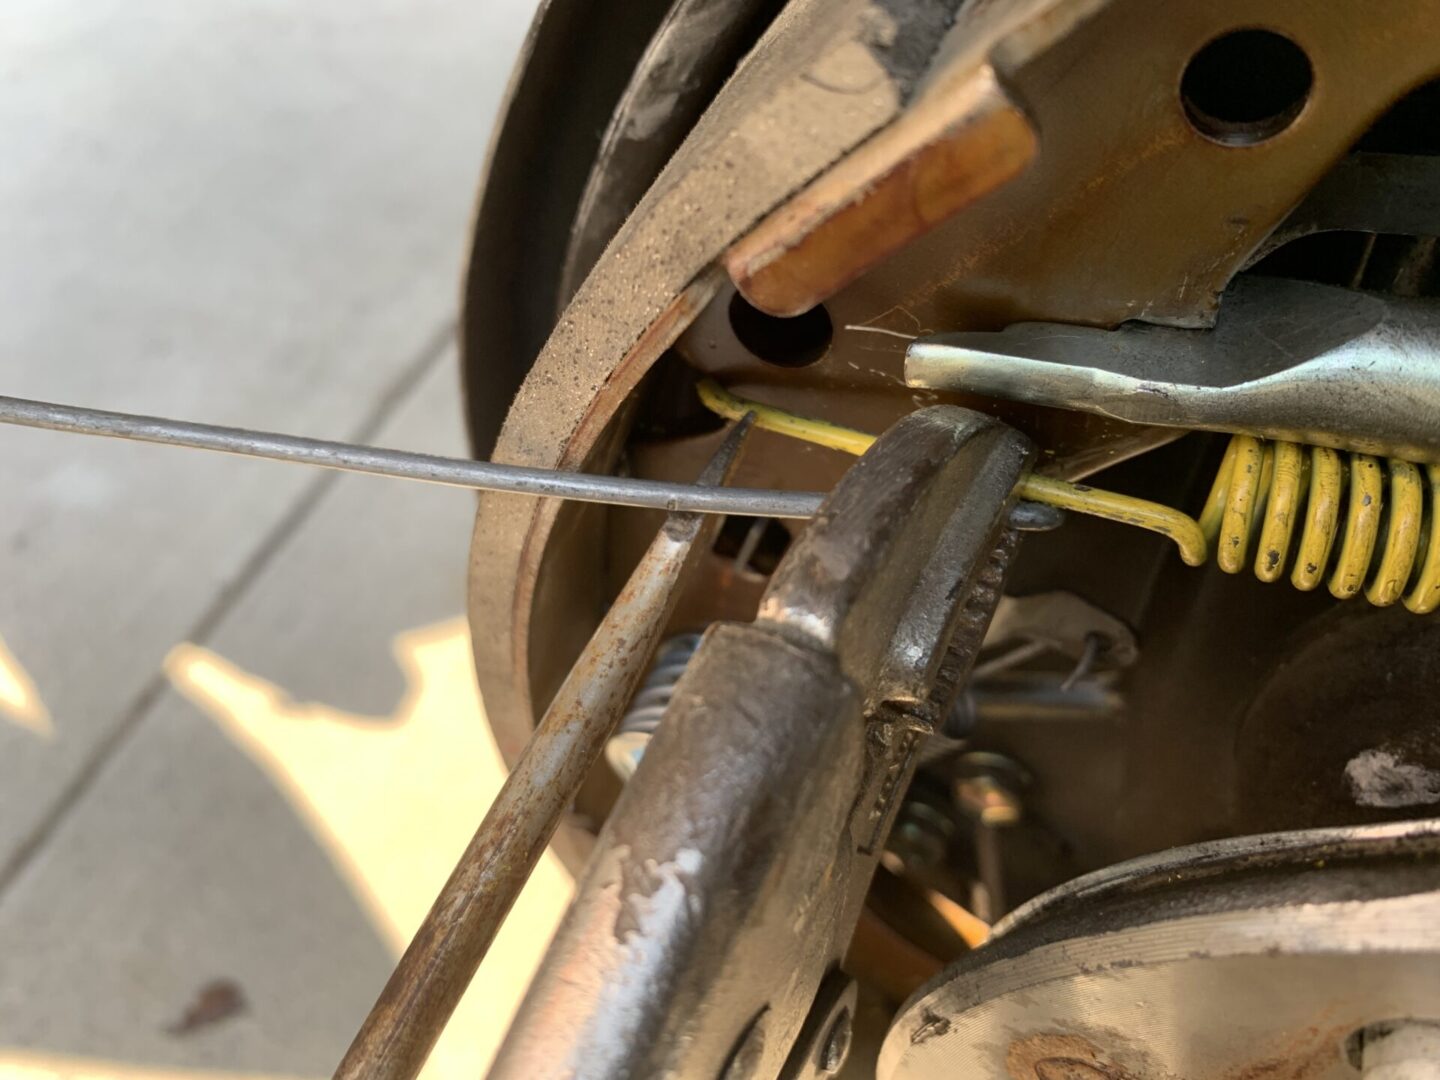
Remove the lower return spring and the brake shoe. On the remaining shoe, remove the shoe hold down assembly and set it aside. With the second shoe hold down spring assembly removed, you should be able to take the second shoe off with the exception of the parking brake cable. Simply unhook this cable to fully remove the second brake shoe.
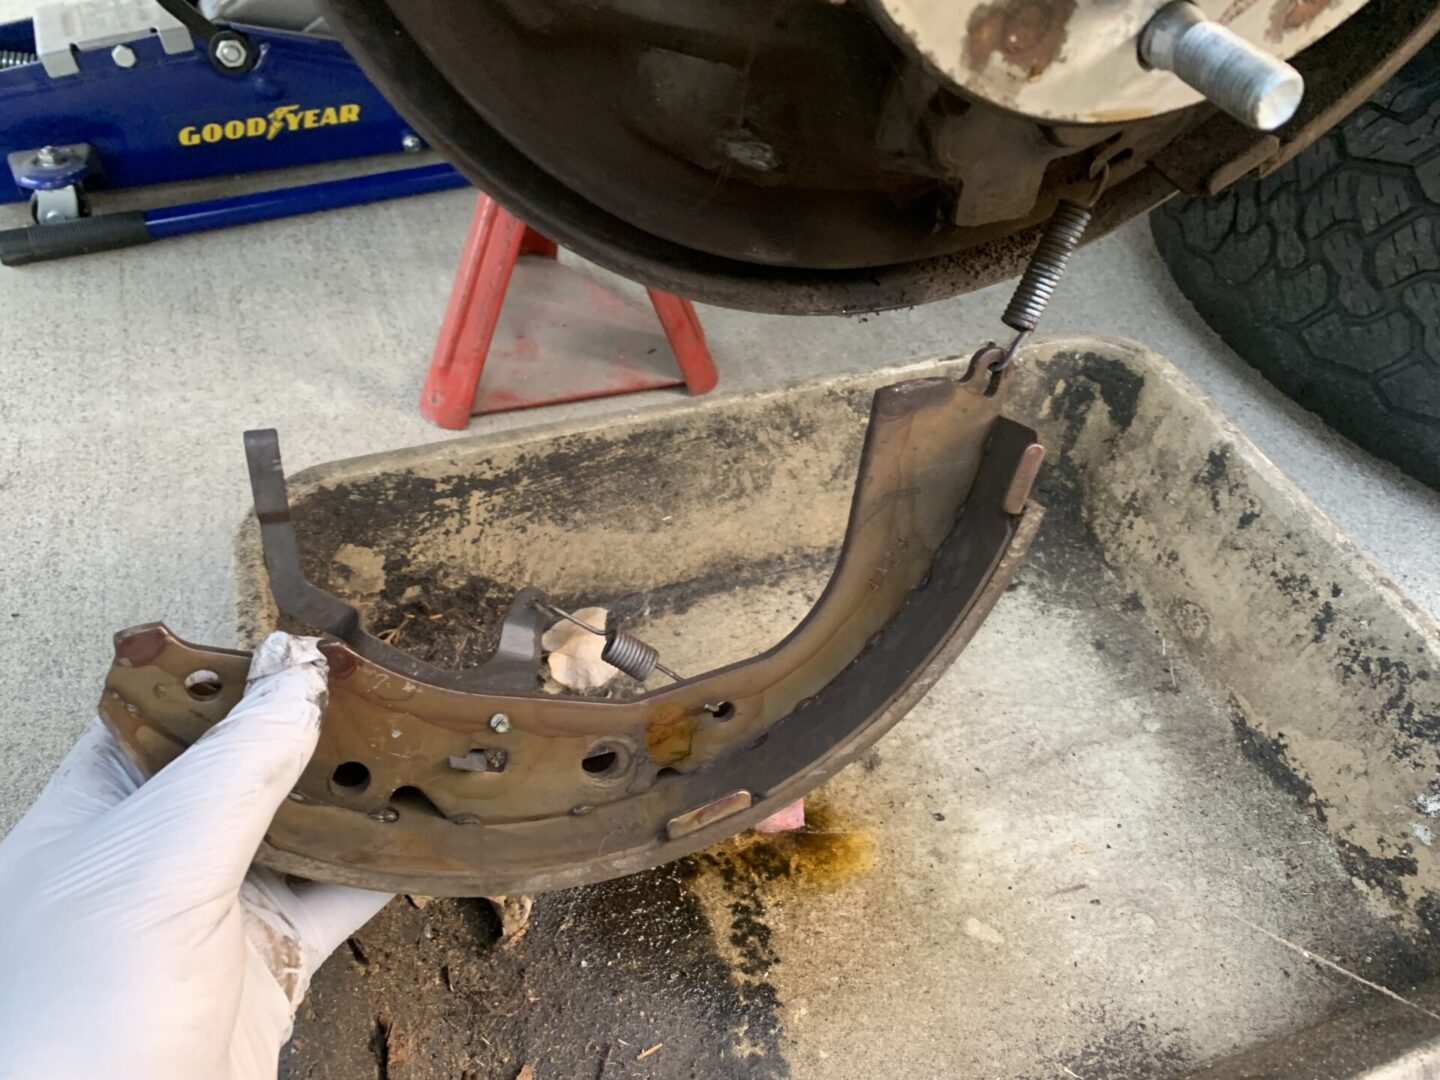


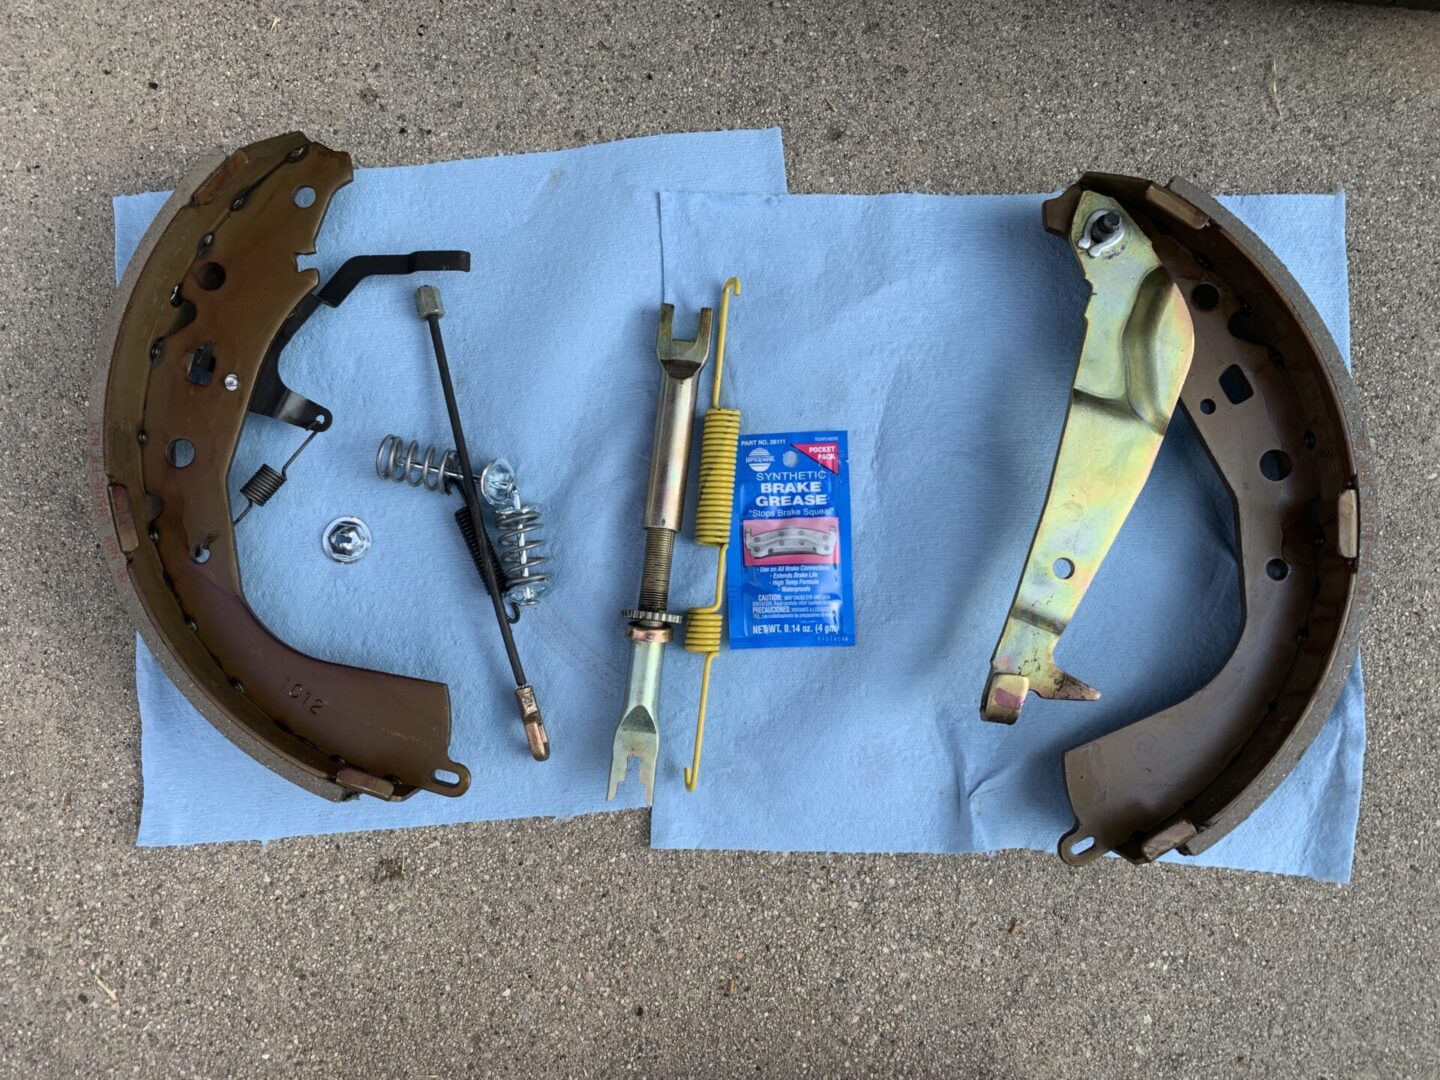
Comparing the old and new brake shoes, you can see there are several parts that need to be transferred over. Start by transferring over the adjuster lever spring and adjusting lever from the old to the new brake shoe. On the other brake shoe, you will need to transfer the parking brake lever, which involves removal and installation of a new non-reusable c-clip.
I have seen some 1st gen Toyota Tacomas that have an additional spring and bracket (and c-clip) attached to the parking brake lever instead of on the opposing brake shoe (like the ones pictured here). If you do have this, simply transfer everything over from the old to the new; just make sure to take photos before so you know how it should look when you transfer parts.

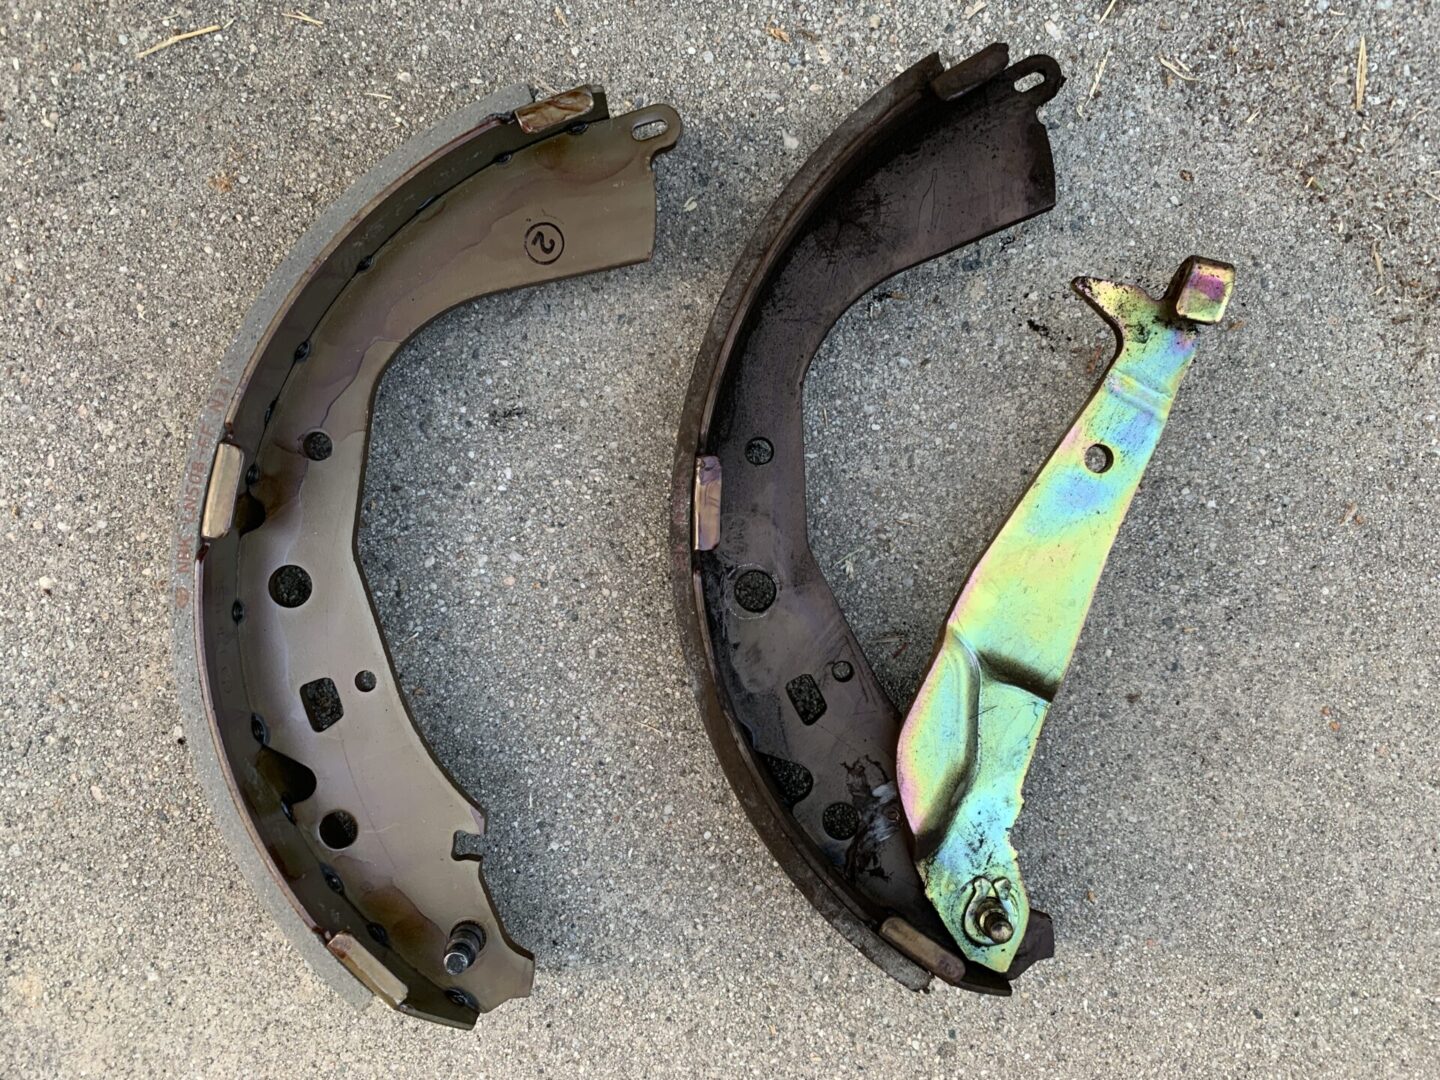
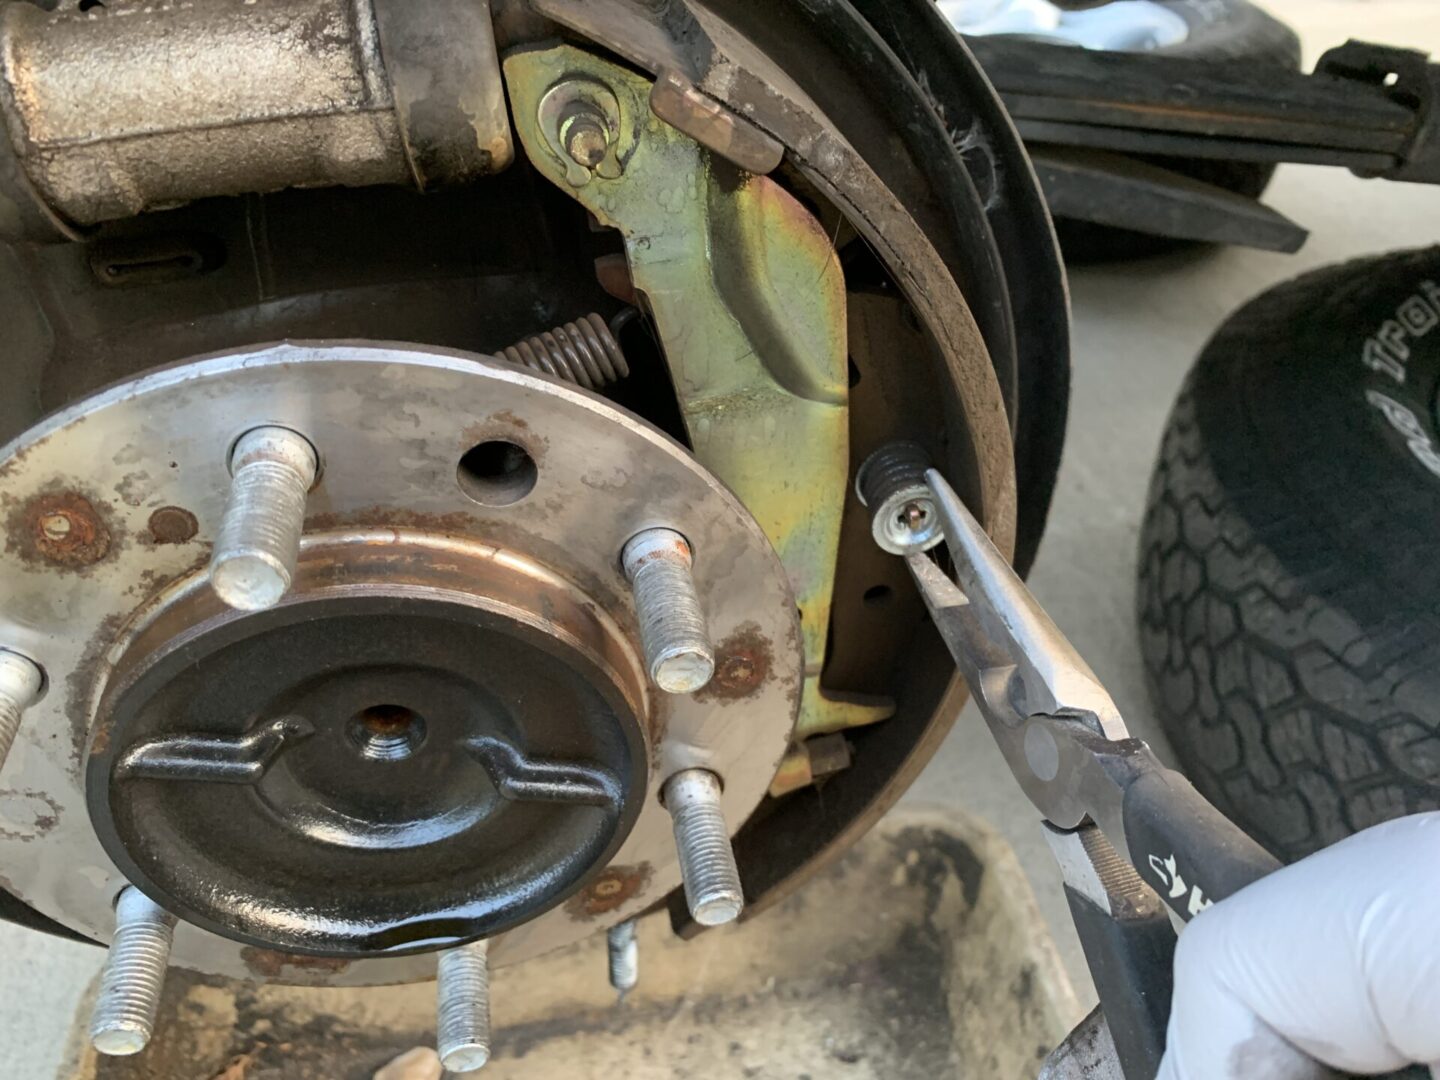
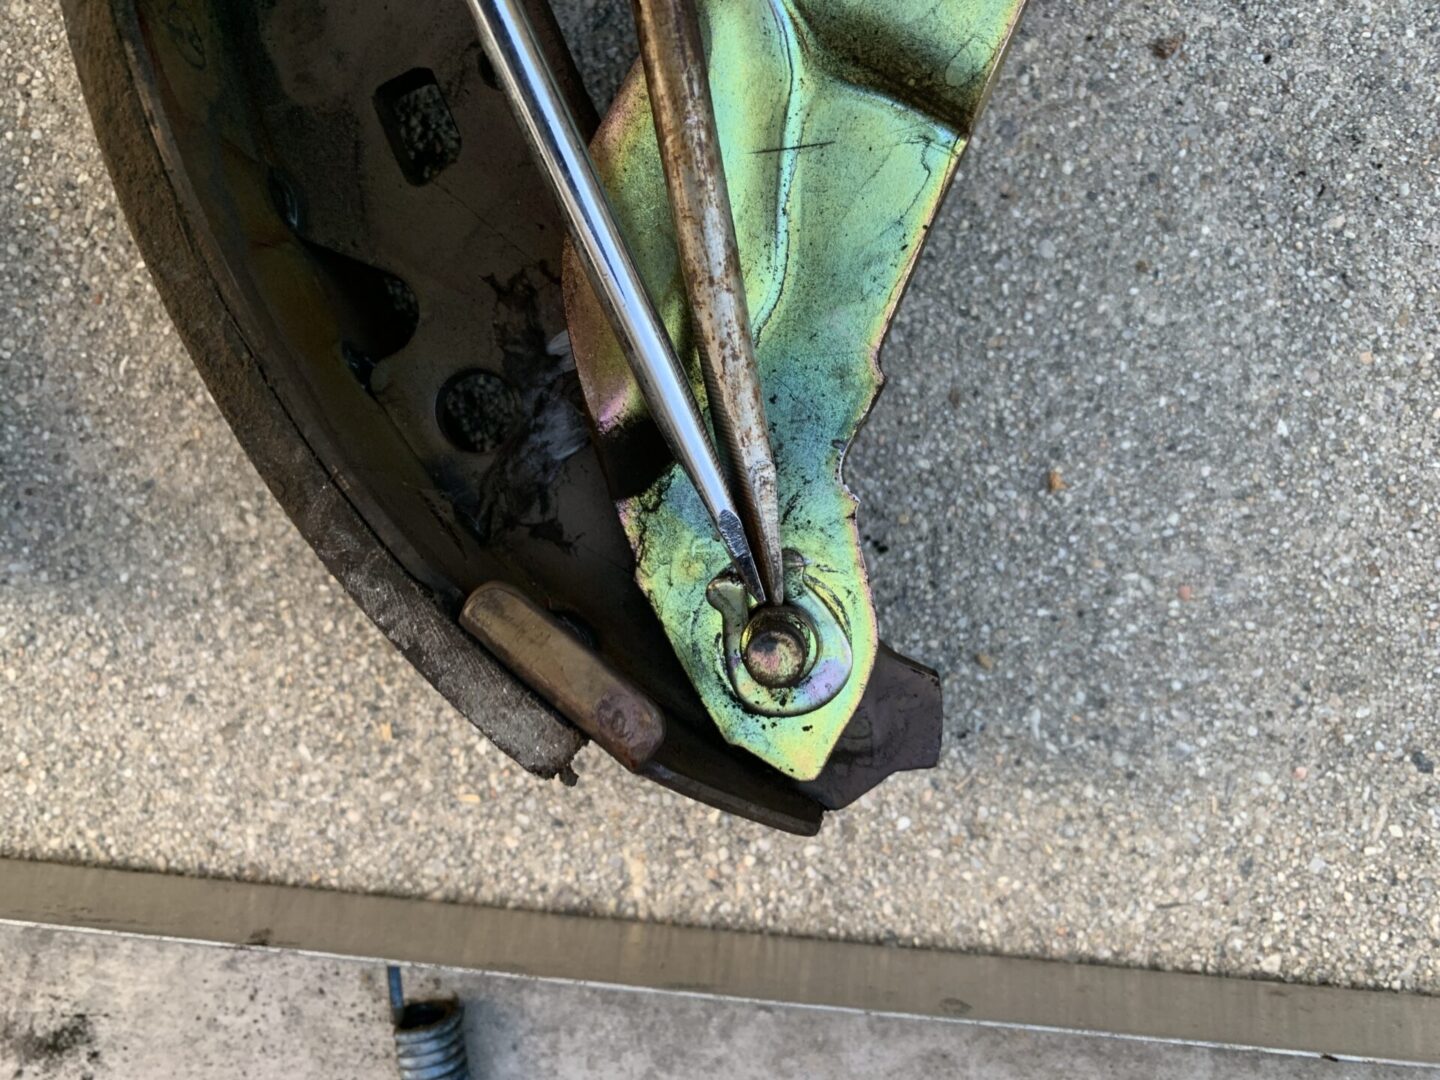
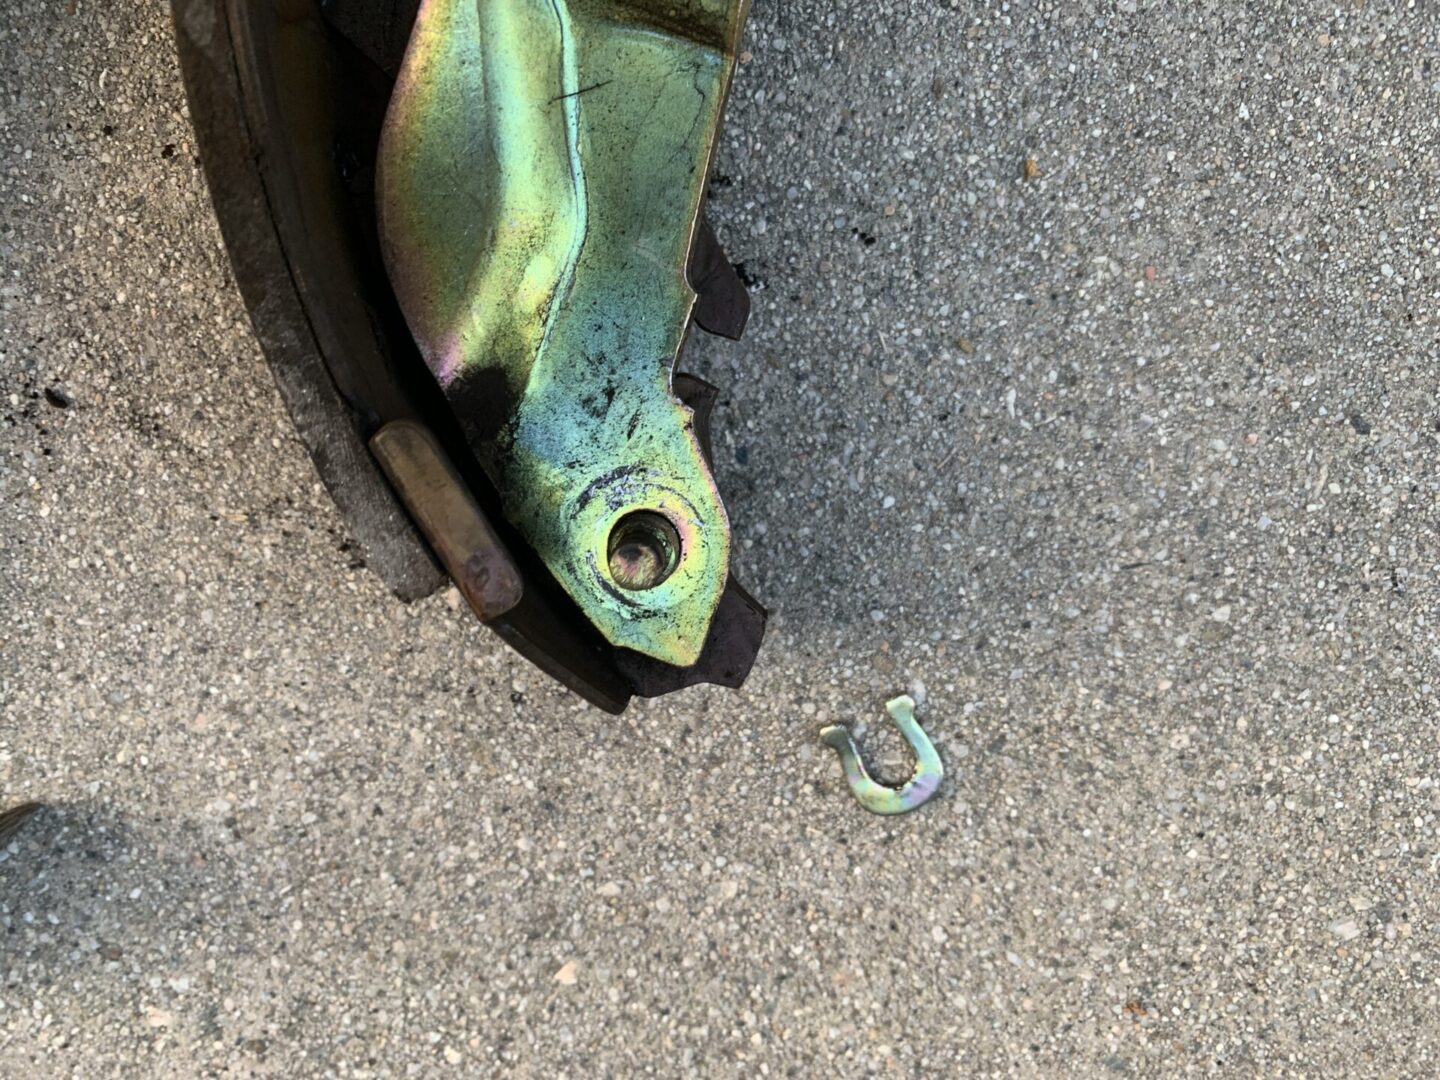
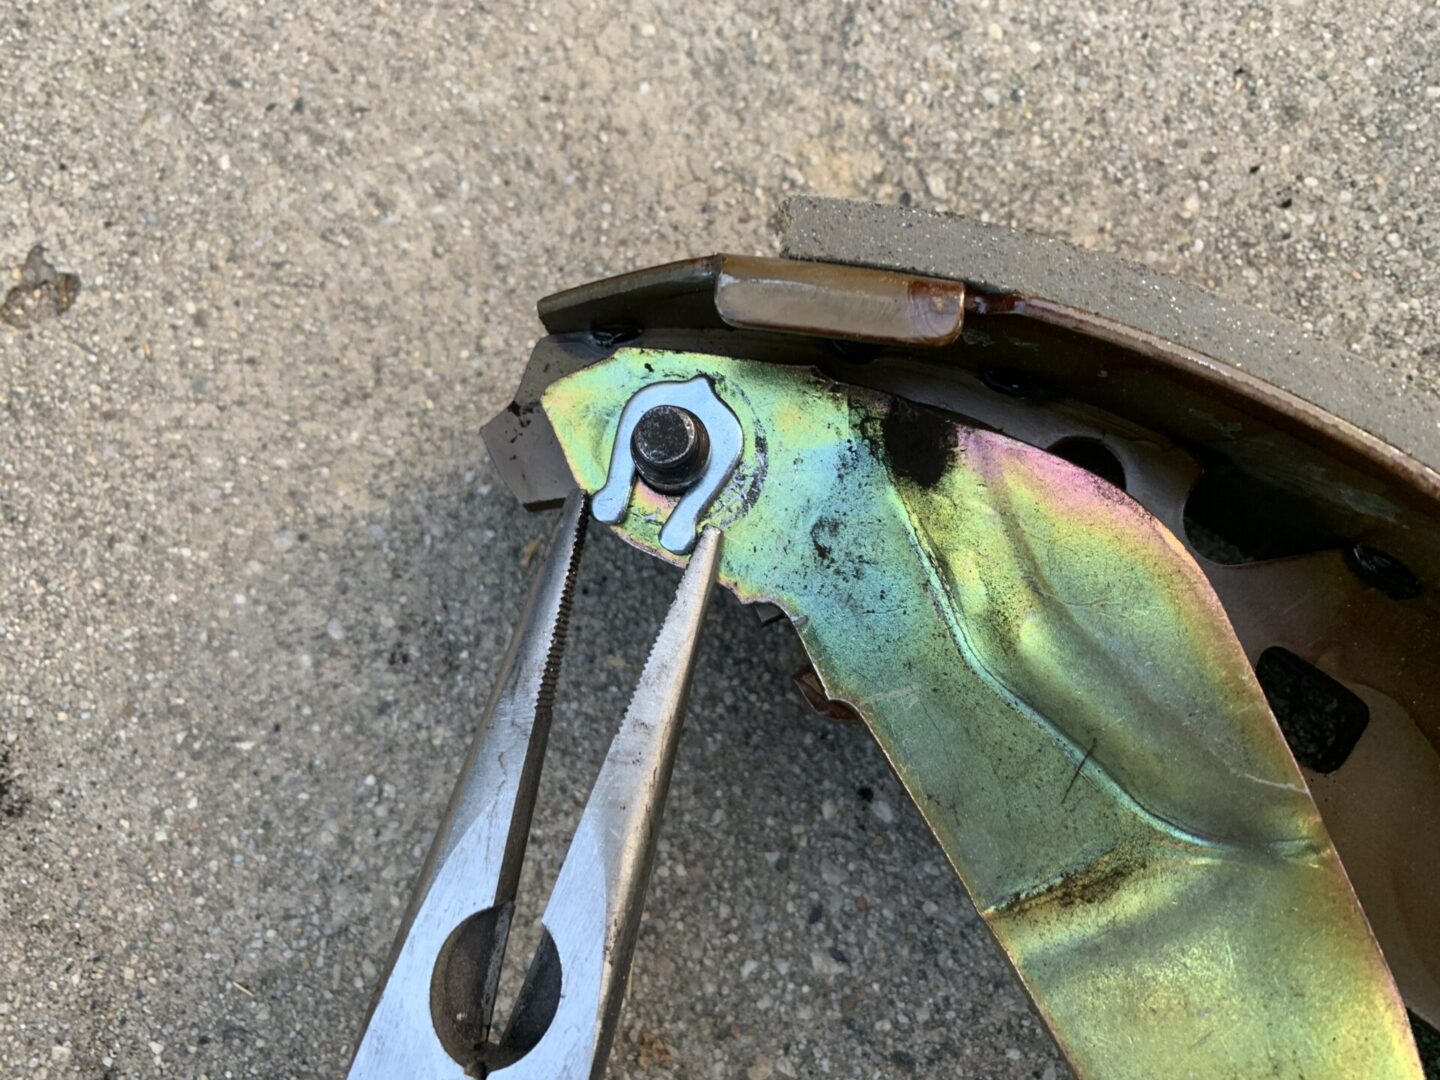
For the parking brake lever, remove the c-clip with a flat head screwdriver (or two) to wriggle it free. Transfer the parking brake lever onto the new brake shoe. Use a new c-clip and slide it over the pivoting pin and clamp it tight with some pliers. Lubricate the pivoting pin with with brake lubricant.

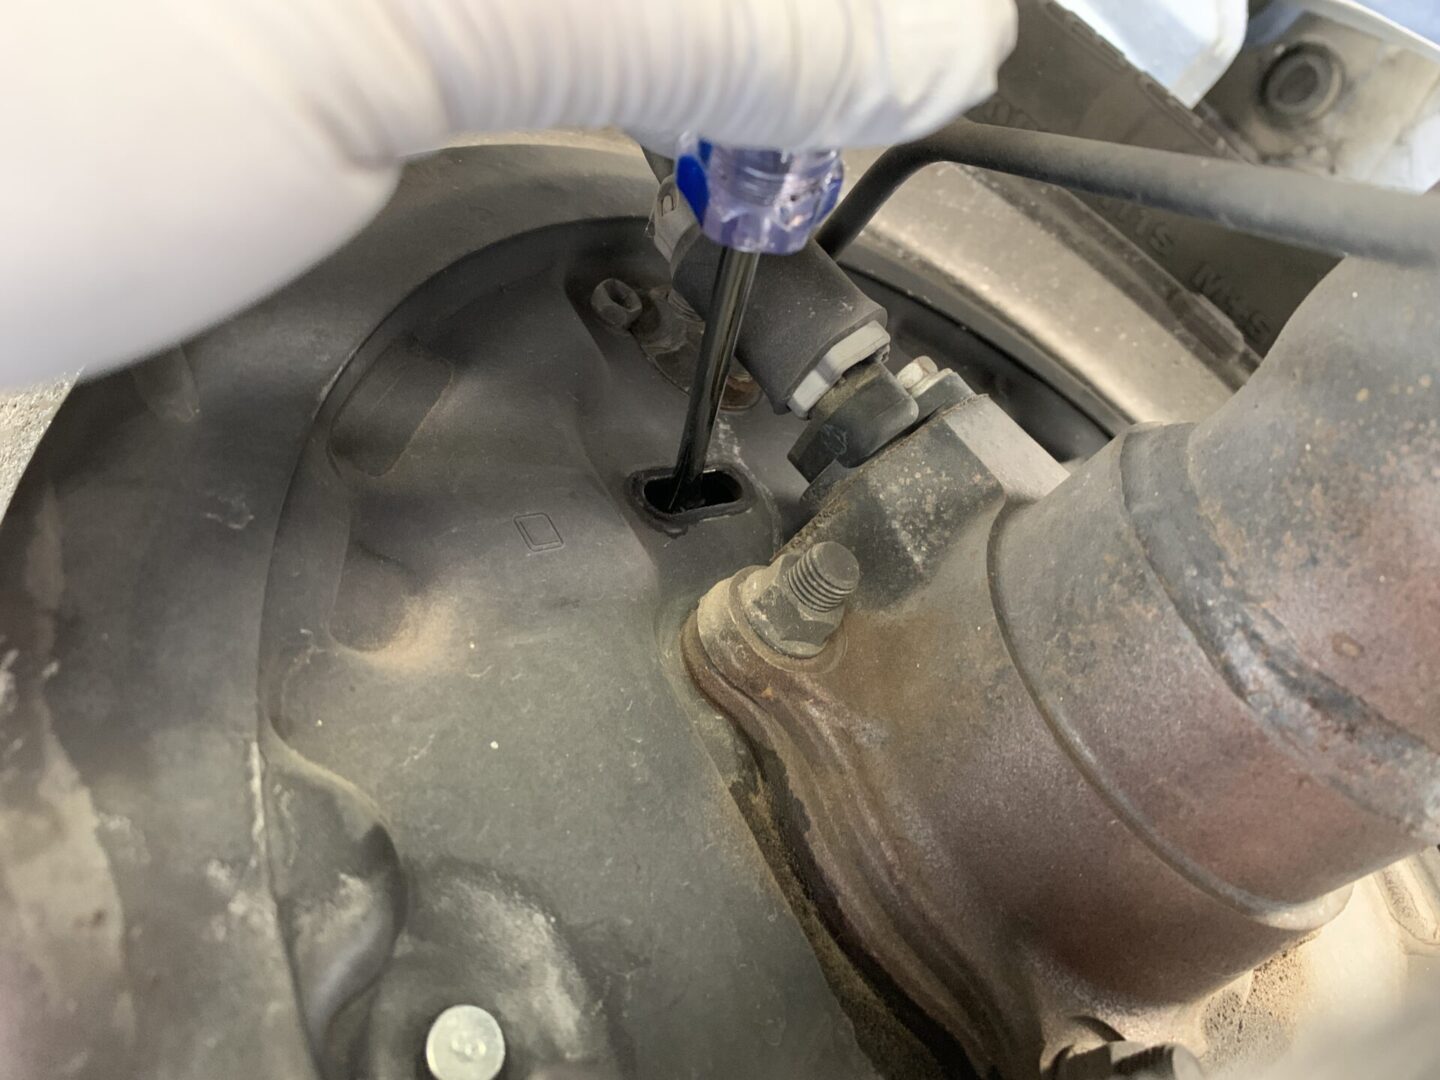
Now, back to the backing plate. Compress the wheel cylinder (you should be able to do this by hand). This will give you some more working room when you reinstall the brake shoes.
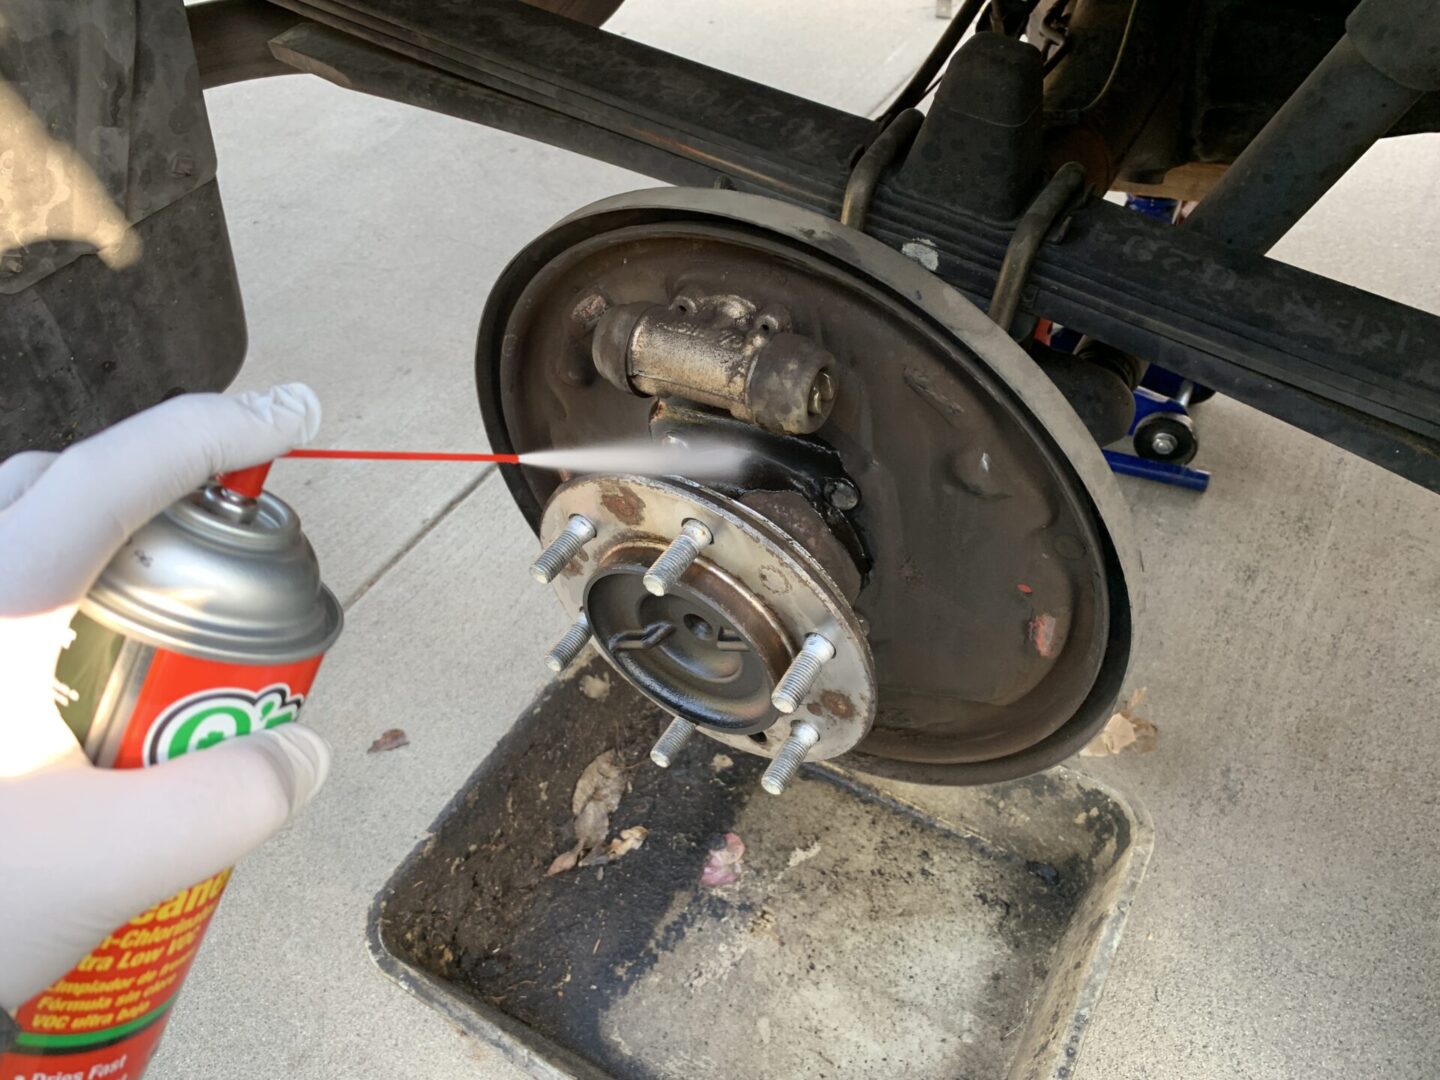
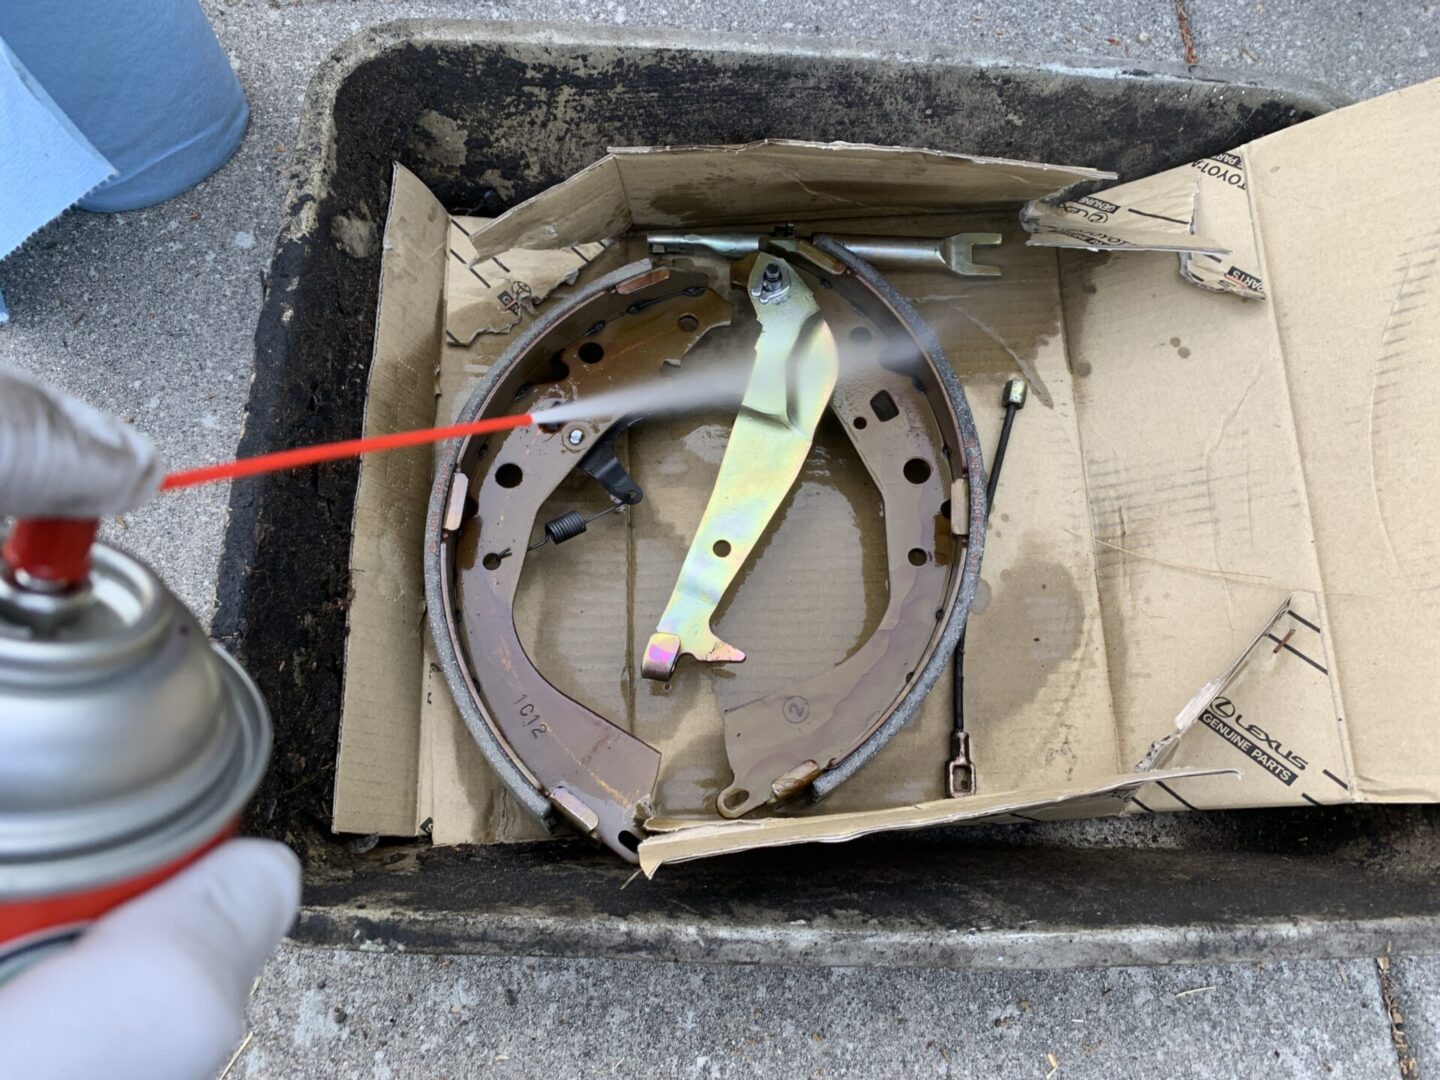
Next, spray down the backing plate with brake cleaner and clean off as much dirt and brake dust as possible. An all-purpose cleaner can be used to further clean off the surface. You can also use brake cleaner to spray down the new parts in case they’ve gotten dirty while handling them previously.
With everything clean, apply brake lubricant to various moving parts such as the various springs, pins, and adjuster assembly.

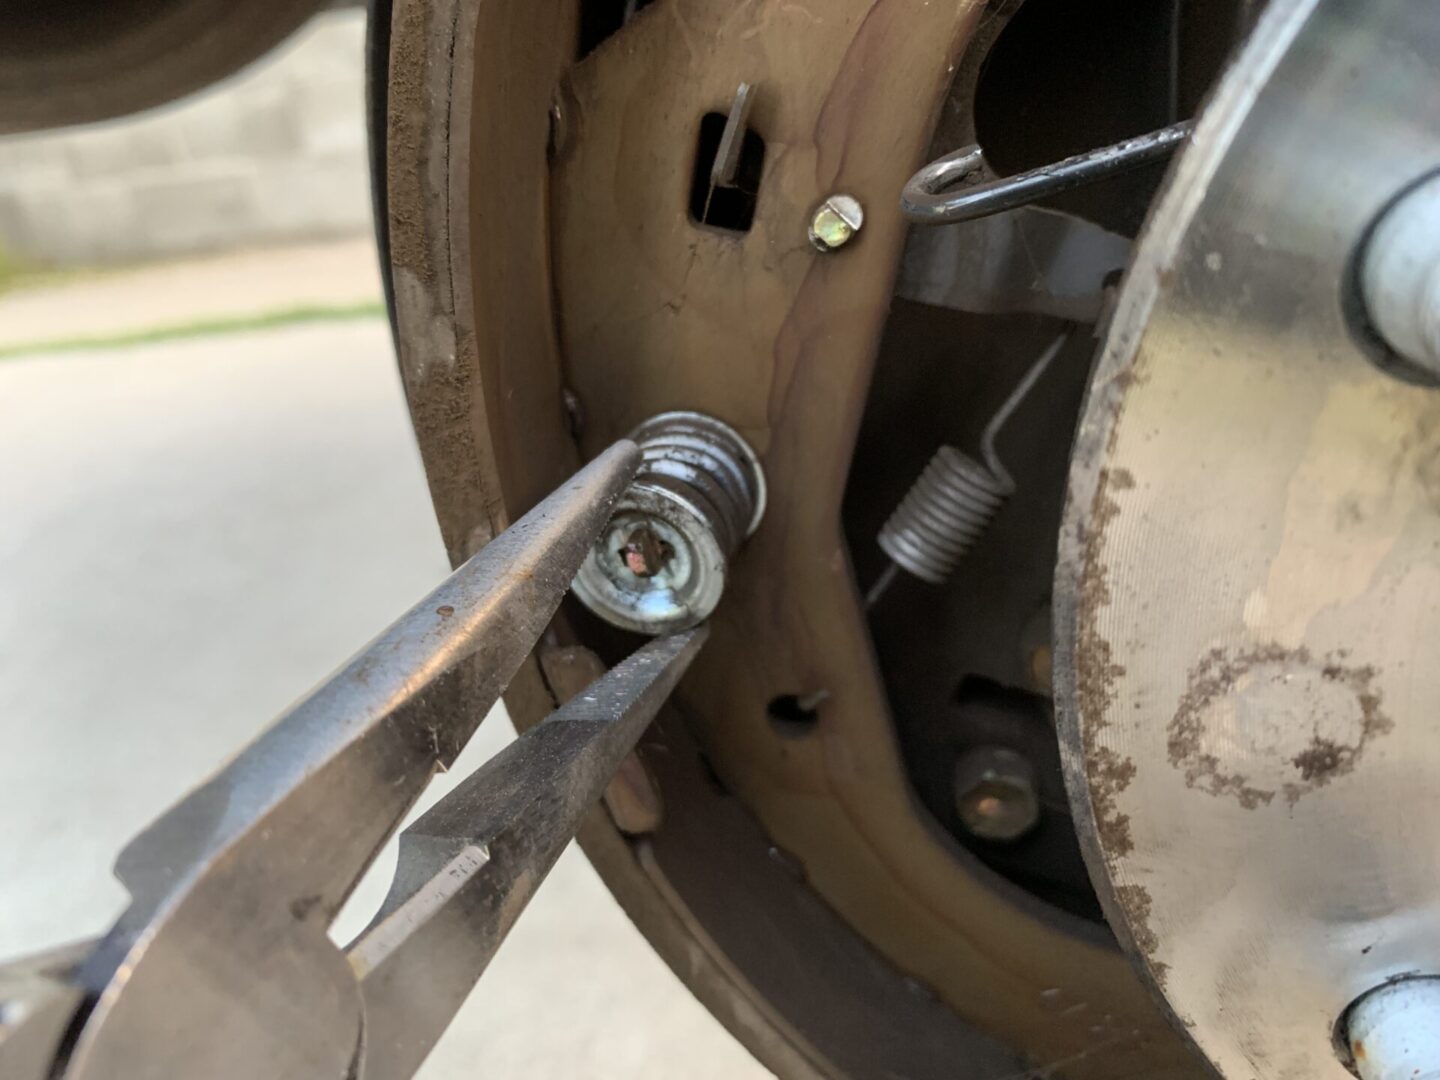
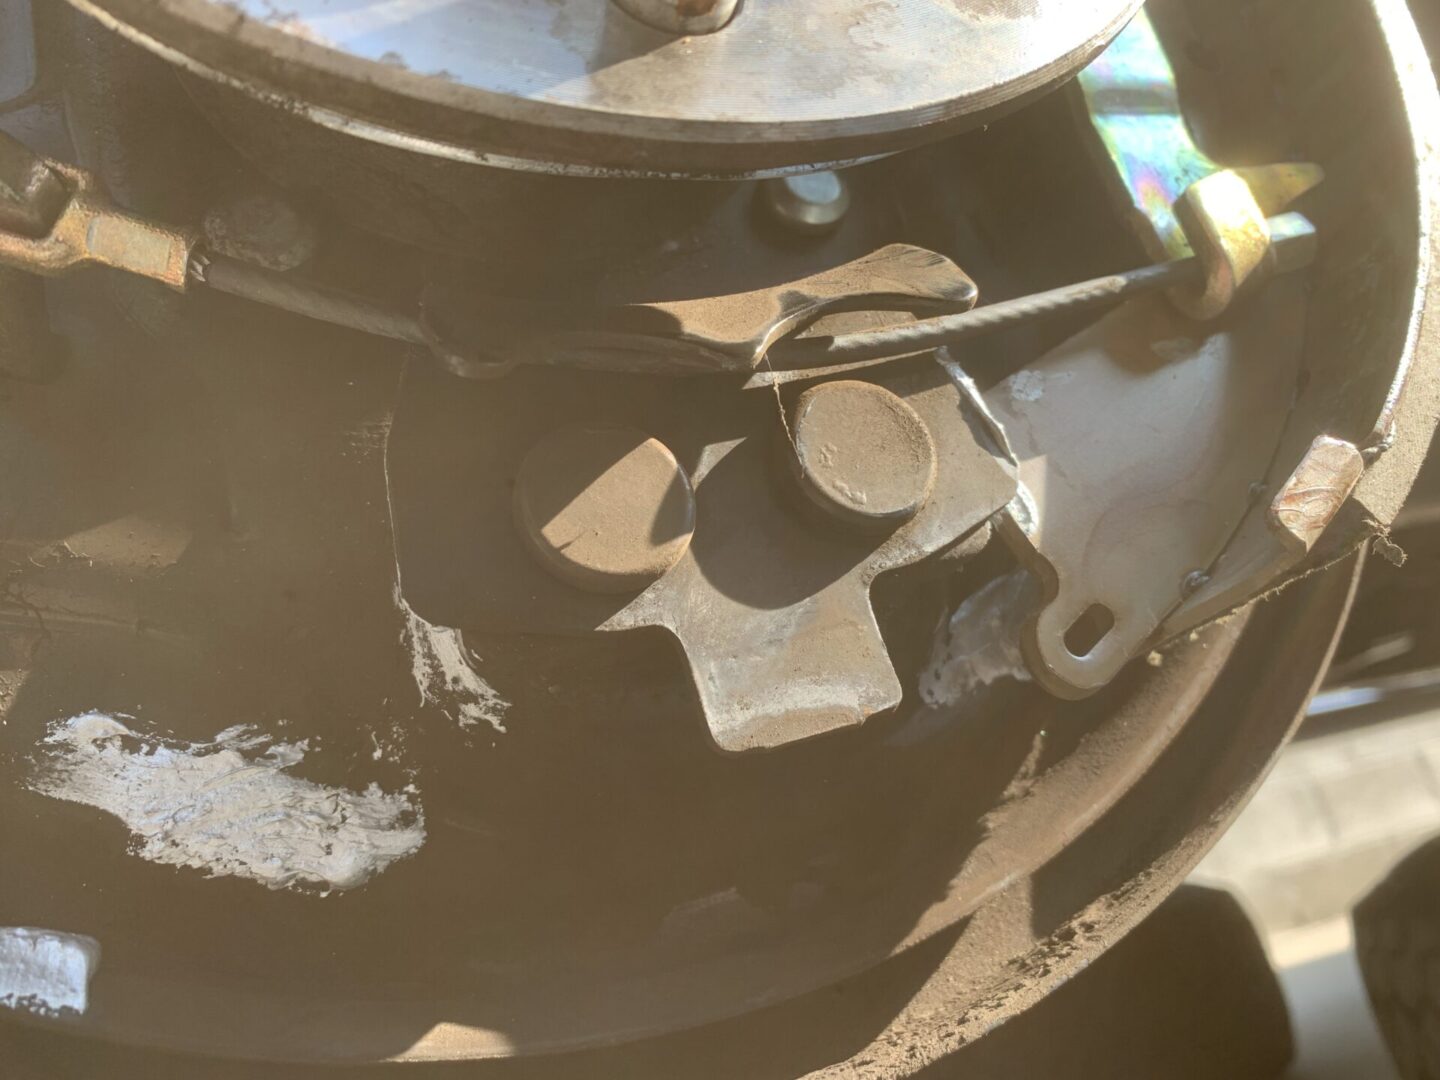
Use anti-seize lubricant on the contact areas on the backing plate as shown below; these are the areas on the backing plate that contact the brake shoes. You should be able to see locate these spots easily from the contact patch left from the rubbing of the brake shoes. Each backing plate should have six of these spots to apply anti-seize lubricant.
Place the first brake shoe into place as shown below making sure to line up the edge of the shoe with the wheel cylinder. Then replace the shoe hold down assembly so that the brake shoe stays in place. Install the parking brake cable by hooking it around the parking brake lever on one end and the parking brake hook on the other end.


Also get the adjuster assembly into place by placing one end against the parking brake lever (into its groove) in the orientation shown below. You also want to get the upper retaining spring hooked onto the brake shoe from the backside with the gap in the upper return spring lining up with the adjusting ring of the adjuster assembly.
Install the new lower return spring onto the installed shoe and then onto the second brake shoe. Bring the second shoe around with the opposite end fitting into the groove of the wheel cylinder at the top. Replace the second shoe hold down assembly to hold the second brake shoe in place.
Also, ensure that the adjuster assembly fits into the groove into the second brake shoe, just in same way it fits on the other end of the first brake shoe. Then attach the upper return spring to the second brake shoe as shown. If you’re using a new upper return spring, this may be nearly impossible to do by hand. Using specific brake spring pliers is immensely helpful here. Otherwise, you might need to get some help from someone using a hook to pull on the return spring while you use pliers to press it into the opening of the brake shoe.

This completes the reassembly of the brake shoes and associated hardware. The only thing left to do is to reinstall the brake drum. The goal of reinstalling the brake drum is to adjust the brake shoes so that the brake drum just barely slides over the brake shoes, then backing off on the brake shoes so that the brake drum spins freely.
This might require a lot of time to get right. Slide the brake drum (new one if you’re replacing the drum) onto the hub and feel if there is any resistance between the brake drum and the brake shoes. If you don’t feel any resistance, take the drum off, and adjust the adjuster assembly.
If you spin the ring on the adjuster assembly and it spins freely (the adjusting lever does not keep it from spinning), then you are pressing the brake shoes outward. If you try to spin it the other way (retracting the brake shoes inward), the adjuster lever will ‘catch’ and prevent you from spinning the ring on the adjuster assembly this direction. You must pull back on the adjuster lever in order to spin it this direction.
Back to getting the brake drum back on. Continue spinning the adjuster assembly a little at a time and sliding the drum back on to feel for any resistance. You are basically pressing the brake shoes outward little-by-little until you get to the point where you slide the drum on and feel a slight resistance; this is the slight rubbing contact between the brake shoes and the drum. At this point, you’d remove the drum, pull back on the adjusting lever, and back off on the adjuster assembly just slightly. Then slide the brake drum back onto the wheel hub; there should be no resistance getting it back on this time.

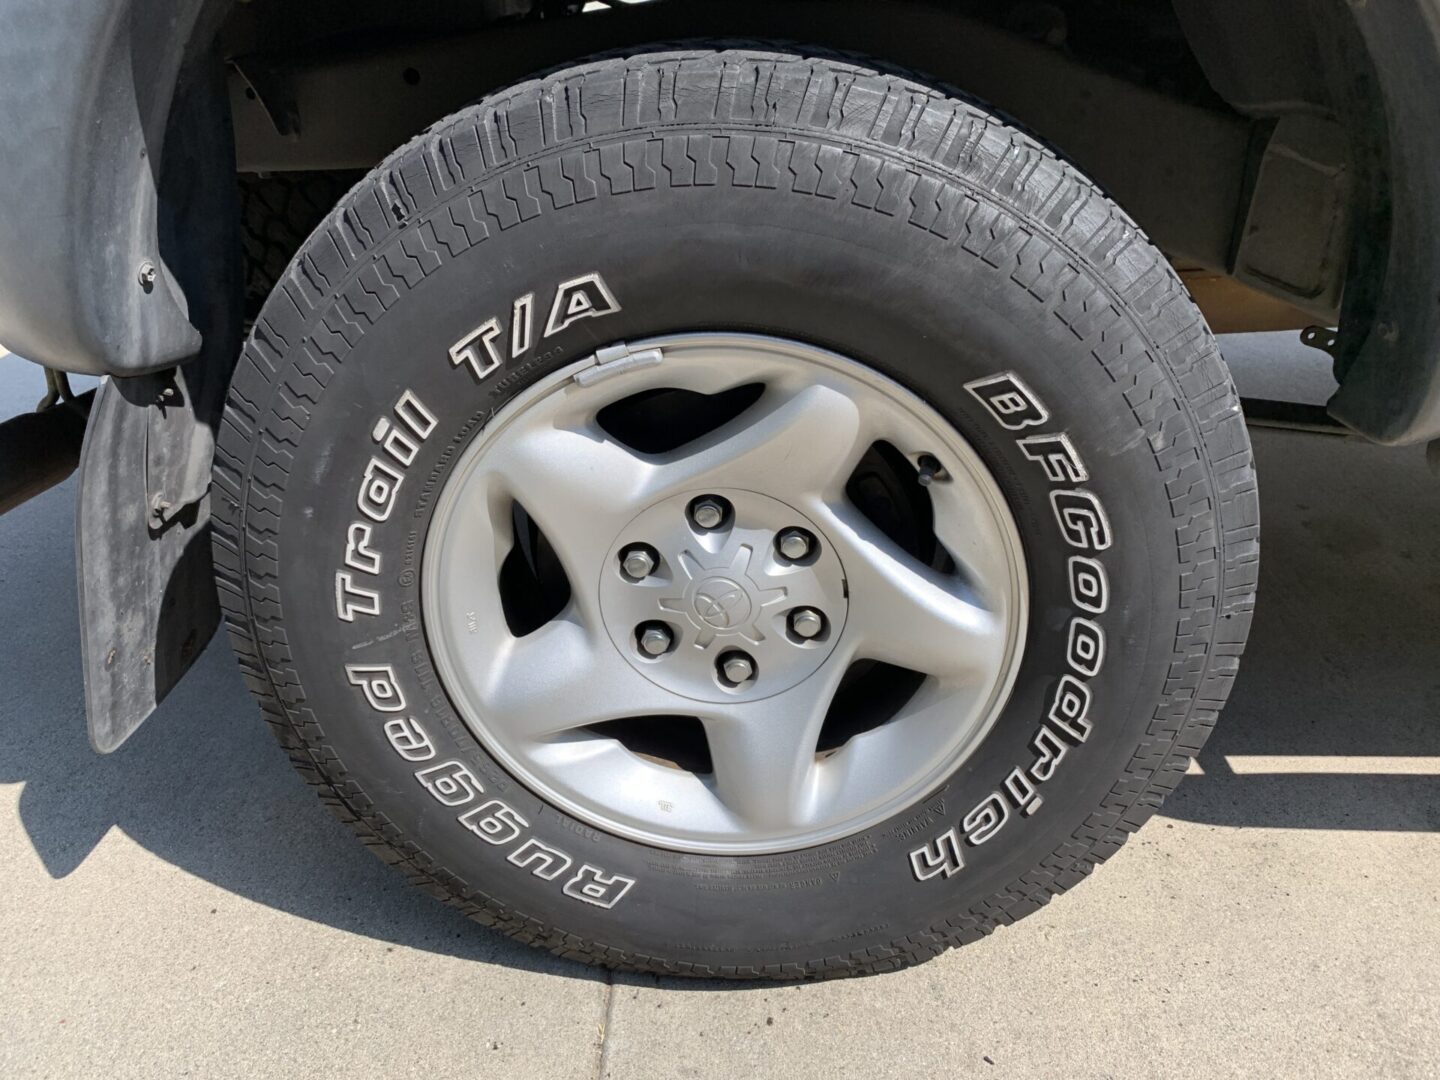
With the brake drum back on, you can reinstall the wheel and lug nuts. Now, perform the brake shoe replacement on the other side of the vehicle. Replace the wheel and lug nuts and then lower the vehicle onto the ground. Do final lug nut tightening and then do a test drive.

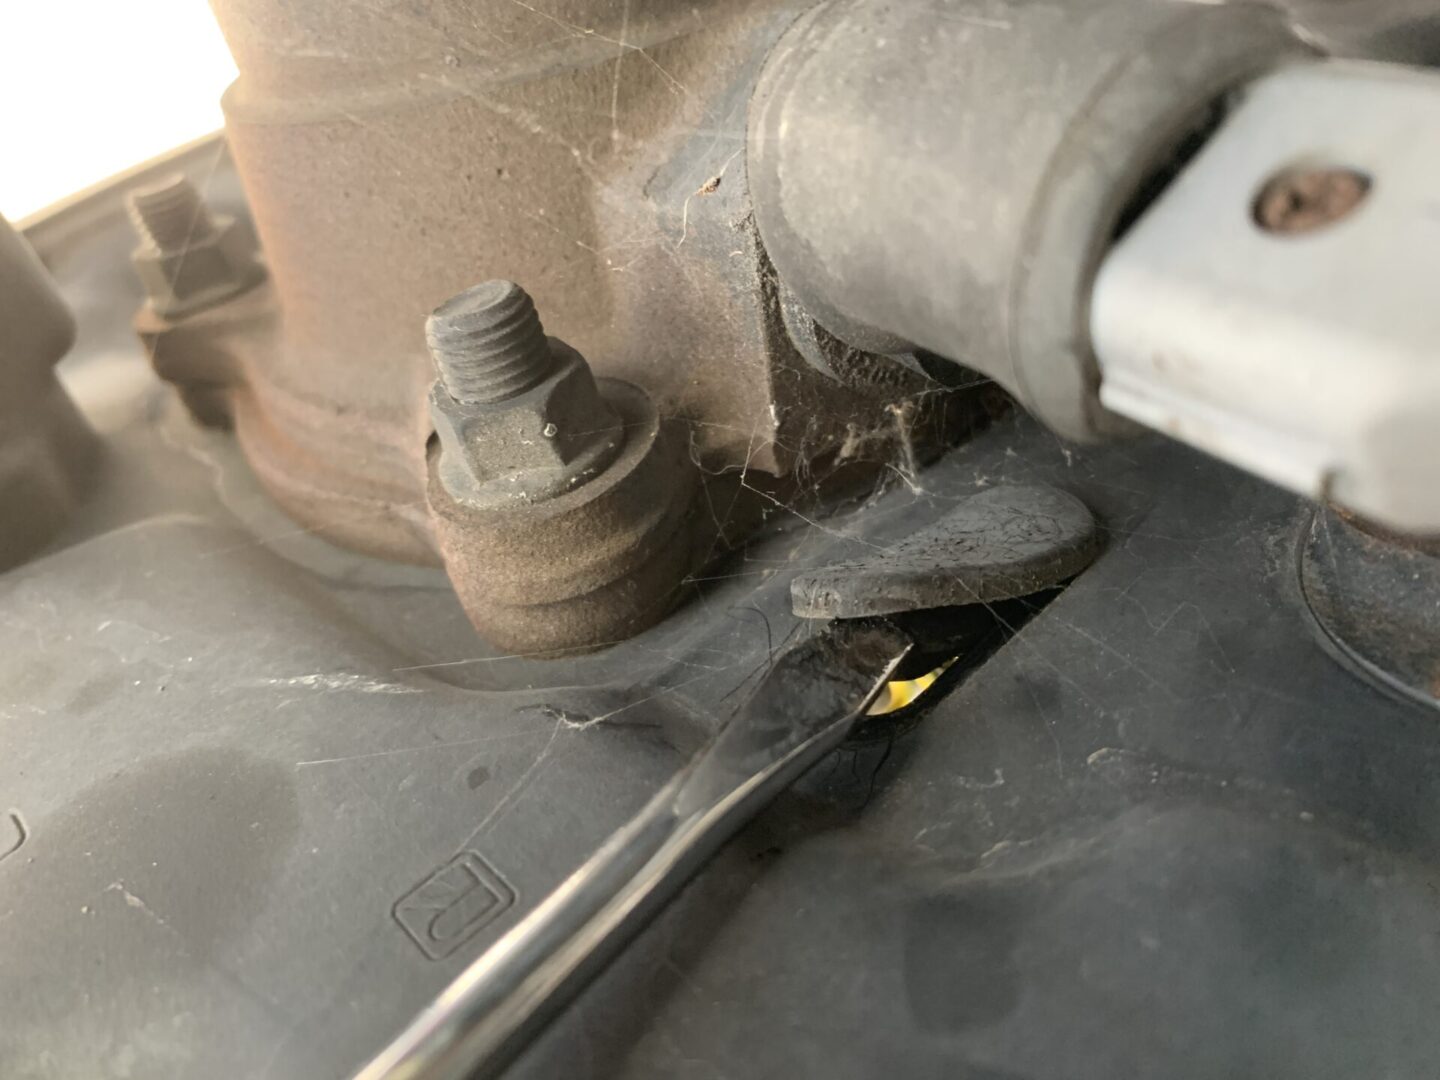
Before heading out on the road, ensure that the brakes are operating properly. Then take the vehicle out for a test drive and check for proper brake operation. Then when you park again, check your parking brake by pulling on it. If it feels too loose (or if the brakes are dragging while driving), then you can always go from the back of the wheel and remove the rubber access plug to do your adjustments on the adjuster assembly with the wheel still on.

: 1st Gen Toyota Tacoma")
: 1st Gen Toyota Tacoma")

: 1st Gen Toyota Tacoma")
: 1st Gen Toyota Tacoma")

: 1st Gen Toyota Tacoma")

4 Comments
Thanks for the well written article, it is very helpful to see where all my hardware is suppose to hook up!
You’re welcome, Steve!
Thank you for this information! It was well presented and very helpful for planning to replace my decrepit rear brakes. I was wondering if you know if the brake shoes and drums will be the same part numbers for any of the 6 lug first Gen tacomas?
Hi Alex, you’re welcome! I’m not 100% sure, but it is likely. The great thing about part sites nowadays is that they can cross check the part numbers with the vehicle information you provide to ensure you get the right parts.