
When you make purchases through links on this site, The Track Ahead may earn an affiliate commission. Also, these posts are based off my own experiences. I am not responsible for any action you take as a result of reading this. Learn More
To the average joe, a clay bar may be seen as a mysterious detailing tool that car detailers use to detail the exterior of the car. The true part of that statement is that it is indeed used for car detailing at certain times (more on that later). The false part of that statement is that only car detailers use them. More and more recreational detailers use clay bar to clay their vehicles to remove paint surface contaminants. They are easy to use and are very safe to use, with little chance for it to cause damage the car’s paint when used properly.
Clay bar can be made of organic clay, but typically these days they are pretty much all made of synthetic clay. The clay is sticky, which allows it to pick up contaminants from paint. Clay is typically used with lubricant to allow it to glide over the exterior surface of a car, but trap contaminants on the paint onto the clay. The clay can be molded over-and-over again to allow for a new clay surface to be used to clay the next portion of the vehicle.

The surface of the car is constantly exposed to airborne contaminants. This can include brake dust, industrial fallout, bug residue, bird droppings, sap, tar, etc. Once settled, all of these things things can stick to the car’s paint/clearcoat and make it difficult to remove. The longer it is left there, the more likely it will work its way through the clear coat and eventually even reach the paint layer itself. Some metallic particles may eventually lead to rust spots as well, which is problematic.
Using a clay bar prepares a car for further car detailing that may be needed. Whether you are doing paint correction with polishing or compounding, or maybe you just applying a wax, you will be doing it using an applicator that abrades against the surface of the vehicle. If the car wasn’t clayed prior to doing those things, then very particles will still be on the surface of the paint. Therefore, doing any sort of detailing work will effectively take those particles and scratching them all over the surface of the paint. Using a clay bar (after an exterior wash), is a critical first step towards preparing your car for additional detailing work.
Tools & Materials
Clay Bar Kits
There are plenty of options out there with one not much better than the other. You might find several types of clay bars with varying abrasion levels, but typically they will either be fine or medium grade. Fine clay bars will have extremely little abrasion with almost no possibility of marring your finish; these will normally be the grade of clay bar found in clay bar kits. Medium grade clays may be more aggressive to remove more heavy contaminants and paint overspray; on some paints, it may require polishing to remove the marring that is left behind. More rare, are some aggressive clay bars that will get the heaviest contaminants, but have the highest chance of marring your paint.
If you’re just starting out or if you find a great deal on one, you should go with a clay bar kit, which will give you everything you need: clay bar and clay bar lubricant; sometimes a microfiber cloth too.
Popular Clay Bar Kits: Chemical Guys Clay Bar Kit, Mothers Clay Bar System, Adam’s Clay Bar Combo
If you do quite a bit of claying, you can opt for purchasing the clay bar and lubricant separately, which can save you quite a bit of money. And taking an extra step, if you make your own clay lubricant, you’ll save even more. Below are some more options for piecing together clay bar and lubricant separately.
Clay Bar
If you want to be safe, stick with the more common brand names. If you want a cheaper alternative, you can try some of the no-name brands on Amazon which still seem to get very good reviews.
Popular Options: Griot’s Garage, Adam’s Polishes
Cheaper alternatives: IPELY, TAKAVU, ROKKES, Senrokes
If you’re looking for brands that offer fine or medium clay bar options, here are a few below:
Adam’s Clay Bar: Fine / Medium
Meguiar’s Clay Bar: Mild (Fine) / Aggressive (Medium)
Clay Bar Lubricant
Whenever a clay bar is being rubbed along the surface of the car’s exterior, it needs to be lubricated. There are several different types of lubricant that can be used, from just using car wash soap leftover from an exterior wash, to using specially formulated lubricants made for claying. Here are several types of lubricants available:
Clay Lubricant
In my opinion, you really shouldn’t be buying clay lubricant as there are many other less costly options out there (i.e. quick detailers and car wash soap). If cost is not an issue and you want to make sure you have the right formula for lubricating the clay bar, then go for the specifically formulated clay lubricant.
Chemical Guys Luber Synthetic Lubricant and Detailer (1 Gal)
Quick Detailer/Optimum No-Rinse (ONR)
Another option is to use a quick detailer as a clay lubricant. Quick detailers are a versatile product which are an excellent choice as a clay bar lubricant.
Popular options: Adam’s Detail Spray , Griot’s Garage Speed Shine
Another option is to use Optimum No-Rinse (ONR) as a clay bar lubricant. ONR is conventionally a no-rinse car wash solution, but diluting it to various degrees can net you a clay lube or interior detailer. ONR recommends a ratio of about 2oz to a gallon of water; which is a fairly diluted formula. This is my go-to clay bar lubricant. ONR has so many uses for detailing and it’s quite easy for me to mix up whenever I need it.
Car Wash Soap
If you’re already washing your car, you’ll likely be using car wash soap. For that reason, it’s really easy to just use car wash soap as a lubricant. Now, we know the important part of claying is to always keep the surface lubricated, but also with a clean lubricant. Any old car wash soap from the actual exterior wash should not be used as it may be carrying heavy contaminants. If you’re using the two bucket method of washing, your leftover car wash solution might be clean enough to use, but it may be safer to just use new car wash solution for your clay. You might be able to dunk your clay bar into clean car wash solution every time you use your clay bar, or you can use a microfiber towel to dunk into the bucket, wet the surface, and then clay bar.
Microfiber Towels
Microfiber towels are a mainstay in detailing and in the case of claying, you use it to wipe off the excess residue after using the clay and lubricant. You can get away with not wiping away excess residue if you continuously rinse it off with a hose to make sure that the residue does not dry and stick on the paint surface. In most cases, it is easier to keep a microfiber cloth on you to wipe off the excess from the just-clayed surface.
Zwipes Microfiber Cloths (48-Pack), AmazonBasics Microfiber Cloths (24-Pack)
Before/After Clay Bar
Before a clay bar is to be used, the car exterior must be washed thoroughly. This is essential to removing all surface contaminants prior to claying, otherwise those particles can flood the clay bar. The clay bar is used for those heavier contaminants that are trapped in the clearcoat (and sometime paint). You don’t want the clay bar soiled with other contaminants that can easily be removed with a car wash.
When clay bar is completed, the surface of the car should feel smooth as you run your fingers along the surface. It should feel as if you’re fingers are gliding along the surface if the clay bar was done correctly. Depending on what you’re looking to accomplish with your car detail, you can proceed with further detailing knowing that you have a clean slate to work with.
Keep in mind that if you do plan to use more aggressive (i.e. medium or aggressive) clay bars, you might have some slight marring of the paint surface. This is normal. This may require you to polish afterwards to remove the marred paint surface.
How to Clay Bar Your Car
First of all, you should determine if you actually need to clay bar your car or not. You should always perform an exterior wash to remove as much surface contaminants as possible before evaluating if the car needs a clay bar treatment. Even if a car is brand new, there might still be a need for clay bar as there can be many contaminants such as rail dust and industrial pollution that can be trapped in the clear coat during transport from the factory to the dealership lot.
Check the Paint Surface to Determine Need for Clay Bar
After the car has been washed, try running your fingers across the surface to feel the texture. If it is rough, it is likely you’ll need to clay bar. If you can’t quite tell or want to be absolutely sure, you can try taking a Ziploc or sandwich bag and perform the “plastic bag test”. This involves placing your hand inside of a plastic bag and running your fingers (inside the bag) along the surface of the vehicle.

This will heighten your sensitivity to touch so that you can feel all of the bumps on the paint surface. Those bumps are surface contaminants that have bonded to the car’s clear coat, which will likely only be able to be removed with detailing clay.
Now, it is possible that if you don’t feel any or minimal bumps on the surface of the paint with the “plastic bag test”, you may simply just not need to clay bar your car. For any more fine detailing work such as polishing or compounding, you may want to use the clay bar as a safeguard against having any possibility of those surface contaminants disrupting your more in-depth detailing work.
It is important to note that it is possible to clay bar your car too much. Every time you clay, you have a chance of having the clay bar collect a piece of debris and scratch it against your car’s surface. Furthermore, even if you’re careful and fold the clay bar over regularly, there is still a chance of marring of the car’s surface. This is the fact of rubbing something against the car over and over again (even with lubricant). The clay bar itself is a very mild abrasive, but it’s still an abrasive. So, use it when you have to and understand that its not necessary to clay your car every time you wash your car.
What does a Clay Bar remove and what doesn’t it remove?
Clay is used to remove the contaminants that have been embedded into your clearcoat. An exterior wash may remove dust and various debris that has settled on the car, but it won’t remove things that are stuck inside of the clear coat. Some of these particulates might include brake dust, rail dust, industrial pollution, and sometimes overspray. It can also get rid of bug guts and tree sap as well.
Clay bar will not remove scratches or swirls, or acid rain water spots. Basically anything that has already gone through the clear coat, leaving a physical blemish, will not be removed with clay.
Using a Clay Bar
If you haven’t used a clay bar before, I’d recommend using a fine clay bar to ensure that you don’t accidentally damage your paint as you learn the ropes. You should be starting to clay on a freshly washed car to guarantee you are working on a car without any additional contaminants in the paint other than what you are trying to remove with the clay.
Take the clay bar and split it up into several pieces. Each piece should be able to provide you with plenty of use, but you want to make sure you have some extras in case you drop the clay bar you’re working with.


If you drop your clay bar on the ground, consider it trash. If the clay bar falls on the ground, it will have already collected a bunch of particles from the ground. You do not want to reuse this piece because all you’ll be doing is scratch the rest of your car’s finish with the particles collected from the ground. If you do drop it on the floor, just throw it away and get a new piece; it’s not worth reusing.
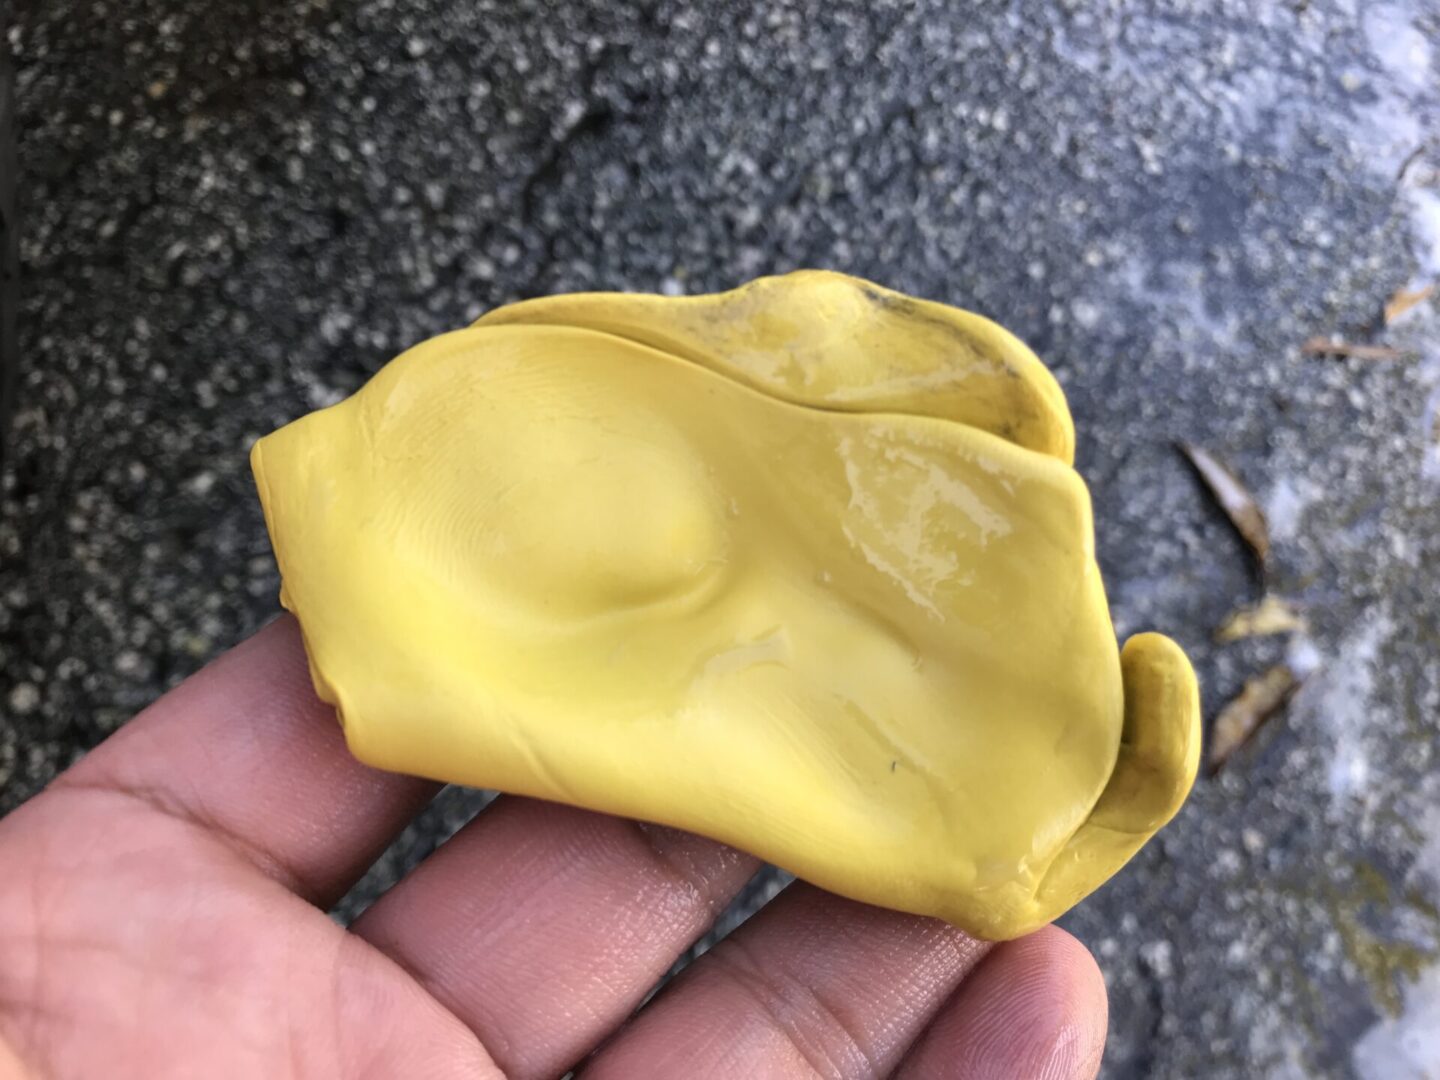
Mold the clay so that you have a good flat surface to work with and feels comfortable and secure in the hand.

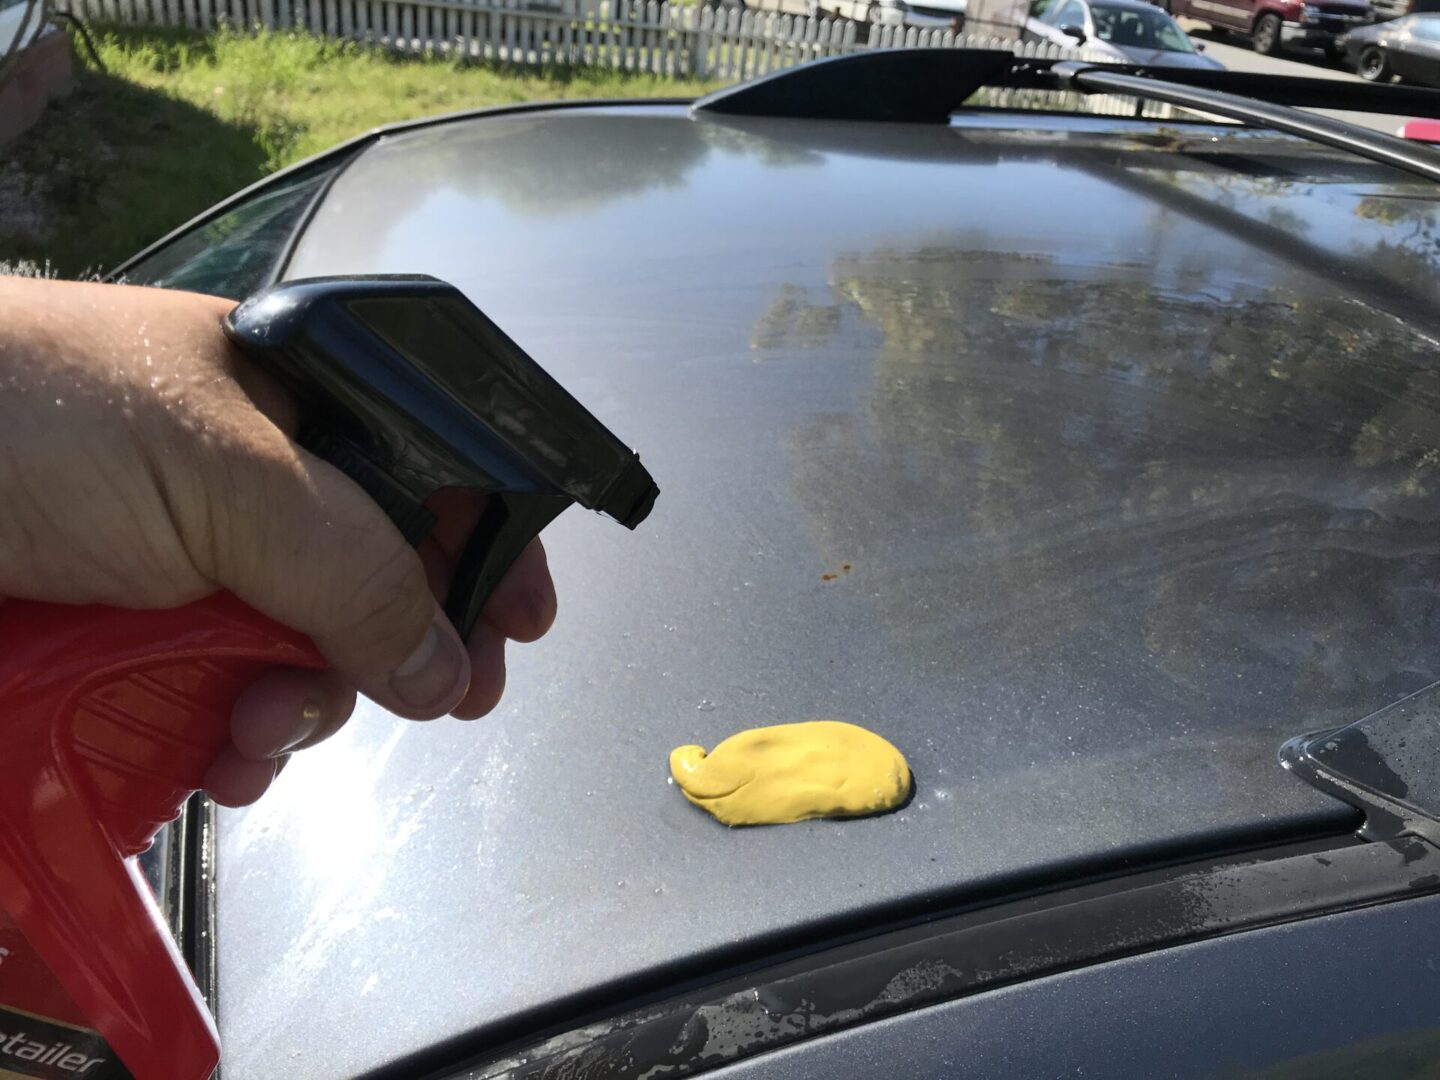
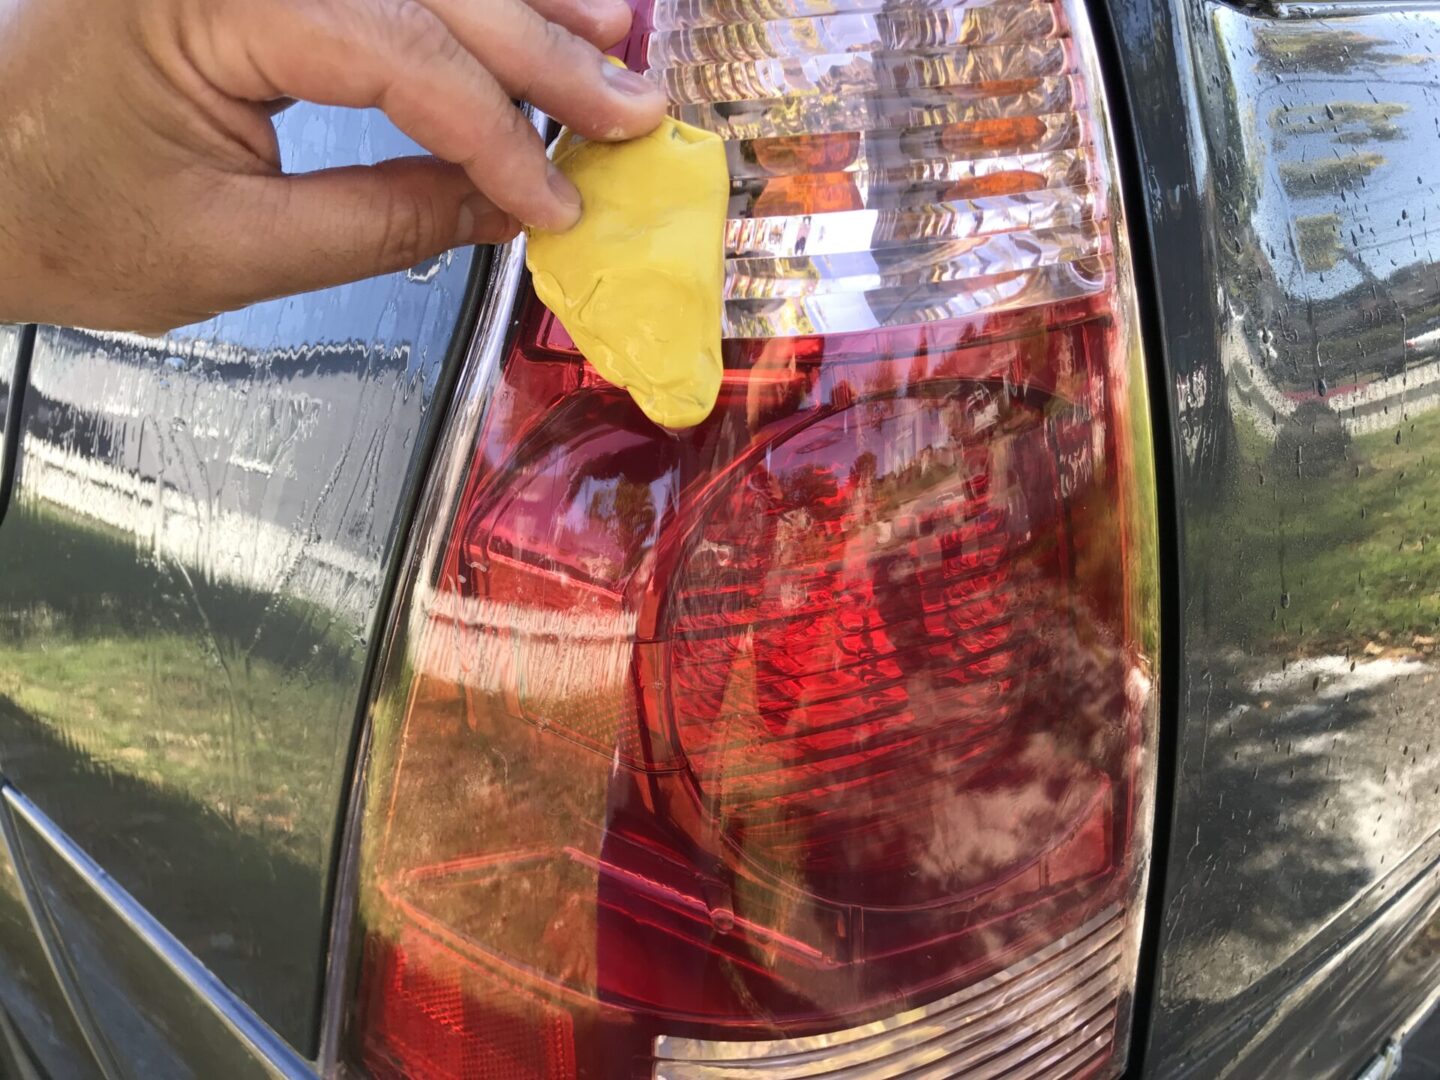
Working in small sections (about a 2ft. x 2ft. area) on the the paint surface, liberally spray clay lubricant onto the area you’re working on. Use the clay and lightly rub it back and forth across the lubricated surface. There’s no need to do any other motion besides back and forth and perhaps left and right. As the clay glides across the surface, it should pass over the paint surface without much friction, but it will catch on the contaminants, trapping them in the clay.


Try not to push too hard and make sure you have plenty of lubrication when using the clay bar. If you apply too much pressure and/or you don’t have enough clay lubricant, you risk the clay catching and having it drop to the floor. You also have a greater chance of the clay bar marring the paint surface.
I like to spray clay lubricant directly on the clay bar itself as well as on the surface I’m working on. I’ve found this to be a good method for well-lubricated claying.
After working one section, inspect the rubbing surface of the clay. If it has a lot contaminants stuck on the surface, you’ll want to use a new section of the clay bar. Carefully fold the piece of clay over so that you have a new clean surface to use on the next section of the car.


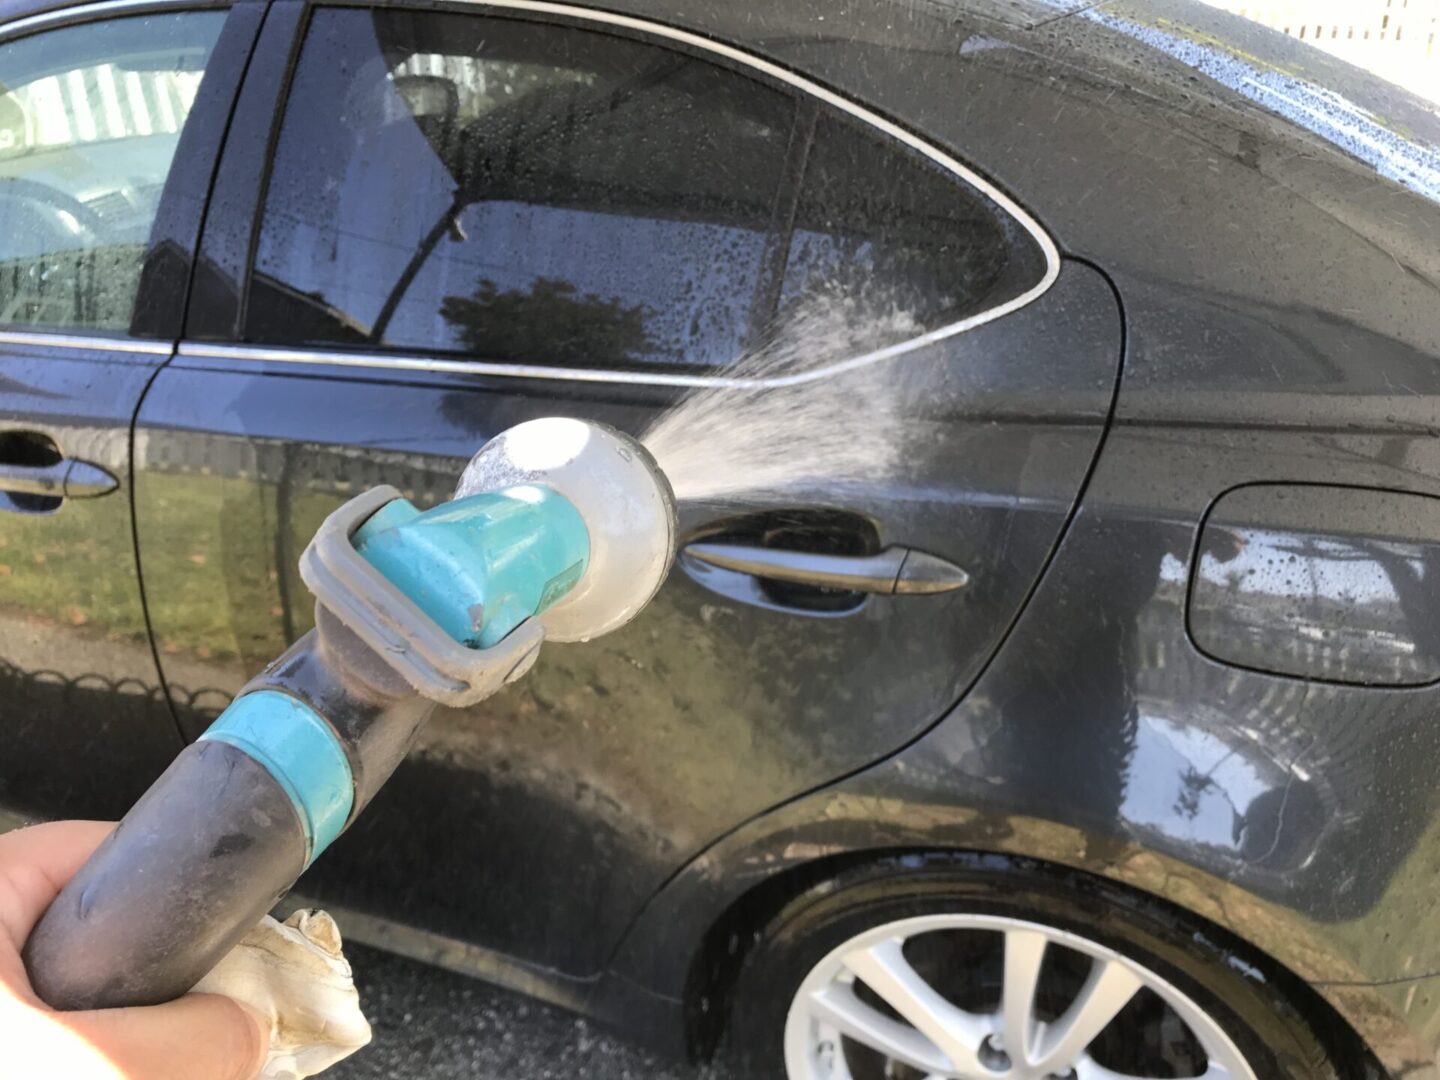
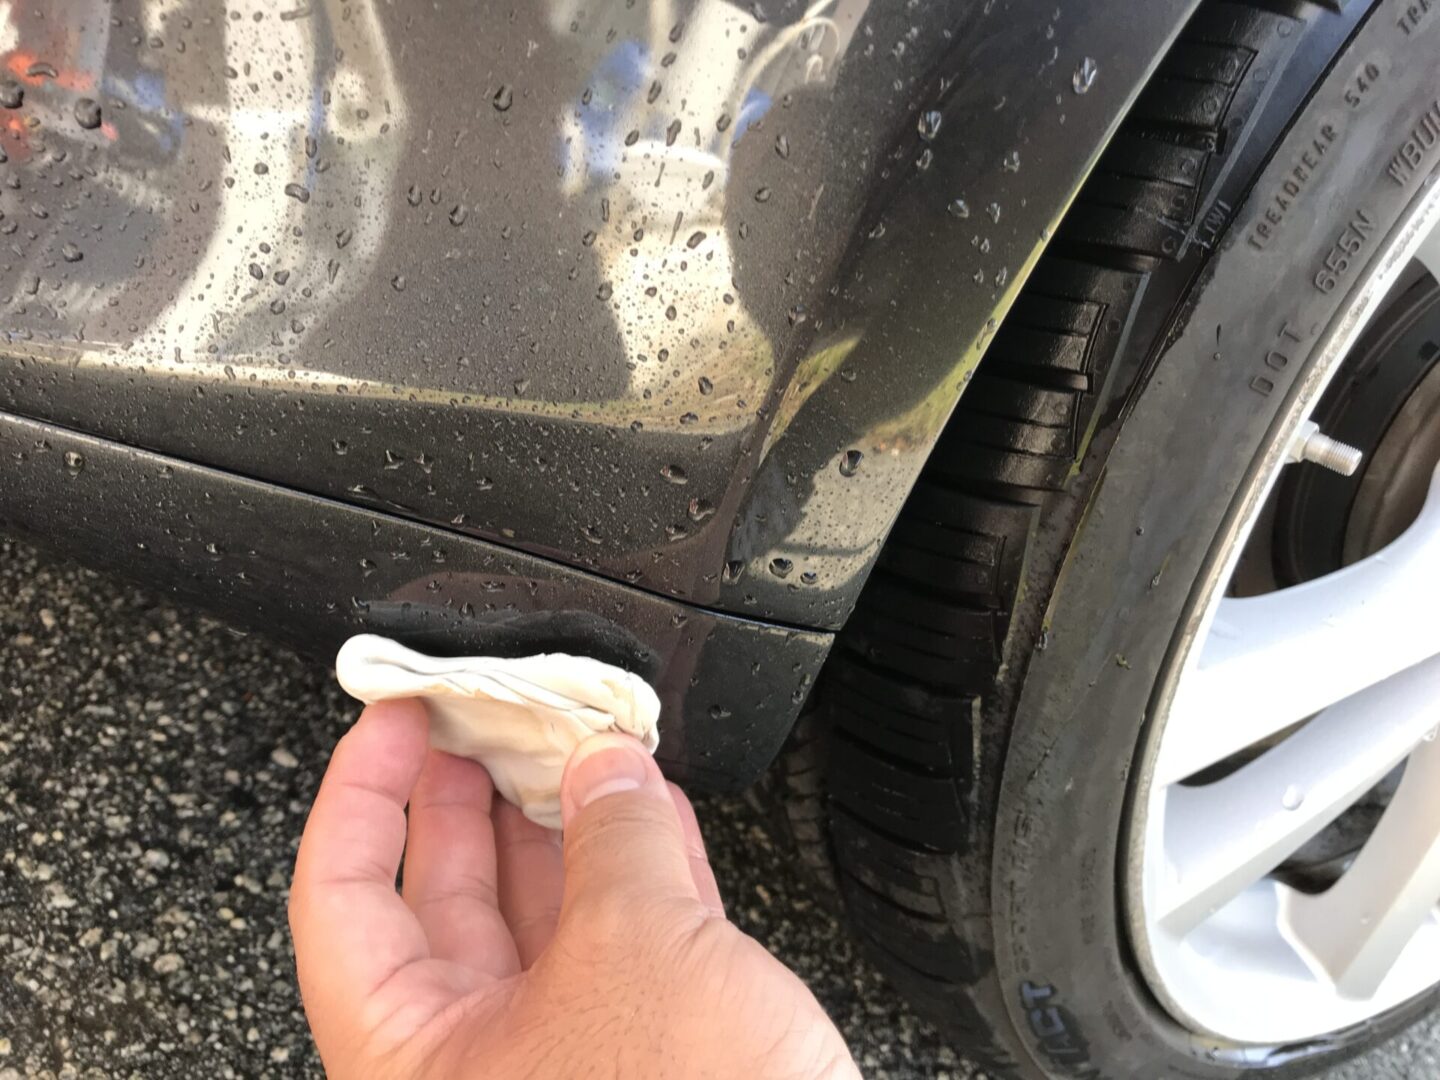
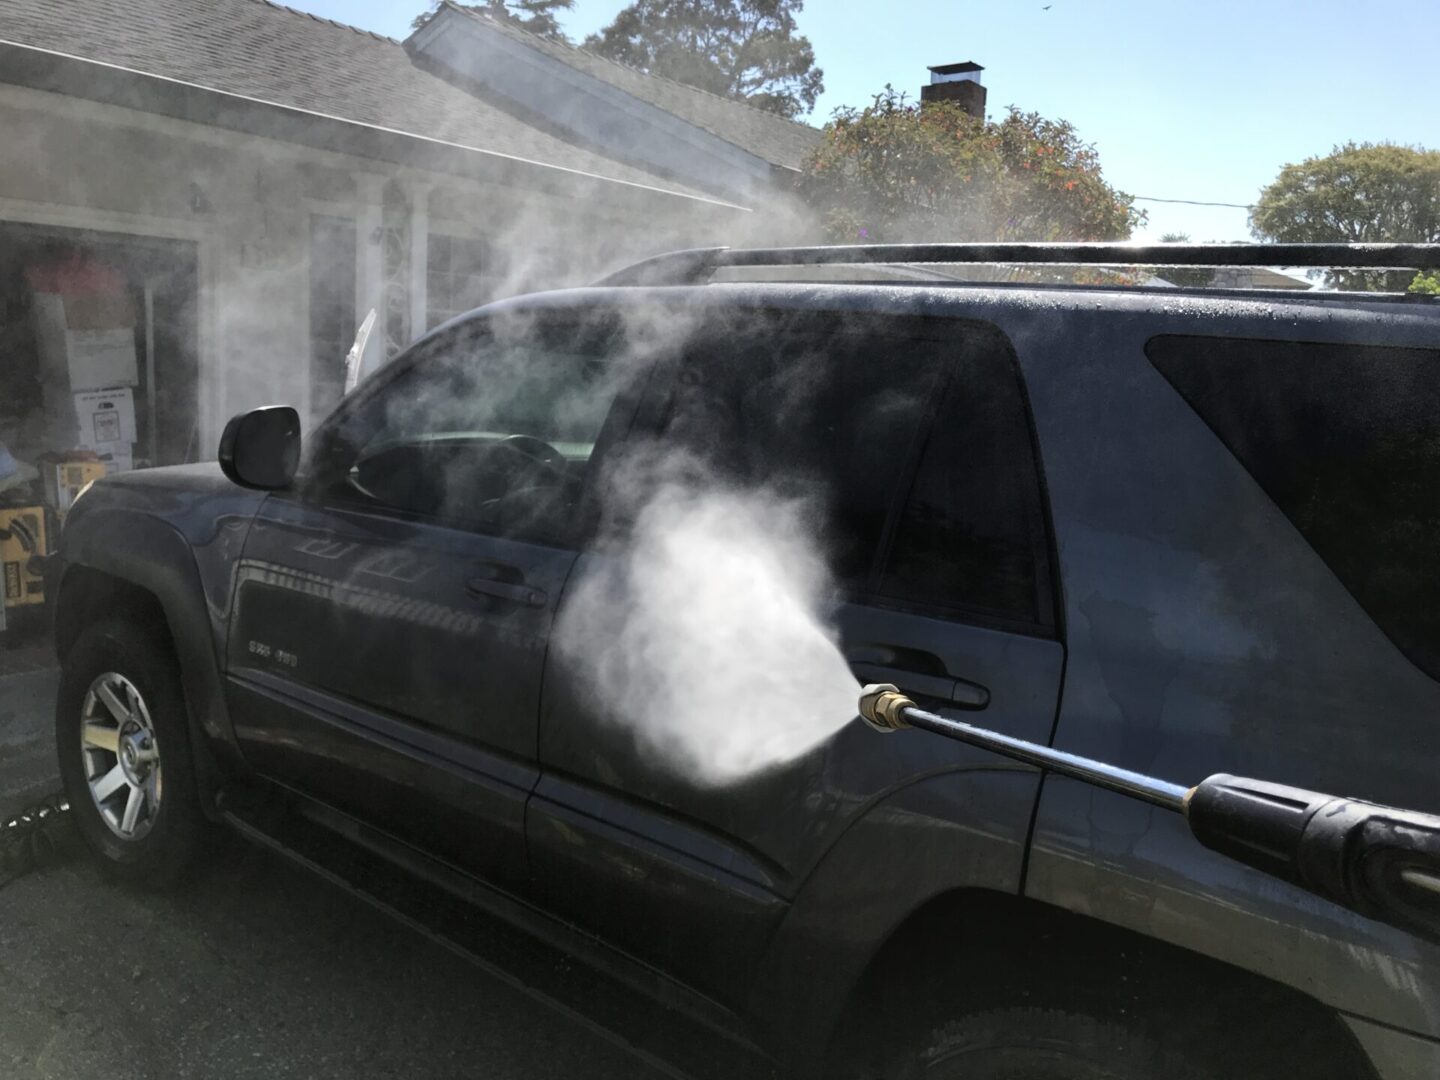
Continue to move onto the next section of the car while carefully folding the clay bar over. After you finish each section with clay, spray it down with some water or use a microfiber cloth to wipe the excess.
When the clay bar has been pretty much used up, don’t throw it away; save it for later when you have to do the dirtiest areas of the car.
You’ll want to work on the least contaminated surfaces of the car first, and work towards the heaviest contaminated surfaces last. I’ll take all of my used clay bars that I’ve put aside and use them on the heavily contaminated areas last. It’s the same thing you might do when you’re using soap when washing your car.

Typically, the most contaminated areas of the vehicle are the bottom sides of the vehicle (all around), front and rear bumpers, roof, and hood. You’ll generally have the most contaminants in these areas because they either are collected from the ground (usually kicked up towards the car), or they have fallen down from the sky onto the horizontal surface of the vehicle, sitting there and embedding itself into the clear coat. I’d save the areas closest to the bottom of the car very last as you can see how dirty it gets on the lower portions of the vehicle.
Clay bar is not only used on the surface of the paint, but it can also be used on windows, headlights/tail lights, and even wheels too! Of course, I’d probably use a clean piece of clay bar on the windows, headlights, and tail lights.


After you have finished claying the entire car, you can rinse down or even re-wash the car to remove any miscellaneous debris that might have worked loose, but still remains on the paint surface. You may want to inspect the car again to make sure you didn’t miss any spots. Use the “plastic bag method” again if you need to.
One misconception about claying is that polishing the car with a pad is a replacement for using a clay bar. The thought here is that the physical abrasion of the pad will actually remove the contaminants that are embedded in the clear coat, therefore there is no need to clay if you’re planning to polish. This is not true. Polishing pads are quite soft, and so if it is used on a non-clayed surface, it will simply glide over the contaminants. The contaminants will not catch on the pad like it does effectively on a clay bar.
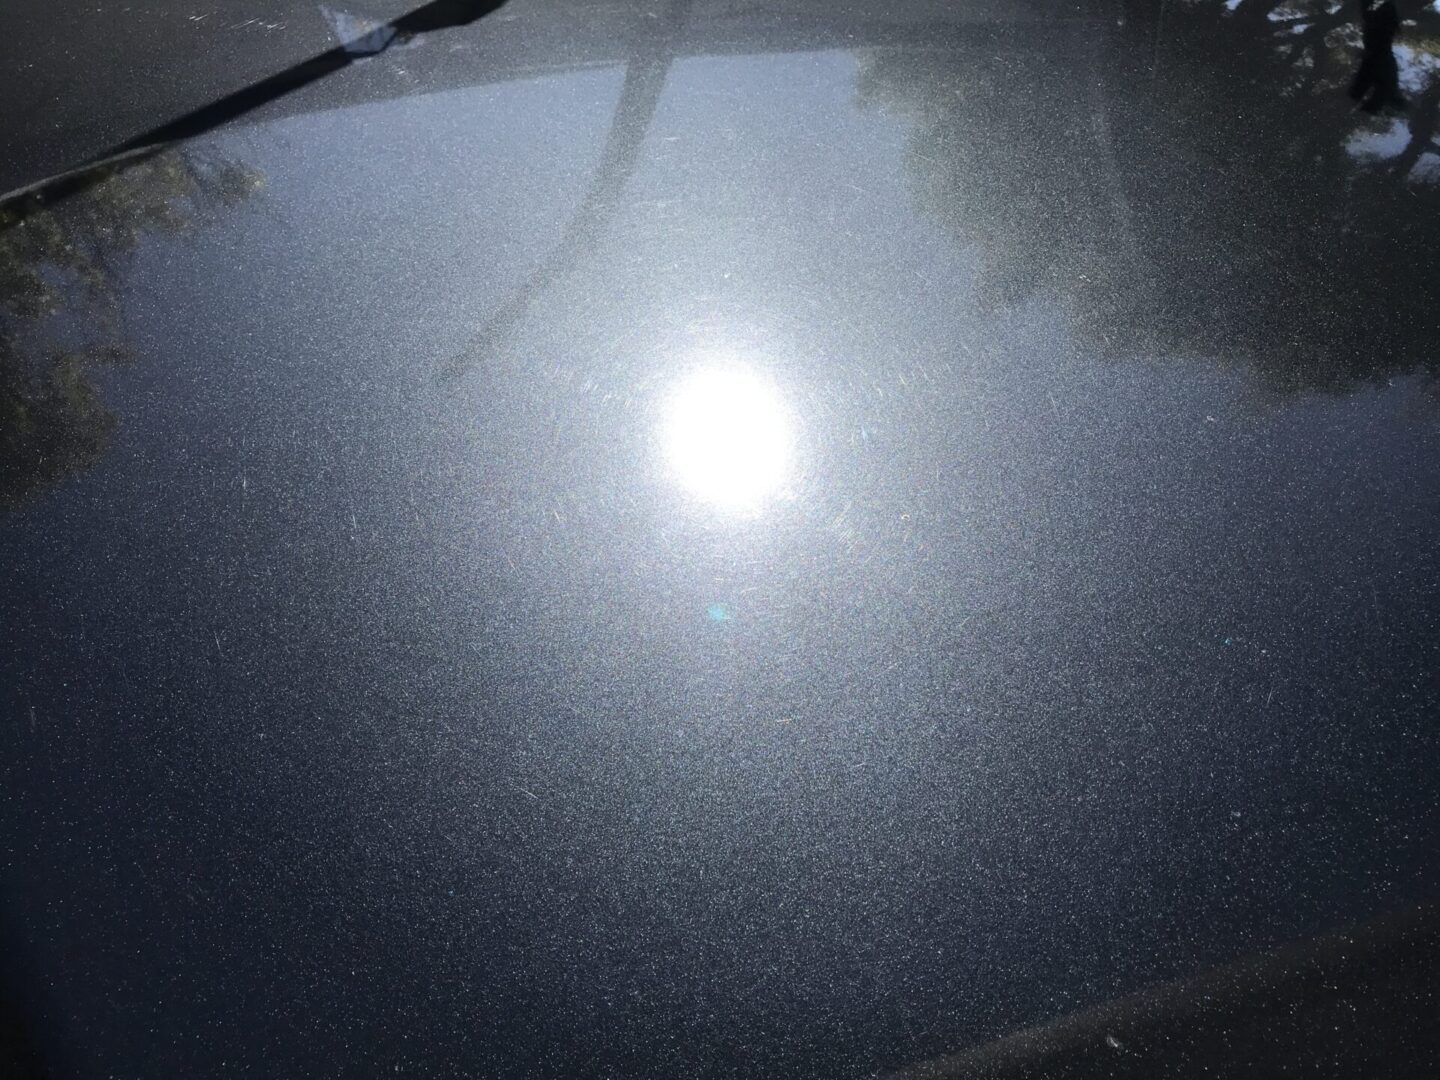

I’ve provided two photos above, which shows how the paint might look after being done with a clay bar. The left photo is a 14-year-old car that has paint in pretty good condition, and the photo on the right is an 17-year-old car with paint that is in a bit more rough shape.
You’ll see in both photos that the paint surface is clean, but there are still scratches left. This is perfectly normal, as we know that clay bar will not remove clear coat scratches. A follow-up with a polish (and possibly compound) will likely take care of those remaining scratches on the photo on the left.
The right photo has significantly more scratches and even some small chips in the paint that again, will not be removed with a clay bar. A follow-up paint correction with compound/polish will likely get rid of those scratches, but the paint chips will likely need some degree of paint chip repair.
Pitfalls to Avoid
Try not to clay bar directly under sunlight or on a hot day. The sun ends up drying up the clay lubricant very quickly so there is more chance of the clay not having enough lubrication. This means more chance of the clay bar catching and falling on the ground, and also more chance of it marring the paint surface.
Obviously, its sometimes difficult to avoid working under sunlight, so the best thing to do when working in the sun is simply work in smaller sections and continuously lubricate and rinse down. This will prevent particles that may have been worked loose to sit on the paint surface for any prolonged length of time. Another option is to go for a fold-up tent that gives you some shade to work under.
As mentioned before, try to resist the temptation to use a piece of clay bar that has fallen on the ground. Even if it does not appear to be that dirty after falling on the ground, there is likely more particles than you can see that have clinged onto the clay bar. This will inevitably scratch your car if you continue to use it.
Clay Bar Alternatives
There are some alternatives to clay bar that are available on the market such as clay towels, clay mitts, clay sponges, etc. One of the biggest positives with these options is that if it does fall on the ground, it is reusable. You just pick it up off the ground, wash it clean, and re-use it for your claying needs.
If you’ve had experience with traditional clay bars, you can probably count the number of times you’ve dropped it on the floor and had to throw away a perfectly good chunk of clay bar. These options are quite promising given that you can re-use them over and over, making them not only re-usable, but also last much longer than the short life of traditional clays.
These clay bar alternatives are usually made of a rubber coating that acts as a replacement for the abrasives of standard clay bar. These options are available in a number of shapes and sizes depending on your preferred applicator type.
I’ve personally not used any of these clay bar alternatives, however they seem to get glowing reviews. I plan to try some of these out to test out their effectiveness once I’ve used up my stock of clay bars. If you’re interested in trying these clay bar alternatives out, I’ve provided several products below that seem to be of the most popular and well-reviewed:
Clay Sponges: Nanoskin Autoscrub Fine Grade Sponge, Mothers Speed Clay 2.0, Griot’s Garage Synthetic Clay
Clay Towel: AutoCare Clay Bar Towel
Clay Mitt: Adam’s Premium Clay Bar Mitt


