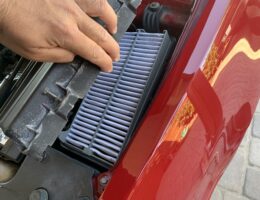
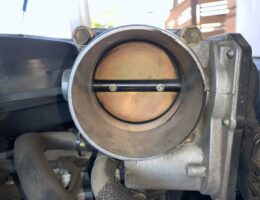
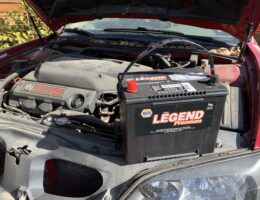
A very simple maintenance item you can do on your 2nd generation Acura CL (including Type-S models) is to replace the engine air filter. This applies to model years 2000-2003. Acura also calls the engine air filter the air cleaner element and recommends replacing it every 30,000 miles or 24 months, whichever comes first. Changing the engine air filter is incredibly easy on this car and takes 5 minutes to do.
The 2nd generation Acura CL utilizes a remote key fob to gain entry into the vehicle. There are times when you may have lost a remote key fob, or need to program an extra one. However, if you do this through the dealership, you may end up paying $100 or more for the remote and for them to program it for you. But, it is possible for you to program your own remote key fob.
One very common issue on the 4th generation Toyota 4Runner is an oil leak that occurs at the front corner of the passenger side valve cover. Changing out the valve cover gaskets on both passenger and driver sides can be a bigger job, but mainly because it can be a bit overwhelming with the amount of parts you need to disconnect or remove. Therefore, it’s very important to be organized when removing parts and to document everything you take apart. Photos along the way help tremendously in guiding you to put everything back in the right order. I hope this guide helps you if you need to replace the valve cover gaskets on your 4.0L V6 (1GRE-FE) 4th Generation Toyota 4Runner.
One of the most common encounters that you’ll have when you start increasing the size of your wheels and tires is the front tires rubbing on the fender liner of your 4Runner. The rubbing will normally occur when your wheel is turned full-lock to the left or to the right. Since there are countless different combinations of wheels, tires, and lifts, everyone will experience something different. This guide will outline the steps it takes to do a fender liner mod so that you can eliminate the front tires rub.
Cleaning the throttle body on a 4th generation Toyota 4Runner (1GRE-FE 4.0L V6 engine) is not a difficult job. It requires removal of the air intake and air filter housing to gain access to the throttle body. You should also consider replacing the throttle body gasket since you will already have access to it.
The Mass Air Flow (MAF) sensor is a device that is located at the air intake, which measures how much air is coming into the engine and then tells the vehicle how much fuel it needs to inject. Over time, the MAF sensor can become dirty and require cleaning. Since the sensor on these vehicles utilizes an extremely delicate “hot wire”, used to measure air flow, it cannot be cleaned with regular cleaners or even brake cleaner. A mass air flow sensor cleaner is required to safely clean the hot wire.
If you own a 4th generation Toyota 4Runner and are still running OEM wheels, you may be looking into upgrading your wheels. One of the common things that people look to do is to upgrade to wheels that have more negative offset. This effectively pushes your wheels out towards the outside of the vehicle for a more aggressive stance. A popular option and one that I’m a big fan of is using 5th generation Toyota 4Runner OEM wheels to replace the stock 4th generation ones.
When I purchased my Acura CL-S from the original owner a couple years back, I continued to use the OEM battery that was installed. Since I didn’t get to drive the car much, the battery had gone dead several times already and after jumping it and recharging it so many times, I felt it was probably about time to replace the battery. Plus, it would be nice to get a battery that had some more cold-cranking amps (CCA’s) to help with cold starts.
The serpentine belt (also known as the drive belt) is a reinforced rubber belt that delivers power from the crankshaft to multiple accessories of a vehicle such as the air conditioning, alternator, water pump, etc. Since it drives critical components of a vehicle, it is important to perform regular inspections of the serpentine belt and to replace it when it is required to do so. he replacement of the serpentine belt can be a quick and easy job if you are aware of a couple things that could possibly throw you off-course.

