It’s a common issue on the 4th generation Toyota 4Runner to encounter the ‘VSC TRAC’ and ‘VSC OFF’ warning lights come on randomly and stay on. These lights may come on whenever you have an engine trouble code, which will be apparent when the engine light also comes on at the same time. However, if you are experiencing only the ‘VSC TRAC’ and ‘VSC OFF’ lights on without the check engine light on, then there might be a quick fix to getting rid of those lights.
It’s not the question of if your Lexus IS350 remote key will eventually go out, but when. After some time the small coin battery inside of your remote key will eventually go dead and you’ll need to replace it. It usually comes at the most inopportune time, but luckily the IS350 key is easy to take apart even without the use of any tools; all you need is a replacement battery.
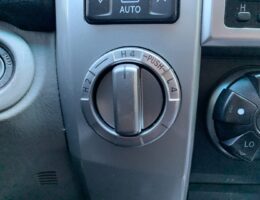
If you’re a 4th generation Toyota 4Runner owner, you may have heard of the phrase, “use it or lose it” being used. This term basically means that you should use your four-wheel drive system on a regular basis, otherwise it may stop working later down the road. The electronically-controlled 4WD actuator that is located inside of the transfer case can potentially seize up if not used for prolonged periods of time. Since the actuator is located inside of the transfer case, the transfer case itself needs to be opened before gaining access to the actuator. As you can conclude, if the 4WD actuator fails, you will end up with a costly repair. So “use it or lose it” to save yourself from future headaches.
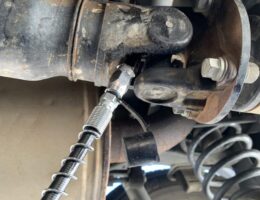
Lubricating the driveshaft (a.k.a. propeller shaft) is a key maintenance item on the 4th generation Toyota 4Runner that every owner should be doing. Armed with a grease gun and appropriate grease, it is easy to grease up the driveshaft and keep your driveline working properly. There is a bit of variability in information related to how often you should be greasing your driveshaft, as well as what type of grease you should be using on the various components of the propeller shafts. Once you navigate through the confusion around the the maintenance interval and the grease type, the maintenance itself is quite easy and ensures you keep your driveline in tip-top shape.
The specific issue with the sticky melting dash is that the dashboard literally becomes sticky to the touch and becomes brittle. This is even a problem with the front and rear door panels showing similar symptoms. Both the dashboard and door panels seem to fail in several ways: they can become very glossy-looking, can crack, and/or can break off in pieces. Regardless of what the exact issue is that you’re experiencing, you might be wondering what options you have so that you can address the issue with the dashboard and door panels.
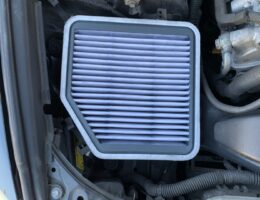
On the second generation Lexus IS350 (years 2006 through 2013), Lexus recommends checking your engine air filter every 6 months (or 5,000 miles) and replacing it every 36 months (or 30,000 miles), whichever comes first. The time that it takes to replace the engine air filter is essentially the same as the amount of time it takes to inspect. This is due to the fact that the majority of the time spent doing either is in removing the engine cover and air duct. Therefore, it may be easier to simply replace the engine air filter at the replacement interval. However, if you live in an are that might have more severe environmental conditions, you may consider being more zealous with your inspection schedule.
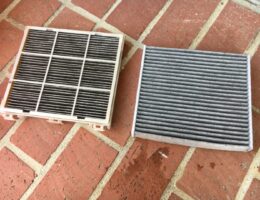
On the second generation Lexus IS350 (years 2006 through 2013), Lexus recommends checking your cabin air filter (or as they call it, air conditioning filter) every 5,000 miles and replacing it every 10,000 miles. This might be a bit more aggressive of a maintenance schedule as you might typically see, with many paper cabin air filters typically requiring replacement every 24 months or about 30,000 miles. Regardless, you should be at checking your cabin air filter on a regular basis to ensure that it is not clogged up with dirt and debris.
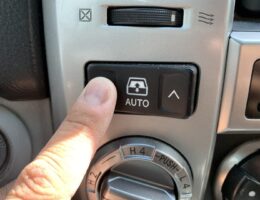
If the car battery on your 4th generation Toyota 4Runner was ever replaced, you might have experienced your automatic driver’s side window, moonroof, and rear hatch window no longer opens or closes automatically with the single full press of your controls. This is common when the battery has been disconnected; it requires you to perform a “normalizing” procedure to re-activate the auto open and close feature of your 4Runner.
This short cable that is broken off in the photo below is a battery ground cable. This cable should be connected between the negative terminal of the car battery and the body of the vehicle. Over time, if the battery is not securely tied down, the wire strands of the battery ground cable can fatigue and break due to constant movement. Rust and corrosion will accelerate this process. This can potentially be a safety issue and you might see some voltage issues as well.


