
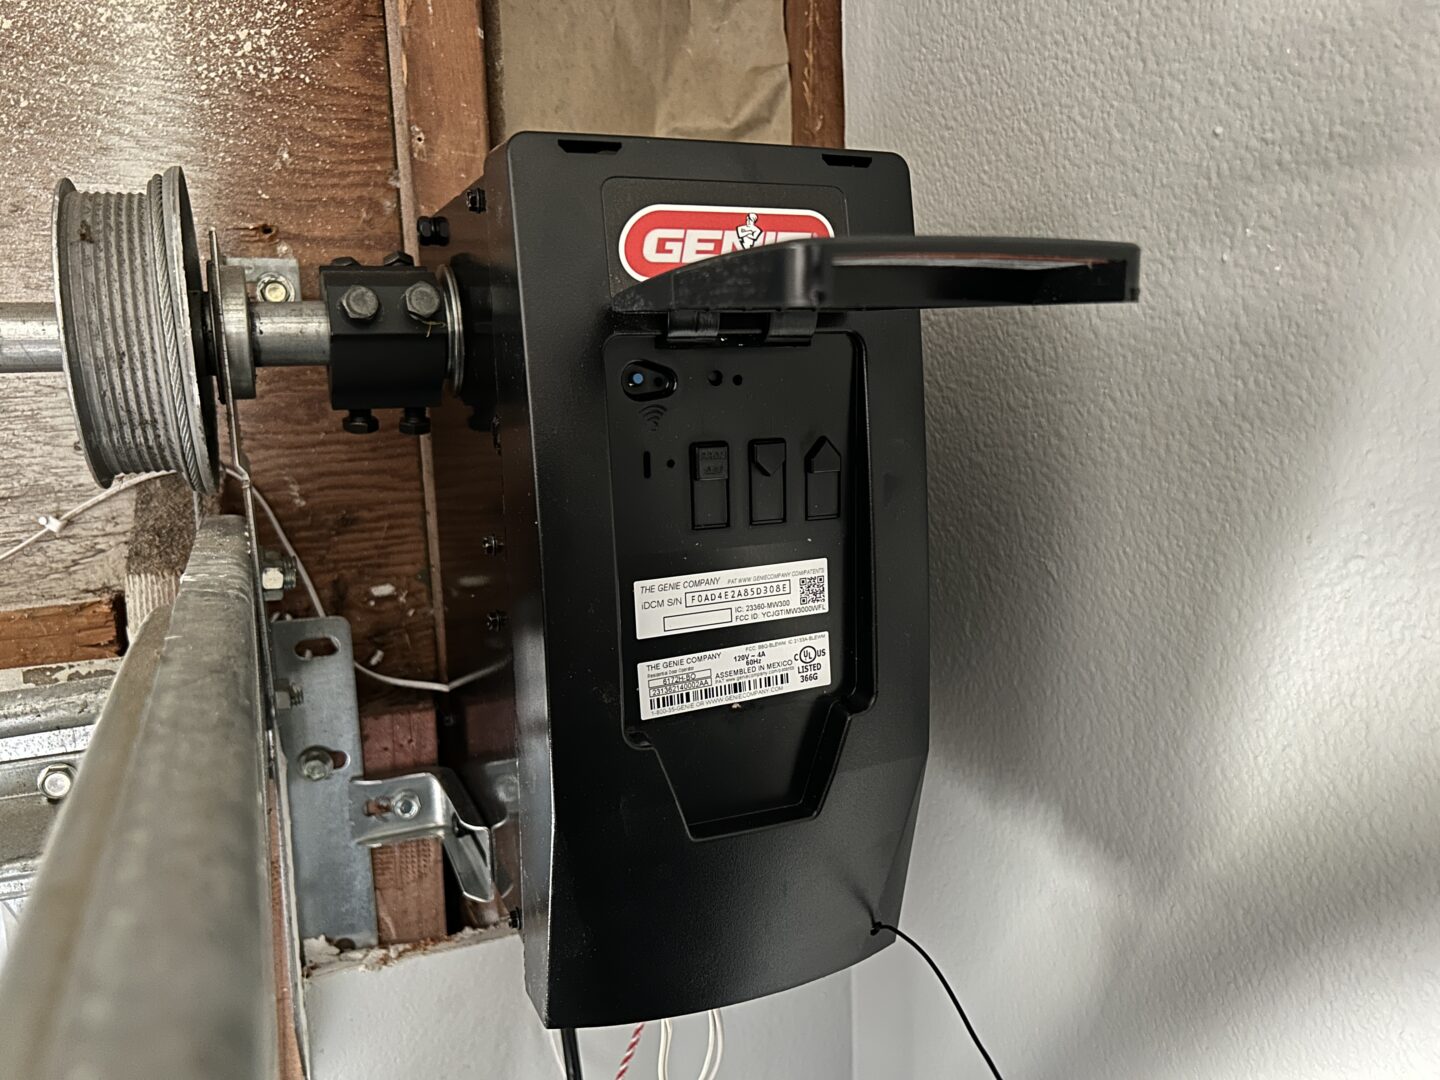
One of the biggest improvements to my garage during my renovation has been upgrading the standard ceiling-mounted, belt-driven garage door opener to a wall-mounted one that has smart capabilities. I purchased the Genie B6172H Wall Mount Smart Garage Door Opener while it was on sale (around $425) when it typically sells for about $500 regular price. This unit mounts to the wall right by the garage door and drives the garage door using its internally driven shaft, eliminating the need for the bulky ceiling-mounted garage door opener and track.
The Genie B6172H is surprisingly small. I was expecting it to be much bigger, but it only measures 14.5″ tall, 7″ wide, and 9″ deep. The unit comes with a battery backup, garage door opener remotes, LED light, motion sensors, and other hardware to install. You can also connect this smart device to the Aladdin App on your smart phone to remotely open and close the garage door.
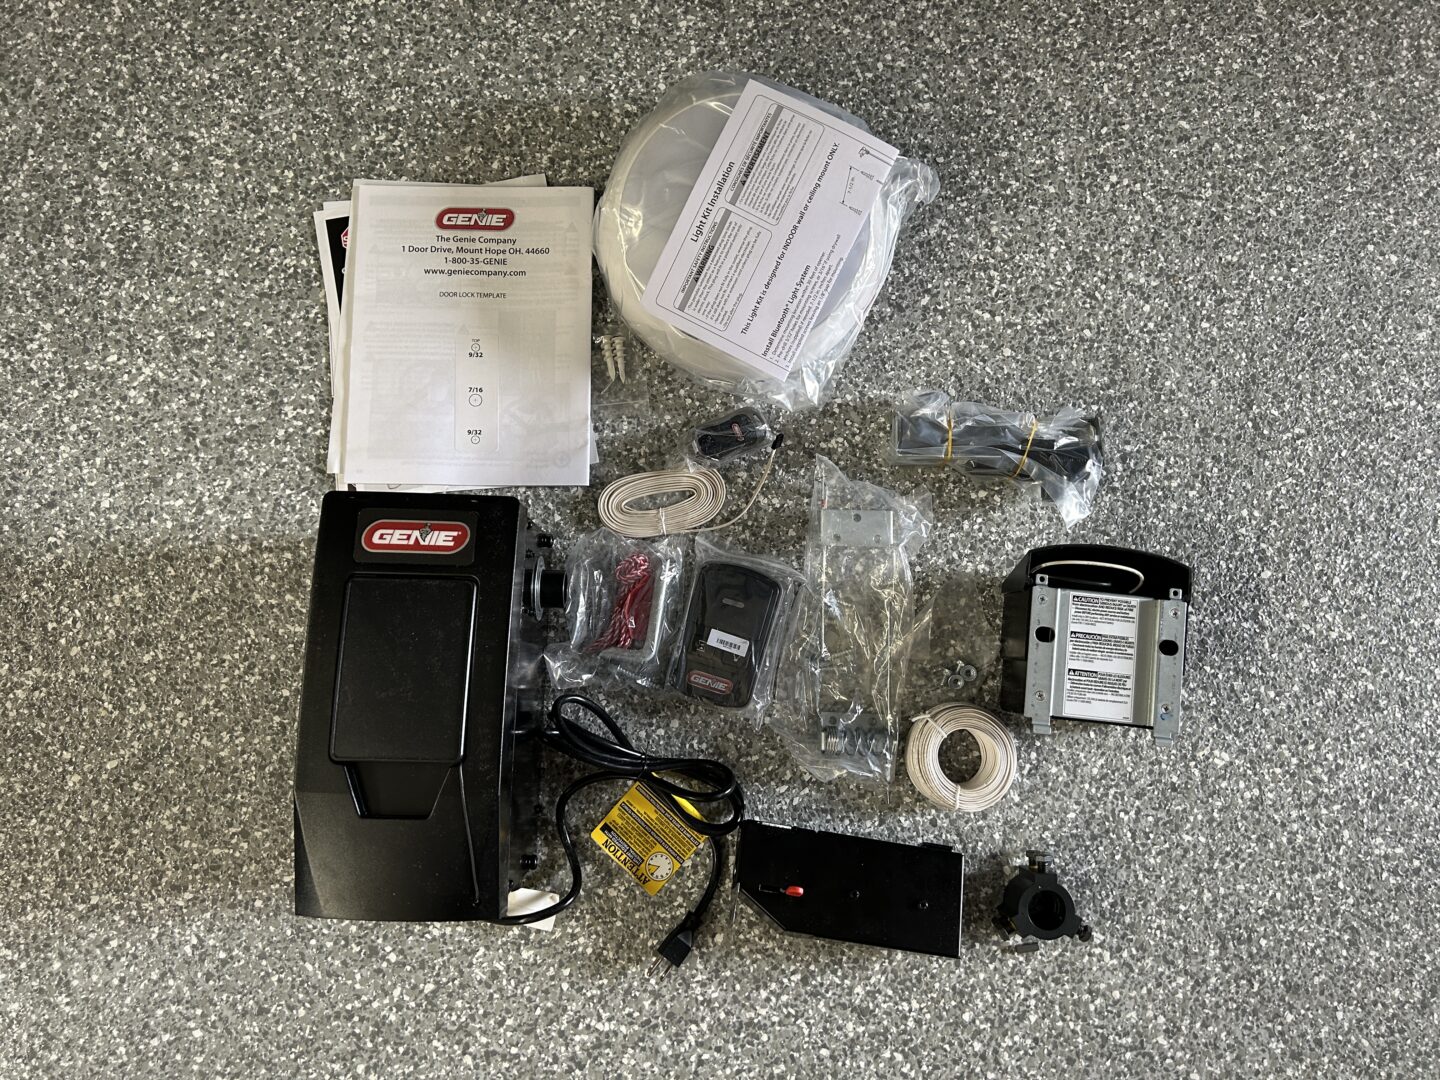
Tools & Parts Required for the Installation
Genie B6172H Wall Mount Smart Garage Door Opener
Socket Set
Tape Measure
Power Drill and Bits
Stud Finder
9″ Torpedo Level
Screwdriver Set
Wire Strippers
How to Install the Genie B6172H Wall Mount Smart Garage Door Opener
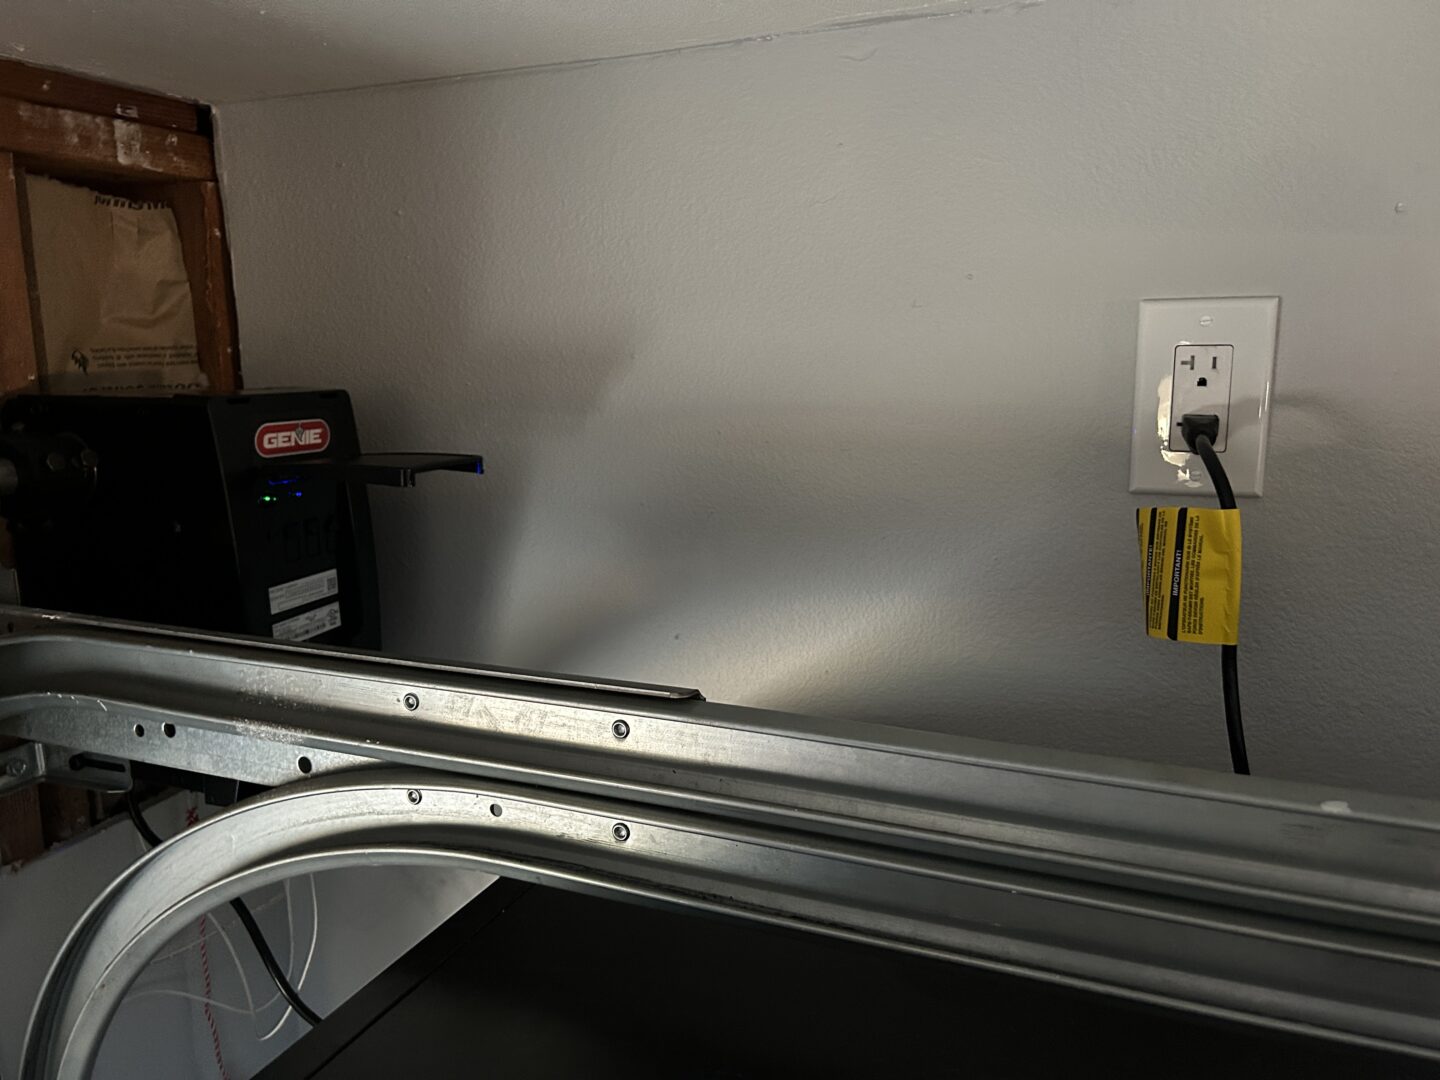
There are a number of things you should consider prior to installing the smart garage door opener. These considerations are all listed in the manufacturer’s instructions. Without going through every one, some things include where you want to install the garage door opener (right side or left side of garage door), whether you have a stud or something sturdy that you can mount the garage door opener to, and if you have a nearby outlet readily available to plug the unit into.
I always recommend following the instructions that come with your product as this will guarantee that you follow all the right steps towards a proper install. Below is a walkthrough of my personal install of the Genie B6172H Wall Mount Smart Garage Door Opener. I hope that it is a helpful supplement to the manufacturer’s instructions and aids you in either deciding whether to get one or not, and also to help guide you through the installation of the product.
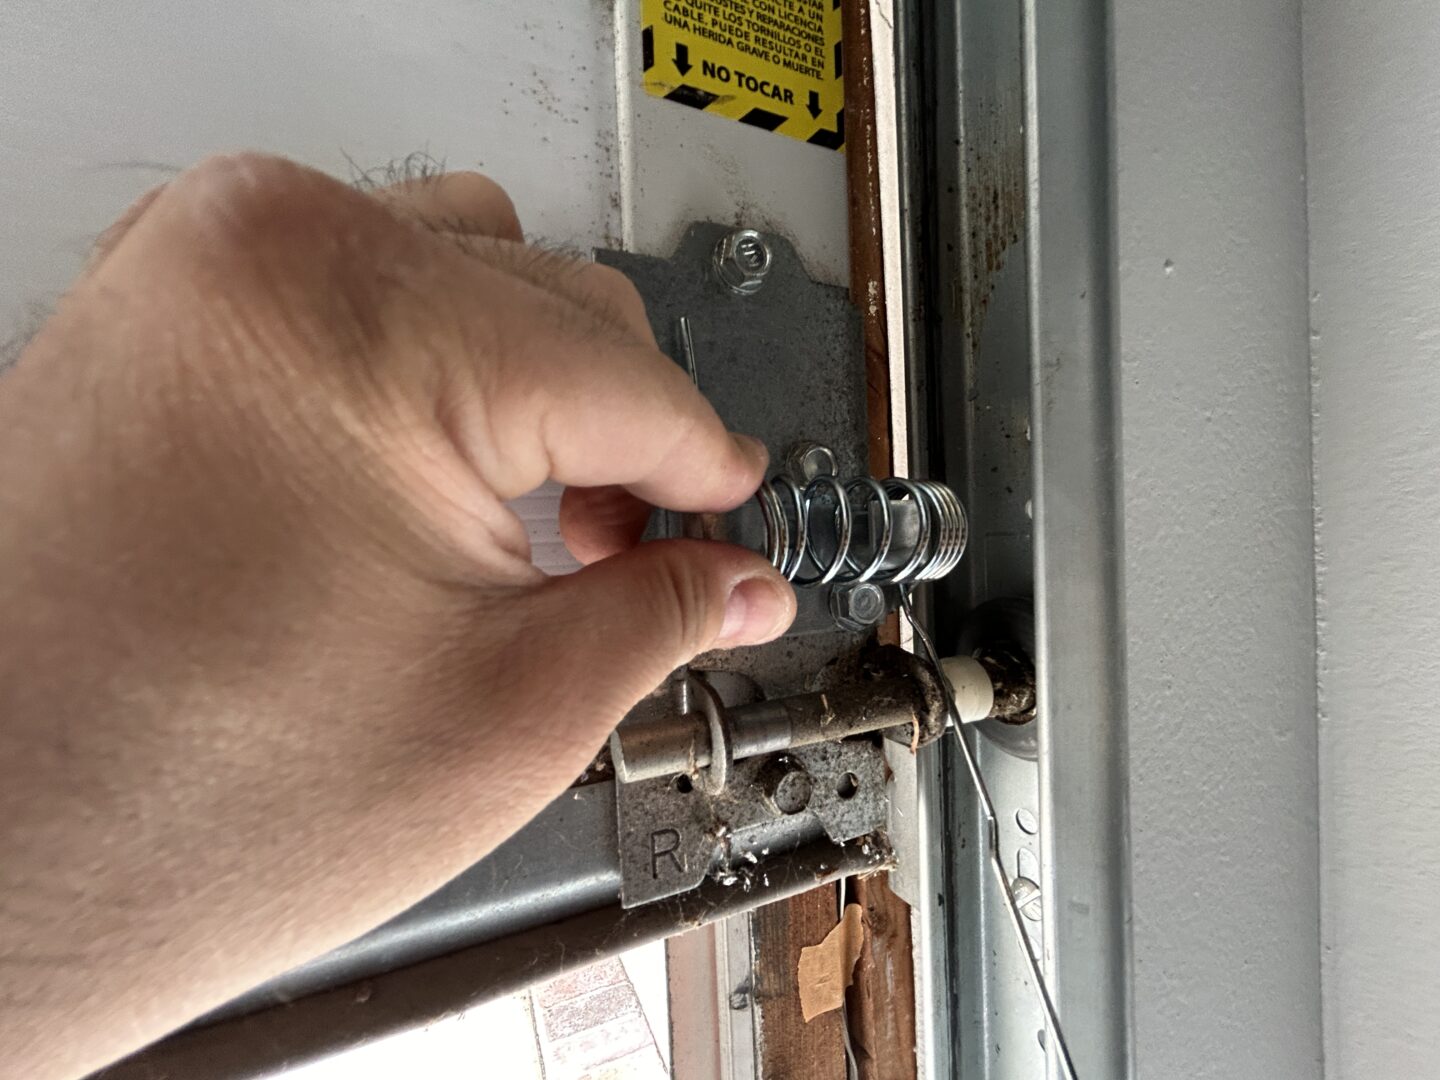
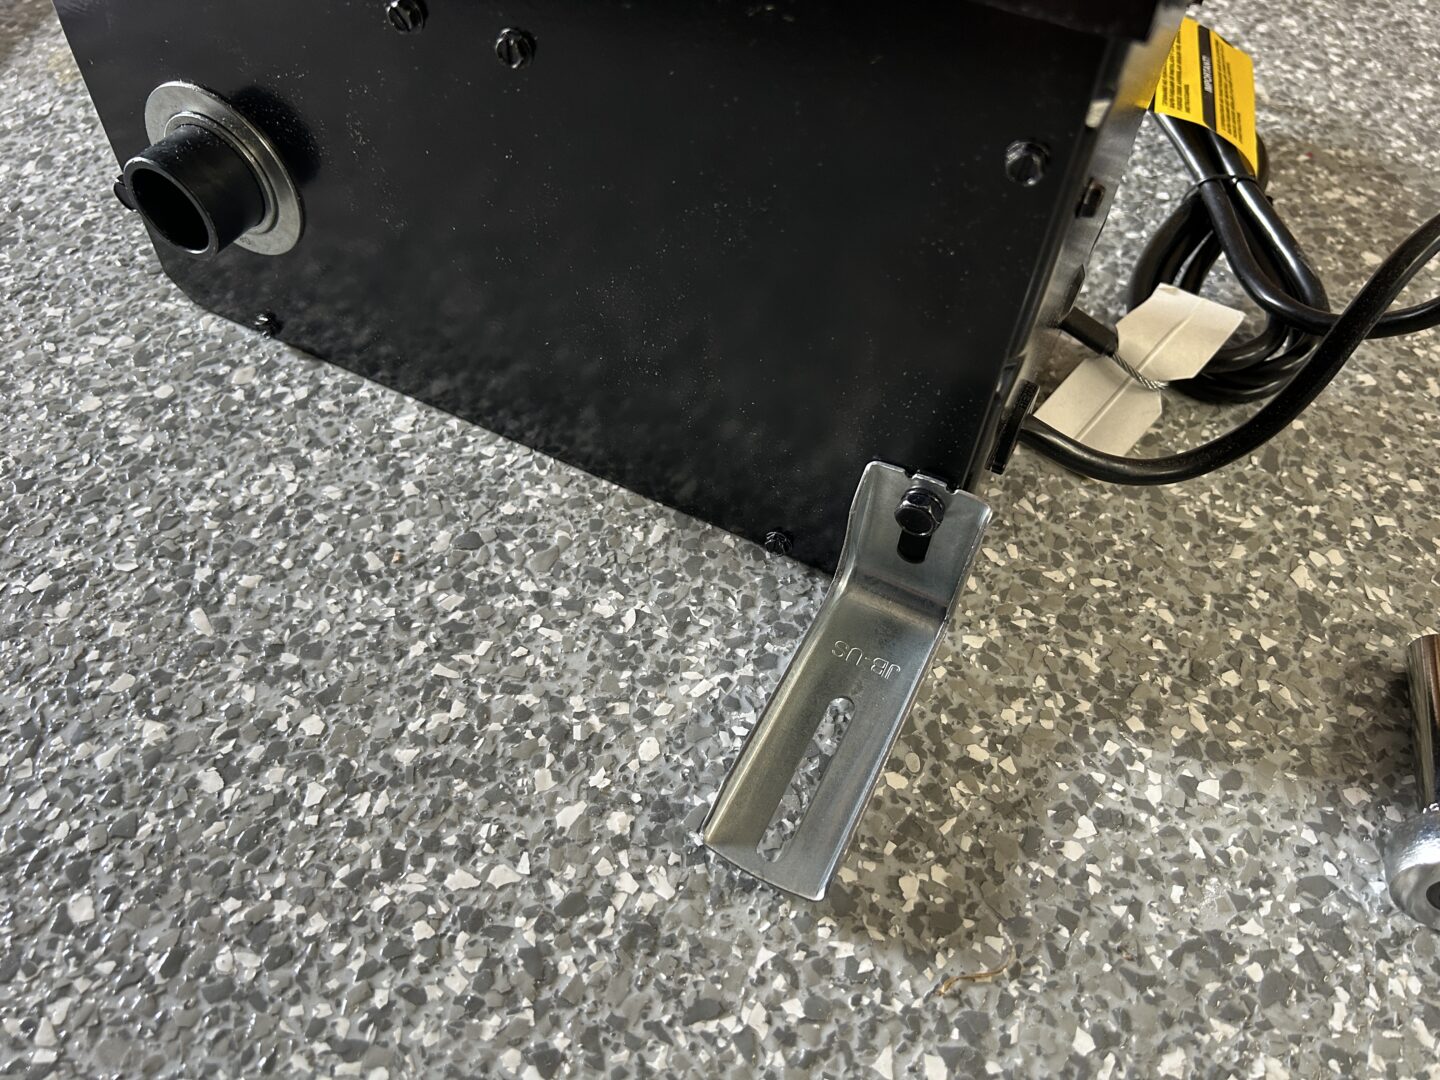
Installing the Cable Keepers
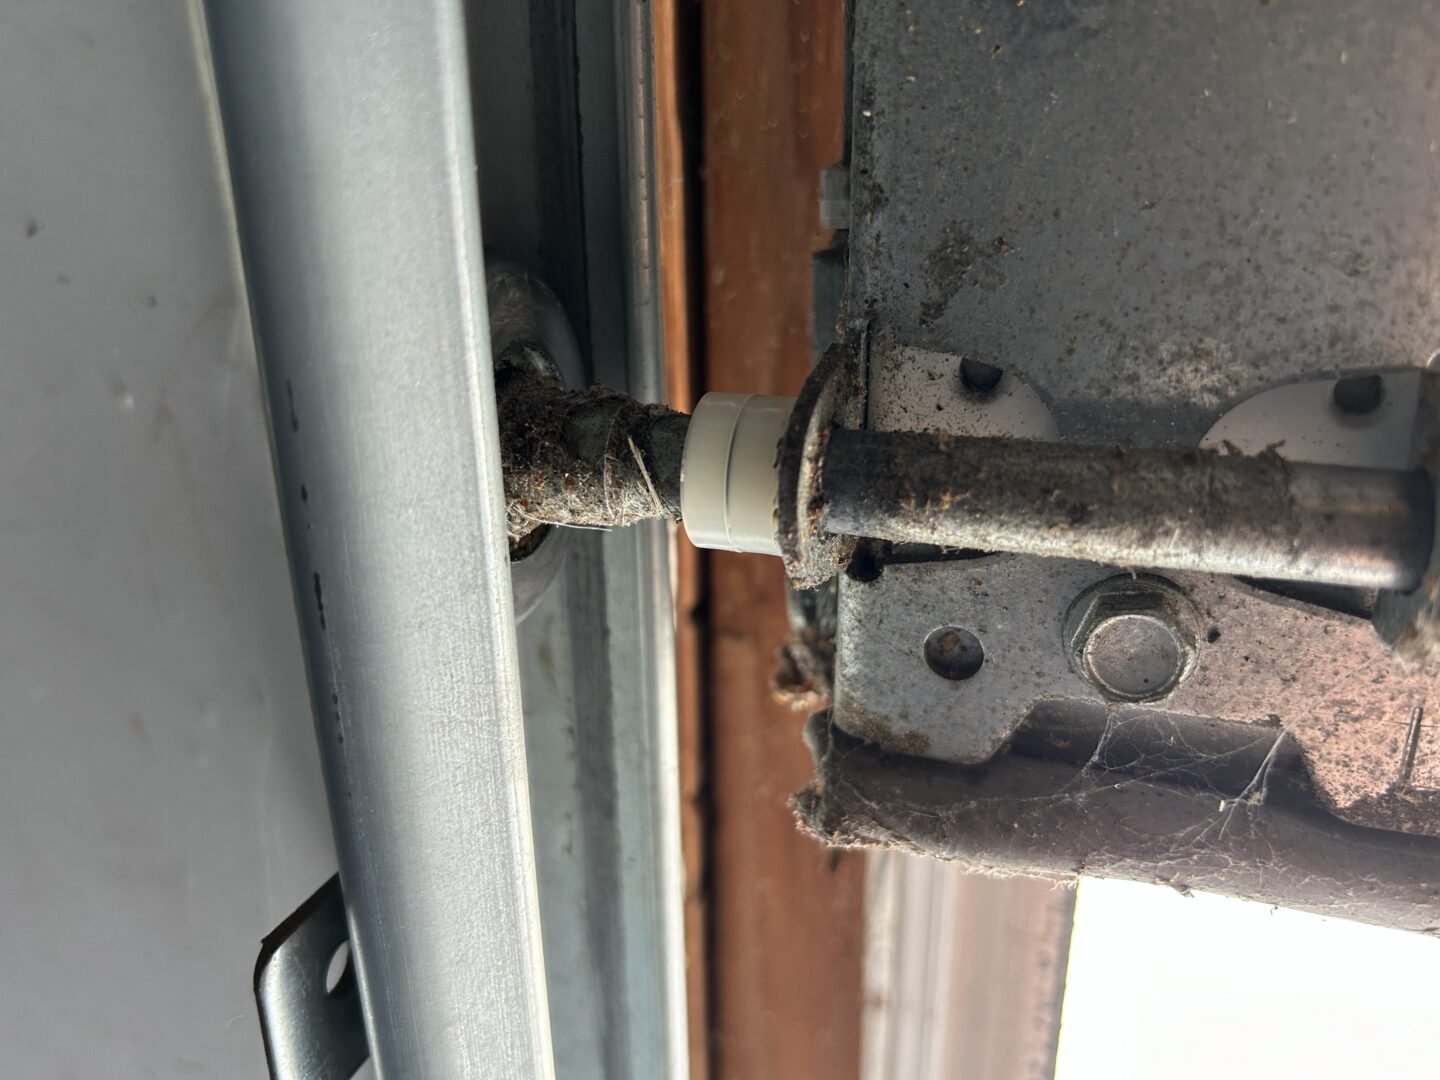
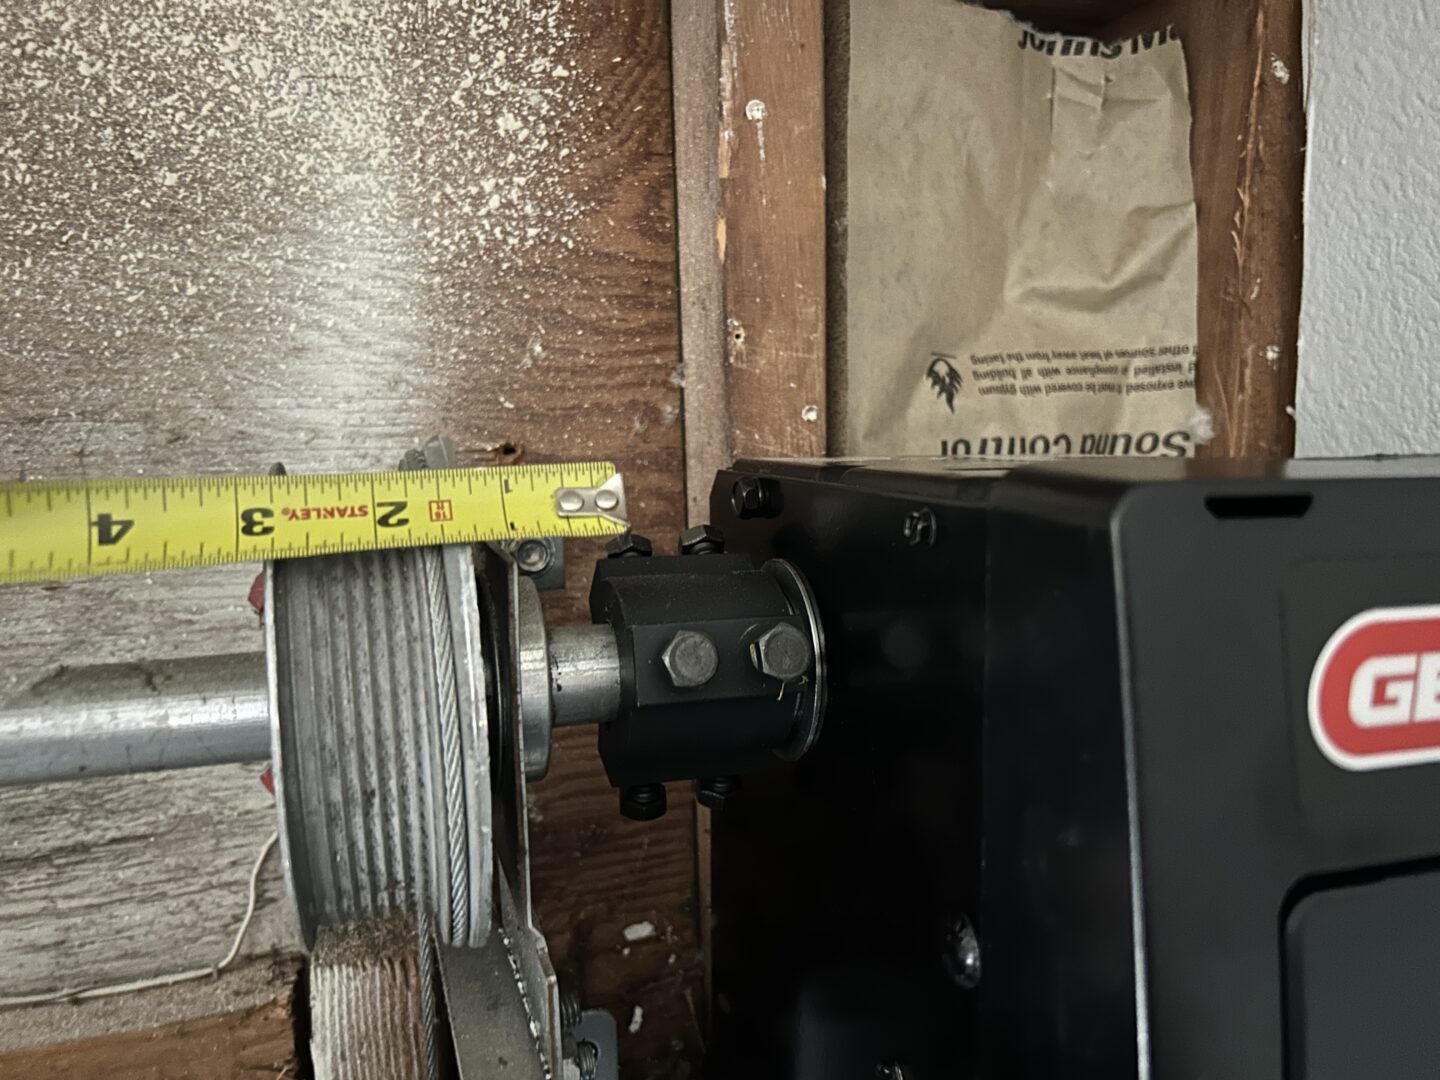
The first thing to install are the cable keepers. Push the provided white spacers onto the shaft for the roller wheel between the track roller and the bottom corner bracket. Doing this should provide you with a 1/2″ clearance between the track roller and corner bracket. Do the same thing for both sides of the garage door.
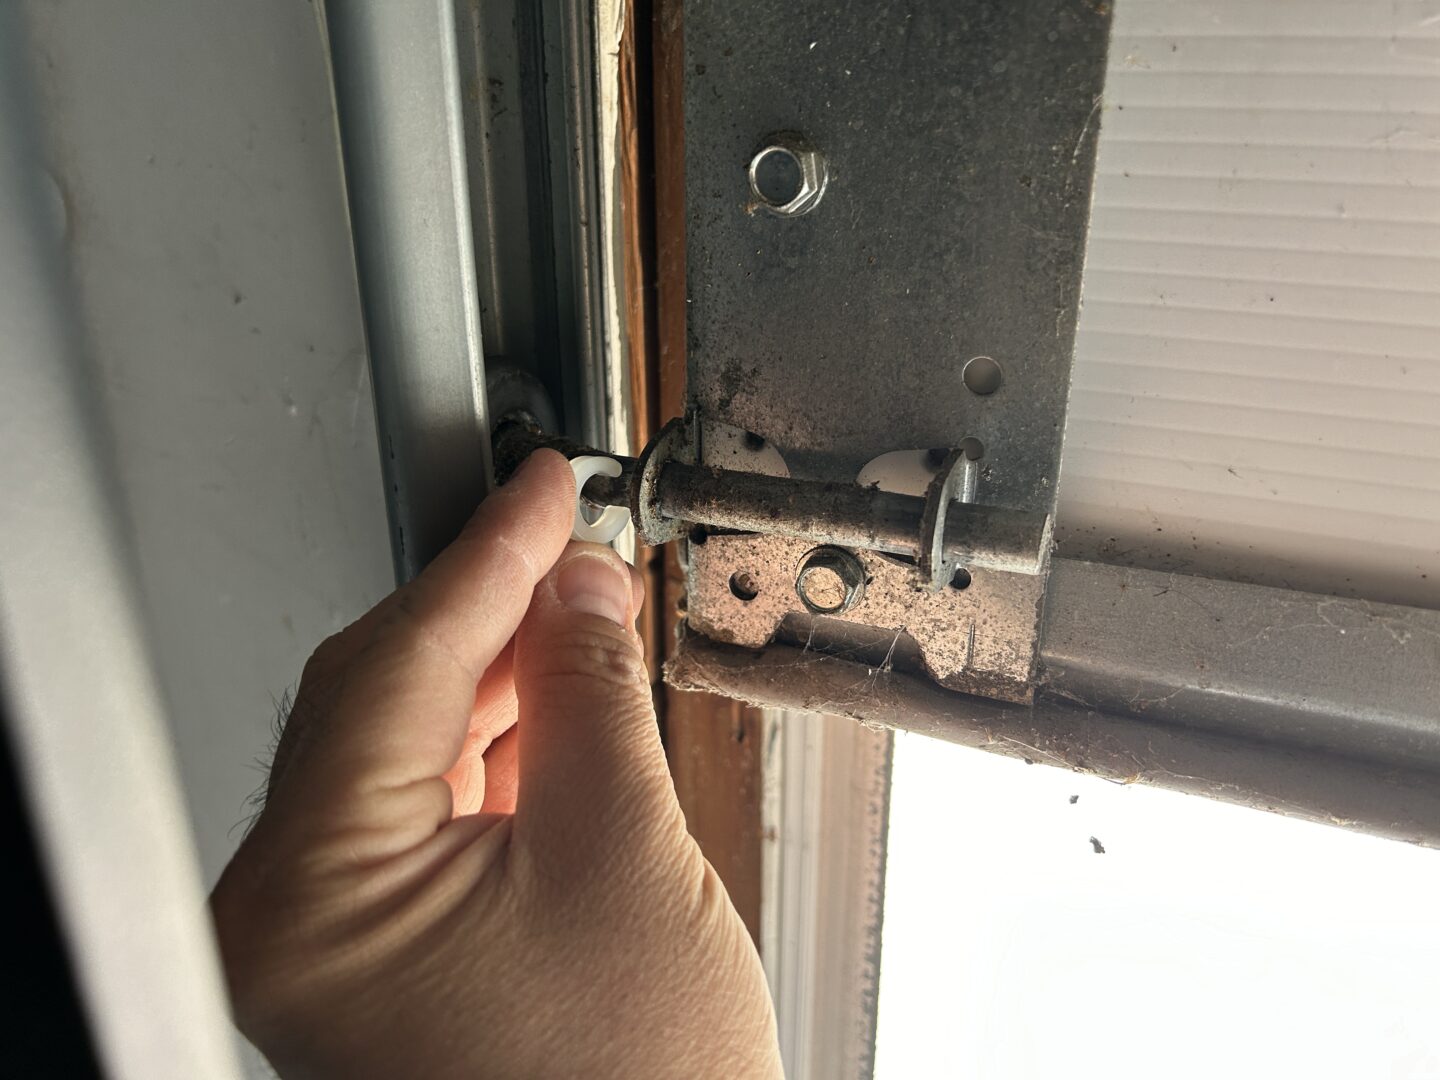

If you still don’t have the required 1/2″ clearance, you can install a second spacer to attain the needed clearance. If you still cannot get this clearance, you may need to remove and re-attach the track to the wall and adjust the track.
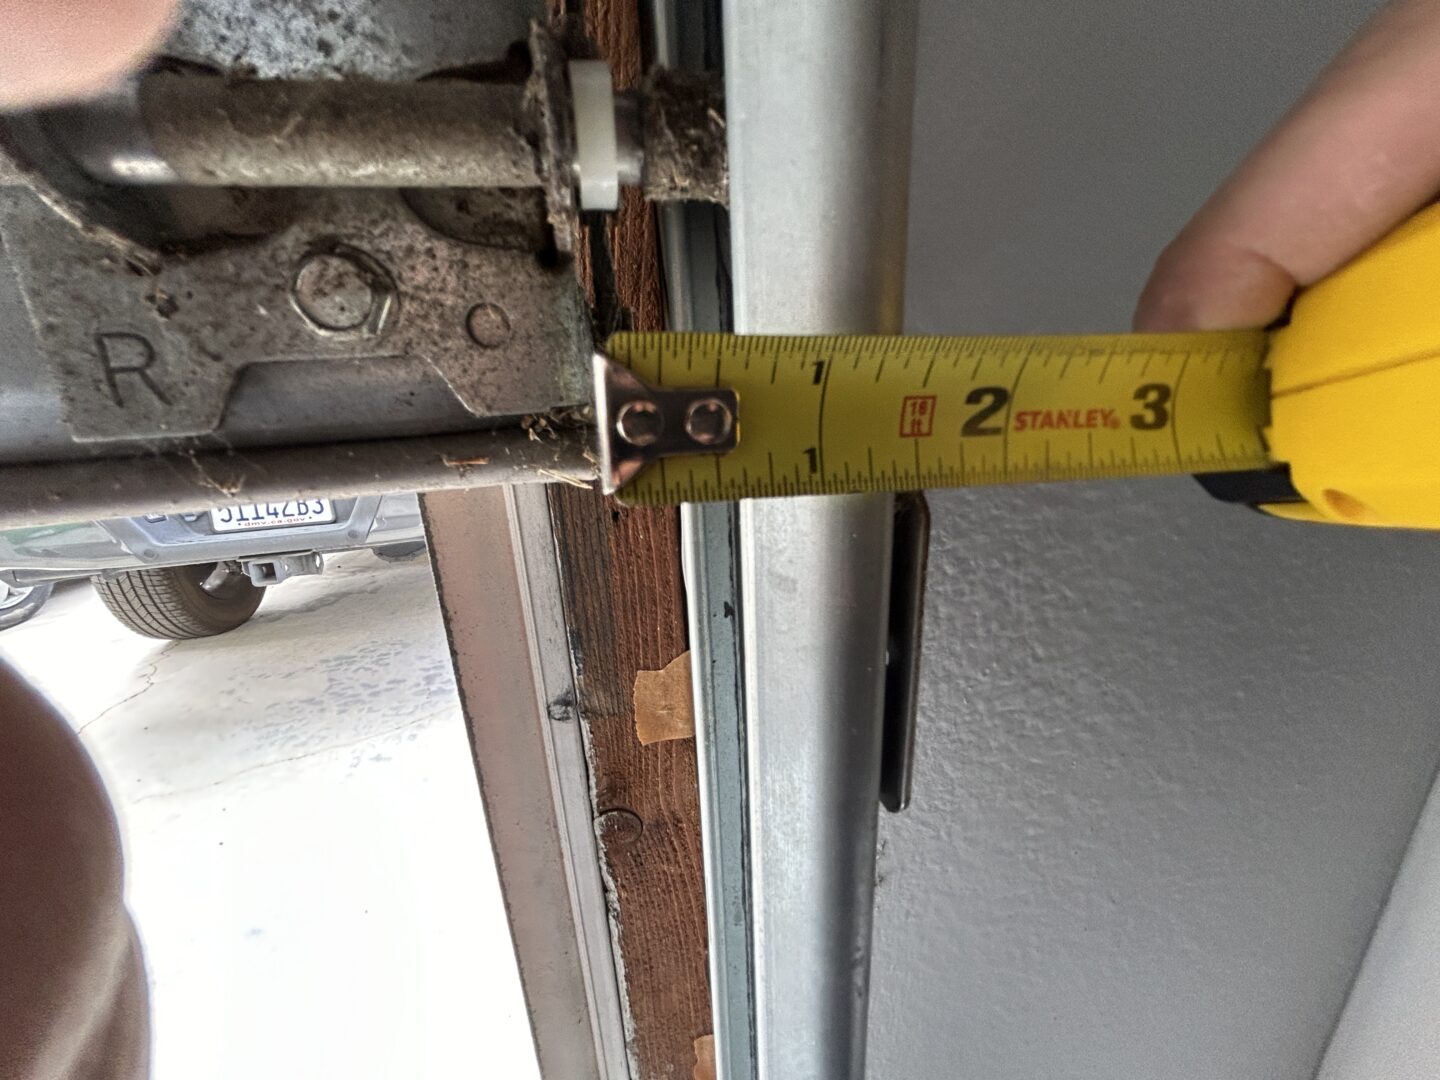
Position the cable keeper assembly (bracket and spring) directly above the garage door bottom bracket. The cable keeper must extend 1/8″ past the end of the door section. There should not be more than 4-1/2″ from the bottom edge of the door to the bottom of the cable keeper.
Use a marker to mark the openings of the bracket so that you can drill and/or install self drilling screws to affix the cable keeper assembly to the main bracket. There is a recommendation to pre-drill 1/8″ pilot holes into the garage door if it is made out of wood. Then repeat on the other side of the door.
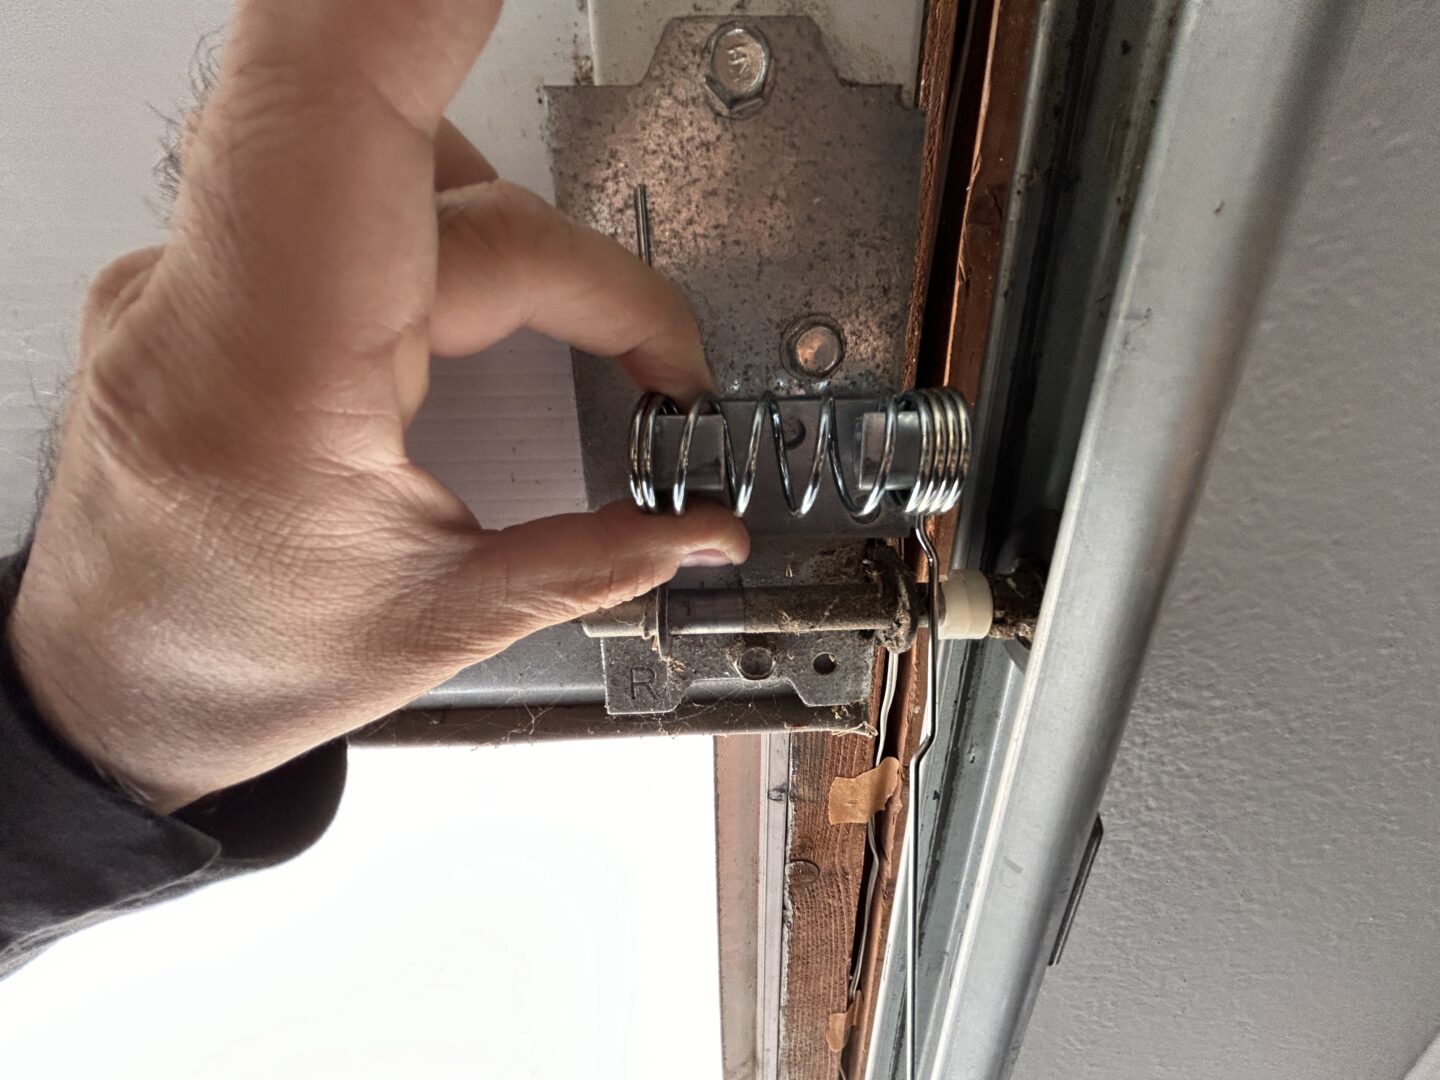
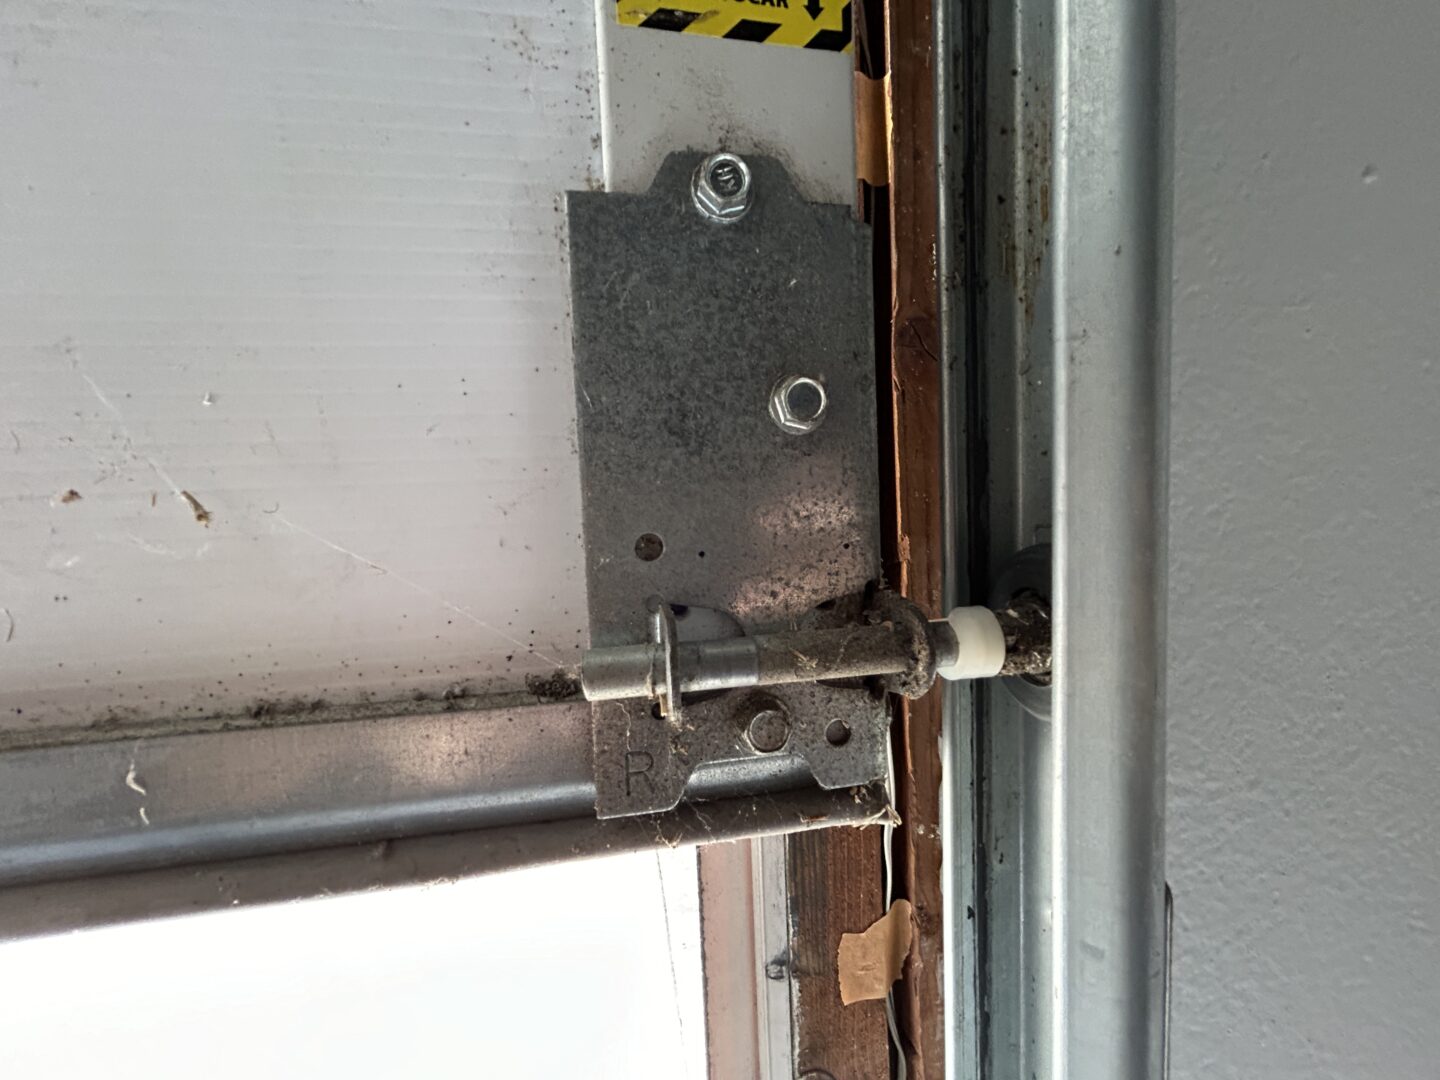
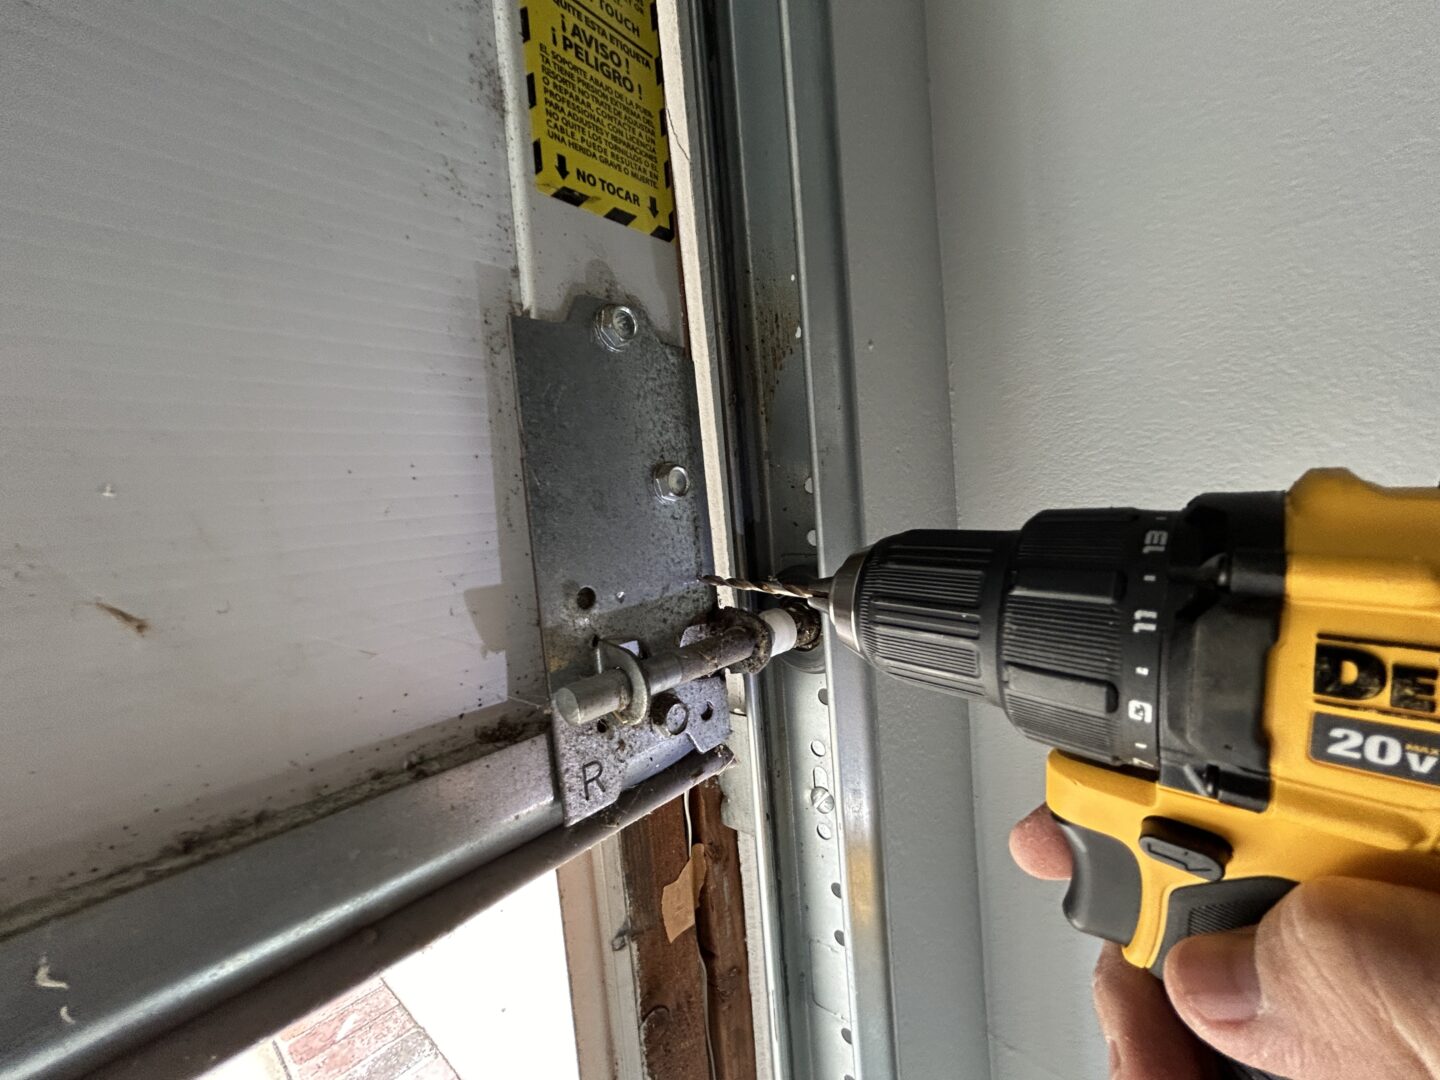
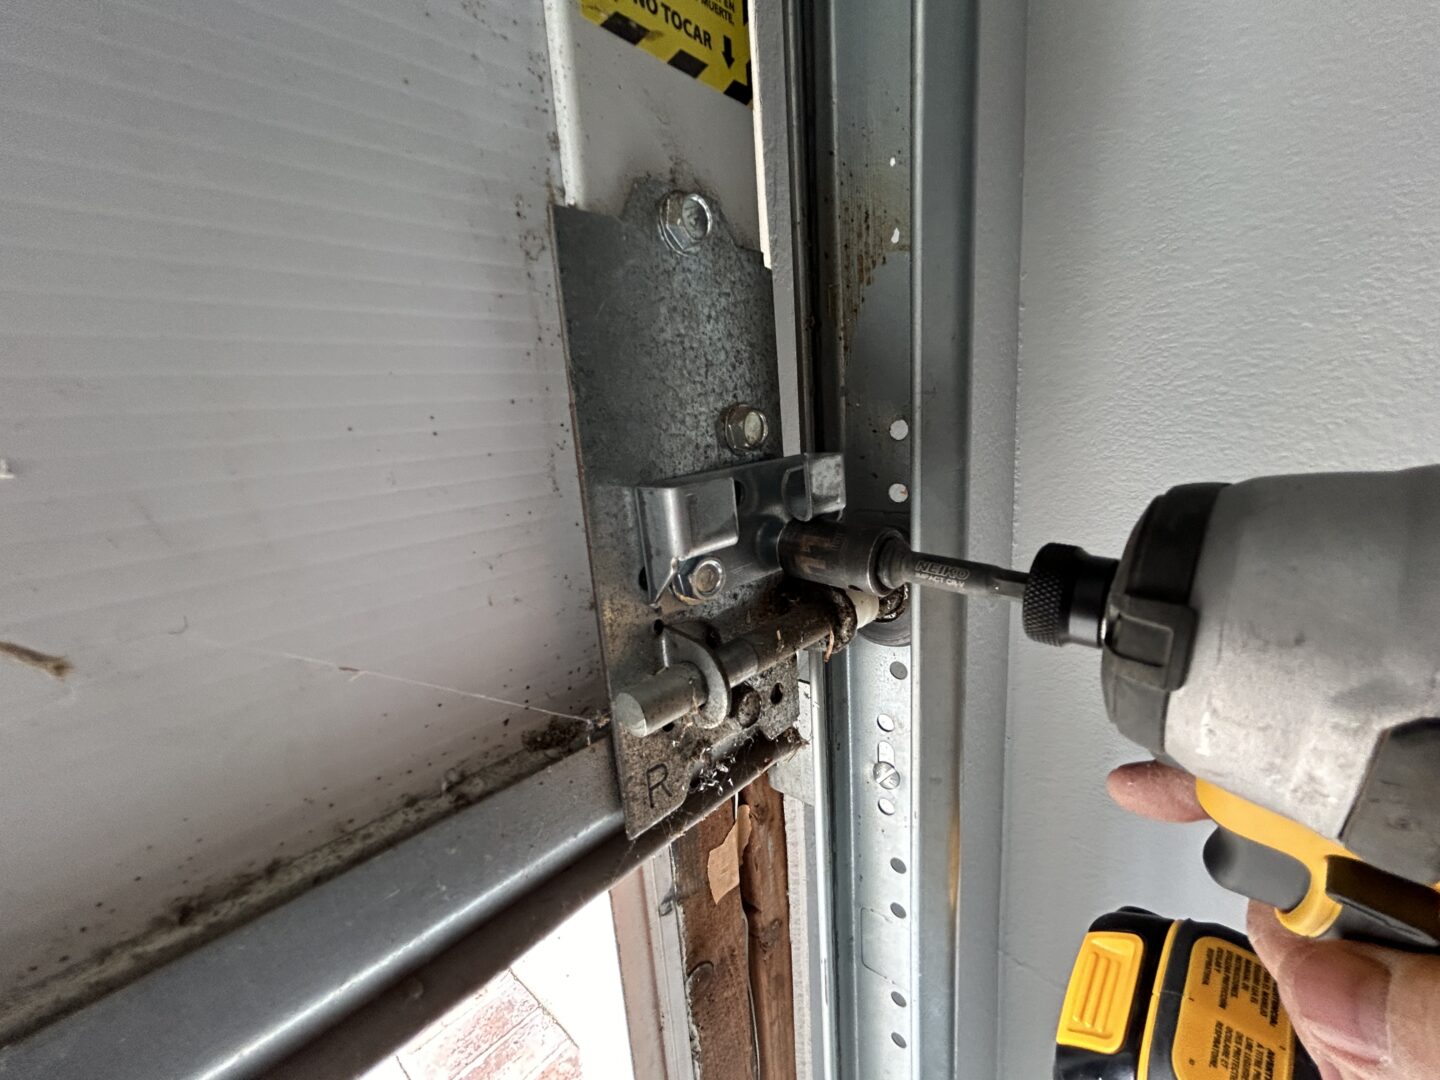
Bring the spring rod up and hook the white sleeve around the garage door tension cable on both sides of the garage. We can then move onto the installation of the door opener motor itself.

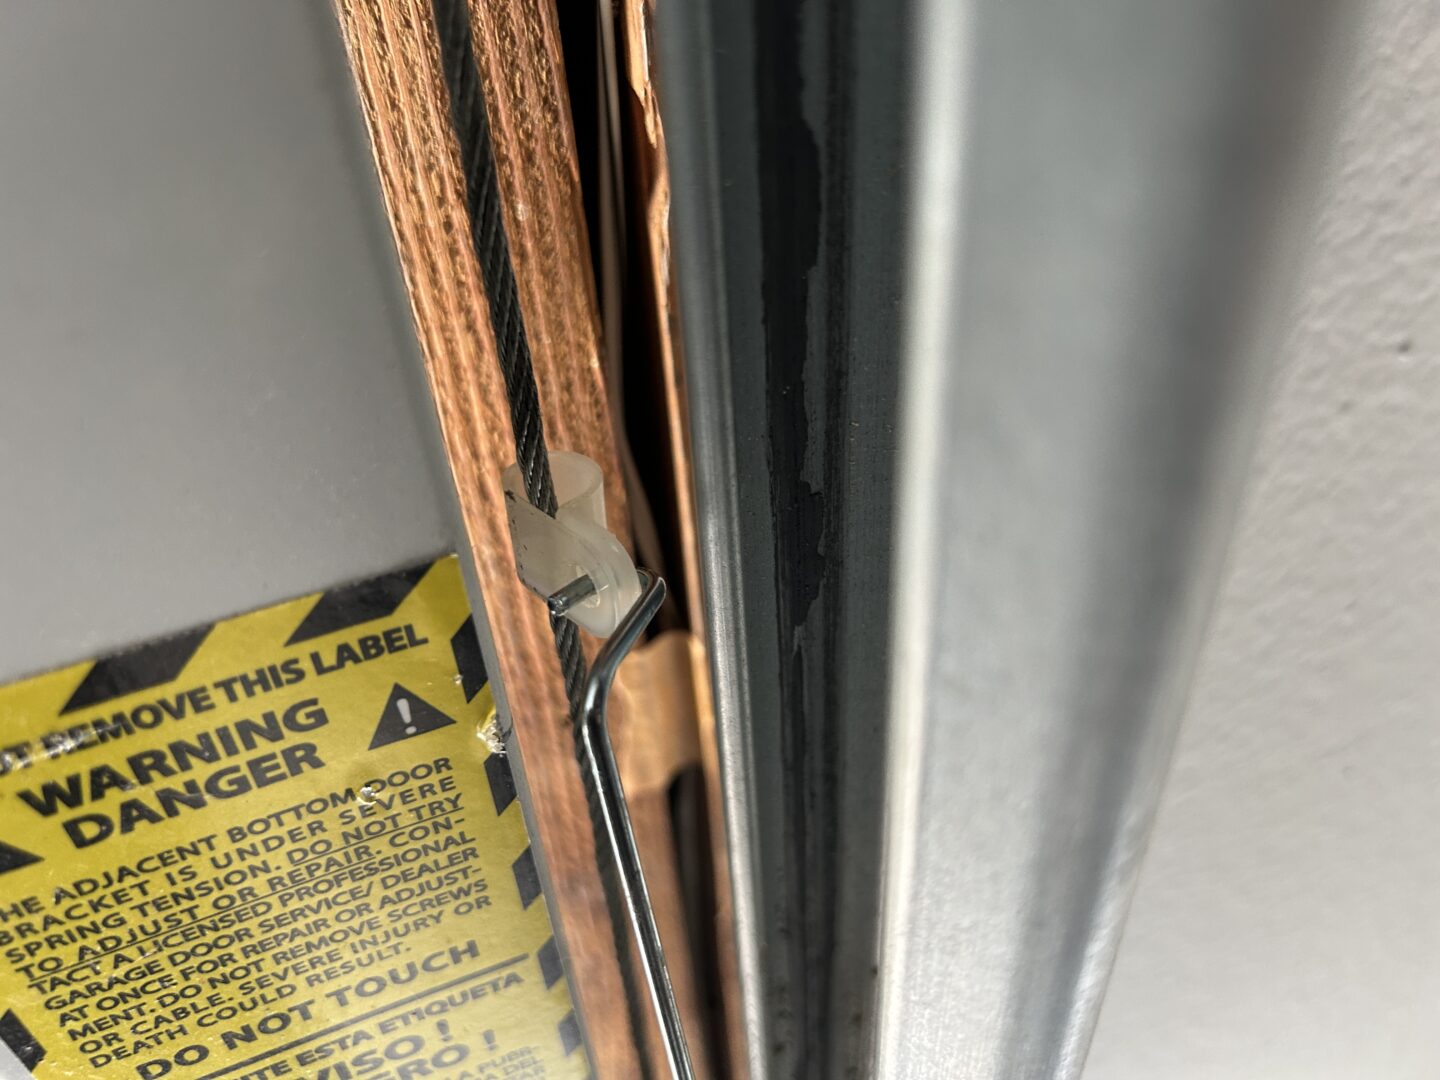
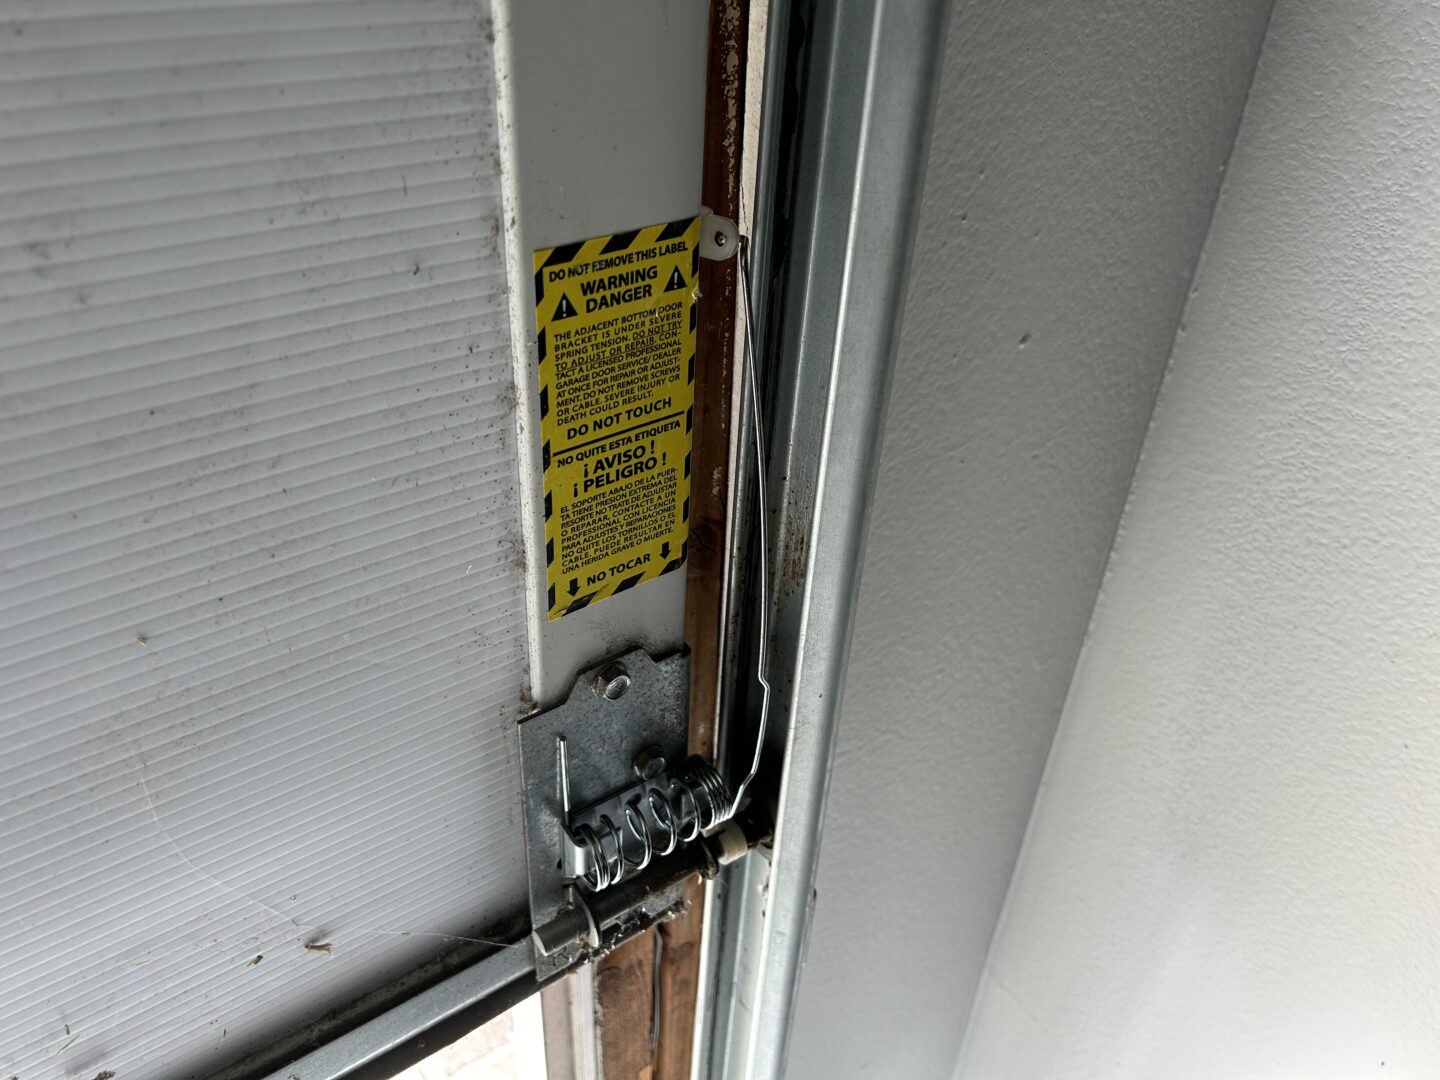
The reason the cable keeper is needed is
Installing the Opener Unit
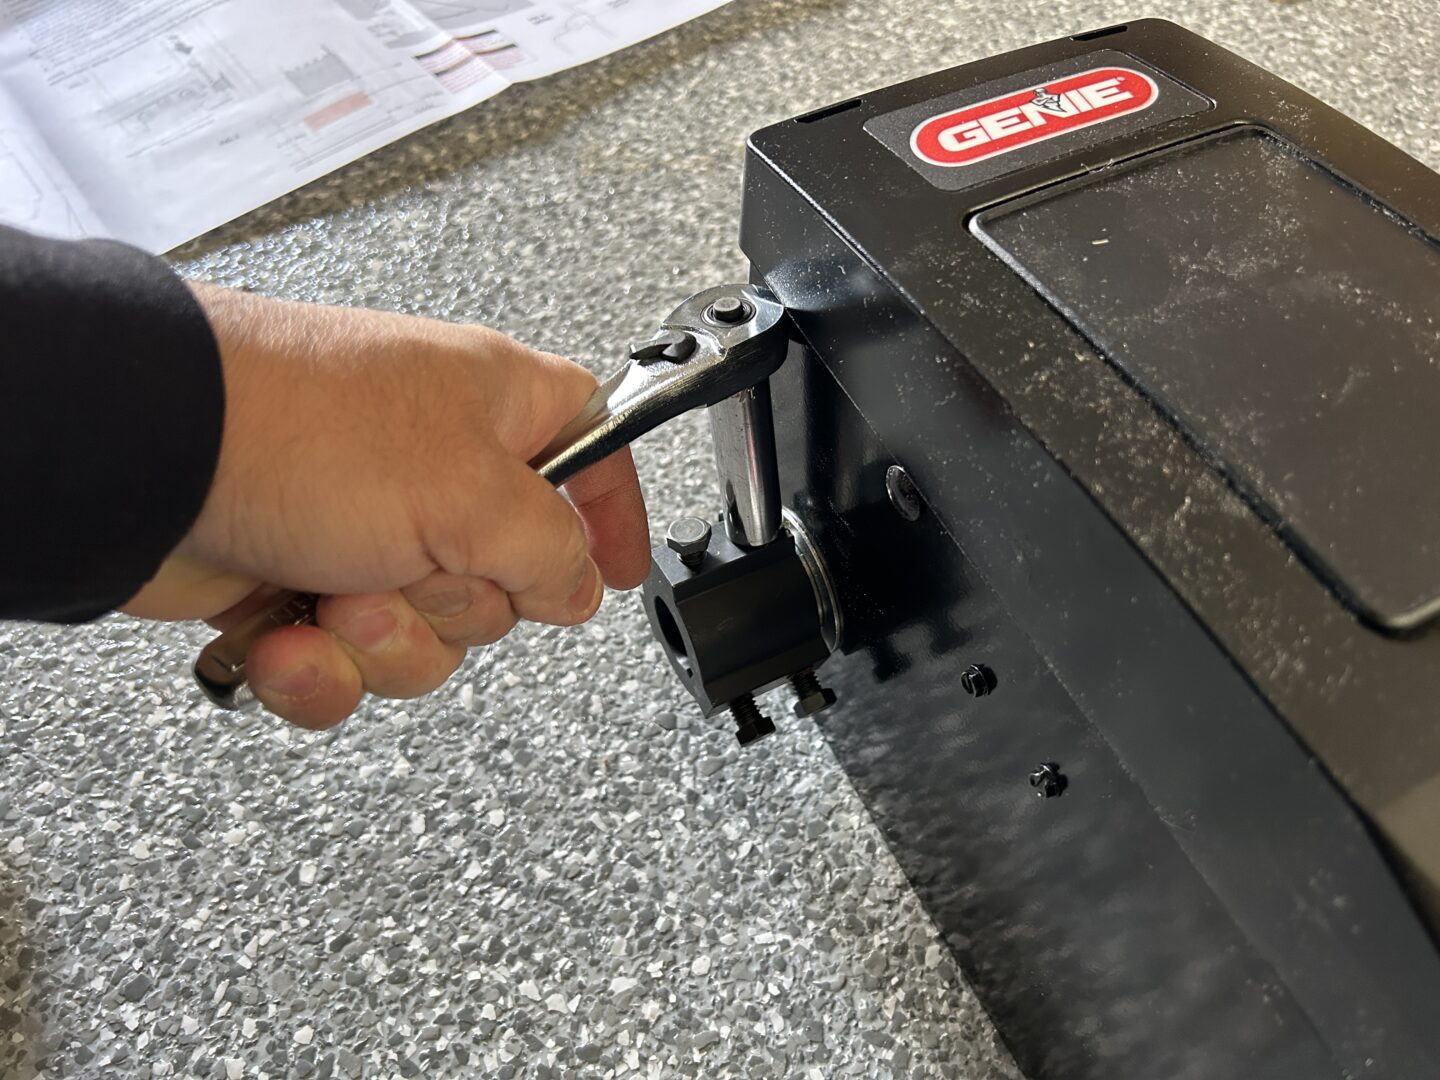
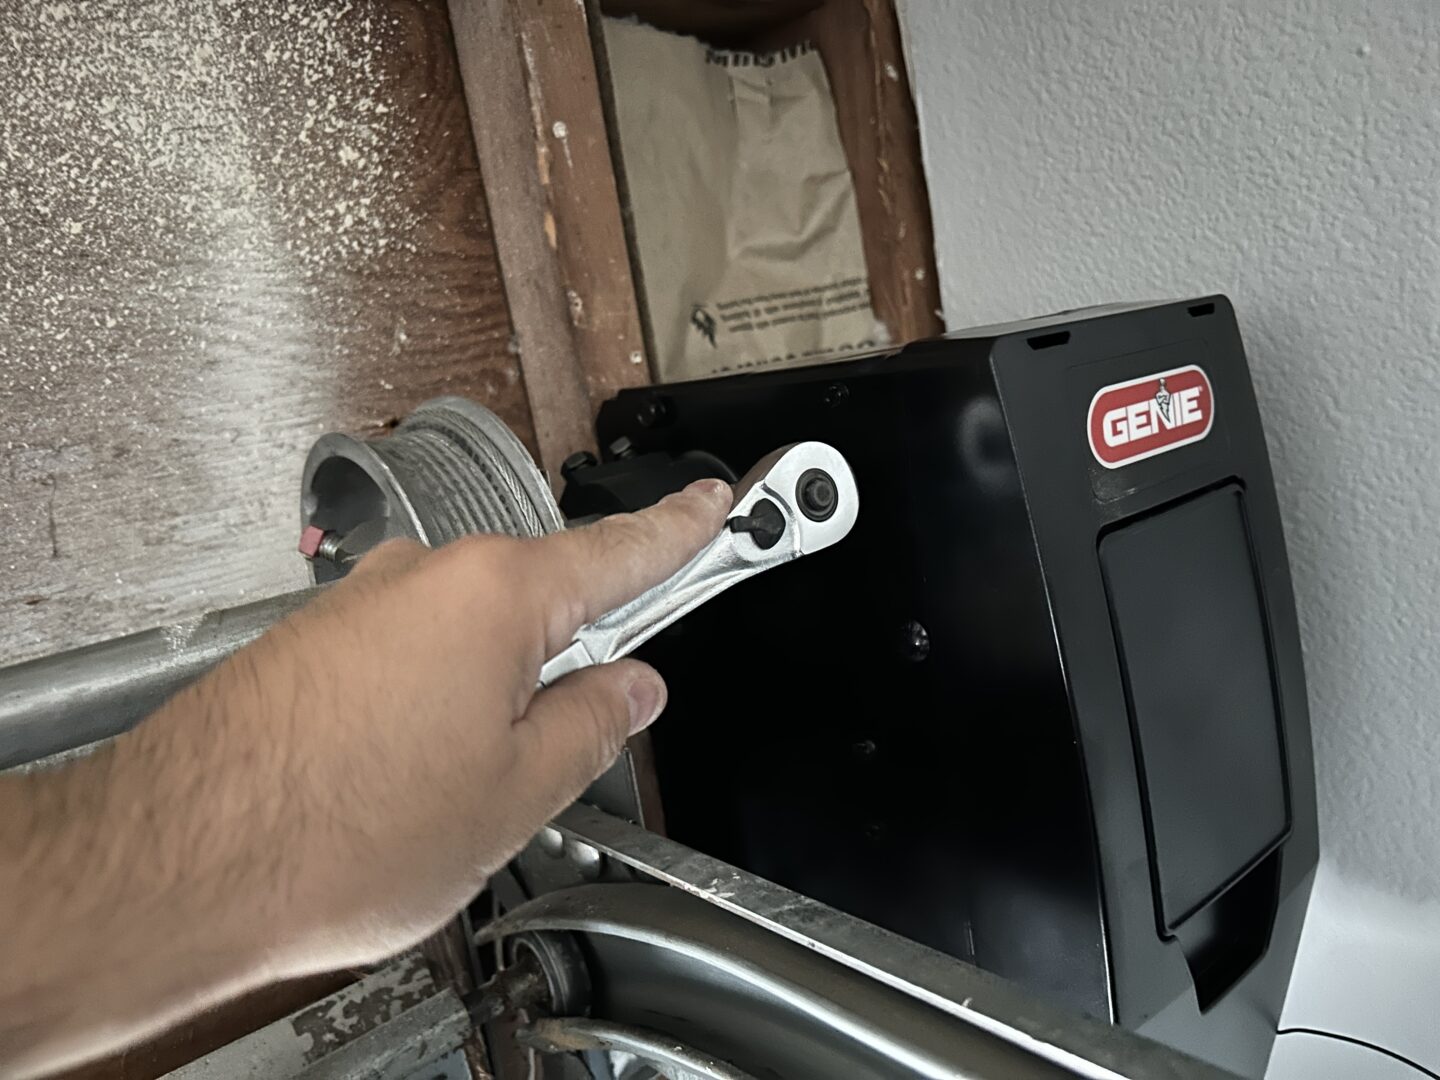
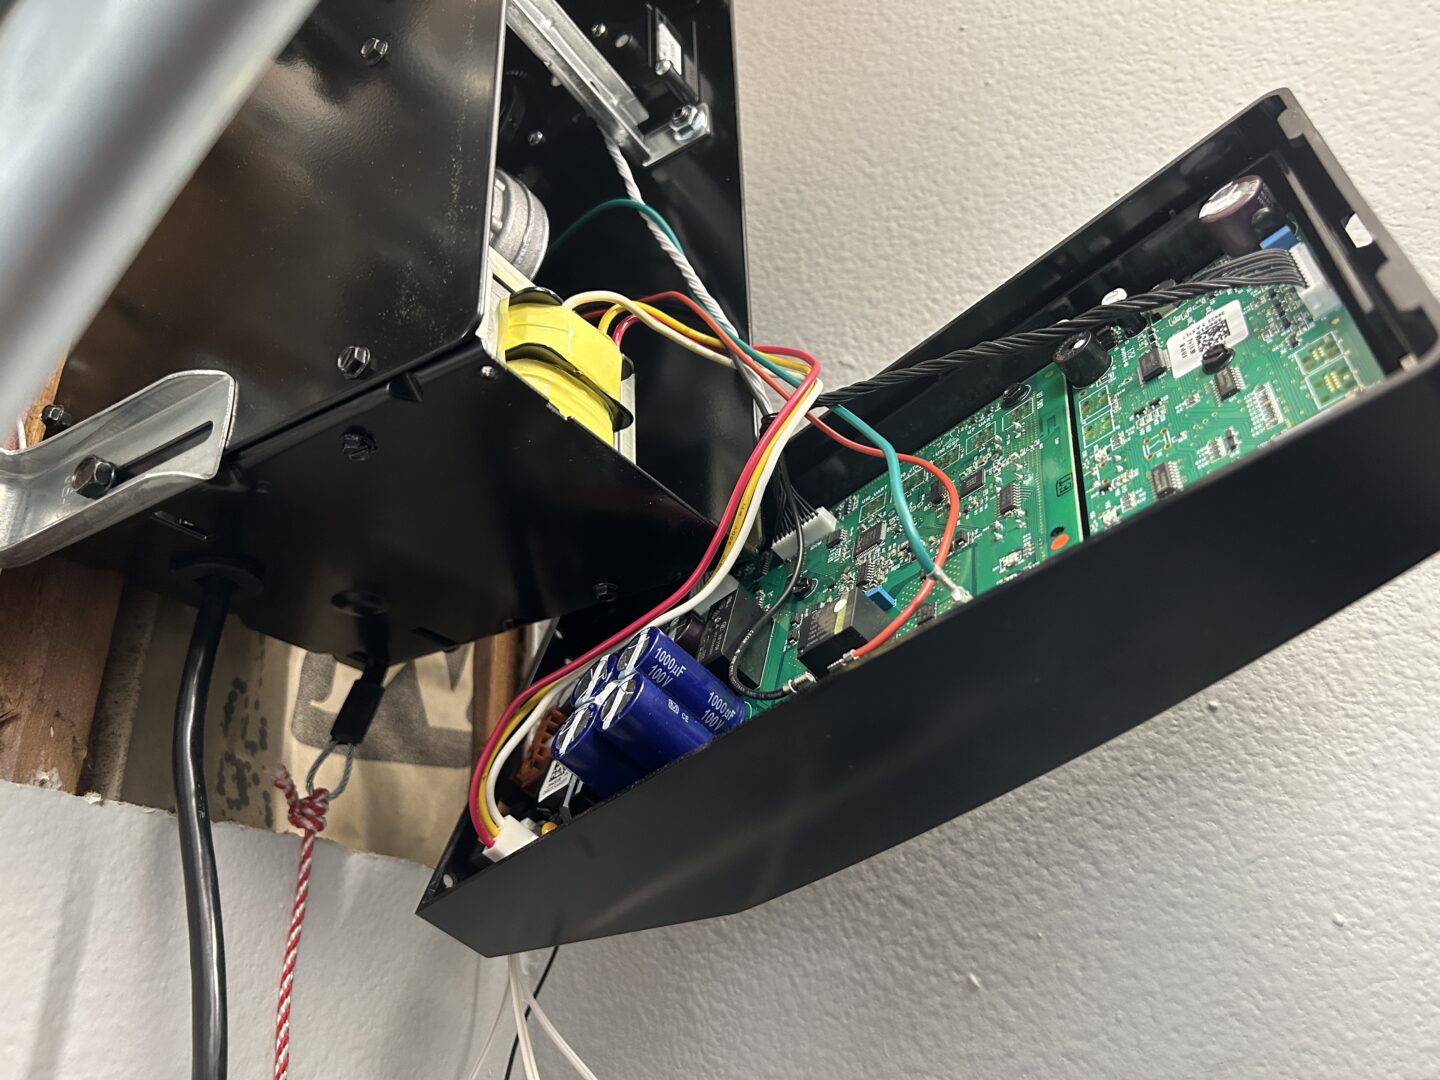
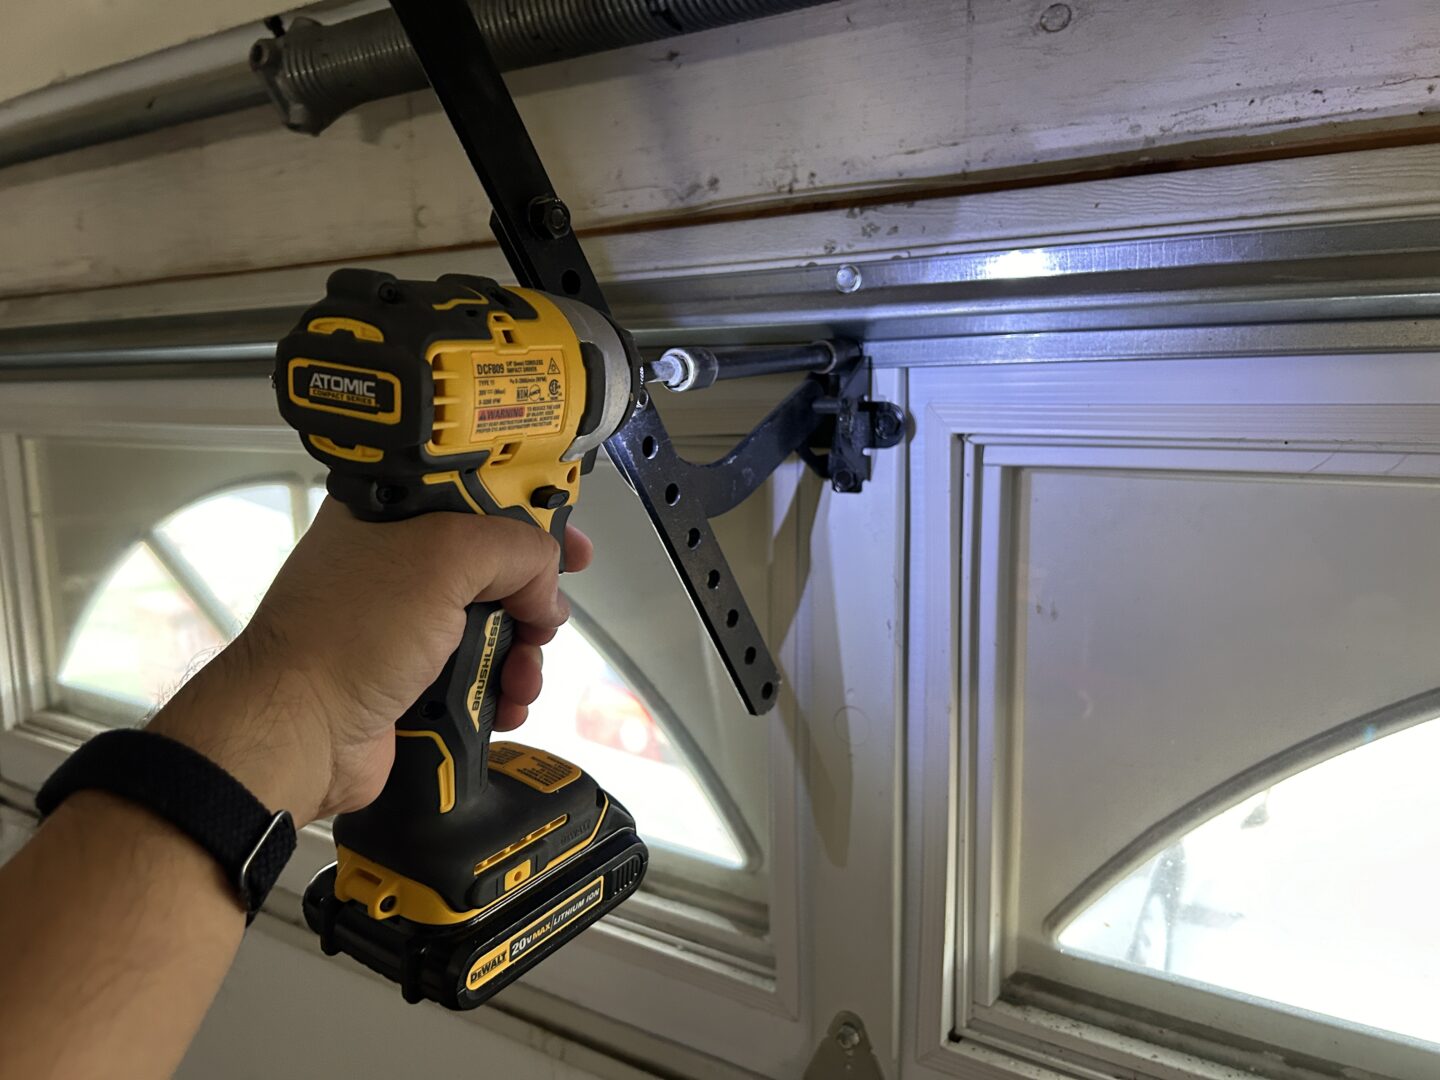
Now, close the garage door. This might require you to pull the emergency release cable on your existing garage door opener, so that you can manually close the garage door. To install the main door opener unit, start with installing the opener mounting bracket (L-shaped bracket) to the main motor unit with a 7/16″ socket, but make sure it is only lightly tightened down as it still needs room for adjustment during the install.
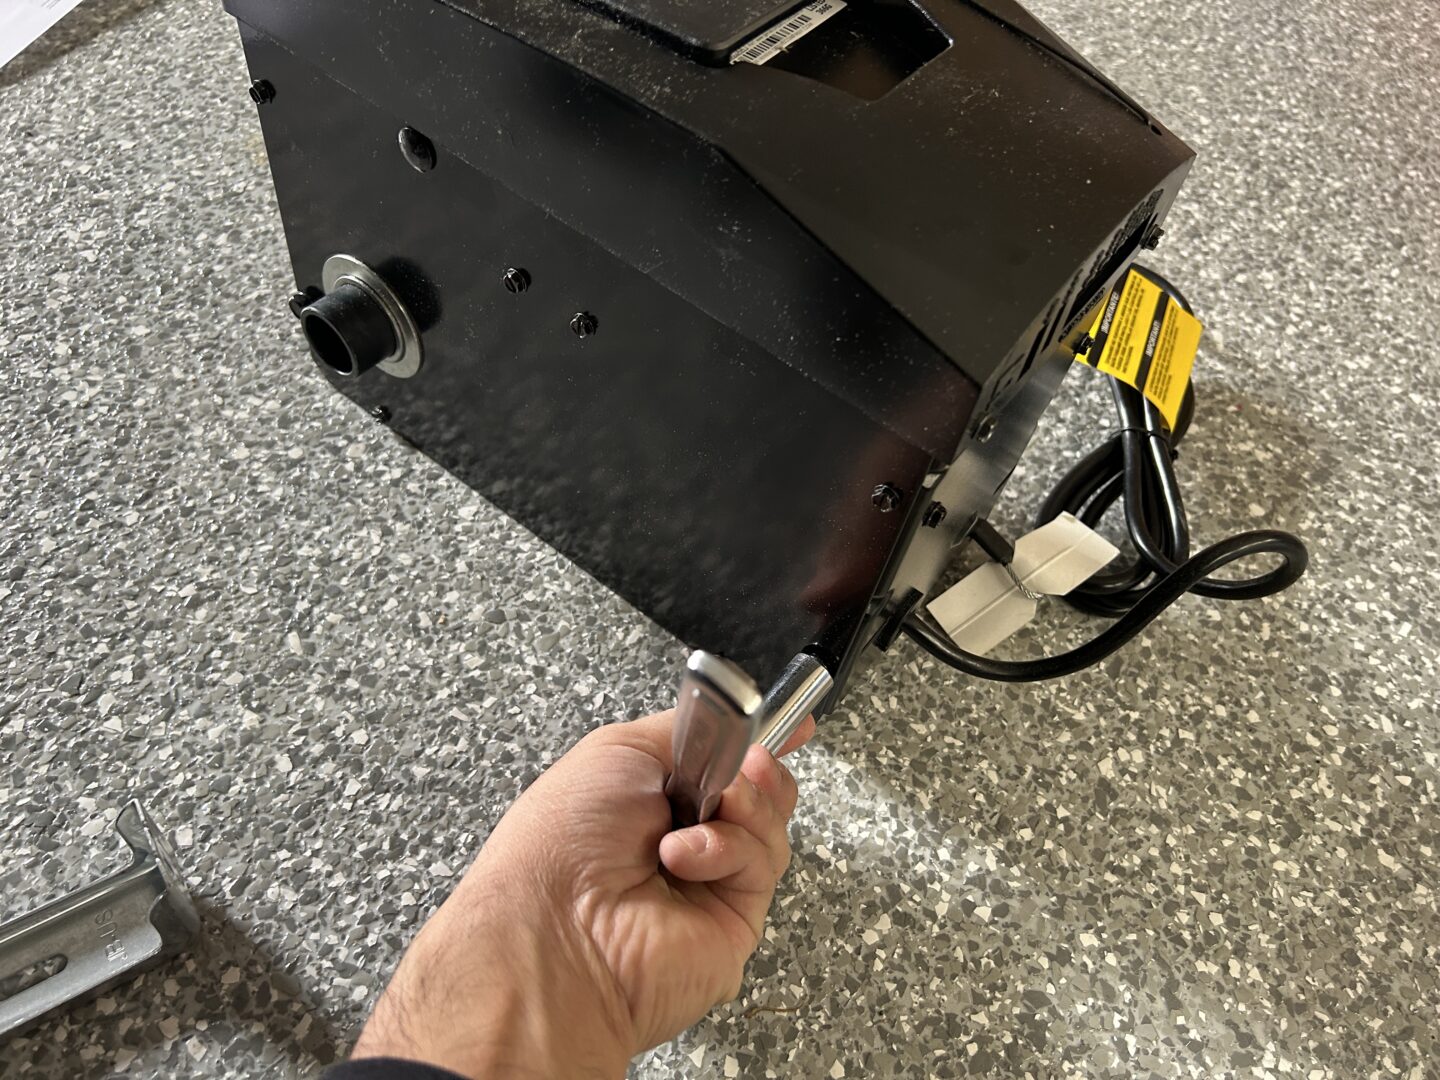
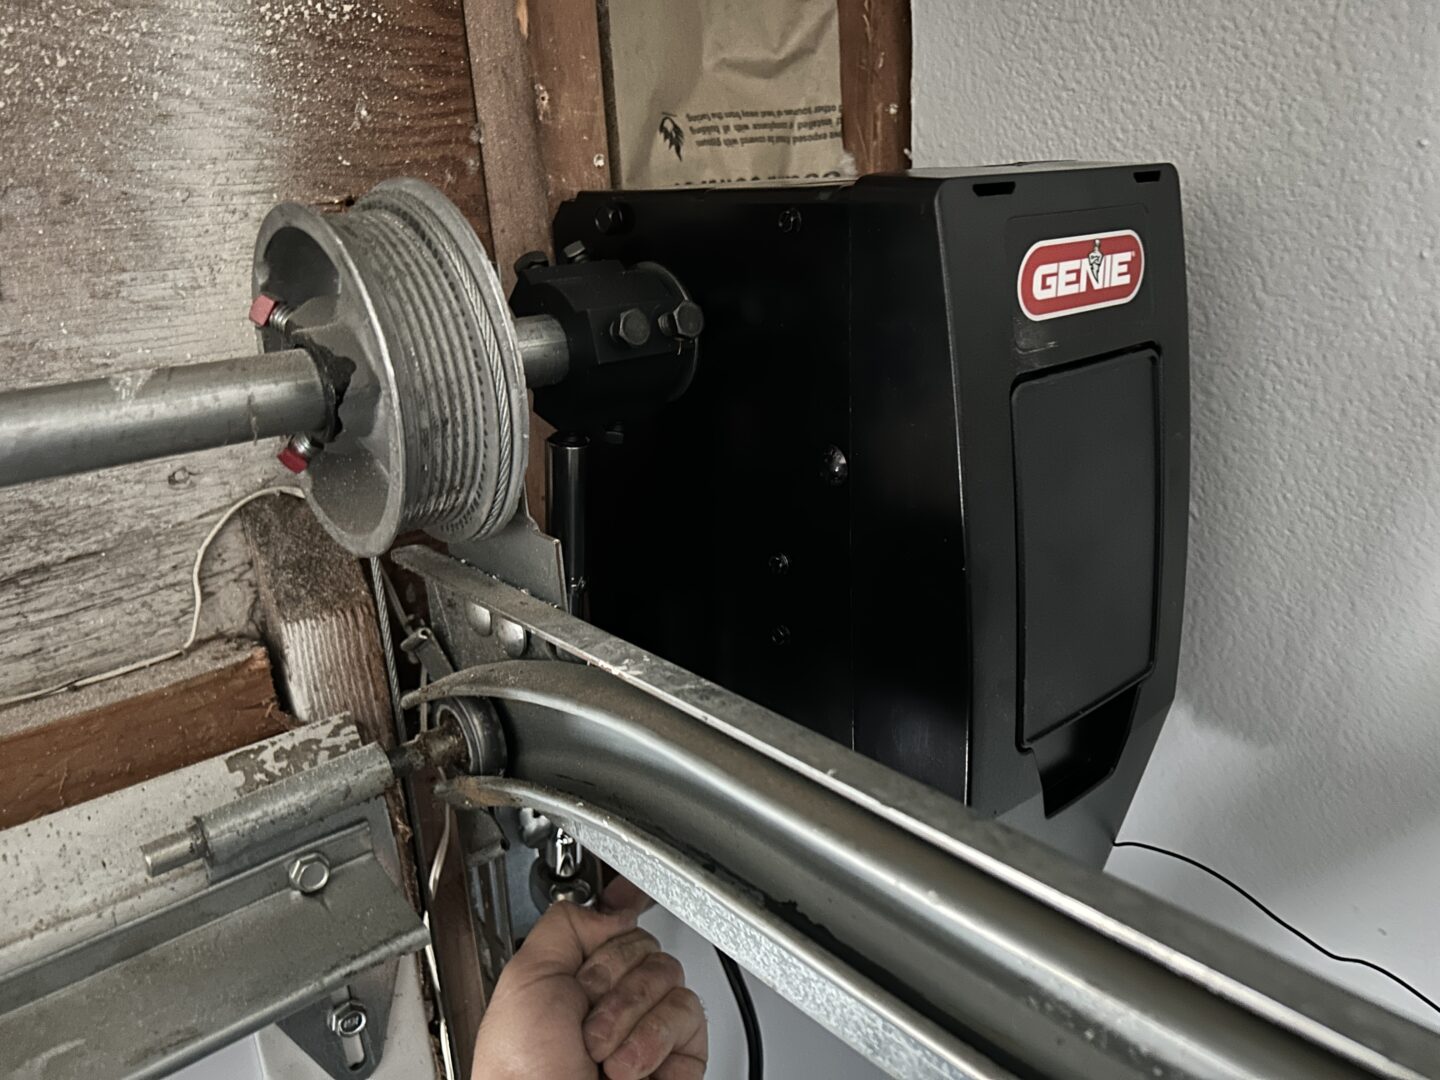
Install the coupler onto the output shaft of the motor unit. The larger diameter opening of the coupler goes to the opener’s output shaft and the smaller diameter side points towards where the garage door torsion shaft. Tighten the (3 qty) inner set screws onto the output shaft using a 7/16″ socket.

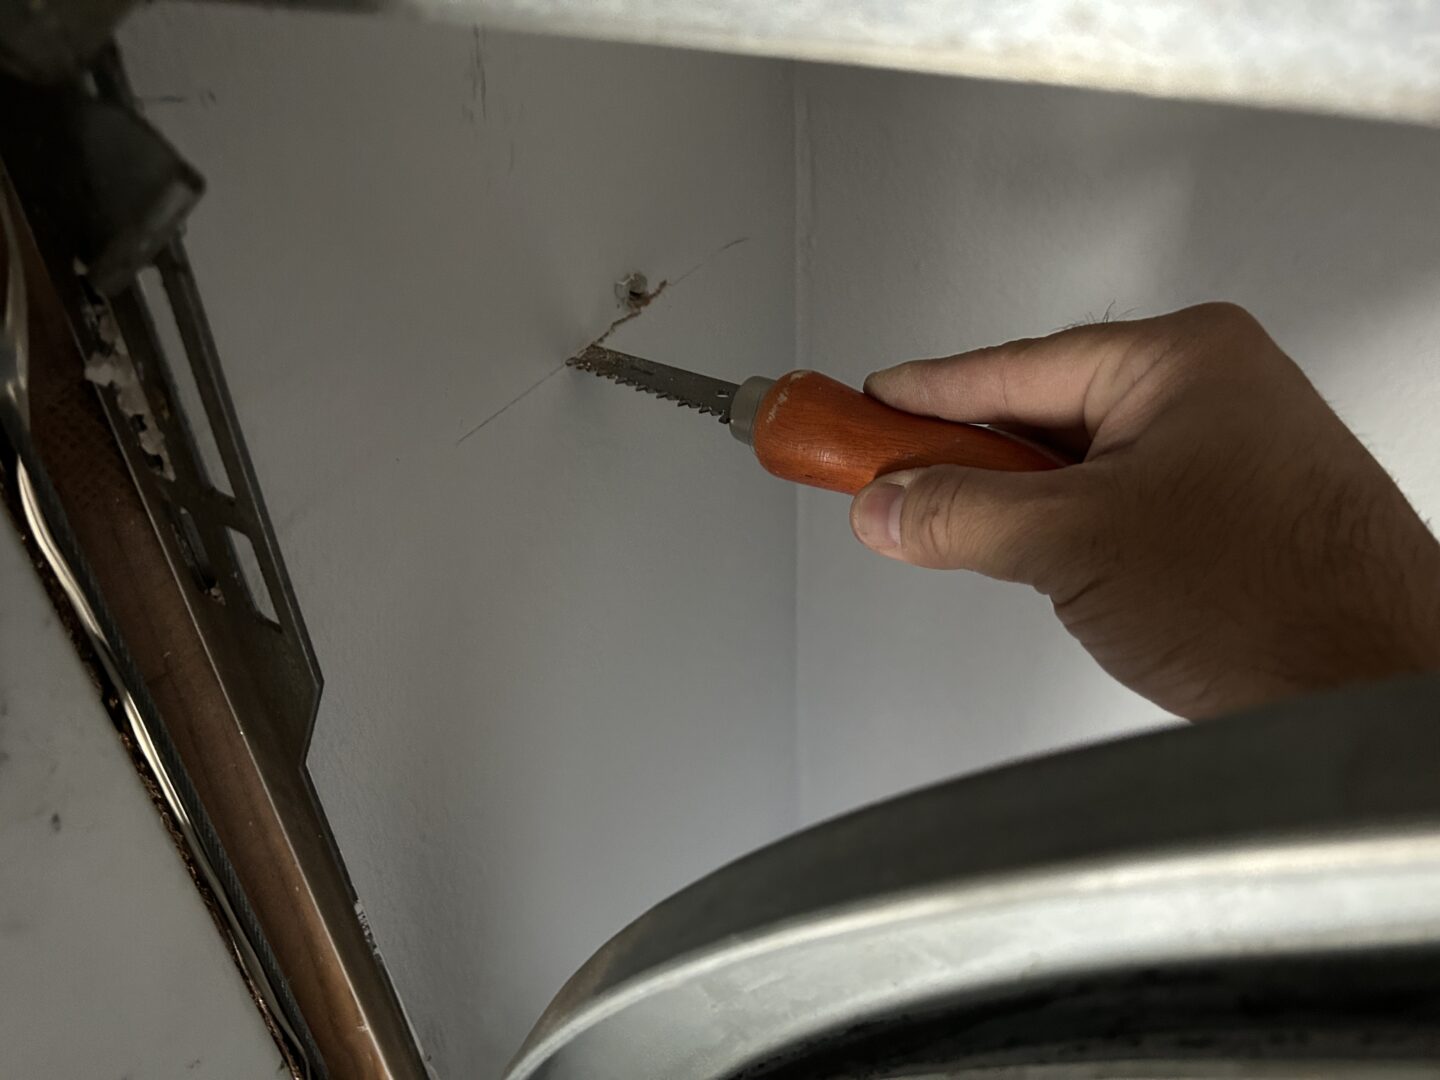
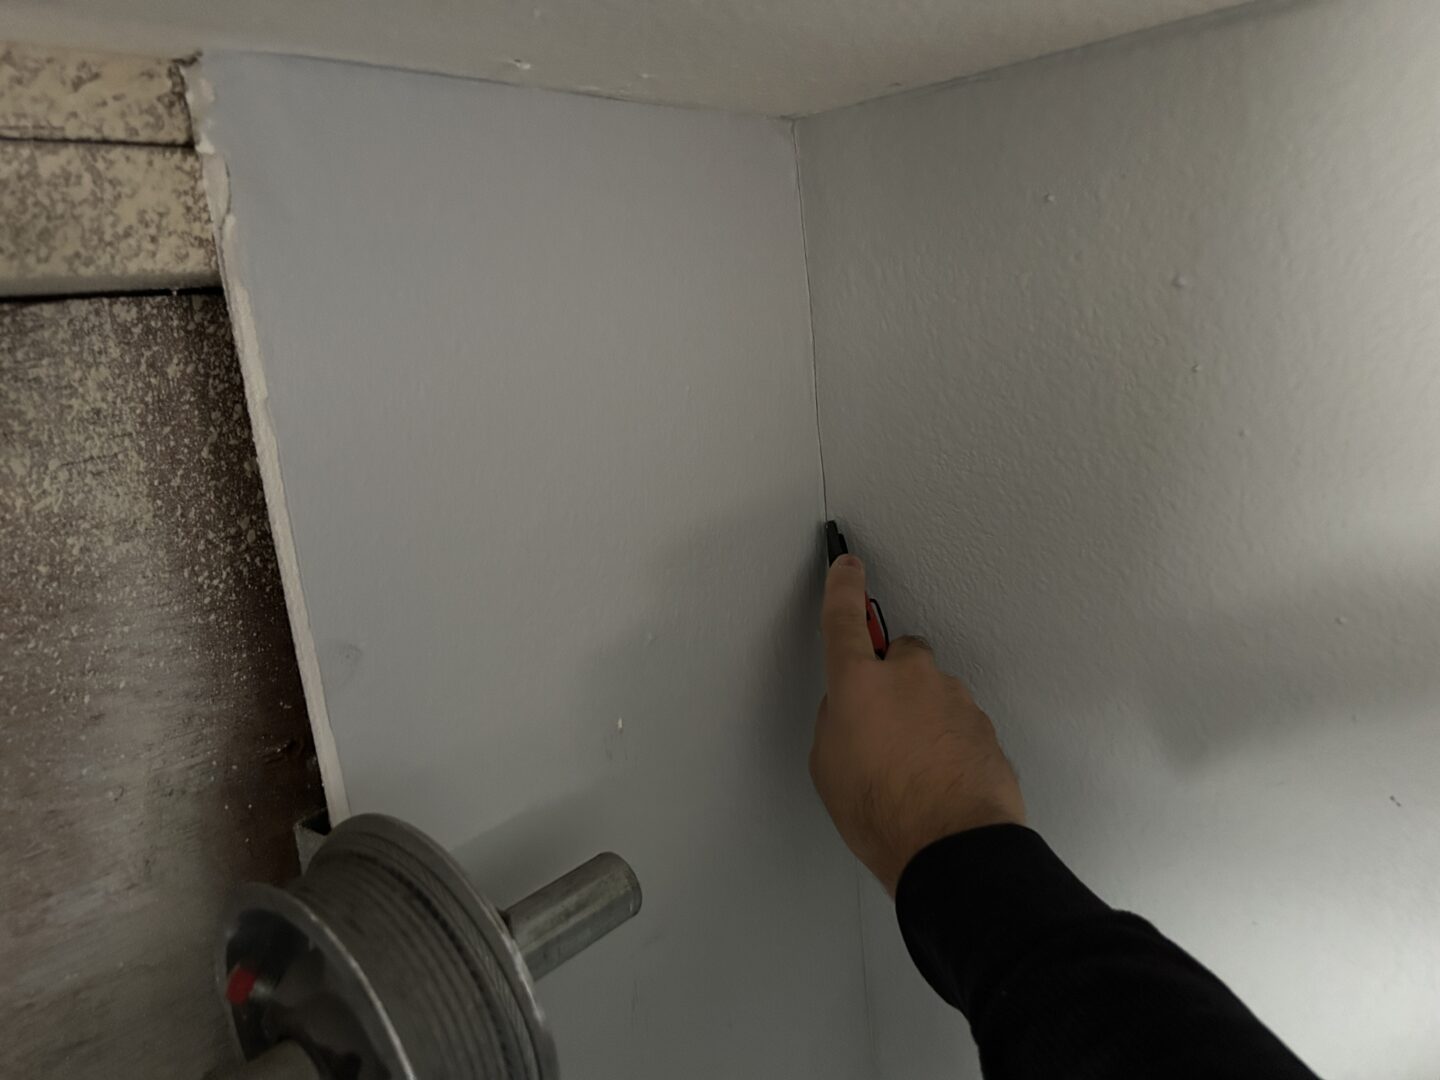
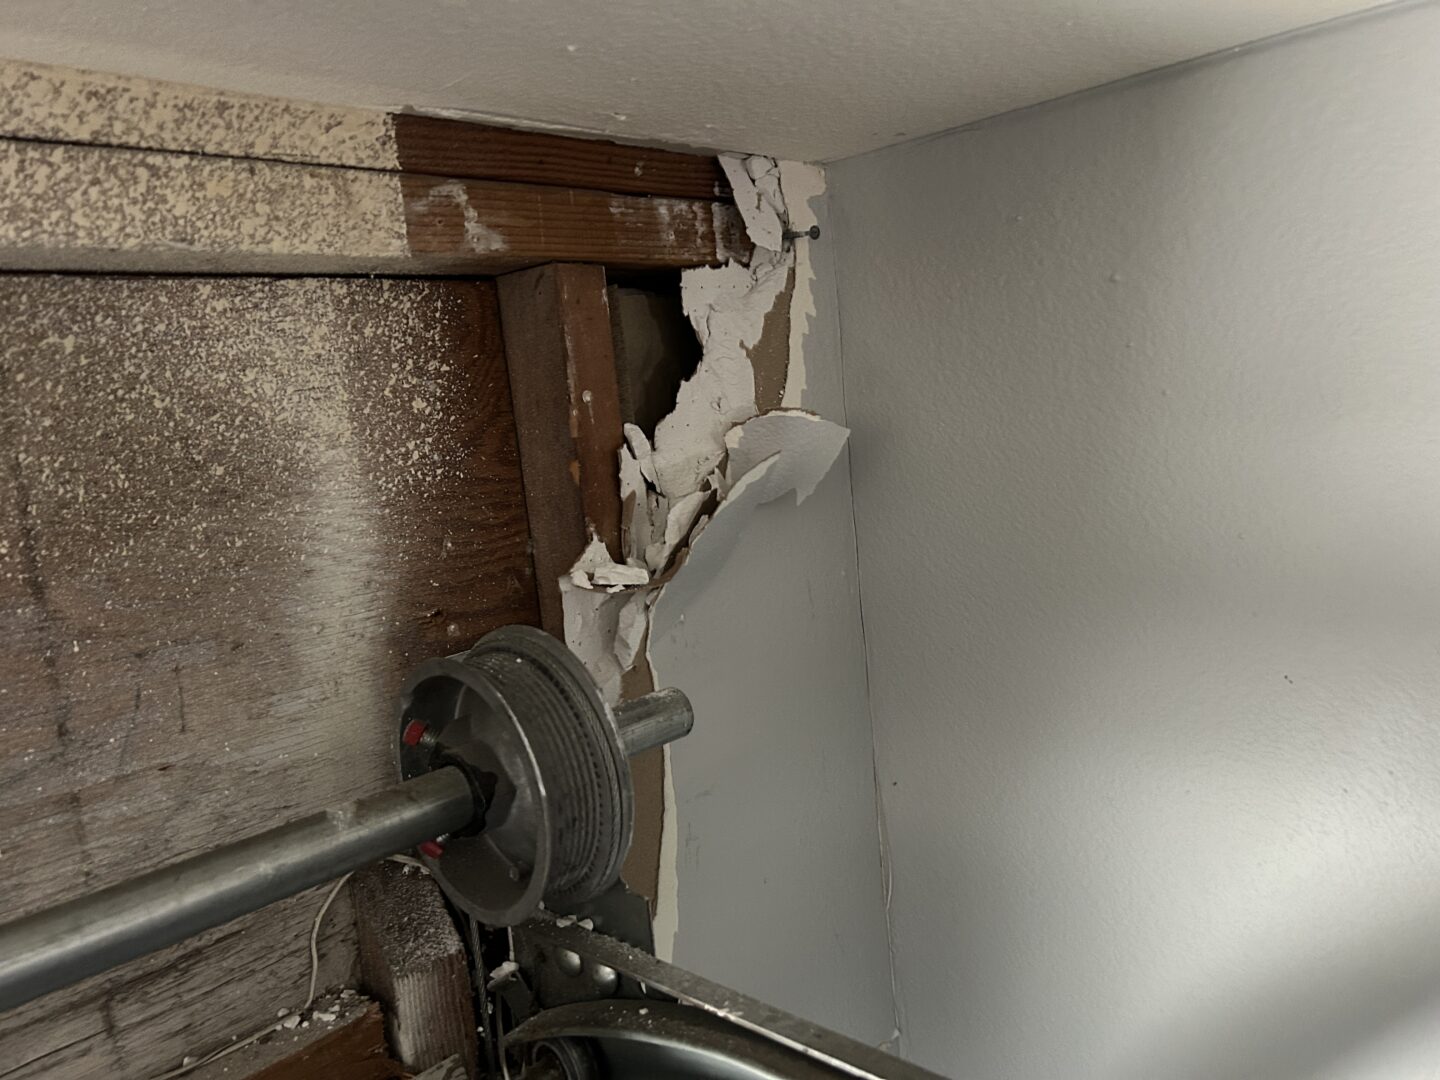
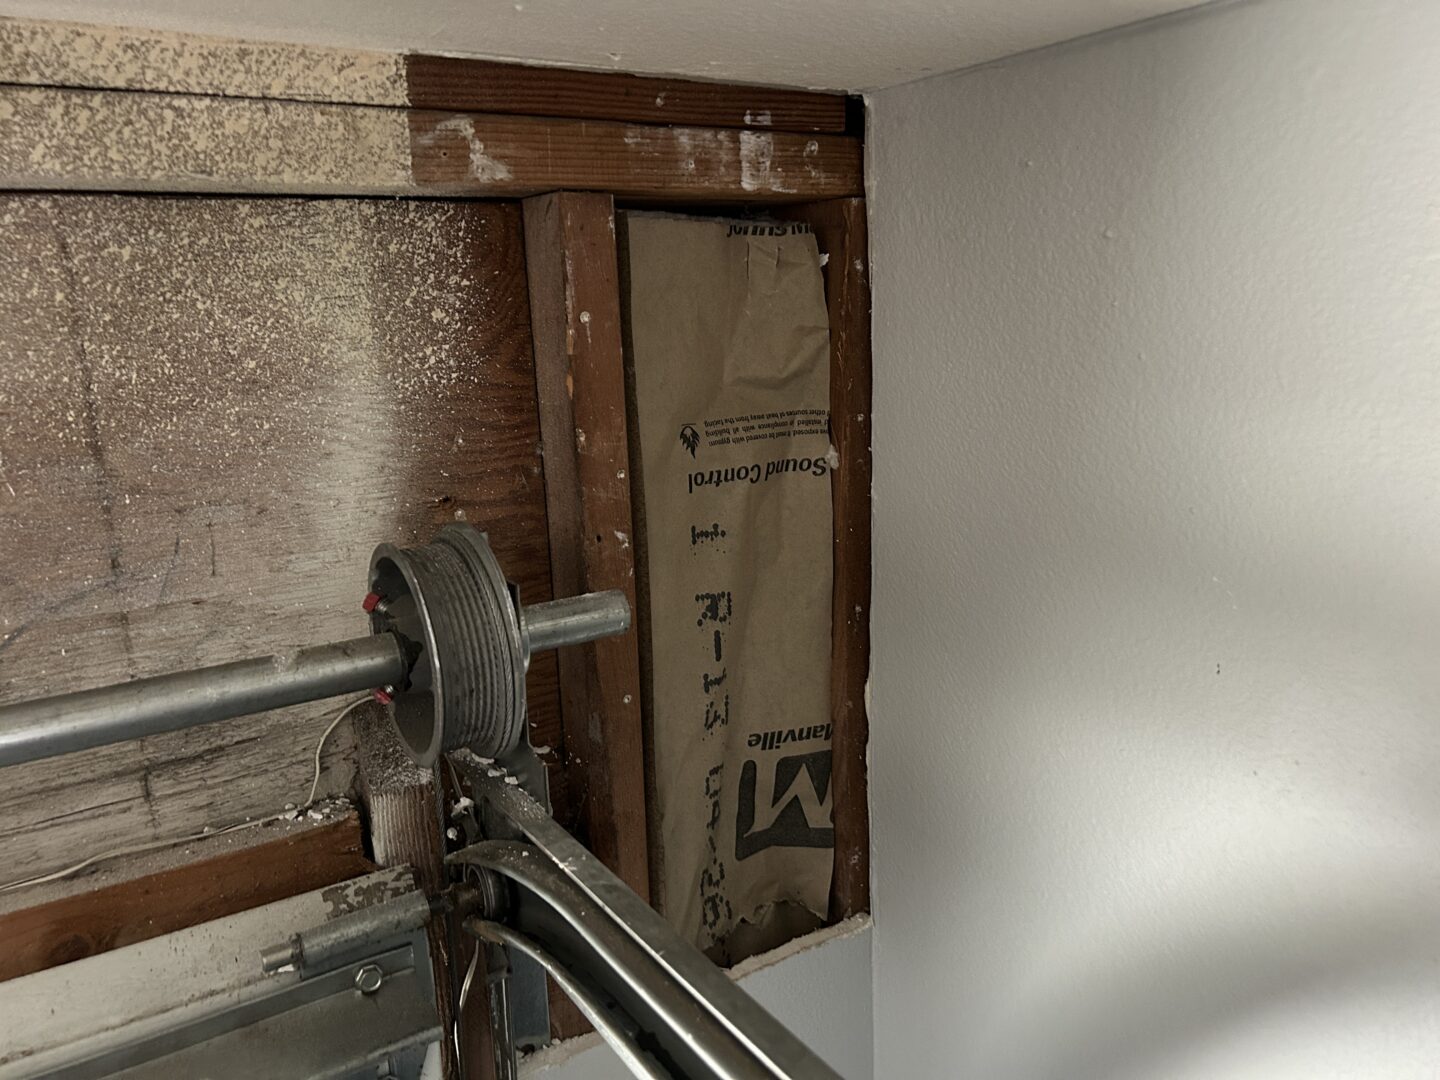
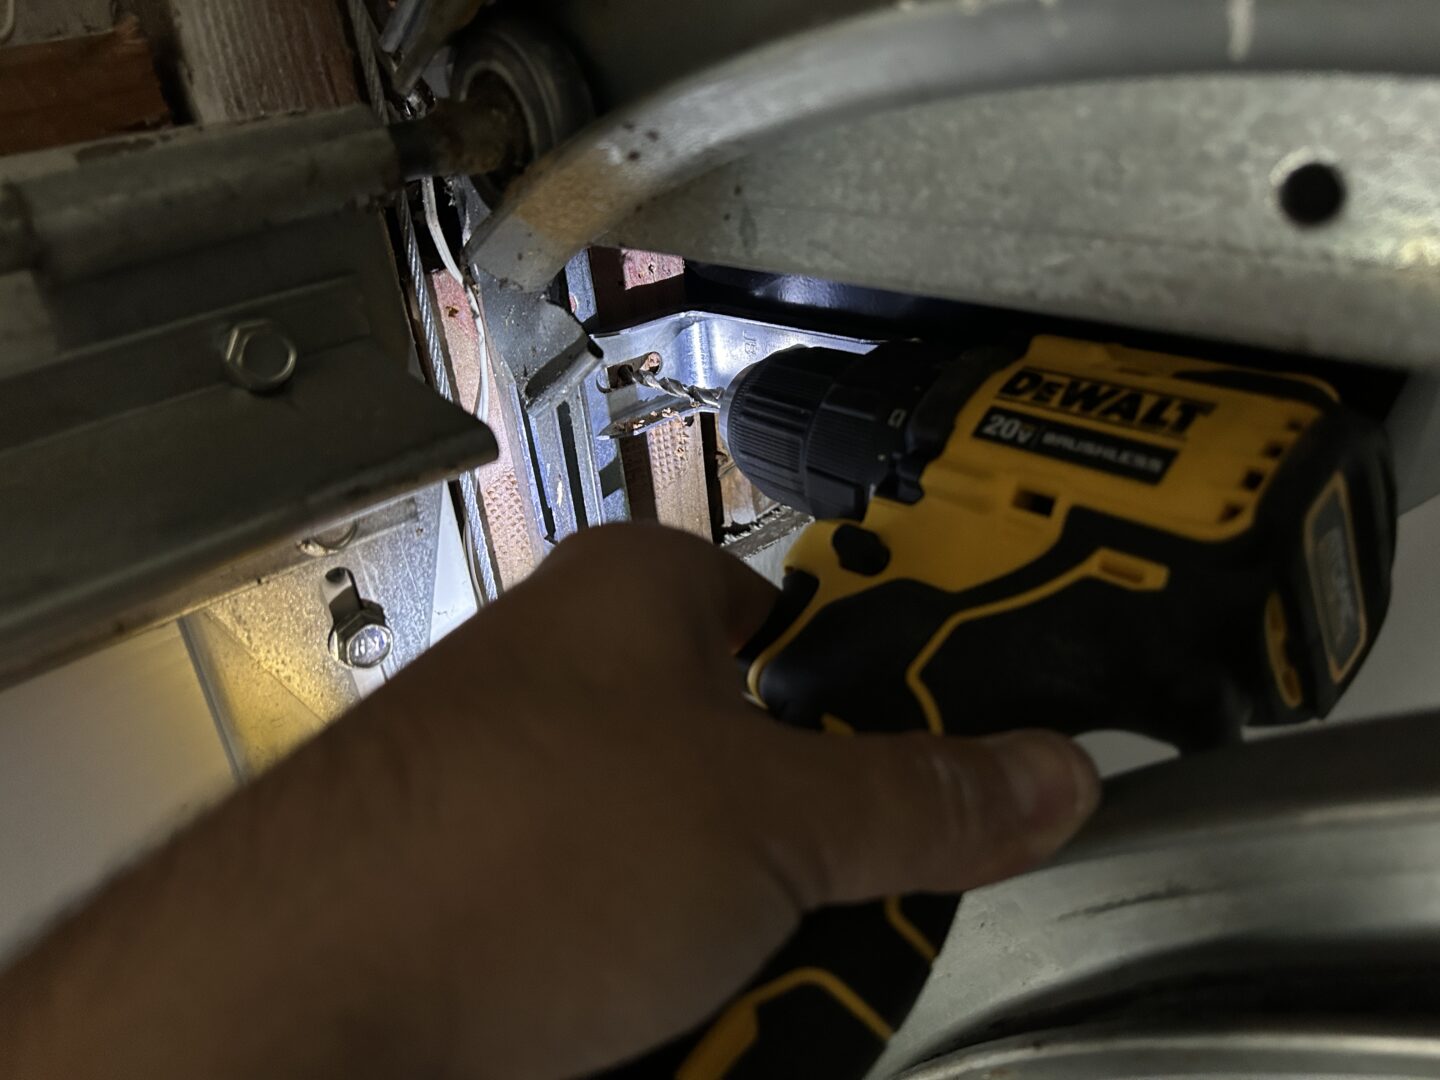
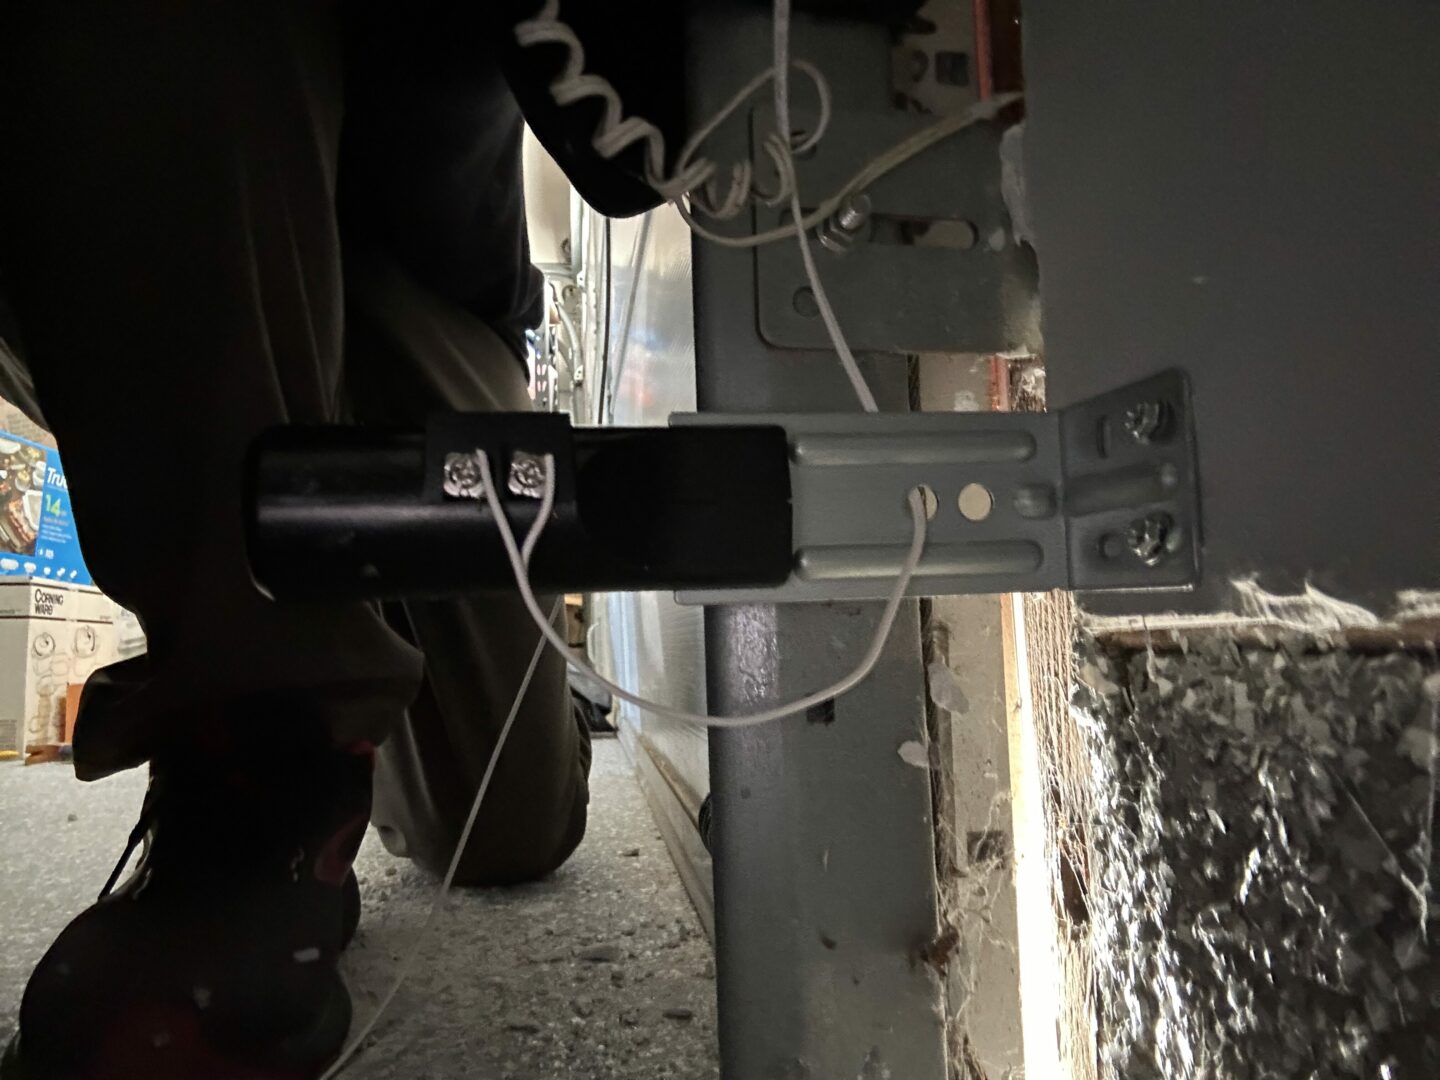
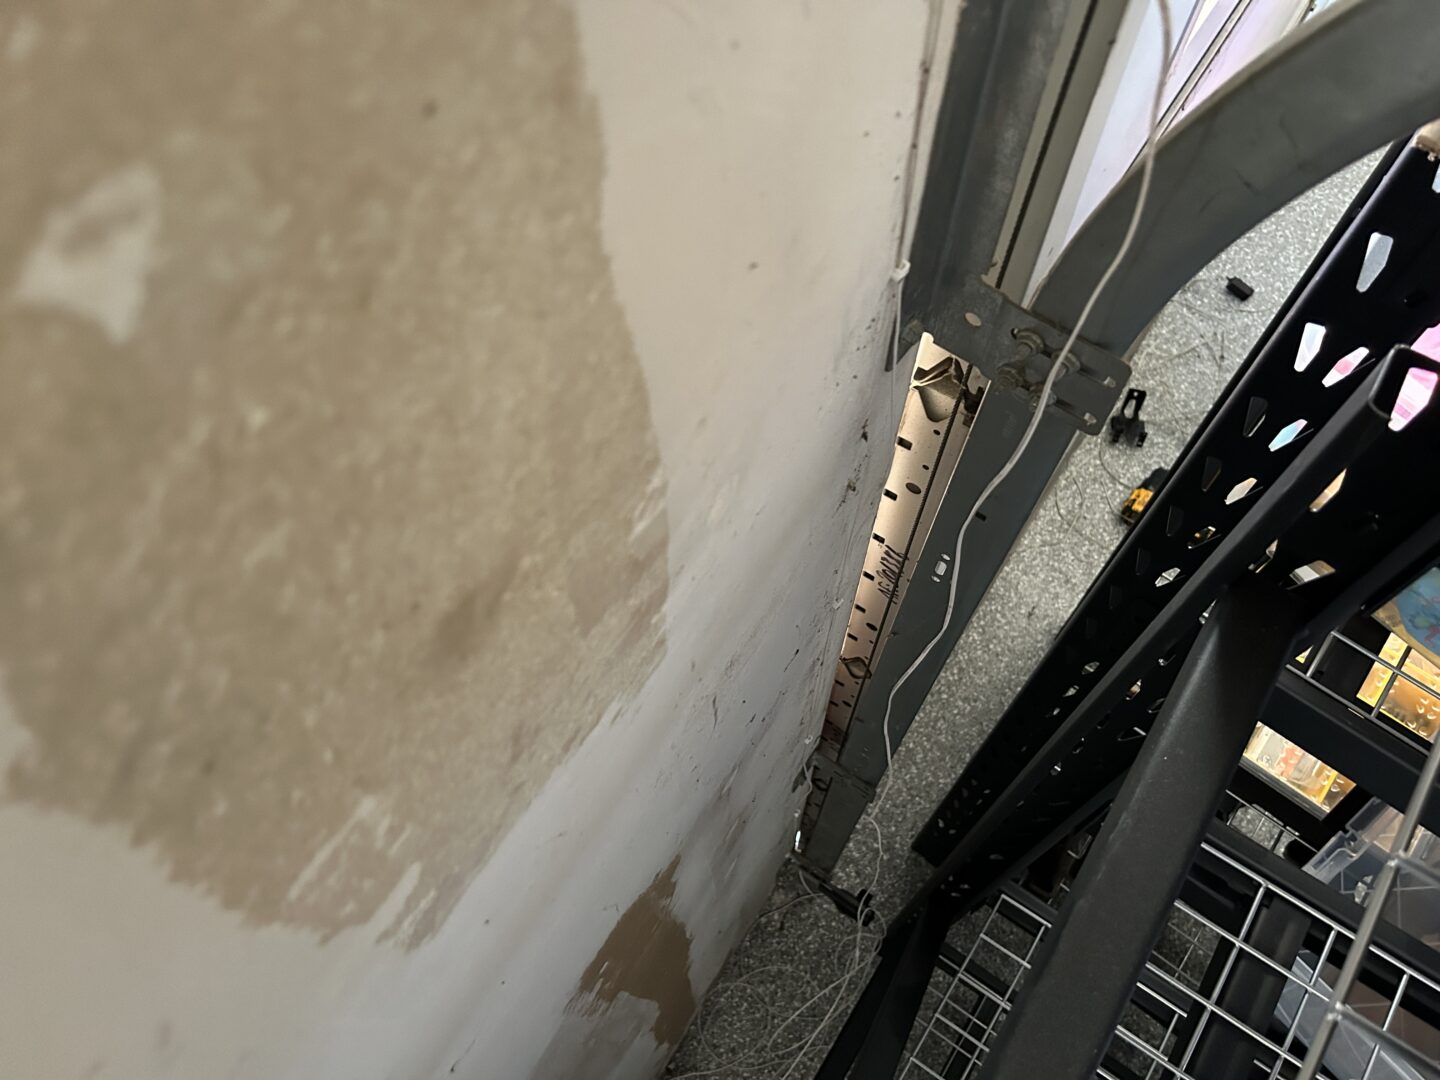
When I went to install my opener unit, it turns out I didn’t have enough space if I were going to mount directly onto the drywall. I had to cut out this portion of drywall to get enough depth for me to install the door opener unit.
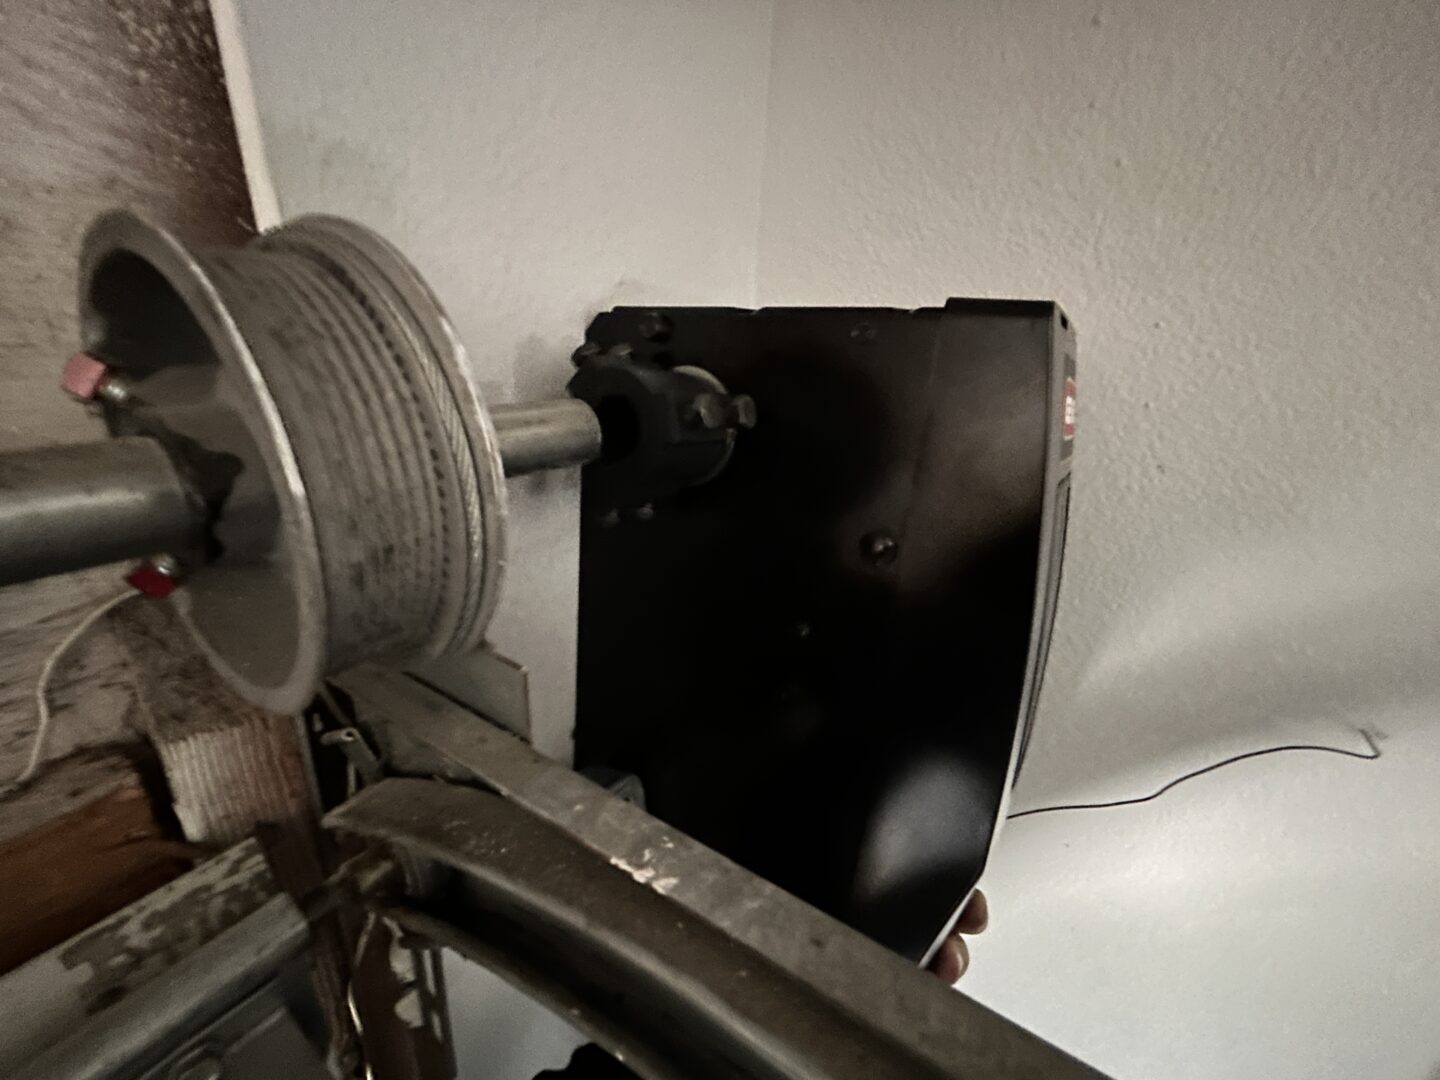
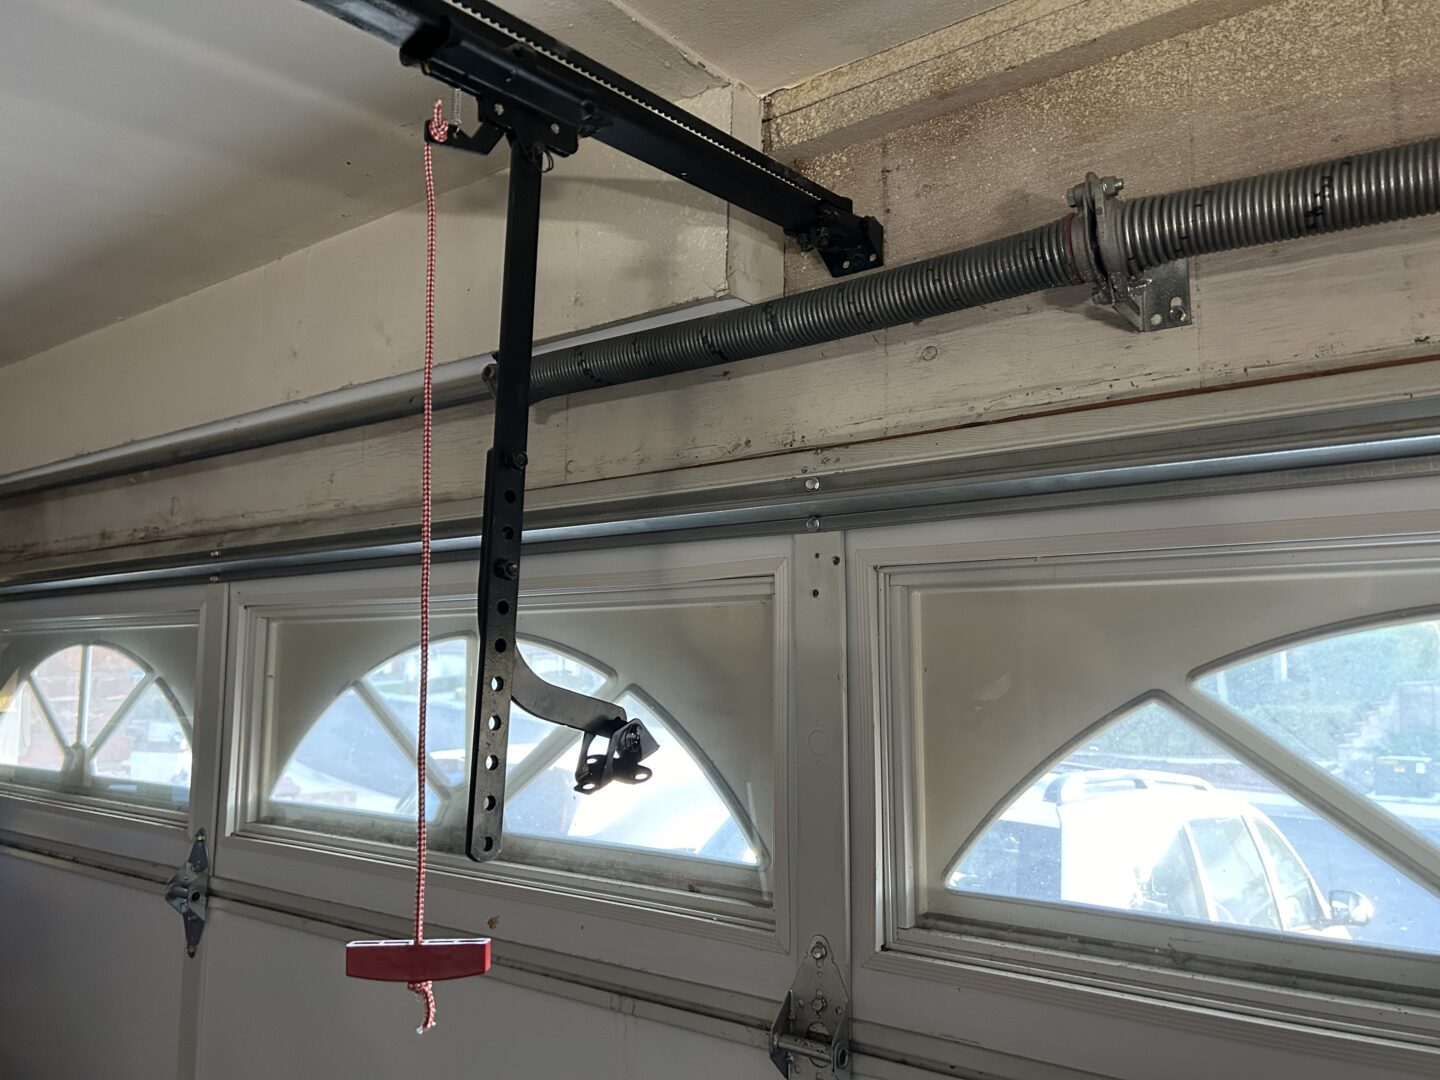
Lift the whole motor unit and fit the coupler onto the garage door opener torsion shaft. My garage door opener shaft is not keyed, and therefore I simply slide it on and tighten the set screws finger tight. If your shaft is keyed, then follow the instructions that come with the product.
Keep in mind that the garage door shaft is designed to slide all the way through the opening and into the hollow ouput shaft of the opener up to 3-3/8″. Don’t worry about going too far as there is a stop pin located at the center of the output opener shaft.
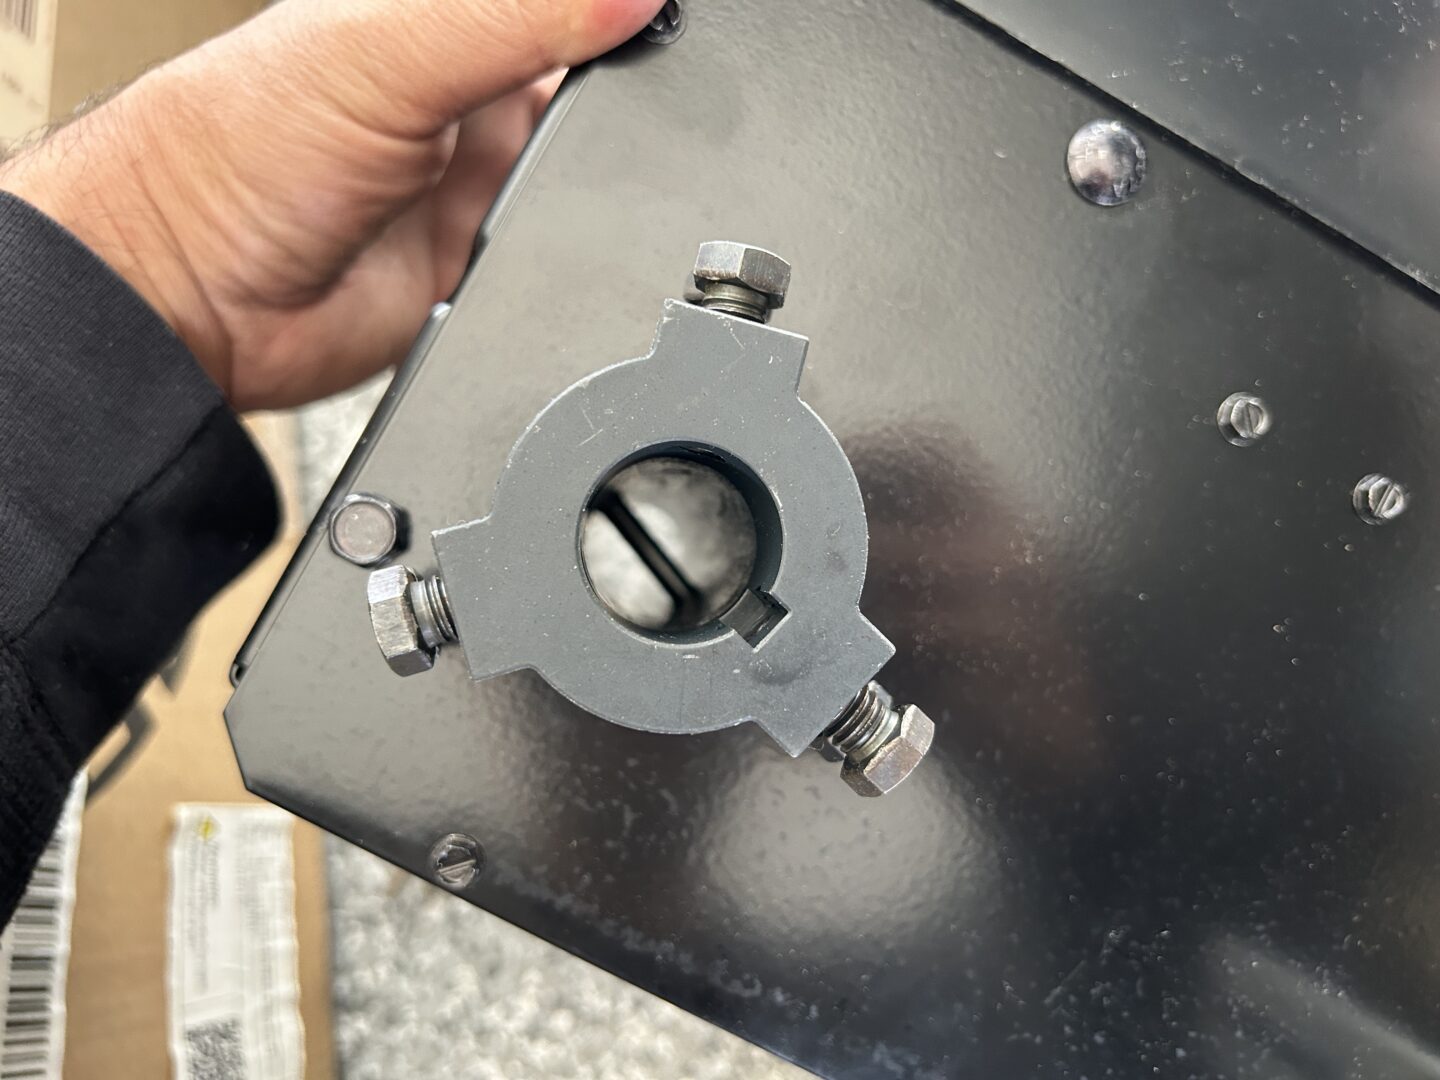
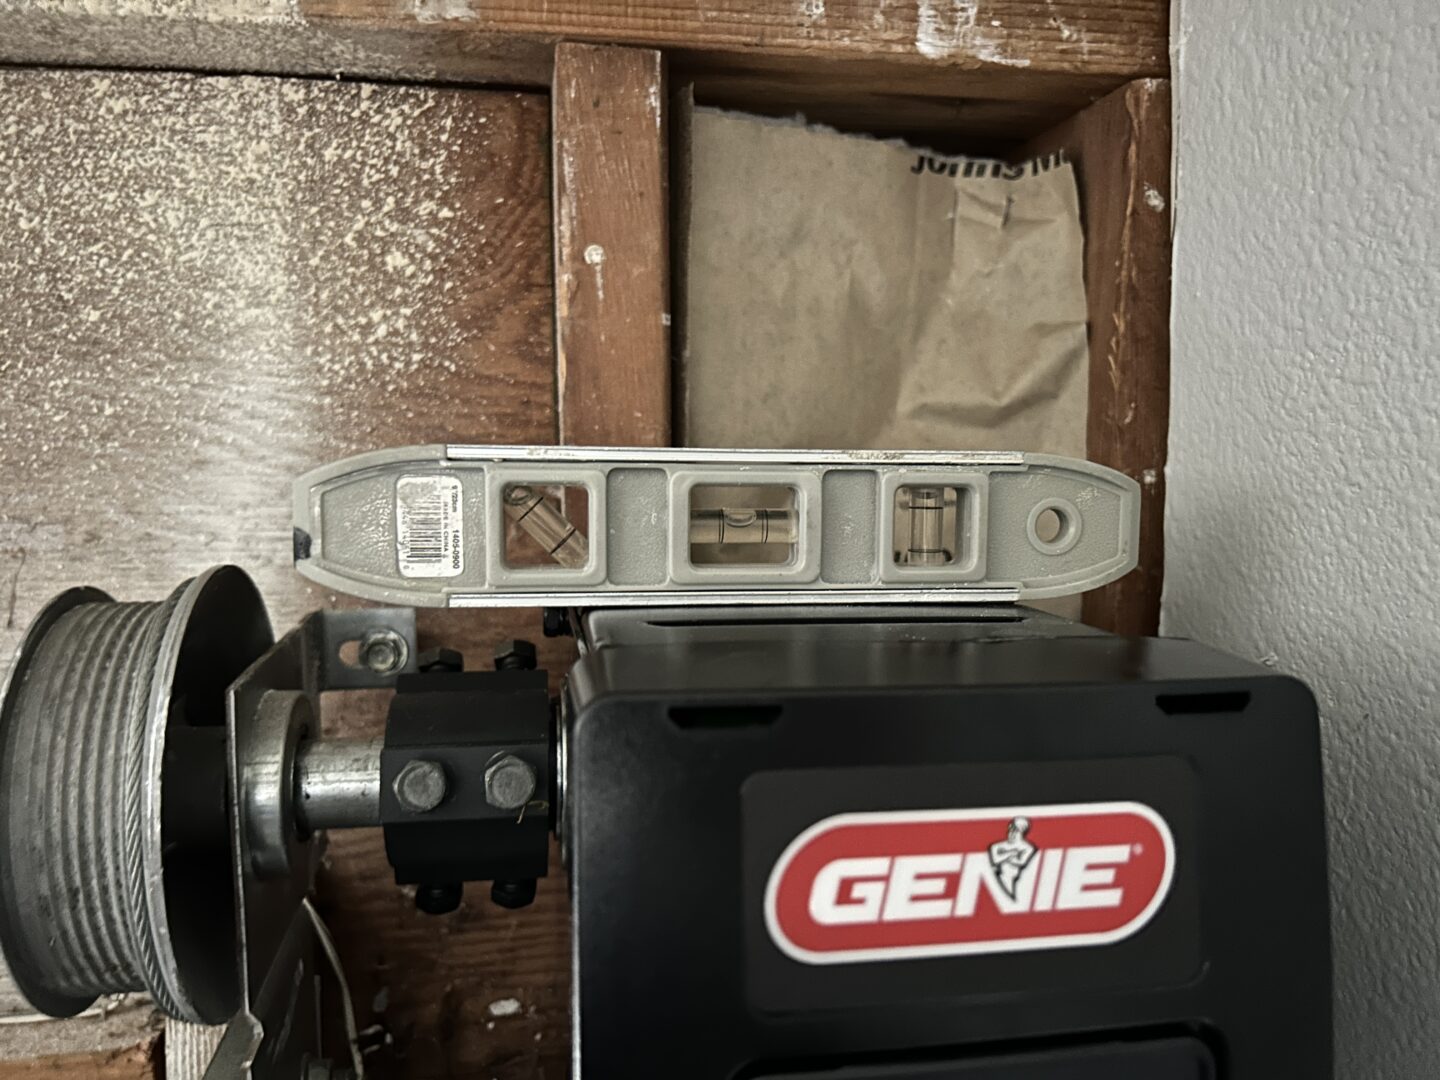
Make sure that there is at least a 1/4″ gap between the coupler and the door shaft bearing. Also, make sure that the unit is level.
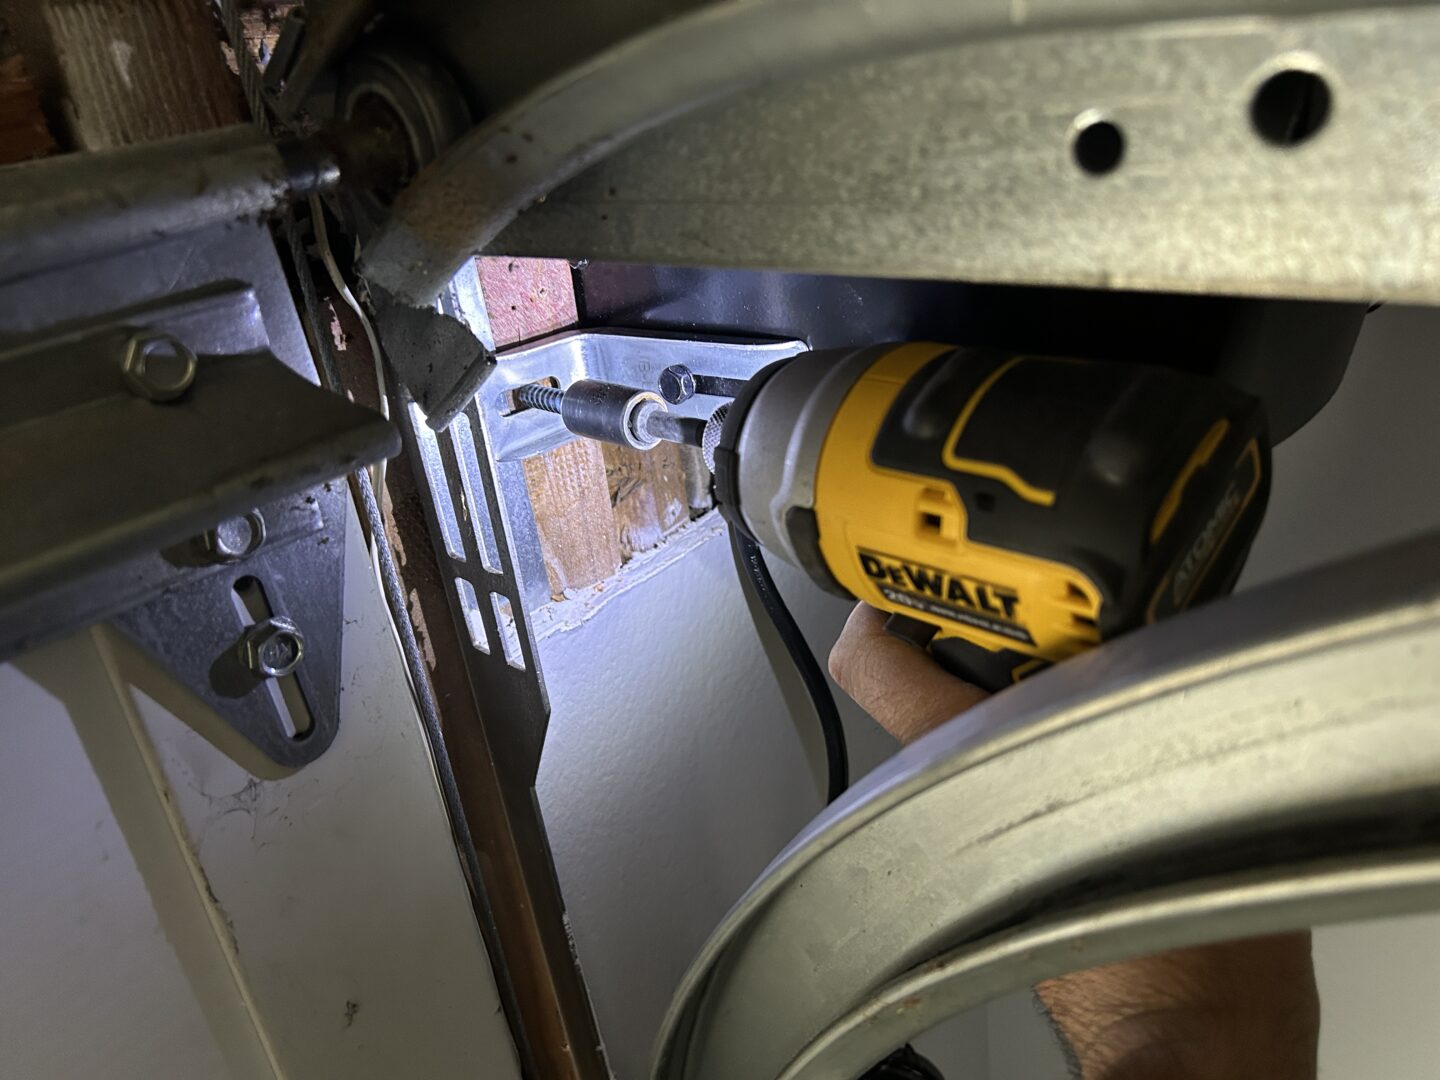
The mounting bracket is adjustable side-to-side and can also be installed on either side of the opener unit. When ready to mount, pre-drill a 3/16″ pilot hole through the wood behind, prior to installing the lag screw. I think it goes without saying, but the lag screw needs to be secured to solid wood like a stud, and not to solely to drywall or particle board. Install the lag screw and then tighten the bolt that is holding the bracket to the motor unit.
Tighten the (3 qty) remaining bolts on the coupler to the garage door opener shaft. You want to avoid tightening one bolt all the way, then moving onto the next one. Tighten each one a little at a time, moving to the next bolt and doing the same until all of them are fully tightened. Pull the red emergency release on the Genie door opener and manually open/close the door to check that there is no binding.
Installing the Door Locks
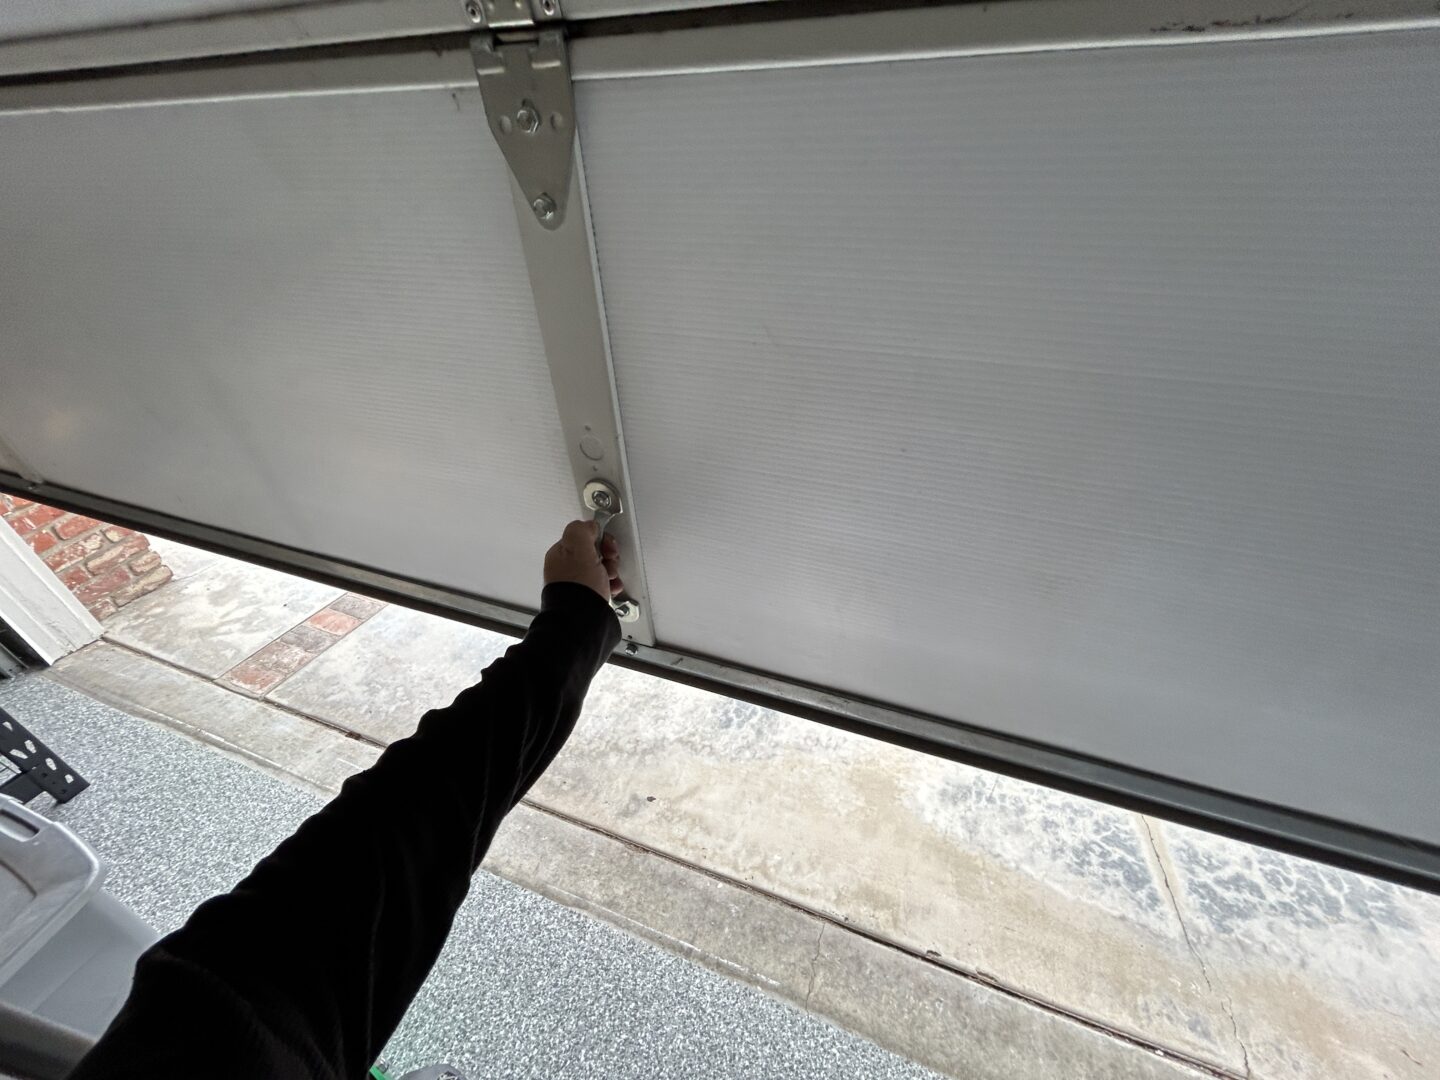
Next up is the install of the door locks, which will be wired to the door opener unit. Whenever the garage door closes, the door locks will automotically lock. Conversely when the garage door opens, the door locks automatically unlock so that it can be opened.
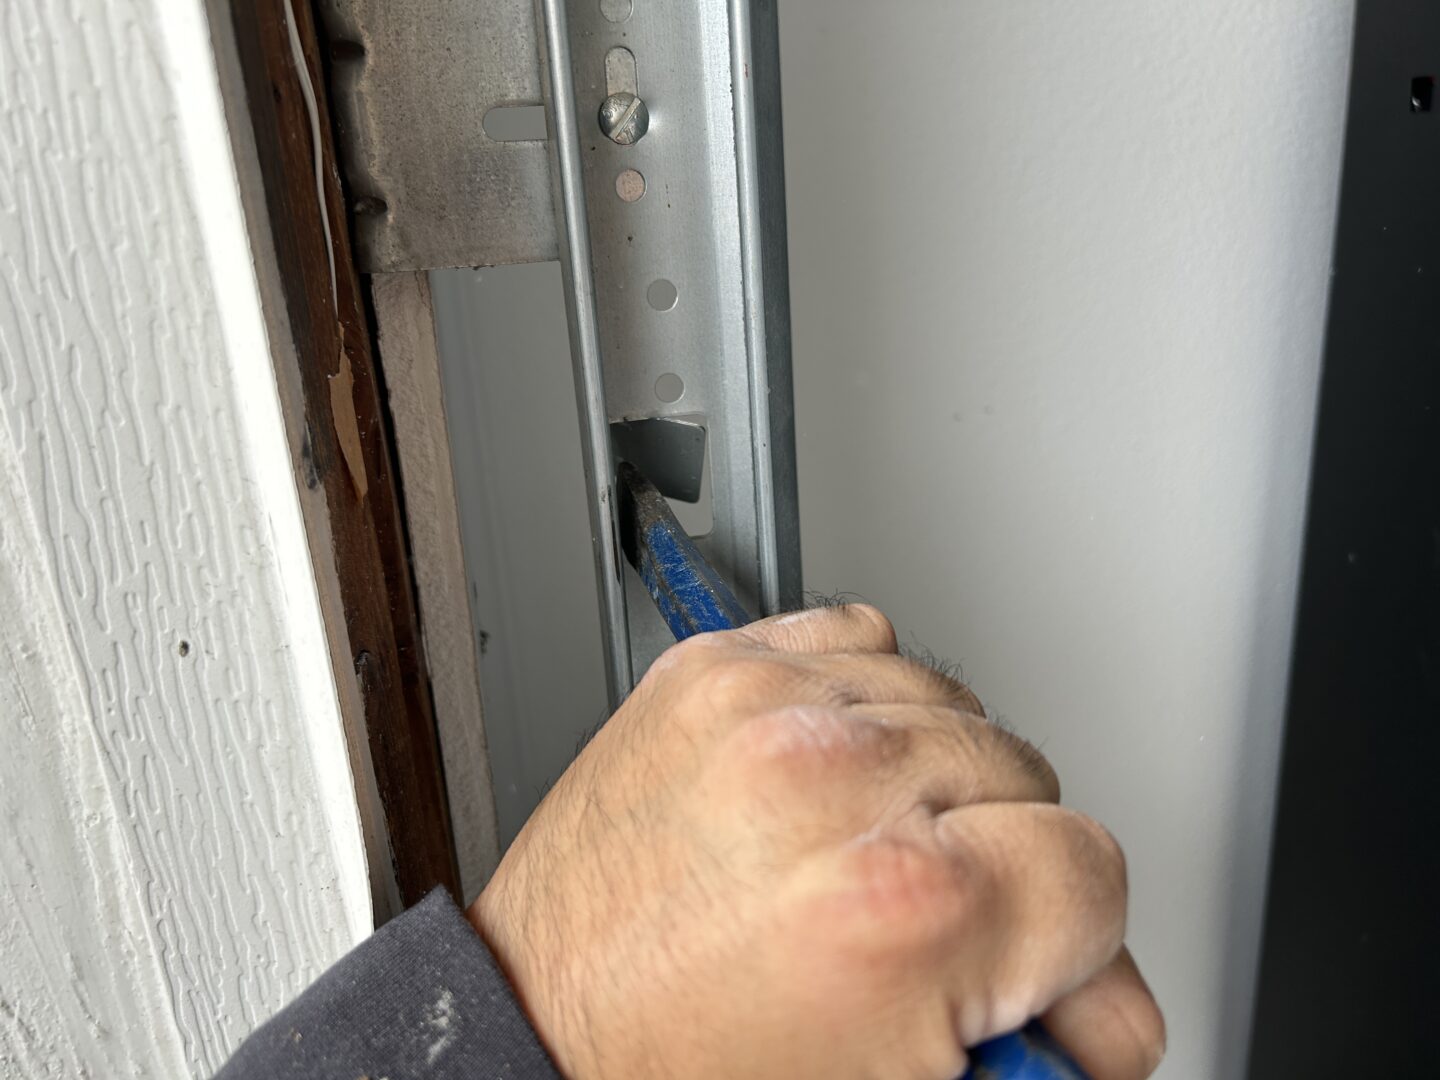
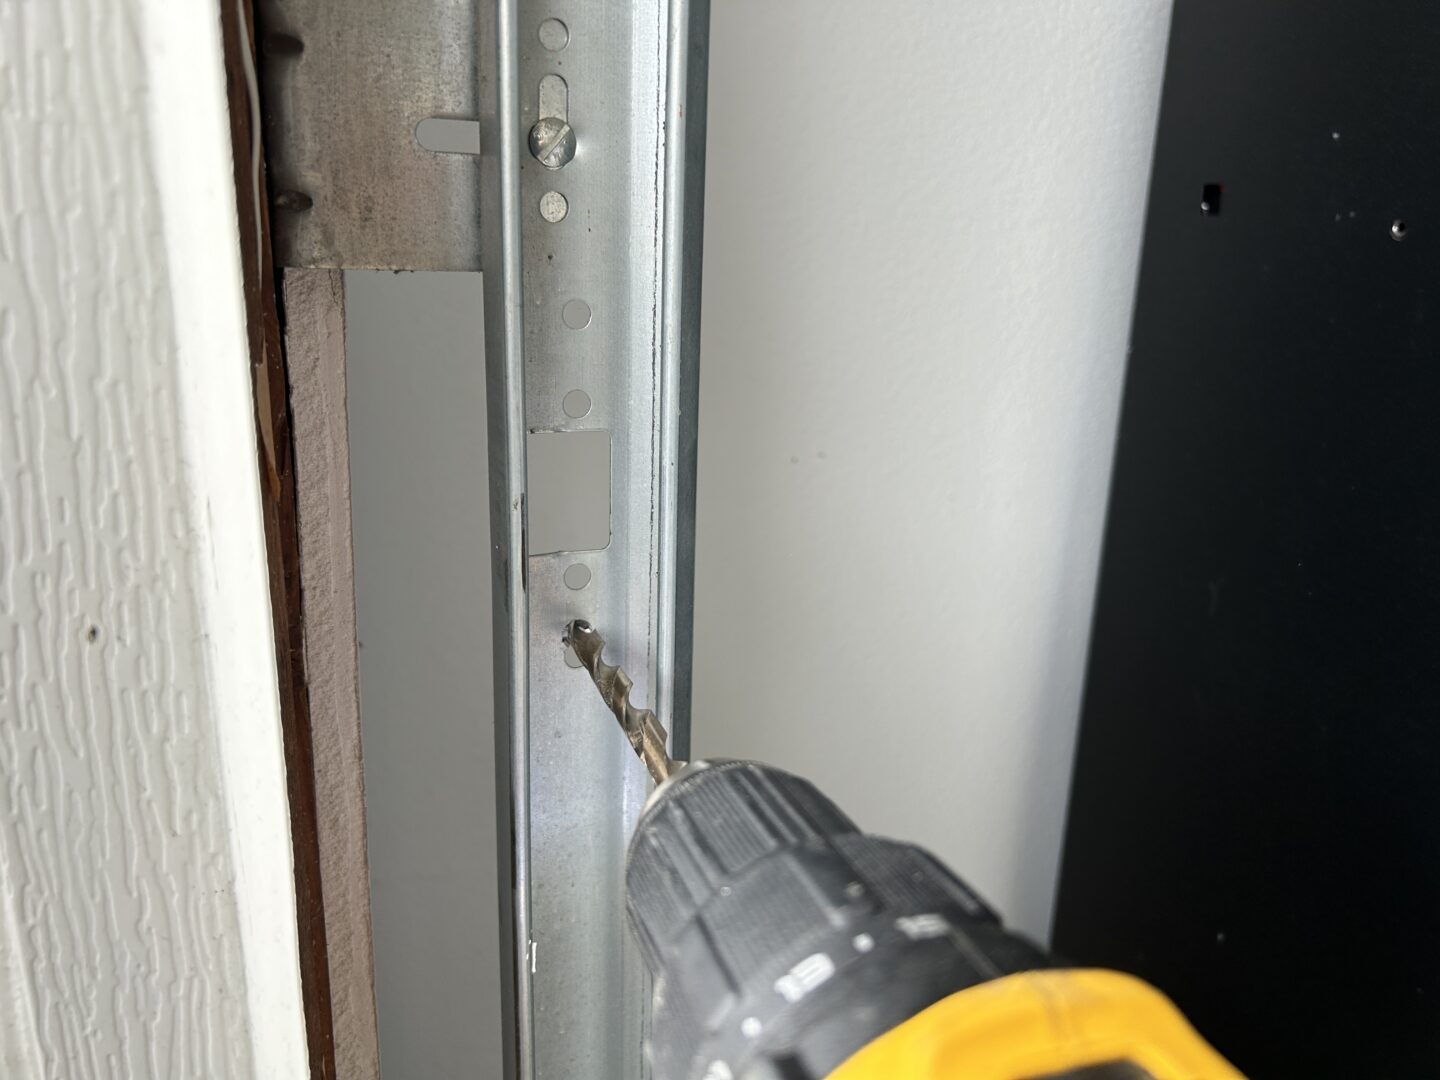
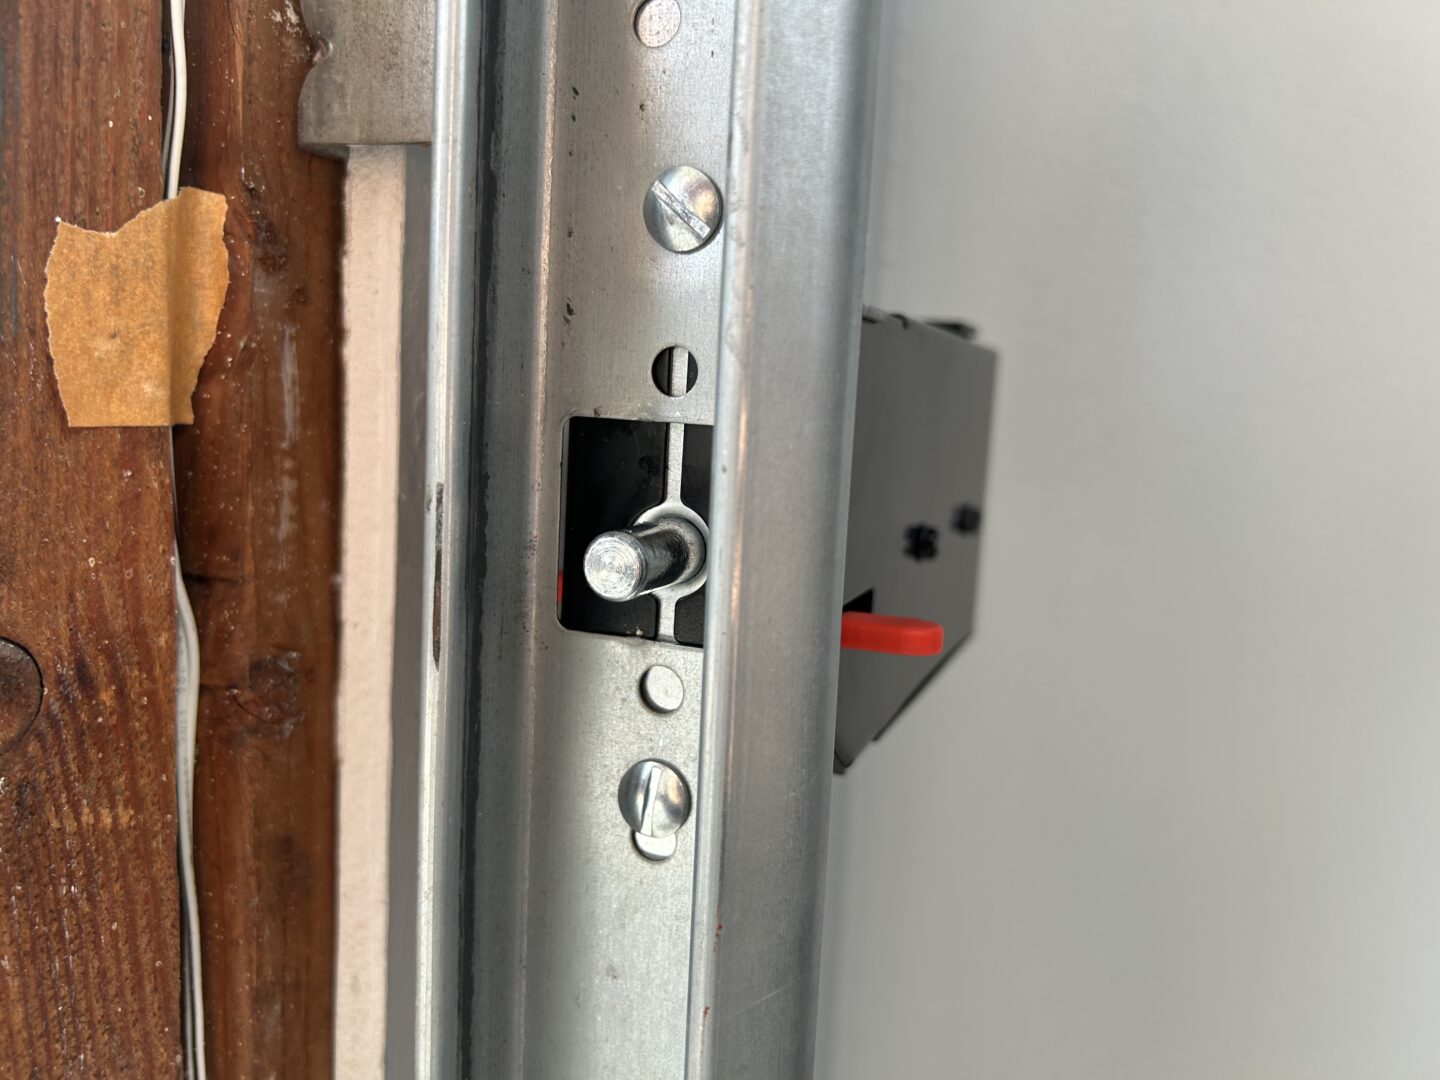
You can either use the included template to drill new holes in the track to mount the door lock, or use a pre-cutout section of your existing garage door track. (2 qty) 9/32″ holes will be drilled for mounting and (1 qty) 7/16″ hole will be needed for the lock. Use the included hardware to secure the door lock to the outside of the track.
You need to install the door opener so that the lock pin is located directly above the roller of the garage door. I initially installed it with a pre-cutout as I thought it would be easier, however I realized that not installing the door lock directly above a roller allows the door to be opened to a certain height before the lock engages. If the lock is right above a roller, then the garage door will hit that lock before it opens.
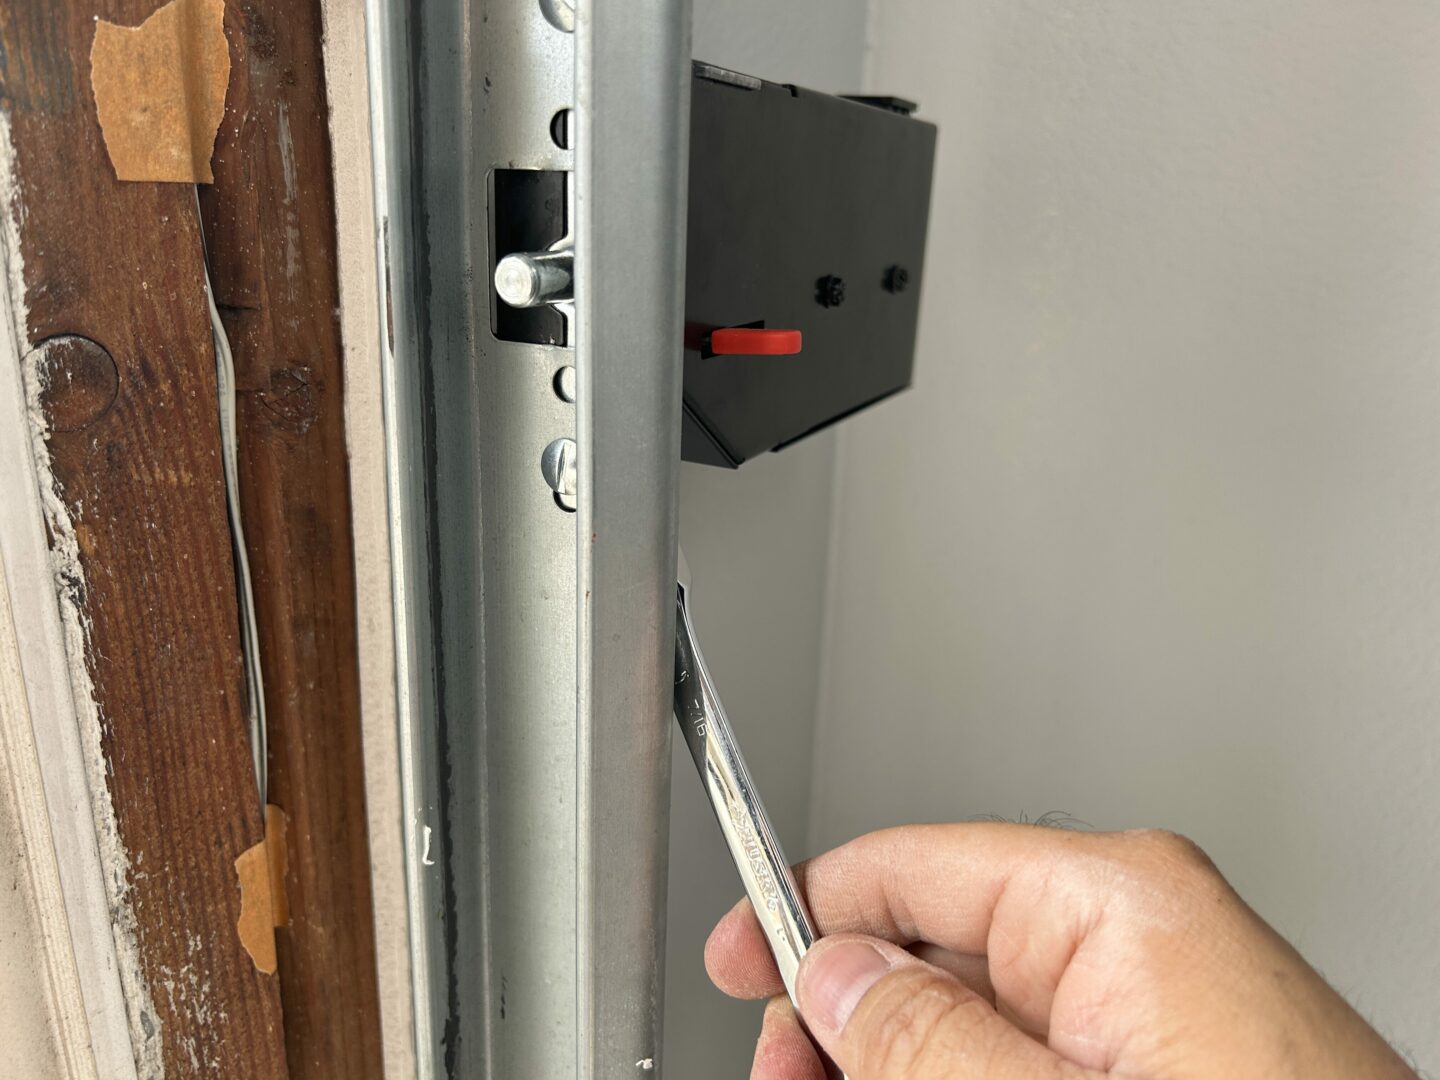
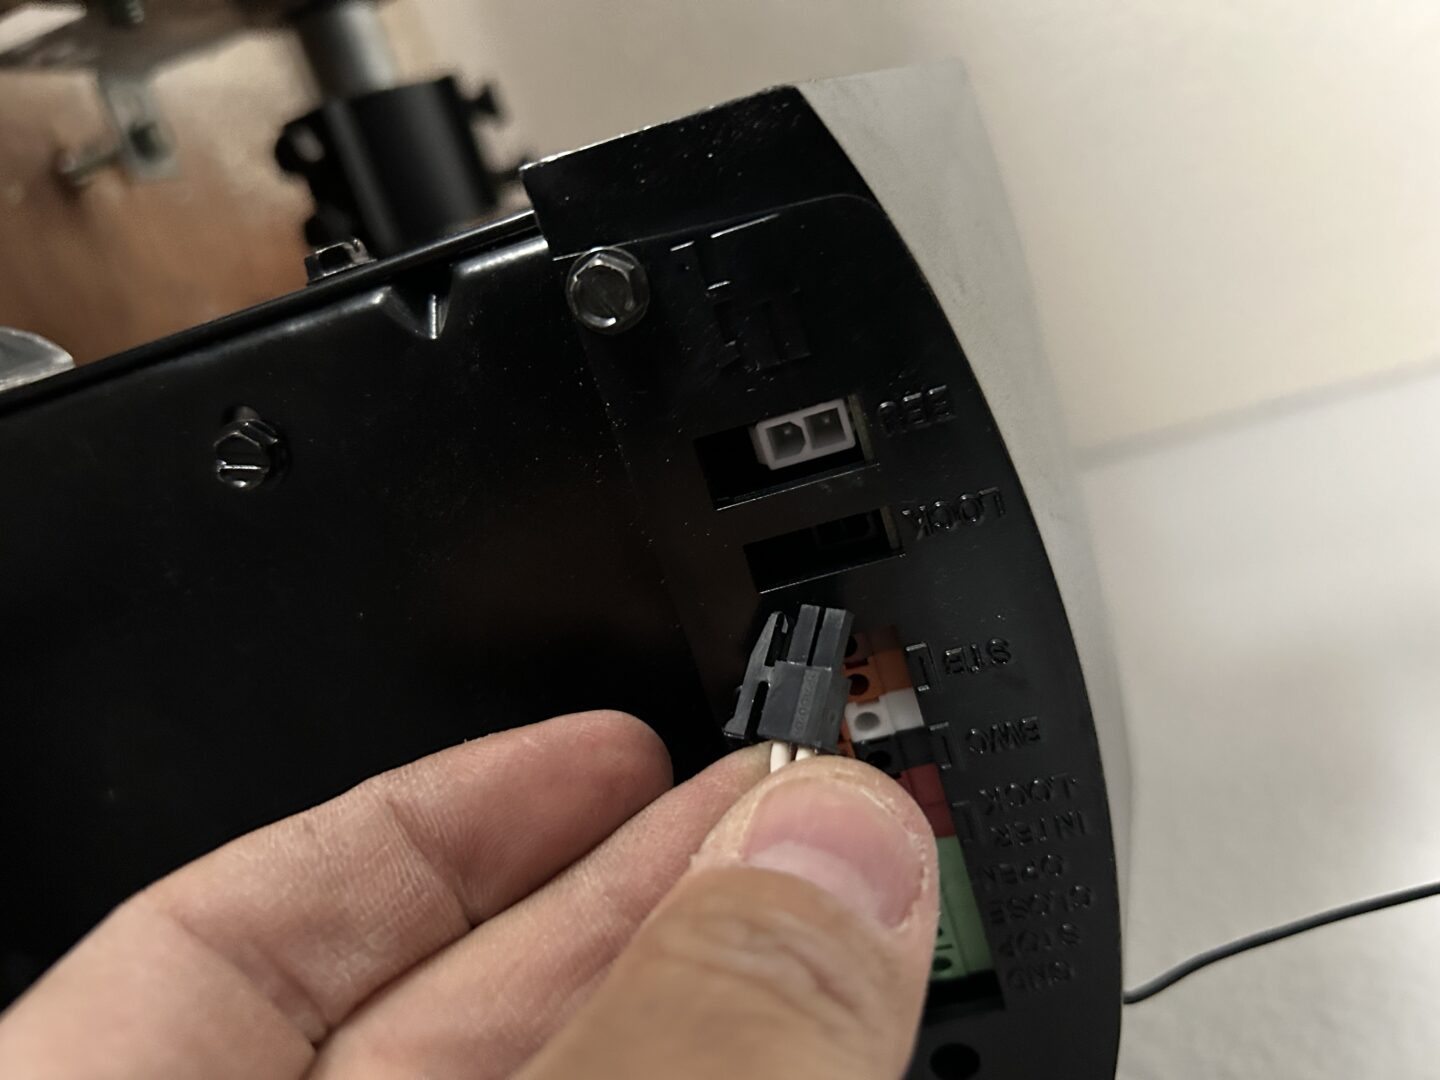
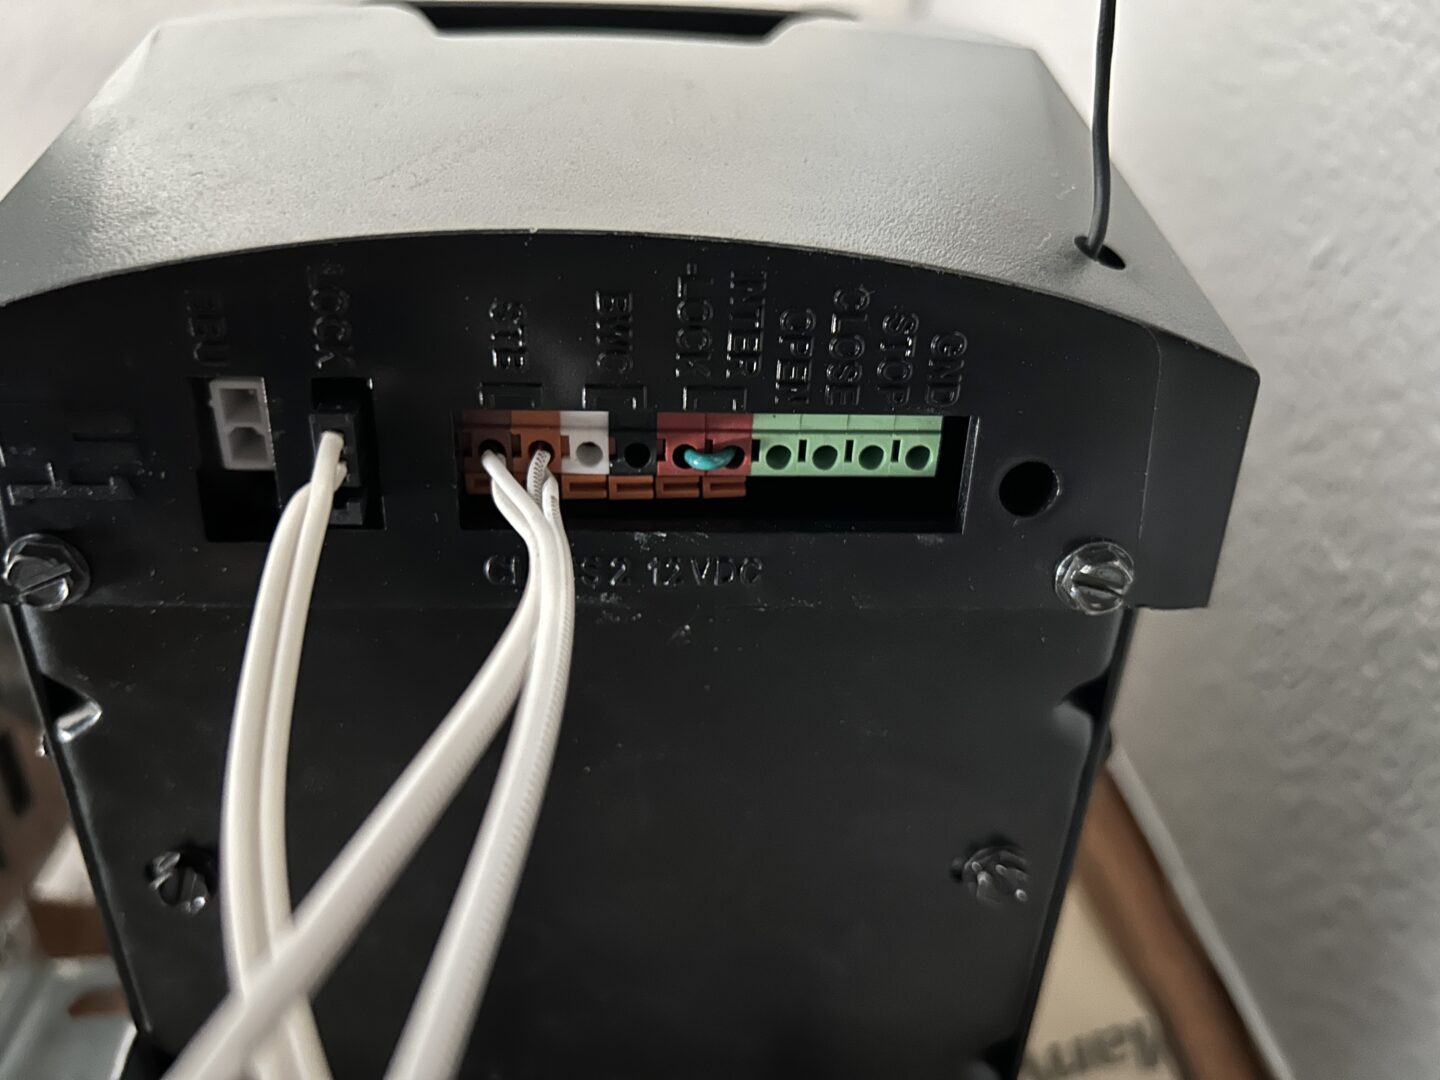
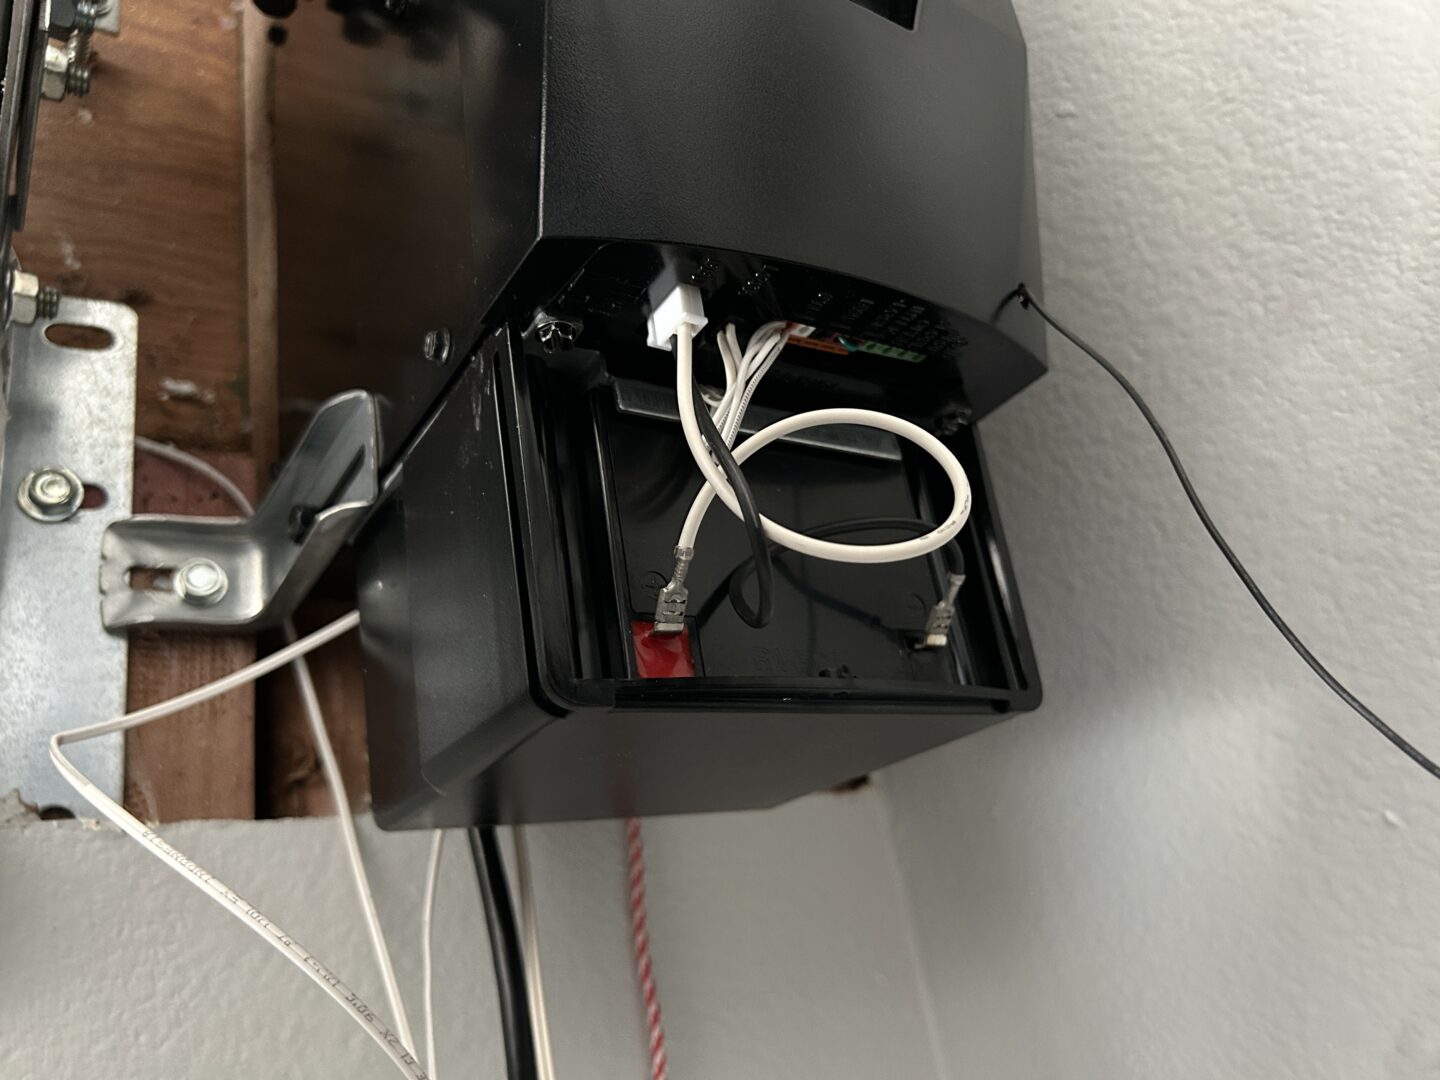
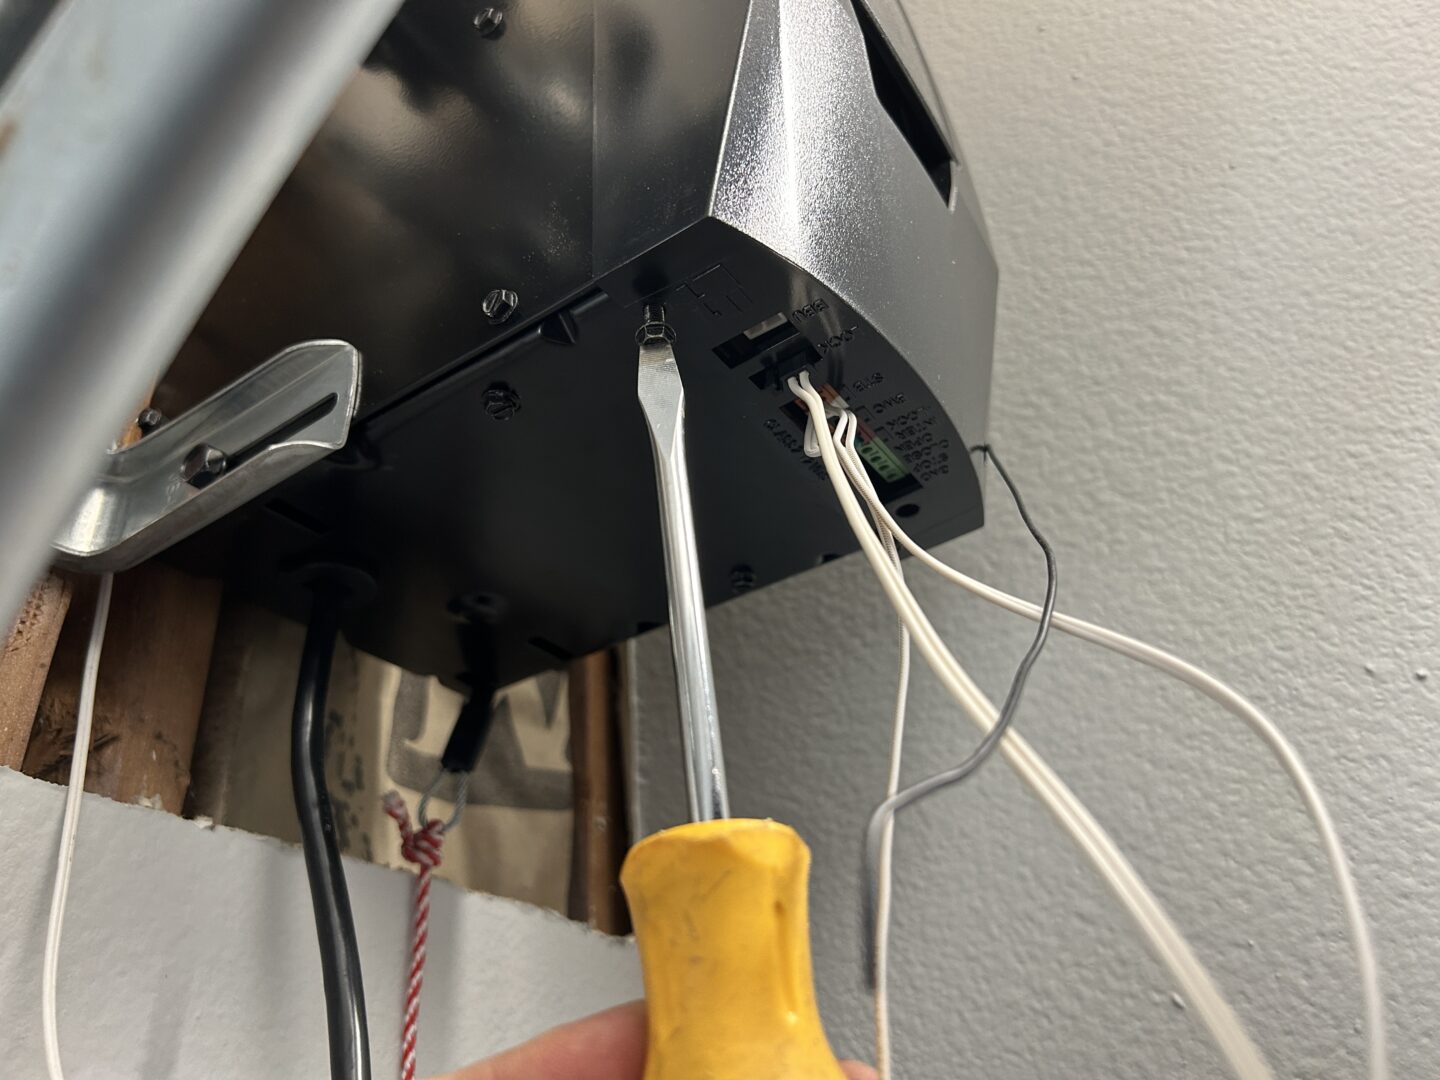
Plug the connector end of the door lock wiring into the garage door opener (plugs into the LOCK plug on the bottom of the opener) and then run it along the wall securely using wire staples all the way to the door lock. Cut the wire to the appropriate length at the door lock, separate and strip the wires back so that they can be connected to the terminals on the door lock. Note that the polarity of the wires here do matter; the door opener lid shows which wire goes where (i.e. B/W wire and W wire).
Installing the Sensors (Wire Safe-T-Beams)
The Wire Safe-T-Beams are the sensors that are installed at the base on both sides of the garage door. The two sensors should be positioned approximately 5-6 inches above the floor. The sensor lenses should also be facing each other.
To mount the Safe-T-Beam brackets, pre-drill a 3/32″ pilot holes into the wall next to the garage door, for where you’ll be installing the brackets. Install the included 1/4″ lag screws through the brackets to the wall.
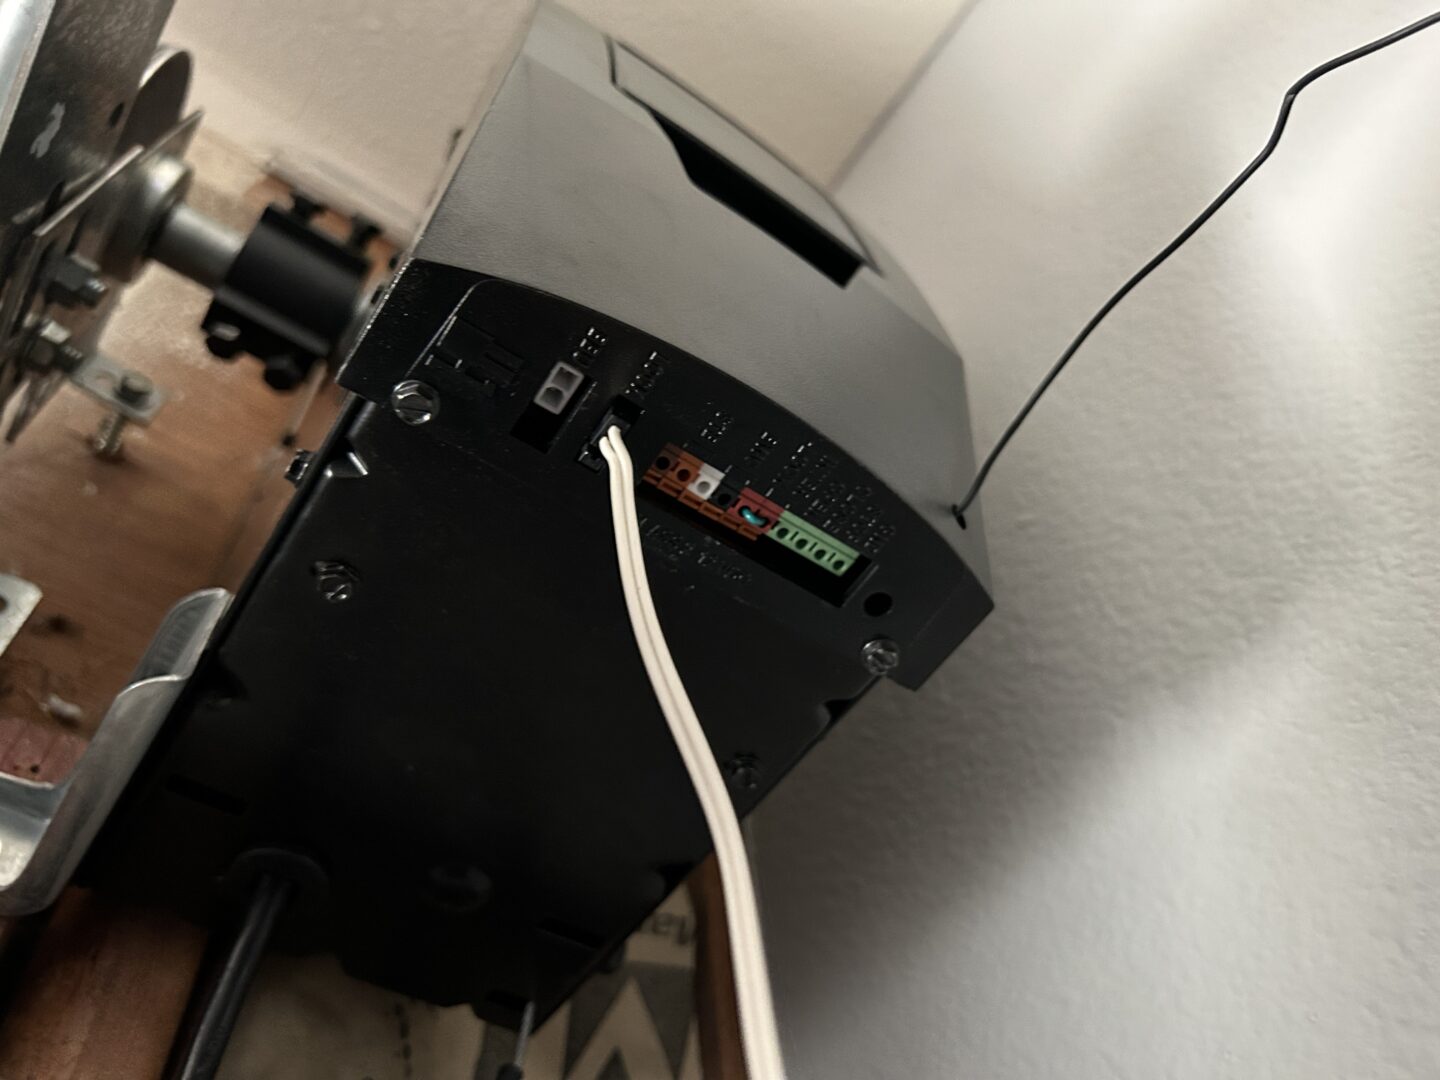
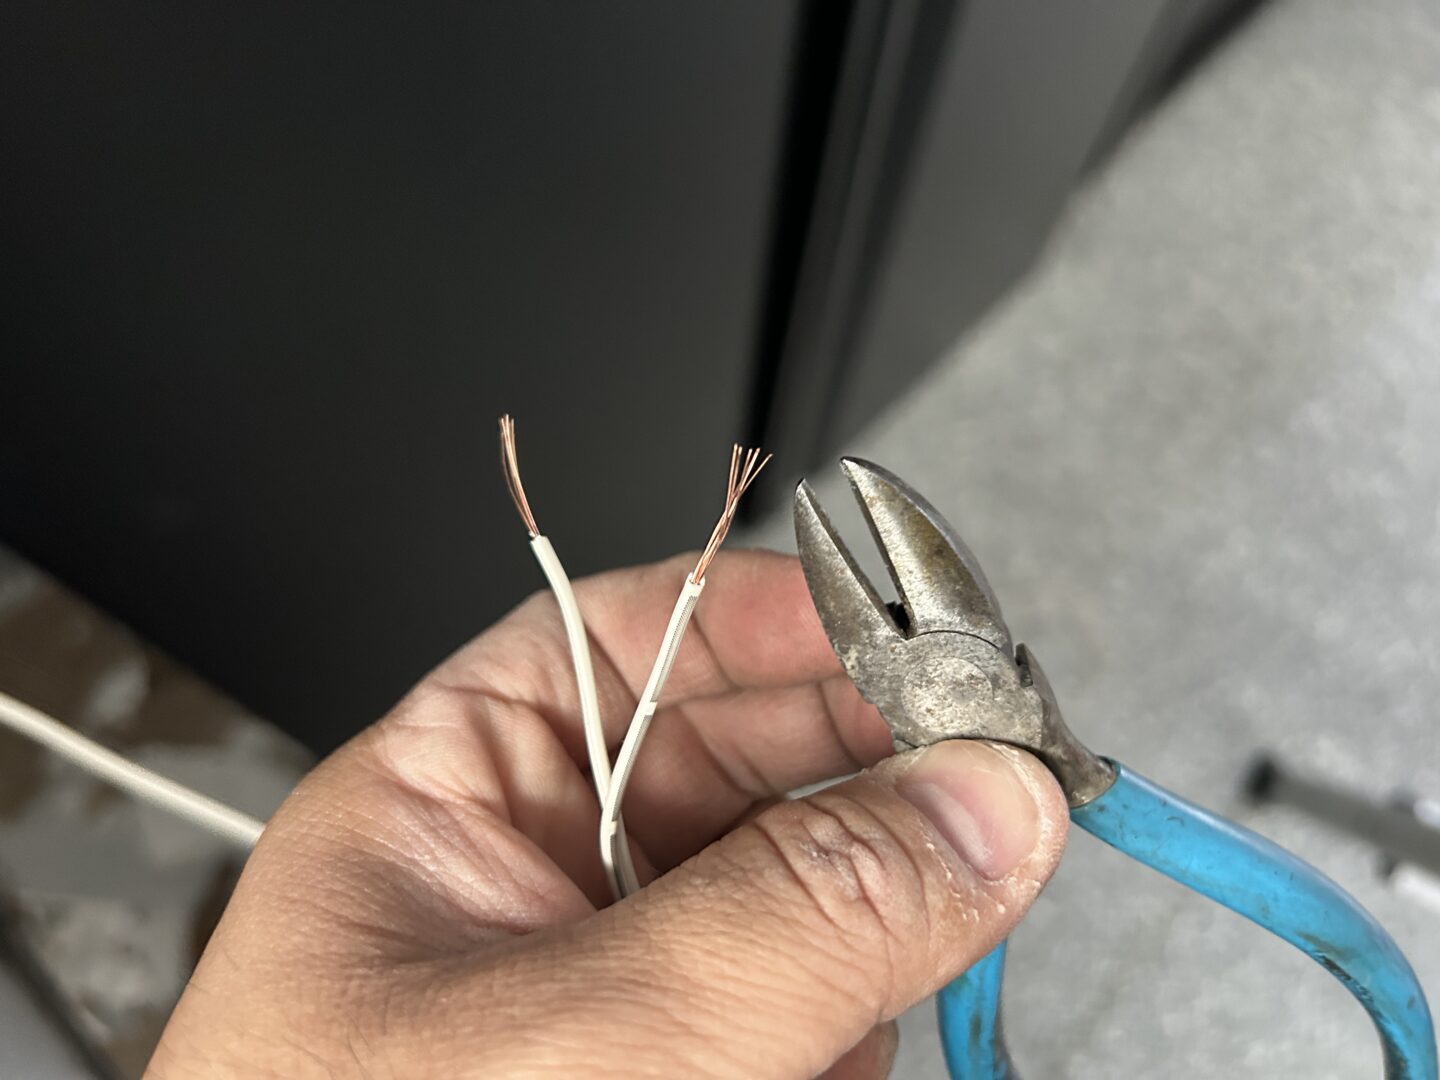
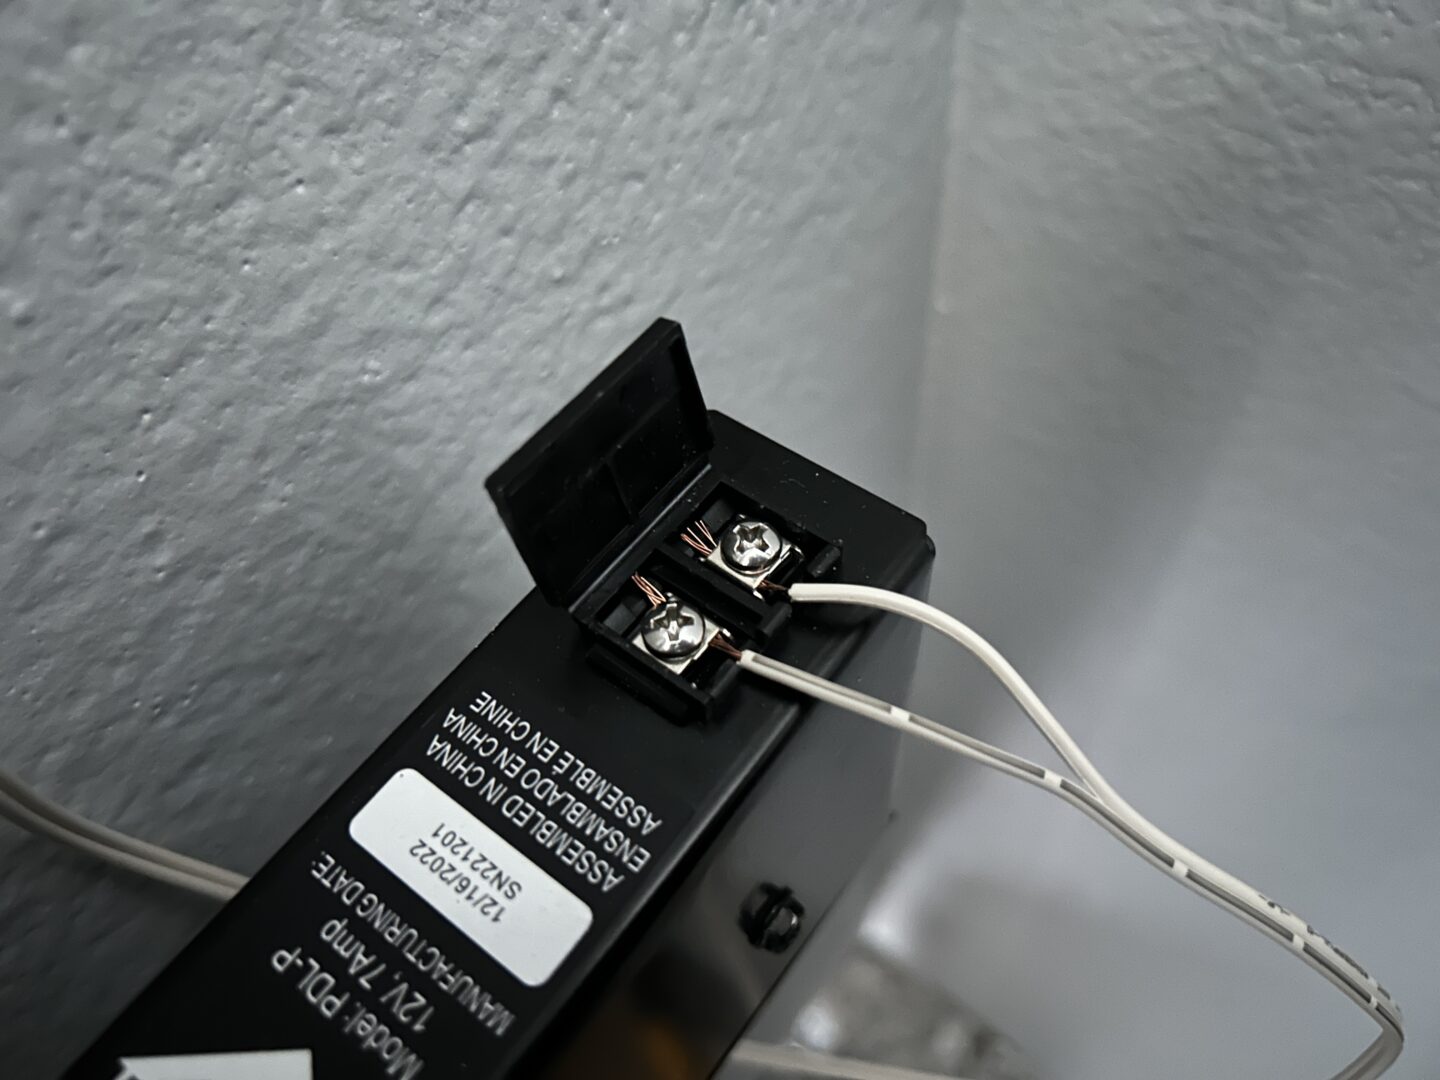
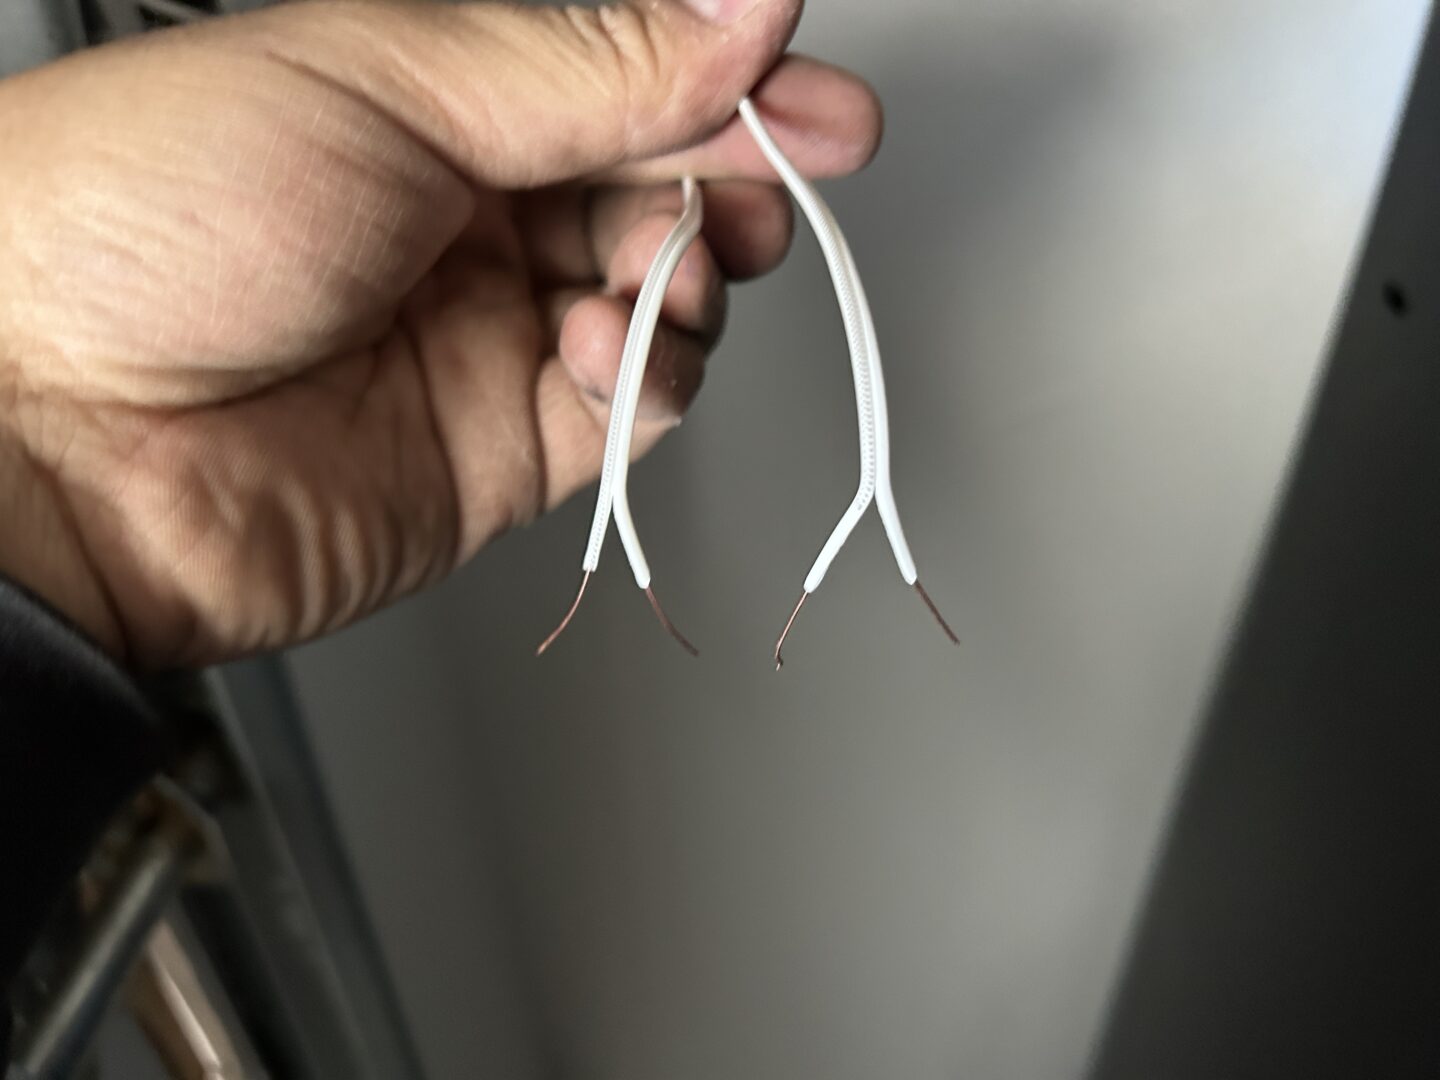
Each sensor will have a pair of wires that are not polarity-sensitive. These wires will need to be separated and stripped at the ends, then connected via the terminal screws on each sensor. Then, run the wiring up the wall and to the door opener, securing them with wire staples.
At the door opener unit, you’ll need to take the white wire from each set of wires and twist them together. Then use a small flat head screwdriver to press on the tab labeled “STB” and insert the twisted wires into the opening, then release the tab. Next, do the same with the white with black striped wires: twist them together and insert into the other “STB” slot.
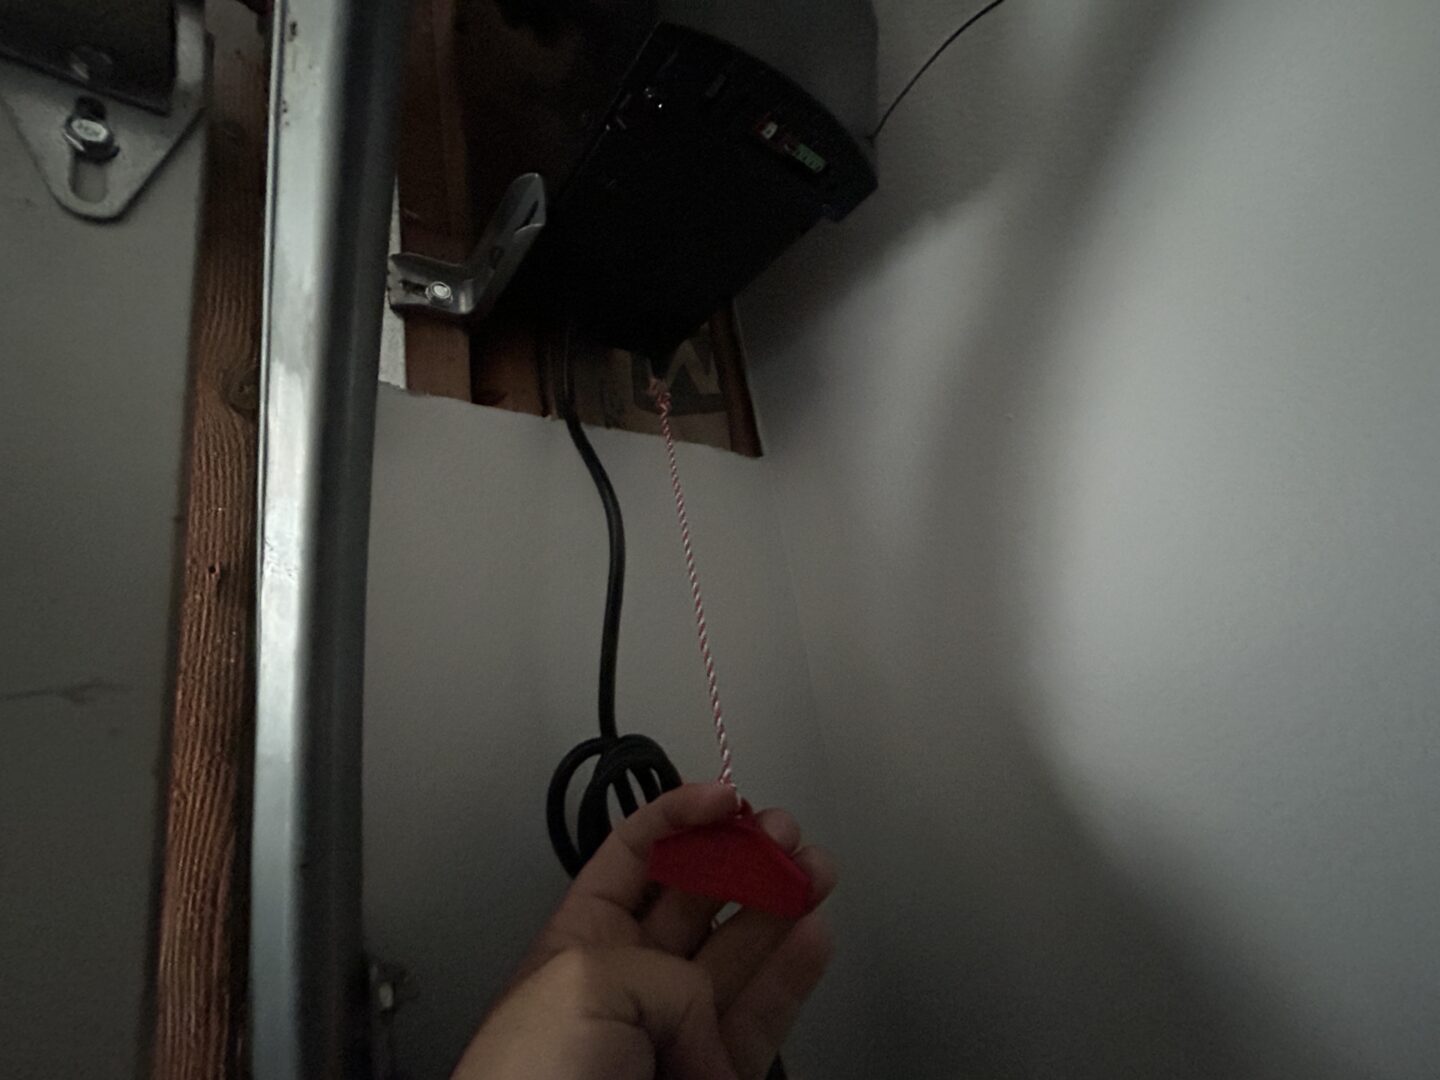
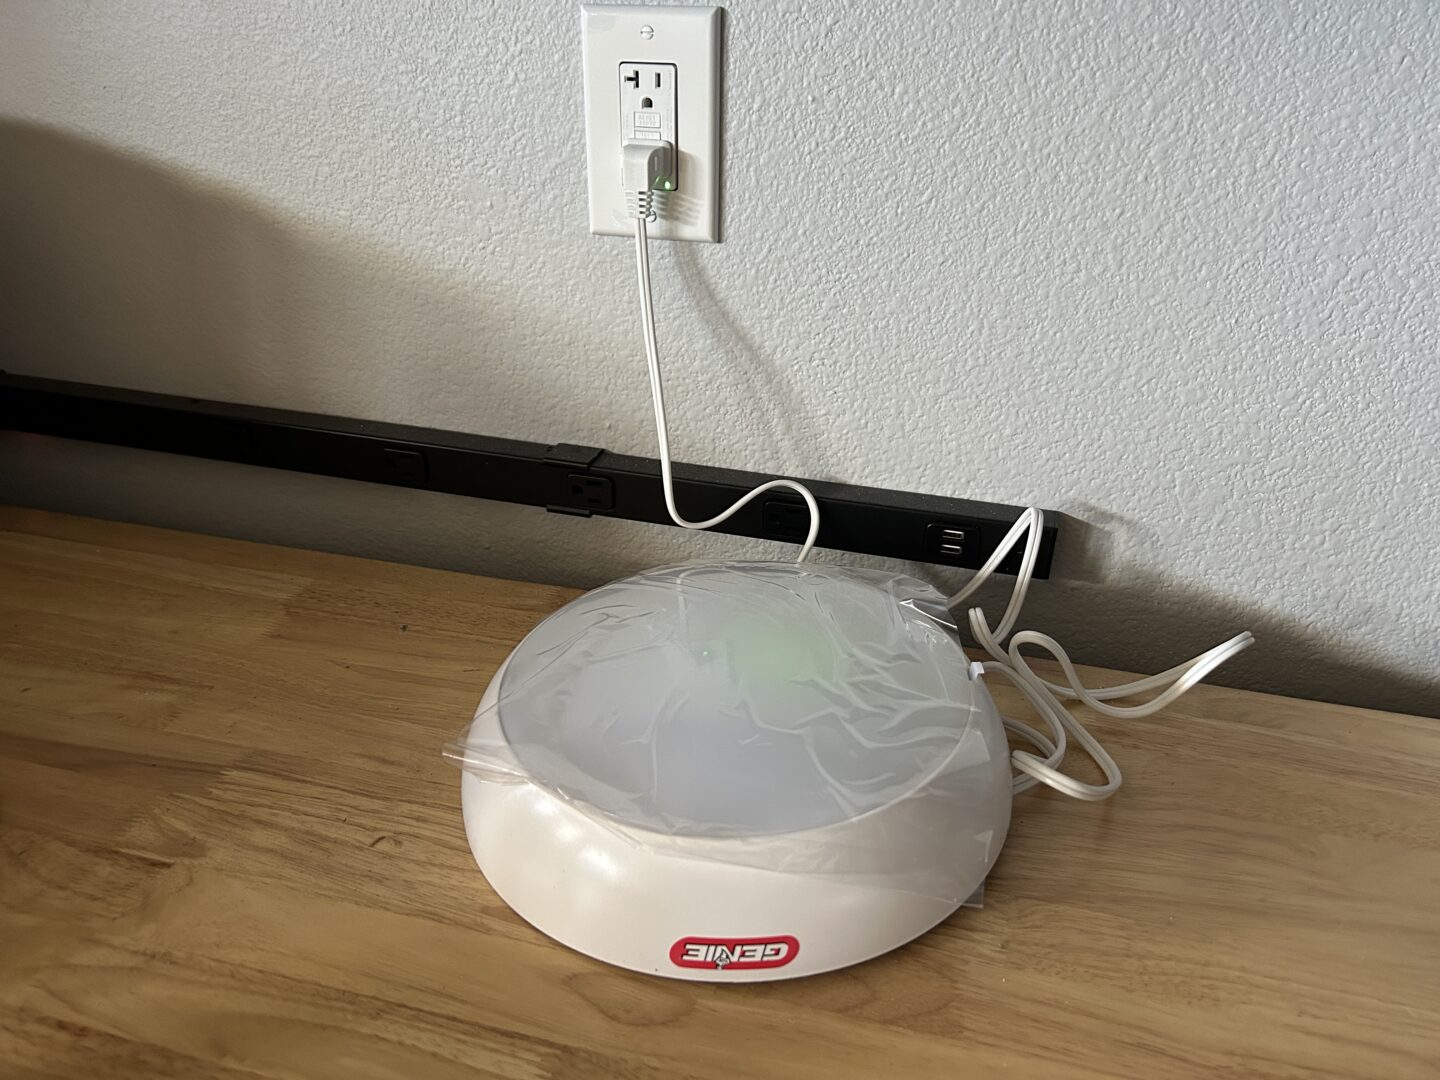
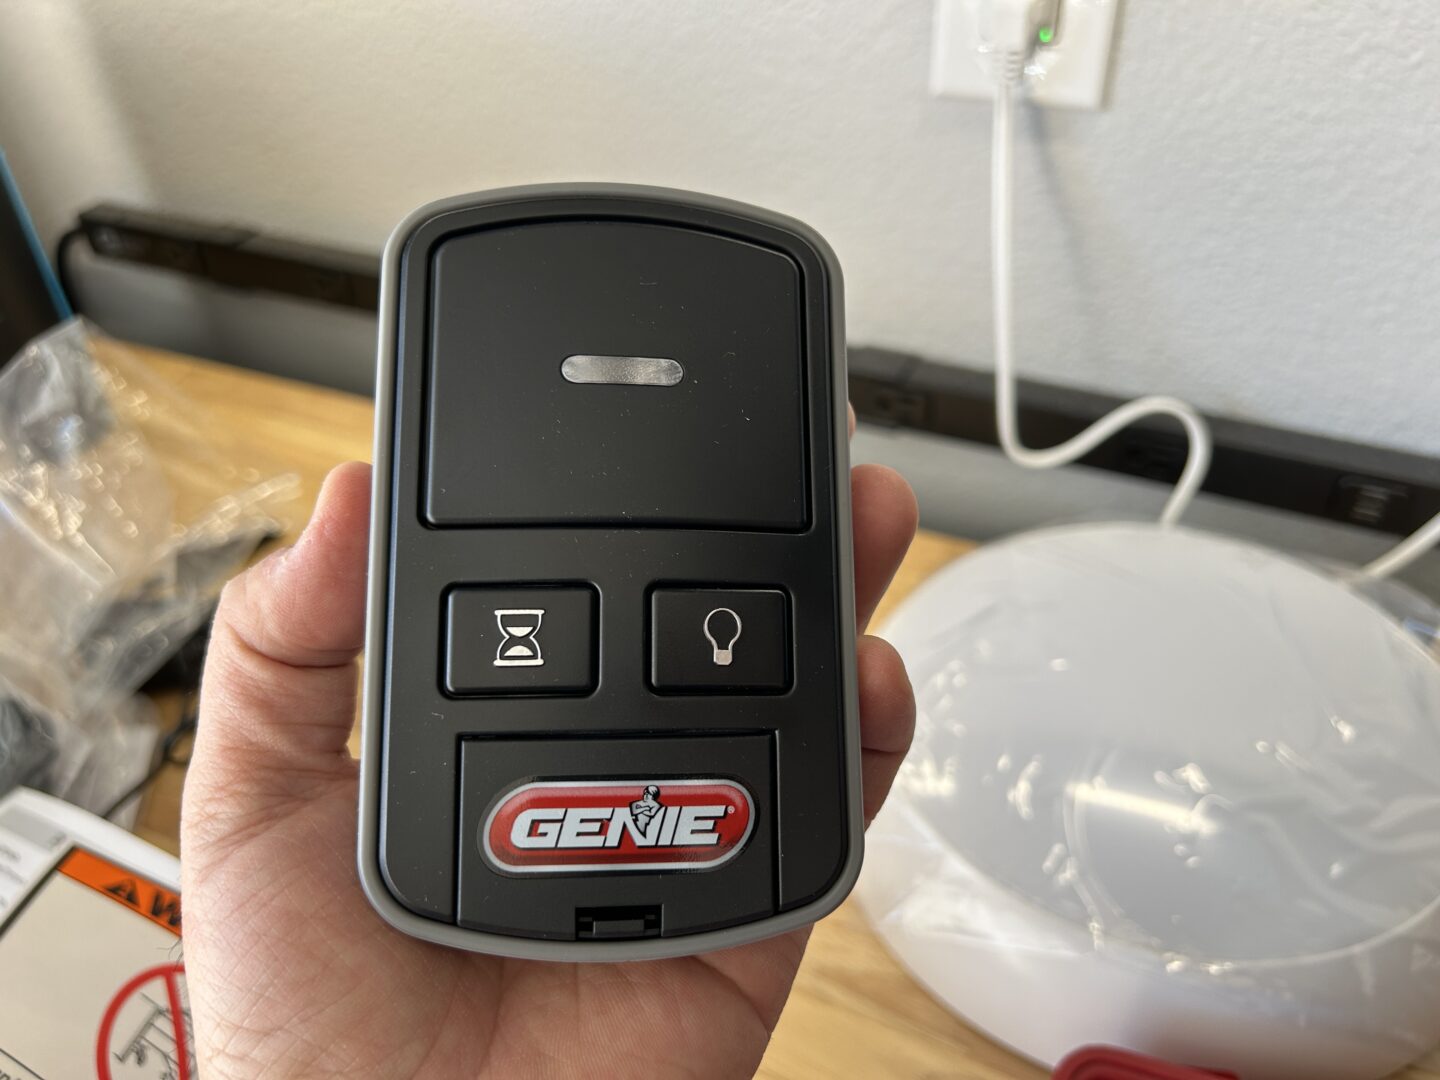
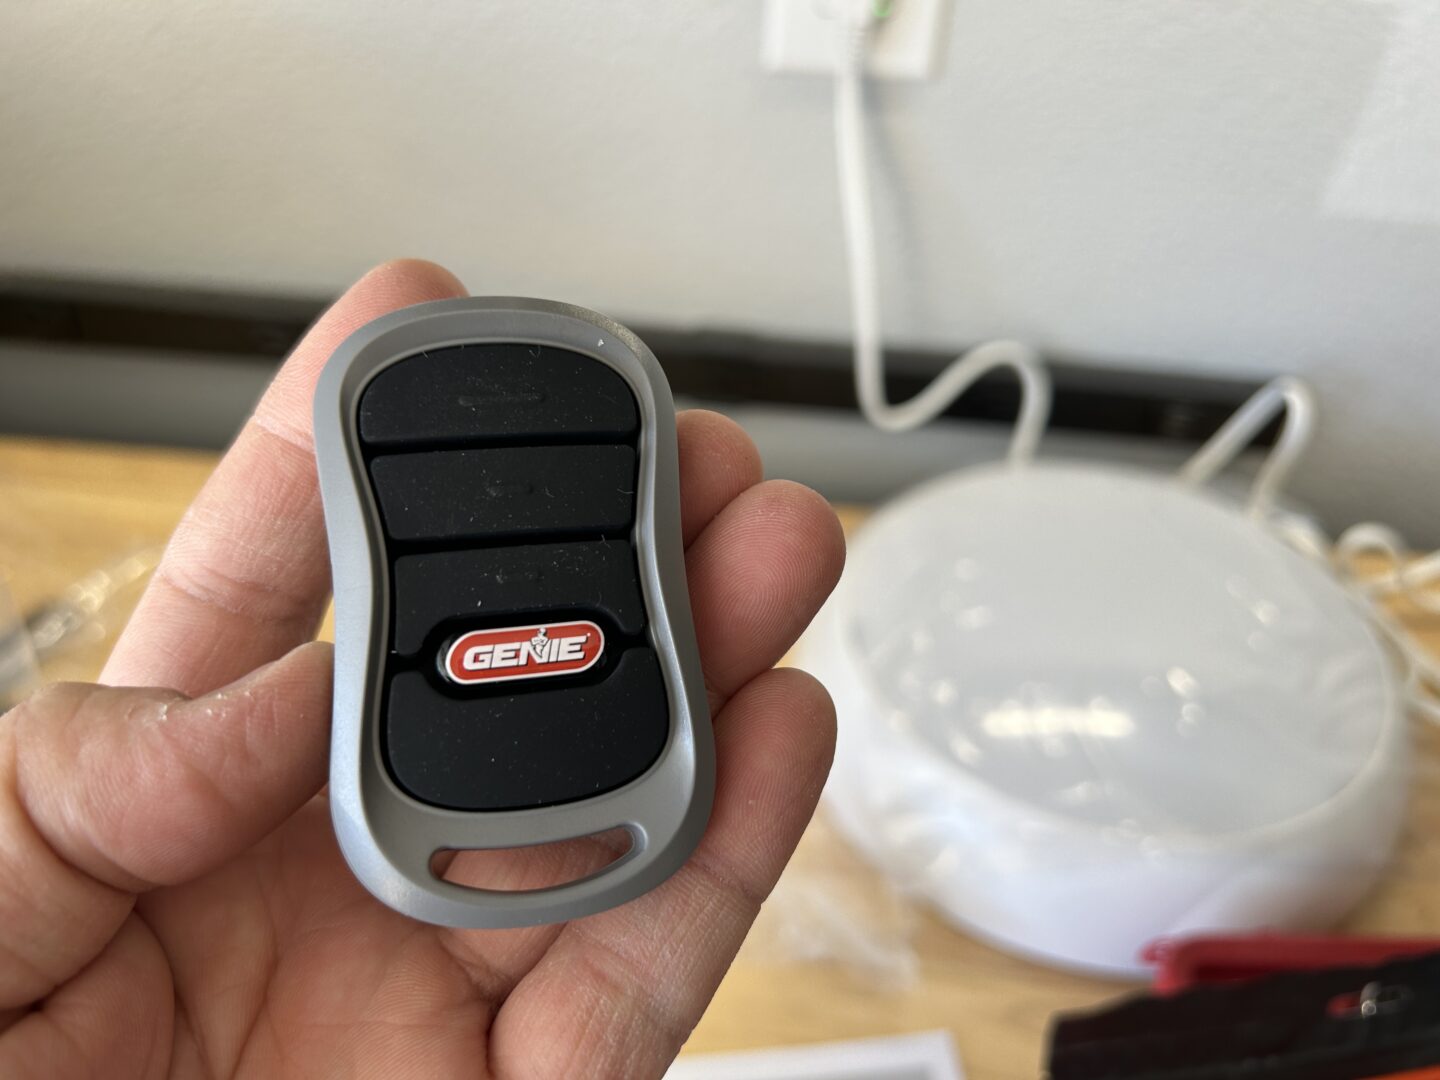
Plug in the motor opener unit to power it on. Install new batteries in the wireless garage door remote and mount it as needed. The remote automatically pairs to the opener when it powers on with batteries. The Bluetooth LED light can also be plugged in at this point and mounted to its final location. The LED light will also automatically pair once powered up with a series of light flashes and beeps.
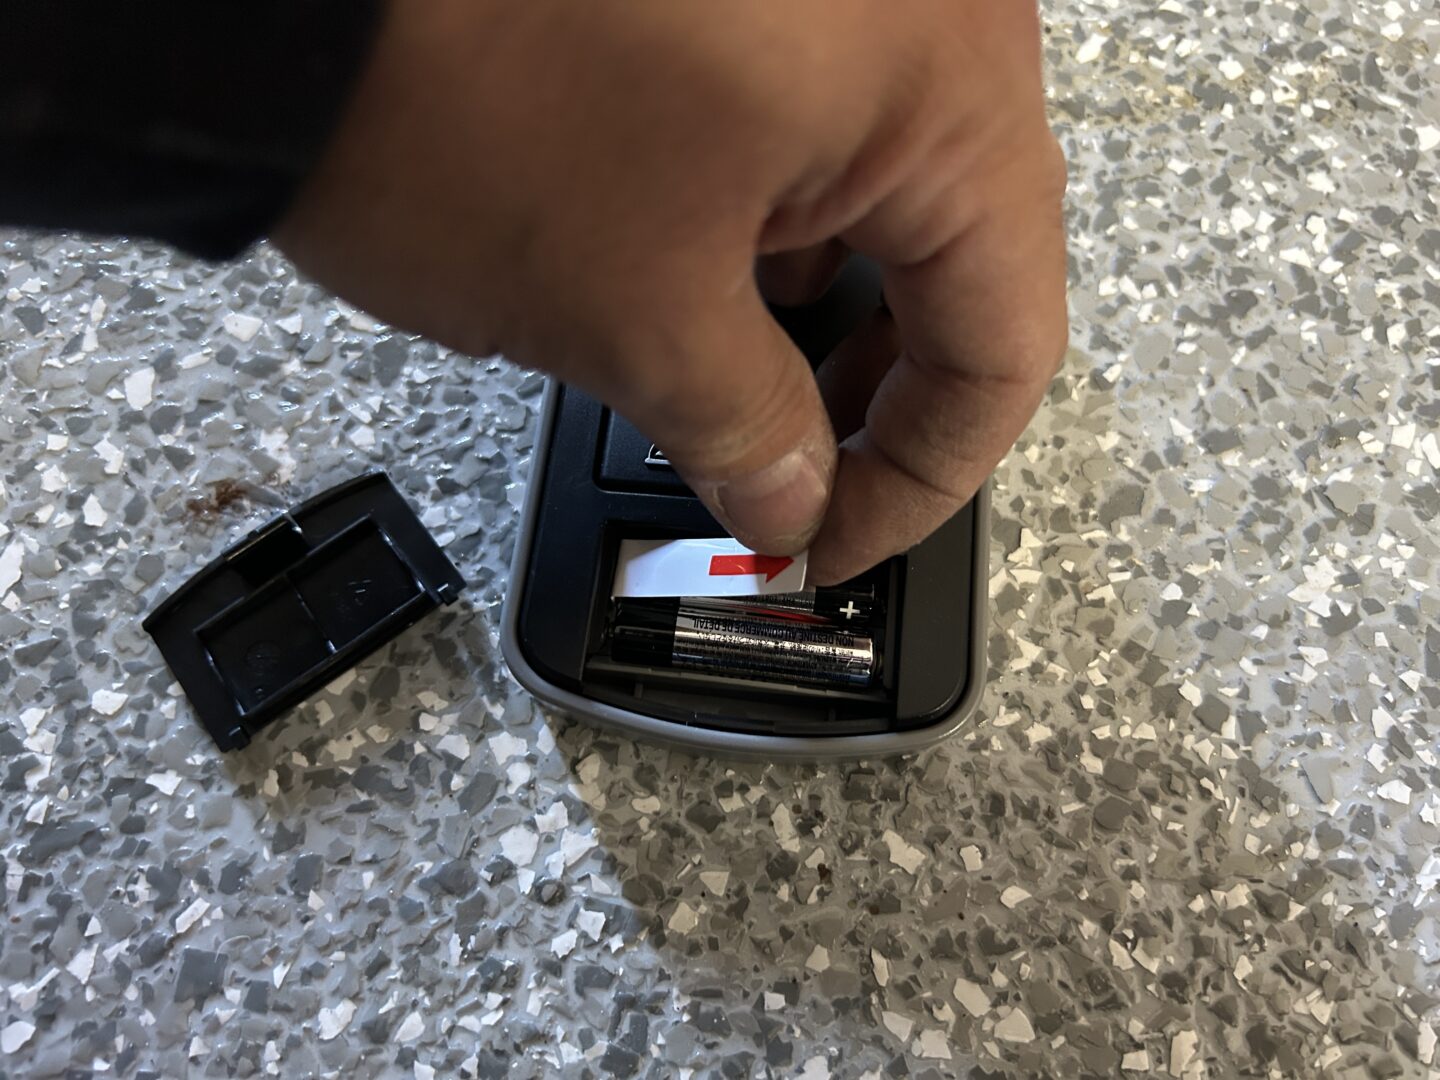
The Genie B6172H comes with two remotes, one larger one that is used as your main remote, typically mounted in your garage near the entrance of the garage to the house. The other is your portable remote that you can leave in your car or other desired location.
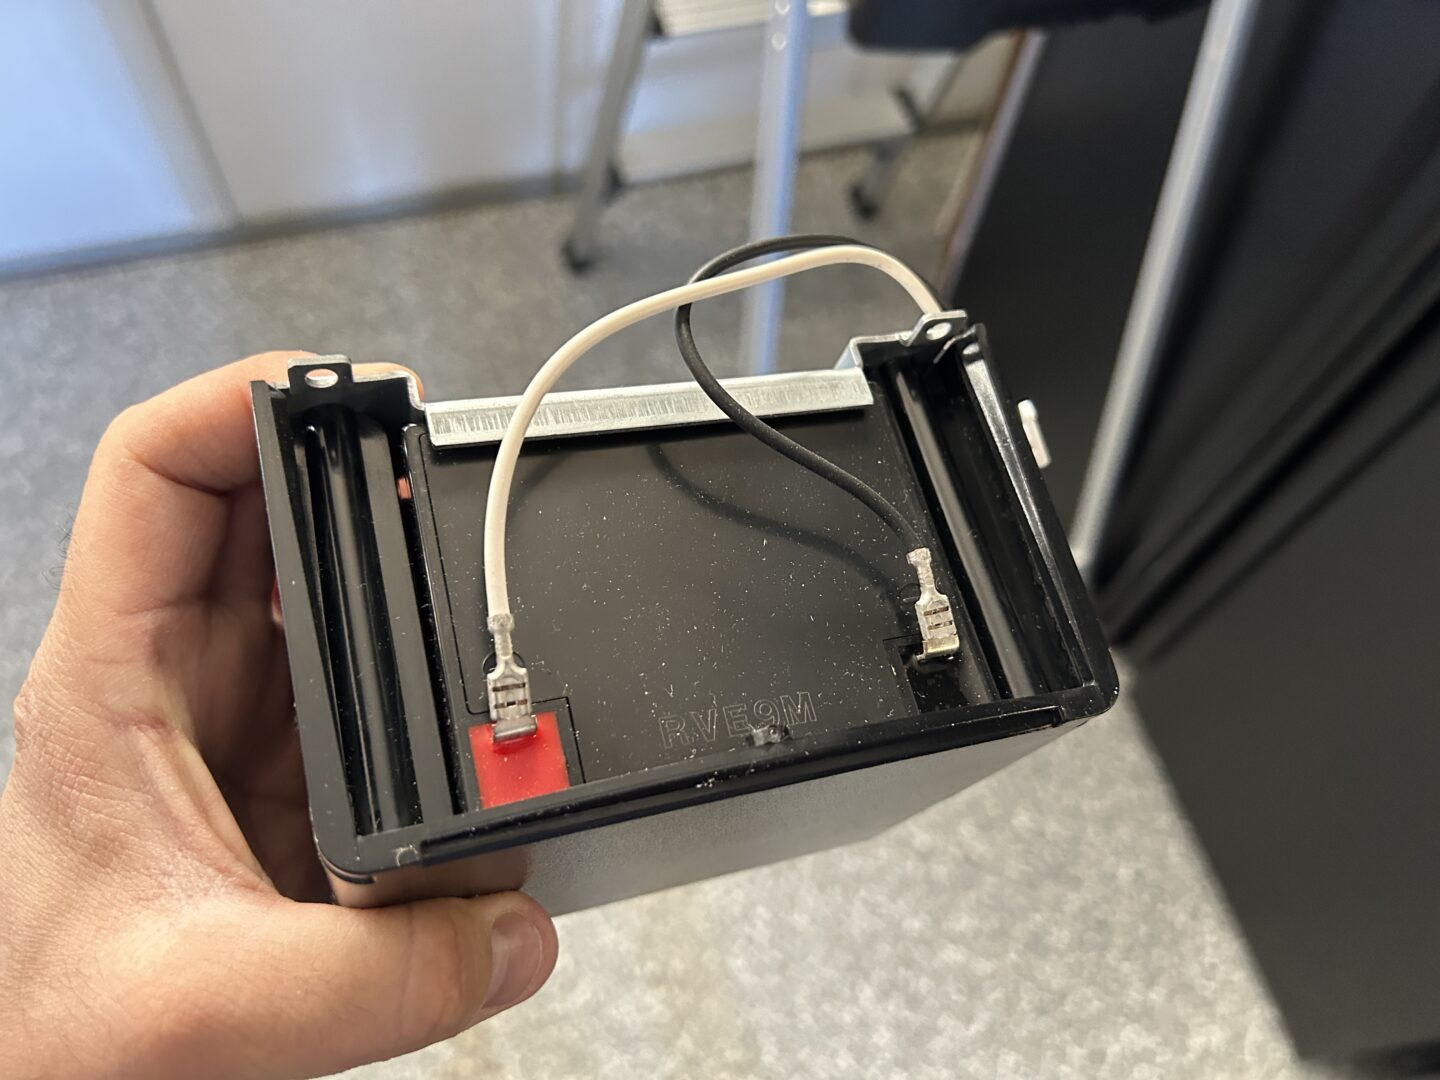
At this time, installation is largely complete. There are some final adjustments and other programming that may need to be completed. These items include installing the battery backup, adjusting for drum selection (if needed), programming the up and down limits, force profile, and contact reverse. I recommend following the manufacturer’s instructions to ensure you are following all the required steps for your particular install.
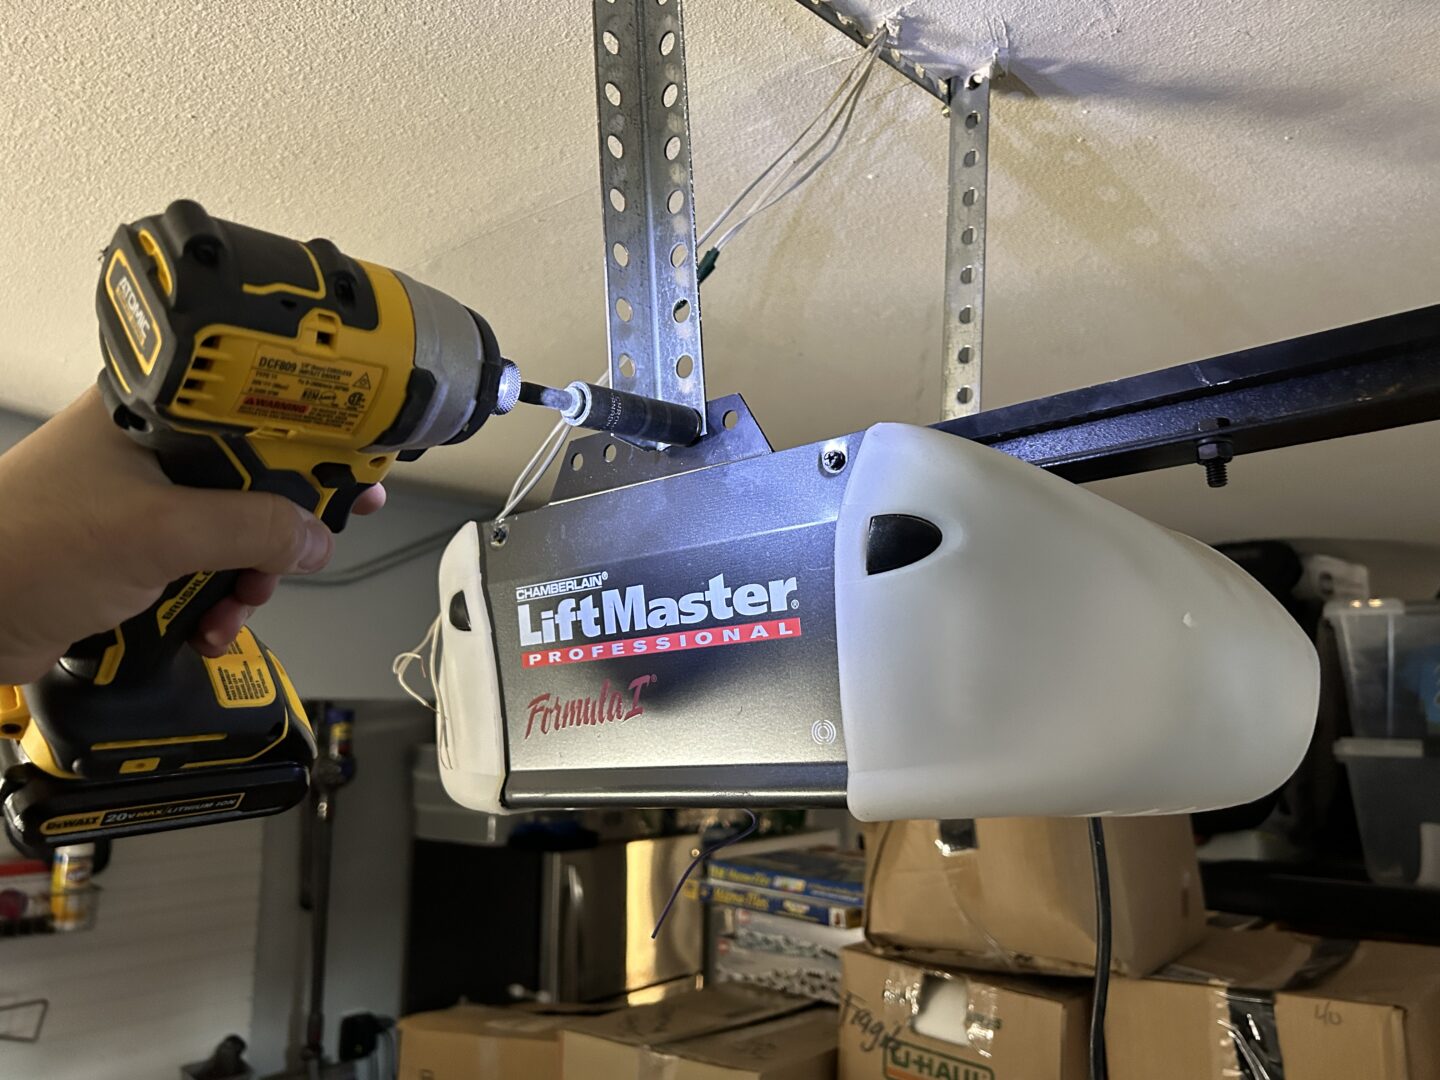
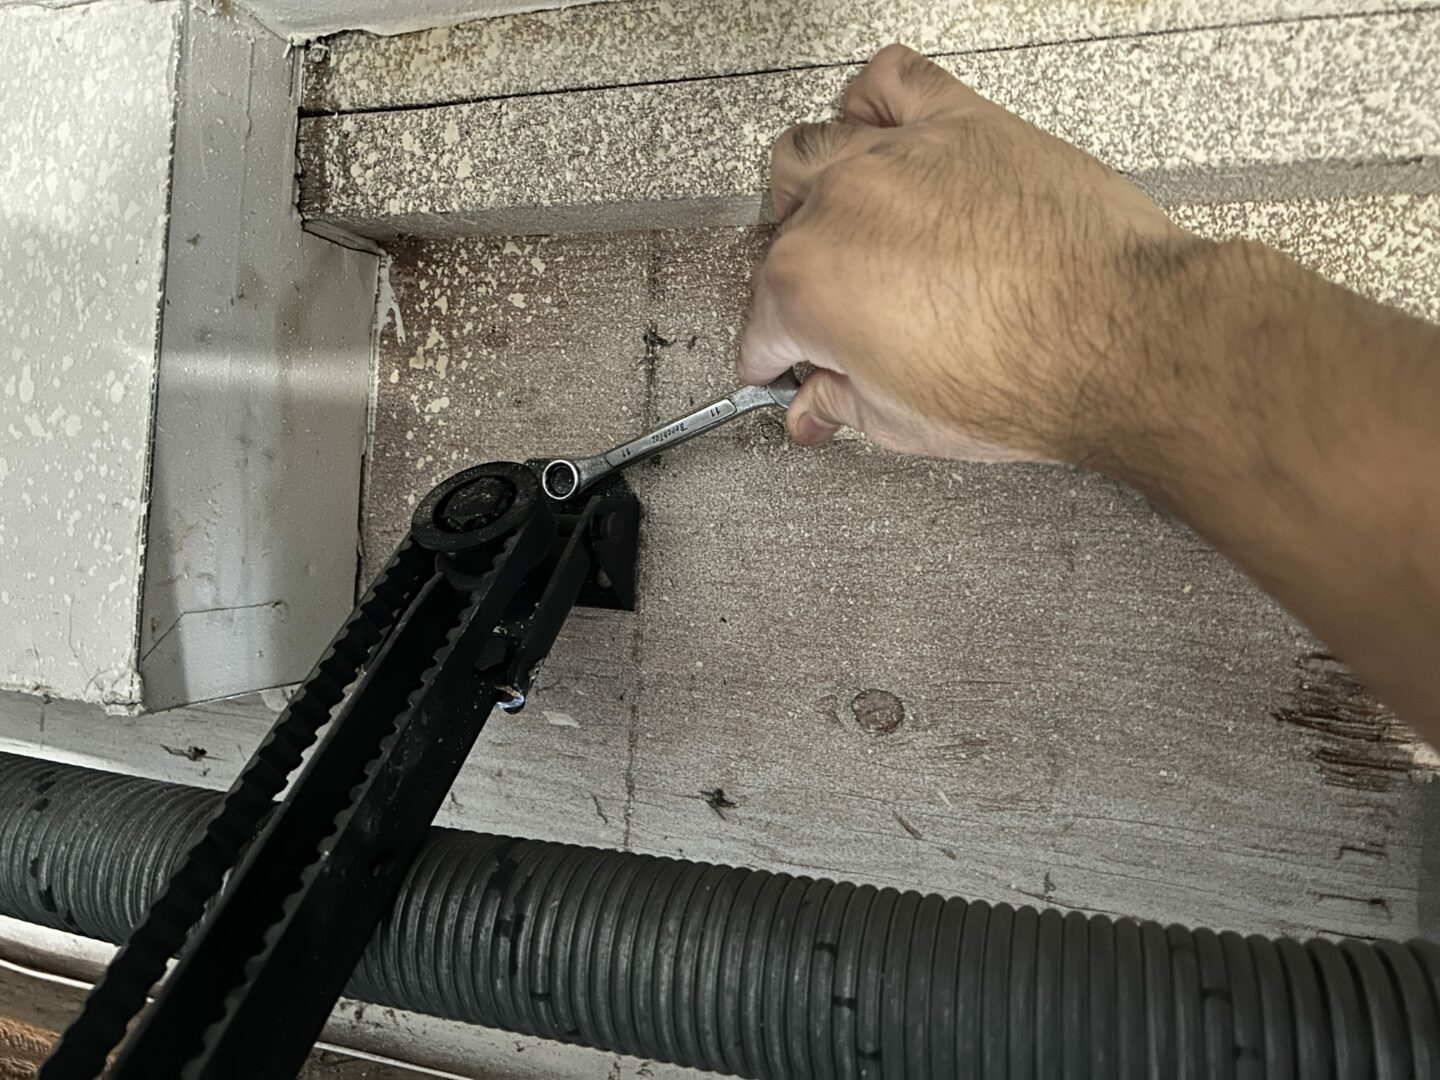
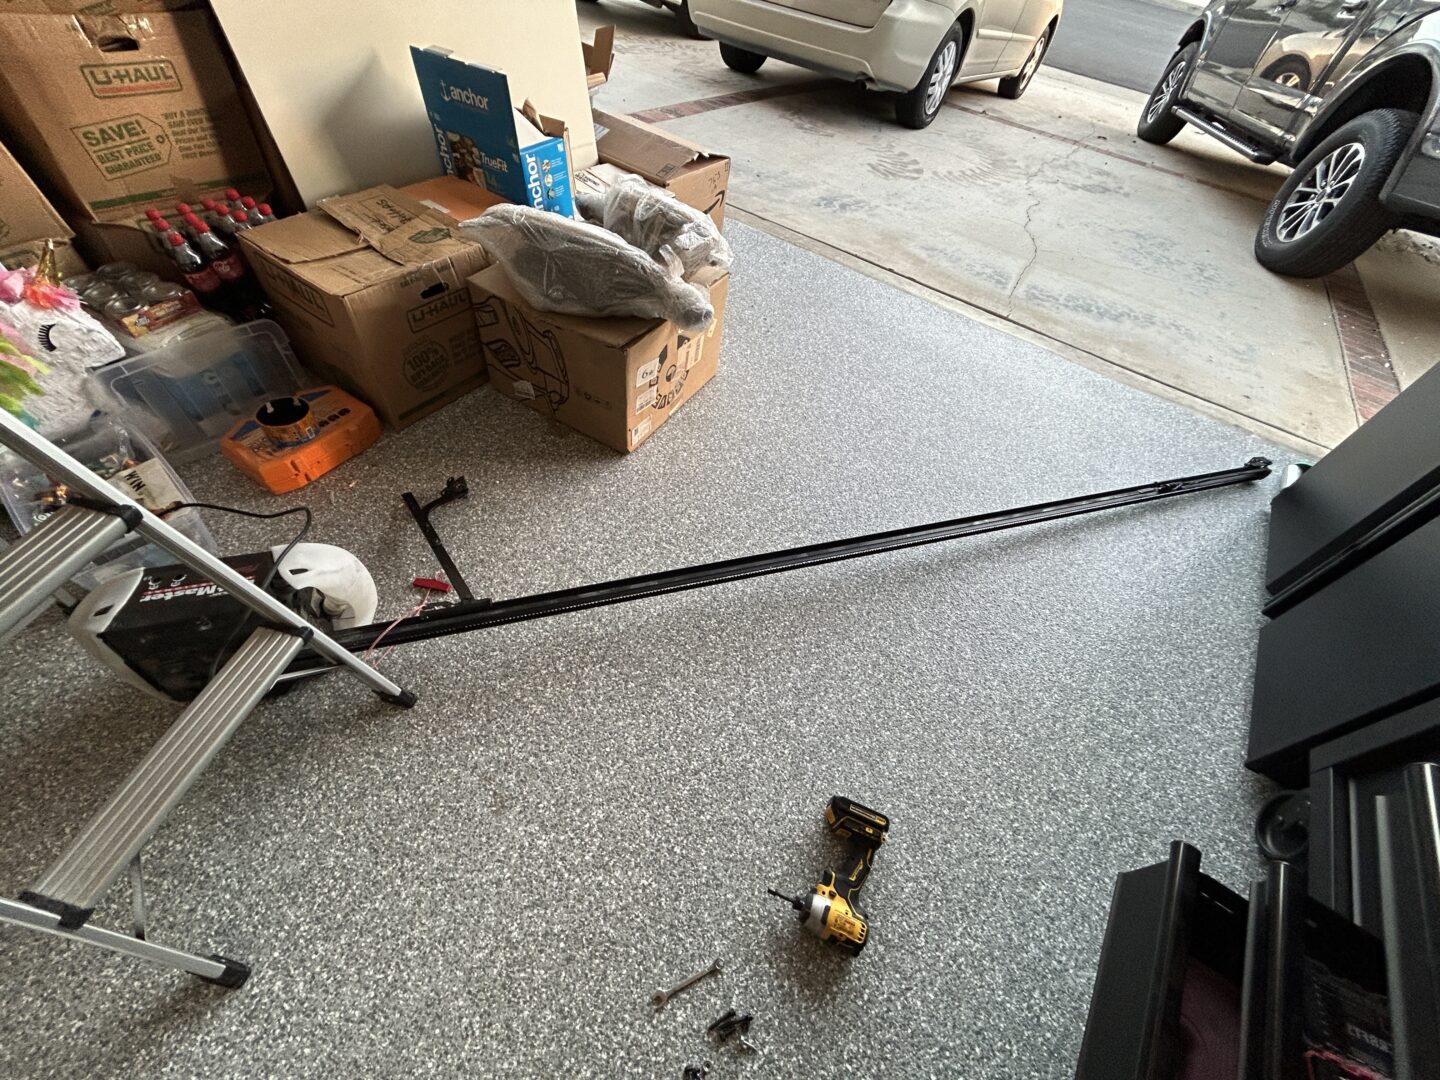
If you previously had a ceiling-mounted garage door opener, now would be the time to remove the unit along with the track and associated mounting steel. Ensure that you have adequate support of the track and door opener so that when you remove the connections to the garage door and the ceiling, the track doesn’t come crashing down.

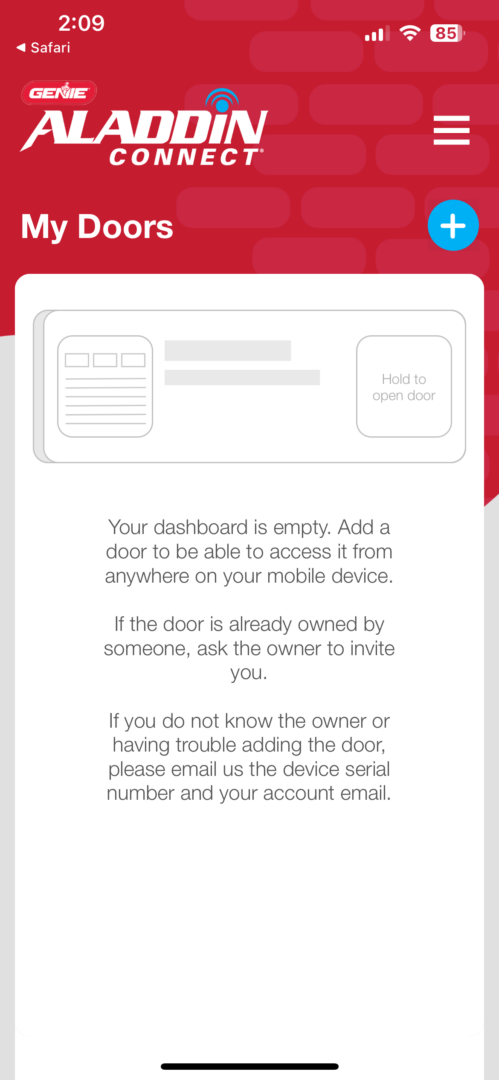
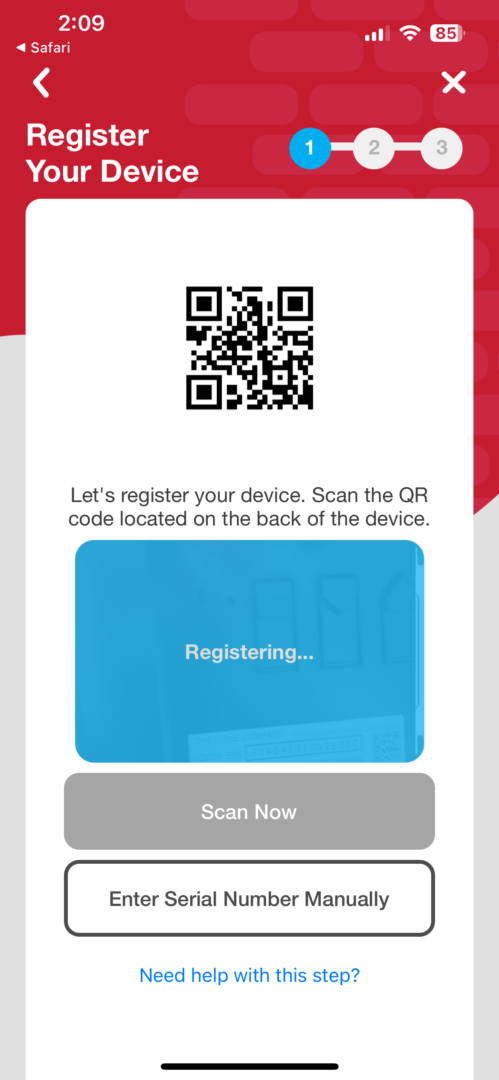
The Genie B6172H Wall Mount Smart Garage Door Opener won’t be smart if you don’t install the Aladdin Connect App, which will allow you to connect your smartphone to your garage door opener. The app sets up pretty easily; you just download the app and follow the instructions to make the connection to your garage door opener. After it is set up, you can remotely open and close the garage door with your smartphone.
Overall Impression on the Genie B6172H
The main reason why I bought the Genie B6172H was to replace the ceiling mounted one because the ceiling mounted garage door opener hung down pretty low on my already low ceiling. With the track and ceiling-mounted opener removed, it gives me much more ceiling clearance to allow me to drive taller vehicles into the garage.
The smart functionality is a nice feature that makes it easy to open/close the garage door by just using your smartphone instead of having to use the remote. It’s very convenient to be able to operate the door from anywhere. You also get added security because you get notified on your phone whenever the garage door opens or closes. I find the remote open/close feature most useful when I’m in the front yard and I want to go in through the garage door.
Over the past year of using the Genie B6172H, I have one major issue with it. If you happen to stop the garage door while it’s opening or closing so that it stays in a partially open position, and then you operate the door with your app, the app can’t always tell whether the door is partially opened or not. I’ve had a few times where the garage door was partially open, and I used the app to close the garage door at night because I was too lazy to walk out to check. After I closed it with the app, it stated that the garage door was closed, but lo-and-behold I came out the next morning only to find the garage door wide open. However, I never did have these types of issues on the app when I’d open or close the door fully without stopping it part way.
That’s the only complaint I really have, but I can totally avoid that issue by either only using the physical garage door remote, or not partially open/close the garage door while using the app. Everything else about the B6172H Wall Mount Smart Garage Door Opener is absolutely worth it. The installation is not complicated, but it does take some time to complete. I feel that it’s so convenient to open and close the garage door without having to press the button inside, and best of all I love that there’s plenty of ceiling space now for me to work on taller vehicles in the garage.


