When you make purchases through links on this site, The Track Ahead may earn an affiliate commission. Also, these posts are based off my own experiences. I am not responsible for any action you take as a result of reading this. Learn More
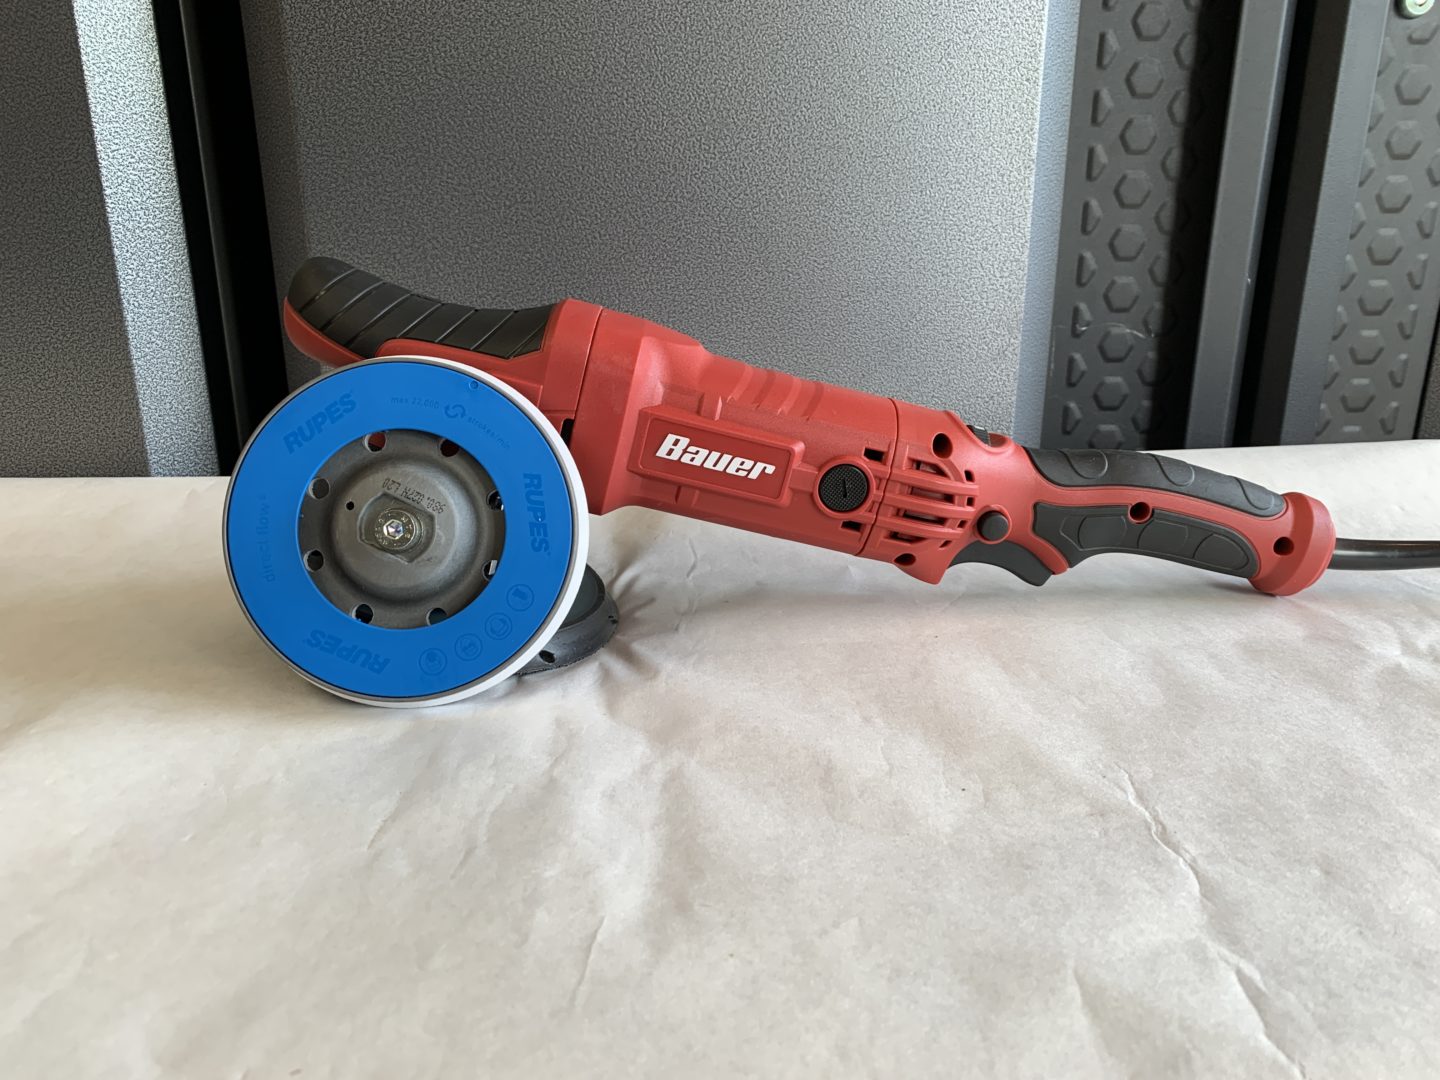
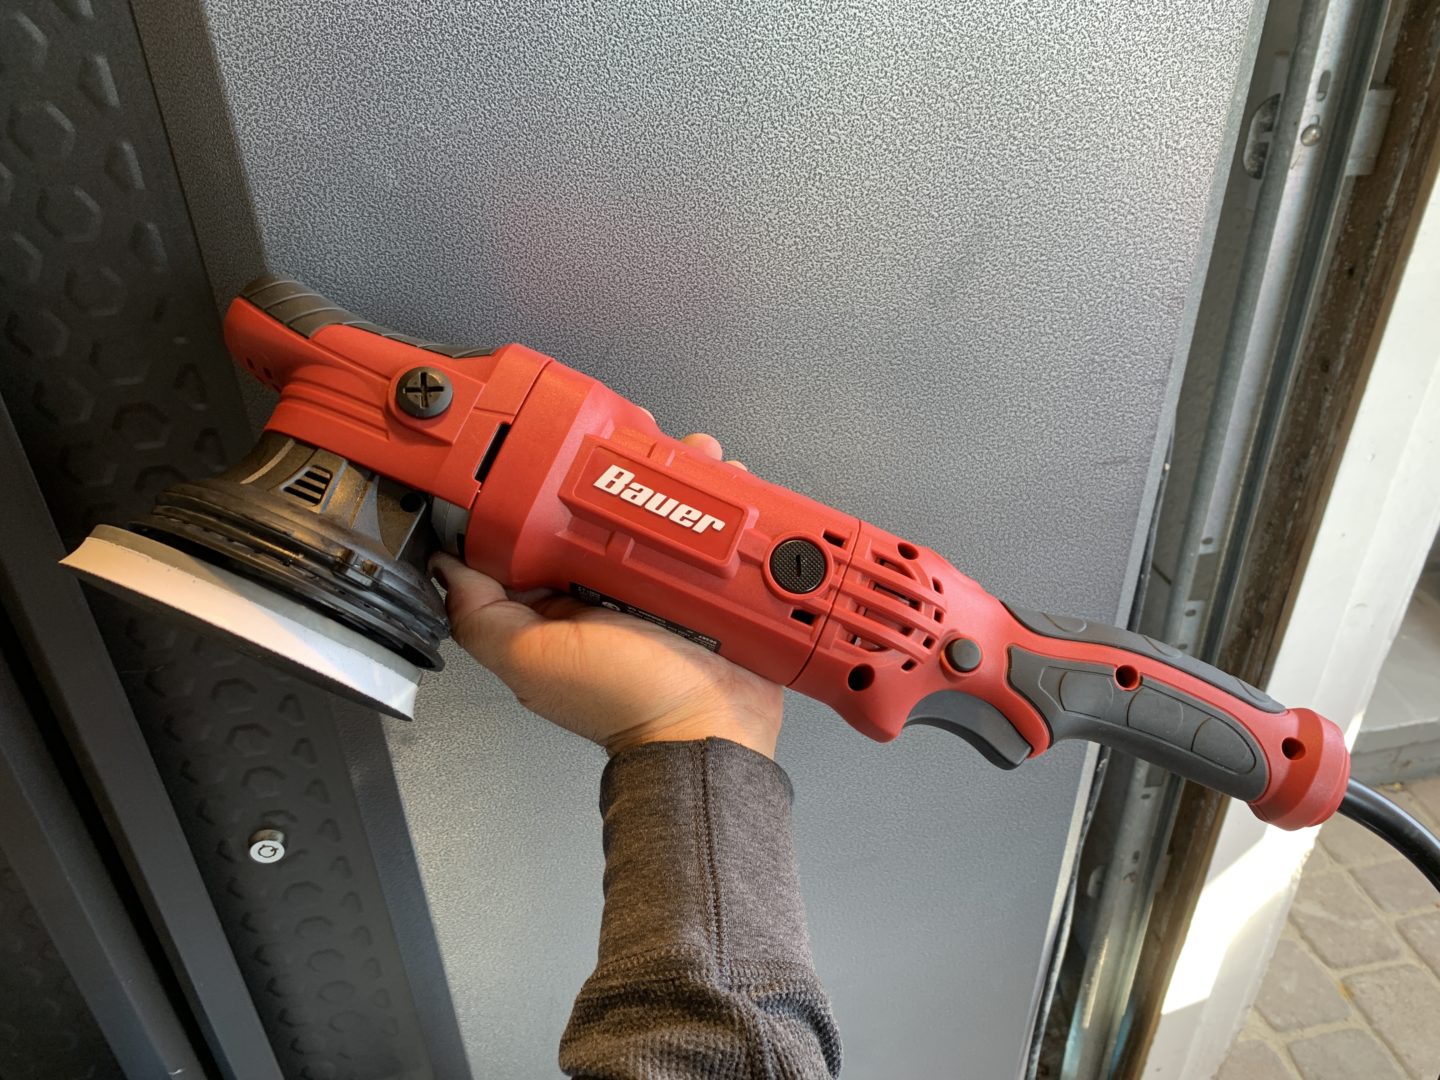
If you’ve ever been in the market for a long throw DA polisher, you’ve probably come across the budget $100 Bauer long throw polisher sold at Harbor Freight. This economical, yet effective polisher is aggressive enough to do some serious paint corrections. However, straight out of the box, the Bauer long throw polisher comes with a 6-inch backing plate and uses a generic yellow-looking grease that I would be weary of.
A popular detailer on YouTube, Scott HD, has done an upgrade of the Bauer long throw polisher from Harbor Freight. He basically swaps out the grease with a lithium grease, and then changes out the backing plate with a more useable 5-inch backing plate made by Rupes. He has done some tests that show that the upgrade results in less vibration.
I thought I’d give it a try since I prefer using a 5-inch polishing pad versus a 6-inch one. I also believe that the lithium grease will offer better-performing lubrication of the internal gears than what comes with the original polisher. These changes makes for a nice upgrade for the budget Bauer Long Throw Polisher from Harbor Freight.
Tools/Materials
Rupes 5-inch backing plate: RUPES LHR15 – 5″ Backing Plate
Allen wrench (requires size 5 to install Rupes backing plate): Amazon Basics 26-pc Set
Lucas Oil Lithium Grease: White Lithium Grease or Red ‘N’ Tacky
MedPride Nitrile Gloves (Box/100): Small / Medium / Large / X-Large
Shop Towels: Search for Shop Towels
Upgrade 1: Rupes 5-inch Backing Plate
In my experience, I much prefer the use of 5-inch polishing pads over the larger 6-inch pads. Because of this, it makes sense to change out the backing plate to a 5-inch plate, which will be a better fit for those slightly smaller pads. Obviously, Rupes is a reputable brand name and so you are going to get a quality product with this 5-in. backing plate.

To replace the backing plate, simply unscrew the cover of the handle with the two Philips head screws. Then, slide the cover off. This isn’t entirely necessary for the upgrades, but I found it easier to get it out of the way— plus, you don’t want to get grease all over your handle.

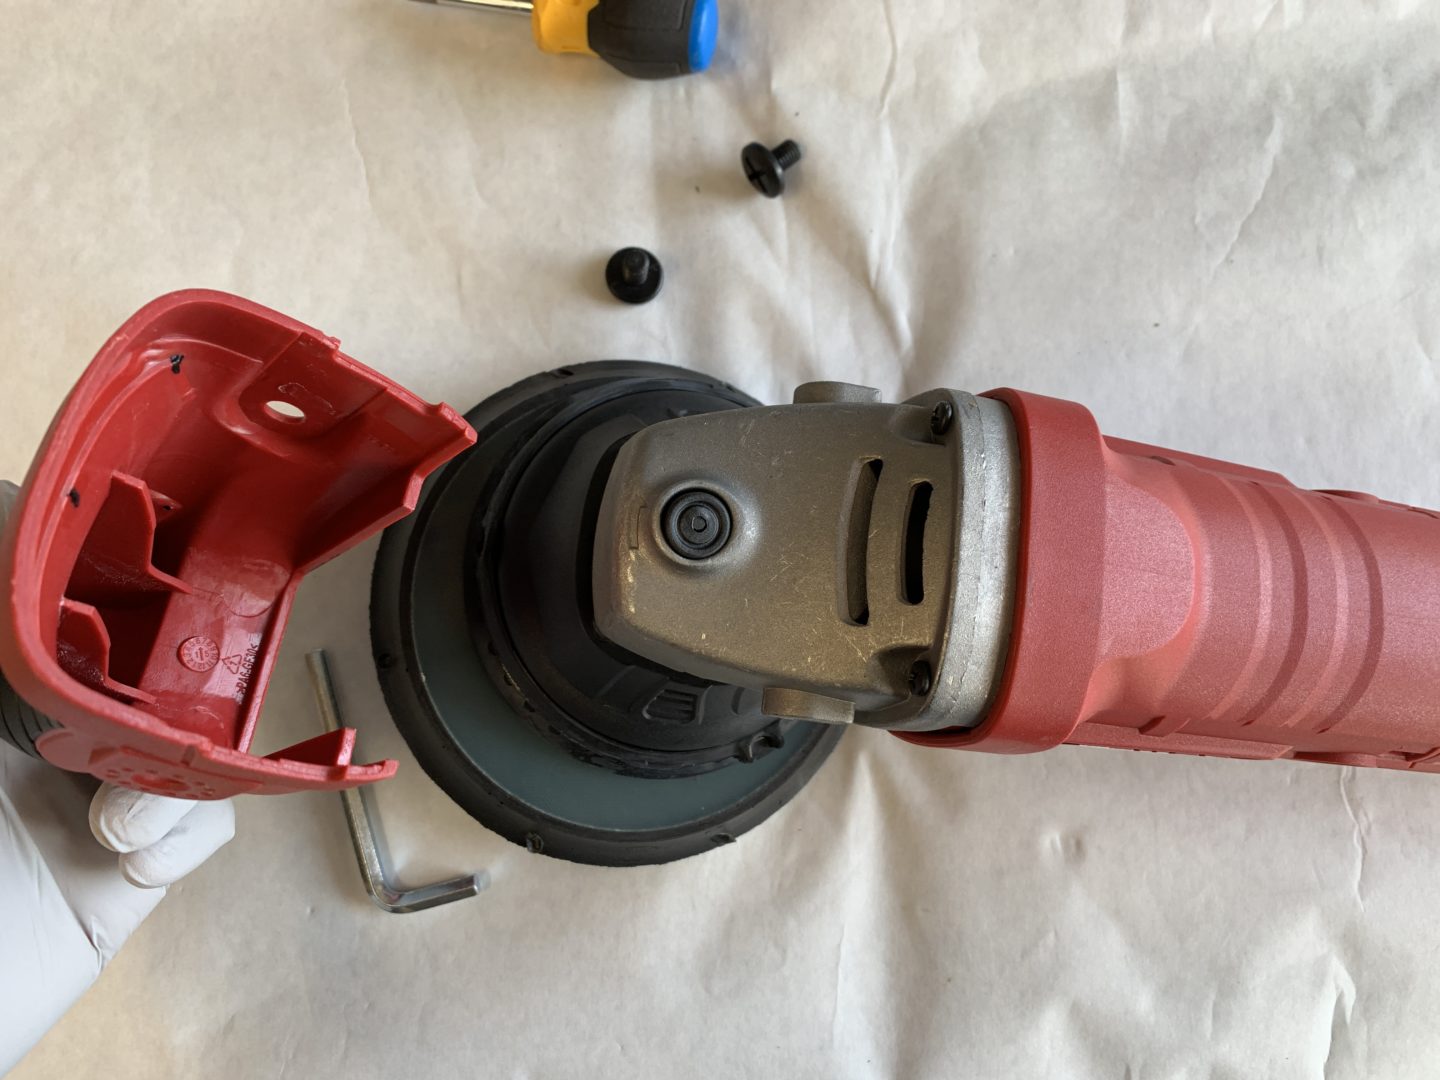
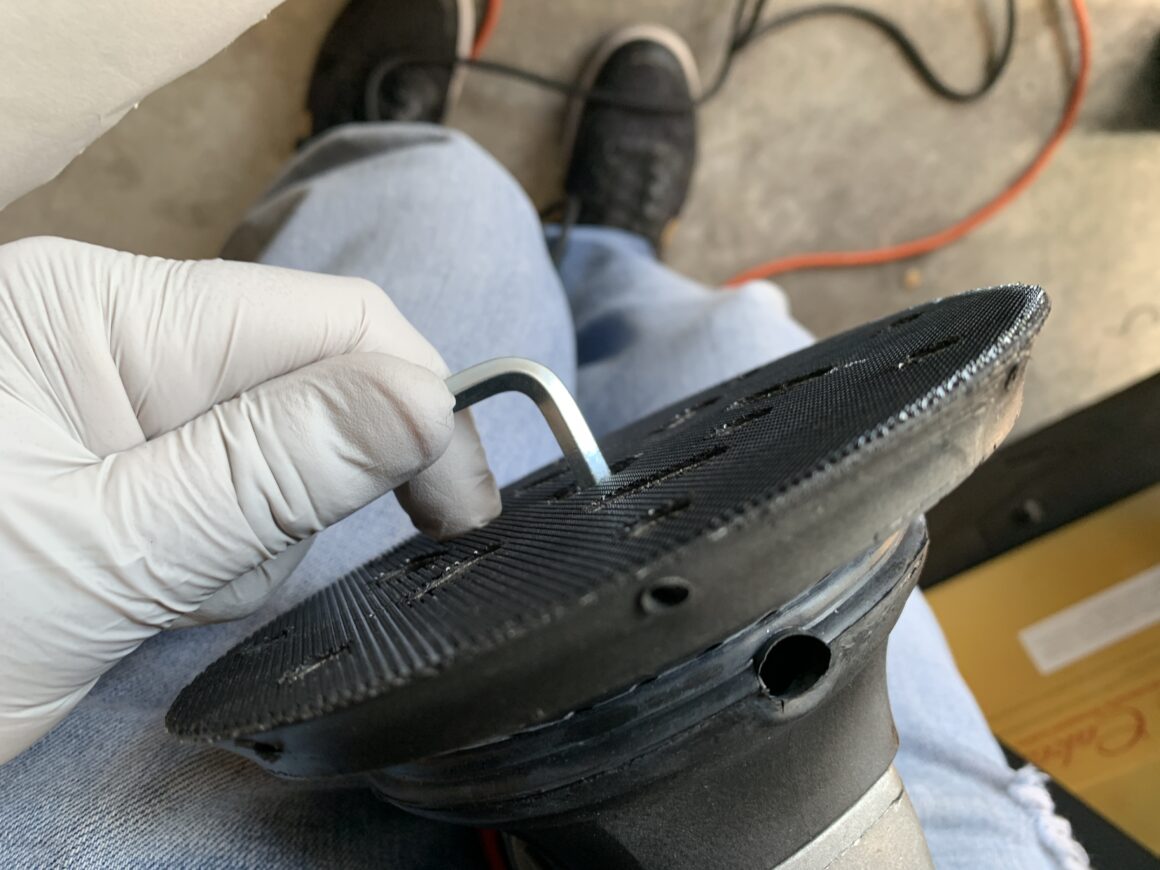
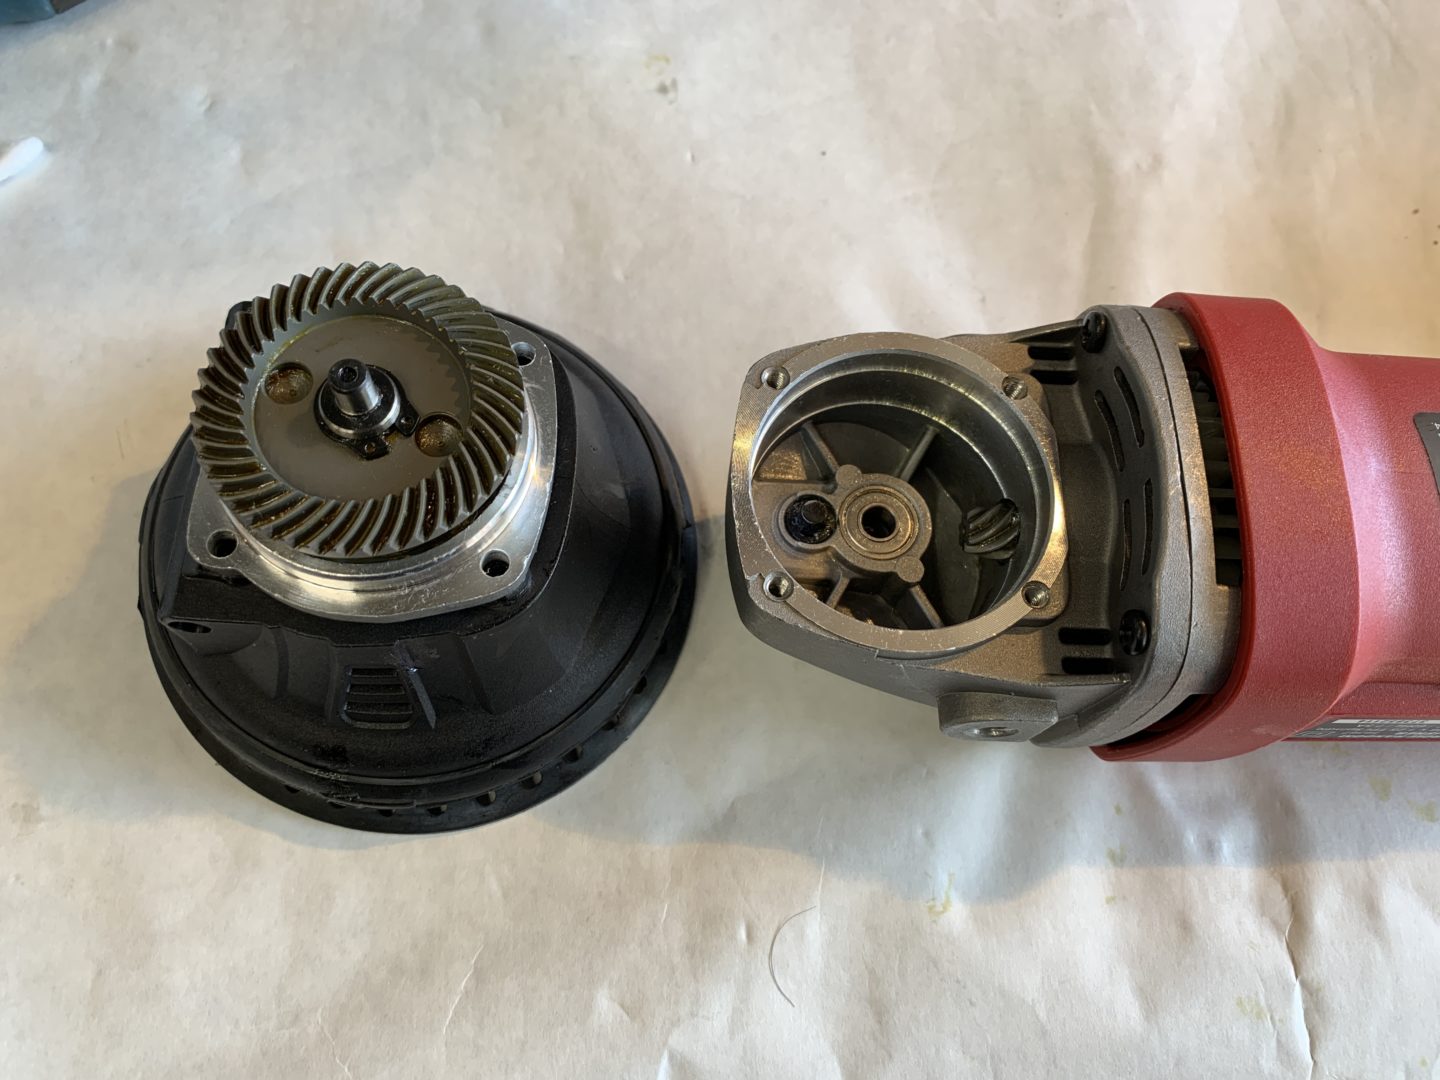
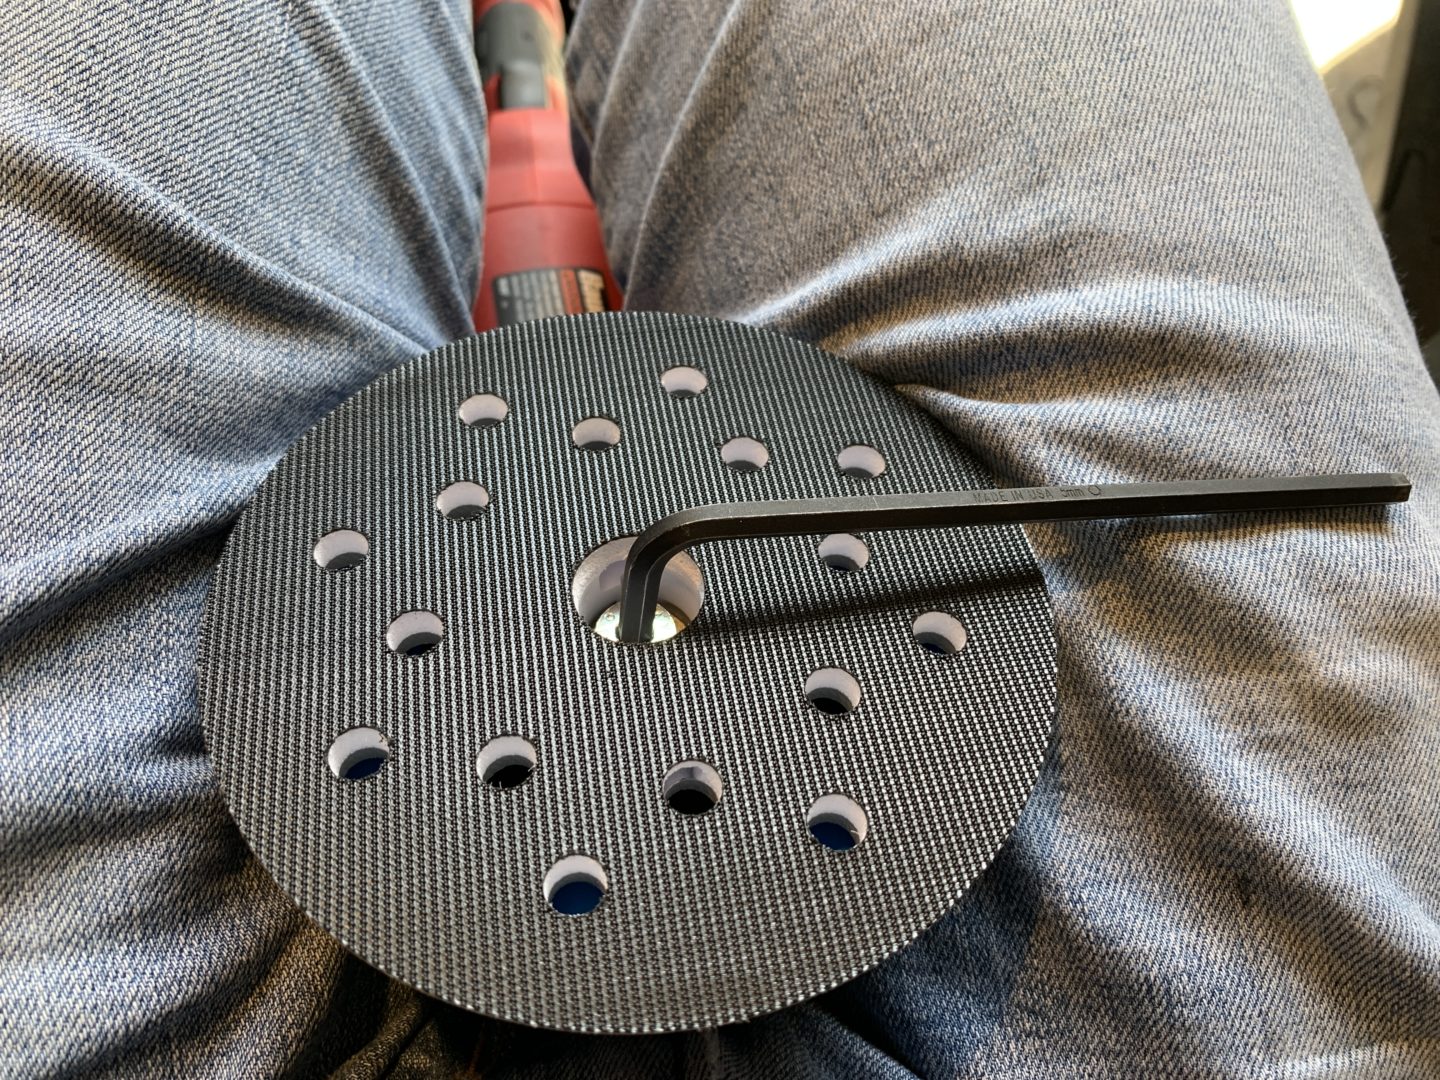
Next, use a size 6 Allen wrench (included with the polisher) to remove the 6-inch backing plate. Just hold the backing plate securely to keep it from spinning, then unscrew the hex screw holding it to the polisher.
At this point, you can swap out the 6-inch backing plate and replace it with the 5-inch Rupes backing plate (the Rupes backing plate requires a size 5 Allen wrench). However, I will be continuing with the second part of this upgrade: swapping out the grease with lithium grease.
Upgrade 2: Replacing the Grease
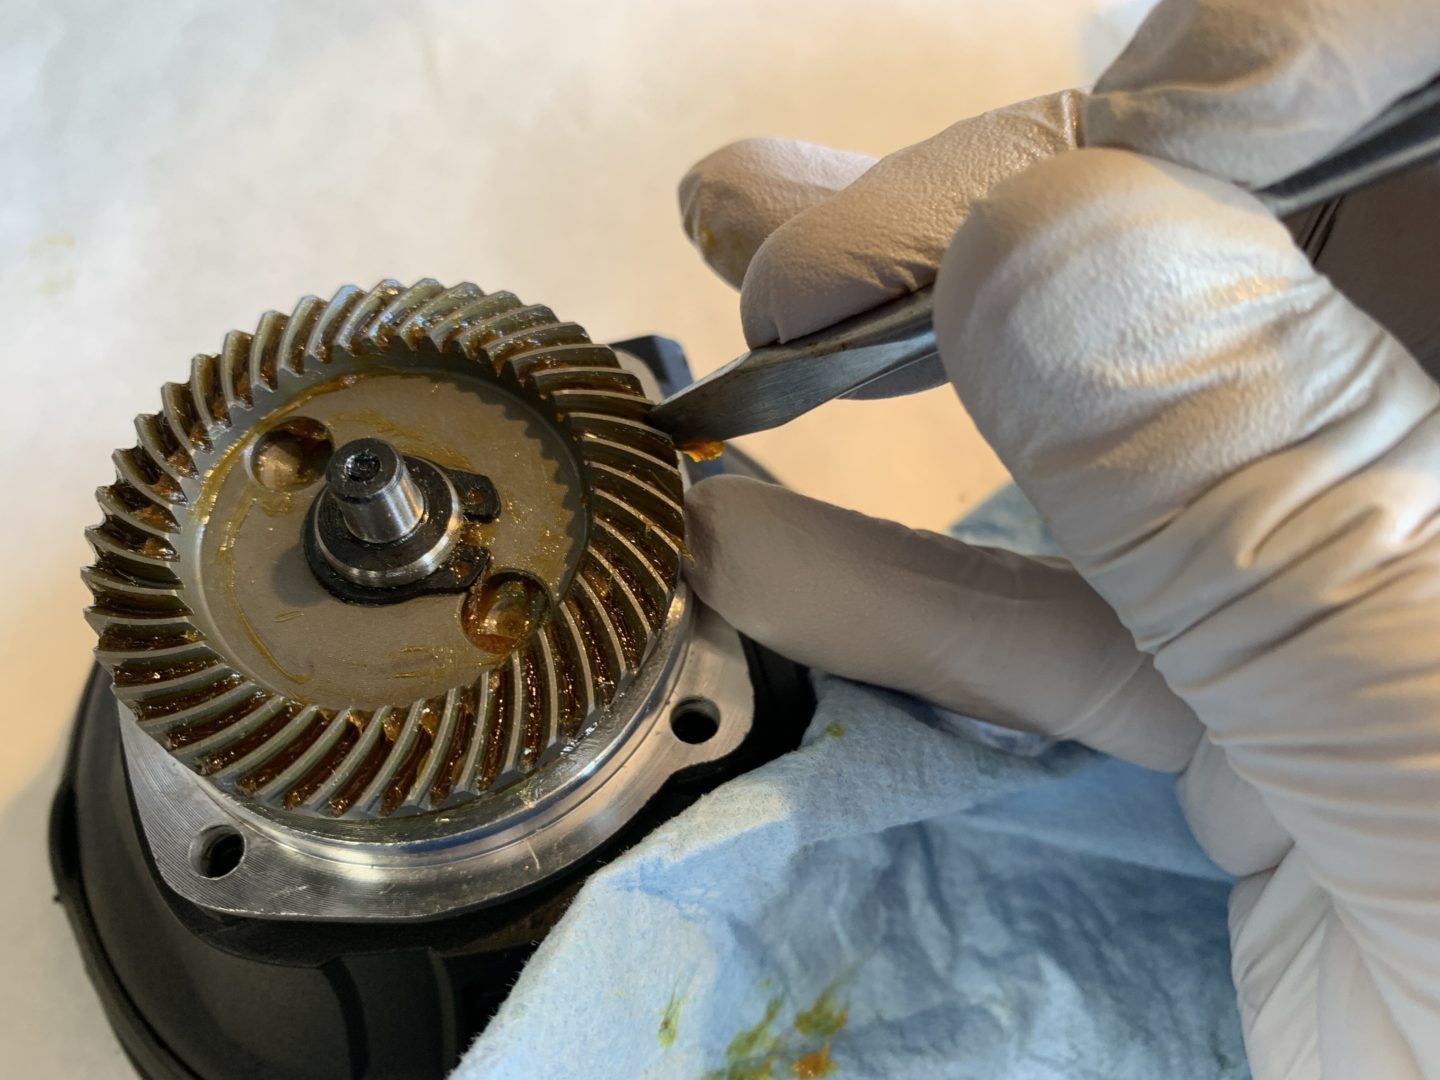
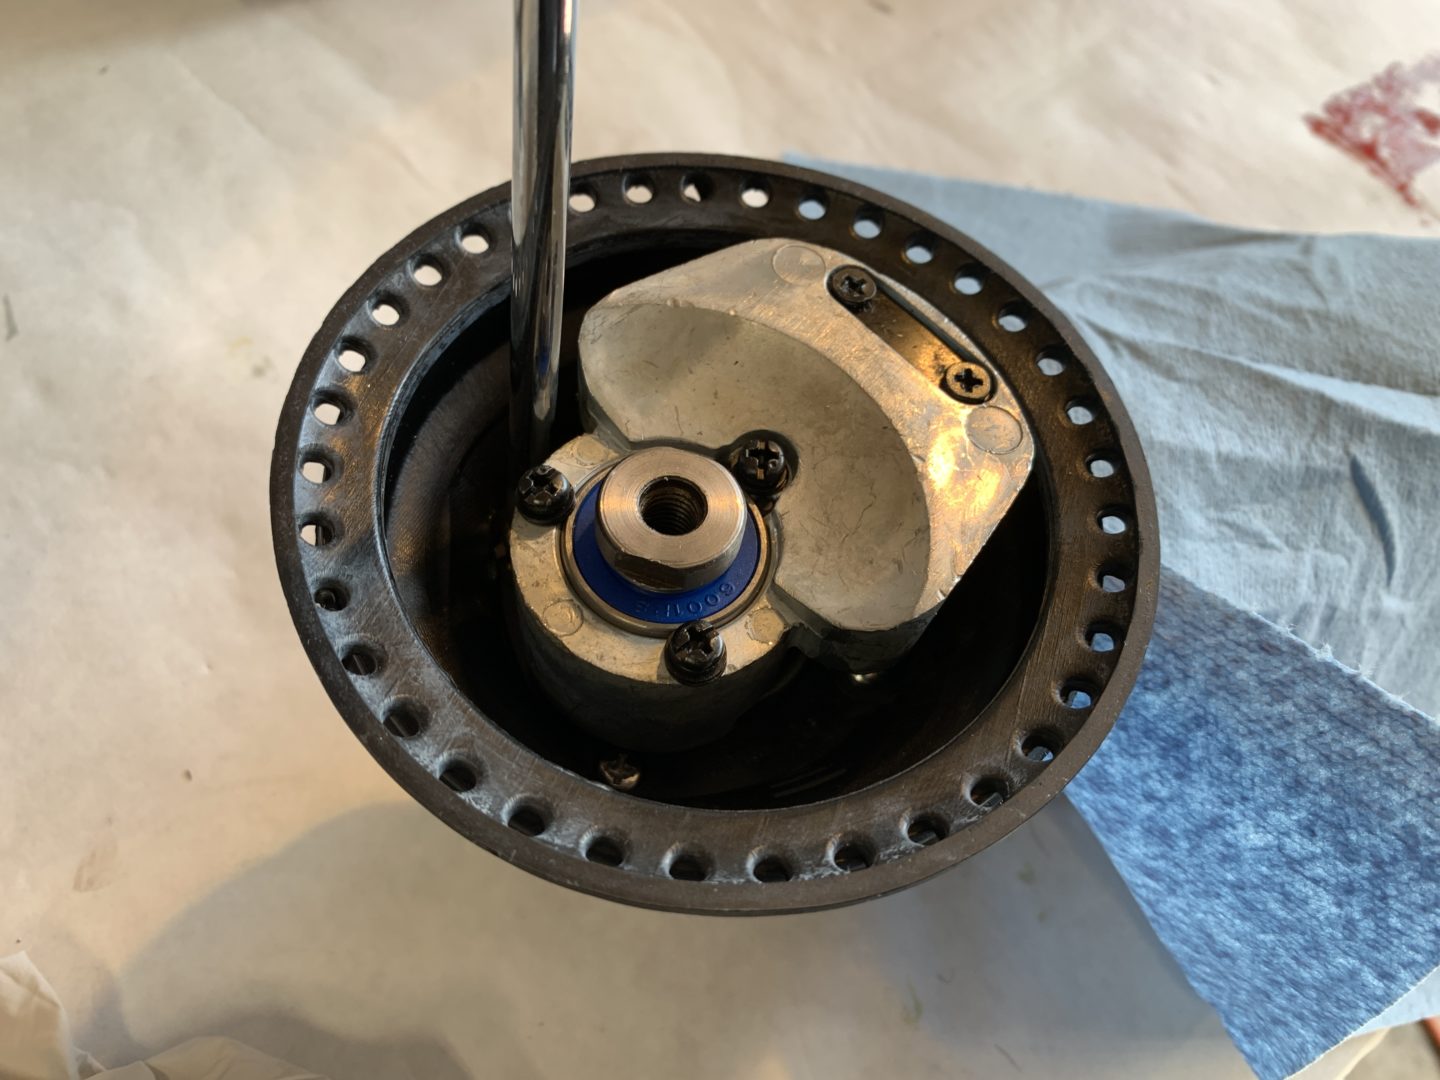
To replace the grease, you’ll need to remove the counter balance. This is removed via the (4 qty) Phillips head screws on the inside of the unit as shown below. Spin the counter balance to get access to all four screws behind it.


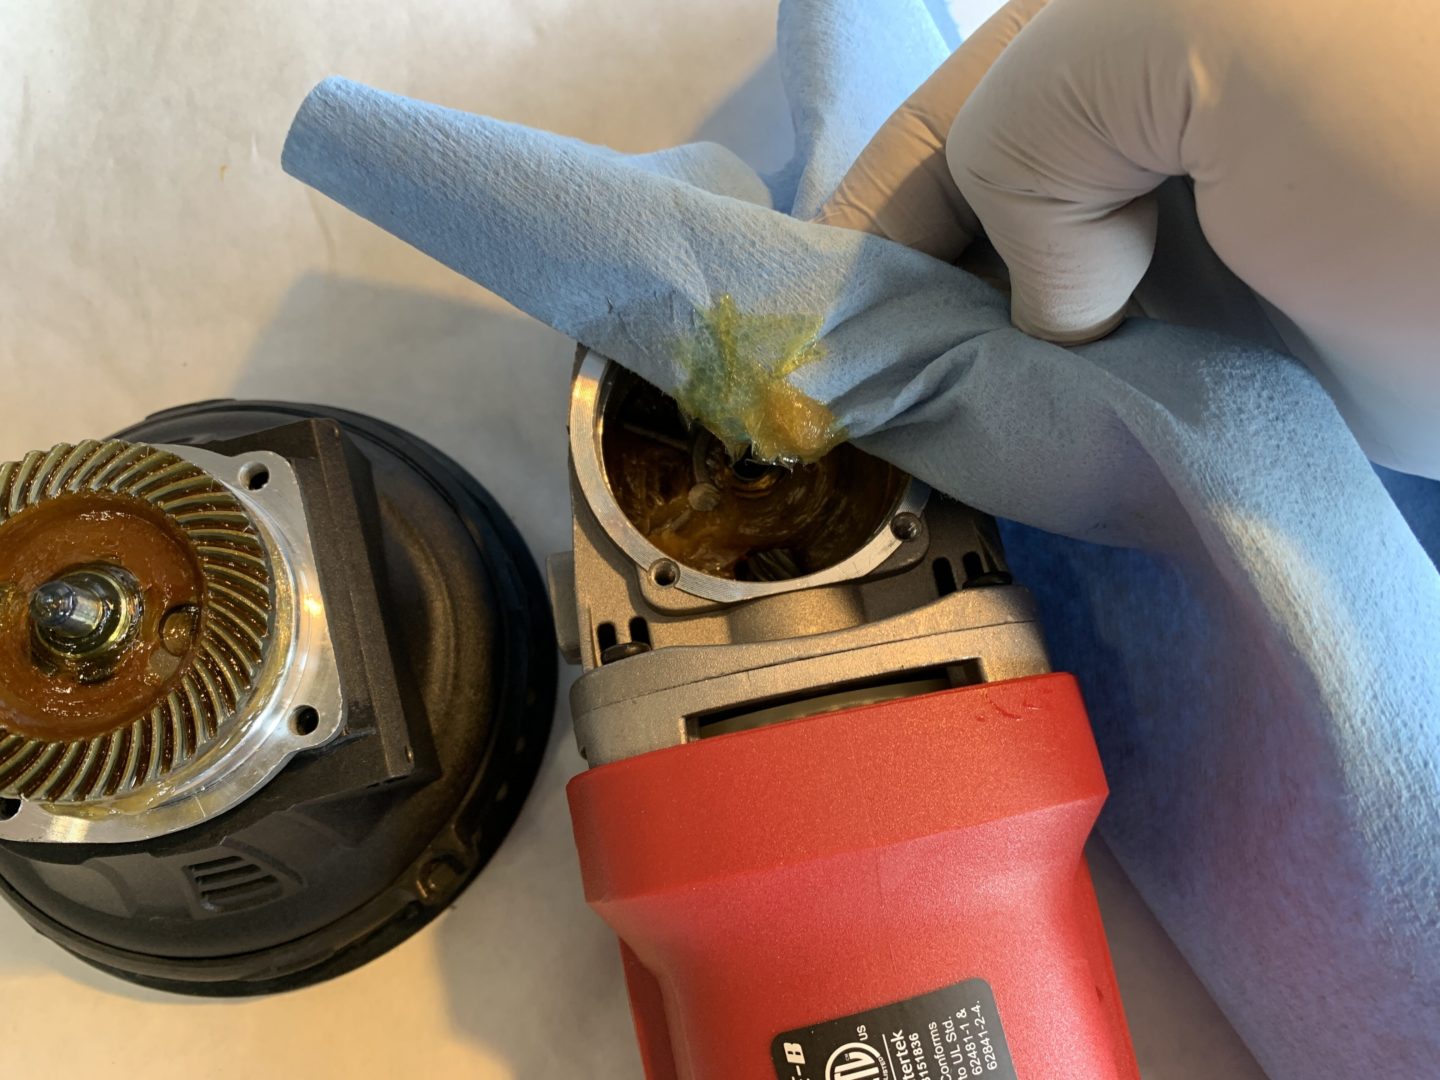
Finally, pull the whole head of the unit off. This can be done by pulling straight up and away from the polisher. You may need a flat head screwdriver to pry it off, however I was able to do it by hand (this will be easier if unit is still new.)
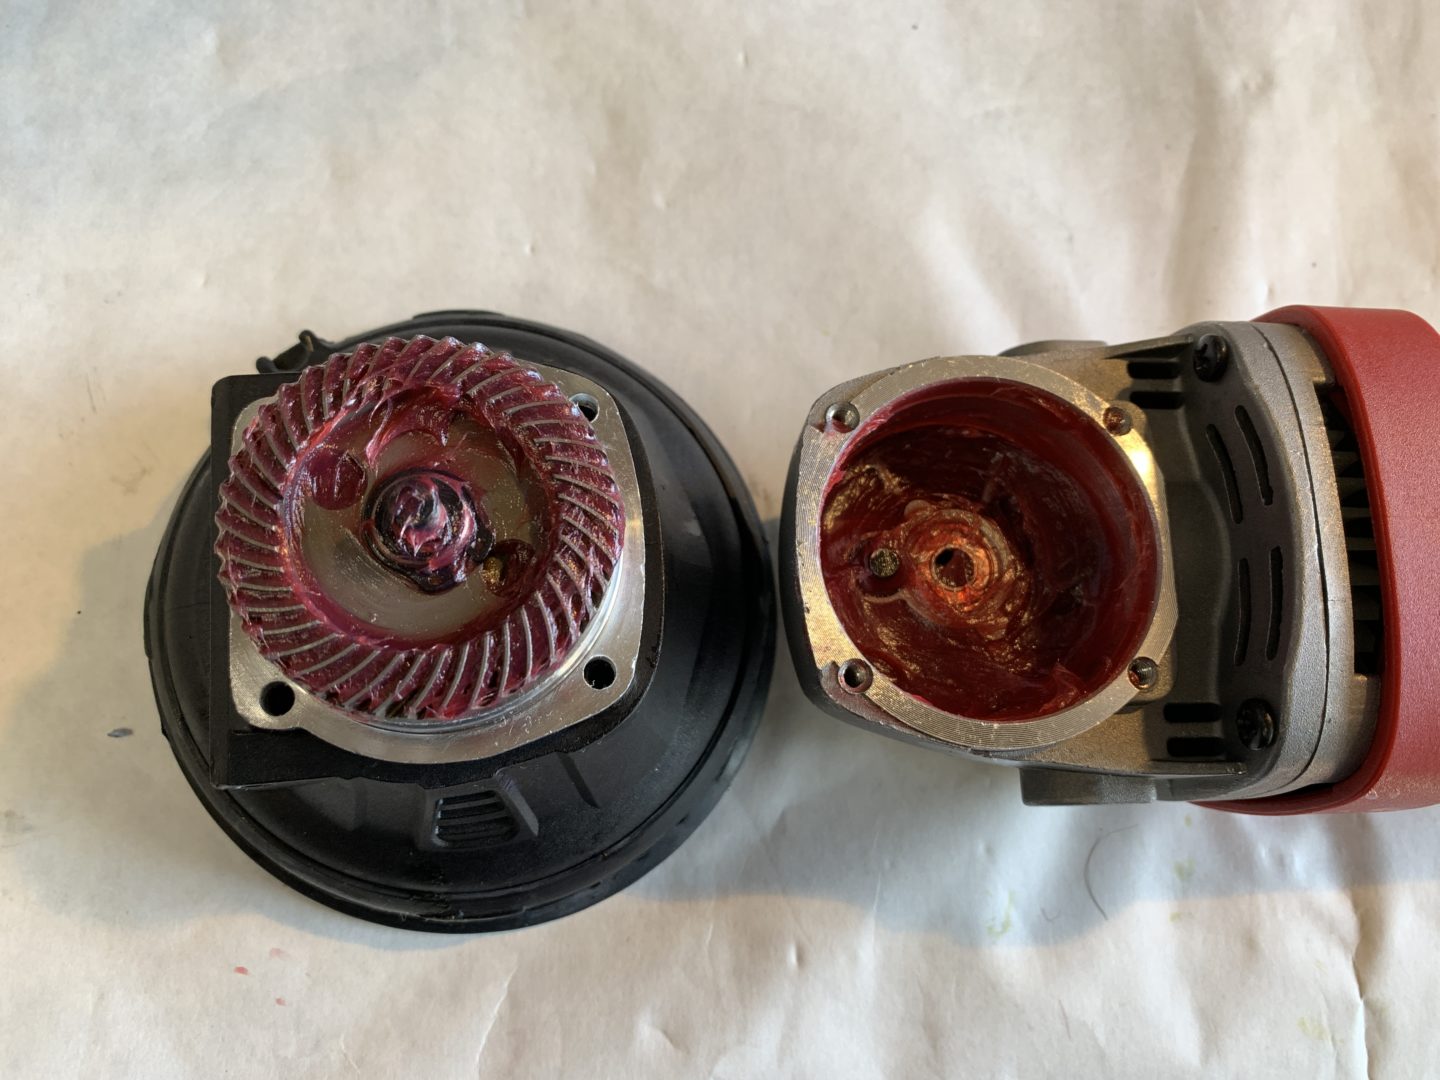
As you can see below, I’m not totally sure what kind of grease they used, but I figured you cannot go wrong with a quality high temperature grease, such as the lithium-based grease I will be using.
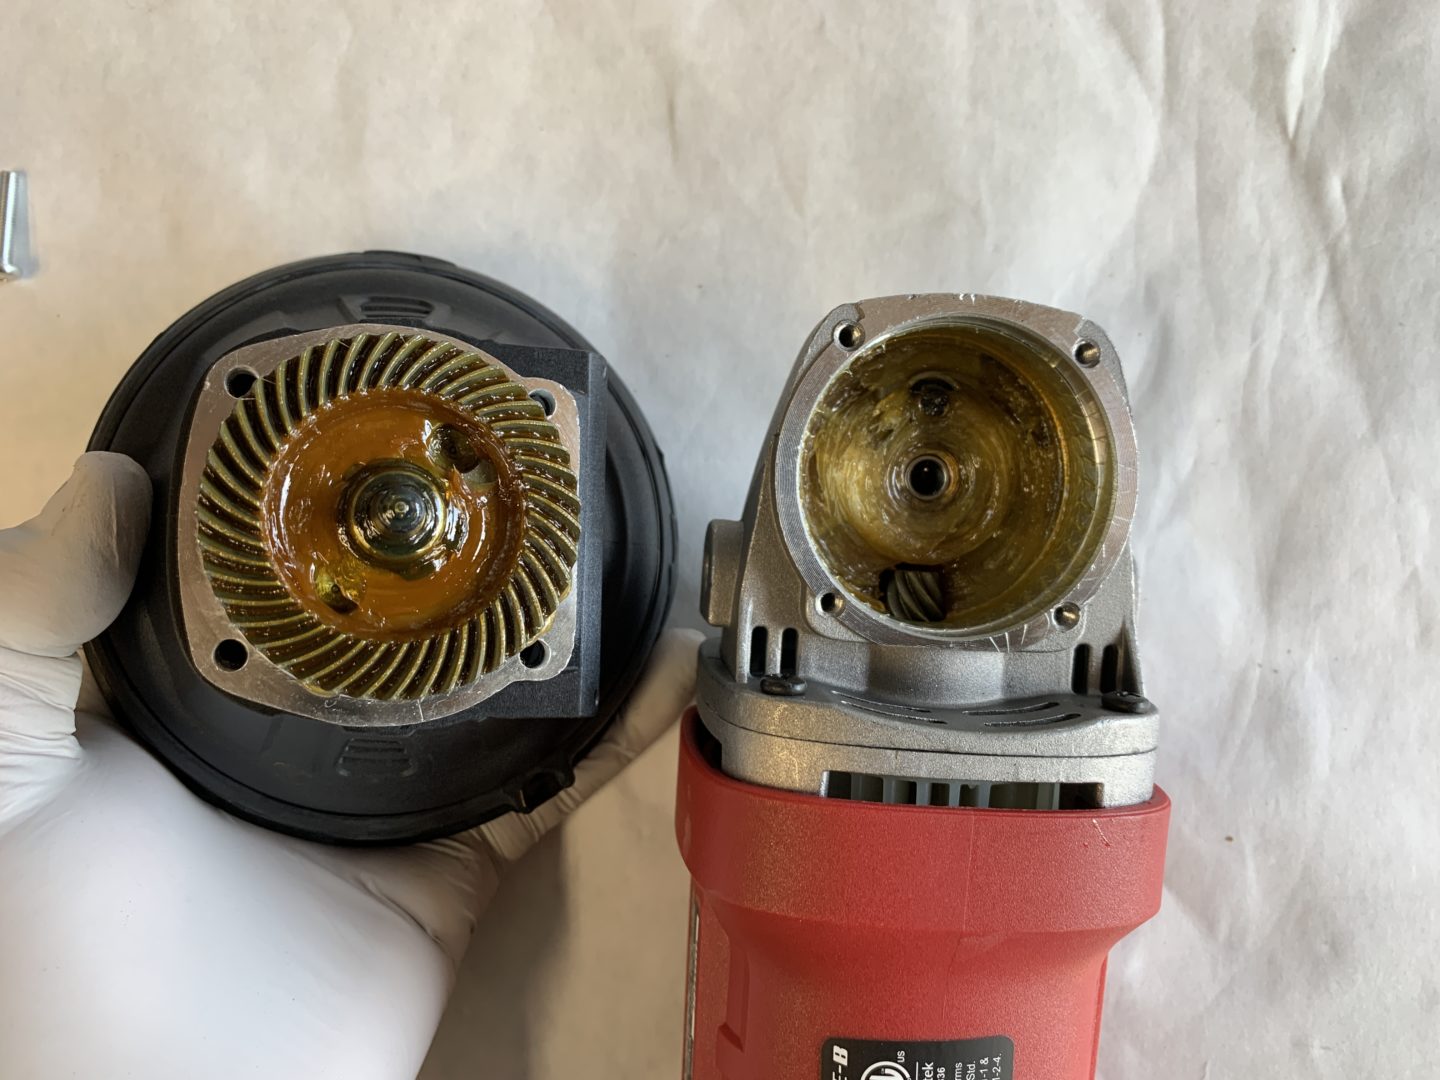
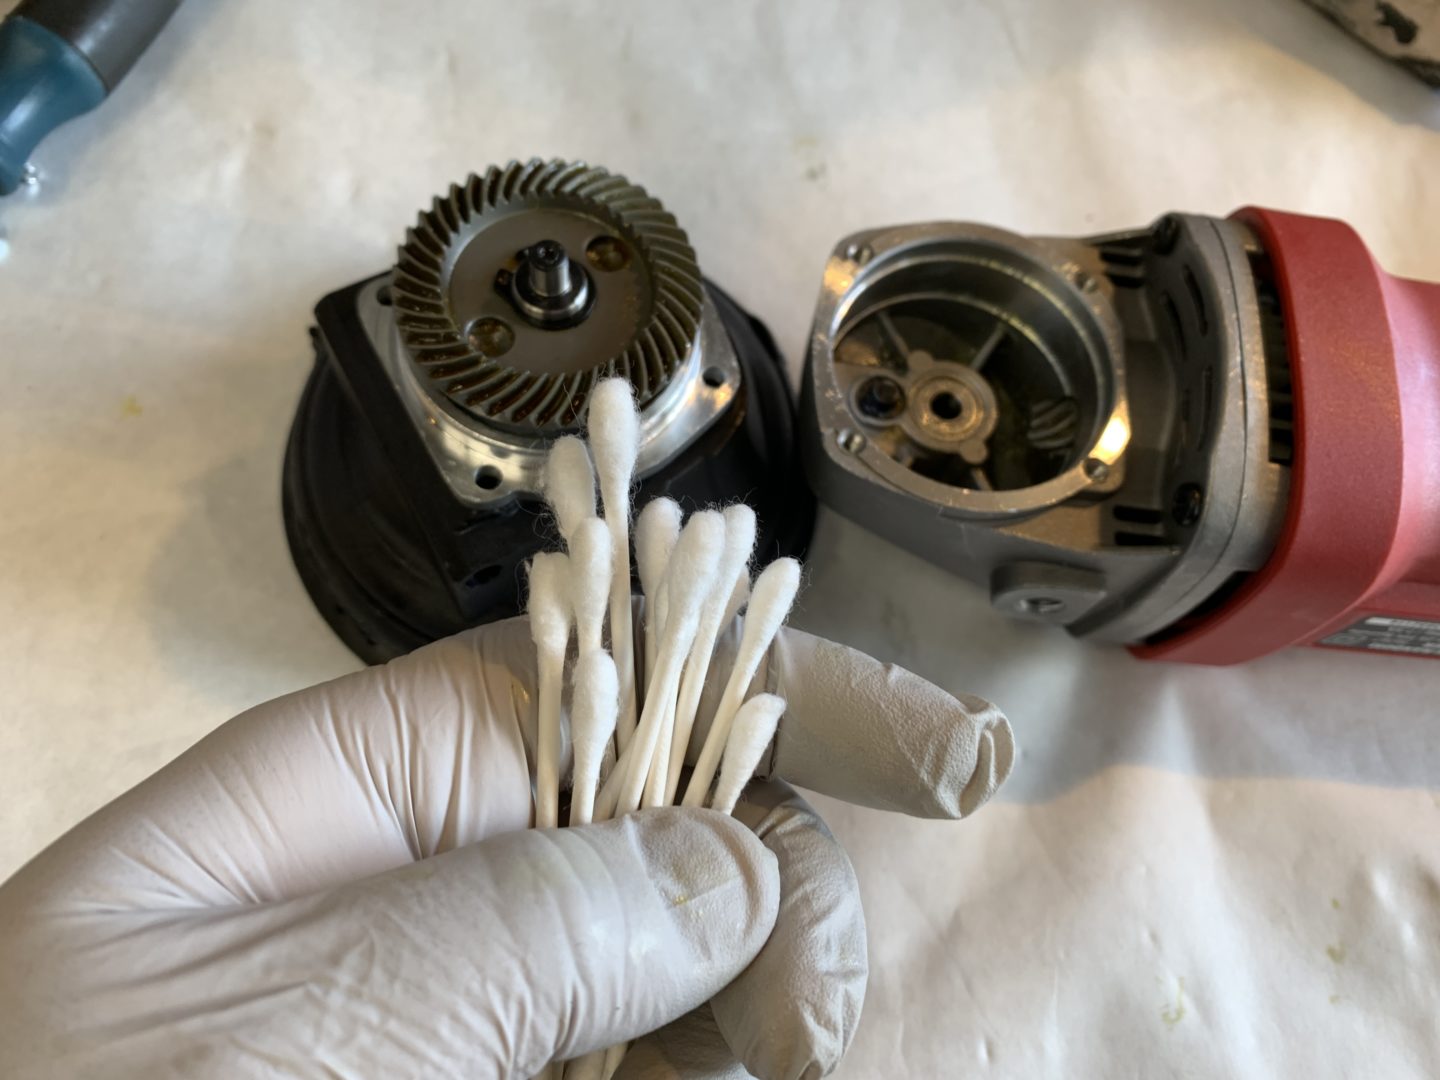
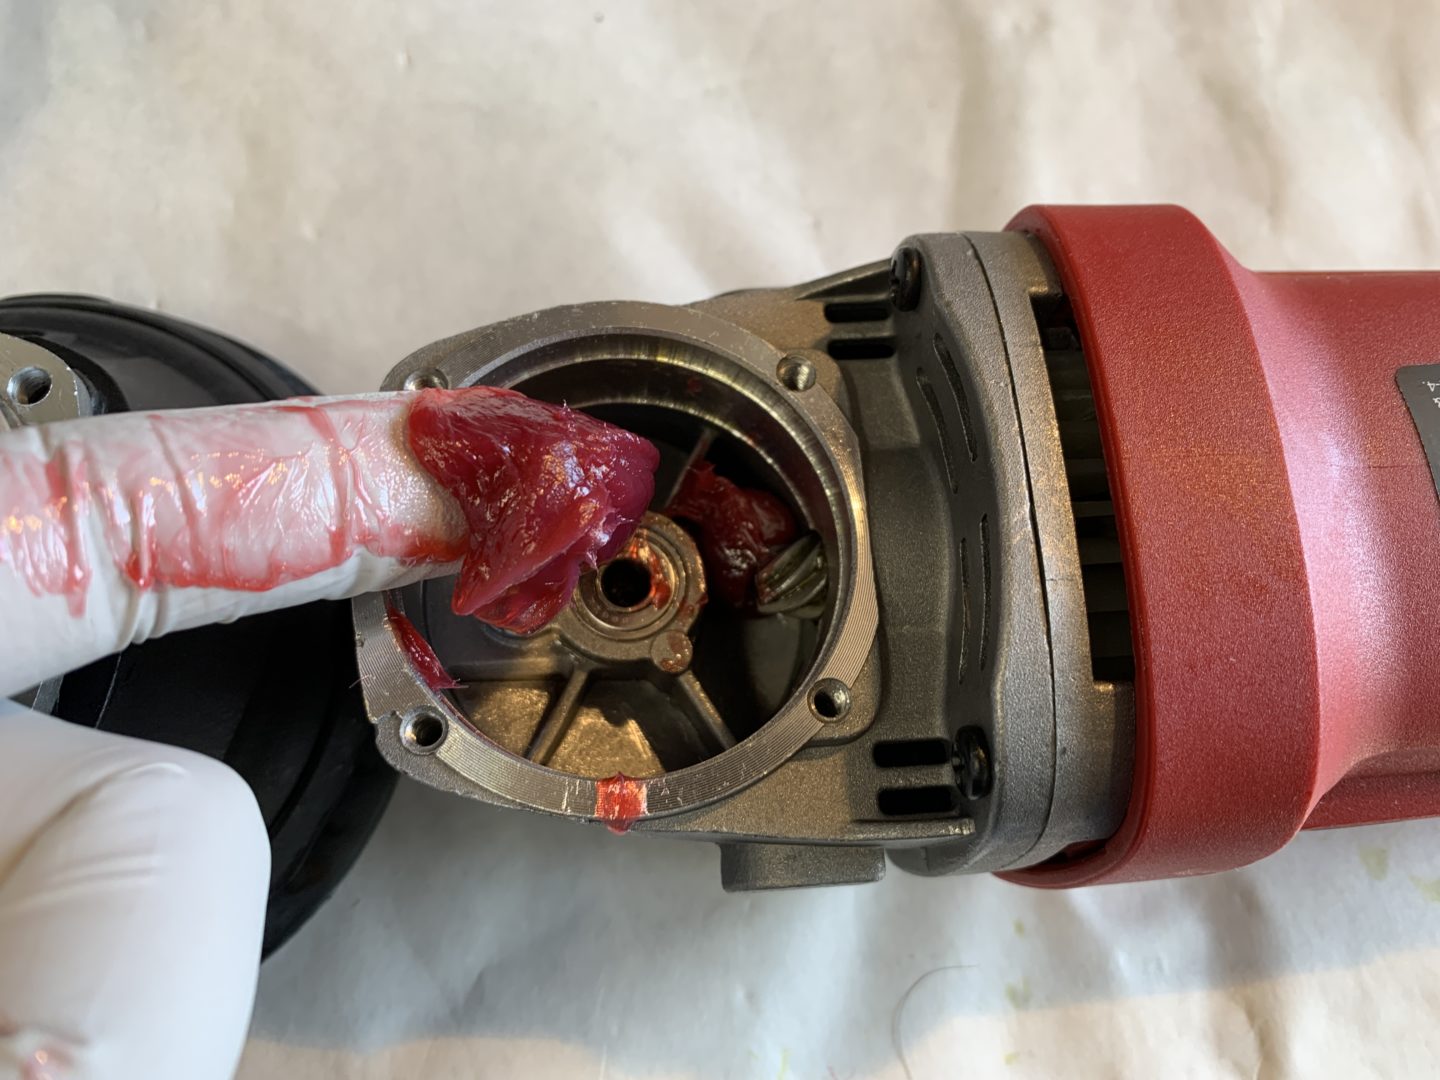
I used blue shop towels and cue tips to clean out as much grease as possible. This takes some time as it is difficult to get into all of the crevices and teeth of the gears. I actually prefer not to use cue tips (although I did try) as the cotton threads come off and are left in the gears. So I think the best way is to take your time and use a mix of tools along with shop towels to clean out all of the grease.

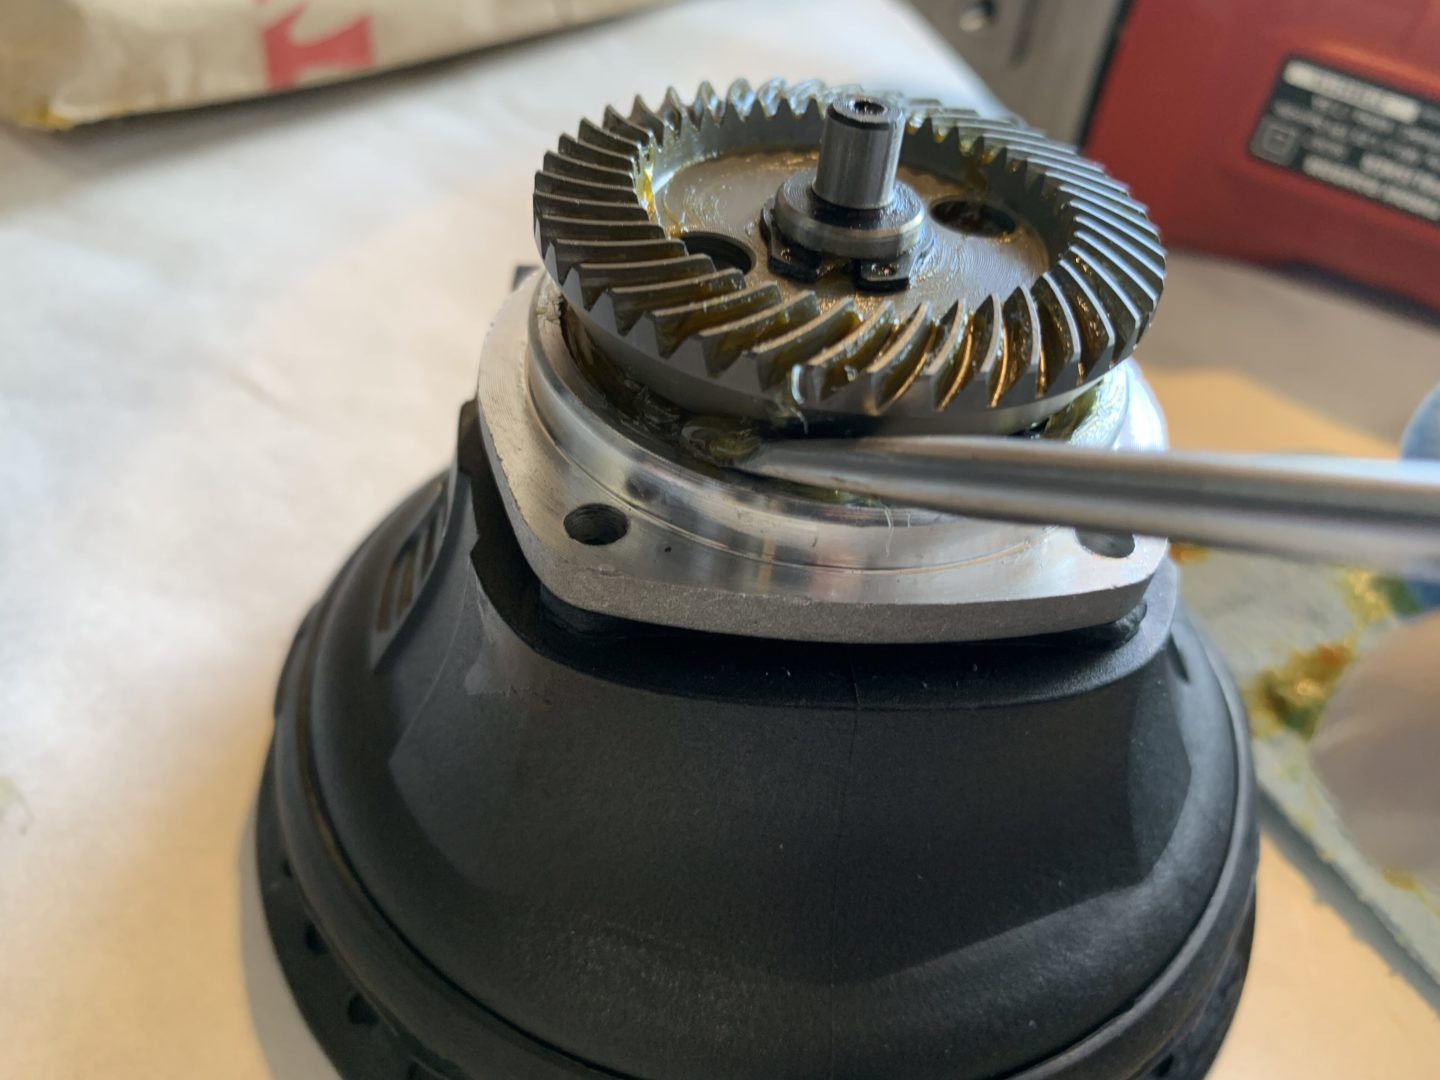
When the old grease is all cleaned out, put a bunch of lithium grease inside. I personally used a synthetic lithium grease called Red ‘N’ Tacky, which is good for high temperatures and high speeds for these types of moving parts.
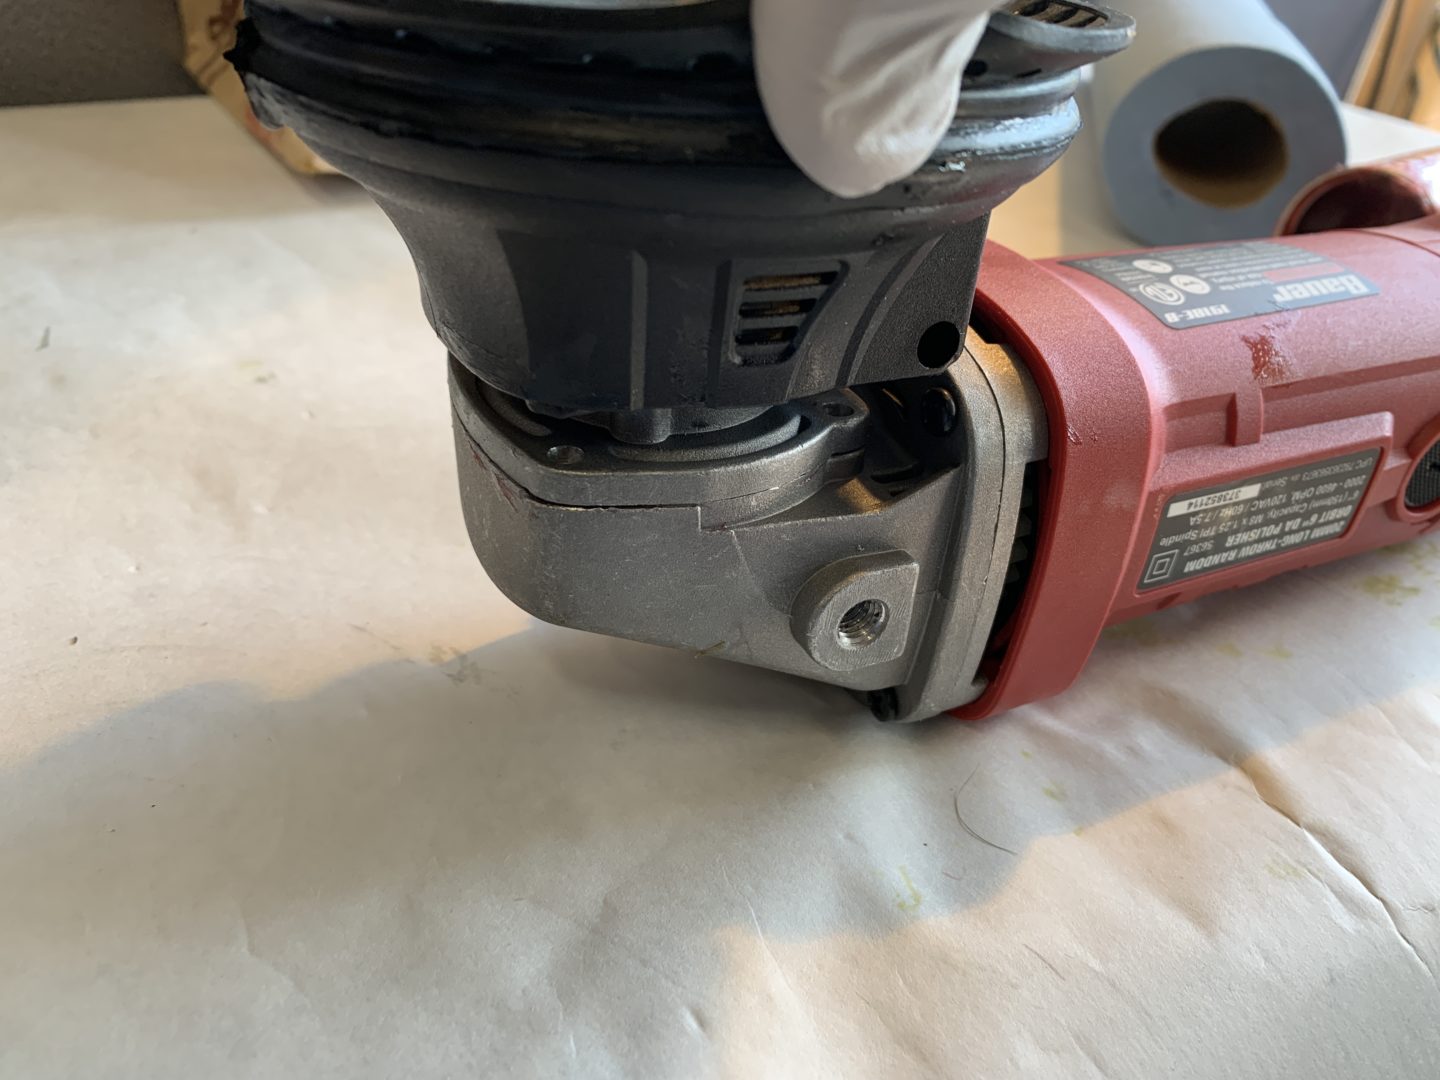
After packing it with grease, replace the head, install the (4 qty) Philips head for the counter balance, and then re-install the backing plate (the new 5-inch Rupes one if you choose to upgrade at this point.) The Rupes backing plate comes with the hex bolt to install it to the polisher, but you will need to use your own size 5 Allex wrench to secure the Rupes backing plate to the polisher.
And that is it, your $100 Bauer Long Throw DA Polisher has been upgraded for an additional $50-$60 of parts and materials. I’ve been using this upgraded unit for a few paint corrections lately and it has performed incredibly well. I noticed immediately that the polisher was operating more smoothly, albeit still quite loud. Besides the noise, it has the power and the throw to do substantial paint corrections especially paired with a more aggressive polishing pad or microfiber cutting pad.


4 Comments
I am glad I changed the grease out on mine. I found a large (3/8″) metal shaving left over from manufacturing. Large enough that it would have done some damage. I swapped the grease out before even plugging it in. New backing plate arrives in a couple days.
Wow, that’s crazy. I wouldn’t have expected something like that, but good thing you did this! Hope the upgrades serves you as well as it did me.
Just recently picked up the Bauer long-throw and will be doing this upgrade.
For the grease, could you clean up the rest of the grease with a wax and grease remover?
Cool! For the initial cleaning, you’ll probably want to remove it by hand with towels, rags, Q-tips, etc. The wax and grease remover usually works for small amounts of grease/wax like wiping down your car’s paint prior to painting. It might help with cleaning the gears at the end prior to re-packing with new grease however. Good luck!