
When you make purchases through links on this site, The Track Ahead may earn an affiliate commission. Also, these posts are based off my own experiences. I am not responsible for any action you take as a result of reading this. Learn More
Headlight Material
First of all, headlights nowadays are made out of polycarbonate plastic due to its impact resistance and safety. Because headlights are made out of this specific material, it is more prone to becoming foggy and/or hazy due to oxidation over time. This ends up leaving the headlights with an unappealing appearance, as well as affecting the light output of the headlamps.
Reason for Foggy/Hazy Headlights
Of course, there are other potential reasons for a headlight to become less clear. However, the prime reason for headlights to become imperfect over time (without something causing physical damage), is oxidation from prolonged exposure to UV rays from the sun. The UV rays from the sun can photo-oxidize the polycarbonate material, which actually breaks down the plastic within the outer layer of the headlight lens.
The headlight can also be scratched or dented physically by rocks, debris, even people walking by and having their clothes, keys, or anything else scratch or hit it. In order to restore the headlight, you will need to abrade the lens in the form of polishing, or sanding if it is worse condition.
In the most severe cases and to obtain a perfect looking lens again, it will usually be necessary to wet sand with various grits (inside as well if it is imperfect on the inner part of the lens) and then polishing it to a perfect finish. However, if you want a quick fix that will immediately improve the look of your headlights, you can use toothpaste (if you have some at home… and you should.)
Restoring Headlights
If your headlights have fogging/hazying occurring inside of the headlight lens, then there’s nothing you can do about restoring the headlights unless you take apart the headlight housing. If the haziness/fogging is on the outside of the lens, then it is much easier to restore. If the headlight lens is only mildly hazed or fogged, then a simple polish may suffice.
Surprisingly, toothpaste can actually work quite well as a polish on headlights. Using toothpaste alone on the headlight lens can make a big difference in polishing the headlights, but polishing once more with a final polish like Meguiar’s PlastX can really make the restoration look complete.
Tools & Materials
Toothpaste
The type of toothpaste used actually makes a difference. You need a whitening toothpaste because it contains micro-abrasives that act as a polish. I tried using another toothpaste that was a regular toothpaste without whitening, and it did virtually nothing to correct the hazy lens.
Everyone should have some toothpaste laying around, but if you don’t have a specific whitening toothpaste, you need to get it in order to polish your headlights.
Microfiber Polishing Pads
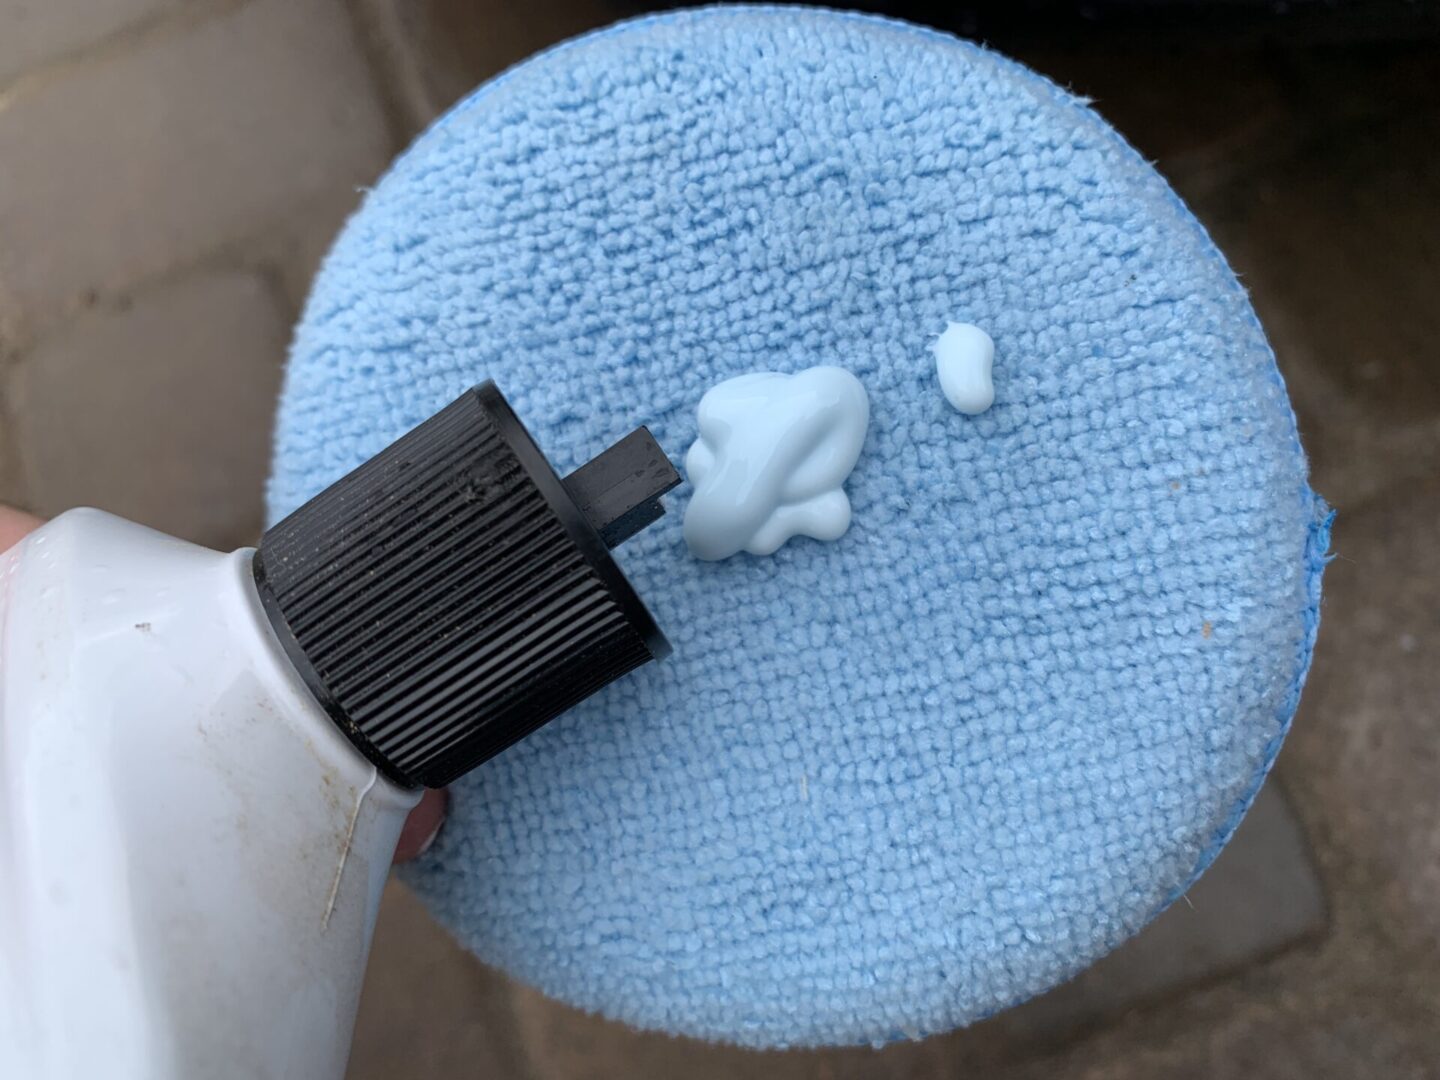
You’ll need something to rub the toothpaste in, as well as the PlastX or similar fine polish. I used a microfiber wax applicator, but you can find other similar products that do the same thing. For the toothpaste, you can even use a toothbrush if you want. You do want a nice applicator for the finer polish or PlastX, however.
Autocare Microfiber Wax Applicator (Blue, 5″ Diameter, Pack of 10)
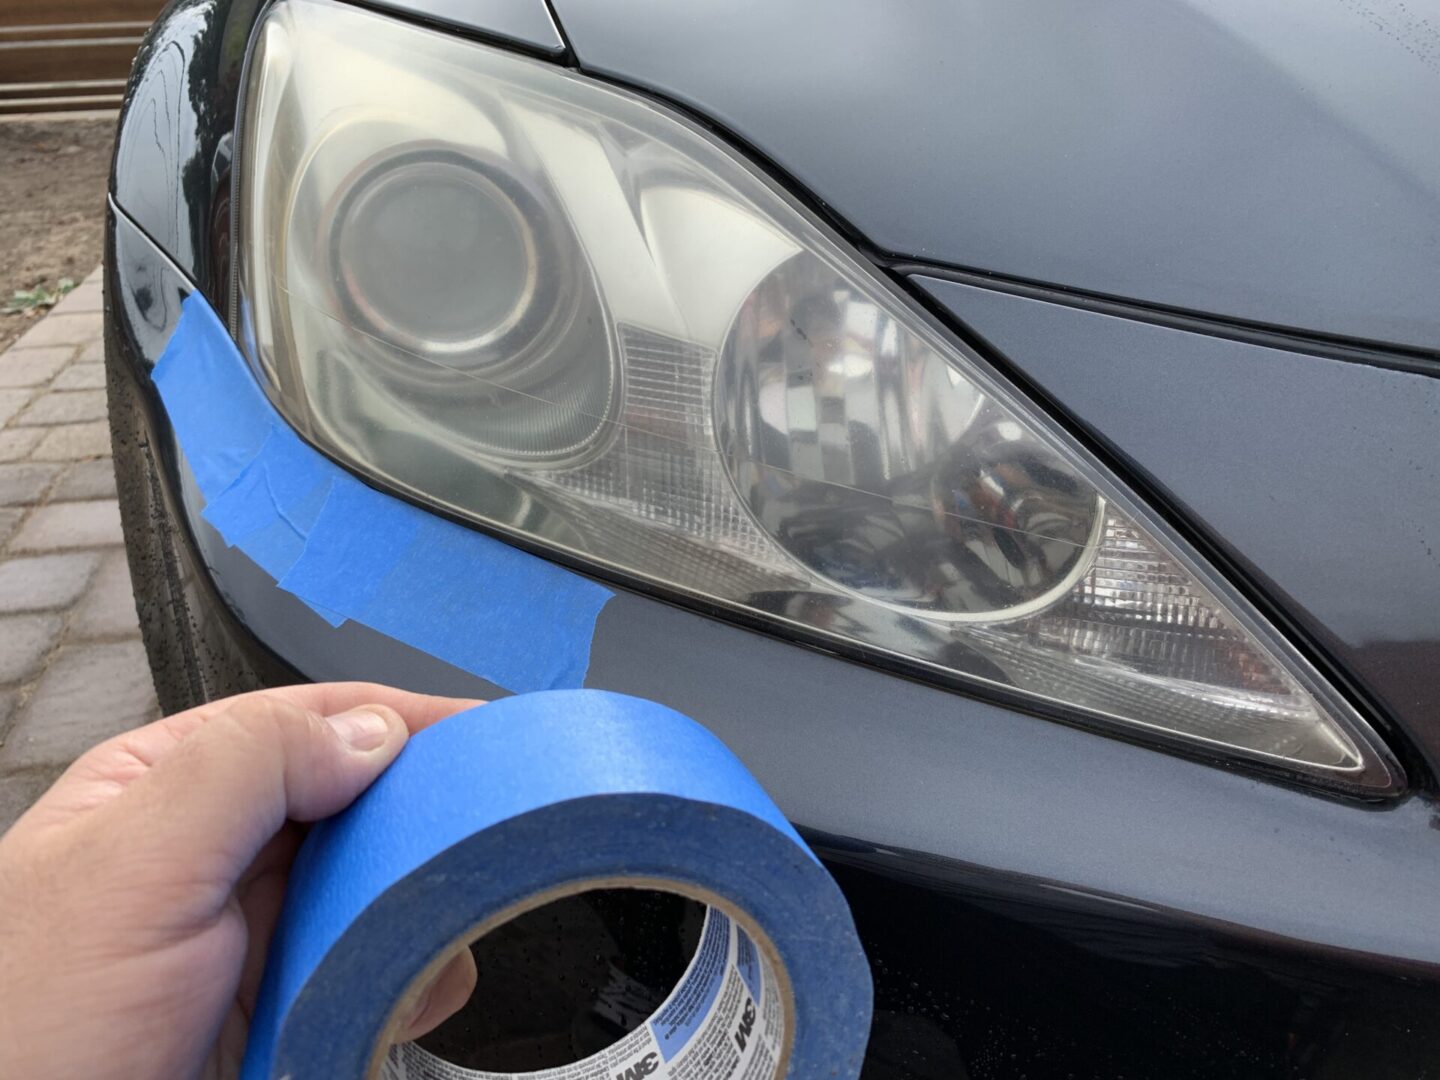
Blue Tape
Blue tape is a must for protecting the paint around your headlights, otherwise you might accidentally scratch the surrounding paint with the toothpaste. Blue tape is preferred over other materials as it won’t leave behind any residue when removed.
ScotchBlue Painter’s Tape, 1.41 inches x 60 yards, 2093, 1 Roll
Microfiber Towels
Microfiber towels are a mainstay in detailing and is useful for wiping off excess toothpaste and polishing material.
Popular options: Chemical Guys (6-Pack) / Zwipes (48-Pack) / AmazonBasics (24-Pack)
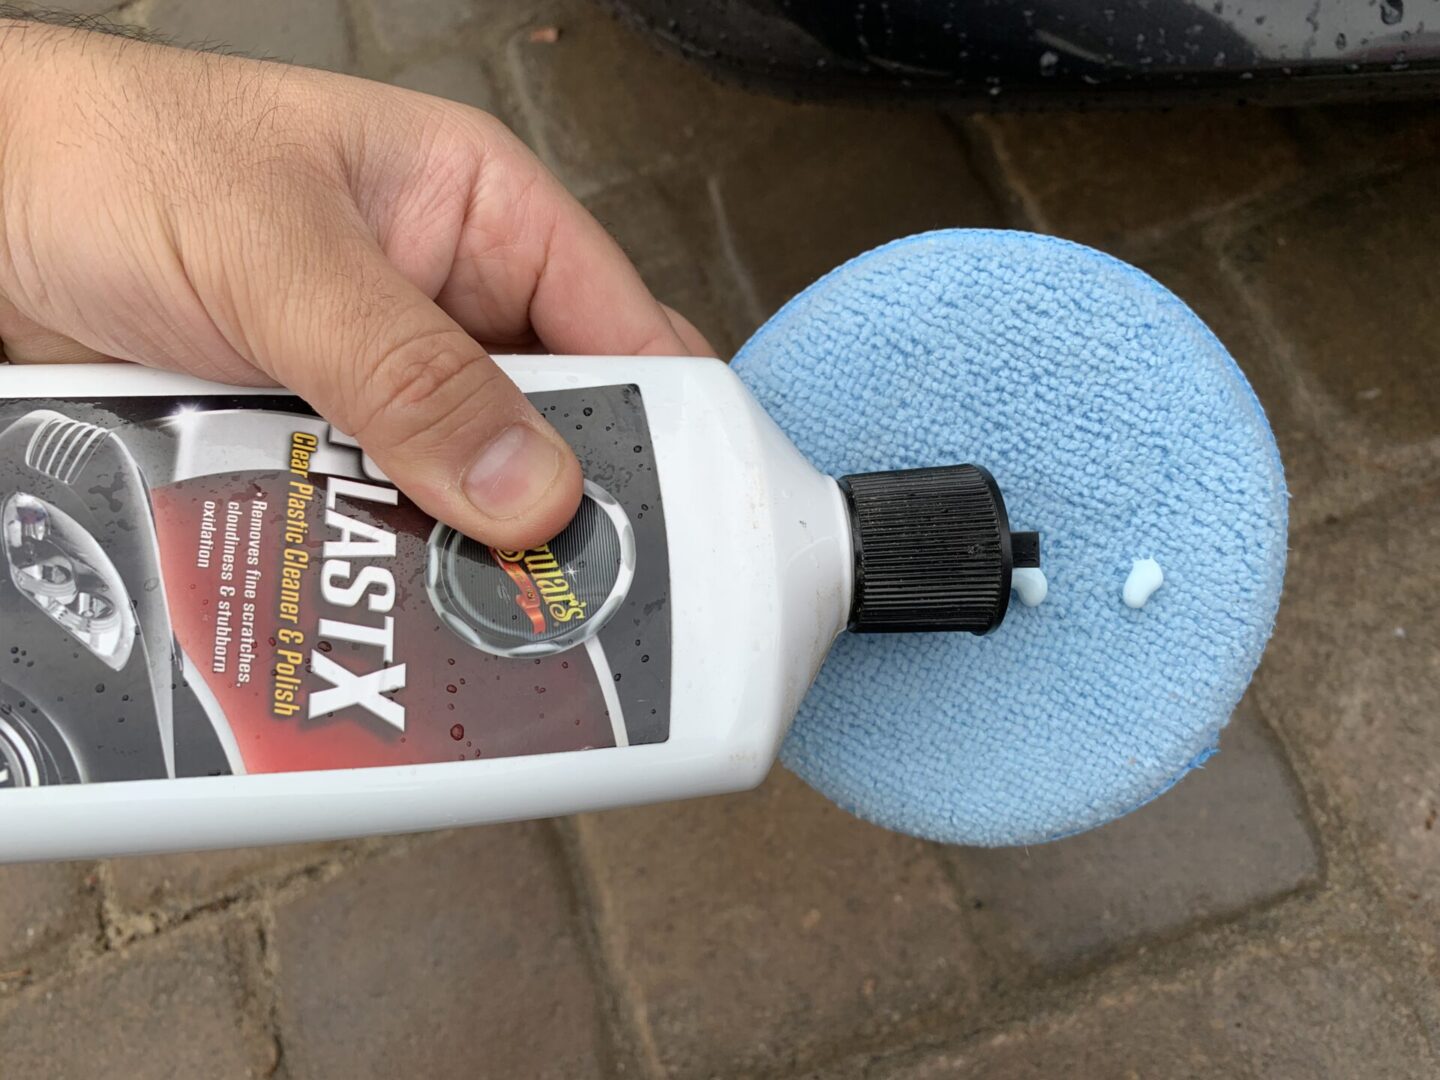
Meguiar’s PlastX
This is a fine final polish meant for plastics, intended to remove very light scratches. I felt this step was necessary to really improve the clarity of the lens after the toothpaste was used.
Meguiar’s PlastX Clear Plastic Cleaner & Polish, 10 Fluid Ounces
How to Polish Headlights with Toothpaste
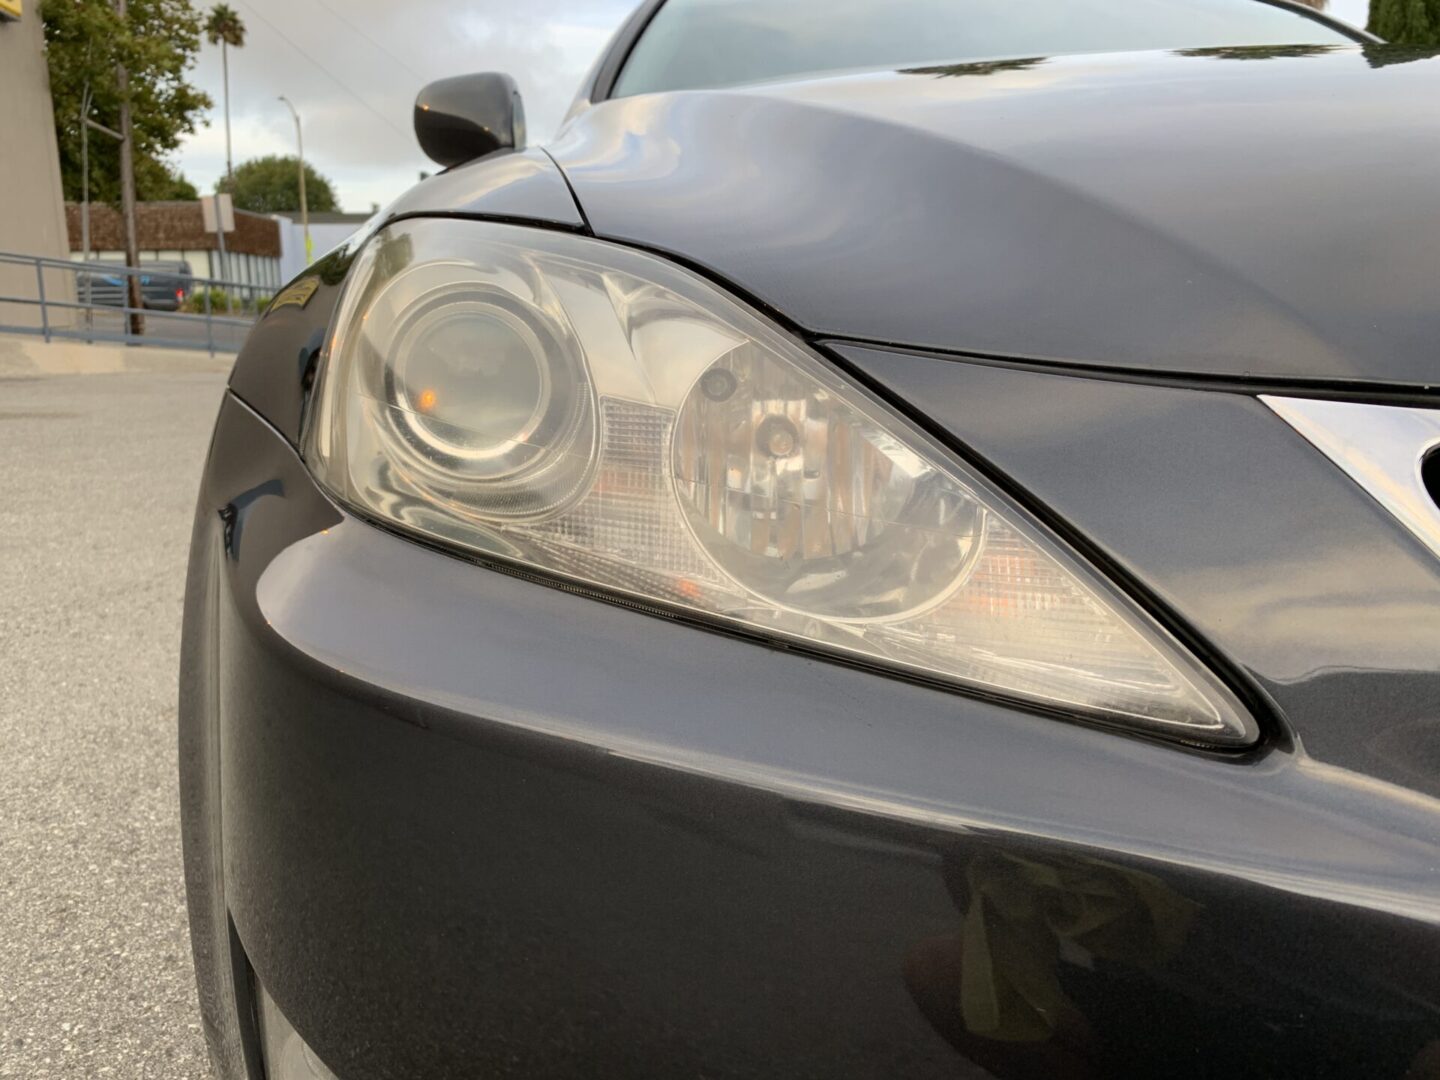
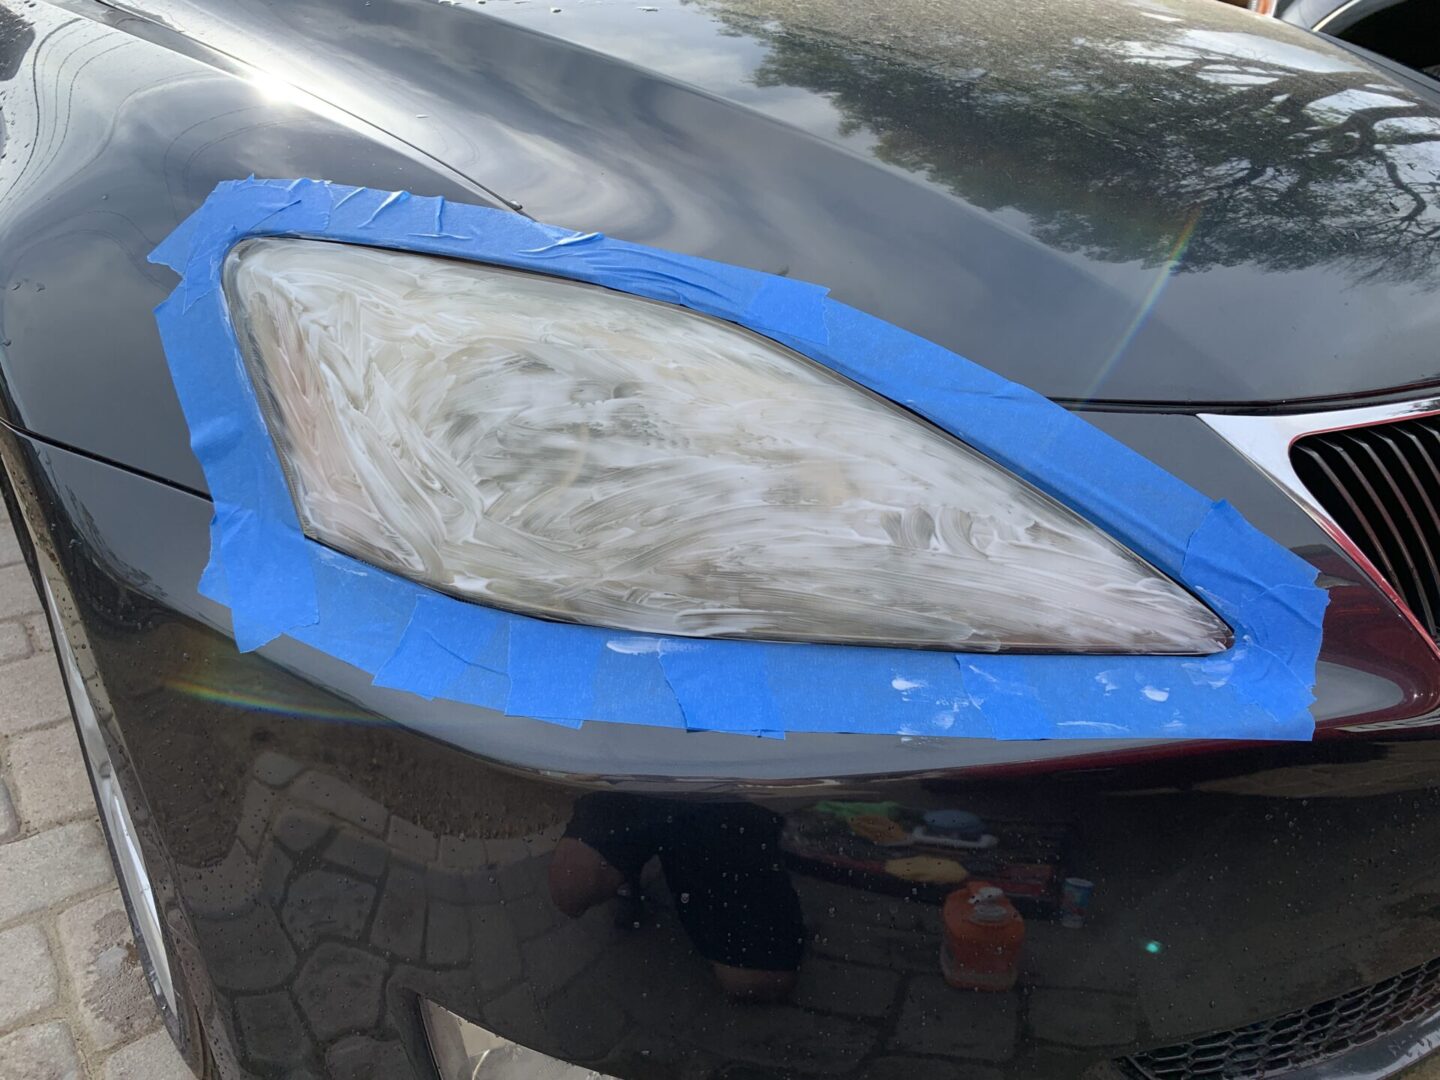
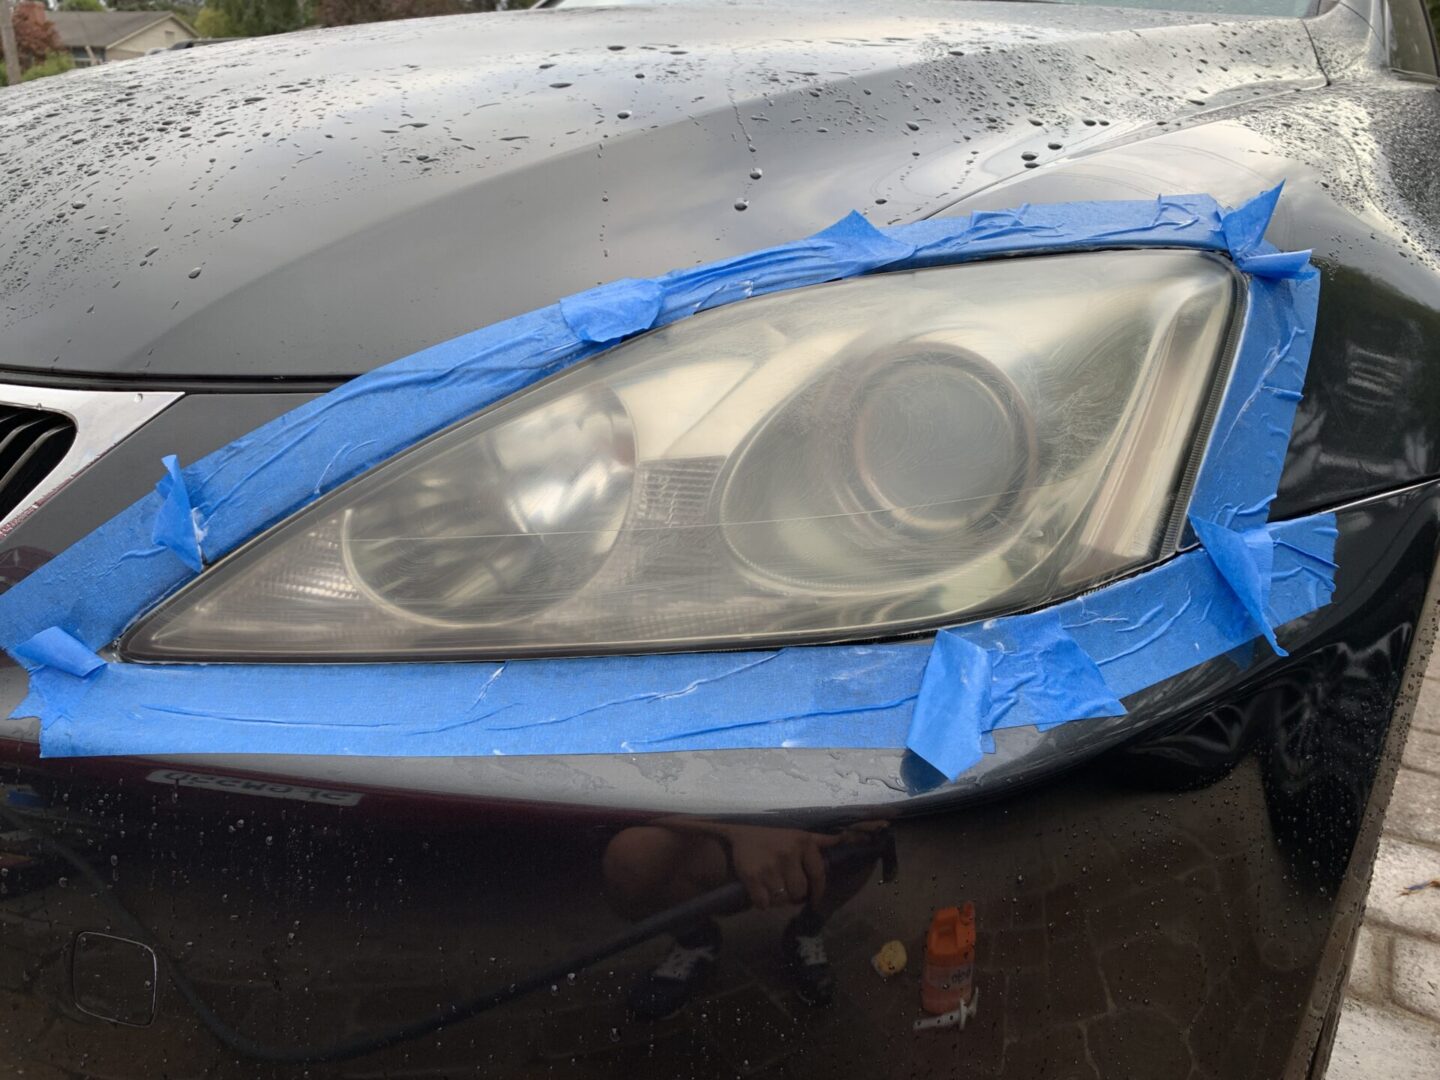
Here are some before photos of a Lexus IS350’s headlights. The lenses don’t look terrible, but it did exhibit a yellowish haze.

As I mentioned before, I tried both a whitening toothpaste, as well as a non-whitening toothpaste. I even experimented with some Gojo hand cleaner since it has a gritty texture to it like the whitening toothpaste has. Turns out that even though the pumice hand cleaner was definitely abrasive, it just did do a good job of polishing the headlights. The non-whitening toothpaste also seemed to have no effect in polishing the headlights.

The main materials you’ll need are the whitening toothpaste (I found that I needed almost a whole container for both headlights), some Meguiar’s PlastX (or similar plastic polisher), and some microfiber towels or pads.
First off, wash off the headlights. Soap and water, or even just a bit of Optimum No-Rinse or diluted all-purpose cleaner will do. Dry it off with a microfiber towel. Make sure to dry off any water that gets trapped between the headlight and the surrounding body panels. Use compressed air or a blower to get all the water dried off.
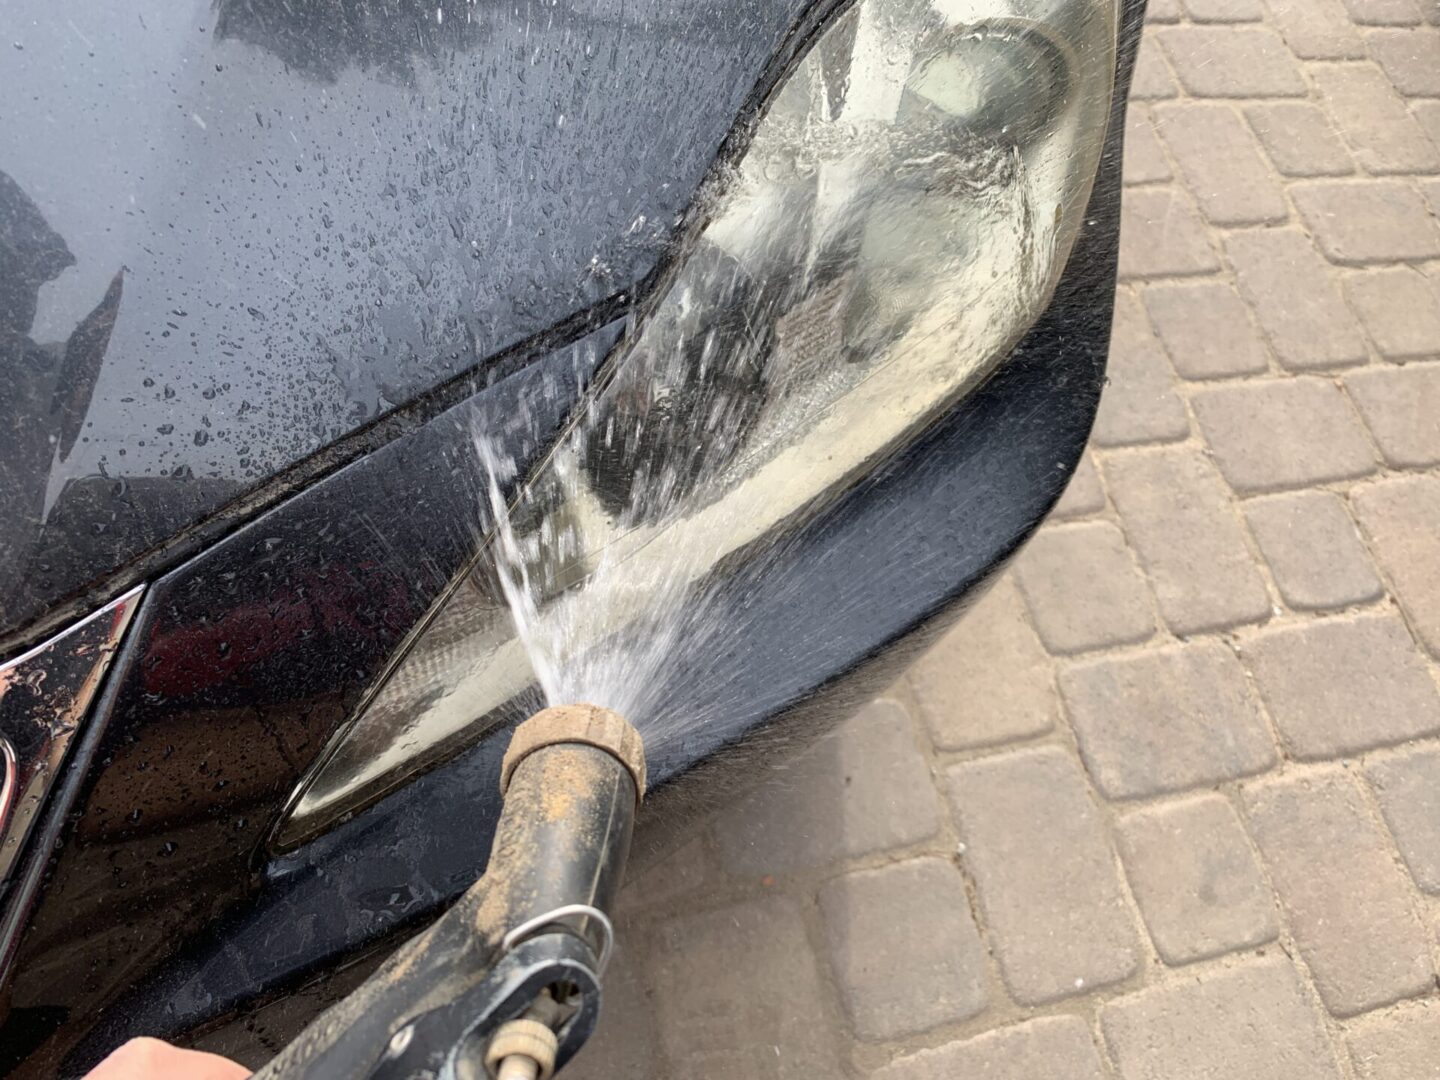

Let the headlights air dry for at least 5-10 minutes so the panels are very dry. Use blue tape and tape off the surrounding areas around the headlight. This will prevent polishing/scratching the surrounding areas during the headlight polishing.
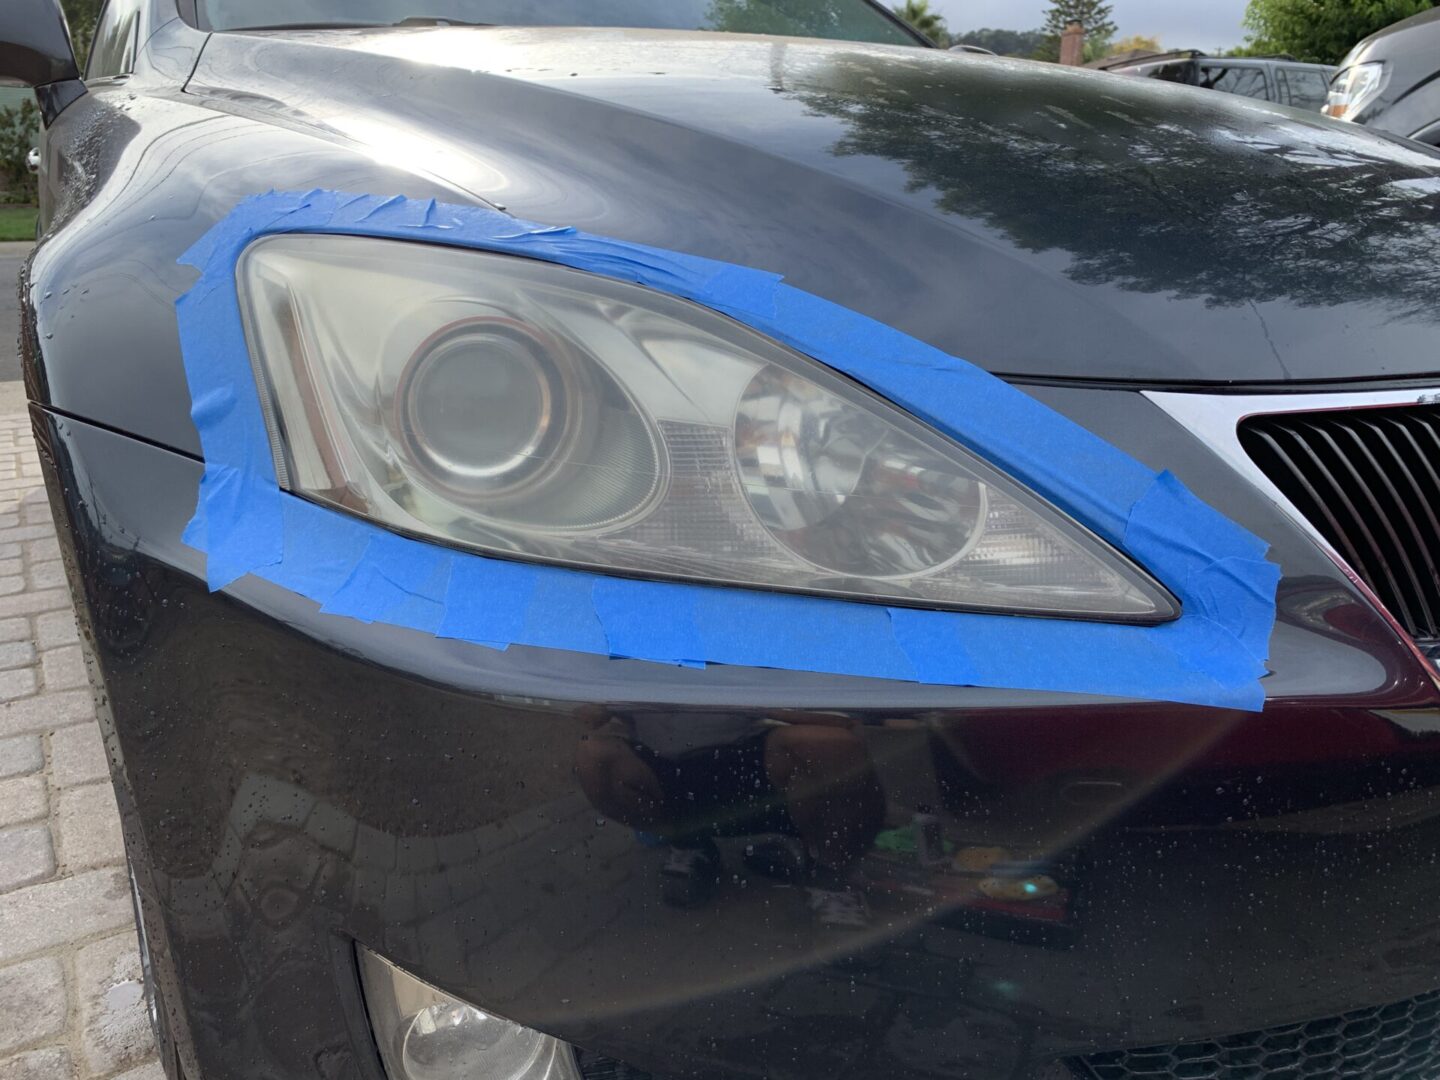
With the headlights taped off, take the whitening toothpaste and wipe it all over the headlights. It is at this time that all your neighbors will be watching and wondering what you’re doing. Ignore them and continue rubbing a generous amount of toothpaste all over the headlight.

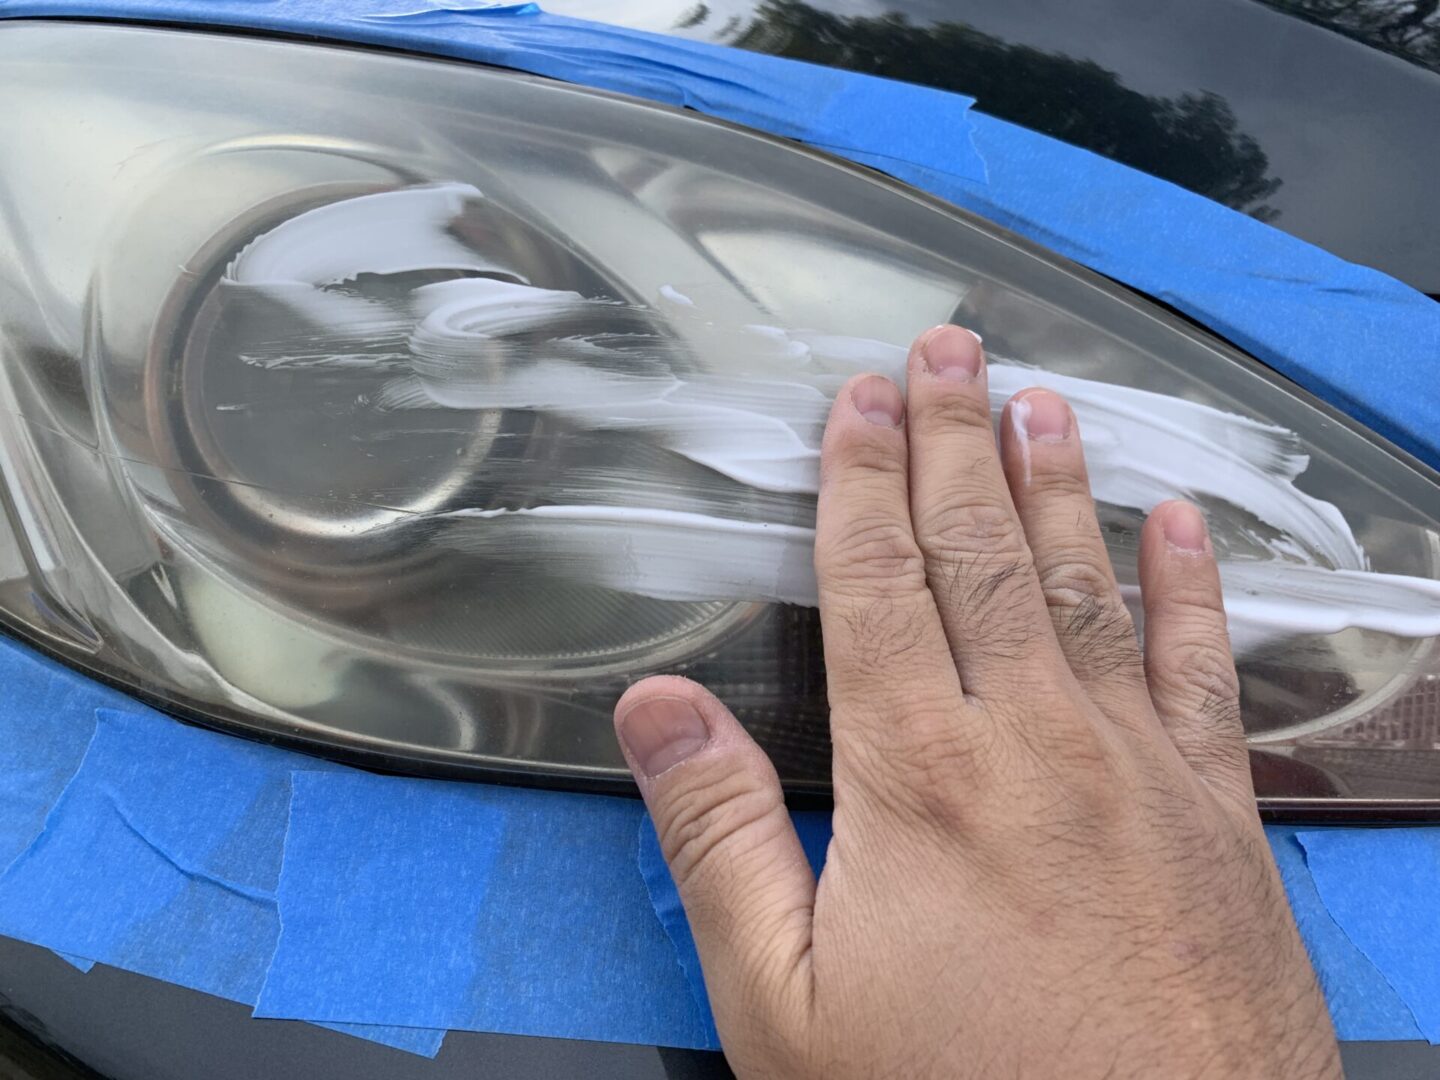
Rub the toothpaste in and rub it with a microfiber pad in a circular motion. You can even use a toothbrush if you’d like. Just make sure you scrub the entire headlight long enough to abrade the whole surface, which will effectively polish the lens down.
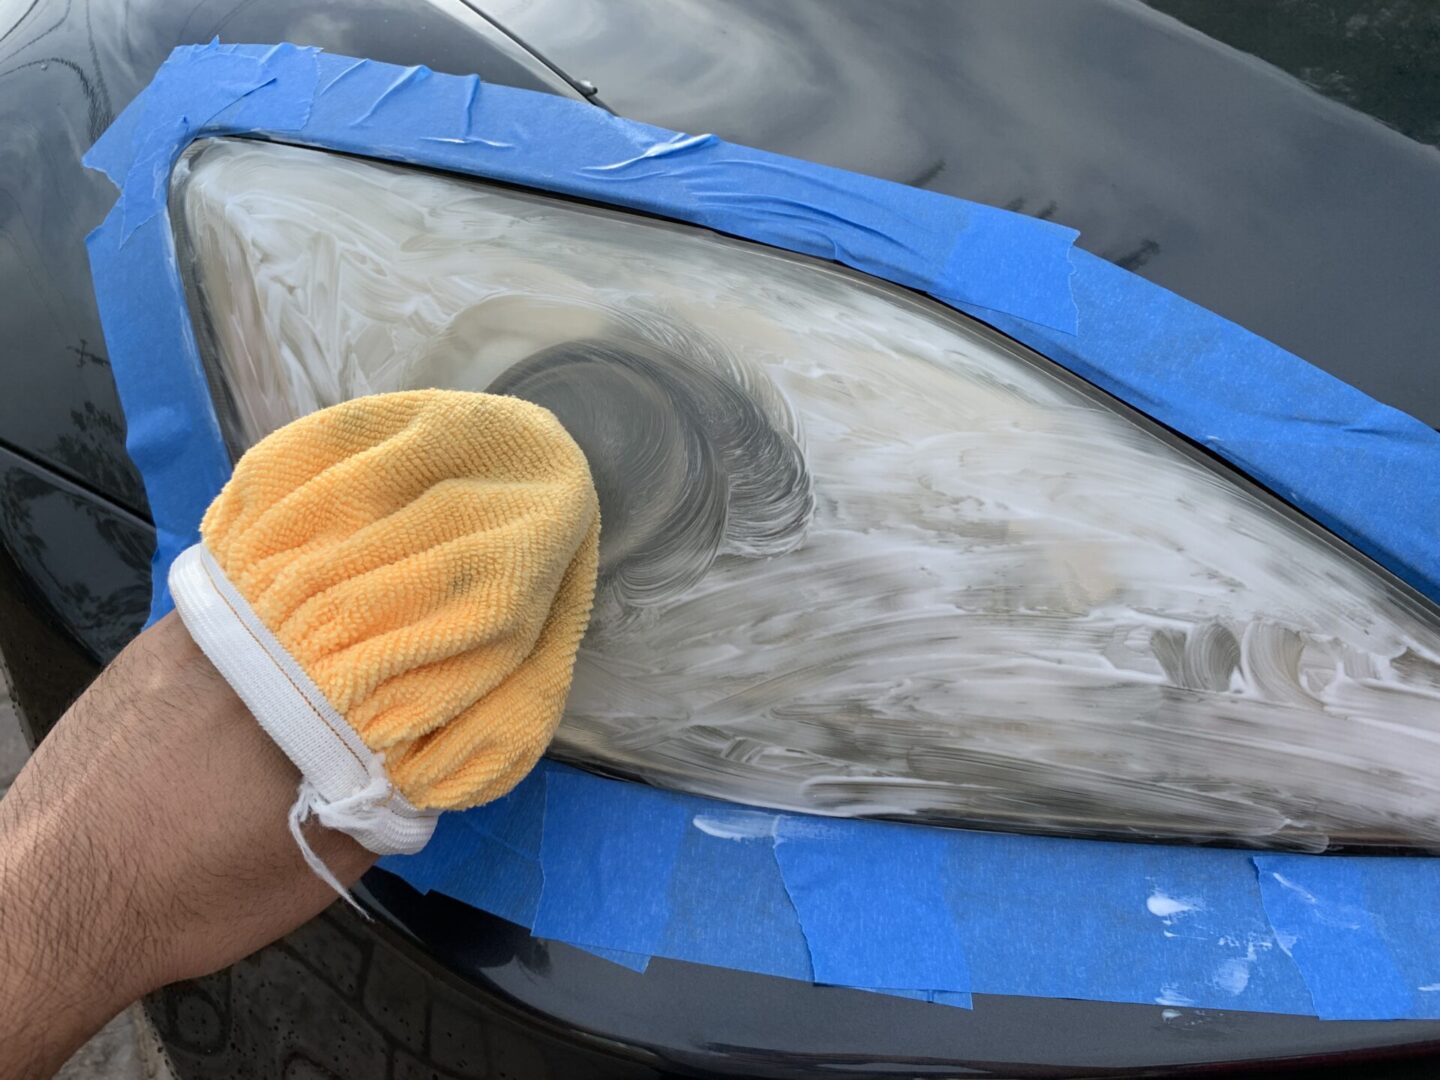

Once you’ve done this, you may wipe all the remaining toothpaste residue with a clean microfiber towel.

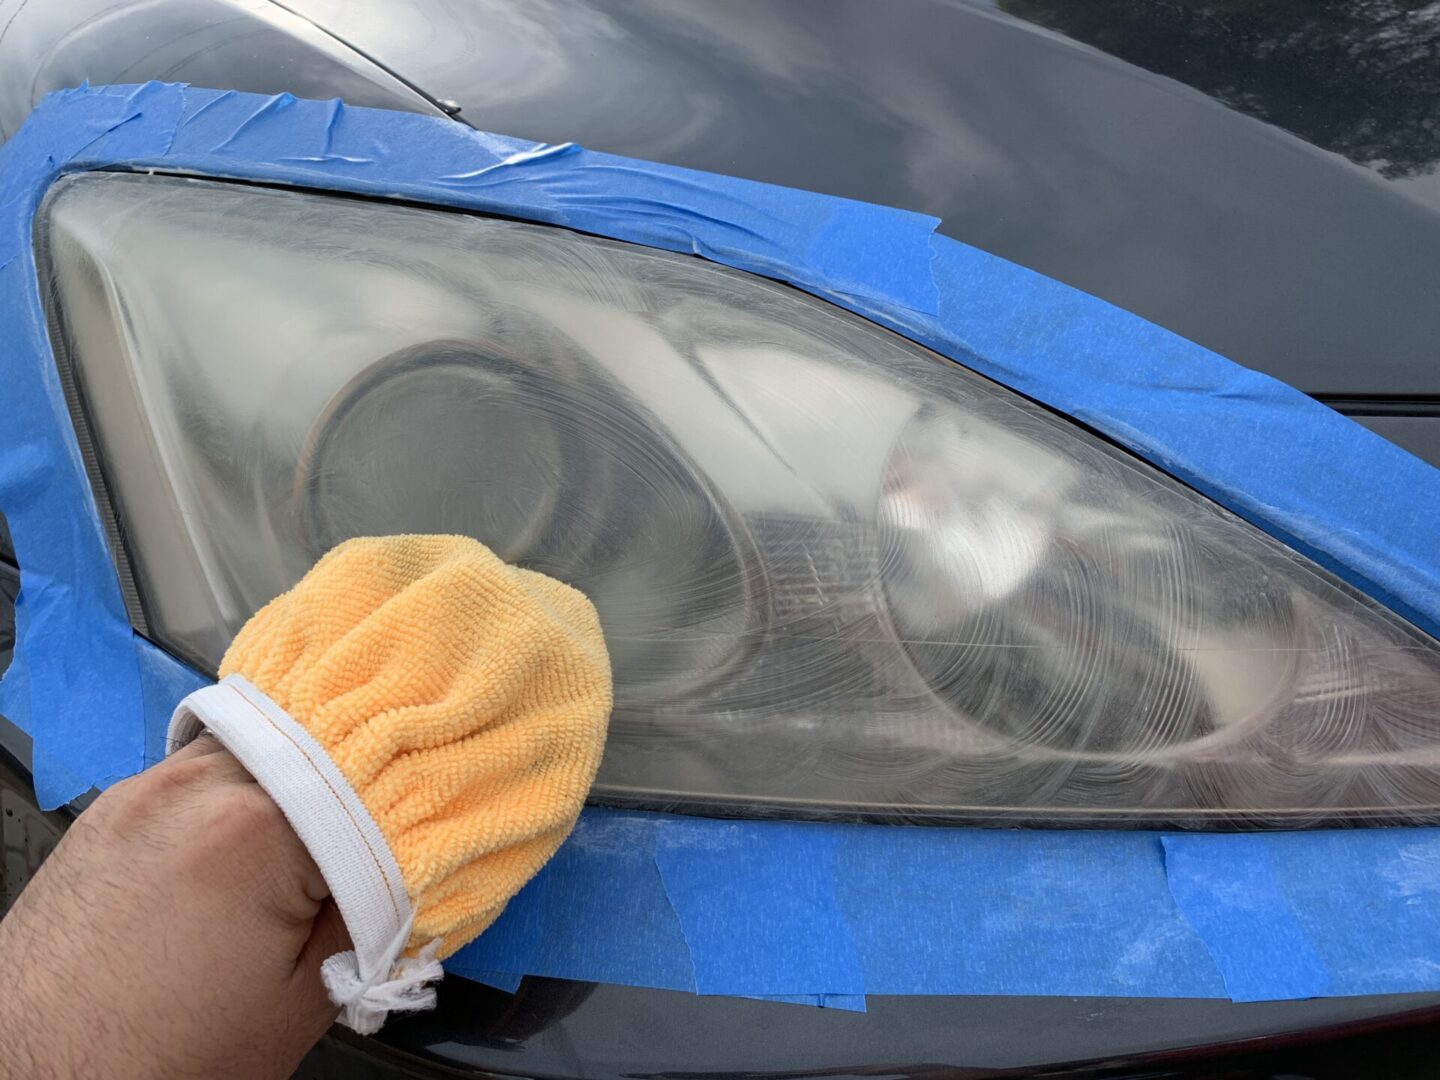
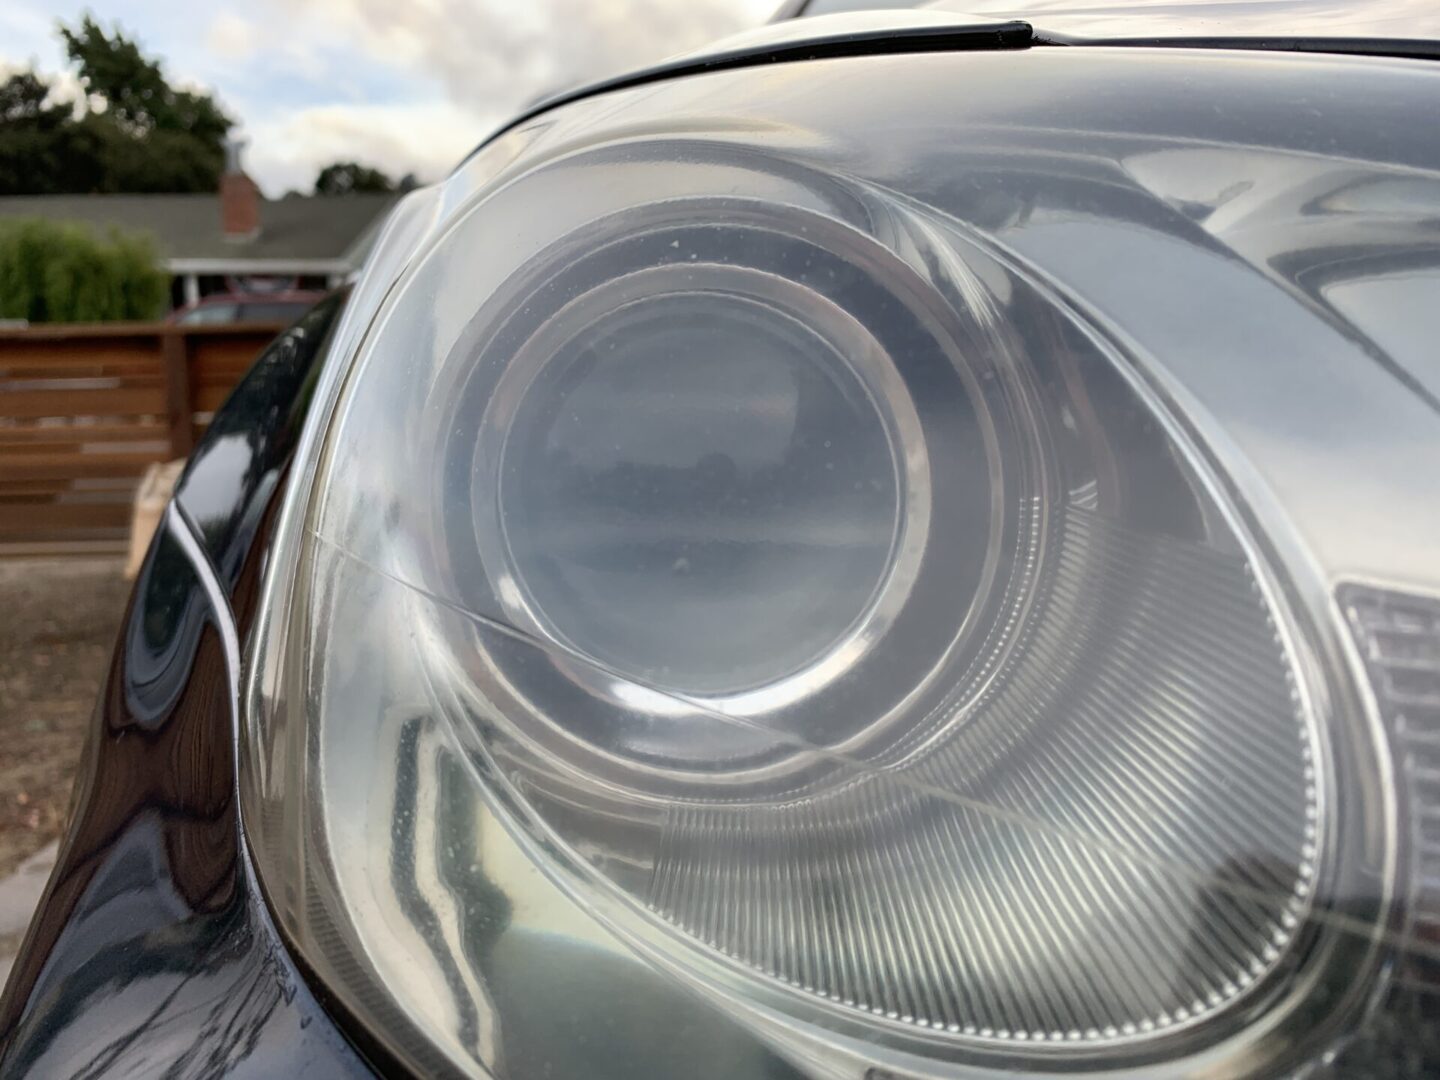
The headlight should look a bit clearer, although I’ve found that performing another polish with some Meguiar’s PlastX really brings out the clarity of the headlight lens.
I used PlastX with a microfiber pad and did another thorough polishing of the headlight lenses. Again I used a circular motion and did several passes over both headlights.

Again, wipe it all off when you’re done polishing with the PlastX.

Take a look at the results and if you are happy with it, then remove the blue tape. If you are still not happy with the clarity of the lens, you might hit the lens again with the PlastX (or other plastic polish) see if it improves the appearance. If it still does not improve the clarity of the lens, you might have to go with a more aggressive polishing with a polish, compound, or sanding.

After removing the blue tape, wash the headlights and surrounding areas again with soap and water again, and then dry off. You’ve now successfully polished your headlights with some good ‘ol fashioned (whitening) toothpaste!
It is likely that after you polish your headlights, it may get hazy or yellow over time. It is recommended to either spray on a coat of clear coat to maintain the clarity of your headlights. Another option is to apply wax, sealant, or coating to protect the outer lens of the headlights.


