When you make purchases through links on this site, The Track Ahead may earn an affiliate commission. Also, these posts are based off my own experiences. I am not responsible for any action you take as a result of reading this. Learn More
What is the “No Spring Compressor Method”?
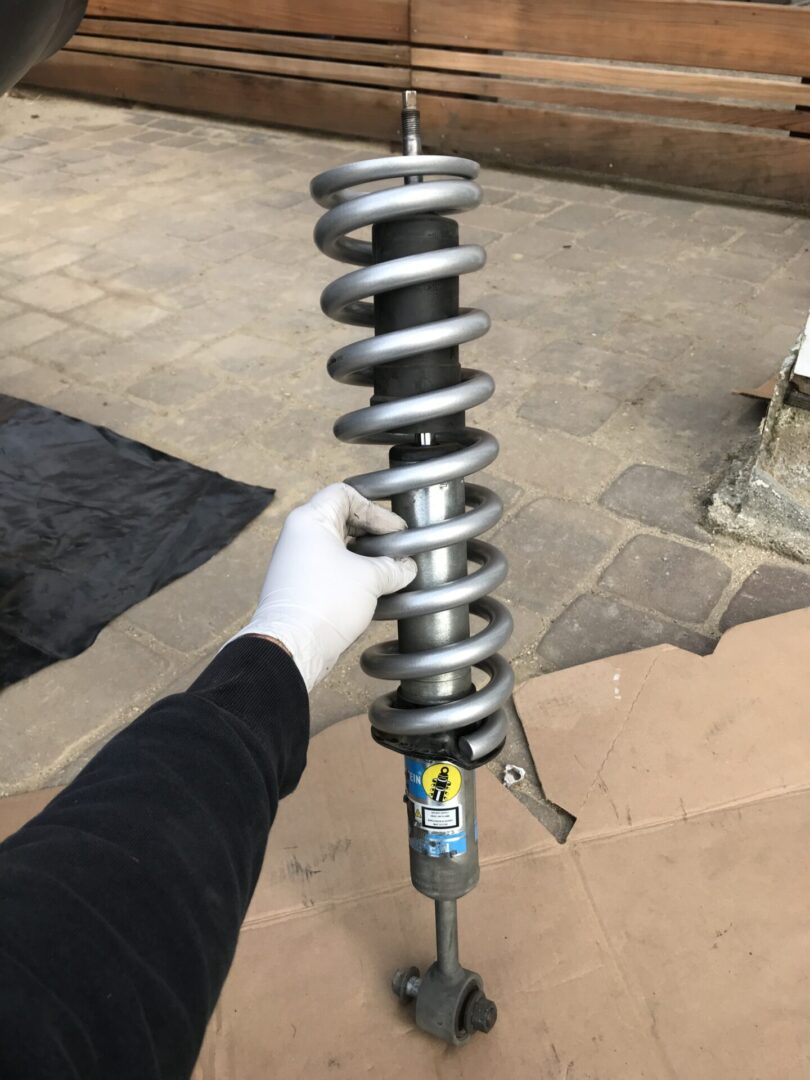
The No Spring Compressor Method is a way of disassembling your shock assembly (or coilover) without the use of a spring compressor tool. In your coilover/shock assembly, you have a spring that is compressed by a shock between the upper and lower perches, which are connected to the shock. This assembly of shock and spring can be mounted to the frame of the vehicle (via the strut mount on top) and then to the lower control arm (on the bottom). The perches may look different from depending on the type of shock assembly you have, but they serve the same purpose with some models offering some level of adjustability.

If you’re replacing the entire shock assembly, you can remove the whole coilover without taking the shock and spring apart. You can then proceed with installing a pre-assembled coilover. If you go about replacing the front coilovers this way, you won’t need to worry about the release of energy of the compressed spring because you’ll have never disassembled the coilover.
However, if you need to take the shock and spring apart, then you’ll either need spring compressors or you can perform the No Spring Compressor Method. Rather than using a tool to compress the spring enough for you to remove the shock, the No Spring Compressor Method uses the the weight of the vehicle as well as a floor jack, to decompress the spring.
Options for Compressing Springs
If you do need to disassemble/reassemble the shock assembly, you can go about it several ways. One option is using a spring compressor tool.
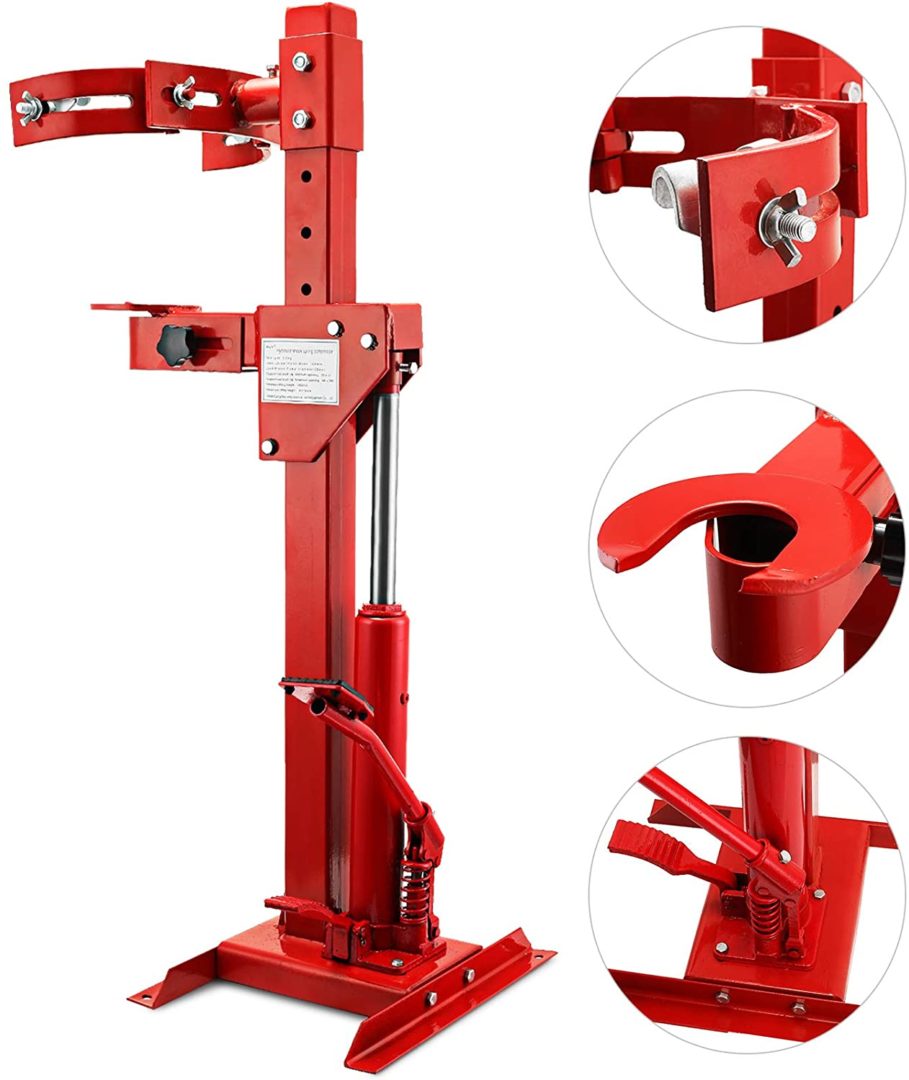
Spring compressor tools come in either a hydraulic bench mounted type or a hand tool type. The bench mounted type is a very safe option for this work. People generally don’t have this tool in their garage, but garages/shops will generally utilize such a tool. I believe this to be the safest method of assembly/disassembly of the shock assembly. Handing off this work to a trained mechanic with a heavy duty tool such as this one, will offer the least risk for this type of work.
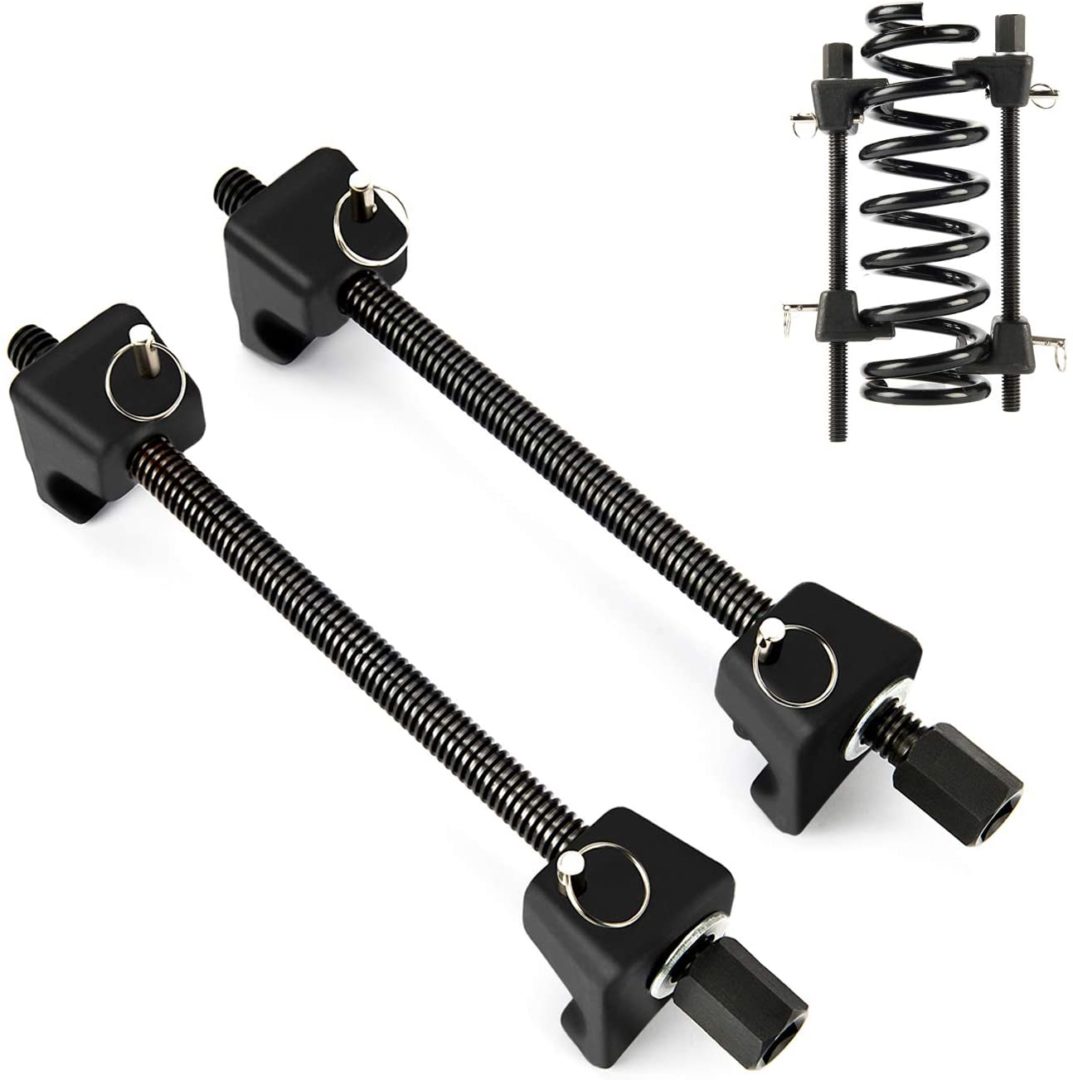
The other spring compressor tool is a hand tool that uses hooks to hold the spring, while requiring you to ratchet down the hooks to compress the spring. This tool is hit or miss. Sometimes when you ratchet down, this tool effectively compresses the spring, but the spring will compress to the point where the arms interfere with the compression of the spring. Therefore, you can’t compress the spring anymore, even if you still have more to compress. Another problem that I’ve seen is that these tools typically instruct you to hand-tighten these tools with a ratchet, but in most cases folks use air wrenches or impact wrenches when they shouldn’t, simply due to the ease of use.
The last method for compressing springs is using the No Spring Compressor Tool. In my opinion when this is done in a safe and controlled manner, it can be much safer and effective than using a standard spring compressor hand tool. What this method does is use the weight of the vehicle as support the top side of the shock assembly, and a floor jack on the bottom end, to slowly decompress the spring until you can diassemble/reassemble the shock assembly. You’ll still need to do a few steps in order for the lower control arm (LCA) to swing down and also allow the floor jack to support and lower it securely.
A Word of Warning
There’s always some level of risk when working on cars, but I feel this supplemental warning is warranted when dealing with springs. Vehicle springs store up a tremendous amount of energy when compressed, so working with it when not fully understanding how the components work and how they interact with one another is very dangerous. The spring releasing all of its compression energy can seriously injure you, if not kill you. Do your research, watch videos online, and do as much learning as possible to completely understand how the suspension components work before trying this yourself.
Even go watch a bunch of “coil spring fail” videos on YouTube to know what can go wrong. People have gotten incapacitated and killed from accidents like these, so fully understand that this can be extremely dangerous and fatal if not done properly.
Performing the No Spring Compressor Method will vary from vehicle-to-vehicle depending on the suspension components used on the vehicle. I performed this No Spring Compressor Method on a 2003 Toyota 4Runner which uses a double wishbone suspension up front. Keep that in mind; if you’re doing this on a different vehicle or different suspension setup, please know that you need to still do your research to know if the No Spring Compressor Method works for your application.
Tools/Materials
Jack Stands: Instrumental in keeping your vehicle propped up and secure. Find on Amazon
Floor Jack: Needed to jack up the vehicle, but is also instrumental in completing the “no spring compressor method” to disassemble and reassemble the strut assembly. Find on Amazon
How to do the “No Spring Compressor Method”?
Overview
The vehicle should be raised and supported on jack stands prior to doing any of this work. The weight of the vehicle (supported on jack stands) will act as the support on one end when decompressing the spring.
For the next steps, there are a variety of ways to disconnect suspension components in order to allow the lower control arm to articulate down for this process, but I’ve found the simplest way is the one I’ve outlined below.
- disconnect the sway bar (via the end links) from the steering knuckle
- loosen the cam adjusters
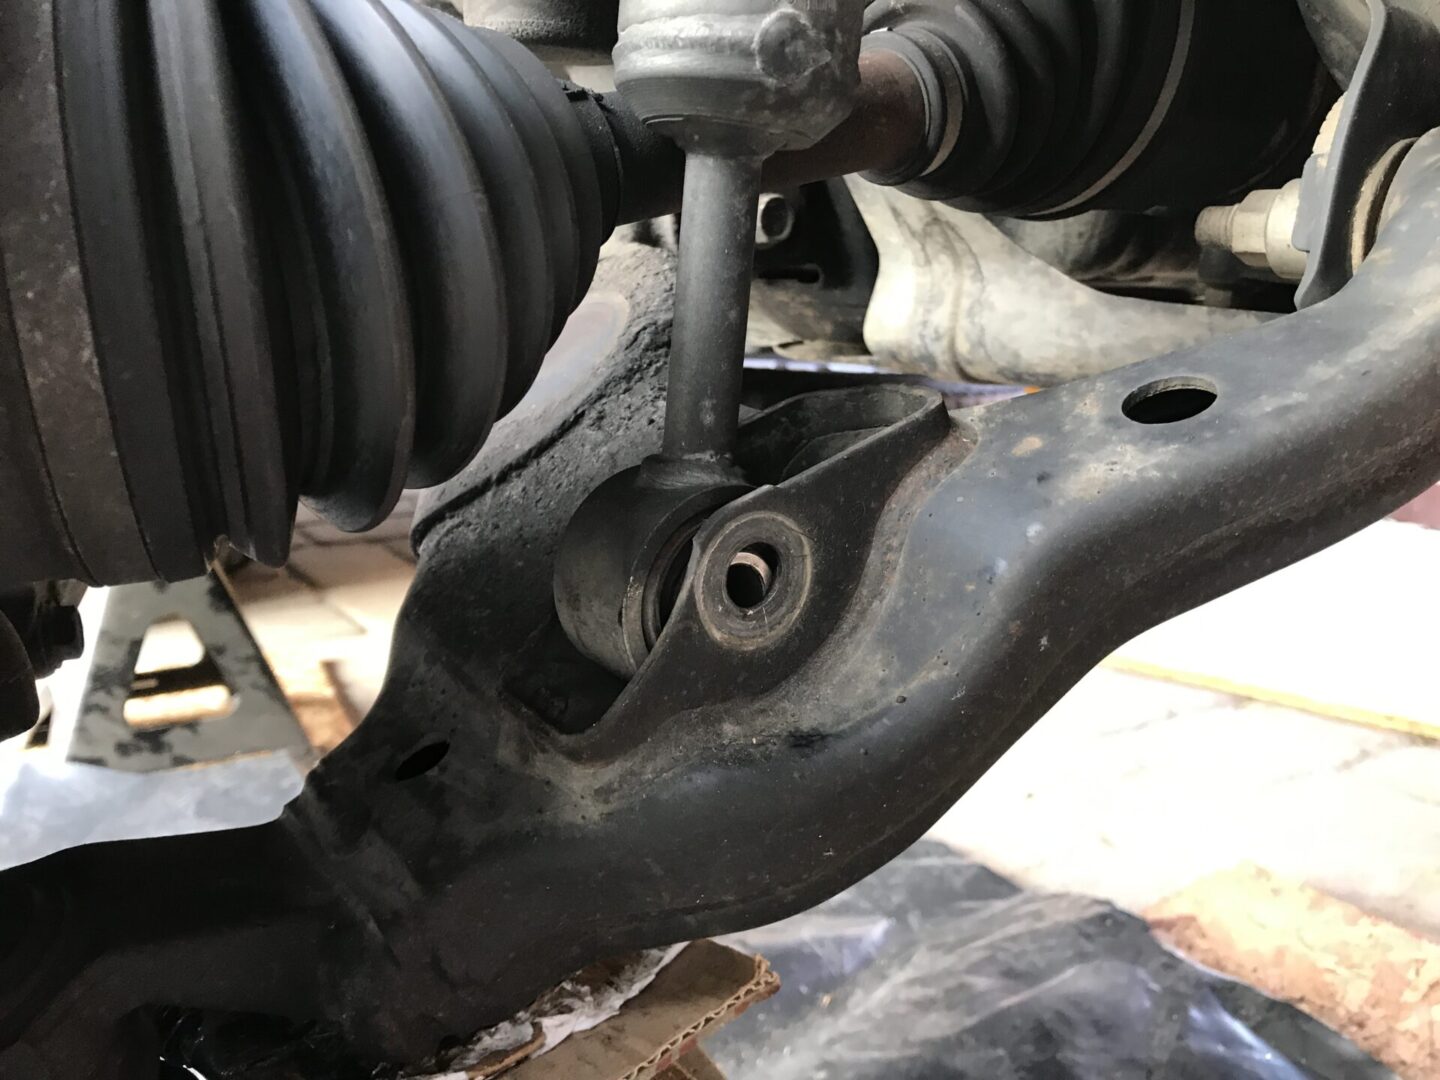
- disconnect the lower ball joint
- loosen the lower shock connection: bolt and nut still in place for safety
- ensure the floor jack is supporting the LCA and hydraulic valve closed
- remove upper shock center nut (this last step will be the last step the LCA can be lowered)
These steps are essential to getting your LCA to be able to rotate down and out of the way. The sway bar is connected to the steering knuckle via the end link. The cam adjusters need to be loosened in order for the LCA to rotate. The lower ball joint needs to be disconnected in order to separate the LCA from the wheel hub.
The bottom connection (lower shock connection) is still connected to the LCA with the nut/bolt broken loose, but still connected. The upper connection (large center shock nut) will be the last step of removal before the spring can be free to decompress. However, when you disconnect that top center shock nut, the shock’s top center threads are still sticking out of the strut mount. Therefore, it is still supported from lateral movement. The only way for the shock to go is down… that is what the floor jack is for— to allow the LCA (and shock/spring) to lower down with it.
When the spring needs to be be compressed again, the floor jack will be used to push up on the LCA and in effect the spring will be compressed into place. The center upper shock nut will then be tightened to complete the installation.
Step-By-Step Guide
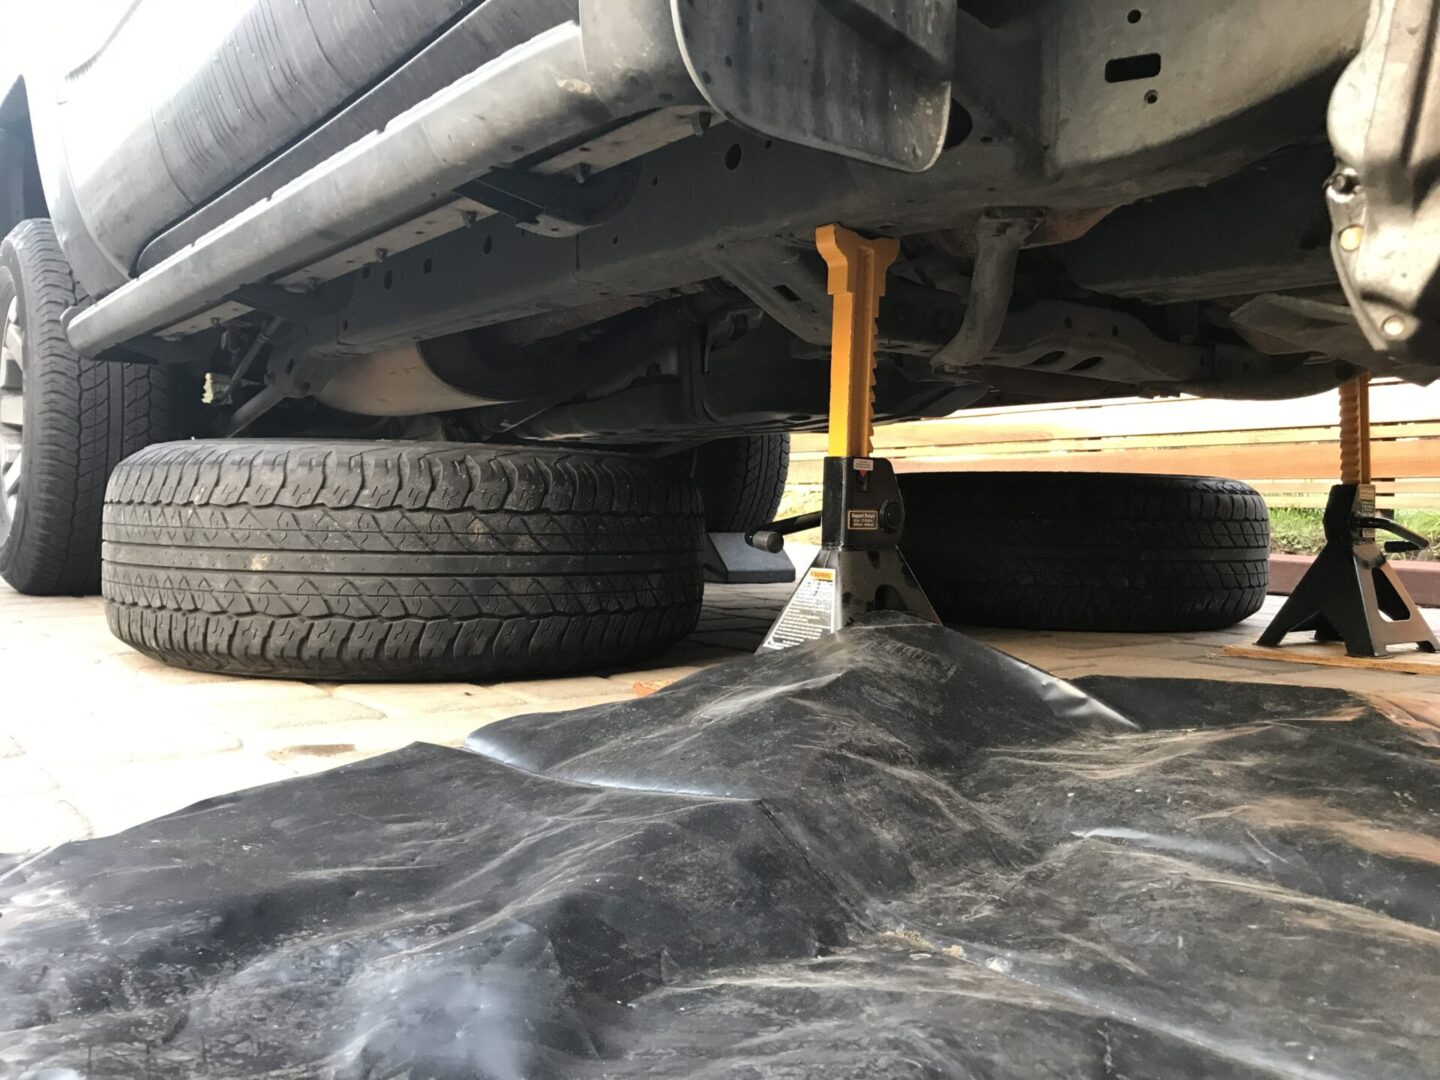
First, jack up the front of the vehicle and support it on jack stands. Remove the wheels. You may set them aside, or place them below each side of the vehicle as an extra safety precaution in the case the jack stands fail. Finally, make sure to chock the rear wheels with wheel chocks so that the car will not roll and cause the car to come off of the jack stands.
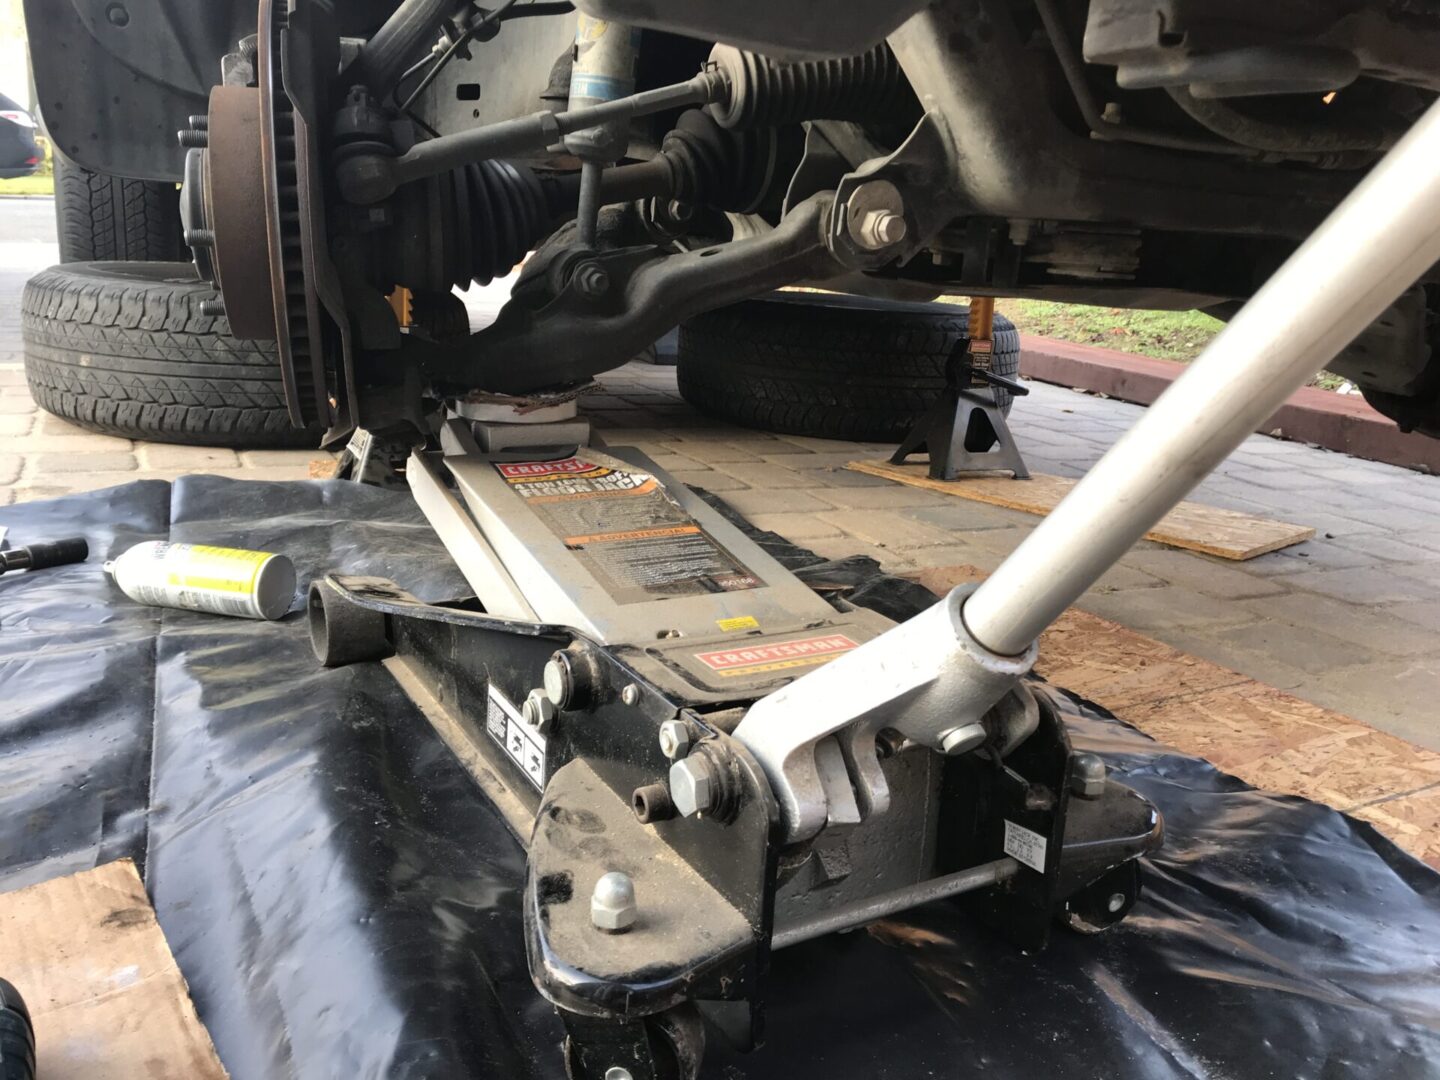
Move the floor jack into place. I’ve swung it over into this position where the handle points to the front of the vehicle. This way, I can operate the jack from the front and out of the way of any danger. If anything goes wrong and the spring shoots out, it is encased in the wheel well or it shoots out the side.
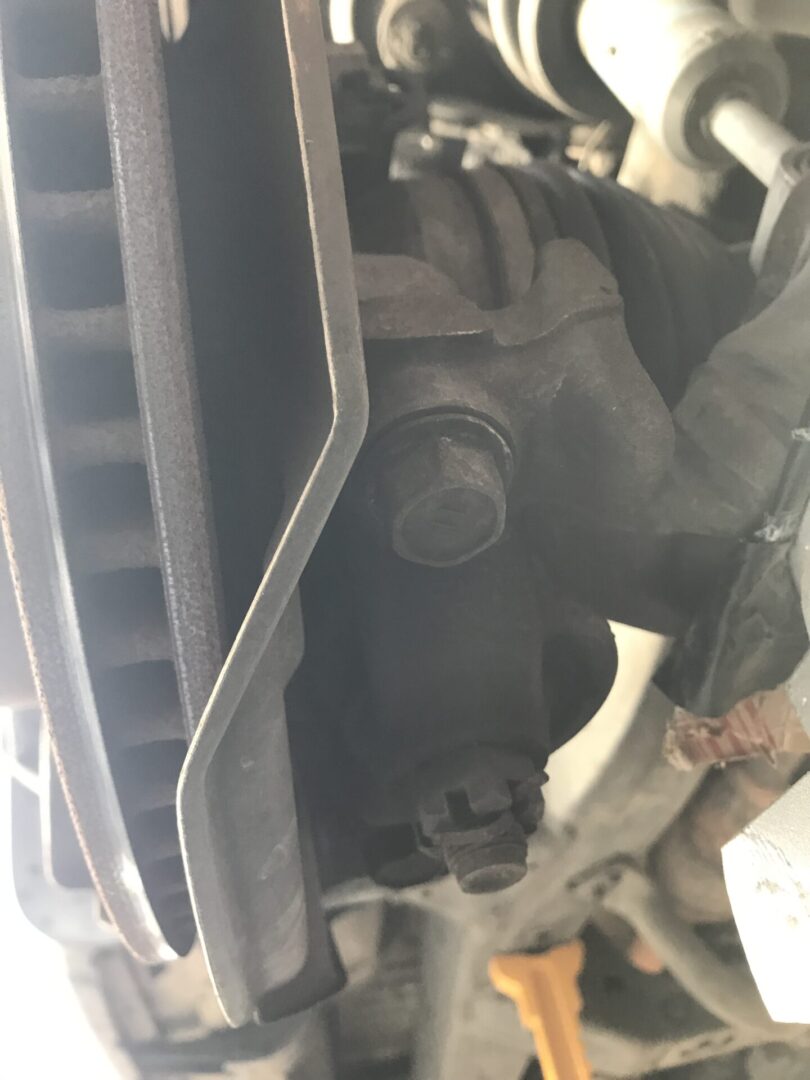
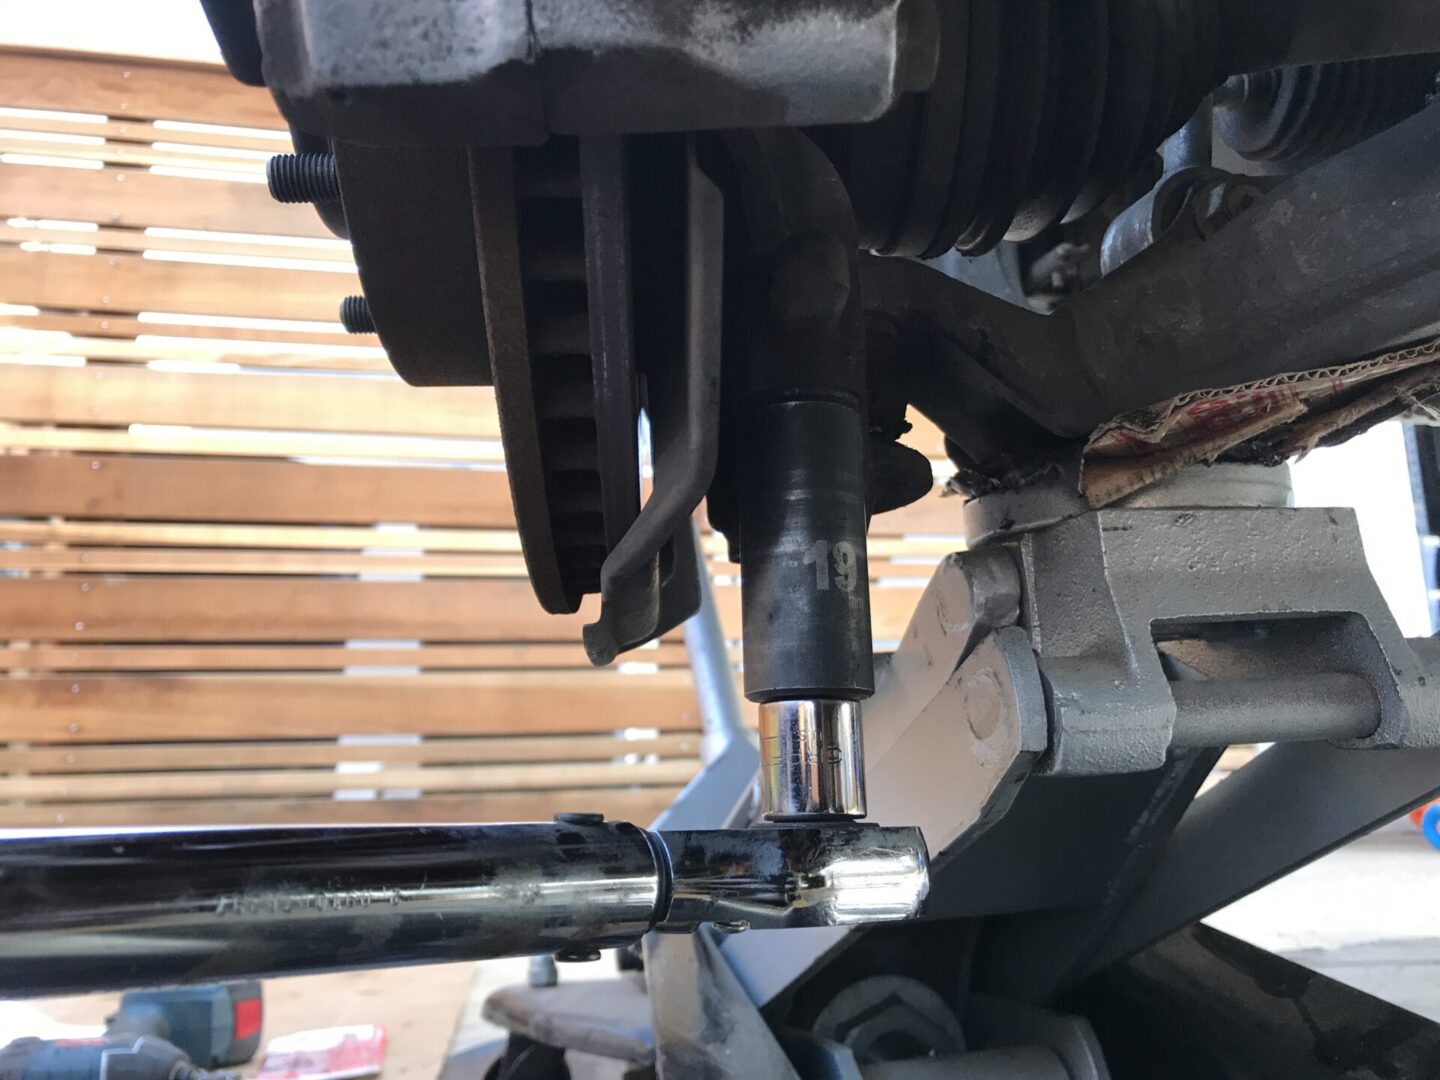
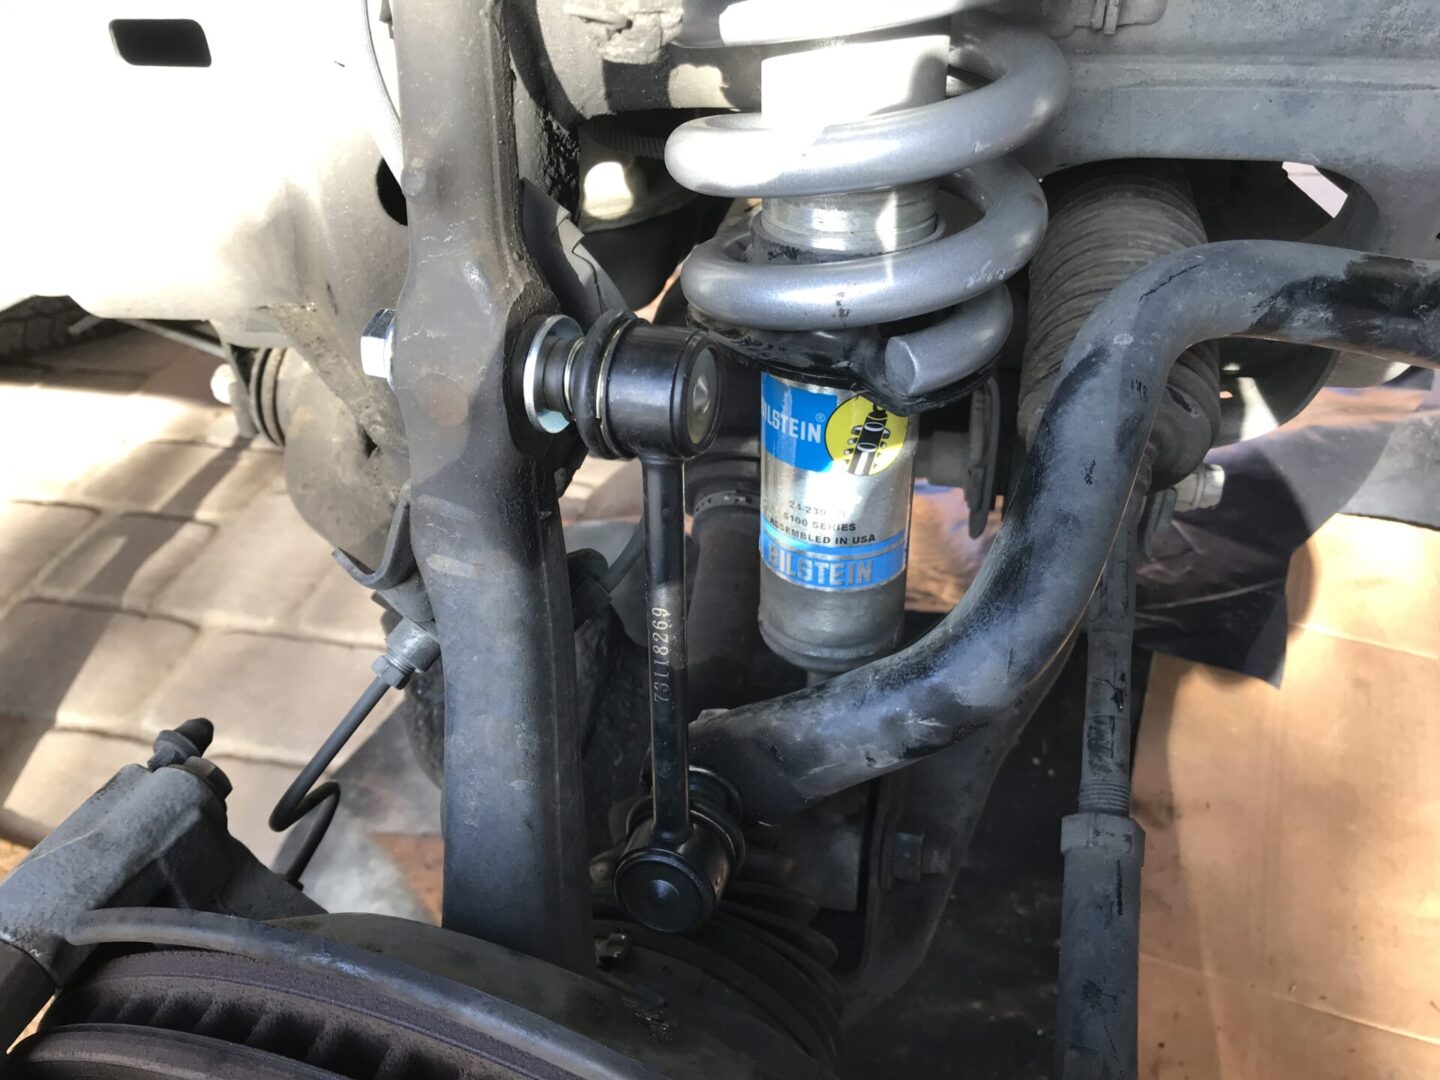
Begin by disconnecting the front sway bar end links from the axle on both sides of the vehicle. You can leave the end link connected to the sway bar as you are mainly concerned about separating the sway bar from the steering knuckle.

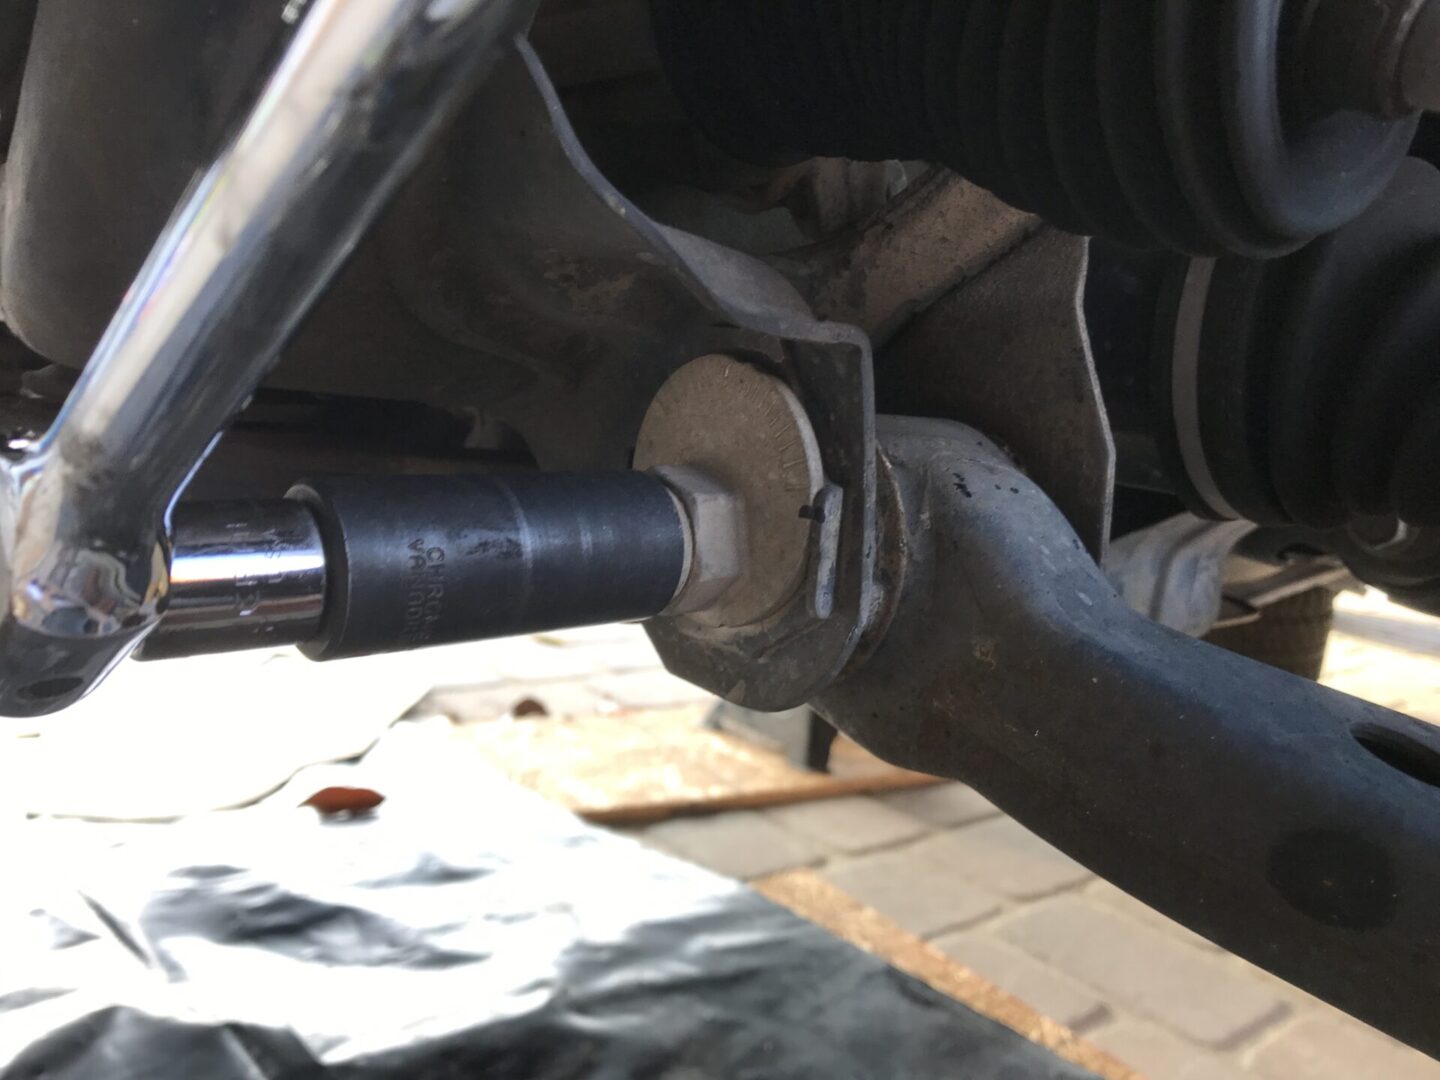
Mark the alignment cams with a paint marker so that they can be positioned back in place during re-installation. You might need to remove some panels or skid plates under the vehicle to get access to these cam bolts.
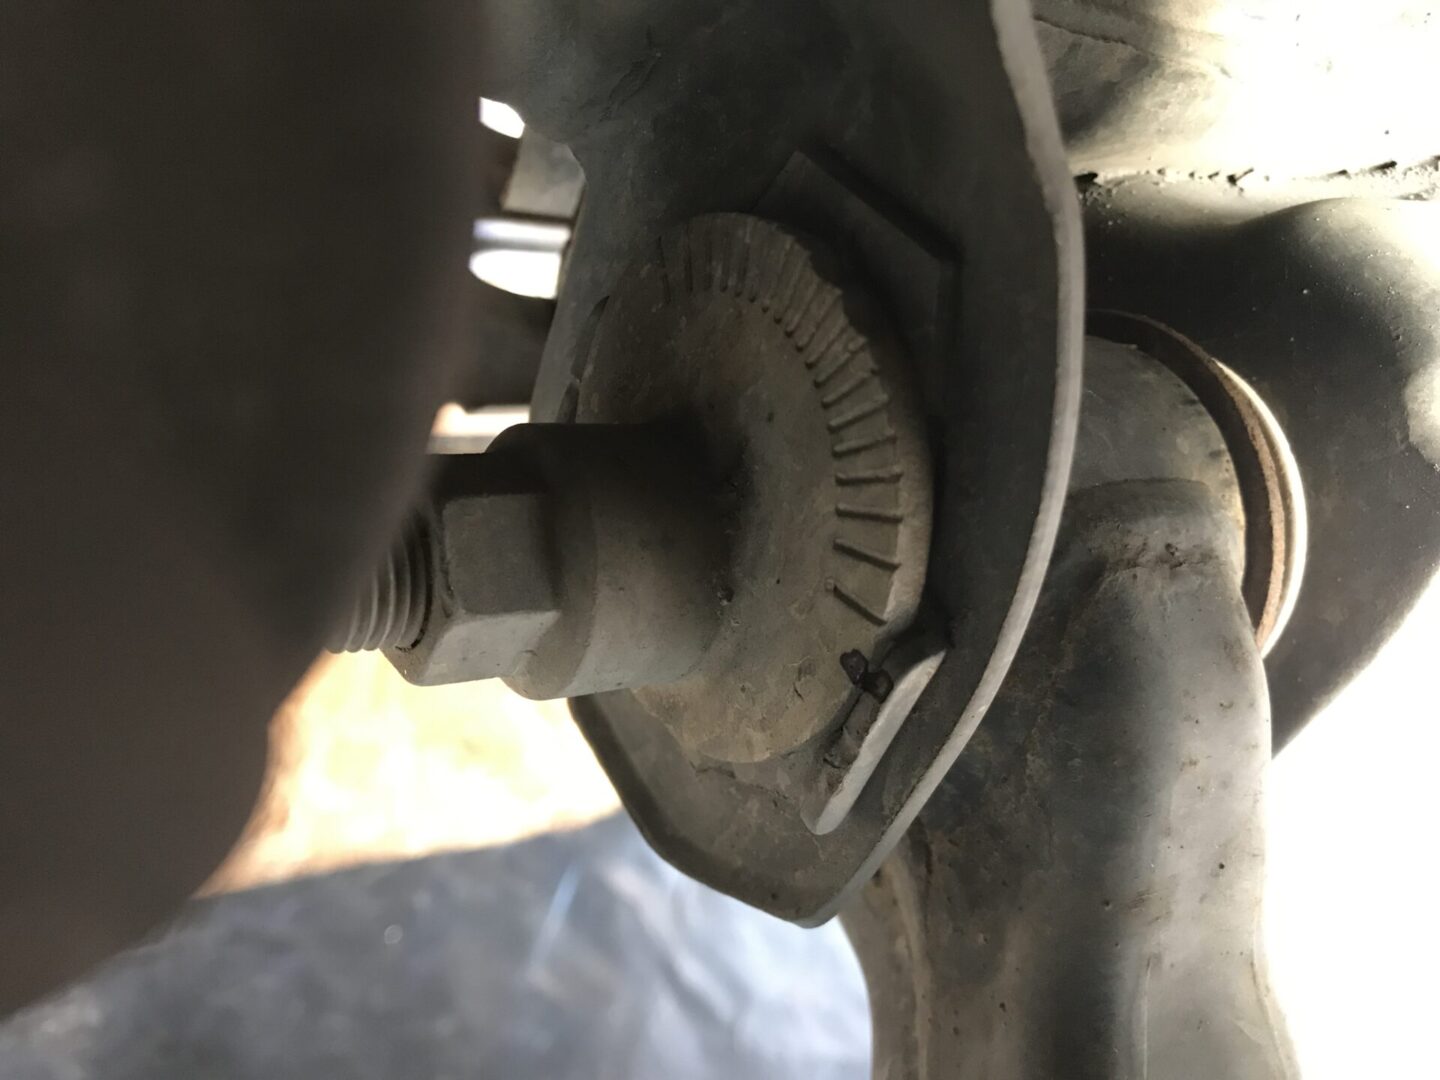
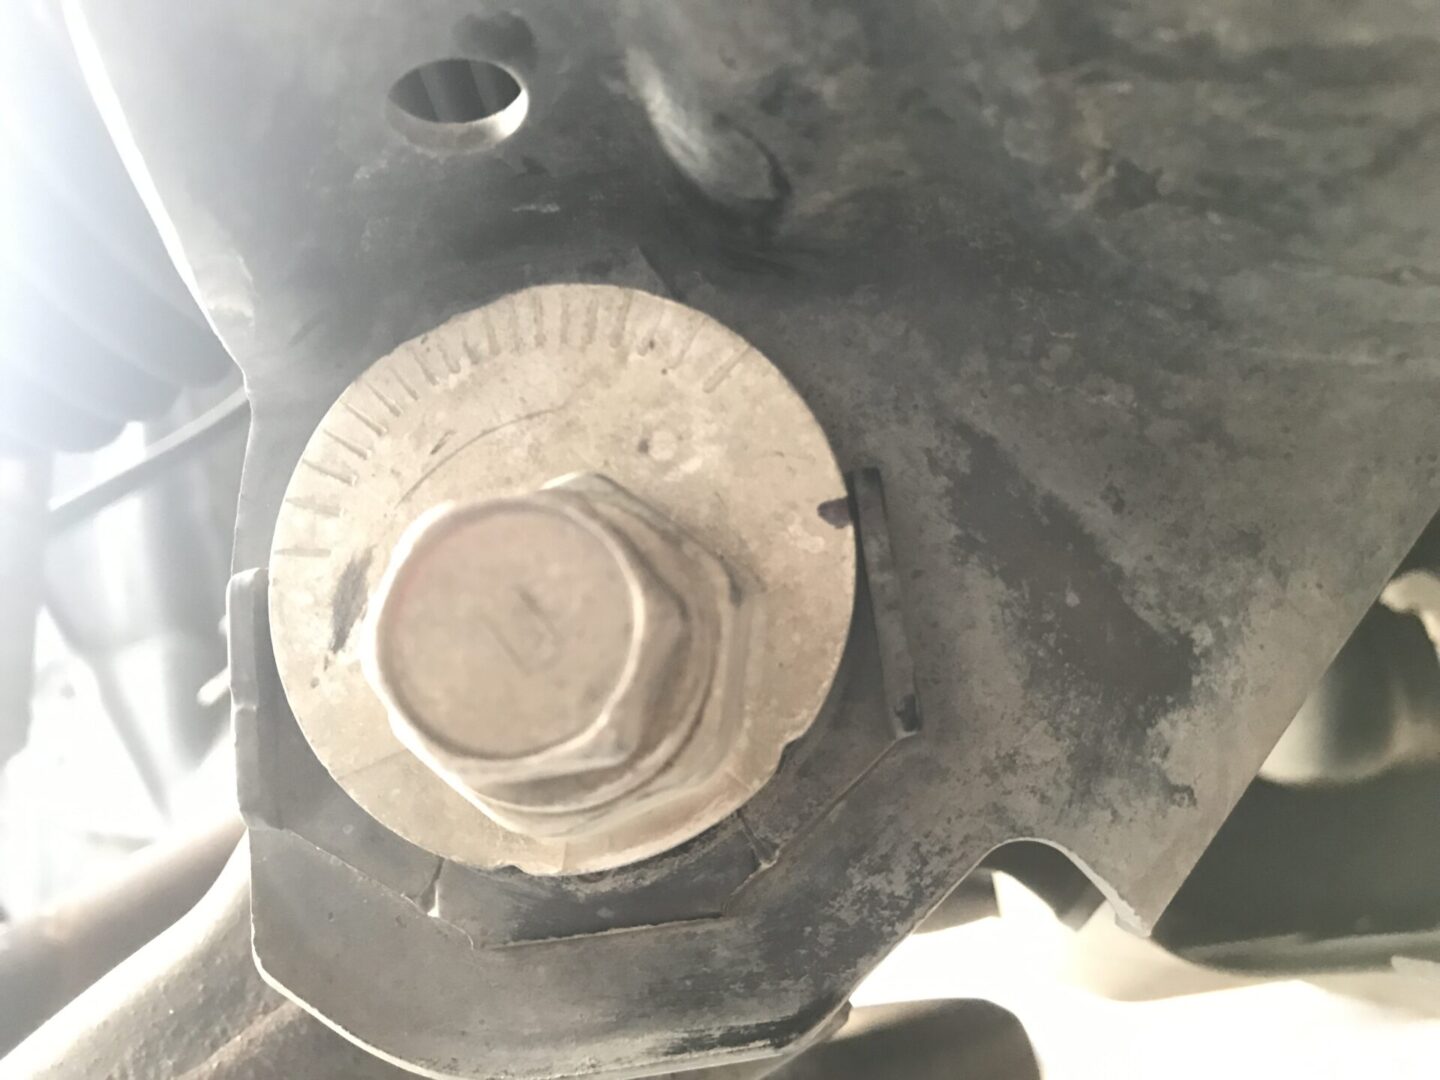
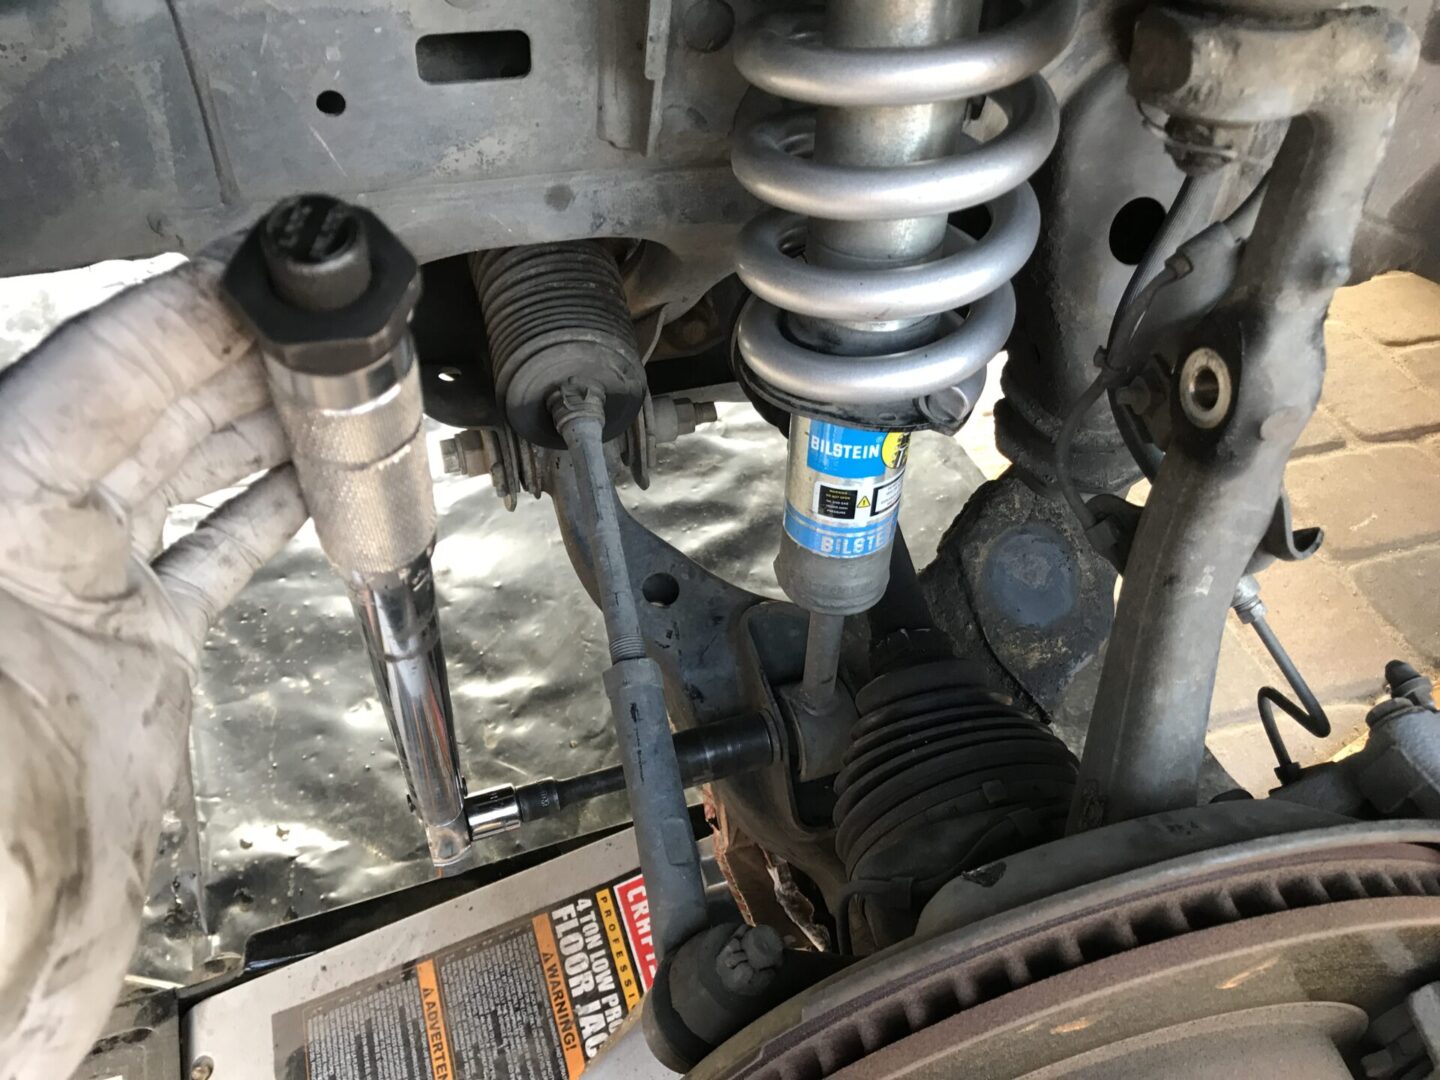
Loosen but do not remove these cam adjustment bolts. This will allow for articulation of the lower control arm (LCA), which will allow the LCA to rotate and provide additional room to remove/install the front shocks/springs. Penetrating oil can be used if these bolts are stubborn to break loose. You may need to use a box end wrench on the nut on the other side of the cam adjuster to loosen this bolt.


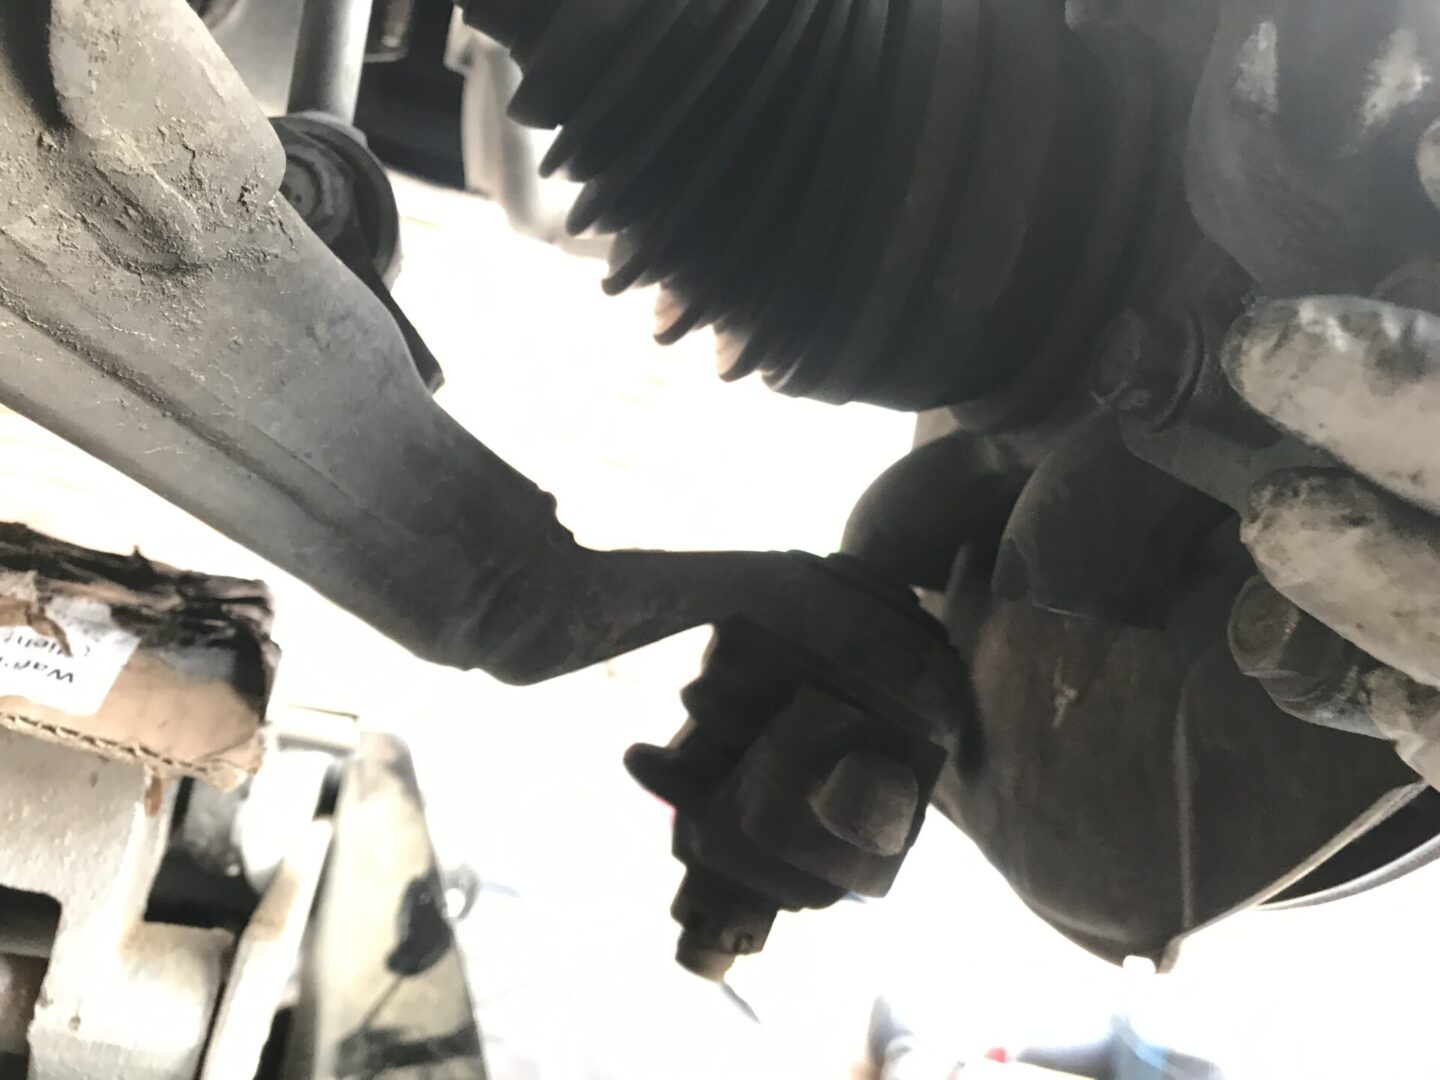
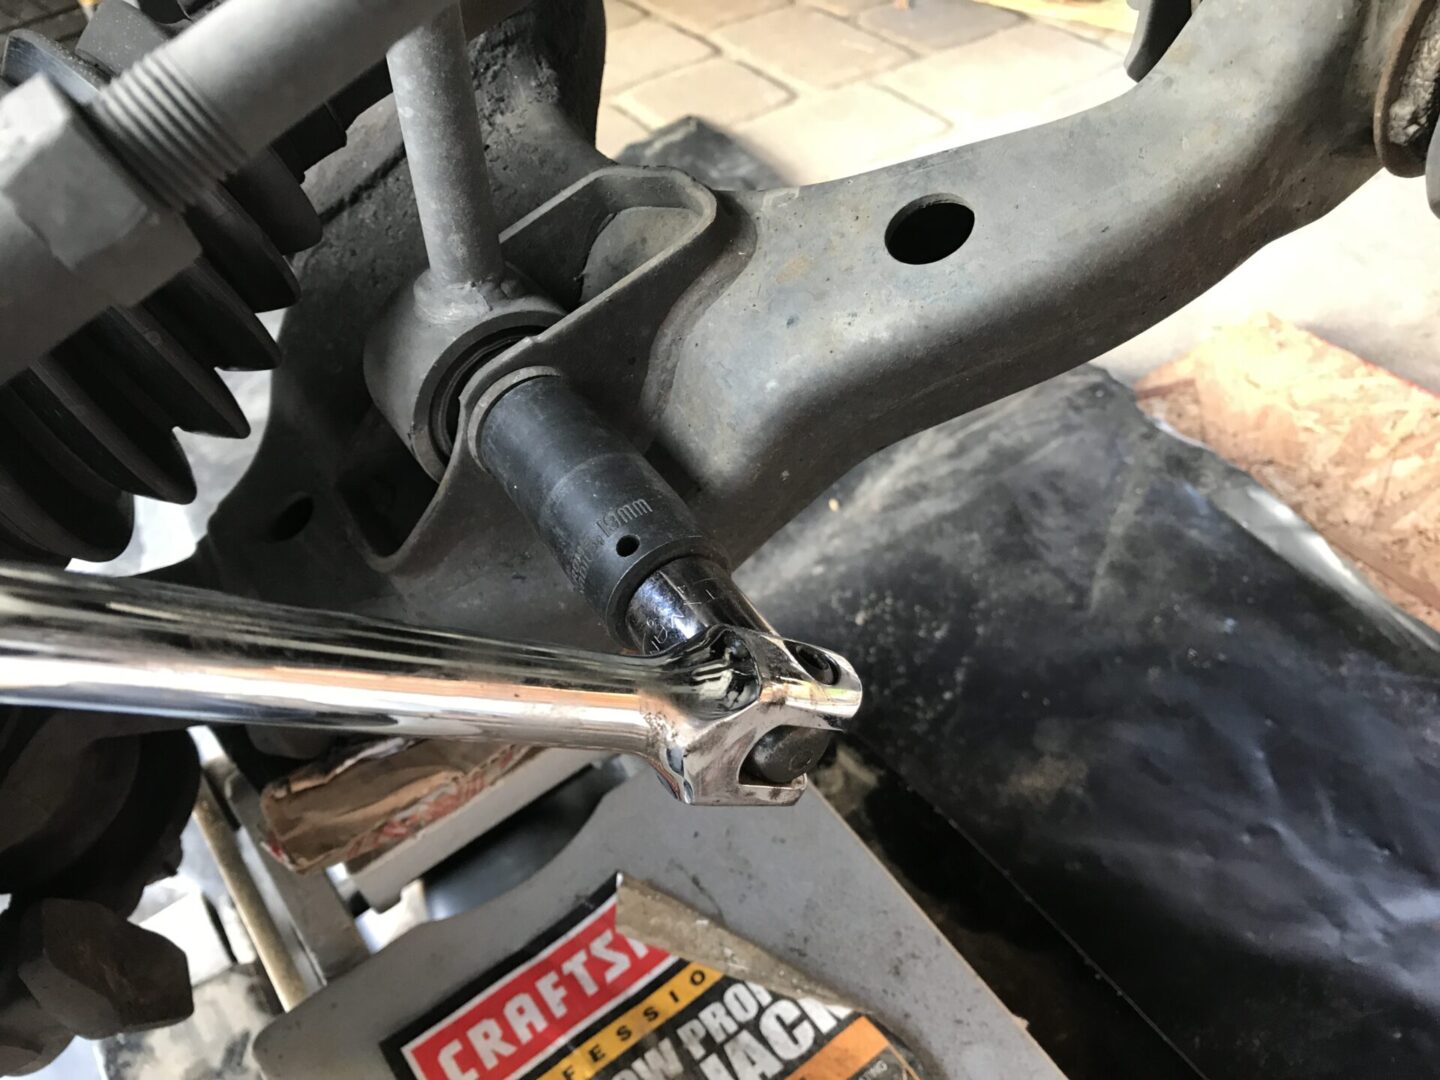
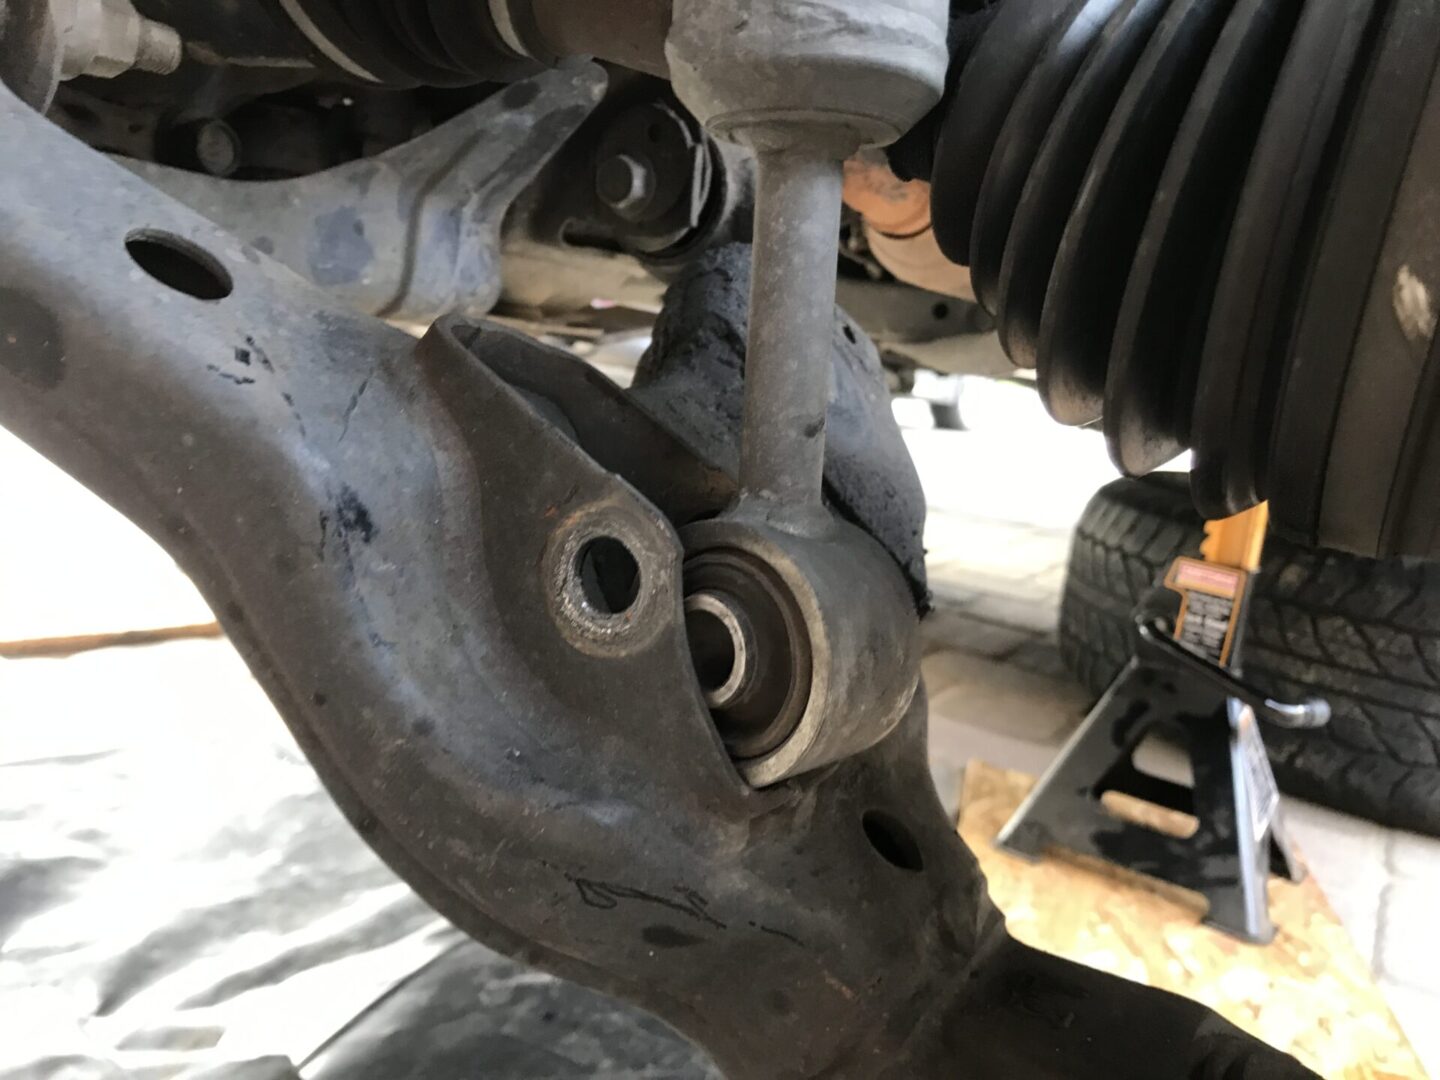
There are two lower ball joint mounting bolts that need to be removed as well. Once these bolts are removed, the tip of the LCA will be able to be separated from the wheel hub. Keep in mind that the two lower ball joint to lower bracket nuts flank the center castle nut. So removing the two nuts on both sides of the castle nut will allow the wheel hub to separate from the lower bracket.
I’ve seen some other people remove the center castle nut in order to separate the ball joint itself, however separating a ball joint can be challenging and may require a ball joint puller. I find going with the lower bracket nuts easier to deal with.
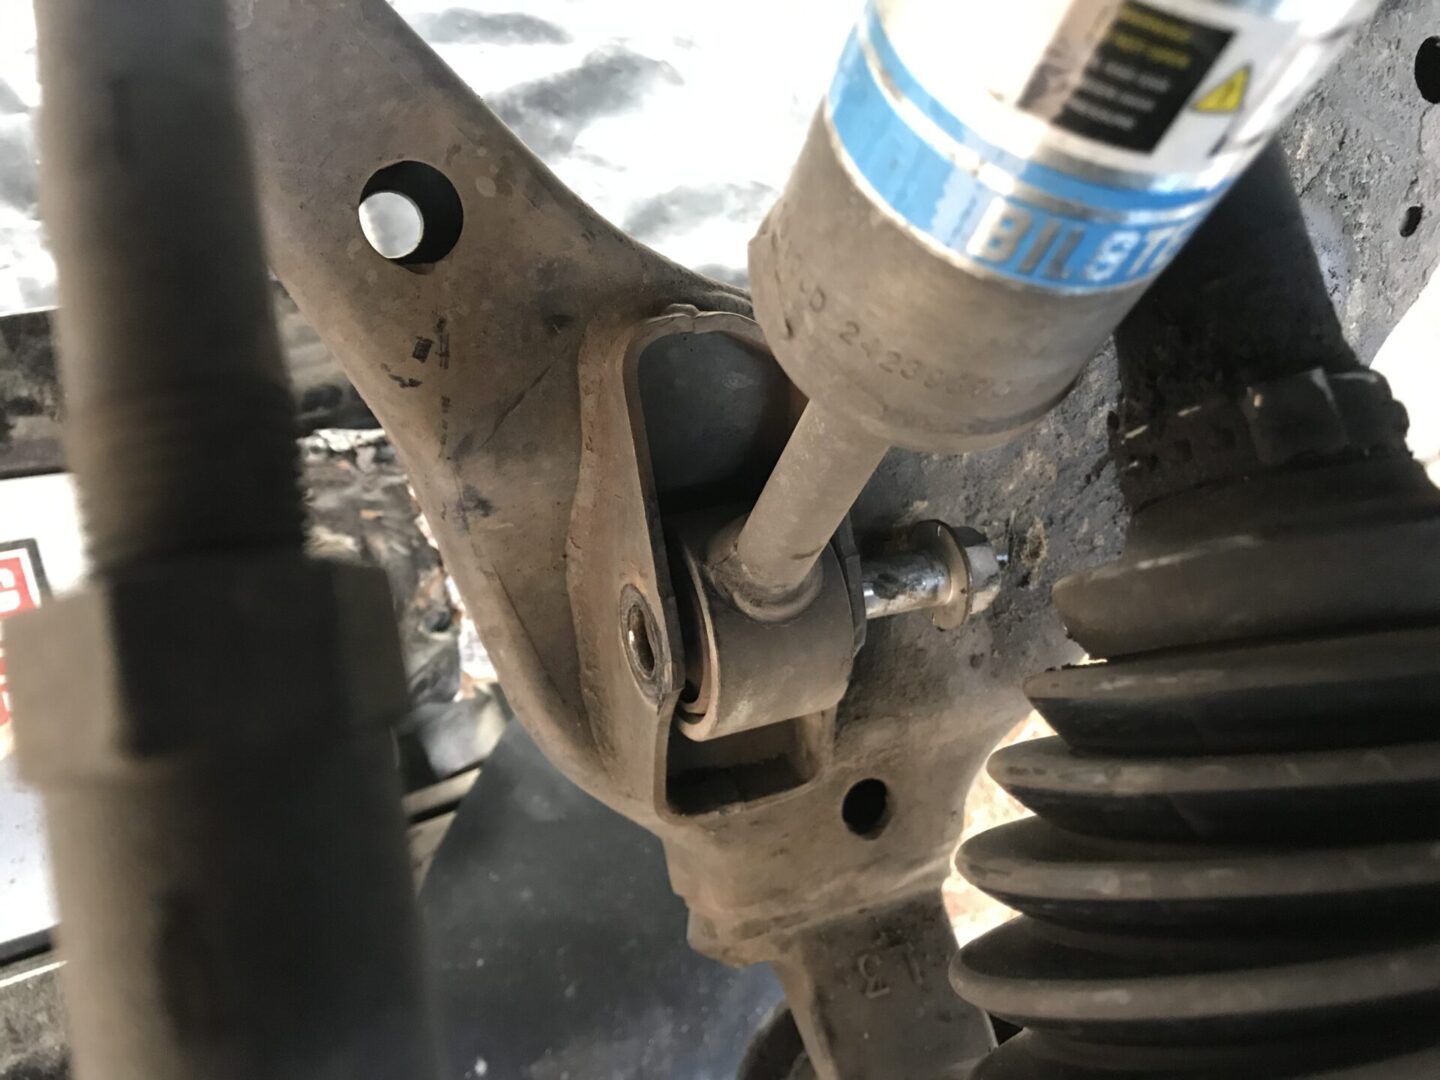
Loosen, but do not remove the lower shock mount nut; use penetrating oil if you need it. Keep the bolt and nut in place still as this is the only thing that is still keeping the front spring compressed. It’s wise to keep the lower shock mount bolt/nut there for safety.
At this point, the only thing holding the shock and spring in place is:
At the bottom of the coilover: the lower shock mount (which you still have the nut and bolt in place to hold it to the LCA)
At the top of the coilover: the top center shock mount (large center nut still needs to be removed)
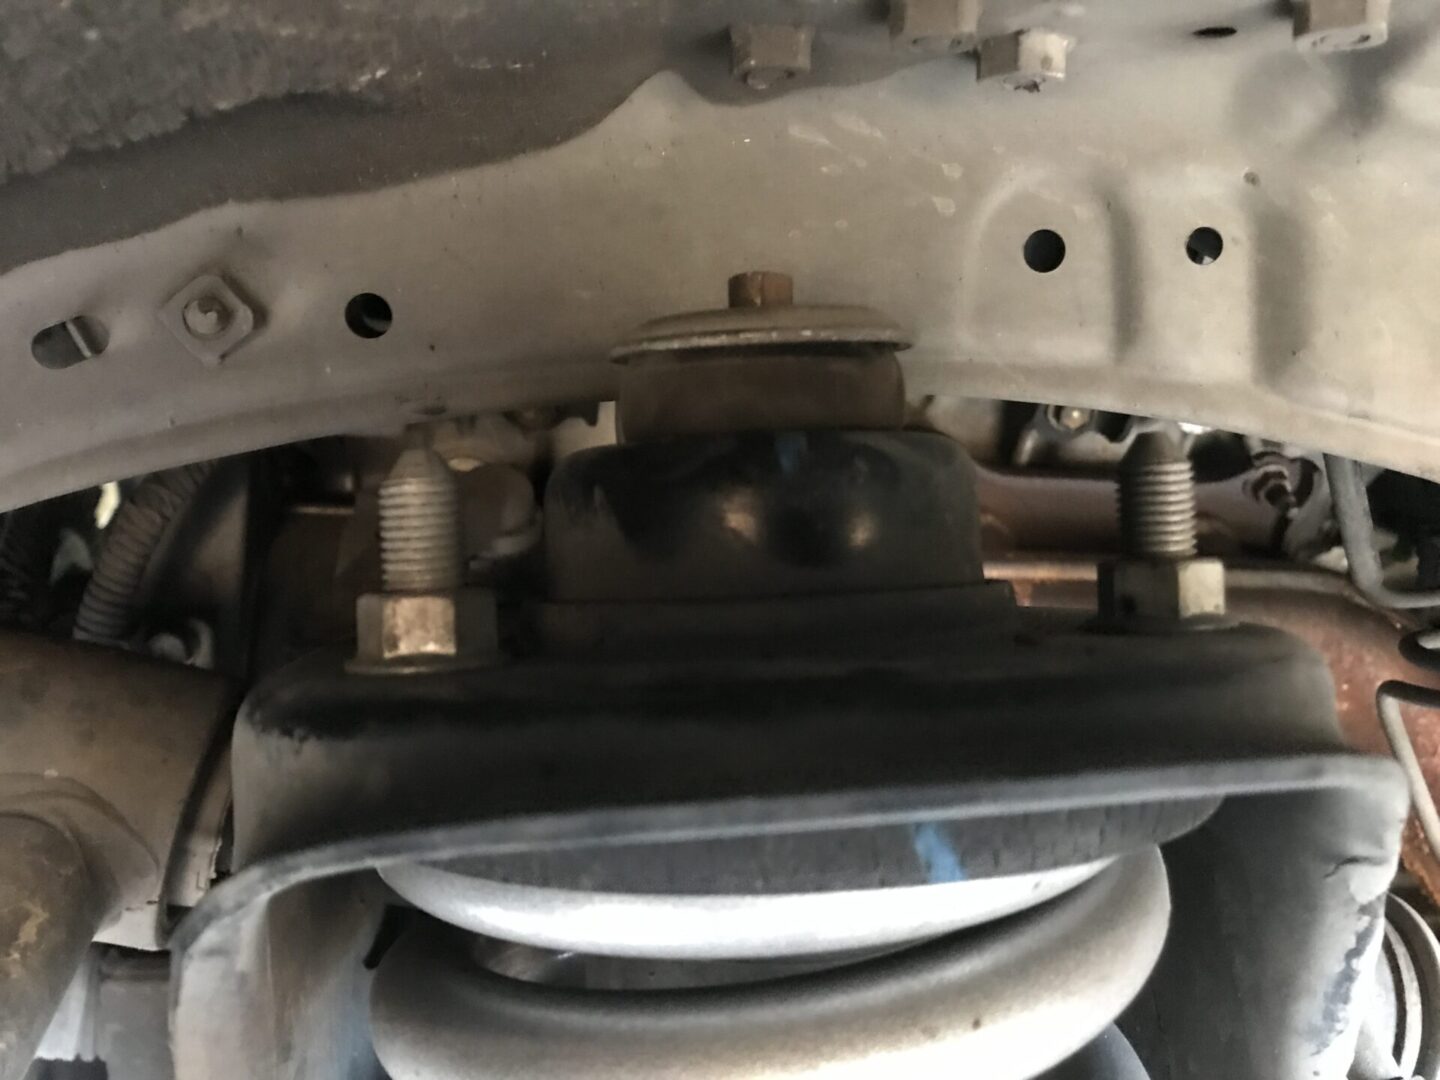
Know that the spring is pre-compressed with the shock and is secured via the large center nut. The other three nuts that surround the center nut hold the shock assembly to the body of the vehicle.
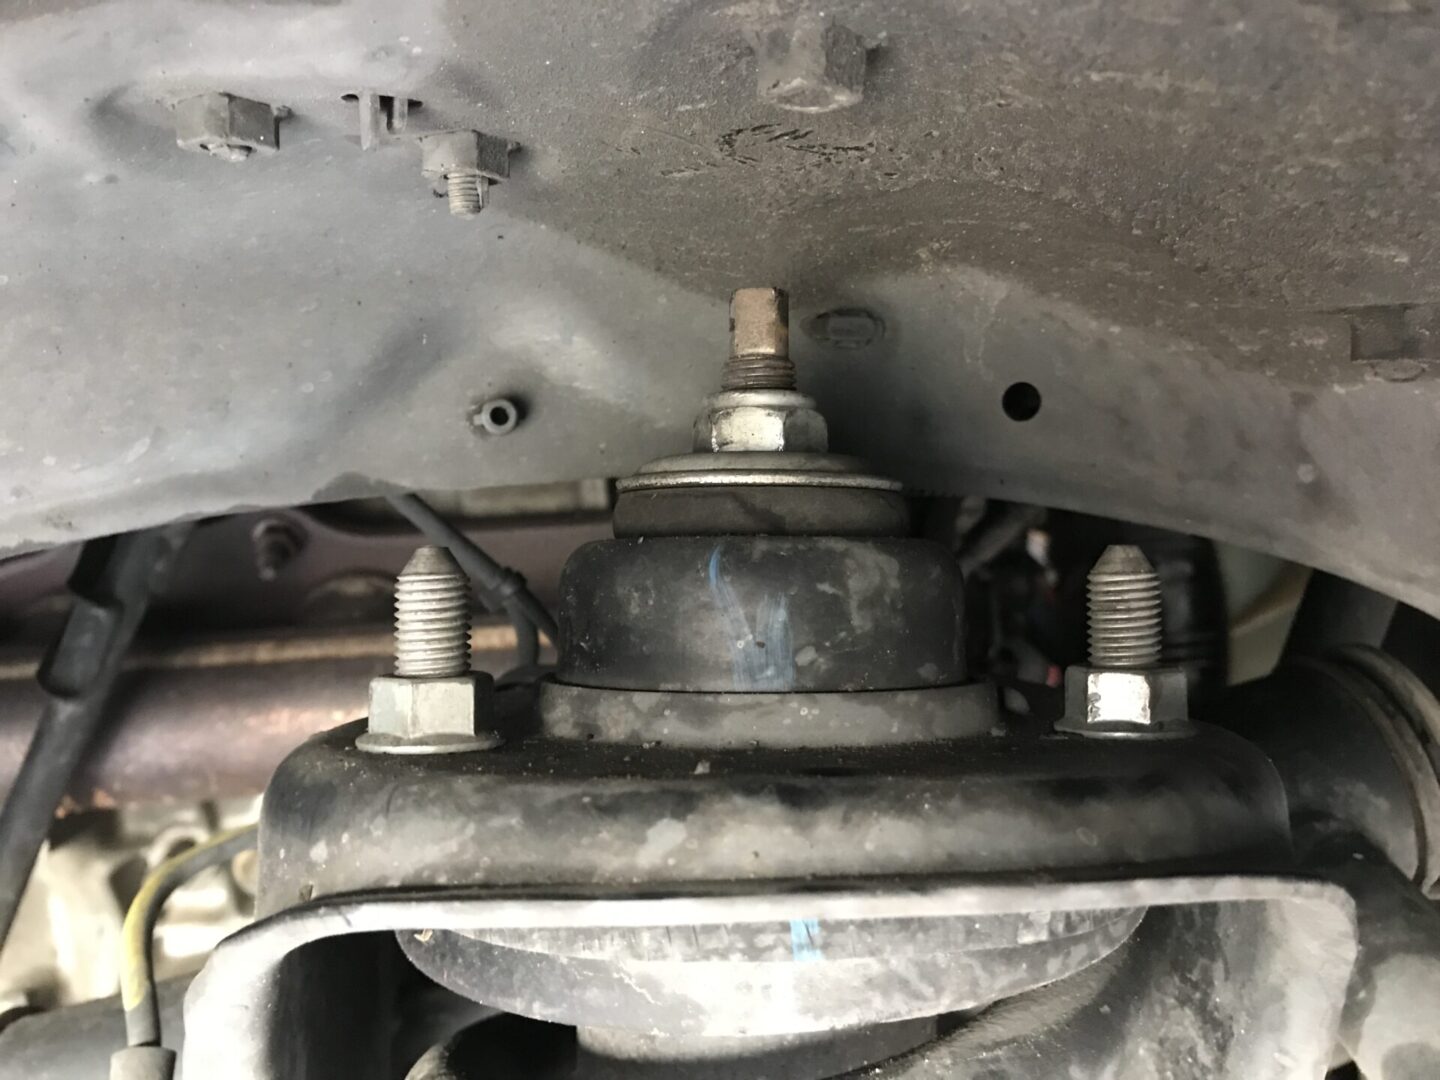
Therefore, if you are simply replacing the entire shock assembly, then you can remove the three top mount nuts (that surround the center nut), and this will disconnect the strut assembly from the body. The whole shock assembly will have the shock and spring—still compressed with the center nut. However, for the No Spring Compressor Method, you will leave these three nuts in place and will be focusing on the large center nut. By doing this, you will be removing the shock and spring but the top perch/mount will still be connected at the top with those three nuts/bolts.
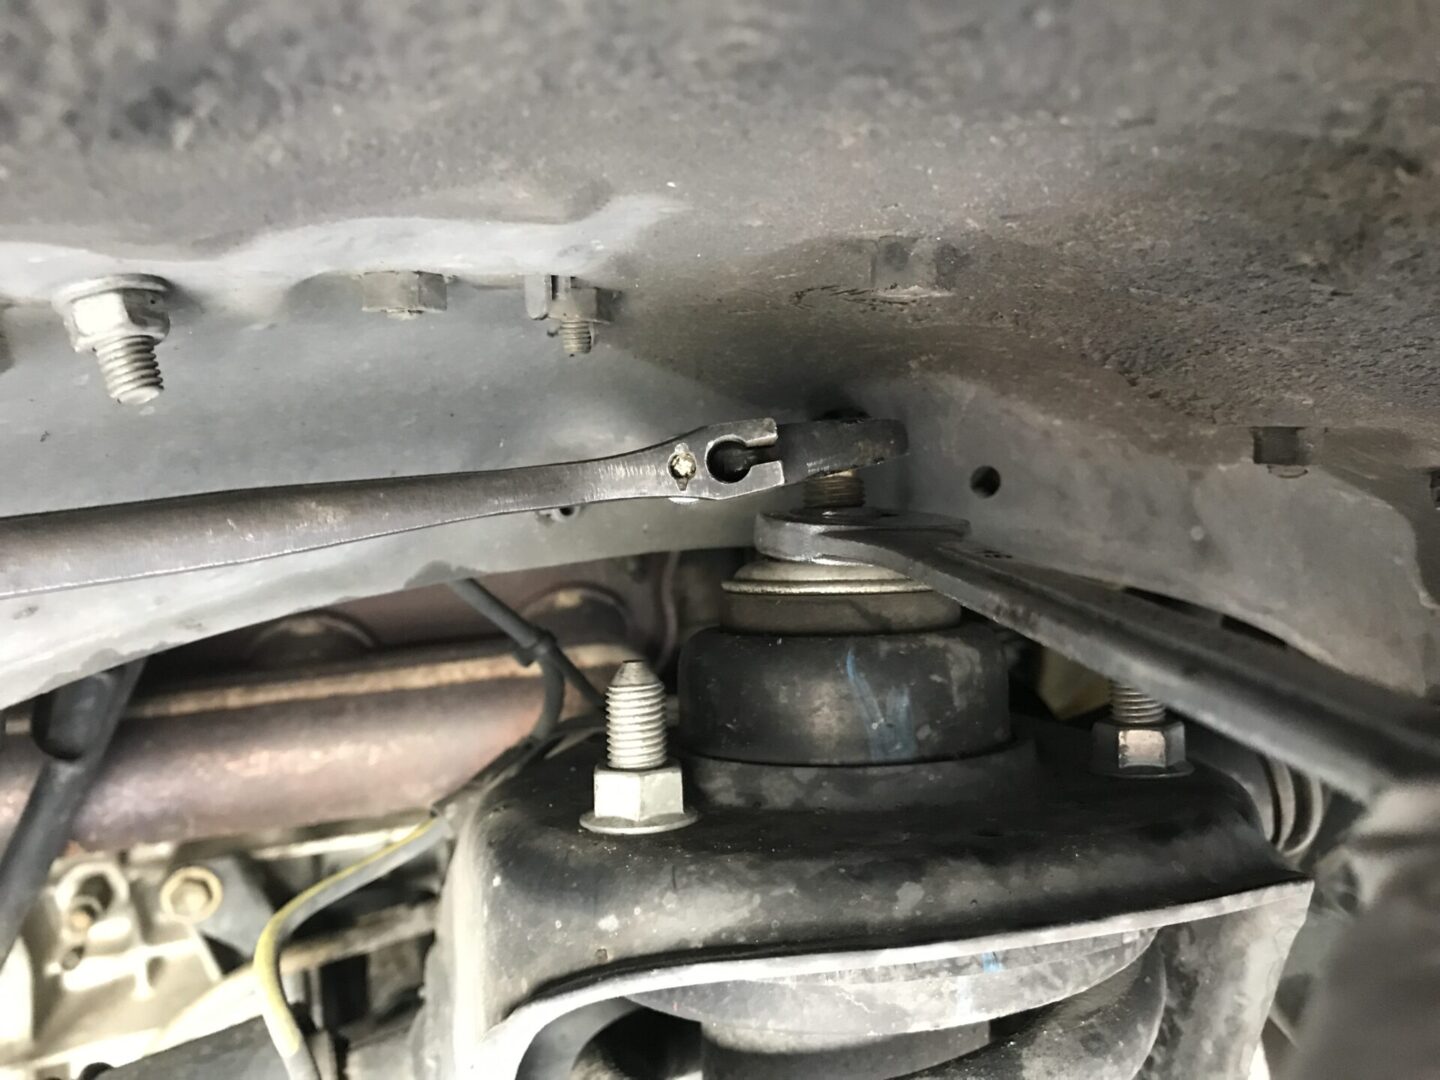
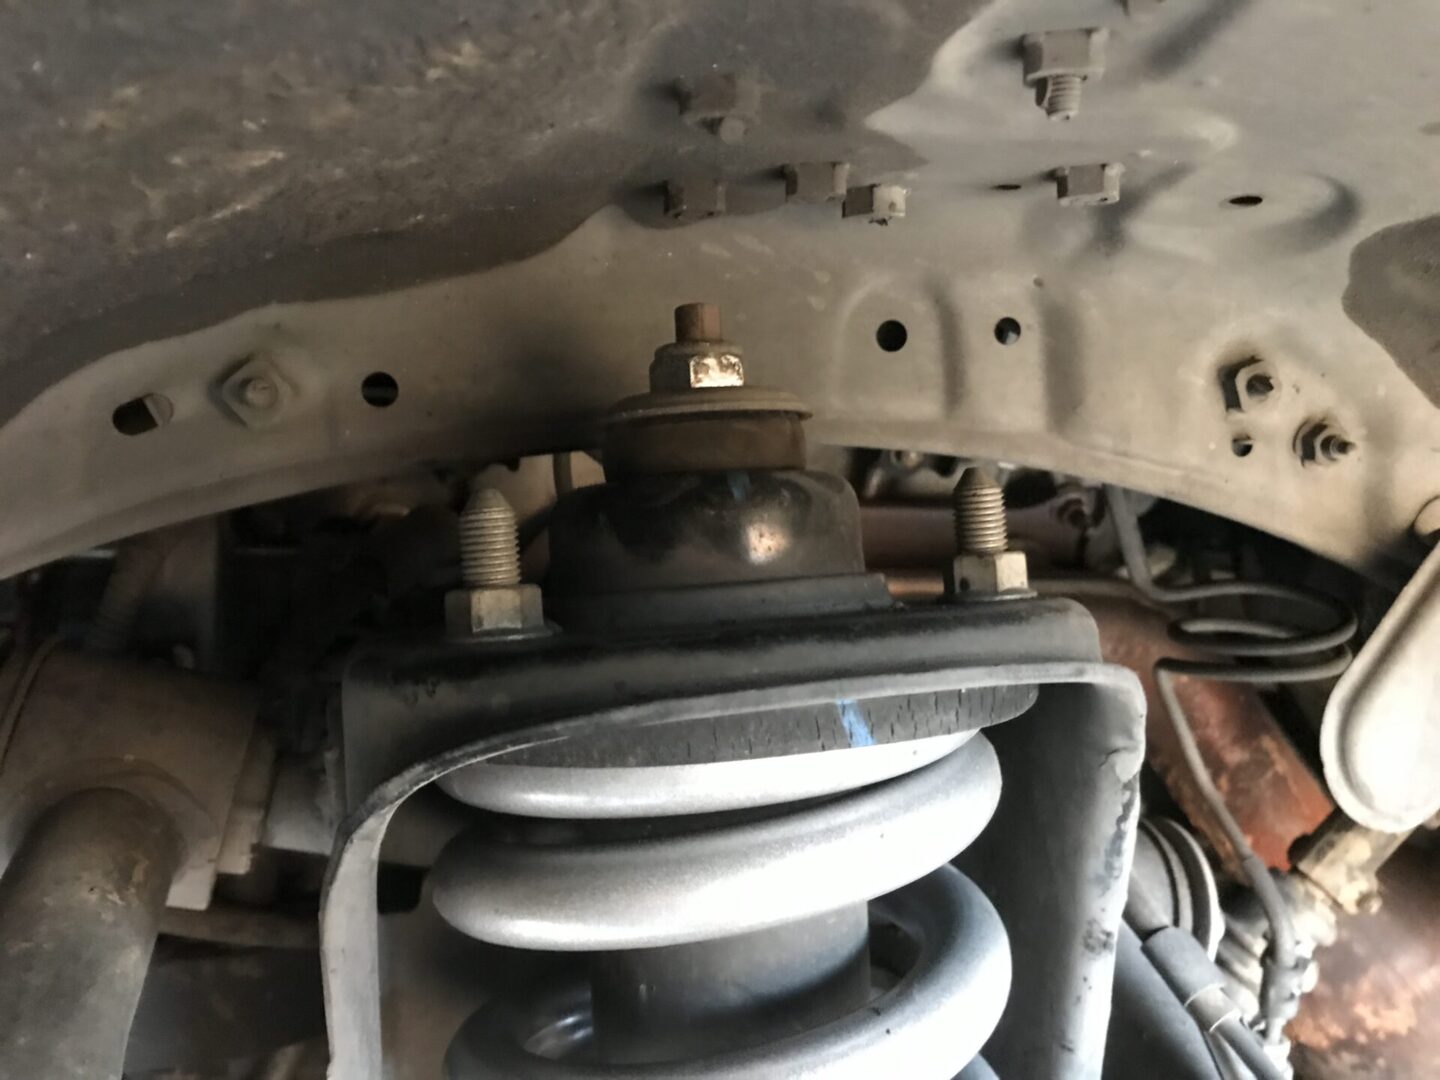
Remove the large center nut and this will disconnect the spring and shock from the upper shock mount. Therefore, when you bring the LCA down along with the spring and shock, it will be supported against the upper shock mount when decompressing the spring.
The center nut may need an additional wrench or allen wrench to keep the bolt from turning while you loosen the center nut.
Go over to the jack handle and very, very slowly lower the control arm and decompress the spring until it is fully decompressed. As you release all the energy from the spring, you will hear all sorts of disconcerting creaks as the spring decompresses.
Eventually, the spring will be fully decompressed and you no longer have the danger of spring under compression that can shoot out at any moment. You should be able to move the spring around and be able to feel that there is no compression on the spring.
Now, you can now remove the lower shock to LCA bolt. You can tap the bolt out with a hammer and punch.
Now, the full strut assembly should be able to be removed; carefully guide it down and out from under the car.

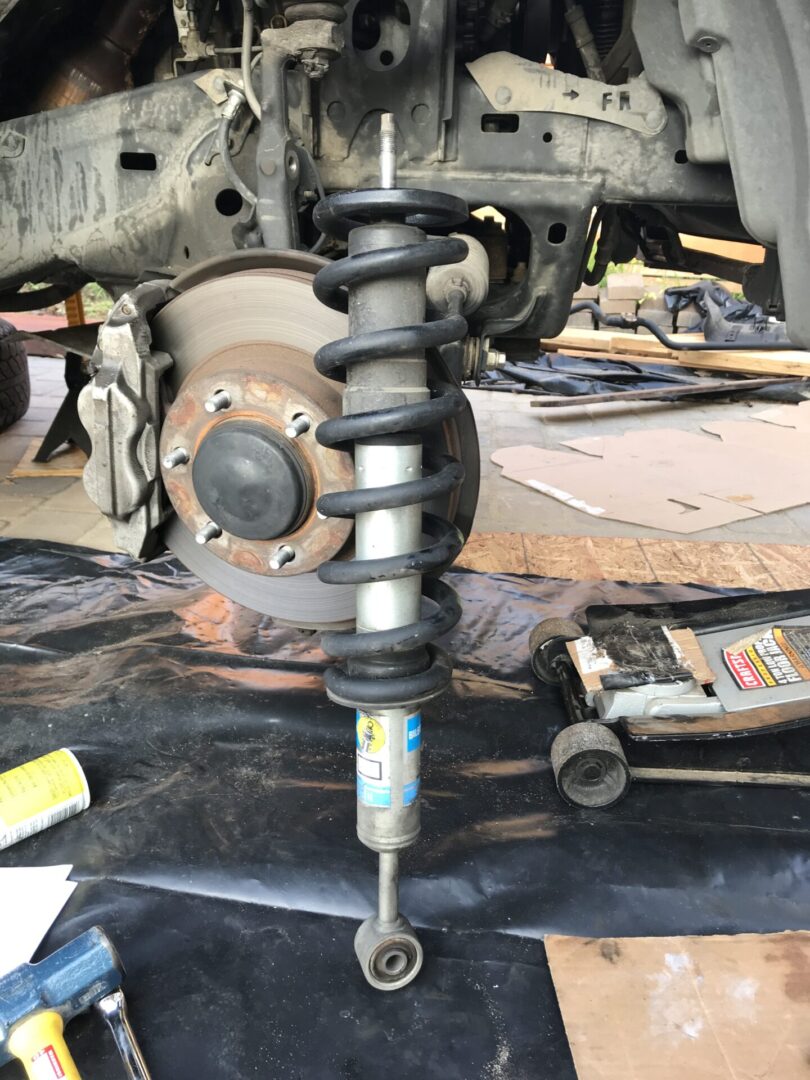
When you reinstall a spring and shock, you’ll have the whole coilover minus the top perch and associated hardware that will go above the top shock mount. The top perch (with three mounting bolts to the strut mount) should still be there if you haven’t removed it. Carefully guide the coilover into position.

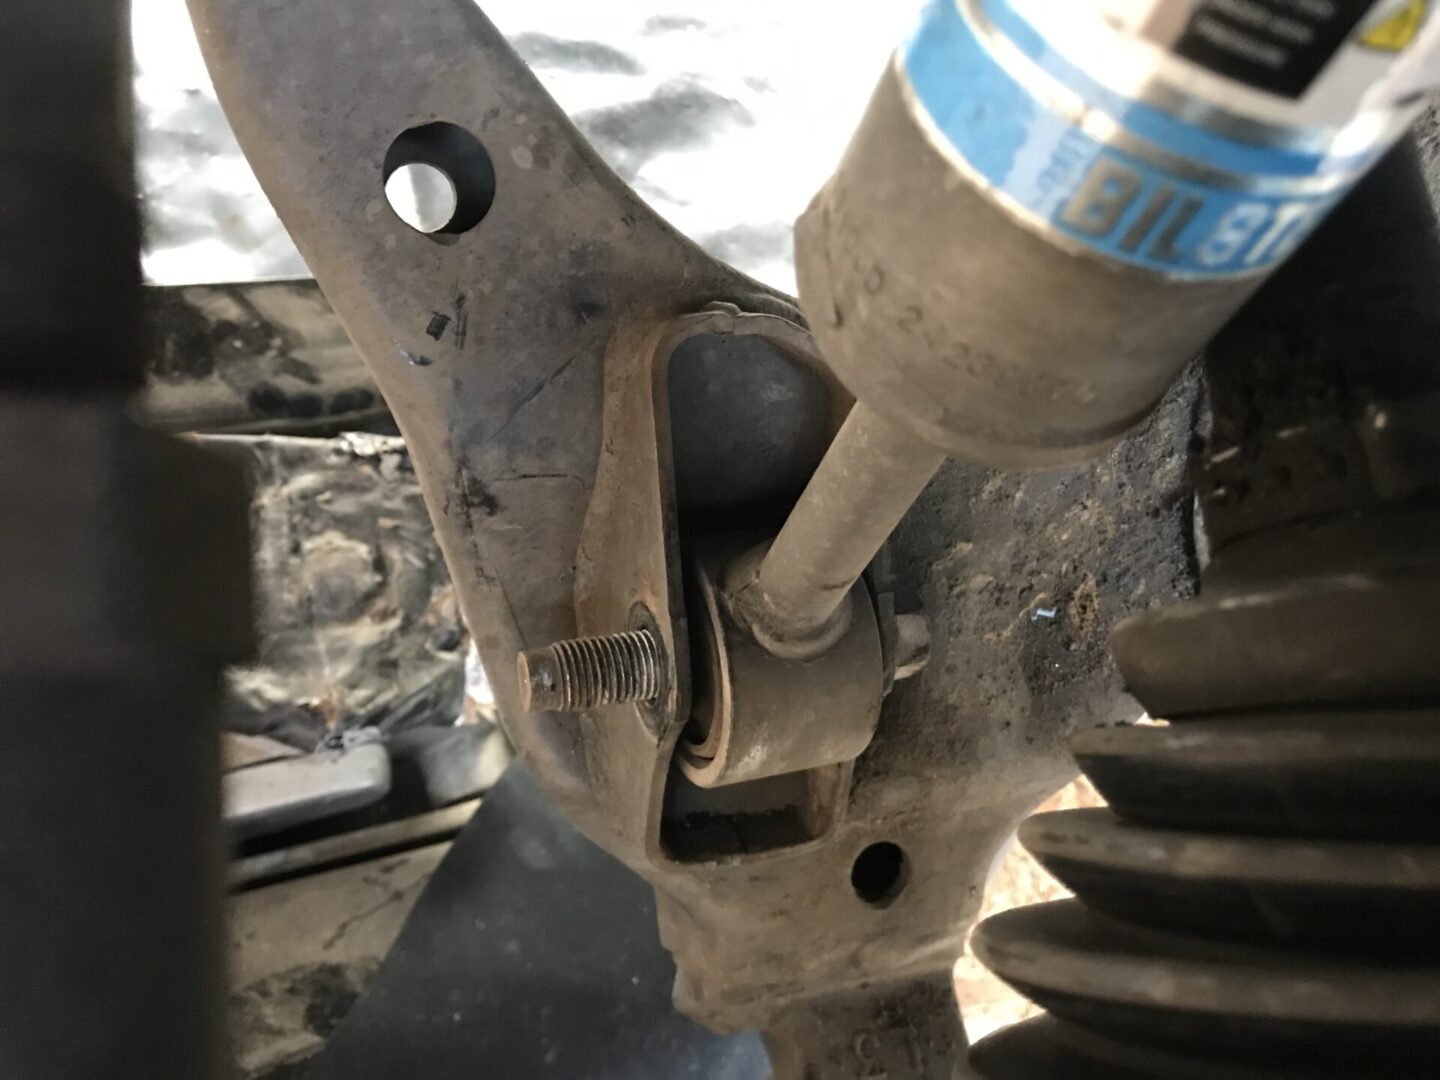
Rotate the shock itself so that the lower mount hole lines up with the lower control arm opening.
Press up on the shock and move the LCA down so that the lower mount hole lines up with the LCA mount. Then insert the lower mounting bolt through and hand-tighten; you still torque this after the strut assembly is reinstalled.
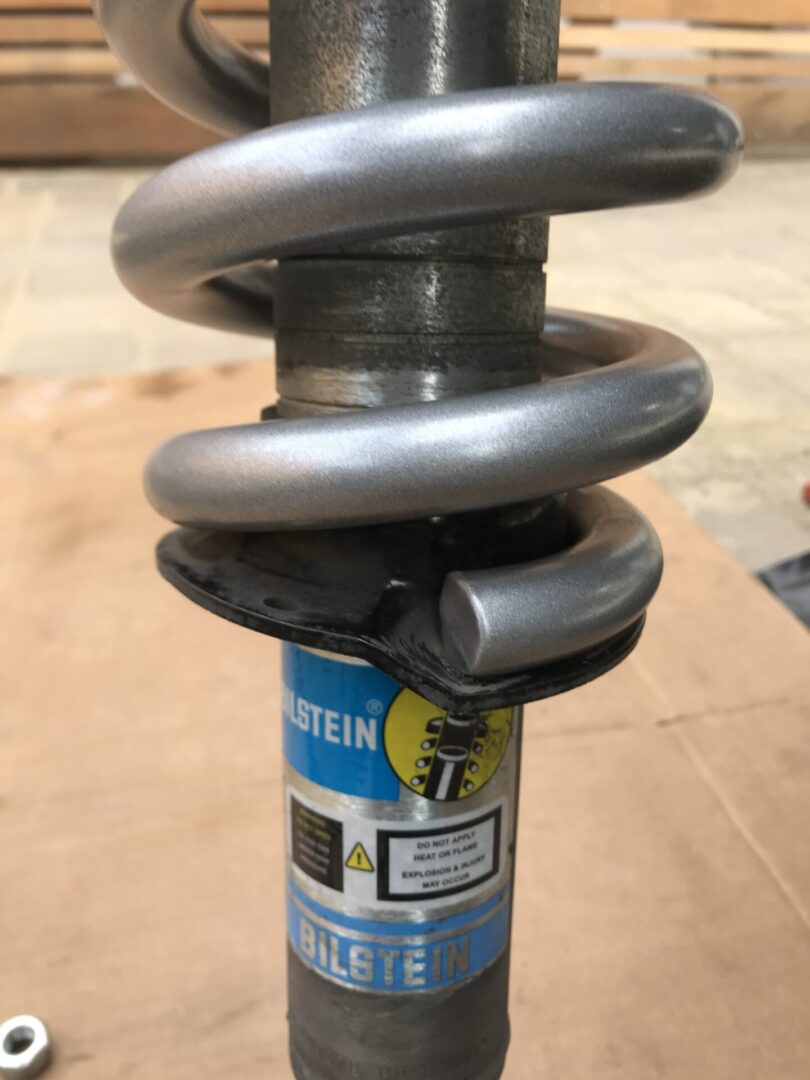
Make sure the coil spring is rotated within the shock so that the top and bottom of the coil matches the top and bottom perches as shown below.
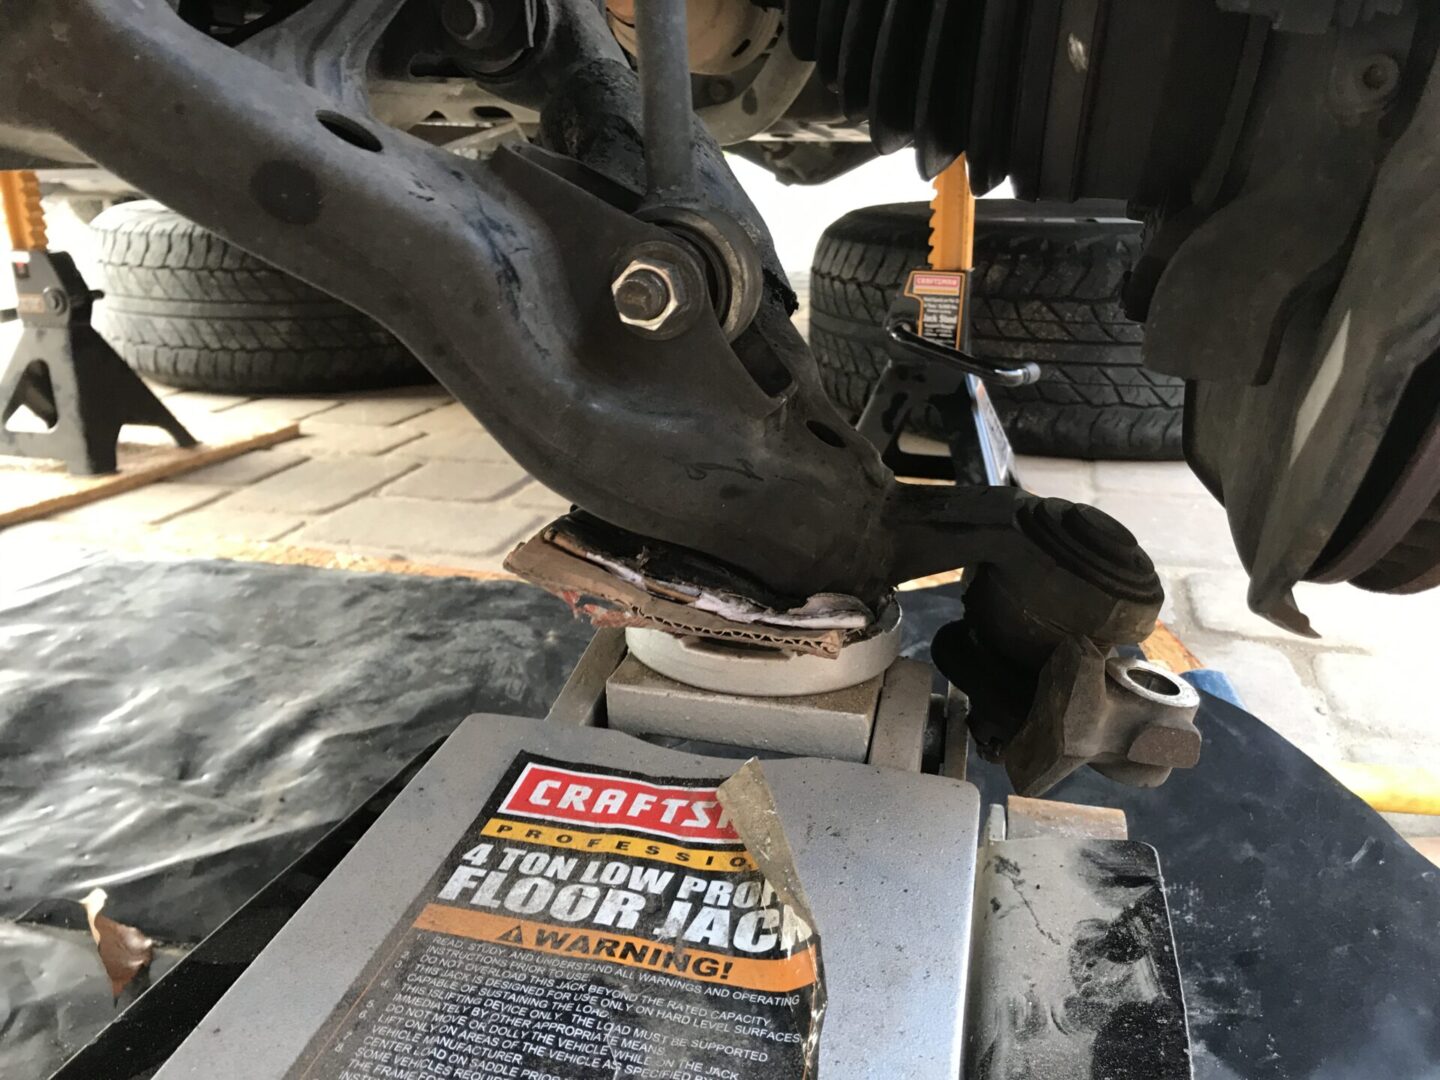
Now, get the floor jack into position so that when it jacks up the lower control arm, it contacts the very end of the LCA. This will be the same position in which you lowered the LCA previously with the floor jack.


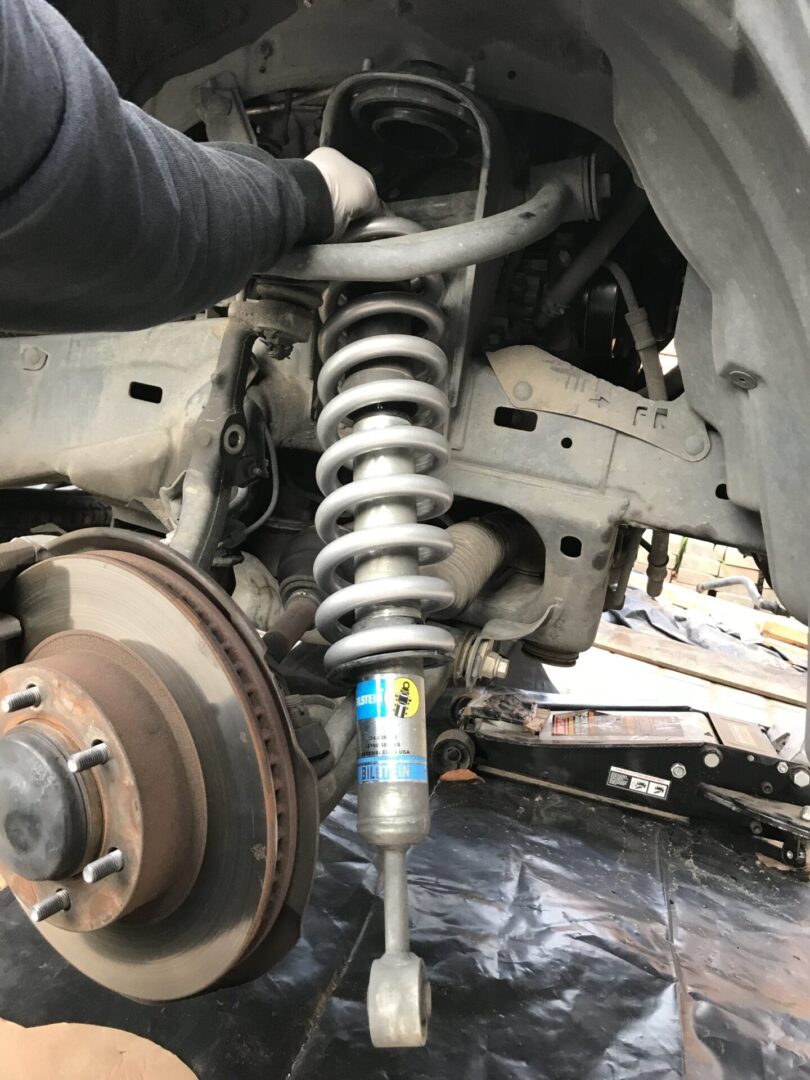
Slowly jack up the floor jack and you will see the LCA begin to lift the shock assembly into place. Remember that prior to raising the whole assembly with the floor jack, the bolt that comes out of the top of the shock is sitting right below the level of the top strut mount. Therefore, when you raise the whole assembly with the floor jack, you need to do it very, very slowly with very slight increases in height.
As you do this, you can go back to the wheel well and make sure that you guide the top shock mount bolt through the top opening. If you don’t guide it through this opening properly, you’ll basically be pressing the top shock mount bolt right into the strut mount (not good).
Continue to slowly jack up the LCA (while guiding the upper shock mount bolt through) until you see the bolt start to protrude through the top strut mount. Make sure the floor jack is supporting the LCA securely without any possibility of it slipping off of the floor jack.
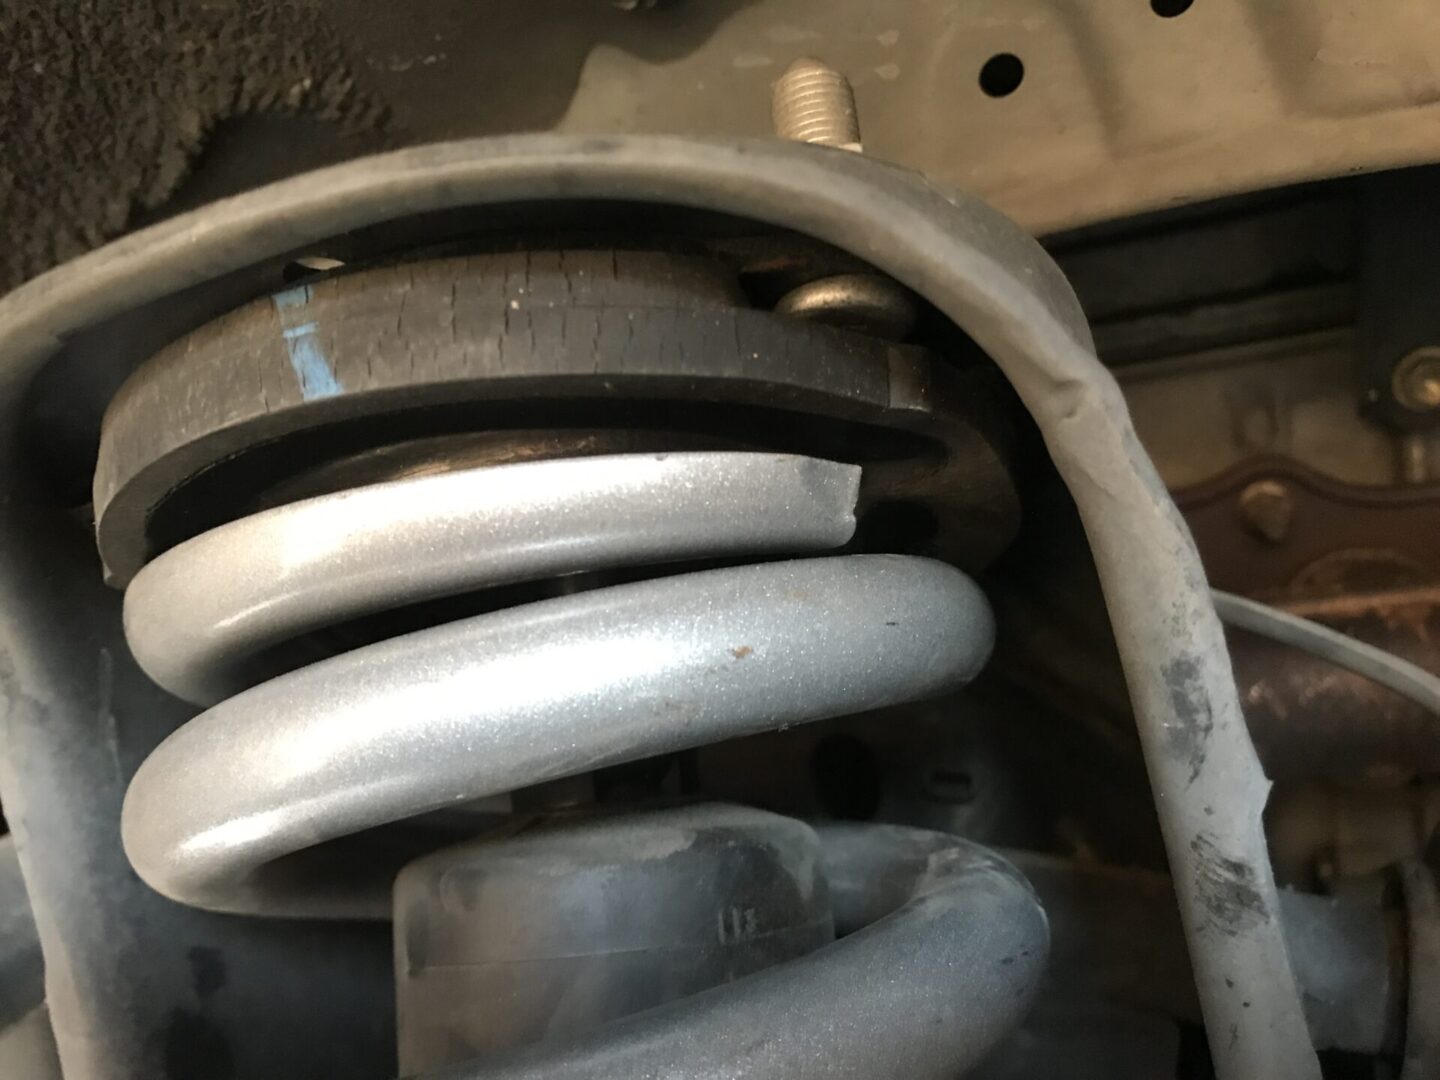
As you are jacking up the shock assembly, you are compressing the spring— again reintroducing danger of the spring’s energy. Be very careful. Also, check that the tips of the spring are still lined up with the top and bottom perches as you are jacking up the shock assembly.
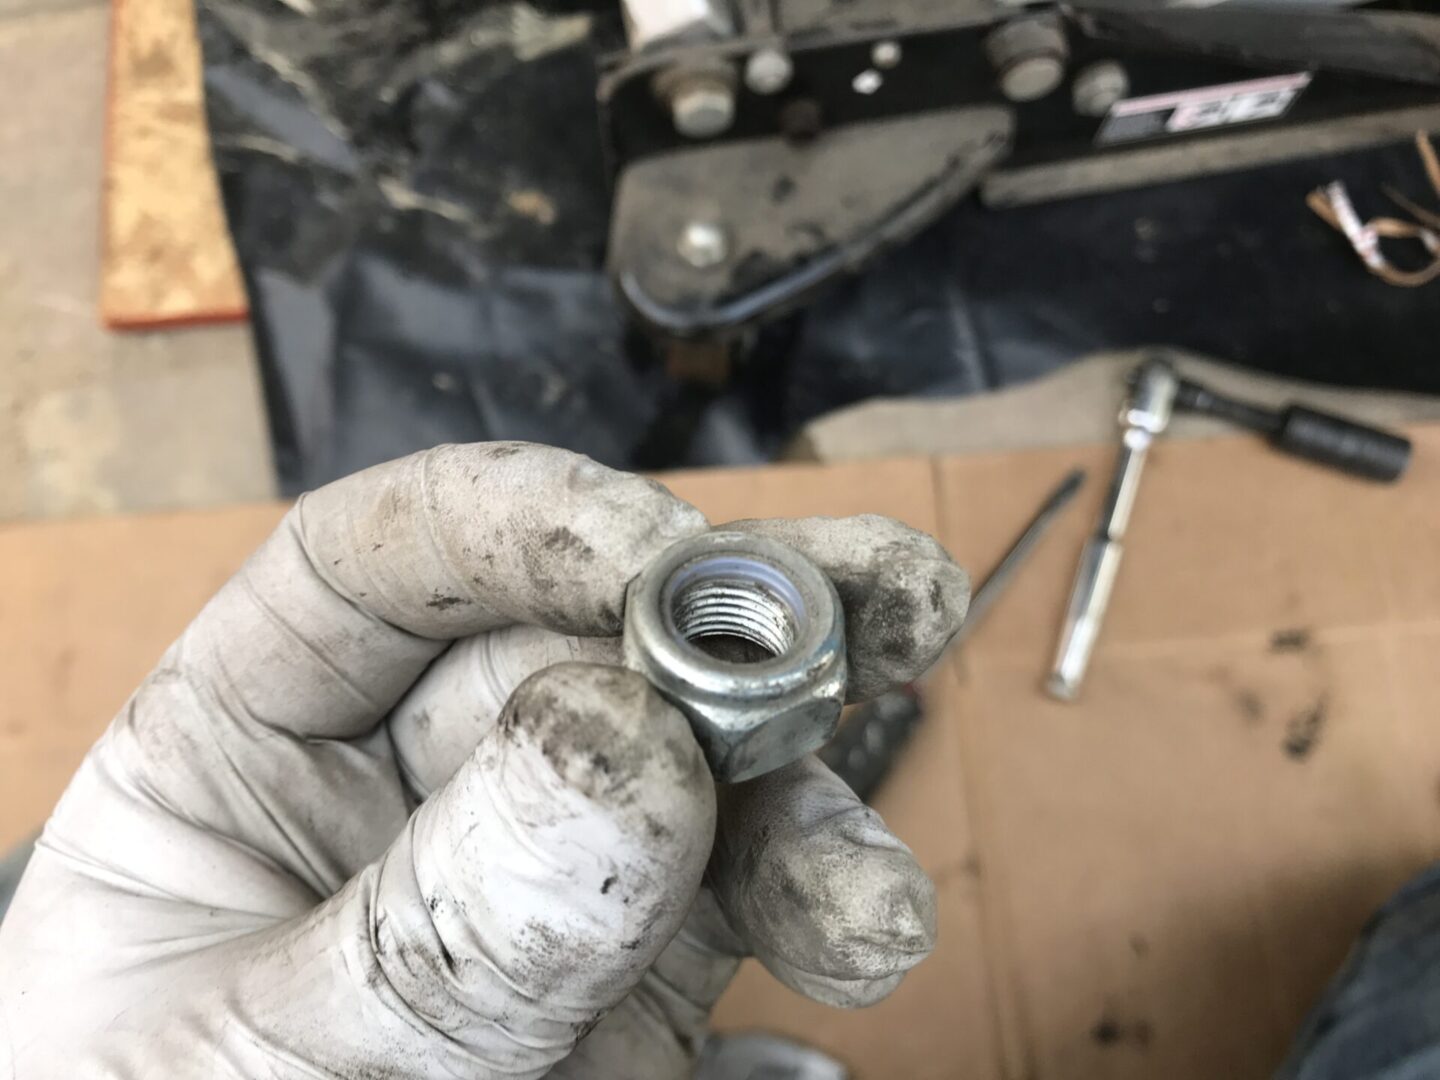
You’ll need to get it jacked up enough to where there is enough thread to fit the remaining hardware: the top bushing, bushing retainer washer, and nylok nut. Fit these parts onto the upper shock mount bolt and then screw in the nut until you have full engagement.
Torque the center nut and the shock assembly is secured to the top hat.

Torque down the lower shock mount bolt/nut to the LCA.

The (2) lower ball joint to lower bracket nut needs to be reinstalled and torqued.
Finally, reinstall the front end links to the steering knuckle and hand-tighten these snug.

Repeat this for the other side of the vehicle and you’ve successfully completed the No Spring Compressor Method.
Make sure to torque all movable suspension components when the weight of the vehicle is on the axles. You don’t want to torque everything when the vehicle’s axle is drooped down. You want to do this when the vehicle weight is on the suspension. Lower the vehicle back onto the ground and begin torquing down all of the components.
Torque the lower shock to LCA nut/bolt down.
Torque down the front end links that you previously tightened snug.
The alignment cams should be in about the same position of where you marked them. This should be torqued down. Getting the alignment cam adjustment back to its original position allows you to safely run the vehicle to an alignment shop, where they can do a full alignment based on your new suspension components.
That completes the No Spring Compressor Method, which in my opinion is the safest way to handle diassembly and reassembly of shock assemblies at home. The safest choice overall is to have a shop handle this type of work, but if that is not an option this one works superbly.


2 Comments
great writeup, thanks
You’re welcome!