")
When I’m driving my Audi TT, I love the feeling when I’m accelerating and you feel the boost, which pulls you back into your seat. Whenever you run into boost issues, you’ll immediately notice that suddenly you just don’t have the same kind of torque like you used to have. It feels like you’re driving your TT as if it didn’t have a turbocharger.
If you notice any boost issues on your car, the first thing you probably want to do is to pull the diagnostic trouble codes (DTCs) on your TT. When I started experiencing boost issues, I got an intermittent DTC code P1548: Boost Pressure Regulation Valve (N75): Open Circuit. Sometimes there would be no code and sometimes I’d get this code.
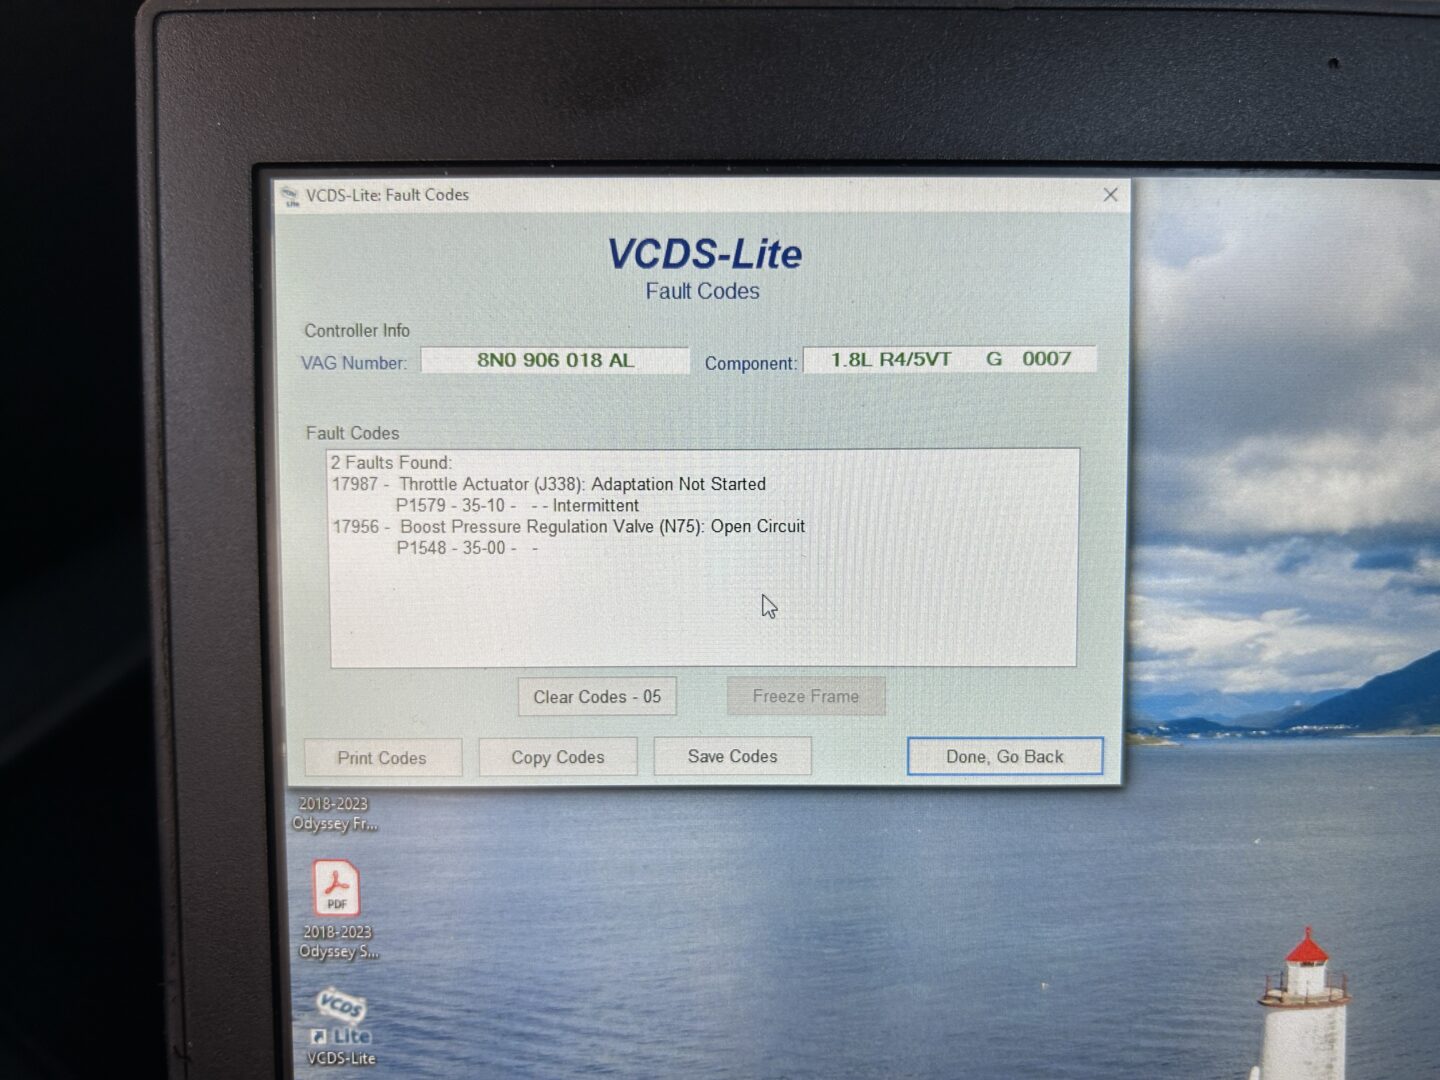
If you get a P1548 DTC code on your Audi TT, you may want to look at troubleshooting your N75 valve or even replacing it outright. In my experience, the cost of a replacement N75 valve is not much so it may be worth it to just replace it outright. I say this because even testing the N75 valve may show that it is working, but it may still be cause your P1548 code and be the contributer to your boost issues.
Turbo Pressure Control Solenoid (N75 Valve)
The Turbo Pressure Control Solenoid (also more commonly referred to as the N75 valve) is an electronic vacuum solenoid whose main purpose is to control boost. It has three connections: to the charge pipe, to the wastegate actuator, and to the intake hose bleed line. The part should fit 2000-2006 Audi TT’s, but double check when you buy to make sure this specific part fits your vehicle.
URO Parts 06A906283E Turbo Pressure Control Solenoid Valve
Diagnosing the N75 Valve
There are a few procedures for testing the operation of the N75 valve, but even if you test it as good, it can still not operate properly. Therefore, I recommend just replacing the N75 valve from the get-go rather than trying to test the valve itself. If you want to know a little more on why, I’ll go through my testing procedure below which will show you that the valve appeared to be working but still ultimately caused my DTC code and problems with boost.
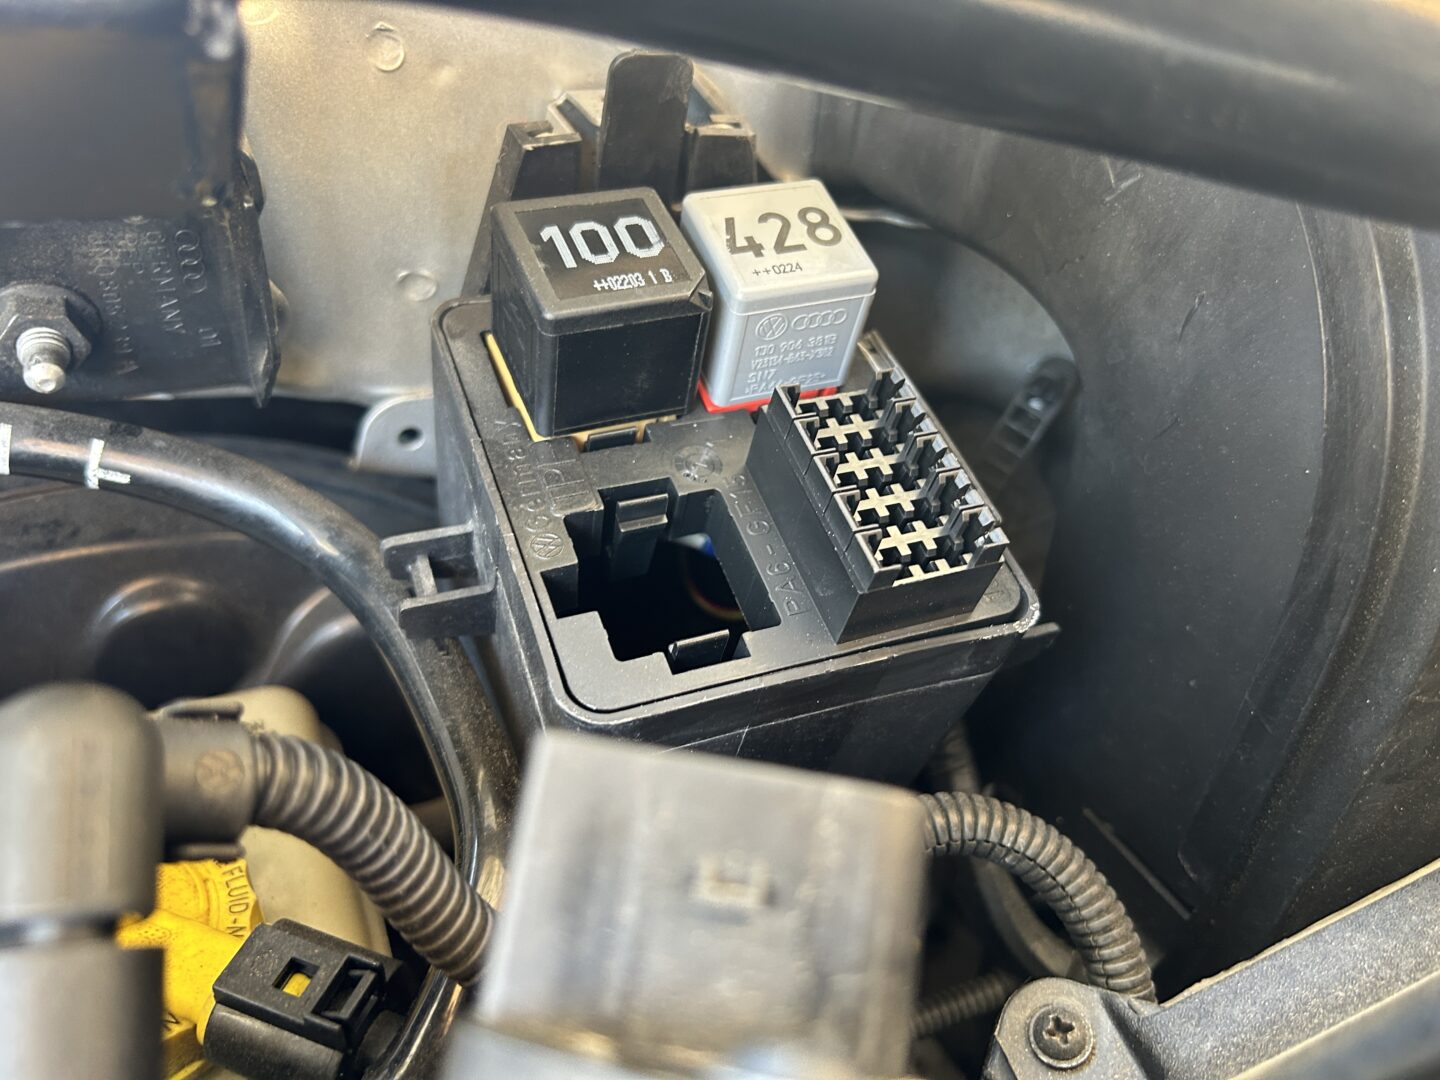
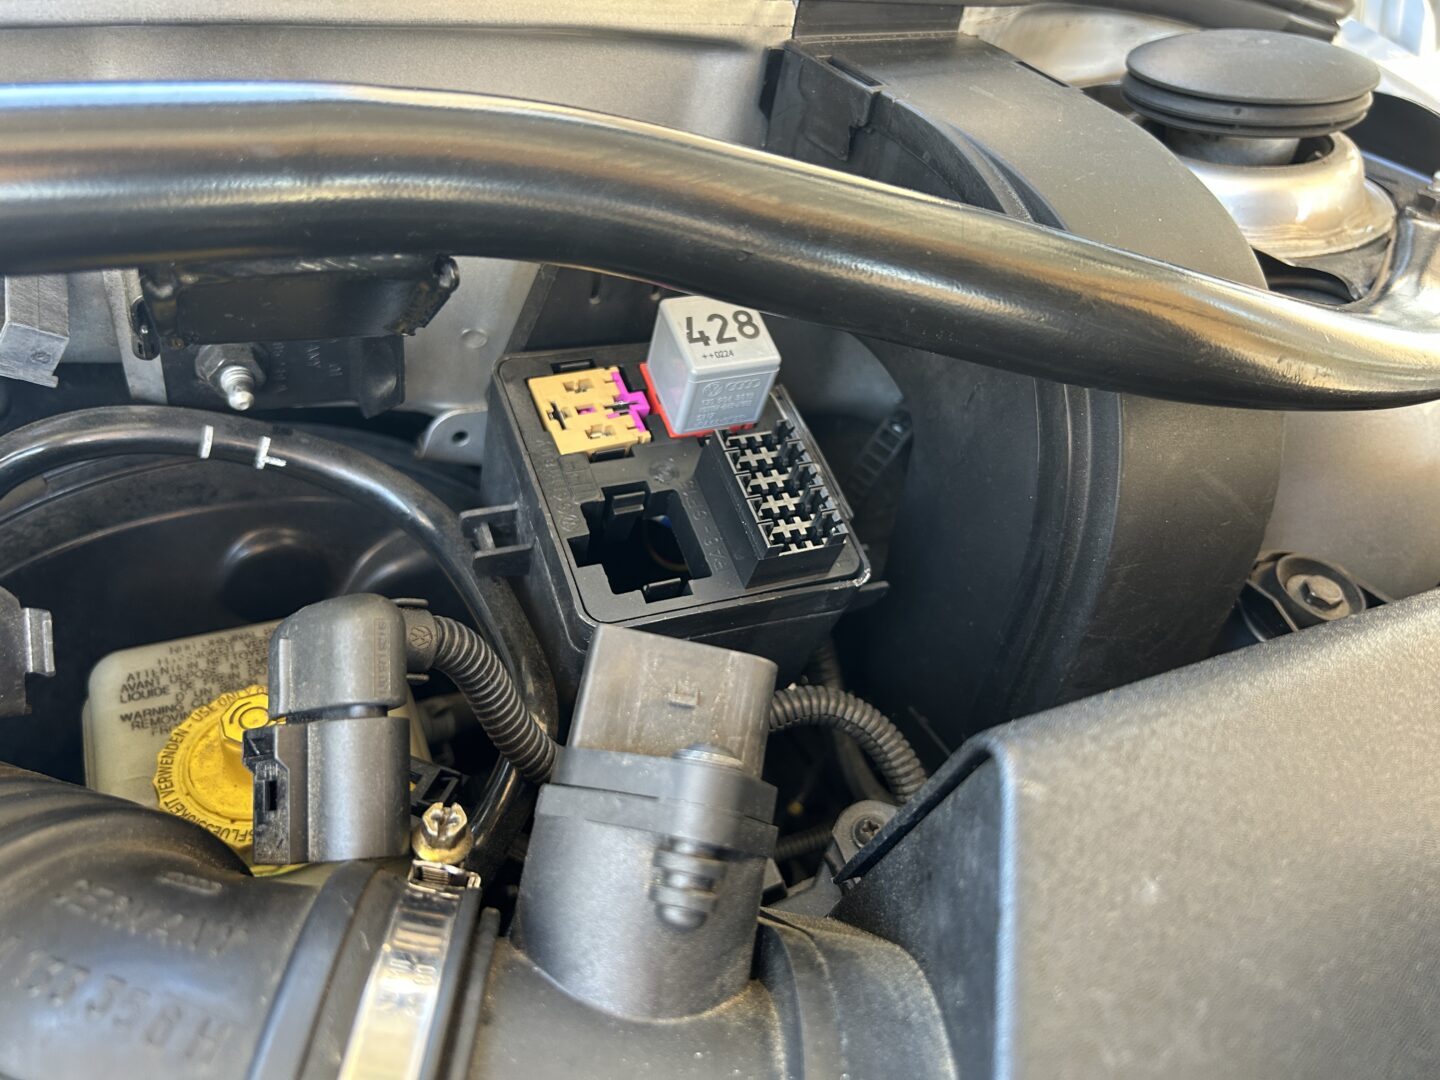
If you want to try testing your N75 valve anyway, there are a few things that you can check, such as the relay that powers the N75 valve. This is a simple test of hooking up power to the relay terminals and checking for switch operation of the relay. You will be able to audibly hear the sound of the relay switching and also feel the movement of the internal switch. If the relay doesn’t switch on and off as you provide power to the power terminals, then it might just be a relay issue, which can be fixed by swapping out the relay with a new one.
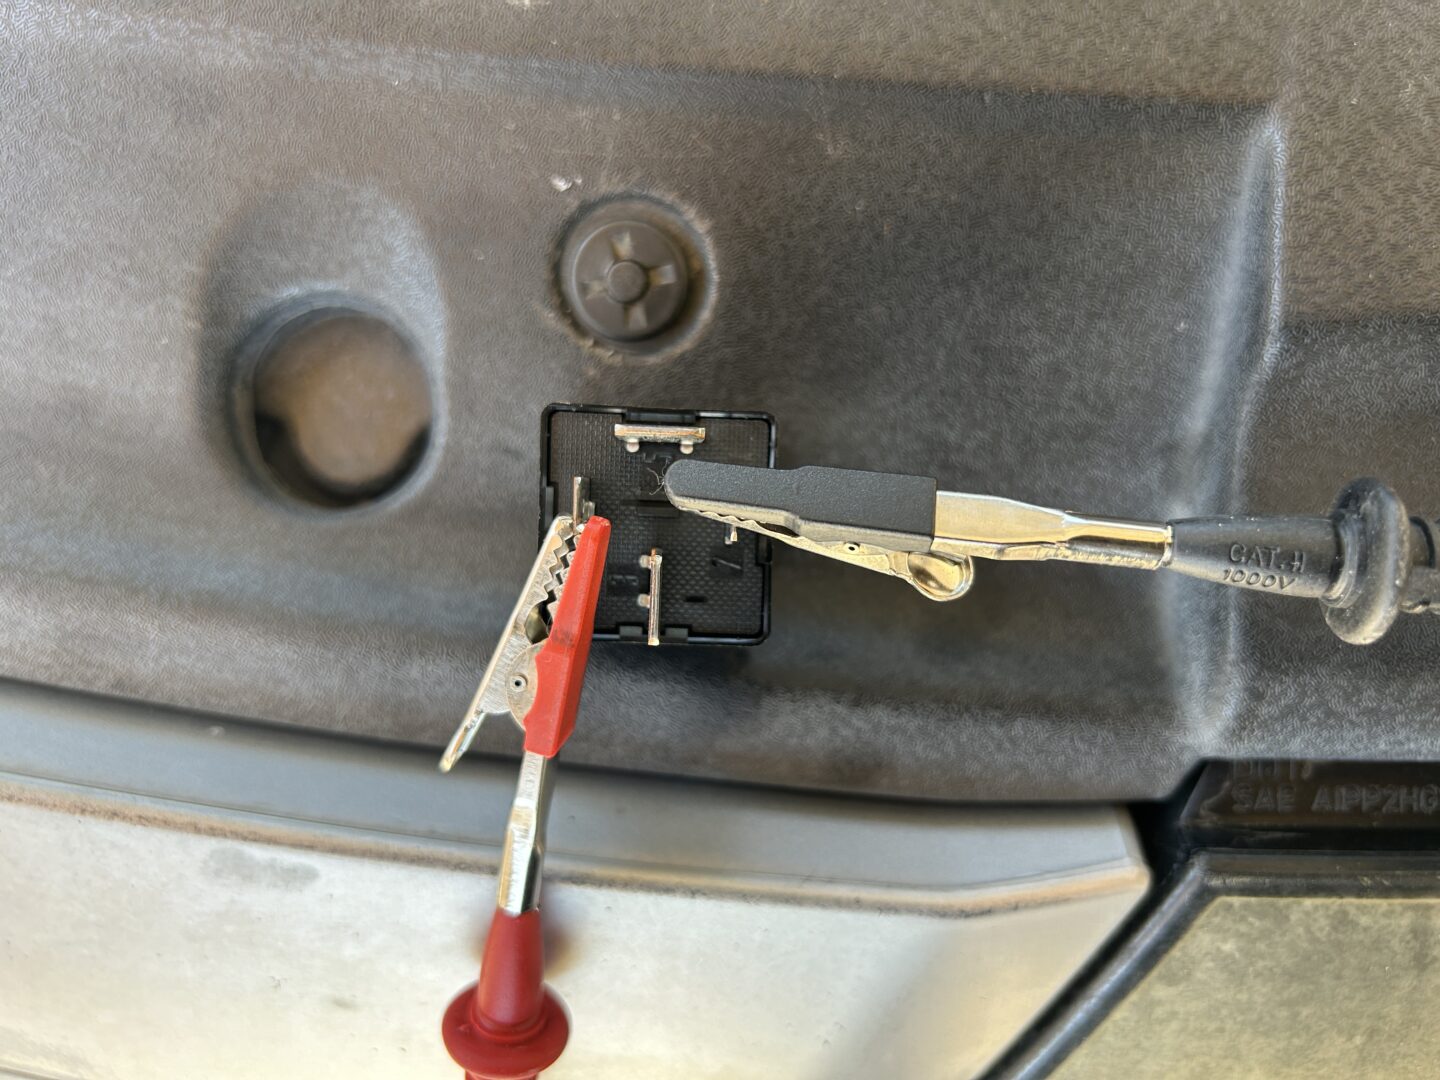
Another test that you can do is to check the internal resistance of the N75 valve via the two leads where the electrical connector plugs into. According to my Bentley repair manual, the resistance value is supposed to be somewhere between 25-35 Ohms. My N75 valve had a reading of 30.1 Ohms across the two leads.
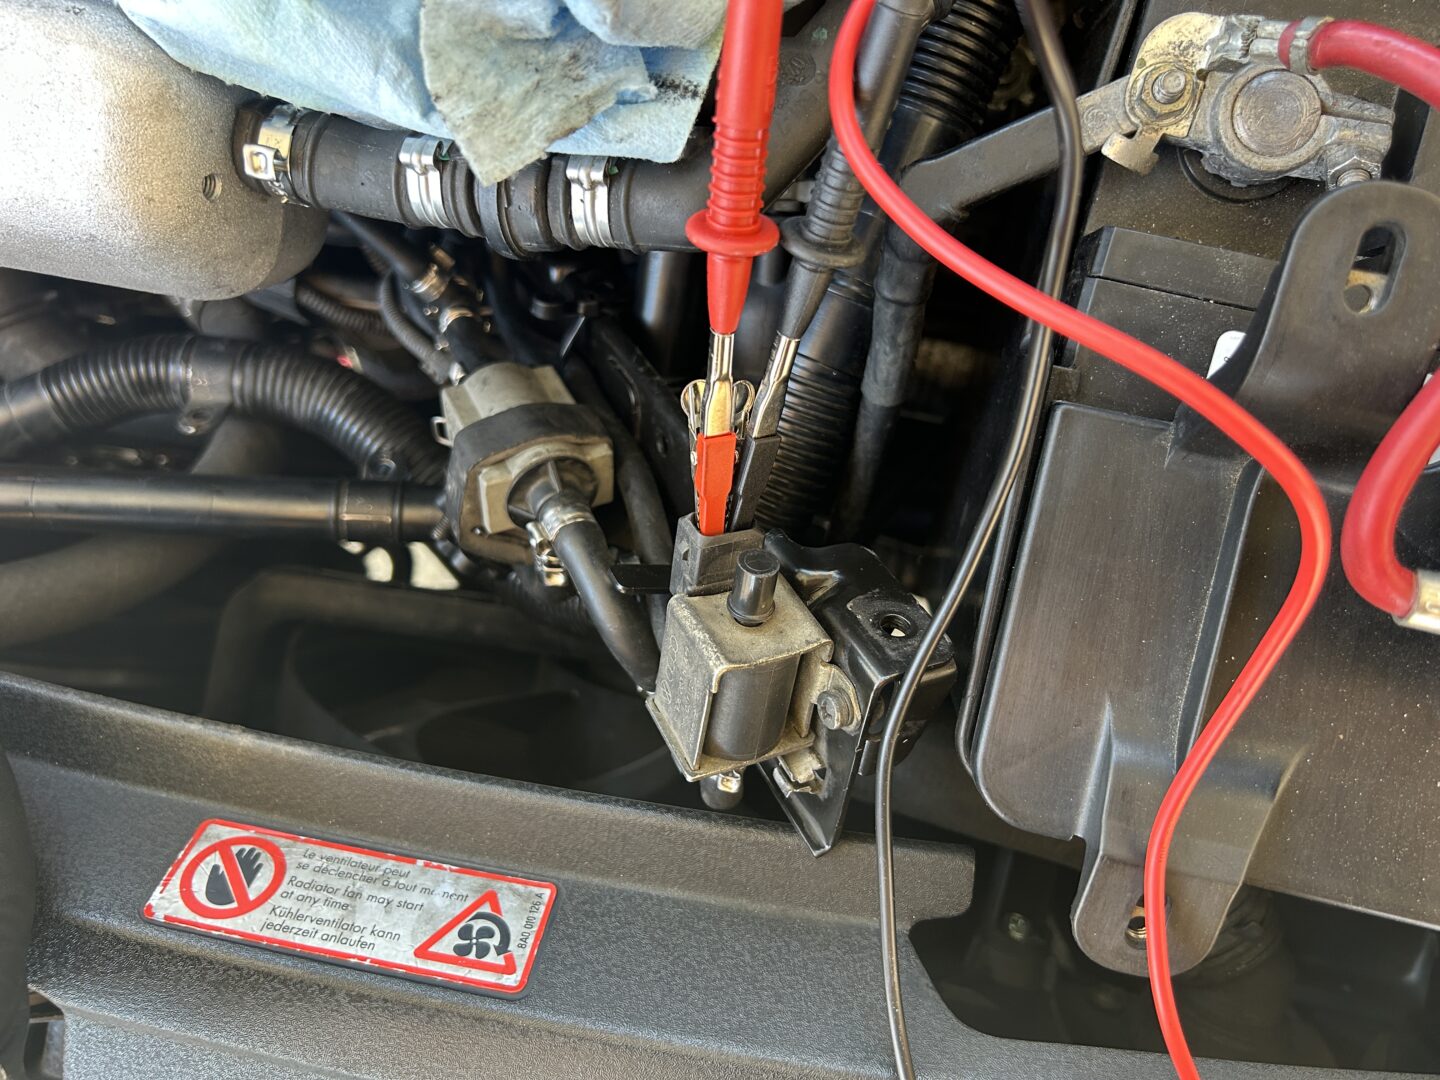

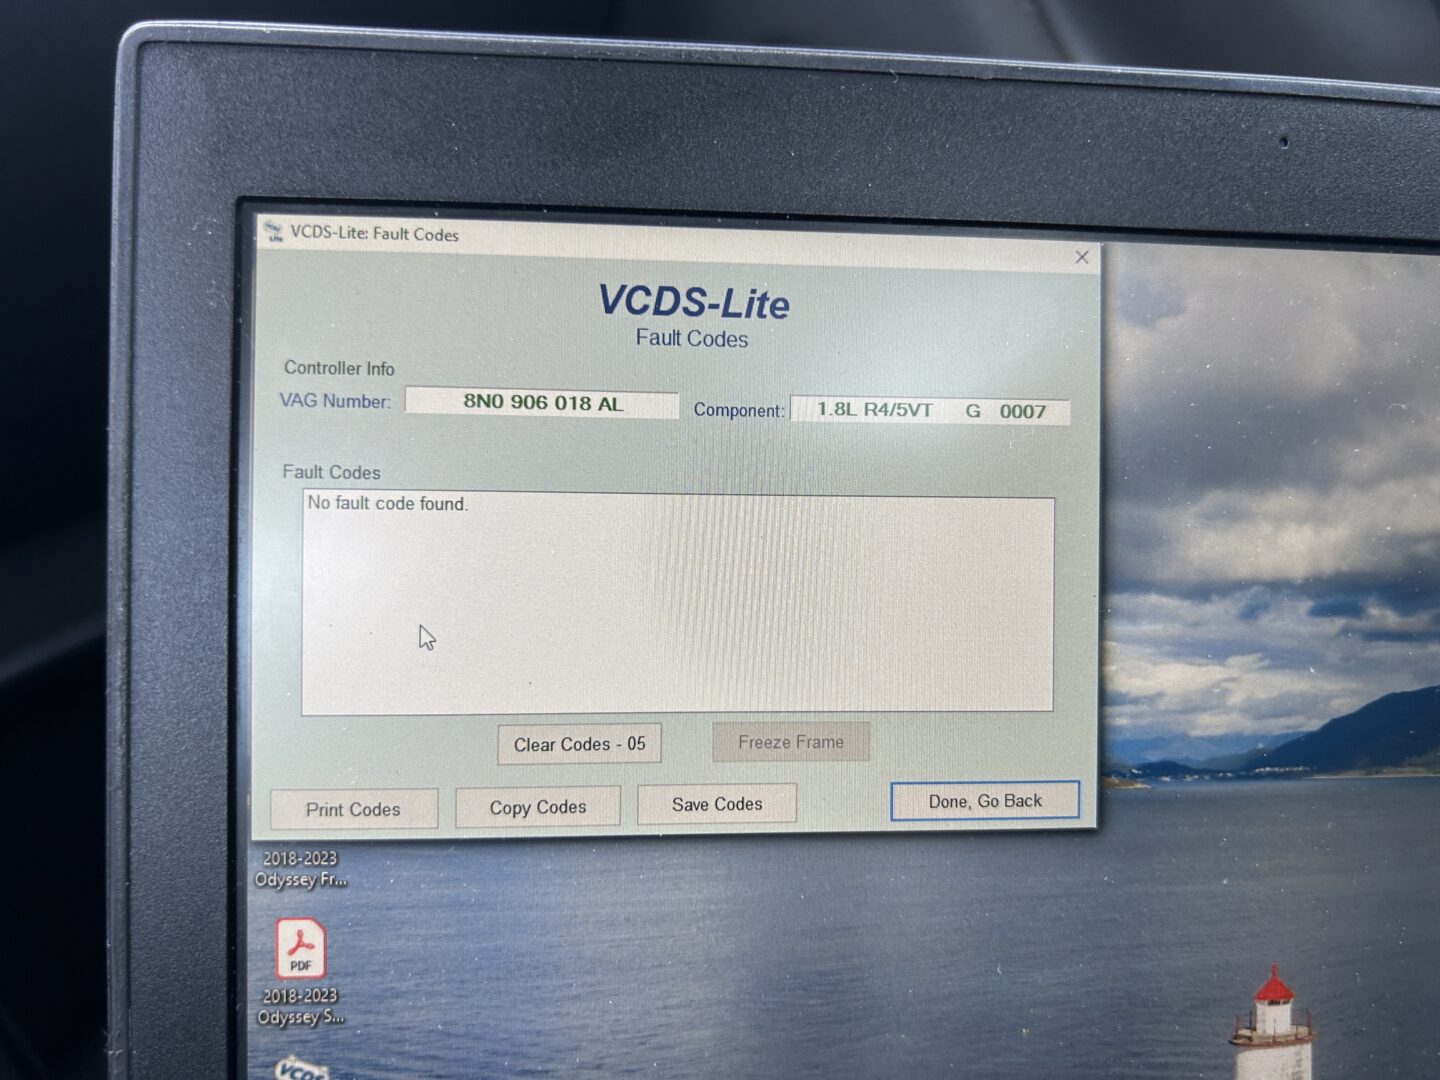
Finally, you can use the VCDS software on a computer, connected via OBDII port to run tests where you can actually hear the N75 running, to see if it works. But even with the these various tests showing me that my N75 valve was working properly, it still ended up being a bad part that needed replacing.
Diagnosing and Replacing the N75 Valve
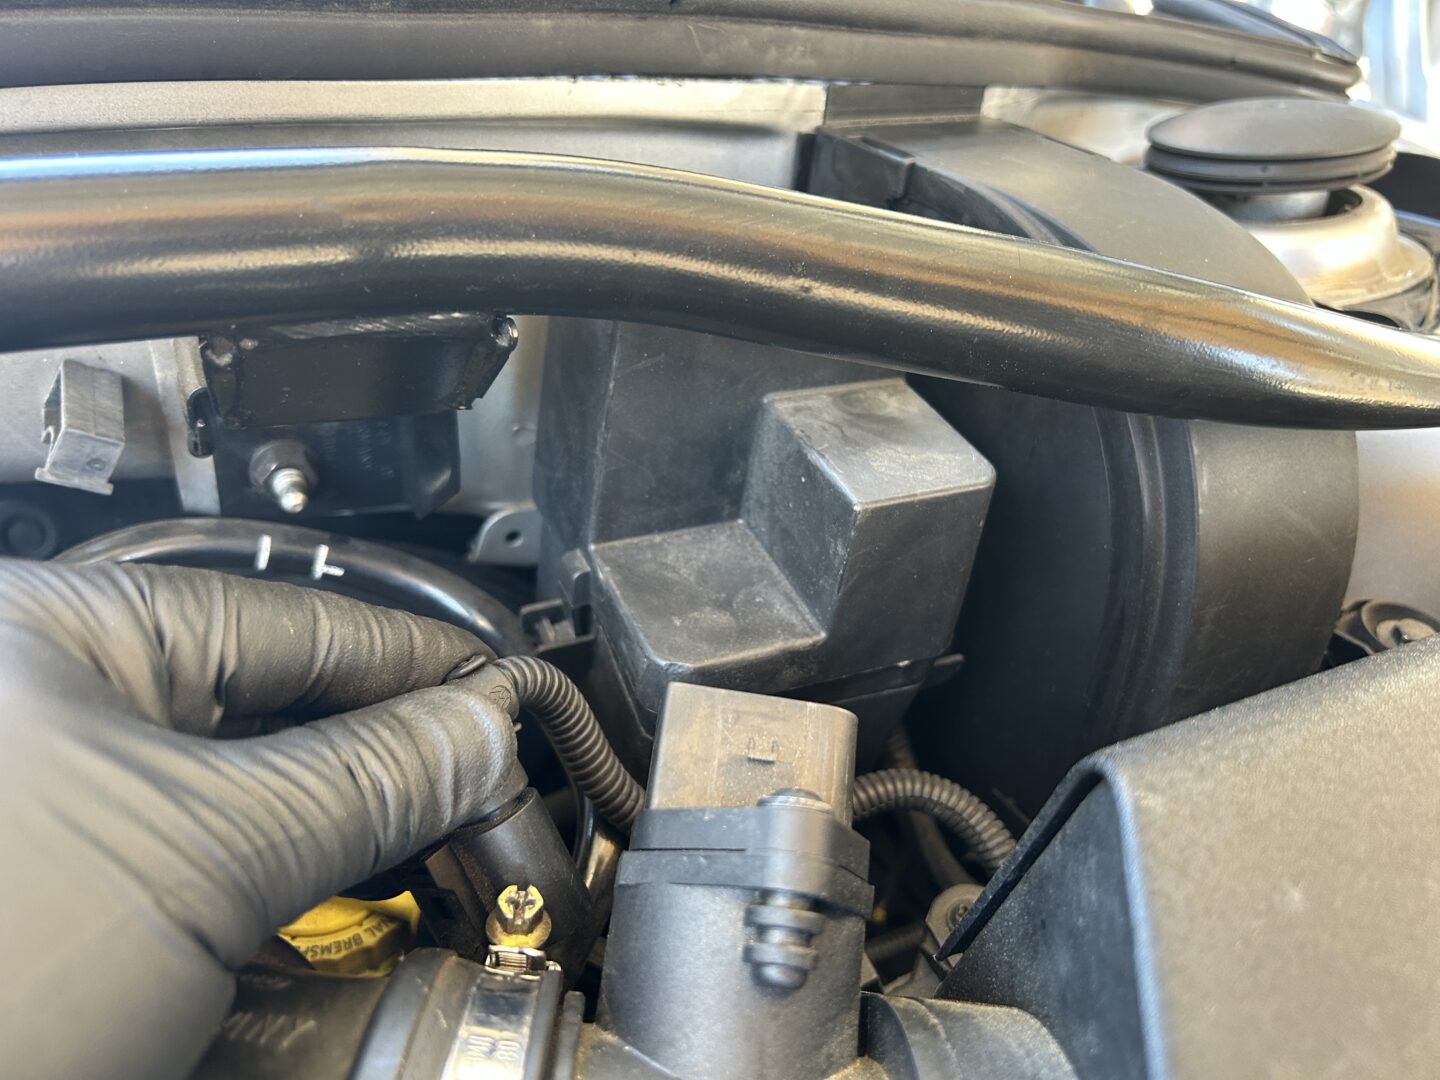
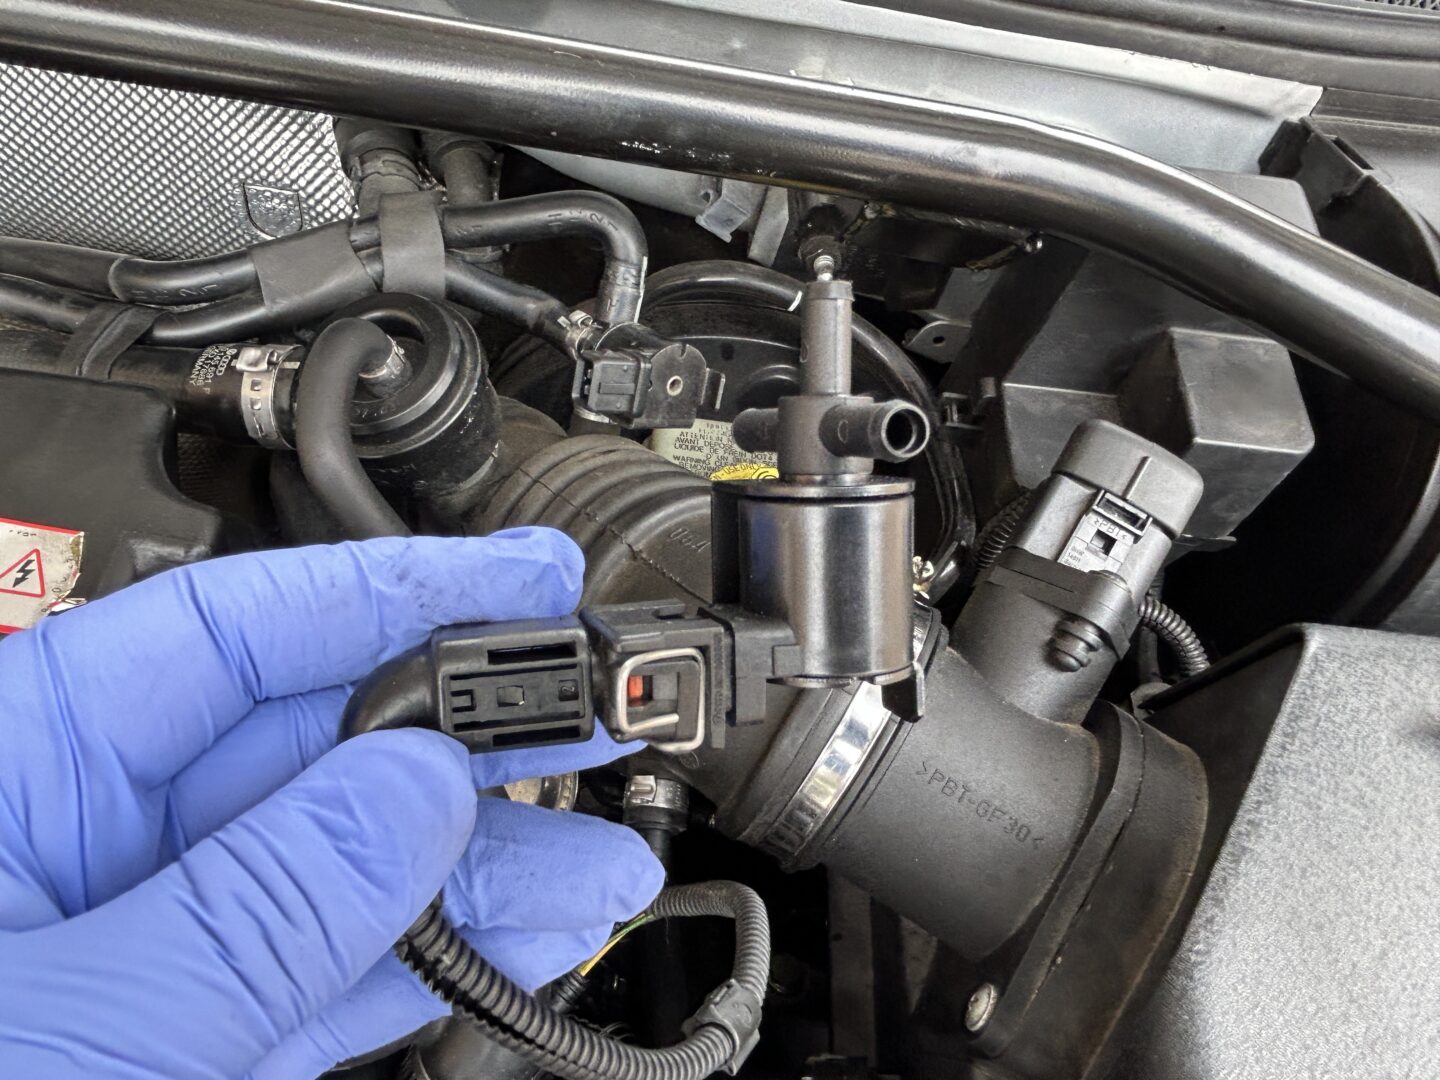
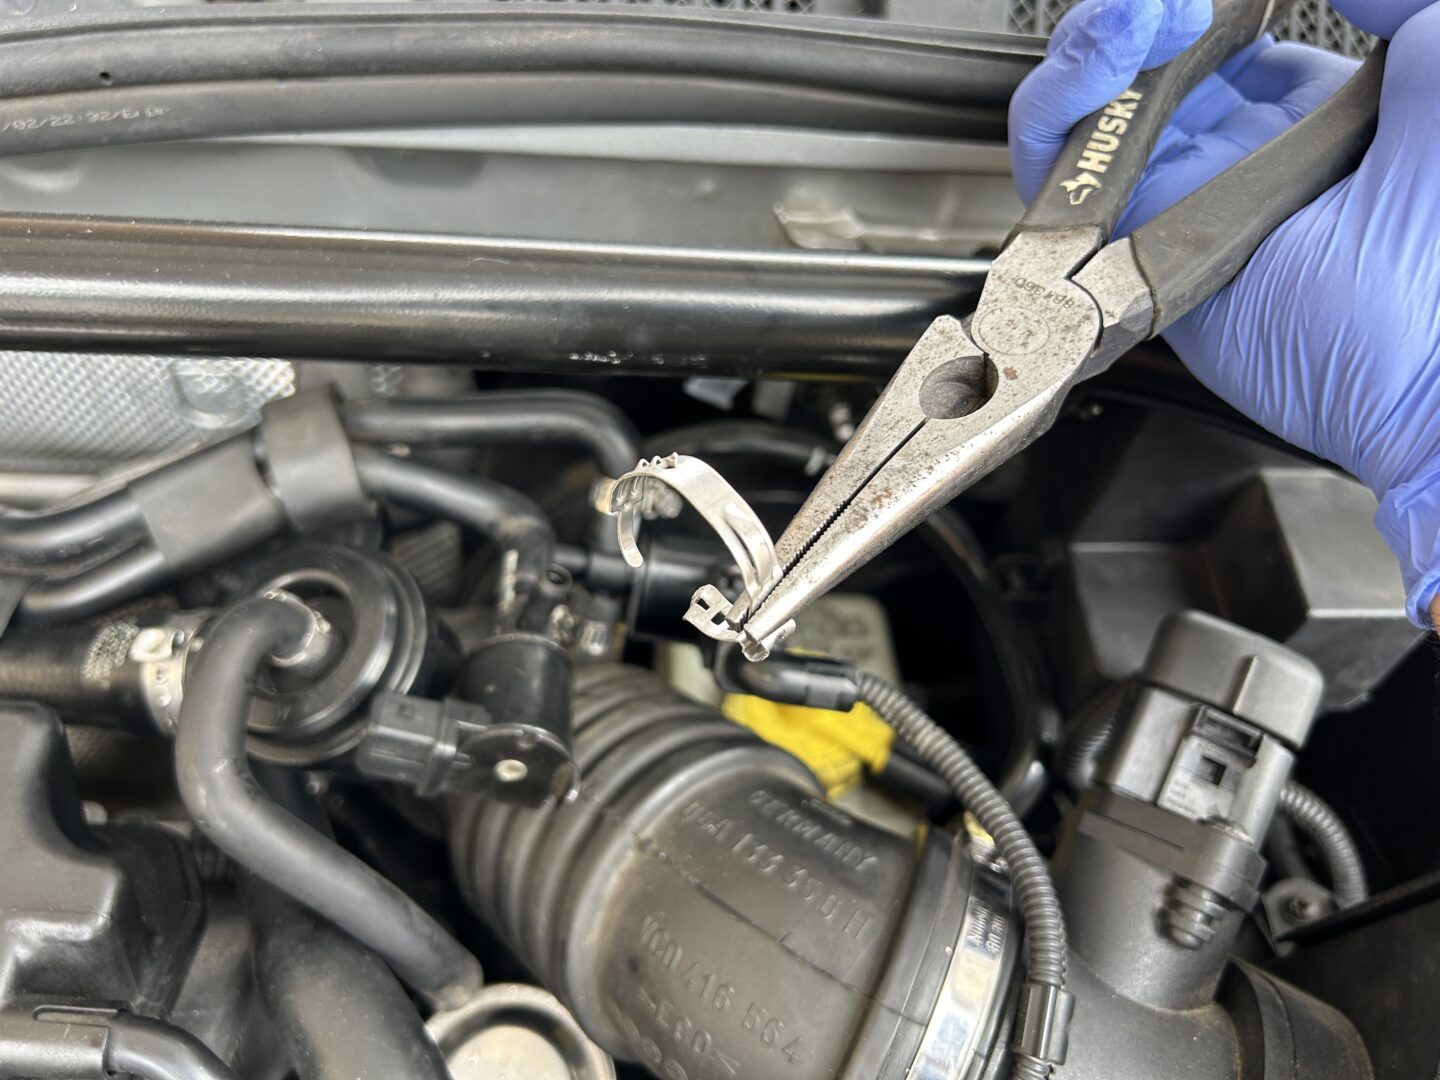
The first thing to do is to disconnect the electrical connector to the N75 valve, which is done by pressing down on both sides of the connector (on the metal clips seen below) and pulling it off. To make things easy and to avoid mixing up any vacuum lines, I would take the connections off of the existing N75 valve one-by-one and swapping them over to the new valve.
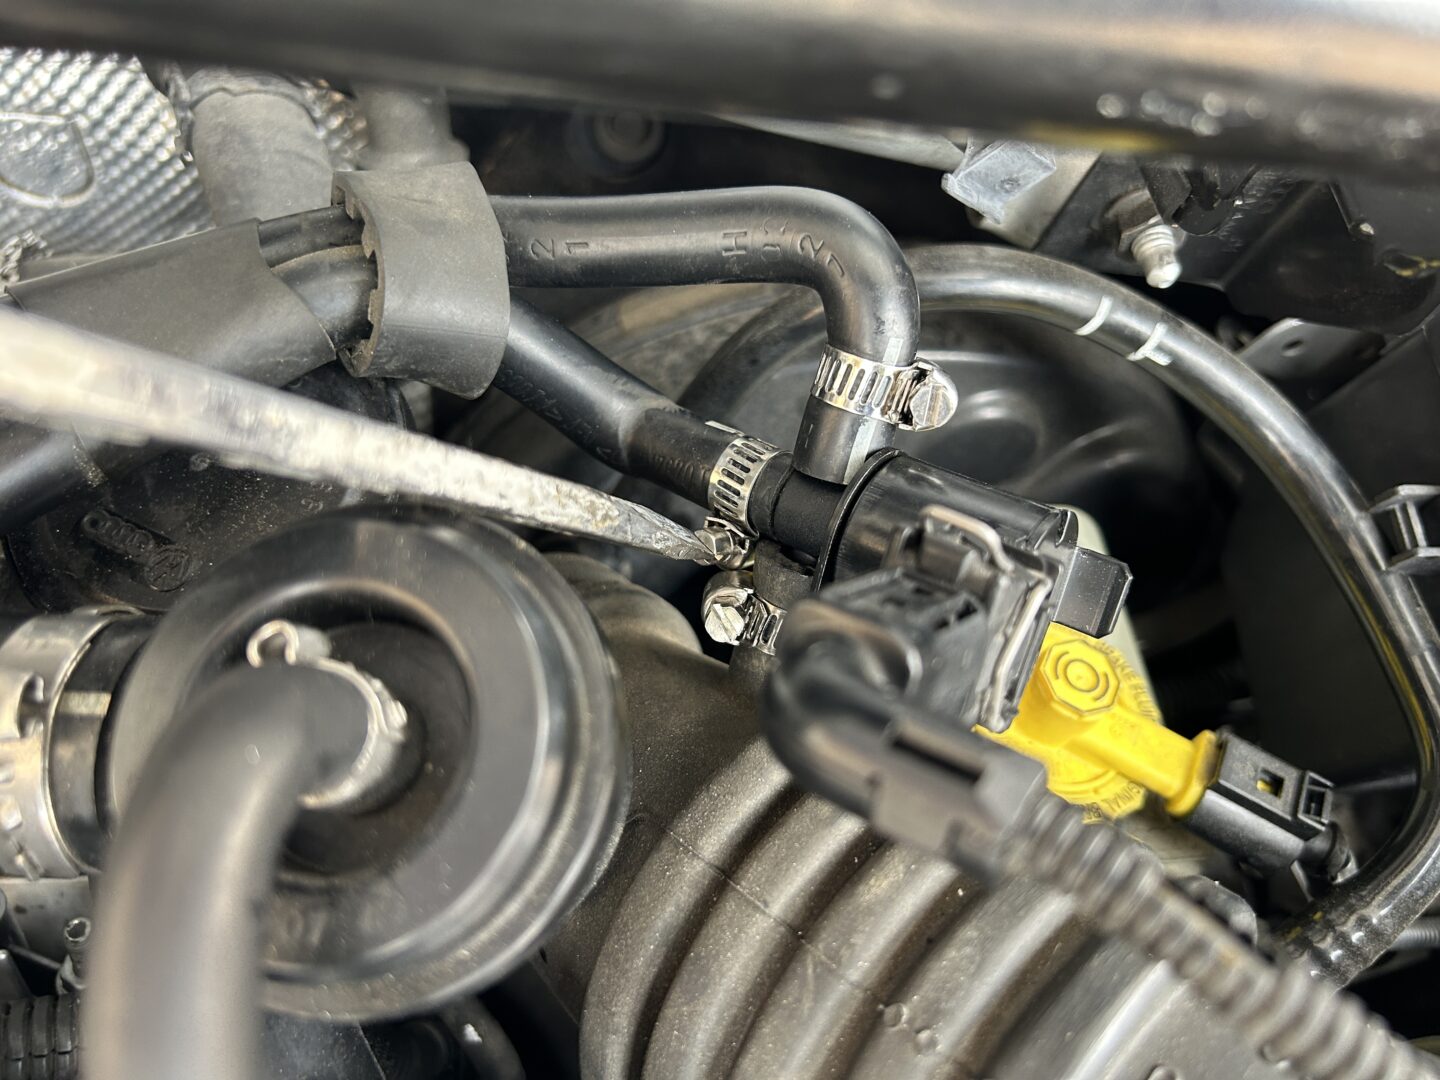
You’ll also need a few hose clamps so that you can reinstall the vacuum connections to the N75 valve. The original clamps are single ear clamps, which you could technically replace them with new ones, but it’s a lot easier to go back with worm gear clamps.
TICONN 1/4”–1-1/8” Hose Clamp Set – 1/4”–1-1/8” (40pcs)
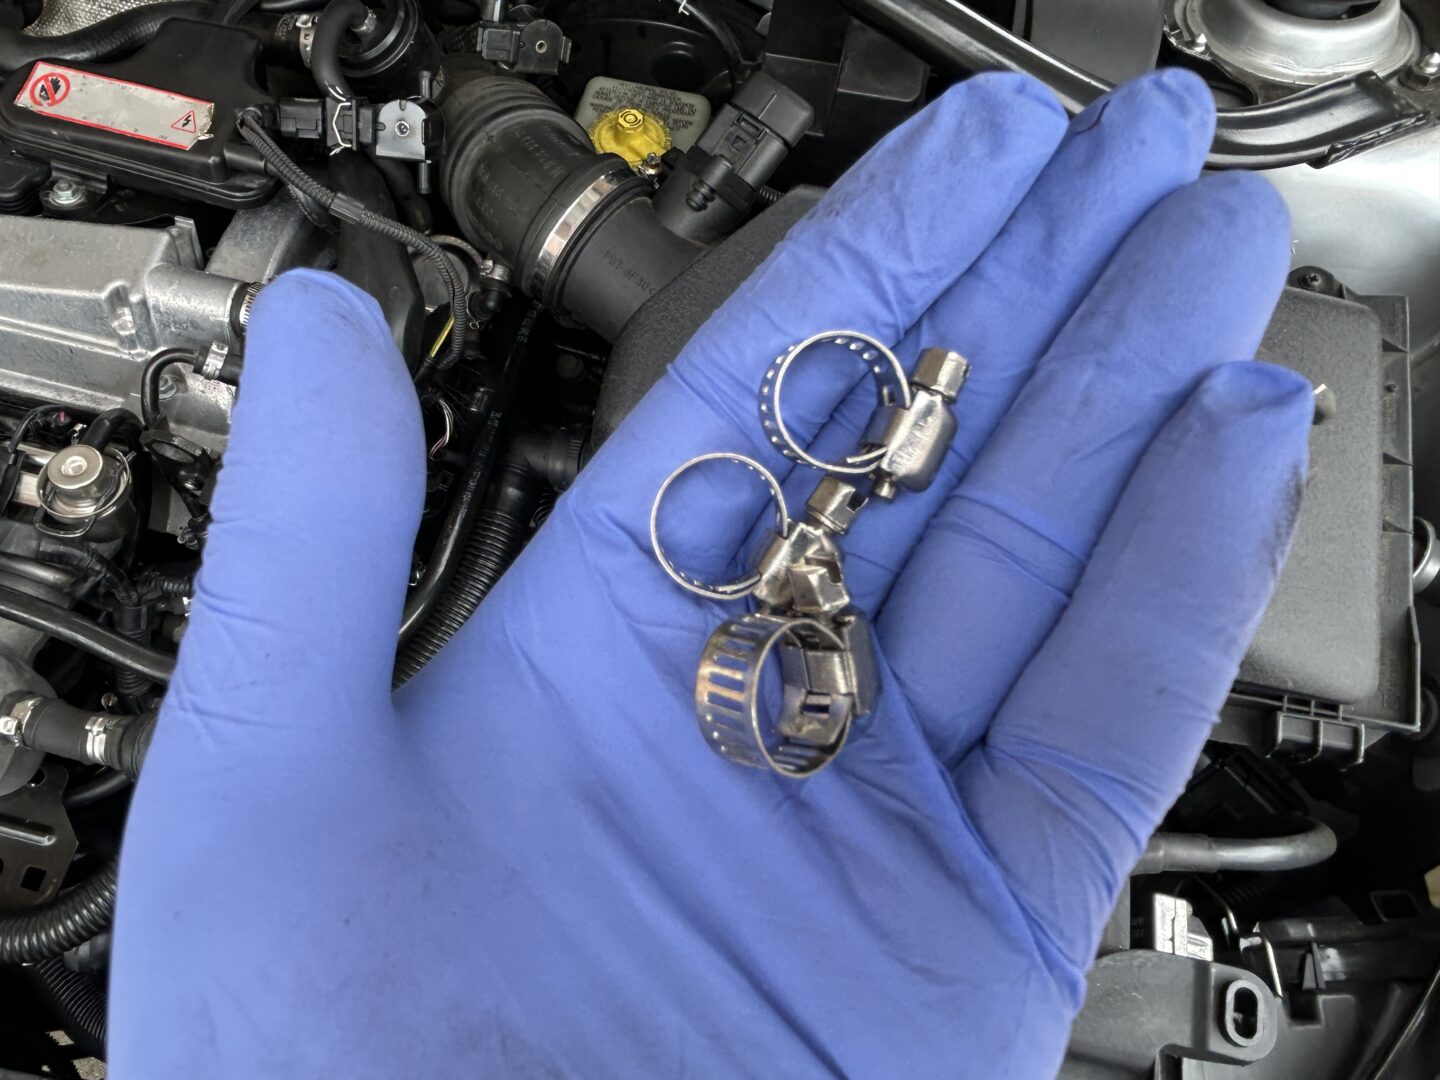
Removing the existing single ear clamps are a pain to do. Usually it requires using a set of cutters to cut it before removing it with some pliers. You could also use a flat head screwdriver and long-nose pliers to remove these clamps. Once removed, you can pull the vacuum hose off, fit it over the nipple of the new N75 valve with a new clamp, and clamp down the connection.

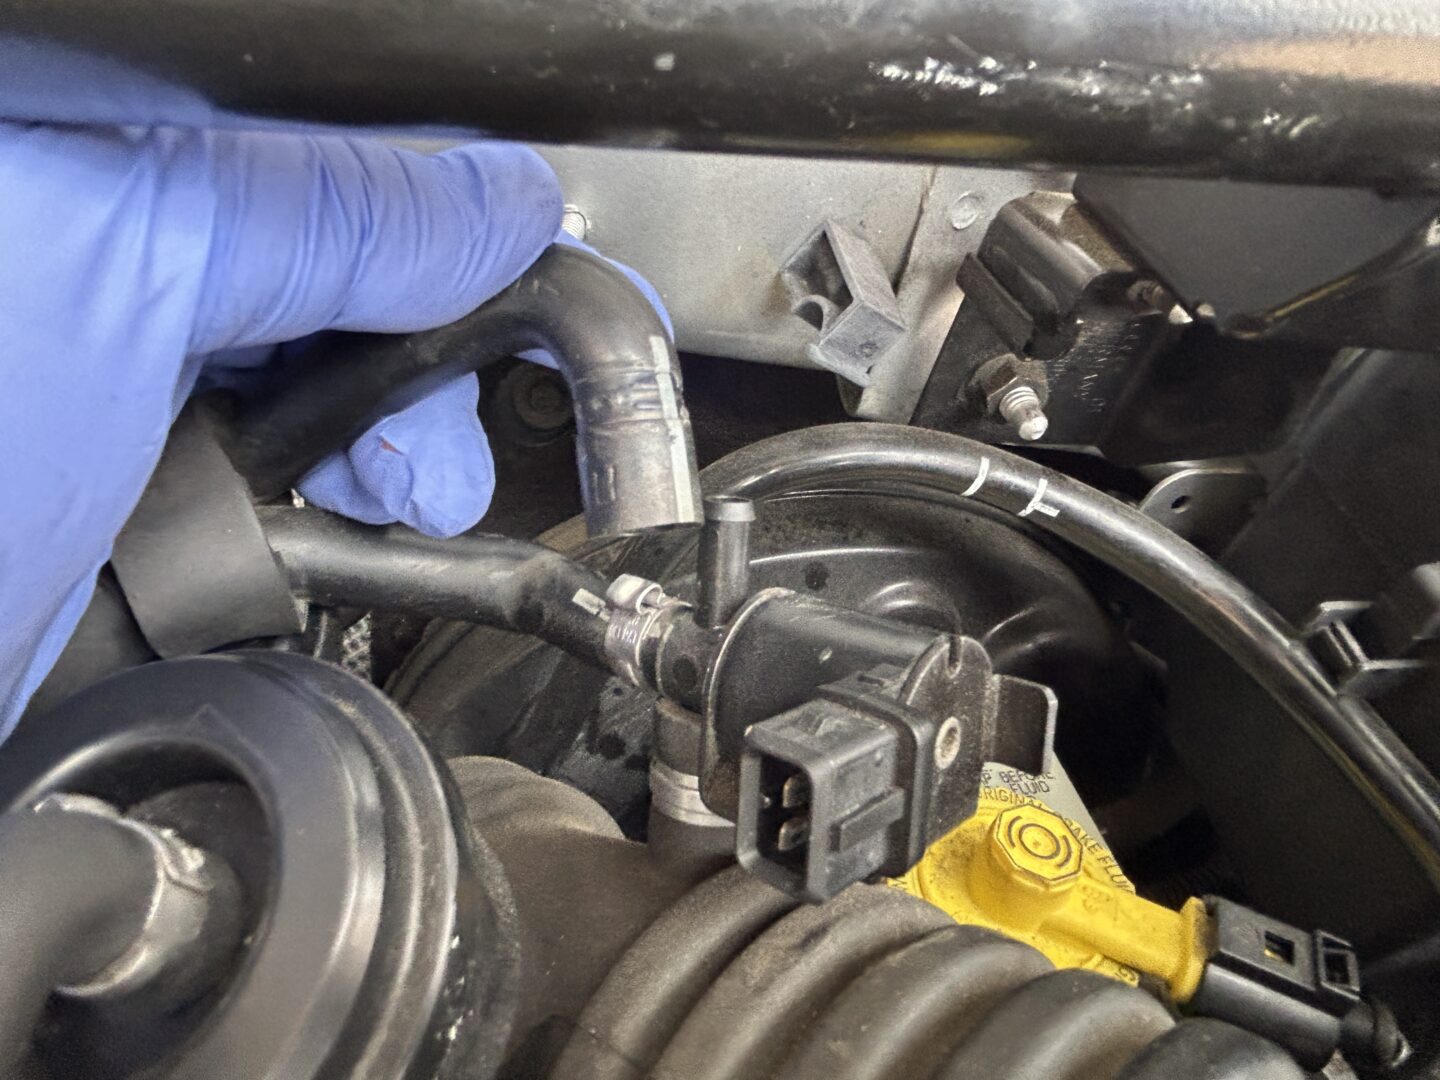
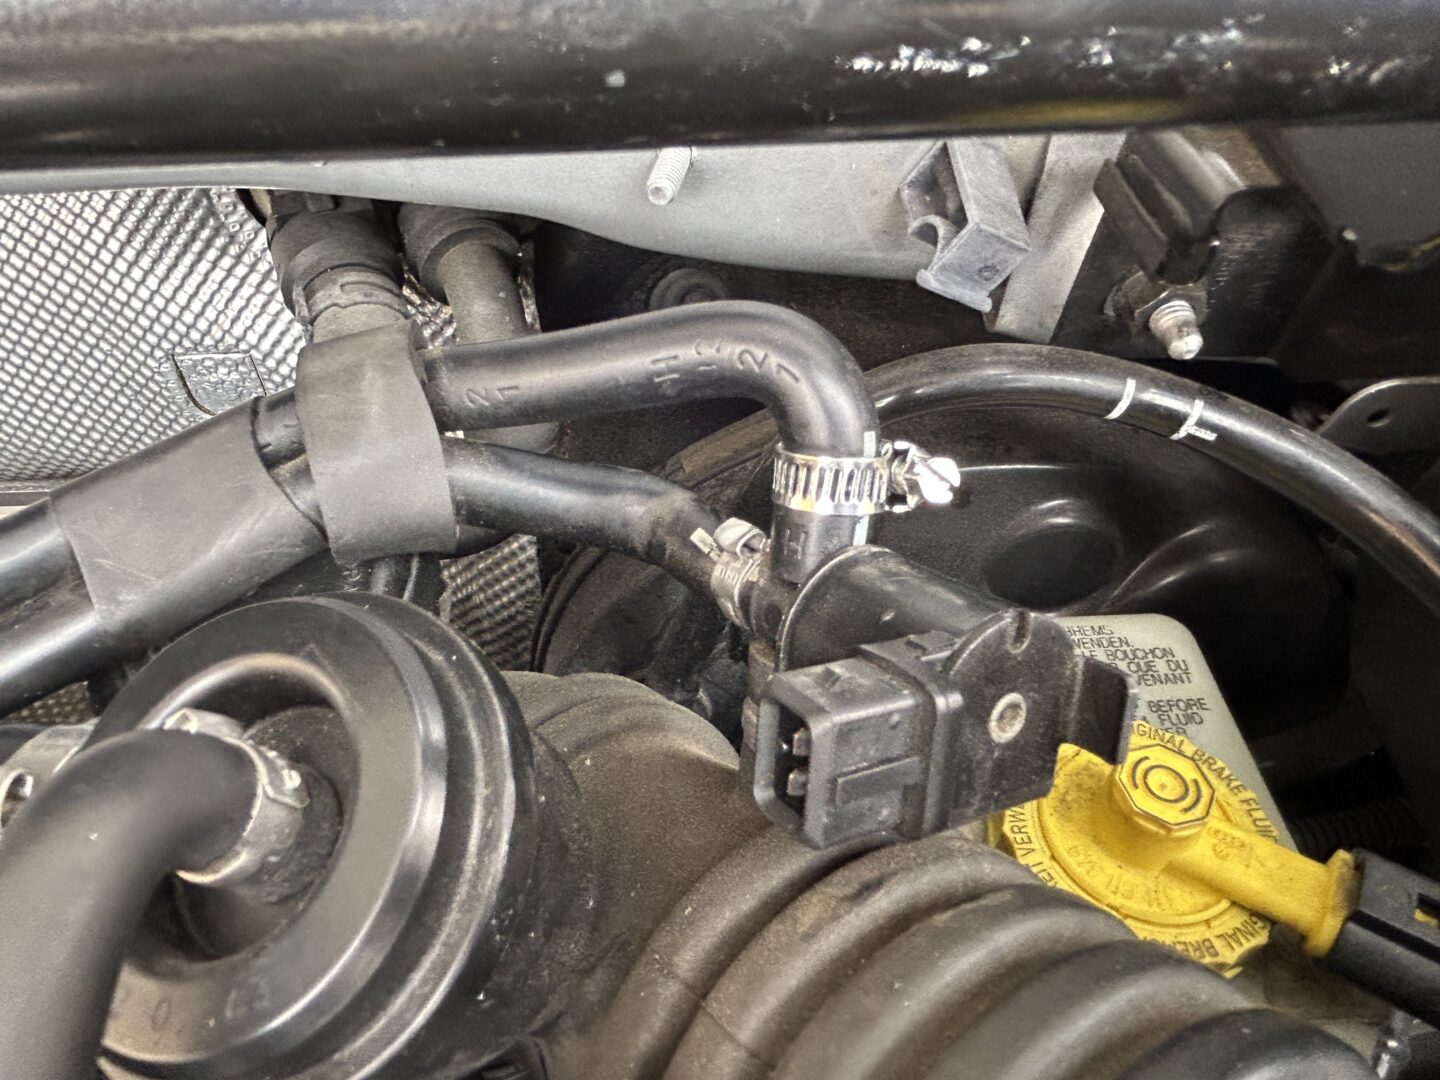
My preferred way is to transfer each connection one-by-one and only slightly tightening the clamps on for each. Then when all of the connections have been transferred over to the new N75 valve, then I’ll go back and tighten each of the three connections tight.
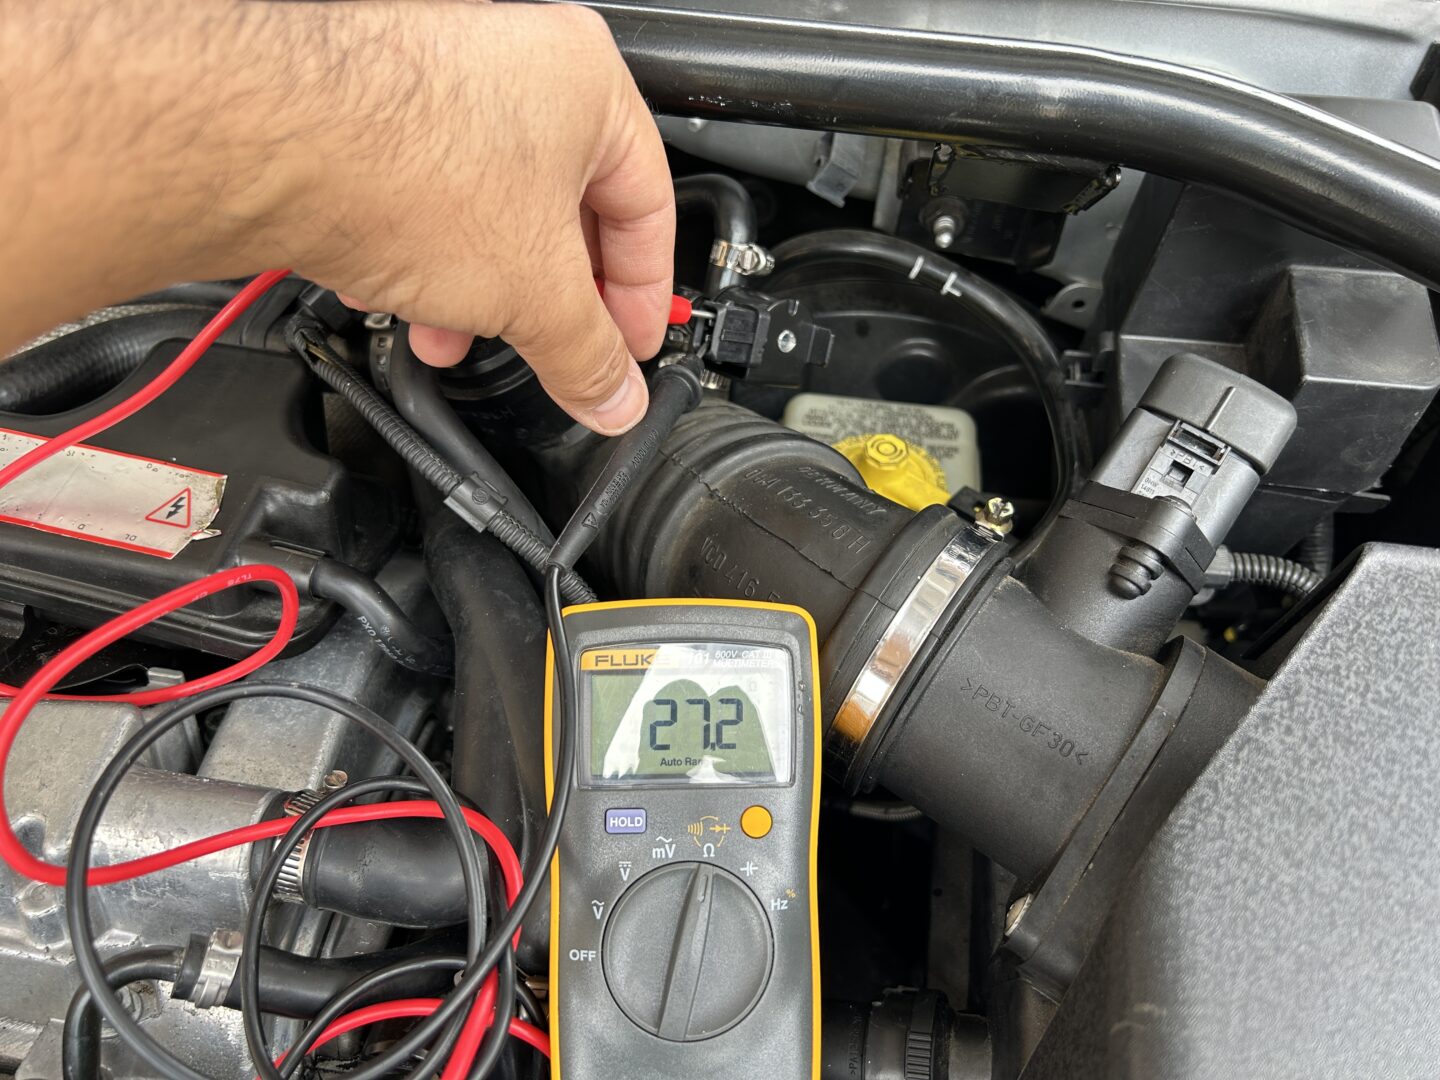
I checked the new N75 valve’s internal resistance which came within tolerance at 27.2 Ohms. I also drove my car right after changing out the valve and immediately I could tell a difference. The car pulls hard during acceleration, compared to before where the vehicle had very little torque. And lastly, checking for diagnostic trouble codes results in the P1548 no longer showing up.
Changing out the N75 valve on the MK1 Audi TT is pretty easy to do. Whenever you get the P1548 trouble code on your car, it points you right to this valve. Boost issues could also lead you towards taking a closer look at this valve.
To test out the N75 valve, you could do a few quick checks like checking if the valve’s relay is working and inspecting for any damaged wiring on the connector for the N75 valve. I don’t recommend testing the N75 valve itself as you can sometimes get false negatives, leading you to think the valve is totally fine when it is not. My suggestion would be to replace it outright and see if it addresses your problem.
")
")
")
")
")
")
")
")
")