When you make purchases through links on this site, The Track Ahead may earn an affiliate commission. Also, these posts are based off my own experiences. I am not responsible for any action you take as a result of reading this. Learn More
Years ago, the speedometer on my 4th Generation 4Runner had been working intermittently; it appeared that the stepper motor had stopped working. I replaced the stepper motor and the speedometer had started working again. About a year later, my speedometer had failed again but this time several of my gauges stopped working. Since stepper motors can be costly, especially if you’re replacing more than one, sometimes it’s more cost-effective to replace the entire instrument cluster.
Tools & Materials
Instrument Cluster
You can find a variety of used instrument clusters on Ebay or your local junkyard, but for me the easiest and safest option is to use Ebay. Since instrument clusters can have issues the older they get, its best to get a low mileage one if possible. My instrument cluster had 206,000 miles at the time, and the instrument cluster I bought on Ebay had 133,000 miles on it. I will show how to transfer the mileage later in this post.
You should also be aware of what trim level your vehicle is and what features it offers to ensure that you purchase an instrument cluster that offers the same. You can usually find the OEM part number on your cluster and replace it with the same one. You can also check Toyota OEM parts sites to identify what part number you need.
Soldering Kit
There are a number of soldering kits available on Amazon. You can even get them at your local auto parts store or home improvement store. I have a pretty basic Weller soldering gun with a station that holds the gun safely when its hot.
De-Soldering Tools
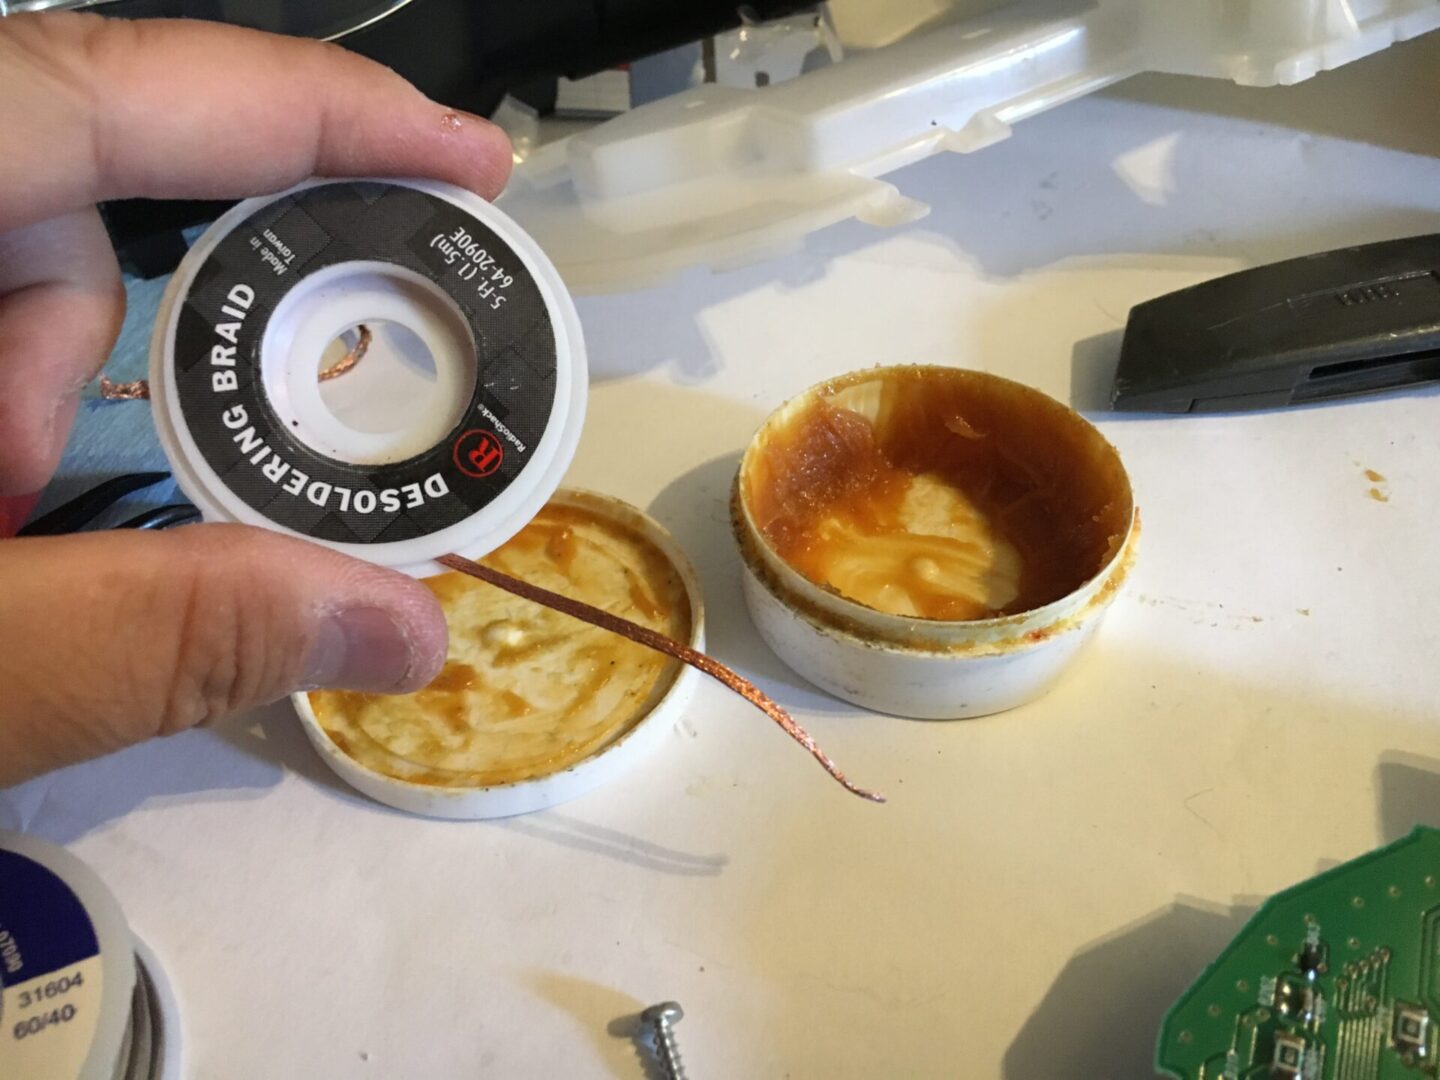
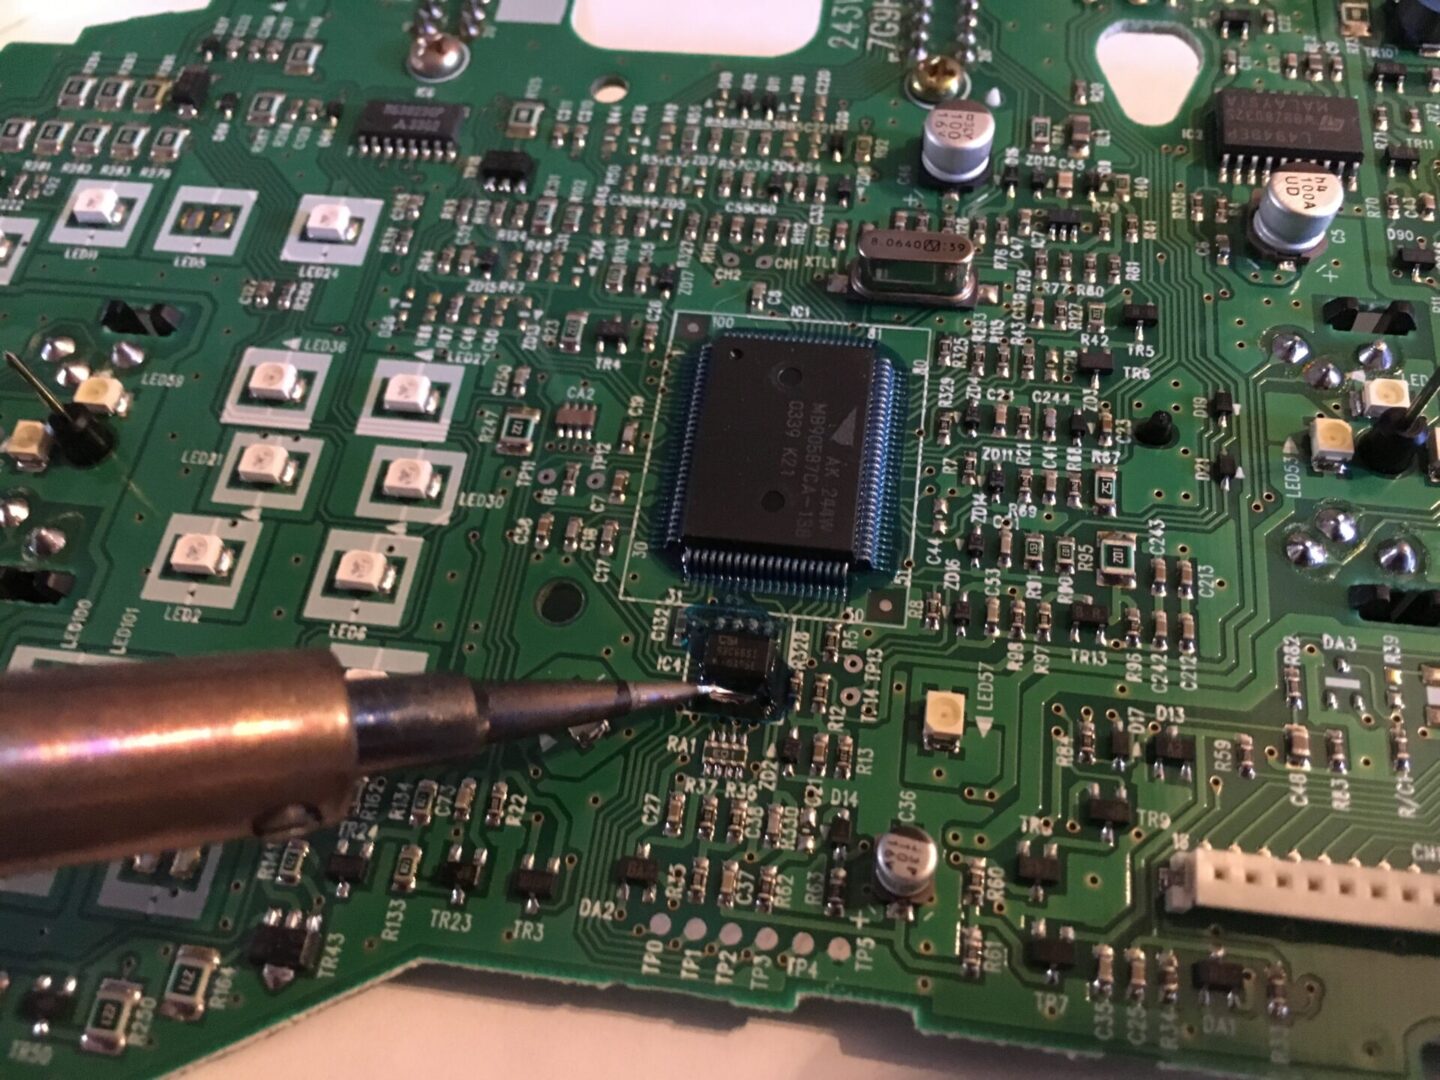
This is important to have if you’re trying to remove existing solder. When you replace your instrument cluster with one from another car, you’re going to need to transfer the mileage. In order to do this, there is an electronic chip that needs to be transferred from your instrument cluster to the new instrument cluster. To remove this electronic chip that stores your mileage, you’ll need to de-solder the chip.
There are two tools that I generally use for removing old solder. The solder wick and the solder sucker (or solder bulb). They both do the same thing but in different ways, and because of that it might be worth it to have both tools at your disposal. I found it useful to have both tools during the de-soldering process.
Solder Wick
The solder wick is a fine copper woven flat wire that you use by pressing it into the solder that you want to remove, heating the solder connection with your solder gun, and letting the solder draw up into the solder wick.
Popular on Amazon: NTE Electronics Solder Wick, 4 Blue.098″ Width, 10′ Length
Solder Sucker (or Solder Sucker Bulb)
There are some variations of this tool, but the way it works is the solder connection is heated with your solder gun until the solder flows. You then quickly grab the solder sucker tool, and place it over the connection and ‘suck’ the loose solder out. I personally use the bulb style: press the bulb in, place the tip of the bulb sucker right over the connection, and release to suck the solder out.
Search on Amazon: Solder suckers
Solder Sucker Bulb that I use: American Beauty Solder Sucker Bulb
How to Replace the Instrument Cluster on a 4th gen Toyota 4Runner
Start by disconnecting the negative terminal of your battery to prevent any electrical issues while working with these sensitive electrical components. Remove the dash and trim pieces out until you have access to the instrument cluster mounting hardware.

Now, you can use a Phillips head screwdriver and loosen the two mounting bolts at the top of the instrument cluster. Once you get them loose enough, you may feel that it disconnects from the mounts. You should be able to pull the instrument cluster out a bit more, but you’ll still need to disconnect the four connectors from behind. Once you disconnect those four connectors, the instrument cluster can be pulled out.

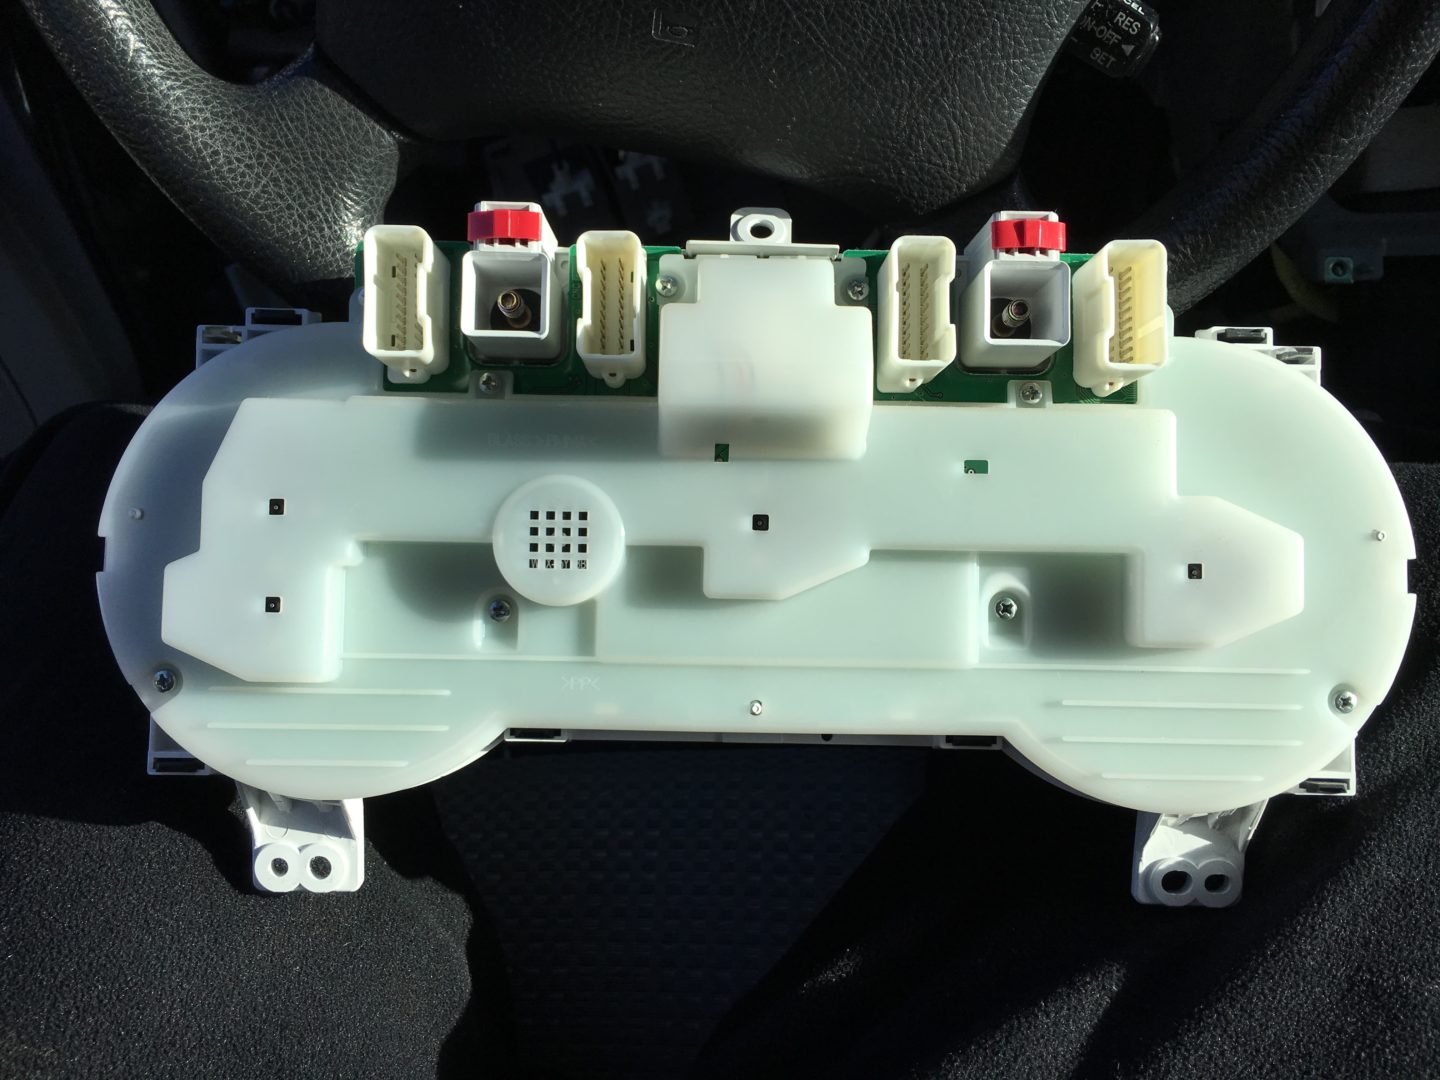
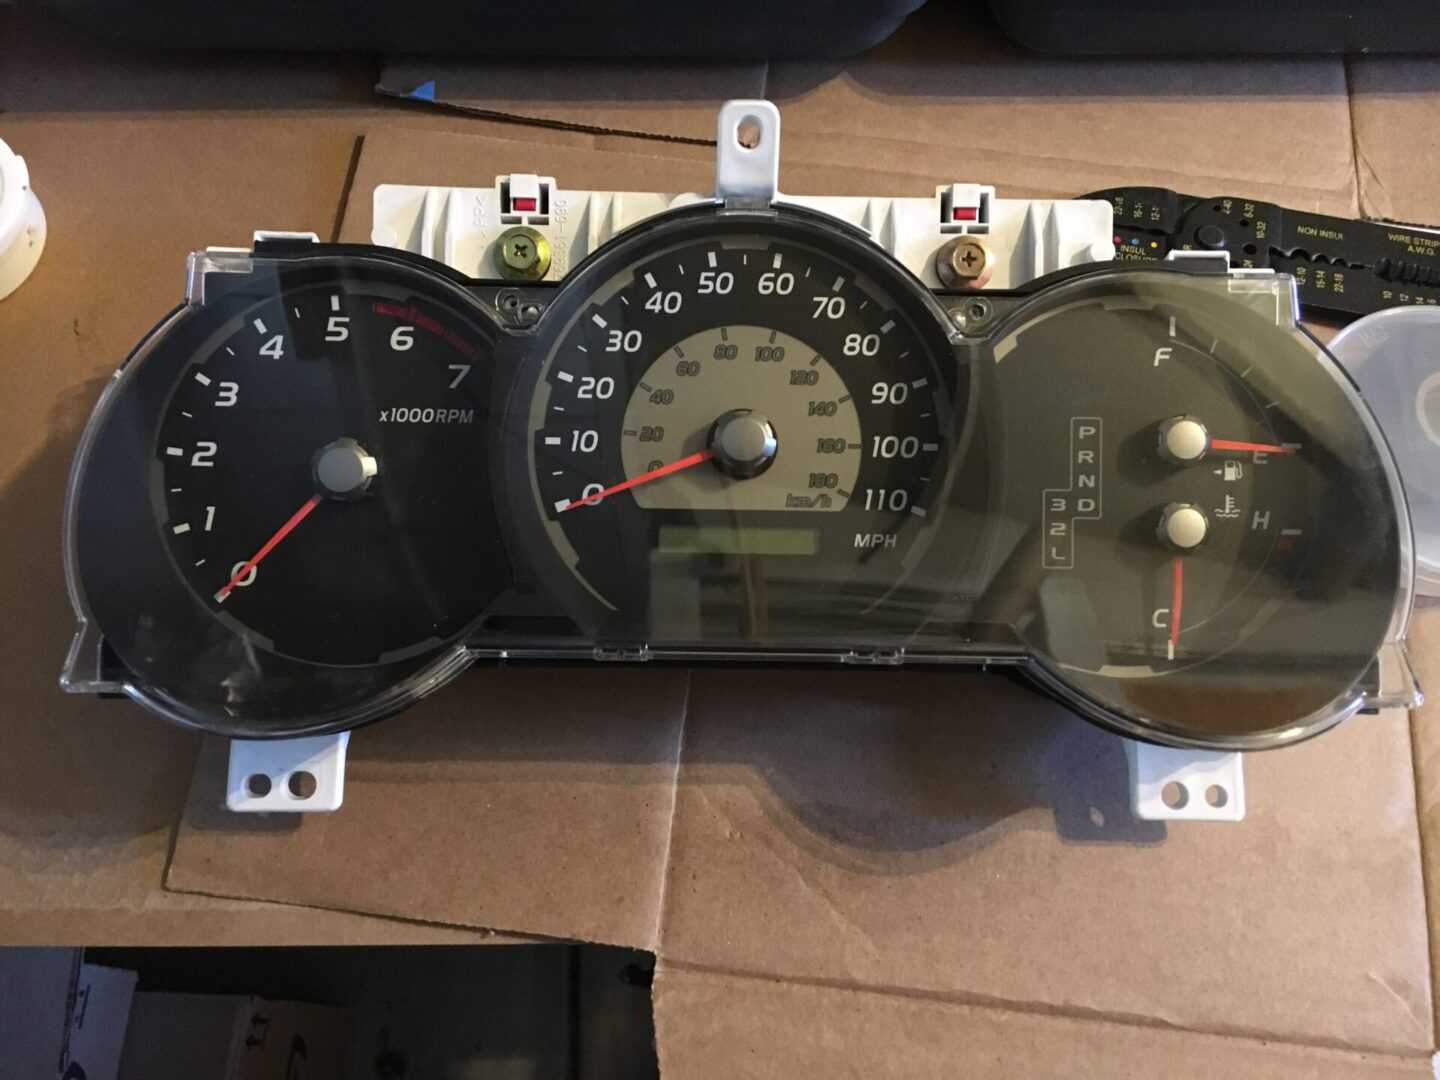
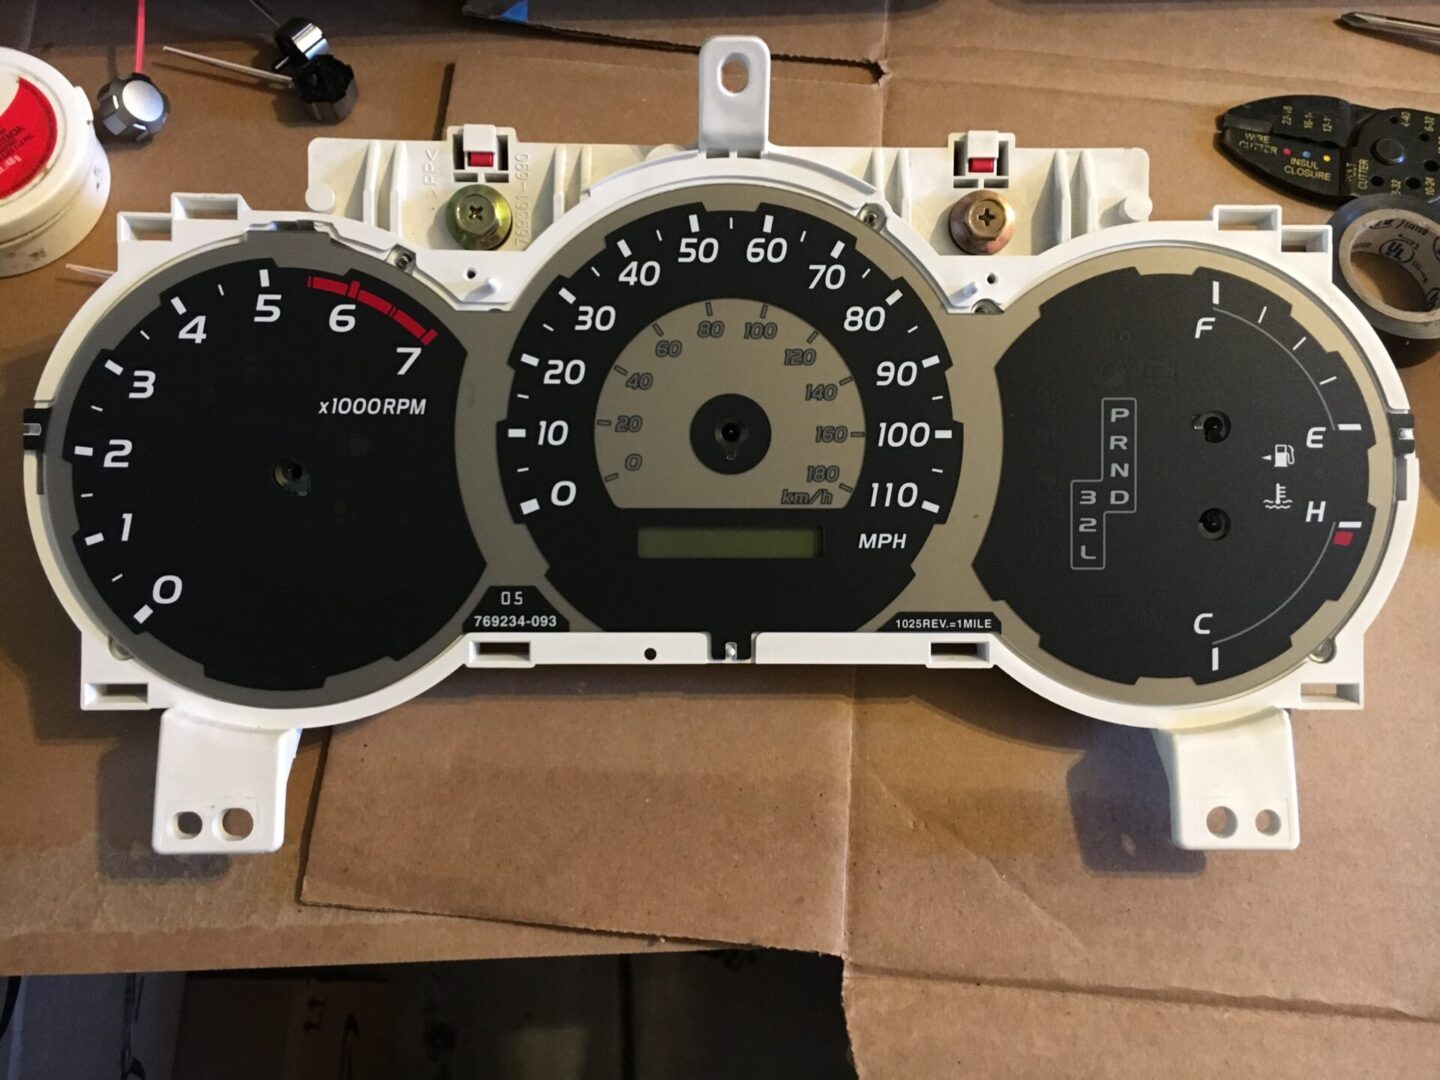
Your replacement instrument cluster should come in pretty much complete to where you can just plug it directly in.
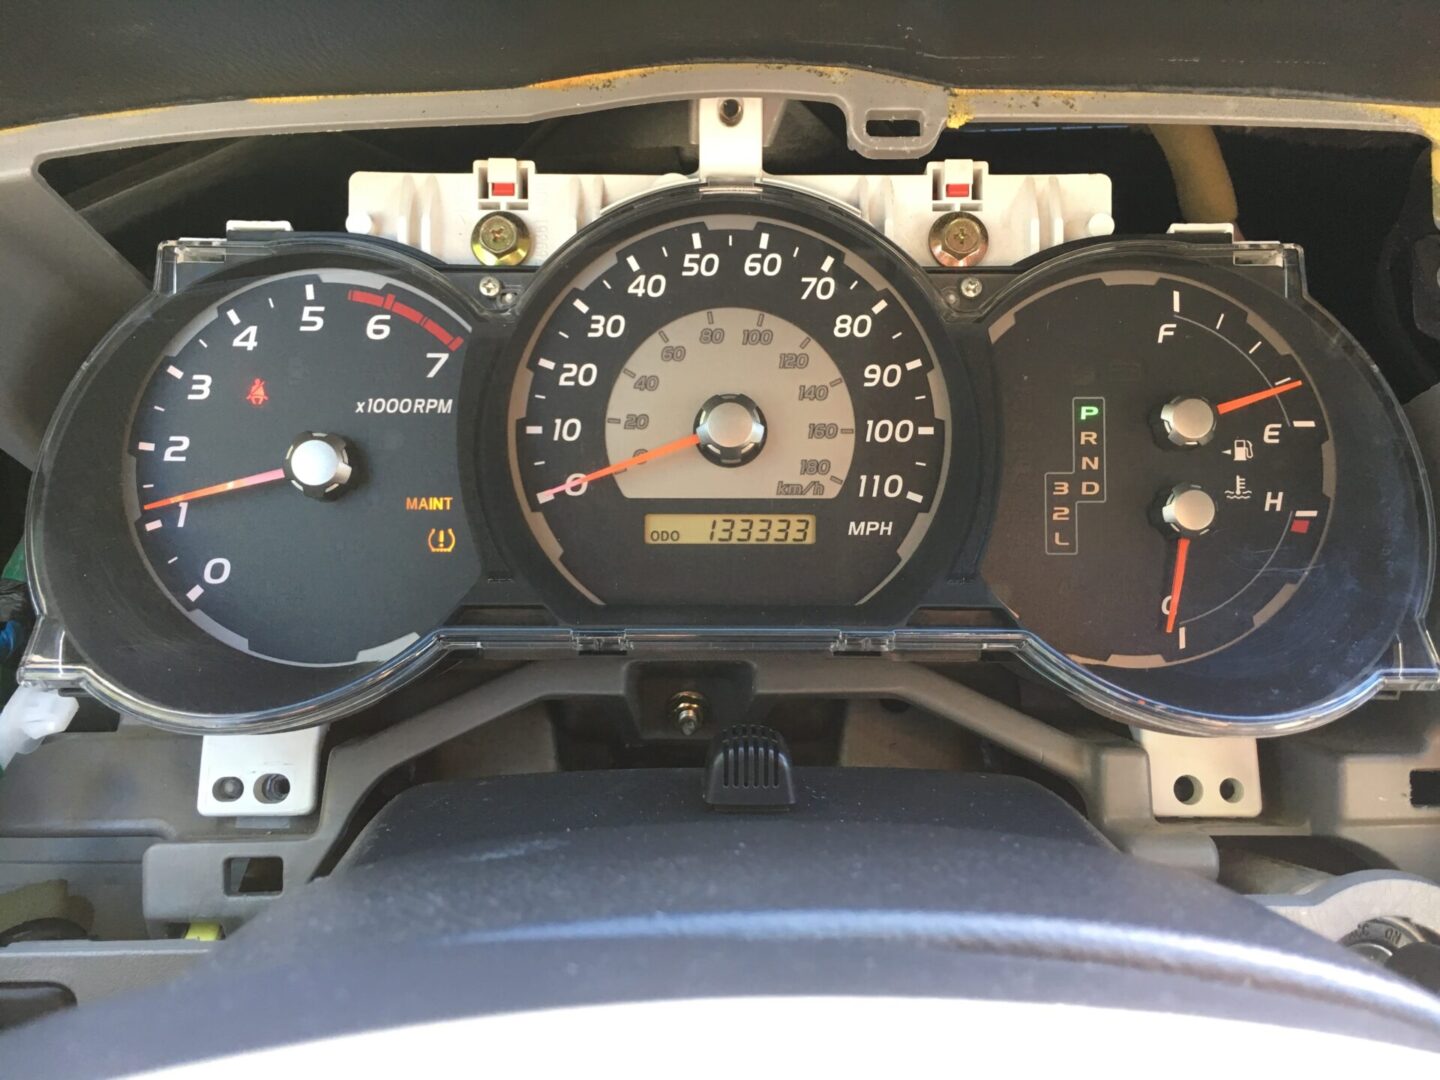
If you plug your new ‘used’ instrument cluster in now and turn the key to ignition, you will be able to see what mileage the host vehicle was when the instrument cluster was removed. You can do this for fun to see a potential low mileage on your vehicle, or maybe you just want to confirm the mileage with the information that was provided to you by the seller of the instrument cluster. Nonetheless, you do have a problem on your hands as you need to have your real mileage transferred over to the new working instrument cluster.
Yeah, it’s pretty cool to see your mileage drop down 70,000 miles in a matter of minutes…

How to Transfer Mileage from Old Instrument Cluster to New
Part of me feels a bit guilty for showing how to do this as I can see some unscrupulous individuals using this information for less-ethical purposes. But, if anyone has needed to replace their instrument clusters on a 4th gen 4Runner, you will need to do this if you want your mileage accurately displayed.
Take the glass off both existing and new instrument clusters, carefully pull straight up the gauge needles and then remove the gauge faces. On the back side of the instrument cluster, remove the screws holding the plastic cover on.


You should now have access to the digital readout screen in the front, and the circuitry from the back. Remove the center piece via the two screws as shown below on the back side.


On the front side, pull straight out on the digital readout and be careful that the pins do not get damaged on its way out.
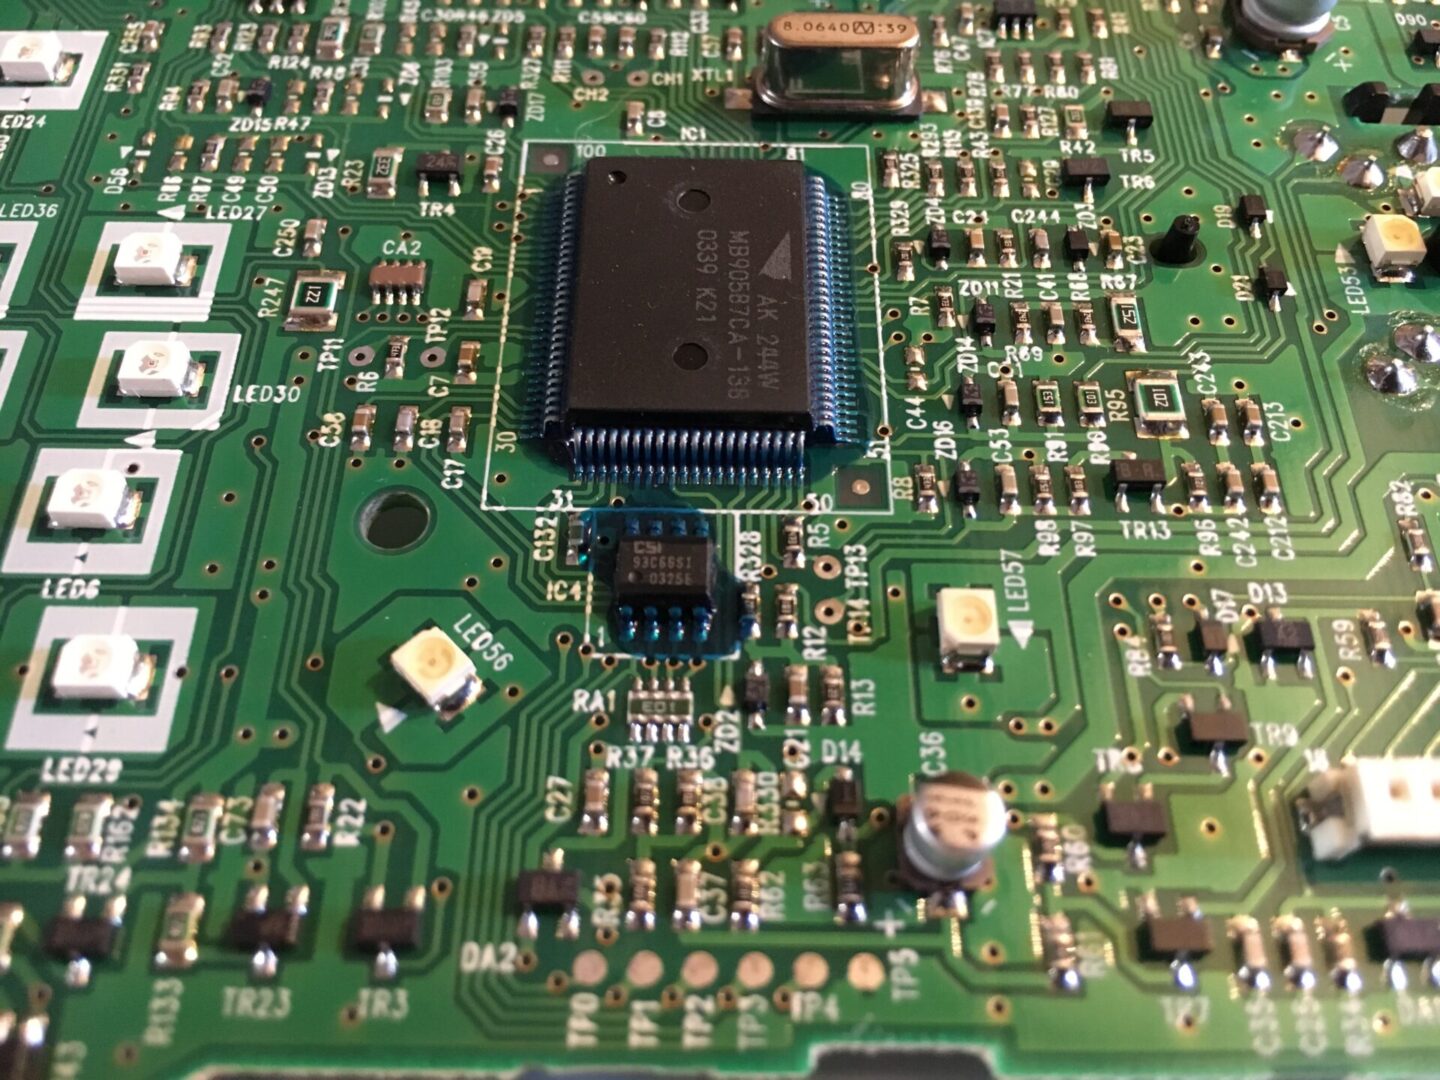
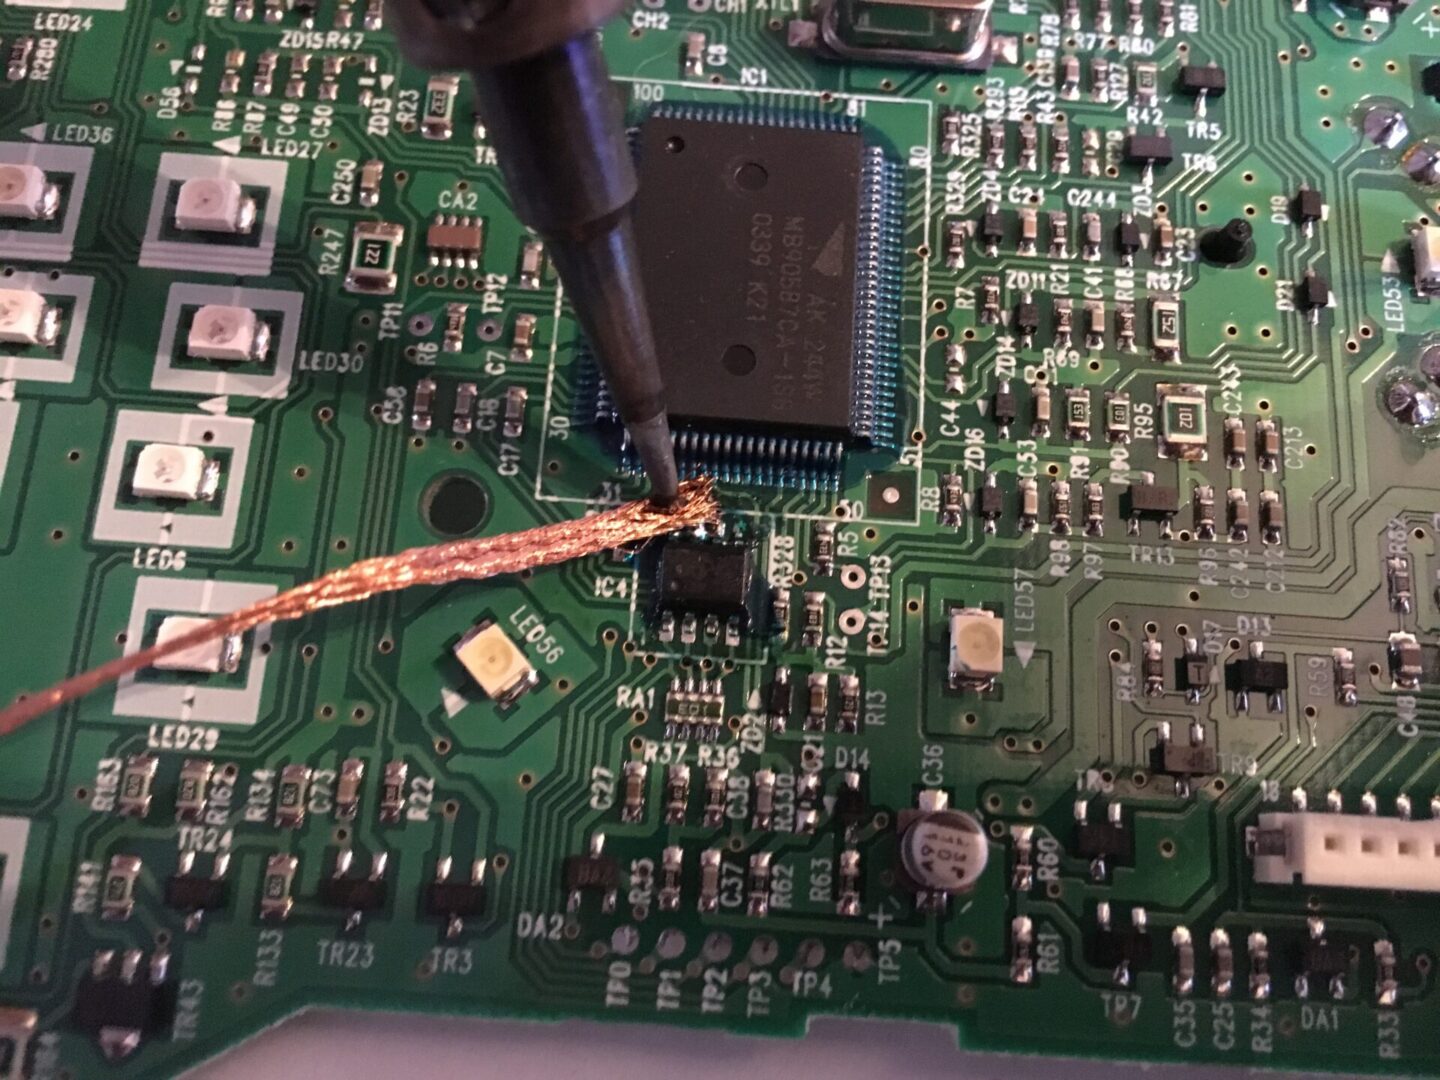
The internal circuit board should be able to be completely separated from the plastic of the instrument cluster. The part that needs to be transferred is the part circled in red below.

A closer view of the small chip that stores the mileage information.
I put a bit of soldering paste on the chip’s eight connections and then placed the de-soldering tape over the connection I want to de-solder. I then use the soldering iron and place it right on the connection to heat. There is a blue film protecting these connections; you can either use a knife to scrape this film away or just allow the heat to melt through it.
With the de-soldering tape over the connection and the heat gun touching the connection, the solder should wick into the de-soldering braided tape. Do this for all eight connections. A solder sucker works well for this too.
Once all connections have had its solder removed, the chip will be able to be removed. Use some long nose pliers and/or a box cutter knife to pry up on the chip as you’re removing the last bit of solder. Remember that if the chip does not budge, there is probably still solder that is holding it in place. Trying to force the chip out when all of the solder has not been removed may cause damage.
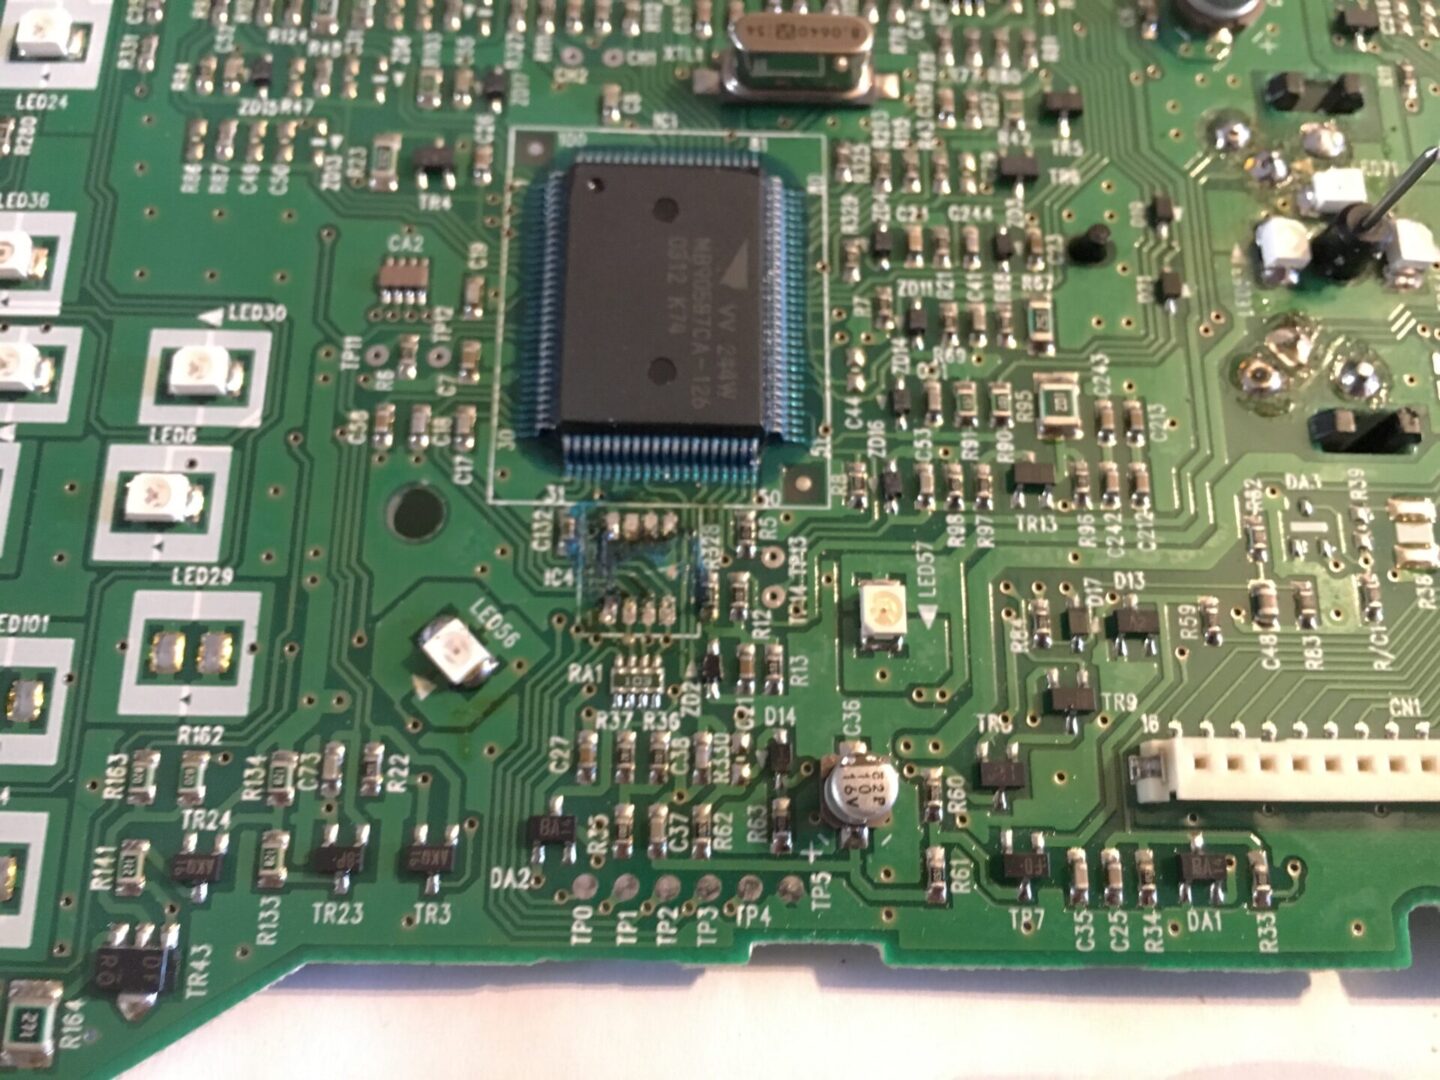

Take your time removing the solder and eventually enough solder will be removed so that the chip will be able to be removed effortlessly. Once the chip is removed, continue heating the remaining connections and removing as much excess solder as you can.
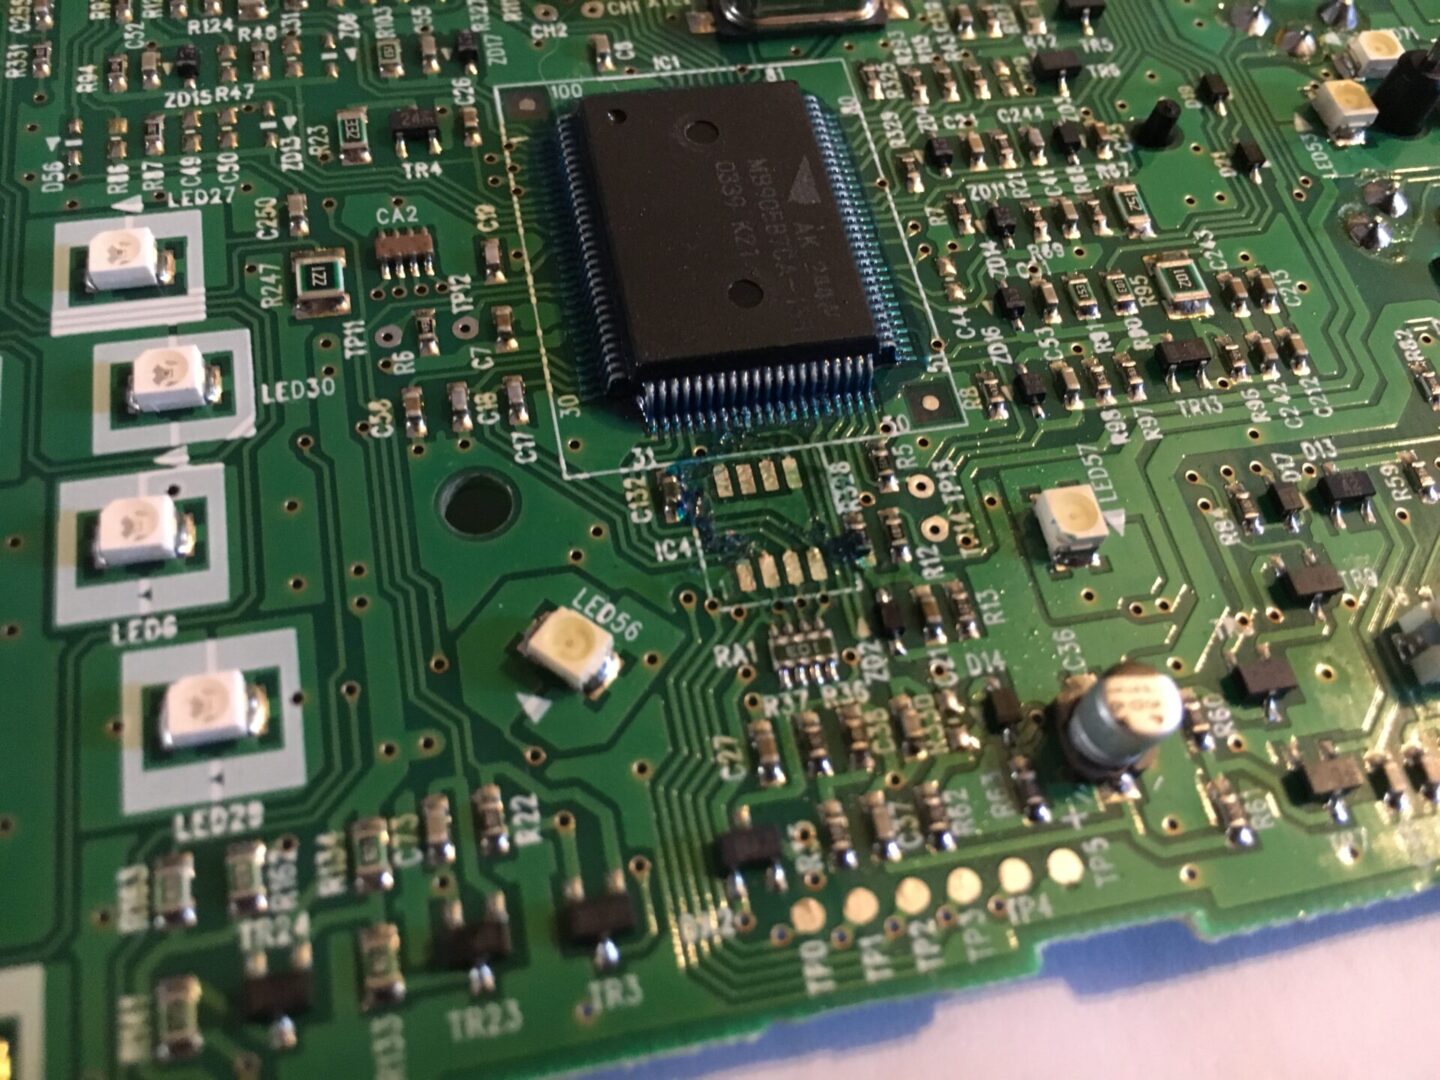
Follow this same de-soldering process for the other instrument cluster and make note of which chip is being transferred and which one is not. Take the chip that you are transferring over from your existing vehicle and place the chip carefully into the new instrument cluster’s slot. You might need to heat the connection points again as you insert the chip so that it fits properly.
You’re trying to get the chip to fit in completely and aligned without adding any solder yet. Once it is in its correct position, you can begin using solder and soldering each of the eight connections.

Once the connections are made, inspect everything before putting everything back together again. Put everything back in the reverse order of removal and test out the odometer before putting all the trim back. Make sure the instrument cluster is back in place, plugged back in, and the two tightening bolts are tightened.
Connect the negative terminal on the battery and then go back to turn the key to the ignition slot to check the odometer reading.
And voila! The mileage from your existing vehicle has now been transferred over to your new instrument cluster. You can reinstall all of your trim pieces to complete the install.
Variation of Gauges
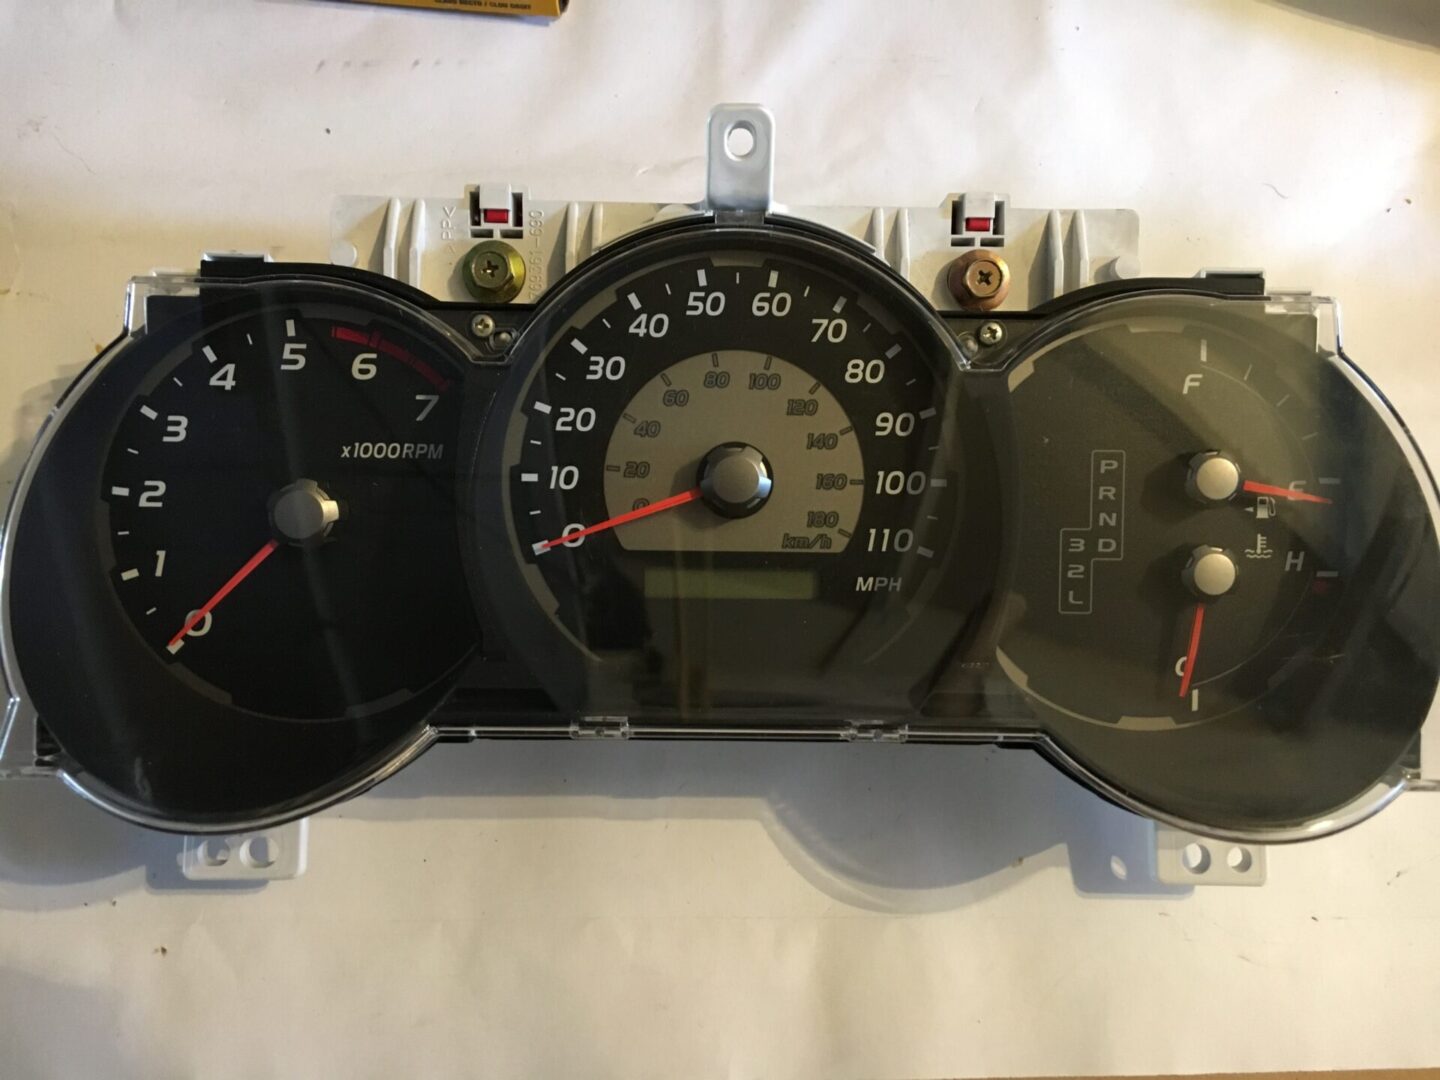
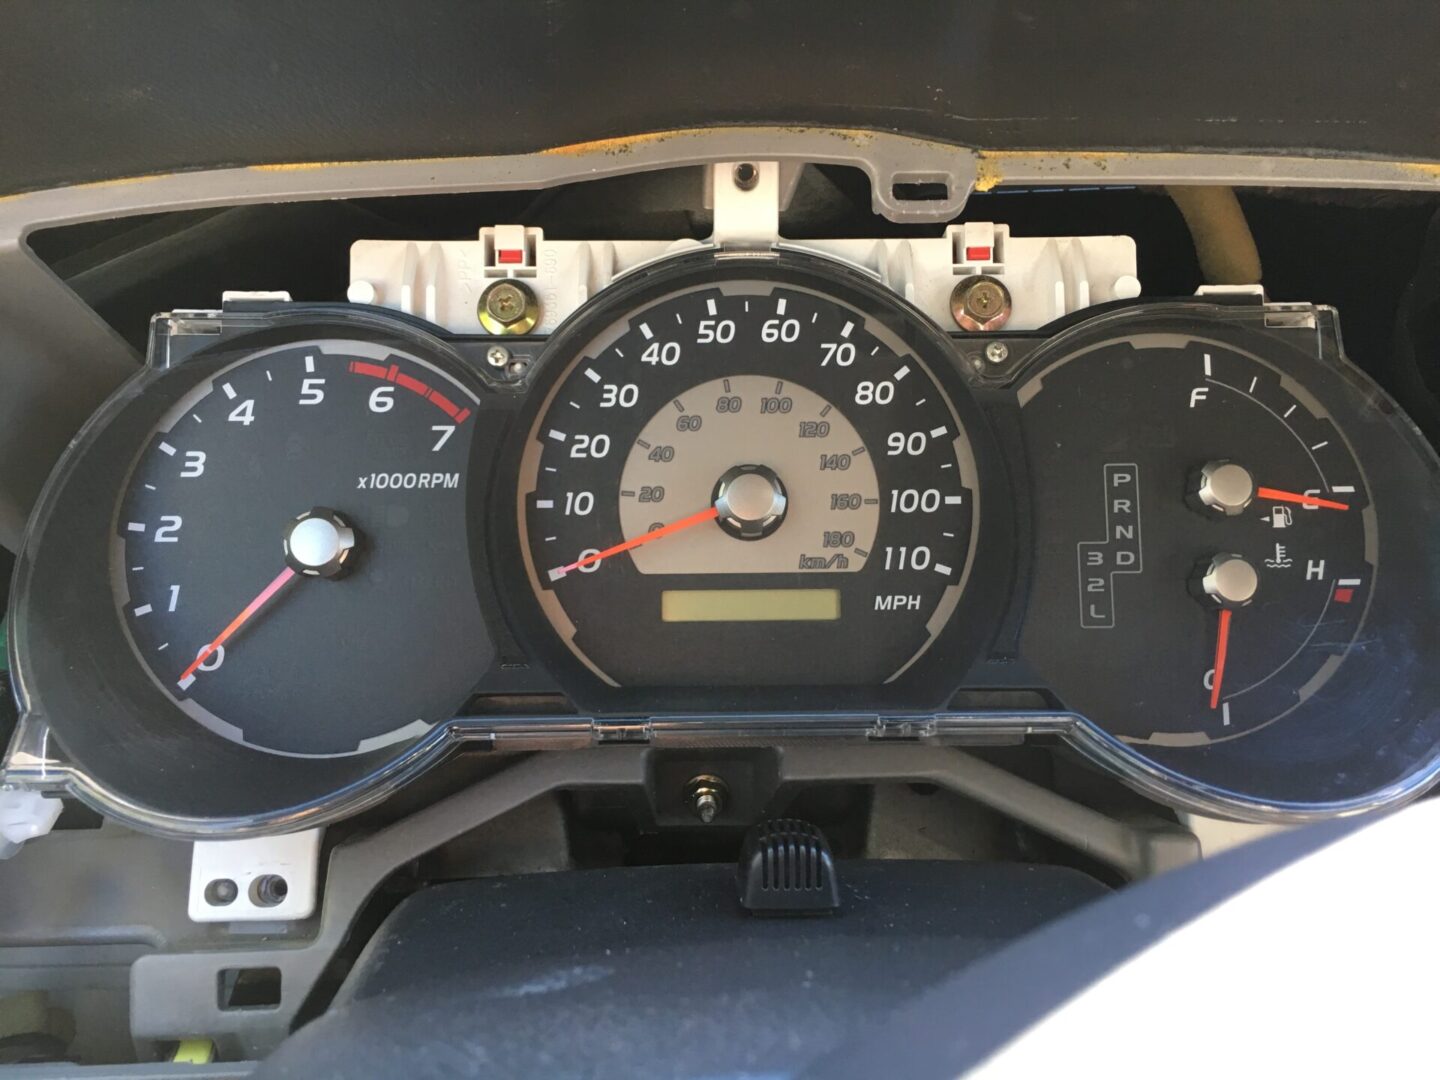
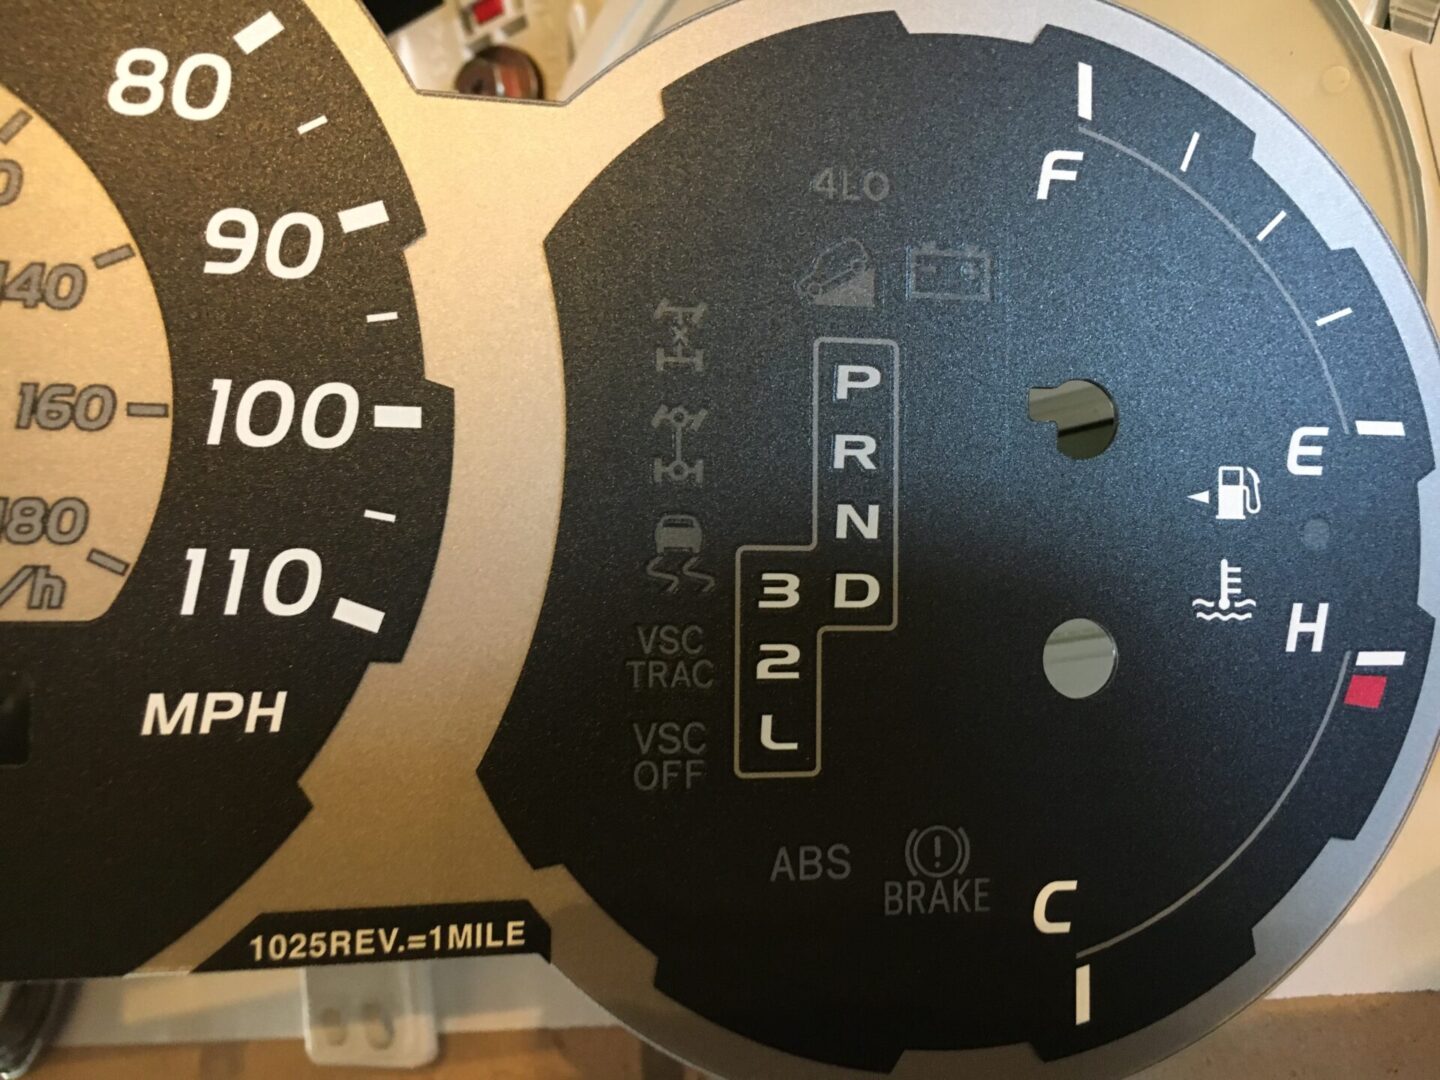
Please be aware that some 4th generation Toyota 4Runners have different gauges for different features depending on the year/trim you have. My 2003 Toyota 4Runner came in a 4×4 SR5 trim and the gauges look like this:

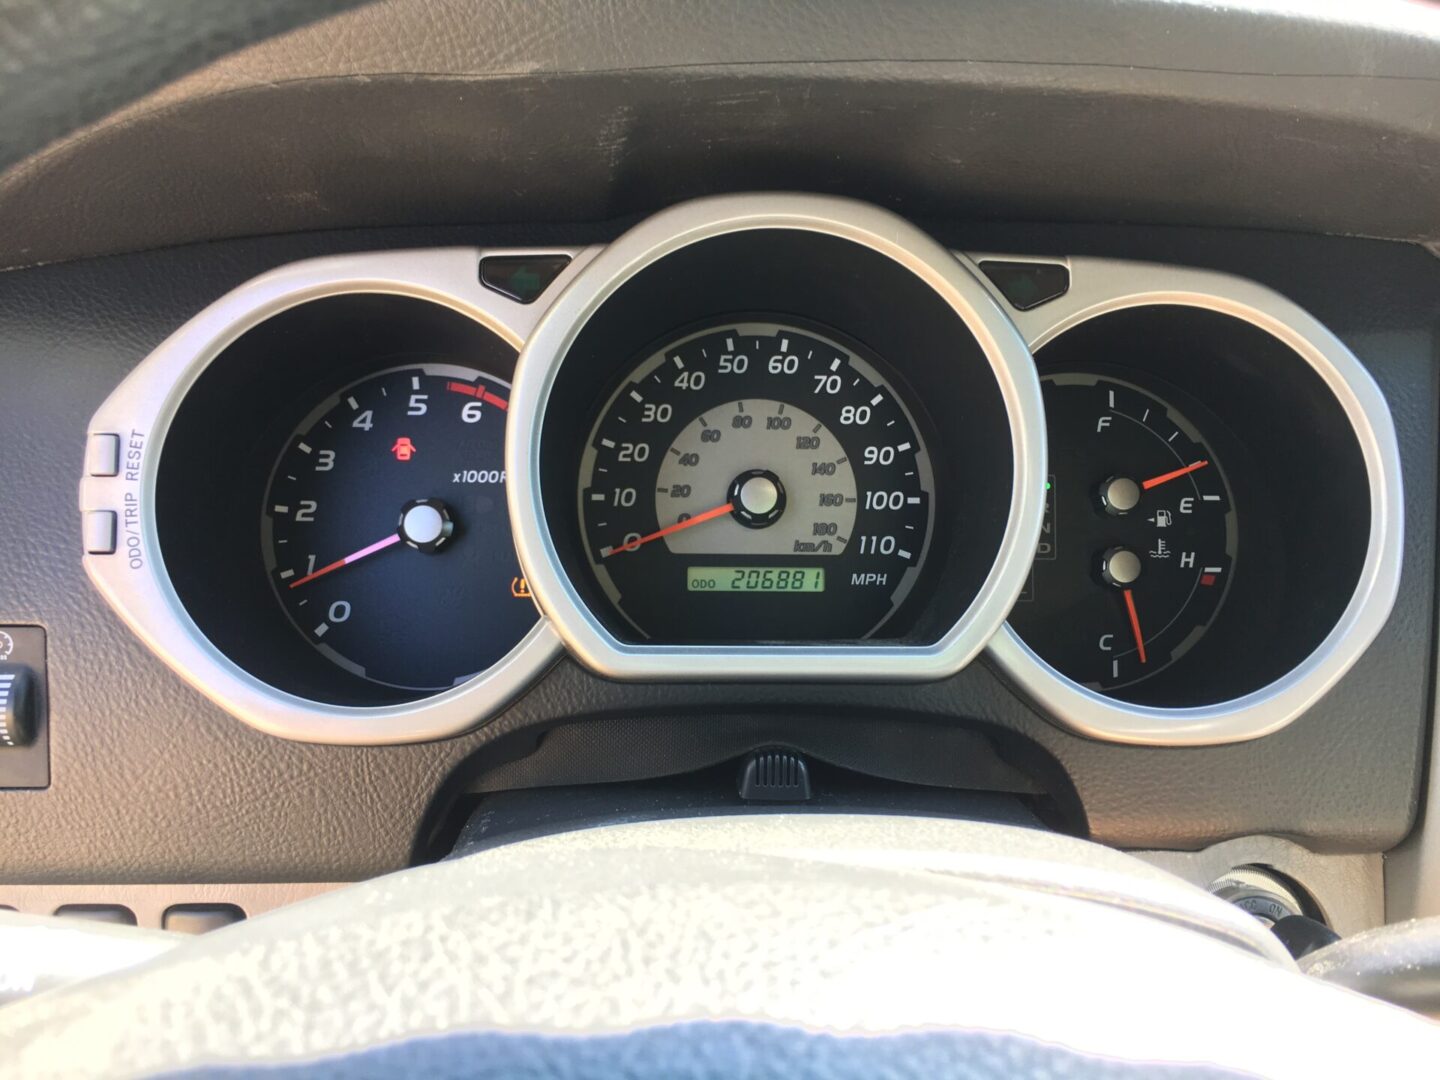
Compare that with the instrument cluster I got came from a Toyota 4Runner that may have been a newer model that had side curtain airbags (RSCA OFF button). This button is for Roll-sensing Side Curtain Airbags. There is also a light for tire pressure sensors, but my car doesn’t have it.

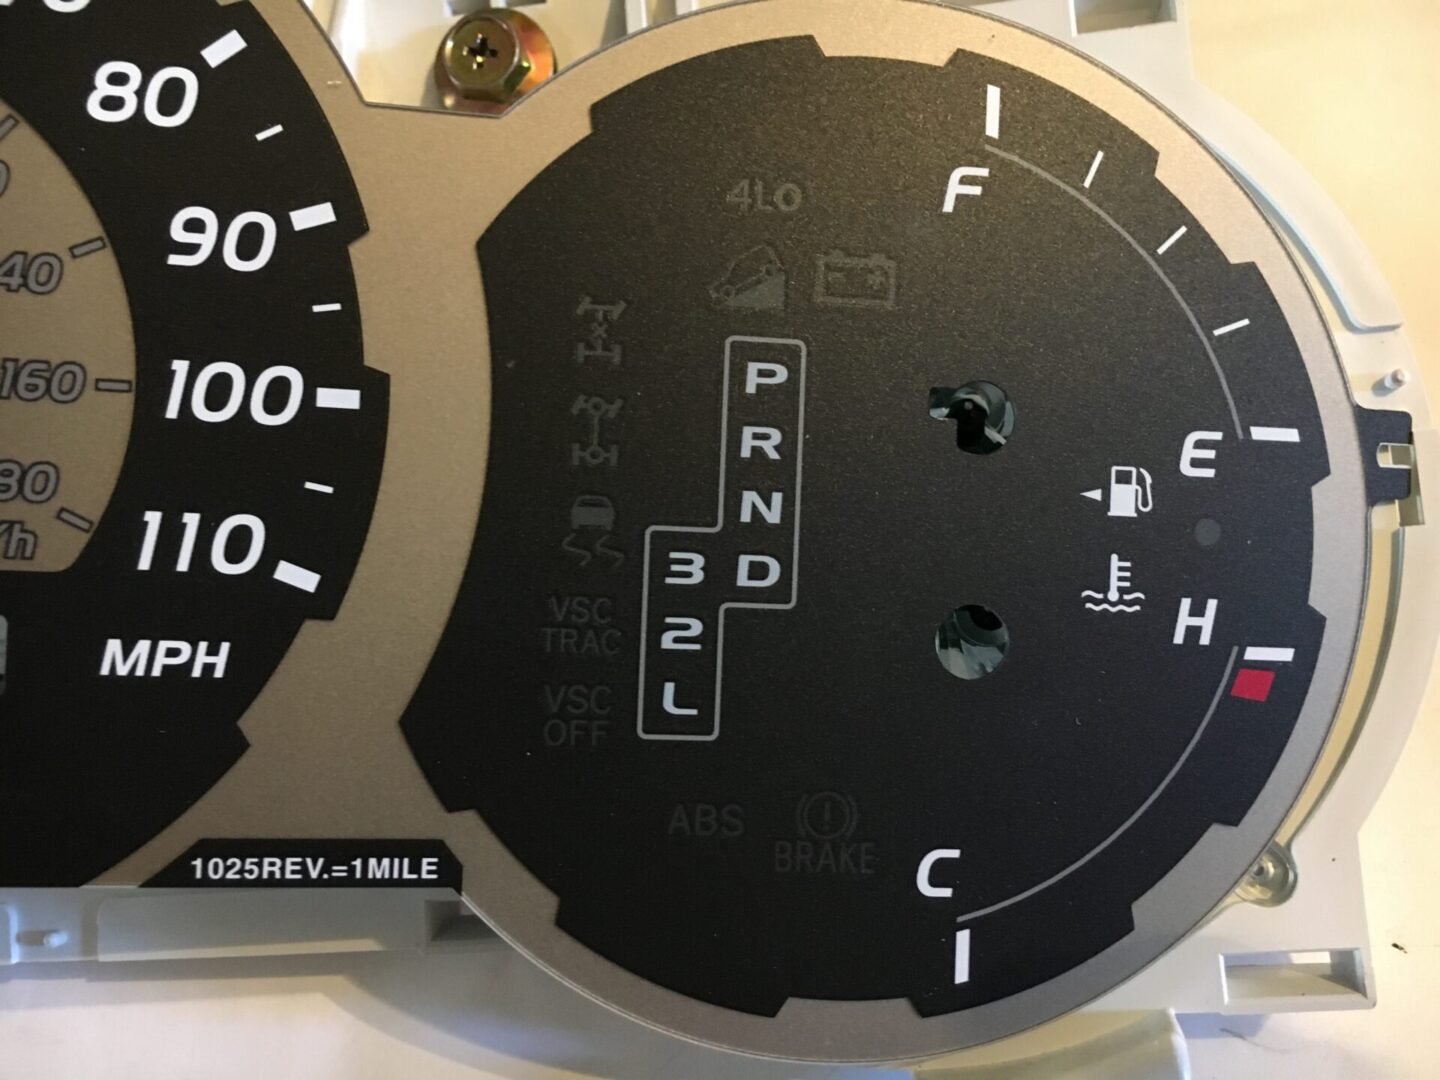
Because of this difference, I needed to transfer over the gauge face. I removed the glass off the front (two screws below instrument cluster mounting bolts), then popped off the plexiglass. Then I was able to replace the gauge face.
If you have bought an instrument cluster that looks different than yours, you can transfer the gauges over. Carefully pull up on the gauge needles without moving their positions. Then, the gauges can be carefully removed from their place and transferred over. You can then replace the gauge needles back into the same positions as you removed them.
")
")
")
4 Comments
Hey, I followed your tutorial and transferred my mileage from my original cluster to a different one. The new cluster I transferred to did not have 4×4 and I thought just by transferring the LED that it would work in the car. The light does not work when I engage 4WD High or low in my car and I was wondering if you knew of another chip that stores the data that makes the LED light up when engaged, that needs to be transferred as well. I’ve searched the internet with no success and am hoping you can help with this.
This is a tough one and I don’t know for certain if it can be done. From looking at the circuit diagrams, it looks like the 4WD is controlled through a separate component. You can see in the photo that the instrument cluster seems to have a diode, resistor, and capacitor for the 4WD light. I’m wondering if its possible to transfer this over from your old one to your new one. Perhaps you can compare the difference in the circuitry on the board between the old and new one. I’m not sure if this actually would work or not, just throwing some ideas out there.
If you need to enlarge the image, try right-clicking and open in new tab.
Thank you! I will give it a look hopefully I can figure it out