
When you make purchases through links on this site, The Track Ahead may earn an affiliate commission. Also, these posts are based off my own experiences. I am not responsible for any action you take as a result of reading this. Learn More
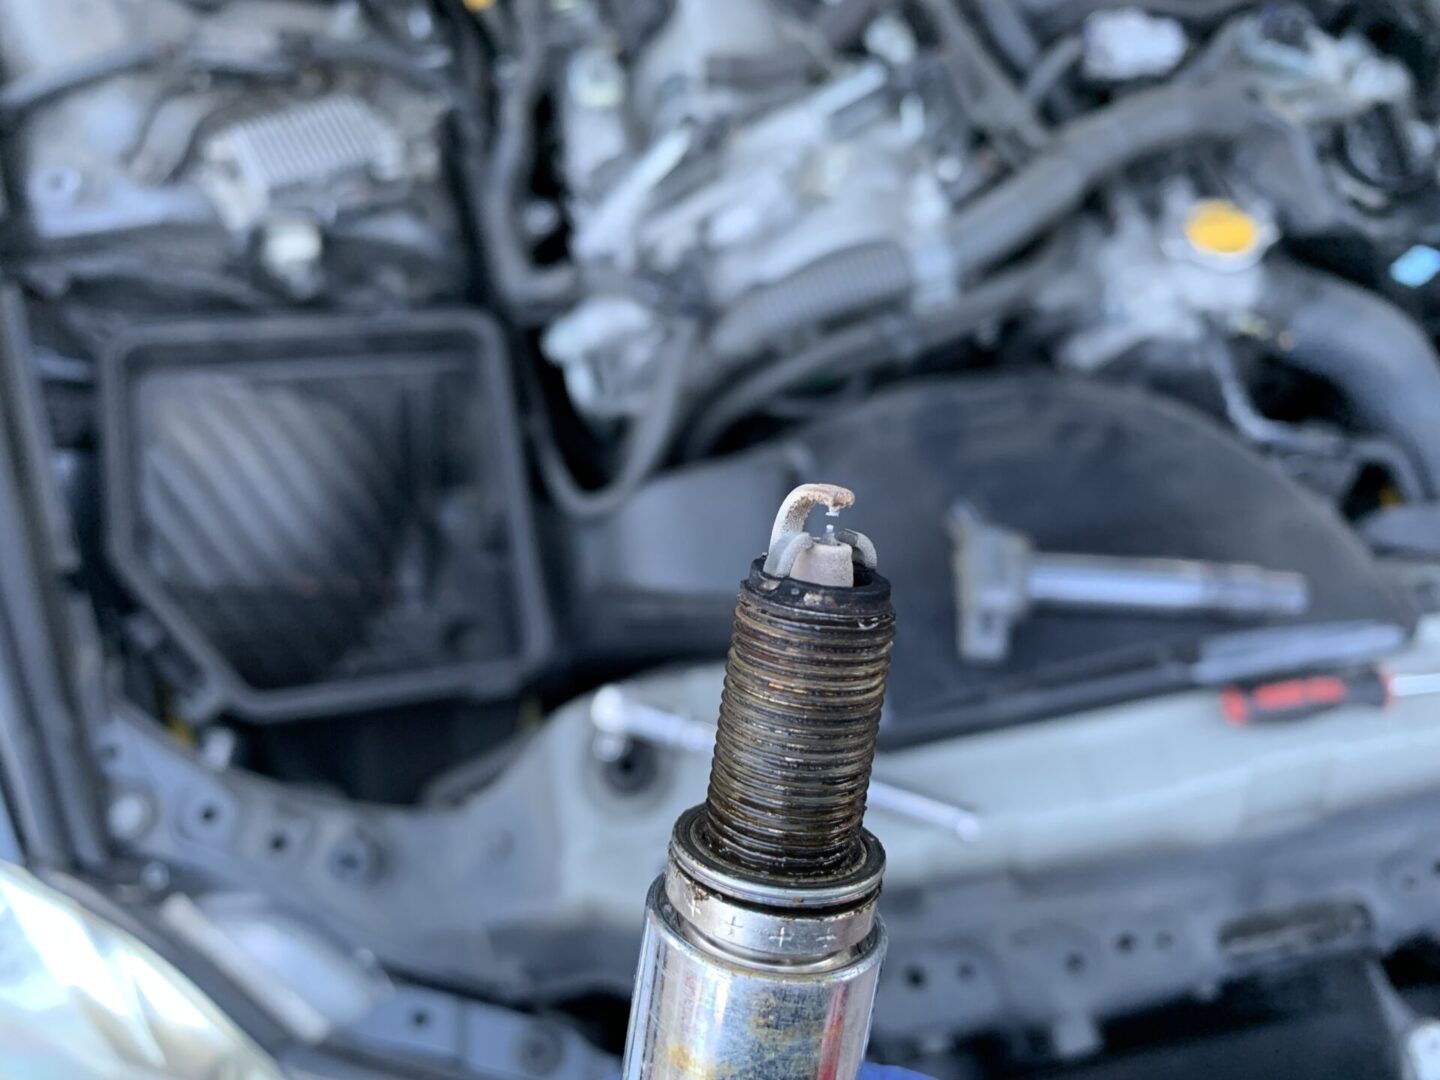
I had gotten an engine code recently showing a misfire in one of the cylinders in my Lexus IS350, which had gone away after resetting. However, I knew that since I was overdue for a spark plug replacement, it was probably time to do it. I discovered that there was some pretty bad fouling on two of the six spark plugs. After replacing all the spark plugs, I never had the check engine light come on again and I knew I’d be good for at least another 60k miles.
Replacing the spark plugs is not a difficult job to do; the hardest part of it all is removing all of the connectors and various ducts while keeping track of them all. Besides that, as long as you have all the necessary tools, parts, and materials, you should have no problem performing this maintenance. This write-up should be valid for the 2nd generation IS350. The spark plug replacement performed here was on a 2006 Lexus IS350.
Tools & Materials
Spark Plugs
I typically use OEM products for most maintenance on my cars and this is no exception. The same OEM spark plugs are used for the 2nd gen IS350’s (2006-2013).
Lexus OEM part #90919-01249 (made by Denso part #FK20HBR11): Search on Ebay
Be aware that there are counterfeit spark plugs out there. I don’t recommend going to Amazon for these parts as it’s really hard to tell what is real or not (even if reviews are good and plentiful, they can still be fake reviews). To ensure you get authentic parts, stick with Lexus OEM spark plugs and go into your local Lexus/Toyota dealership to the parts counter to get the parts. Or if you purchase online, stick with Ebay and make sure you are buying from a reputable seller who show photos of the actual item, which you can then verify come in OEM packaging.
5/8″ Spark Plug Socket, Socket Extensions, Socket Wrench Set, Torque Wrench
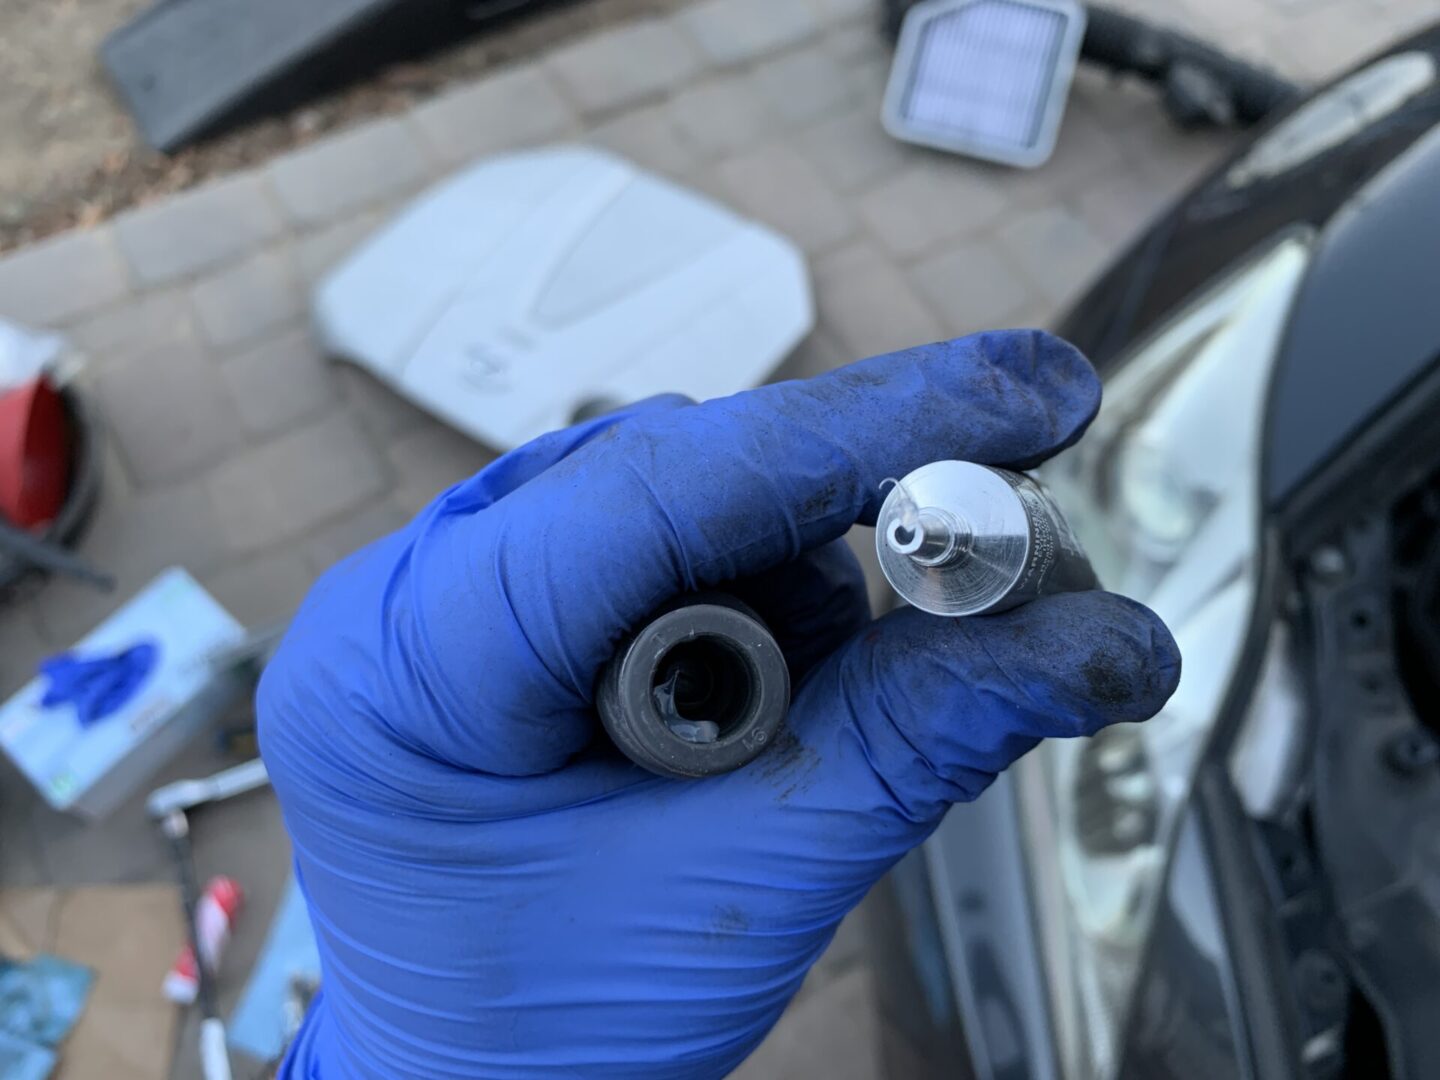
You will need a 5/8″ spark plug socket, which might be included in a mechanics tool set. The spark plug socket has a little rubber boot that helps pull the loosened spark plug during removal and helps place the new spark plug in place during installation.
You will also need a socket wrench set as well as plenty of socket extensions in order to get your spark plug socket deep into the chamber where the spark plugs goes into. I’ve discovered there are some 2-in-1 socket wrench + extension sets, which might fit your need.
Standalone 5/8″ Spark Plug Socket: CRAFTSMAN 5/8″ Spark Plug Socket, 3/8-Inch Drive
5/8″ Spark Plug Socket + Extension Combo: LEXIVON 5/8″ Swivel Magnetic Spark Plug Socket, 3/8″ Drive
Socket Wrench Set: EPAUTO 45 Pieces 3/8″ Drive Socket Set with 72-Tooth Pear Head Ratchet
Torque Wrench: EPAuto 1/2-inch Drive Click Torque Wrench
Spark Plug Gap Tool
Whether you install new OEM or aftermarket spark plugs, they are supposed to come pre-gapped when you purchase them. No matter how many times I’ve heard to not adjust the gap on the plug (essentially trusting that they were pre-gapped properly and handled properly until it is in your hand), I always check the gap of every spark plug before I install them. You never know if they are truly pre-gapped, so you might as well be safe than to be sorry.
On my 2006 Lexus IS350, the spark plug gap should be 0.043″ gap. Likely other 2nd gen Lexus IS350’s will have the same spark plug gap, but you should always refer to your owner’s manual to be absolutely sure. If you want to learn more about checking and adjusting gapping on spark plugs, check out this post.
CTA Tools Ramp-Type Spark Plug Gapper
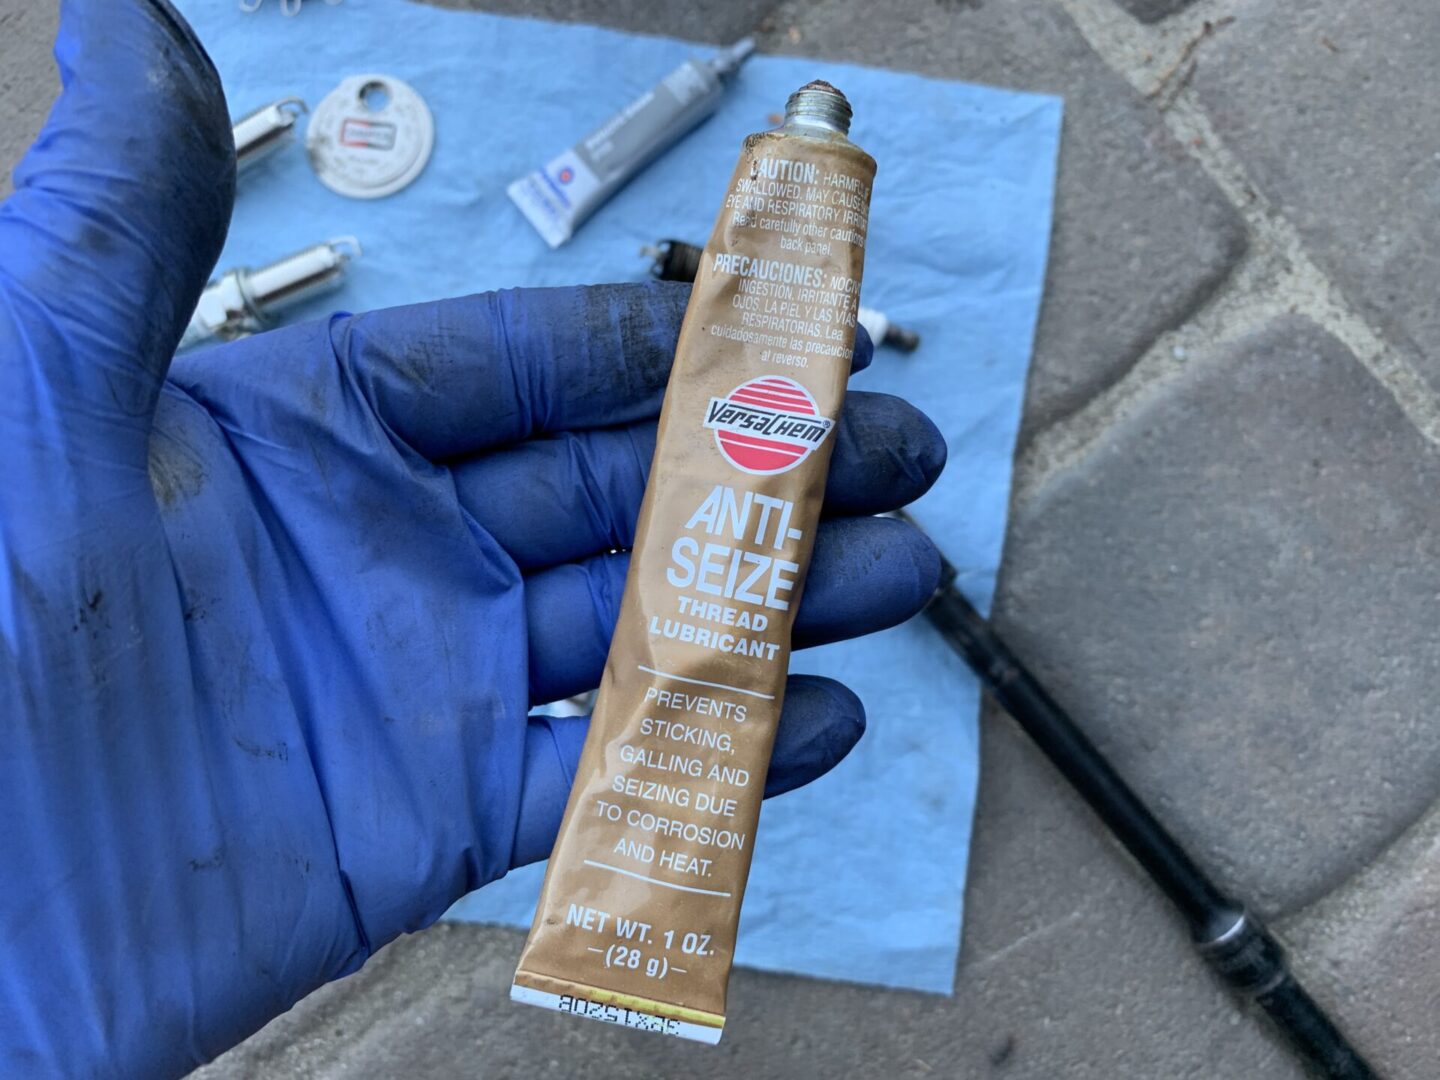
Anti-Seize Thread Lubricant
This will be used to apply in small amounts to the new spark plug threads to prevent it from seizing up, leaving you in a situation where you may be unable to remove it due to the high temperatures of the engine.
Amazon: Permatex Anti-Seize Lubricant, 1 oz. Tube
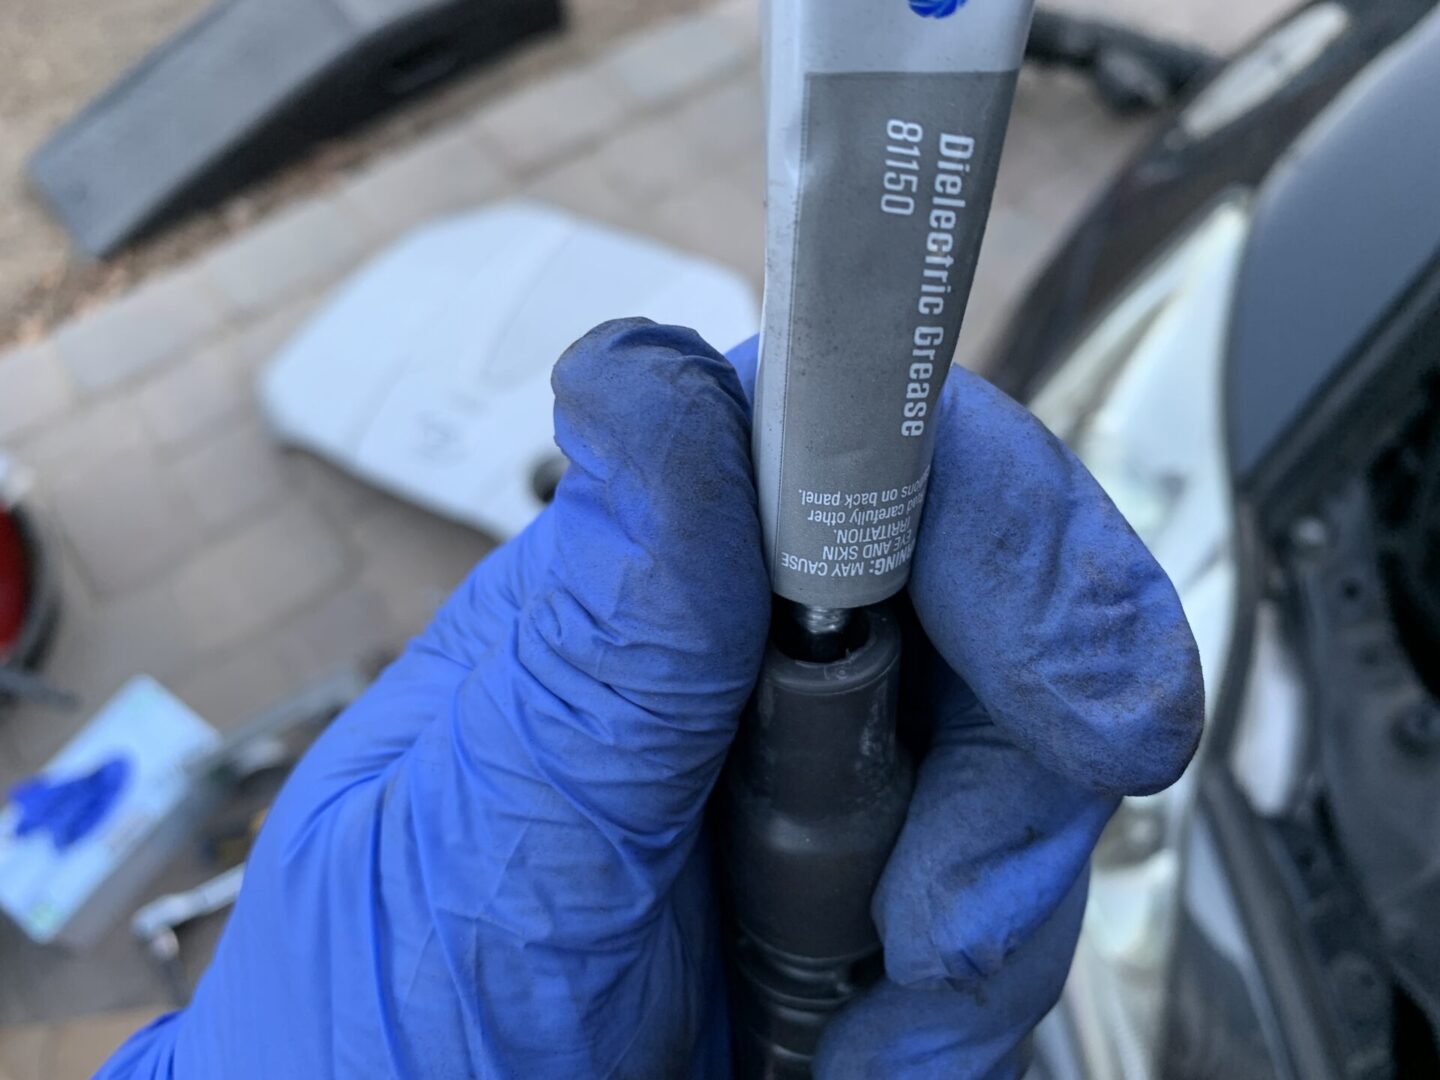
Dielectric Grease
Dielectric grease is applied to the inner portion of the ignition coil boot preventing voltage leaks and protecting electrical connections from salt, dirt, and corrosion.
Amazon: Permatex Dielectric Grease, 0.33 oz. Tube
How to Replace Spark Plugs
To start, you may remove the negative side of the battery if it makes you feel safer, however to service the spark plugs, it is not necessary.
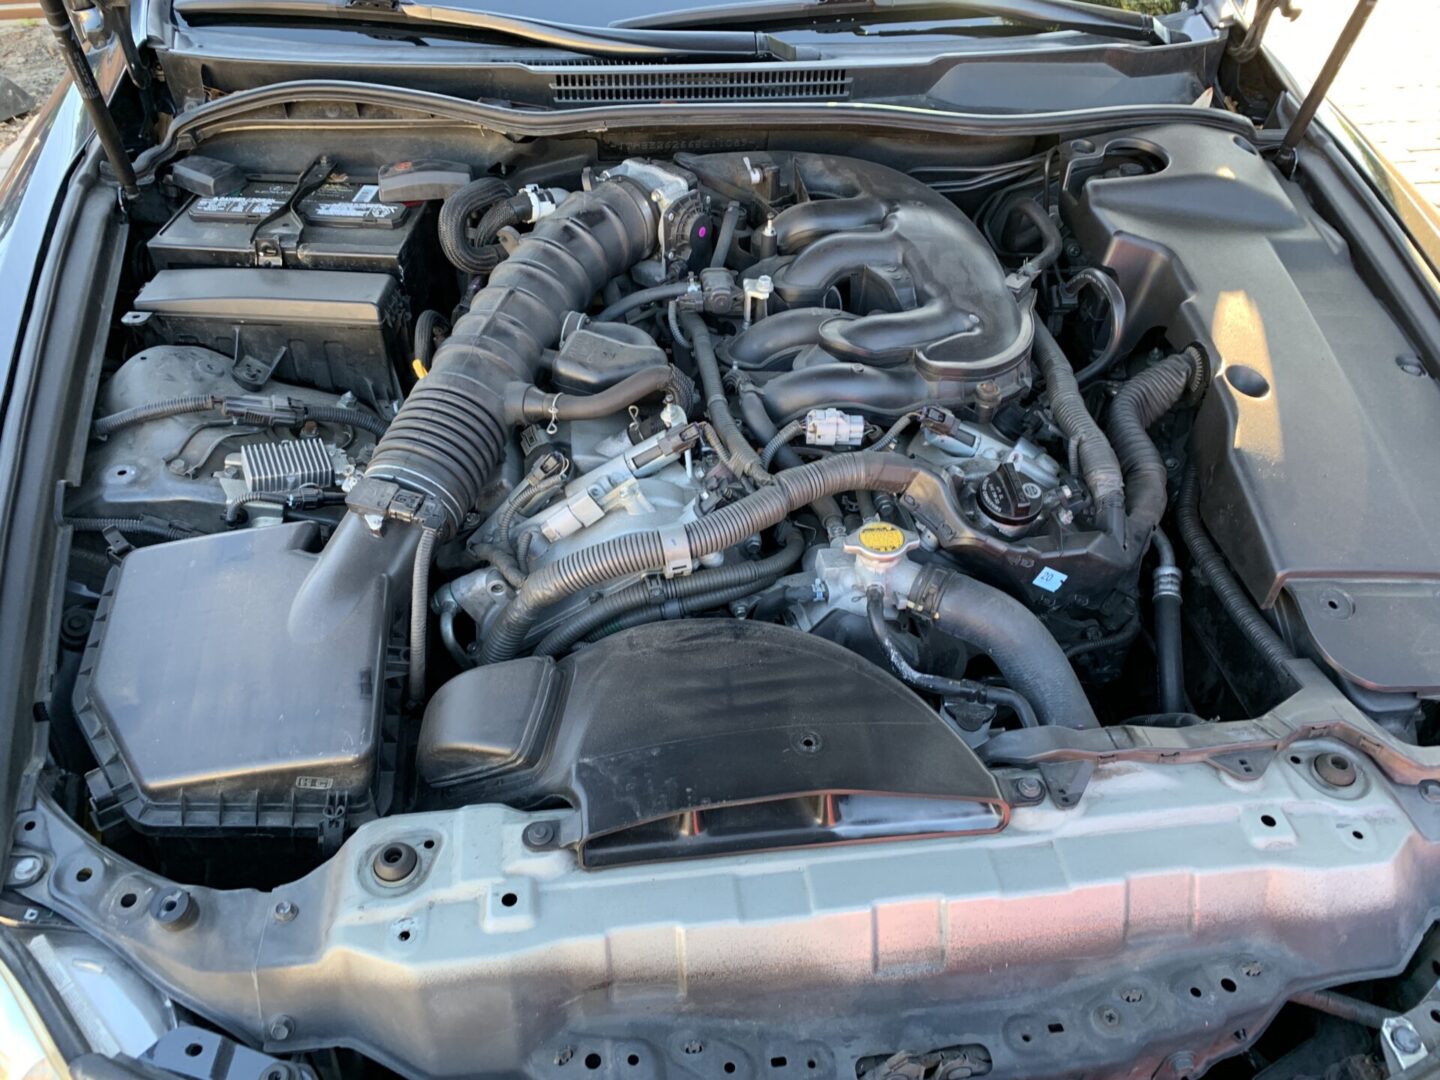
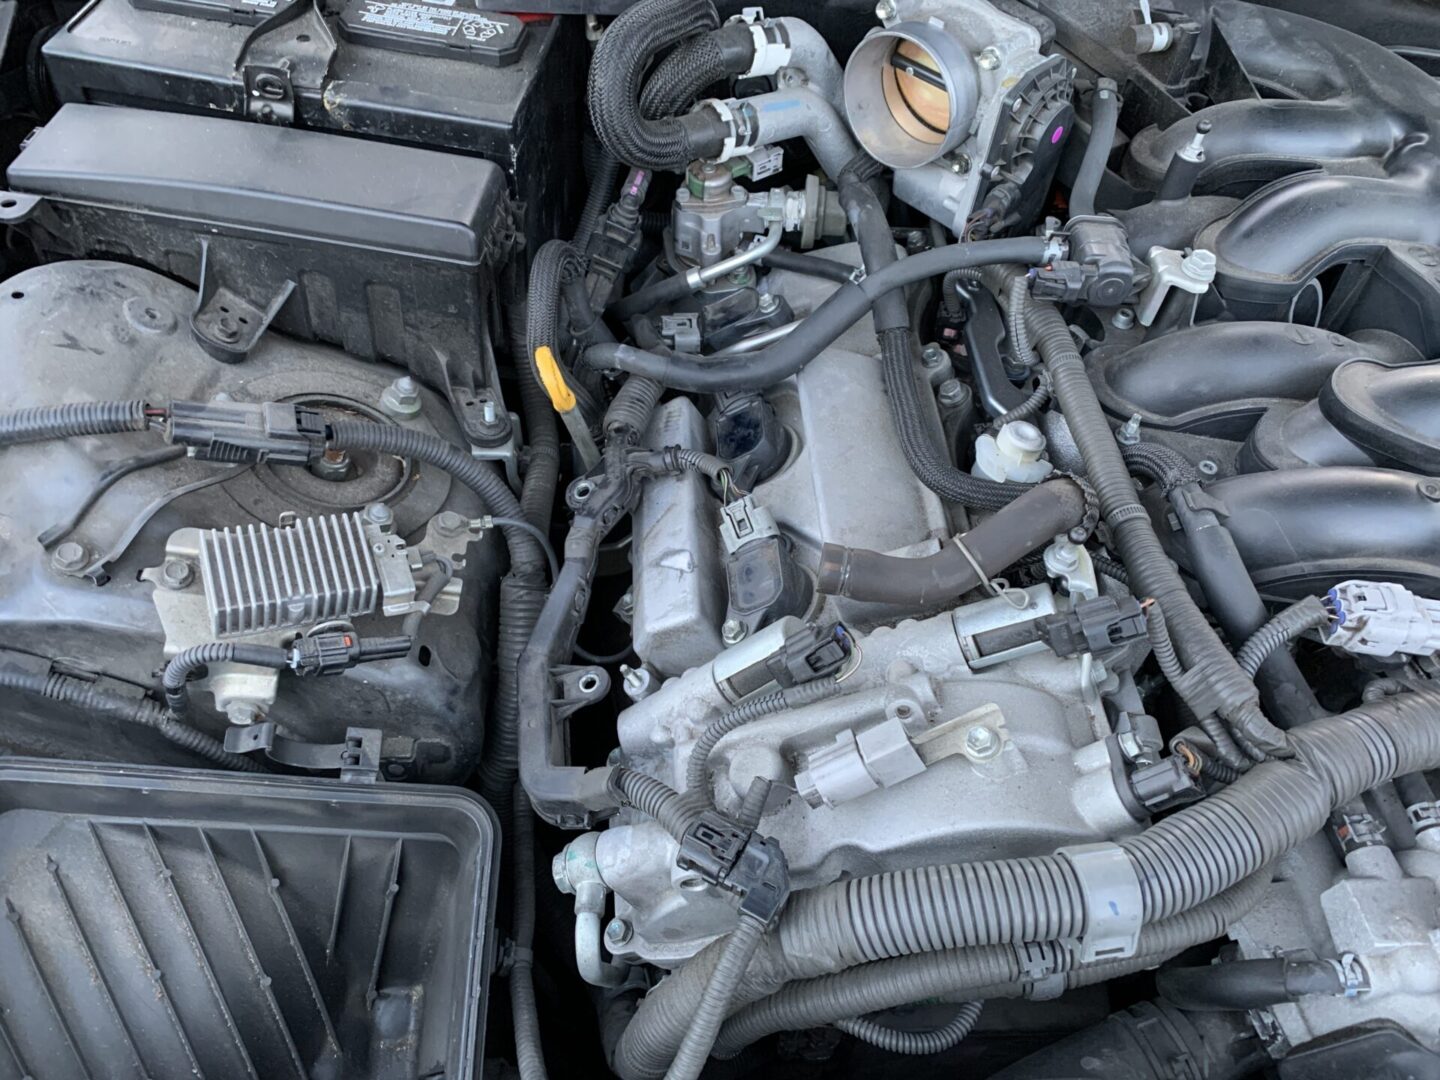
First, remove the engine cover and the plastic covers on both sides and in front. The photo below shows the engine cover, front cover, and the passenger’s side cover off, with the driver’s side cover yet to be removed.
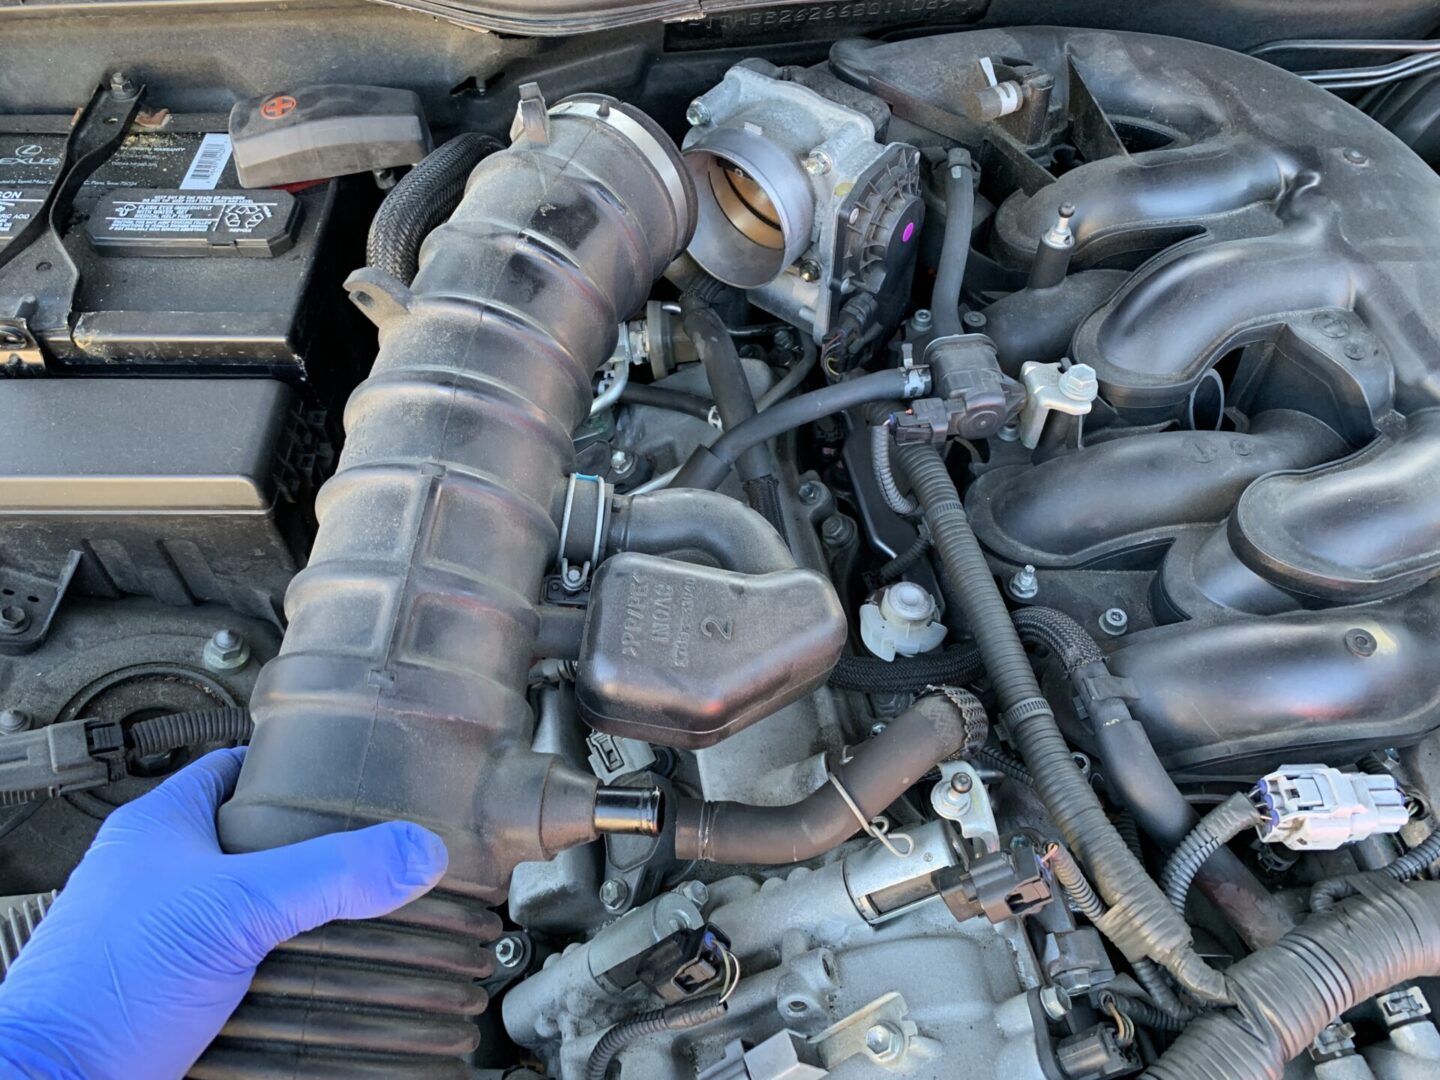
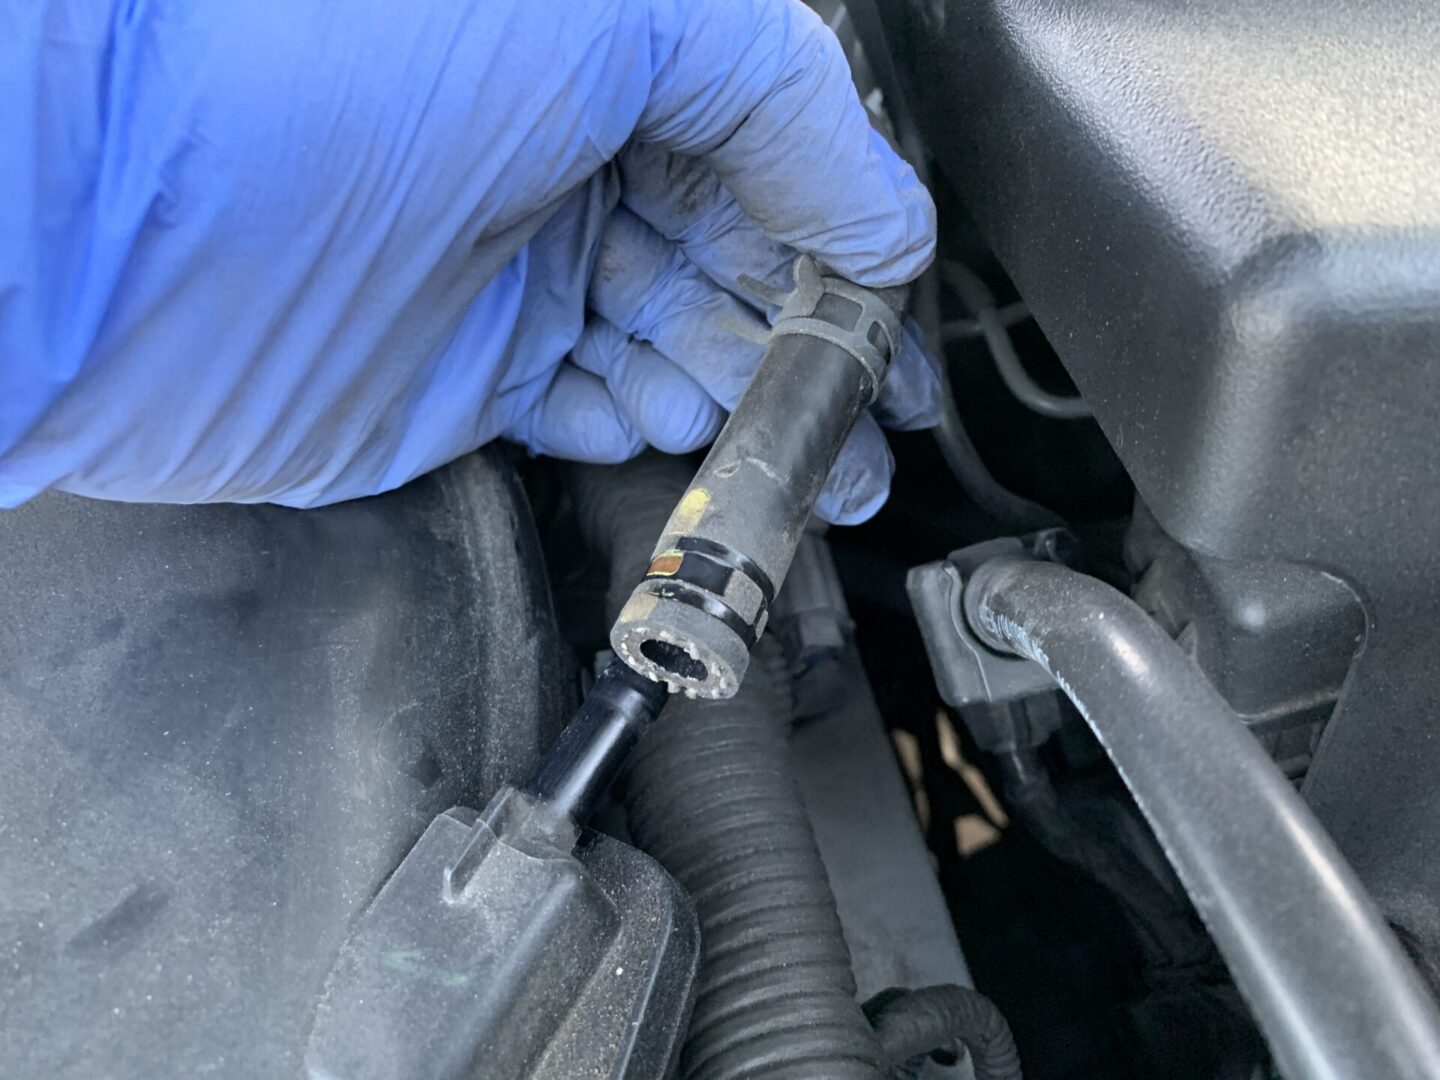
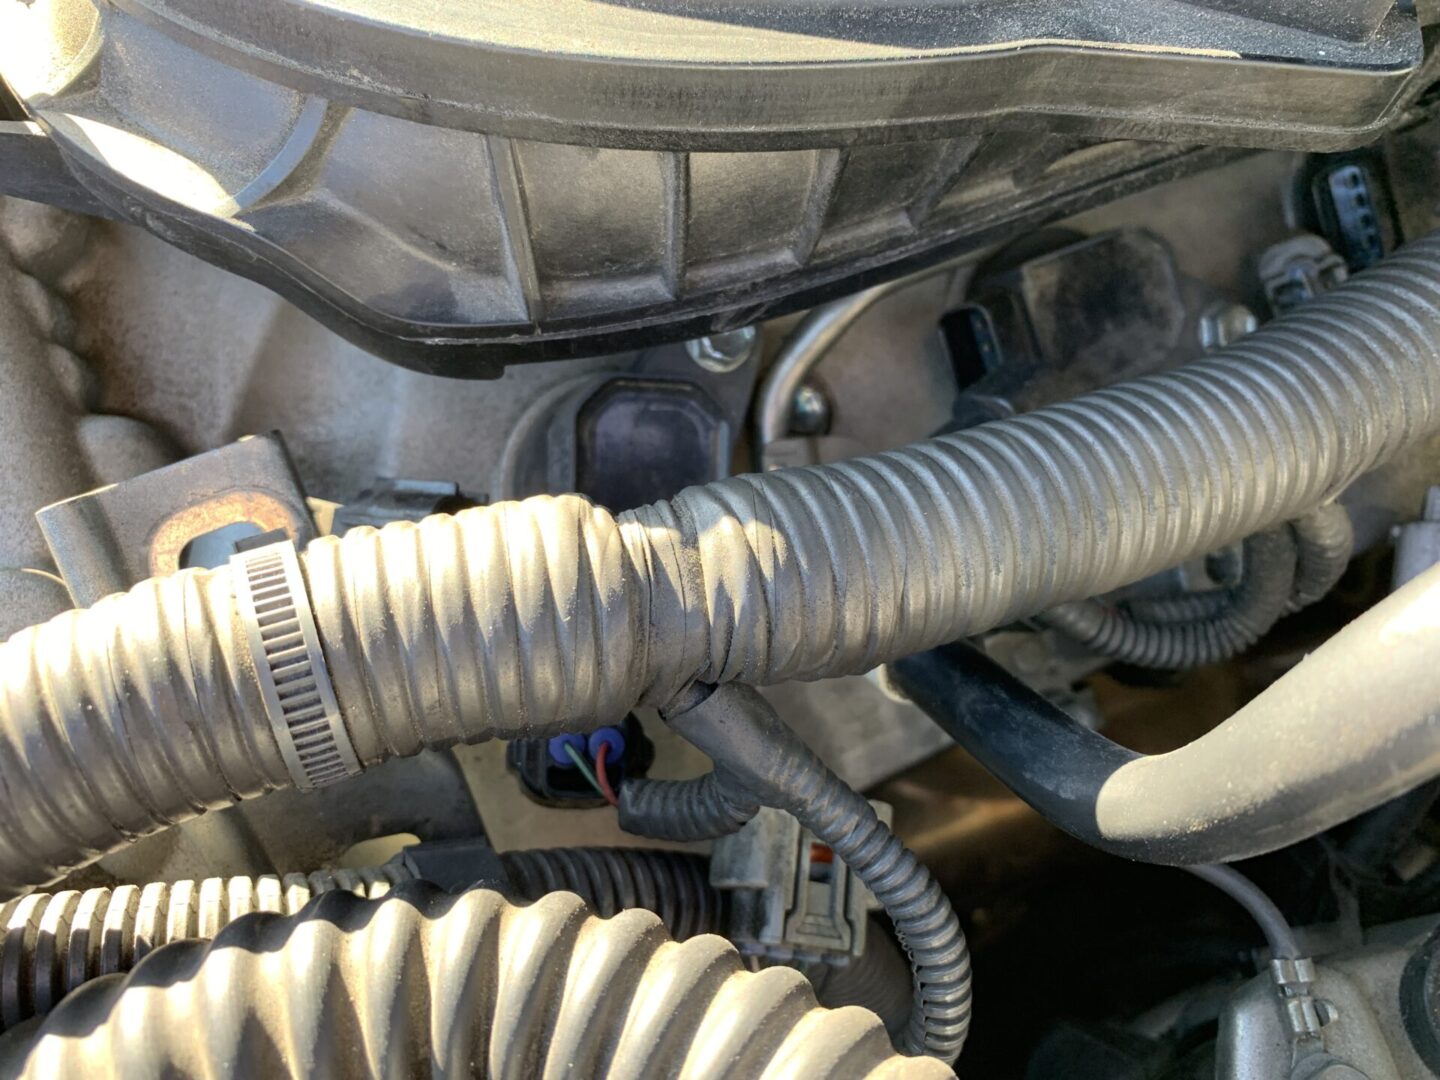
After removing the covers, you may now begin removing the air ducts. Start by removing the following connector to the intake.

Disconnect the following clamp and hose to the intake.
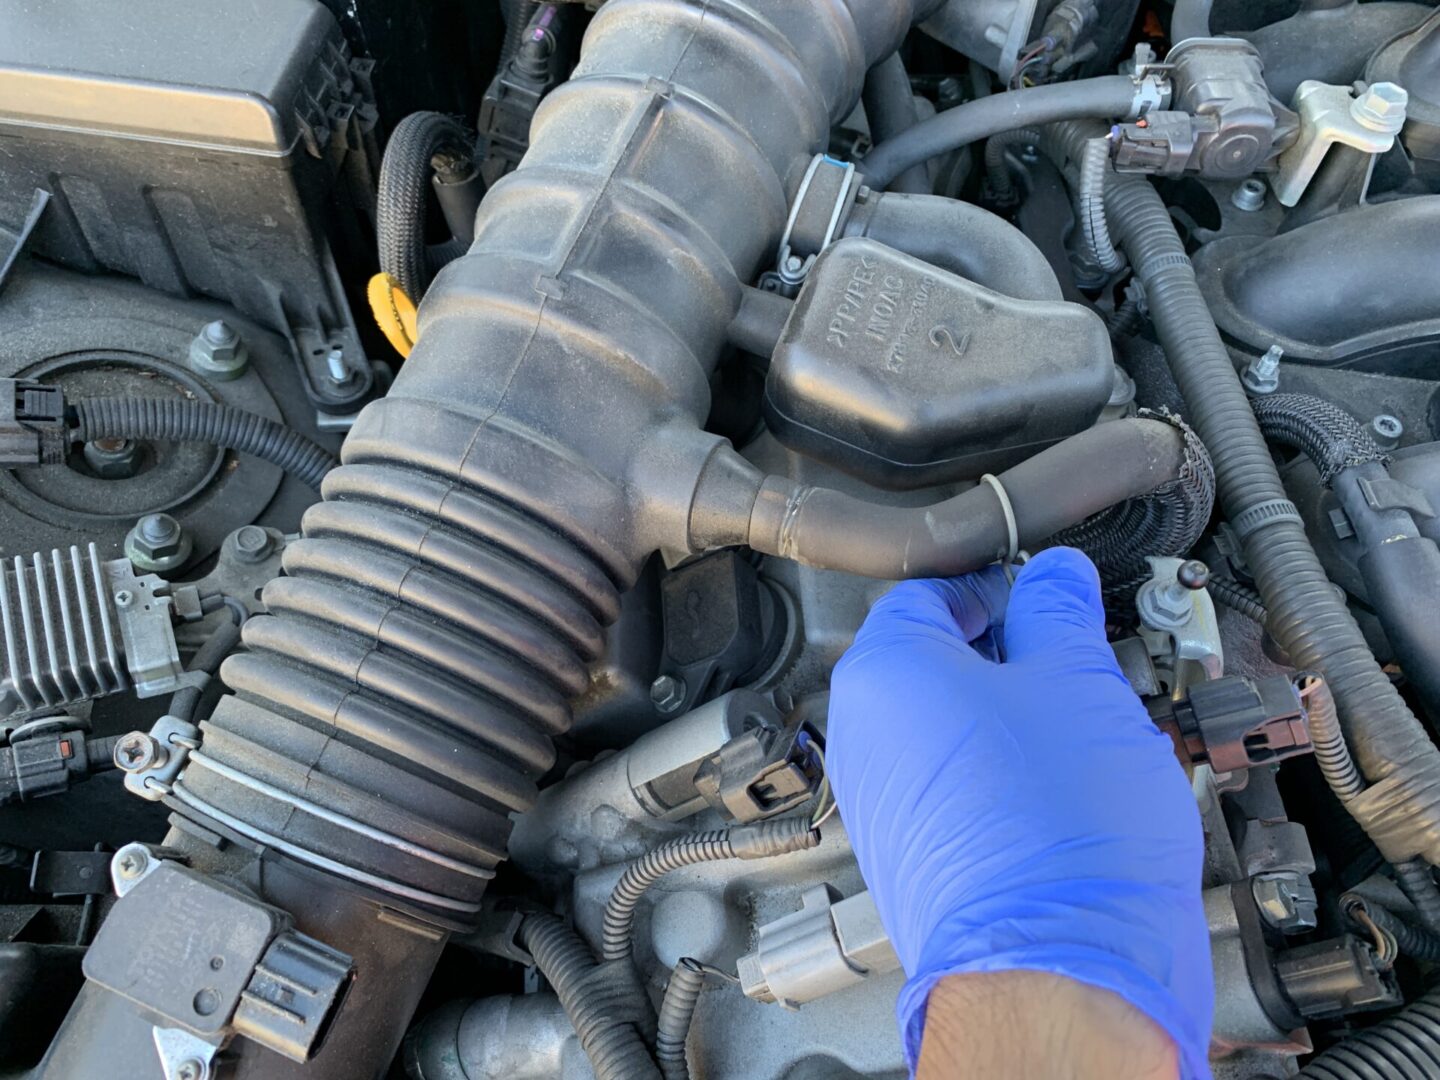

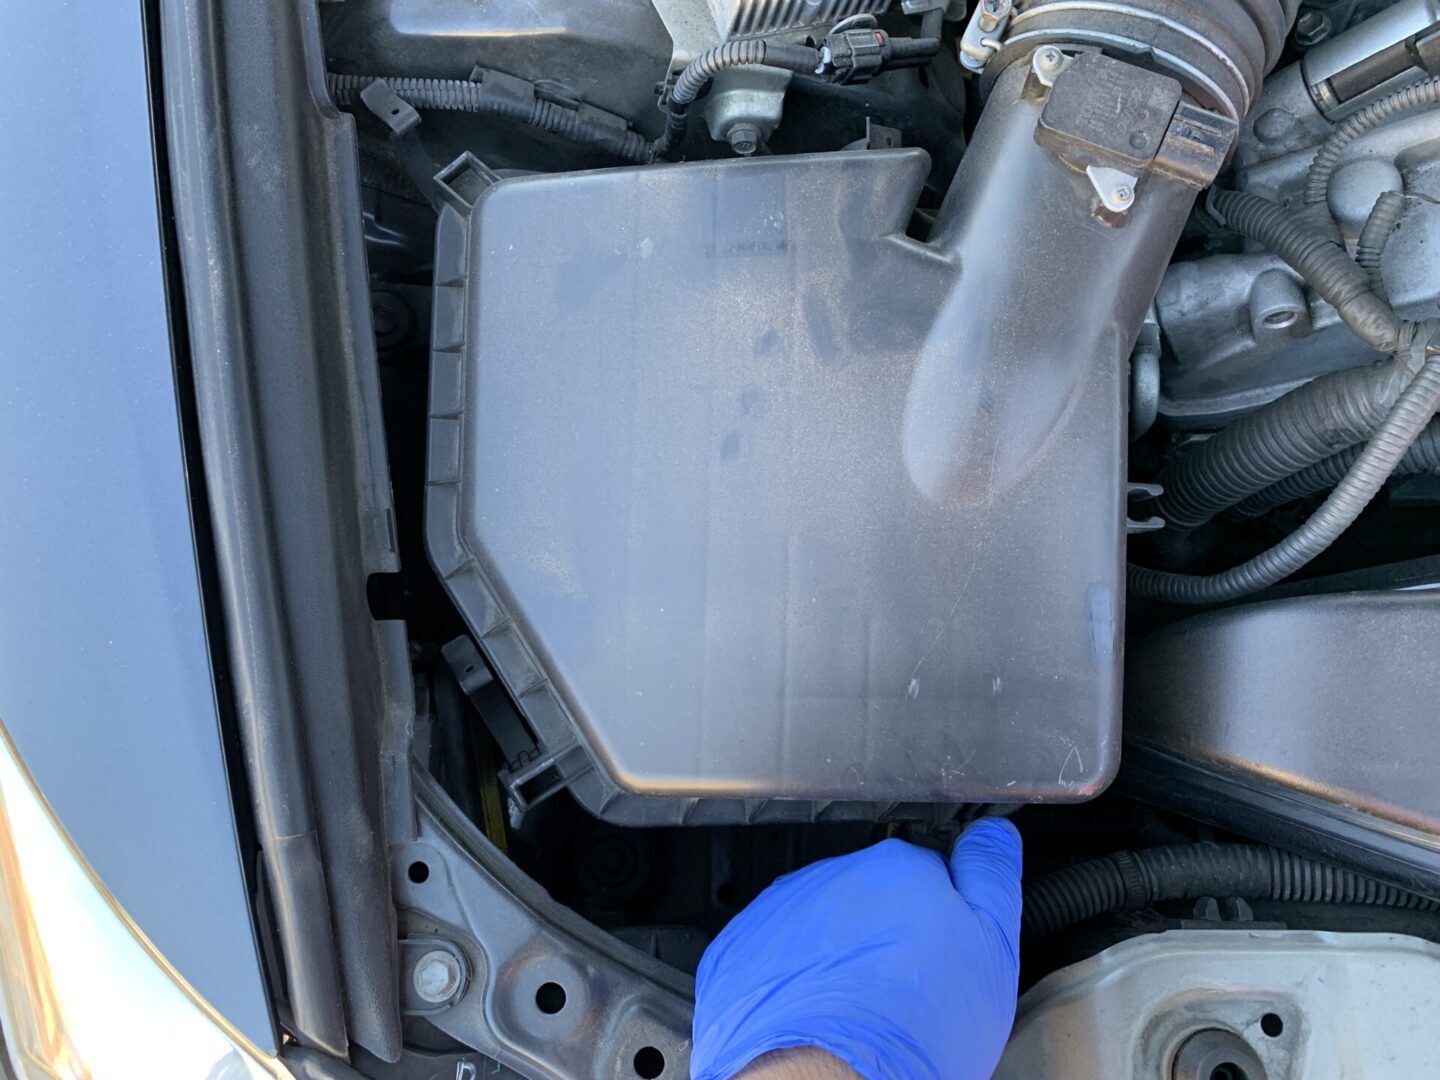
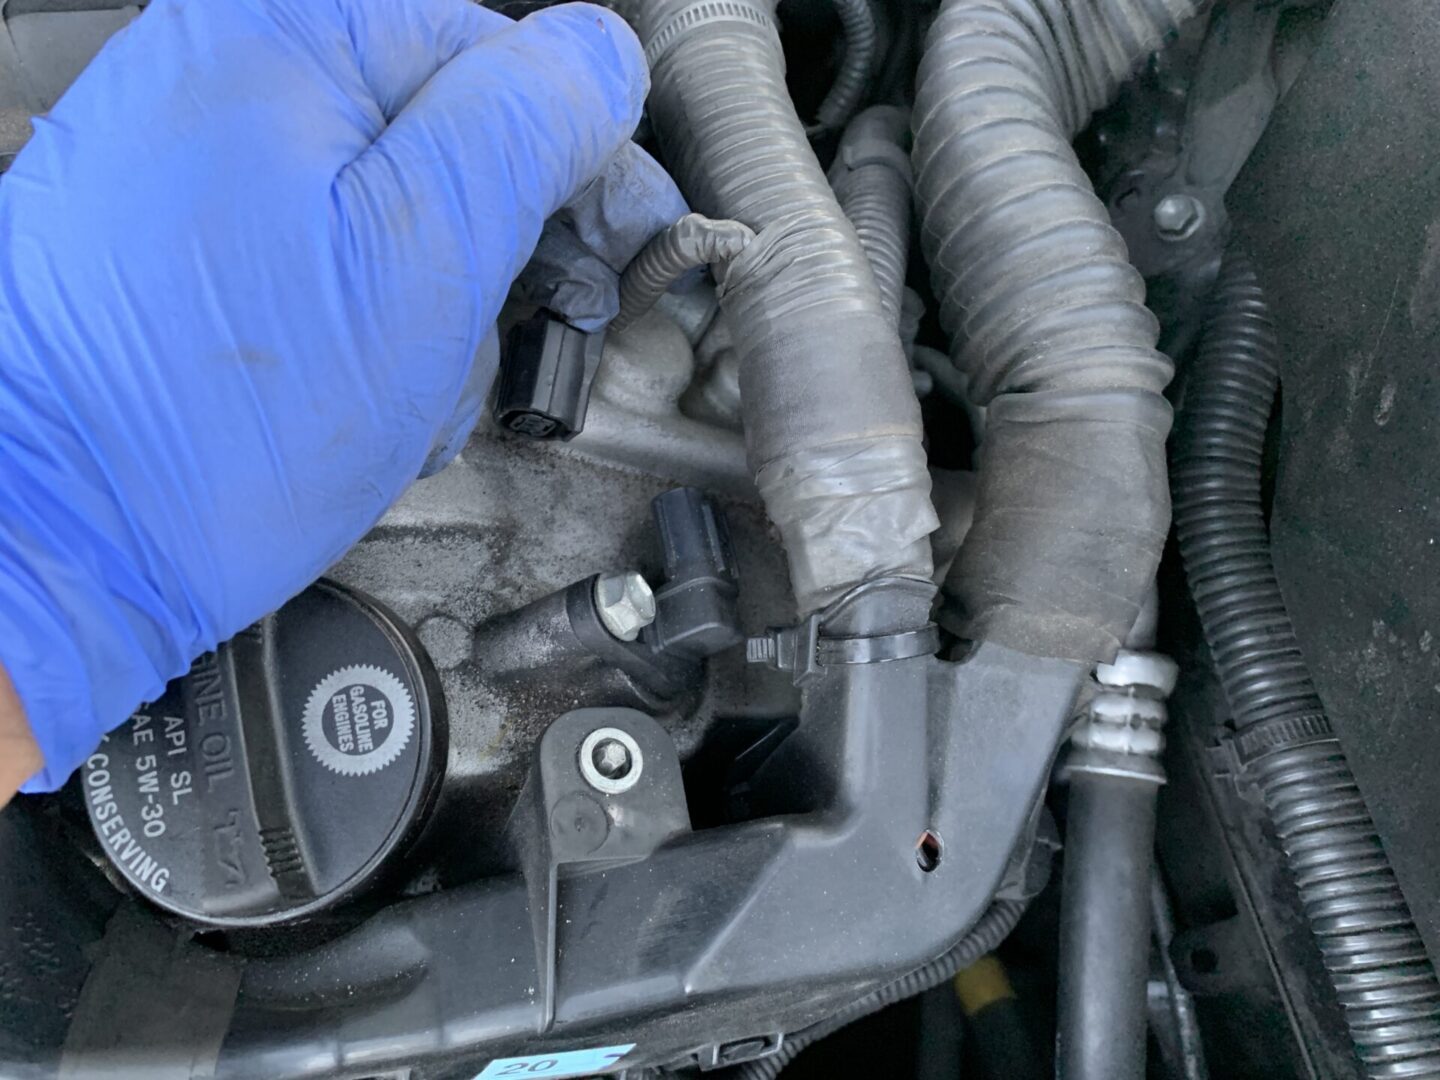
Open all of the clamps to the air filter housing.
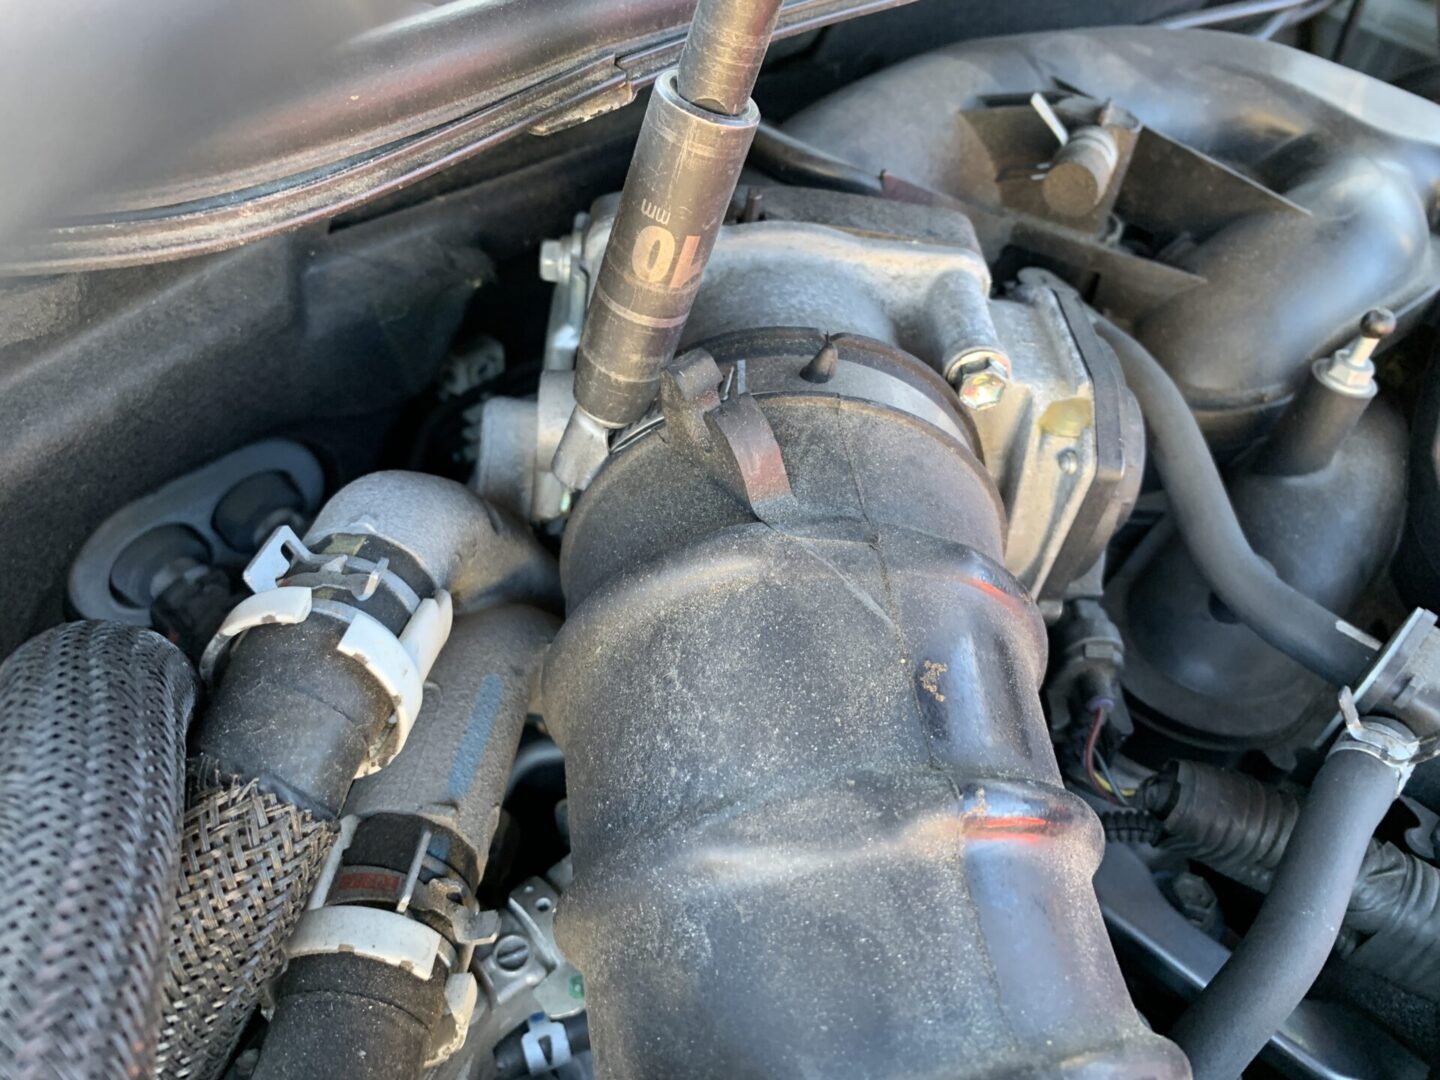
Use a 10mm socket to loosen the wire clamp holding the intake duct to the throttle body. You should now be able to wriggle the intake duct free from the throttle body remove the entire intake assembly.
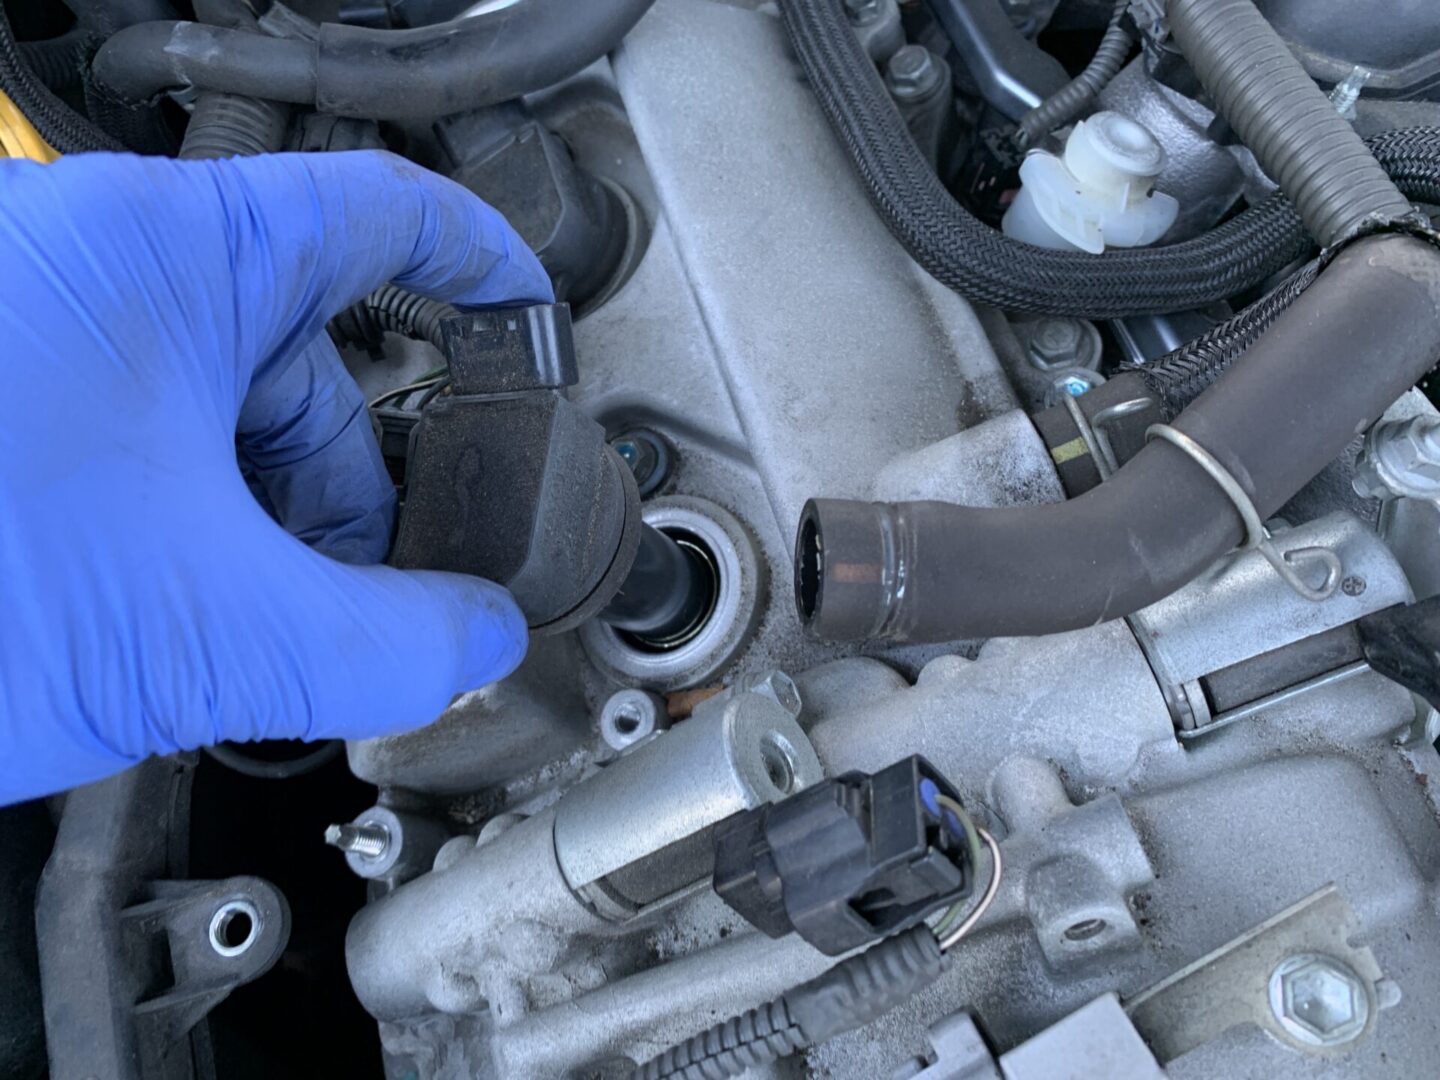
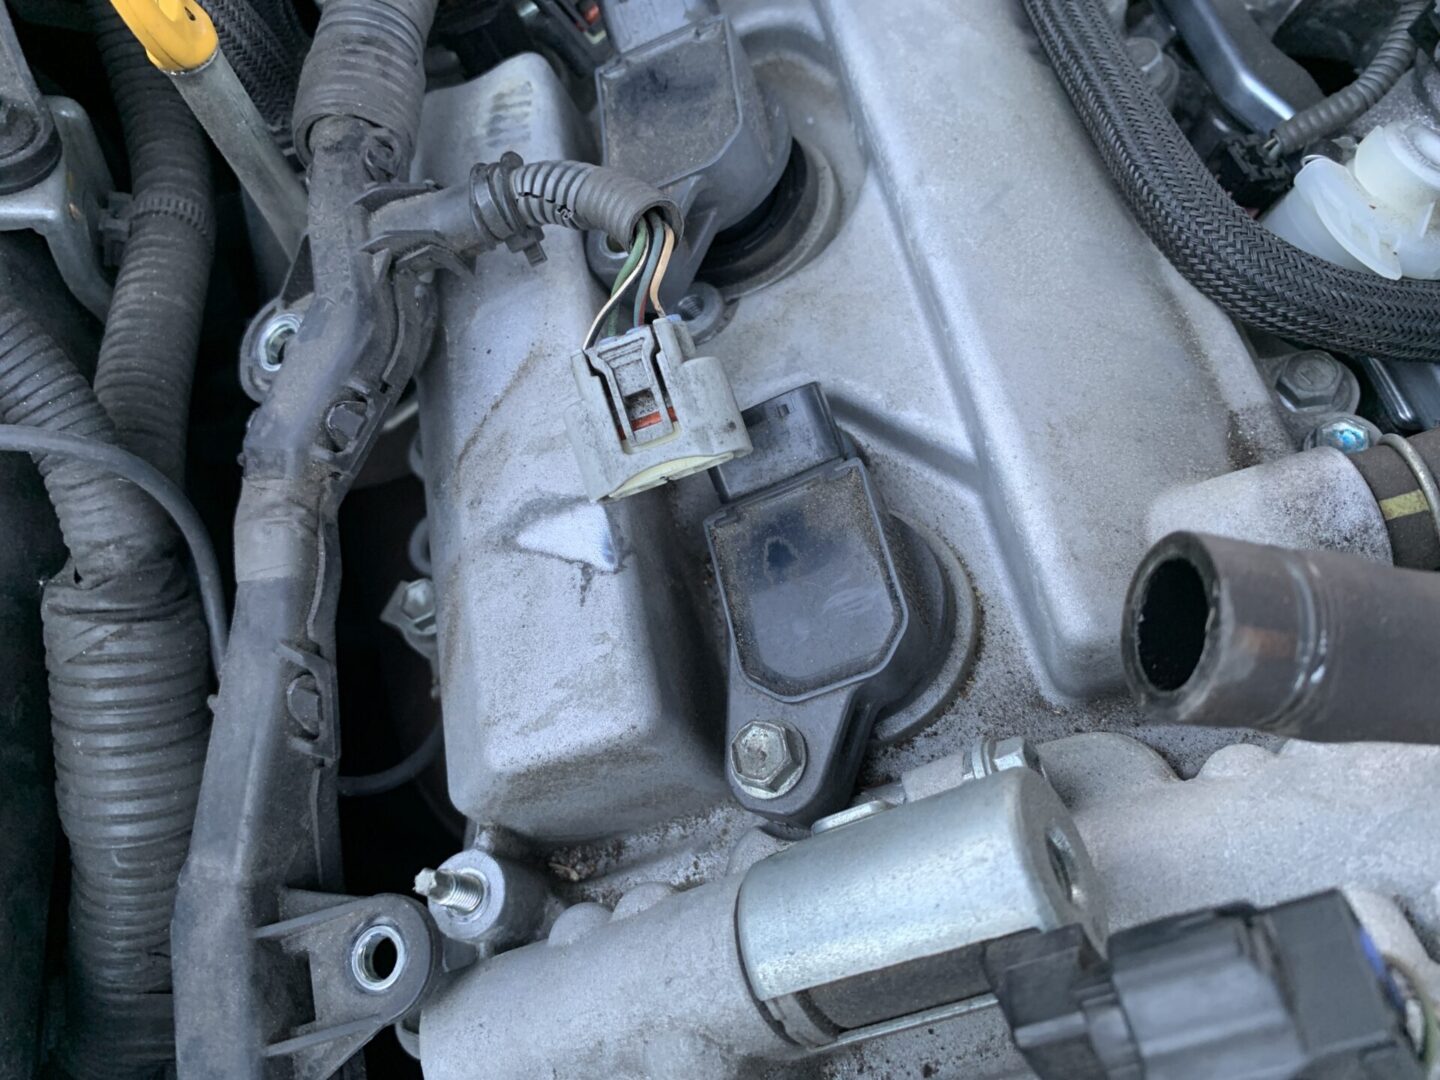
You now have access to the passenger side bank of the engine, which will allow you to replace the (3) spark plugs on this side. Disconnect all (3) connectors to the ignition coils. You can see them removed below.
Then remove the (2) 10mm nuts that hold the spark plugs connector harness.
Now, the spark plug connectors and wiring harness should be able to freely move out of the way so that you can replace the three spark plugs in the passenger side engine bank.
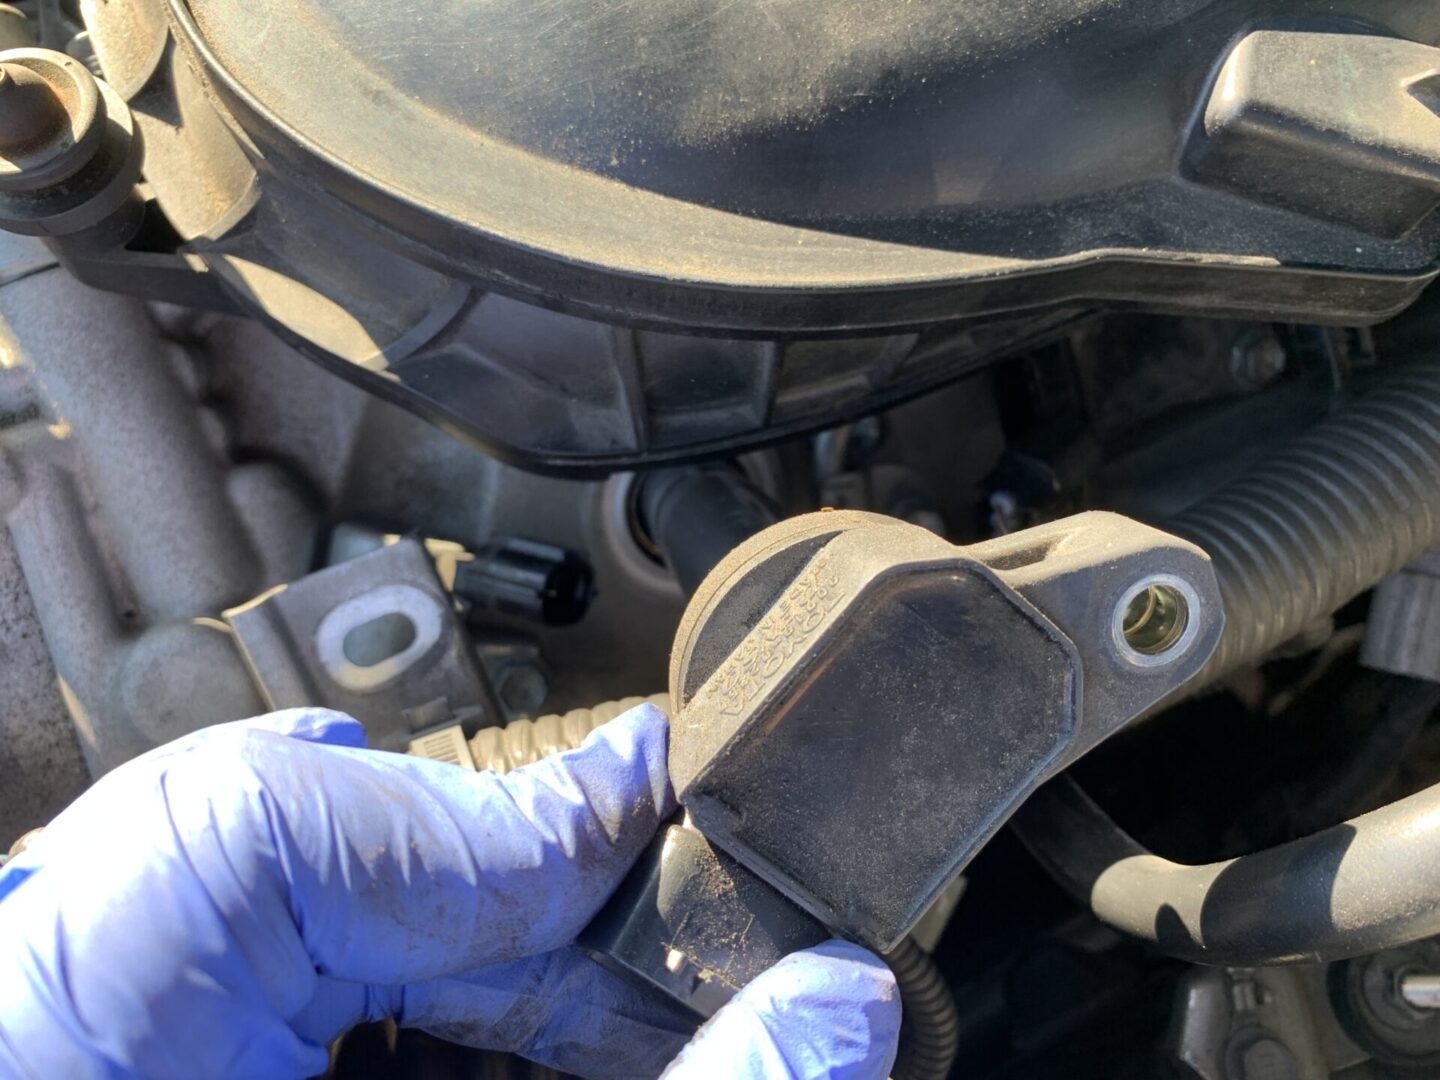
Using a 10mm socket, remove the (3) nuts holding in the three ignition coils.

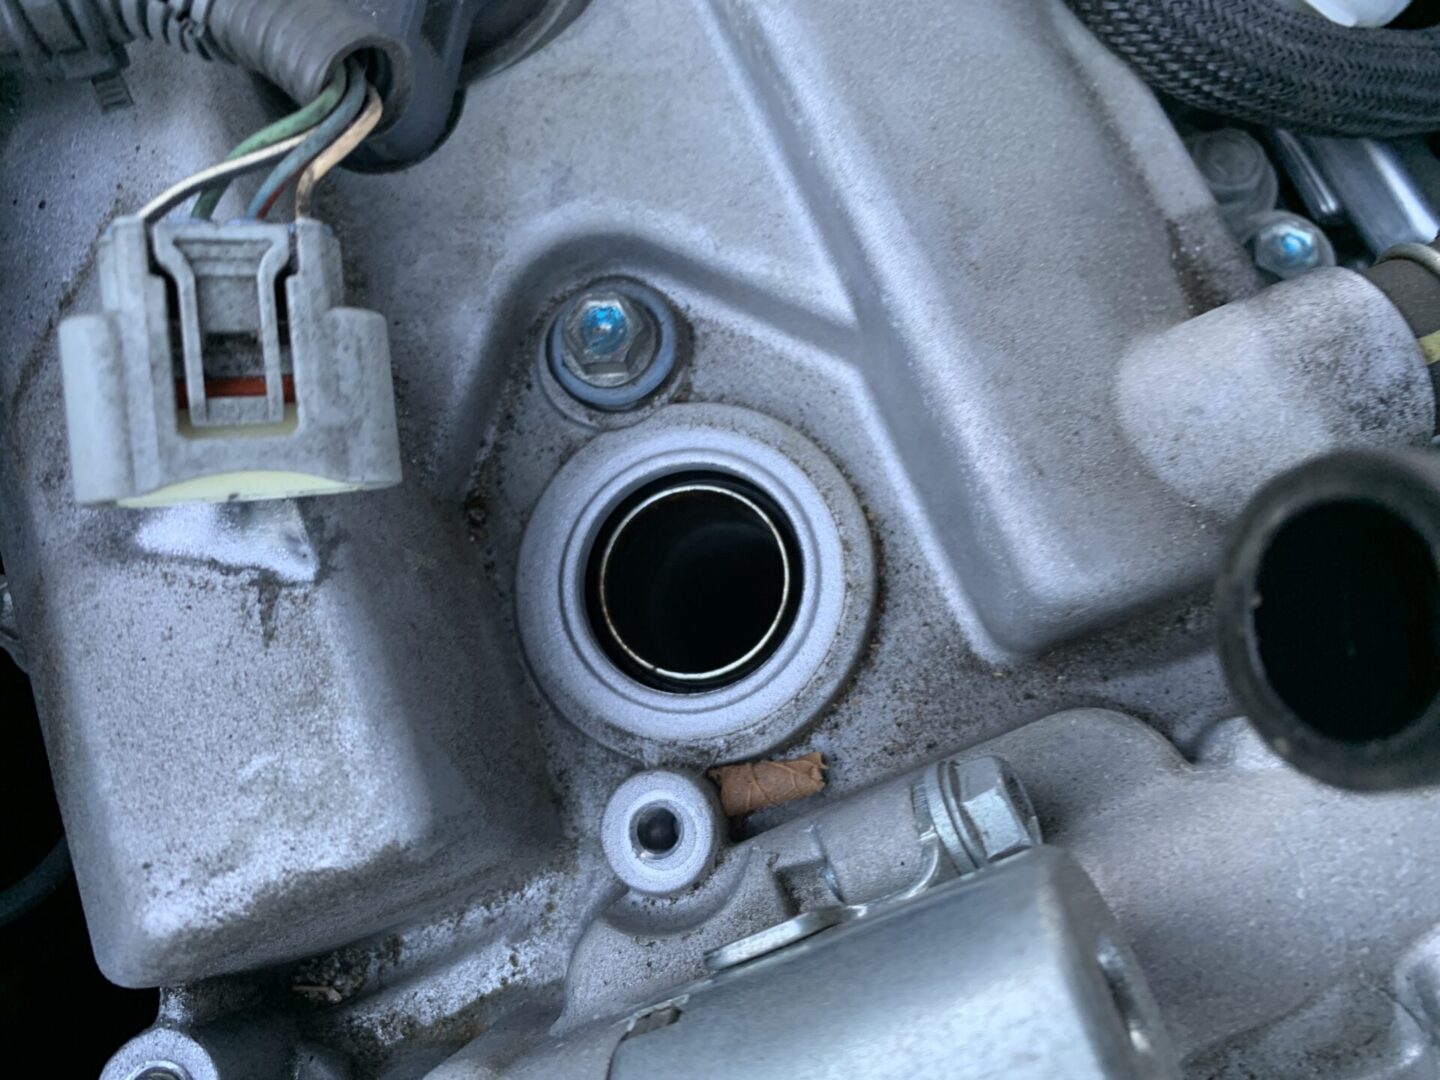
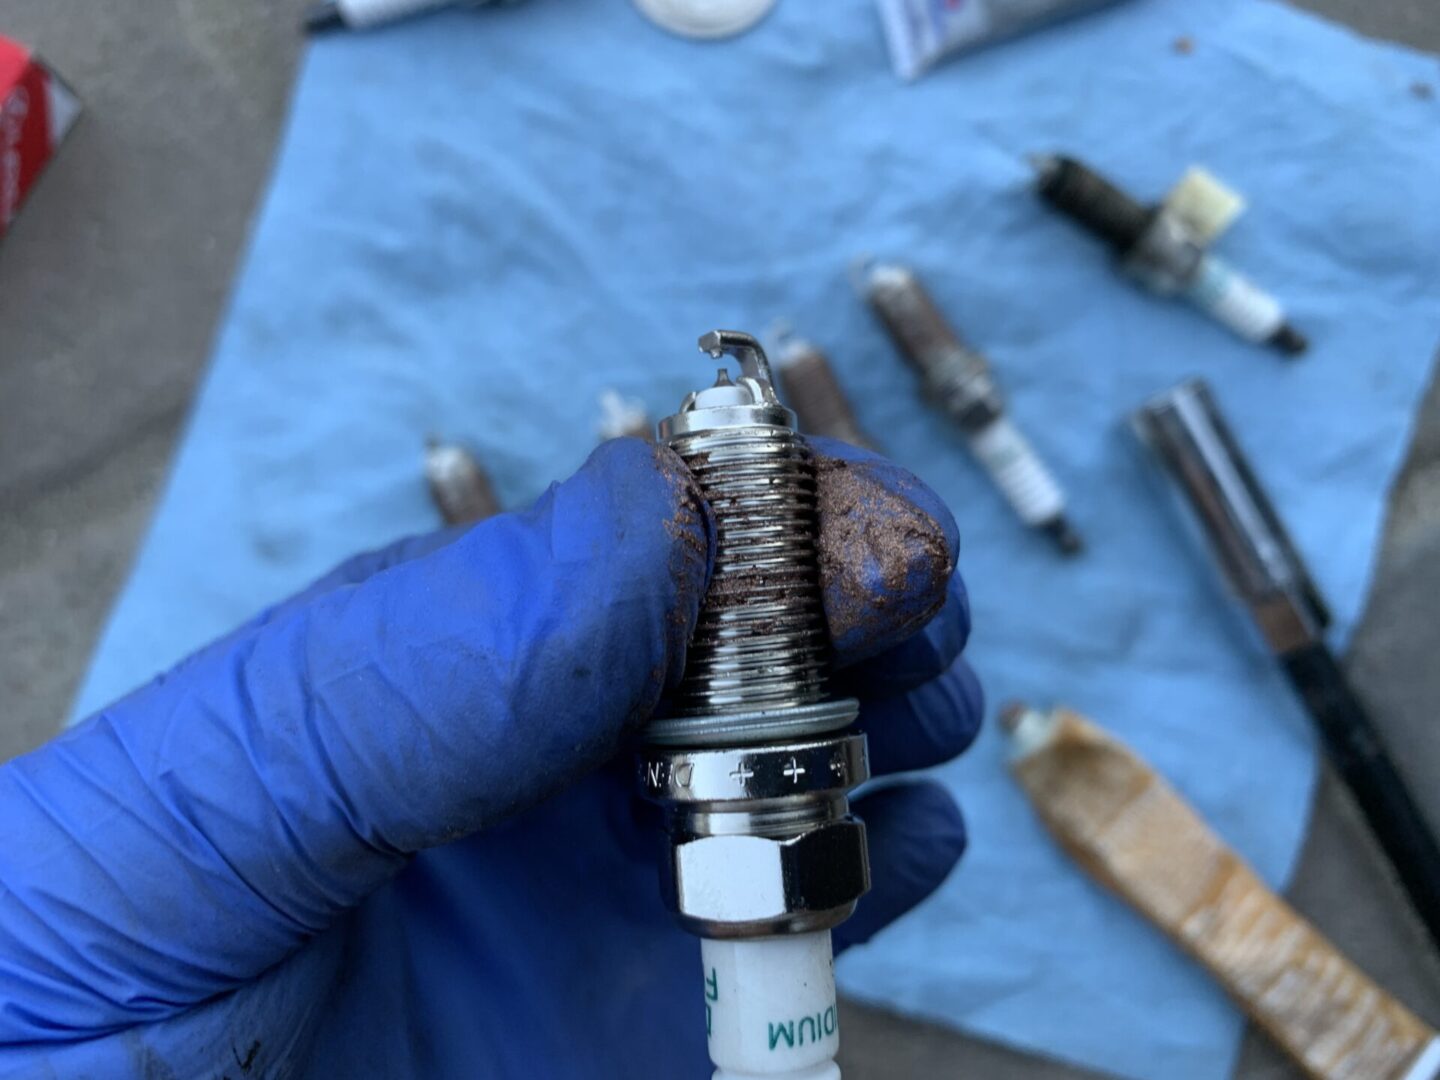
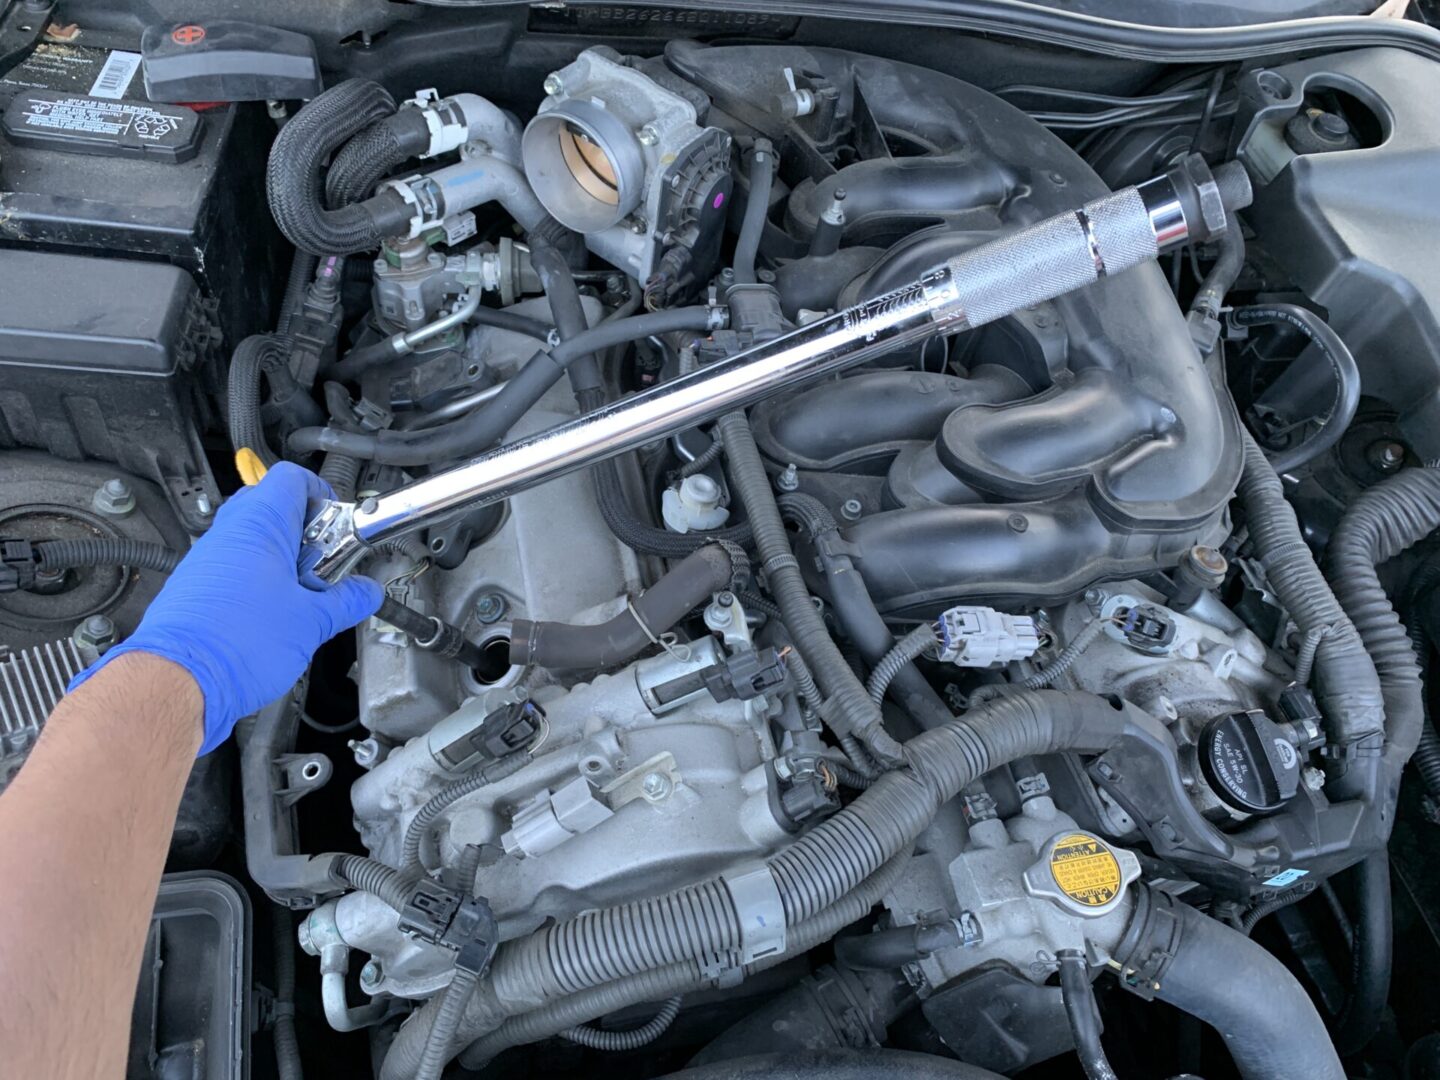
For each of the three spark plugs, you will need to pop the ignition coil out and set it aside. Use a socket wrench with several extensions and the 5/8″ spark plug socket to loosen and remove the spark plug. The spark plug socket has a boot within the socket that you should pop onto the spark plug, which will hold the spark plug after loosening, so that you can remove it completely.


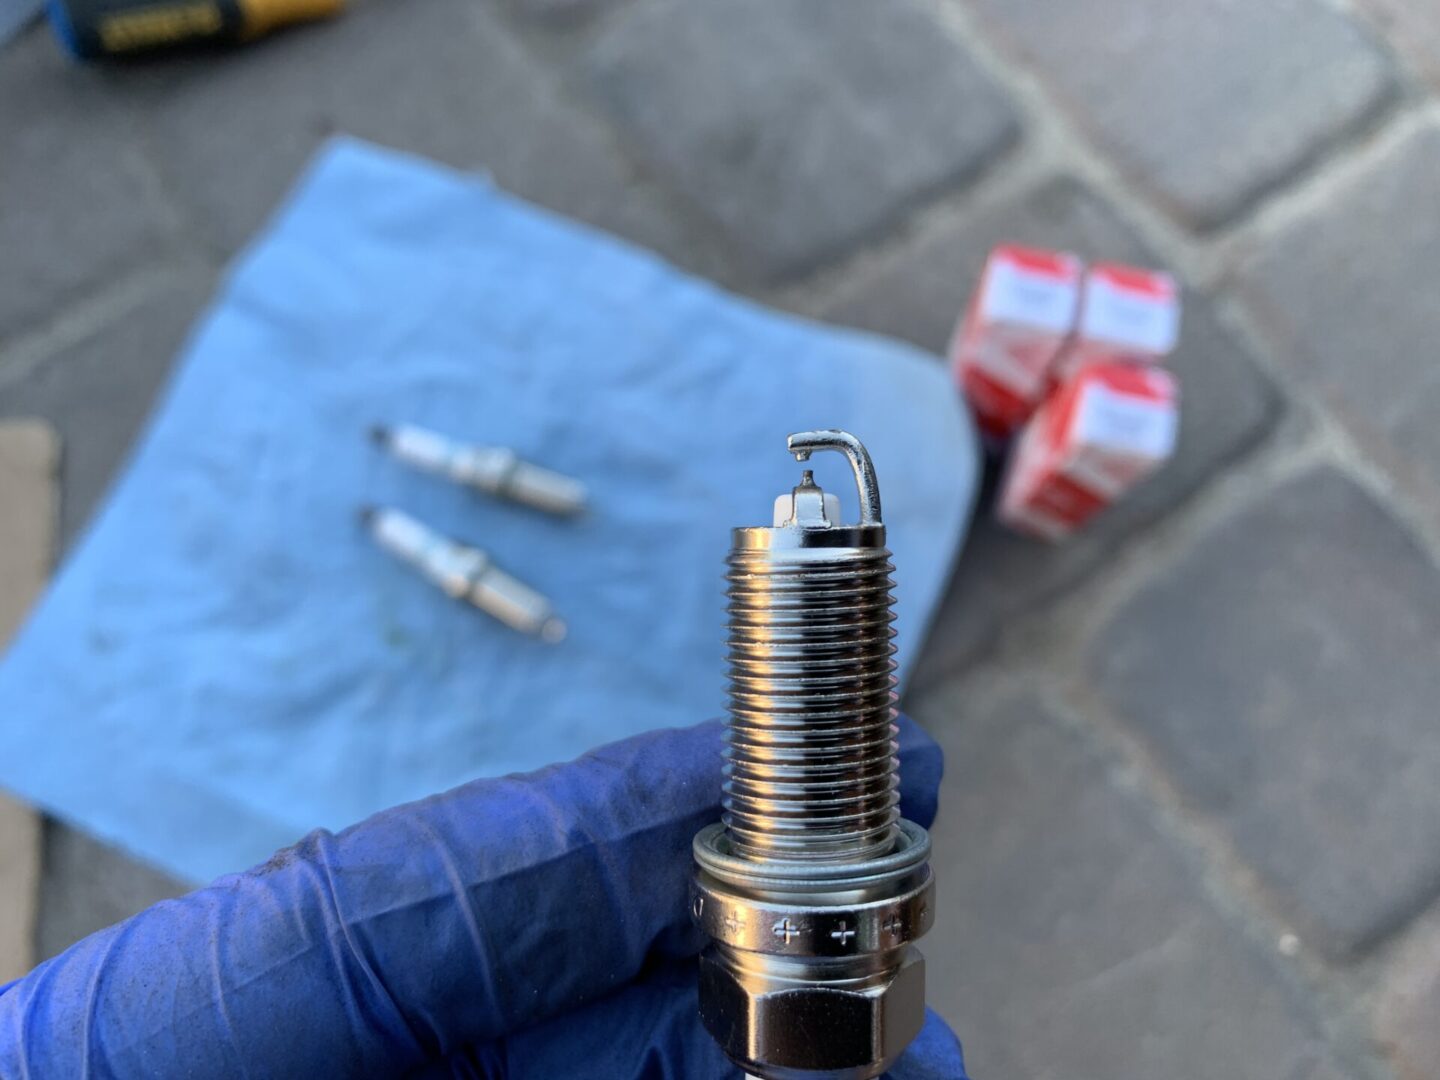
Now, you should prep your new spark plugs for replacement.
As I mentioned before, you should always check the gaps on your new spark plugs before installing them. Even if they are supposed to come pre-gapped to the correct specification, I’ve found that you can never be too sure. In this case, I purchased these Lexus OEM spark plugs that would have come stock from the factory. It turns out the gap on these spark plugs were completely off; every single one of them. So, always check your spark plug gaps and match it to your owner’s manual specifications.


Spark plug gap per owner’s manual for 2006 Lexus IS350: 0.043″ gap
For a more in-depth guide to gapping spark plugs, see my post here: How to Gap a Spark Plug
After ensuring all your spark plugs are gapped properly, apply a small amount of anti-seize thread lubricant to the thread of the spark plug. I’ve found it easy to apply by taking a small dab of anti-seize, and spreading it onto two gloved fingers, then rubbing it onto the spark plug threads.
Replace each spark plug one at a time. It’s best not to remove several at a time as it will expose the combustion chamber to debris while the spark plug is removed.
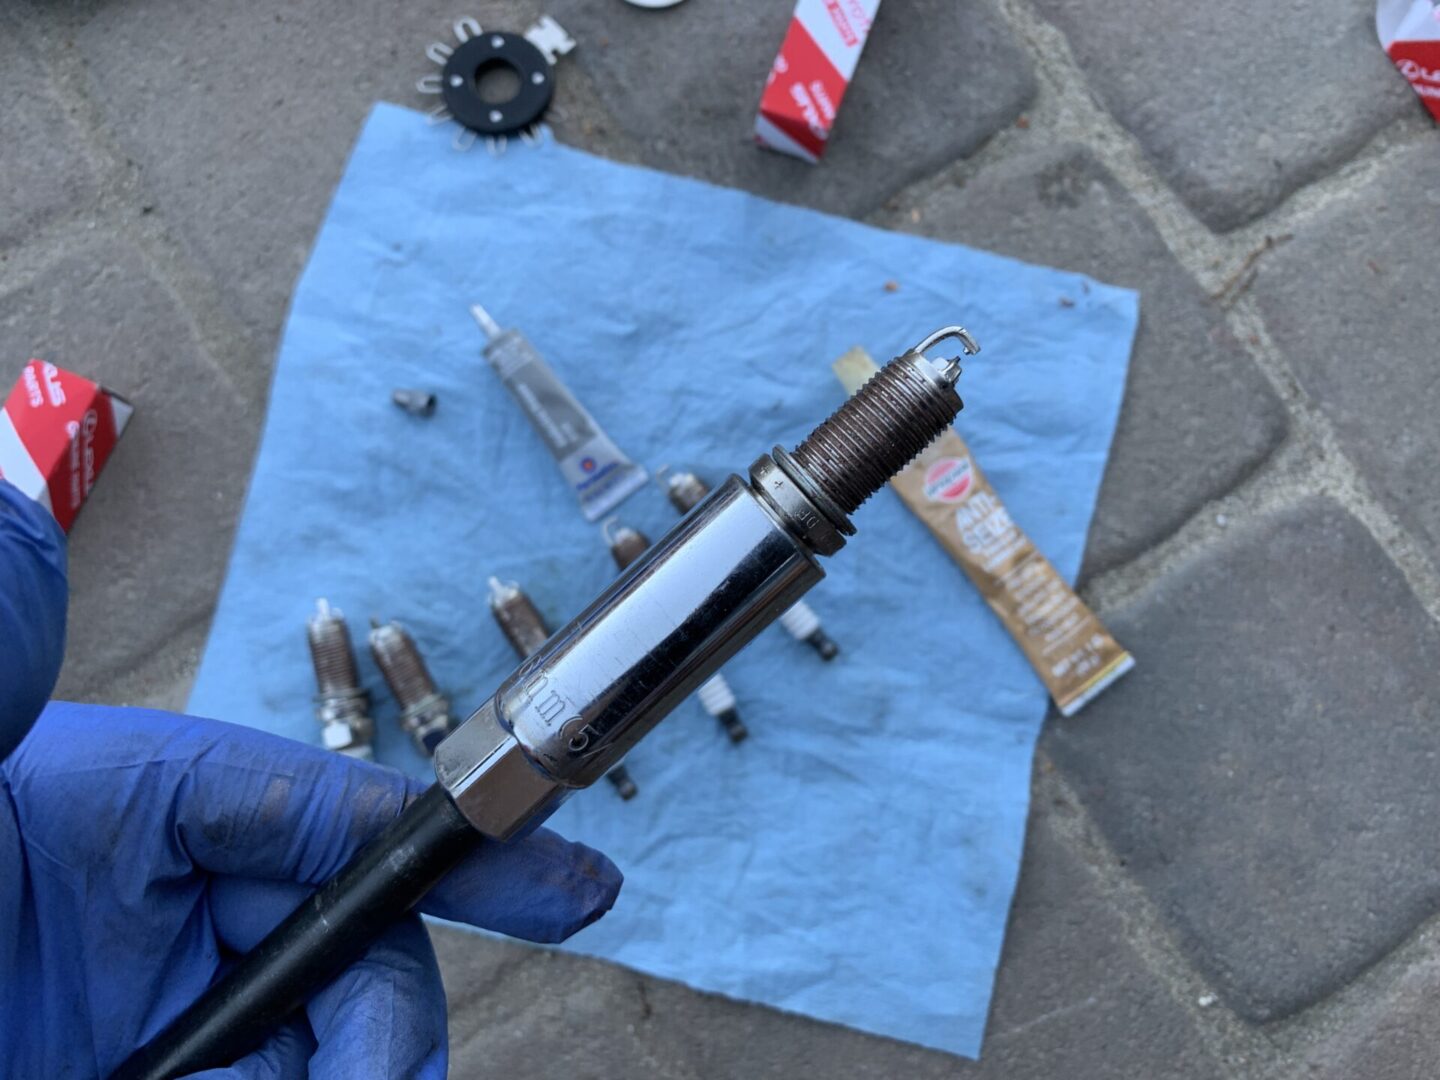
Pop a new spark plug onto the spark plug socket and only use the extensions connected to it (don’t use the socket wrench yet). Insert the new spark plug with extensions and insert it all the way down into place. Turn it counter-clockwise a bit, then thread it in clockwise very carefully by hand. You don’t want to accidentally cross-thread the spark plug threads as you’re going to have a bigger job dealing with it than doing a simple spark plug replacement.

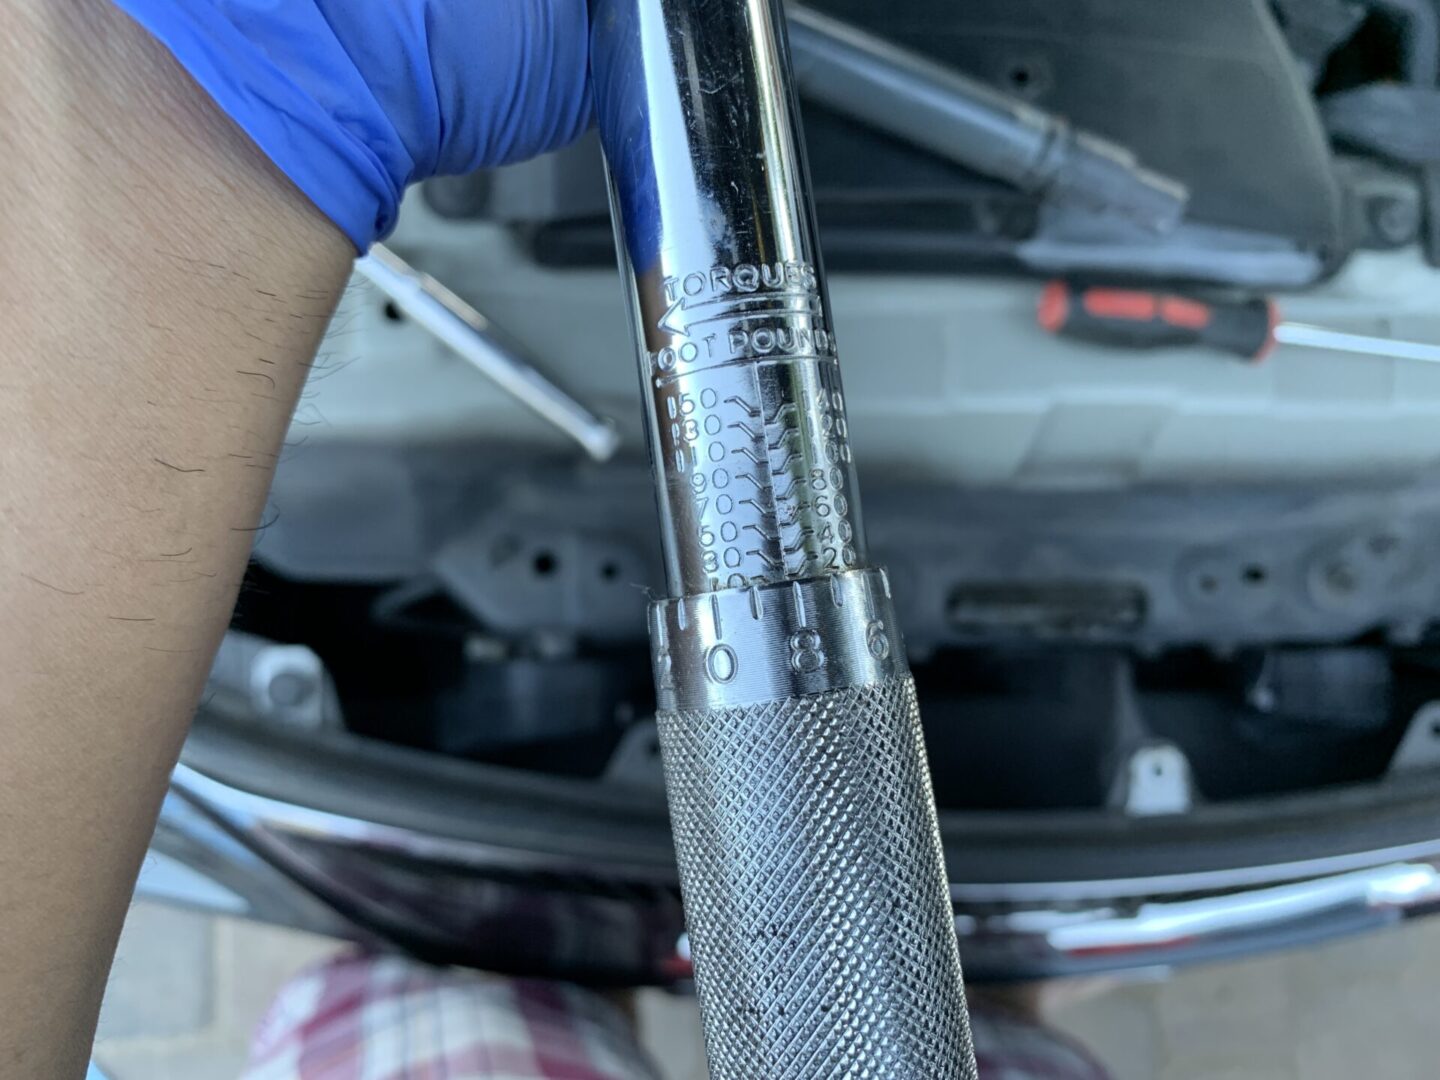
Once the spark plug is pretty much hand-threaded all the way in, use a torque wrench and torque down to 18 ft-lbs.
After you’ve torqued down the spark plug, you can now apply some dielectric grease to the inner portion of the ignition coil boot. Only a small dab is necessary, and then I use the tip of the applicator to swish it around the inside of the boot.
Insert the ignition coil back into place making sure that it sits properly in position. Then re-install the 10mm bolt bolt that holds the ignition coil in place, then hand-tighten. Repeat for the other two spark plugs on the same side.

After the three spark plugs are done on the passengers side of the engine, it’s time to move onto the driver’s side. You may reinstall the harness and intake assembly at this point if you’d like.
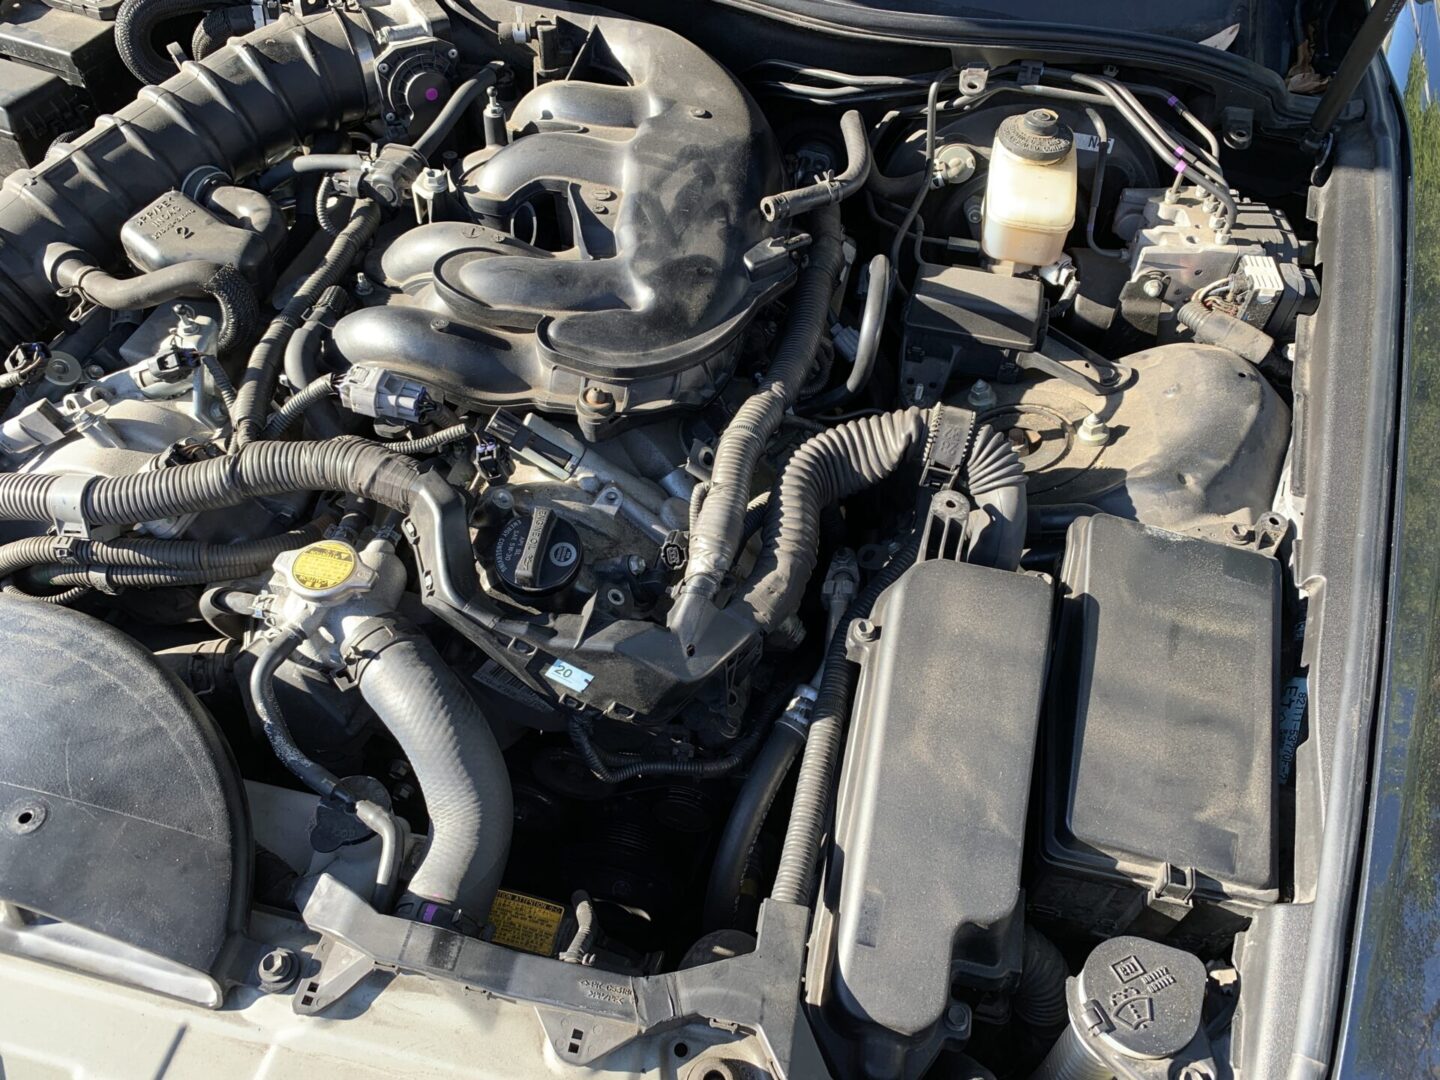
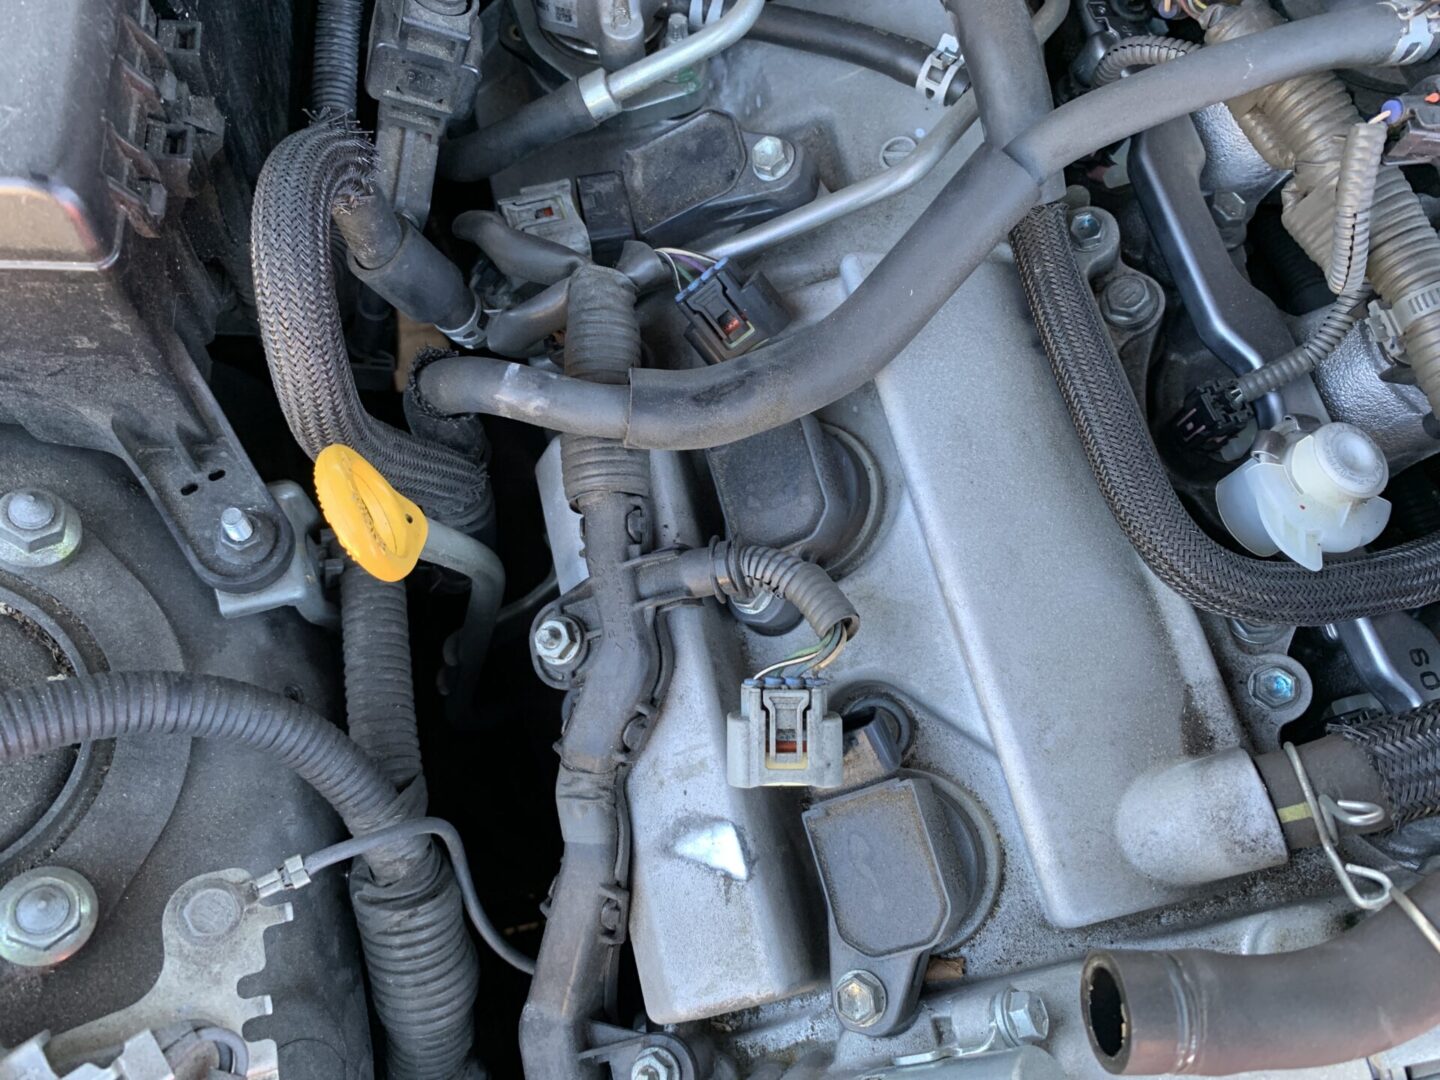
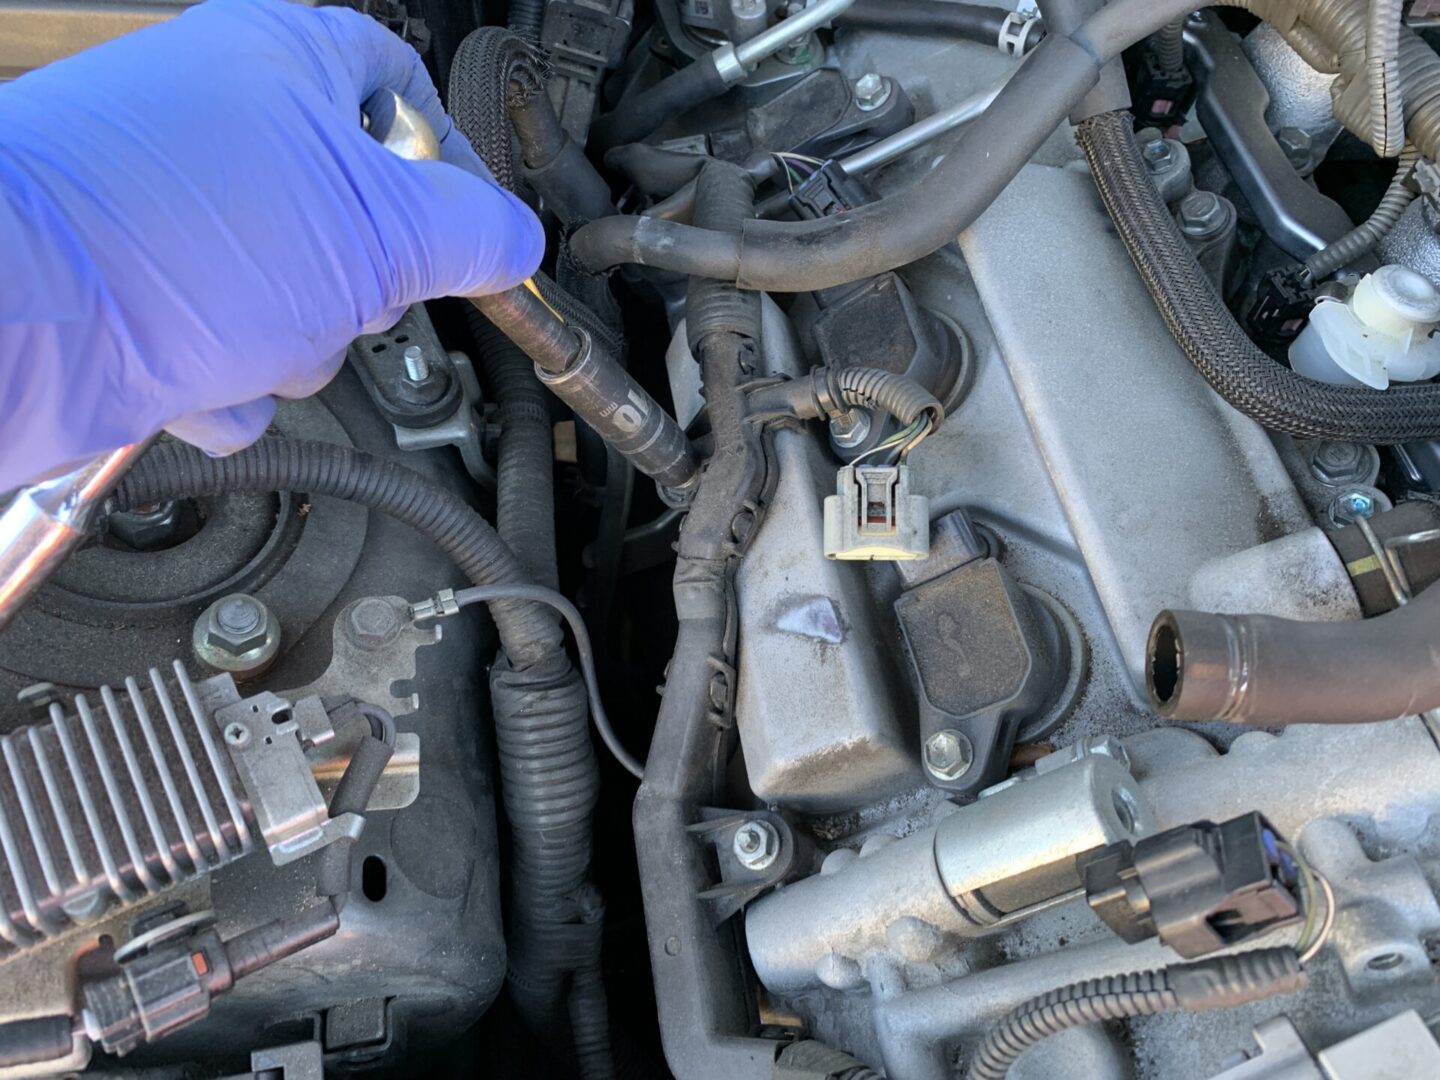
The driver’s side has a bit more access issues, but the additional difficulty is very minor. Before getting access, you’ll want to get this wiring harness loose so that you can maneuver around it when accessing the three spark plugs on the driver’s side. To get the harness loose, there are three nuts holding it to the engine and several other clips/connectors that you will need to remove. There is also a hose that can be removed that may just make it a tad easier for access.


The main point is to basically get everything that may restrict movement of the harness removed, so that you can move it out of the way to get access to the three driver’s side spark plugs.
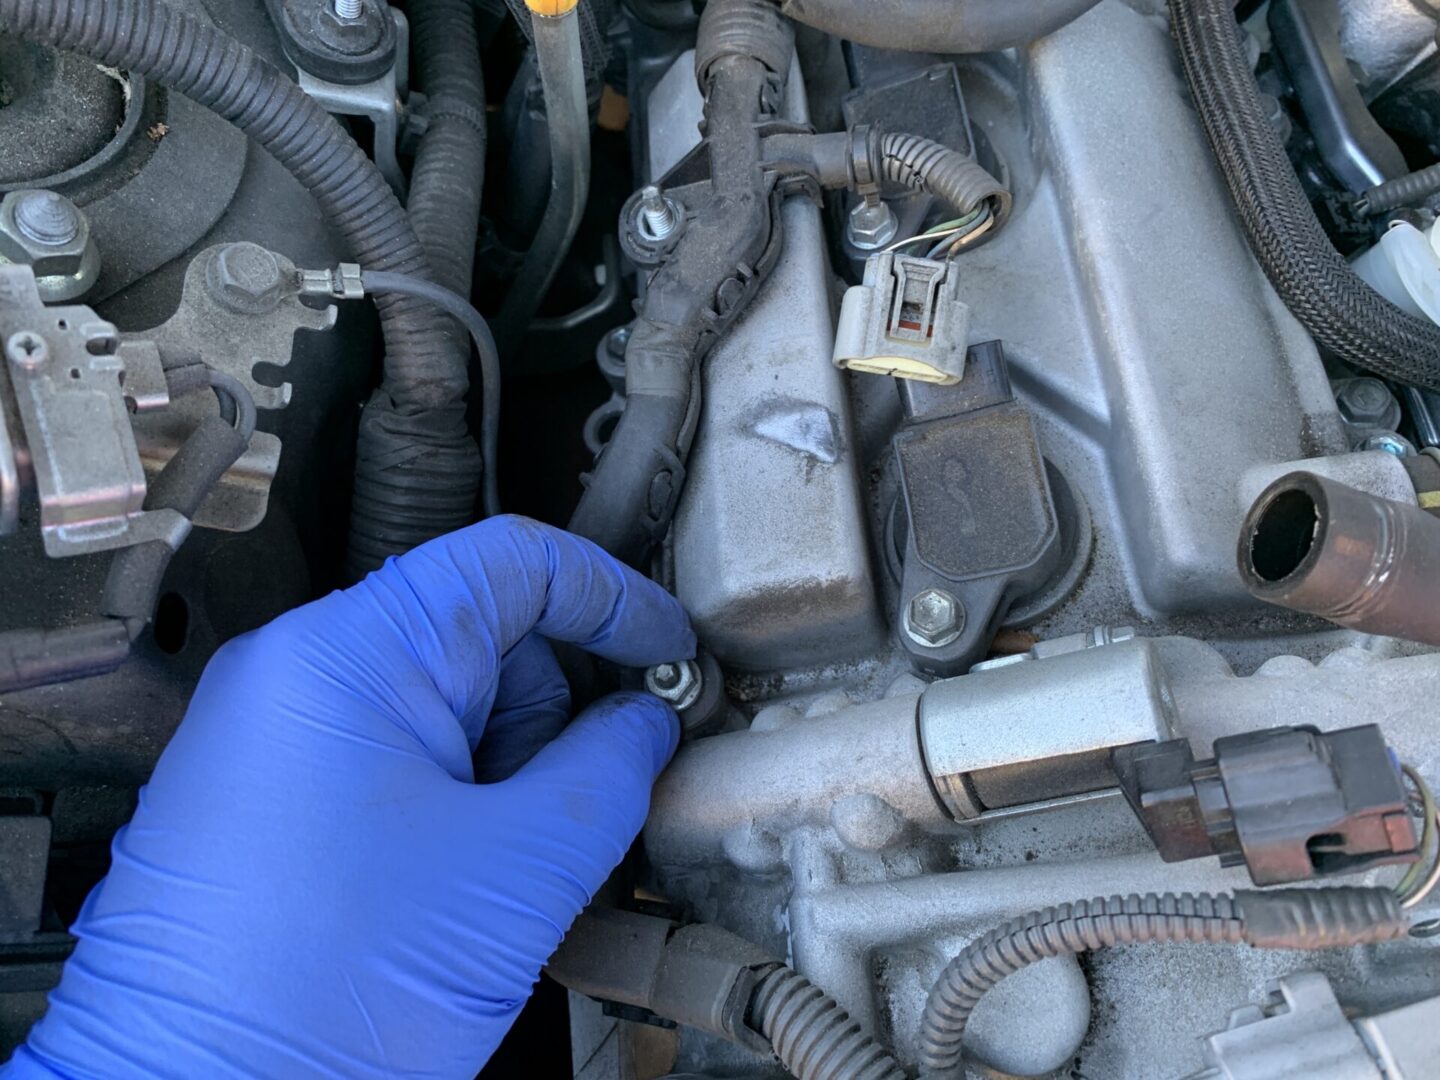
The spark plug that is located closest to the front of the car on the driver’s side is the hardest to access. This is due to the fact that if you were to try to place a socket directly in line with the bolt that holds in the ignition coil, it would not work because the upper air intake manifold is in the way.
Therefore for this bolt, you’ll need to use a 10mm wrench (ratcheting-style wrench works best here) to loosen the ignition coil bolt. Continue with the removal of the ignition coil, removal of the spark plug, and then re-installation.


Continue with the remaining two spark plugs, which shouldn’t present any problems. You may need some longer extensions for three spark plugs on this side of the engine, but the process for replacing the spark plugs on this side is basically the same as the passenger’s side.
Once completed, re-install everything back again and double-check that you’ve re-connected all of the connectors, harnesses, clips, and hoses. Turn on the car and ensure that everything is running properly. After confirming the install was a success, re-install the engine cover and plastic covers in the engine bay.

: 4th Gen Toyota 4Runner")
: 1st Gen Toyota Tacoma")